| LEGO Audio & Braille Building Instructions for the LEGO Super Heroes set "Thanos Mech Armor". |
| Put Thanos into the cockpit of his mech and make the universe's most powerful super villain even more awesome! With movable arms, legs and fingers, plus Thanos's double-sided sword, Infinity Gauntlet and Infinity Stones, the Thanos Mech Armor is unstoppable! |
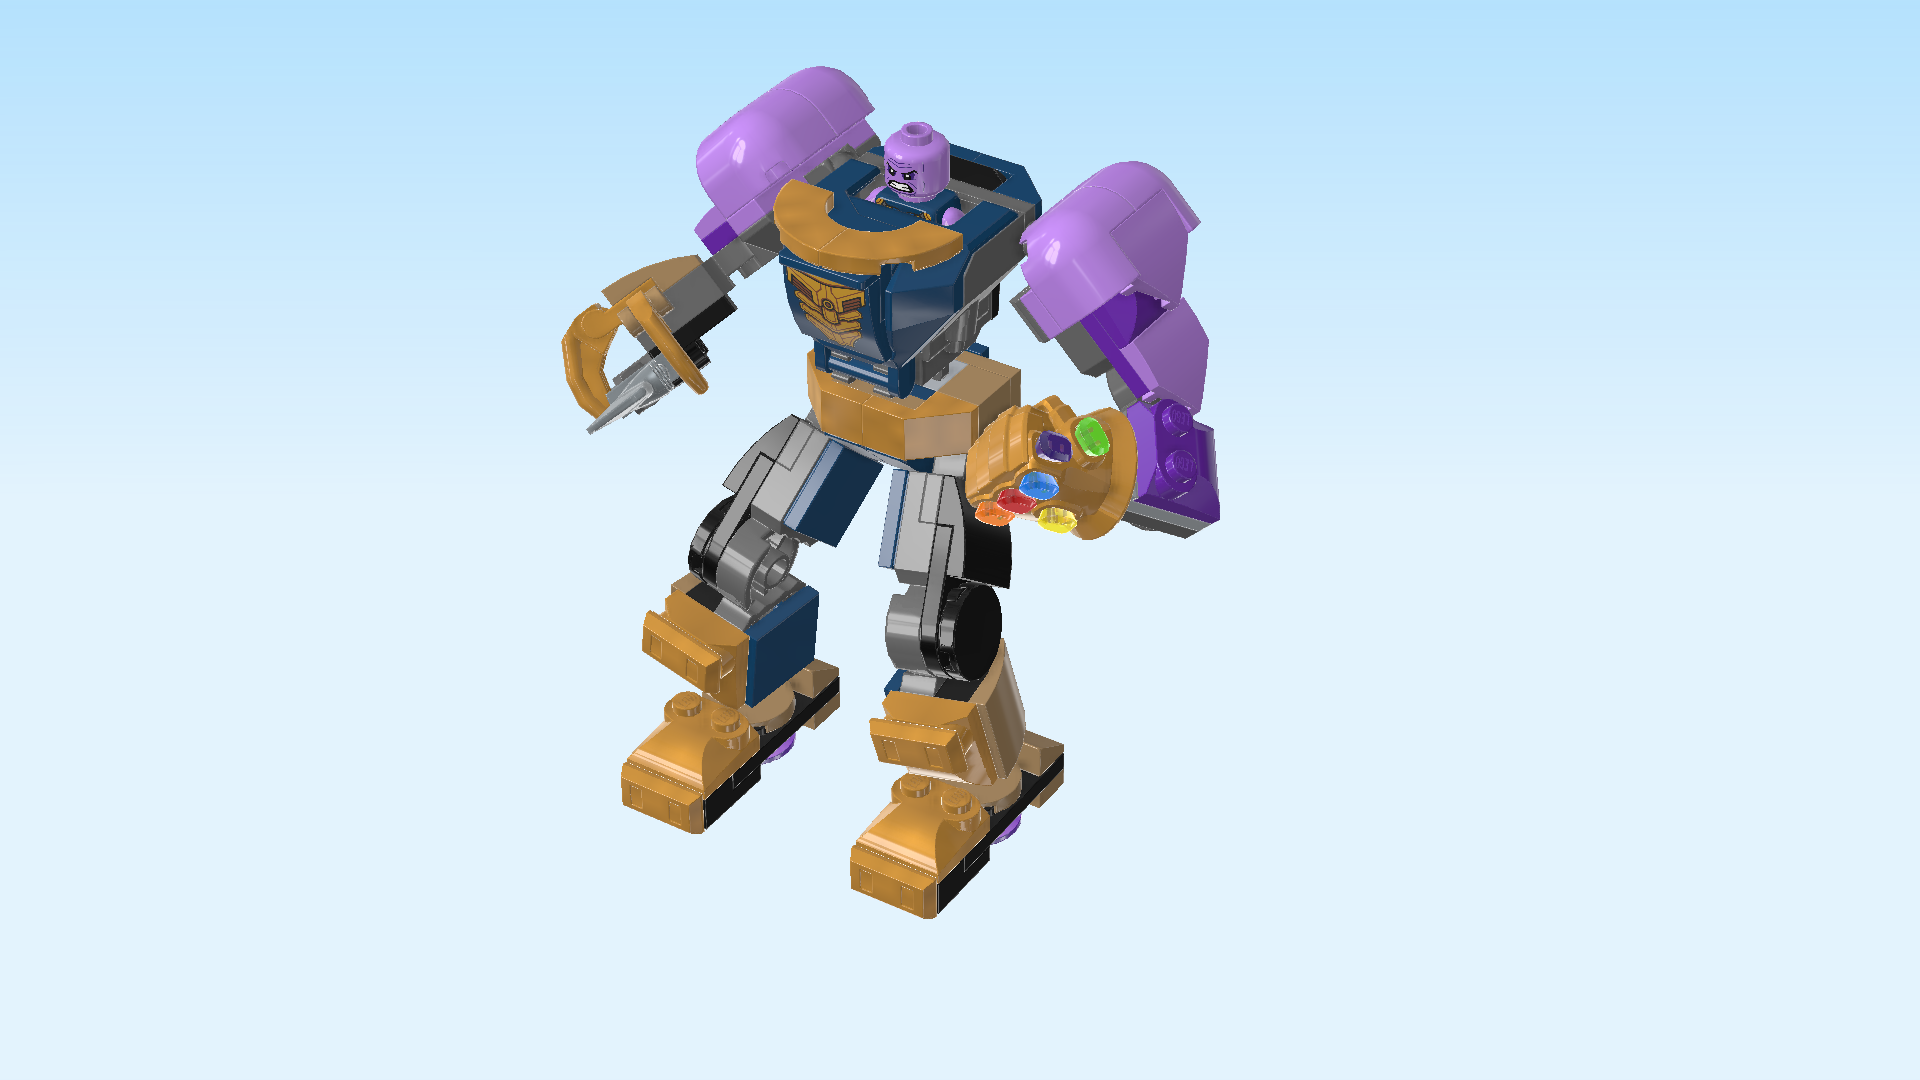
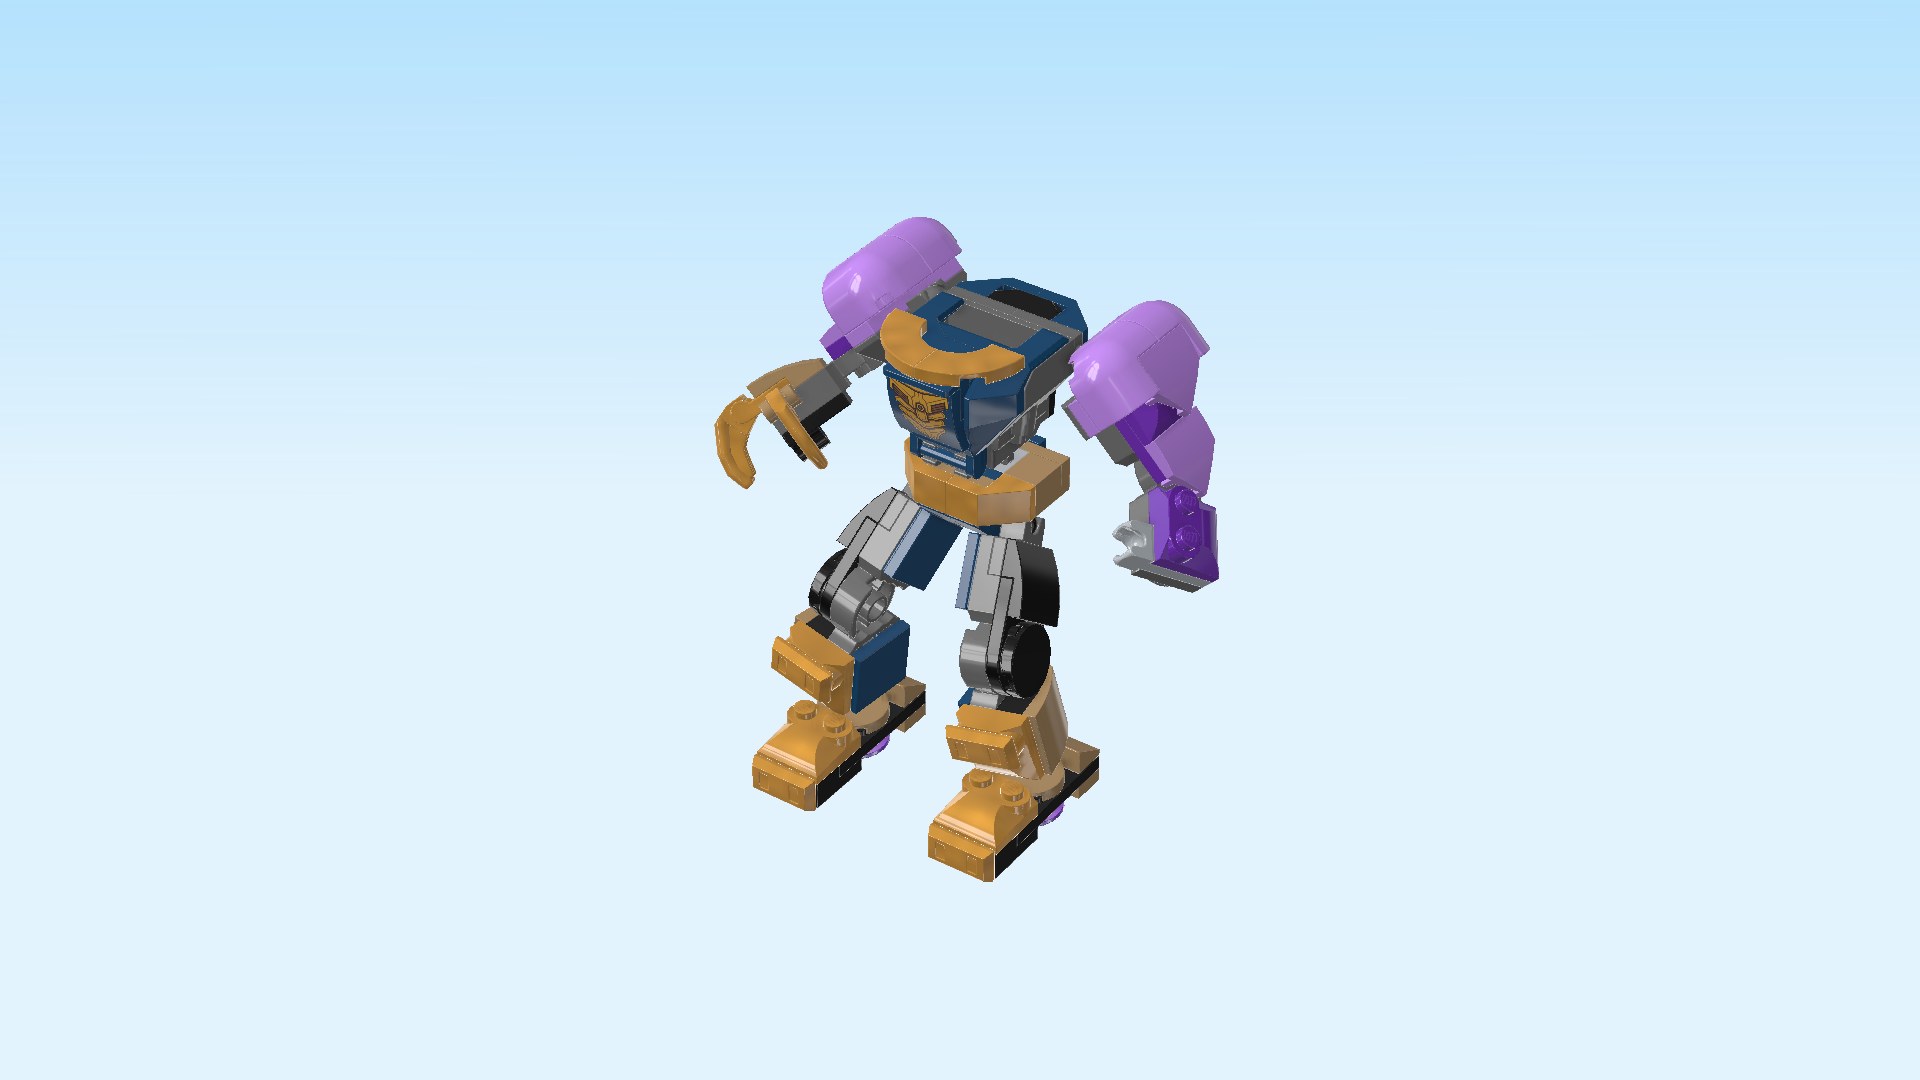
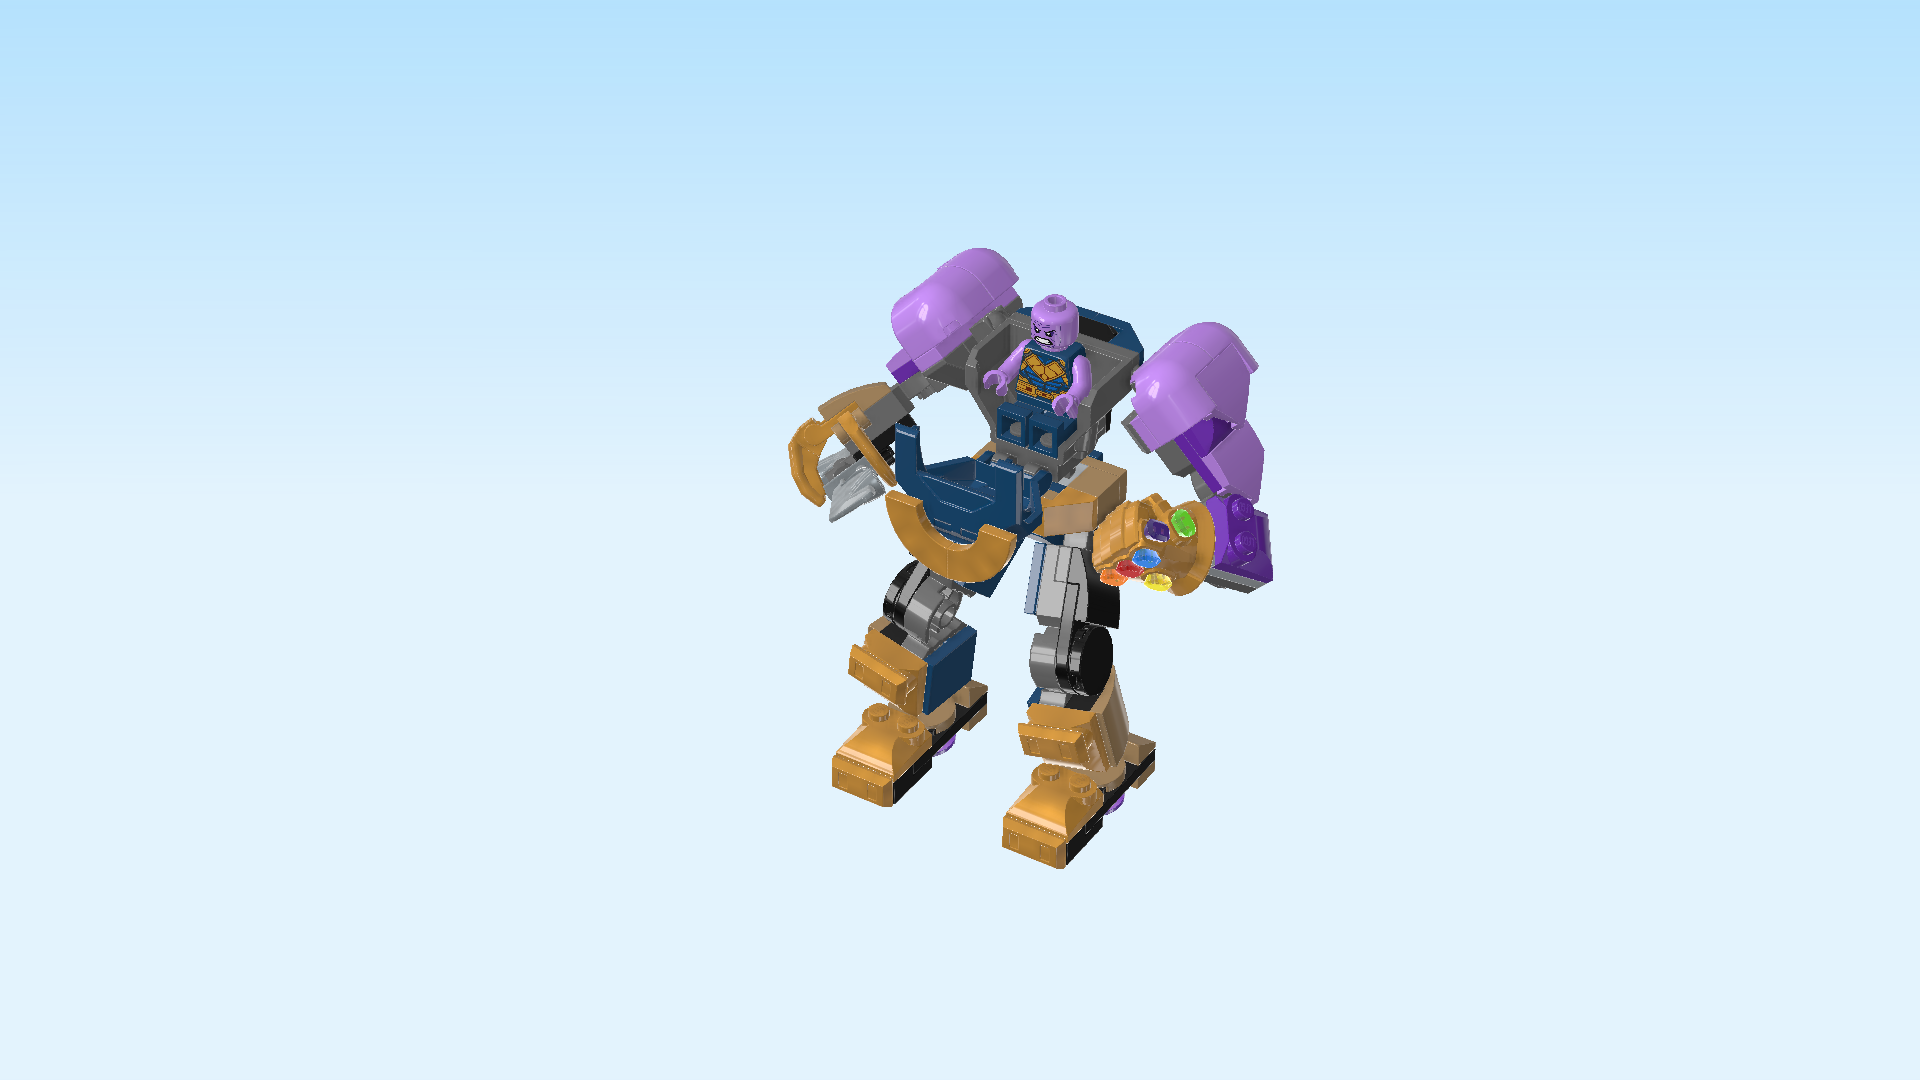
| The box cover shows Thanos' mech armor in all its glory: Growling, the super villain is sitting in the operator cockpit of the mech, showing off his Infinity Gauntlet: a golden supersized glove that looks like a clenched fist. The mech is wearing it on its left arm. Six glimmering Infinity Stones are embedded in the gauntlet. The mech consists of a cockpit with chest plate and flexibly adjustable legs and arms. It is dark blue, purple and golden. The mech is extremely strong, the upper arms have huge muscles. The right arm of the mech holds Thanos' infamous double-sided sword, a weapon to be feared. There is a gleaming light behind Thanos with blue and purple shades, making his mech look even more glamorous. The top right corner of the box cover is folded back, revealing some of the Avengers: the Hulk, Iron Man, Captain America and others are peeking out to see what Thanos is up to. In the bottom right corner, there is a portrait of the Thanos Minifigure. But now, let's start building! |
| Open the box. This can be tricky; ask someone to help you! |
| The box contains 1 booklet with visual building instructions, 2 unnumbered bags, and 2 loose pieces: 2 large swords with side handle. Ask a sighted person to help you find the correct bag! |
| Carefully open the bags and any small sub-bags in them. |
| Before you start building, ask a sighted person to help you sort the pieces by color. This makes finding the correct pieces even easier! |
| First, let's build the Thanos Minifigure. |
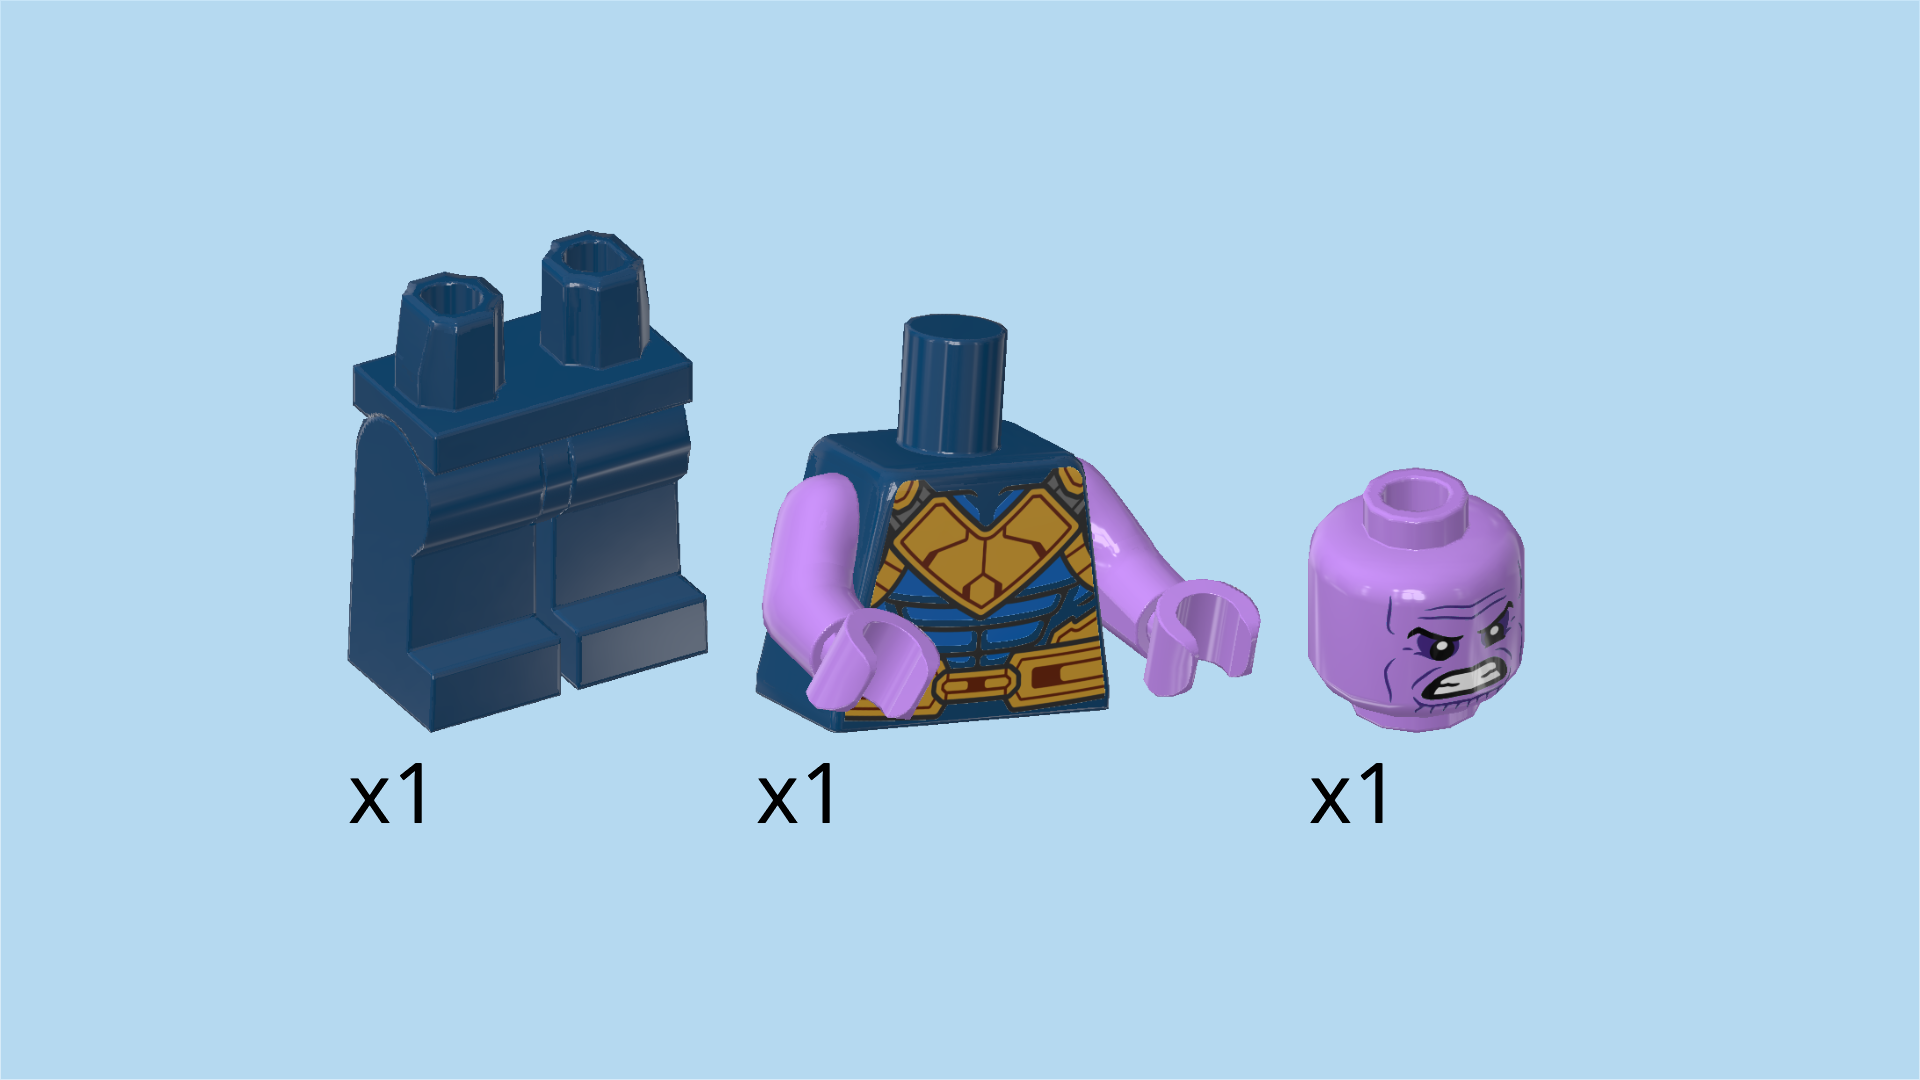
| Collect the following 3 pieces: |
| 1 lavender Minifigure head, |
| 1 earth blue and lavender upper part of the body, |
| and 1 earth blue pair of legs. |
| Assemble the Minifigure: put the upper part of the body on the legs, and put the head on top. |
| The Thanos Minifigure is finished! Thanos has purple skin that is wrinkled and cracked all over. His arms are purple as well, while his legs and torso are blue. He is wearing a golden V-shaped chest plate and a golden three-part back plate as well as a golden belt. Below the plates, we can see his ripped six pack through his bright blue shirt. He has an angry and determined look on his face, clenching his teeth. He seems to be ready to take over the world. Let's continue and find out what he is capable of once he gets into his powerful mech! |
| Now, we will build the mech. |
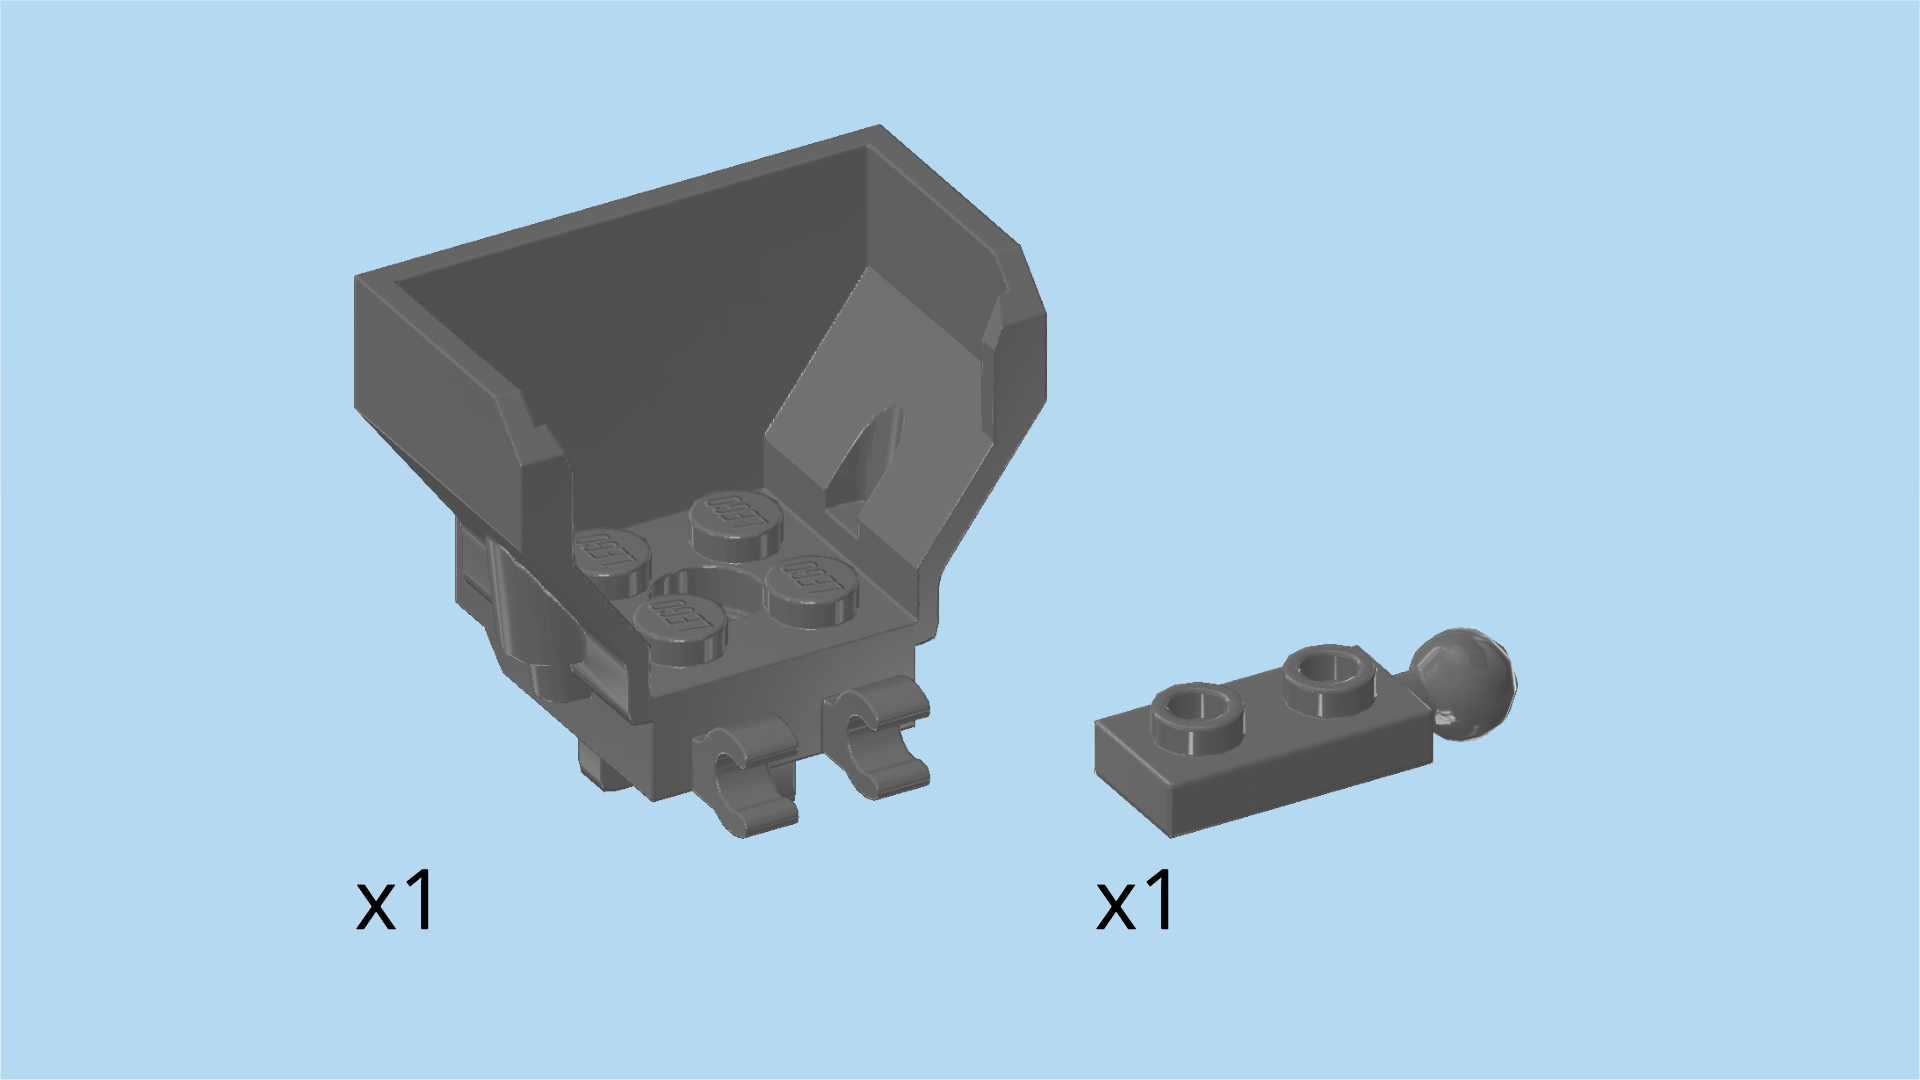
| Collect the following 2 pieces: |
| 1 dark stone grey mech cockpit 2x4x3, |
| and 1 dark stone grey plate 1x2 with ball on short side. |
| Put the mech cockpit 2x4x3 horizontally on the table, opening to the back. |
| Put the plate 1x2 upright horizontally on the top row of side knobs, starting from the left edge, ball protruding to the left. |
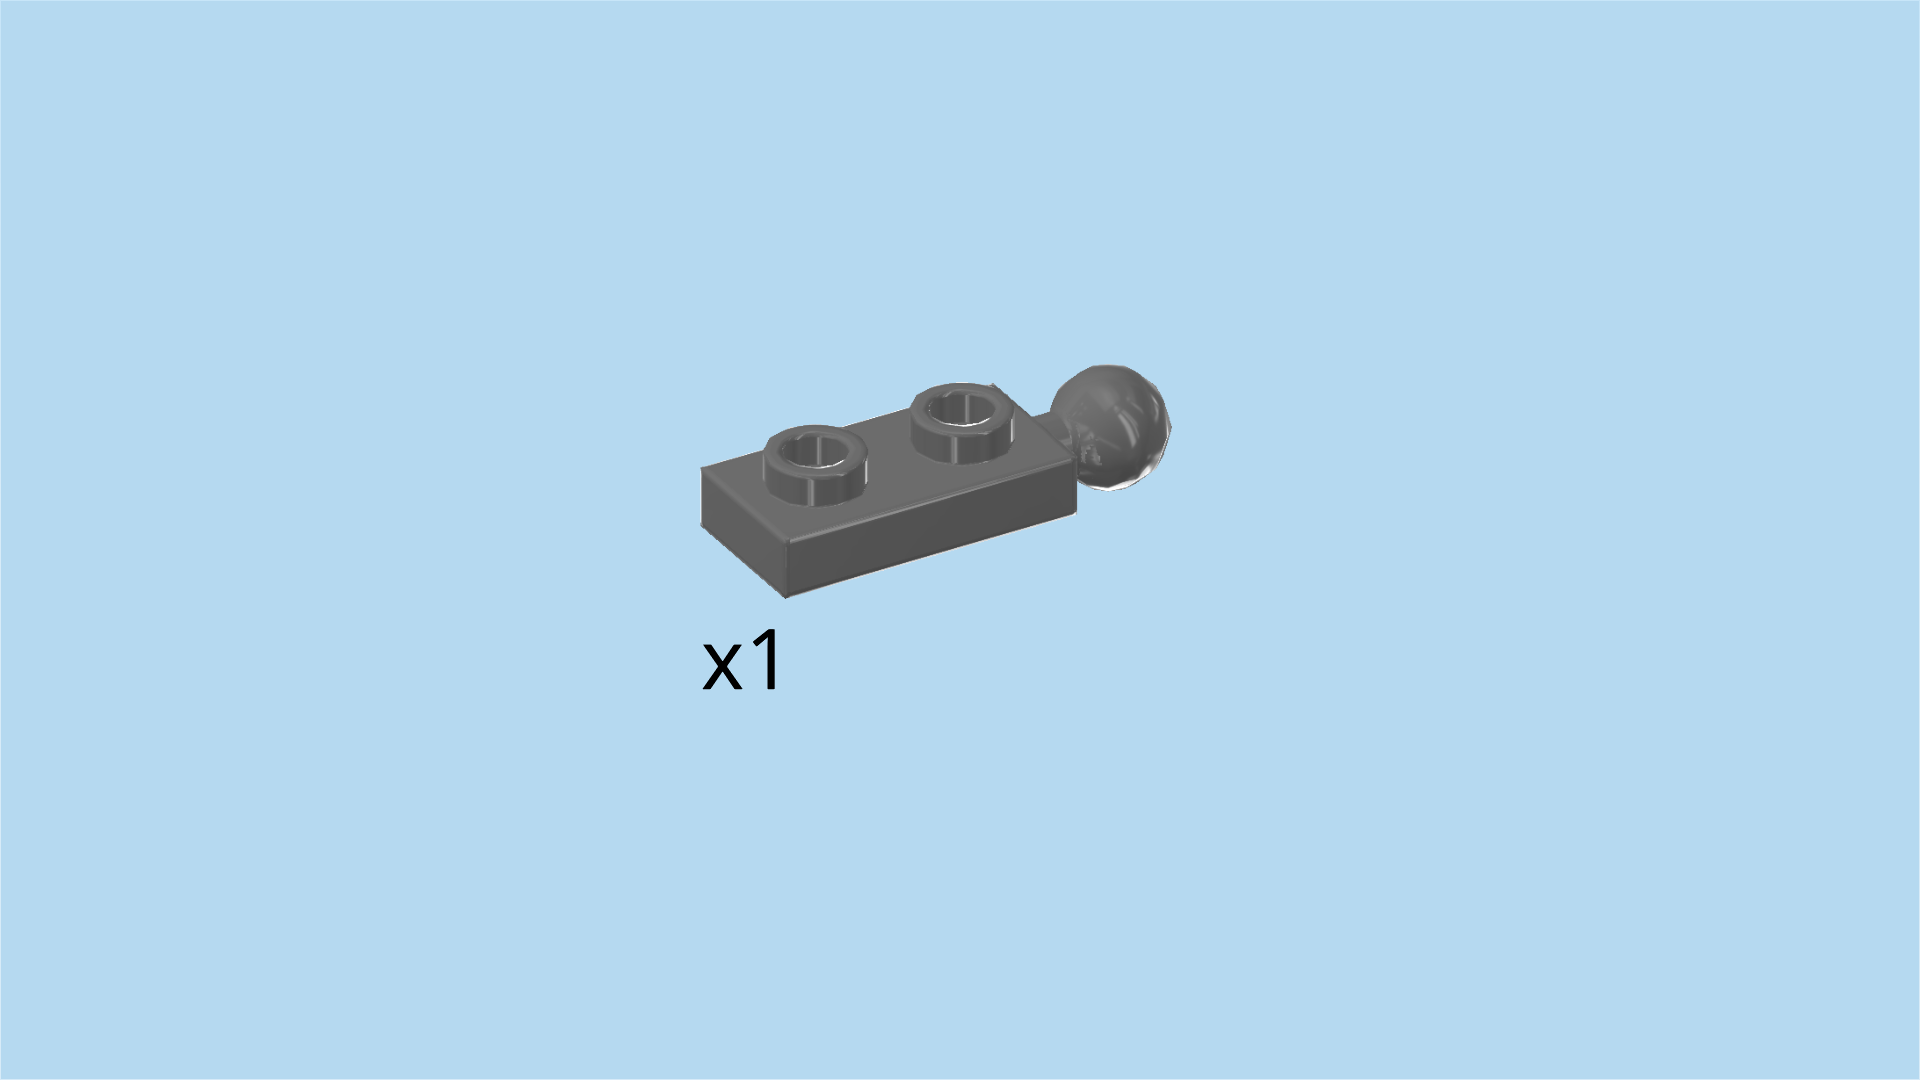
| Find 1 dark stone grey plate 1x2 with ball on short side. |
| Put it upright horizontally to the right of the previous piece, ball to the right. |
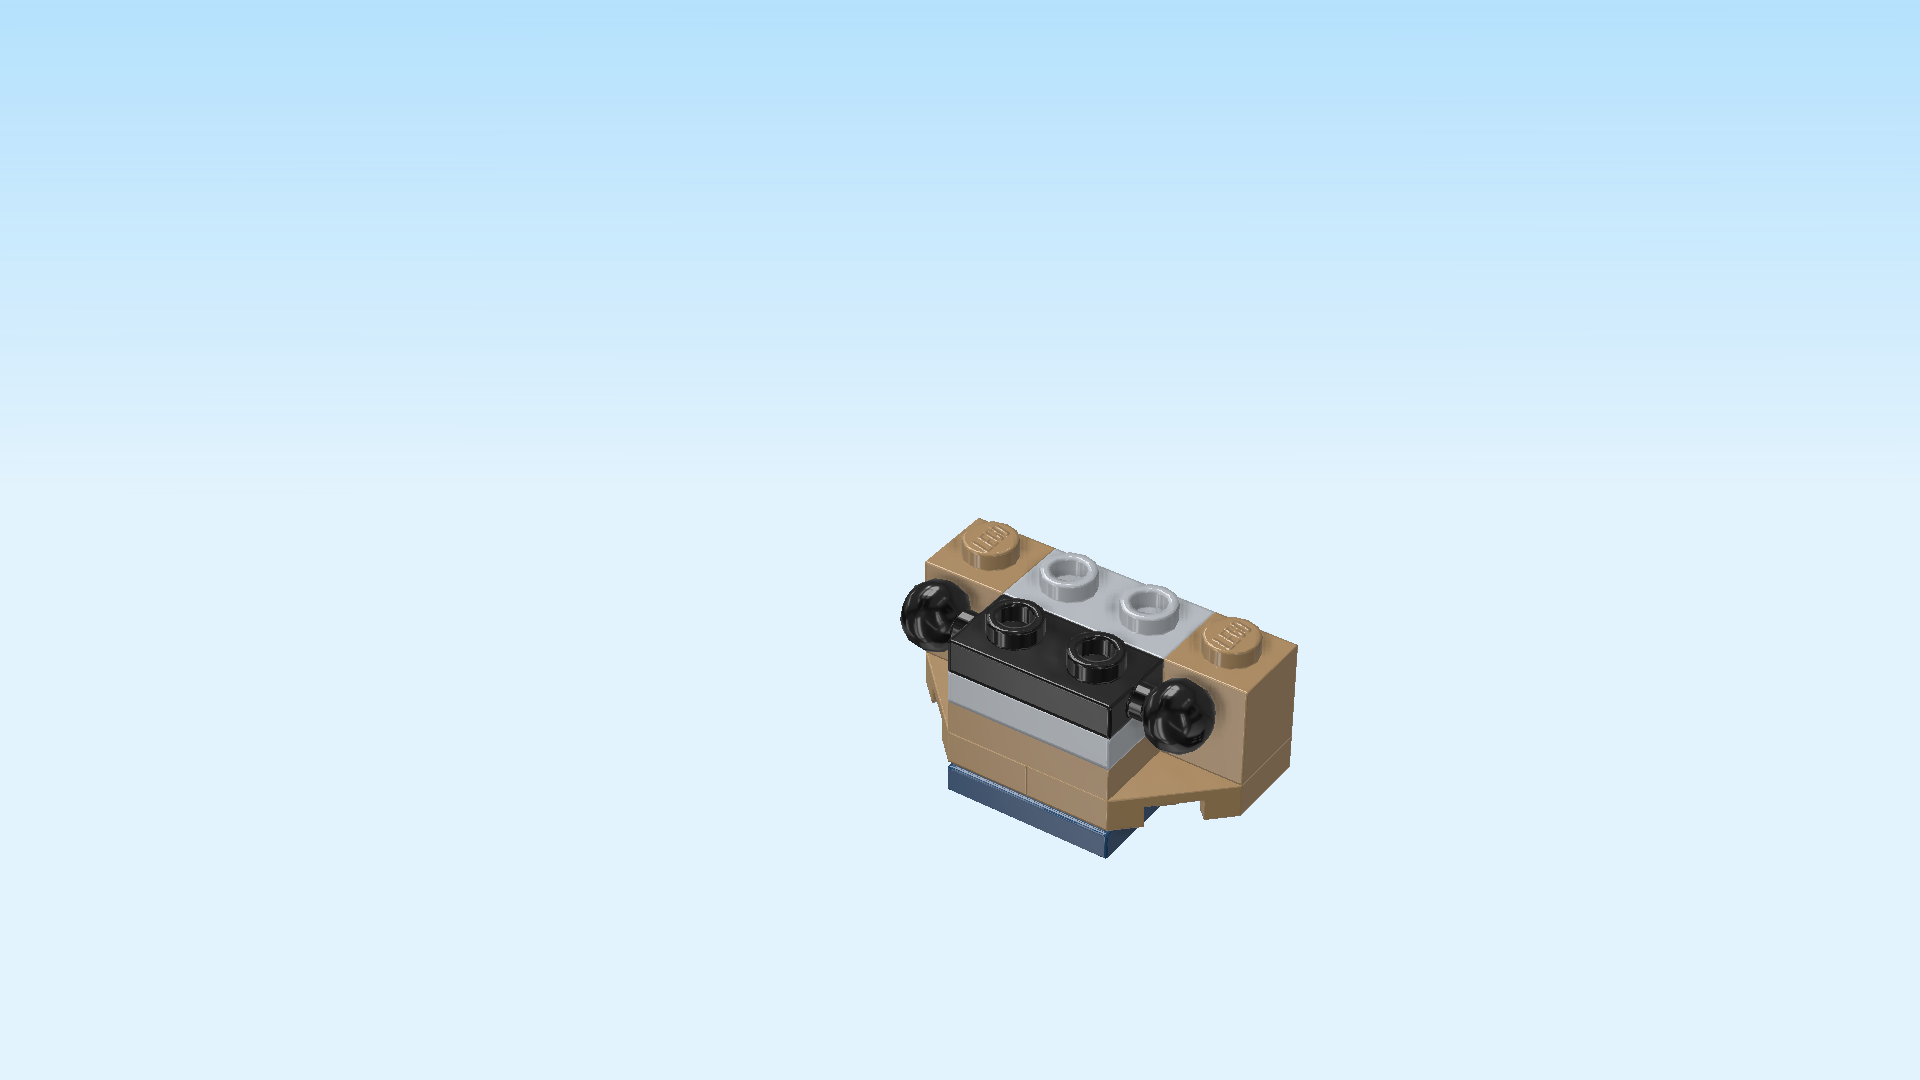
| Find 1 black curve plate 2x3 with 2 knobs and fin. |
| Put it upright vertically on the front side surface, 2 knobs at the top, fin to the bottom. Make sure the piece sits in the middle of the panel. |
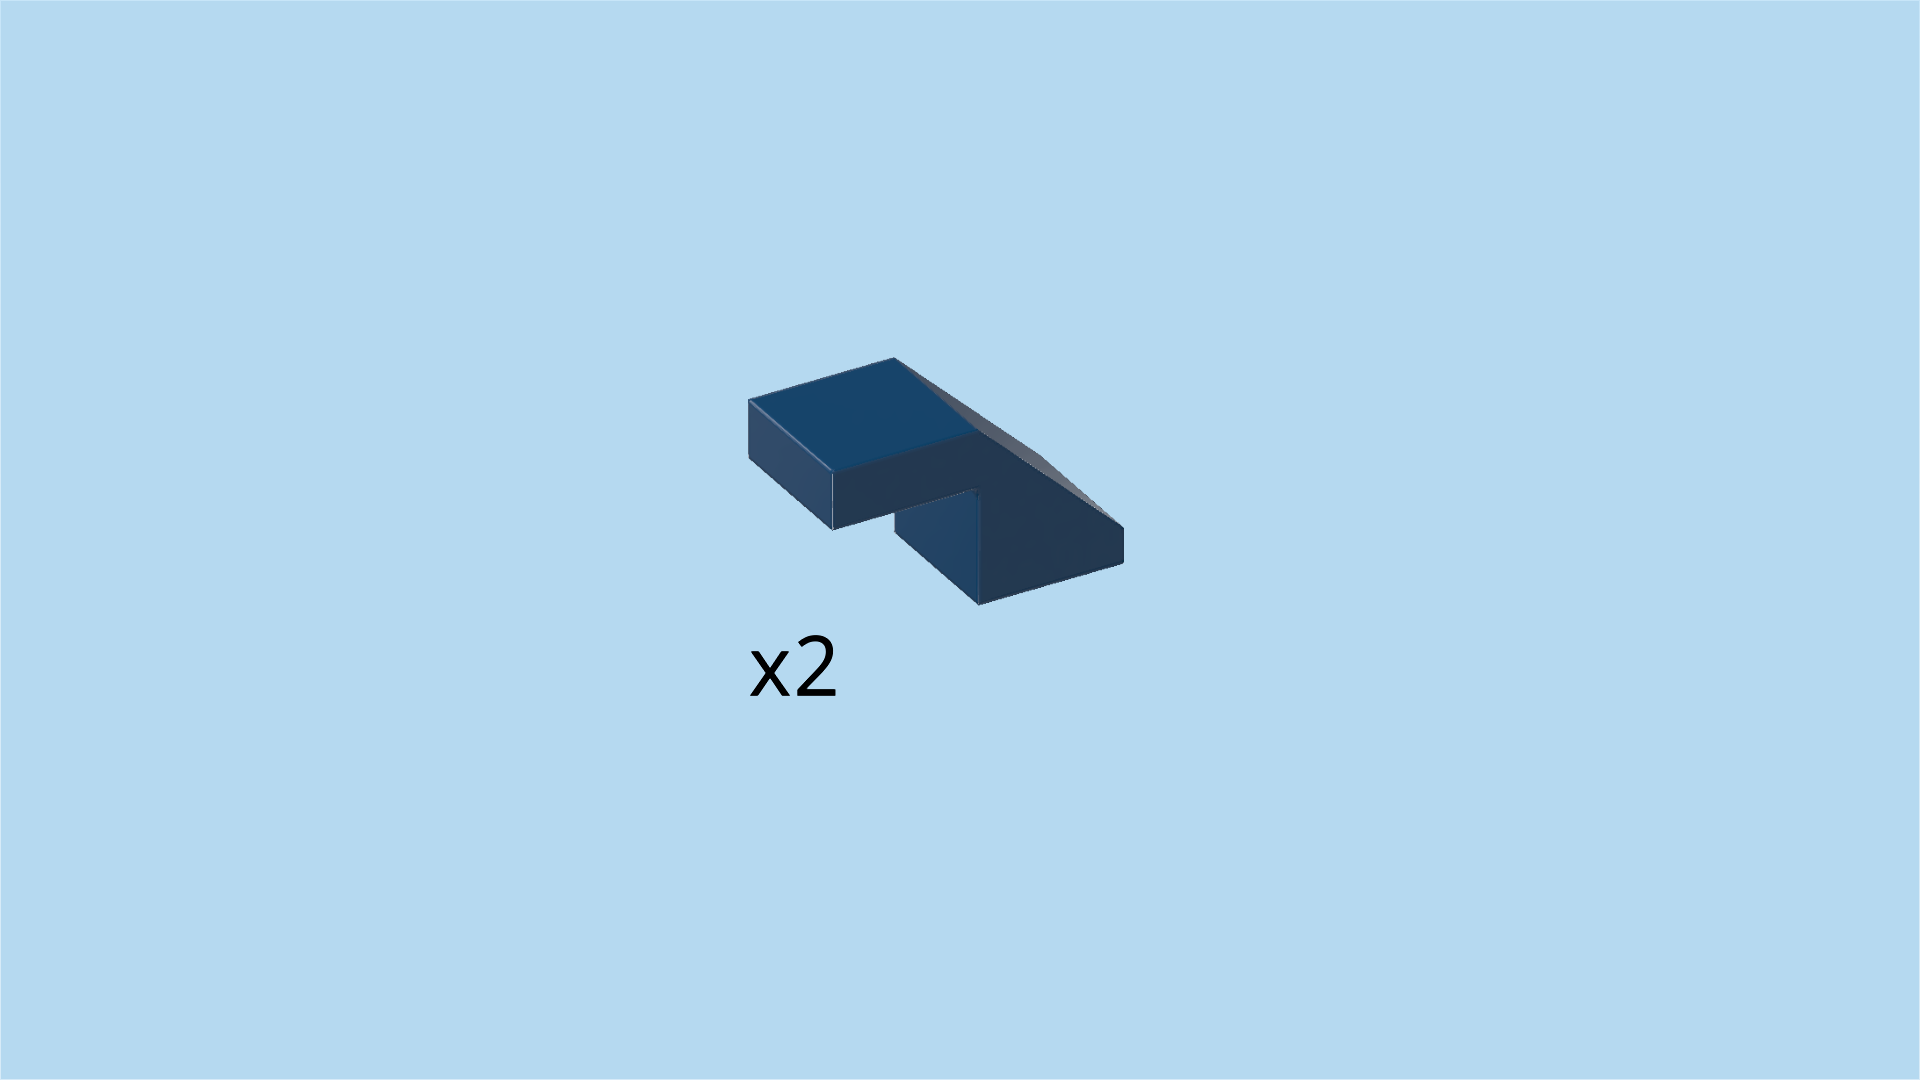
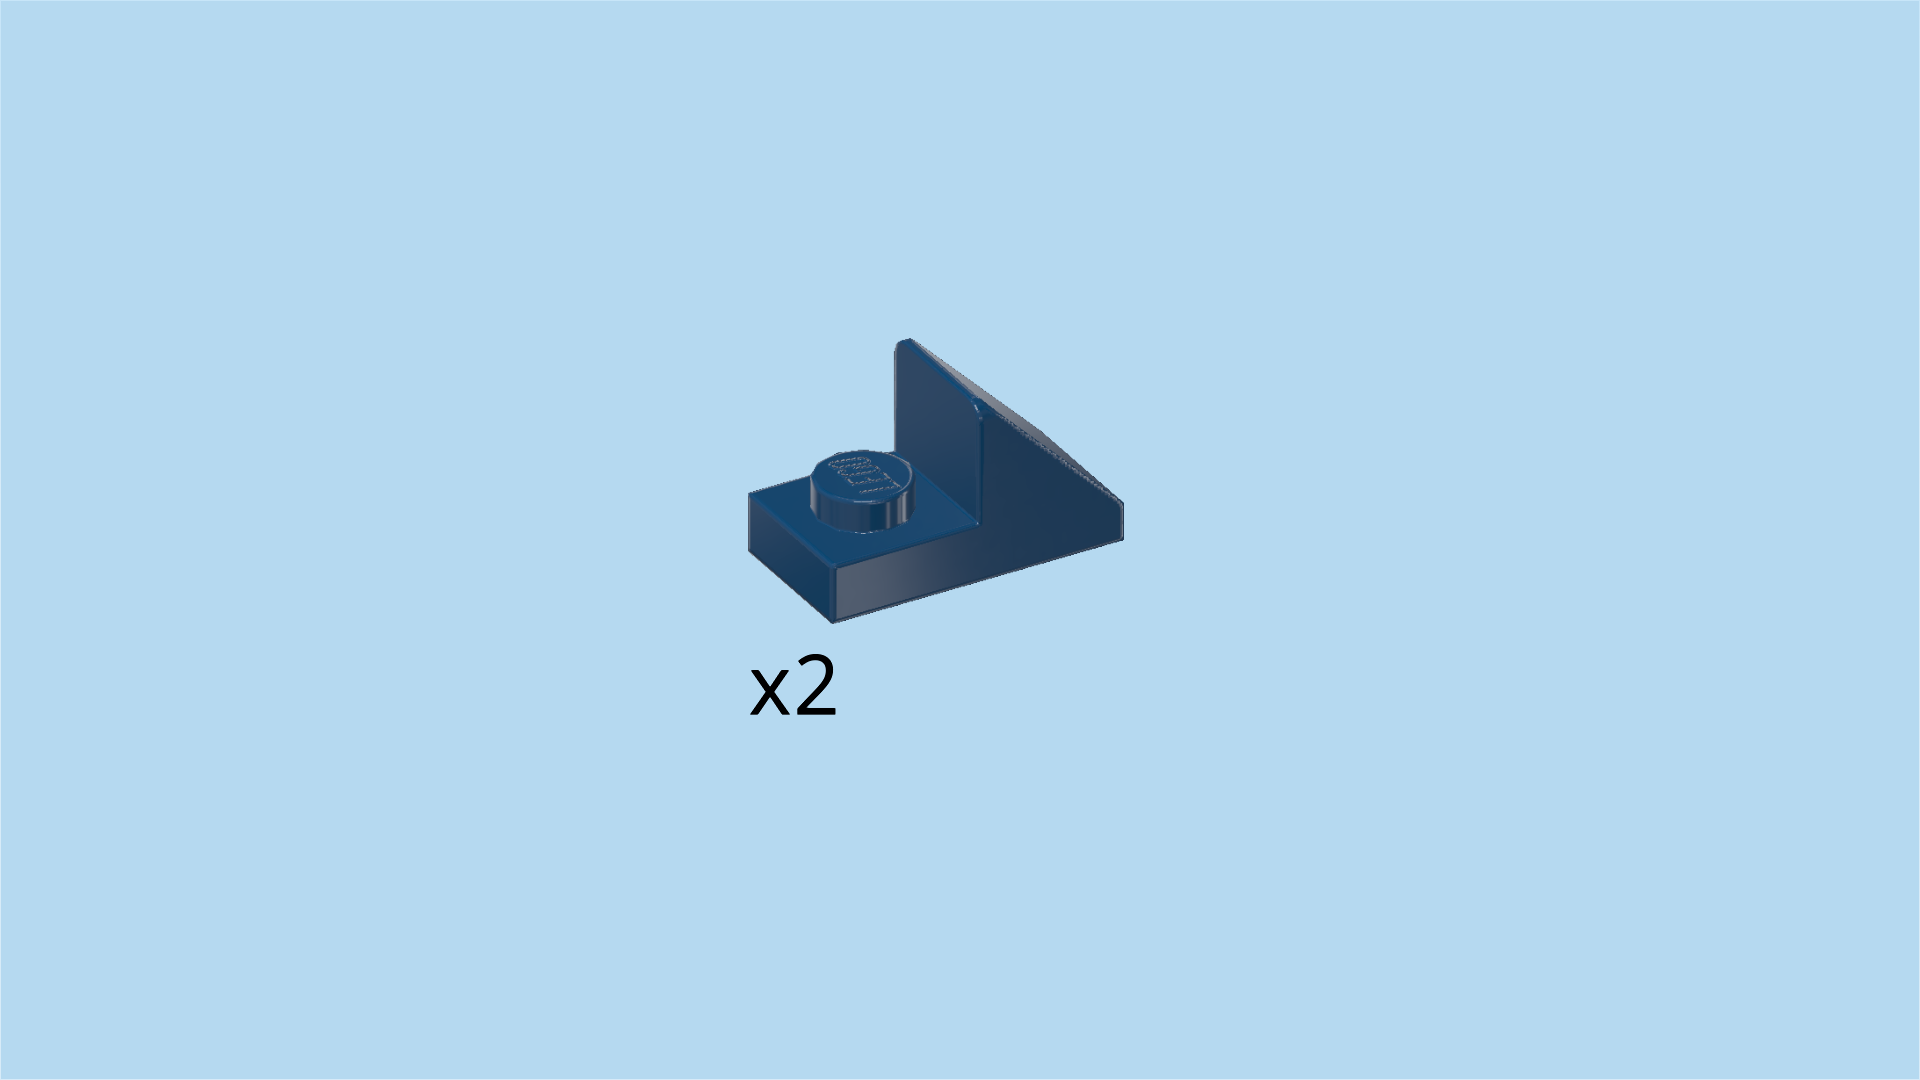
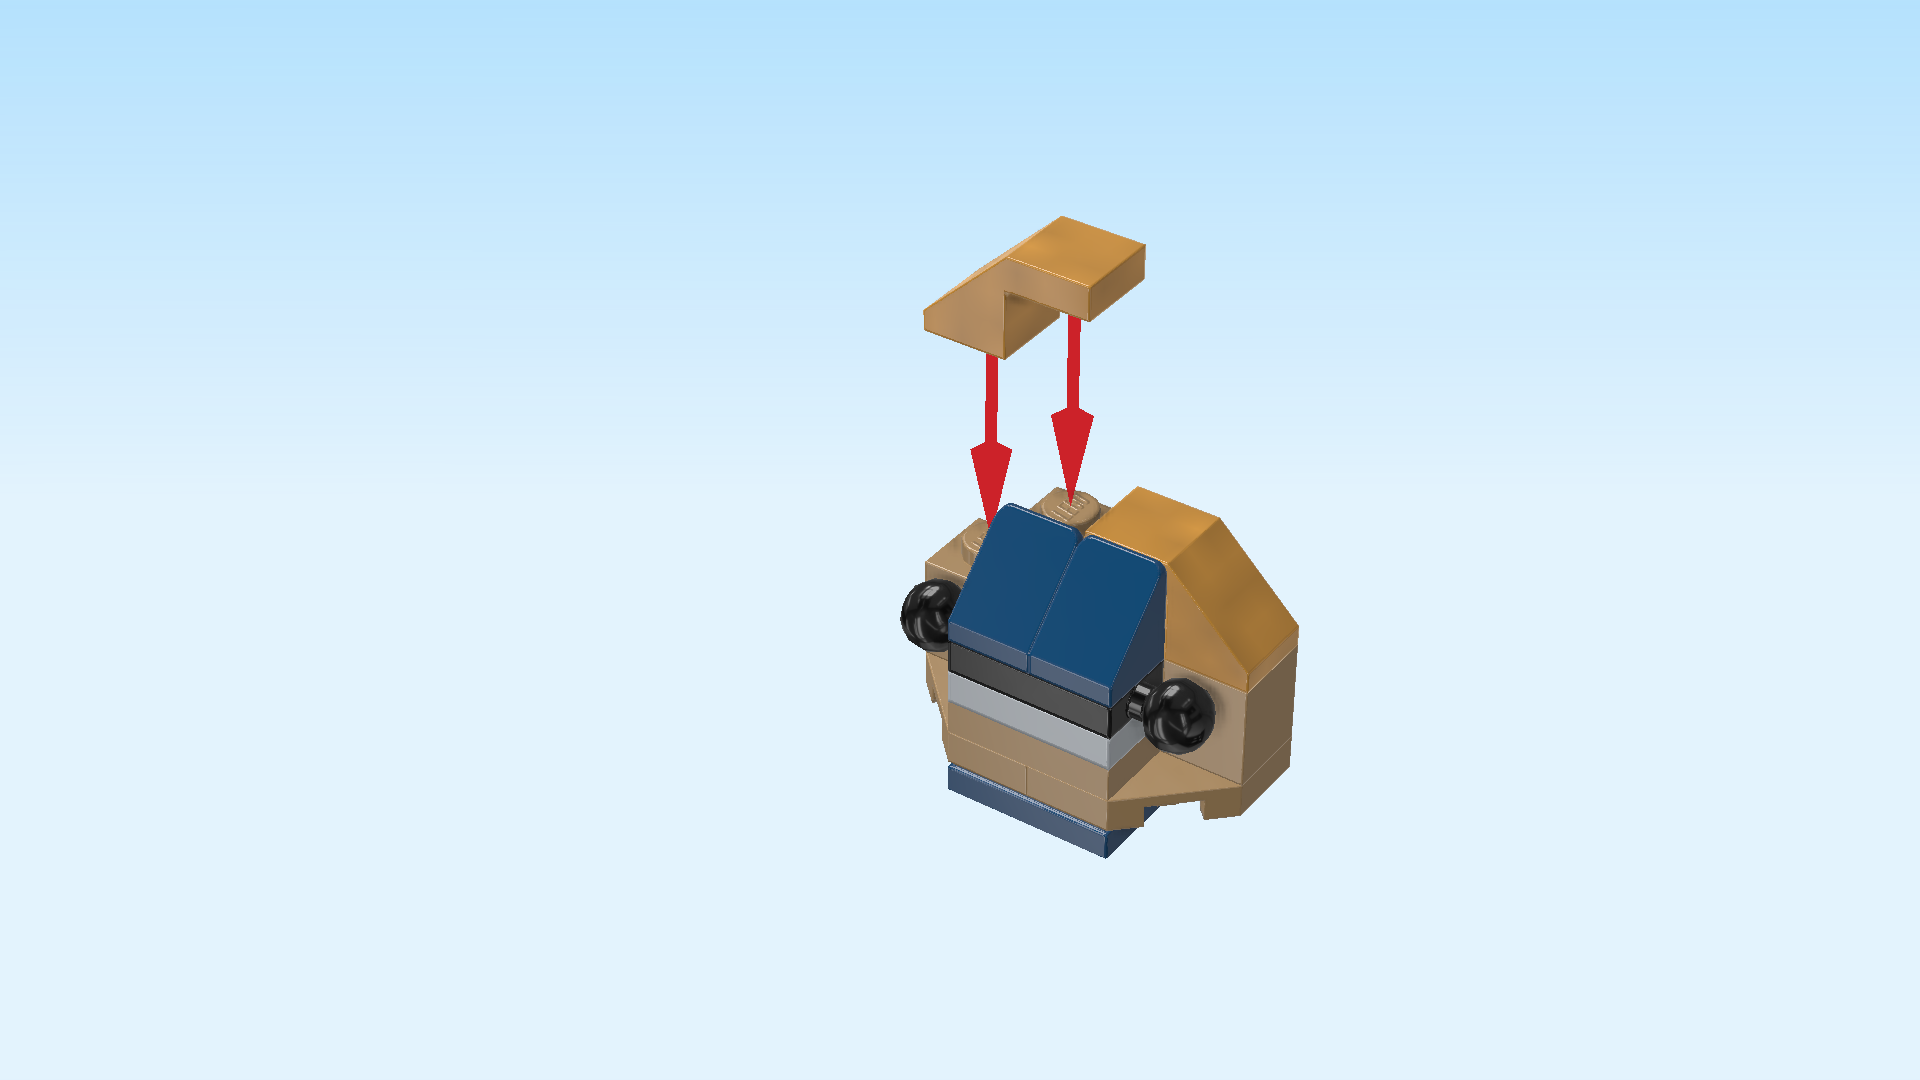
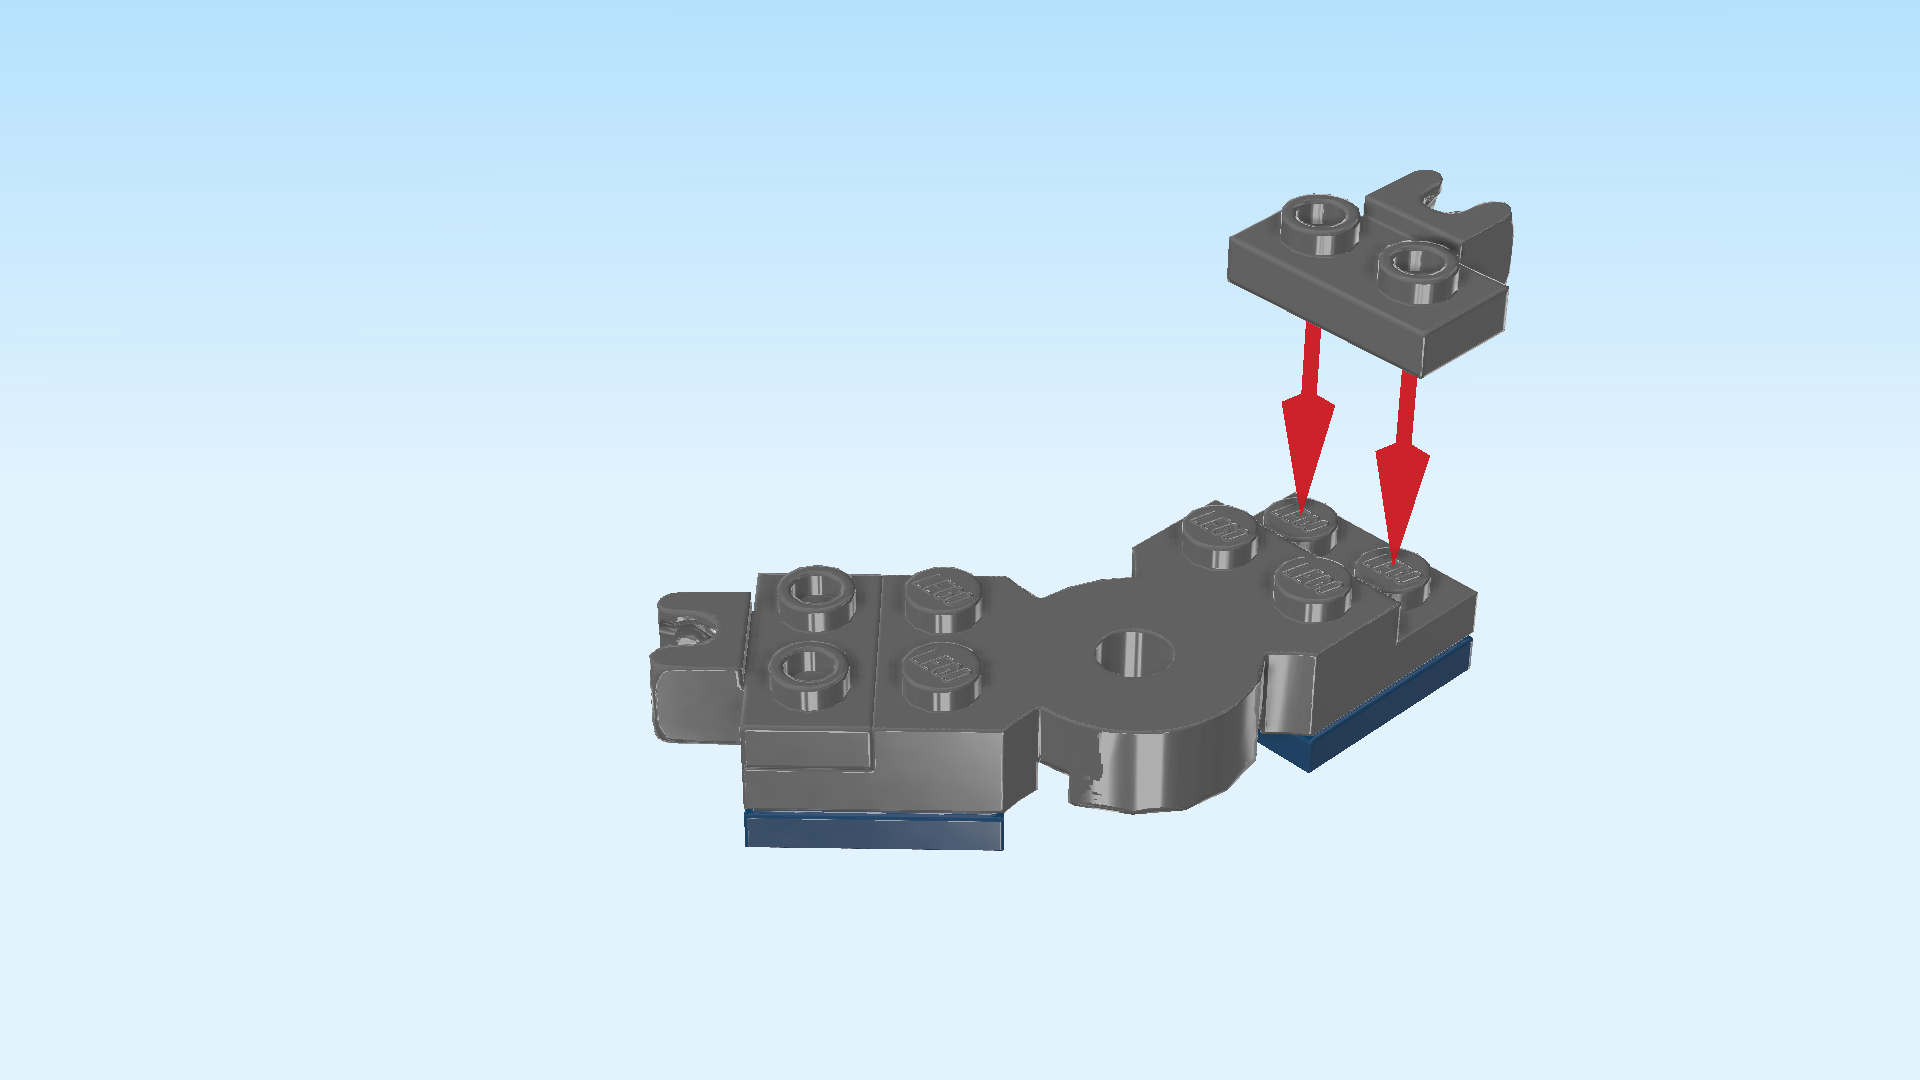
| Find 2 earth blue smooth roof tiles 1x1 with overhanging top tile 1x1. |
| Put 1 upright horizontally on the top row of side knobs, starting from the left edge, slope to the left. |
| Put the other one upright horizontally to the right of the previous piece, slope to the right. |
| Now, we will assemble the chestplate of the mech cockpit. |
| Collect the following 2 pieces: |
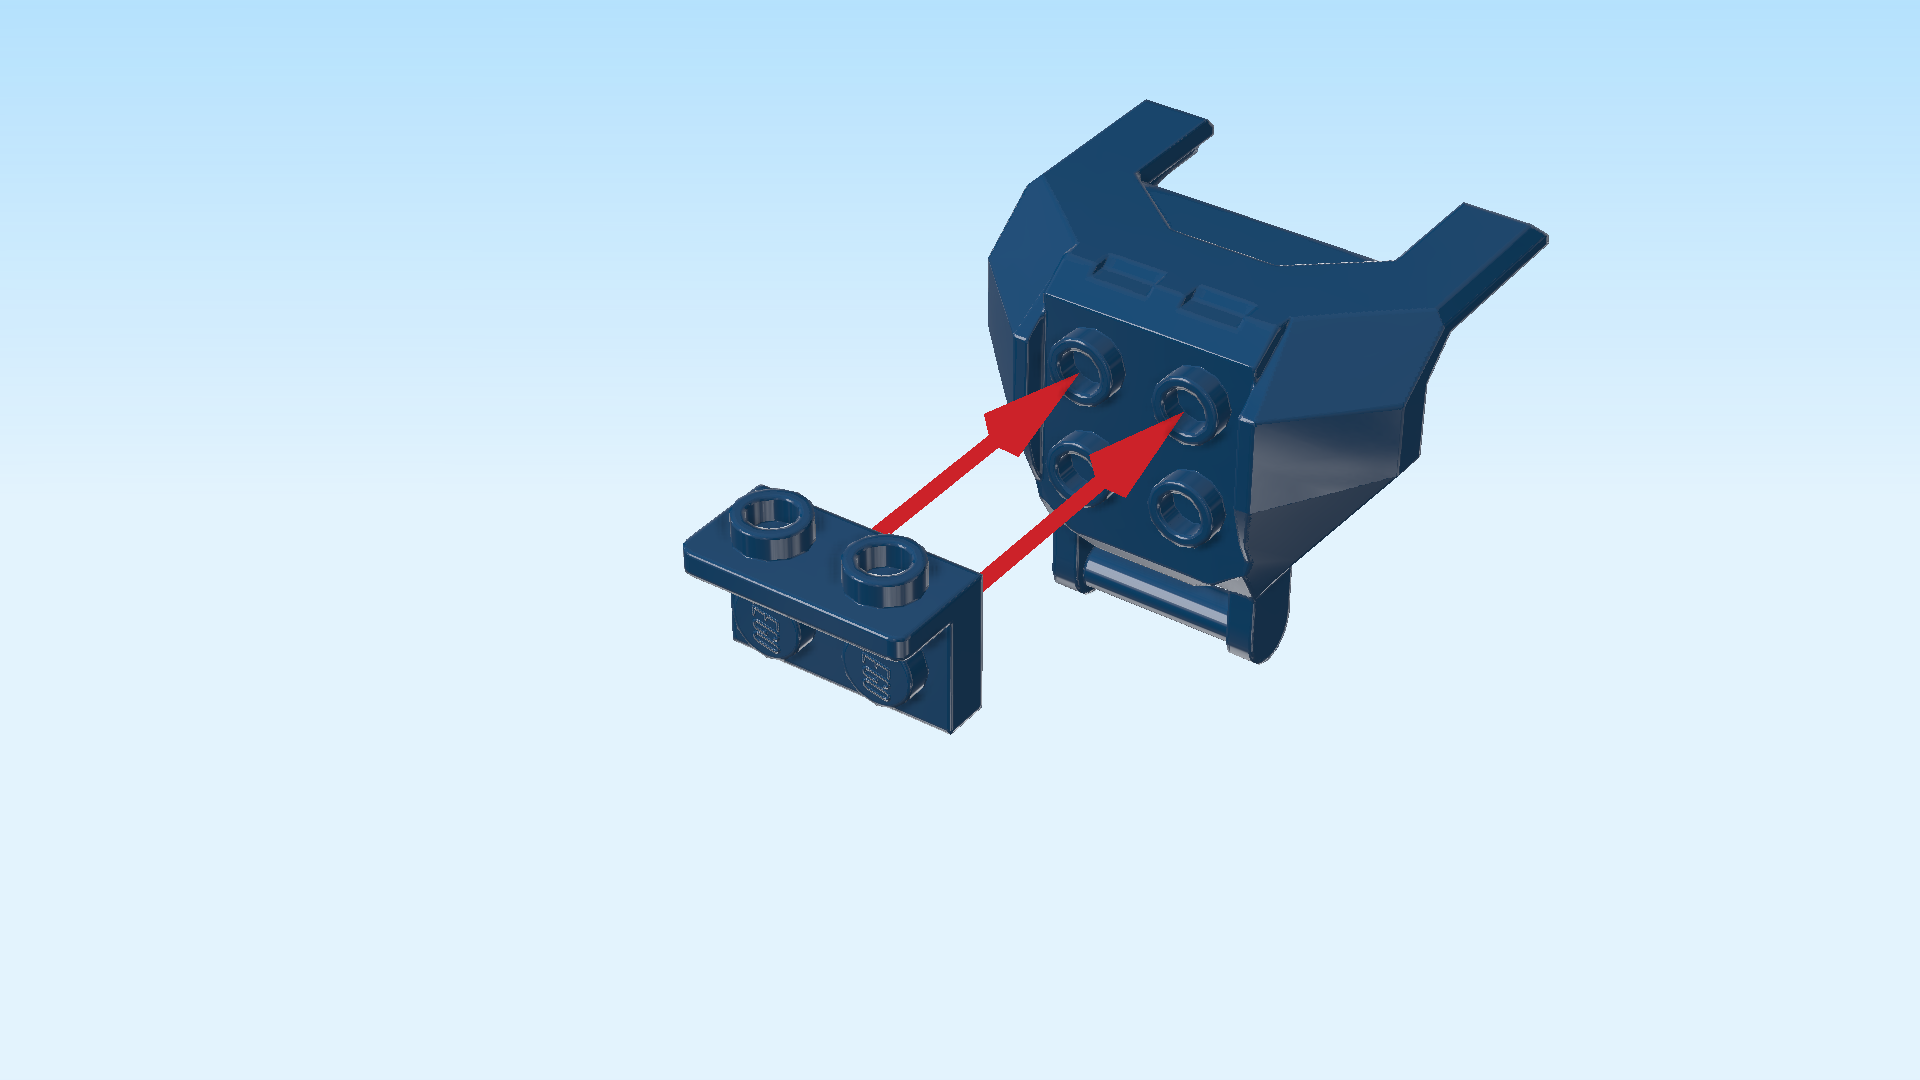
| 1 earth blue bottom angle plate 1x2 - 1x2 with 2 side knobs, |
| and 1 earth blue chest piece 3x3x4 with bottom shaft and 2 tabs. |
| Hold the chest piece upright, shaft to the bottom, 4 knobs pointing towards you. |
| Flip the bottom angle plate upright horizontally, hollow side knobs pointing to the top, standard knobs pointing towards you. |
| Mount the angle plate on the 2 top side knobs of the chest piece. |
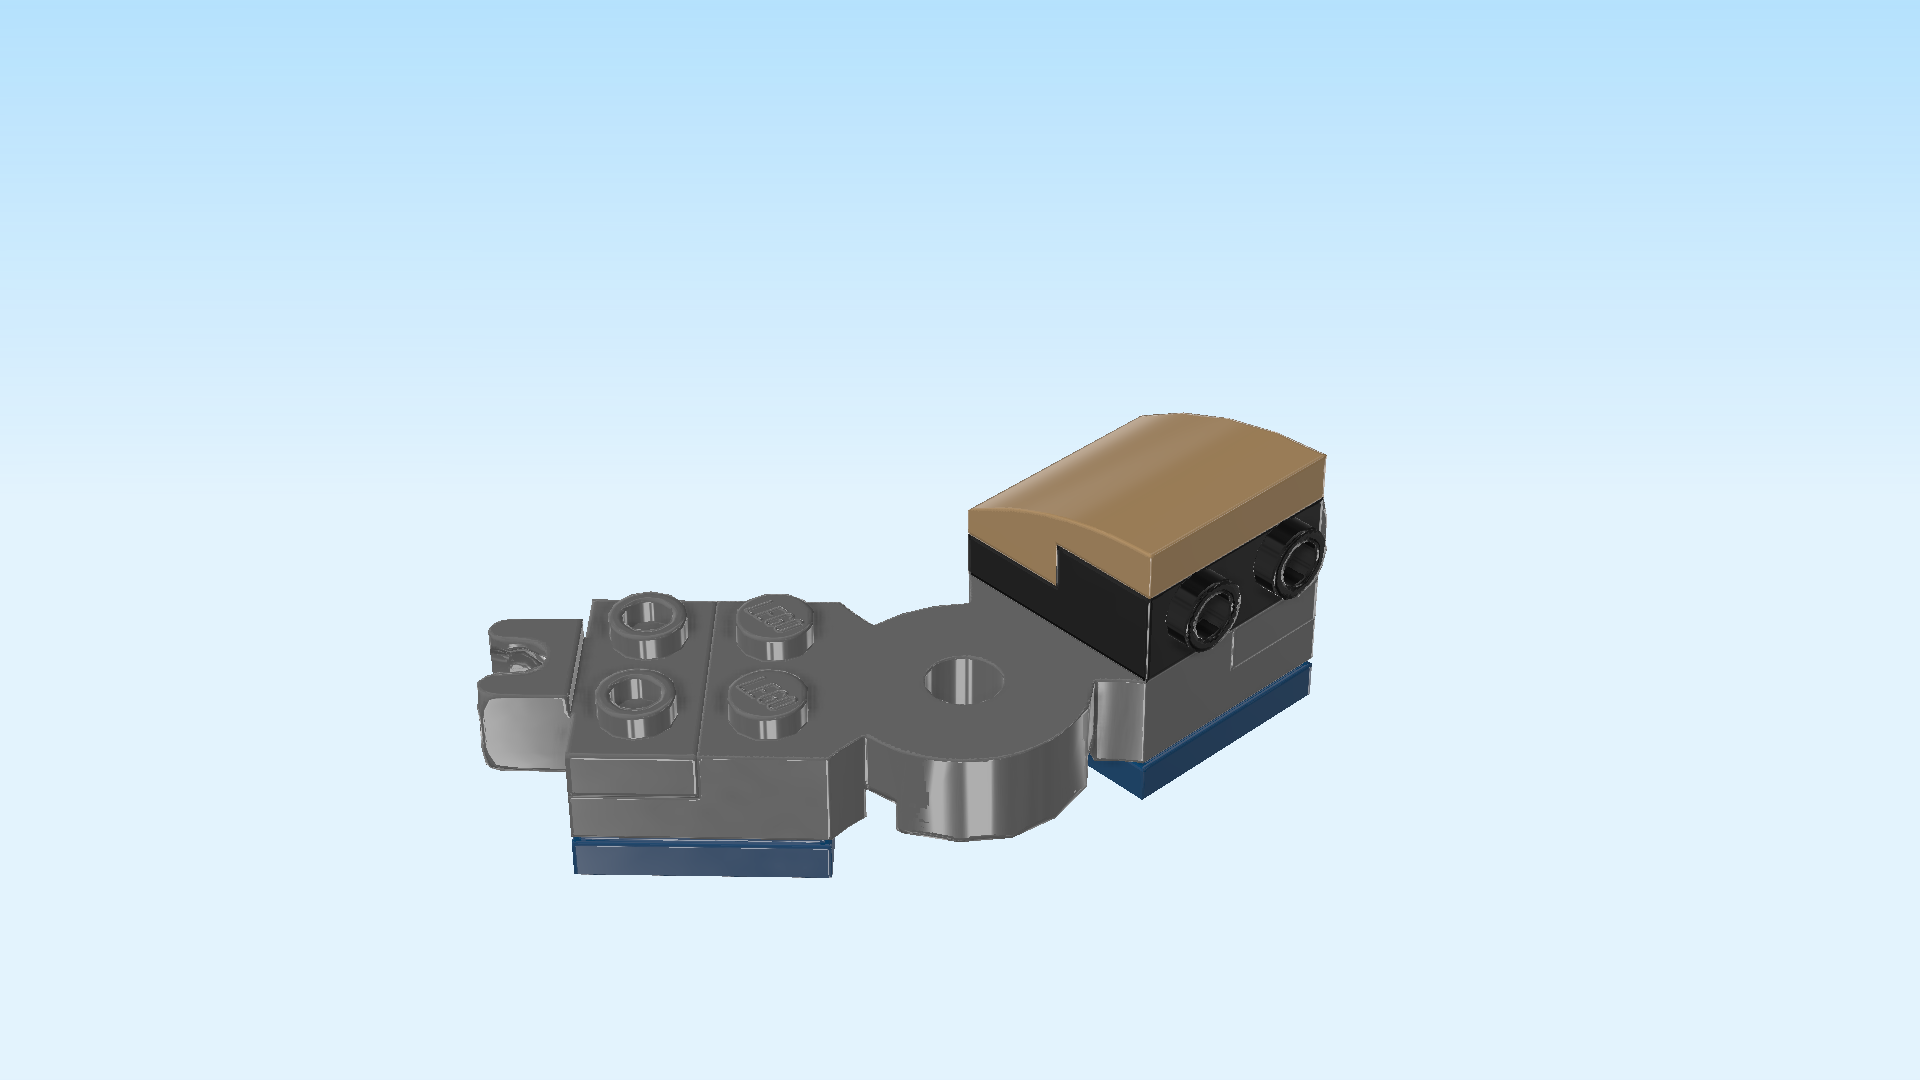
| Find 1 earth blue one-stepped curve tile 2x2x⅔. |
| Mount it upright on the 4 side knobs pointing to the front, curve to the bottom. |
| This piece is printed with the golden chestplate and sixpack of Thanos. |
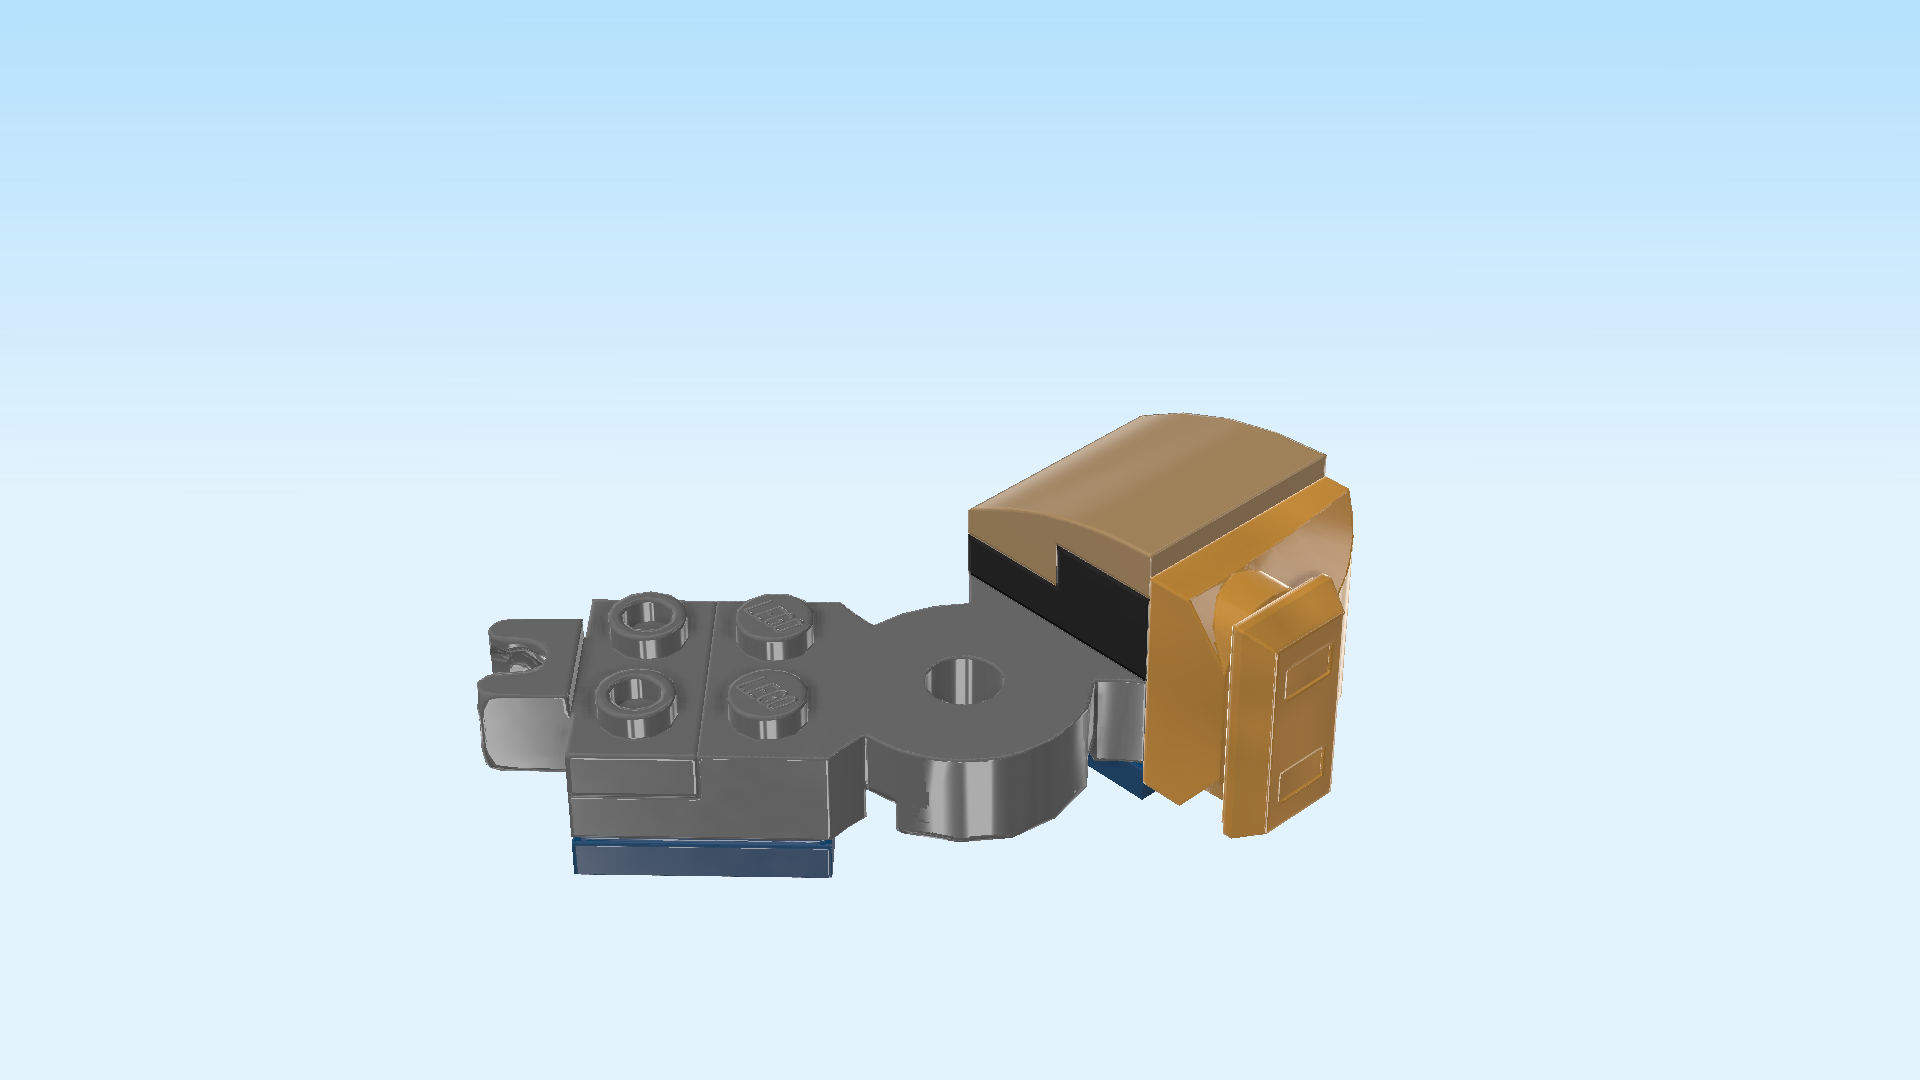
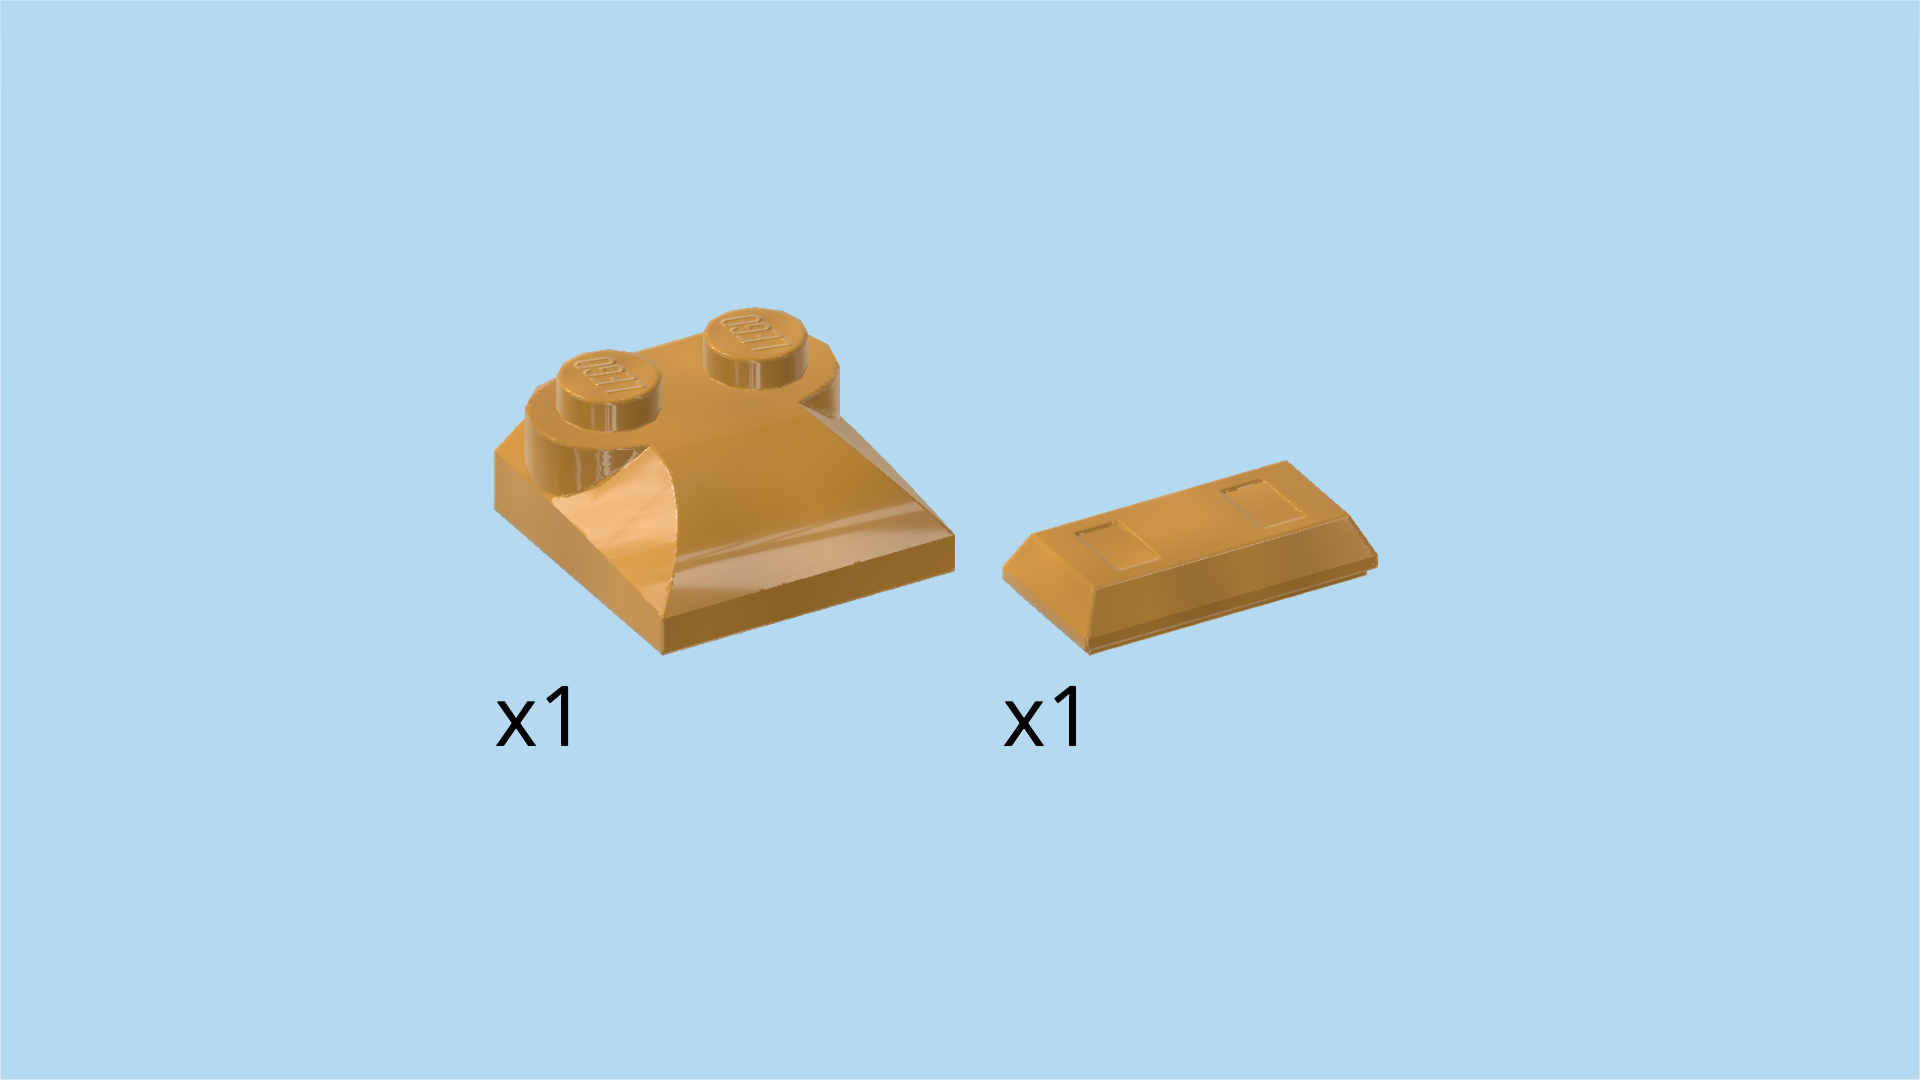
| Find 2 warm gold quarter-arched tiles 2x2. |
| Turn 1 so that its outer curve is to the front left. |
| Mount its rightmost connection point on the left knob of the chest piece, tile extending to the left and back. |
| Put the other one to the right of the previous piece, mirroring it. |
| Together, the 2 quarter-arched tiles should form a half circle towards the front. |
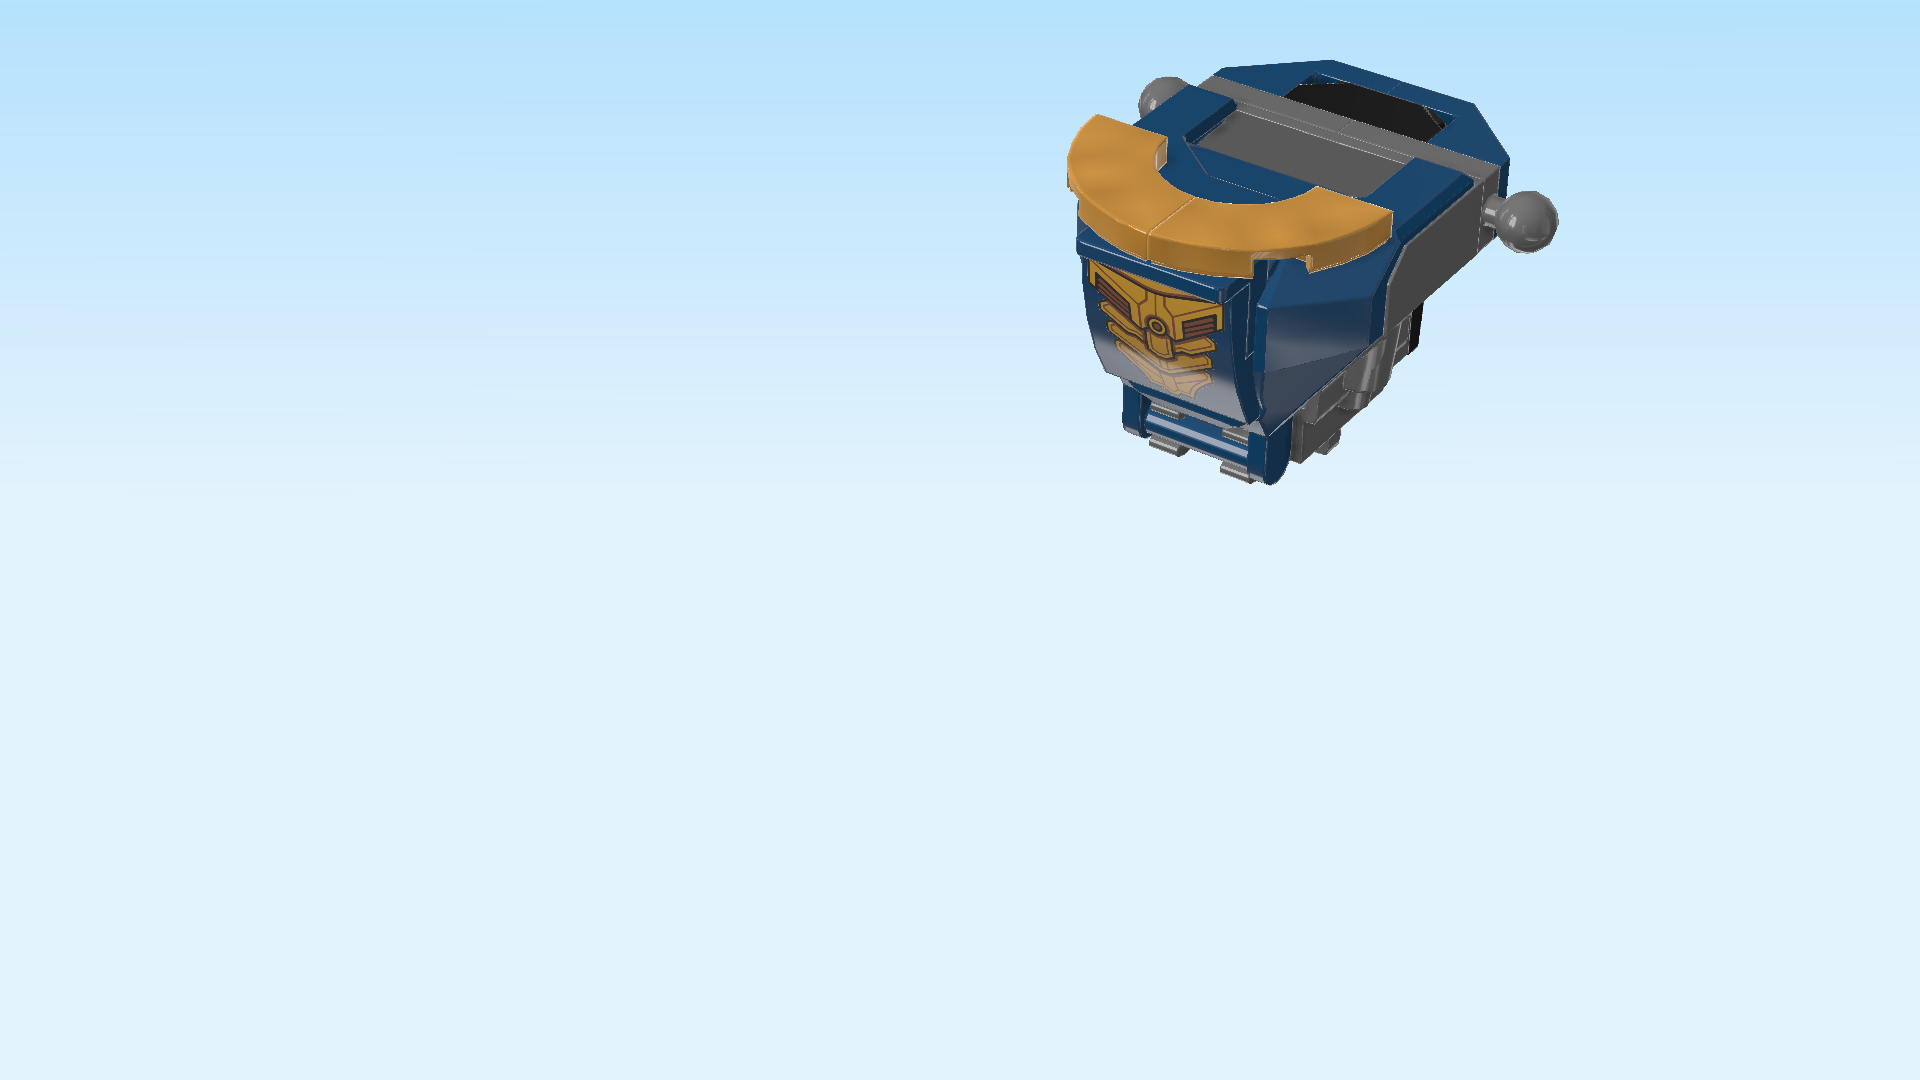
| The chestplate of the mech cockpit is finished! Well done! Turn the mech cockpit from left to right so that its opening is facing you. |
| Snap the chest plate's bottom shaft into the 2 clasps at the bottom of the cockpit. |
| Fold the chestplate up. The mech cockpit is finished! |
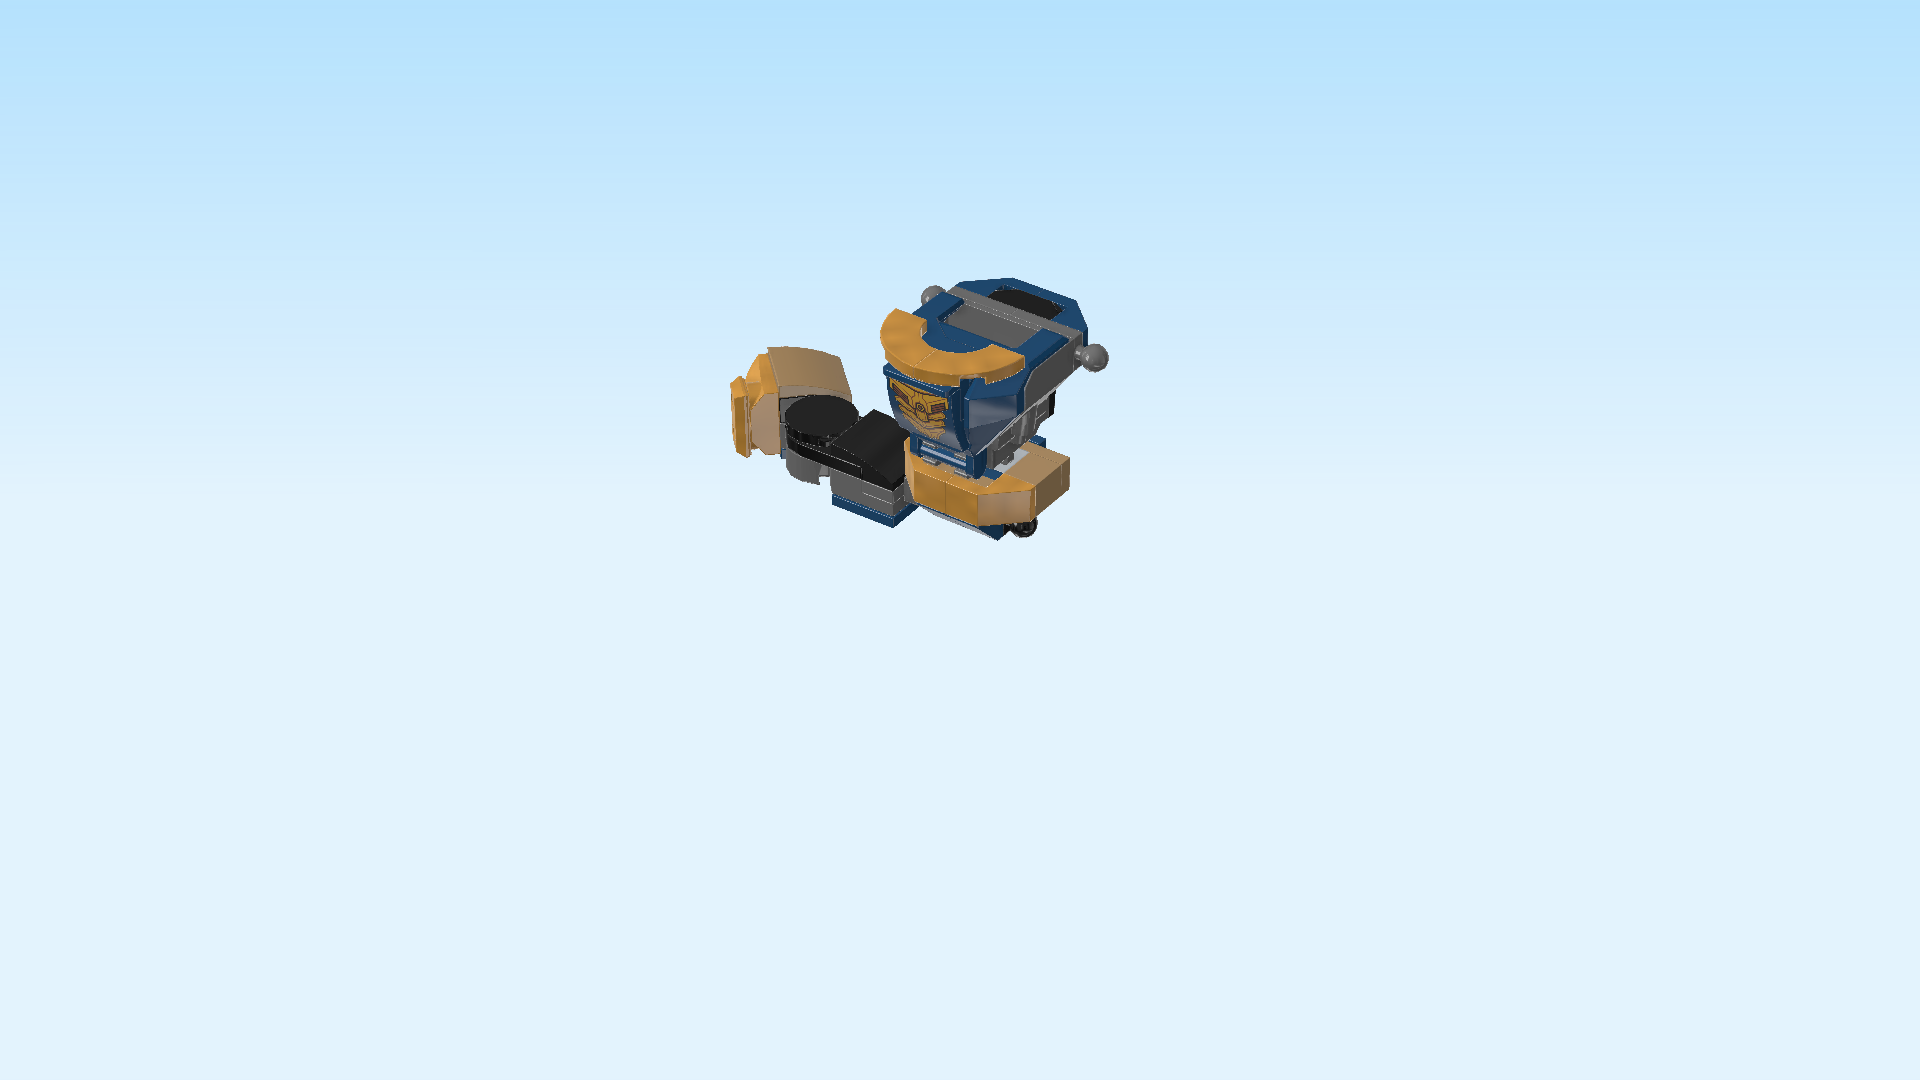
| Now, we will build the mech's hip. |
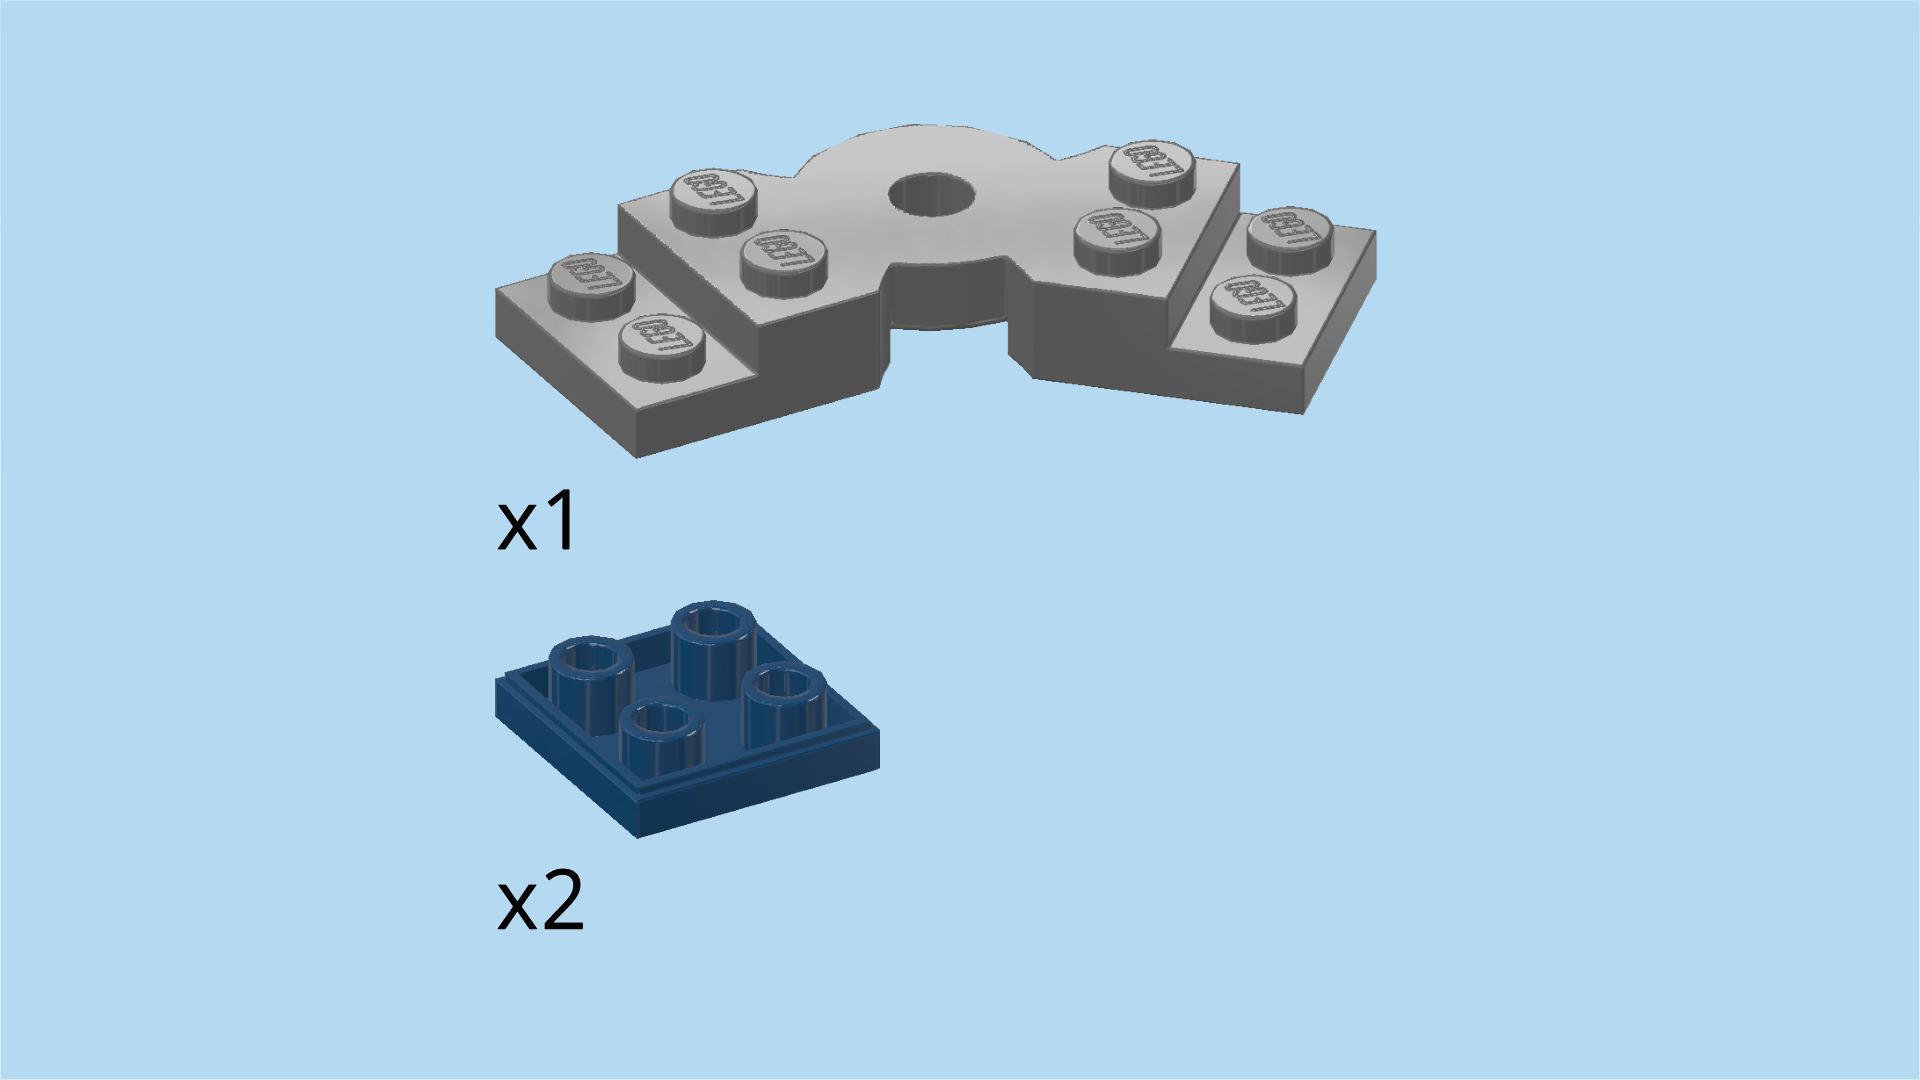
| Collect the following 2 pieces: |
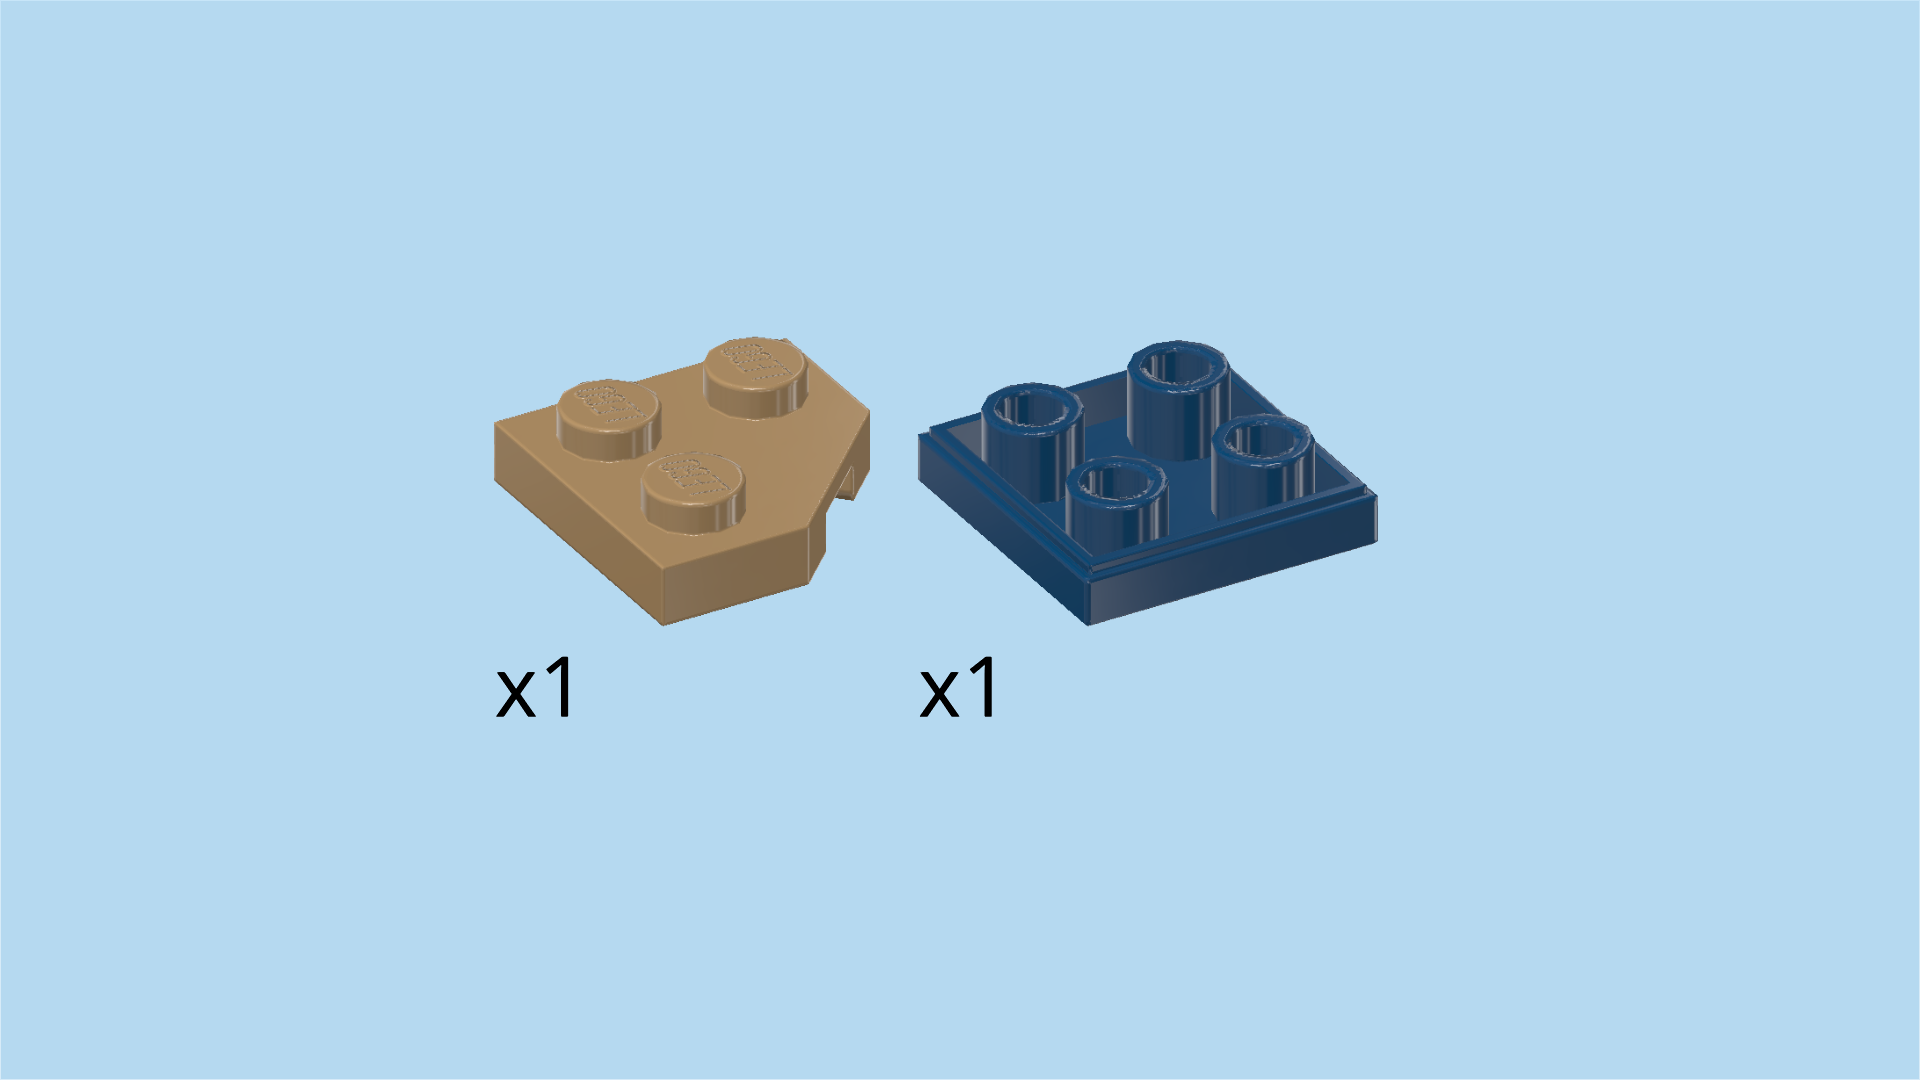
| 1 earth blue inverted flat tile 2x2, |
| and 1 mud grey plate 2x2 with 1 cut-off corner. |
| Put the inverted flat tile 2x2 on the table, hollow knobs to the top. |
| Turn the plate with cut-off corner so that the cut-off corner is to the front left. |
| Mount it on the left column of the inverted flat tile, 1 column overhanging to the left. |
| Find 1 mud grey plate 2x2 with 1 cut-off corner. |
| Turn it so that the cut-off corner is to the front right, and mount it to the right of the previous piece, 1 column overhanging to the right. |
| Find 1 mud grey plate 1x2. |
| Put it horizontally on the front row. |
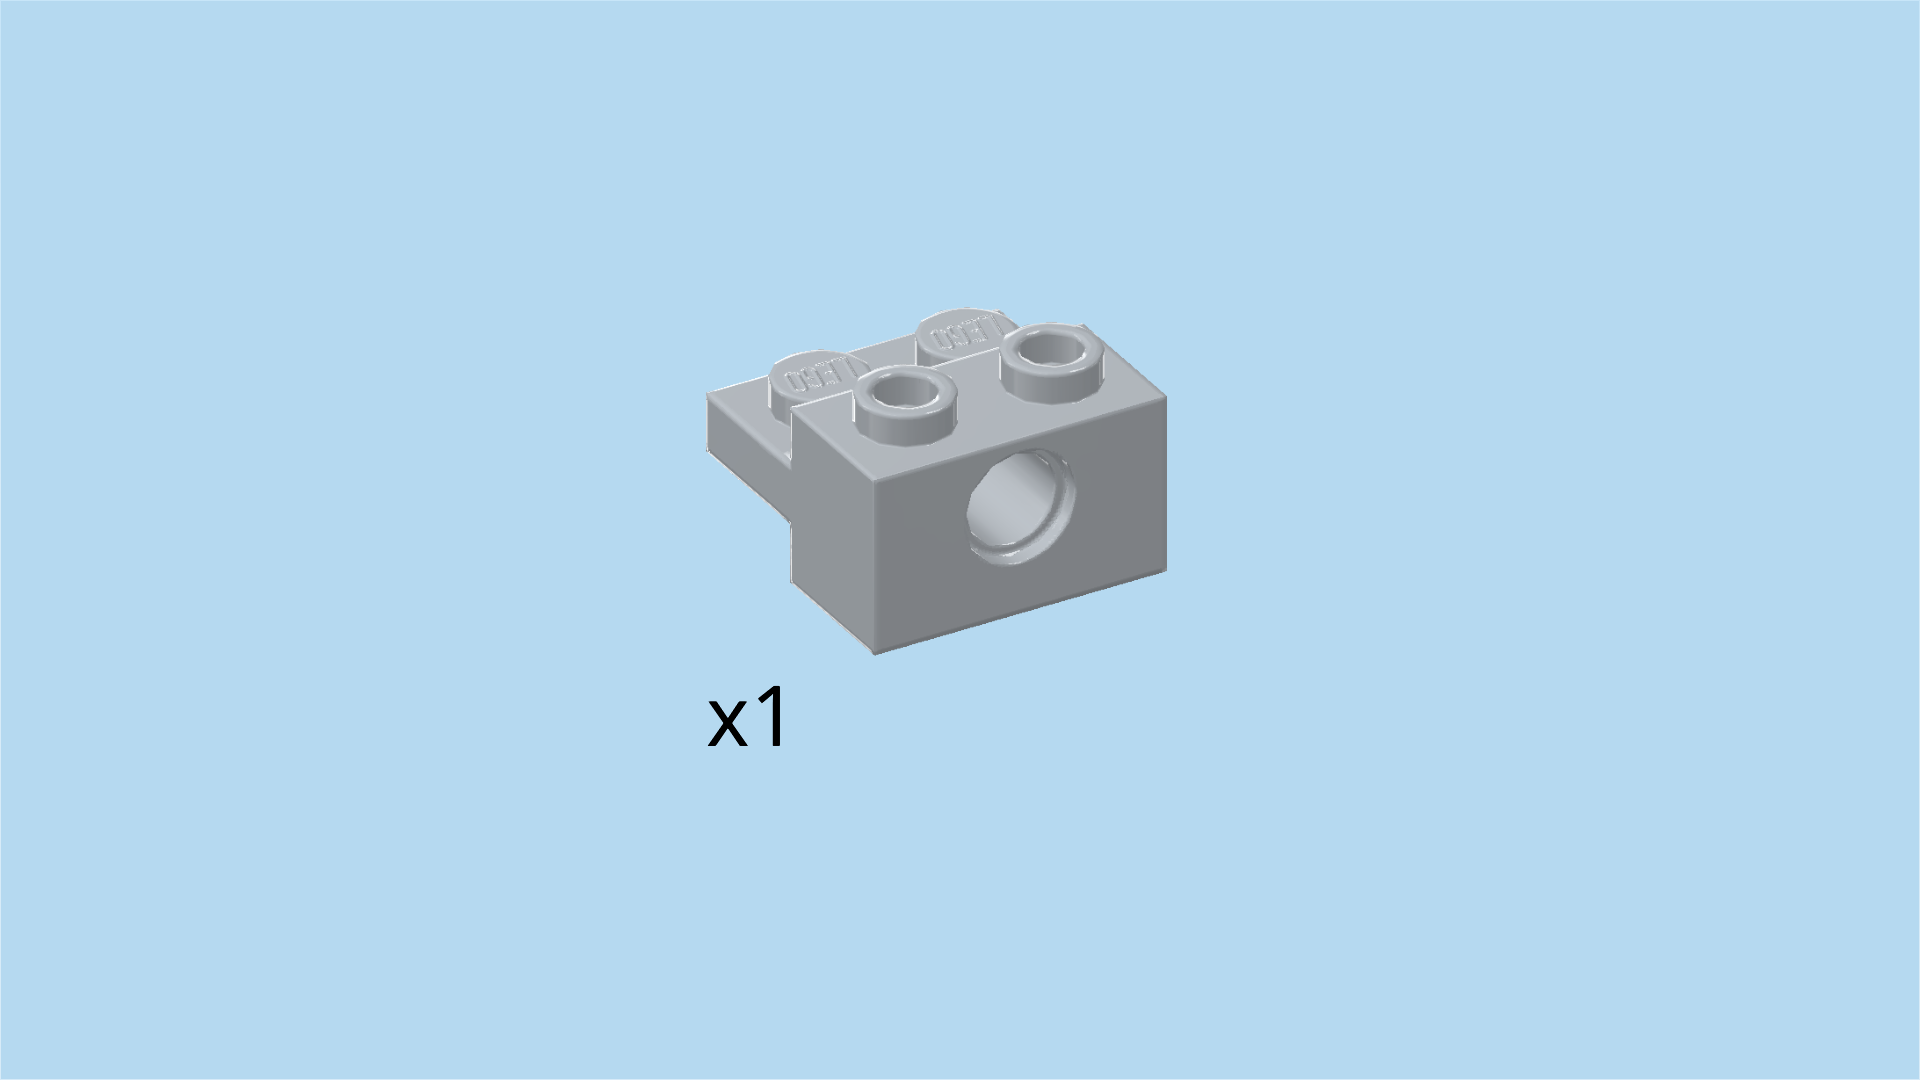
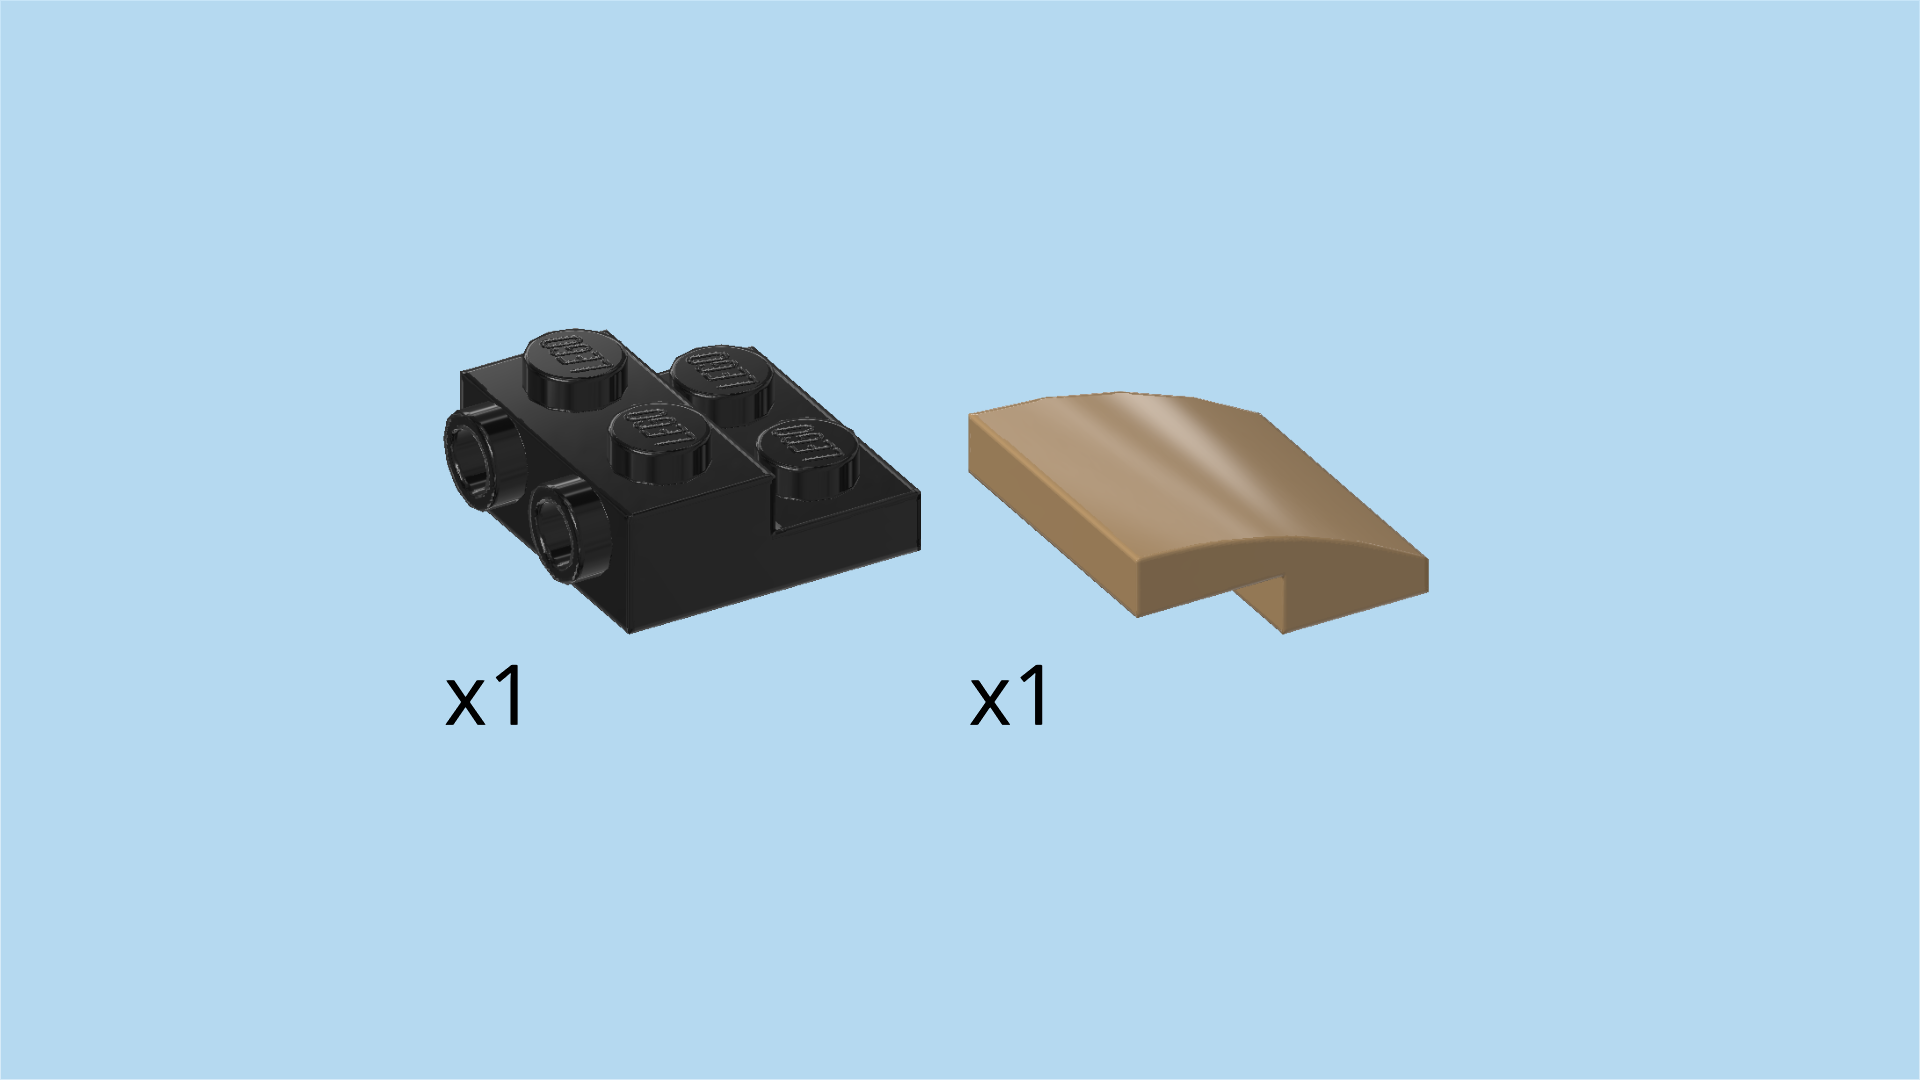
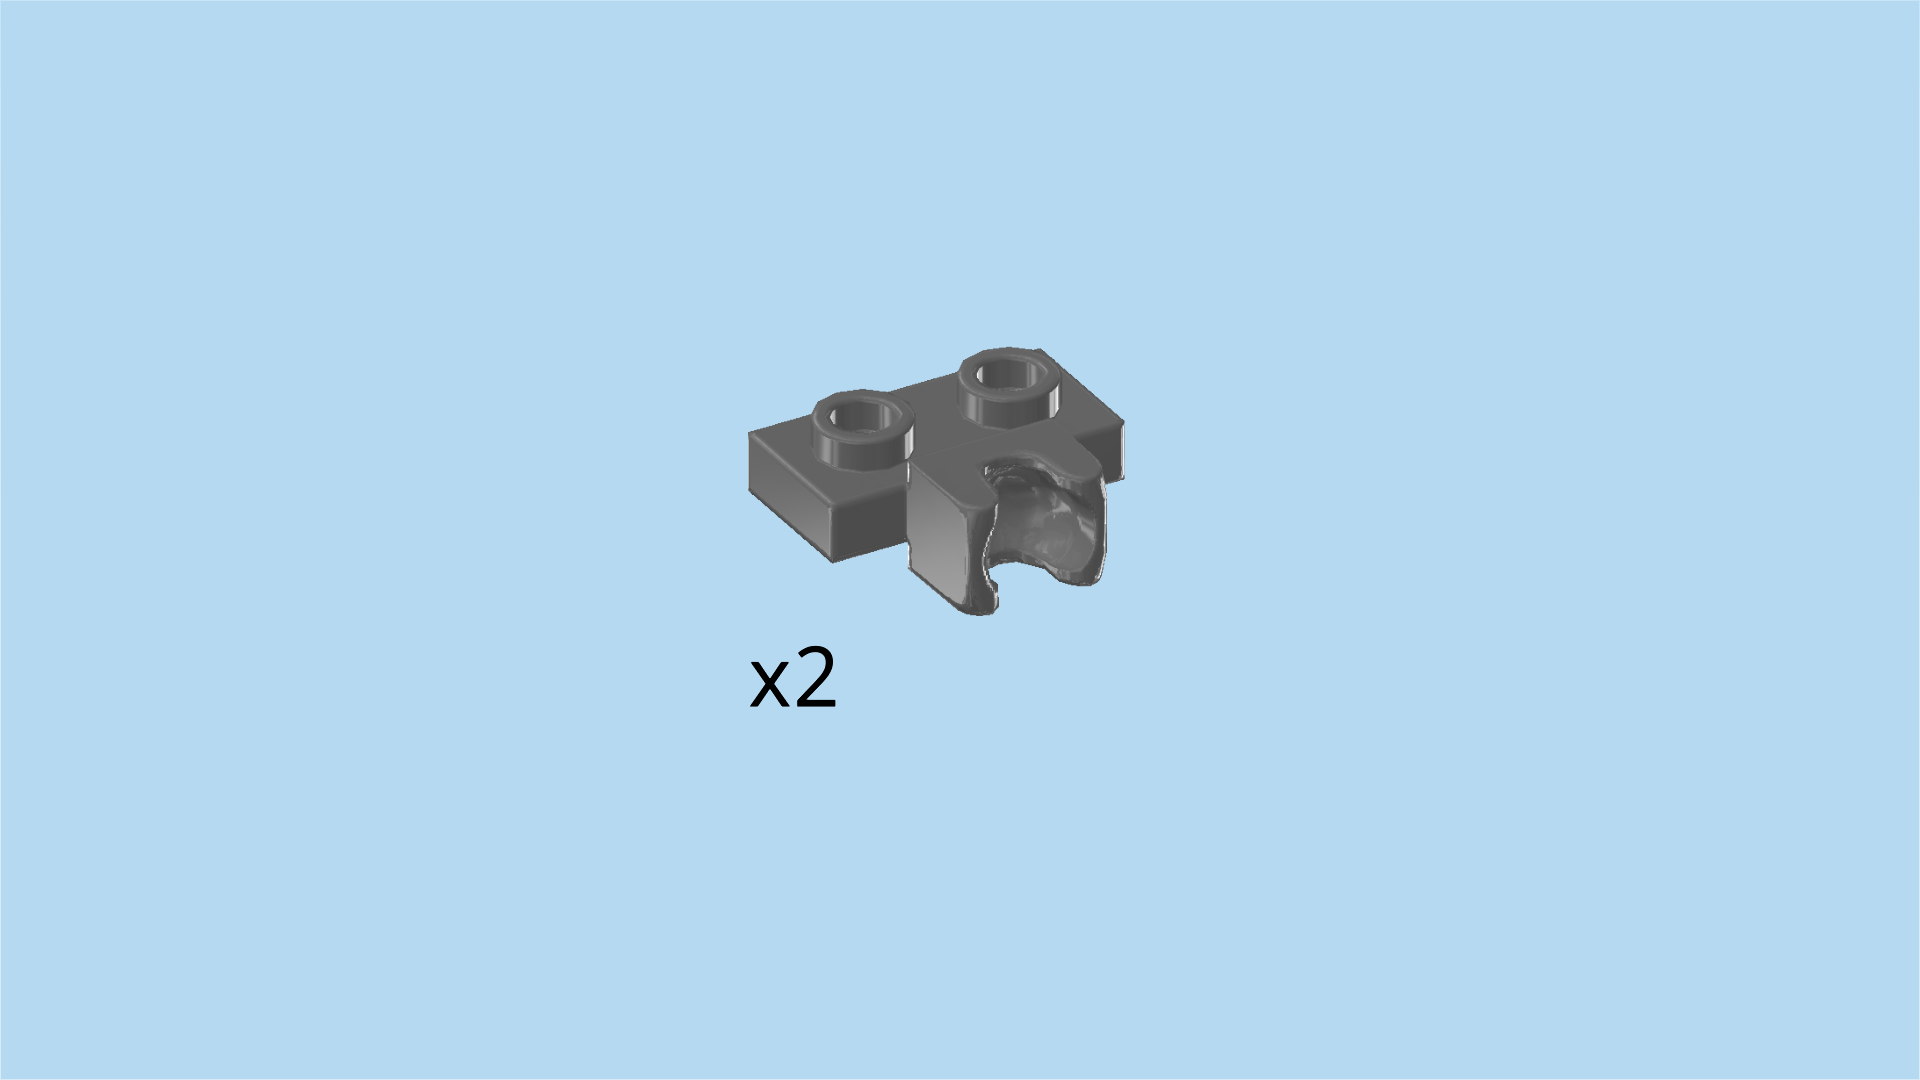
| Find 1 medium stone grey brick 1x2 with side plate 1x2. |
| Put it behind the previous piece, side plate to the front, connecting to the previous piece. |
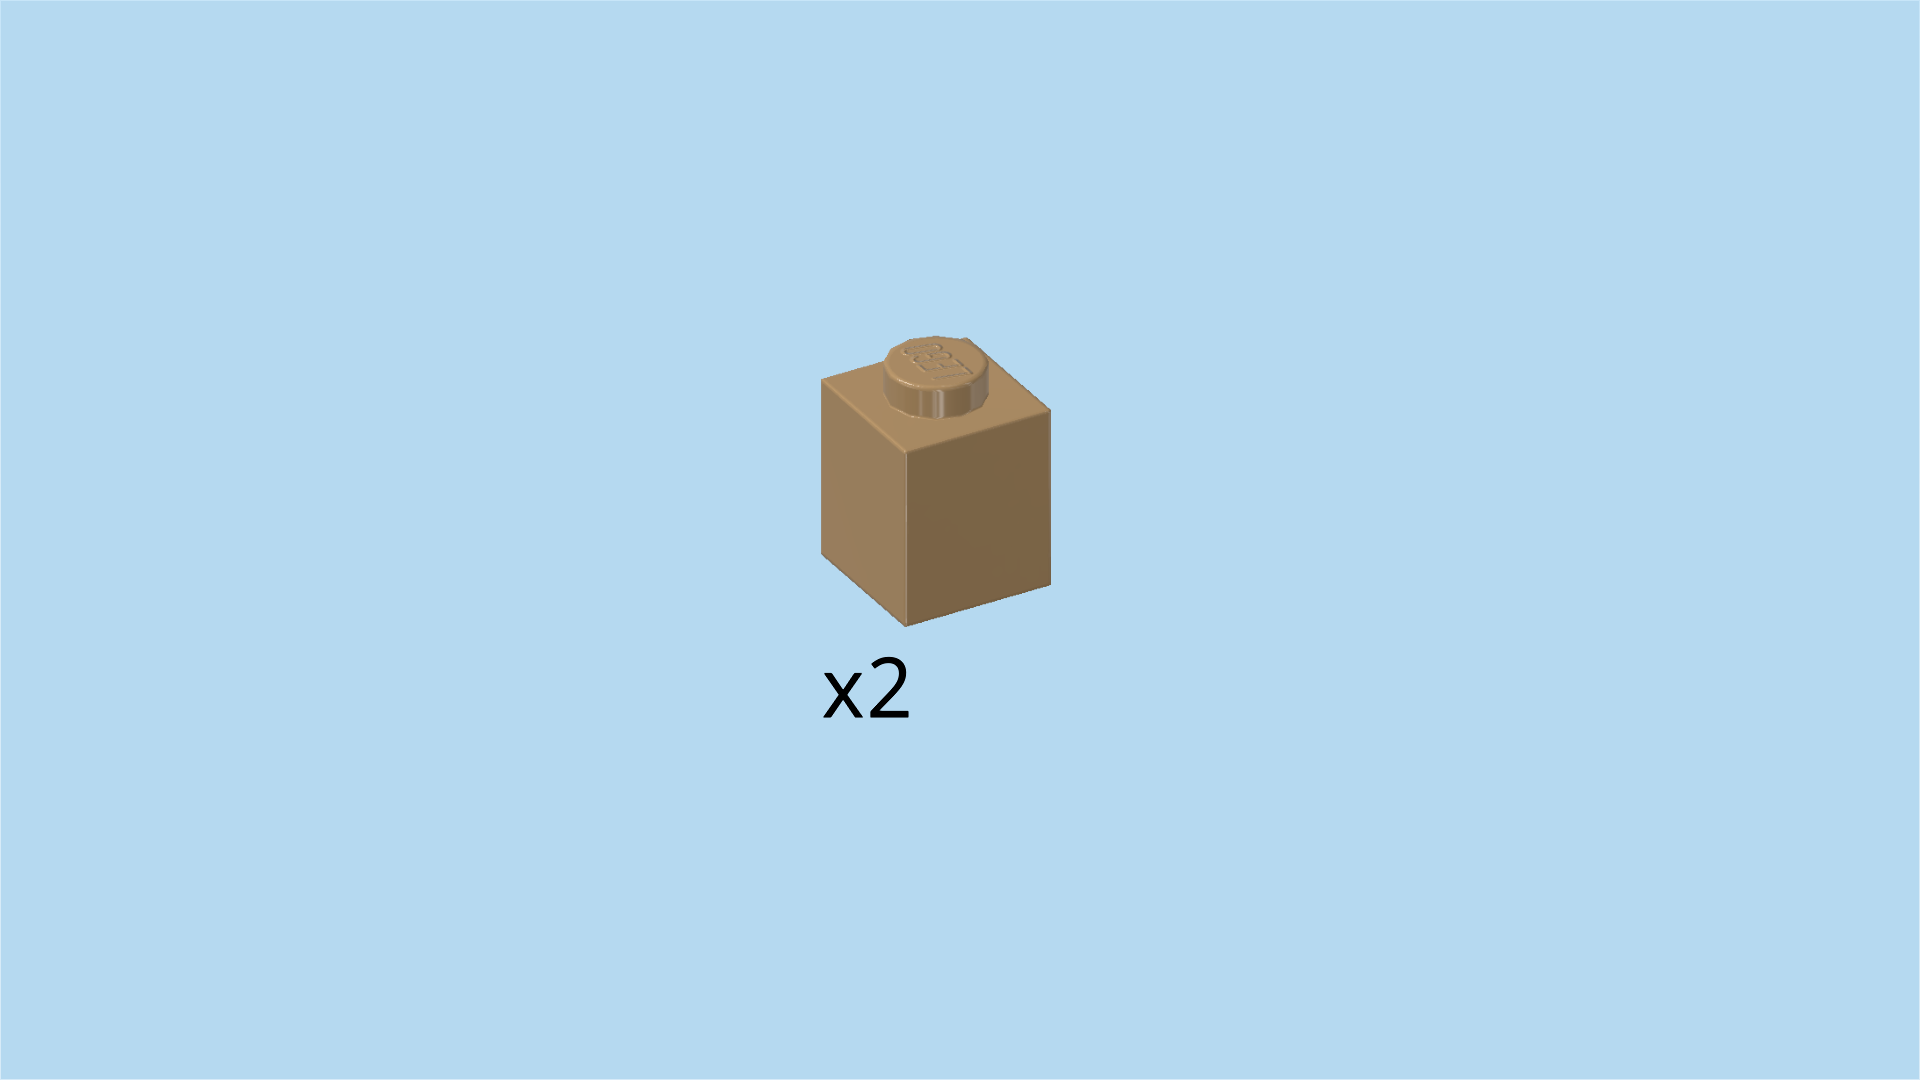
| Find 2 mud grey bricks 1x1. |
| Put 1 to the left of the previous piece and the other one to the right of the previous piece. |
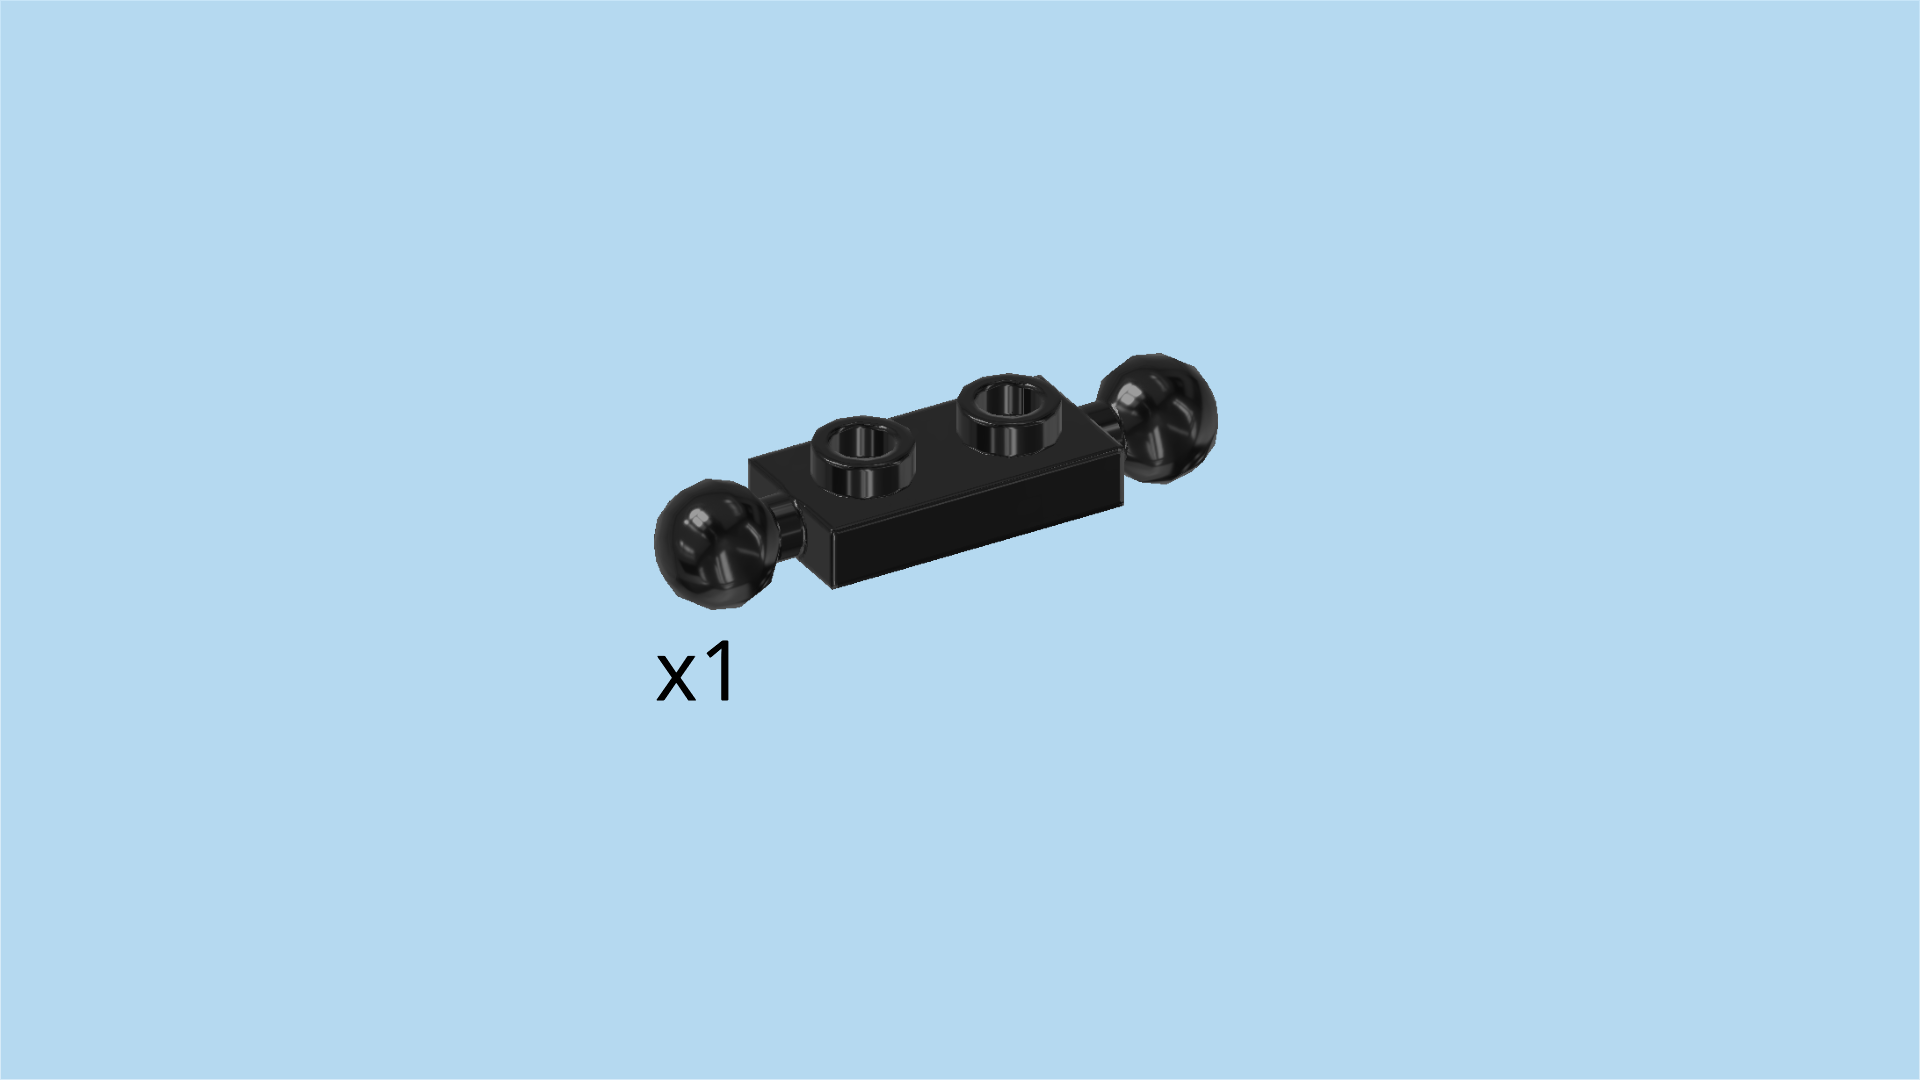
| Find 1 black plate 1x2 with 2 balls on short ends. |
| Put it horizontally on the front row, balls to the left and right. |
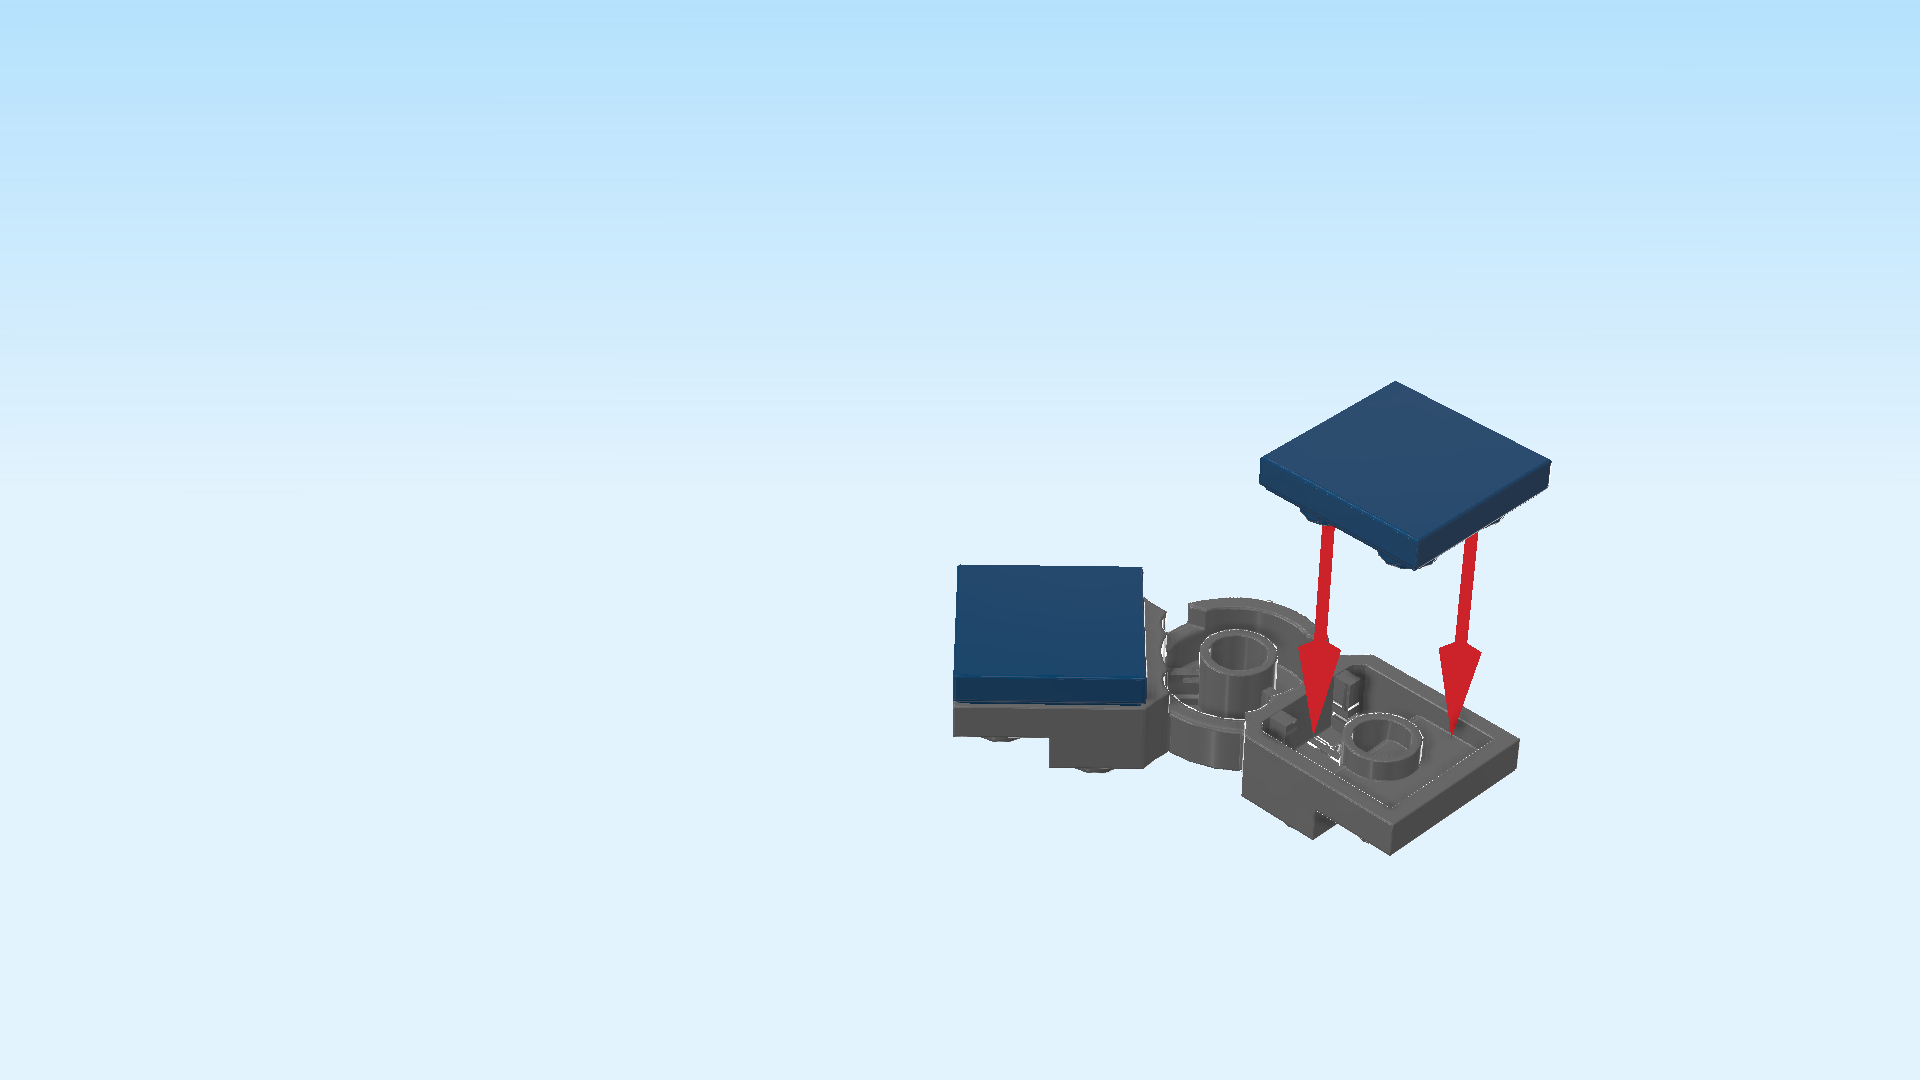
| Find 2 earth blue plates 1x2 with top roof tile 1x1. |
| Put them vertically next to each other on the 2 middle columns, roof tiles to the front. |
| Find 1 mud grey plate 1x2. |
| Put it horizontally on the 2 previous pieces. |
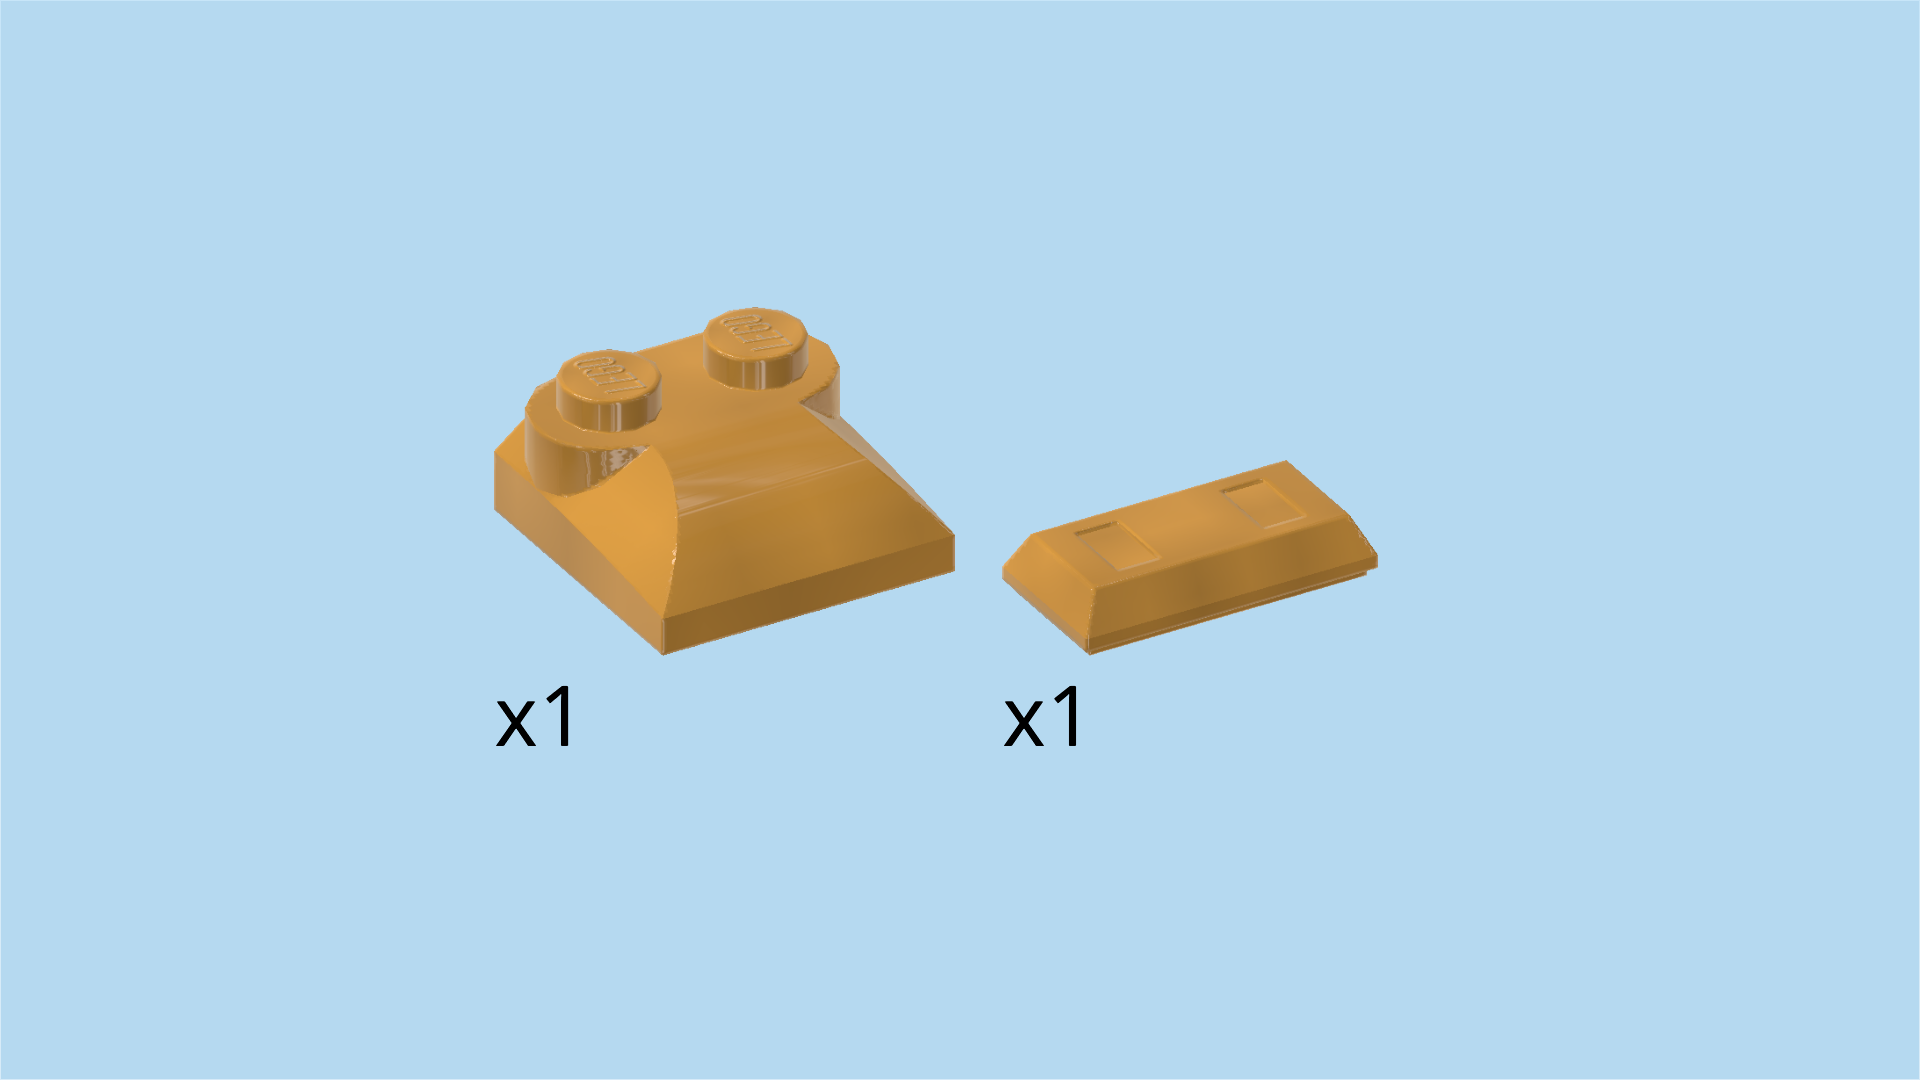
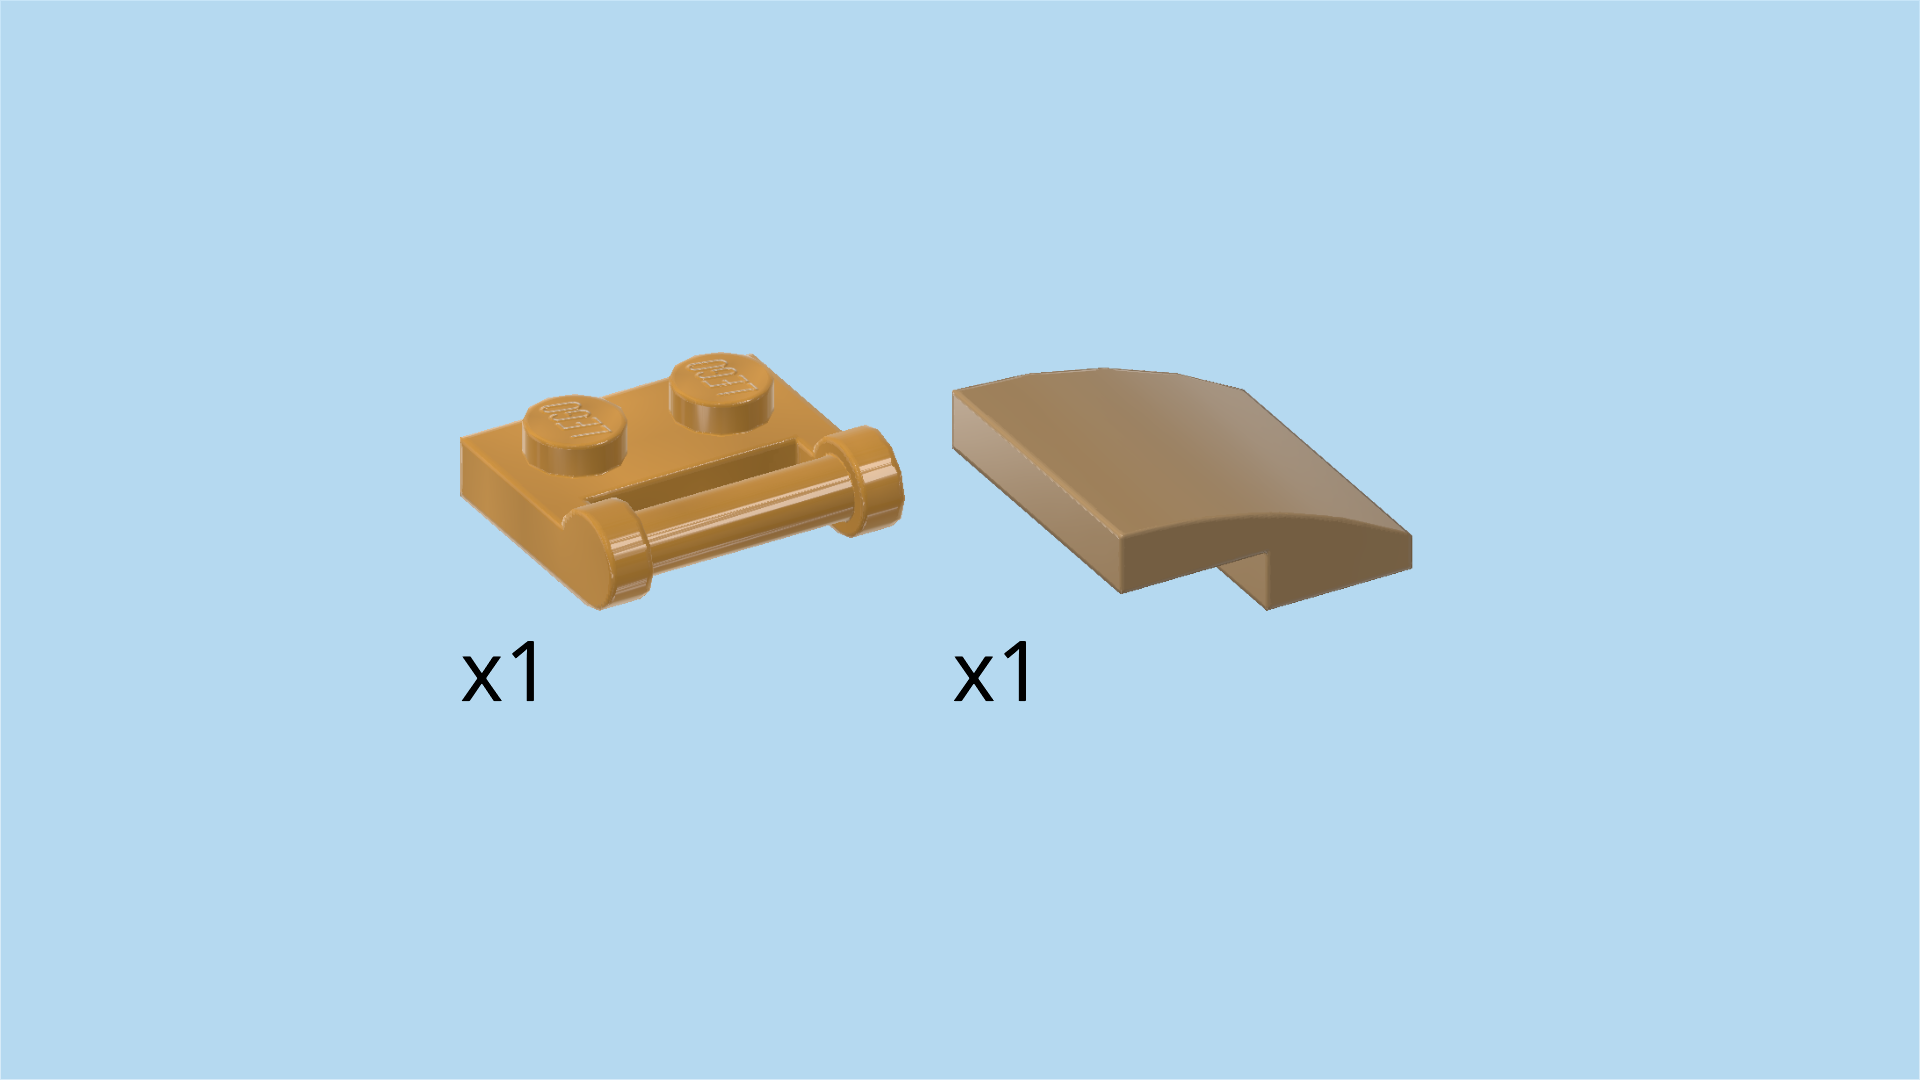
| Find 2 warm gold smooth roof tiles 1x1 with overhanging top tile 1x1. |
| Put 1 horizontally on the left half of the back row, top tile to the right. |
| Put the other one horizontally to the right of the previous piece, top tile to the left. |
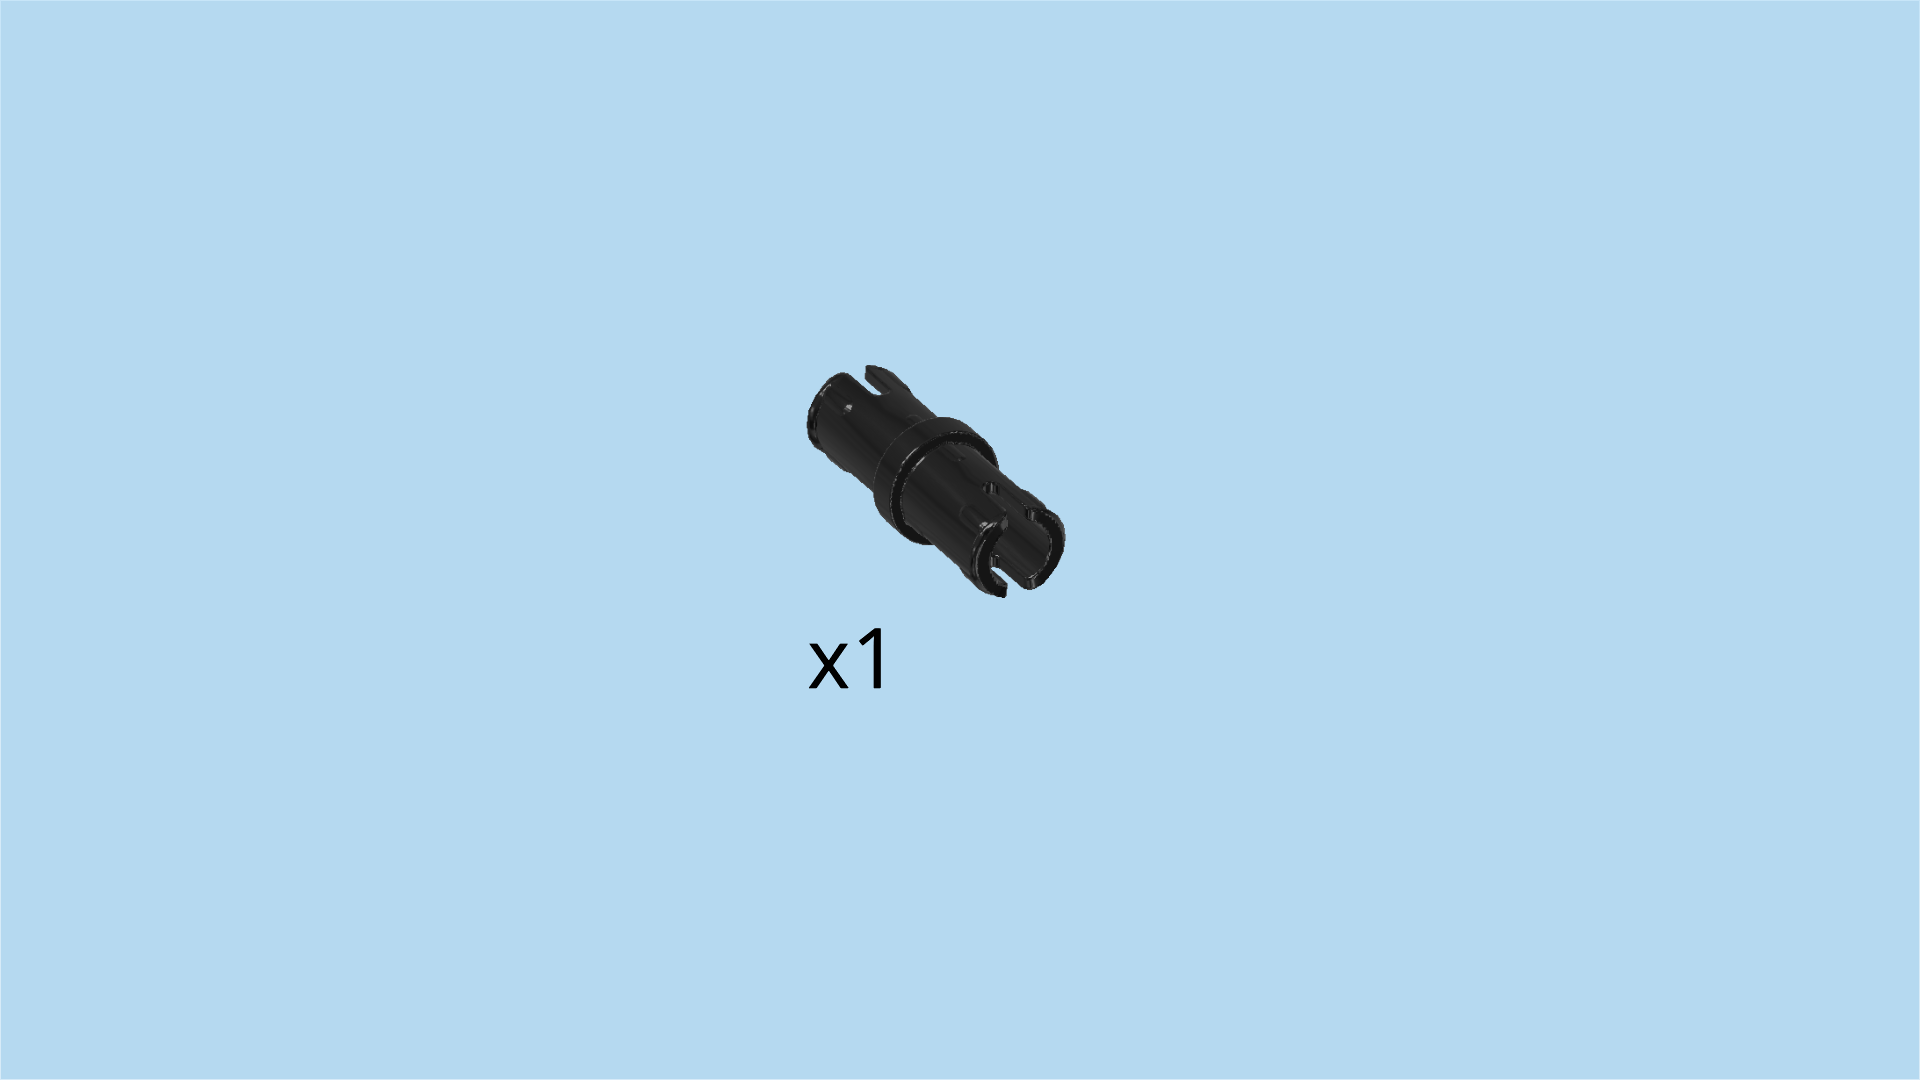
| Find 1 black connector peg 2m with middle ring. |
| Tilt the hip structure towards you and put it flat on the table. Now, the last 2 pieces you have mounted should be pointing towards you. |
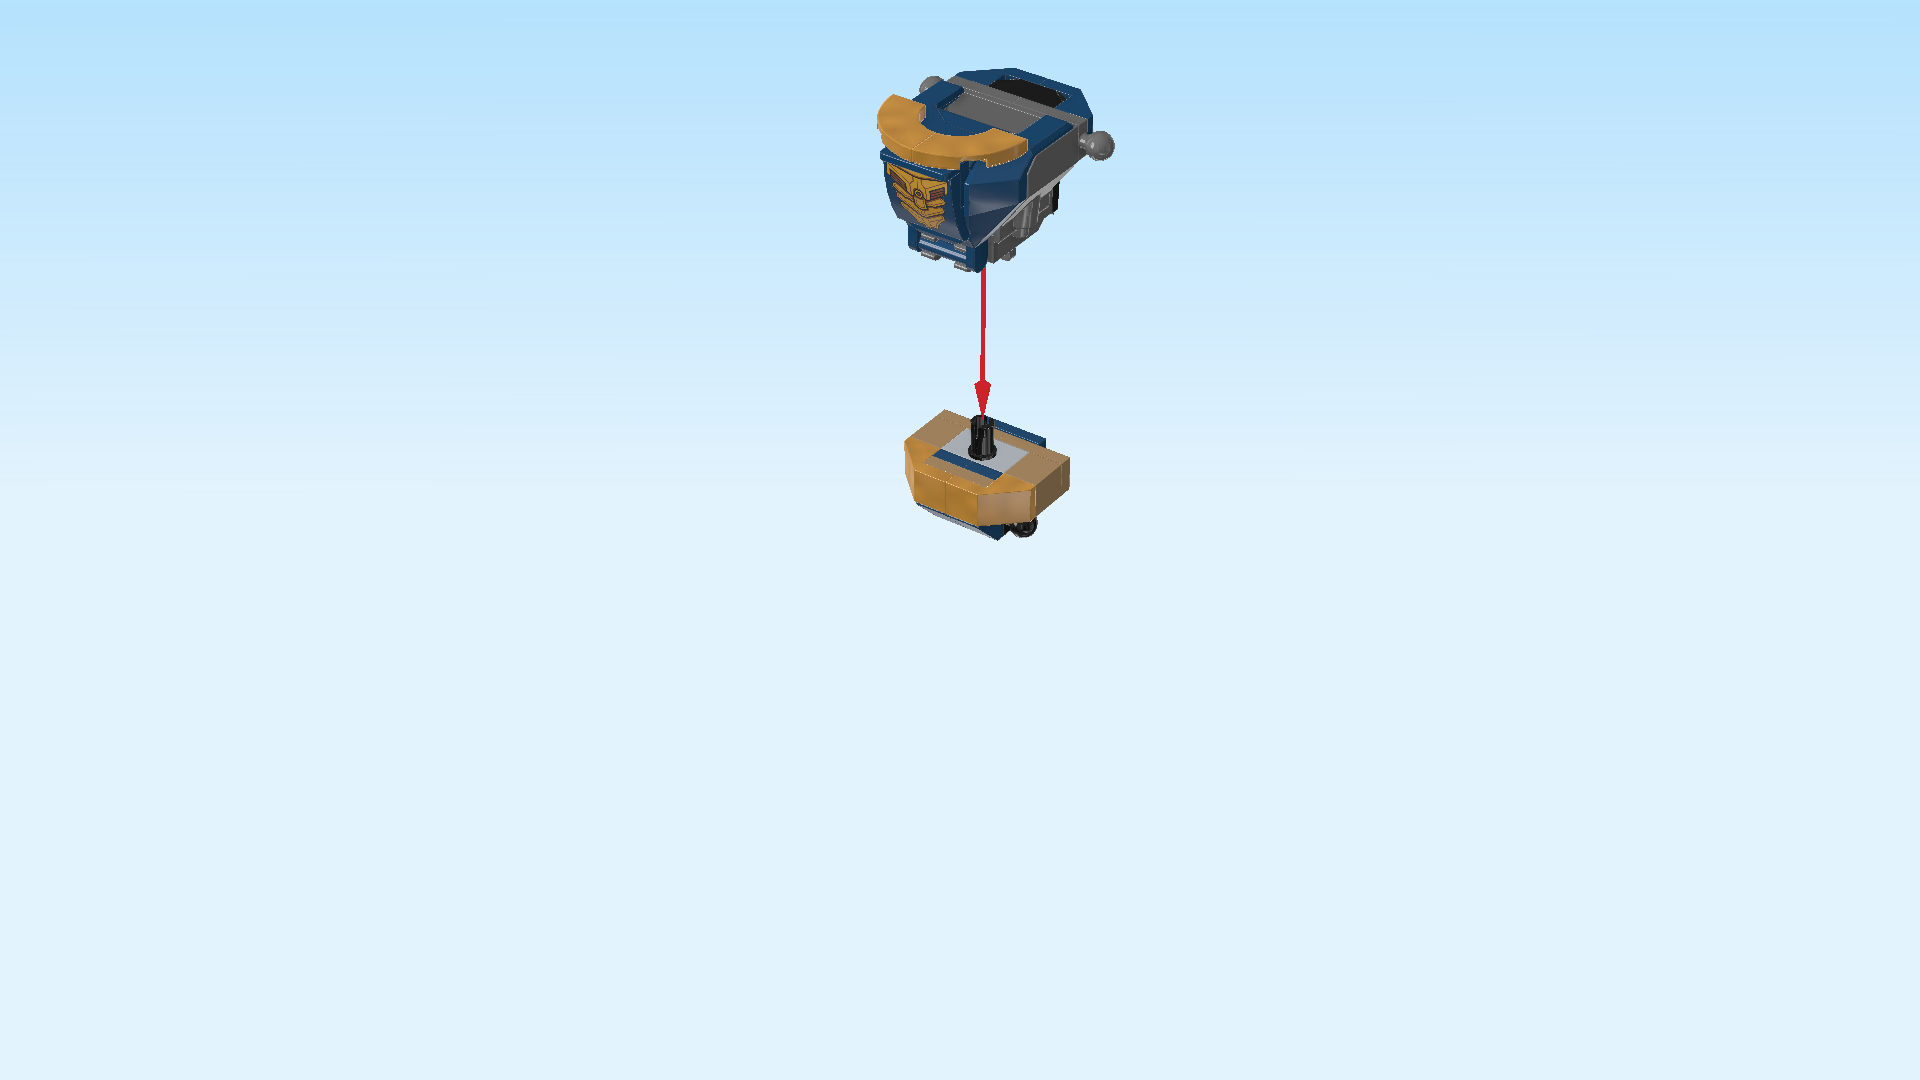
| Insert the connector peg into the hole in the center of the top surface, 1/2 sticking out towards the top. |
| The mech's hip is finished! Well done! Keep the building orientation of the hip. Put the mech cockpit from the top on the connector peg of the hip. |
| Now, we will build the first leg of the mech. |
| Collect the following 3 pieces: |
| 1 dark stone grey bent plate 2x6 with 2 steps and fixed joint, |
| and 2 earth blue inverted flat tiles 2x2. |
| Put the bent plate 2x6 upside down horizontally on the table. This means that its knobs are know pointing down. Make sure the fixed joint is pointing to the back. |
| Put 1 inverted flat tile on the left 2x2 surface. |
| Repeat symmetrically on the right. |
| Find 2 dark stone grey plates 1x2 with ball cup on long side. |
| Flip the leg structure right side up again, but now the fixed joint should be pointing to the front. |
| Put 1 plate 1x2 vertically on the leftmost column, ball cup to the left. |
| Repeat symmetrically on the right. |
| Next, let's make a small sub-part of the leg. |
| Collect the following 2 pieces: |
| 1 mud grey one-stepped curve tile 2x2x⅔, |
| and 1 black one-stepped plate 2x2 with 2 side knobs. |
| Put the one-stepped plate on the table, side knobs pointing to the front. |
| Put the curve tile on top, curve to the back. |
| Mount this sub-part on the left 2x2 surface of the leg, 2 side knobs pointing to the front. |
| Next, we will make another small sub-part of the leg. |
| Collect the following 2 pieces: |
| 1 warm gold curve plate 2x2 with 3 slopes and 2 knobs, |
| and 1 warm gold ingot 1x2. |
| Put the curve plate 2x2 on the table, 2 knobs forming a row at the back. |
| Put the ingot 1x2 horizontally on top. |
| Flip this sub-part upright, and turn it so that the ingot is oriented vertically on the right, and the curve is towards the left. |
| Mount it on the side knobs pointing to the front. Make sure that this sub-part symmetrically covers the side surface of the leg's left half. |
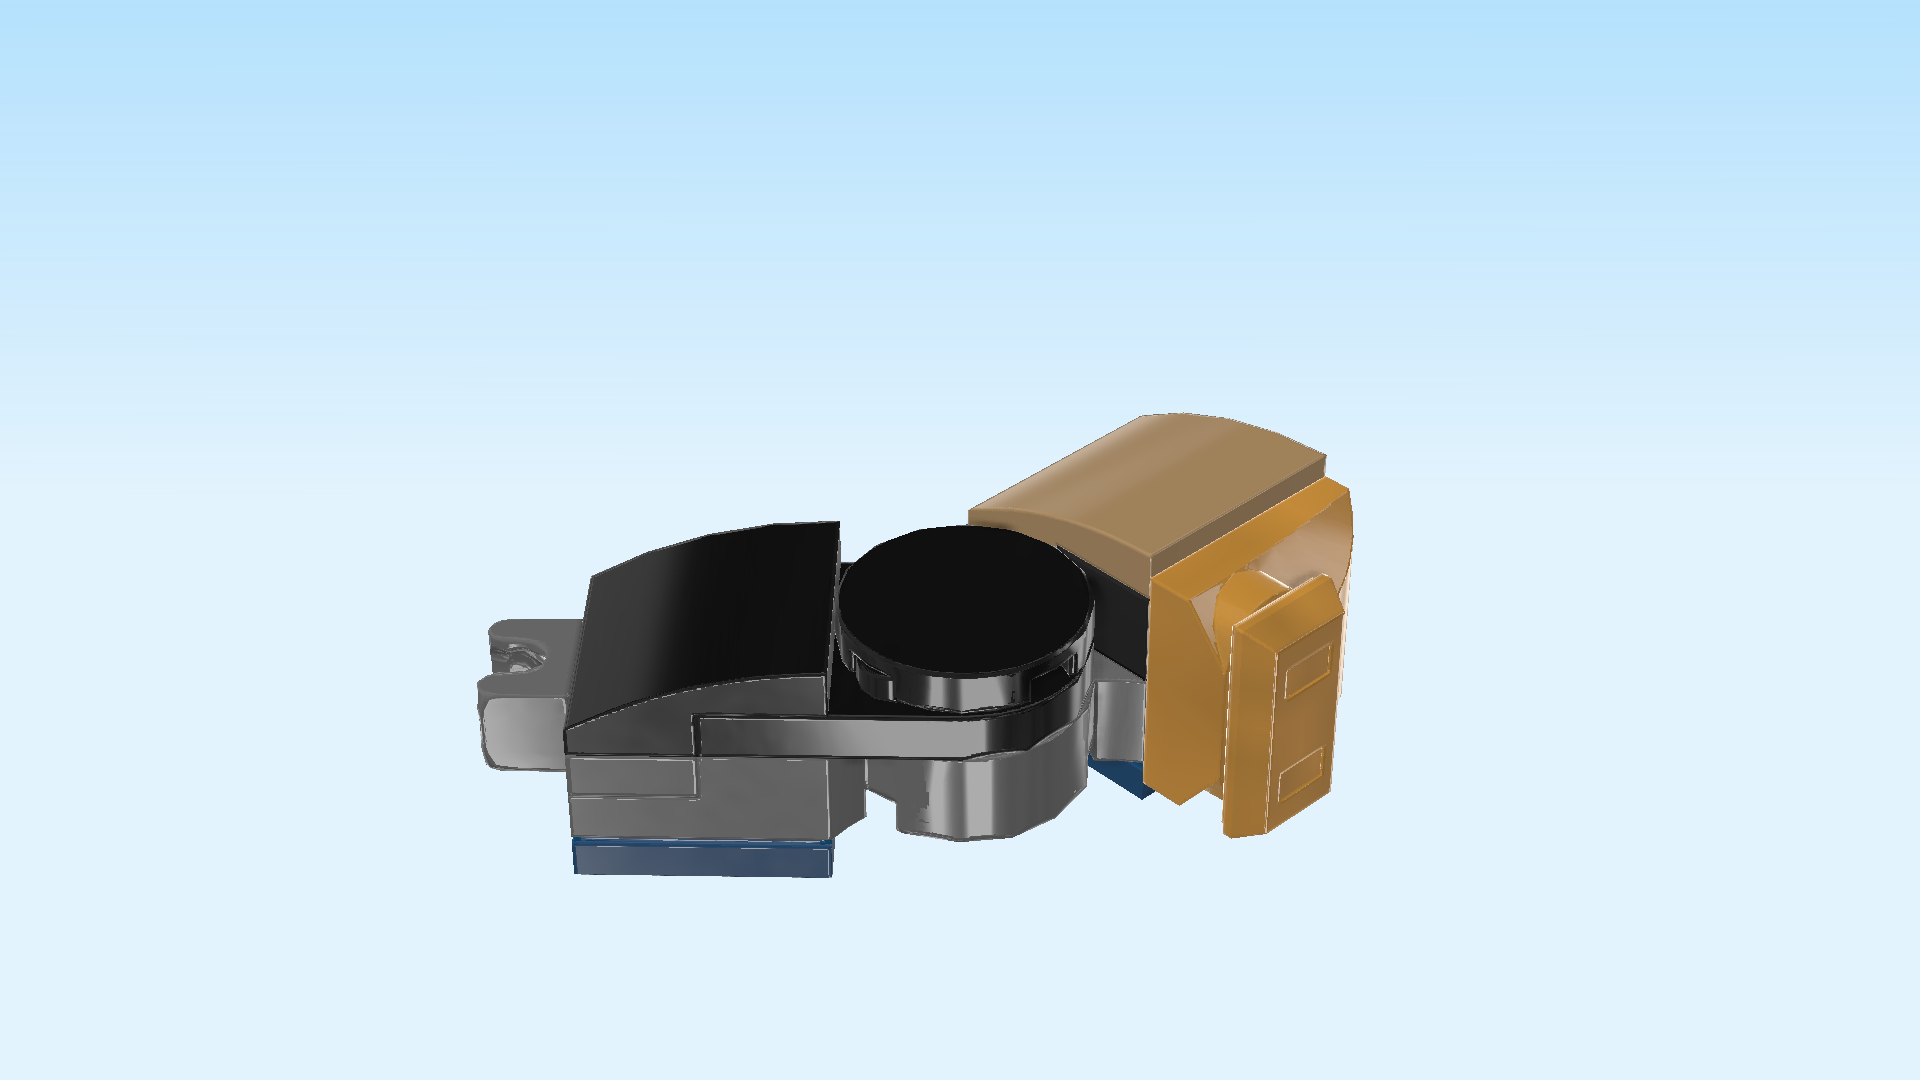
| Next, we will assemble another sub-part of the leg. |
| Collect the following 2 pieces: |
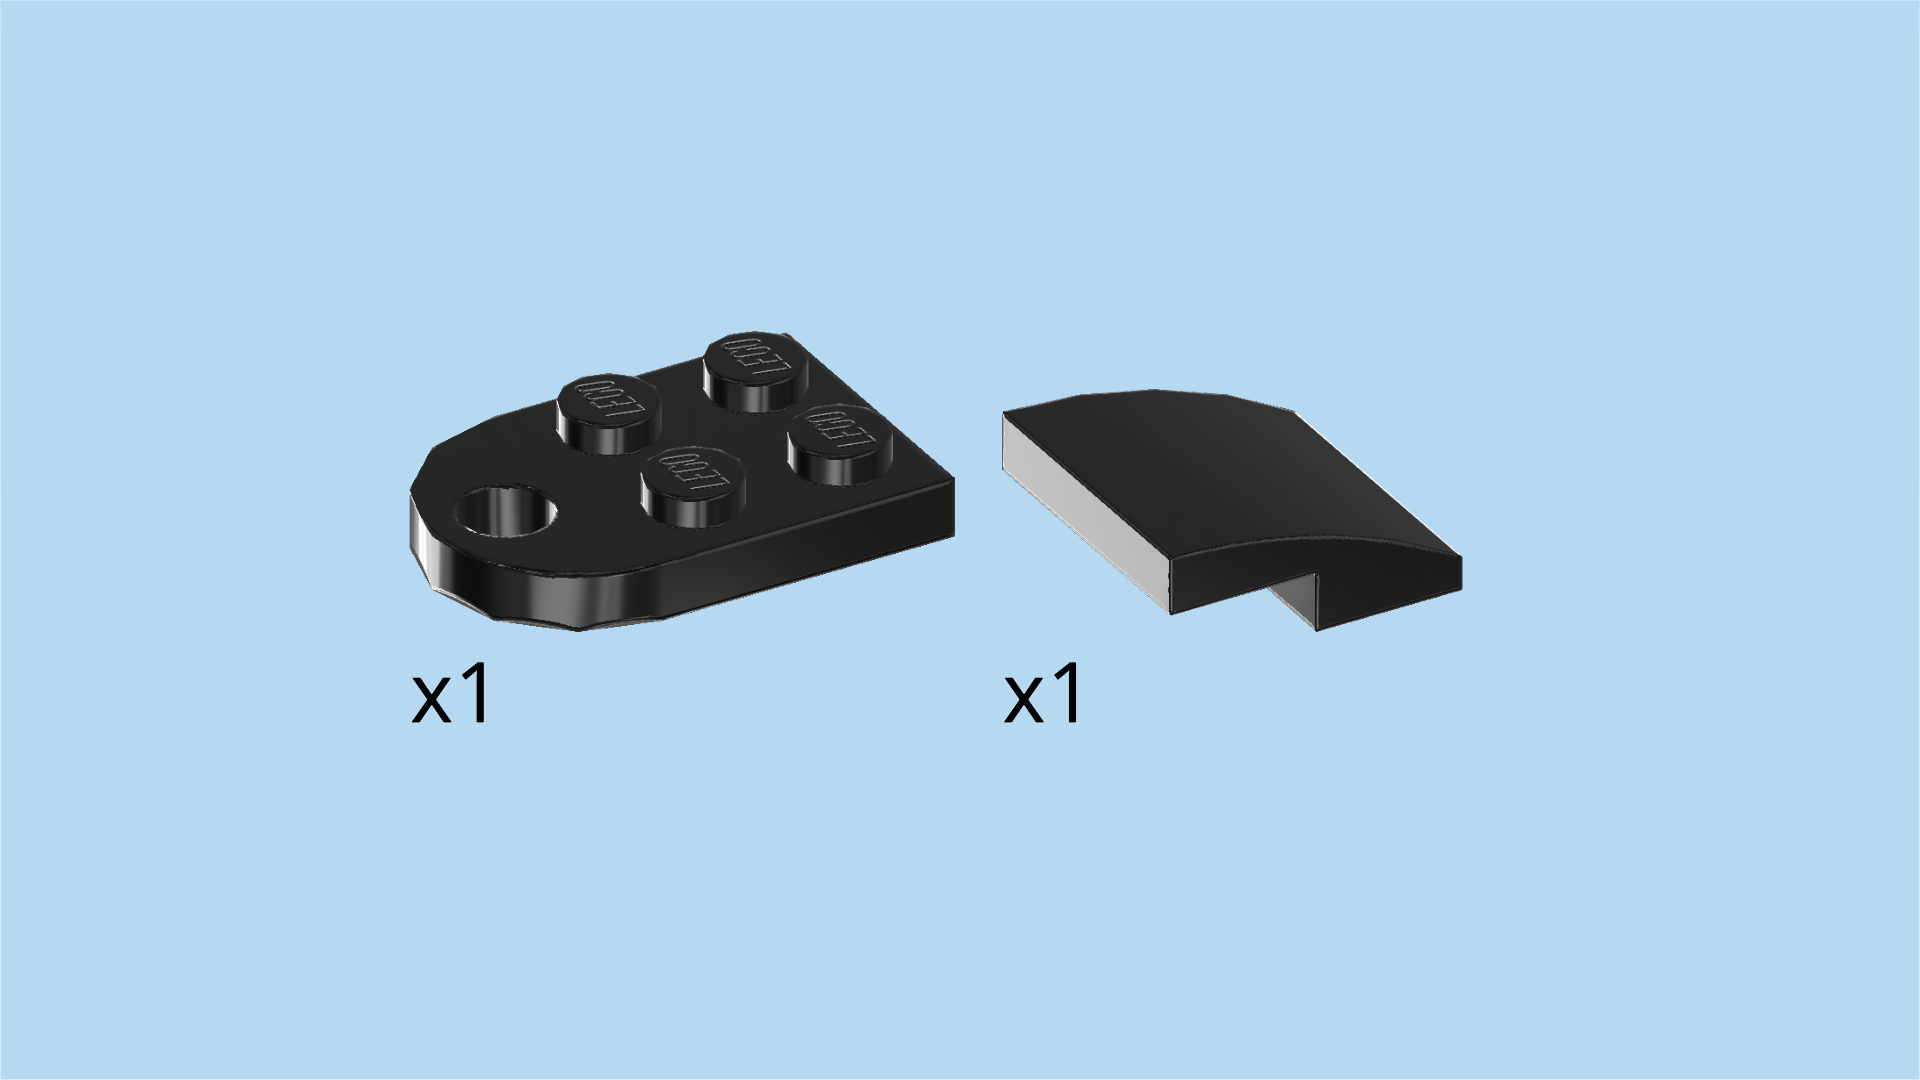
| 1 black plate 2x3 with half circle and hole, |
| and 1 black one-stepped curve tile 2x2x⅔. |
| Put the plate 2x3 horizontally on the table, half circle and hole to the left. |
| Put the curve tile on the rightmost column, curve to the right, 1/2 overhanging to the right. |
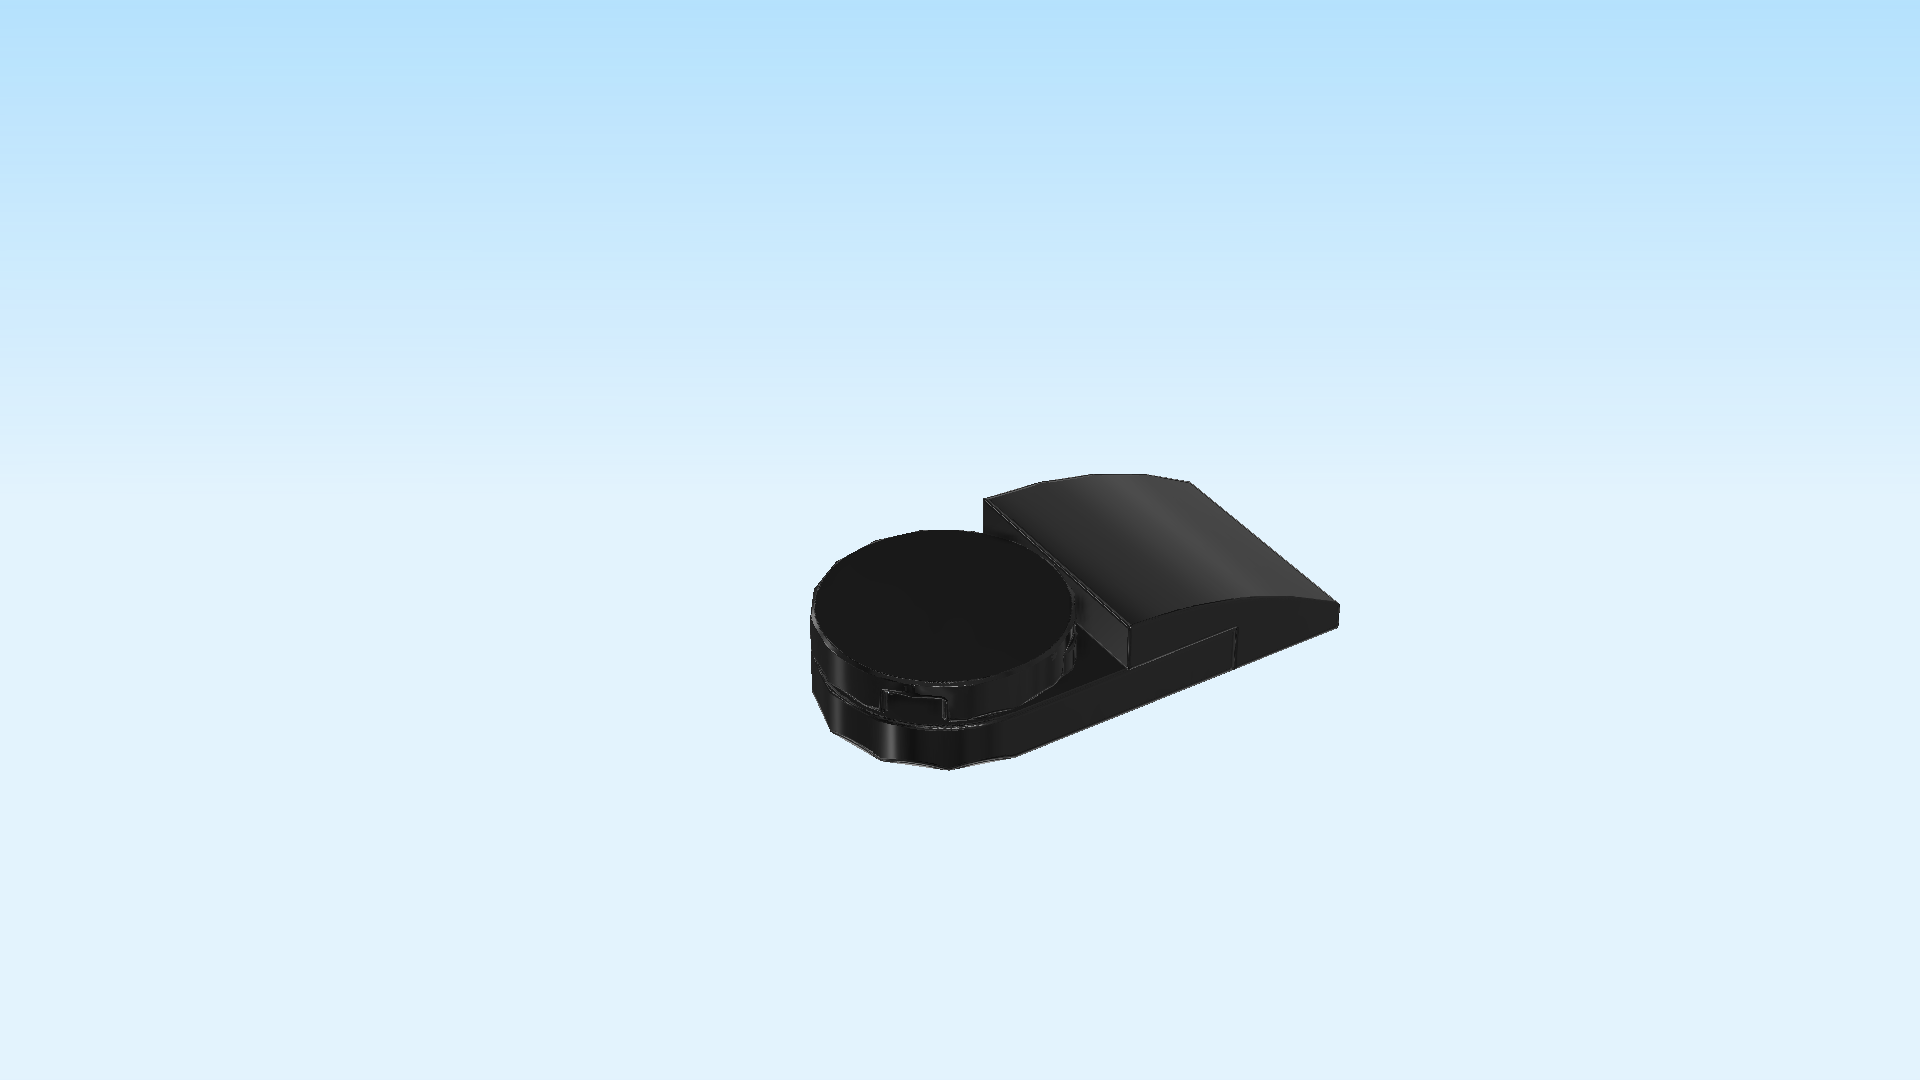
| Find 1 black round tile 2x2. |
| Put it to the left of the previous piece. It will only connect to 2 knobs and match the half circle at the left edge. |
| Mount this sub-part in its building orientation on the leg's right half. Its round part should rest on the fixed joint. |
| The first leg of the mech is finished! Well done! Coming from the left, snap its ball cup on the hip ball pointing to the left. |
| Next, we will build the second leg. |
| Collect the following 3 pieces: |
| 1 dark stone grey bent plate 2x6 with 2 steps and fixed joint, |
| and 2 earth blue inverted flat tiles 2x2. |
| Put the bent plate 2x6 upside down horizontally on the table. Make sure its fixed joint is pointing to the back. |
| Put 1 inverted flat tile on the left 2x2 surface. |
| Repeat symmetrically on the right. |
| Find 2 dark stone grey plates 1x2 with ball cup on long side. |
| Flip the leg structure right side up again, but this time the fixed joint should be pointing to the front. |
| Put 1 plate 1x2 vertically on the rightmost column, ball cup to the right. |
| Repeat symmetrically on the left. |
| Now, let's make a sub-part of the second leg. |
| Collect the following 2 pieces: |
| 1 mud grey one-stepped curve tile 2x2x⅔, |
| and 1 black one-stepped plate 2x2 with 2 side knobs. |
| Put the one-stepped plate on the table, side knobs pointing to the front. |
| Put the curve tile on top, curve to the back. |
| Mount this sub-part on the right 2x2 surface of the leg, 2 side knobs pointing to the front. |
| Next, we will make another sub-part. |
| Collect the following 2 pieces: |
| 1 warm gold curve plate 2x2 with 3 slopes and 2 knobs, |
| and 1 warm gold ingot 1x2. |
| Put the curve plate 2x2 on the table, 2 knobs forming a row at the back. |
| Put the ingot 1x2 horizontally on top. |
| Flip this sub-part upright, and turn it so that the ingot is oriented vertically on the left, and the curve is towards the right. |
| Mount it on the side knobs pointing to the front. Make sure that this sub-part symmetrically covers the side surface of the right half of the leg. |
| Next, we will make another sub-part of the leg. |
| Collect the following 2 pieces: |
| 1 black plate 2x3 with half circle and hole, |
| and 1 black one-stepped curve tile 2x2x⅔. |
| Put the plate 2x3 horizontally on the table, half circle and hole to the right. |
| Put the curve tile on the leftmost column, curve to the left, 1/2 overhanging to the left. |
| Find 1 black round tile 2x2. |
| Put it to the right of the previous piece. |
| Mount this sub-part in its building orientation on the left half of the leg. Its round part should rest on the fixed joint. |
| The second leg of the mech is finished! Great job! Coming from the right, snap its ball cup on the hip ball pointing to the right. |
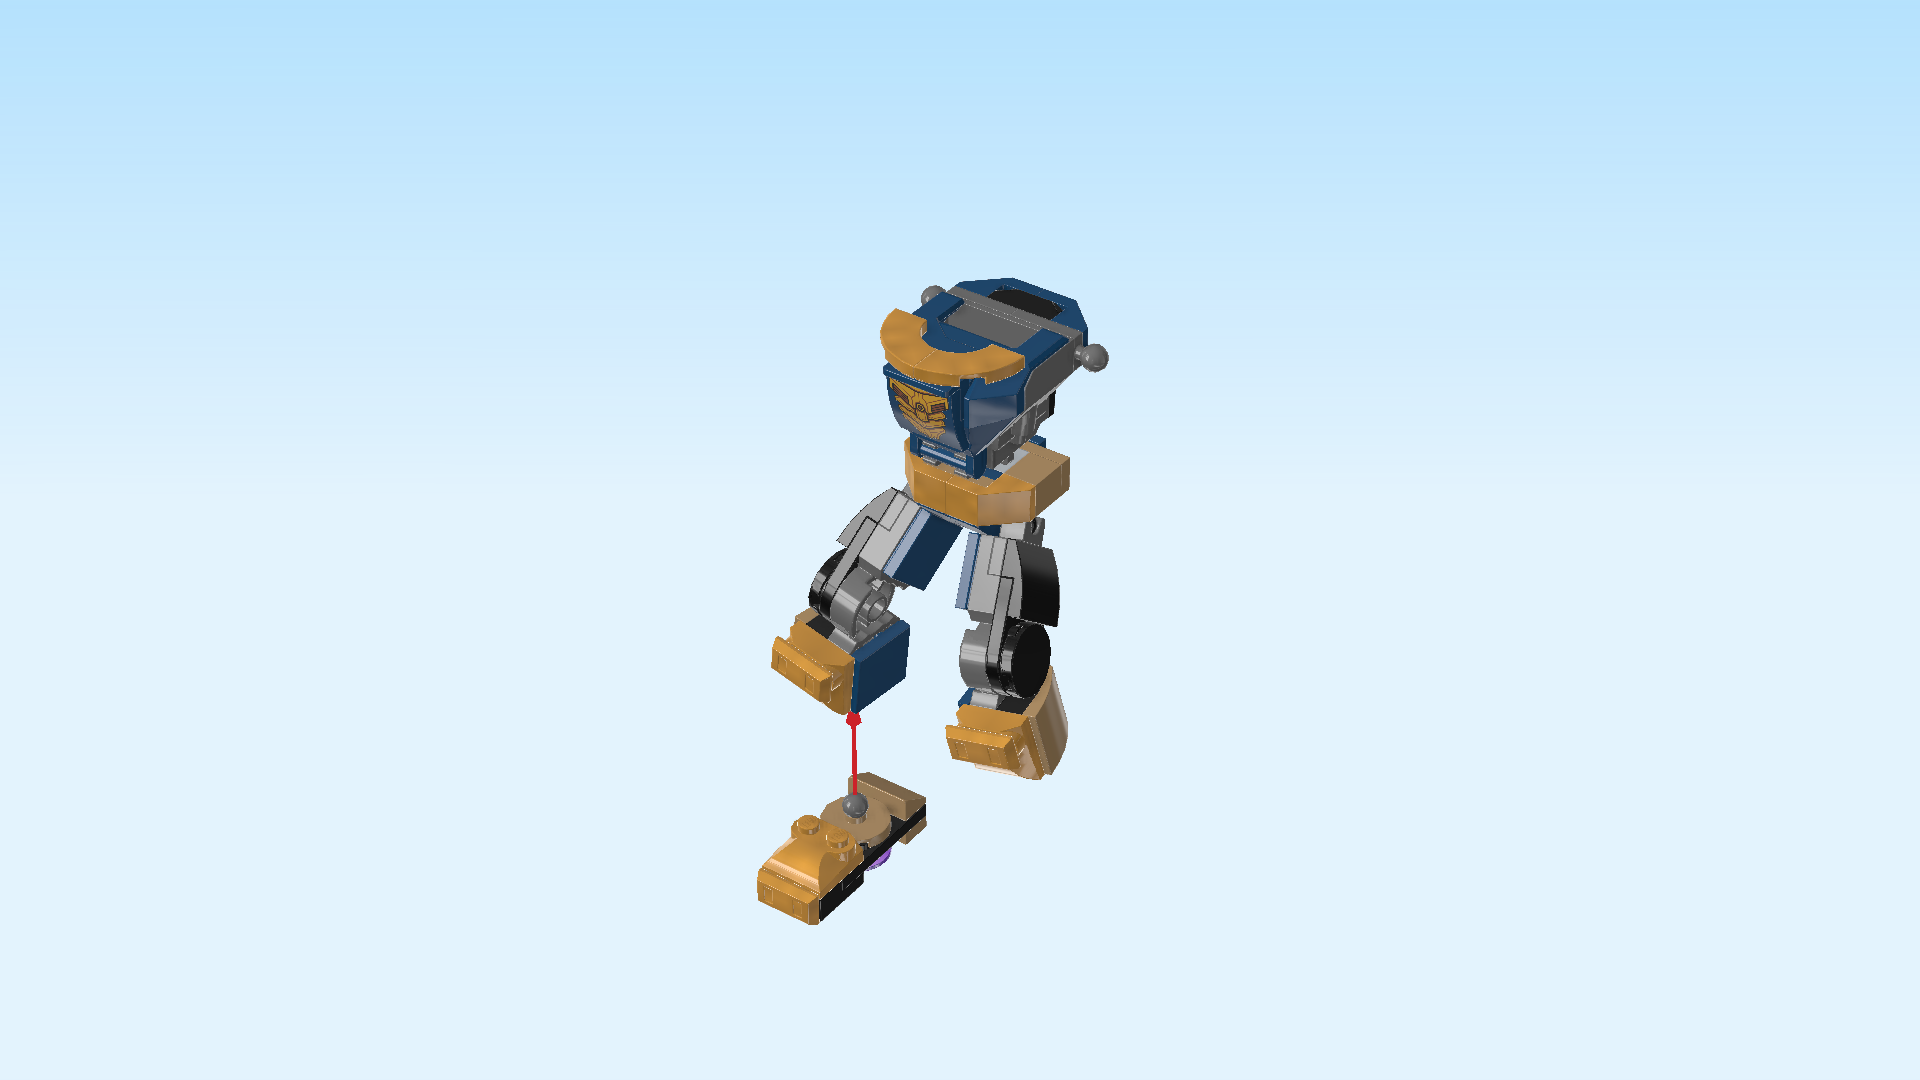
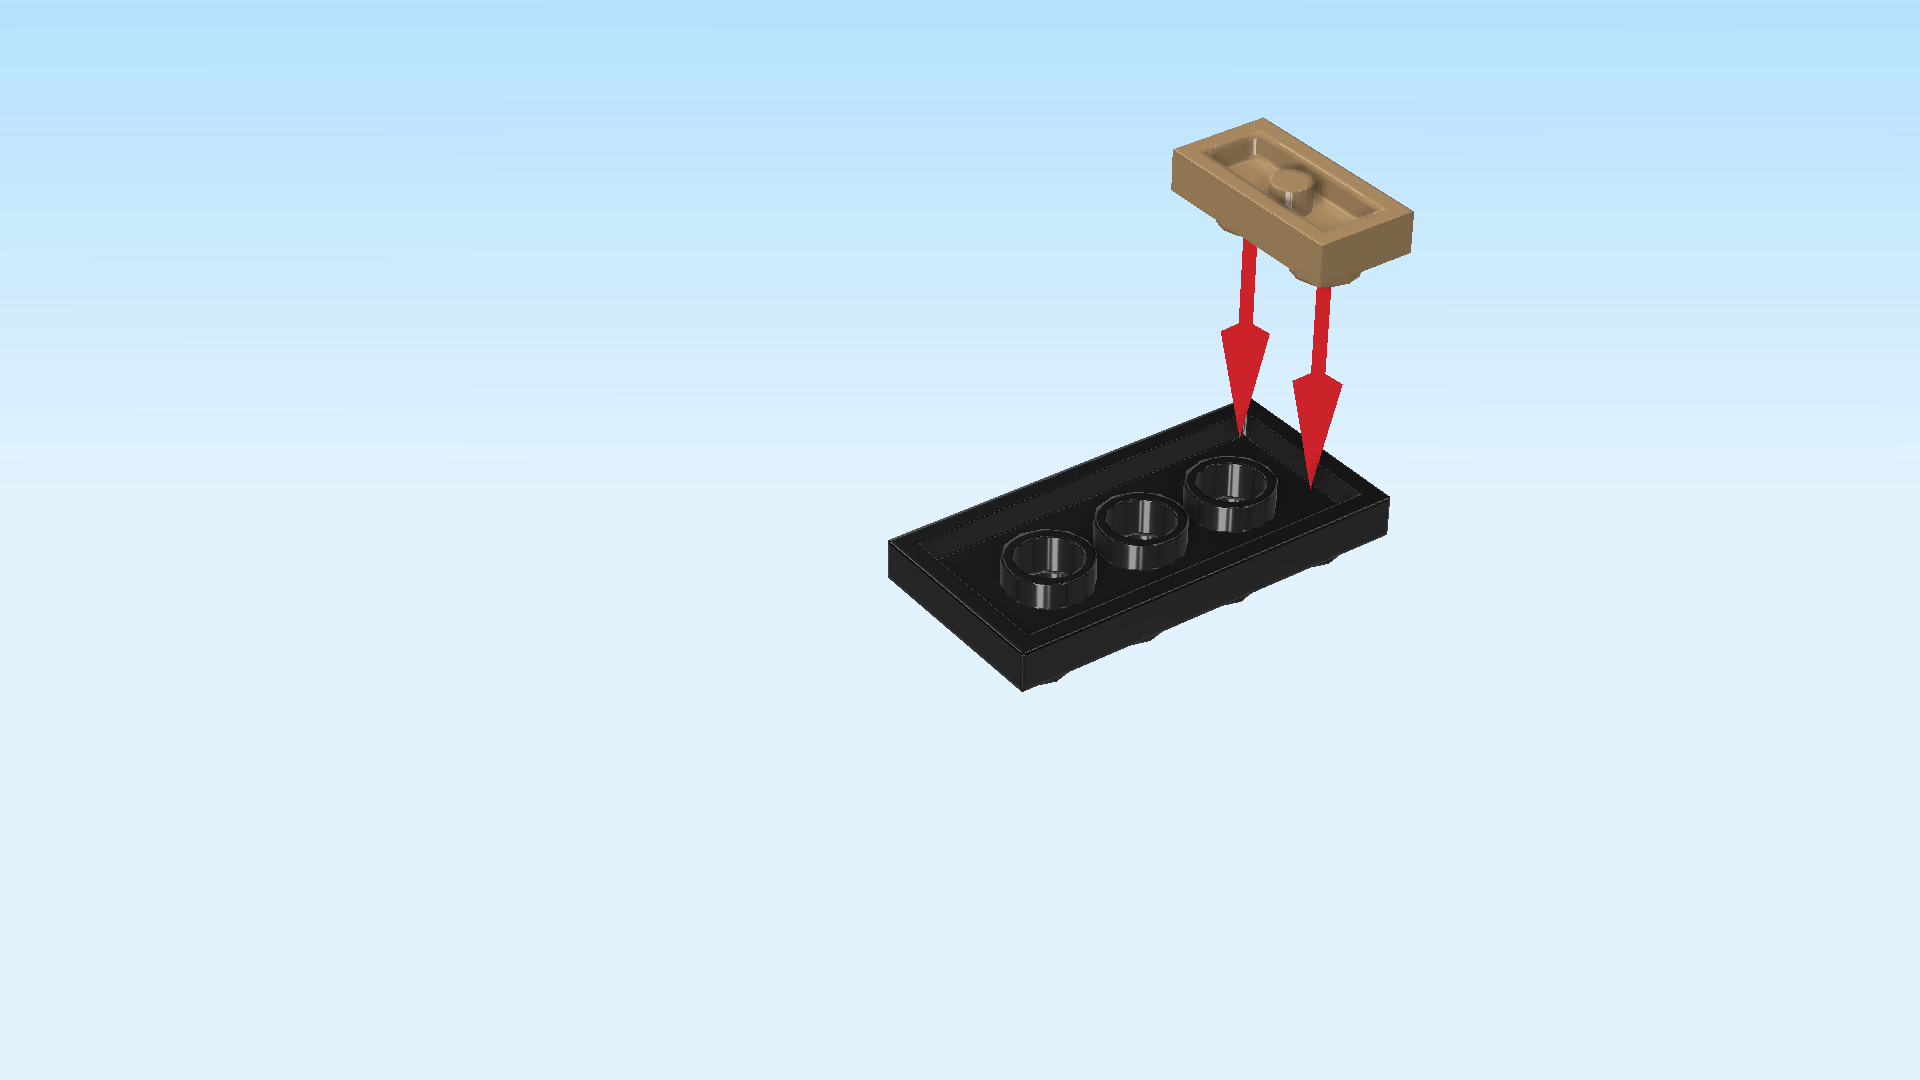
| Next up, we will build the mech's first shoe. |
| Collect the following 2 pieces: |
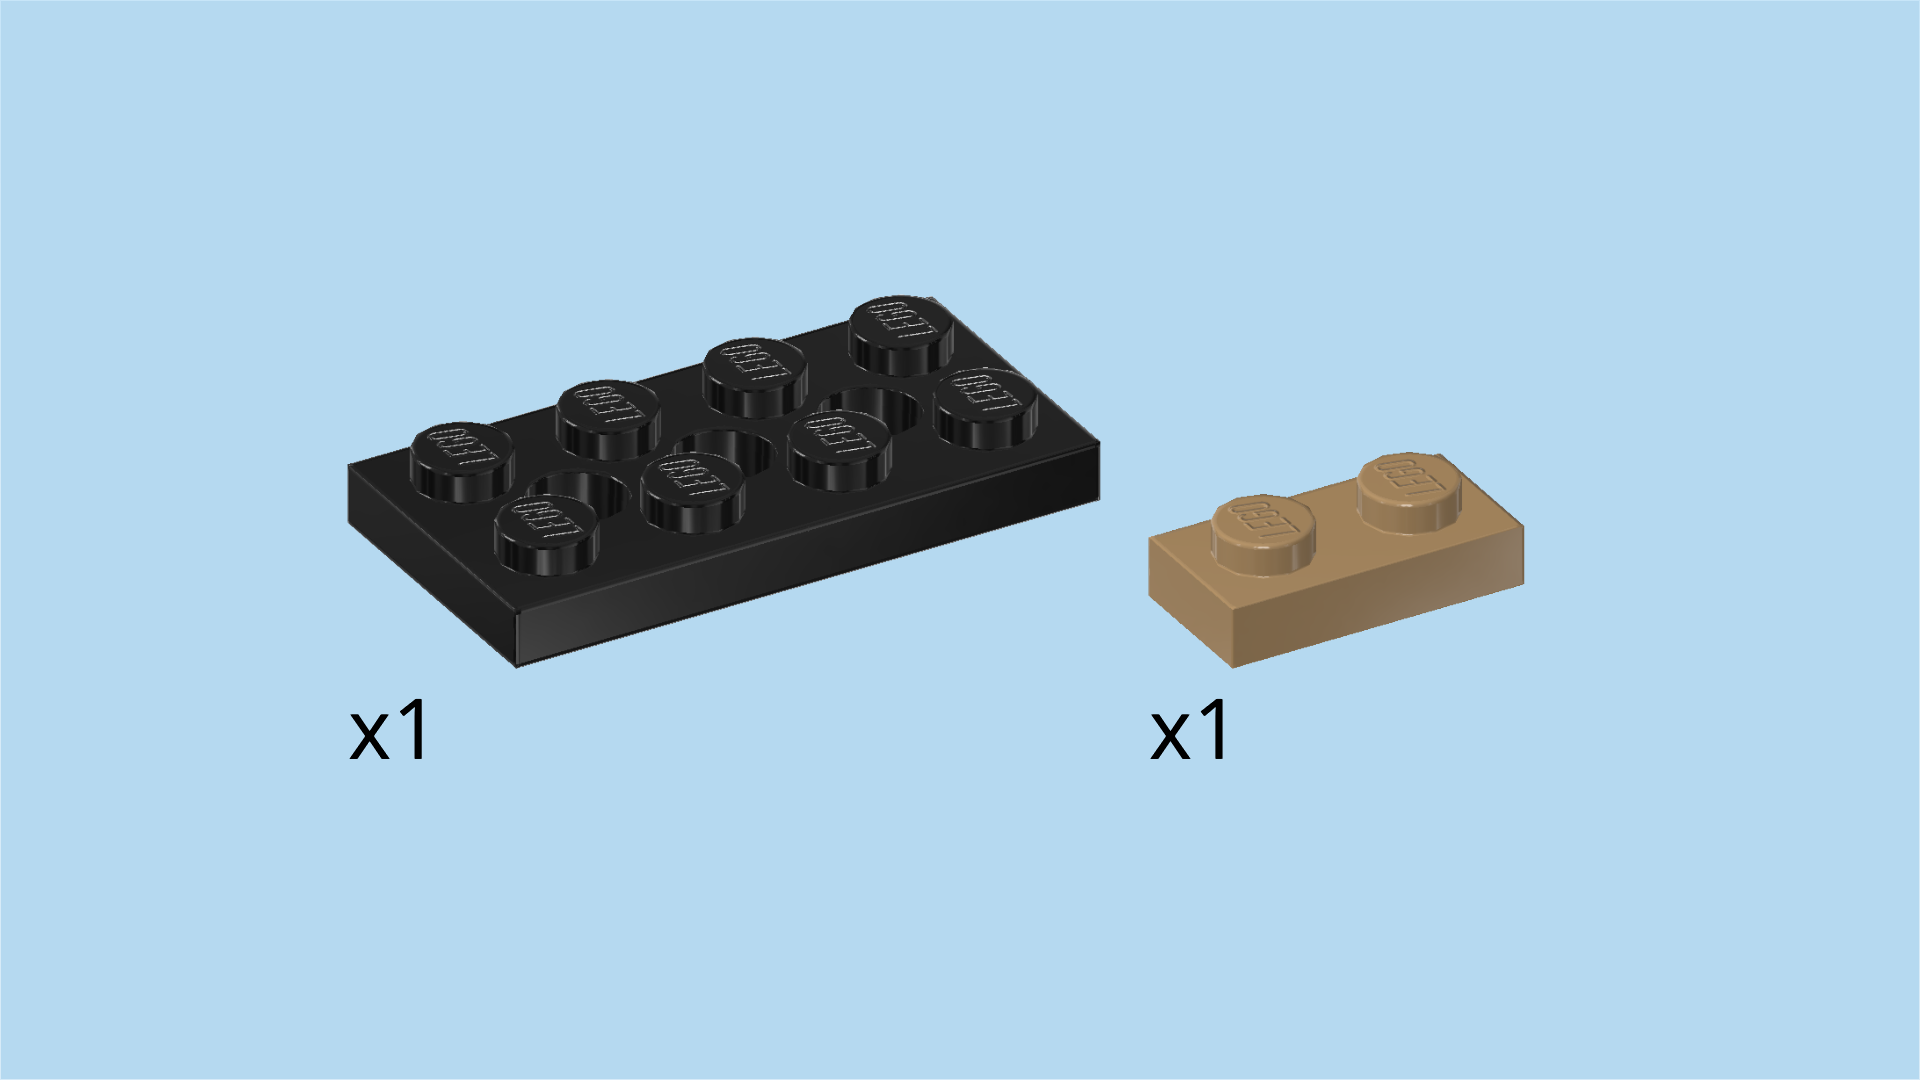
| 1 black plate 2x4 with 3 holes, |
| and 1 mud grey plate 1x2. |
| Put the plate 2x4 upside down horizontally on the table. This means that its knobs should touch the table. |
| Put the plate 1x2 vertically on the rightmost edge. |
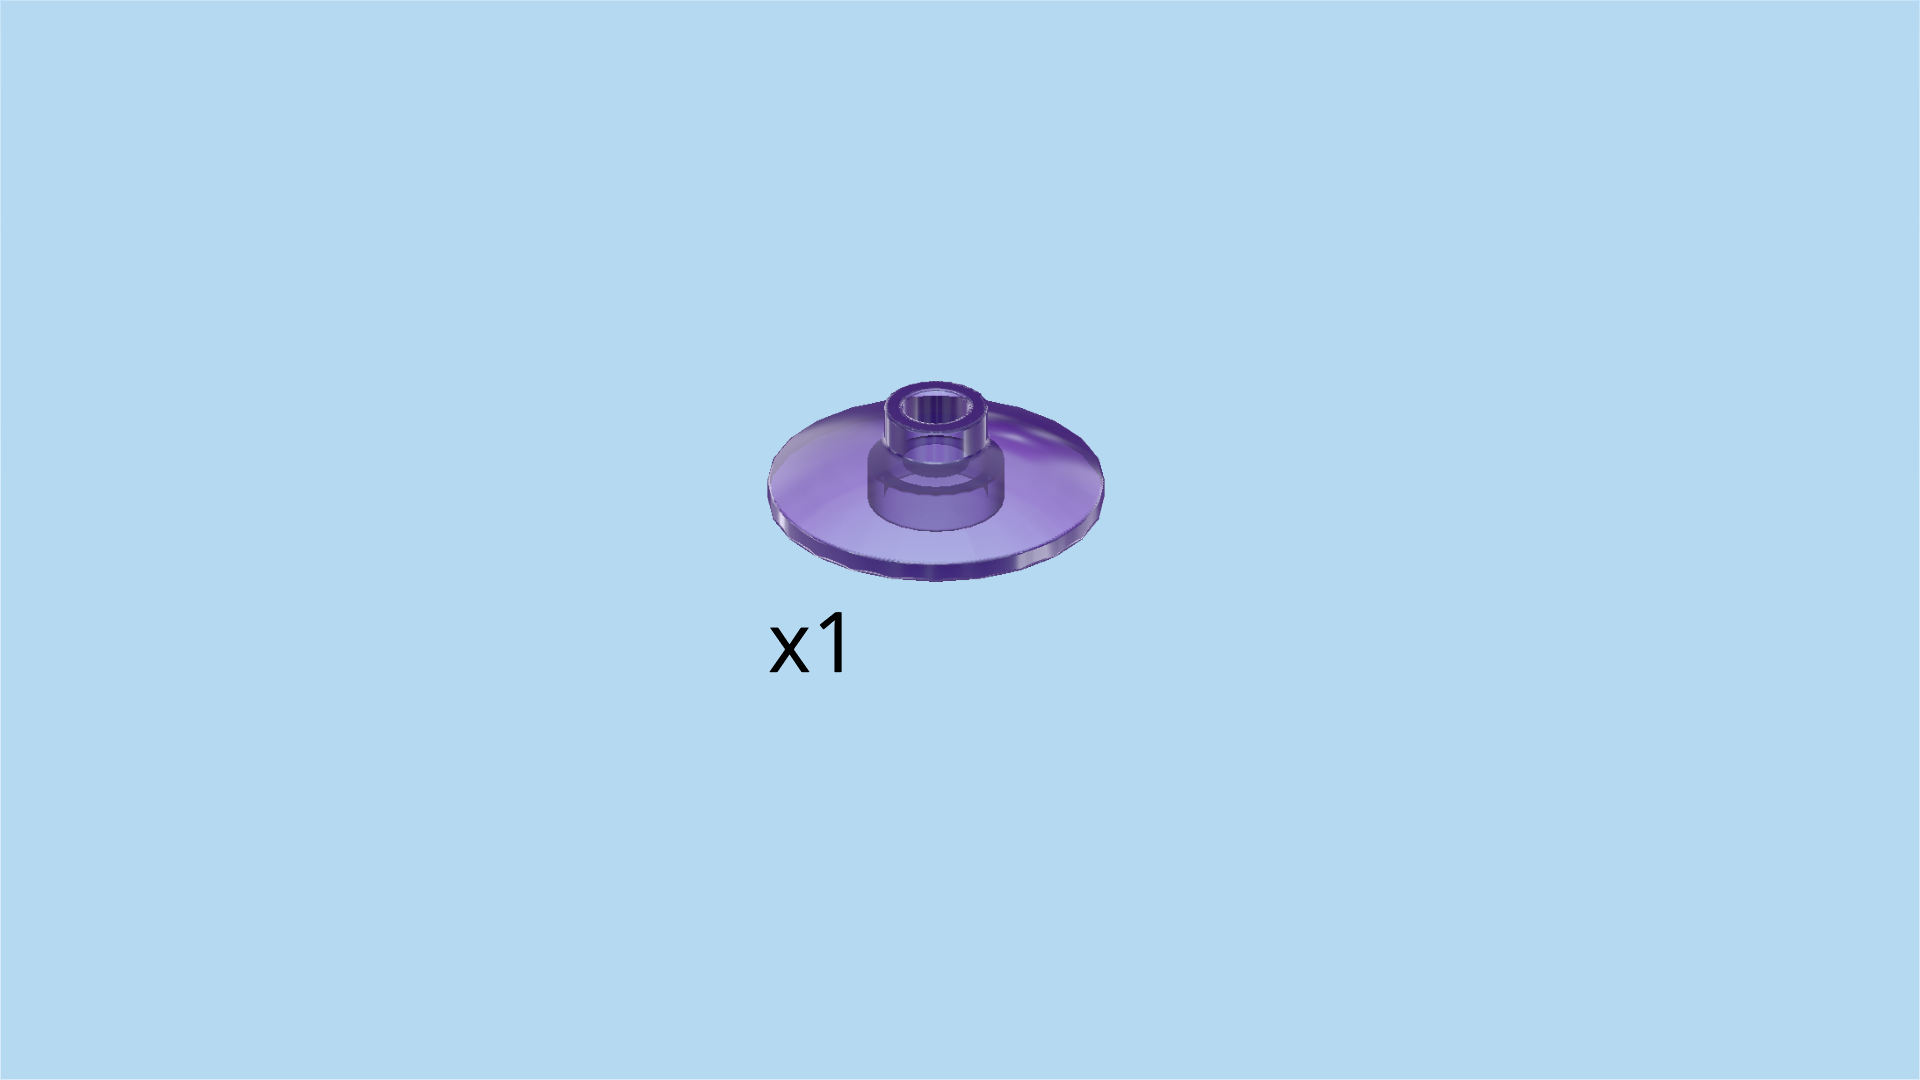
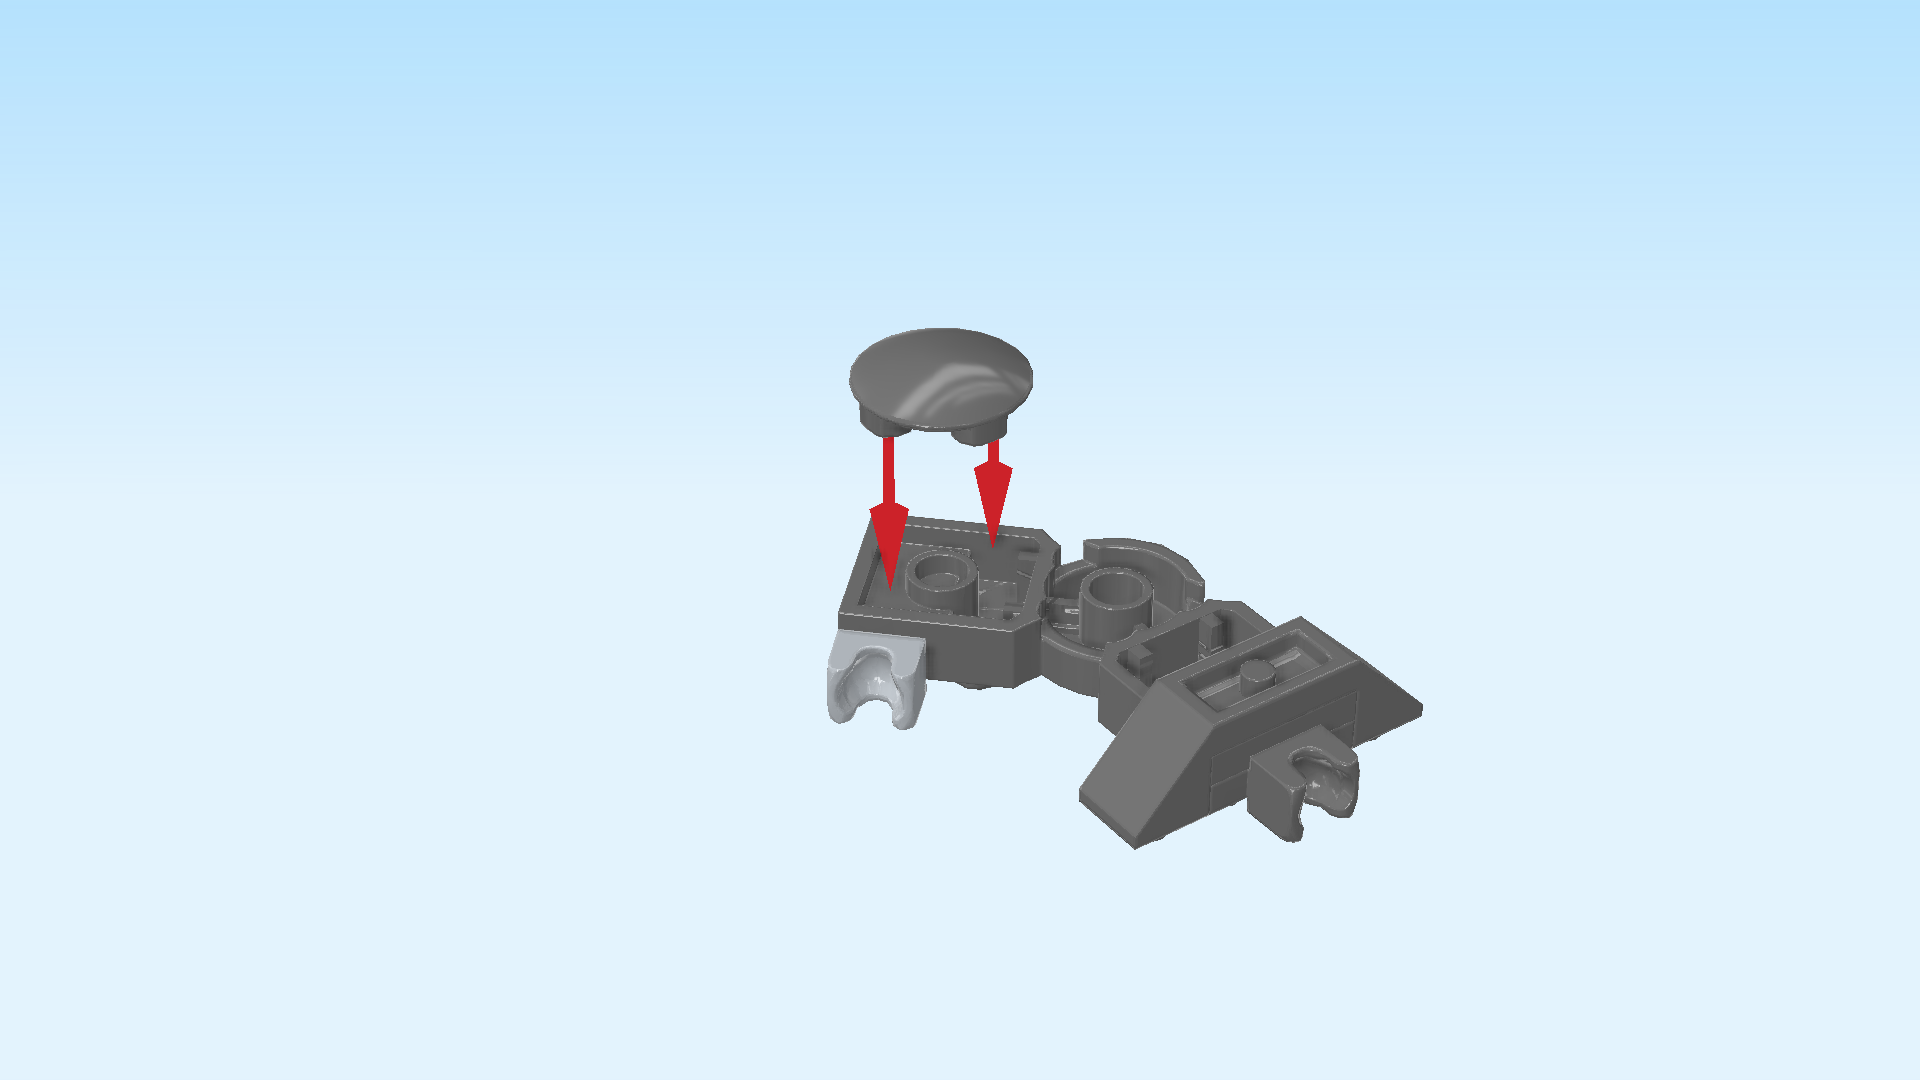
| Find 1 transparent bright bluish violet disk 2x2 with 1 knob. |
| Put it to the left of the previous piece. |
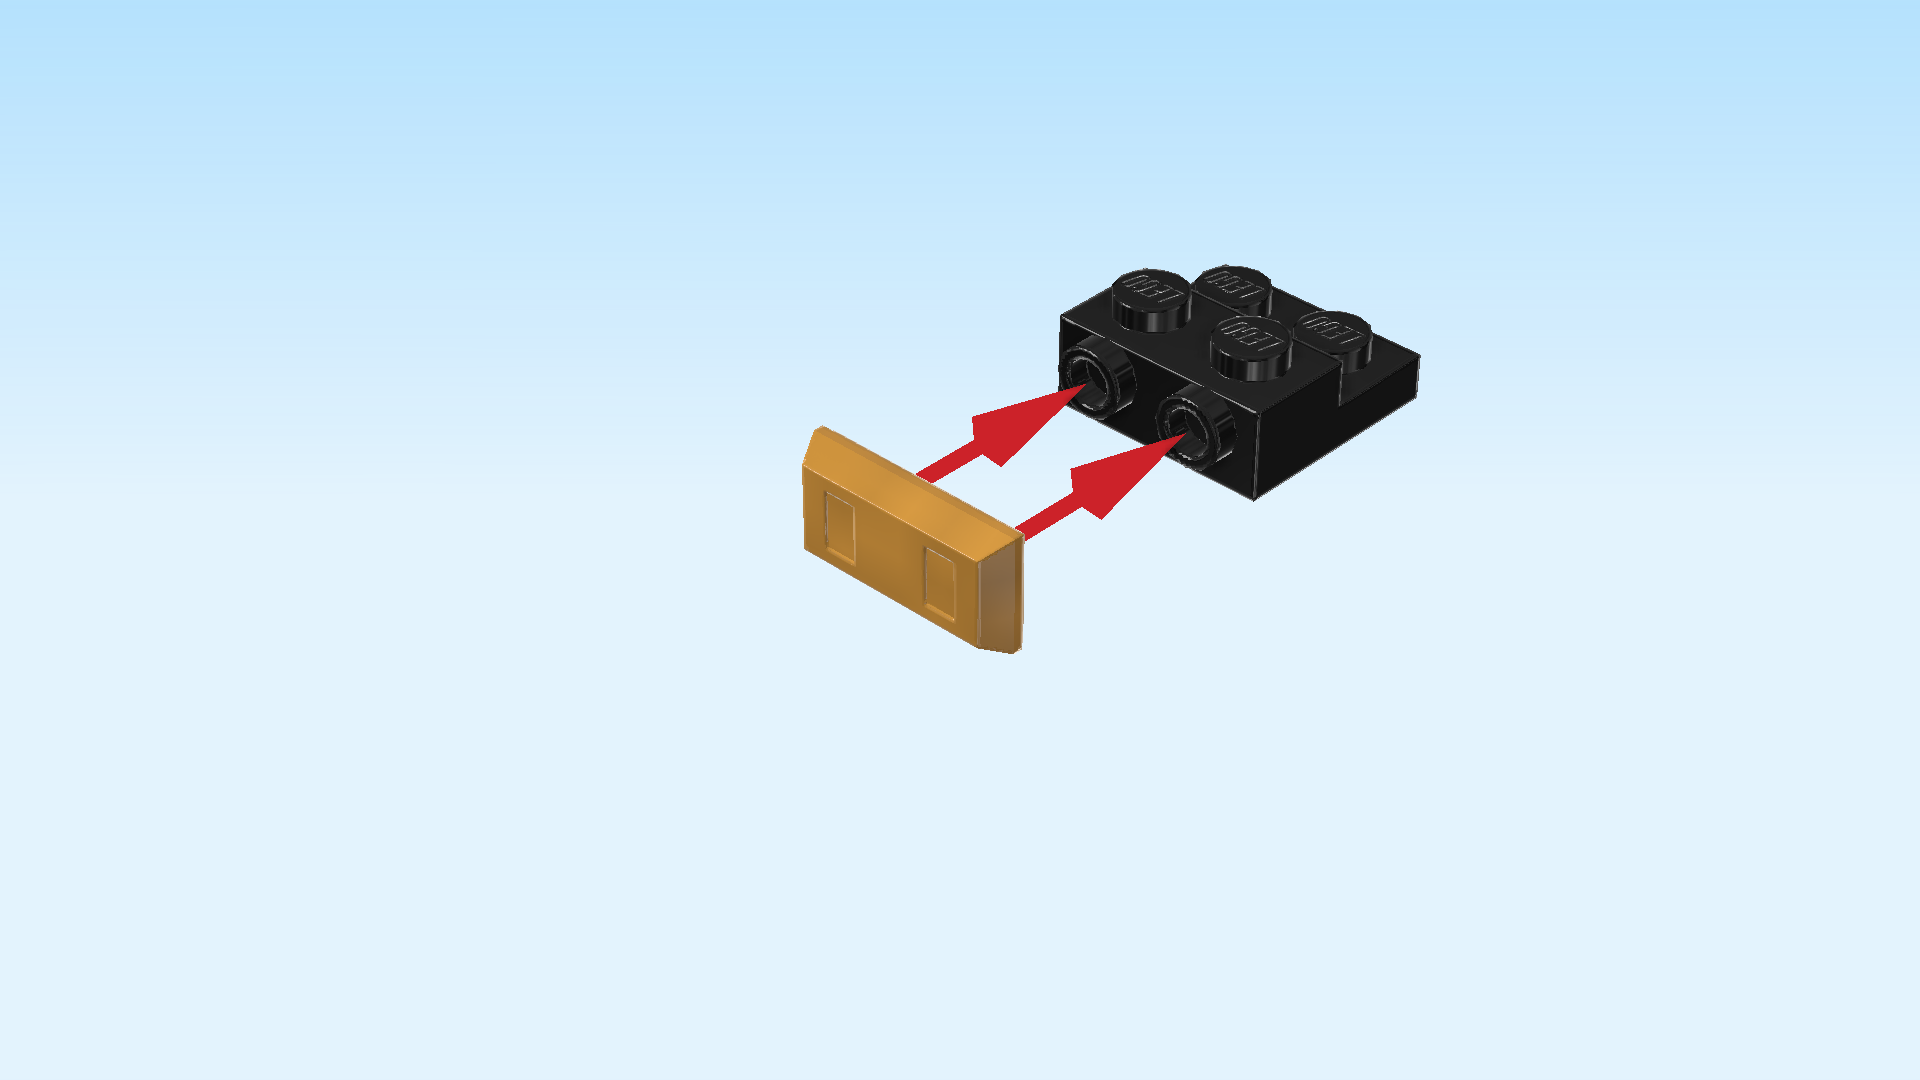
| Next, we will make a sub-part of the shoe. |
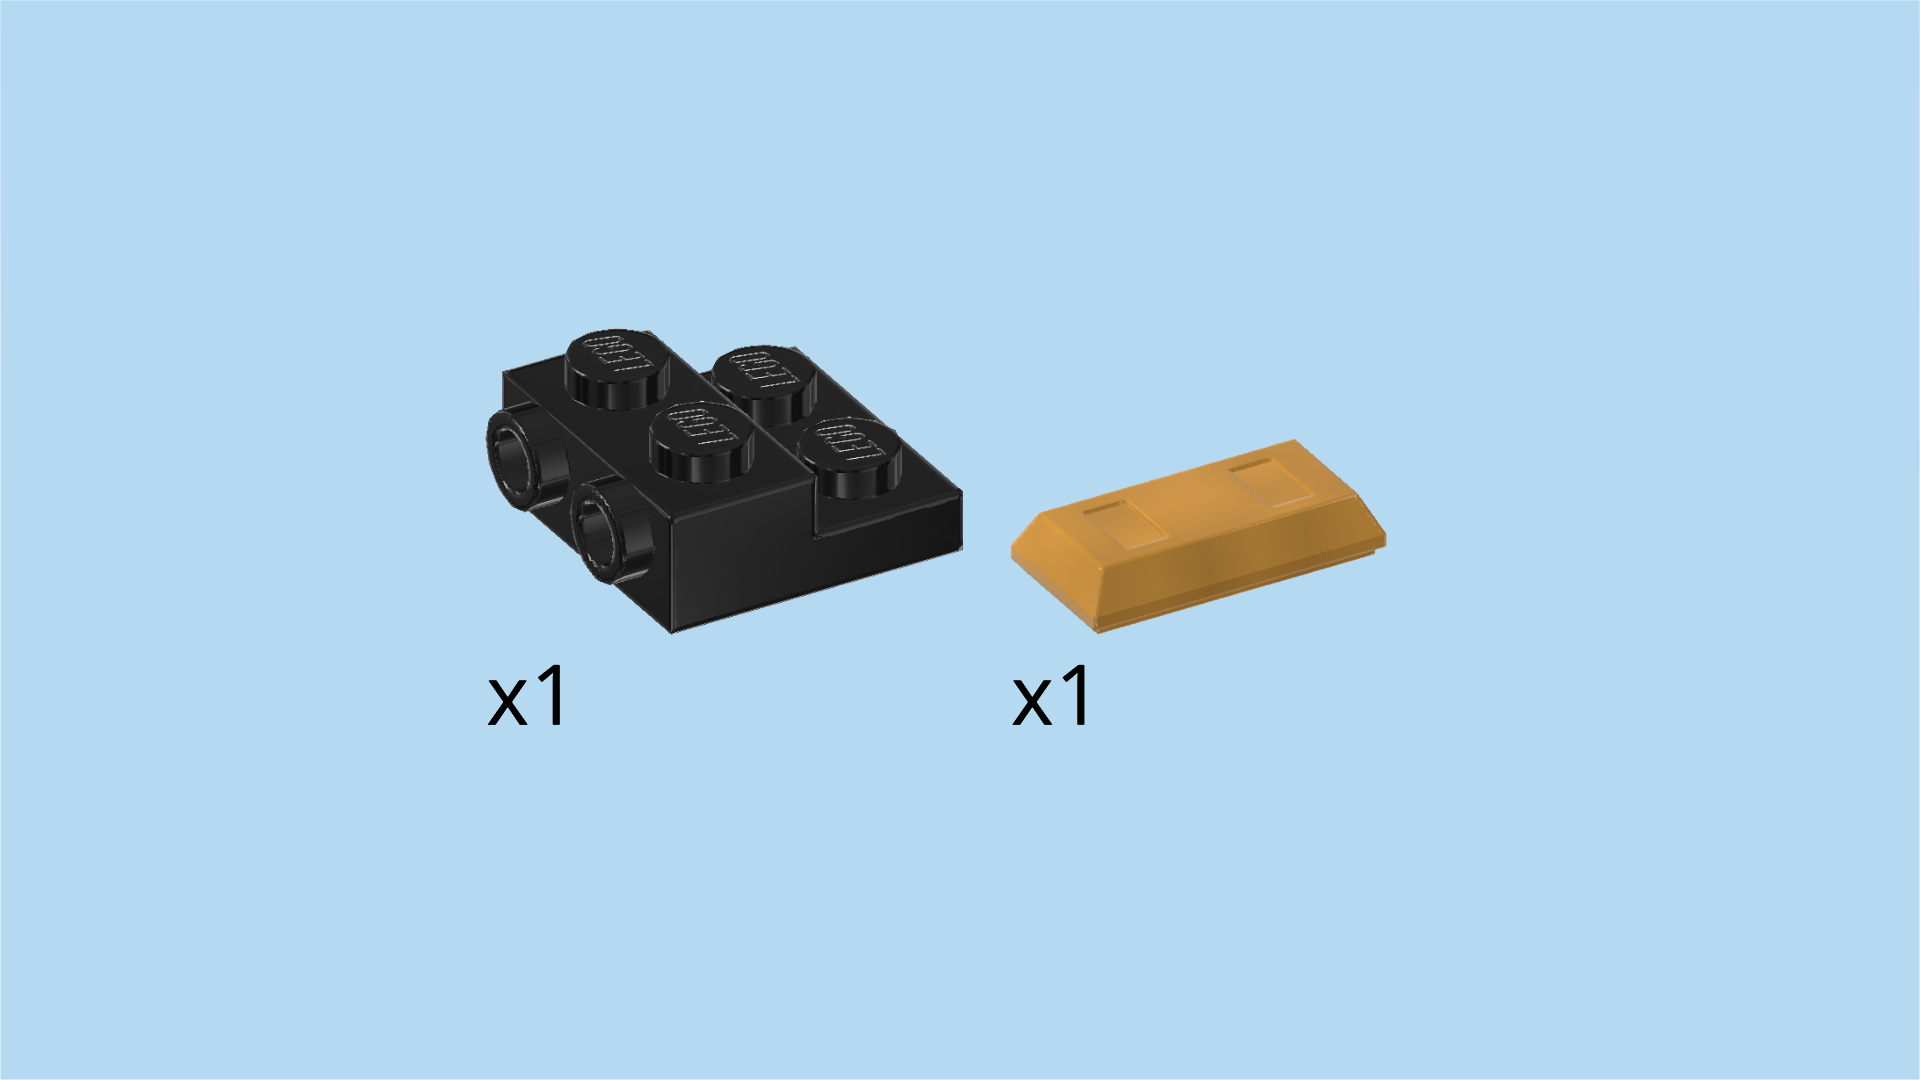
| Collect the following 2 pieces: |
| 1 black one-stepped plate 2x2 with 2 side knobs, |
| and 1 warm gold ingot 1x2. |
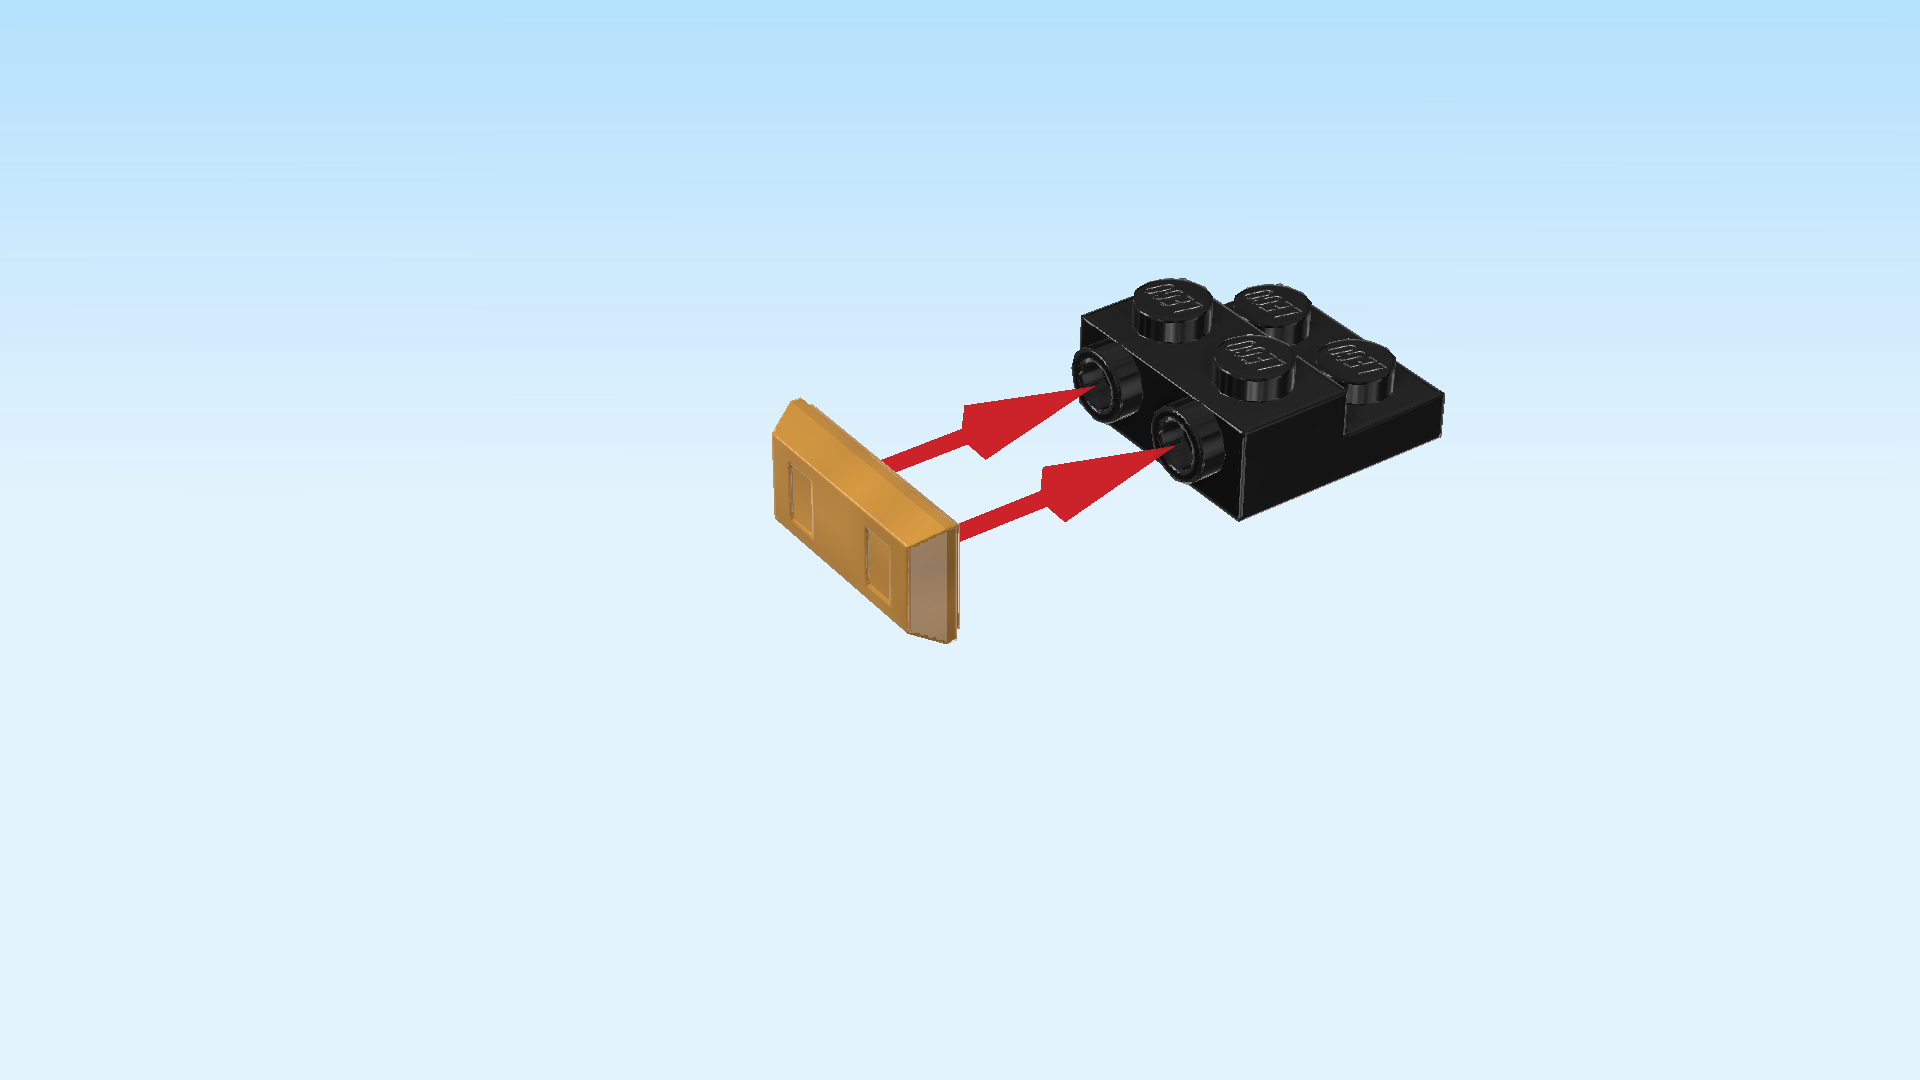
| Put the one-stepped plate 2x2 on the table, side knobs to the left. |
| Put the ingot 1x2 upright horizontally on the 2 side knobs. |
| The sub-part of the shoe is finished! First, flip the shoe structure right side up again. Keep the horizontal orientation, and make sure that its empty edge is on the left. |
| Mount the sub-part underneath the leftmost column of the shoe structure, 1 column and ingot protruding to the left. |
| Collect the following 2 pieces: |
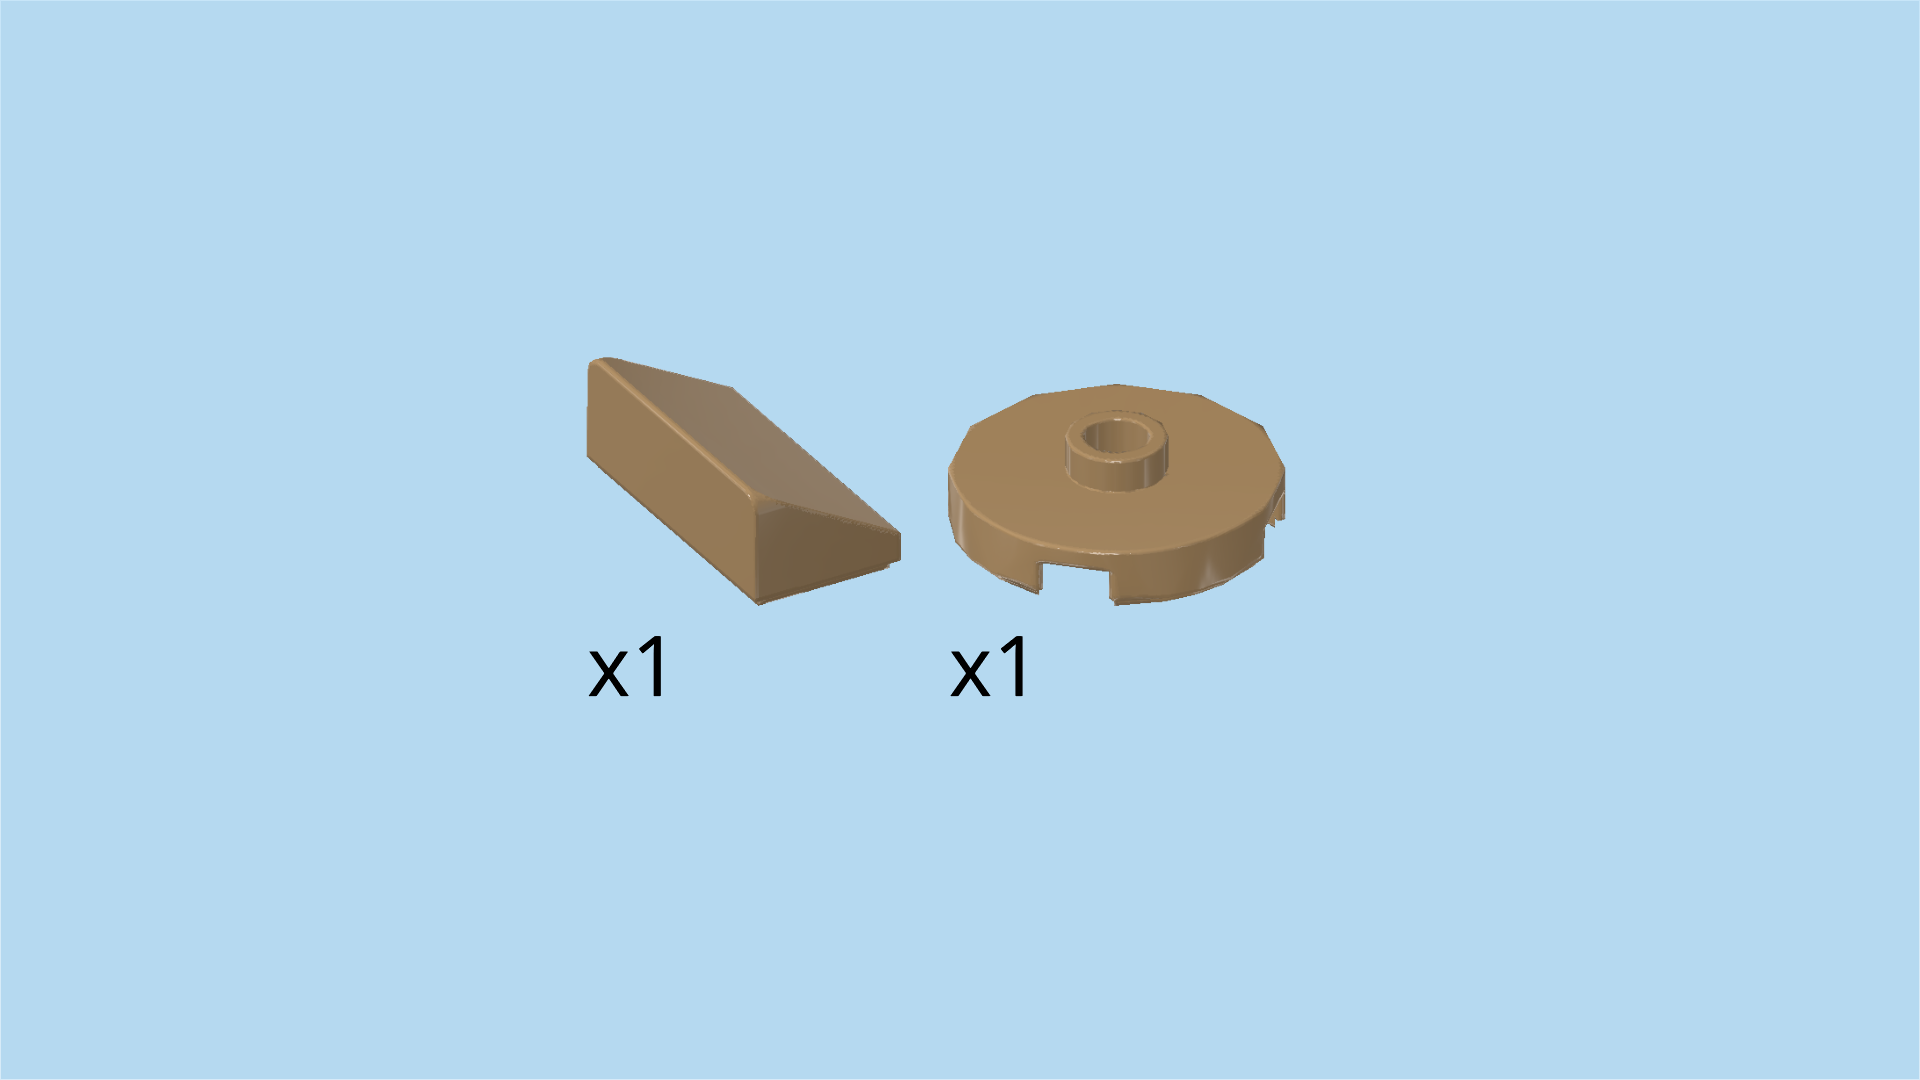
| 1 mud grey smooth roof tile 1x2x⅔, |
| and 1 mud grey round plate 2x2 with 1 knob. |
| Put the roof tile 1x2 vertically on the rightmost column, slope to the right. |
| Put the round plate 2x2 to the left of the previous piece. |
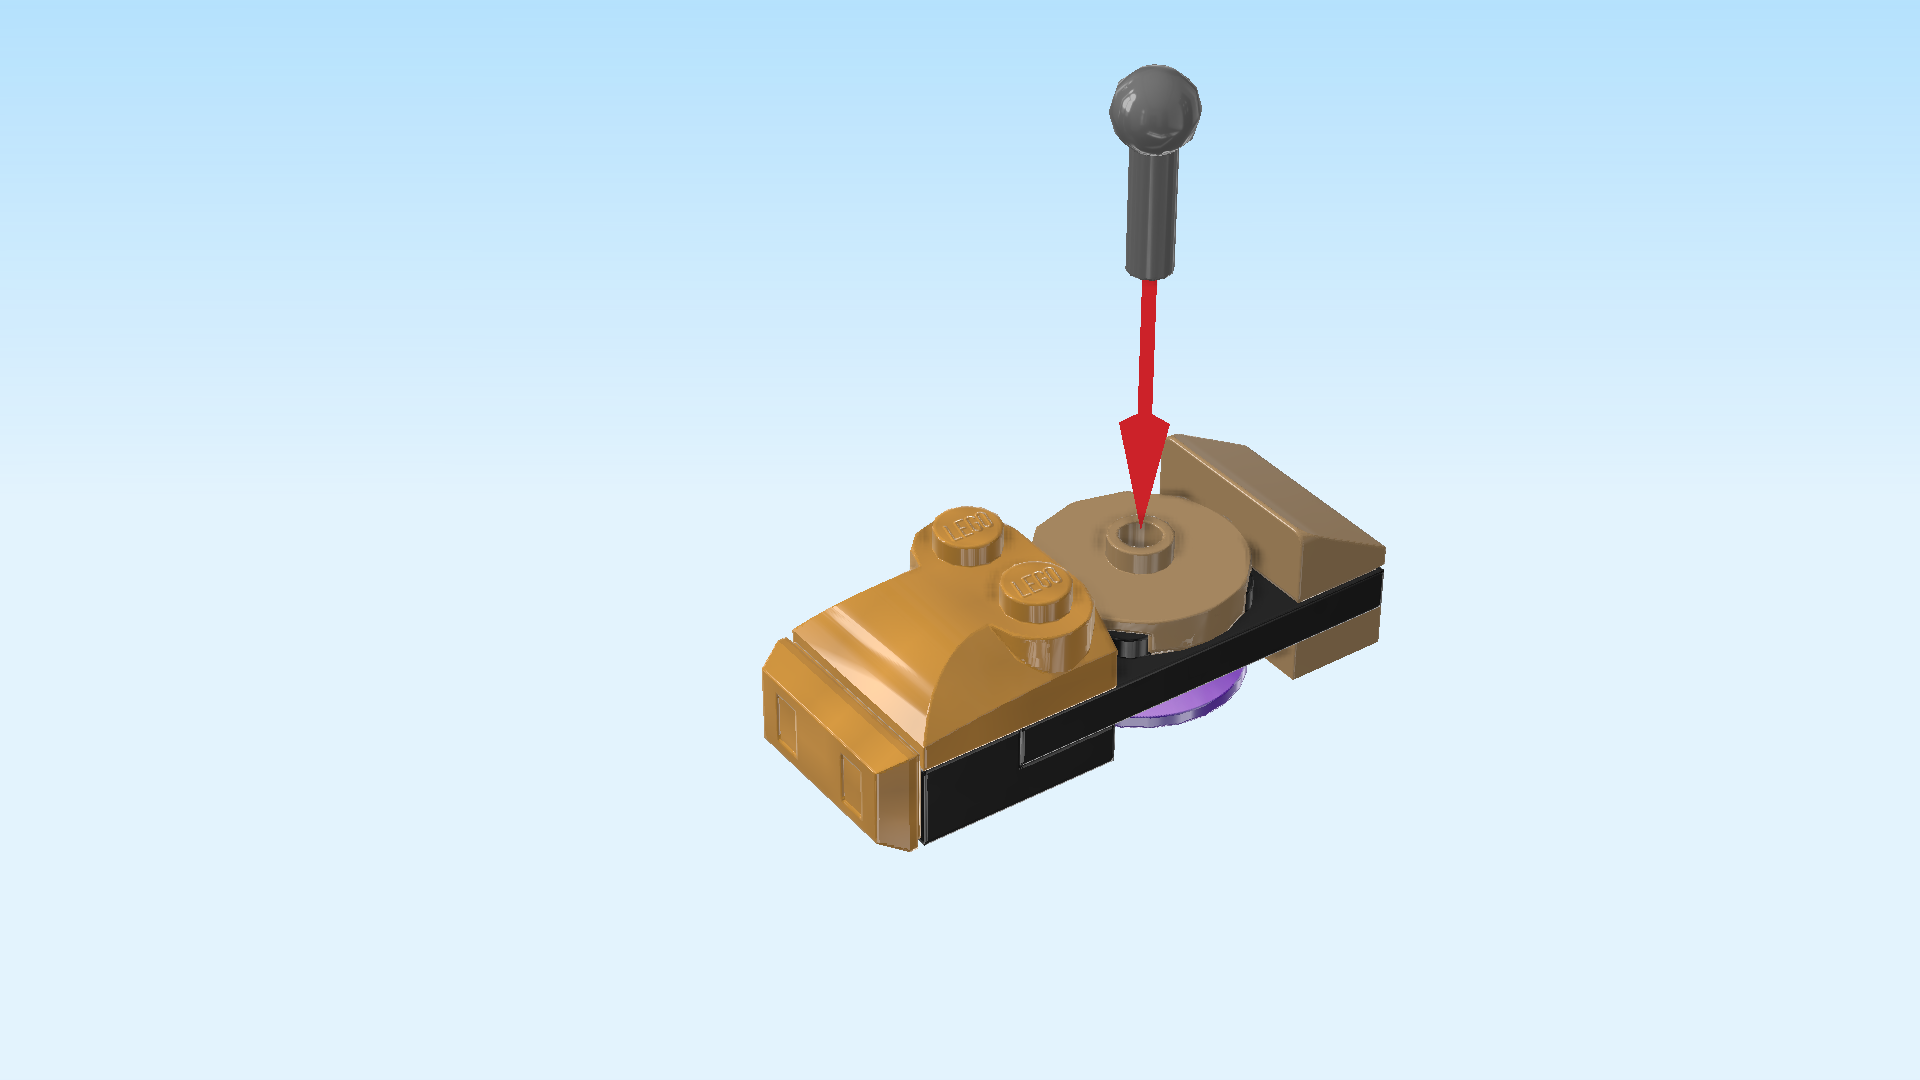
| Collect the following 2 pieces: |
| 1 dark stone grey shaft 1m with ball, |
| and 1 warm gold curve plate 2x2 with 3 slopes and 2 knobs. |
| Insert the shaft from the top into the hollow knob of the previous piece. |
| Put the curve plate 2x2 on the 4 remaining knobs, curve to the left, its 2 knobs forming a column on the right. |
| The mech's first shoe is finished! Great job! First, lay the mech flat on its back and fold the 2 legs down so that the ball cups on the legs are pointing towards you. Make sure that the knees of the legs bend upwards, not downwards. |
| Now, flip the shoe upright, ball pointing to the back, and snap the ball on the ball cup of the left leg. Make sure that the curve plate and ingot of the shoe are towards the top. |
| Next, we will build the second shoe. |
| Collect the following 2 pieces: |
| 1 black plate 2x4 with 3 holes, |
| and 1 mud grey plate 1x2. |
| Put the plate 2x4 upside down horizontally on the table. |
| Put the plate 1x2 vertically on the rightmost edge. |
| Find 1 transparent bright bluish violet disk 2x2 with 1 knob. |
| Put it to the left of the previous piece. |
| Next, we will make a sub-part of the second shoe. |
| Collect the following 2 pieces: |
| 1 black one-stepped plate 2x2 with 2 side knobs, |
| and 1 warm gold ingot 1x2. |
| Put the one-stepped plate 2x2 on the table, side knobs to the left. |
| Put the ingot 1x2 upright horizontally on the 2 side knobs. |
| The sub-part of the shoe is finished! First, flip the shoe structure right side up again. Keep the horizontal orientation, and make sure that its empty edge is on the left. |
| Mount the sub-part underneath the leftmost column of the shoe structure, 1 column and ingot protruding to the left. |
| Collect the following 2 pieces: |
| 1 mud grey smooth roof tile 1x2x⅔, |
| and 1 mud grey round plate 2x2 with 1 knob. |
| Put the roof tile 1x2 vertically on the rightmost column, slope to the right. |
| Put the round plate 2x2 to the left of the previous piece. |
| Collect the following 2 pieces: |
| 1 dark stone grey shaft 1m with ball, |
| and 1 warm gold curve plate 2x2 with 3 slopes and 2 knobs. |
| Insert the shaft from the top into the hollow knob of the previous piece. |
| Put the curve plate on the 4 remaining knobs, curve to the left, its 2 knobs forming a column on the right. |
| The second shoe is finished! Well done! Flip the shoe upright, ball pointing to the back, and snap the ball on the ball cup of the second leg. Make sure that the curve plate and ingot of the shoe are towards the top. |
| You can now try to make the mech stand! Adjust the hip and legs as needed so that Thanos' mech has a stable stance. Great job so far, you are making excellent progress! |
| Now, we will build the mech's first arm. |
| Collect the following 2 pieces: |
| 1 dark stone grey bent plate 2x6 with 2 steps and fixed joint, |
| and 1 dark stone grey plate 1x2 with ball cup on long side. |
| Put the bent plate 2x6 horizontally on the table, fixed joint to the front. |
| Put the plate 1x2 vertically on the leftmost column, ball cup to the left. |
| Find 1 mud grey plate 1x2 with shaft on short side. |
| Put it vertically on the rightmost column, shaft to the back. |
| Next, let's make a sub-part of the arm. |
| Collect the following 2 pieces: |
| 1 warm gold plate 1x2 with handle on long side, |
| and 1 mud grey one-stepped curve tile 2x2x⅔. |
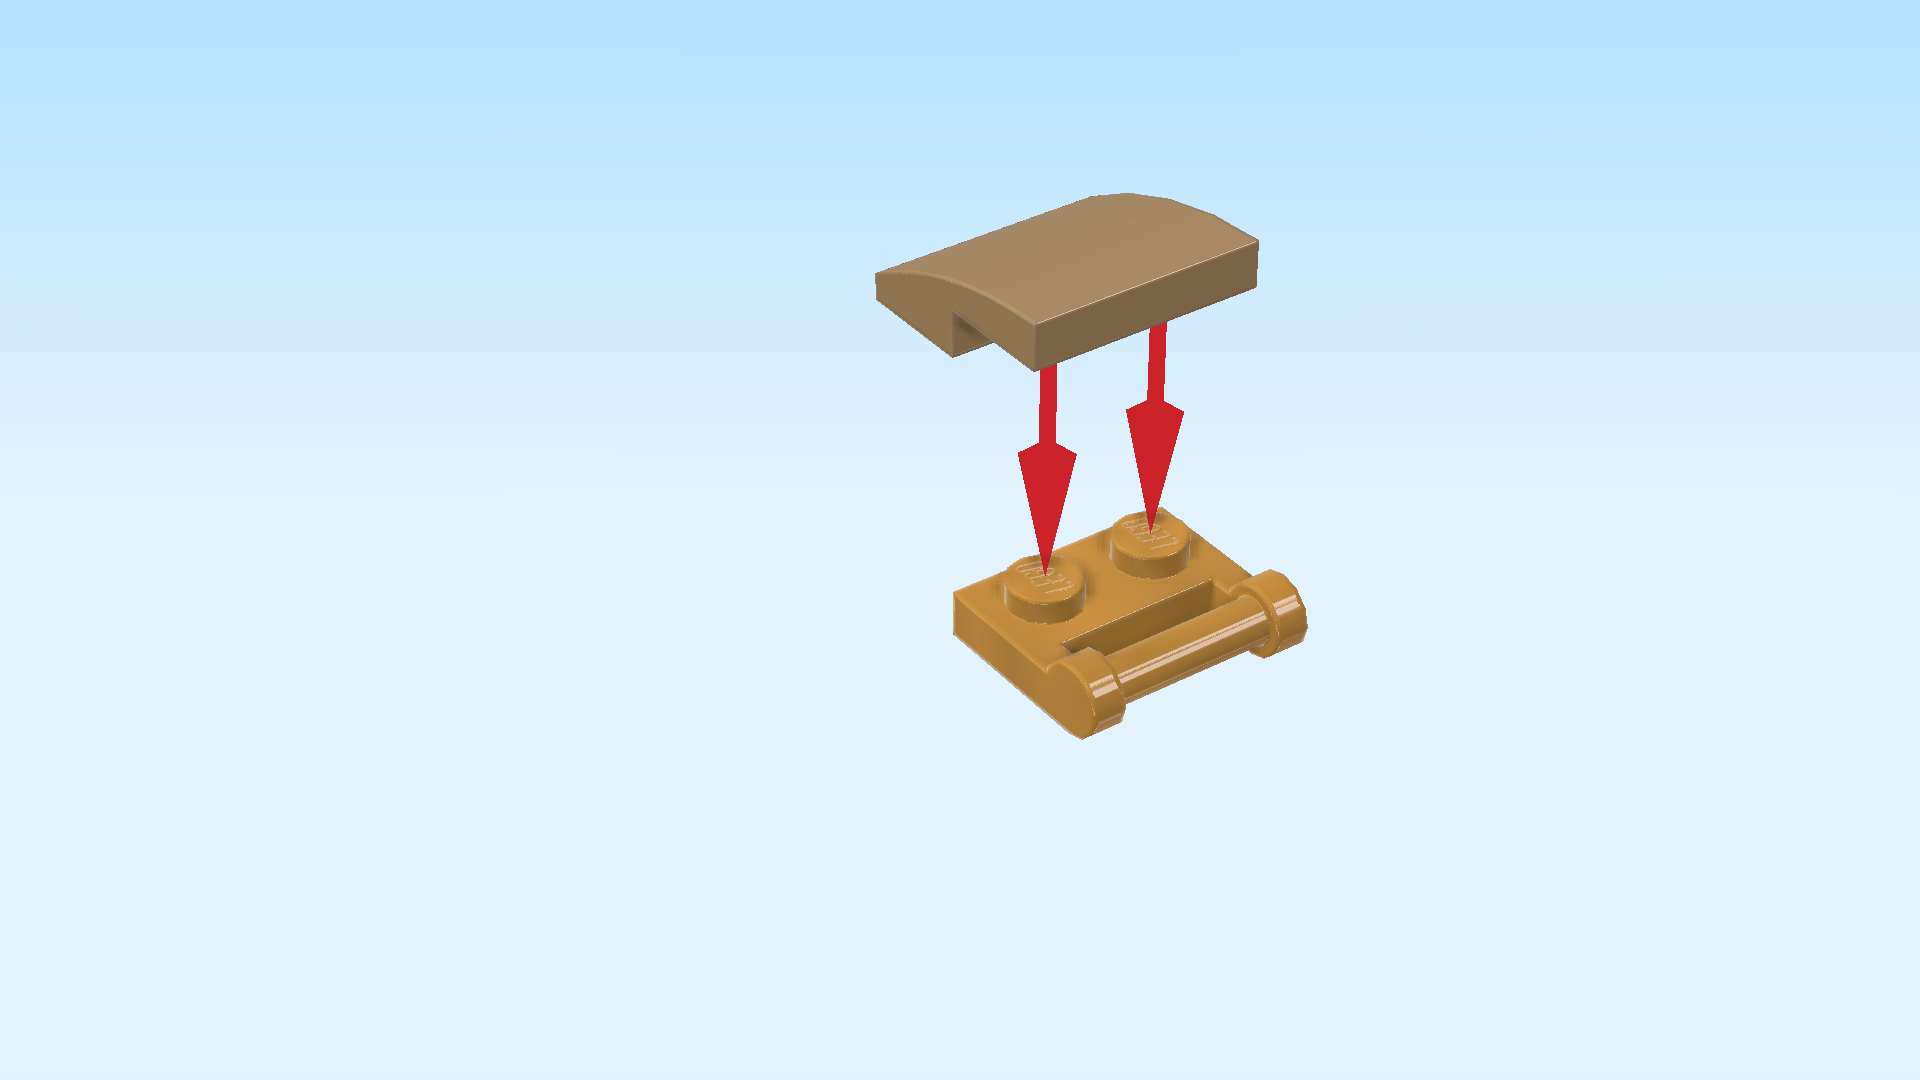
| Put the plate 1x2 vertically on the table, handle to the right. |
| Put the curve tile on top, curve to the left, 1/2 overhanging to the left. |
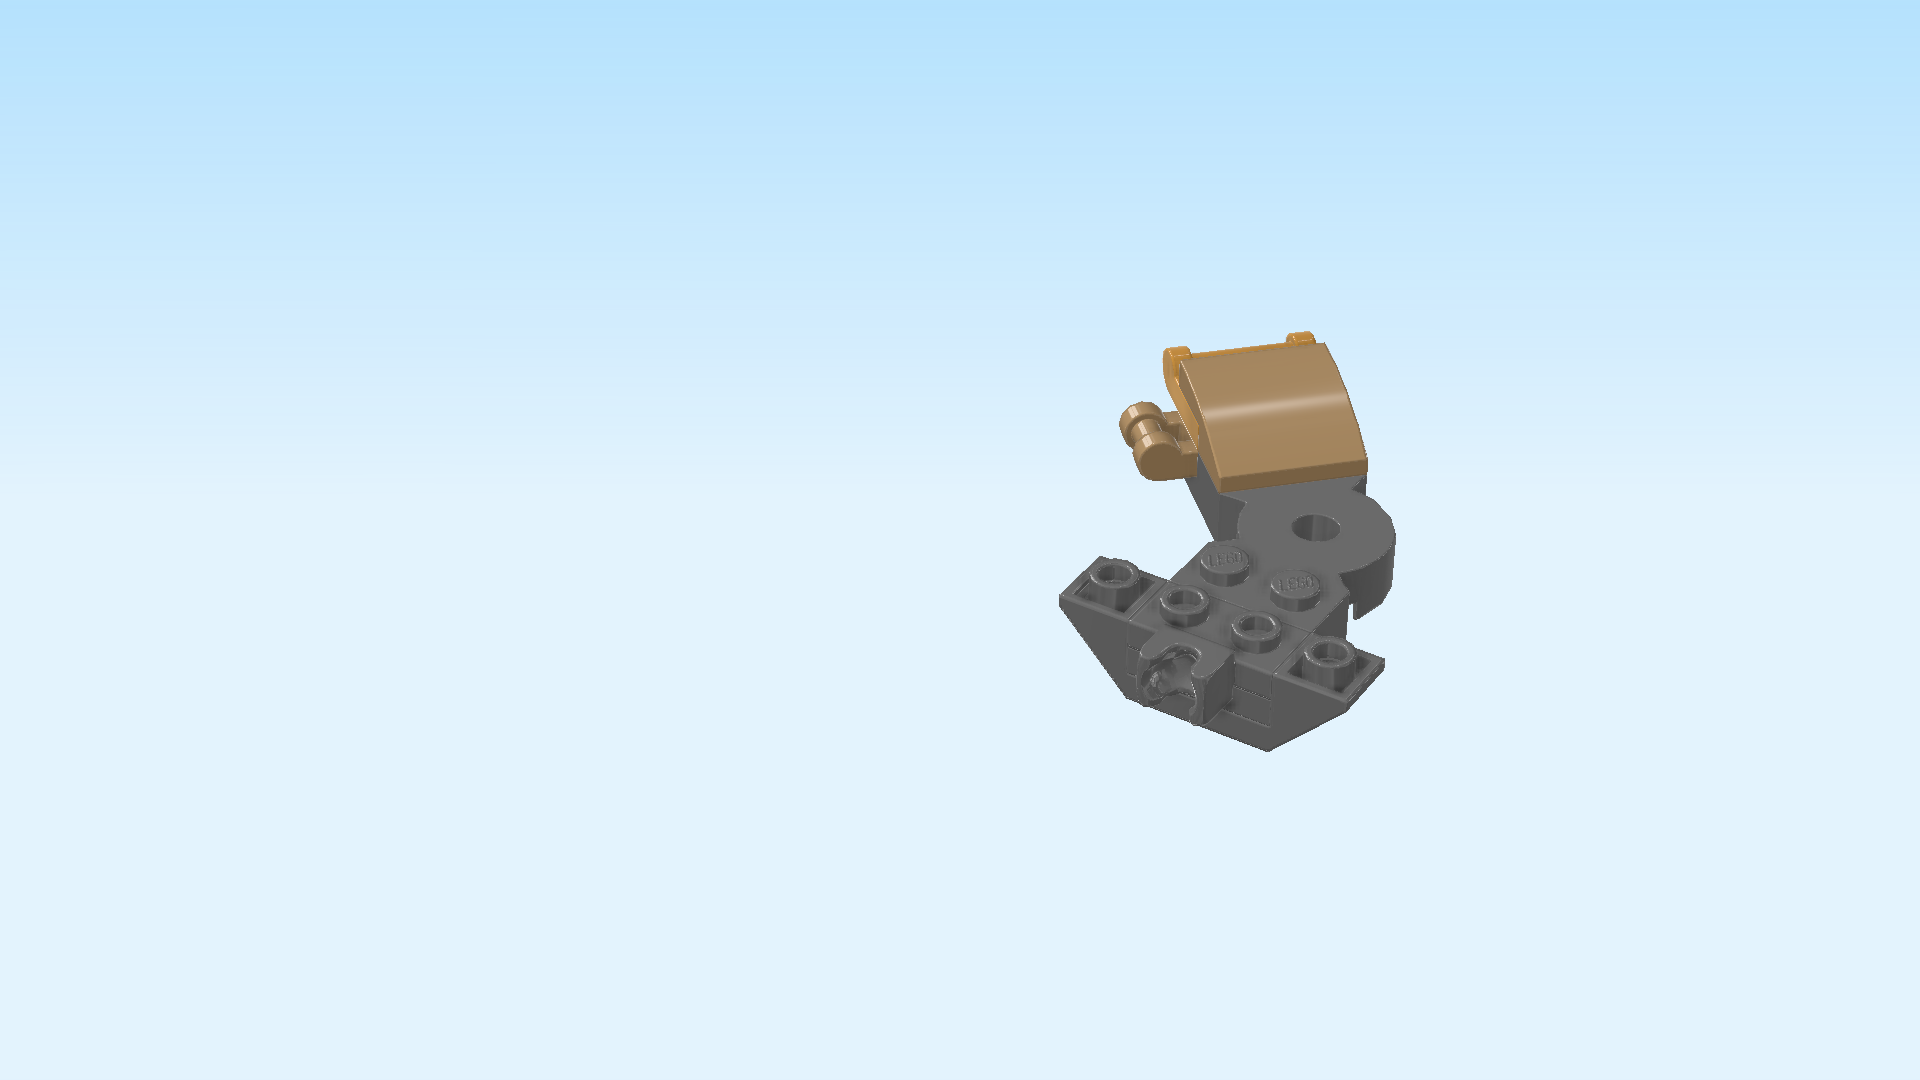
| Mount this sub-part on the right half of the bent plate, shaft to the right. |
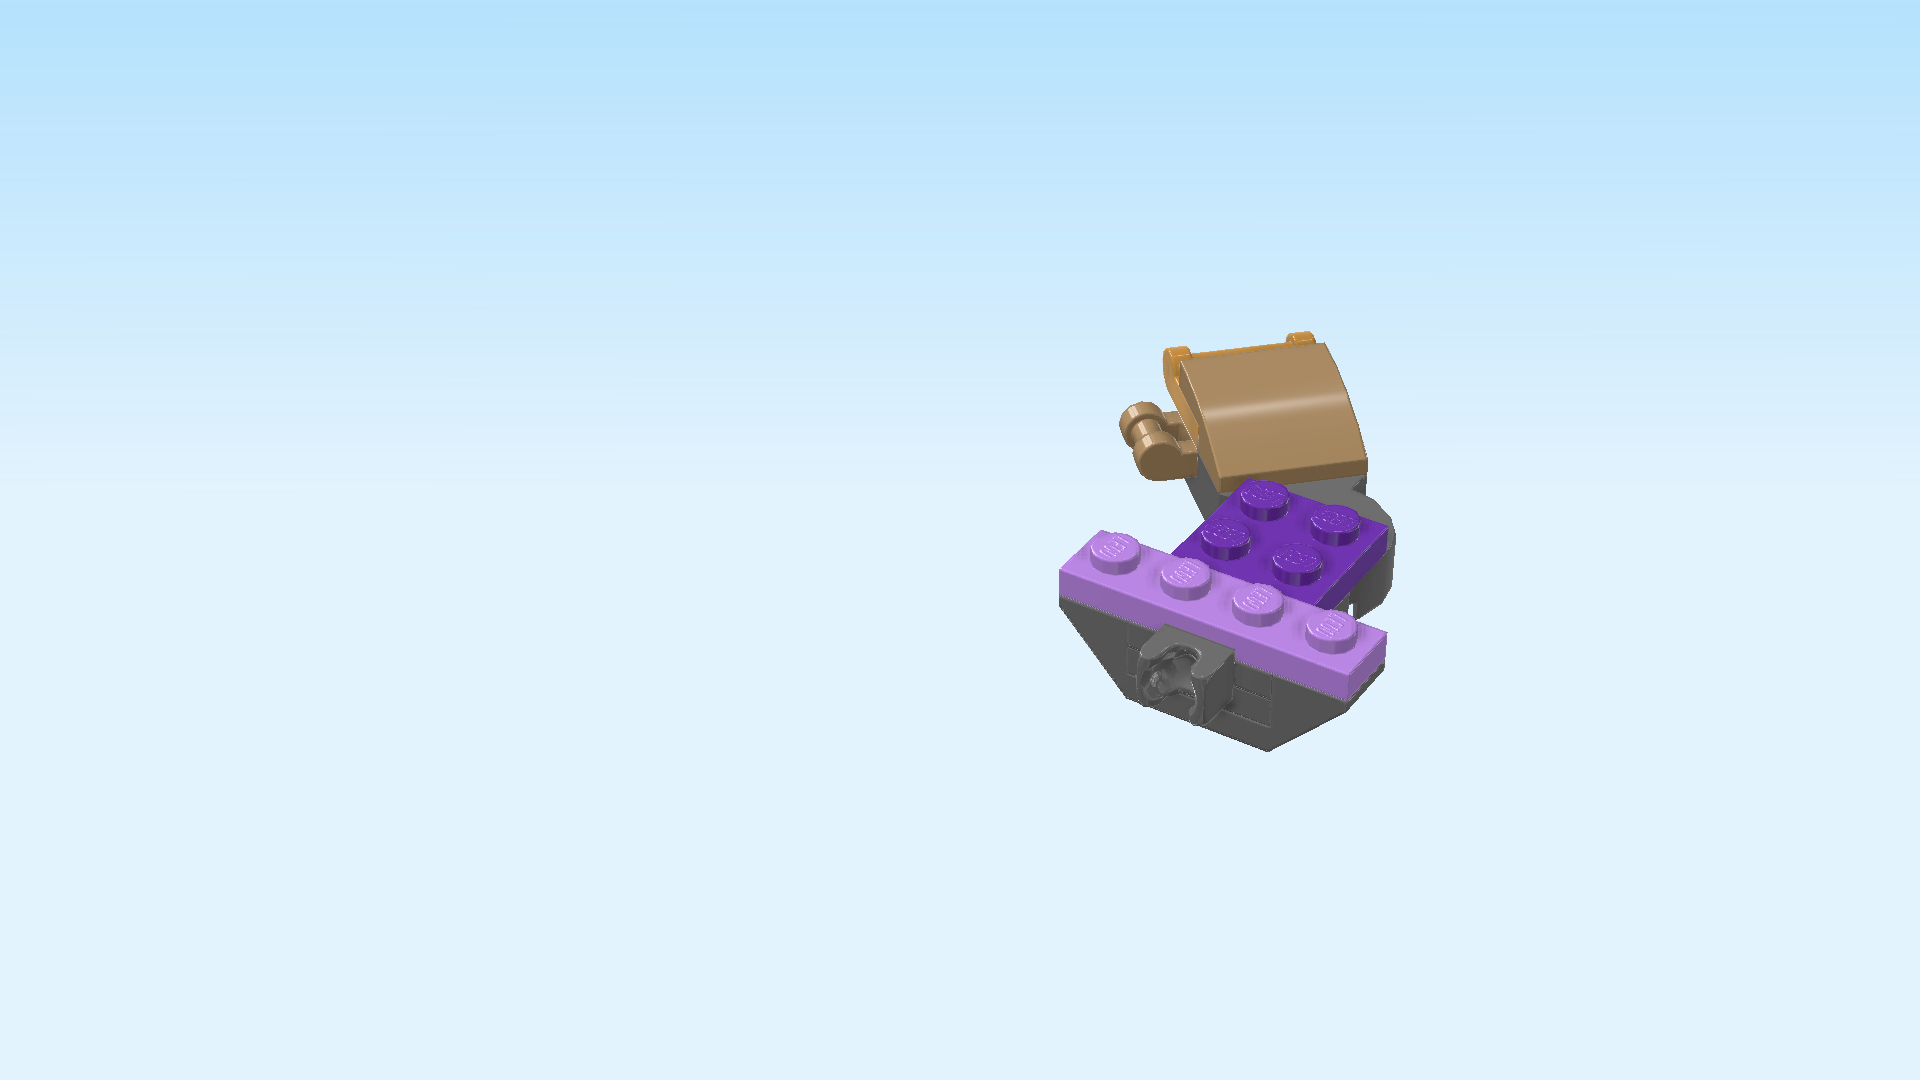
| Find 1 dark stone grey inverted double roof tile 1x4. |
| Put it vertically underneath the leftmost column, slopes to the front and back. |
| Collect the following 2 pieces: |
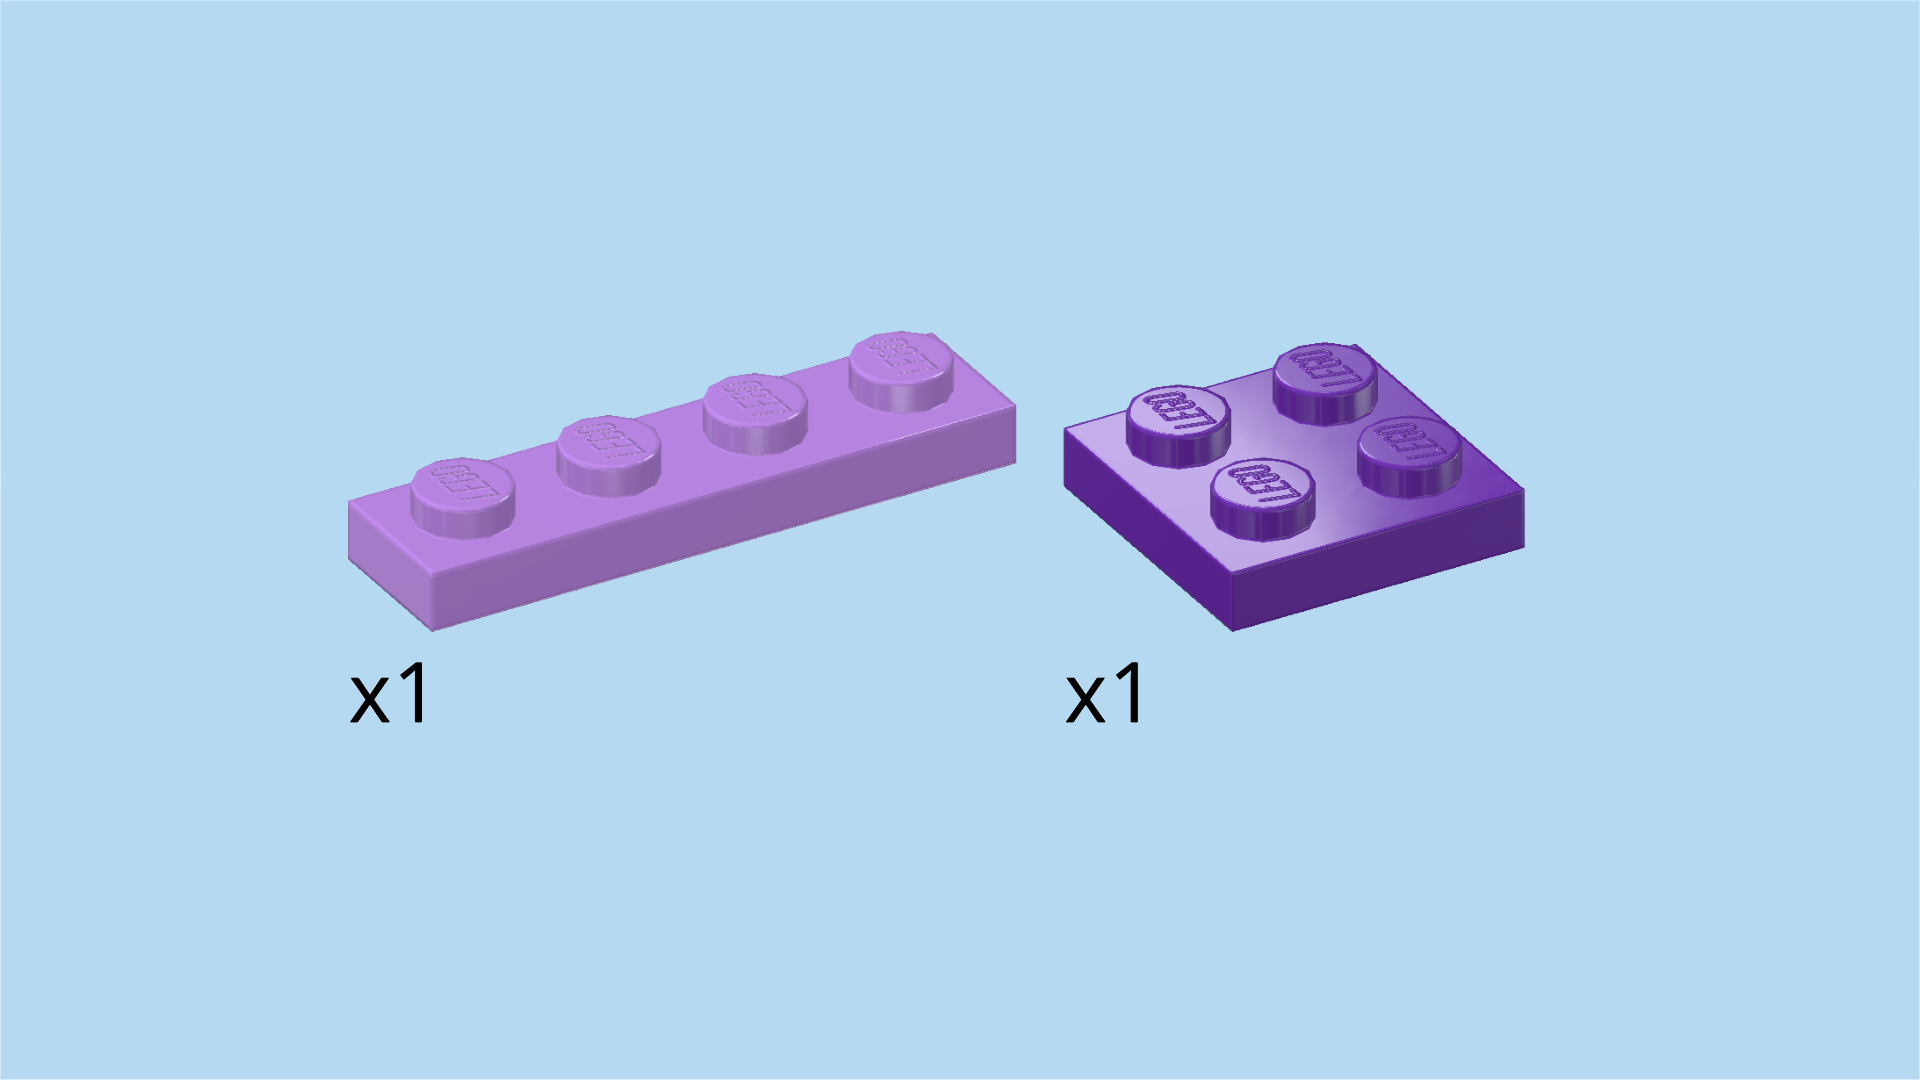
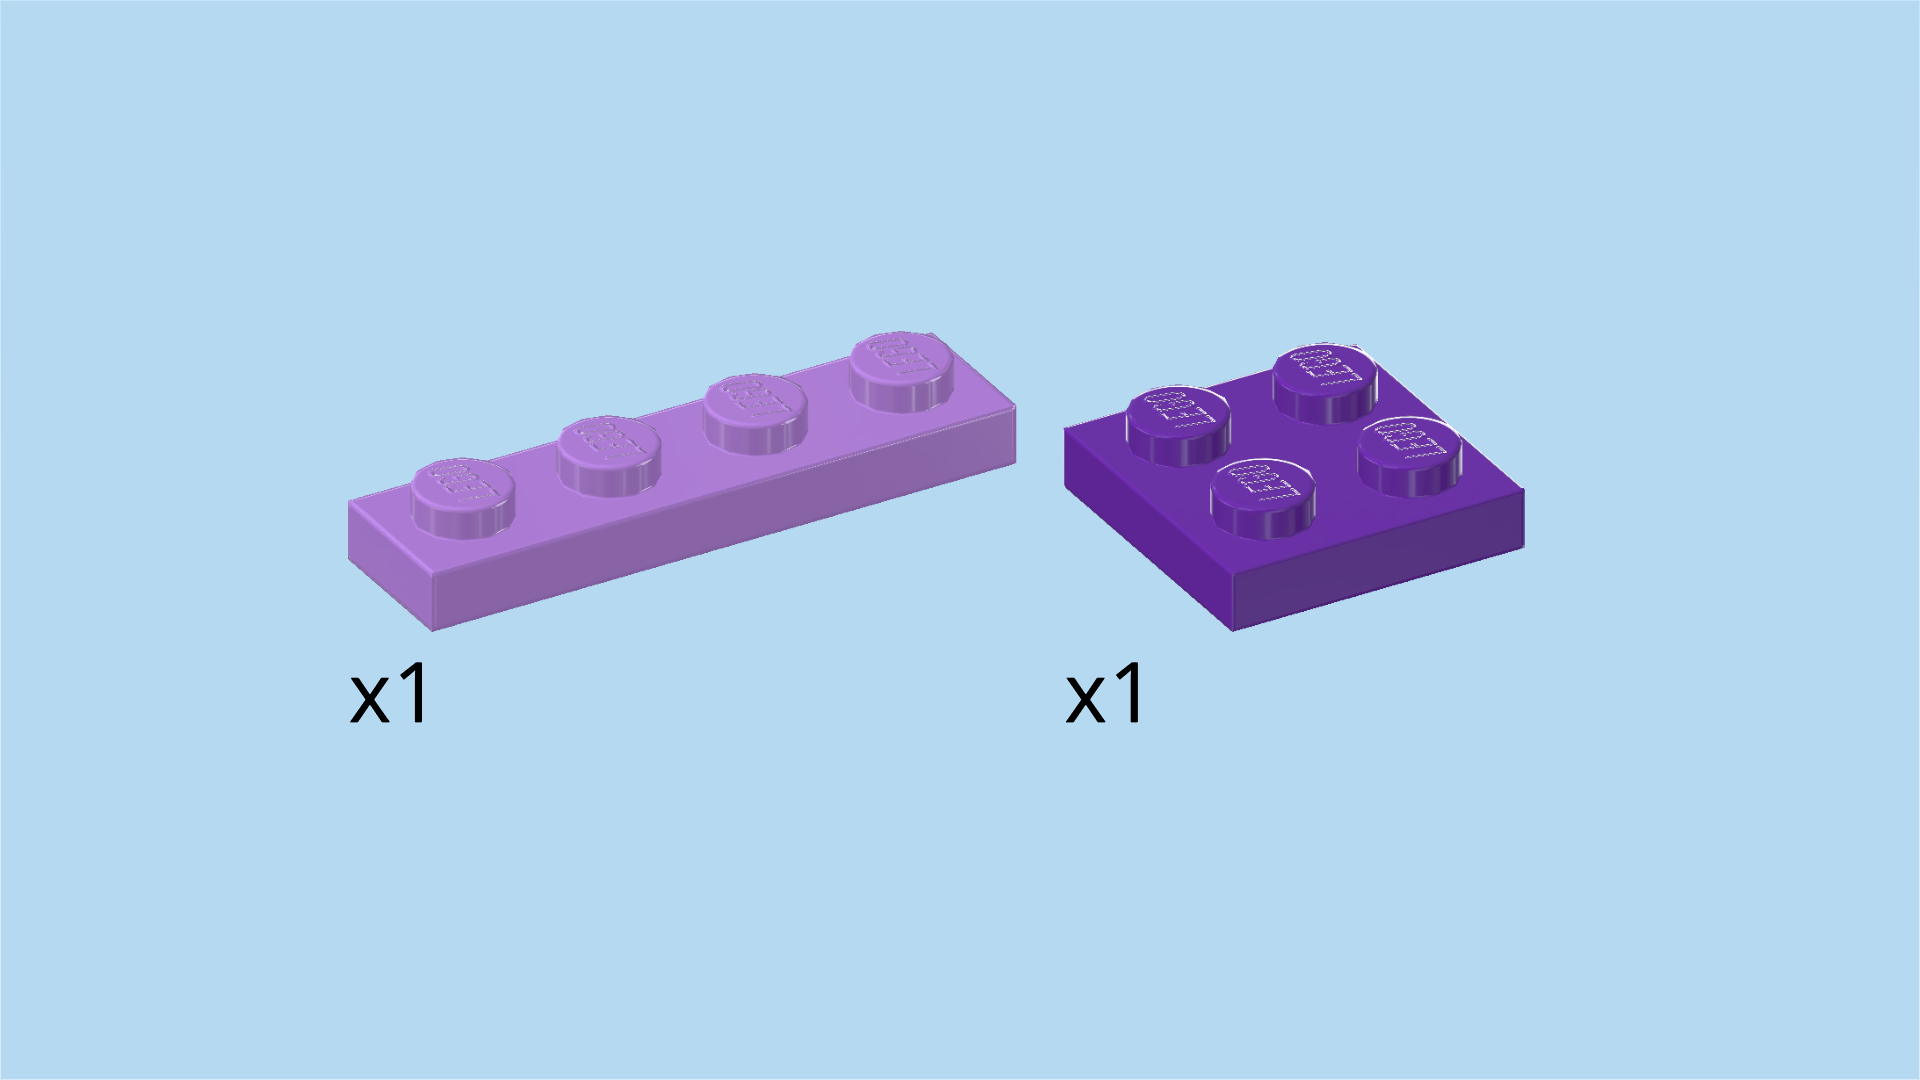
| 1 lavender plate 1x4, |
| and 1 medium lilac plate 2x2. |
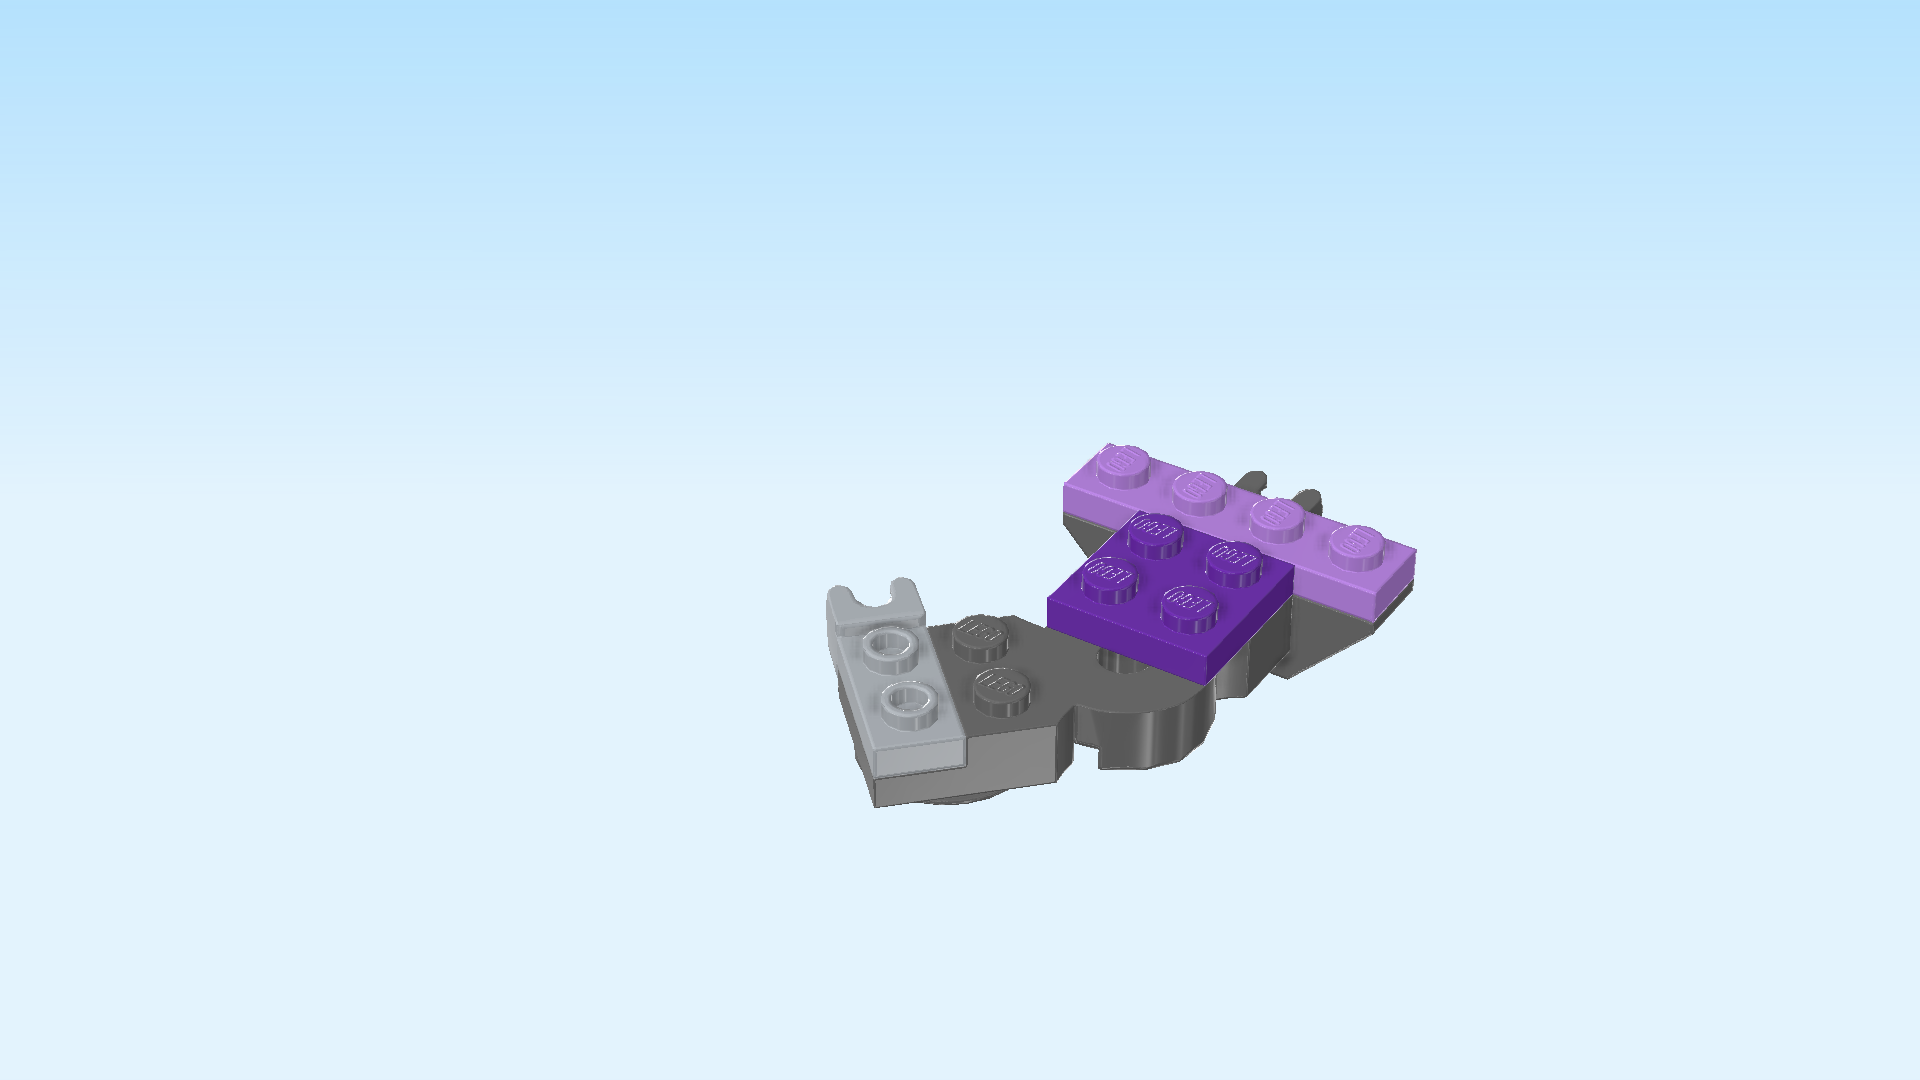
| Put the plate 1x4 on the leftmost column. |
| Put the plate 2x2 to the right of the previous piece. |
| Collect the following 2 pieces: |
| 1 medium lilac curve plate 2x2 with 3 slopes and 2 knobs, |
| and 1 lavender curve tile 2x2 with arrow-shaped side. |
| Put the curve plate 2x2 centered on the 2 leftmost columns, curve to the right, 2 knobs forming a column on the left. |
| Put the wedge tile to the right of the previous piece, arrow-shaped end to the right. |
| Find 2 lavender curved corner pieces 2x2x1⅓ with lowered knob. |
| Put 1 on the back left corner of the arm build, knob to the front right. |
| Put the other one in front of the previous piece around the front left corner of the arm, knob to the back right. |
| These pieces are the impressive muscles of the mech! |
| Find 1 lavender curve tile 2x2 with arrow-shaped side. |
| Put it on the 2 knobs of the 2 previous pieces, arrow-shaped end to the right. |
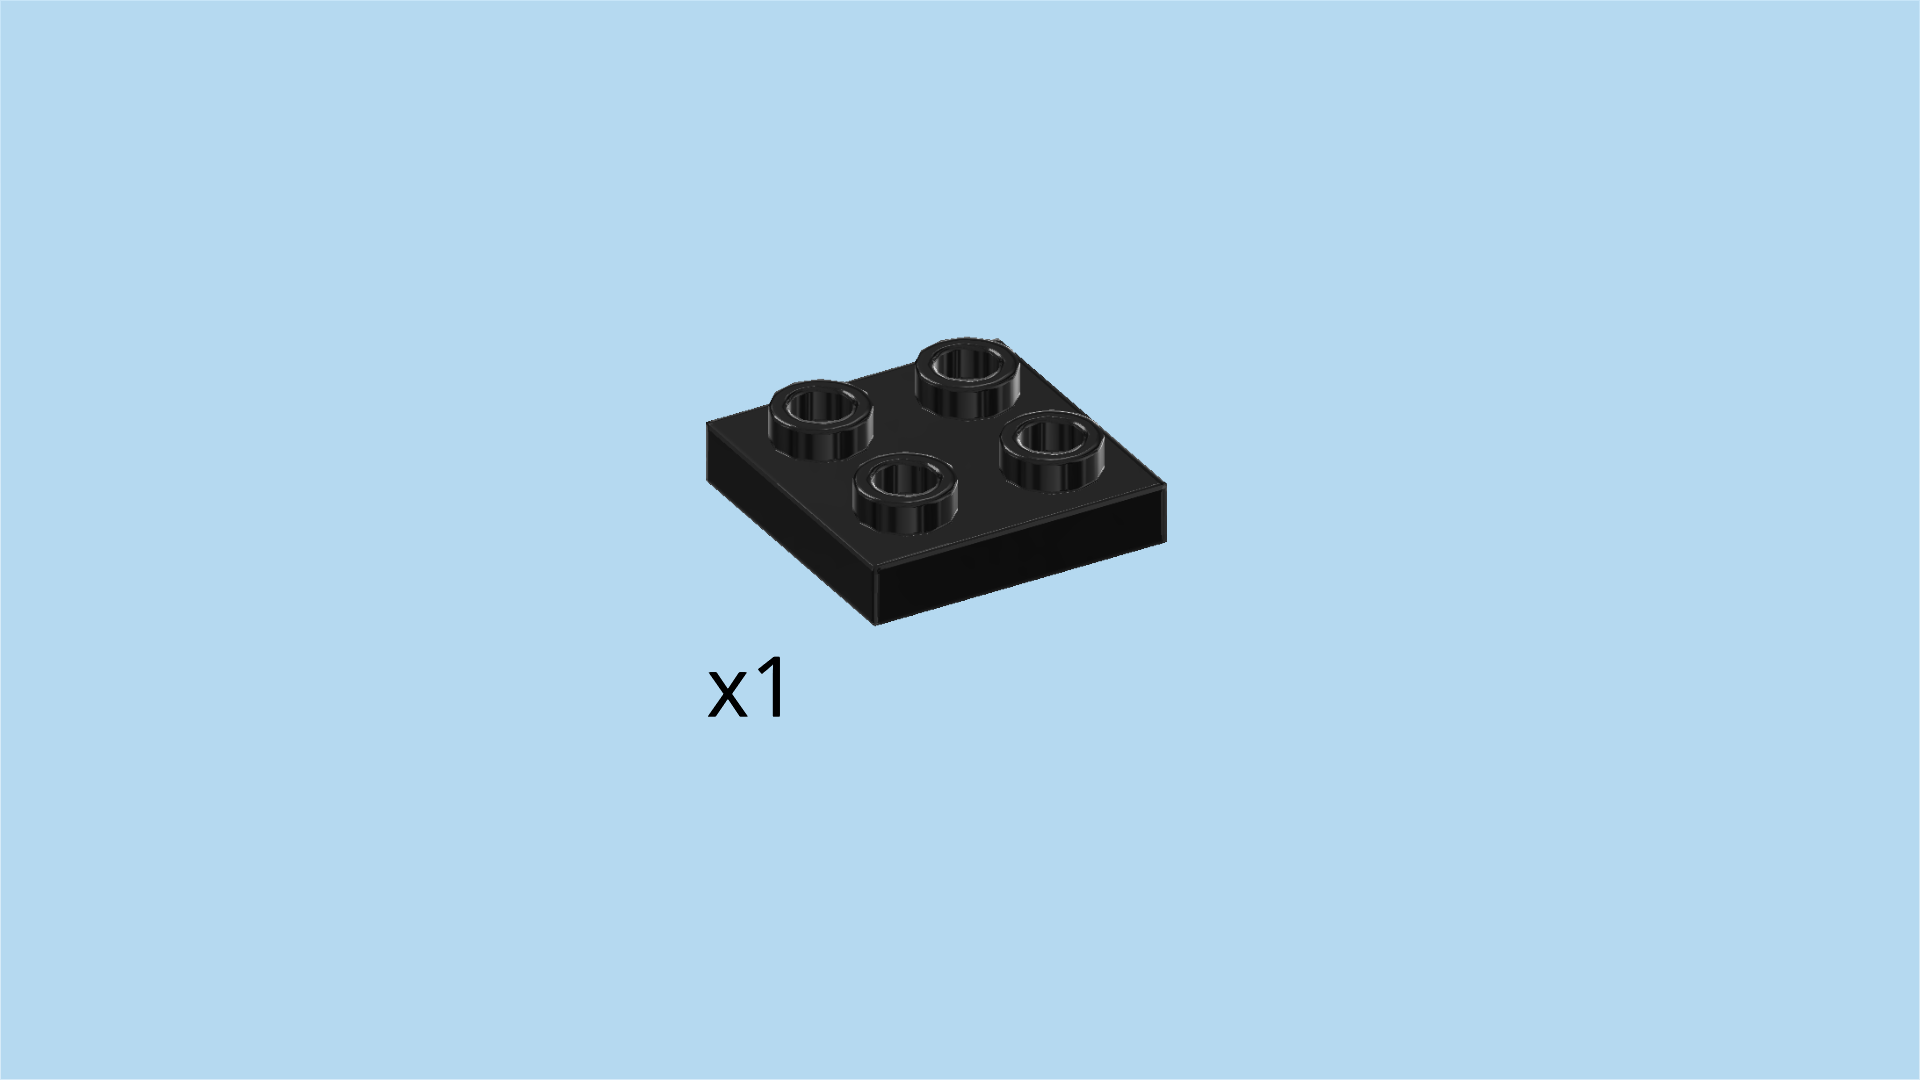
| Find 1 black plate 2x2 with middle bottom tube 1m. |
| Flip the arm build upside down, fixed joint to the back, shaft to the right and curved corners to the left. |
| Mount the plate on the right 2x2 surface, tube on the right edge. |
| This tube will be used to mount the double-sided sword. We will get back to that later. |
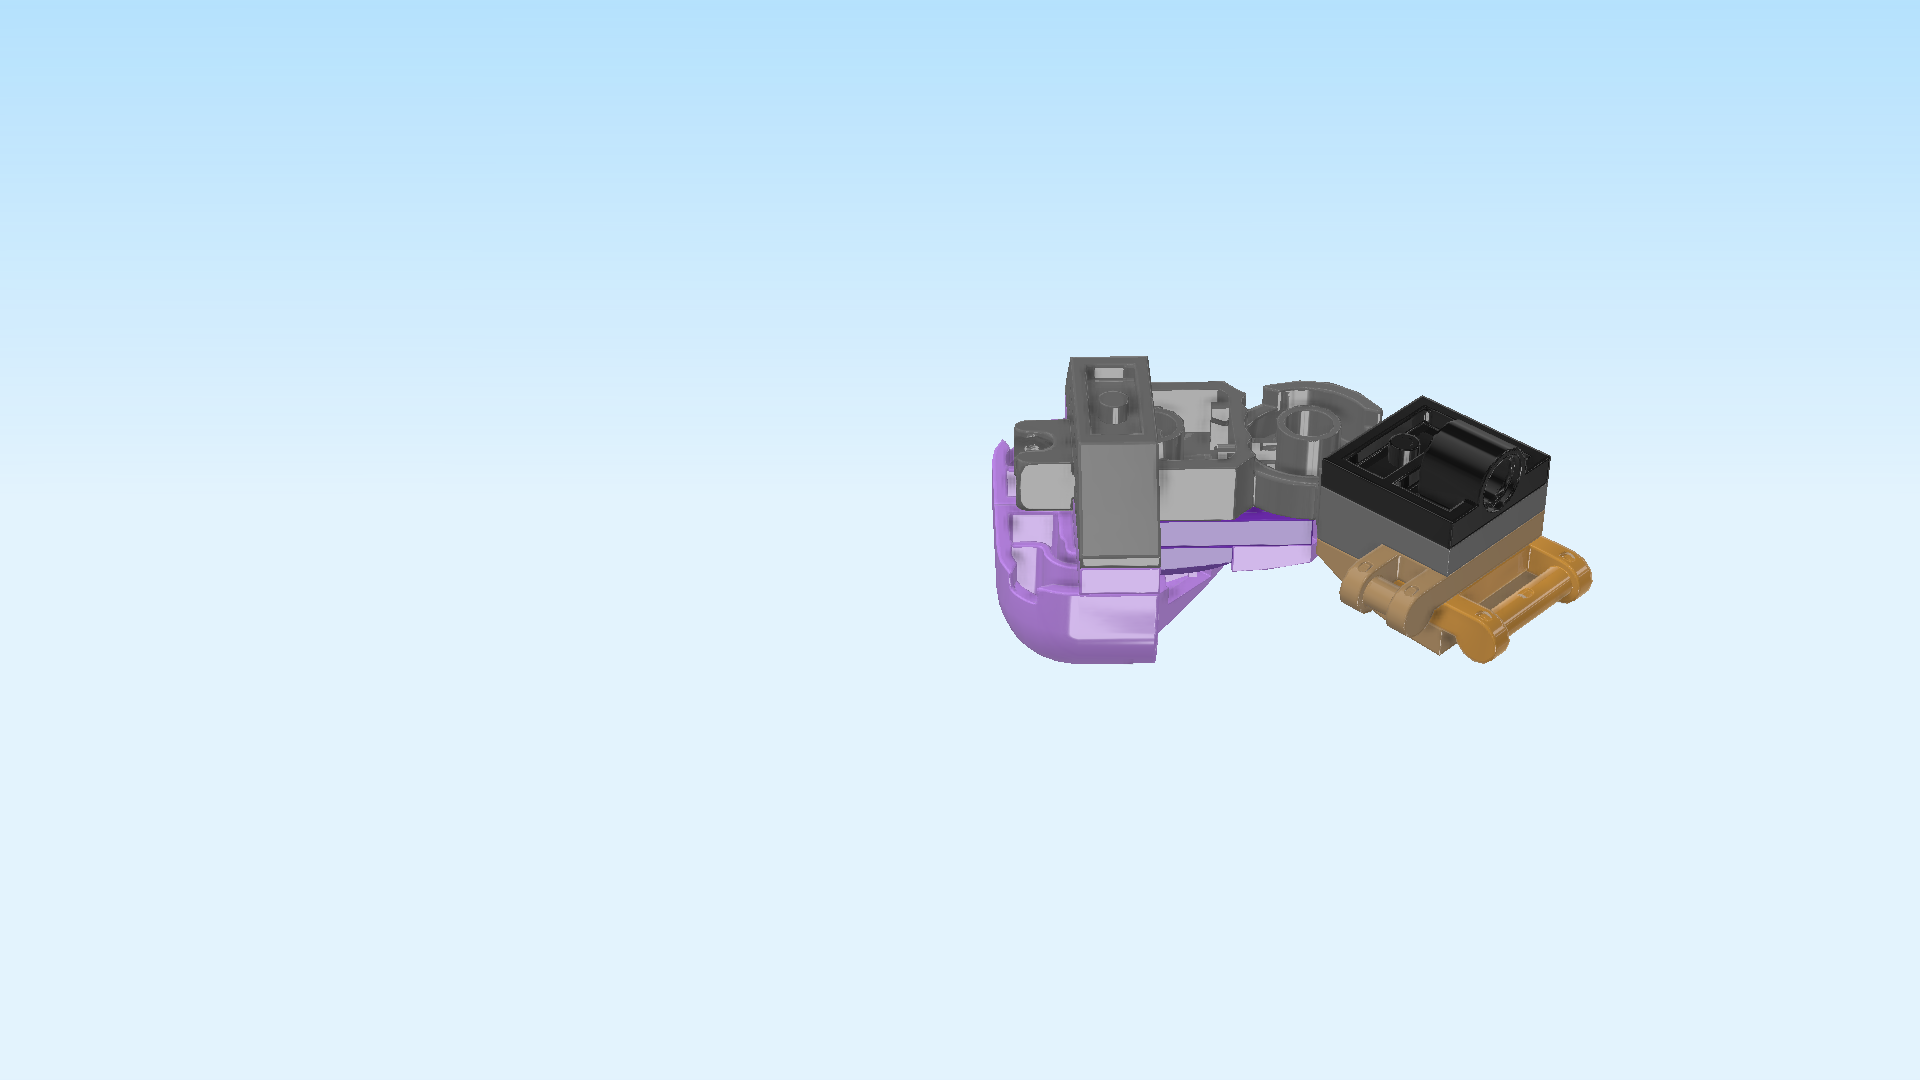
| Find 4 warm gold claws with thick clasp. |
| Flip the arm build right side up again and turn it vertically. Now, the curved corner pieces should be at the back and the long shaft should be facing you. |
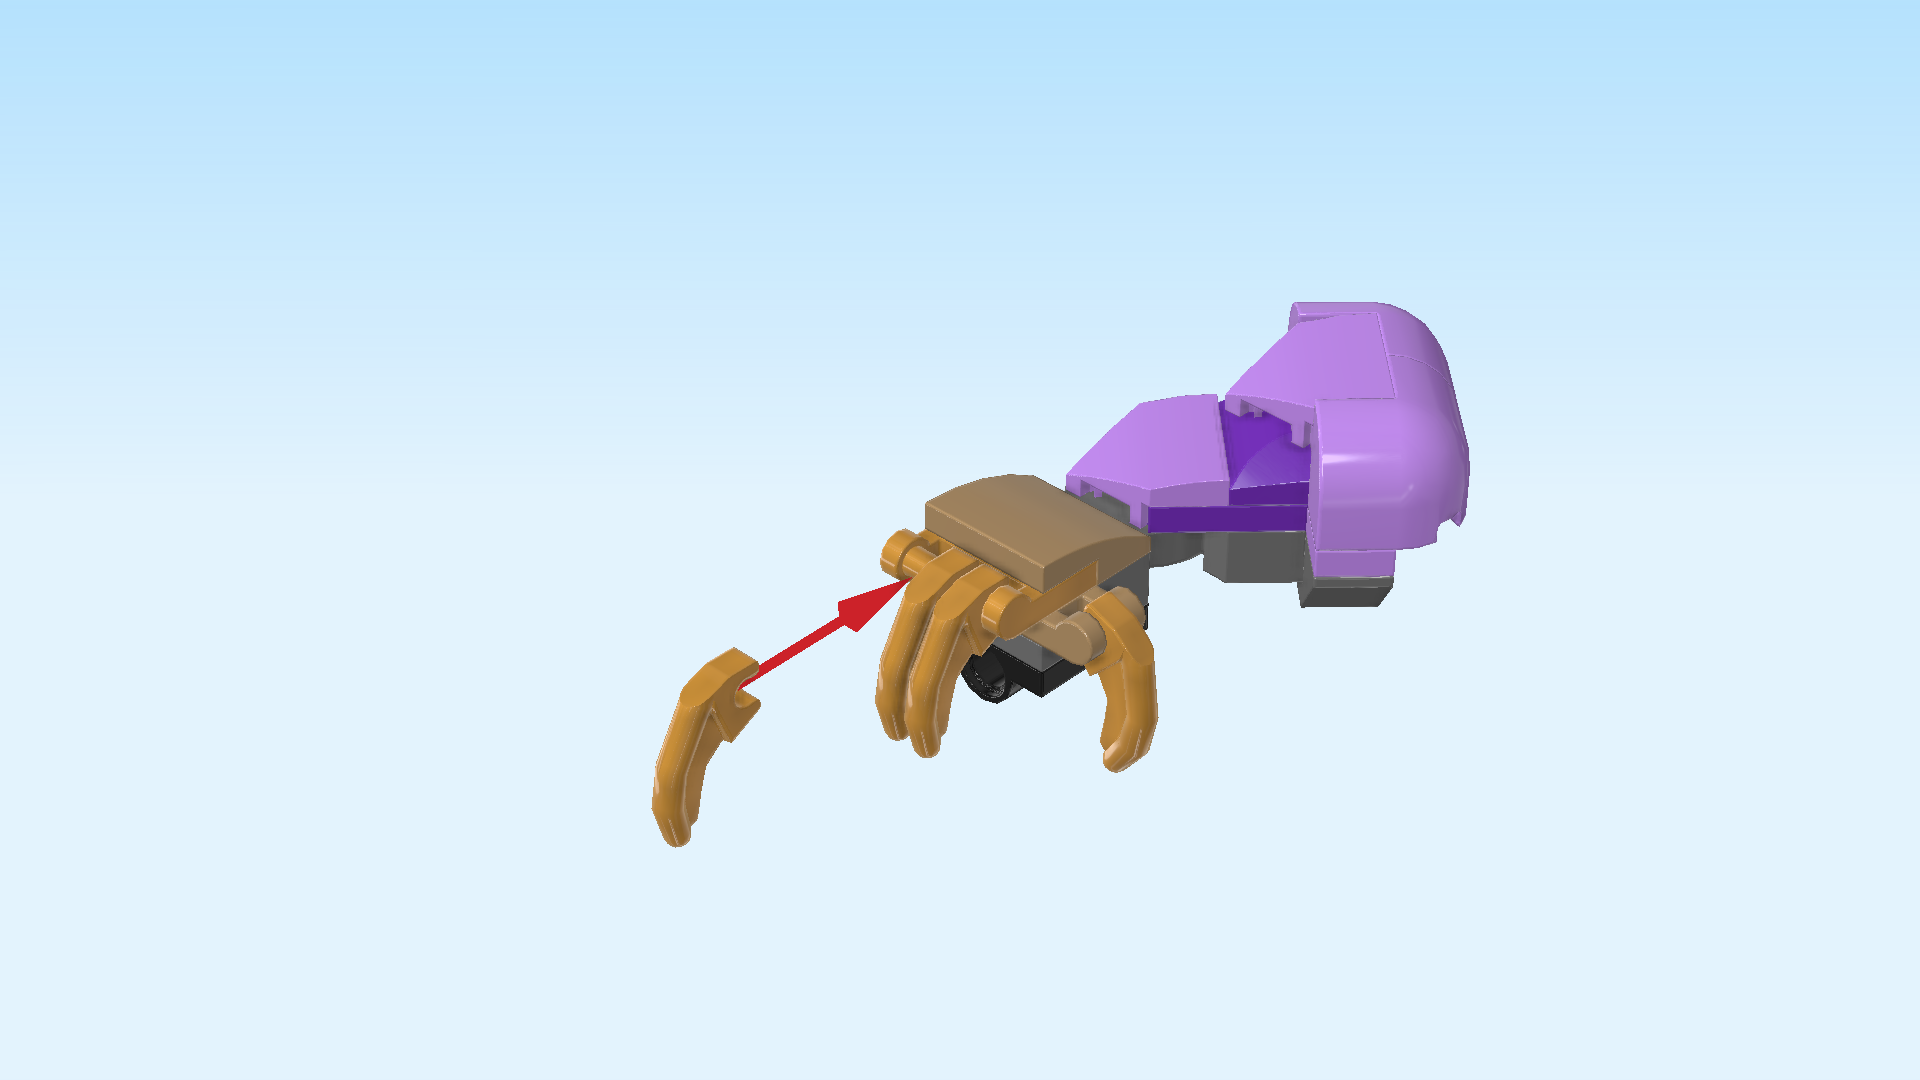
| Hold 1 claw vertically in front of you, clasp to the back, claw pointing down. |
| Snap it on the long shaft that is facing you. |
| Snap 2 more claws on the same shaft in the same orientation. |
| Snap the last claw on the side shaft pointing to the right, claw pointing down. |
| These are the fingers of the mech! |
| The mech's first arm is finished! Well done! Snap the ball cup hidden underneath the curved corner pieces on the left ball of the mech cockpit. |
| Next, we will build the second arm. |
| Collect the following 2 pieces: |
| 1 dark stone grey bent plate 2x6 with 2 steps and fixed joint, |
| and 1 dark stone grey plate 1x2 with ball cup on long side. |
| Put the bent plate 2x6 horizontally on the table, fixed joint to the front. |
| Put the plate 1x2 vertically on the rightmost column, ball cup to the right. |
| Find 1 medium stone grey plate 1x2 with ball cup on short side. |
| Put it vertically on the leftmost column, ball cup to the back. |
| Collect the following 2 pieces: |
| 1 dark stone grey inverted double roof tile 1x4, |
| and 1 dark stone grey inverted curve disk 2x2 with 4 knobs. |
| First, flip the arm structure upside down, fixed joint to the back, the ball cup of the previous piece to the front, and the other ball cup still to the right. |
| Put the inverted double roof tile vertically on the rightmost column, slopes to the front and back. |
| Put the inverted curve disk on the left 2x2 surface. |
| Collect the following 2 pieces: |
| 1 medium lilac plate 2x2, |
| and 1 lavender plate 1x4. |
| Flip the arm build right side up again, fixed joint to the front, 1 ball cup to the right, 1 ball cup to the back. |
| Put the plate 1x4 vertically on the rightmost column. This means it will sit above the inverted double roof tile from the previous step. |
| Put the plate 2x2 to the left of the previous piece. |
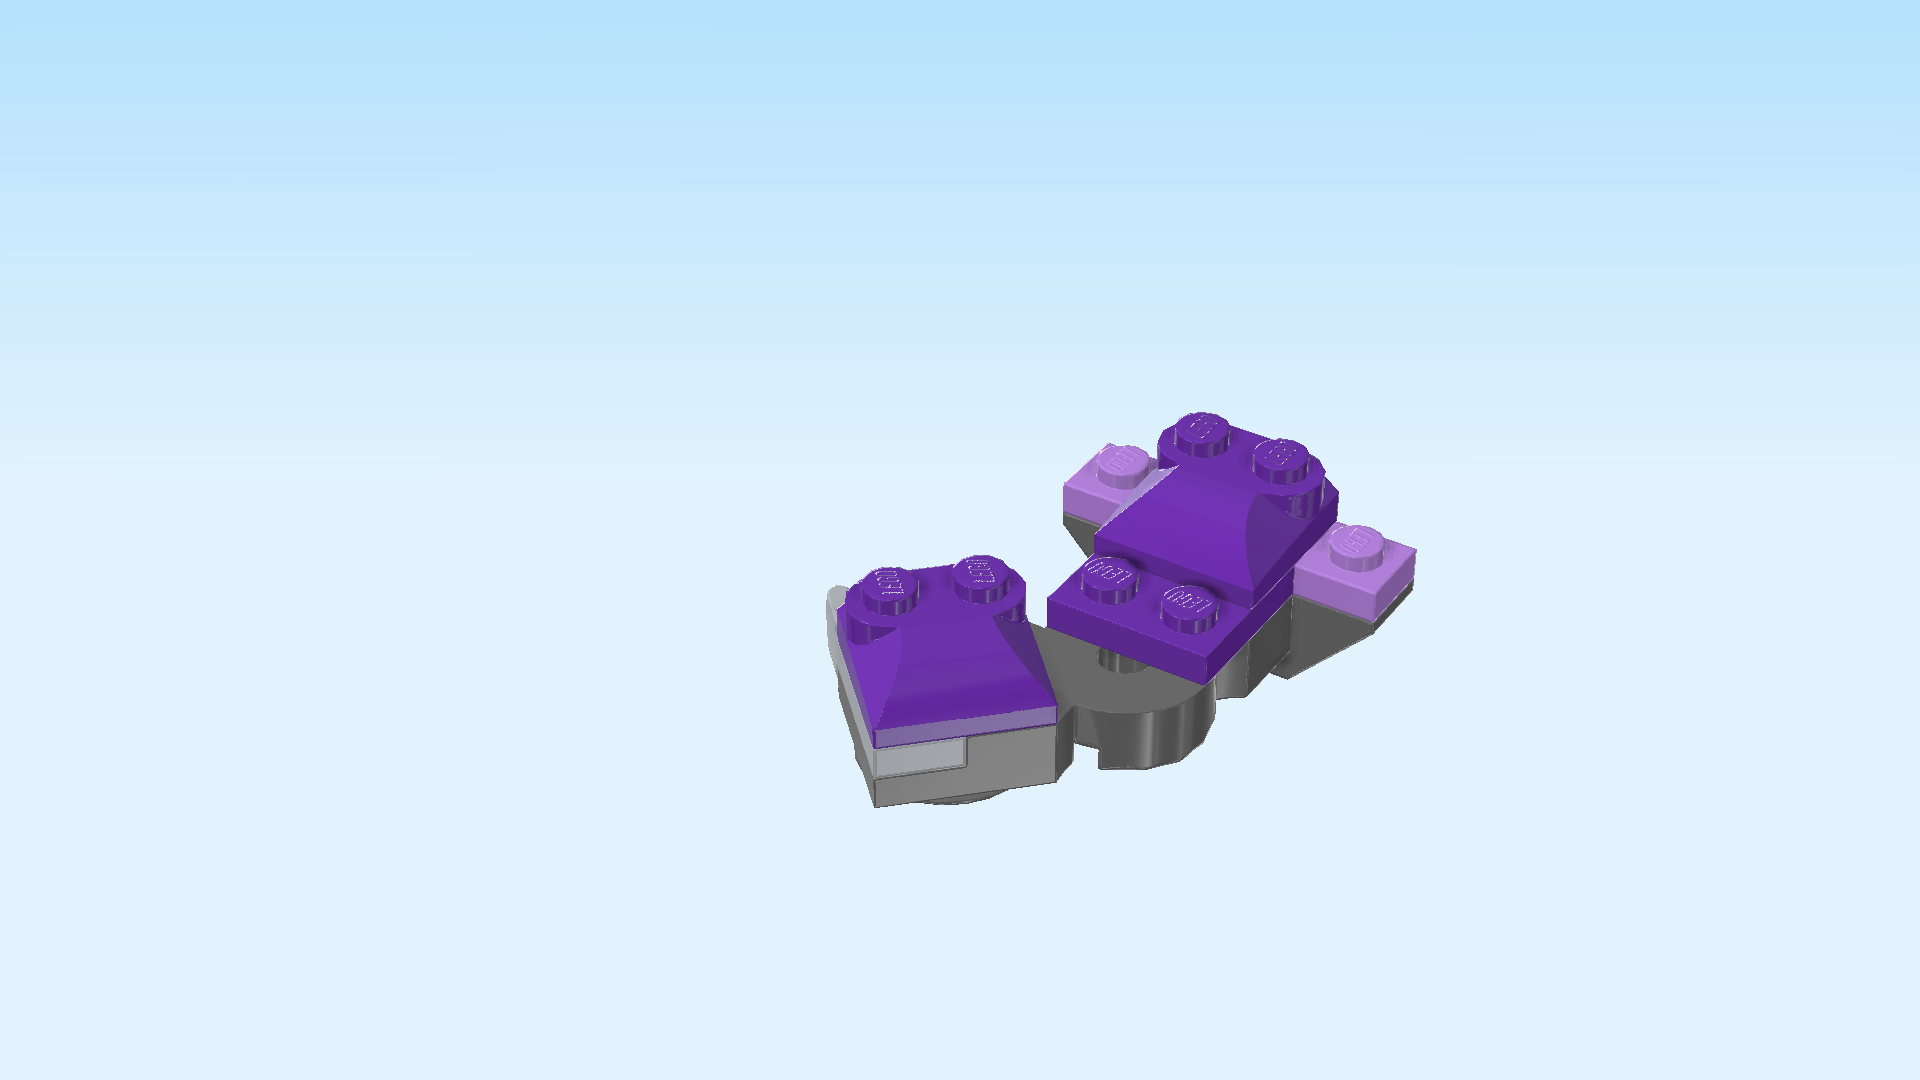
| Find 2 medium lilac curve plates 2x2 with 3 slopes and 2 knobs. |
| Put 1 on the 2x2 surface in the left half of the arm, curve to the front, 2 knobs forming a row at the back. |
| Put the other one centered on the rightmost edge of the arm, curve to the left, knobs forming a column on the right edge. |
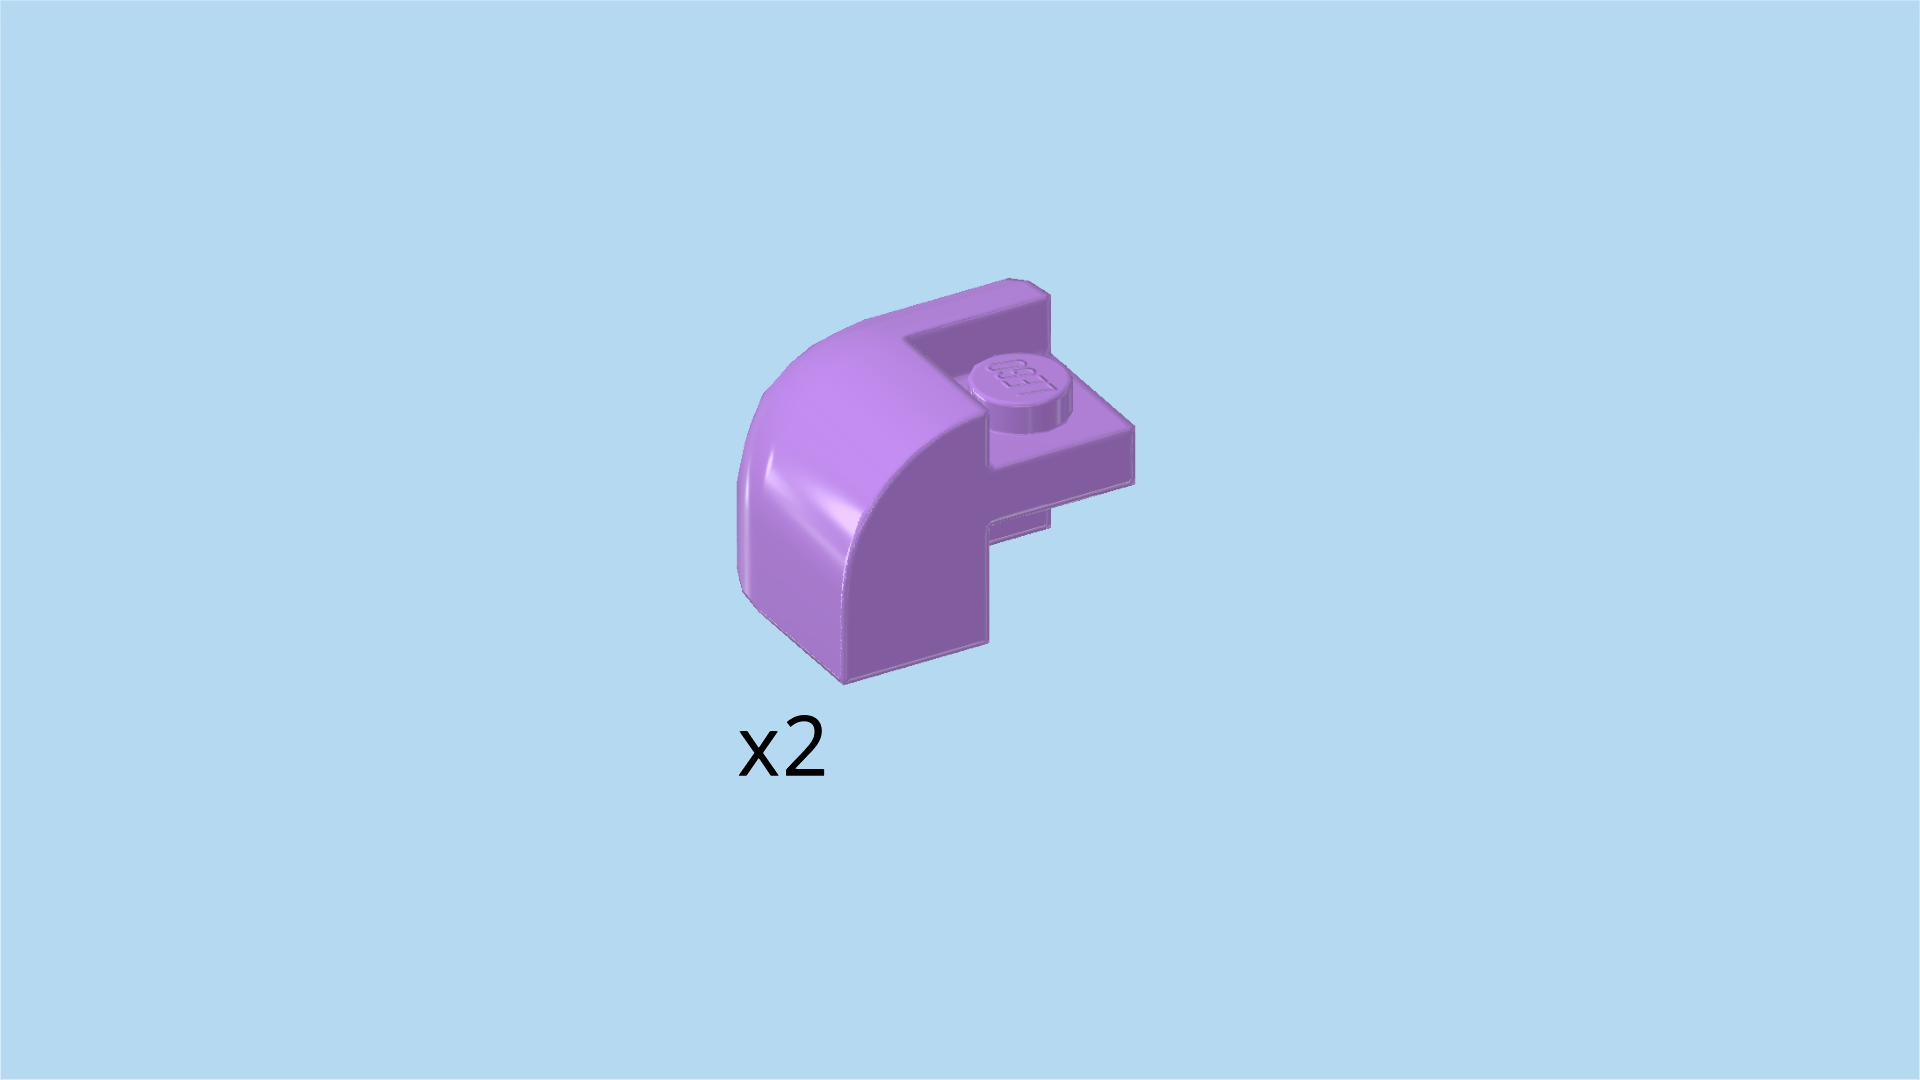
| Find 2 lavender curved corner pieces 2x2x1⅓ with lowered knob. |
| Put 1 around the back knob of the previous piece, its knob to the front left. |
| Put the other one in front of the previous piece around the front corner, knob to the back left. |
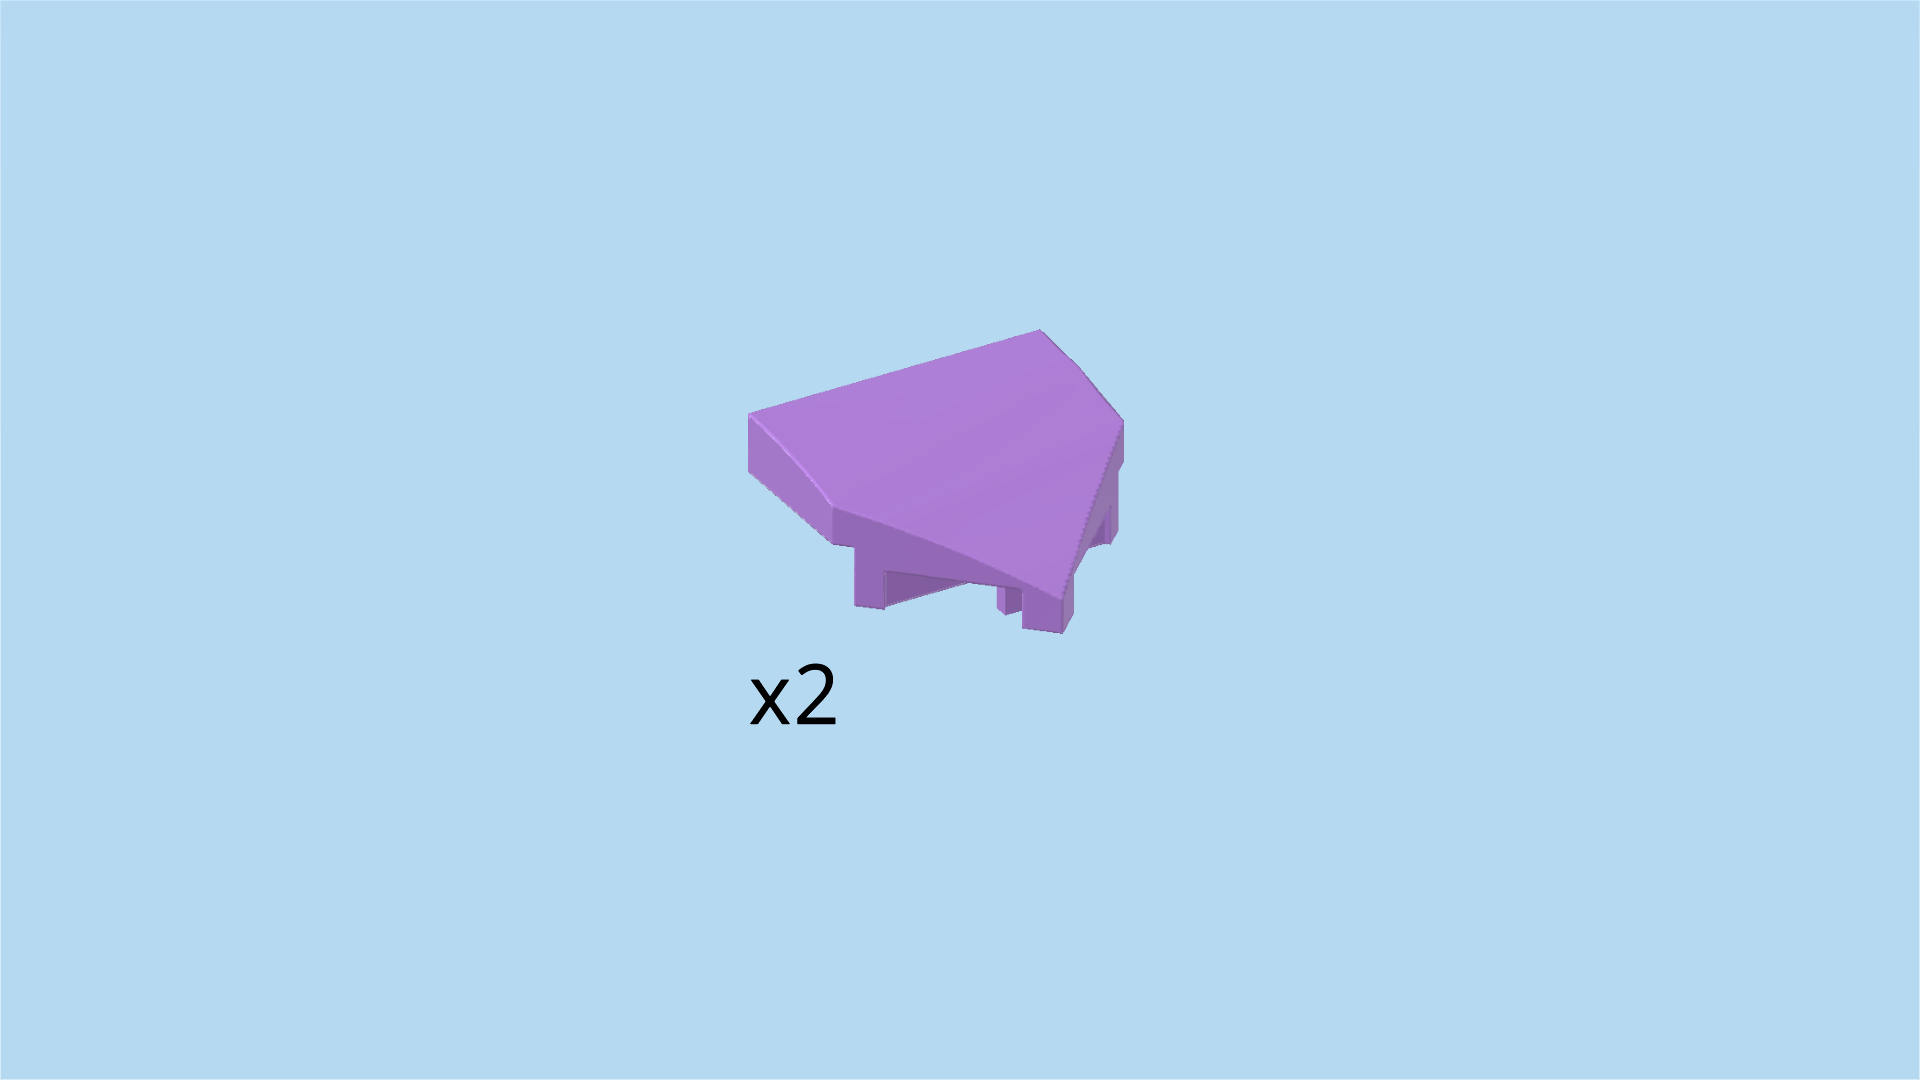
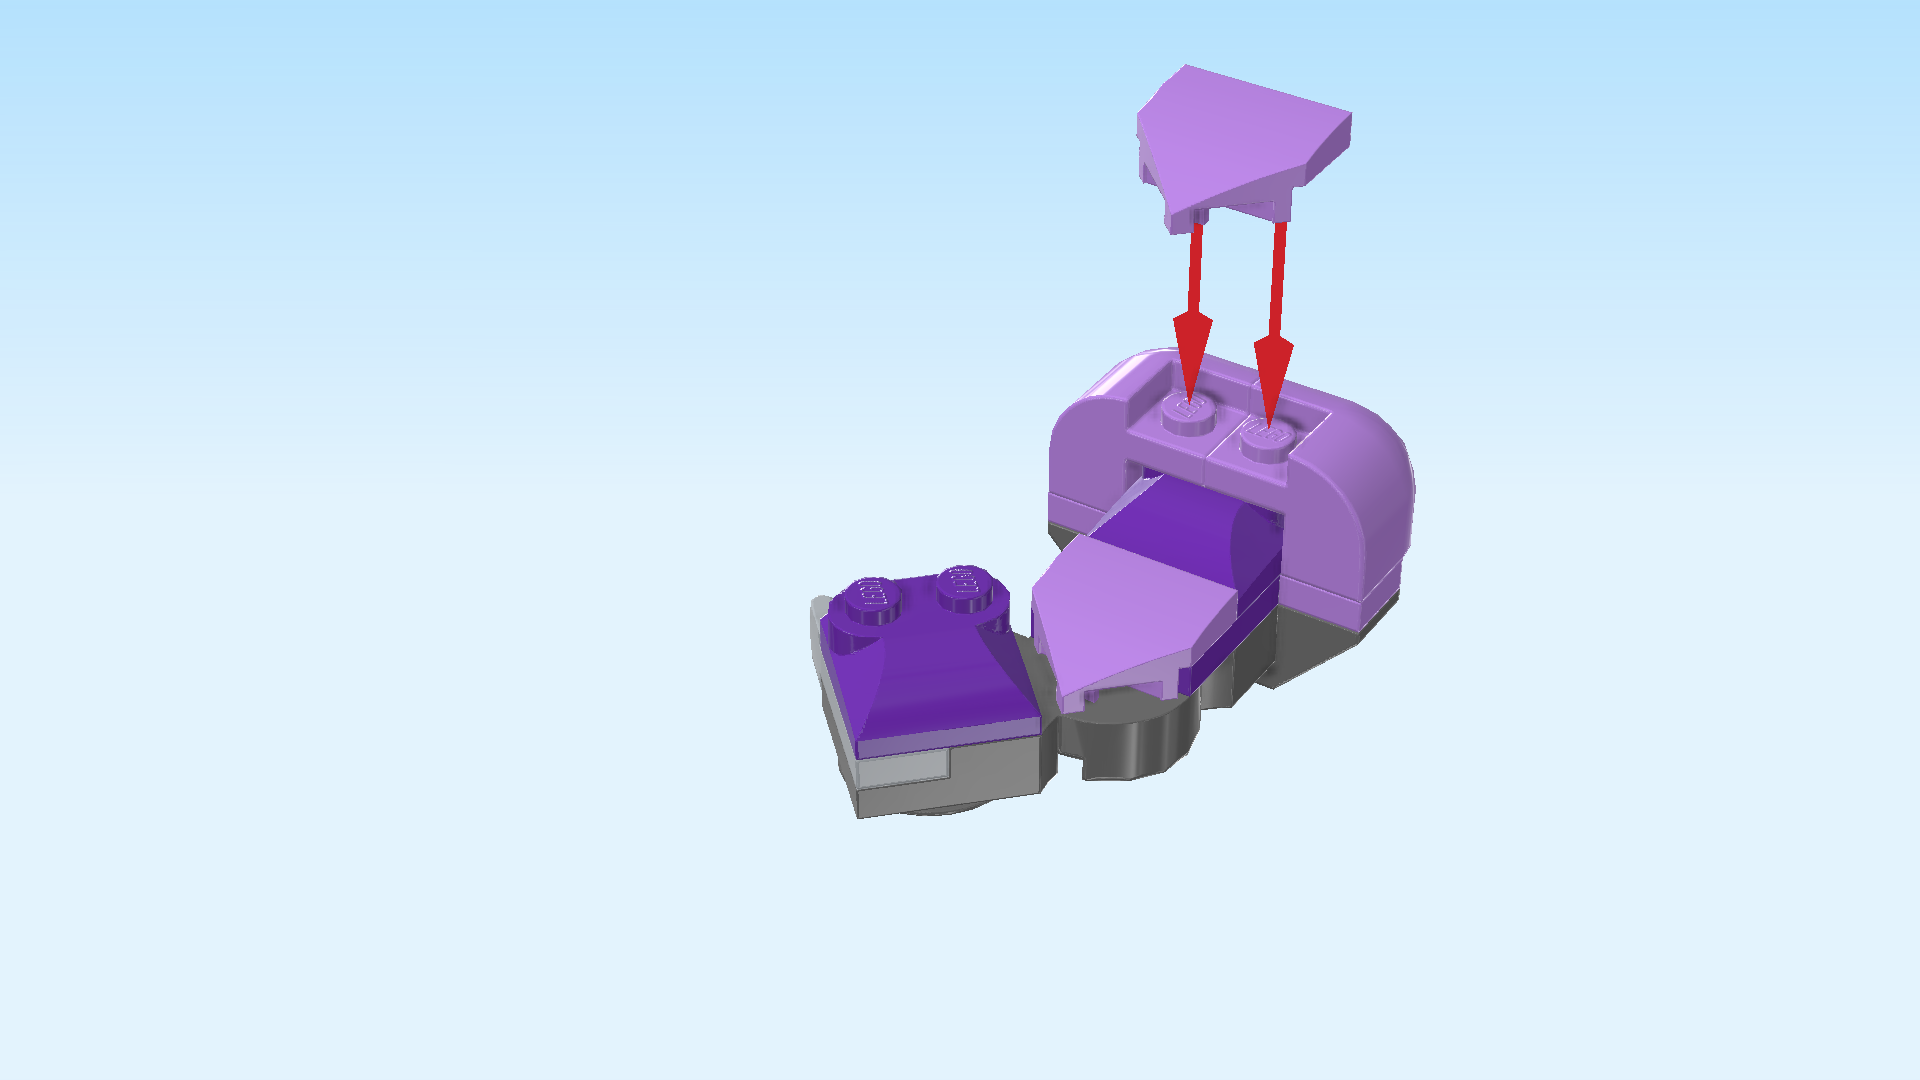
| Find 2 lavender curve tiles 2x2 with arrow-shaped side. |
| Put 1 on the 2 knobs of the 2 previous pieces, arrow-shaped end to the left. |
| Put the other one on the 2 remaining knobs of the arm build, arrow-shaped end to the left. |
| The second arm is finished! Well done! Snap the ball cup covered by the curved corner pieces on the right ball of the mech cockpit. |
| Next, we will assemble the Infinity Gauntlet. |
| Collect the following 7 pieces: |
| 1 warm gold gauntlet, |
| and 6 Infinity Stones, 1 from every color. |
| Put the gauntlet on the table, side with 4 holes facing you. |
| Insert the 6 Infinity Stones into the 6 holes. You can either pick your own order, or you can continue with the instructions to hear how we arranged the colors. |
| Put the orange stone in the top left hole of the front surface. |
| Put the red stone to the right of the previous piece. |
| Put the blue stone to the right of the previous piece. |
| Put the yellow stone below the 3 previous pieces. |
| Put the bright bluish violet stone in the top hole on the right side. |
| Finally, put the green stone in the hole below the previous piece. |
| Find 1 black connector peg 1m with ball. |
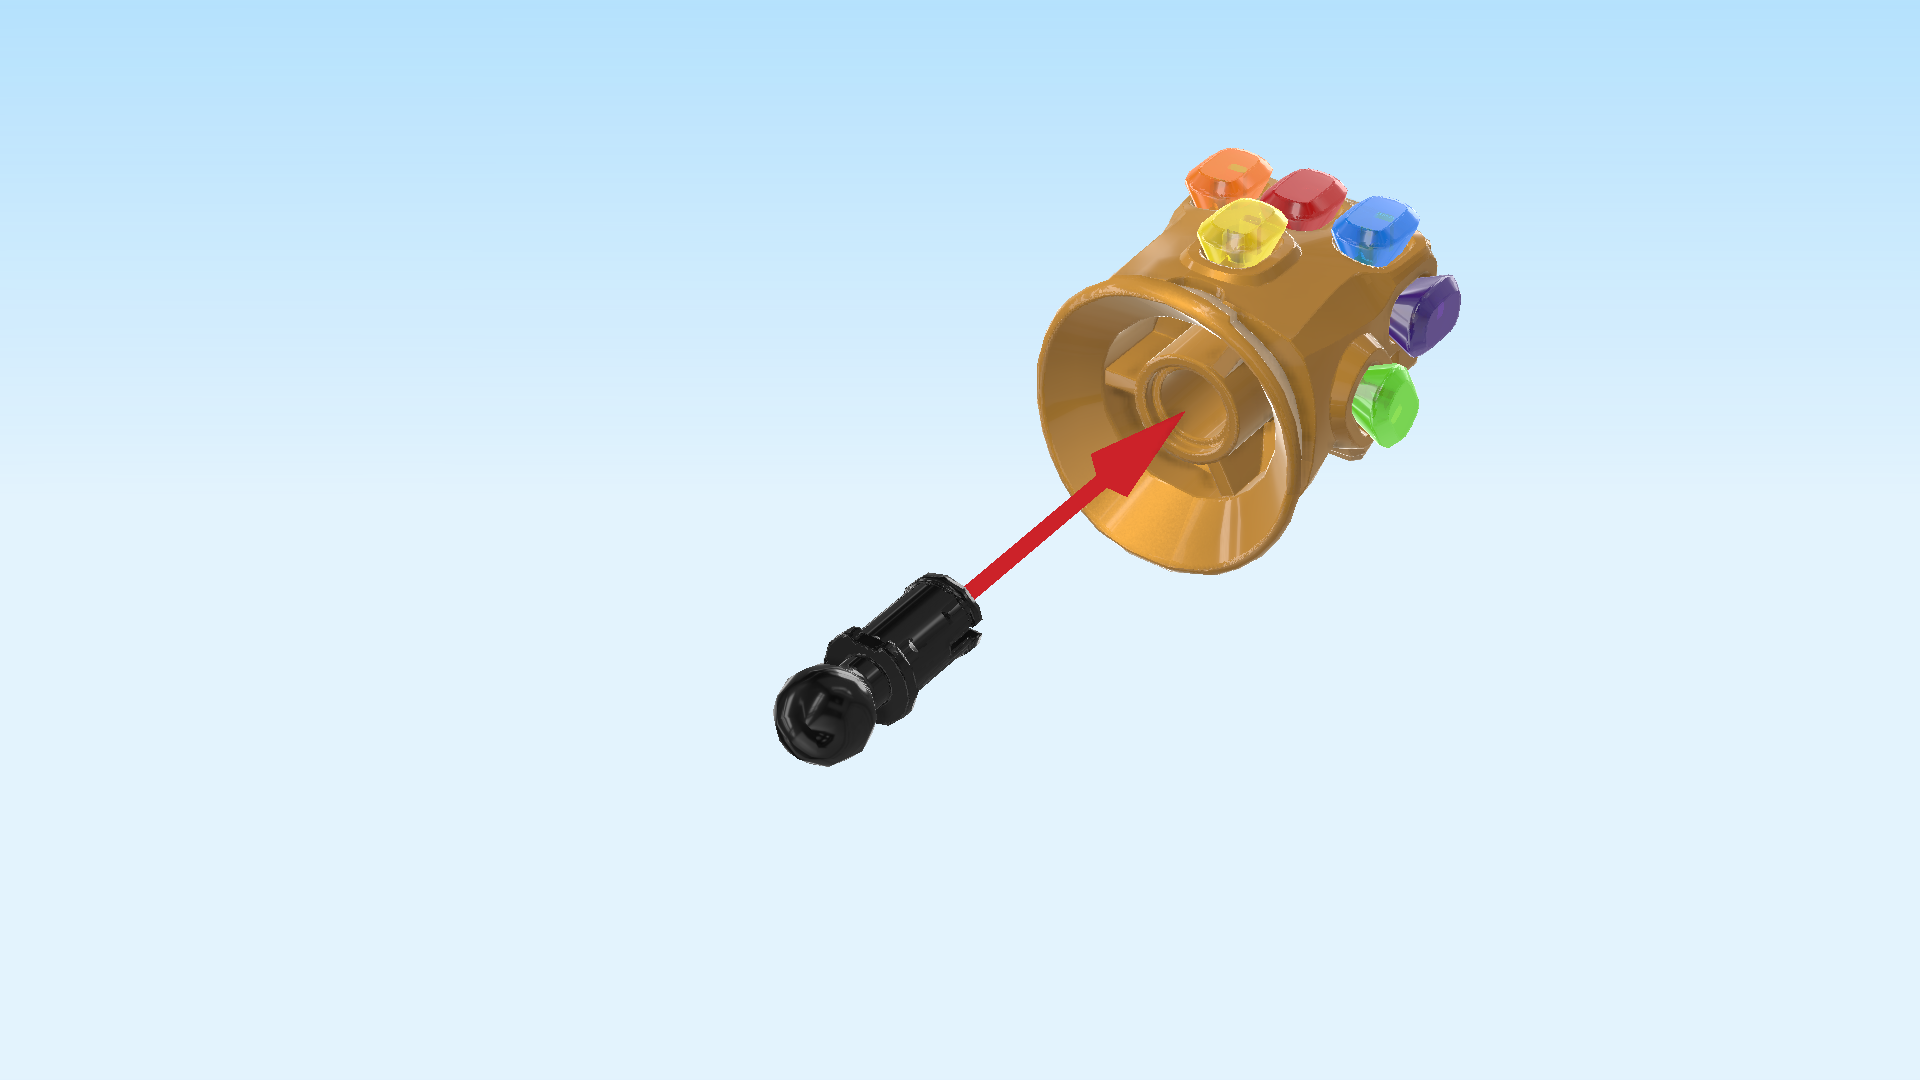
| Insert the connector peg from below into the bottom hole of the Infinity Gauntlet. |
| The Infinity Gauntlet is finished! Great job! Snap its ball on the ball cup at the end of the second arm. |
| Next, we will build the double-sided sword. |
| Collect the following 2 pieces: |
| 1 dark stone grey cross axle extension 3m with middle bushing, |
| and 1 silver metallic large sword with side handle. |
| Hold the cross axle extension horizontally, middle hole running from front to back. |
| Hold the blade horizontally and flat, 3 knobs to the back, cross axle to the left, and insert the cross axle from the right into the right cross hole. |
| Collect the following 2 pieces: |
| 1 black connector peg 2m with middle ring, |
| and 1 silver metallic large sword with side handle. |
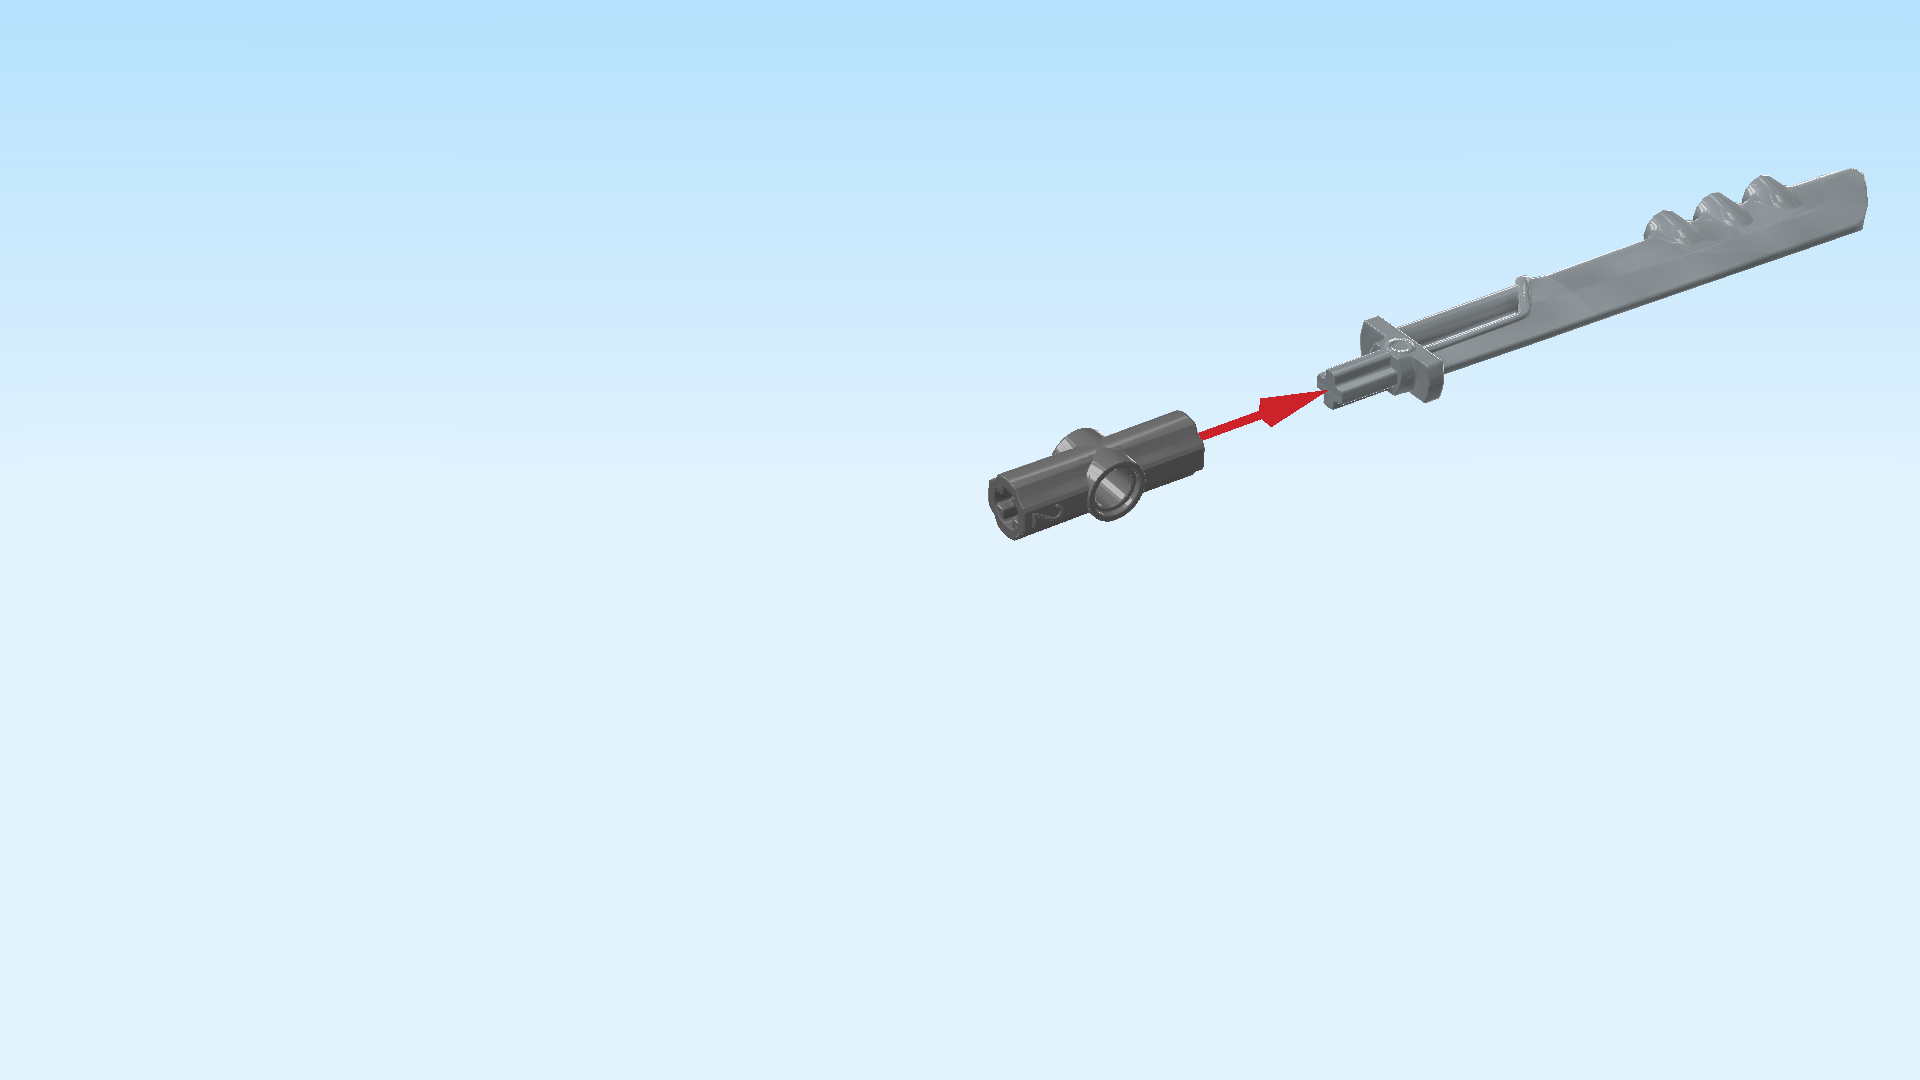
| Hold the blade horizontally and flat, 3 knobs towards you, cross axle to the right, and insert the cross axle from the left into the cross axle extension. |
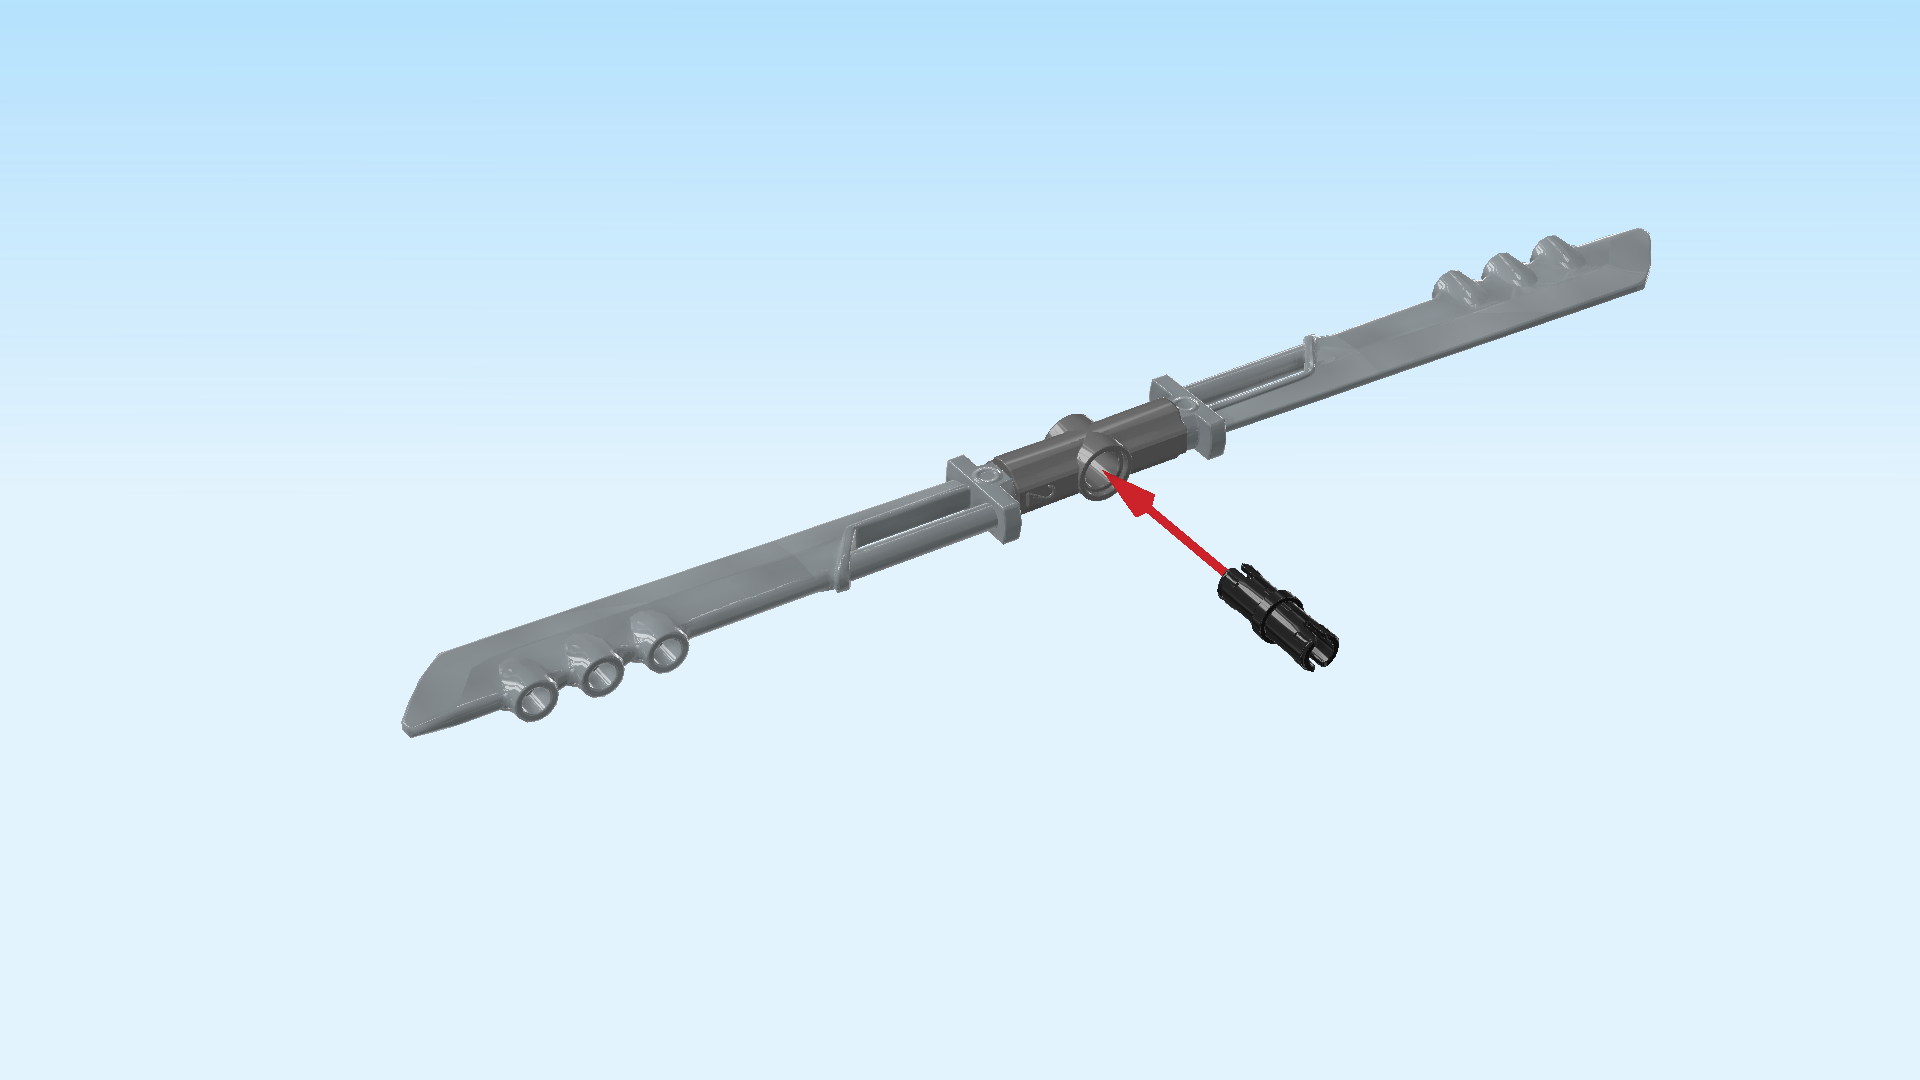
| Insert the connector peg from the front into the middle hole of the cross axle extension. |
| The double-sided sword is finished! Well done! Insert its connector peg into the tube below the claw fingers on the left arm. You might have to adjust the fingers to be able to access the tube. |
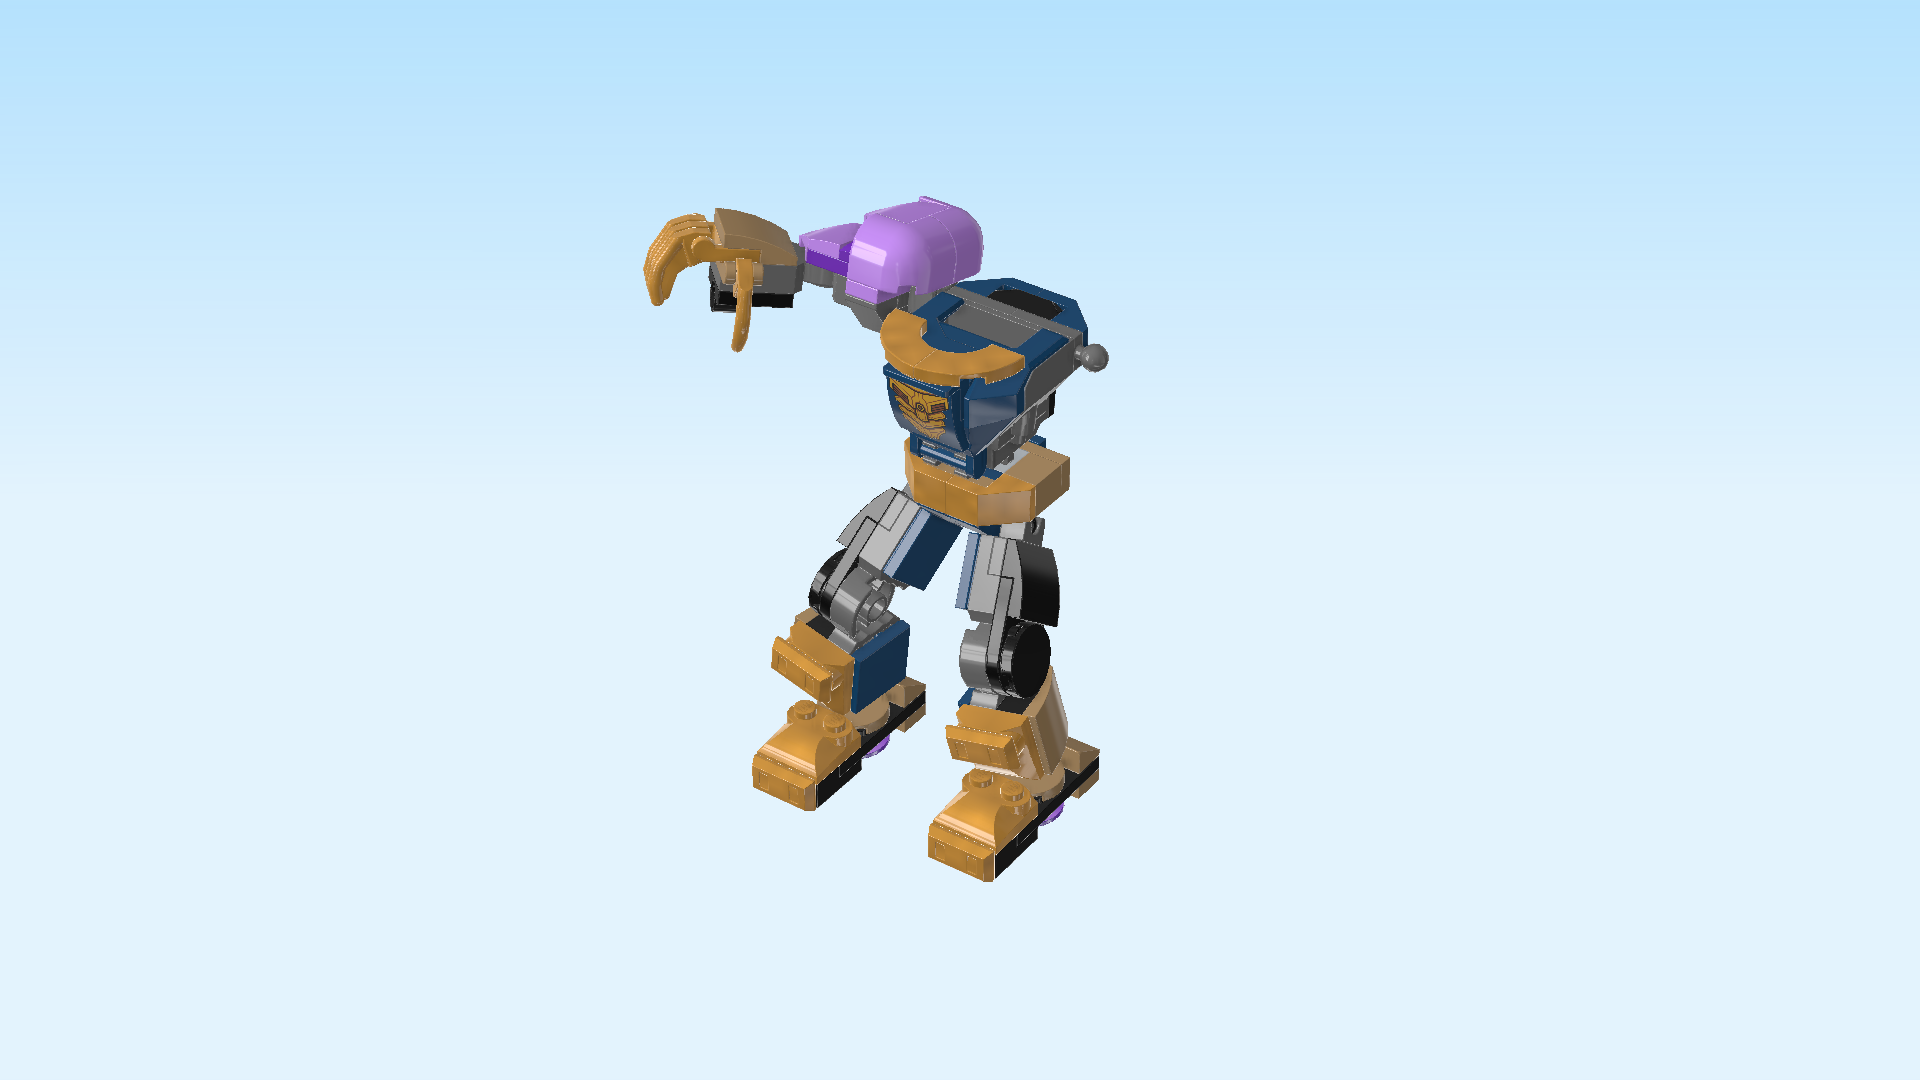
| Thanos' mech is finished! Fantastic job! It is time for Thanos to mount his mech. Open the chest plate of the cockpit and seat Thanos on the 4 knobs of the cockpit. Close the chest plate again. Try and adjust the legs and arms of the mech to find different poses. The legs, arms and hips are quite flexible, so Thanos has a lot of fighting room in his mech. |
| You have finished building the entire set! Very well done! The time has come for Thanos' evil plans. Thanks to the powerful Infinity Gauntlet, he might very well be unstoppable! |
| Enjoy! |