LEGO 75265 T-16 Skyhopper 

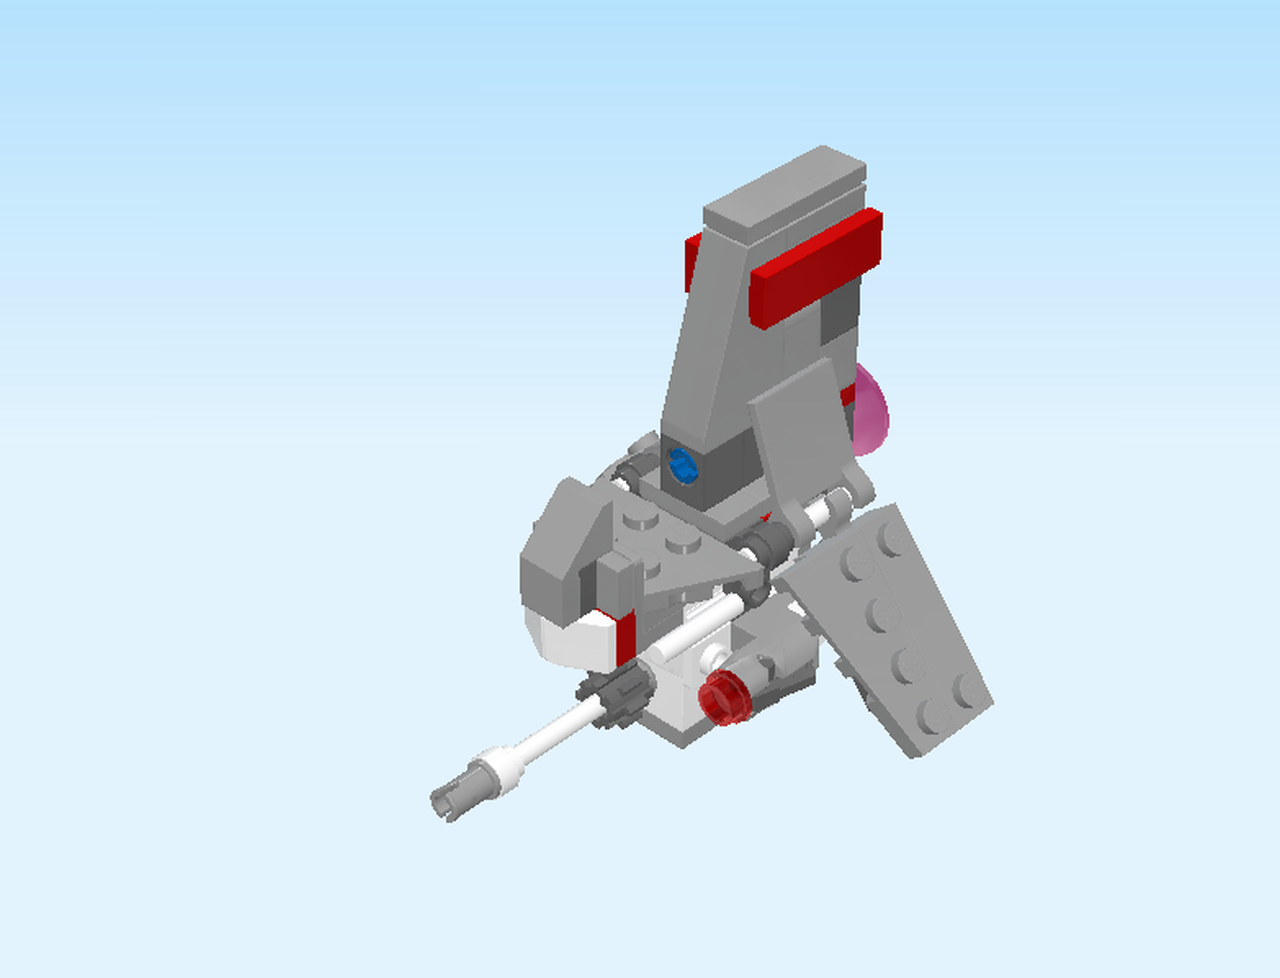
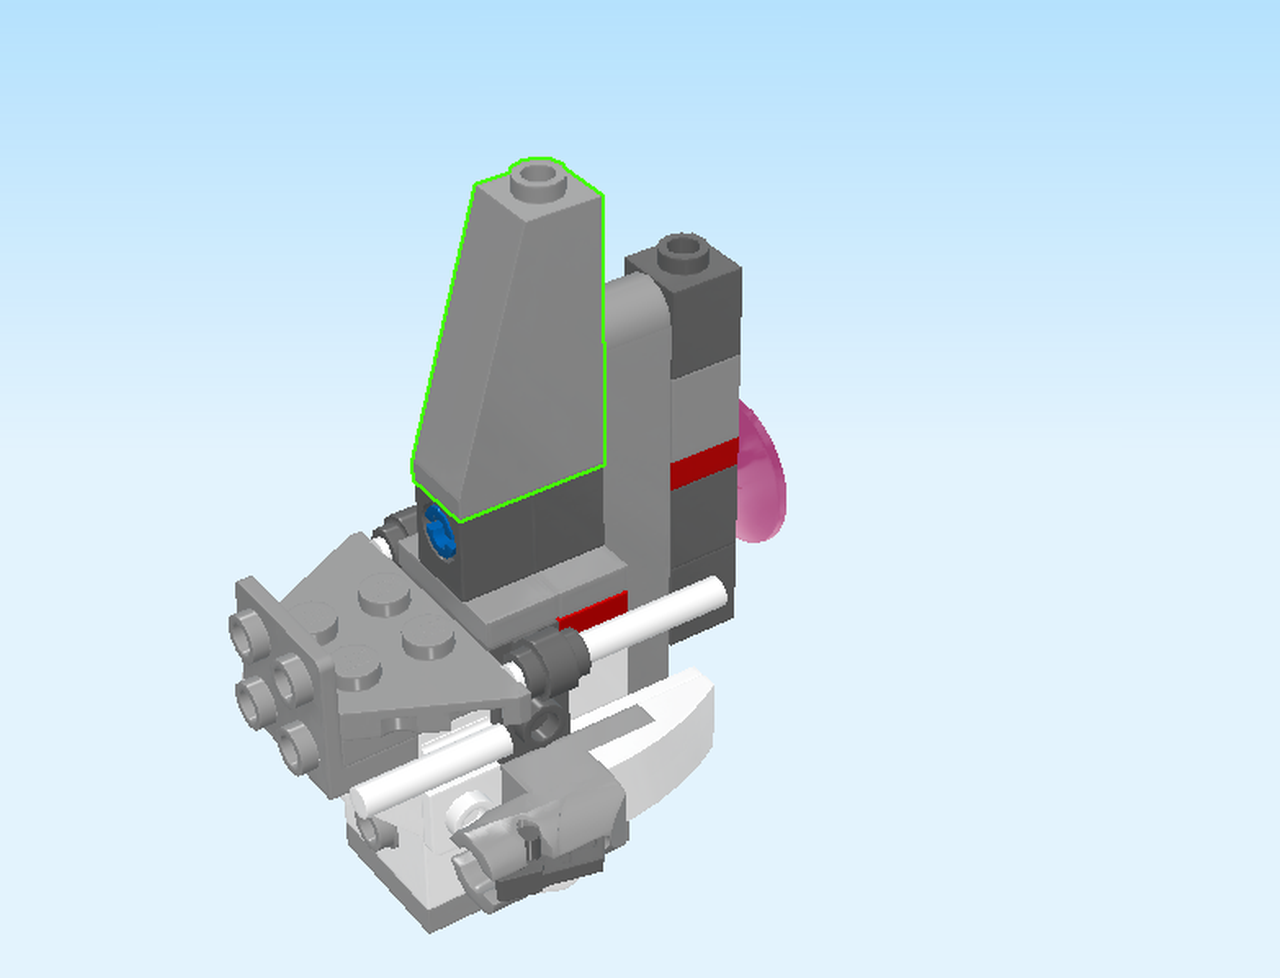
LEGO Audio & Braille Building Instructions for the LEGO Star Wars set "T-16 Skyhopper".

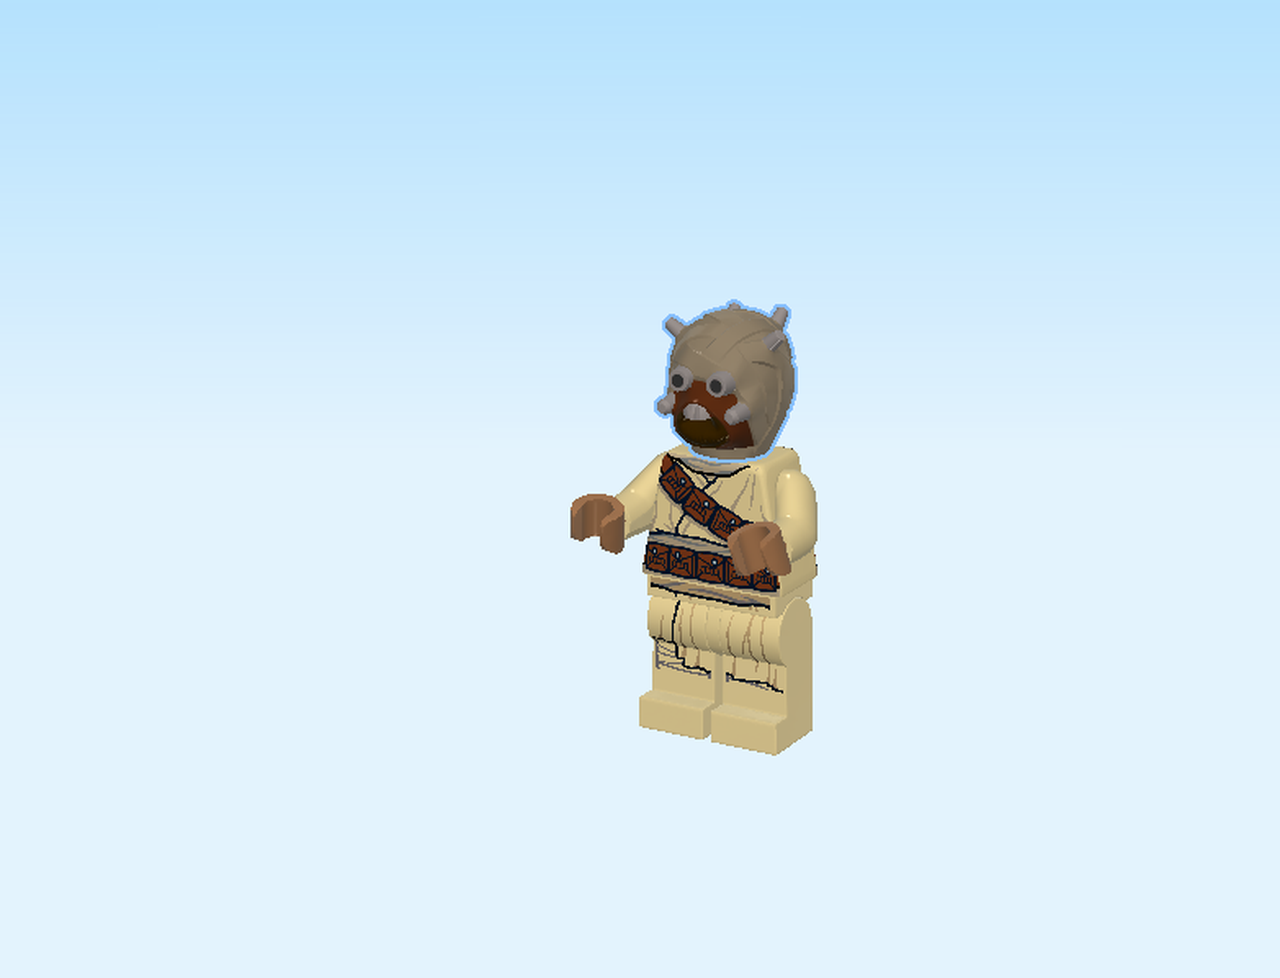
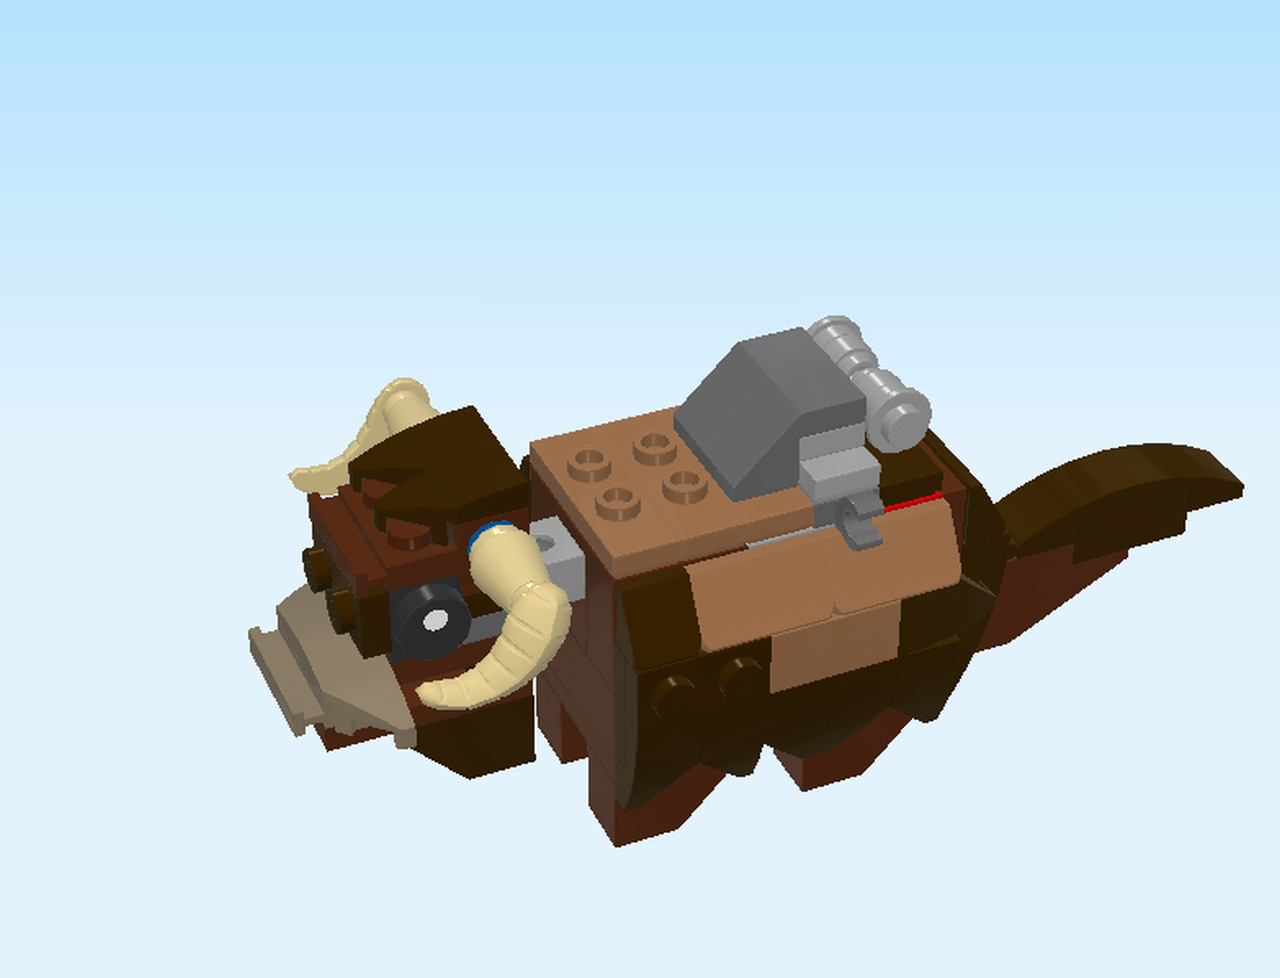
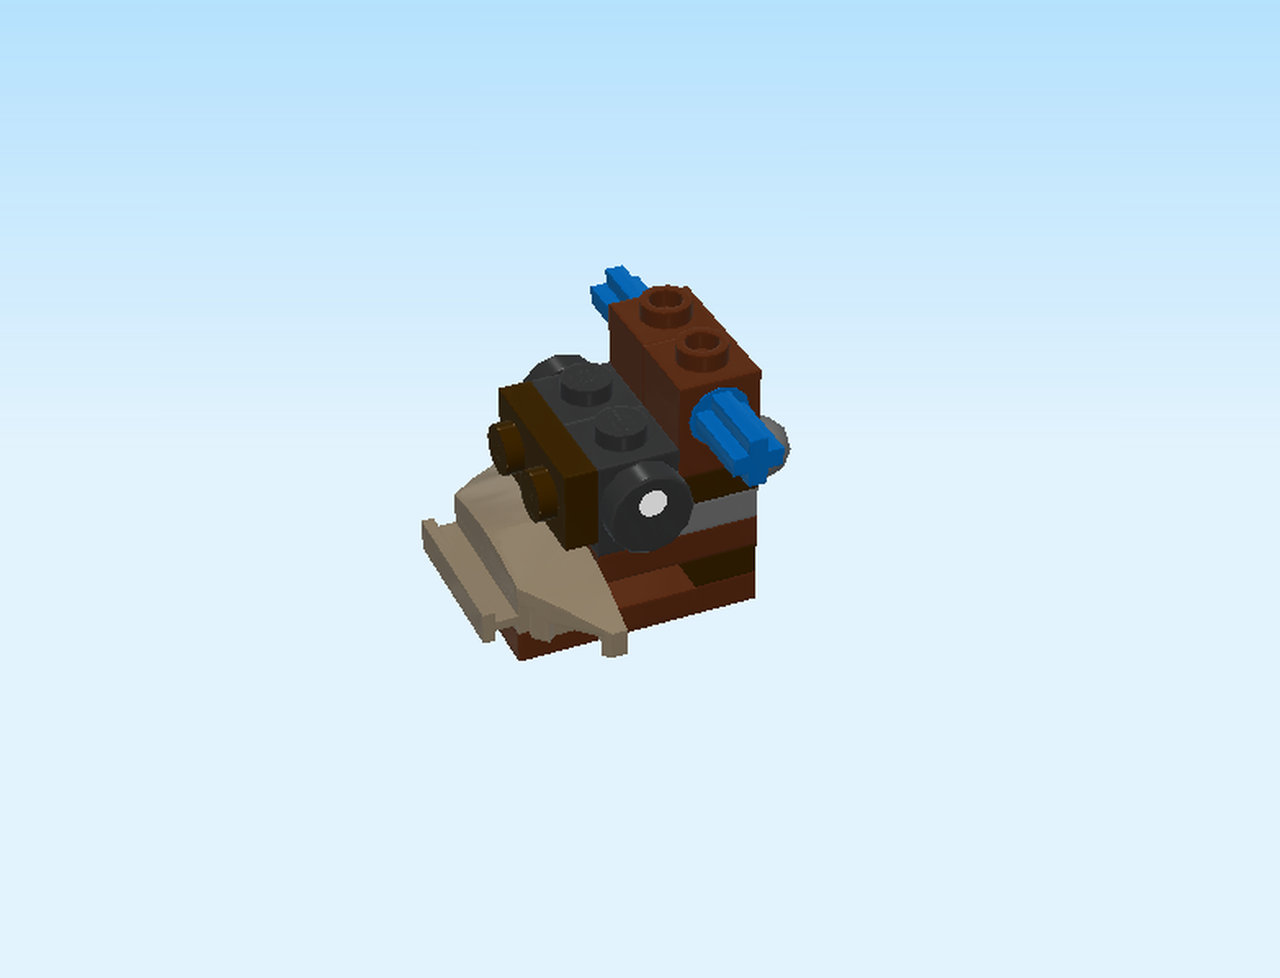
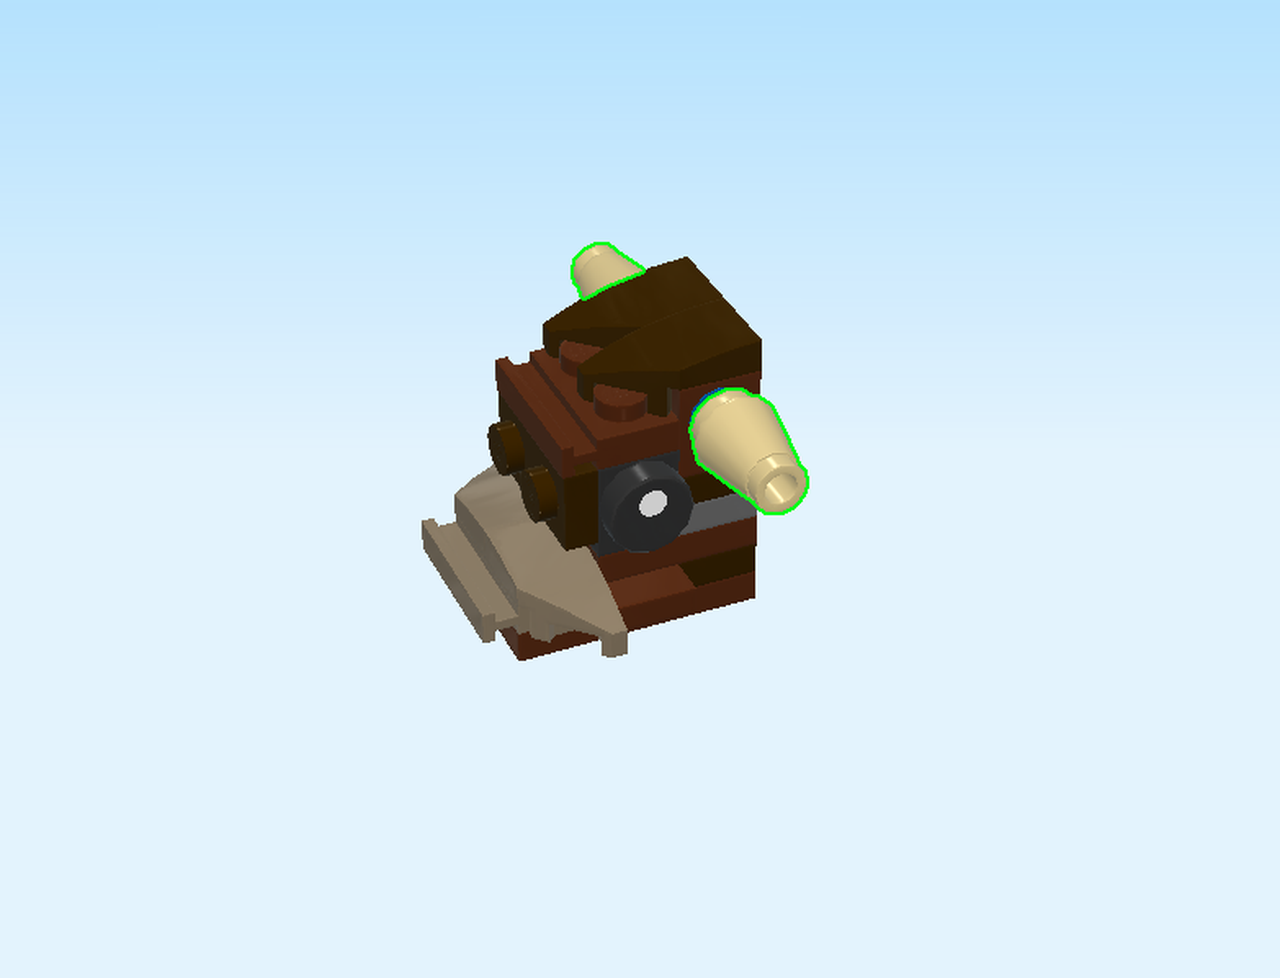
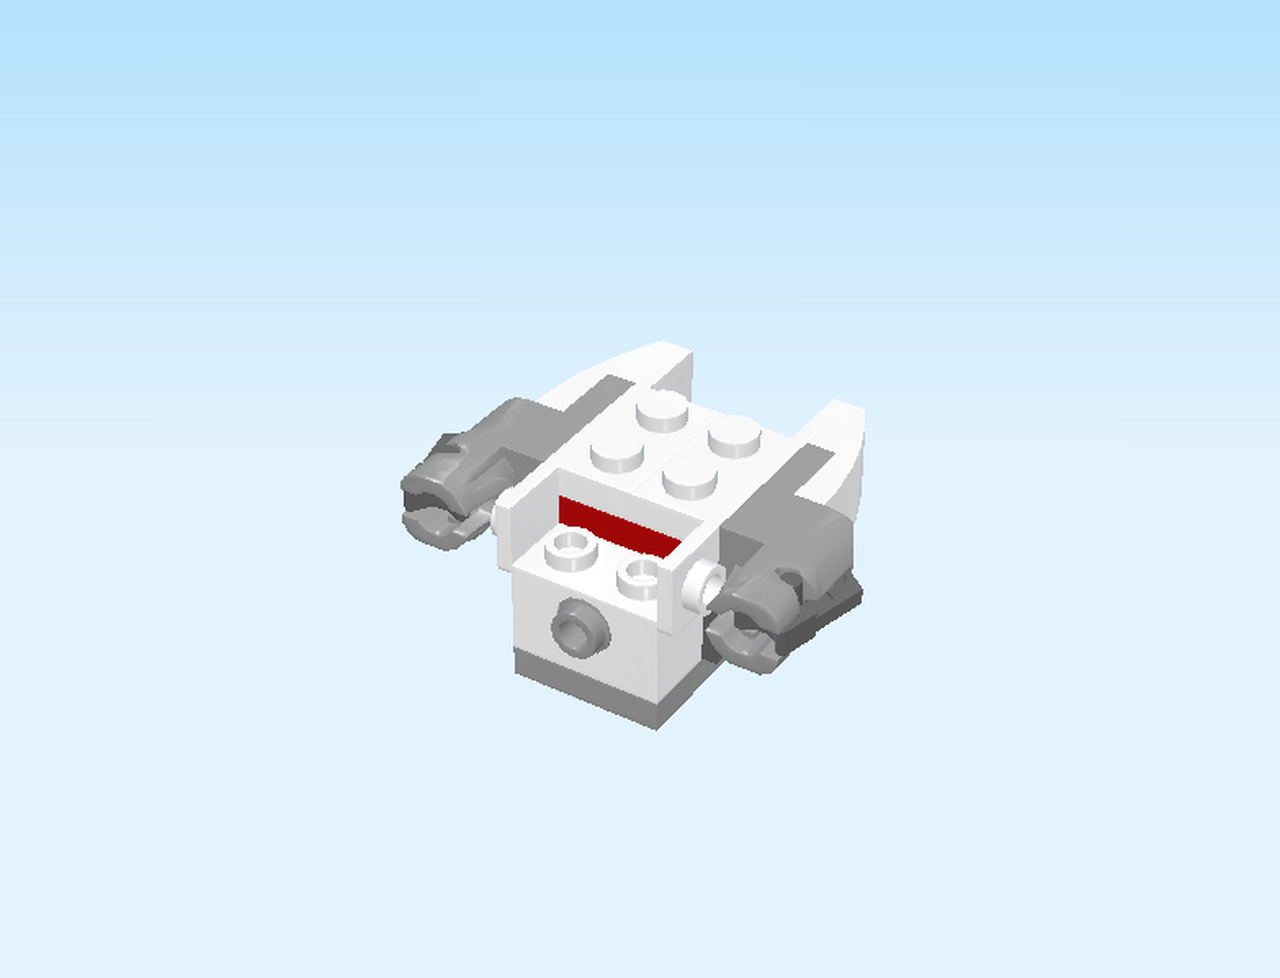
From Star Wars: a New Hope. Here is the mighty Bantha with the Tusken Raider and the T-16 Skyhopper with pilot.

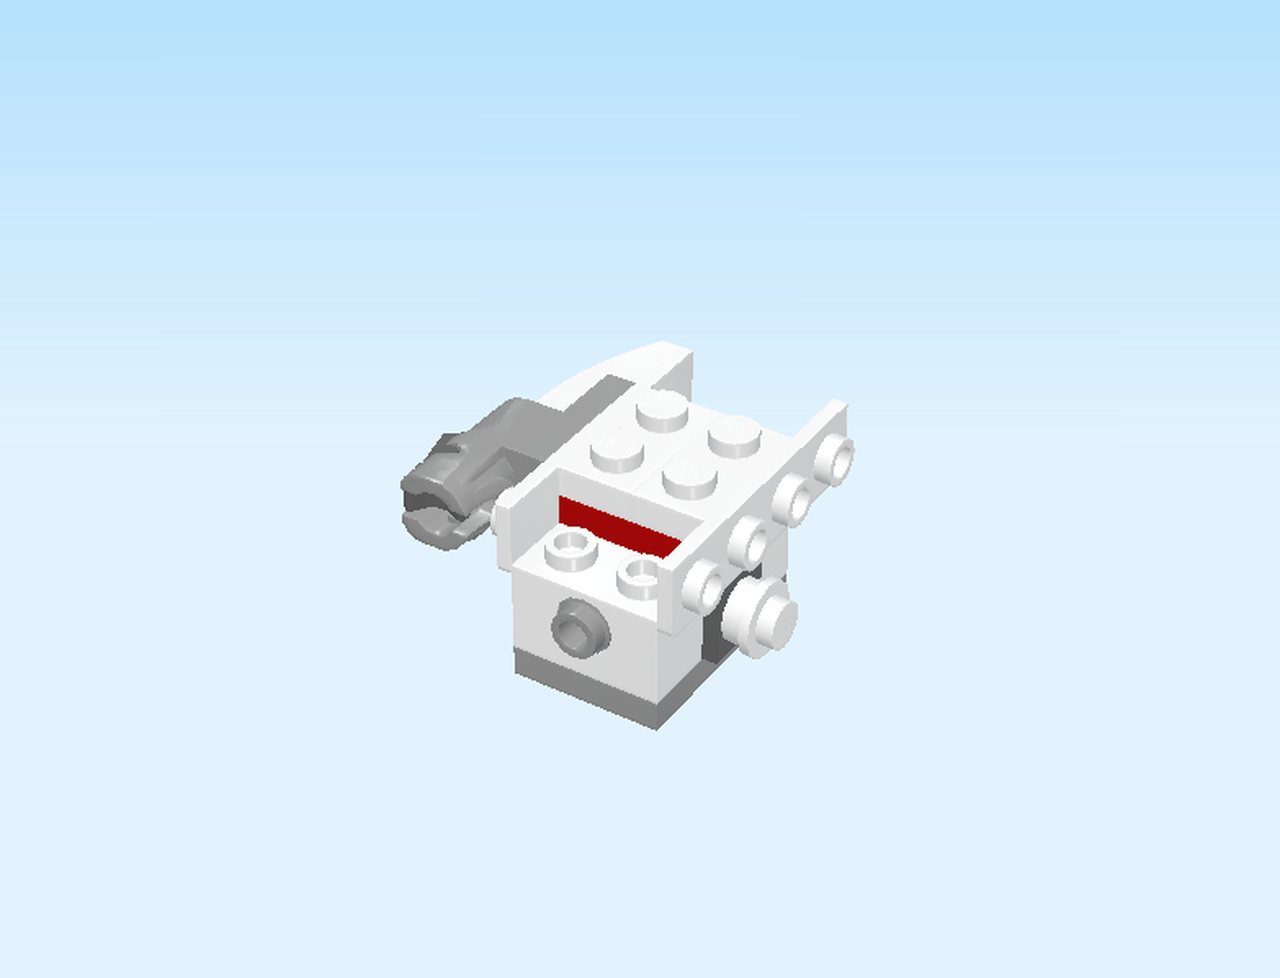
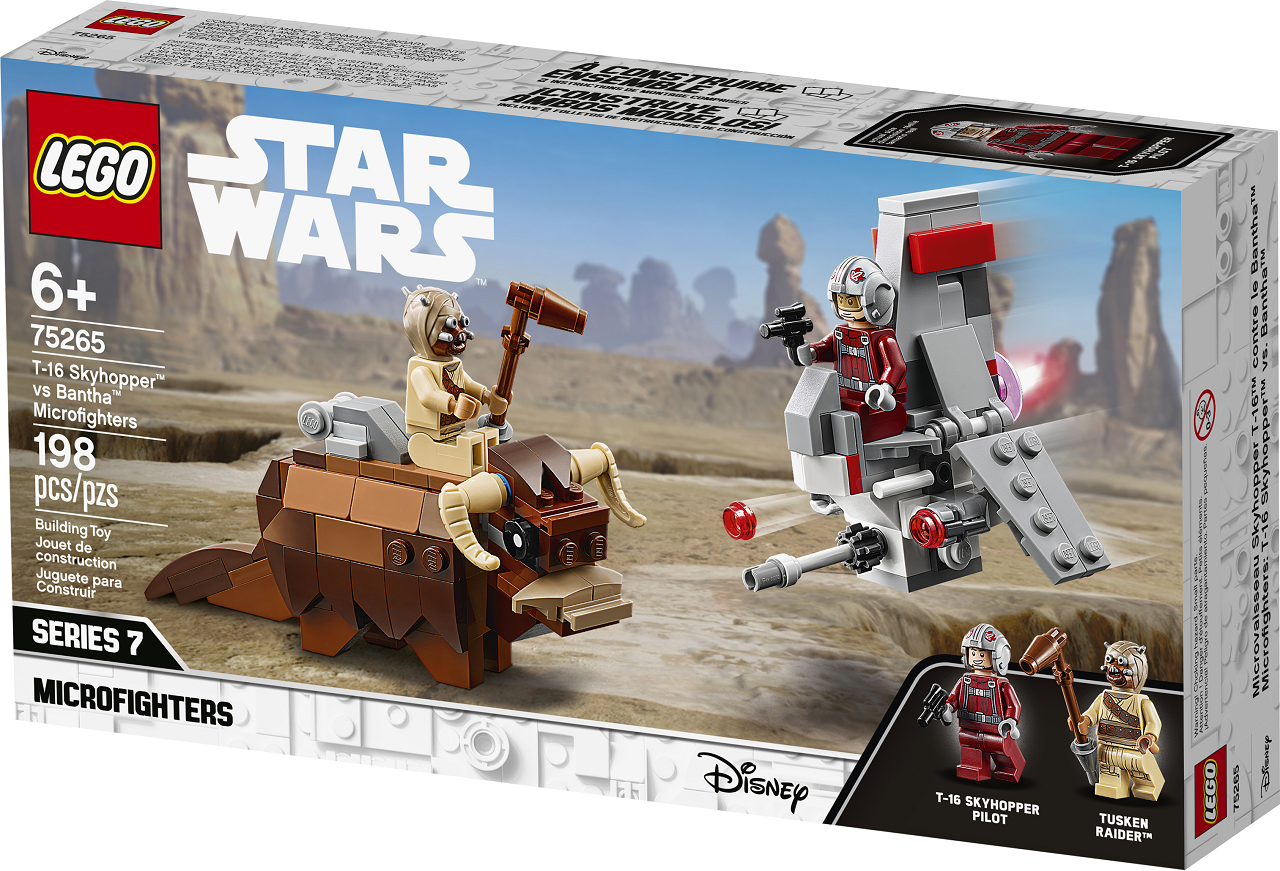
On the box cover the T-16 Skyhopper and the Bantha Microfighters are dueling in the Tatooine desert.

Open the box. This can be tricky; ask someone to help you!

The box contains a booklet with visual building instructions and 2 bags. Ask a sighted person to help you find the correct bag!

Open bag 1, but before you get started, ask a sighted person to sort the bricks by color. This way, you will be even faster in finding the correct piece!

First, we will build the Tusken Raider minifigure.

Find 1 pale ocher yellow pair of legs.

Place them on the table.

Find 1 light and medium nougat brown upper part of the body.

Stack it on top of the legs.

Find 1 mud grey and silver metallic Tusken Raider head.

Put the head on the body.

You have now built the Tusken Raider minifigure. Good job!

Now we will build a weapon for him, it's the Bantha Stick.

Find 1 reddish brown shaft, 3 knobs long.

Find 1 dark stone grey inverted cone 1x1 with shaft.

Insert the shaft into the knob of the cone.

Find 1 reddish brown t-shaft with 3 knobs.

Insert the other end of the weapon into the single knob of the t-shaft.

Find 1 reddish brown nose cone 1x1.

Put it on the previous piece on one of the sides.

The Bantha Stick is now done. Put it in the hand of your Tusken Raider minifigure.

Now, we will build the Bantha.

Find 1 reddish brown plate 2x3.

Place it vertically on the table.

Find 1 reddish brown brick 1x3.

Put it vertically on the right column of the previous piece.

Find 1 reddish brown brick 2x3.

Put it vertically to the left of the previous piece, one column overhanging to the left.

Find 1 reddish brown plate 2x3.

Put it vertically underneath the previous piece

Now we have built the first section. Put it aside, we will return to it in a moment.

Find 1 reddish brown plate 1x3.

Put it vertically on the table.

Find 1 reddish brown plate 2x3.

Put it vertically on the previous piece, one row overhanging to the right.

Mount this part vertically on the left lower column of the structure.

Find 1 black plate 1x2 with shaft on short end.

Put it horizontally in the middle of the lower section on the left, shaft overhanging to the left.

Find 2 medium nougat brown plates 1x2.

Put 1 horizontally in front of the previous piece.

Repeat symmetrically at the back.

Find 1 reddish brown plate 2x3.

Put it vertically on top of the previous pieces. The top of the structure is now 3x5 knobs.

Find 1 pale ocher yellow brick 1x4.

Put it horizontally on the middle row, starting from the left.

Find 1 reddish brown brick 1x1 with hole.

Put it to the right of the previous piece, hole to the front.

Find 1 reddish brown plate 1x3.

Put it horizontally on the middle row, starting from the left.

Find 1 medium stone grey plate 1x2 with ball cup on short end.

Put it horizontally to the right, ball cup overhanging to the right.

Find 1 reddish brown plate 1x3.

Put it horizontally on the middle row, starting from the right.

Find 1 medium nougat brown plate 1x2.

Put it horizontally to the left of the previous piece.

Find 2 bright red bricks 1x1x2 with 2 side knobs.

Put 1 on the front row on the leftmost knob, side knobs to the left.

Repeat symmetrically at the back.

Find 2 medium stone grey bricks 1x2x2 with 4 side knobs.

Put one to the right of the previous piece, side knobs to the back.

Repeat symmetrically at the front

Find 4 reddish brown bricks 1x1x2 with 2 side knobs.

Put 2 to the right of the previous piece, side knobs to the front.

Repeat symmetrically at the back.

Now flip the structure upside down, ball cup still on the right.

Find 1 reddish brown inverted roof tile 1x2.

Careful, this piece has a special orientation!

Flip it upside down, slope to the right.

Put it horizontally on the back left corner of the structure, slope to the right.

Find 3 reddish brown inverted roof tiles 1x2.

Careful: these pieces have a slightly different orientation than the previous roof tile! Flip them upside down.

Put 1 horizontally on the front left corner of the structure, slope to the left.

Put 1 horizontally on the front right corner of the structure, slope to the left.

Put 1 horizontally on the back right corner of the structure, slope to the left.

Now flip the structure right side up again, so that it can stand on its new legs!

Great job

Now, we will build the buttocks of the Bantha.

Find 1 reddish brown plate 2x3.

Put it vertically on the table.

Find 1 dark brown curved tile 1x3x⅓.

Put it horizontally on the backmost knob on the right, curve overhanging to the right.

Find 1 dark brown roof smooth tile 1x1.

Put it in front of the previous piece, slope to the right.

Find 1 dark brown curved tile 1x3x⅓.

Put it horizontally in front of the previous piece, curve overhanging to the right.

Find 3 dark brown smooth roof tiles 1x1.

Put them on the left column, slopes to the left.

Now we will mount this part on the structure. This part can be hard, ask for help if needed.

Flip it upright so that the curved tiles point to the bottom.

Mount it on the left side of the structure. The shaft should fit between the curved tiles.

Now, we will build the Bantha's tail.

Find 1 reddish brown inverted roof tile 1x3.

Put it on the table, 3 knobs on top and slope to the left.

Find 1 reddish brown plate 2x1 with clasp on short end.

Put it horizontally on top starting from the right, clasp overhanging to the right.

We will need this structure again in a moment

Find 1 dark brown plate 1x2.

Put it horizontally on the table.

Find 1 dark brown plate 1x2.

Put it horizontally on top.

Find 1 dark brown tile 1x4 with bow.

Put it horizontally on top of the previous piece.

Now, mount this part horizontally on the top left so that it fits tightly. Make sure it overhangs to the left.

Find 1 dark brown smooth roof tile 1x1.

Put it on the knob on the right top of the structure, slope to the left.

Now we will mount this tail on the Bantha.

Snap the clasp of the tail onto the shaft on the left of the creature.

Now, we will build the side fur of the Bantha.

The side fur has a very detailed pattern because we will alternate right and left tiles. You can also choose your own patterns here if you like.

Find 1 mud grey plate 2x4.

Put it horizontally on the table.

Find 1 dark brown right tile 1x2 with bow and 45° cut.

Put it on the leftmost knob of the back row, overhanging to the left, cut-off corner to the back.

Find 1 medium nougat brown flat tile 1x2.

Put it horizontally to the right of the previous piece.

Find 1 dark brown plate 1x2.

Put it to the right, one knob overhanging to the right.

Find 1 dark brown plate 1x2.

Careful, this next step can be hard. Ask for help of needed.

Put it vertically underneath on the right side, overhanging knob engaging at the back.

Collect the following 5 pieces:

3 dark brown right tiles 1x2 with bow and 45° cut,

and 2 dark brown left tiles 1x2 with bow and 45° cut.

Placing these pieces can be tricky. The important thing is that all the bows are overhanging to the front. The order can be up to you.

Put 1 of the left tiles on the front row on the left edge of the structure, cut-off corner on the right.

Put 1 right tile to the right of the previous piece, cut-off corner on the left.

Continue with another right tile to the right, cut-off corner on the left.

Continue with a left tile to the right, cut-off-corner on the right.

Lastly, put the remaining right tile to the right, cut-off corner on the left.

You have now finished the side fur. Good job!

Now we will mount it on the Bantha.

First, turn the Bantha so that its tail is on the left side, and the side body of the Bantha is facing you. Careful: we will be building on the front side surface, not on the top surface of the Bantha

Now, flip the side fur part upright and make sure the straight edge is at the top.

Mount it on the second row from the top on the front side surface of the structure.

Find 2 medium nougat brown smooth roof tiles 1x2.

Mount them on the top row of the front side surface, slopes to the top. Start from the left.

Find 1 dark brown smooth roof tile 1x1.

Put it to the right of the previous pieces, slope to the top.

Now, turn the Bantha left to right. The tail is on the right side now.

Find 2 medium nougat smooth roof tiles 1x2.

Mount them on the top row of the front side surface, slopes to the top. Start from the right

Find 1 dark brown smooth roof tile 1x1.

Put it to the left of the previous pieces, slope to the top.

Now, we will build the side fur for the other side.

Find 1 mud grey plate 2x4.

Put it horizontally on the table.

Find 1 dark brown left tile 1x2 with bow and 45° cut.

Put it on the rightmost knob at the back, overhanging to the right, cut-off corner to the back.

Find 1 medium nougat brown flat tile 1x2.

Put it horizontally to the left of the previous piece.

Find 1 dark brown plate 1x2.

Put it to the left, one knob overhanging to the left.

Find 1 dark brown plate 1x2.

Put it vertically underneath on the left side, overhanging knob engaging at the back.

Collect the following 5 pieces:

3 dark brown right tiles 1x2 with bow and 45° cut,

and 2 dark brown left tiles 1x2 with bow and 45° cut.

Placing these pieces can be tricky. The important thing is that all the bows are overhanging to the front. The order can be up to you.

Put 1 of the left tiles on the front row on the left edge of the structure, cut-off corner on the right.

Put 1 right tile to the right of the previous piece, cut-off corner on the left.

Continue with another right tile to the right, cut-off corner on the left.

Continue with a left tile to the right, cut-off-corner on the right.

Lastly, put the remaining right tile to the right, cut-off corner on the left.

You have now finished the side fur. Good job!

We will now mount it on the Bantha.

Flip the side fur part upright and make sure the straight edge is at the top.

Mount it on the second row on the front side surface.

Find 1 dark stone grey plate 1x1 with side clasp.

Put it on the 4th knob from the left on the front row on top of the Bantha, clasp overhanging to the front.

This is the holder for the Bantha Stick.

Find 1 dark brown flat tile 1x3.

Put it vertically to the right of the previous piece

Find 1 medium nougat brown plate 1x2.

Put it vertically to the left of the previous piece, skipping the frontmost row.

Find 3 medium nougat brown plates 1x3 with 2 knobs.

Put them vertically on the 3 columns to the left.

Find 1 medium stone grey plate 1x3 with 2 knobs.

Put it vertically on the second column from the right.

Find 1 medium stone grey plate 1x1 with connector clip.

Put it on the table, connector clip to the right.

Find 1 medium stone grey round plate 1x1.

Careful this piece has a special orientation.

Turn it, so the knob is pointing to the front.

Put it on the previous piece on the side connector clip at the front.

Put this part on top of the Bantha above the clasp at the front, side connector clip overhanging to the right.

Let's build another part like that

Find 1 medium stone grey plate 1x1 with connector clip.

Put it on the table, connector clip to the left.

Find 1 medium stone grey round knob 1x1.

Careful this piece has a special orientation

Turn it, so the knob is pointing to the front.

Put it on the previous piece on the side connector clip at the front.

Put this part on top of the Bantha behind the previous piece, side connector clip overhanging to the right.

Find 2 dark stone grey smooth roof tiles 1x1 with overhanging top tile.

Put one on the front row on the third knob from the left, overhanging top tile to the right.

Repeat symmetrically at the back.

We are now done with the body of the Bantha. Great job! 

Now, we will build the head.

Find 1 reddish brown plate 2x3.

Put it horizontally on the table.

Find 1 dark brown plate 1x2.

Put it vertically on the rightmost column of the previous piece

Find 1 reddish brown plate 1x3 with 2 knobs.

Put it vertically on the table.

Find 1 reddish brown plate 2x2.

Put it on top of the previous piece, 2 knobs overhanging to the right.

Put this part on the previous structure, overhanging 2 knobs on the plate on the right.

Find 1 mud grey plate 1x2 with side rail.

Put it vertically on the left of the structure, rail overhanging to the left.

Collect the following 2 pieces:

1 mud grey right tile 1x2 with bow and 45° cut,

and 1 mud grey left tile 1x2 with bow and 45° cut.

Put 1 on top of the previous piece, bow overhanging to the front, and cut-off corner on the left.

Repeat symmetrically at the back.

Find 1 dark stone grey plate 1x2 with ball.

Put it vertically on the rightmost column, ball to the right.

Find 1 dark brown plate 1x2.

Put it vertically on top.

Now, we will build the eyes.

Find 1 black brick 1x1 with front and side knob.

Put it on the table, side knobs to the front and left.

Find 1 black round tile 1x1.

This piece is decorated with a black eye.

Put it on the knob at the front.

Now, mount the eye on the front knob of the middle column, eye to the front, side knob to the left.

Let's make the second eye.

Find 1 black brick 1x1 with front and side knob.

Put it on the table, side knobs to the front and right.

Find 1 black round tile 1x1.

Put it on the knob at the front

This piece is decorated with a black eye

Mount the second eye behind the first one, side knob to the left, eye to the back.

Find 1 dark brown plate 1x2.

Careful, this piece has a special orientation.

Put it vertically upright on the 2 knobs on the left side of the structure, next to the eyes.

Find 1 reddish brown brick 1x1 with hole.

Put it on the table, hole to the left.

Find 1 bright blue connector peg 2m with cross axle pin.

Insert the connector peg into the hole on the left.

Put this part on the front knob of the rightmost column, cross axle to the front.

Let's make another such part.

Find 1 reddish brown brick 1x1 with hole.

Put it on the table, hole to the left.

Find 1 bright blue connector peg 2m with cross axle pin.

Insert the connector peg into the hole on the left.

Put it behind the previous part, cross axle to the back.

Find 1 reddish brown plate 1x2 with side rail.

Put it vertically on the left column, rail to the left.

Find 2 dark brown left tiles 1x2 with bow and 45° cut.

Put 1 horizontally on the front row on top of the structure, cut-off corner to the front.

Put the other one horizontally to the back, cut-off corner to the front.

Find 2 pale ocher yellow nose cones 1x1.

Flip them upright and put them on the cross axles at the front and back.

Collect the following 2 pieces:

1 pale ocher yellow right horn with shaft,

and 1 pale ocher yellow left horn with shaft.

Put the left horn in the cone on the front side, horn pointing to the left.

Repeat with the right horn on the back side

Find 1 dark brown inverted roof tile 2x2.

Flip the structure upside down, horns towards the table.

Flip the inverted roof tile 2x2 upside down.

Put it on top on the right side of the structure, slope to the left.

Flip the structure right side up again.

The head is now done! Great work

Snap the ball on the head into the ball cup on the body.

The mighty Bantha is now finished! Take your Tusken Raider for a ride. Great job!

Open bag 2 and ask a sighted person to sort the bricks by color.

Now, let's build the pilot.

Find 1 maroon red pair of legs.

Put them on the table.

Find 1 maroon red and medium stone grey upper part of the body.

Stack it on top of the legs.

Find 1 light nougat brown head.

Put the head on the body.

Find 1 medium stone grey rebel pilot helmet.

This piece is decorated with red rebel decals.

Put the helmet on the pilot head.

Find 1 black small blaster.

Put it in the hand of the pilot minifigure.

The minifigure is now done. Good job!

Now, we will build the T-16 Skyhopper.

Find 1 medium stone grey plate 2x3.

Put it horizontally on the table.

Find 1 white brick 1x2 with technic hole.

Put it vertically on the right most column of the previous piece.

Find 1 black connector peg with middle friction ring.

Insert it into the hole from the right, connector peg overhanging to the right.

Find 2 dark stone grey bottom angle plates 1x1 – 1x1 with side knob.

Put 1 on the front row to the right, side knob to the front.

Repeat symmetrically at the back.

Find 1 bright red brick 1x2.

Put it vertically on the previous 2 pieces.

Find 1 medium stone grey plate 1x2.

Put it vertically to the right of the previous piece.

Find 2 white round plates 1x1.

Careful! These pieces have a special orientation

Put 1 upright on the side knob on the front side surface.

Repeat symmetrically at the back.

Find 1 white brick 1x2 with technic hole.

Put it vertically on the leftmost column.

Find 1 medium stone grey connector peg with knob.

Insert the connector peg from the left into the hole so that only the knob sticks out.

Find 2 white top angle plates 1x2 - 1x4 with 4 side knobs.

Put 1 on the front row on the top right of the structure, side knobs to the front.

Repeat symmetrically at the back.

Now we will create the shooter.

Find 1 medium stone grey plate 1x2 with shooter base.

Put it horizontally on the table, shooter base to the left.

Find 1 white curved tile 1x2x⅔.

Put it horizontally on the knob on the right, curve to the right.

Find 1 dark stone grey flat trigger with 2 small shafts.

Snap it into the top of the shooter base, arrow tip to the left.

Now, mount the shooter. Careful, it has a special orientation!

Put it upright horizontally on the side knobs at the back side surface on the right edge, shooter to the left.

Now let's build the other shooter.

Find 1 medium stone grey plate 1x2 with shooter base.

Put it horizontally on the table, shooter base to the left.

Find 1 white curved tile 1x2x⅔.

Put it horizontally on the knob on the right, curve to the right.

Find 1 dark stone grey flat trigger with 2 small shafts.

Snap it into the top of the shooter

Now, mount the shooter. Careful, it has a special orientation!

Put it upright horizontally on the side knobs at the front side surface on the right edge, shooter to the left.

Find 1 white brick 1x2 with technic hole.

Put it vertically on the top right of the structure.

Find 2 dark stone grey bottom angle plates 1x1 - 1x1 with side knob.

Put 1 on the front row to the left of the previous piece, side knob to the front.

Repeat symmetrically at the back, side knob to the back.

Find 1 bright red plate 1x2.

Put it vertically on top of the previous 2 pieces.

Find 1 white inverted roof tile 2x2.

Put it on the table, slope to the left.

Find 1 white plate 1x2 with 2 side handles.

Put it on the right column of the previous piece, handles to the left.

Find 1 medium stone grey bottom angle plate 1x2 - 2x2 with 4 side knobs.

Put it to the left of the previous piece, between the handles, side knobs to the left.

Now, mount this part: put it on the leftmost column of the structure, slope and side knobs to the left.

Find 1 medium stone grey plate 2x3.

Put it horizontally on top of the previous pieces on the left edge.

Find 1 bright red plate 1x2.

Put it vertically on the right column.

Find 2 dark stone grey plates 1x1 with connector clip.

Put 1 on the front row to the left of the previous piece, connector clip to the front.

Repeat symmetrically at the back, connector clip to the back.

Find 1 medium stone grey trapeze plate 2x4.

Put it vertically left of the previous piece, short edge to the left.

Find 2 medium stone grey plates 1x2 with 1 knob.

Put 1 vertically on the top right of the structure.

Put the other one vertically to the left.

Find 2 white shafts, 3 knobs long.

Insert them from the right into the connector clips at the front and back of the structure.

We will now build the tail of the T-16 Skyhopper.

Find 1 dark stone grey brick 1x1 with hole.

Put it on the table, hole to the left.

Find 1 bright blue connector 3m with asymmetric friction ring.

Insert the shorter end of the connector into the hole from the right.

Find 1 dark stone grey brick 1x1 with hole.

Put it onto the connector and slide it all the way to the other brick 1x1.

Mount this part on the structure. Put it horizontally on the right edge, connector to the right.

Find 1 medium stone grey technic beam 7m.

Hold it upright so that it is pointing top to bottom. It has two points of connection: identify the bottommost hole and the third hole from the top.

Now, mount the technic beam on the connectors on the right side: bottommost hole on the bottom connector, third hole from the top on the top connector

Find 1 black connector peg with middle friction ring.

Put it right-to-left in the top hole of the technic beam.

Find 1 bright blue connector 3m with asymmetric friction ring.

Insert the longer end of the connector right-to-left into the third hole from the bottom.

Find 1 dark stone grey brick 1x1 with hole.

Put it on the table, hole to the front.

Find 1 dark stone grey brick 1x1 with hole.

Put it on top of the previous piece, hole to the front.

Find 1 bright red plate 1x1.

Put it on top of the previous piece.

Find 1 medium stone grey brick 1x1.

Put it on top of the previous piece

Find 1 dark stone grey brick 1x1 with hole.

Put it on top of the previous piece, hole to the front.

Now, mount this on the right side of the technic beam: insert the top connector into the topmost hole of the pole, and the lowest connector into the bottom hole.

Find 1 raspberry red satellite dish 2x2 with knob.

Careful this piece has a special orientation.

Turn it upright, knob to the left.

Insert the knob of the disc into the second hole from the bottom on the right side.

Find 1 medium stone grey roof tile 1x2x3.

Put it horizontally on the middle 2 knobs on top of the structure, slope to the left.

Find 1 medium stone grey brick 1x2 with 4 side knobs.

Put it horizontally on the table.

Find 1 medium stone grey plate 1x2.

Put it horizontally on top of the previous piece.

Find 1 medium stone grey flat tile 1x3.

Put it horizontally on top, overhanging to the left

Keep the orientation of this part and mount it horizontally on the top right edge of the tail.

Now you should have 2 knobs on the front and back sides of the tail.

Find 1 bright red flat tile 1x3.

Put it upright horizontally on the side knobs at the back of the tail.

Find 1 bright red flat tile 1x3.

Put it upright horizontally on the side knobs at the front of the tail.

Now, we will build the front weapon.

Find 1 white flagpole 1x1x3.

Put it on the table, laying down.

Find 1 medium stone grey connector peg with knob.

Put the knob of the connector peg in the bottom end of the flagpole.

Find 1 dark stone grey gear wheel 1m with 8 teeth.

Slide it on the flagpole. Make sure it is somewhere in the middle of the flagpole.

Insert the top of the flagpole into the knob on the left side at the bottom of the structure.

Now, slide the gear wheel towards the structure.

Find 1 bright red plate 1x2.

Put it horizontally on the table.

Find 2 white smooth roof tiles 1x1.

Put 1 on the left knob, slope to the left.

Put the other one on the right knob, slope to the right.

Careful, this part has a special orientation.

Turn this part upright vertically, roof tiles pointing to the left.

Mount it on the lower 2 side knobs on the left side surface of the structure.

Find 1 medium stone grey plate 1x2 with 1 knob.

Put it on the table.

Find 1 dark stone grey plate 1x1.

Put it on top of the previous piece.

Find 1 medium stone grey smooth roof tile 1x1 with overhanging top tile.

Put it vertically in front of the previous piece, top tile to the back onto the previous piece.

Careful, this part has a special orientation.

Mount it upright on the top 2 side knobs on the left side surface, roof tile to the top.

Find 1 medium stone grey flag 2x2 with 2 clasps.

Snap the clasps onto the shaft at the front of the structure. Fold the flag to the top until it touches the structure.

Now, we will build the wings of the T-16 Skyhopper.

Find 1 dark stone grey plate 2x2.

Put it on the table.

Find 1 medium stone grey plate 1x4 with 2 knobs.

Put it horizontally on the back row of the previous piece, 1 knob overhanging on each side.

Find 1 medium stone grey right wing plate 2x4 with angle.

Put it horizontally on the front row, wing overhanging to the front.

Flip the structure upside down, wing plate to the back.

Find 1 medium stone grey plate 1x2 with side clasp.

Careful, this piece has a special orientation.

Turn it upside down, clasp to the left.

Put it on the left of the structure, next to the plate 2x2, clasp to the left.

Find 1 transparent red round knob 1x1.

Careful, this piece has a special orientation.

Turn it upside down and put it on the front right corner.

Find 1 dark stone grey curved disk 2x2.

Put it on the left of the structure.

Flip the wing right side up again.

Snap the clasp of the wing on the shaft at the front of the structure. It is on the same shaft as the flag 2x2. Fold the wing to the bottom.

Find 1 medium stone grey flag 2x2 with 2 clasps.

Snap the clasps on the shaft on the other side of the T-16 Skyhopper. Fold it to the top until it touches the structure.

Now, we will build the other wing.

Find 1 dark stone grey plate 2x2.

Put it on the table.

Find 1 medium stone grey plate 1x4 with 2 knobs.

Put it horizontally on the back row of the previous piece, 1 knob overhanging on each side.

Find 1 medium stone grey left wing plate 2x4 with angle.

Put it horizontally on the front row, wing overhanging to the front.

Flip the structure upside down, wing plate to the back.

Find 1 medium stone grey plate 1x2 with side clasp.

Turn it upside down, clasp to the right.

Put it on the right of the structure, next to the plate 2x2, clasp to the right

Find 1 transparent red round knob 1x1.

Turn it upside down.

Put it on the front left corner of the structure next to the plate 2x2.

Find 1 dark stone grey curved disk 2x2.

Put it on the right edge of the structure.

Flip the wing right side up again.

Snap the wing on the shaft at the back of the  structure. It is on the same shaft as the flag. Fold the wing to the bottom.

Find 1 transparent red round knob 1x1.

Put it upright on the shooter next to the front weapon.

Warning! Do not aim at eye or face!

Find 1 transparent red round knob 1x1.

Put it upright on the shooter at the front.

They are your ammunition

Warning! Do not aim at eye or face.  

Great work! Your T16 Skyhopper is now loaded and ready for take-off. Make sure you get the pilot on board before you start the battle!

Enjoy!