| LEGO Audio & Braille Building Instructions for the LEGO set "DreamZzz Grimkeeper the Cage Monster - Main Build". |
| Note: these are the instructions for the main build of the set including the Grimkeeper as well as the Mateo and Cooper Minifigures. To access the instructions for building the mini-plane or the hoverbike dream-crafted from Mateo's companion Z-Blob, go back to the instructions website and navigate to the corresponding instructions. |
| The Grimkeeper has snatched Cooper during his sleep and is taking him back to the Nightmare King! Now it’s up to you to help Mateo and Z-Blob rescue their friend. Choose to dream craft Z-Blob into a mini-plane to confront the Grimkeeper head-on or a hoverbike to pursue and intercept the Grimkeeper and free Cooper when the moment is right! |
| The box cover shows an action-packed scene from the Dream World: the scene is framed with the white silhouette of a cloud. The Grimkeeper, a frightening black monster with neon-green claws, a white, demon-like head with horns and a cage built into its chest, is right in the middle of the scene. He is standing in front of a hellish landscape: grass turned purple, streaked with small streams of lava, the frightening sight of the Nightmare King in the far distance. The monster is trying to fight off the attack of brave Mateo who is flying towards the Grimkeeper in his mini-plane. The mini-plane is actually Mateo's Dream World companion Z-Blob rebuilt into a plane! Mateo is shooting ammunition at the Grimkeeper, trying to free his friend Cooper who is locked in the Grimkeeper's cage, desperate to get out! It will not be easy to defeat the creepy monster. Let's get started and help out Mateo! |
| Open the box. This can be tricky; ask someone to help you! |
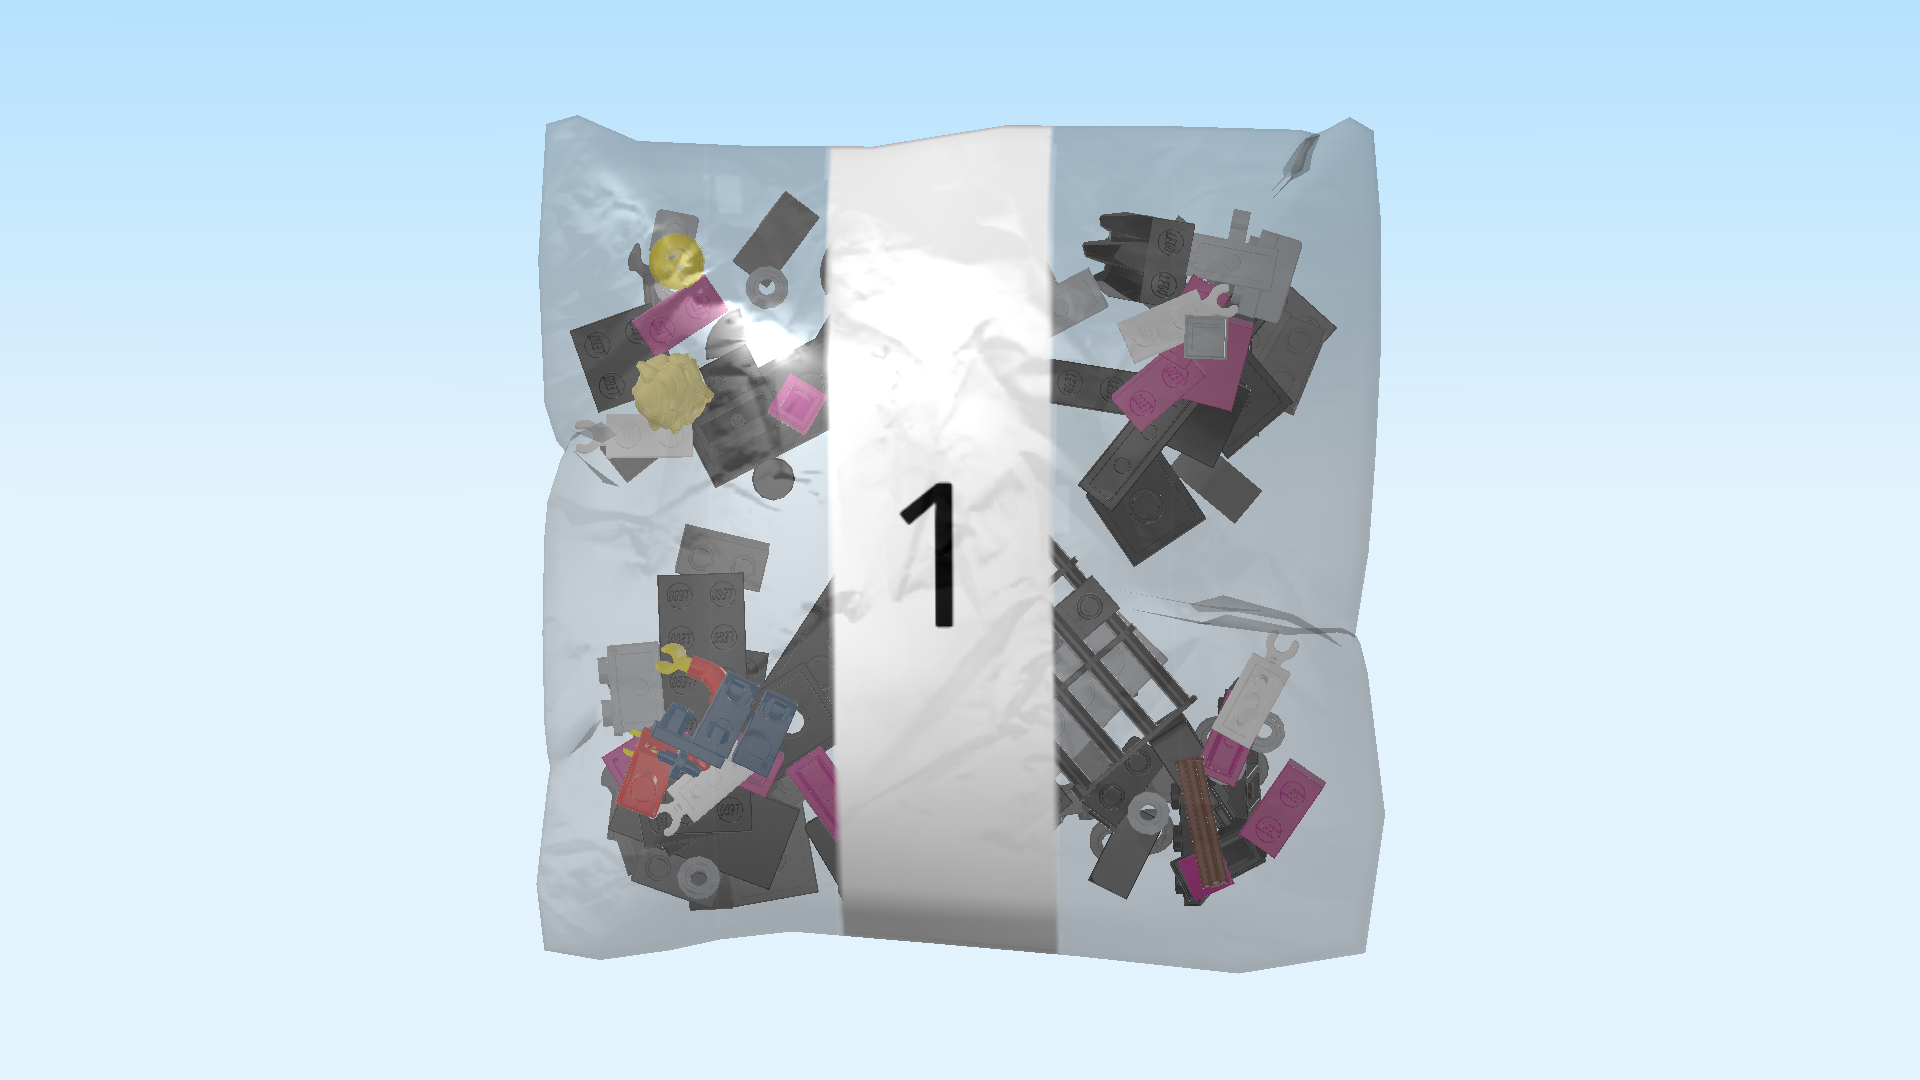
| The box contains 1 booklet with visual building instructions, and 3 bags with numbers printed on them. Ask a sighted person to help you find the correct bag! |
| Carefully open bag number 1 and any small sub-bags in it. This bag contains all bricks and pieces for the Cooper Minifigure, and the Grimkeeper's torso with cage as well as his legs. |
| Before you start building, ask a sighted person to help you sort the pieces by color. This makes finding the correct pieces even easier! |
| First, we will build the Cooper Minifigure. |
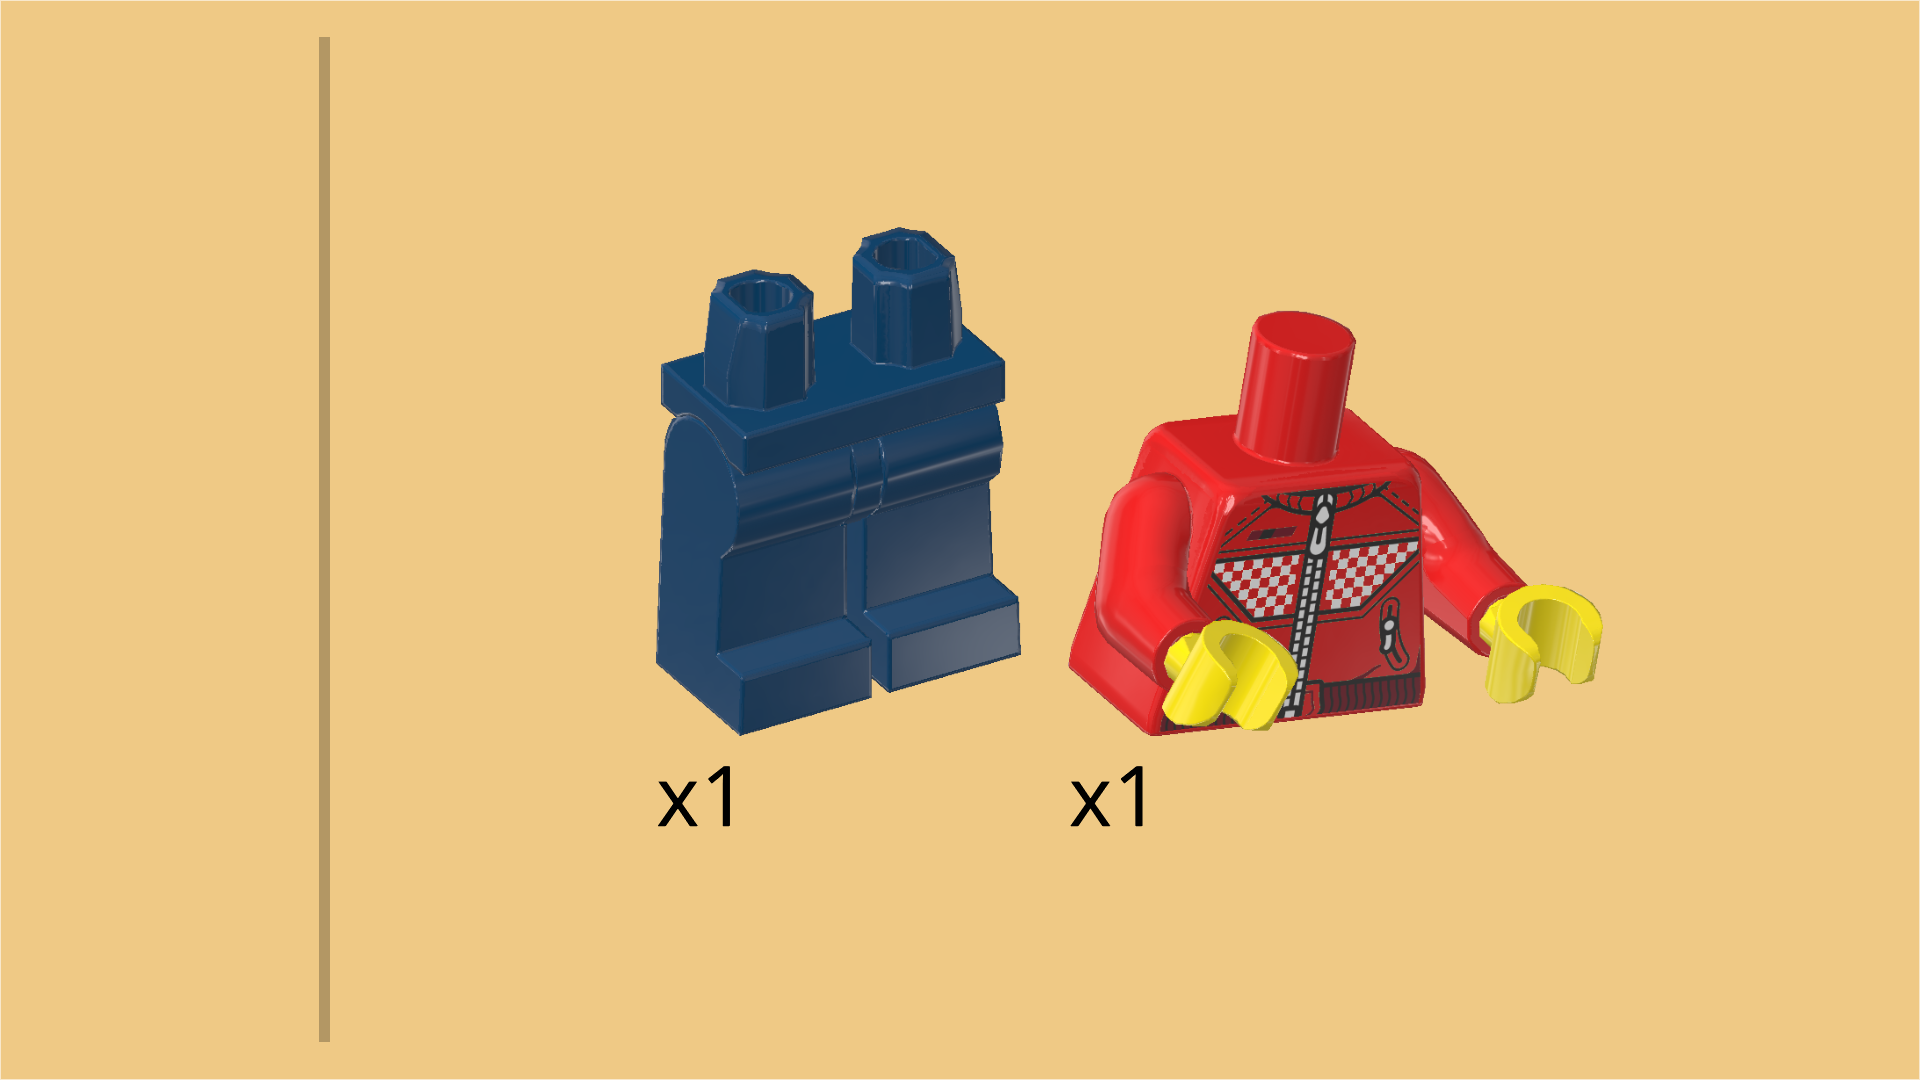
| Collect the following 2 pieces: |
| 1 earth blue pair of legs, |
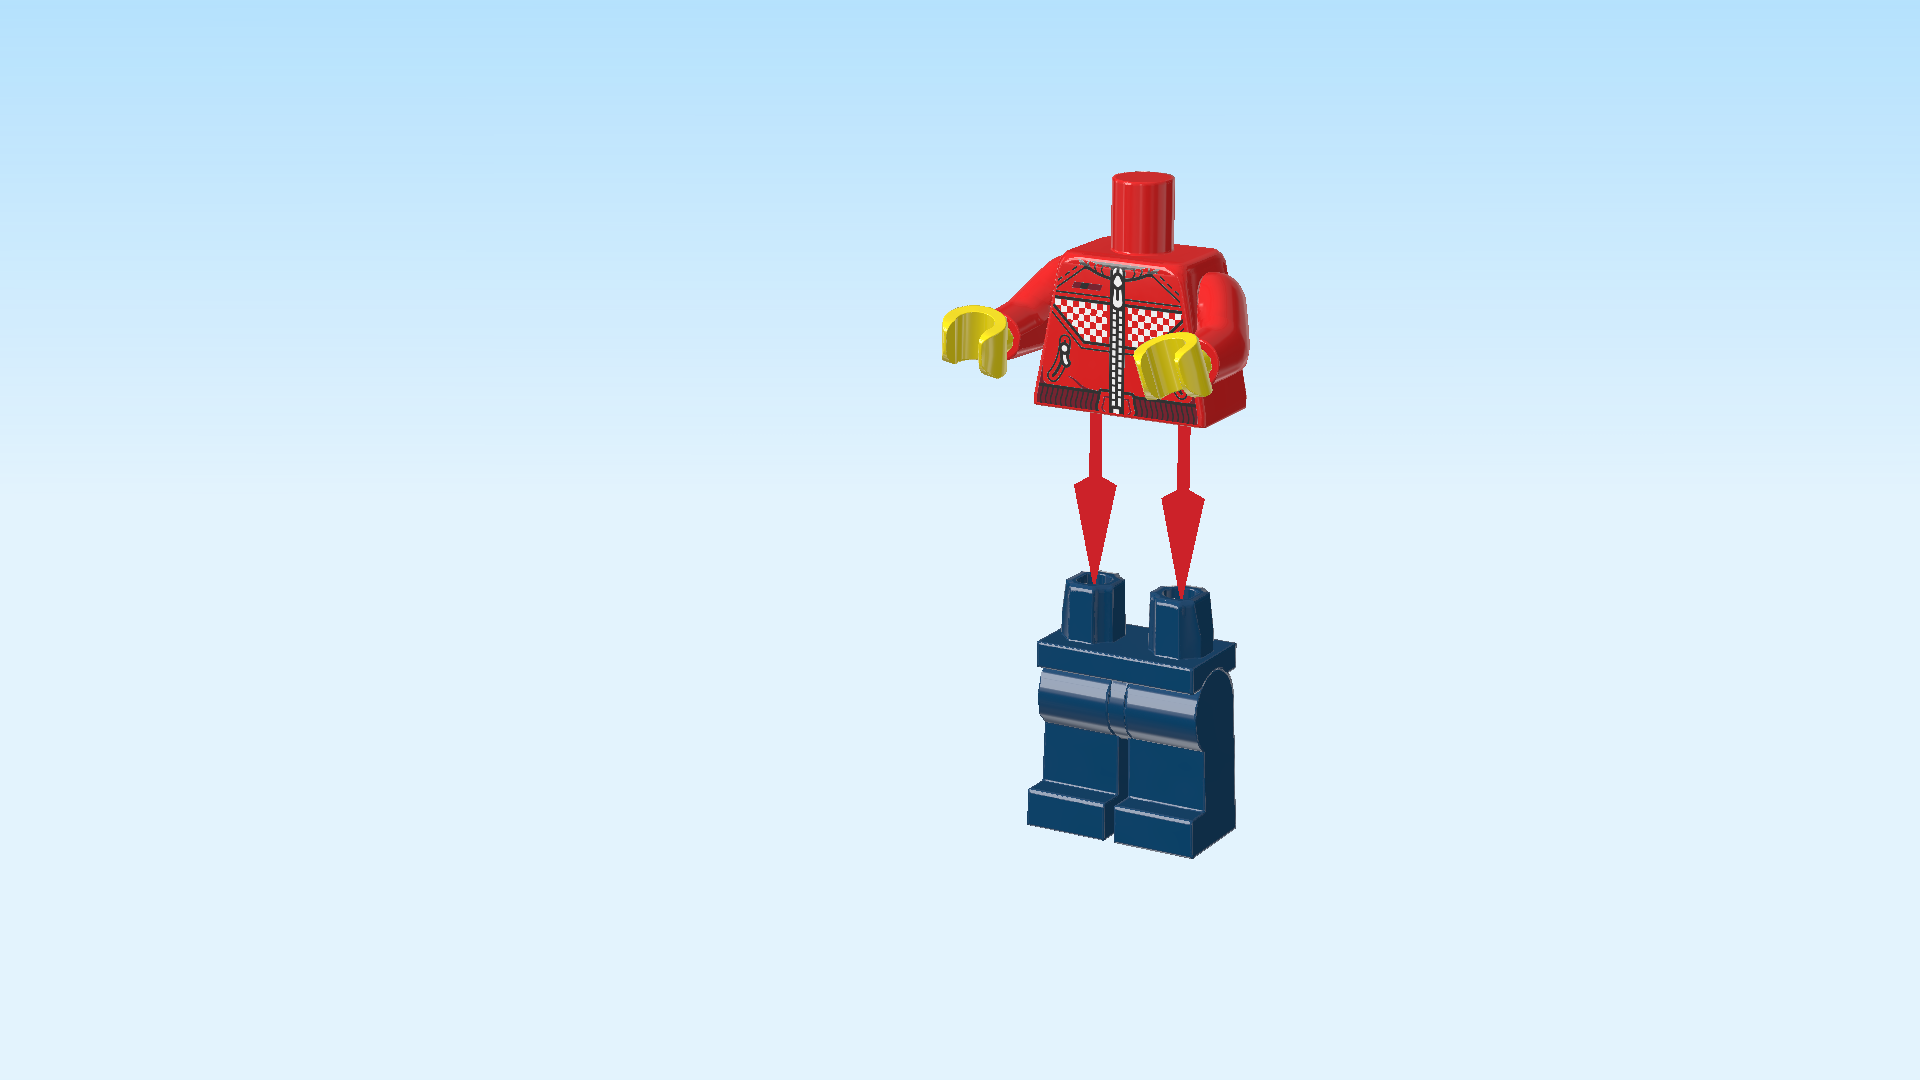
| and 1 bright red and bright yellow upper part of the body. |
| Put the upper body on the legs. |
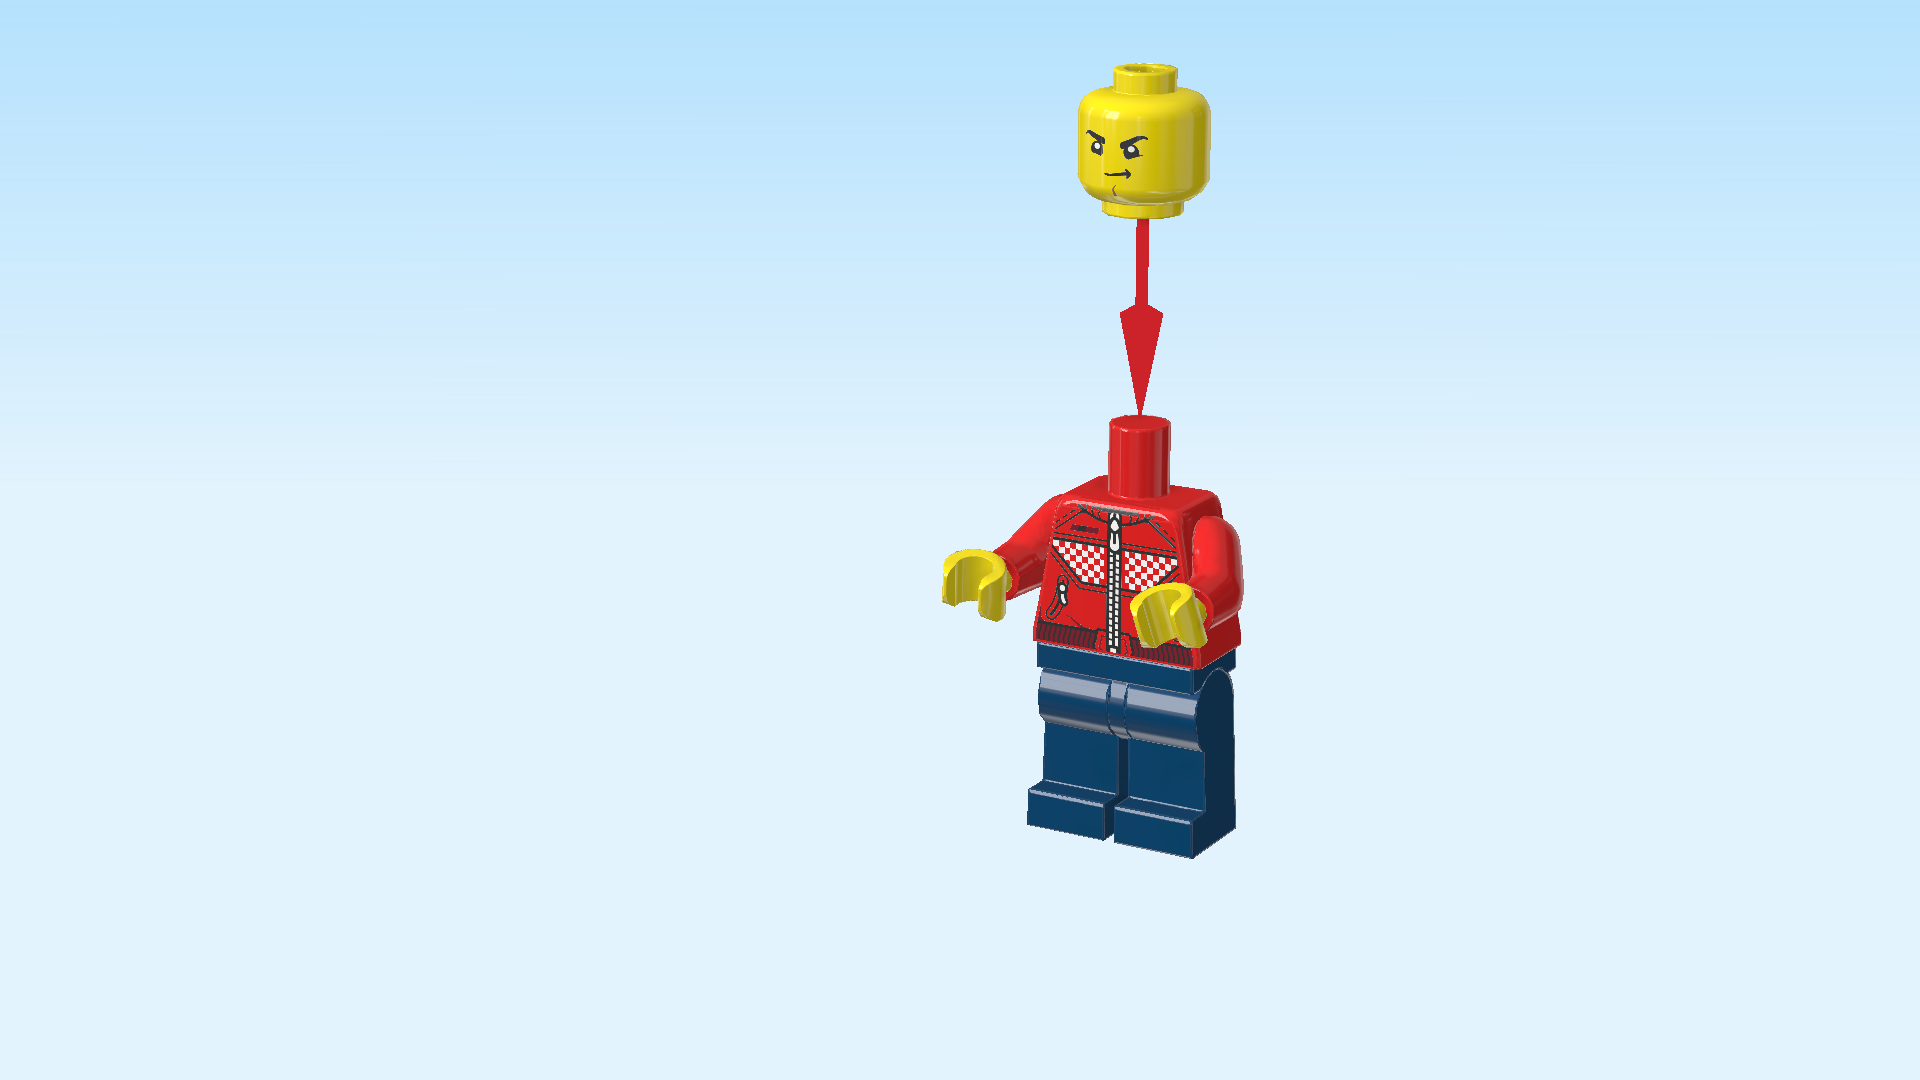
| Find 1 bright yellow Minifigure head. |
| Put it on the body. |
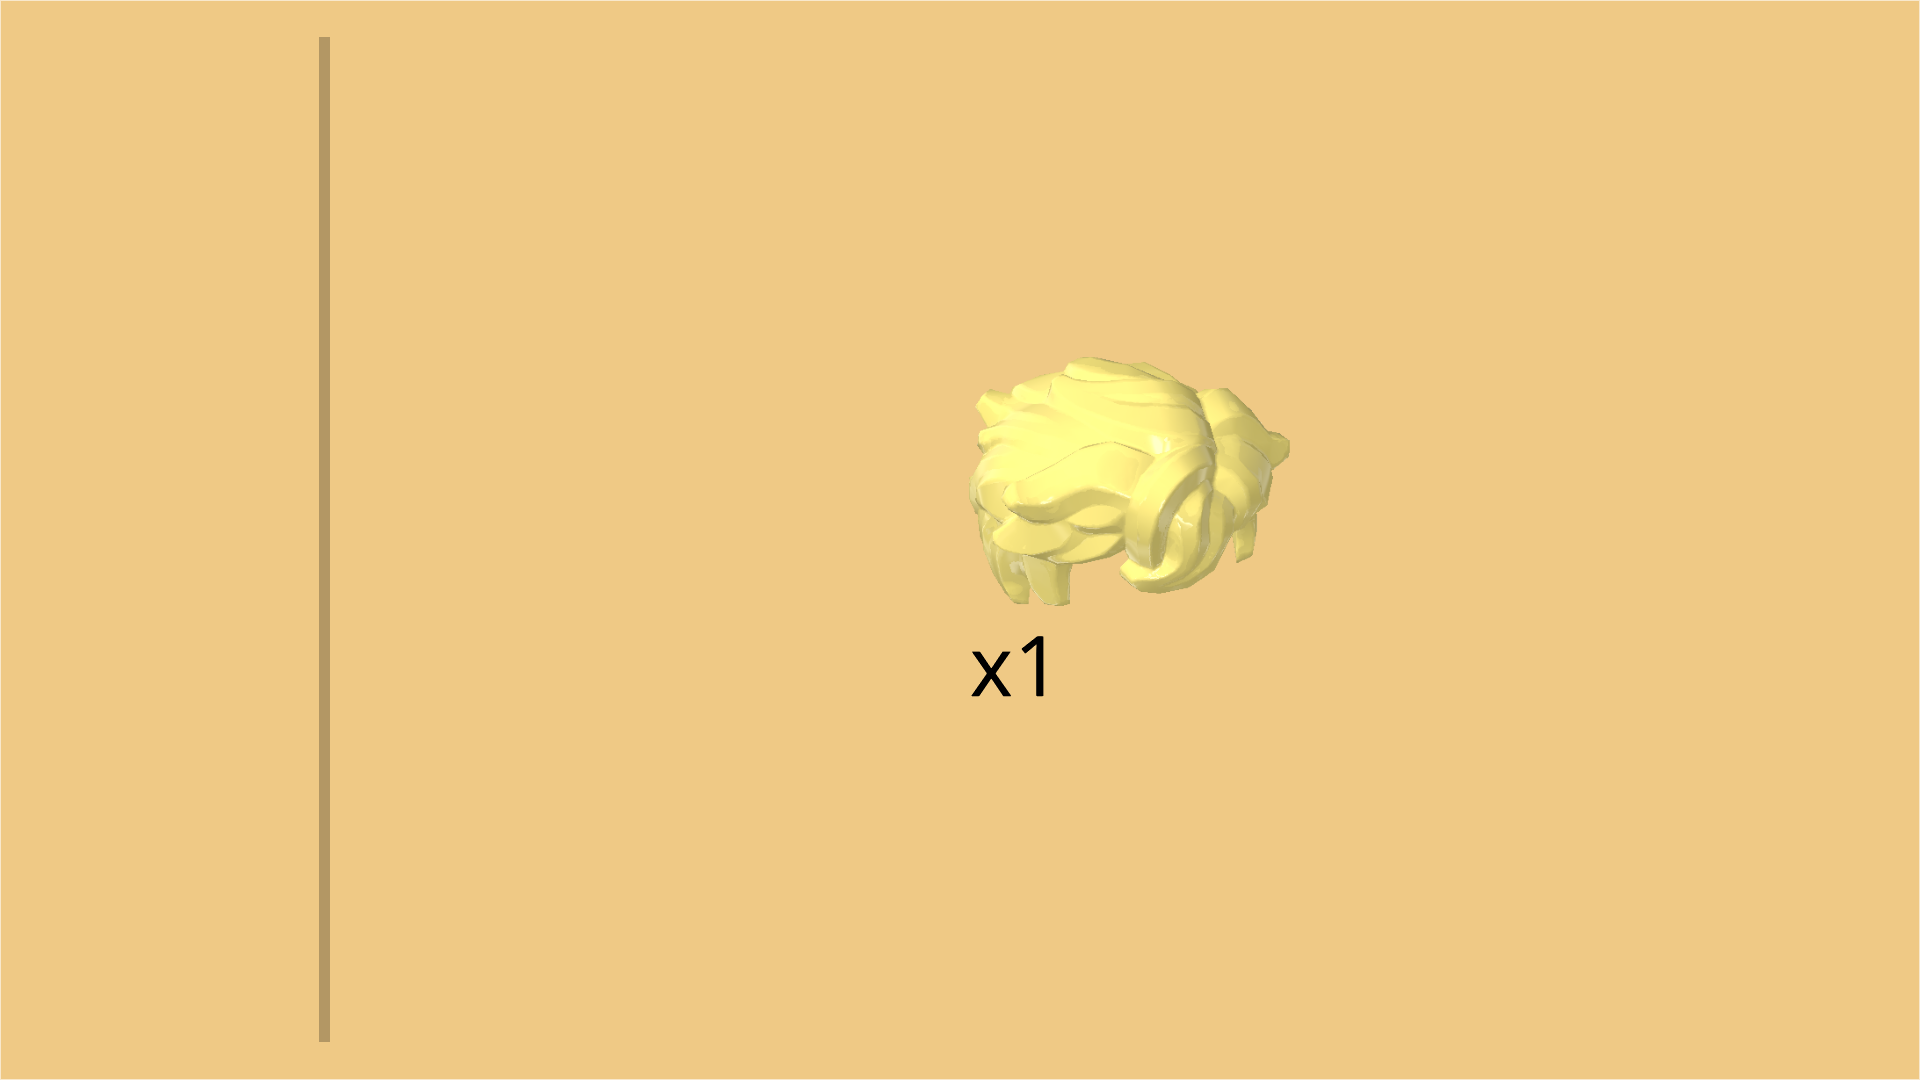
| Find 1 lemon yellow hairpiece with short shaggy hair. |
| Put it on the head. |
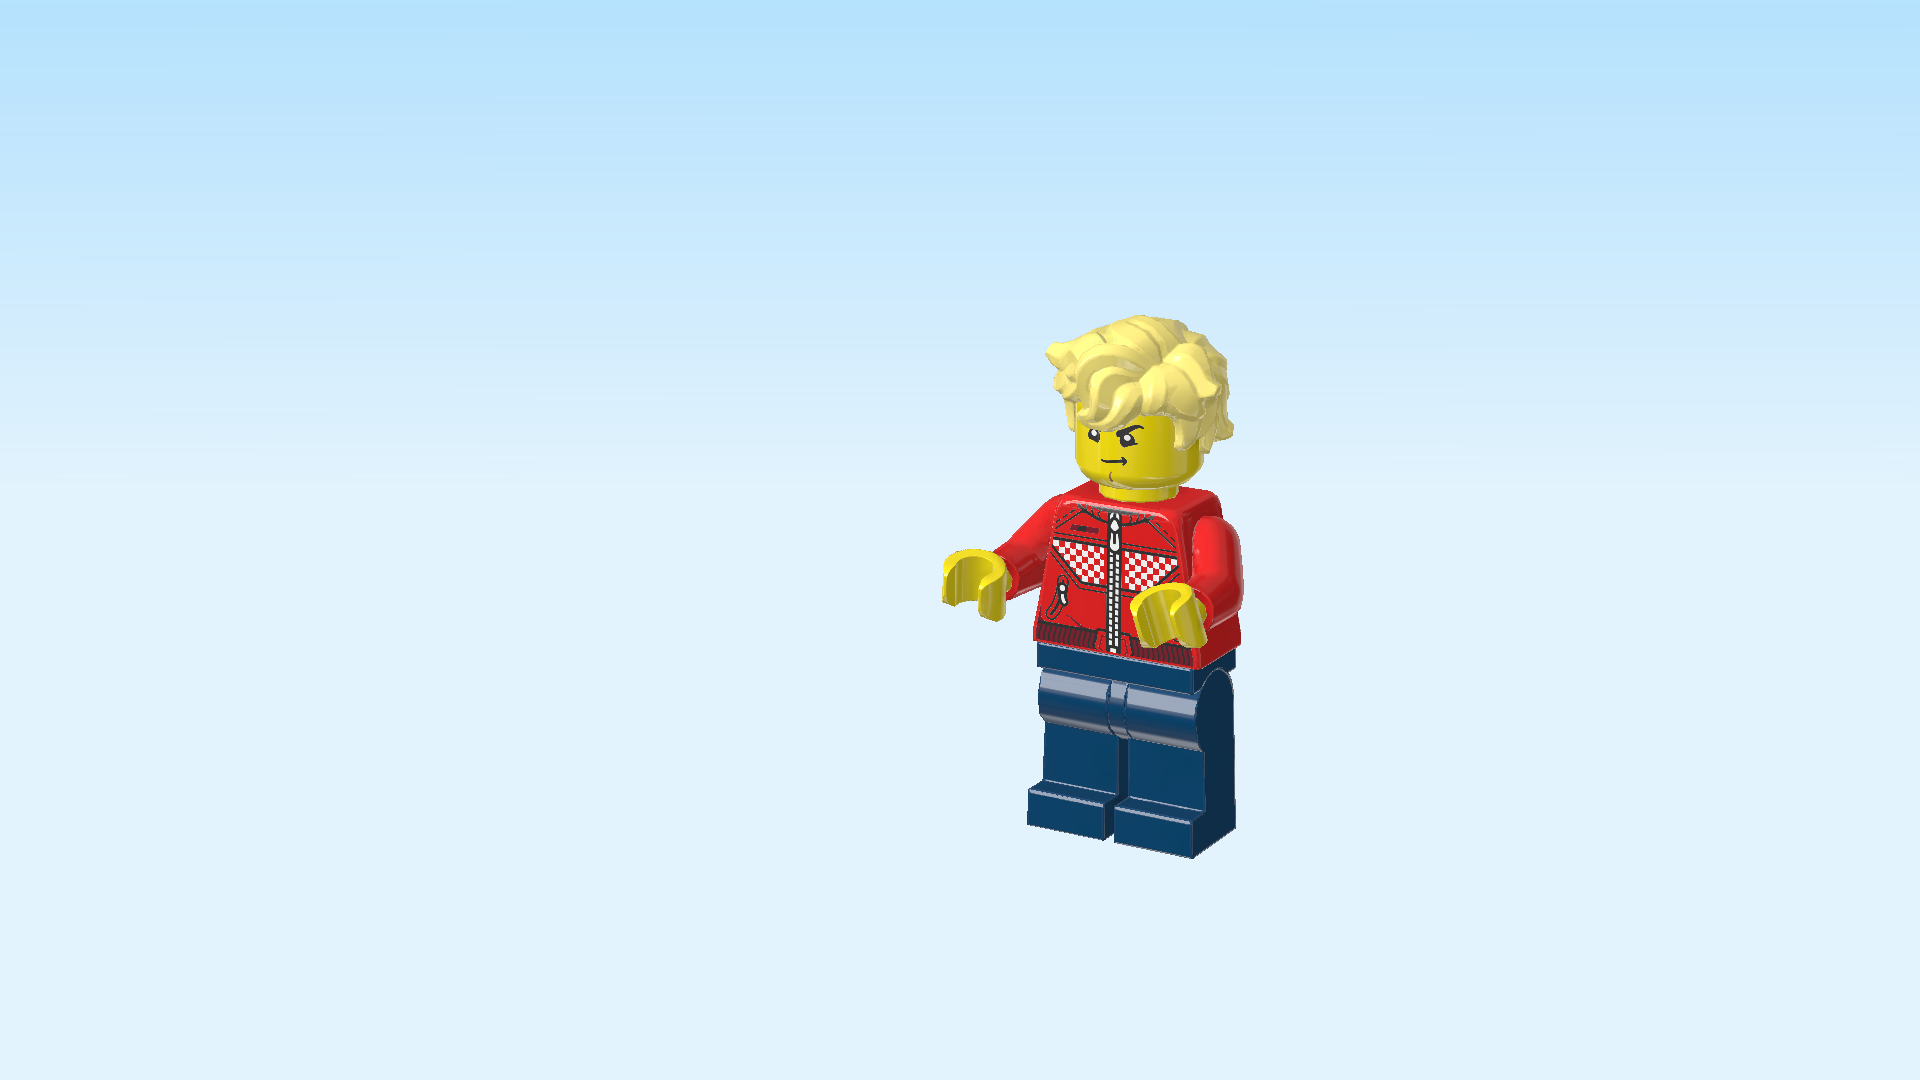
| The Cooper Minifigure is finished! Well done! Cooper is in his Waking World appearance. He is wearing dark blue jeans and red zipper jacket with a race car driver jacket design. It has 2 red-and-white checkered patches on the chest, and a triangle-shaped red-and-white checkered patch on the back. There are 2 side zippers for the jacket's pockets. It has an elastic waistband at the bottom. Cooper's head has two face prints: on one side, he has an adventurous yet determined smirk on his face. He also has a small dimple on his chin! On the other side, his eyes are closed and he is yawning. Remember, the Grimkeeper kidnaps Cooper in his sleep! |
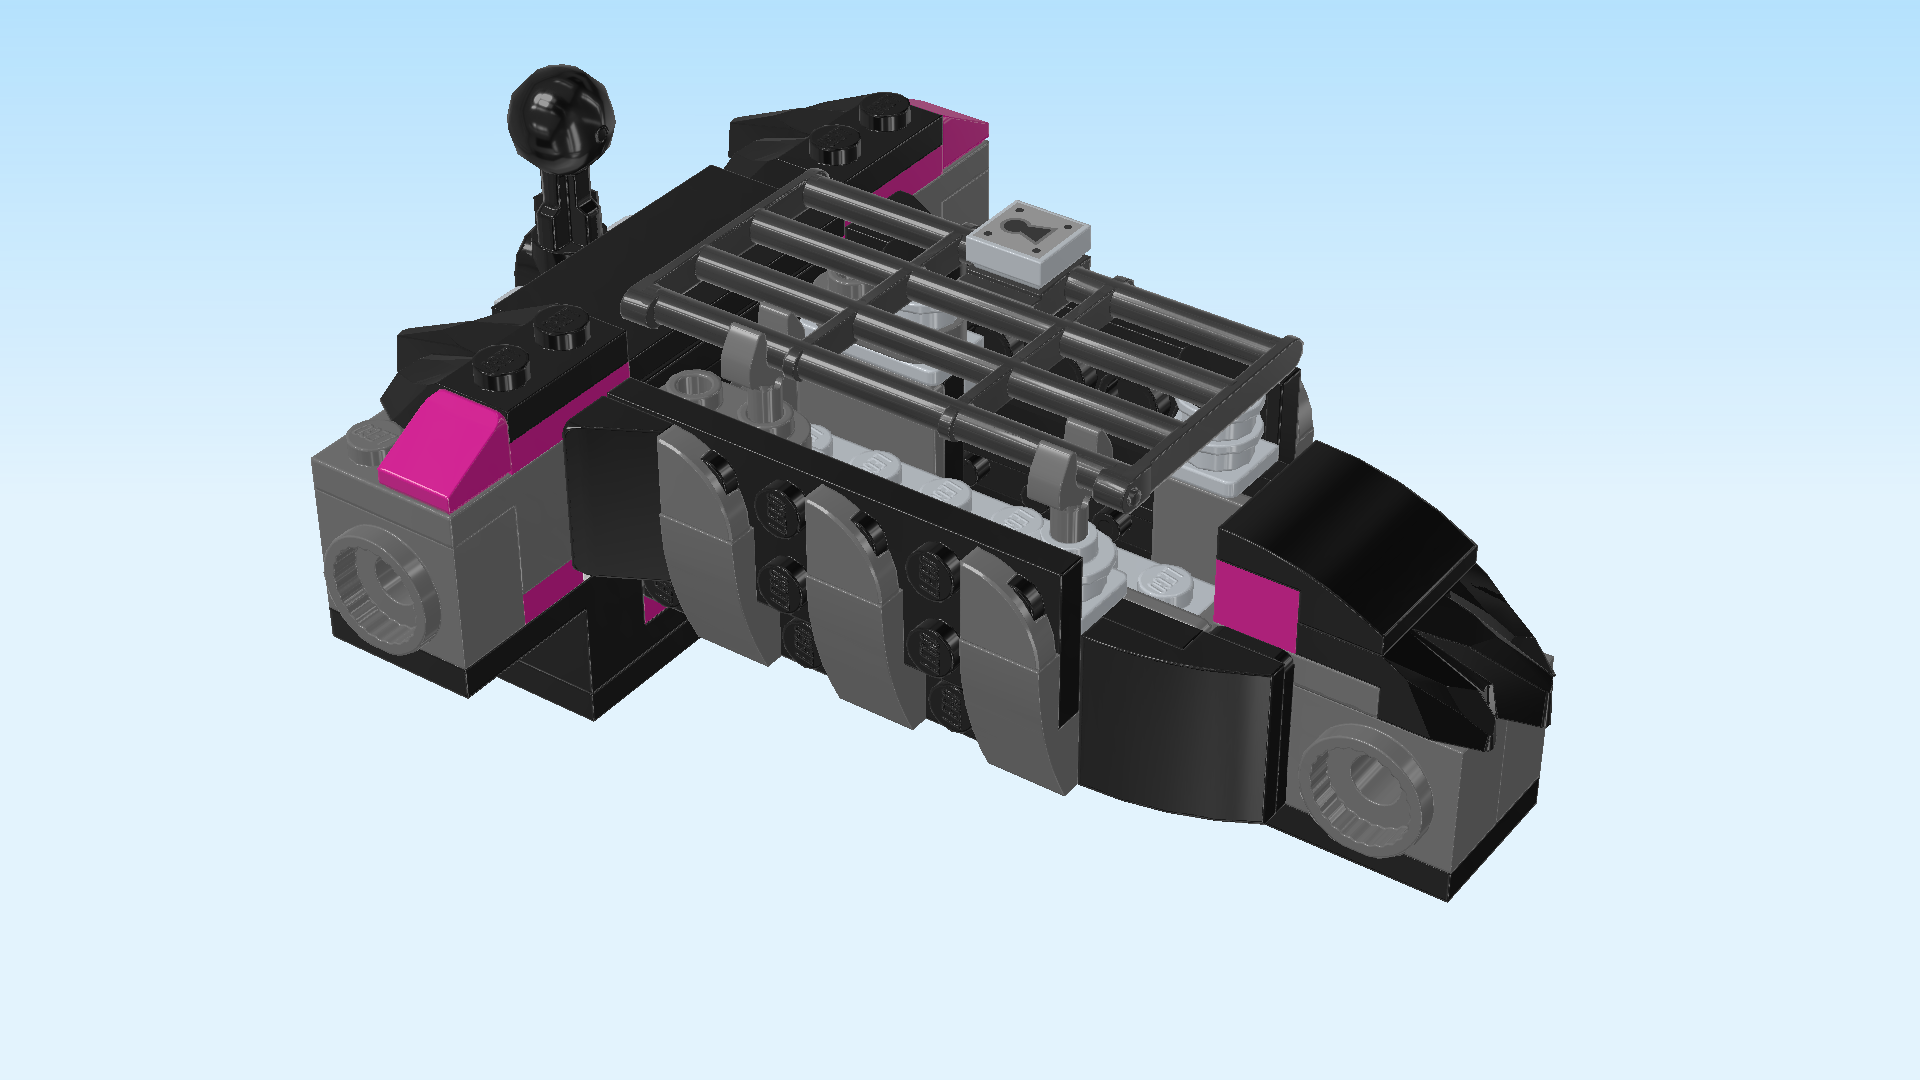
| Next, we will build the Grimkeeper's torso consisting of the chest and the shoulder part with head mount. |
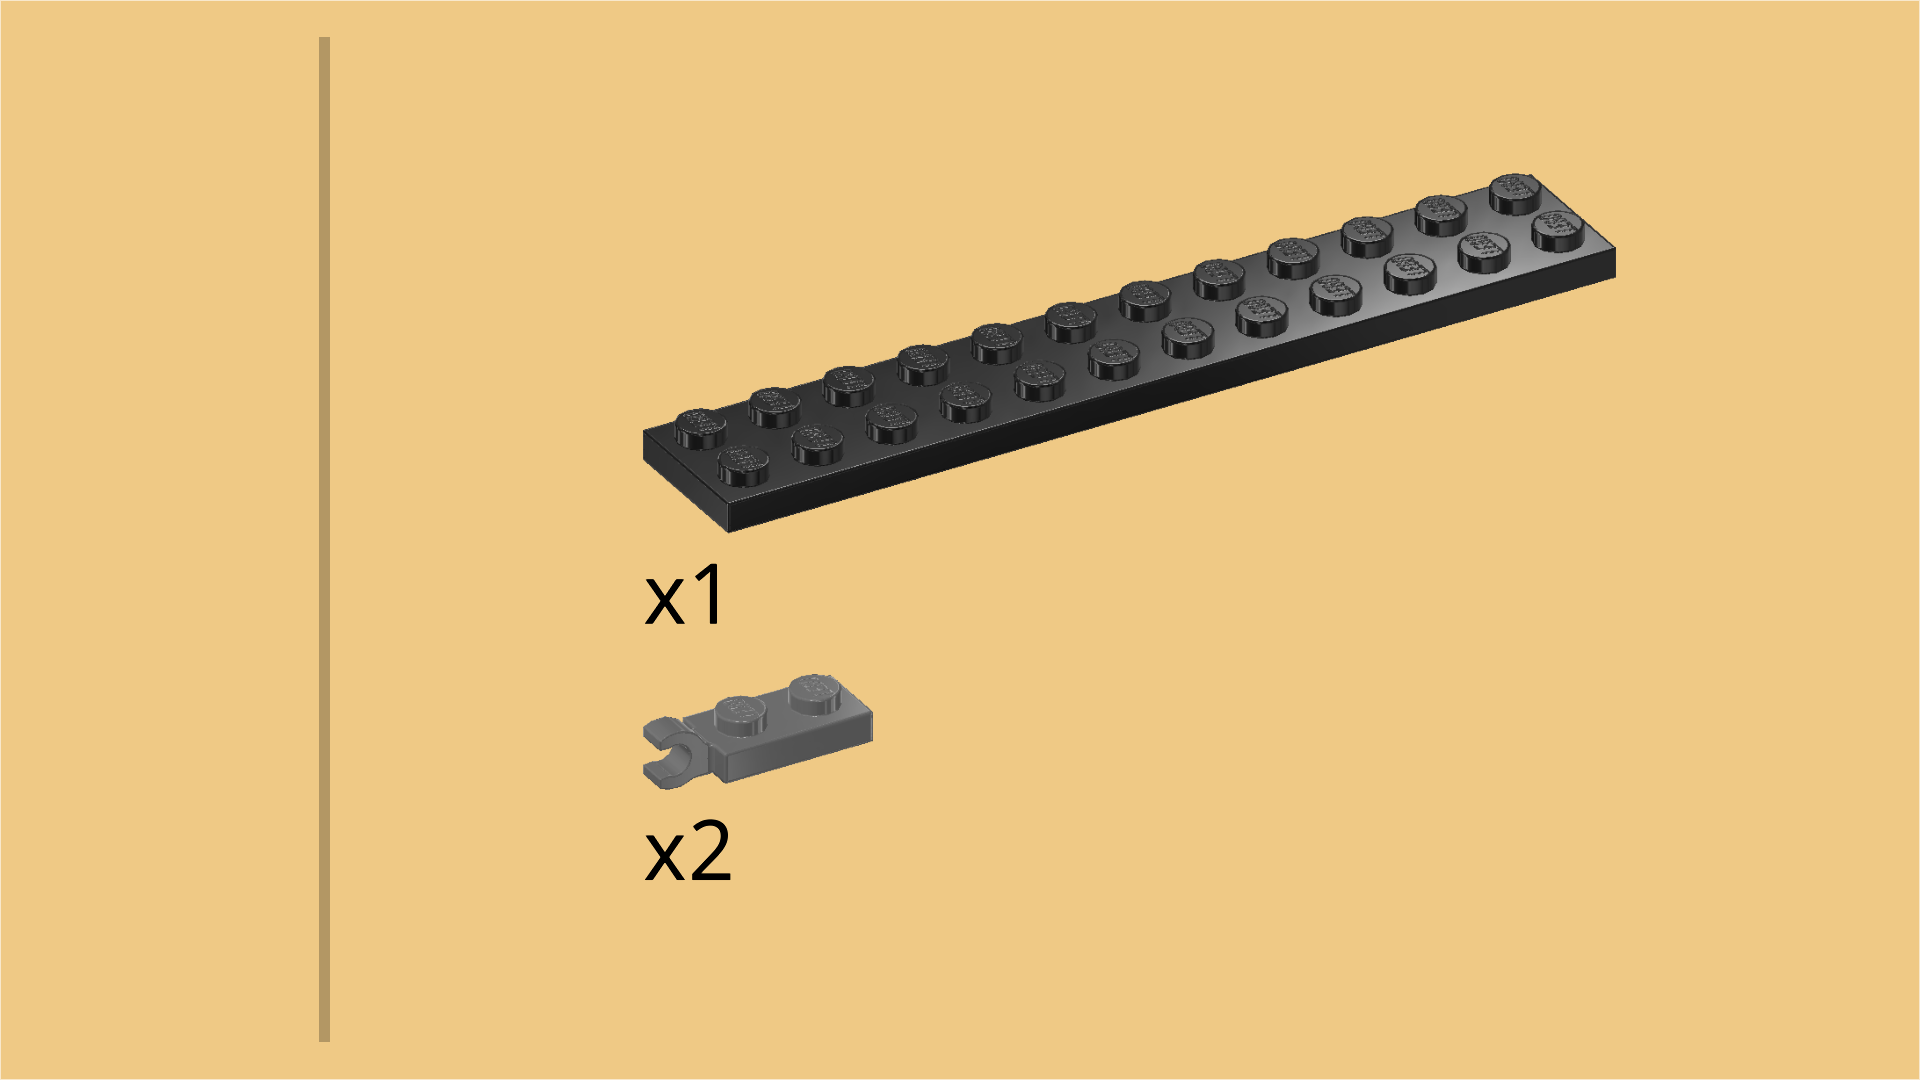
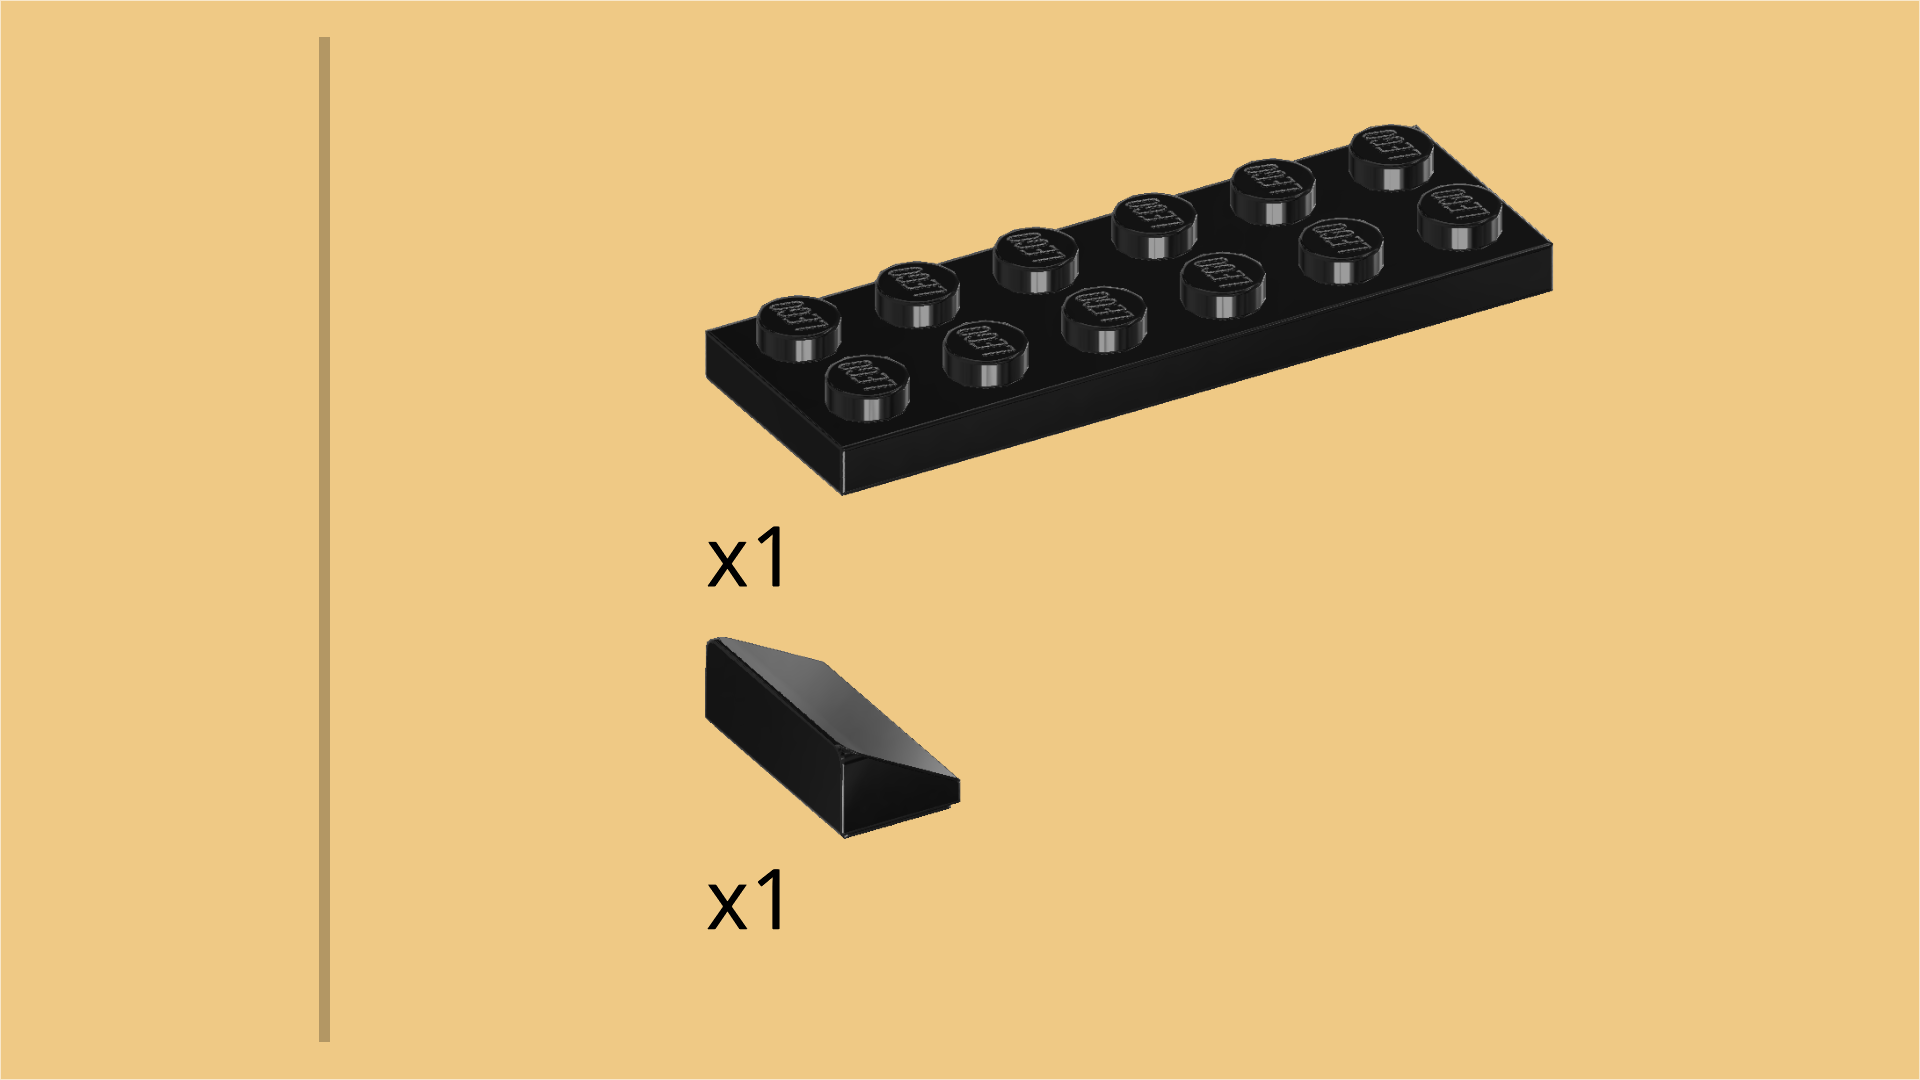
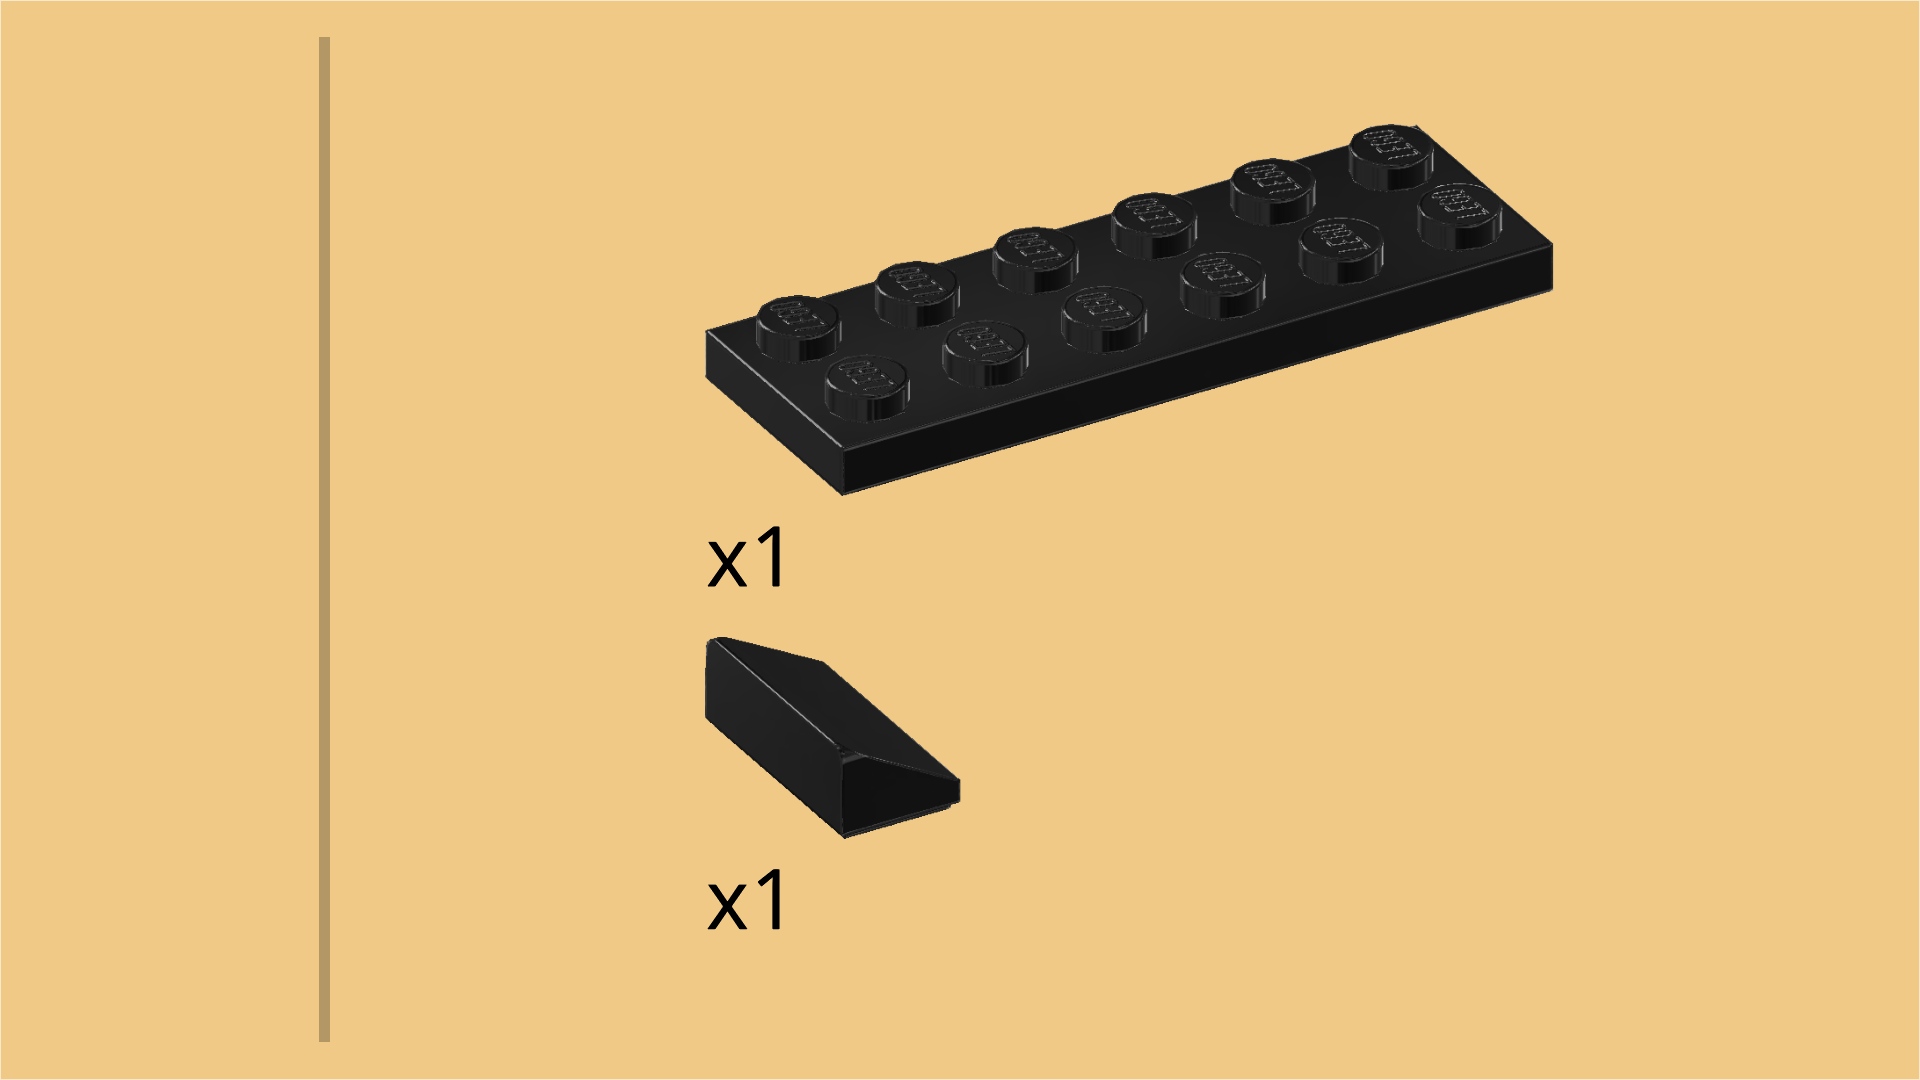
| Collect the following 3 pieces: |
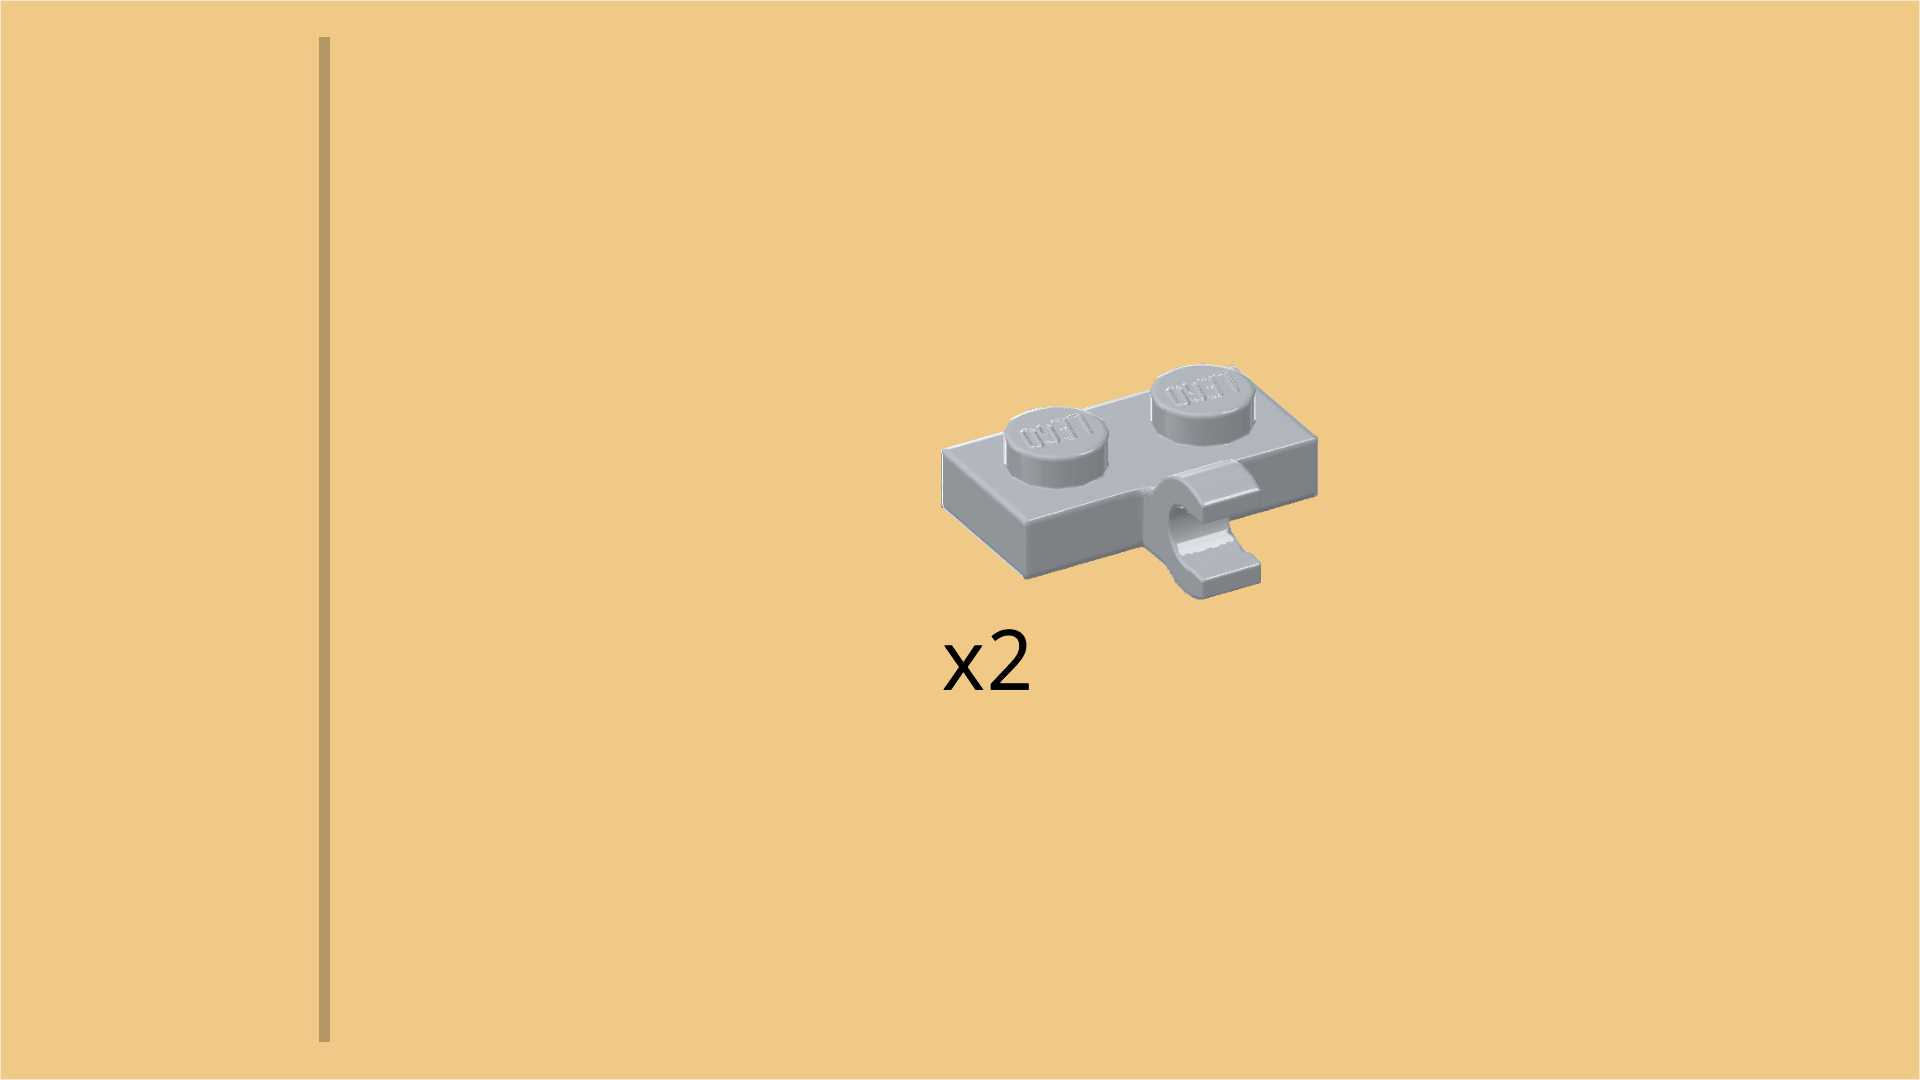
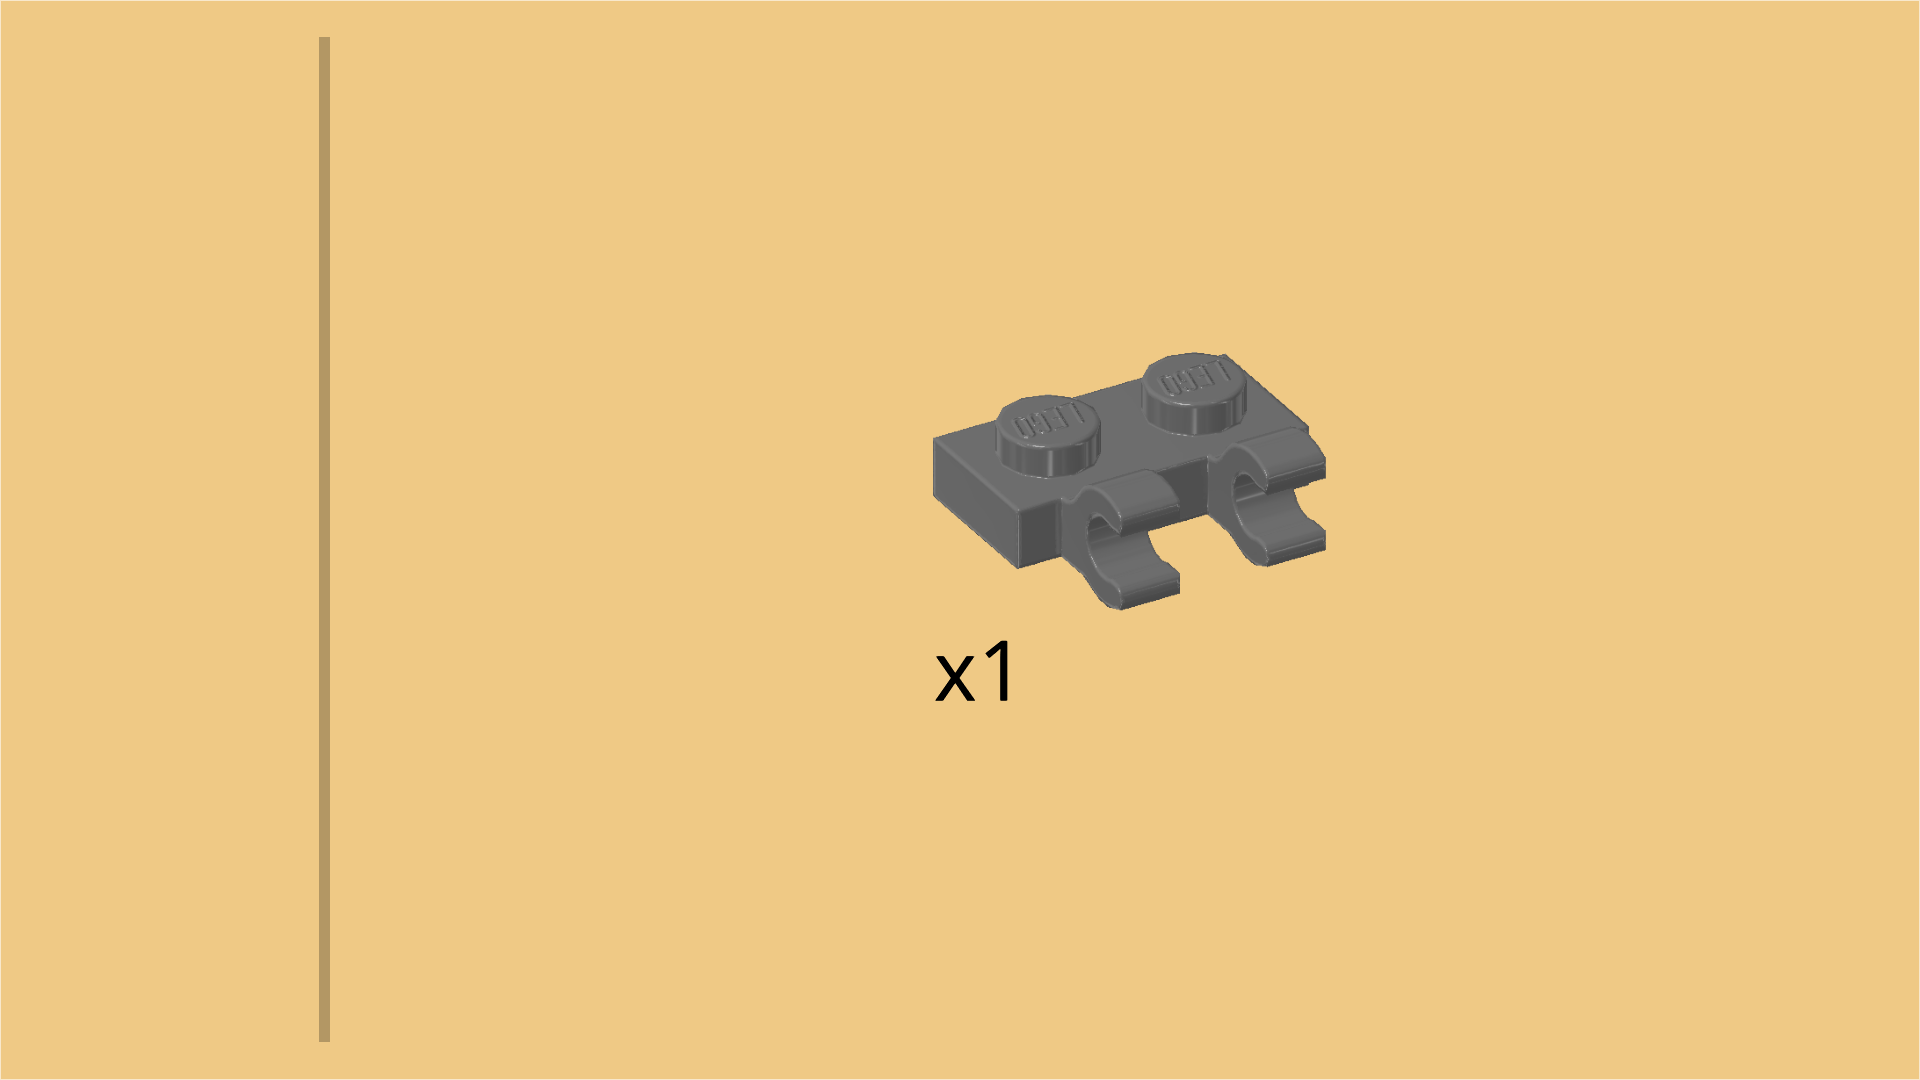
| 2 dark stone grey plates 1x2 with vertical clasp on short side, |
| and 1 black plate 2x12. |
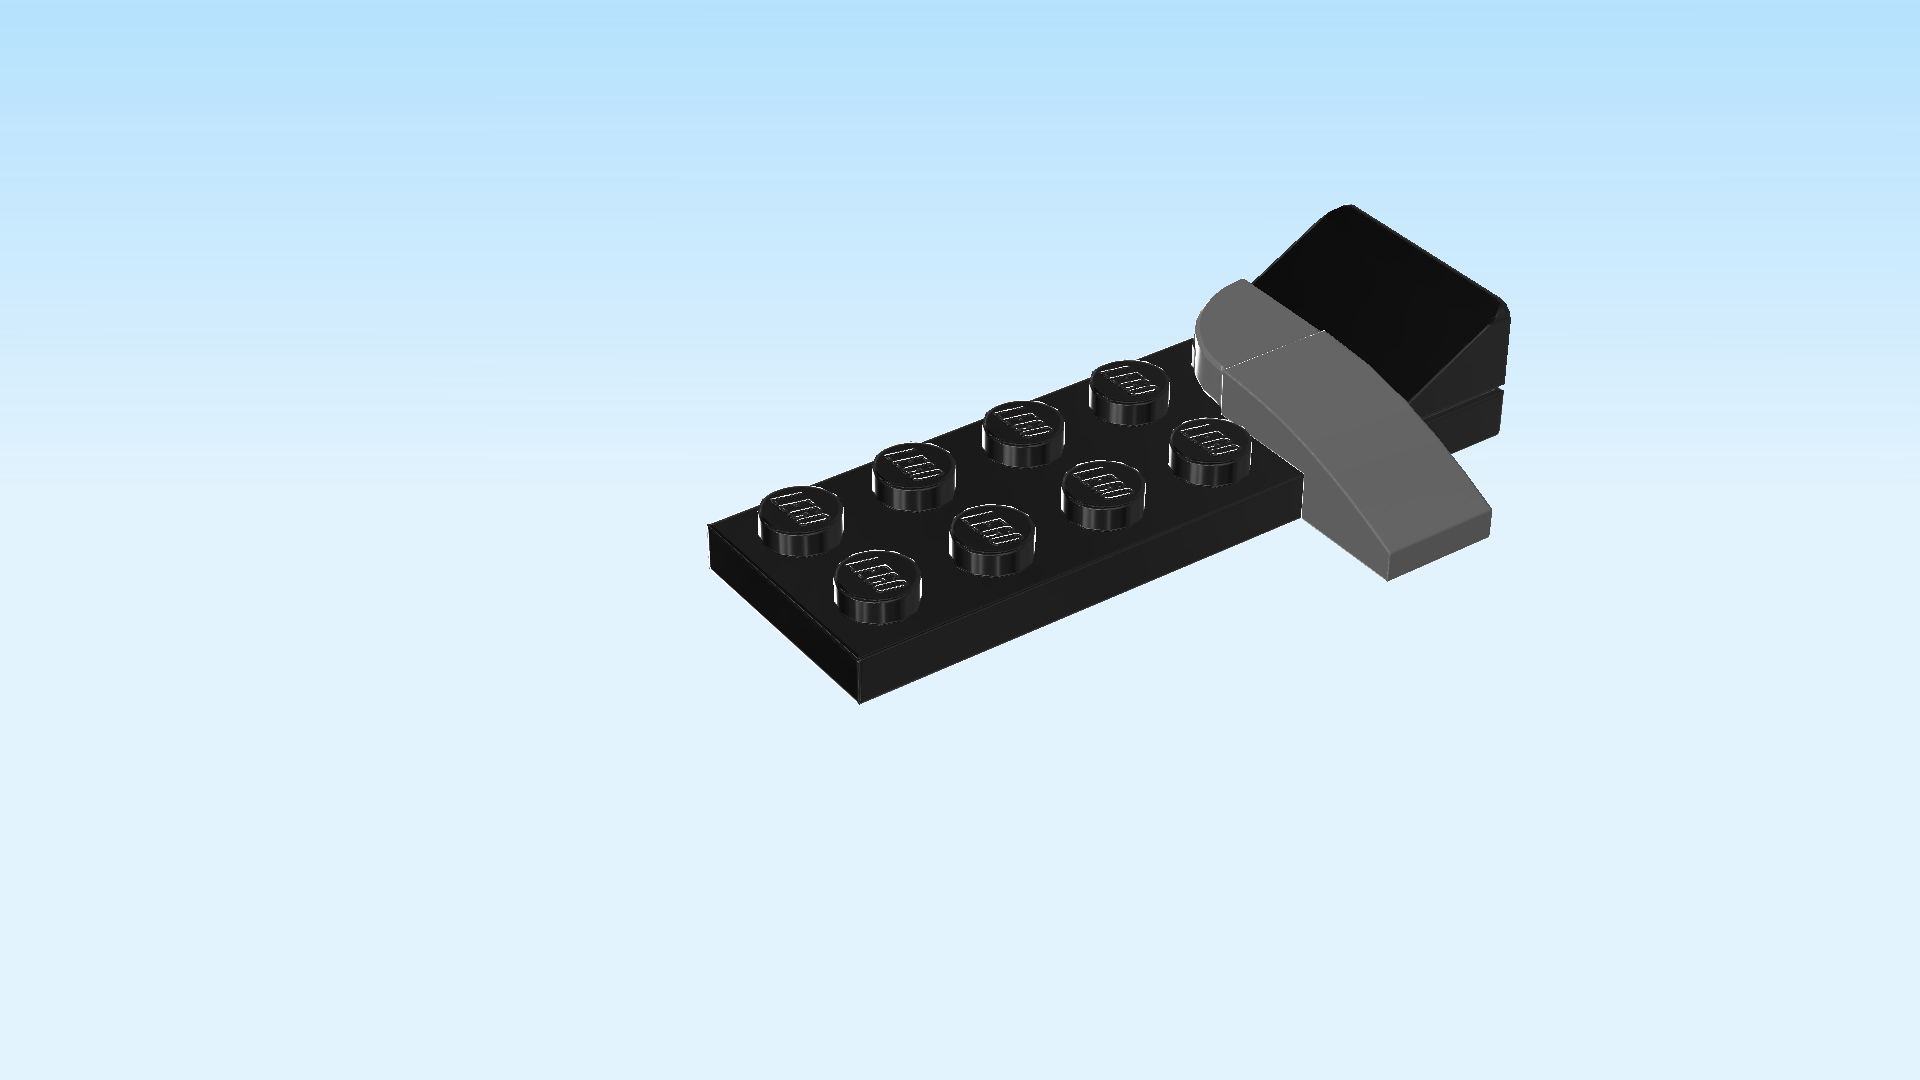
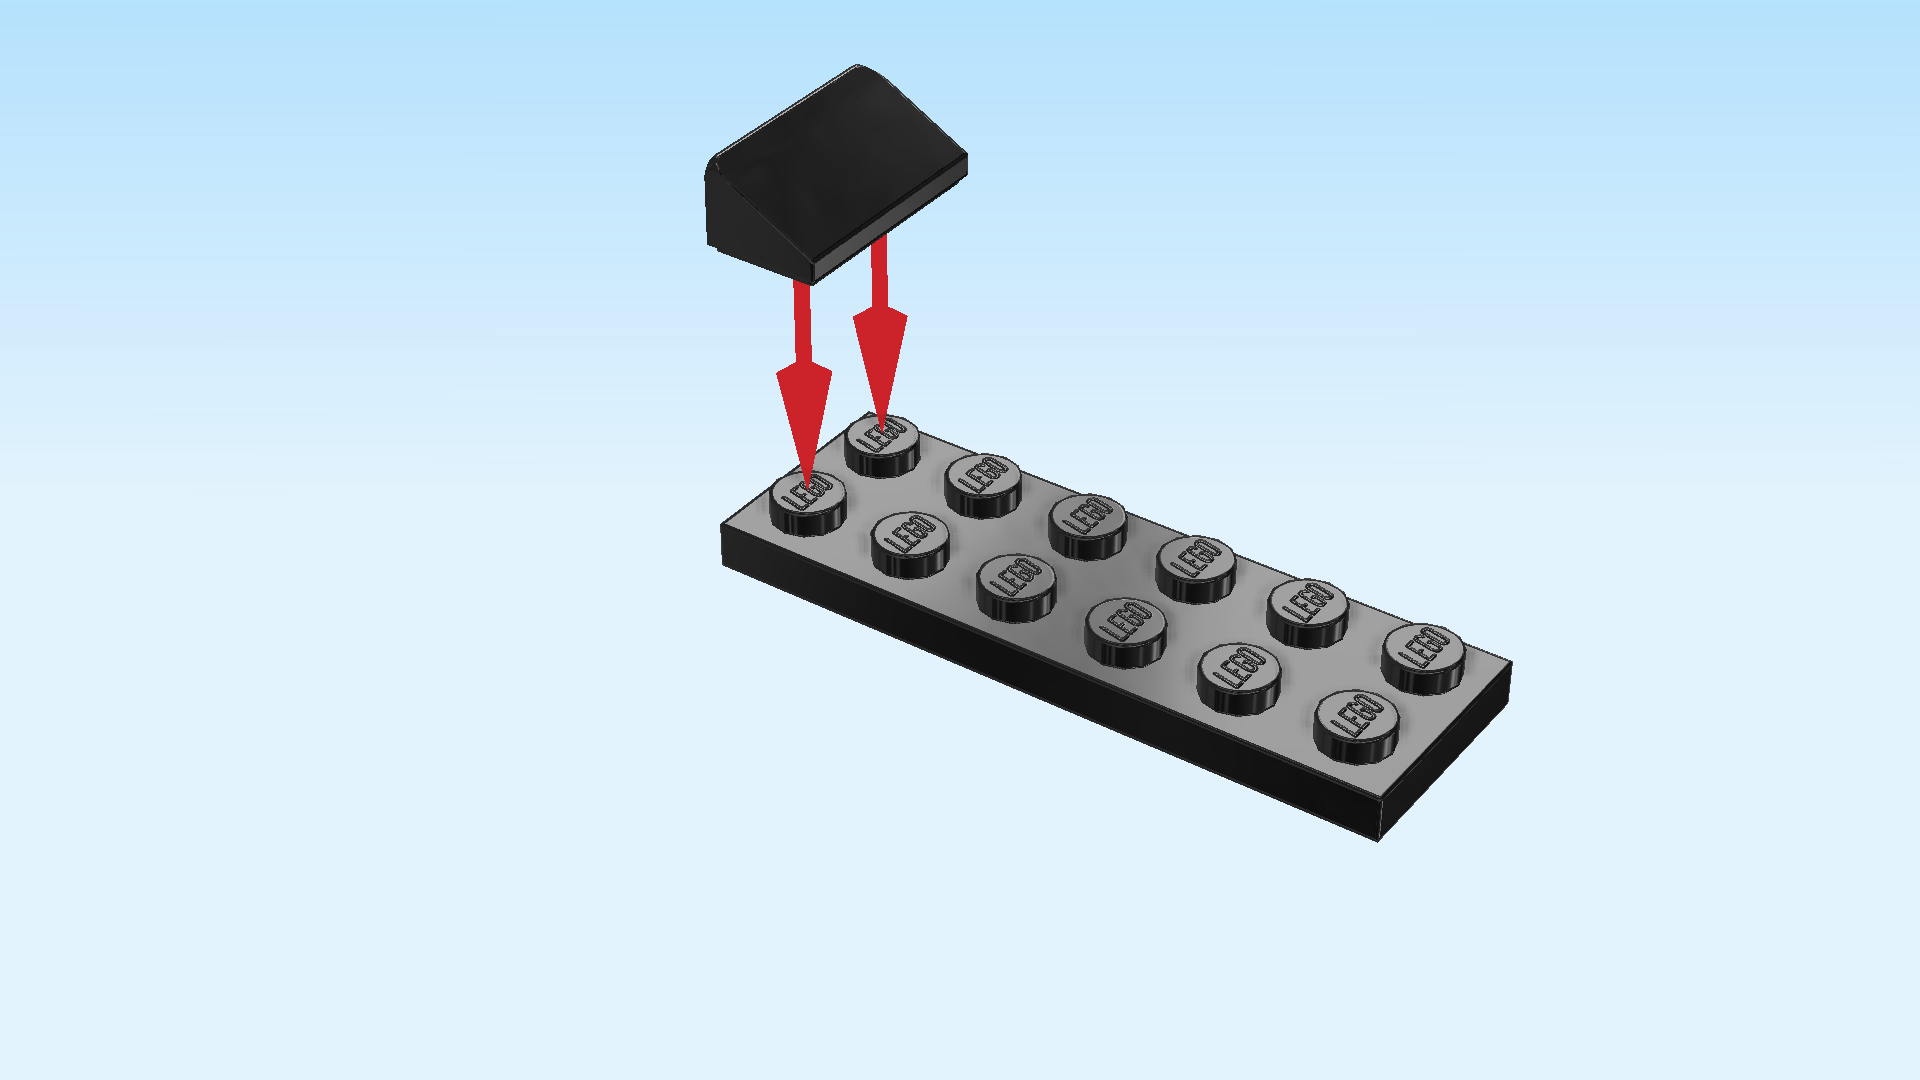
| Put the plate 2x12 horizontally on the table. |
| Put 1 plate 1x2 horizontally on the back row starting from the right edge, clasp to the right. |
| Put the other plate 1x2 horizontally in front of the previous piece, clasp to the right. |
| Next, we will make 2 small sub-parts of the Grimkeeper's chest. |
| Collect the following 4 pieces: |
| 2 black plates 2x2, |
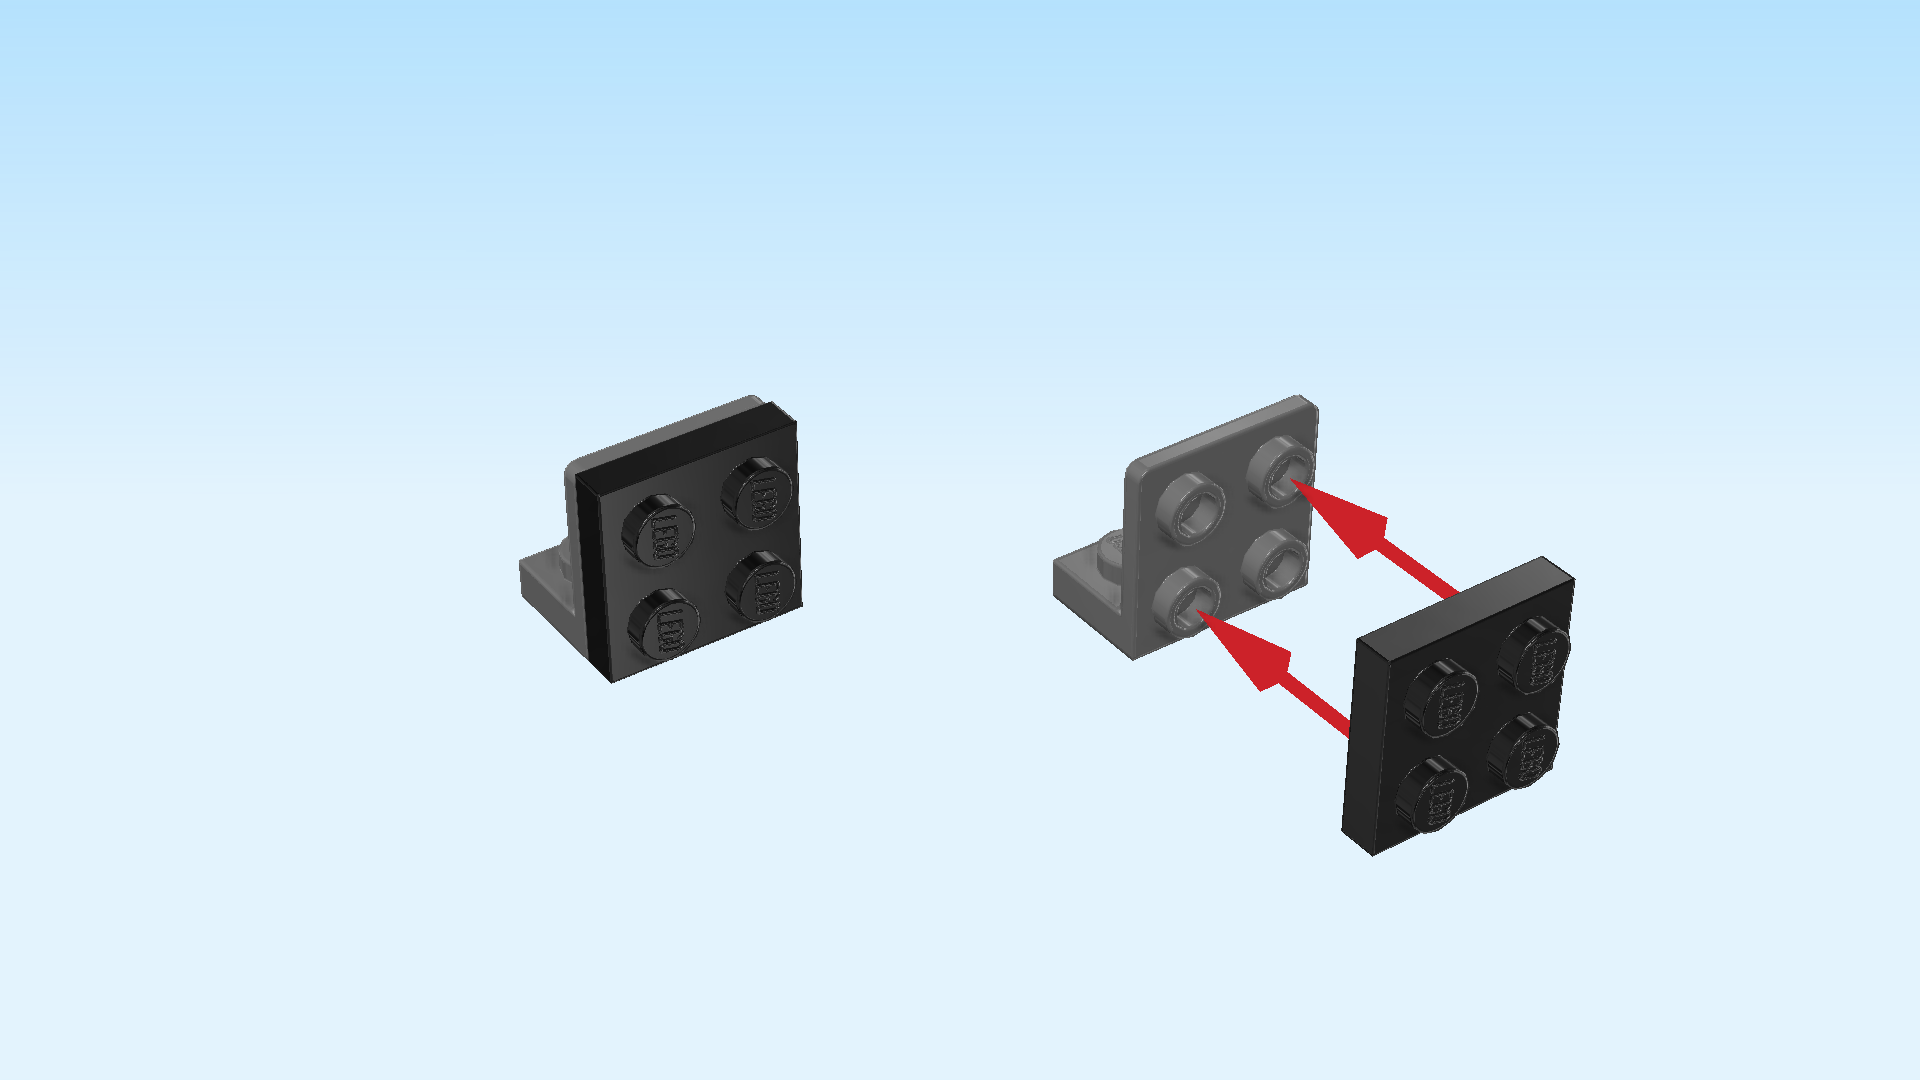
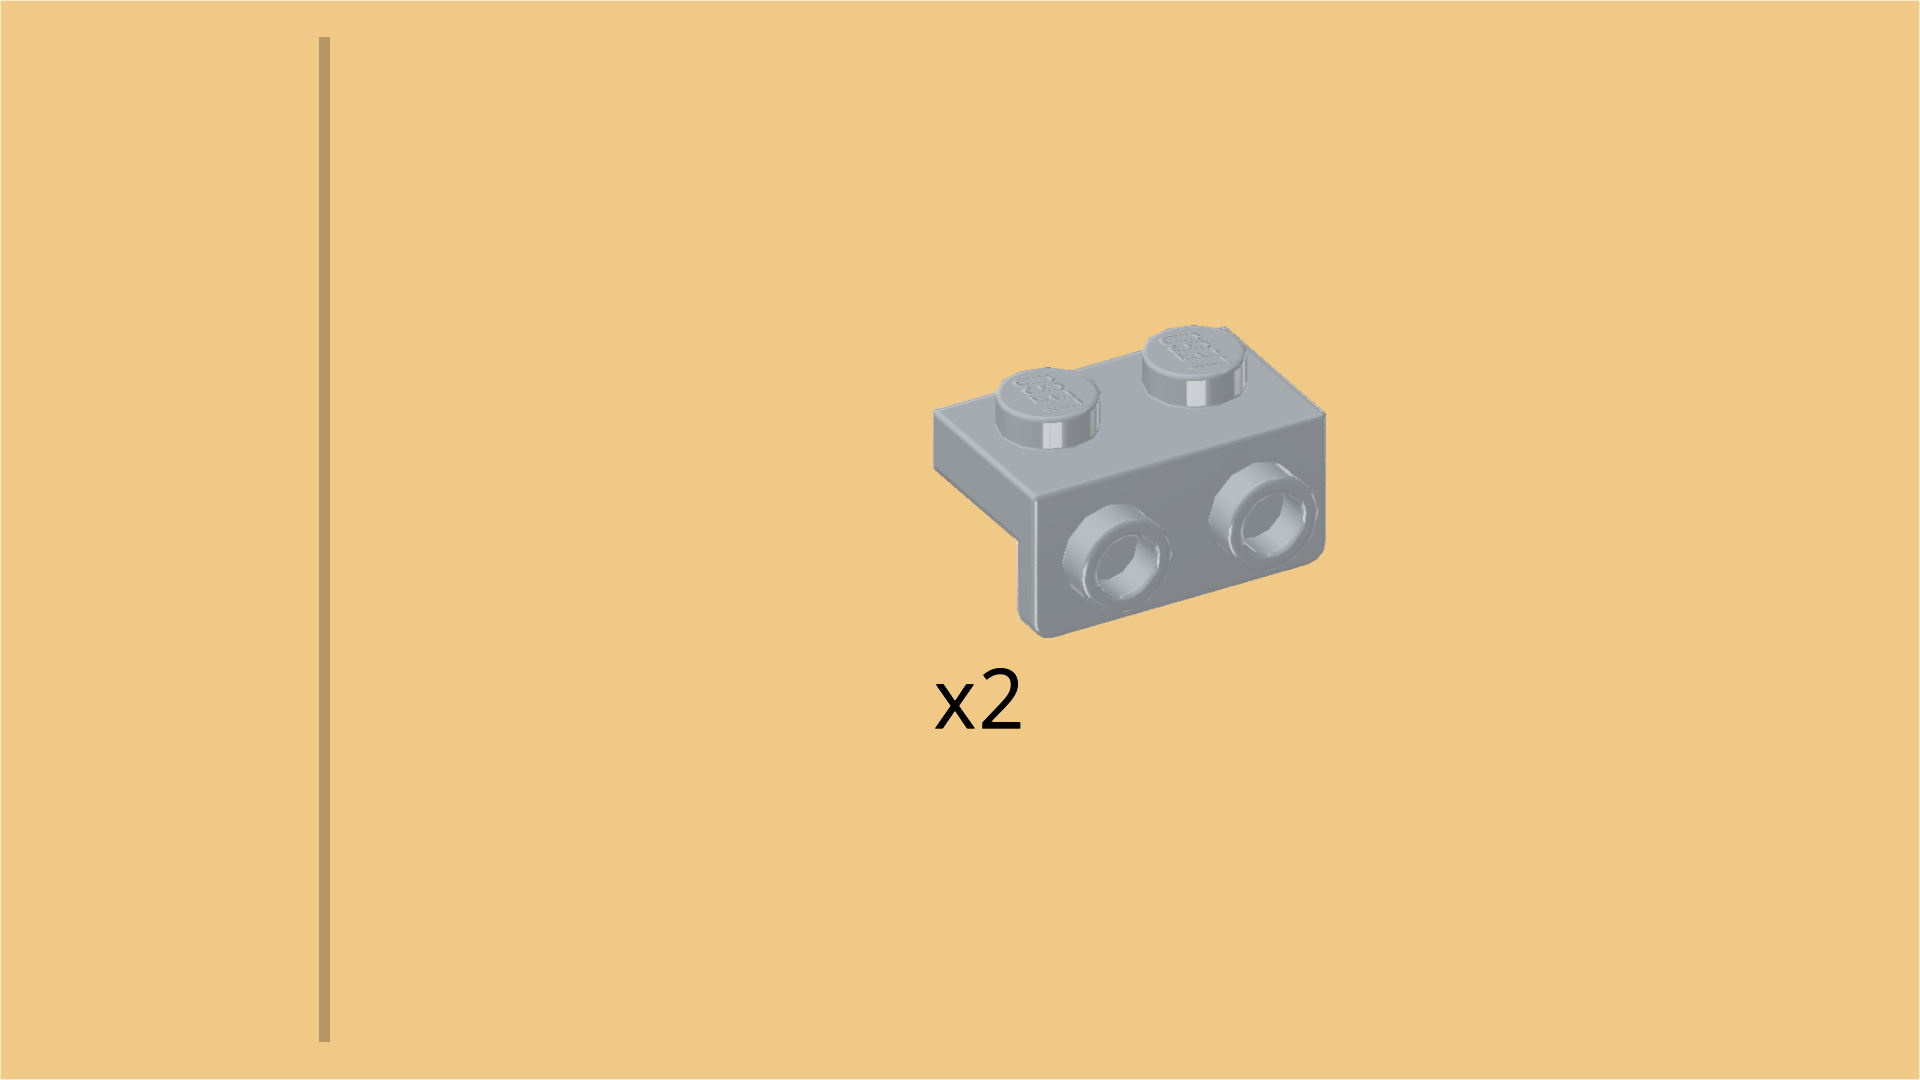
| and 2 dark stone grey bottom angle plates 1x2 - 2x2 with 4 side knobs. |
| Put 1 angle plate horizontally on the table, 4 side knobs to the front. |
| Put 1 plate 2x2 upright on the side knobs. |
| Repeat with the two remaining pieces. |
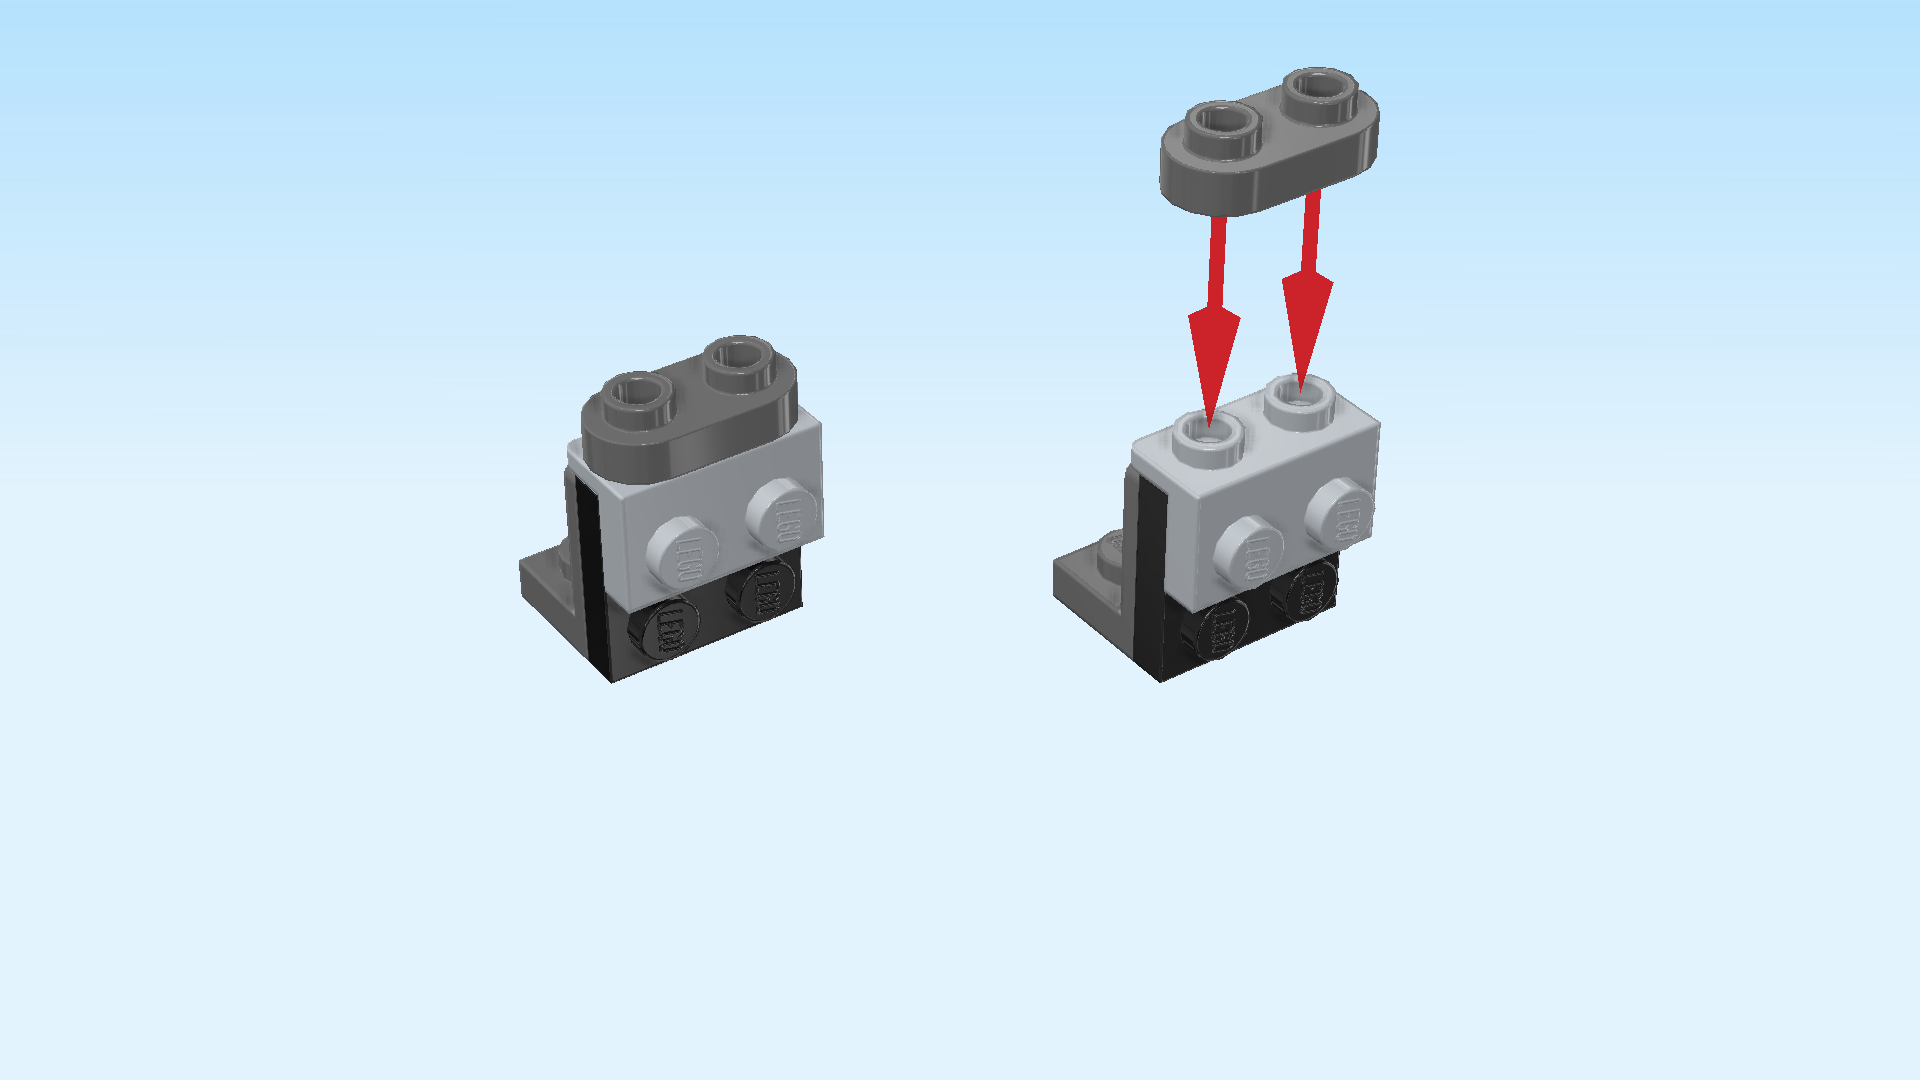
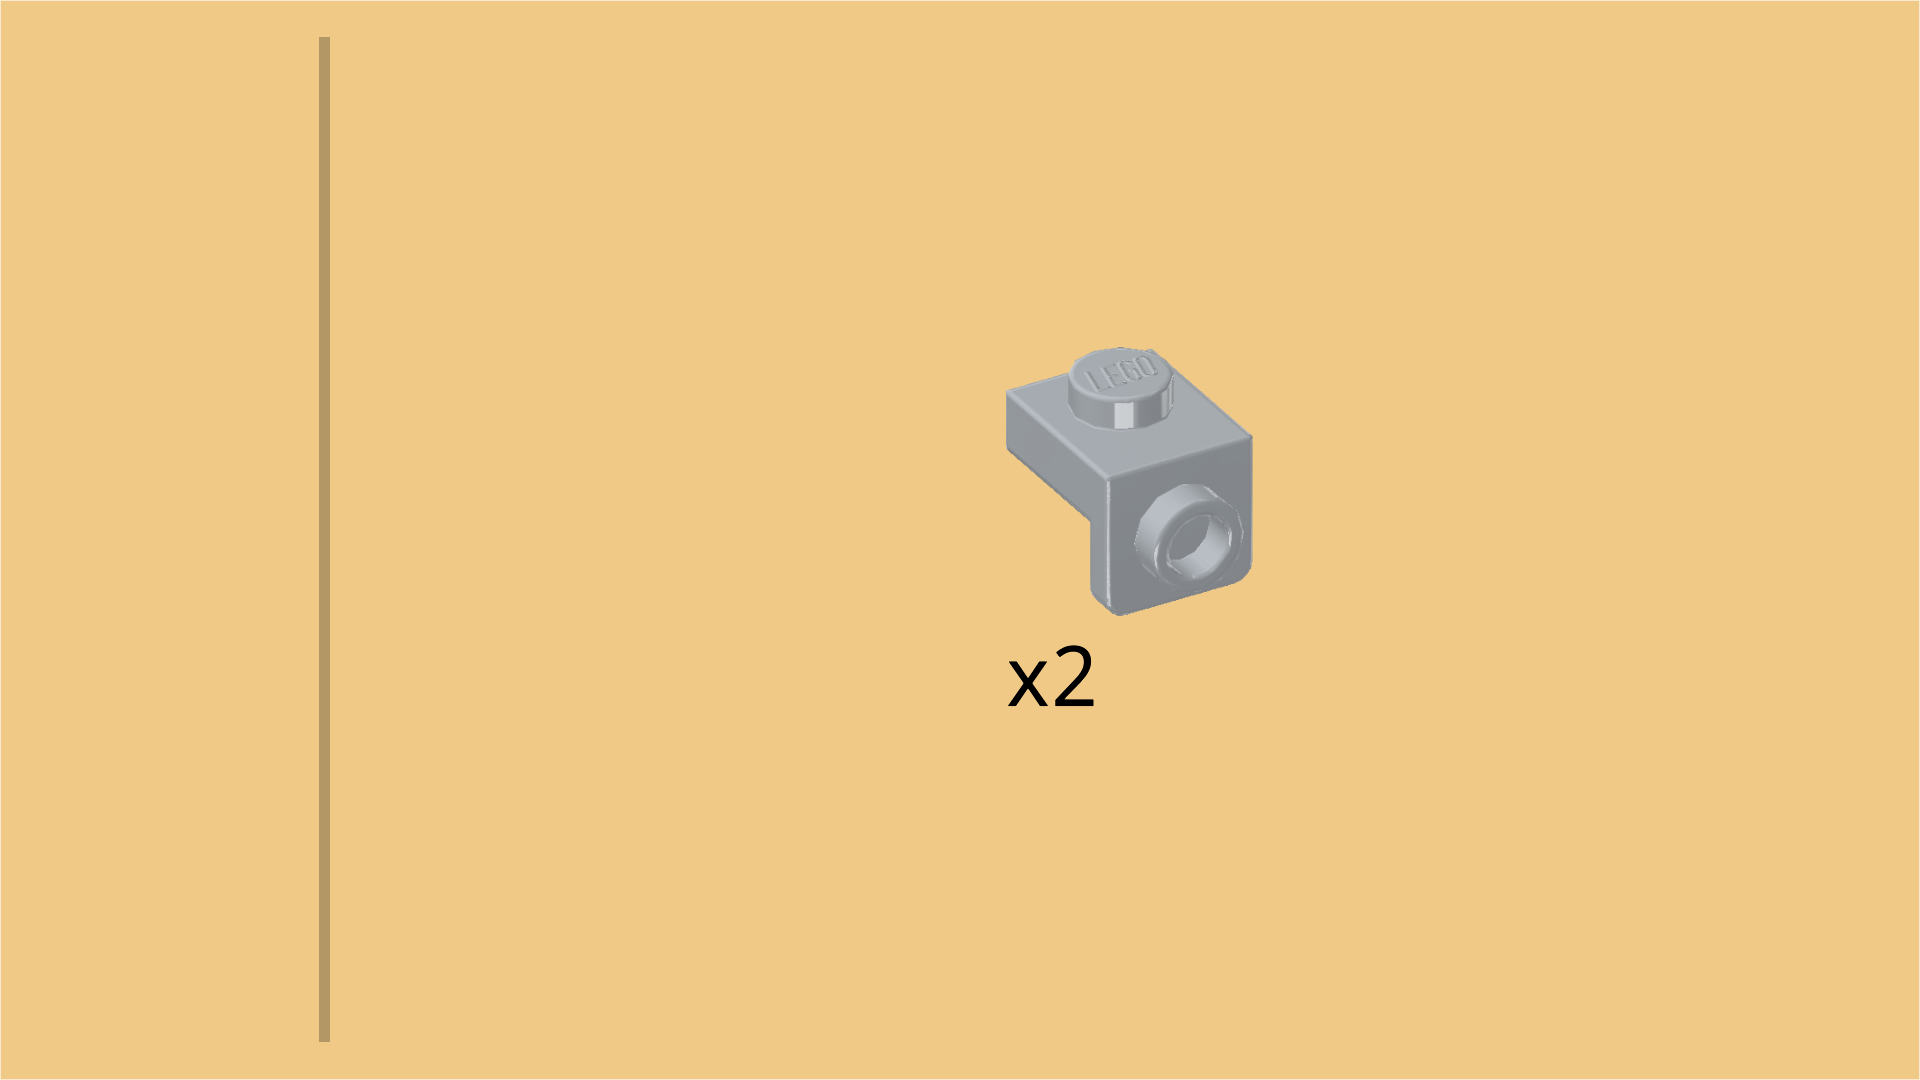
| Find 2 medium stone grey top angle plates 1x2 - 1x2 with 2 side knobs. |
| Turn 1 upright horizontally so that the hollow side knobs are pointing to the top, and the standard knobs are pointing towards you. |
| Mount it horizontally on the 2 top knobs of the side knobs pointing to the front on one of the 2 sub-parts. The side plate with 2 hollow knobs rests on the top edges of the previous pieces. |
| Repeat with the other angle plate. |
| Find 2 dark stone grey rounded plates 1x2. |
| Put 1 horizontally on the hollow top knobs of the previous piece. |
| Repeat on the other sub-part. |
| The 2 small sub-parts of the chest are finished! Well done! Mount 1 horizontally on the front row to the left of the plate with clasp, side panels and 4 side knobs to the front. |
| Repeat symmetrically at the back, side panels and 4 side knobs to the back. |
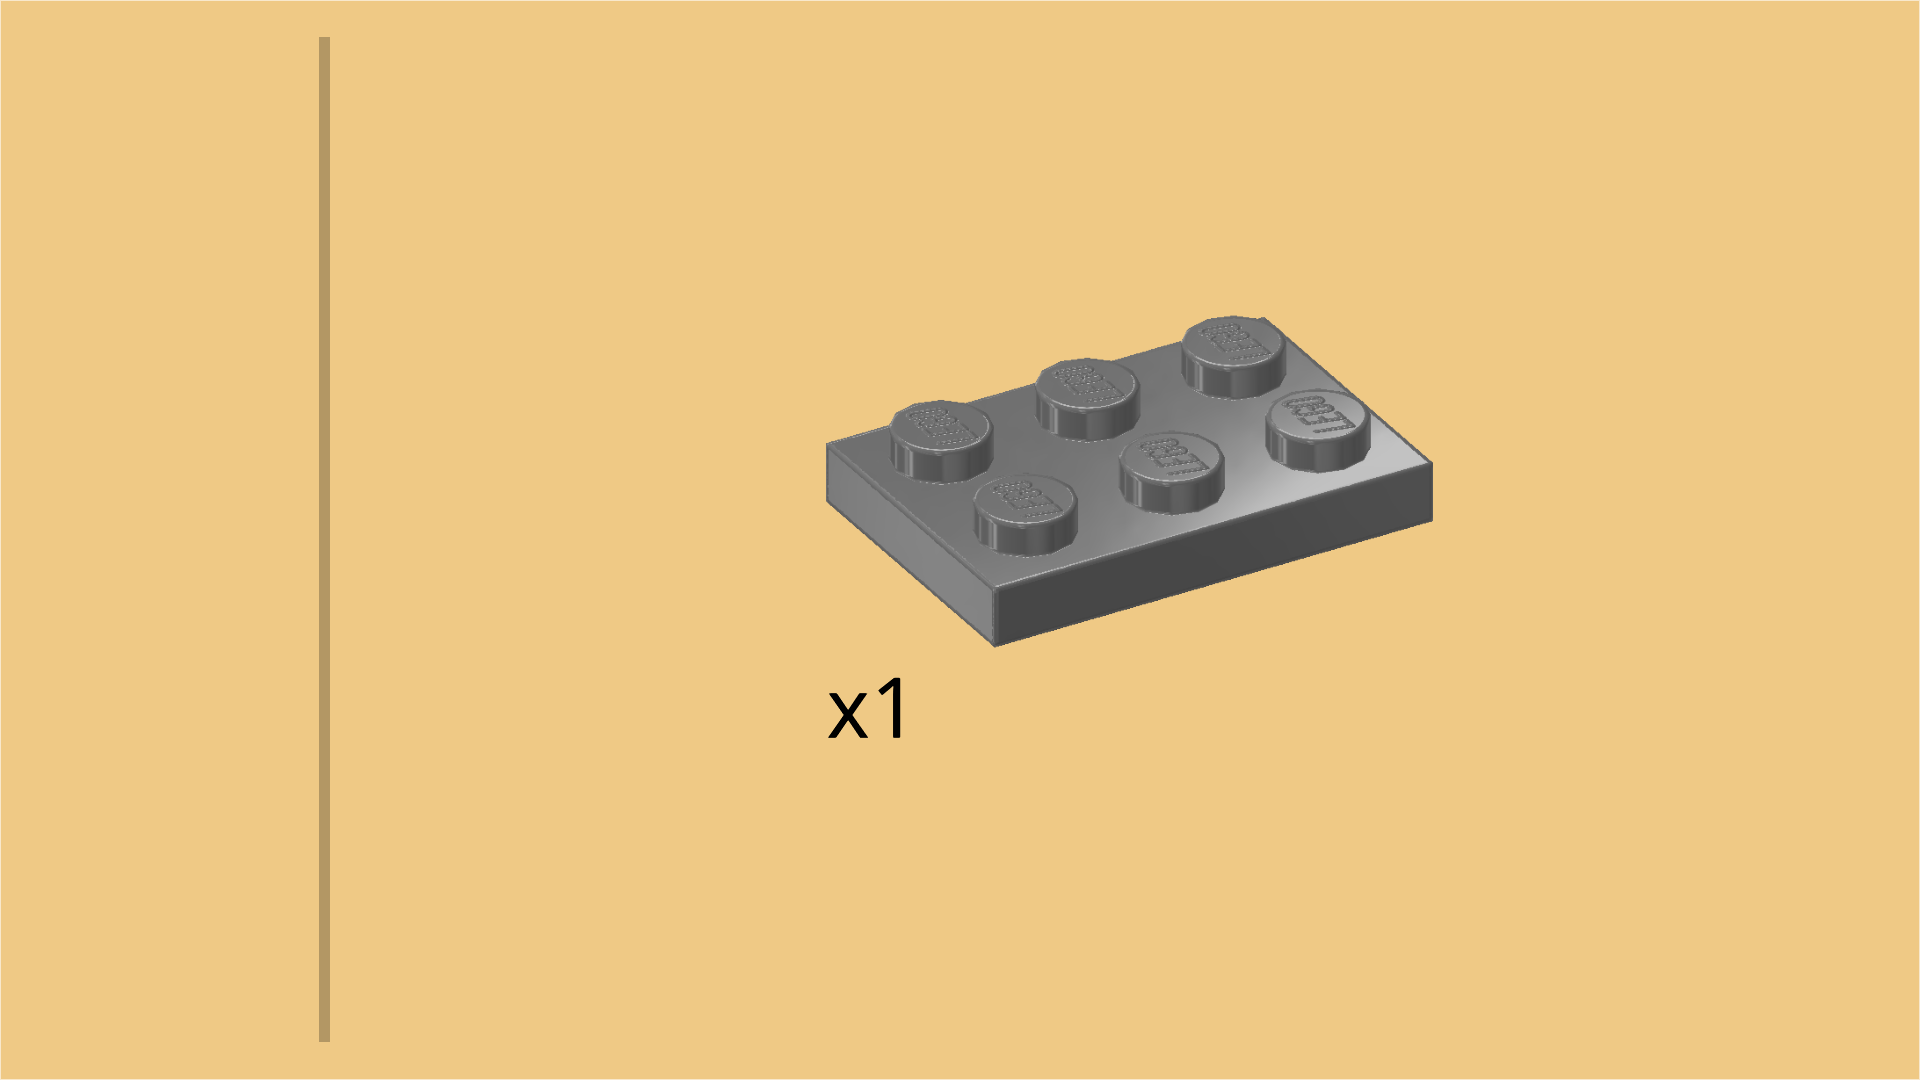
| Find 1 dark stone grey plate 2x3. |
| Put it horizontally to the left of the 2 previous pieces. |
| Now, we will make another 2 sub-parts of the chest. |
| Collect the following 4 pieces: |
| 2 black plates 2x2, |
| and 2 dark stone grey bottom angle plates 1x2 - 2x2 with 4 side knobs. |
| Put 1 angle plate horizontally on the table, 4 side knobs to the front. |
| Put 1 plate 2x2 upright on the side knobs. |
| Repeat with the two remaining pieces. |
| The 2 sub-parts of the chest are finished! Mount 1 horizontally on the front row to the left of the plate 2x3 we have mounted in the previous step. Make sure the 4 side knobs are pointing to the front. |
| Mount the other one horizontally behind the first sub-part, 4 side knobs to the back. |
| Find 2 black bottom angle plates 1x1 - 1x2 with 2 side knobs. |
| Put 1 to the left of the previous piece, 2 side knobs to the back. |
| Put the other one in front of the previous piece, 2 side knobs to the front. |
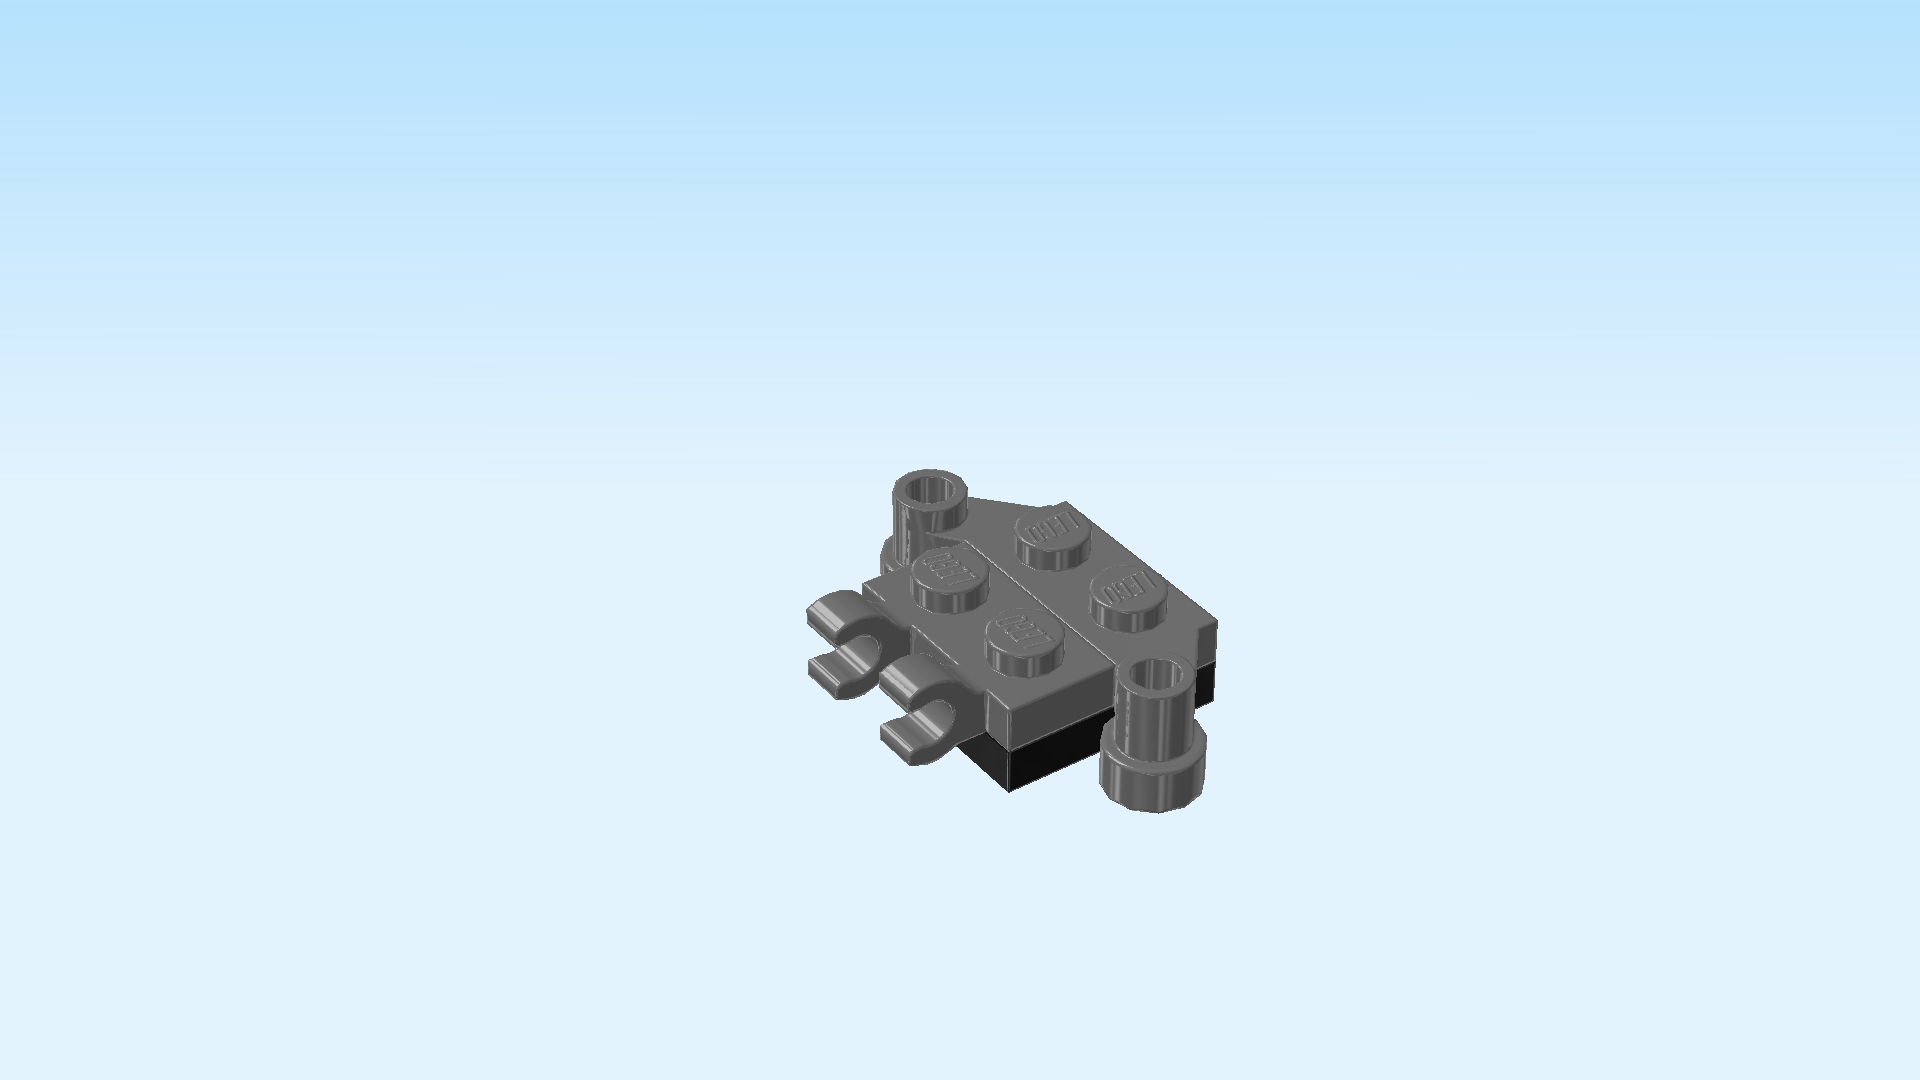
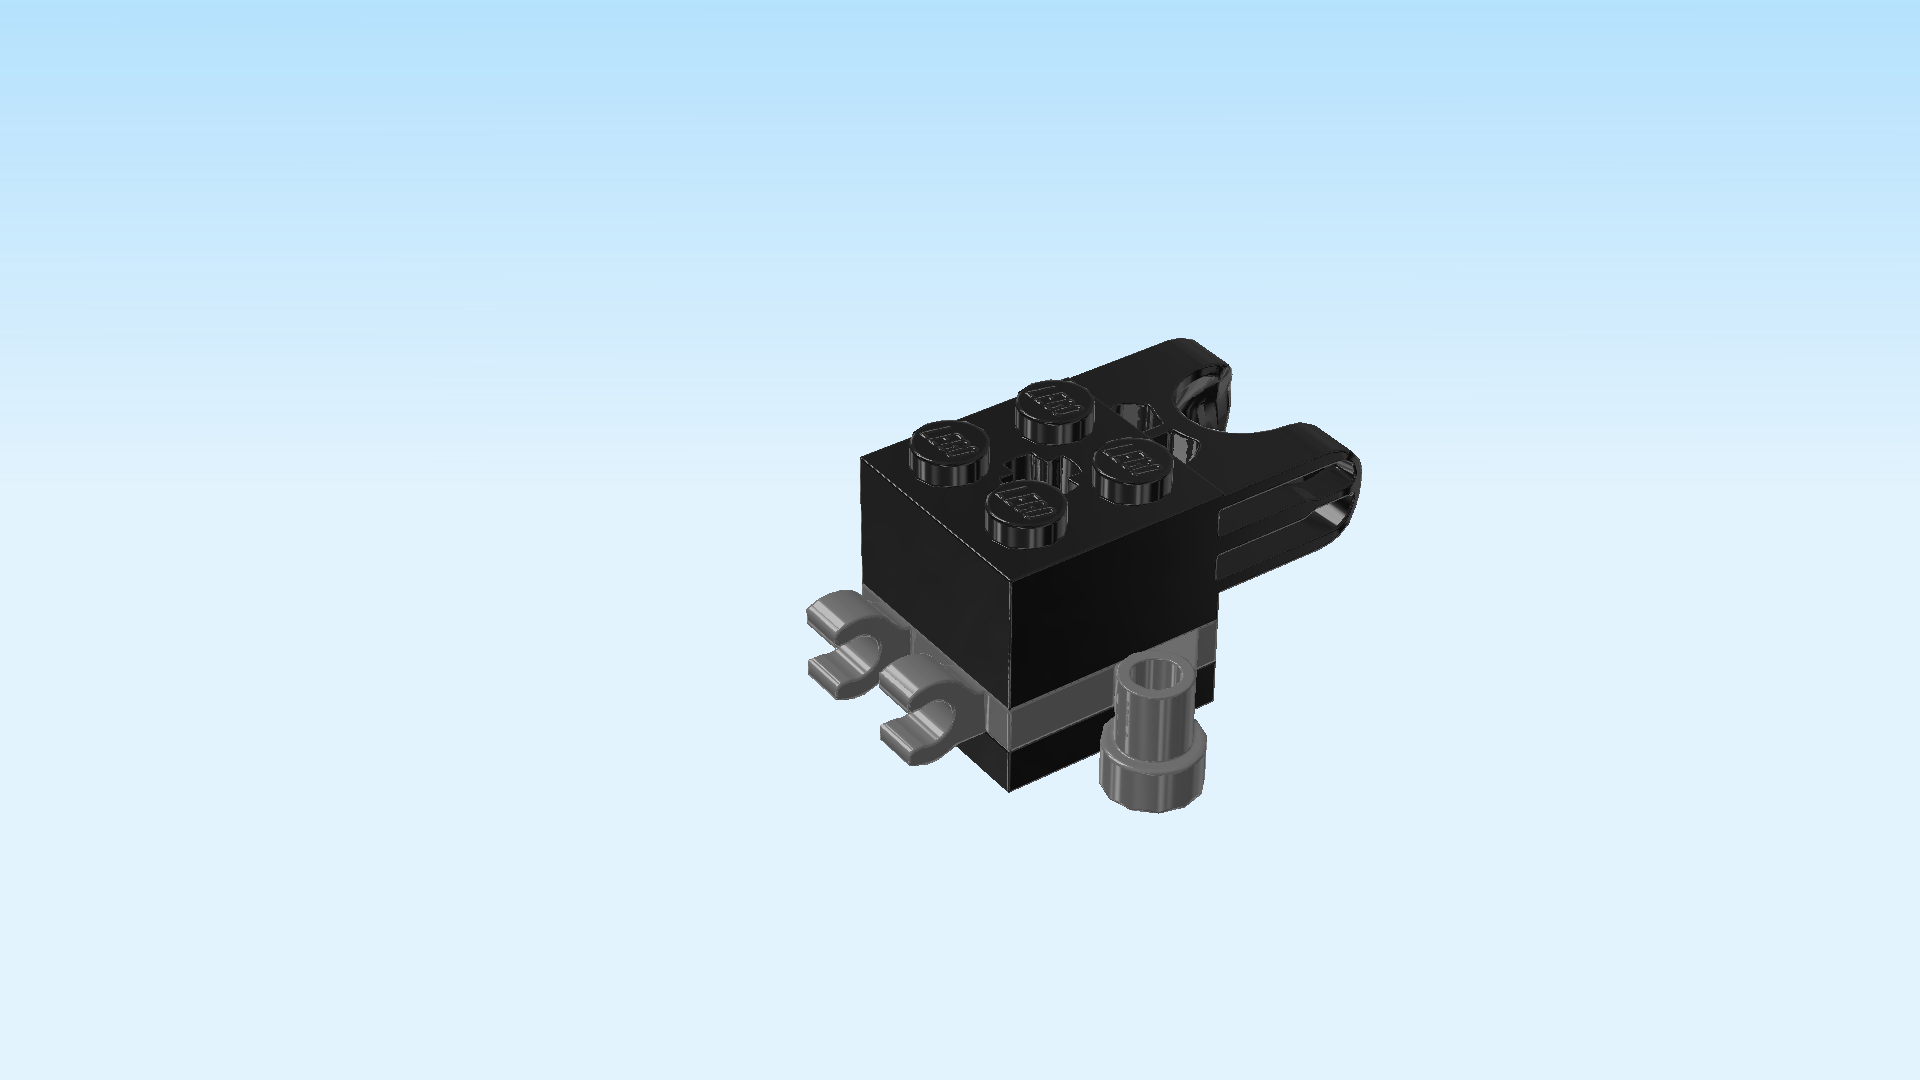
| Find 2 dark stone grey bricks 1x2x1⅓ with joint socket. |
| Put 1 horizontally to the left of the previous piece, joint socket to the front. |
| Put the other one horizontally behind the previous piece, joint socket to the back. |
| In a later step, the 2 joint sockets will be used to mount the Grimkeeper's legs. |
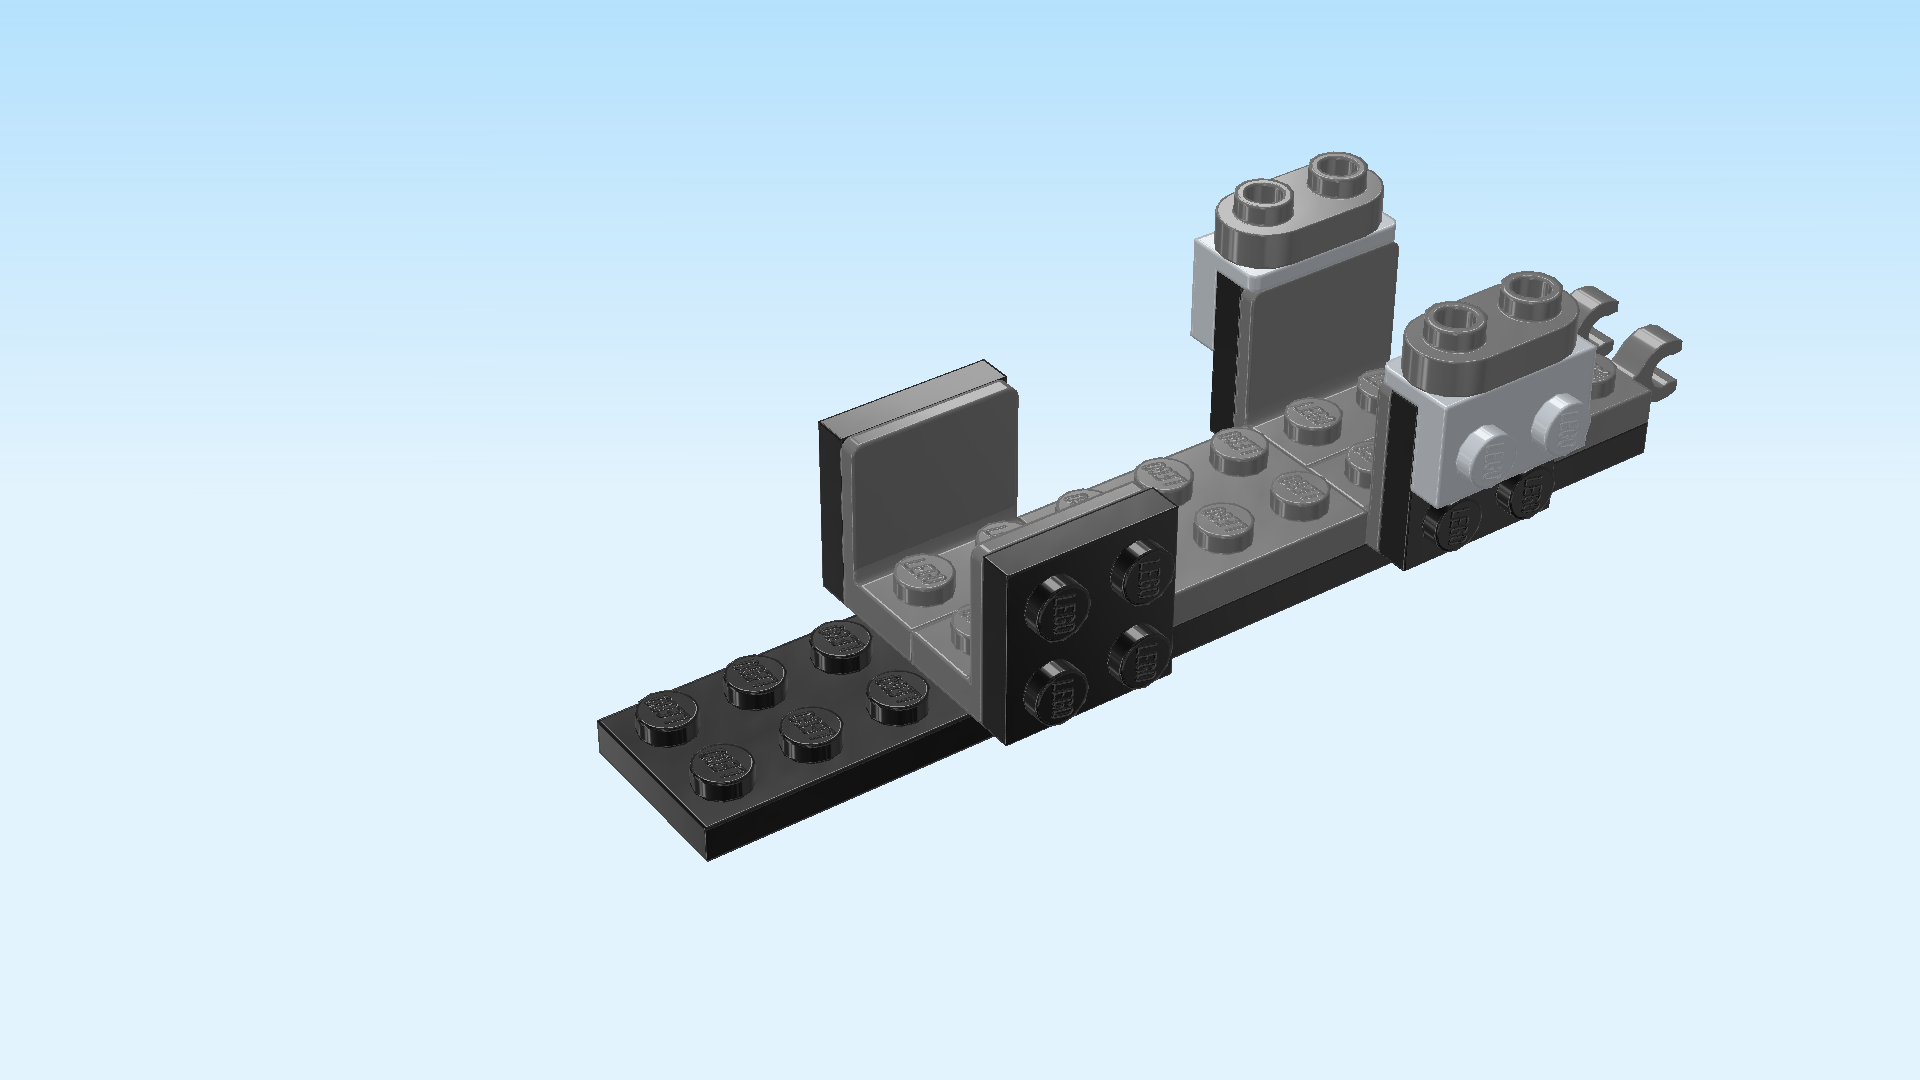
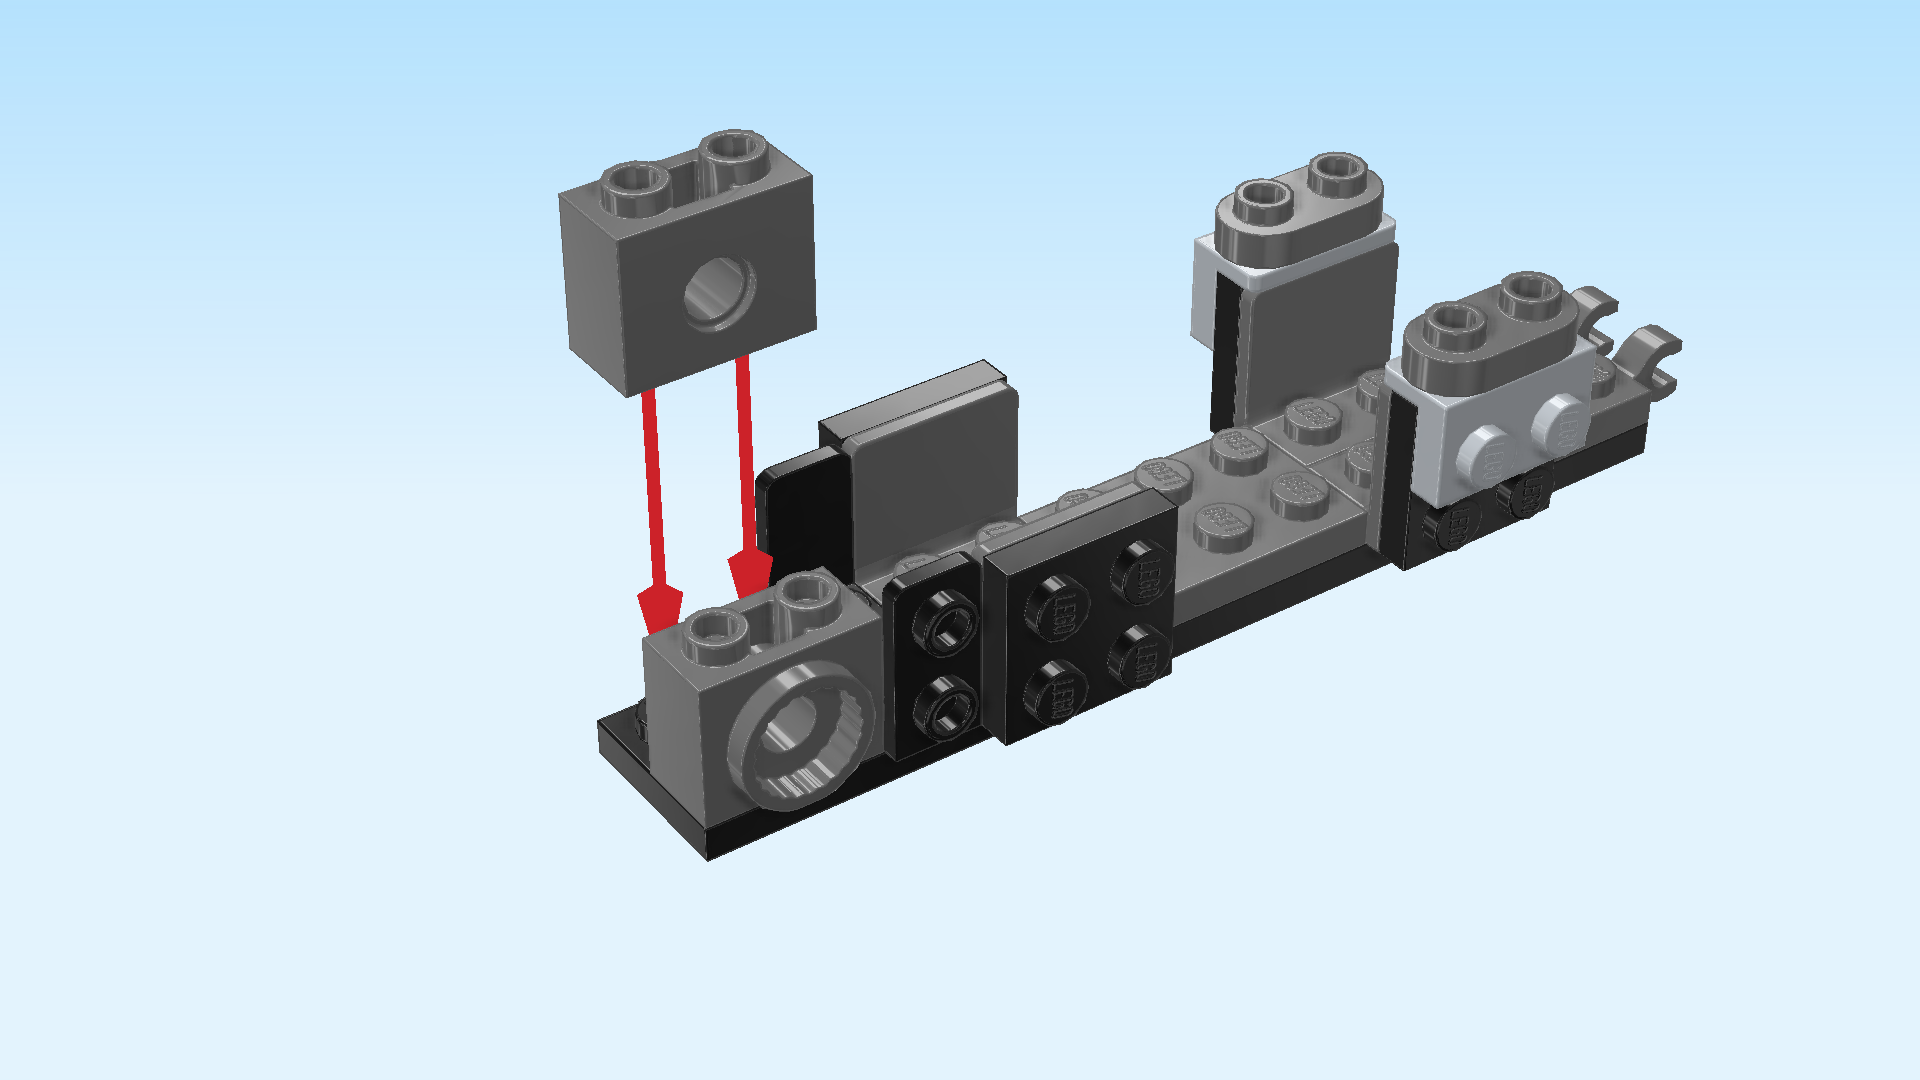
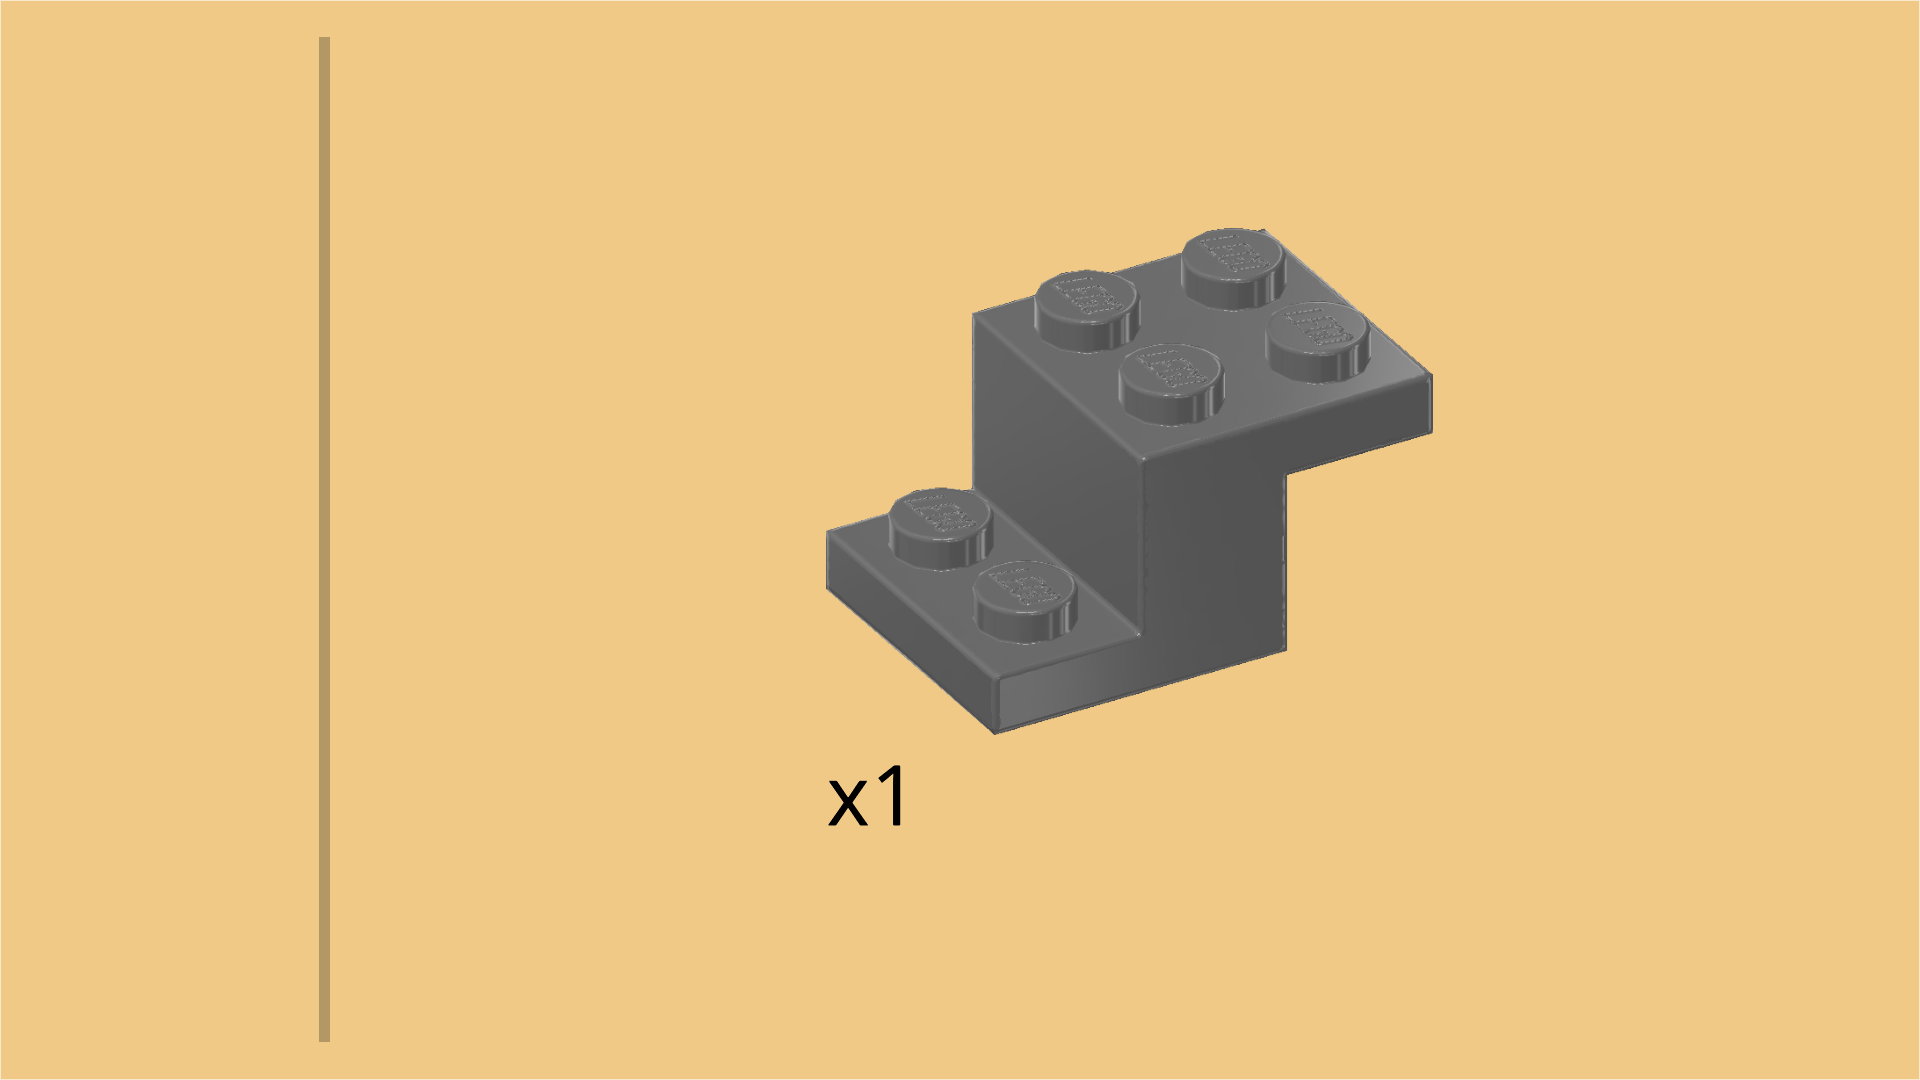
| Find 1 dark stone grey stepped brick 1x2 - 2x2 with top and bottom plate. |
| Turn it horizontally so that its top plate is pointing to the left. |
| Mount it so that its top plate is covering the right knobs of the 2 previous pieces. |
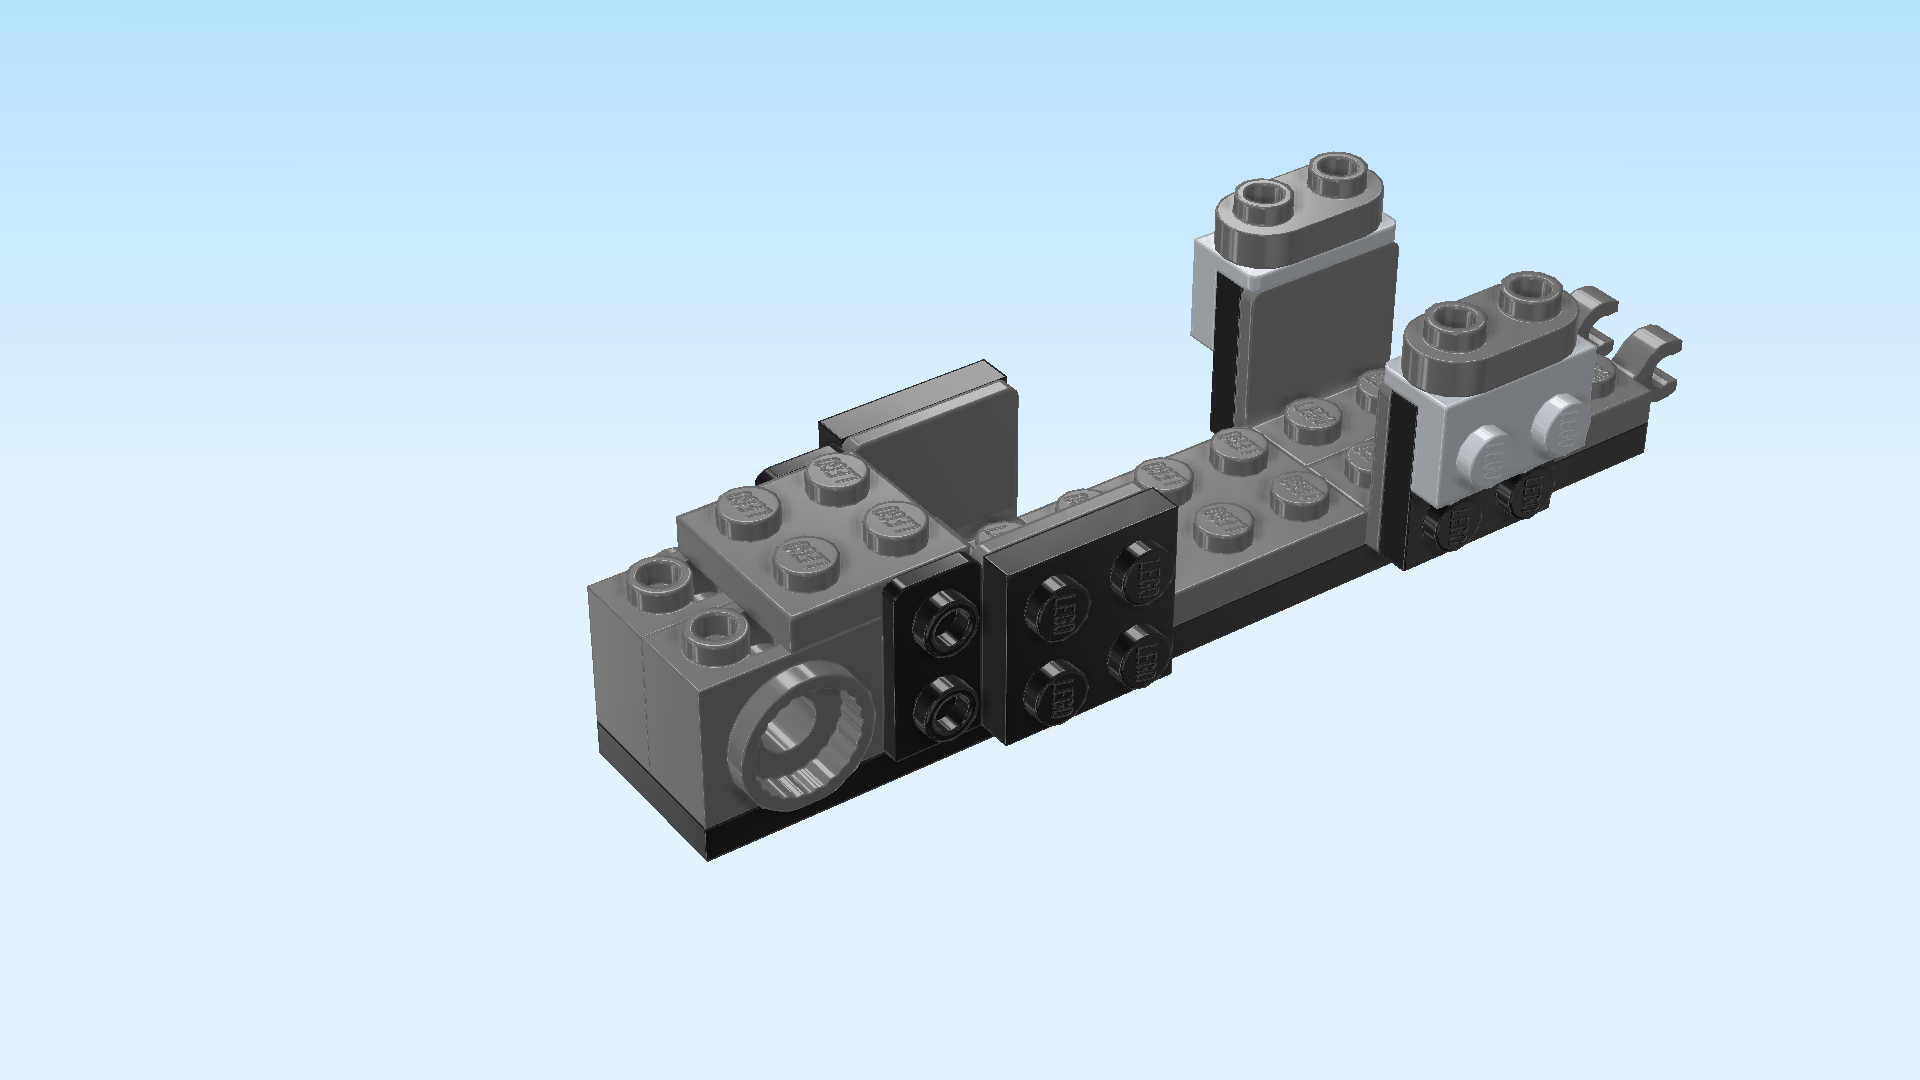
| Now, we will make another small sub-part of the chest. |
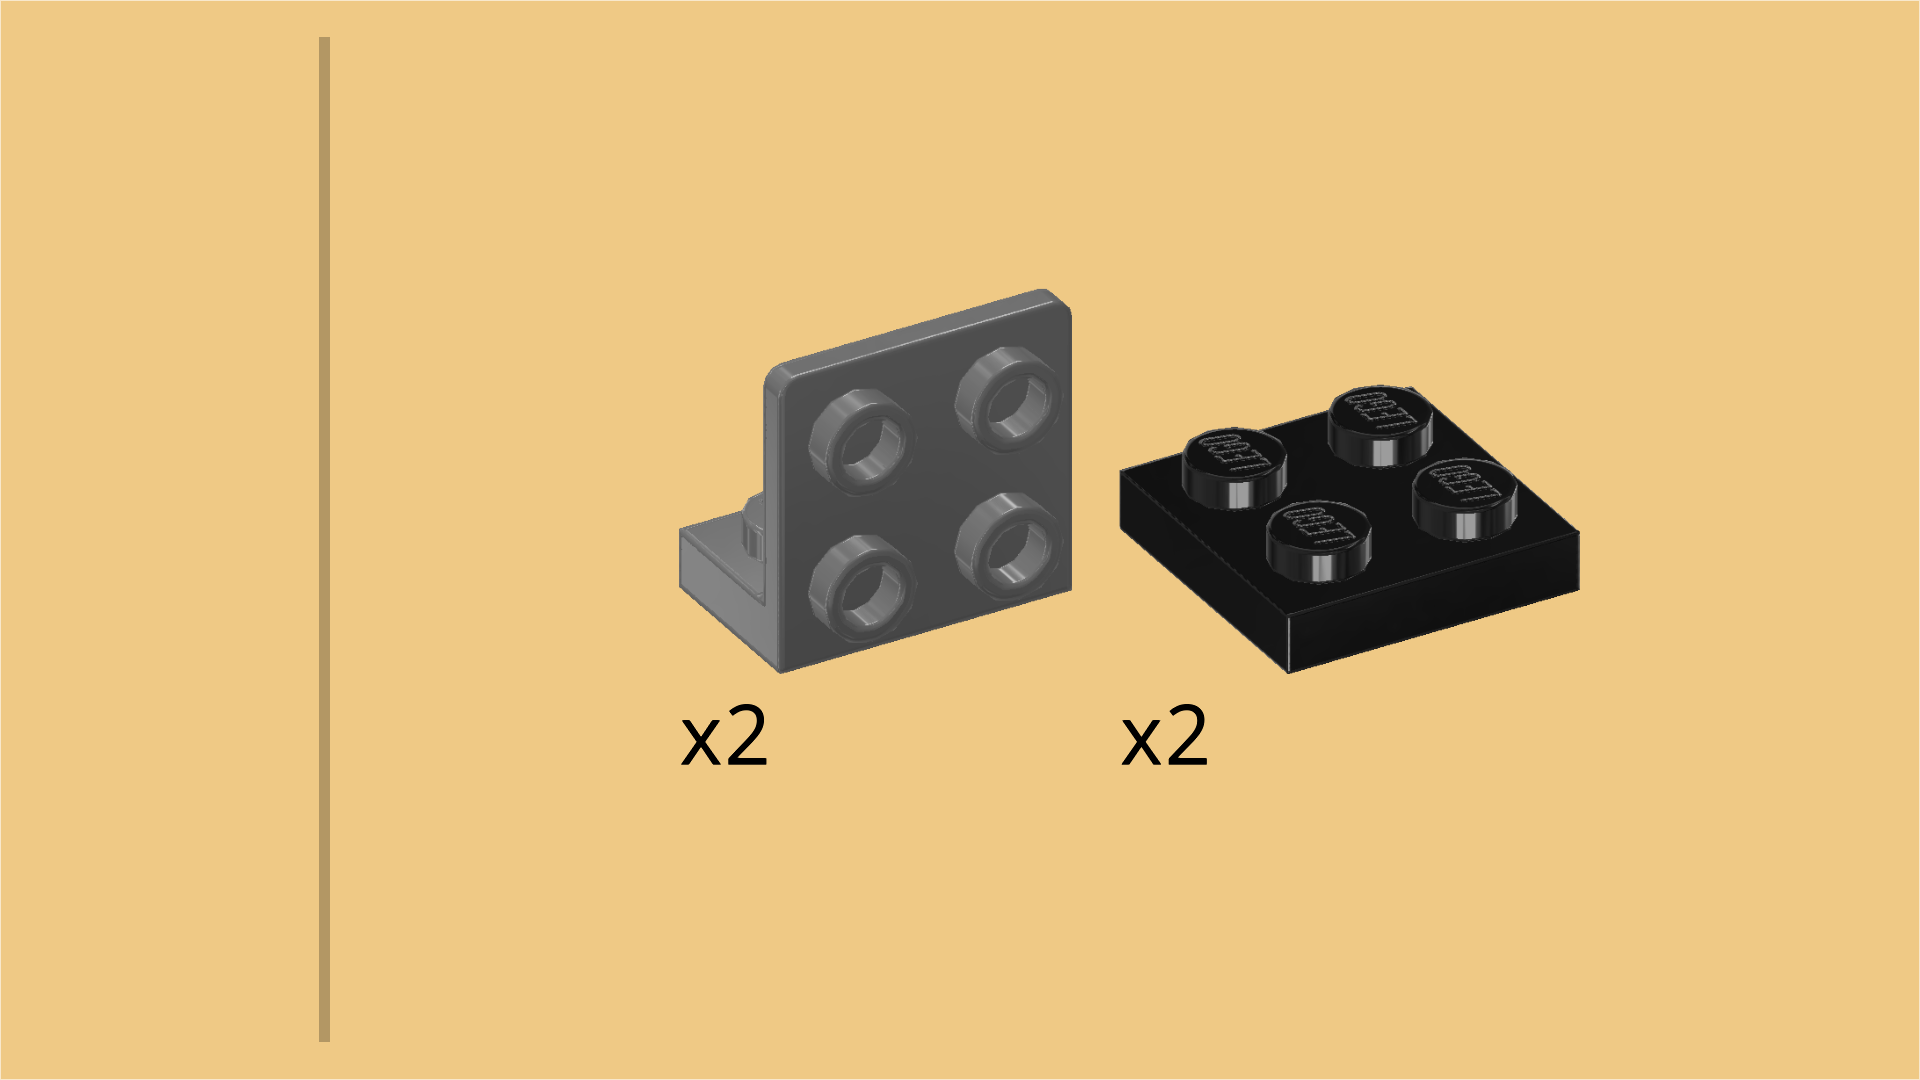
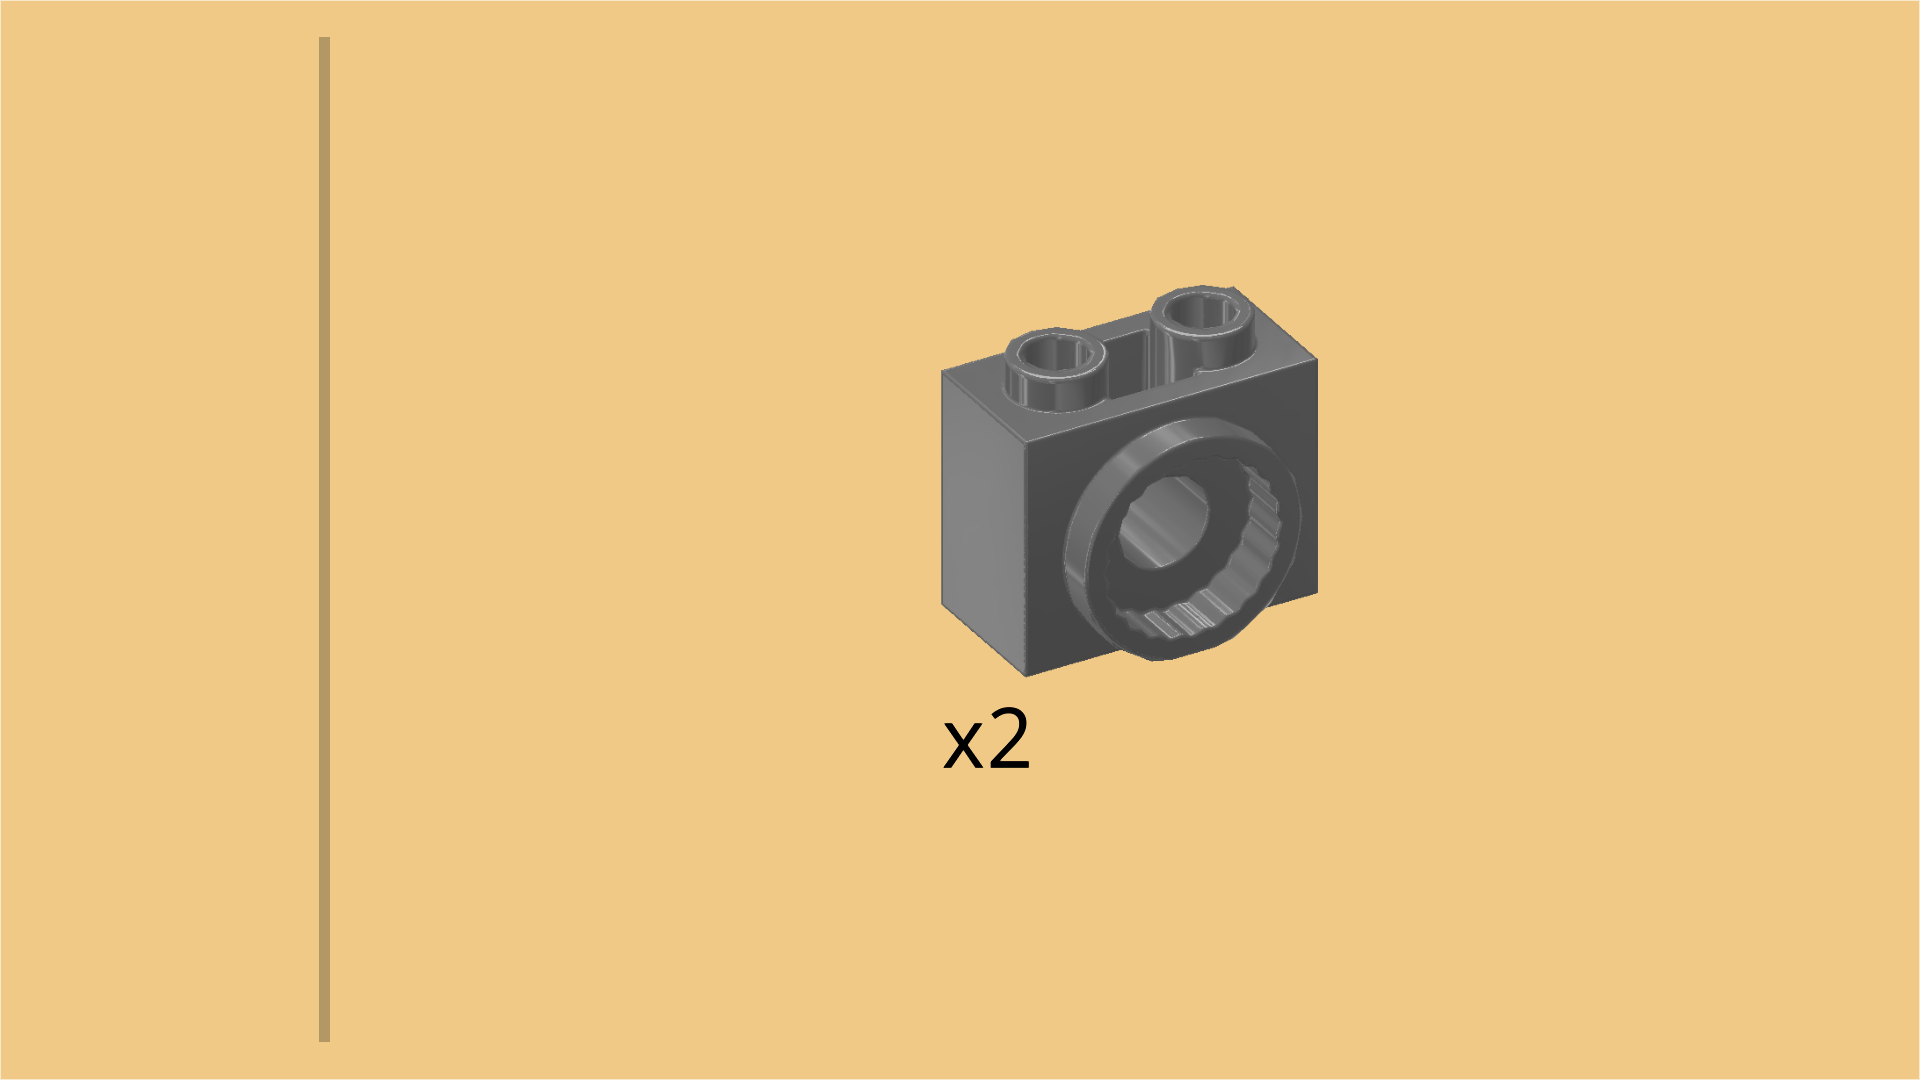
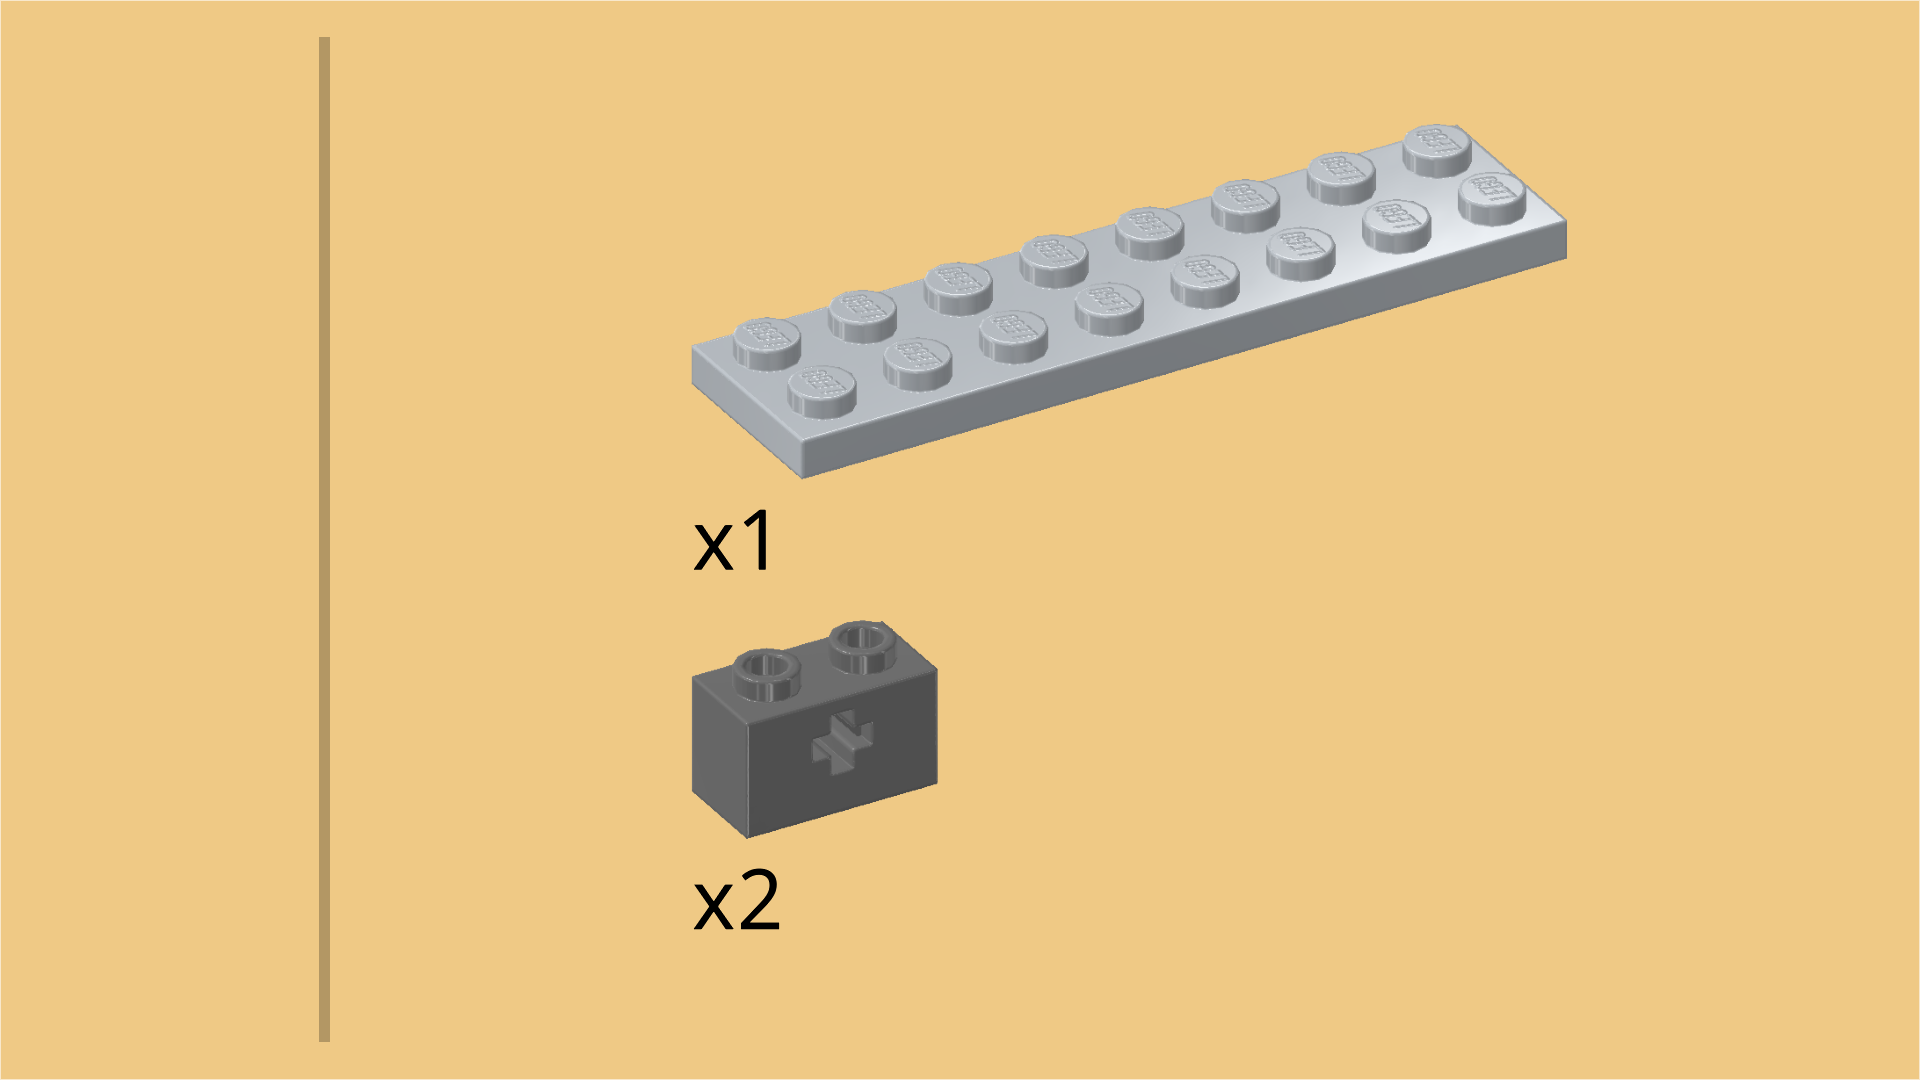
| Collect the following 3 pieces: |
| 1 medium stone grey plate 2x8, |
| and 2 dark stone grey bricks 1x2 with side cross hole. |
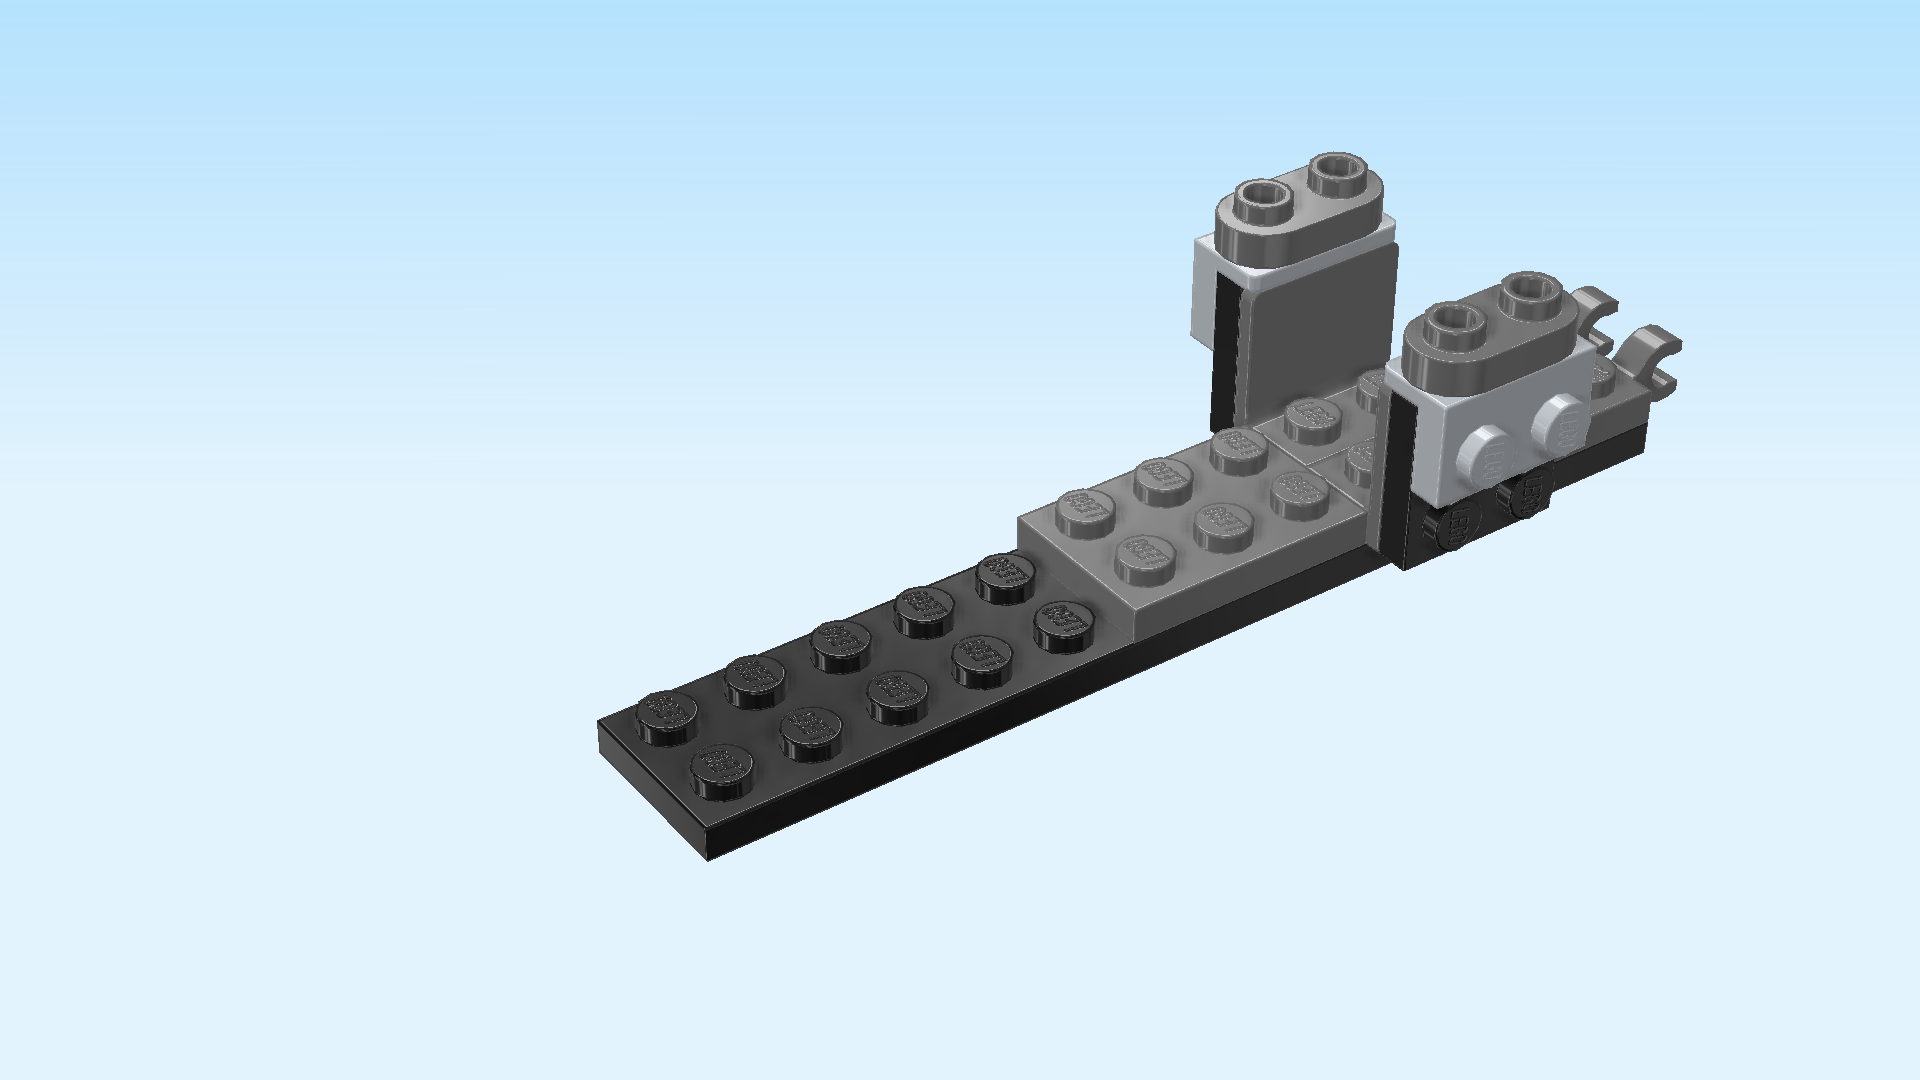
| Put the plate 2x8 horizontally on the table. |
| Put 1 brick 1x2 vertically on the rightmost column. |
| Put the other brick 1x2 vertically to the left of the previous piece. |
| Mount this sub-part of the chest horizontally on the main structure, starting from the right edge, 2 bricks 1x2 on the right. |
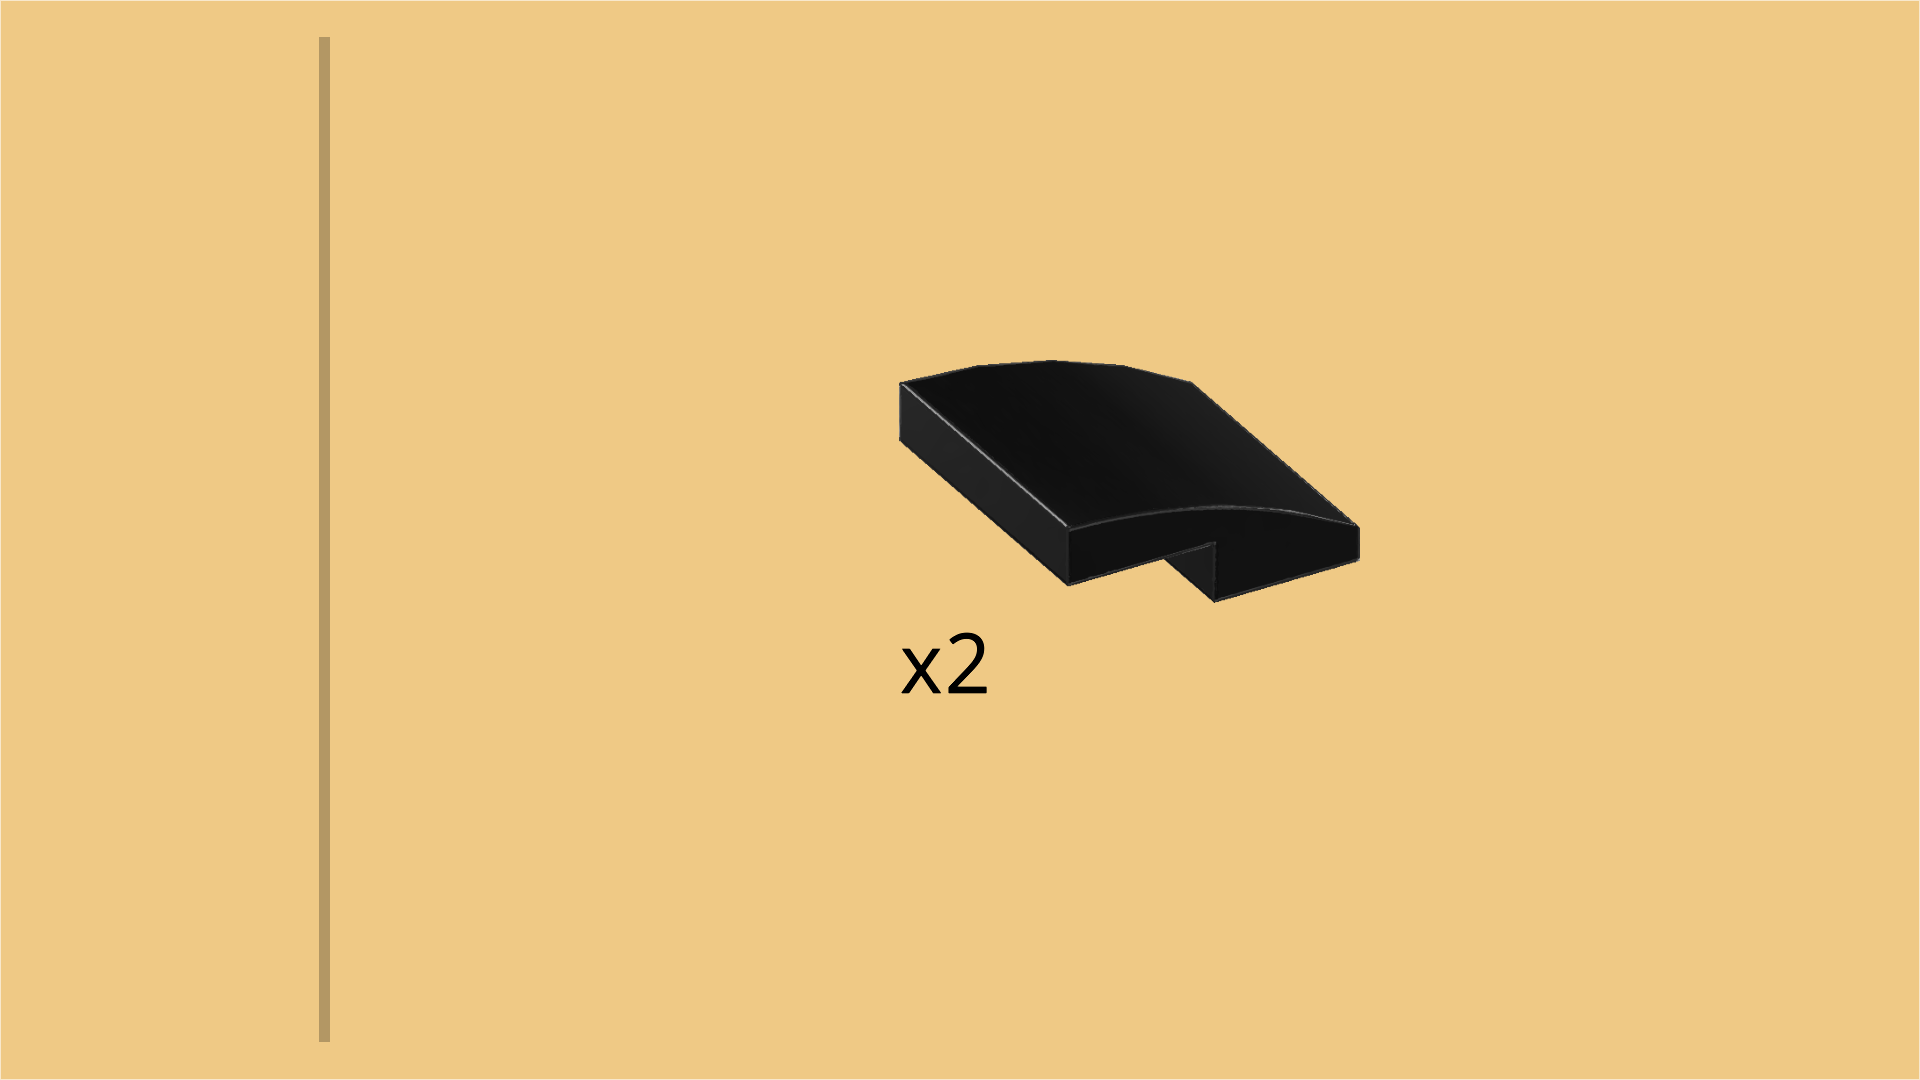
| Find 2 black one-stepped curve tiles 2x2x⅔. |
| Turn 1 upright, curved surface facing you, slope towards the left. |
| Mount it on the 4 leftmost side knobs pointing to the front. |
| Repeat symmetrically at the back. |
| Find 2 medium stone grey top angle plates 1x1 - 1x1 with side knob. |
| Turn 1 upright so that the hollow side knob is pointing to the top, and the standard knob is pointing to the back. |
| Mount it to the right of the previous piece on the top side knob. The side panel with hollow knob will rest on the top edges of the underlying panels. |
| Repeat symmetrically at the front. |
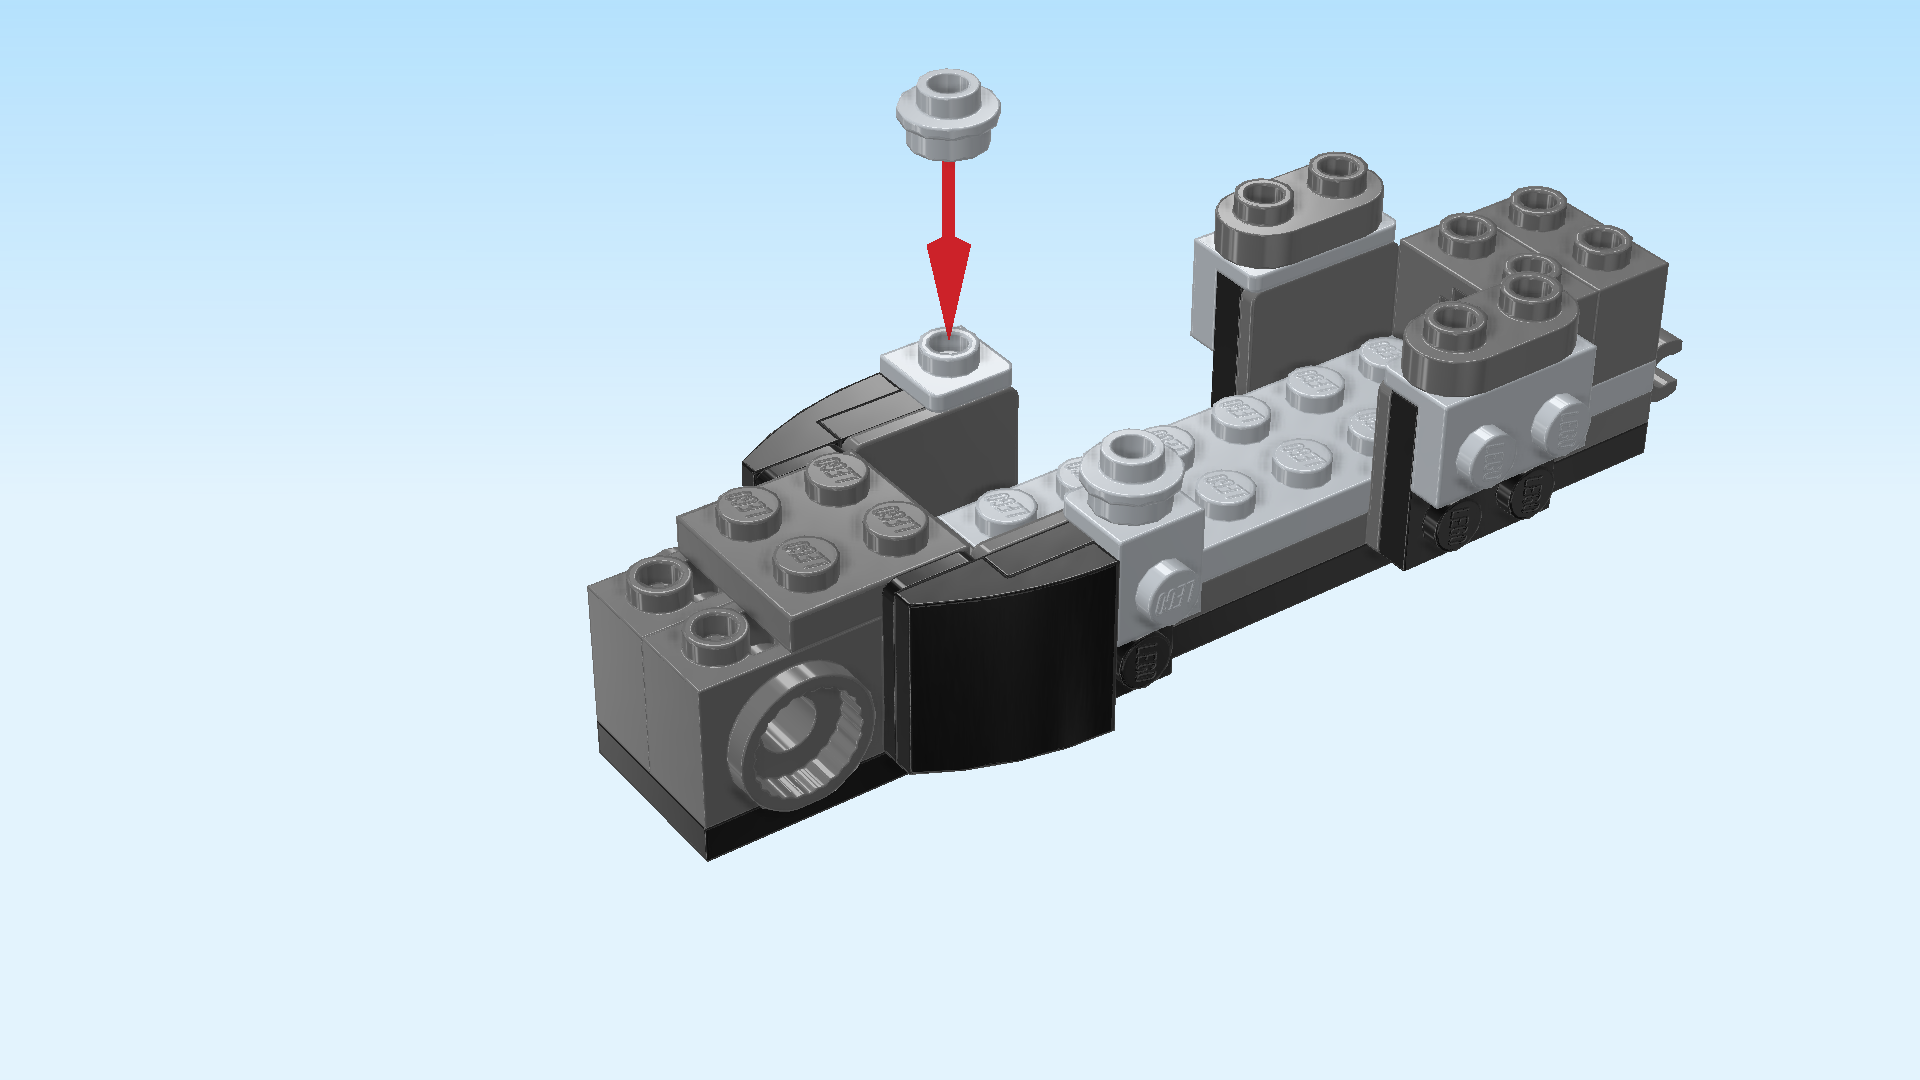
| Find 2 medium stone grey round plates 1x1 with through-hole. |
| Put 1 on the hollow top knob of the previous piece. |
| Repeat symmetrically at the back. |
| Collect the following 3 pieces: |
| 1 black plate 1x2 with ragged side rock, |
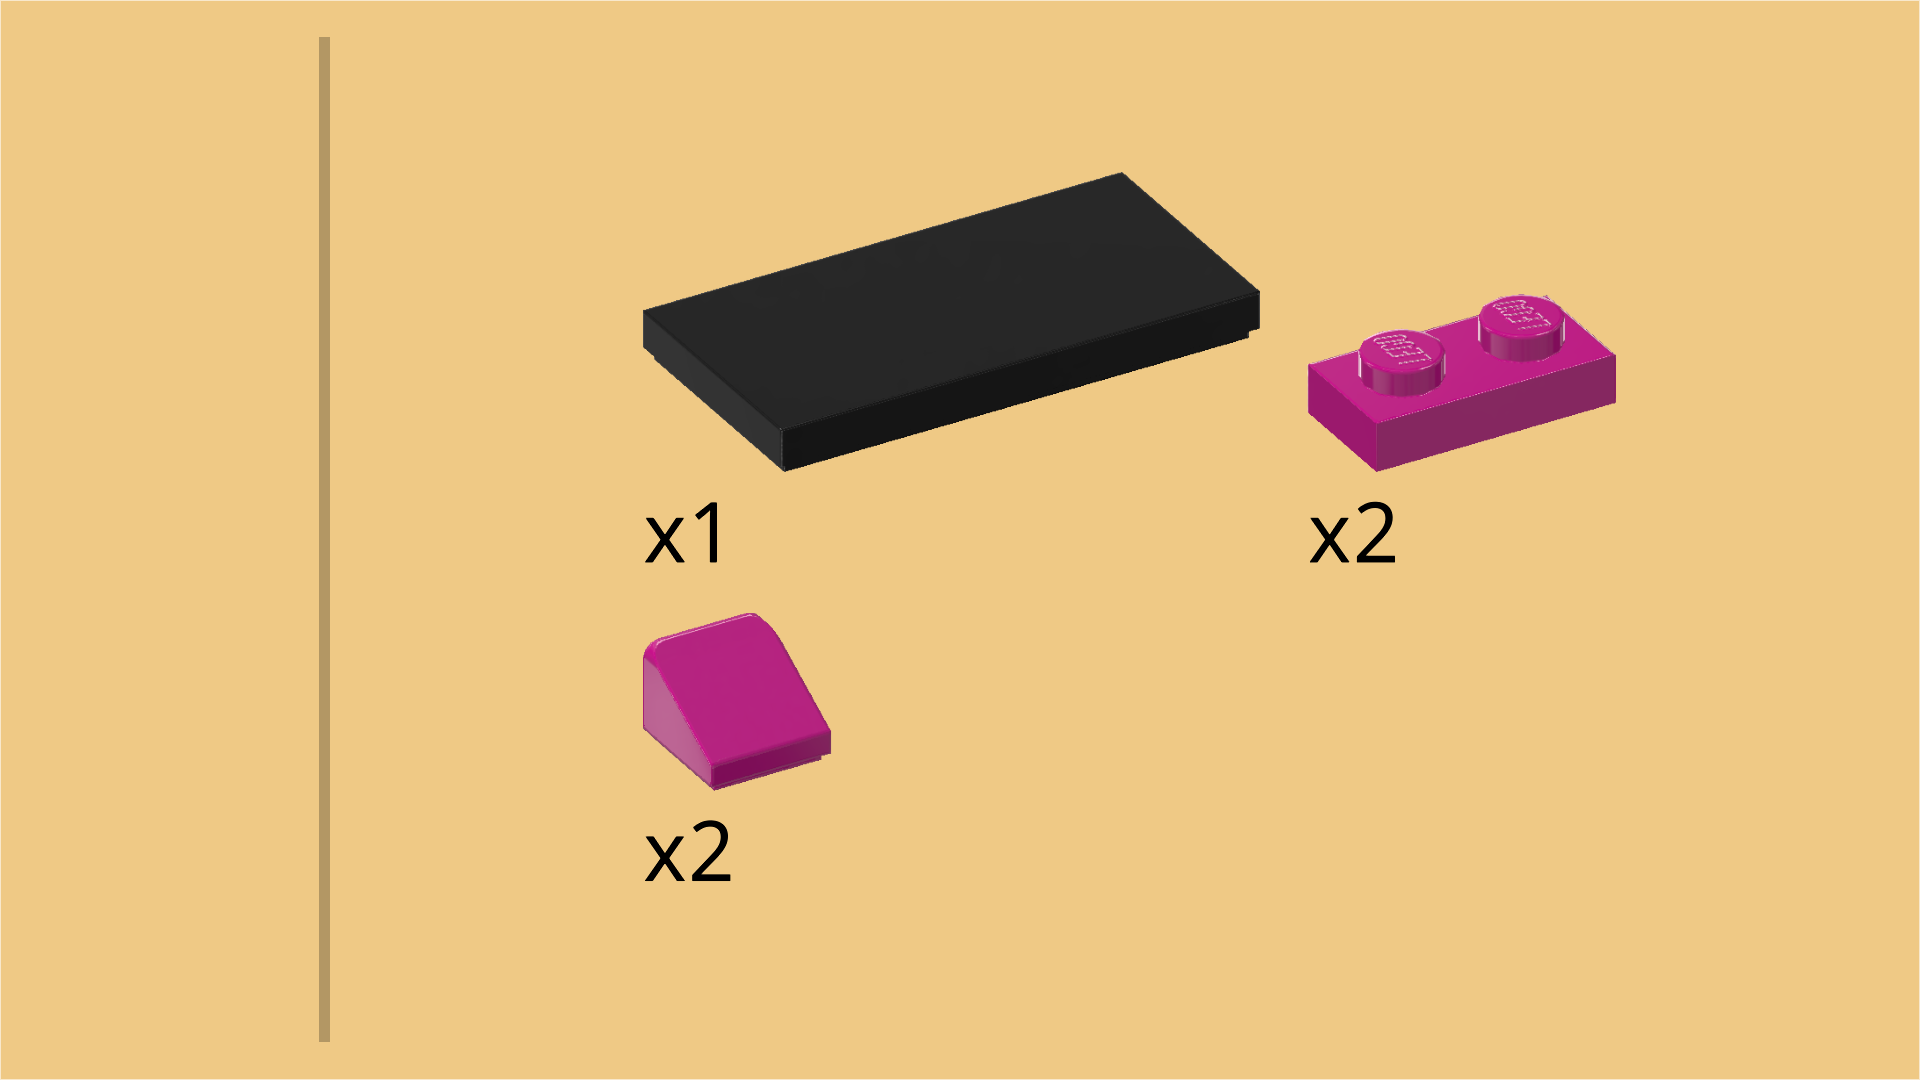
| and 2 purple violet plates 1x2. |
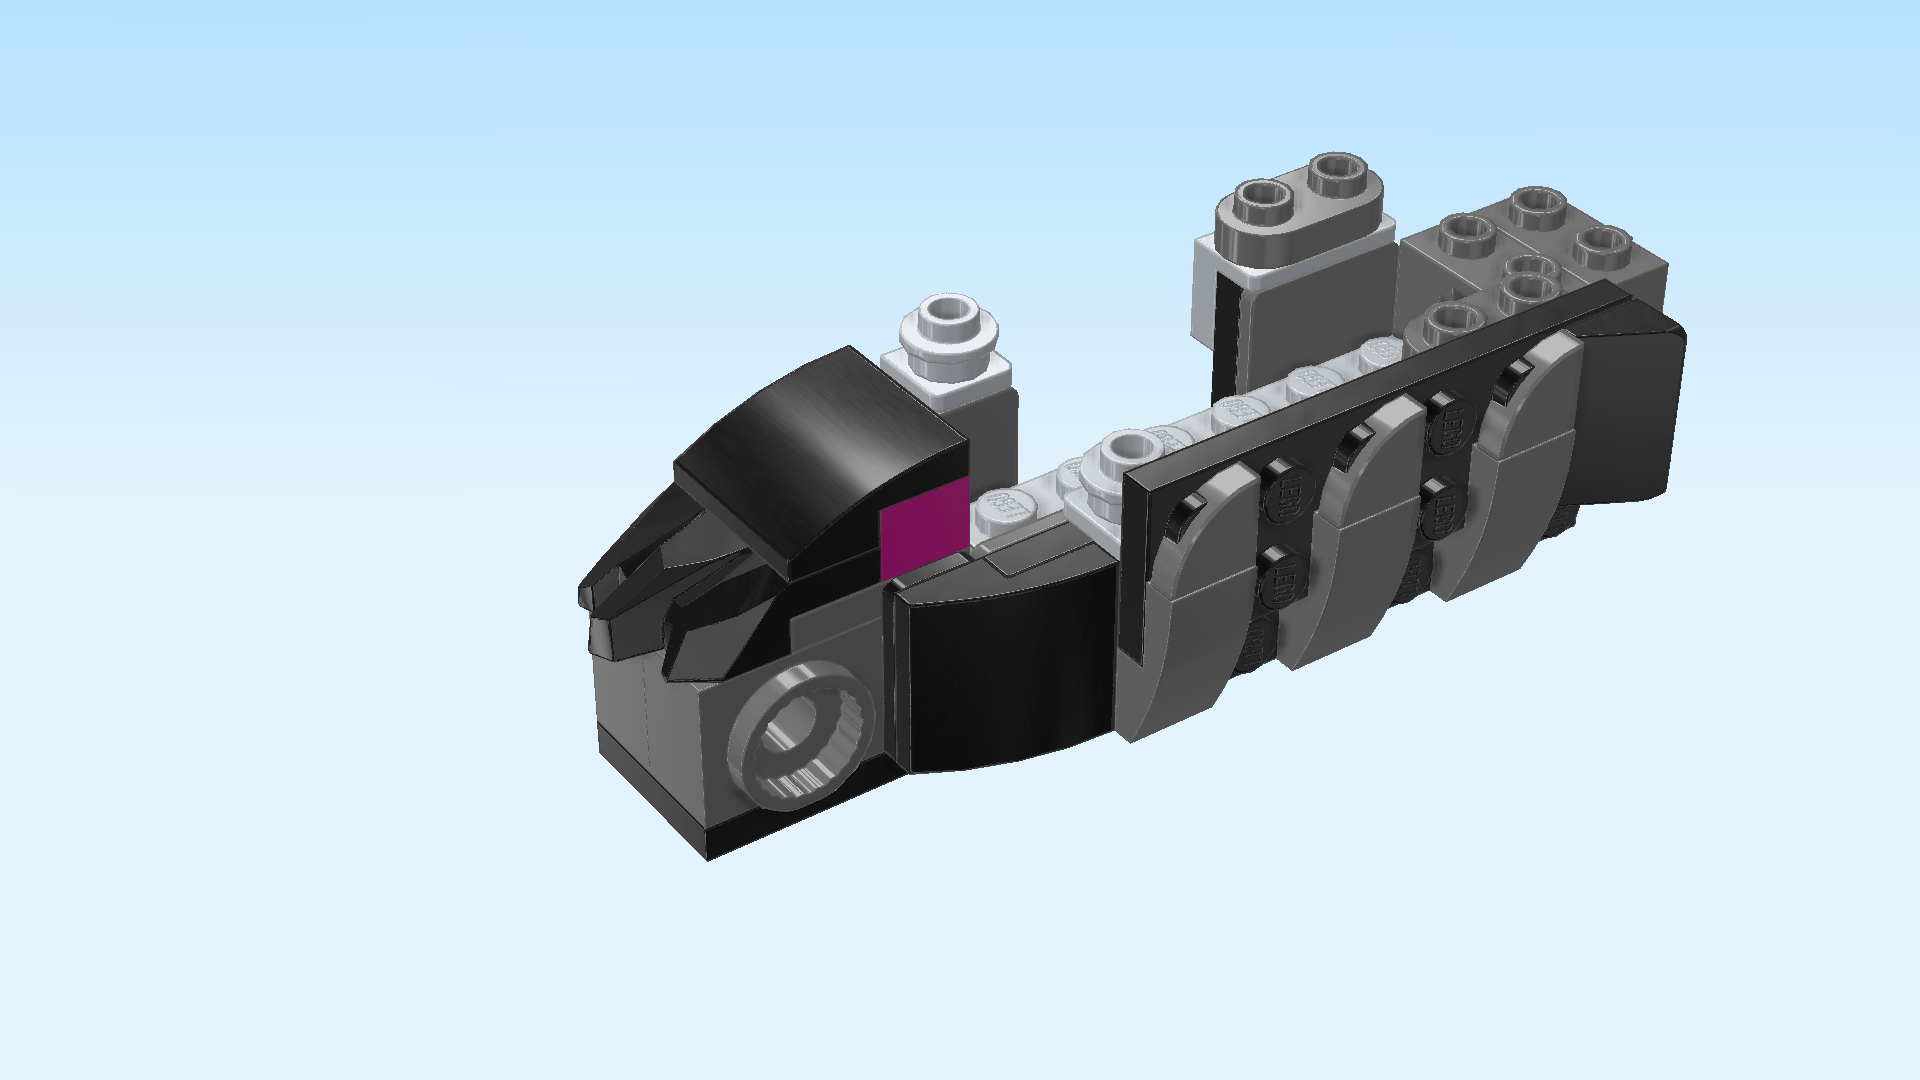
| Mount the plate with ragged side rock on the 2 leftmost columns, ragged rock to the left. |
| Put 1 plate 1x2 vertically to the right of the previous piece. |
| Put the other plate 1x2 vertically on top of the previous piece. |
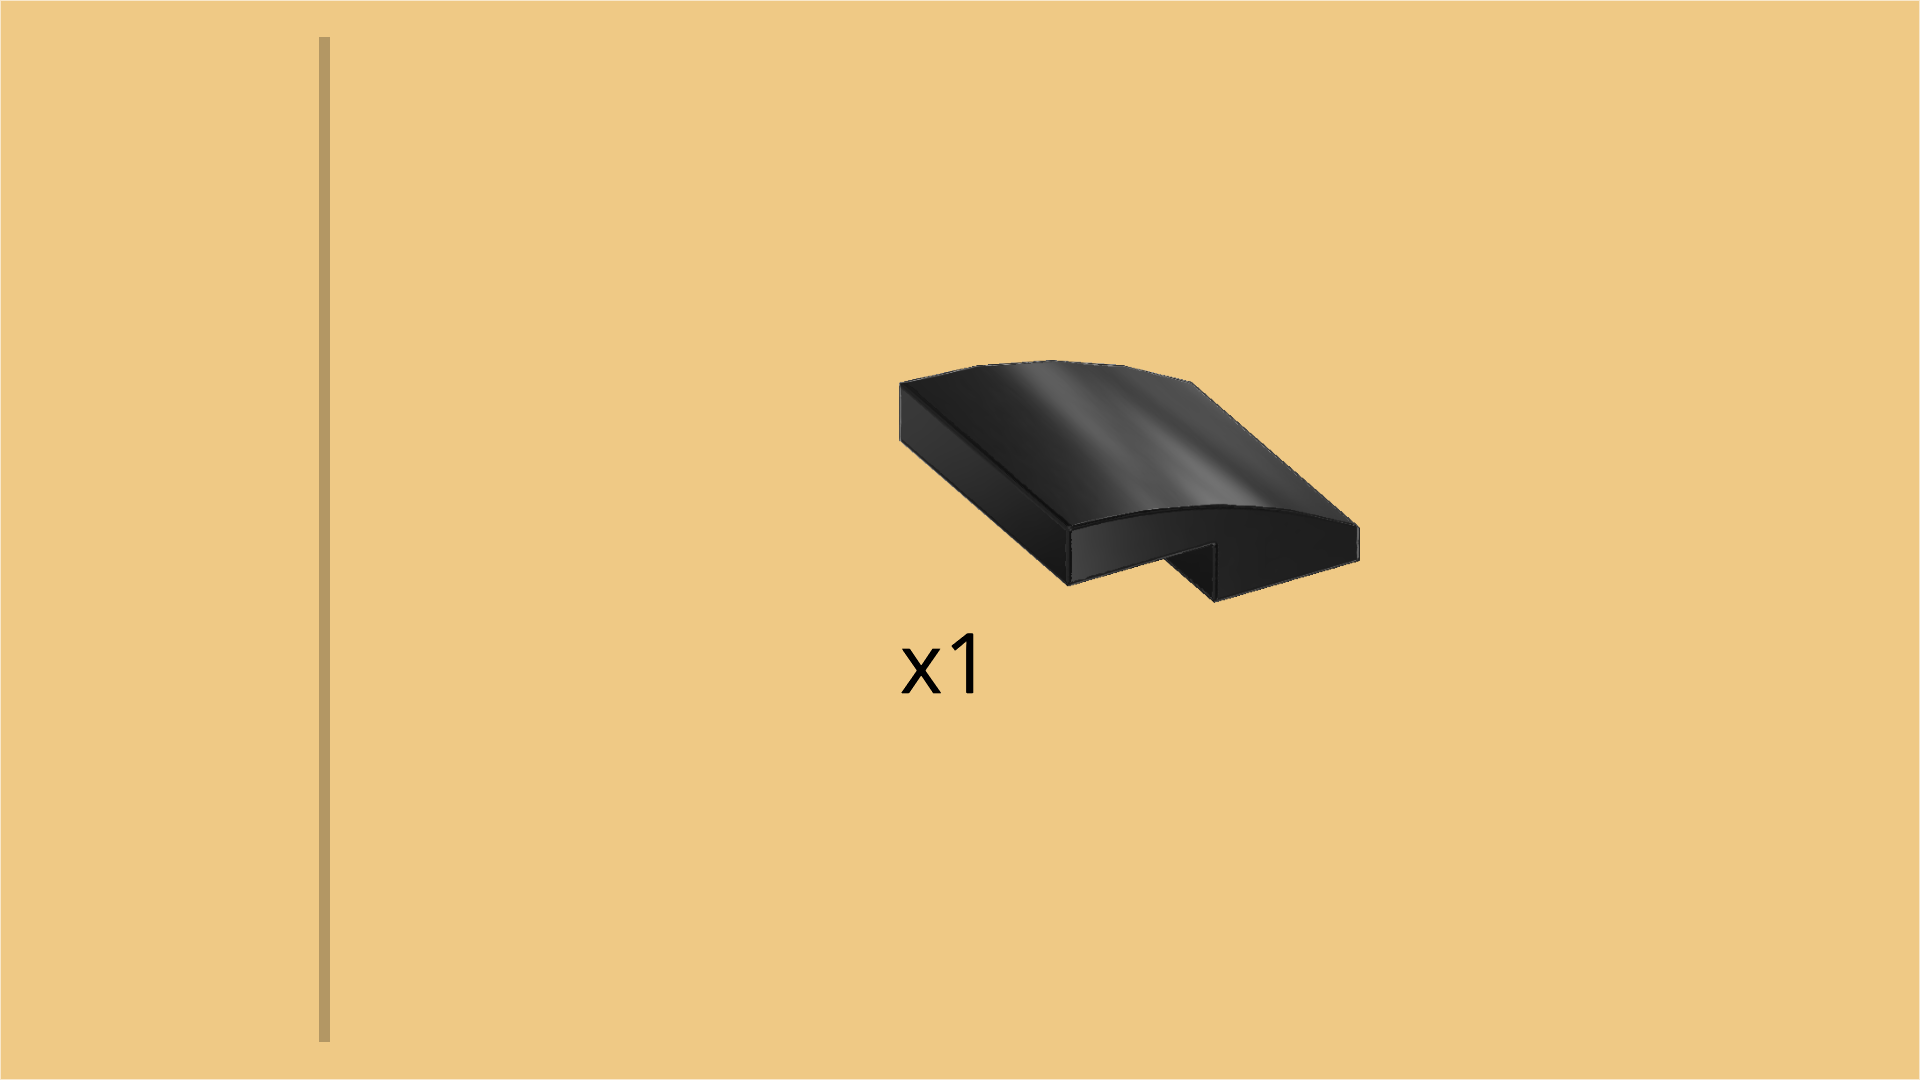
| Find 1 black one-stepped curve tile 2x2x⅔. |
| Put it on the 3 previous pieces to cover them, curve to the left. Only the ragged rock should still stick out. |
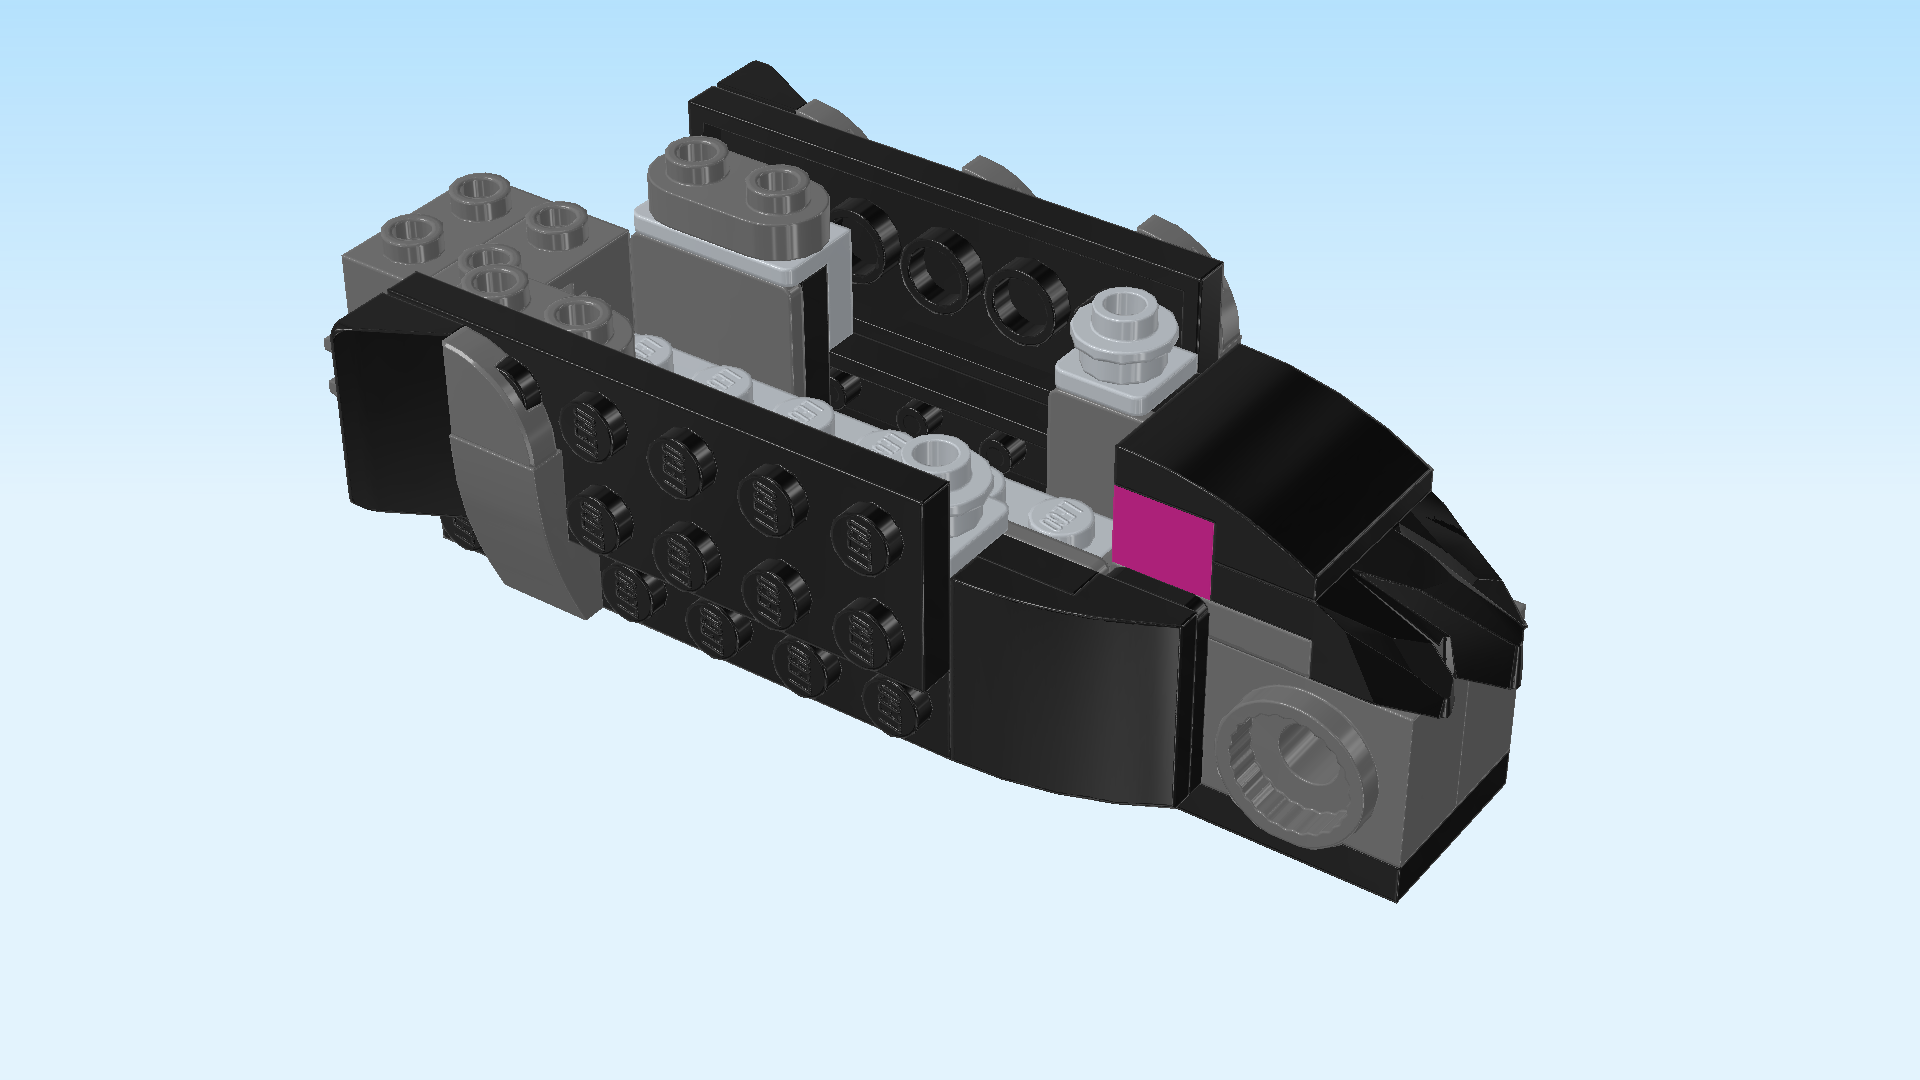
| Find 1 black plate 1x6. |
| Put it upright horizontally on the lowest side knobs pointing to the front, starting directly to the right of the front side curve tile. |
| Next, let's make a side panel of the chest. |
| Collect the following 2 pieces: |
| 1 black plate 2x6, |
| and 1 black smooth roof tile 1x2x⅔. |
| Put the plate 2x6 horizontally on the table. |
| Put the roof tile vertically on the rightmost column, slope to the left. |
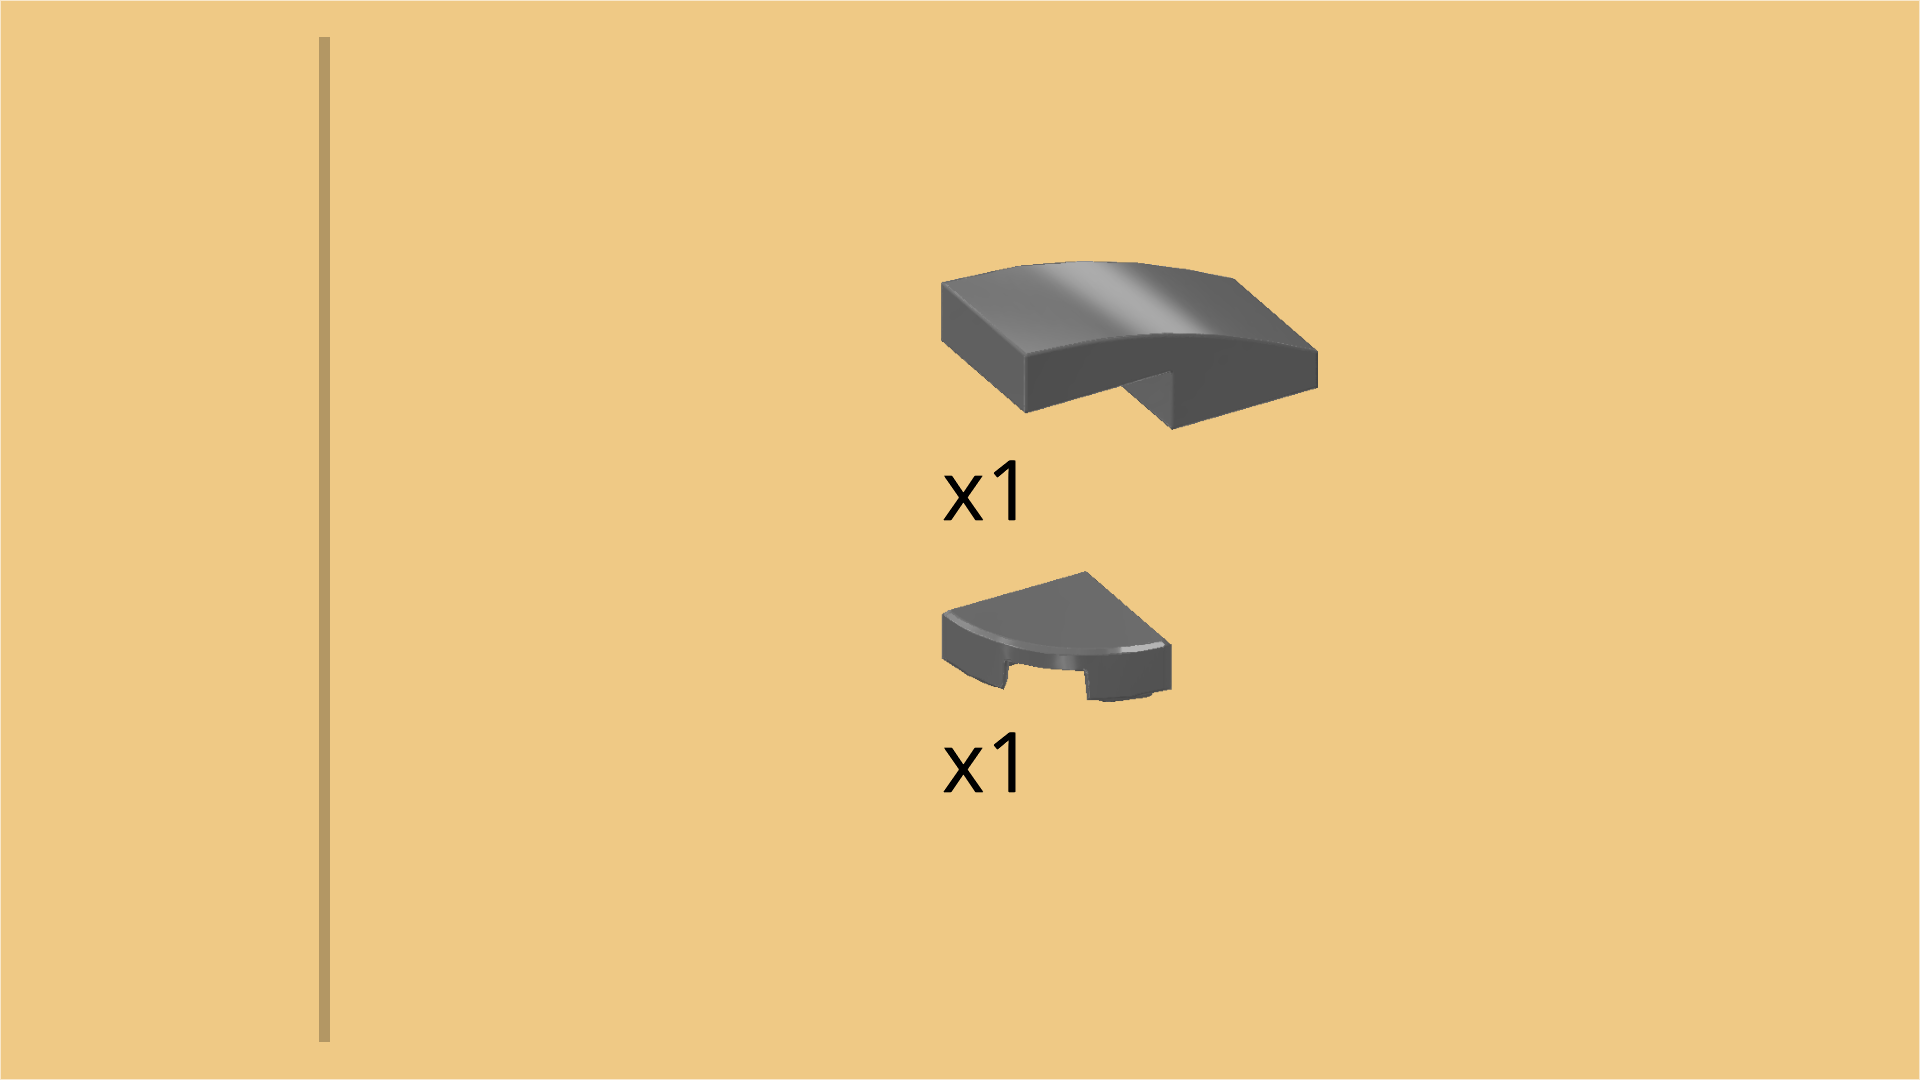
| Collect the following 2 pieces: |
| 1 dark stone grey quarter-circle tile 1x1, |
| and 1 dark stone grey one-stepped curve tile 1x2x⅔. |
| Put the quarter-circle tile on the back knob to the left of the previous piece, quarter circle to the back left. |
| Put the one-stepped curve tile vertically in front of the previous piece, curve to the front, 1/2 overhanging to the front. |
| Flip the side panel upright and turn it horizontally so that the roof tile is on the right edge, pointing towards you, and the overhanging curve tile is pointing to the bottom. |
| Mount it on the top side knobs pointing to the front, starting directly to the right of the front side curve tile 2x2, 1 row protruding to the top. |
| Make sure the overhanging curve tile 1x2 connects to the row below it. |
| Collect the following 4 pieces: |
| 2 dark stone grey one-stepped curve tiles 1x2x⅔, |
| and 2 dark stone grey quarter-circle tiles 1x1. |
| Put 1 quarter-circle tile upright on the leftmost topmost knob of the side panel you have just mounted, quarter circle to the top left. |
| Put 1 one-stepped curve tile vertically below the previous piece, curve to the bottom. |
| Skip 1 column to the right and repeat with the 2 remaining pieces, again curve to the bottom and quarter circle to the top left. |
| If done correctly, you have now 3 quarter circle tiles and 3 curve tiles 1x2 that are arranged symmetrically on this side panel, with 1 column of knobs between each set. |
| These actually represent the Grimkeeper's ribs! |
| Find 1 black plate 1x6. |
| Now, turn the chest structure from right to left. Keep the horizontal orientation, but the ragged rock should now be pointing to the right. |
| Put the plate upright horizontally on the lowest side knobs pointing to the front, starting directly to the left of the front side curve tile. |
| Next, we will build the second side panel of the chest. |
| Collect the following 2 pieces: |
| 1 black plate 2x6, |
| and 1 black smooth roof tile 1x2x⅔. |
| Put the plate 2x6 horizontally on the table. |
| Put the roof tile vertically on the leftmost column, slope to the right. |
| Collect the following 2 pieces: |
| 1 dark stone grey quarter-circle tile 1x1, |
| and 1 dark stone grey one-stepped curve tile 1x2x⅔. |
| Put the quarter-circle tile to the right of the previous piece on the back knob, quarter circle to the back right. |
| Put the curve tile vertically in front of the previous piece, curve to the front, 1/2 overhanging to the front. |
| Flip the side panel upright, and mount it on the top side knobs pointing to the front, starting directly to the left of the front side curve tile 2x2. Make sure that 1 row is protruding to the top, and that the curve tile 1x2 again connects with the lower row. |
| Collect the following 4 pieces: |
| 2 dark stone grey quarter-circle tiles 1x1, |
| and 2 dark stone grey one-stepped curve tiles 1x2x⅔. |
| Put 1 quarter-circle tile upright on the rightmost topmost knob of the side panel, quarter circle to the top right. |
| Put 1 curve tile upright vertically below the previous piece, curve to the bottom. |
| Skip 1 column to the left and repeat with the 2 remaining pieces. |
| The Grimkeeper's ribs are finished! |
| Now, we will build the shoulder portion of the Grimkeeper. |
| Collect the following 2 pieces: |
| 1 black plate 2x6, |
| and 1 black stepped brick 2x3 - 2x2 with top and bottom plate. |
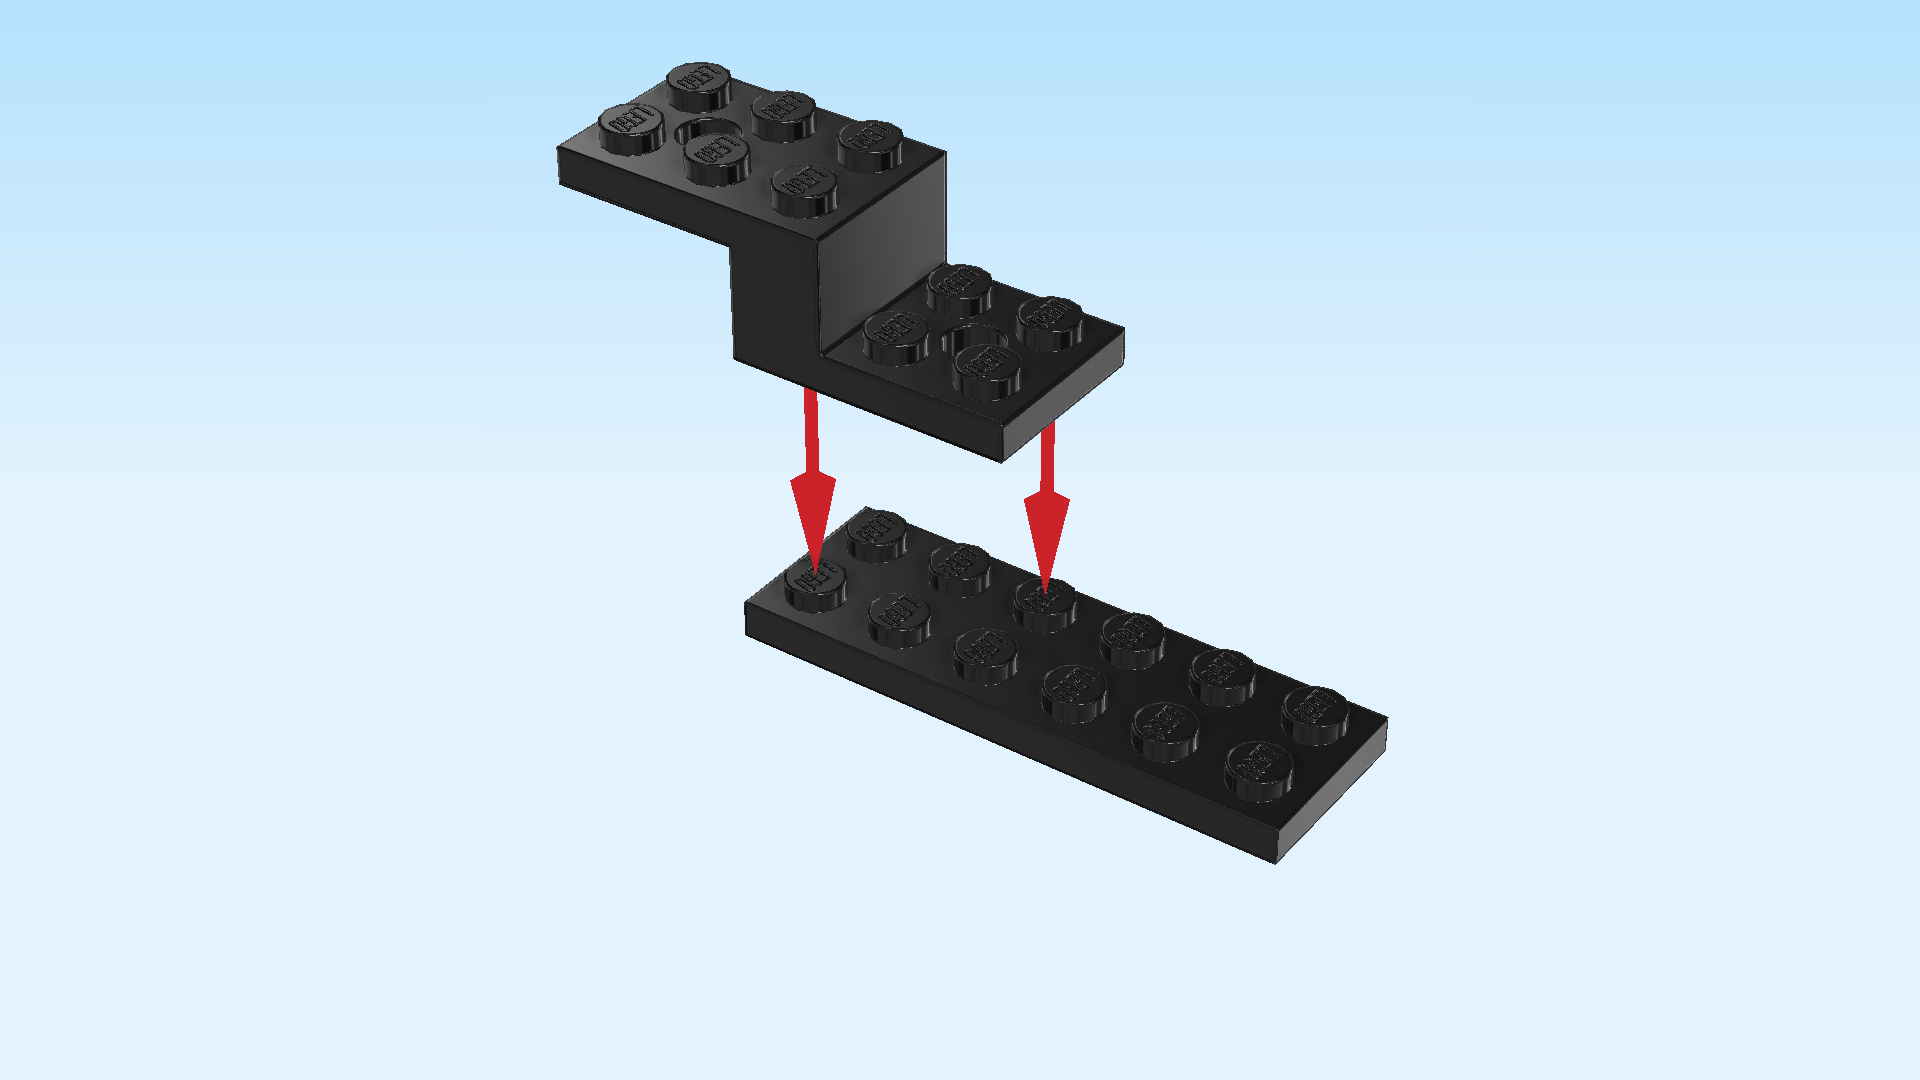
| Put the plate 2x6 horizontally on the table. |
| Put the stepped brick horizontally on the left half of the plate, top plate overhanging to the left. |
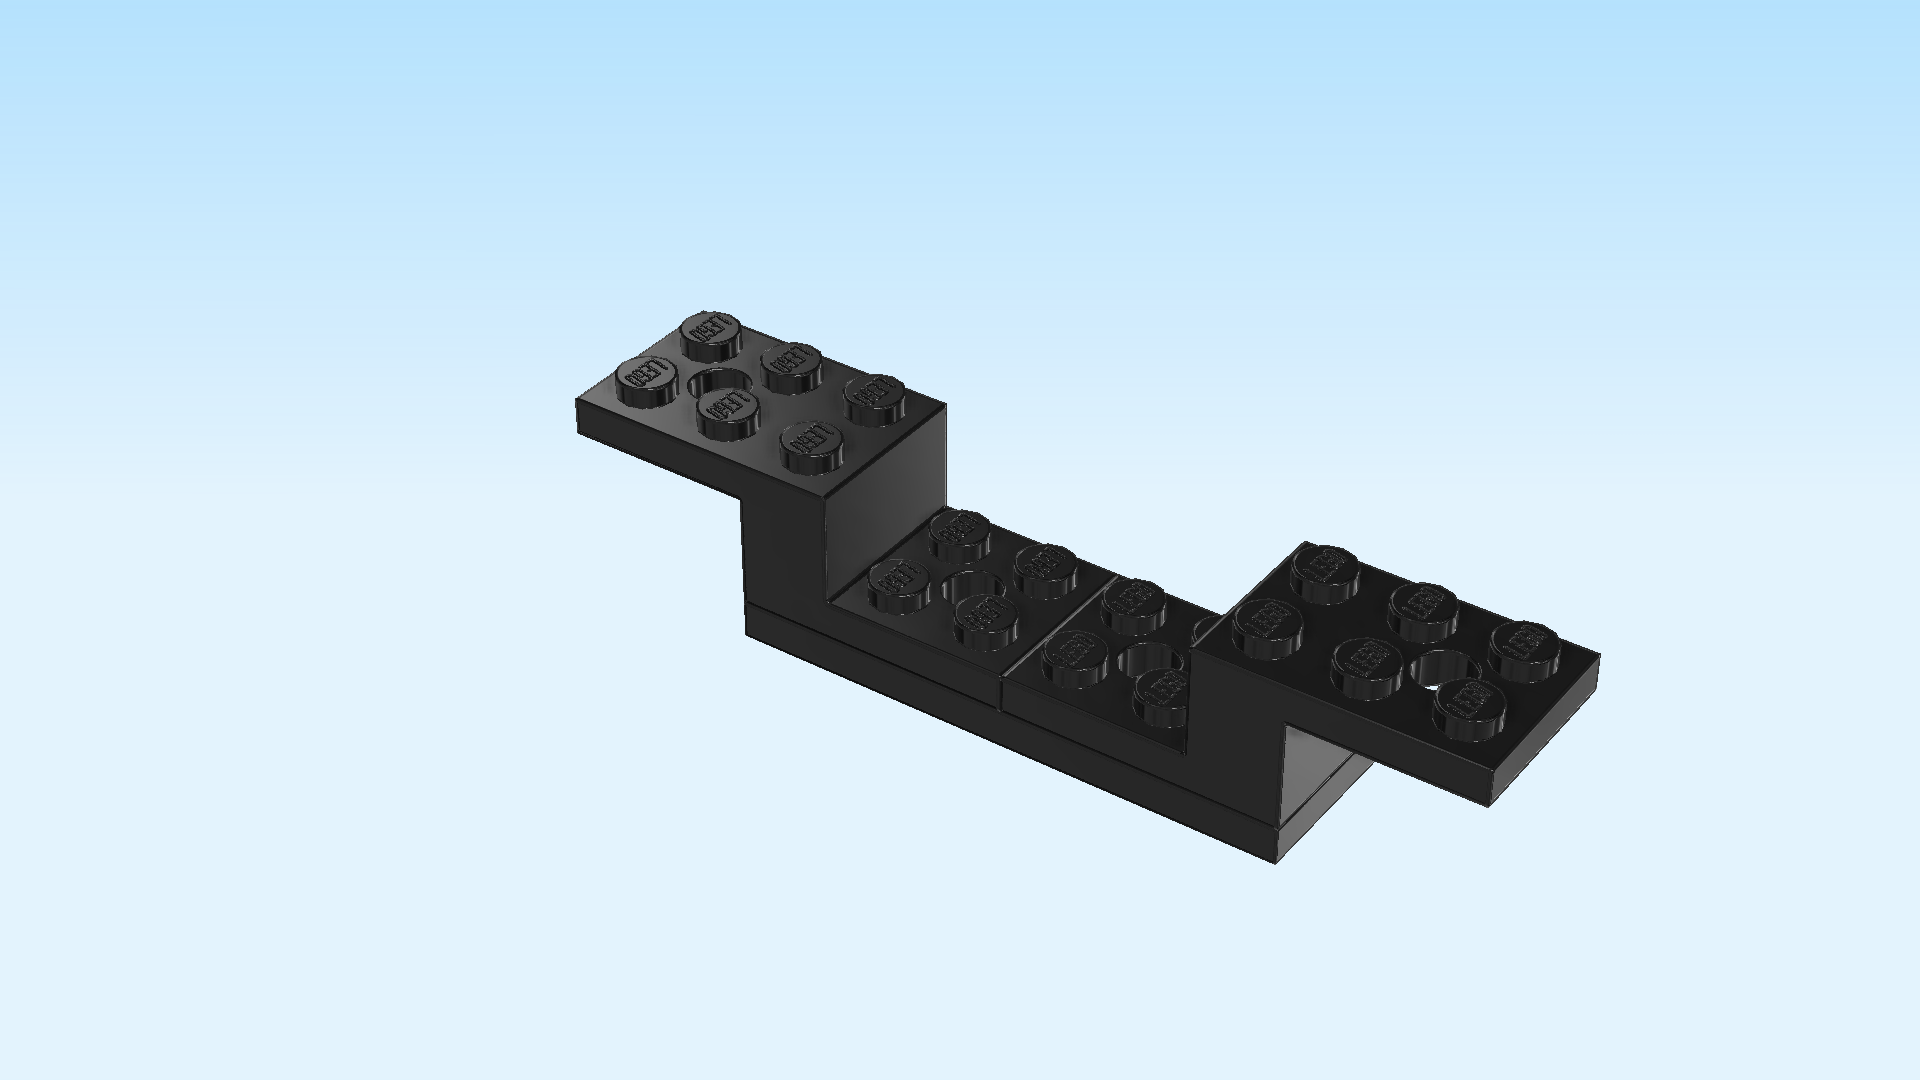
| Find 1 black stepped brick 2x3 - 2x2 with top and bottom plate. |
| Put it horizontally on the right half of the base plate, top plate overhanging to the right. |
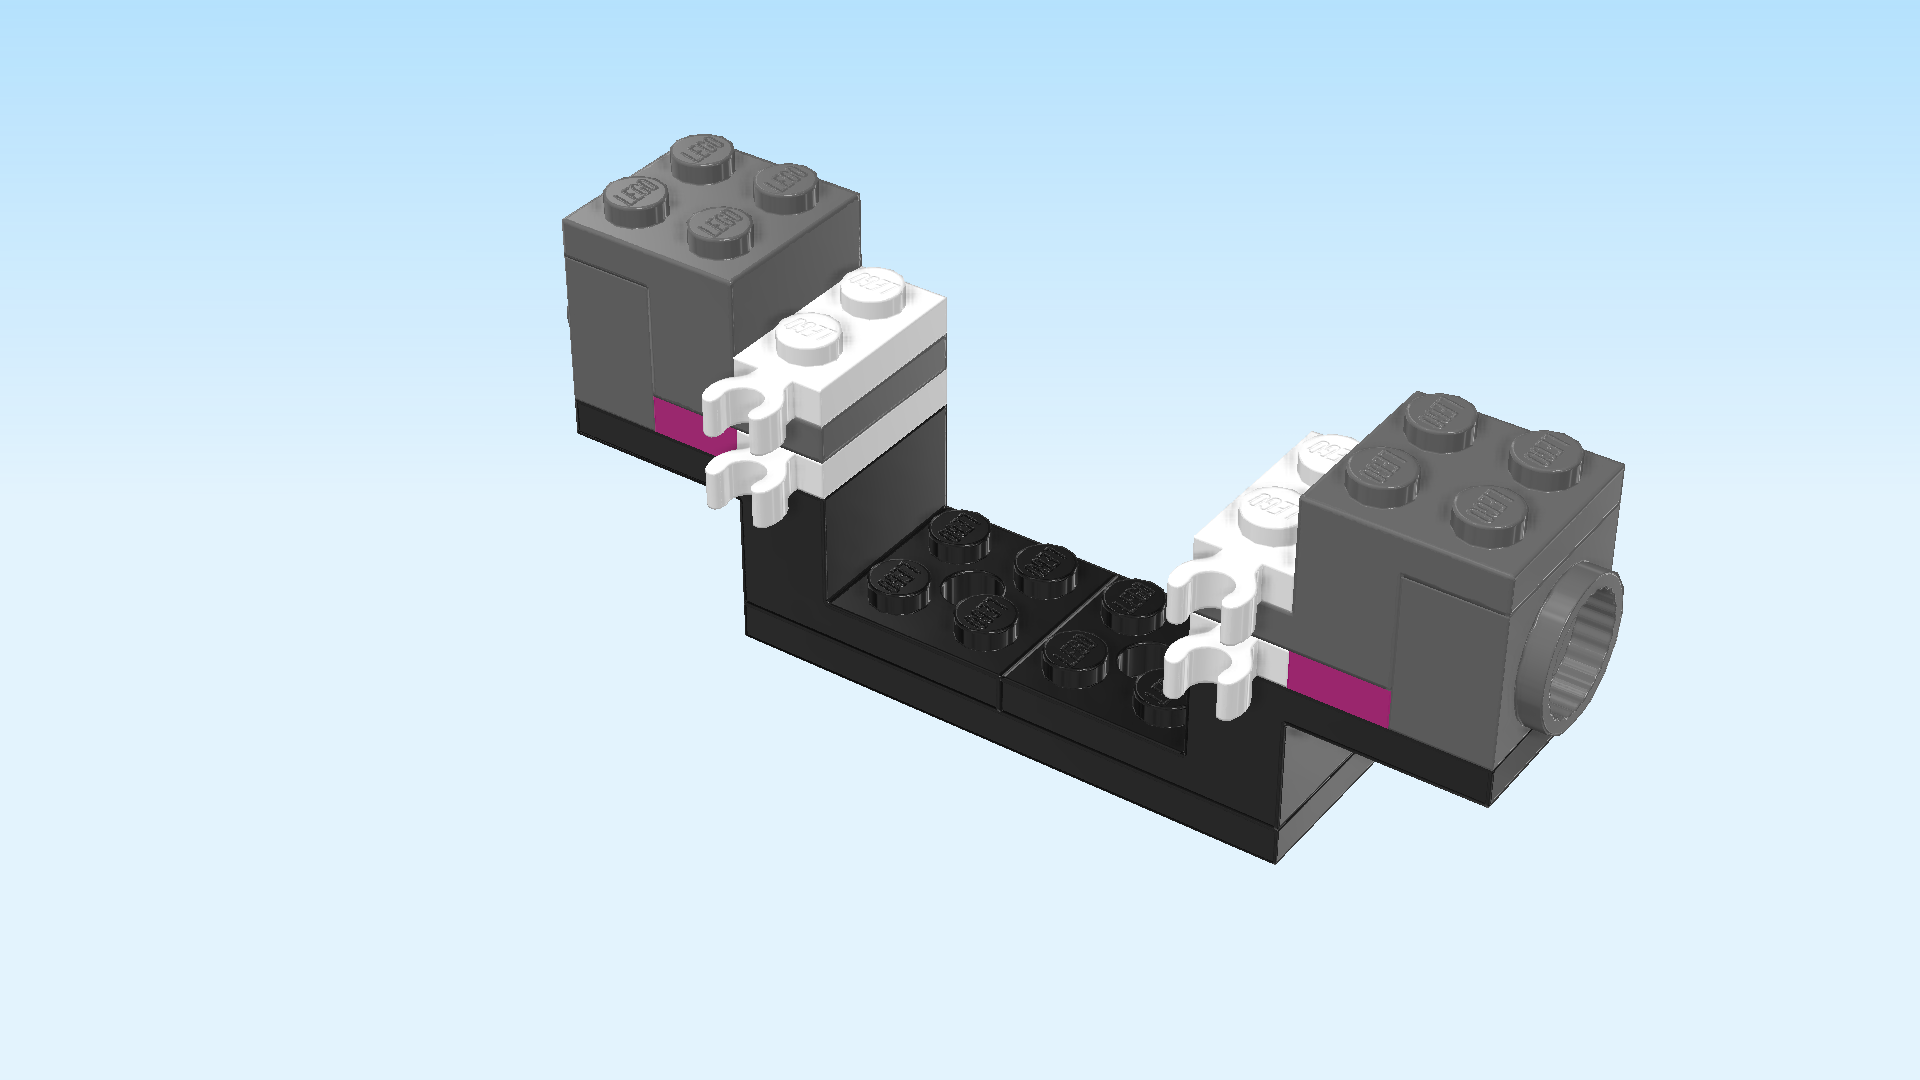
| Collect the following 4 pieces: |
| 2 purple violet plates 1x2, |
| and 2 white plates 1x2 with horizontal clasp on short side. |
| Put 1 plate 1x2 vertically on the previous piece's second column from the right. |
| Put 1 plate with clasp vertically to the left of the previous piece, clasp to the front. |
| Repeat symmetrically on the left. |
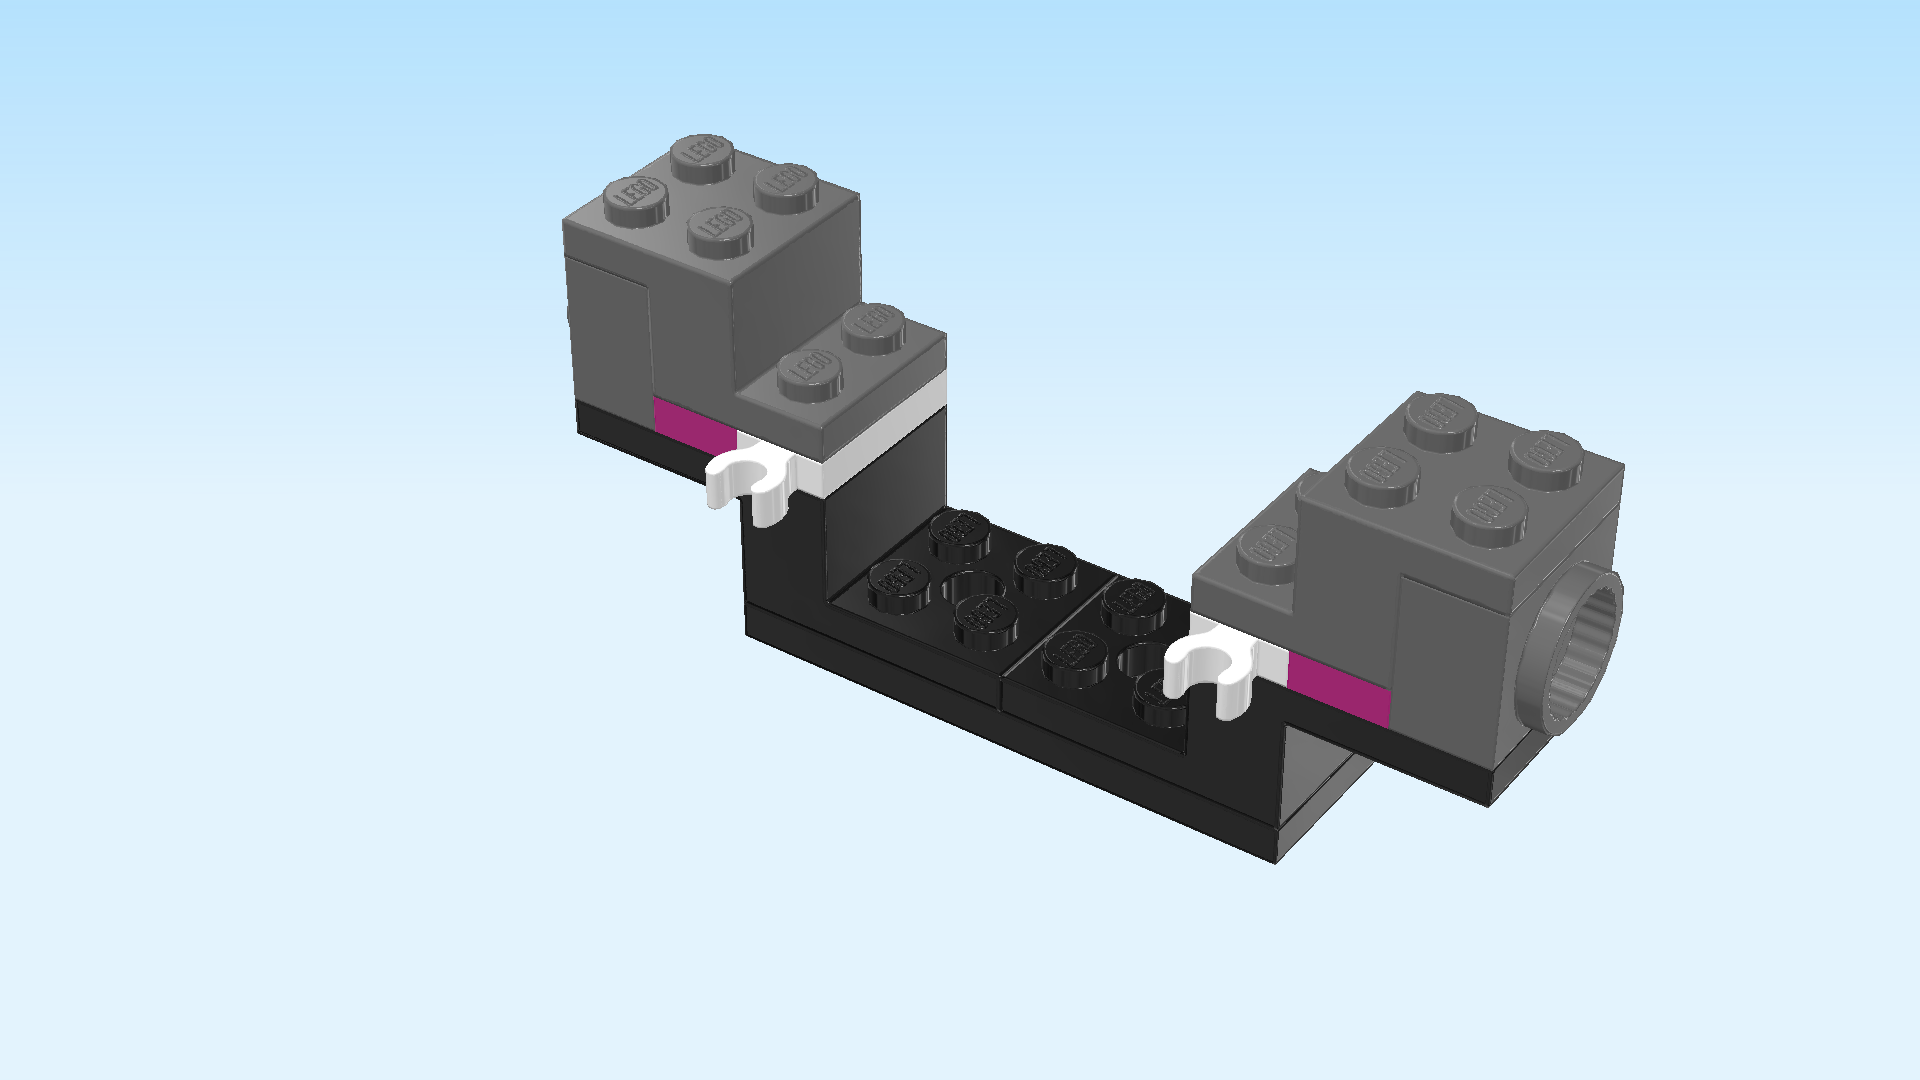
| Find 2 dark stone grey bricks 1x2x1⅓ with joint socket. |
| Put 1 vertically on the leftmost column of the shoulder build, joint socket to the left. |
| Repeat symmetrically on the right, joint socket to the right. |
| Find 2 dark stone grey stepped bricks 1x2 - 2x2 with top and bottom plate. |
| Turn 1 horizontally so that the top plate is pointing to the left. |
| Mount it on the left edge. Its shape fits the steps of the structure perfectly. |
| Repeat symmetrically on the right. |
| Find 2 white plates 1x2 with horizontal clasp on short side. |
| Put 1 vertically on the leftmost column of the previous piece (this is its lower plate), clasp to the front. |
| Repeat symmetrically on the left. |
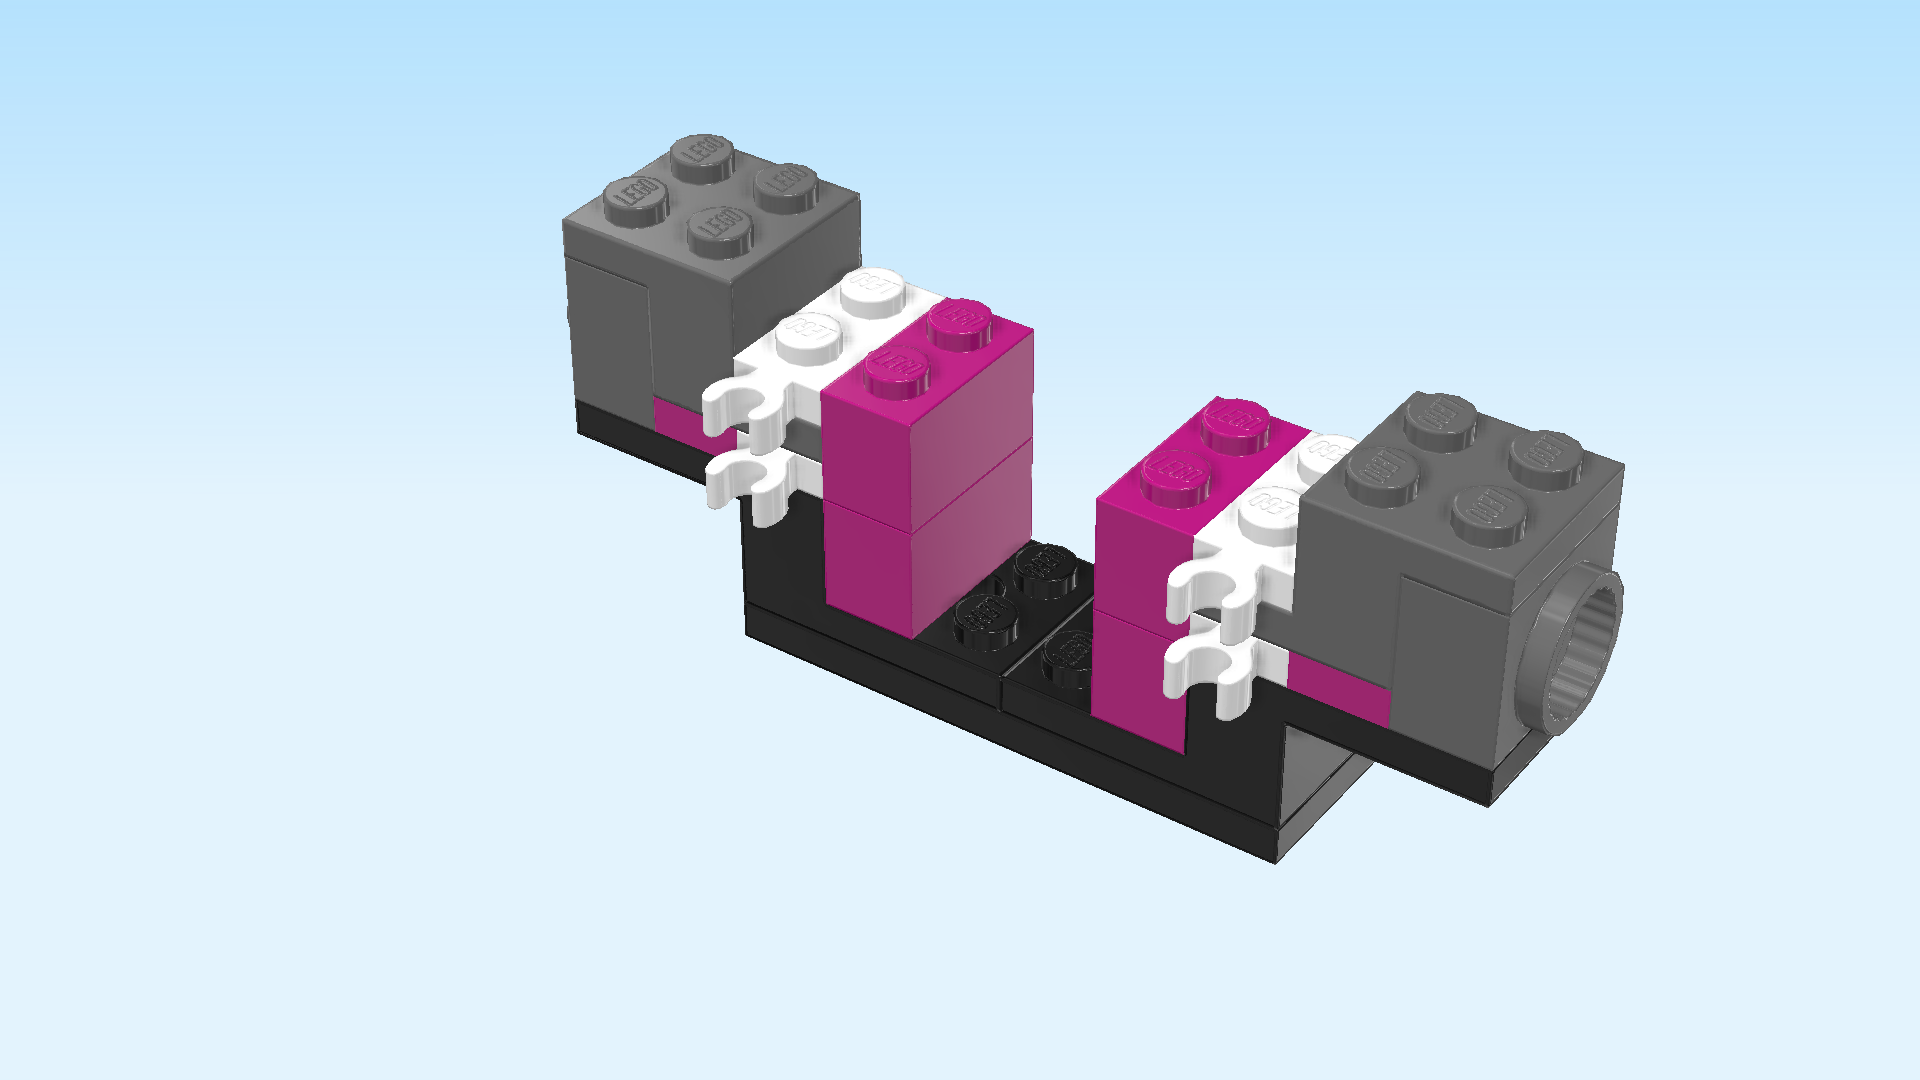
| Find 2 purple violet bricks 1x2. |
| Put 1 vertically to the right of the previous piece. This means it will sit on the lowest level of the current build. |
| Repeat symmetrically on the right. If done correctly, there are only 2 empty columns between the 2 current pieces. |
| Find 2 purple violet bricks 1x2. |
| Put them vertically on top of the 2 previous pieces. |
| The shoulder portion of the Grimkeeper is finished! Well done! Keep this part in its building orientation. Before mounting, turn the chest build vertically so that its narrow end with the ragged rock is pointing to the back. |
| Coming from the back, insert the chest build's front 2x2 portion with clasps into the center recess of the shoulder sub-part, and mount it there. |
| If done correctly, the front surface of the shoulder portion and the front surface of the 2x2 portion with clasps form one surface together. |
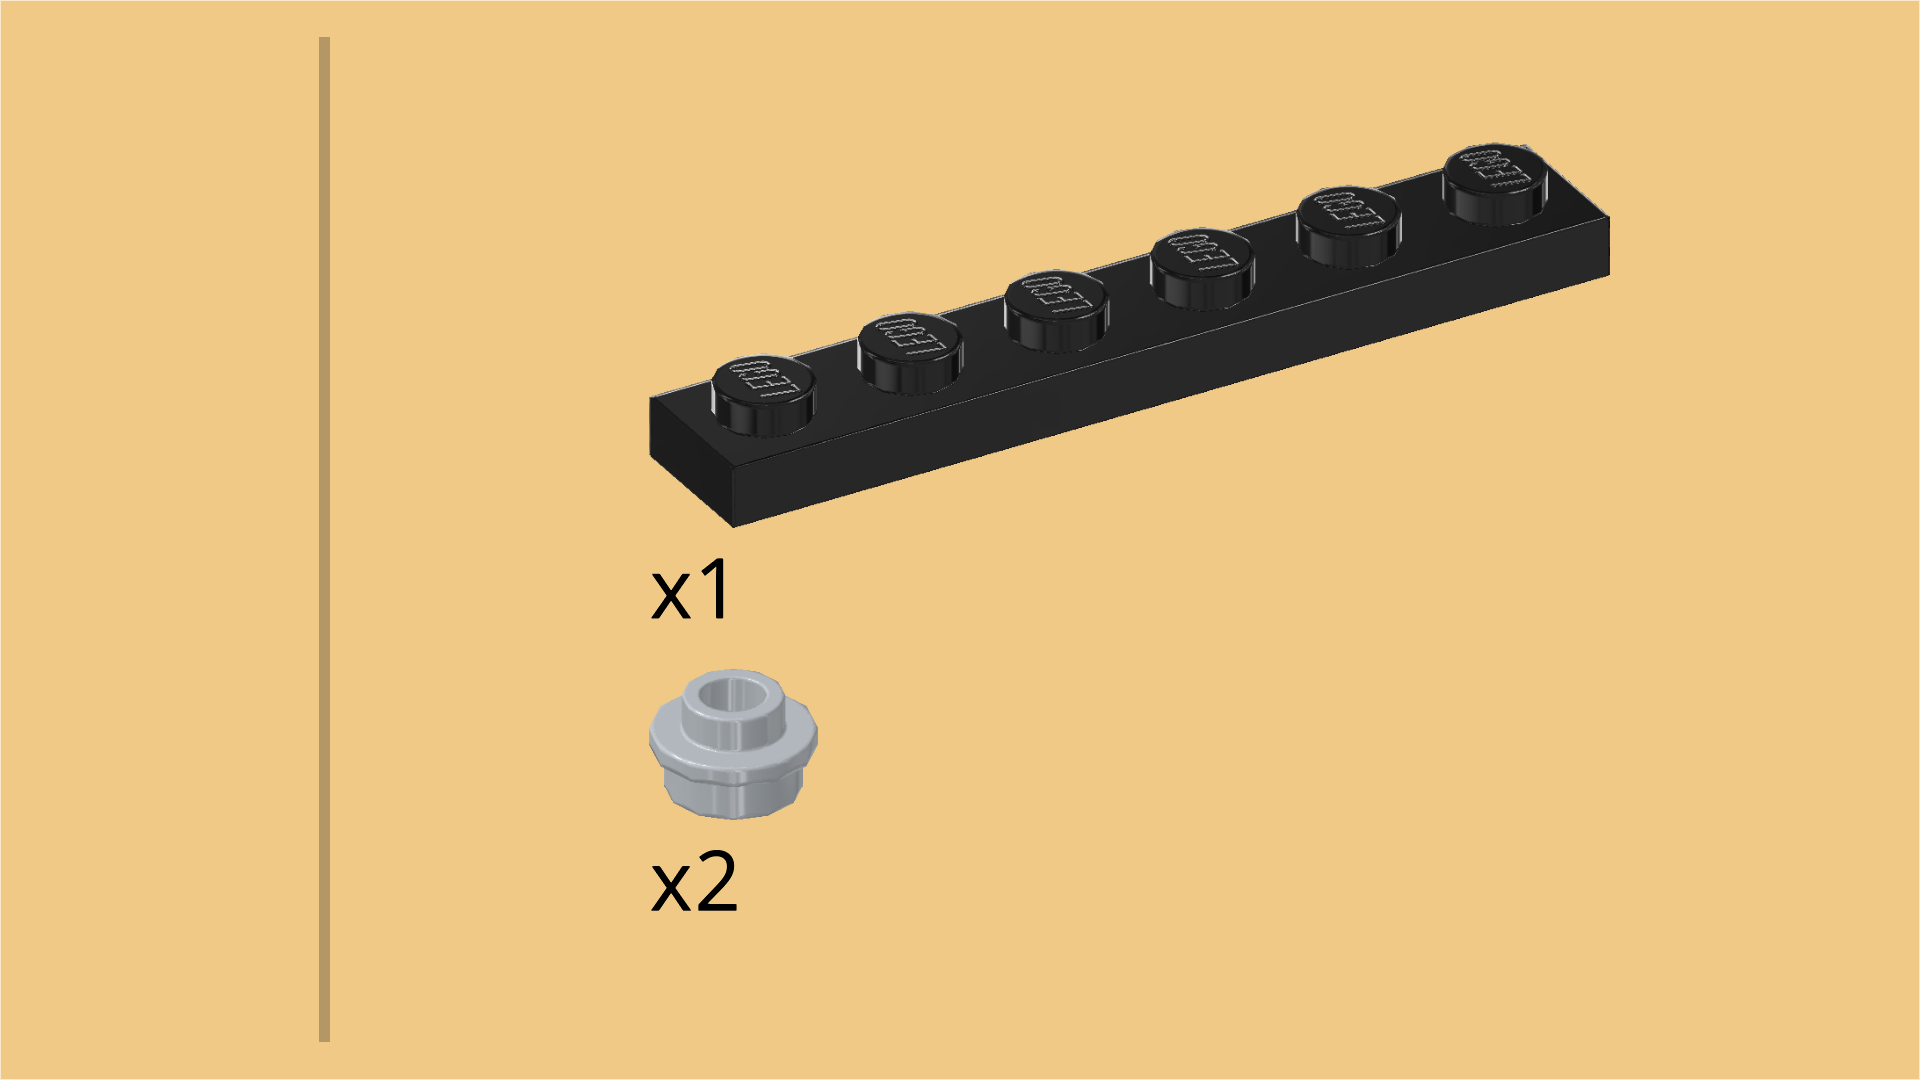
| Collect the following 3 pieces: |
| 2 medium stone grey round plates 1x1 with through-hole, |
| and 1 black plate 1x6. |
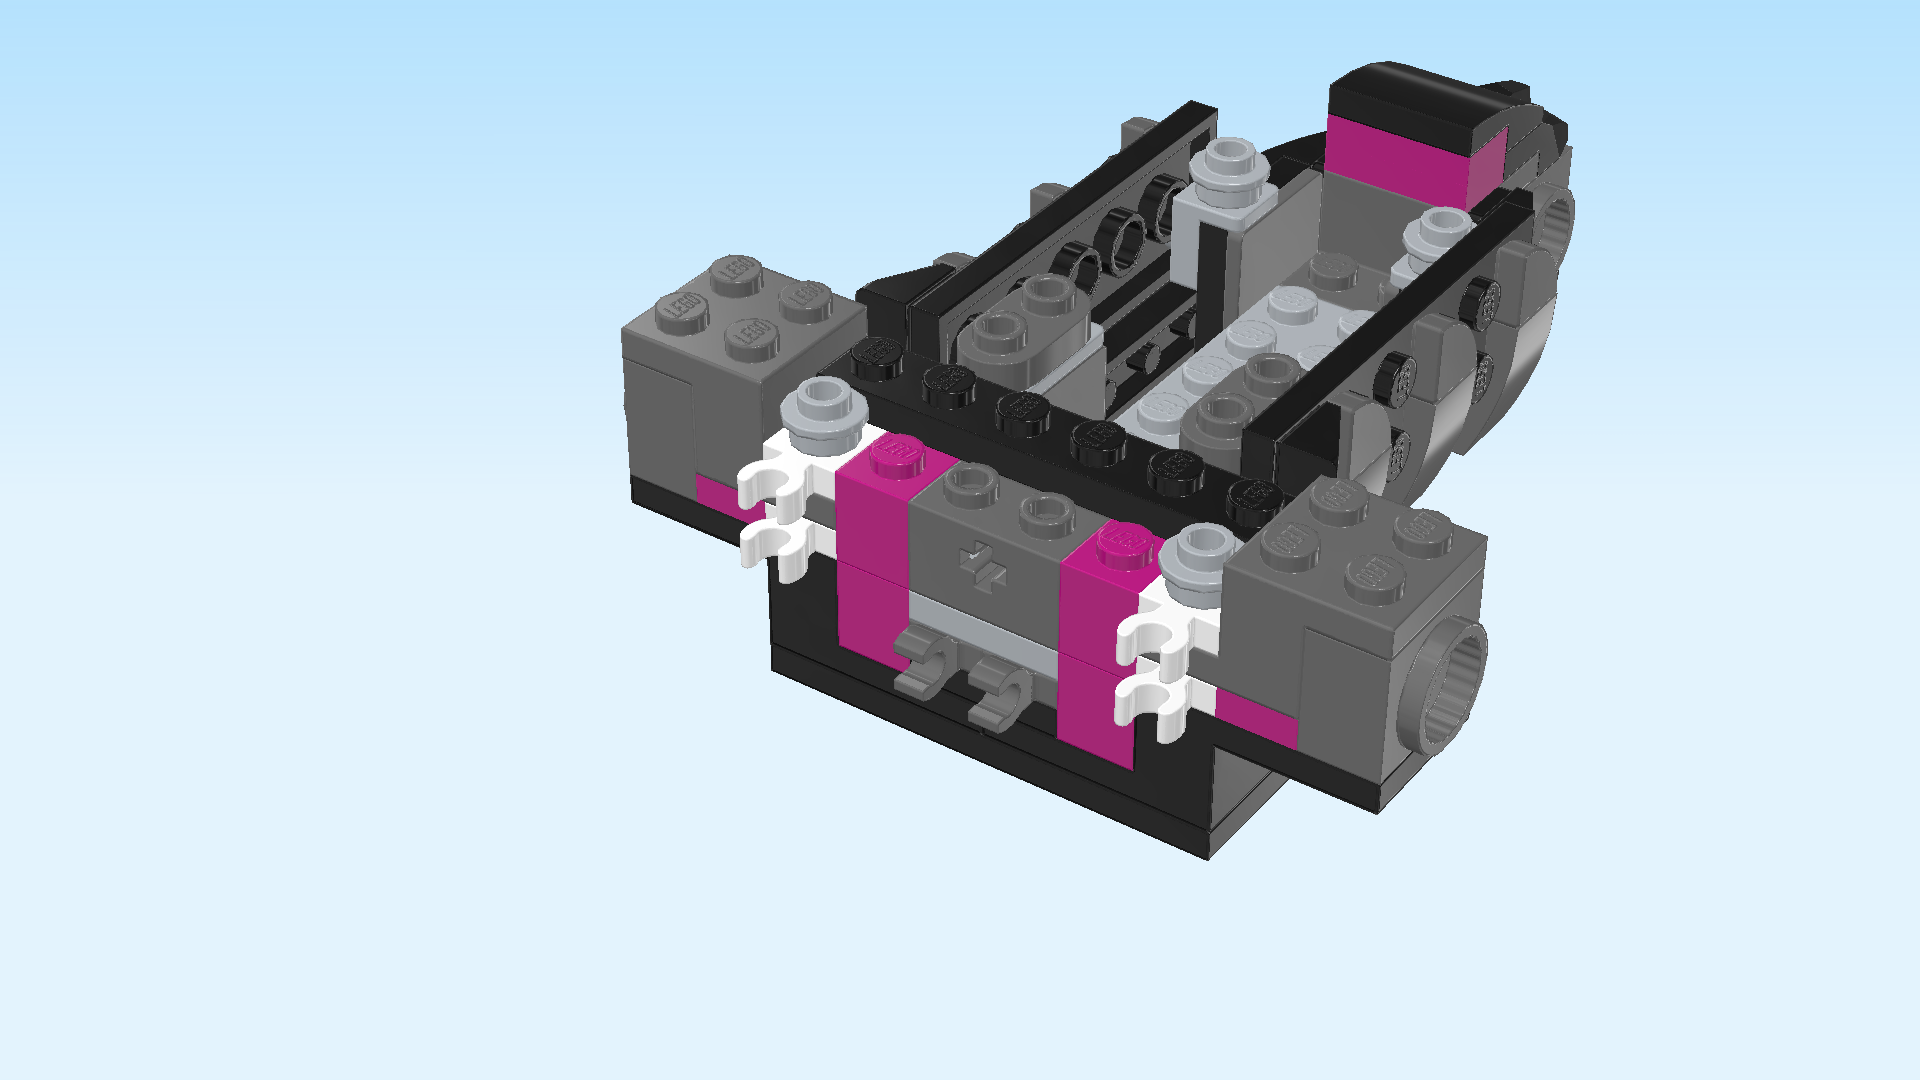
| Put the plate 1x6 horizontally centered on the second row from the front. |
| Put 1 round plate 1x1 in front of the rightmost knob of the previous piece. This means it will sit on the frontmost row. |
| Repeat symmetrically on the left. |
| Find 2 medium stone grey plates 1x2 with vertical clasp on long side. |
| Put them horizontally next to each other on the front row between the 2 previous pieces, clasps to the front. |
| Find 1 black plate 2x6. |
| Put it horizontally centered on the 2 frontmost rows, covering the 5 previous pieces. |
| Collect the following 5 pieces: |
| 2 purple violet plates 1x2, |
| 1 black flat tile 2x4, |
| and 2 purple violet smooth roof tiles 1x1x⅔. |
| Put the flat tile 2x4 horizontally centered on the previous piece. This means it will sit centered on the 2 frontmost rows. |
| Put 1 plate 1x2 horizontally to the right of the previous piece next to its back row. |
| Put 1 roof tile 1x1 to the right of the previous piece, slope to the right. |
| Repeat symmetrically on the left with the 2 remaining pieces. |
| Find 2 black plates 1x2 with ragged side rock. |
| Put 1 on the second and third column from the left, ragged rock to the front. The tips of the ragged rock will slightly protrude to the front. |
| Repeat symmetrically on the right. |
| Now, we will assemble the Grimkeeper's head mount. |
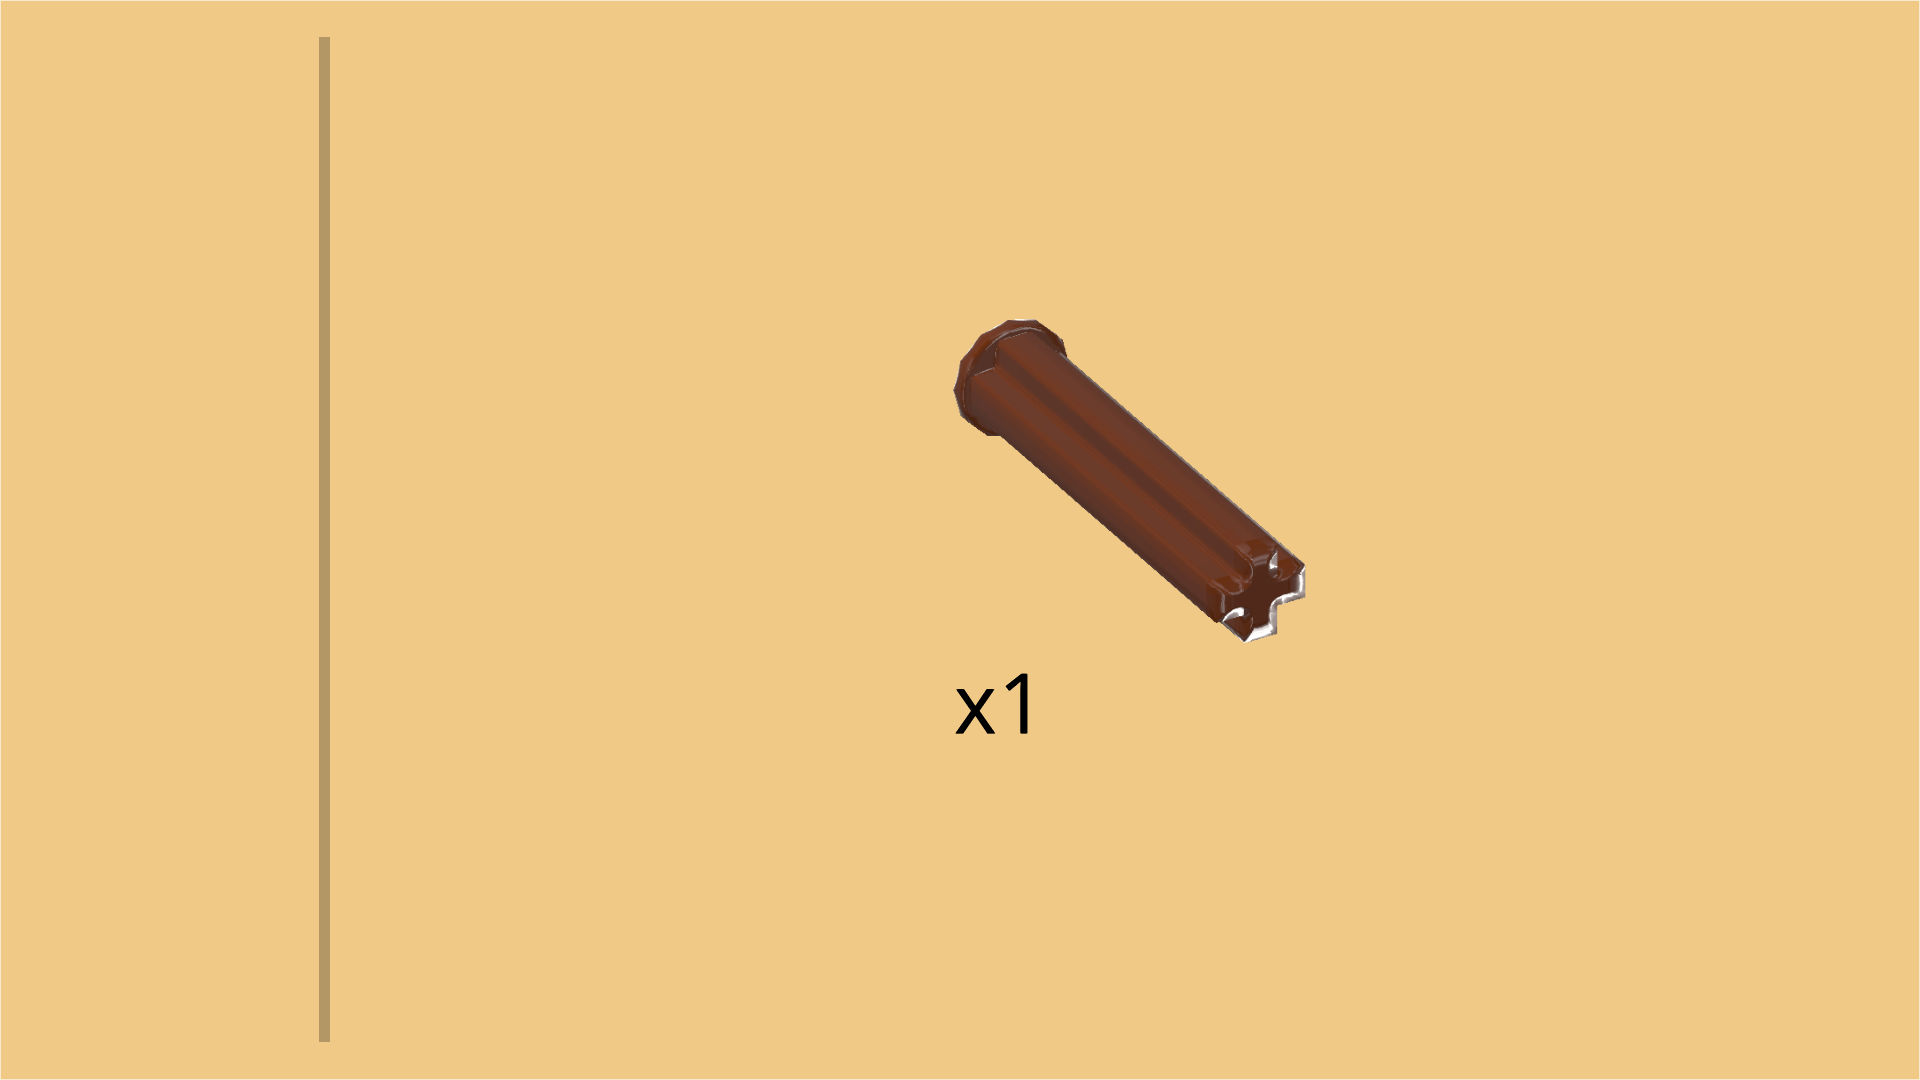
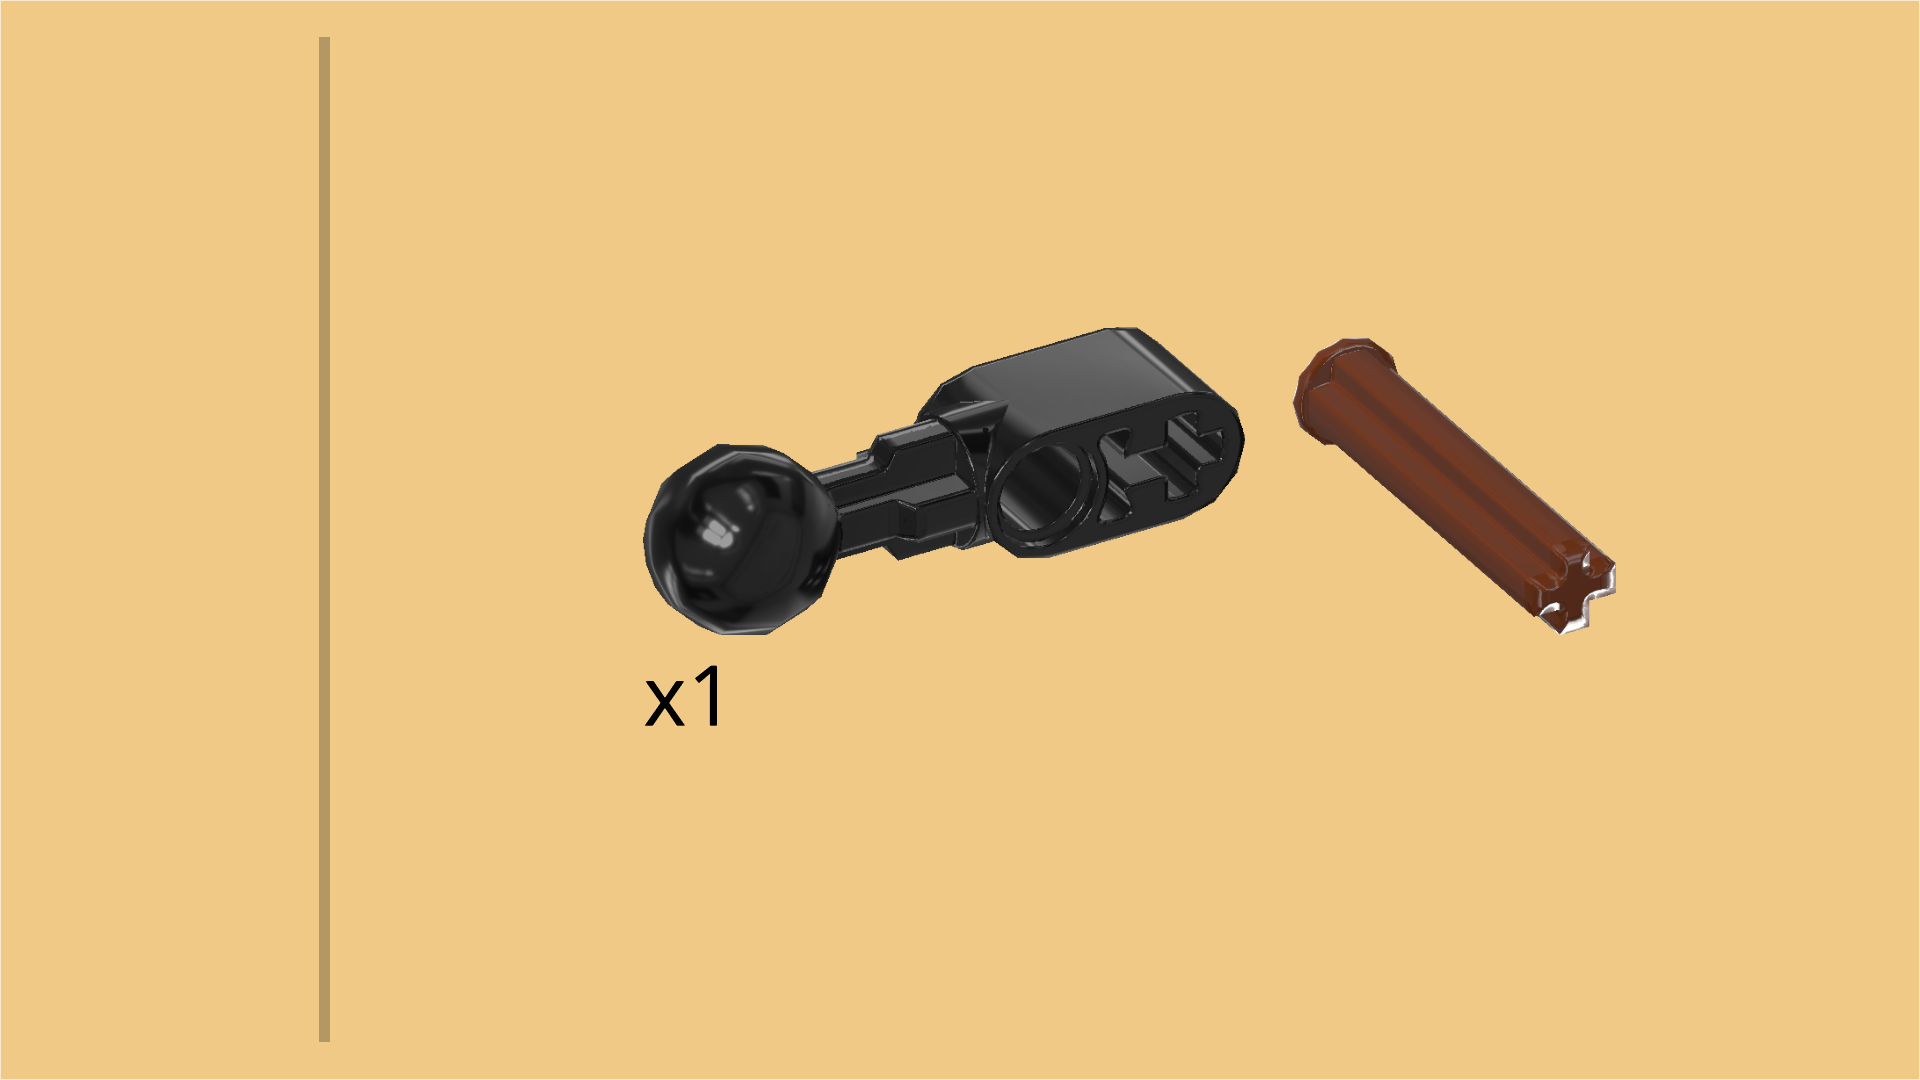
| Find 1 reddish brown cross axle 3m with end stop. |
| Place it horizontally on the table for now, end stop to the left. We will use this piece in the next step. |
| Find 1 technic beam 2m with ball joint. |
| Hold the technic beam so that its holes are running from left to right and the ball is at the top. |
| Pick up the cross axle and insert it from the left into the bottommost cross hole and push it all the way in. |
| To mount the head mount, insert the cross axle from the front into the center cross hole at the front surface, and push it all the way in. Make sure the technic beam with ball stays upright, ball to the top. |
| Collect the following 4 pieces: |
| 2 medium stone grey round plates 1x1 with through-hole, |
| and 2 black round tiles 1x1. |
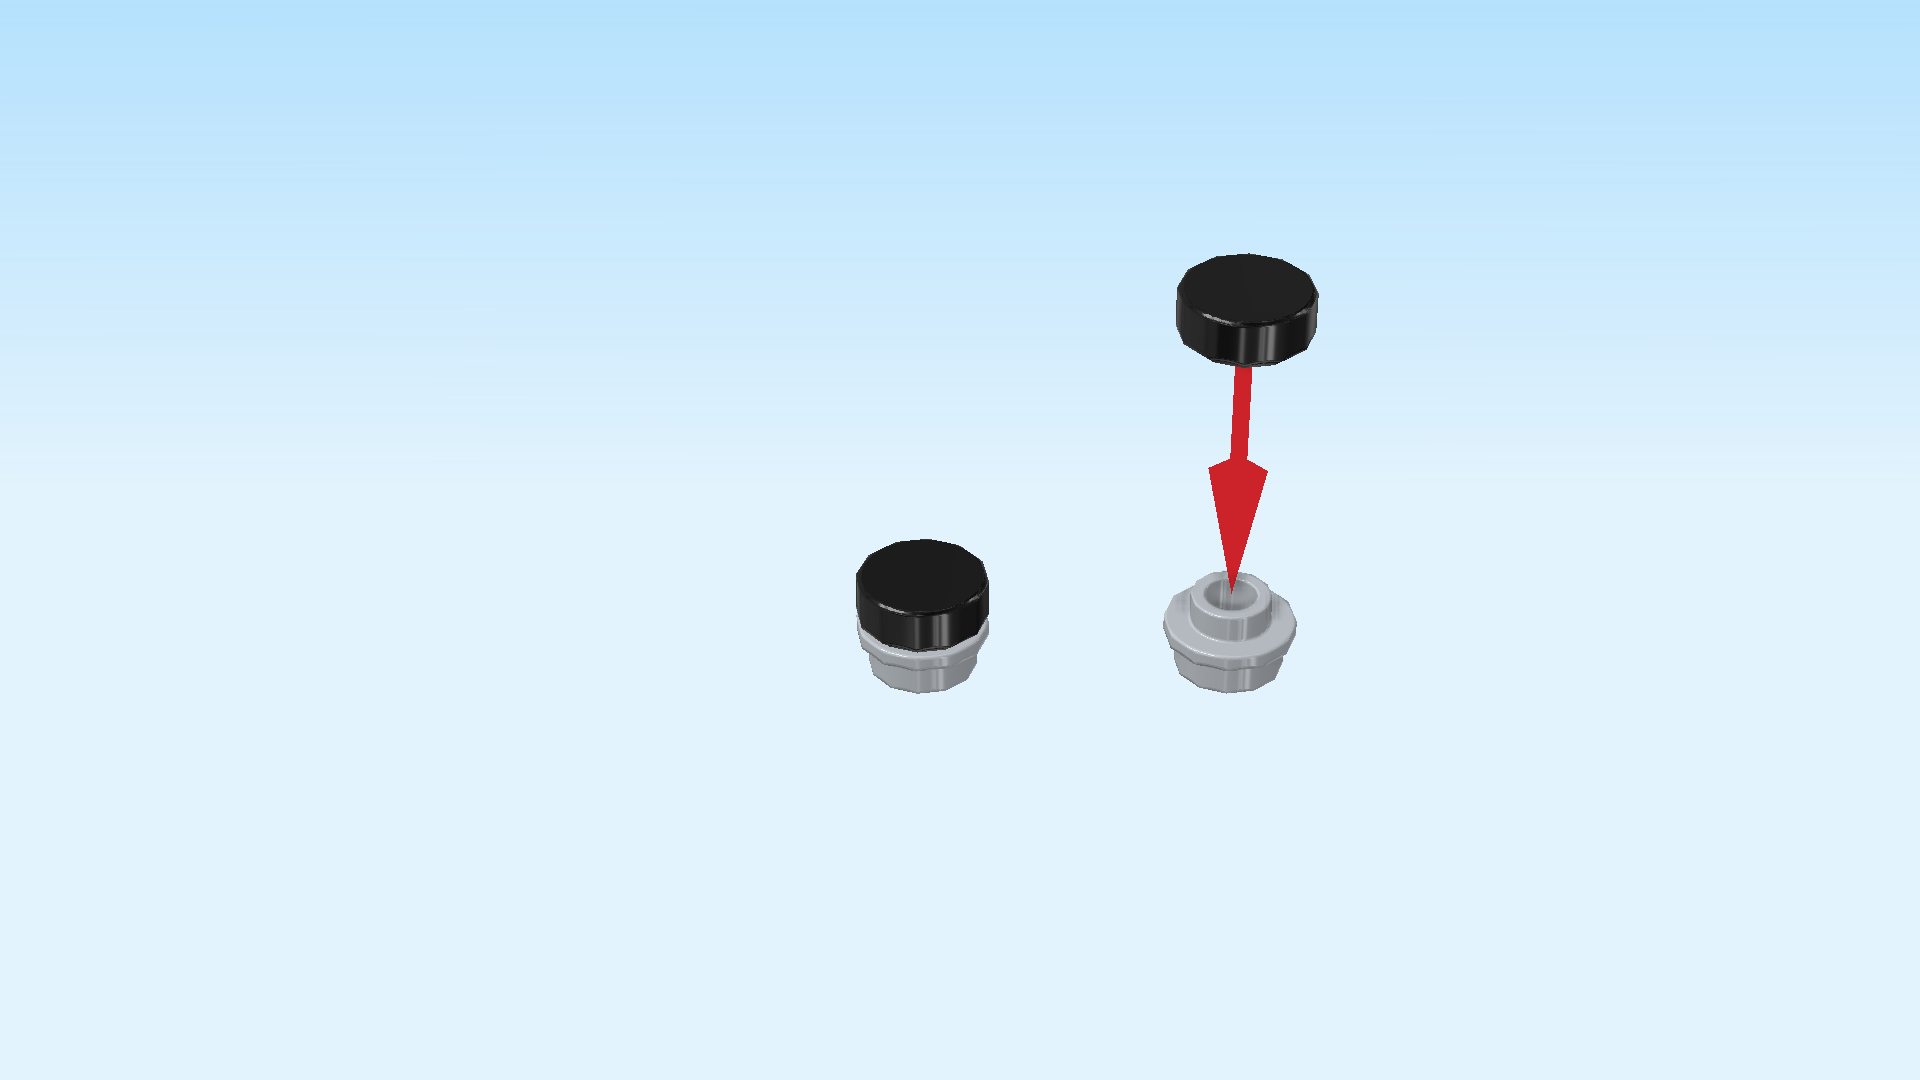
| Put the round plates with through-hole next to each other on the table. |
| Put the round tiles on top. |
| Turn the torso build horizontally, shoulder portion on the left, narrow end on the right. |
| Mount 1 stack on the high knob to the left of the curve tile 2x2 mounted on the right edge. This is the singular knob located directly in front of the rightmost rib. |
| Mount the other stack on the next high knob when going to the left. This knob is directly in front of the leftmost rib. |
| If done correctly, there is 1 empty knob to the left of the second stack, followed by the vertically mounted flat tile 2x4 on the left edge. |
| Find 2 dark stone grey mini wrenches. |
| Insert their handles into the top-level hollow knobs at the front edge that are directly opposite of the 2 stacks we have just mounted. |
| Again, there should be 1 empty knob to the left of the left wrench. |
| Turn the wrench heads so that their tips are pointing to the front and back, not to the left and right. |
| Collect the following 2 pieces: |
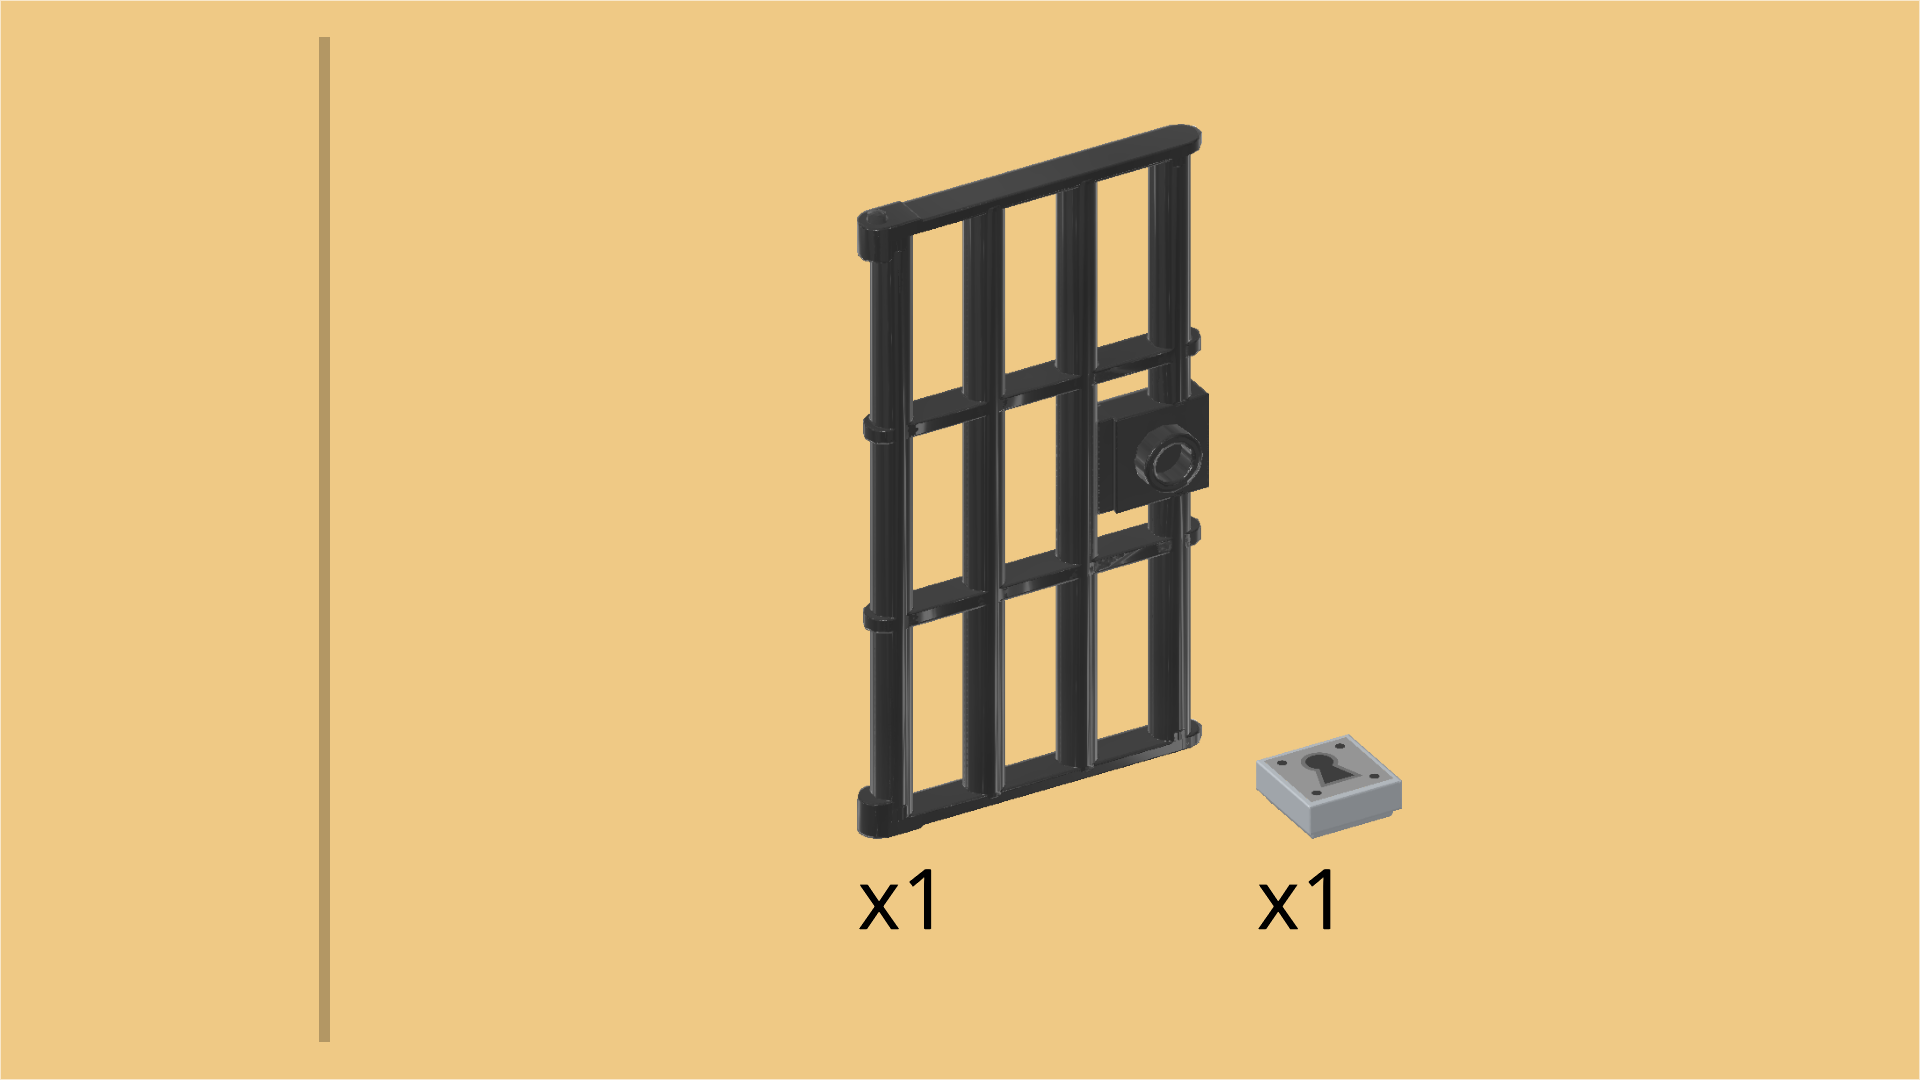
| 1 medium stone grey flat tile 1x1, |
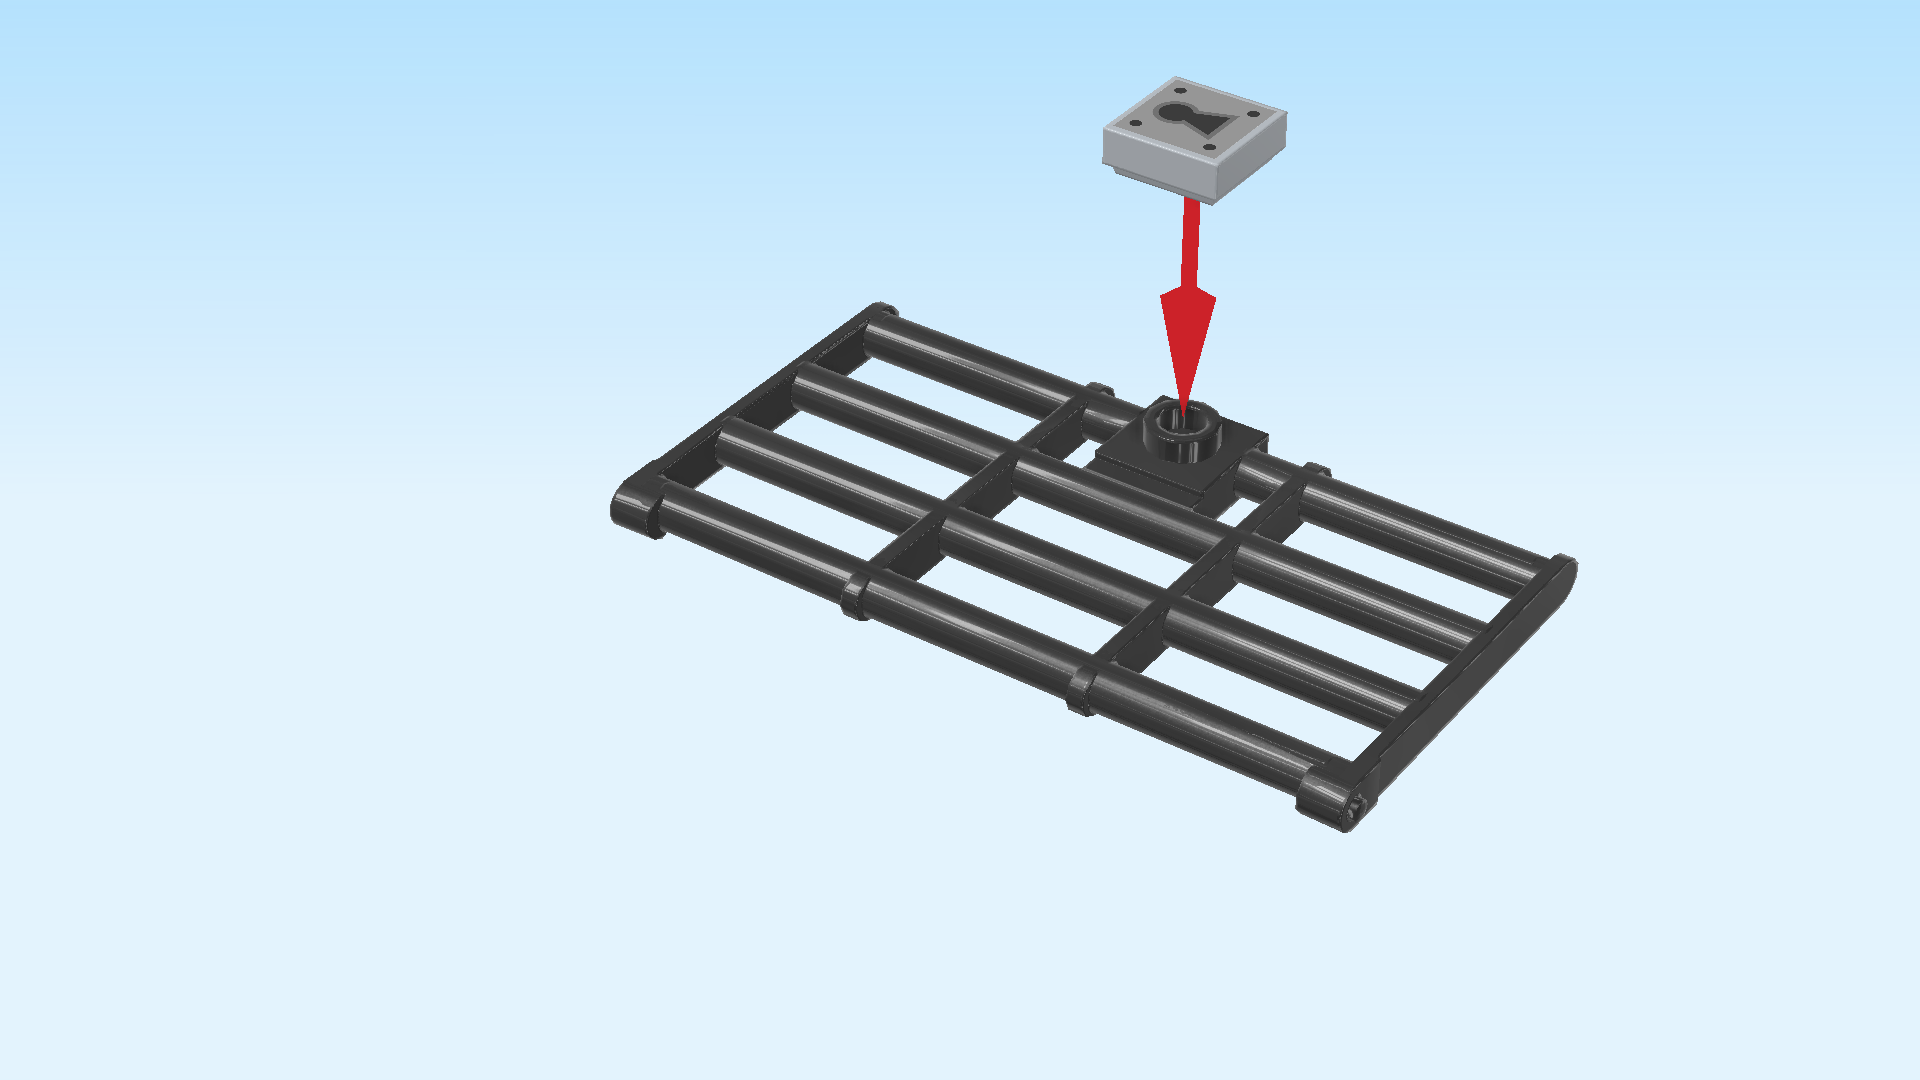
| and 1 titanium metallic lattice door 1x4x6. |
| Put the lattice door horizontally flat on the table so that its doorknob is at the back and pointing to the top. |
| Put the flat tile on the knob. It is printed with an old-school door lock. |
| Hold the lattice door flat and horizontally, making sure the doorknob is at the back edge. Snap its frontmost lattice bars into the 2 wrench heads. Make sure that the right wrench head is very close to the right edge of the lattice door. |
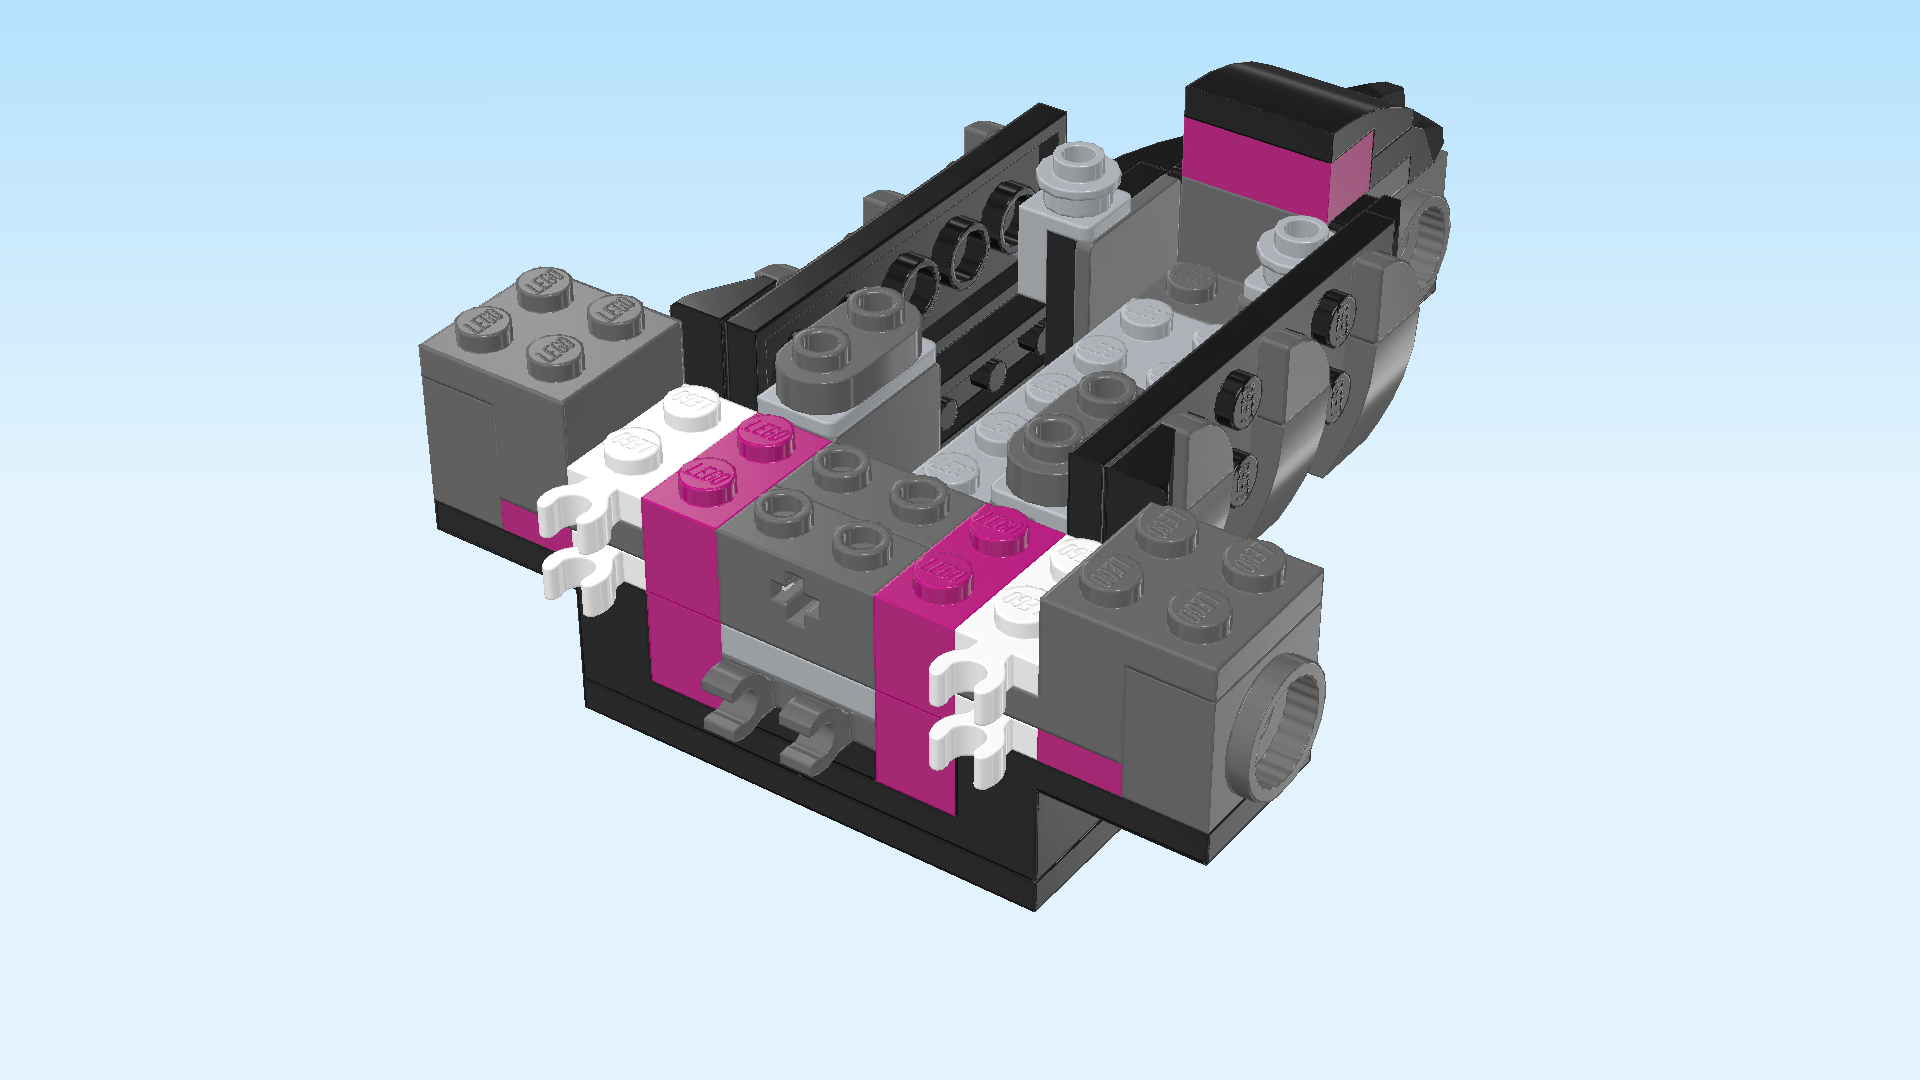
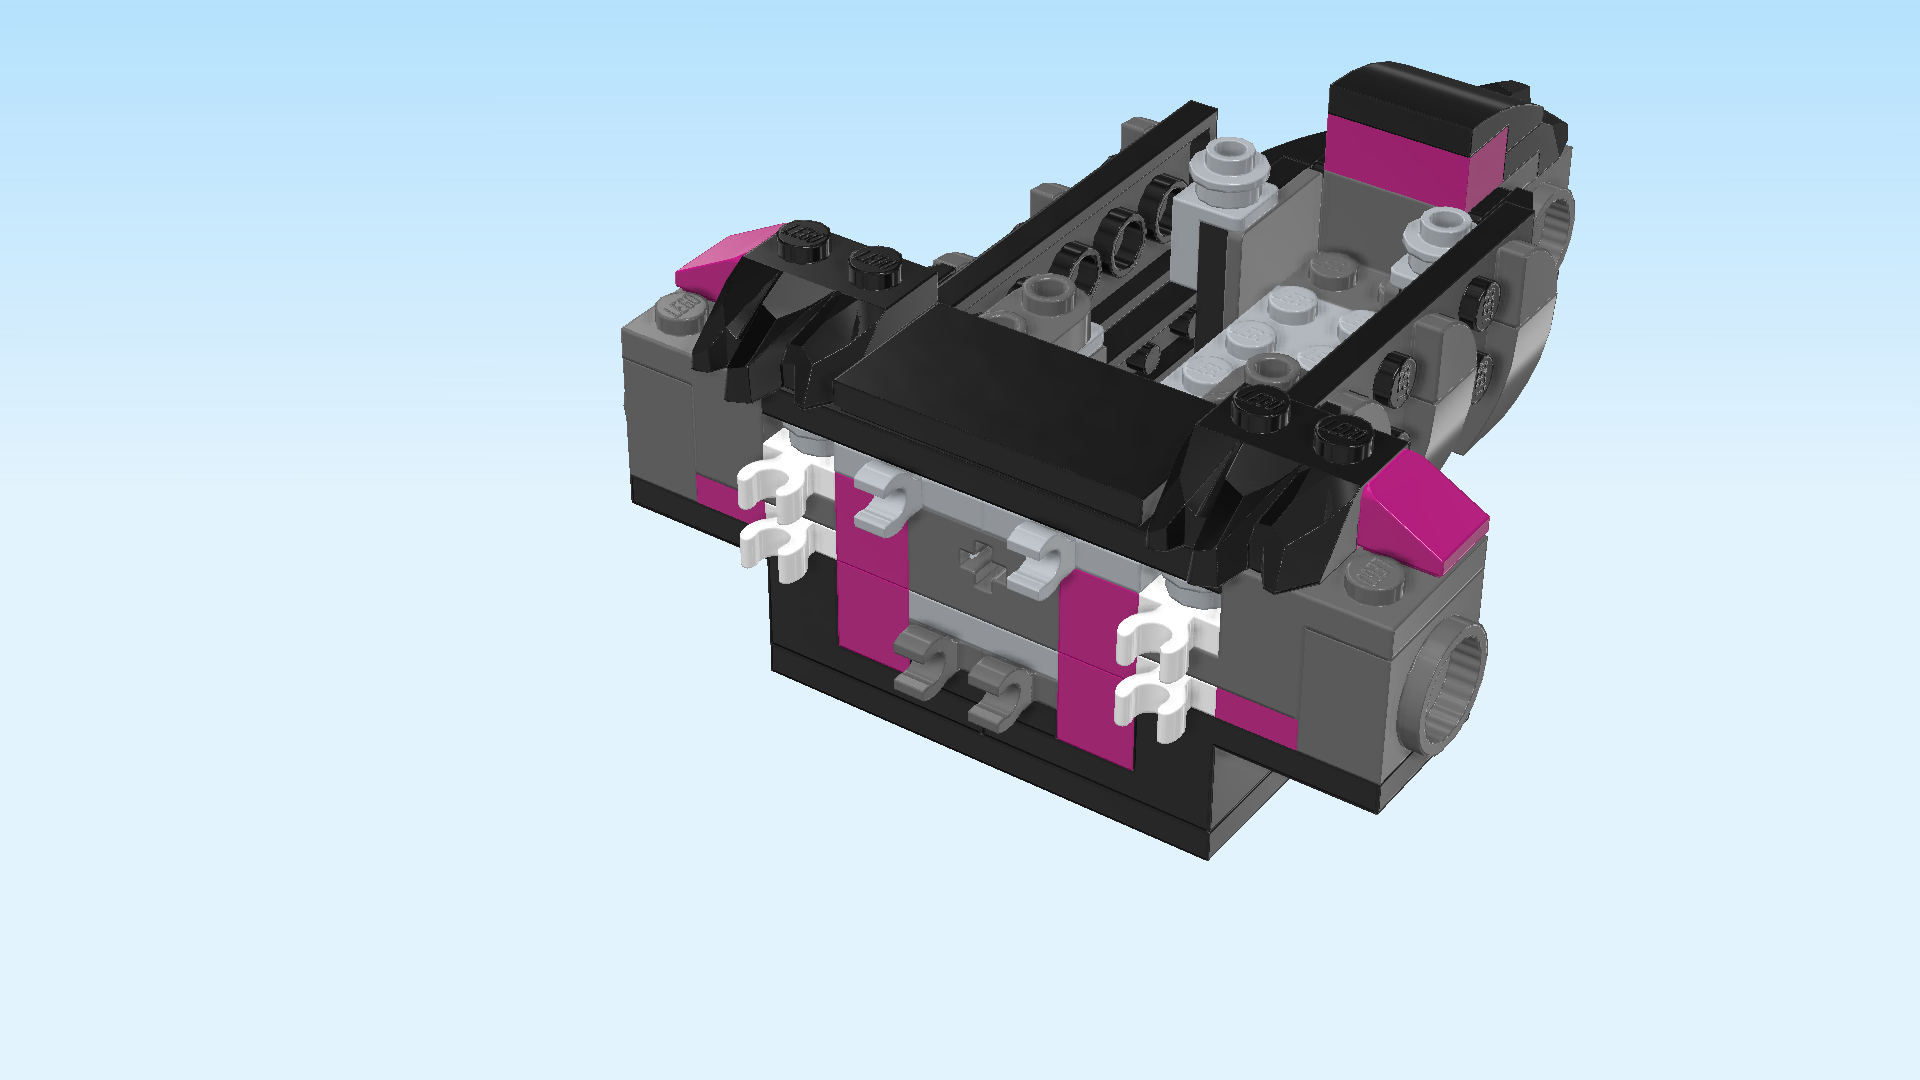
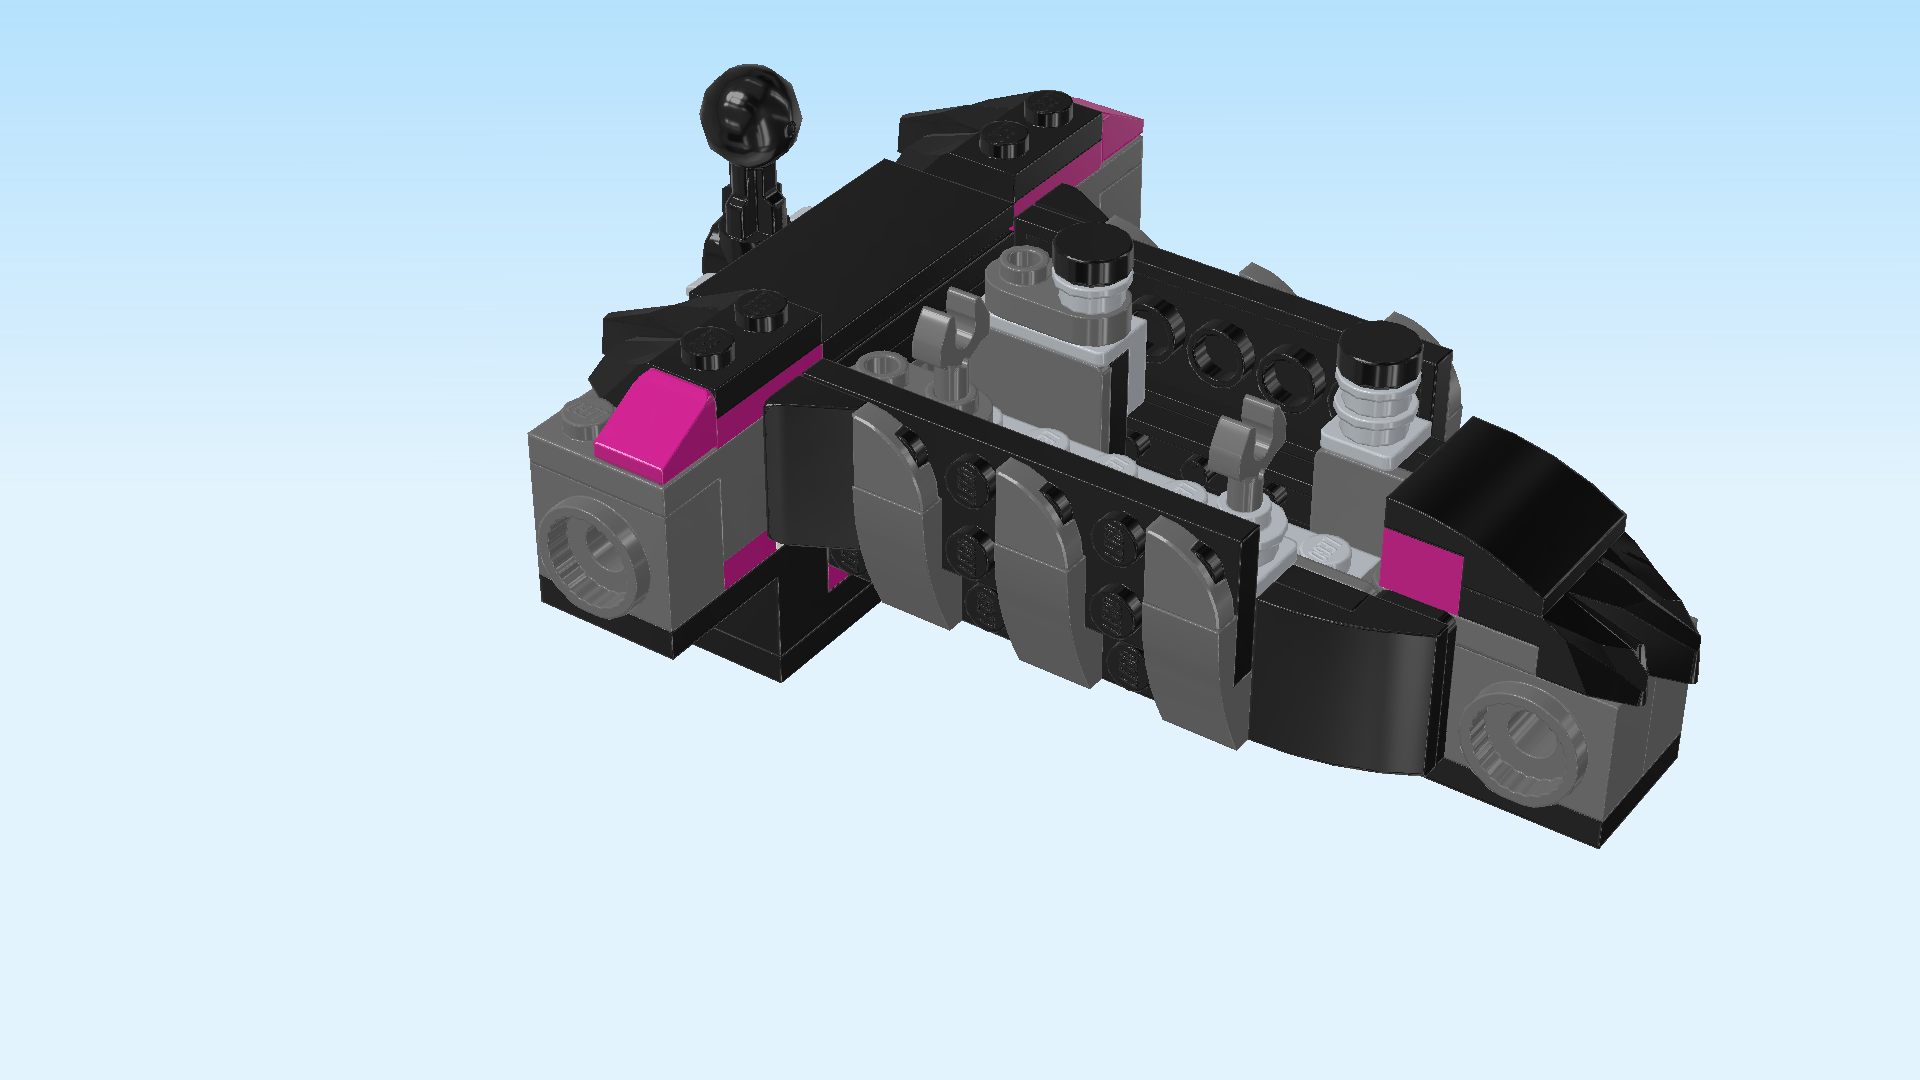
| With this, the Grimkeeper's torso with shoulder portion and chest cage is finished! Fantastic job! You can try to swing the cage door open and close it again. The Grimkeeper will capture his prisoner later. |
| Open bag number 2. You can choose to have the bricks sorted by color again. This bag contains all bricks and pieces for the Grimkeeper's legs and feet, his arms, his head, as well as his lantern nightmare creature. |
| Next up, we will build the Grimkeeper's legs. |
| We will give detailed instructions for one leg now. However, the legs are identical and you can choose to build the second leg already alongside the first one. Alternatively, you can jump back to the beginning of this section when you are done with the first leg, and repeat the instructions for the second one. We will remind you of that option later. |
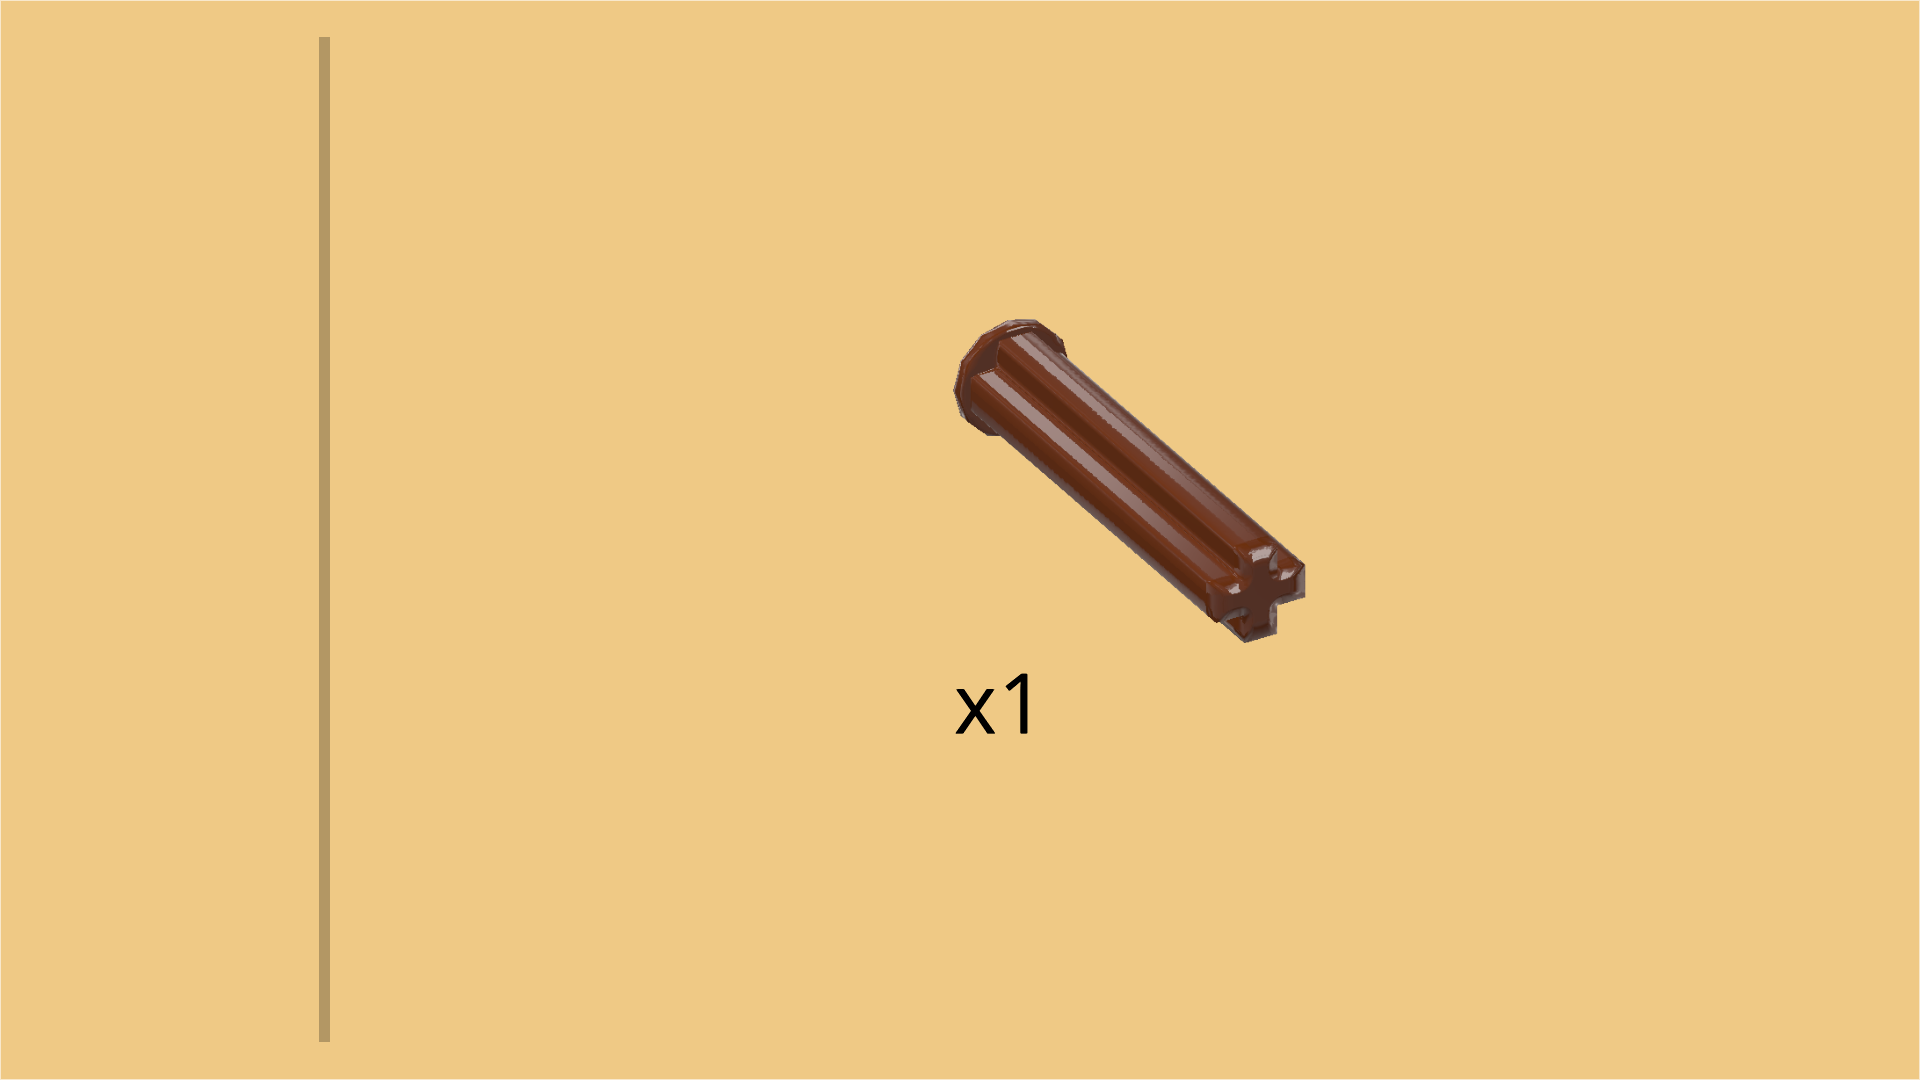
| Find 1 reddish brown cross axle 3m with end stop. |
| Place it horizontally on the table, this time end stop to the right. We will use this piece in the next step. |
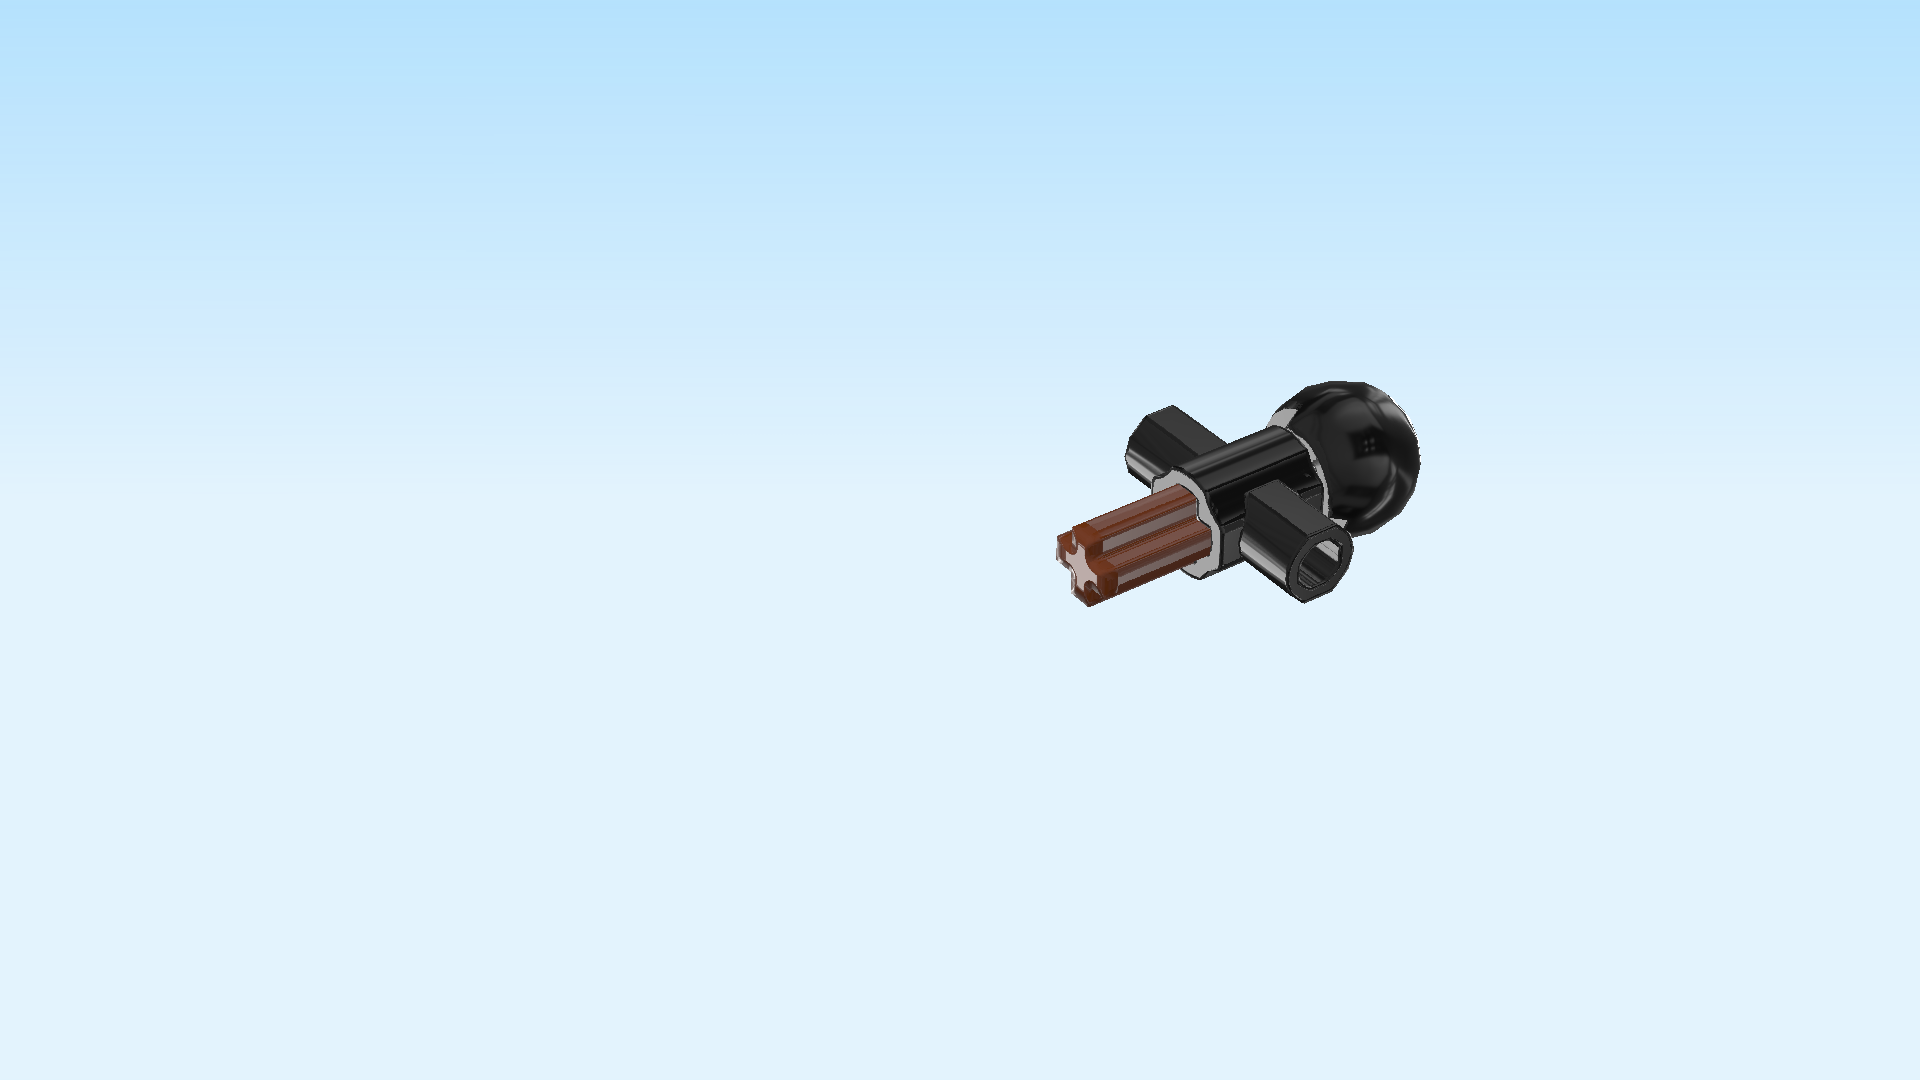
| Find 1 technic ball with cross hole. |
| Hold the ball in your hand so that its cross hole is running from left to right. |
| Pick up the cross axle and insert it from the right into the hole. Push it in until the end stop touches the ball on the right edge. |
| Find 1 black cross axle extension 1m with 2 shaft holders. |
| Hold it vertically, shaft holders pointing to the front and back, and put the cross axle extension from the left on the cross axle. |
| Push the three parts together. The cross axle should only stick out towards the left. |
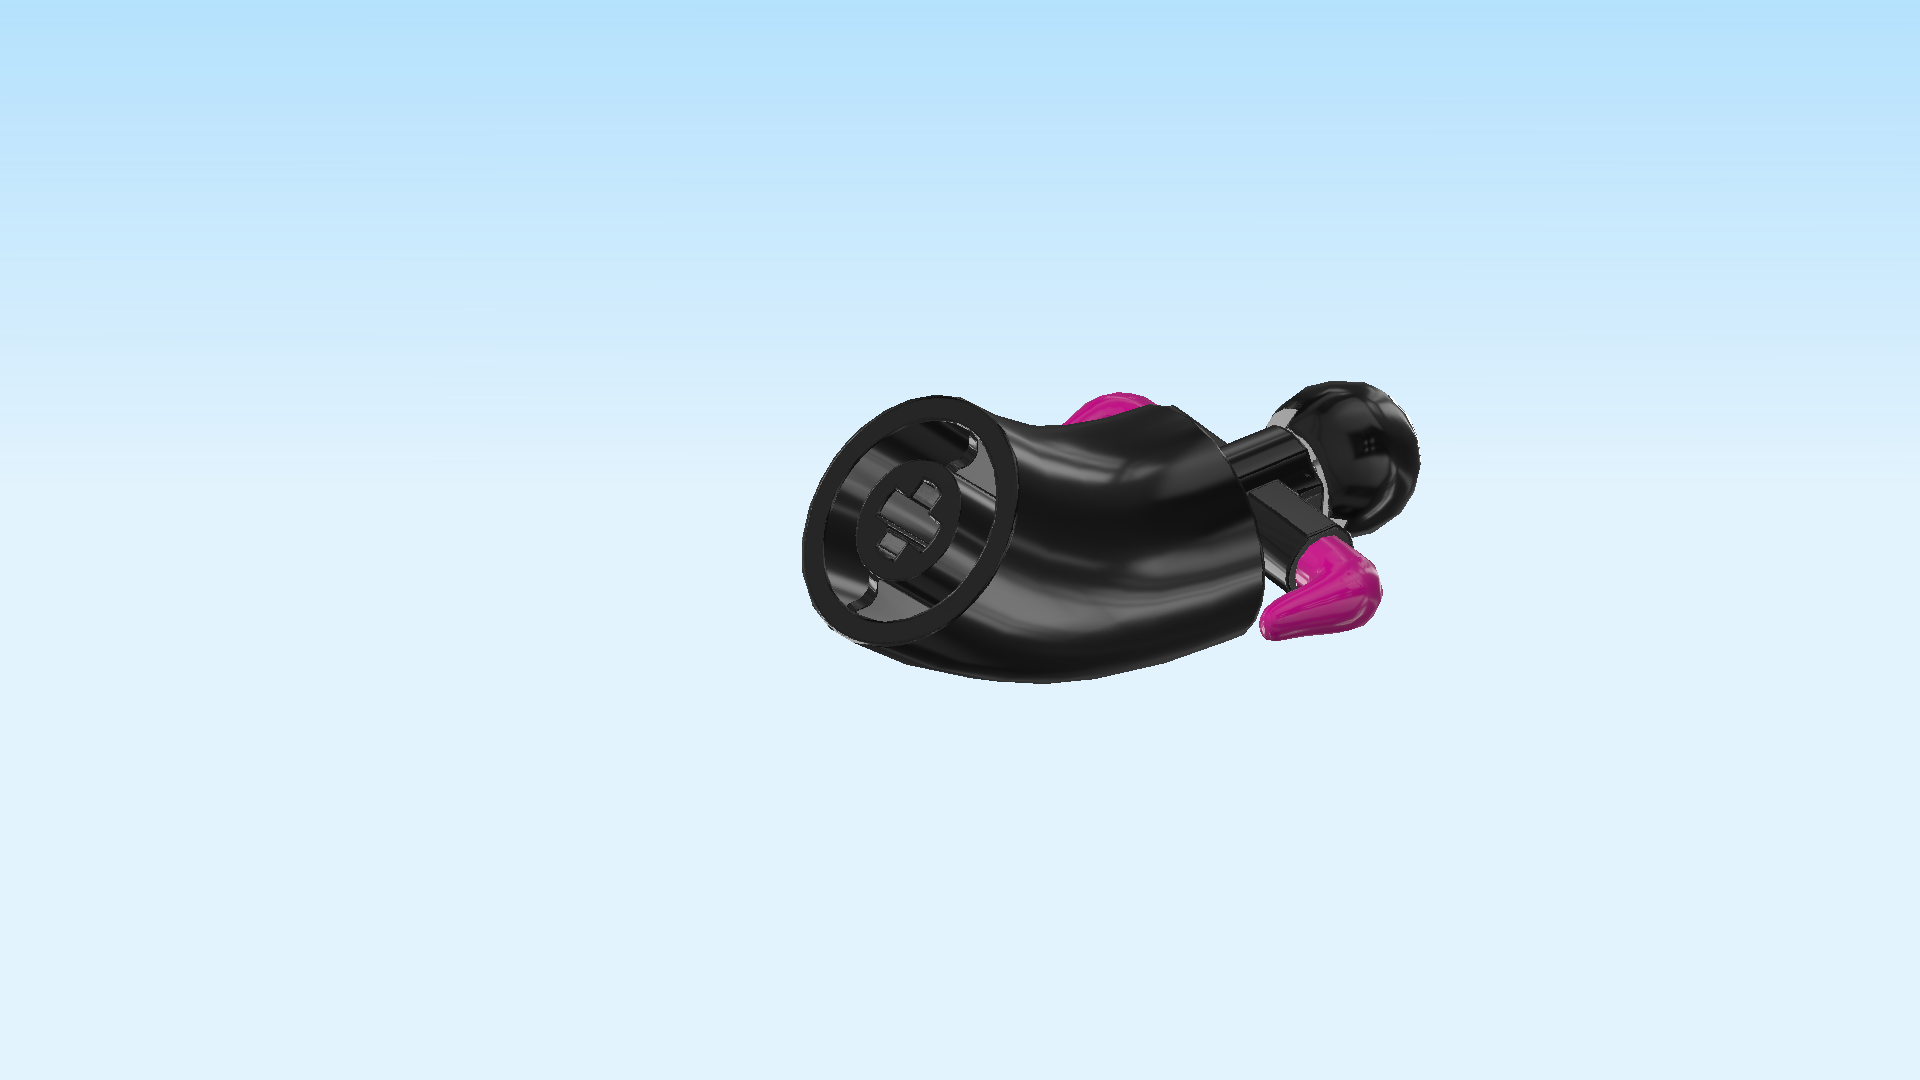
| Find 2 purple violet cow horns with shaft. |
| Insert the shaft of 1 horn into the shaft holder at the front, horn pointing to the left. |
| Repeat symmetrically at the back, horn pointing to the left. |
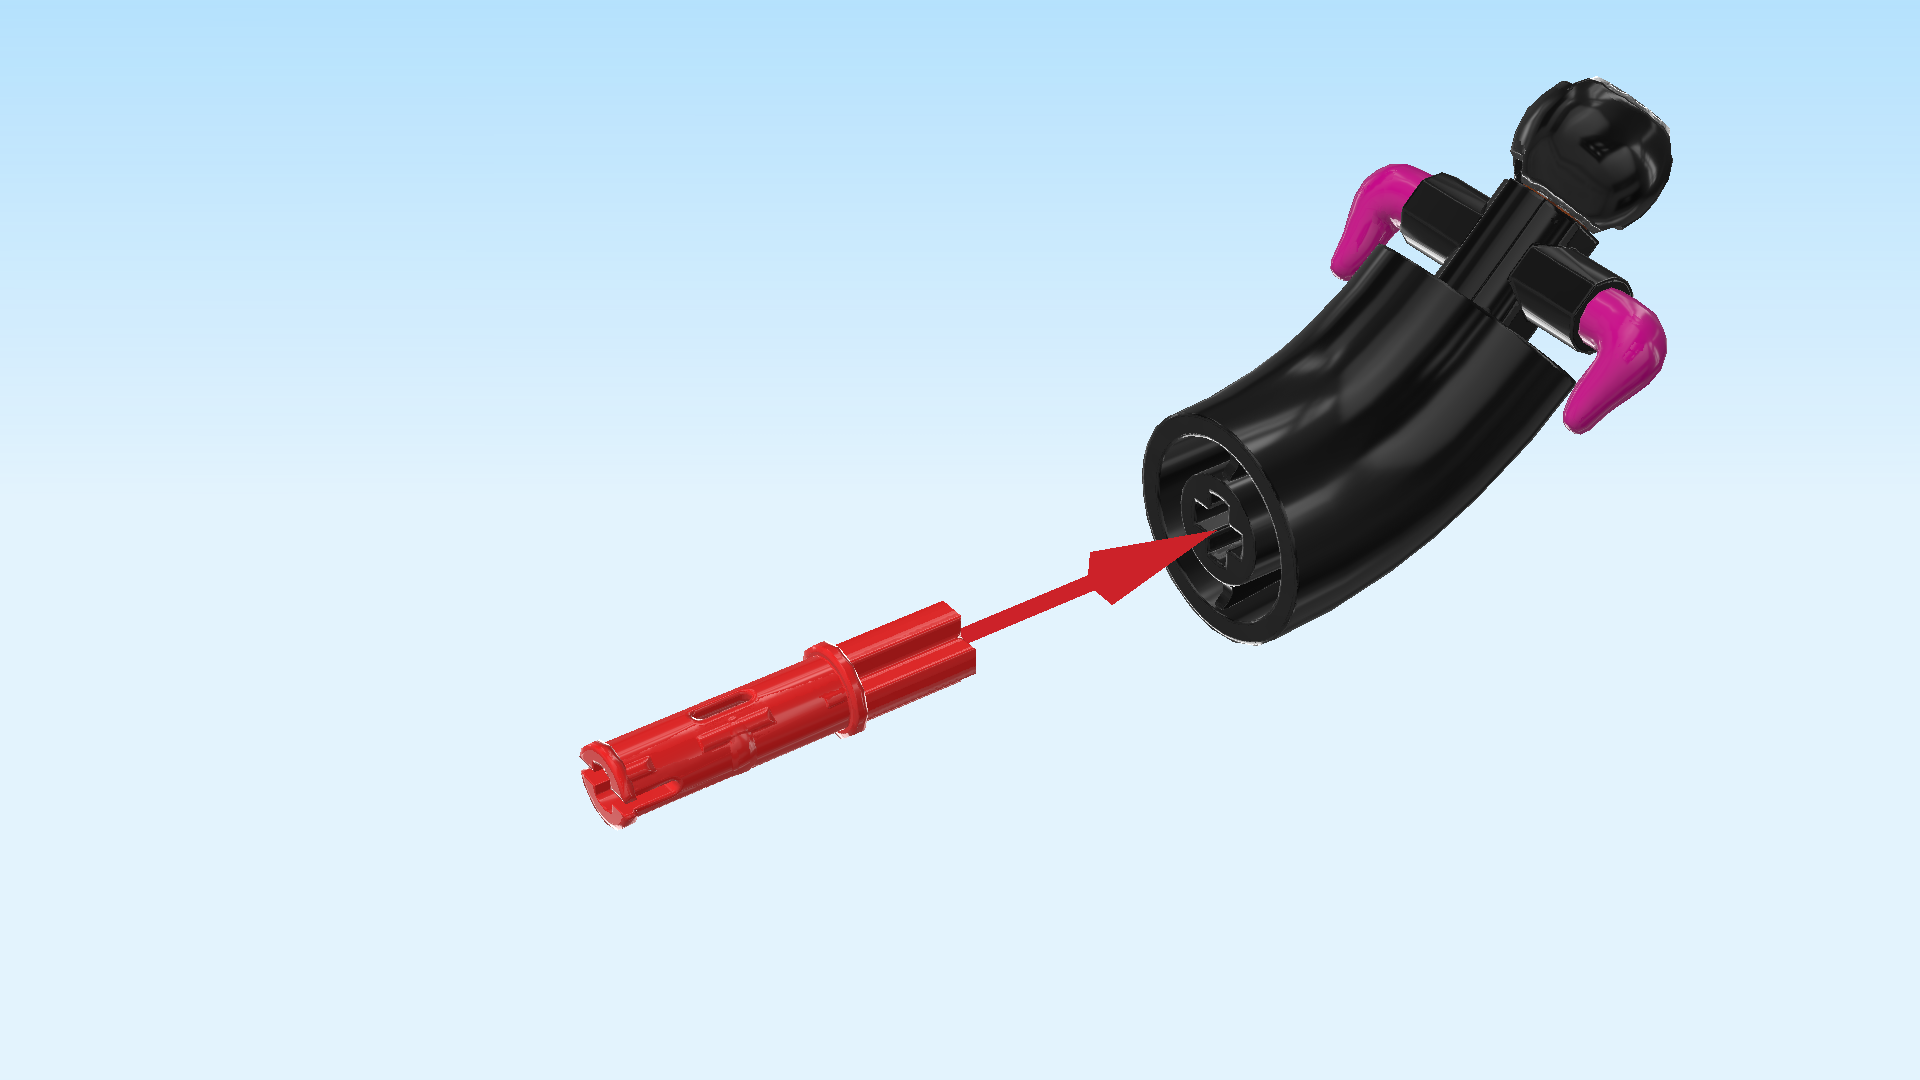
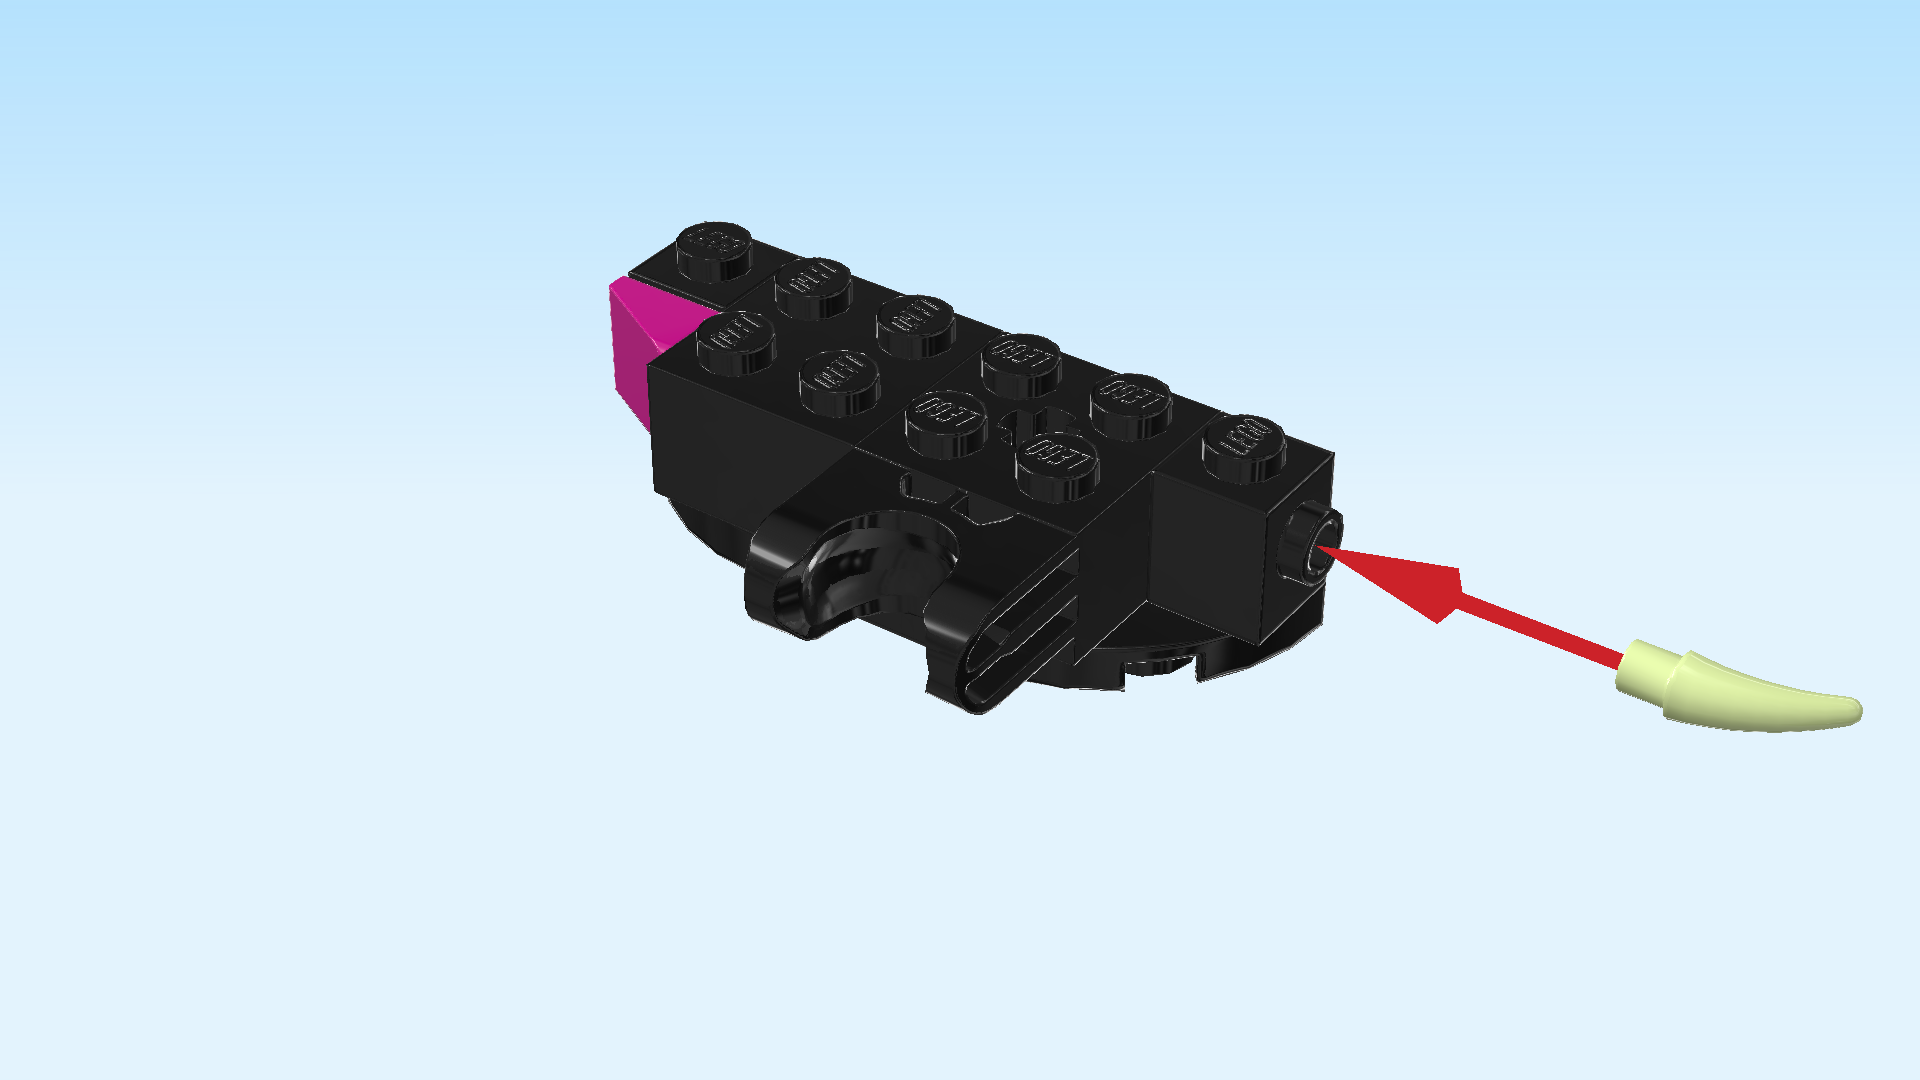
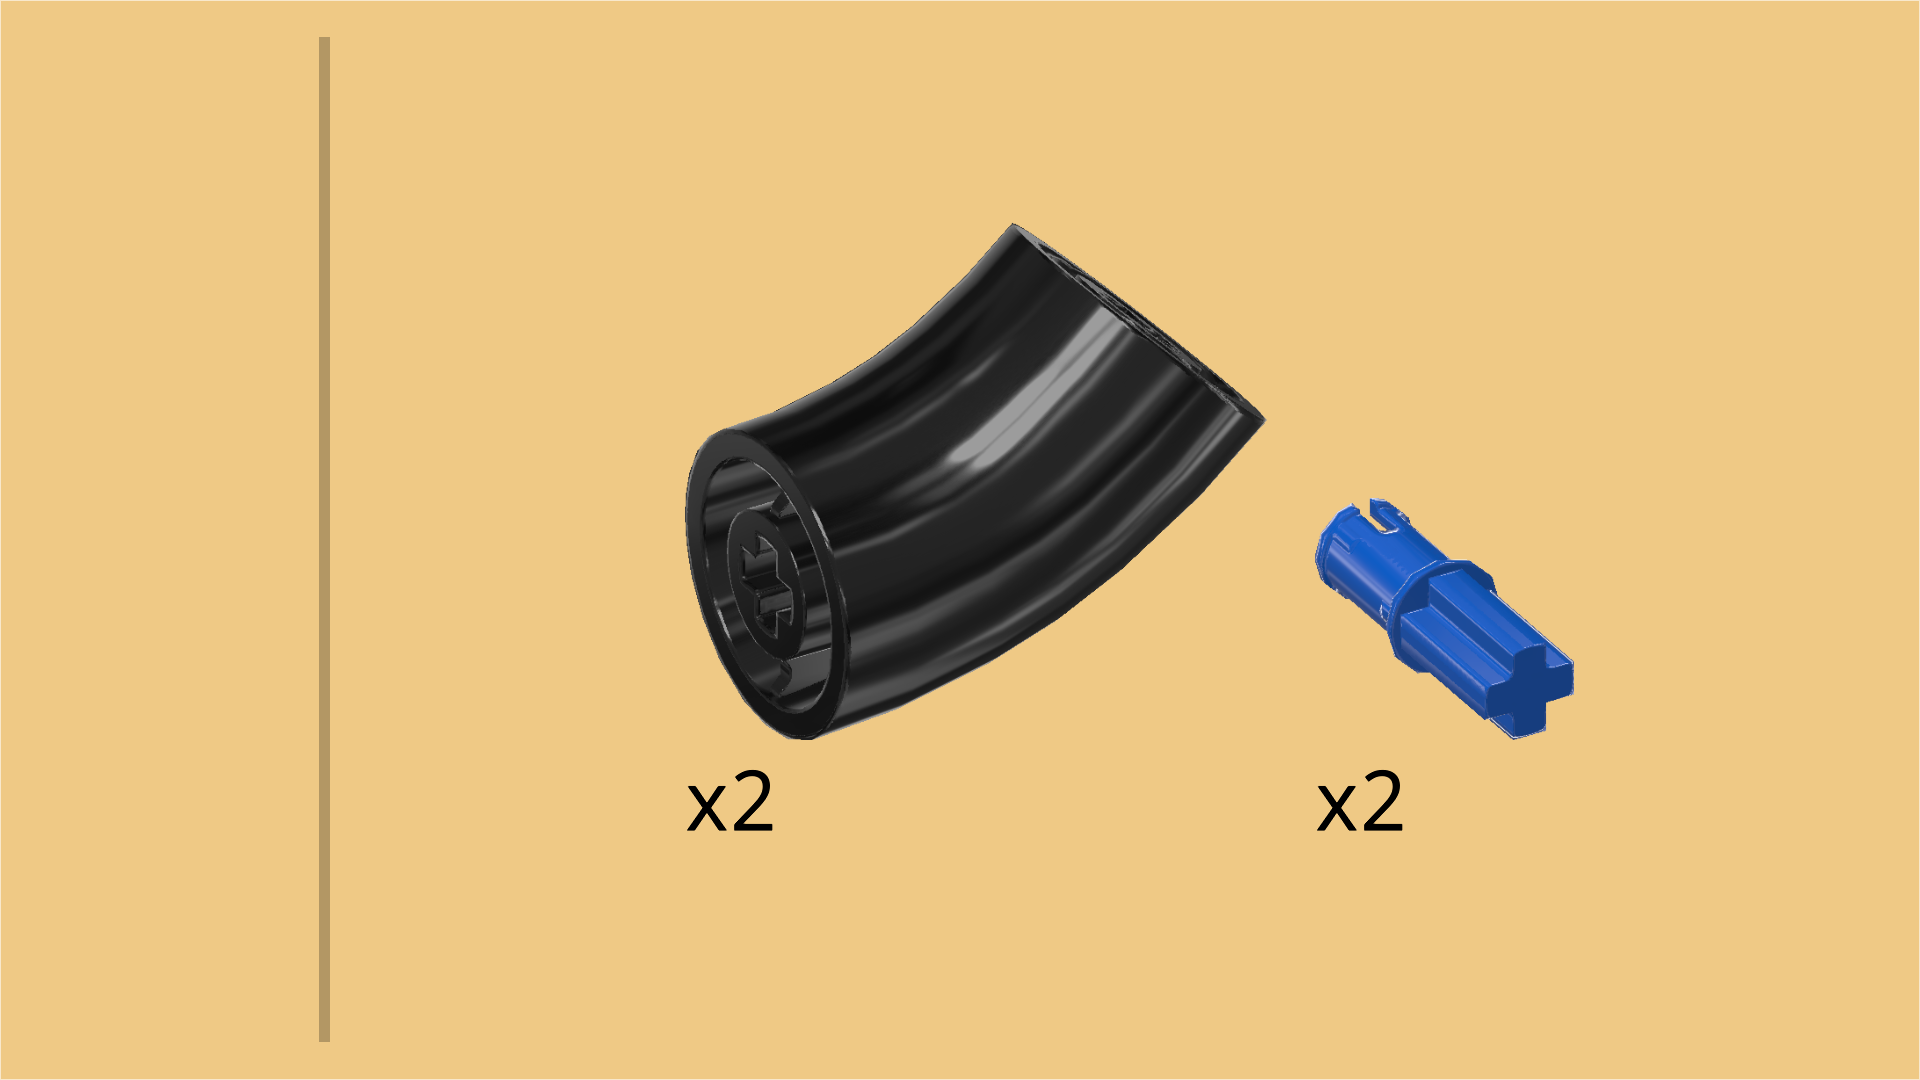
| Find 1 black bent tube element (large). |
| Hold it so that its outer curve is to the bottom. Put its right cross hole on the cross axle, tube bending upwards towards the left. |
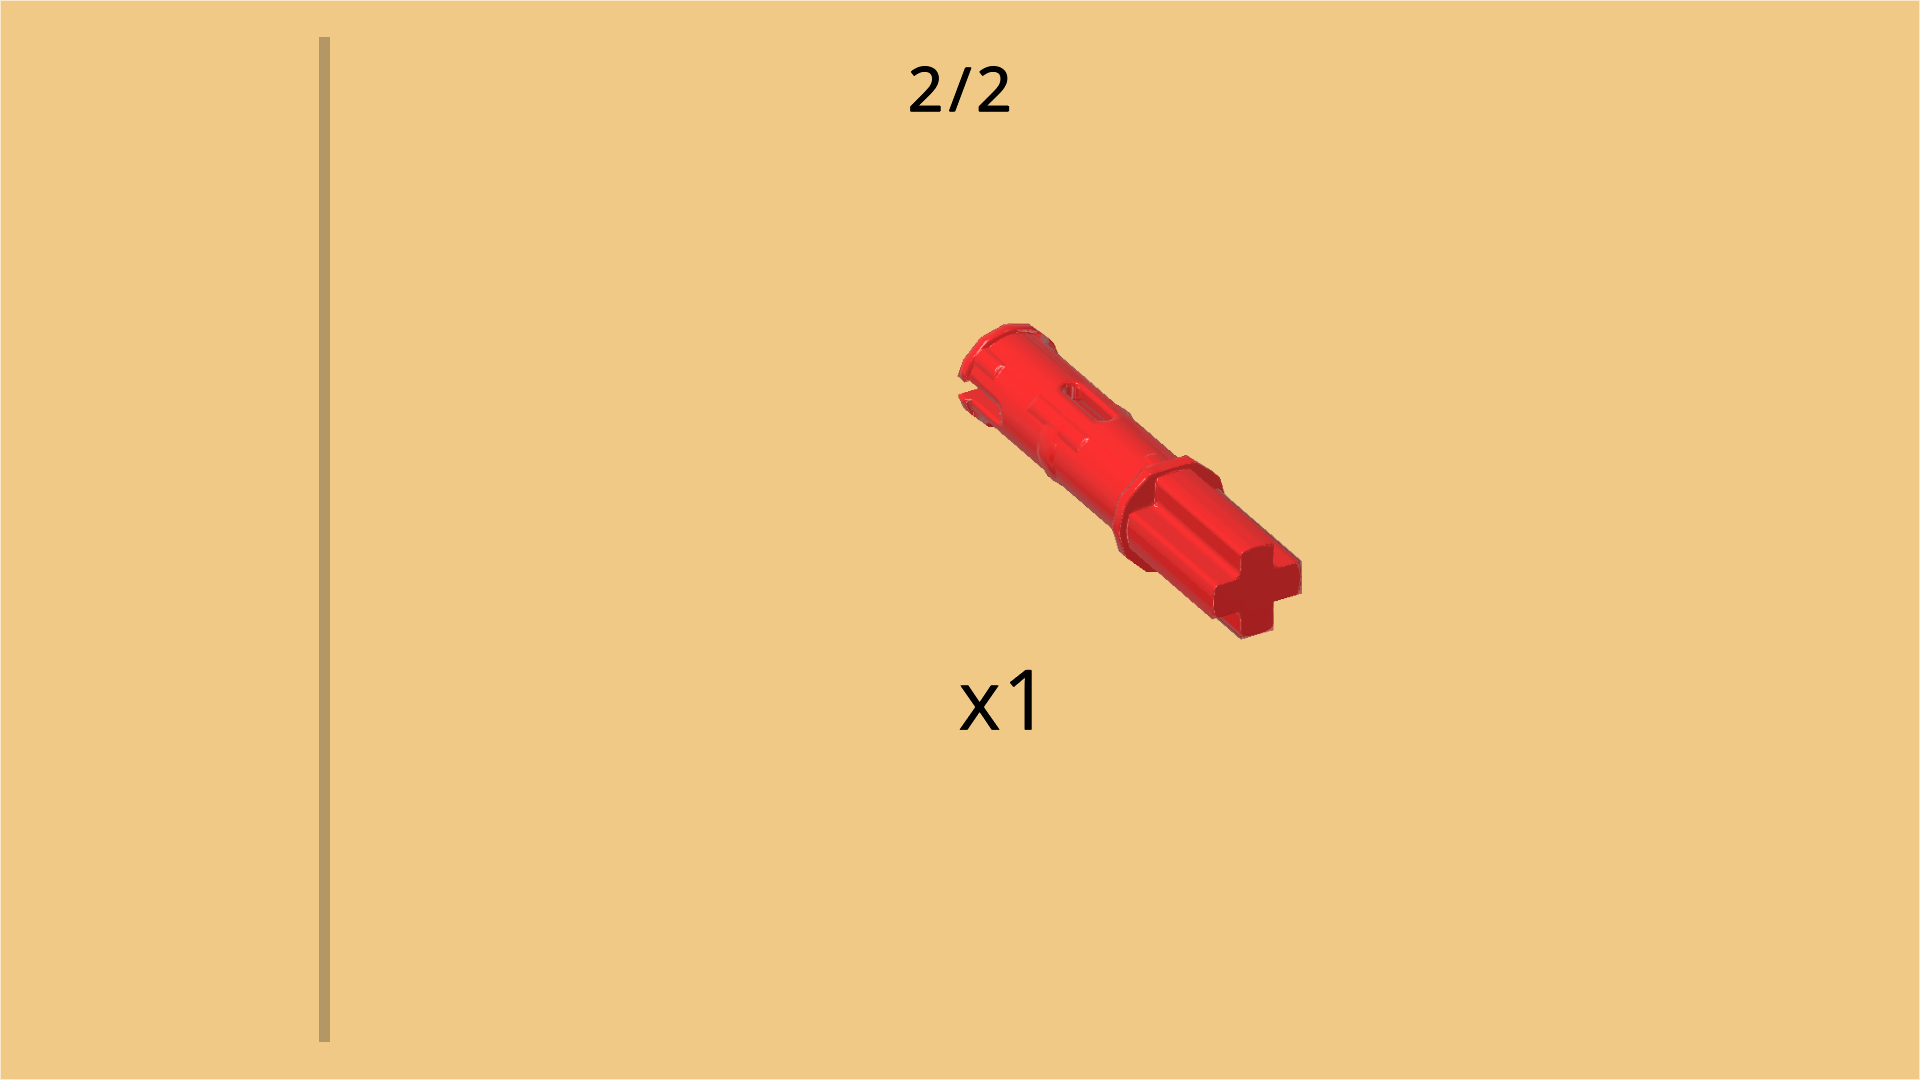
| Find 1 bright red connector peg 3m with stopper ring and 1 cross axle end. |
| Insert the cross axle end into the tube's cross hole from the left, connector peg sticking out towards the left. |
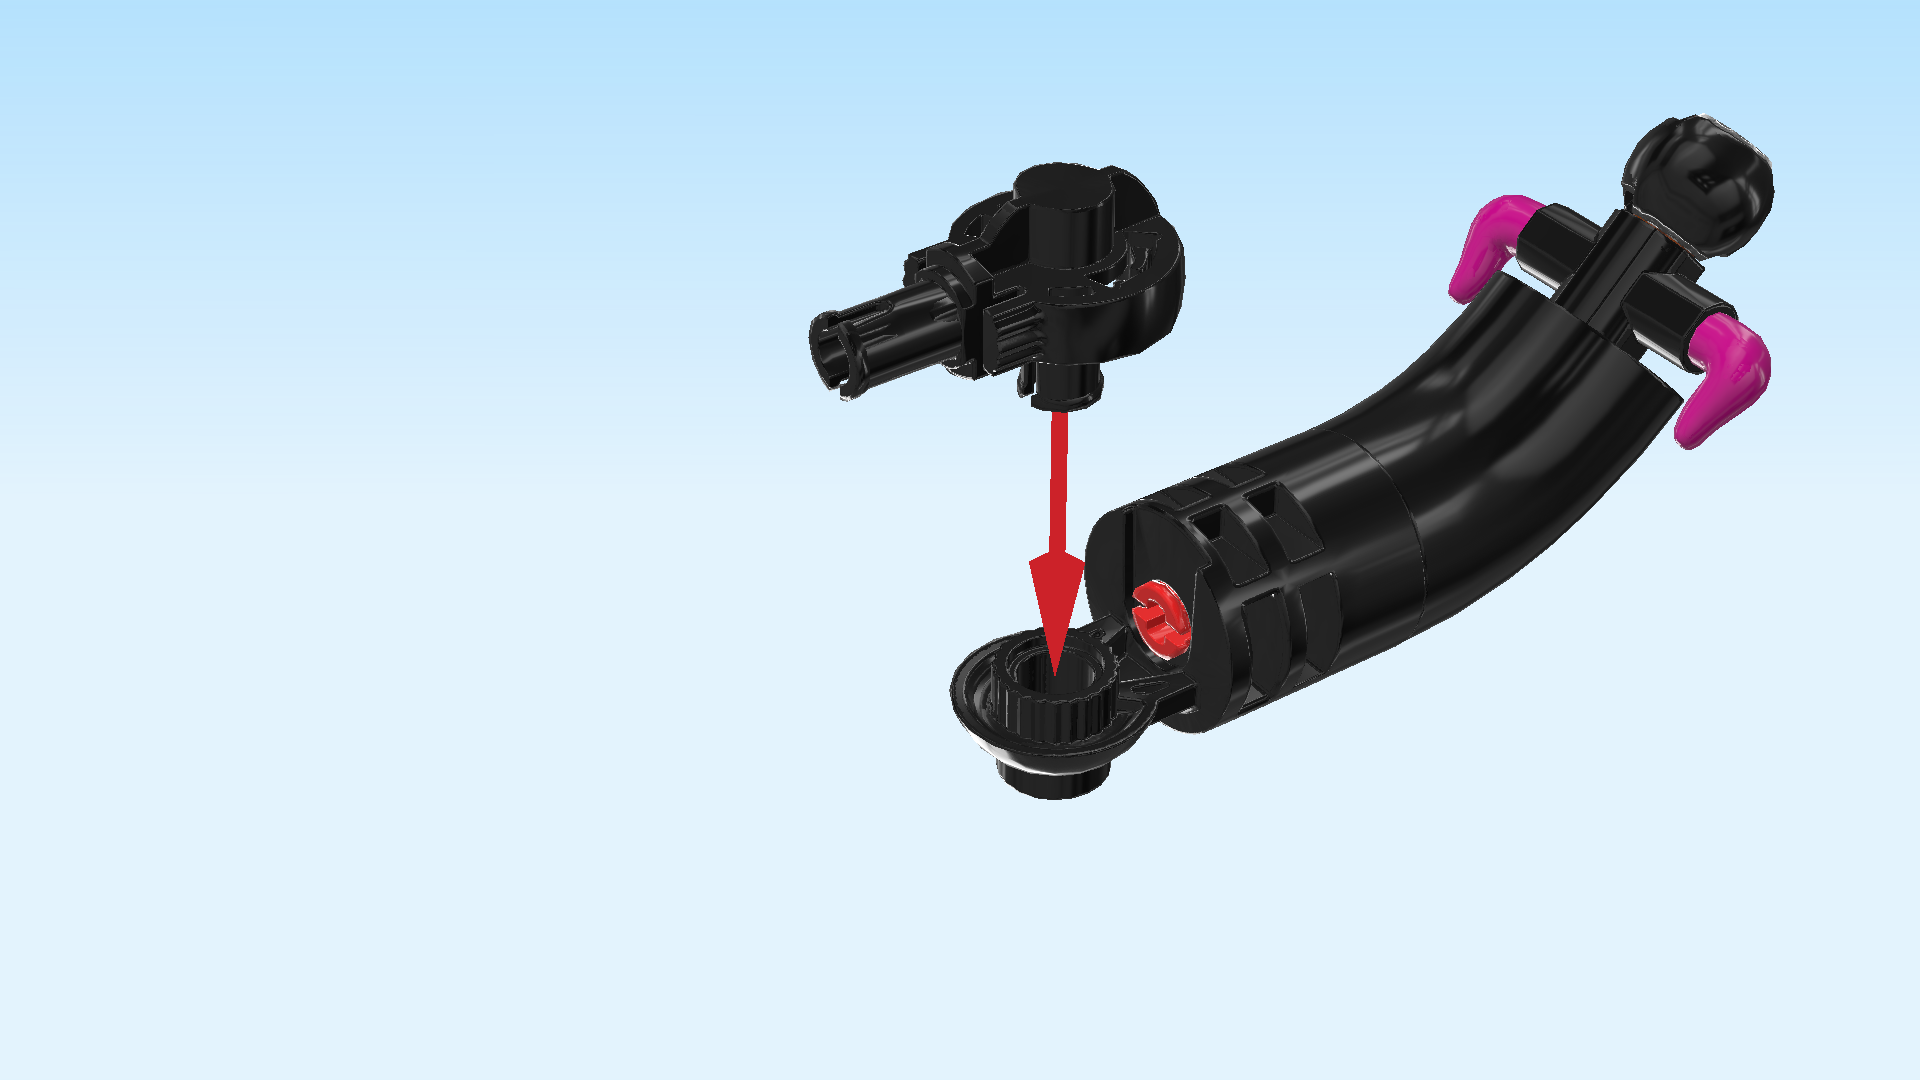
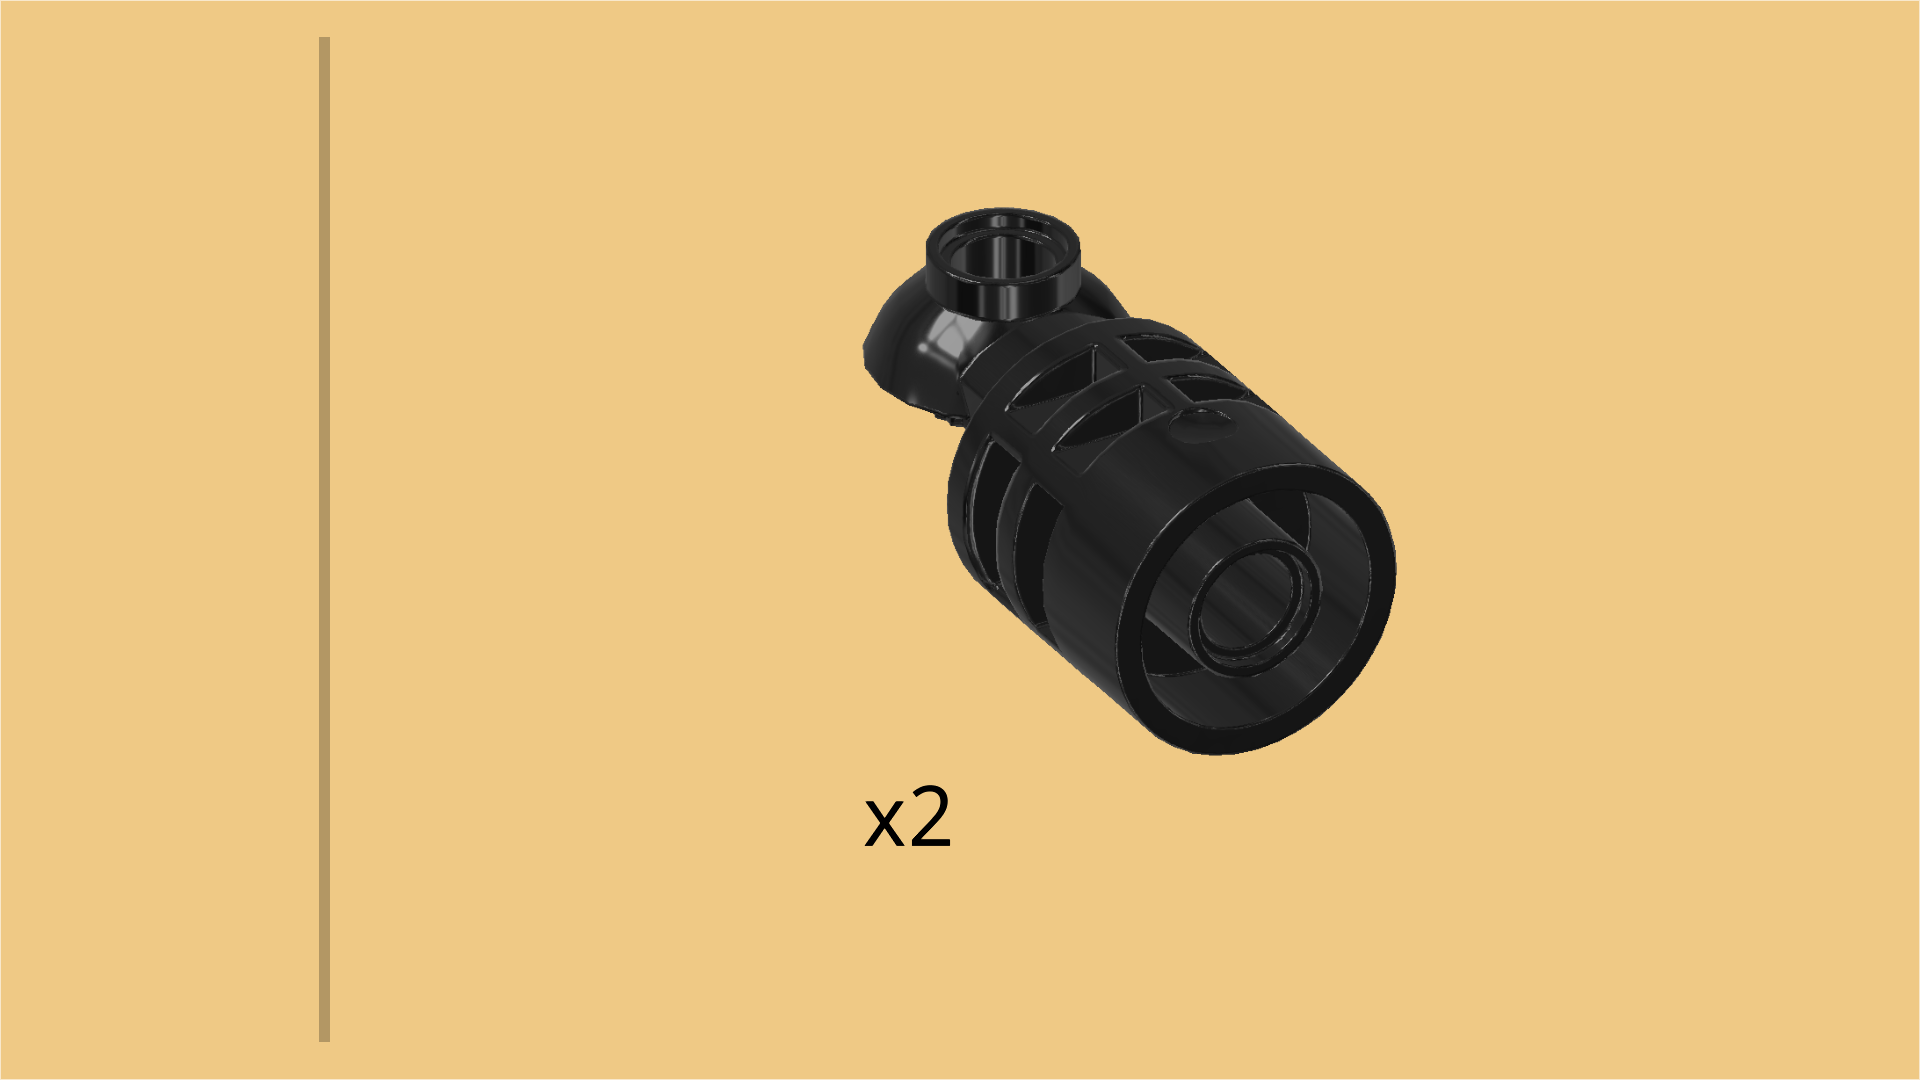
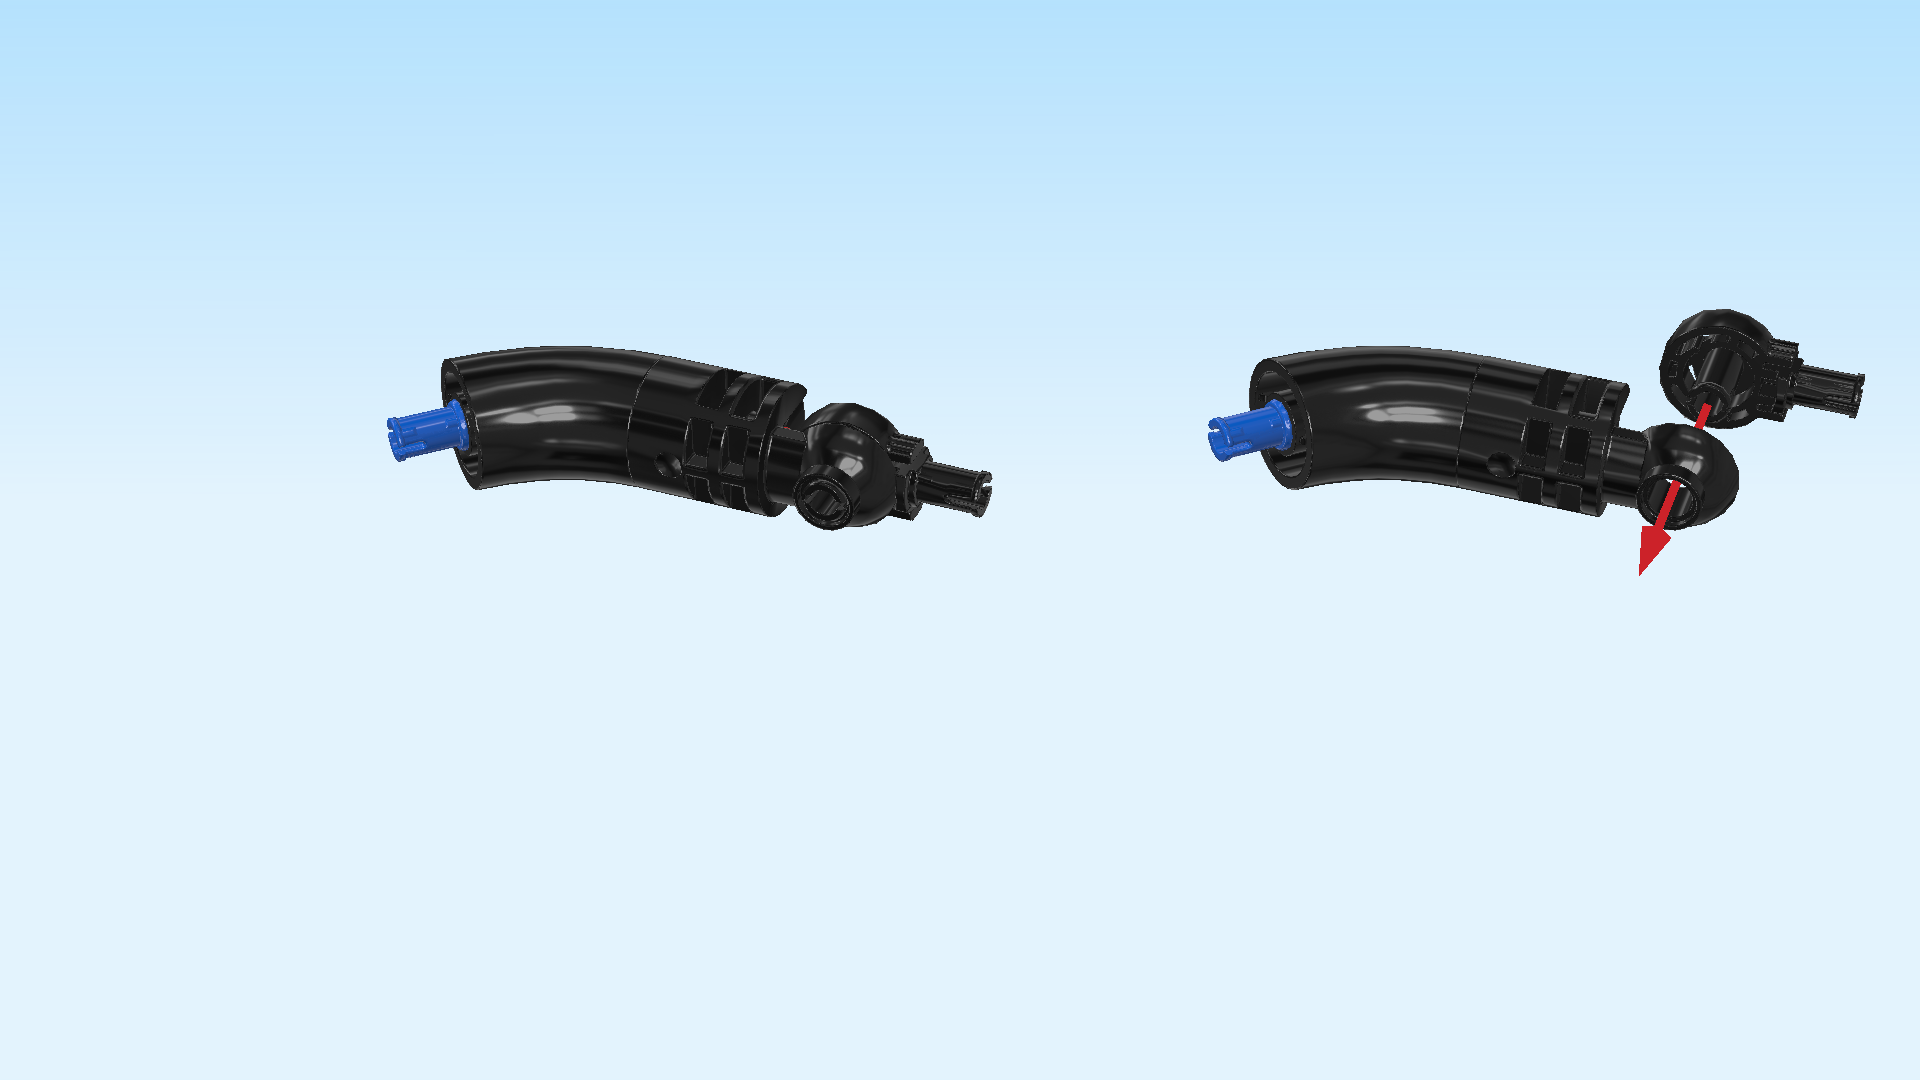
| Find 1 black connecting tube 3x1x1 with ventilation slits and joint disk. |
| Hold it horizontally, joint disk at the bottom and pointing to the left. |
| Put its right hole on the connector peg sticking out towards the left. Again, make sure that the disk is to the left and at the bottom. |
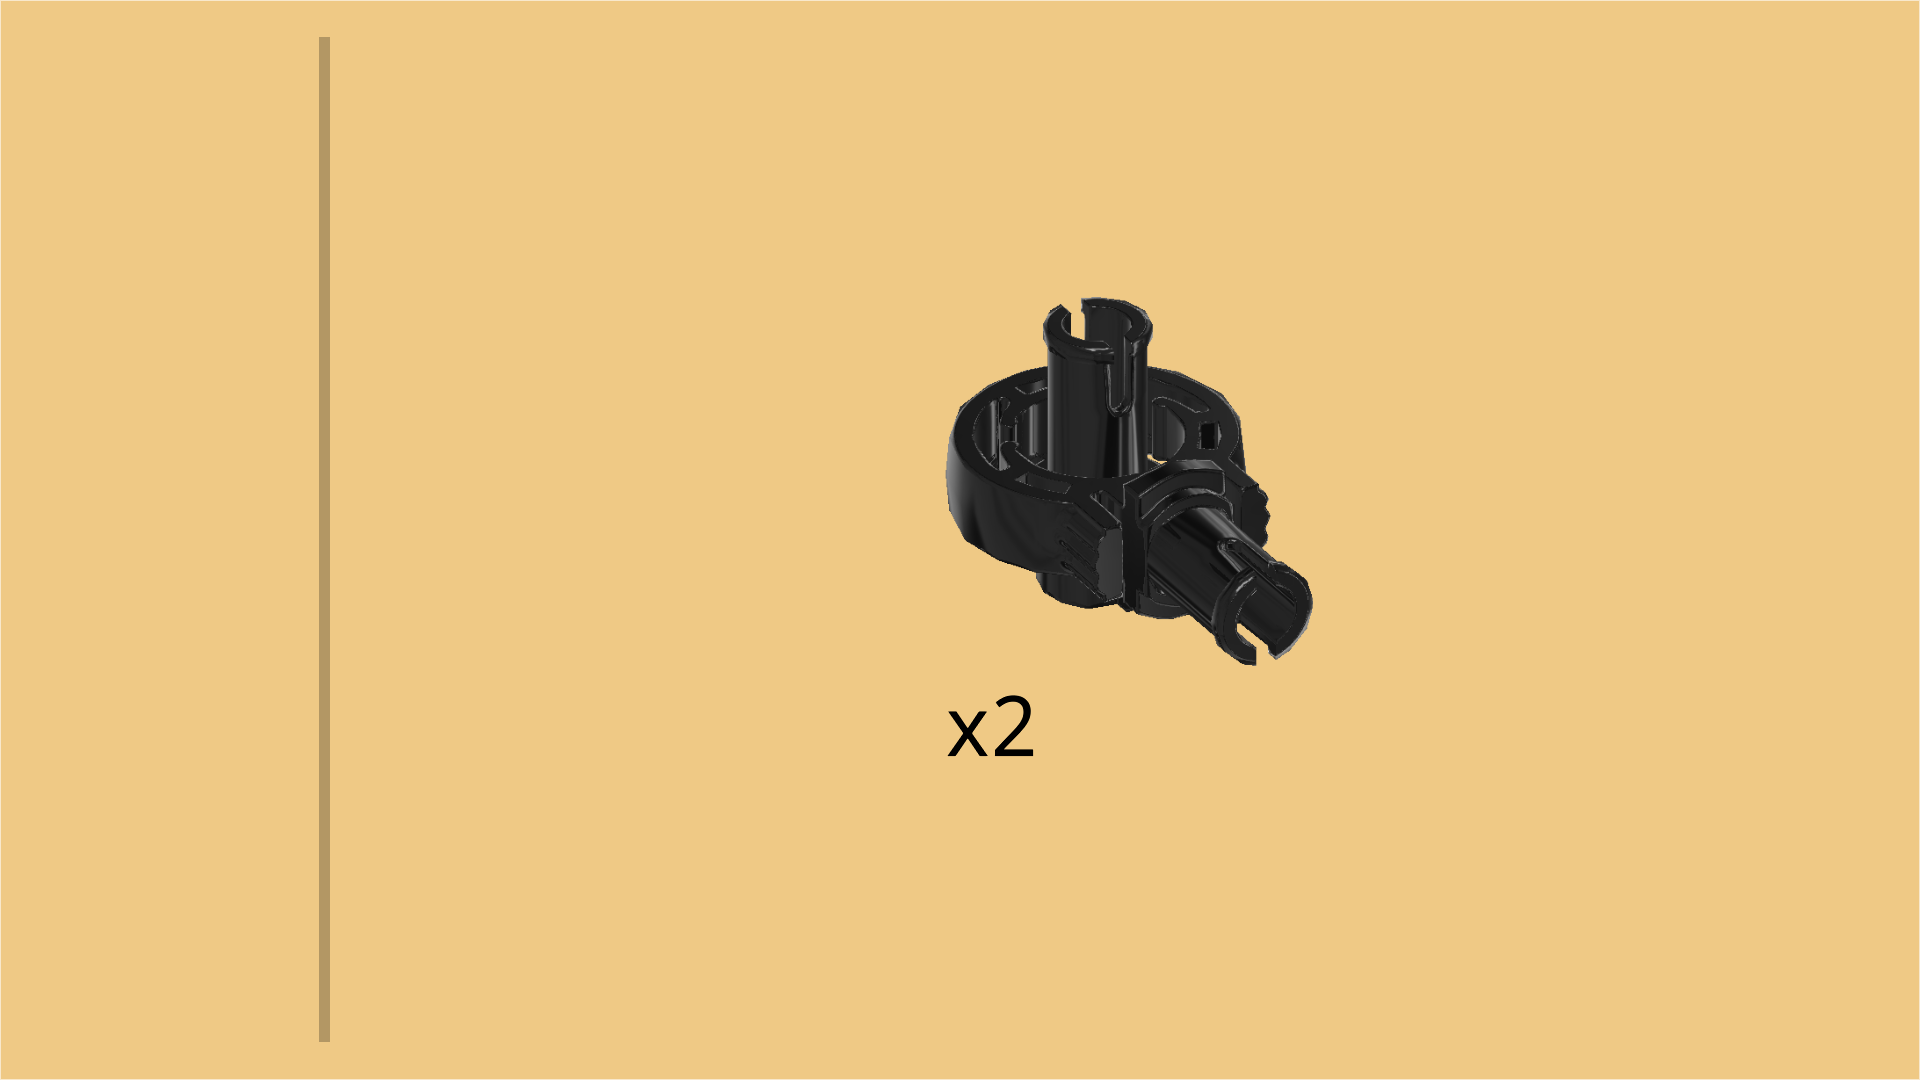
| Find 1 black round joint 2x1x1 with 2 connectors. |
| Hold it so that the connector coming out of the center of the ring is to the bottom, and the connector attached to the ring's side is pointing to the left. |
| Insert the bottom connector from the top into the disk of the previous piece. These pieces make a click sound when snapped together. |
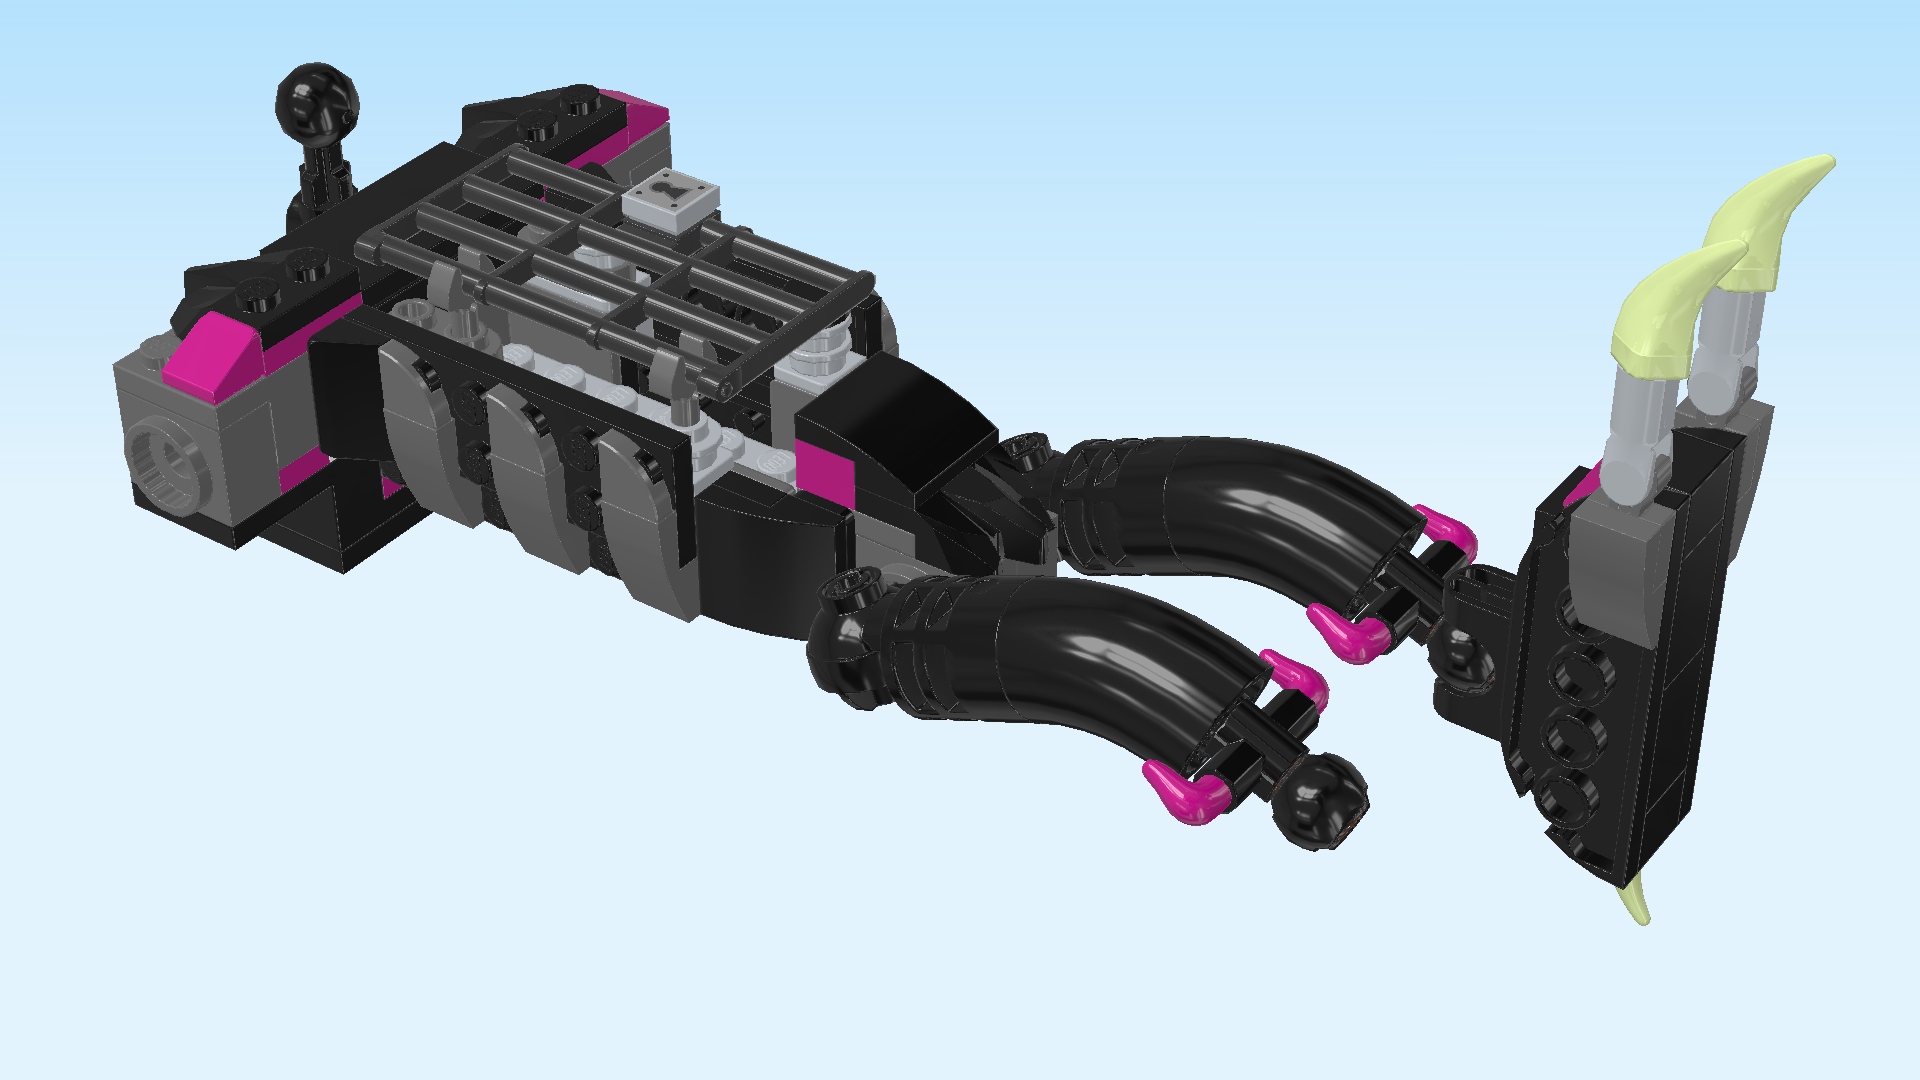
| The first leg of the Grimkeeper is finished! Fantastic job, that was quite tricky! If you have already built the second leg as well, you can continue with the next sentence. If not, skip back to the section titled "Next up, we will build the Grimkeeper's legs.". |
| Turn the torso build vertically so that the shoulder portion is to the back and the narrow end is to the front. |
| To mount the first leg, turn it horizontally so that the outer bend is to the top. Make sure its ball is pointing to the right bottom while the connector is pointing to the left. |
| Insert the connector into the right joint socket at the front of the torso. |
| Repeat symmetrically with the second leg on the left joint socket. |
| Now, bend the legs towards you. Make sure that they are both bending down, balls pointing towards you. |
| Next up, we will build the Grimkeeper's first foot. |
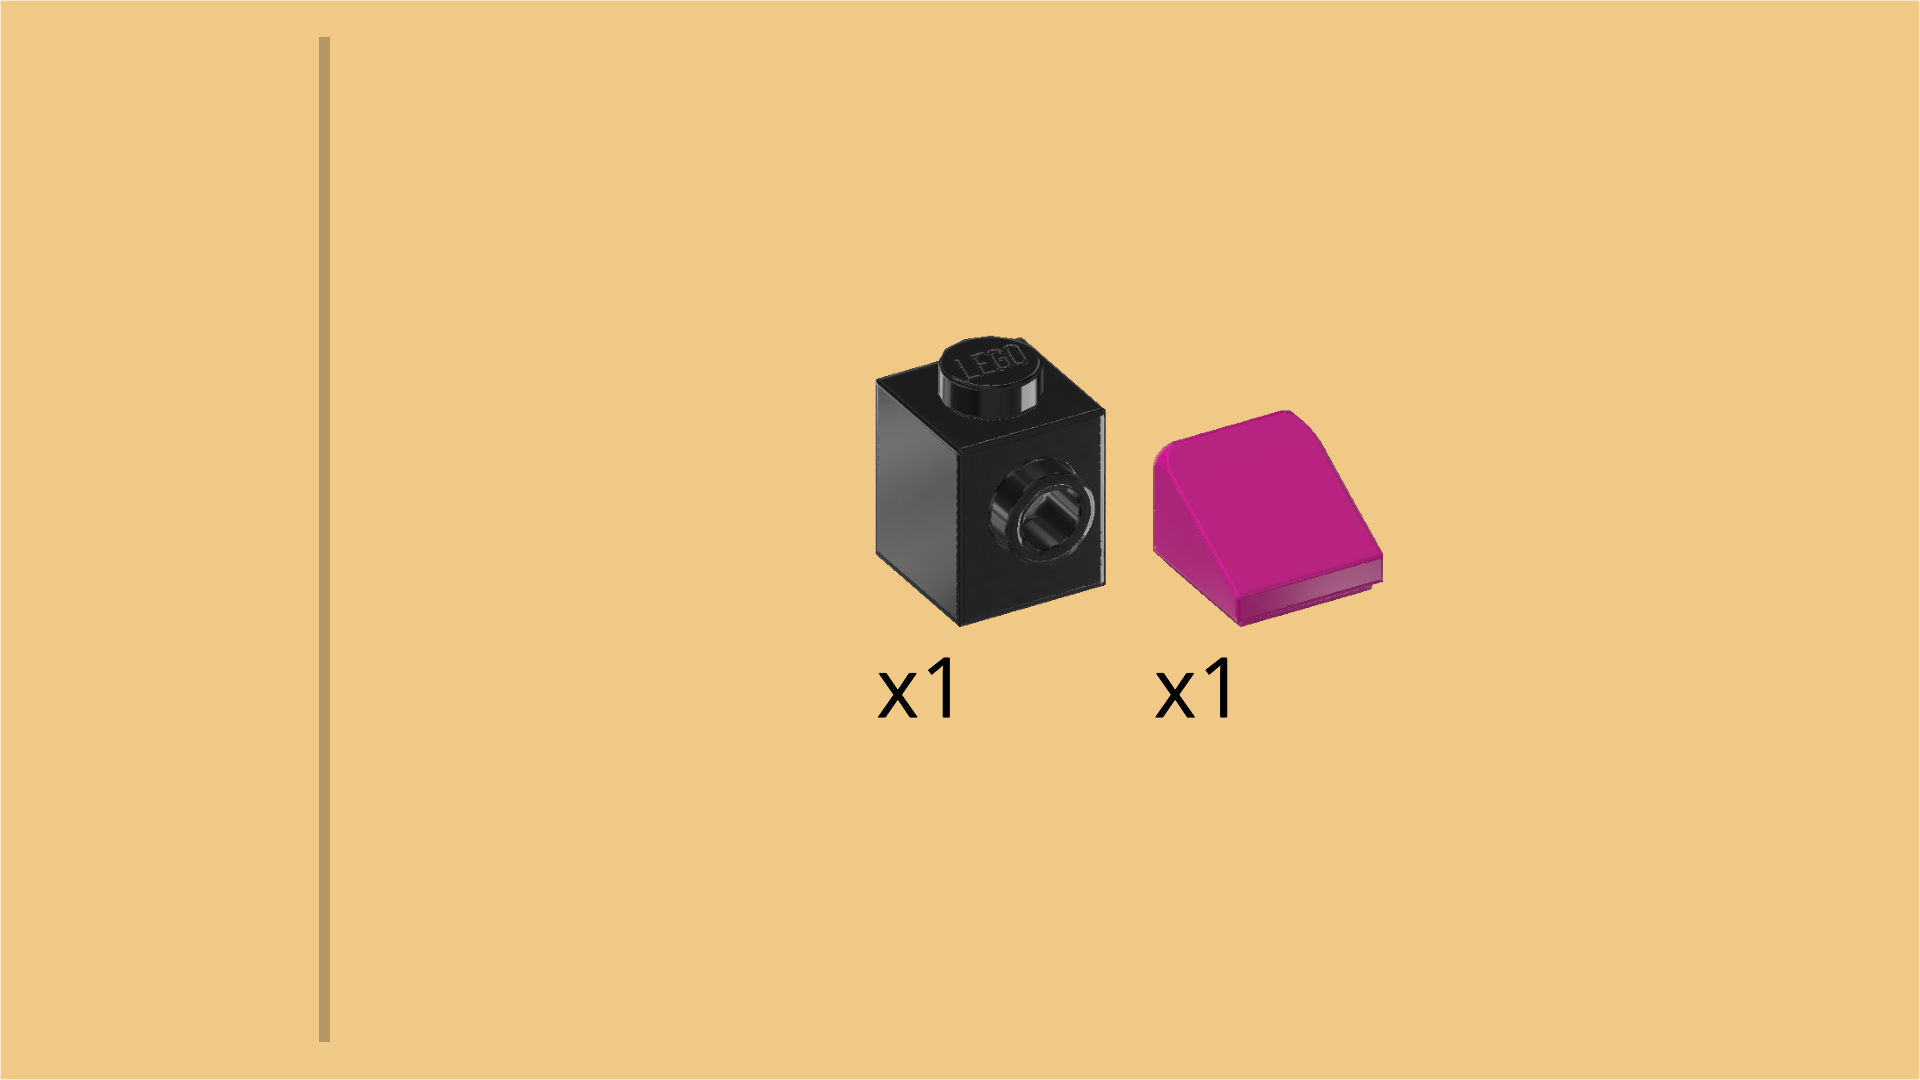
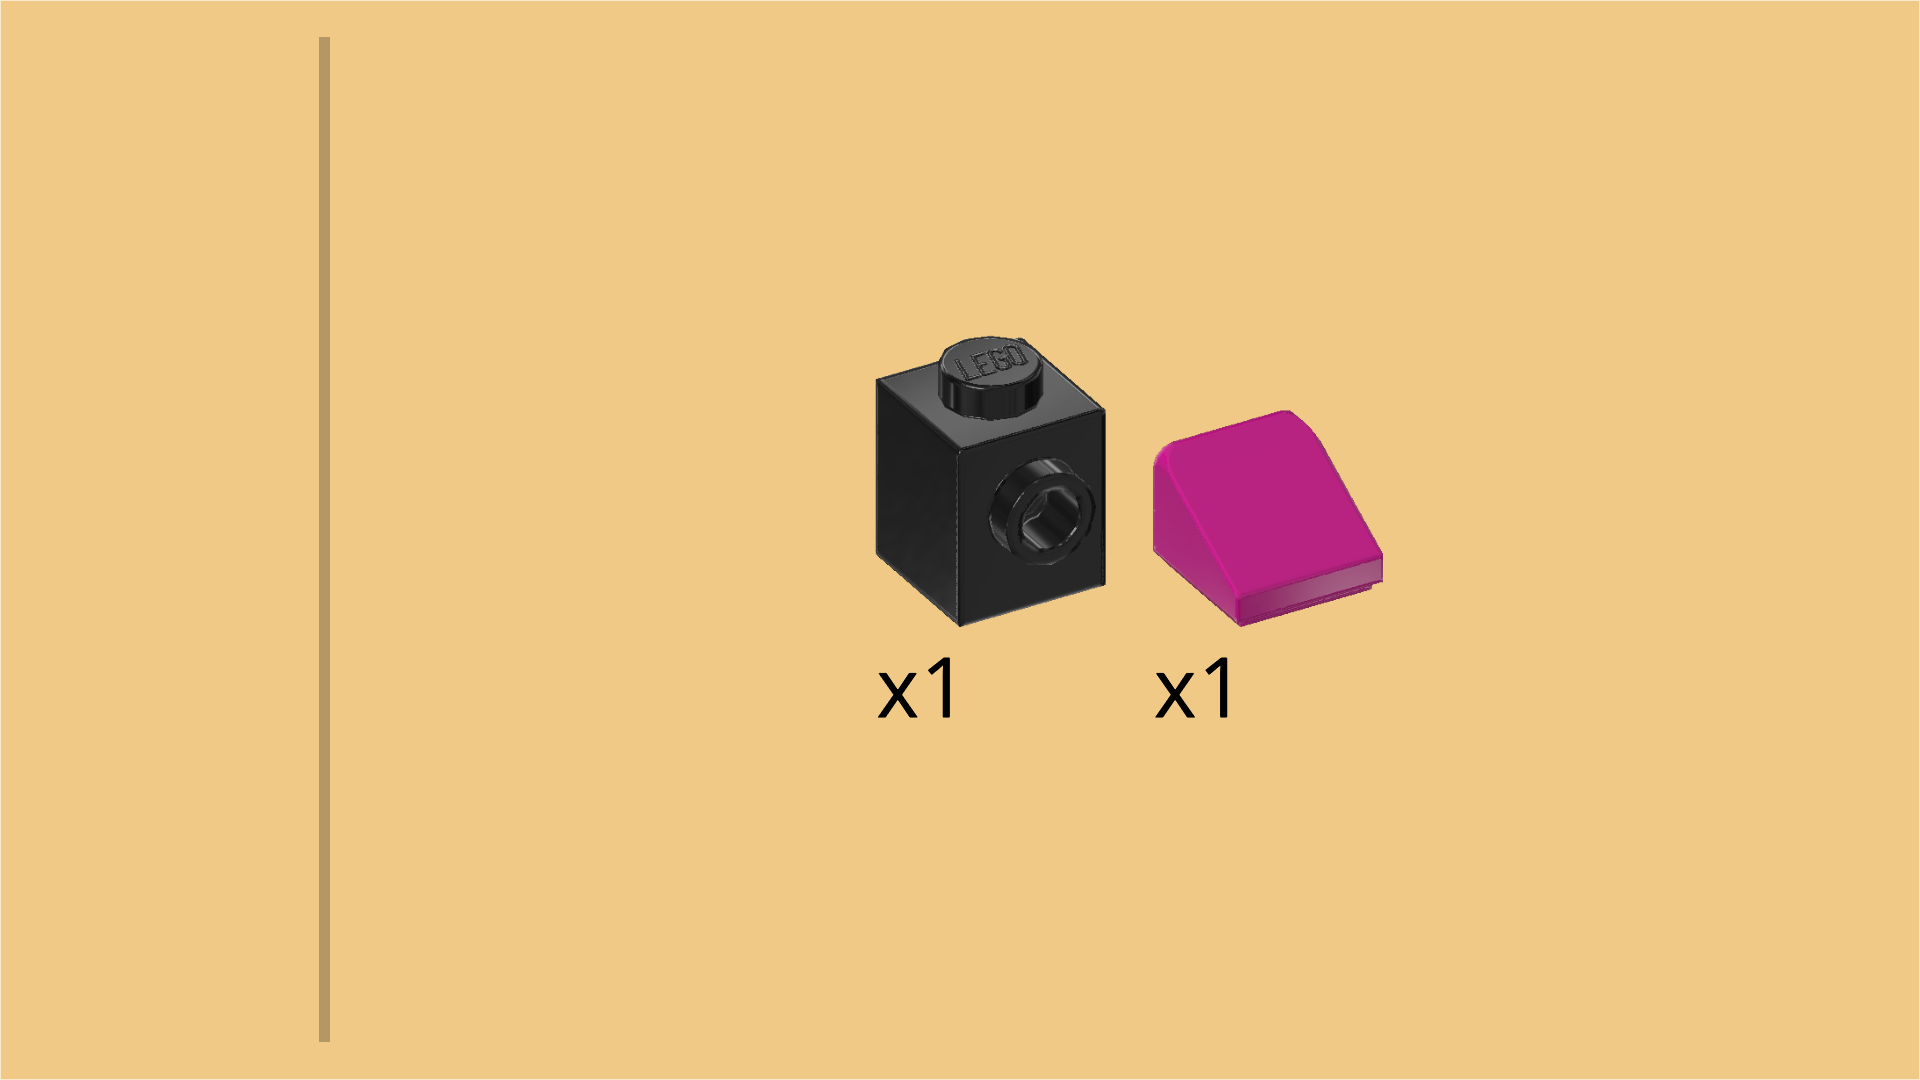
| Collect the following 2 pieces: |
| 1 black brick 1x1 with side knob, |
| and 1 purple violet smooth roof tile 1x1x⅔. |
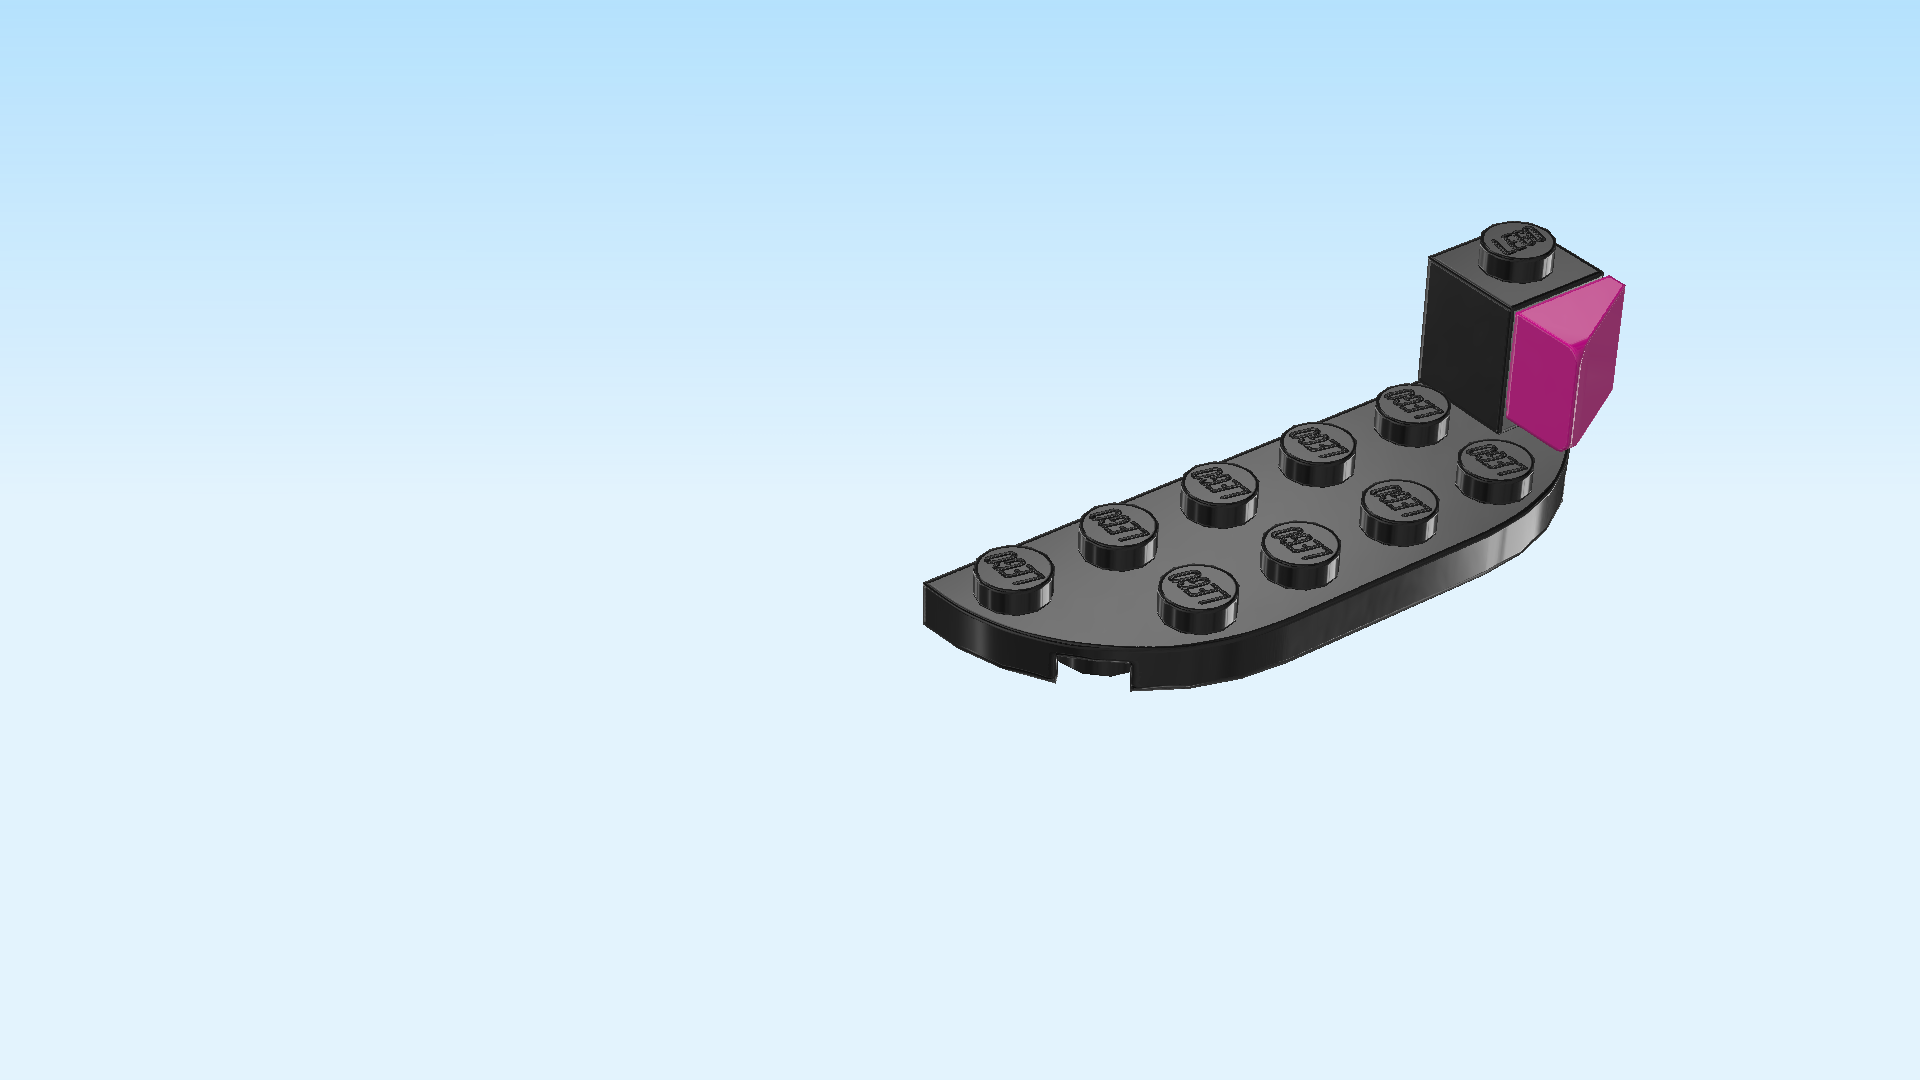
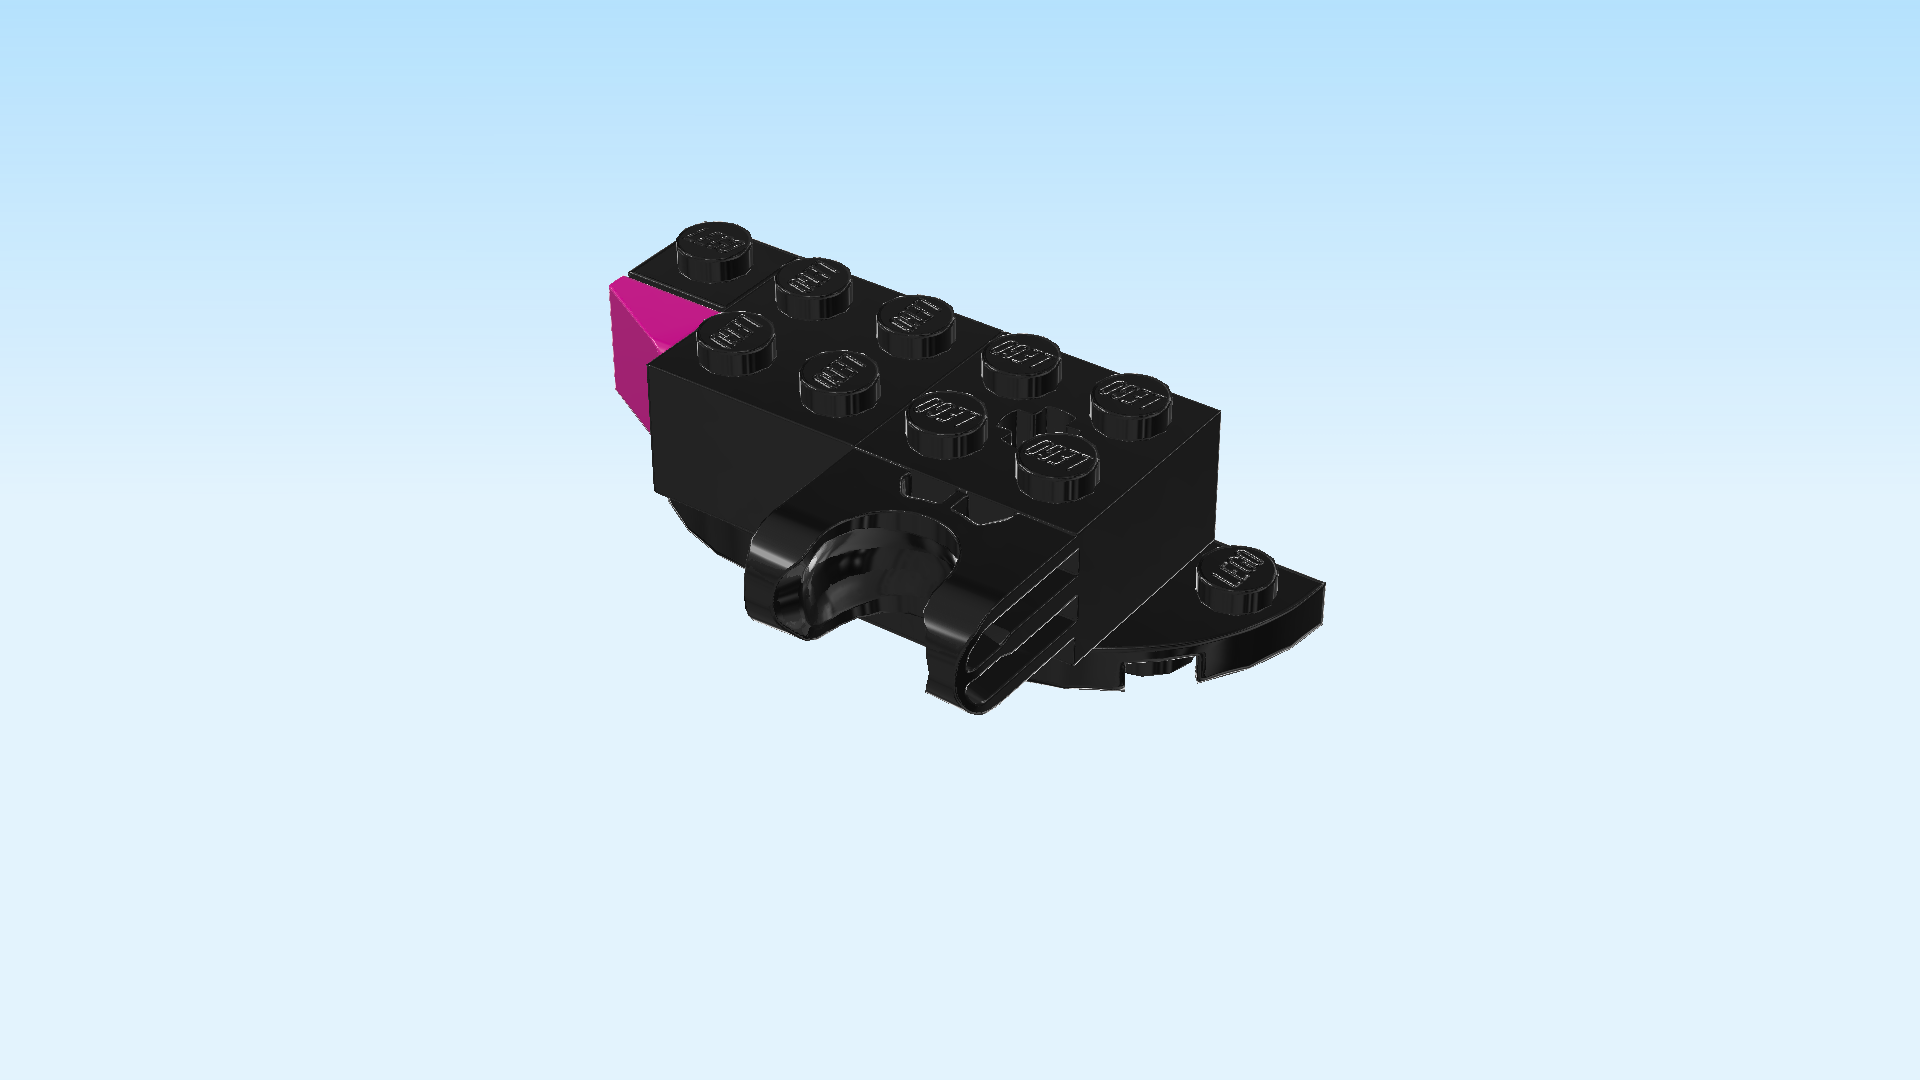
| Put the brick on the table, side knob to the front. |
| Put the roof tile upright on the side knob, slope to the right. |
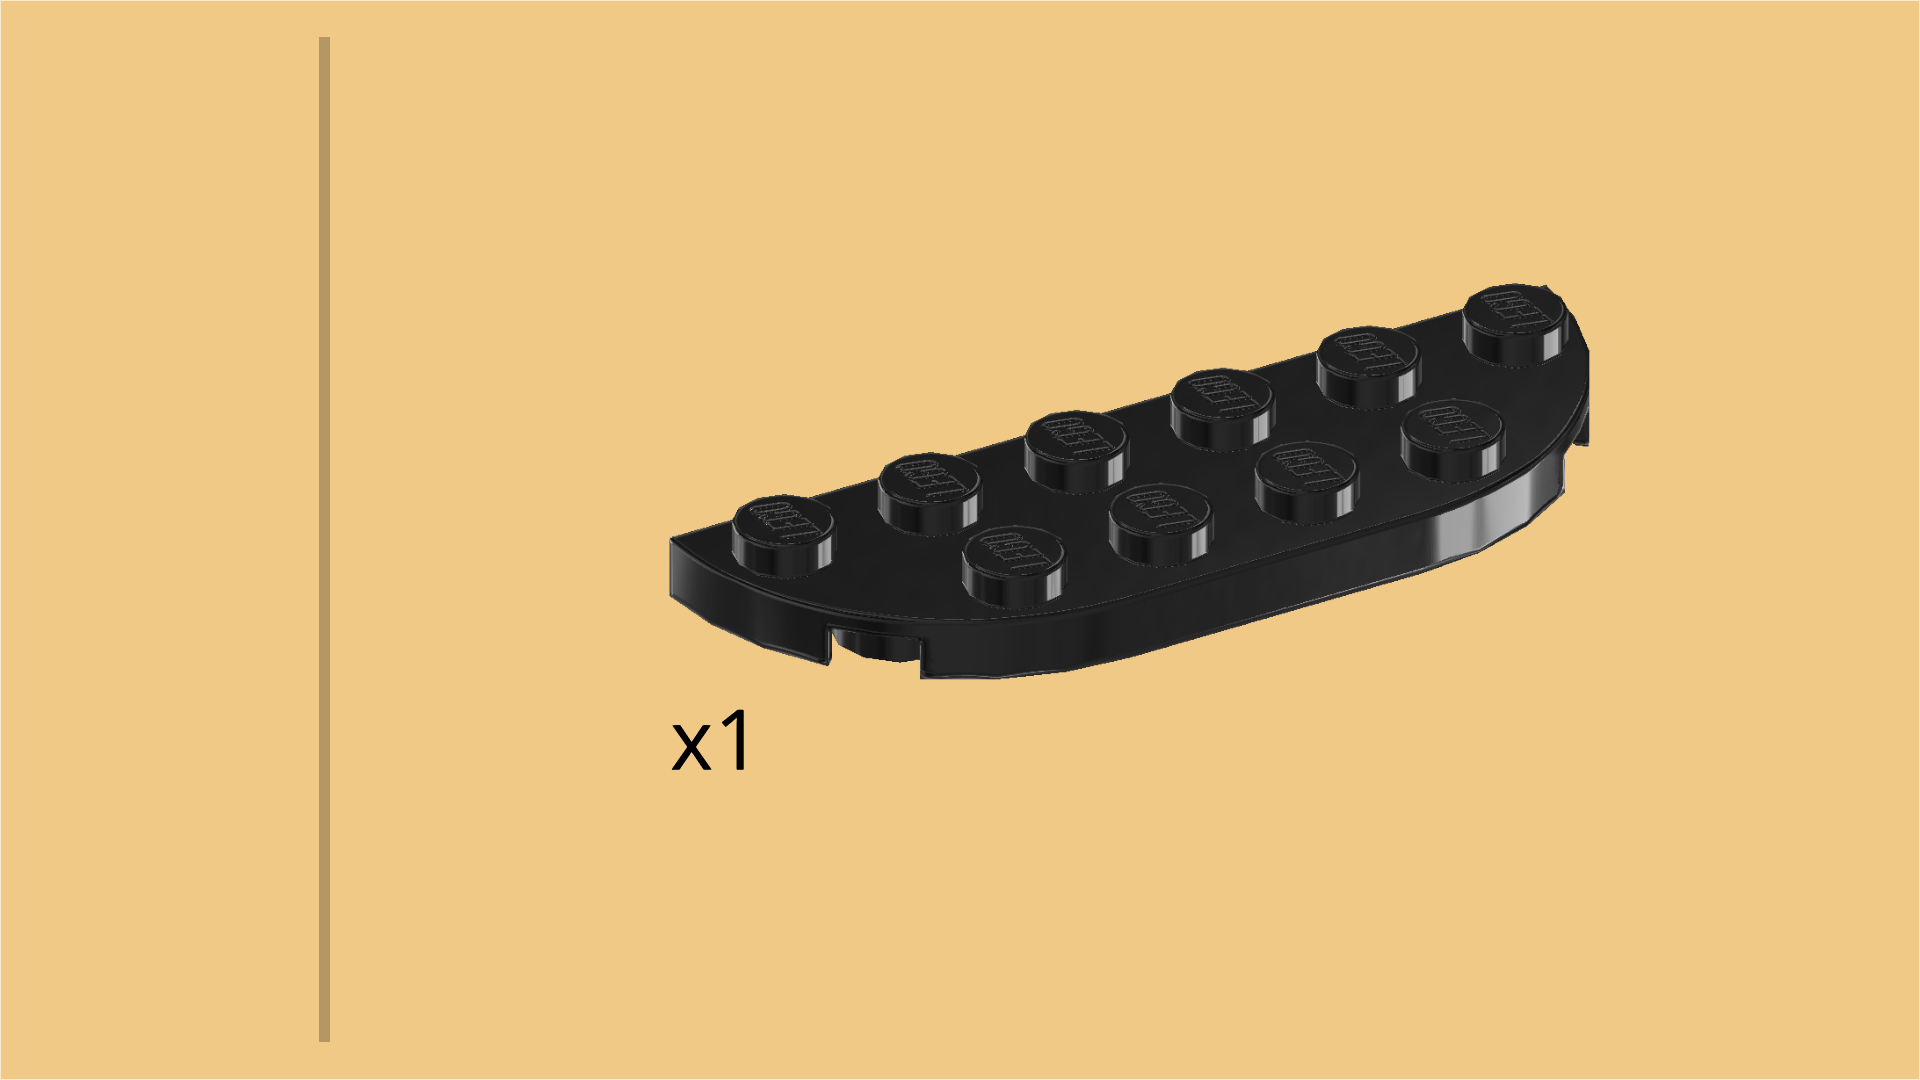
| Find 1 black plate 2x6 with 2 rounded corners. |
| Put it horizontally on the table, rounded corners to the front. |
| Put the brick with roof tile on the rightmost knob of the plate, roof tile to the front. |
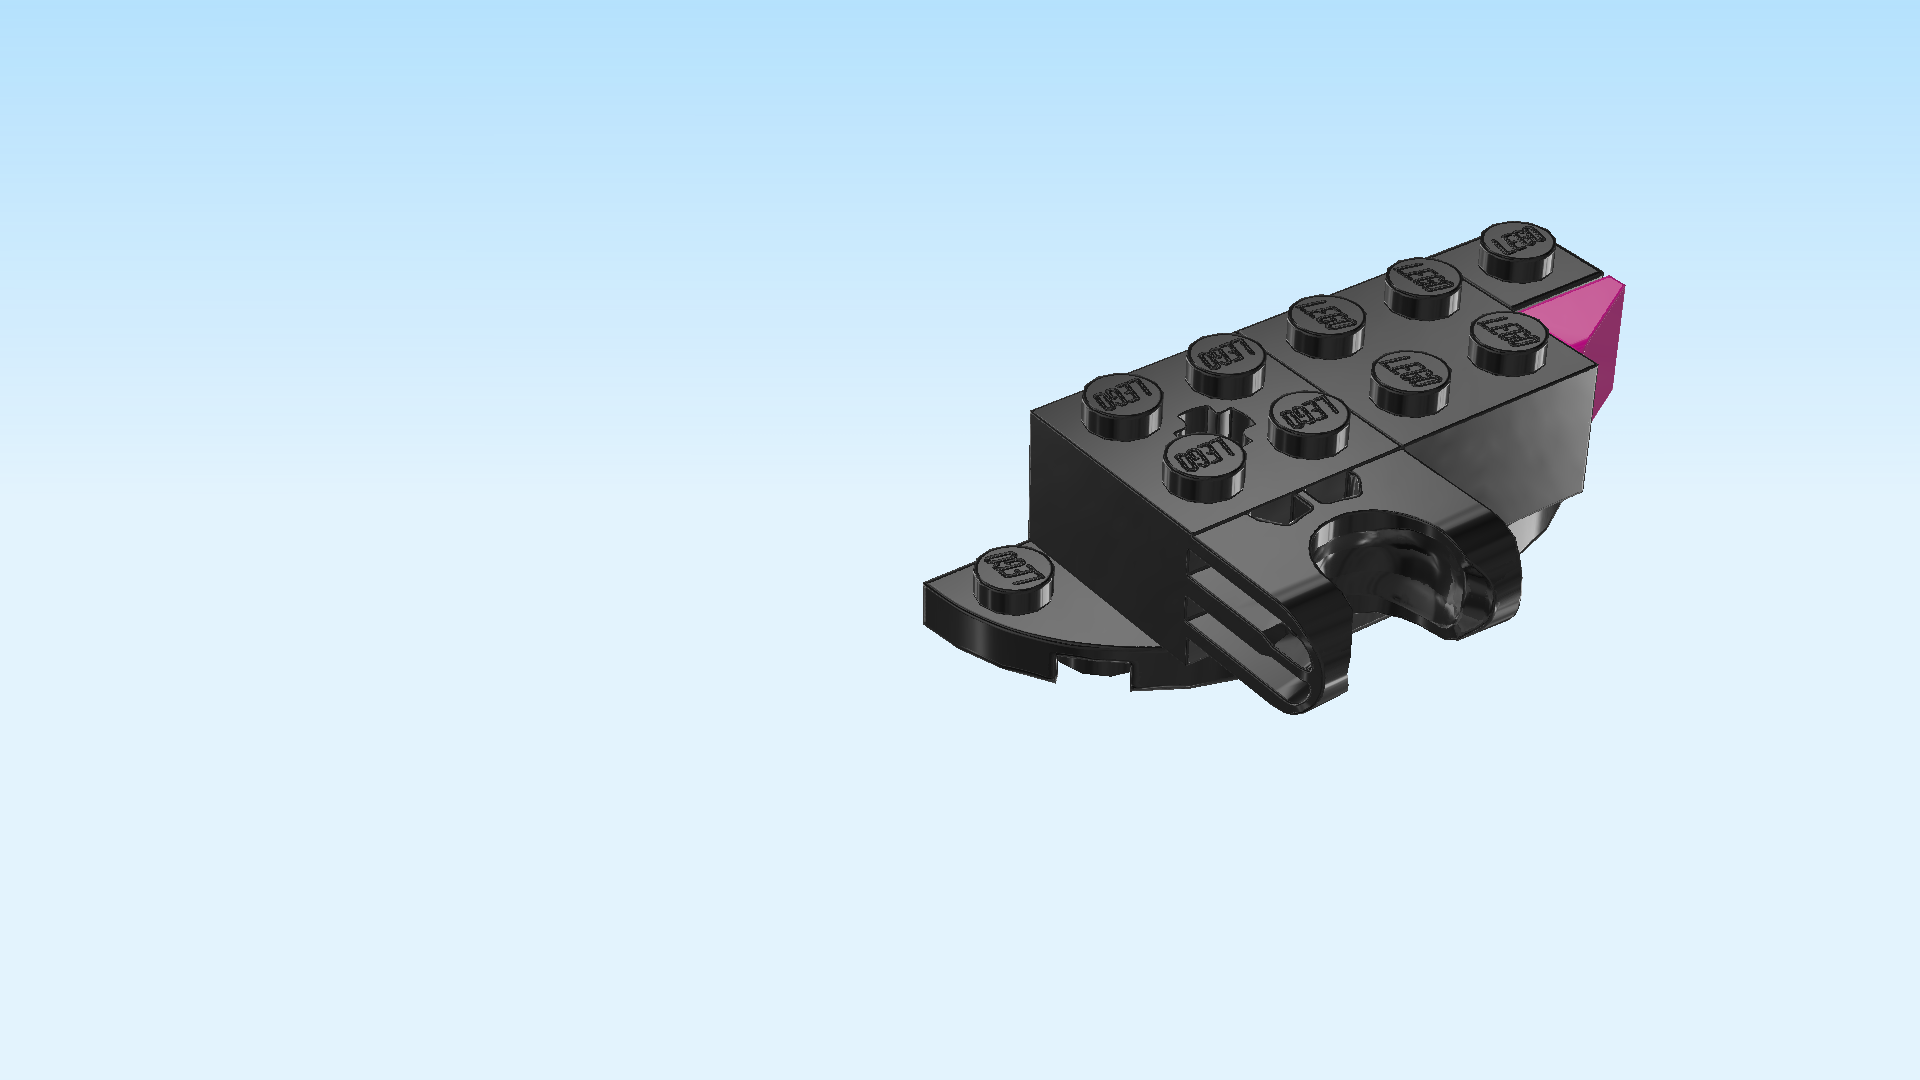
| Collect the following 2 pieces: |
| 1 black brick 2x2 with ball cup, |
| and 1 black brick 2x2. |
| Put the brick 2x2 to the left of the brick with roof tile. Its front right corner will slightly protrude. |
| Put the brick with ball cup vertically to the left of the previous piece, ball cup overhanging to the front. |
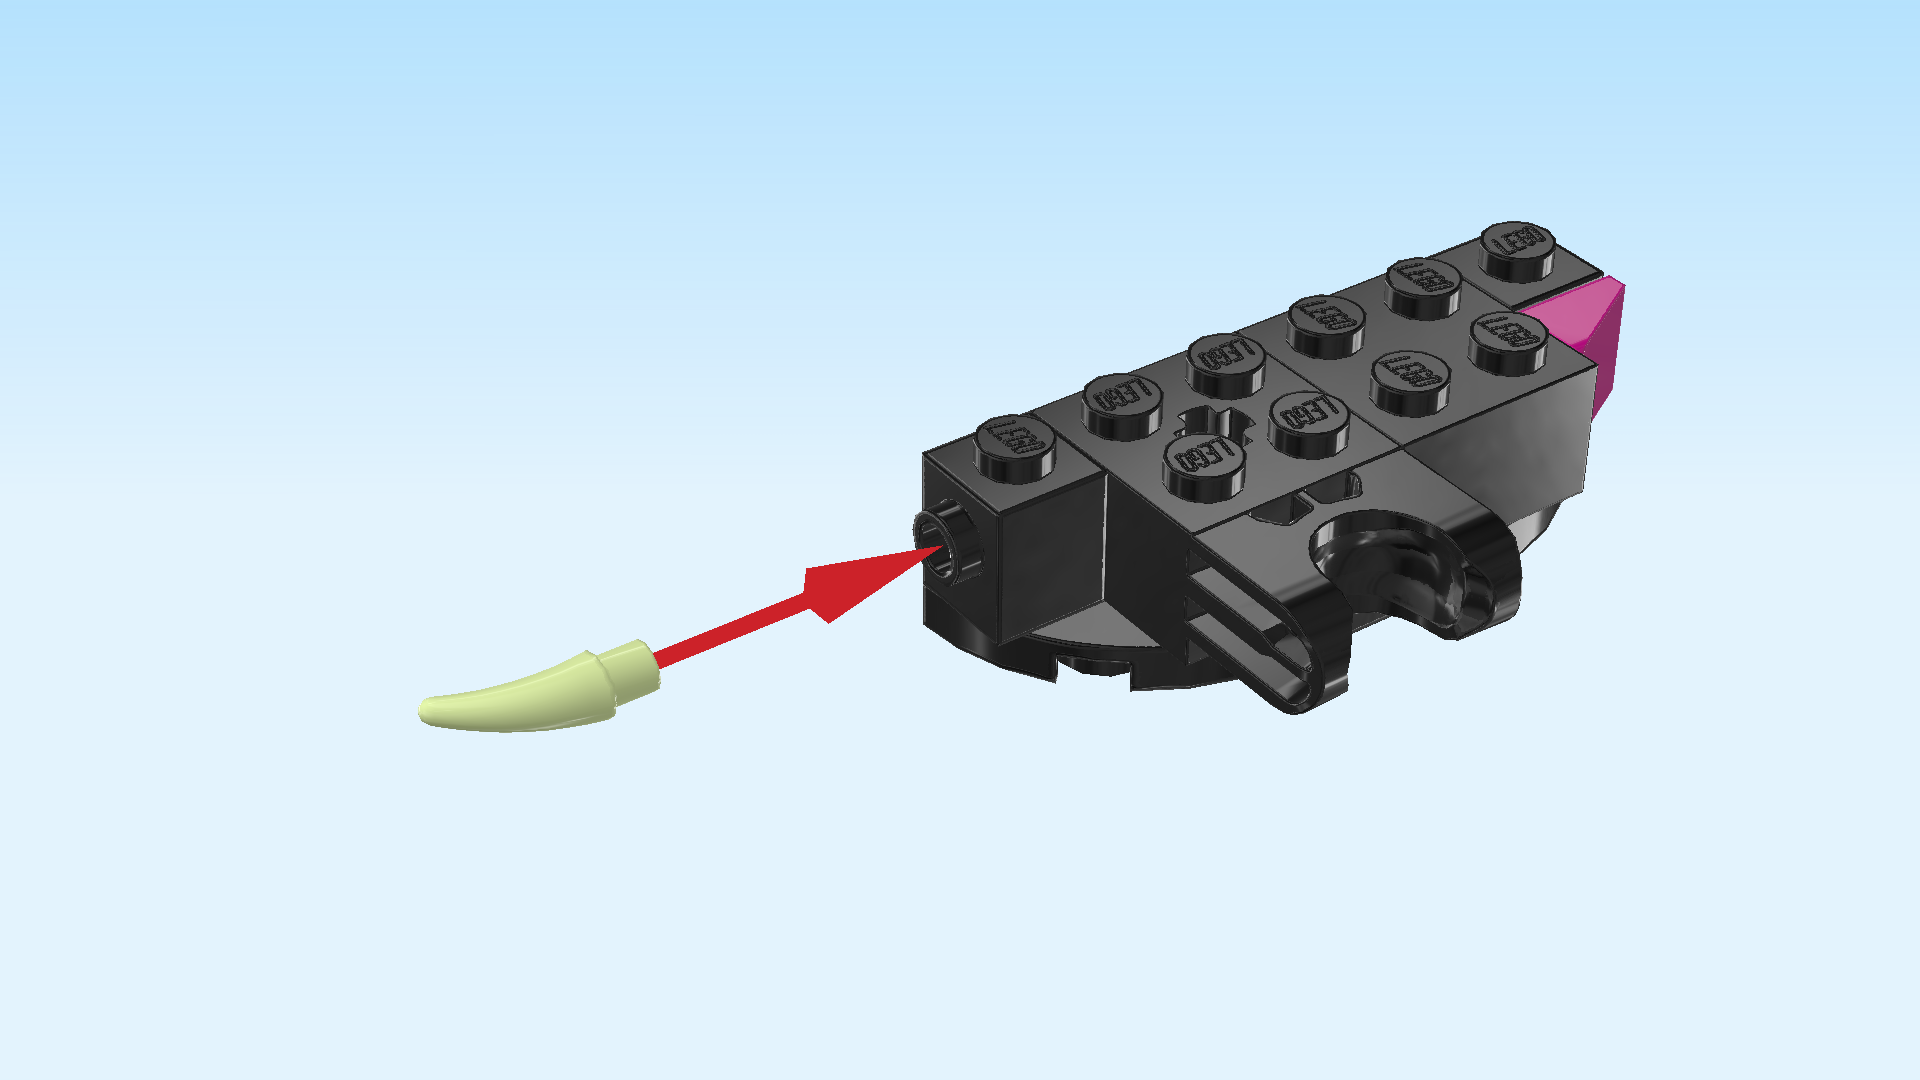
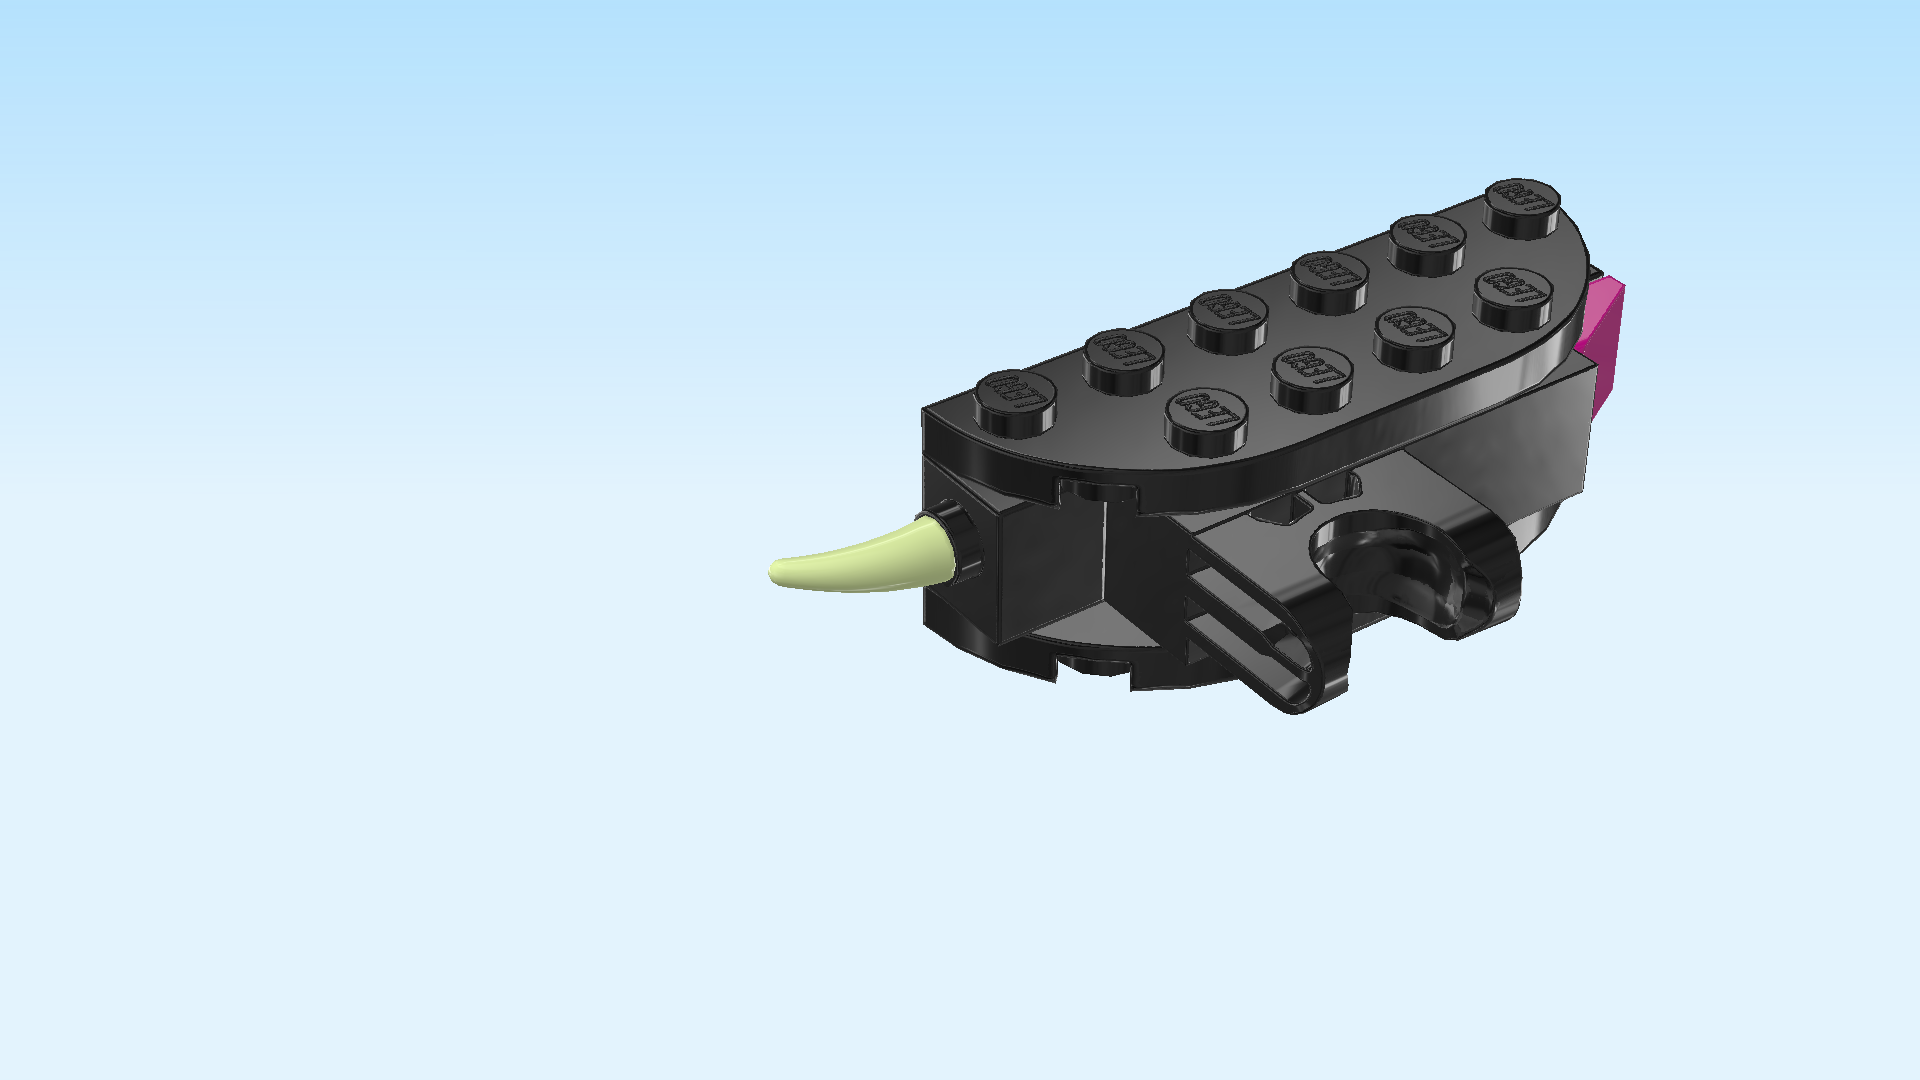
| Collect the following 2 pieces: |
| 1 black brick 1x1 with side knob, |
| and 1 pale lime green horn with shaft. |
| Put the brick 1x1 to the left of the previous piece, side knob to the left. |
| Insert the shaft of the horn into the side knob of the previous piece. Make sure the horn bends slightly towards the back. |
| Find 1 black plate 2x6 with 2 rounded corners. |
| Put it horizontally on top of the foot build, rounded corners to the front. |
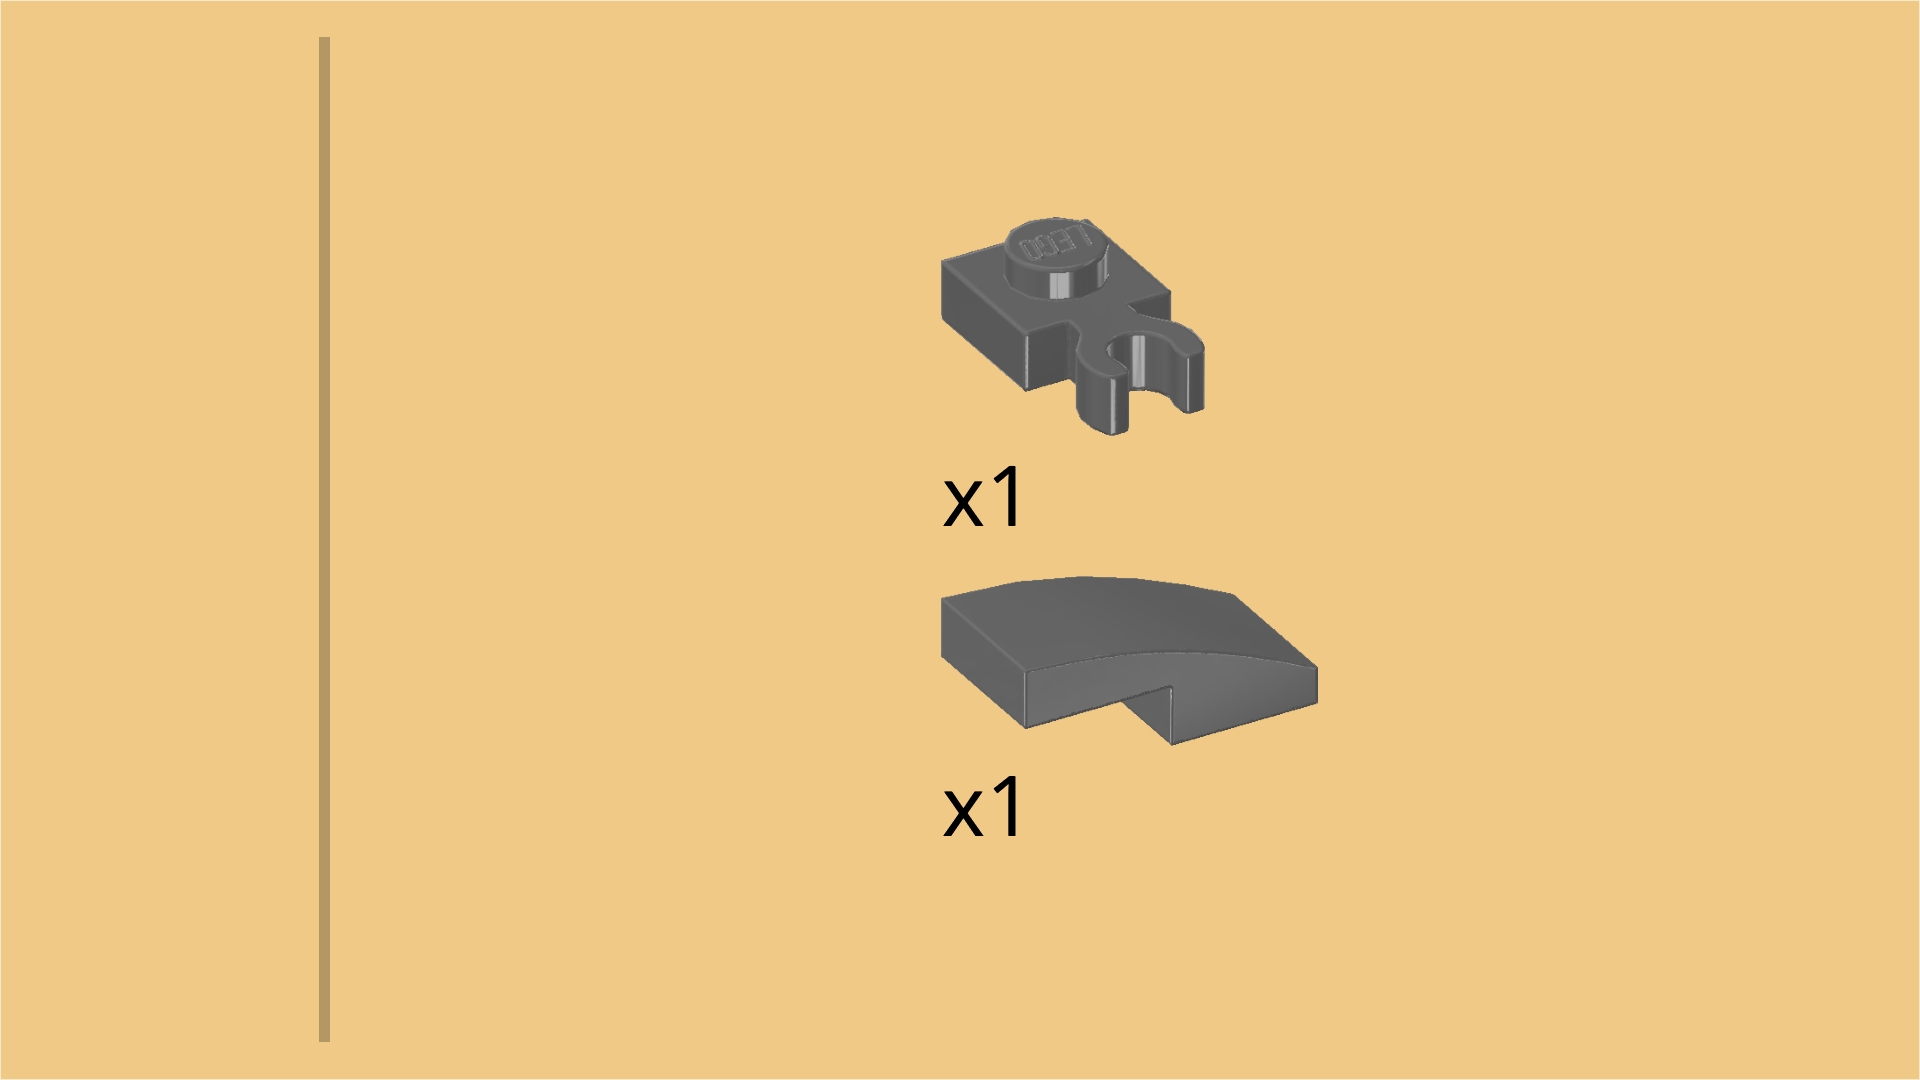
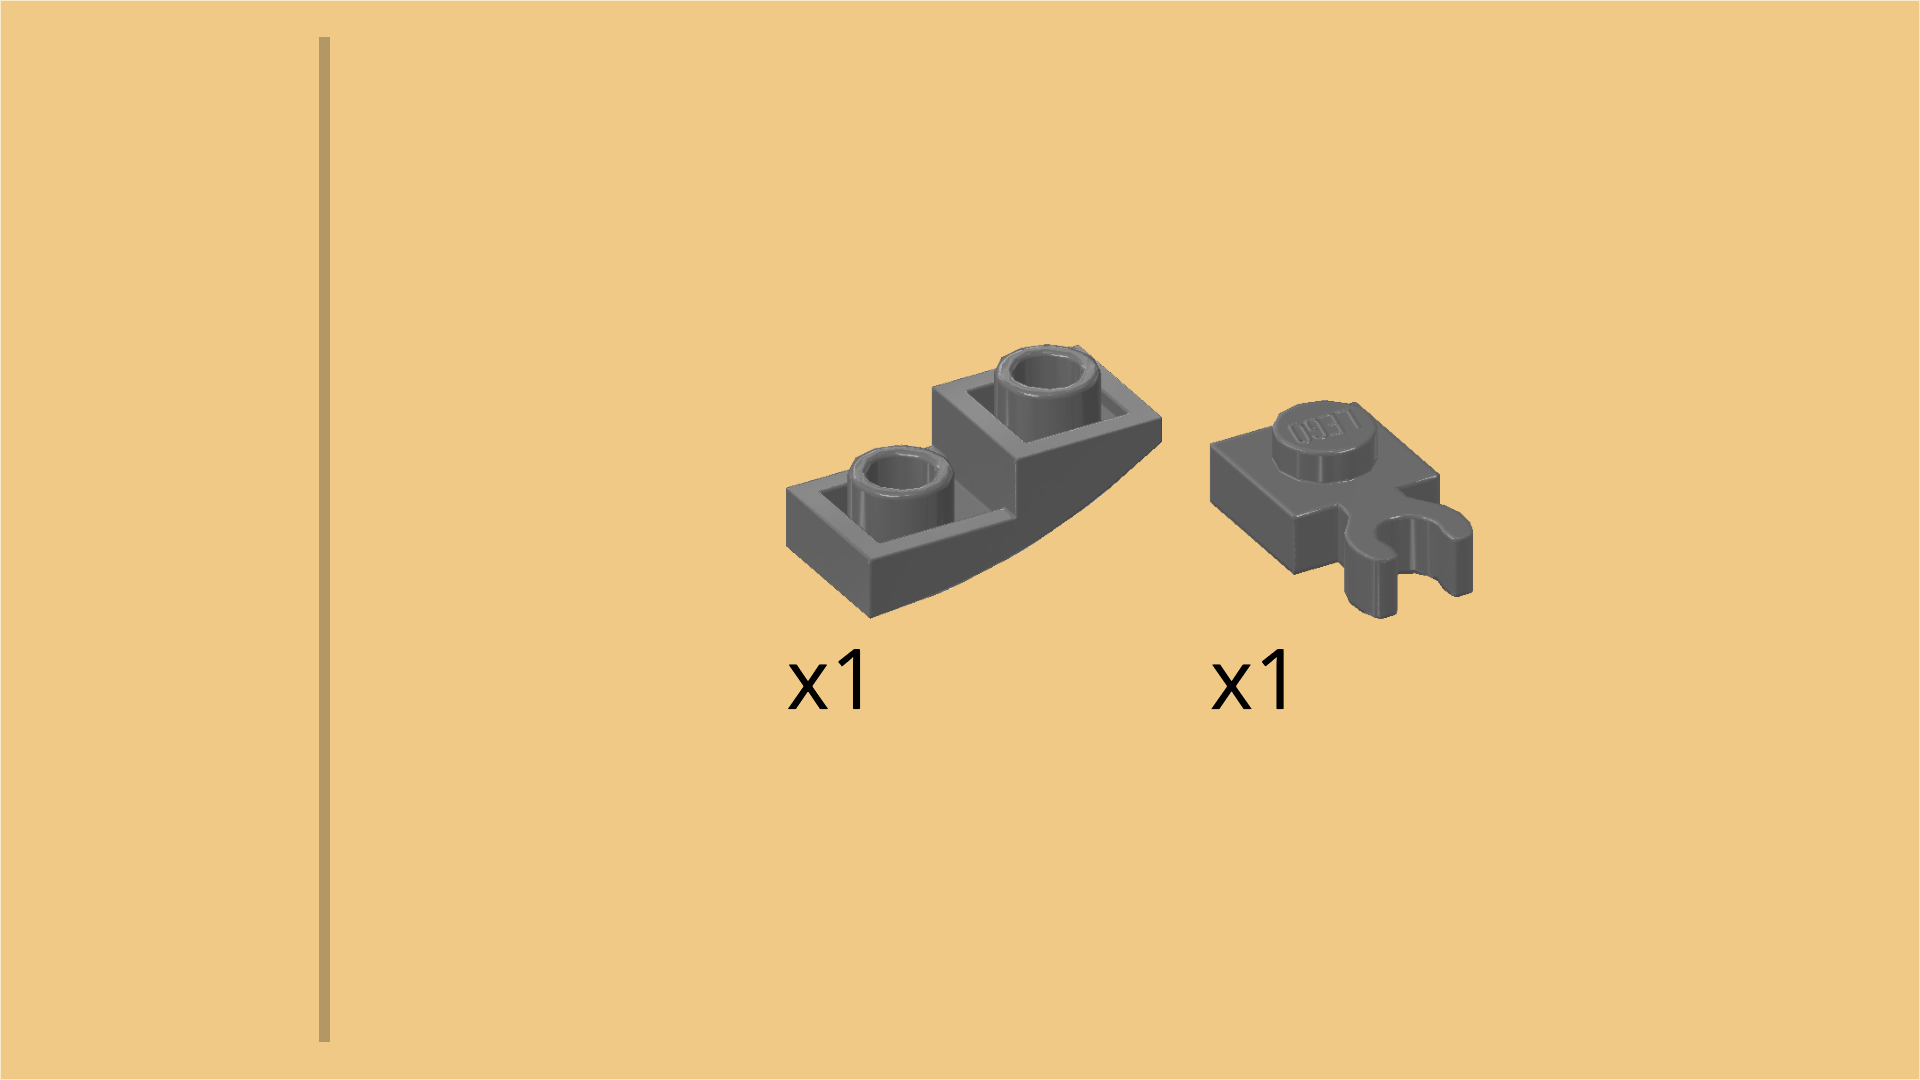
| Collect the following 2 pieces: |
| 1 dark stone grey one-stepped curve tile 1x2x⅔, |
| and 1 dark stone grey plate 1x1 with horizontal side clasp. |
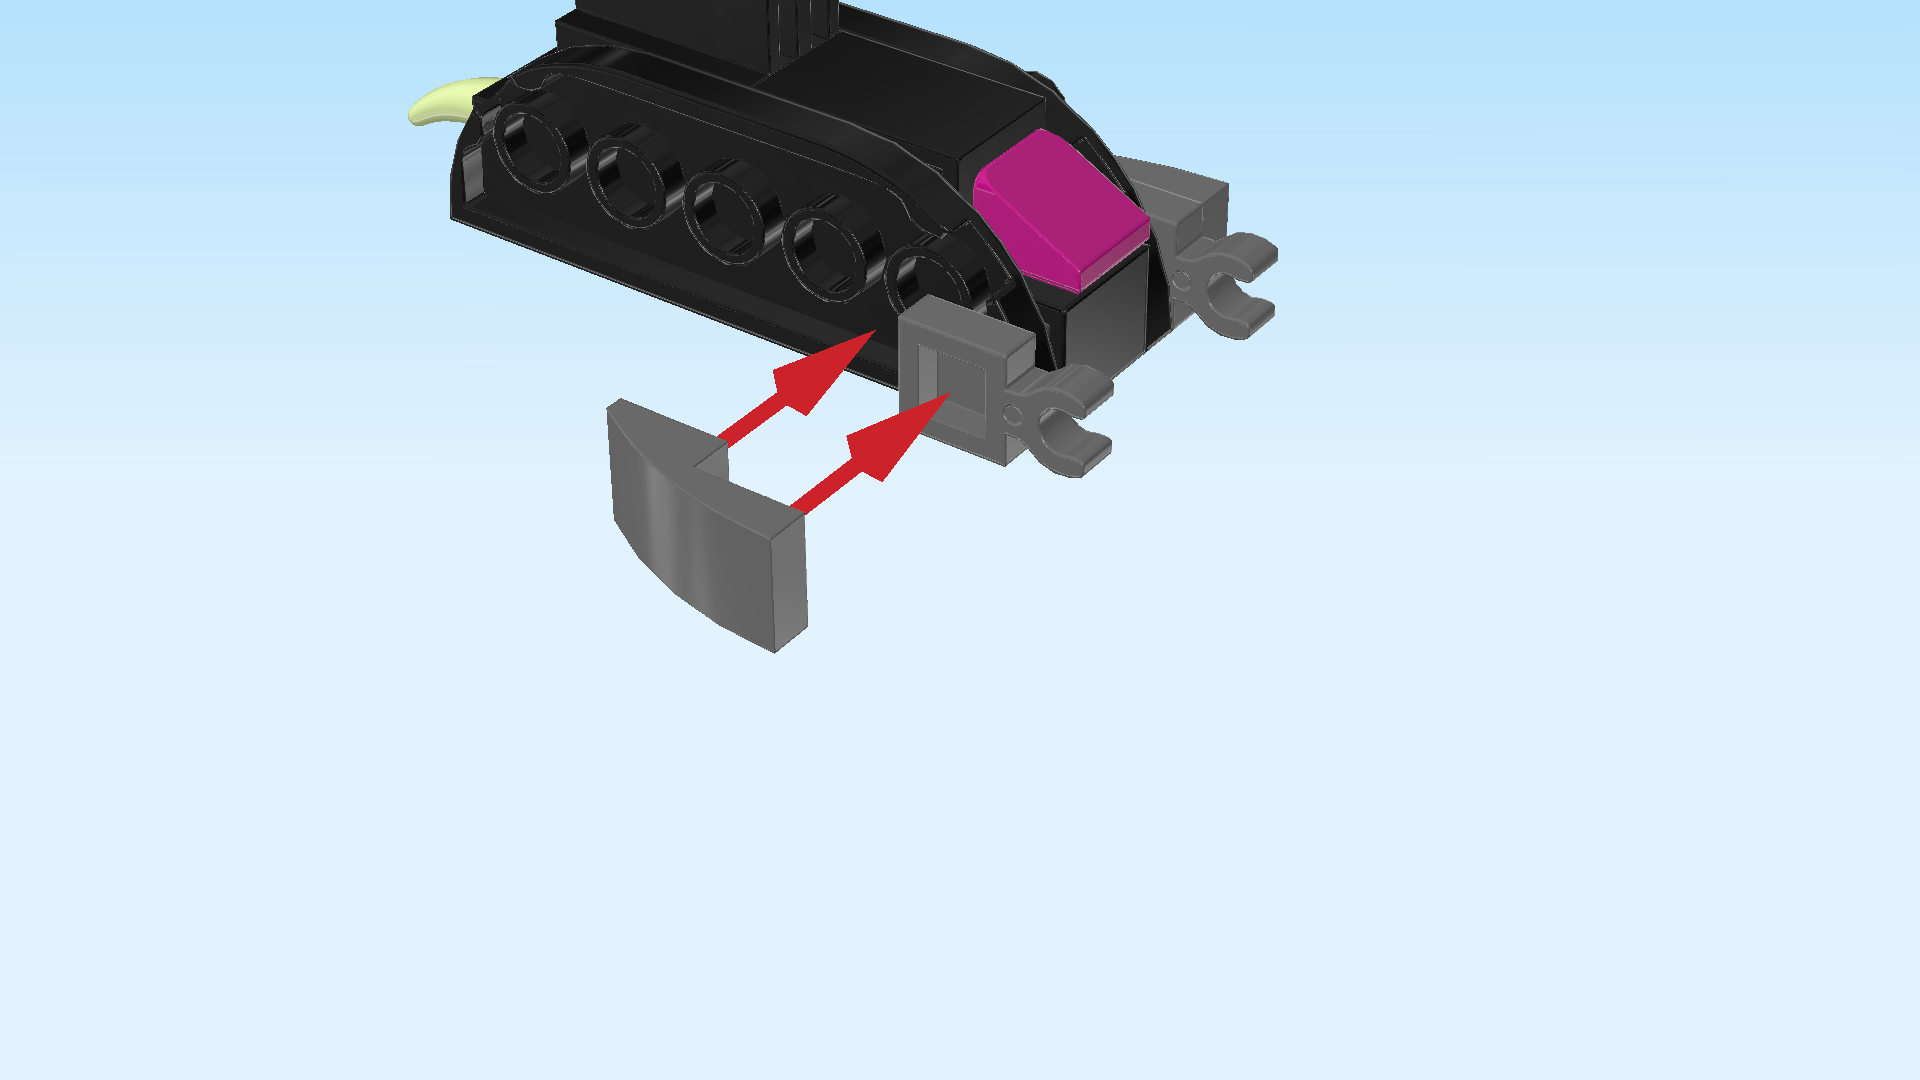
| Put the plate with clasp on the rightmost knob of the previous piece, clasp to the right. |
| Put the curve tile horizontally on the previous piece and the knob to its left, curve to the left. |
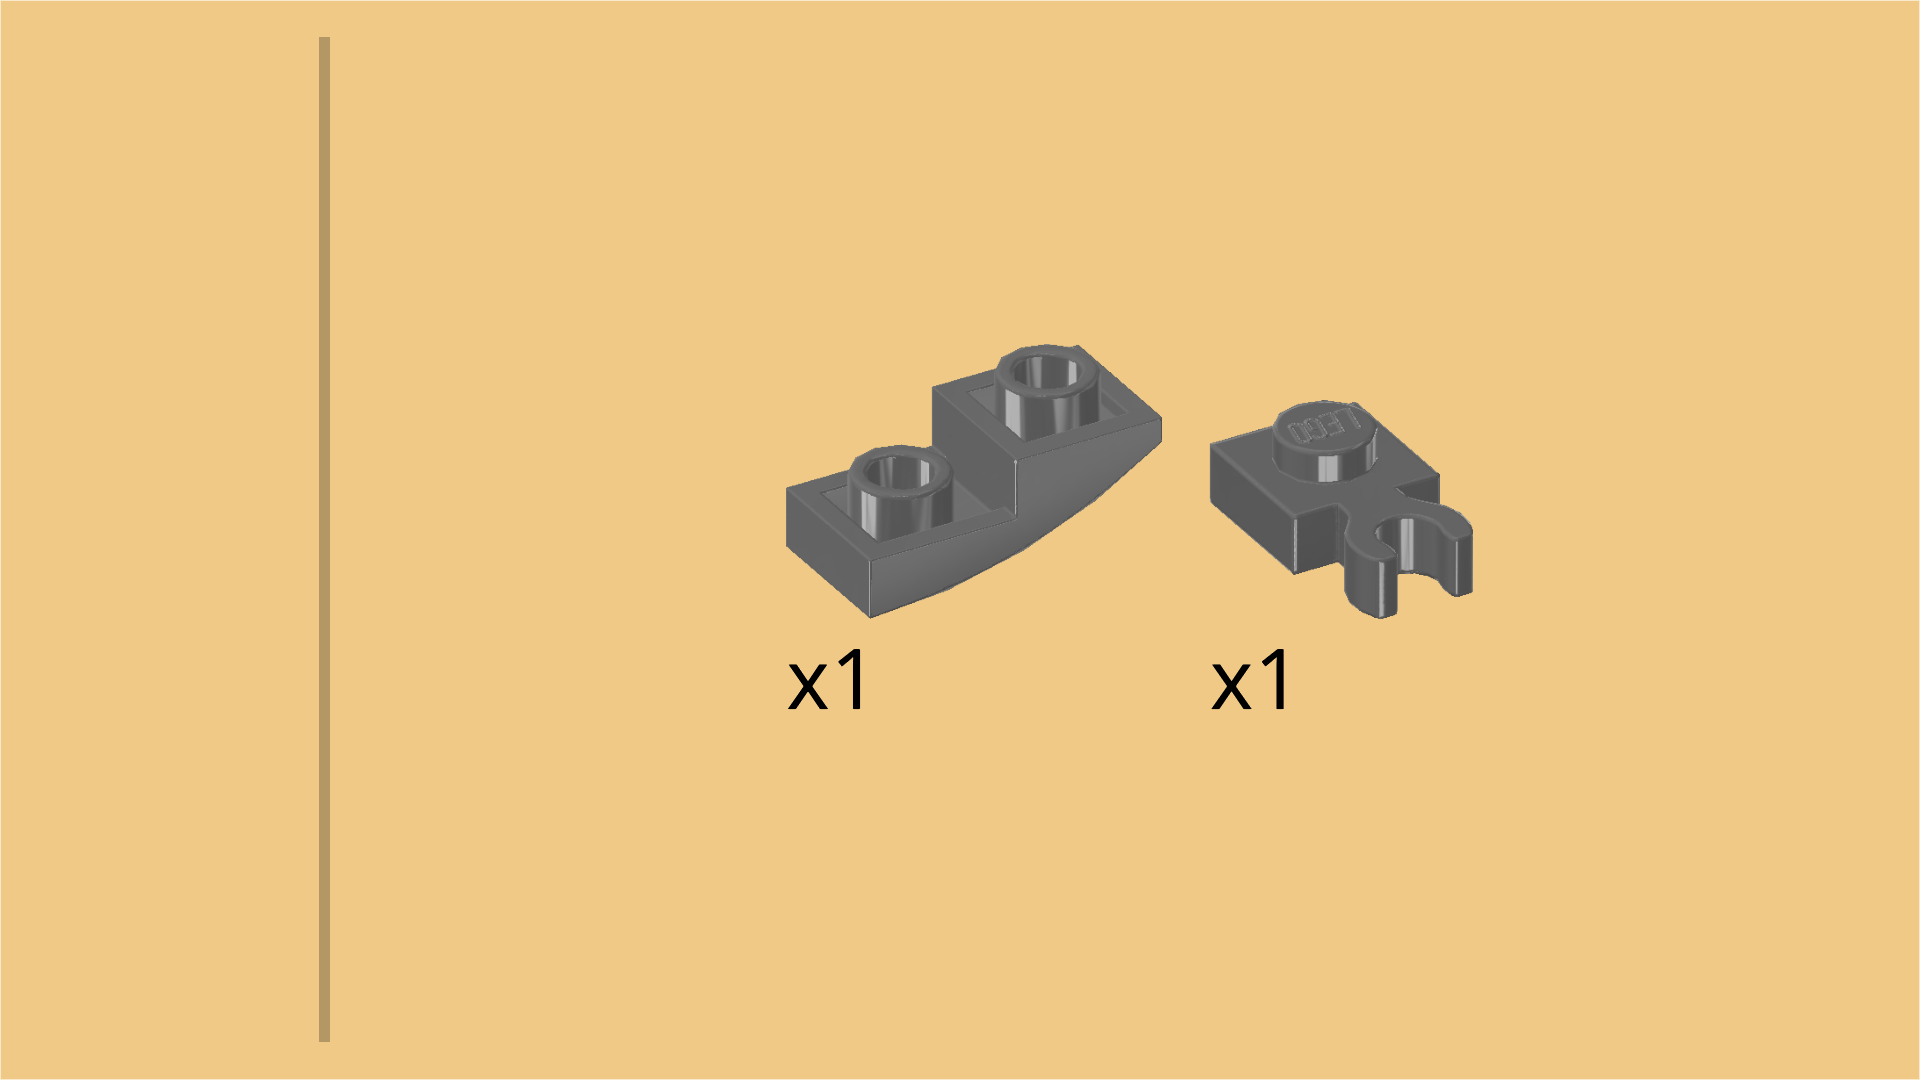
| Collect the following 2 pieces: |
| 1 dark stone grey one-stepped inverted curve tile 1x2, |
| and 1 dark stone grey plate 1x1 with horizontal side clasp. |
| Flip the foot build upright so that the ball cup is pointing to the top and the long edges of the plates with rounded corners are at the bottom. Make sure the clasp is still pointing to the right. |
| Put the plate with clasp upright on the rightmost connection point of the plate that is facing you, clasp to the right. |
| Put the curve tile upright horizontally on the previous piece and the knob to its left, curve to the left. |
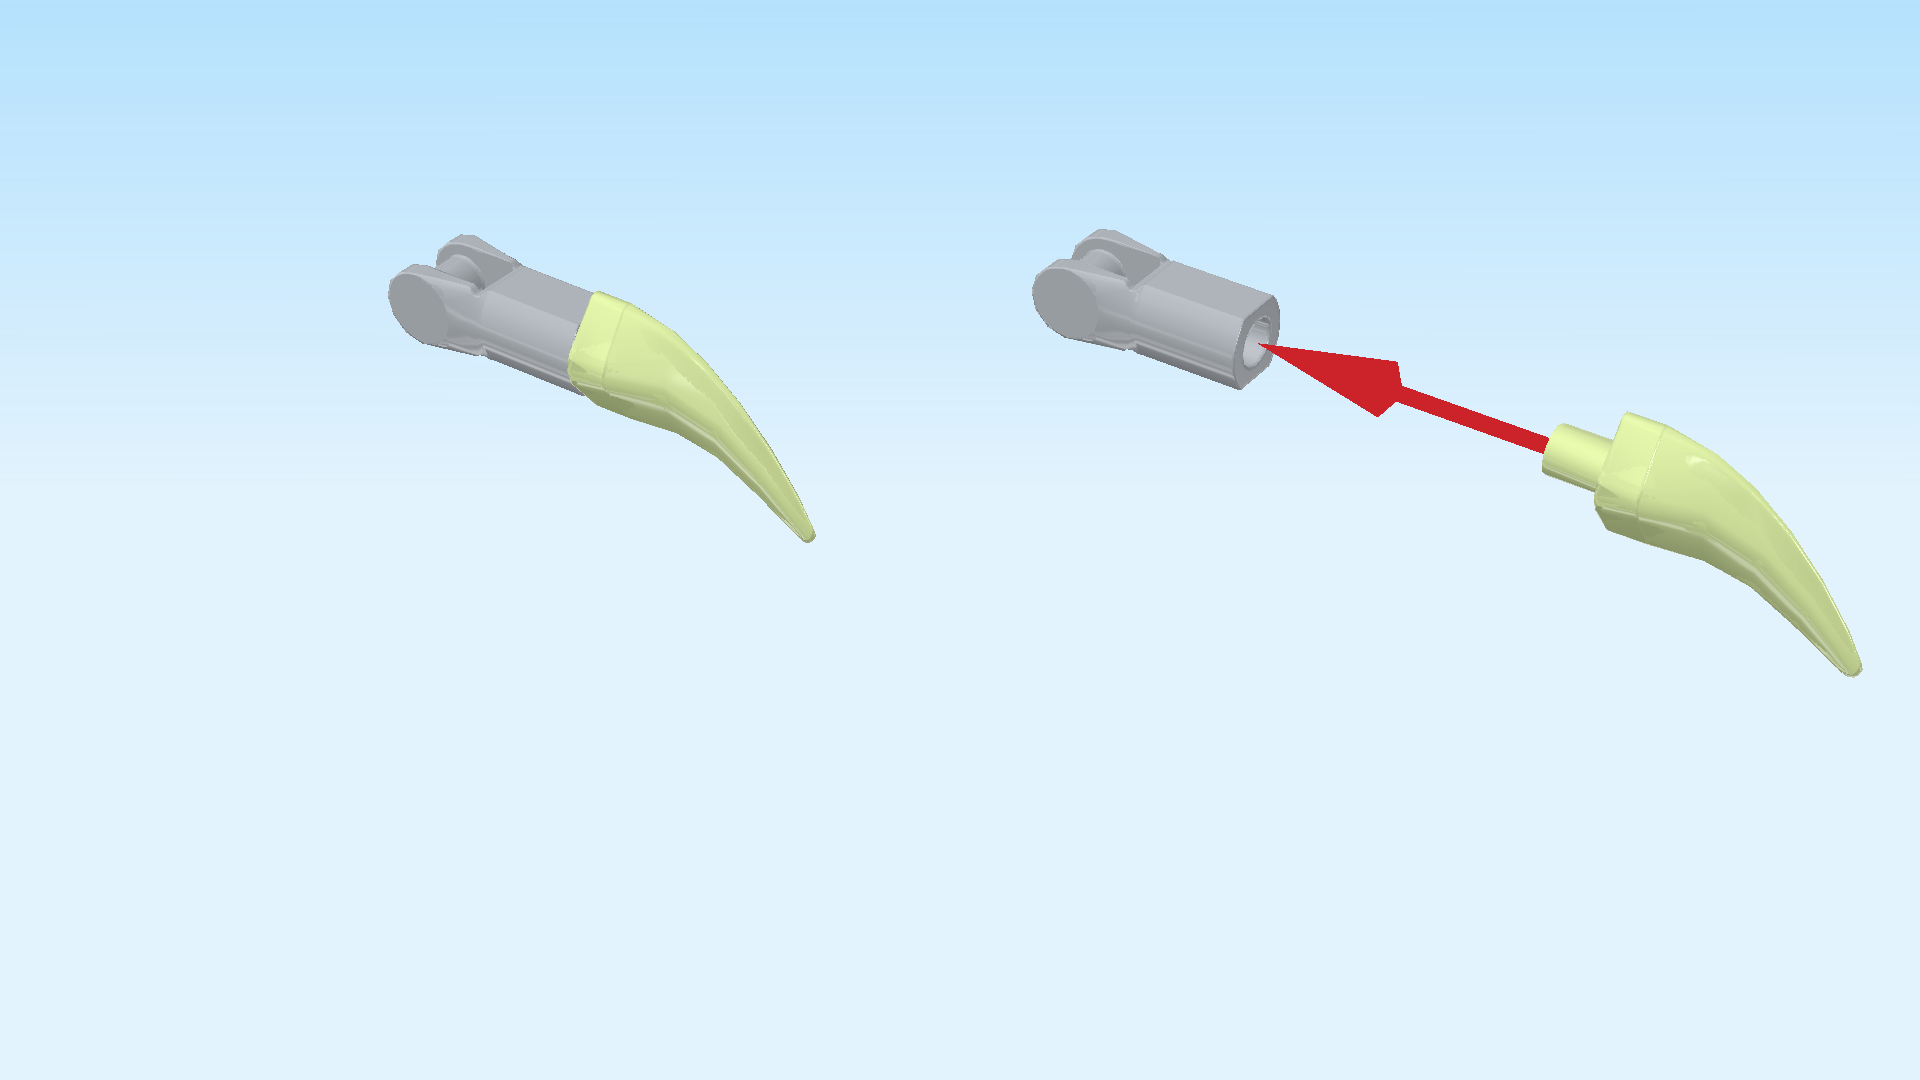
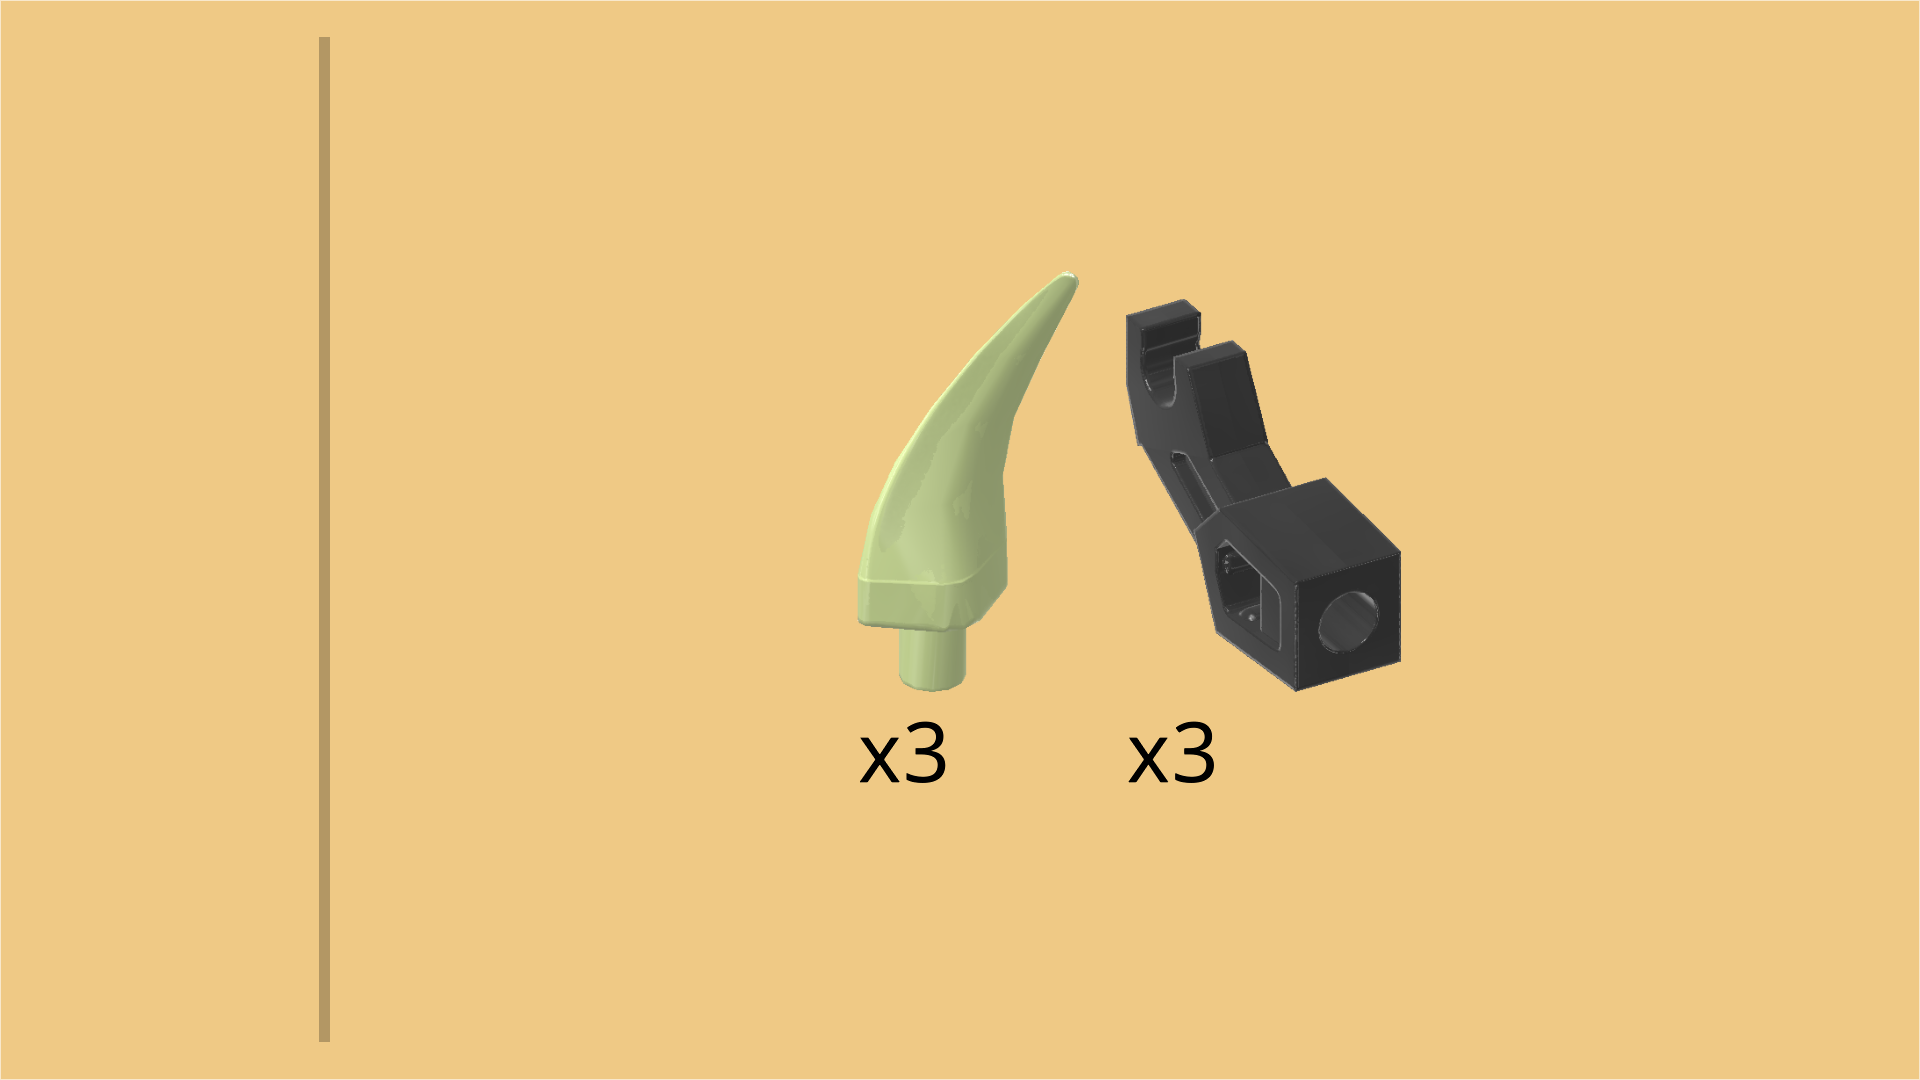
| Next, we will build 2 foot claws. |
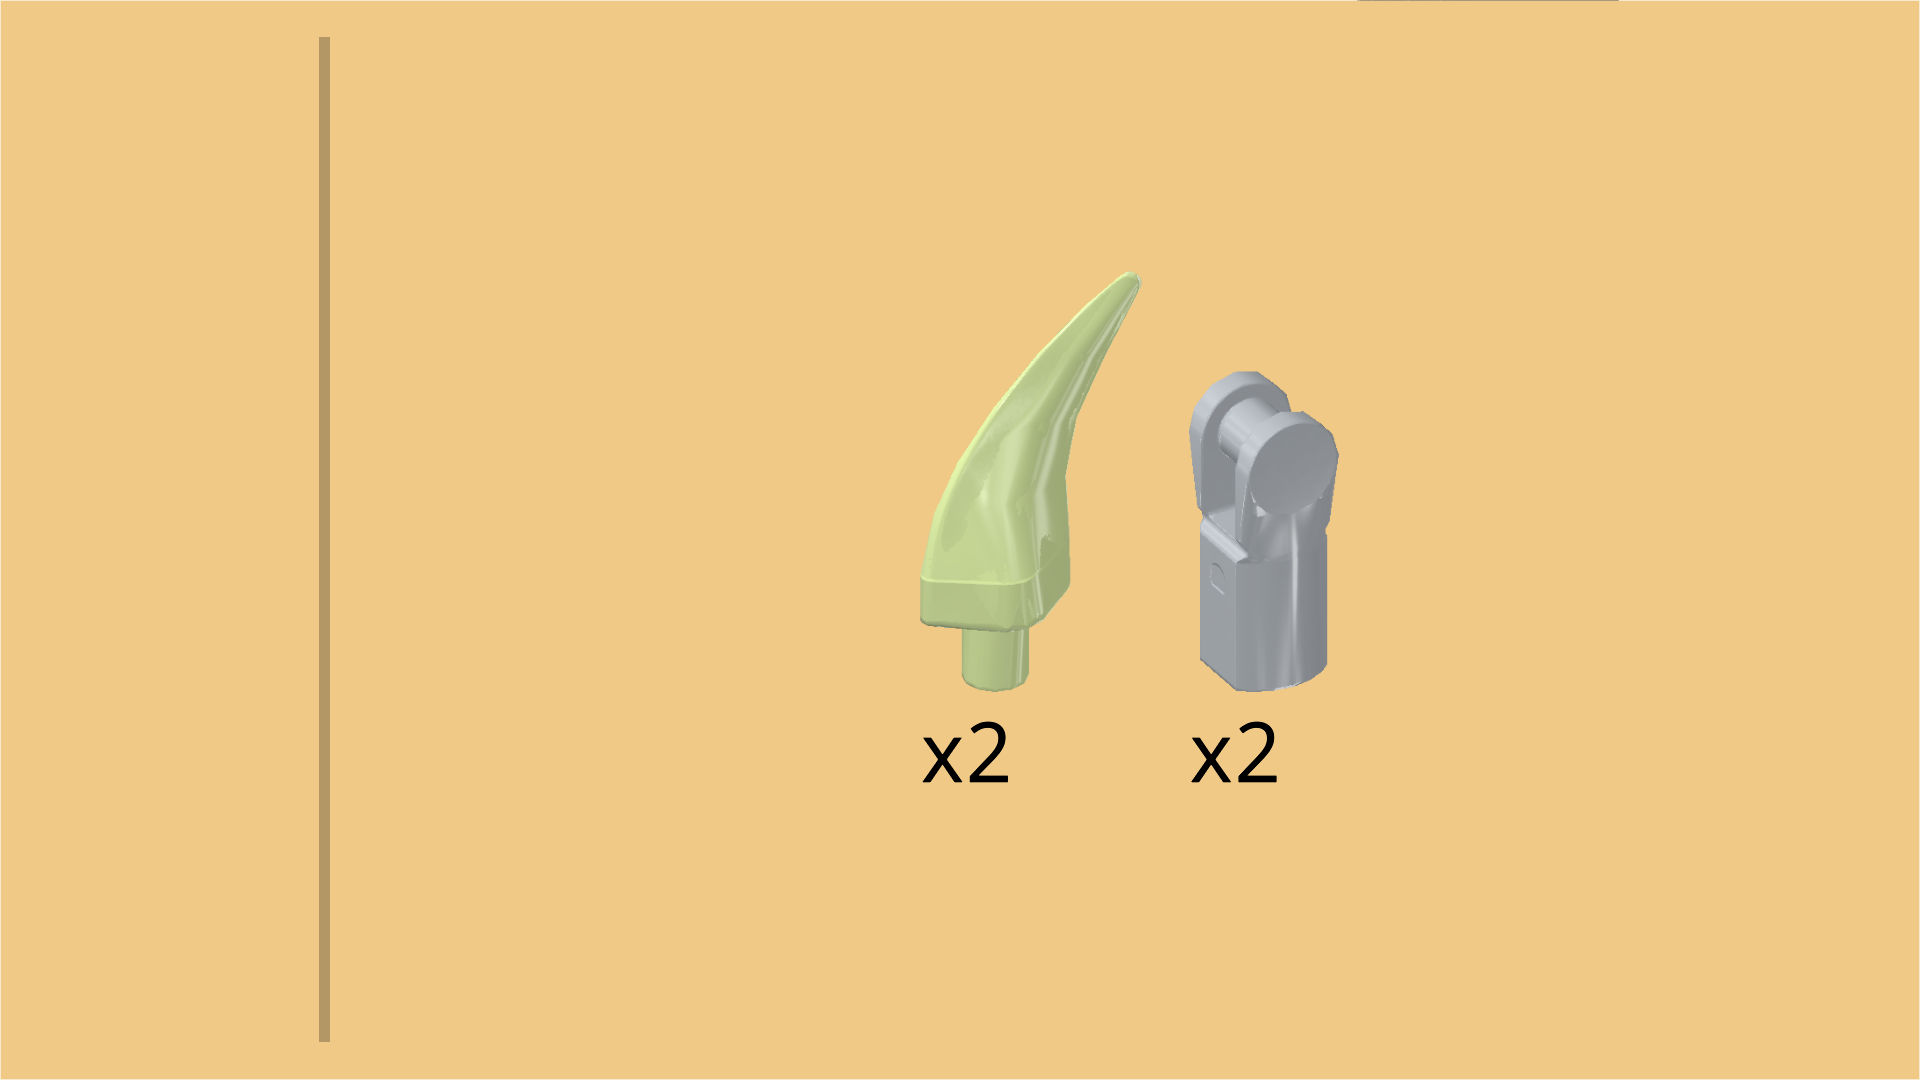
| Collect the following 4 pieces: |
| 2 pale lime green fangs with shaft, |
| and 2 medium stone grey small tubes with shaft. |
| Insert the shafts of the fangs into the small tubes. |
| Snap the shafts of the claws on the 2 clasps of the foot. Rotate the fangs so that they are pointing down. |
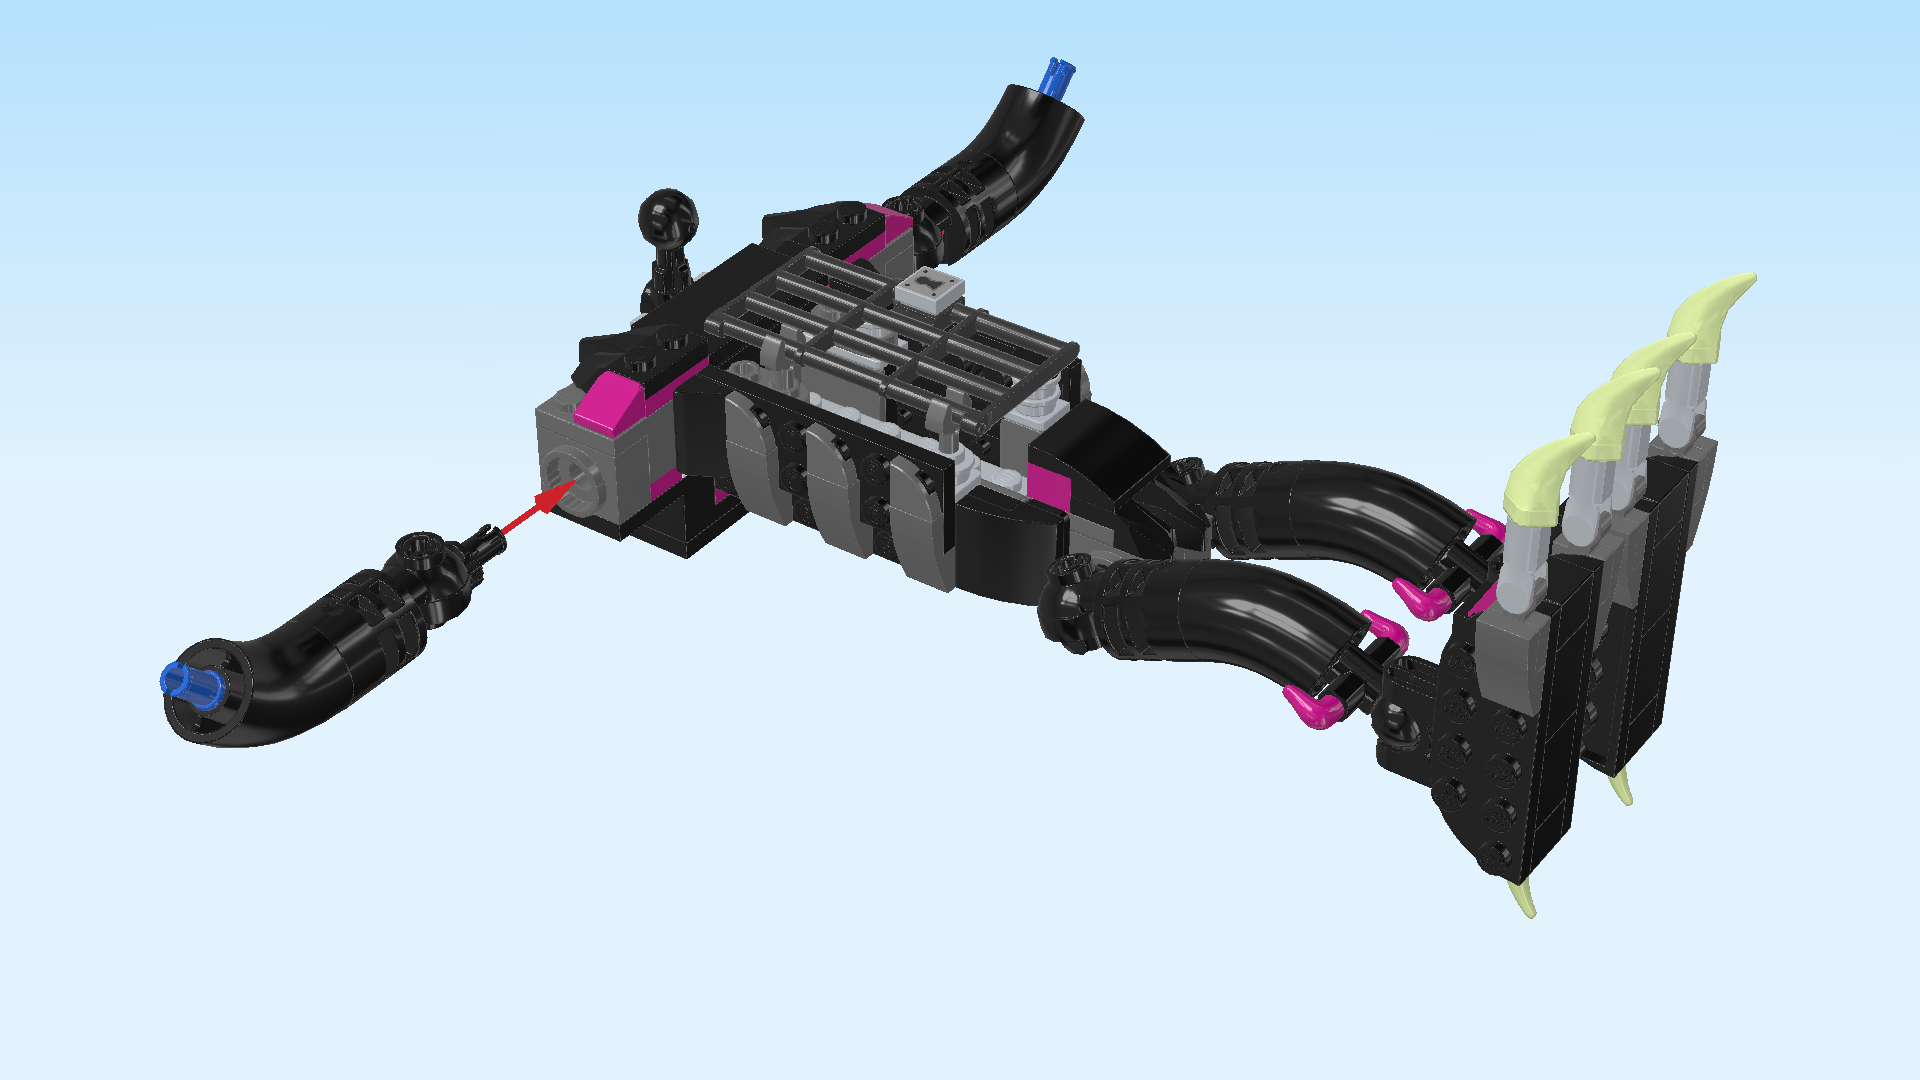
| The Grimkeeper's first foot is finished! Well done! Tilt it up so that the claws are pointing to the top. Snap the foot's ball socket on the ball at the bottom of the right leg. |
| Now, we will build the second foot. |
| Collect the following 2 pieces: |
| 1 black brick 1x1 with side knob, |
| and 1 purple violet smooth roof tile 1x1x⅔. |
| Put the brick on the table, side knob pointing to the front. |
| Put the roof tile upright on the side knob, slope to the left. |
| Find 1 black plate 2x6 with 2 rounded corners. |
| Put it horizontally on the table, 2 rounded corners to the front. |
| Put the brick with roof tile on the leftmost knob, roof tile to the front. |
| Collect the following 2 pieces: |
| 1 black brick 2x2 with ball cup, |
| and 1 black brick 2x2. |
| Put the brick 2x2 to the right of the brick with roof tile. Its front left corner will slightly protrude. |
| Put the brick with ball cup vertically to the right of the previous piece, ball cup overhanging to the front. |
| Collect the following 2 pieces: |
| 1 black brick 1x1 with side knob, |
| and 1 pale lime green horn with shaft. |
| Put the brick to the right of the previous piece, side knob to the right. |
| Insert the shaft of the horn into the side knob. Make sure it bends slightly towards the back. |
| Find 1 black plate 2x6 with 2 rounded corners. |
| Put it horizontally on top, rounded corners to the front. |
| Collect the following 2 pieces: |
| 1 dark stone grey one-stepped curve tile 1x2x⅔, |
| and 1 dark stone grey plate 1x1 with horizontal side clasp. |
| Put the plate with clasp on the leftmost knob of the previous piece, clasp to the left. |
| Put the curve tile horizontally on the previous piece and the knob to its right, curve to the right. |
| Collect the following 2 pieces: |
| 1 dark stone grey one-stepped inverted curve tile 1x2, |
| and 1 dark stone grey plate 1x1 with horizontal side clasp. |
| Flip the foot build upright so that the ball cup is pointing to the top and the clasp is still pointing to the left. |
| Put the plate with clasp upright on the leftmost connection point of the plate that is facing you, clasp to the left. |
| Put the curve tile upright horizontally on the previous piece and the knob to its right, curve to the right. |
| Now, let's make the 2 claws of the second foot. |
| Collect the following 4 pieces: |
| 2 pale lime green fangs with shaft, |
| and 2 medium stone grey small tubes with shaft. |
| Insert the shafts of the fangs into the small tubes. |
| Snap the shafts of the claws on the 2 clasps of the foot. Rotate the fangs so that they point downwards. |
| The second foot is finished! Great job! Tilt it up so that the claws are pointing to the top. Snap the ball of the second leg on the ball cup of this foot. |
| Next, we will build the Grimkeeper's arms. |
| Collect the following 4 pieces: |
| 2 black bent tube elements (large), |
| and 2 bright blue connector pegs 2m with cross axle pin. |
| Hold the tube elements horizontally, and insert the 2 cross axle pins into the tubes from the left, connector pegs sticking out towards the left. |
| Find 2 bright red connector pegs 3m with stopper ring and 1 cross axle end. |
| Insert their cross axle ends into the tube elements coming from the right, connector pegs sticking out towards the right. |
| Find 2 black connecting tubes 3x1x1 with ventilation slits and joint disk. |
| Hold 1 so that its disk is pointing to the right and towards you. |
| Put its left hole on the long connector peg sticking out towards the right of one tube. |
| Repeat with the other connecting tube. |
| Find 2 black round joints 2x1x1 with 2 connectors. |
| Hold 1 so that the connector coming out from the center of the ring is pointing to the front, and the side connector is pointing to the right. |
| Insert the connector pointing towards you from the back into the disk of one connecting tube. |
| Repeat with the other joint. |
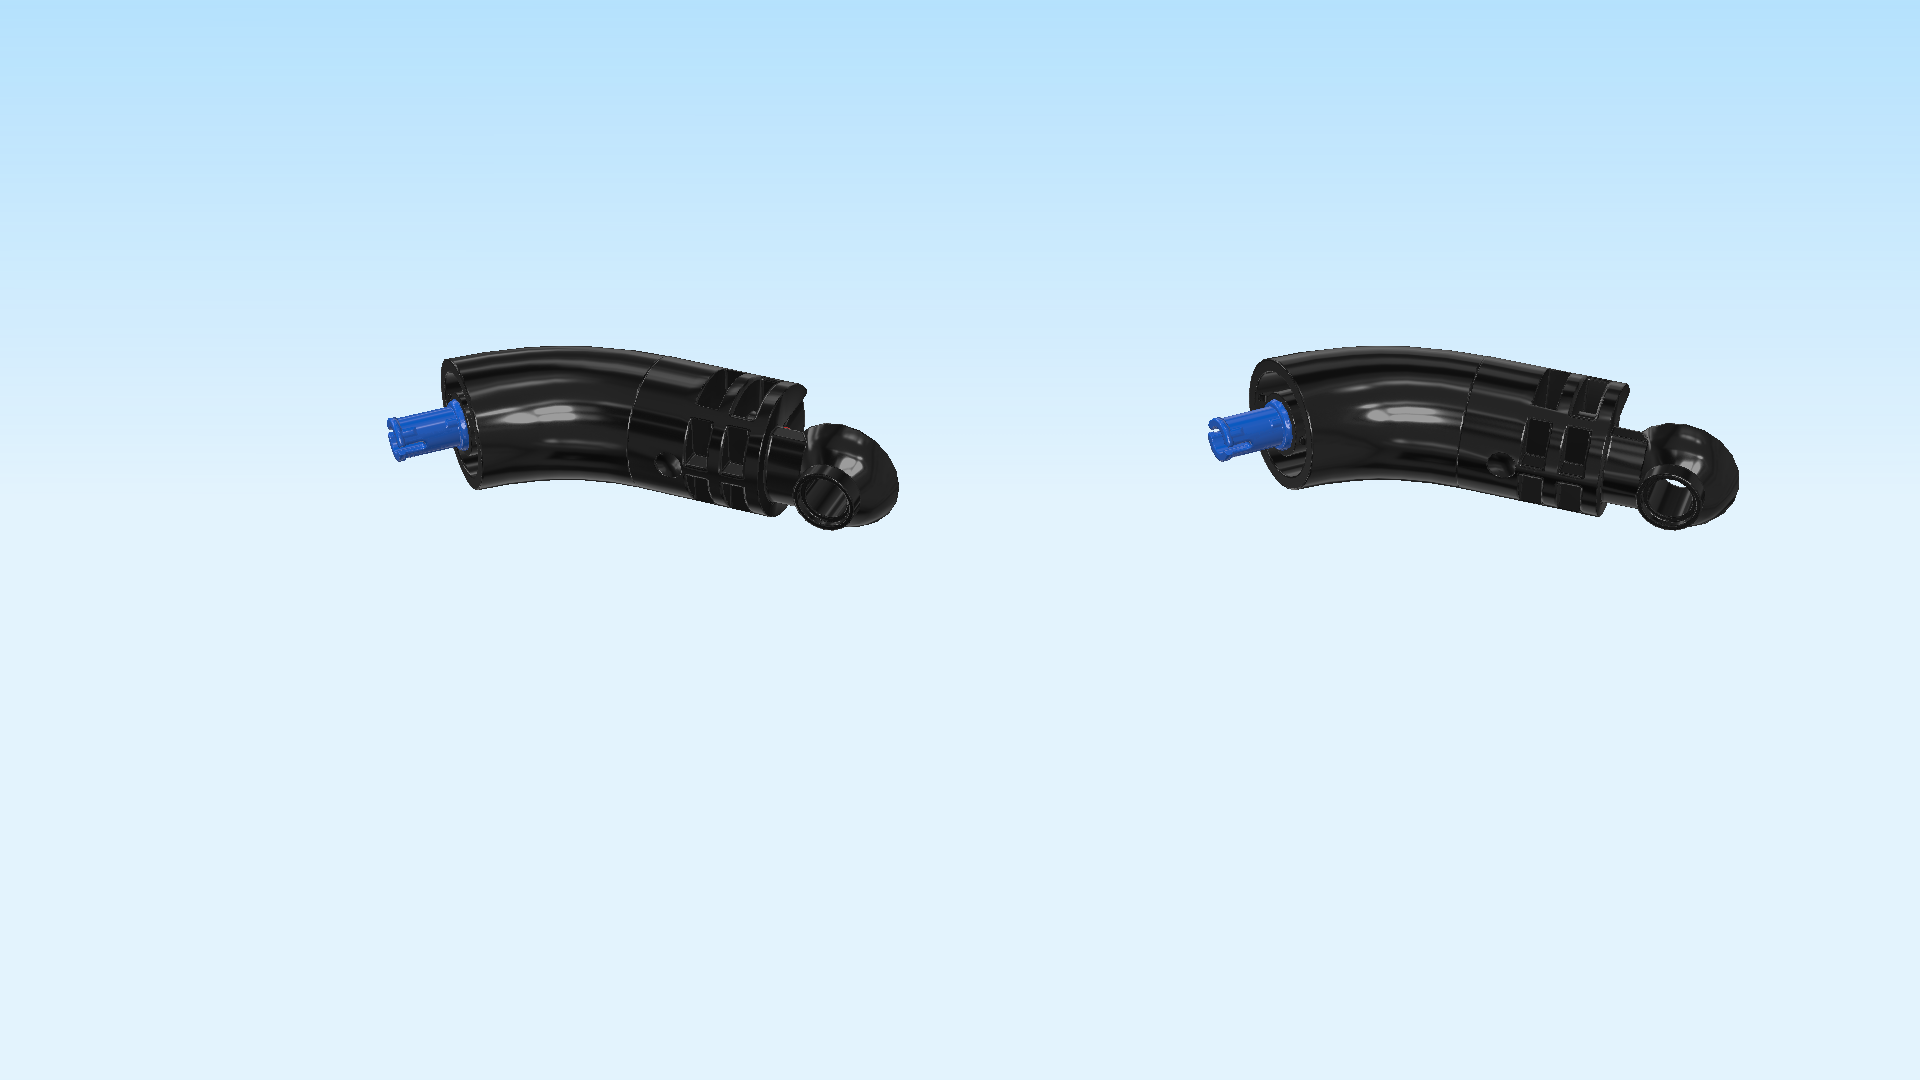
| The Grimkeeper's arms are finished! Well done! Hold 1 arm horizontally, the connector of the round joint pointing to the left, arm bending upwards towards the right. The other connector sticking out of the large tube should be pointing to the right. |
| Insert the connector that is pointing to the left into the joint socket on the right shoulder. |
| Repeat symmetrically with the other arm on the left shoulder. |
| Now, bend the 2 arms down so that the empty connectors are pointing towards you and slightly upwards. |
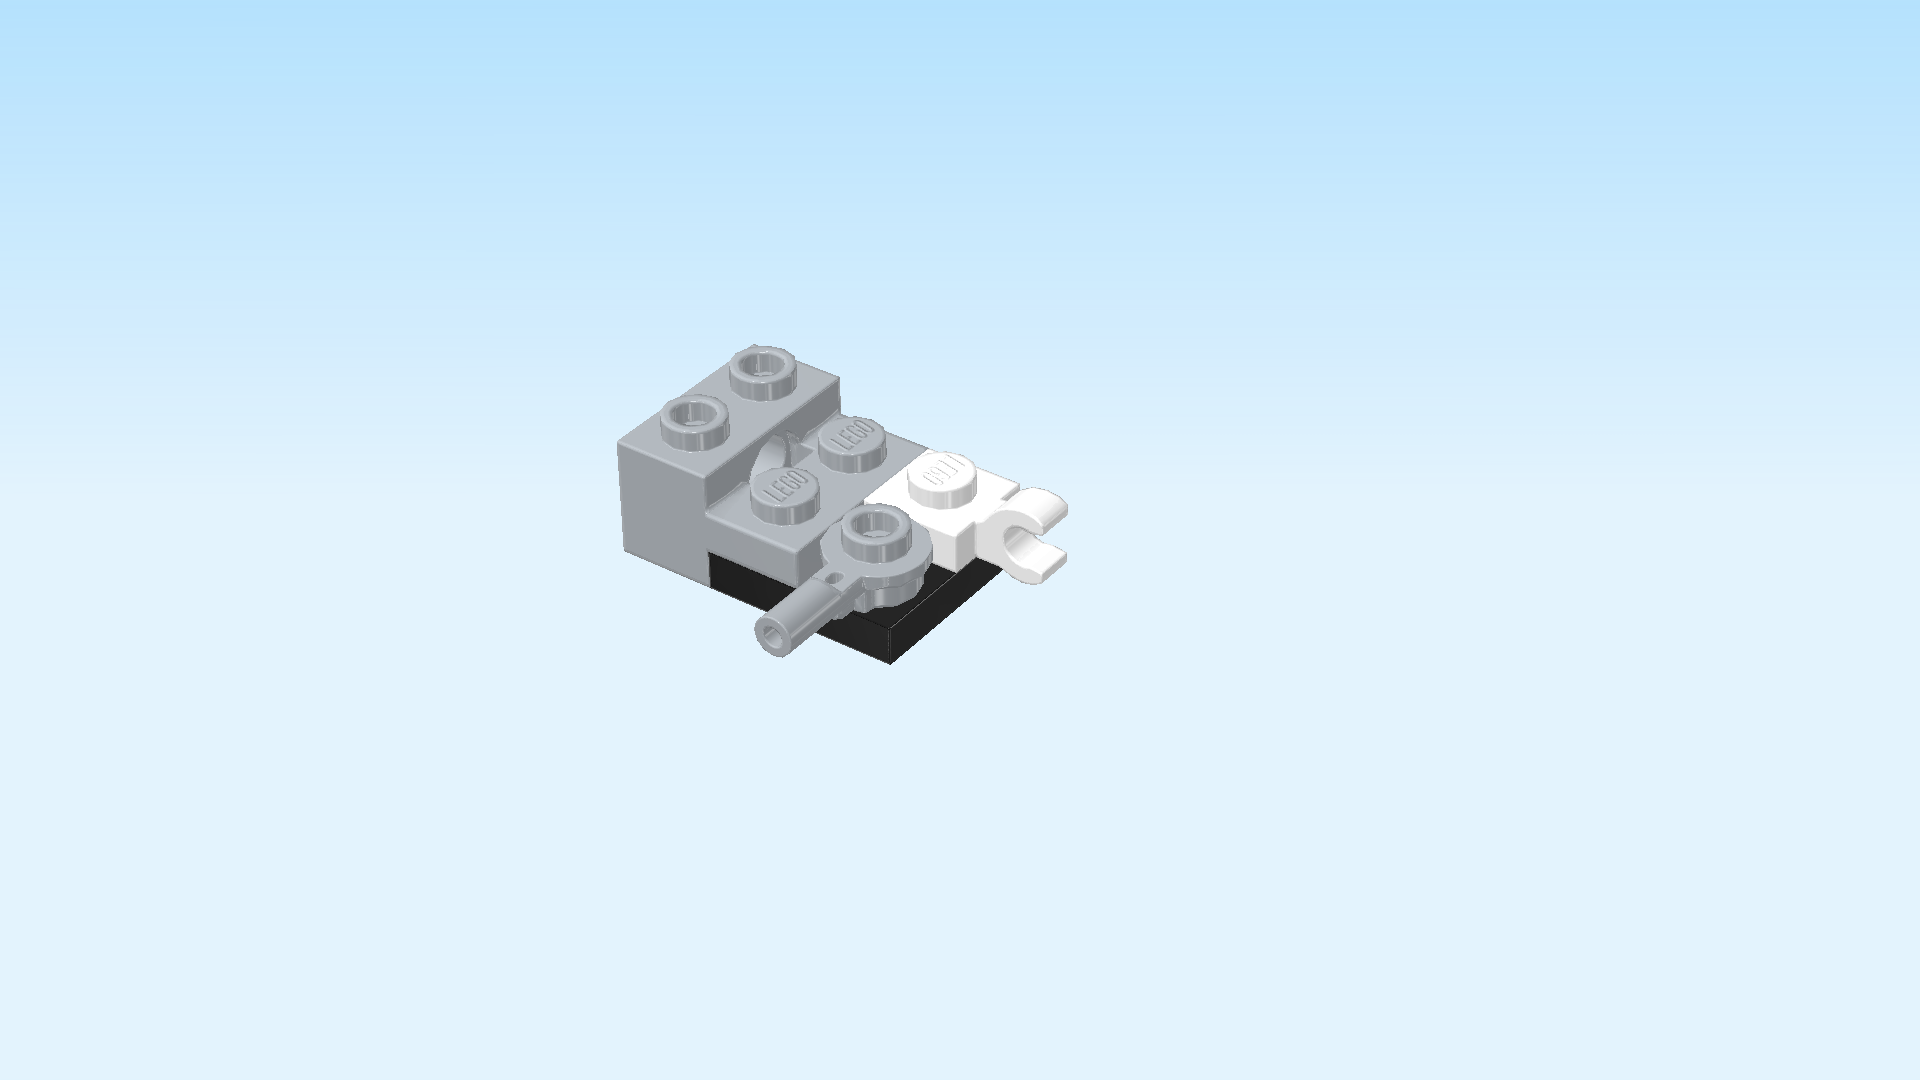
| Next, we will build the Grimkeeper's first hand. |
| Collect the following 2 pieces: |
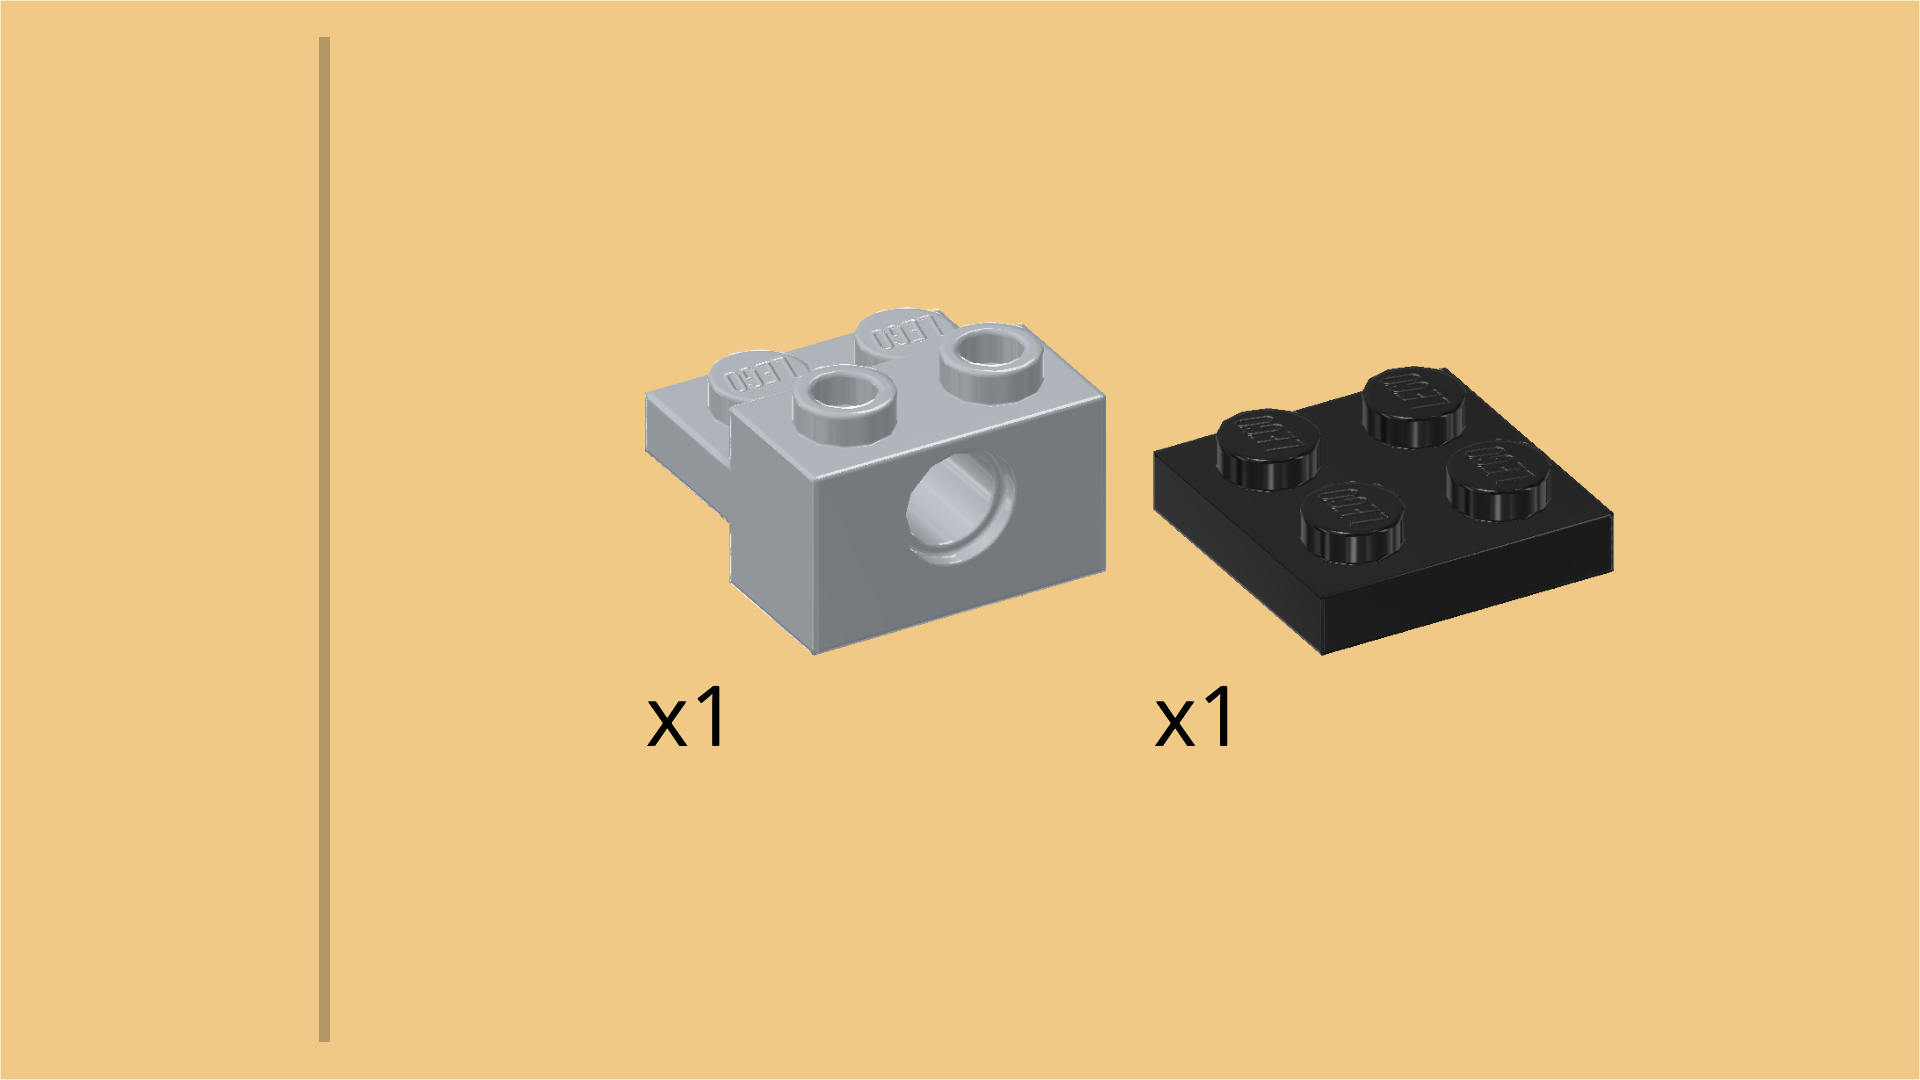
| 1 black plate 2x2, |
| and 1 medium stone grey brick 1x2 with side plate 1x2. |
| Put the plate 2x2 on the table. |
| Put the side plate 1x2 of the brick on the left column, brick overhanging to the left. |
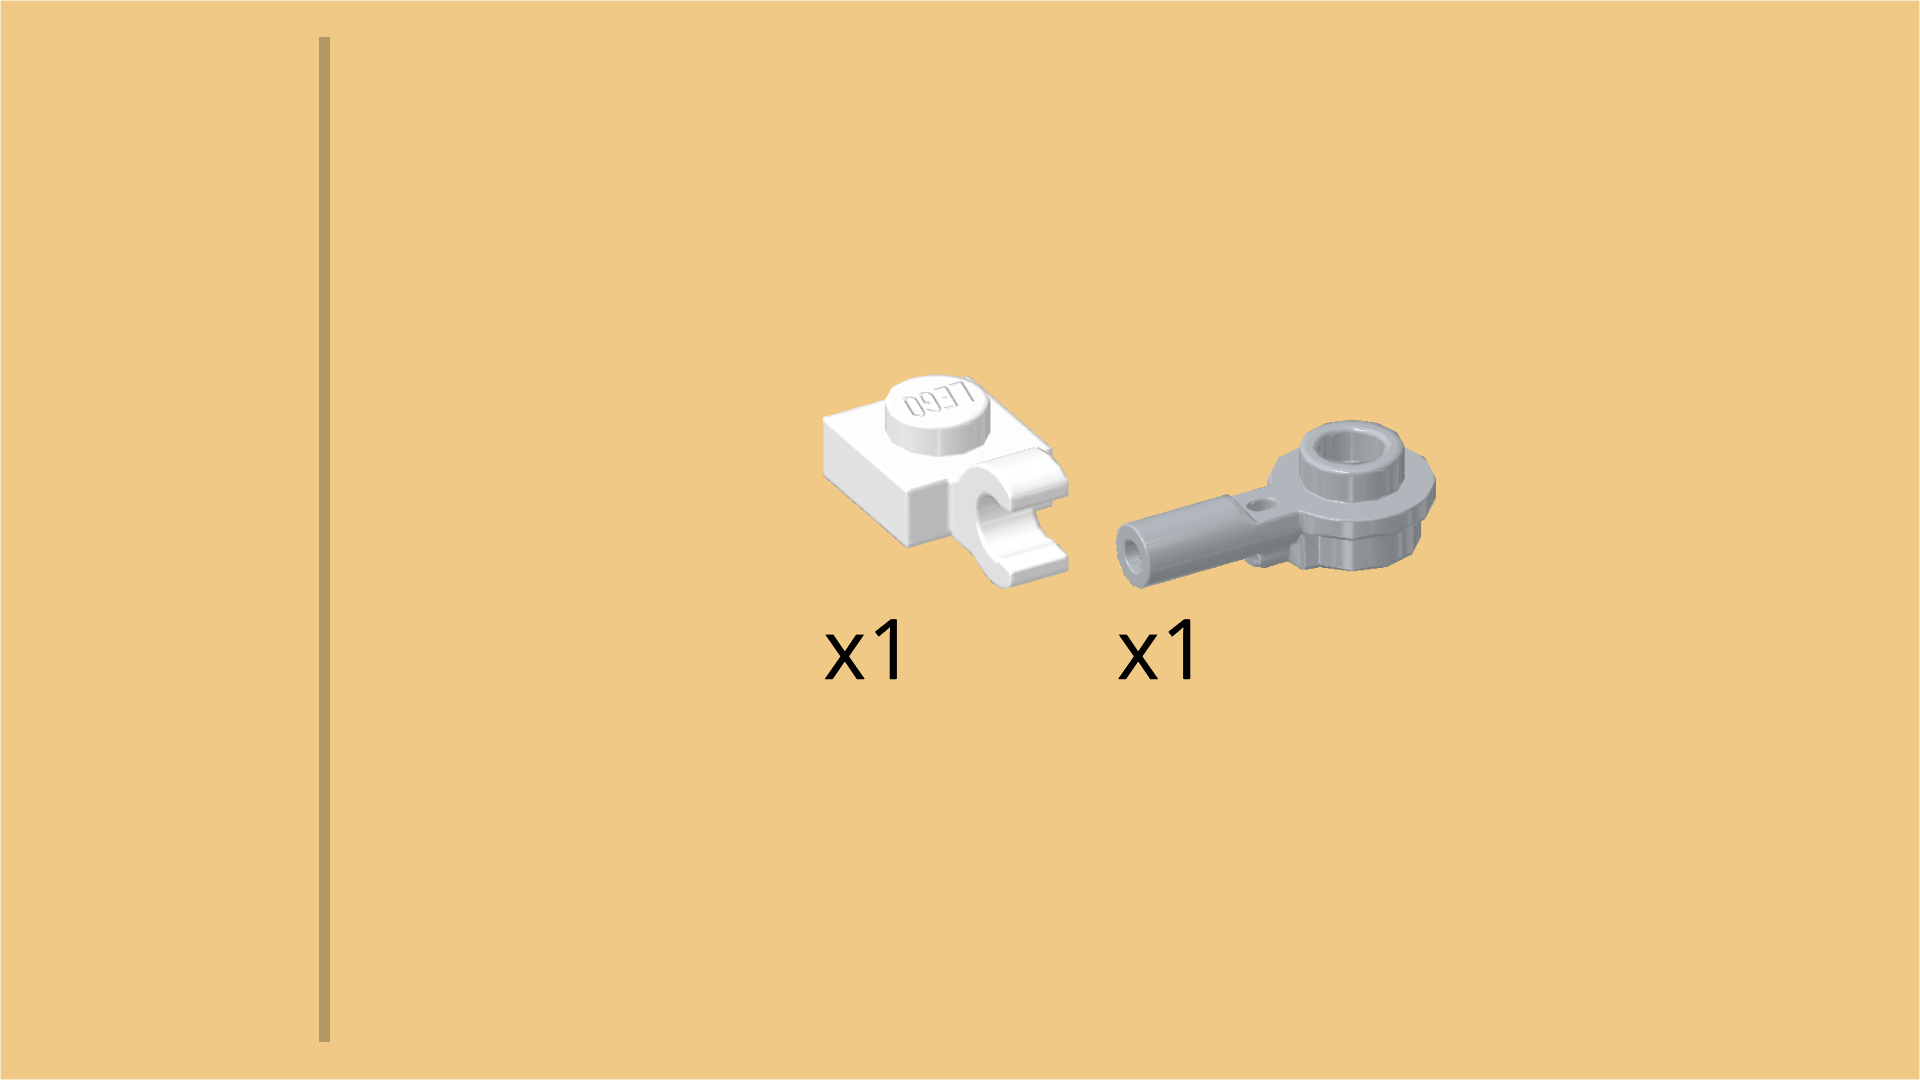
| Collect the following 2 pieces: |
| 1 medium stone grey round plate 1x1 with through-hole and side handle, |
| and 1 white plate 1x1 with vertical side clasp. |
| Put the round plate with side handle on the front knob of the rightmost column, handle to the front. |
| Put the plate with clasp behind the previous piece, clasp to the right. |
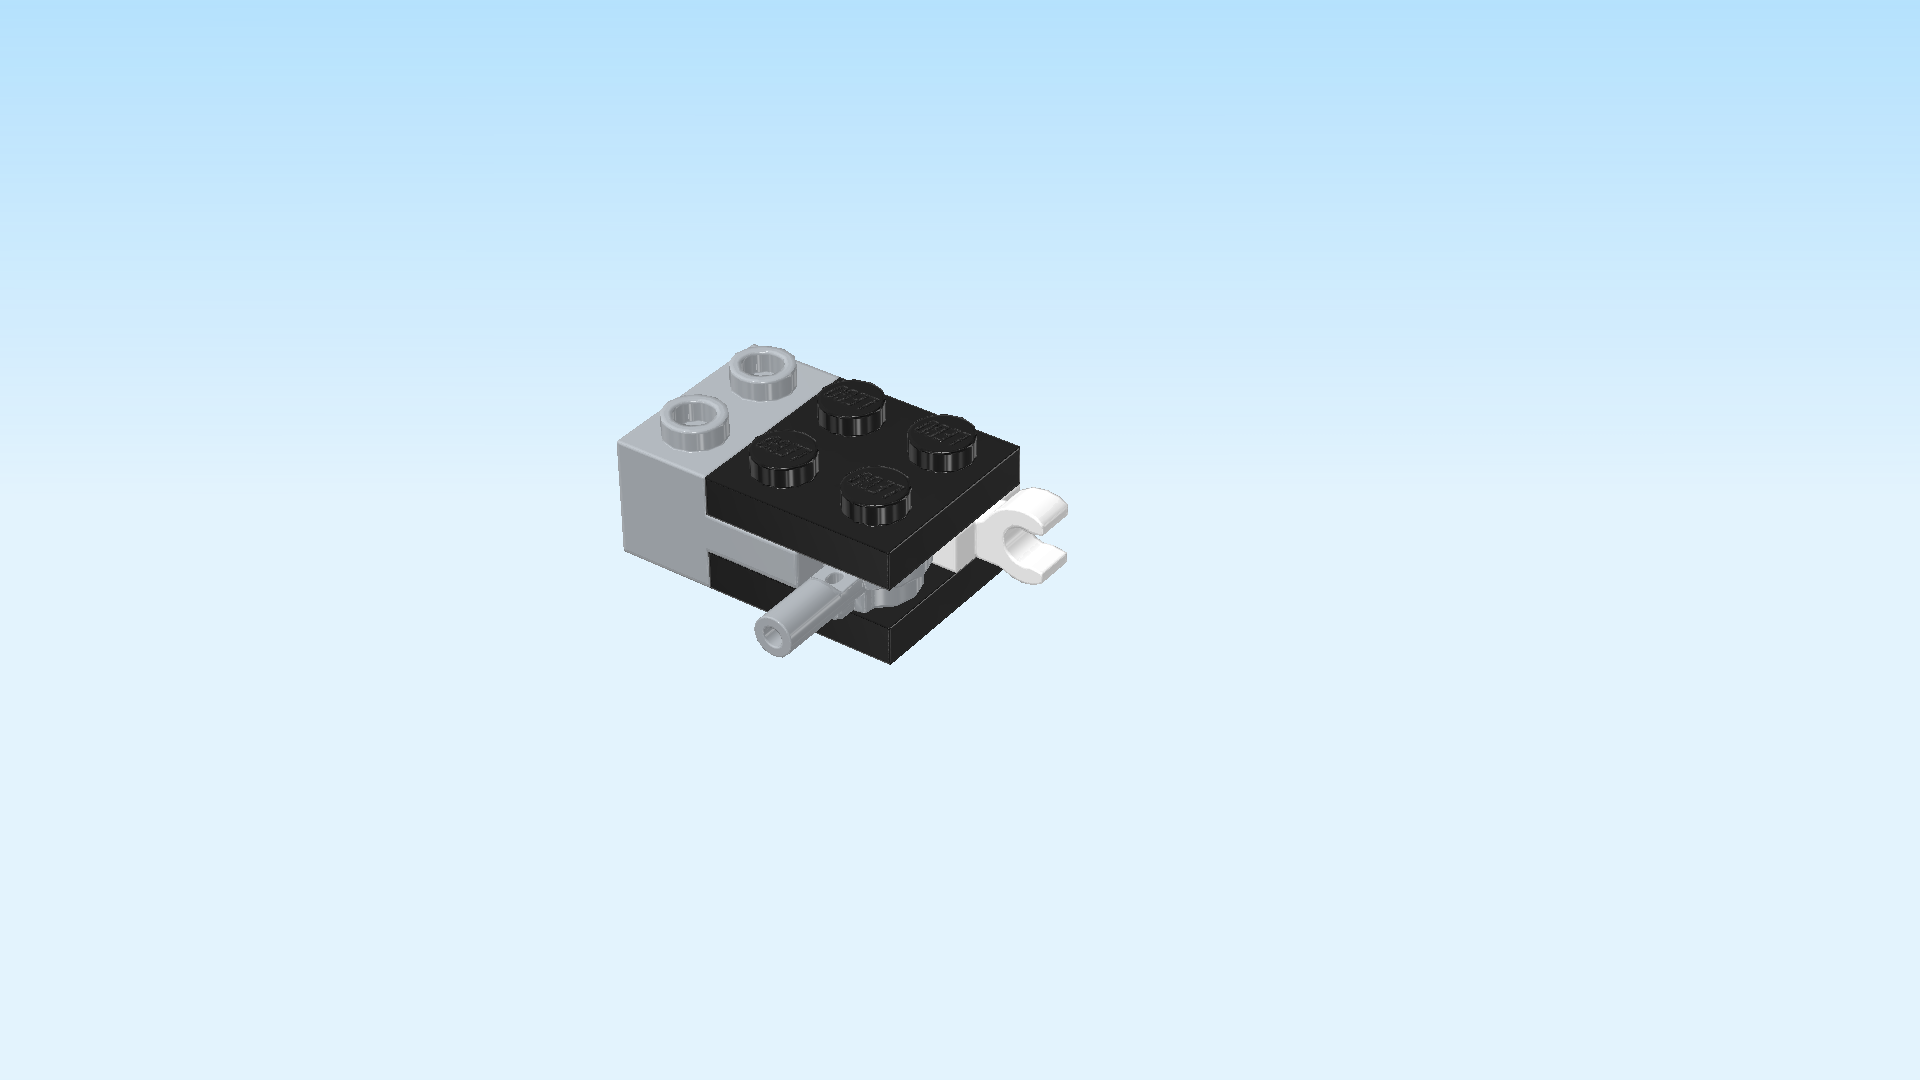
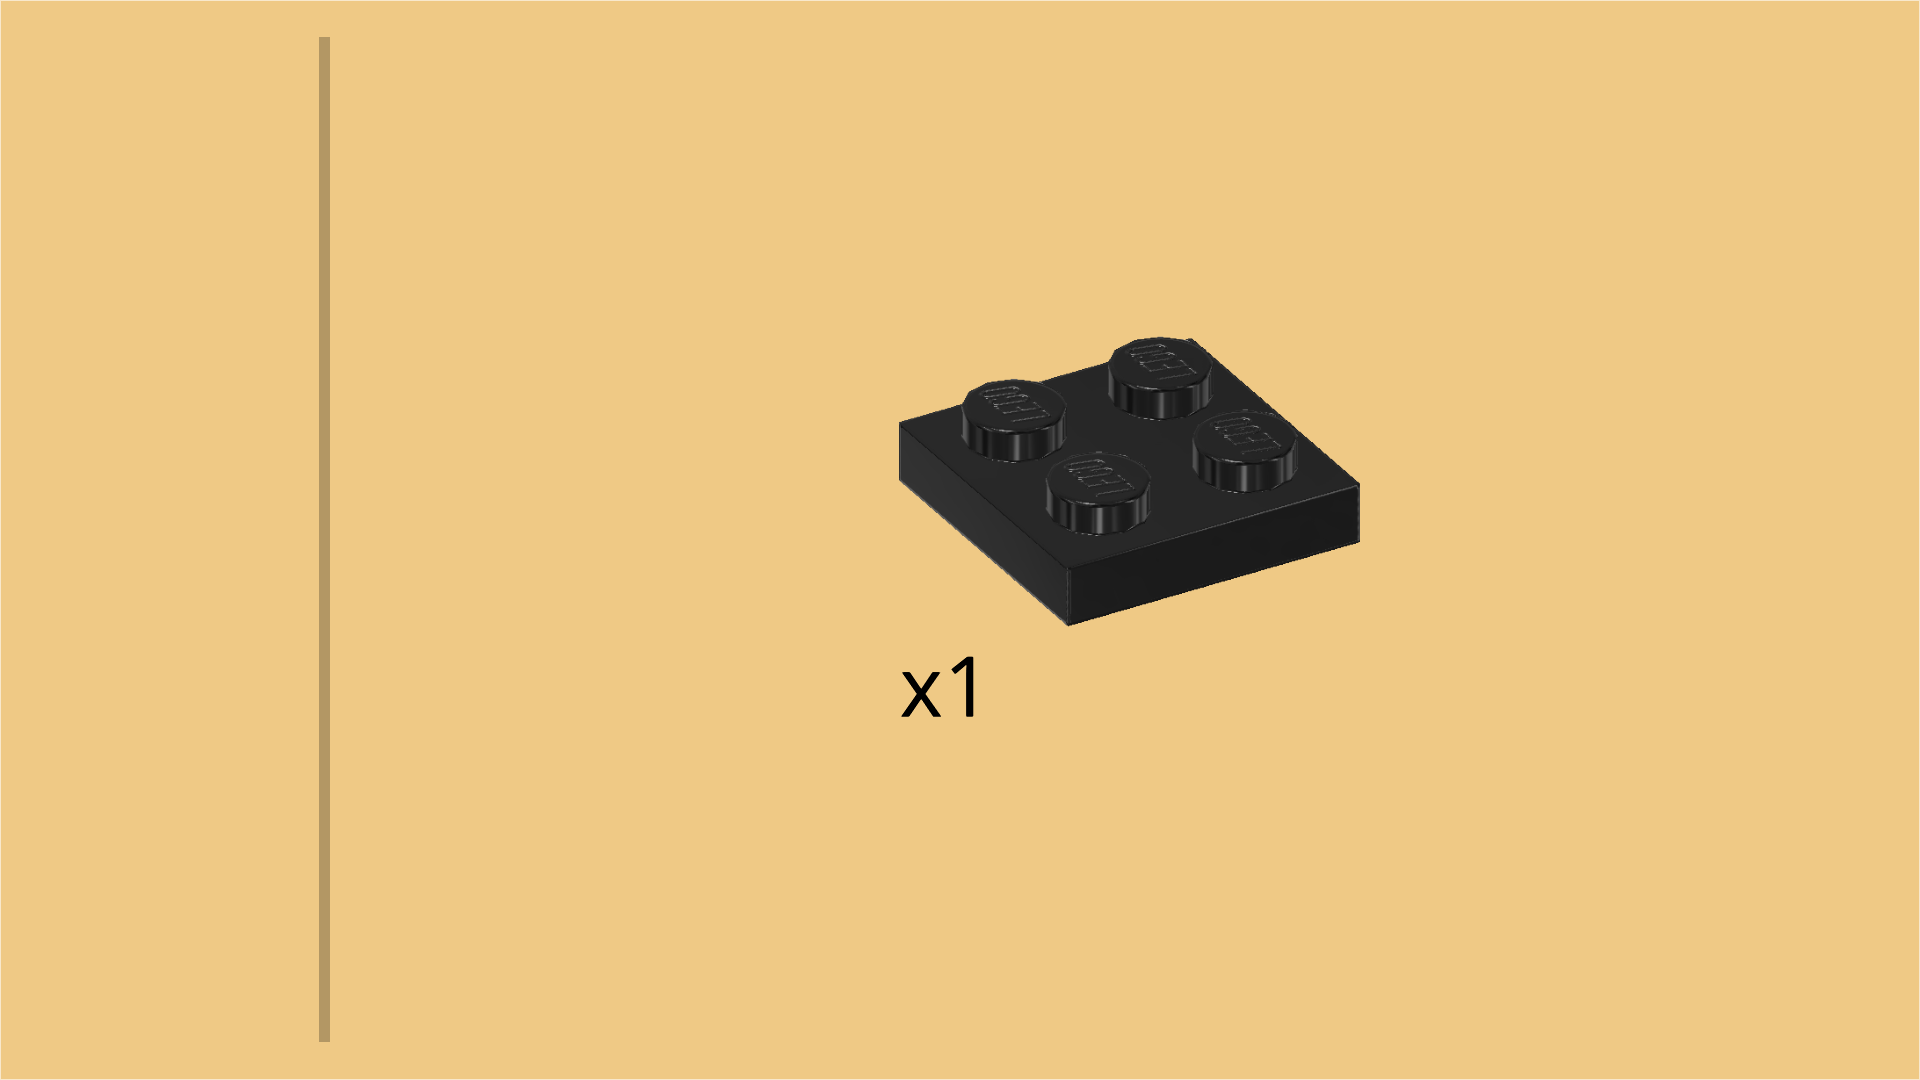
| Find 1 black plate 2x2. |
| Put it on the 2 right columns. |
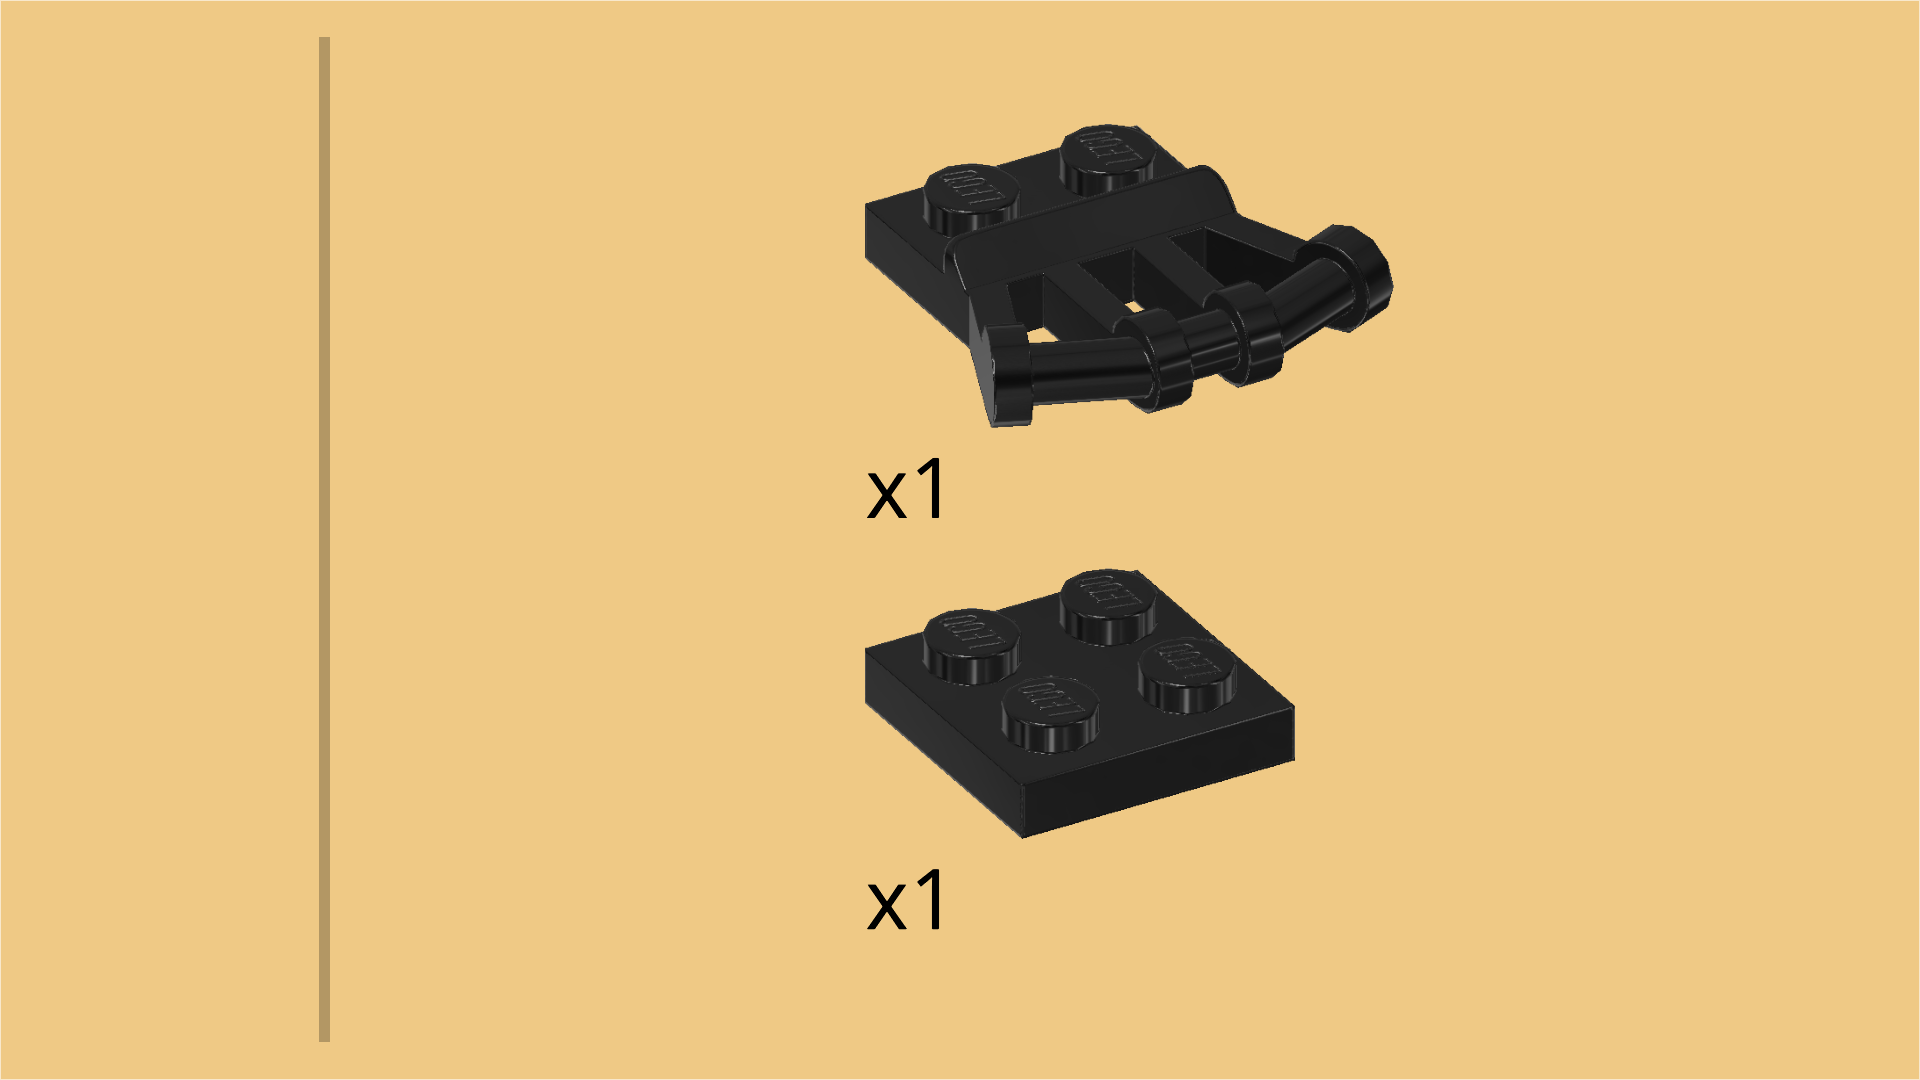
| Collect the following 2 pieces: |
| 1 black plate 1x2 with side grille and bent shaft, |
| and 1 black plate 2x2. |
| Put the plate with side grille and bent shaft on the rightmost column, side grille with shaft to the right. |
| Put the plate 2x2 to the left of the previous piece. |
| Find 1 titanium metallic curve plate 2x3x⅔ with 2 knobs and fin. |
| Put it horizontally on top, 2 knobs to the right, fin to the left. |
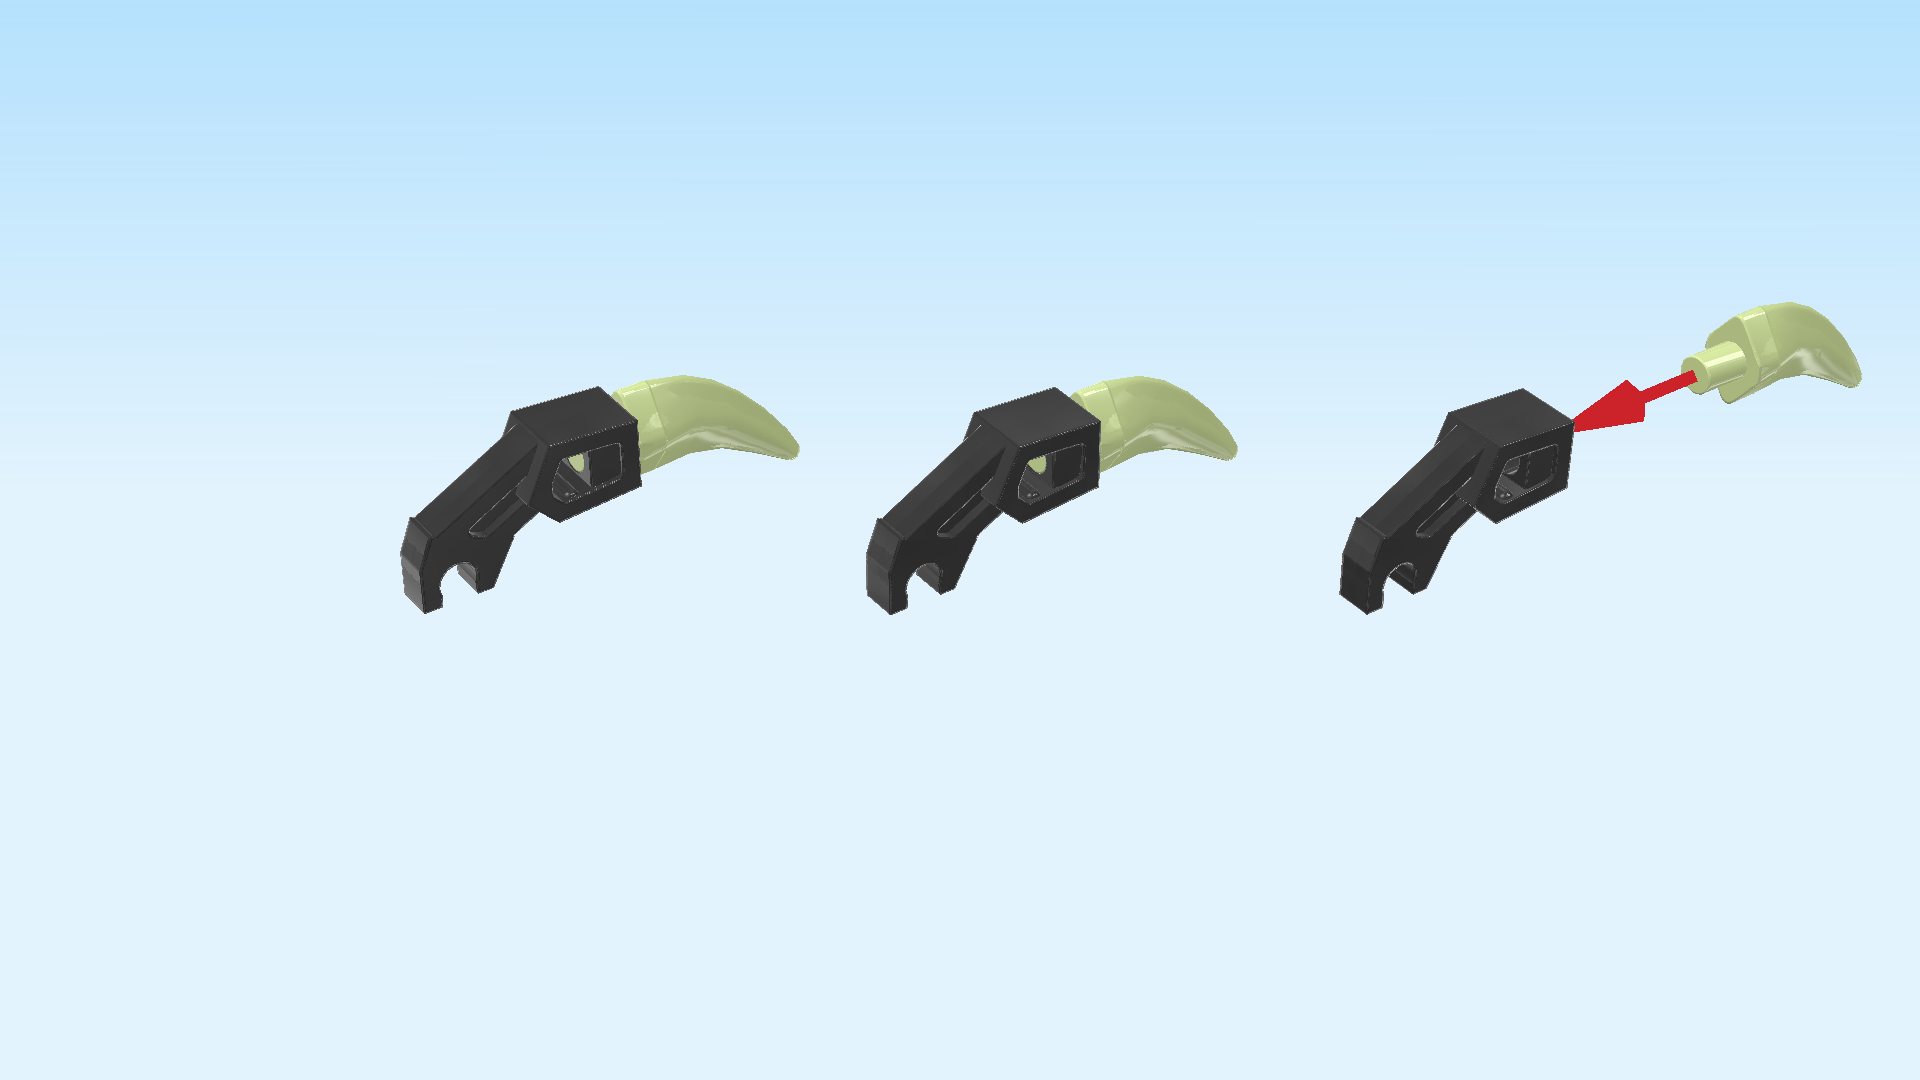
| Next, we will assemble 3 claws for the hand. |
| Collect the following 6 pieces: |
| 3 pale lime green fangs with shaft, |
| and 3 titanium metallic mechanical arms with clasp. |
| Hold 1 mechanical arm horizontally, cube portion to the right, clasp to the left, pointing down. |
| Insert the shaft of 1 fang into the cube from the right, fang pointing down. |
| Repeat 2 times with the remaining four pieces. |
| The 3 claws for the hand are finished! Great job! Snap the clasp of 1 on the backmost part of the bent shaft. Make sure the claw is bending upwards with the fang pointing down. |
| Snap another one on the frontmost part of the bent shaft, again claw bending upwards, fang pointing down. |
| Turn the third one so that its clasp and fang are pointing upwards. |
| Snap the clasp from the bottom on the handle sticking out towards the front. |
| The Grimkeeper's first hand is finished! Great job! Insert the connector of the right arm into the round hole on the left side of the hand. |
| Next, we will build the second hand. |
| Collect the following 2 pieces: |
| 1 black plate 2x2, |
| and 1 medium stone grey brick 1x2 with side plate 1x2. |
| Put the plate 2x2 on the table. |
| Put the side plate 1x2 of the brick on the right column, brick overhanging to the right. |
| Collect the following 2 pieces: |
| 1 medium stone grey round plate 1x1 with through-hole and side handle, |
| and 1 white plate 1x1 with vertical side clasp. |
| Put the round plate with side handle on the front knob of the leftmost column, handle to the front. |
| Put the plate with clasp behind the previous piece, clasp to the left. |
| Find 1 black plate 2x2. |
| Put it on the 2 left columns. |
| Collect the following 2 pieces: |
| 1 black plate 2x2, |
| and 1 black plate 1x2 with side grille and bent shaft. |
| Put the plate with side grille and bent shaft on the leftmost column, side grille with shaft to the left. |
| Put the plate 2x2 to the right of the previous piece. |
| Find 1 titanium metallic curve plate 2x3x⅔ with 2 knobs and fin. |
| Put it horizontally on top, 2 knobs to the left, fin to the right. |
| Now, we will assemble 3 claws for the second hand. |
| Collect the following 6 pieces: |
| 3 pale lime green fangs with shaft, |
| and 3 titanium metallic mechanical arms with clasp. |
| Hold 1 mechanical arm horizontally, cube portion to the right, clasp to the left, pointing down. |
| Insert the shaft of 1 fang into the cube from the right, fang pointing down. |
| Repeat 2 times with the remaining four pieces. |
| Snap 1 claw on the backmost part of the bent shaft, claw bending upwards, fang pointing down. |
| Snap another claw on the frontmost part of the bent shaft in the same orientation as the previous claw. |
| Turn the third claw so that the clasp and fang are pointing to the top. Snap the clasp from the bottom on the side handle pointing to the front, fang to the left. |
| The second hand is finished! Well done! Insert the second arm connector into the hole on the left side of the hand. |
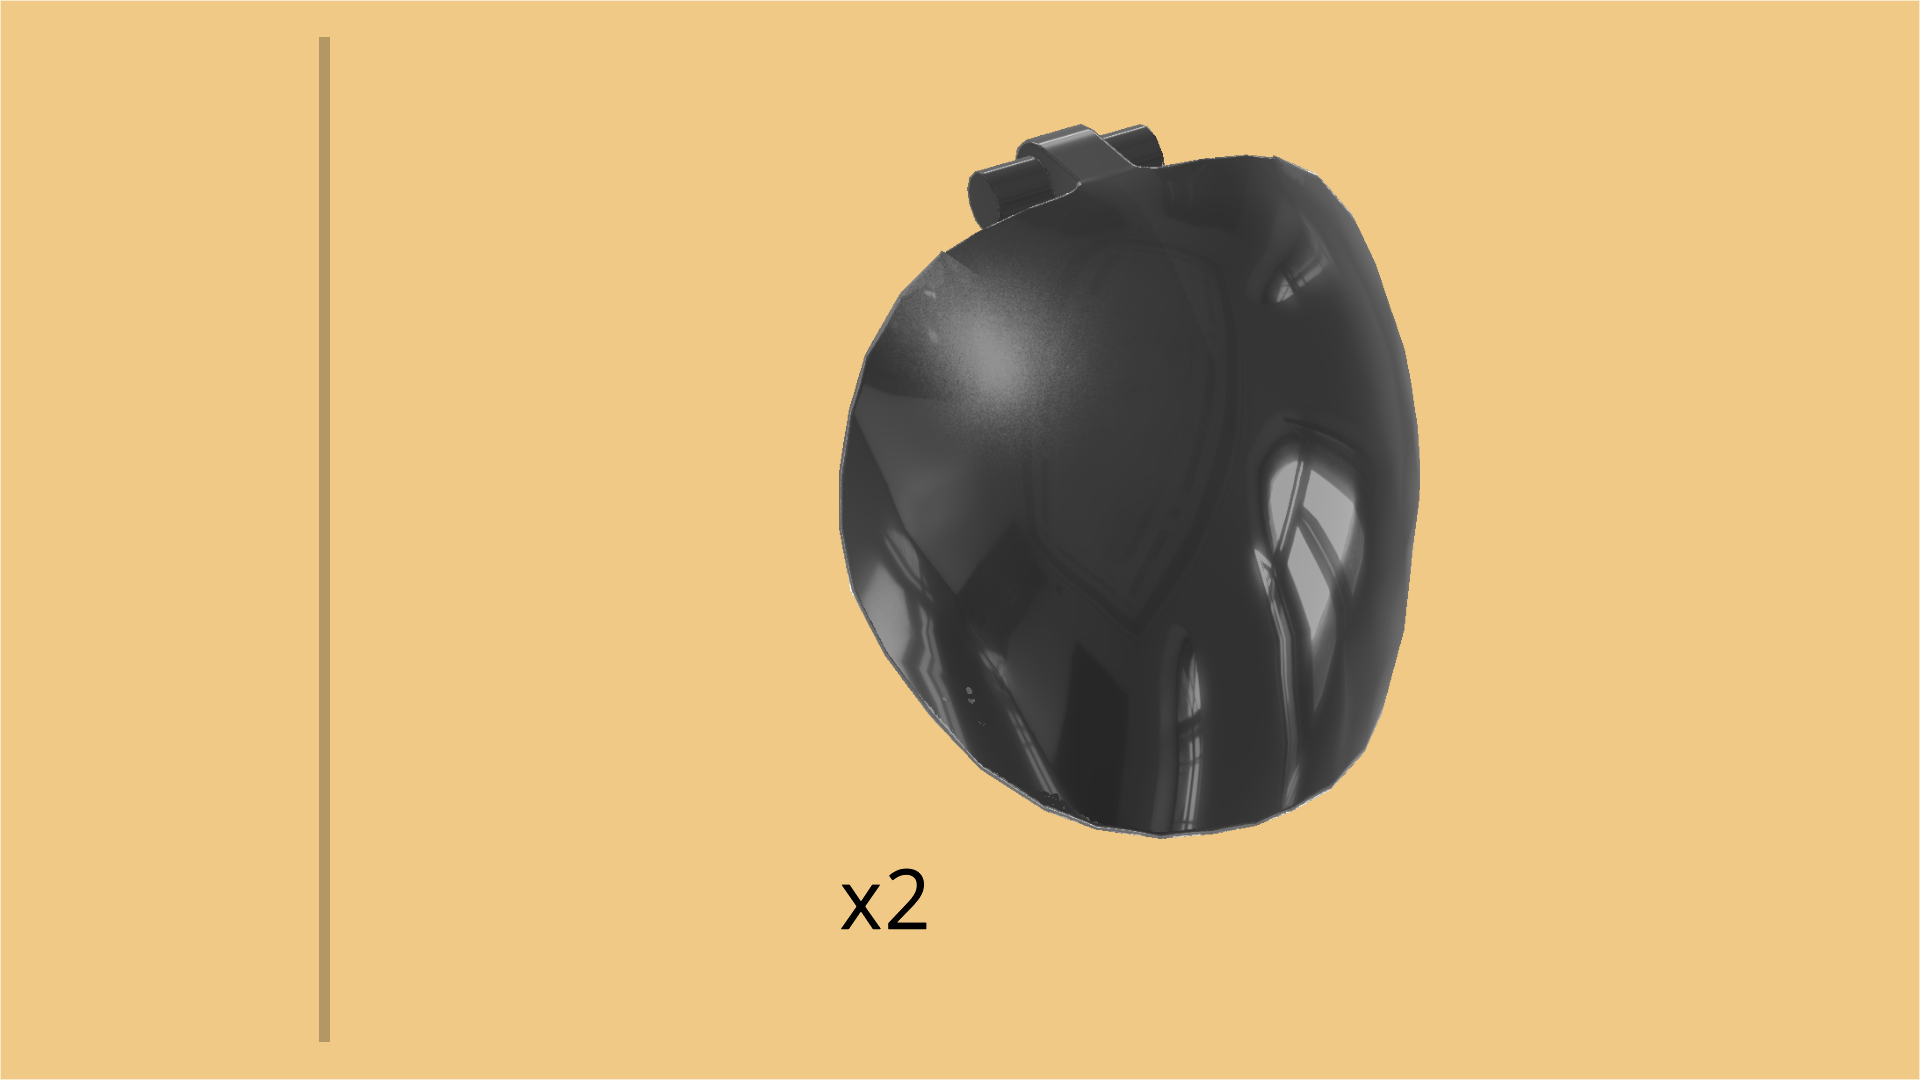
| Find 2 titanium metallic shoulder armor shells with double shaft. |
| Snap 1 on the 2 rightmost clasps on the right shoulder, and fold the shell towards you so that it covers the right shoulder. |
| Make sure to leave the 4 clasps in the center of the shoulder portion (near the head mount) empty! |
| Repeat symmetrically on the left. |
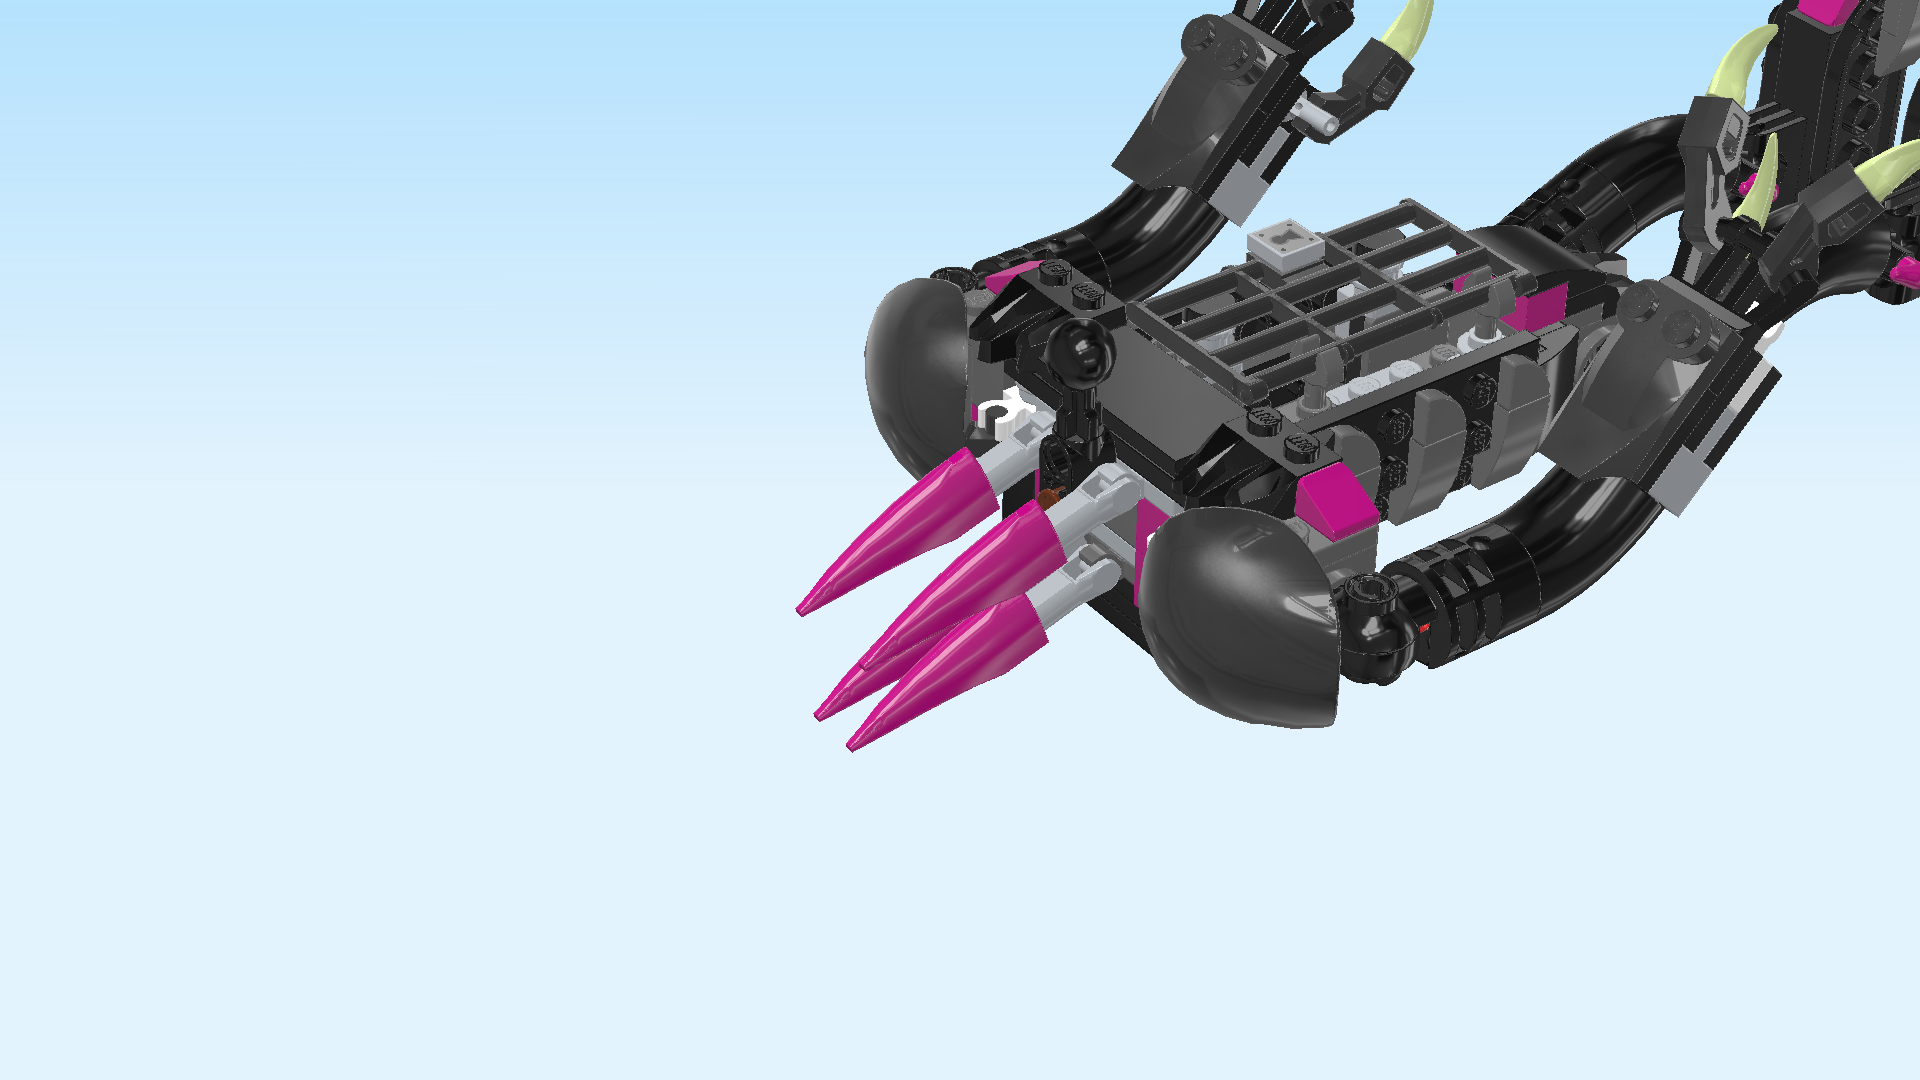
| Next, we will assemble 4 neck spikes. |
| Collect the following 8 pieces: |
| 4 medium stone grey small tubes with shaft, |
| and 4 purple violet large teeth 1x4x1 with shaft. |
| Hold the small tube horizontally, opening to the right, shaft running from front to back. |
| Insert the shaft of one large tooth into the small tube. Make sure the broad side of the tooth is facing you. |
| Repeat 3 times with the other small tubes and large teeth. |
| Snap the shafts of the small tubes on the 4 clasps at the center of the shoulder portion between the shoulder shells. |
| Next, we will build the Grimkeeper's head. |
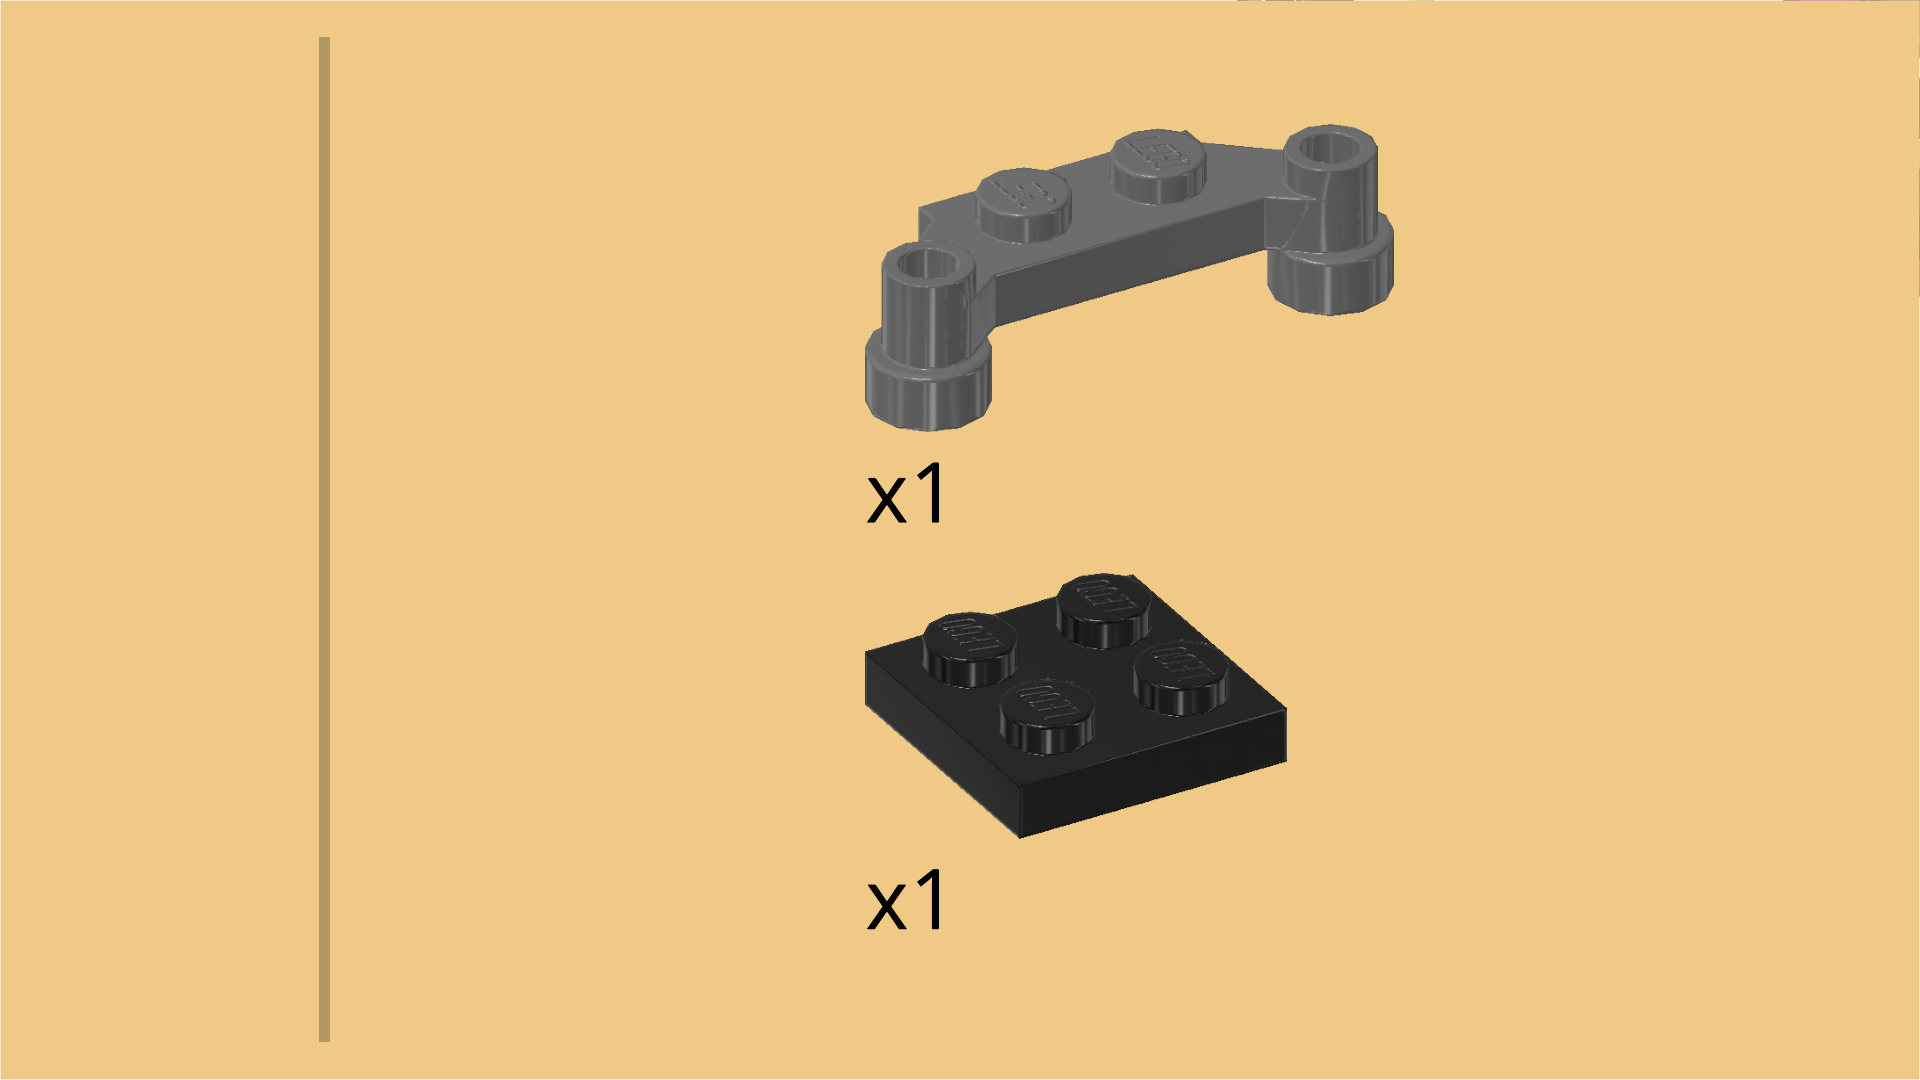
| Collect the following 2 pieces: |
| 1 black plate 2x2, |
| and 1 dark stone grey plate 1x2 with 2 side posts. |
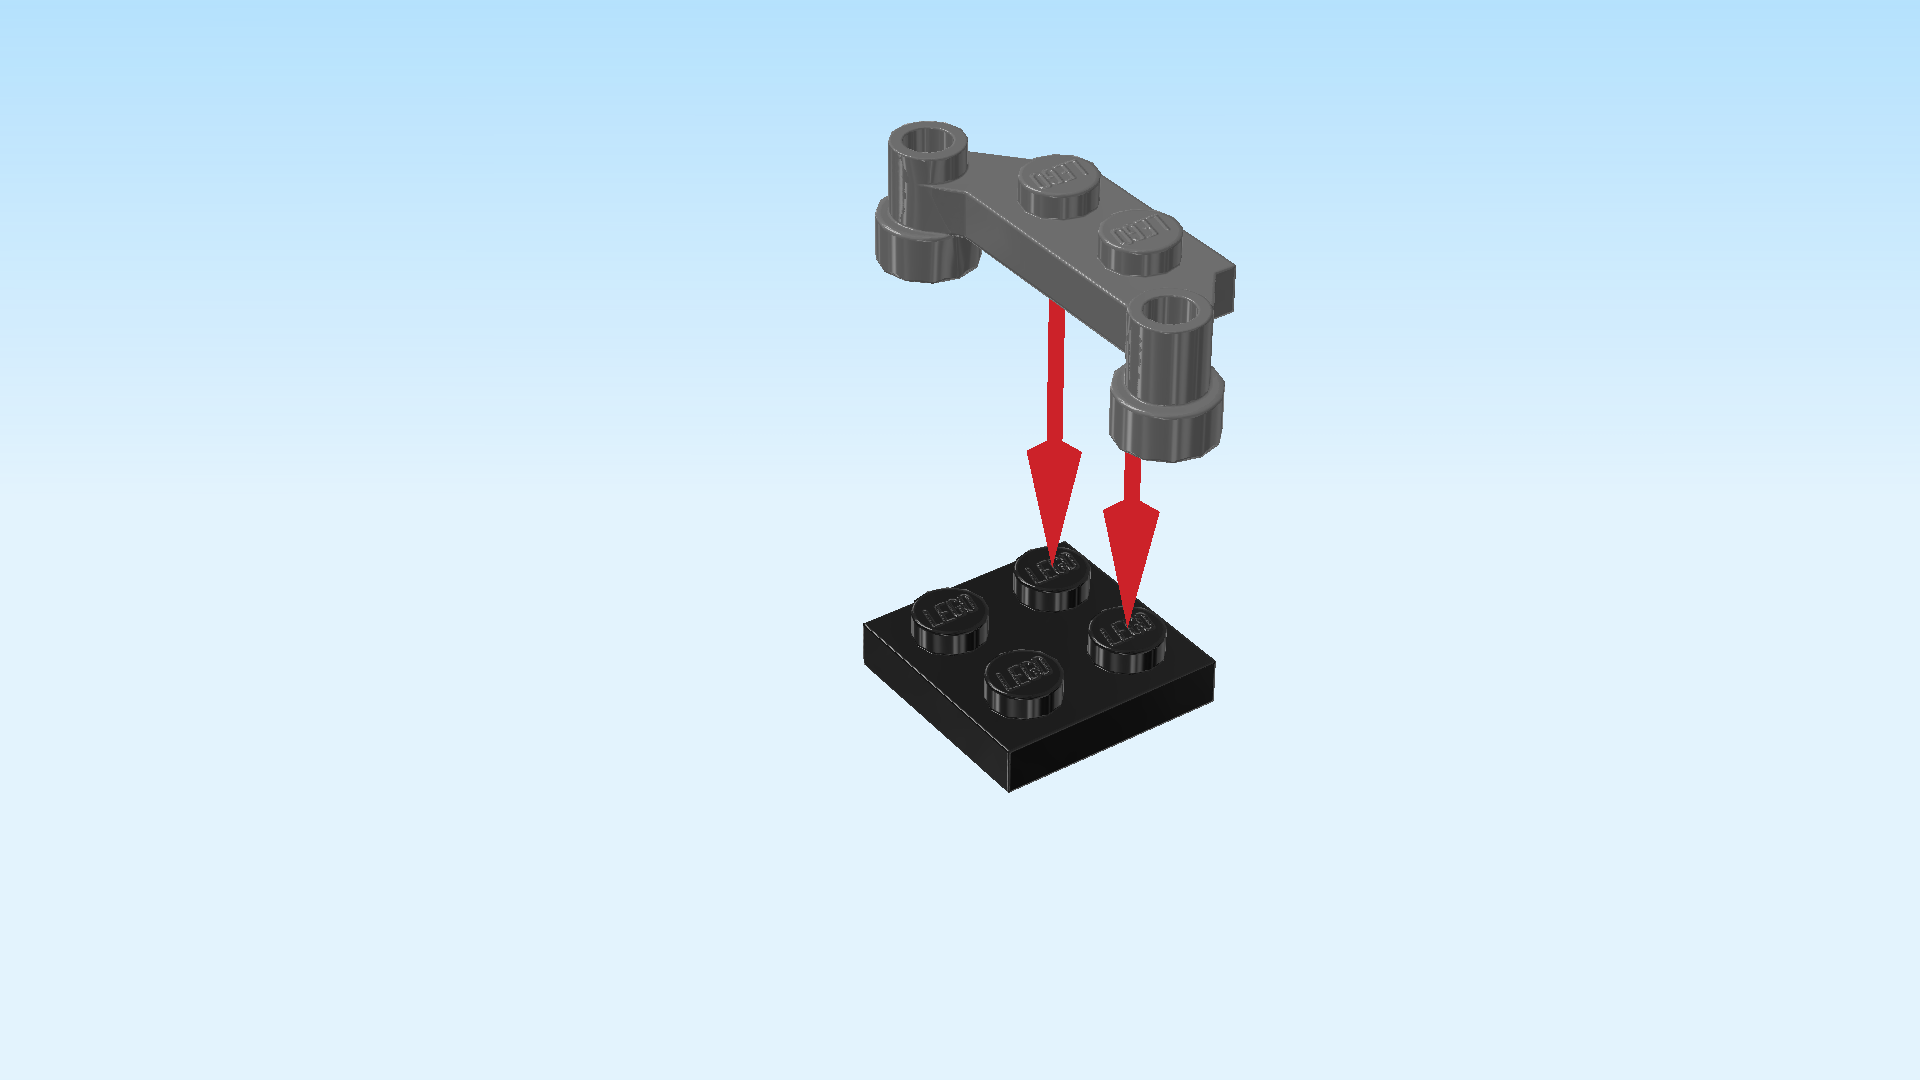
| Put the plate 2x2 on the table. |
| Put the plate 1x2 vertically on the right column, long side and side posts to the left. |
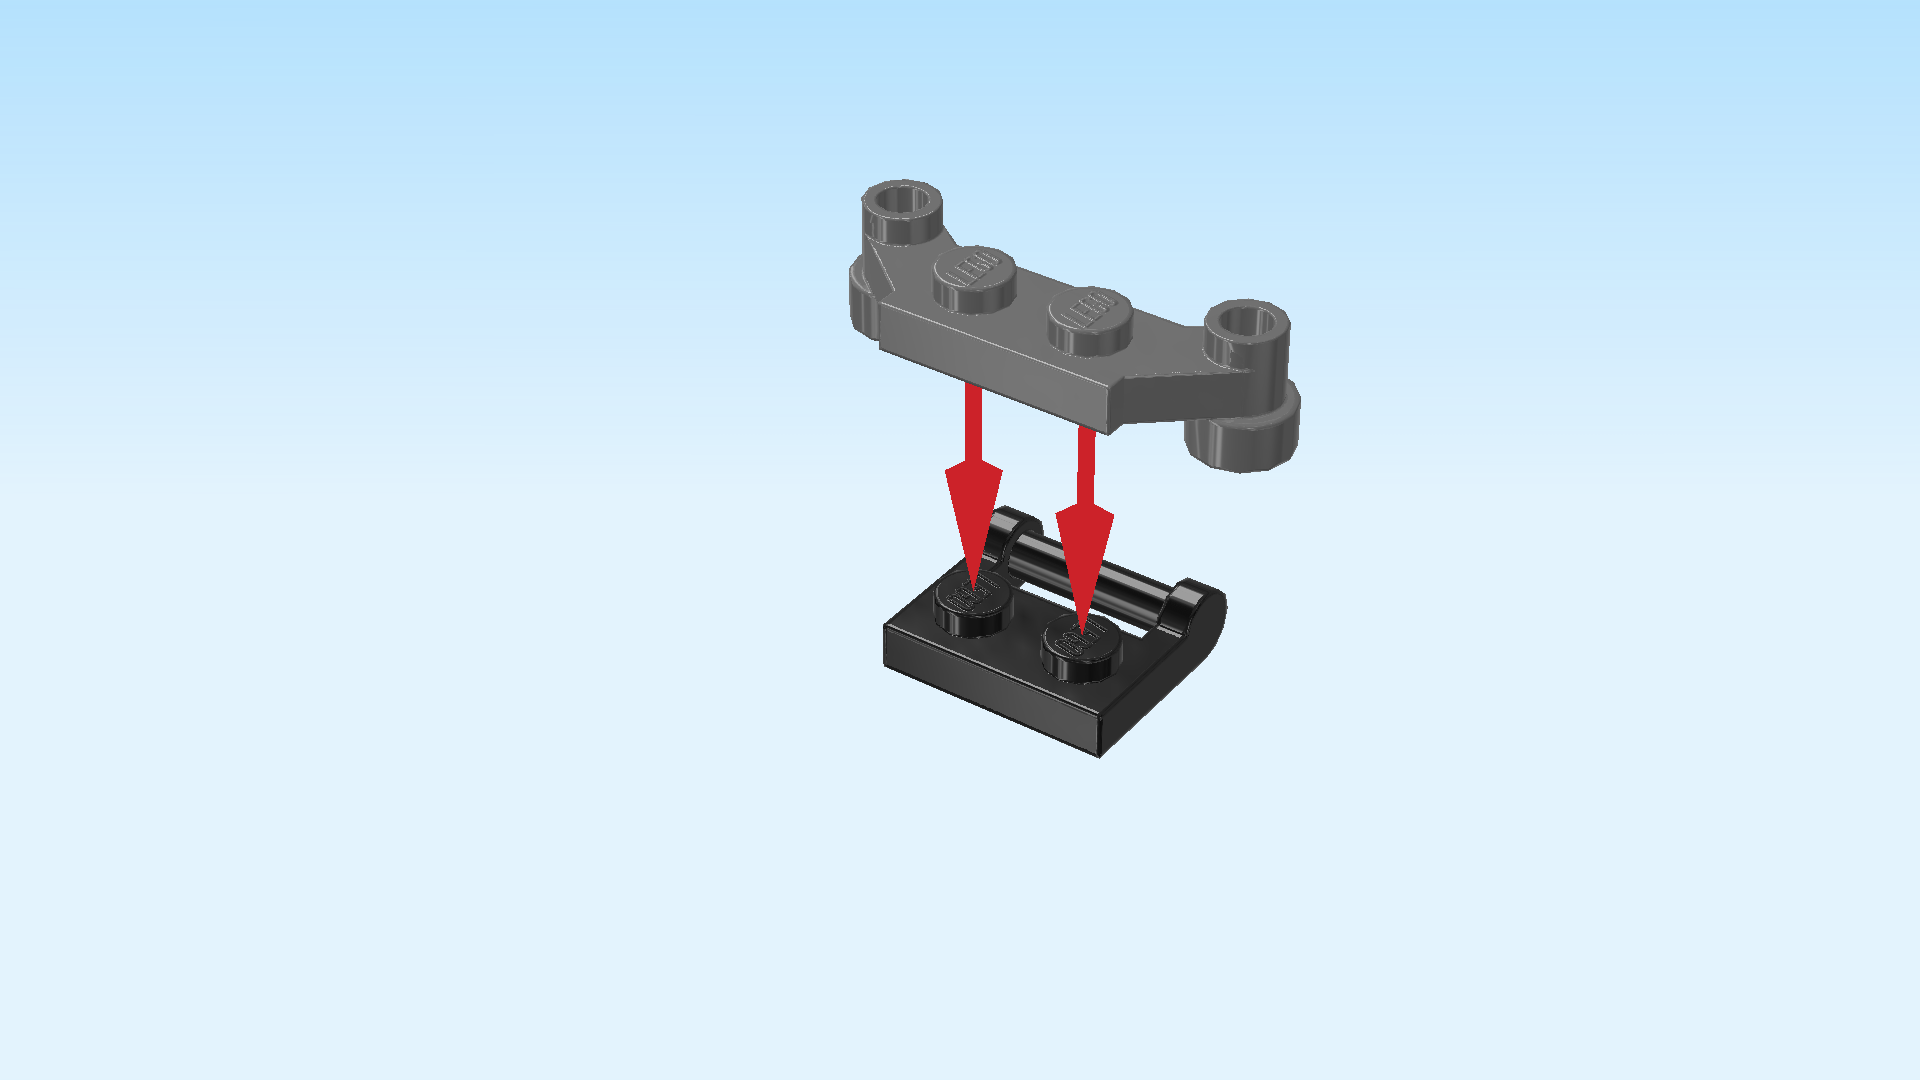
| Find 1 dark stone grey plate 1x2 with 2 vertical clasps on long side. |
| Put it vertically on the left column, clasps to the left. |
| Find 1 black brick 2x2 with ball cup. |
| Put it on top of the 2 previous pieces, ball cup to the right. |
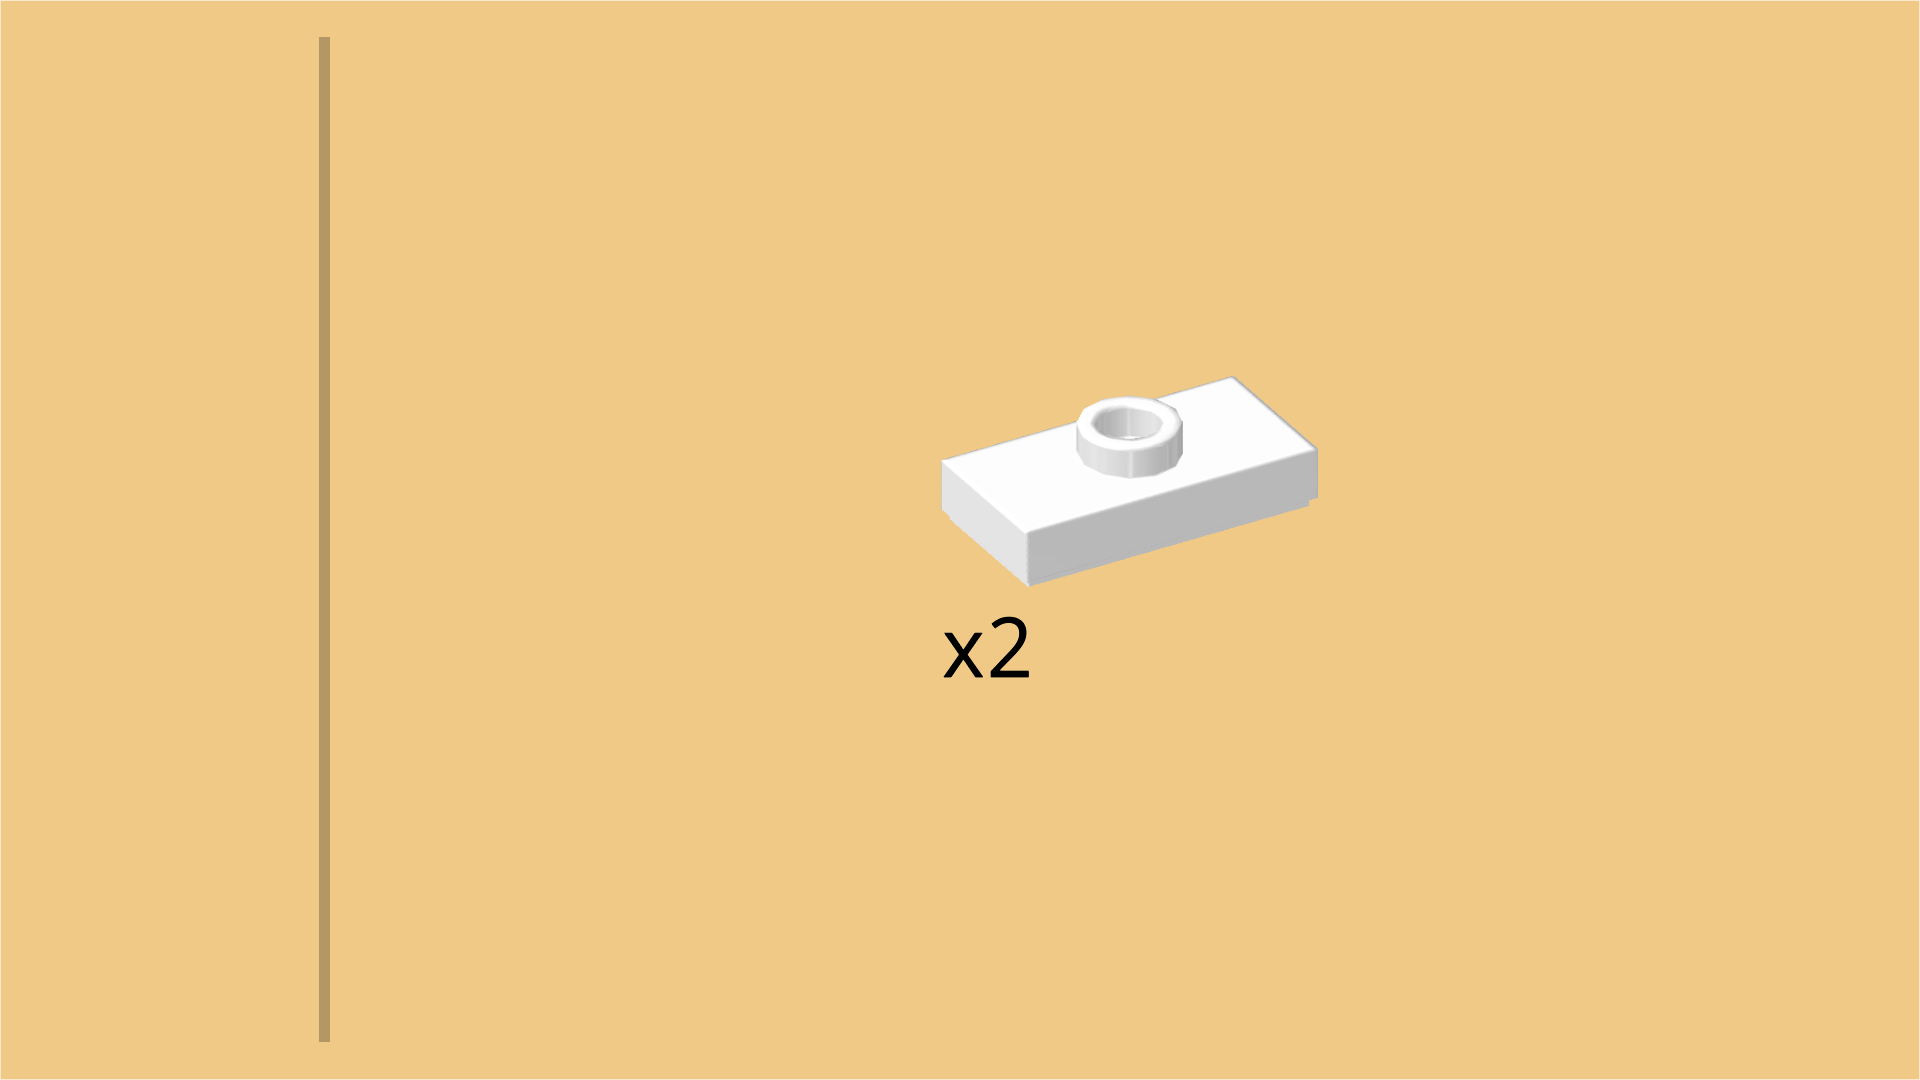
| Find 2 white plates 1x2 with 1 knob. |
| Put 1 vertically on the left column, and the other one vertically on the right column. |
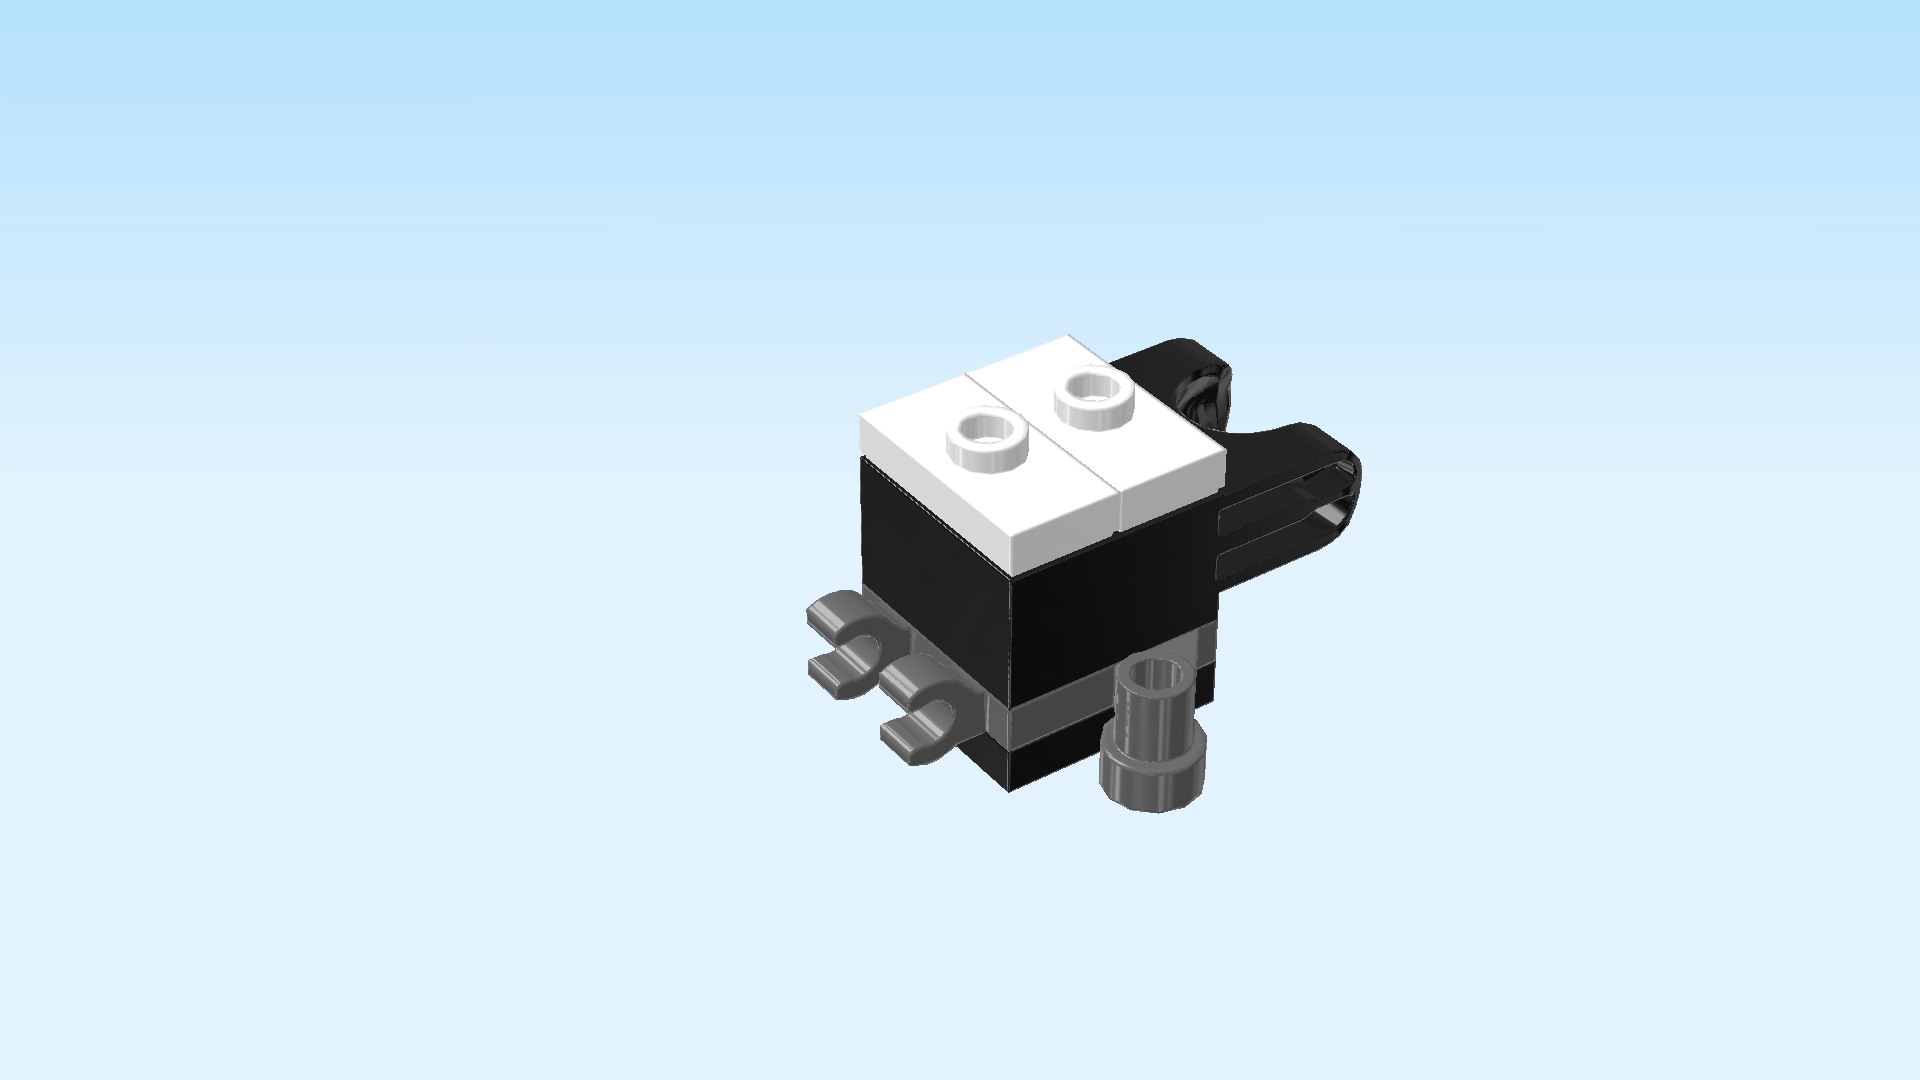
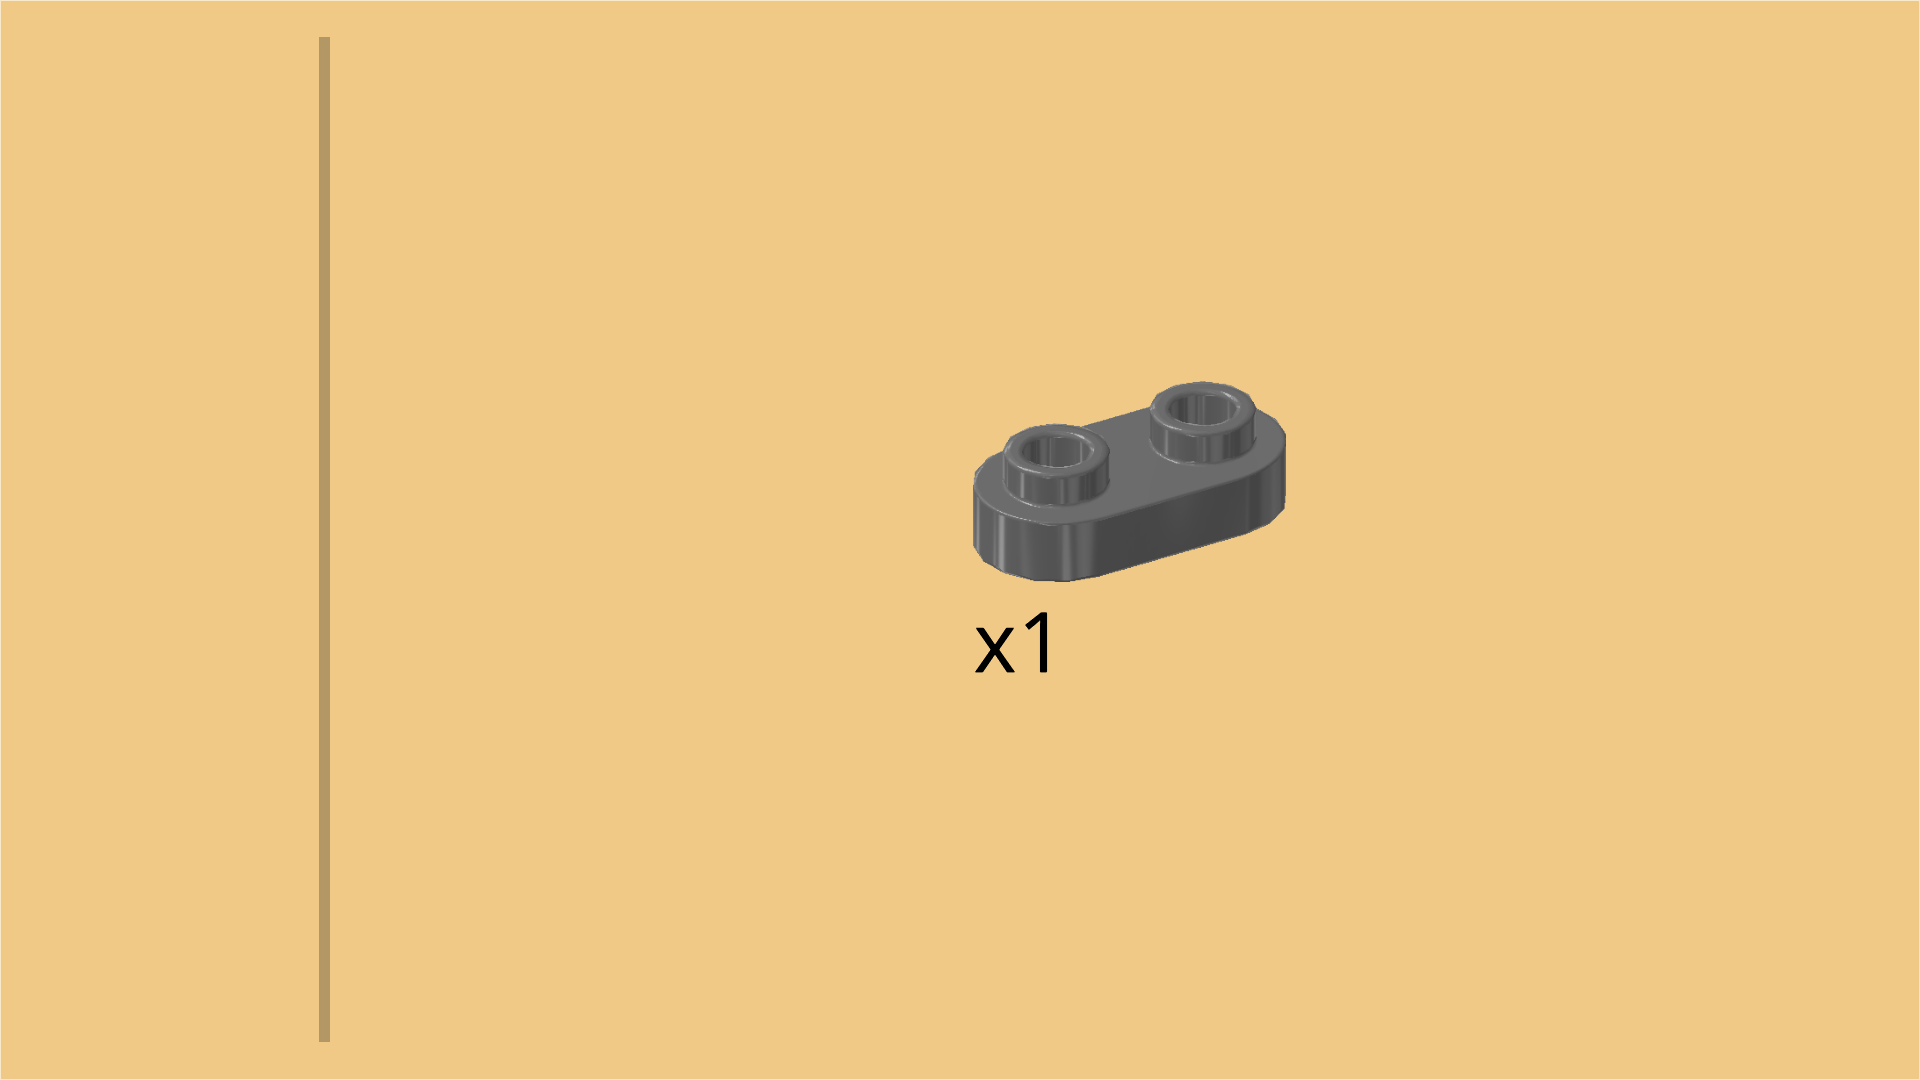
| Find 1 dark stone grey rounded plate 1x2. |
| Put it horizontally on the 2 previous pieces. |
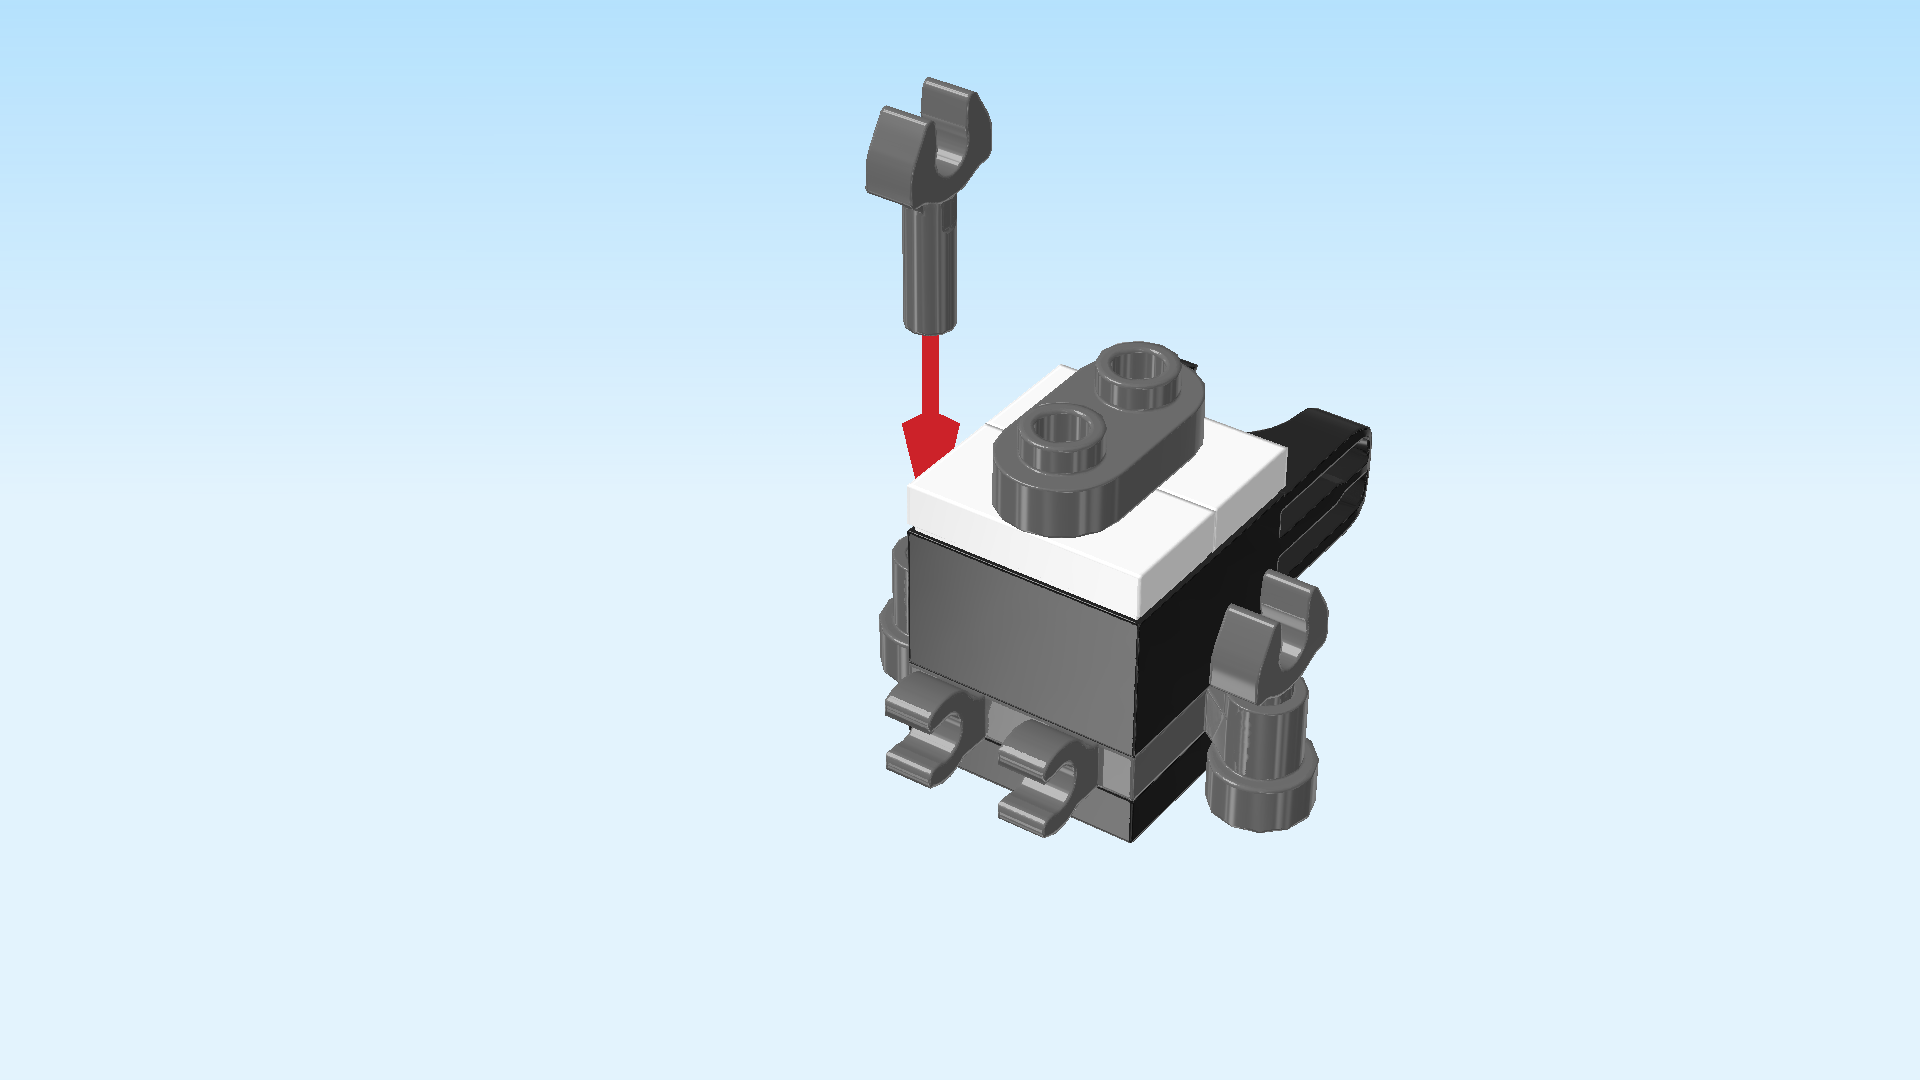
| Find 2 dark stone grey mini wrenches. |
| Insert the handle of one wrench into the front post of the plate 1x2 with 2 posts. Make sure that the tips of the wrench head are to the left and right, not to the front and back. |
| Repeat symmetrically at the back, again tips of the wrench head to the left and right. |
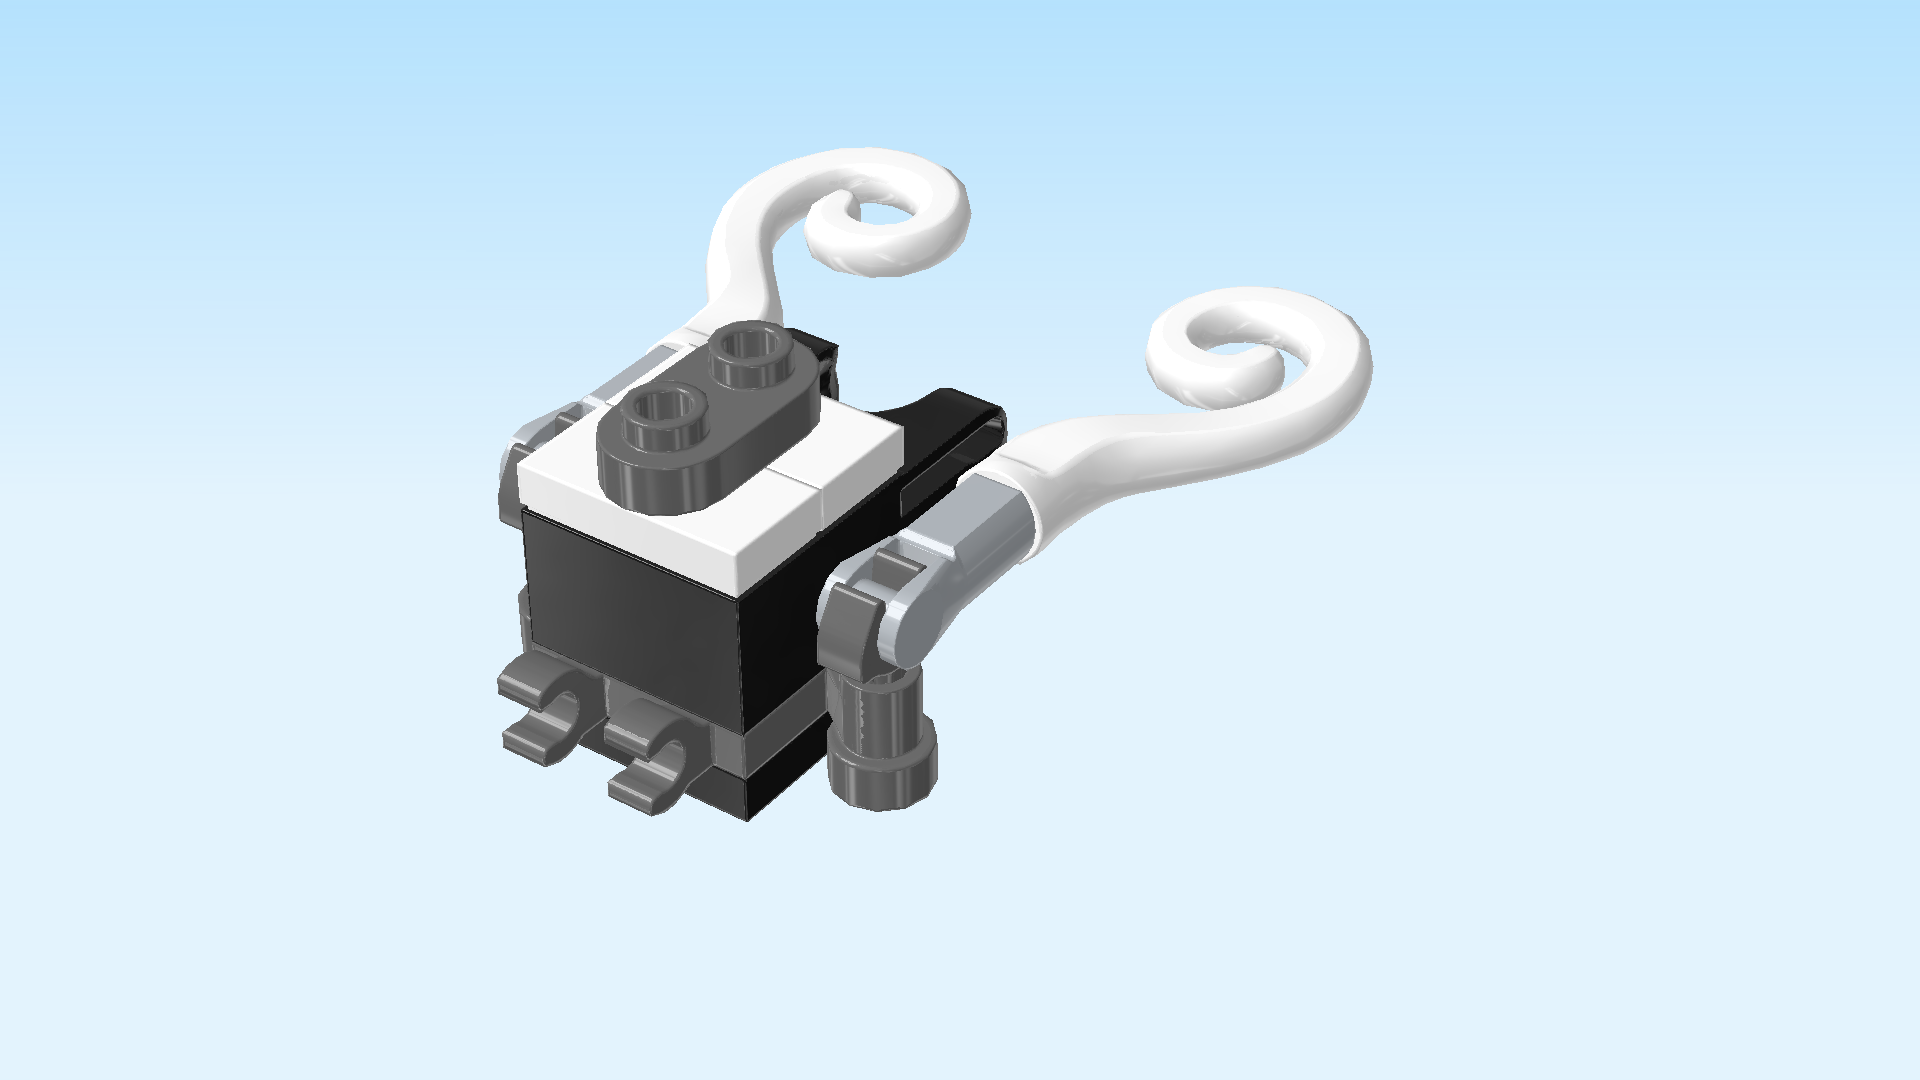
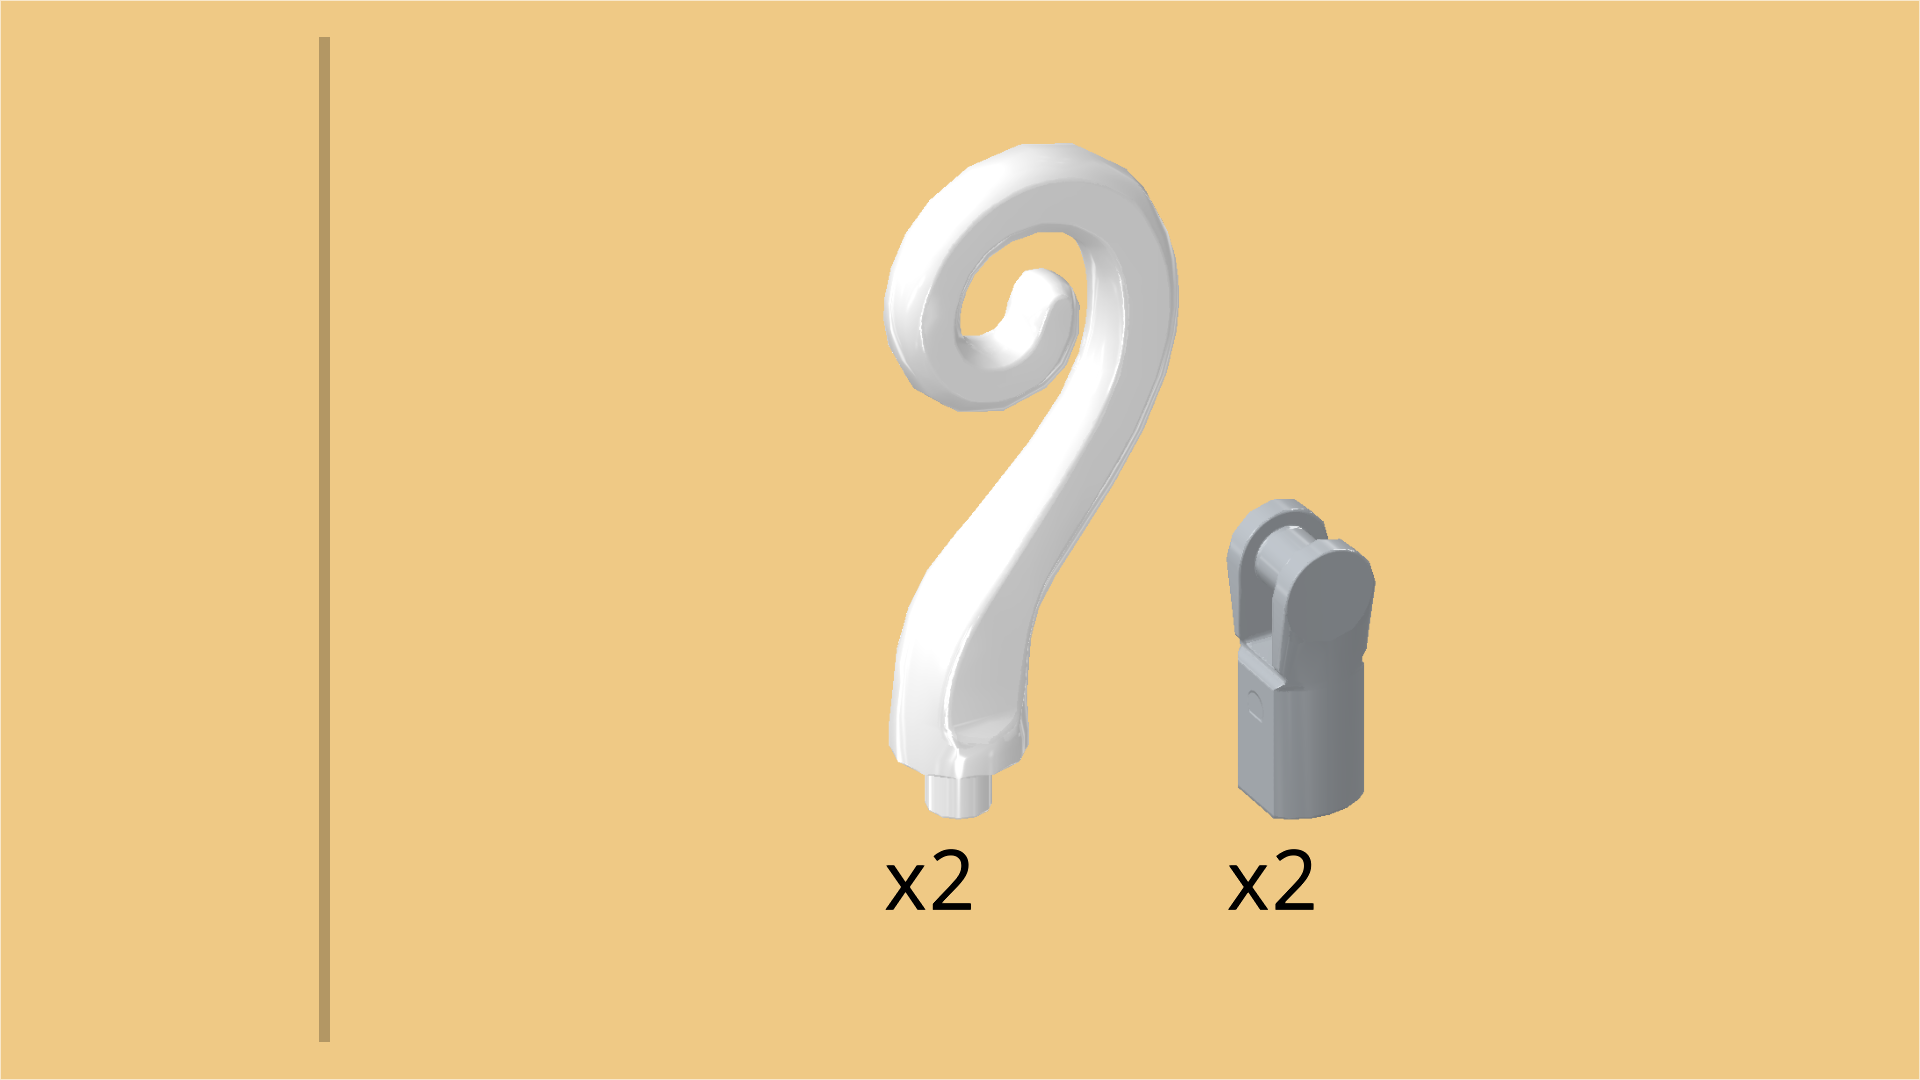
| Next, we will assemble the Grimkeeper's curled horns. |
| Collect the following 4 pieces: |
| 2 medium stone grey small tubes with shaft, |
| and 2 white curled horns with small shaft. |
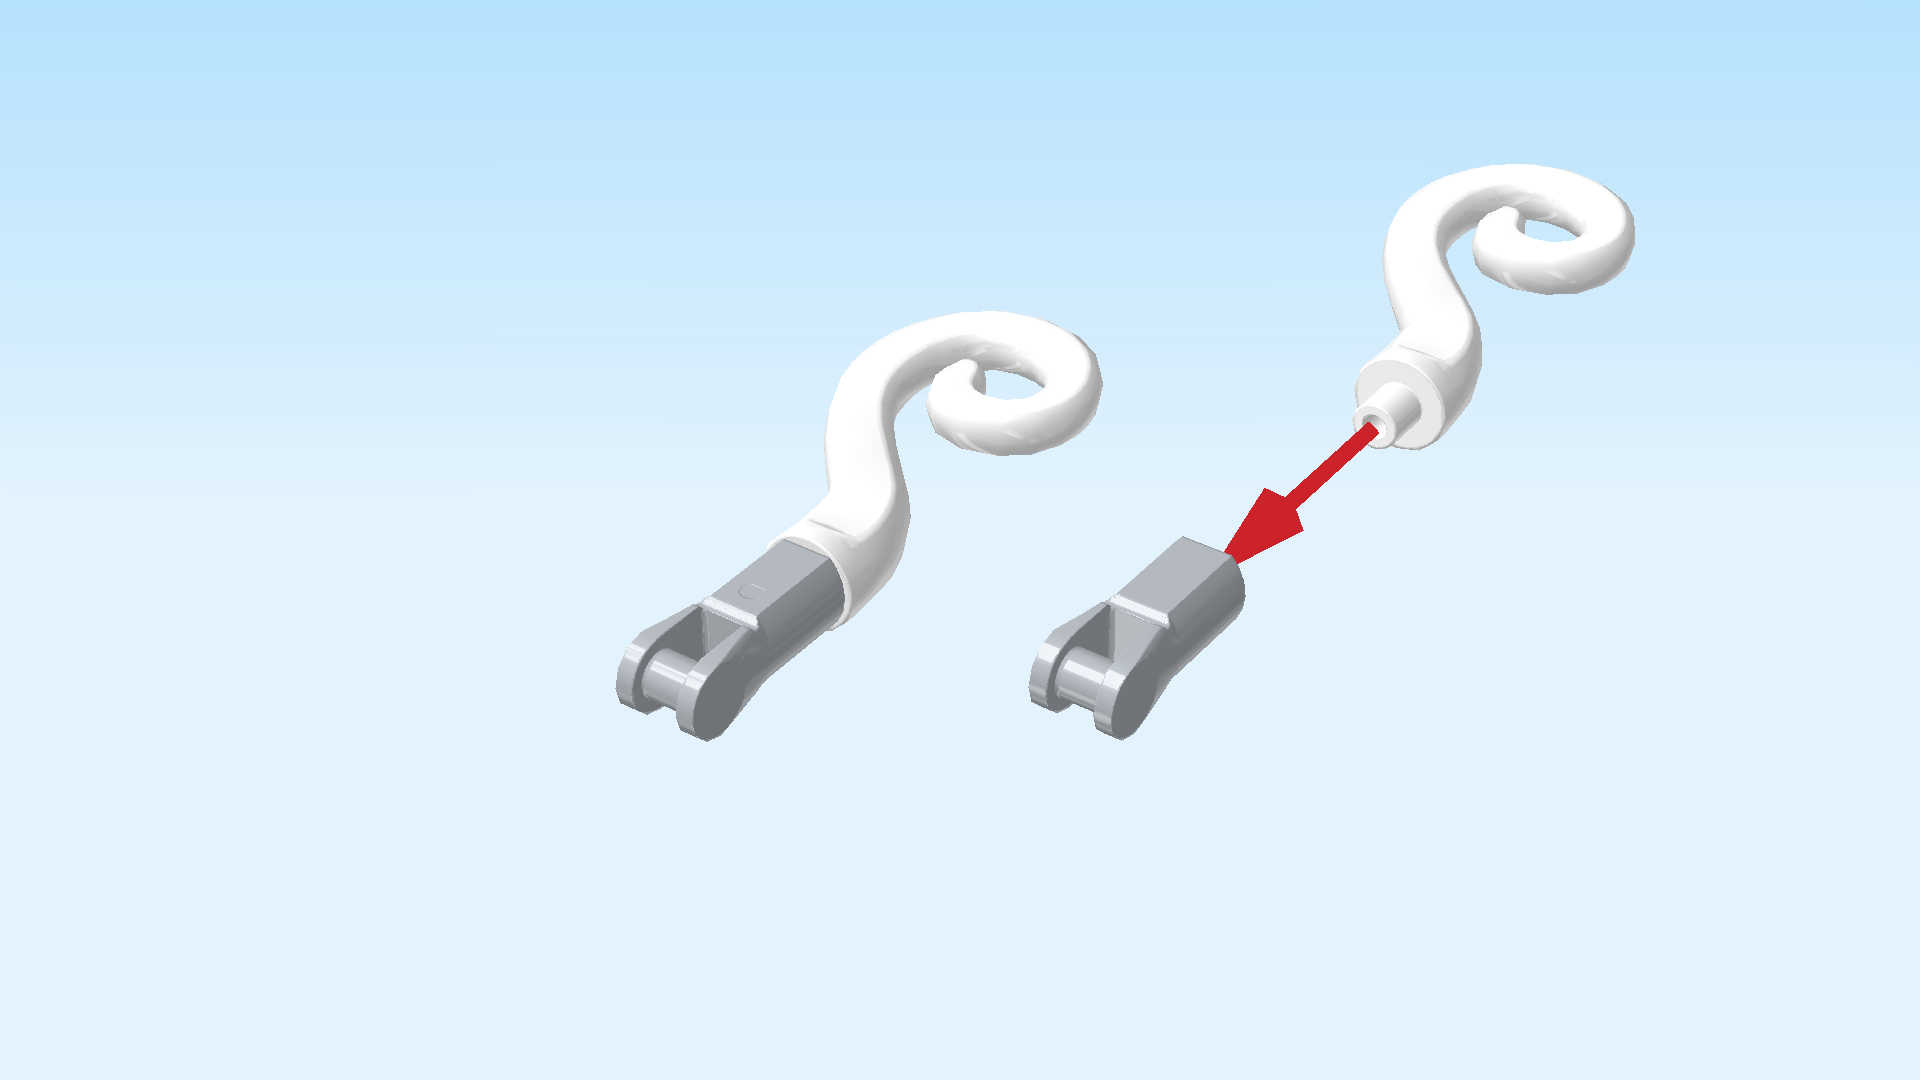
| Hold the small tube horizontally, opening to the right, shaft running from front to back, not top to bottom. |
| Hold the curled horn flat, shaft pointing to the left, large curve to the back and open side towards you. |
| Insert the horn's shaft into the small tube from the right. |
| Put this horn flat on the table for now. |
| Hold the other tube like the first tube: opening to the right, shaft running from front to back. |
| Hold the curled horn flat, shaft pointing to the left, but this time large curve towards you. |
| Insert the horn's shaft into the small tube. |
| Take the horn that has the large curve pointing towards you, and snap its shaft into the wrench head at the front, horn pointing to the right. |
| Take the other horn, large curve to the back, and snap it on the wrench head at the back, horn tip to the right. |
| If done correctly, the 2 horns are mirrored. |
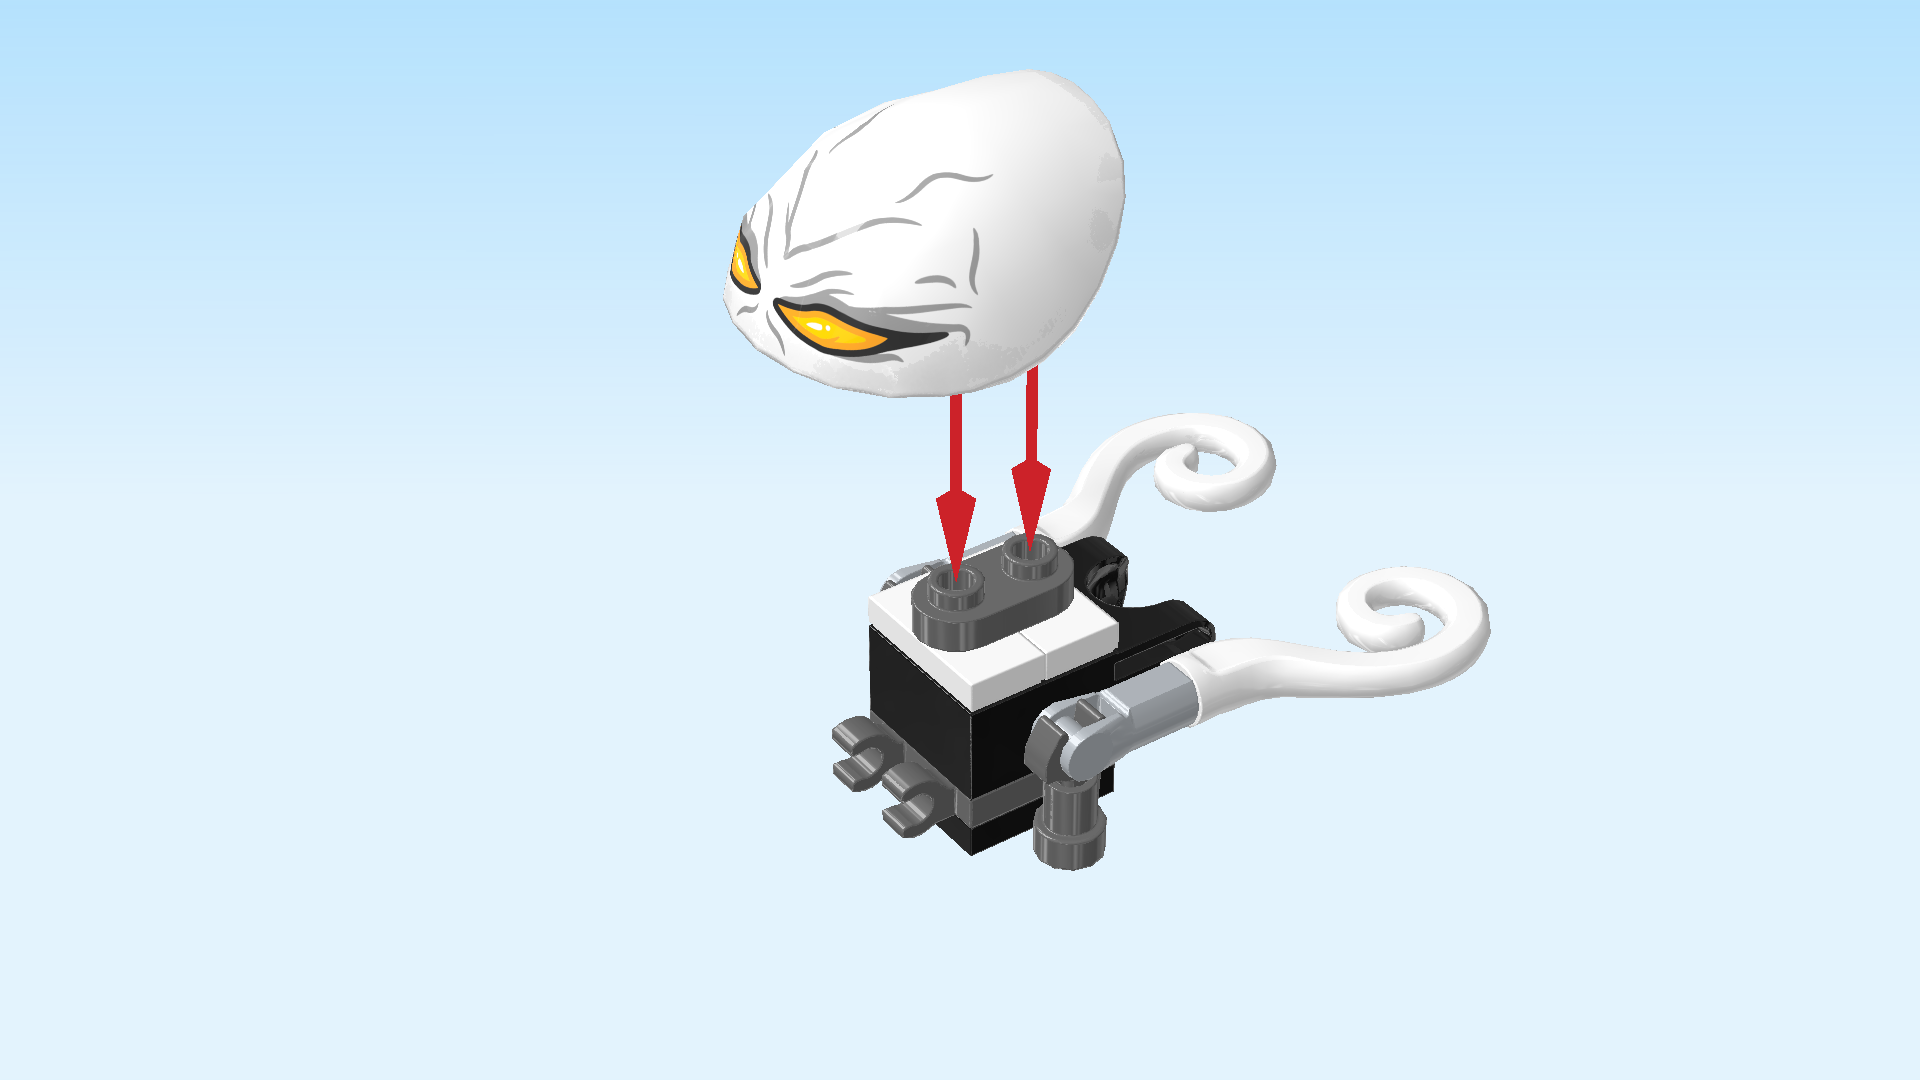
| Find 1 white shell with 2 inner connectors. |
| Turn it so that the print is to the left and the inner connectors are on the right. |
| Insert the 2 inner connectors into the 2 hollow knobs at the top of the head structure. The shell will cover the 2 clasps pointing to the left. |
| This piece is printed with the 2 slit-shaped yellow eyes of the Grimkeeper. They are surrounded by grey wrinkles. His facial expression is hauntingly creepy. |
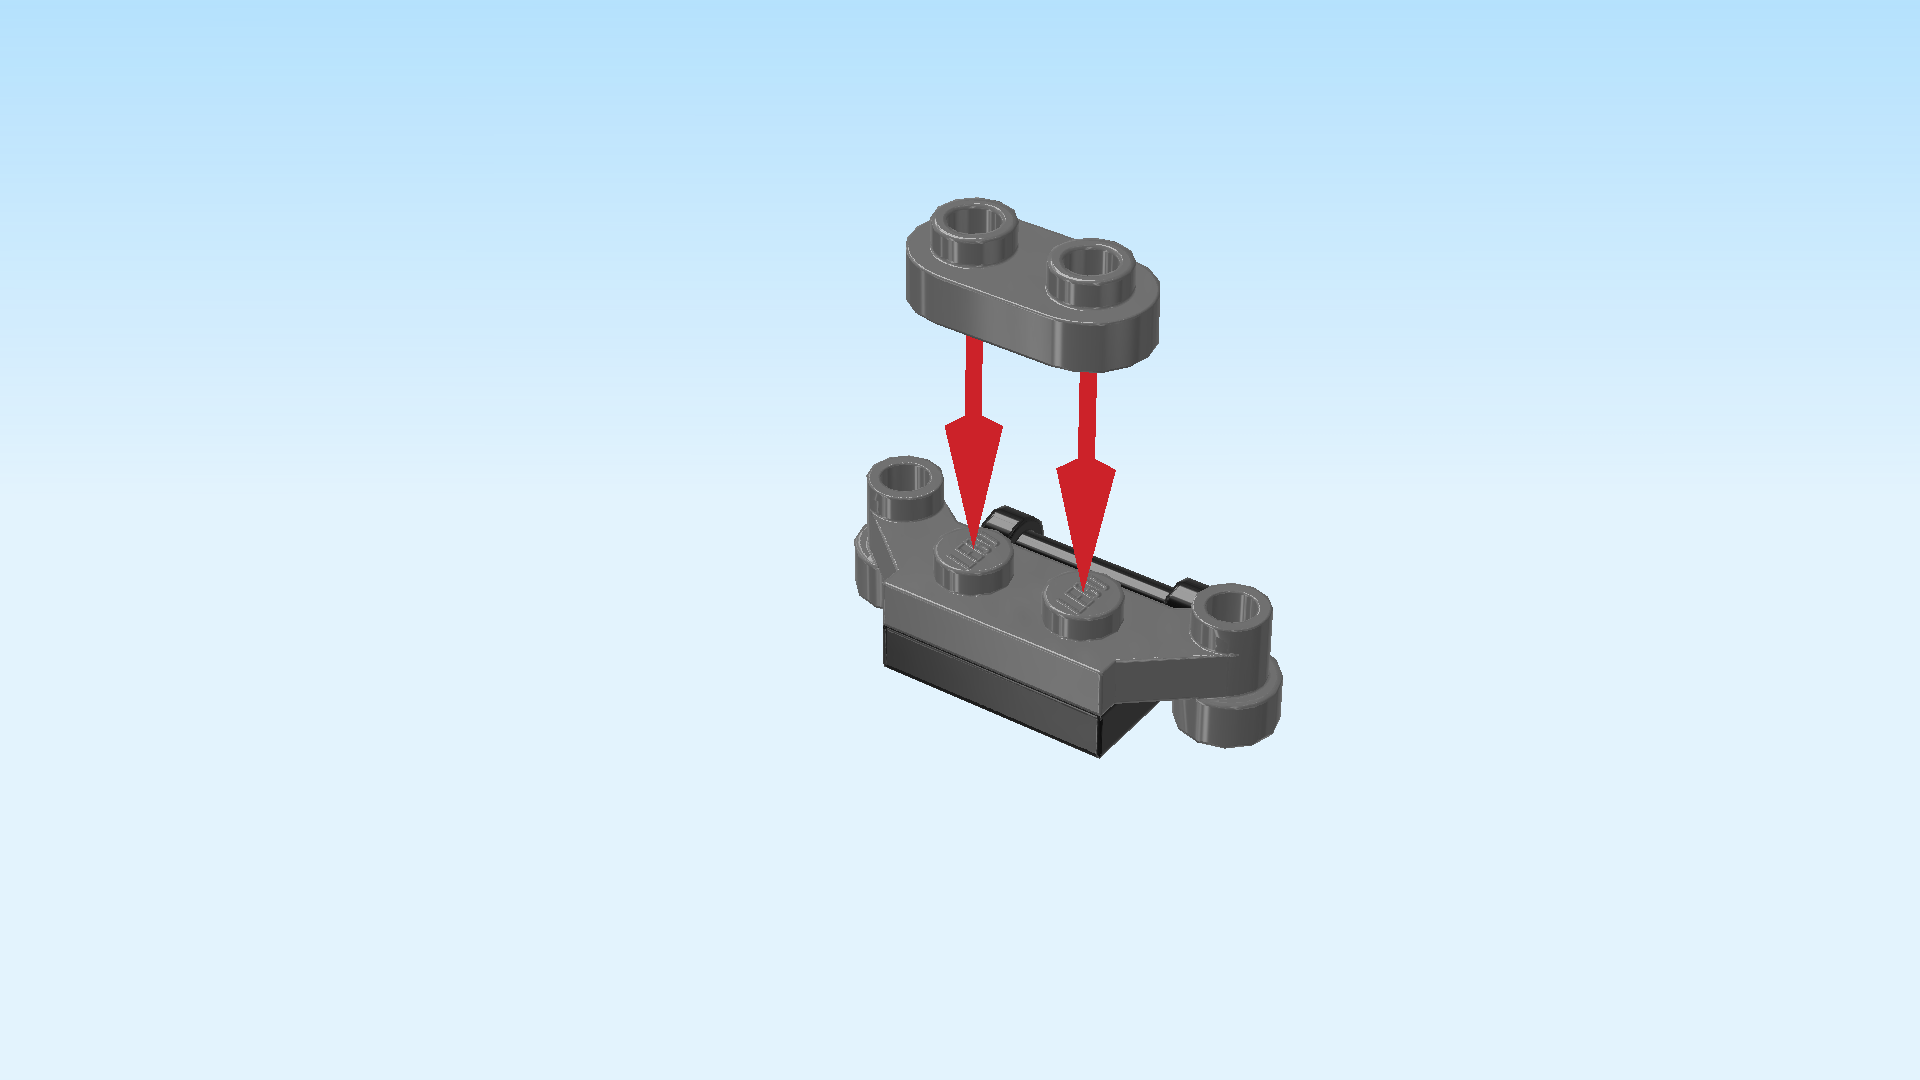
| Next, we will build the Grimkeeper's lower jaw. |
| Collect the following 2 pieces: |
| 1 black plate 1x2 with handle on long side, |
| and 1 dark stone grey plate 1x2 with 2 side posts. |
| Put the plate with handle horizontally on the table, handle to the back. |
| Put the plate with side posts horizontally on top, long side and posts to the back. |
| Find 1 dark stone grey rounded plate 1x2. |
| Put it horizontally on top. |
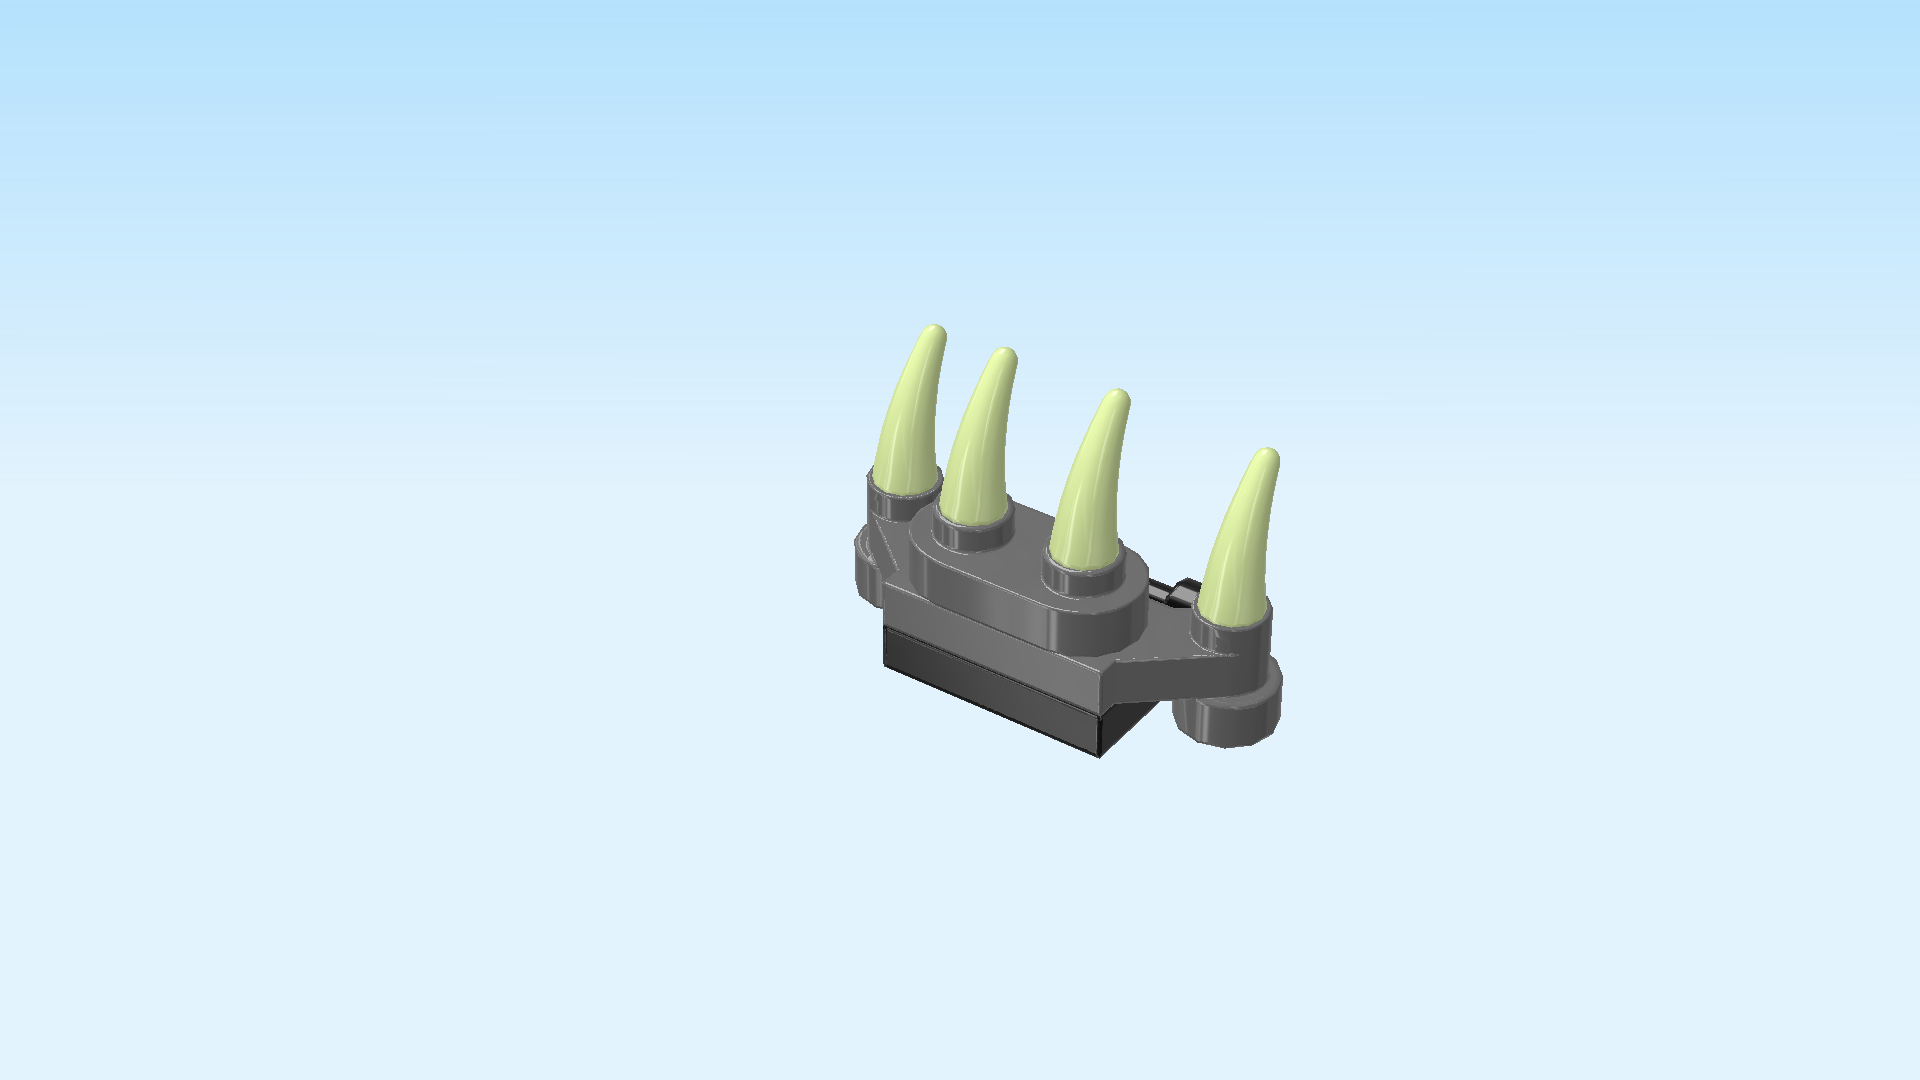
| Find 4 pale lime green horns with shaft. |
| Insert them into the 4 hollow knobs of this build. Make sure the horns are slightly bending towards the back. |
| The Grimkeeper's lower jaw is finished! To mount it, tilt it slightly to the left, and snap the shaft into the clasps below the Grimkeeper's head shell. The 4 horns are the nasty teeth of the Grimkeeper. |
| The Grimkeeper's head is finished! Great job! To mount it, snap its ball cup on the ball between the shoulder shells of the body. You can tilt the head up or down as you please. |
| If done correctly, the horns will be pointing towards the neck spikes. |
| It is now time to put your Grimkeeper to a test: flip it upright, adjust feet and legs, arms and head as needed, and see if it can stand! What an impressive creature! |
| Next, we will build the lantern nightmare creature. |
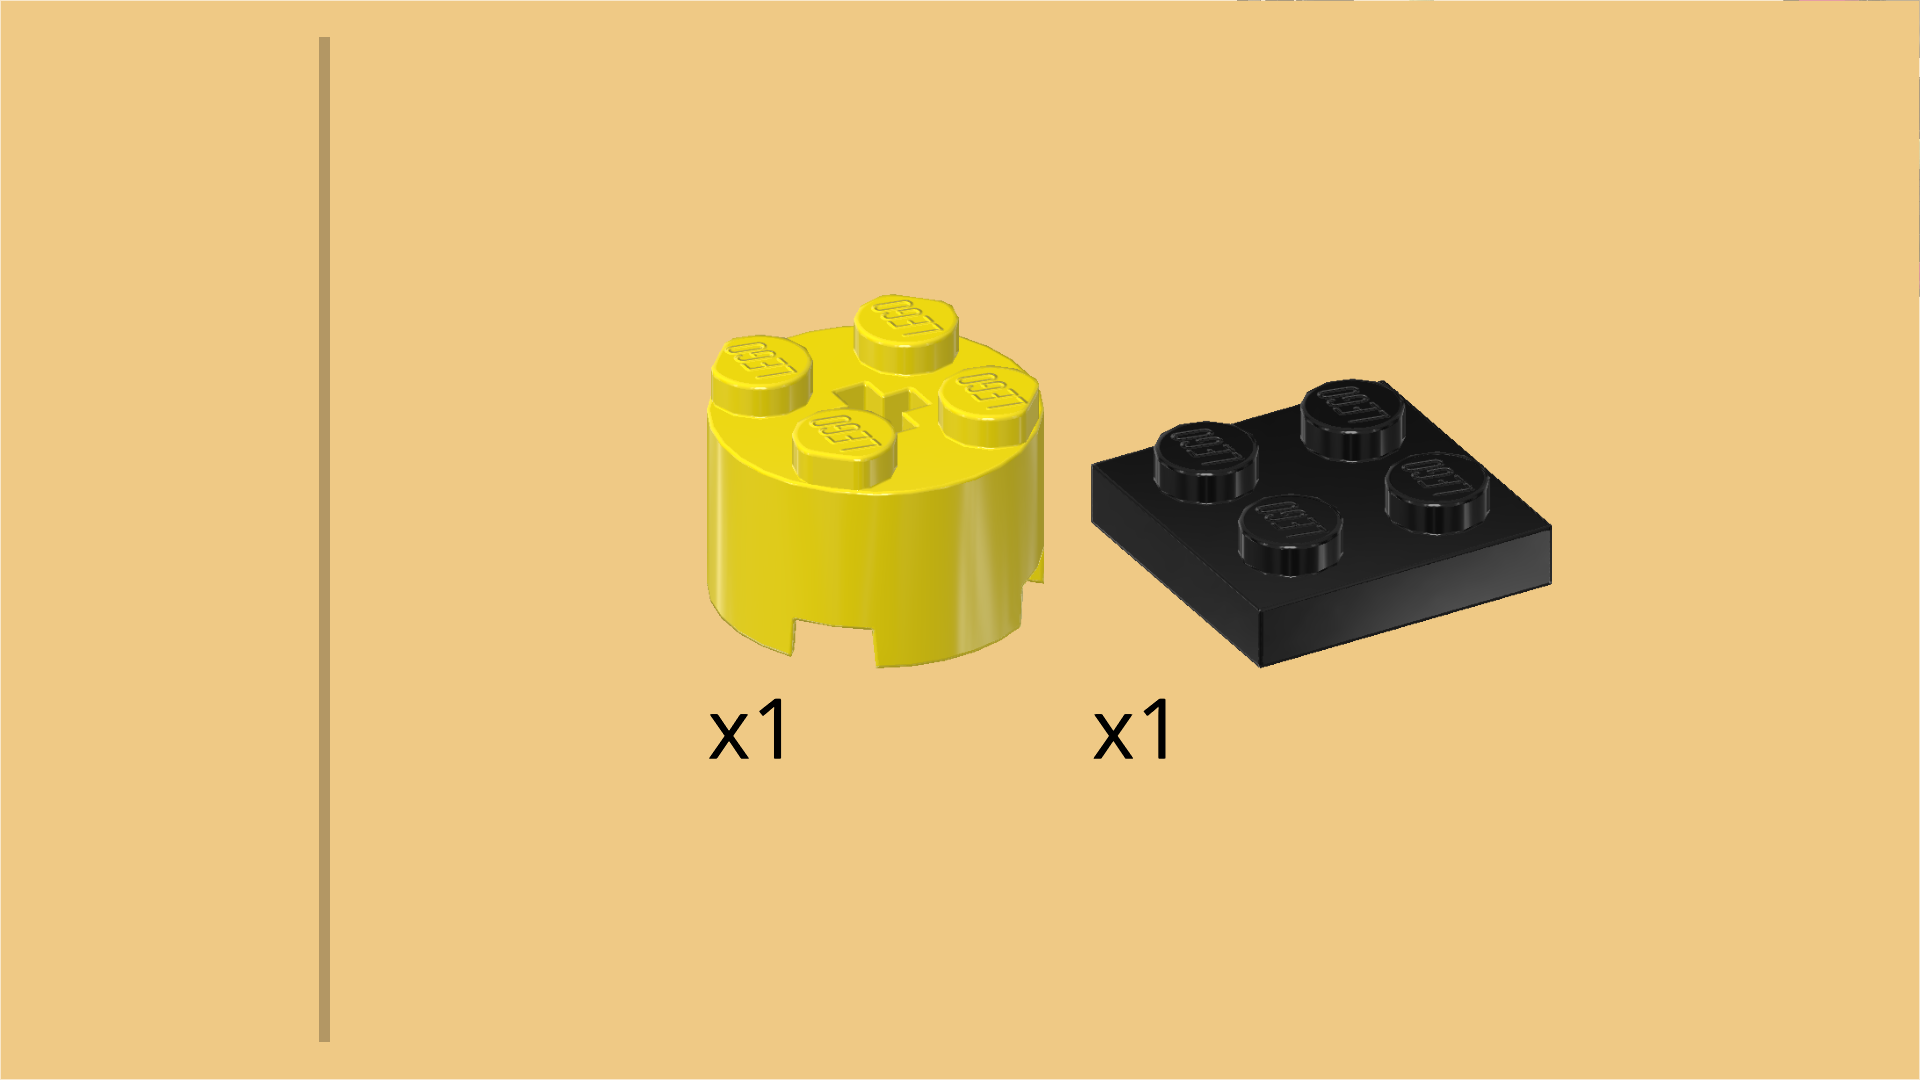
| Collect the following 2 pieces: |
| 1 black plate 2x2, |
| and 1 bright yellow round brick 2x2 with top cross hole. |
| Put the plate 2x2 on the table. |
| Put the round brick 2x2 on top. |
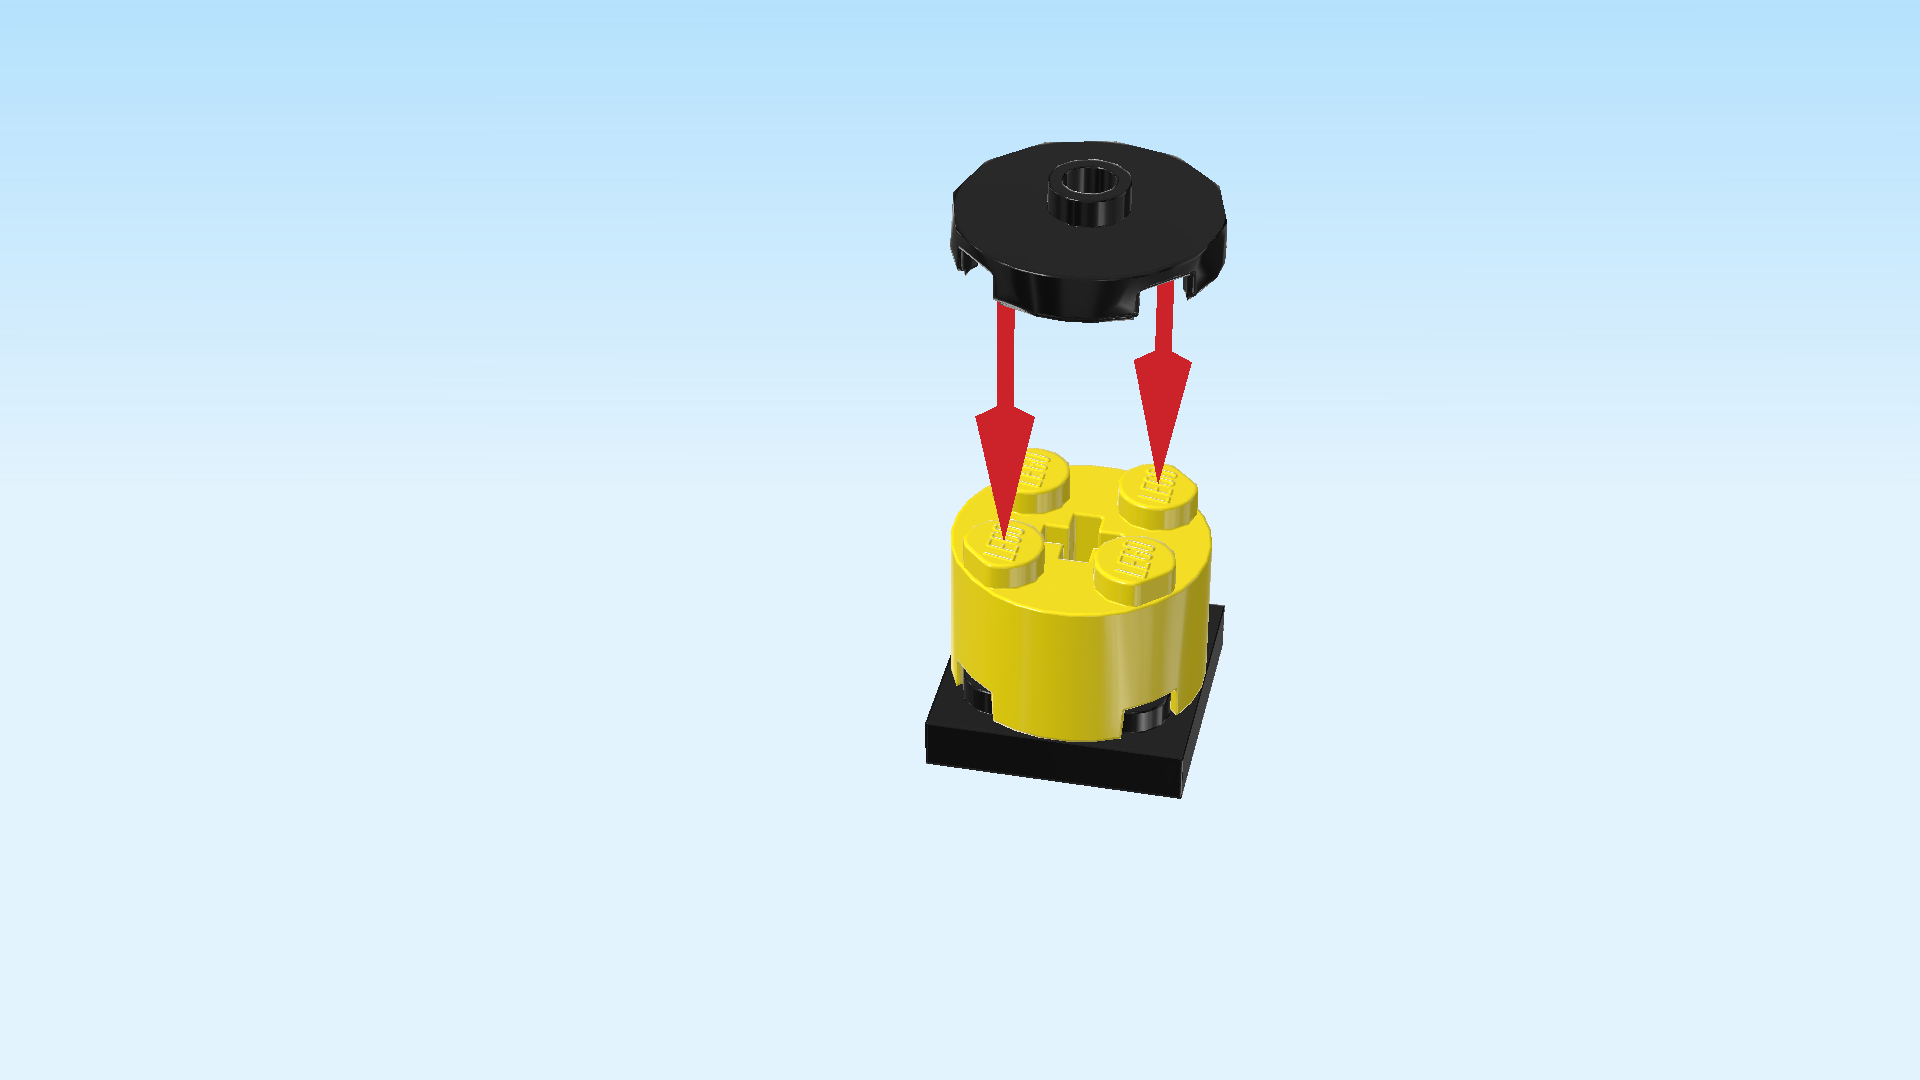
| Find 1 black round plate 2x2 with 1 knob. |
| Put it on top of the previous piece. |
| Next, we will make a small sub-part of the lantern. |
| Collect the following 2 pieces: |
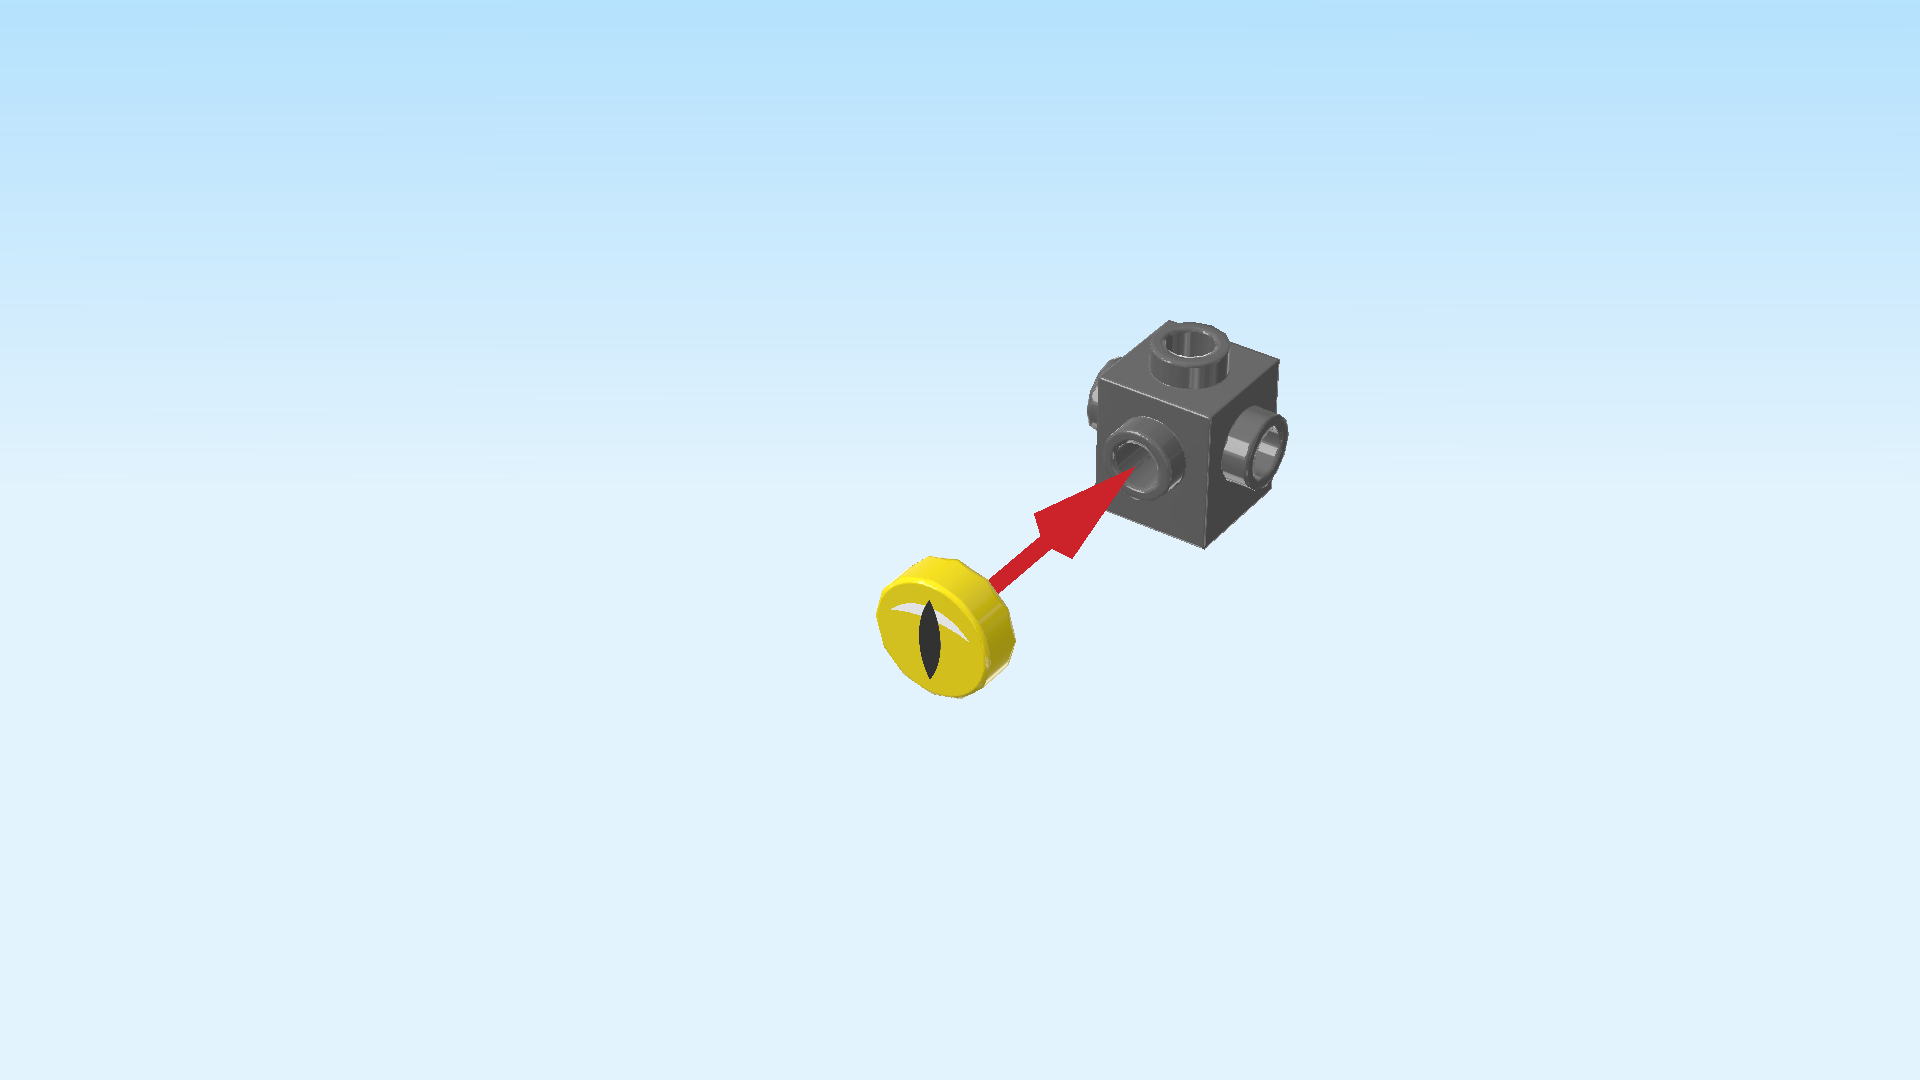
| 1 dark stone grey brick 1x1 with 4 side knobs, |
| and 1 bright yellow round tile 1x1. |
| Put the brick 1x1 on the table. |
| Put the round tile upright on the side knob pointing to the front. It is printed with a vertical slit pupil in black. This is the nightmare lantern creature's - eye! |
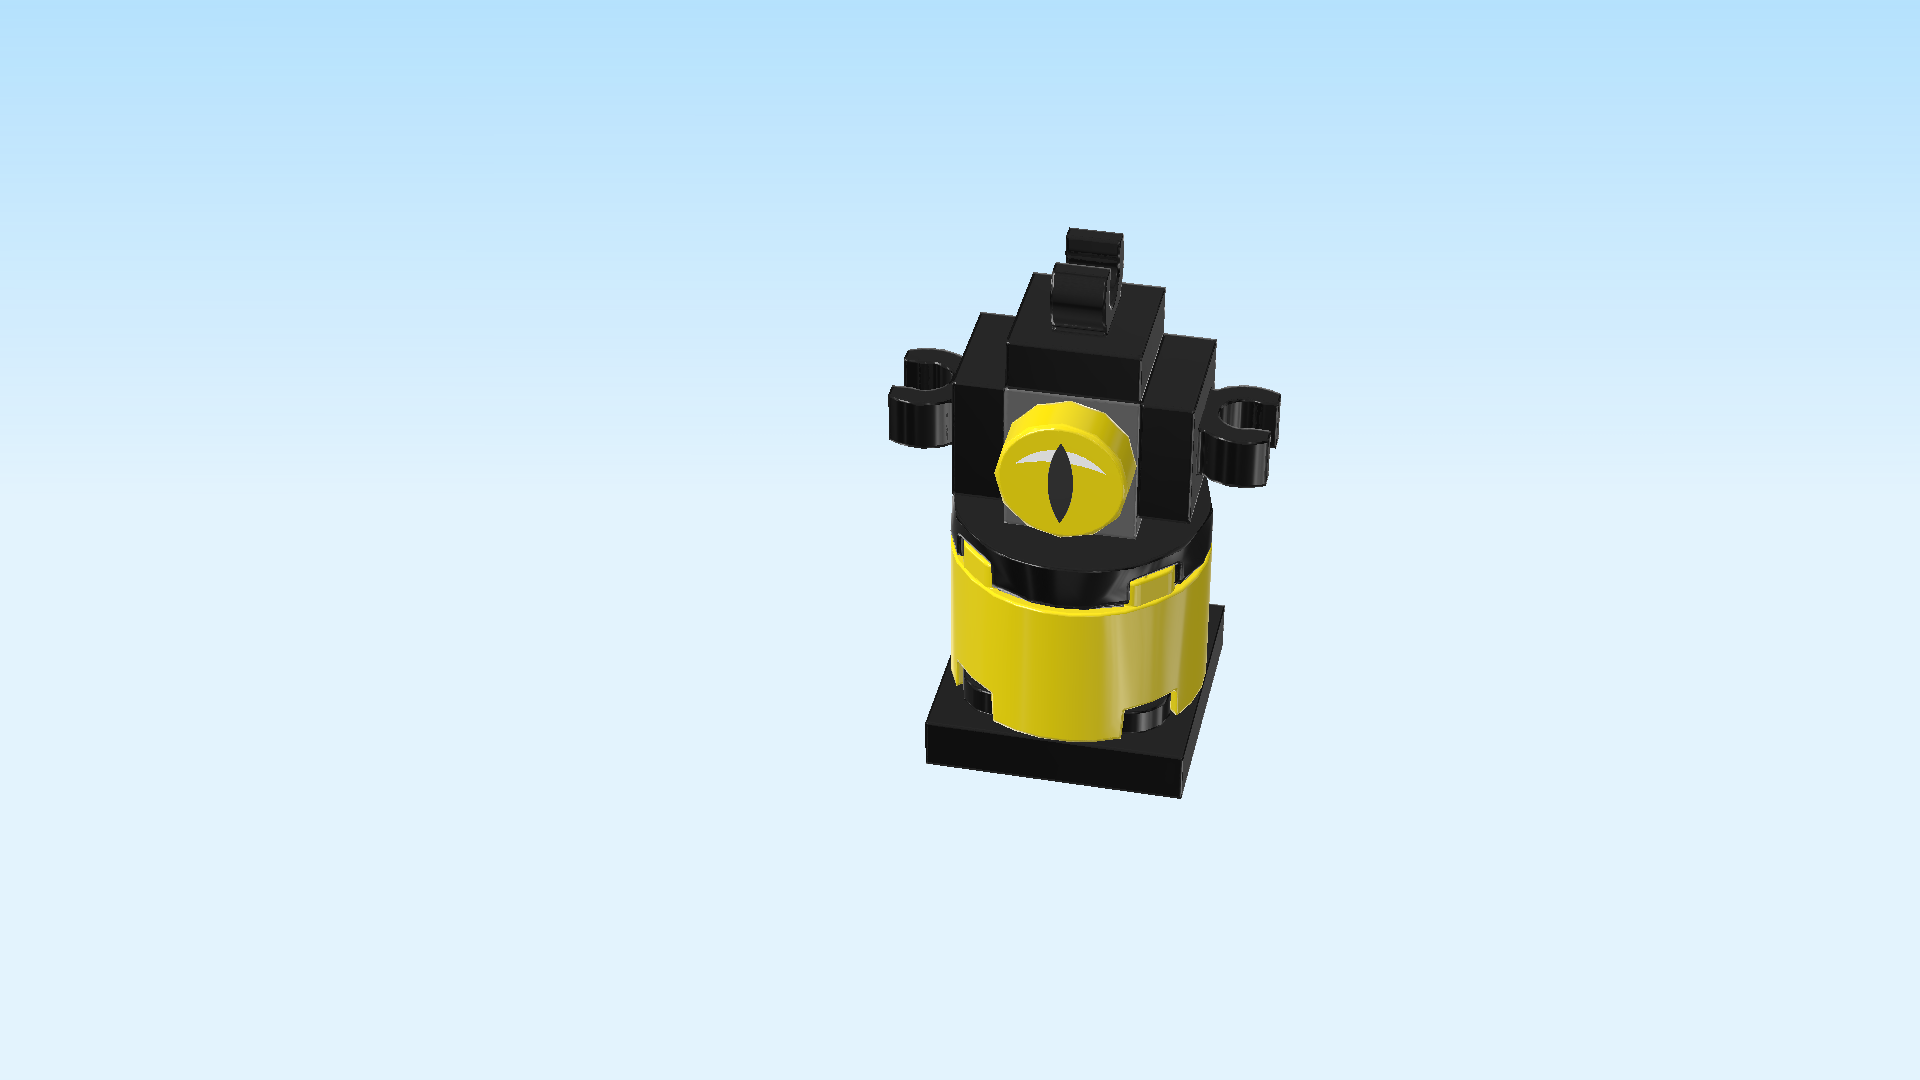
| Find 3 black plates 1x1 with top clasp. |
| Put 1 upright on the side knob pointing to the left, tips of the clasp to the front and back. |
| Put 1 upright on the side knob pointing to the right, tips of the clasp again to the front and back. |
| Put the last one on the top knob, tips of the clasp to the front and back. |
| Mount this small sub-part on top of the creature build, round tile with eye print to the front. |
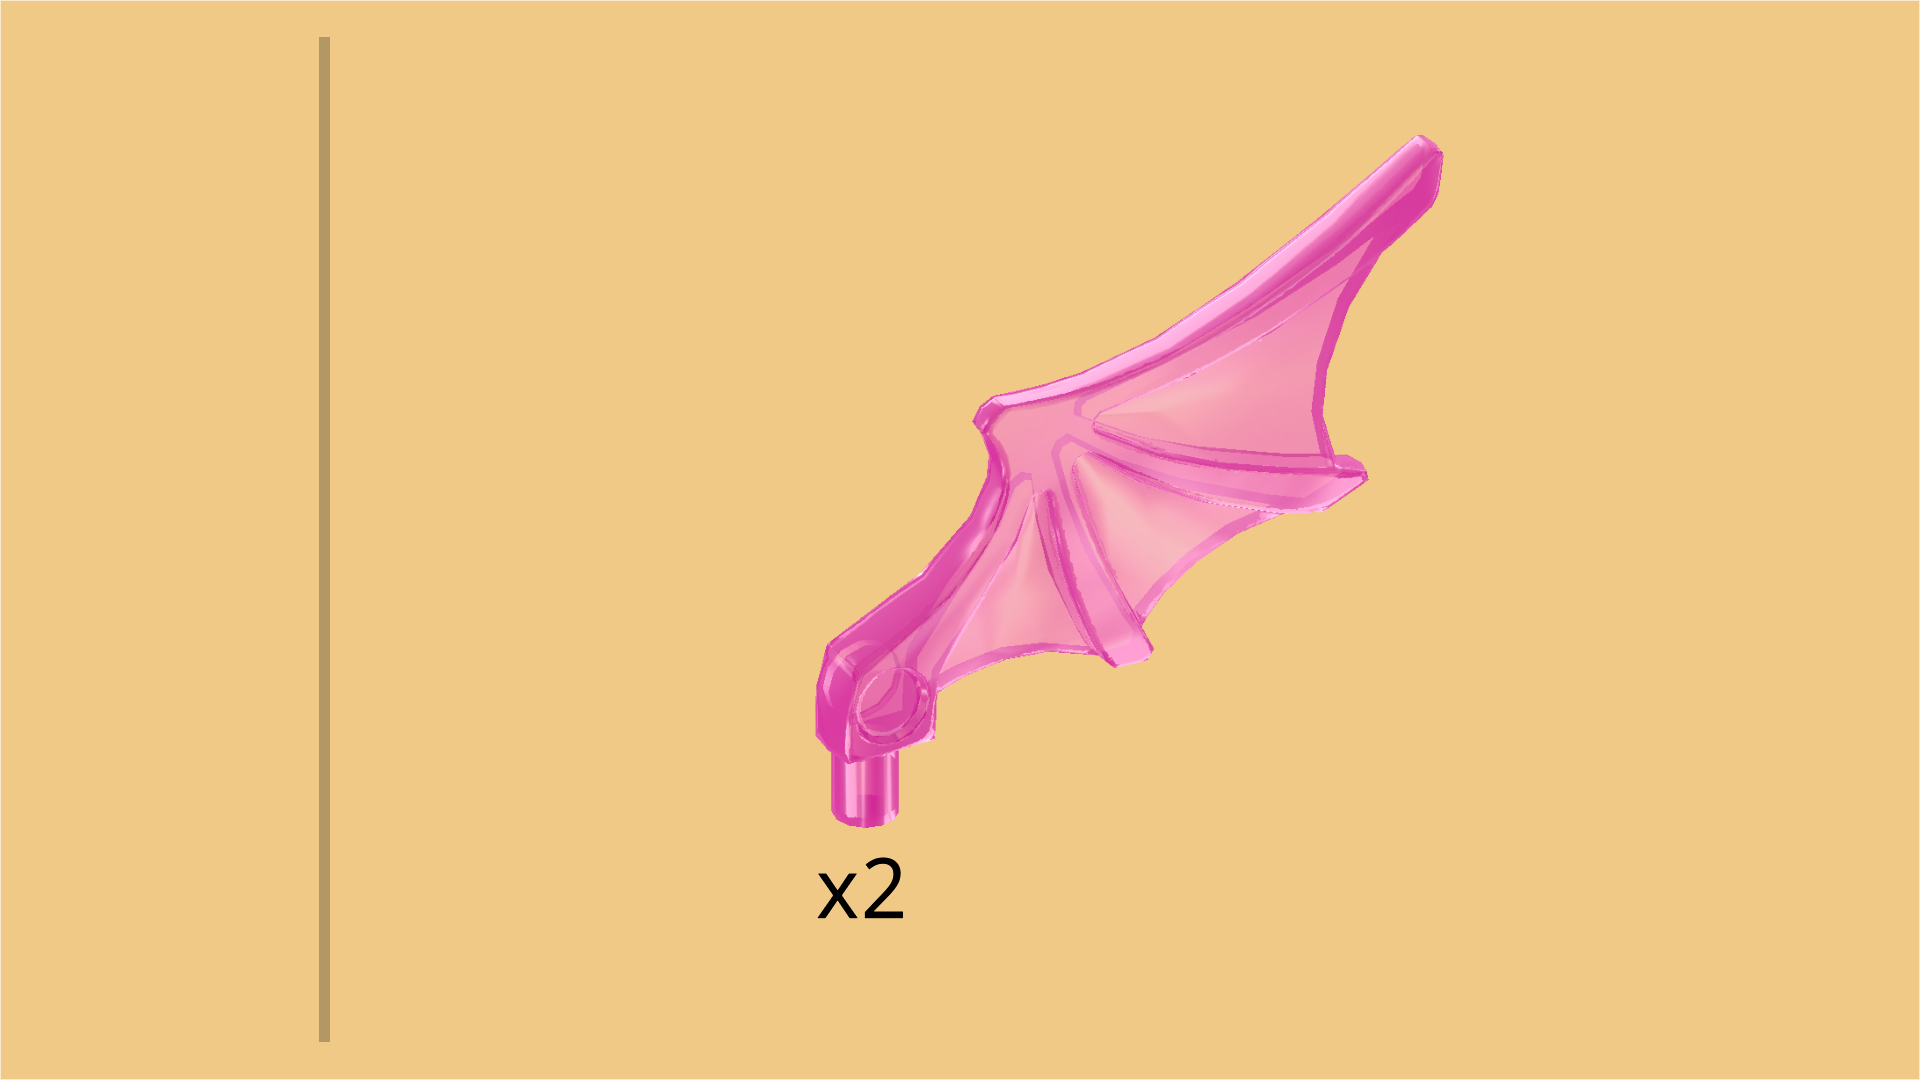
| Find 2 transparent raspberry red animal wings with shaft. |
| Snap the shaft of one wing from the top into the clasp pointing to the right, wing extending to the right. |
| Repeat symmetrically on the left, wing extending to the left. |
| Find 1 black rectangular bar 3x6 with 4 knobs. |
| Hold it upright vertically, knobs pointing towards you. Snap its short side at the bottom centered into the top clasp of the creature. |
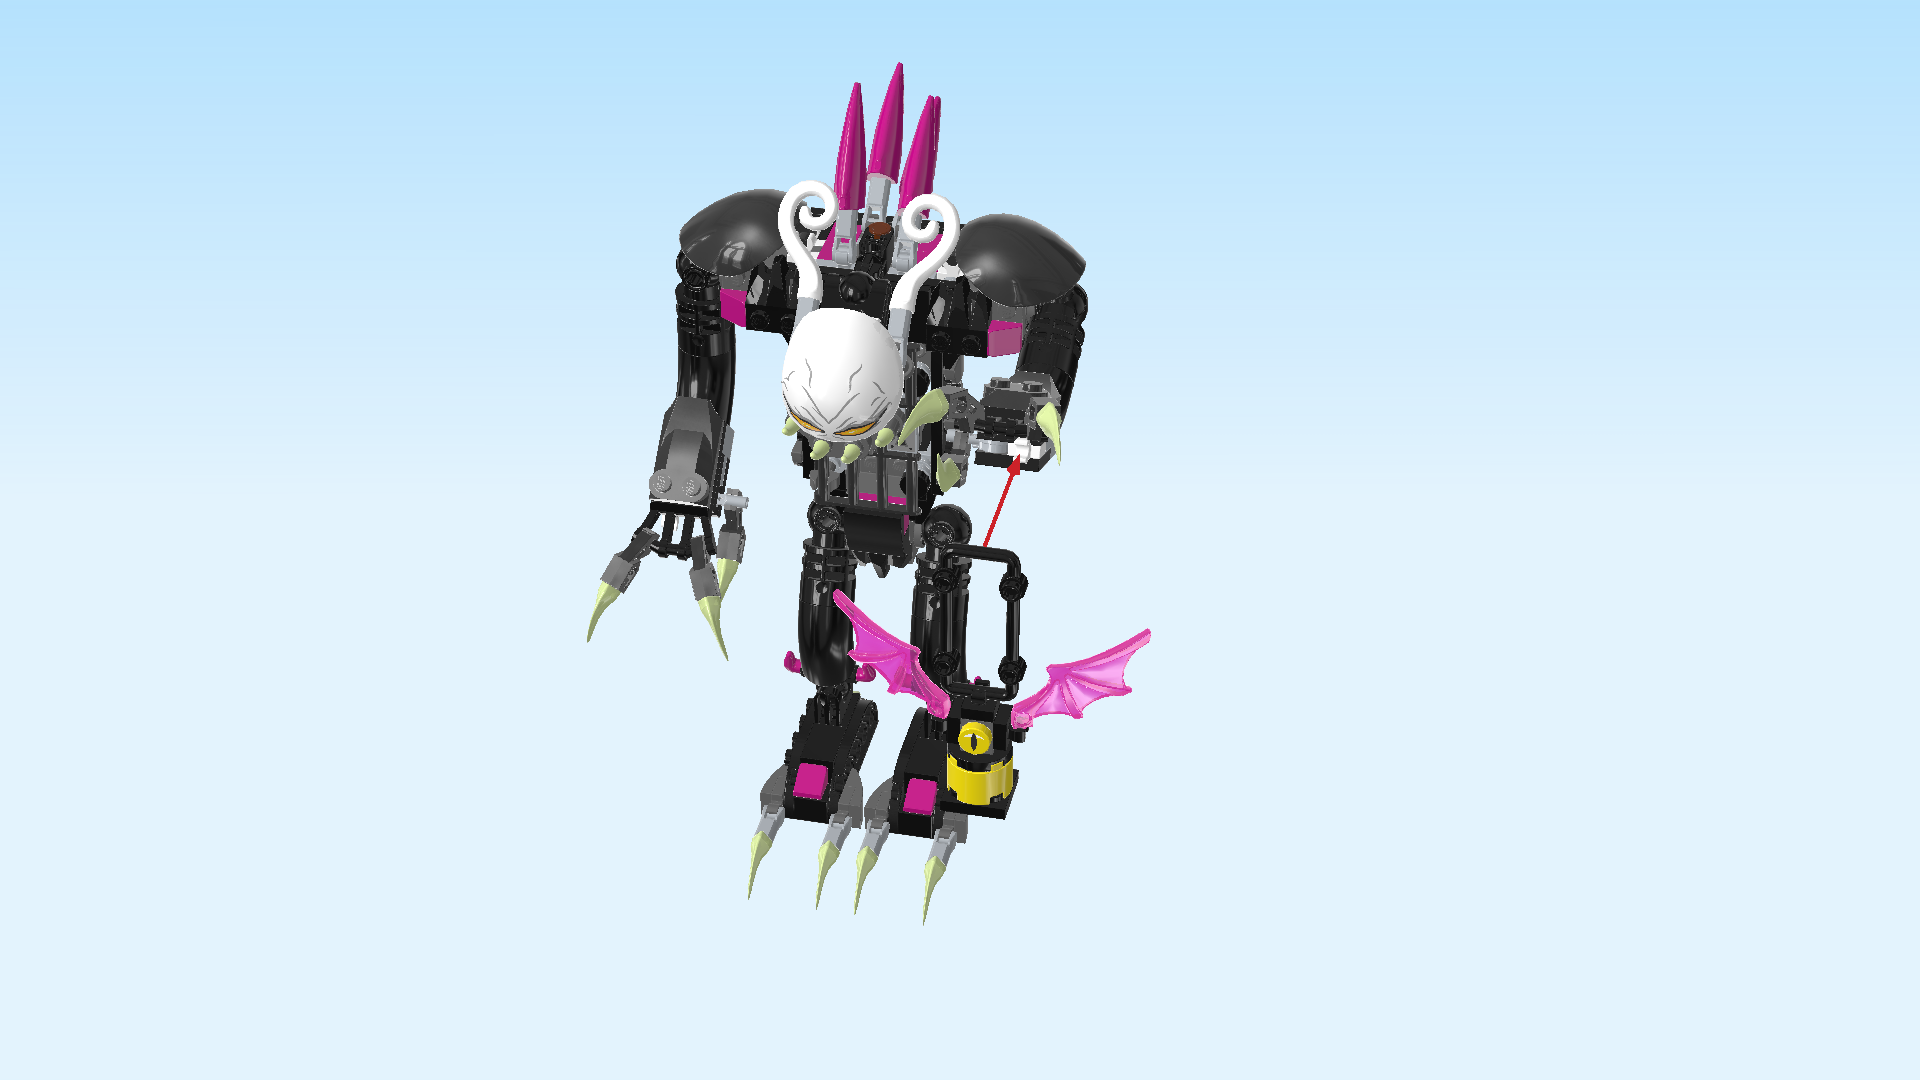
| The lantern nightmare creature is finished! Well done! Snap its short side at the top into the clasp in the Grimkeeper's right hand. You might need to adjust his claws to get the lantern handle in. |
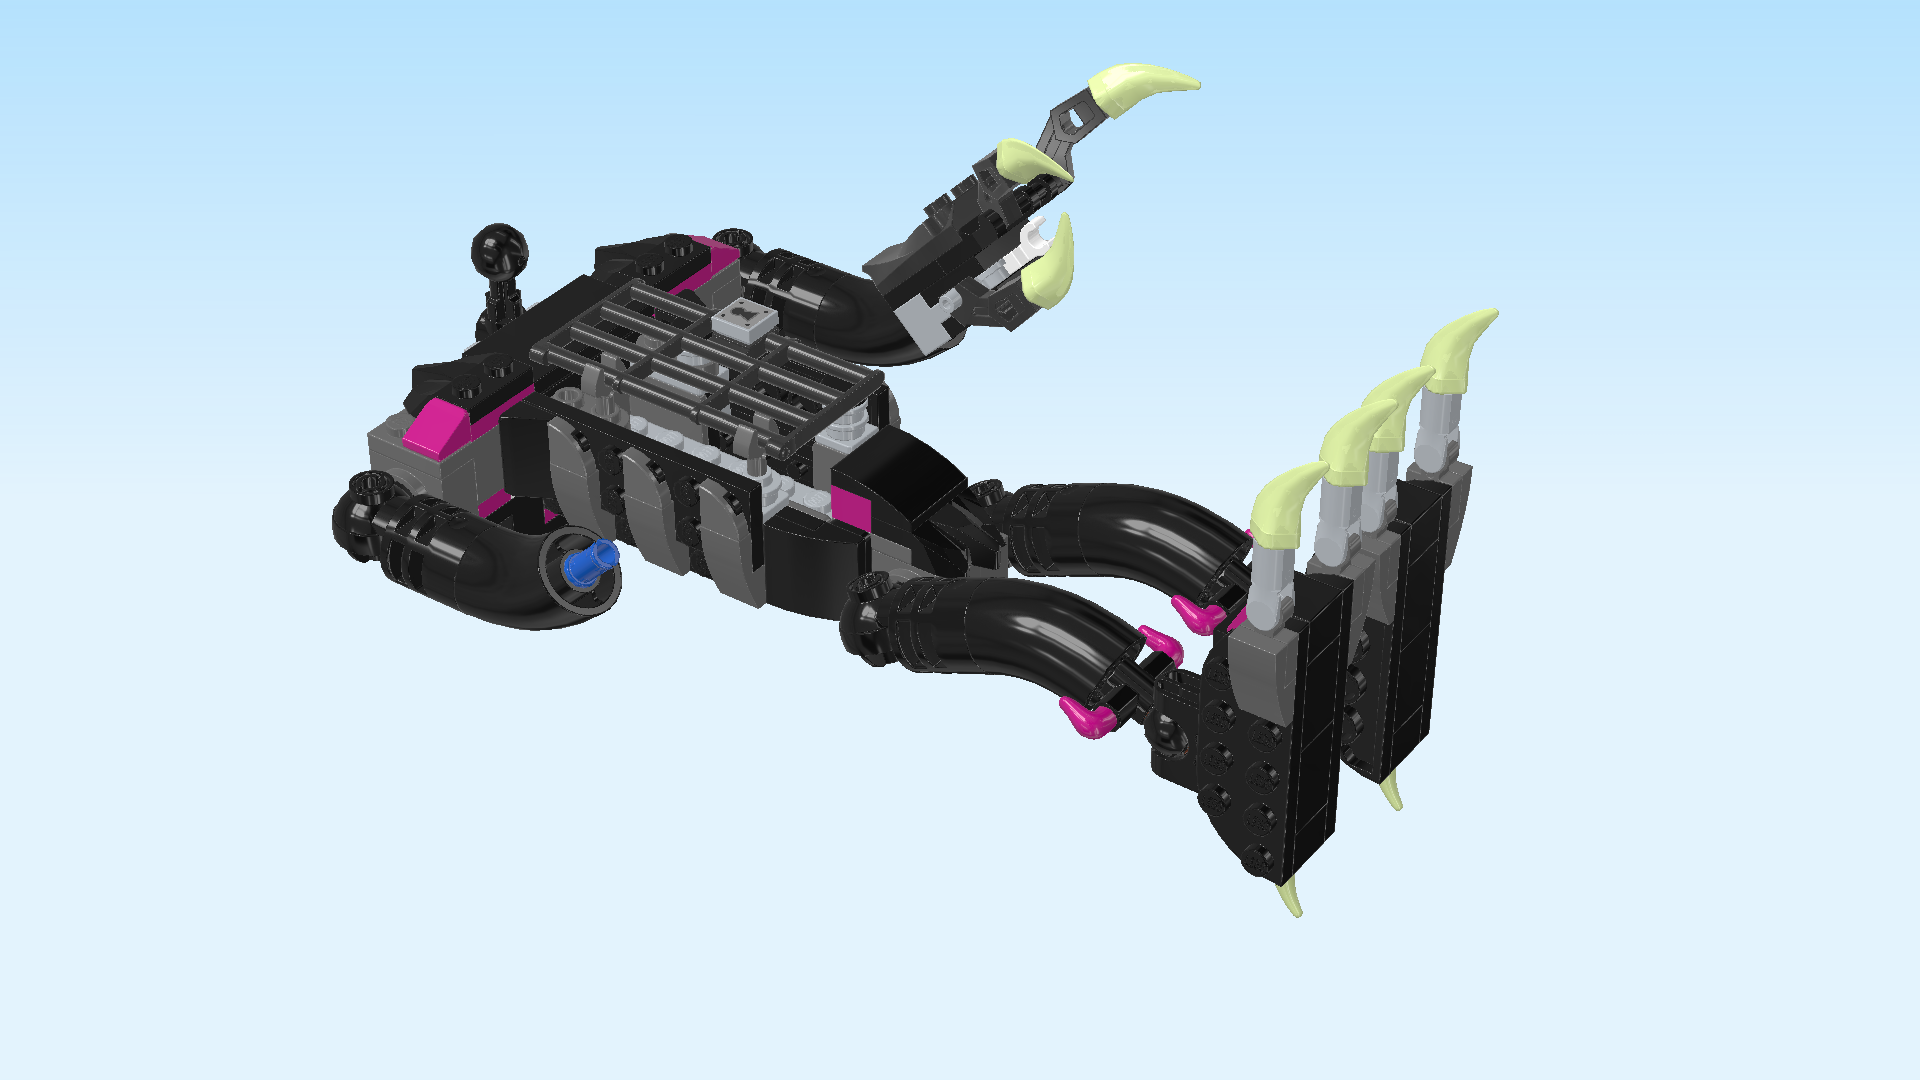
| The Grimkeeper is finished! Fantastic job, this was a very intricate build! The monster sure is worth it though: what an eerie, yet special creature with lots of detail. It is time to fulfill his destiny and lock up the Cooper Minifigure in his chest cage. Only Mateo will be able to help Cooper, so let's continue building! |
| Open bag number 3. You can choose to have the bricks sorted by color again. This bag contains all bricks and pieces for the Mateo Minifigure and the Z-Blob mini-plane or hoverbike. |
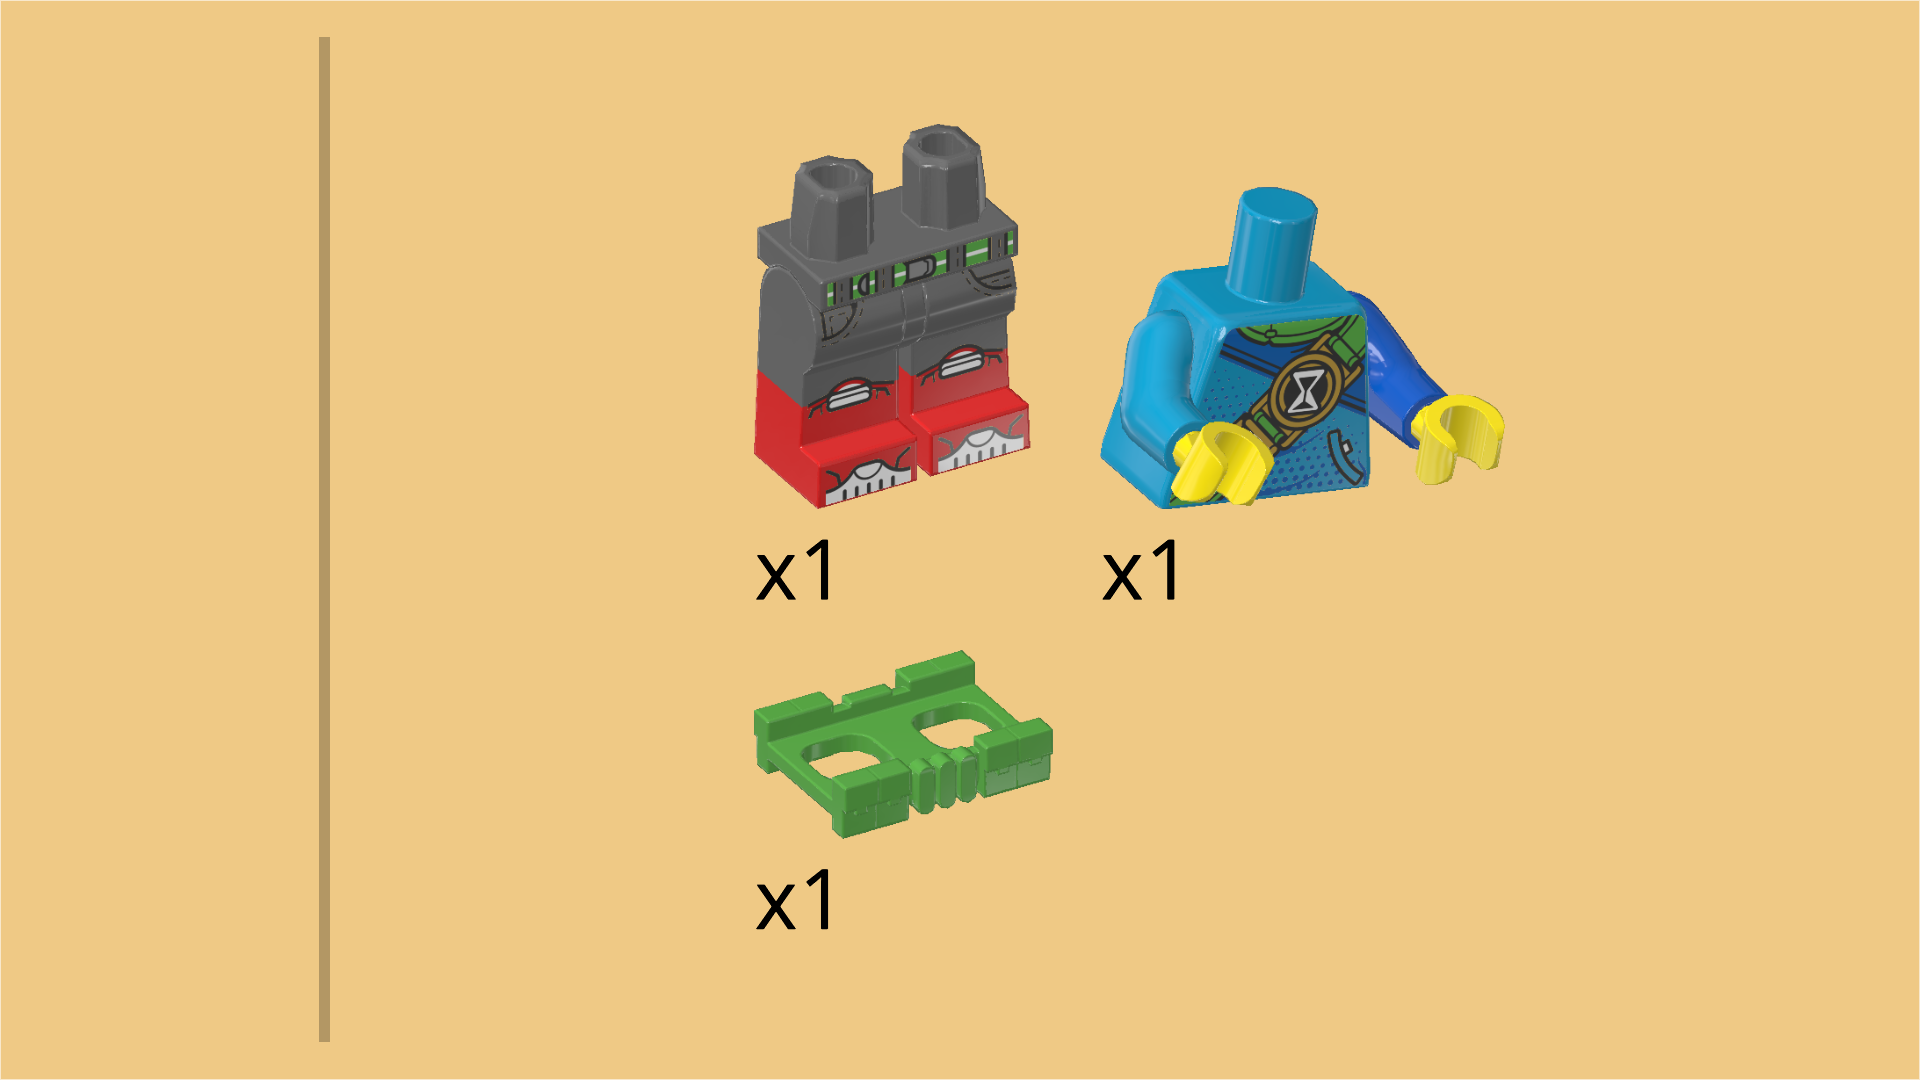
| Collect the following 3 pieces: |
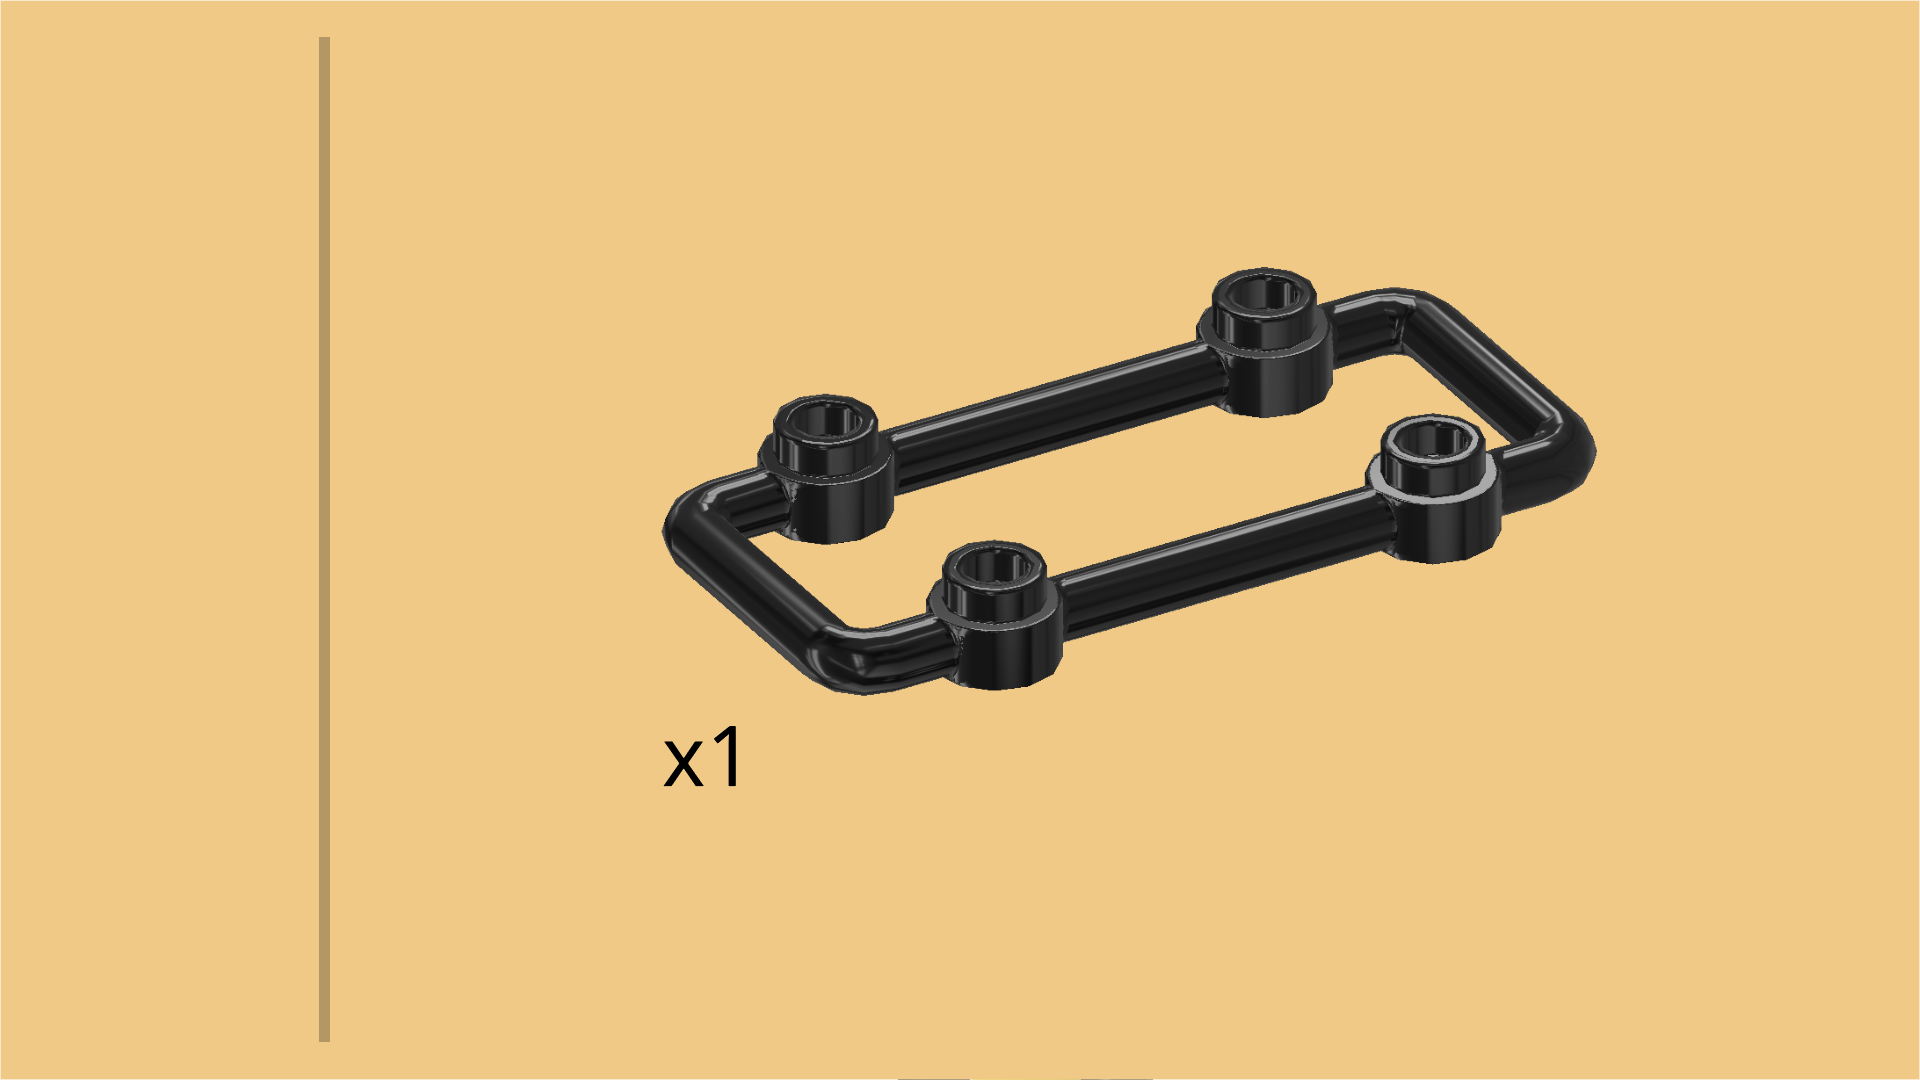
| 1 bright green Minifigure utility belt, |
| 1 dark stone grey and bright red pair of legs, |
| and 1 dark azure blue, bright blue and bright yellow upper part of the body. |
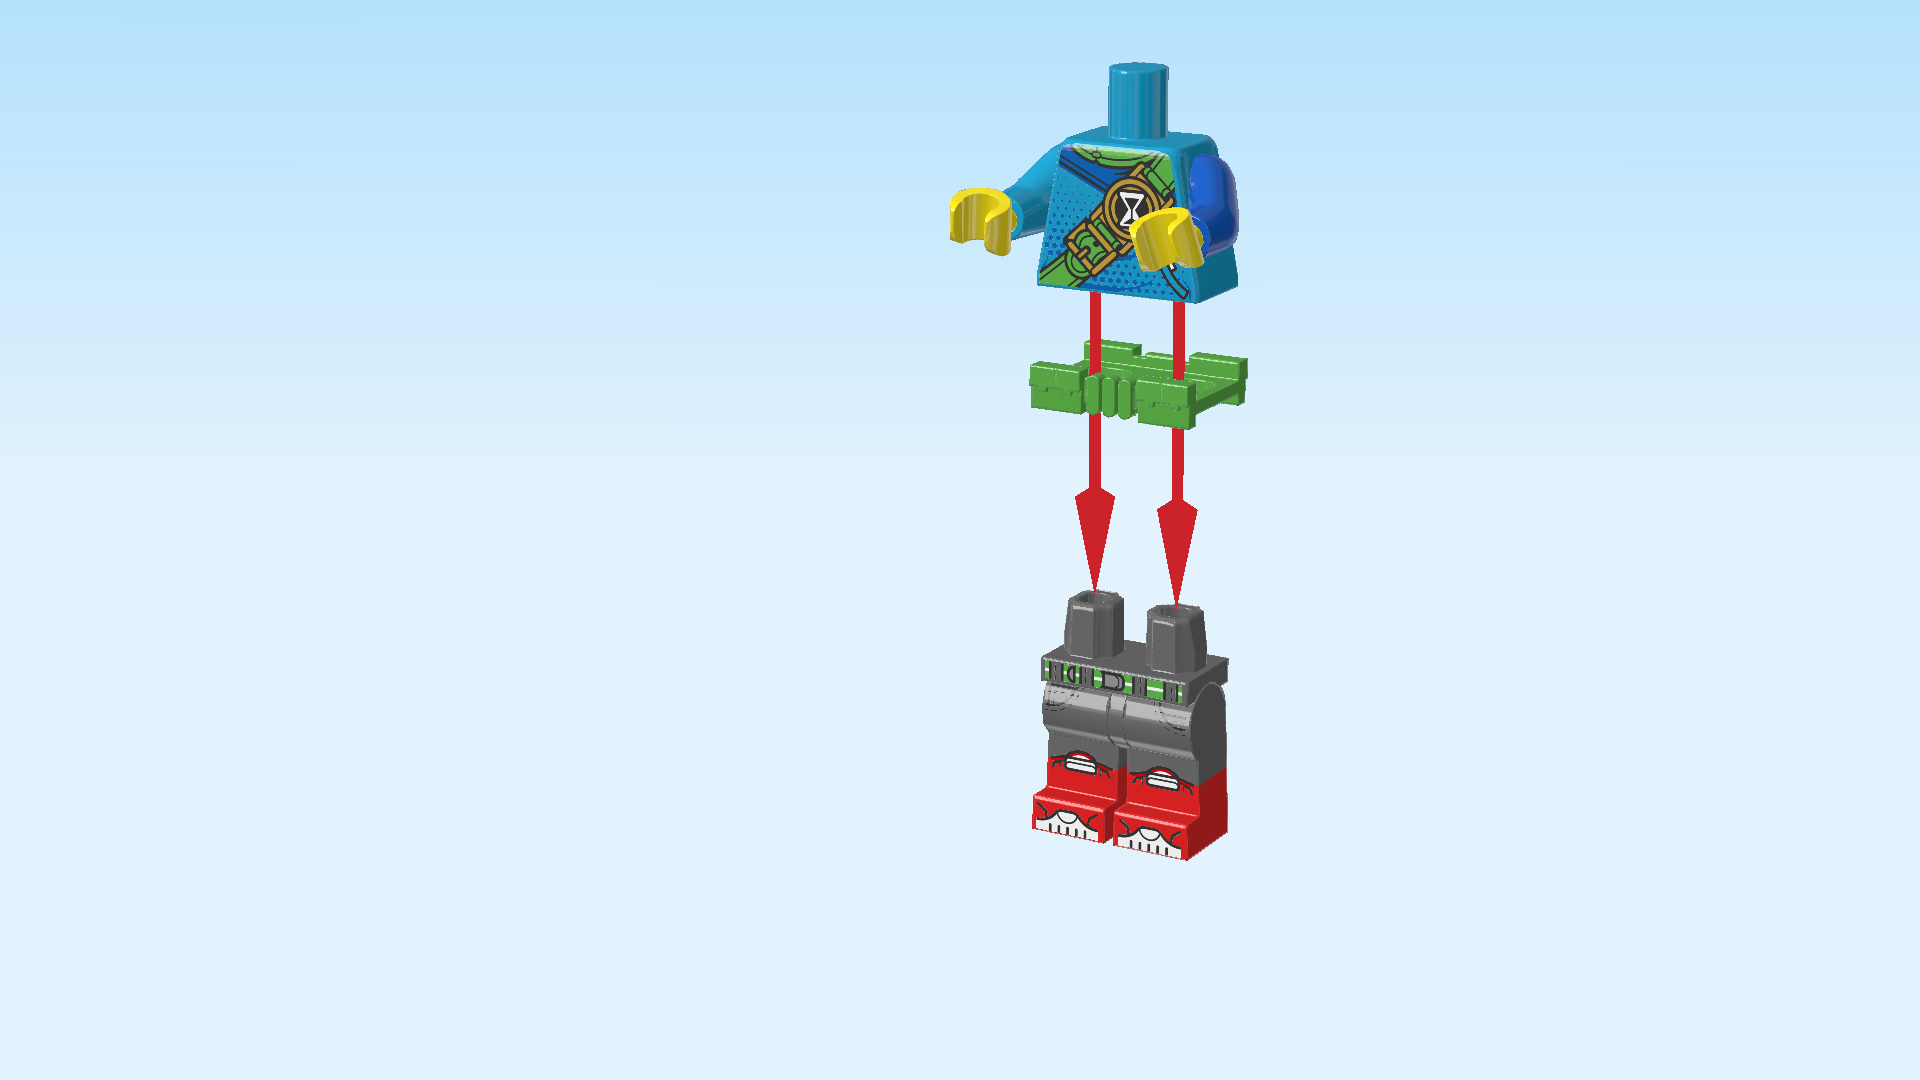
| Put the utility belt on the legs. The square holes fit neatly around the leg connectors. Make sure the square belt buckle is to the front. |
| Put the upper body on top. |
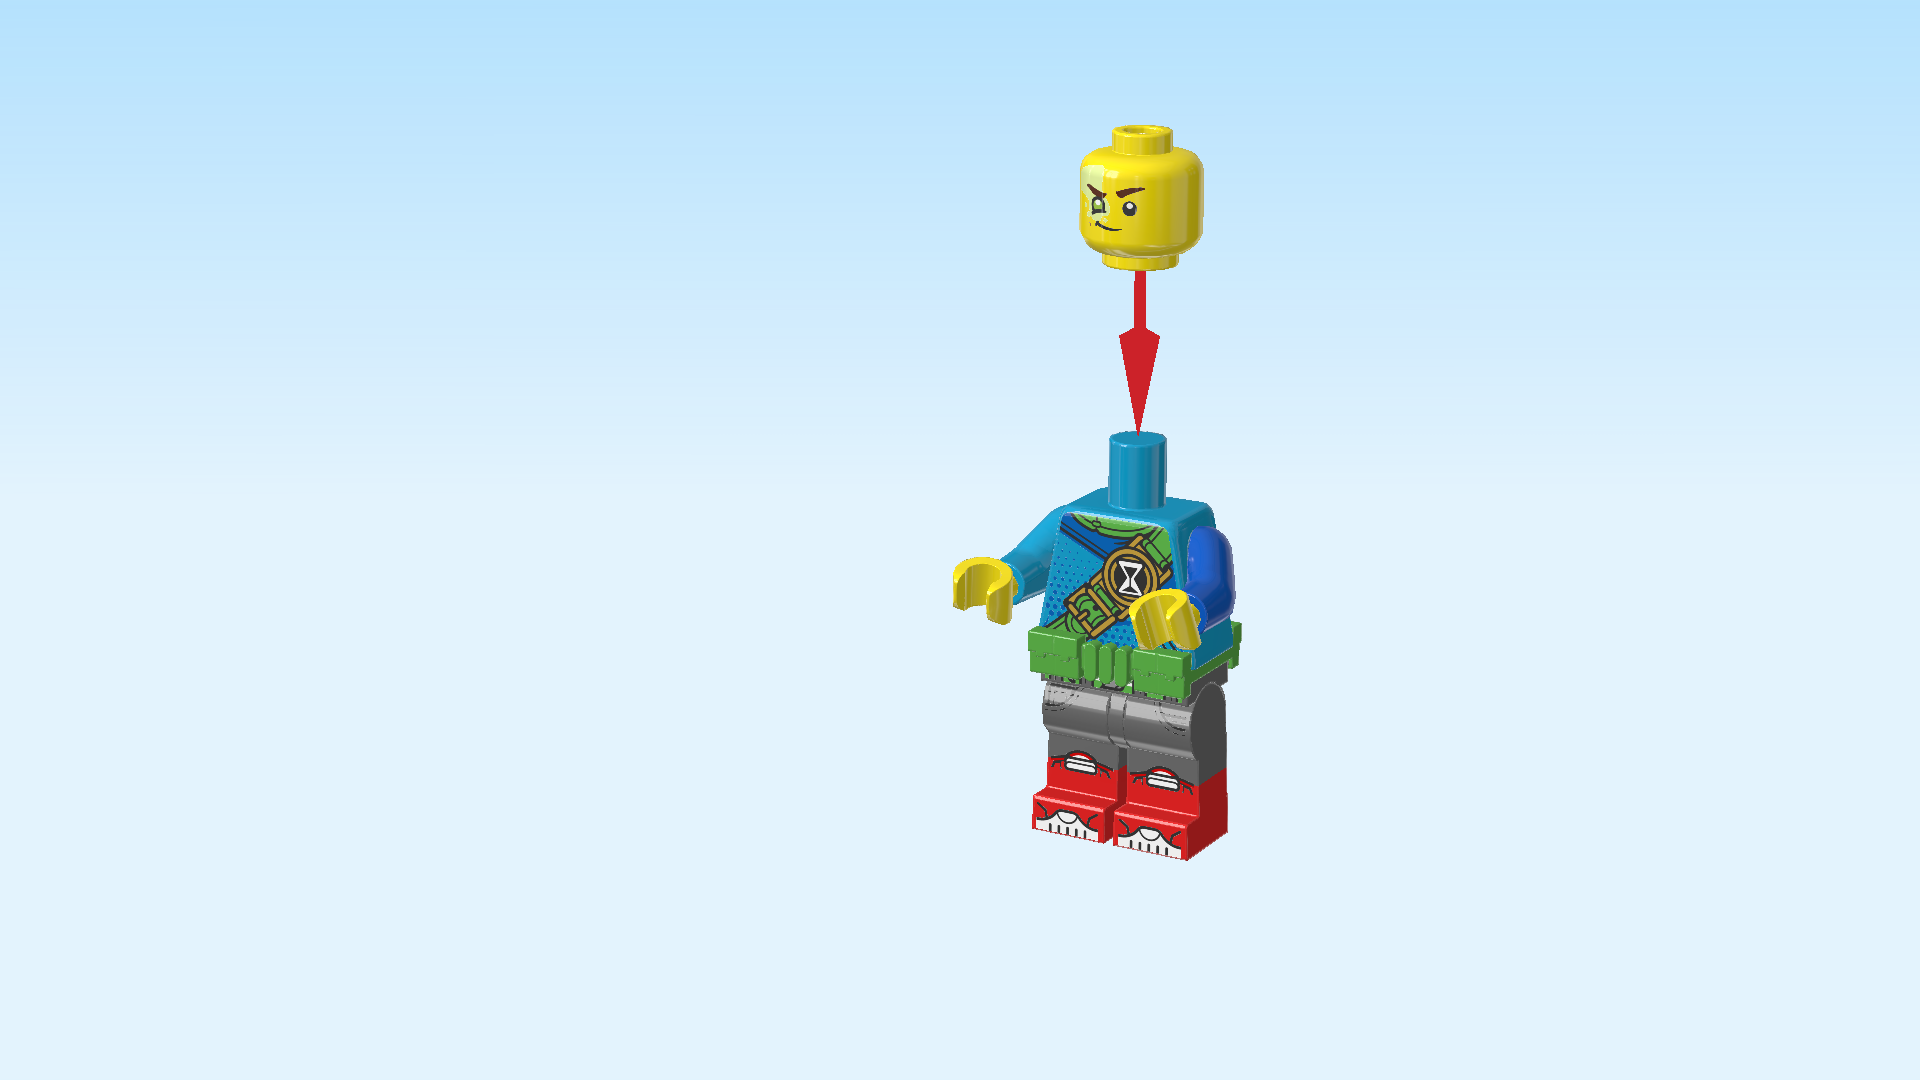
| Find 1 bright yellow Minifigure head. |
| Put it on the body. |
| Find 1 reddish brown hairpiece with dreadlocks. |
| Put it on the head. |
| Next, we will build Mateo's pencil spear. |
| Collect the following 2 pieces: |
| 1 medium stone grey connector peg 1m with knob, |
| and 1 light purple round tile 1x1. |
| Put the round tile upside down on the table. |
| Put the knob of the connector peg from the top on the round tile. |
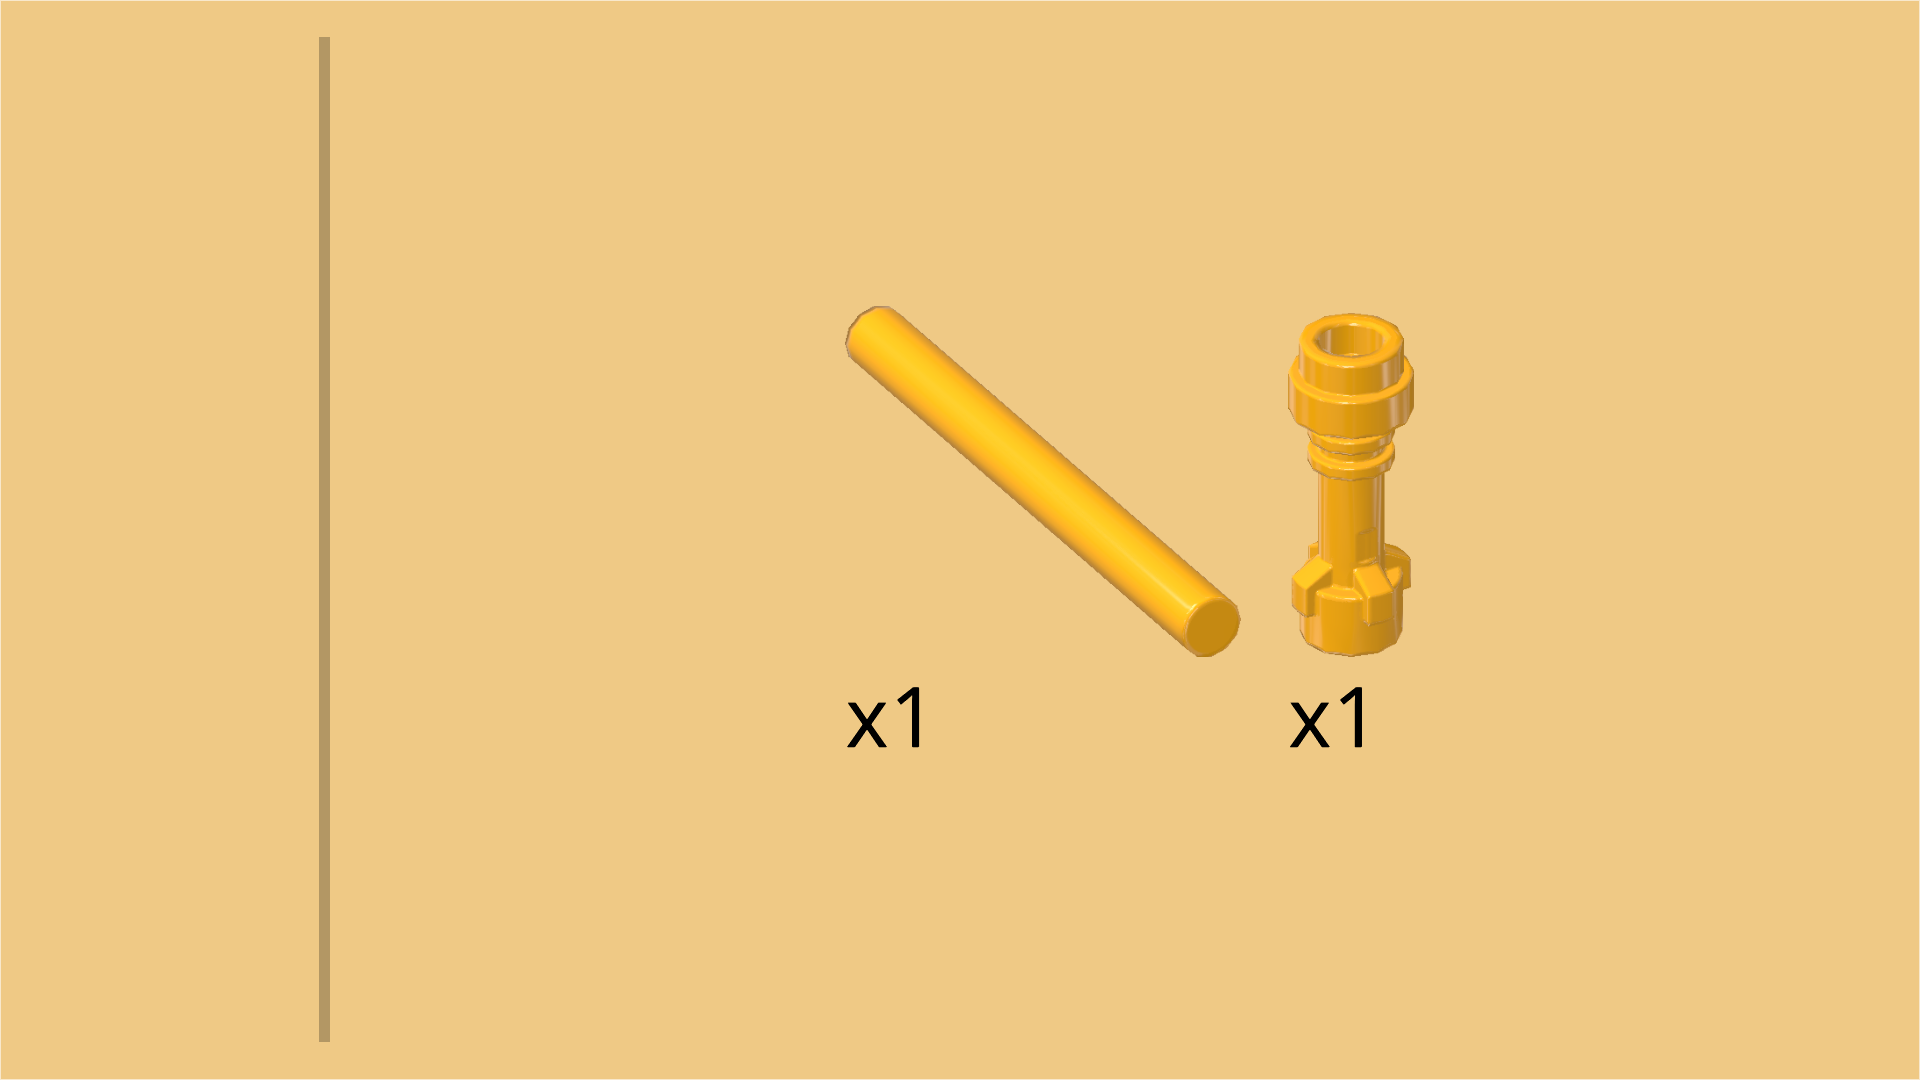
| Collect the following 2 pieces: |
| 1 flame yellowish orange shaft 4m, |
| and 1 flame yellowish orange lightsaber holder. |
| Insert the shaft from the top into the connector peg. |
| Put the bottom end of the lightsaber holder (this is the slightly smaller end) on the top end of the shaft. |
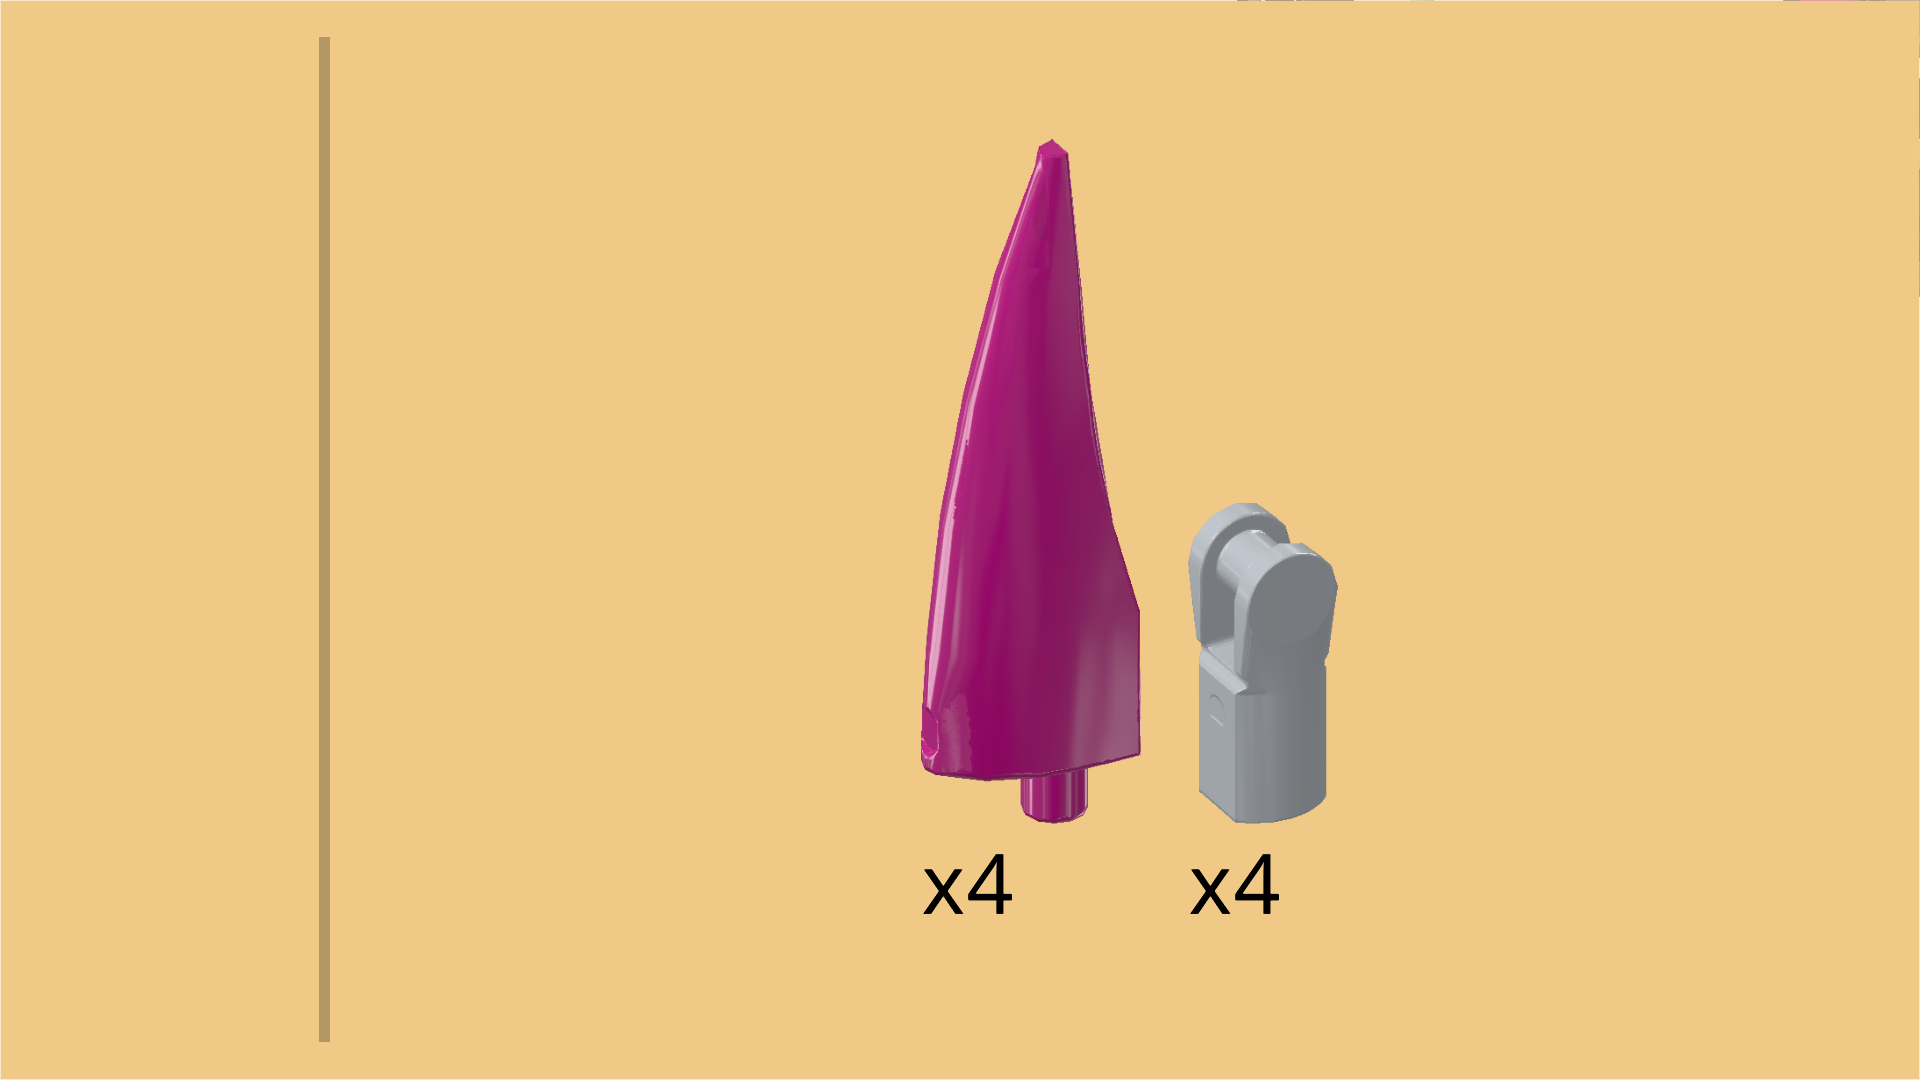
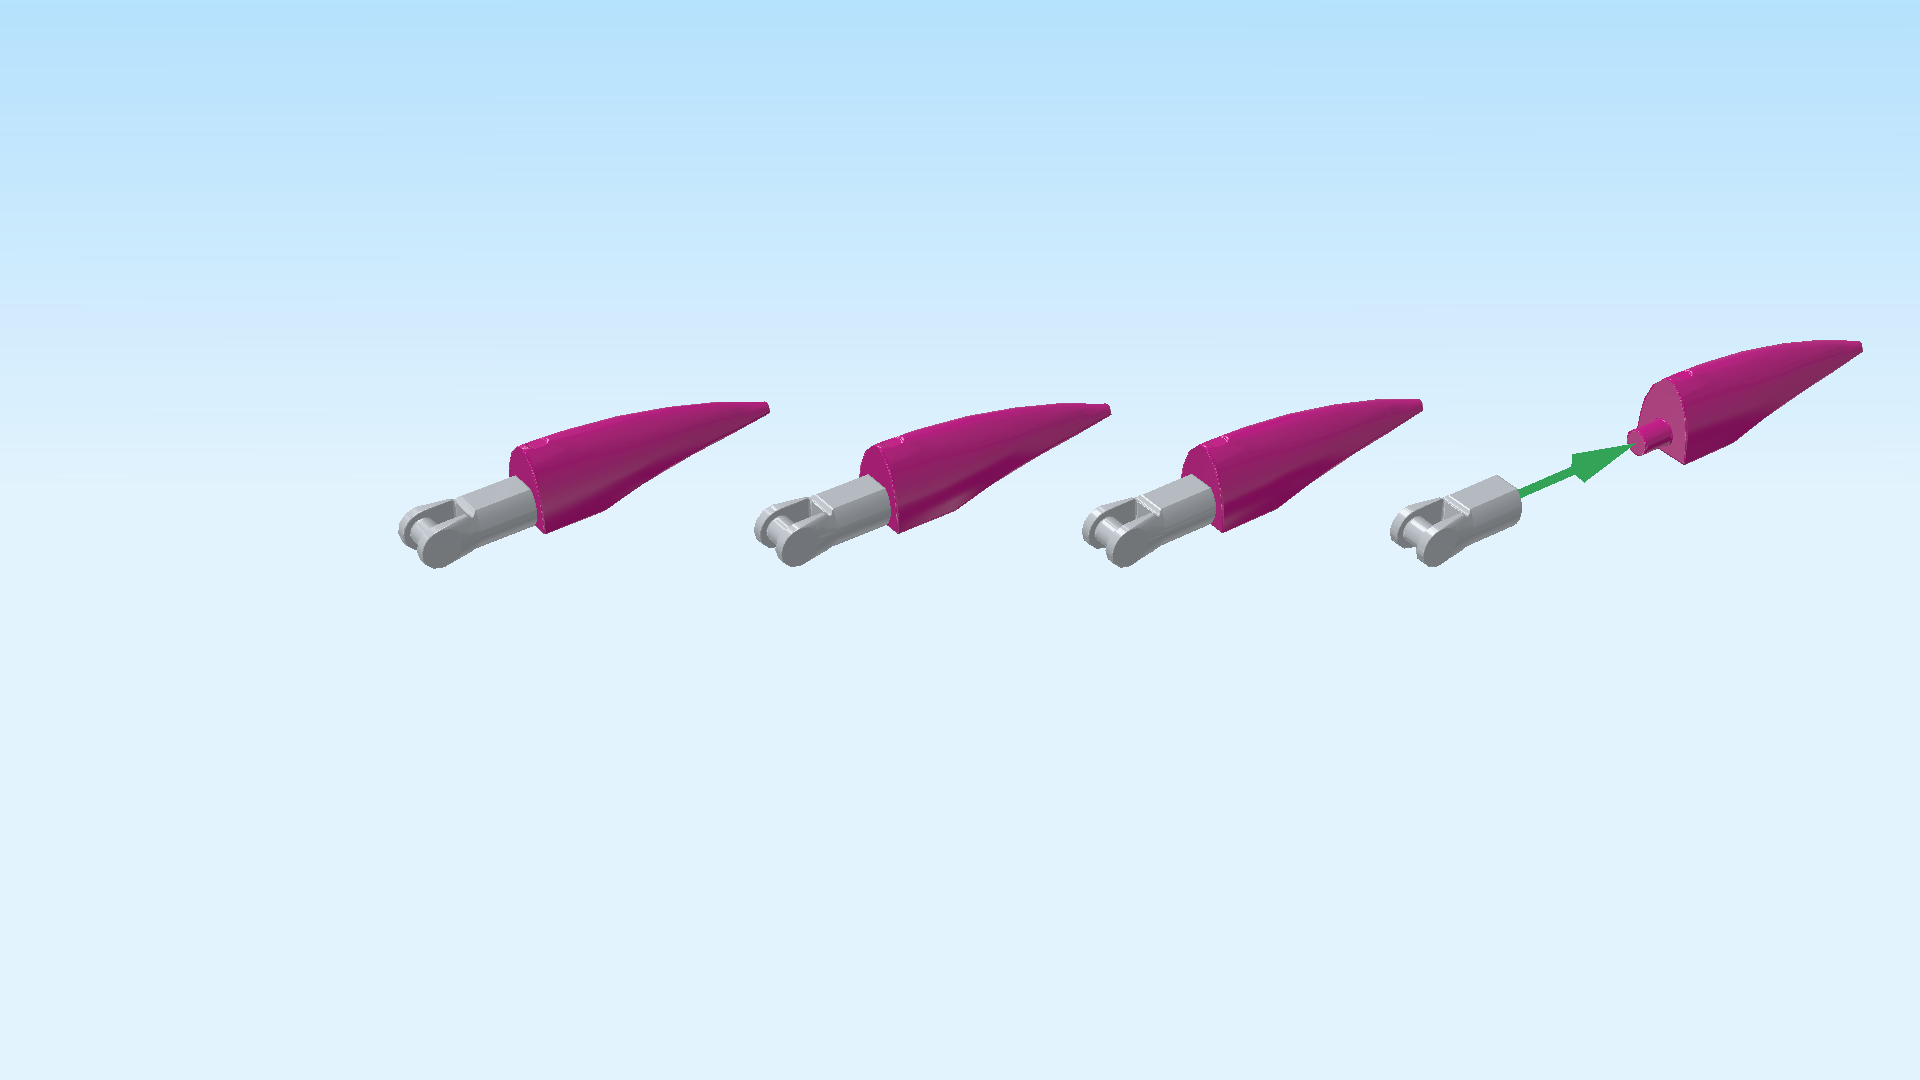
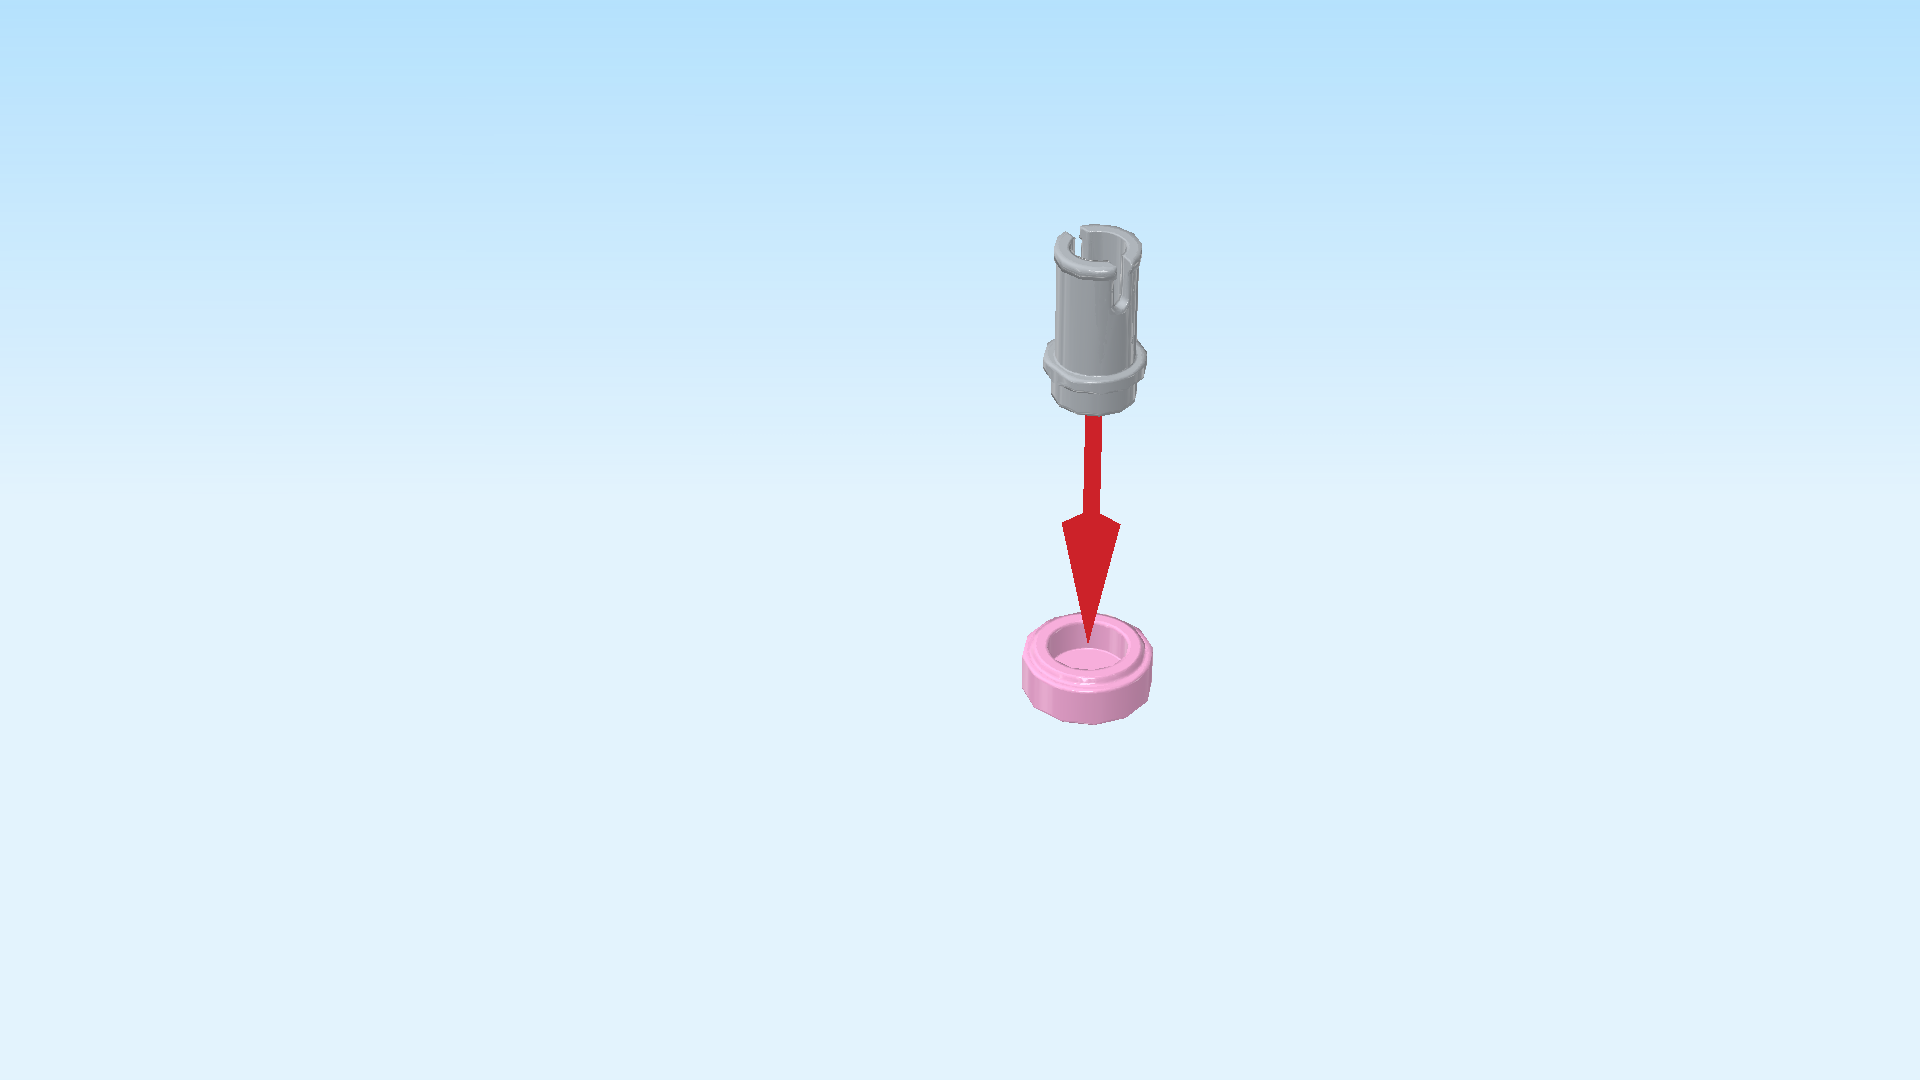
| Collect the following 2 pieces: |
| 1 pale ocher yellow nose cone 1x1, |
| and 1 silver metallic twisted cone with small shaft. |
| Put the nose cone 1x1 on top of the lightsaber holder, narrow end to the top. |
| Put the shaft of the twisted cone on the previous piece, horn tip to the top. |
| Mateo's pencil spear is finished! Great job! Snap its shaft into Mateo's right hand. Mateo is an artist who loves to draw dream comics, so of course a pencil is the accessory of his choice in the Dream World! |
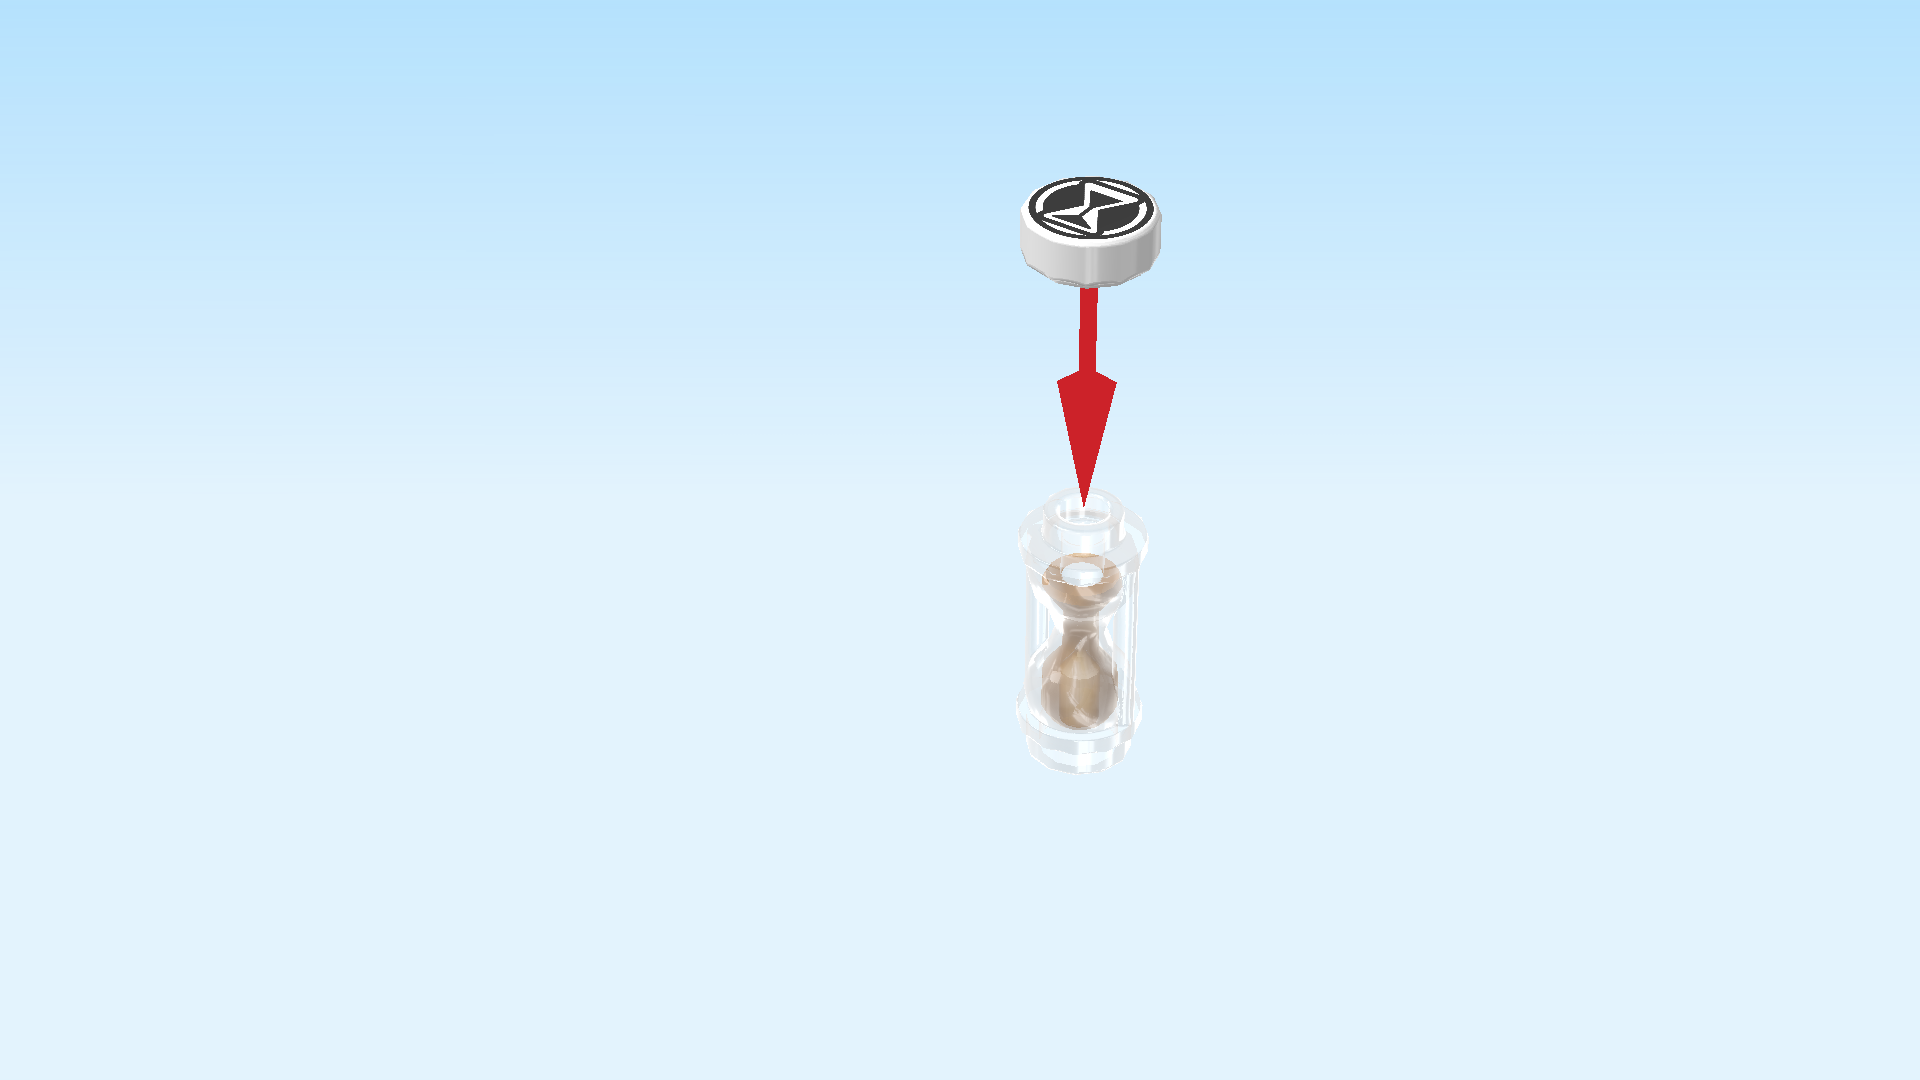
| Next, we will build Mateo's hourglass. |
| Collect the following 2 pieces: |
| 1 transparent and warm gold hourglass, |
| and 1 white round tile 1x1. |
| Put the round tile on the knob of the hourglass. |
| The round tile has a black print with a white hourglass silhouette in the middle. This is the logo of the Night Bureau, an organization that defends the Dream World from dangers. |
| You can put the bottom of the hourglass on one of Mateo's hands. |
| The Mateo Minifigure is finished! Great job! Mateo is in his Dream World appearance: he is wearing grey jeans and red boots. His green belt has a square belt buckle and 2 utility pockets at the front, and 2 utility pockets at the back. Mateo is wearing a blue jacket with a dark blue dotted pattern on it. He wears another green utility belt across his chest with an old-school belt buckle with the hourglass logo at the front and a pocket at the back. His head has two prints: on one side, he is winking at us cheekily. On the other face, he is showing is broad, enticing smile. There is some green Dream World goo on his right eye, and on some of his dreadlocks. Fighting in the dream world can be a messy business! |
| You have finished building the main build of the Grimkeeper the Cage Monster set! Now it's time to choose Mateo's Dream World vehicle: You can either build him a mini-plane or a hoverbike with the remaining bricks. Go back to the instructions website and pick the instructions for Path A for the mini-plane or Path B for the hoverbike. Of course, you can already start playing with what you've built so far. It is entirely up to you! |
| Enjoy! |