| LEGO Audio & Braille Building Instructions for the LEGO City set "Off-Road 4x4 Mountain Truck". |
| If you would like to access the help menu to find out how to use and navigate these instructions, tap with two fingers or press key "H". |
| Embark on epic adventures with the LEGO City Off-Road 4x4 Mountain Truck! Climb steep slopes and pull the vehicle from ditches and danger with the winch. Access tools and equipment in the rooftop storage boxes and flip the vehicle snorkel to pop open the hood for engine repairs. This rugged vehicle is built for exploration beyond the city limits! |
| The box cover shows an exciting rescue mission in the wild mountains. The rugged green and black 4x4 mountain truck is being pulled up a rocky trail by its front winch. The hook of the winch is attached to rocks, helping the vehicle climb out of what looks like a shallow mountain riverbed. The truck is equipped for extreme off-road action: at the front, the sturdy working winch with a grey hook is ready to pull the vehicle up steep inclines or rescue it from ditches. Above the windshield, a light bar hints at night-time expeditions, and the orange‑striped body sides feature jagged mountain-pattern airbrushing, giving it an adventurous, bold look. There are 2 storage boxes mounted on the roof of the truck—but oh no! One of them is about to fall off the roof! Seems like the ride is a little too wild. The driver, however, sits firmly in the driver's seat with an adventurous look on his face. He can't be rattled so easily. In the far distance, a helicopter is roaming the mountain skies. Whether it is part of a rescue operation or a high-tech exploration of the wild is hard to say. In the background, tall evergreen trees line the rocky hillside. The rushing blue water of the stream sparkles with movement, and the distant mountain tops are partially covered in snow. Let’s get building and take this tough mountain truck on its trail! |
| Open the box. It contains visual building instructions, 4 numbered bags, 1 sticker sheet with 5 stickers, and 2 loose pieces: 2 plates 2x14. We will refer to the bag numbers to guide you through the building process. Please ask a sighted person to help you identify the correct bags! |
| The sticker sheet has 5 stickers. Some of them have identical shapes, so if you would like to find and attach the stickers yourself, these are your options: you can try to feel the outlines of the stickers and search for the 2 longest stickers in the set (their size is 2x6, their shapes are identical, and they are right next to each other). Turn the sticker sheet so that these stickers are oriented horizontally and in the bottom left corner of the sheet. You could also ask a sighted person to orientate the sticker sheet such that the bold black line is horizontally at the bottom of the sheet. We will refer to both the shape and the location of the sticker on the sticker sheet during the building process. However, of course you can also decide to skip the stickers in the building process for now or ask a sighted person to help you attach them if you like. |
| Carefully open bag number 1 and any small sub-bags in it. This bag contains all bricks and pieces for the Adventurer Minifigure, and the undercarriage of the truck. |
| If you like, you can ask a sighted person to help you sort the pieces by color before you start building. We recommend using trays or bowls. This can make finding the correct pieces easier! However, if you would like to build without brick colors entirely, you can also ignore them or turn them off. There are different ways to sort and organize the bricks and your building process. It's up to you! |
| First, we will build the Adventurer Minifigure. |
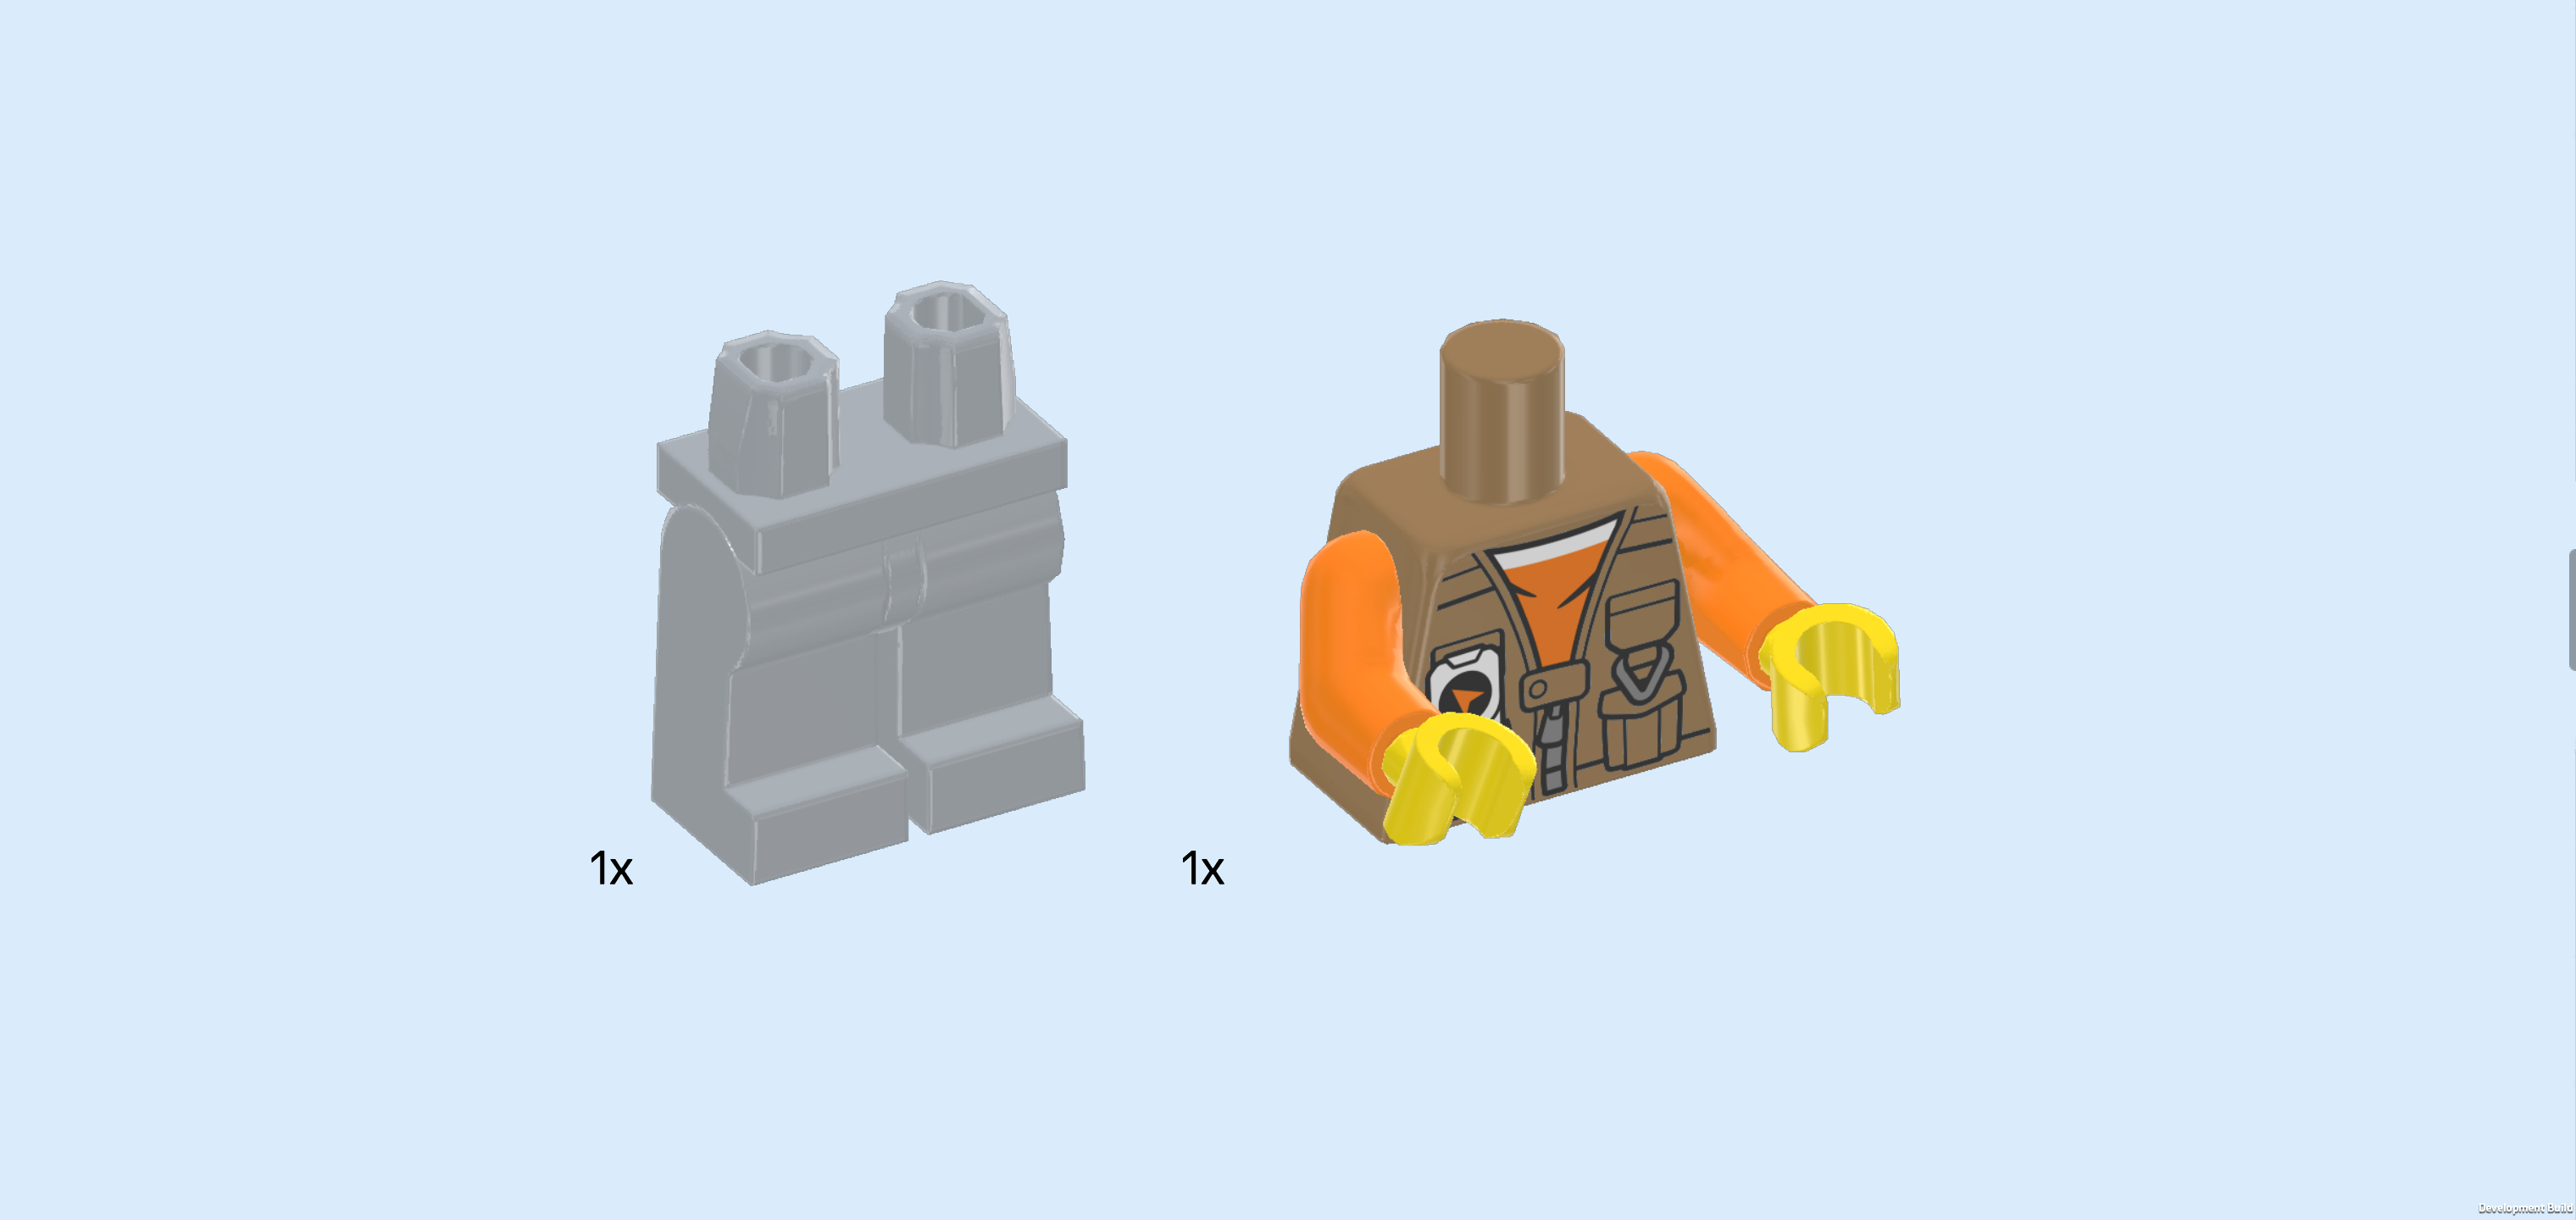
| Collect the following 2 pieces: |
| 1 medium stone grey pair of legs, |
| and 1 mud brown, bright orange and bright yellow upper part of the body. |
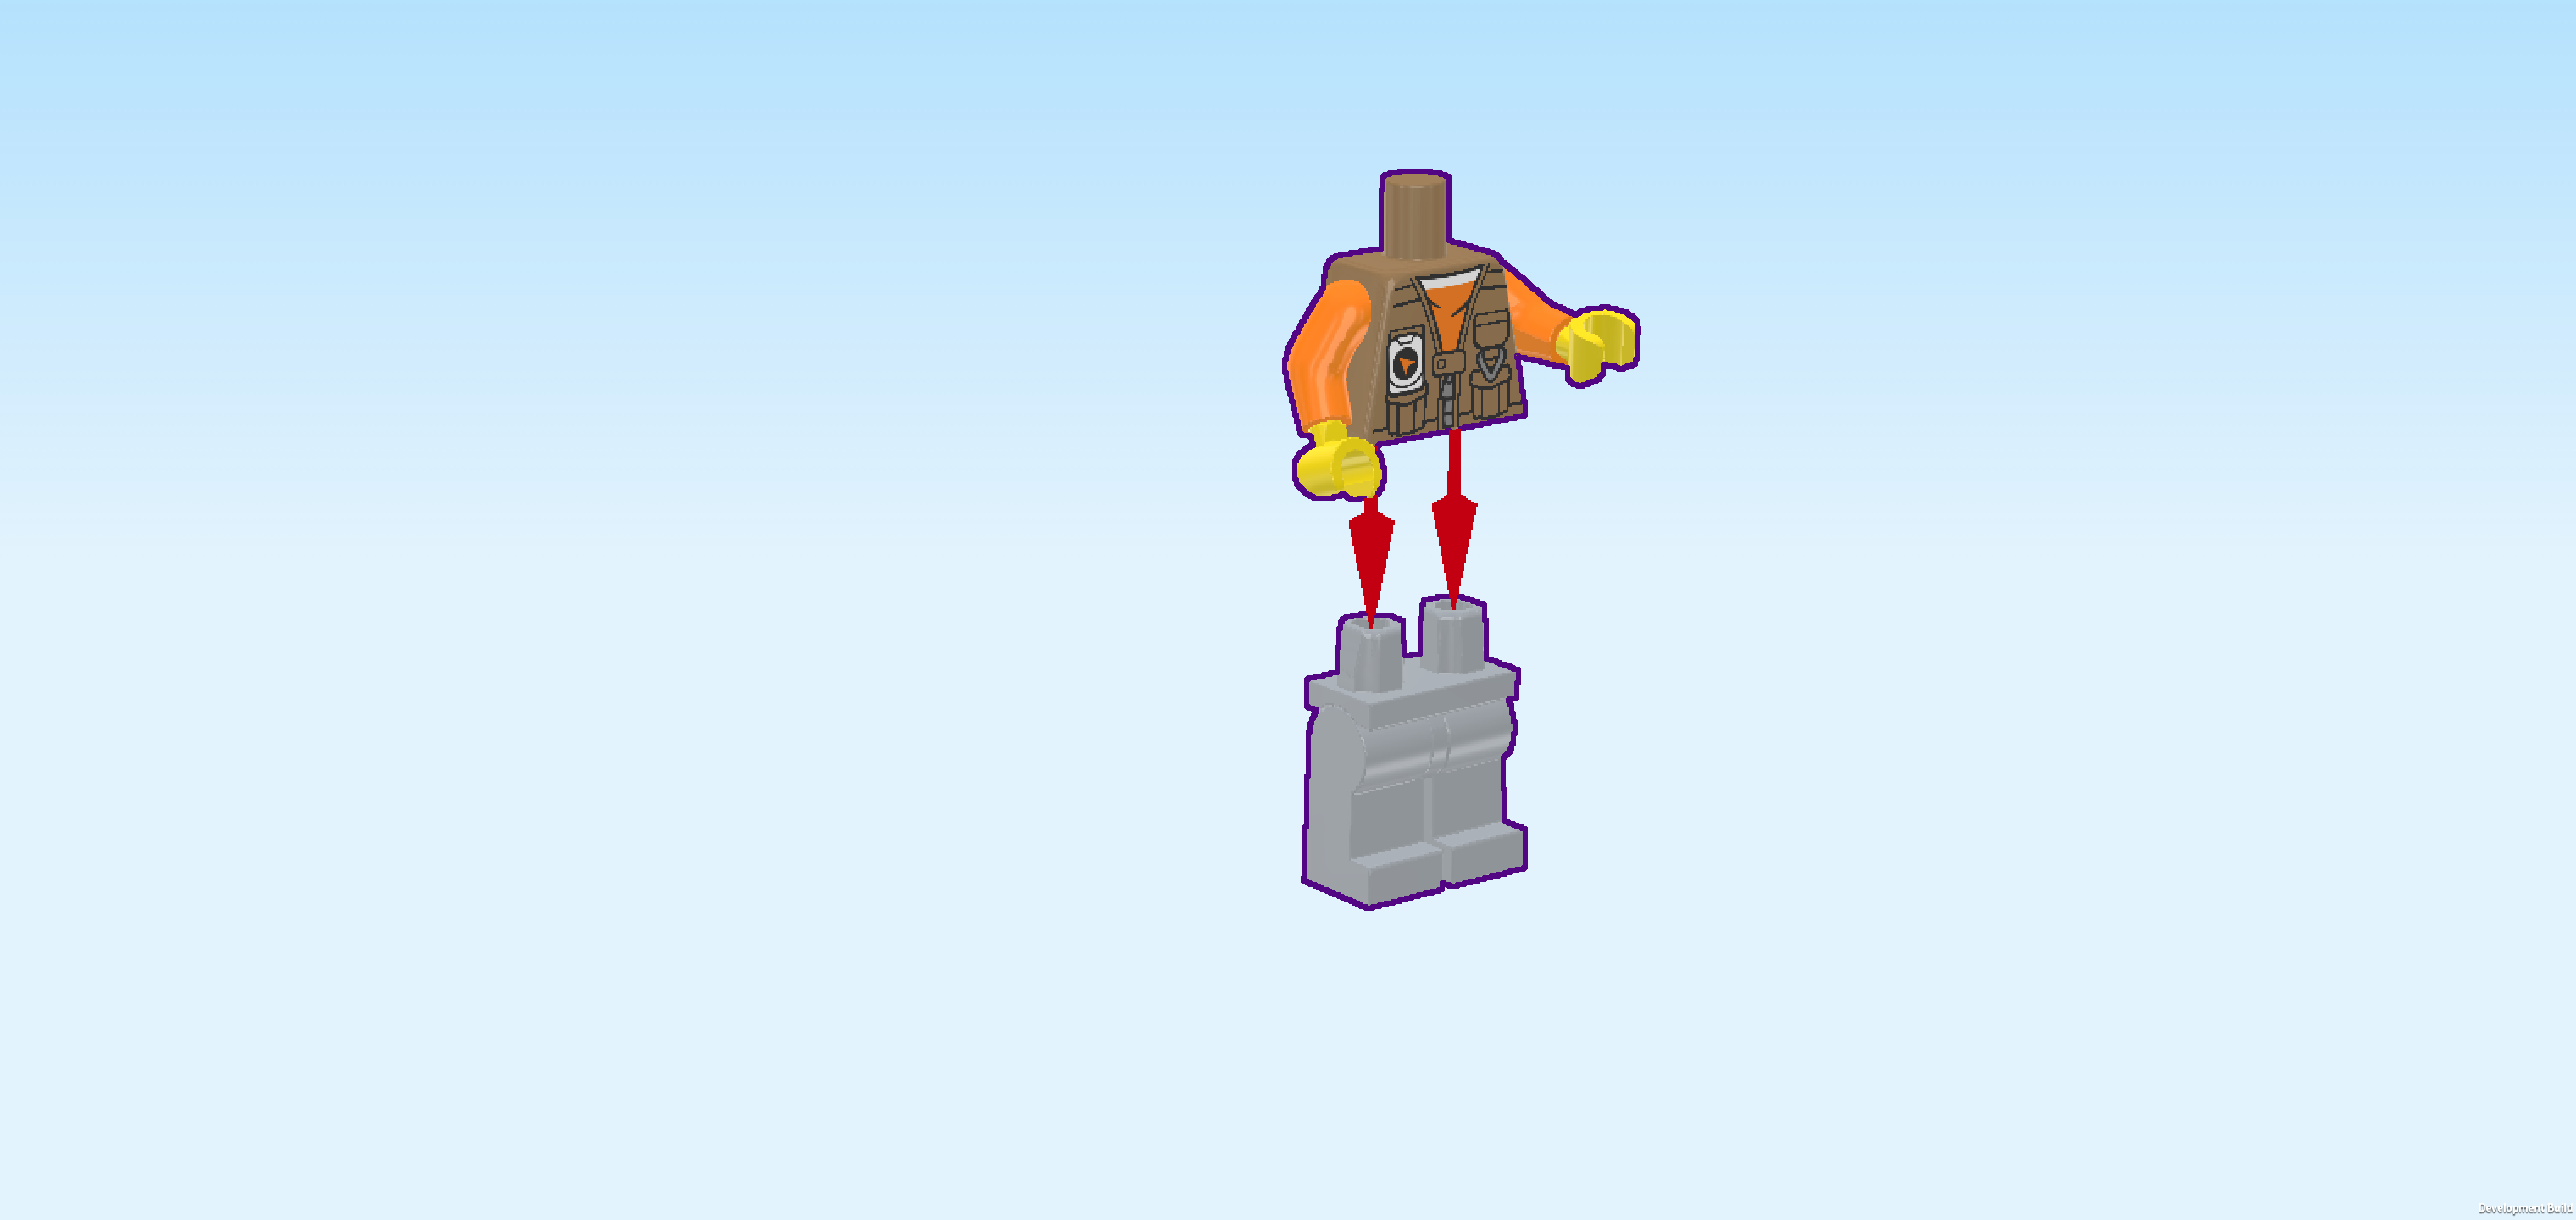
| Put the upper body on the legs. Make sure the hands and toes are pointing in the same direction. |
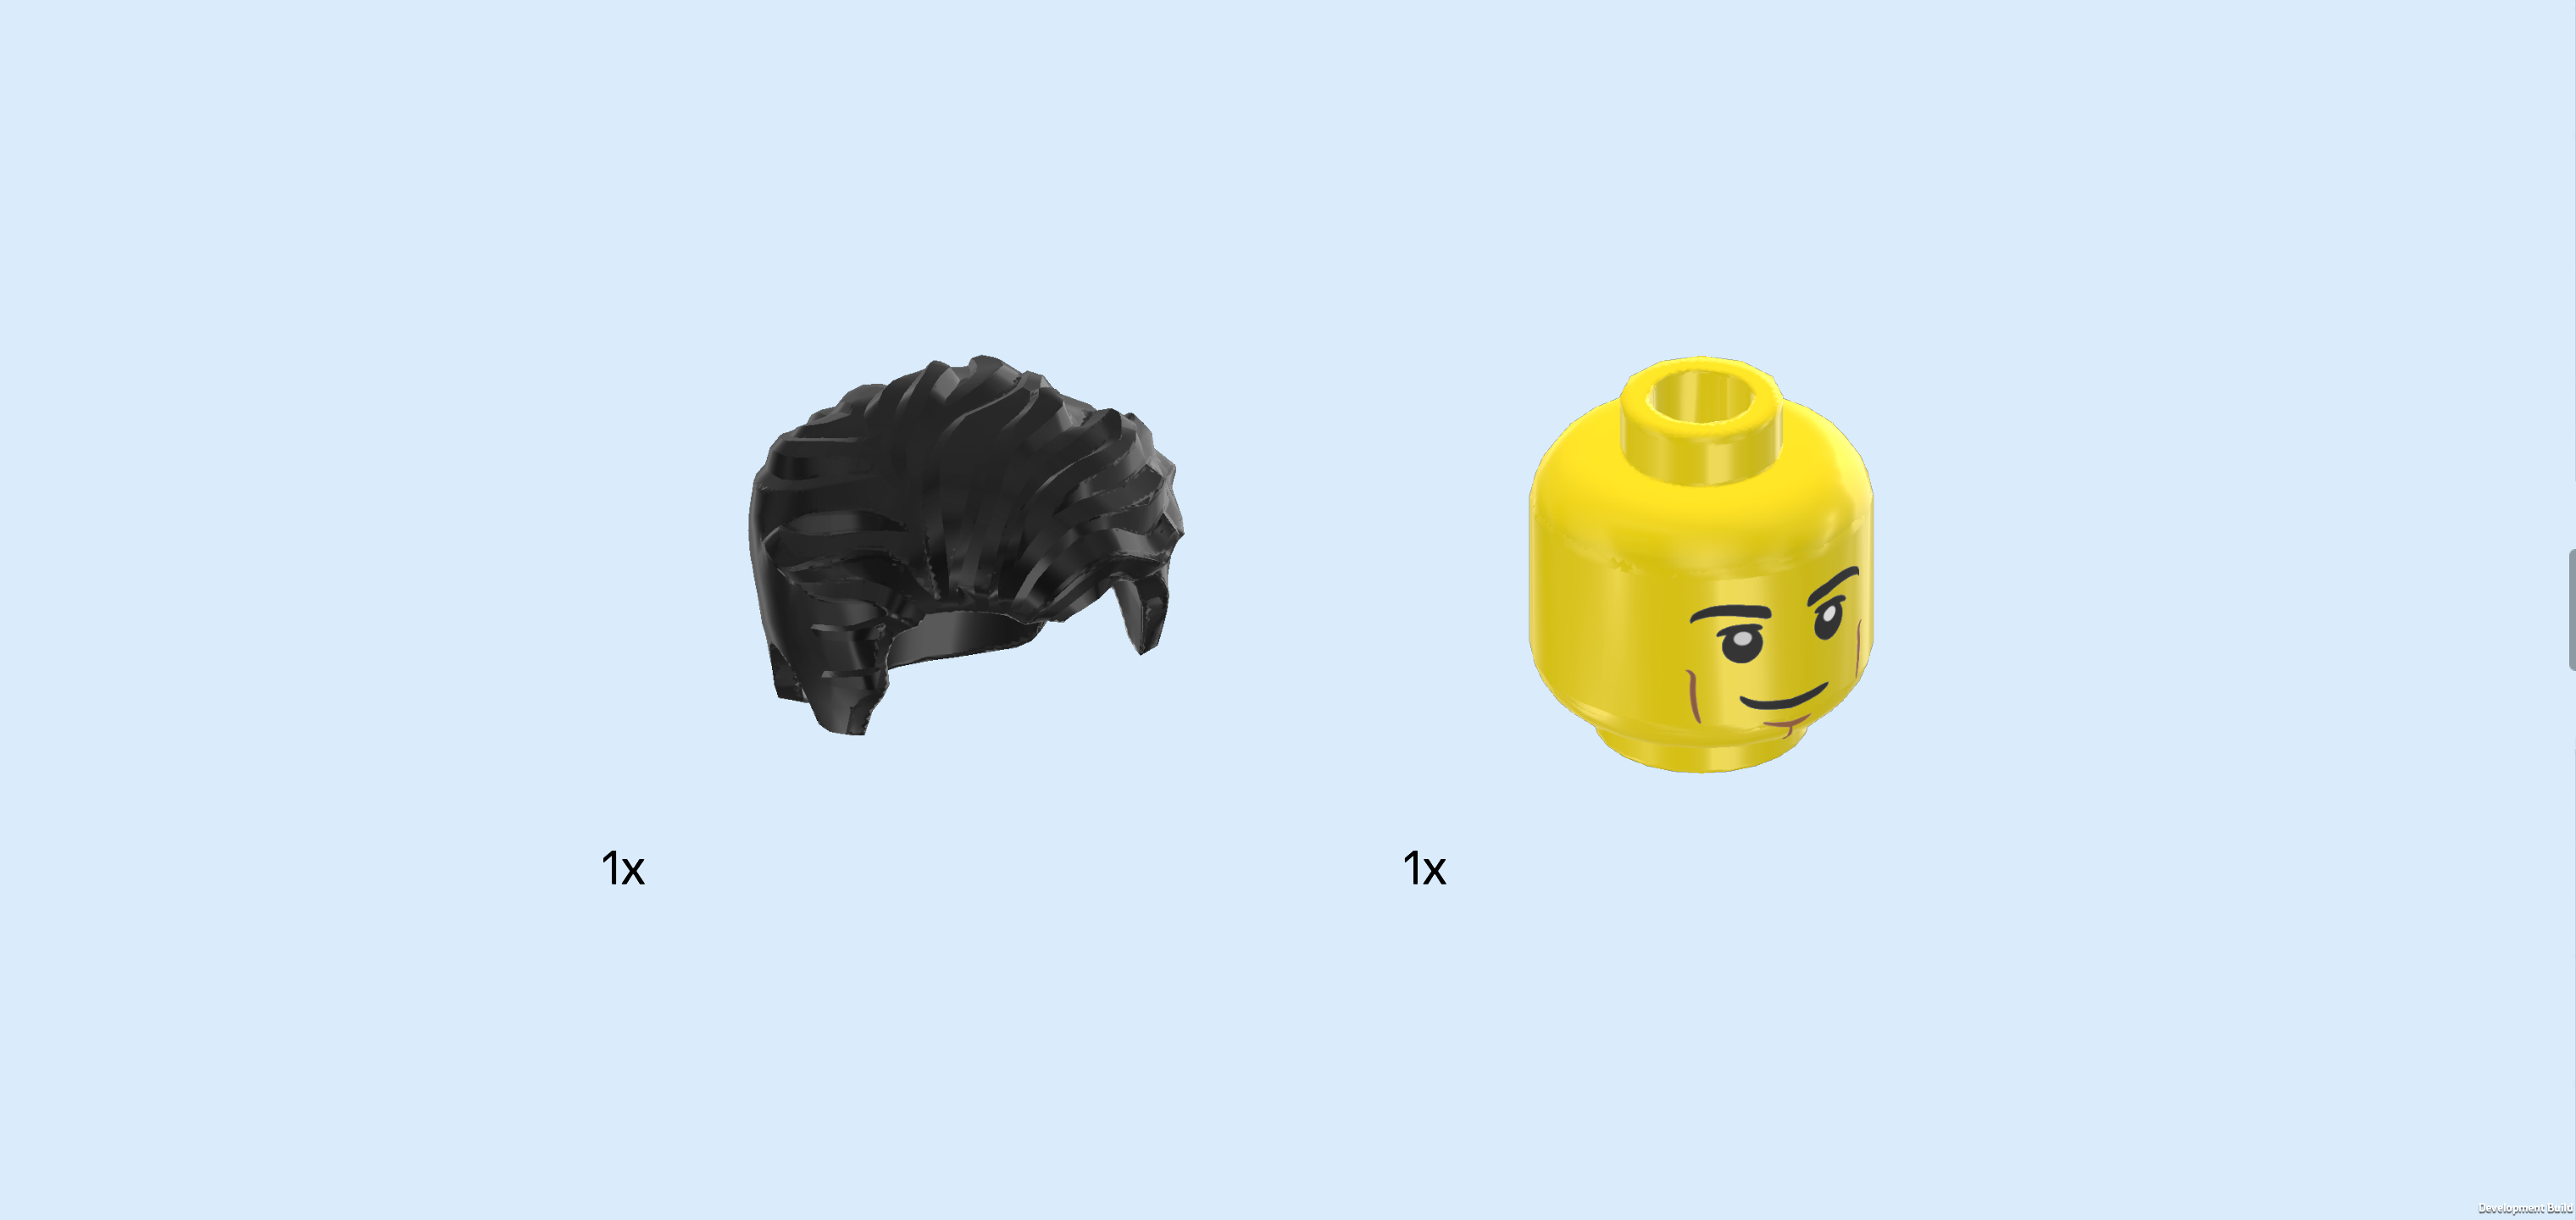
| Collect the following 2 pieces: |
| 1 black hairpiece with short wavy hair and sideburns, |
| and 1 bright yellow Minifigure head. |
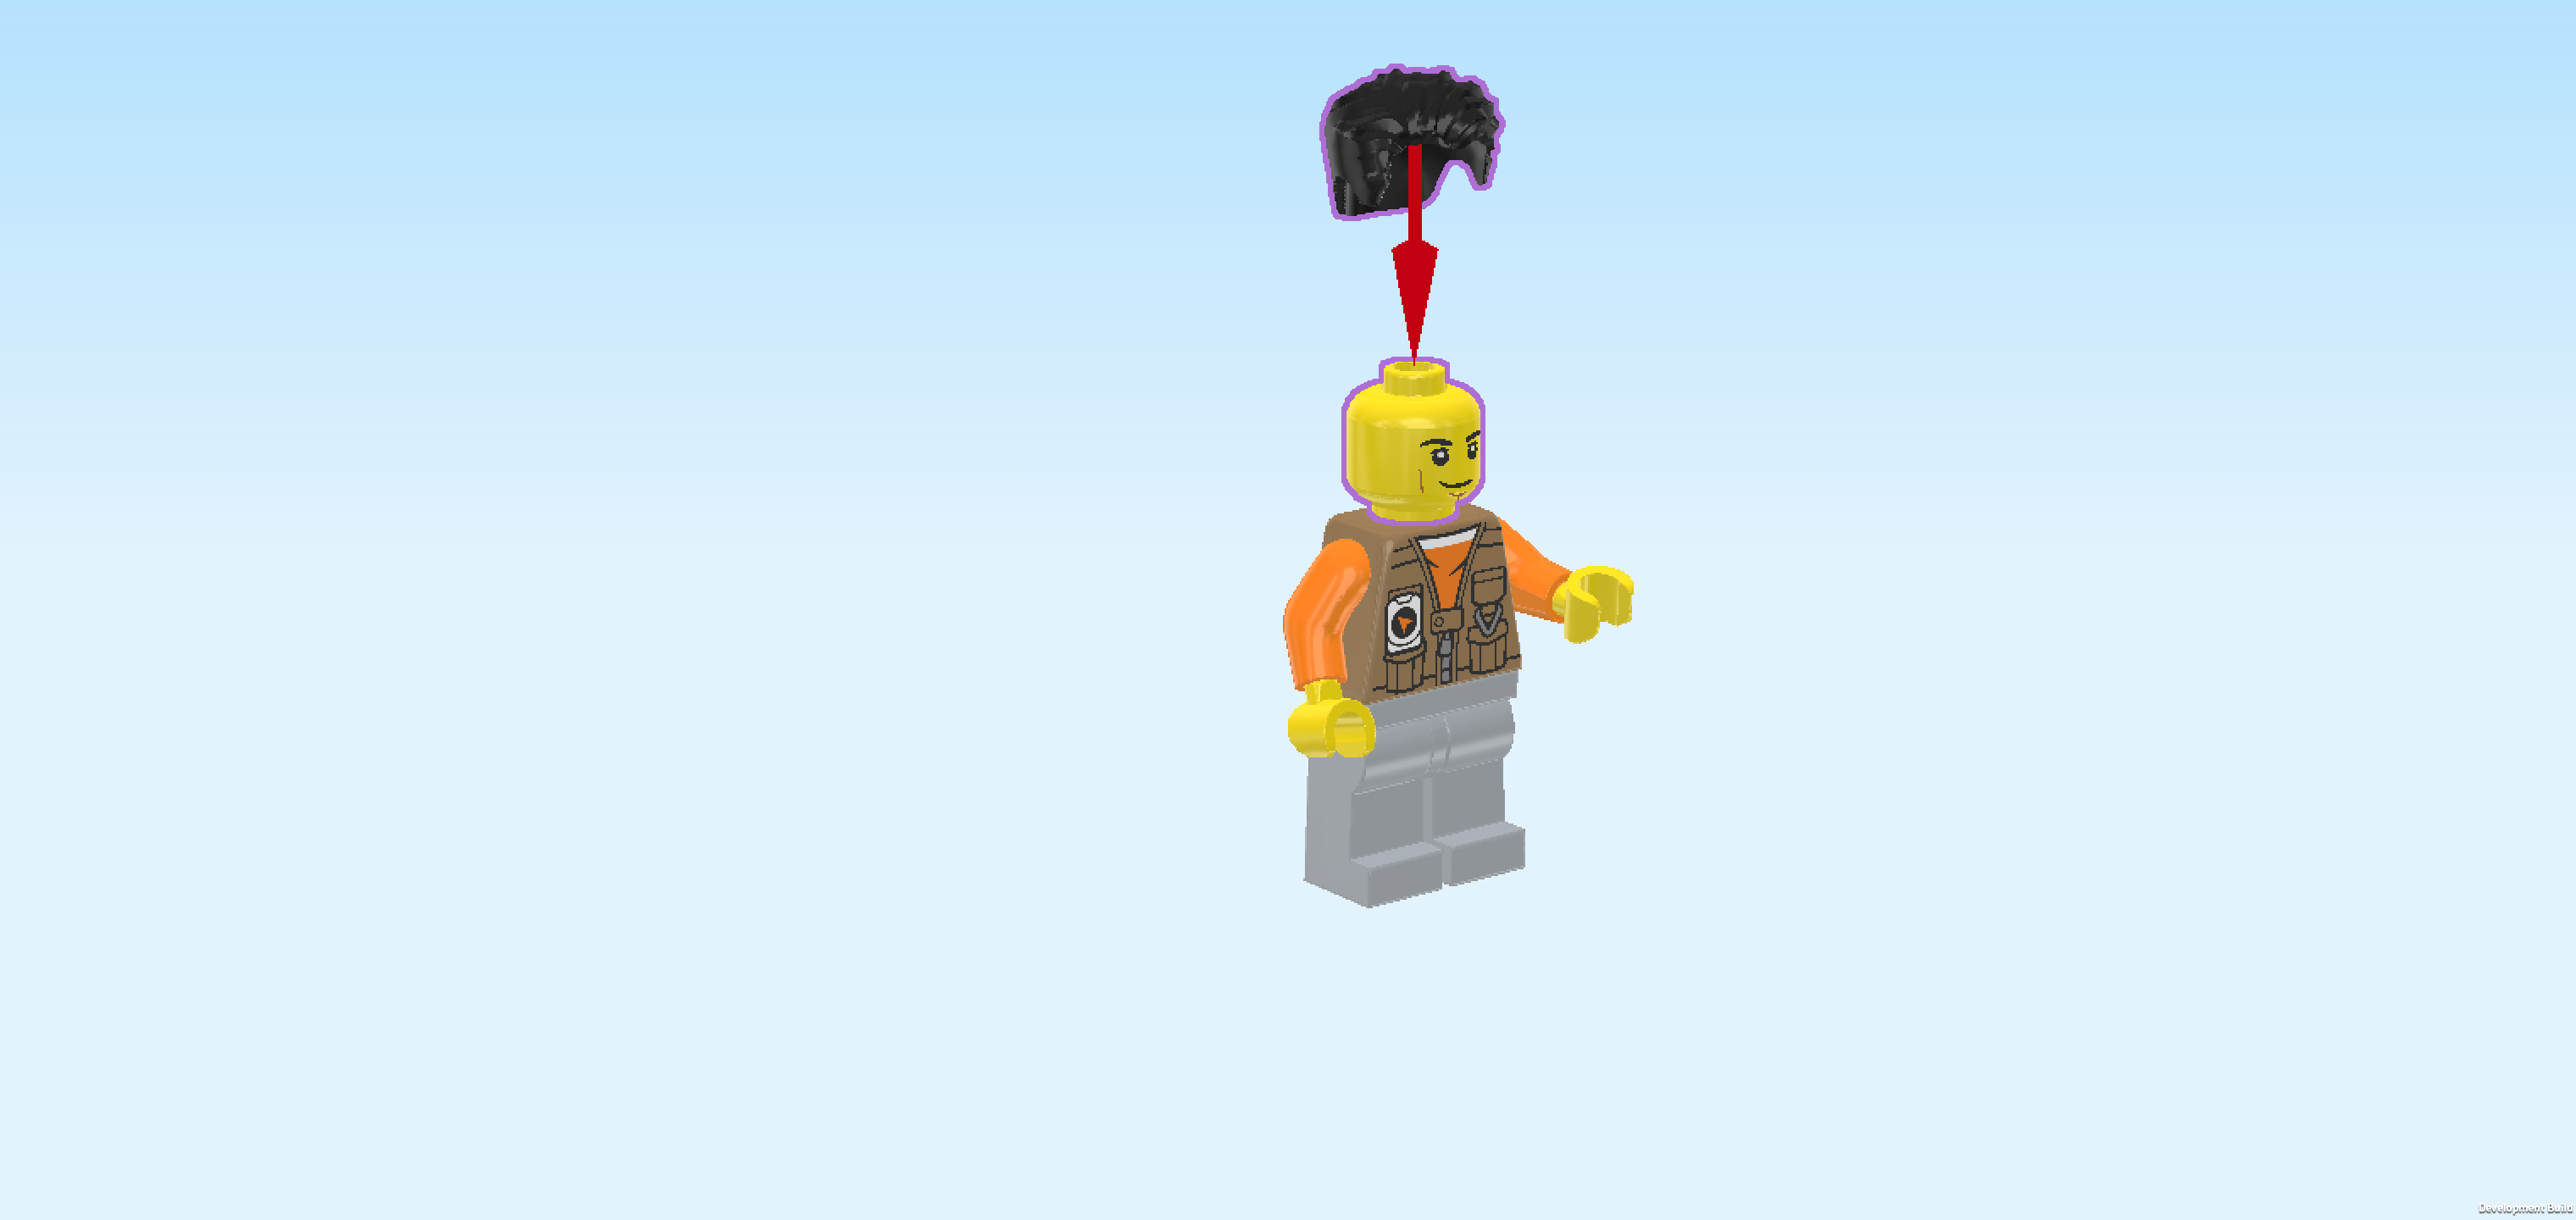
| Put the head on the body. |
| Put the hair on the head. |
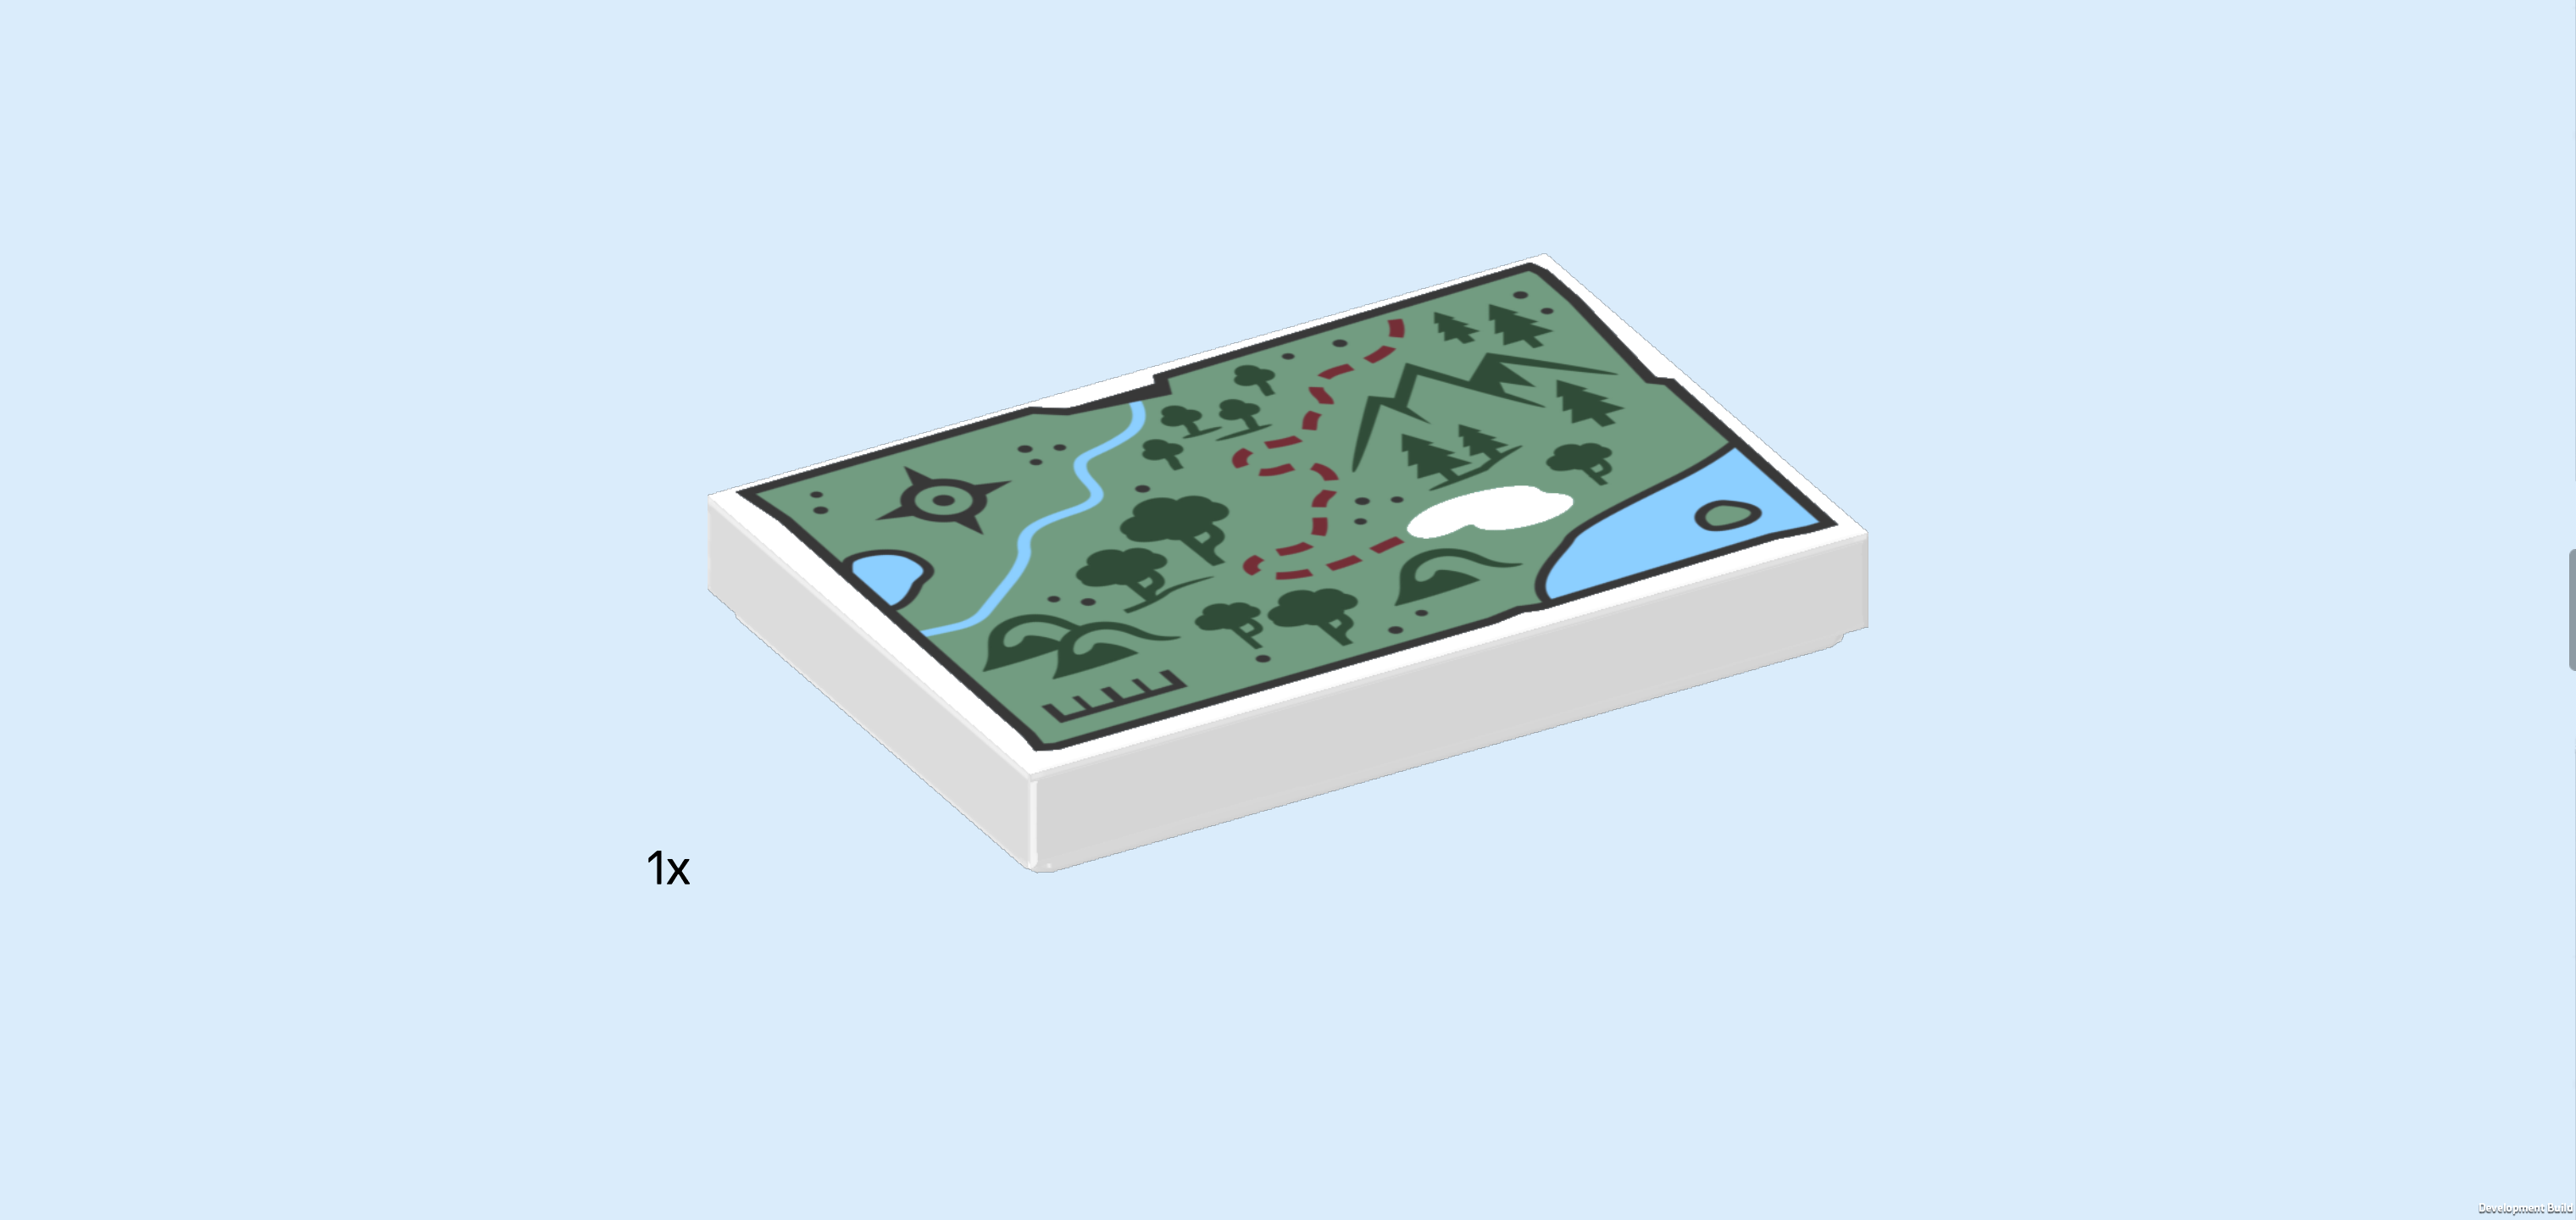
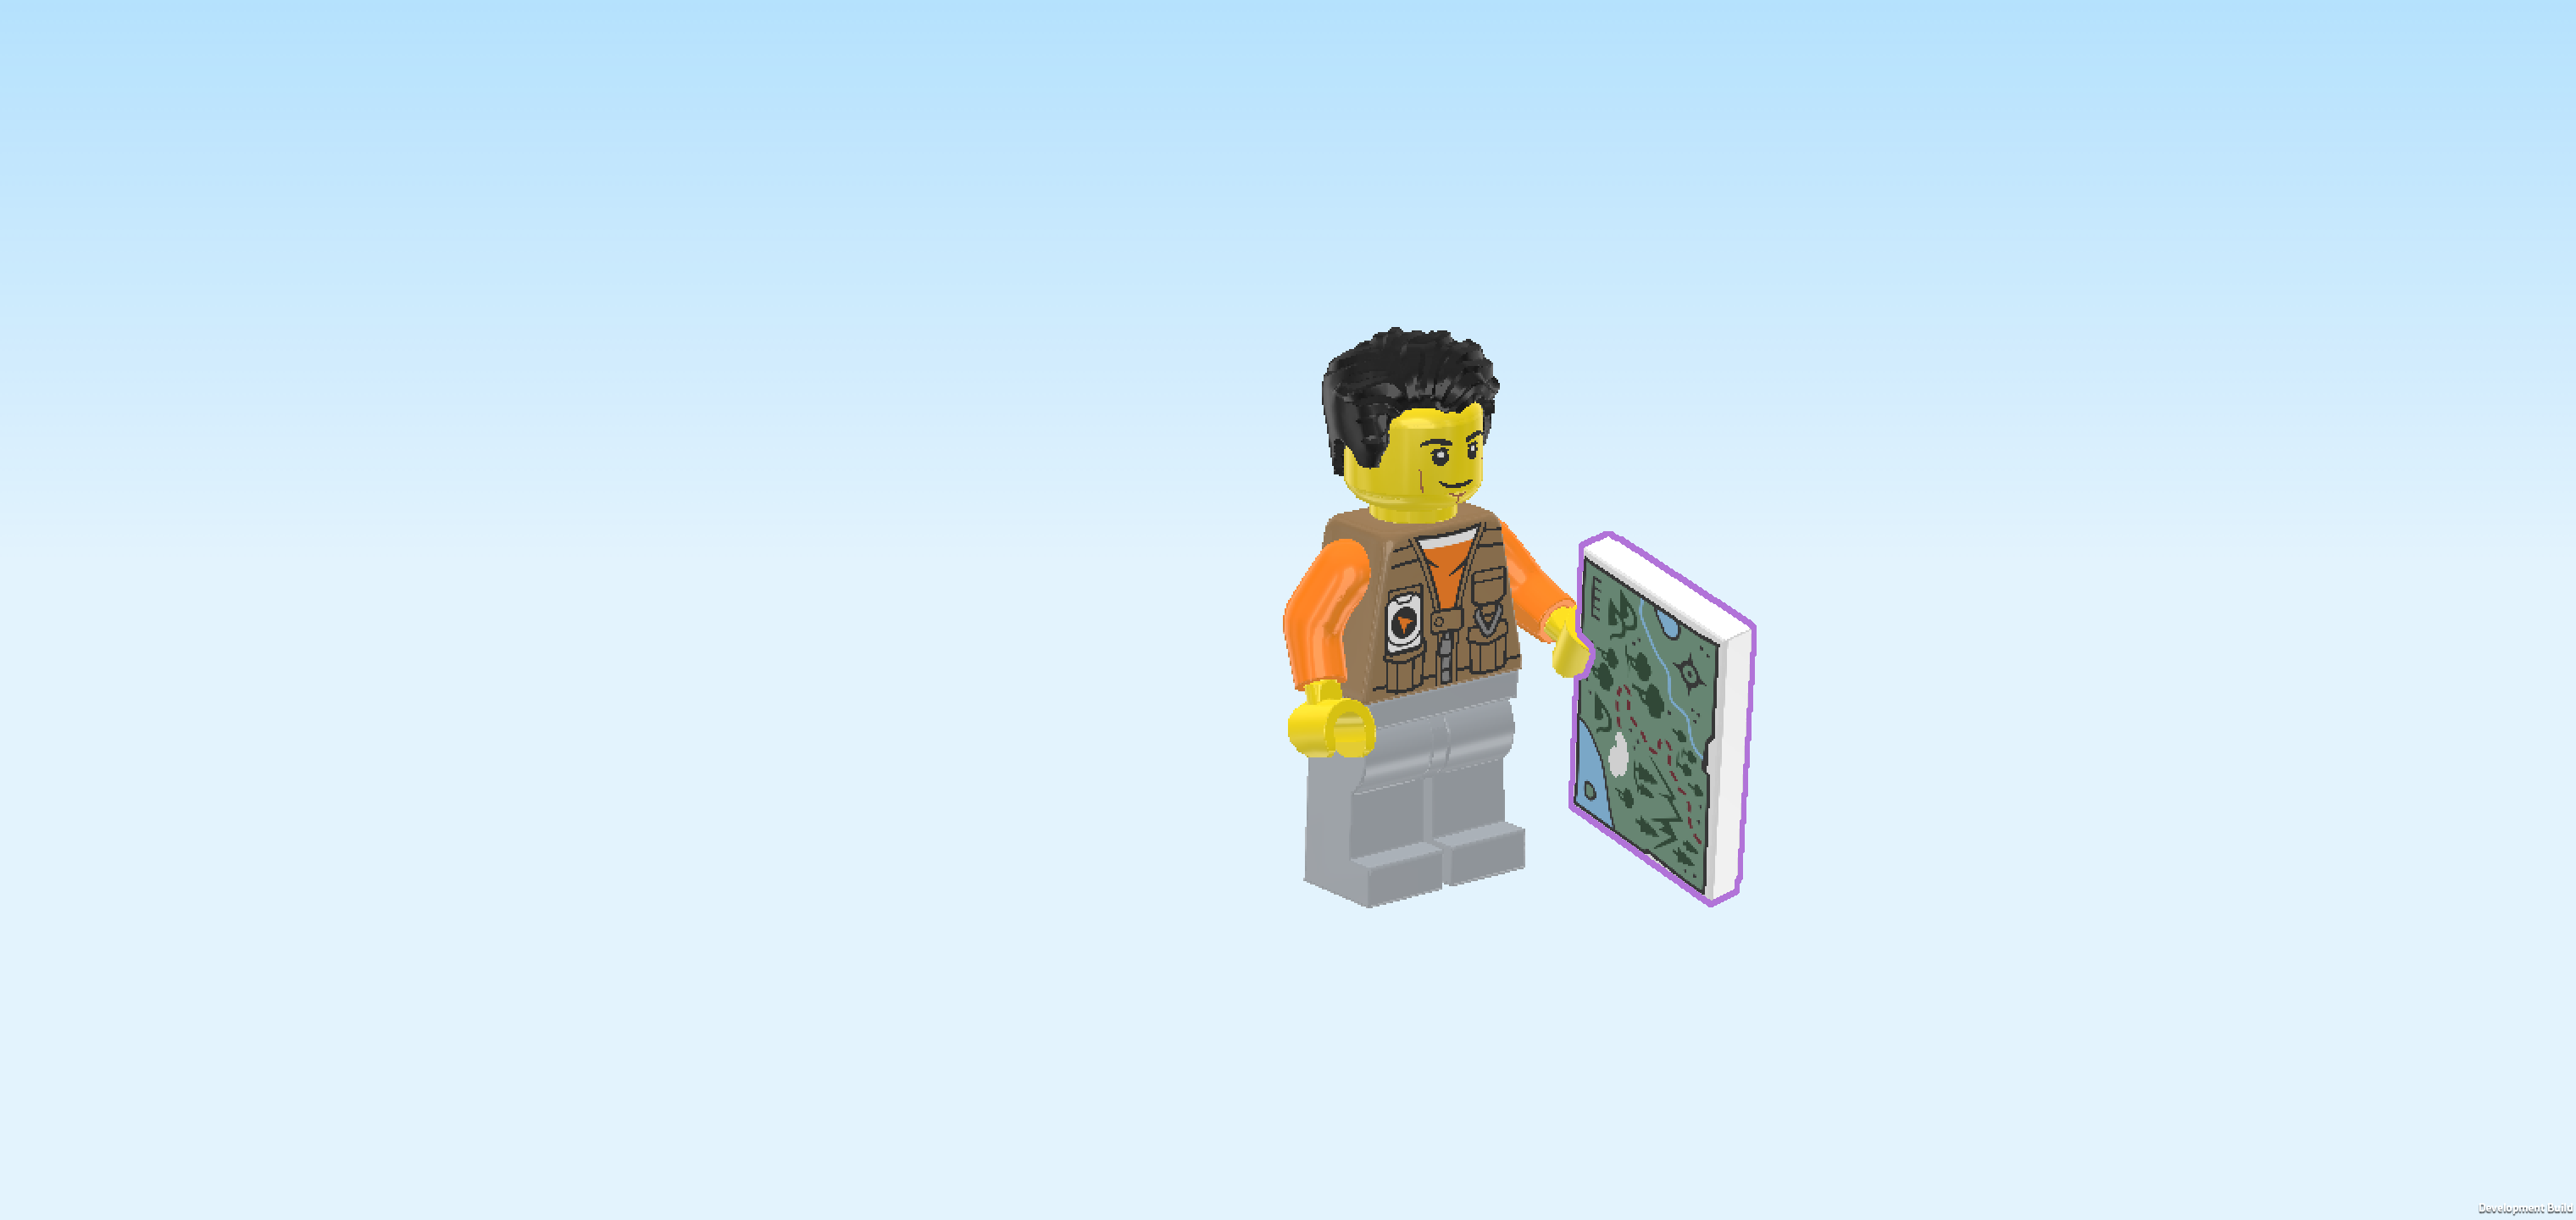
| Find 1 white flat tile 2x3. |
| Snap one of its long edges into the Minifigure's left hand. It is printed with a detailed map of the area, indicating mountains, rivers, lakes and even snowfields. There is a red dotted line indicating a trail and a map scale bar at the bottom of the map. |
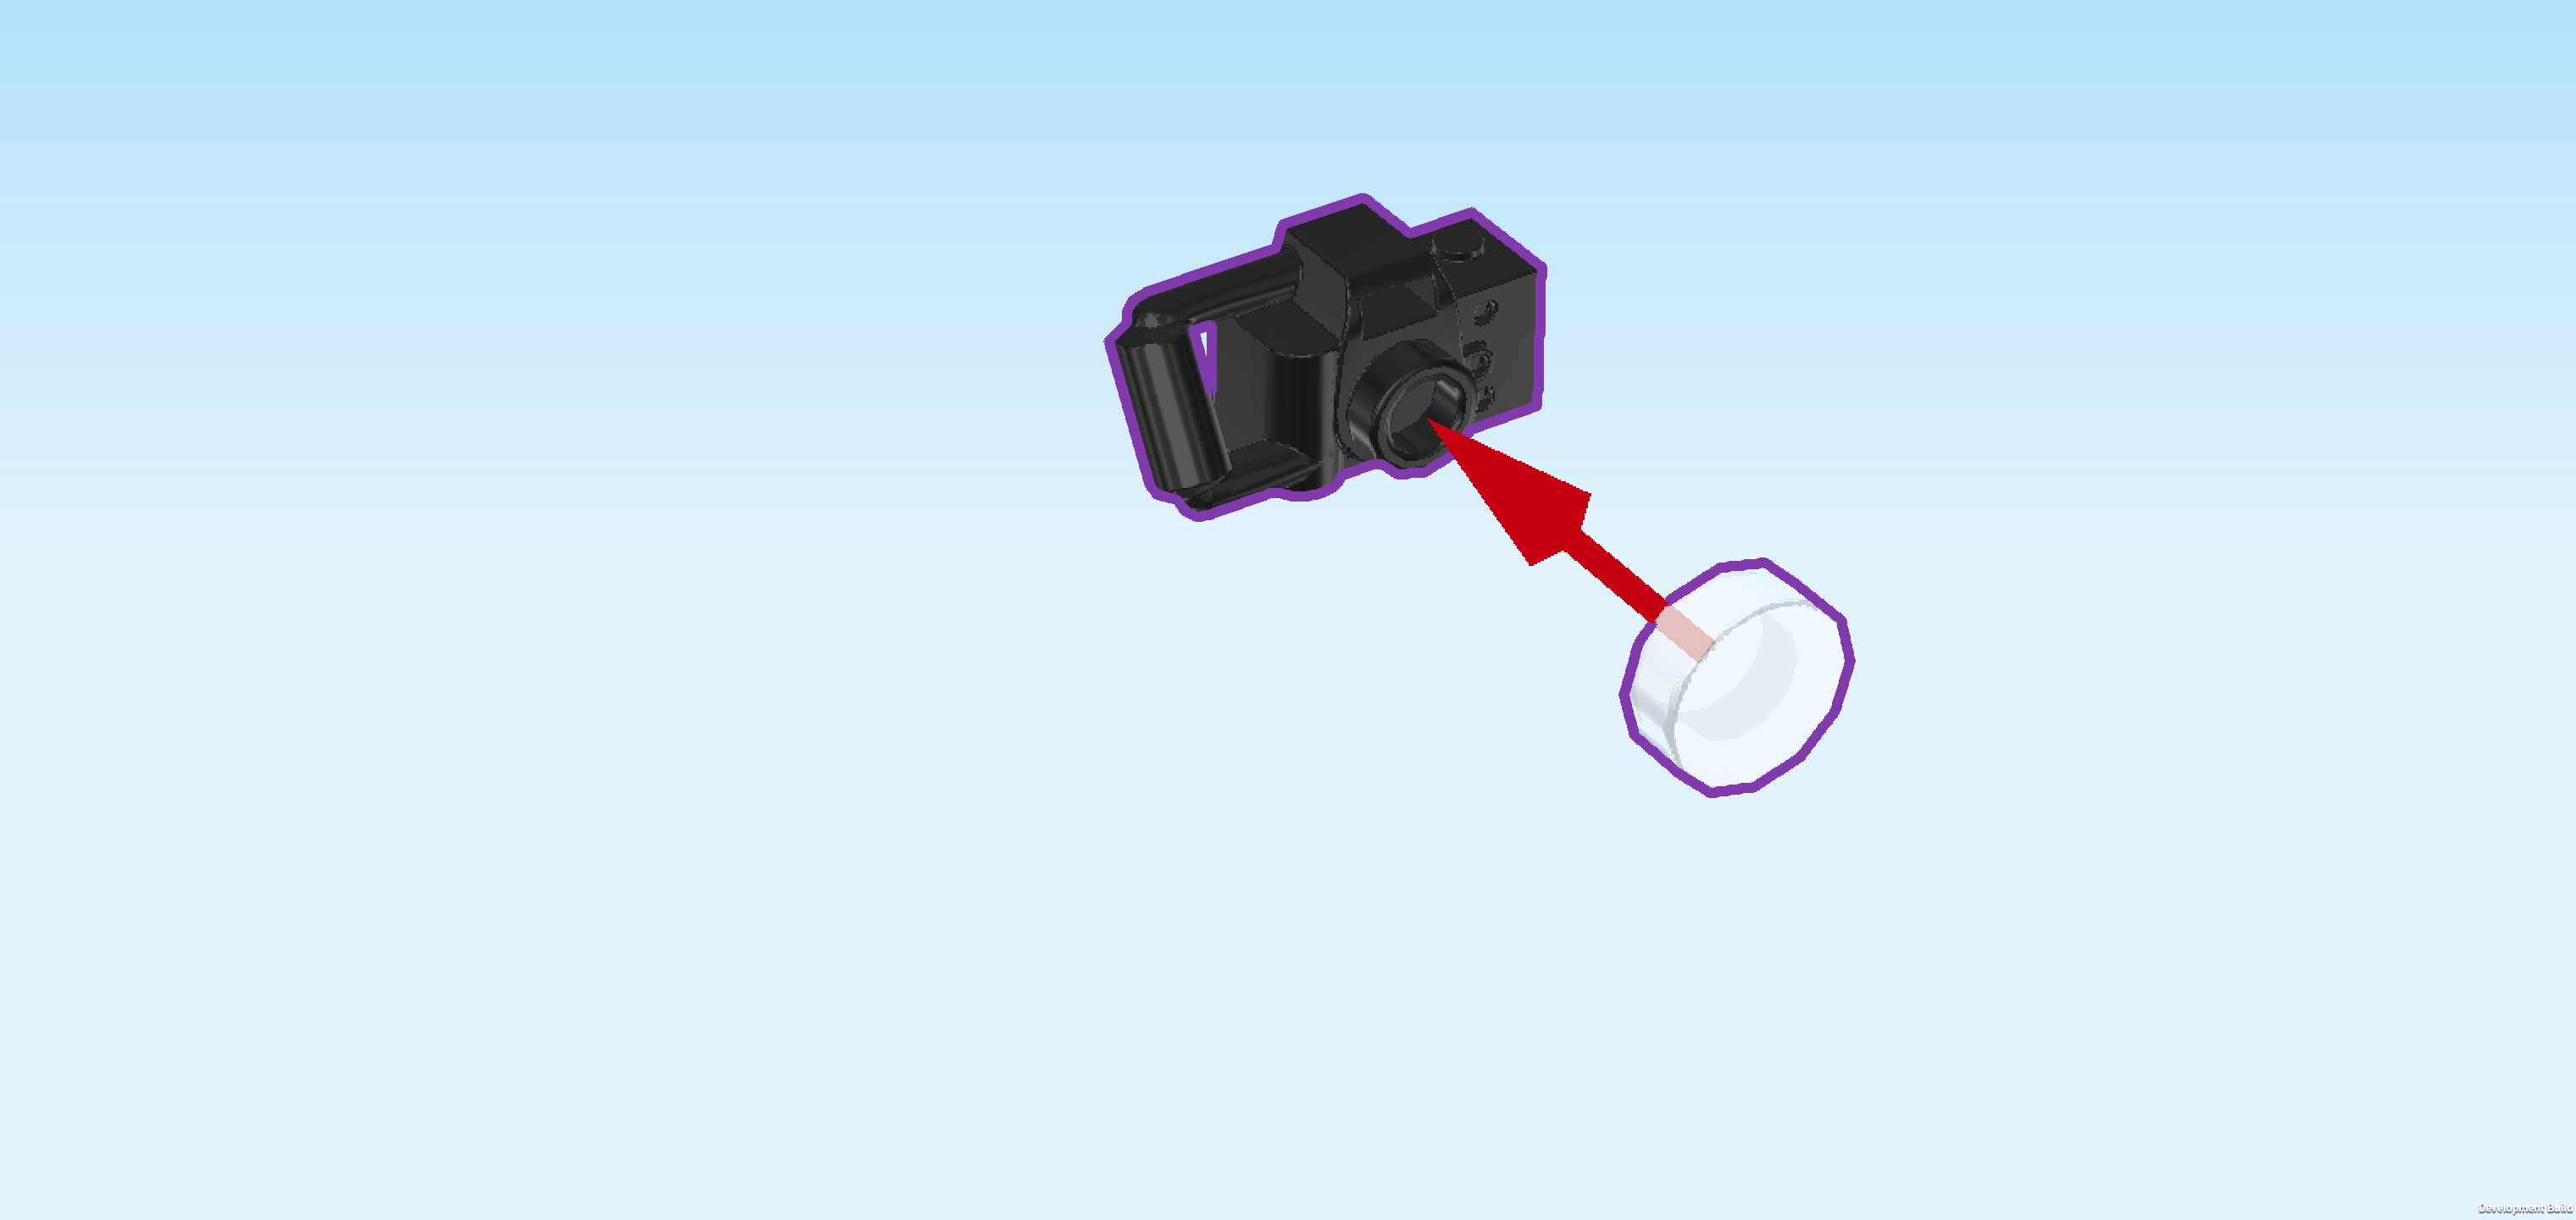
| Now, we will assemble the photo camera. |
| Collect the following 2 pieces: |
| 1 black Minifigure camera piece, |
| and 1 transparent round tile 1x1. |
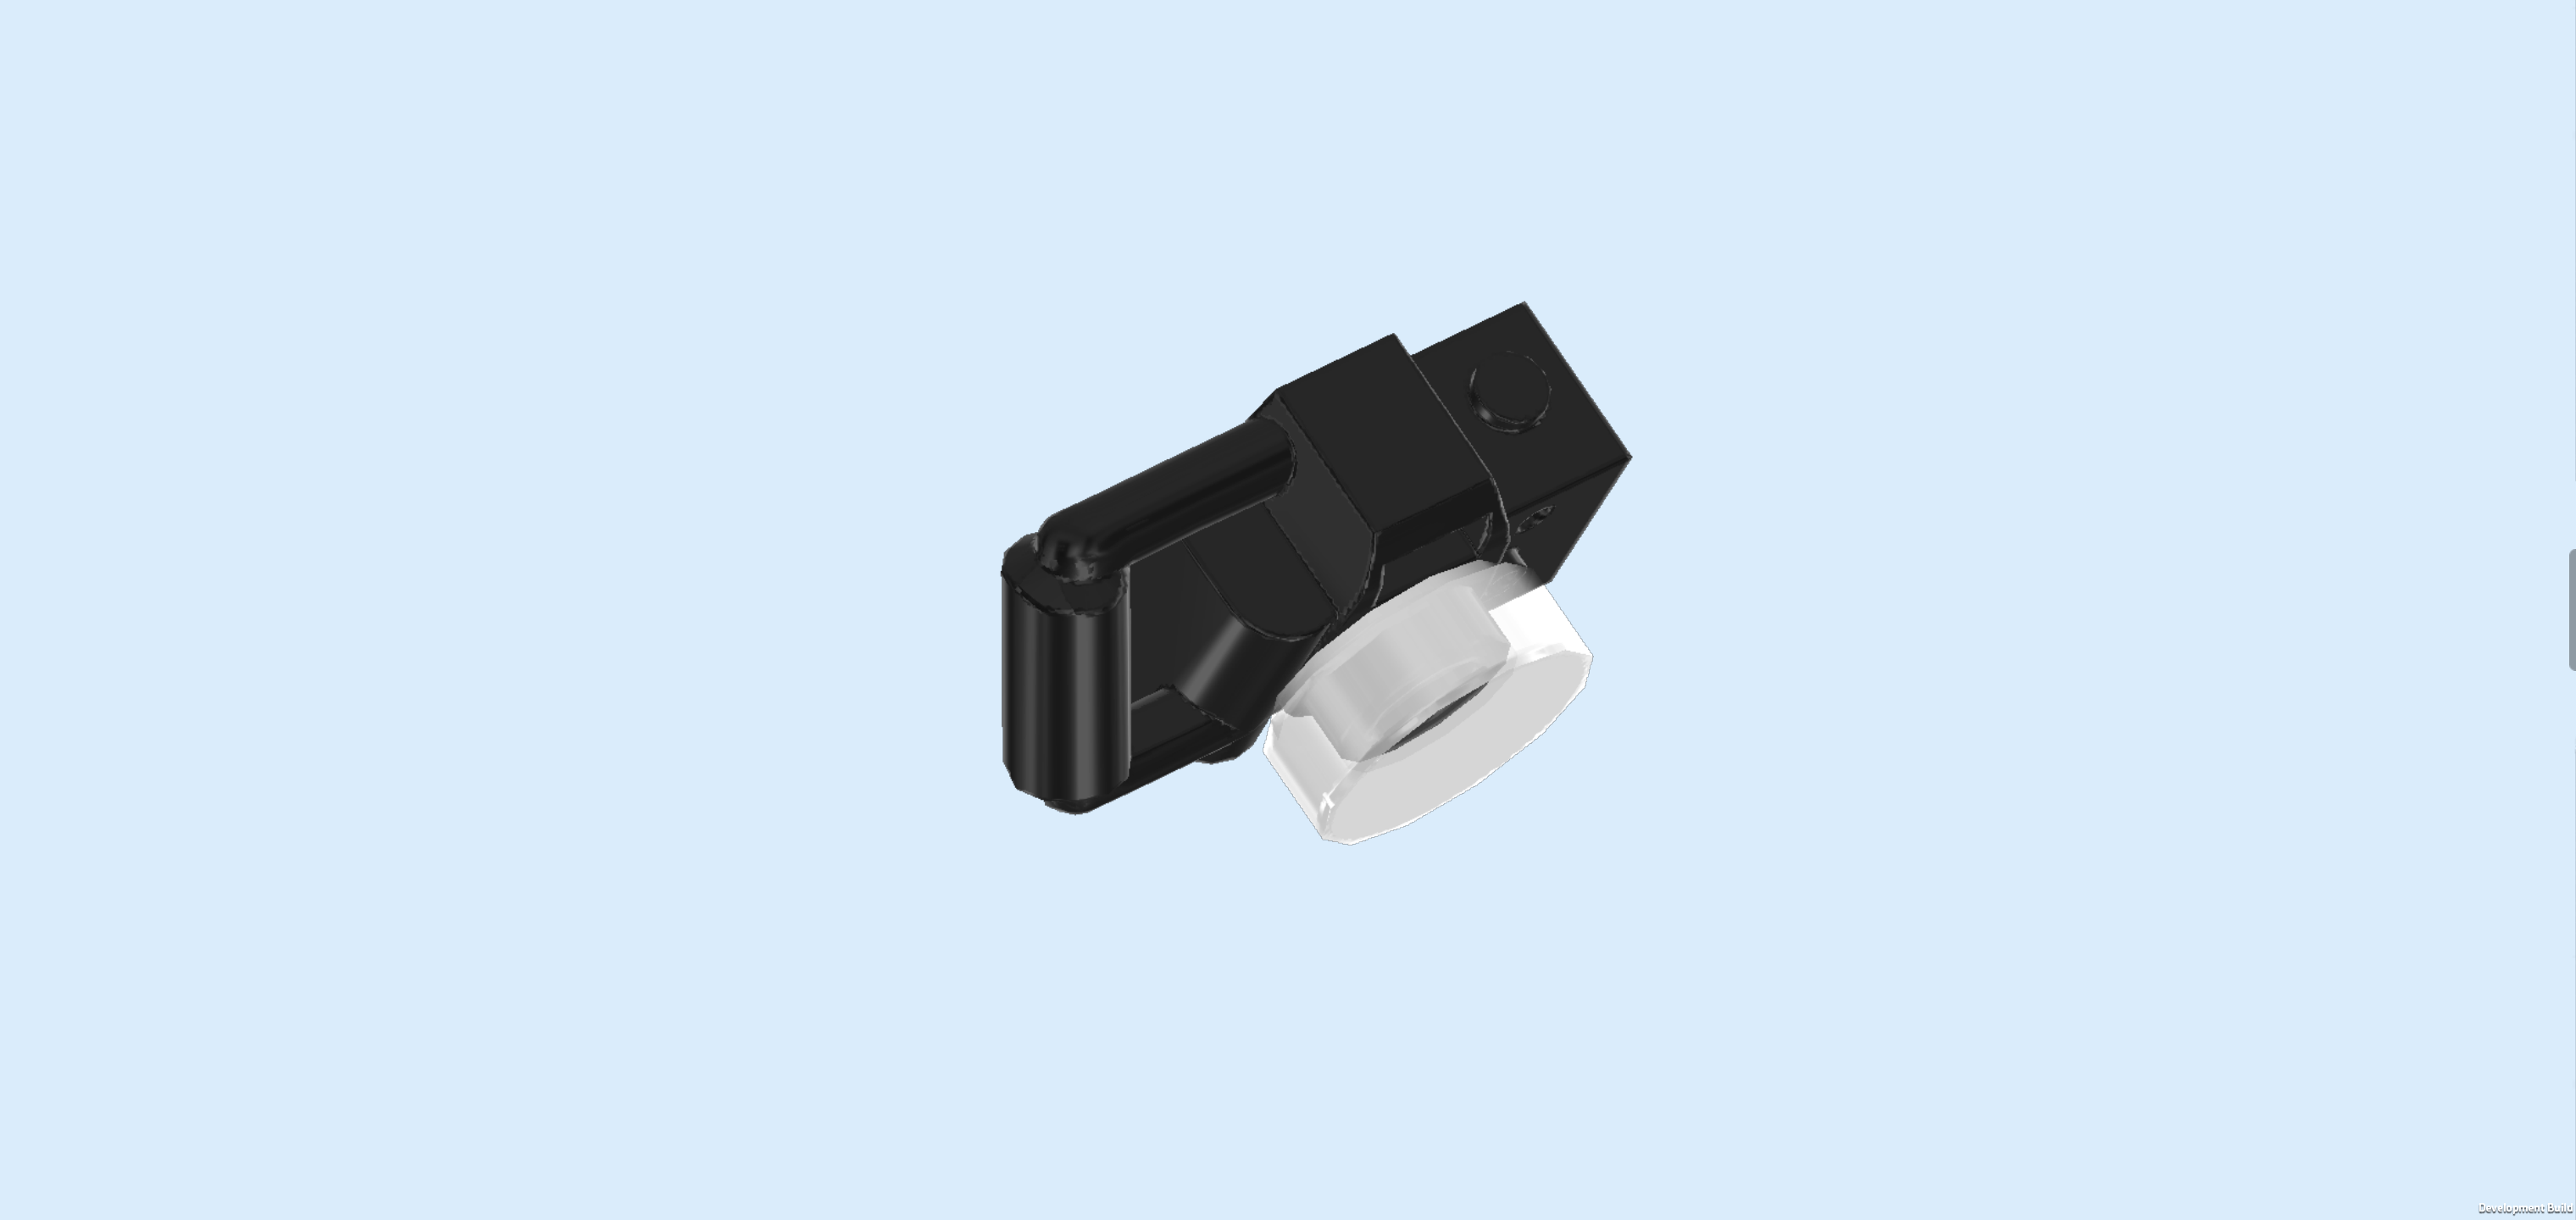
| Put the round tile on the hollow knob of the camera. This is the camera lens! |
| Snap the handle of the camera into the Minifigure's right hand. |
| The Adventurer Minifigure is finished! Great job! He has tousled black hair and a confident smile with dimples on his cheeks and chin—just the look of someone who spends a lot of time in the wild. He's wearing a tan utility vest over a bright orange long-sleeve shirt. His vest is packed with details: a navigation device, lots of pockets, and even a buckle to keep everything in place while climbing, hiking, or repairing the truck. On his legs, he wears light grey trousers that are sturdy enough for rocky trails. The detailed map of the mountains is indispensable when navigating the vast mountain landscapes, and his camera is perfect for snapping wildlife photos or documenting tricky trails. With his gear and cheerful look, he seems like the kind of explorer who loves nature and never forgets his sense of direction. |
| Next, we will build the Mountain Truck undercarriage. |
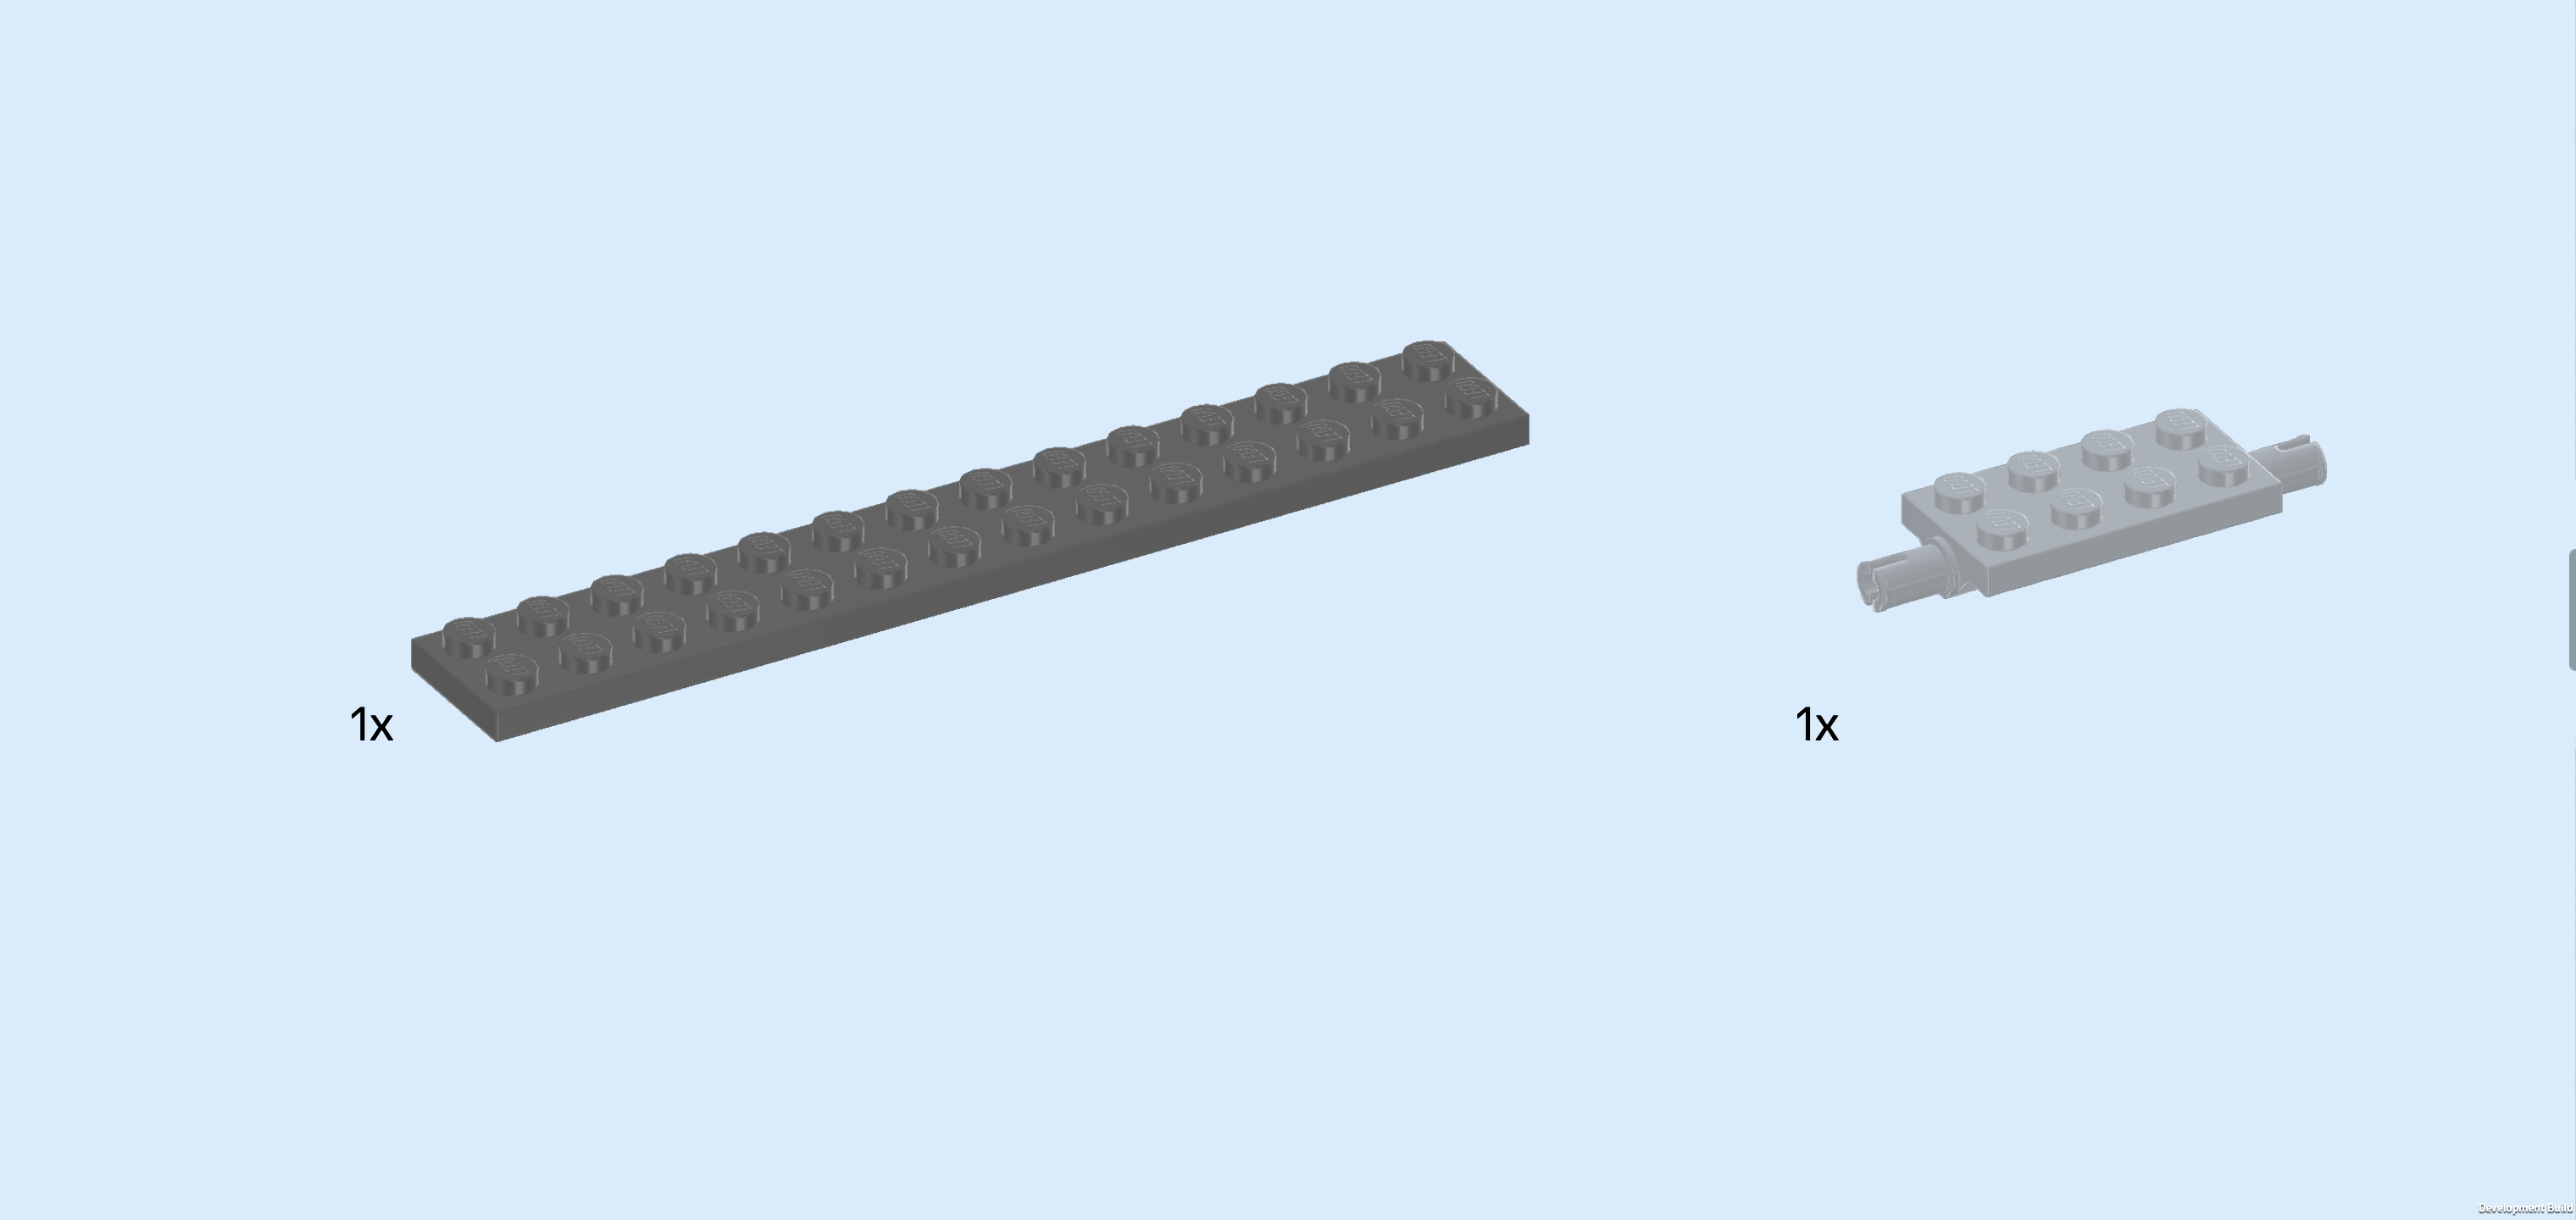
| Collect the following 2 pieces: |
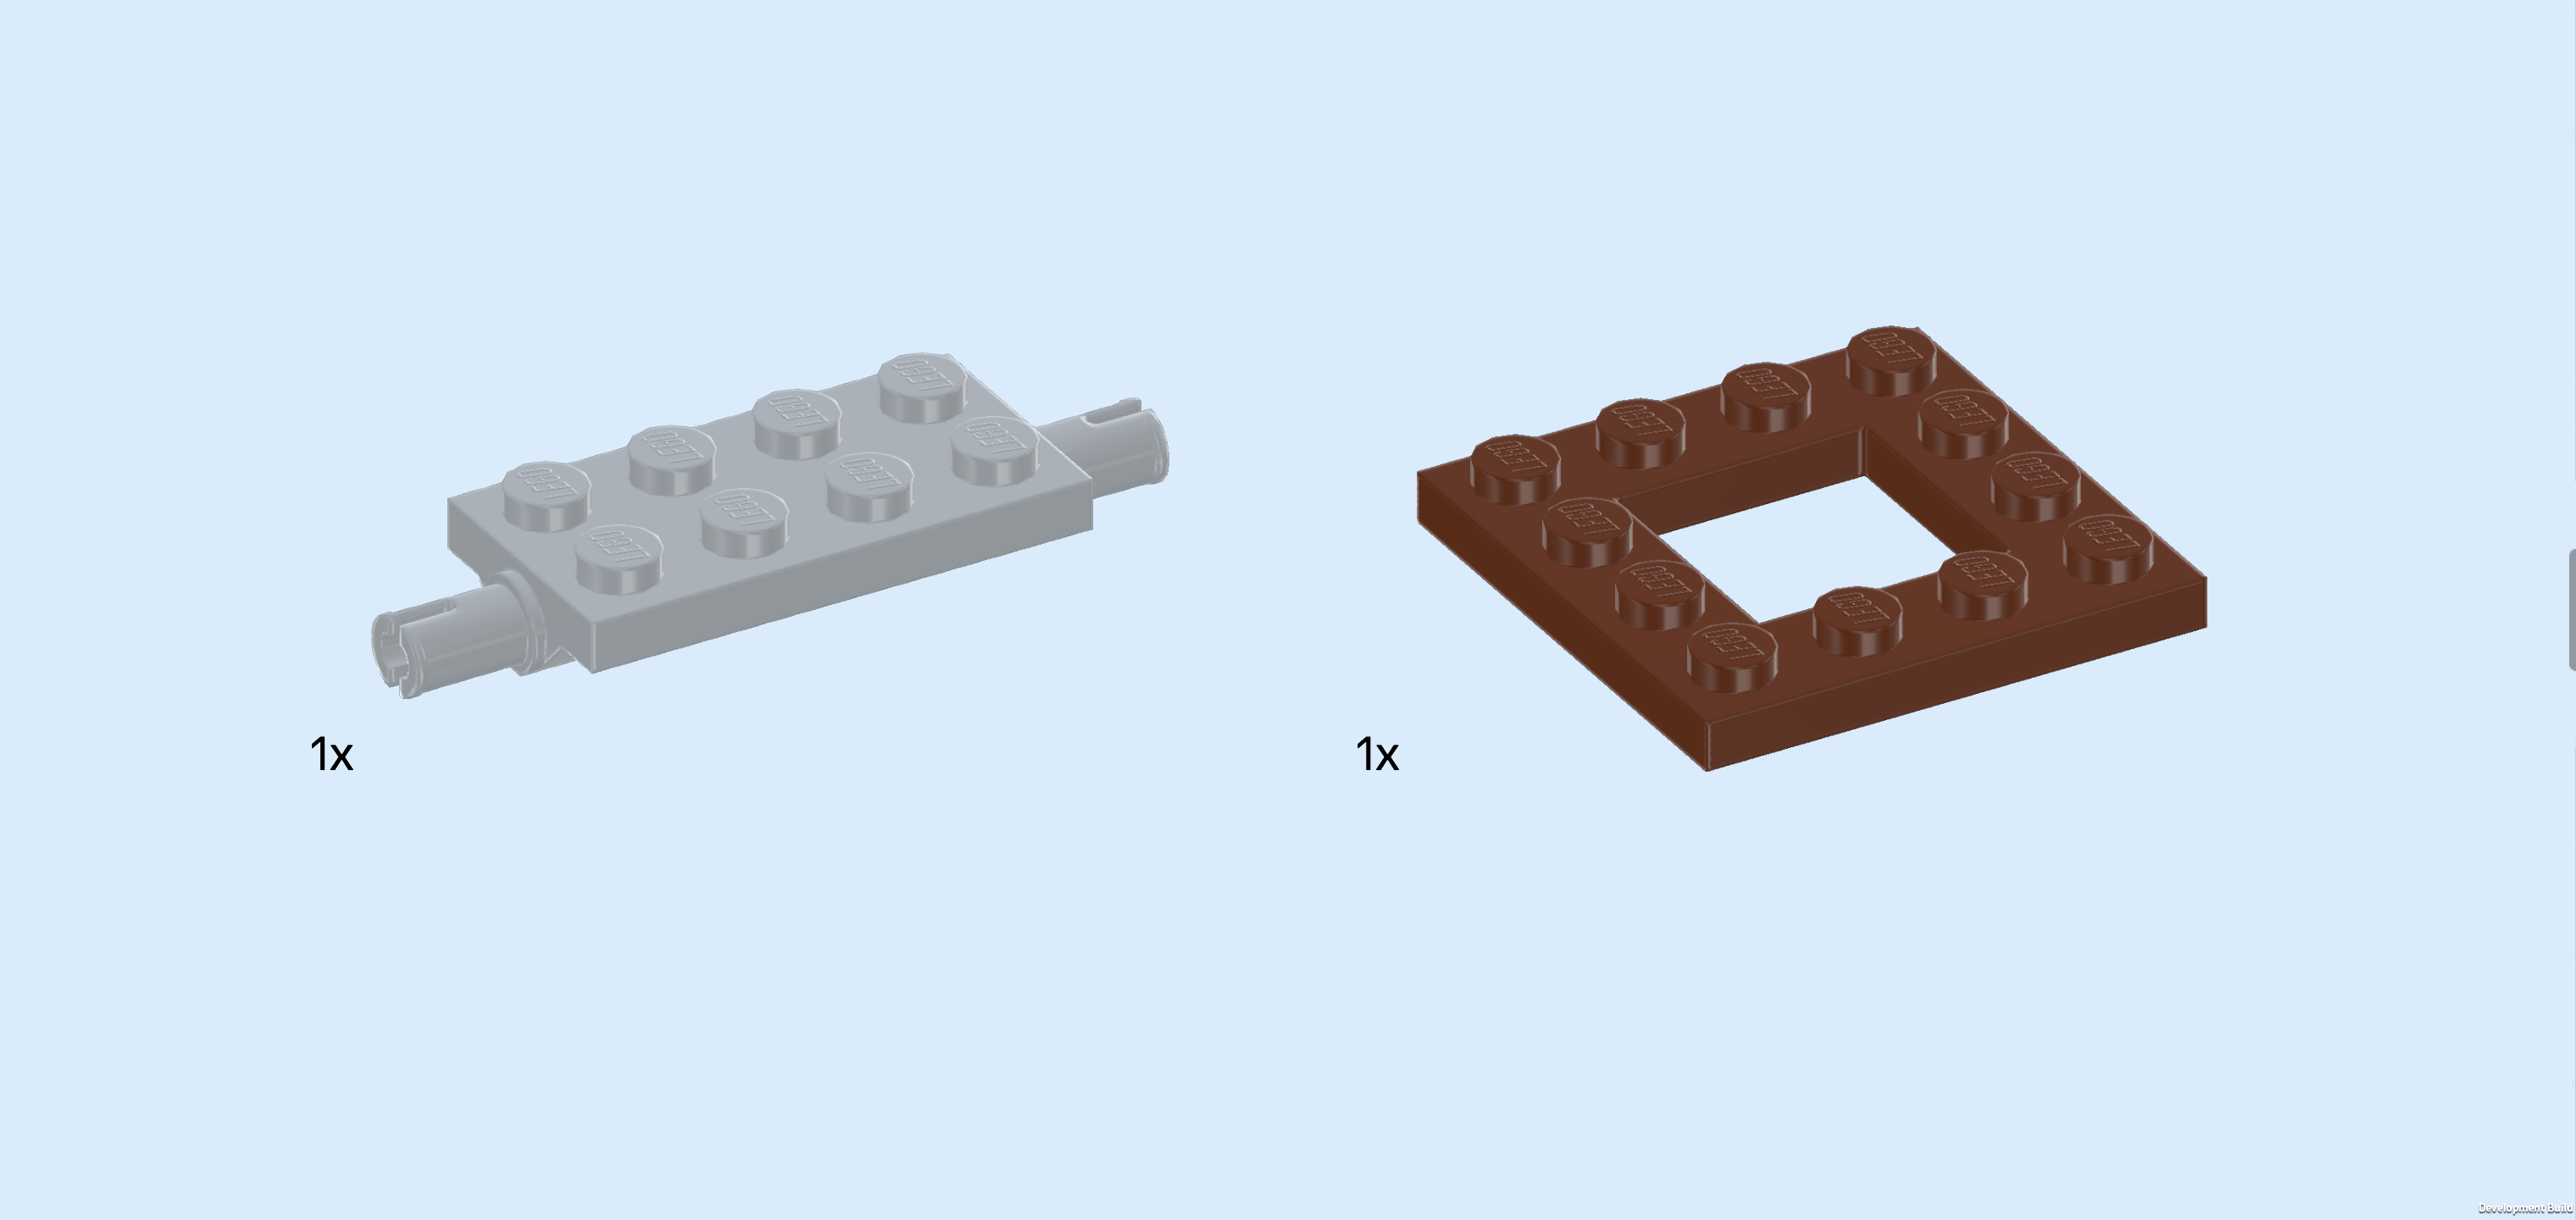
| 1 dark stone grey plate 2x14, |
| and 1 medium stone grey plate 2x4 with 2 connector pins. |
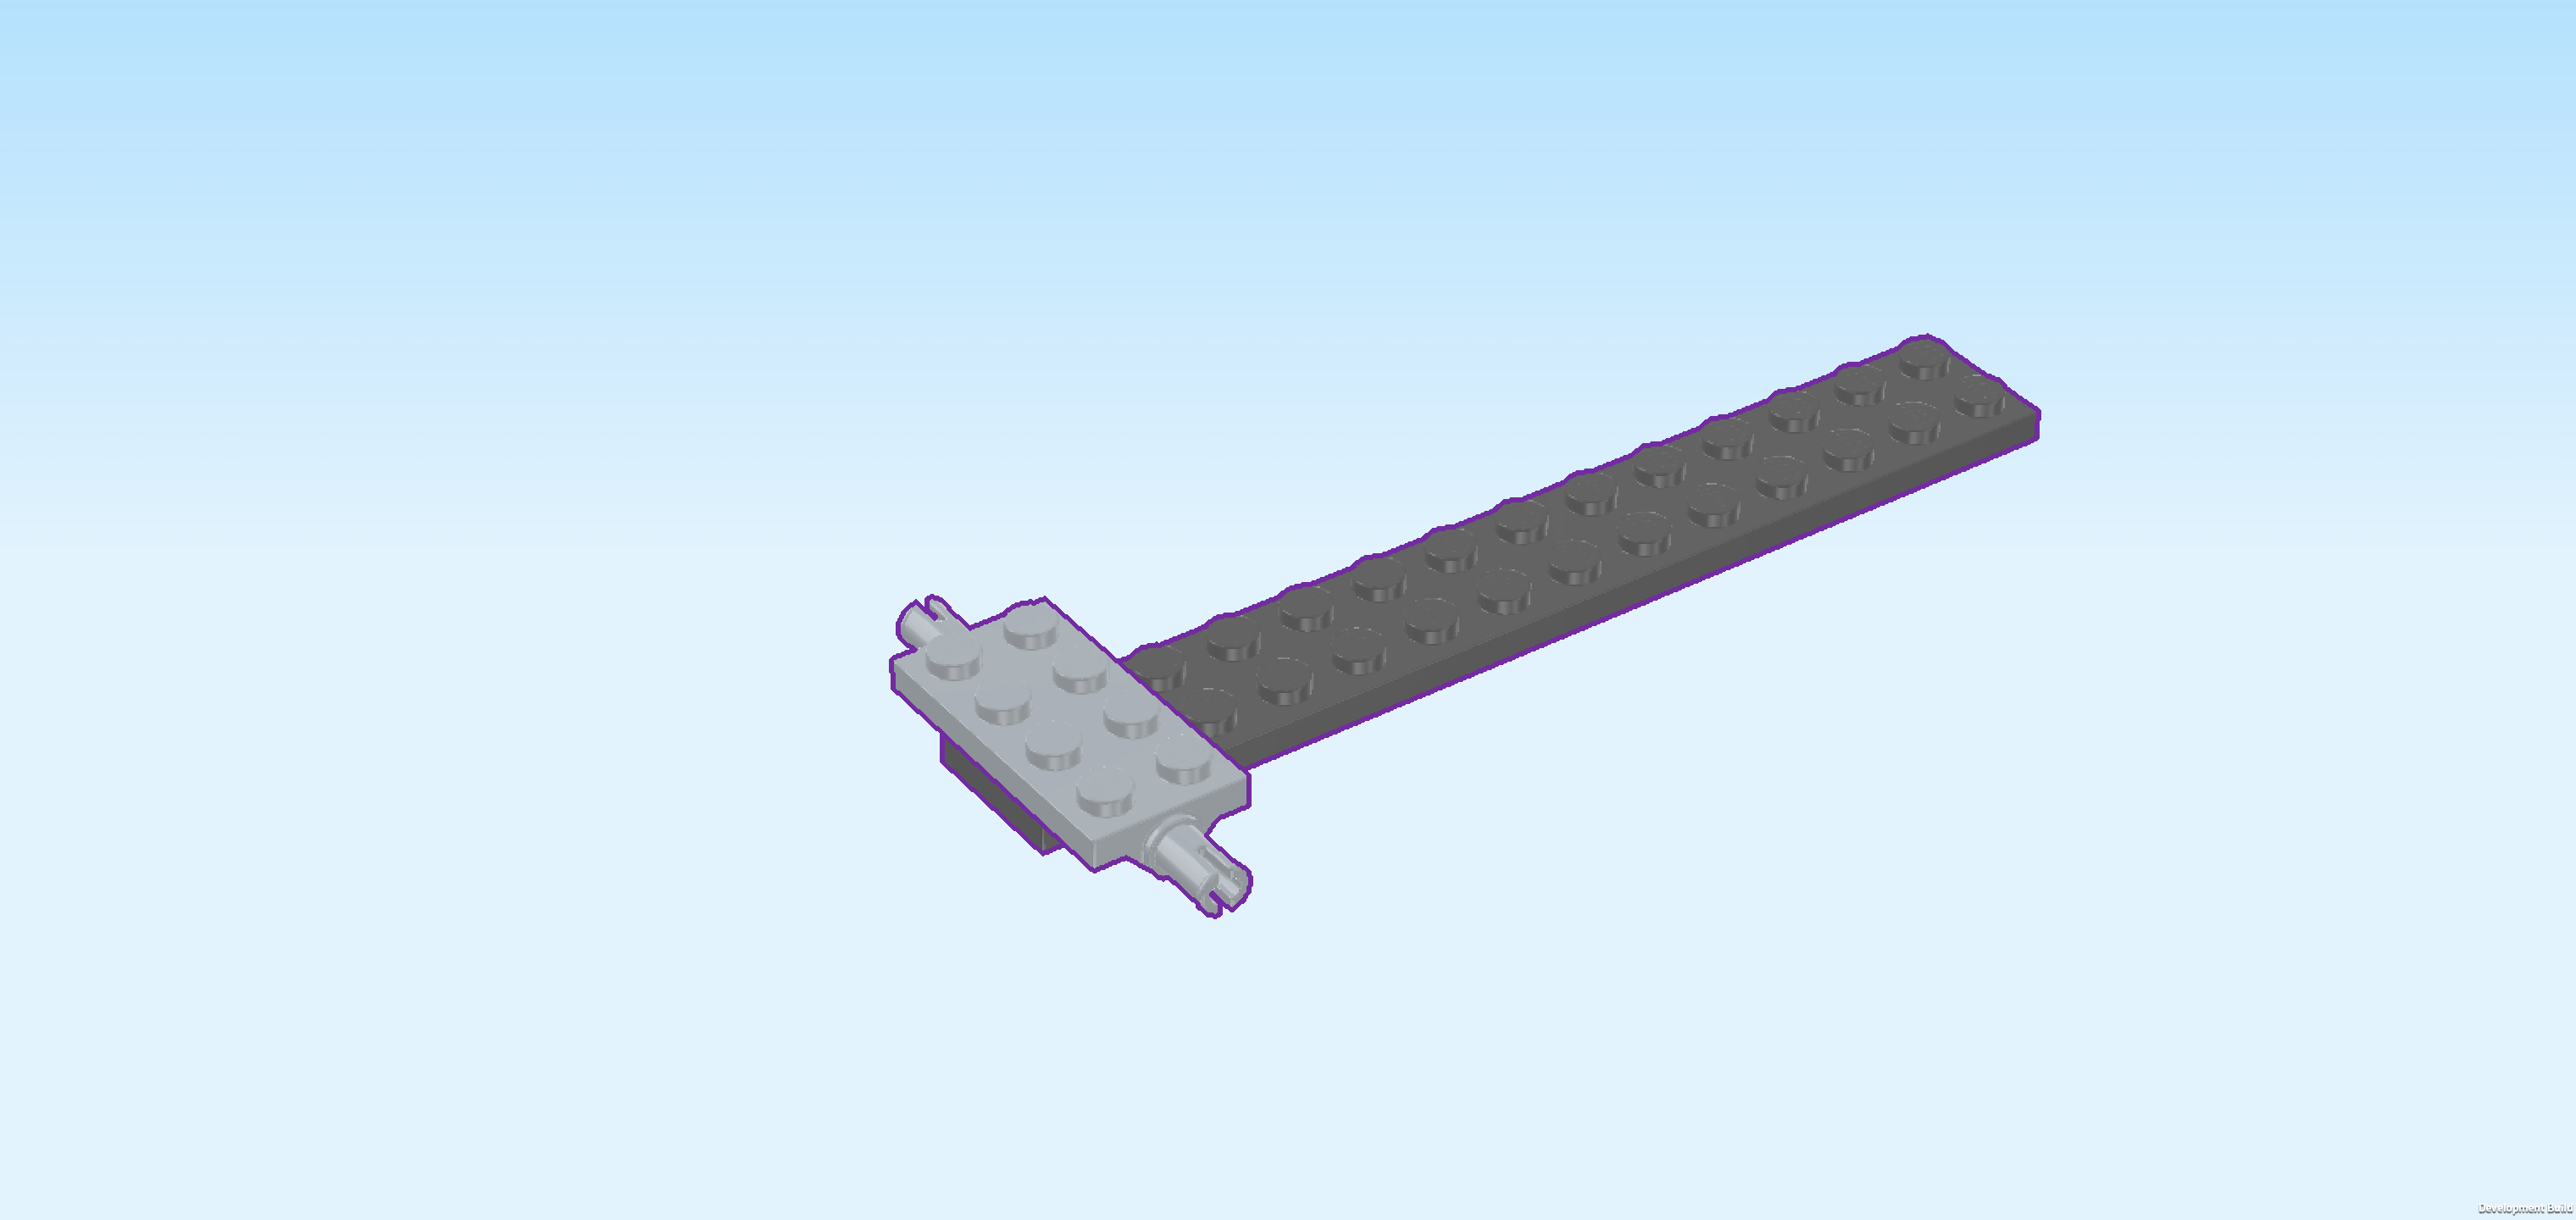
| Put the plate 2x14 horizontally on the table. |
| Put the plate 2x4 vertically on the leftmost edge, symmetrically overhanging to the front and back, connectors to the front and back. |
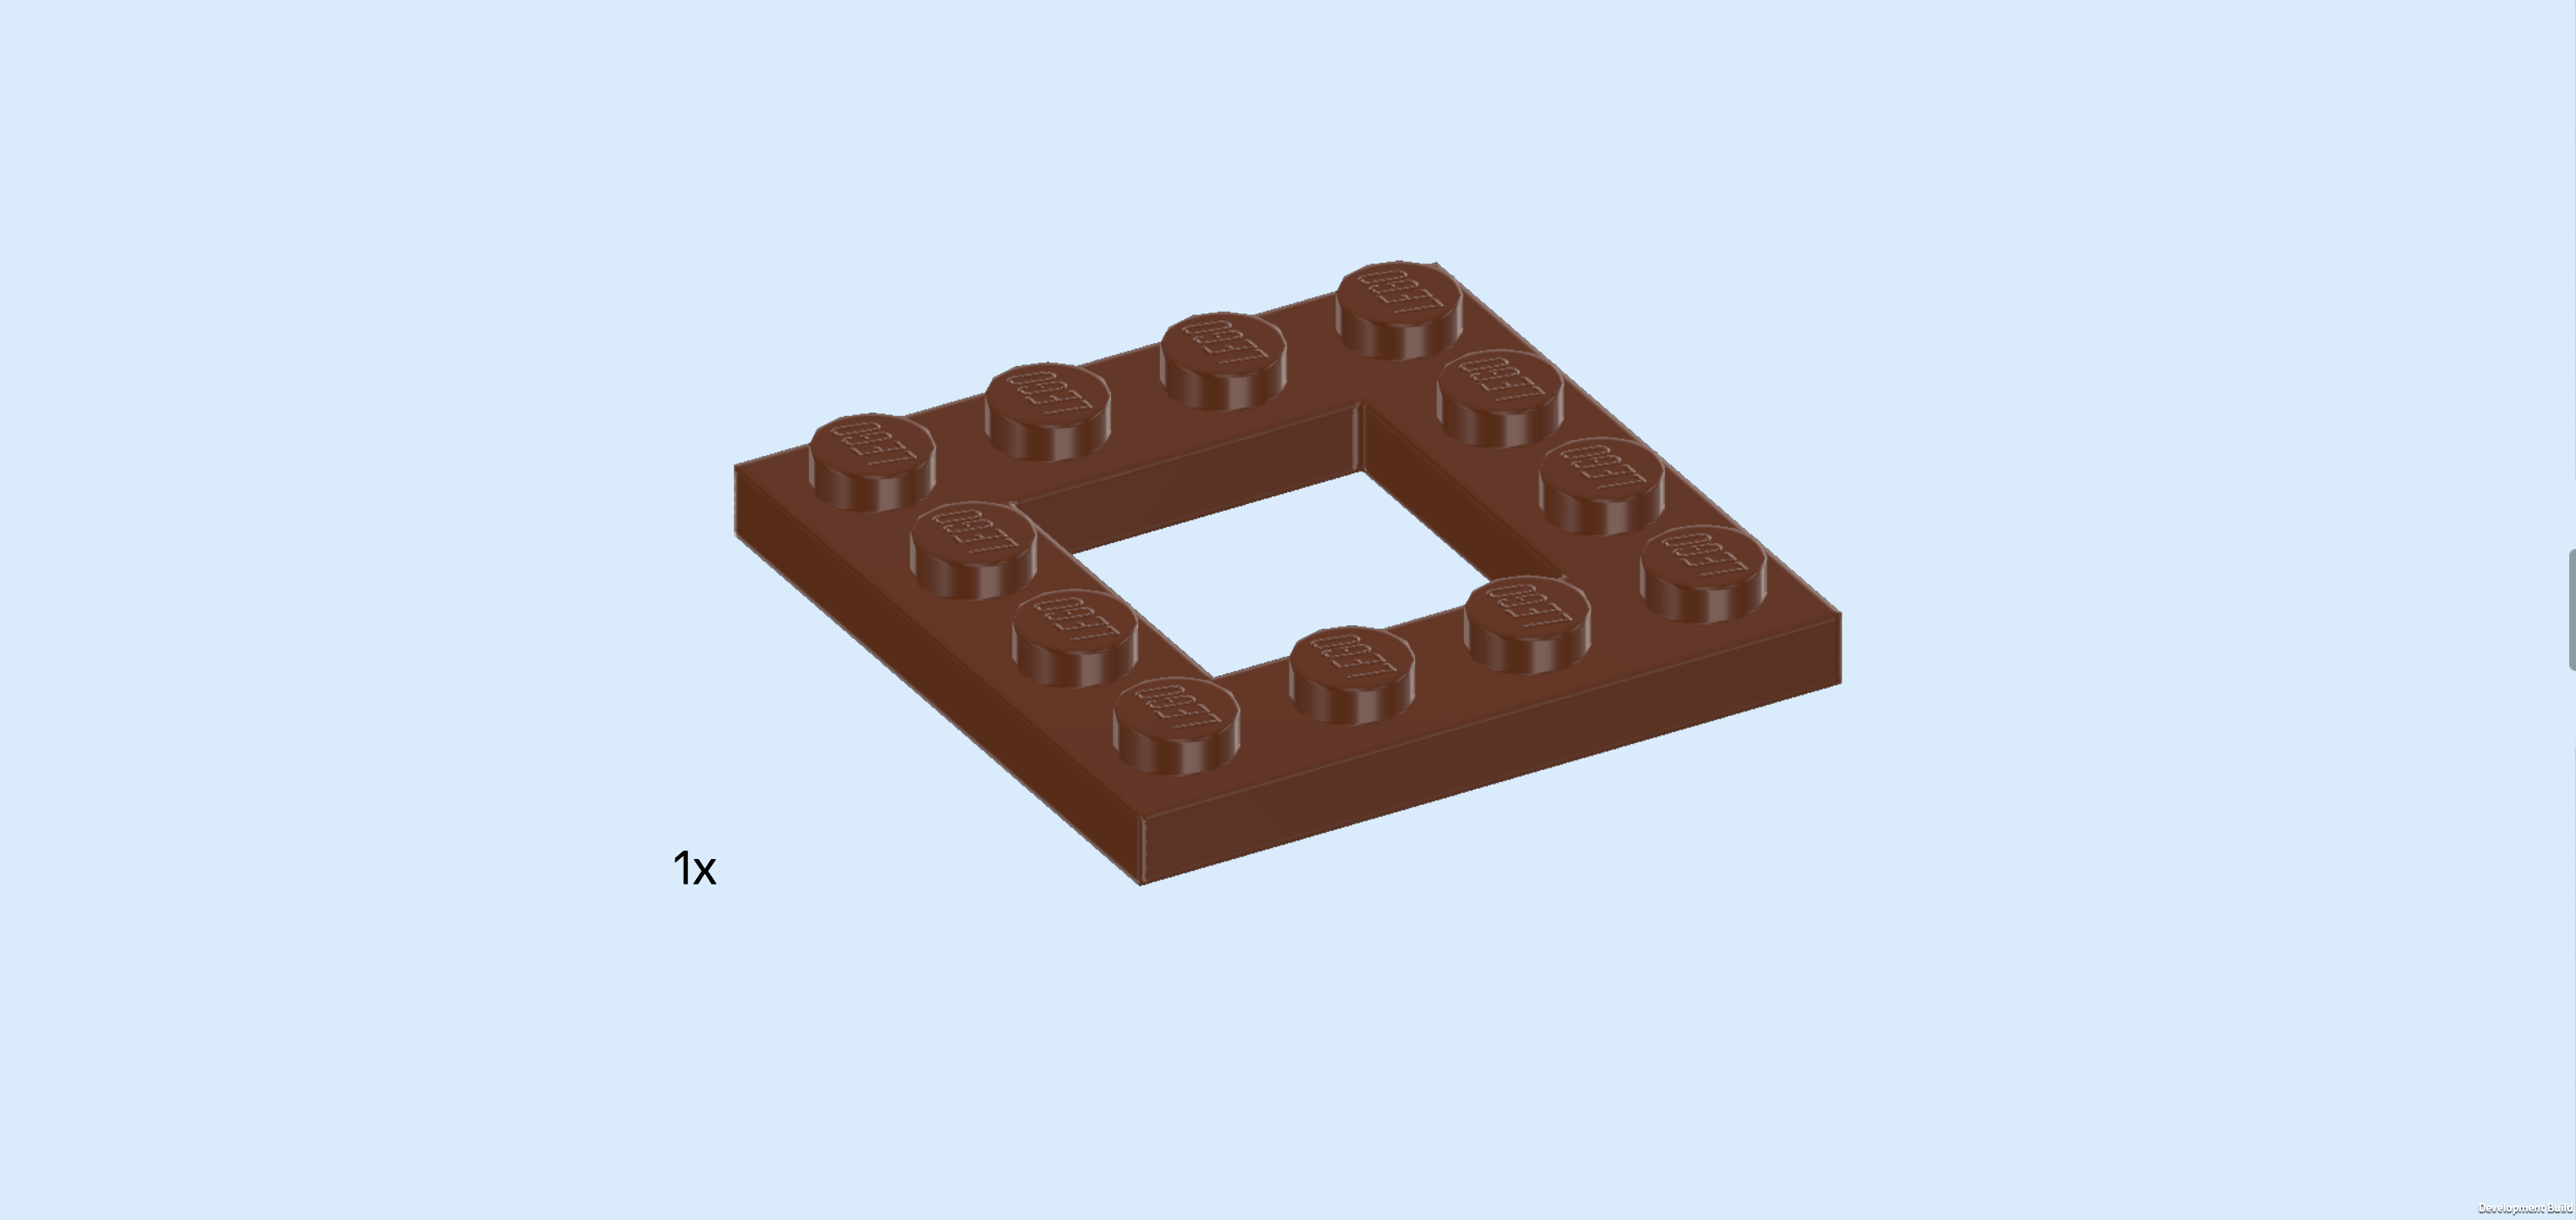
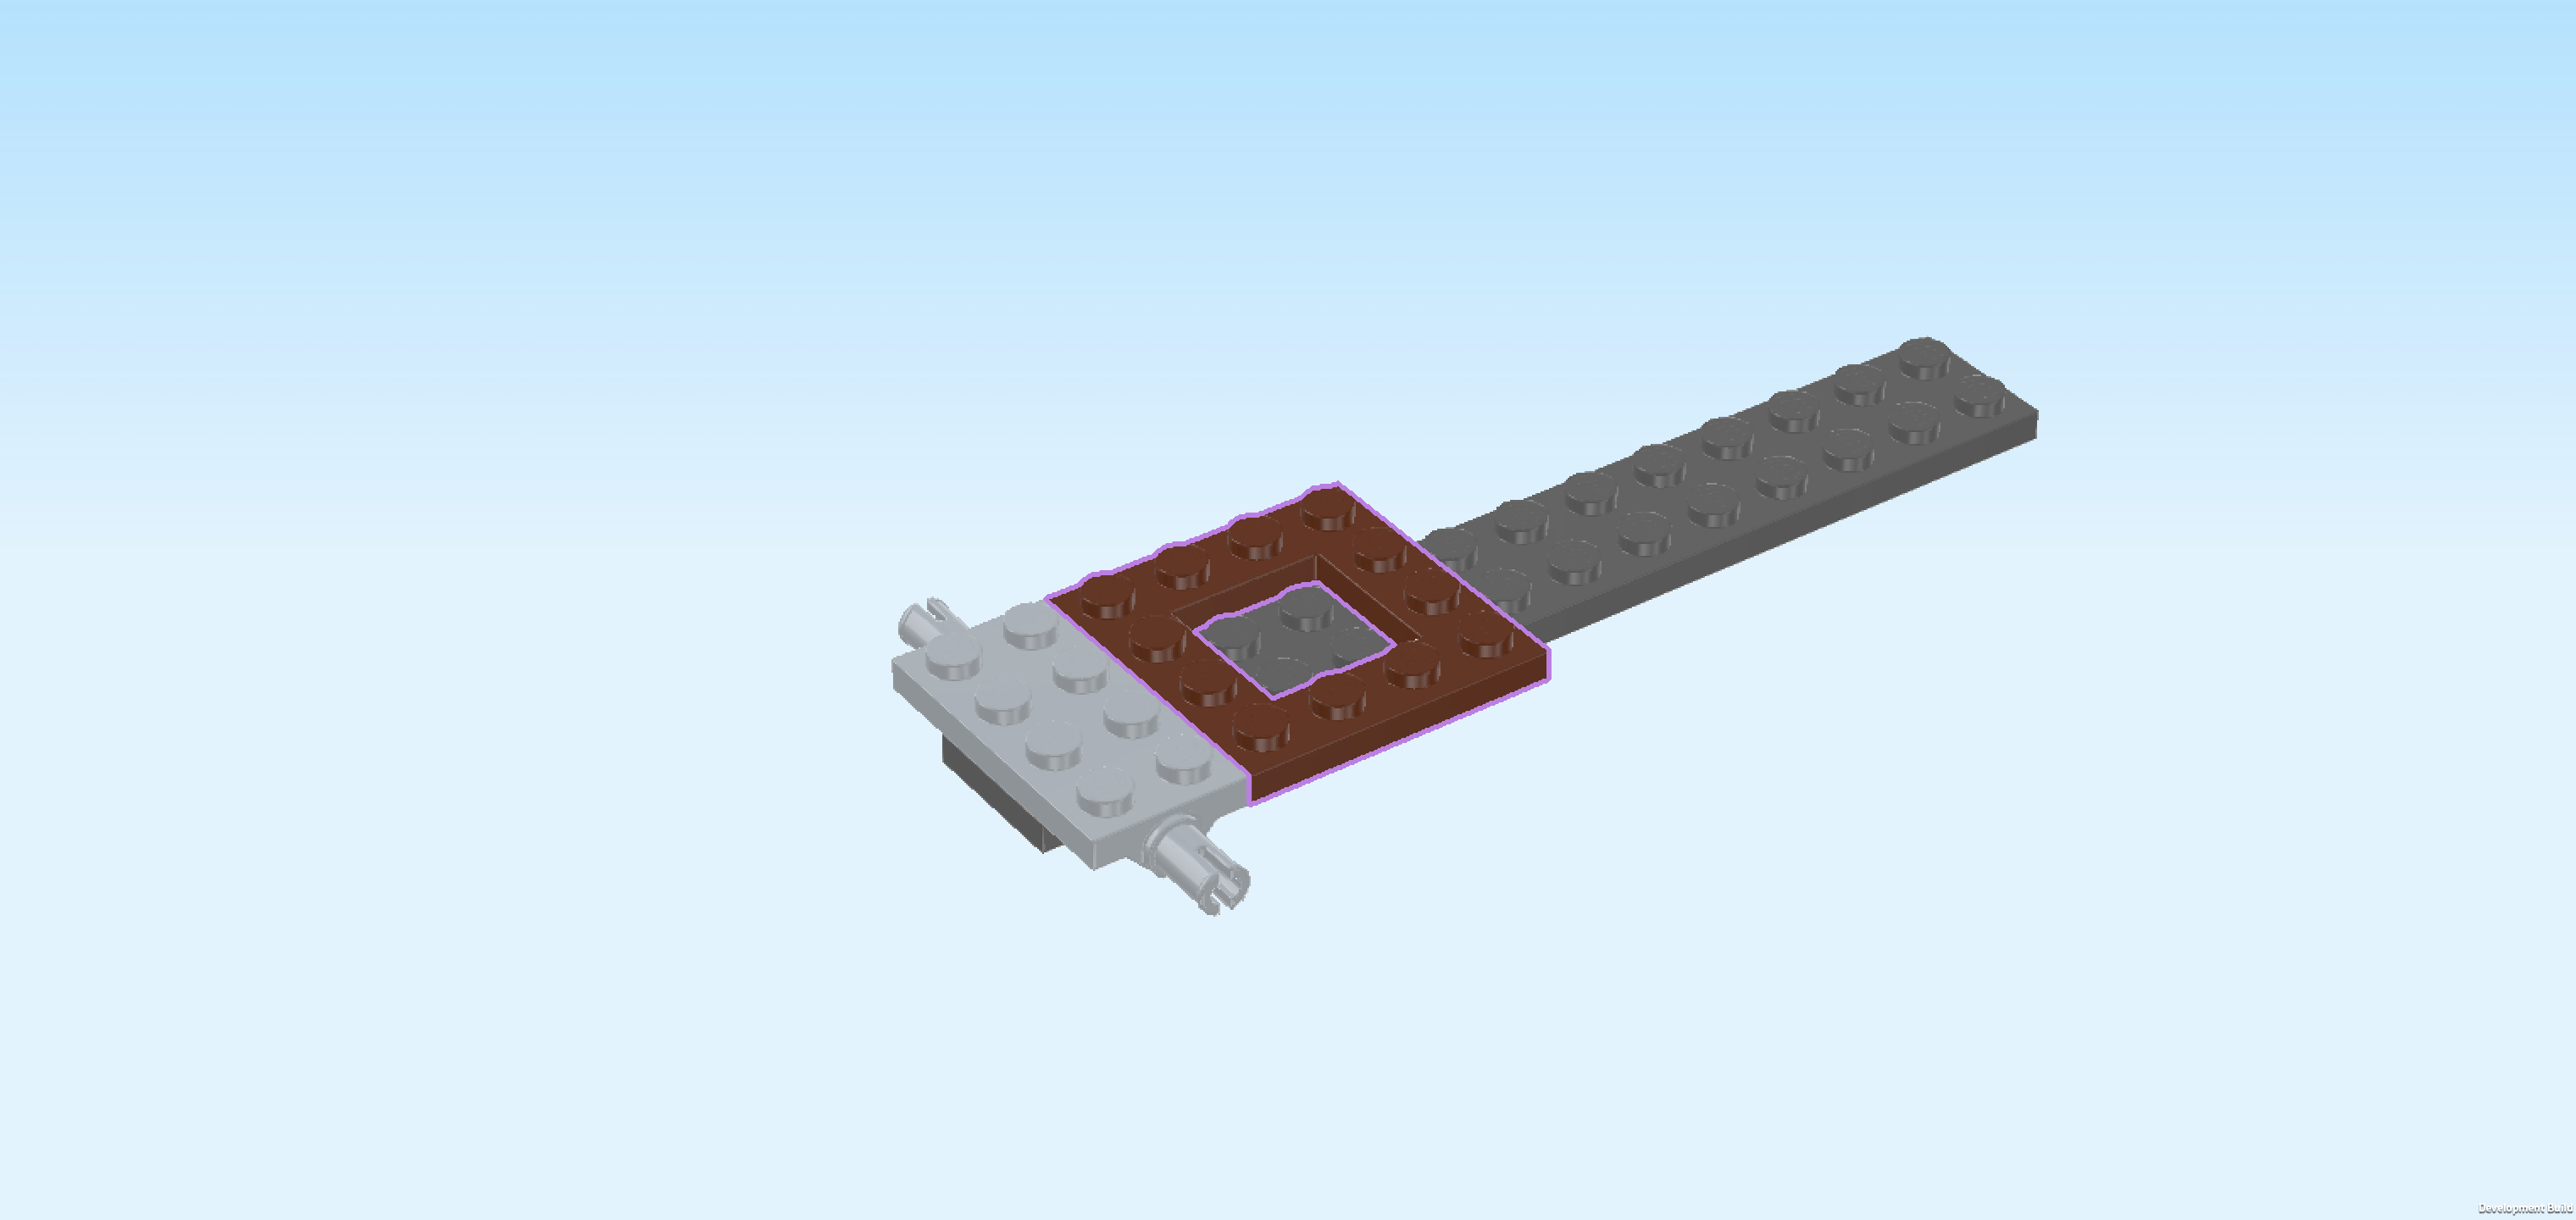
| Find 1 reddish brown frame plate 4x4 with middle hole. |
| Put it centered to the right of the previous piece, symmetrically overhanging to the front and back. |
| Collect the following 2 pieces: |
| 1 medium stone grey plate 2x4 with 2 connector pins, |
| and 1 reddish brown frame plate 4x4 with middle hole. |
| Put the frame plate 4x4 centered to the right of the previous piece. |
| Put the plate 2x4 vertically to the right of the previous piece, symmetrically overhanging to the front and back, connector pins to the front and back. |
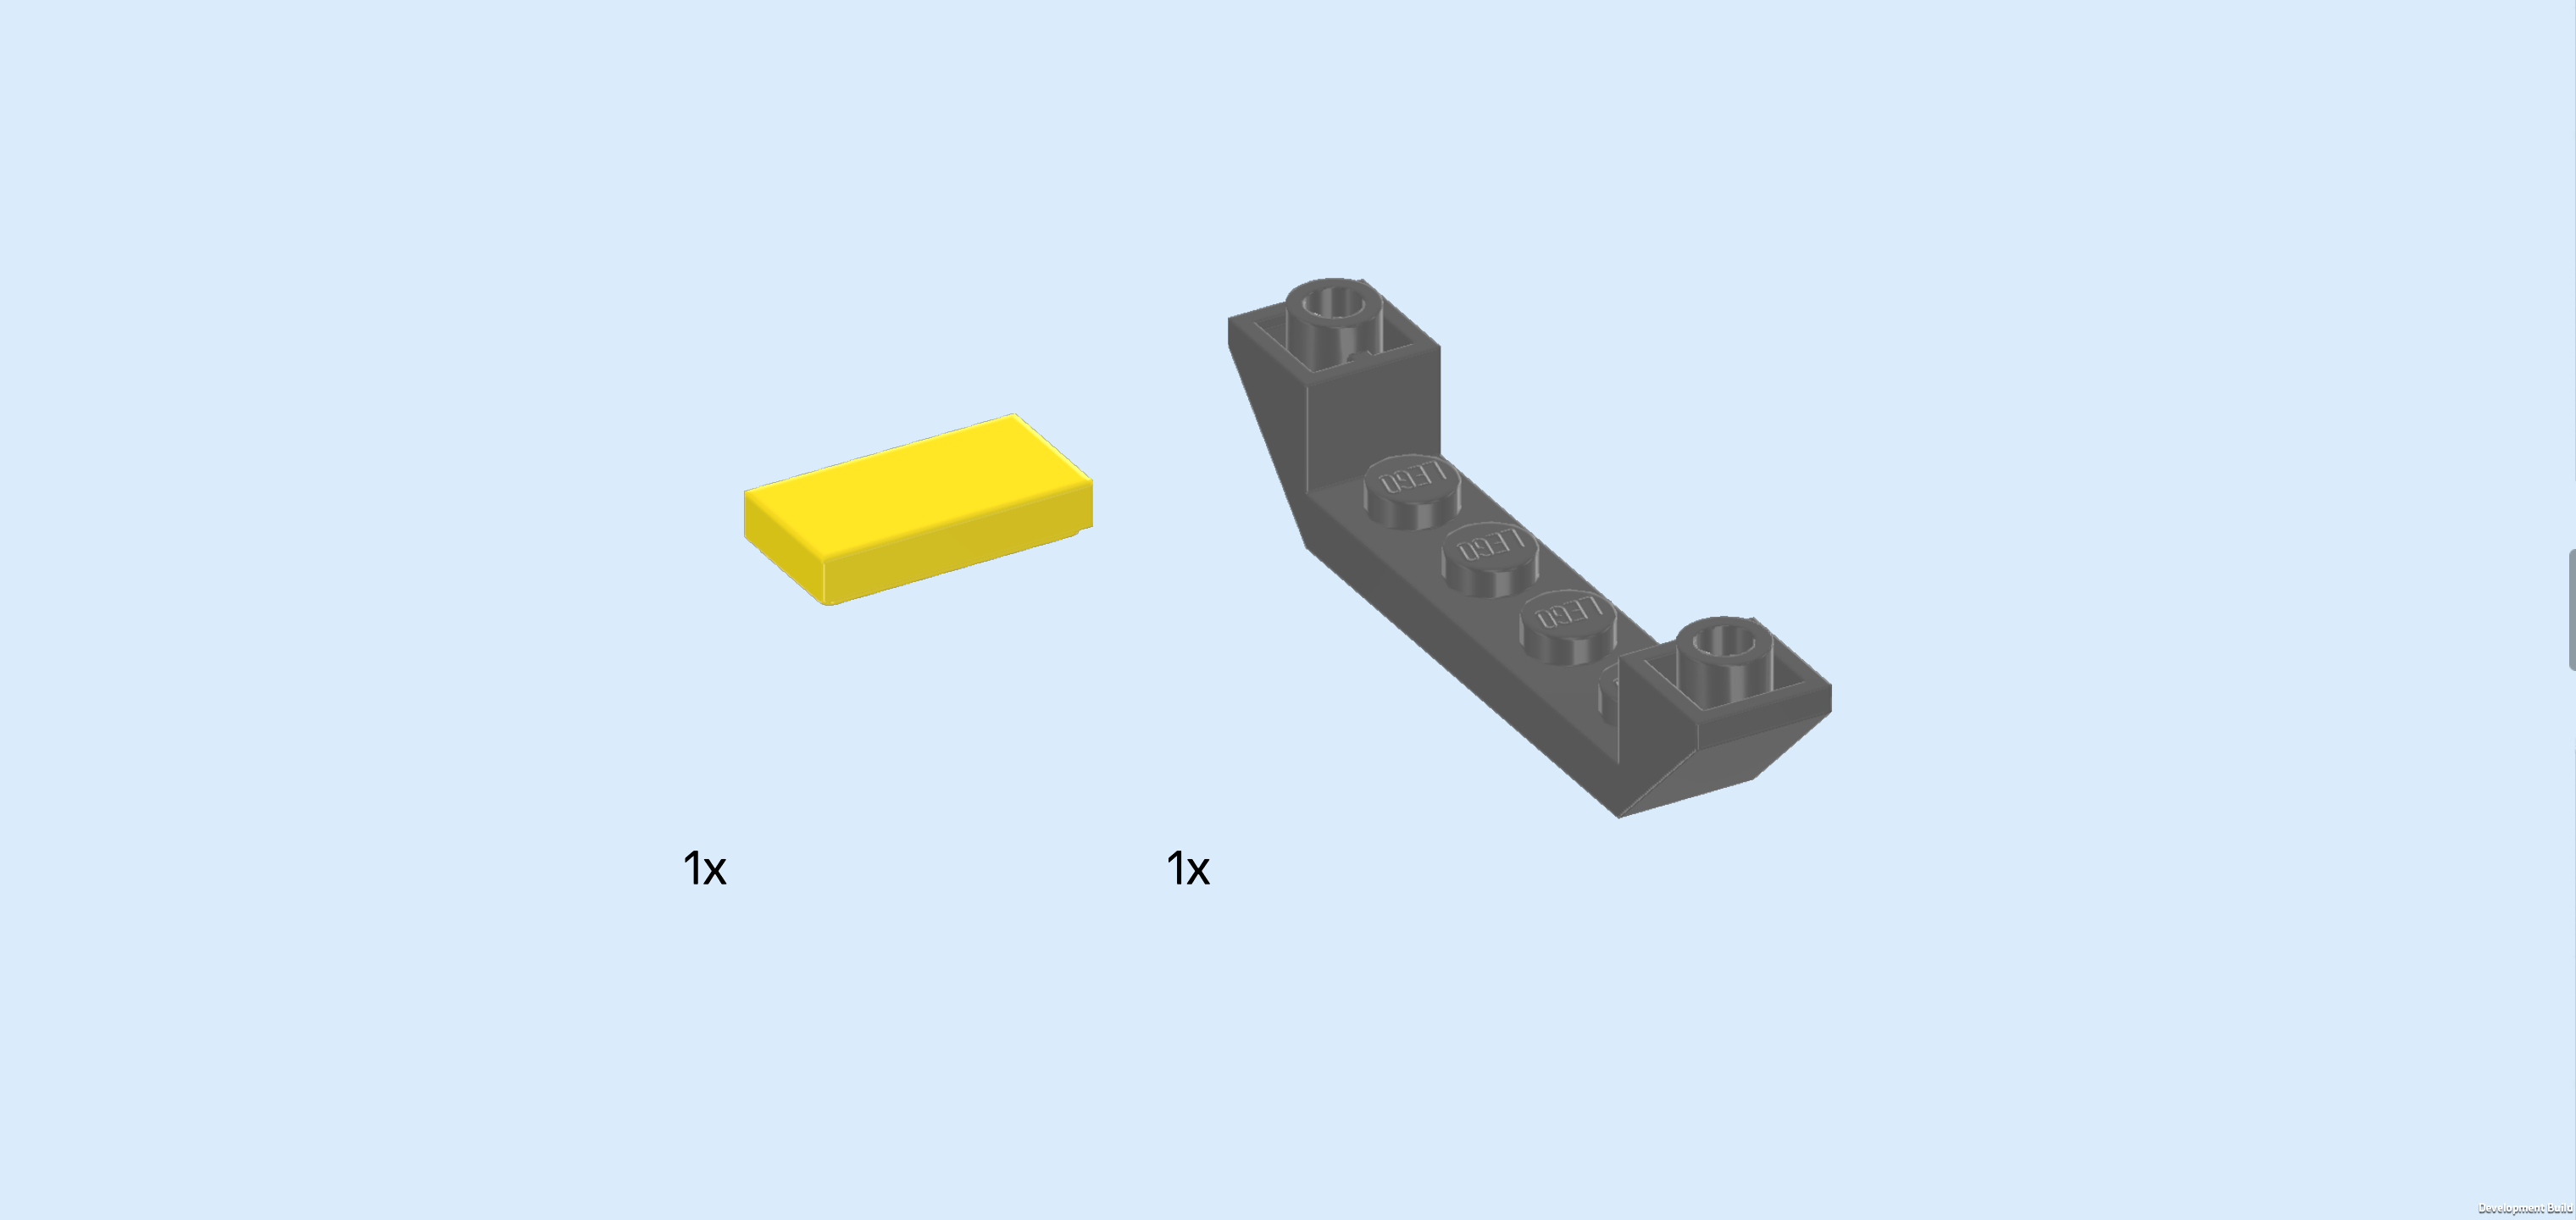
| Collect the following 2 pieces: |
| 1 bright yellow flat tile 1x2, |
| and 1 dark stone grey inverted double roof tile 1x6x1, 45°. |
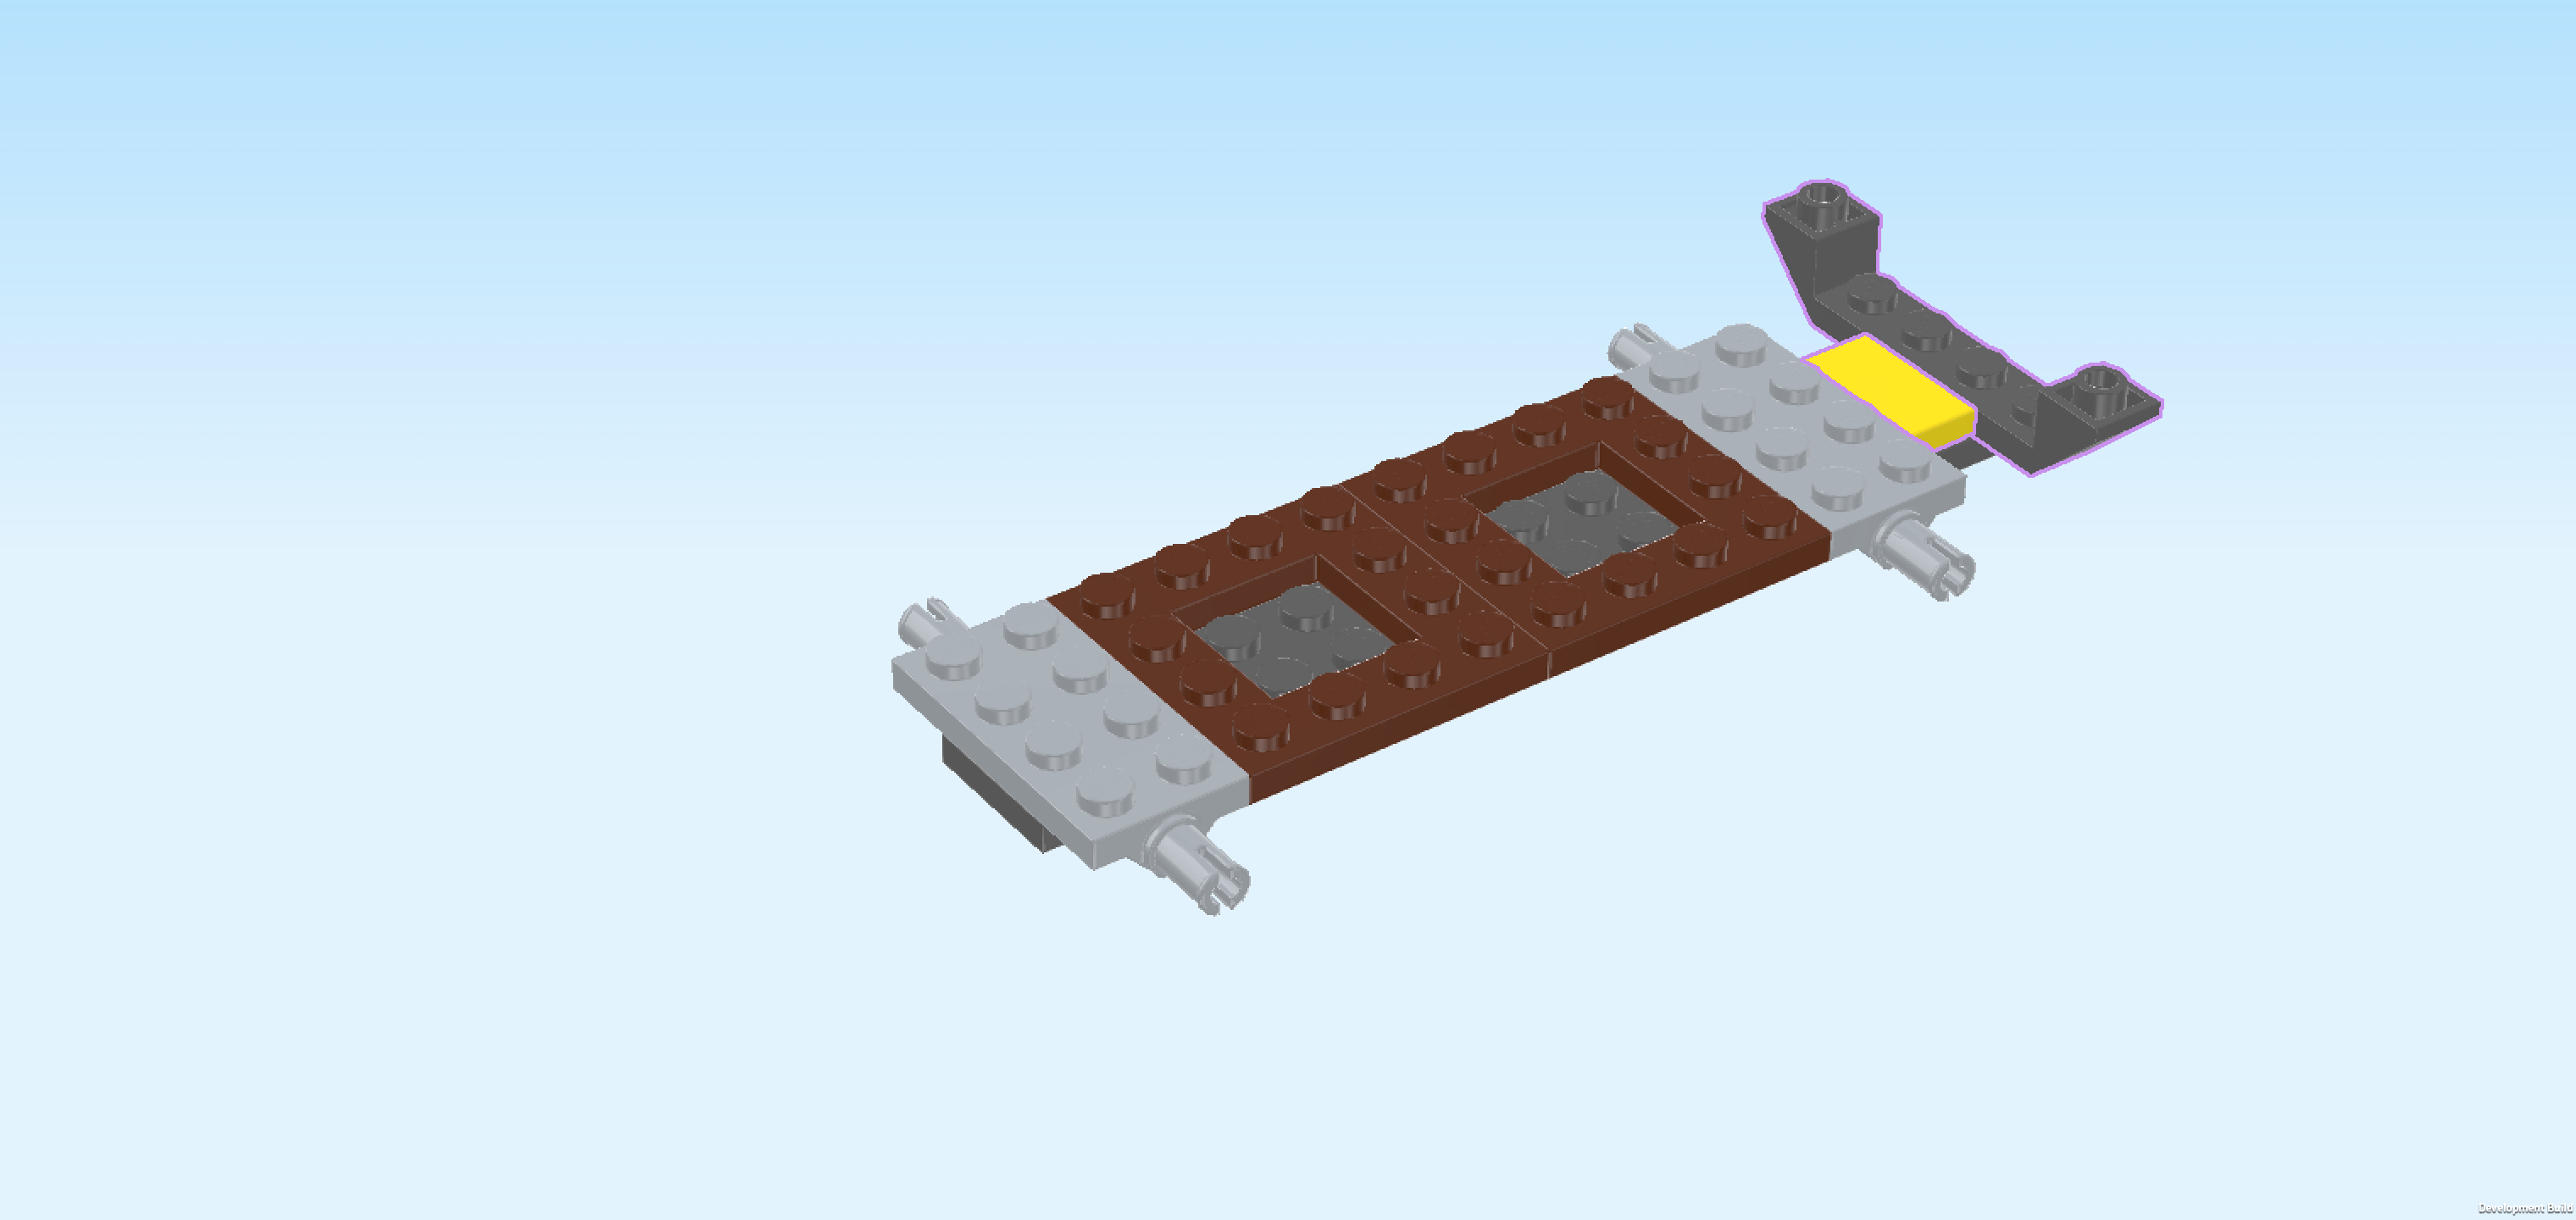
| Put the flat tile 1x2 vertically to the right of the previous piece. |
| Put the inverted double roof tile 1x6x1 vertically to the right of the previous piece, sloped ends to the front and back. |
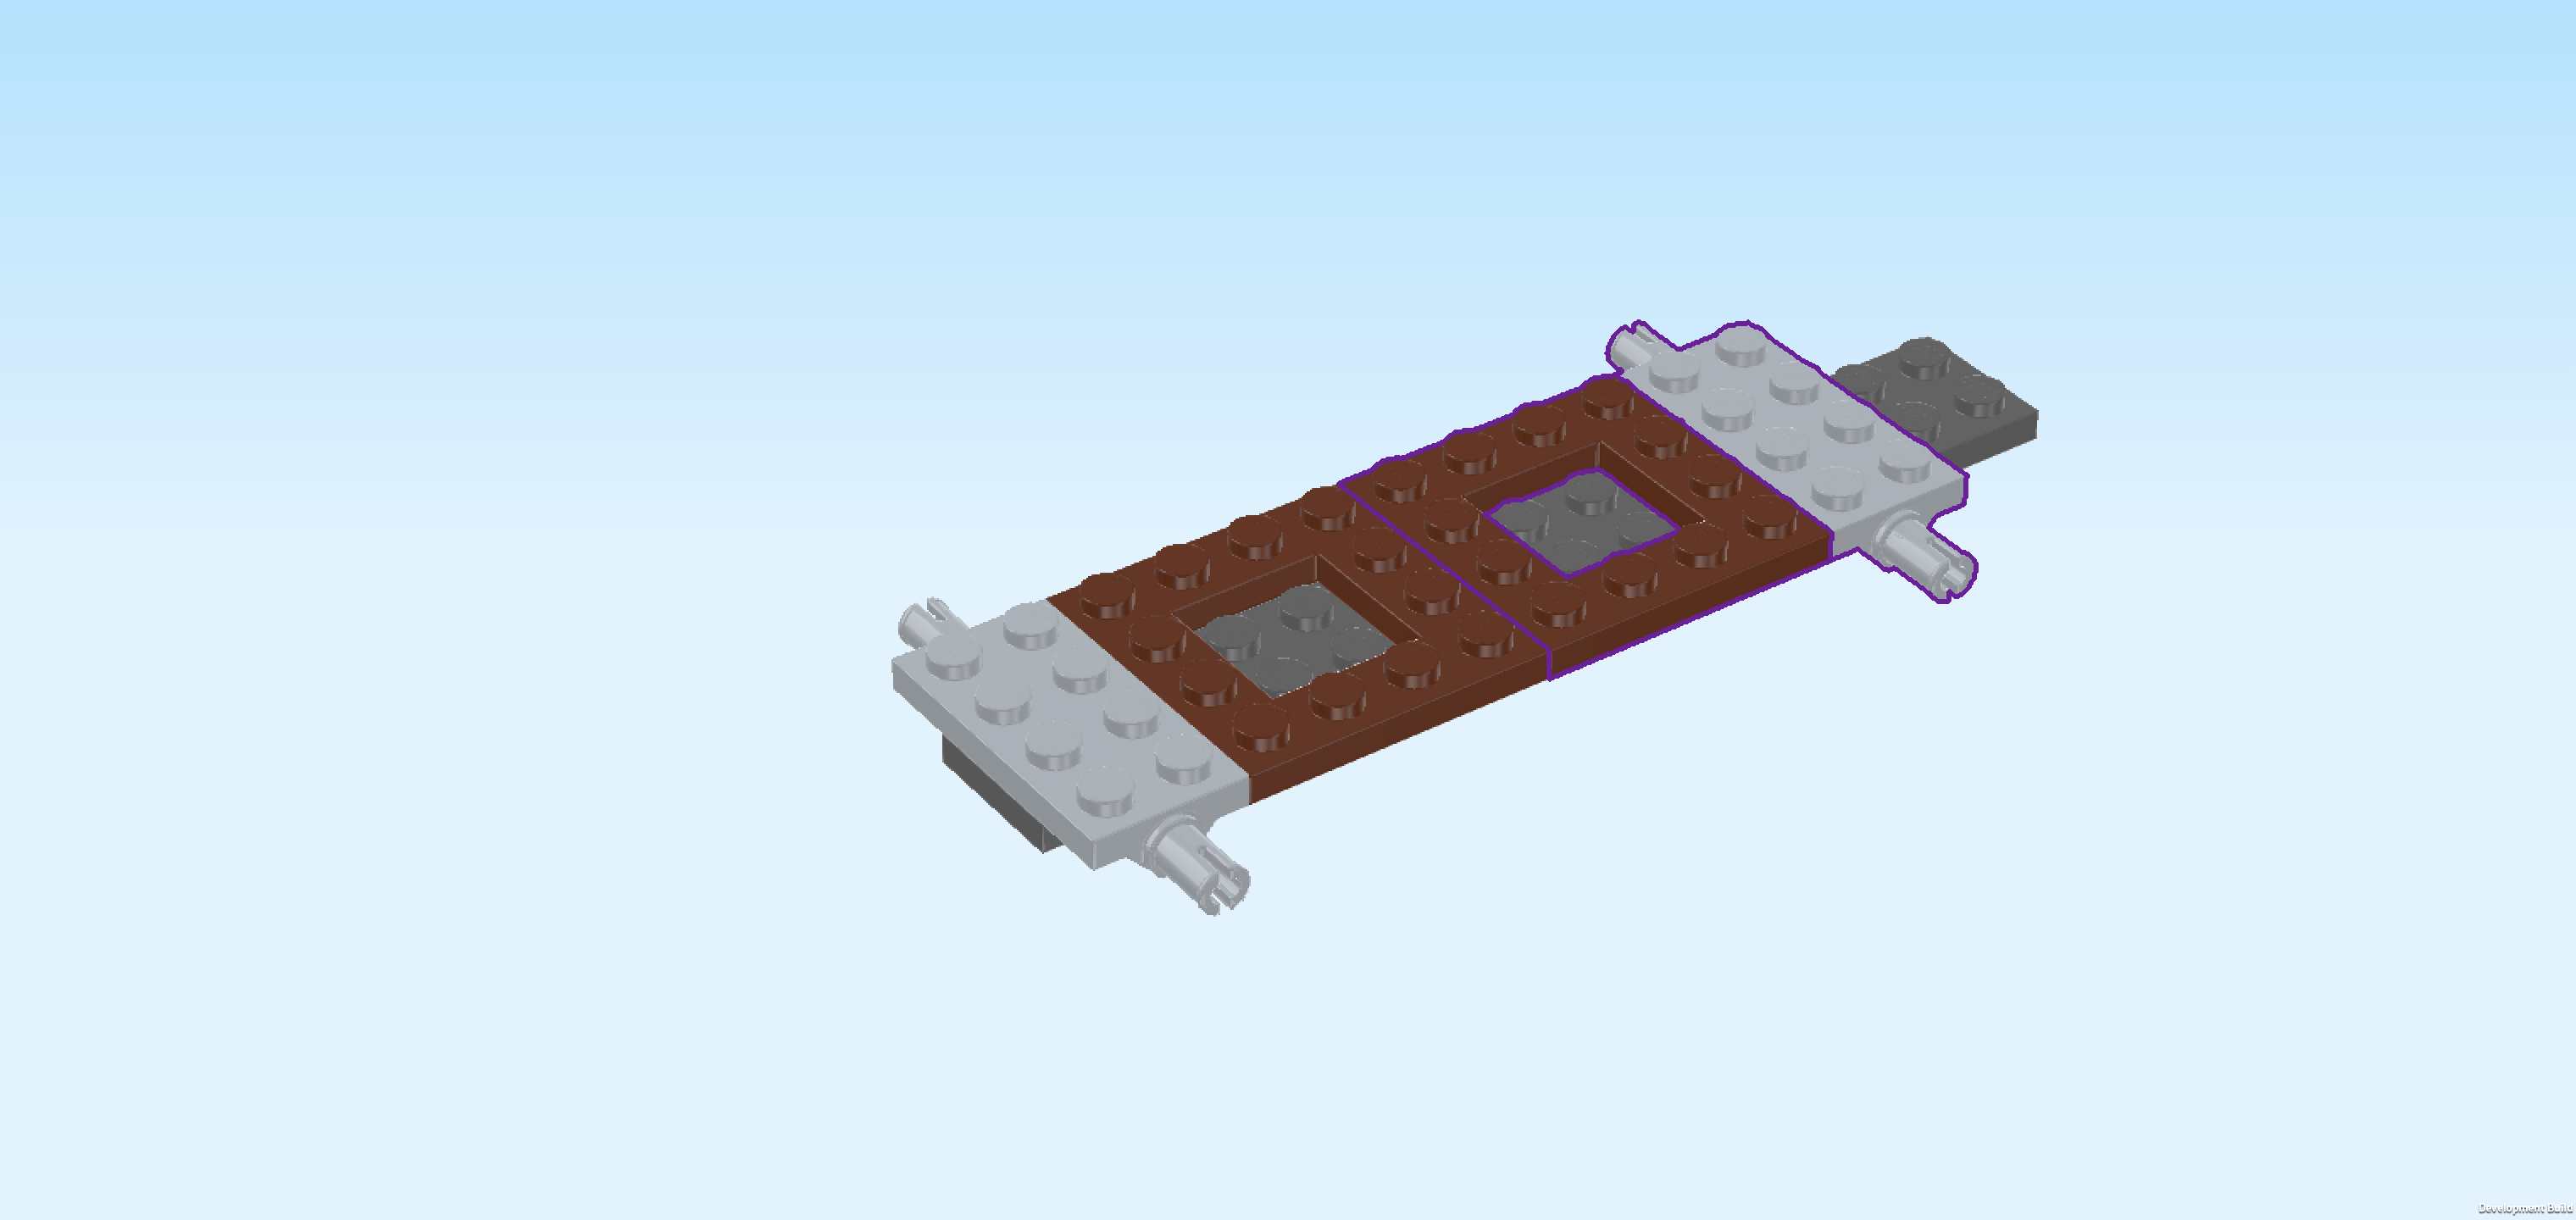
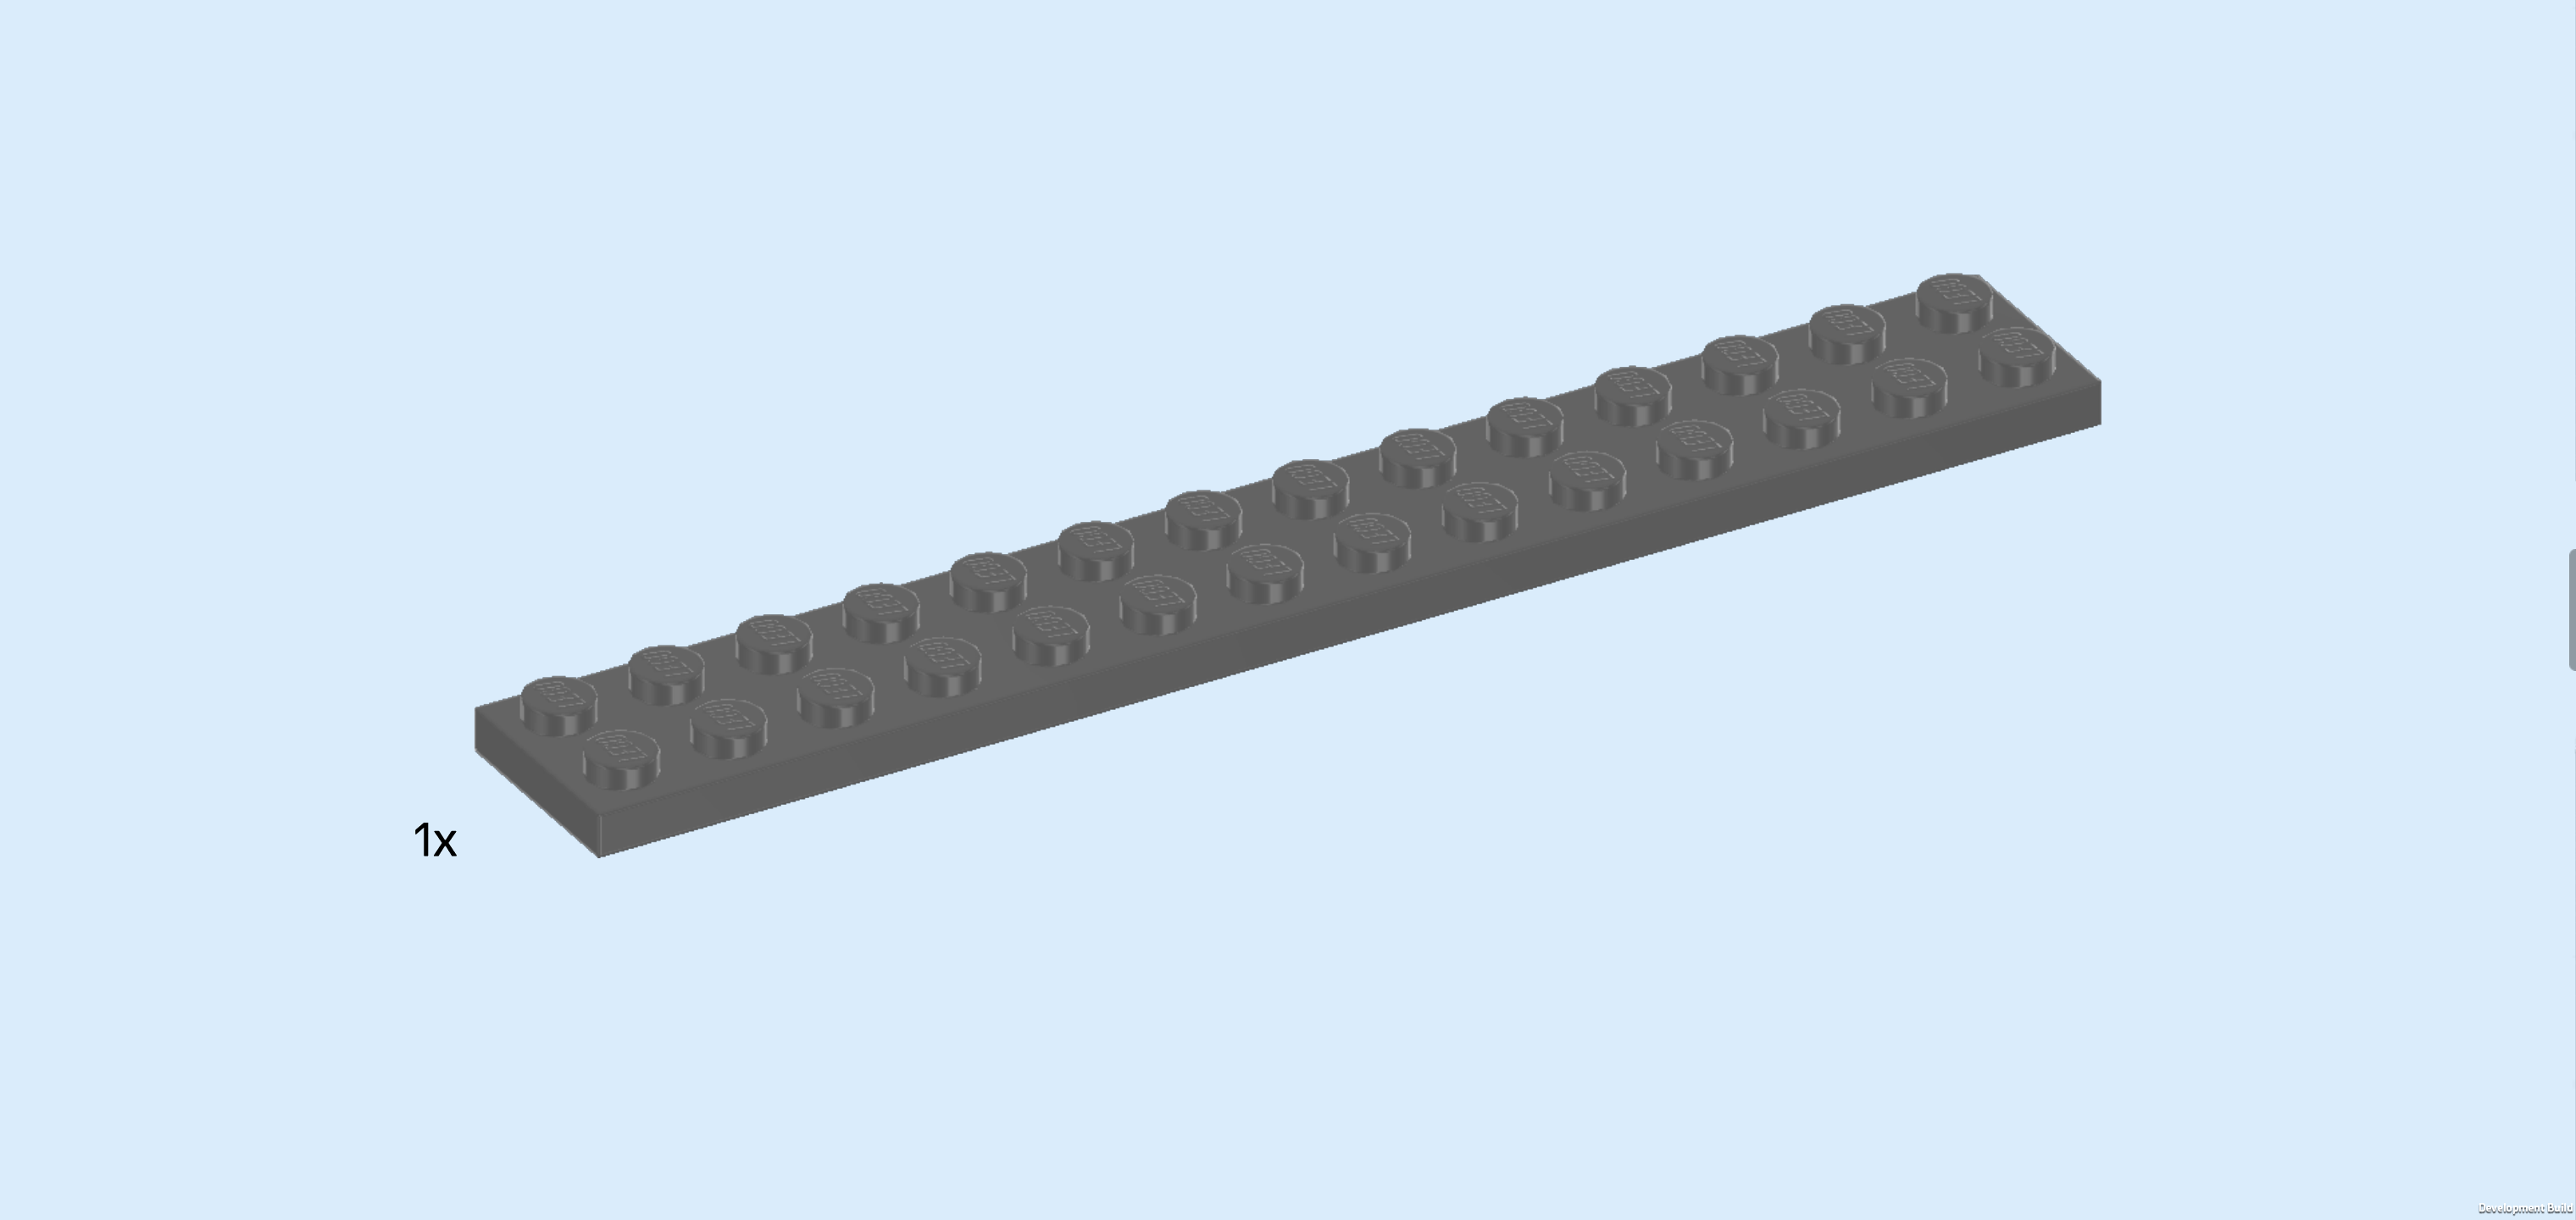
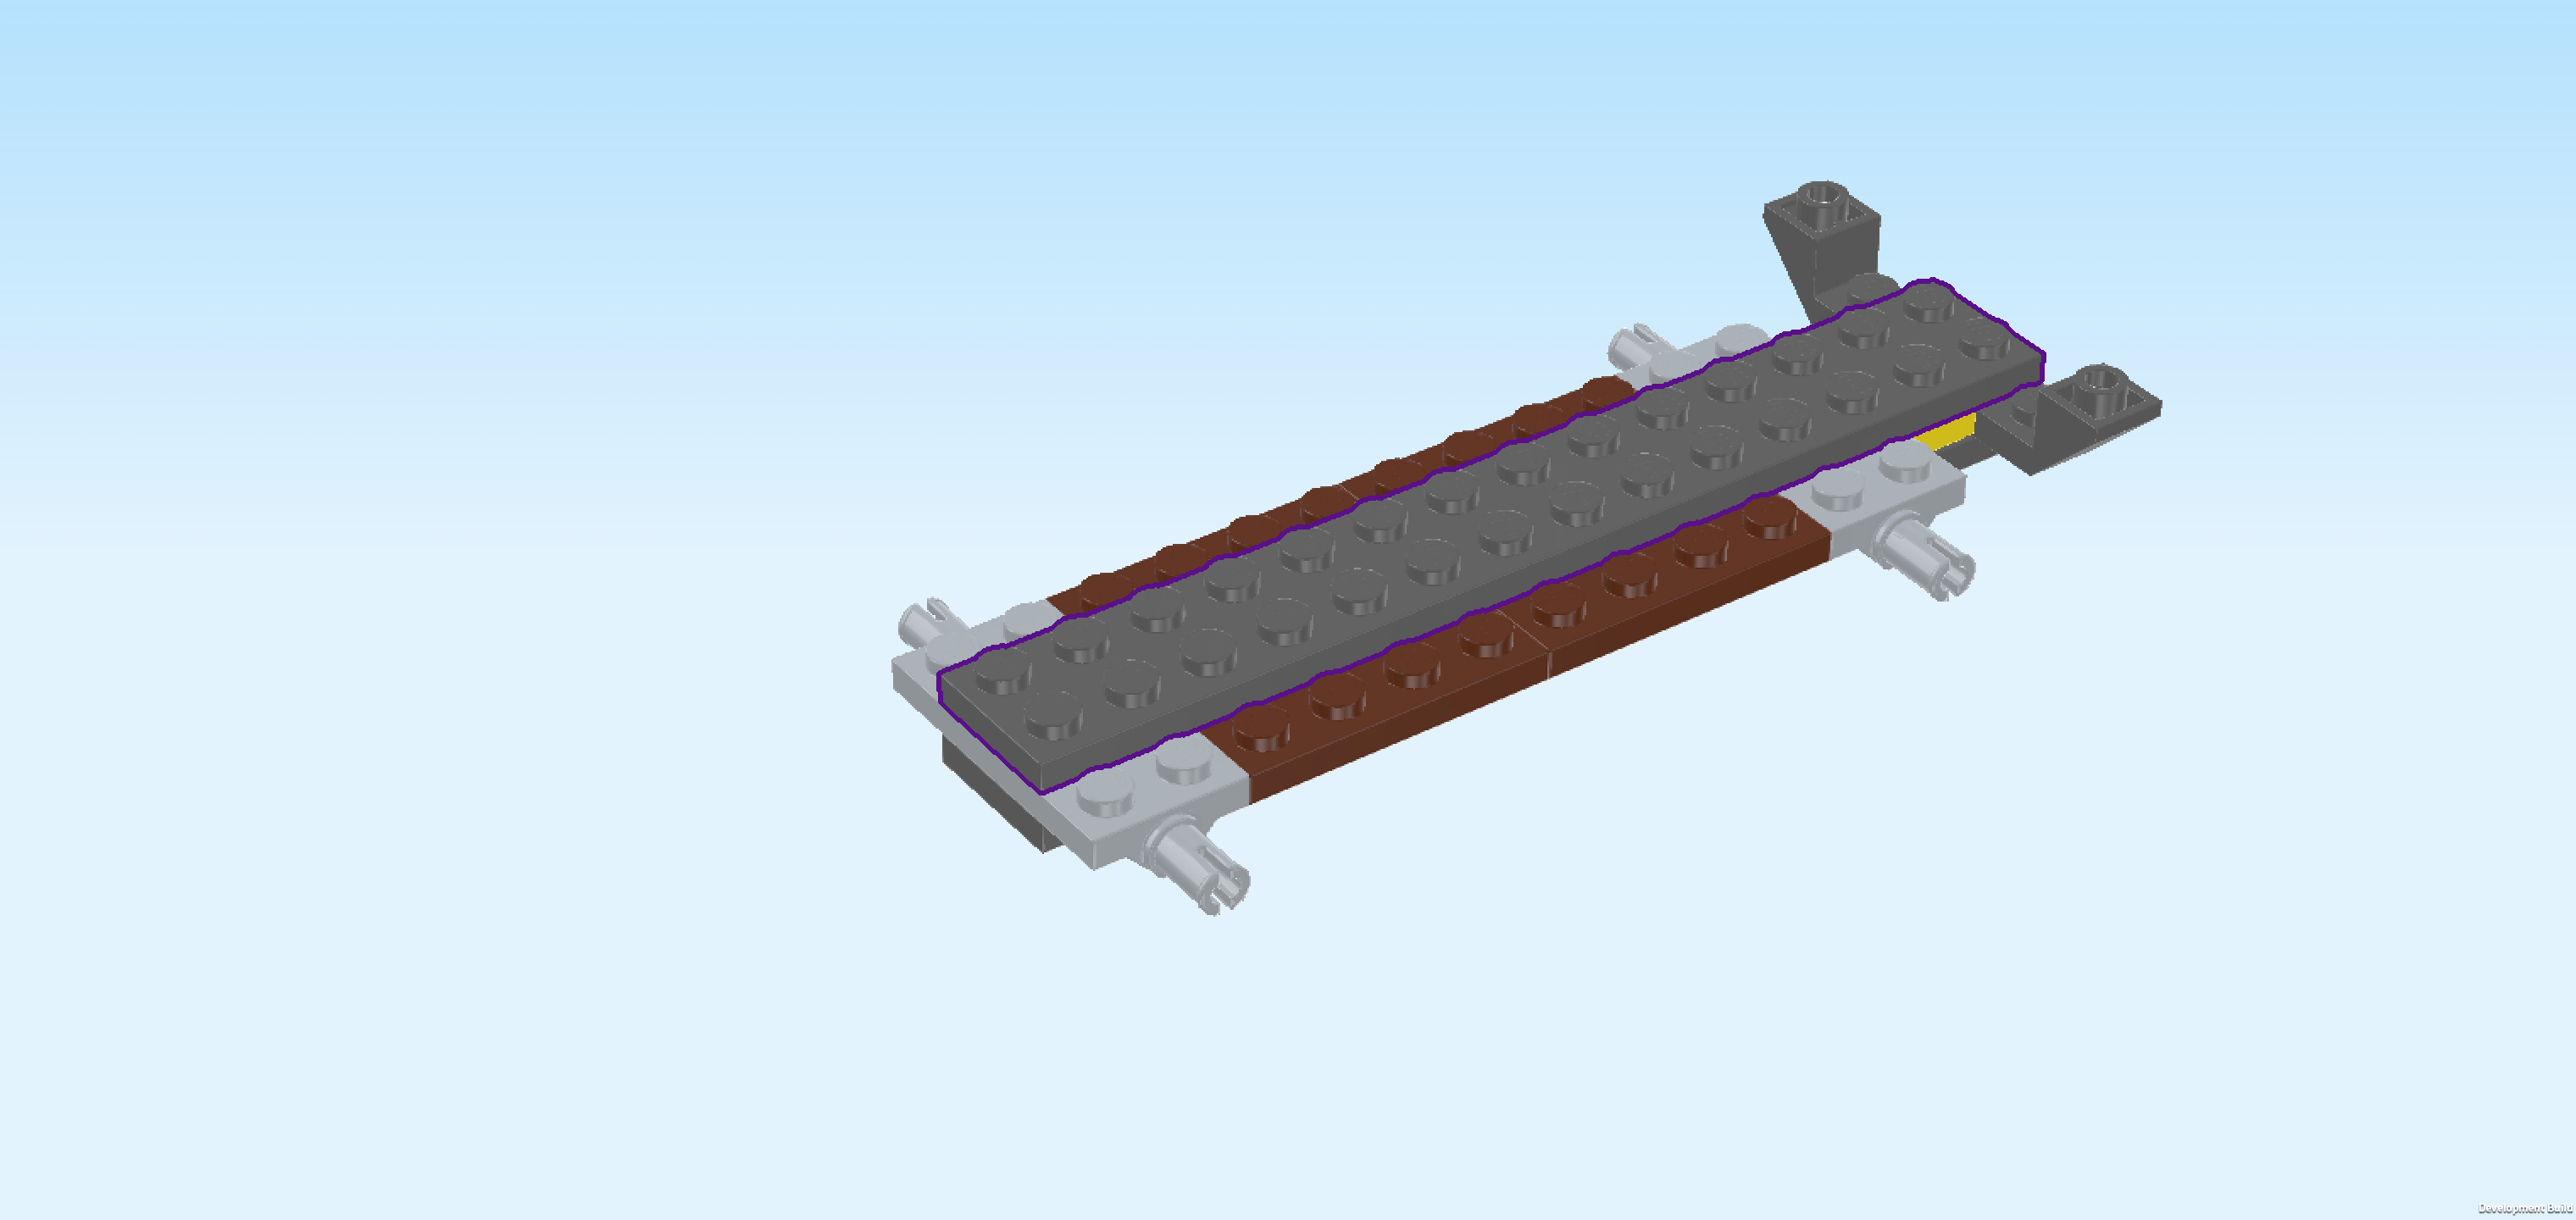
| Find 1 dark stone grey plate 2x14. |
| Put it horizontally centered on top of the build. Make sure the left and right edges are flush with the rest of the structure. |
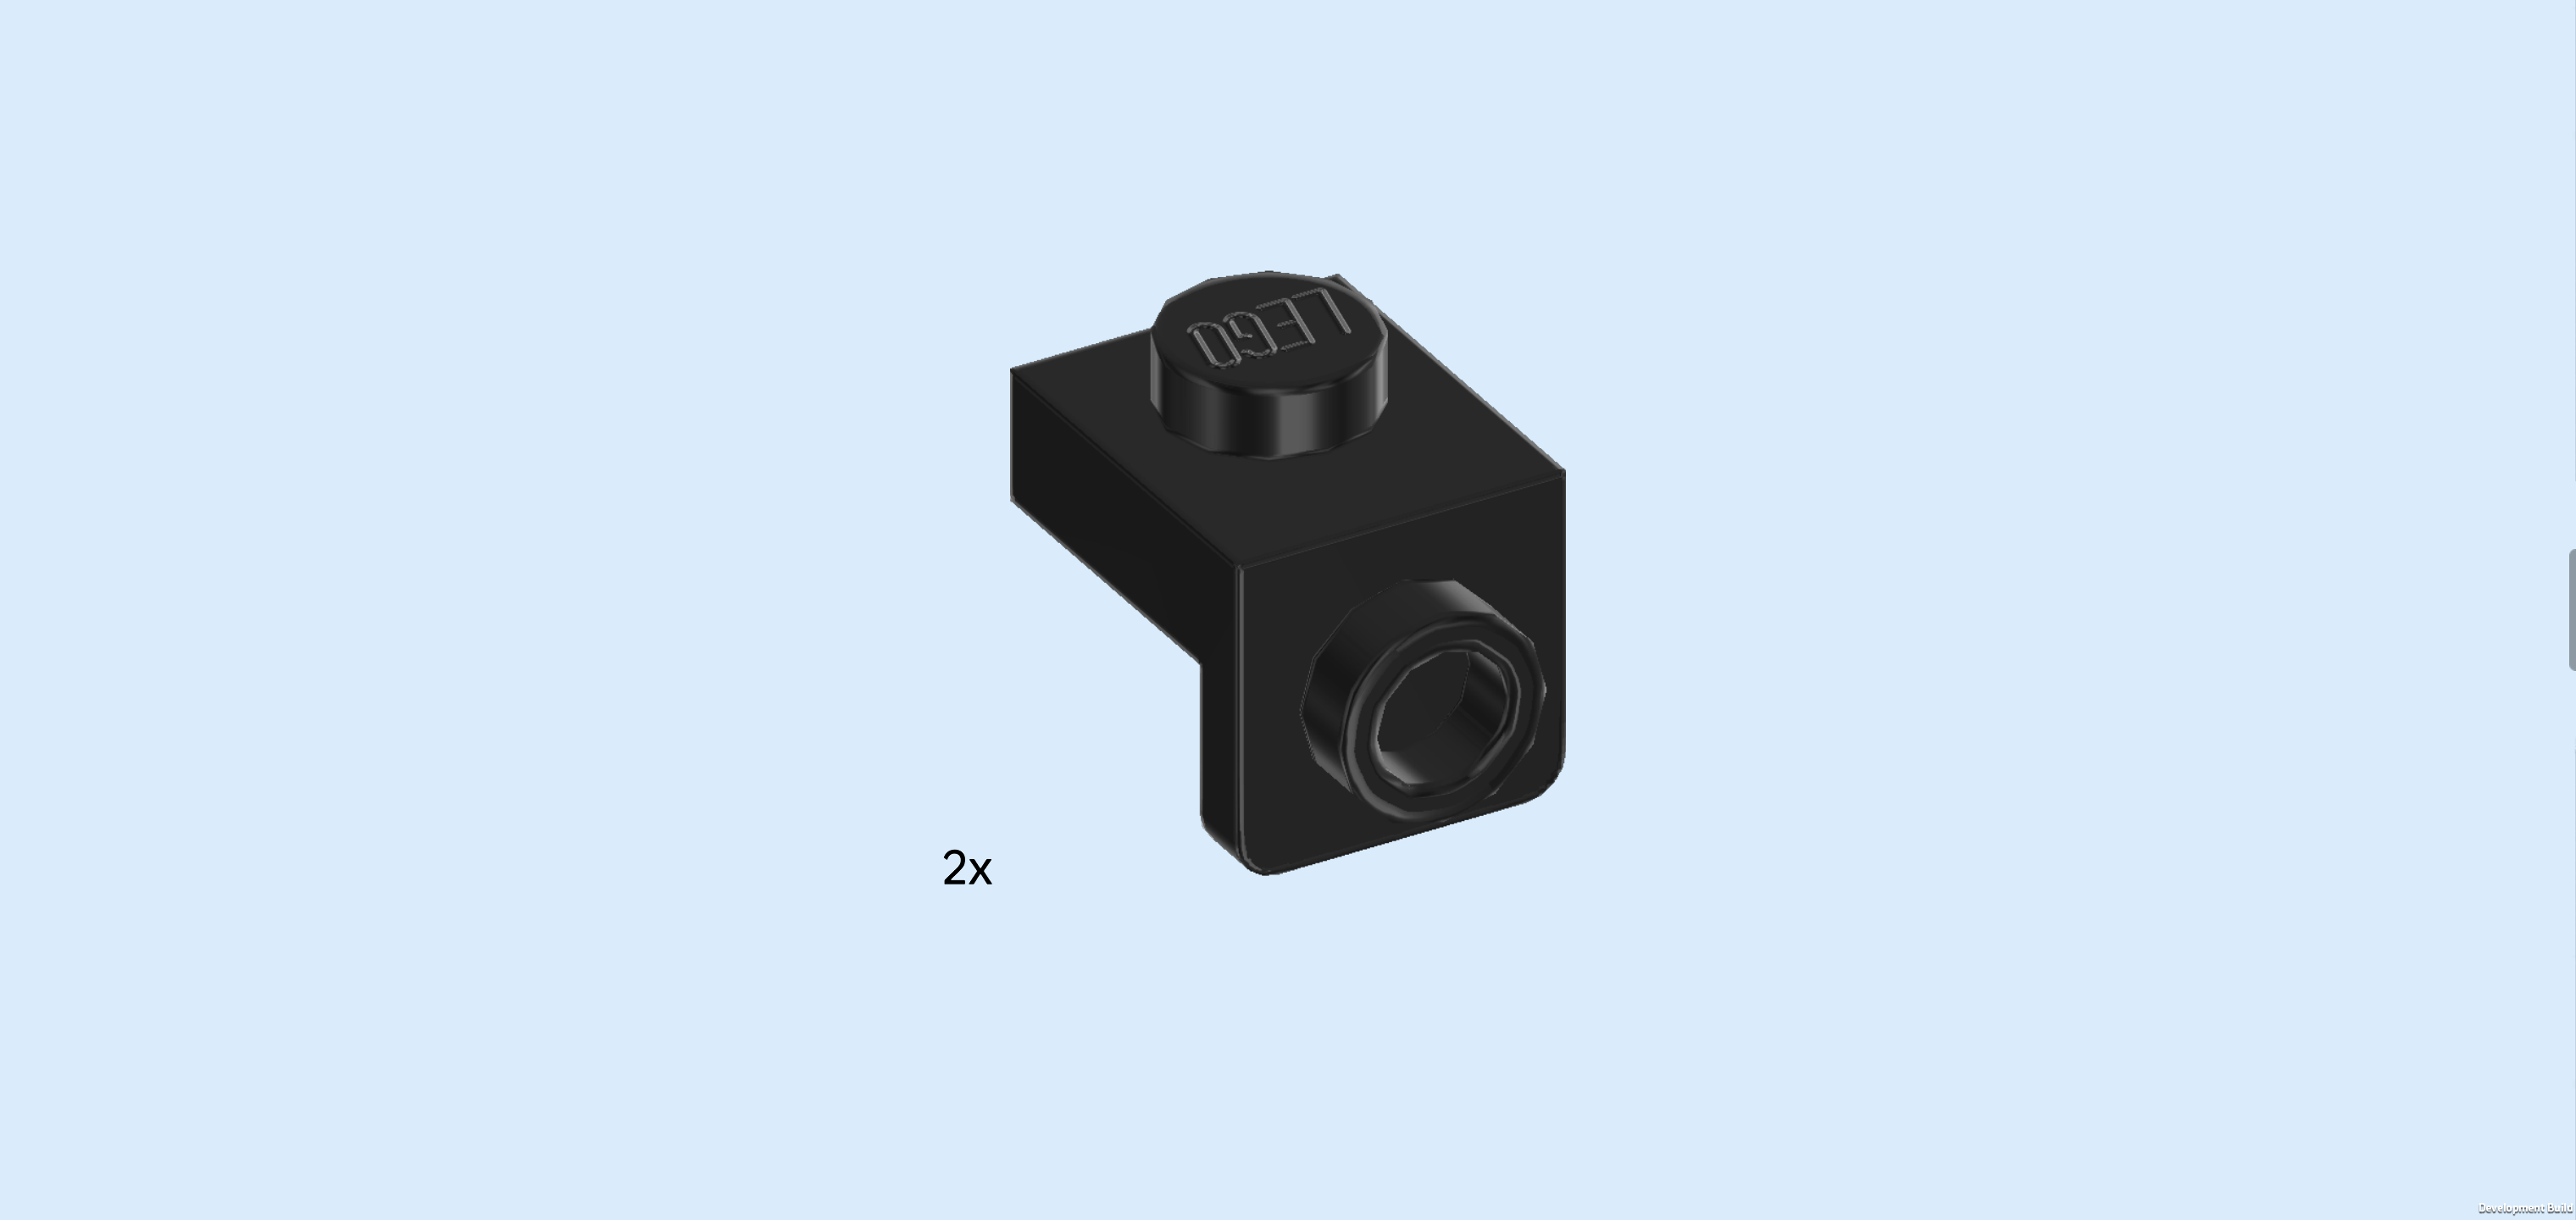
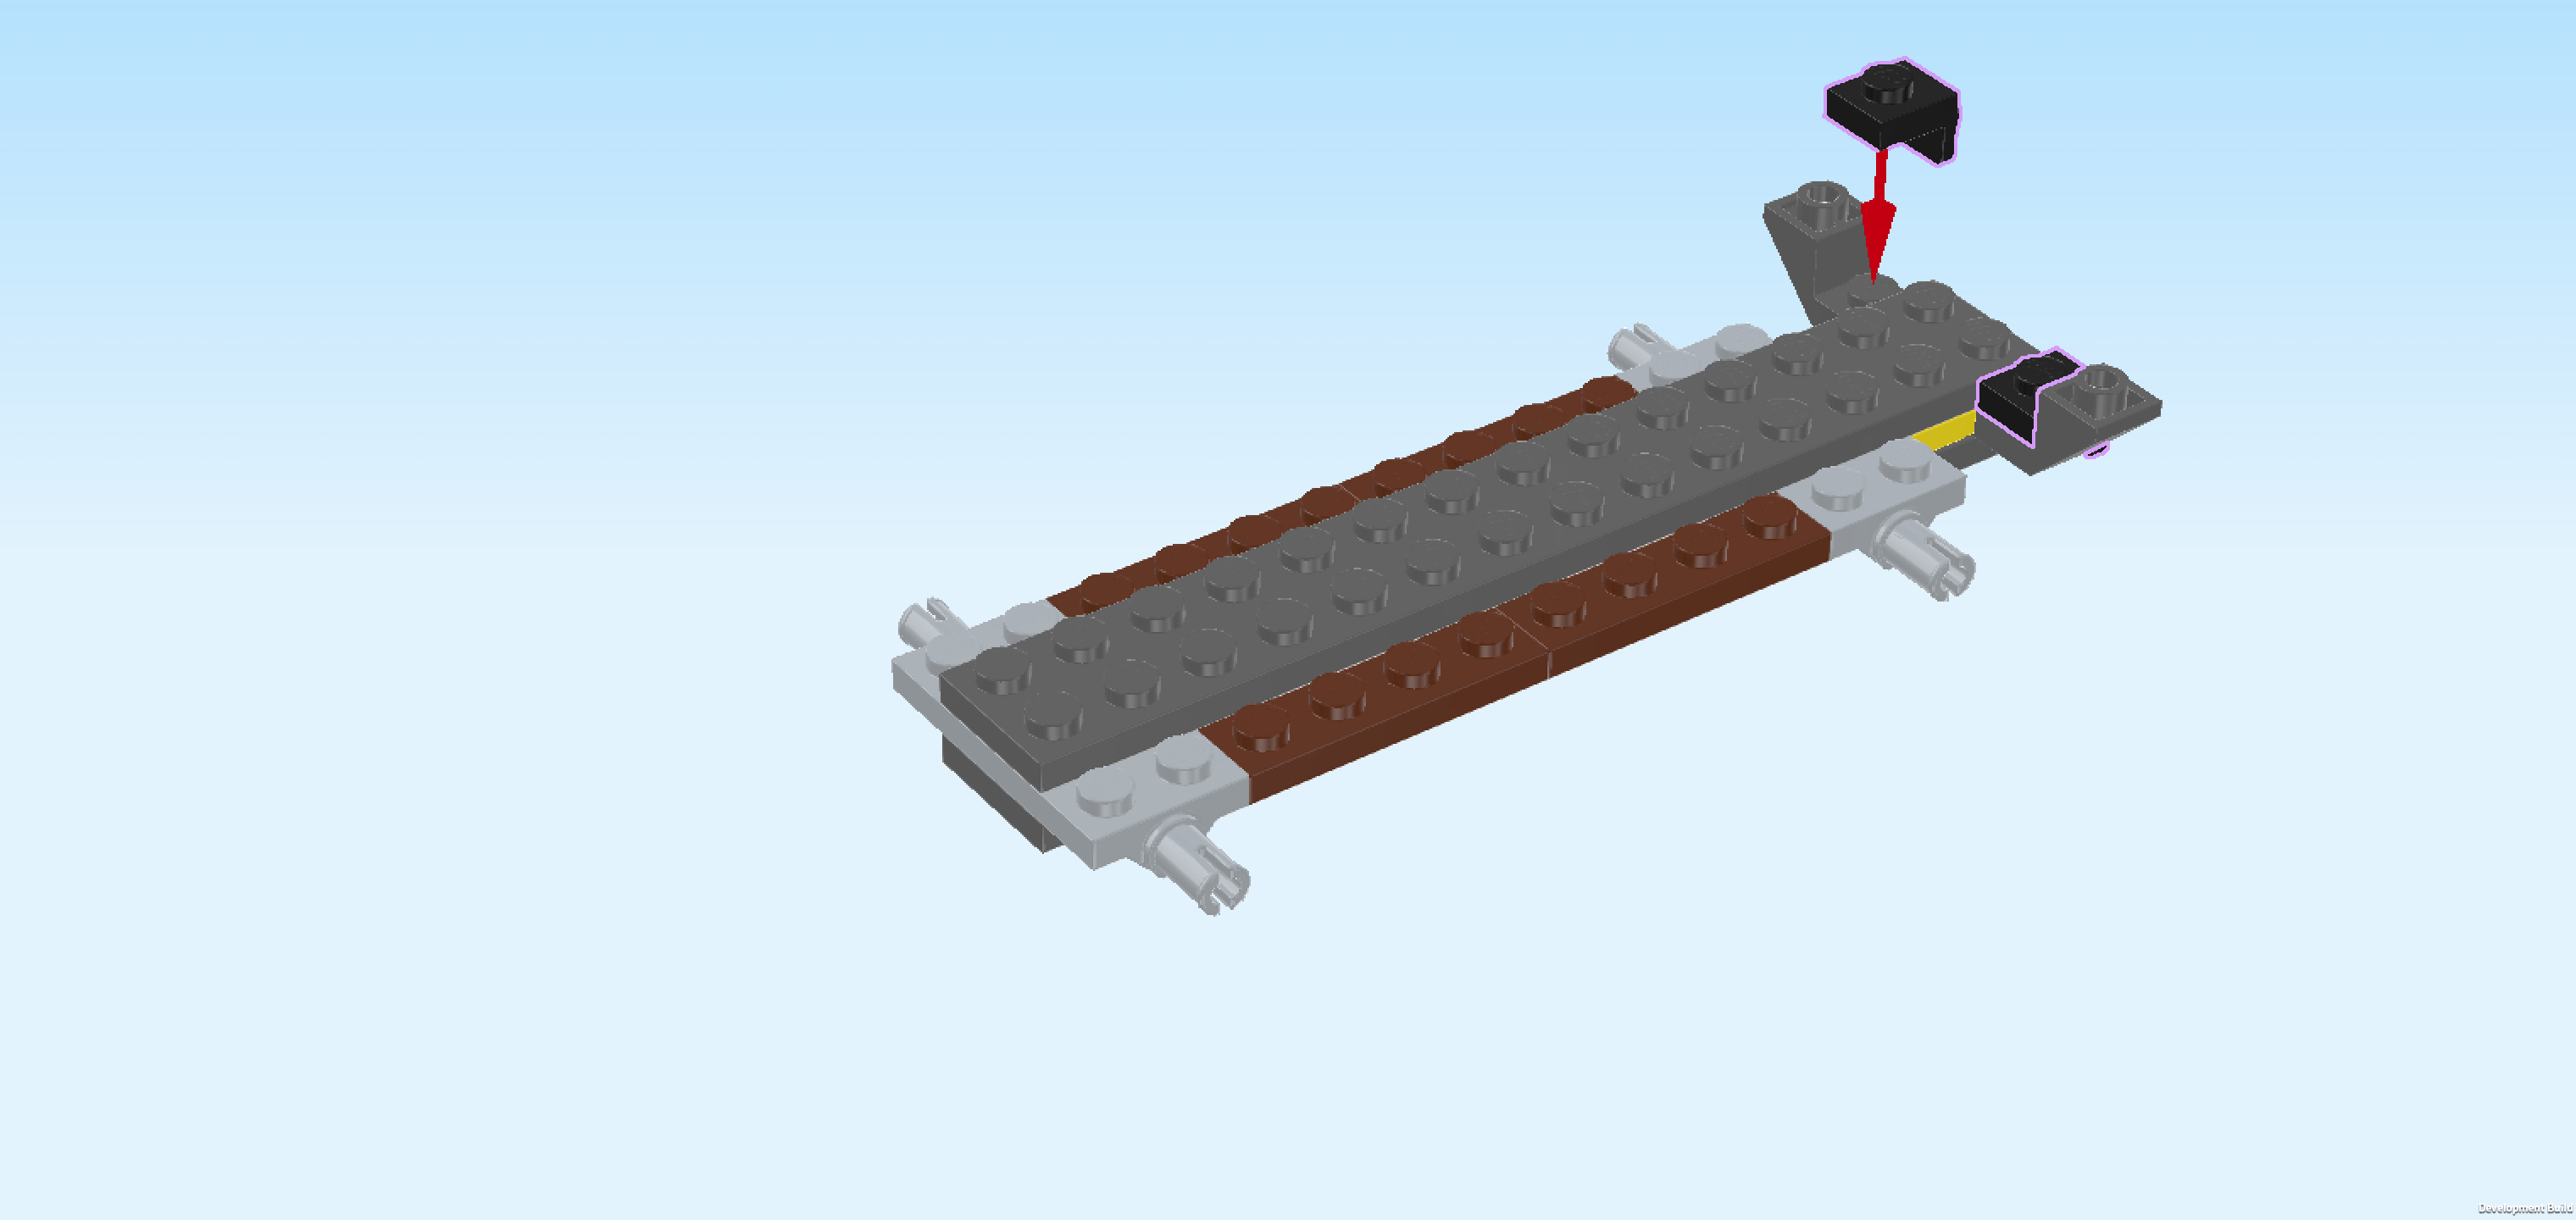
| Find 2 black top angle plates 1x1 - 1x1 with side knob. |
| Put 1 on the rightmost column of the build into the recess directly behind the previous piece, side knob pointing to the right. |
| Repeat symmetrically at the front, side knob again to the right. |
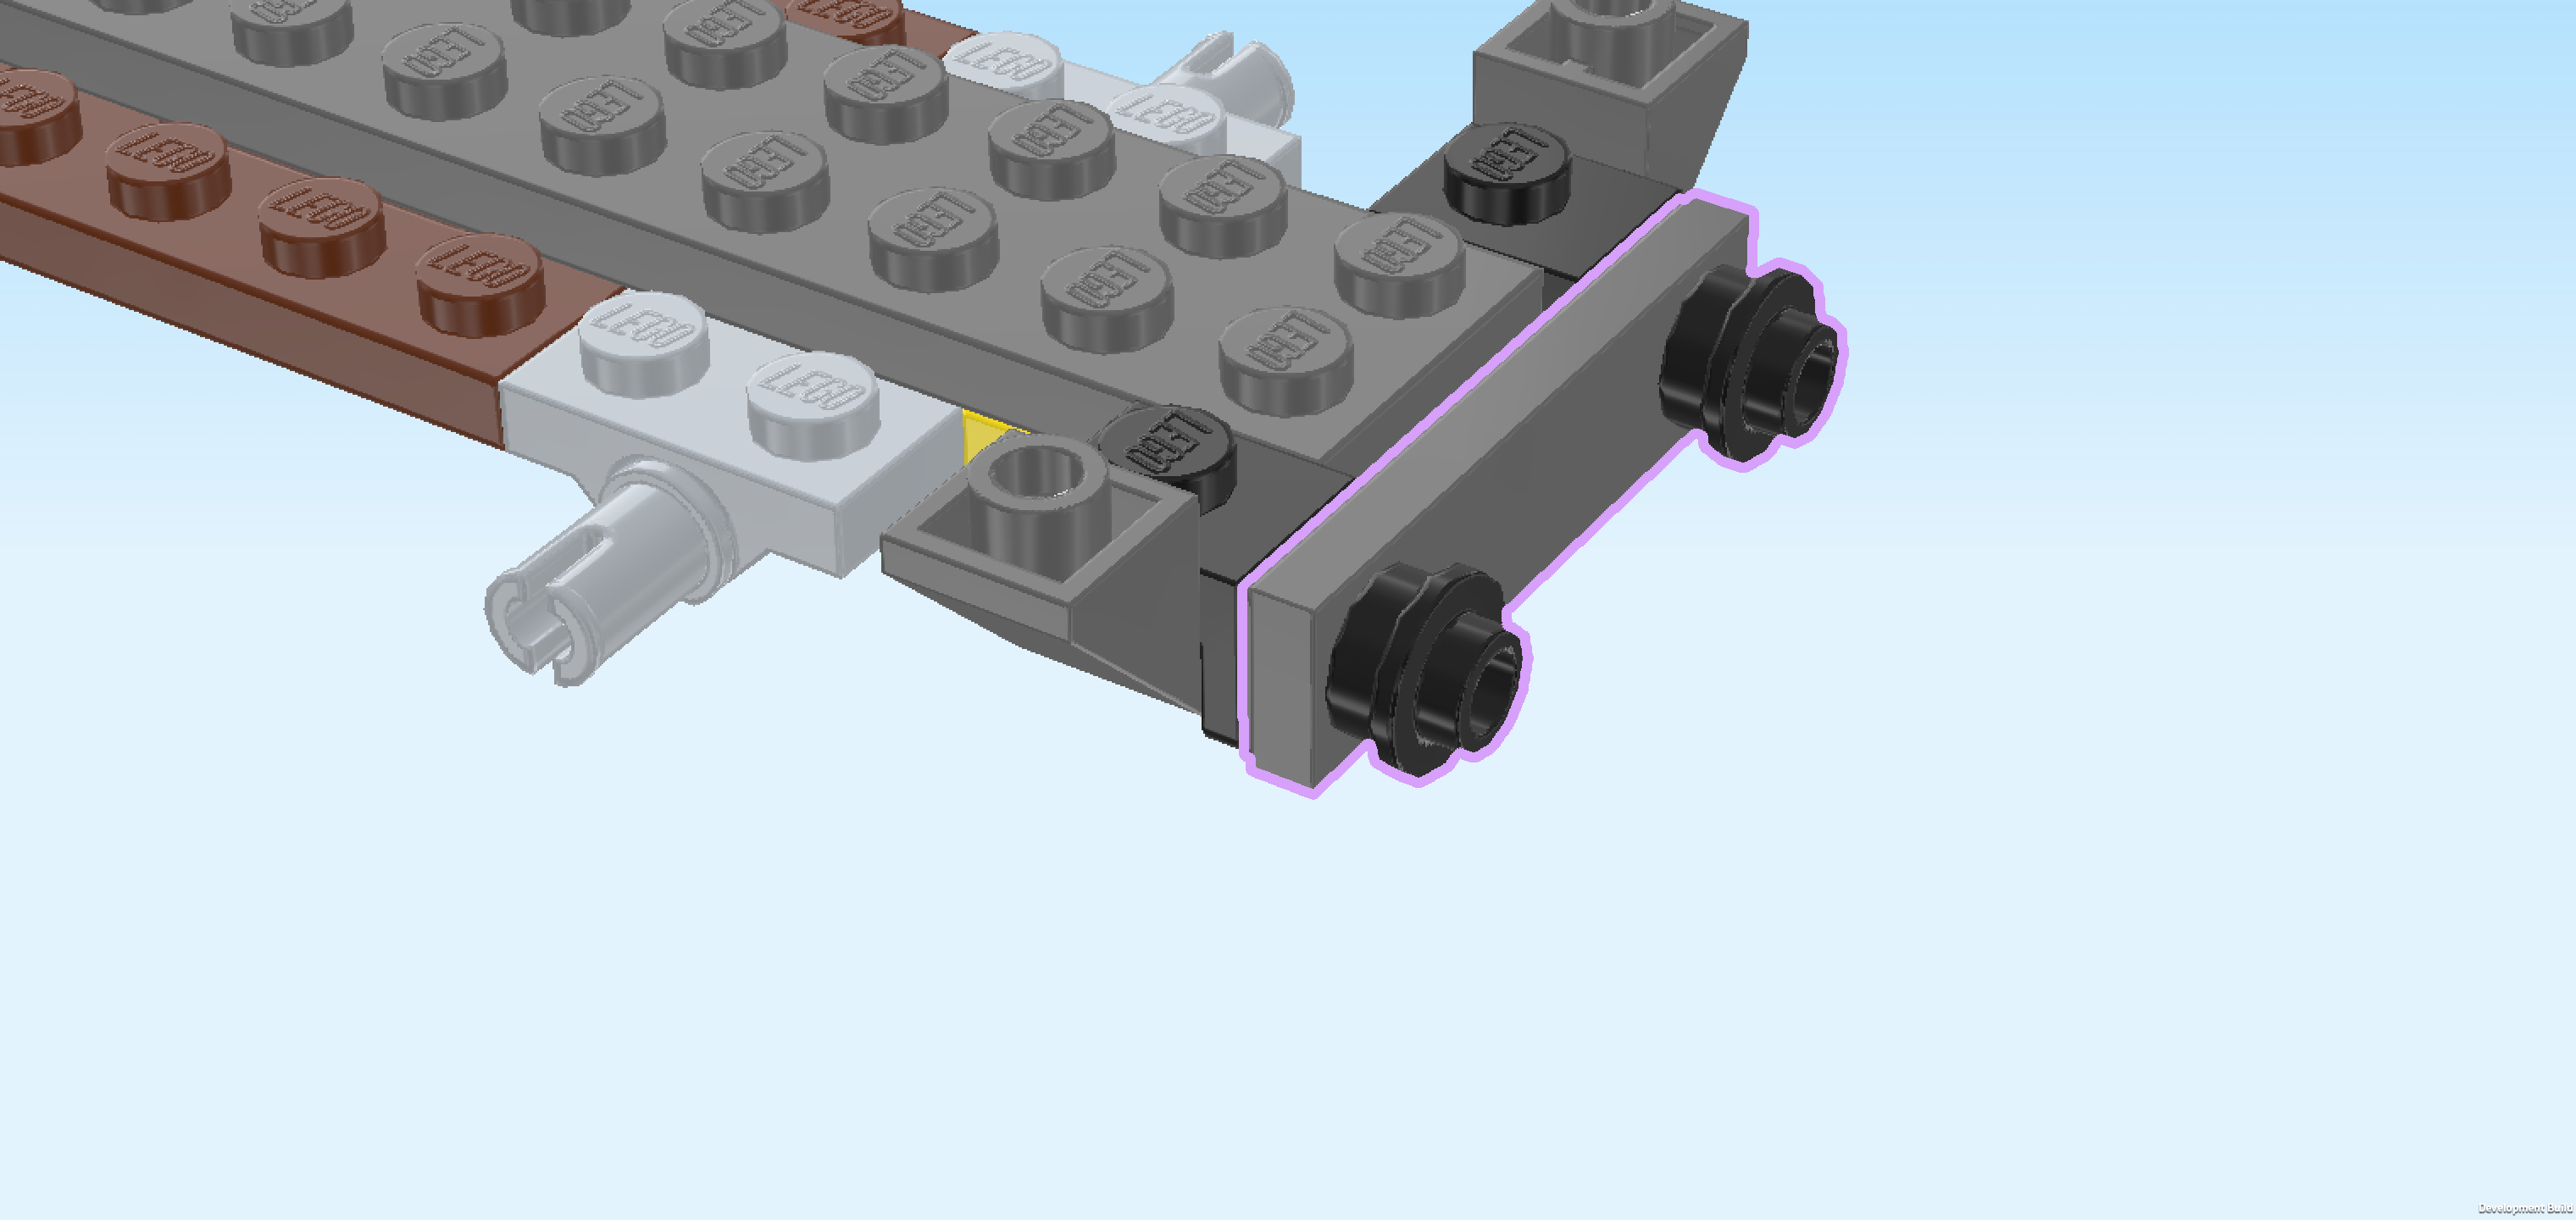
| Next, we will build the rear bumper. |
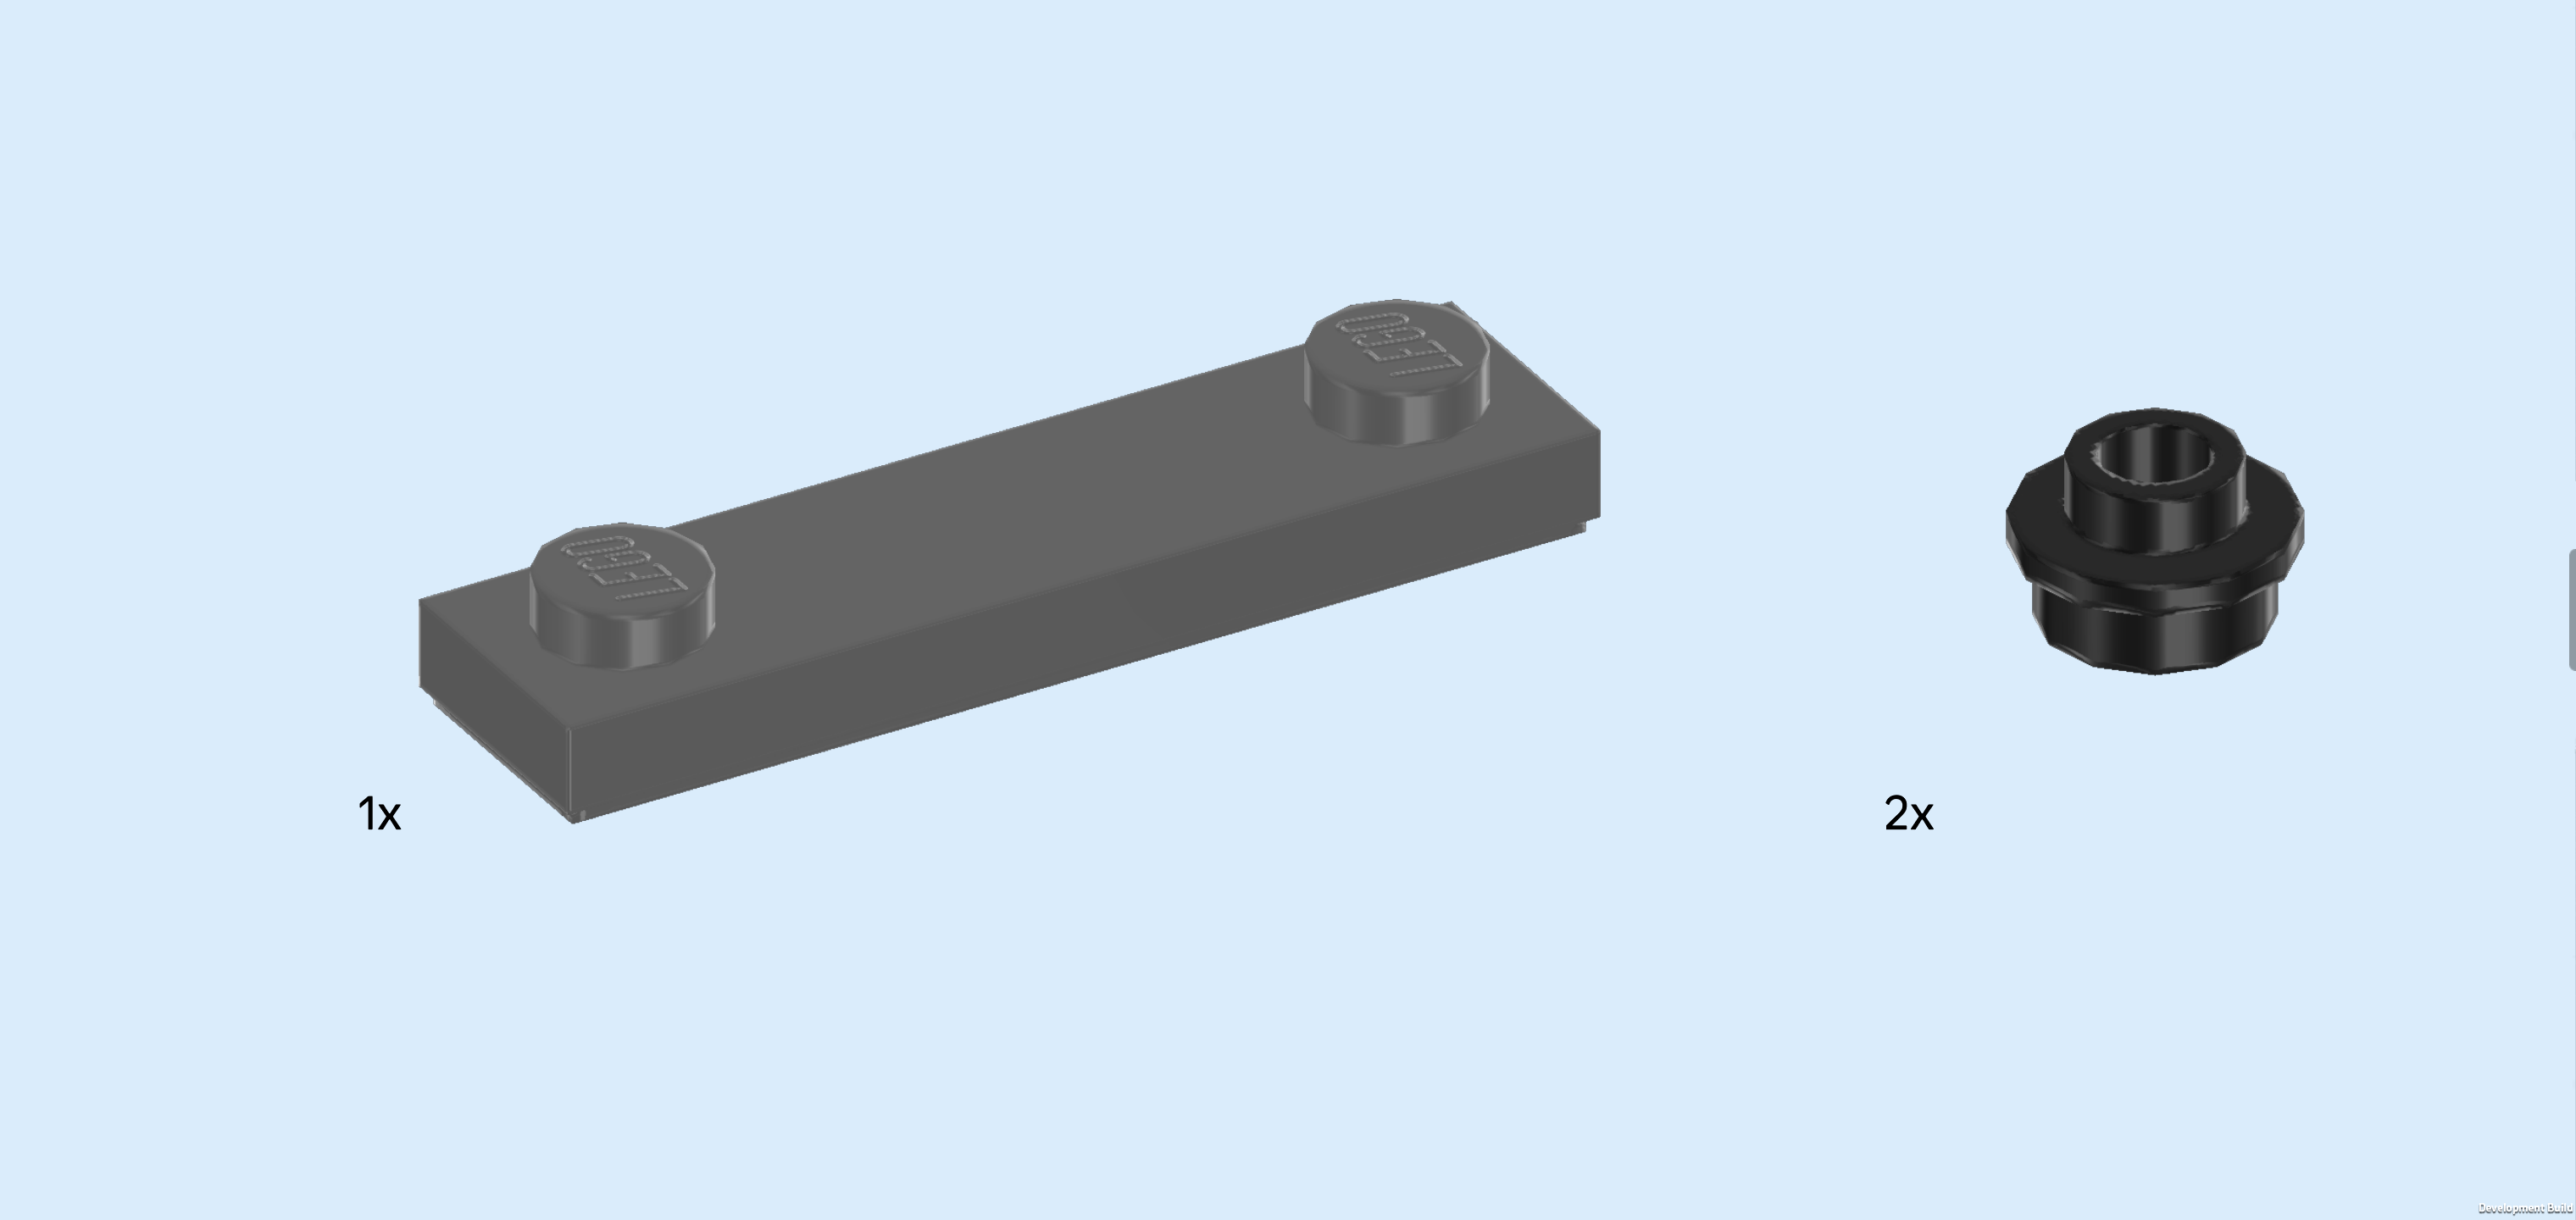
| Collect the following 3 pieces: |
| 1 dark stone grey plate 1x4 with 2 knobs, |
| and 2 black round plates 1x1 with through-hole. |
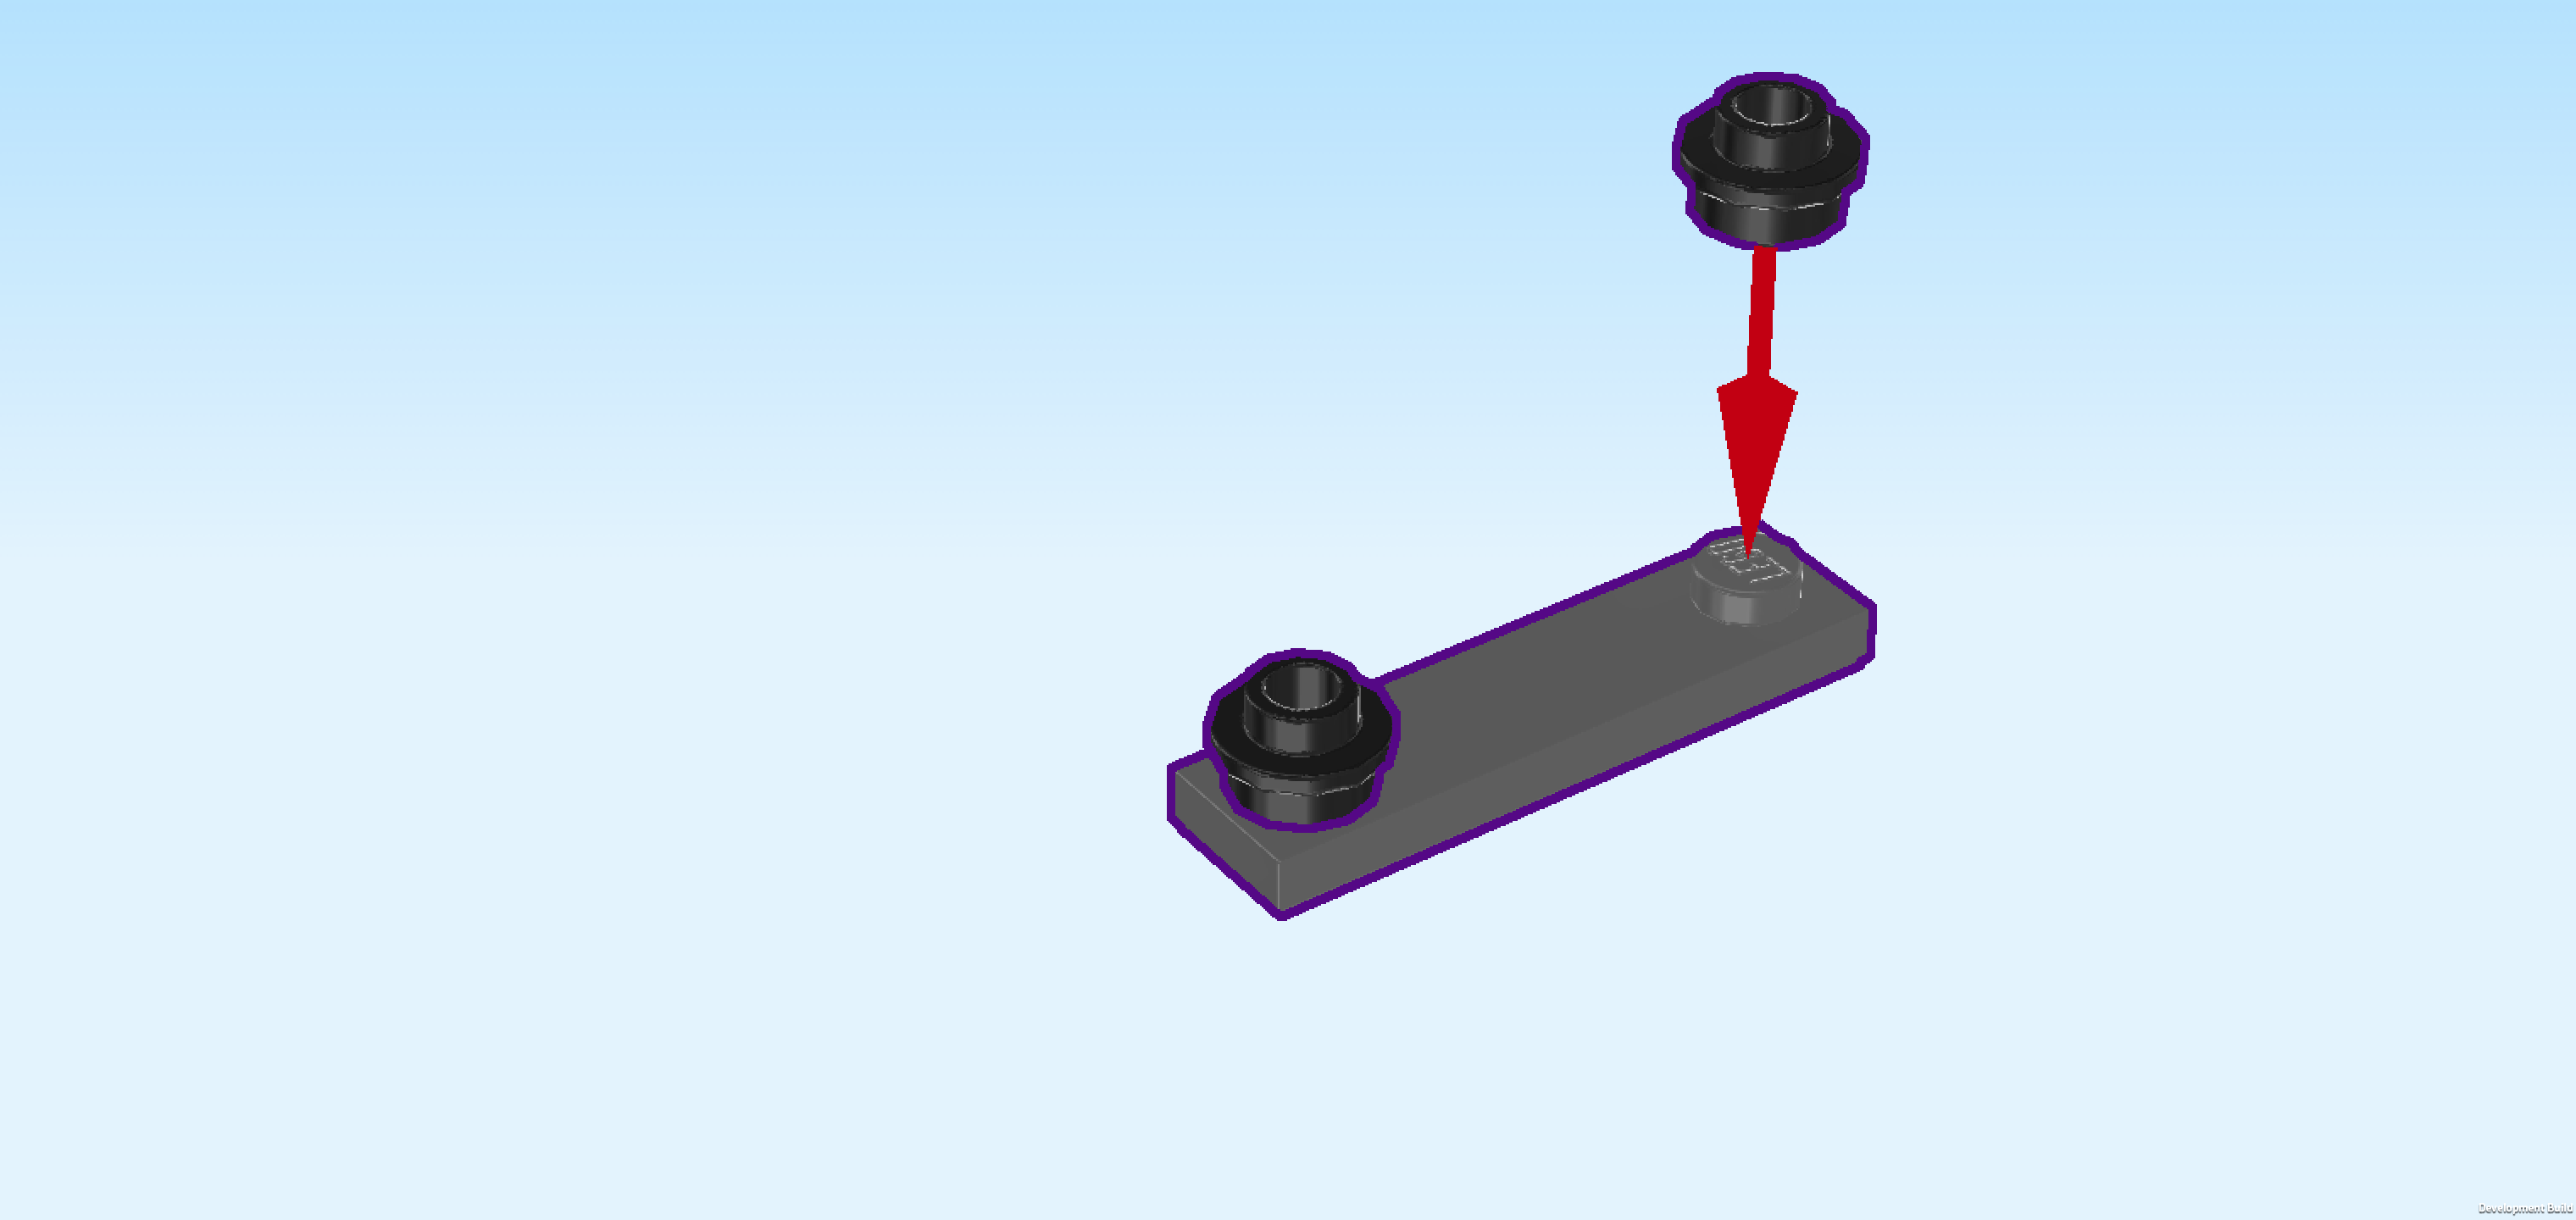
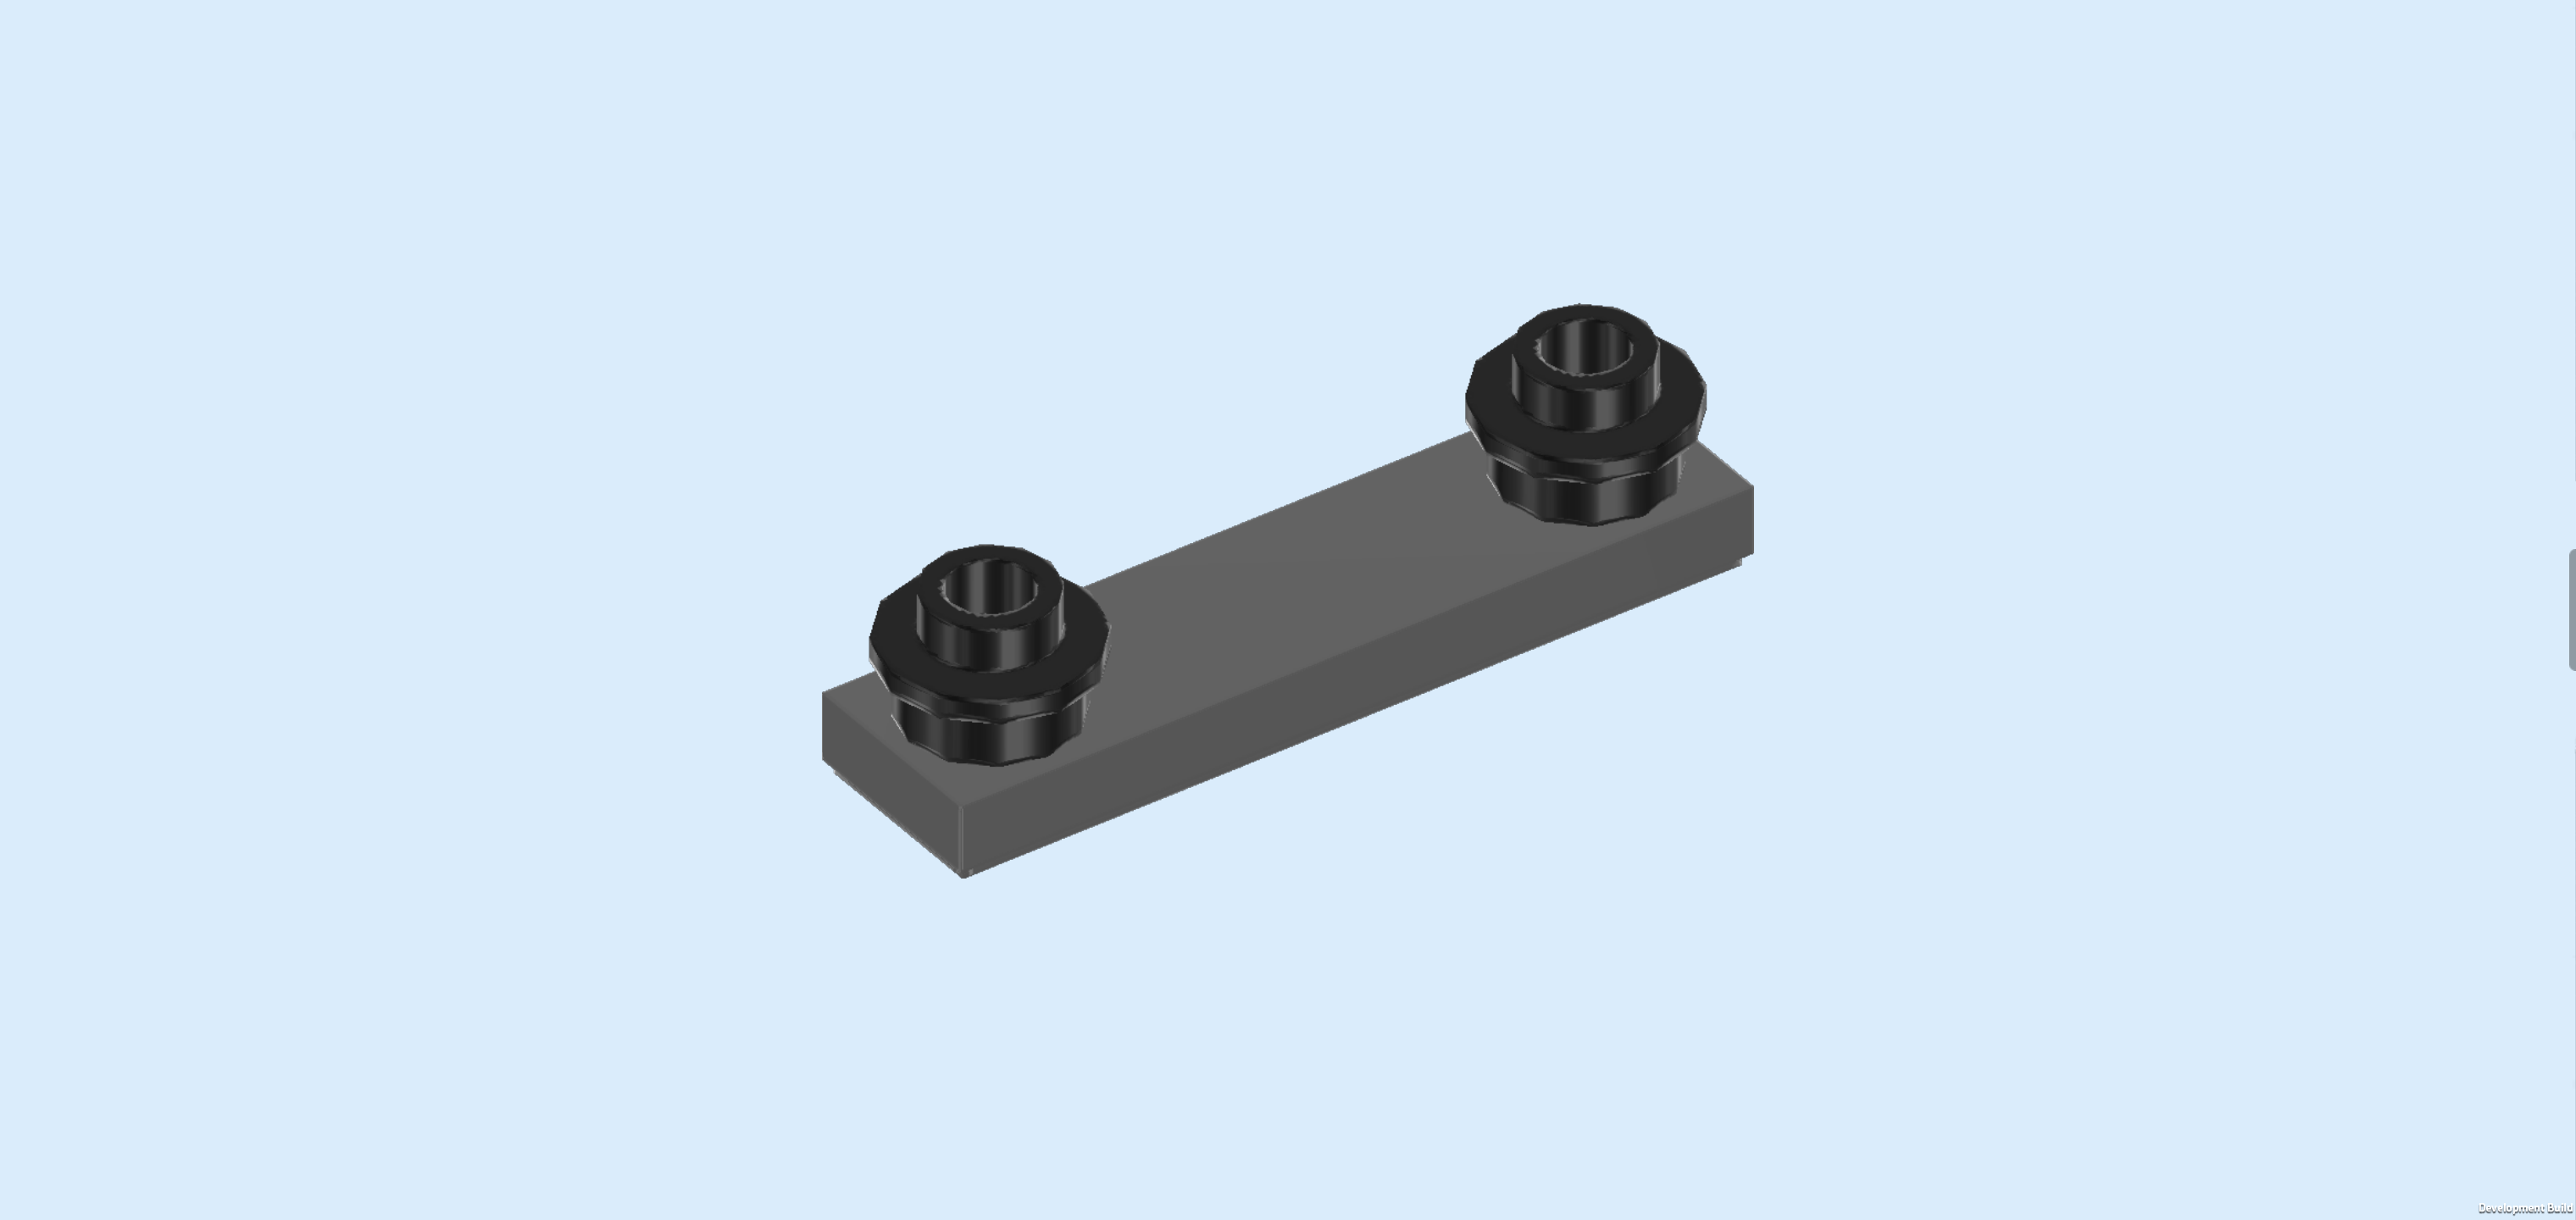
| Put the plate 1x4 horizontally on the table. |
| Put the 2 round plates 1x1 on the 2 knobs of the plate. |
| Turn the rear bumper vertically and then flip it upright so that the 2 round plates 1x1 are pointing to the right. Mount it on the 2 side knobs on the main structure that are pointing to the right. |
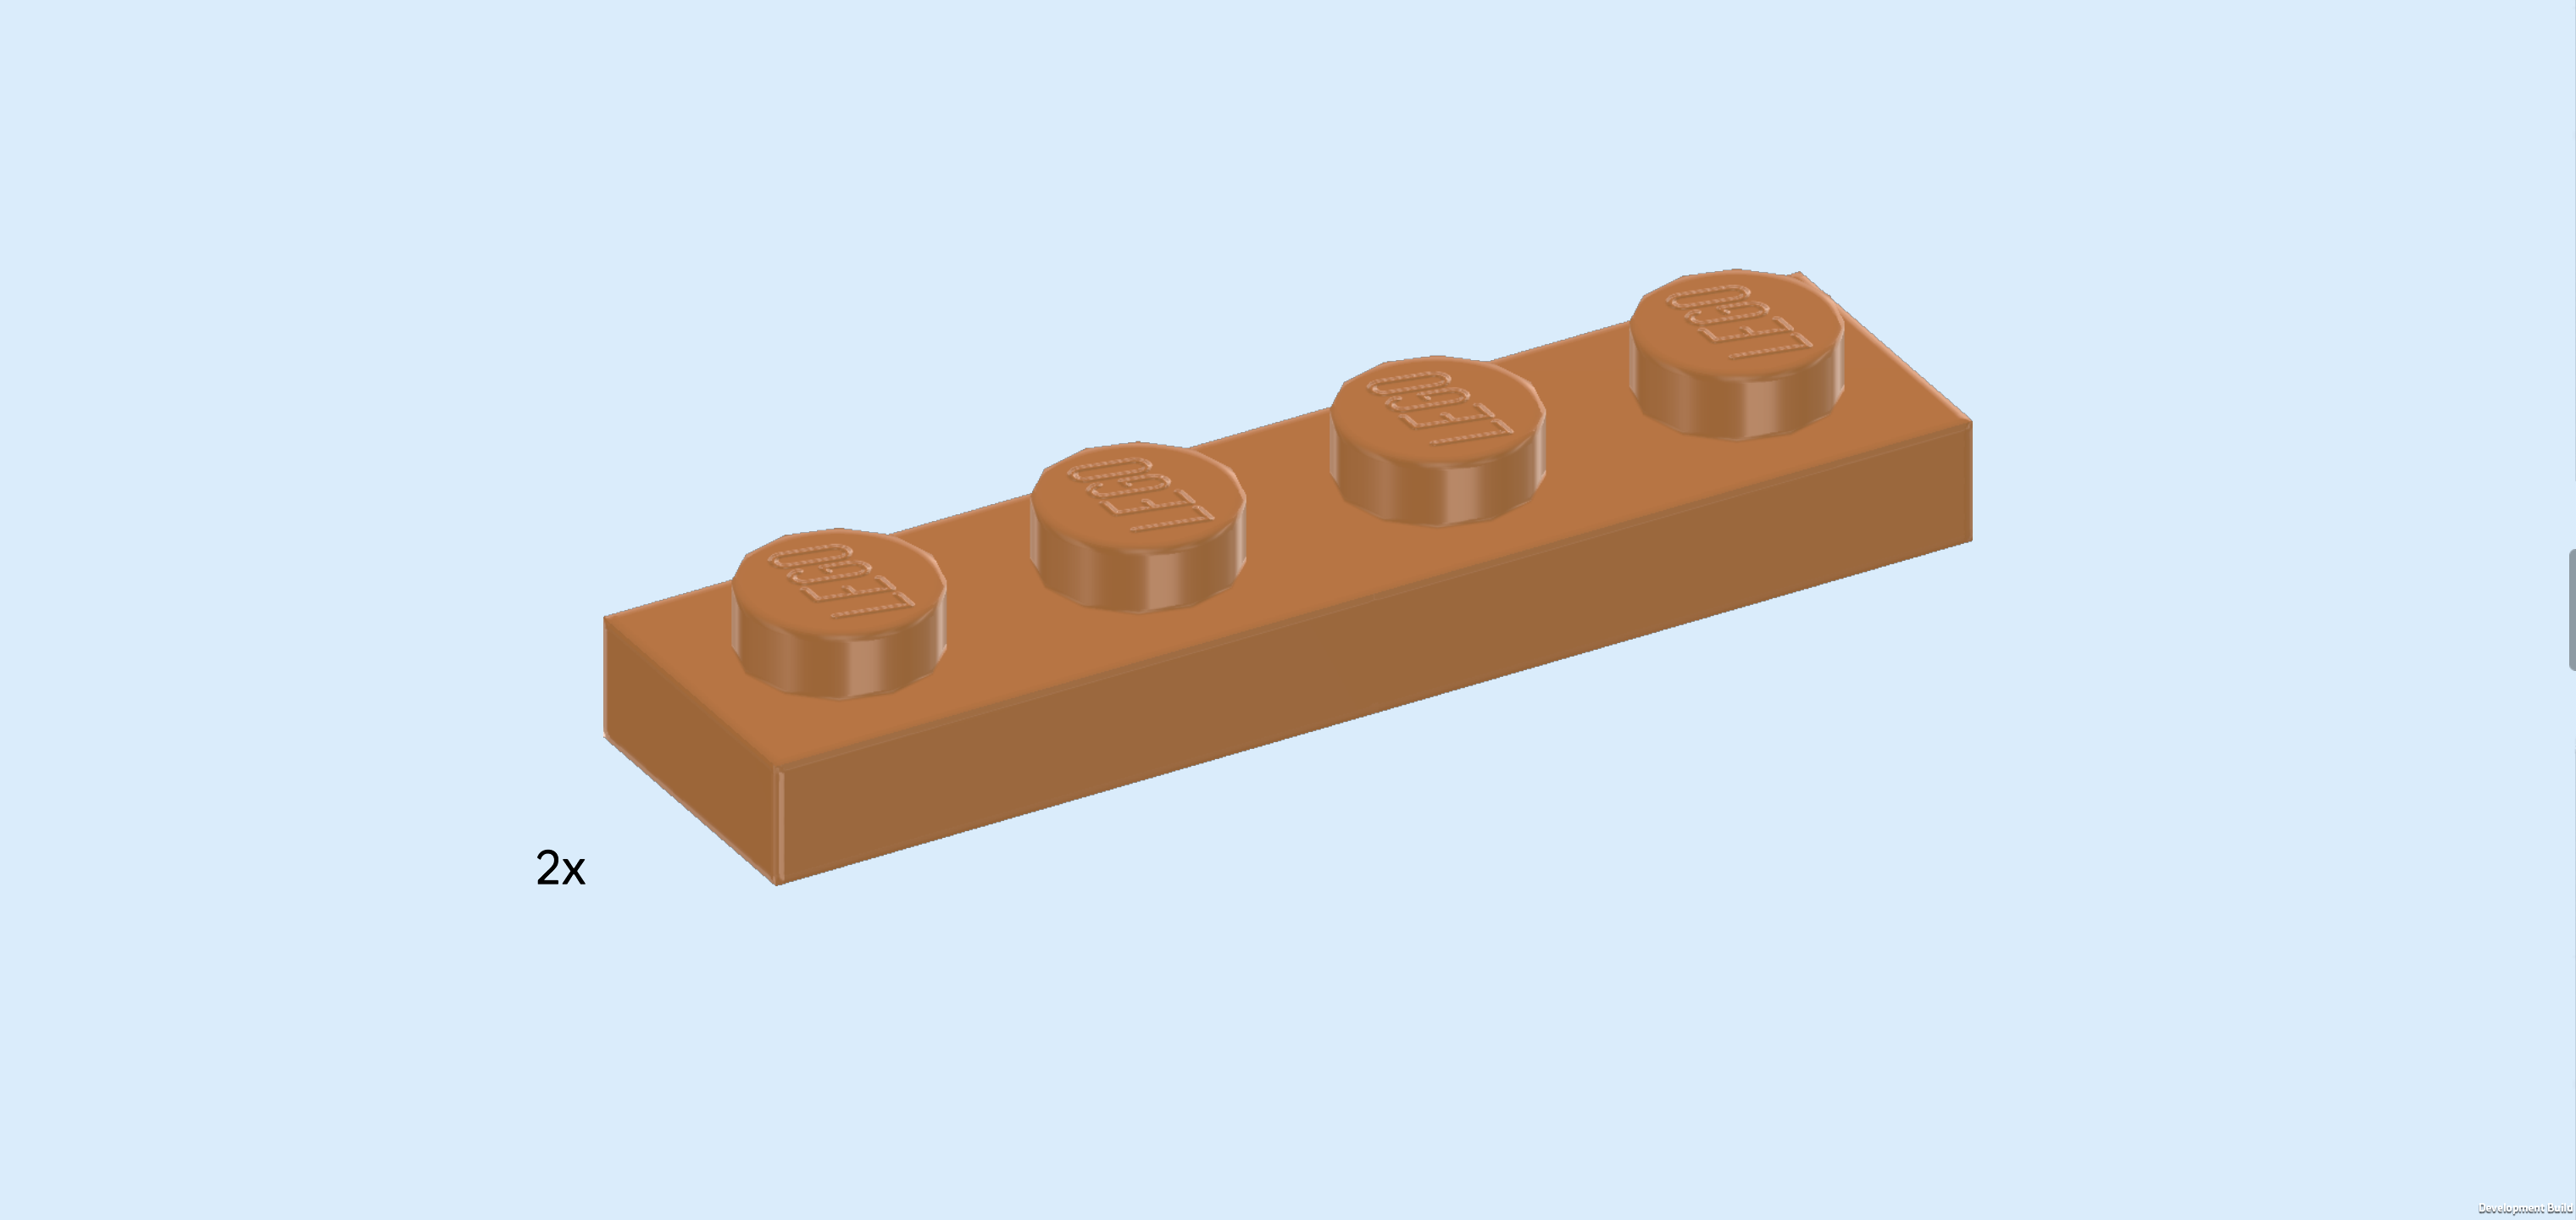
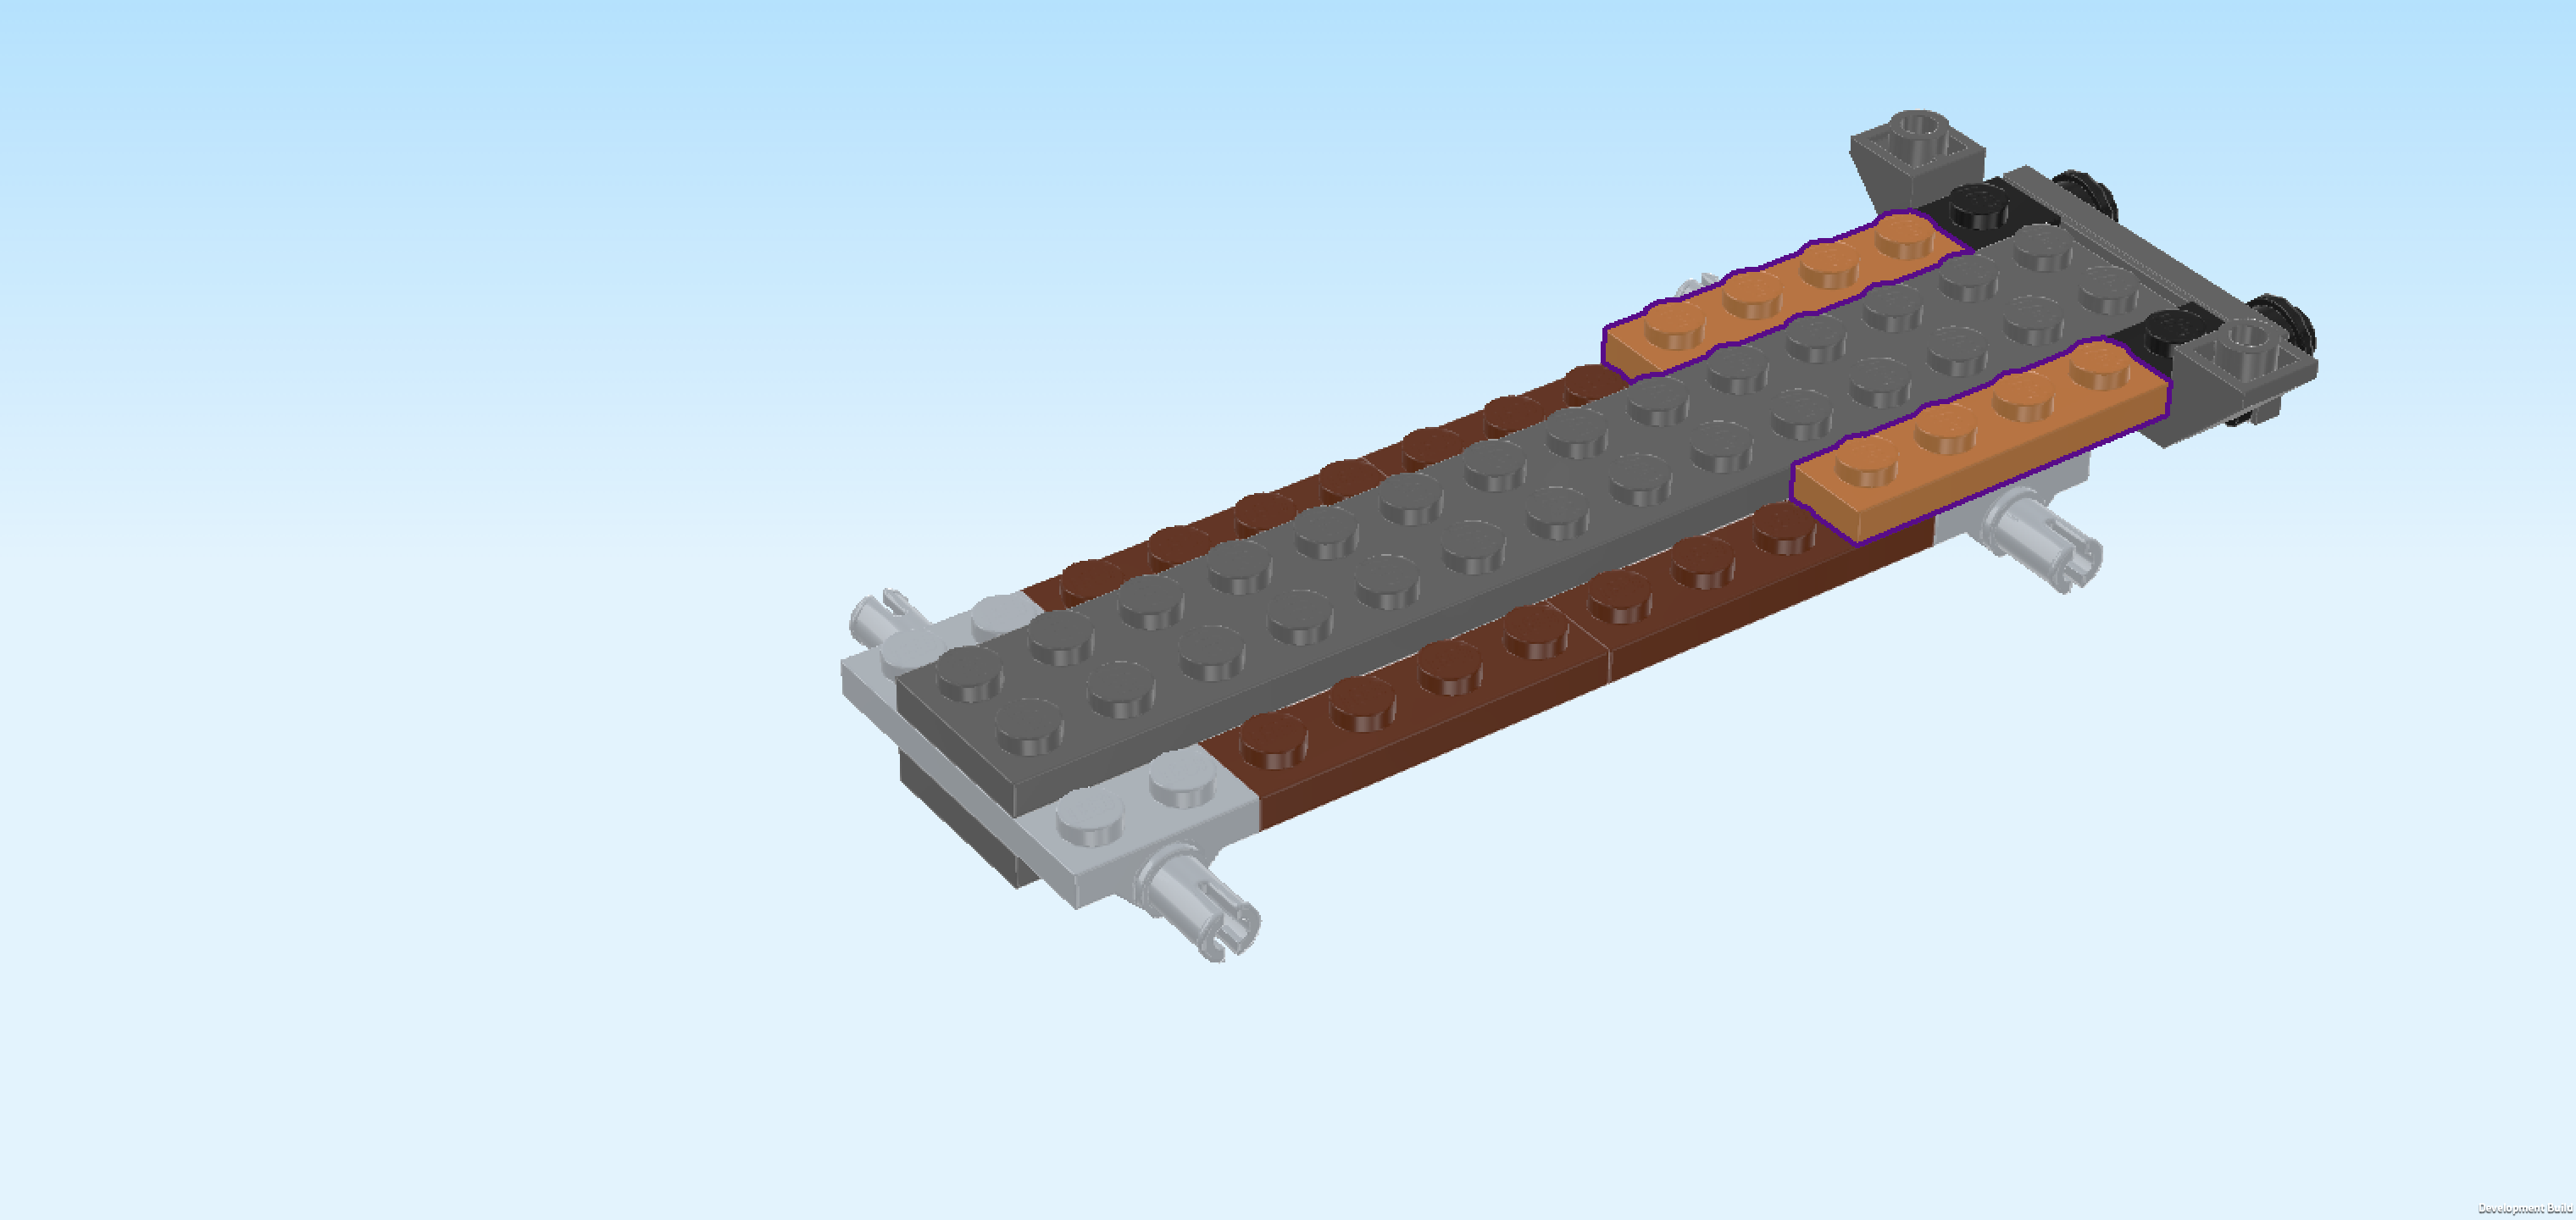
| Find 2 medium nougat brown plates 1x4. |
| Put 1 horizontally on the frontmost row directly to the left of the angle plate 1x1 we have mounted earlier. |
| Repeat symmetrically at the back. |
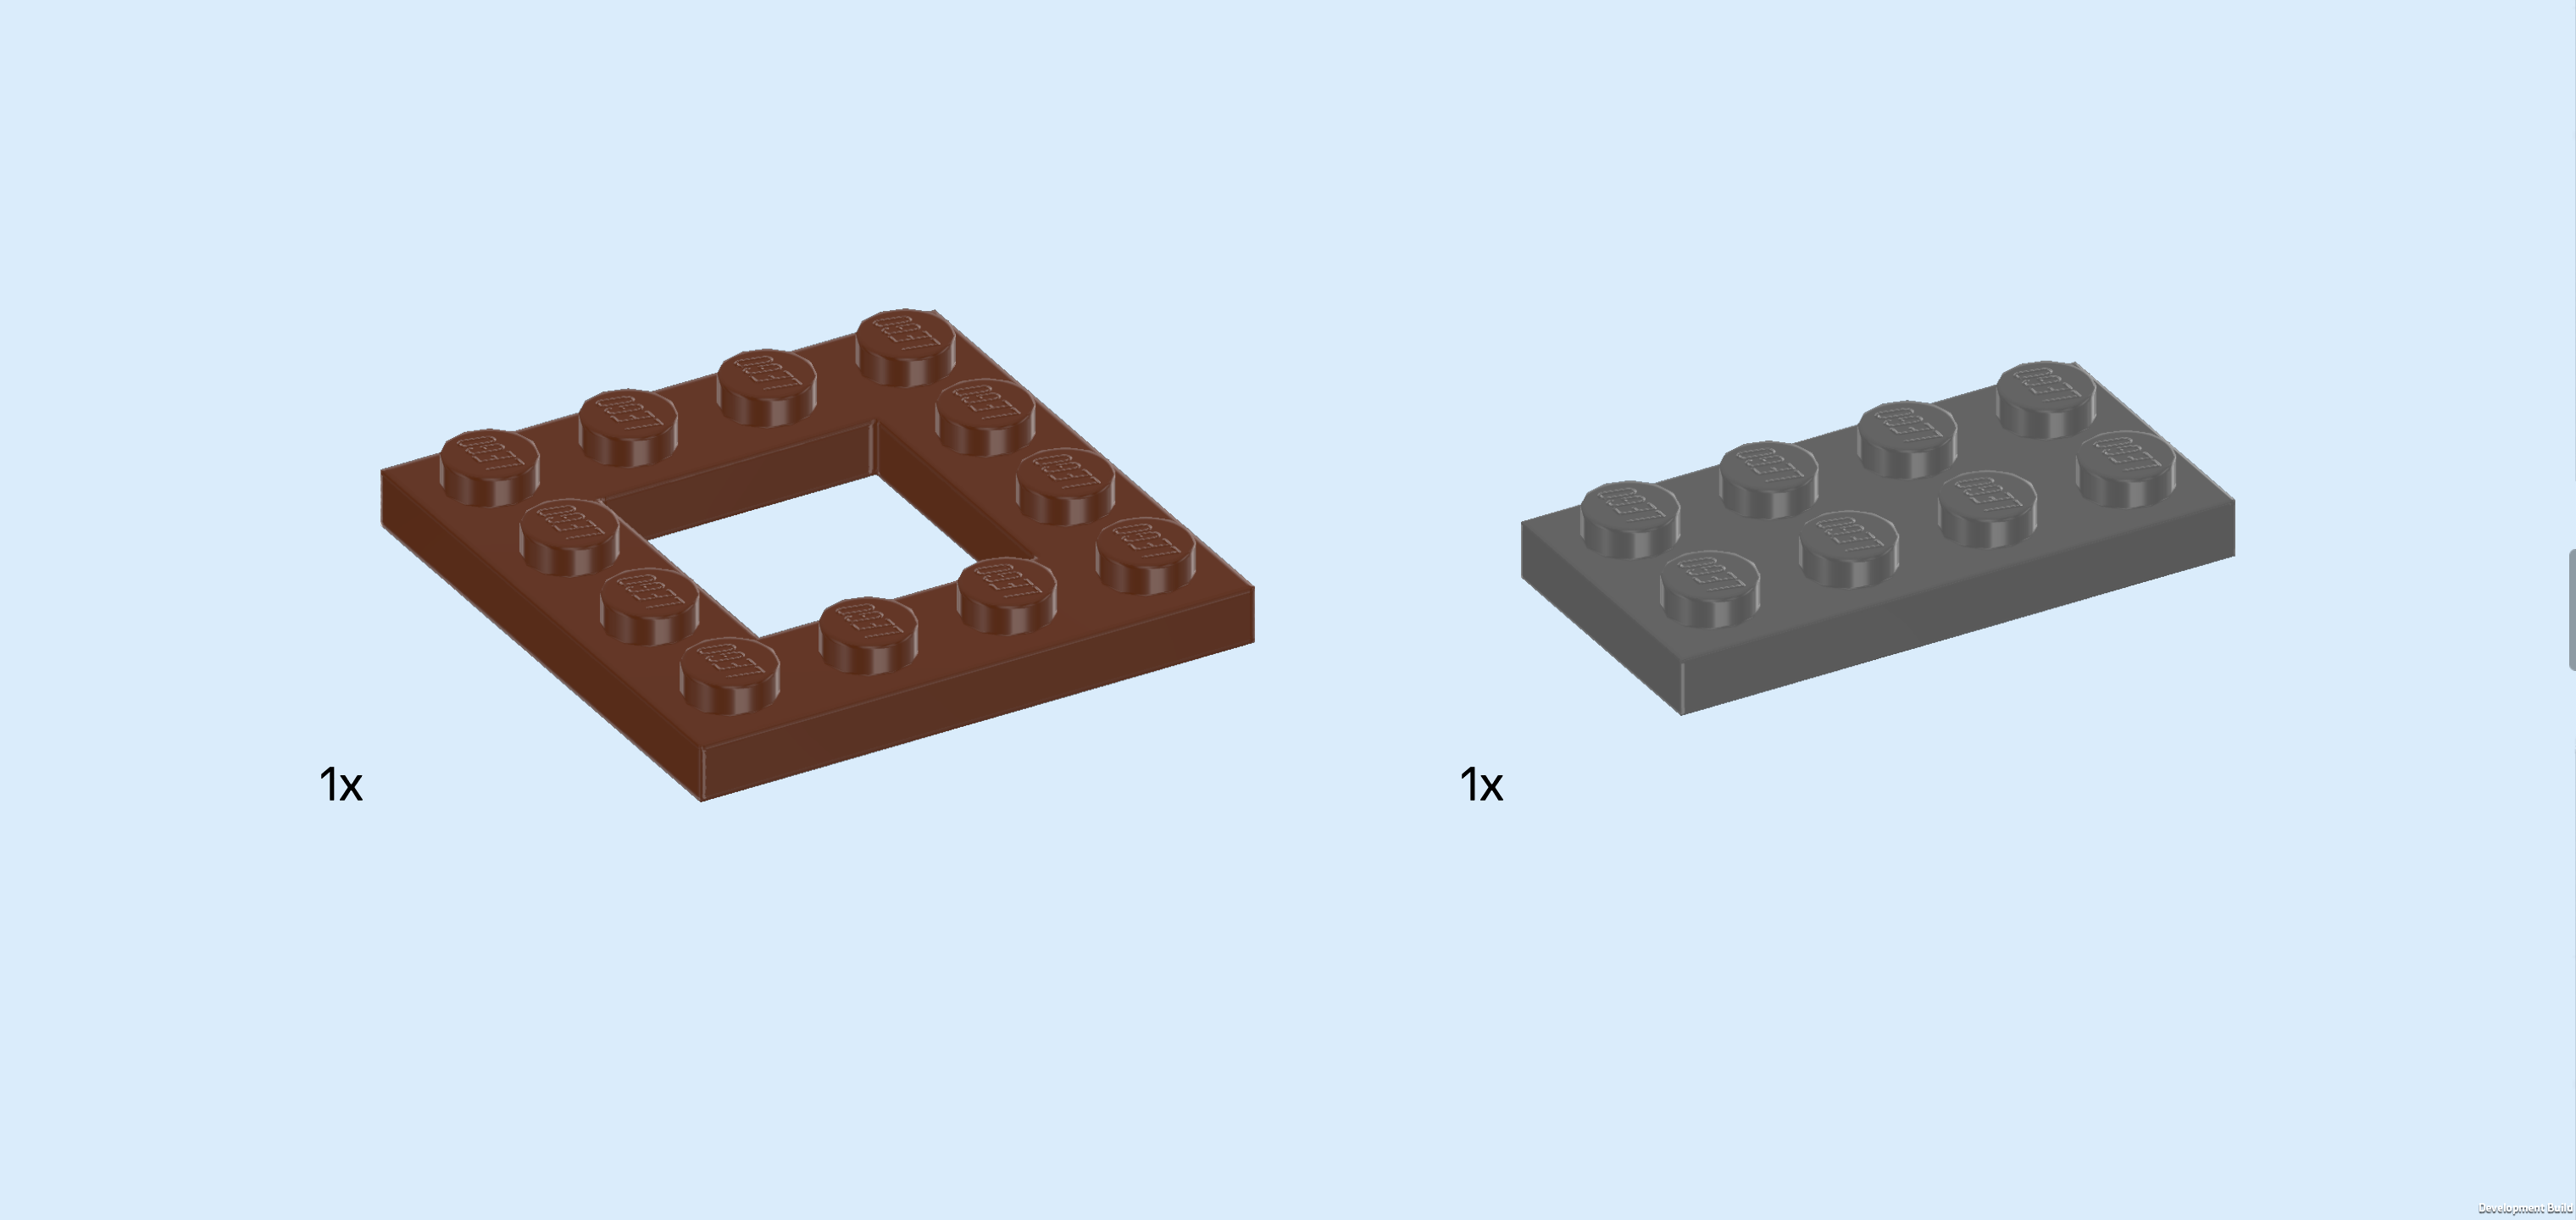
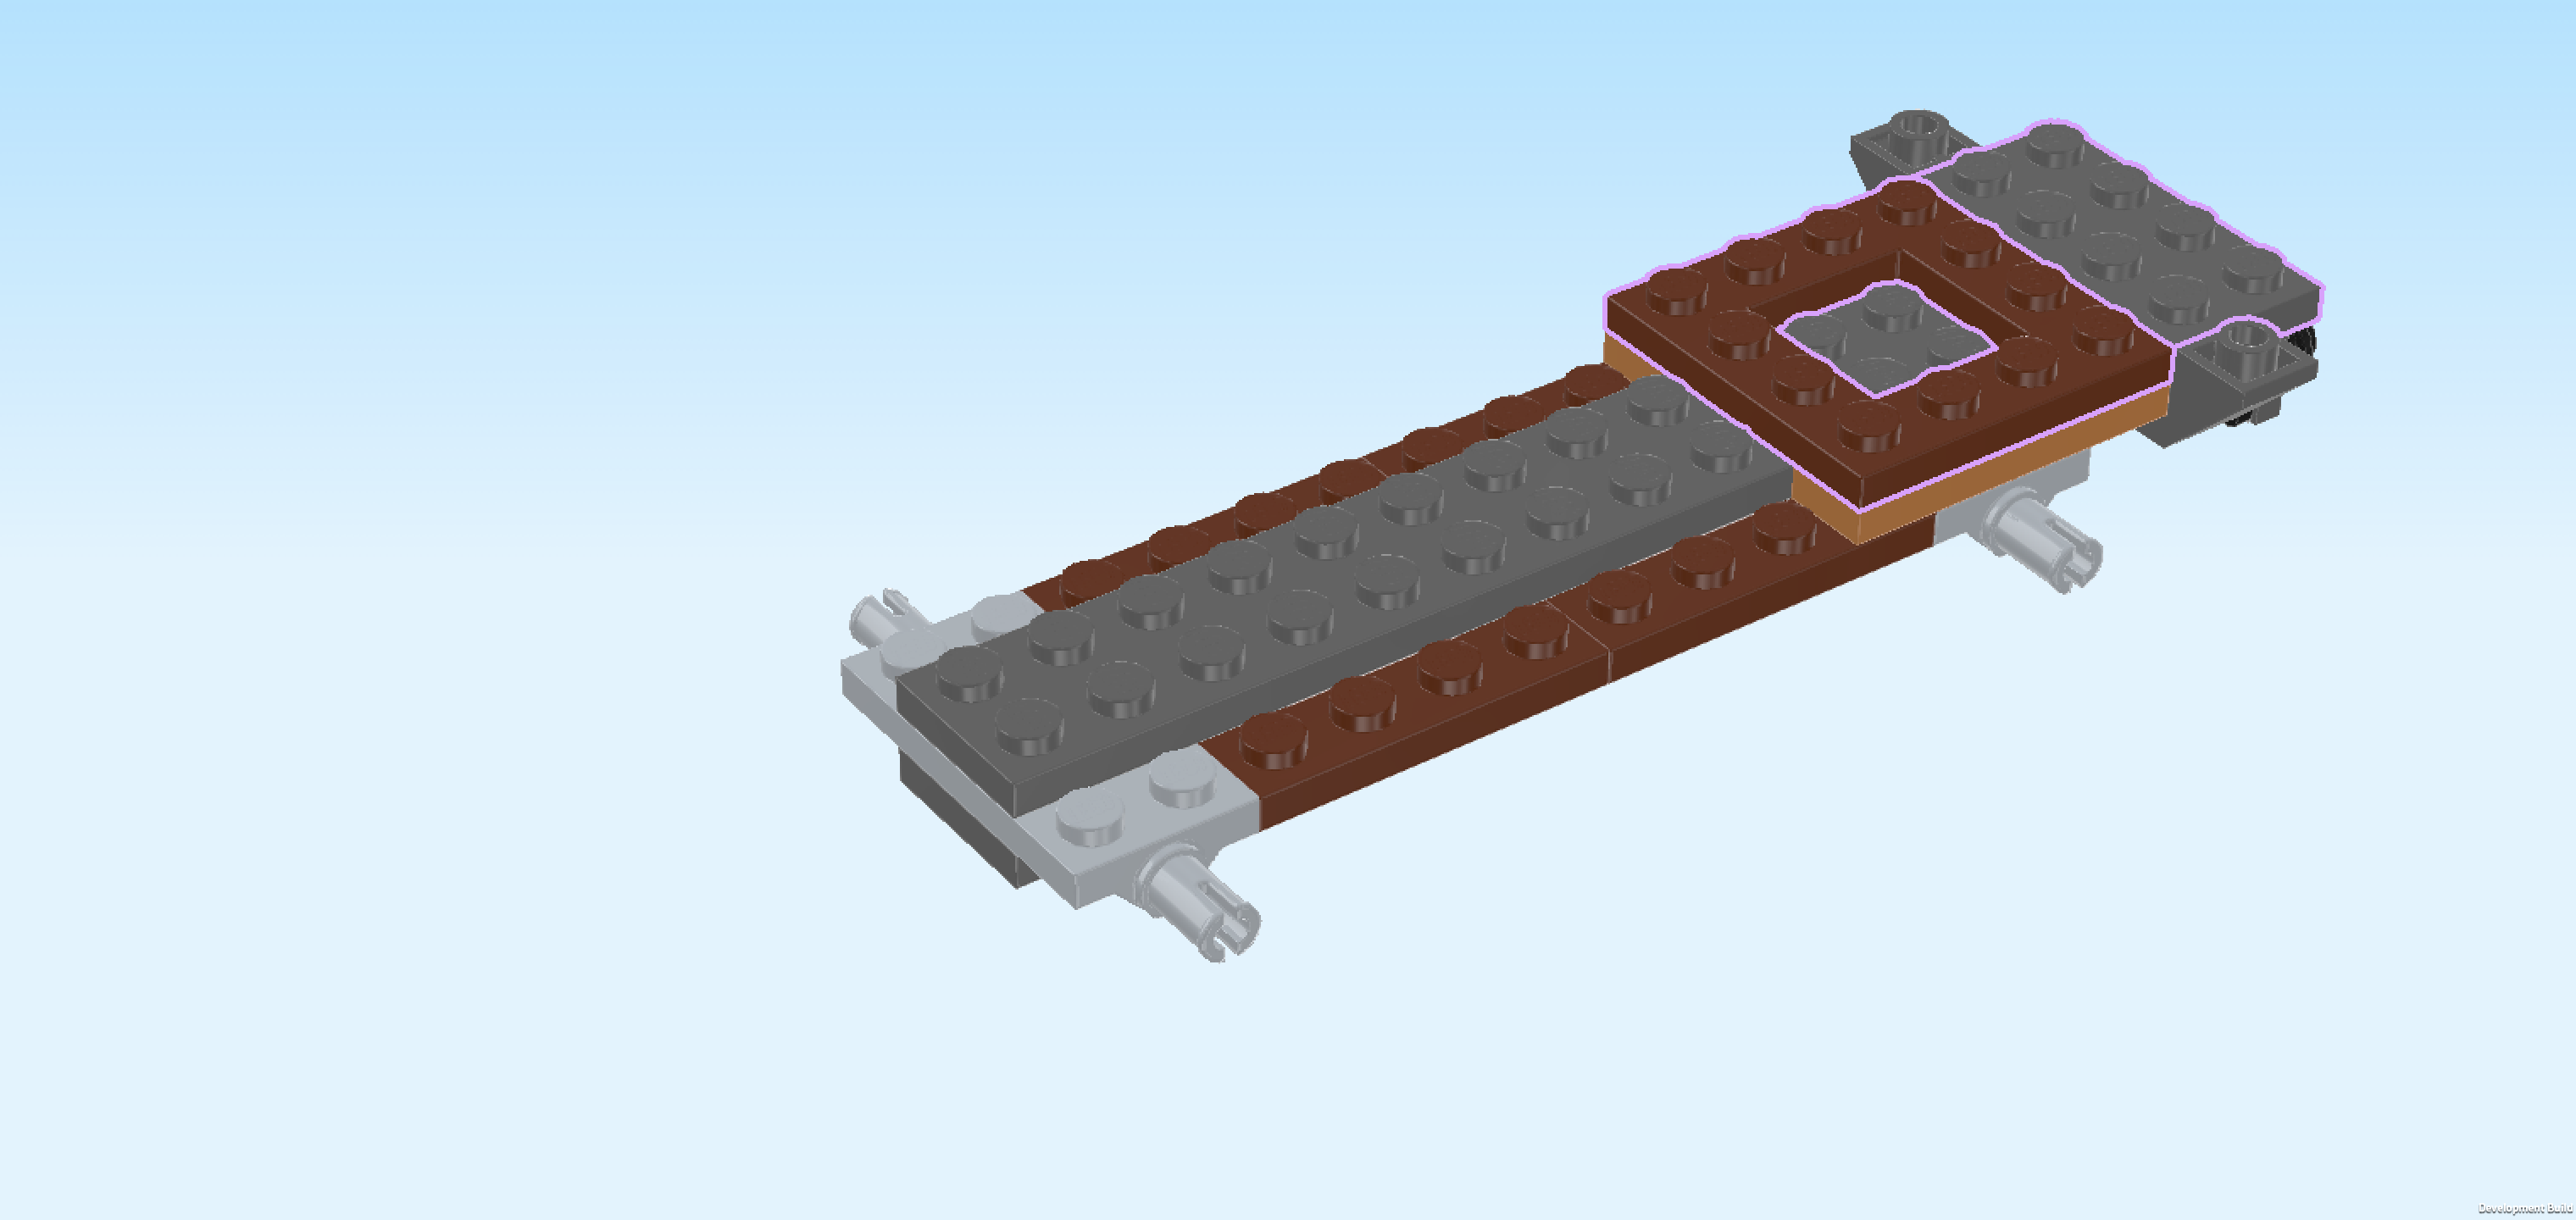
| Collect the following 2 pieces: |
| 1 reddish brown frame plate 4x4 with middle hole, |
| and 1 dark stone grey plate 2x4. |
| Put the plate 2x4 vertically on the 2 rightmost columns. |
| Put the frame plate 4x4 to the left of the previous piece. |
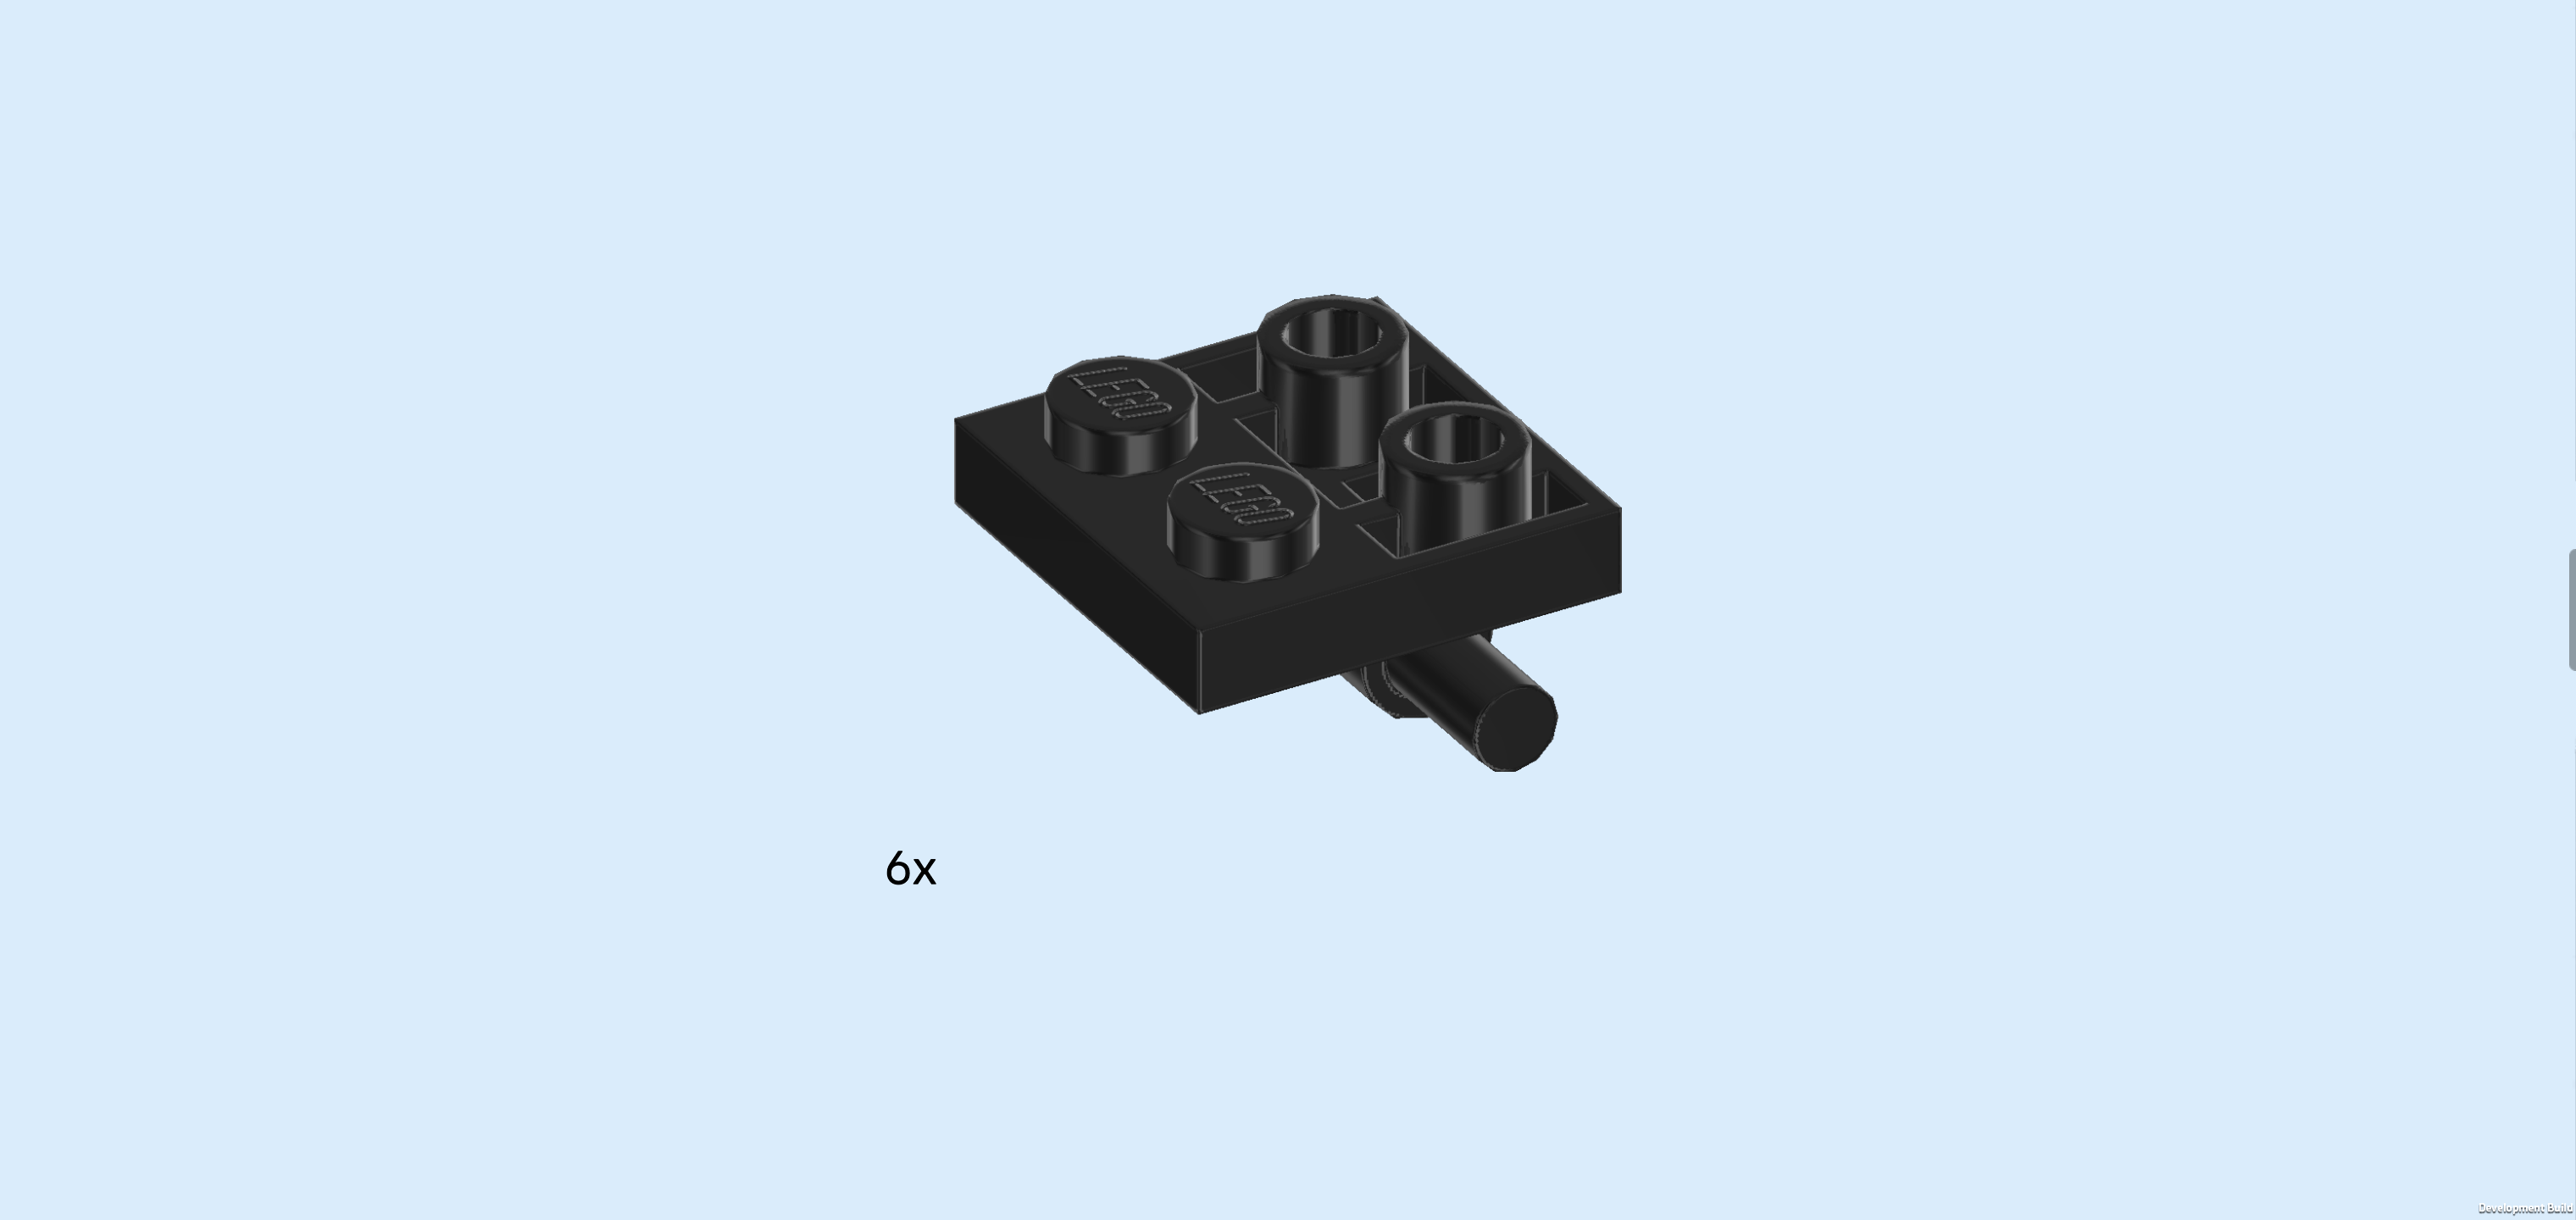
| Find 6 black plates 2x2 with bottom shaft. |
| Put 1 on the frontmost row to the left of the previous piece, 1/2 overhanging to the front. Make sure that the 2 hollow knobs of the plate are at the front edge. |
| Put 1 to the left of the previous piece, the plate half with hollow knobs again overhanging to the front. |
| Put another one to the left of the previous piece in the same orientation. |
| Repeat symmetrically at the back, plate halves with hollow knobs overhanging to the back. |
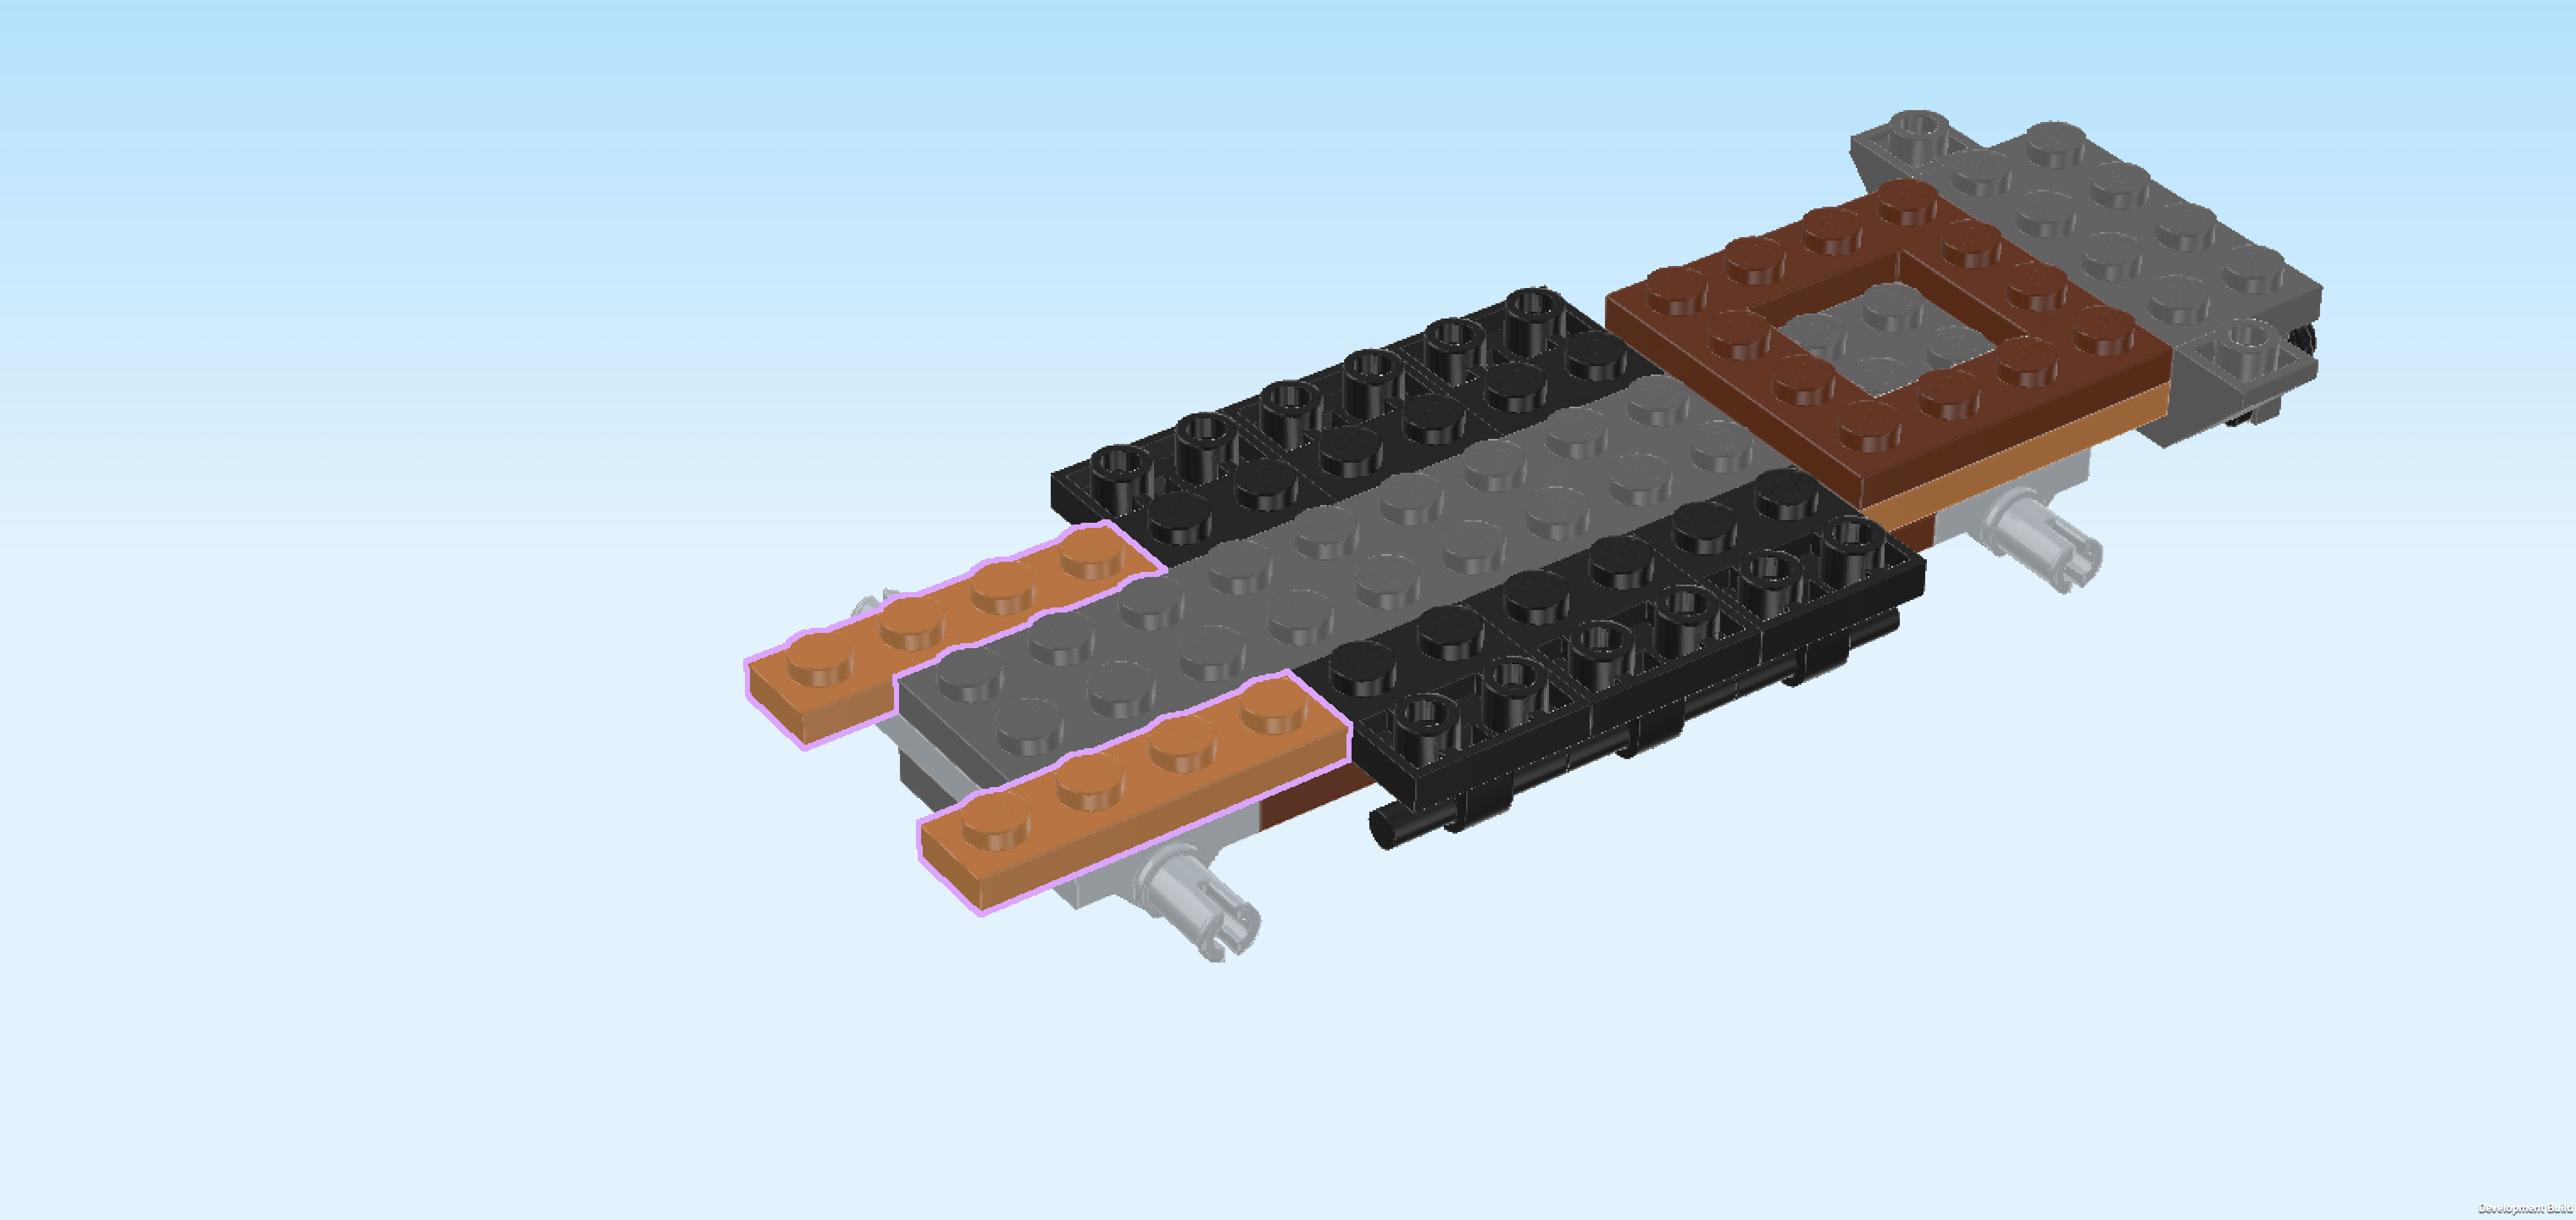
| Find 2 medium nougat brown plates 1x4. |
| Put 1 horizontally to the left of the 3 previous pieces on the back row, 1 knob overhanging to the left. |
| Repeat symmetrically at the front. |
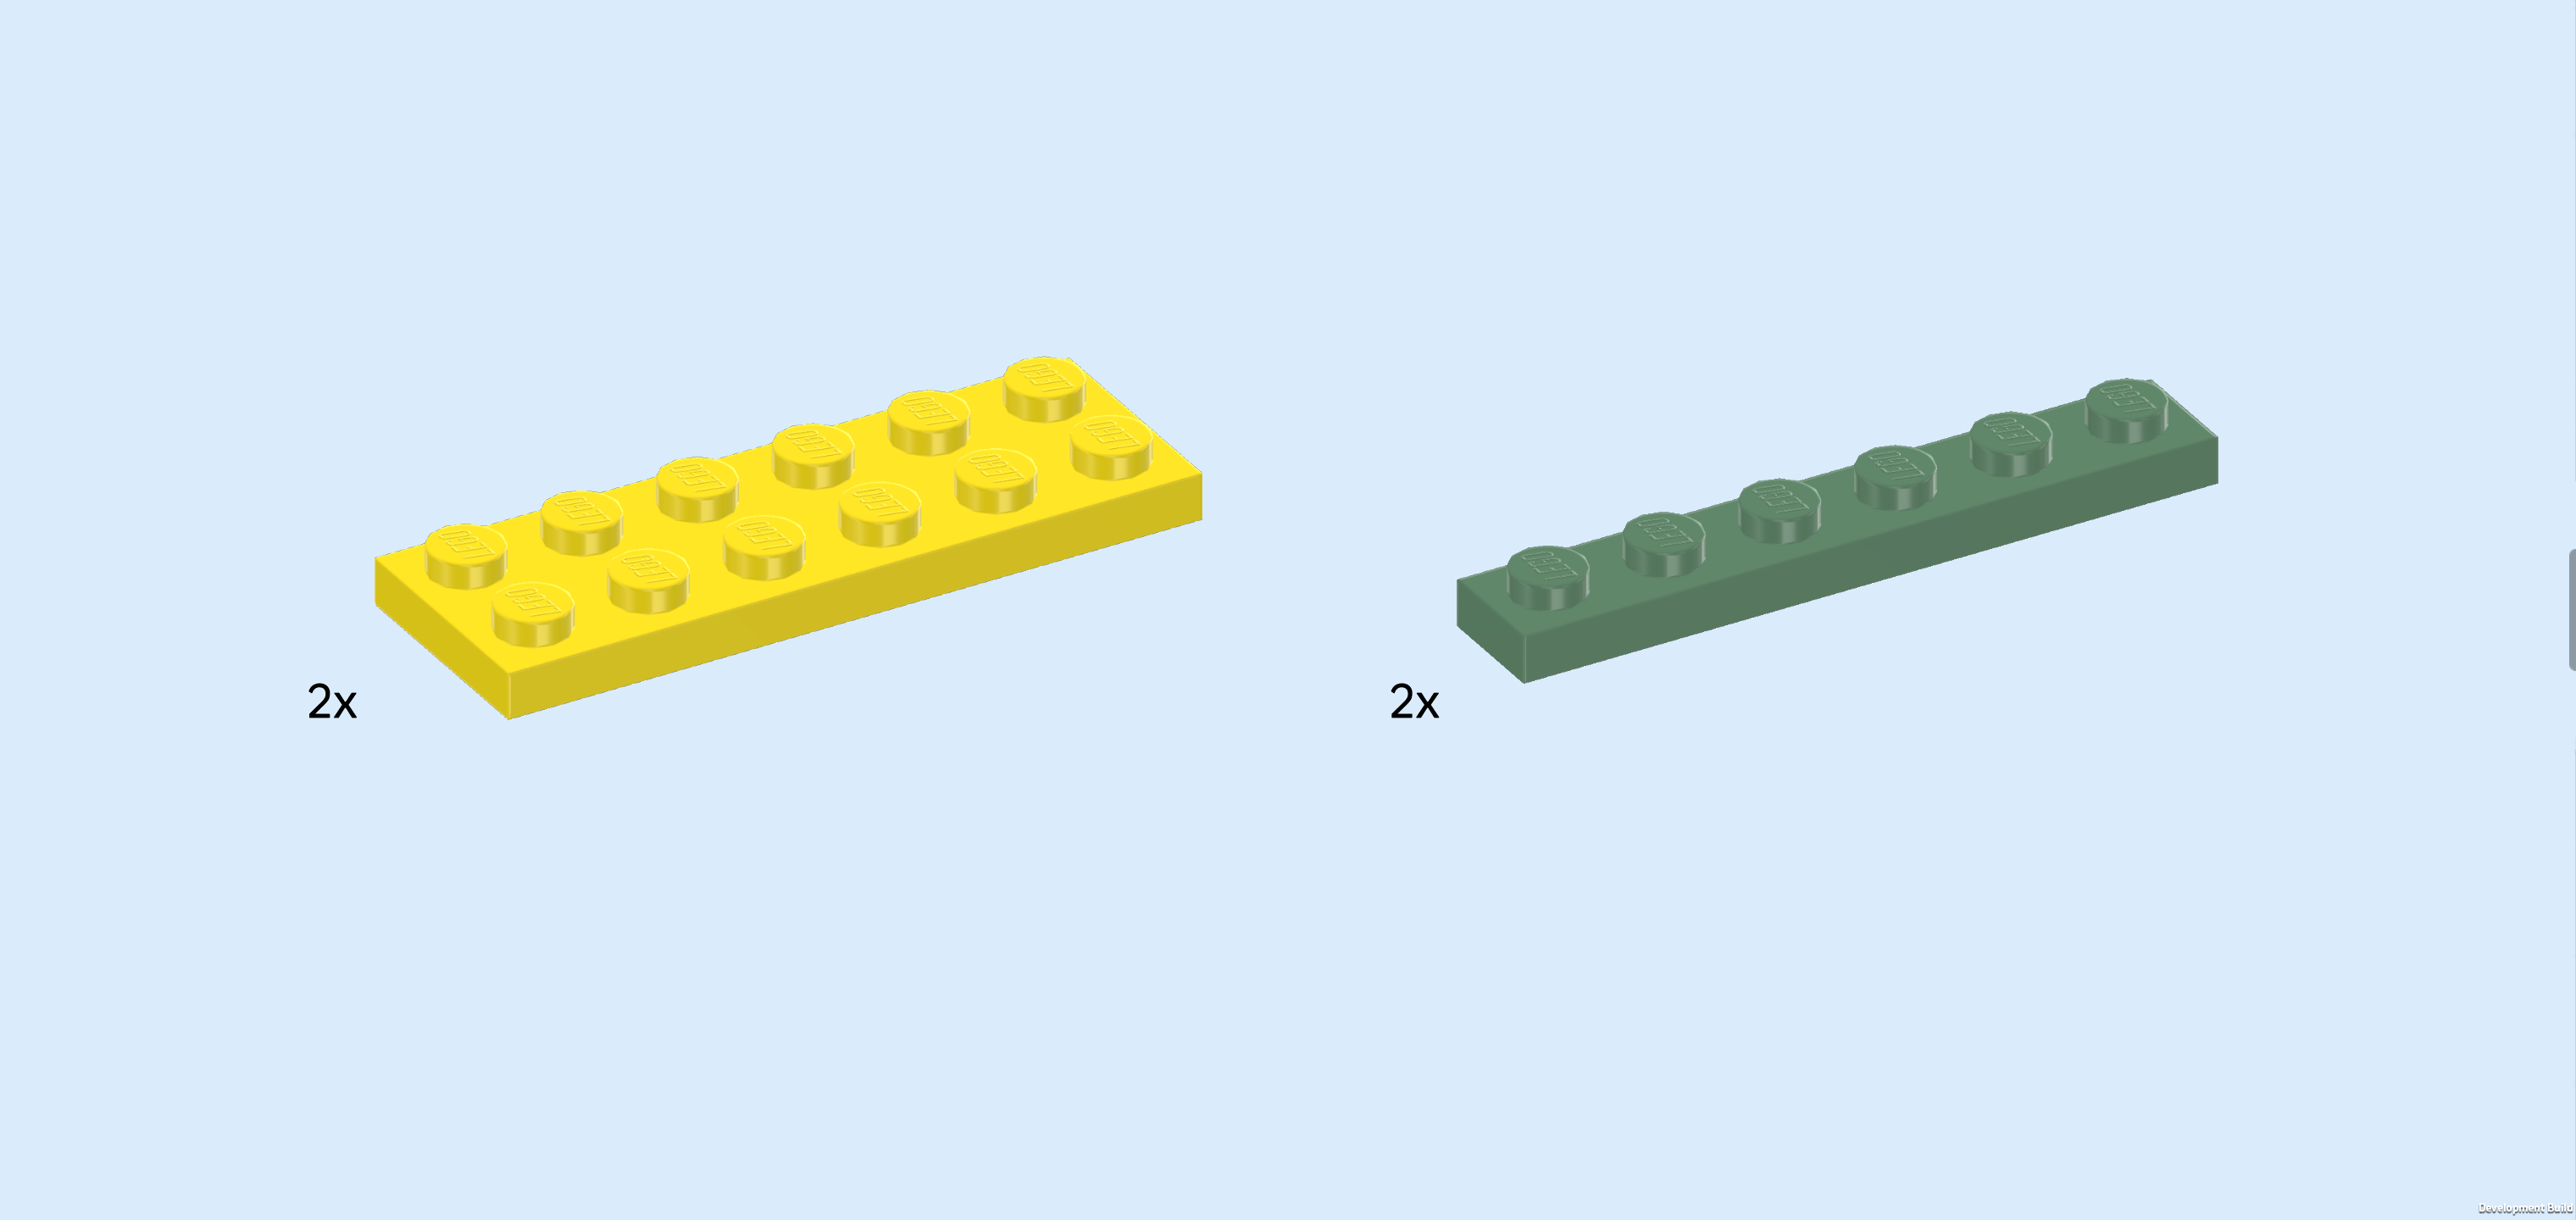
| Collect the following 4 pieces: |
| 2 bright yellow plates 2x6, |
| and 2 sand green plates 1x6. |
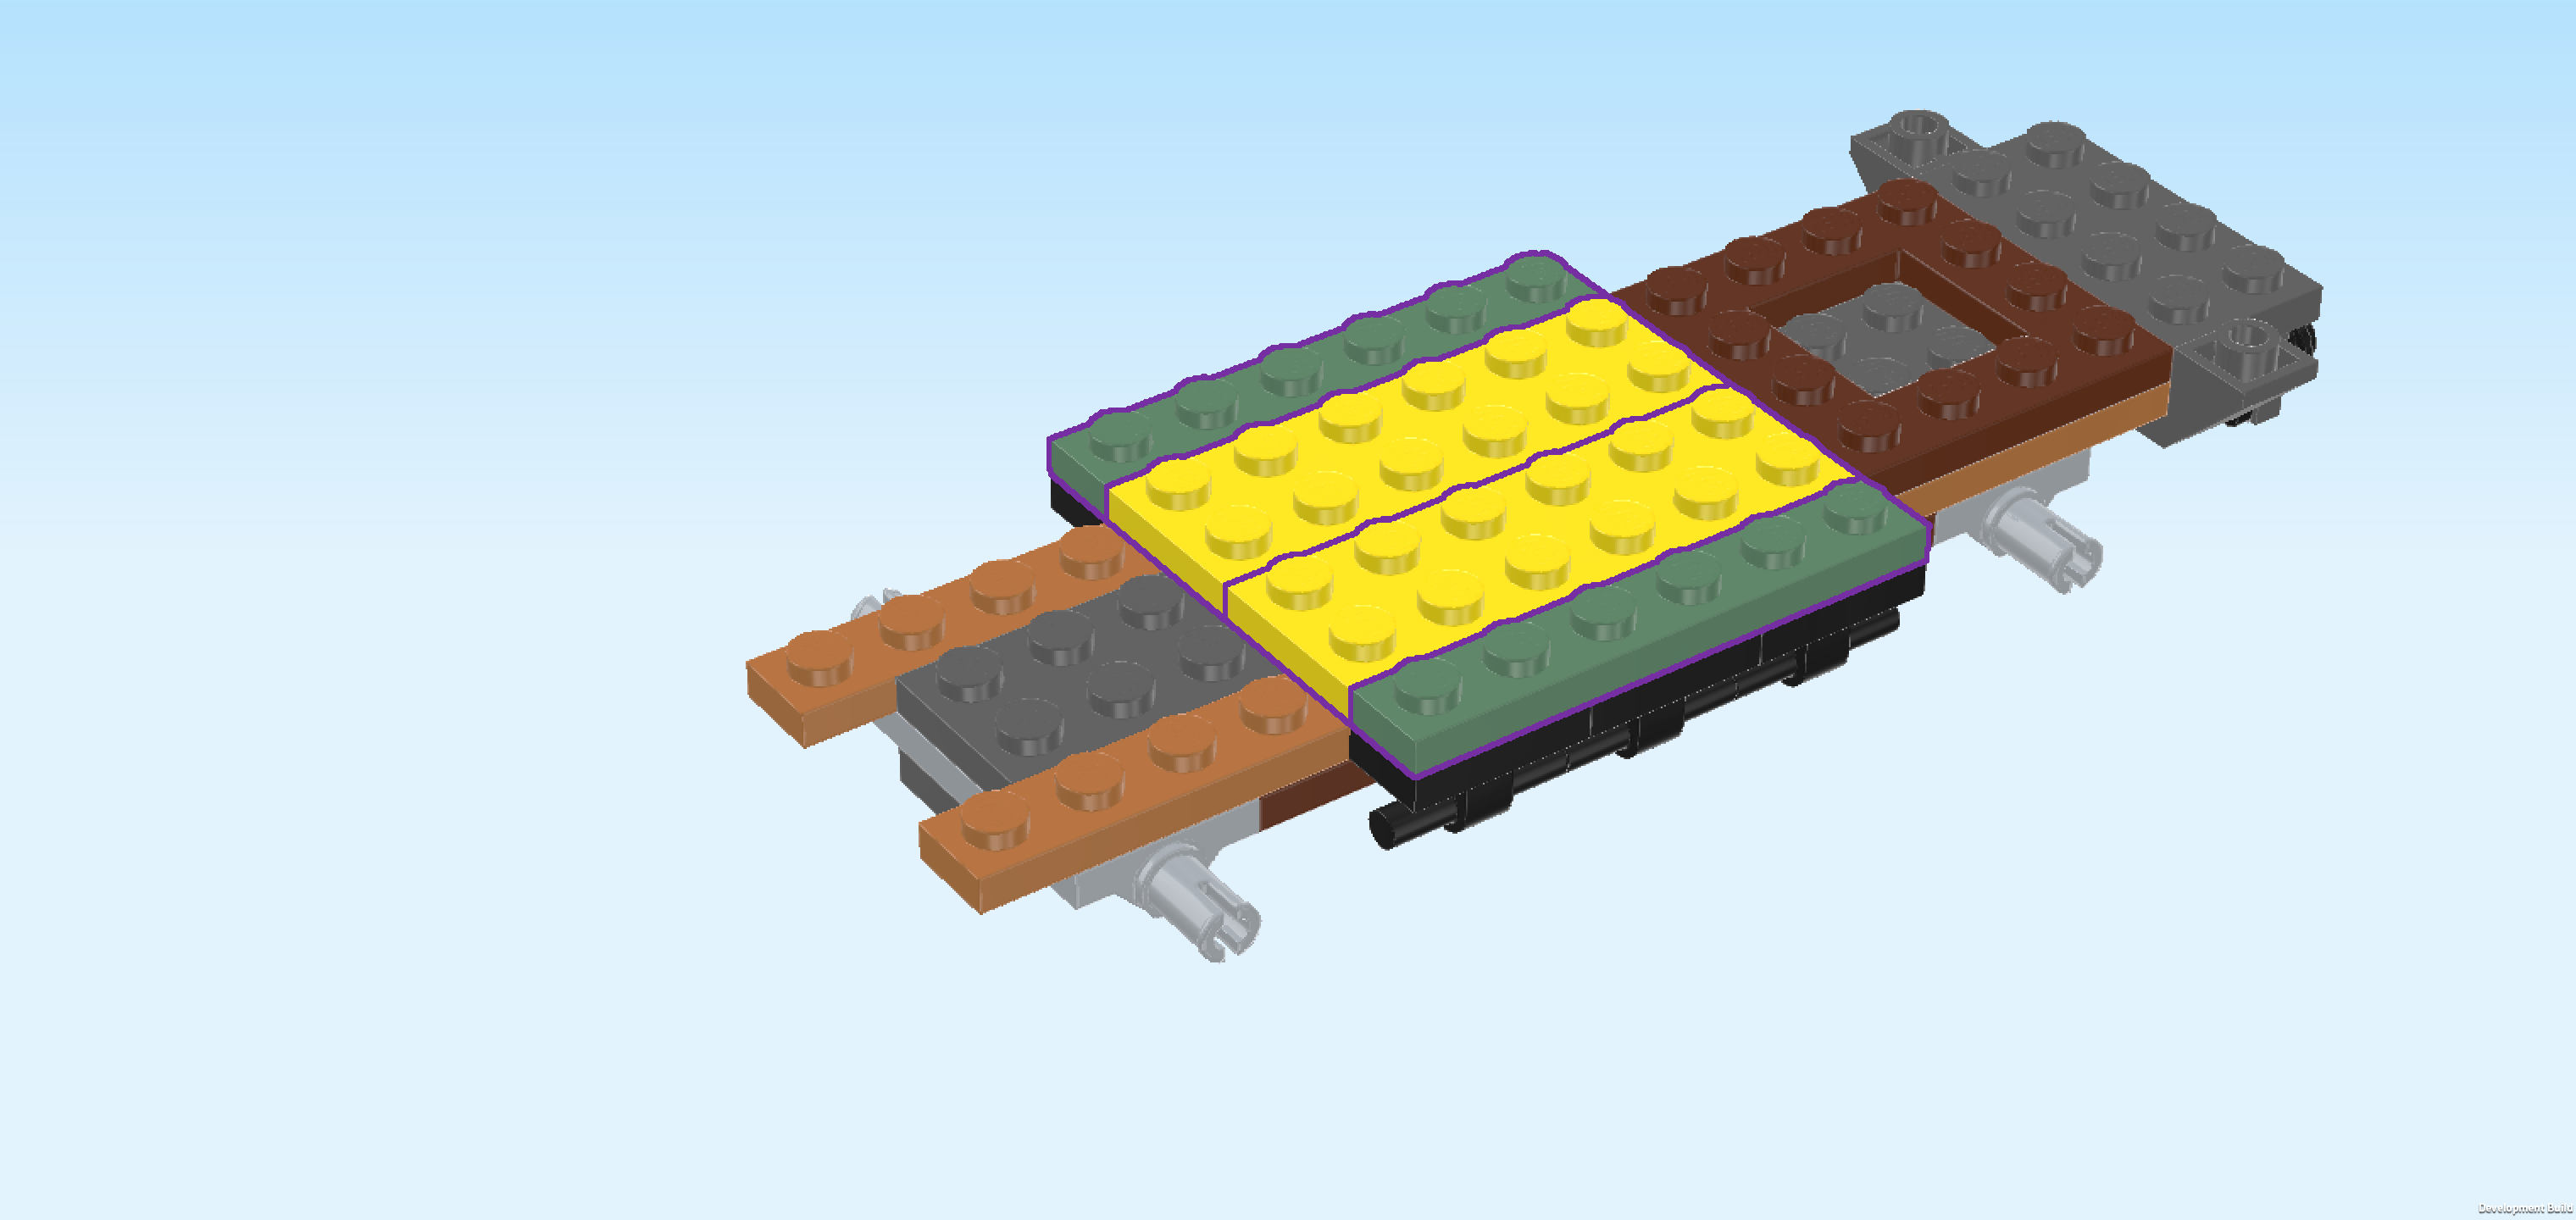
| Put 1 plate 1x6 horizontally on the backmost row. This is the row that consists of 6 knobs and was formed by the plates 2x2 with bottom shafts. |
| Put 1 plate 2x6 horizontally in front of the previous piece. |
| Put the other plate 2x6 horizontally in front of the previous piece. |
| Put the other plate 1x6 horizontally in front of the previous piece, covering the protruding row at the front. |
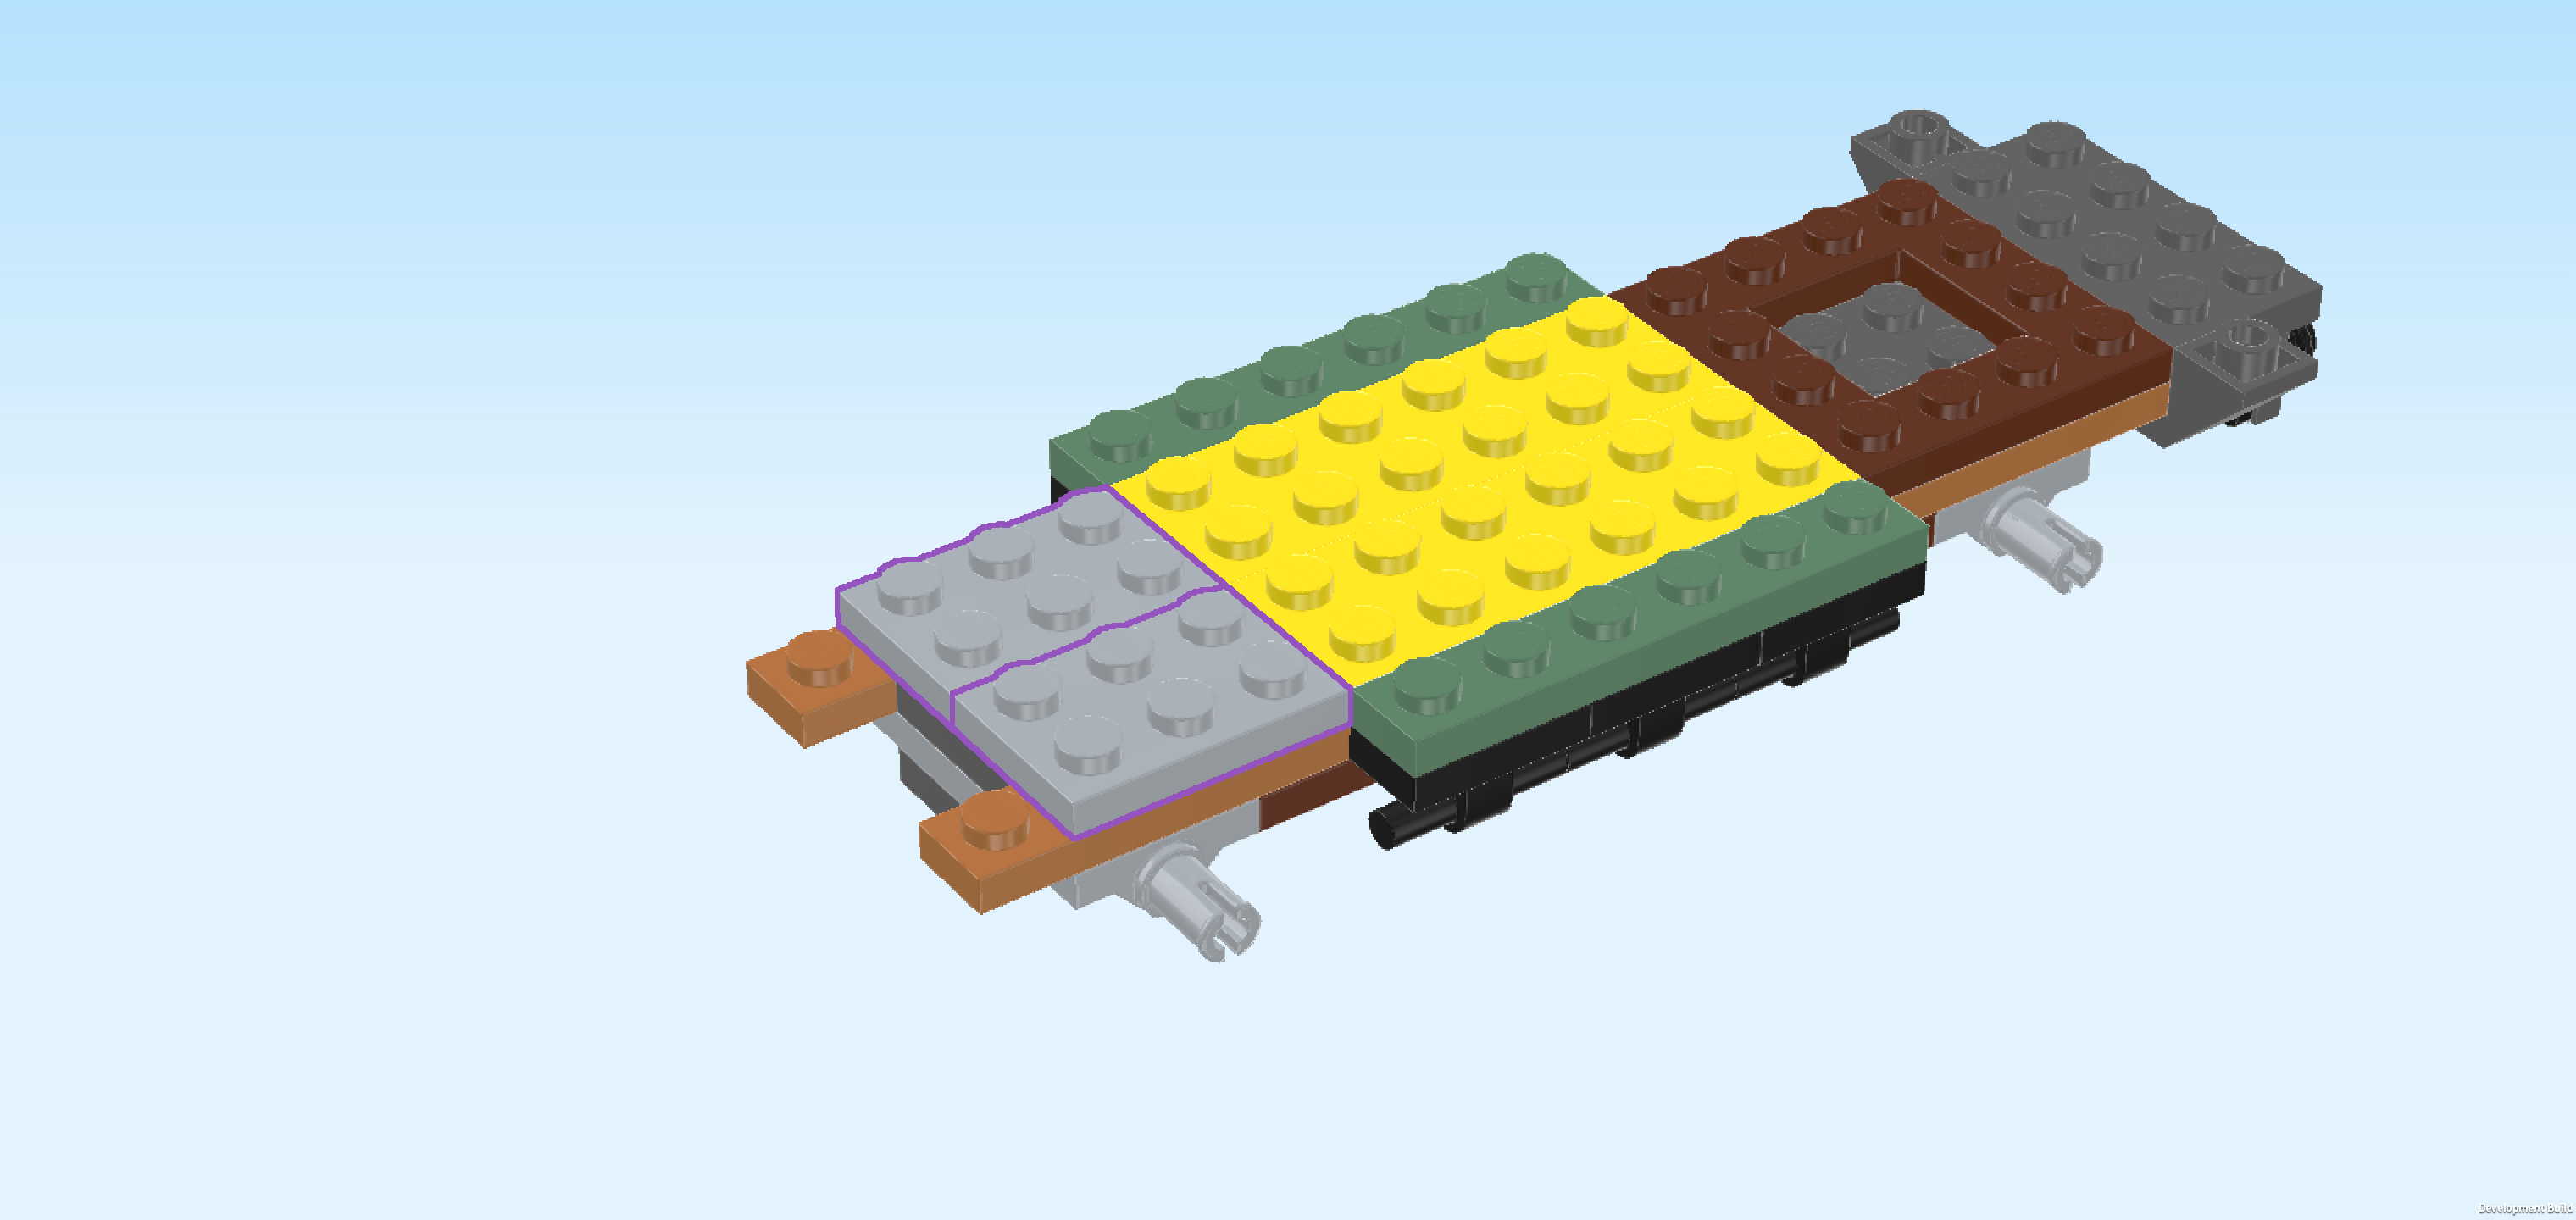
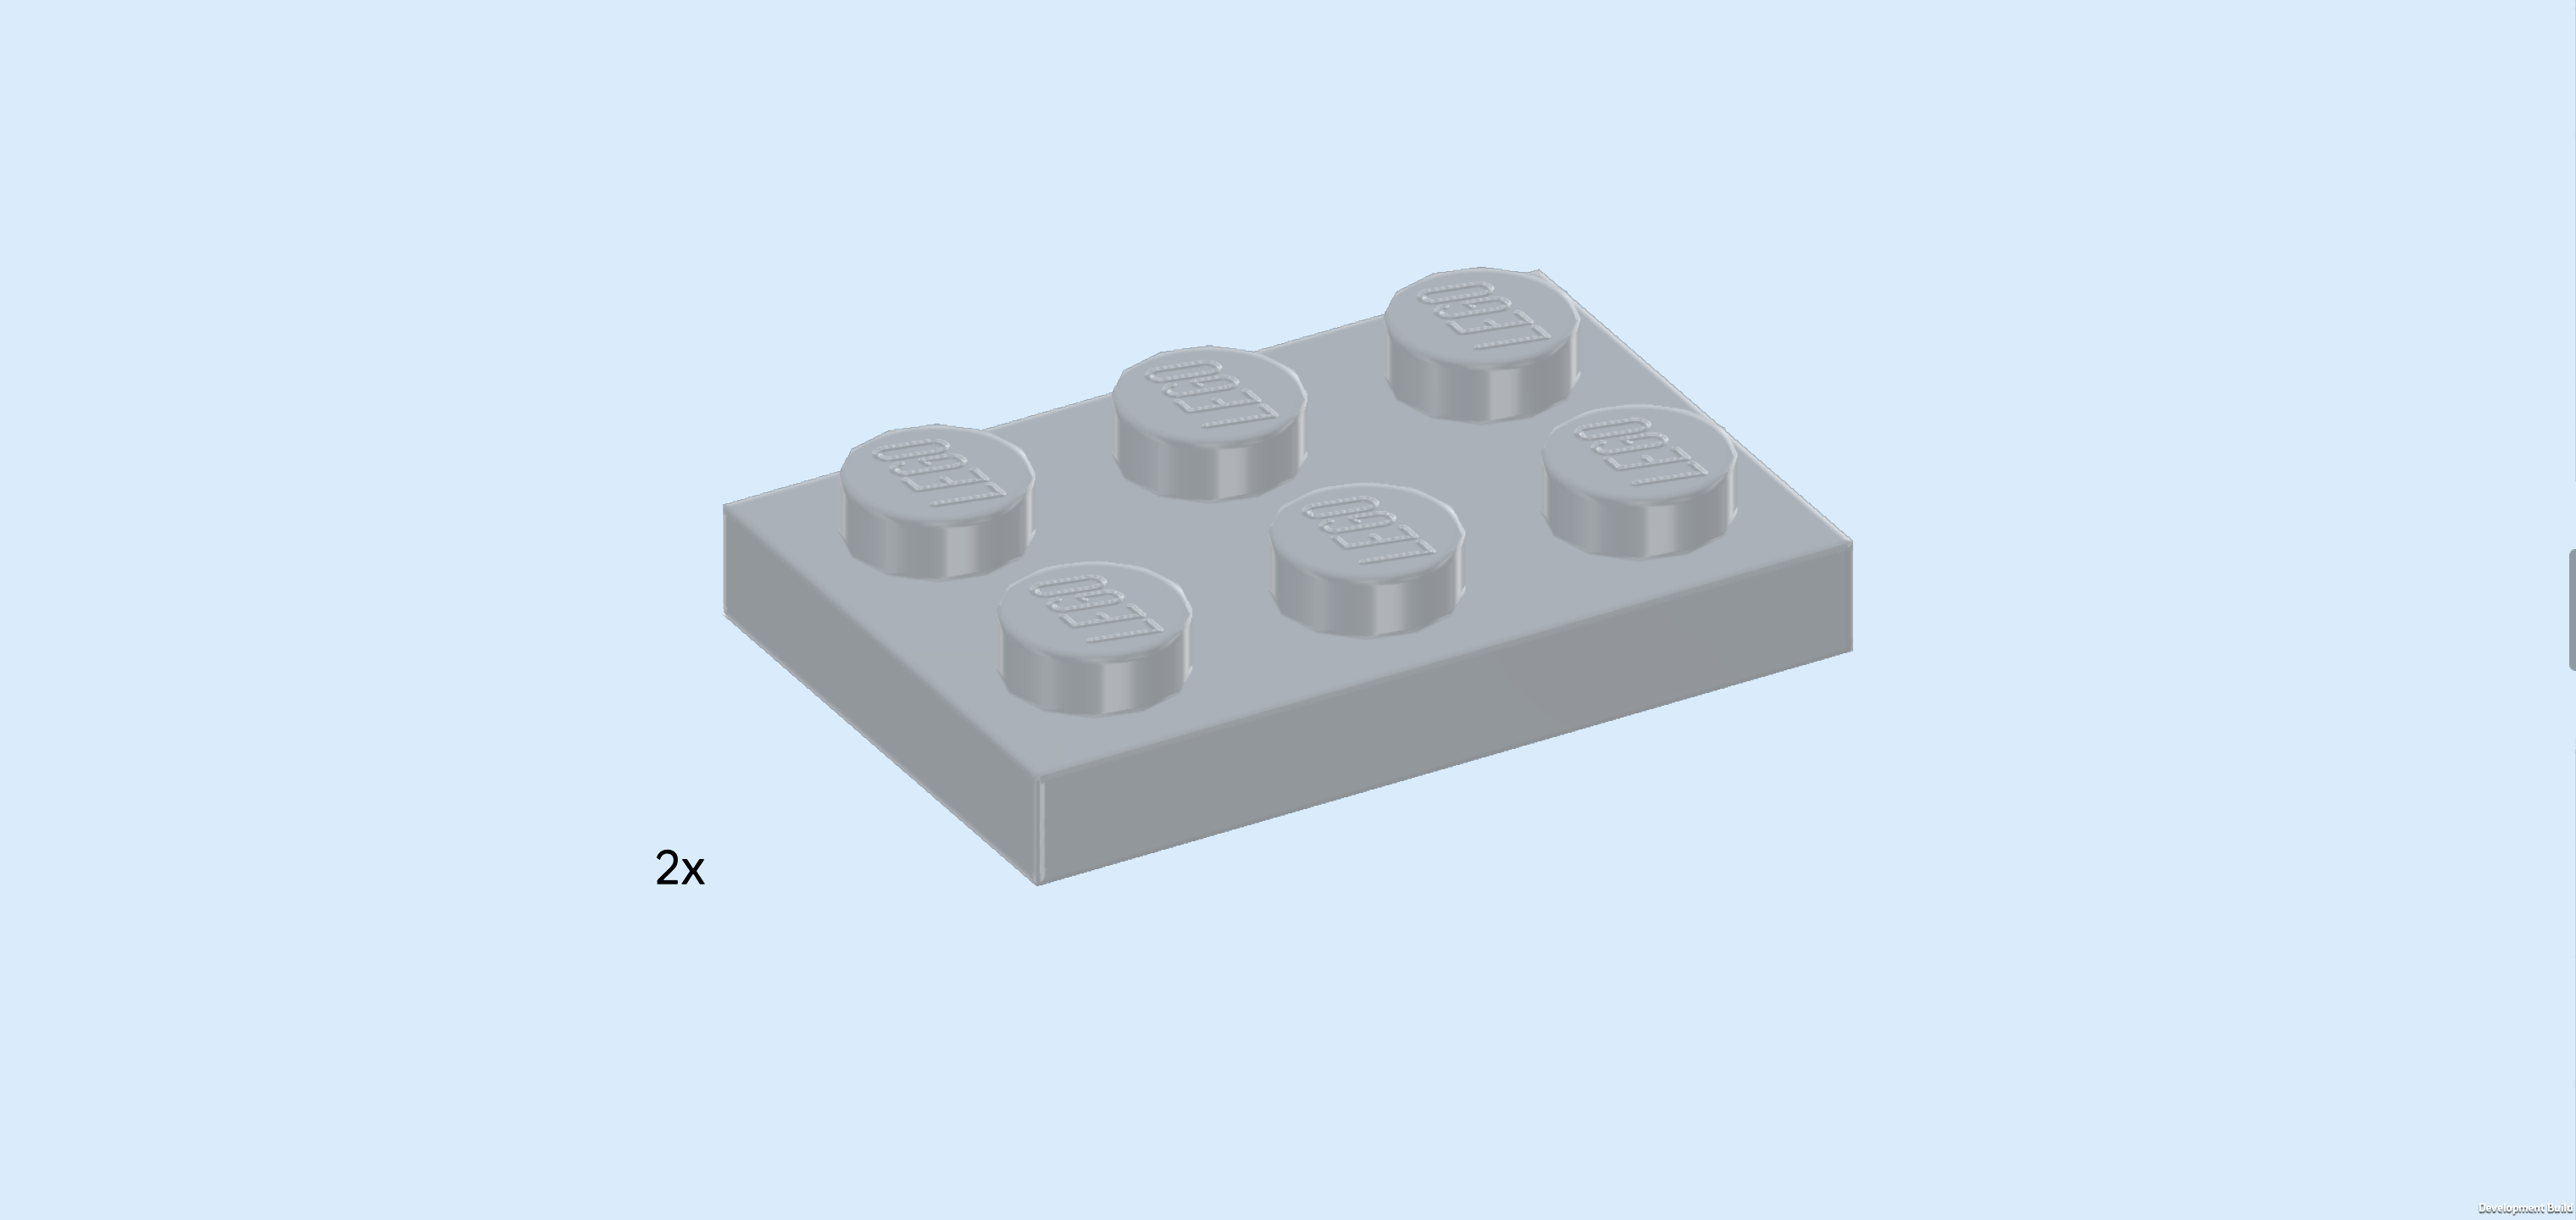
| Find 2 medium stone grey plates 2x3. |
| Put them horizontally to the left of the 2 plates 2x6 we have mounted in the previous step. If done correctly, they will sit on the 4 middle rows at the leftmost edge with only 2 single knobs protruding below them. |
| The mountain truck undercarriage is finished! Well done! With this, we have finished building everything from bag number 1. Well done! We usually pack a few extra bricks and pieces in each bag, so if you still have some pieces left there is no need to worry that you missed something. If you like, you can take a break now and return to the instructions later by skipping to the section introducing bag number 2. If you want to continue building right away, simply move on to the next sentence. |
| Open bag number 2. You can choose to have the bricks sorted by color again if you like. This bag contains all bricks and pieces for the car body panels and other body elements as well as the winch. |
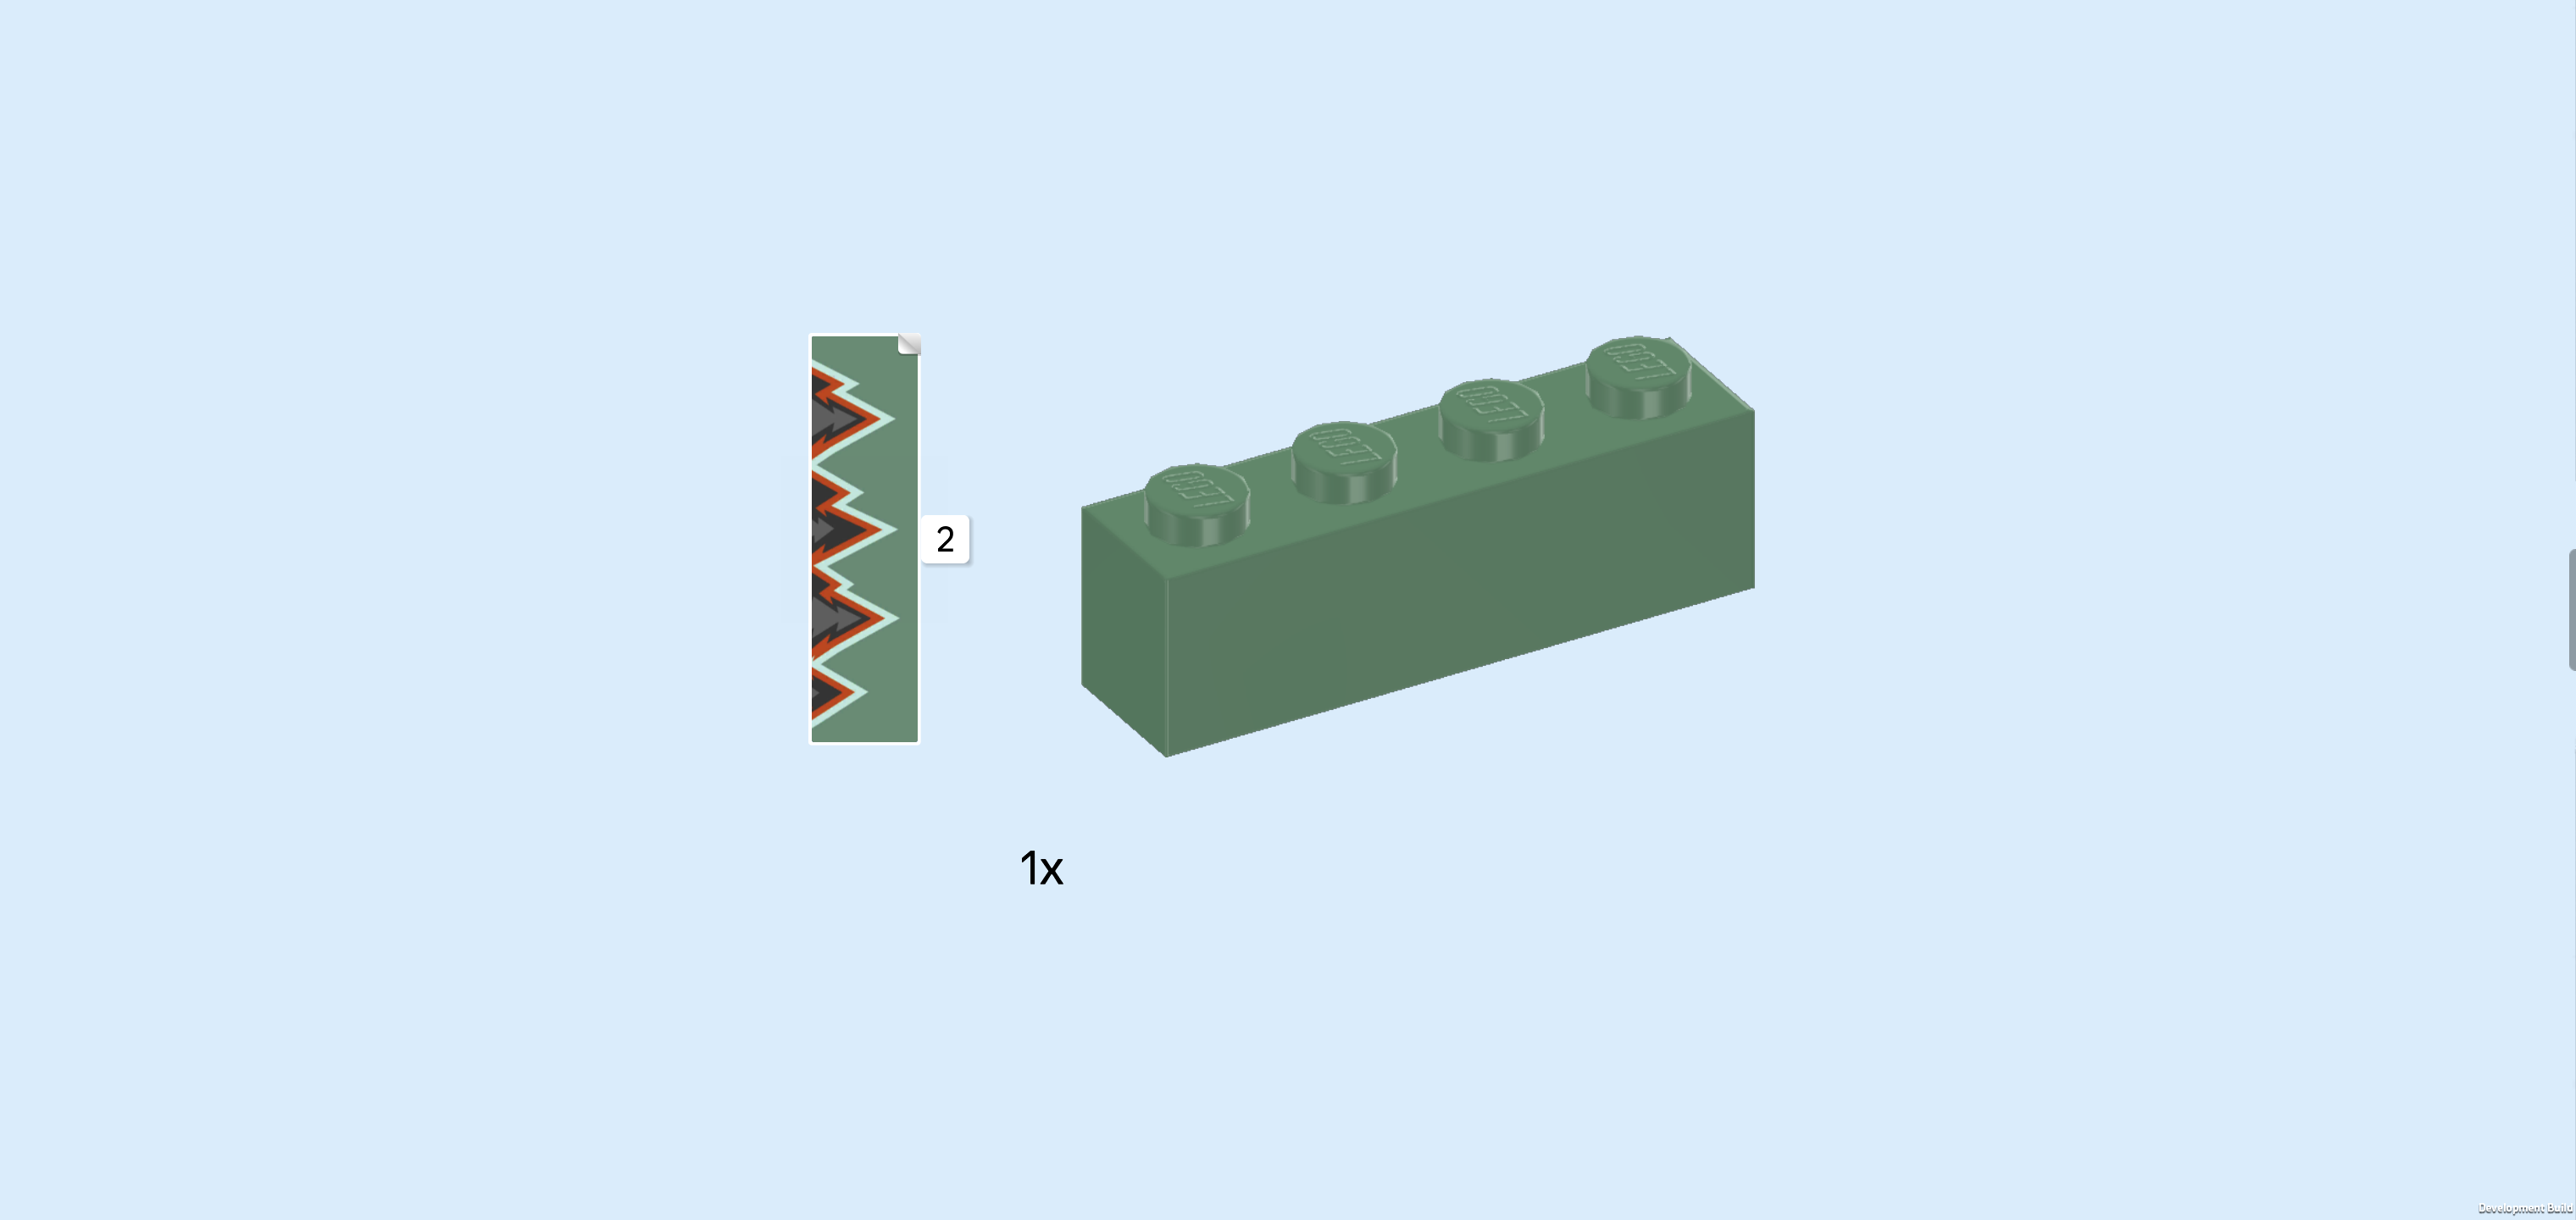
| Collect the following 2 pieces: |
| 1 rectangular sticker 1x4, |
| and 1 sand green brick 1x4. |
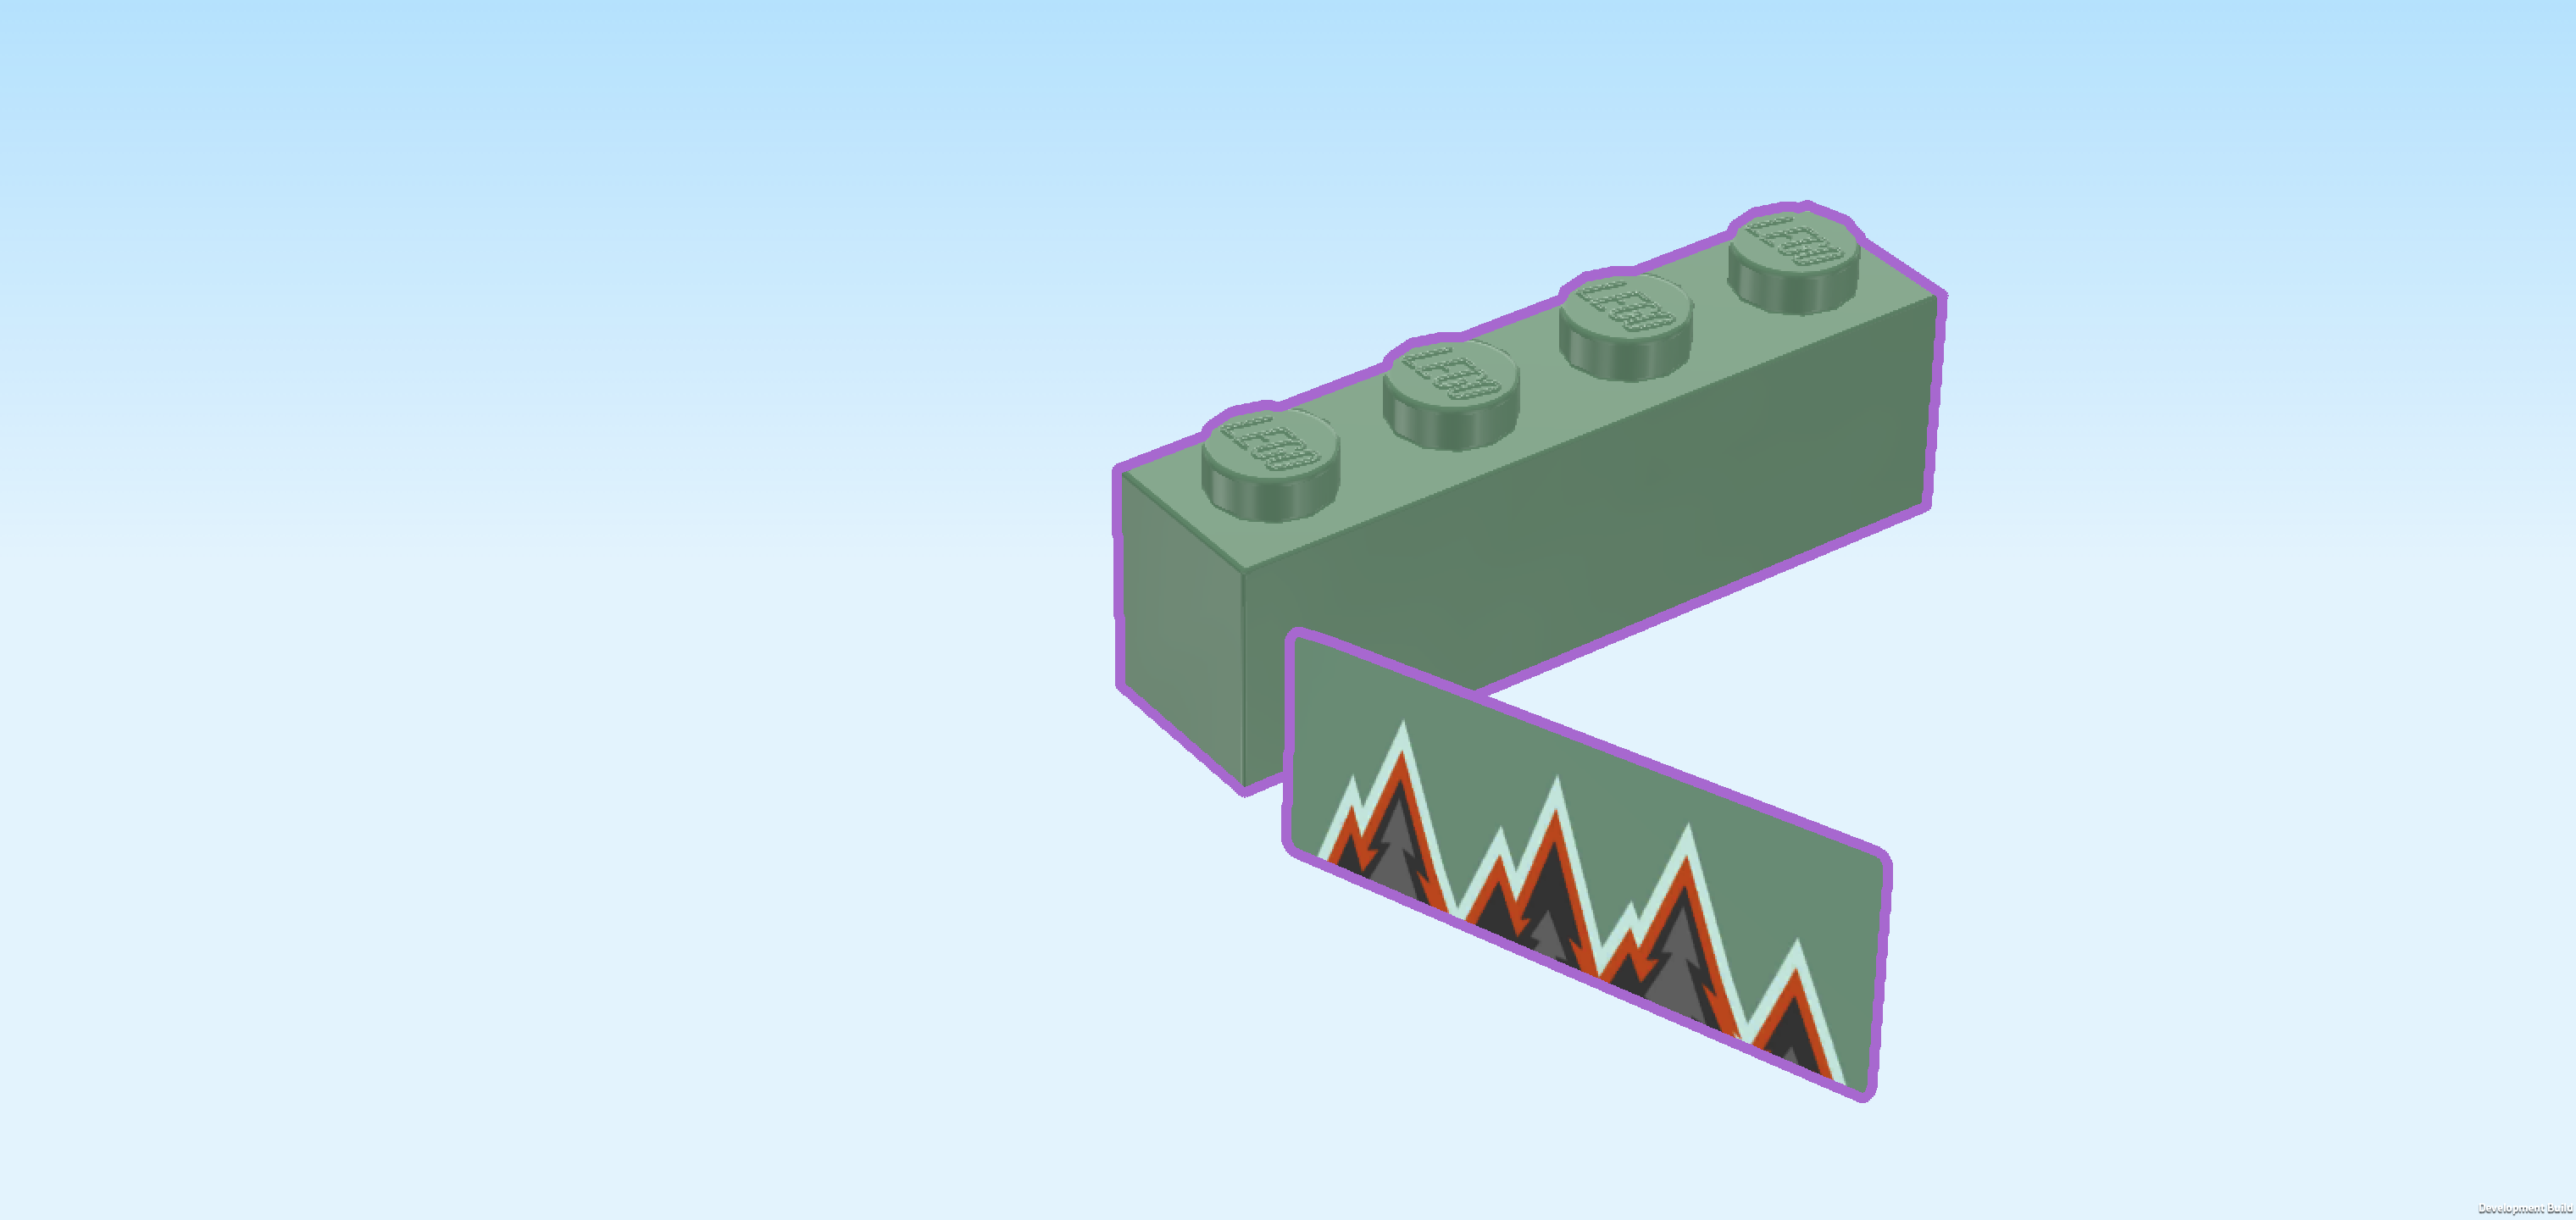
| Attach the sticker on one of the long side surfaces of the brick. |
| The sticker shows a stylized mountain silhouette with bold black mountains that have sharp jagged peaks, outlined with bright red and white lines. In front of the mountains are several tall grey pine trees. The background is a solid sand green color, creating a strong contrast between the trees, mountains, and the vehicle's body color. |
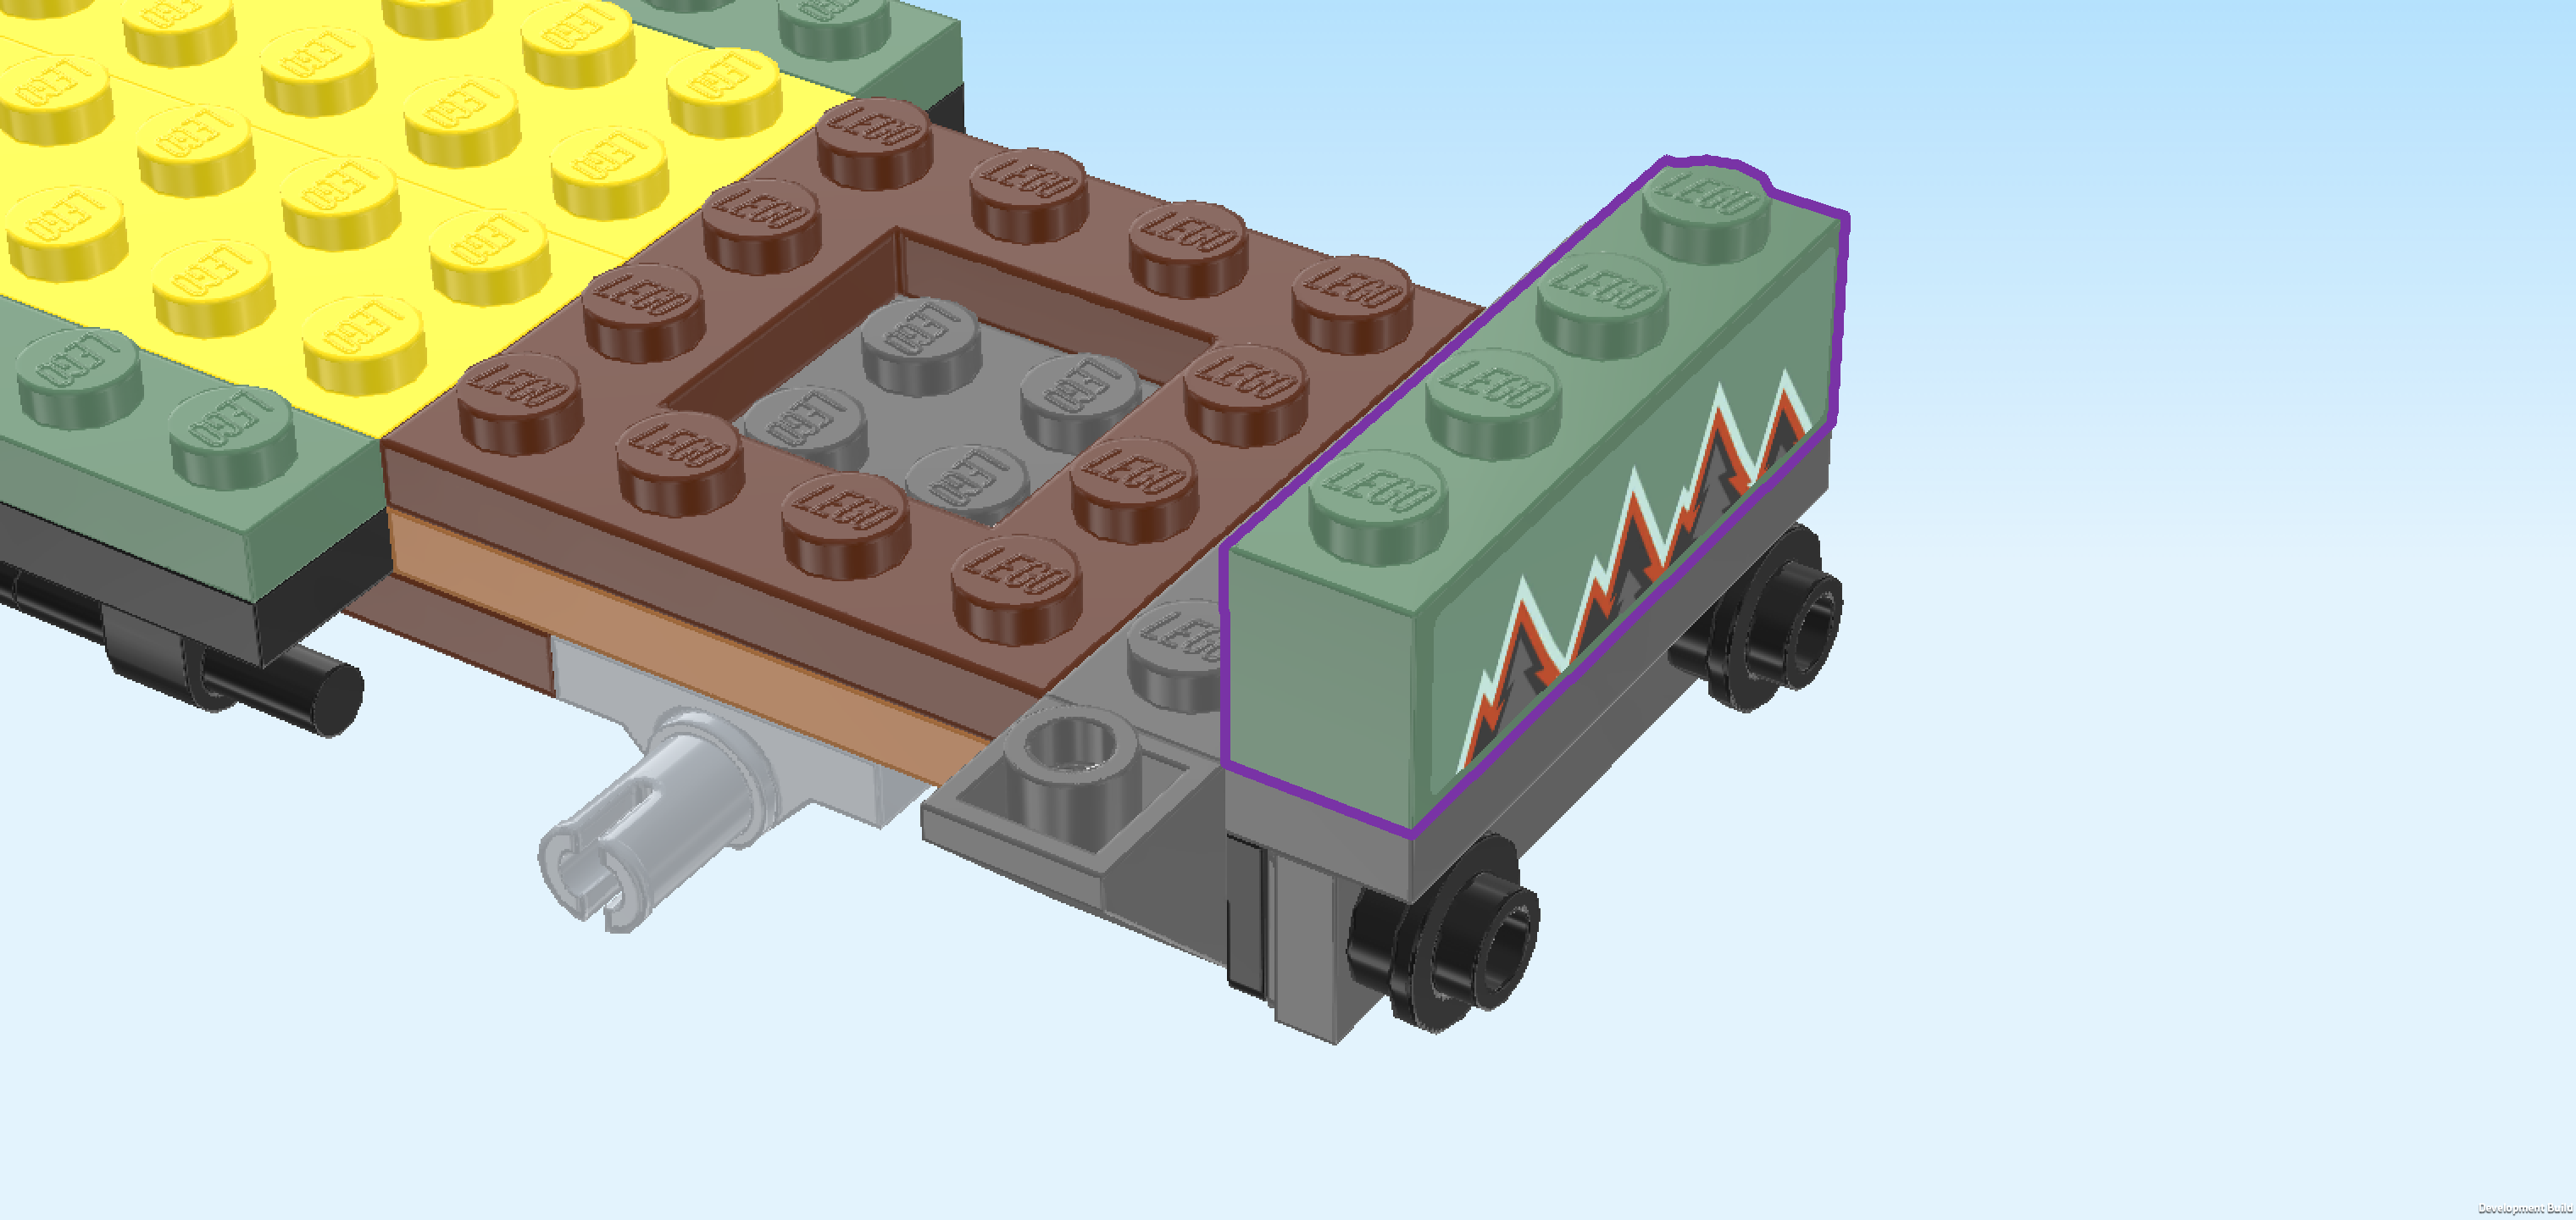
| Mount the brick 1x4 vertically on the rightmost column, stickered side to the right. |
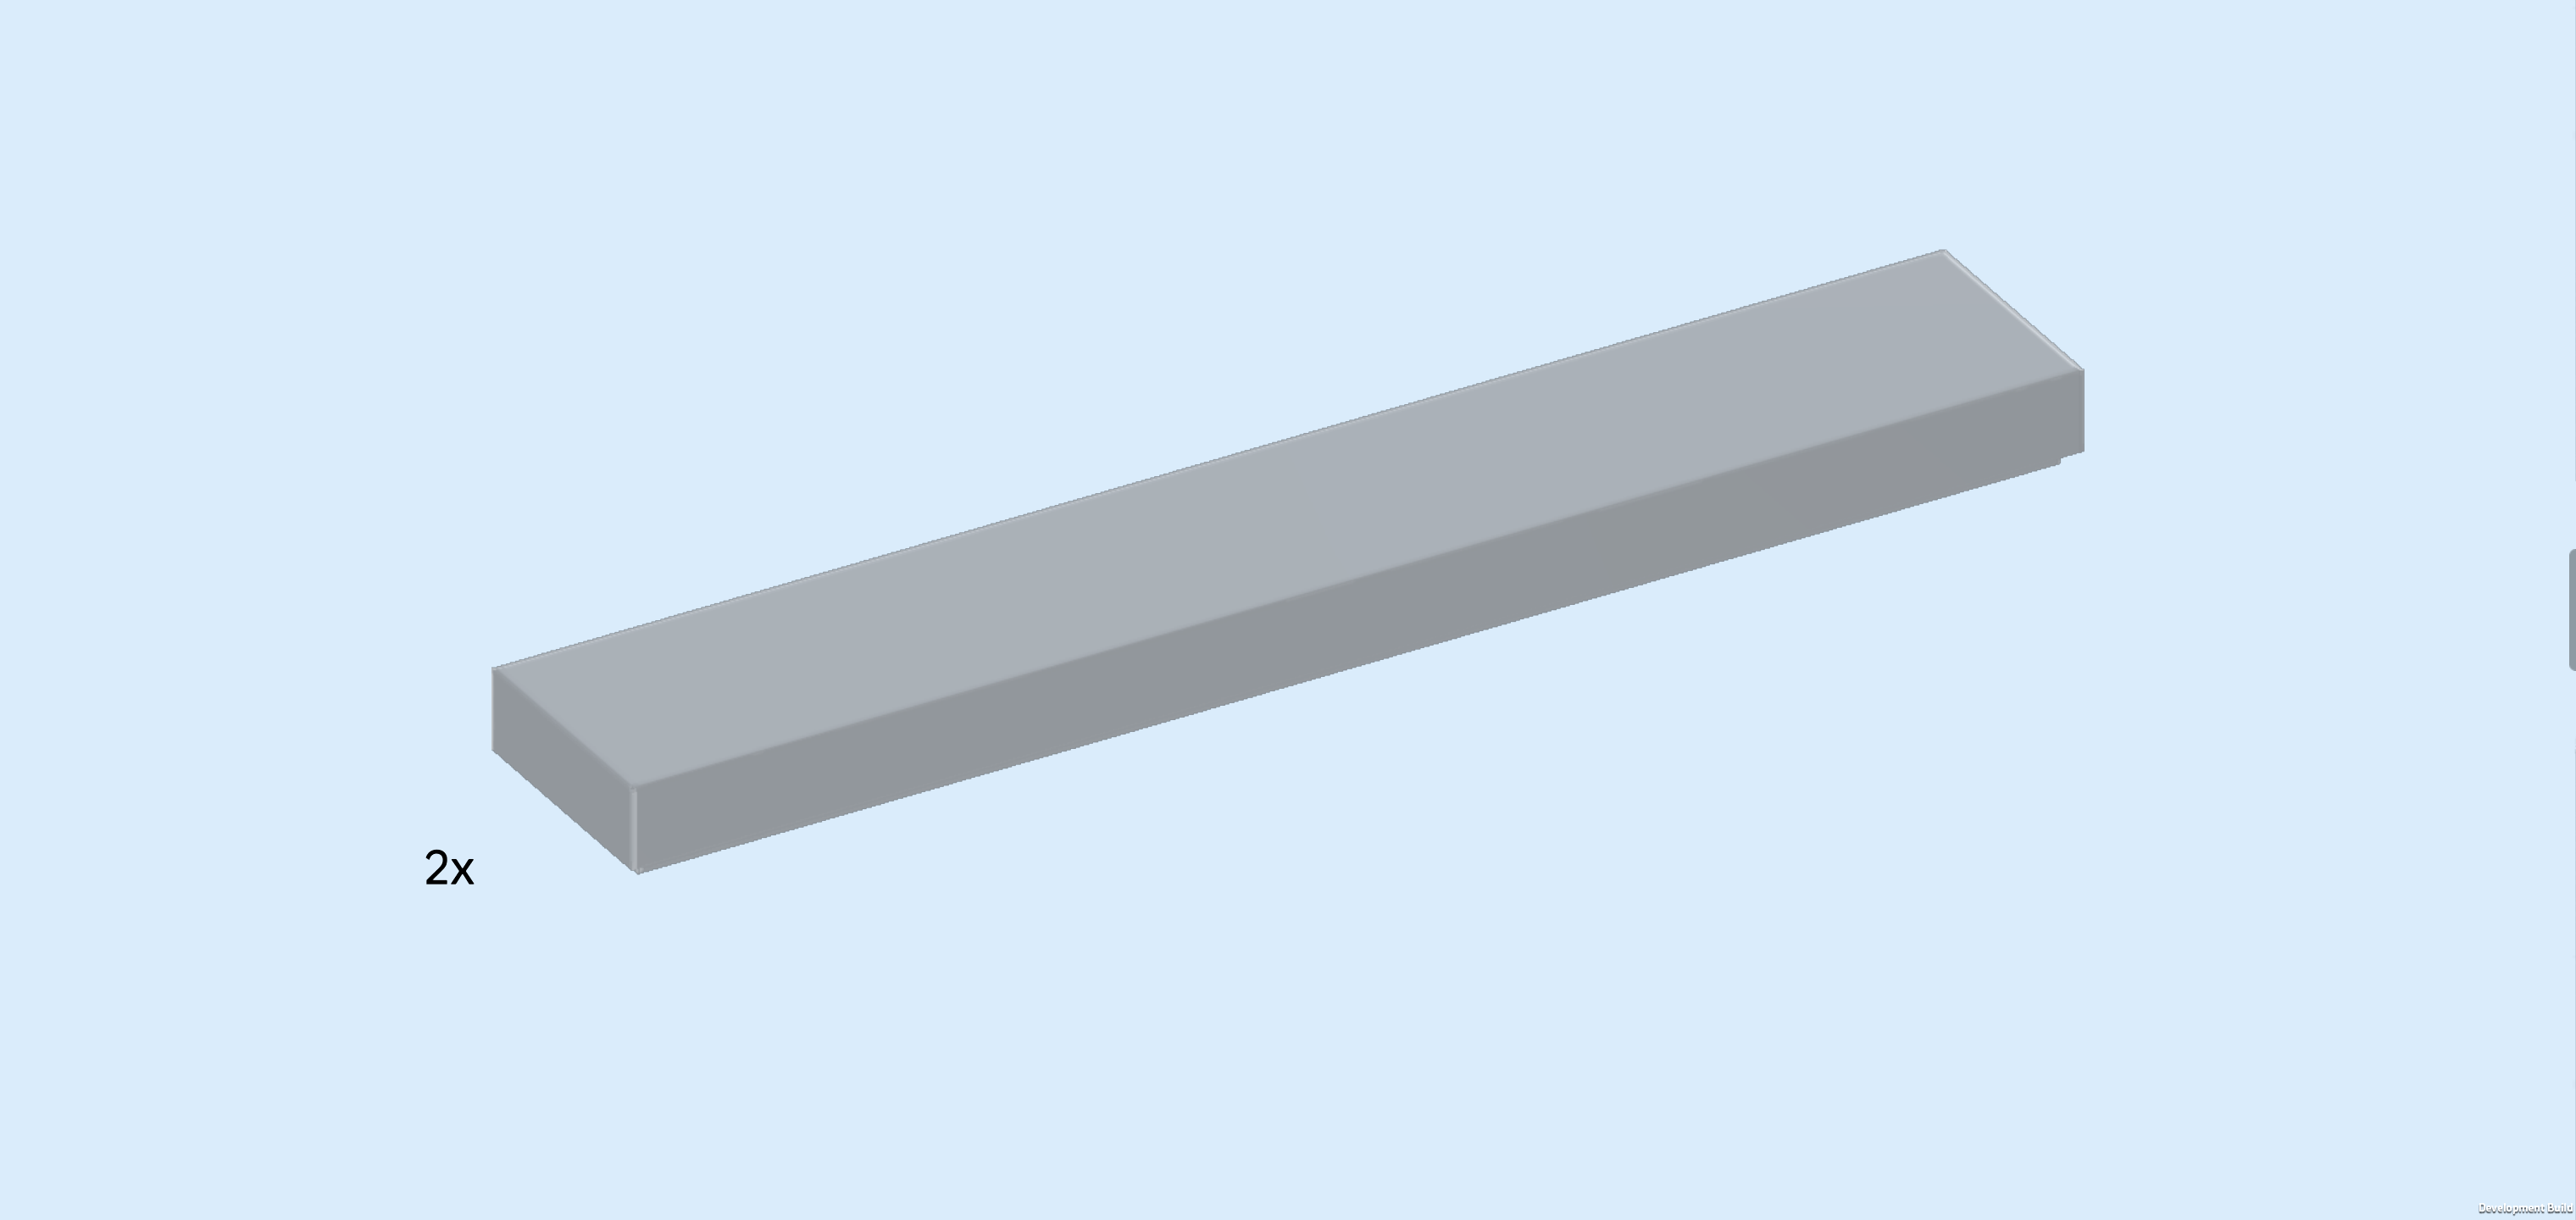
| Find 2 medium stone grey flat tiles 1x6. |
| Put them horizontally on the 2 middle rows of the build directly to the left of the previous piece. |
| Find 2 sand green inverted roof tiles 2x2, 45°. |
| Put 1 on the 2 frontmost knobs of the column directly to the left of the stickered brick 1x4, slope to the left. This also means it will sit directly in front of the 2 previous pieces. |
| Repeat symmetrically at the back, slope to the left. |
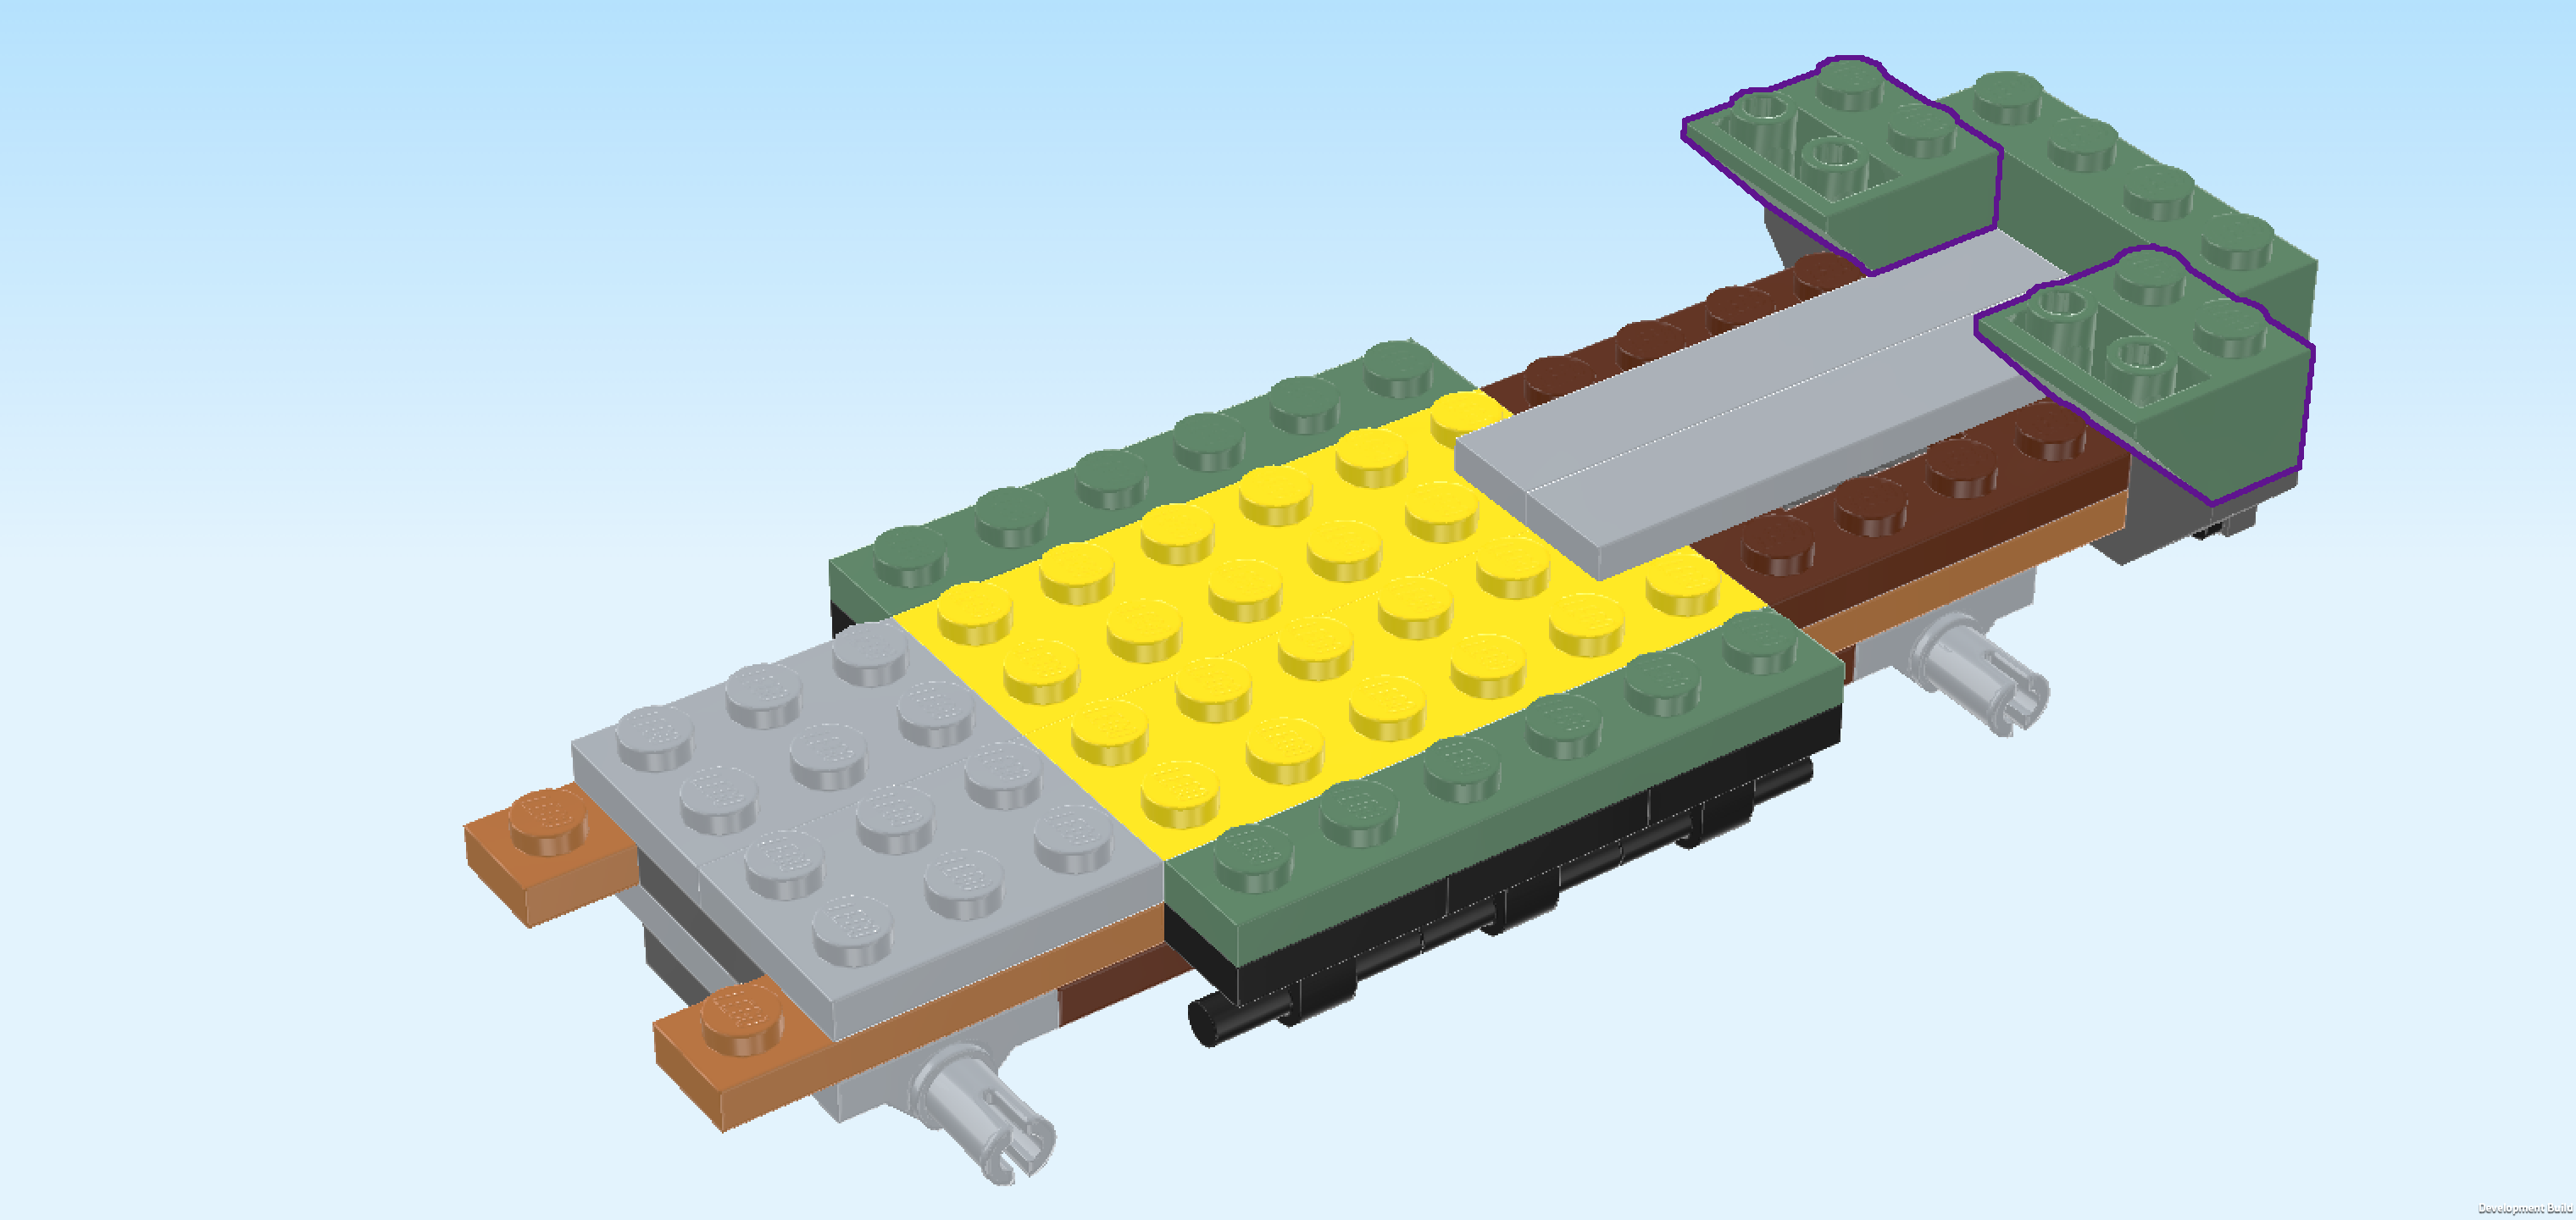
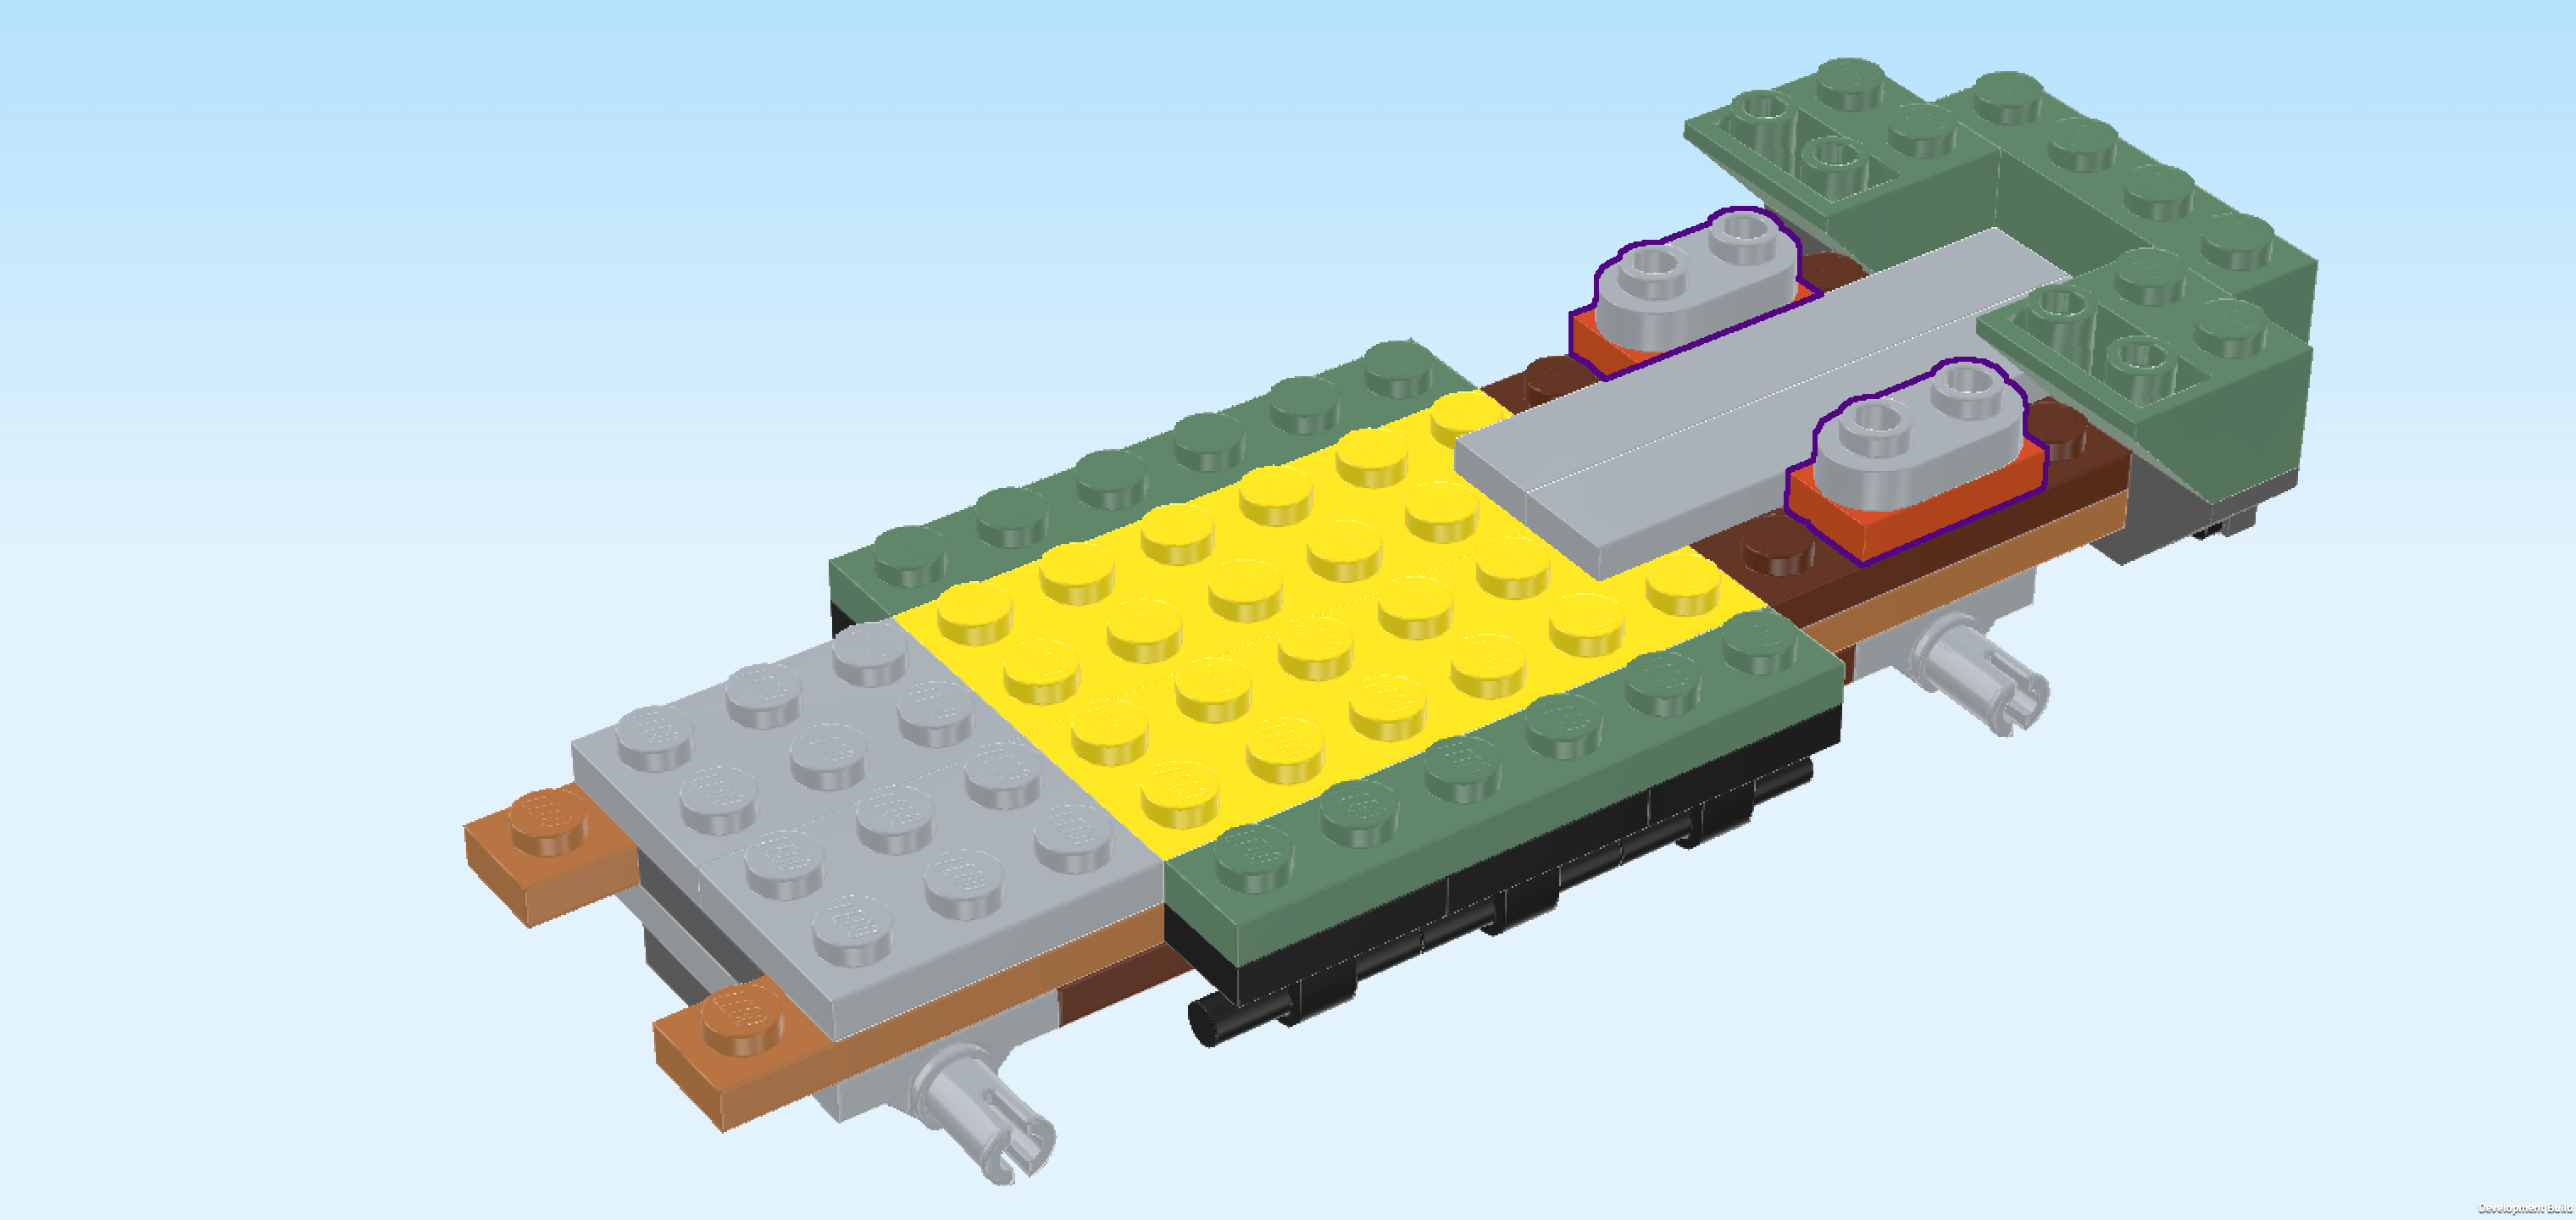
| Next, we will make 2 small parts. |
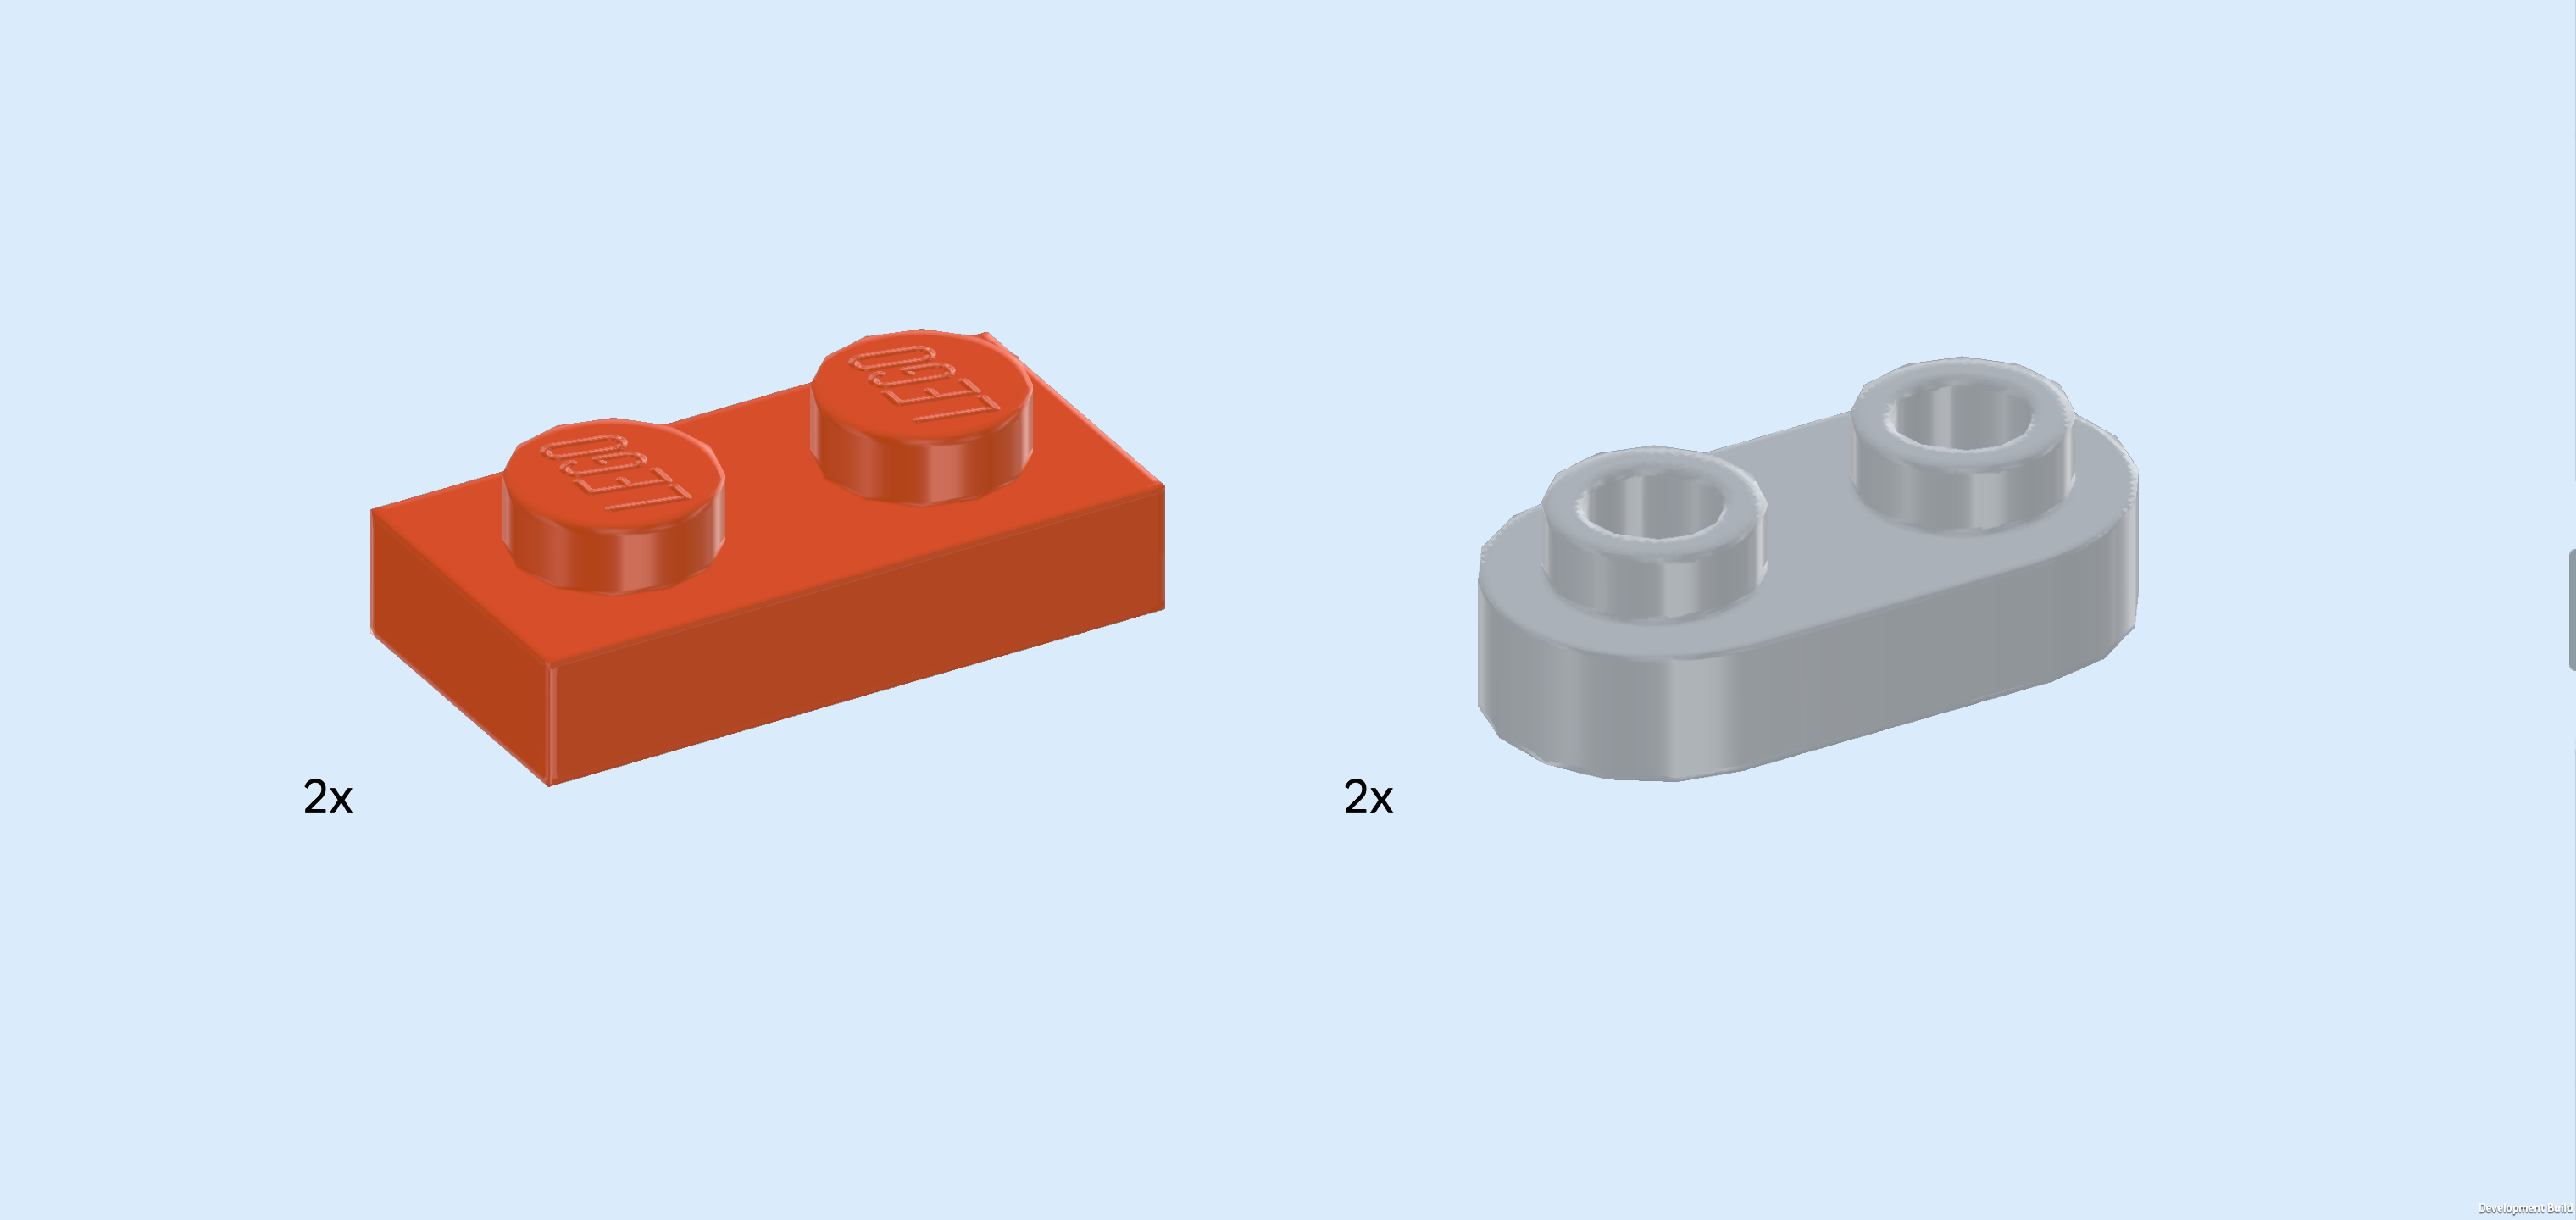
| Collect the following 4 pieces: |
| 2 reddish orange plates 1x2, |
| and 2 medium stone grey rounded plates 1x2. |
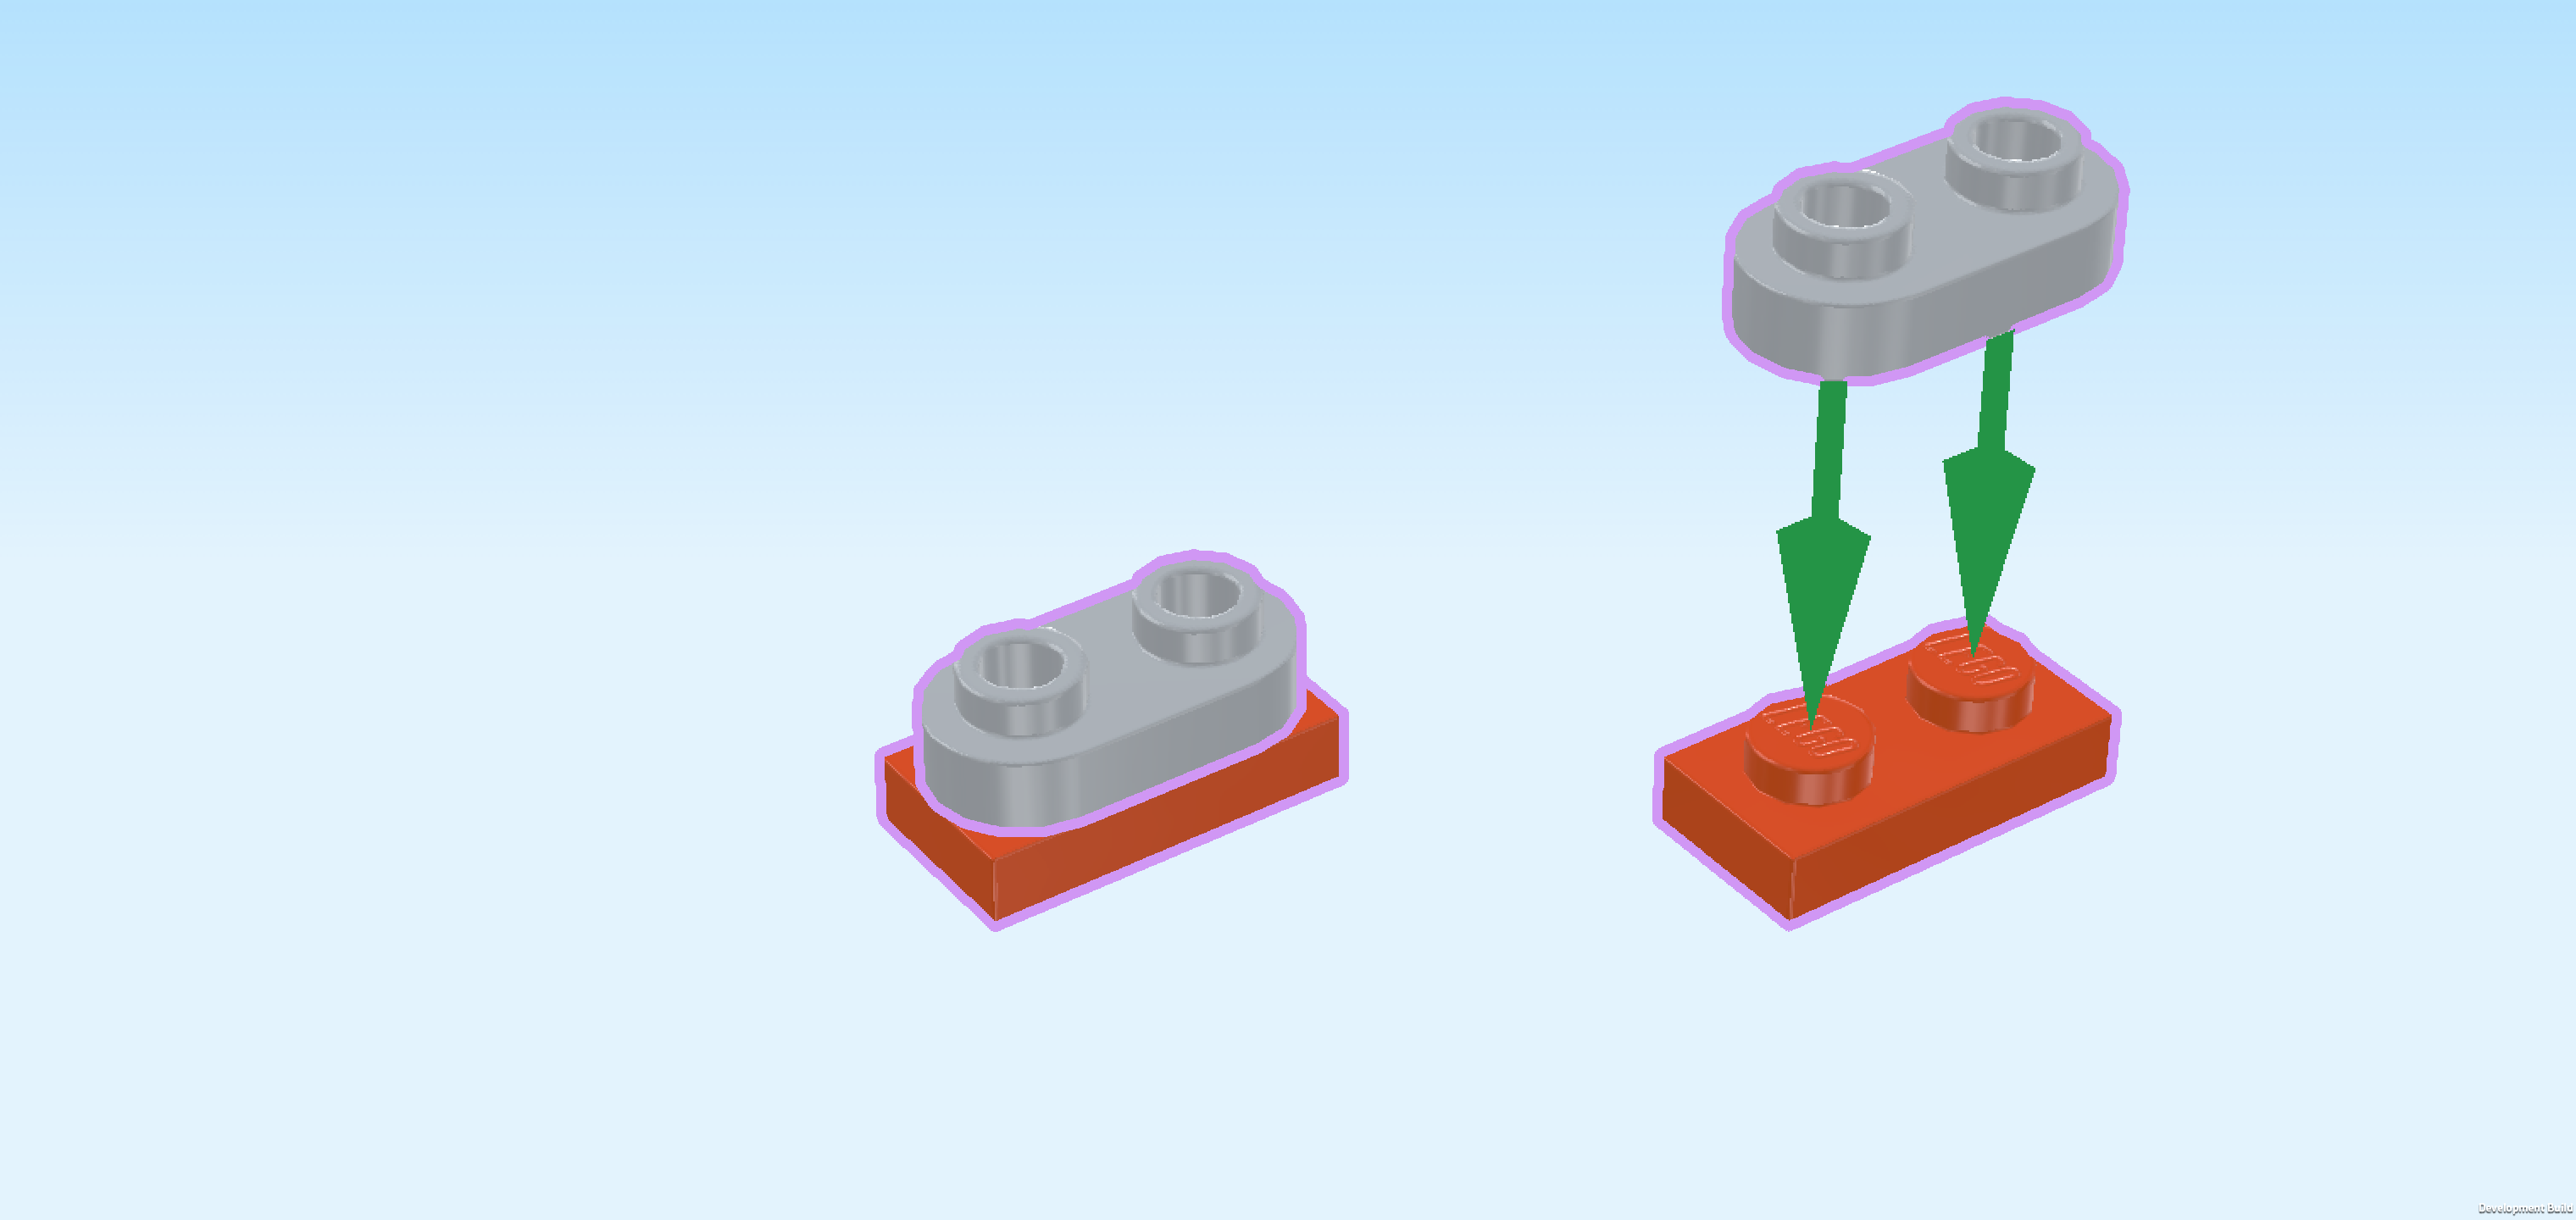
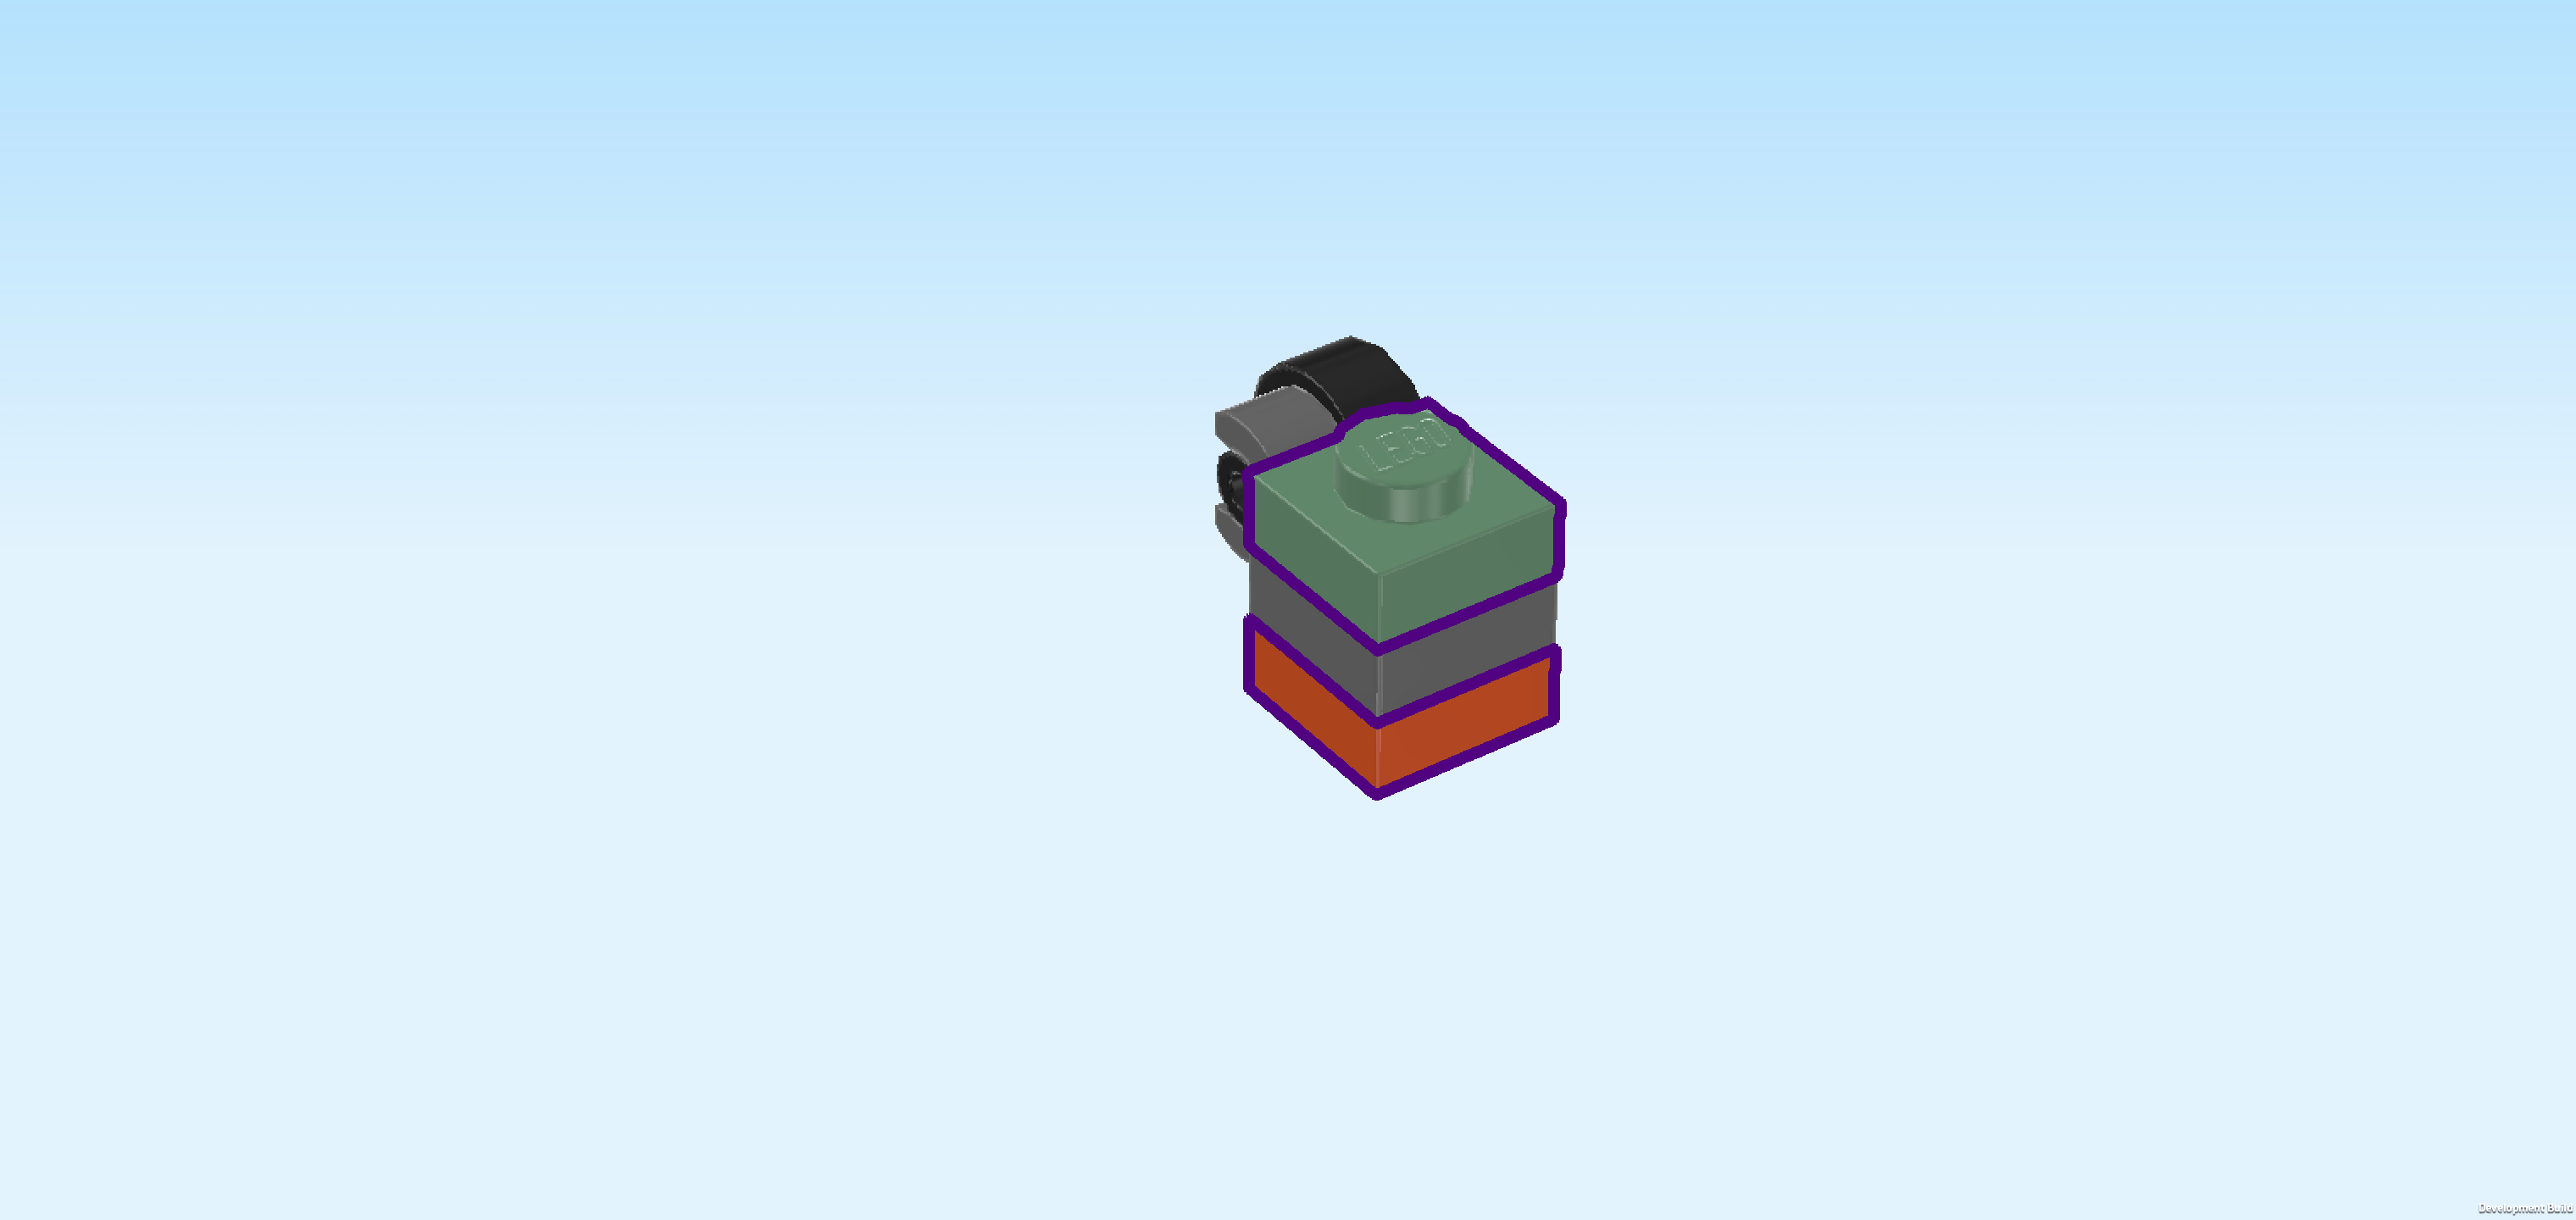
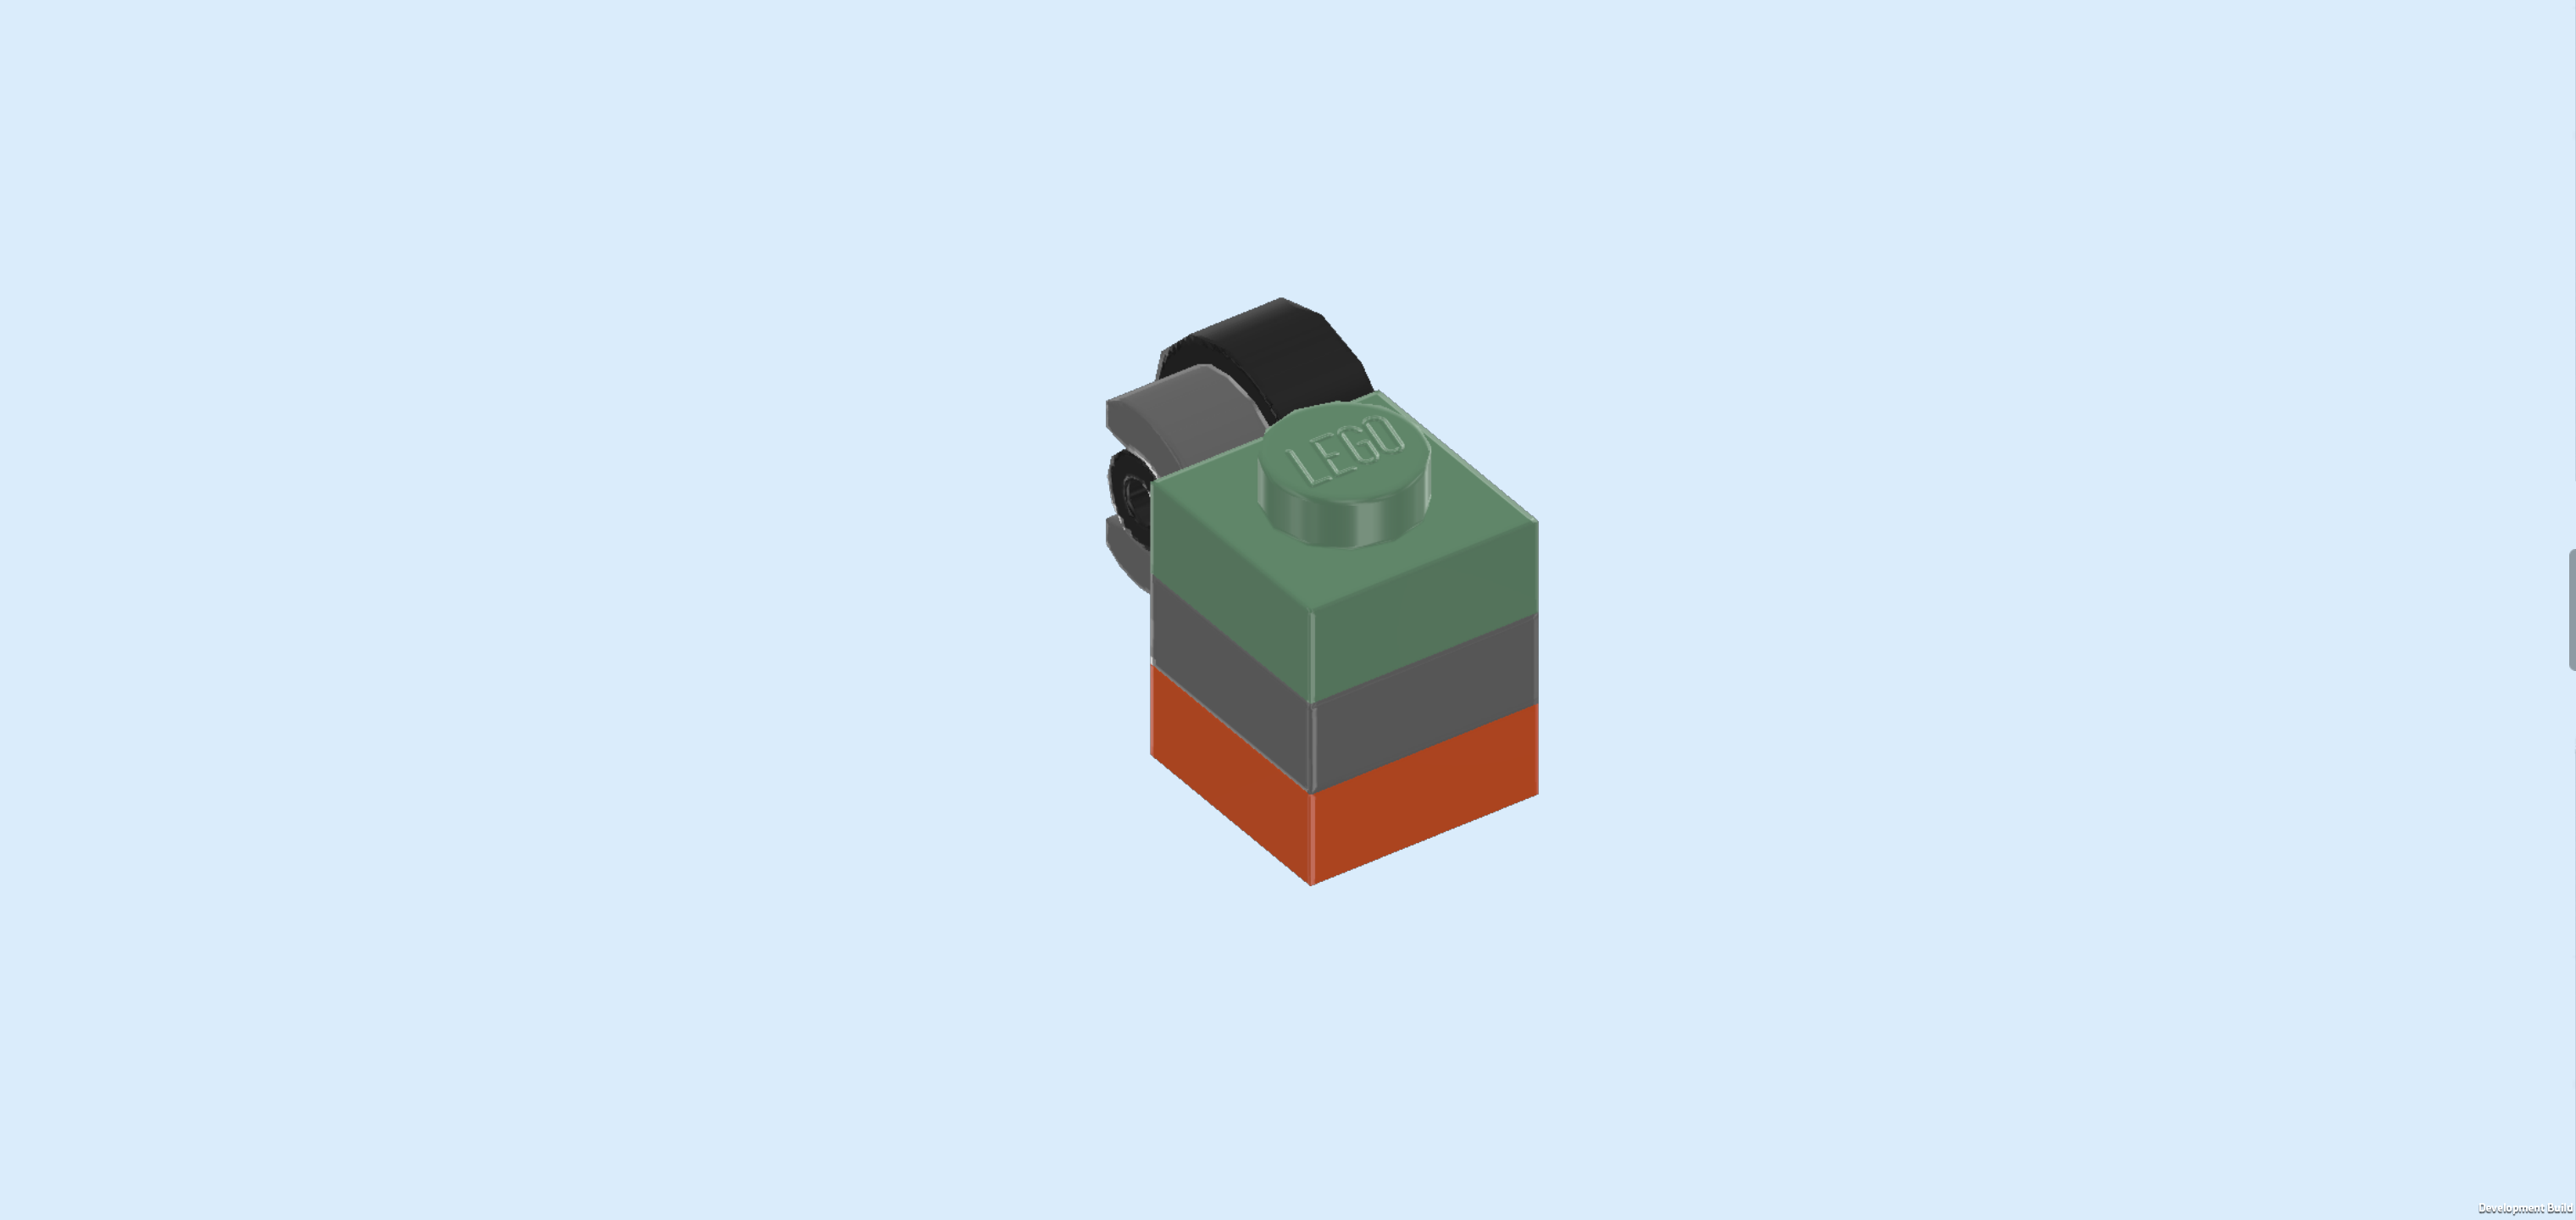
| Put the 2 plates 1x2 horizontally next to each other on the table. |
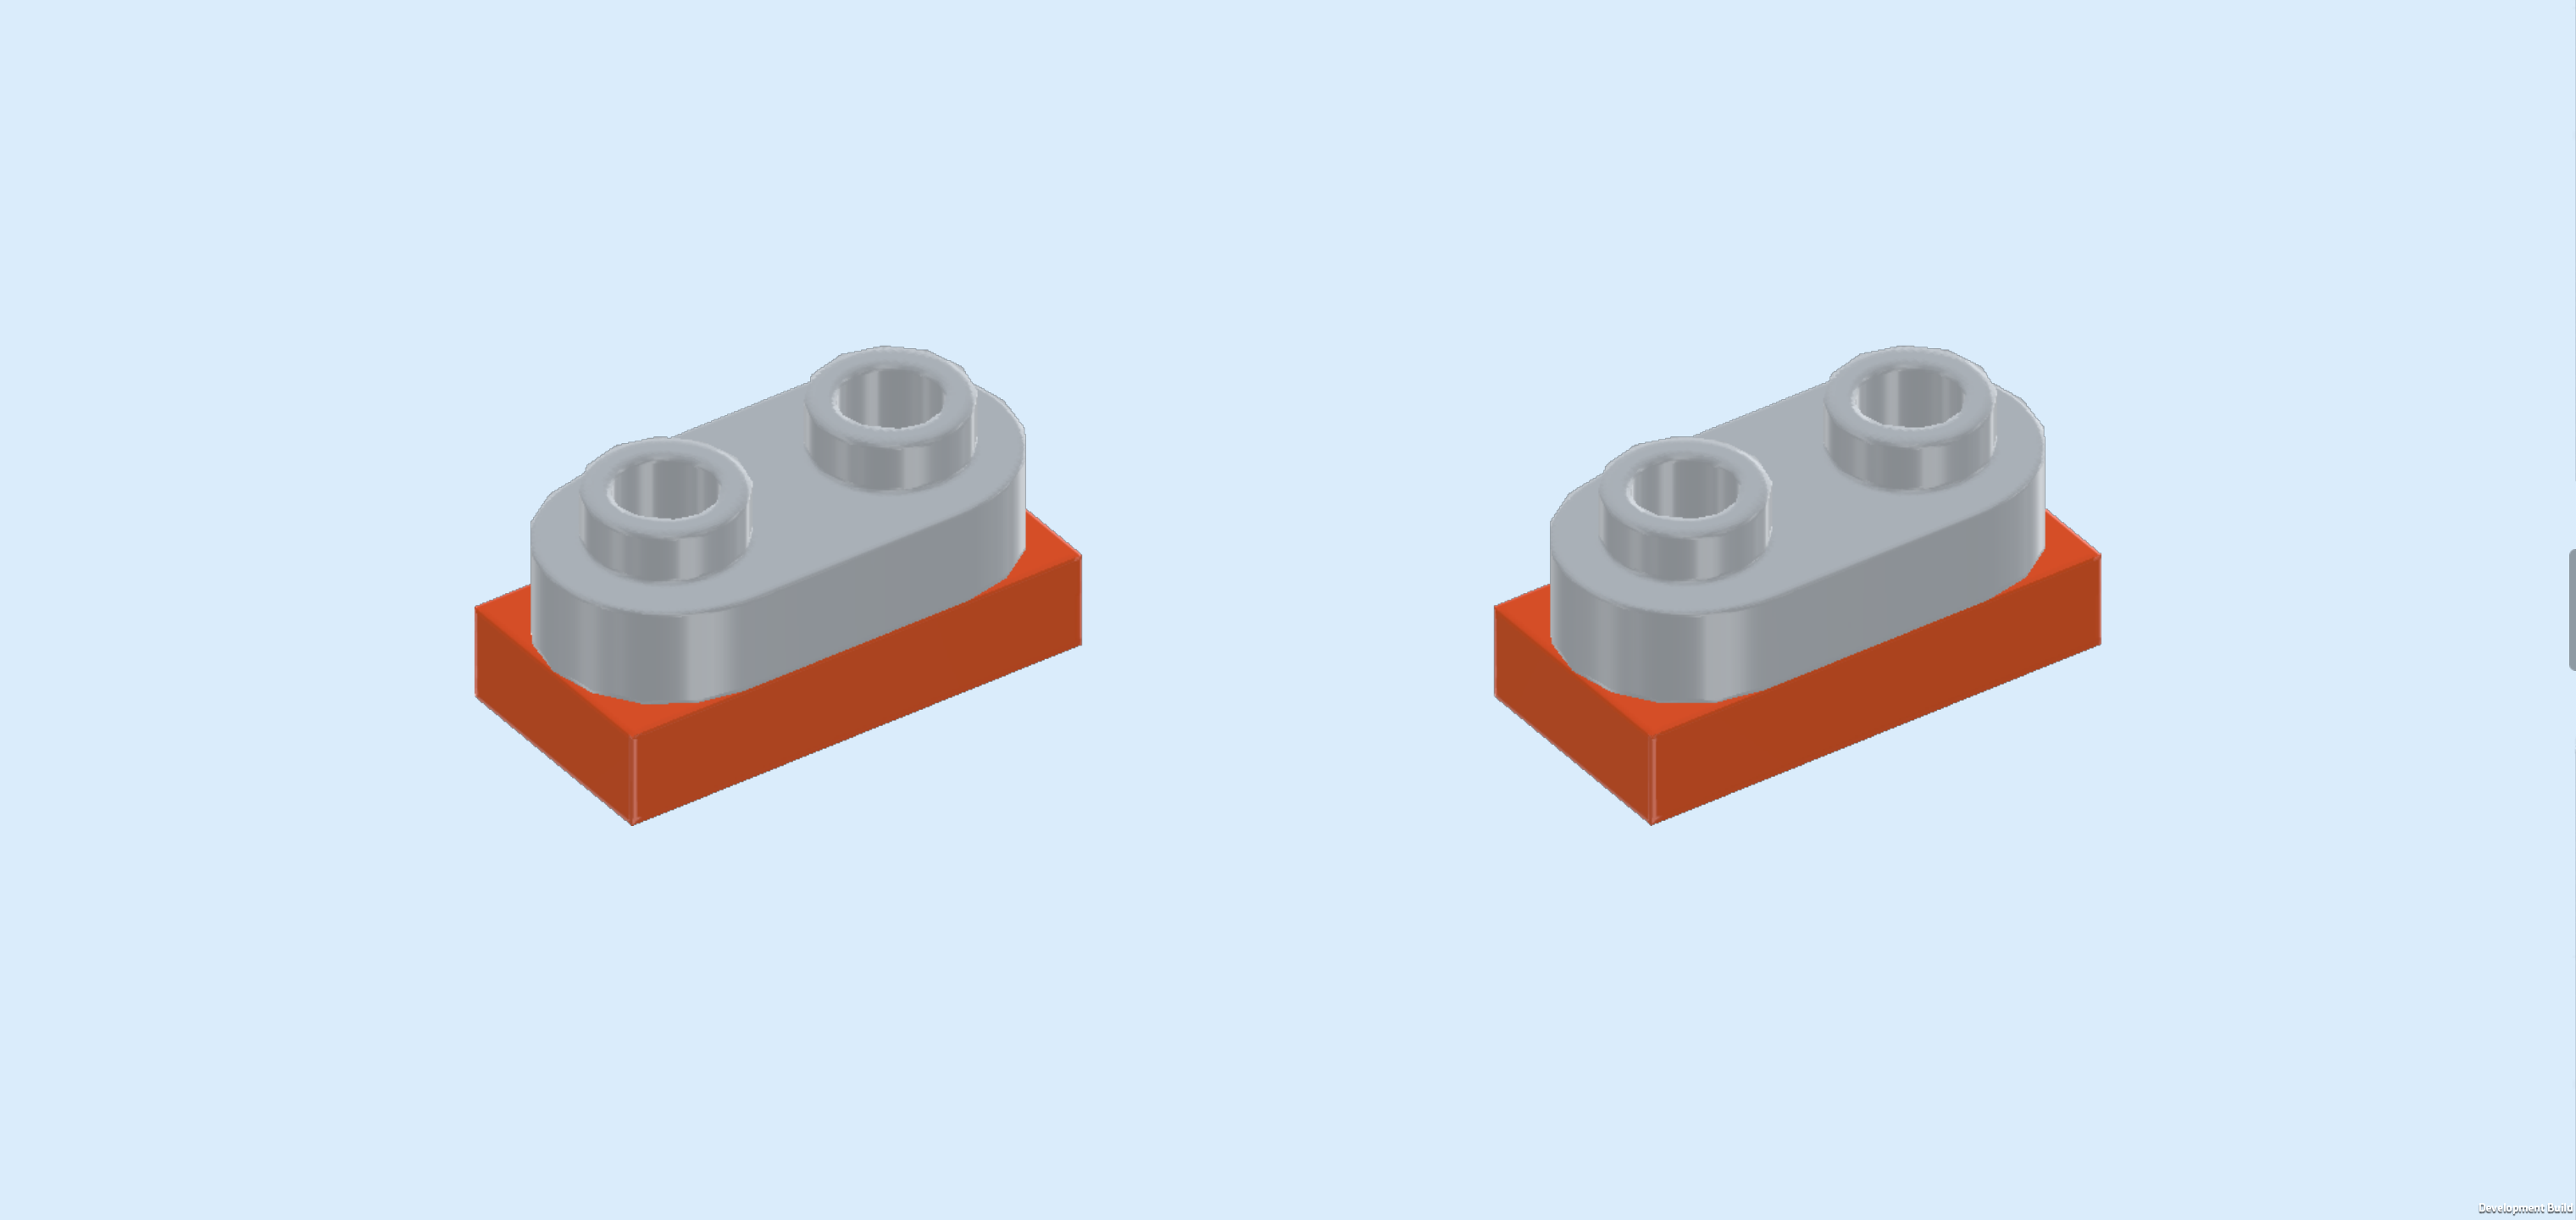
| Put the 2 rounded plates on top of the 2 other plates. |
| Put 1 of the small parts horizontally on the back row to the left of the previously mounted roof tile. There should be 1 empty knob to its right that is inaccessible due to the roof tile slope. |
| Repeat symmetrically at the front. |
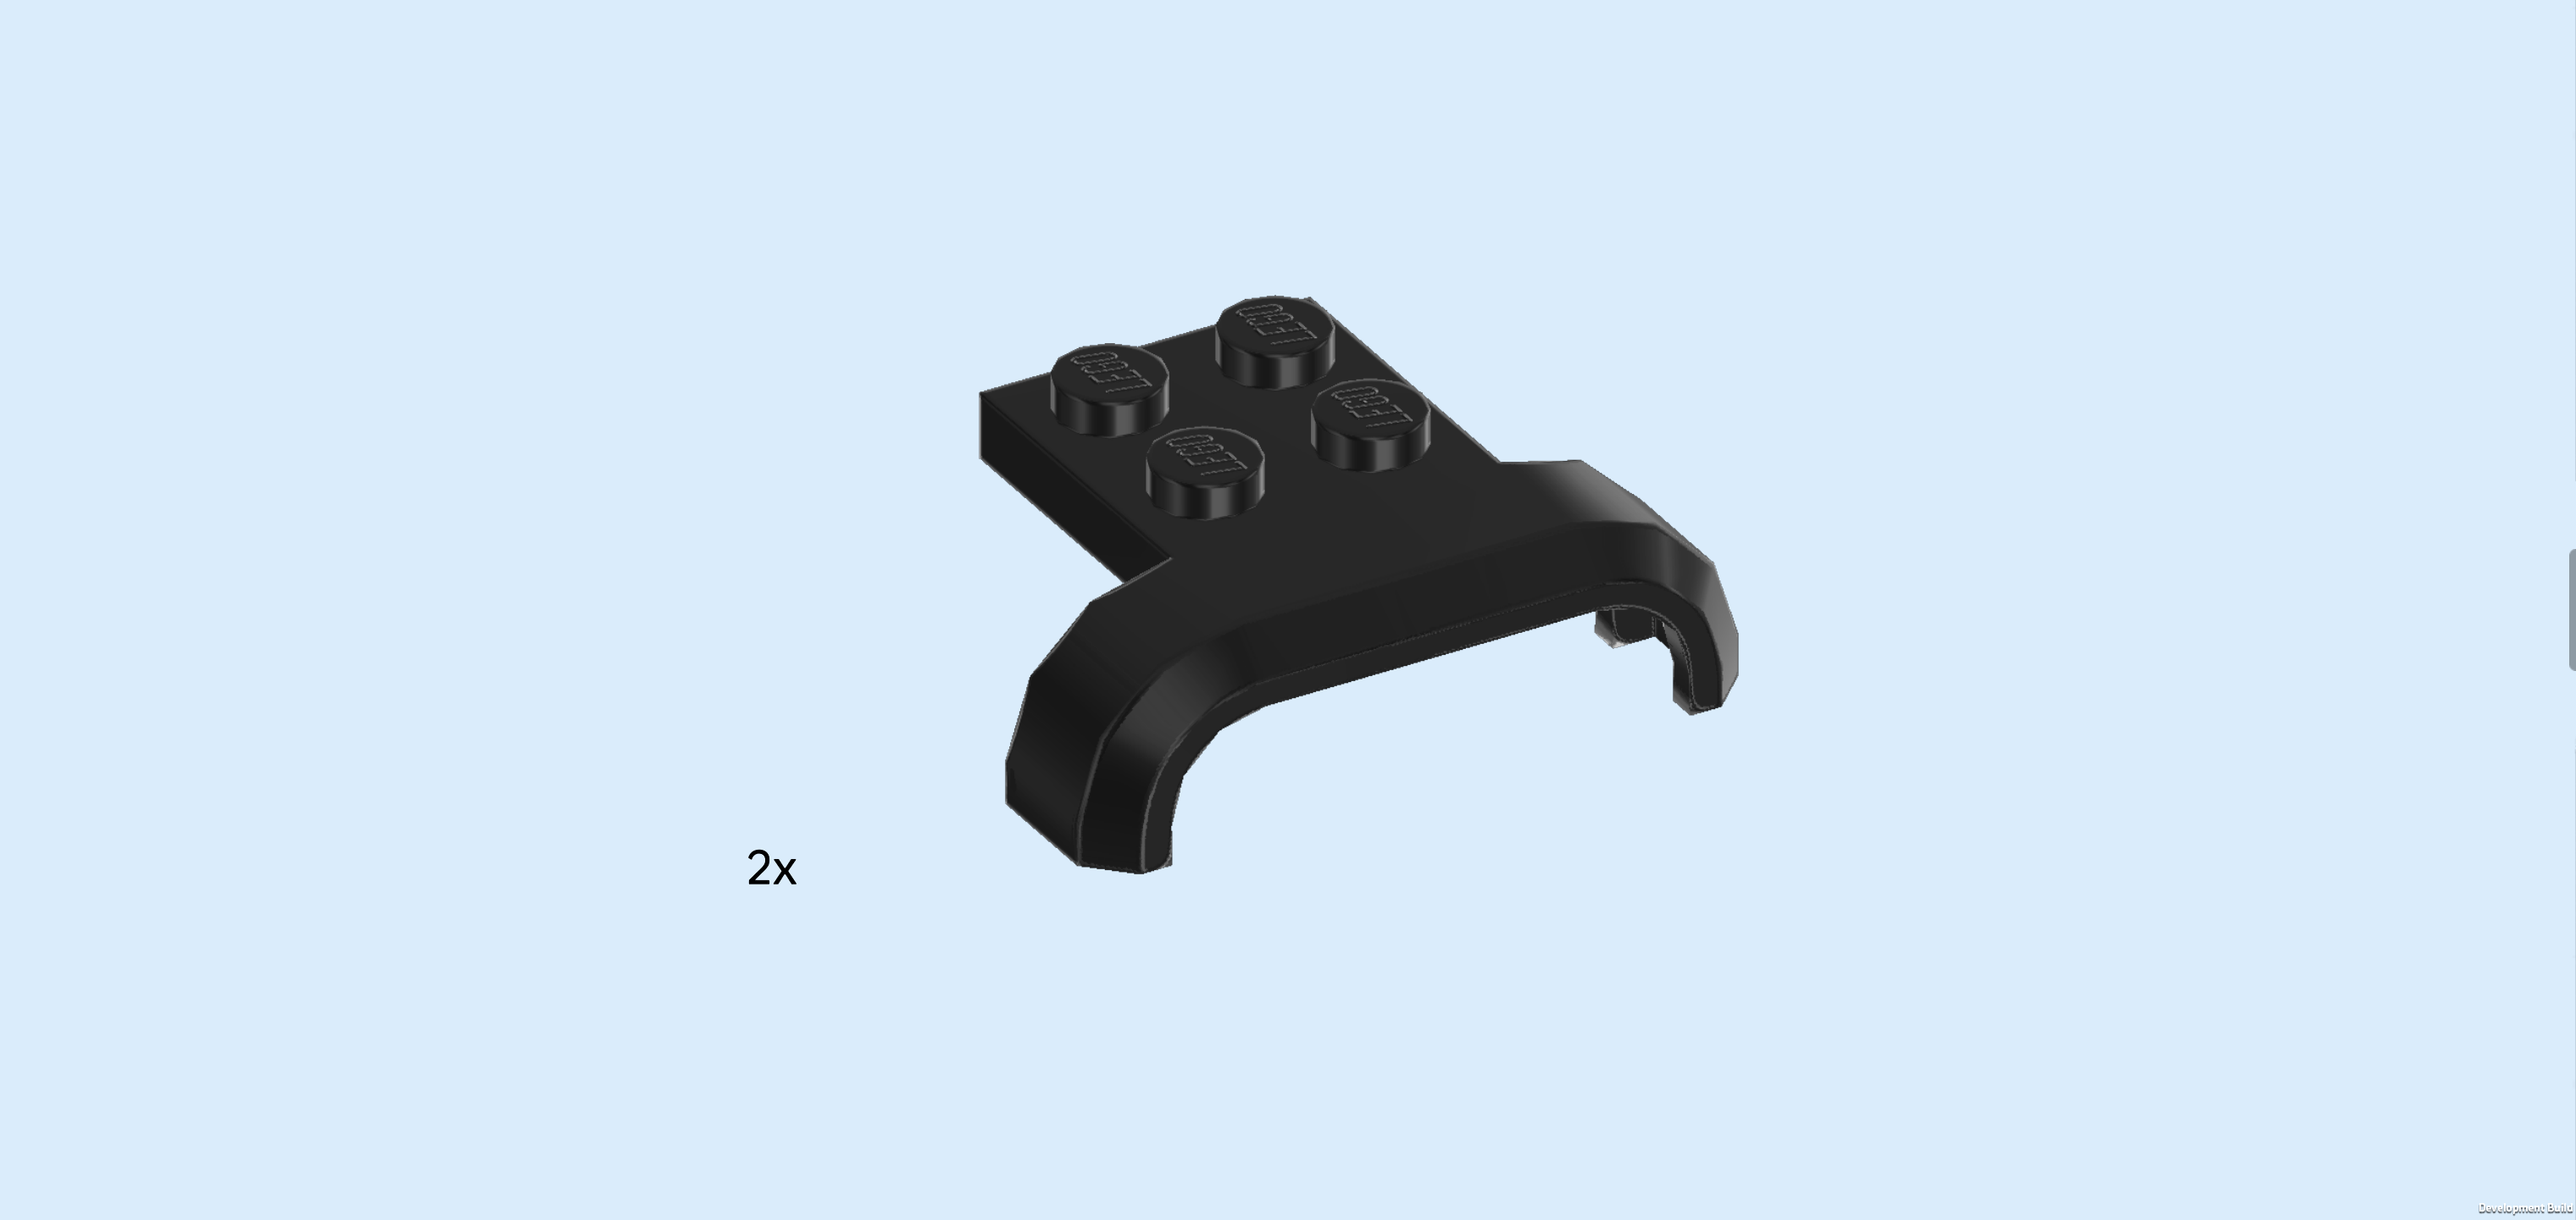
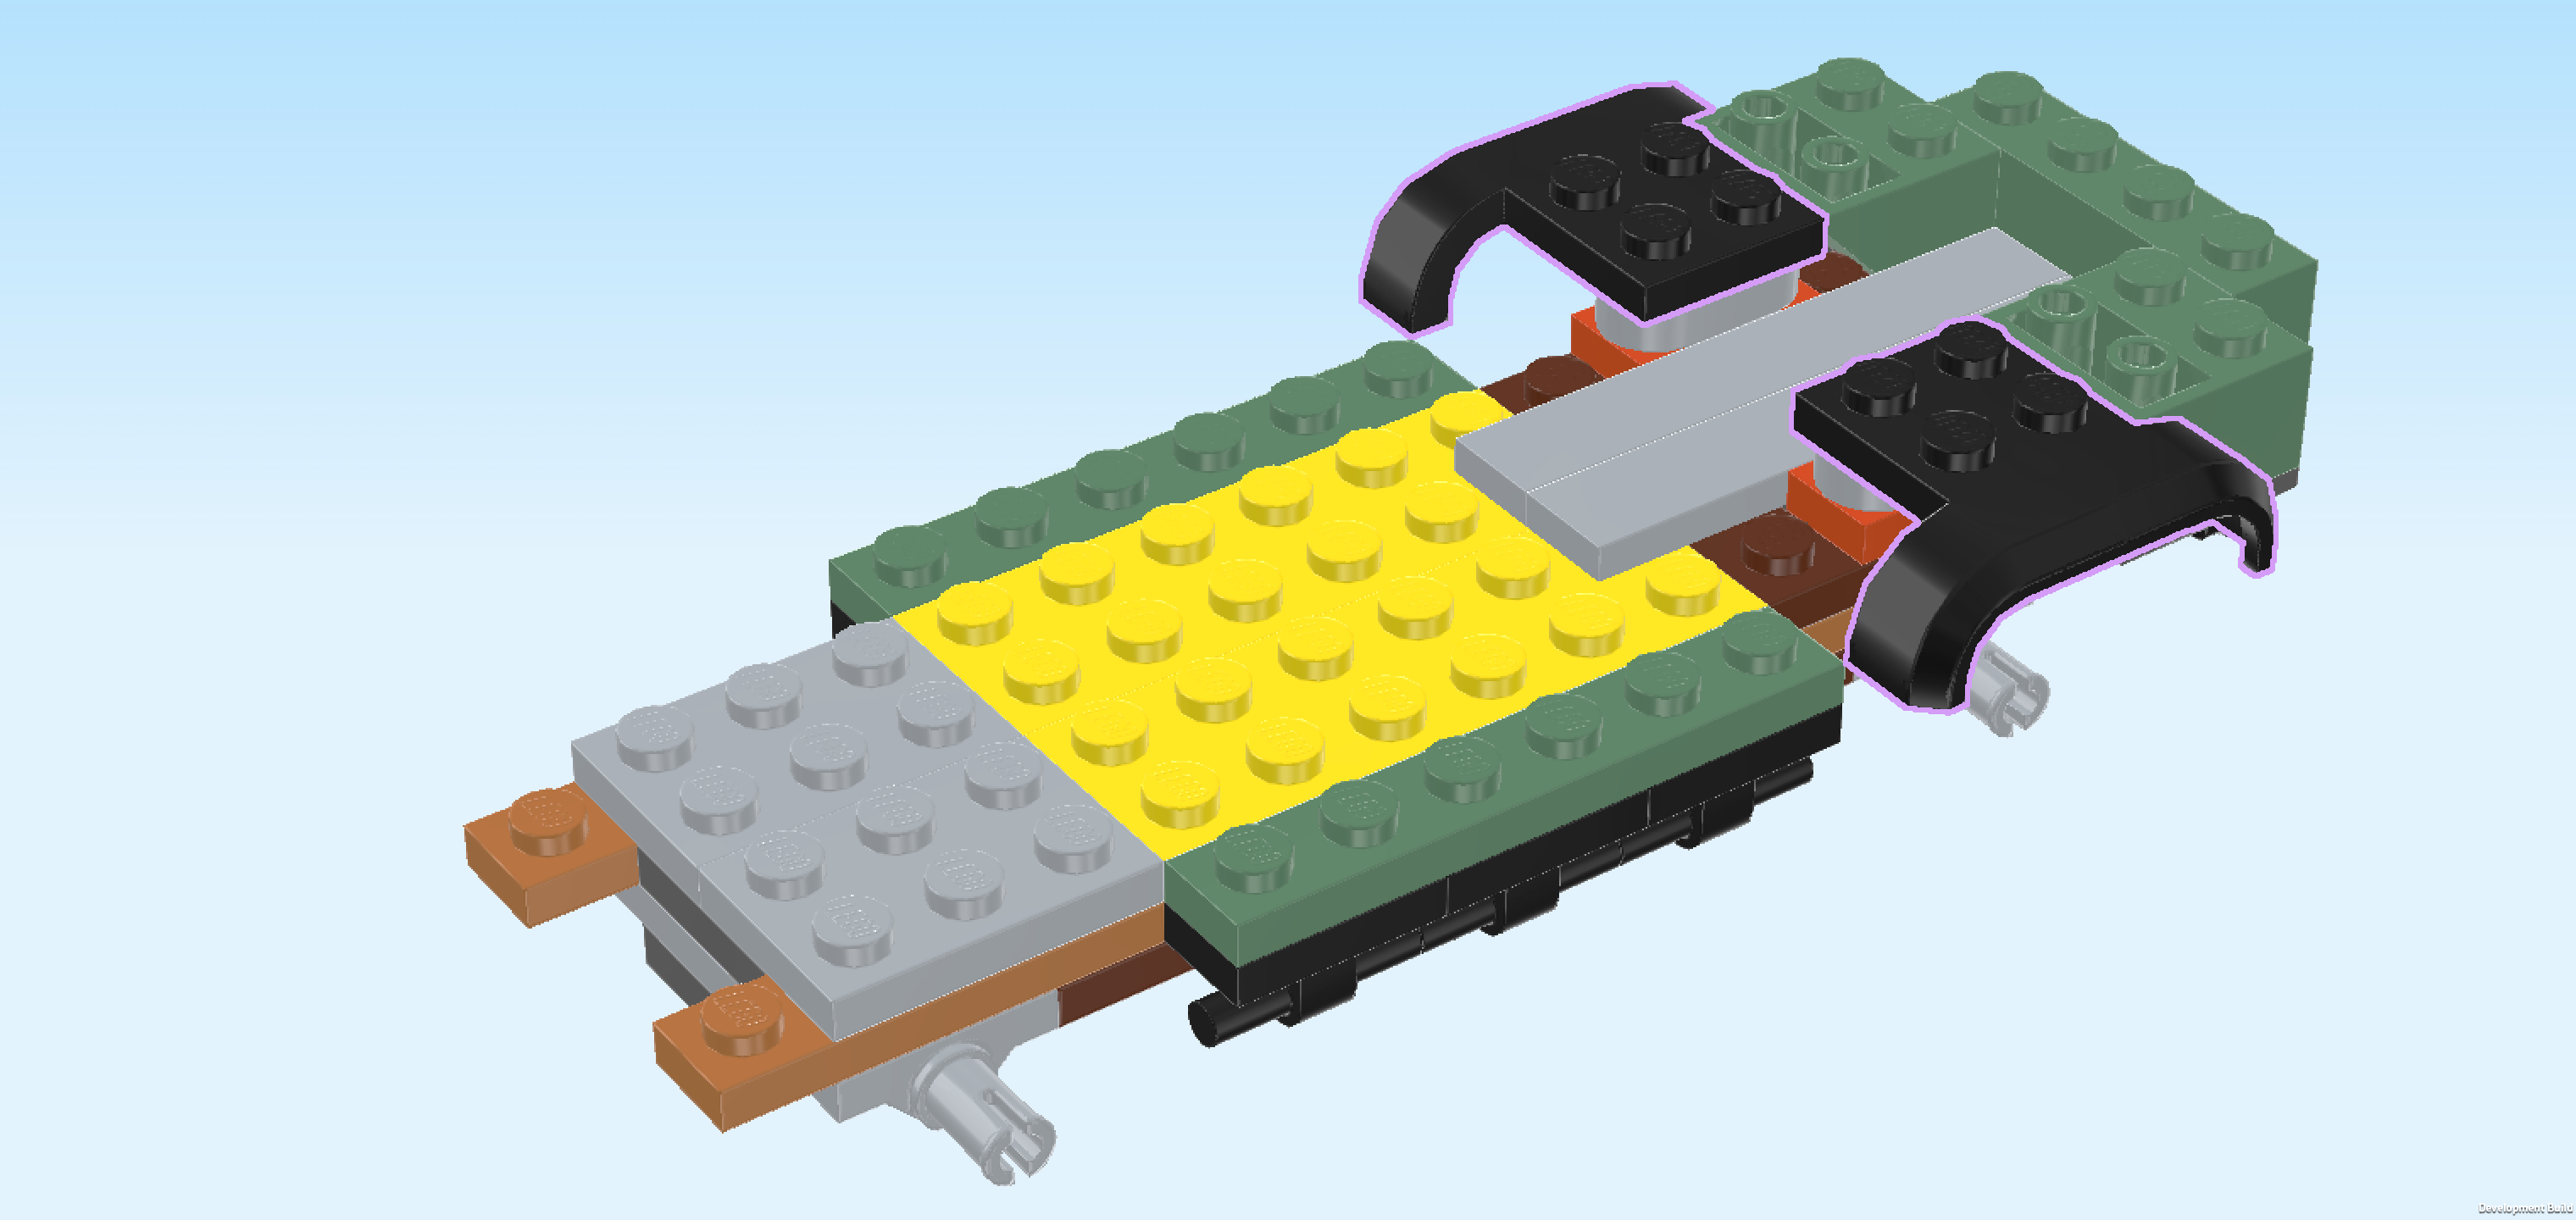
| Find 2 black plates 2x2 with oval mudguard. |
| Put 1 horizontally on the small part you have just mounted, 1 row and mudguard overhanging to the front. |
| Repeat symmetrically at the back. |
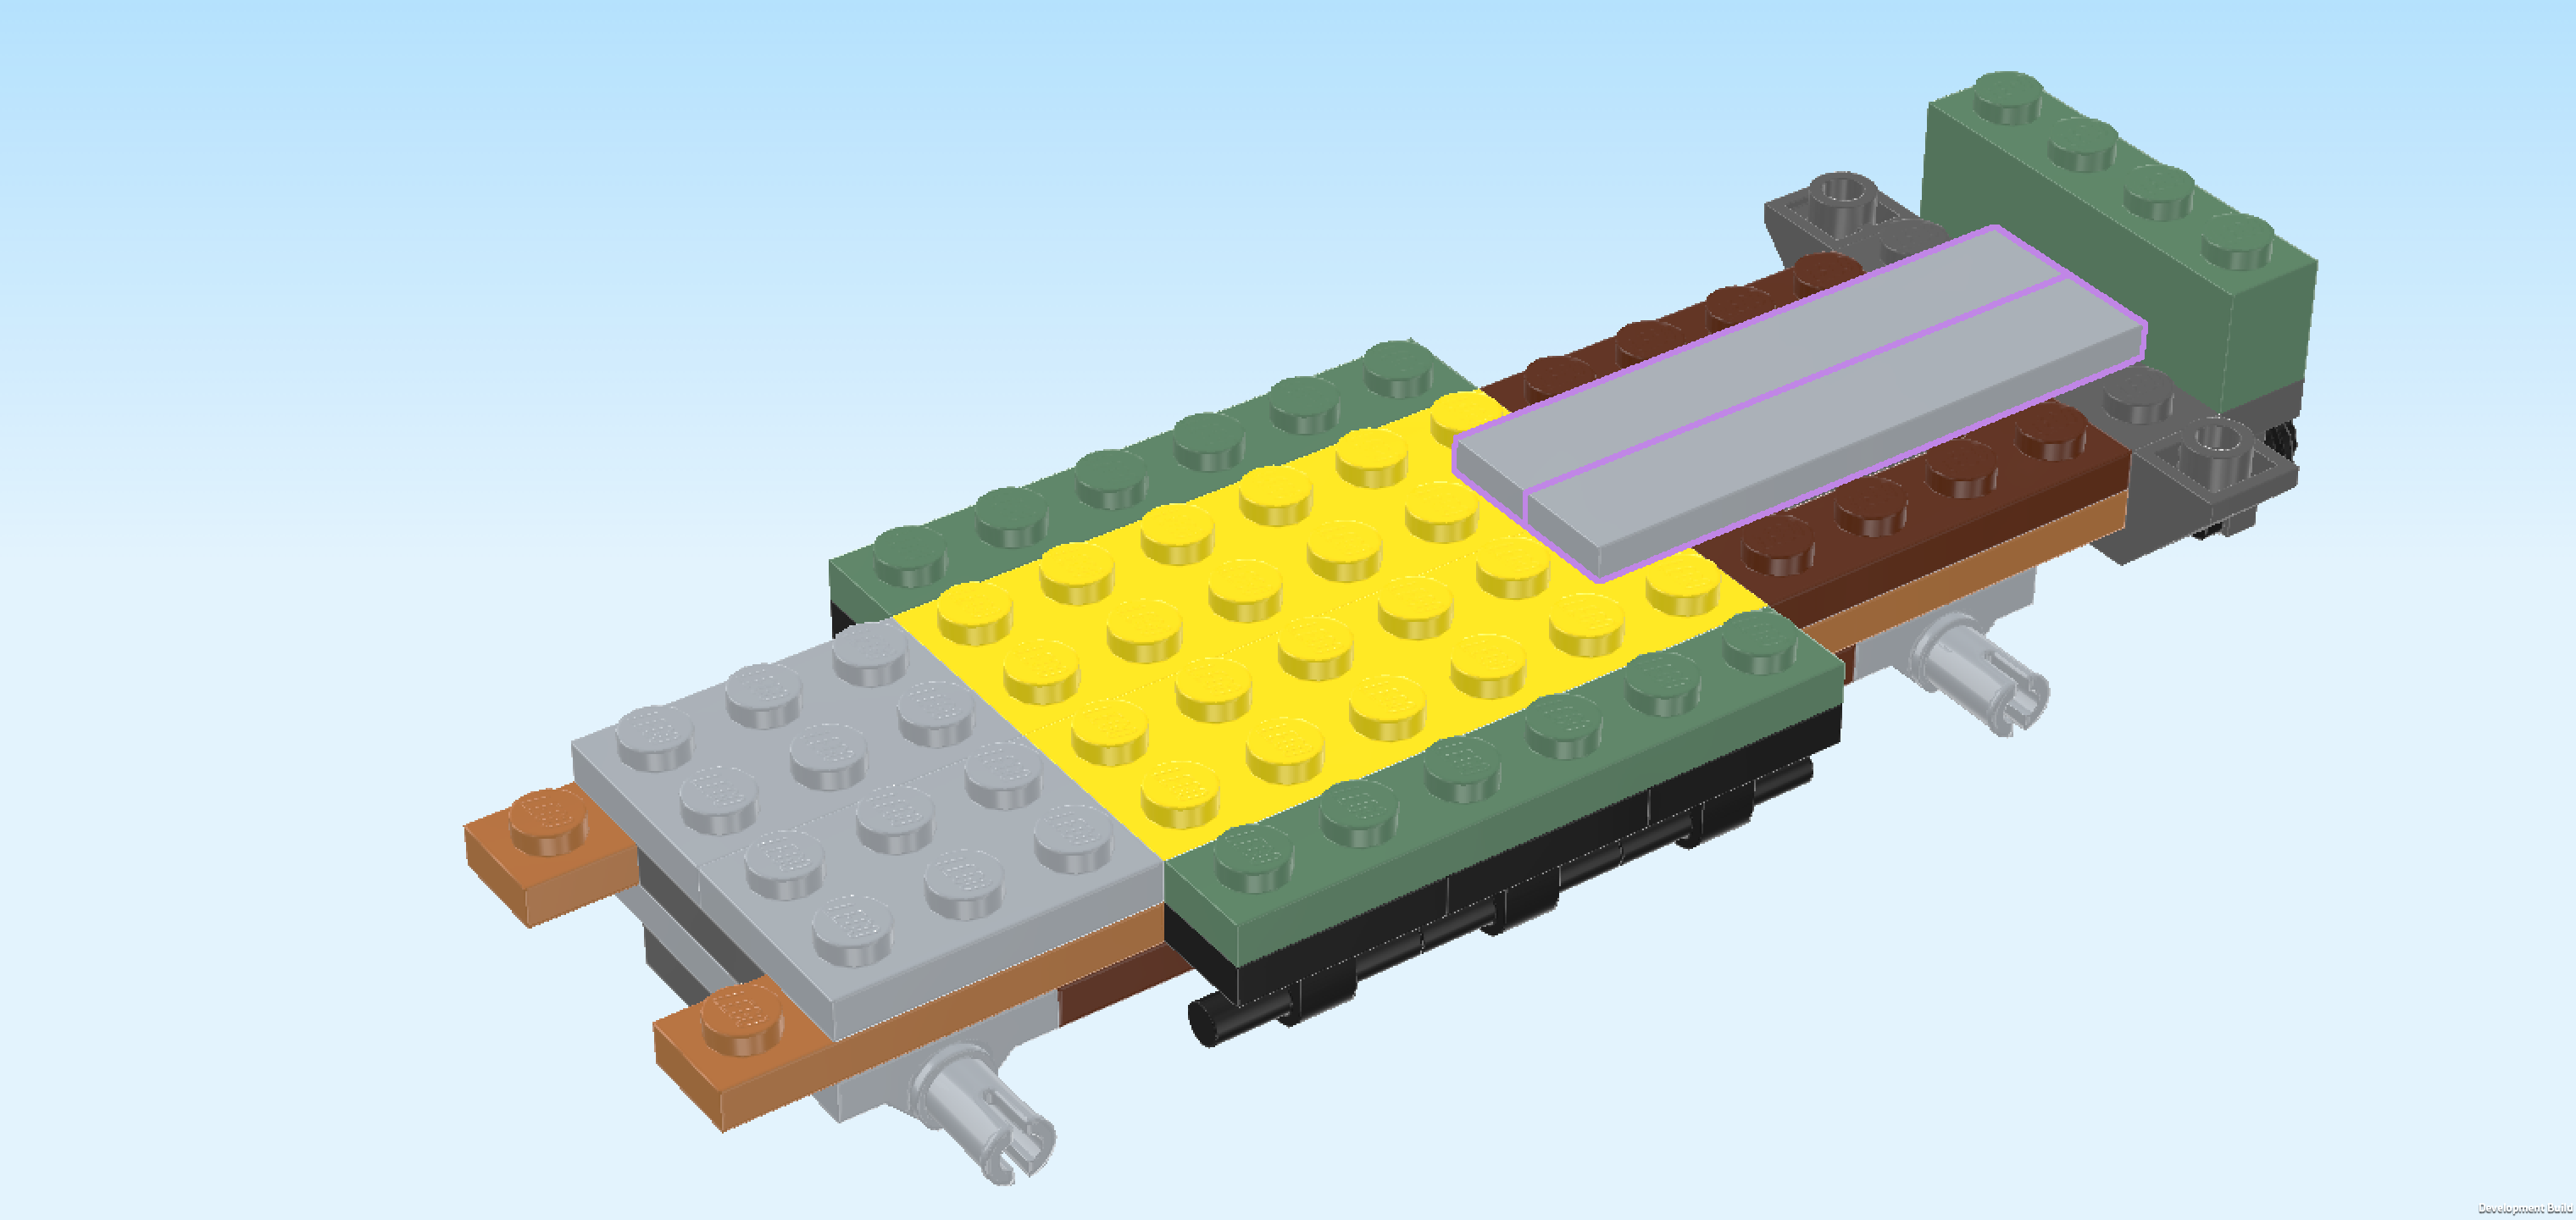
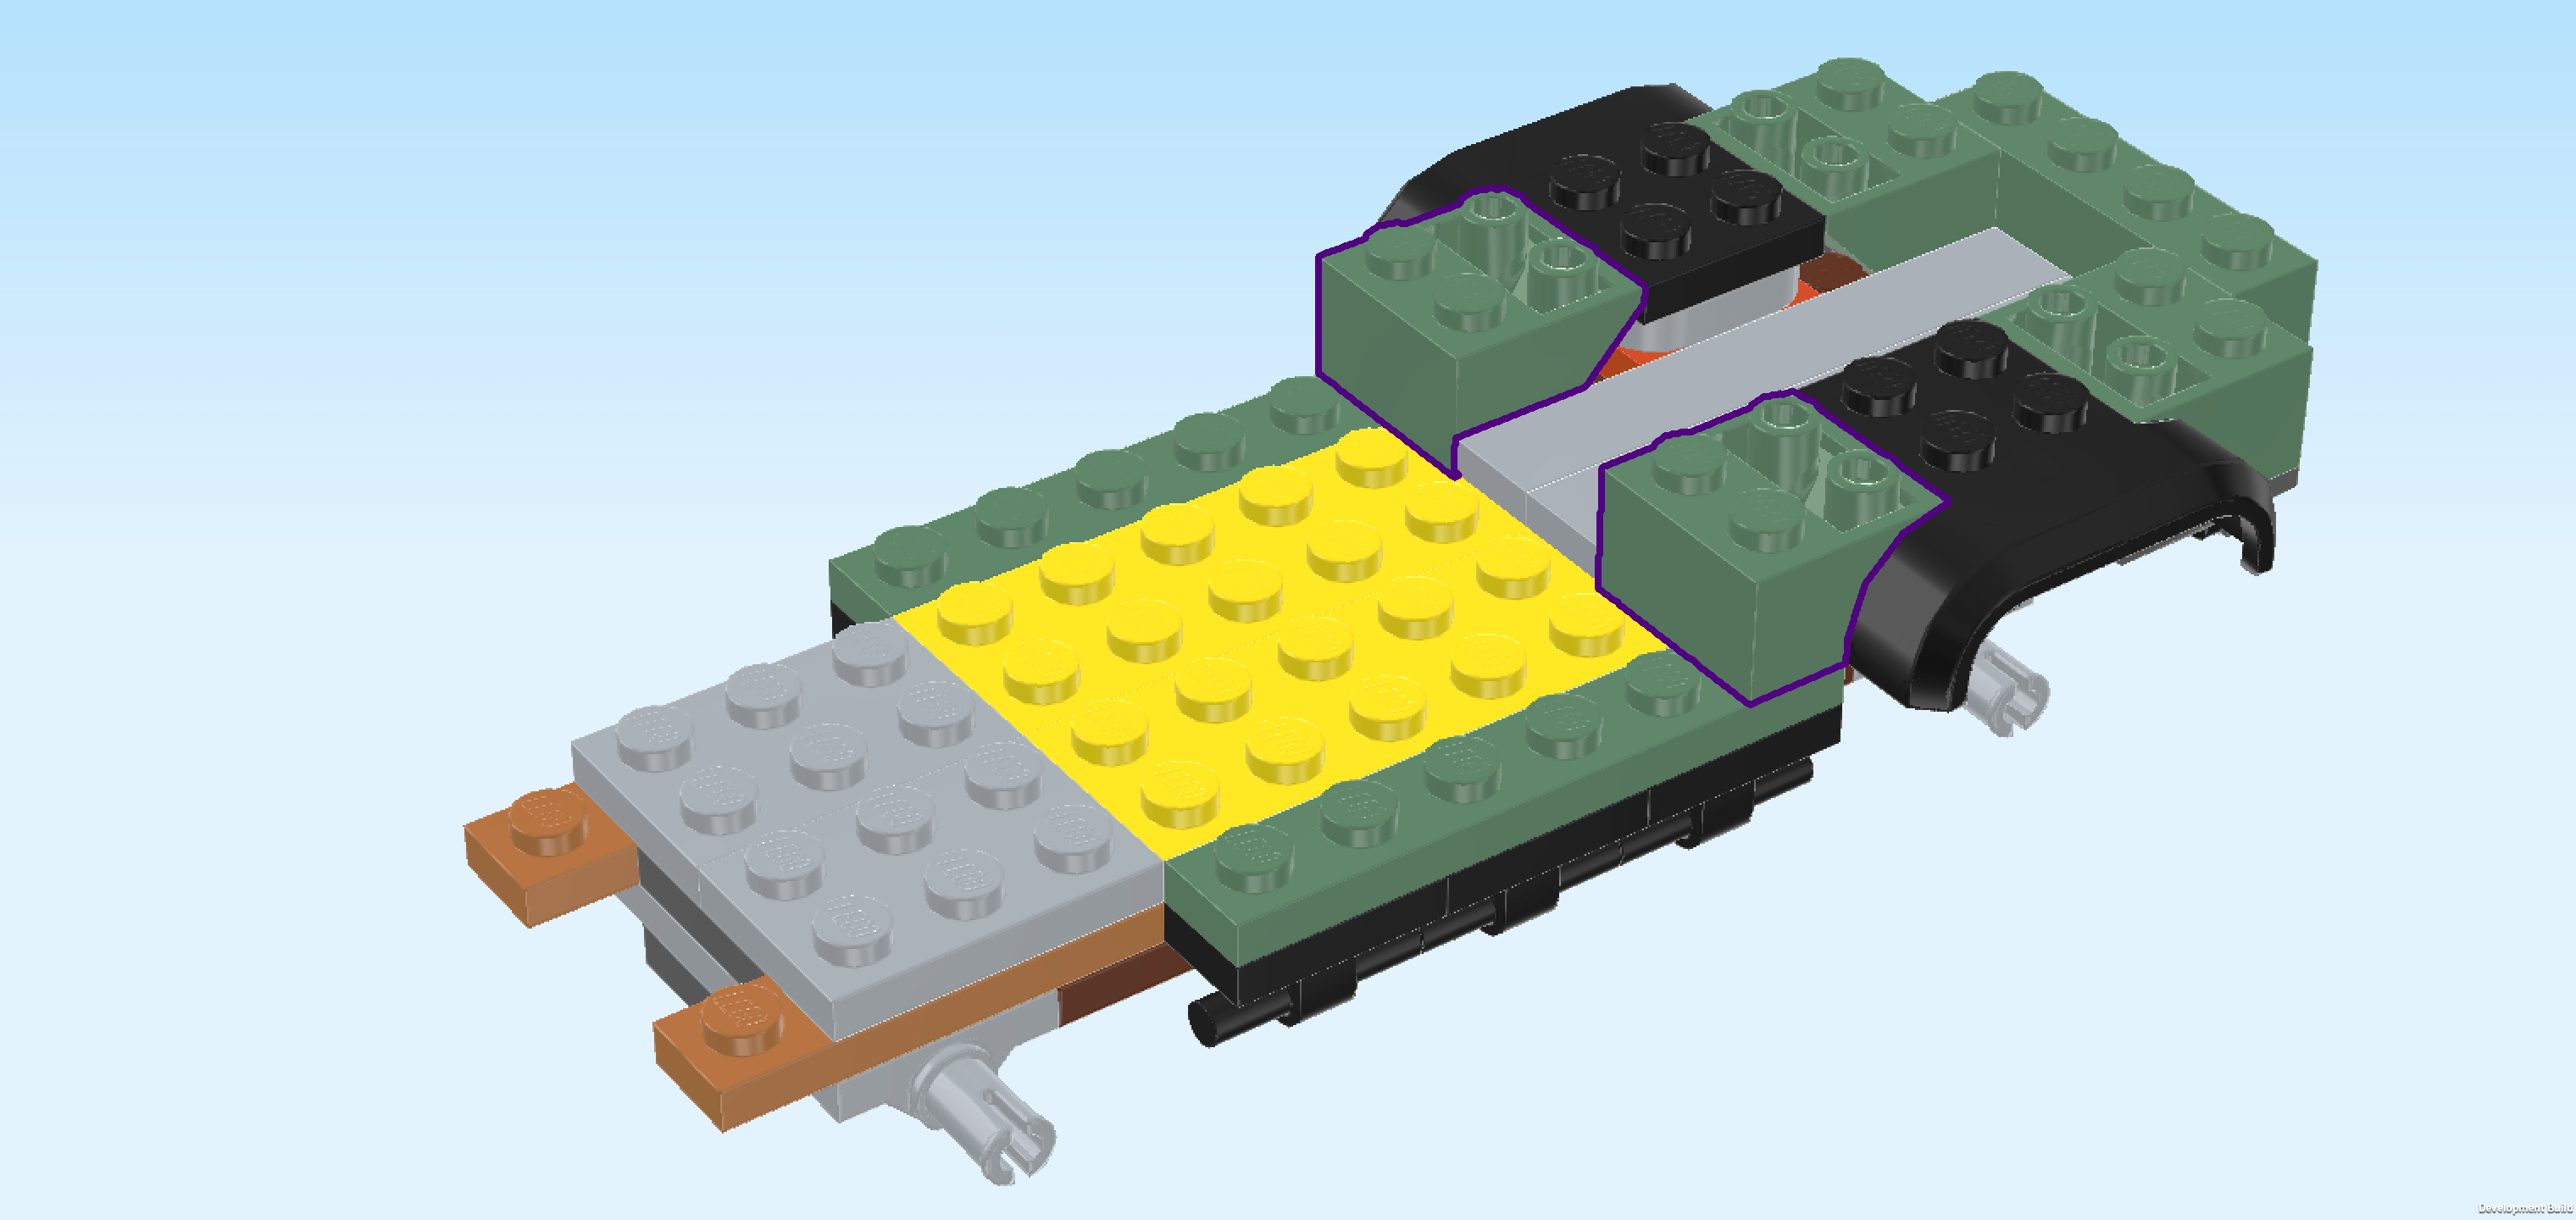
| Find 2 sand green inverted roof tiles 2x2, 45°. |
| Put 1 to the left of the previous piece, slope to the right. If done correctly, its top right edge is touching the mudguard plate 2x2. |
| Repeat symmetrically at the front. |
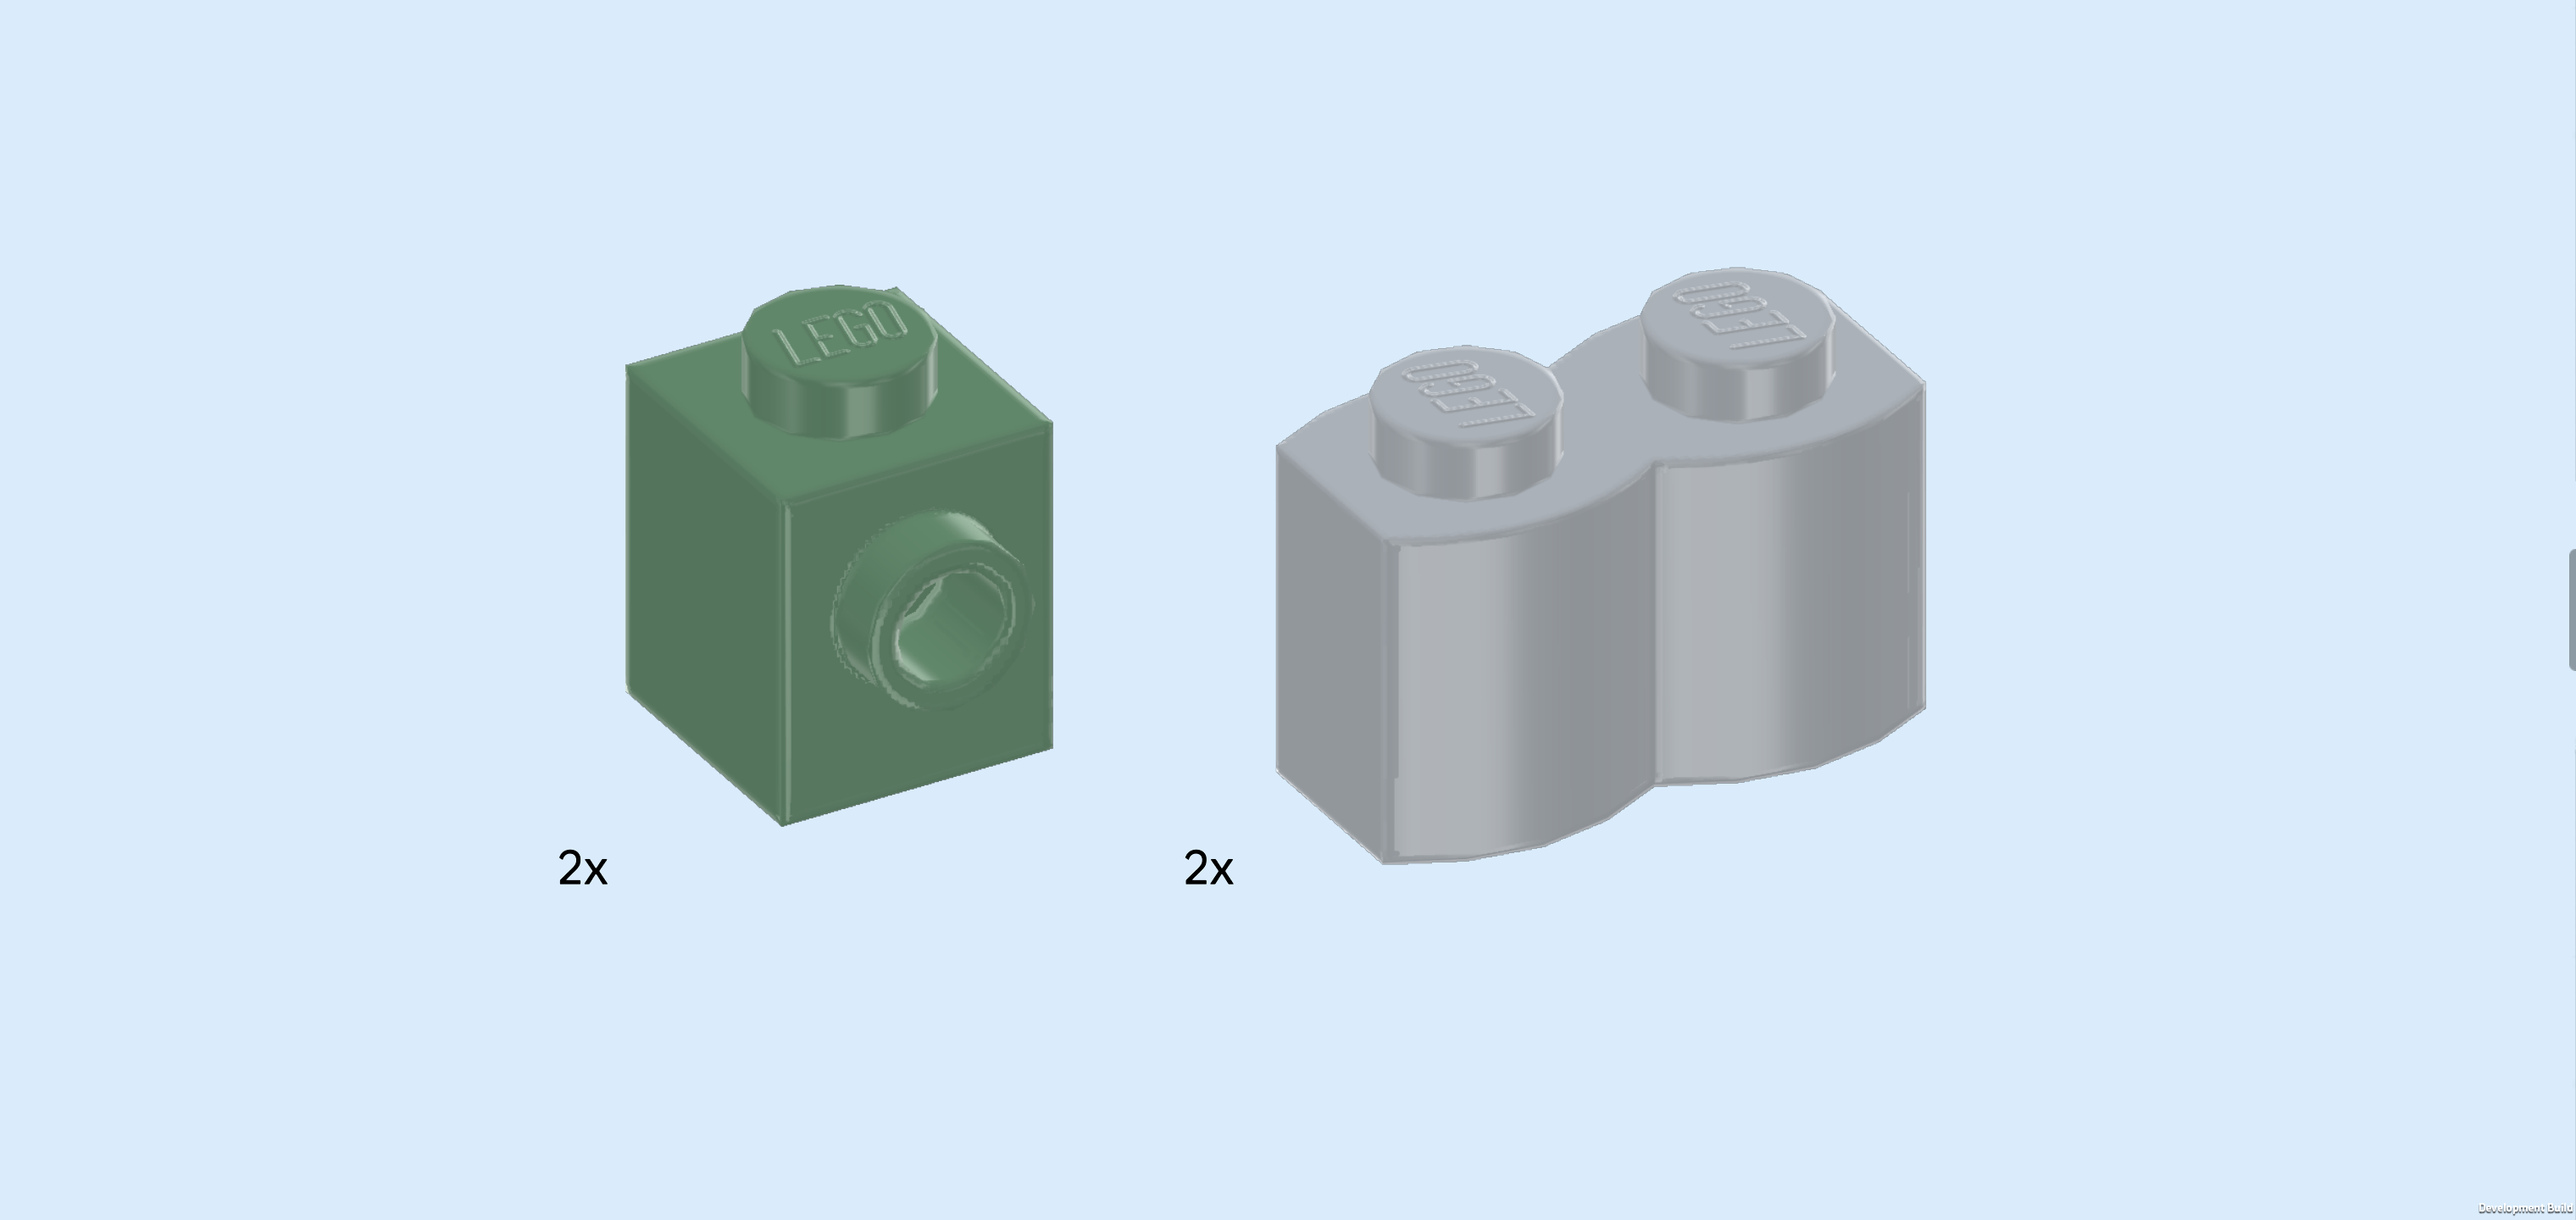
| Collect the following 4 pieces: |
| 2 sand green bricks 1x1 with side knob, |
| and 2 medium stone grey palisade bricks 1x2. |
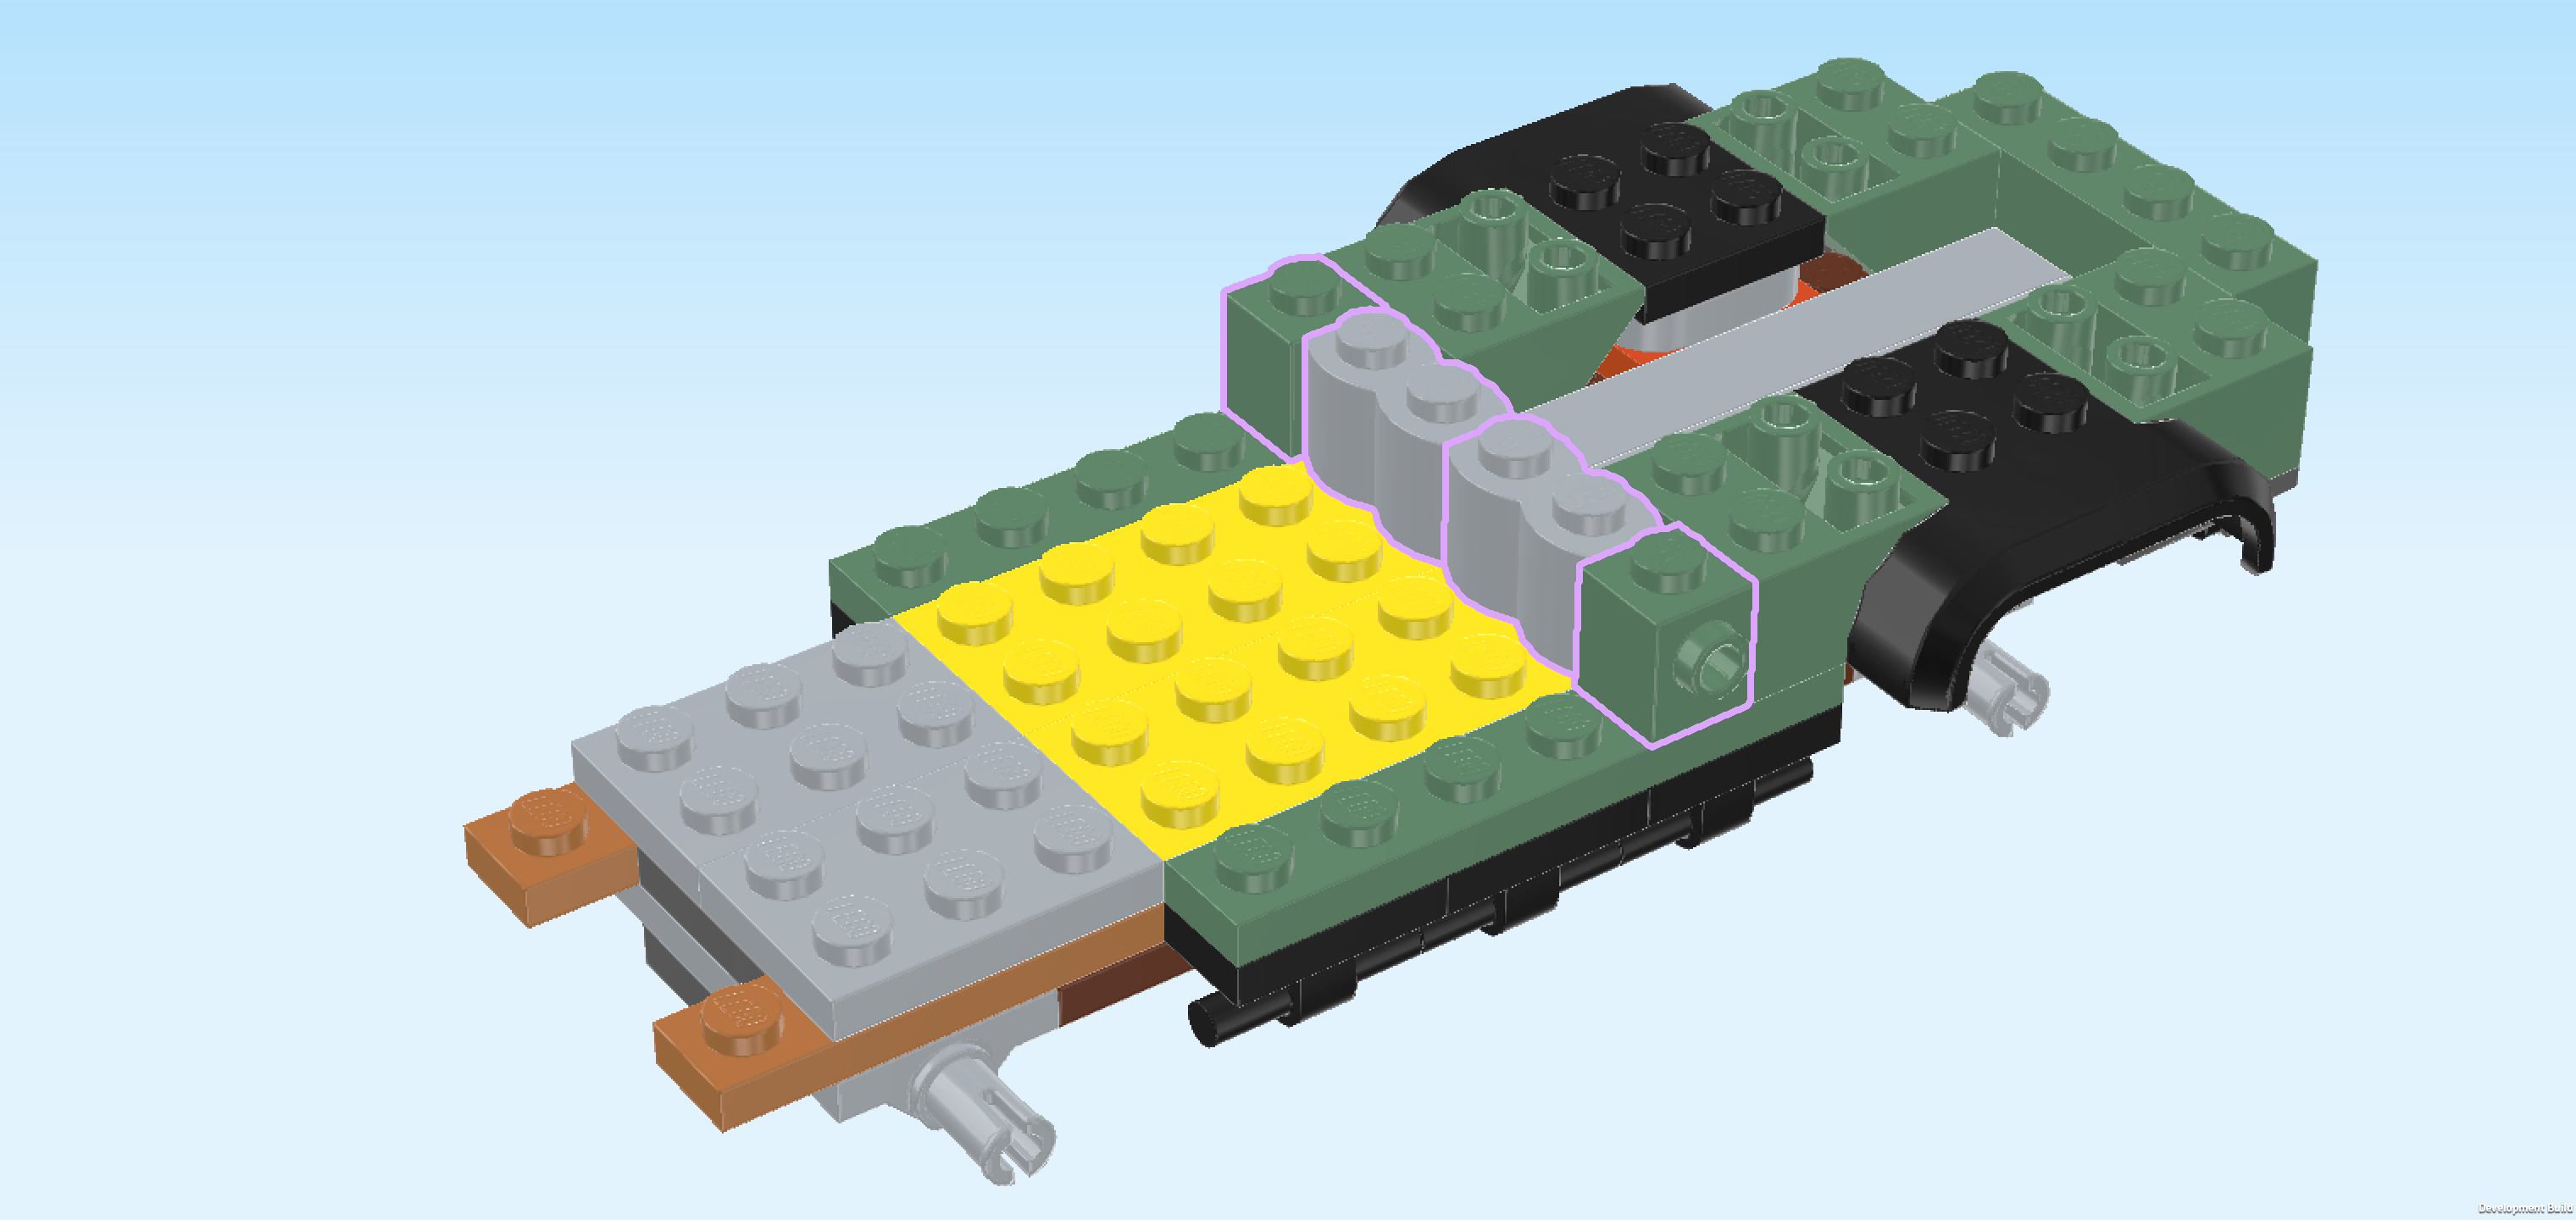
| Put 1 brick 1x1 to the left of the previous piece on the frontmost row, side knob to the front. |
| Put 1 palisade brick 1x2 vertically behind the previous piece. |
| Put the other palisade brick 1x2 vertically behind the previous piece. |
| Put the other brick 1x1 behind the previous piece, side knob to the back. |
| Collect the following 3 pieces: |
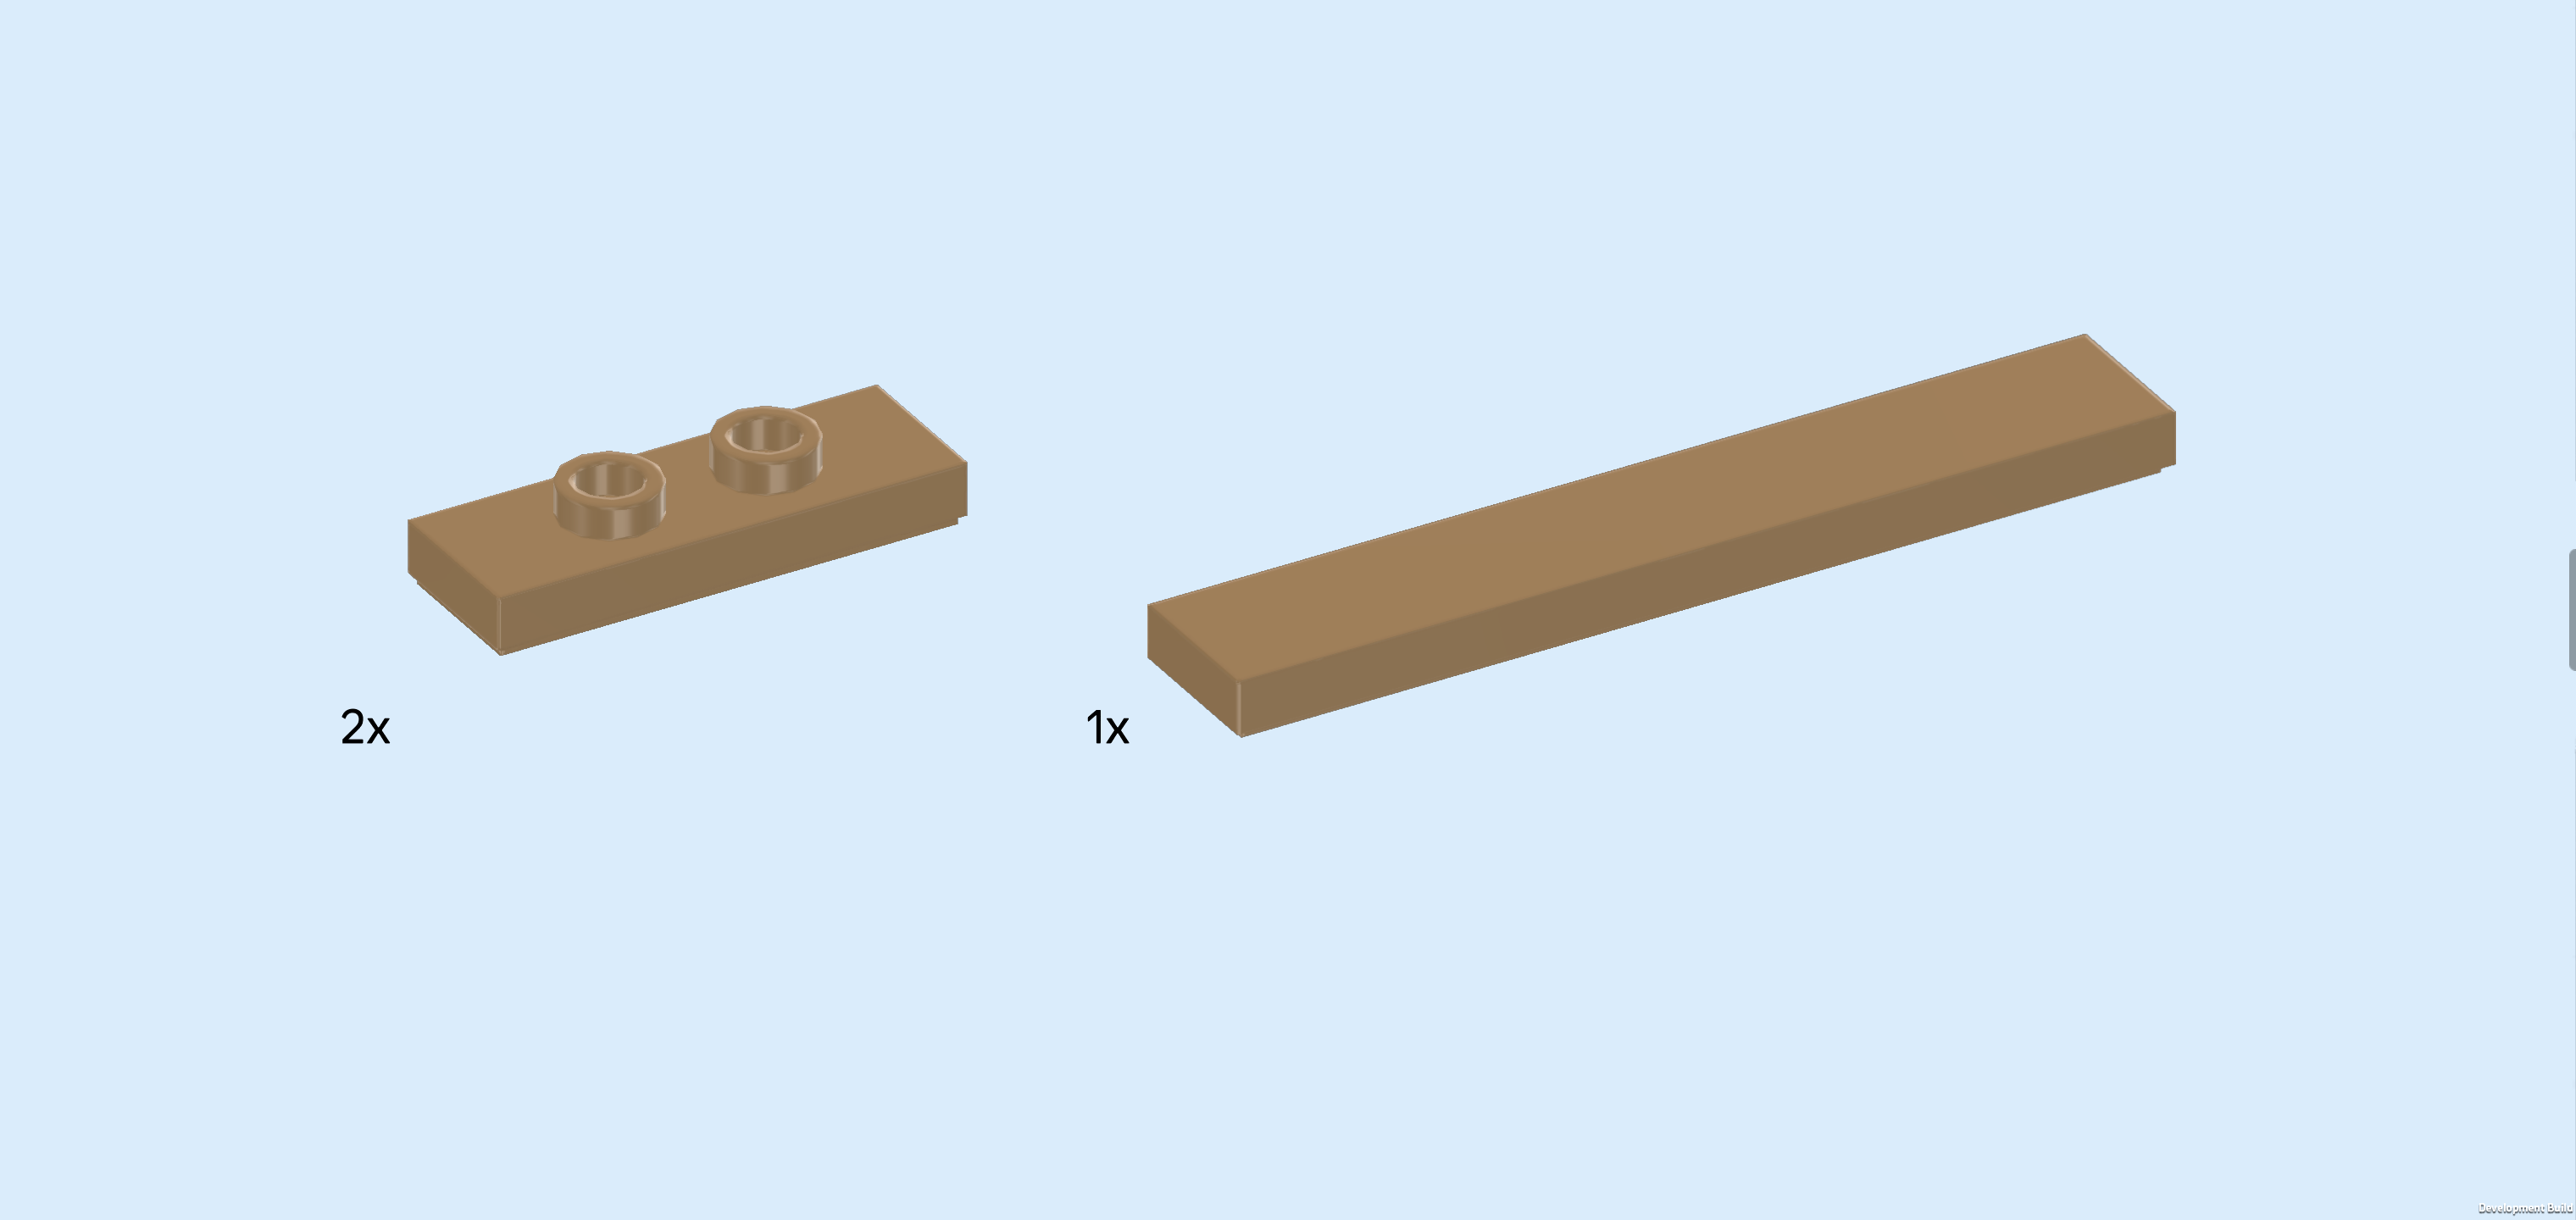
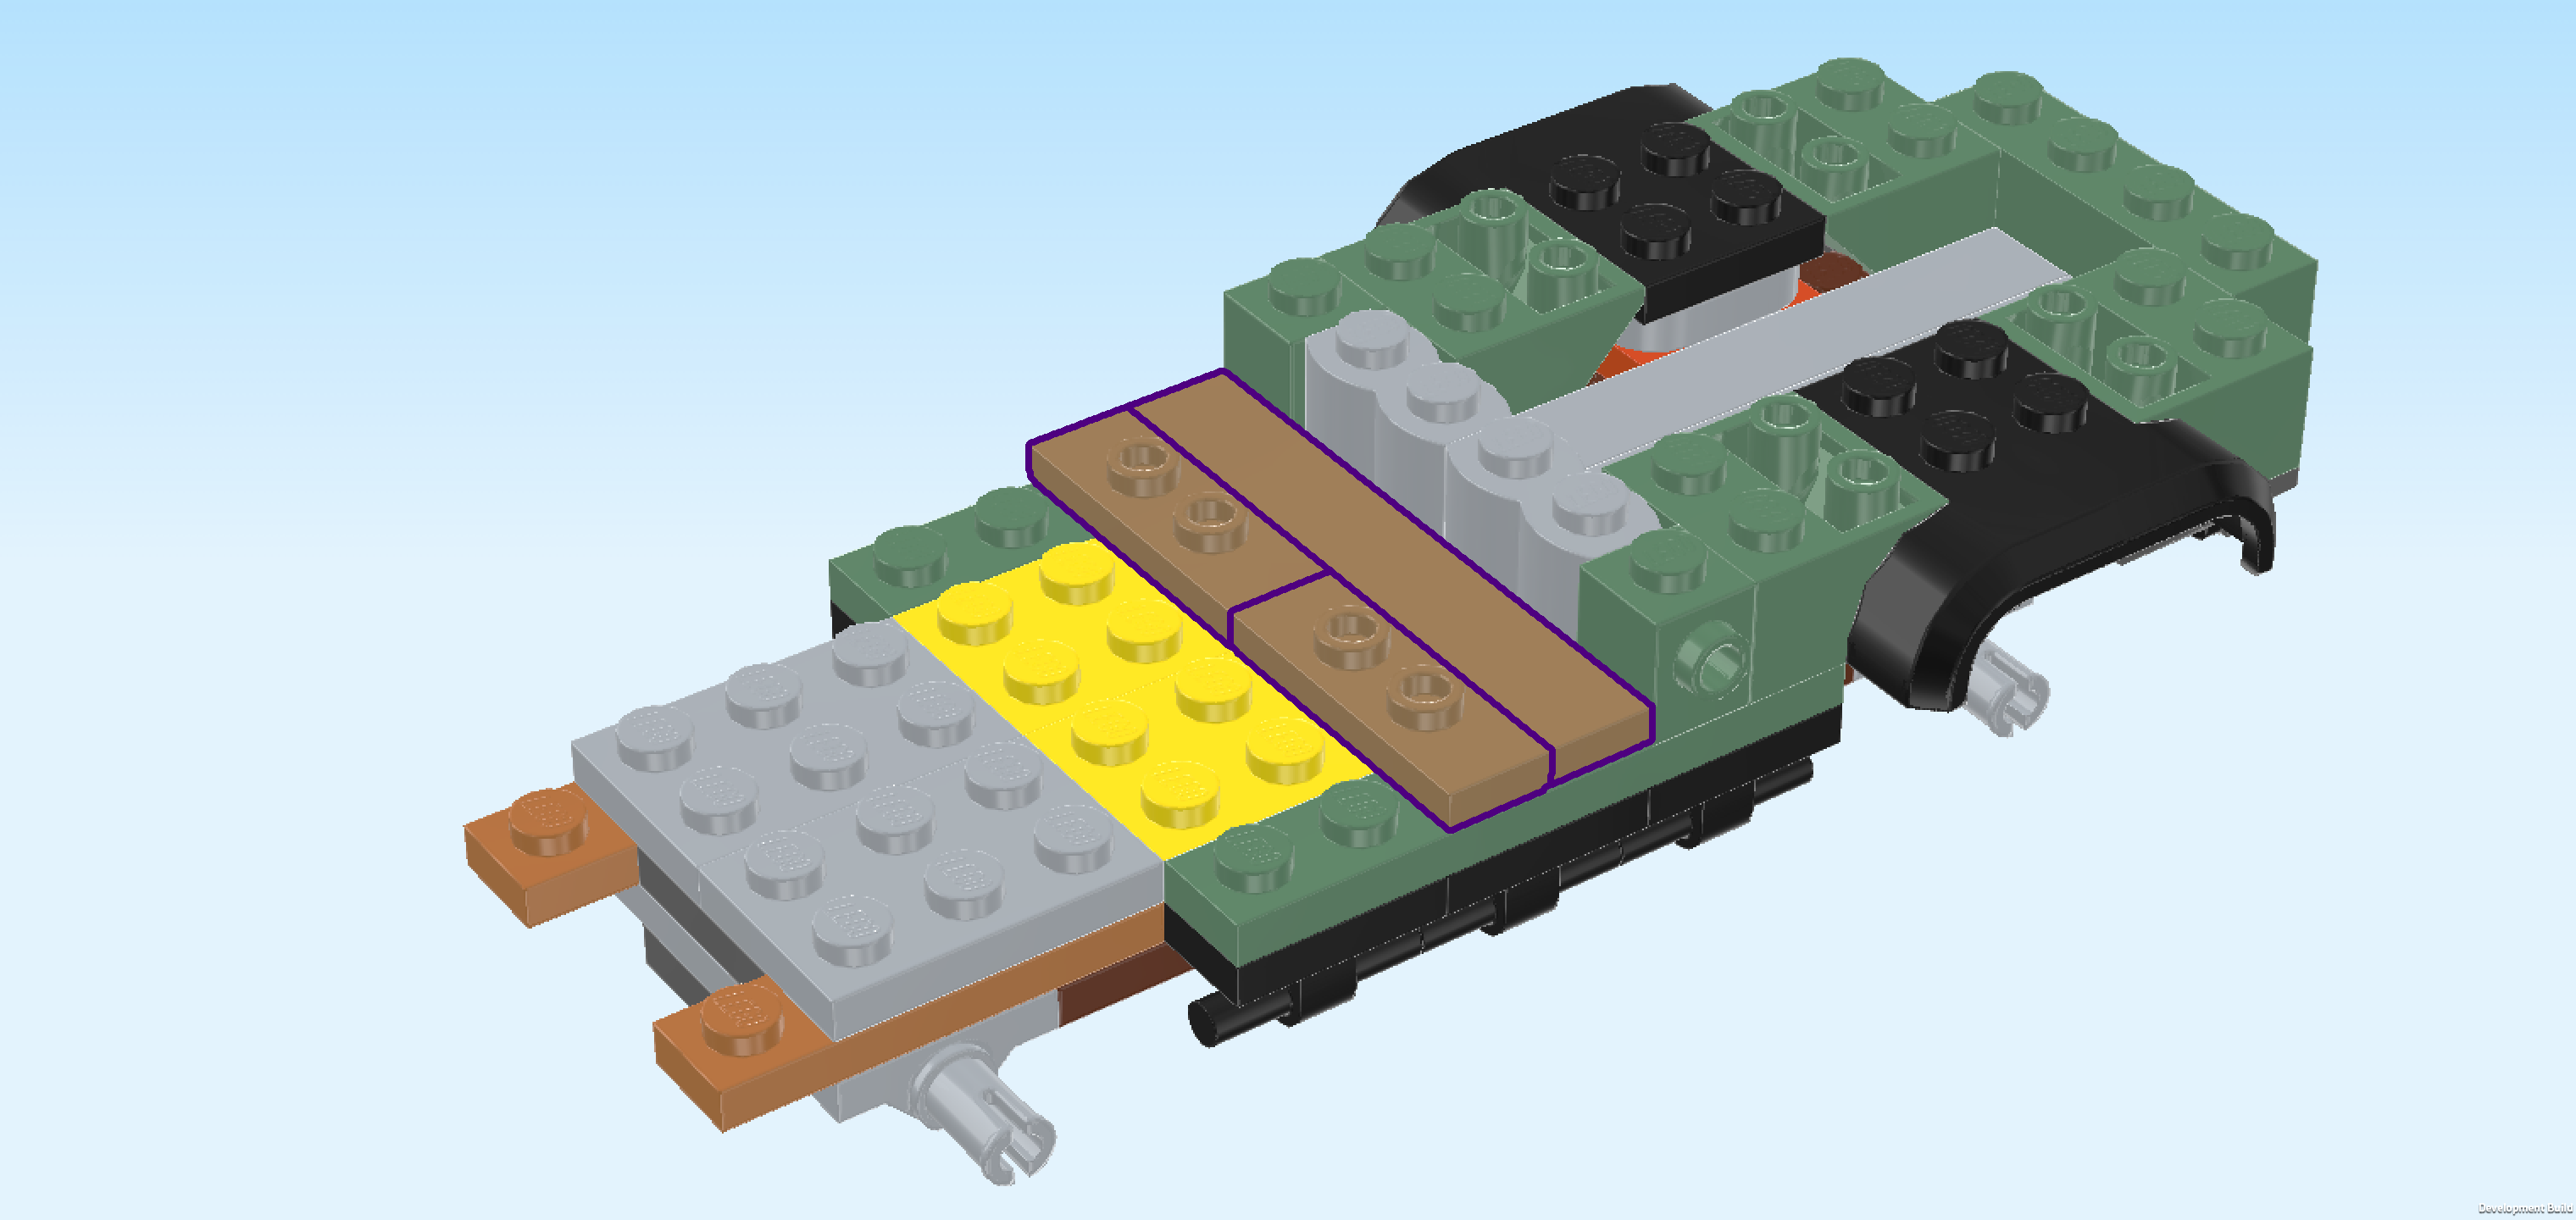
| 2 mud brown plates 1x3 with 2 knobs, |
| and 1 mud brown flat tile 1x6. |
| Put the flat tile 1x6 vertically to the left of the 4 previous pieces. |
| Put the 2 plates 1x3 vertically to the left of the previous piece. Make sure one is in front of the other, together covering 1 column. |
| Collect the following 2 pieces: |
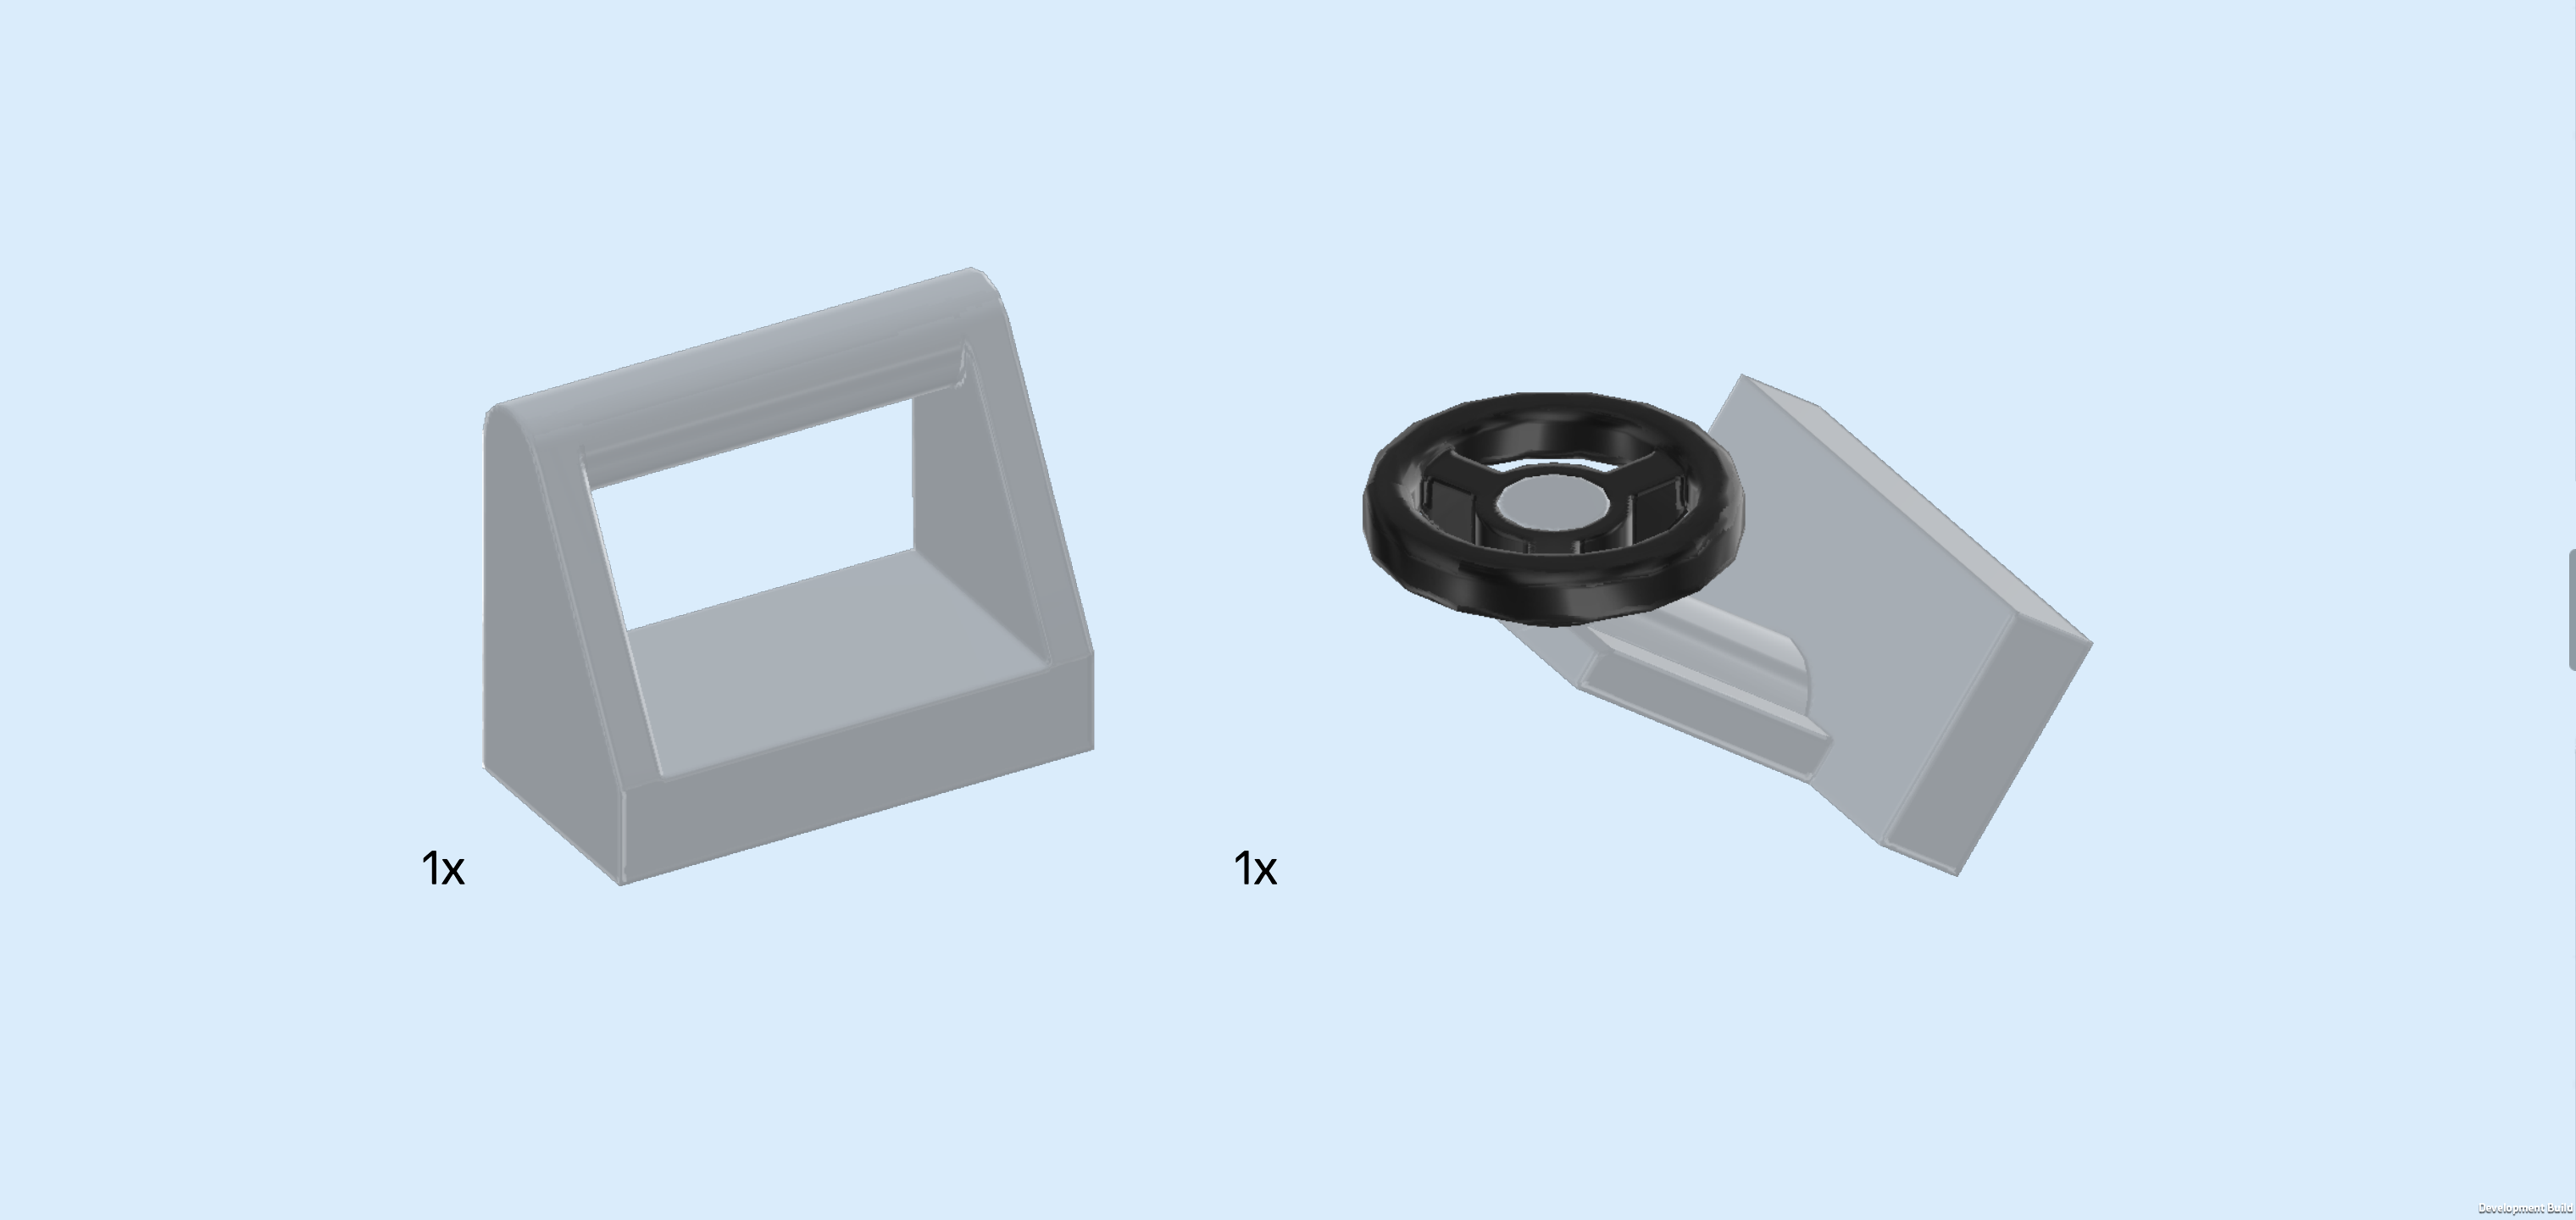
| 1 medium stone grey tile 1x2 with angled top handle, |
| and 1 black and medium stone grey small steering wheel with plate 1x2. |
| Put the tile 1x2 with top handle vertically to the left of the 2 previous pieces, skipping the backmost knob of that column. Make sure the angled side is towards the right. |
| Put the small steering wheel vertically in front of the previous piece, steering wheel to the right. |
| Collect the following 3 pieces: |
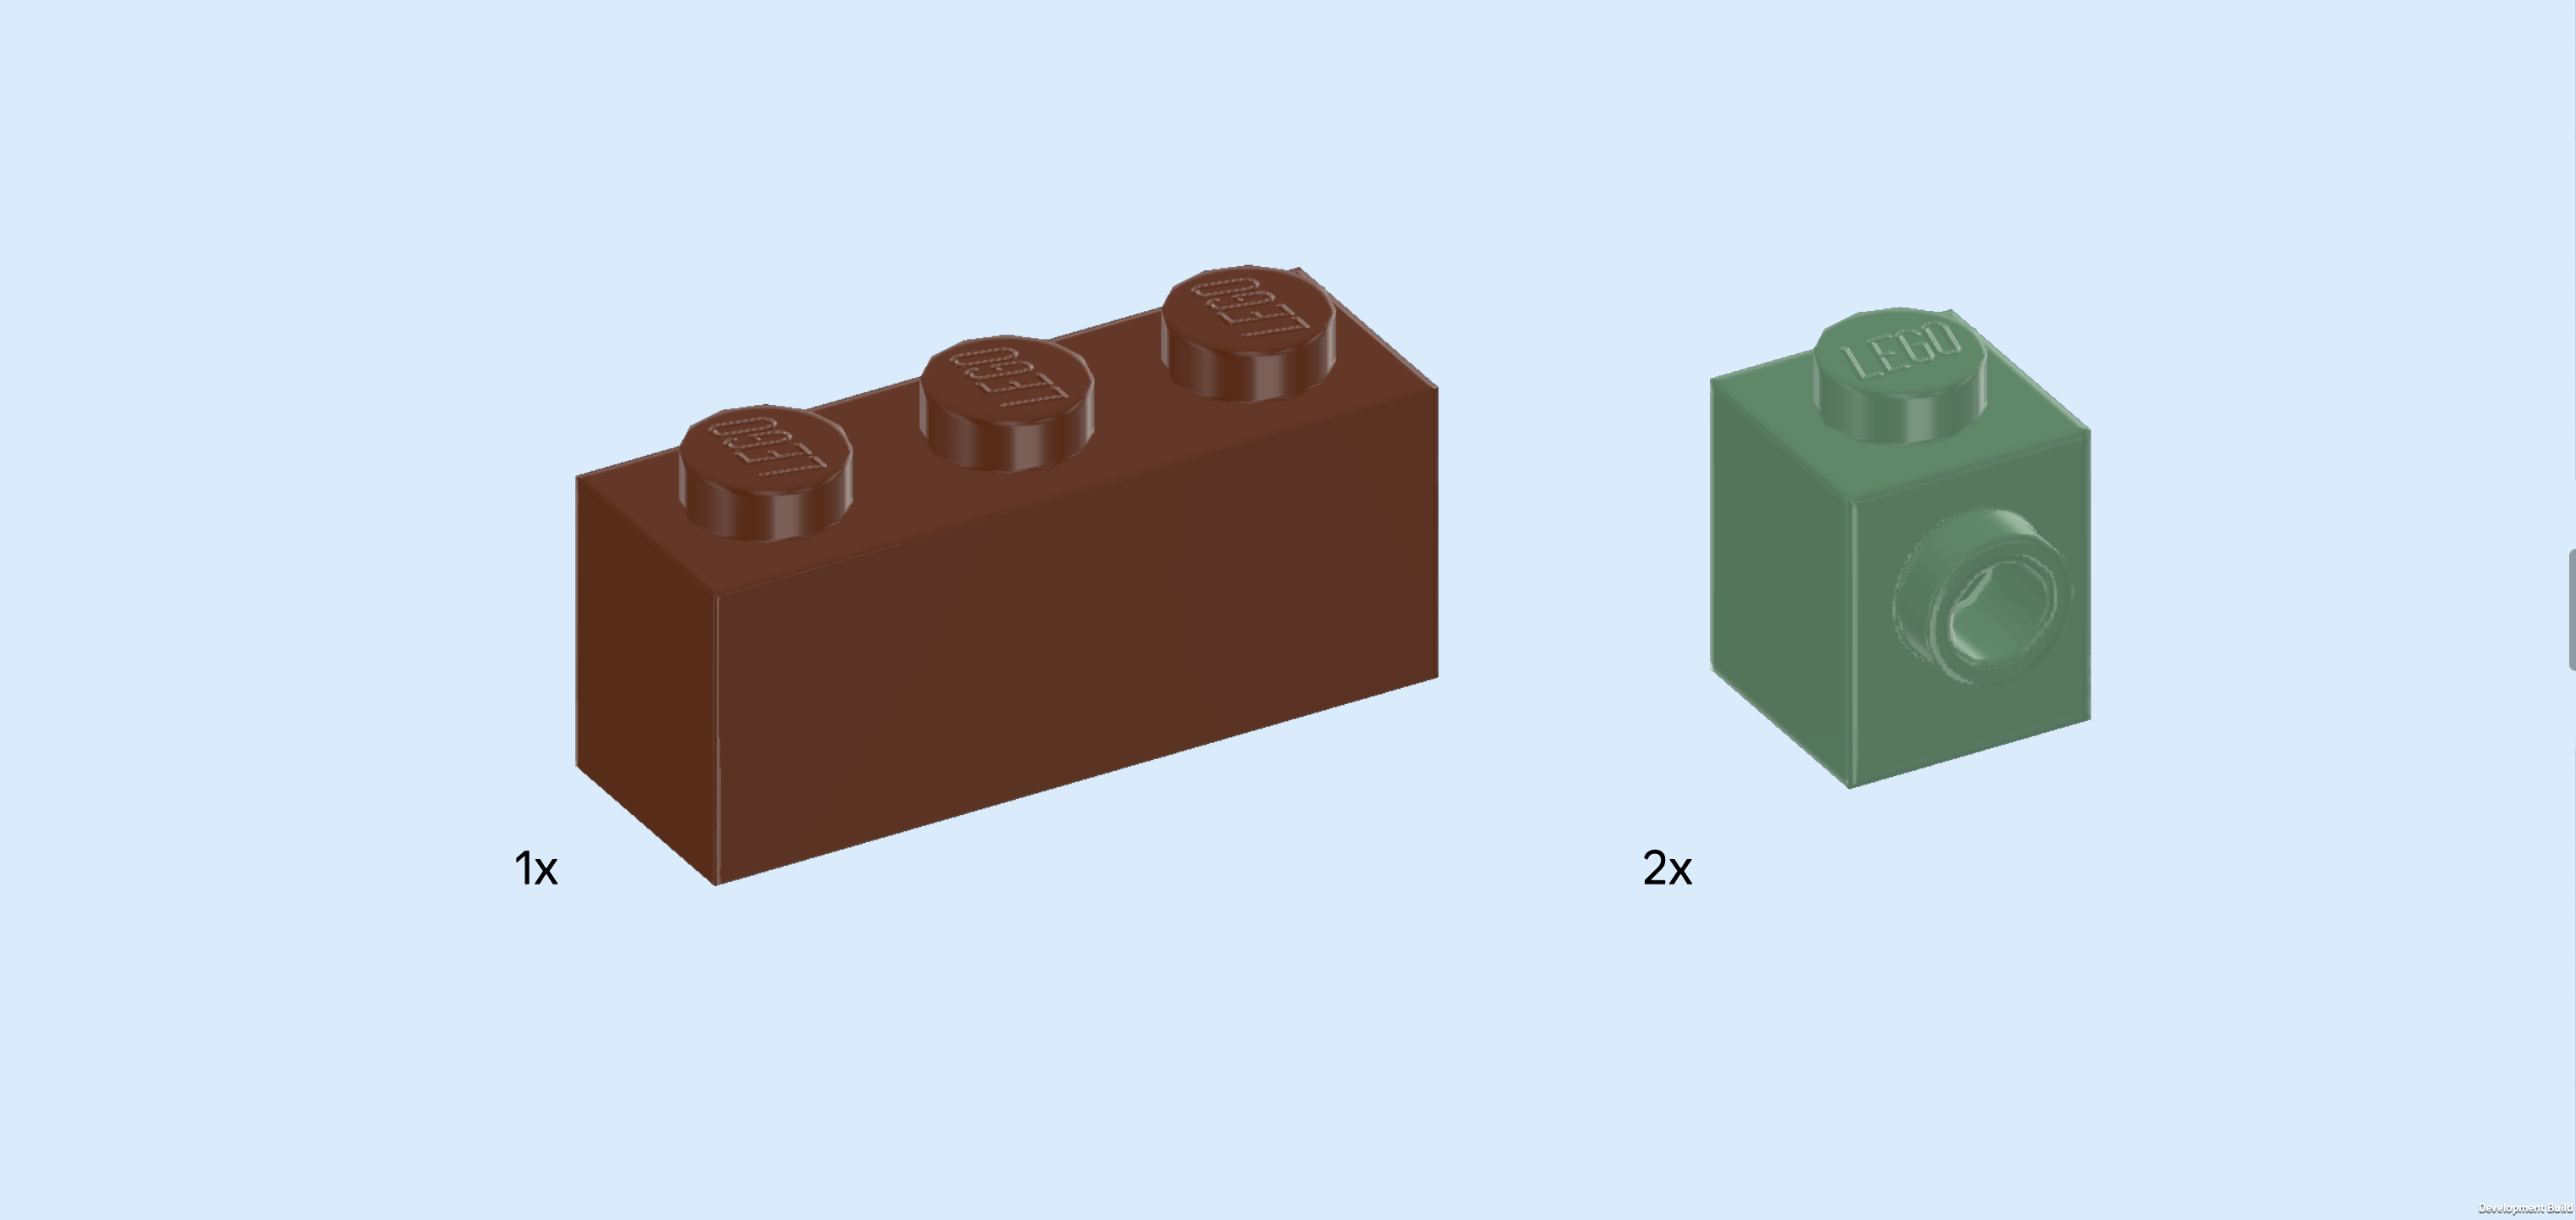
| 1 reddish brown brick 1x3, |
| and 2 sand green bricks 1x1 with side knob. |
| Put 1 brick 1x1 in front of the previous piece, side knob to the front. |
| Repeat symmetrically at the back. |
| Put the brick 1x3 horizontally to the left of the back half of the steering wheel plate. This means there are 3 empty knobs behind its rightmost knob, and 2 empty knobs in front of it. |
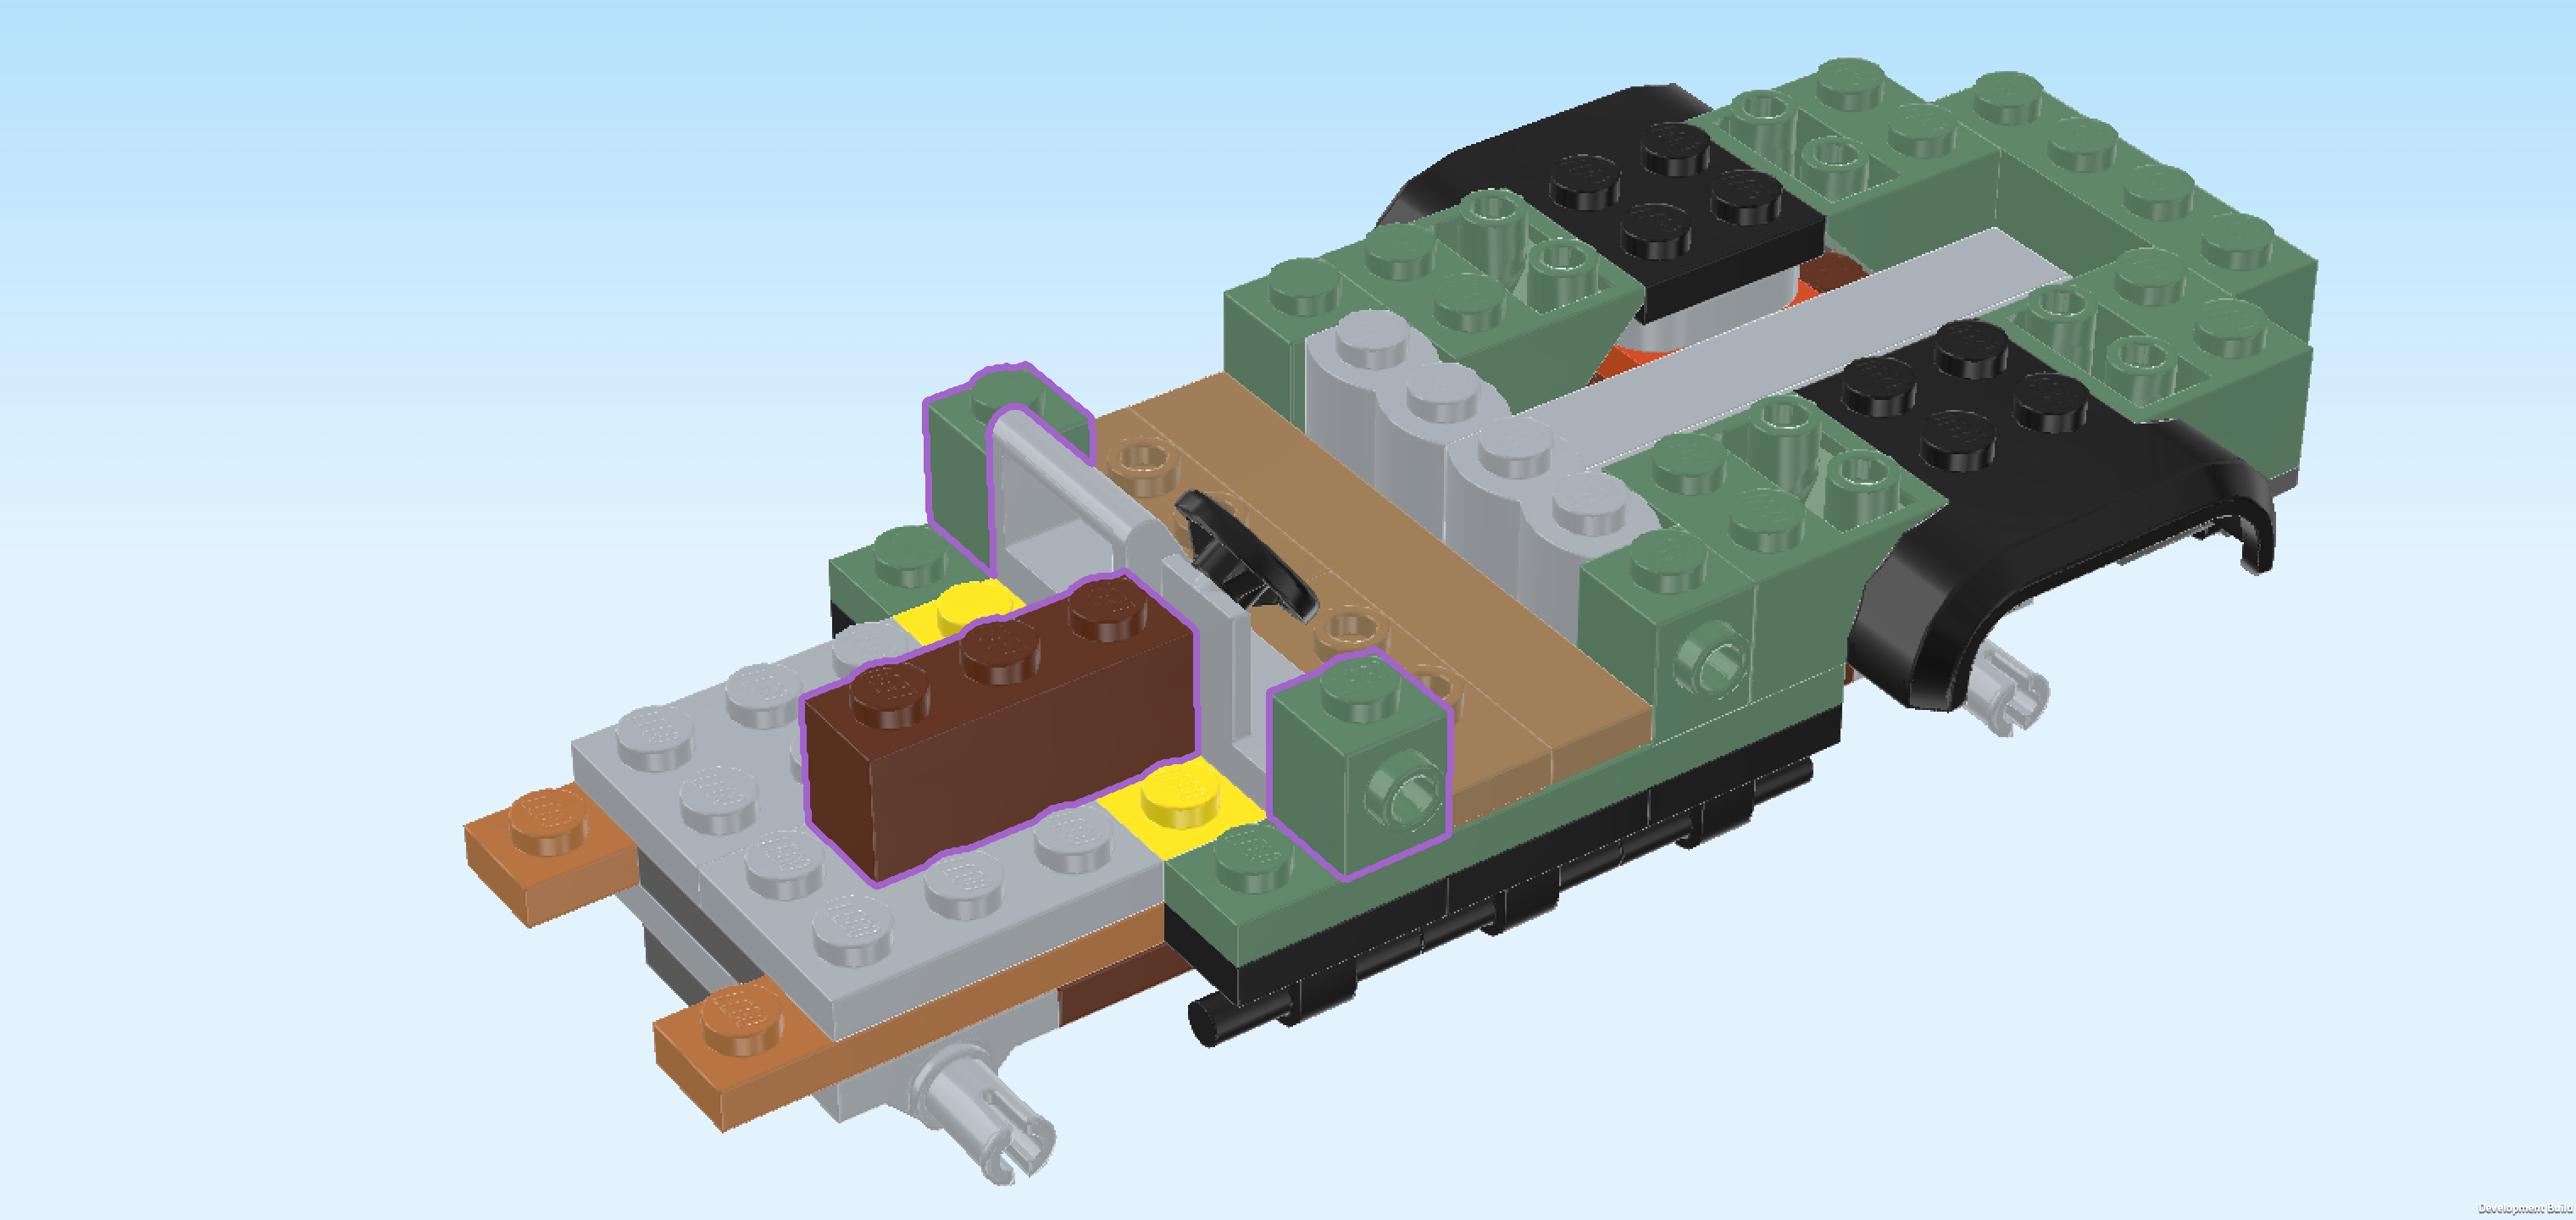
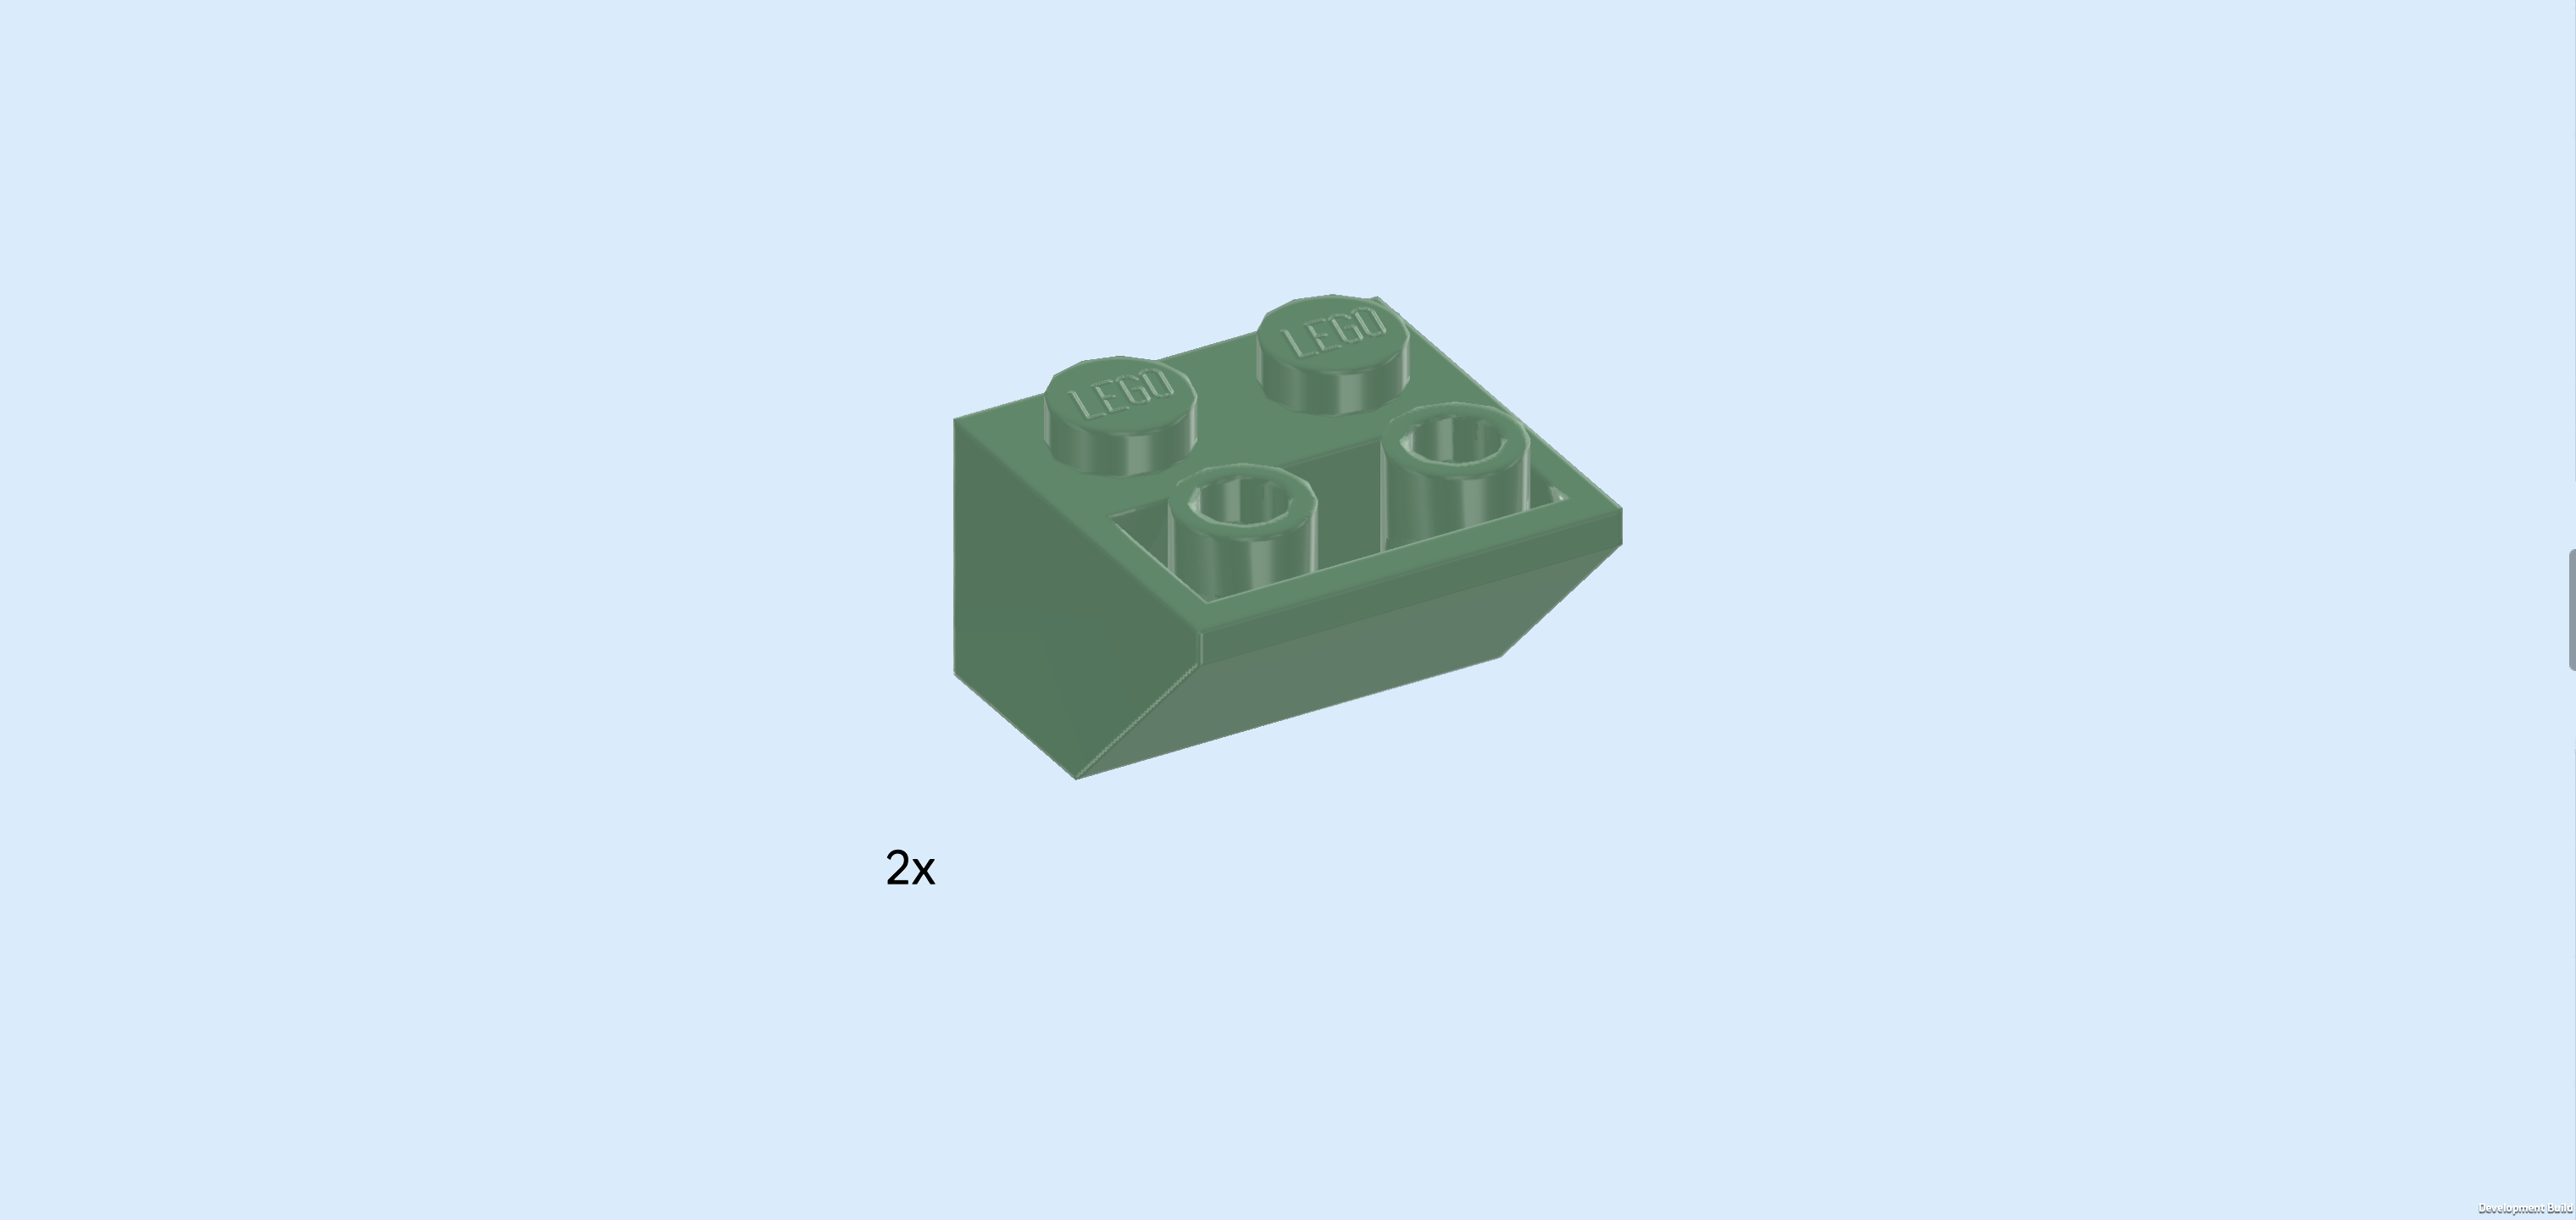
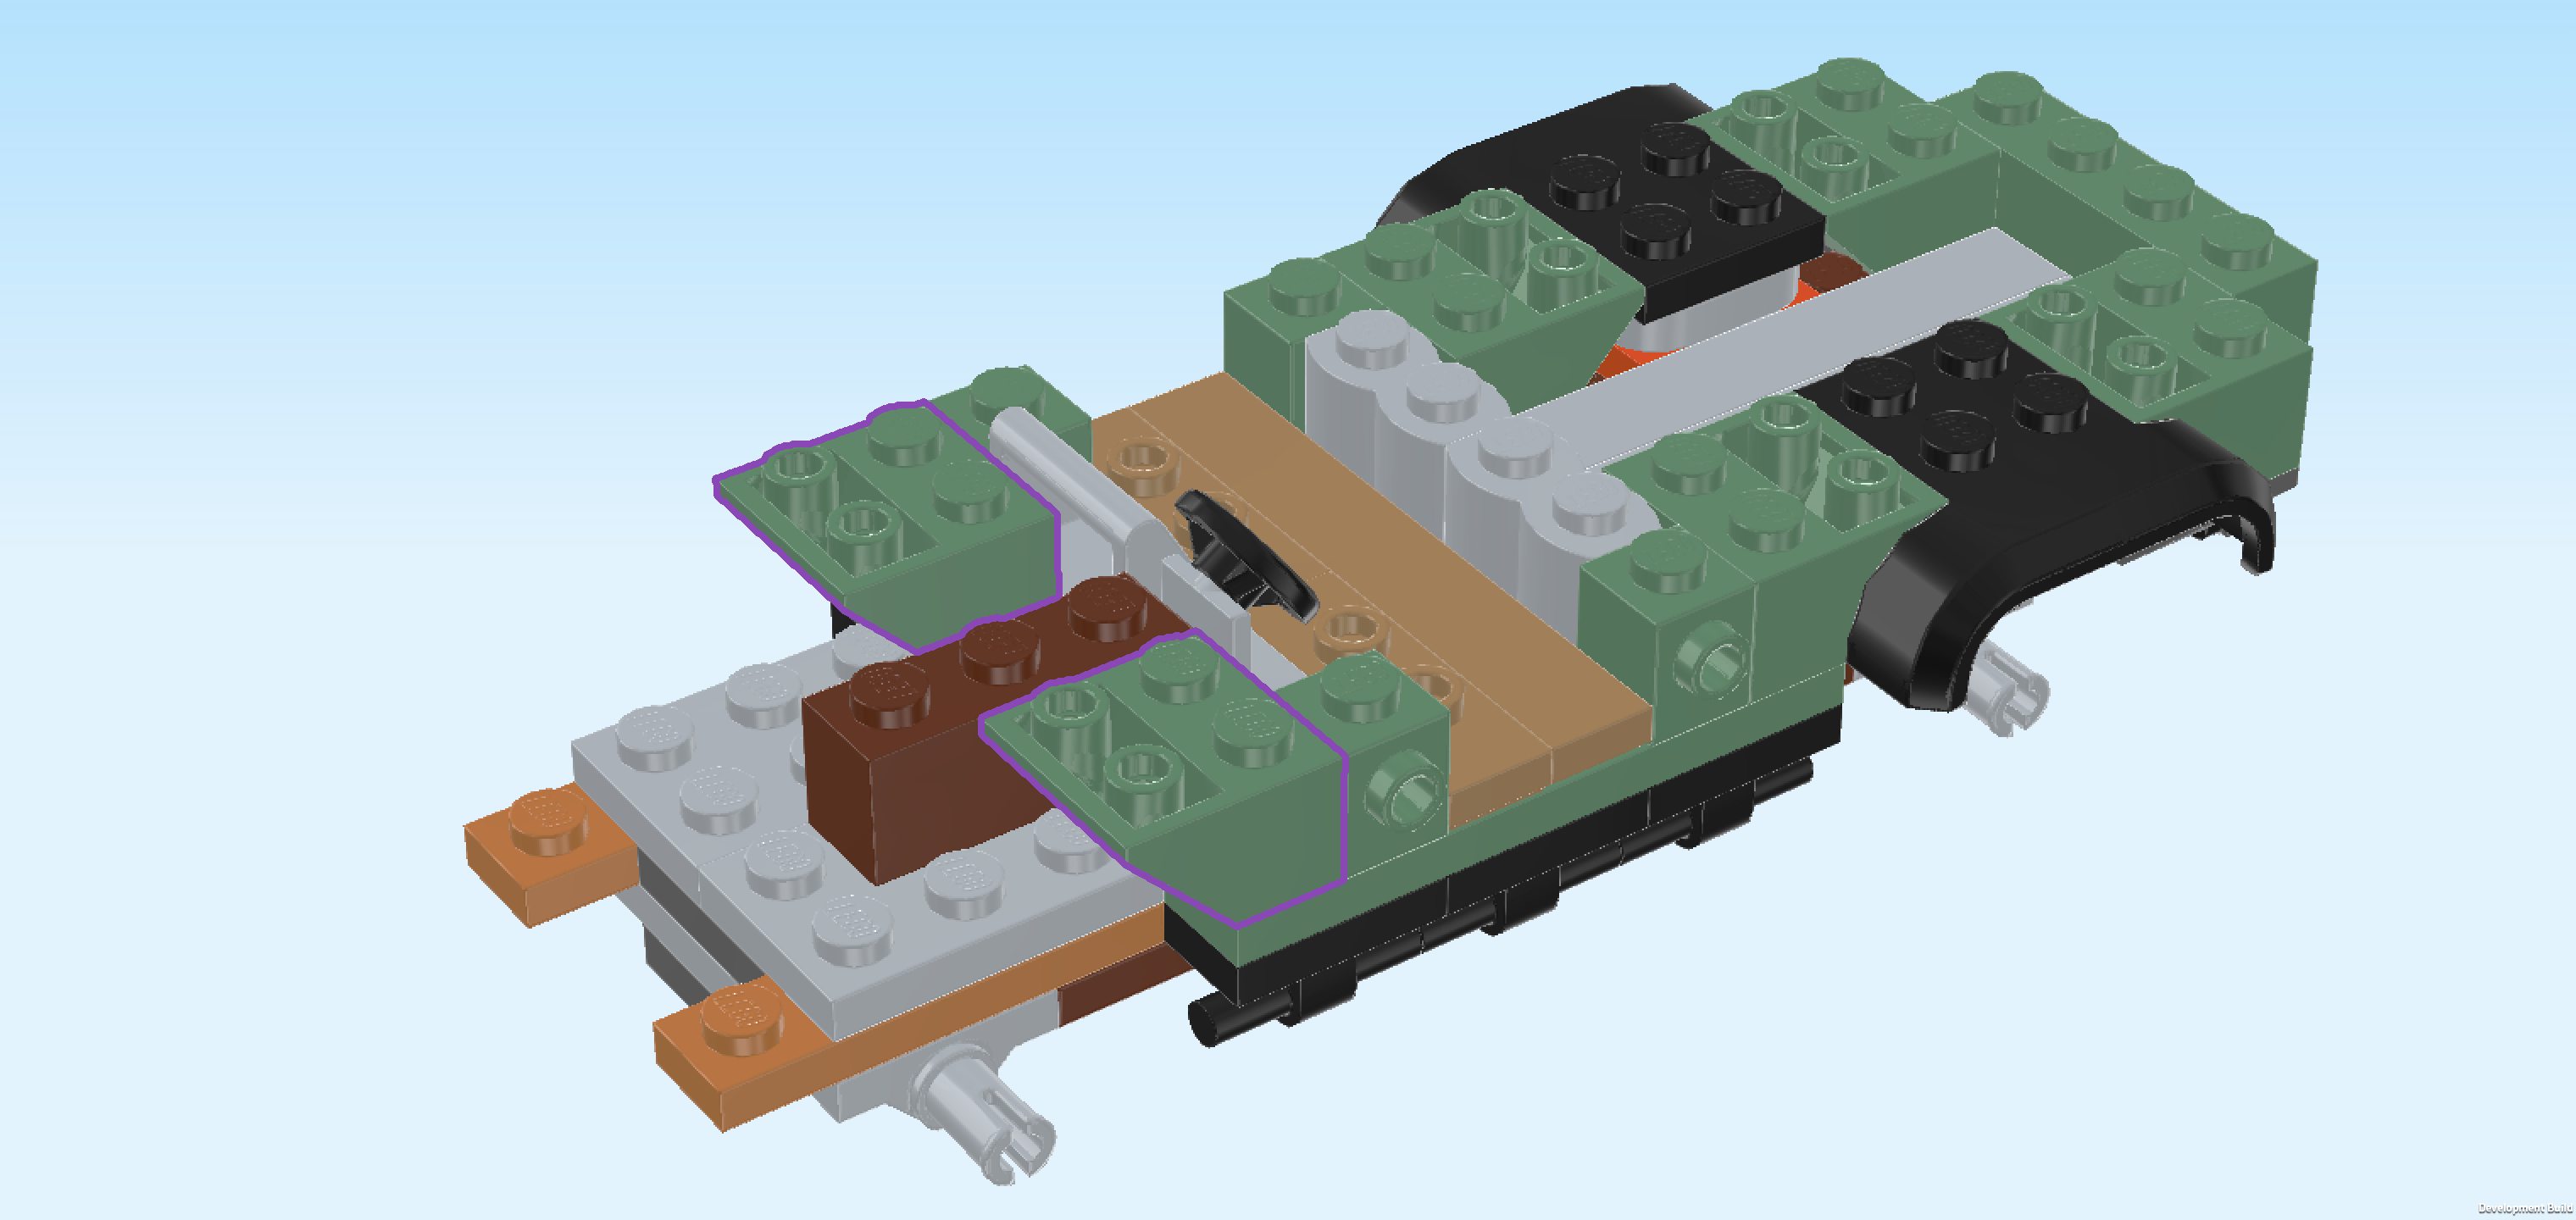
| Find 2 sand green inverted roof tiles 2x2, 45°. |
| Put 1 in front of the previous piece, slope to the left. |
| Repeat symmetrically at the back, slope to the left. |
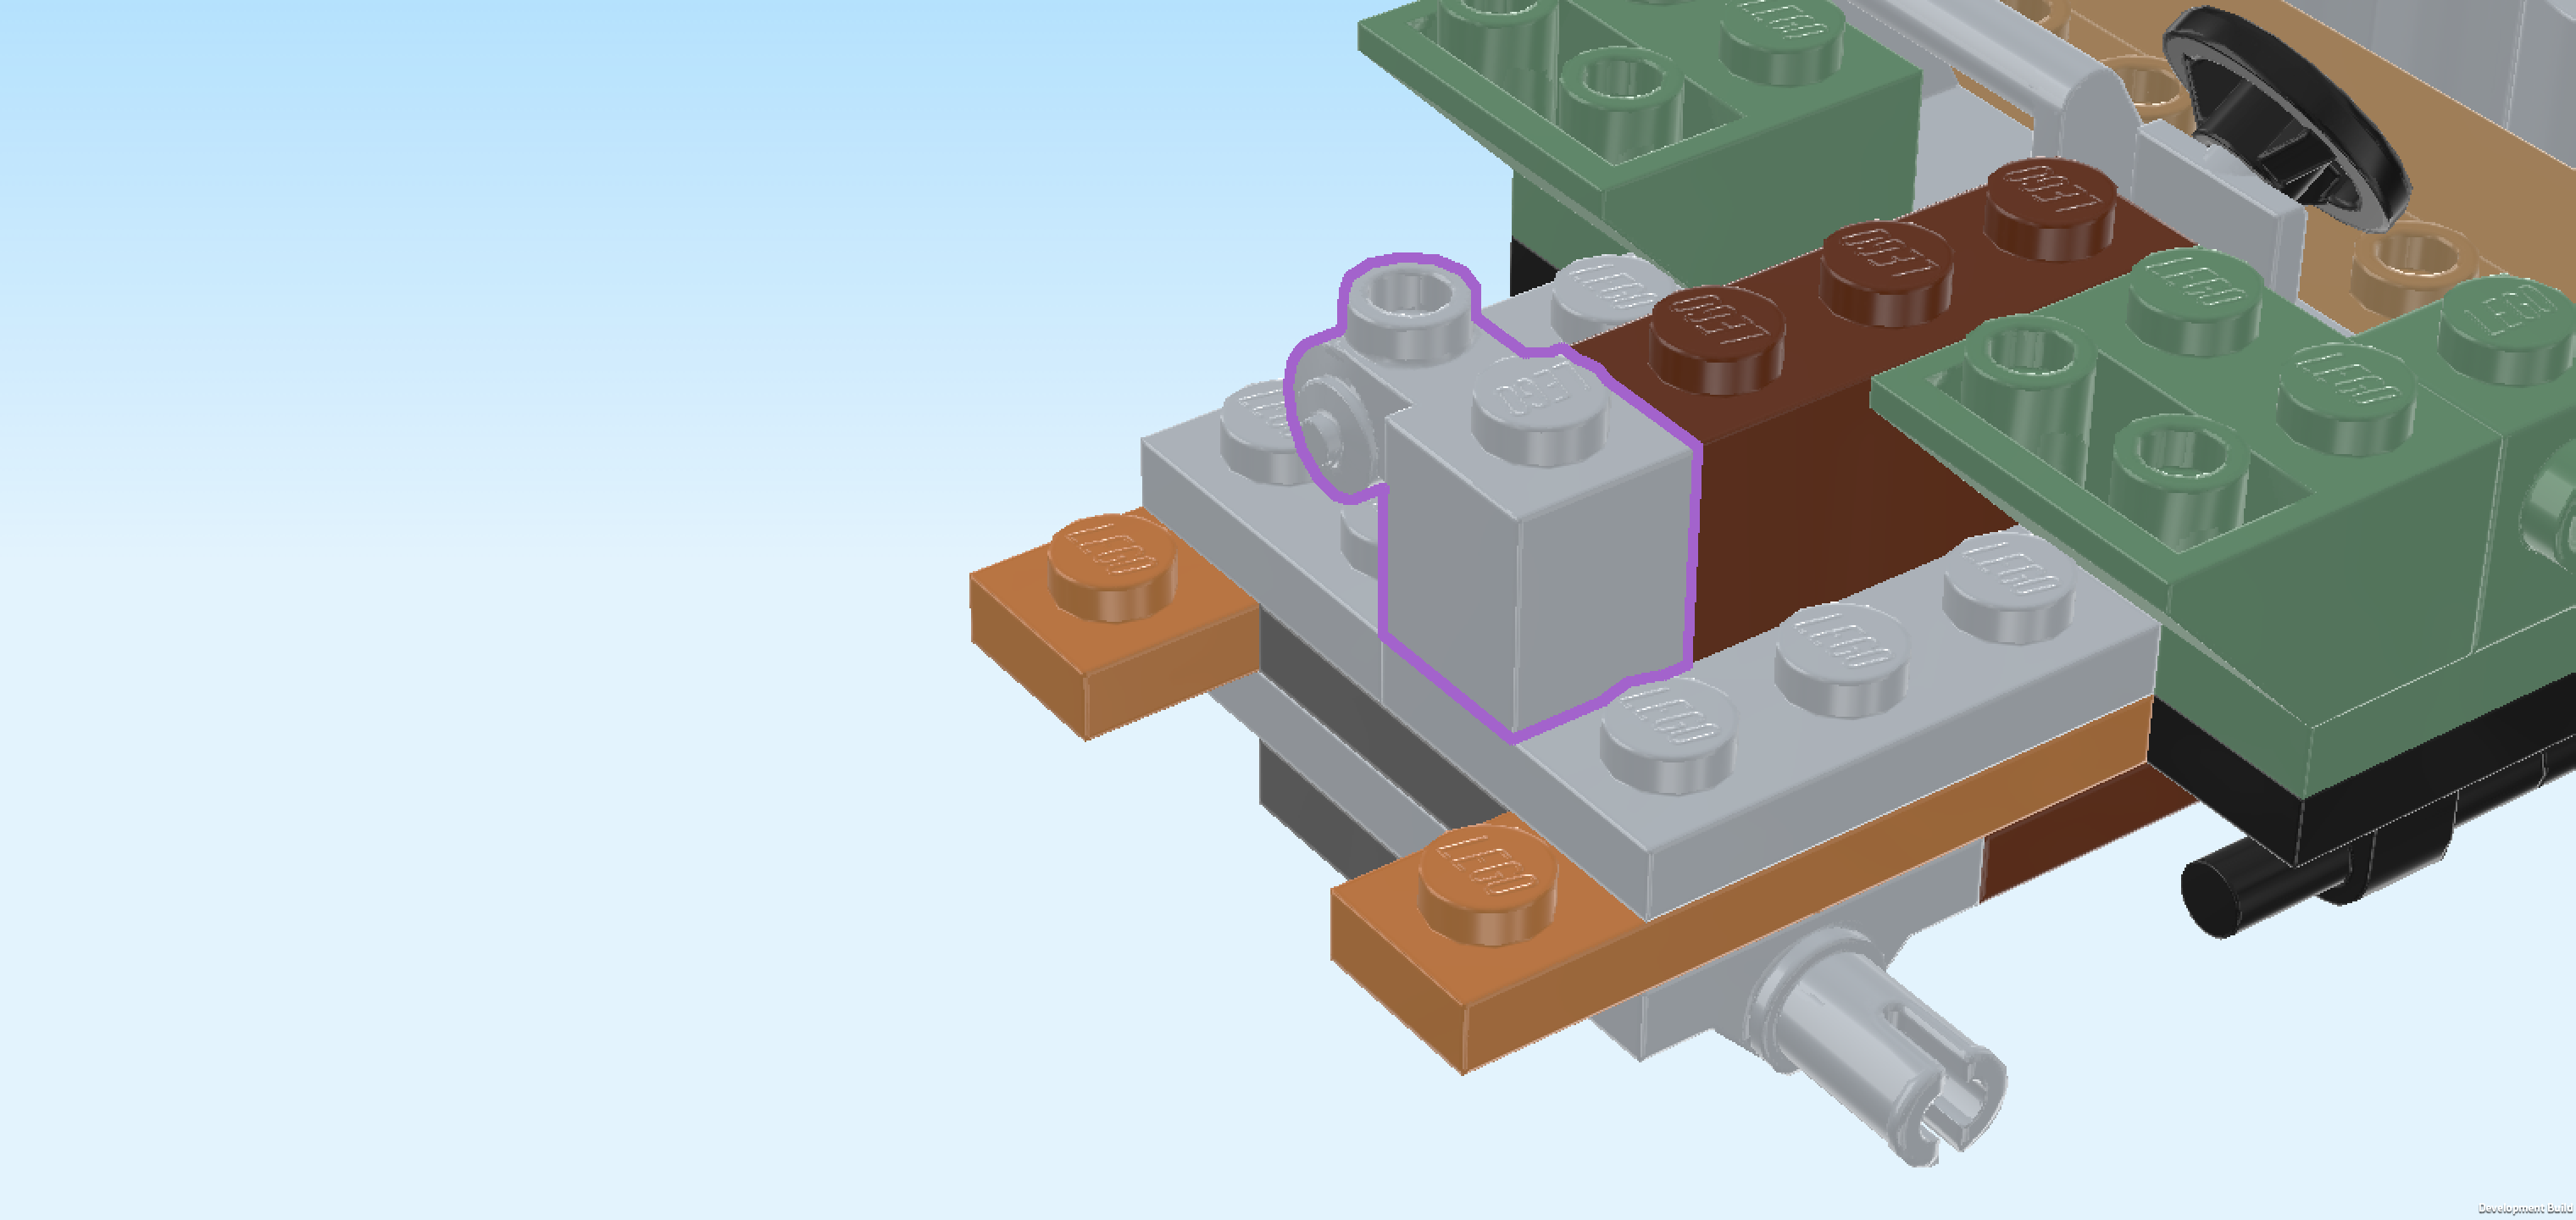
| Find 1 medium stone grey brick 1x1 with side scroll with hollow knob. |
| Put it to the left of the 1x4 brick we have mounted 2 steps ago, scroll with hollow knob pointing to the back. This means it will sit on the left edge (ignoring the 2 protruding singular knobs), specifically on the second knob from the front of that column. |
| Next, we will build the winch. |
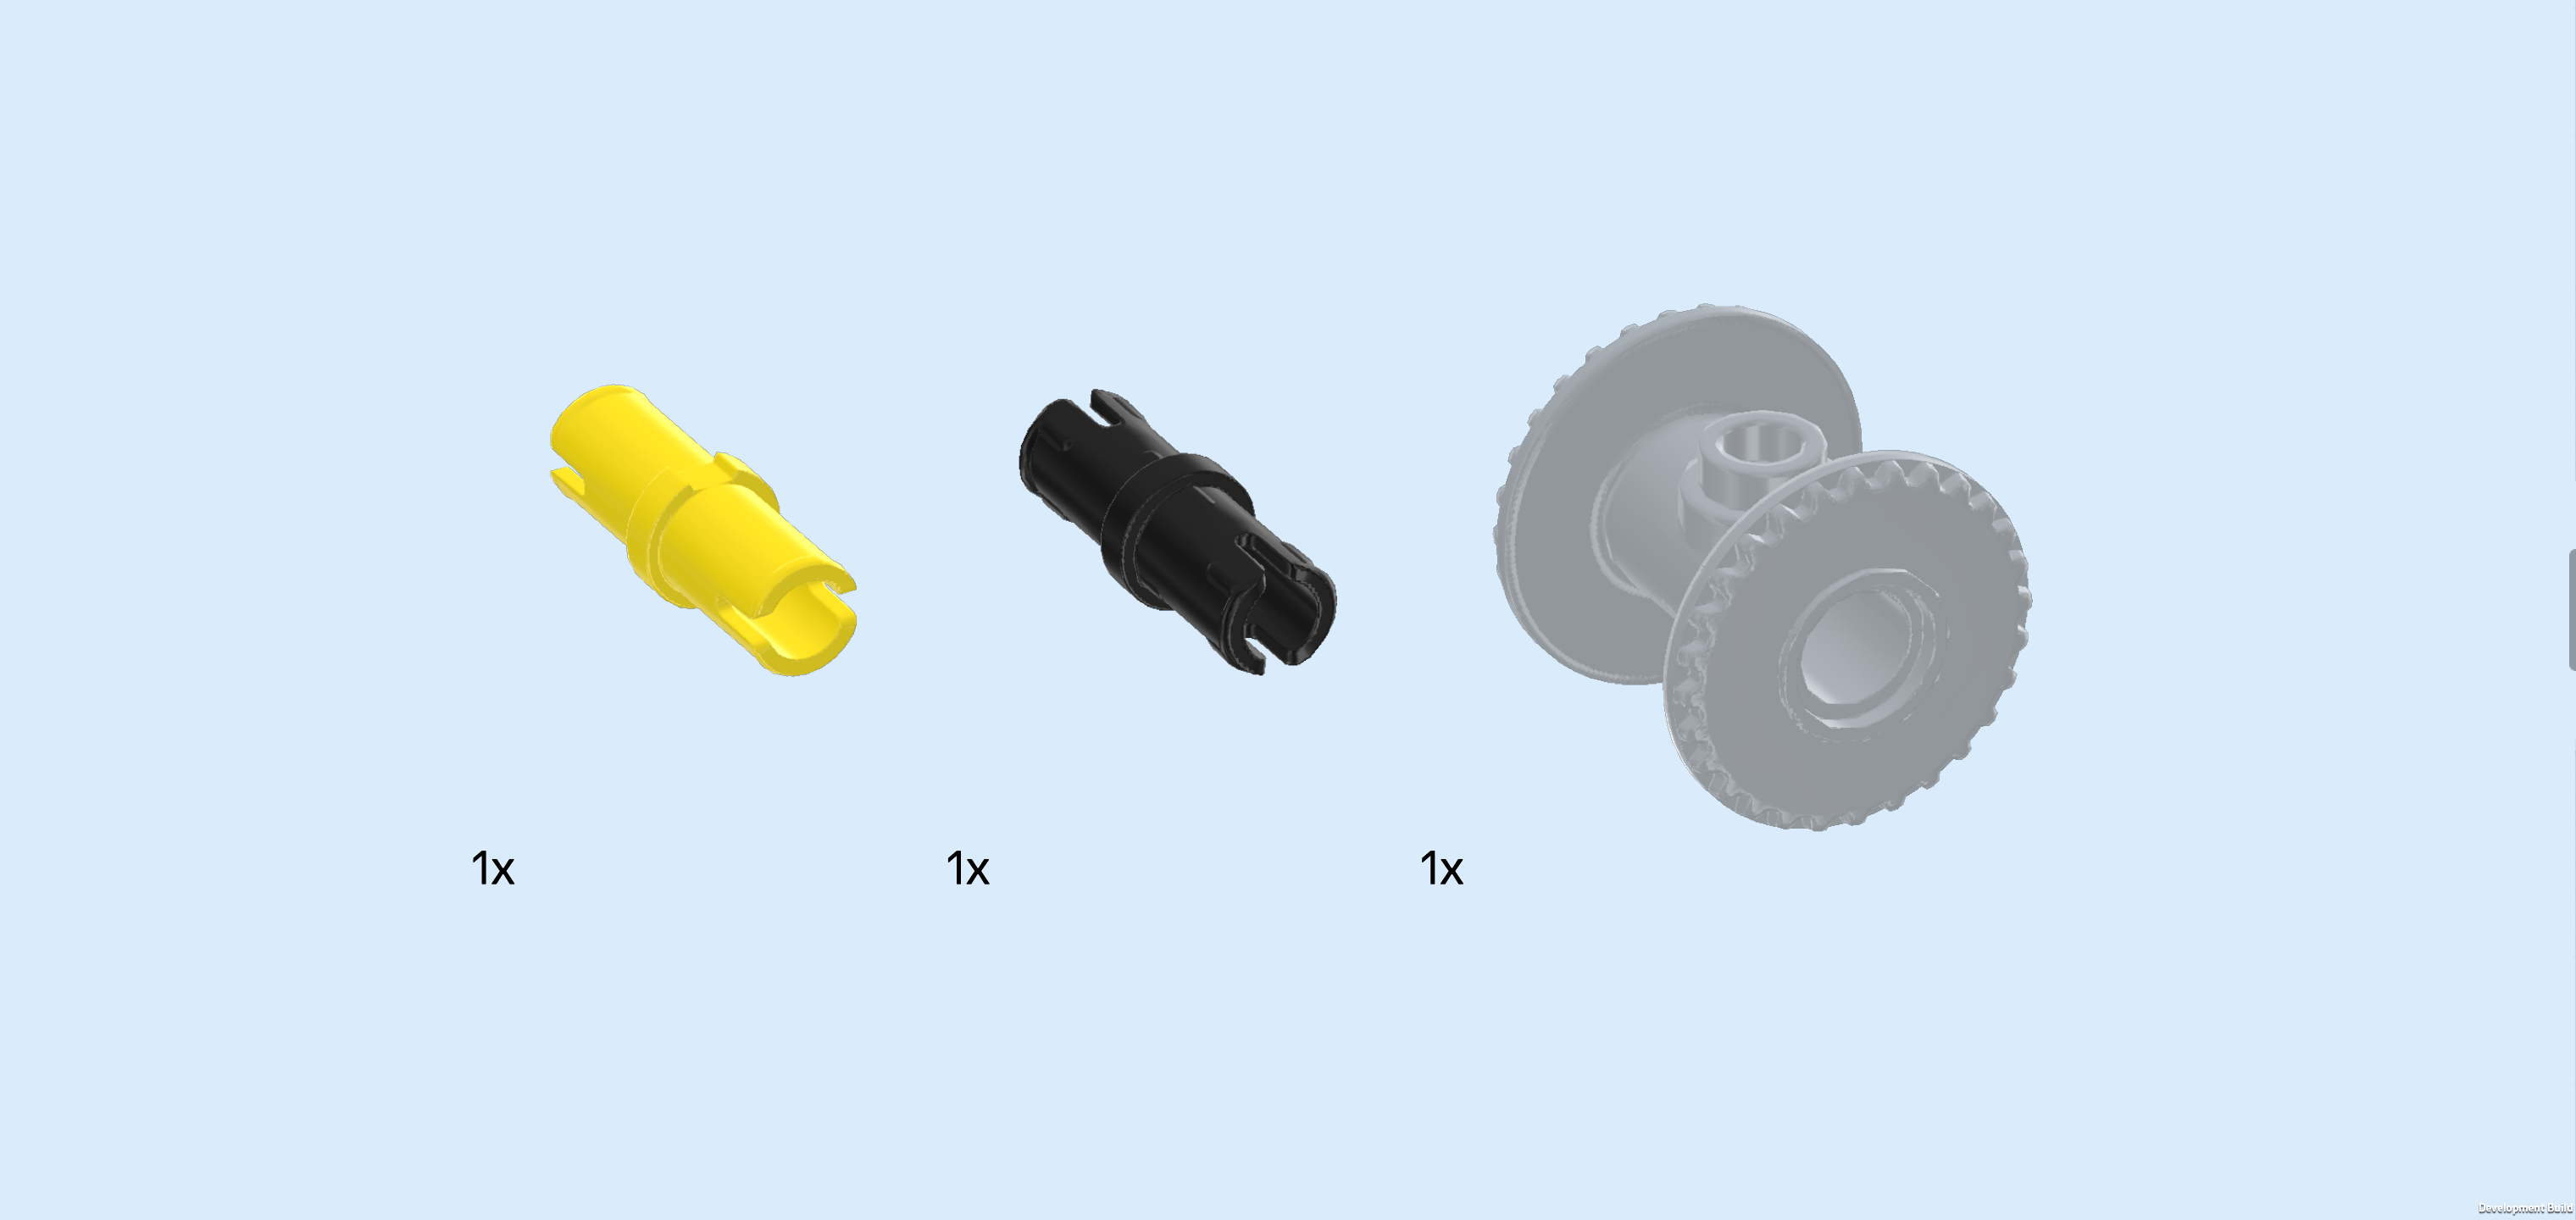
| Collect the following 3 pieces: |
| 1 bright yellow connector peg 2m with middle ring, |
| 1 black connector peg 2m with middle ring, |
| and 1 medium stone grey string reel drum 2x2x2. |
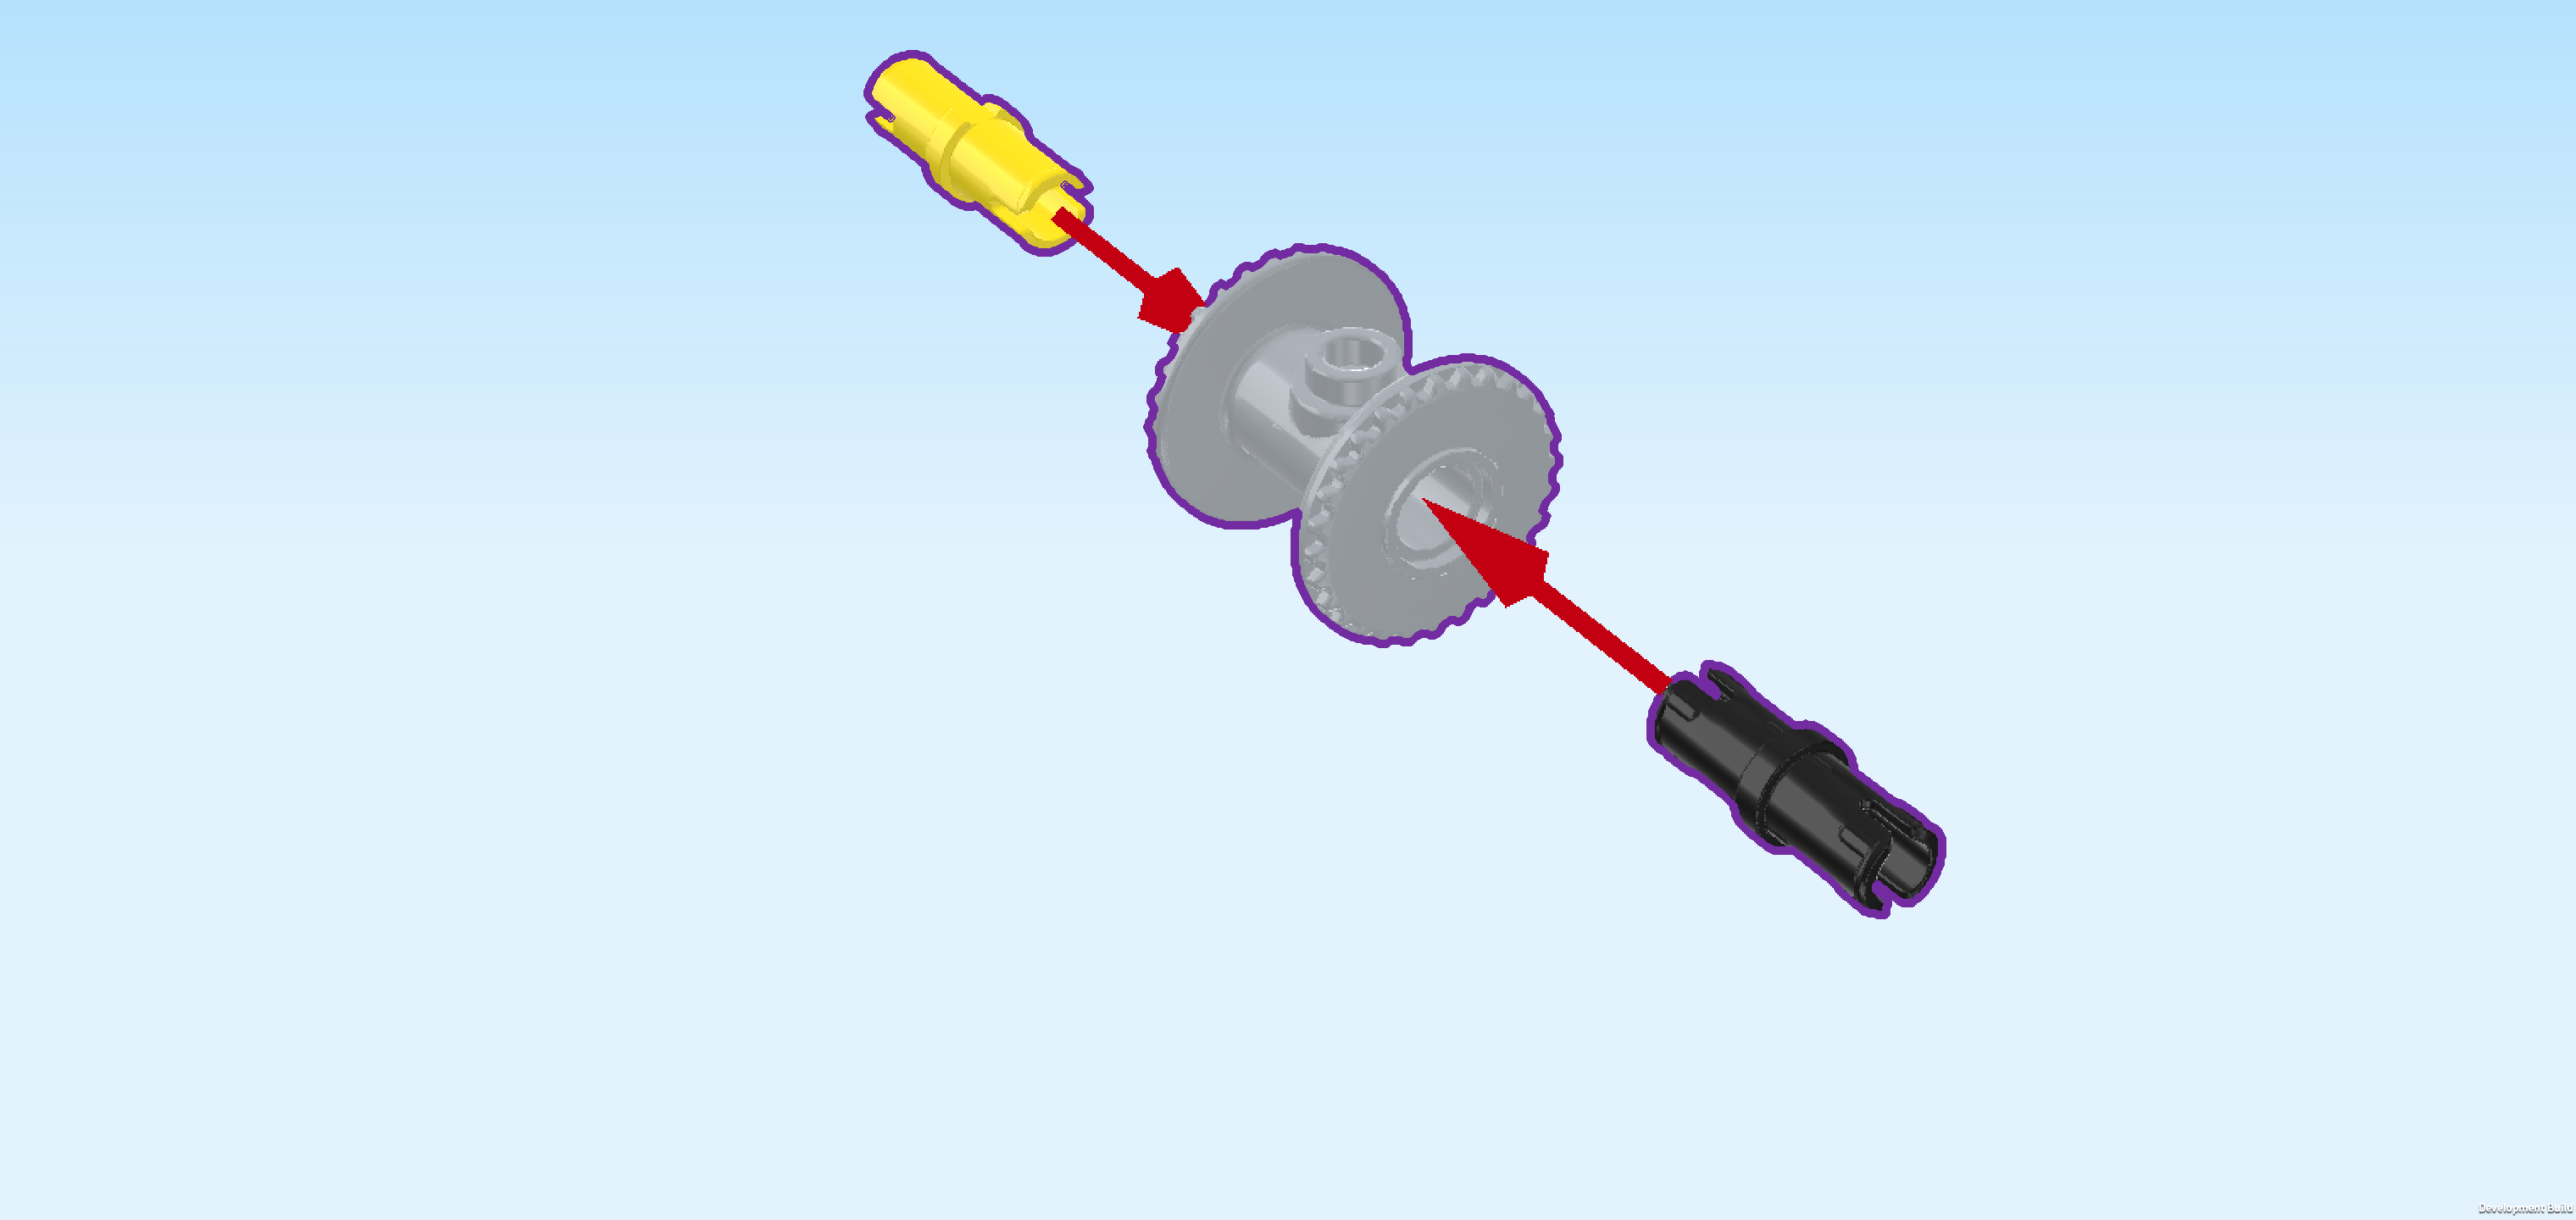
| Hold the drum so that its middle hole is running from front to back. |
| Insert the yellow connector peg into the middle hole from the back, 1/2 protruding to the back. |
| Insert the black connector peg into the middle hole from the front, 1/2 protruding to the front. |
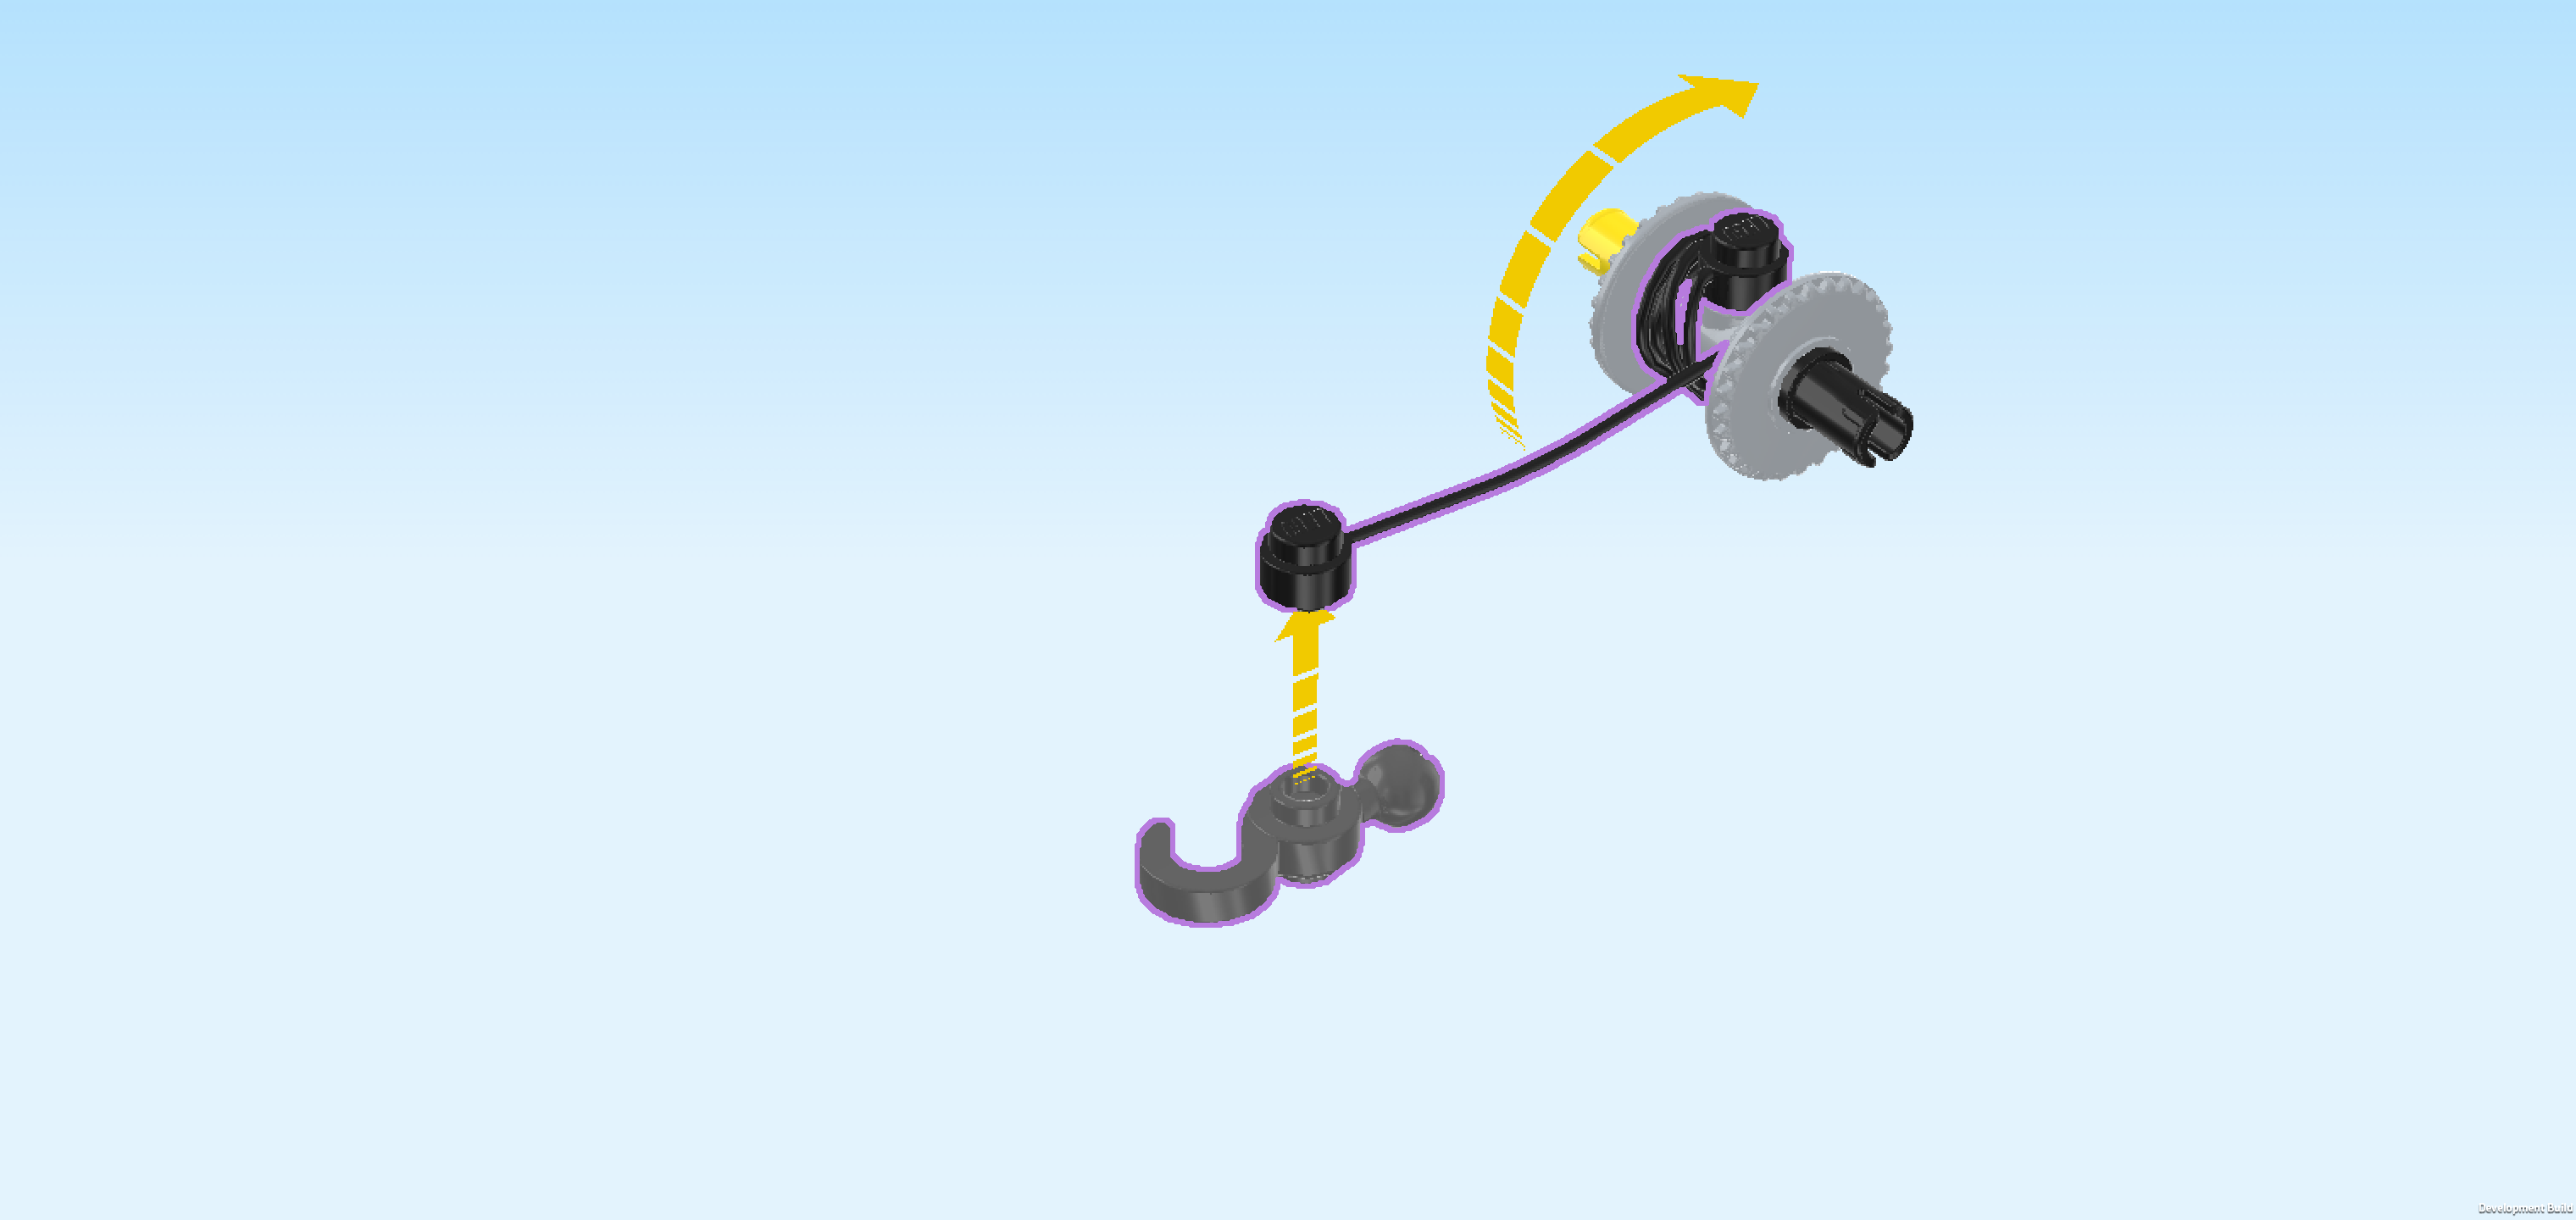
| Collect the following 2 pieces: |
| 1 dark stone grey twin knob 1x1 with hook and ball, |
| and 1 black string 40 m with 2 knobs. |
| To mount the string, put 1 of its knobs on the hollow knob of the string reel drum. |
| To wind the string onto the drum, you have to turn it in one direction until it's all wound up. For now, make sure to leave a little leeway for mounting. You can wind it up fully once it's mounted. |
| Put the other knob of the string on top of the twin knob with hook. You can use either of its knobs. |
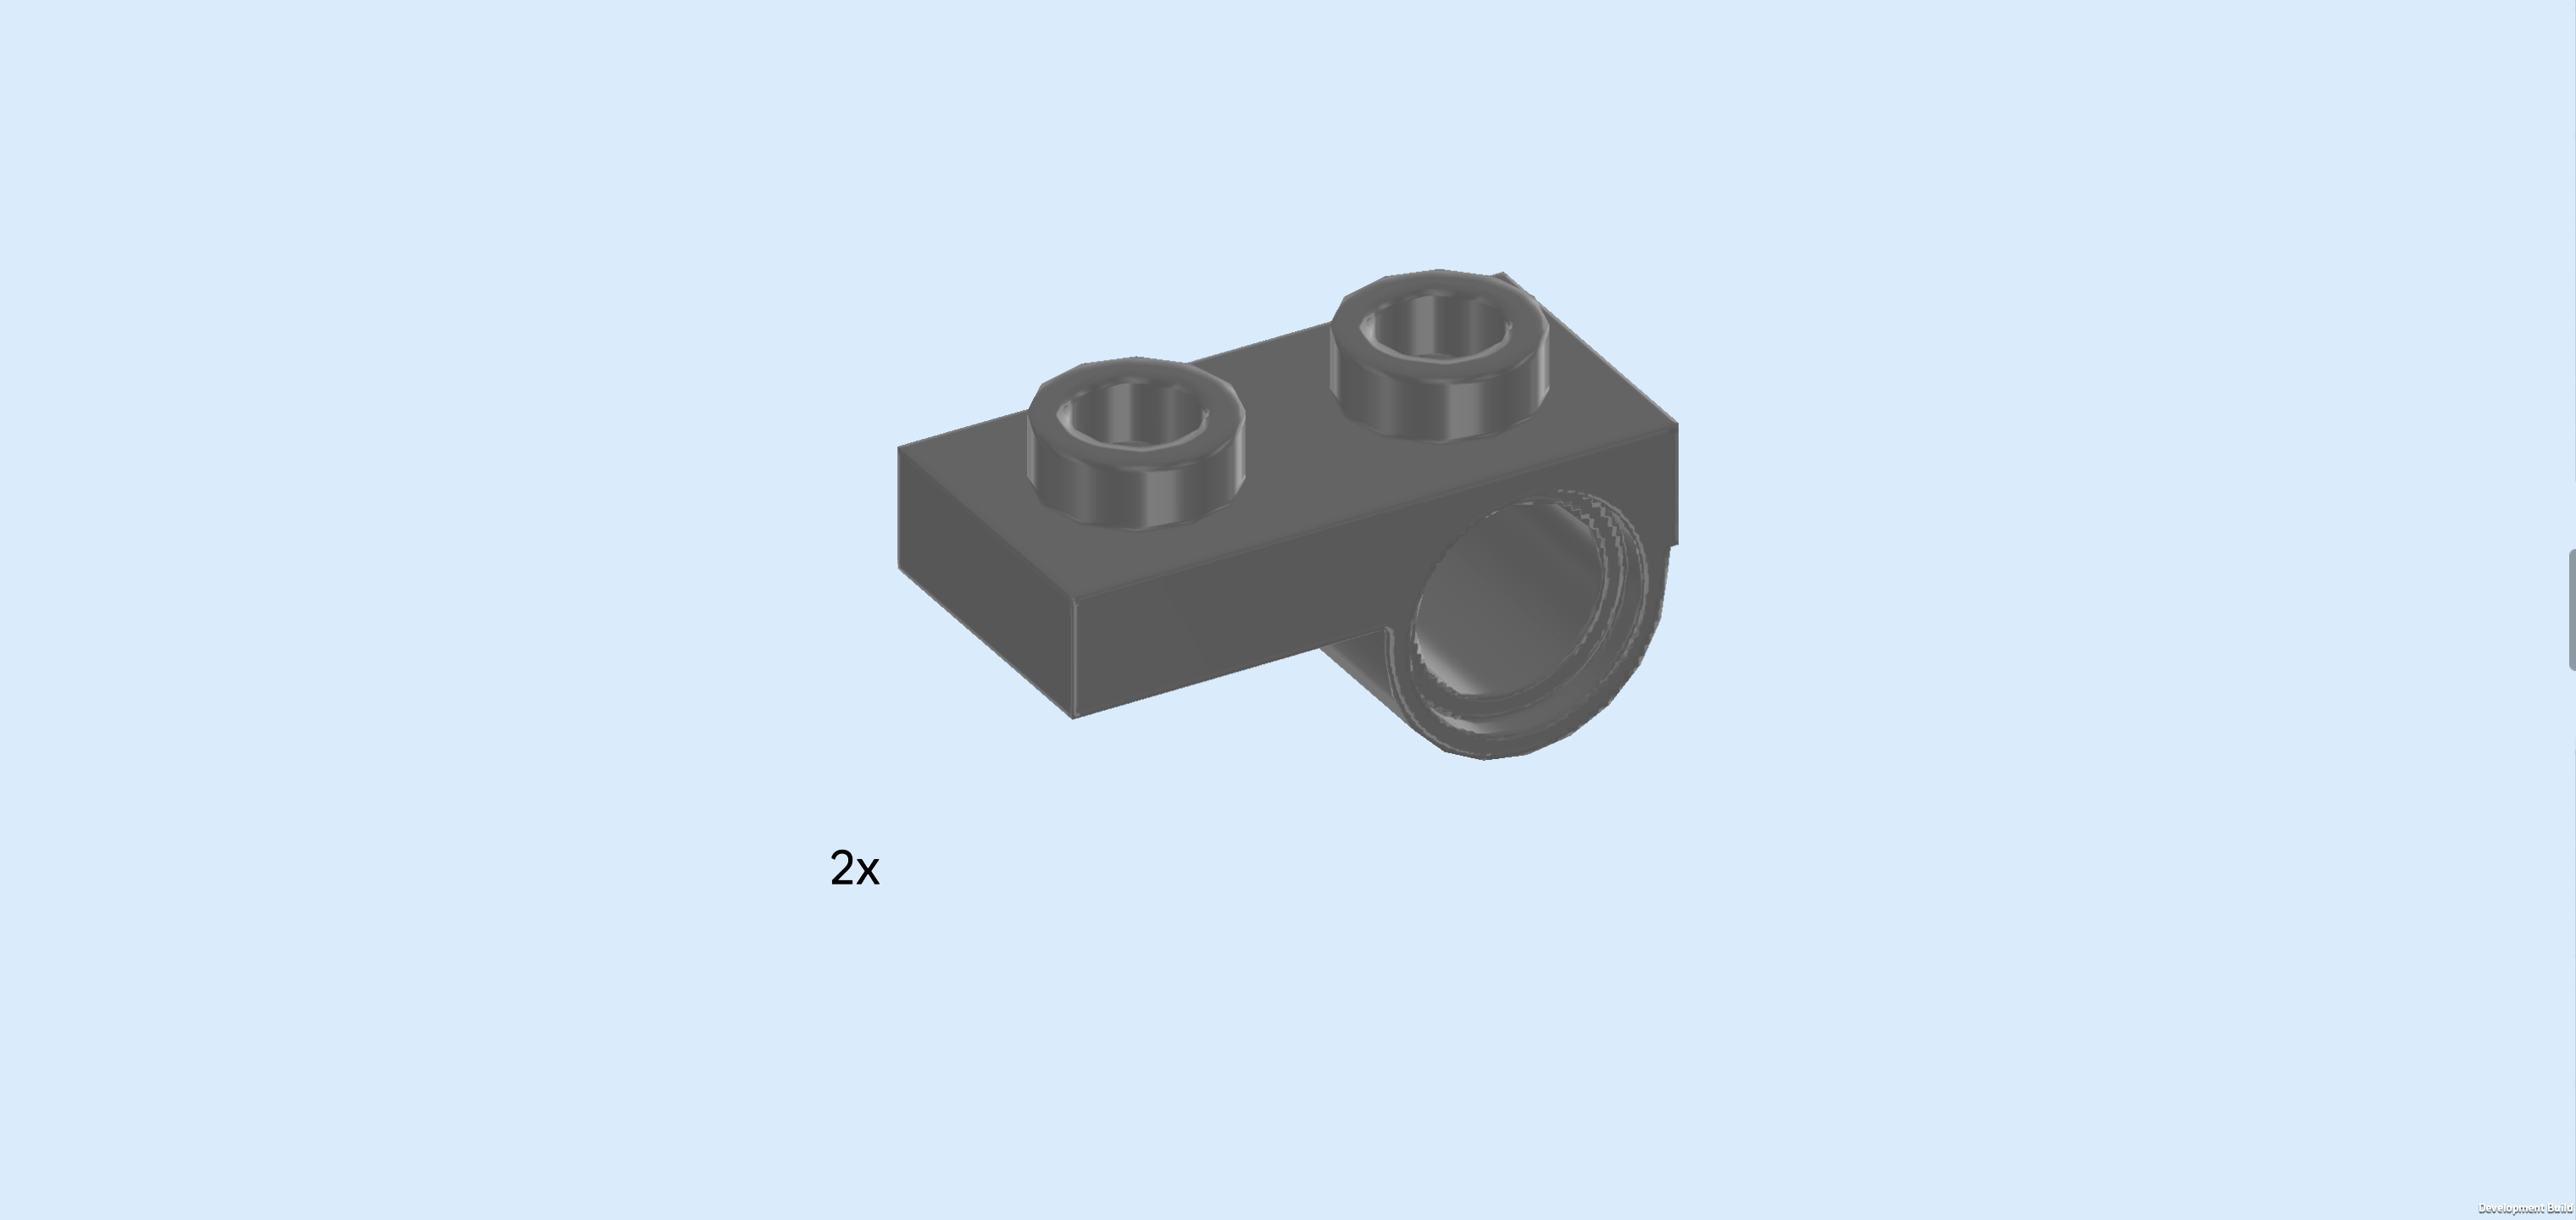
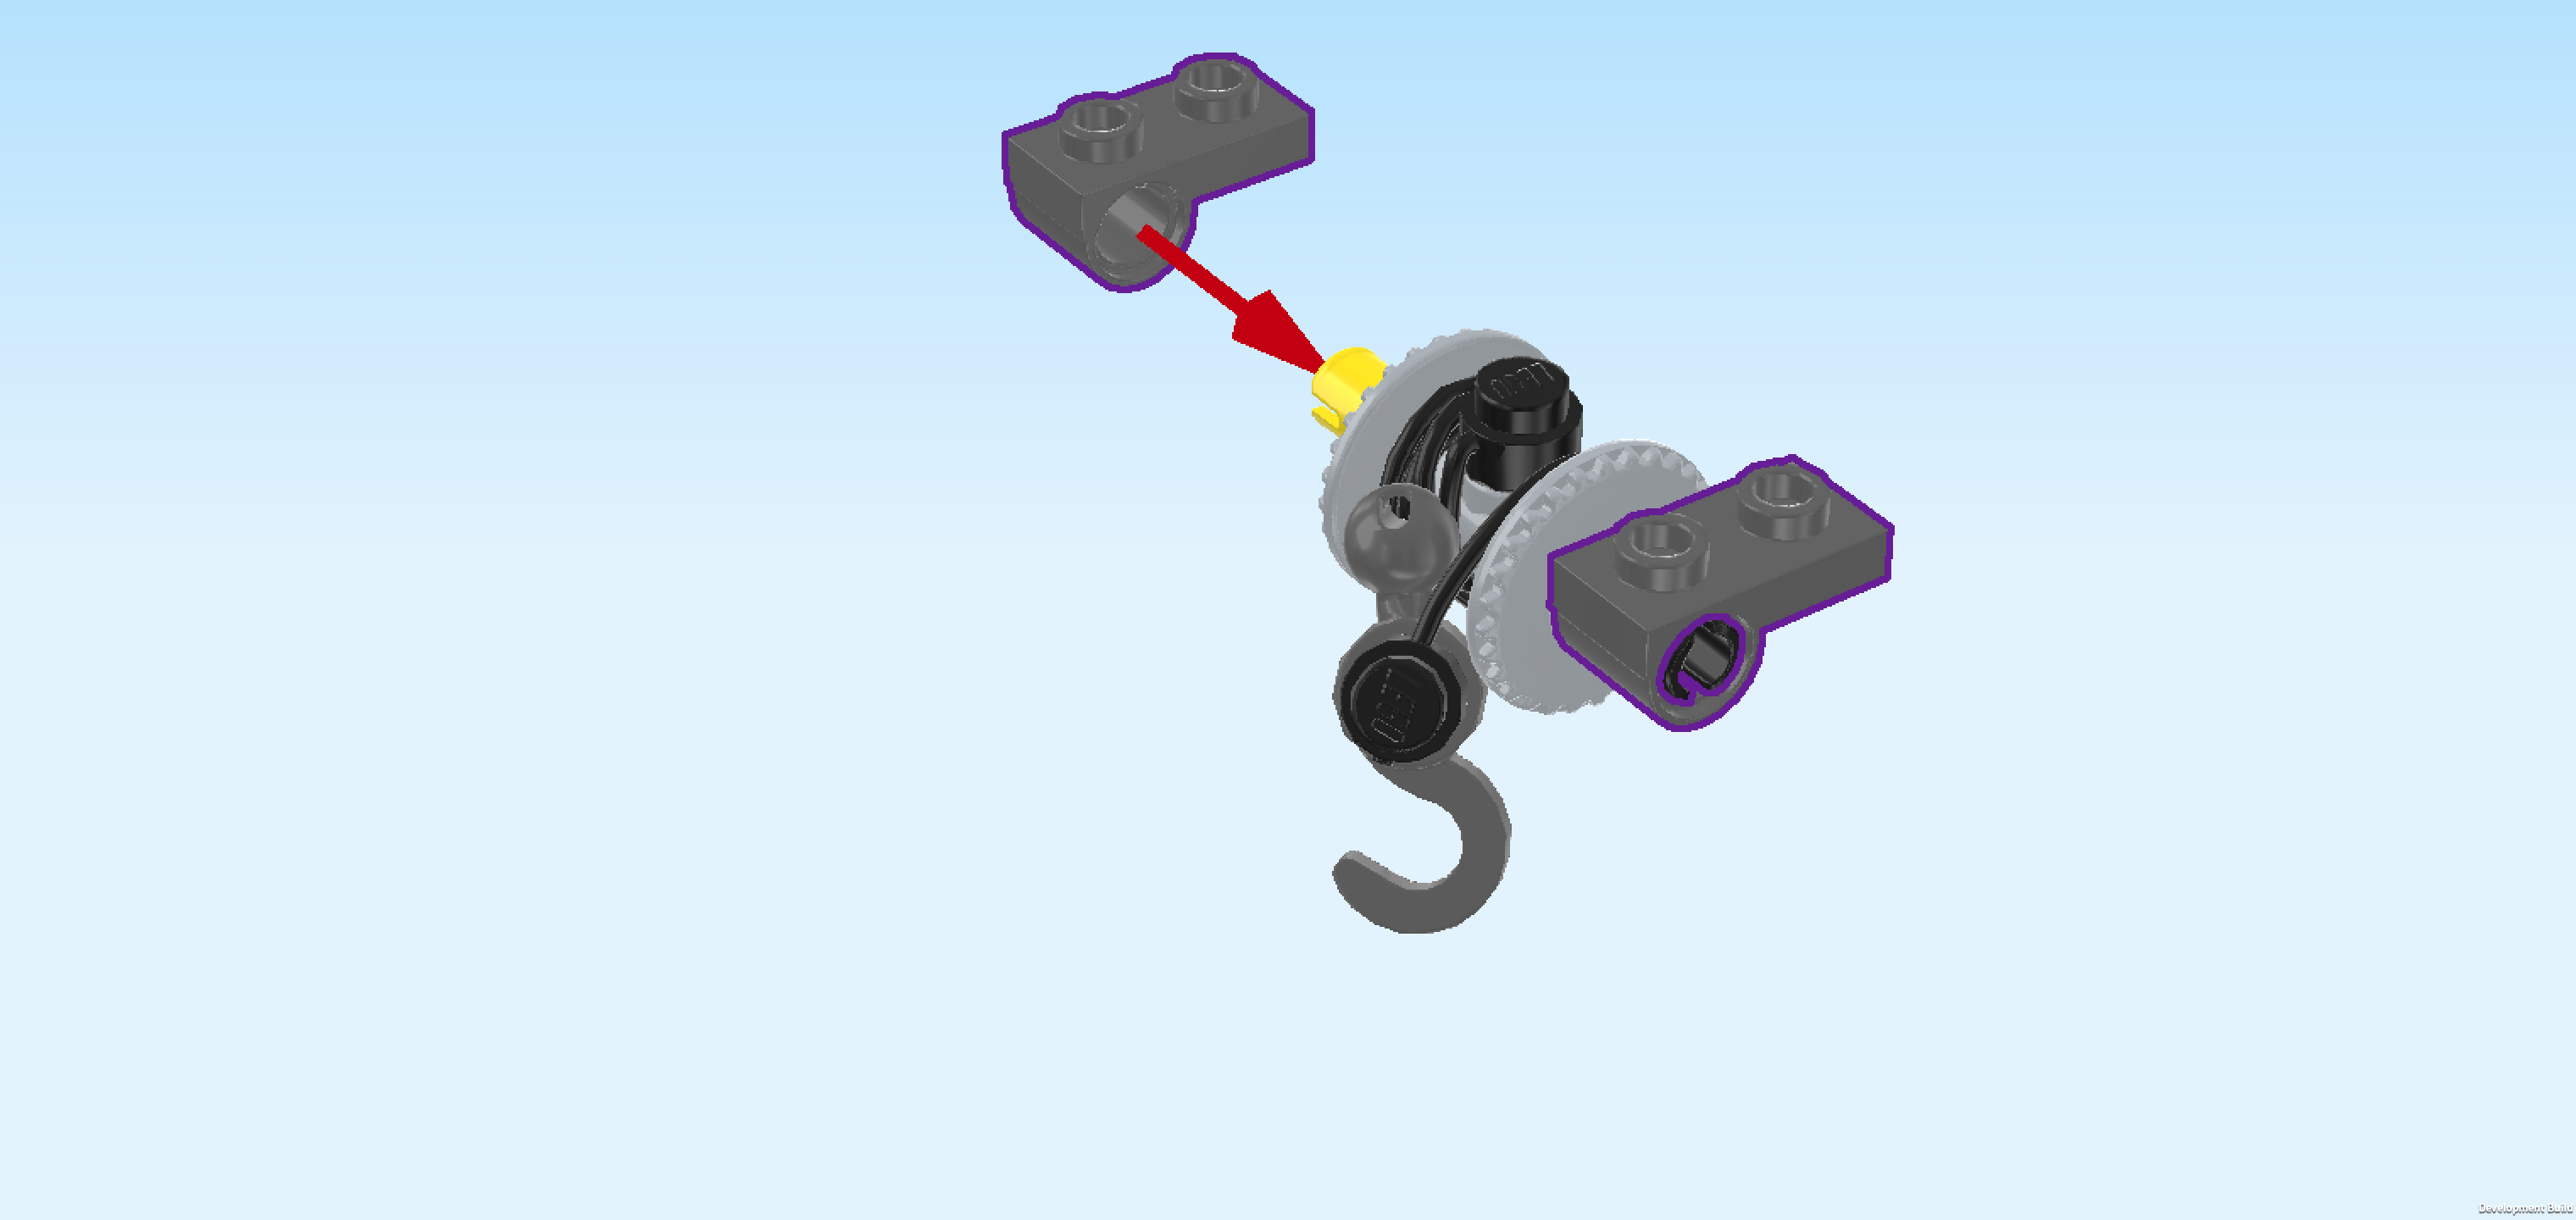
| Find 2 dark stone grey plates 1x2 with side bottom tube. |
| Hold 1 horizontally so that its bottom tube is on the left edge and the plate is pointing to the right. |
| Snap the bottom tube on the connector peg pointing to the front. |
| Repeat symmetrically at the back, making sure that the plate 1x2 is again pointing to the right. |
| The plates are not fixed yet, so they will move around. This is fine, we will mount and fix them in the next step. |
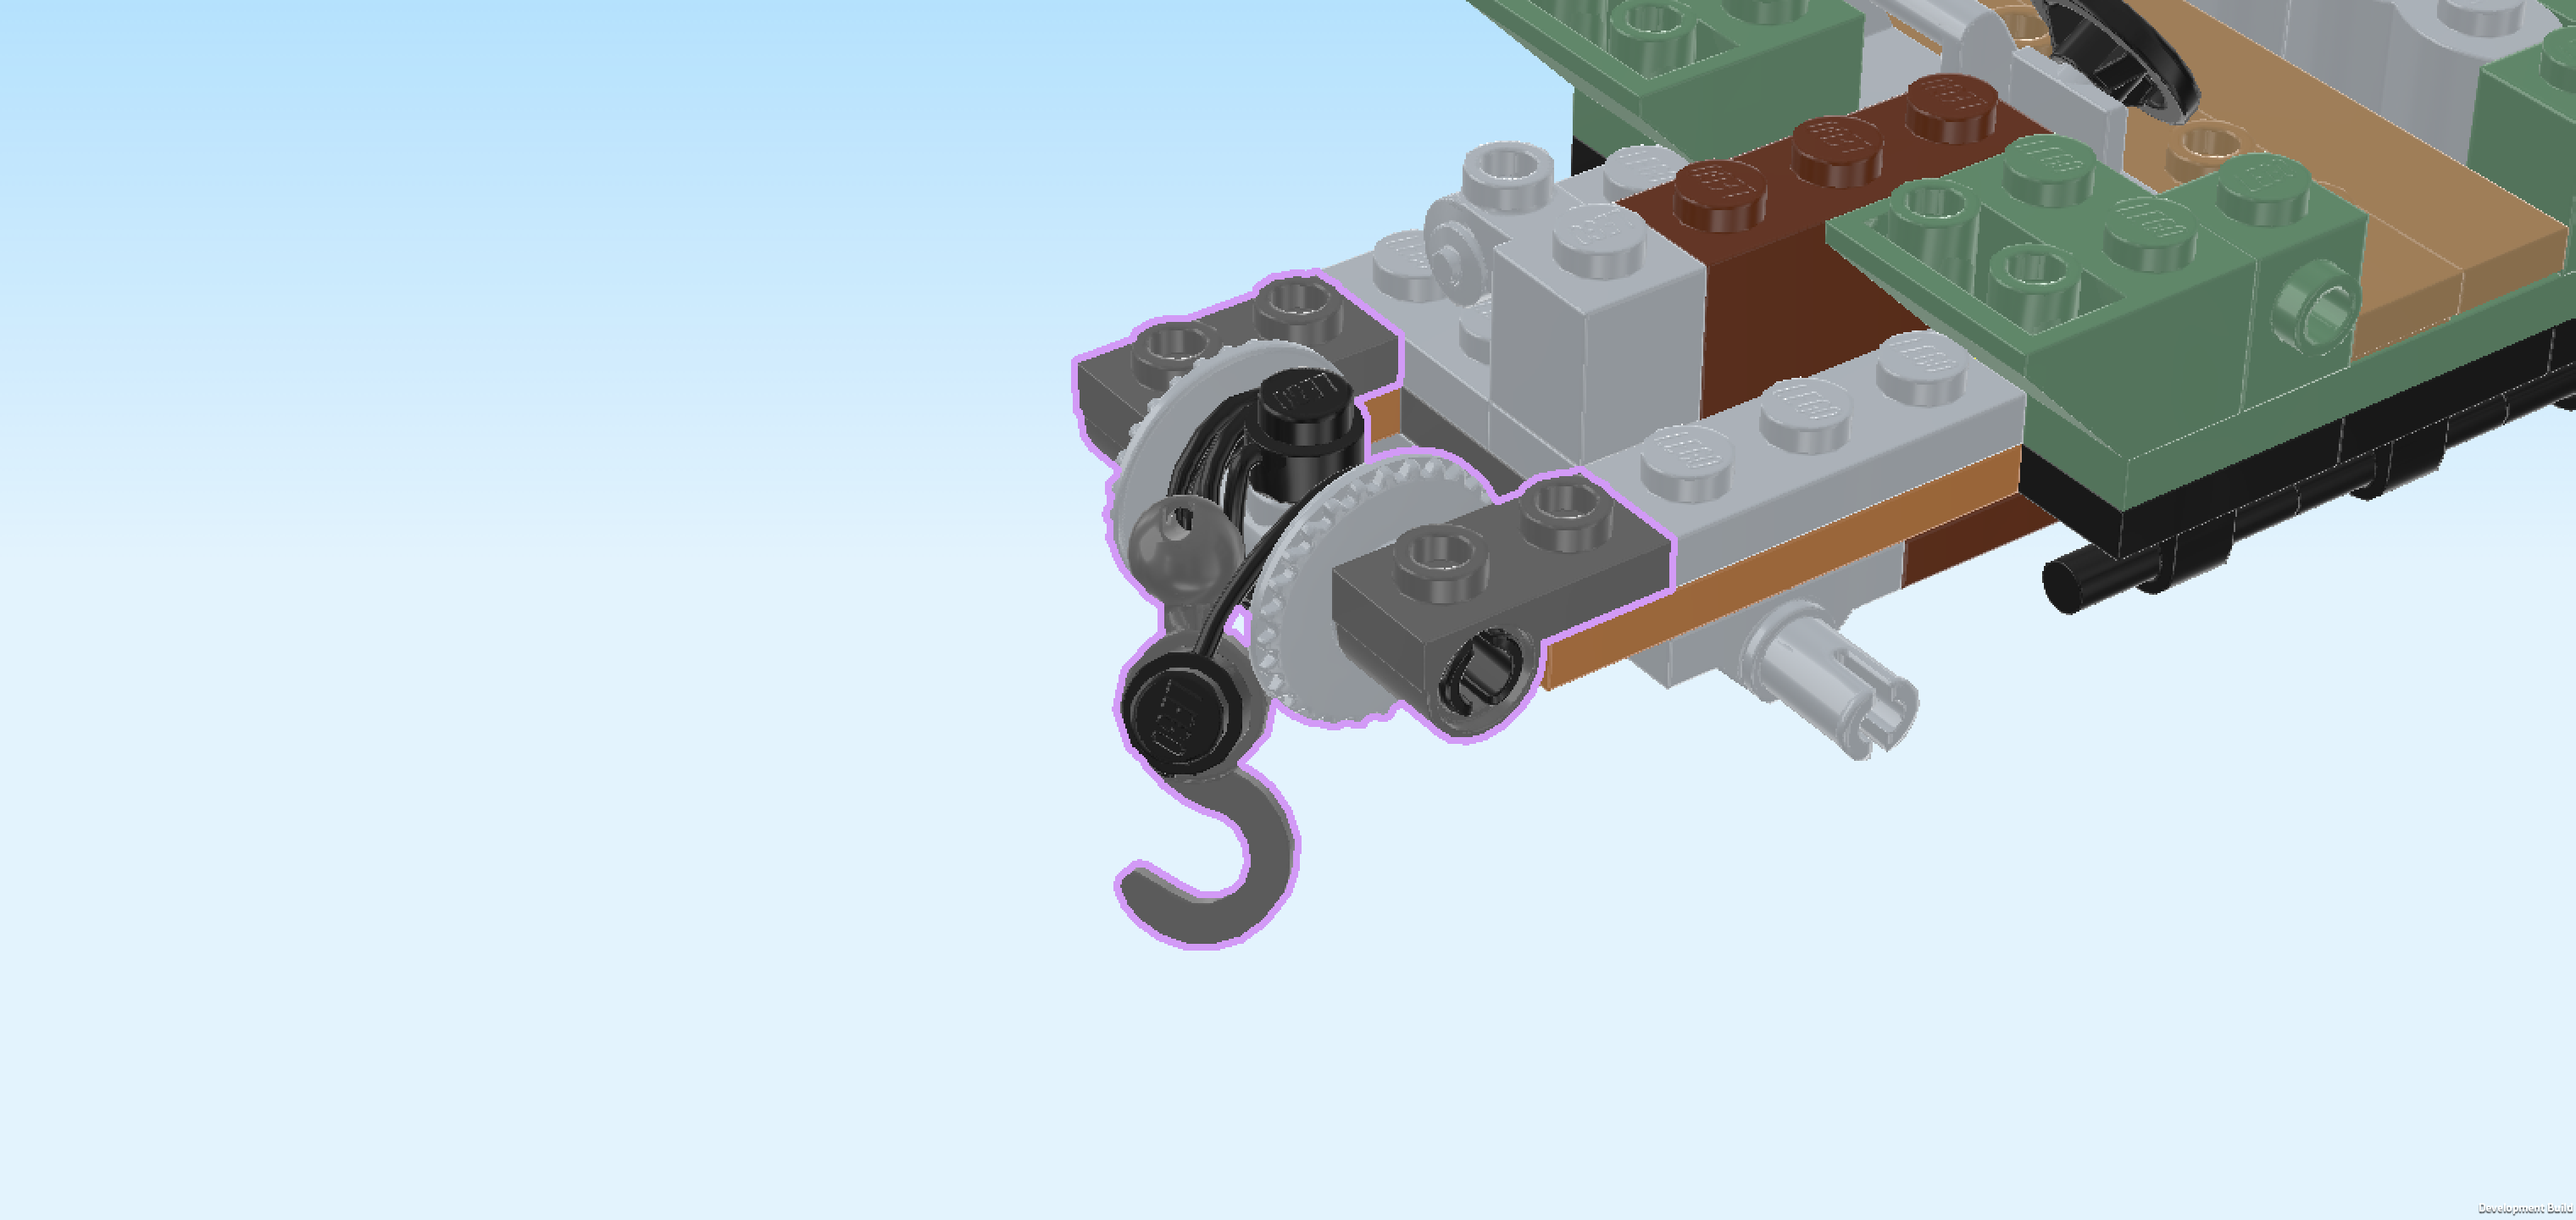
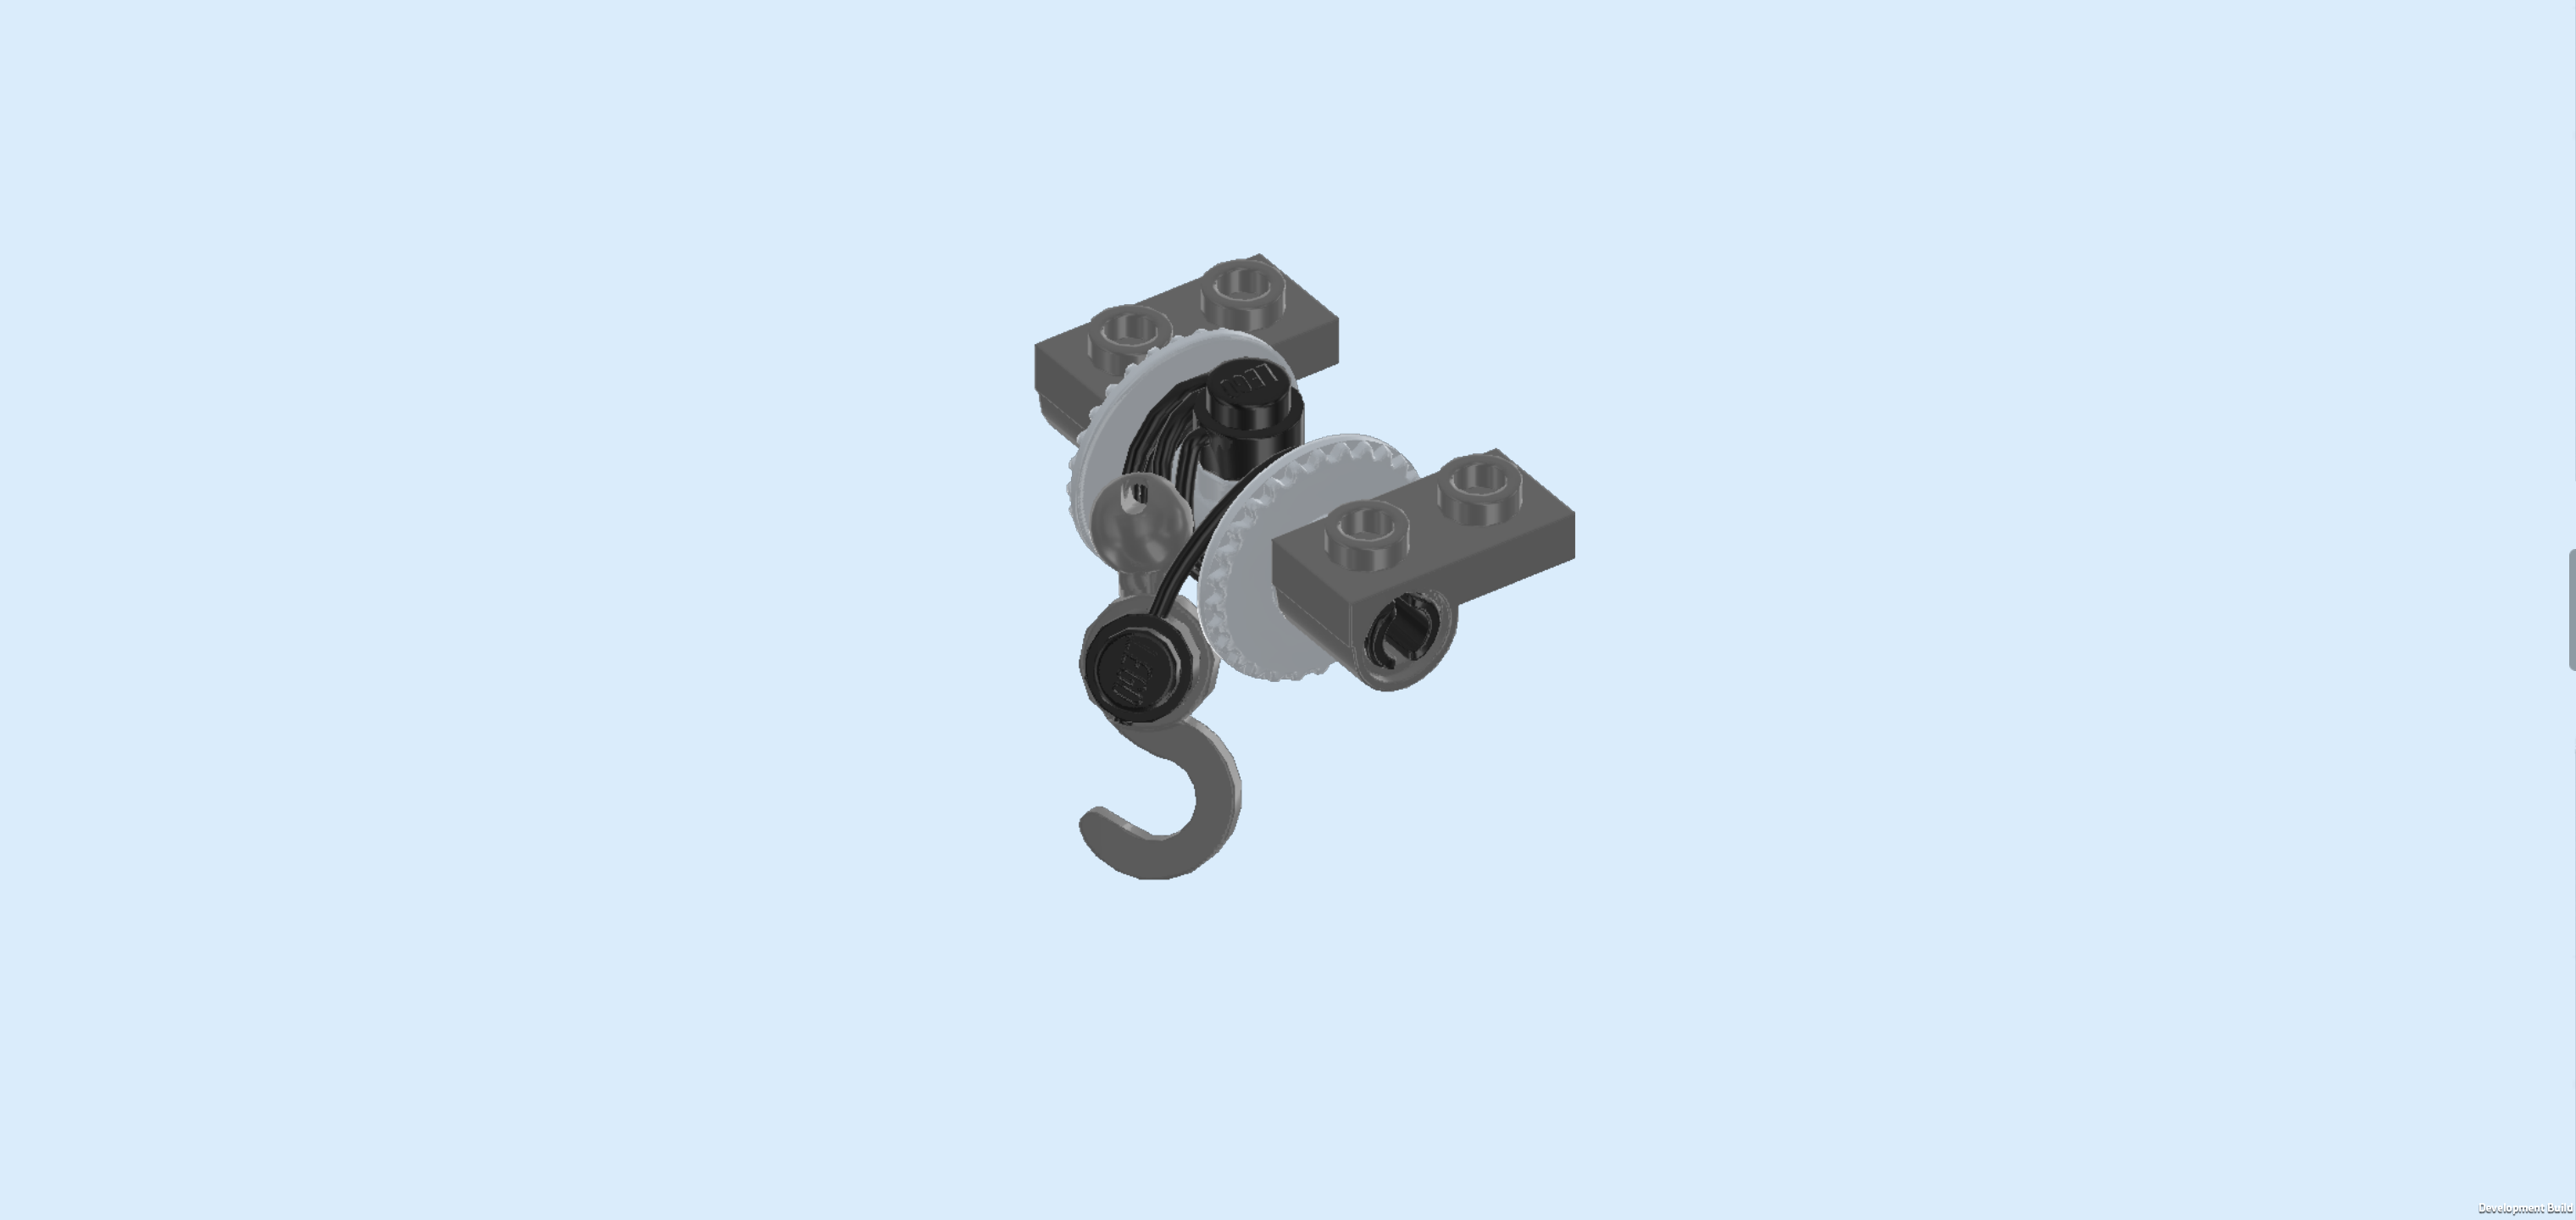
| The winch is finished! Well done! Mount its 2 plates on the 2 singular knobs protruding from the leftmost edge of the main structure. Now, you can wind up the winch or pull the rope with hook out as needed. |
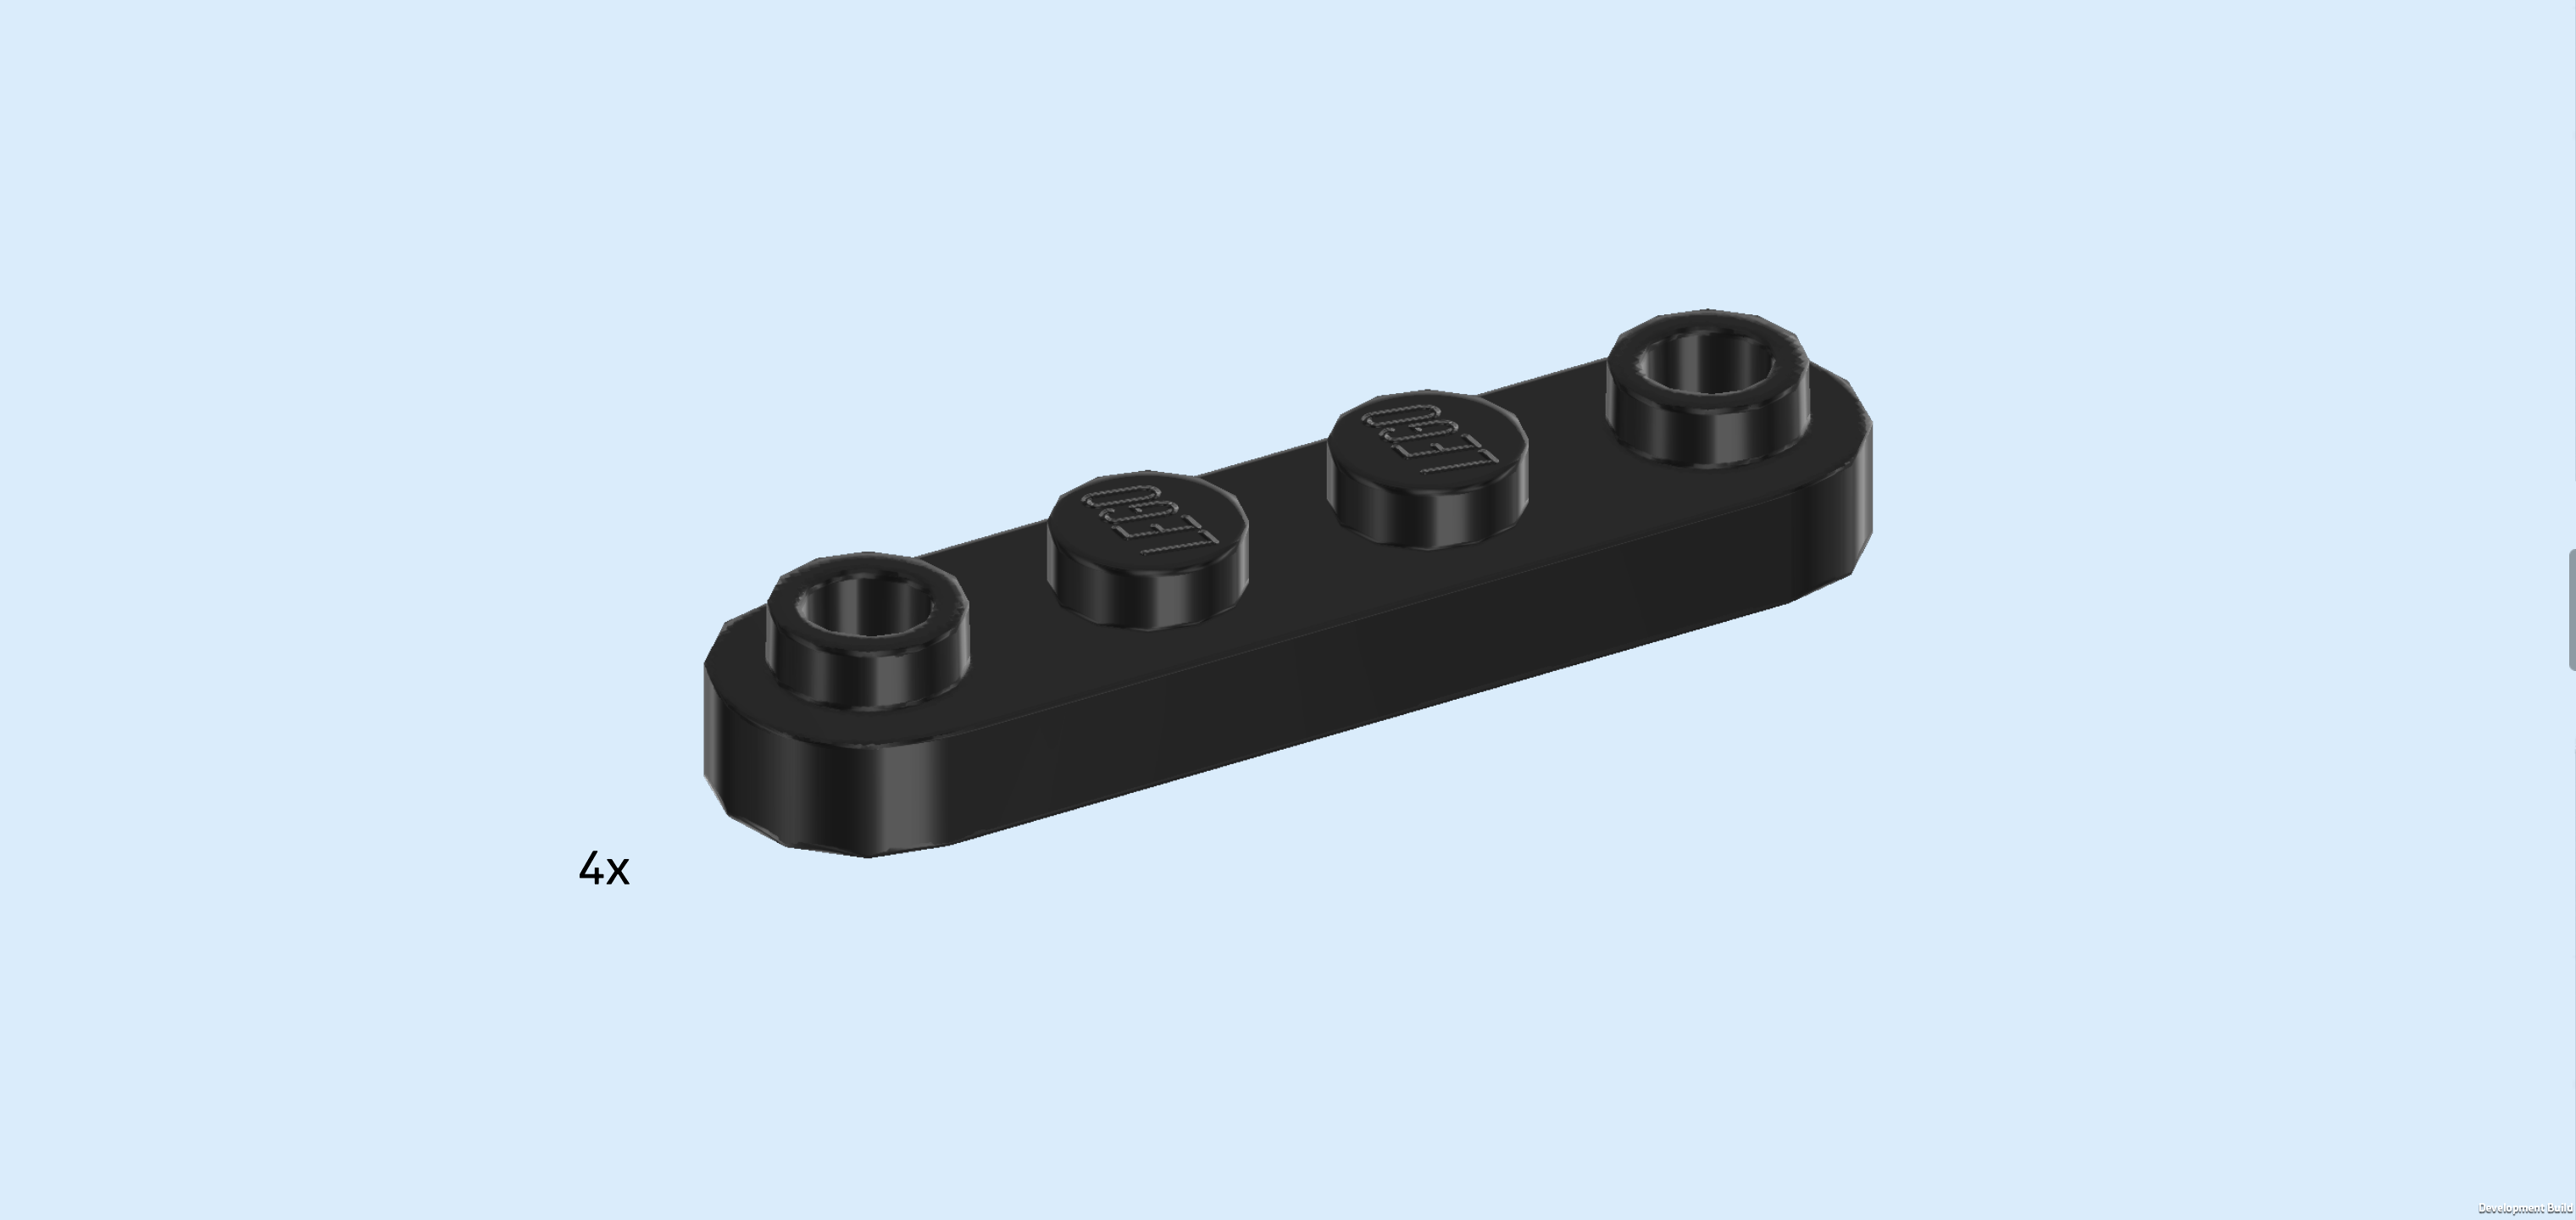
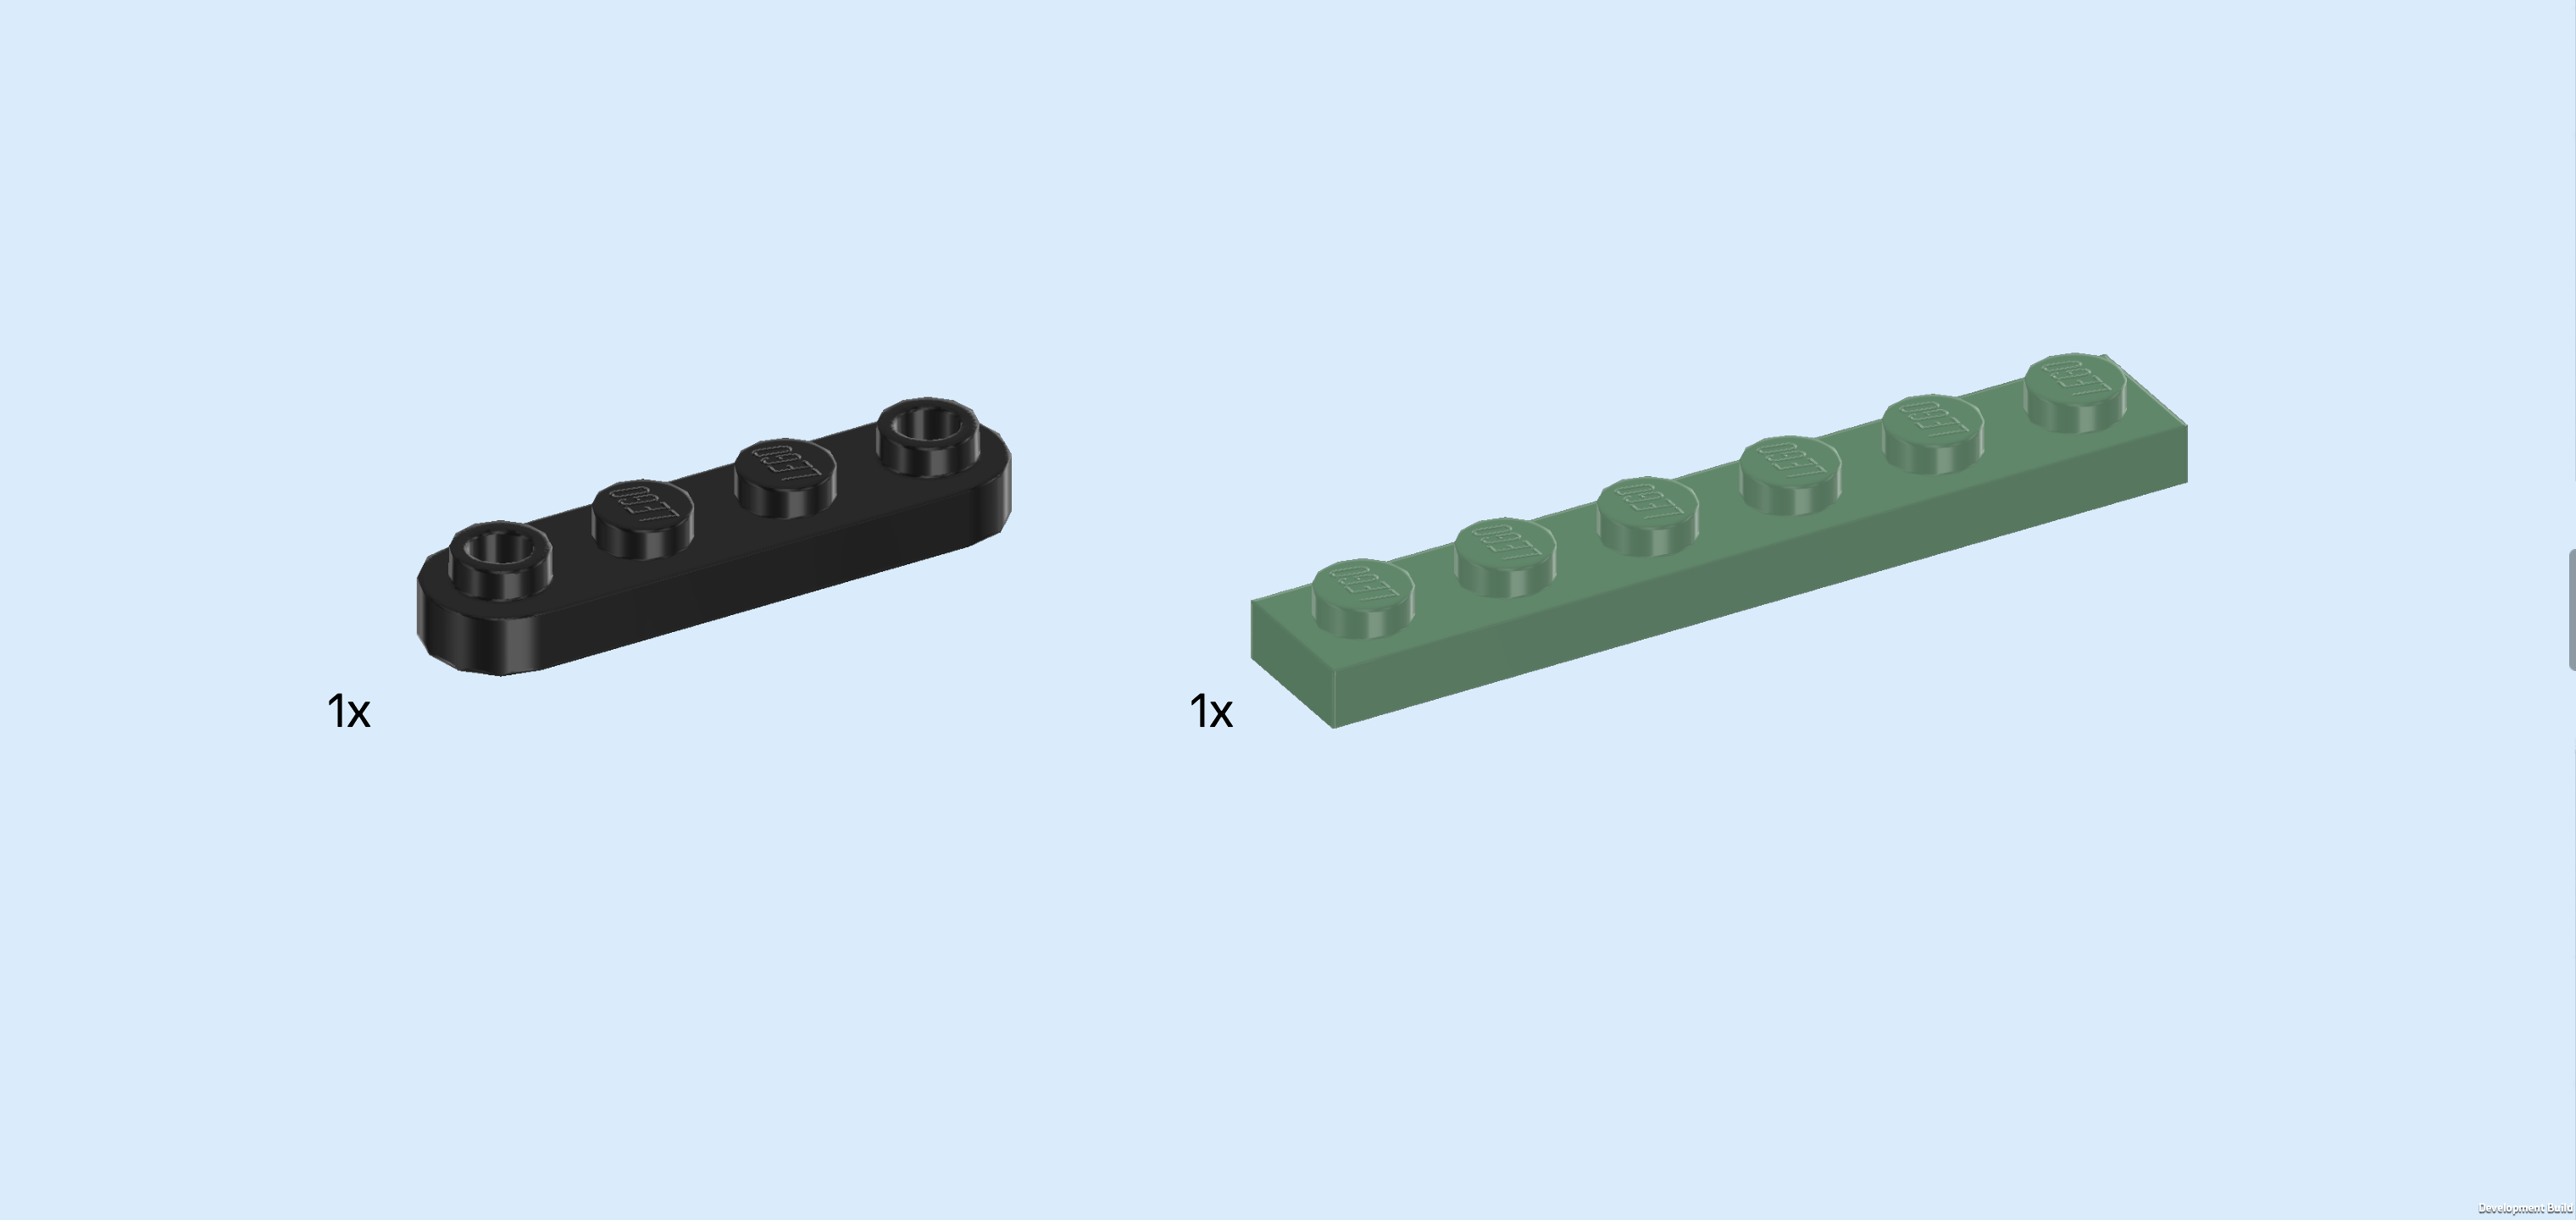
| Find 4 black rounded plates 1x4. |
| Stack 2 on top of each other, and then make a second stack with the 2 remaining plates. |
| Mount 1 stack horizontally on the front row at the leftmost edge. This will lock in the front plate of the winch. |
| Repeat symmetrically at the back, locking in the back plate of the winch. |
| Collect the following 2 pieces: |
| 1 black rounded plate 1x4, |
| and 1 sand green plate 1x6. |
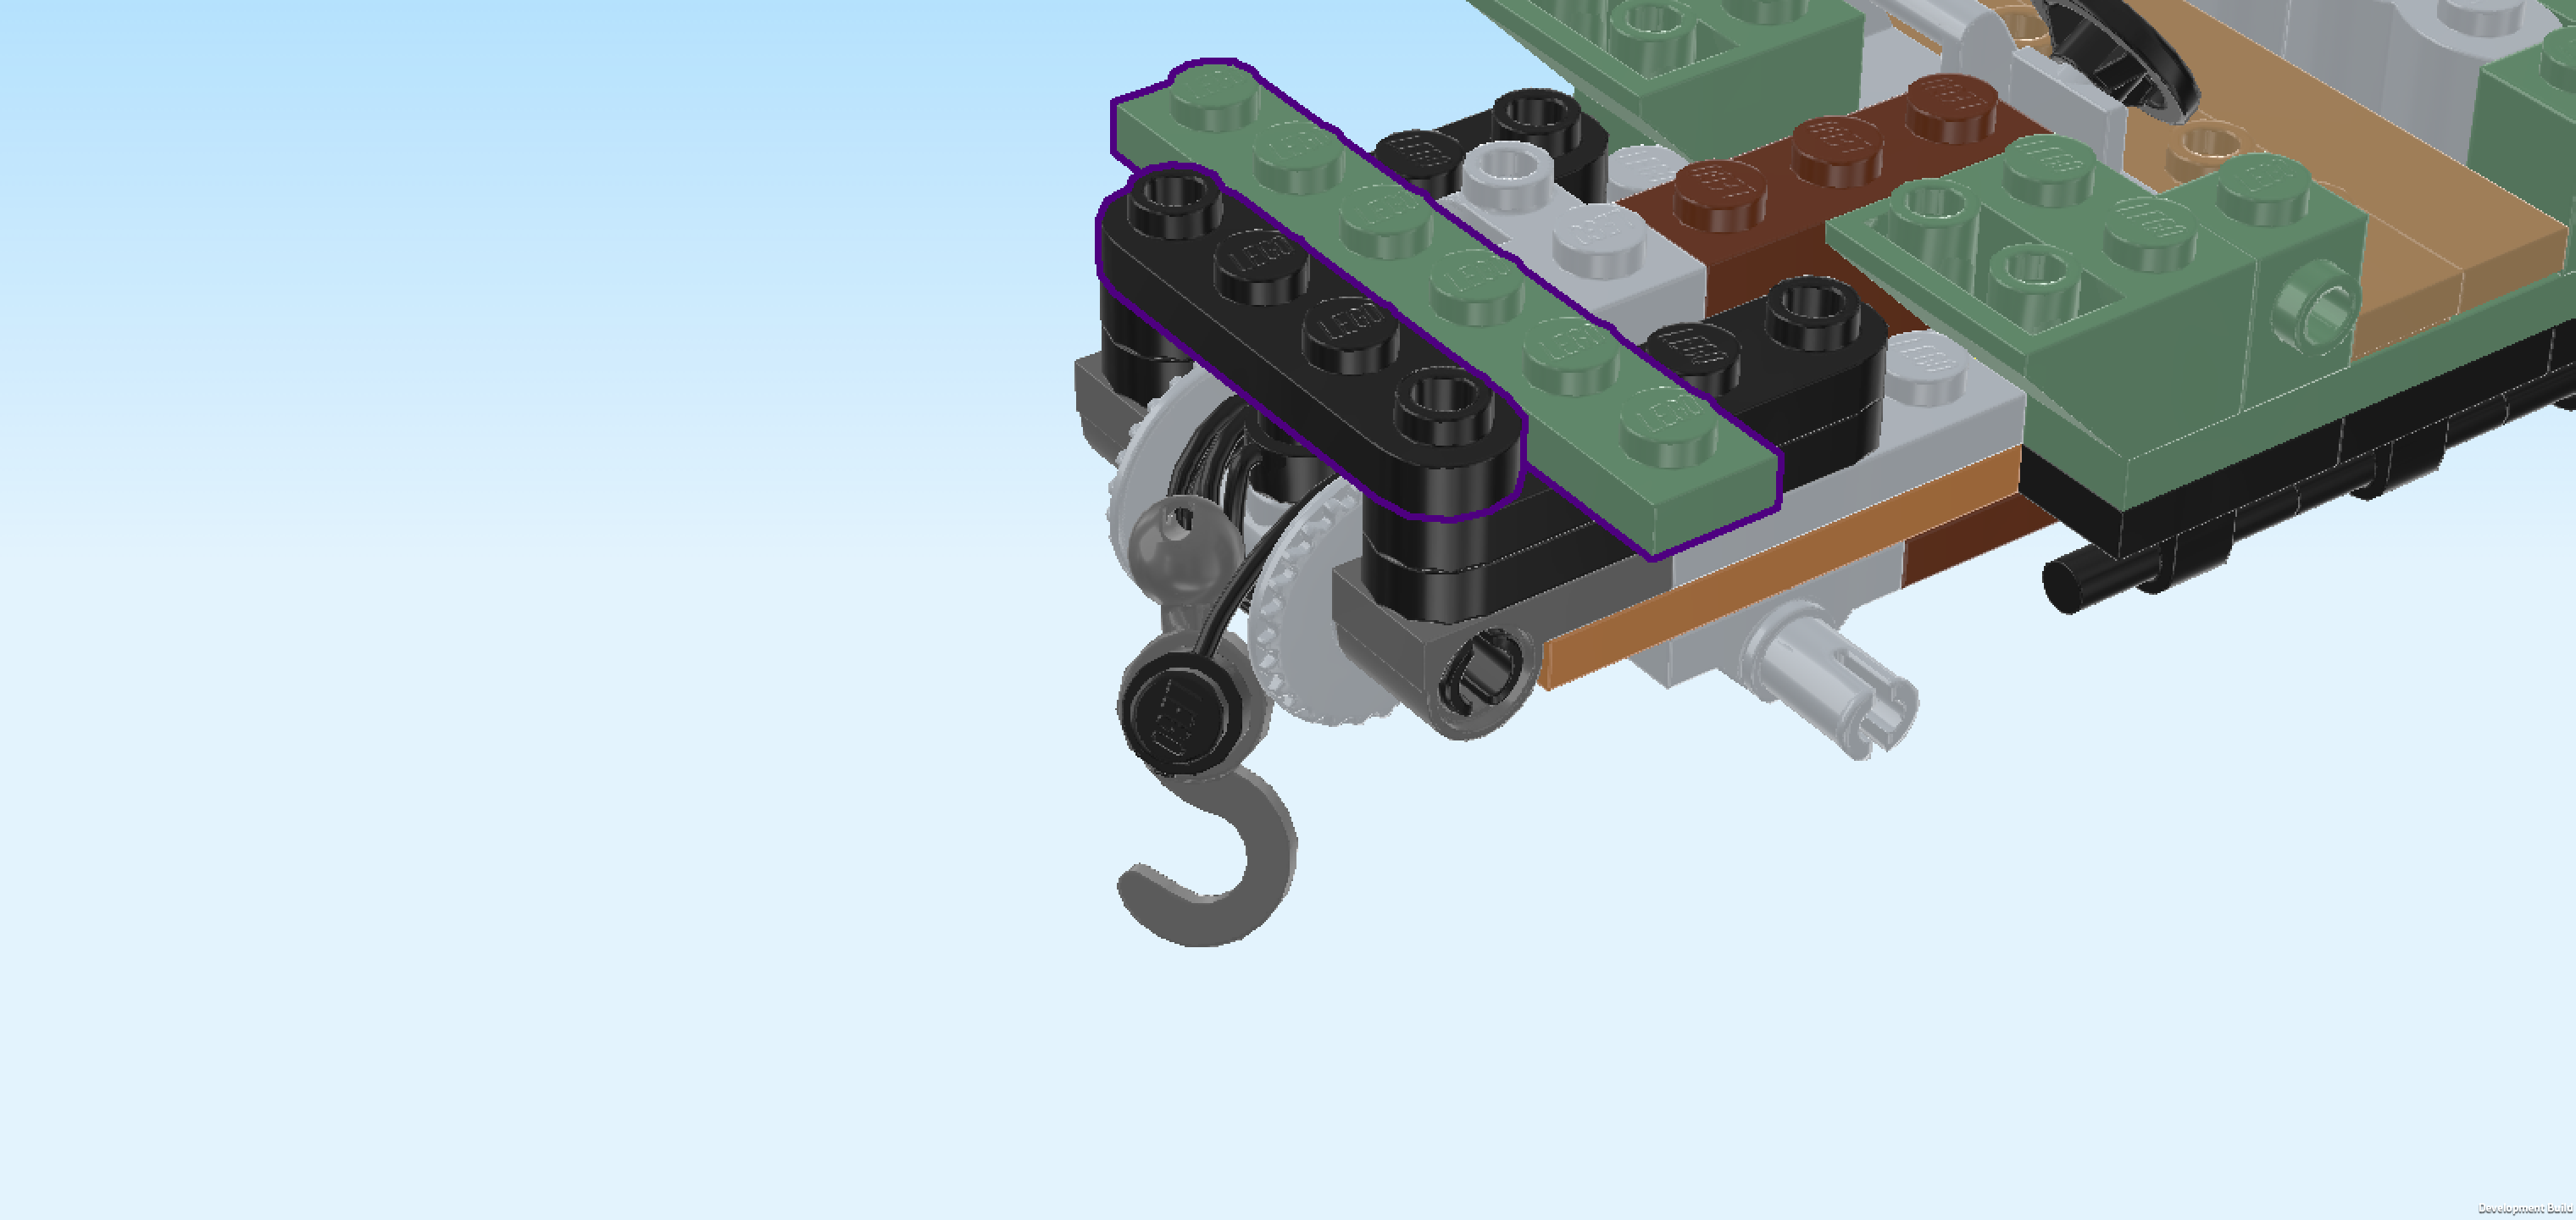
| Mount the rounded plate 1x4 vertically centered on the leftmost edge. This means it will sit above the winch. |
| Put the plate 1x6 vertically to the right of the previous piece, symmetrically overhanging to the front and back. |
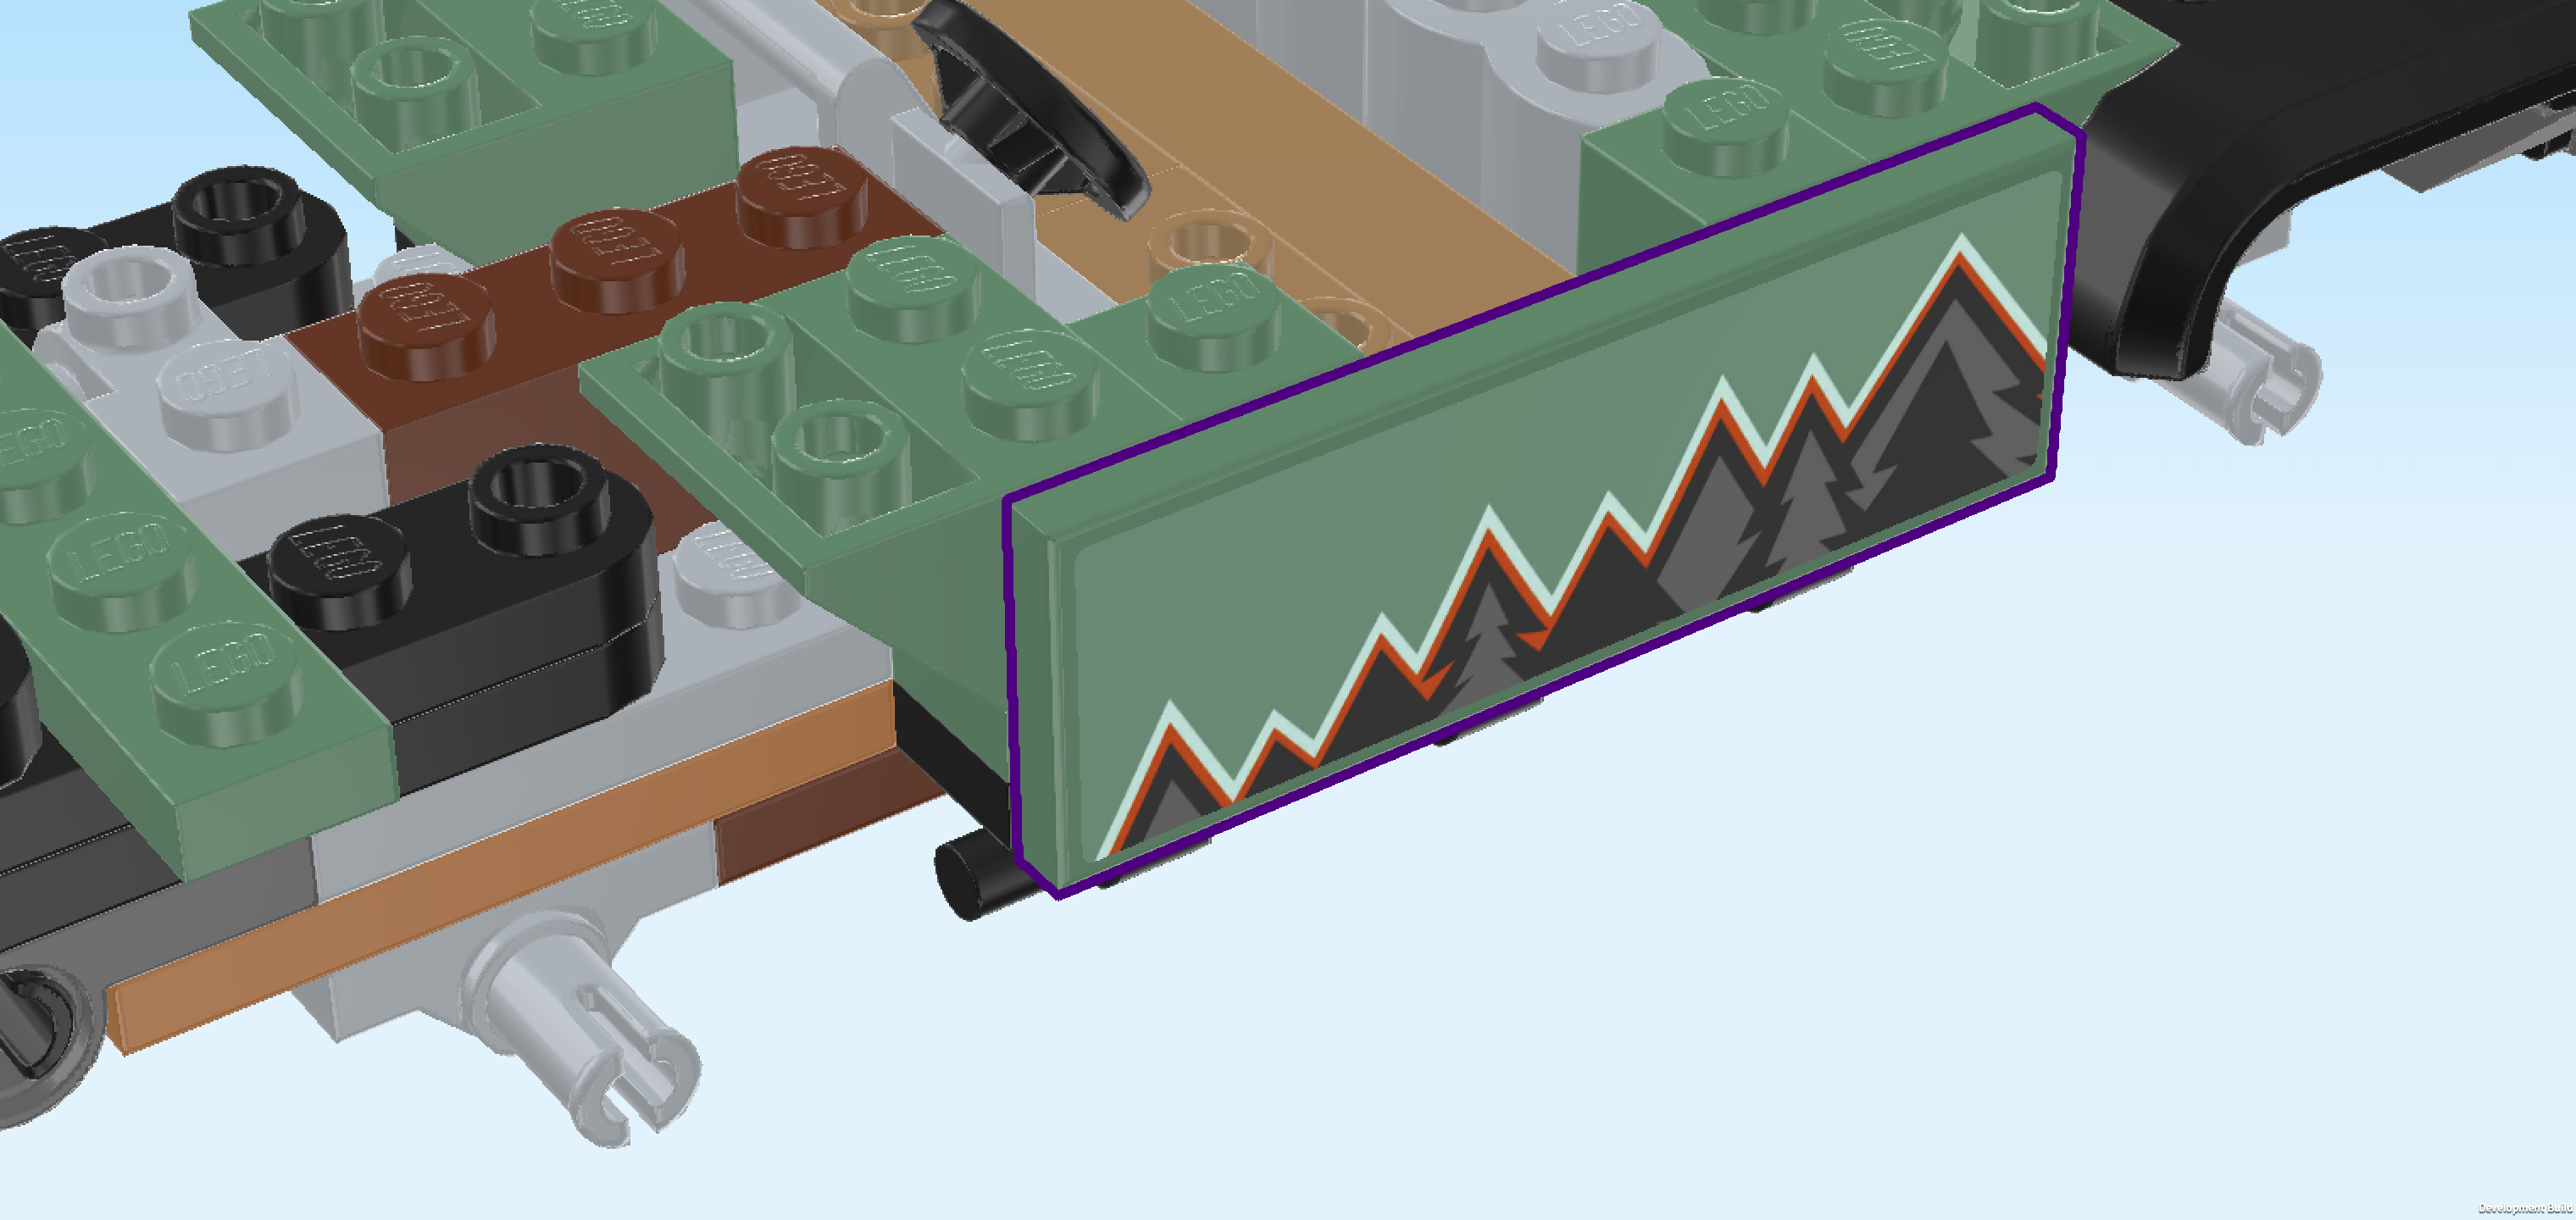
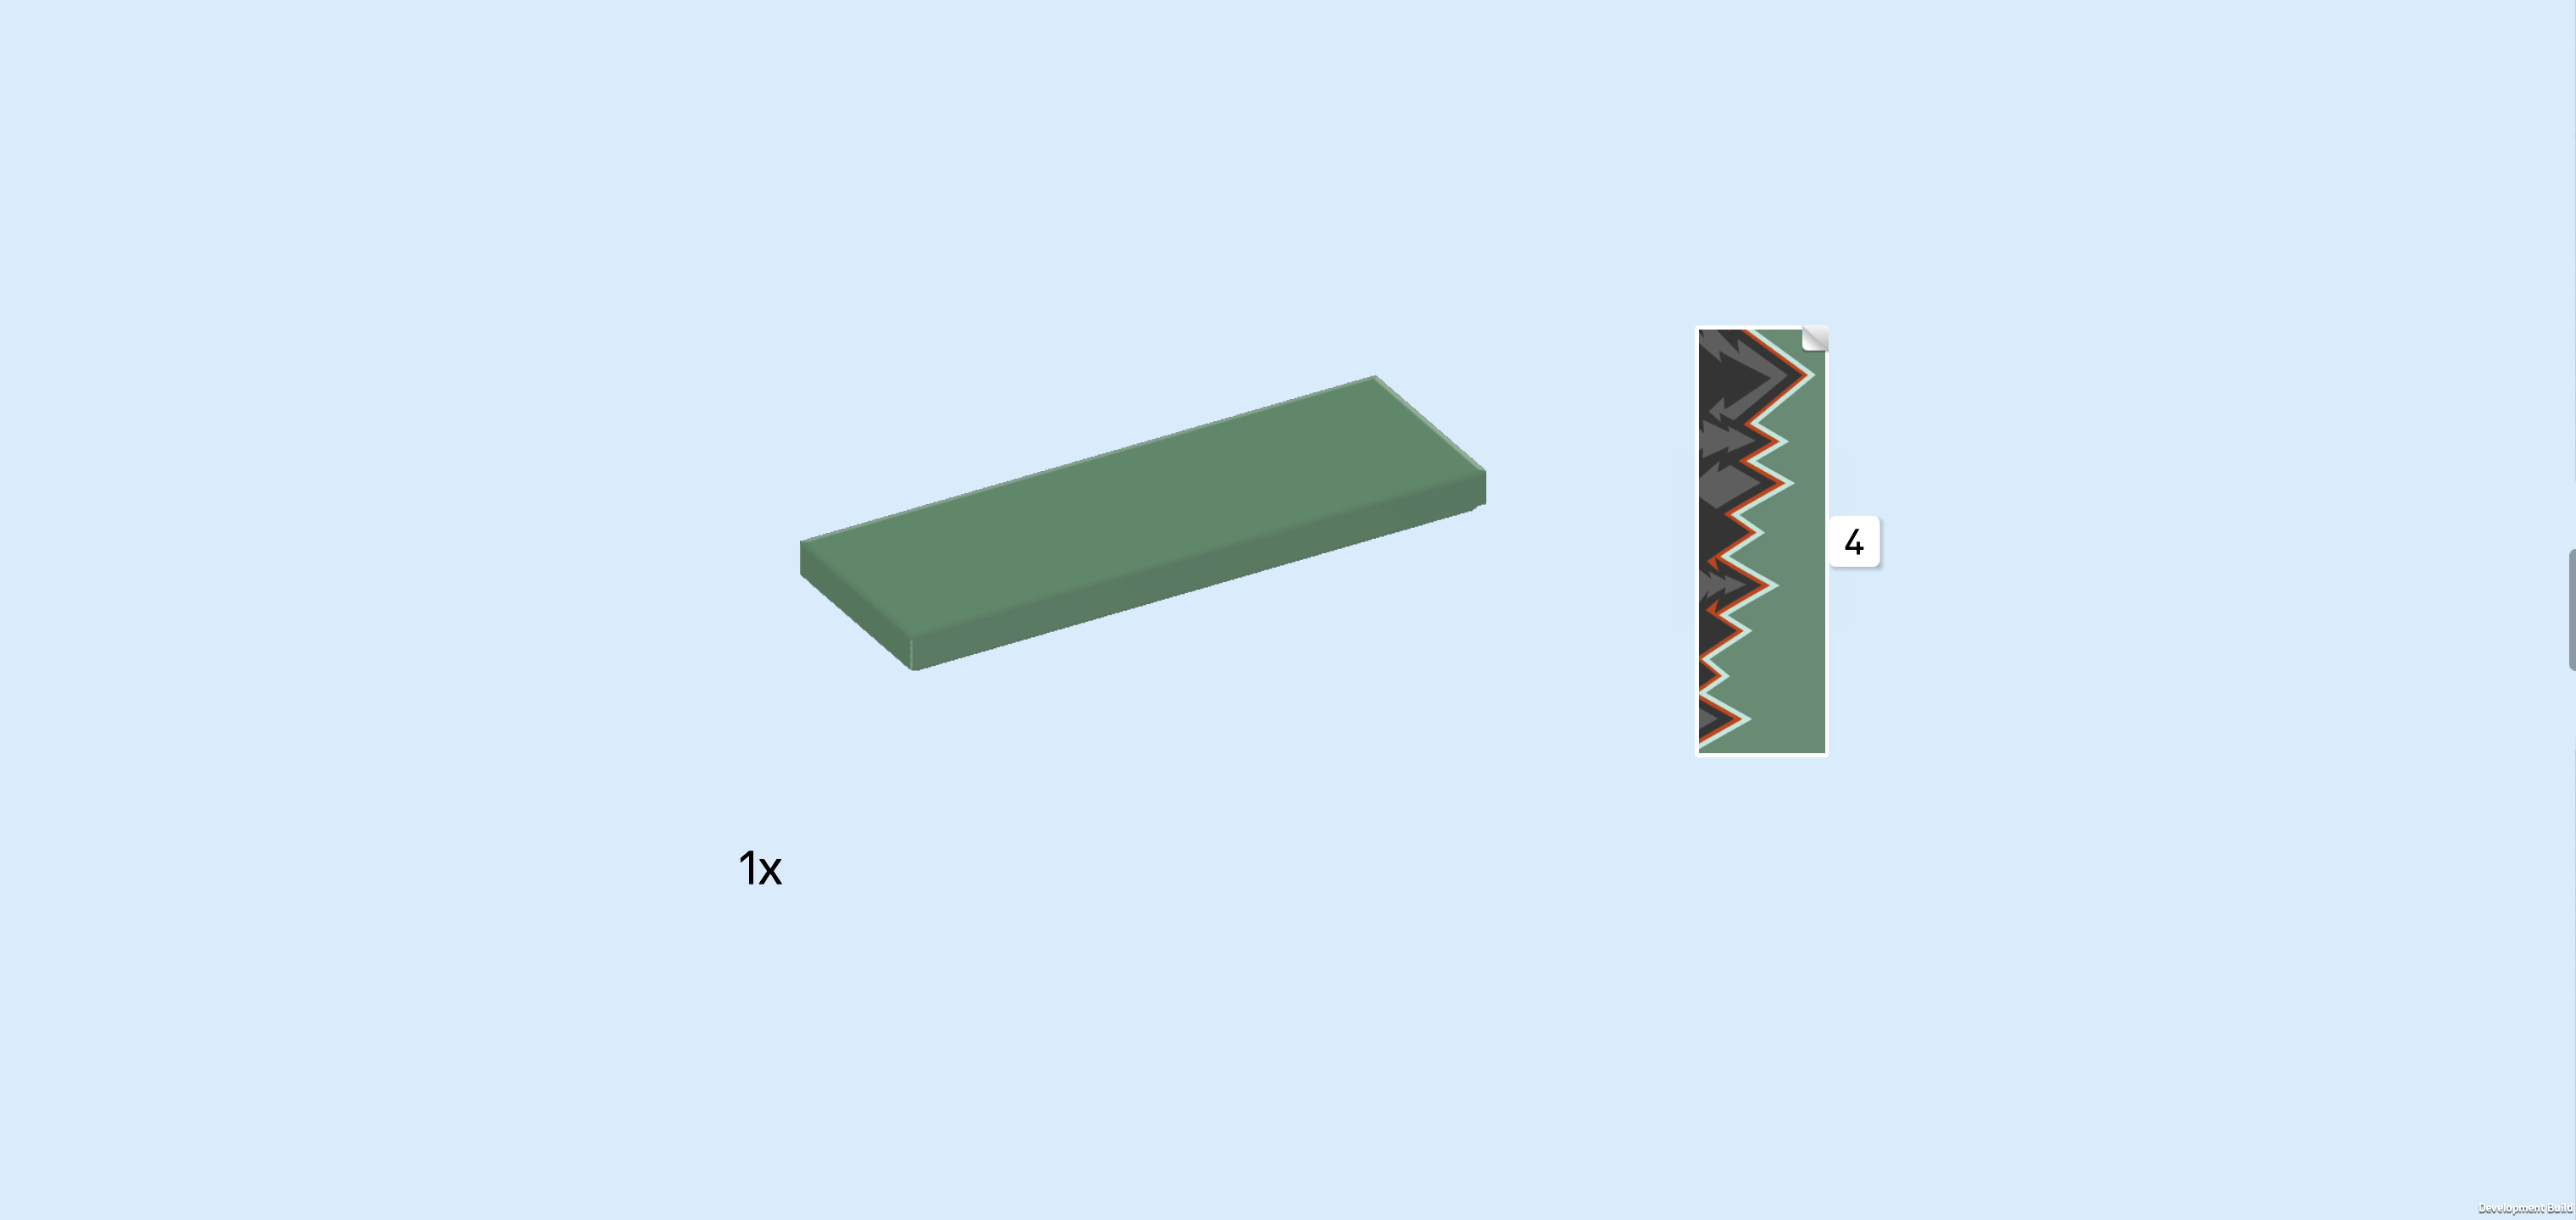
| Collect the following 2 pieces: |
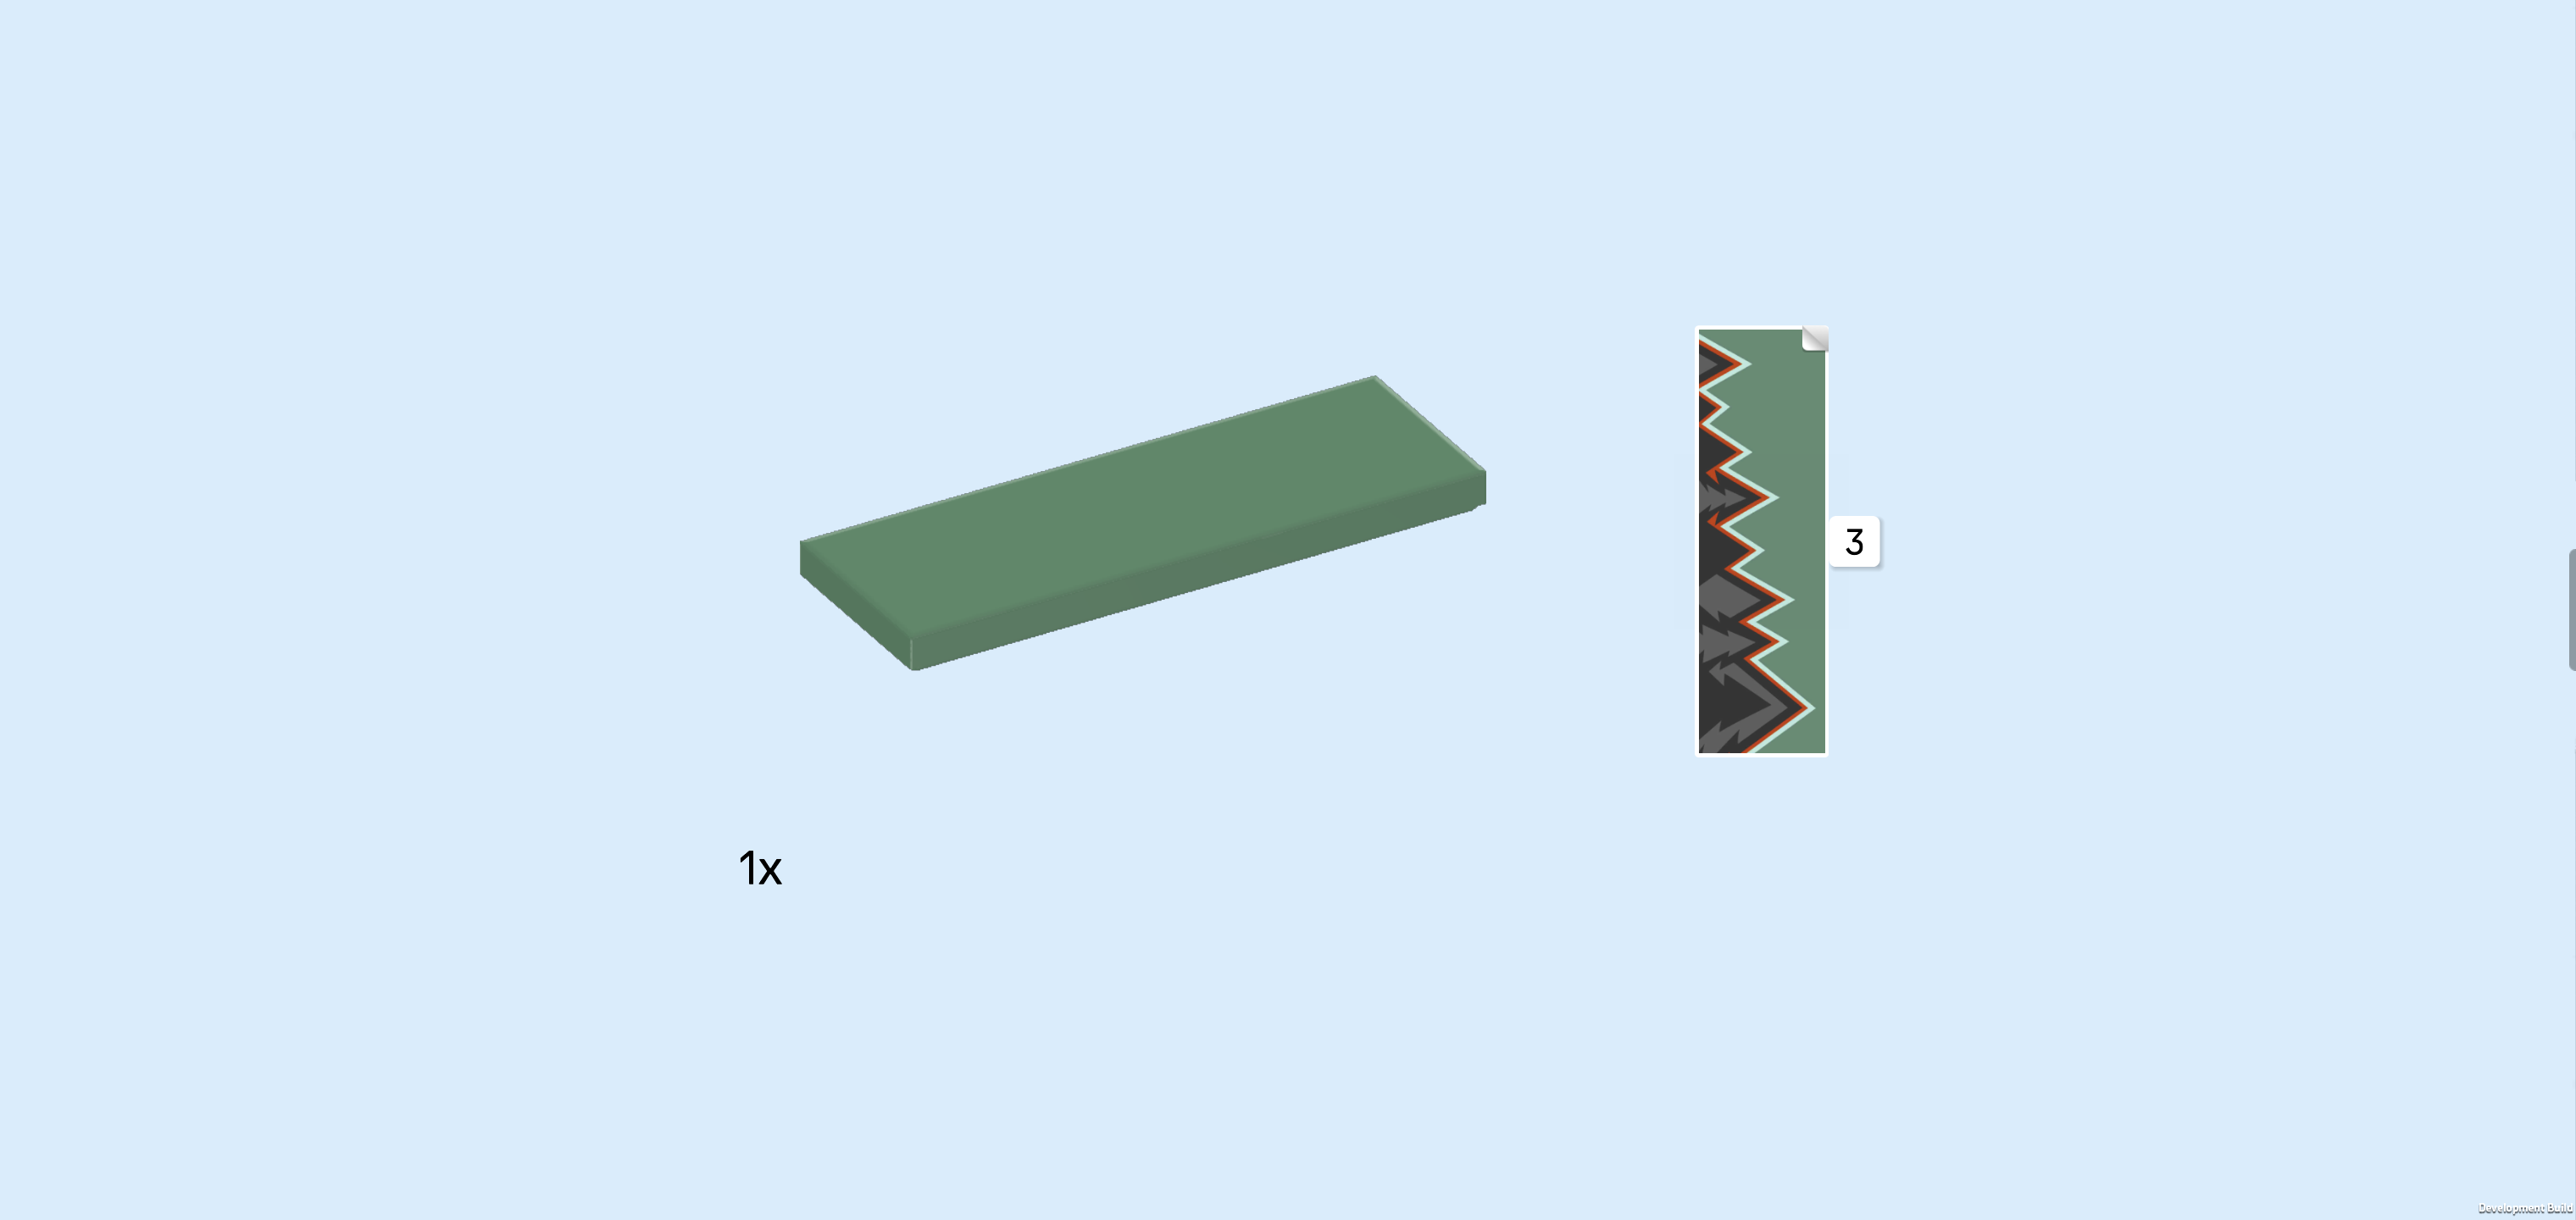
| 1 sand green flat tile 2x6, |
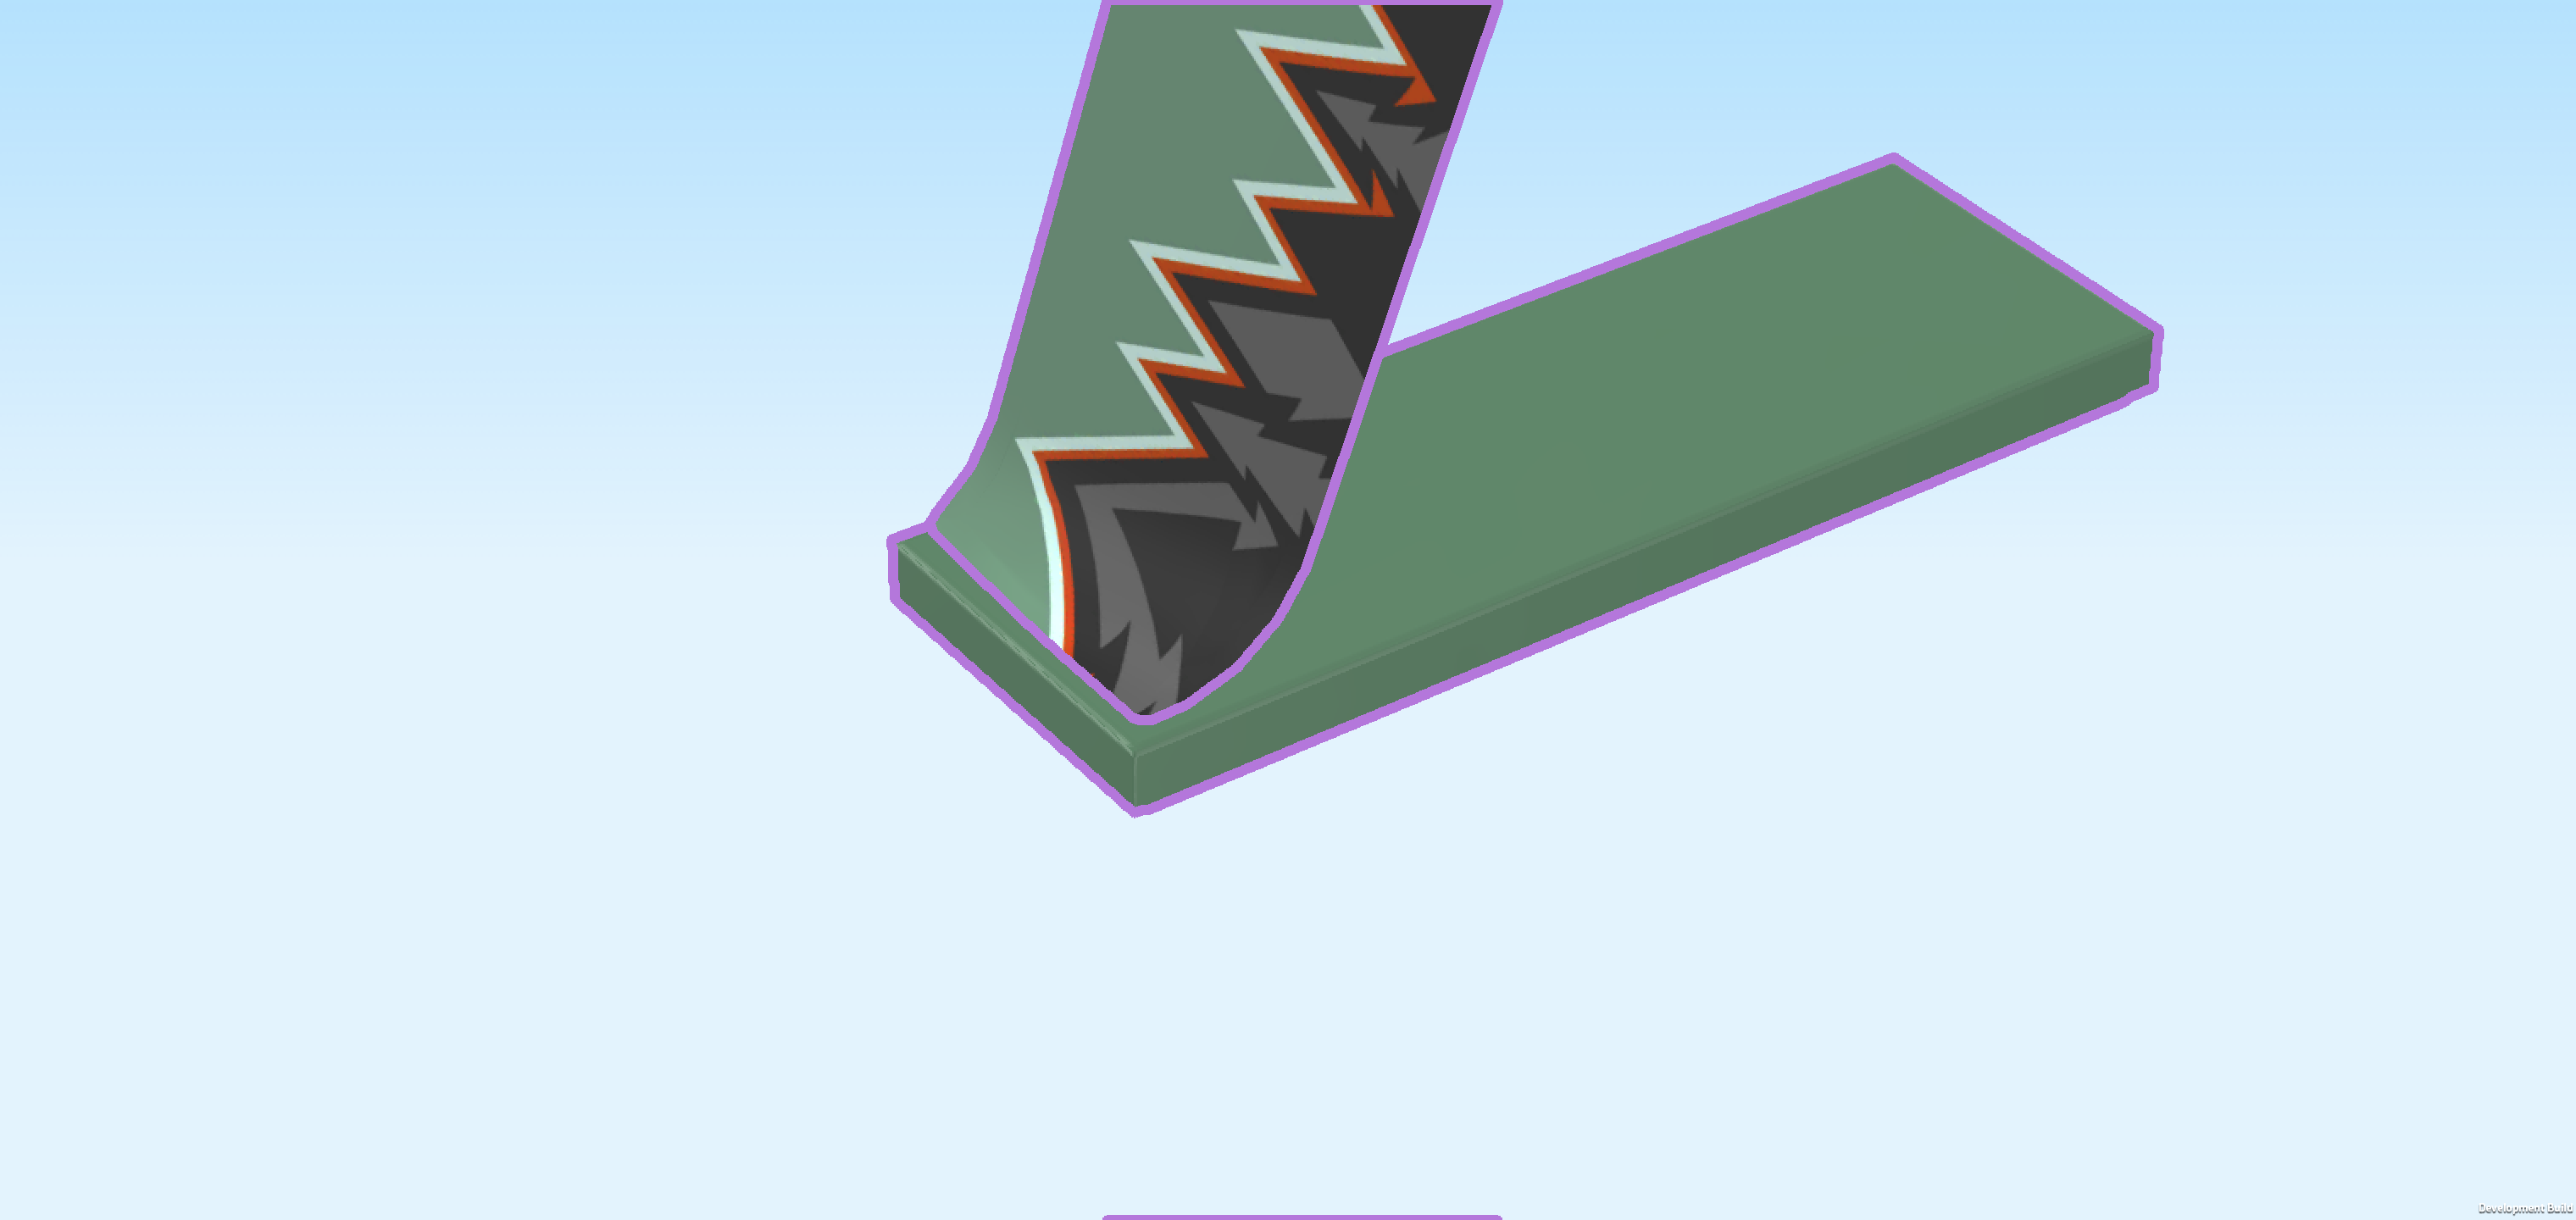
| and 1 rectangular sticker 2x6. |
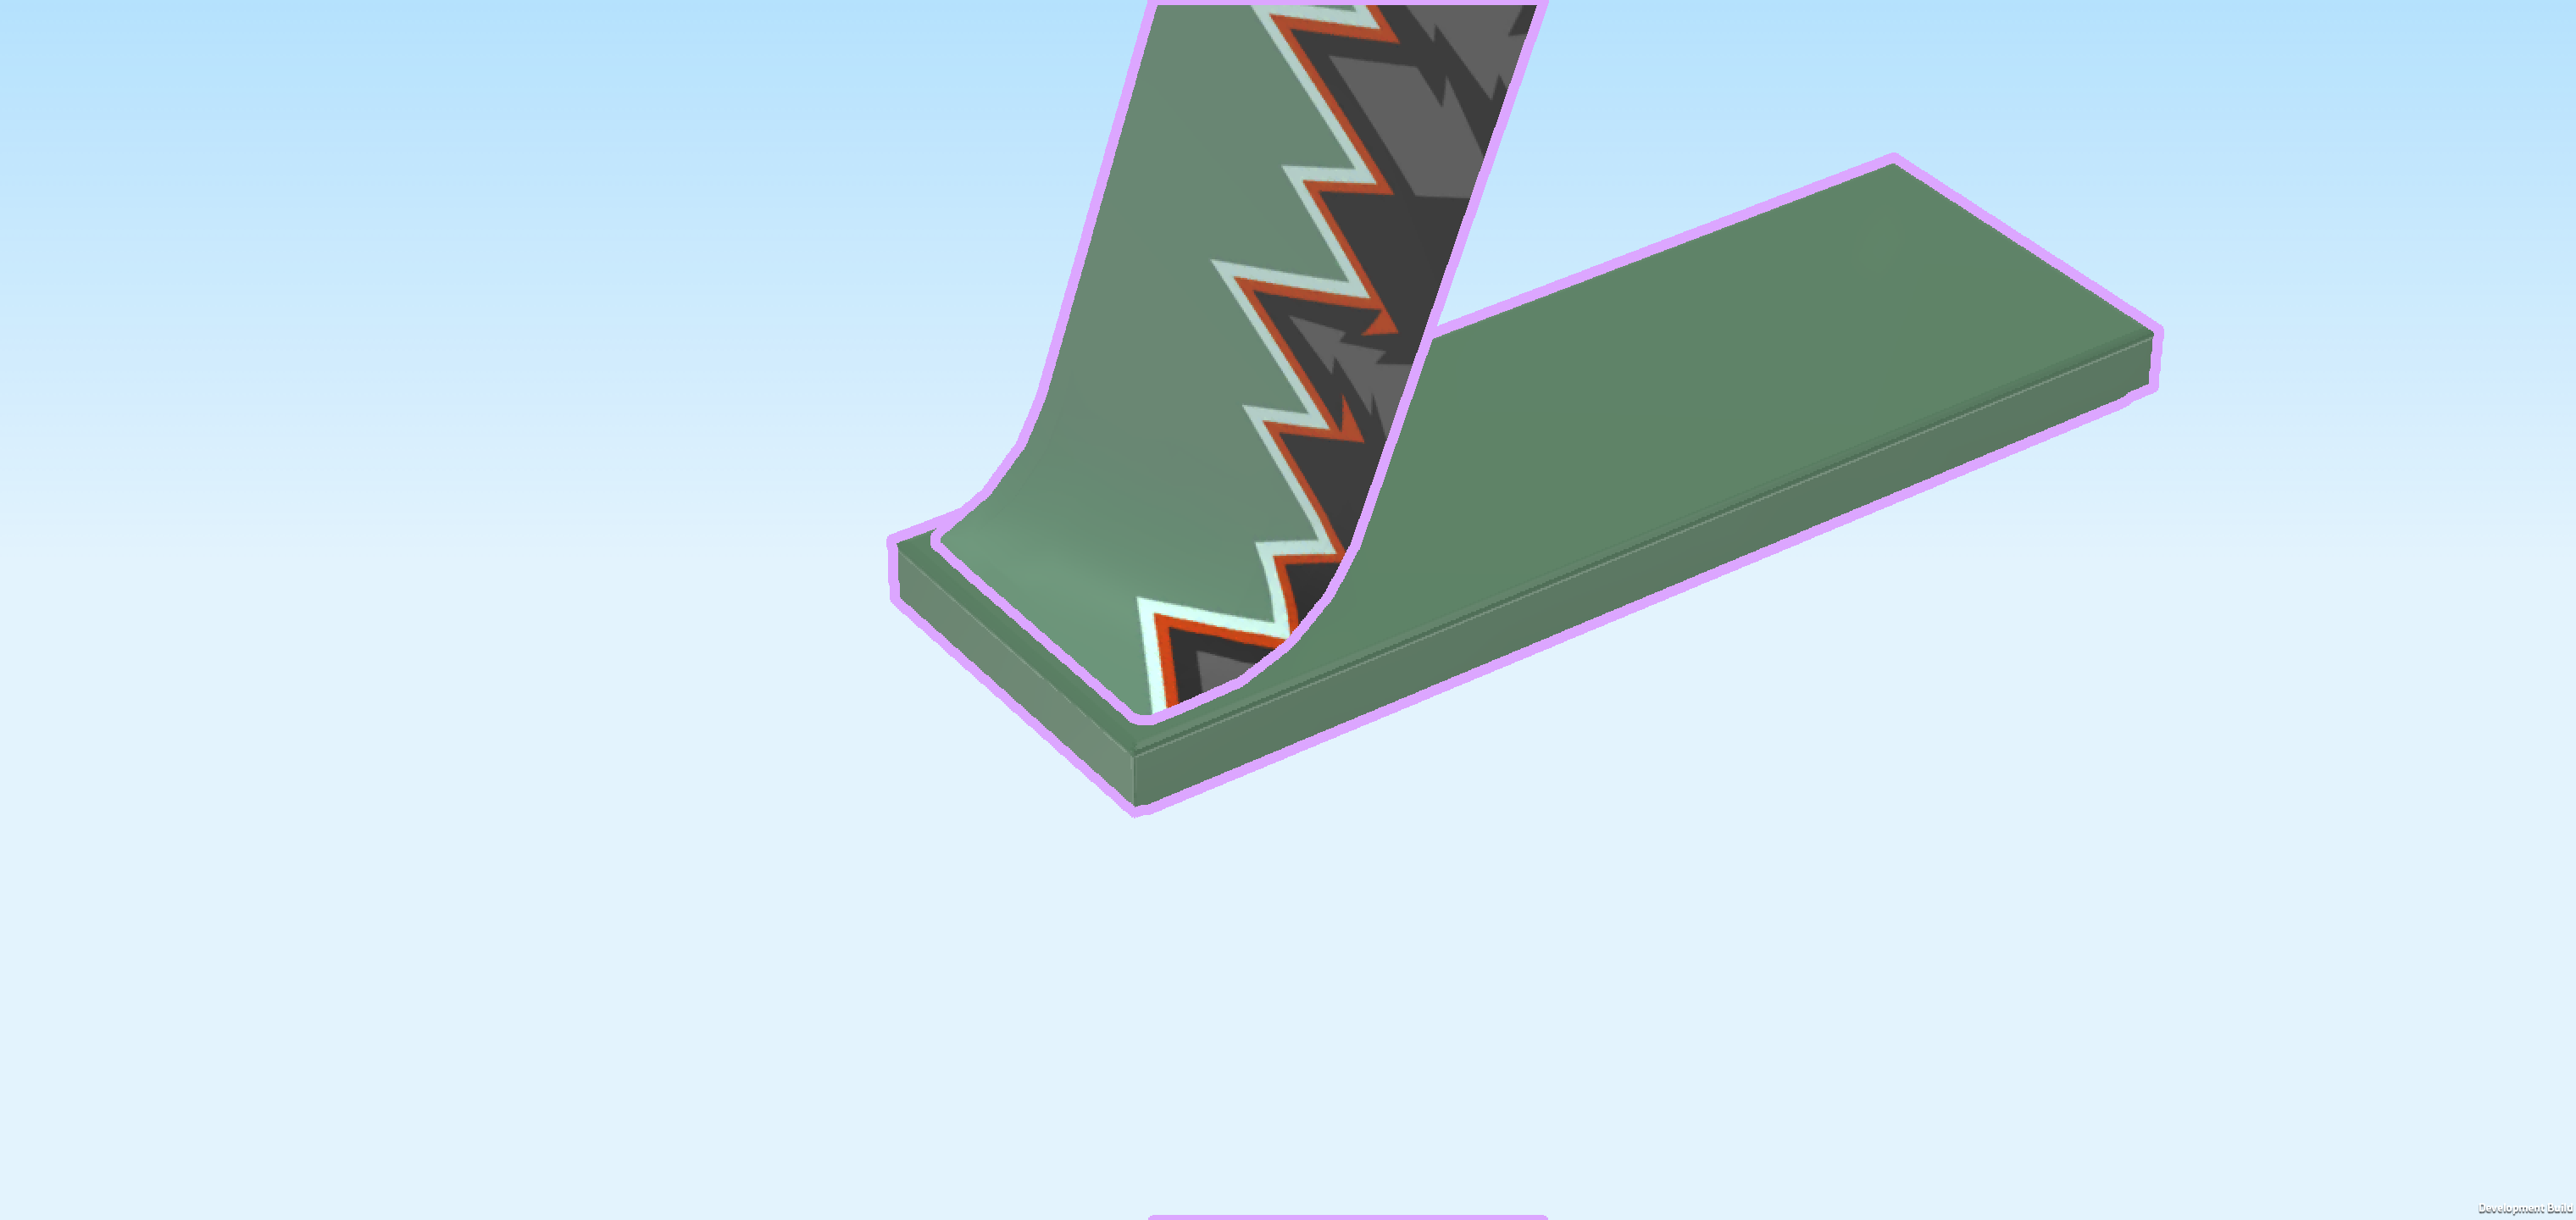
| Put the sticker on the flat tile, matching its shape. |
| The sticker is very similar to the first sticker we have attached. It also shows a stylized mountain silhouette with sharp jagged black peaks outlined in bright red and white. This time, the peaks gradually increase in height from left to right, creating a rising mountain range. |
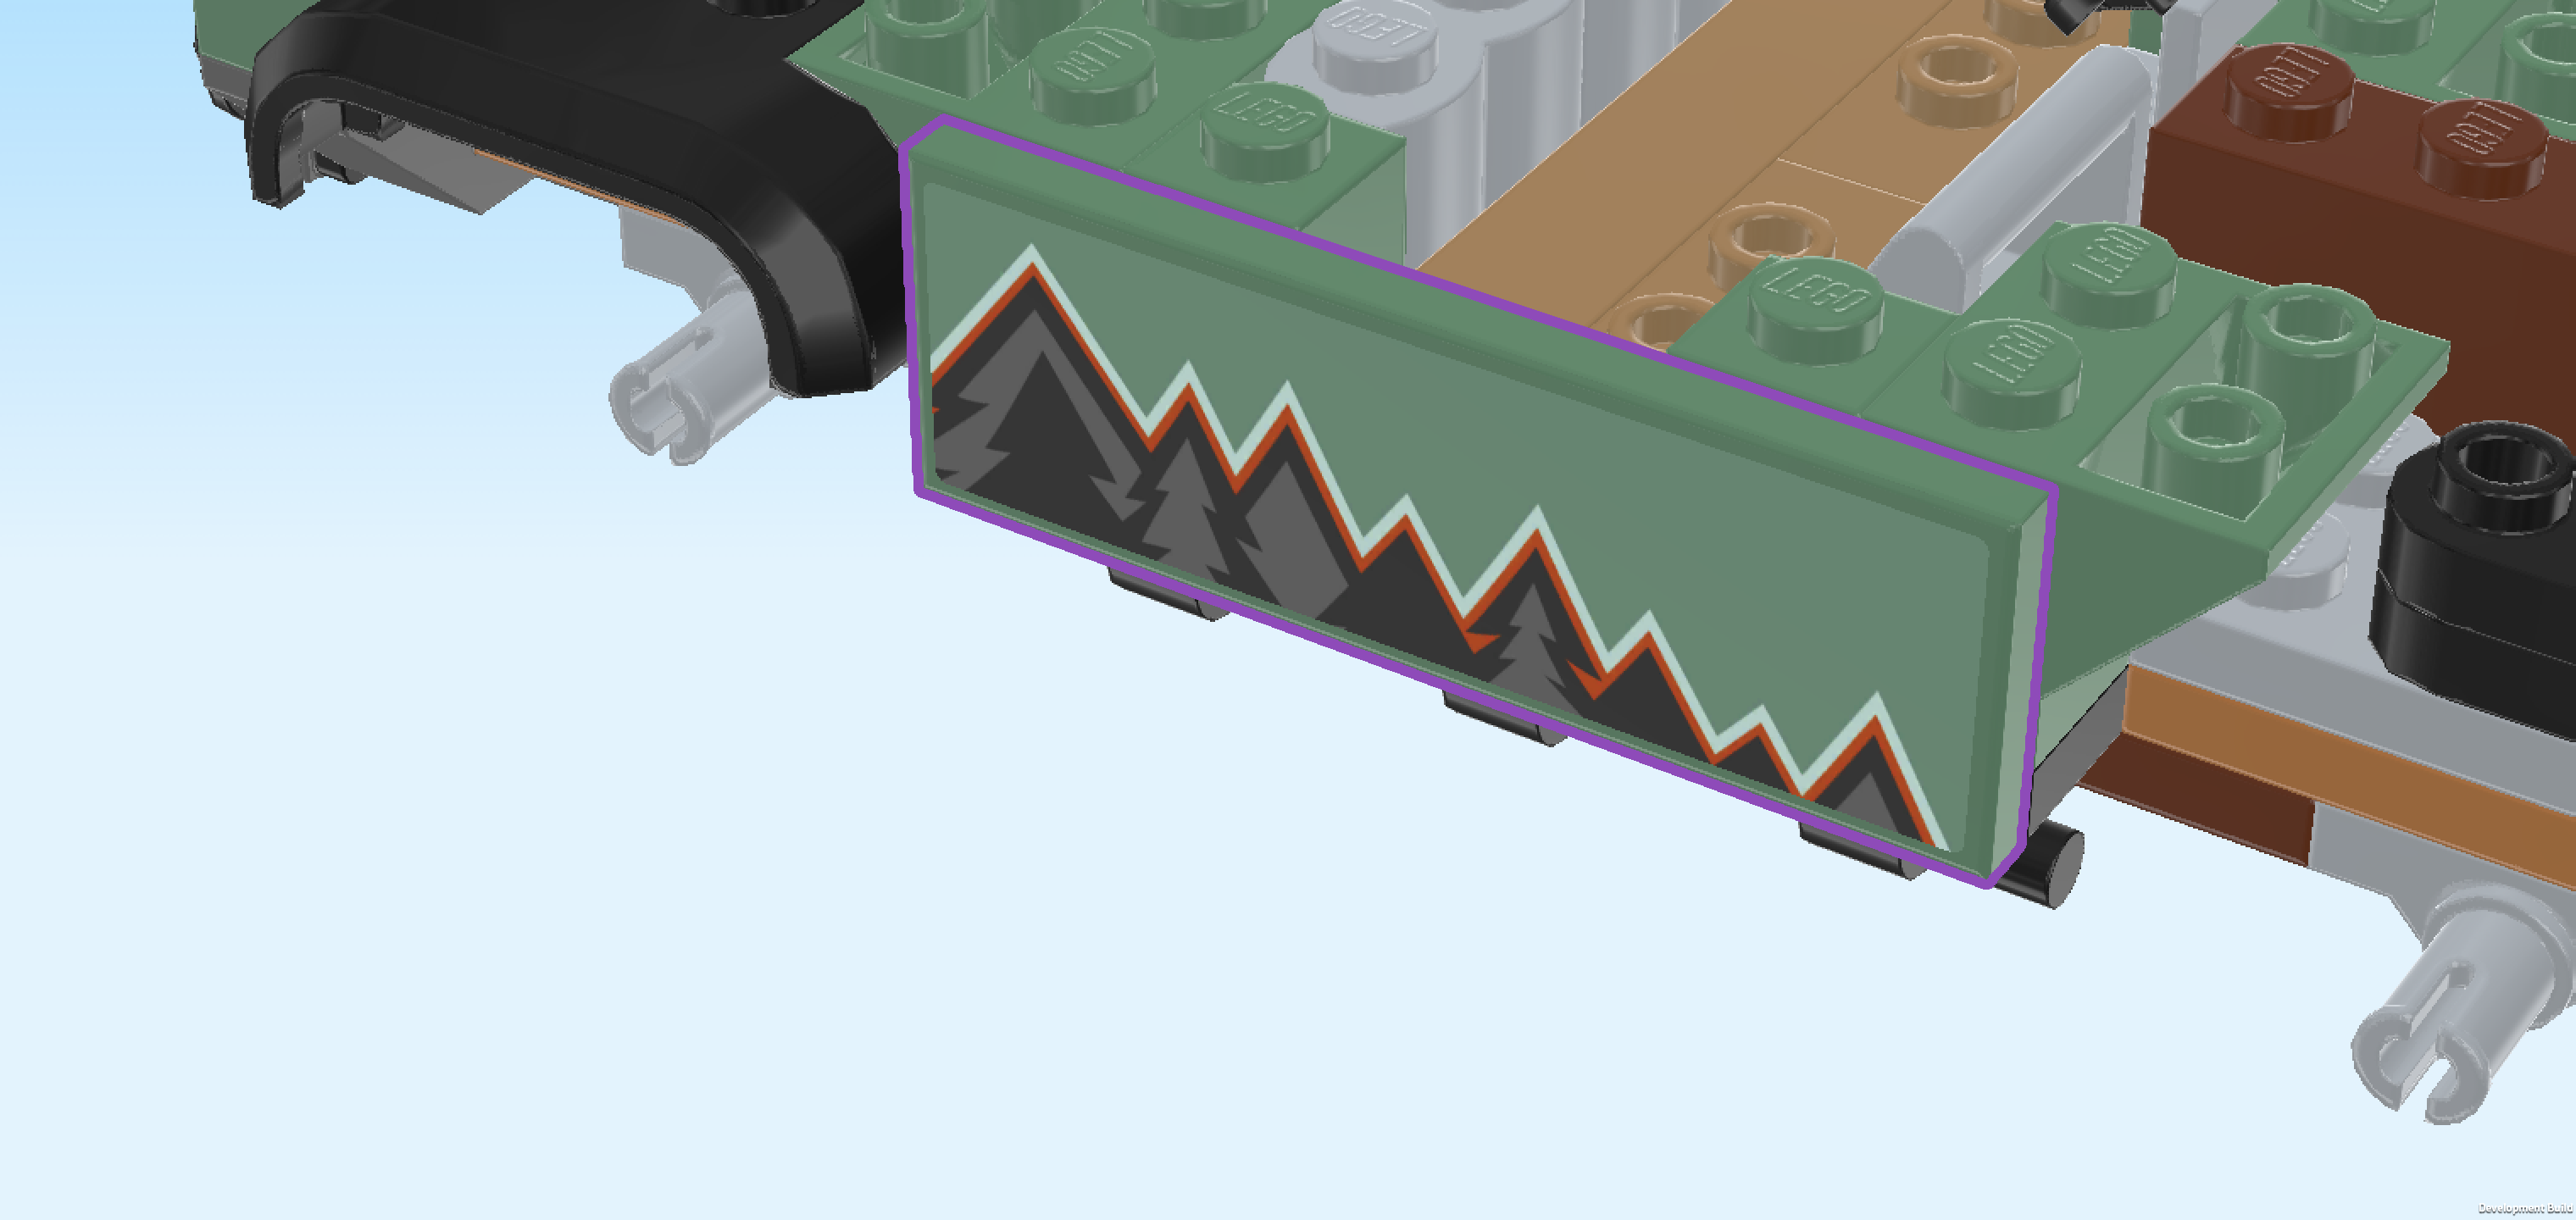
| Flip the flat tile upright so that its smooth or stickered surface is facing you and mount it horizontally centered on the 2 side knobs pointing to the front, 1/2 protruding to the top. If done correctly, the slopes of the roof tiles that are mounted behind this piece will be protruding symmetrically to the left and right. |
| Collect the following 2 pieces: |
| 1 sand green flat tile 2x6, |
| and 1 rectangular sticker 2x6. |
| Put the sticker on the flat tile, matching its shape. |
| This sticker is identical to the previous one, only that it is mirrored: Now, the peaks are gradually increasing in height from right to left. |
| Before you mount this piece, turn the main structure around so that it is still oriented horizontally but now the winch with hook is on the right edge. |
| Flip the flat tile upright with the smooth or stickered surface towards you and mount it horizontally centered on the side knobs pointing towards you, 1/2 protruding to the top. Make sure it mirrors the first side panel we have mounted. |
| Find 2 black plates 2x2 with oval mudguard. |
| Before you mount them, turn the structure back to its original orientation where the winch is on the left edge. |
| Put 1 on the front edge between the plate 1x6 mounted vertically on the left edge and the inverted roof tile. 1 row and the mudguard will overhang to the front. If done correctly, the mudguard will symmetrically hover above the connector at the bottom. |
| Repeat symmetrically at the back. |
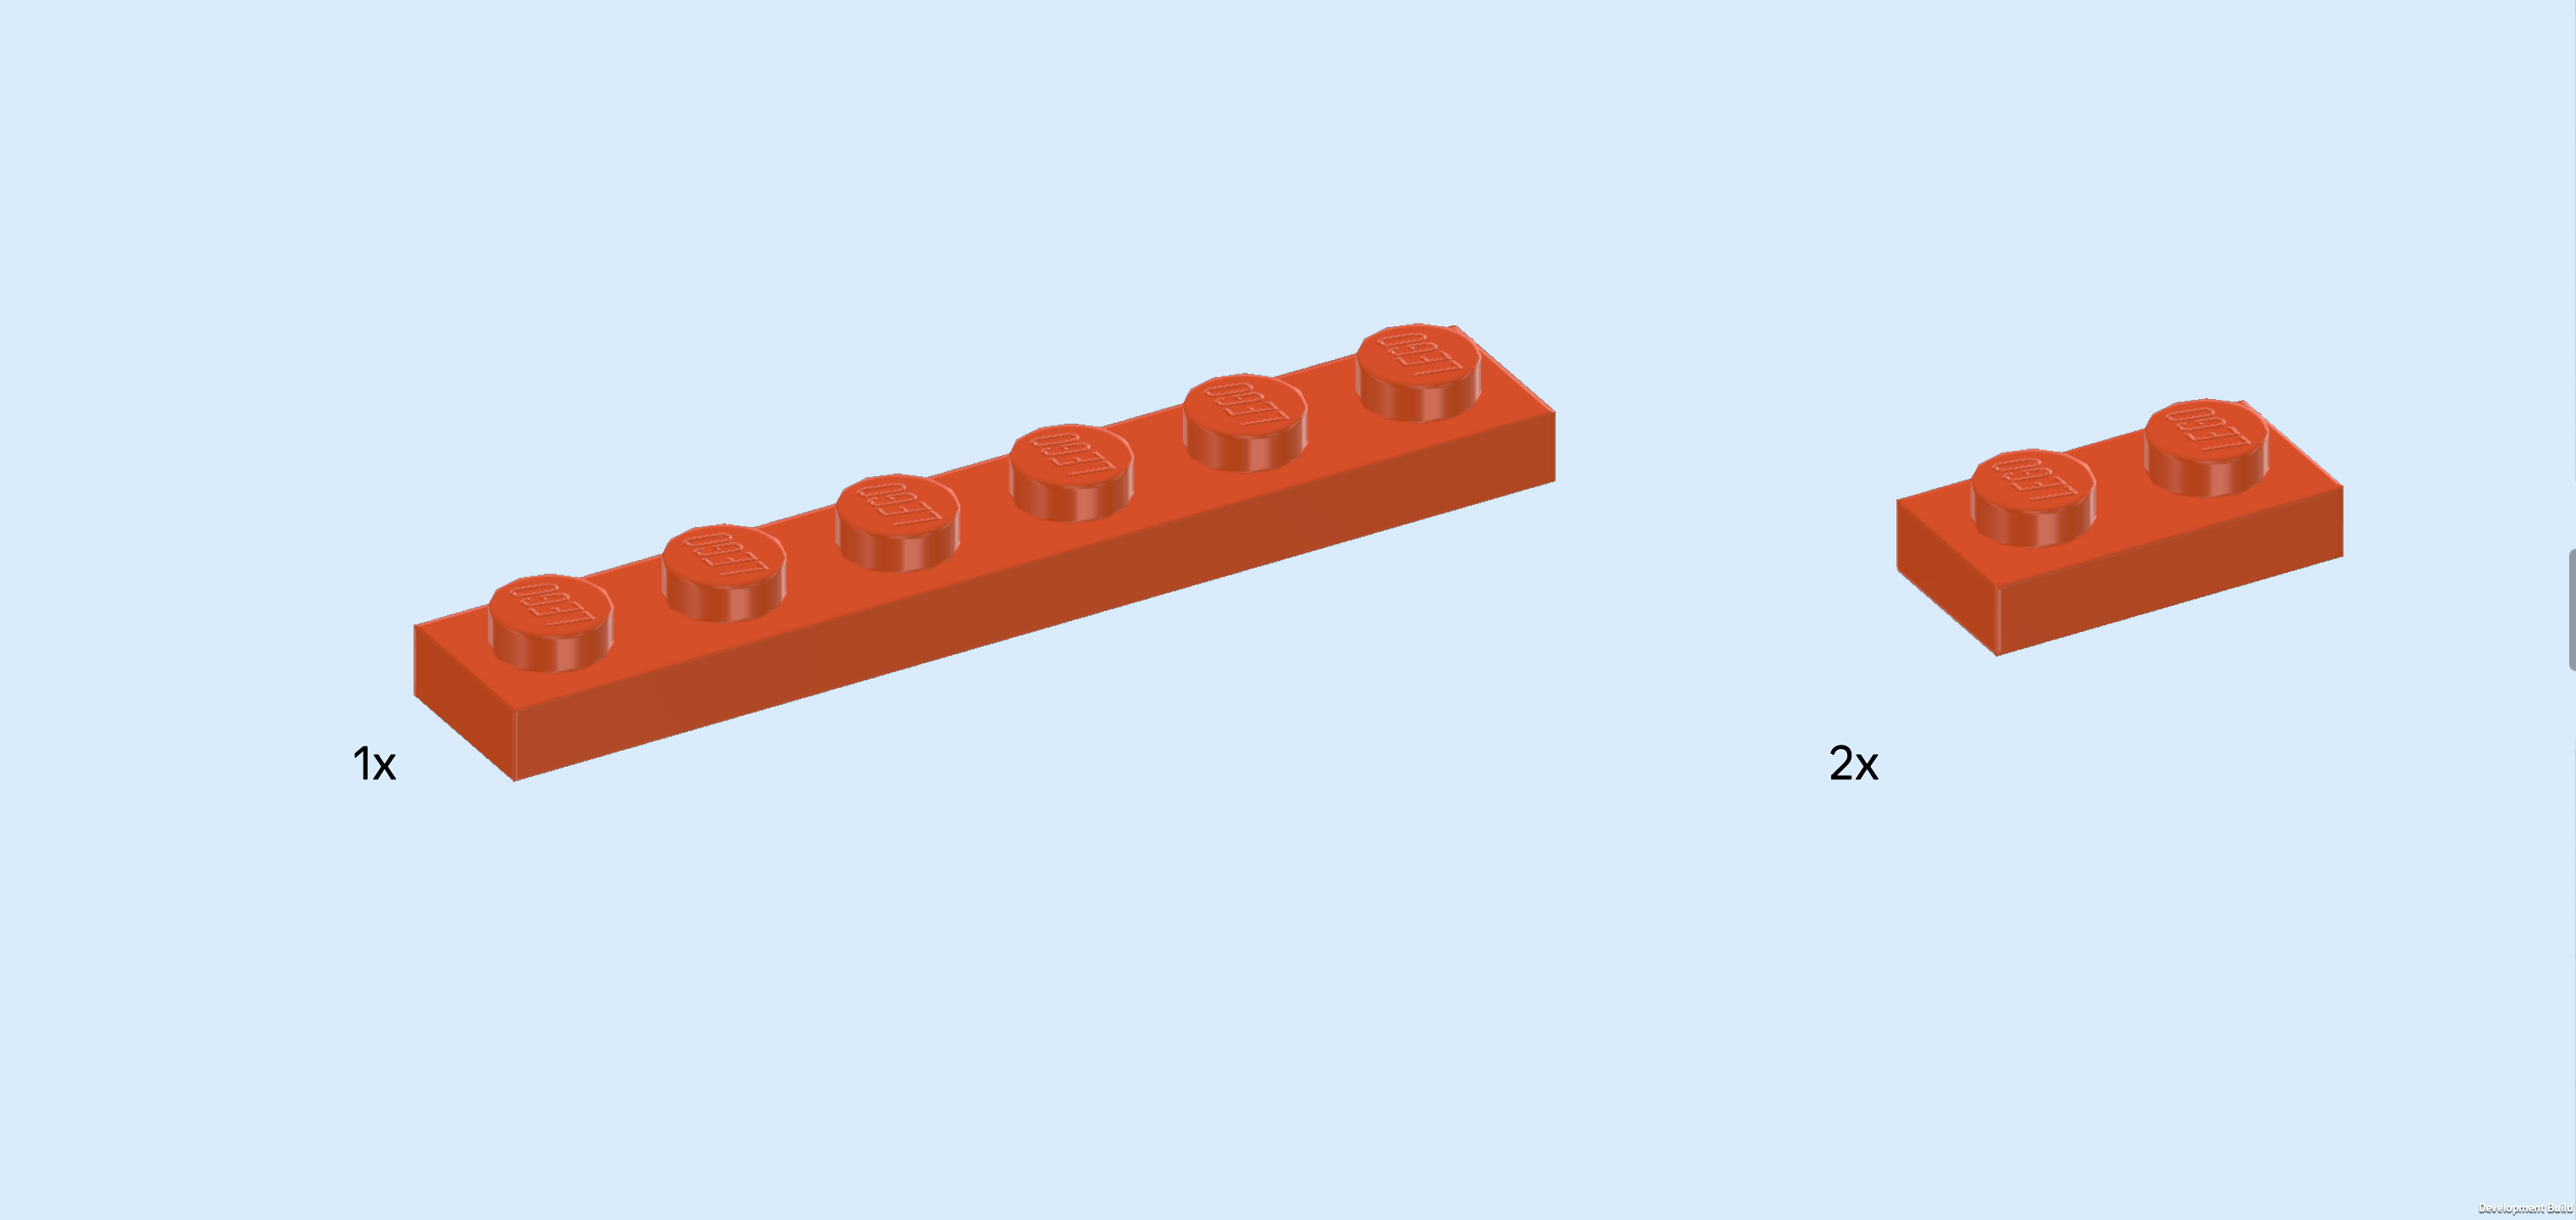
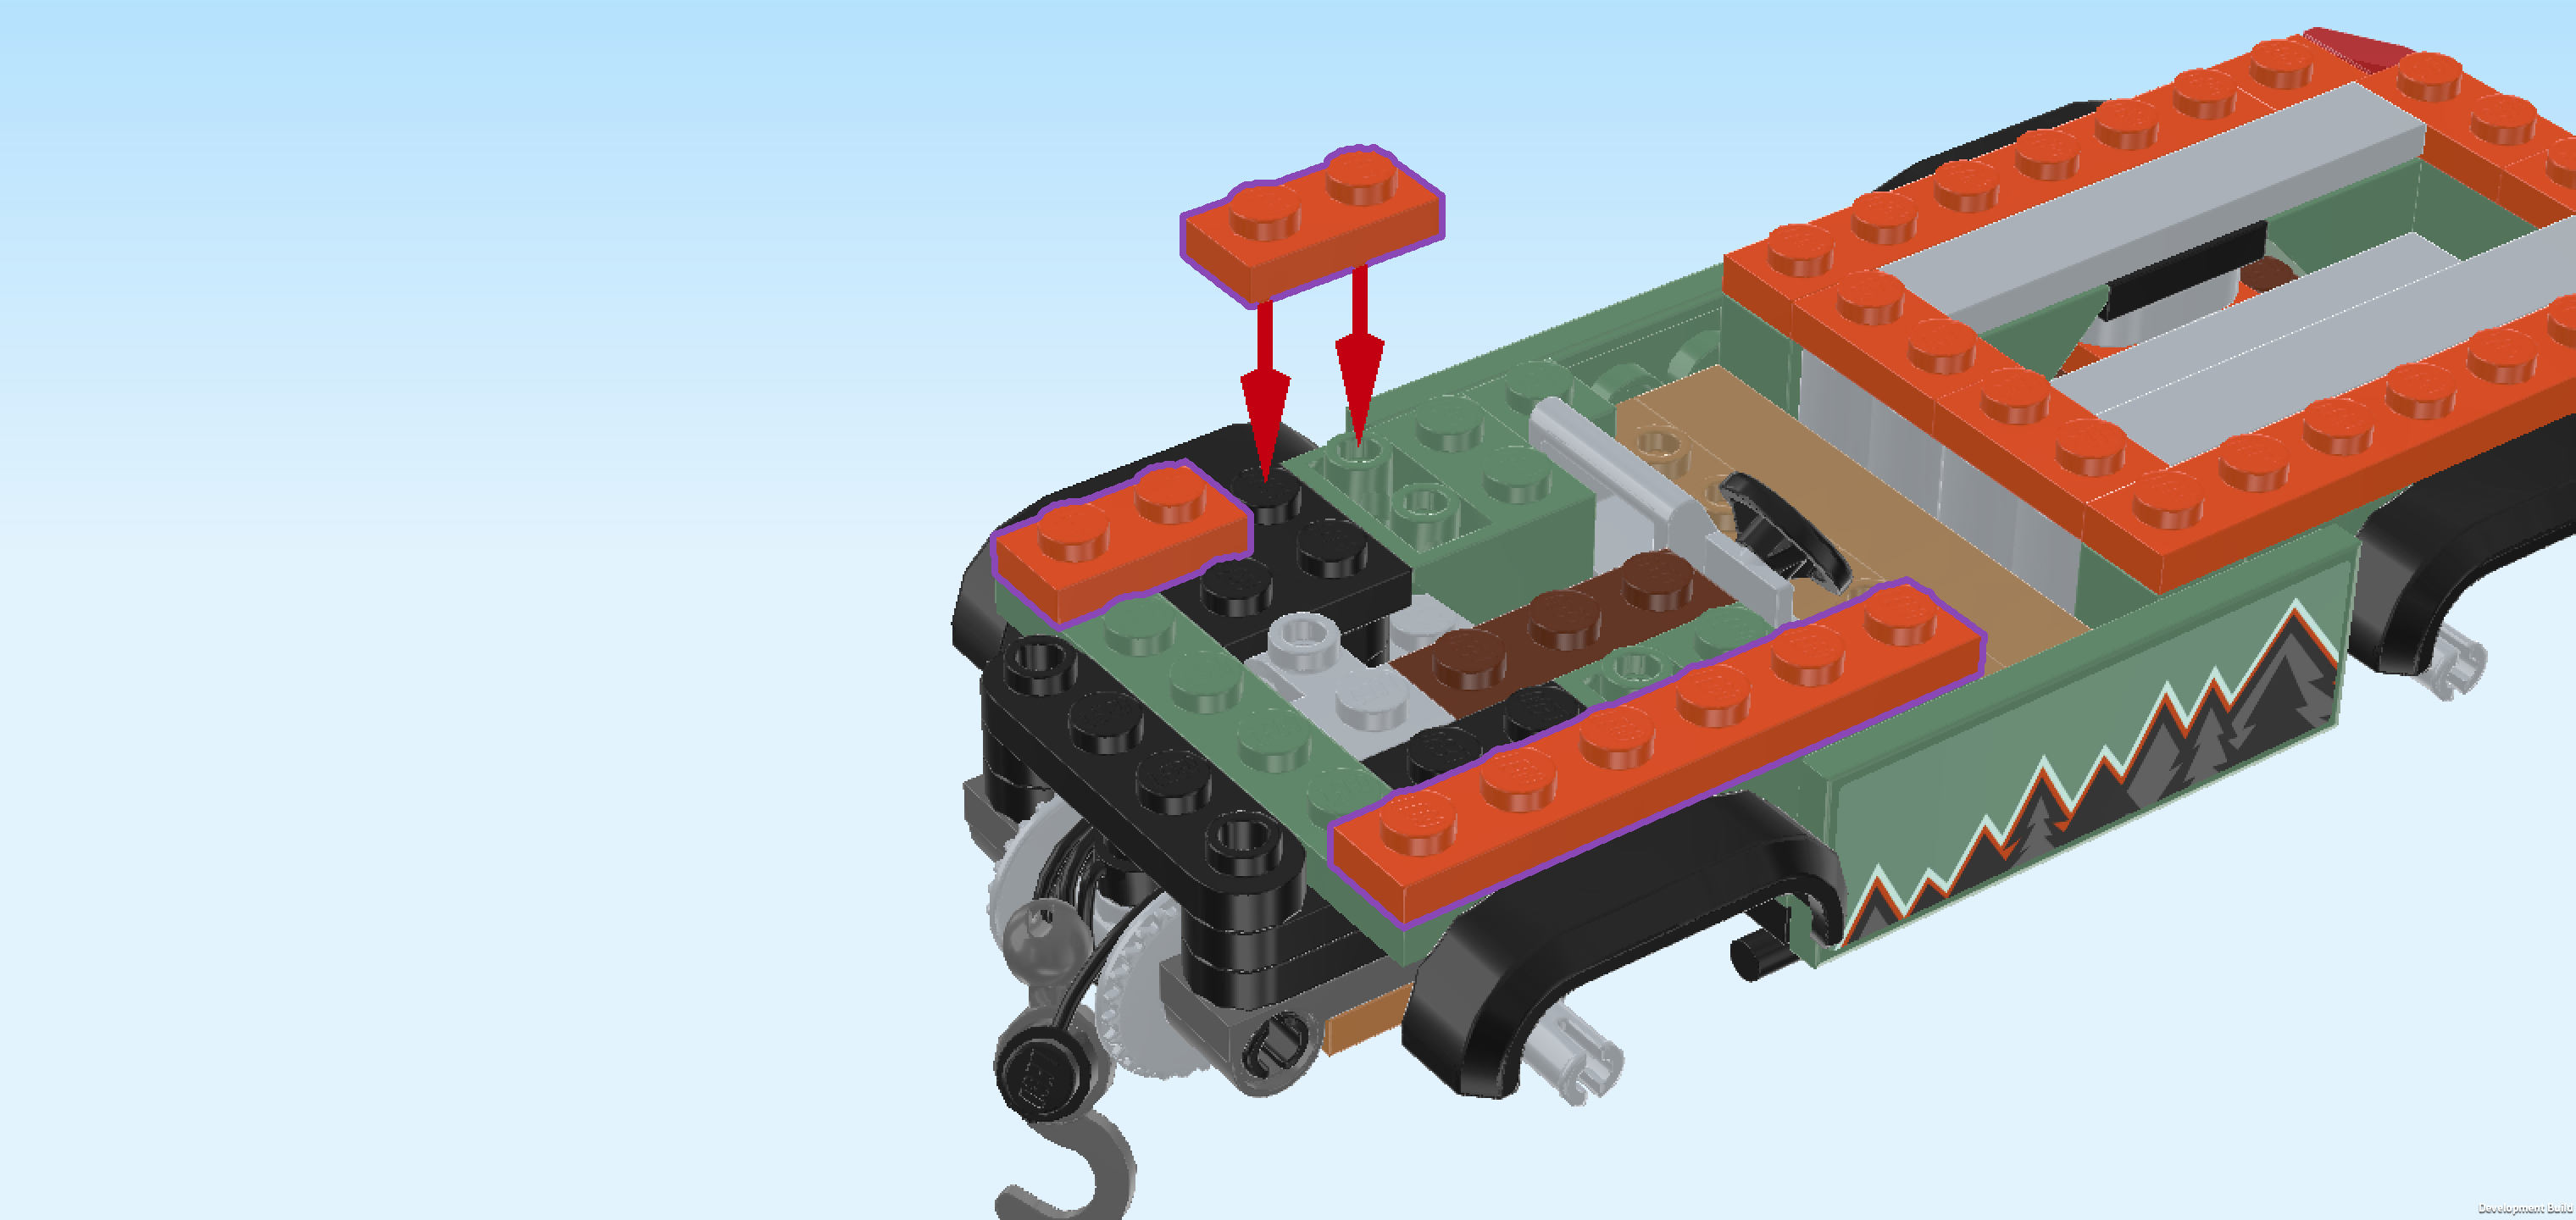
| Find 2 reddish orange plates 1x2. |
| Put 1 vertically on the 2 frontmost knobs of the rightmost column. |
| Put the other one vertically behind the previous piece. |
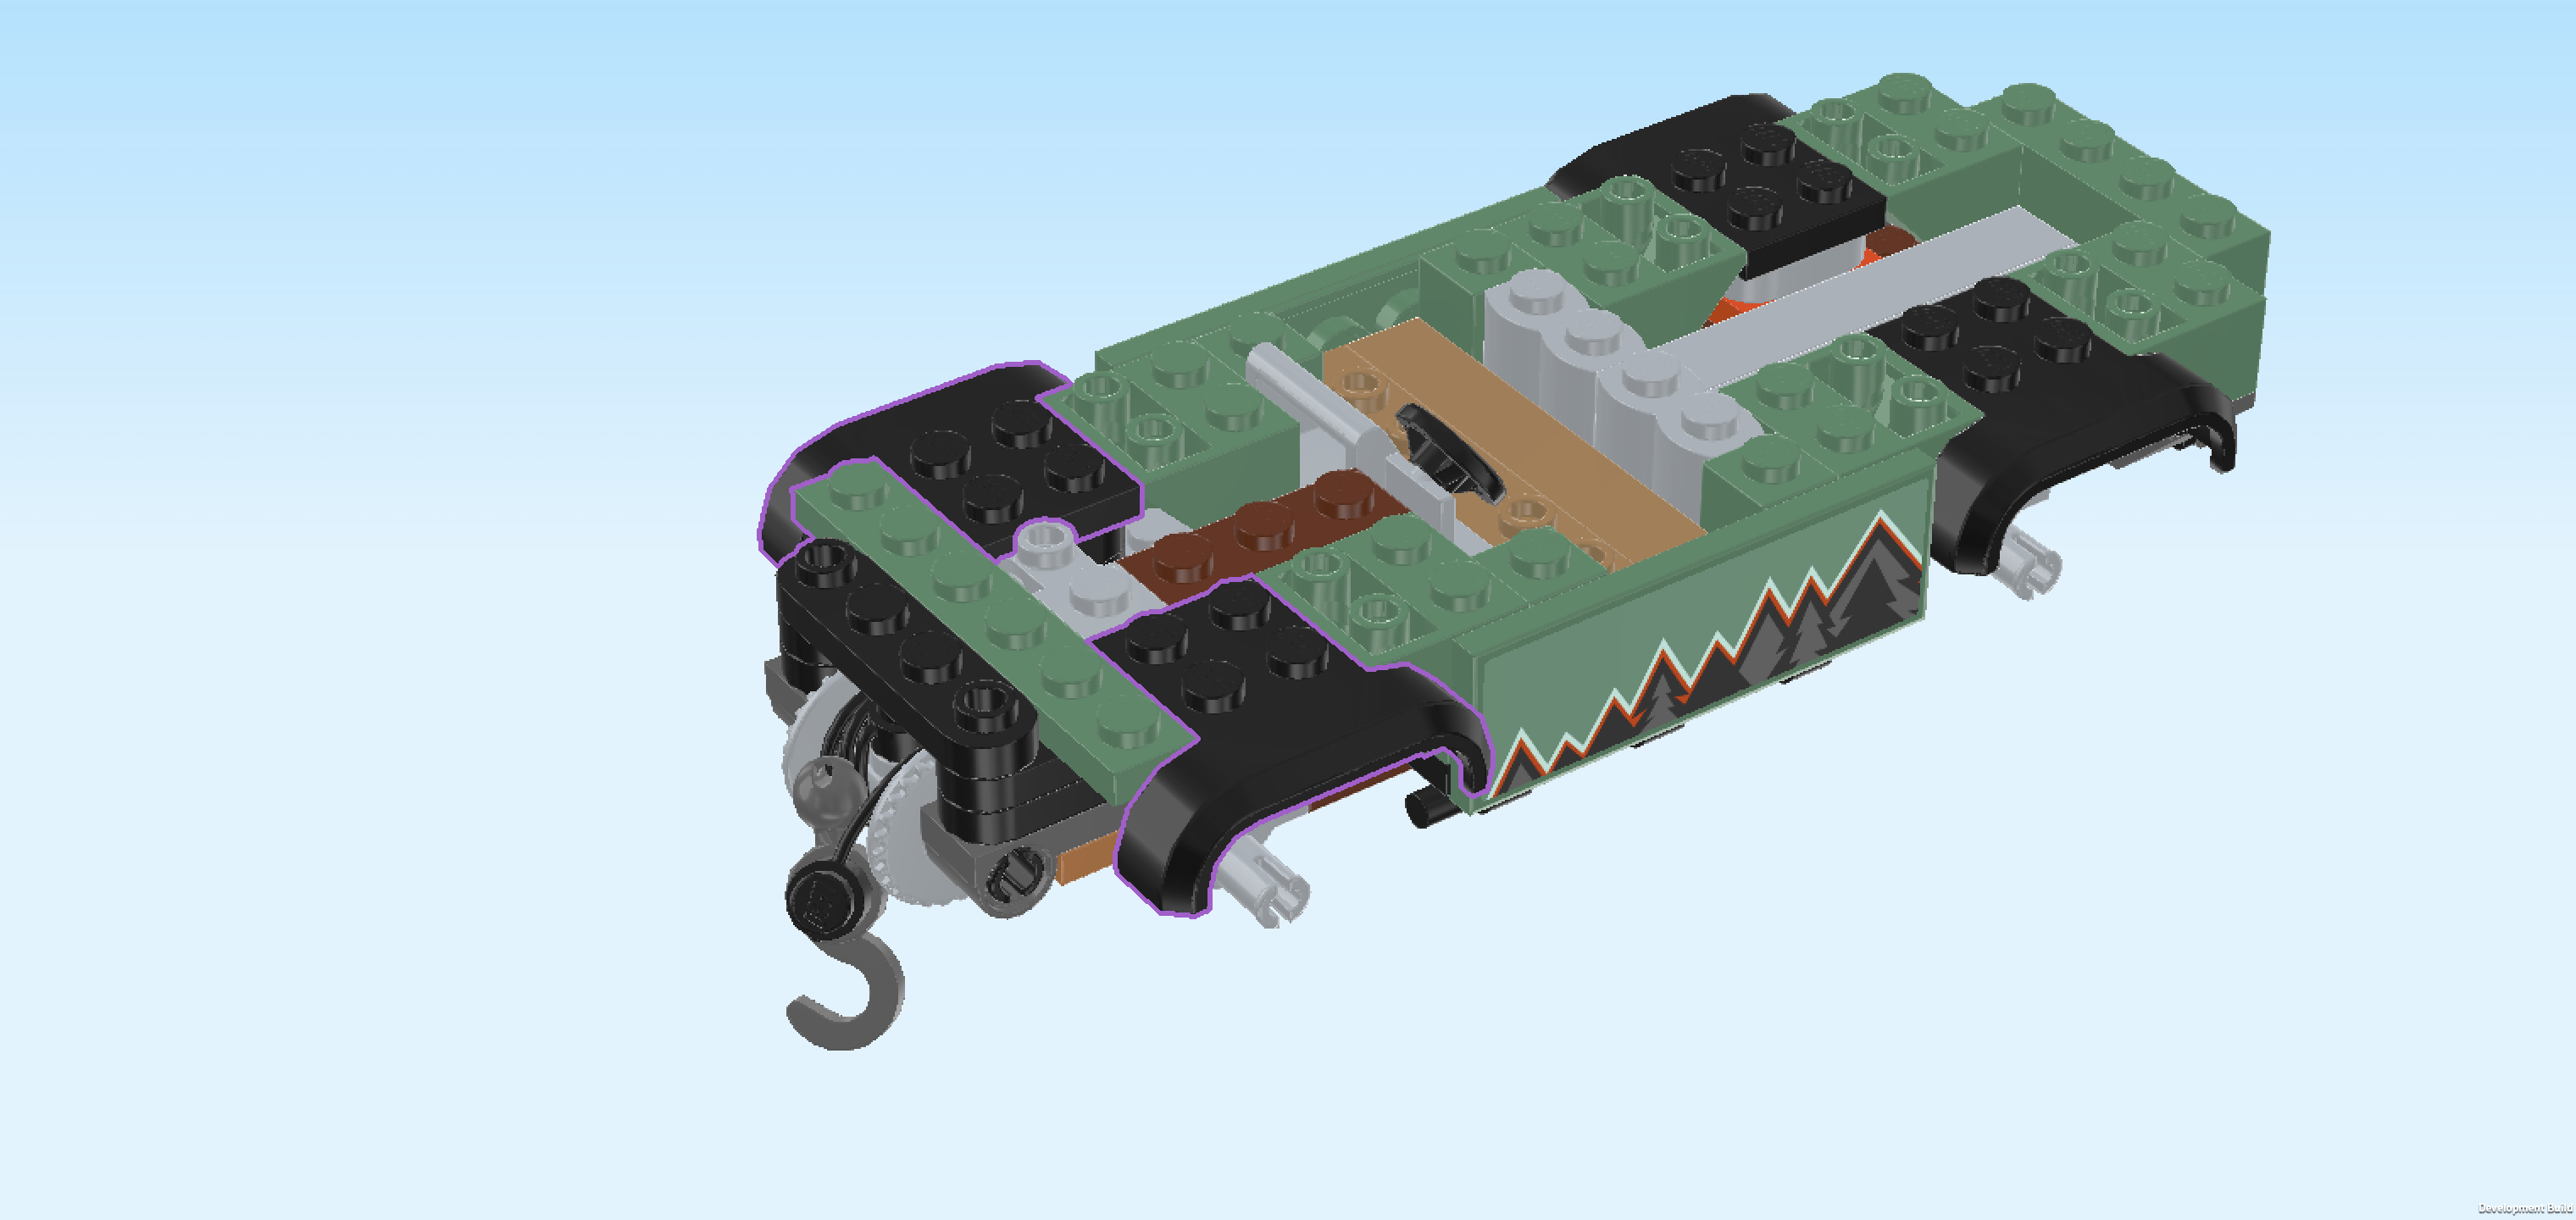
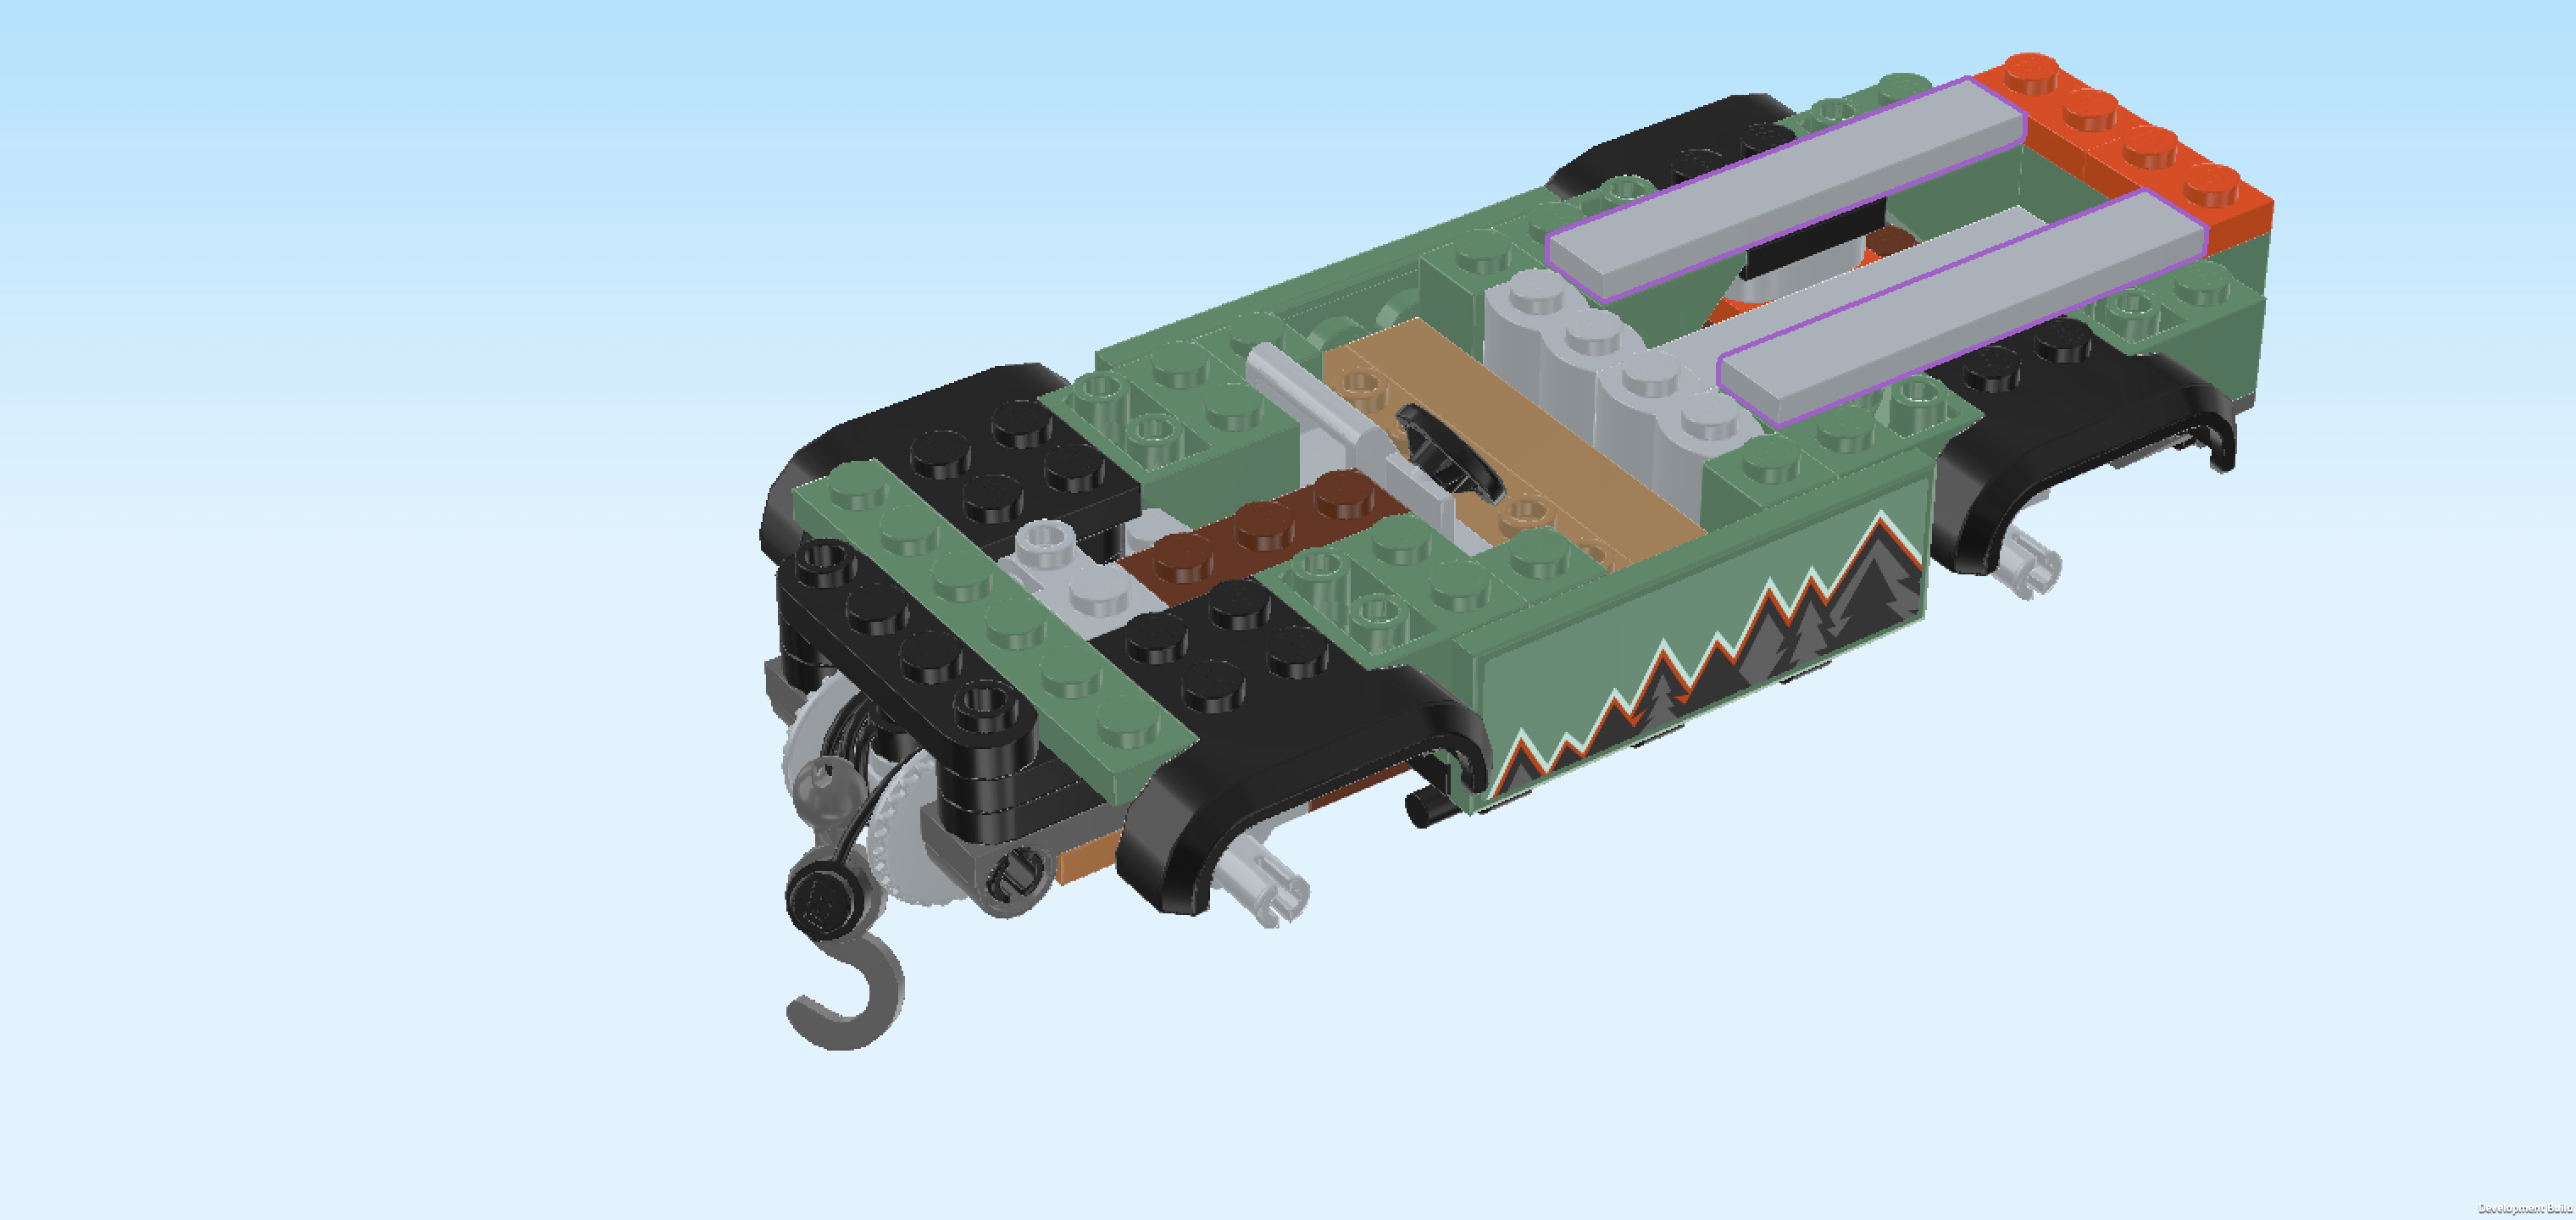
| Find 2 medium stone grey flat tiles 1x6. |
| Put 1 horizontally to the left of the previous piece's backmost knob. |
| Repeat symmetrically at the front. If done correctly, there will be a 2-row gap between these two pieces. |
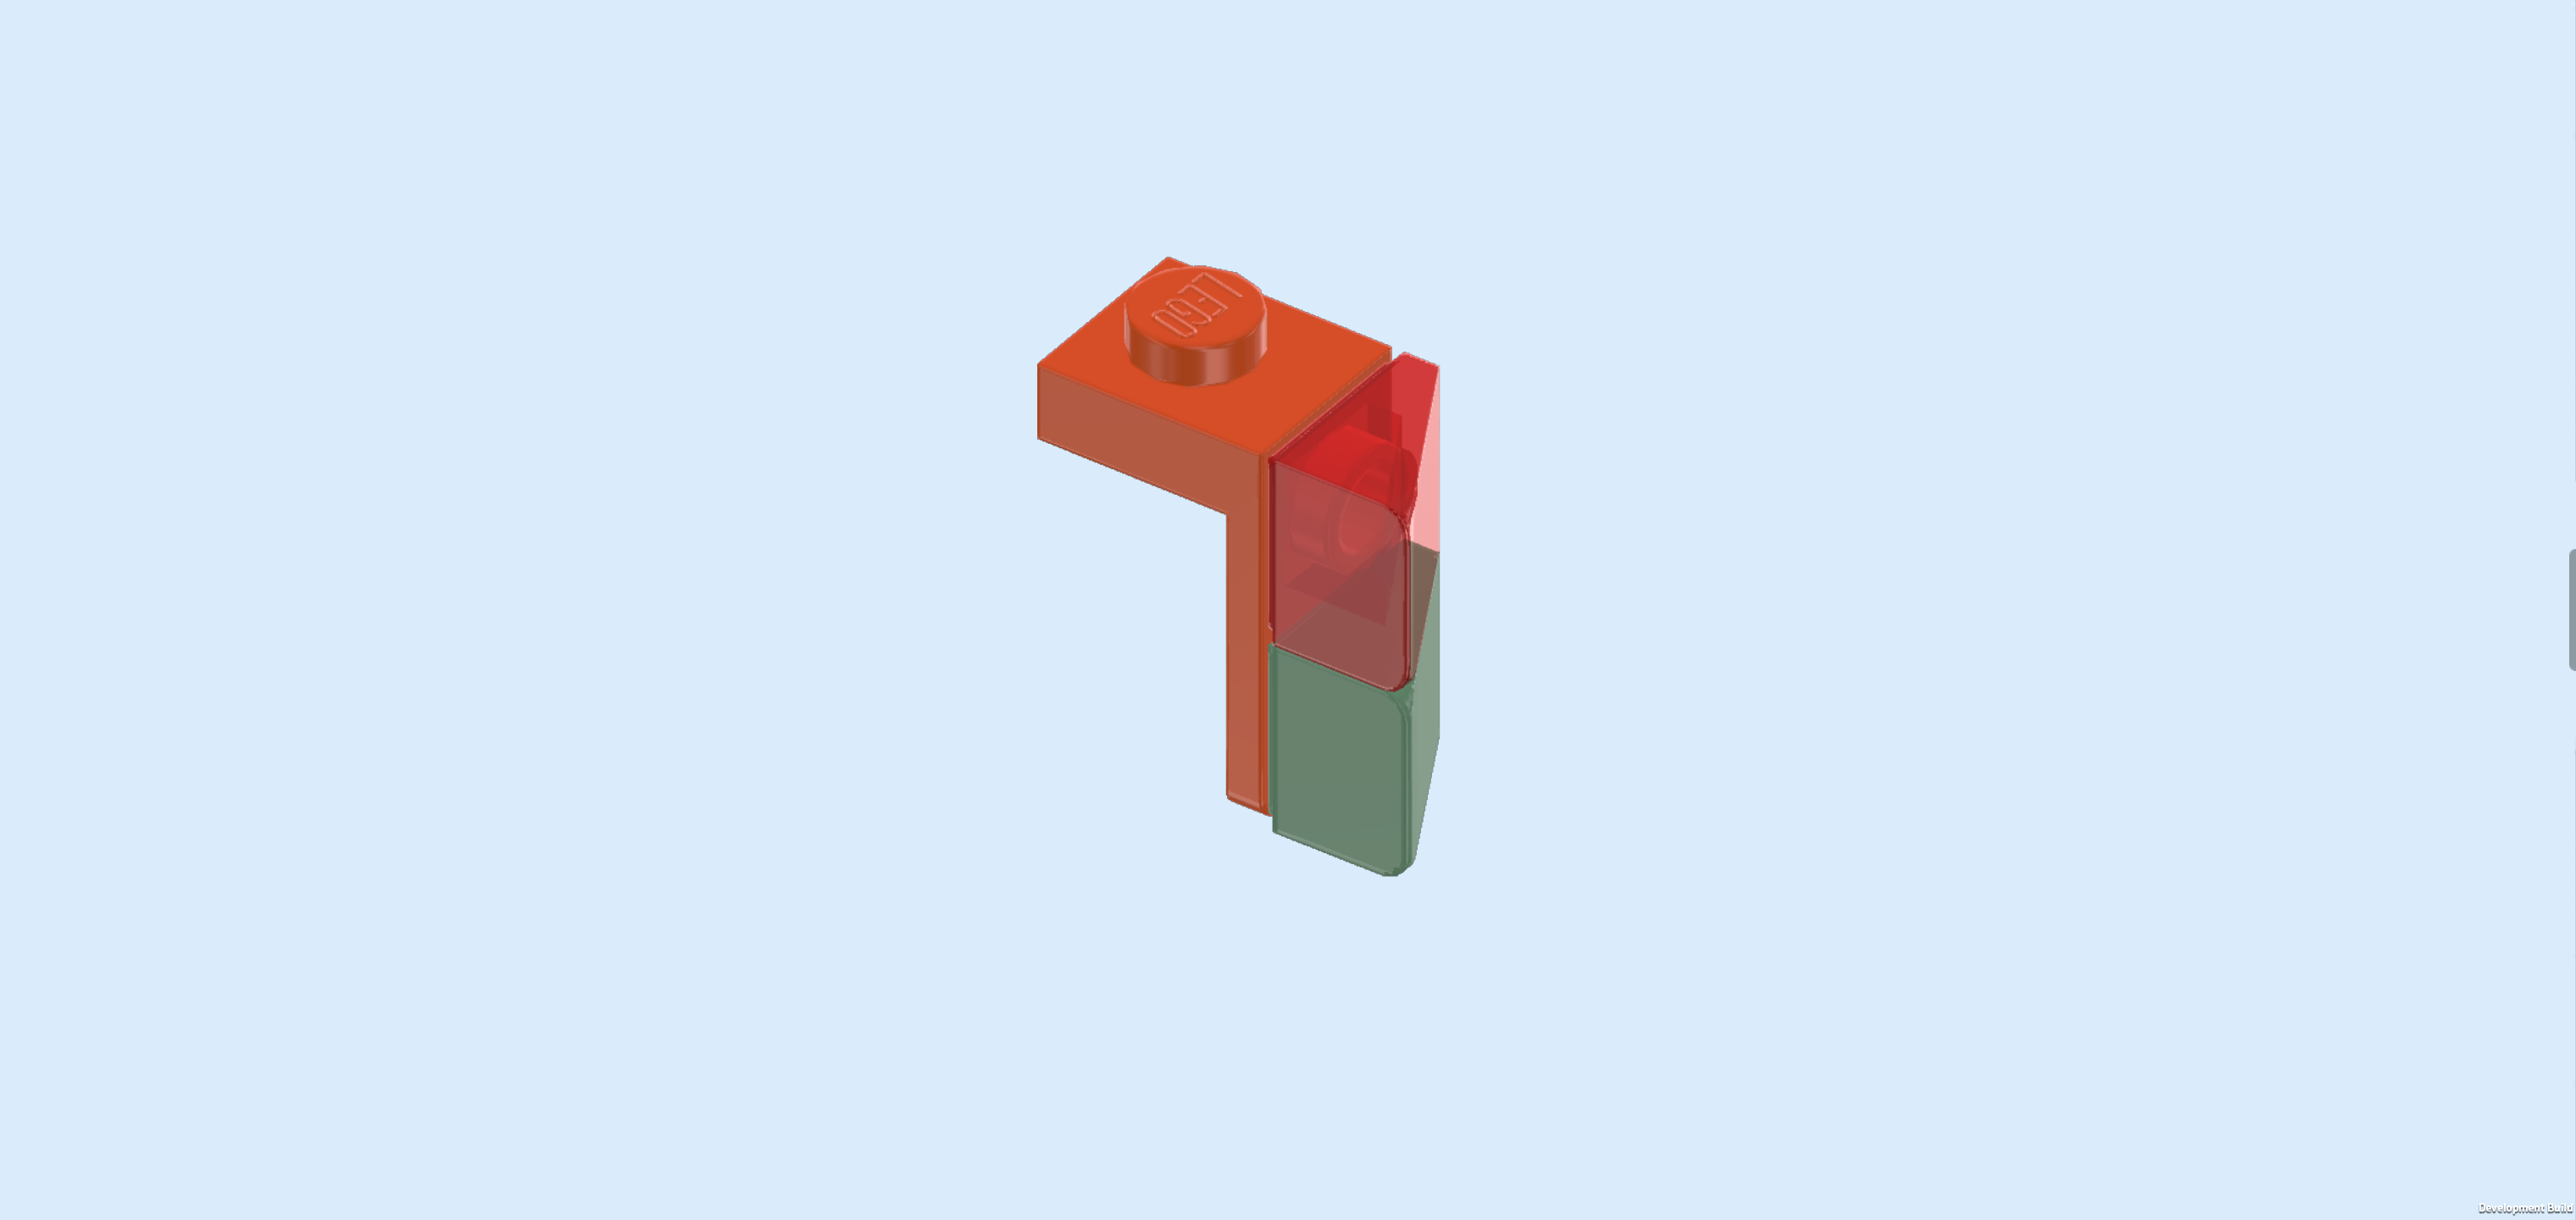
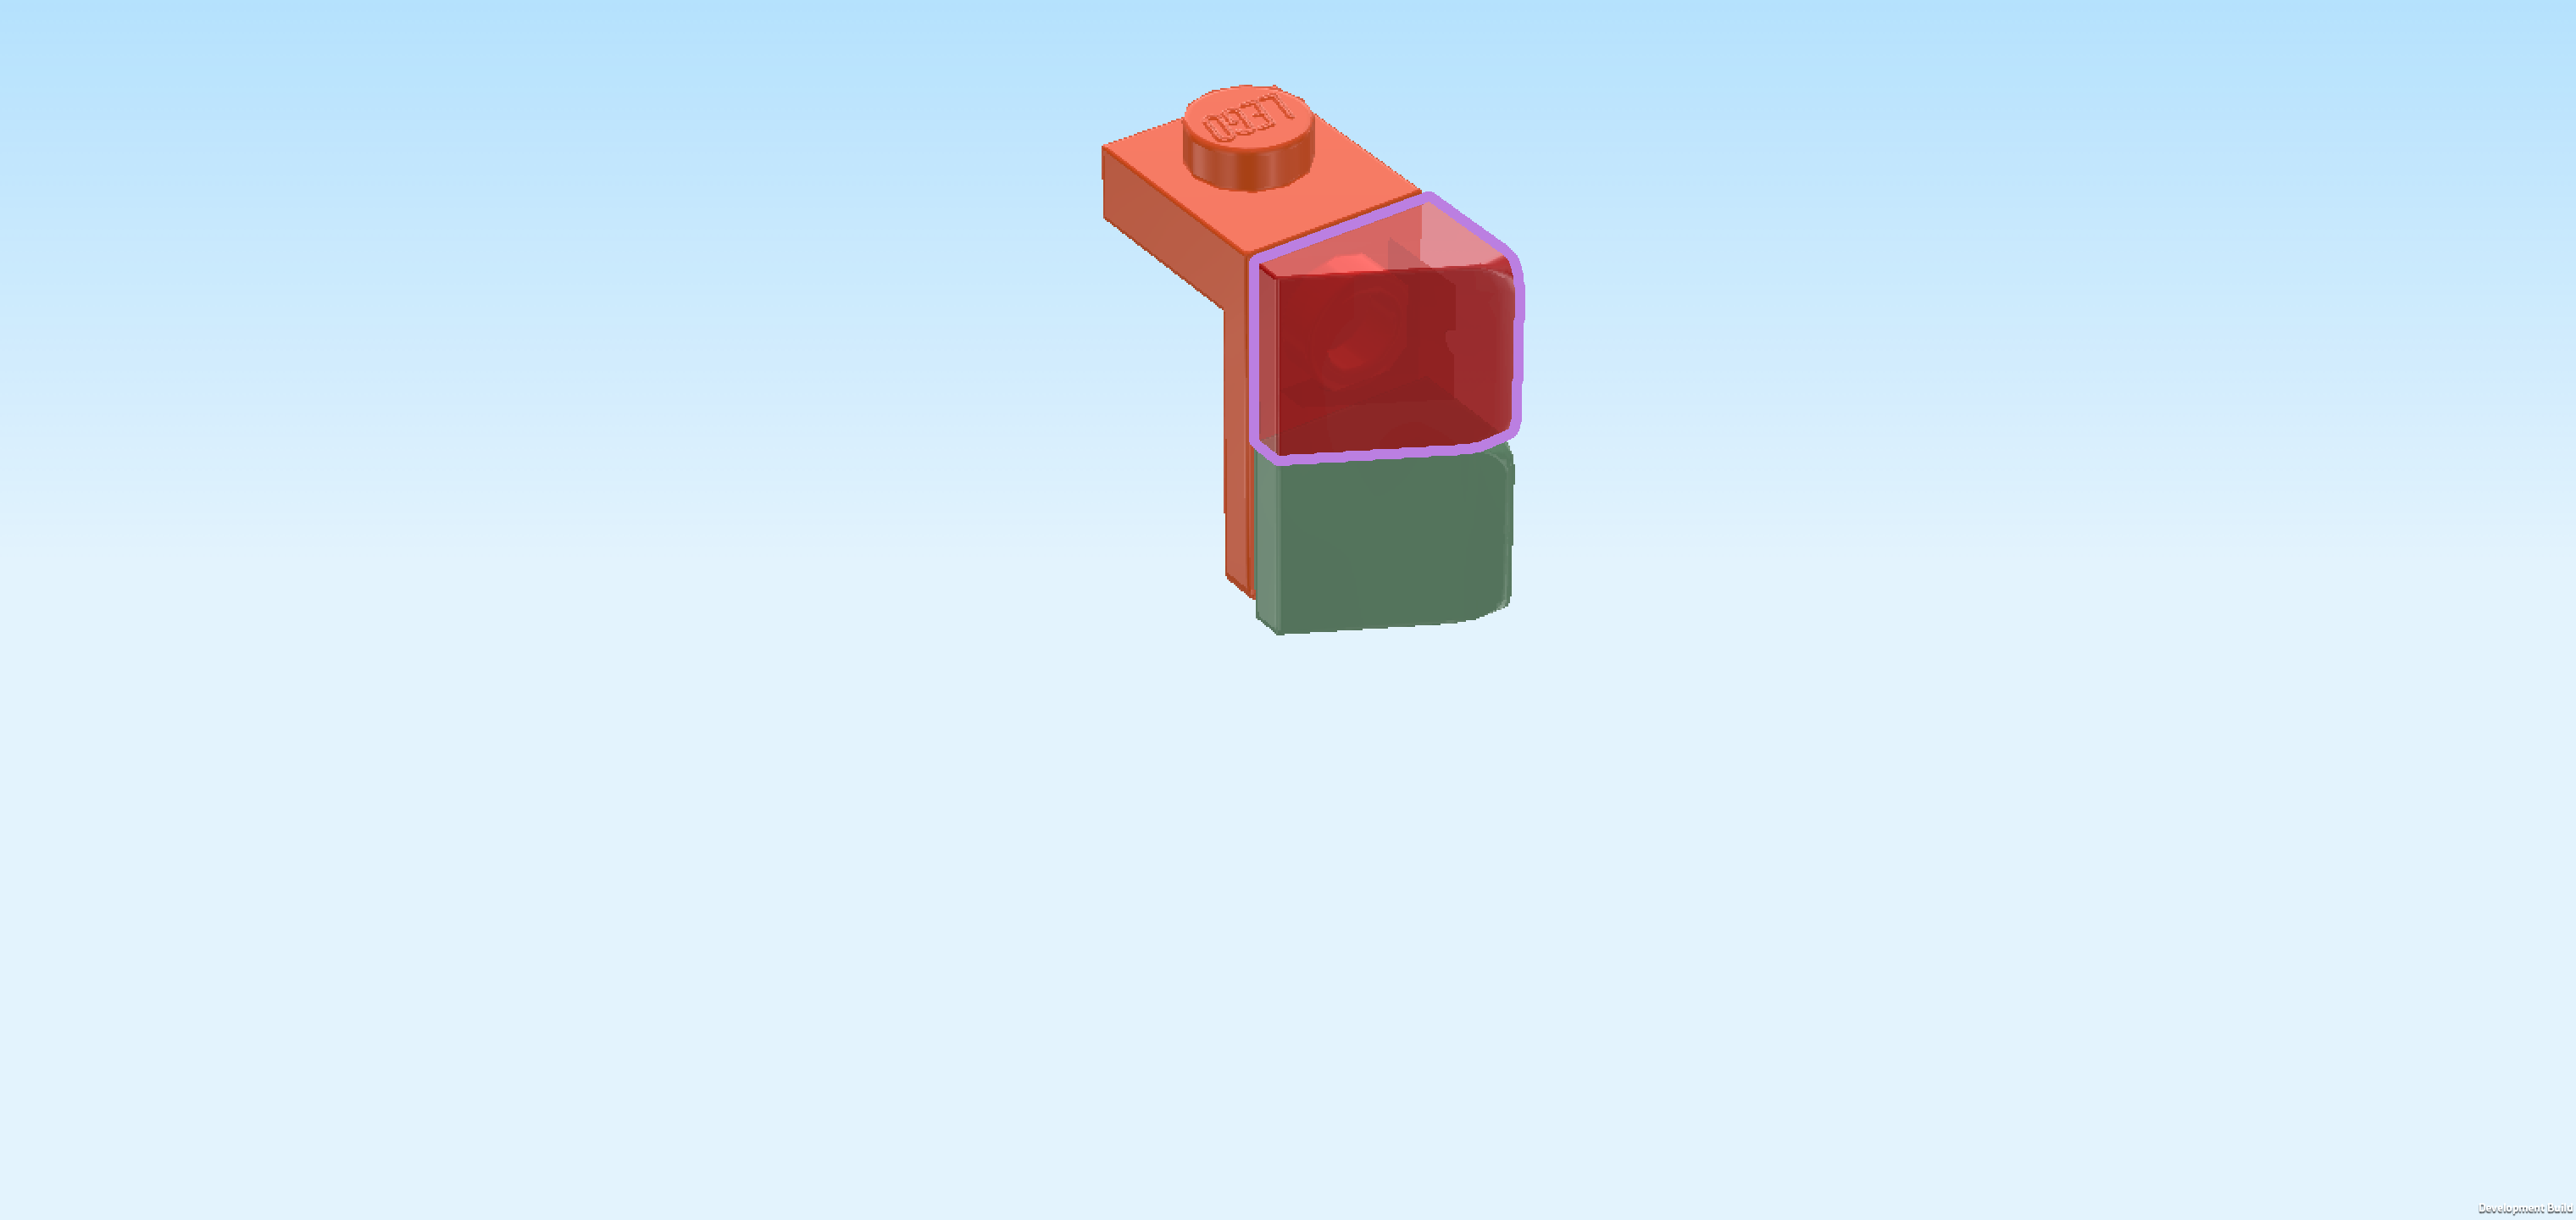
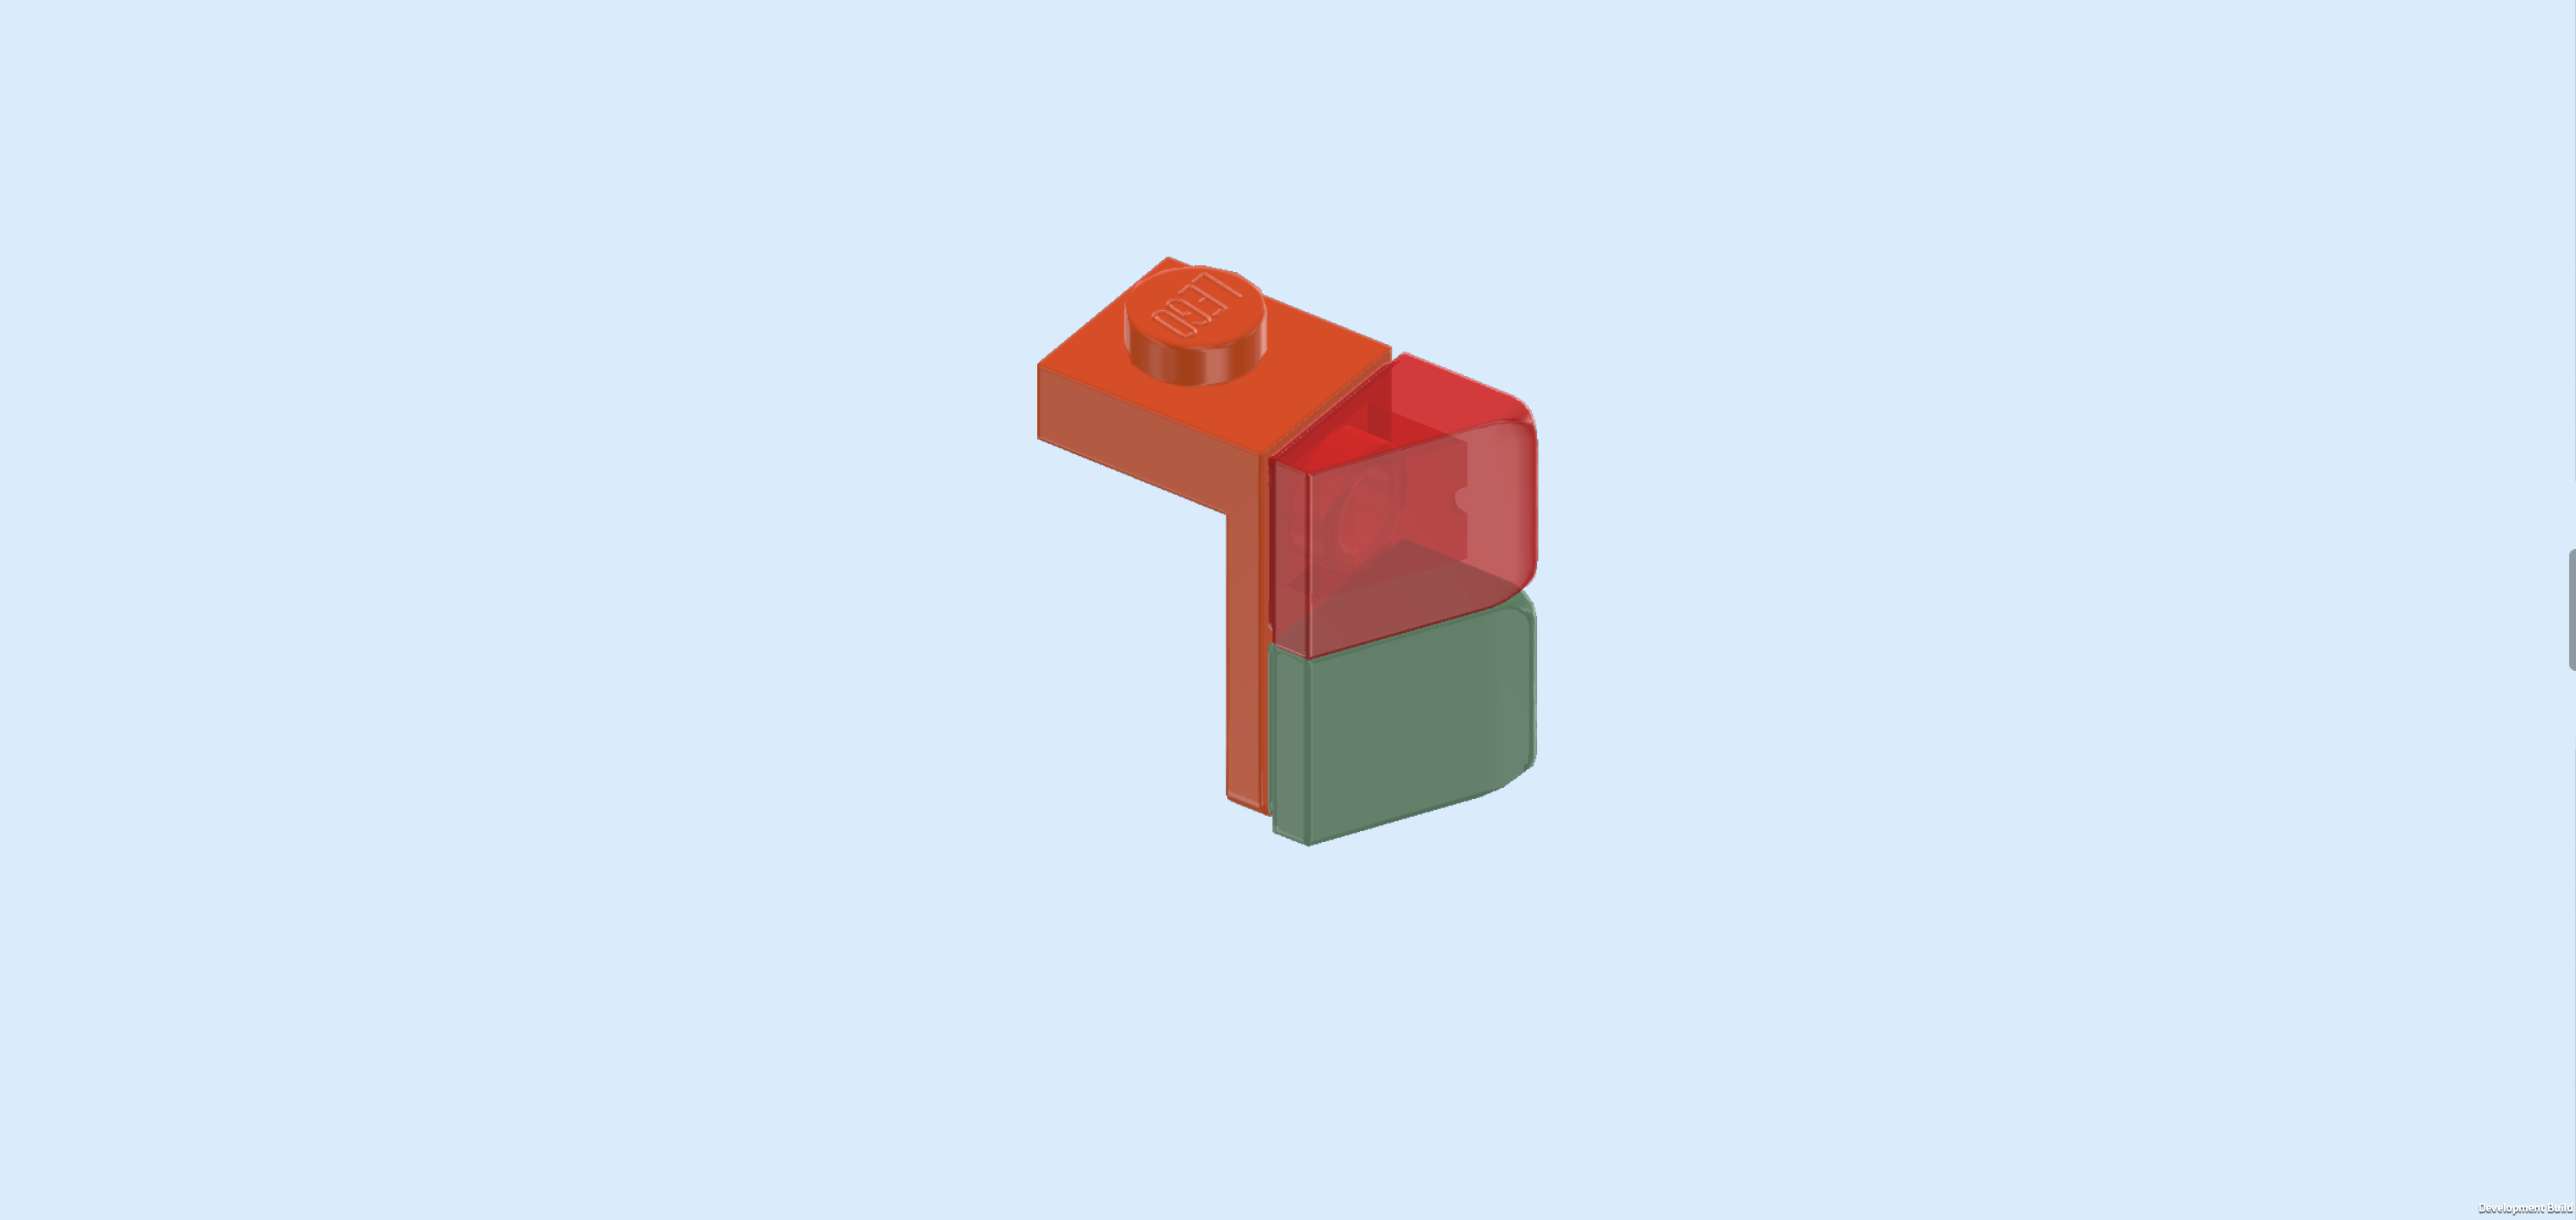
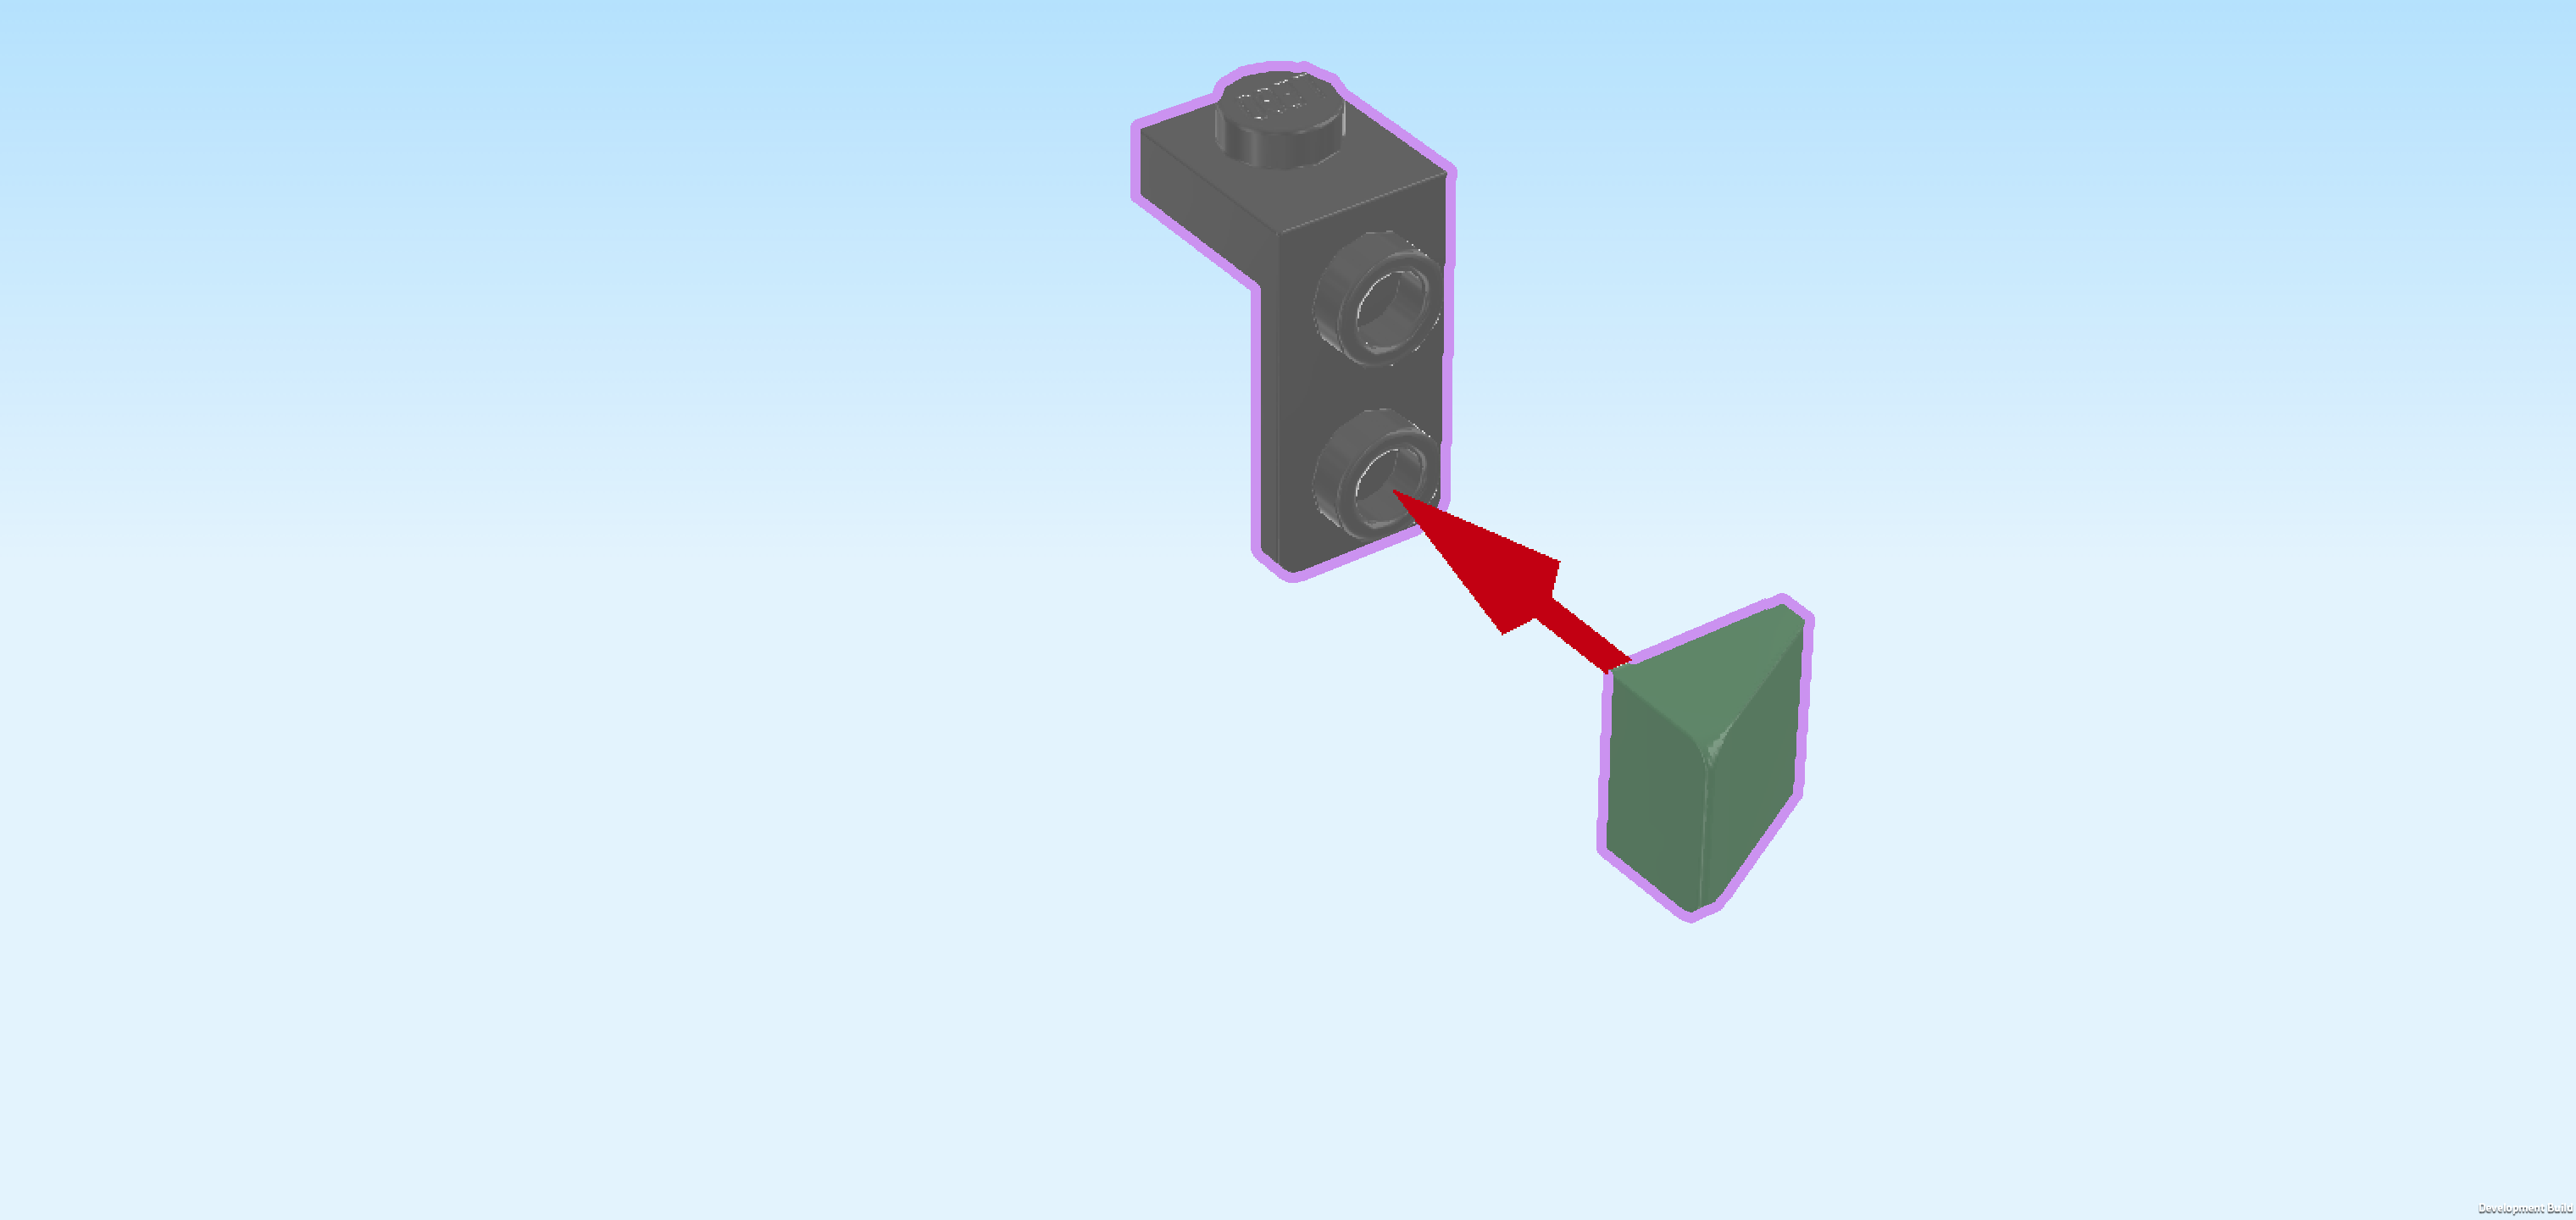
| Next, we will build the first of 2 taillights. |
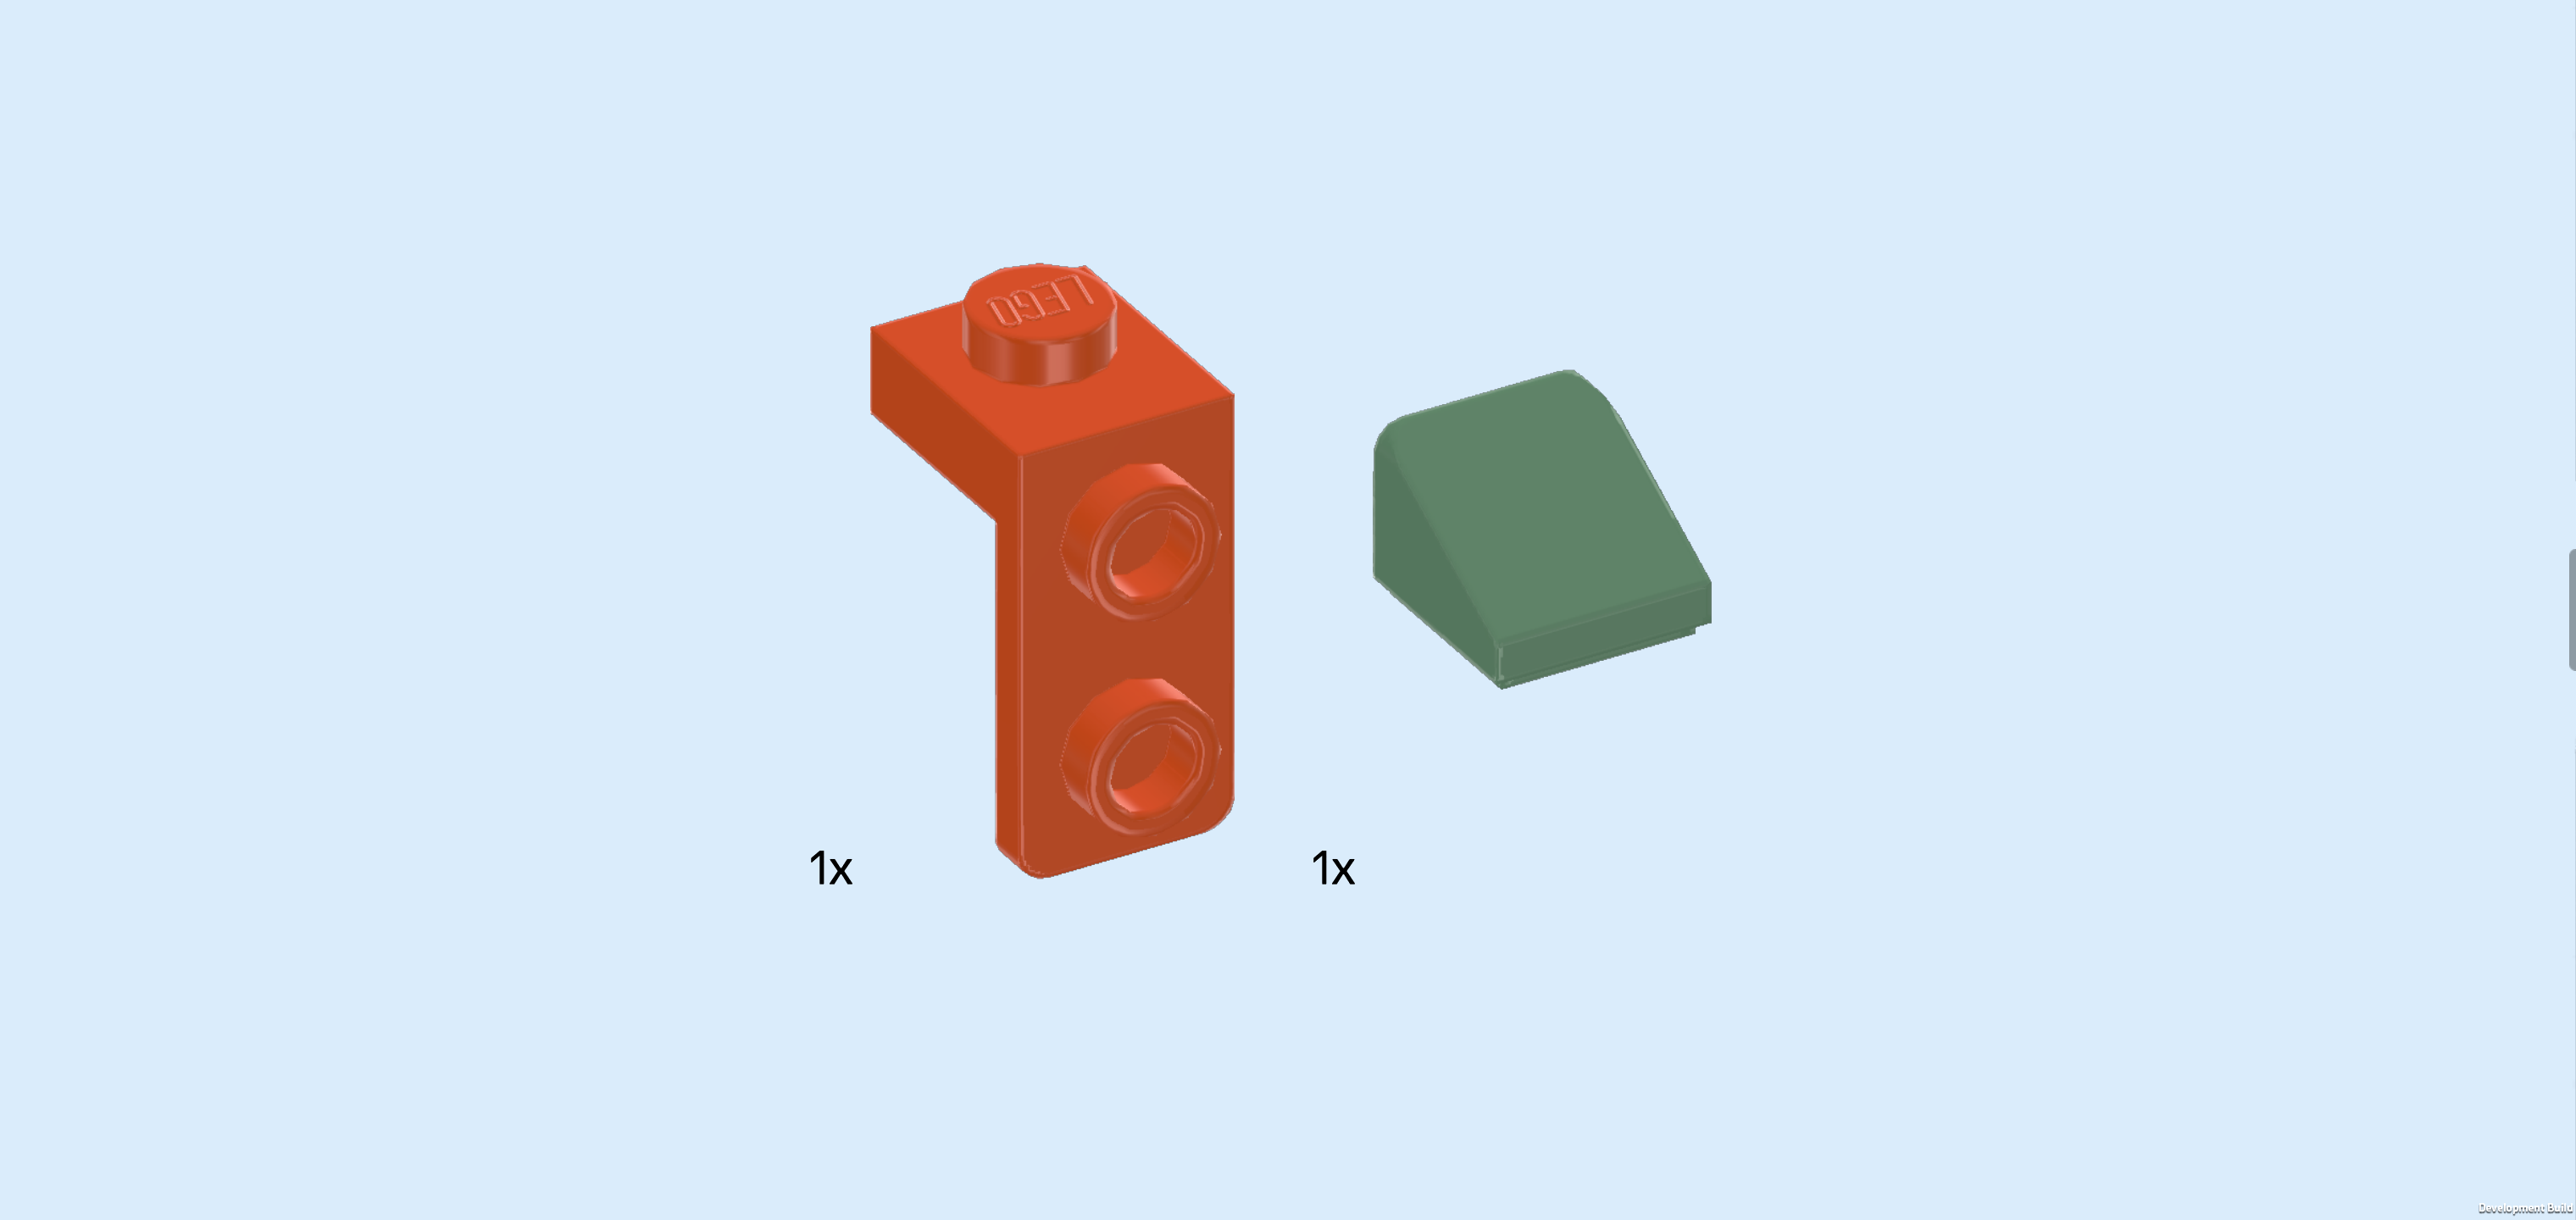
| Collect the following 2 pieces: |
| 1 reddish orange top angle plate 1x1 - 1x2 with 2 side knobs, |
| and 1 sand green smooth roof tile 1x1x⅔. |
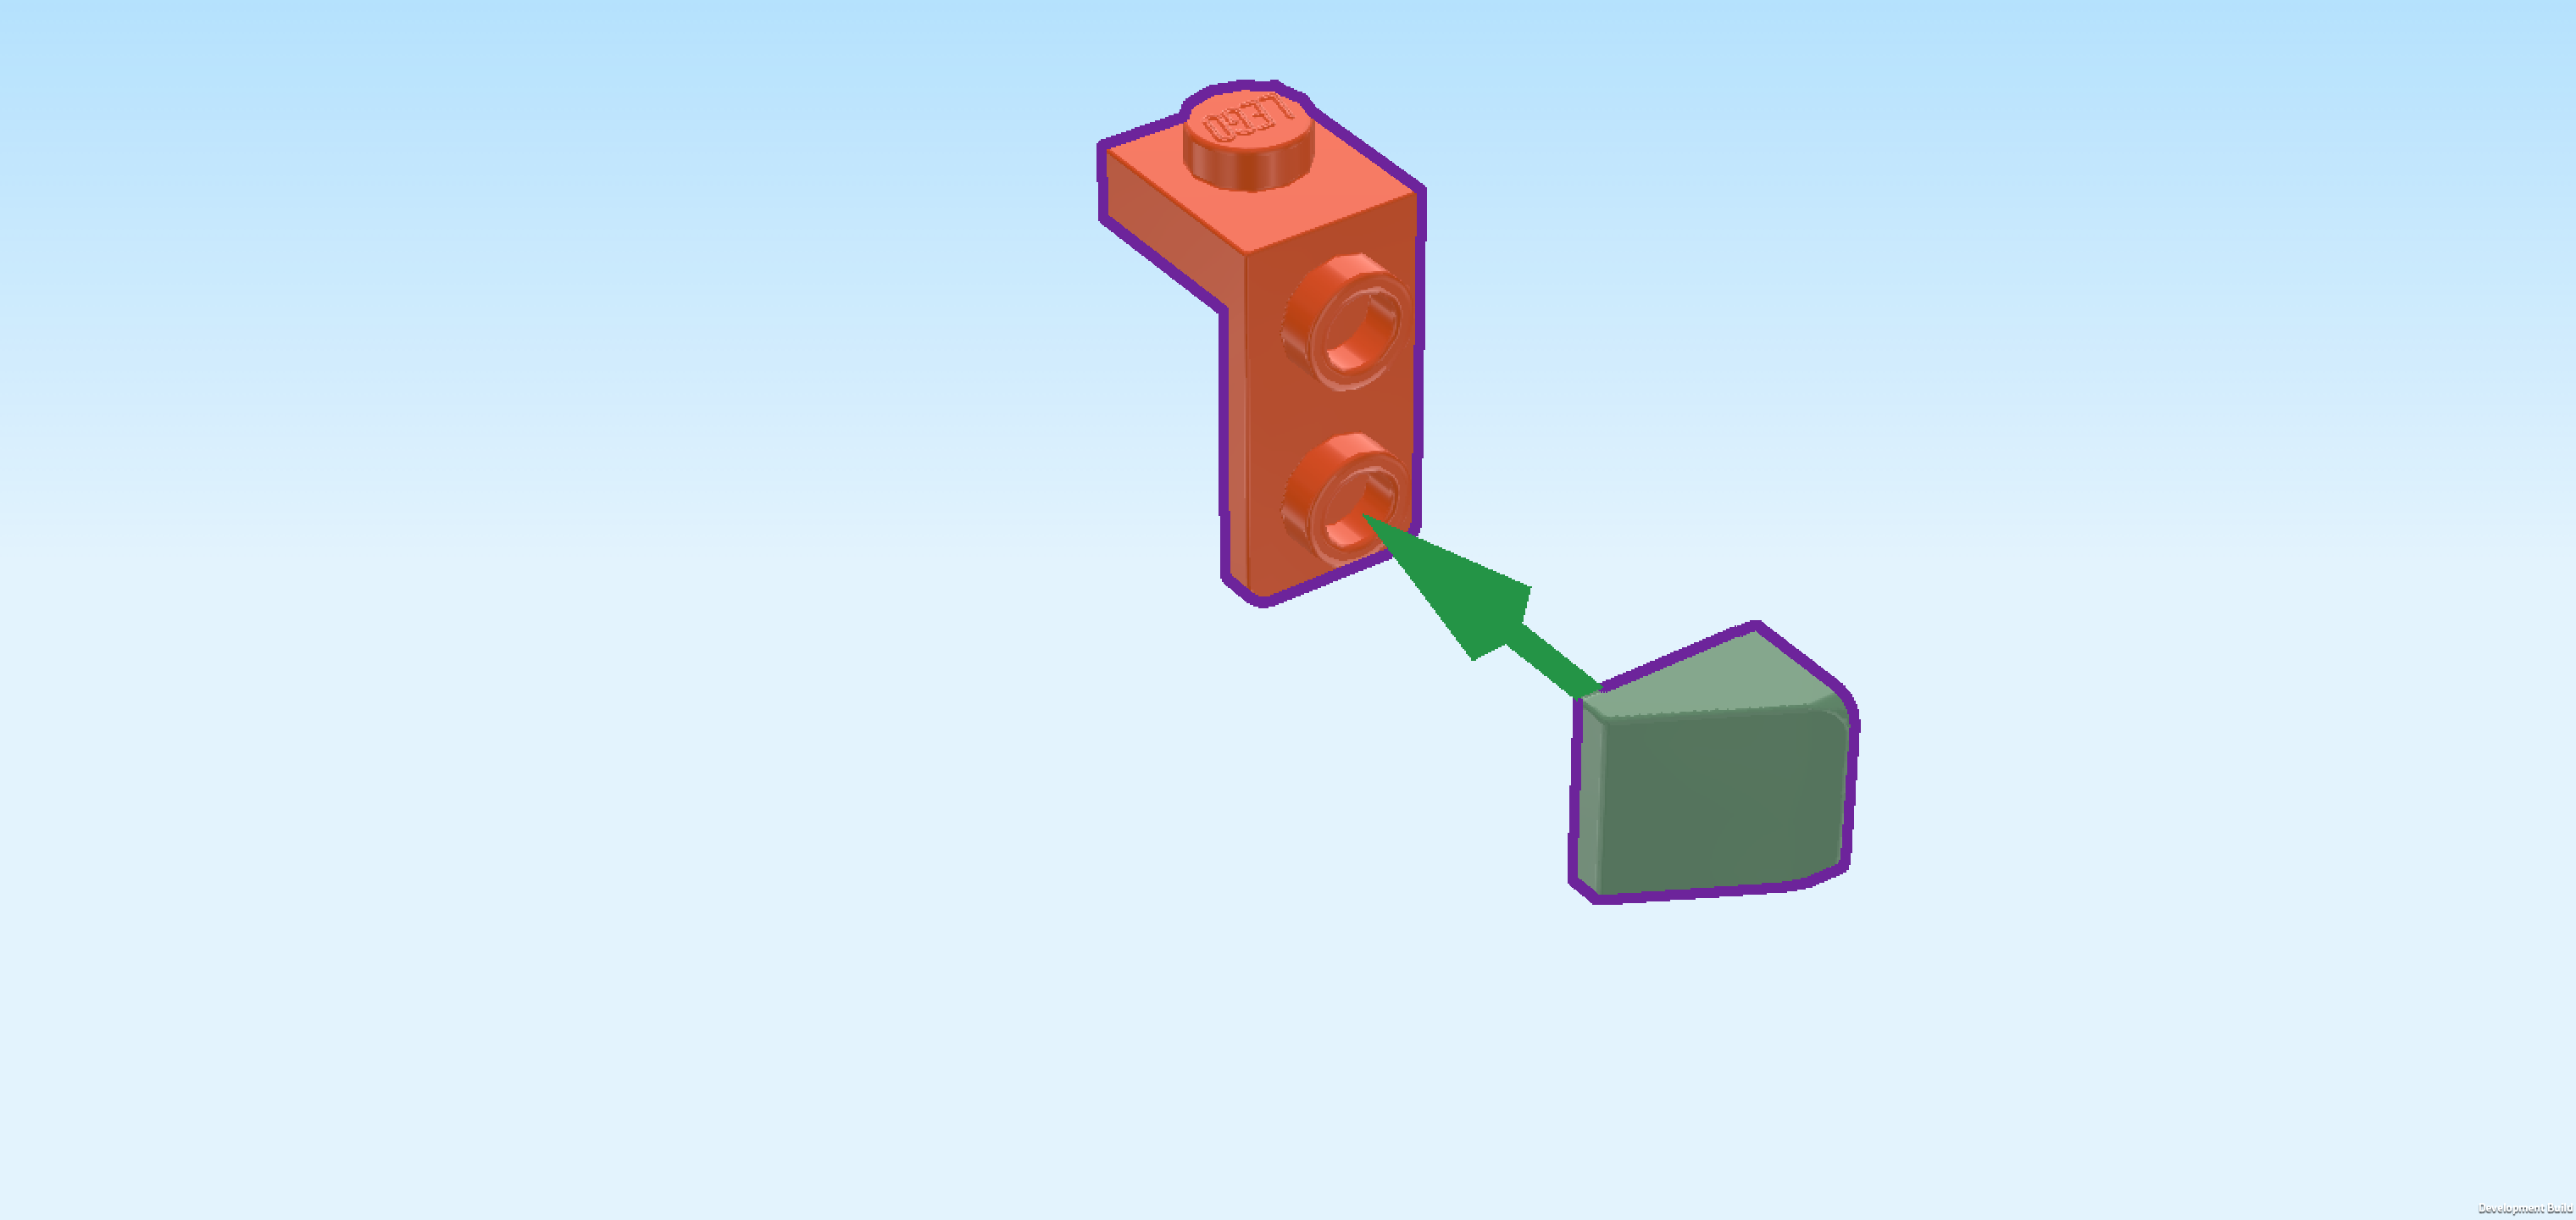
| Hold the top angle plate so that its side plate is pointing to the bottom and the 2 side knobs are pointing to the right. |
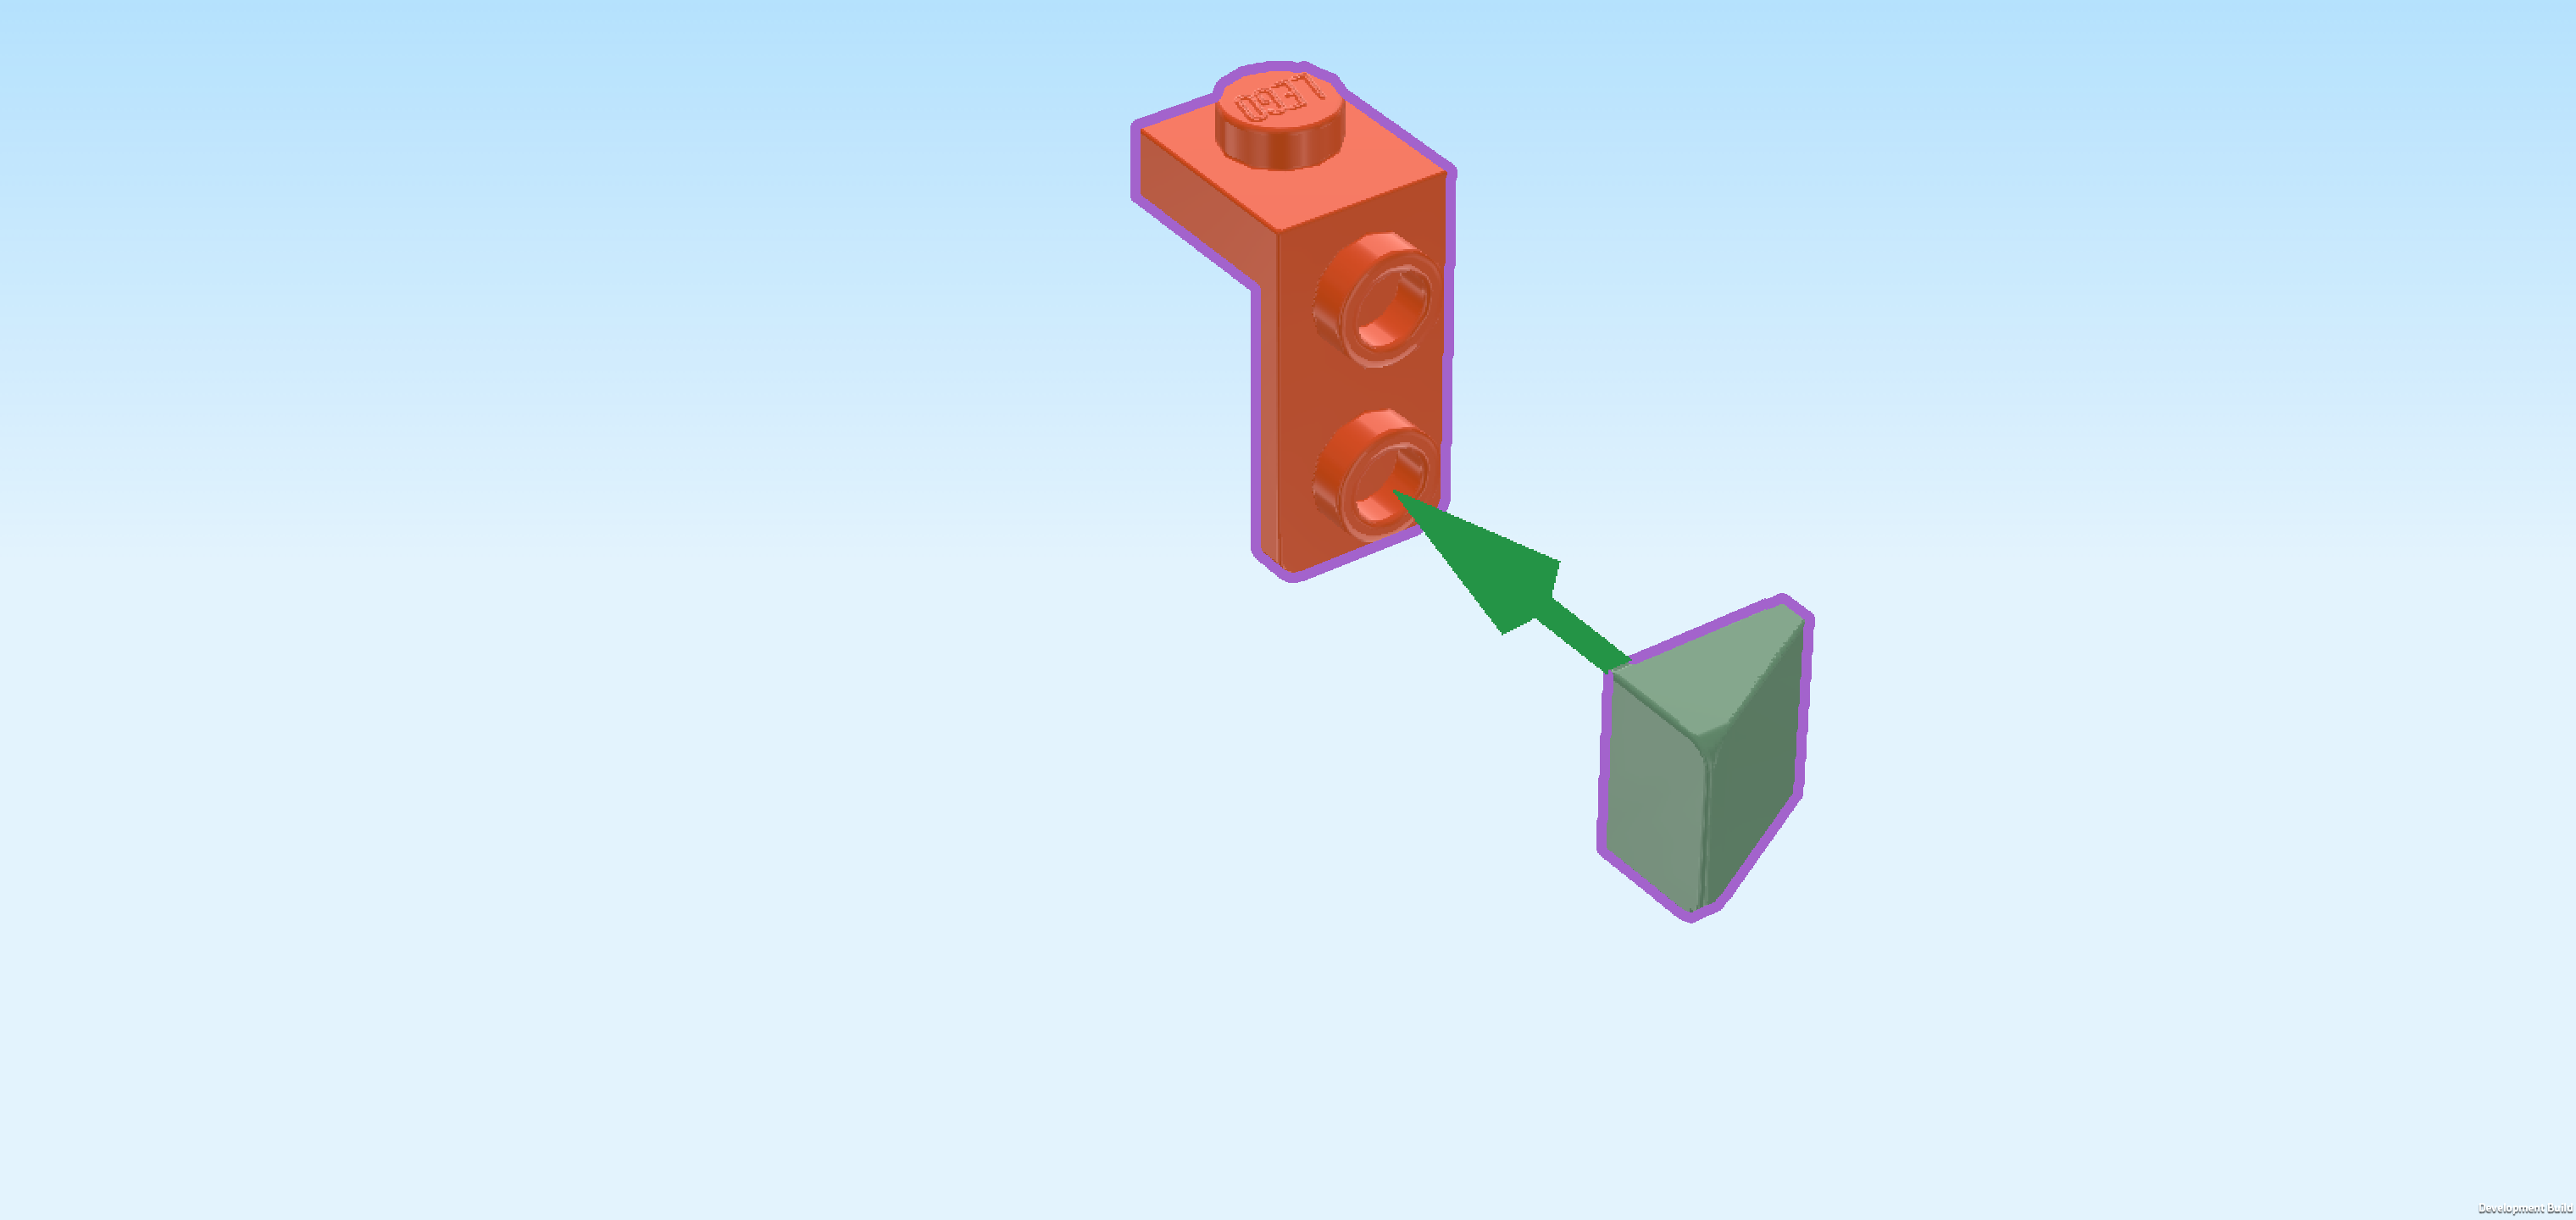
| Put the roof tile 1x1 on the bottom side knob, slope running towards the back left. This means its highest edge will be closest to you. |
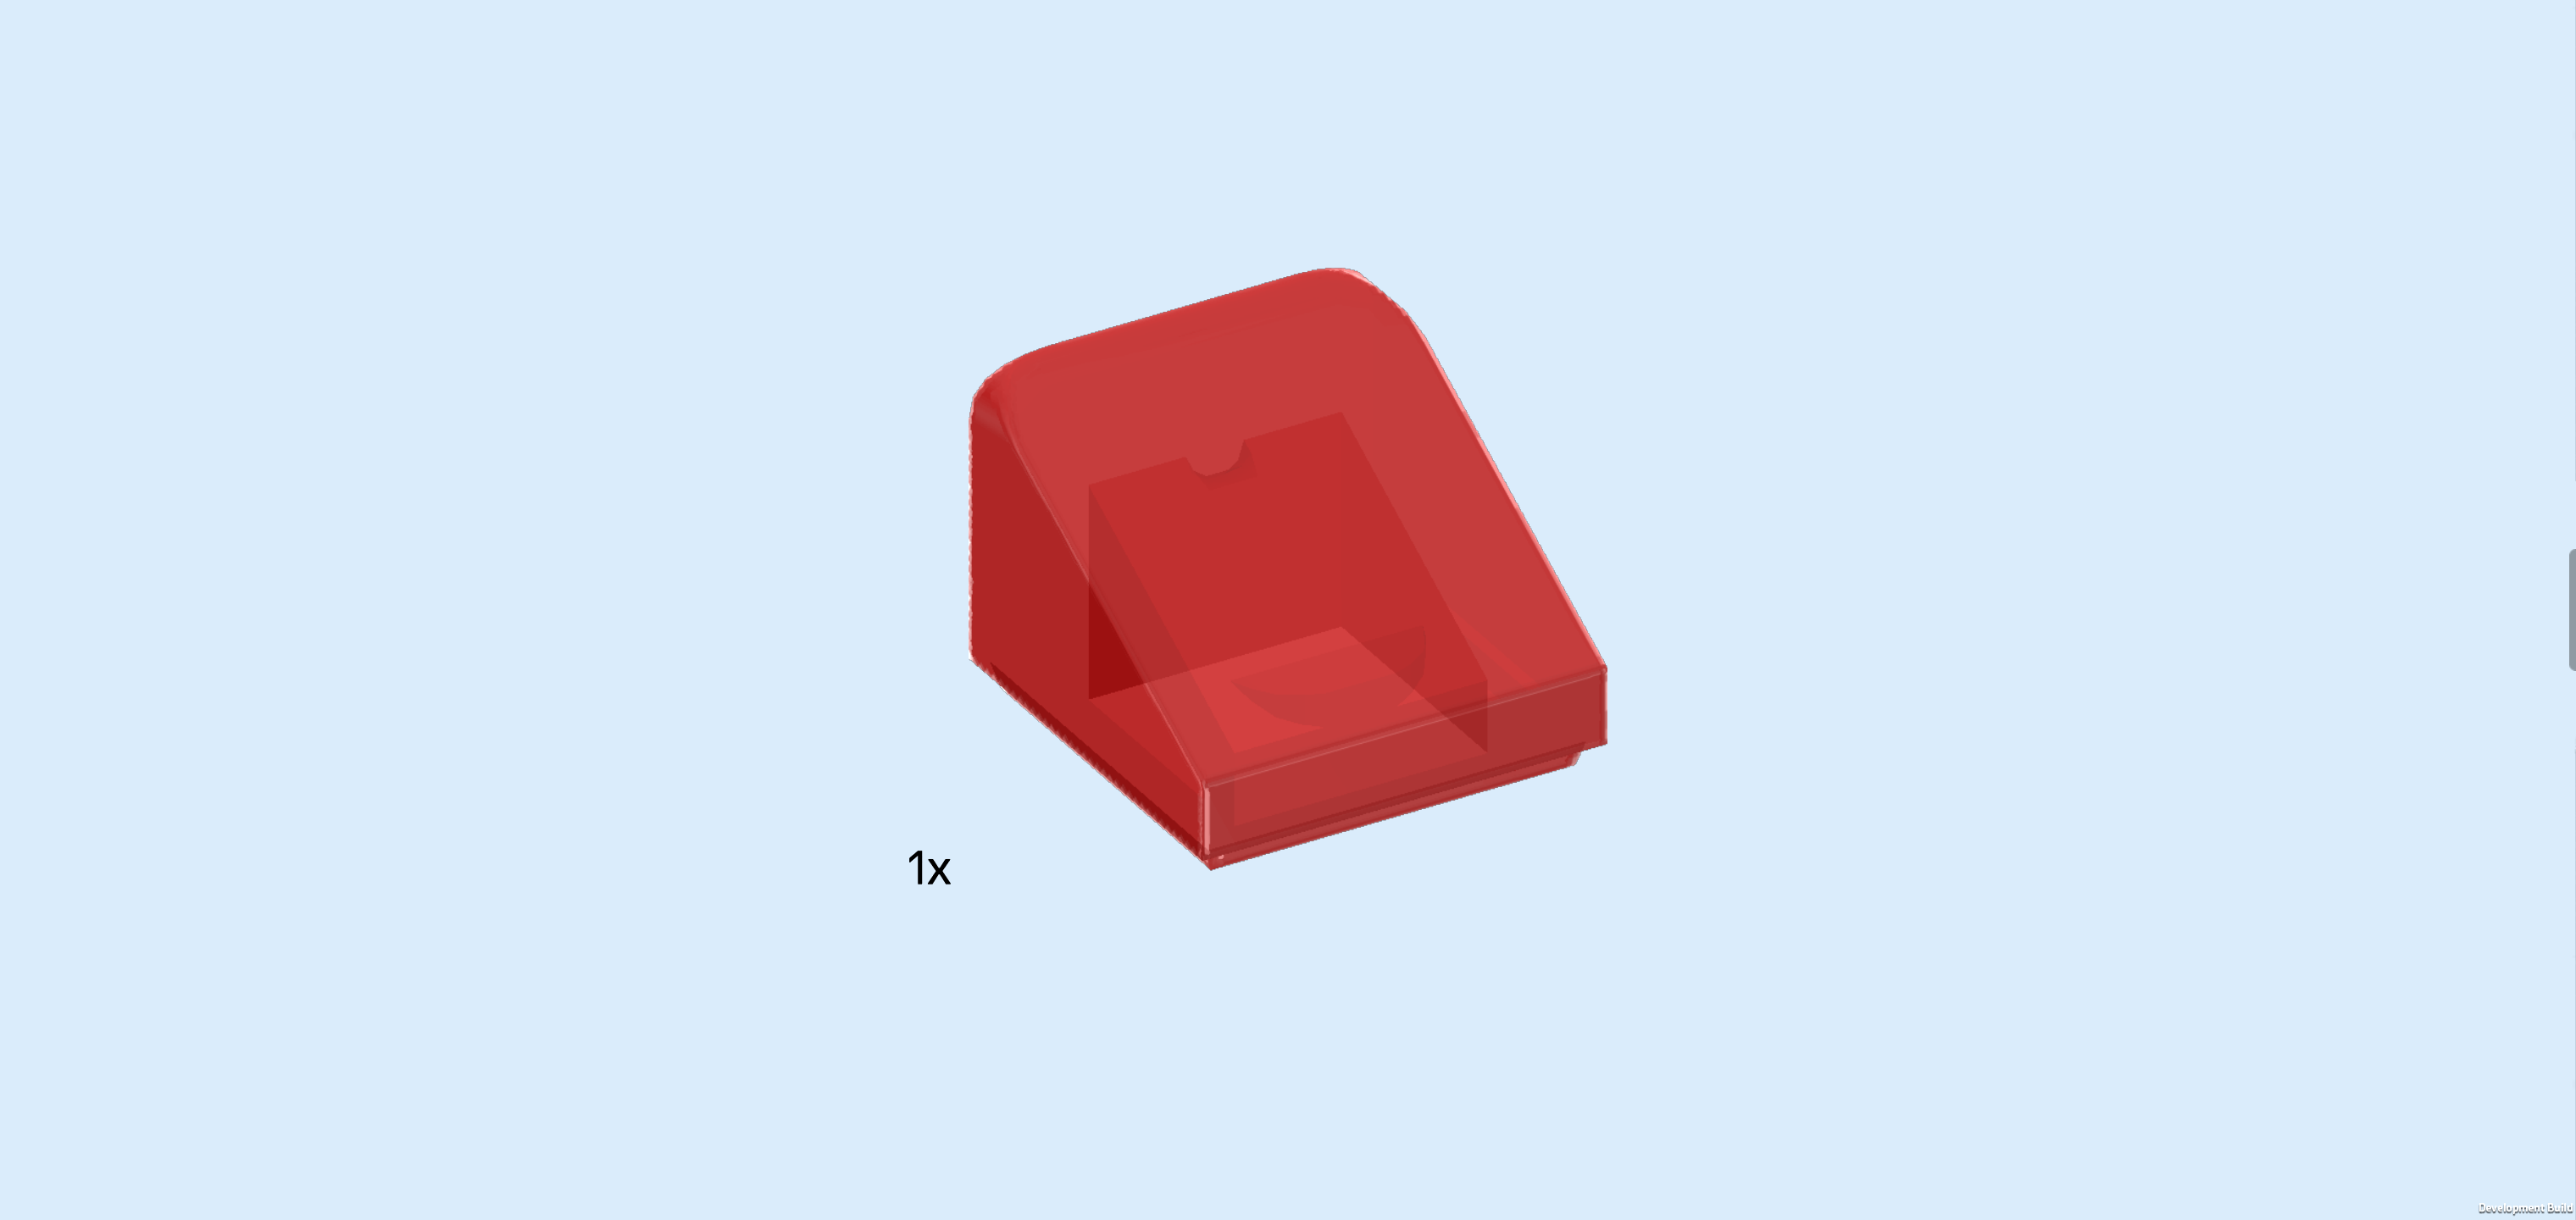
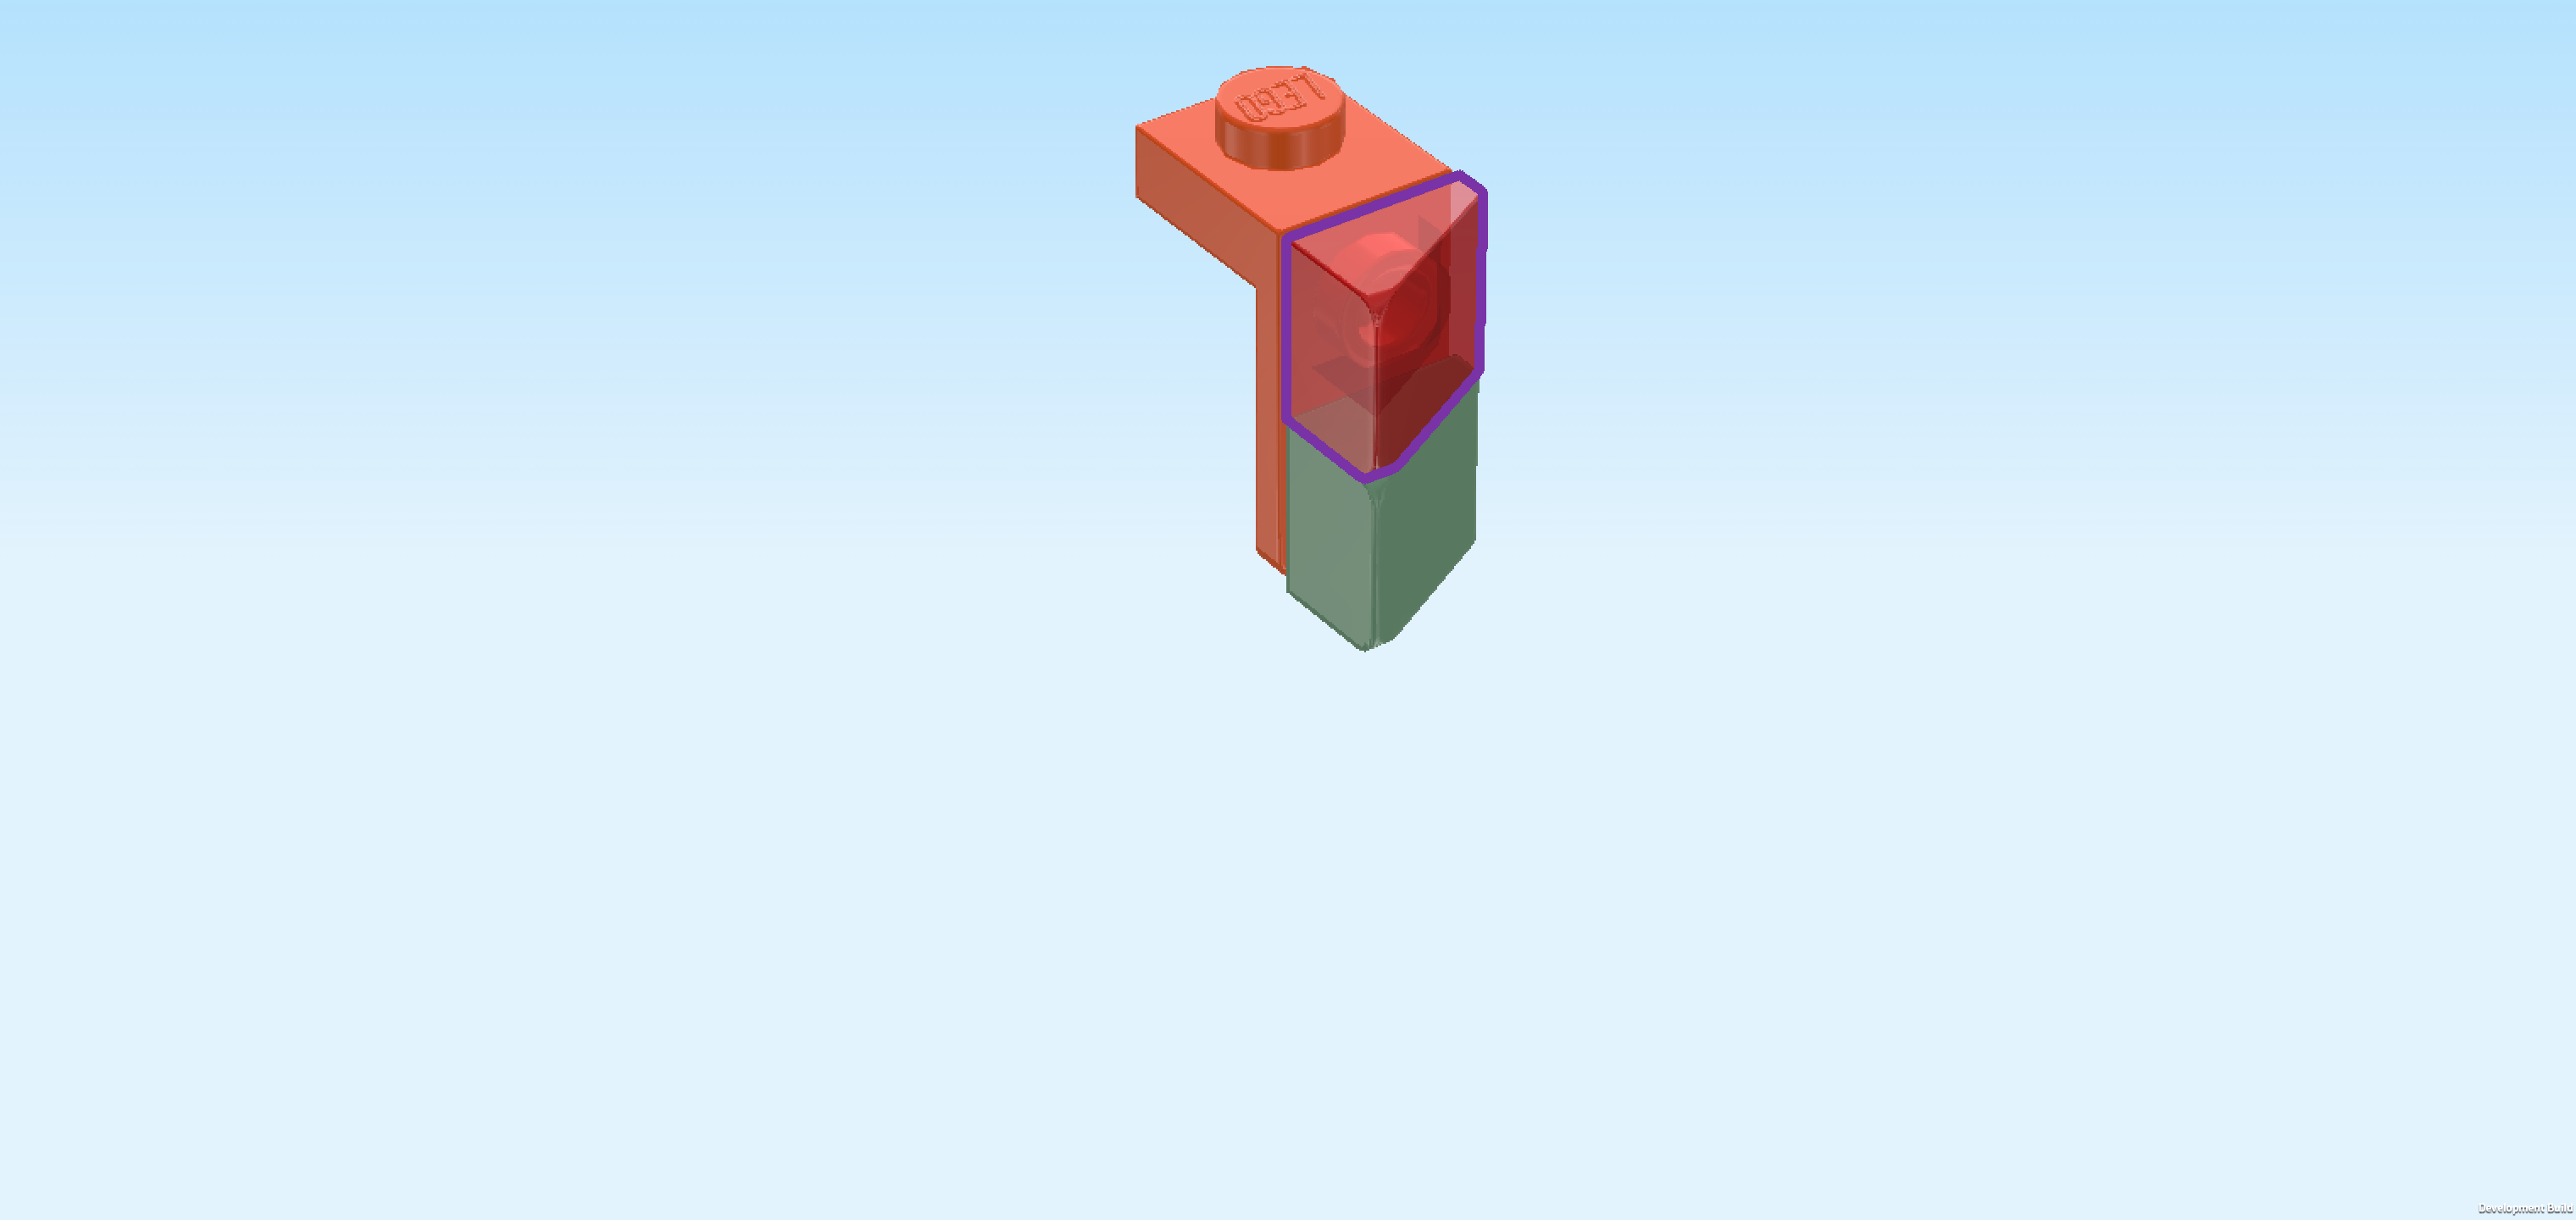
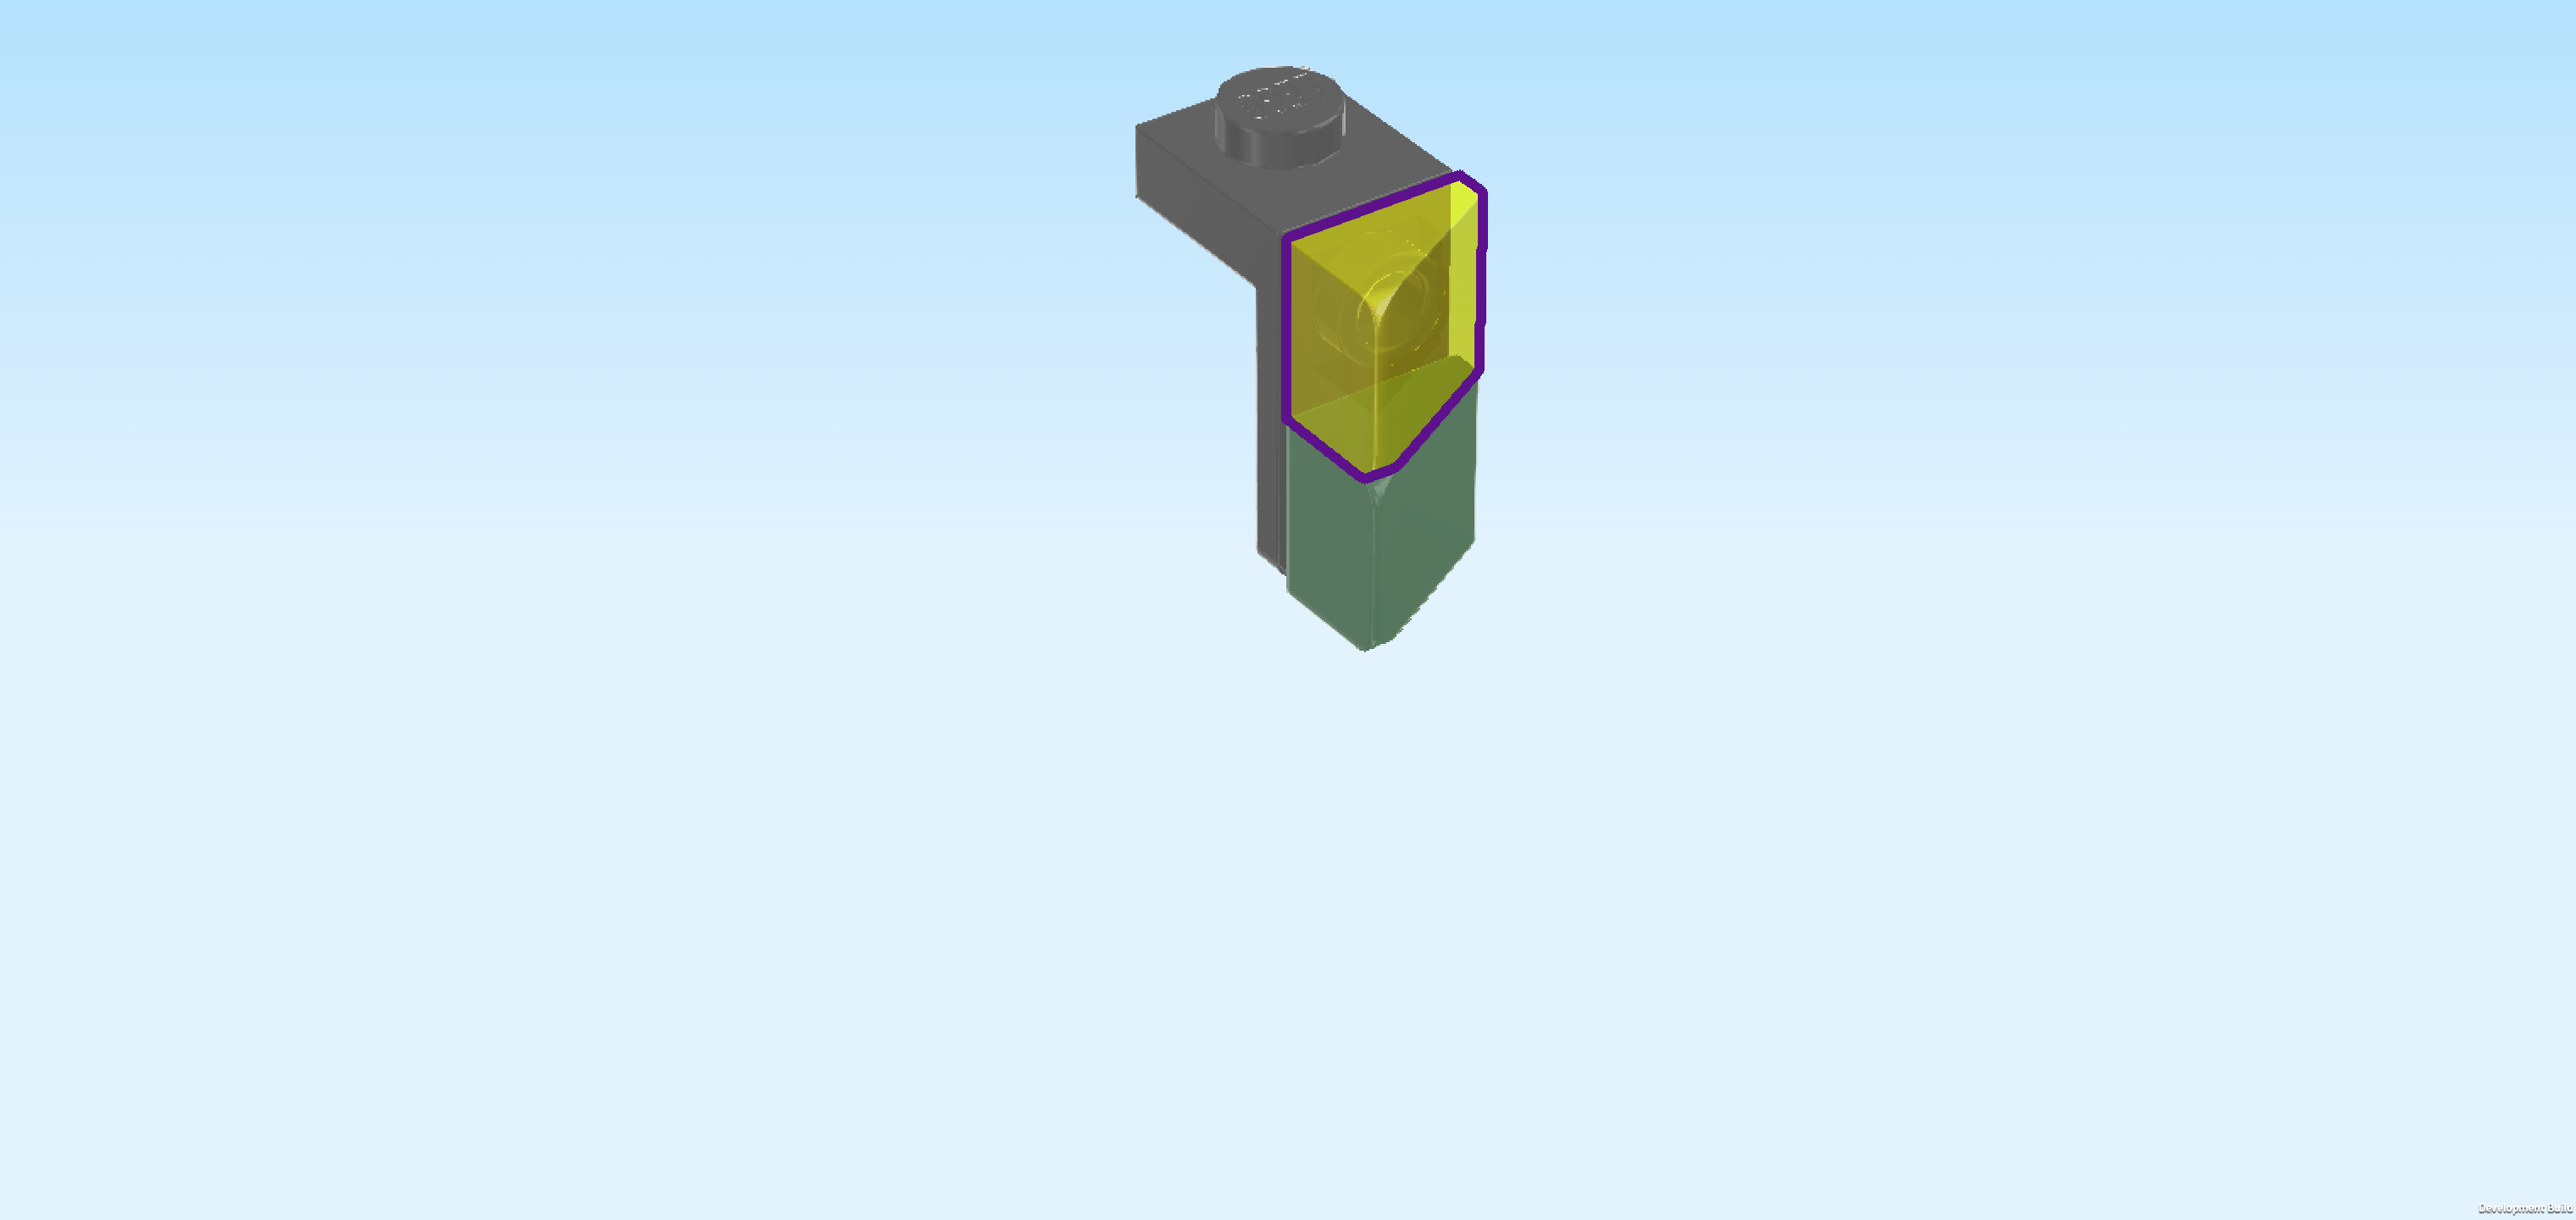
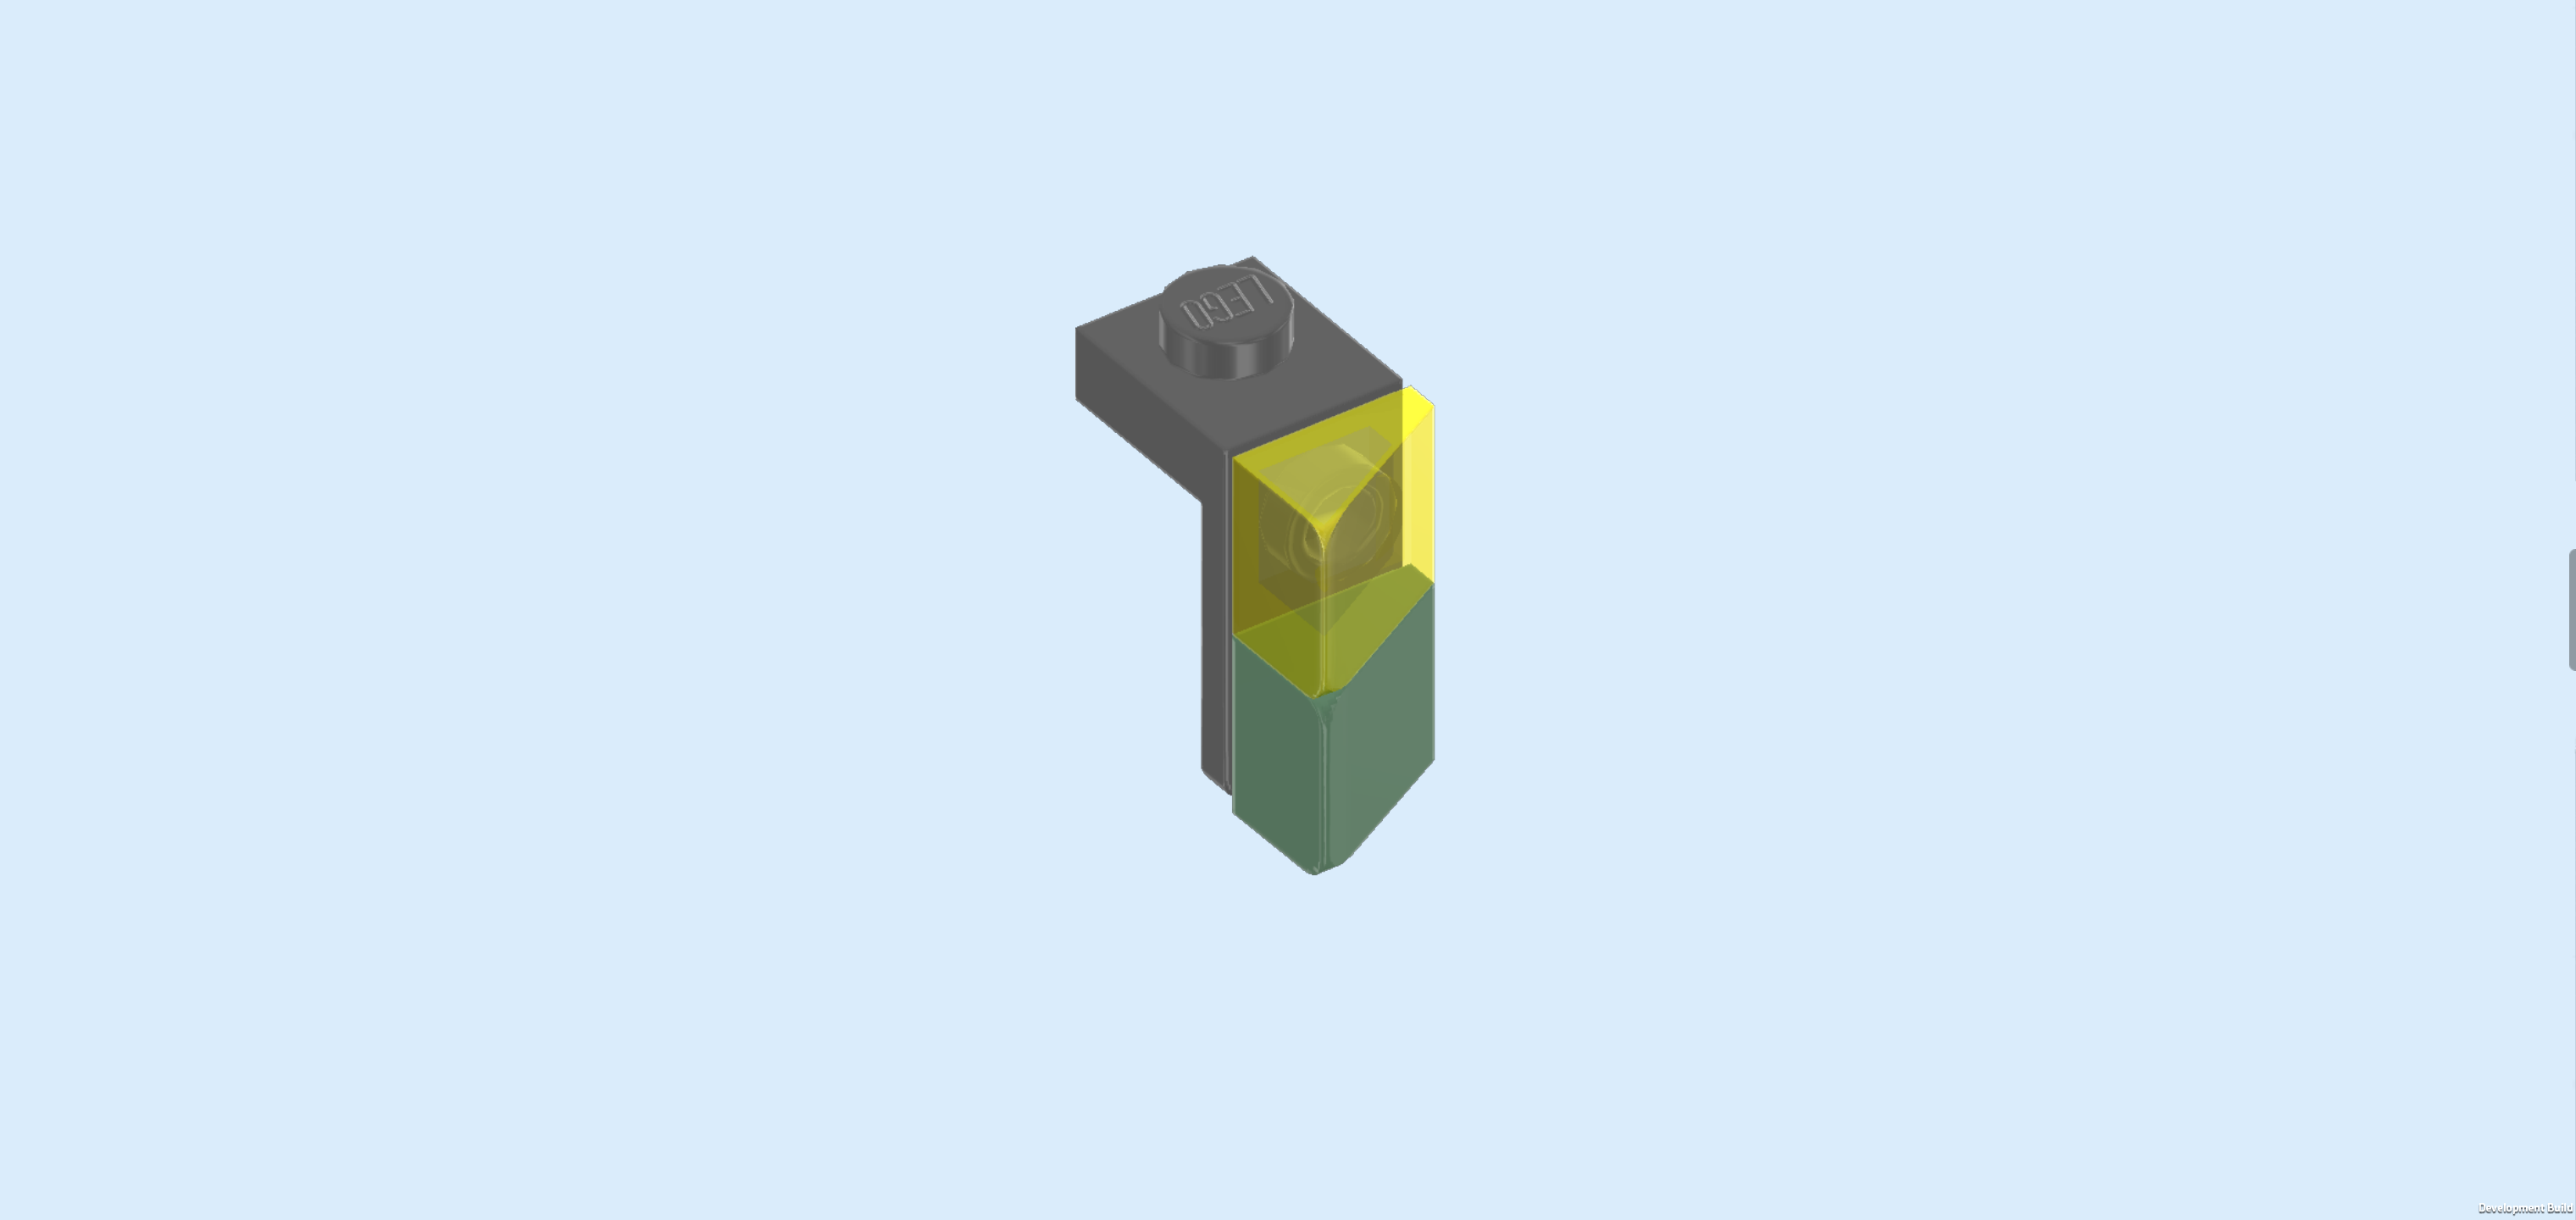
| Find 1 transparent red smooth roof tile 1x1x⅔. |
| Put it on the side knob above the previous piece, slope again to the back left. |
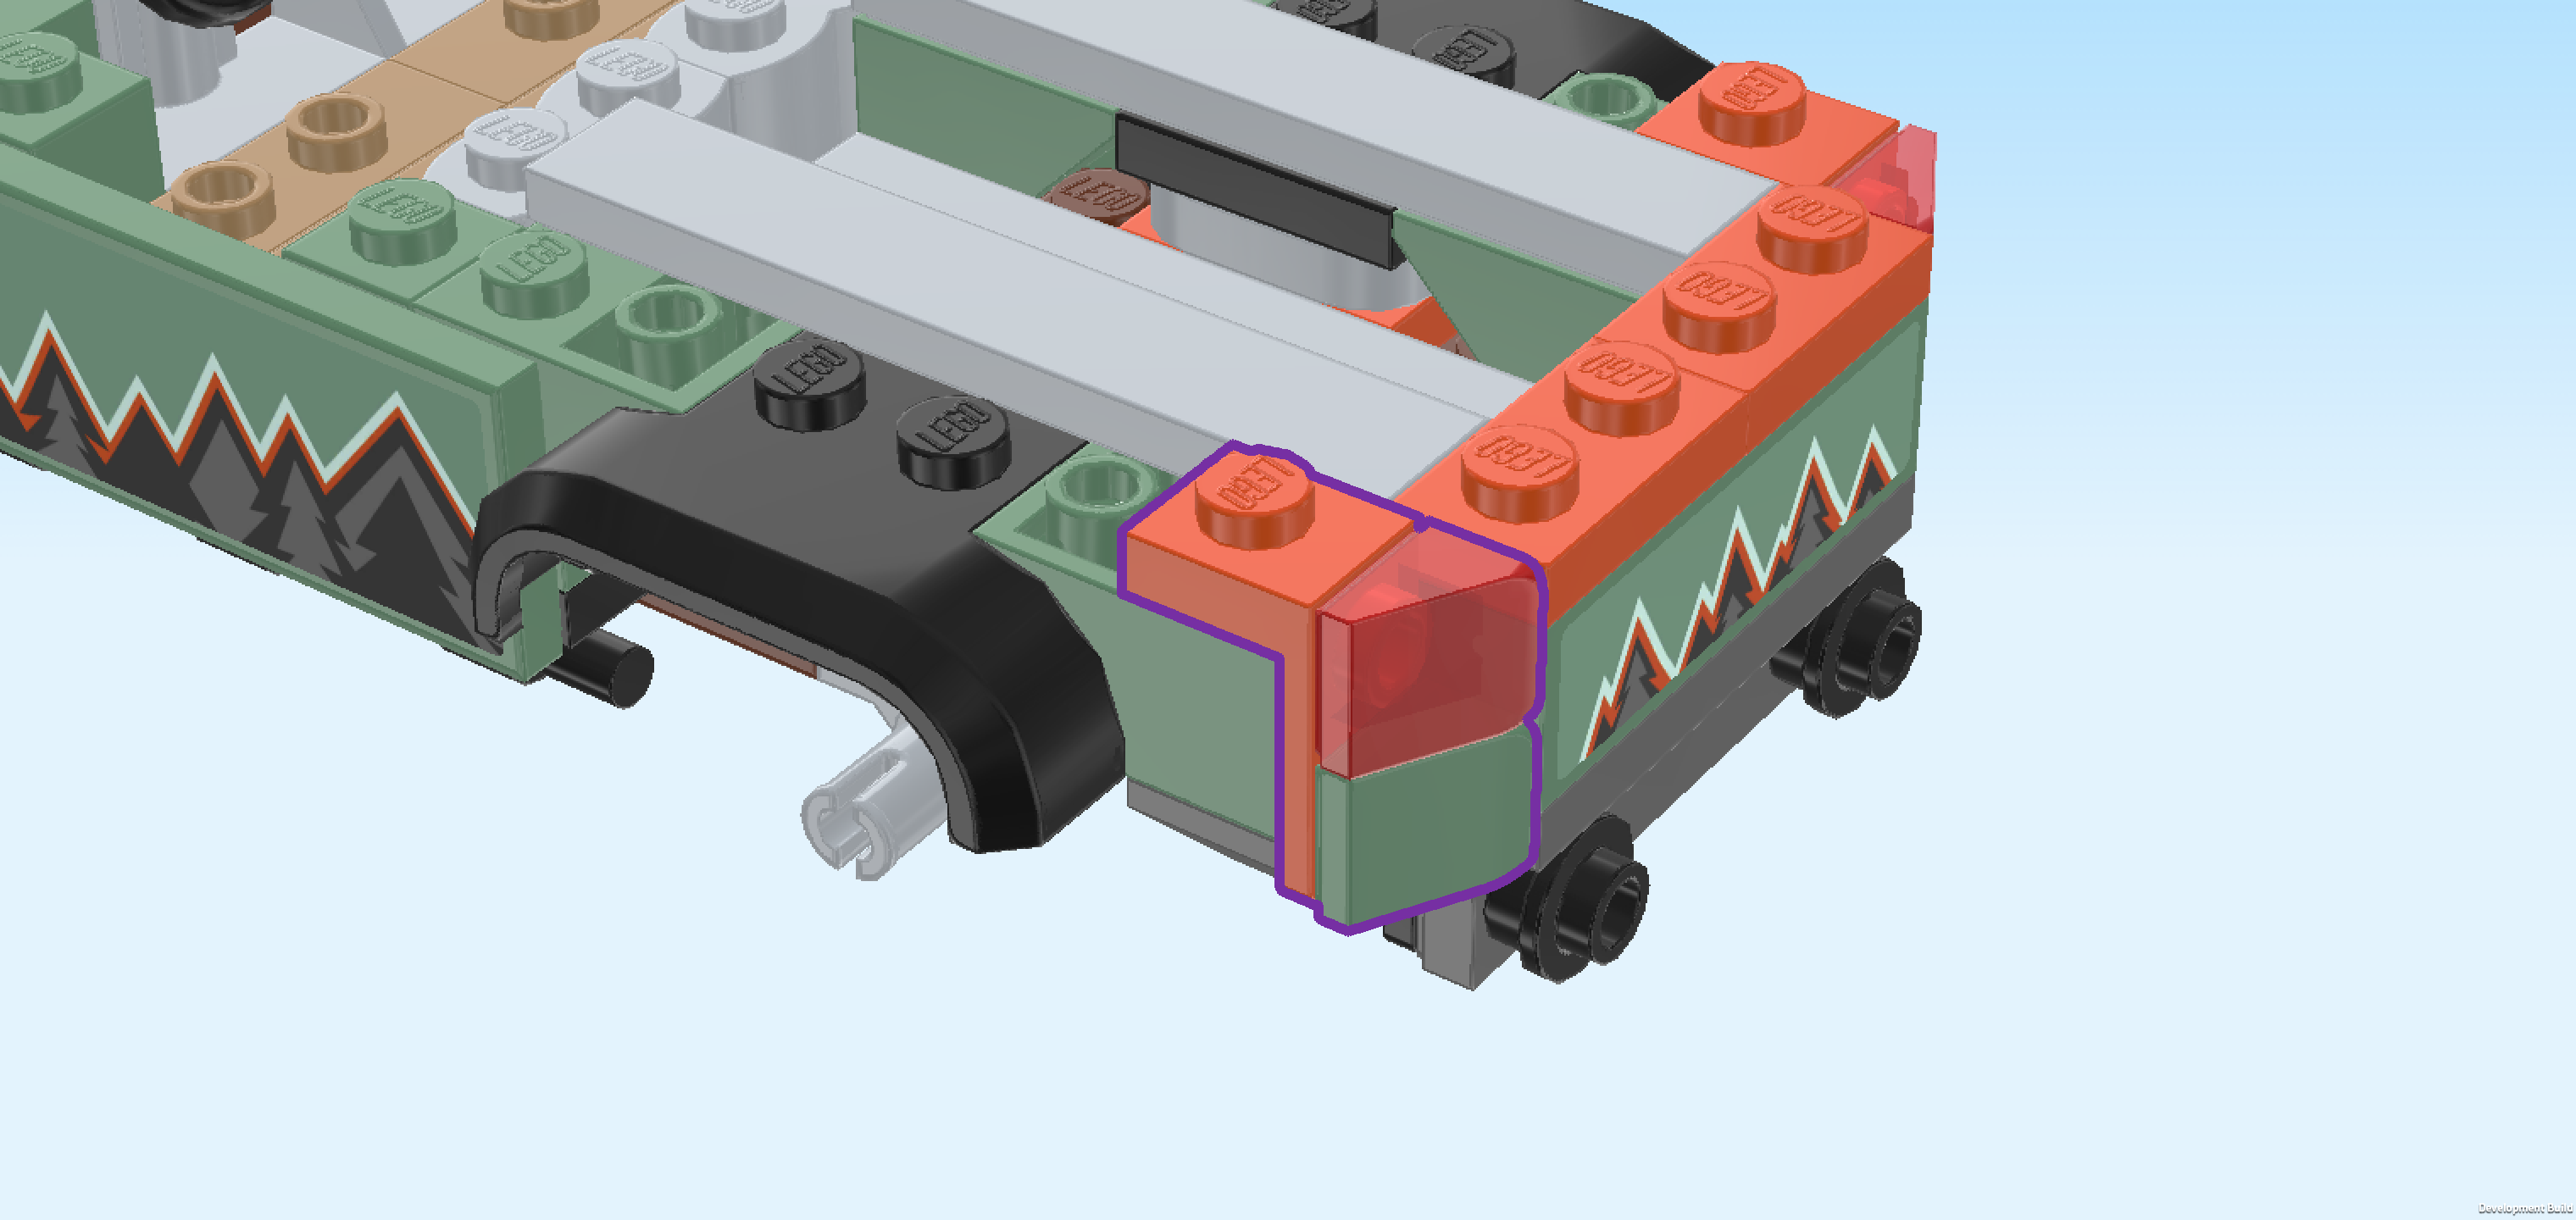
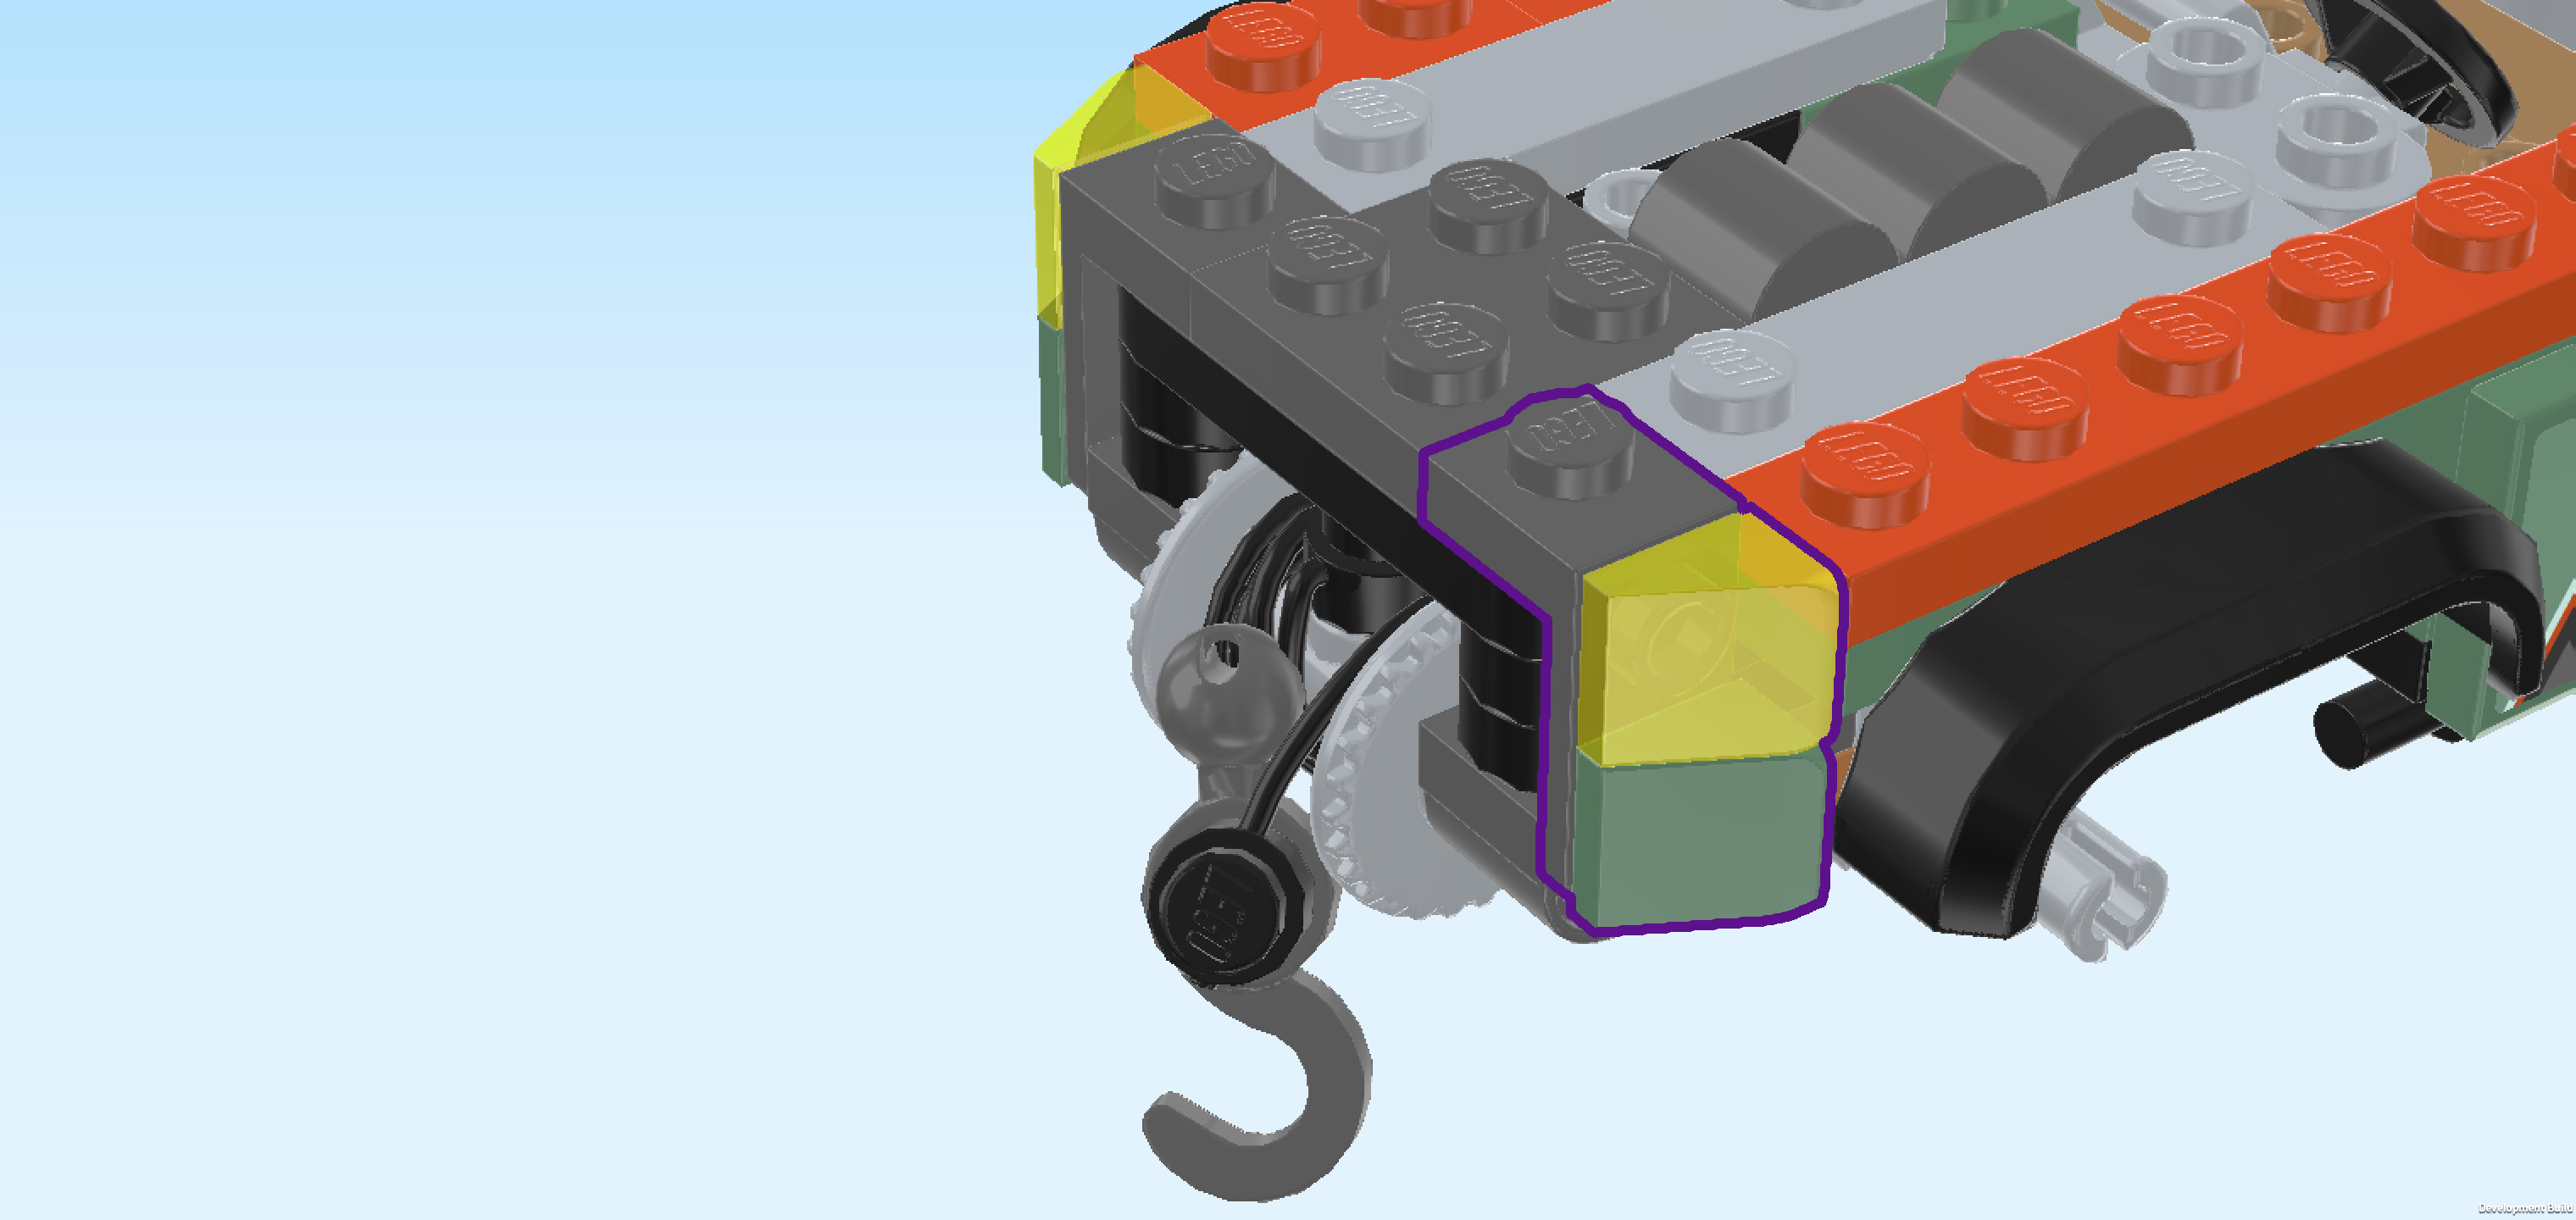
| The first taillight is finished! Mount it on the second column from the right on its backmost knob, roof tiles to the right. This means it will sit directly behind the flat tile 1x6 from the previous step. |
| Next, we will build the second taillight. |
| Collect the following 2 pieces: |
| 1 reddish orange top angle plate 1x1 - 1x2 with 2 side knobs, |
| and 1 sand green smooth roof tile 1x1x⅔. |
| Like before, hold the top angle plate so that its 2 side knobs are pointing to the right. |
| Put the smooth roof tile 1x1 on the bottom side knob, slope running from the back right to the front left this time. This means that its highest edge will be at the back edge. |
| Find 1 transparent red smooth roof tile 1x1x⅔. |
| Put it on the side knob above the previous piece, slope running from the back right to the front left. |
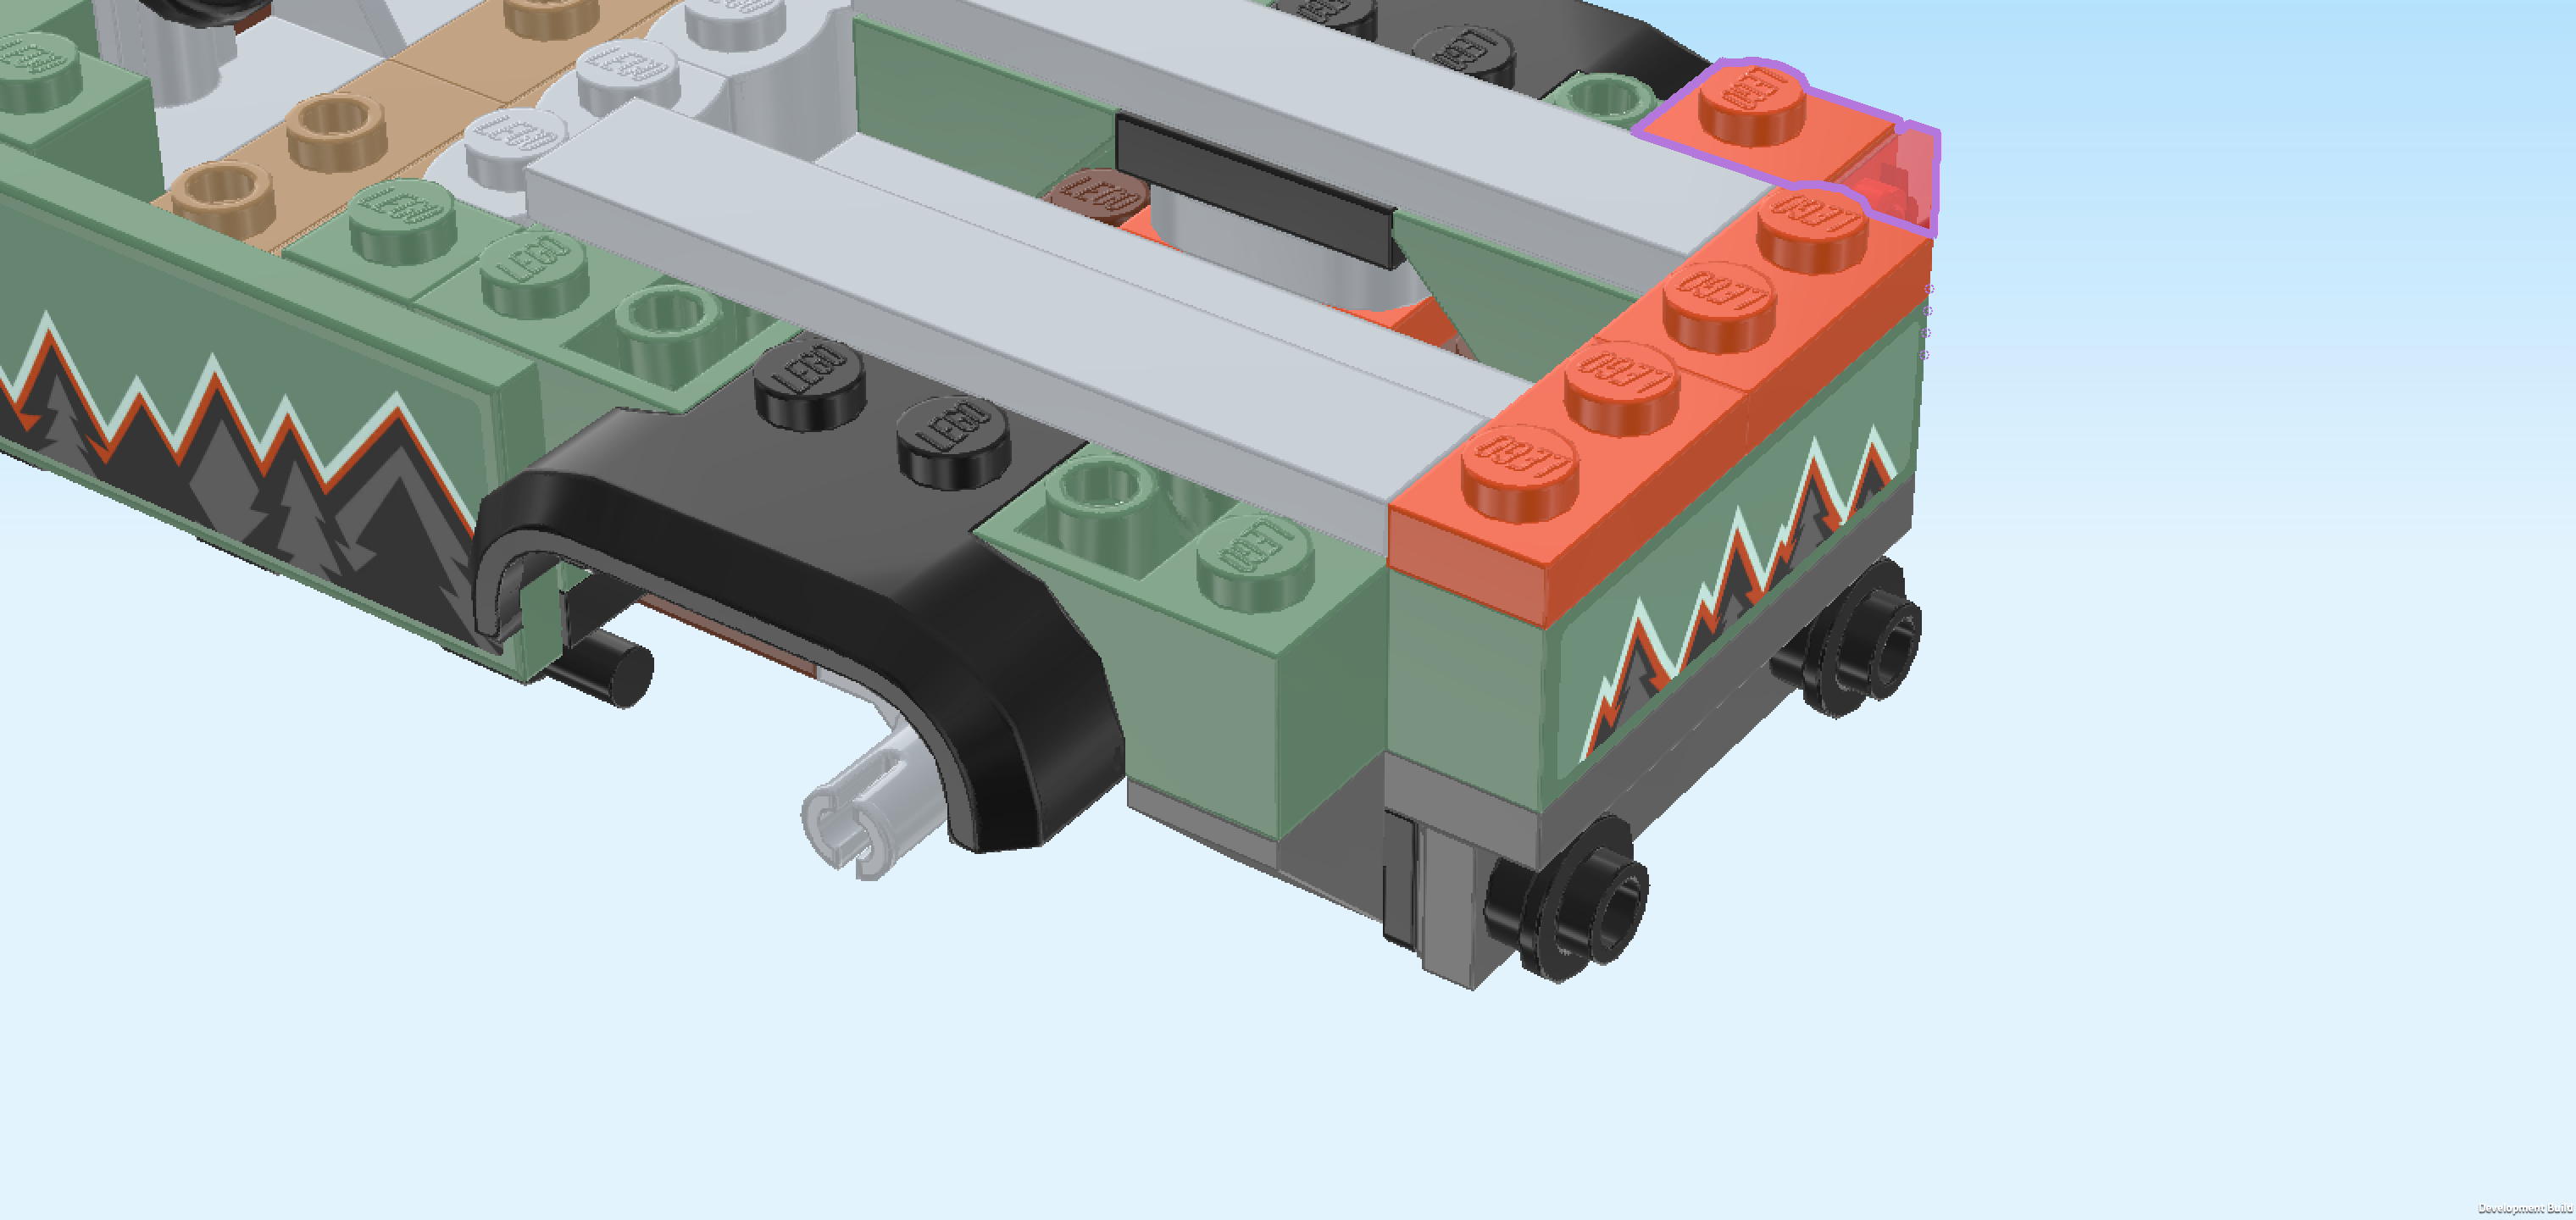
| Mount the second taillight mirroring the first: put it on the second column from the right on its frontmost knob, roof tiles to the right. |
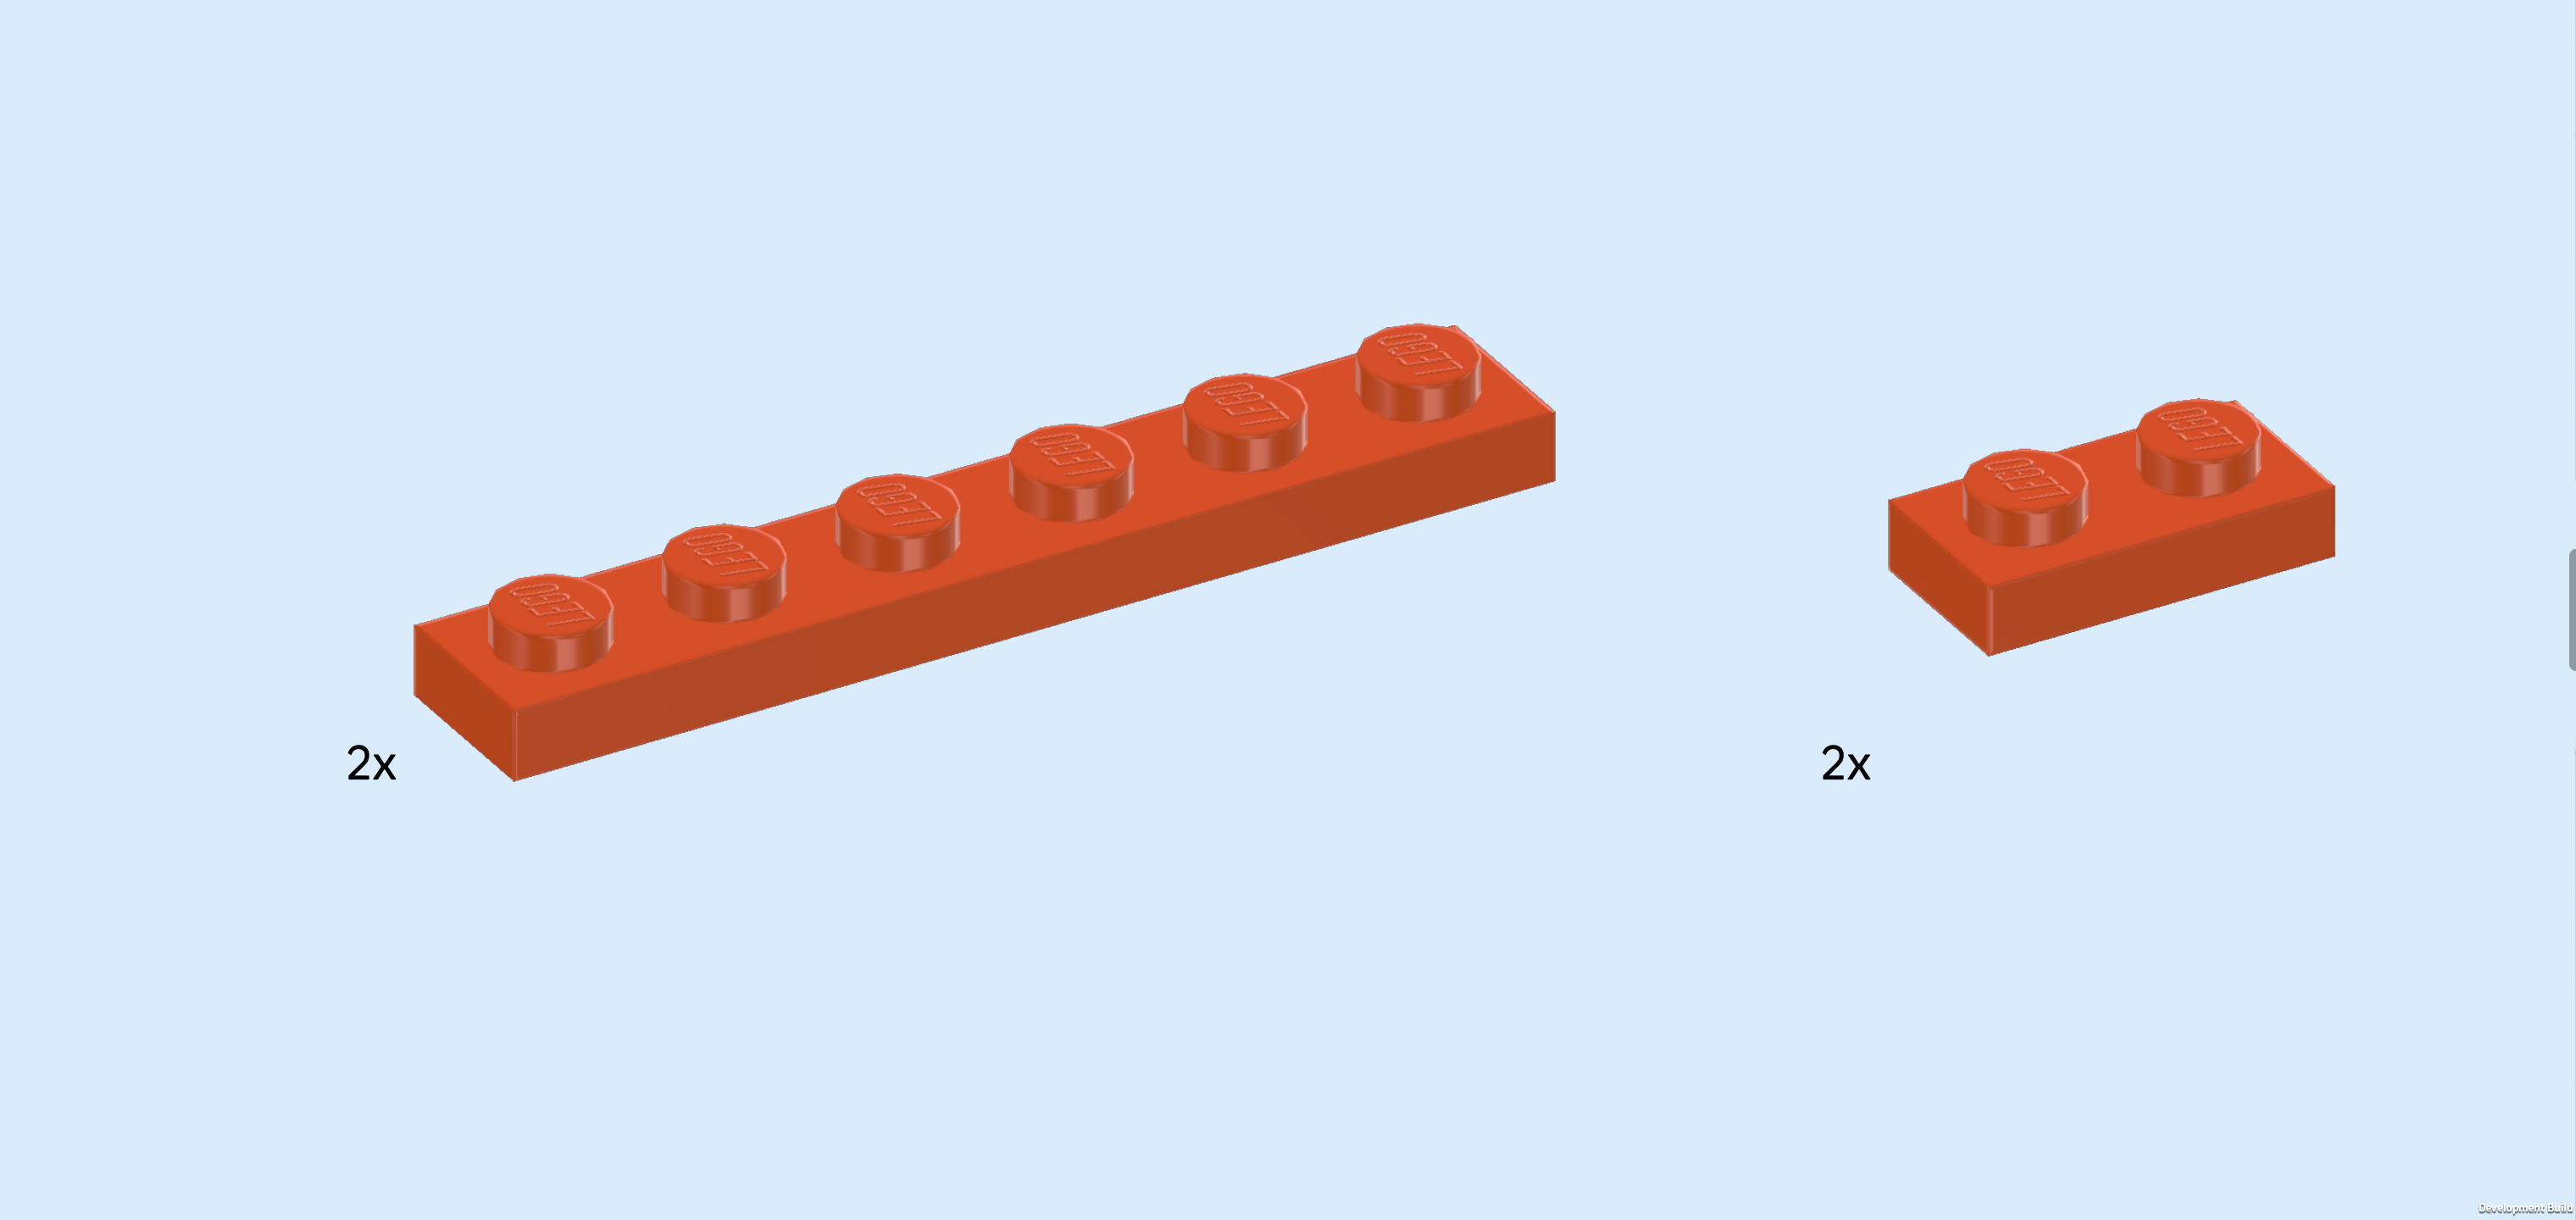
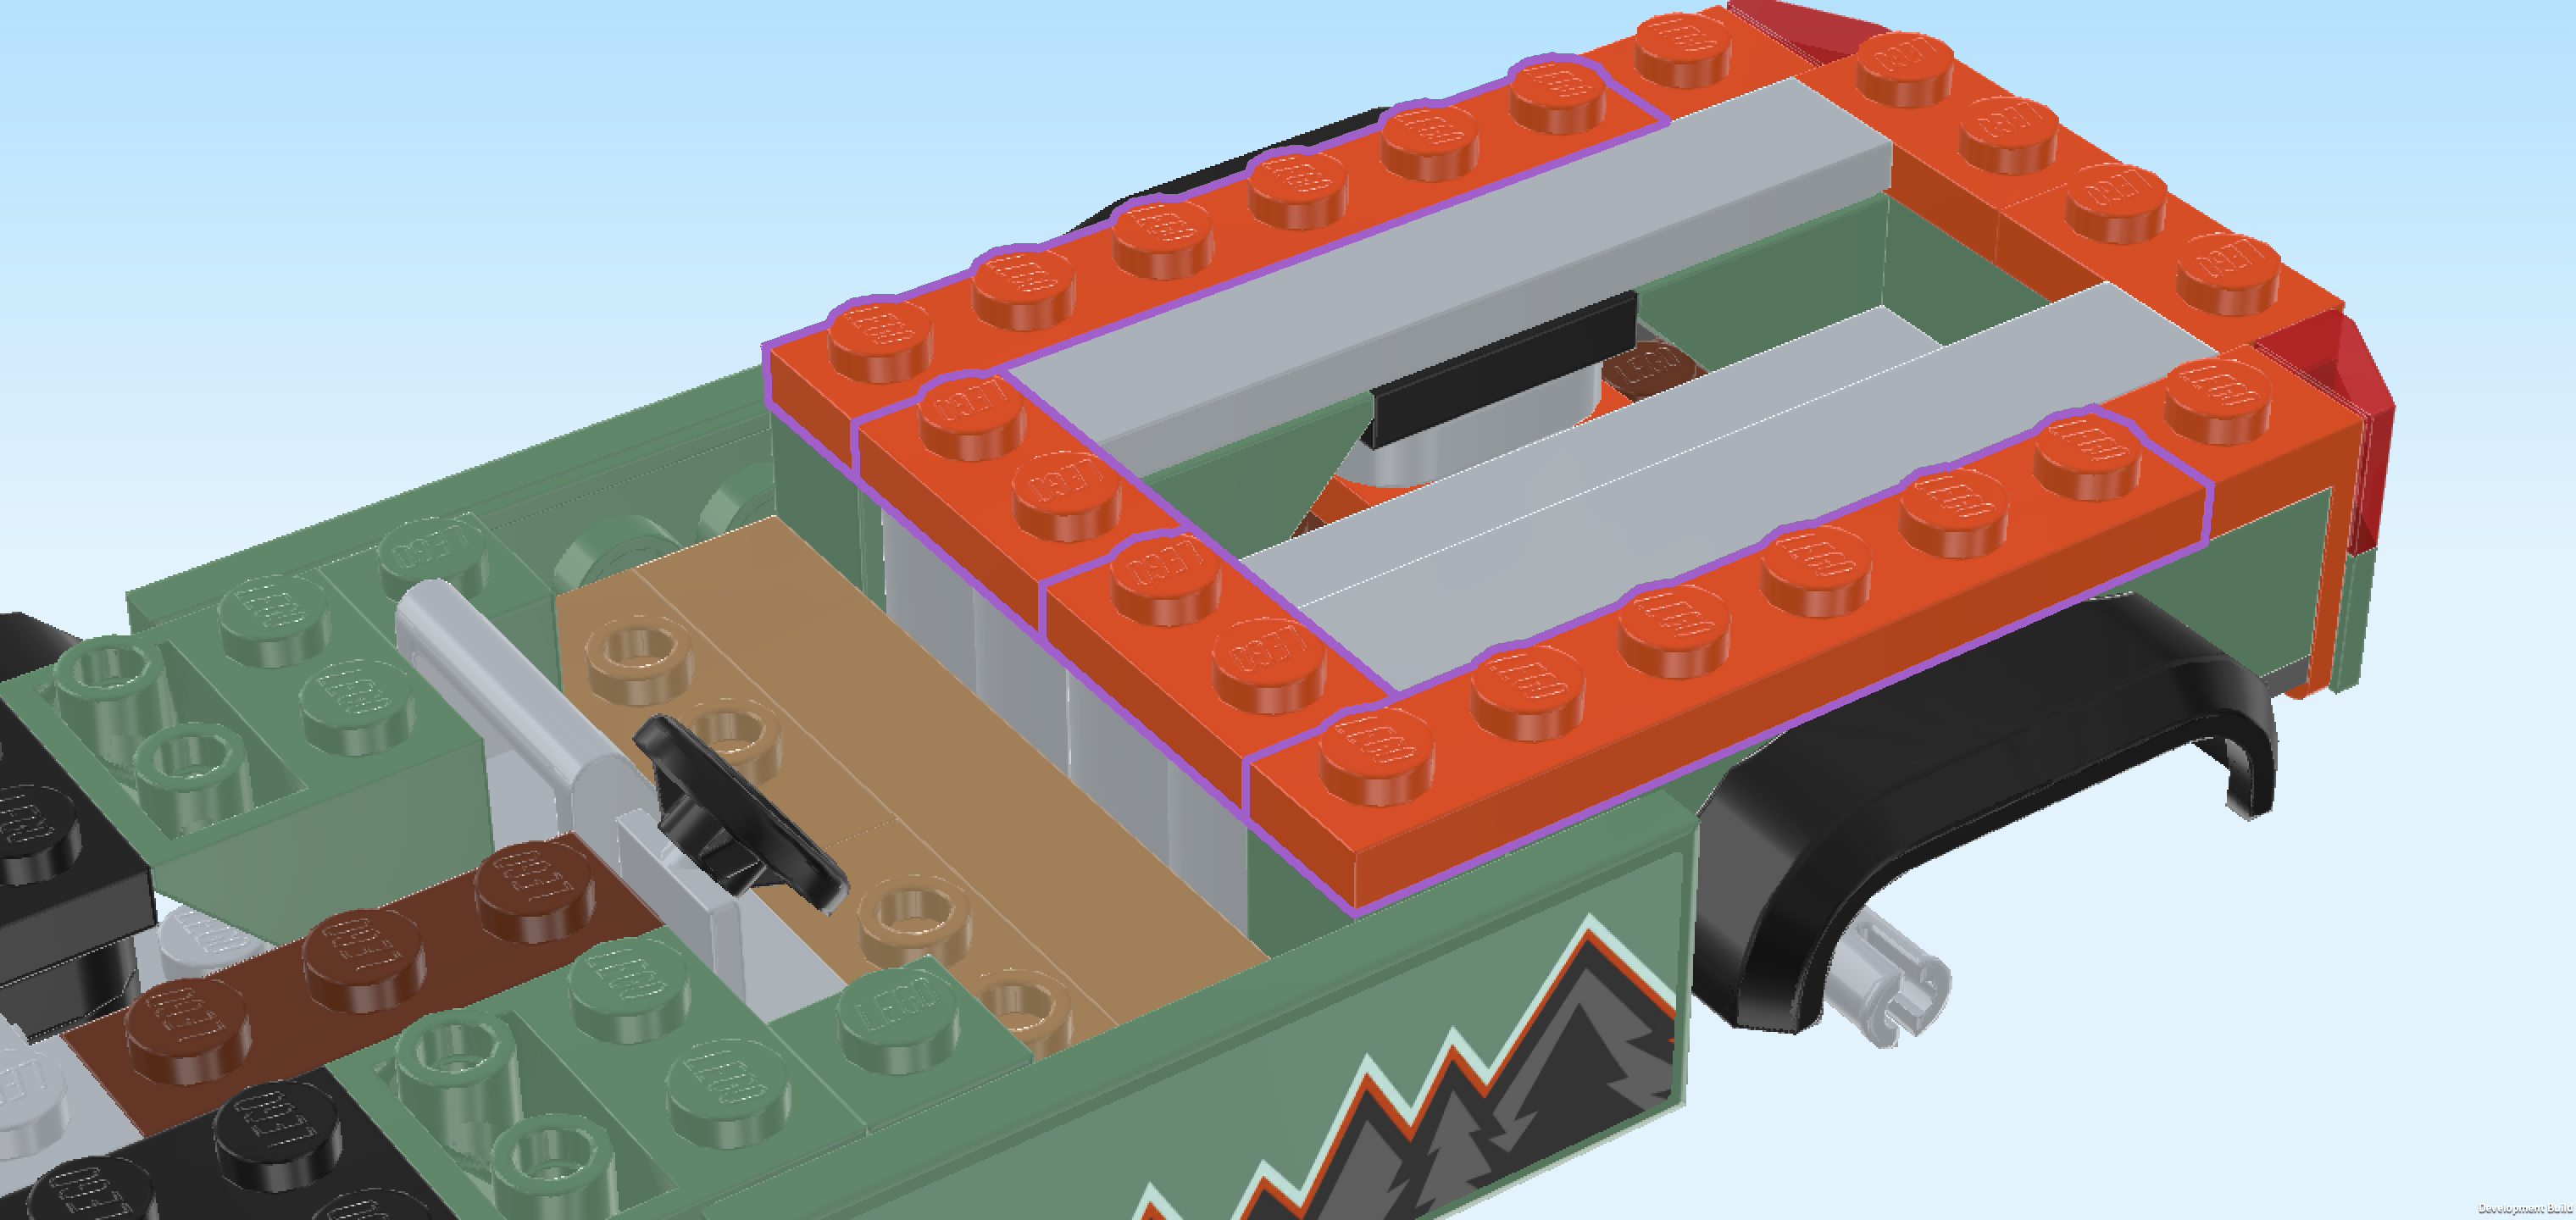
| Collect the following 4 pieces: |
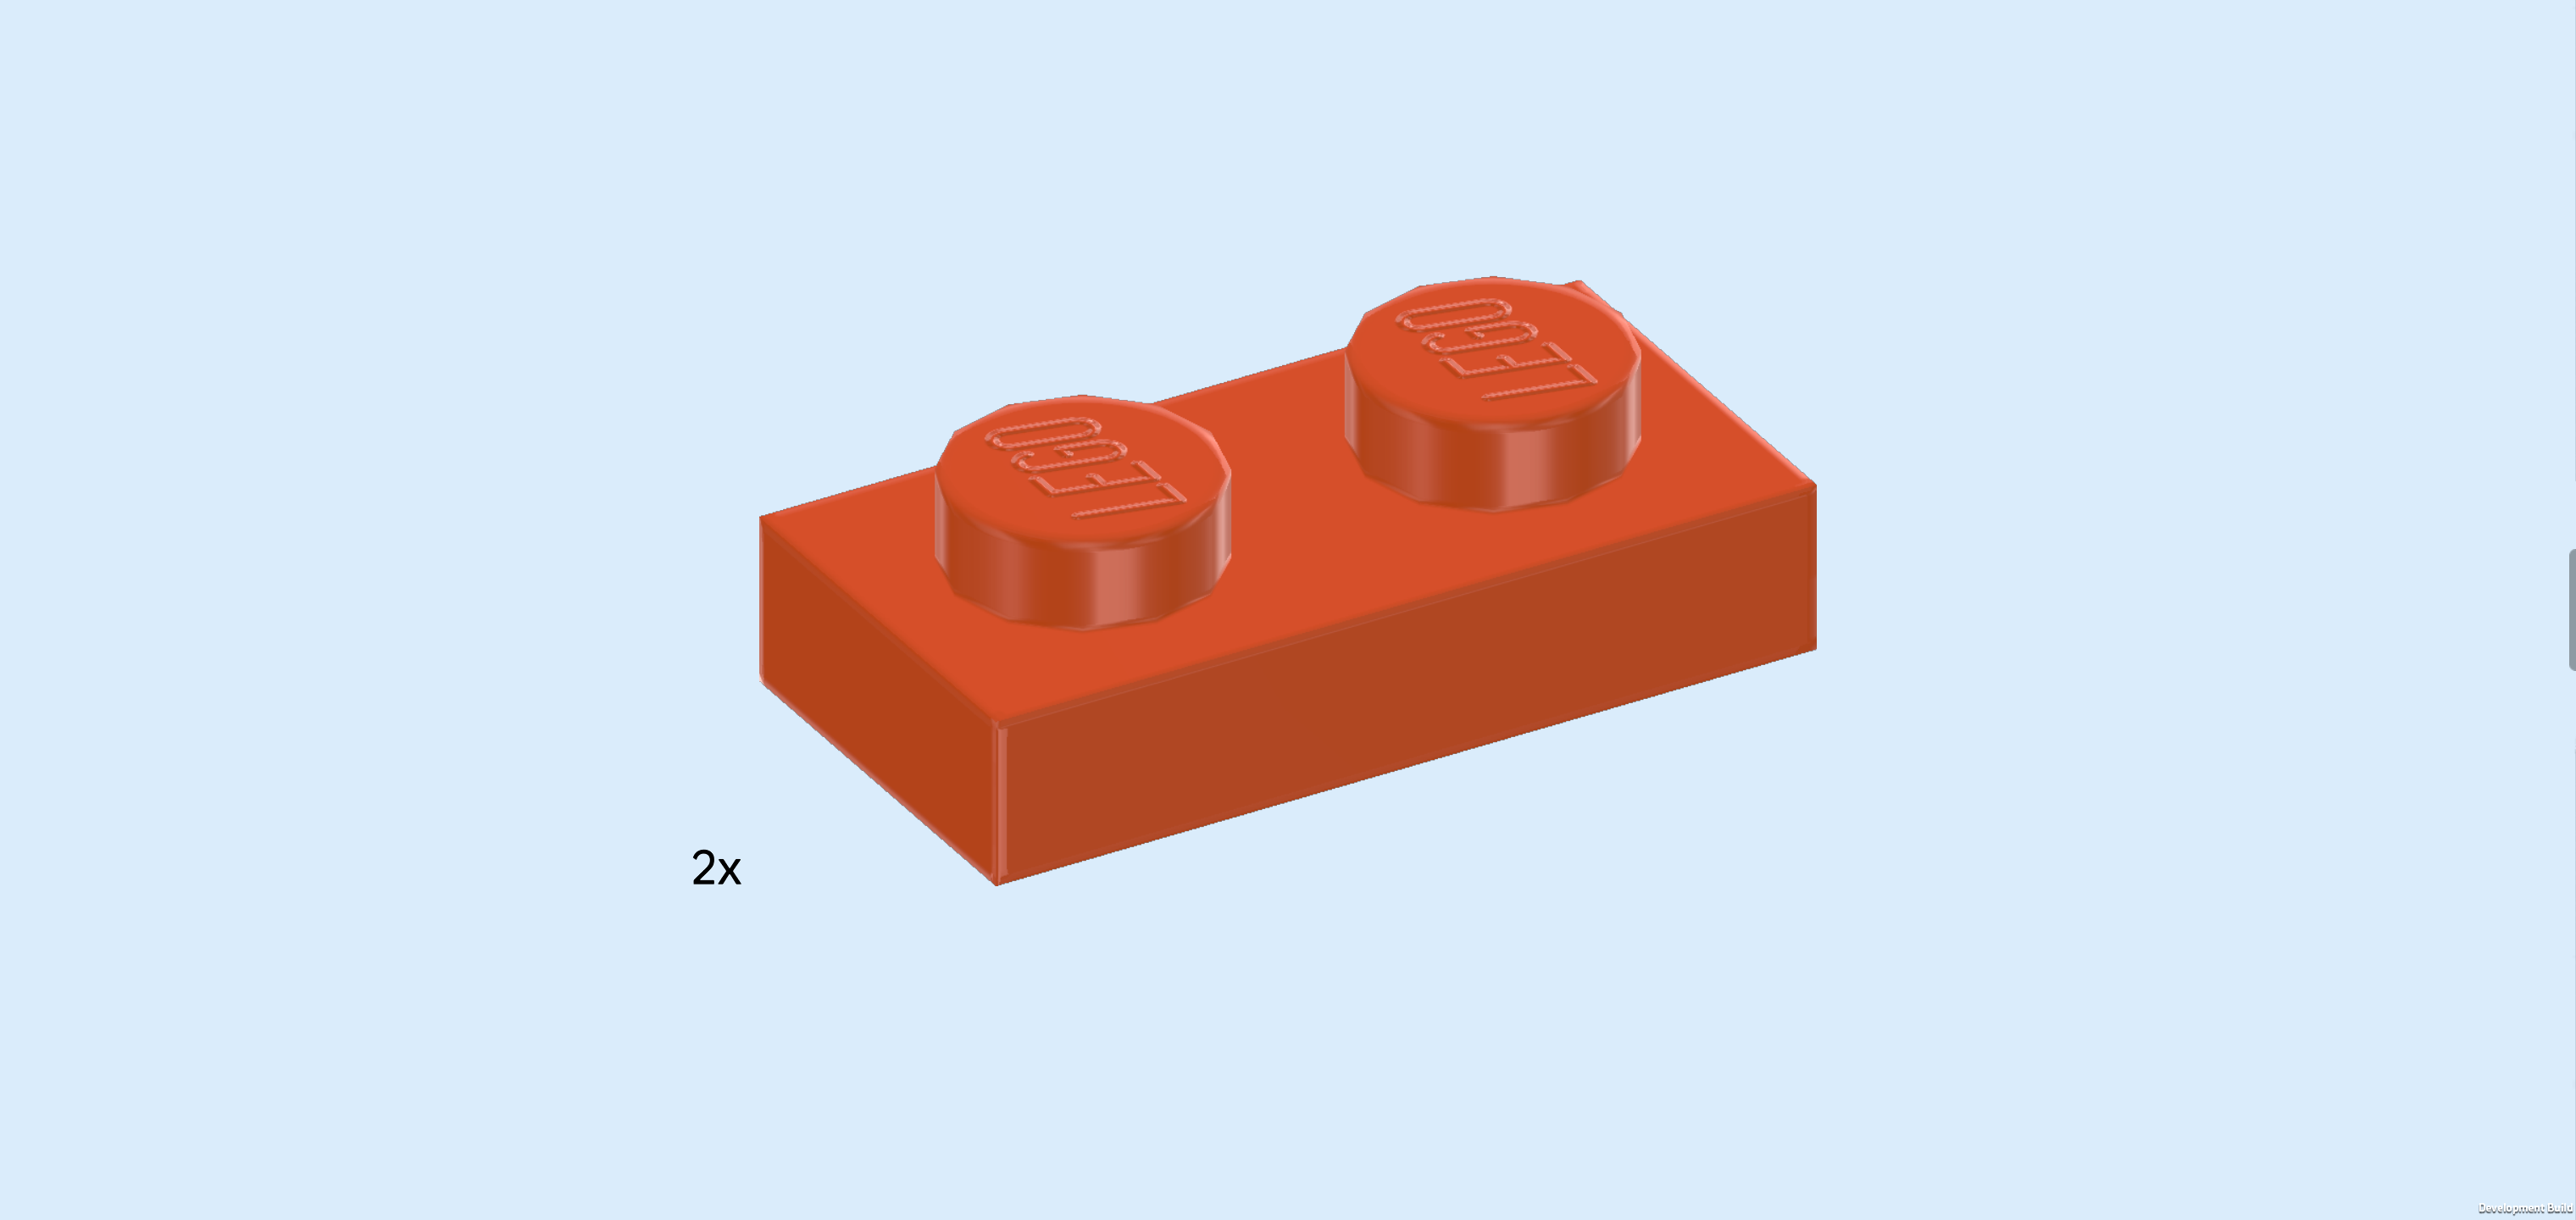
| 2 reddish orange plates 1x6, |
| and 2 reddish orange plates 1x2. |
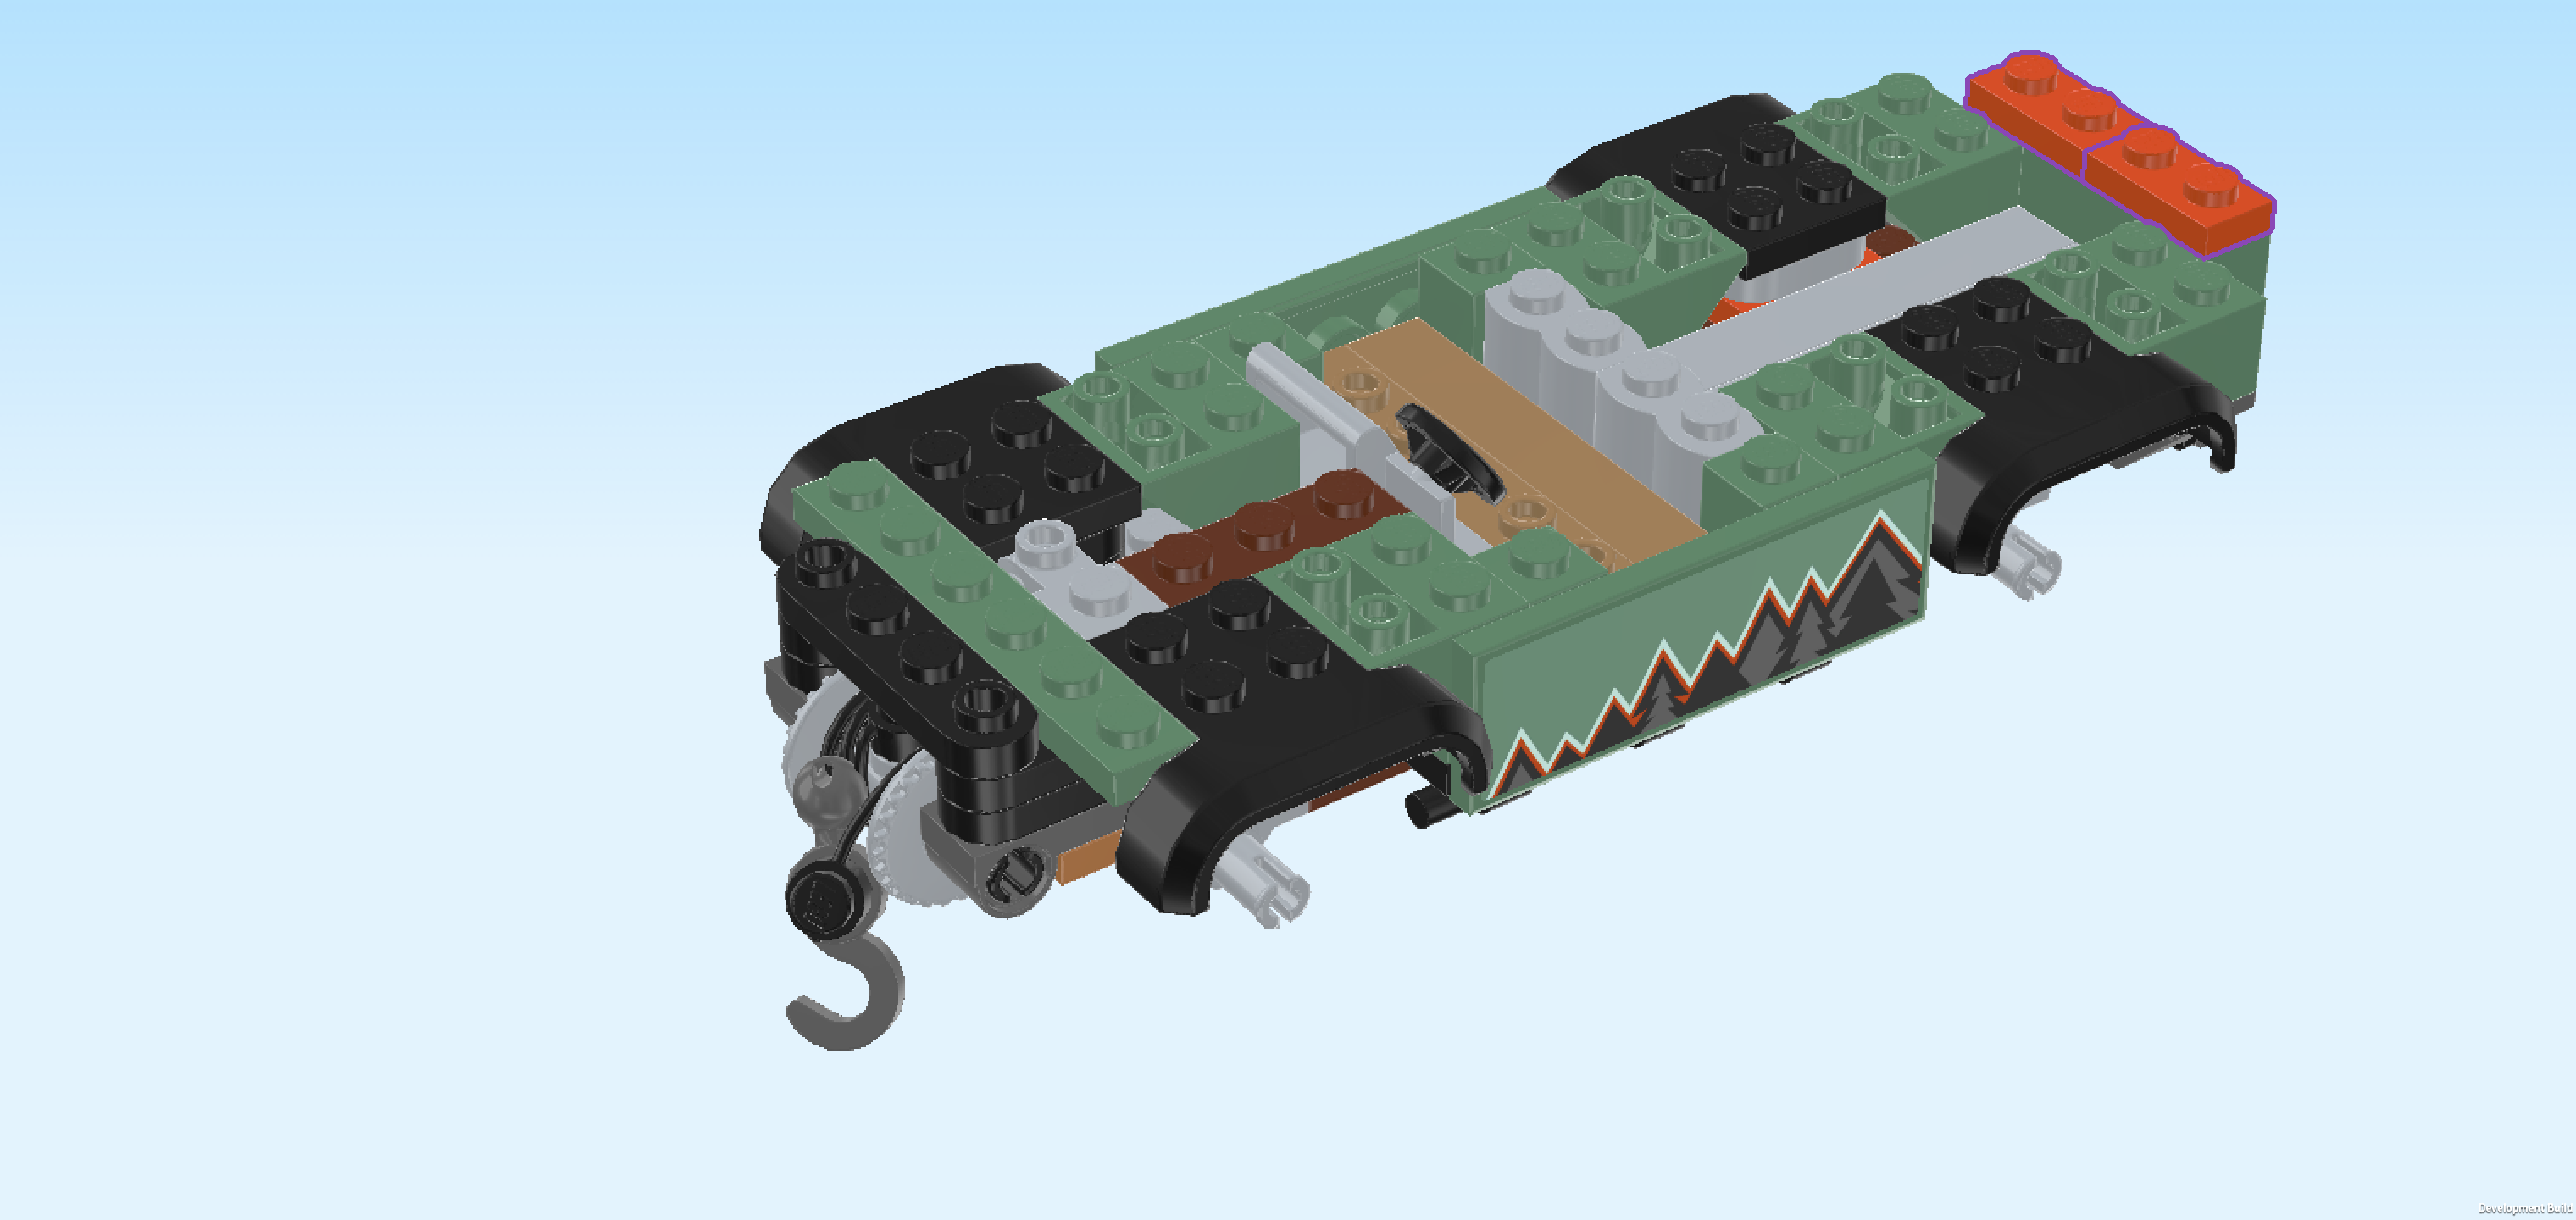
| Put 1 plate 1x6 horizontally to the left of the front taillight. |
| Repeat symmetrically at the back. |
| Put the 2 plates 1x2 vertically between the leftmost knobs of the 2 previous pieces. |
| Collect the following 3 pieces: |
| another reddish orange plate 1x6, |
| and another 2 reddish orange plates 1x2. |
| Put the plate 1x6 horizontally on the frontmost row, starting from the left edge. |
| Put 1 plate 1x2 horizontally on the backmost row, starting from the left edge. |
| Put the other plate 1x2 horizontally to the right of the previous piece. |
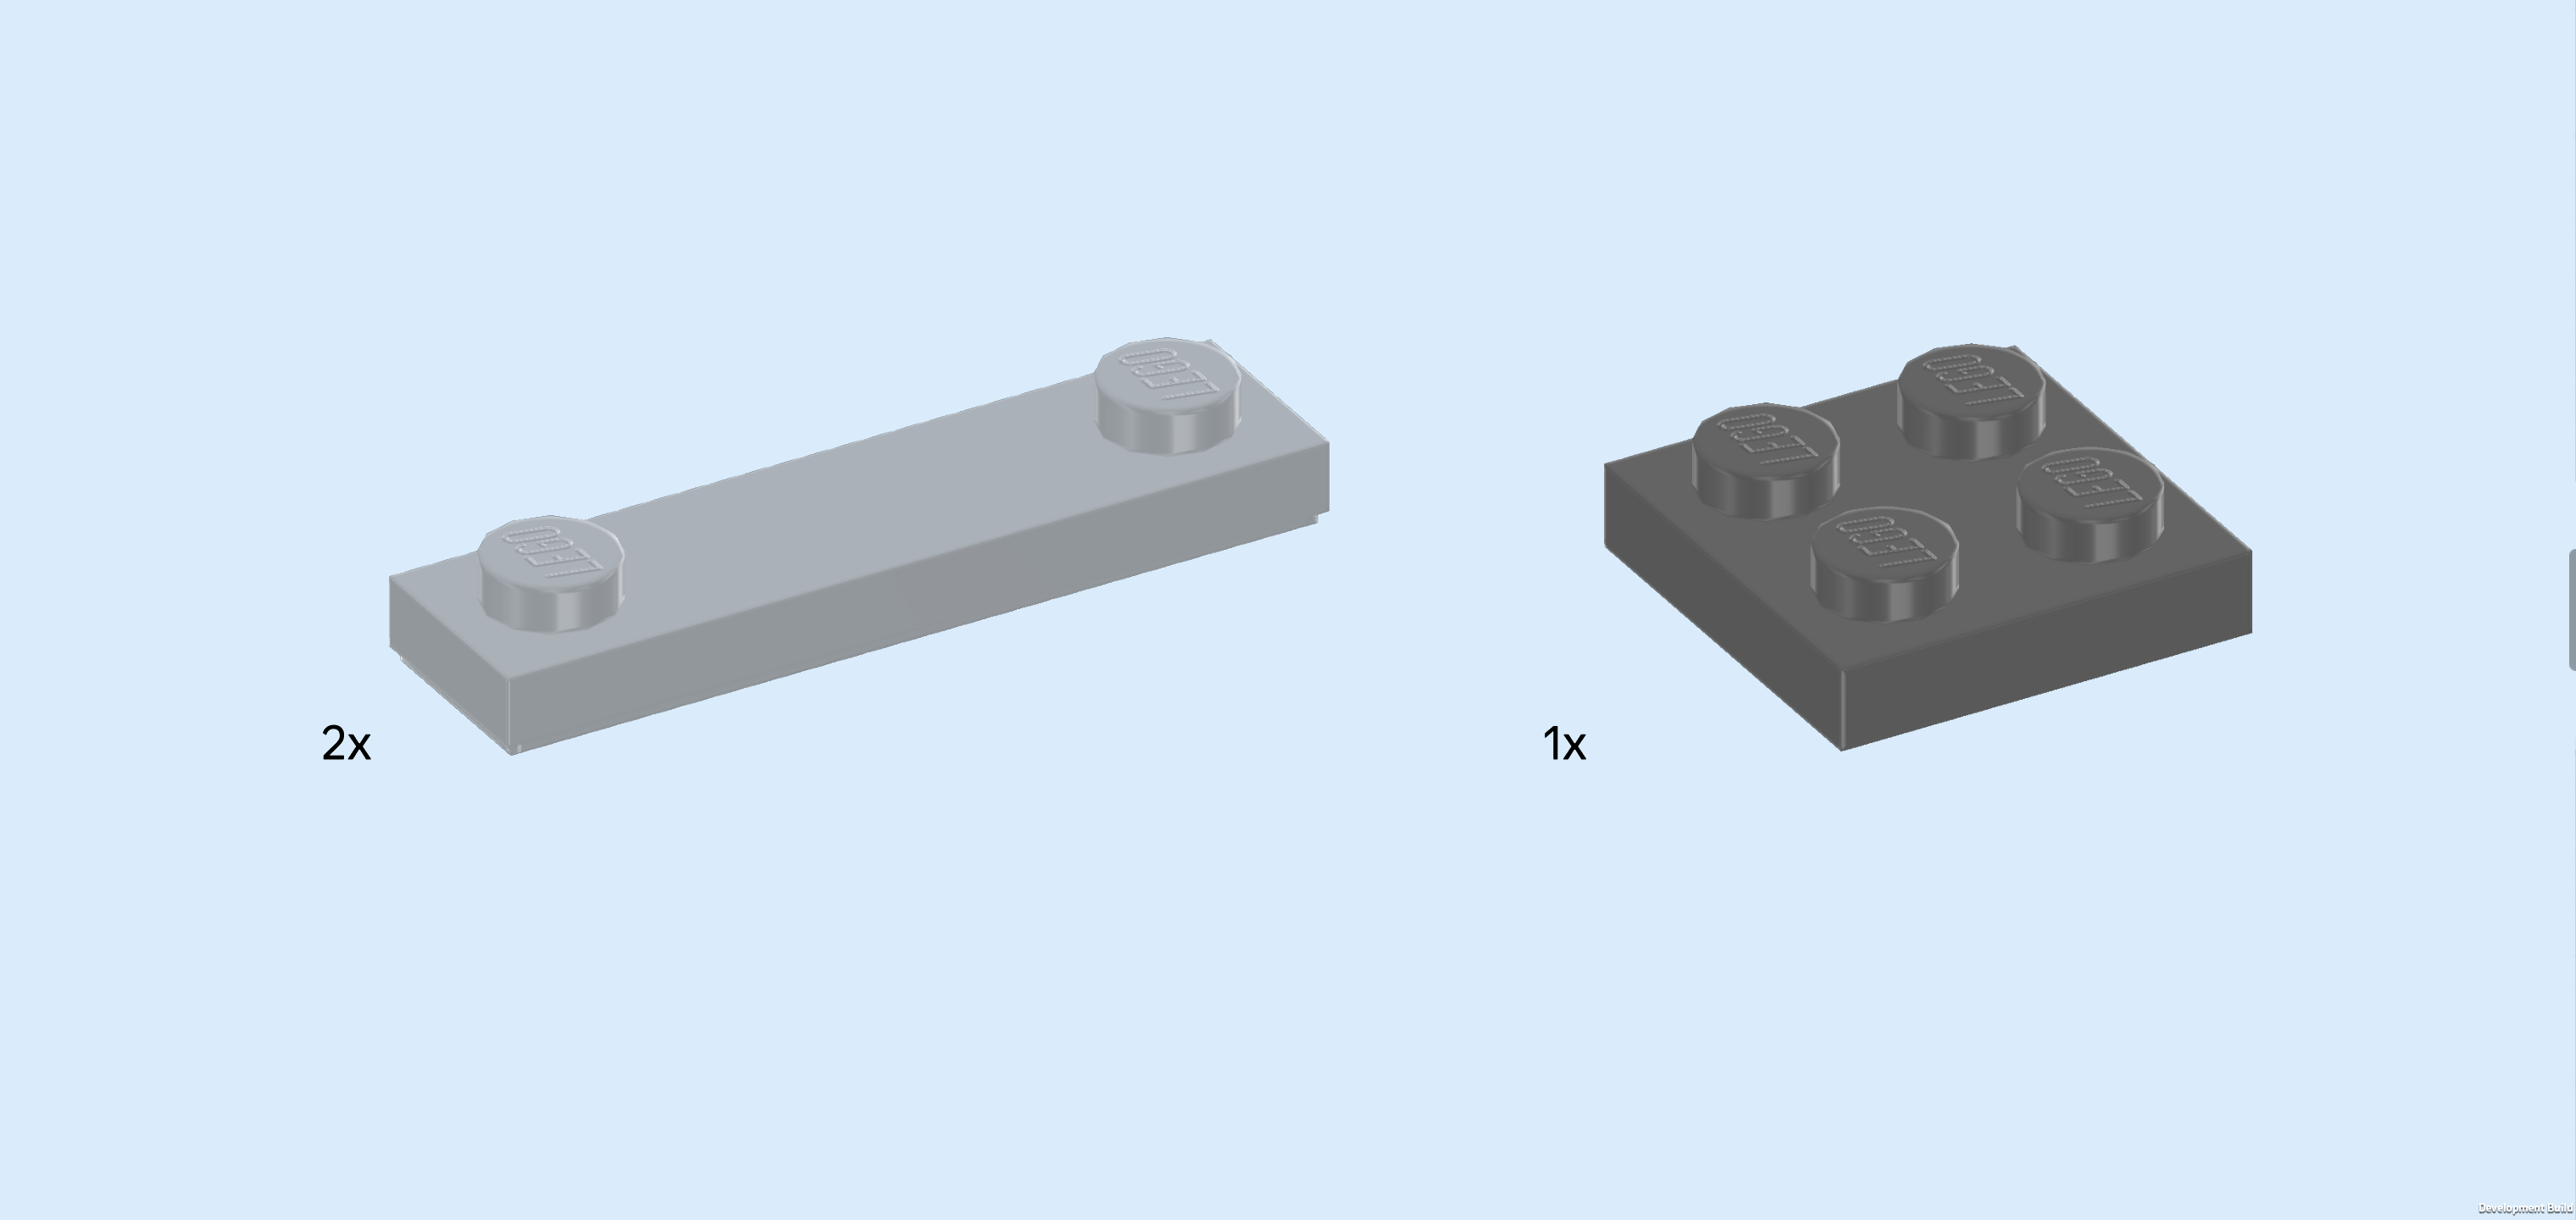
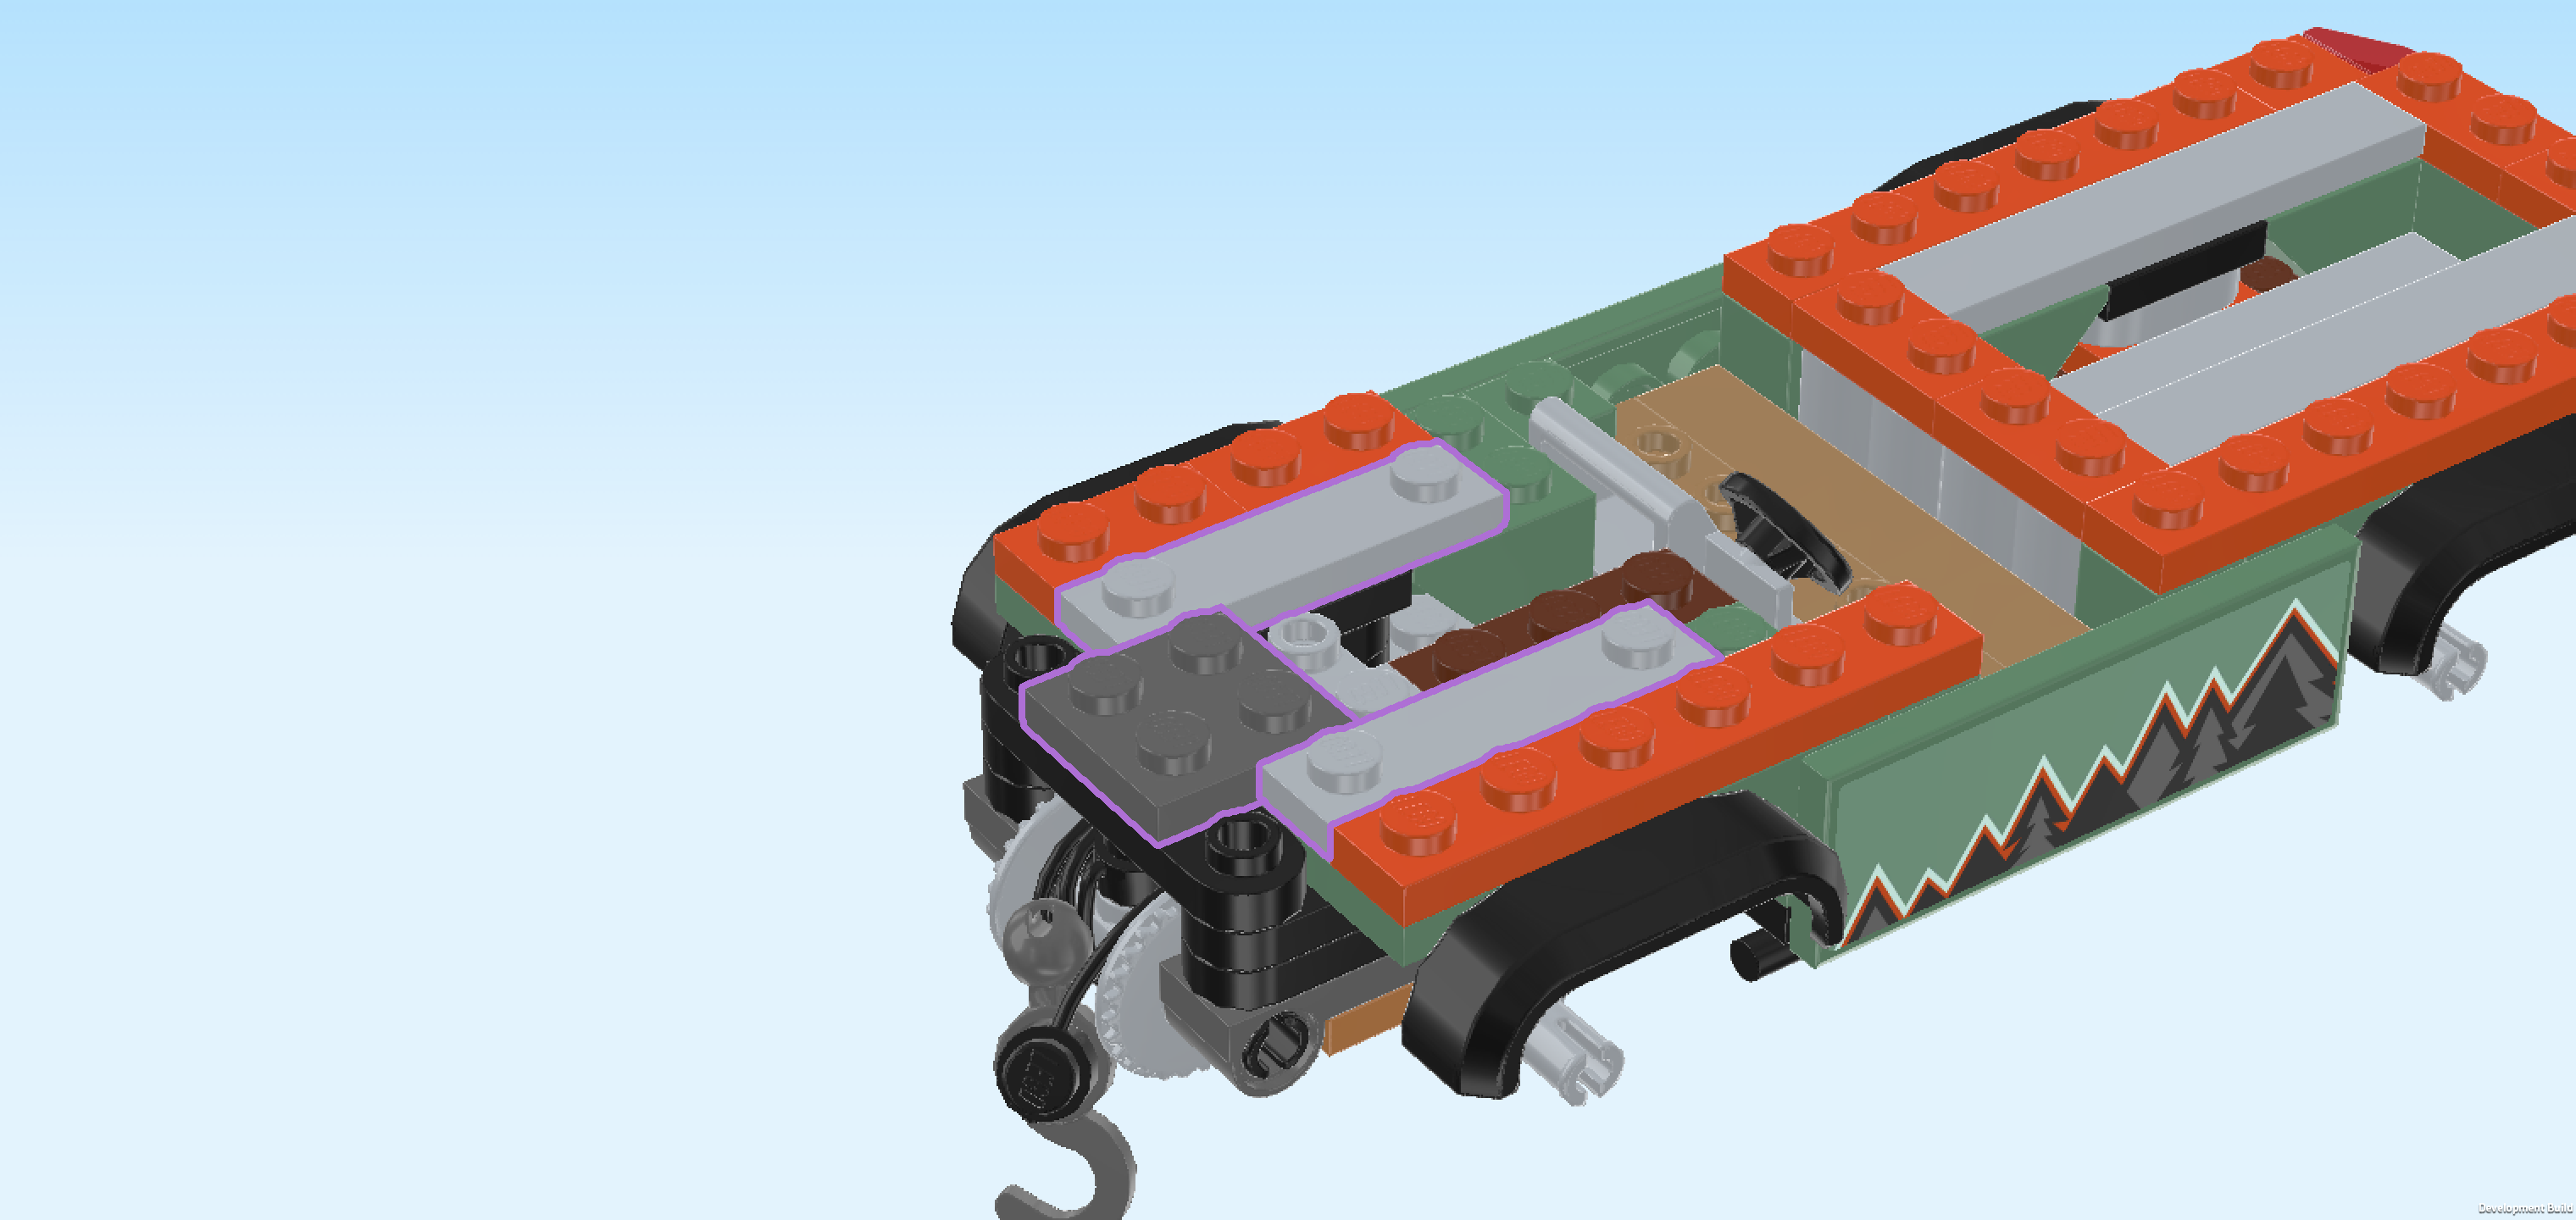
| Collect the following 3 pieces: |
| 2 medium stone grey plates 1x4 with 2 knobs, |
| and 1 dark stone grey plate 2x2. |
| Put 1 plate 1x4 horizontally in front of the 2 previous pieces. |
| Repeat symmetrically at the front. |
| Put the plate 2x2 centered on the leftmost edge. This means it will sit directly above the winch, and its right half will be between the 2 previous pieces. |
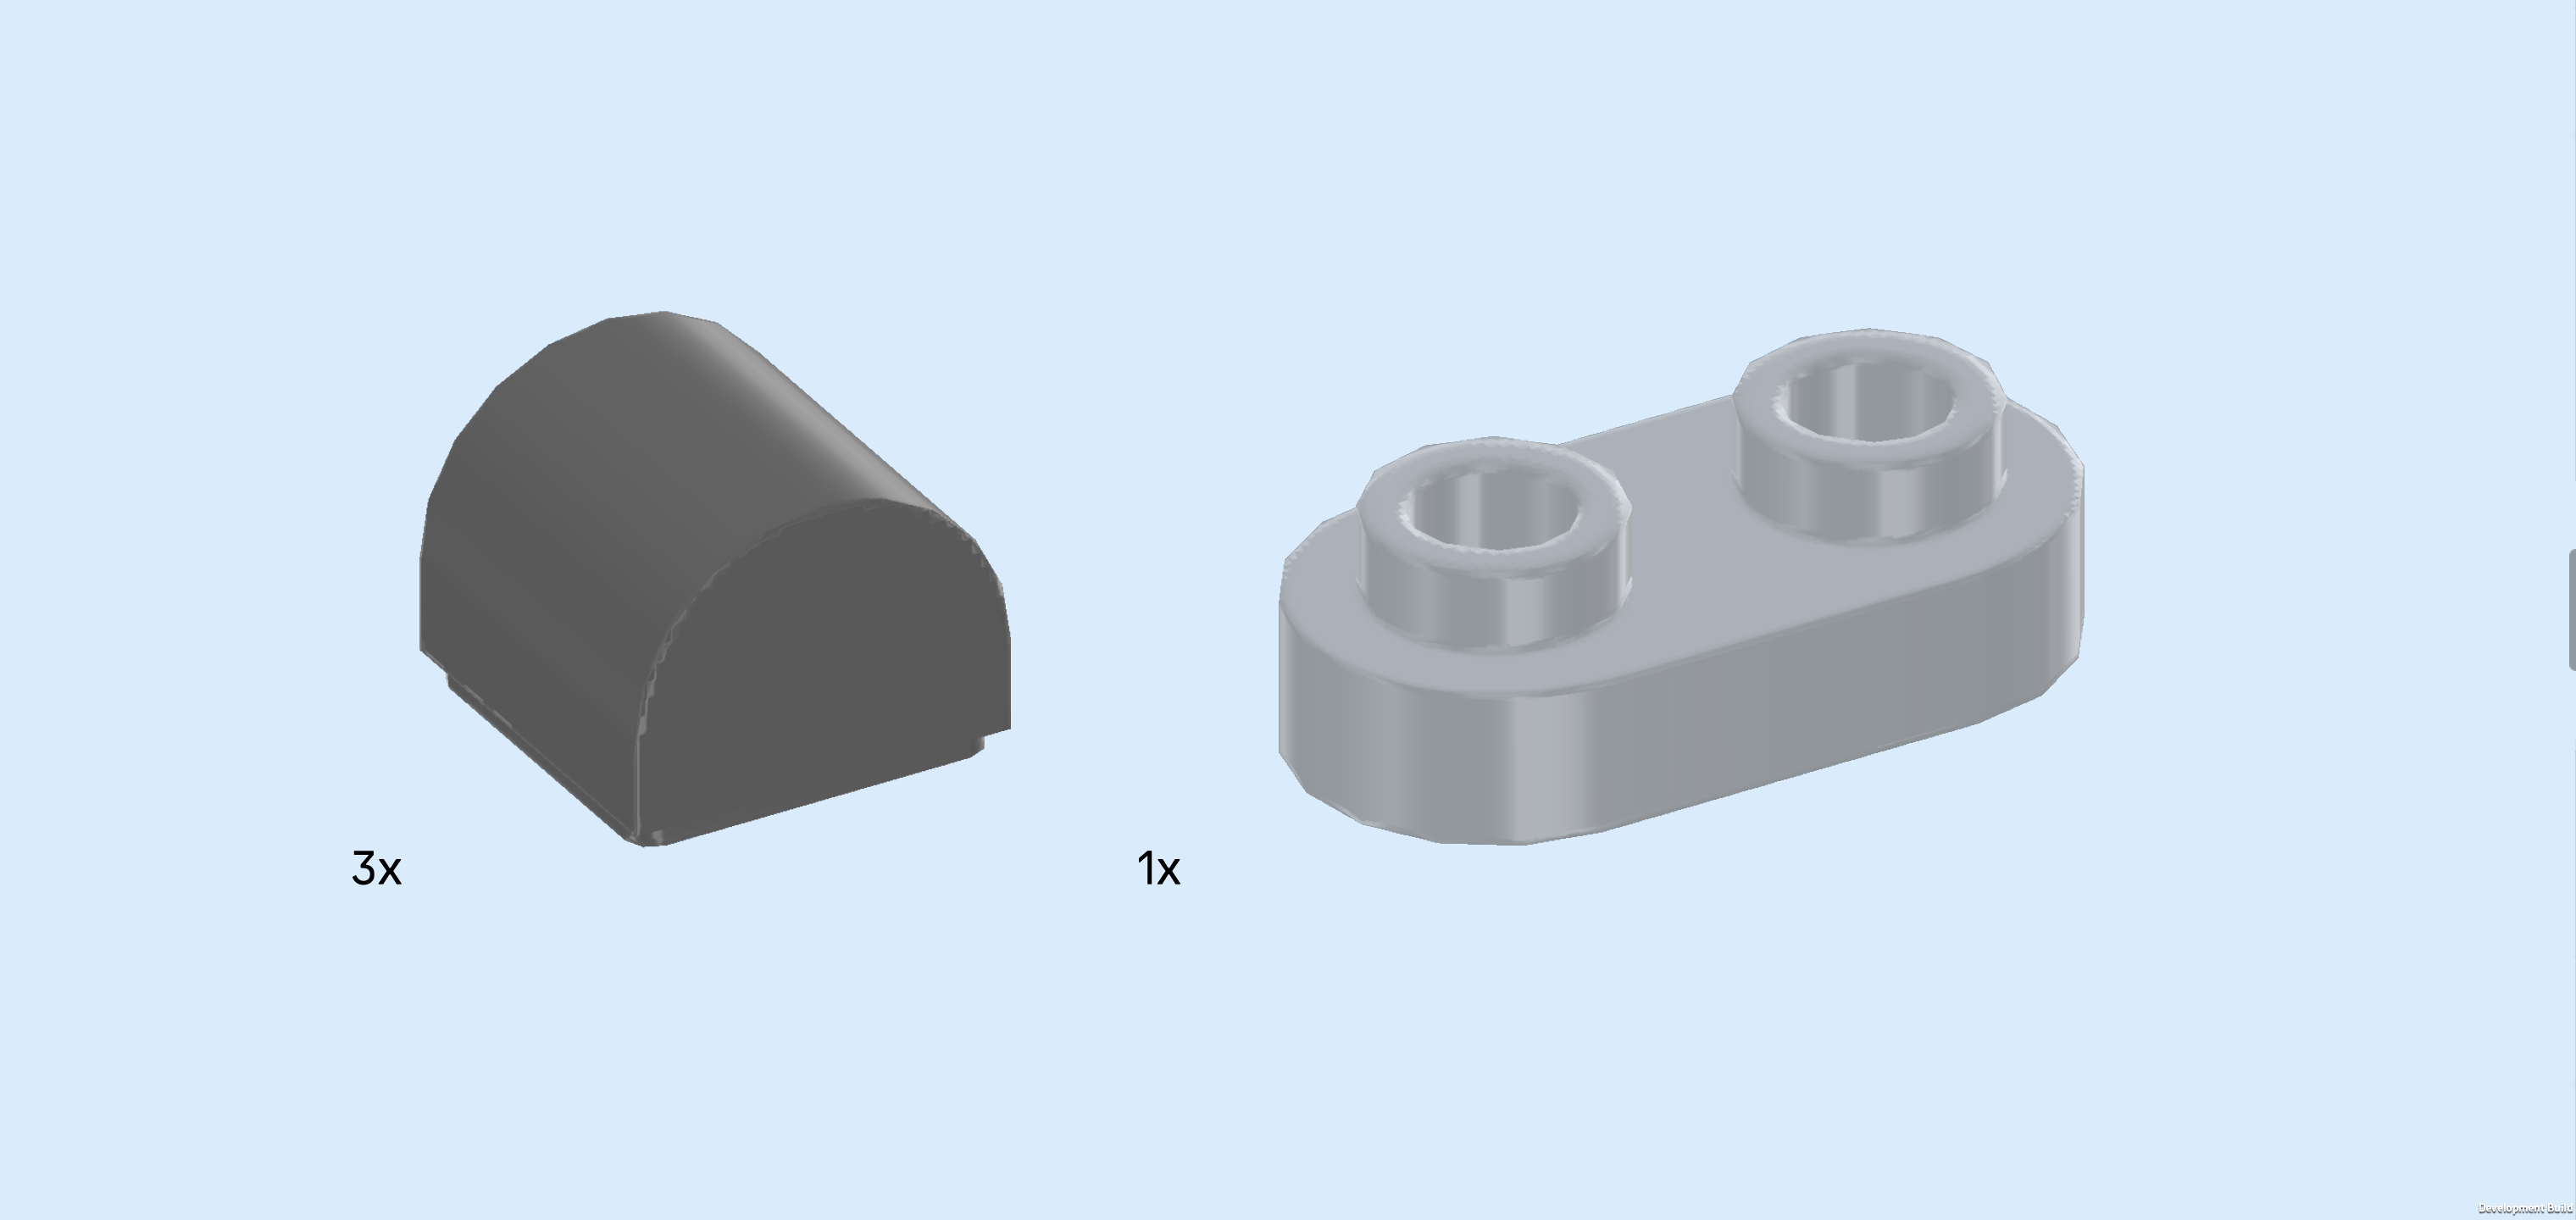
| Collect the following 4 pieces: |
| 3 dark stone grey half cylinders 1x1, |
| and 1 medium stone grey rounded plate 1x2. |
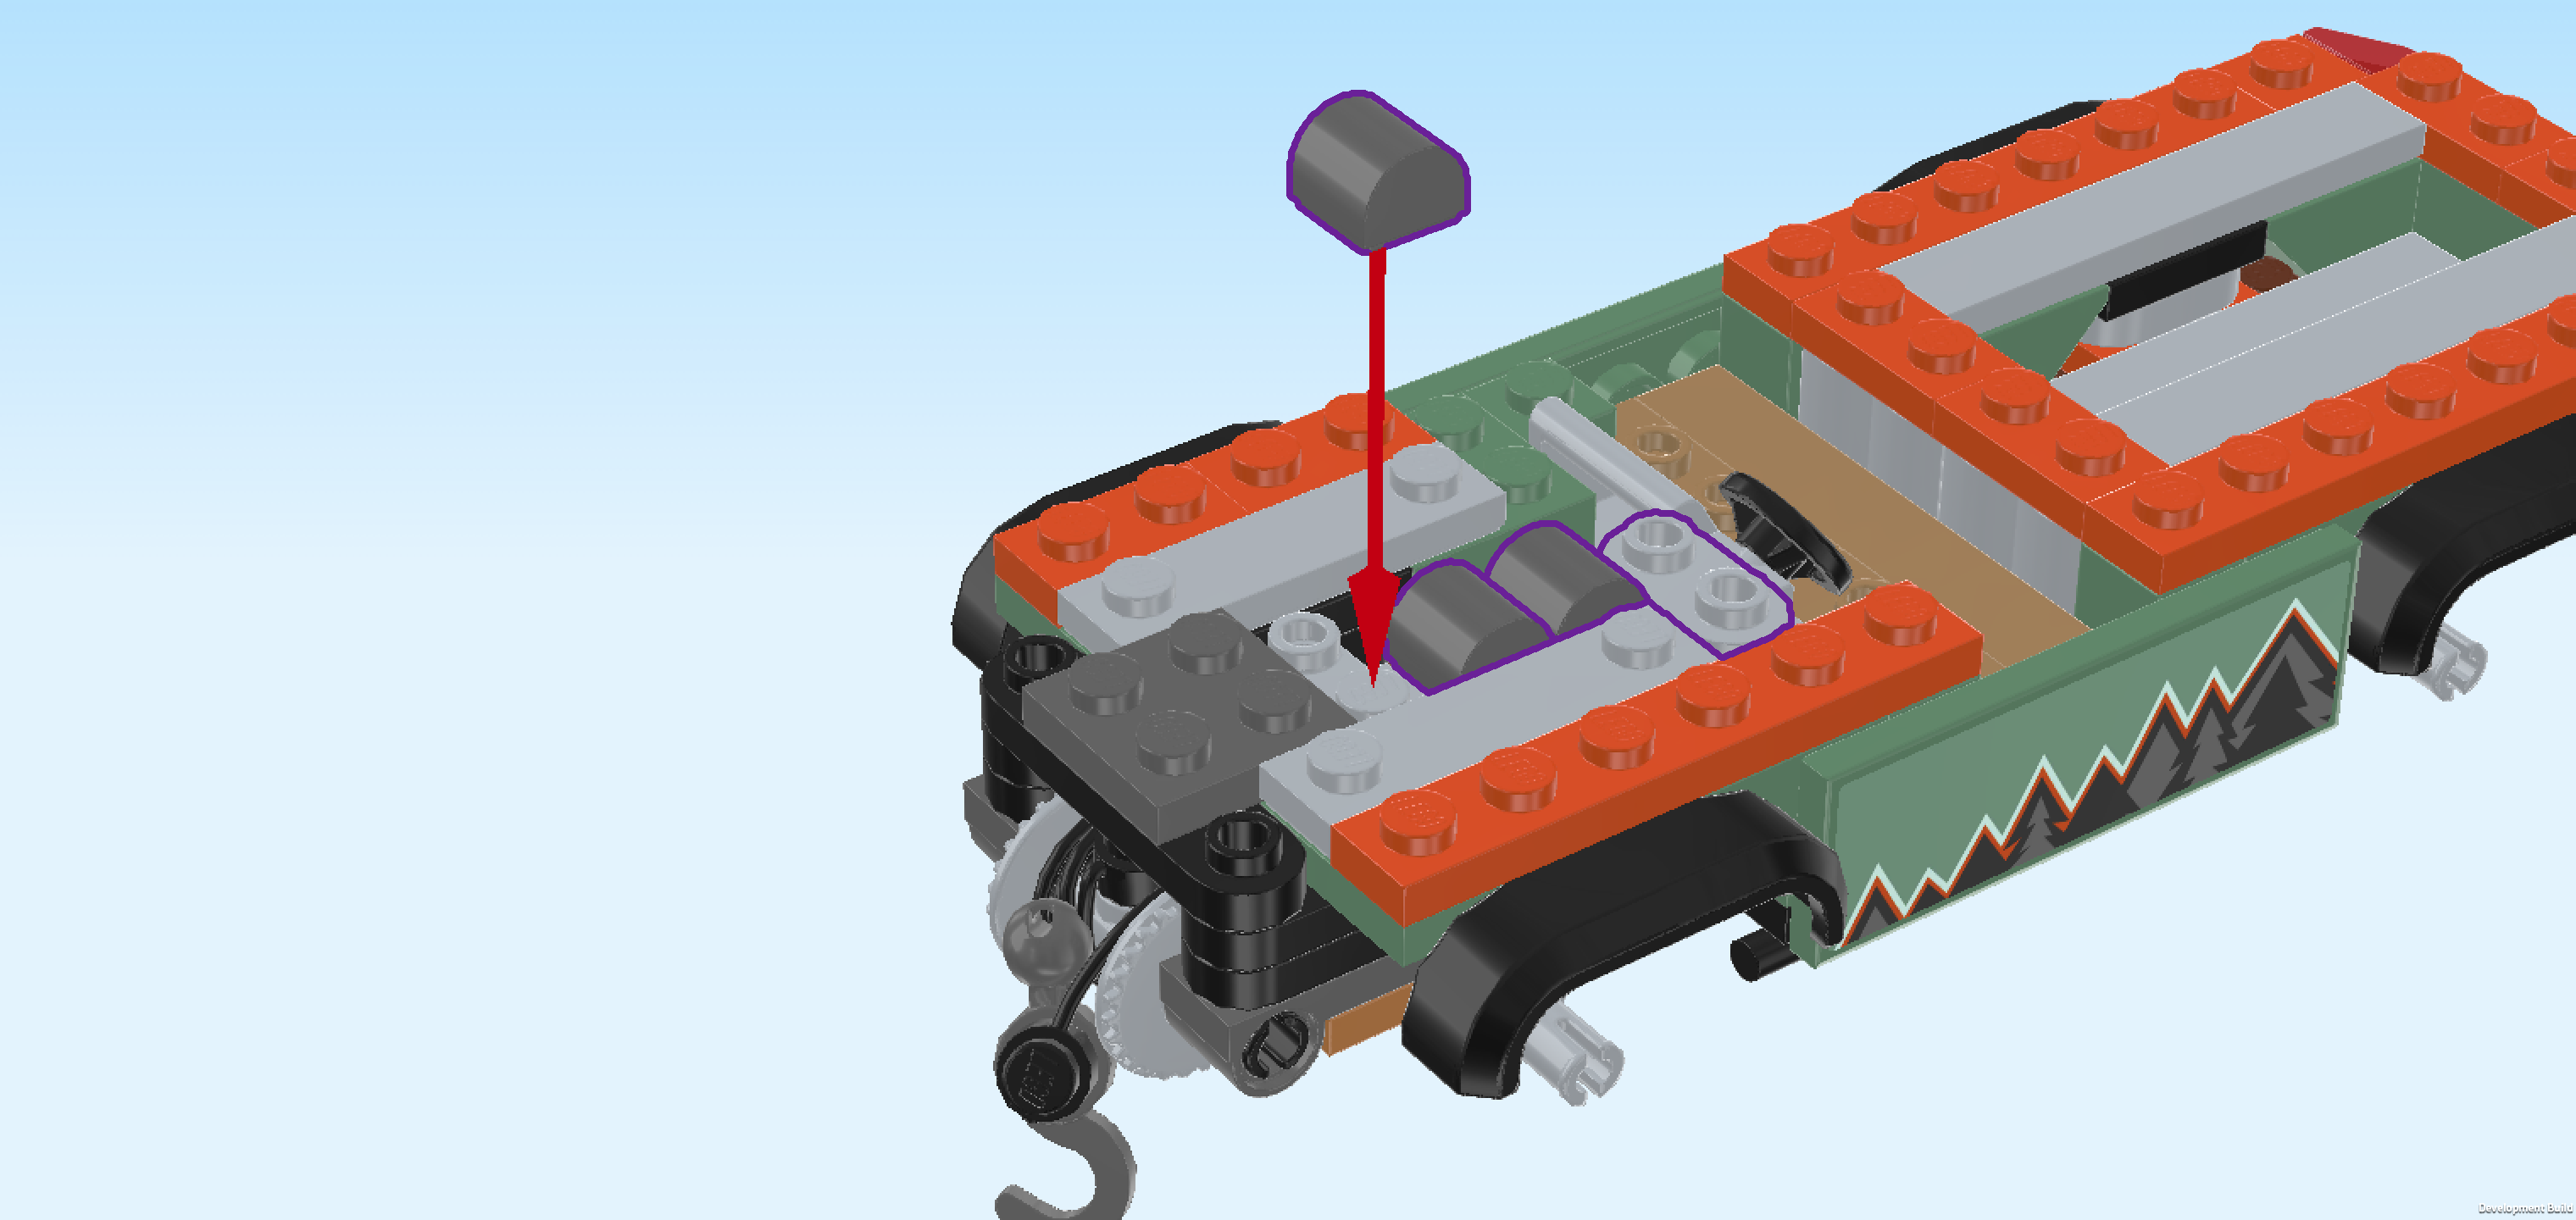
| Put 1 half cylinder 1x1 to the right of the previous piece's front half. Make sure its curve is running from left to right, not from front to back. |
| Put 1 half cylinder 1x1 to the right of the previous piece in the same orientation. |
| Put the last half cylinder 1x1 to the right of the previous piece in the same orientation. |
| Put the rounded plate 1x2 vertically to the right of the previous piece, aligning them at their back edges. |
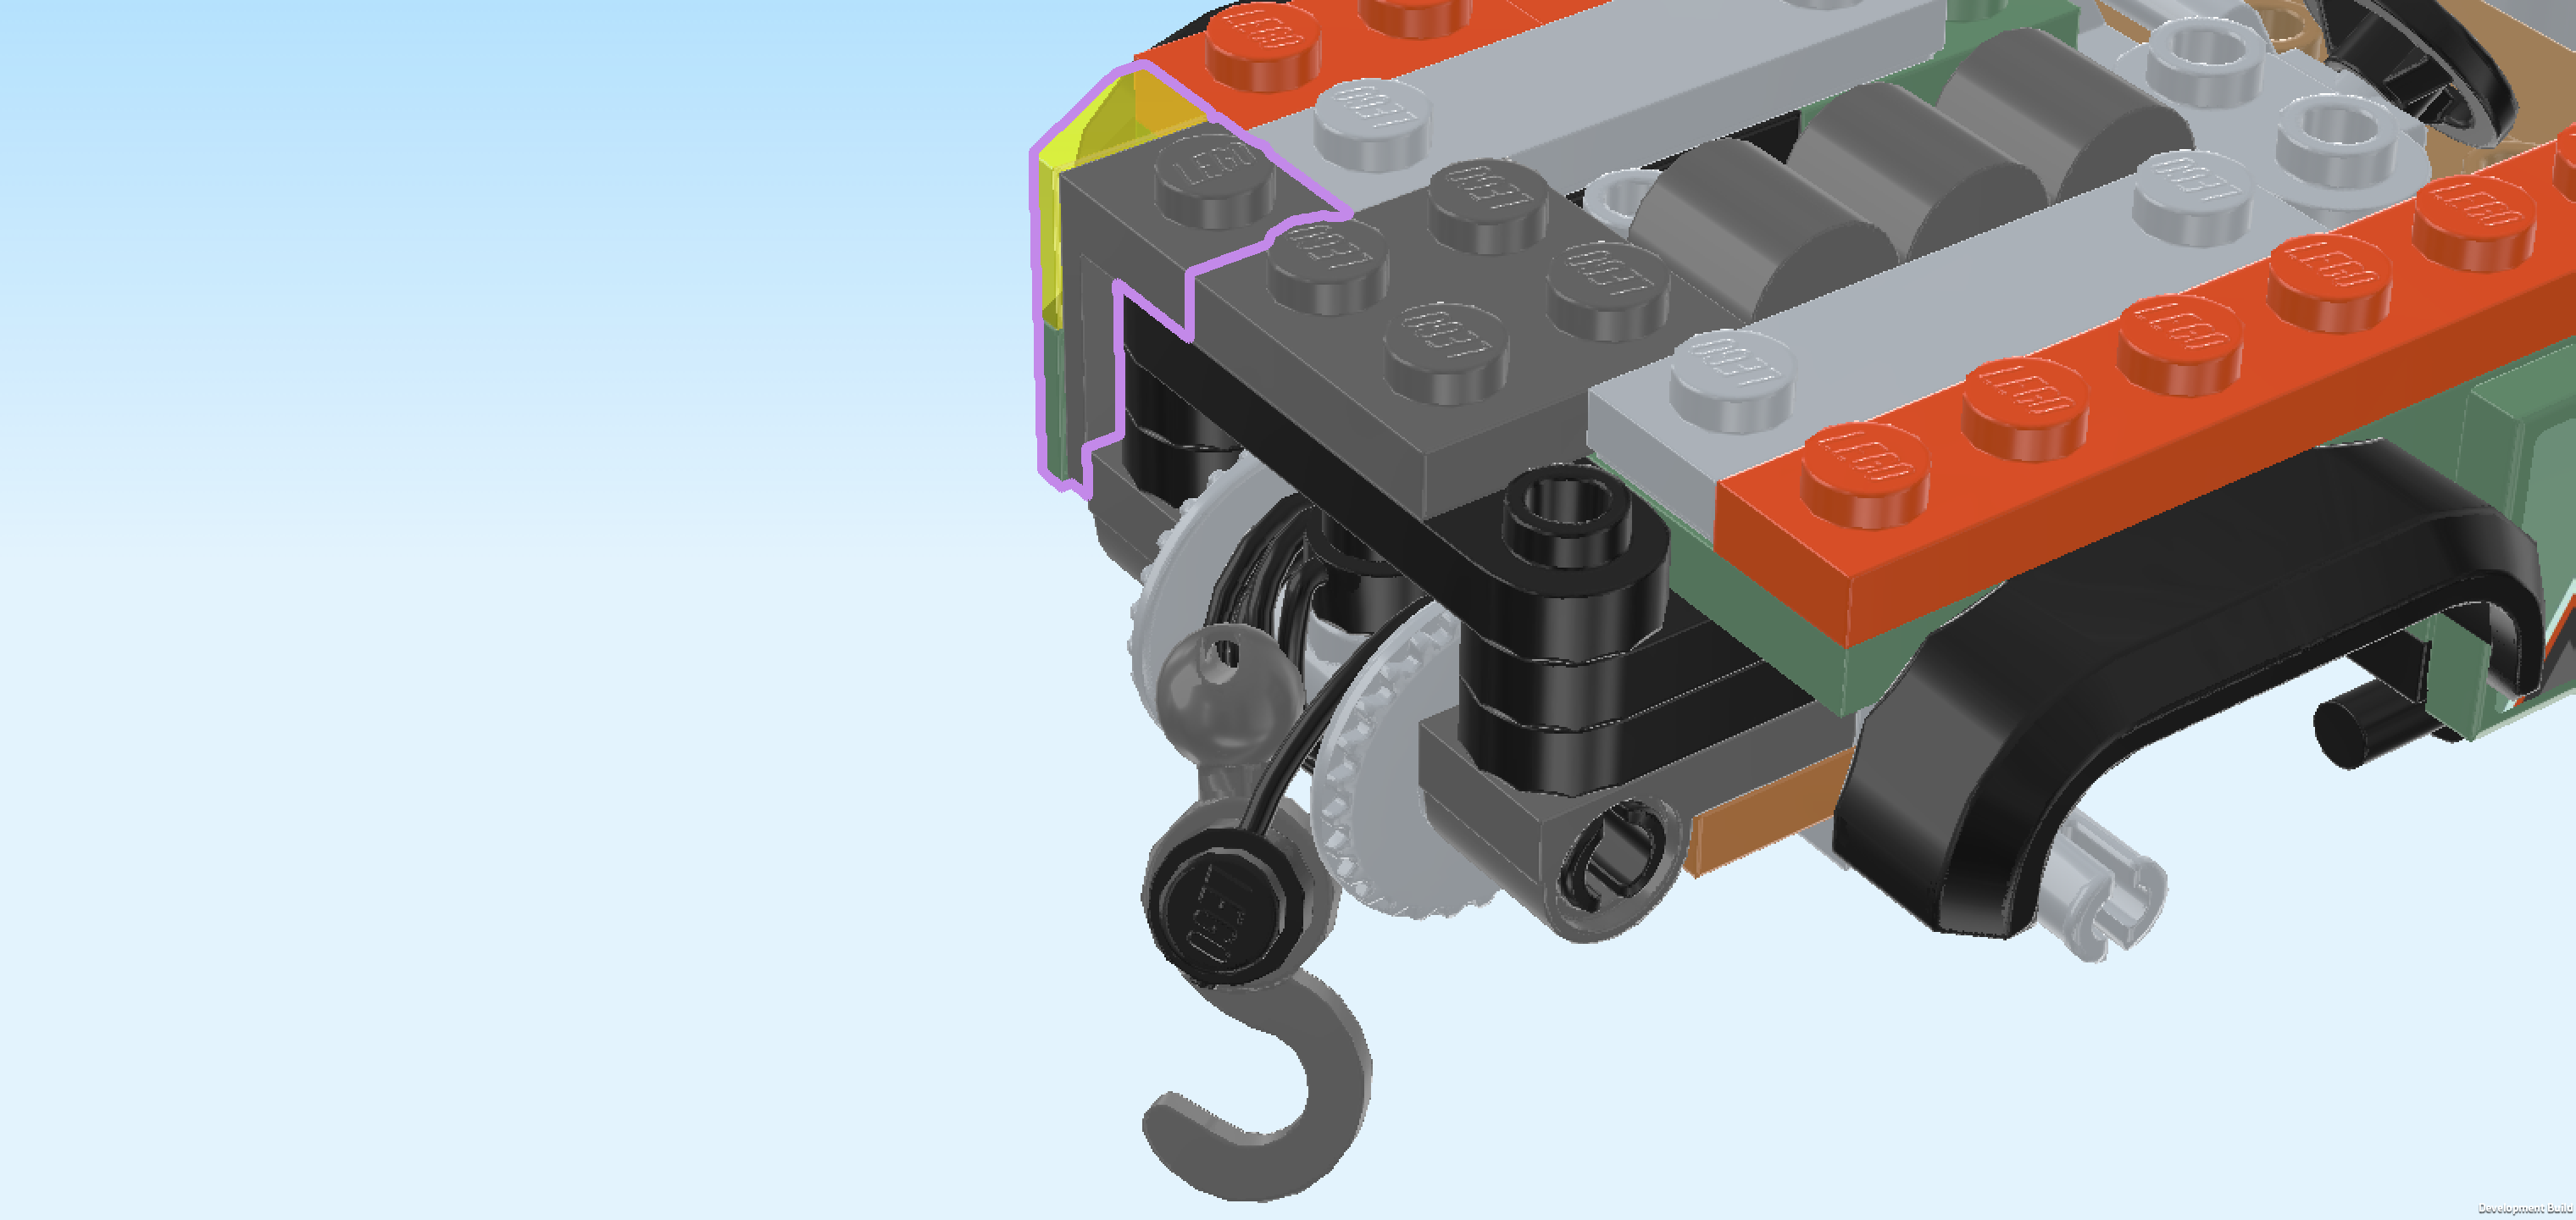
| Now, we will build the first headlight. |
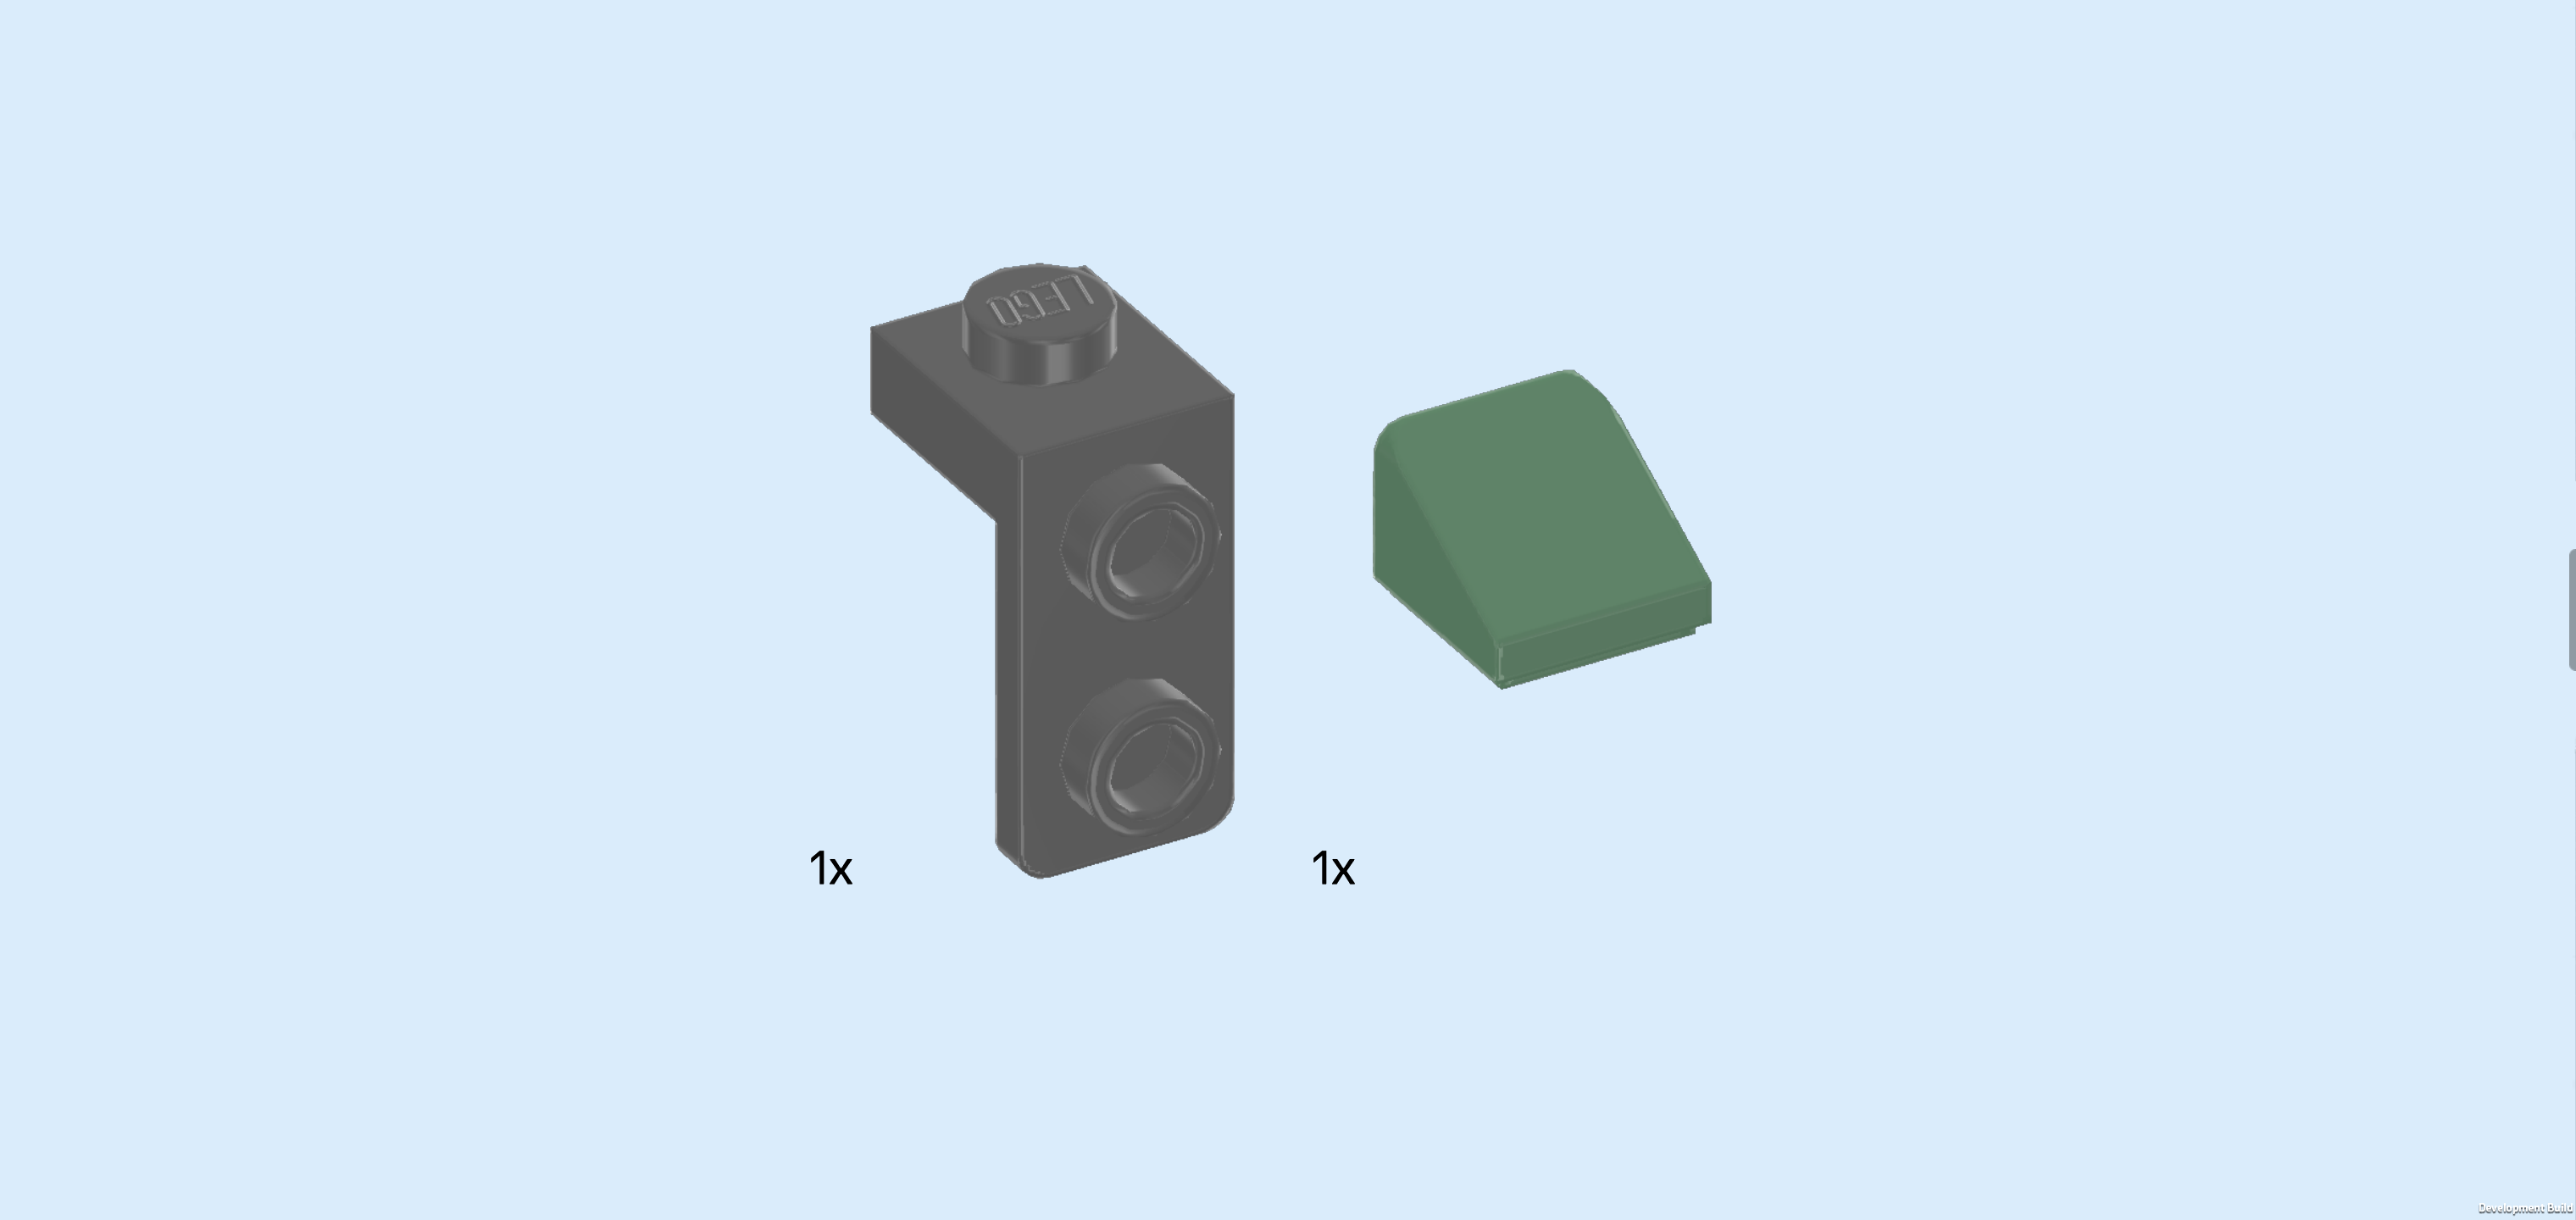
| Collect the following 2 pieces: |
| 1 dark stone grey top angle plate 1x1 - 1x2 with 2 side knobs, |
| and 1 sand green smooth roof tile 1x1x⅔. |
| Hold the top angle plate 1x1 so that its side knobs are pointing to the right. |
| Put the roof tile 1x1 on the bottom side knob, slope running towards the back left. This means that its highest edge will be at the front edge. |
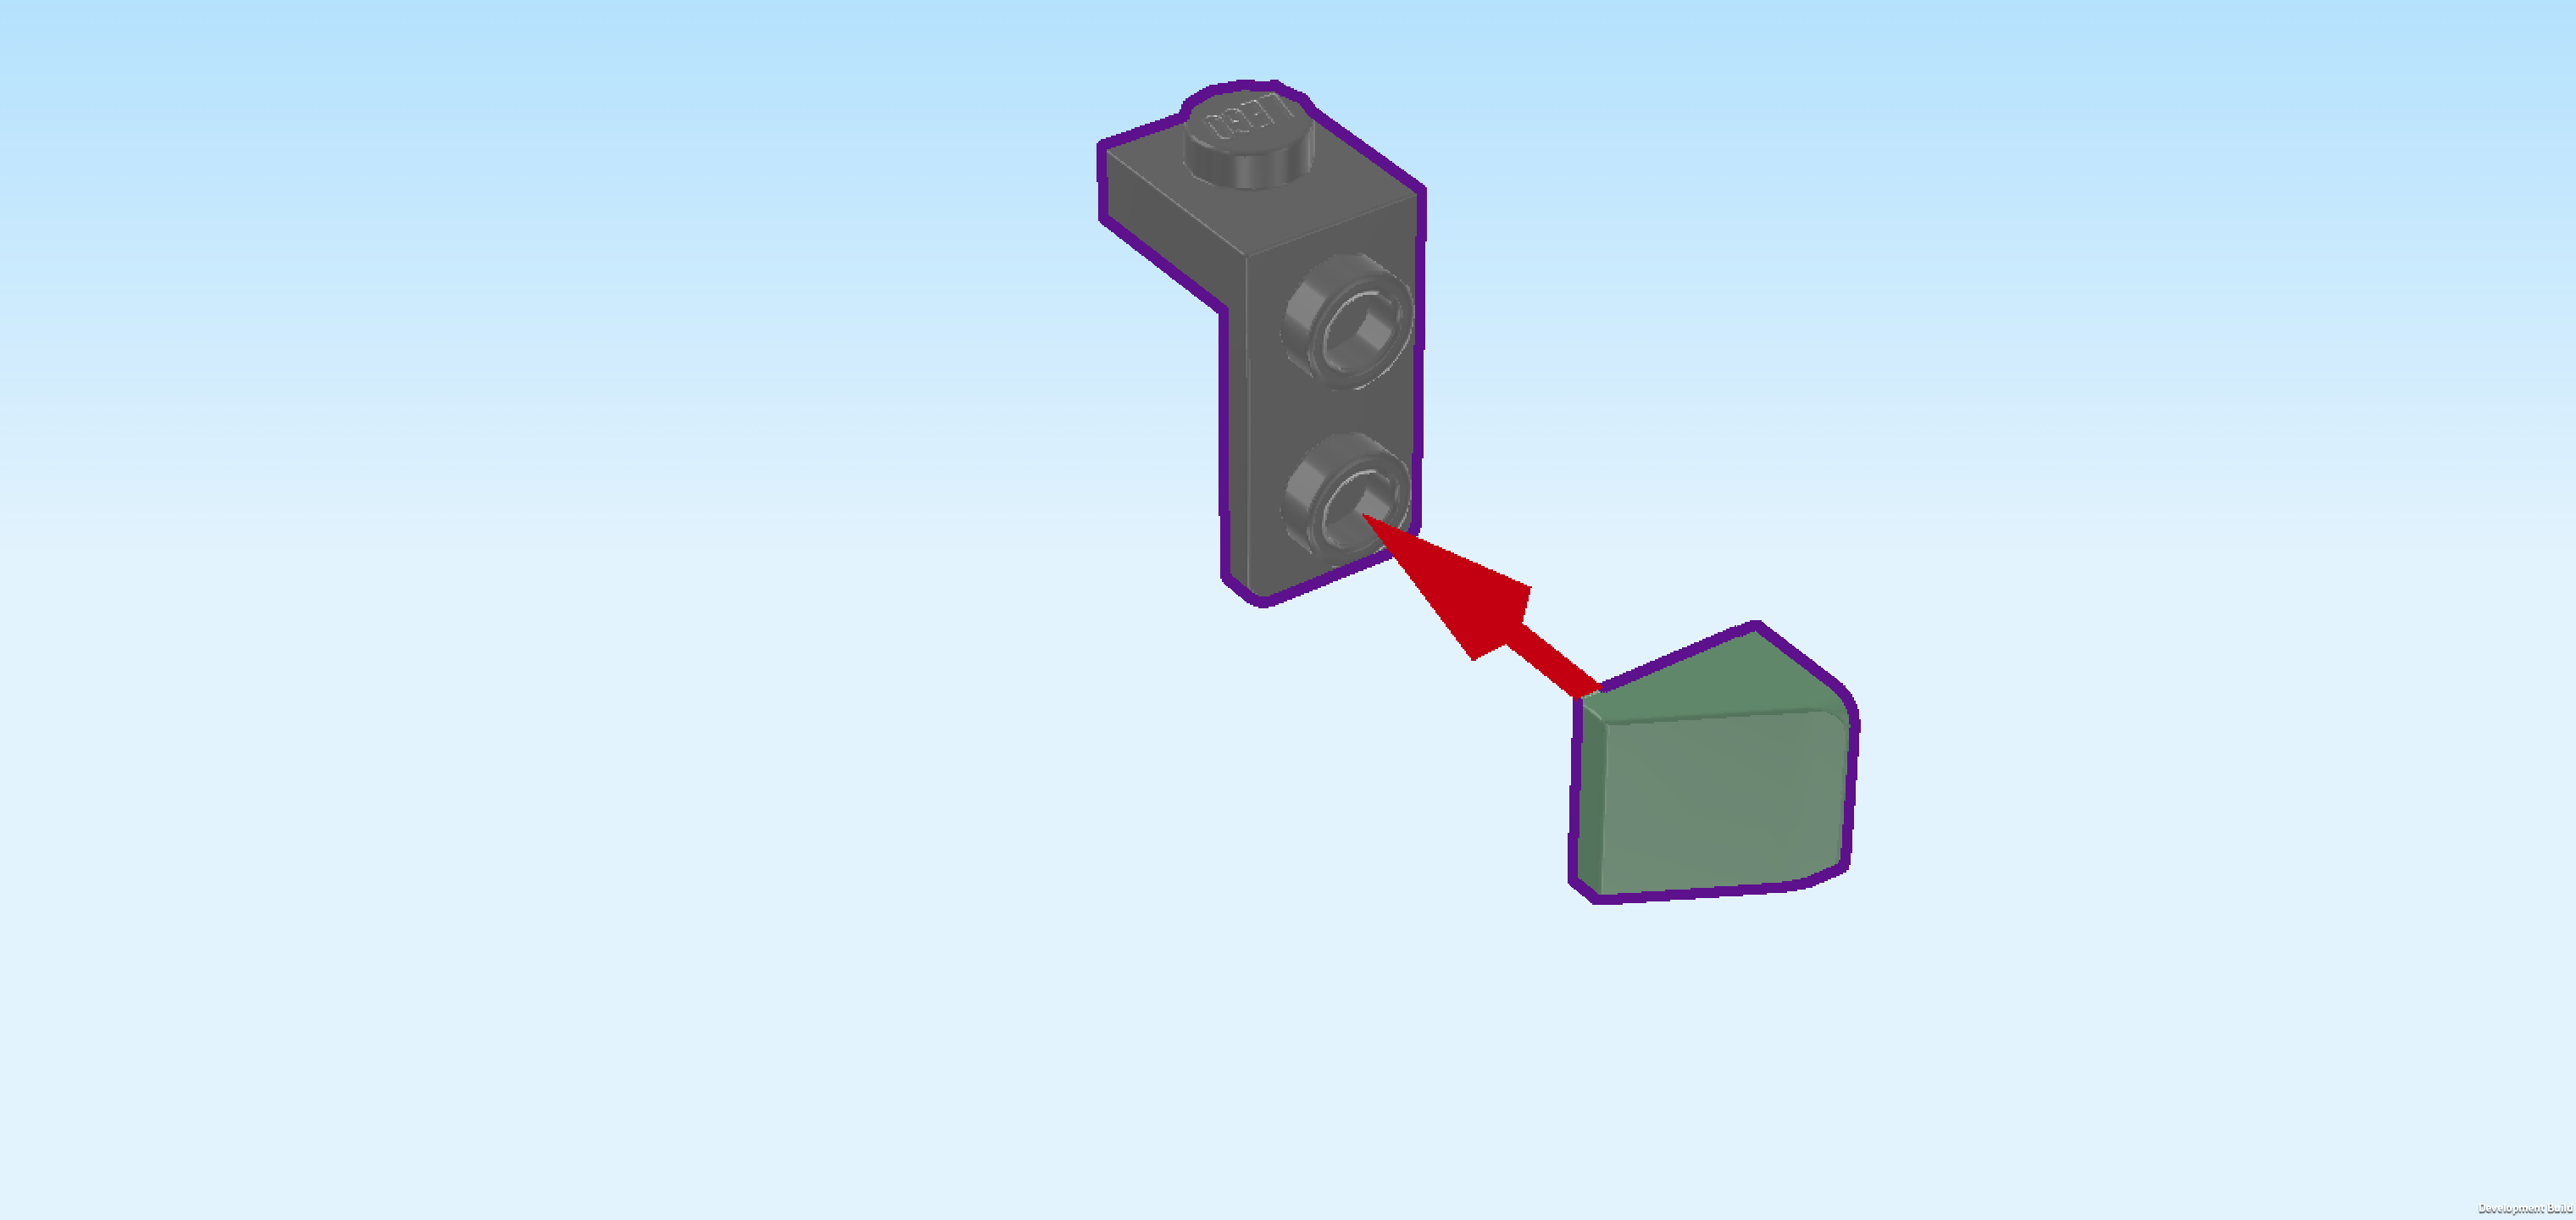
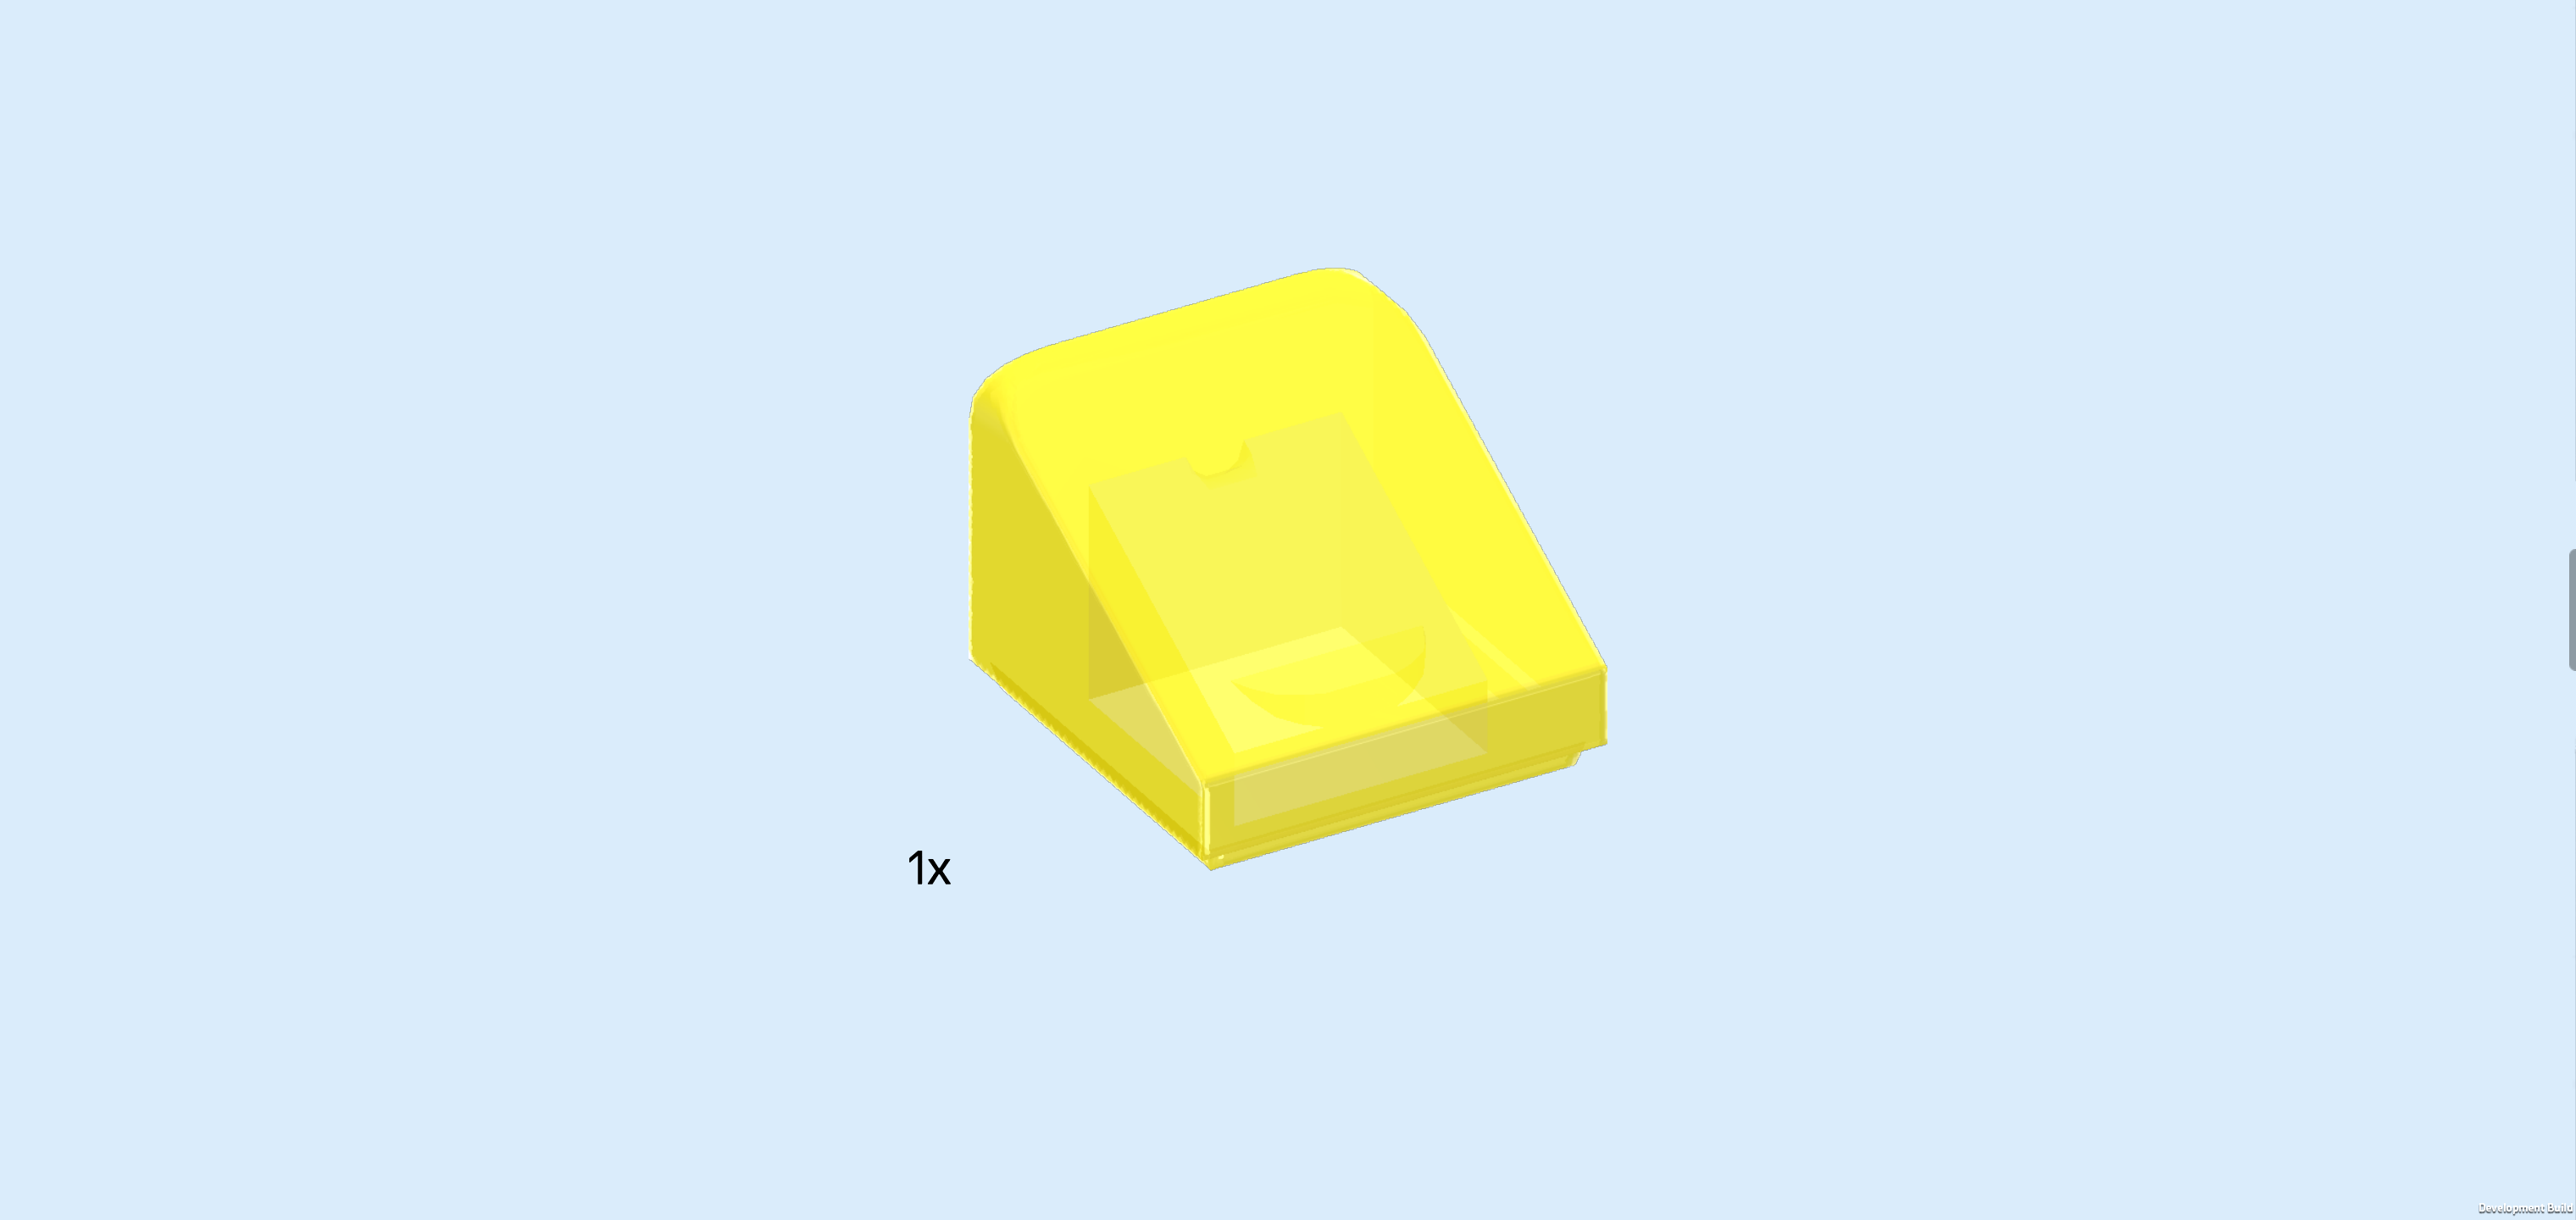
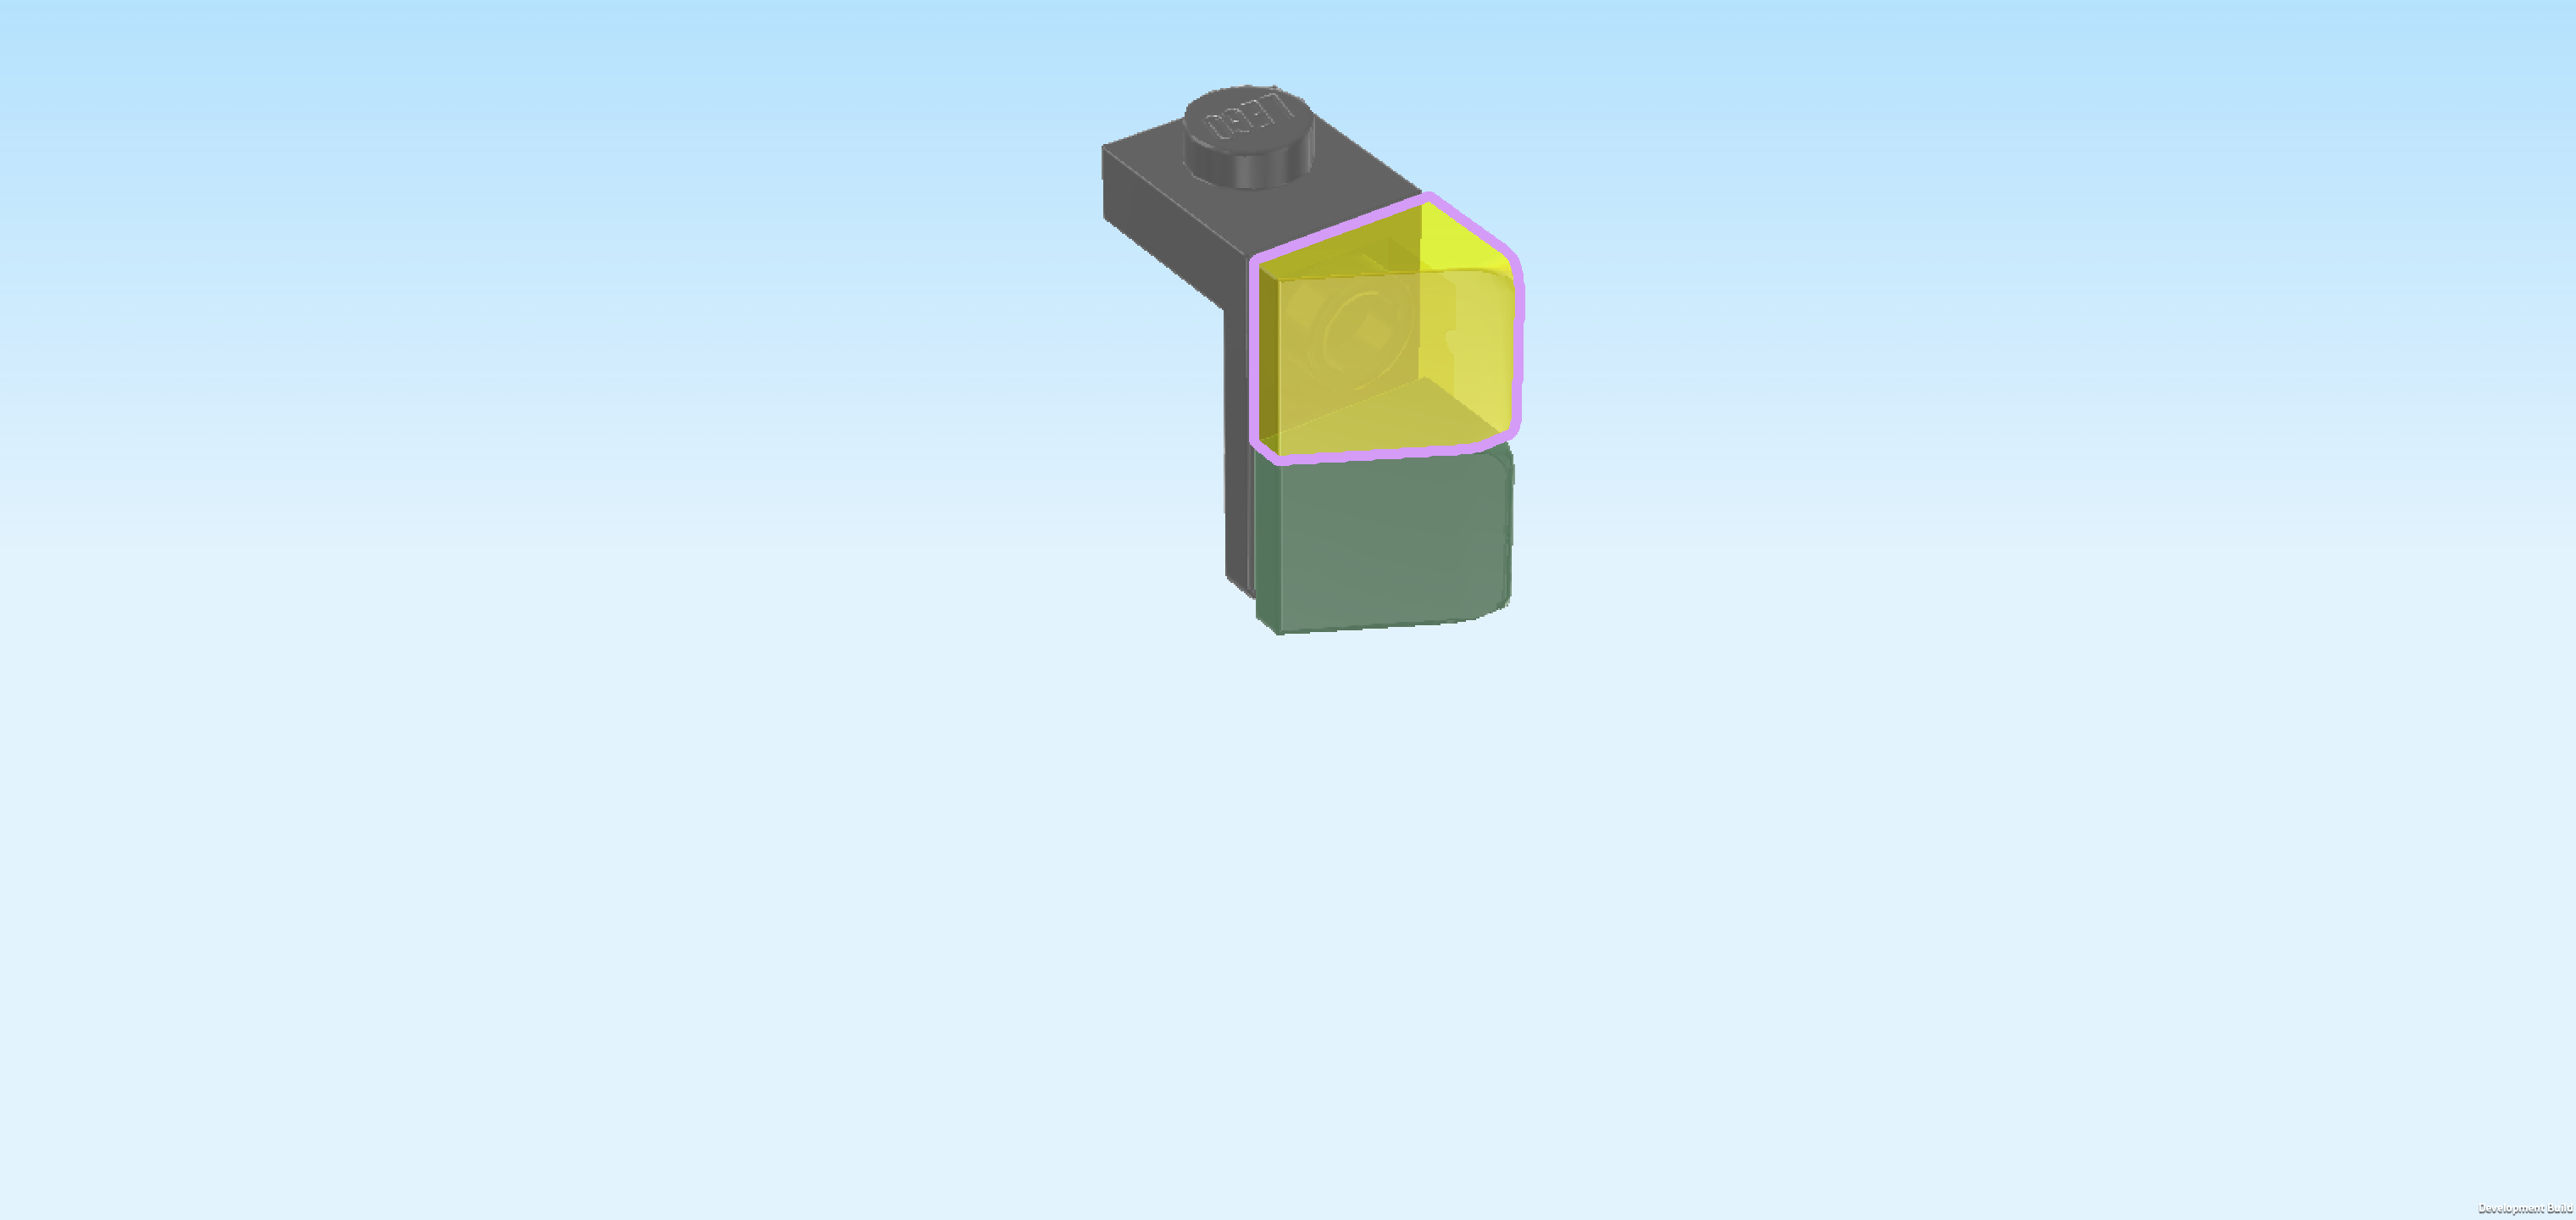
| Find 1 transparent yellow smooth roof tile 1x1x⅔. |
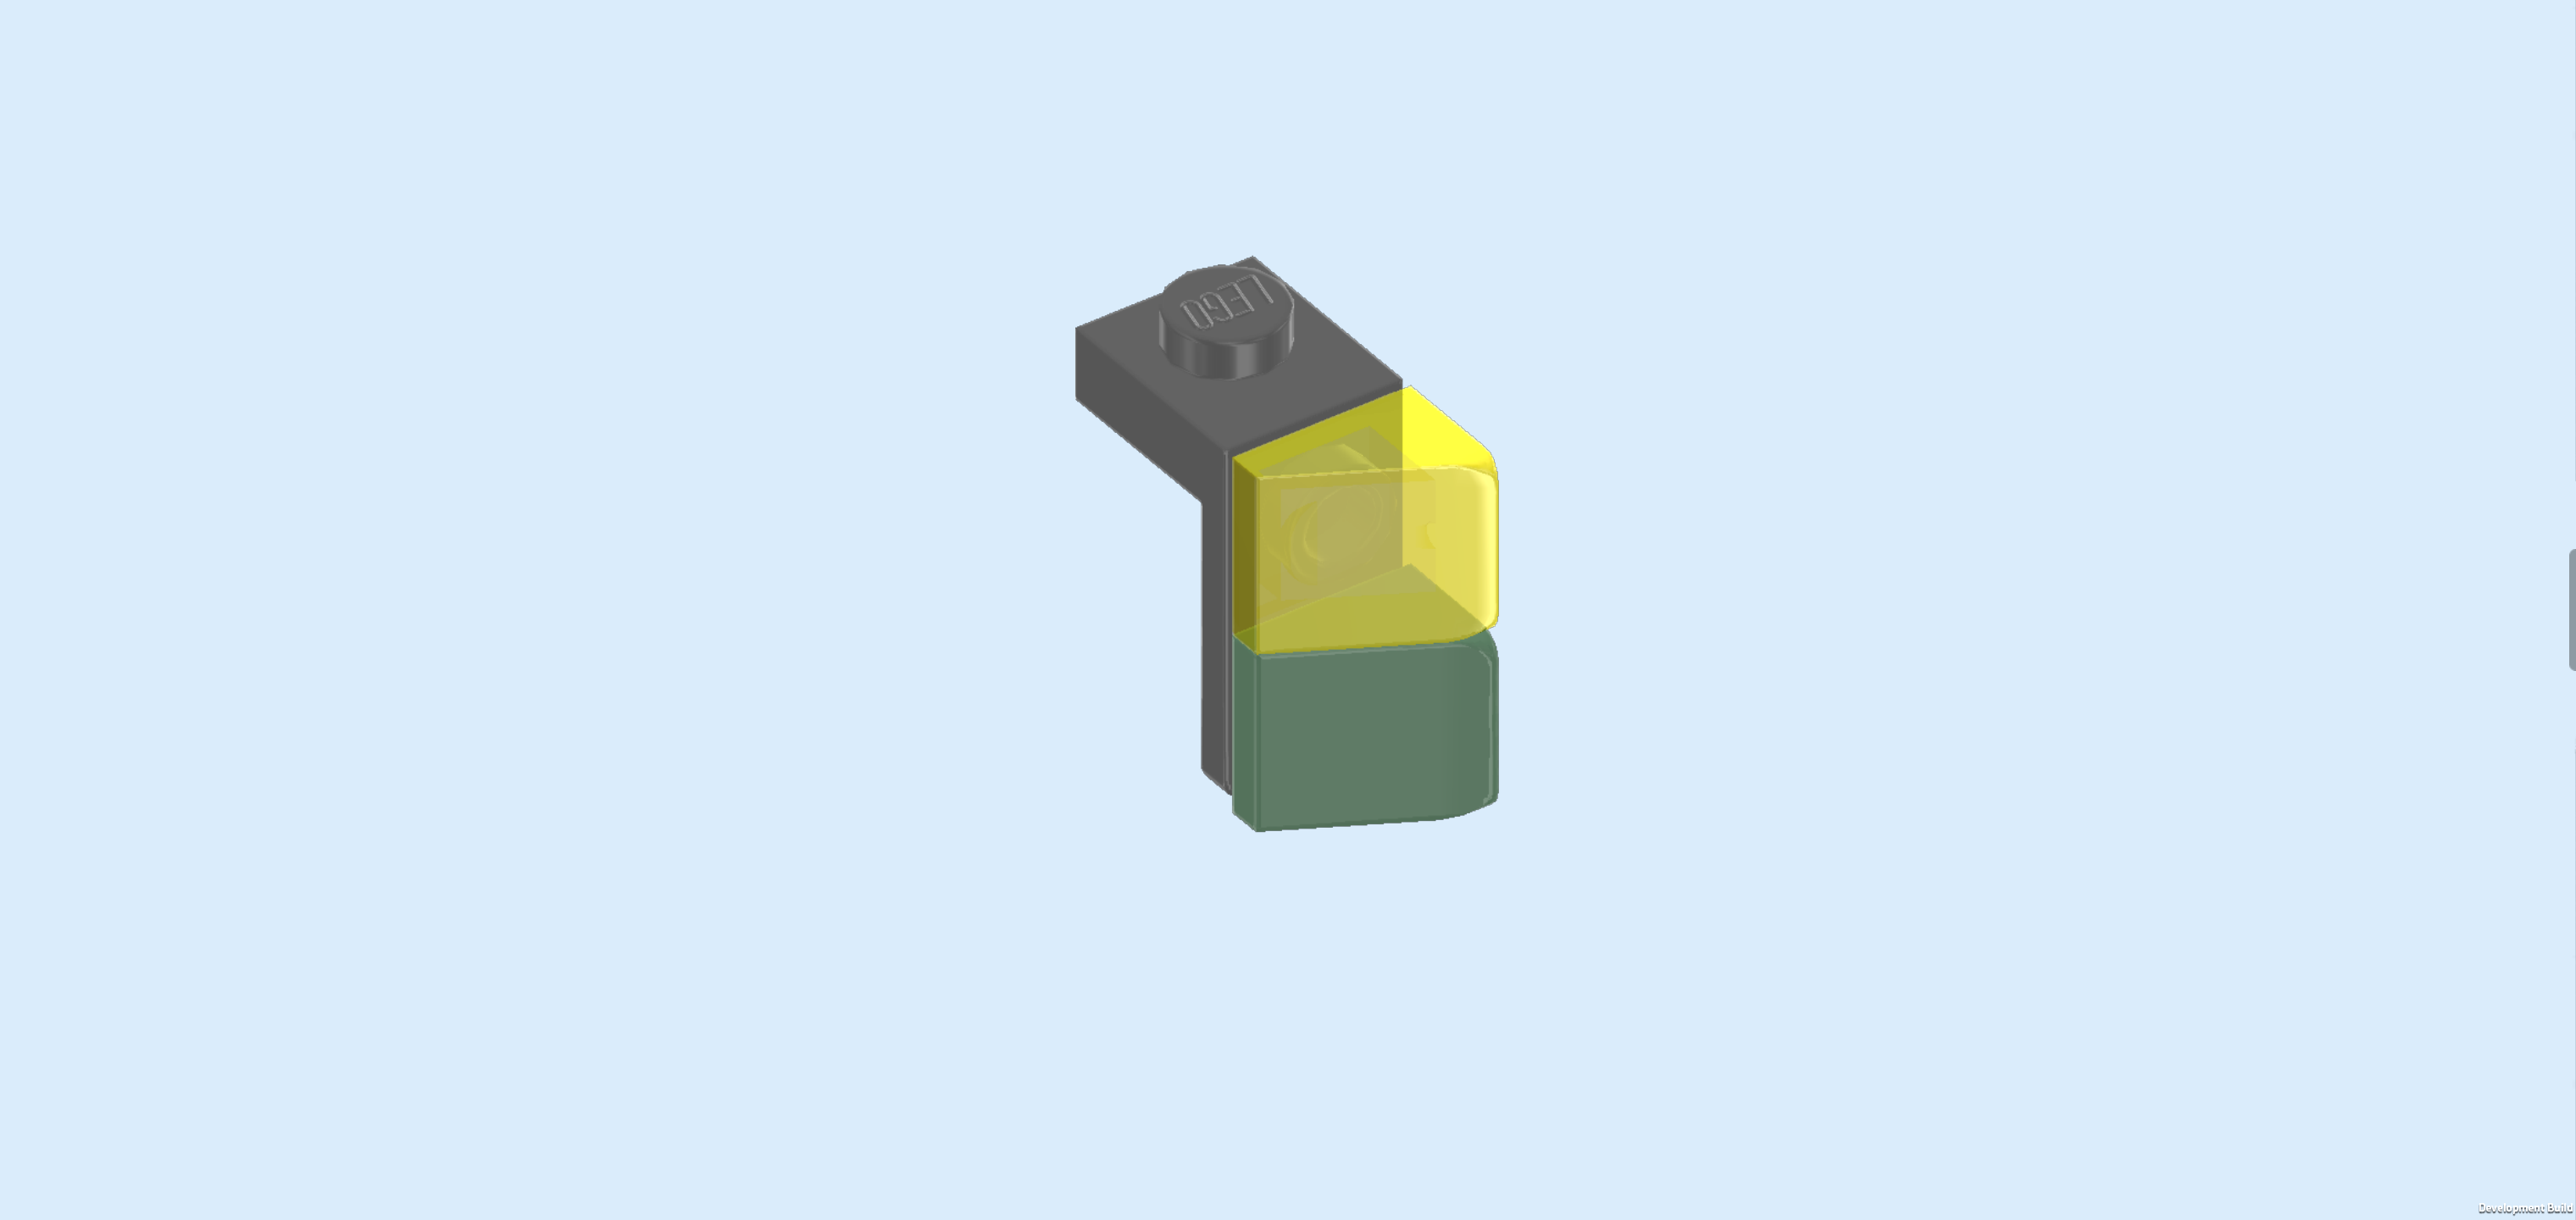
| Put it on the side knob above the previous piece, slope again from the front right to the back left. |
| Mount it on the leftmost column of the build on its backmost knob, but this time make sure that the roof tiles are towards the back. |
| Next, we will build the second headlight. |
| Collect the following 2 pieces: |
| 1 dark stone grey top angle plate 1x1 - 1x2 with 2 side knobs, |
| and 1 sand green smooth roof tile 1x1x⅔. |
| Hold the top angle plate 1x1 so that its side knobs are pointing to the right. |
| Put the roof tile 1x1 on the bottom side knob, slope running from the back right to the front left. This means that its highest edge will be at the back edge. |
| Find 1 transparent yellow smooth roof tile 1x1x⅔. |
| Put it on the side knob above the previous piece in the same orientation. |
| Mount the second headlight on the frontmost knob of the leftmost column, making sure that the roof tiles are towards the front. |
| We have finished building everything from bag number 2! Great job! Only 2 more bags to go. You are probably left with a few extra bricks and pieces again that you can use or stow away as you please. |
| Open bag number 3. You can choose to have the bricks sorted by color again if you like. This bag contains all bricks and pieces for the driver's cabin. |
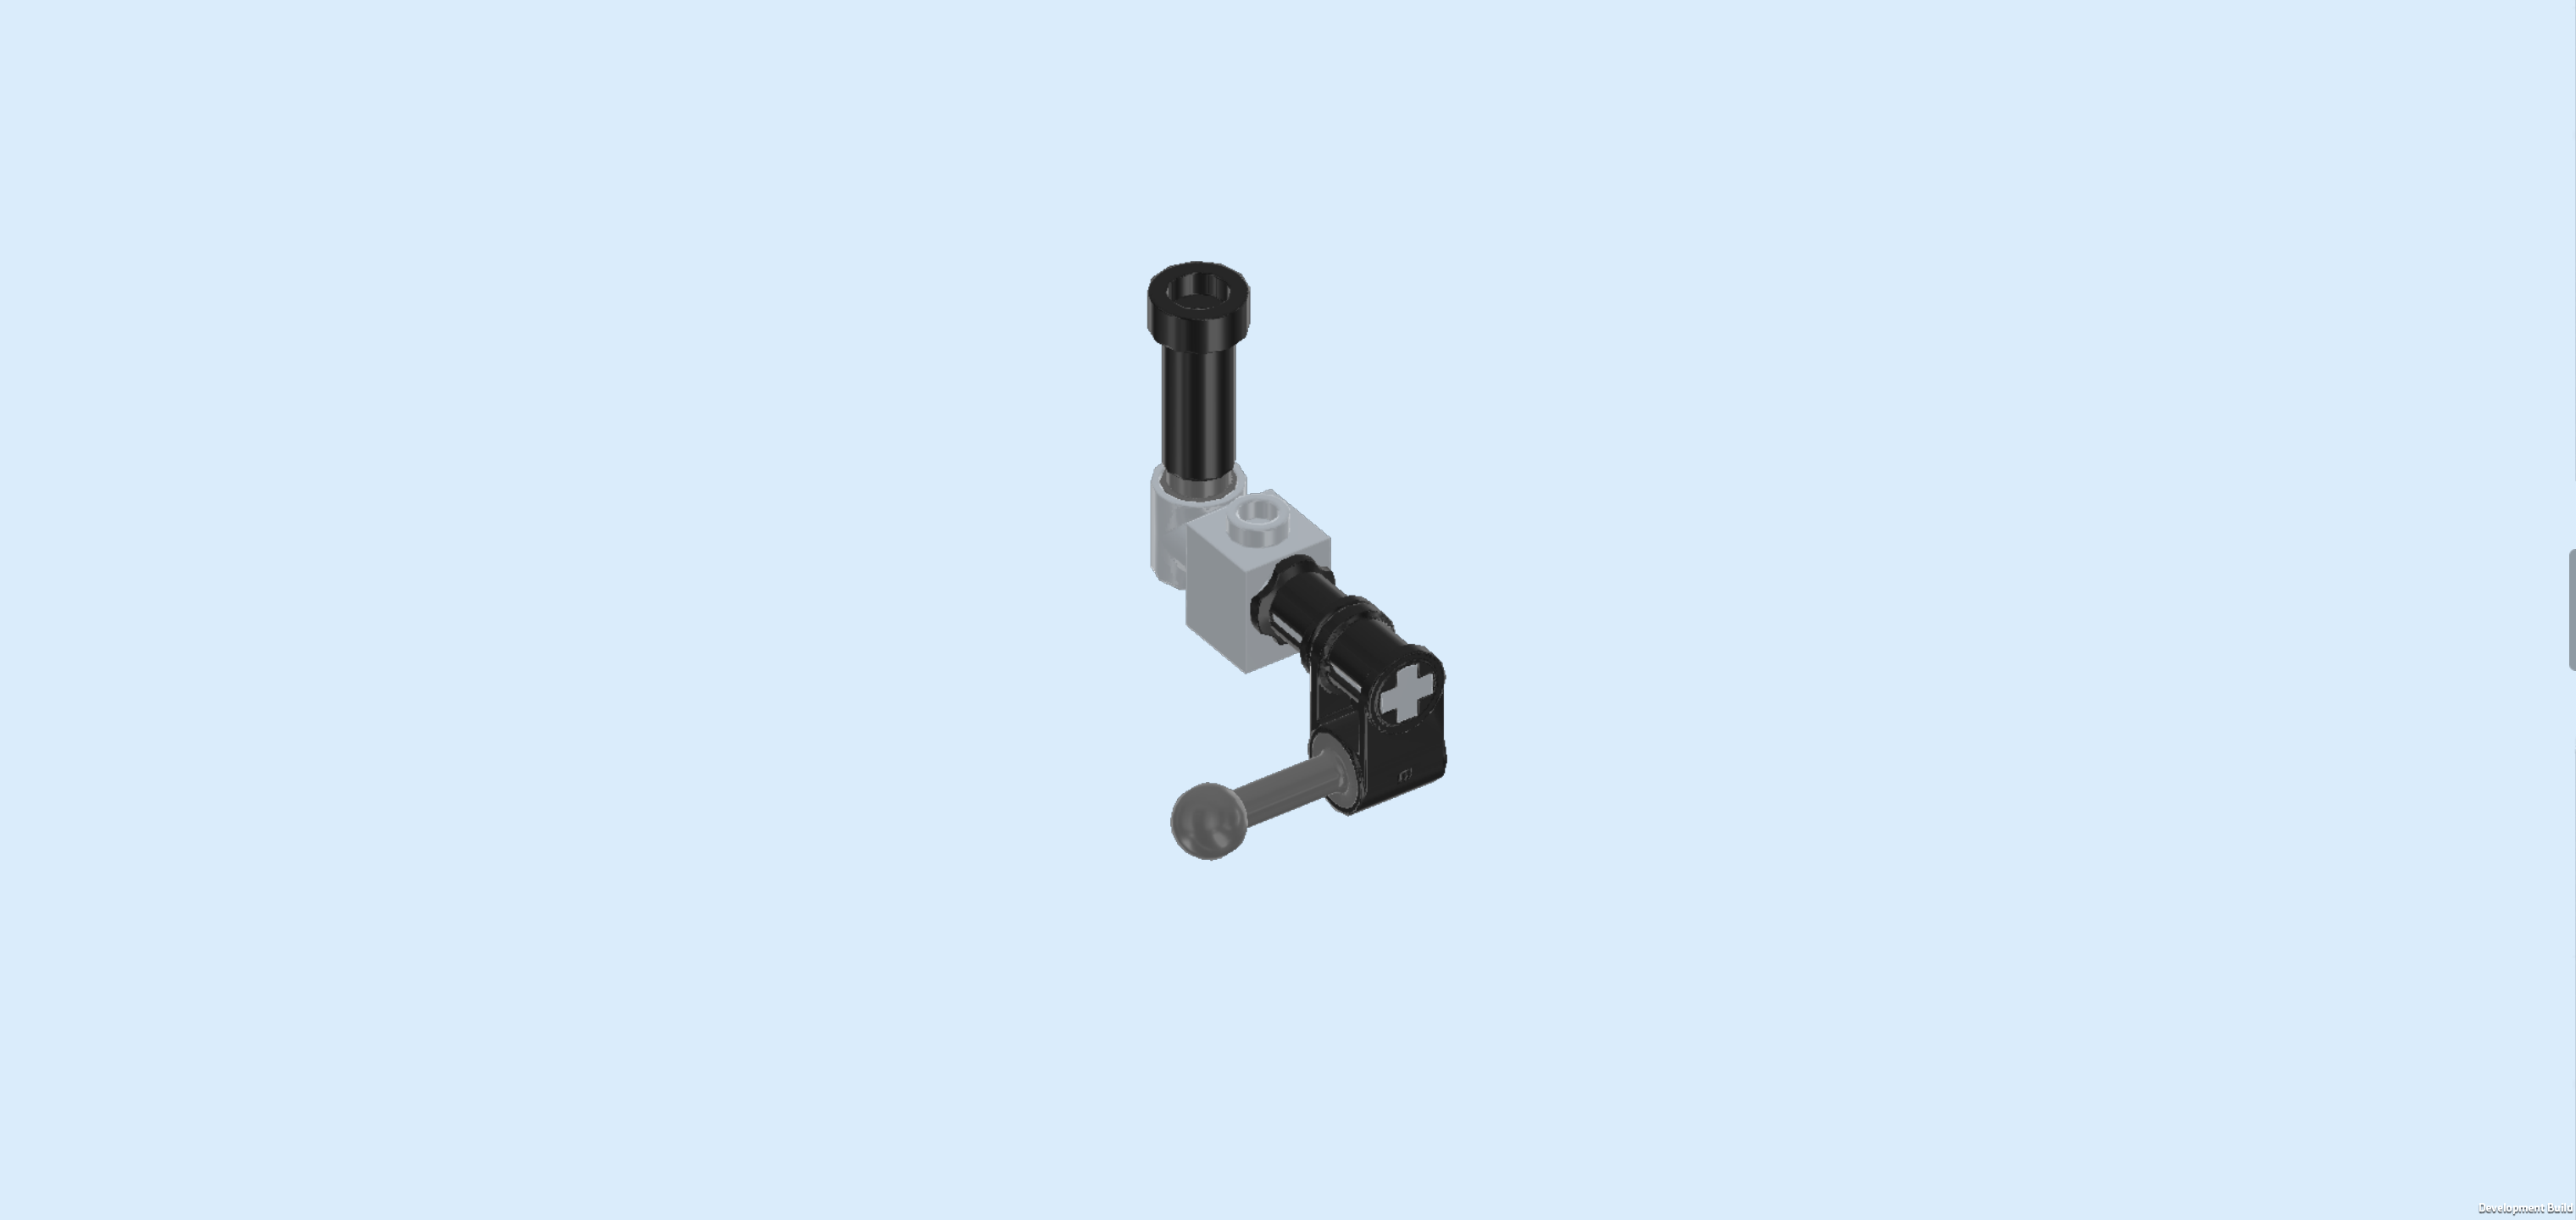
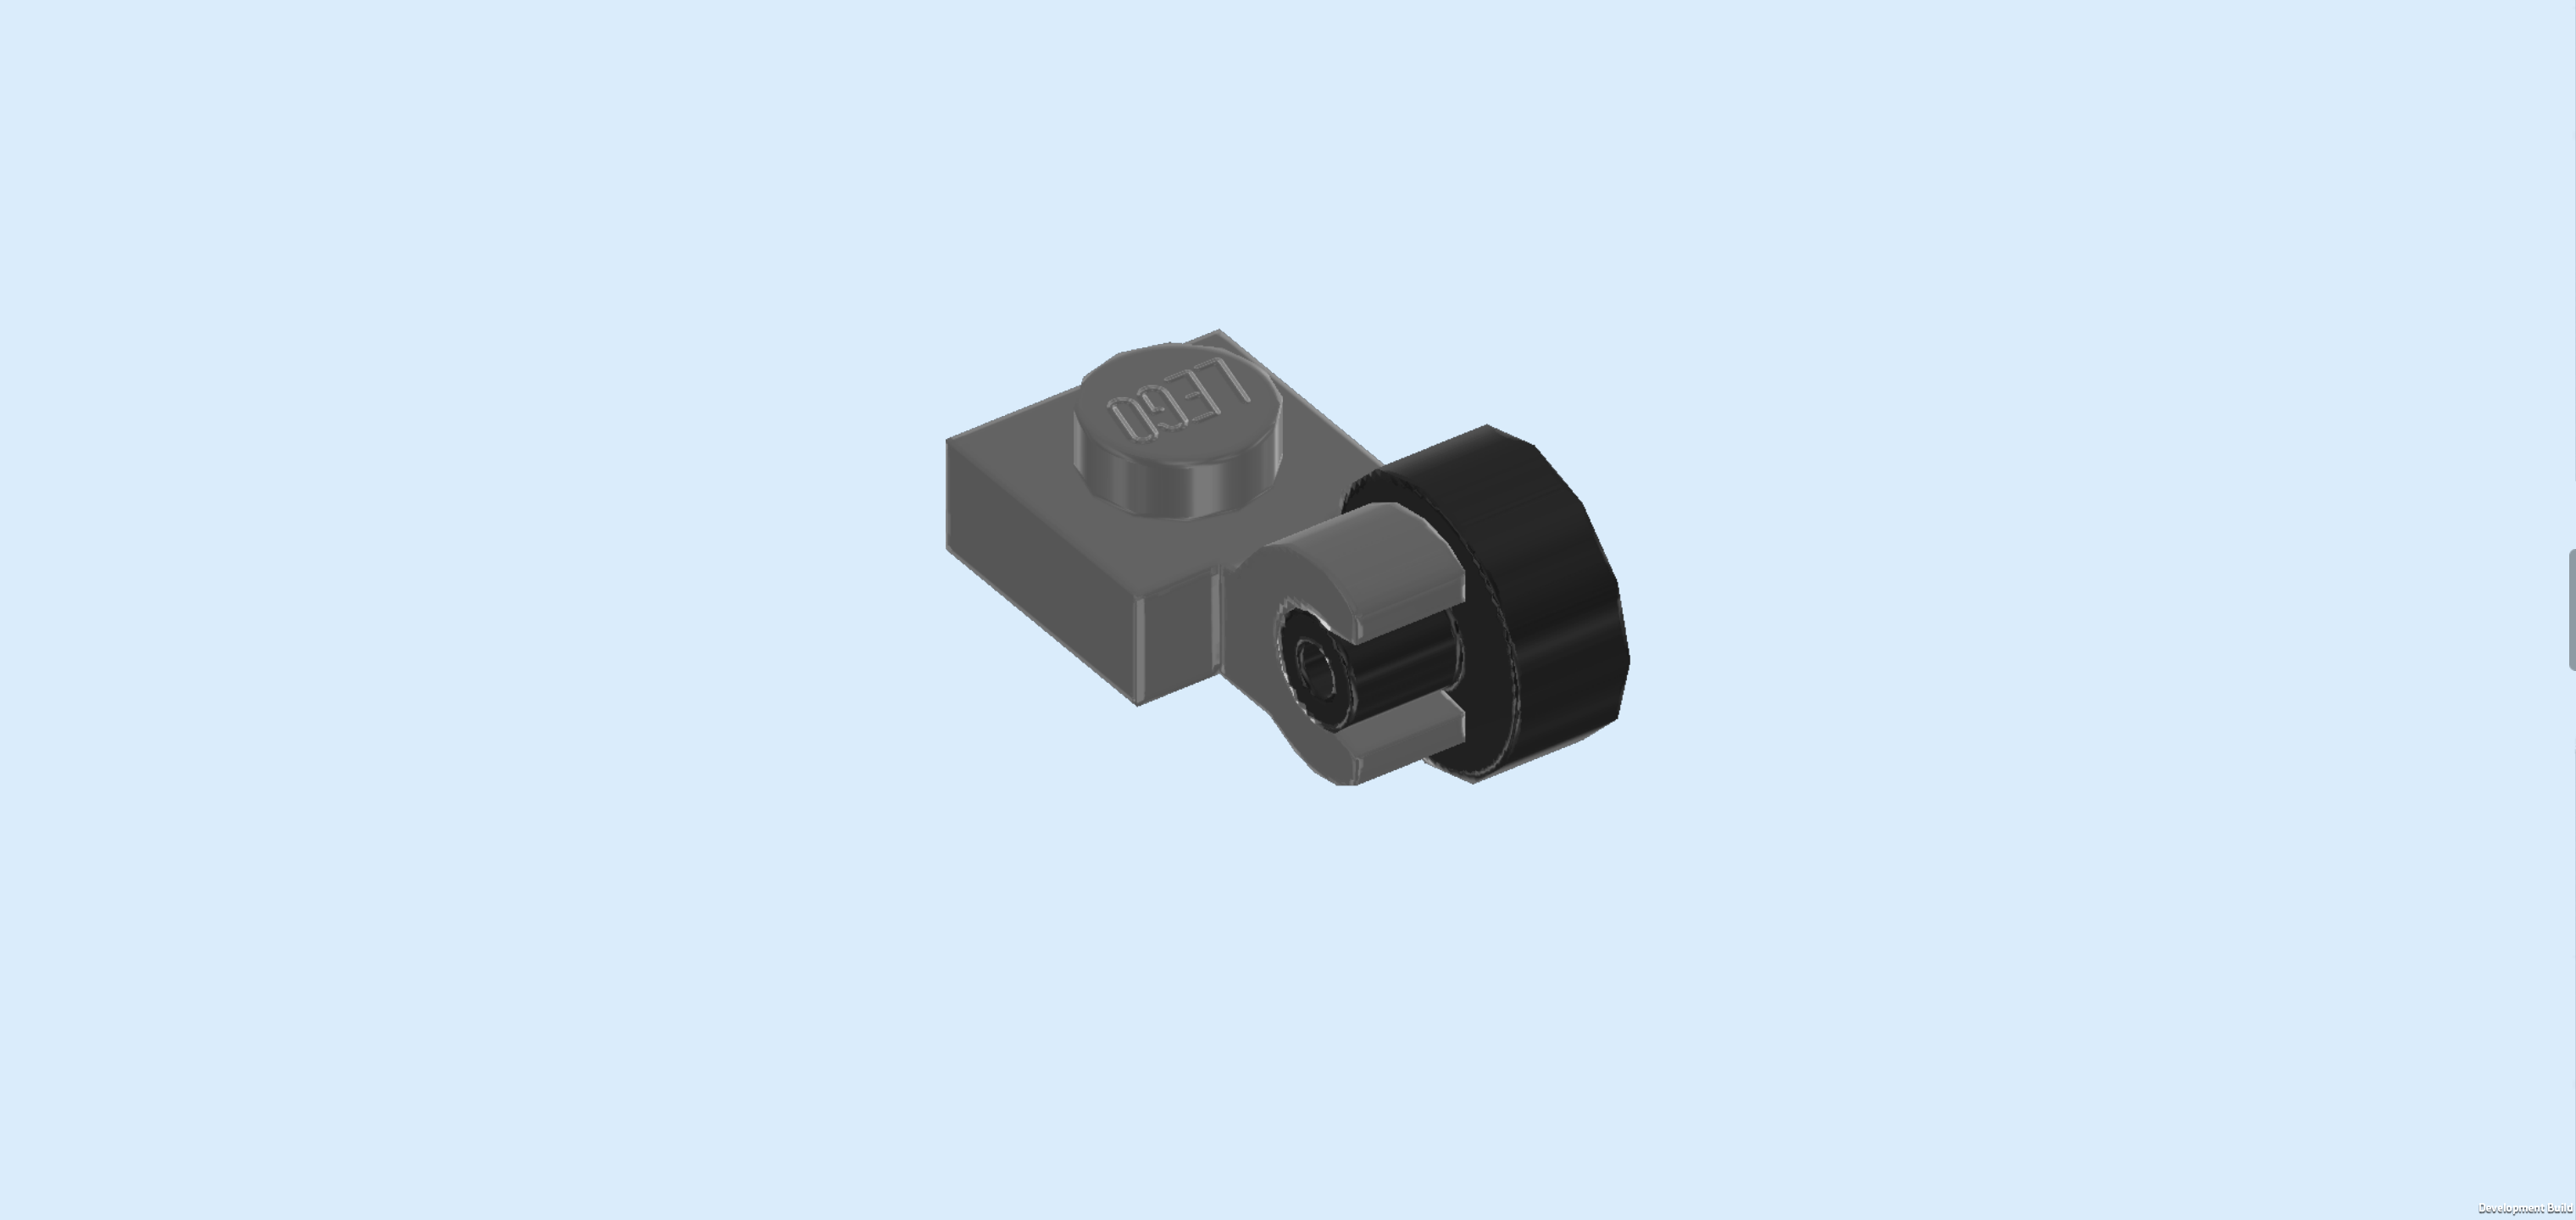
| Next, we will build the first rearview mirror. |
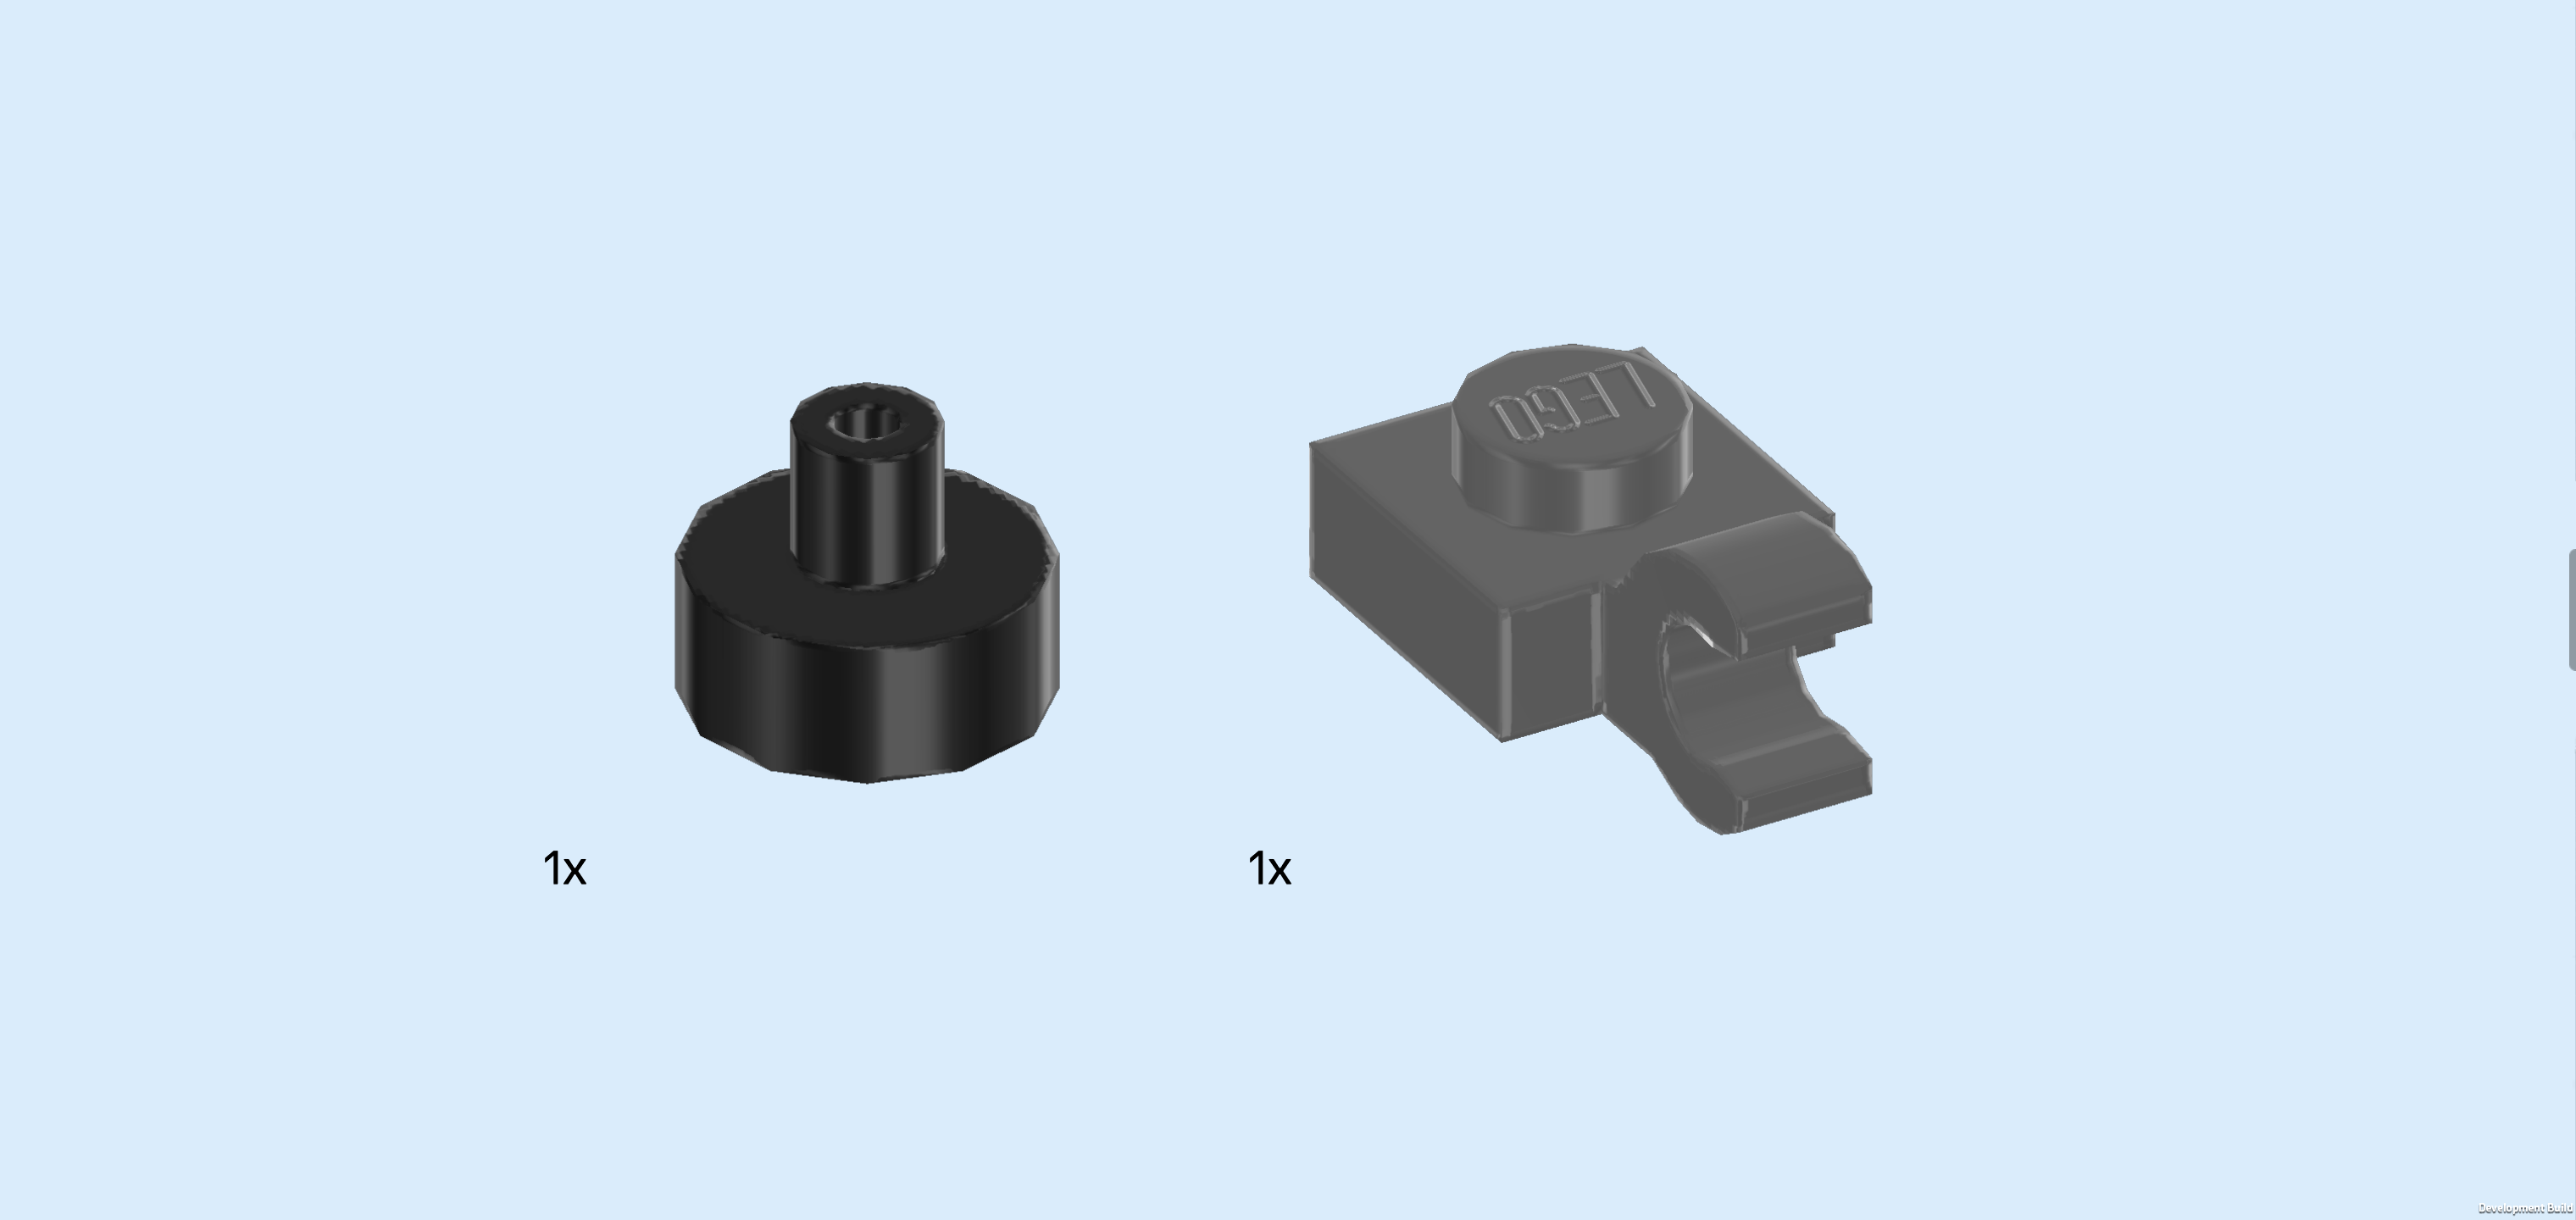
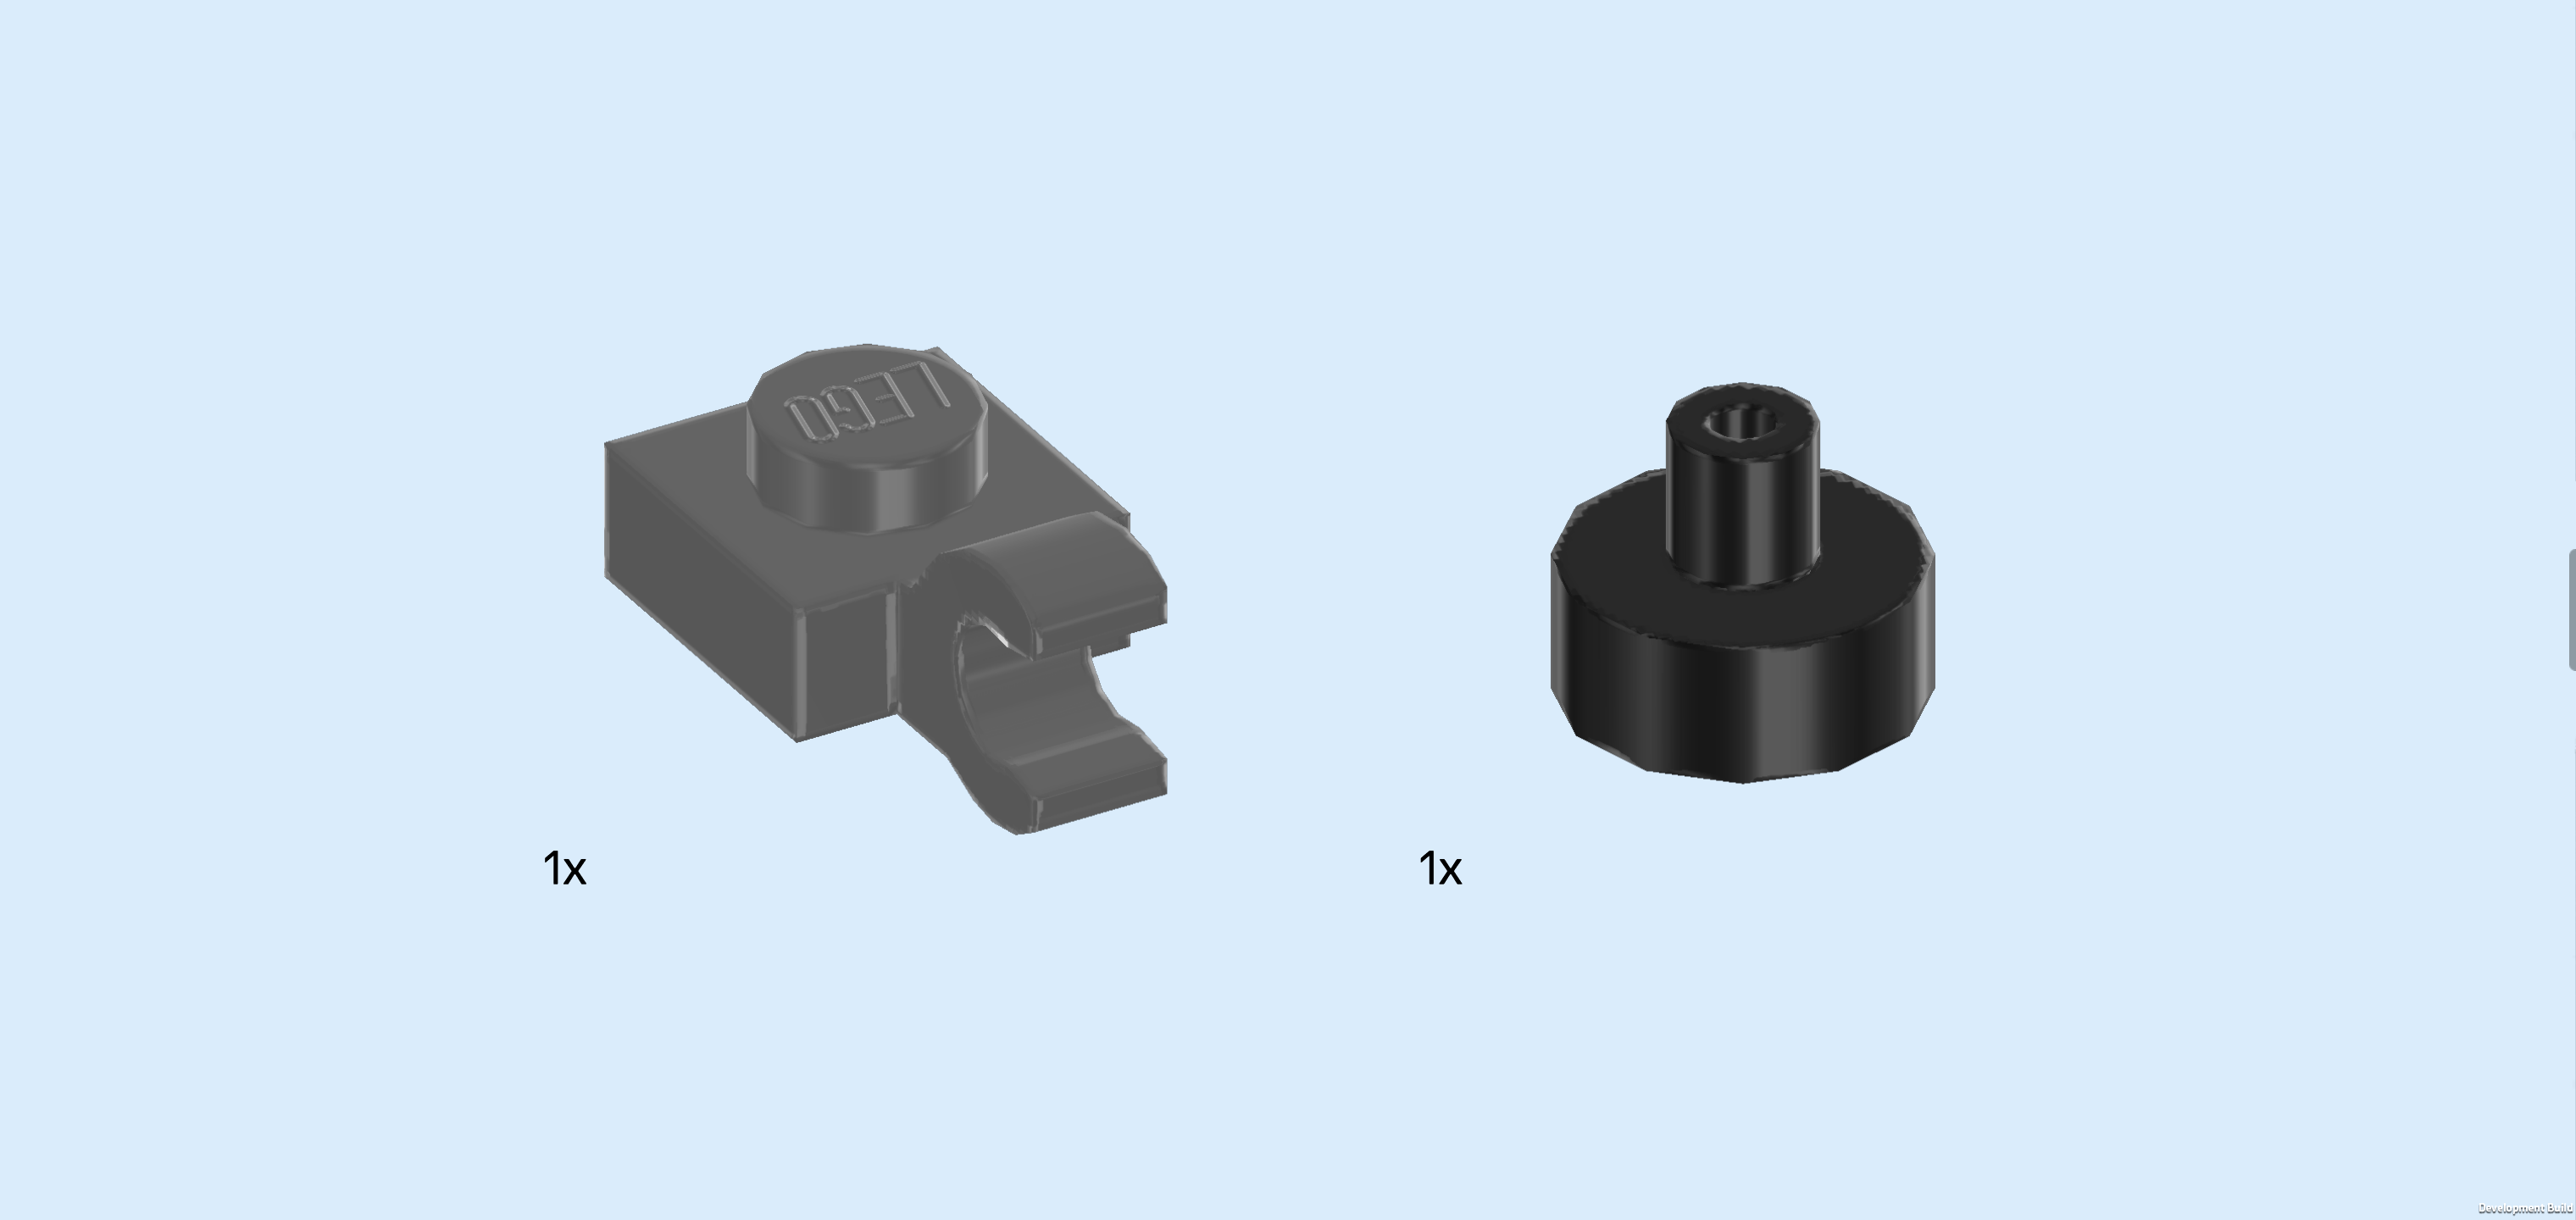
| Collect the following 2 pieces: |
| 1 black round tile 1x1 with small top shaft, |
| and 1 dark stone grey plate 1x1 with vertical side clasp. |
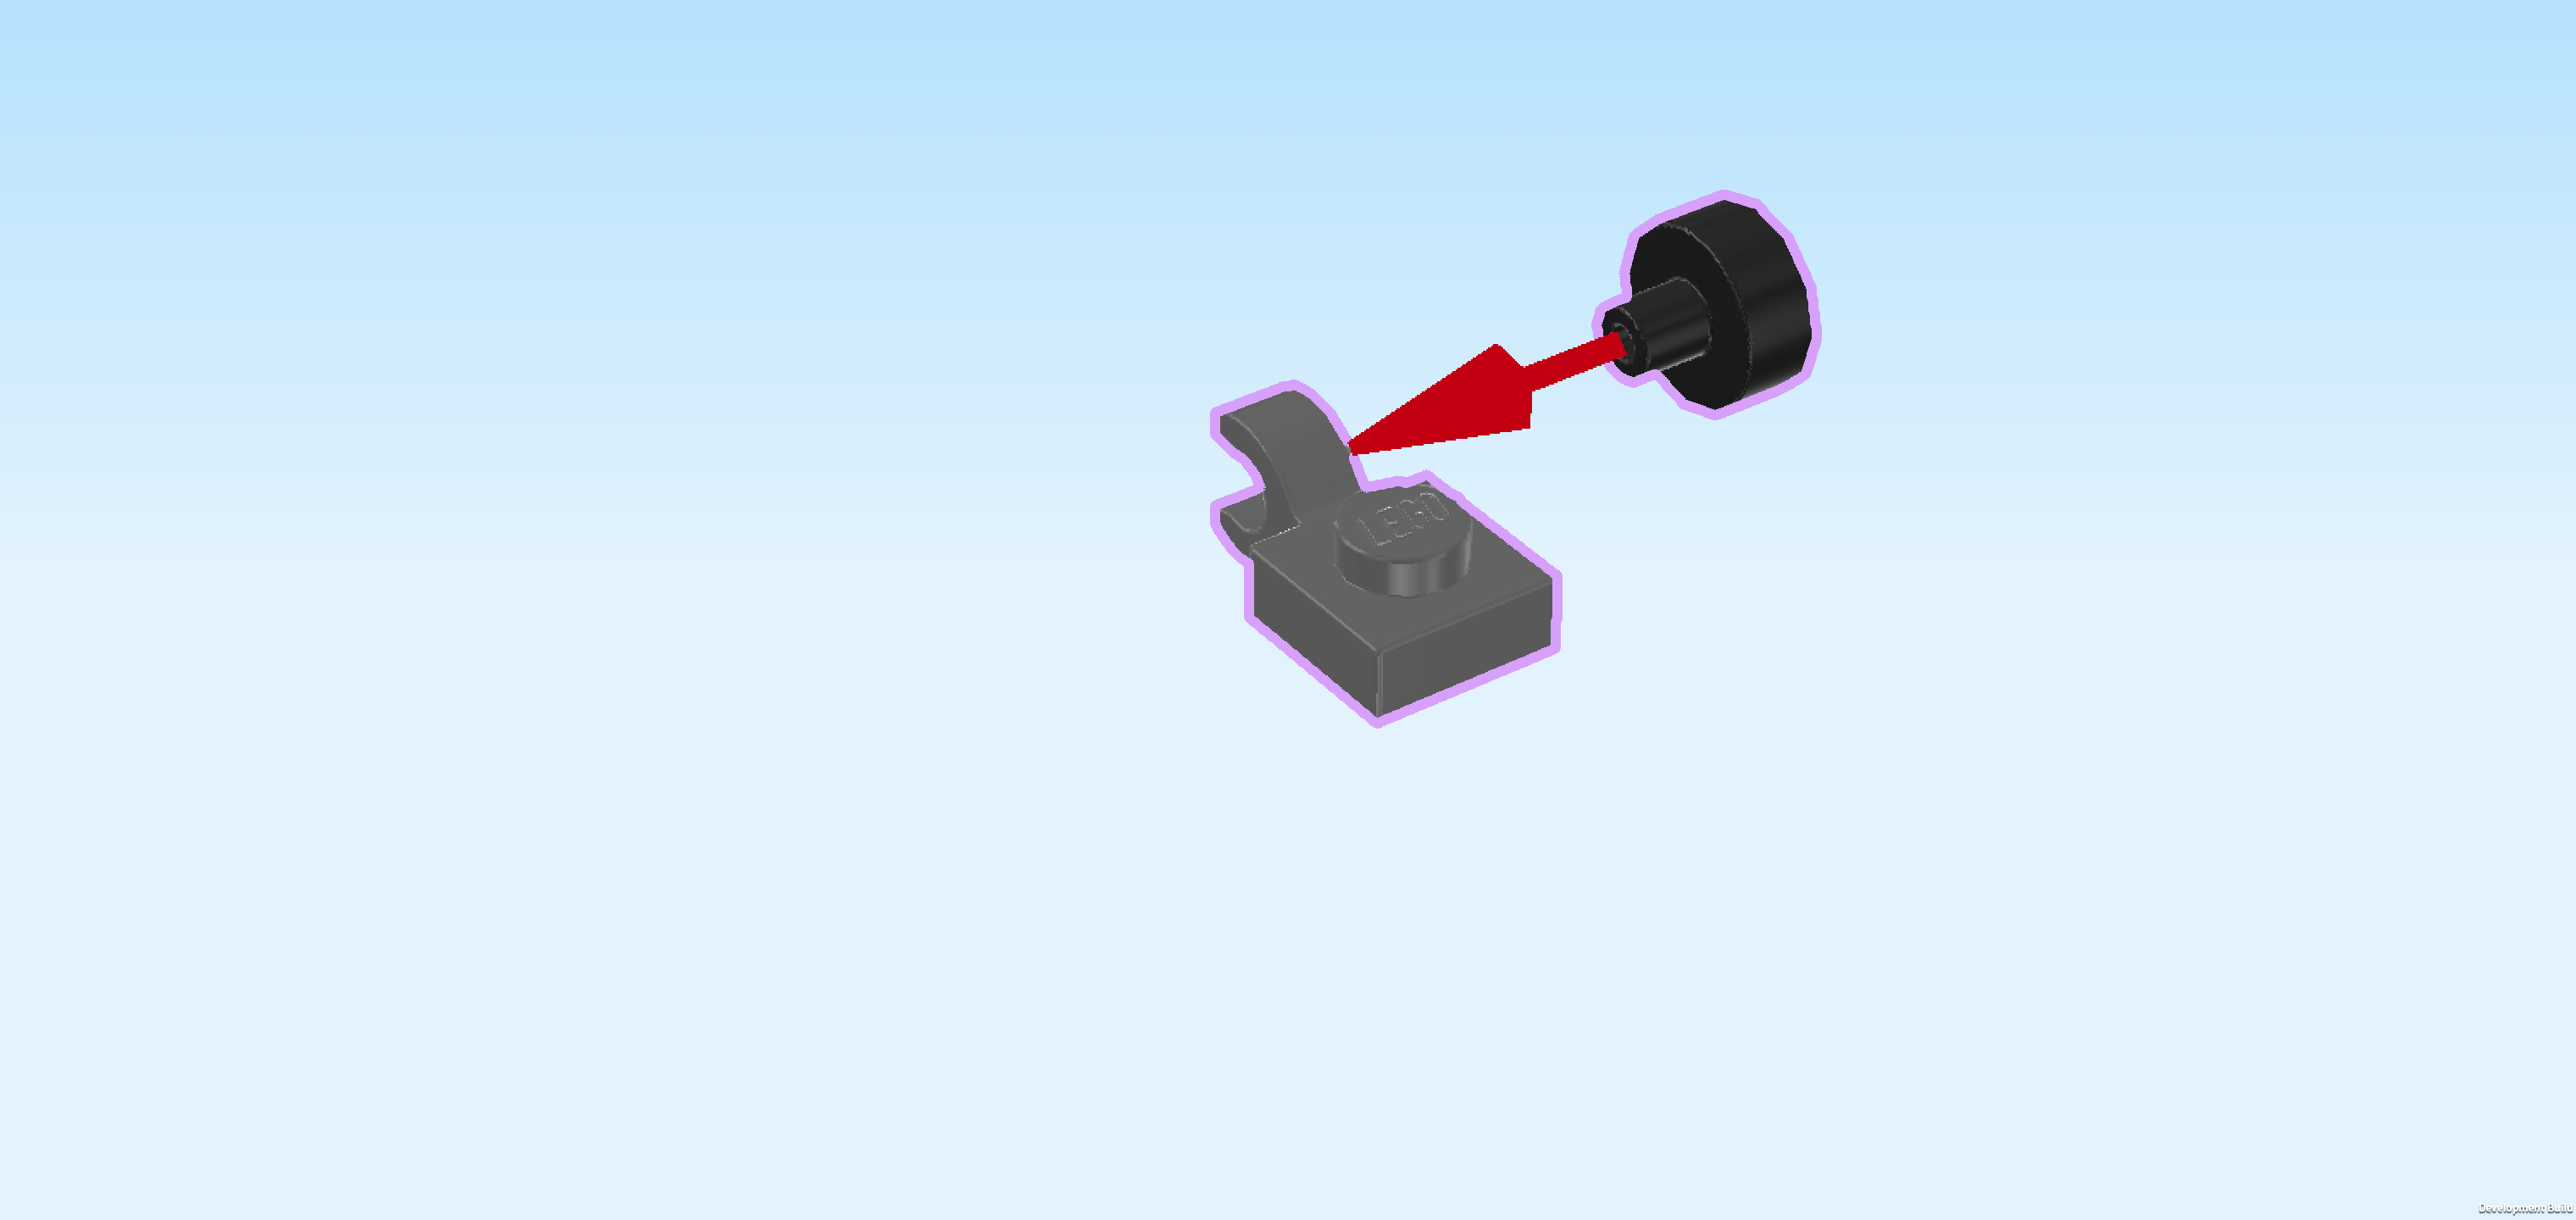
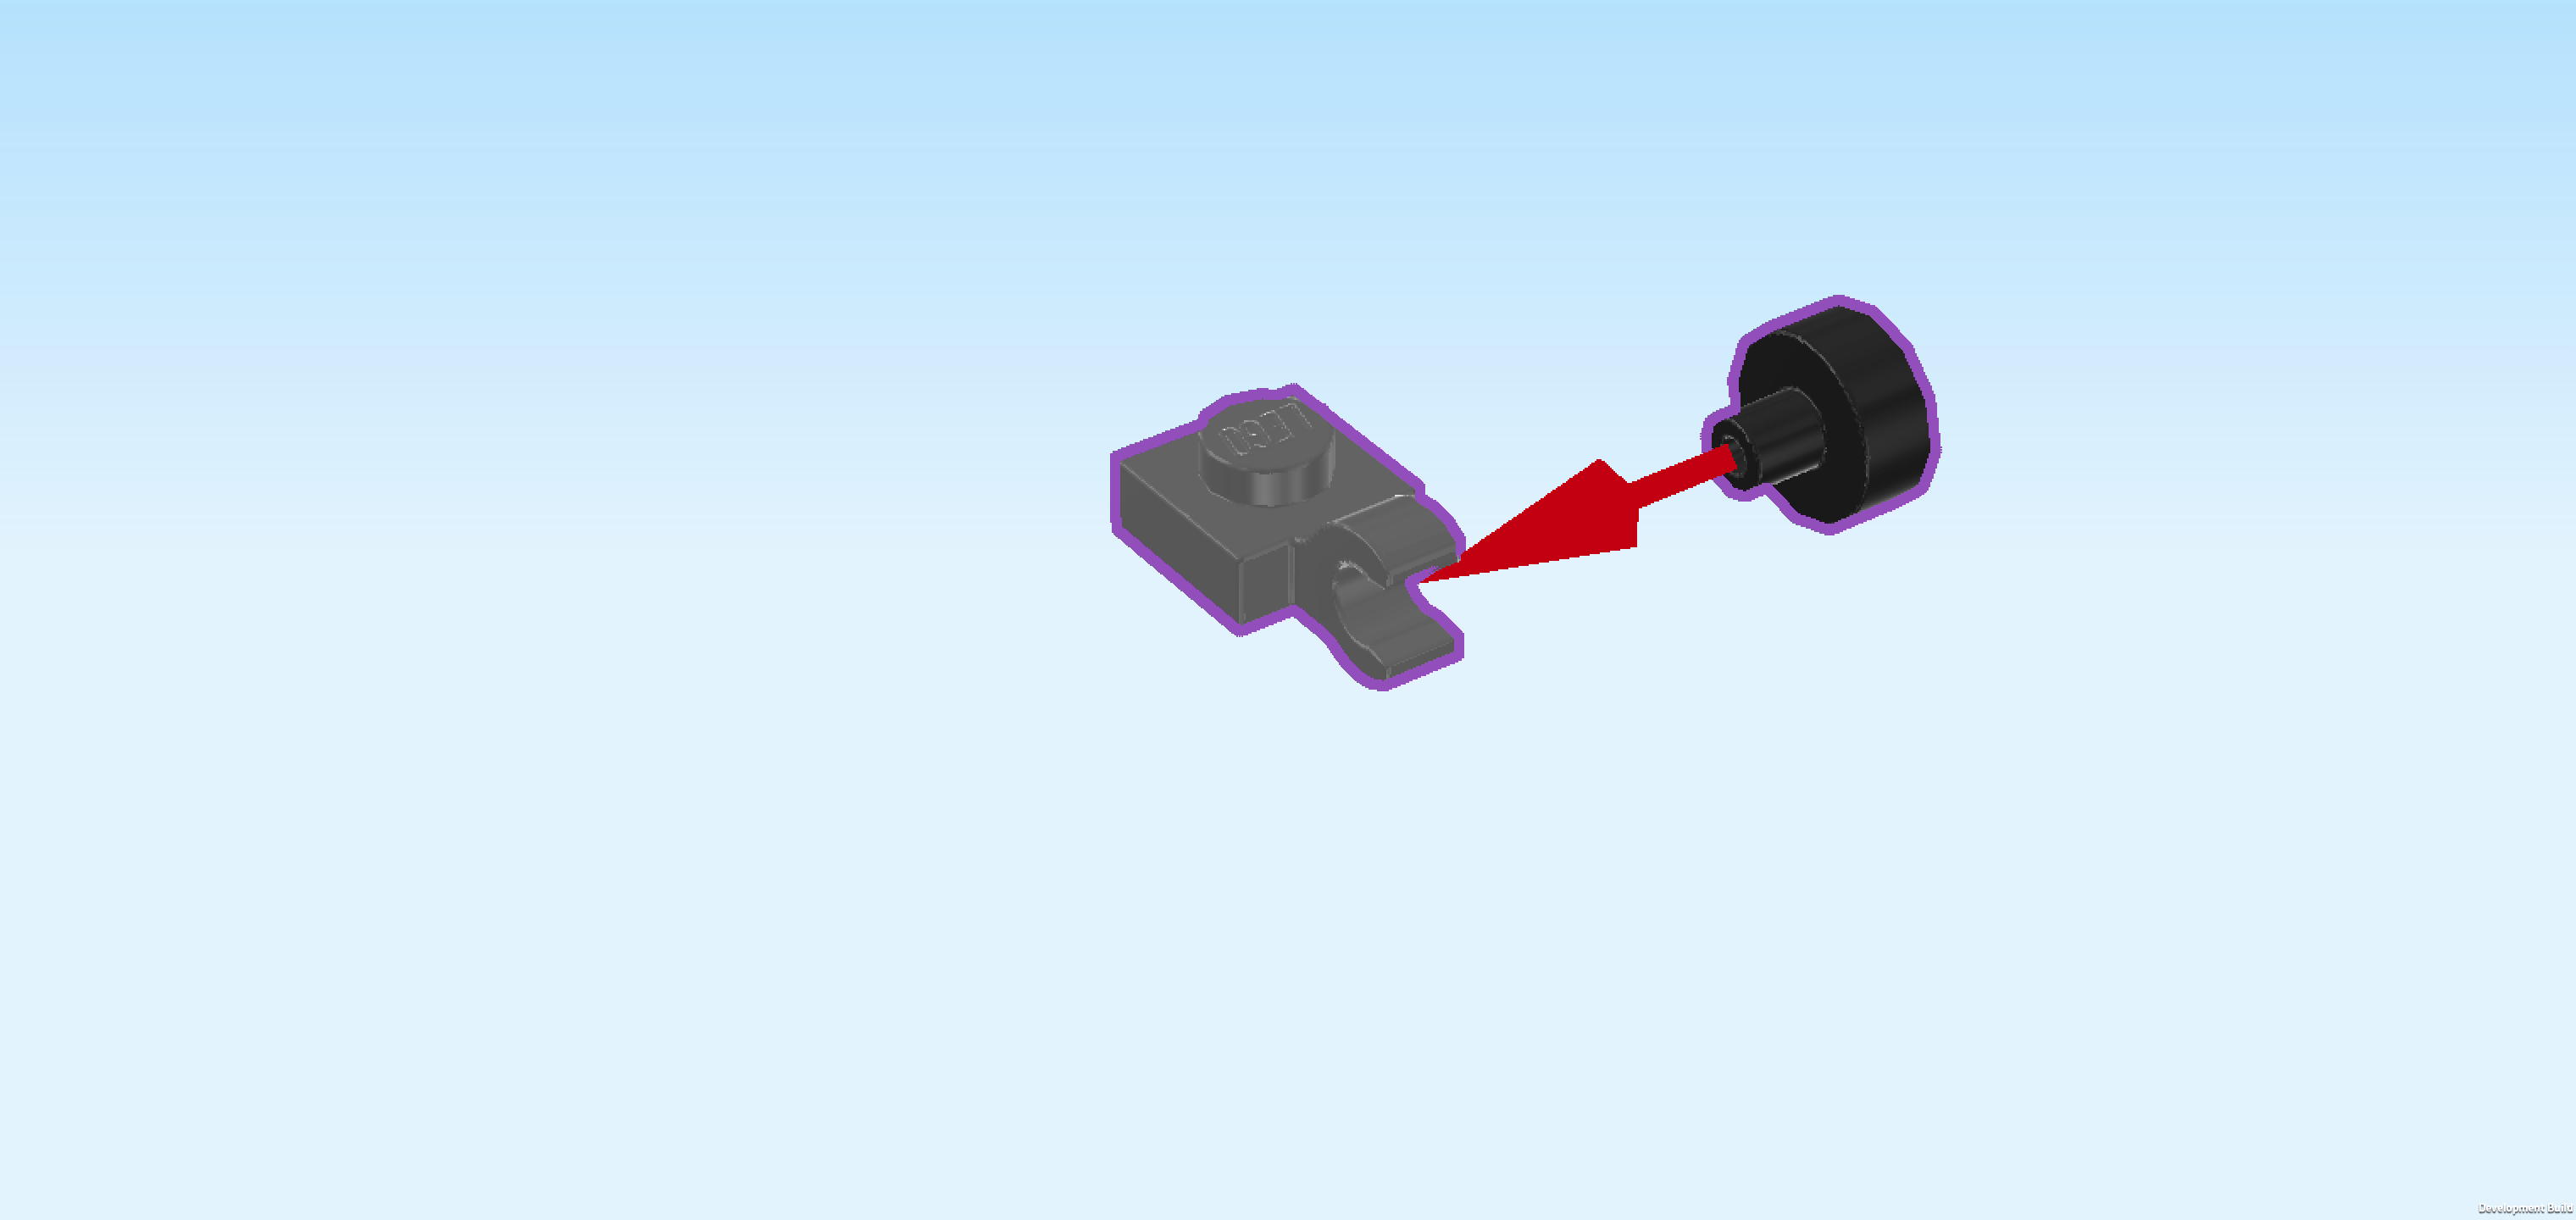
| Put the plate 1x1 on the table so that its side clasp is pointing to the back. |
| Flip the round tile upright so that its shaft is pointing to the left. Insert the shaft into the clasp, coming from the right. |
| Collect the following 2 pieces: |
| 1 reddish orange plate 1x1, |
| and 1 sand green plate 1x1. |
| Put the reddish orange plate 1x1 underneath the plate 1x1 from the previous step. Make sure their edges align. |
| Put the sand green plate 1x1 on top of the build, again aligning the edges. |
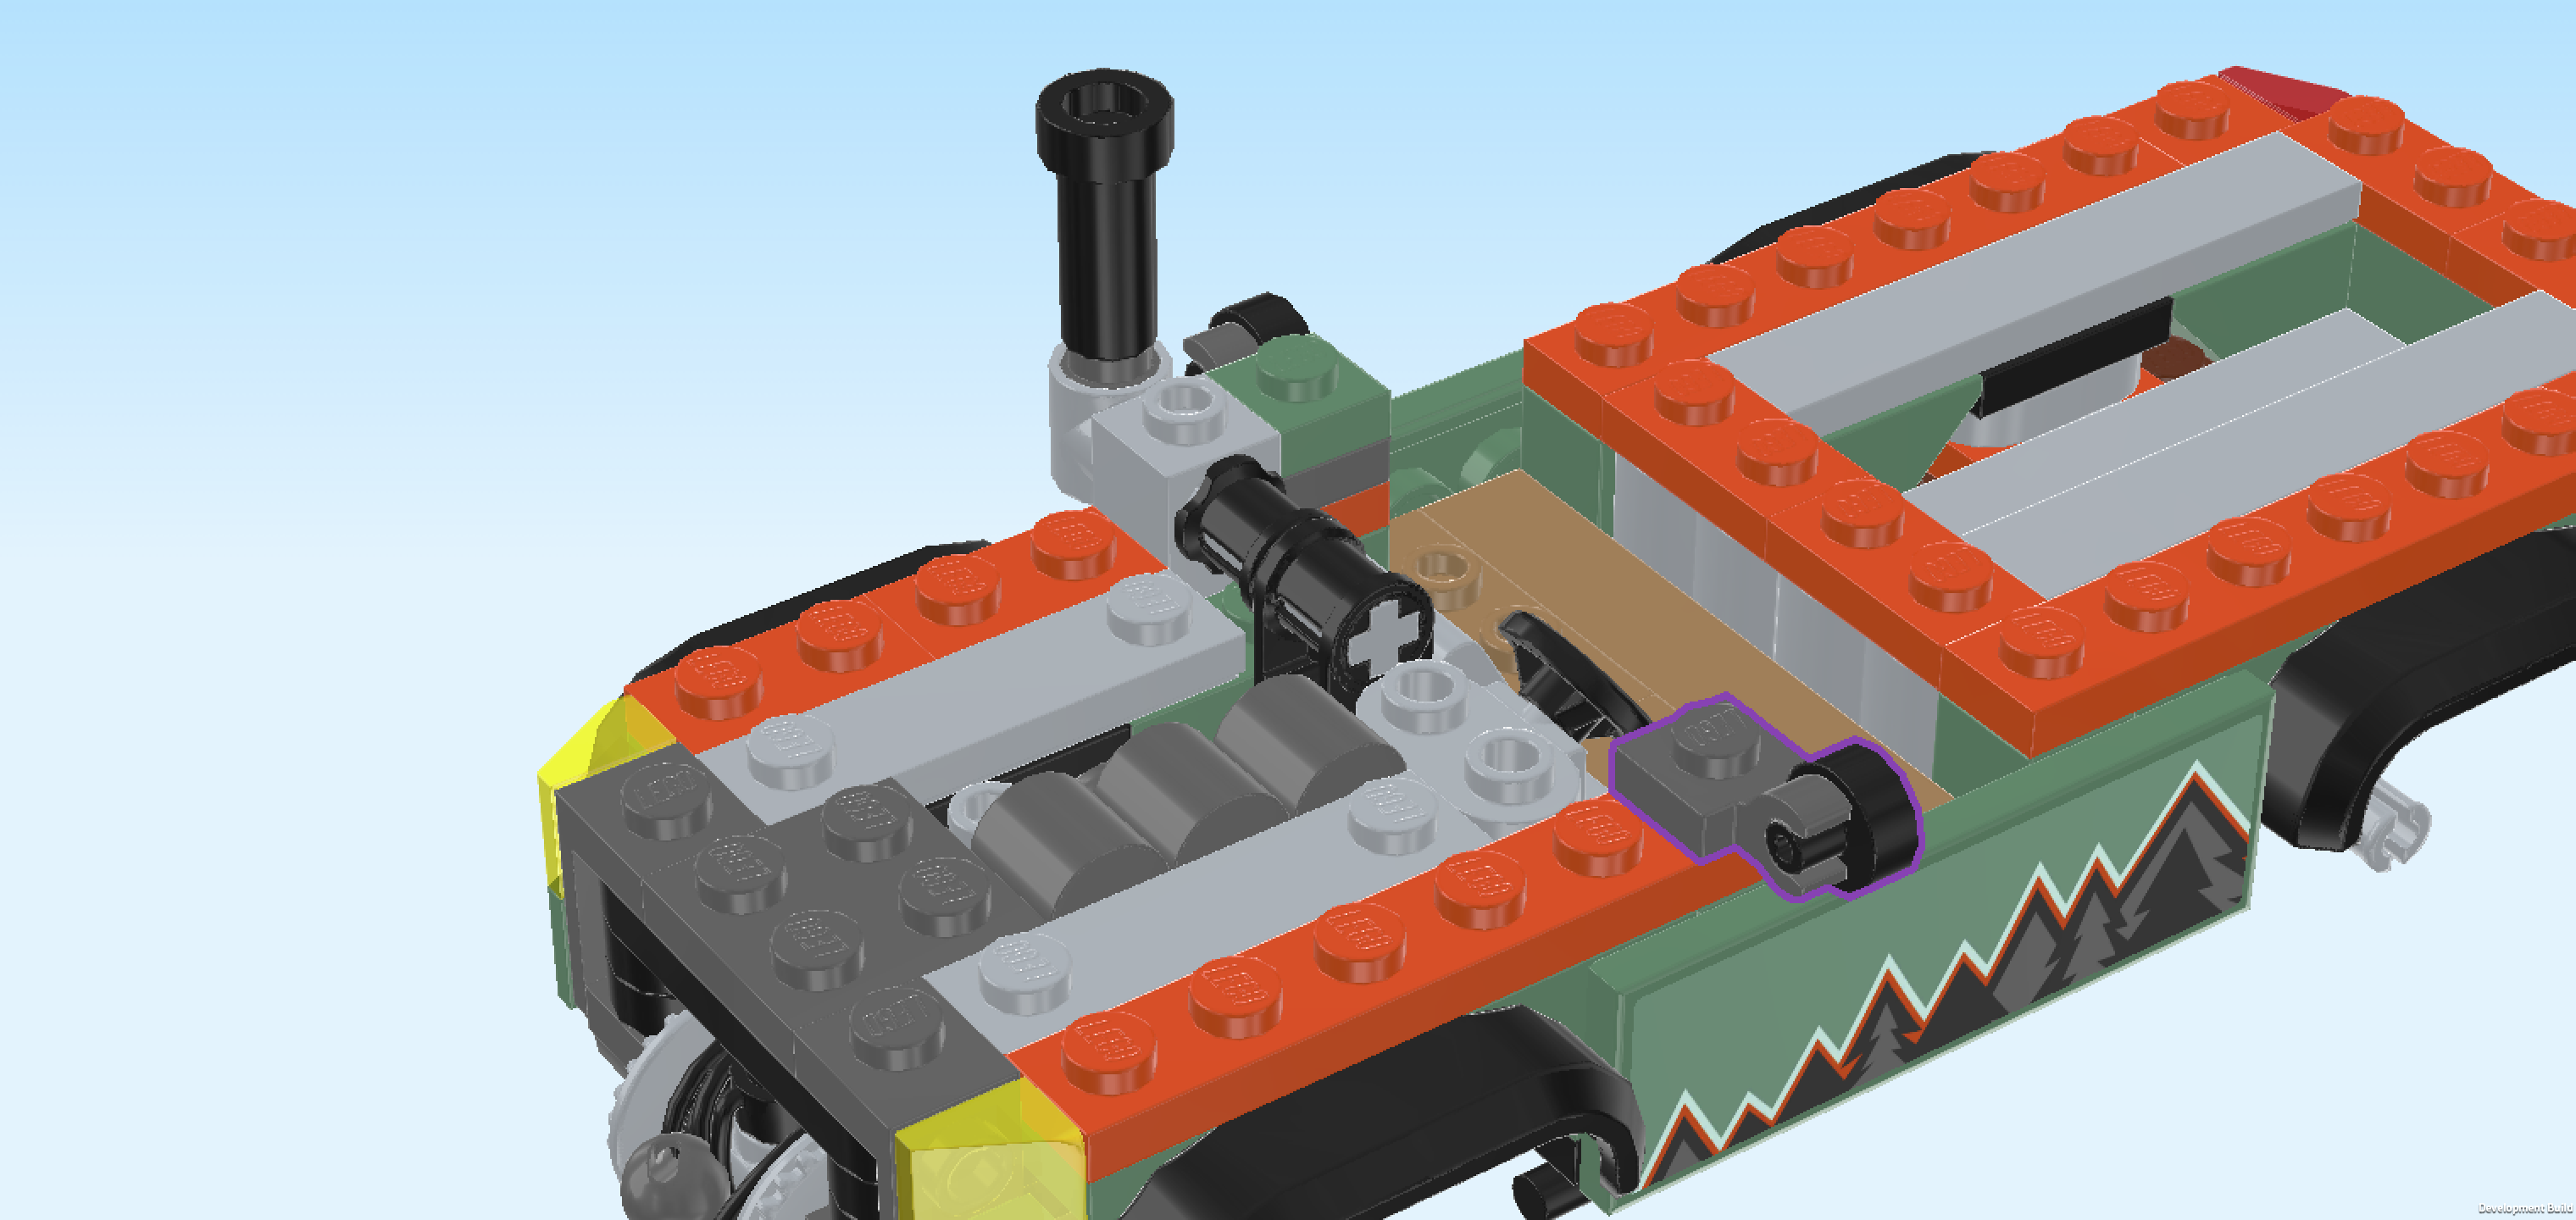
| Mount the rearview mirror build on the backmost row directly behind the angled top handle in the middle of the build, clasp with round tile overhanging to the back. |
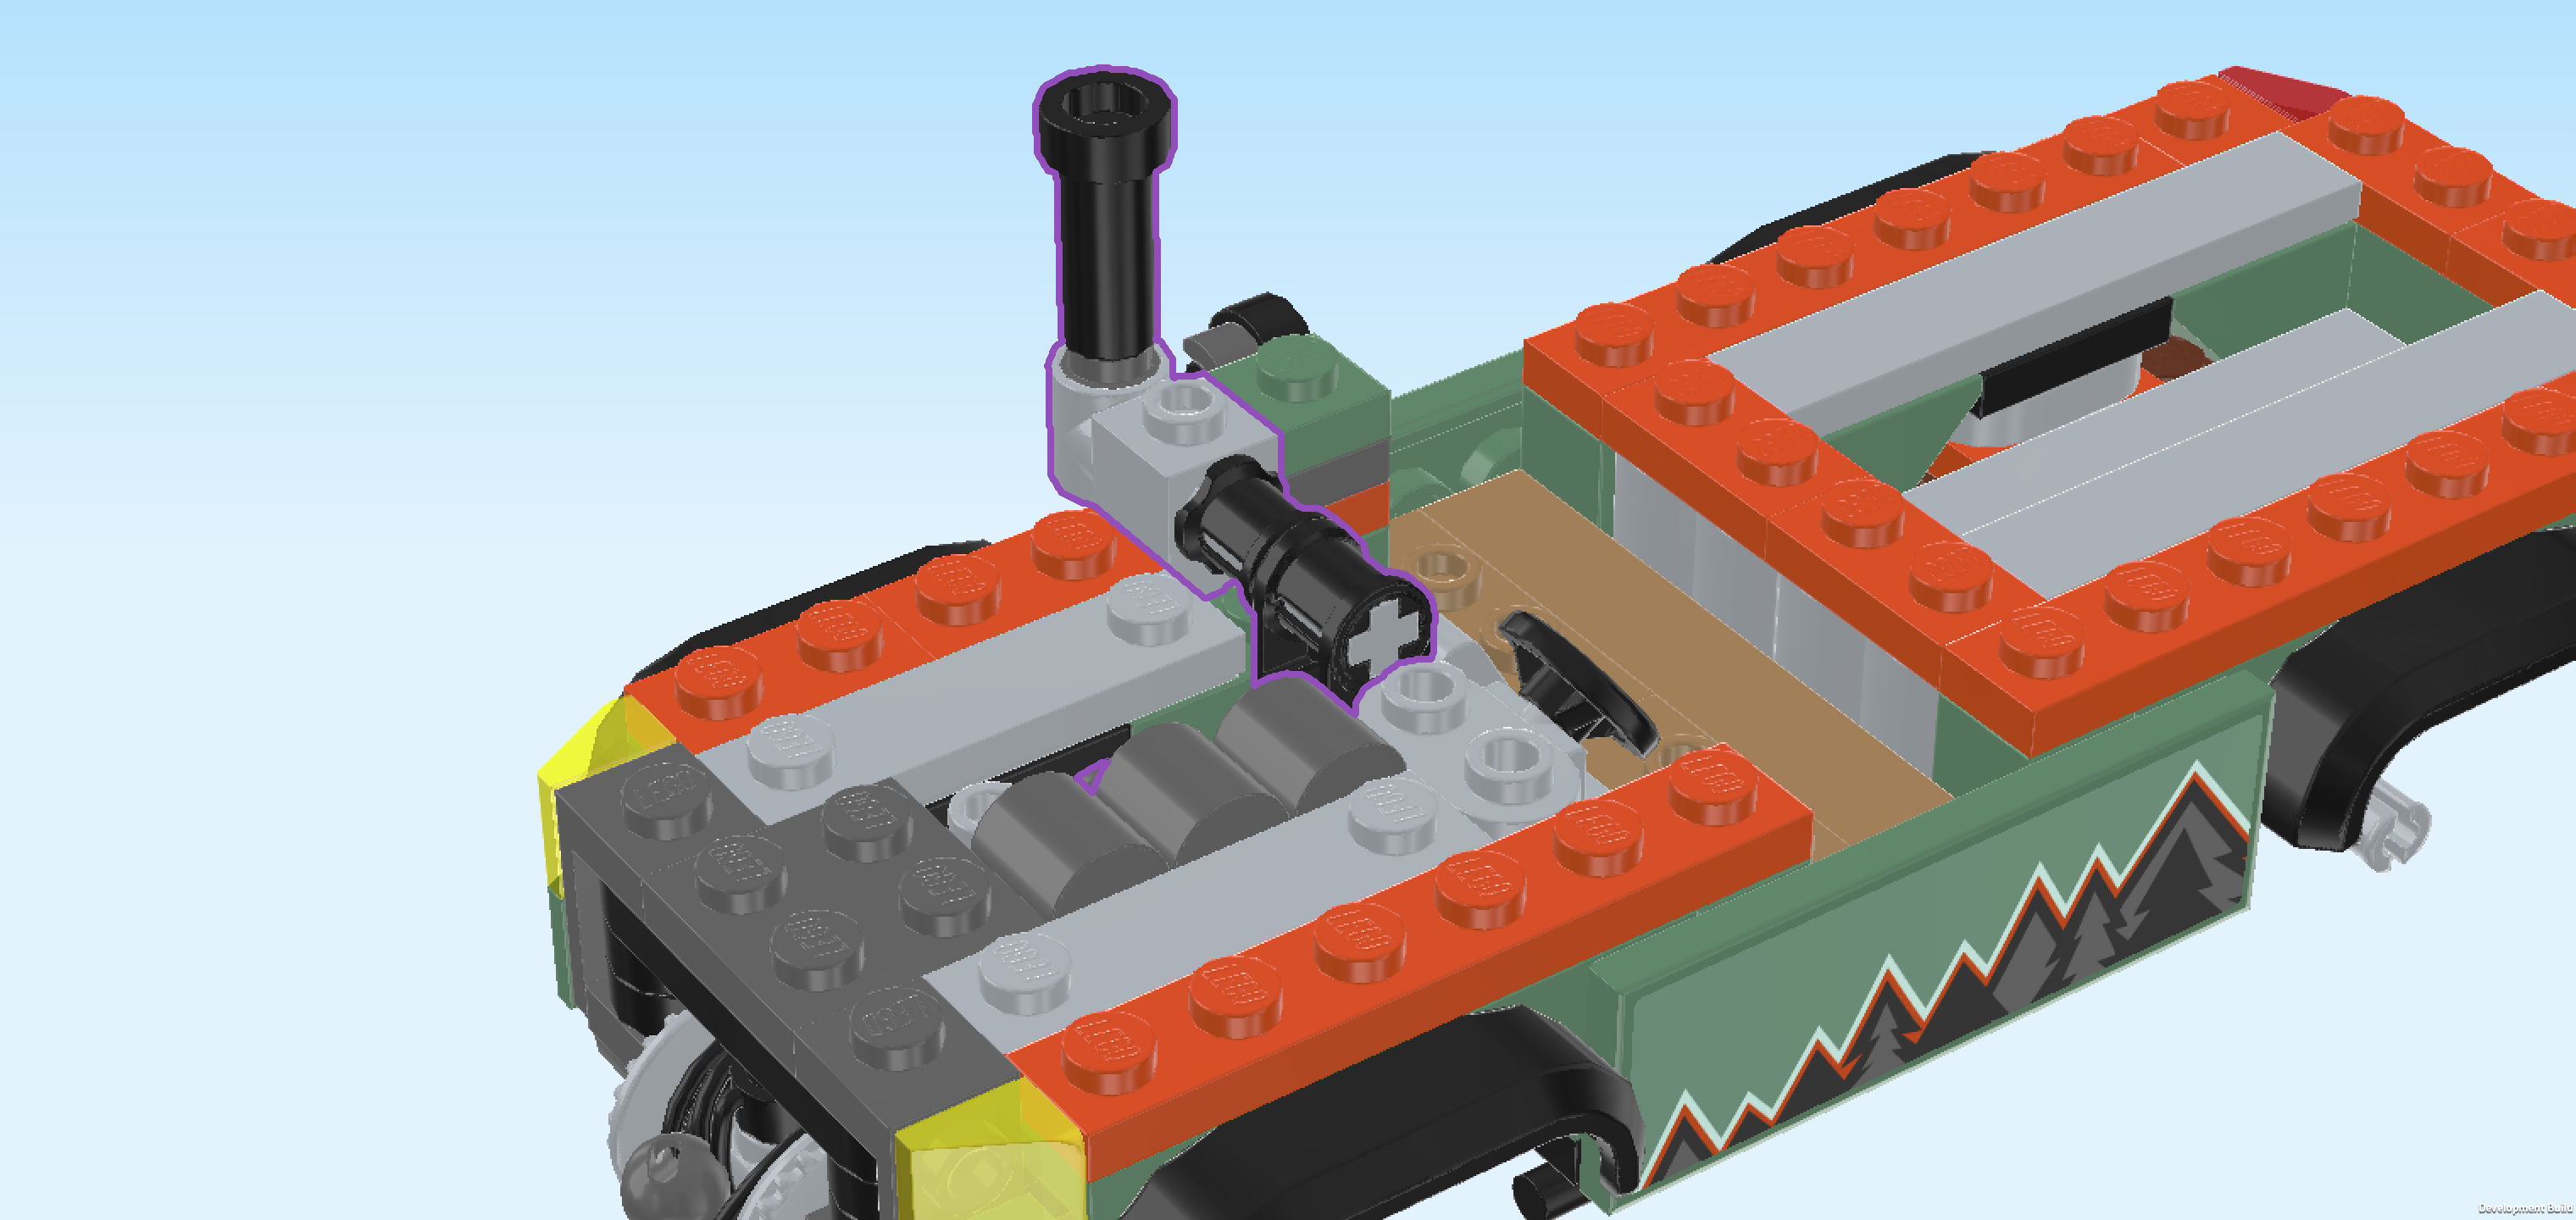
| Now, we will build the air intake snorkel. |
| Collect the following 2 pieces: |
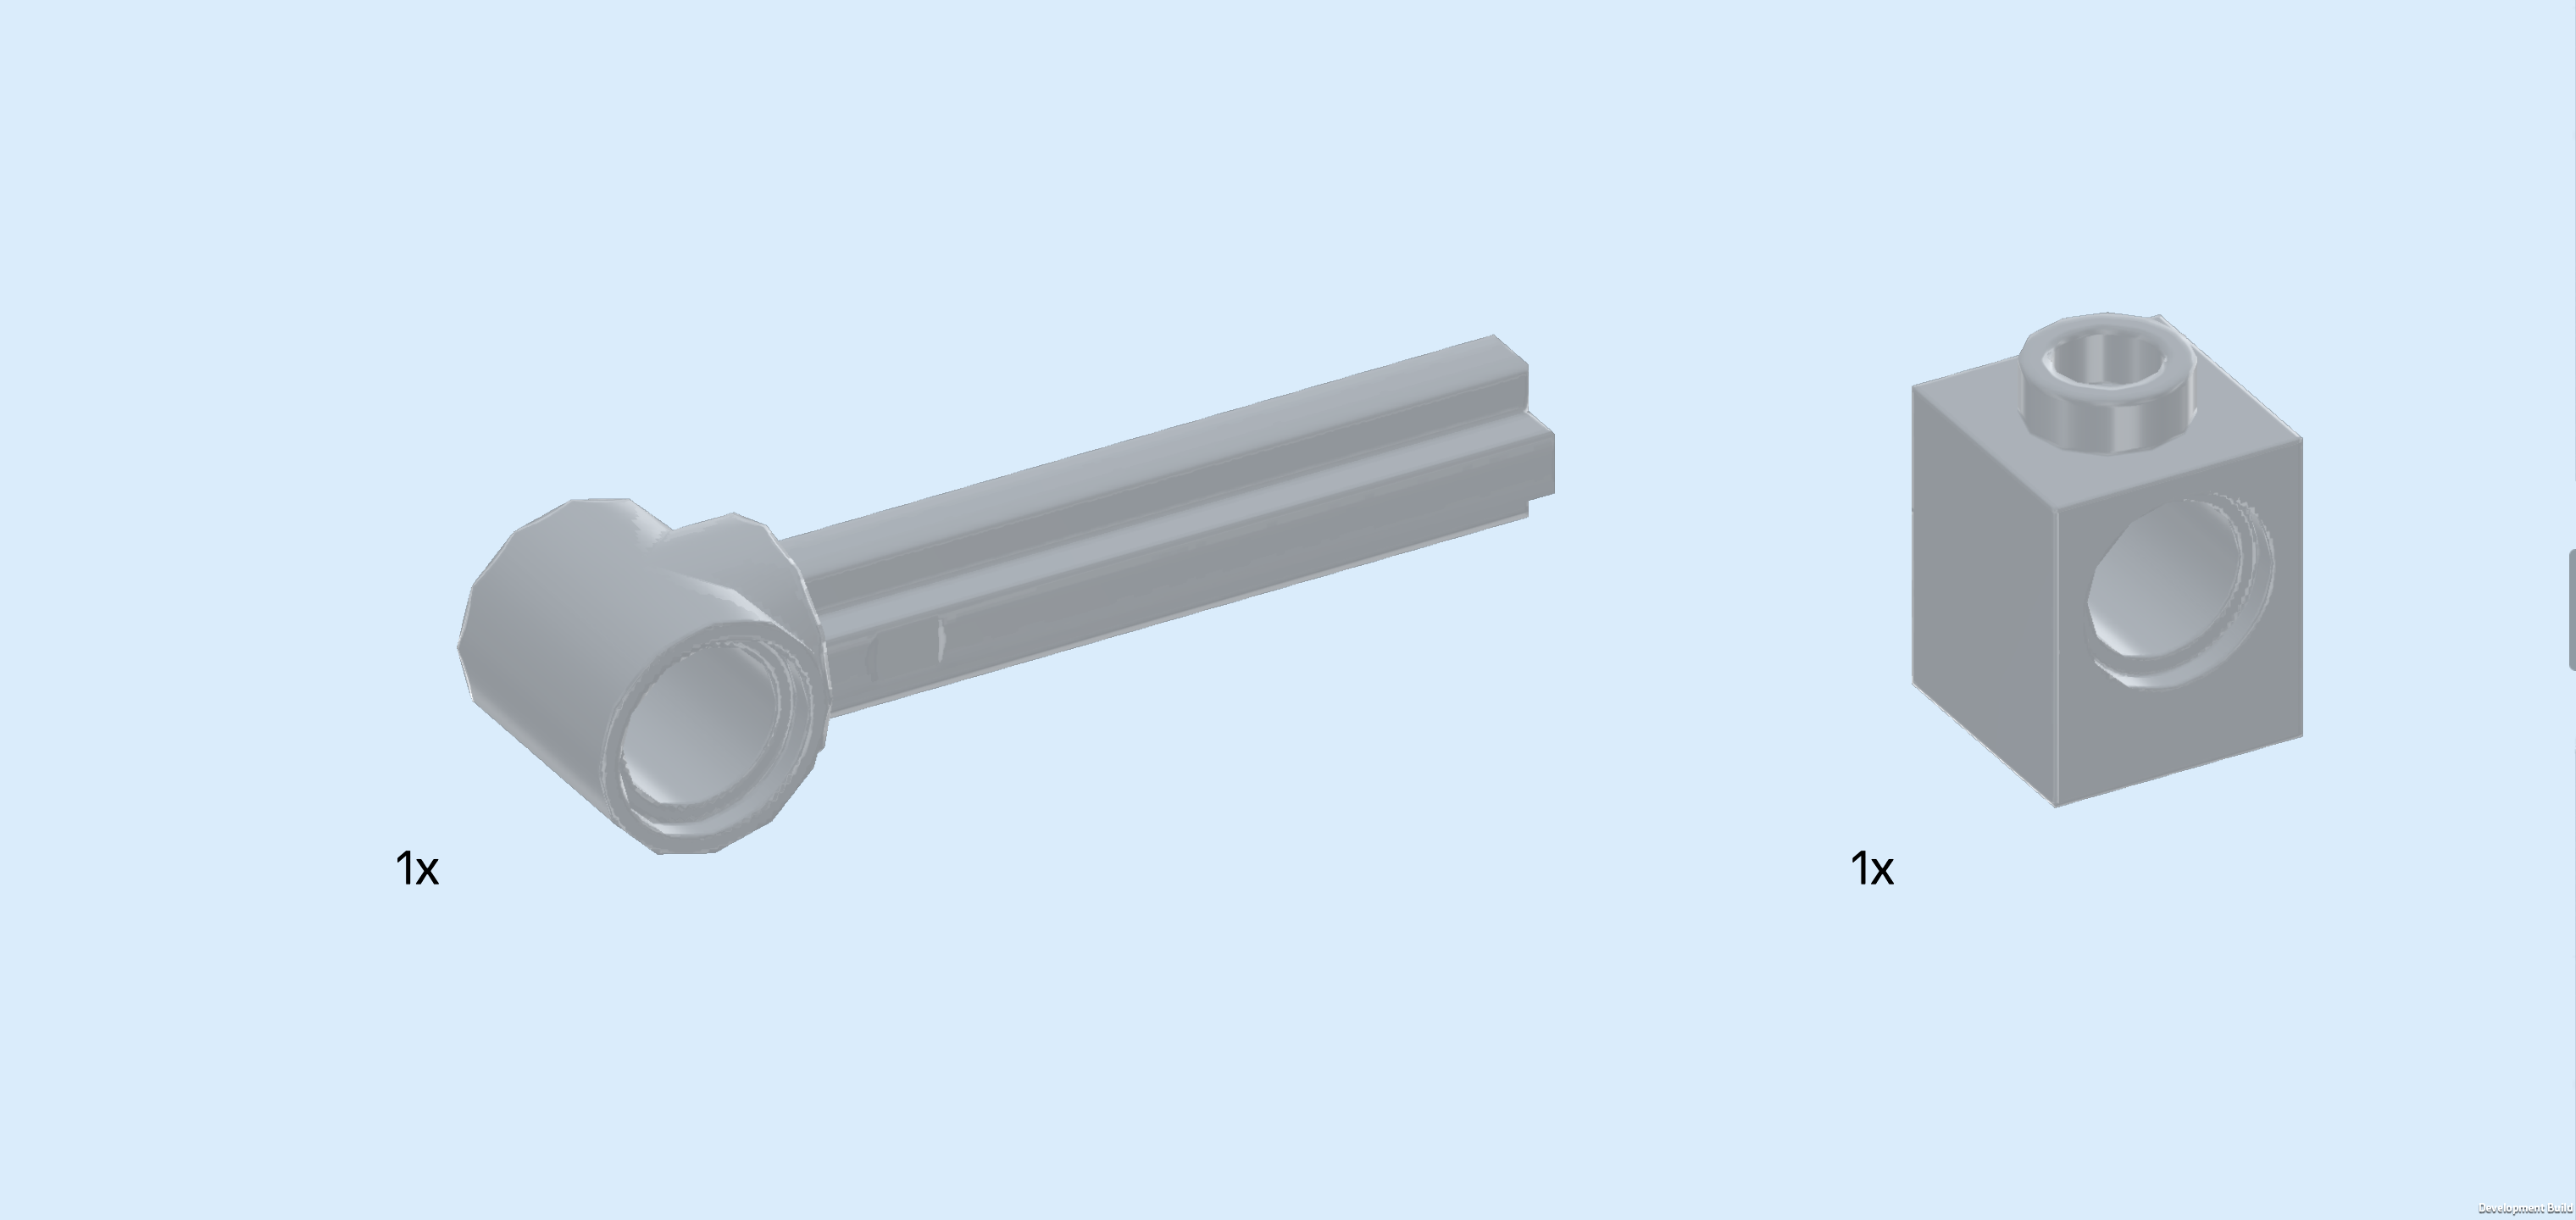
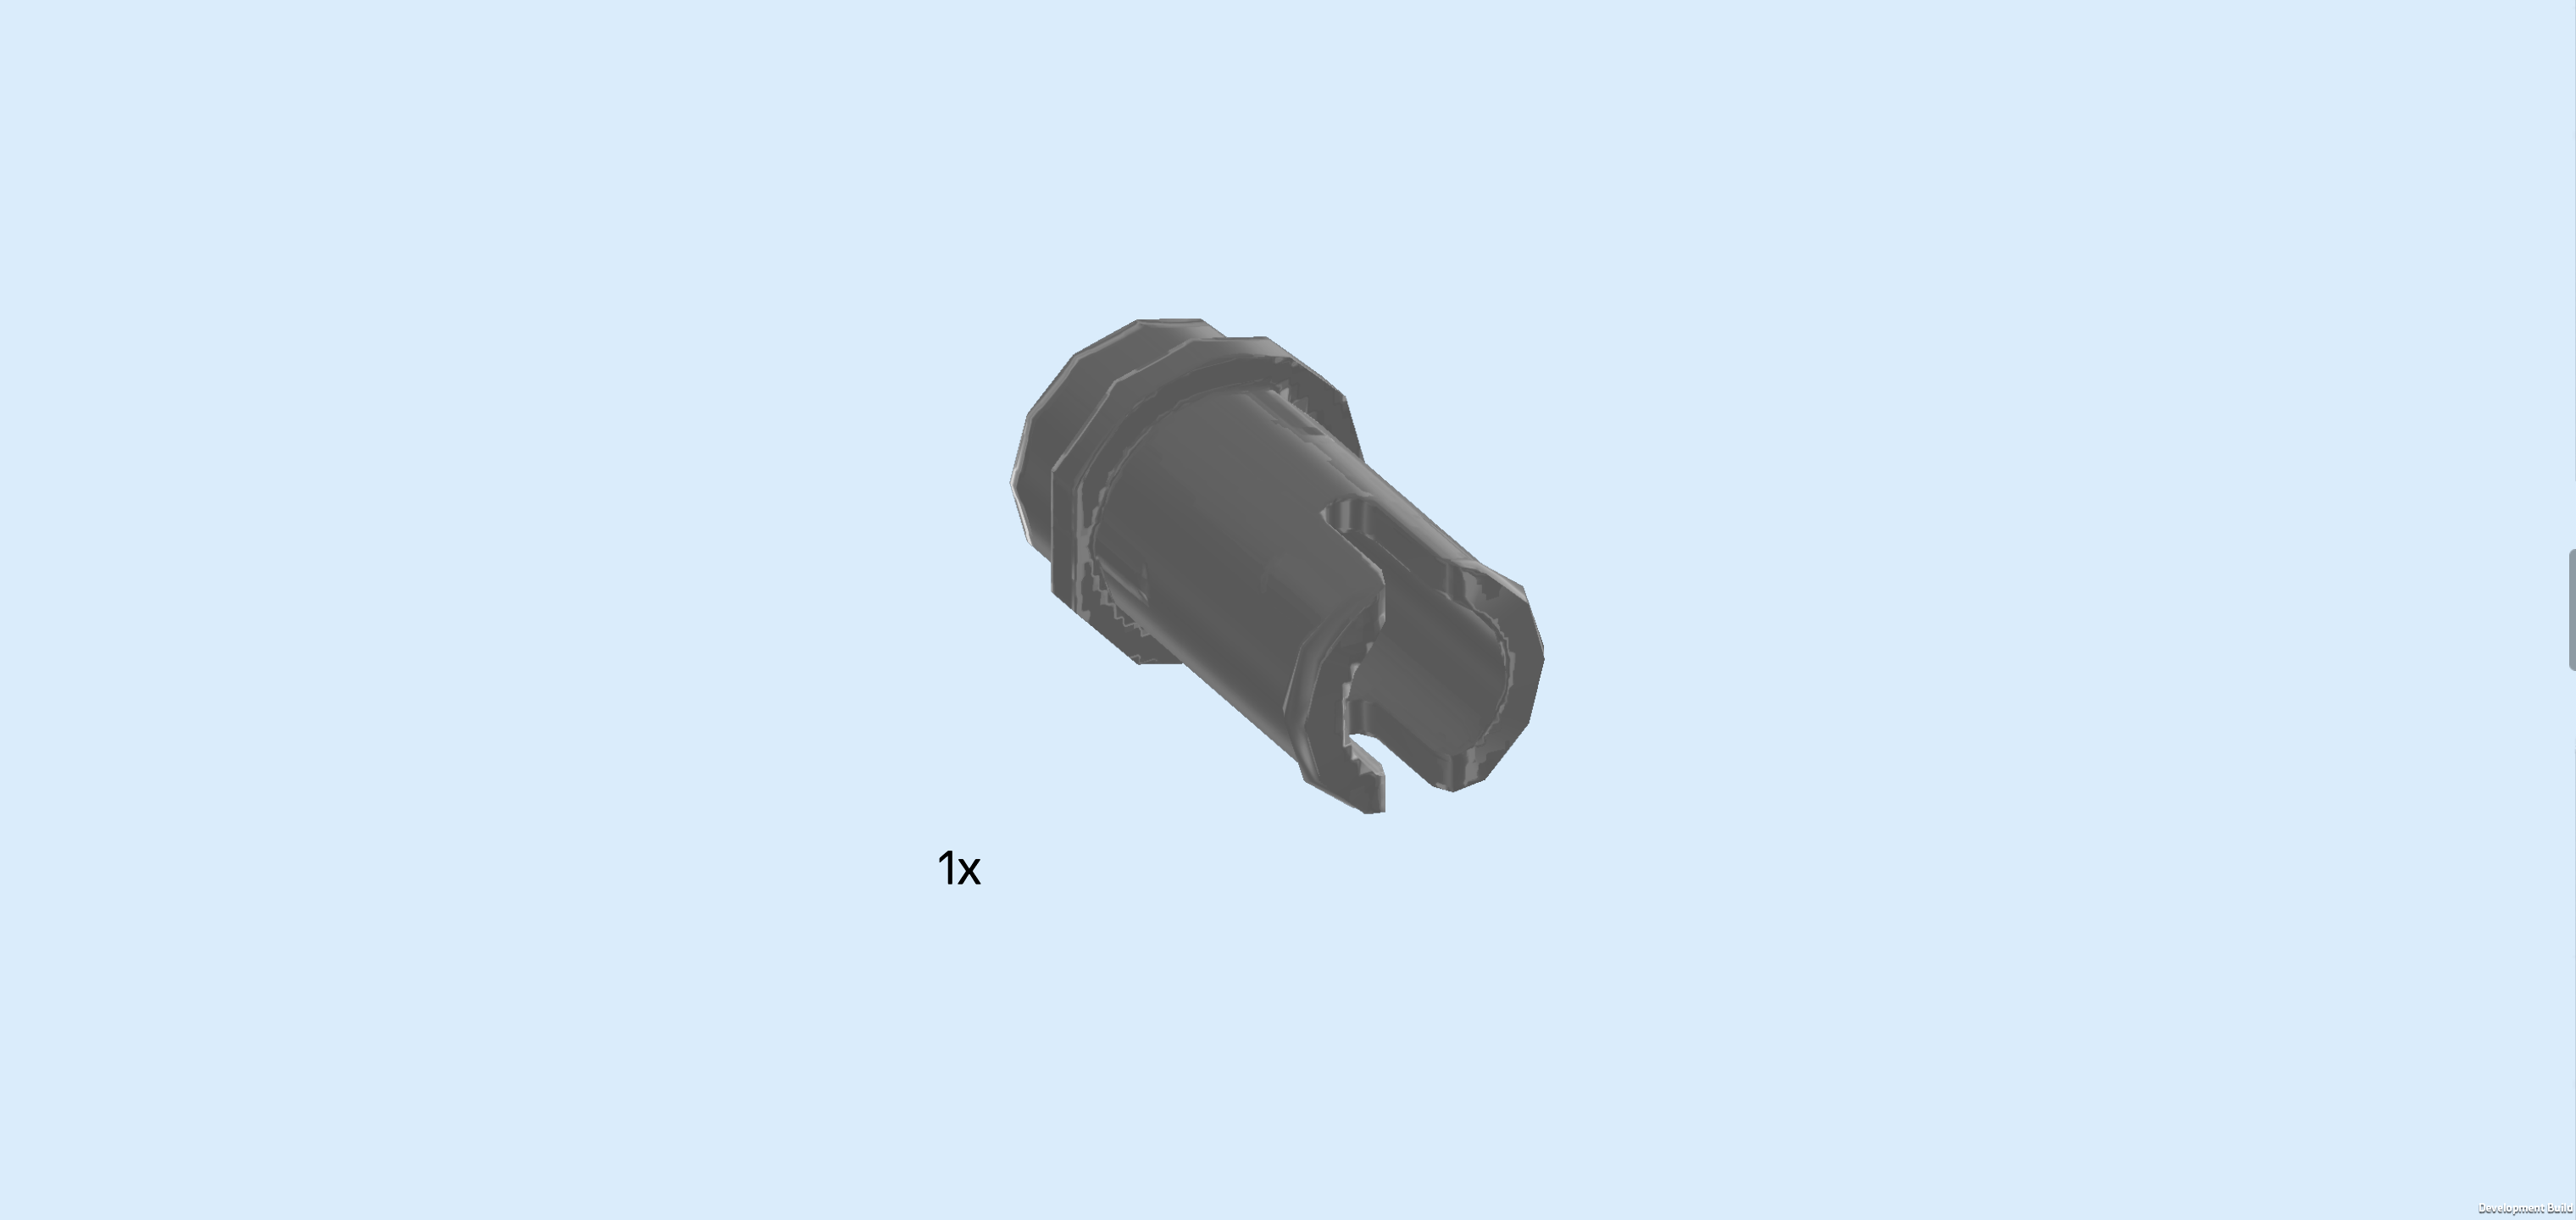
| 1 medium stone grey cross axle 3m with round bushing 1m, |
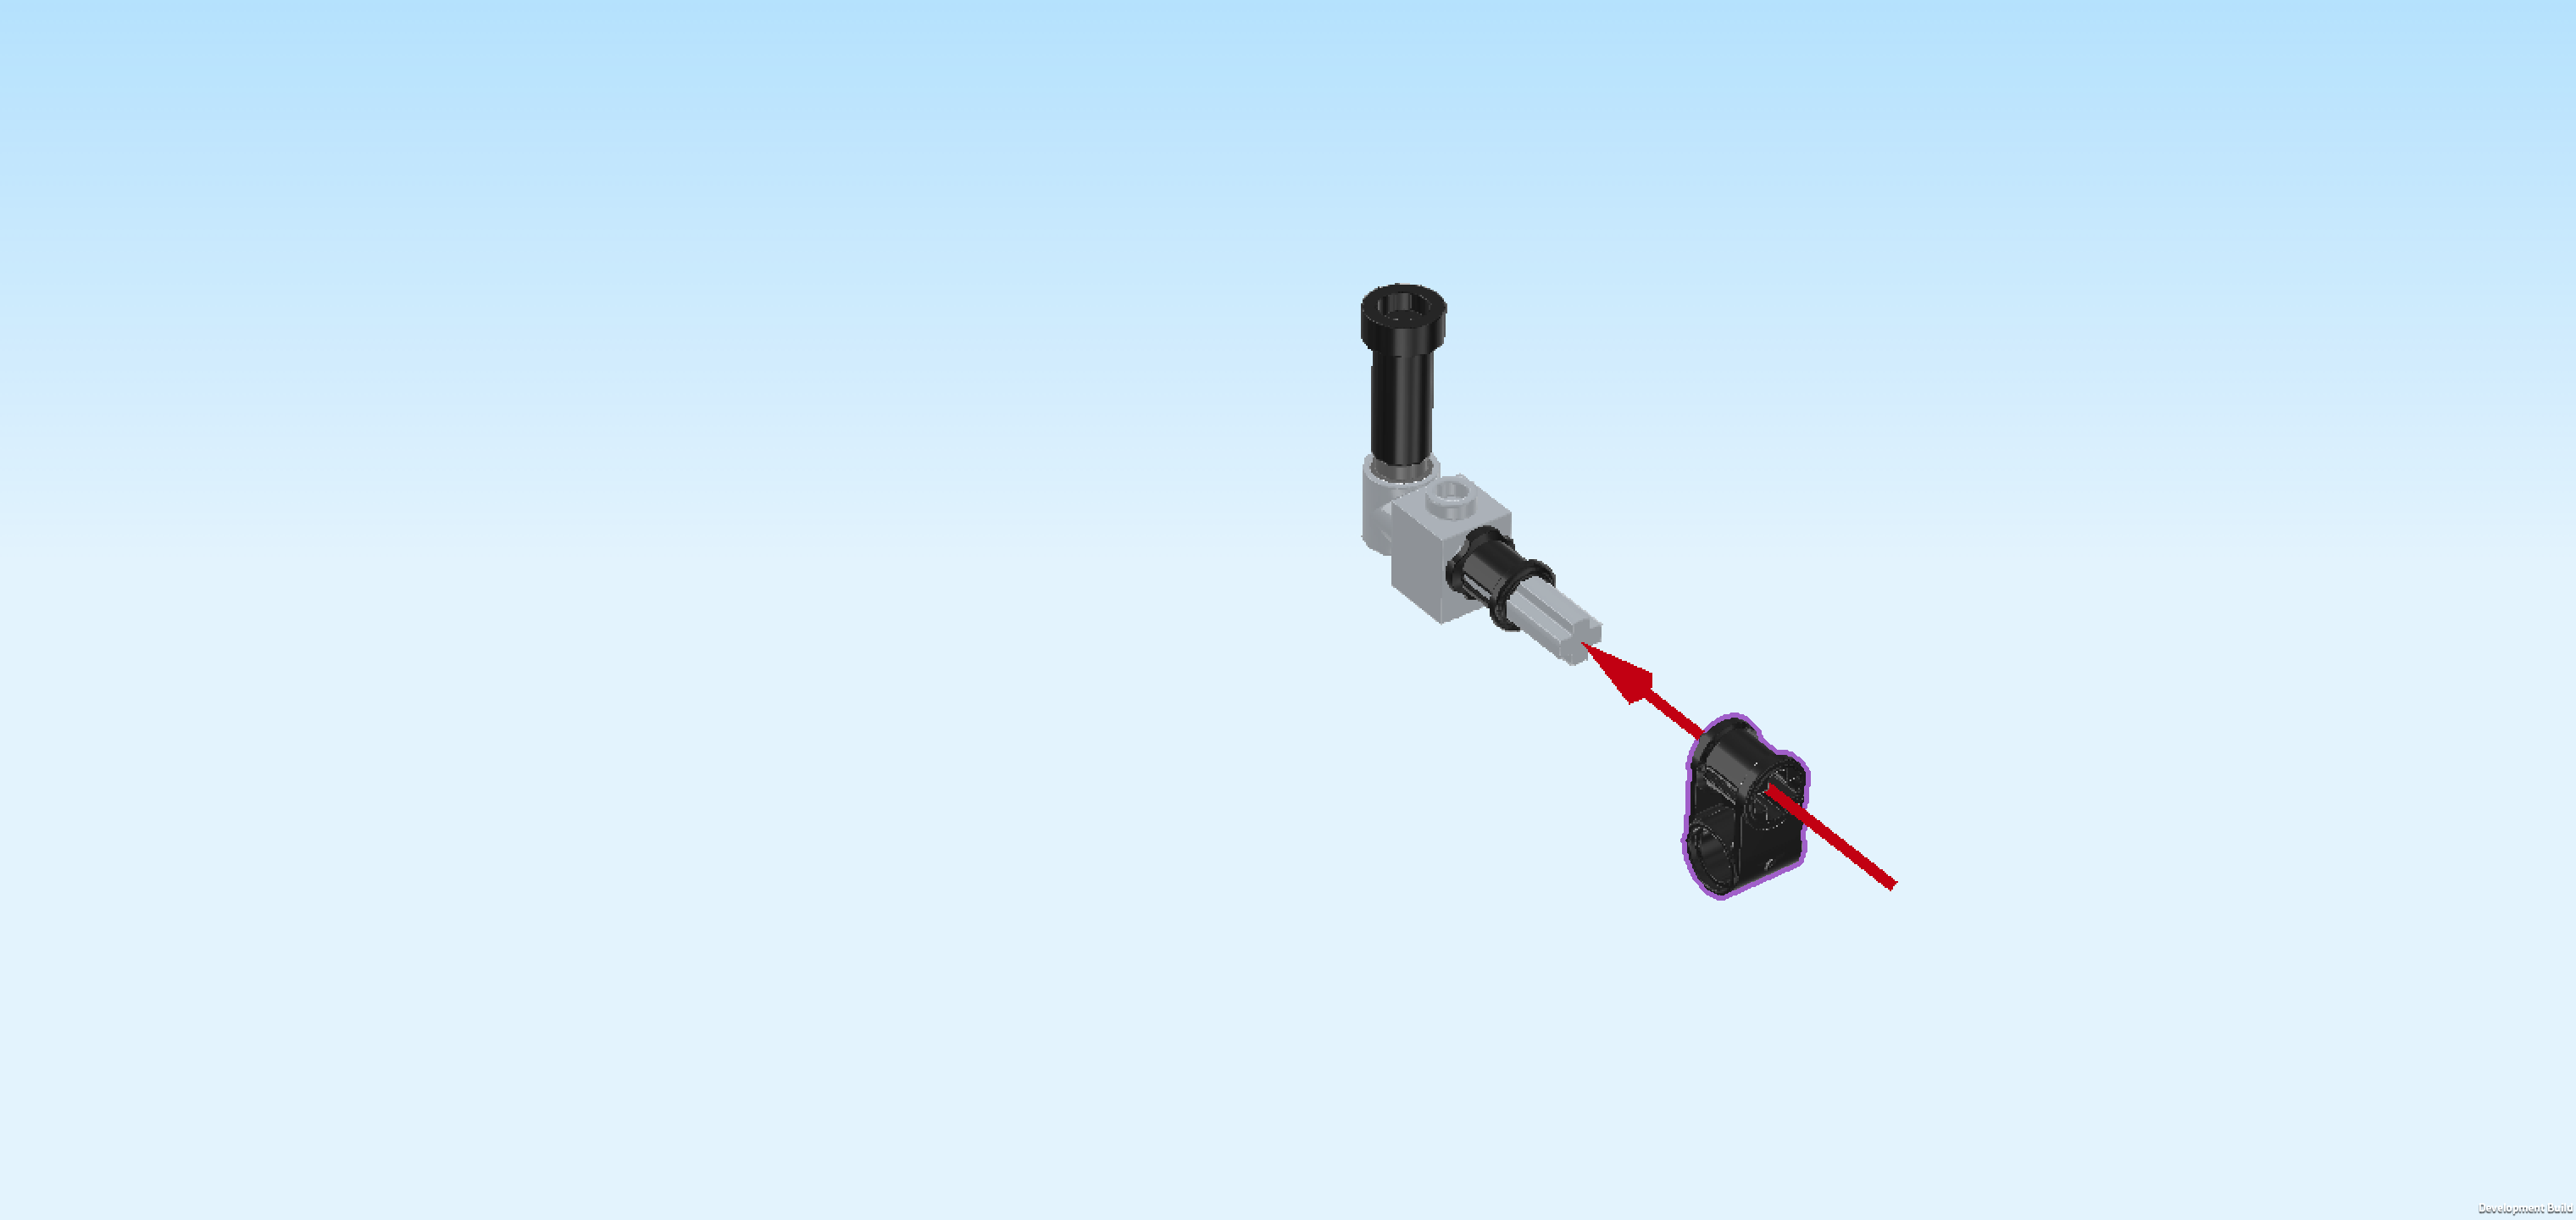
| and 1 medium stone grey brick 1x1 with technic hole. |
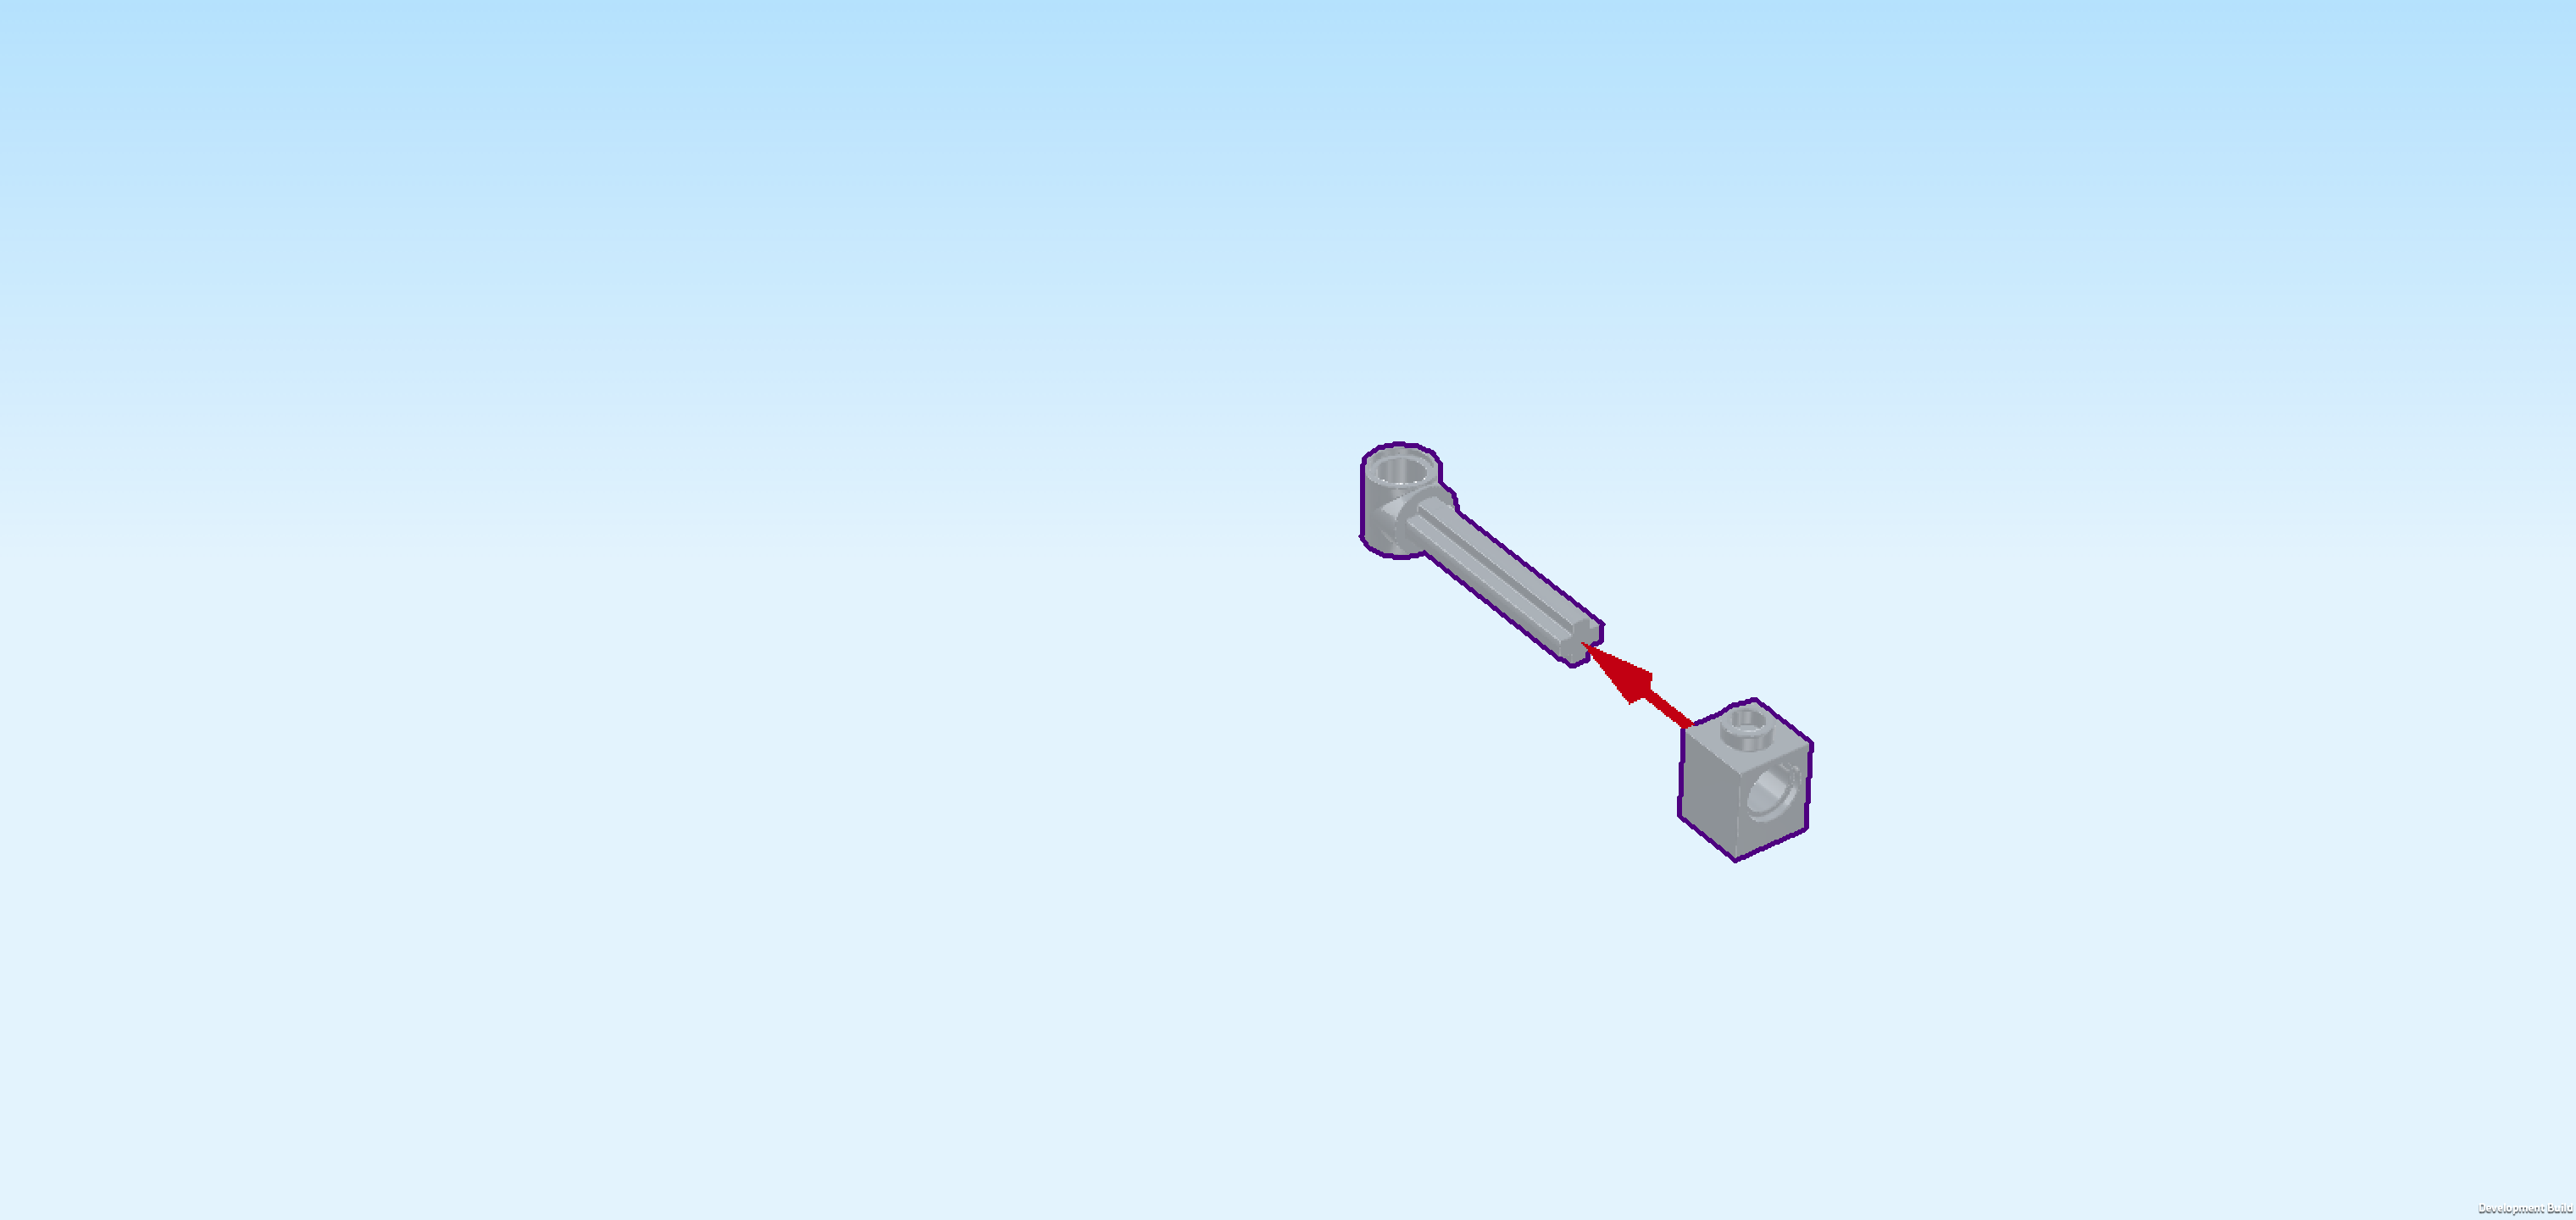
| Put the brick 1x1 on the table so that its hole is running from front to back. |
| Insert the cross axle from the back into the hole, making sure that the hole of its round bushing is running from top to bottom. Push it all the way through to the front. |
| Note that the cross axle will rotate in the round hole because it is not a tight fit. This is intentional. |
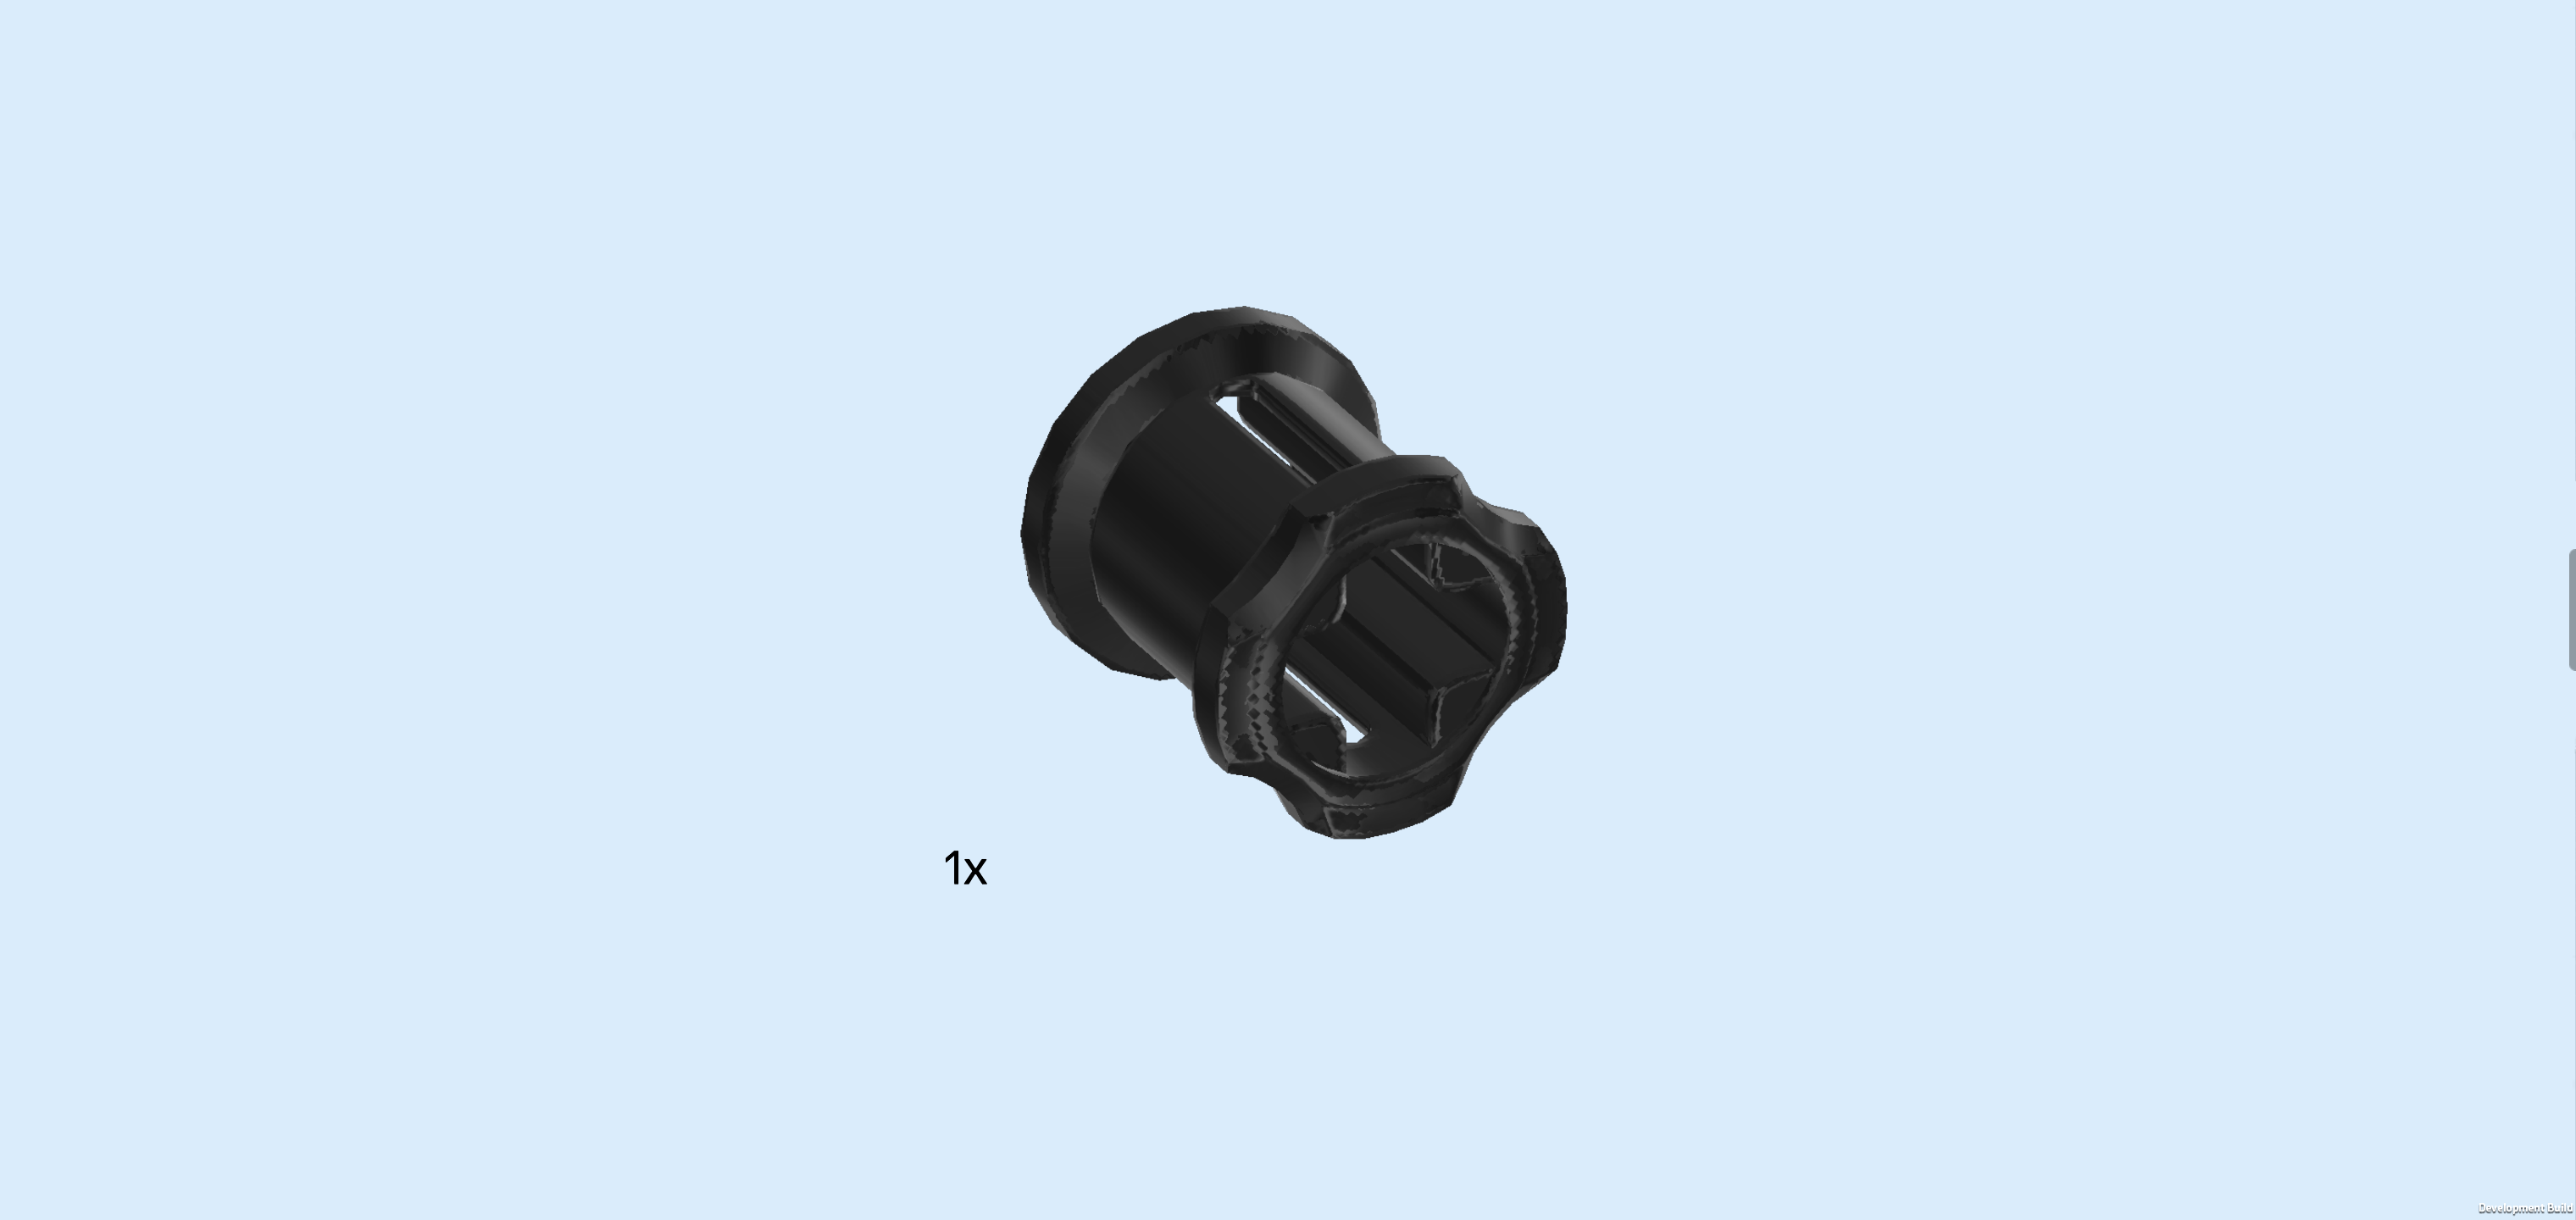
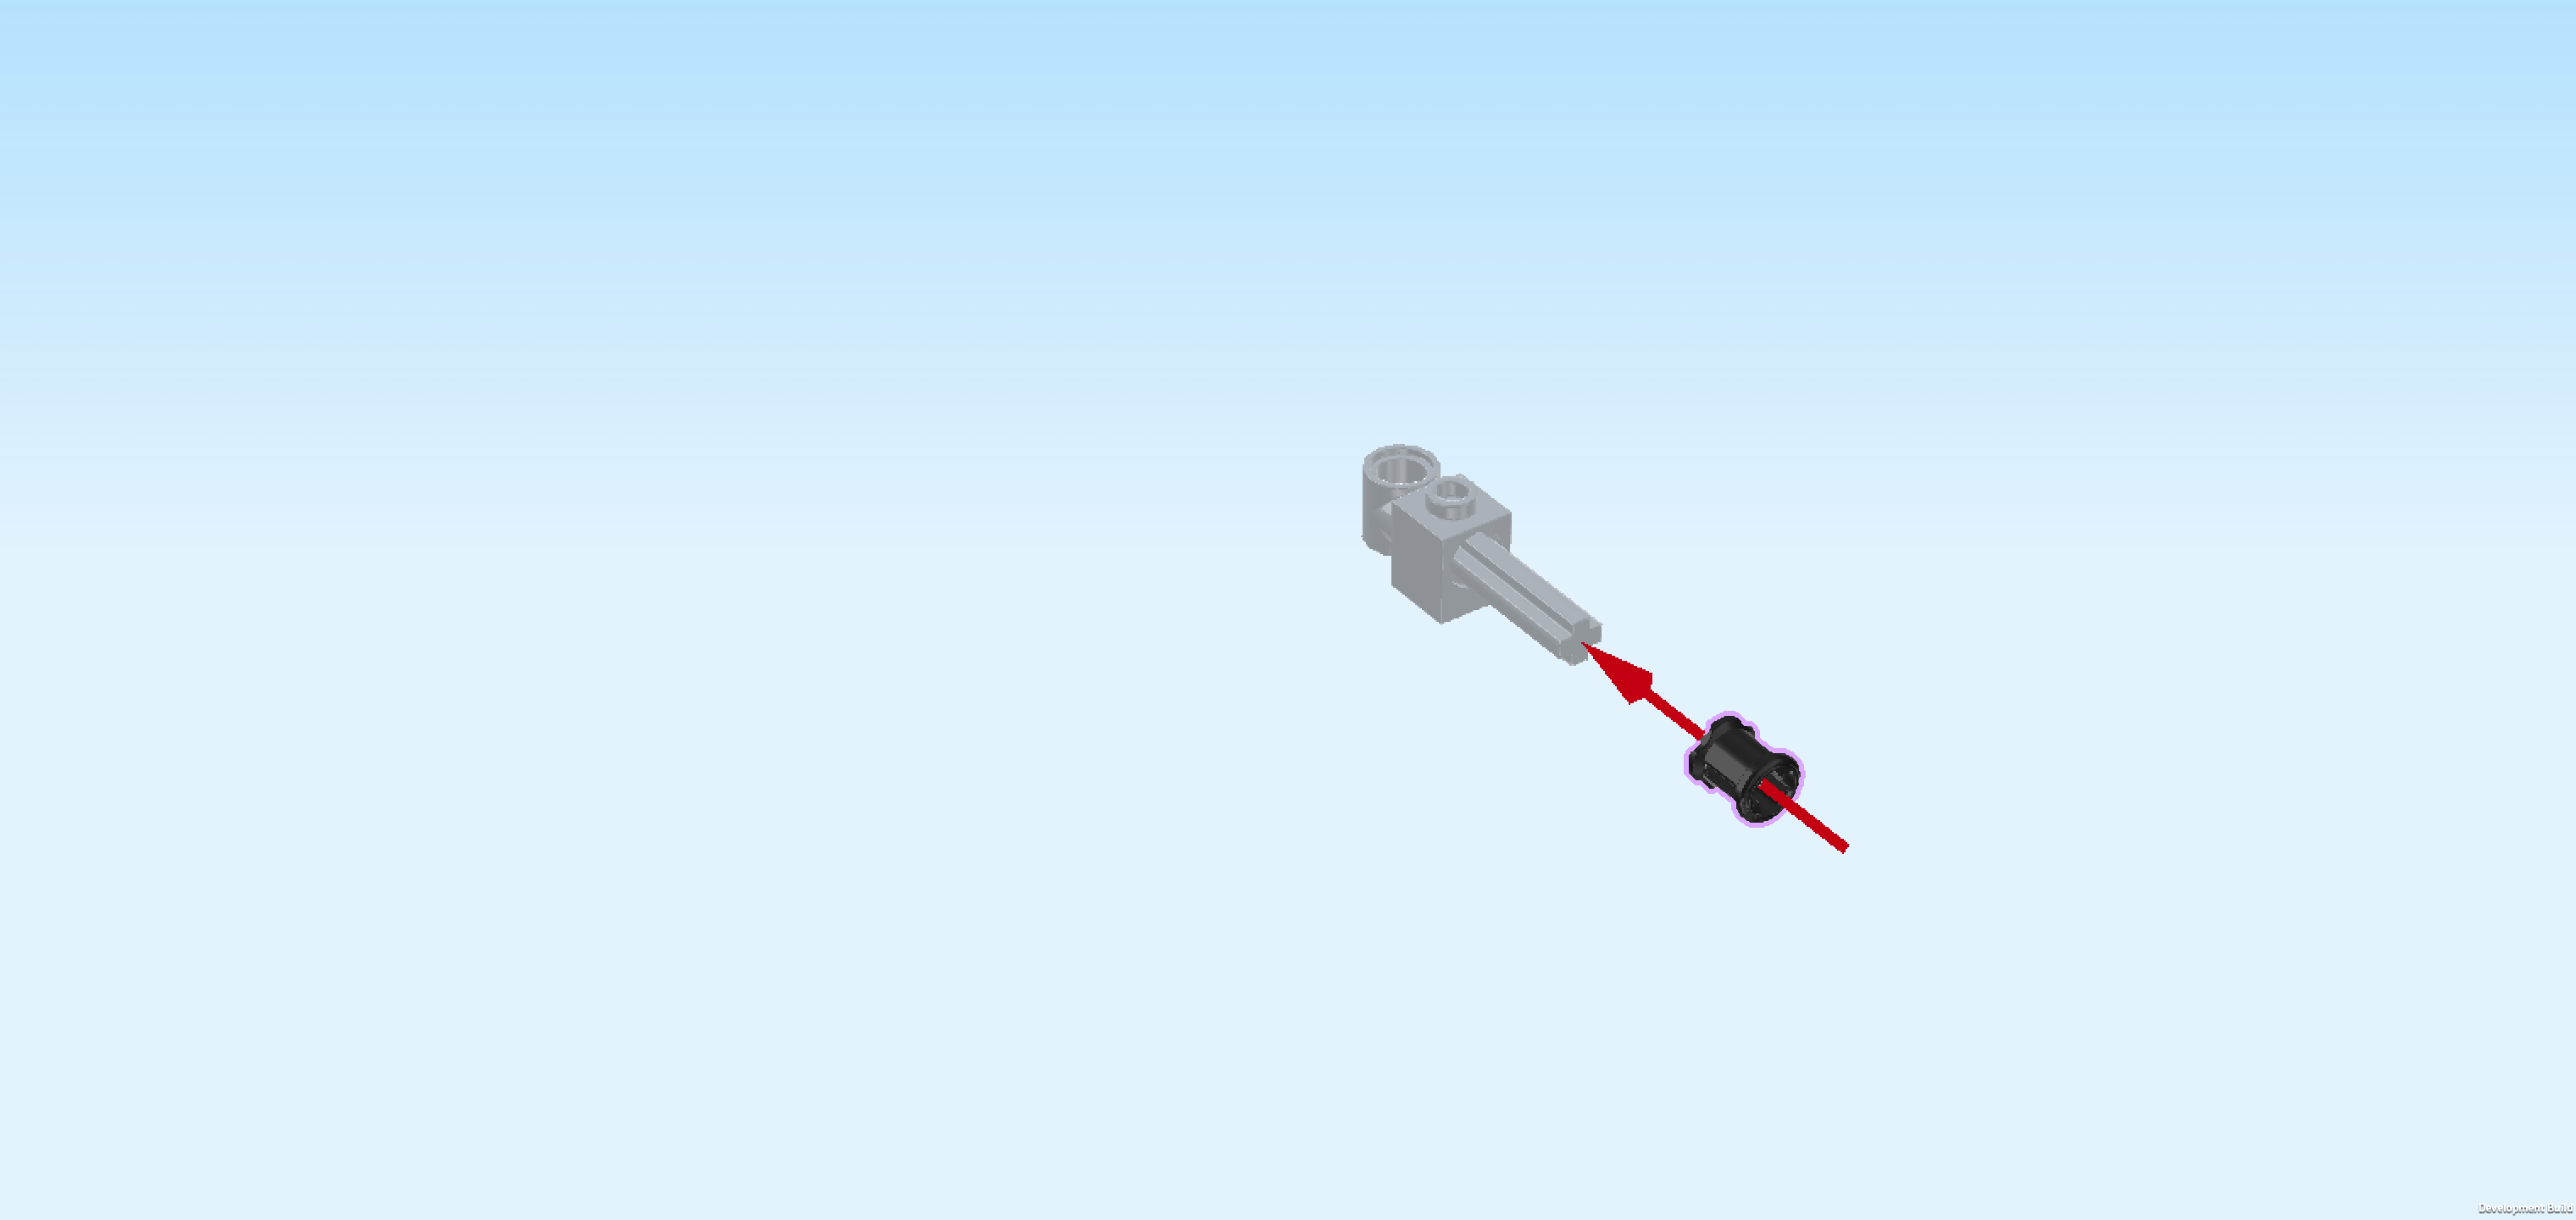
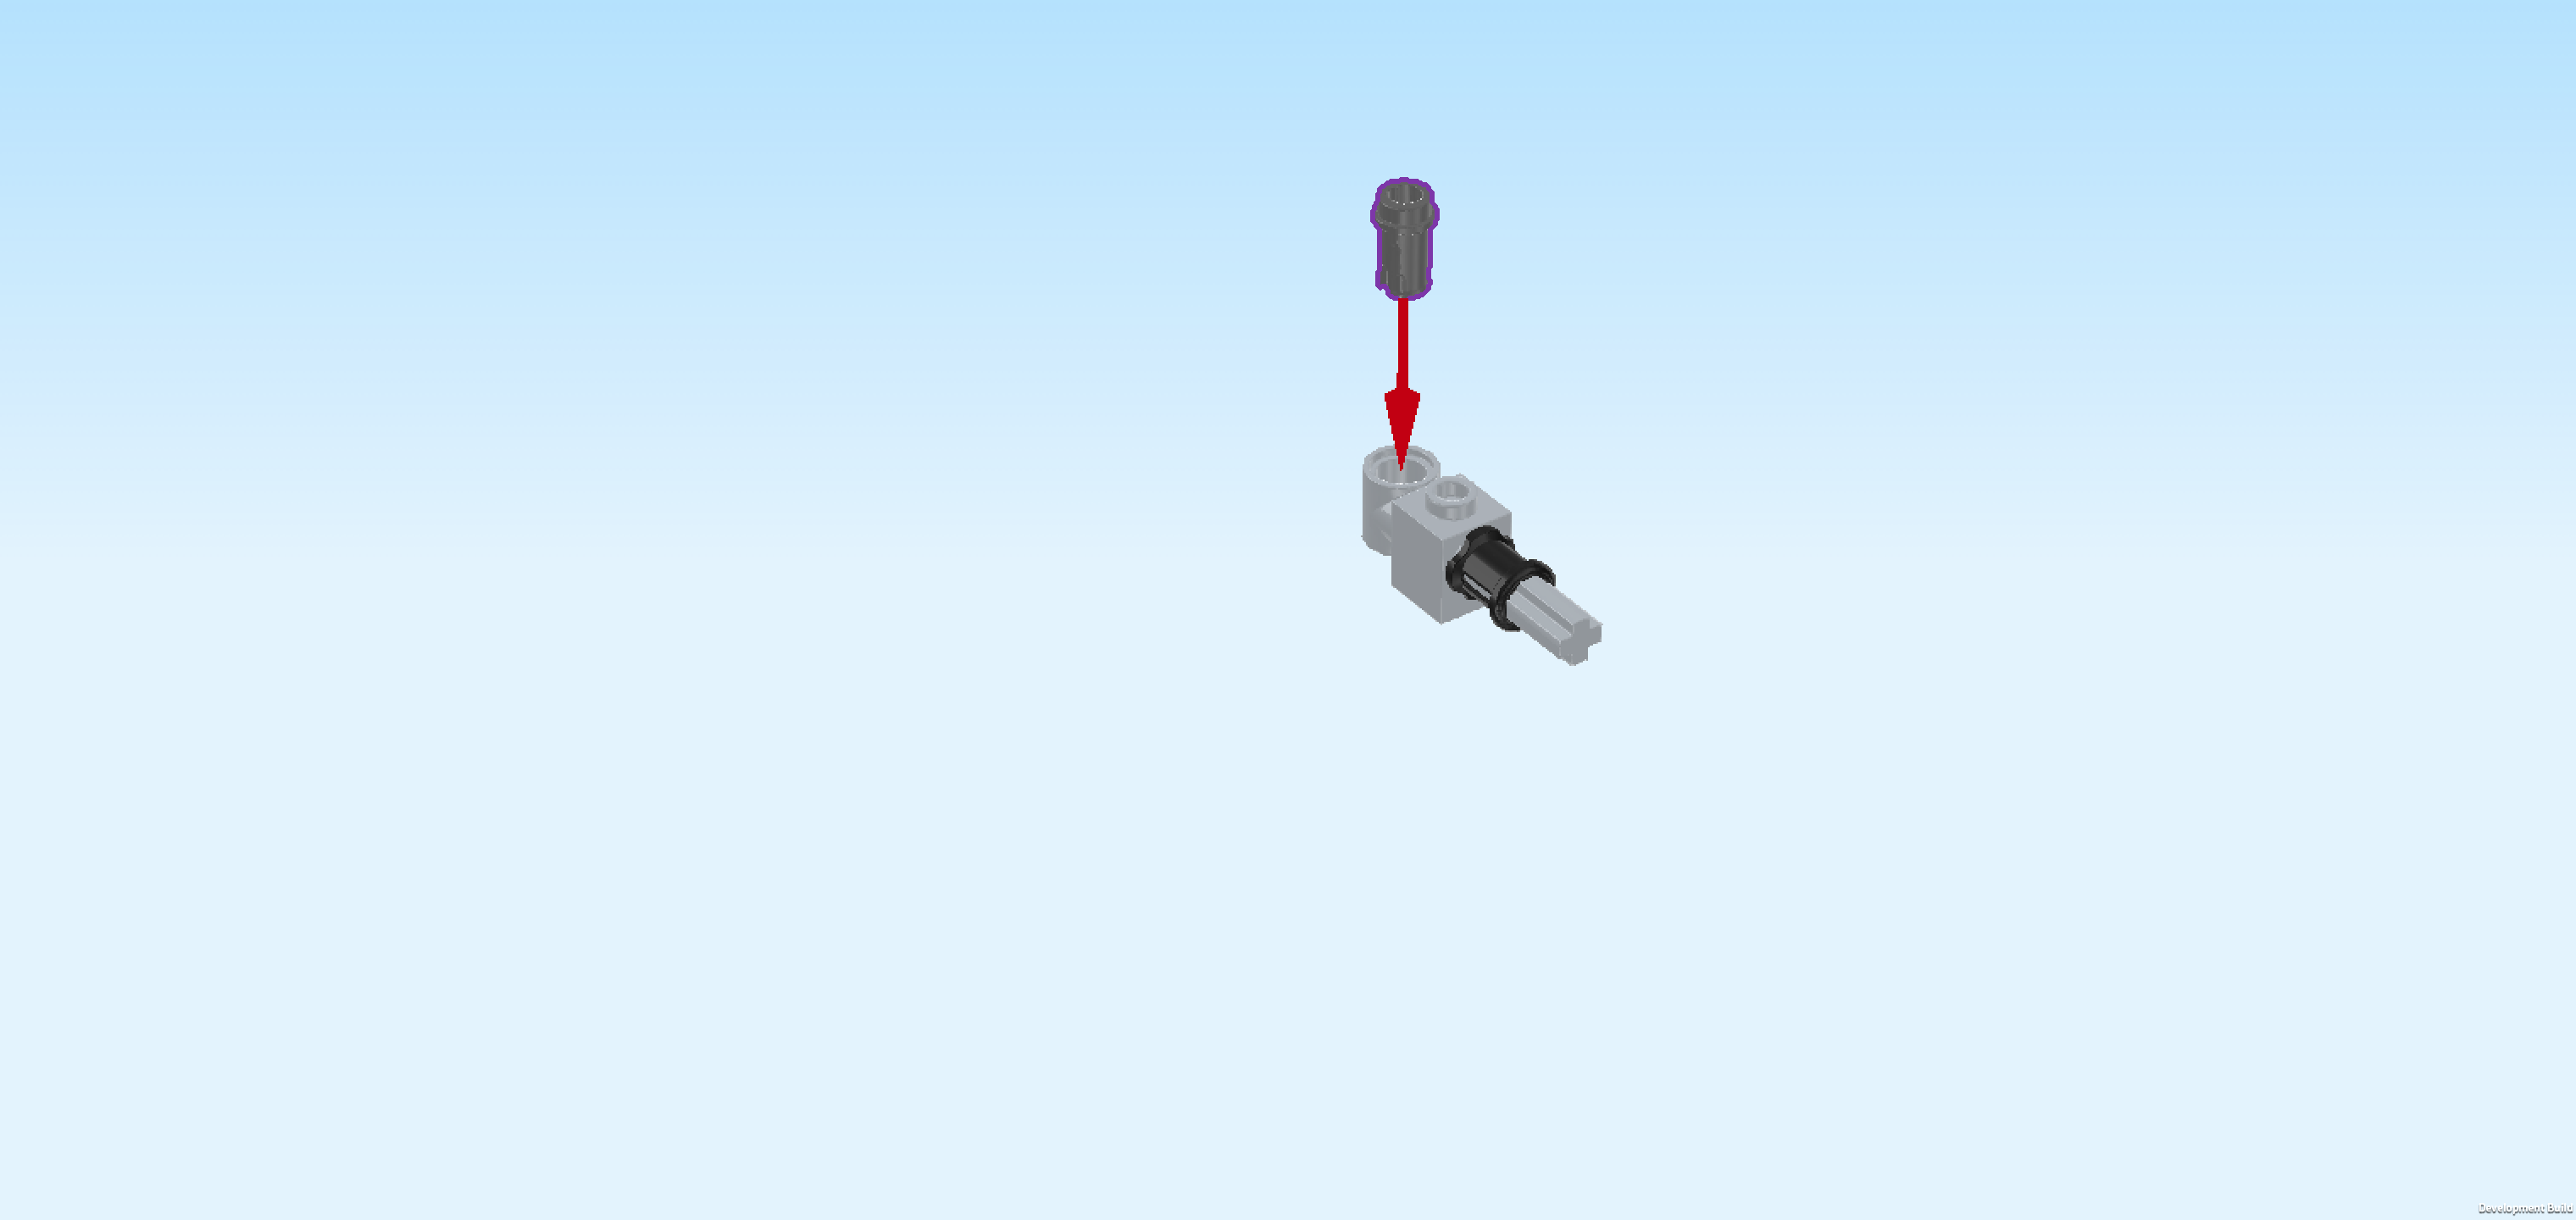
| Find 1 black cross hole bushing 1m. |
| Put it on the cross axle from the front and then push all parts together for a tight fit. |
| Find 1 dark stone grey connector peg 1m with knob. |
| Insert it from the top into the round bushing that is located at the back of the build. If necessary, rotate the cross axle so that the round bushing hole is running from top to bottom. |
| Collect the following 2 pieces: |
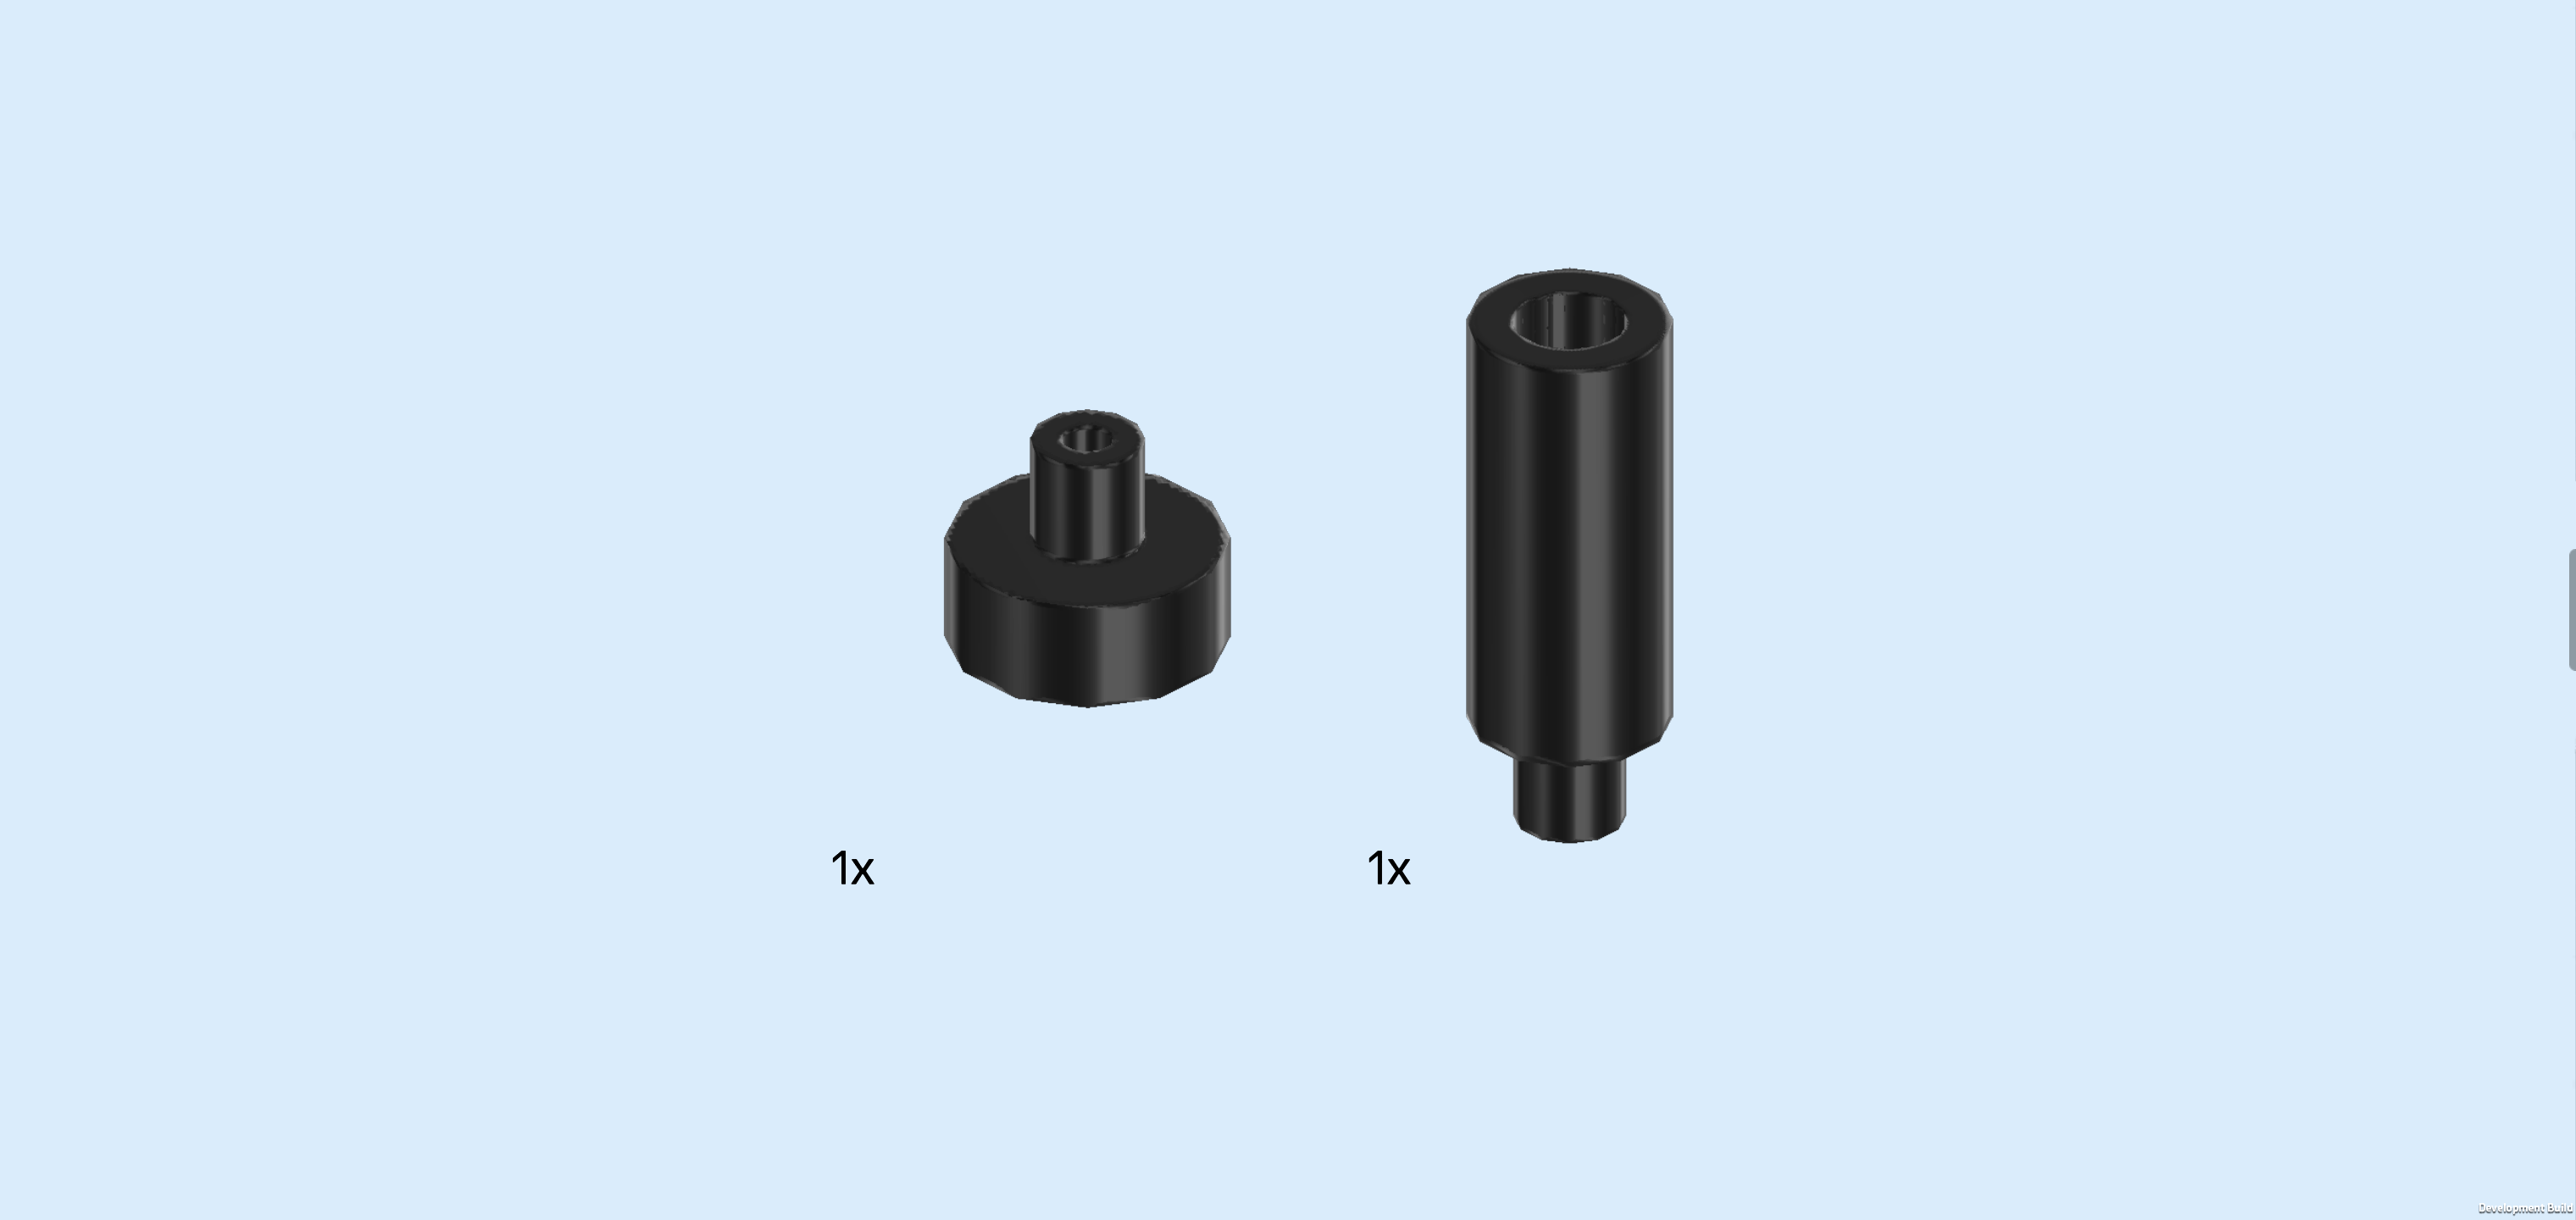
| 1 black round tile 1x1 with small top shaft, |
| and 1 black narrow tube 2m with short shaft. |
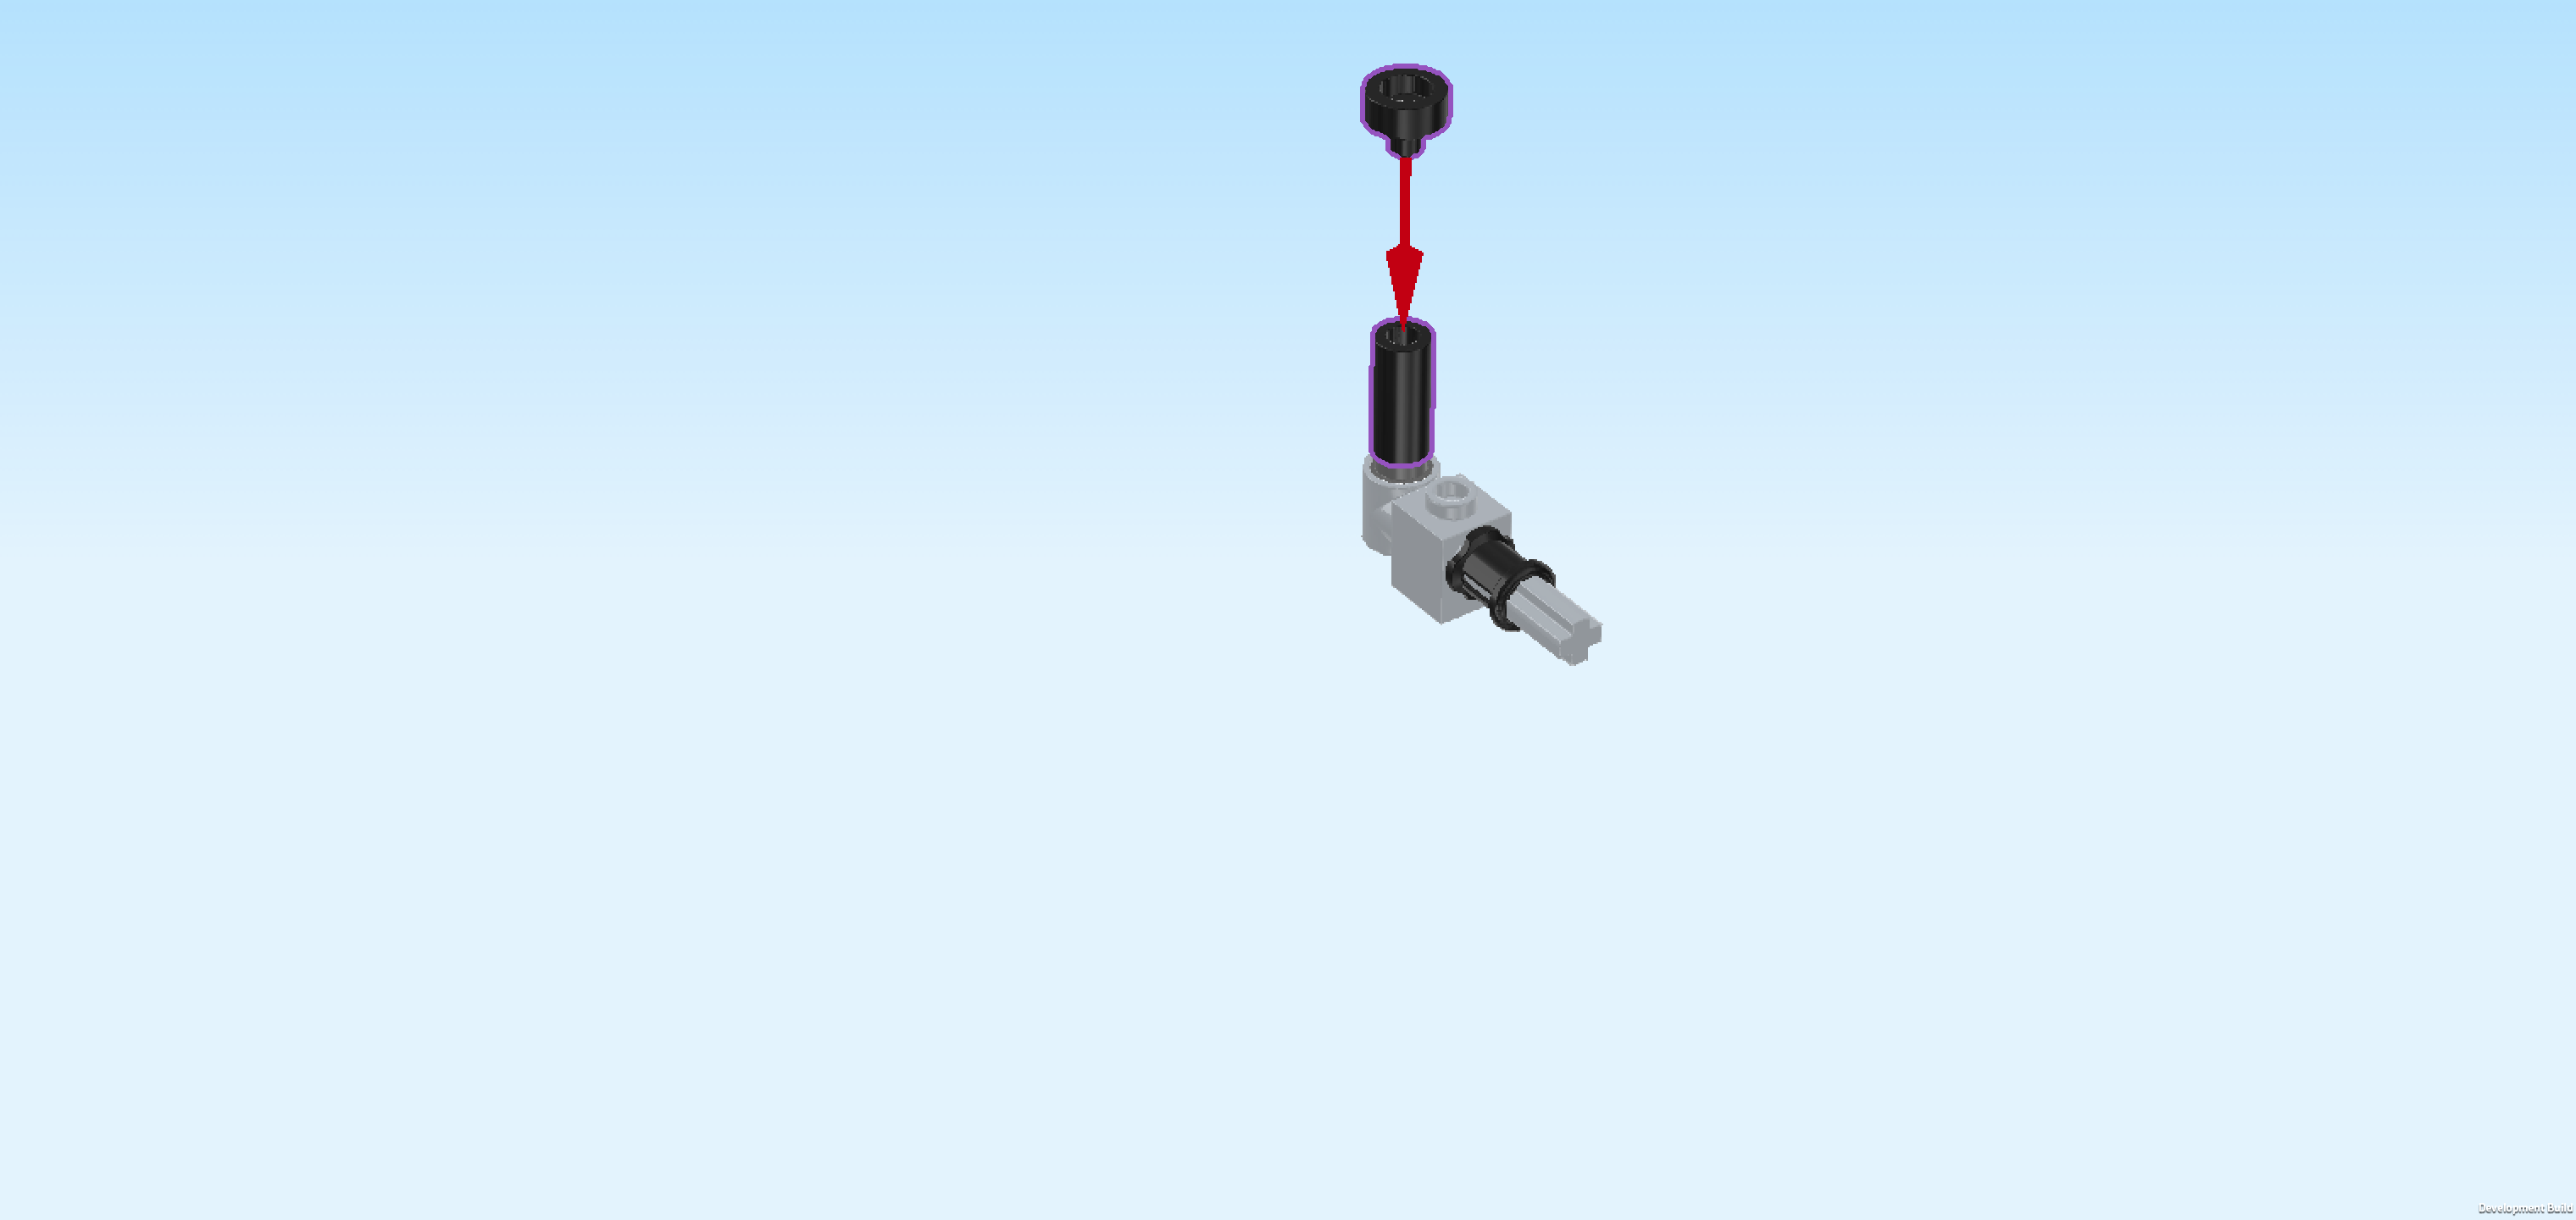
| Insert the short shaft of the narrow tube into the previous piece's hollow knob from the top. That way, the tube is protruding towards the top. |
| Flip the round tile upside down and insert its small shaft from the top into the narrow tube. |
| Find 1 black technic beam 2m with offset cross hole. |
| The following step might be tricky because the cross axle can still rotate in the brick 1x1. However, you will be able readjust the rotating pieces after this step. |
| Slide the cross hole of the current piece from the front on the cross axle, its round hole at the bottom, running from left to right. |
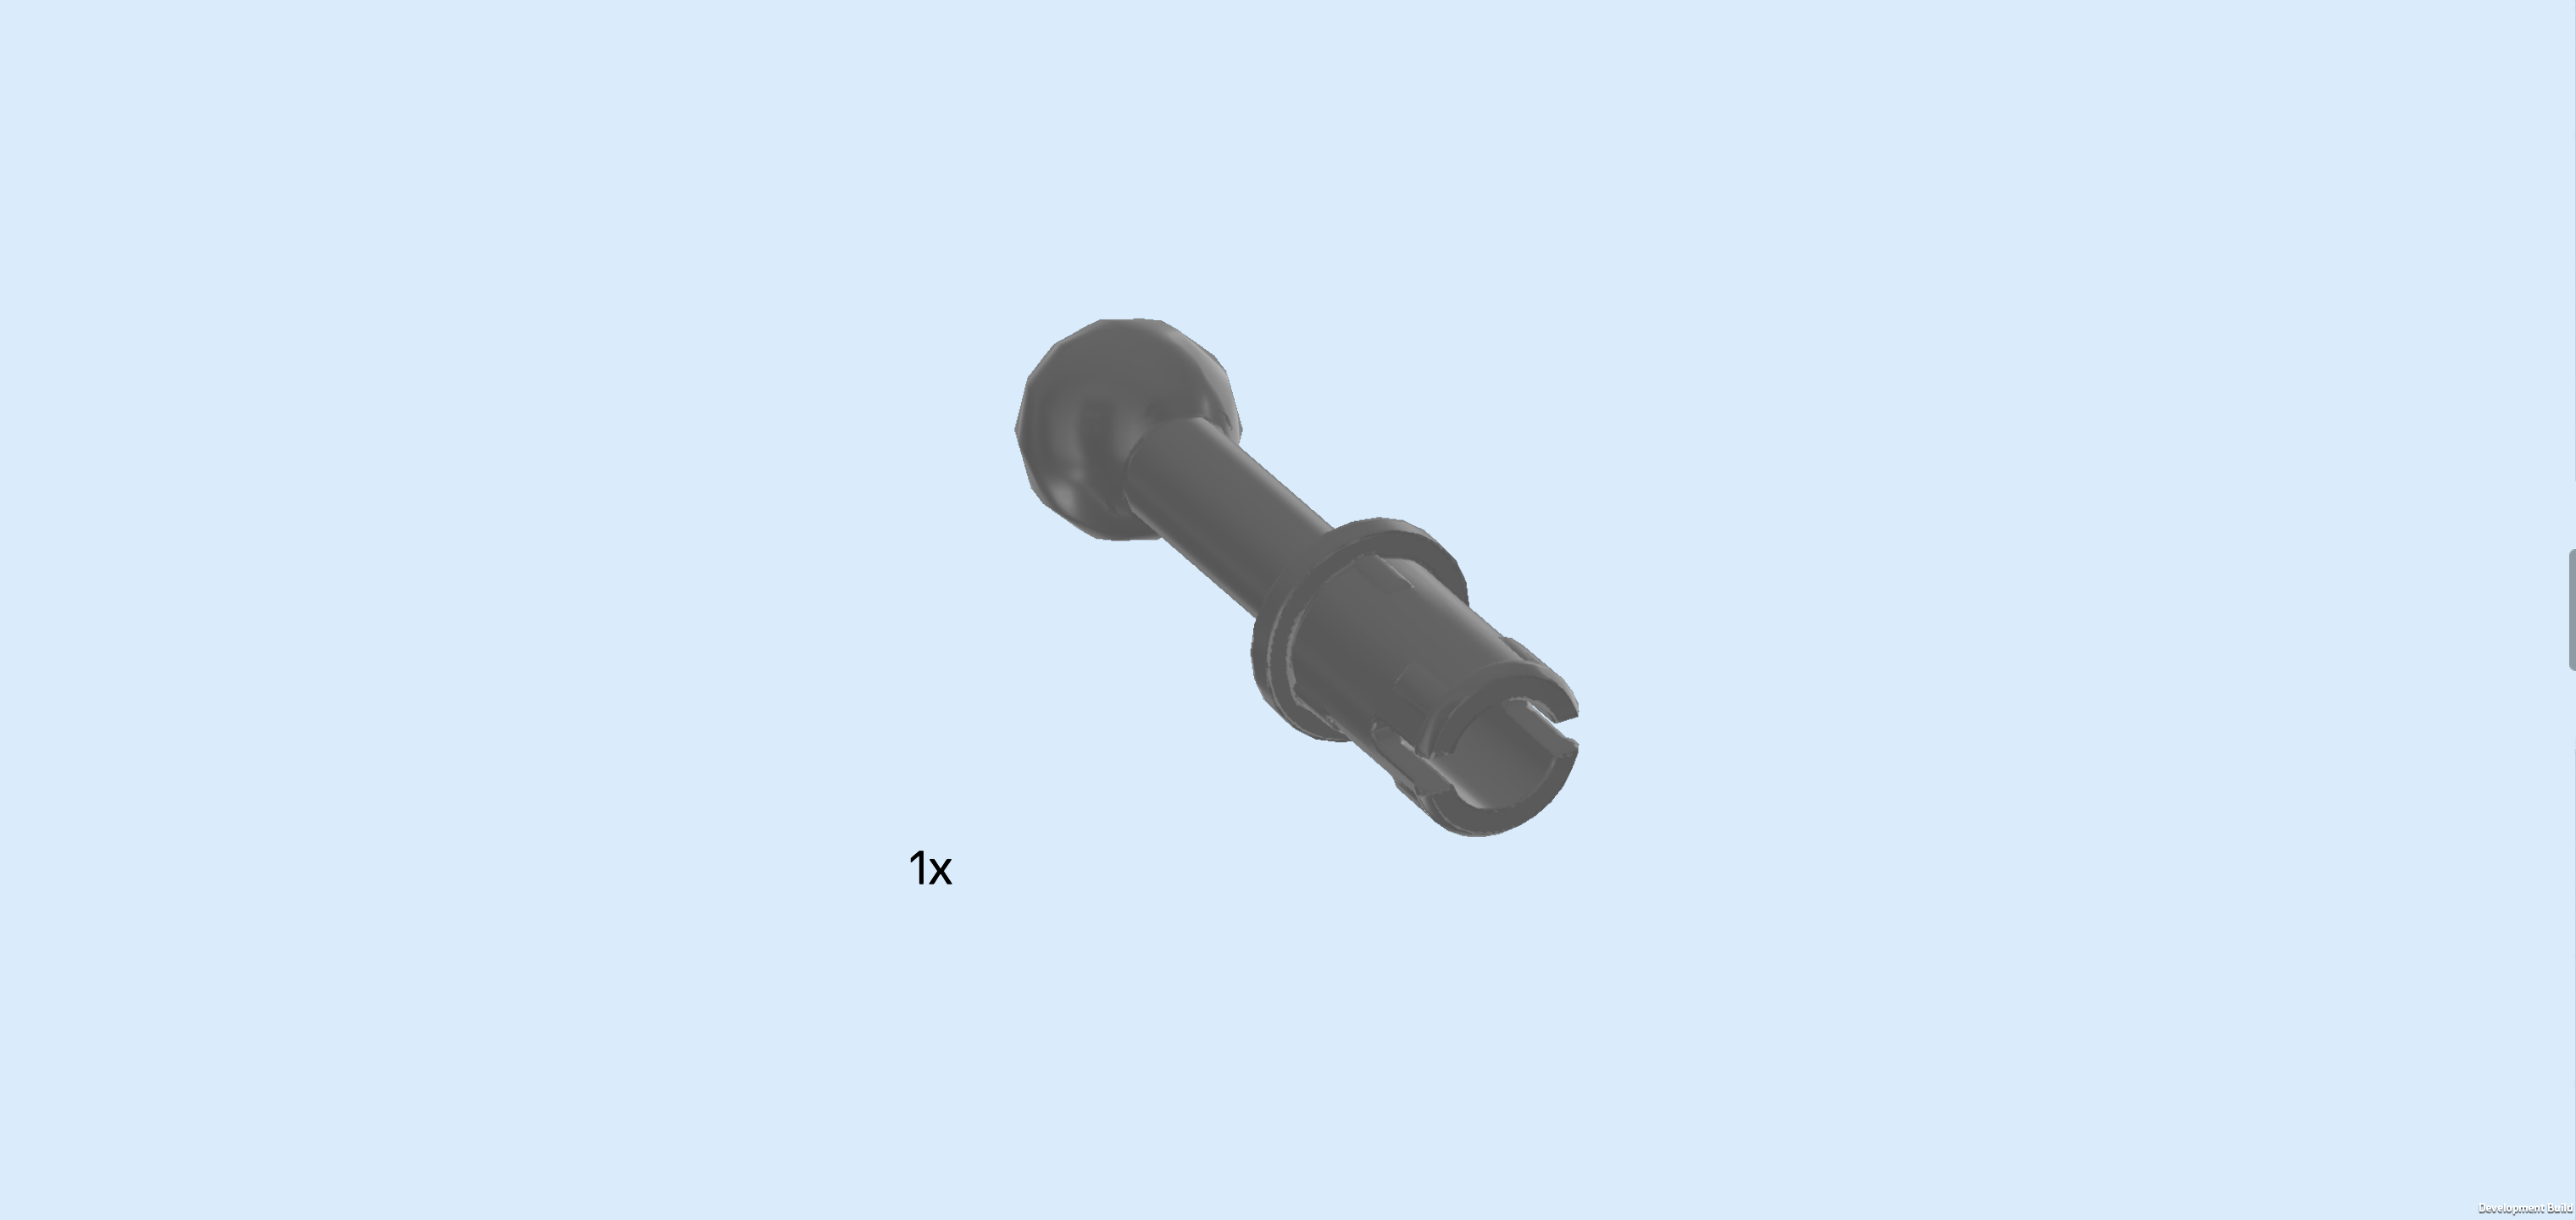
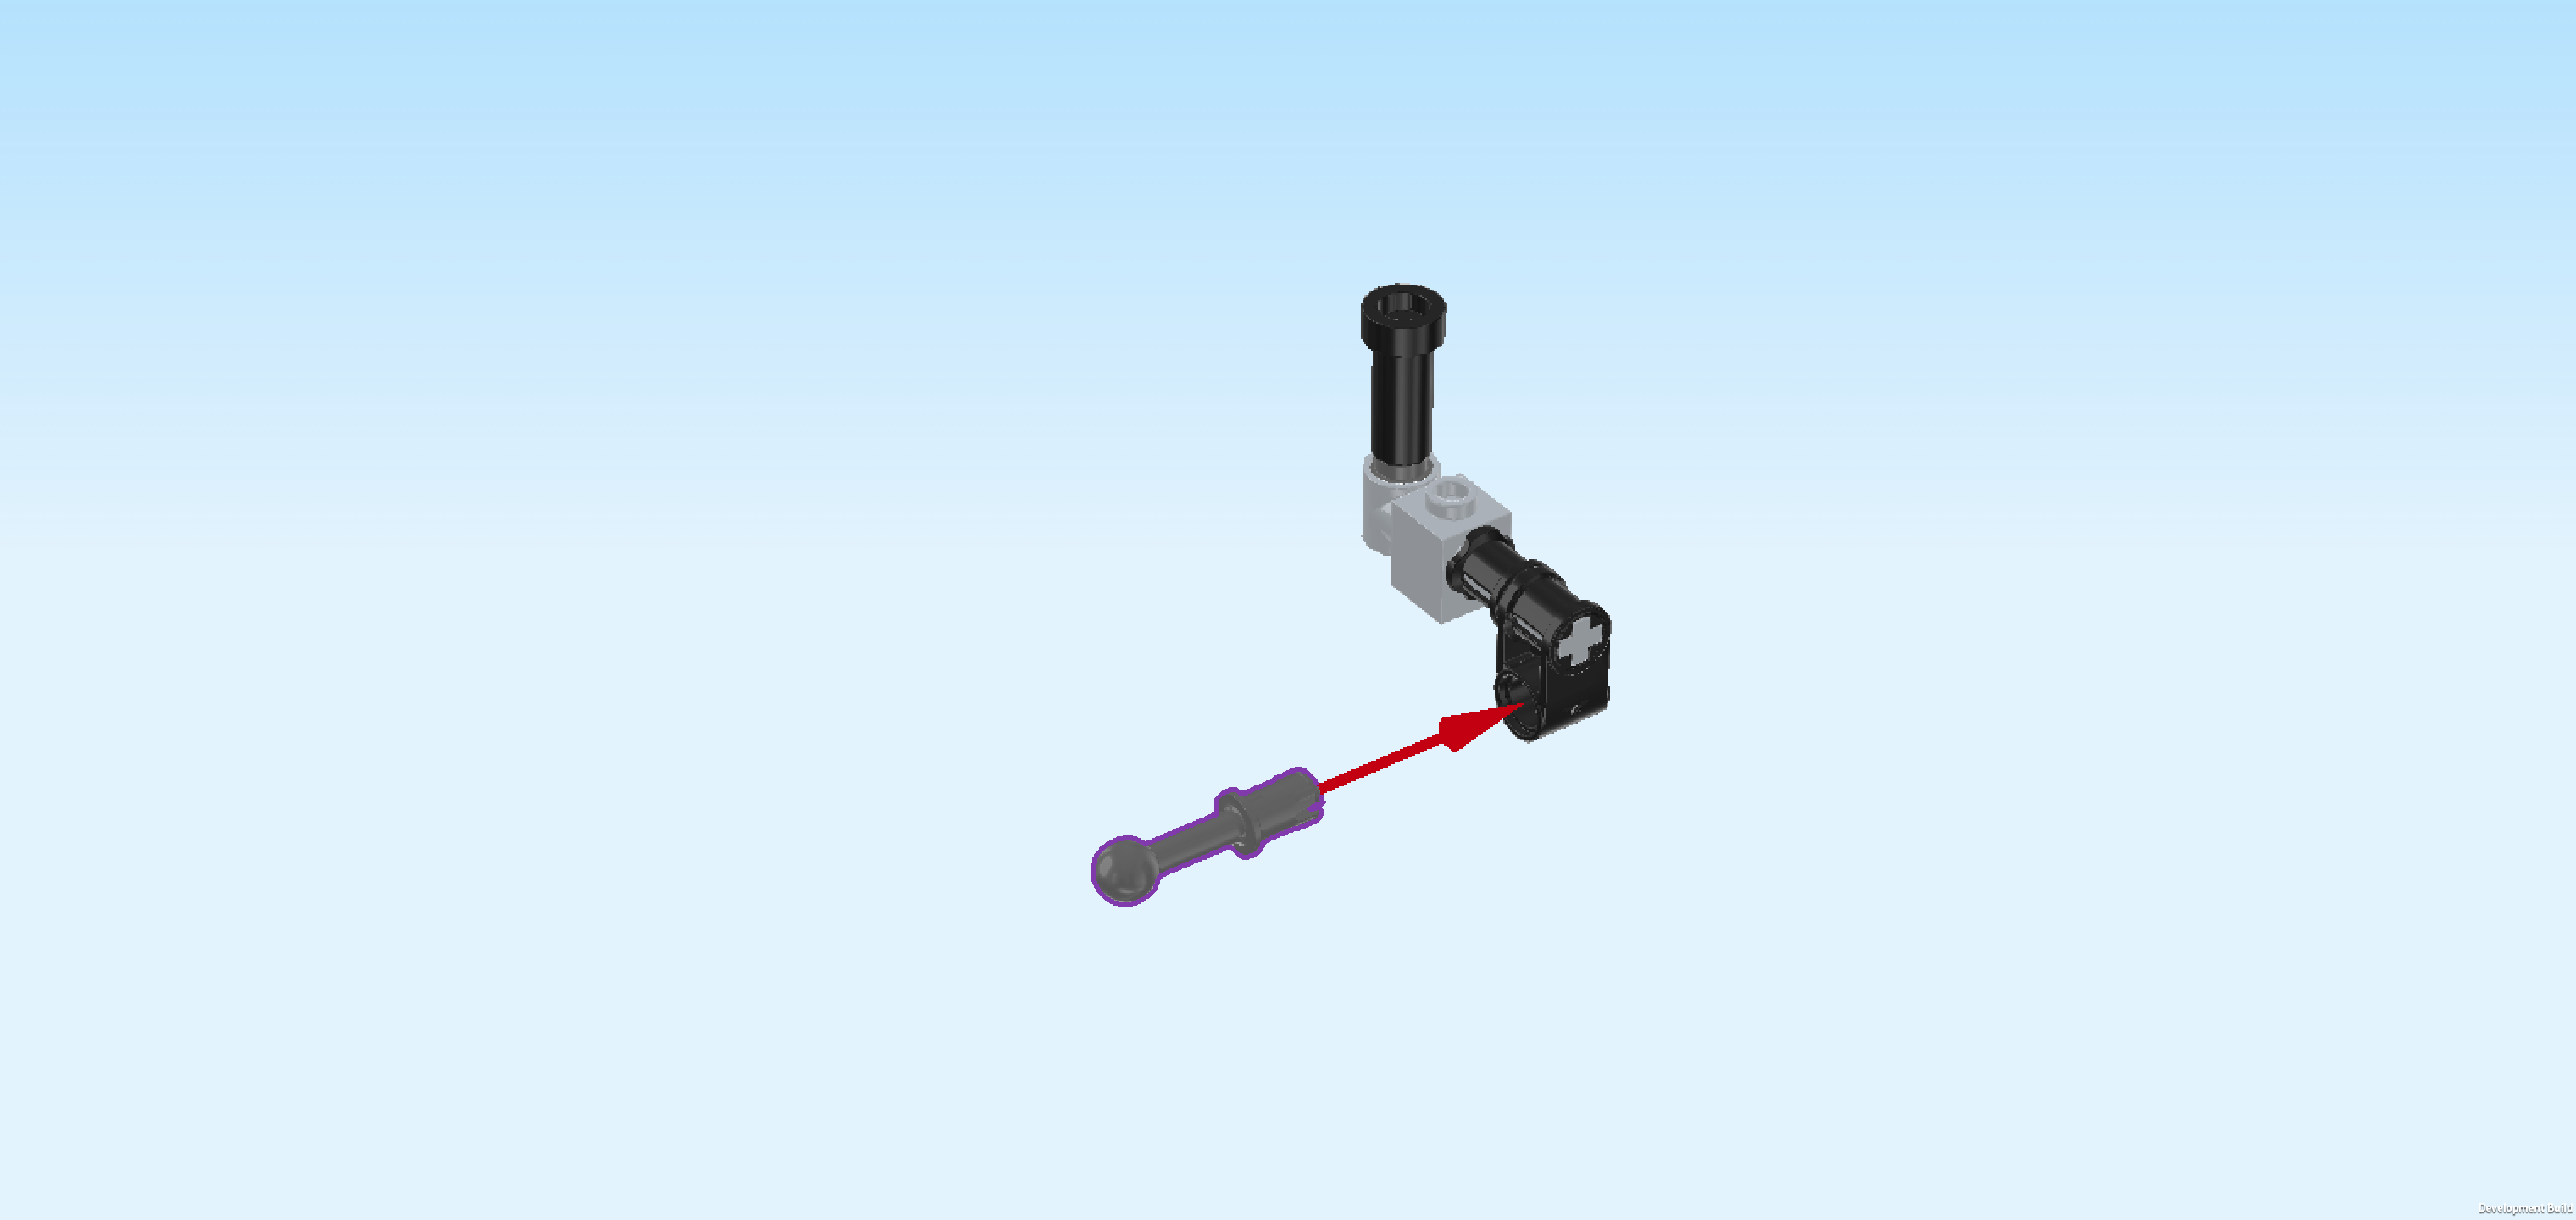
| Find 1 dark stone grey connector peg with ball shaft 3m. |
| Insert the connector peg from the left into the bottom round hole of the previous piece, ball shaft protruding to the left. |
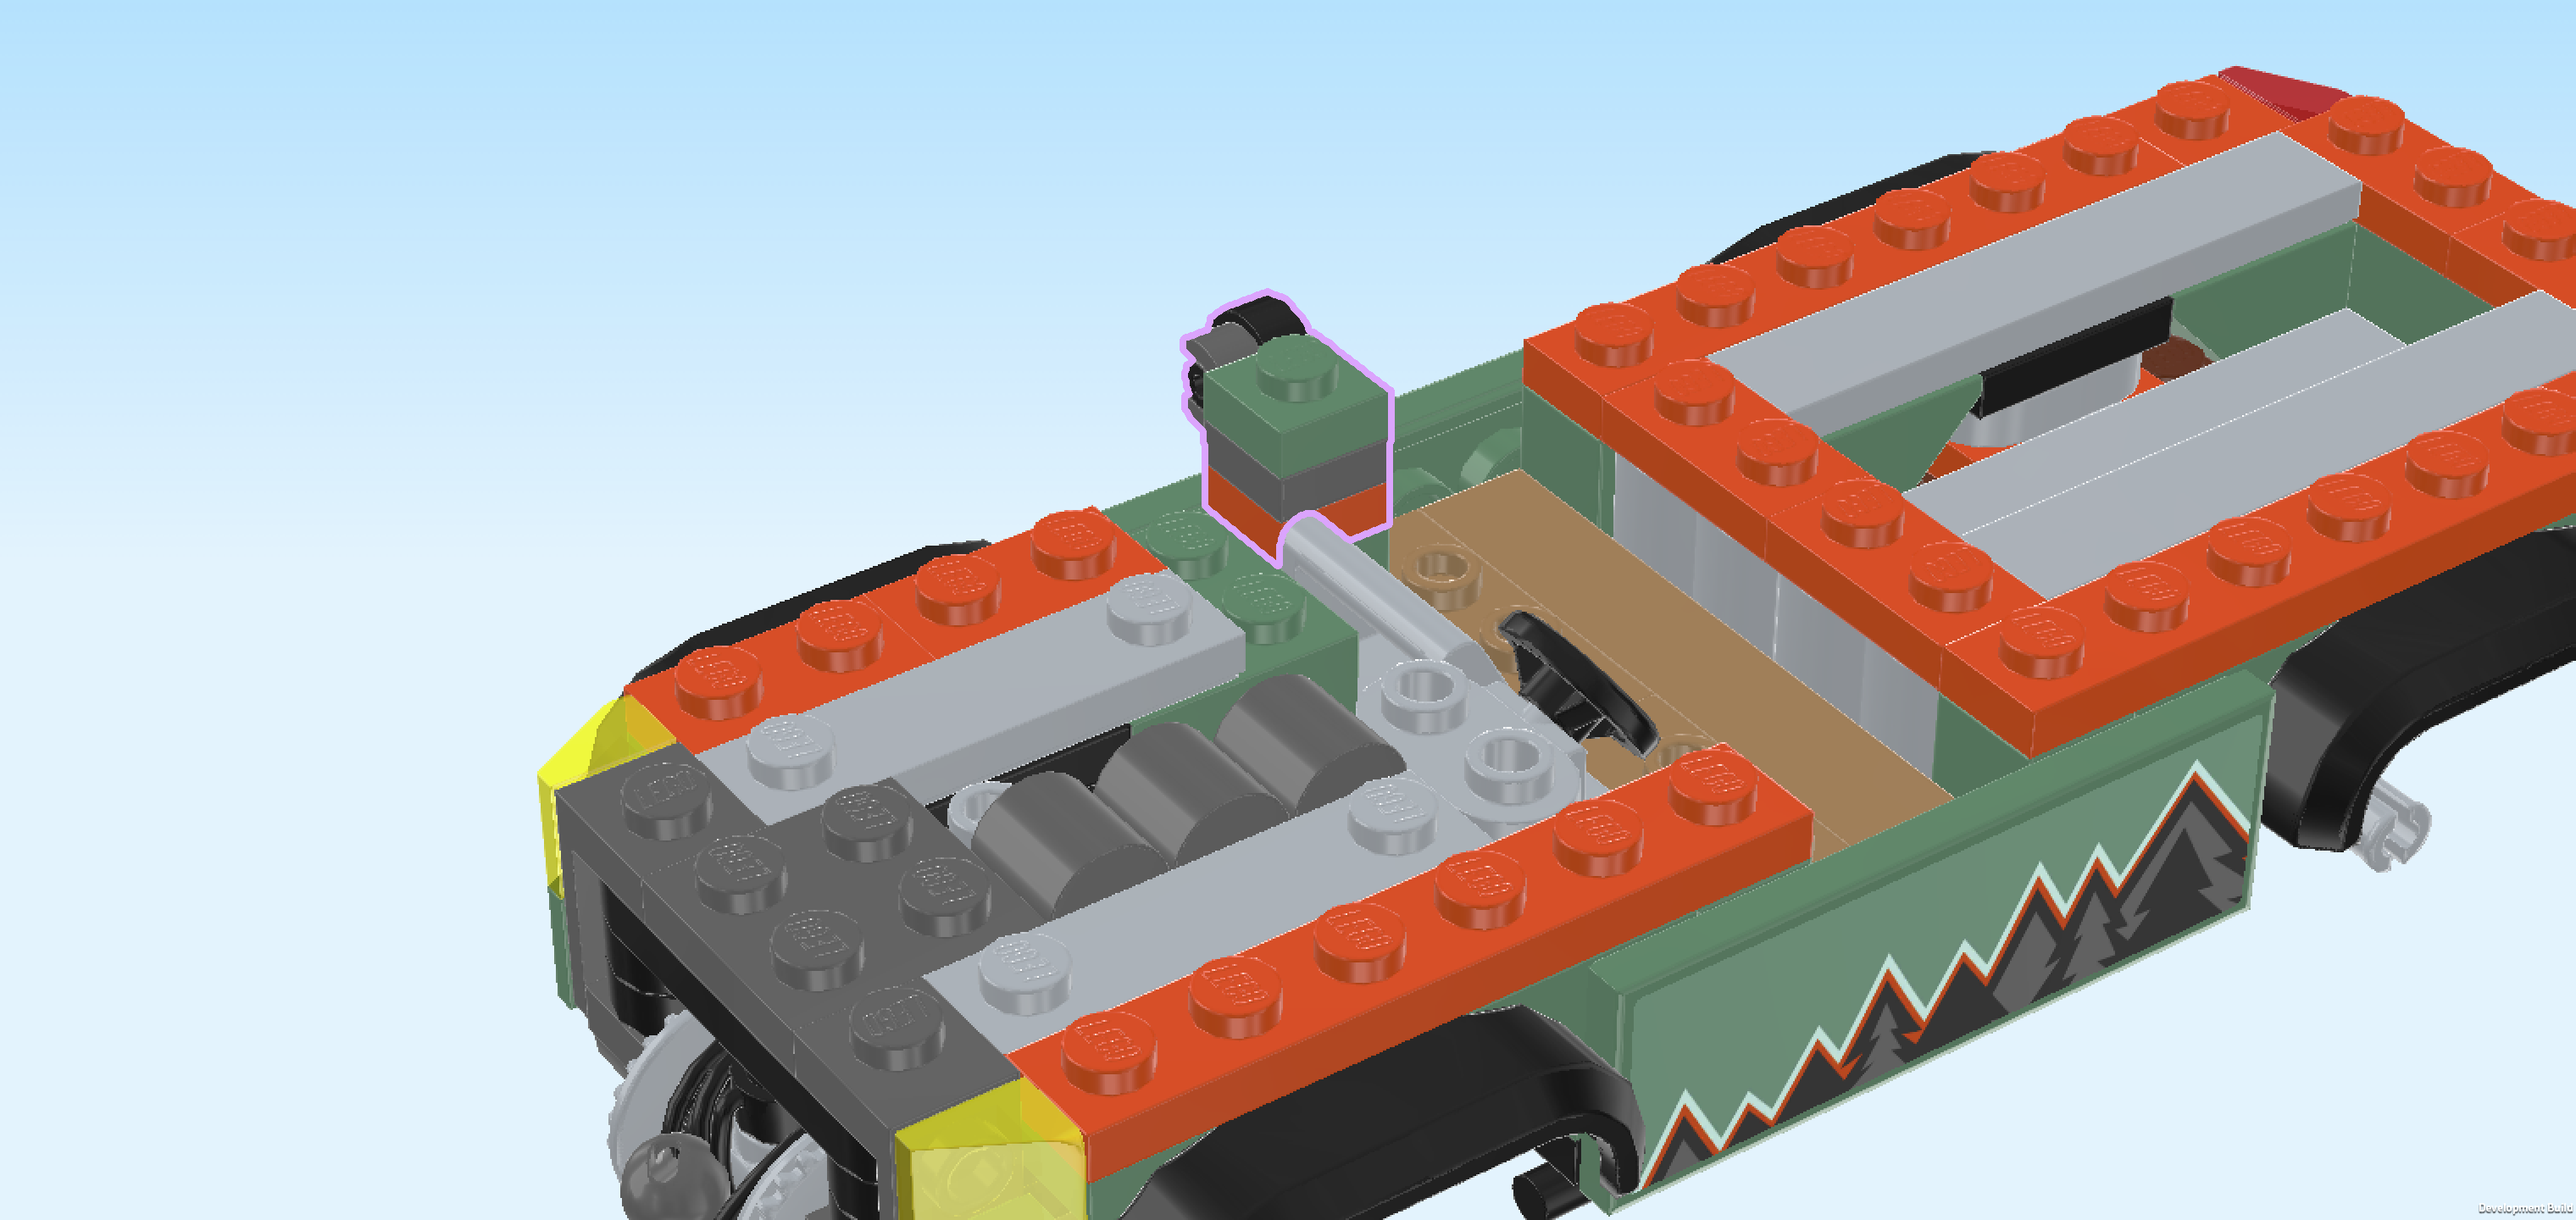
| The air intake snorkel is finished! Well done! Keep its building orientation and mount its brick 1x1 to the left of the rearview mirror that we have mounted on the backmost row. Make sure the snorkel is pointing to the top at the back edge and the ball shaft fits neatly into a recess that is extending from the mounting position towards the left. |
| This structure can be tilted! You can use it later to pop open the engine hood. |
| Next, we will build the second rearview mirror. |
| Collect the following 2 pieces: |
| 1 dark stone grey plate 1x1 with vertical side clasp, |
| and 1 black round tile 1x1 with small top shaft. |
| Put the plate 1x1 on the table, clasp to the front. |
| Flip the round tile upright, small shaft pointing to the left, and insert the small shaft into the clasp, coming from the right. |
| The second rearview mirror is finished! Great job! Mount it on the frontmost row in front of the steering wheel, clasp with round tile protruding to the front. |
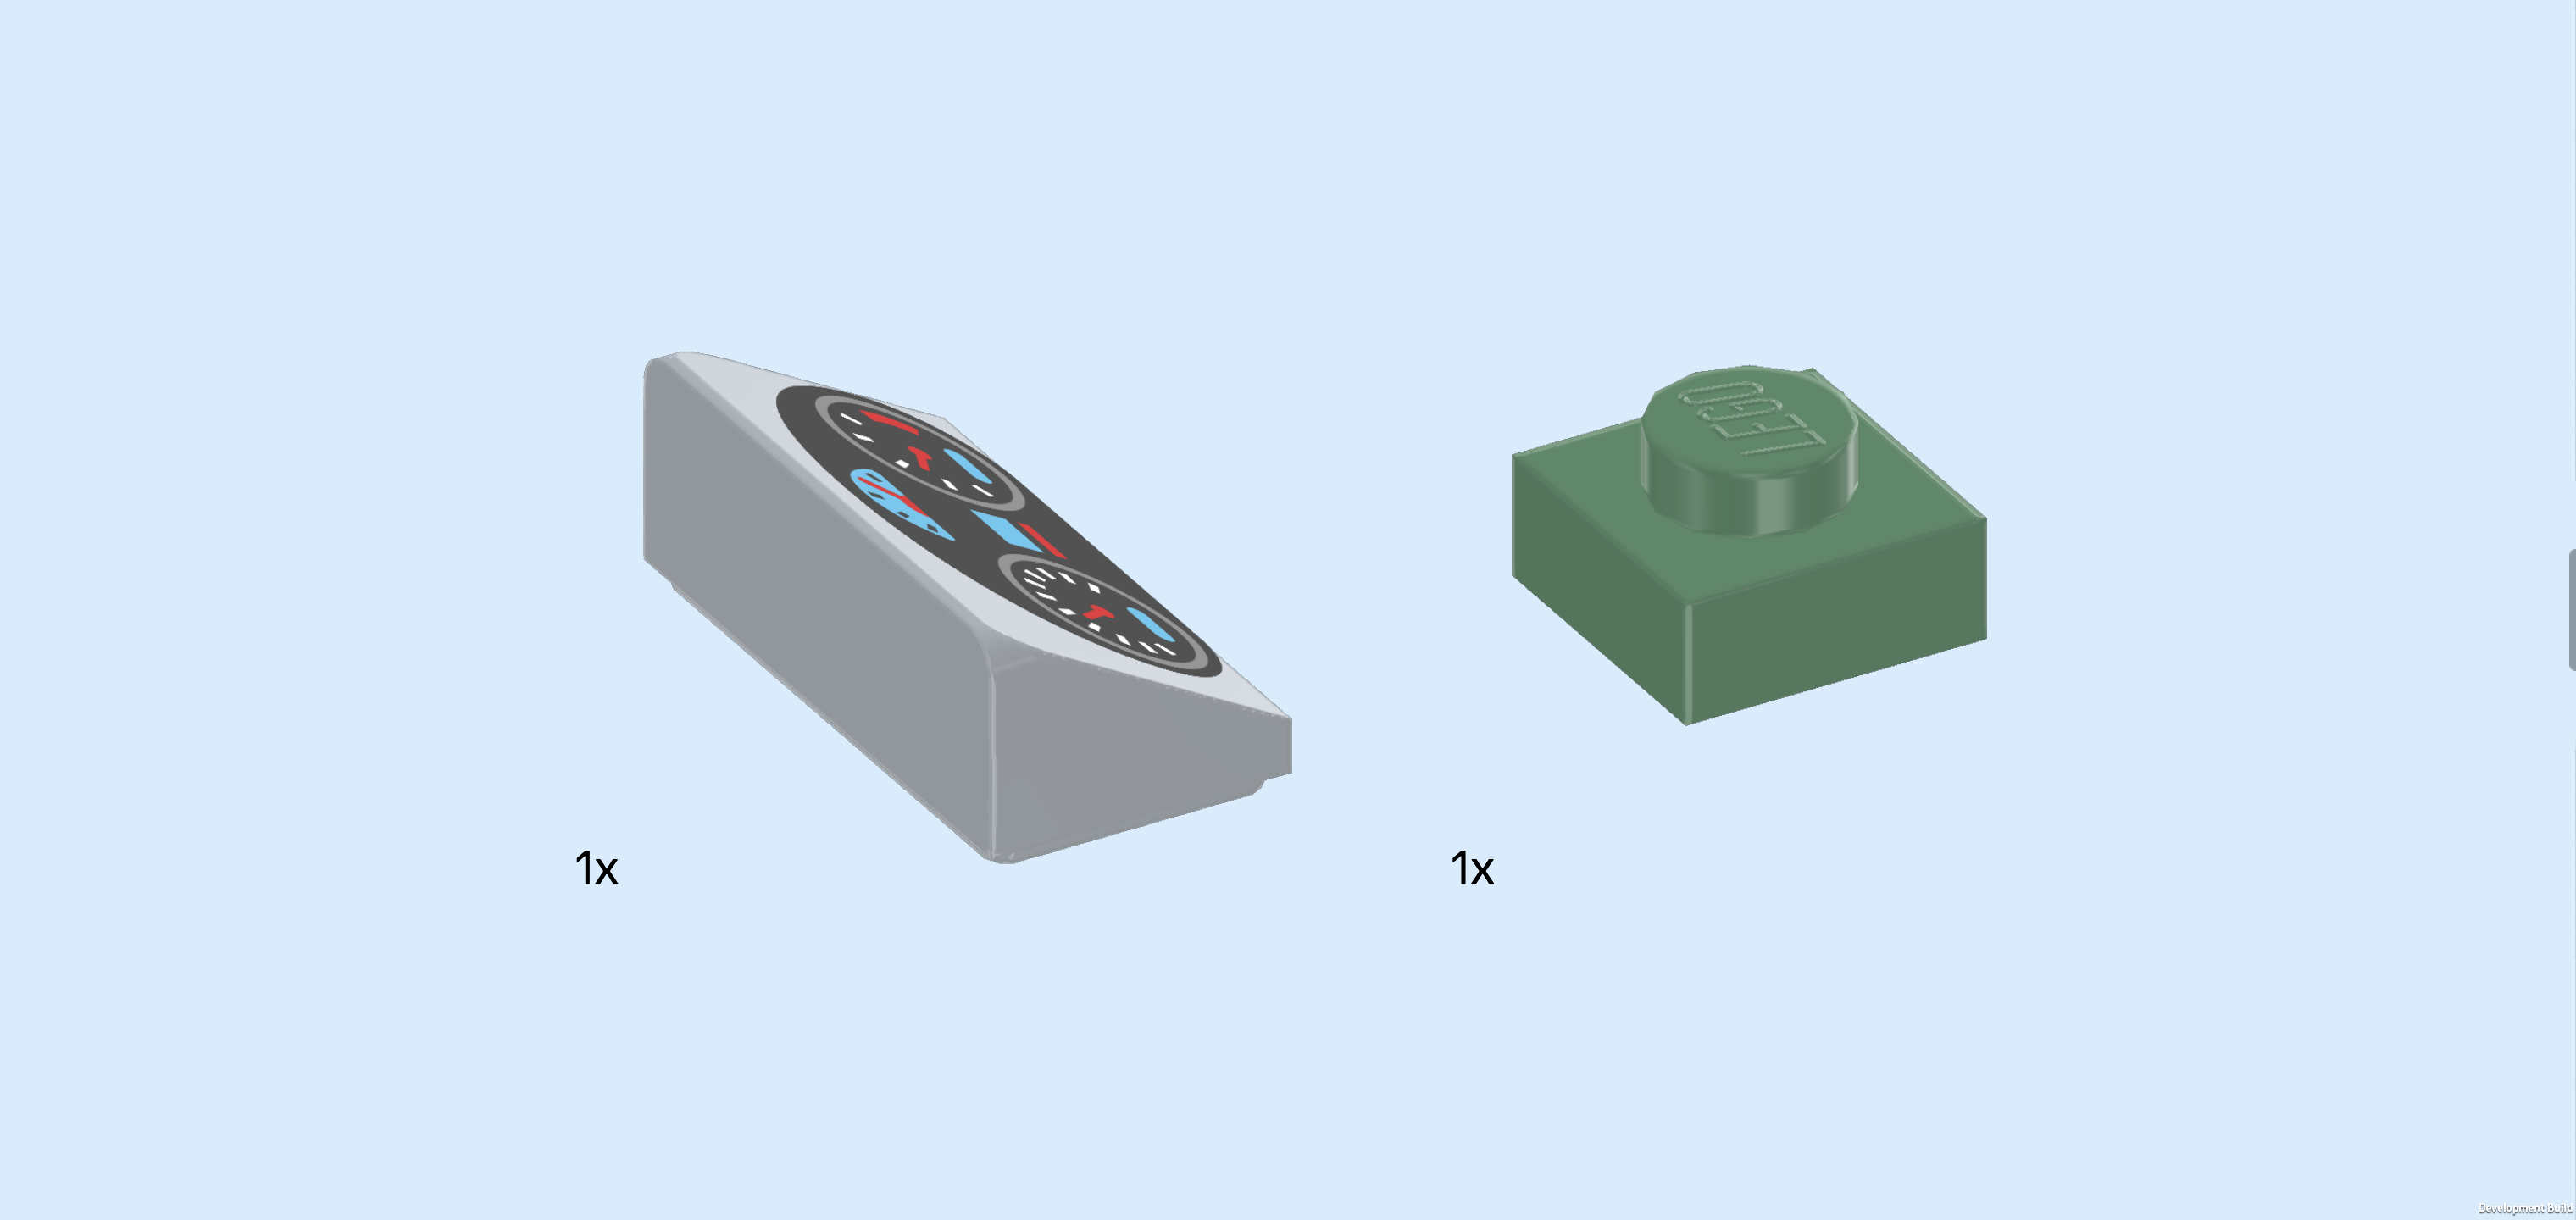
| Collect the following 2 pieces: |
| 1 medium stone grey smooth roof tile 1x2x⅔, |
| and 1 sand green plate 1x1. |
| Put the plate 1x1 to the left of the previous piece. |
| Put the roof tile 1x2 vertically behind the previous piece. |
| This piece is printed with the dashboard: the instrument cluster has an oval shape, its background color is black. At the center top there is a blue fuel gauge with a red needle. The fuel tank is three quarters full. Directly below the fuel gauge there is a small blue display, this is probably the odometer showing the distance traveled. To its right is the revolution meter, and on the left there is the tachometer. The vehicle is driving with medium speed at the moment. |
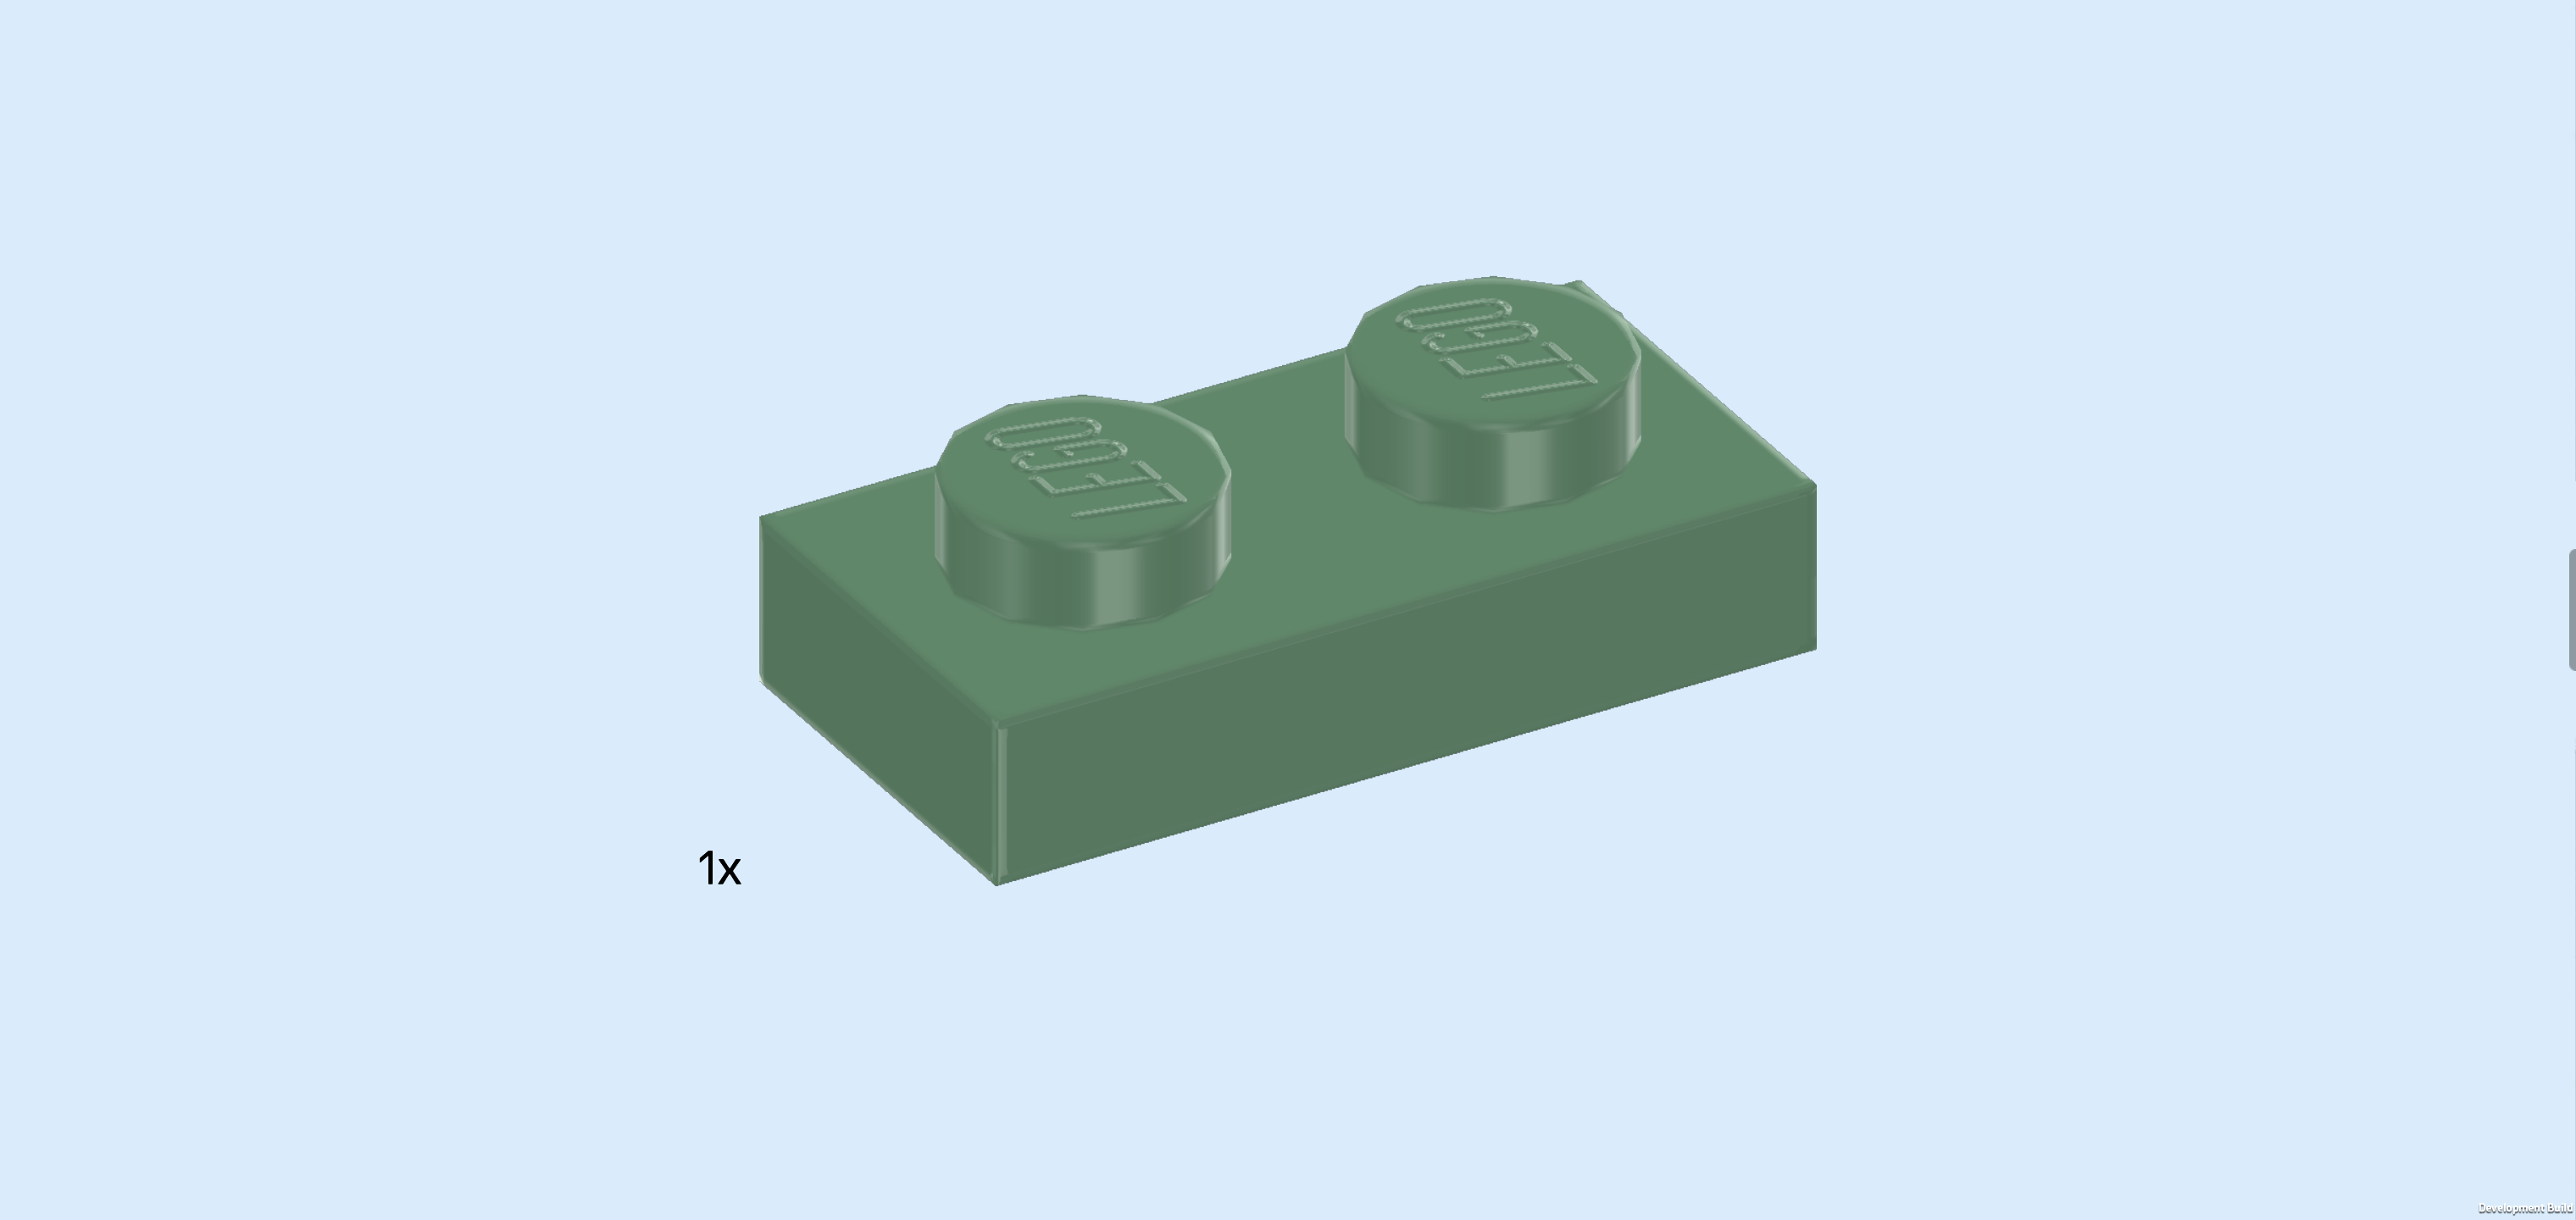
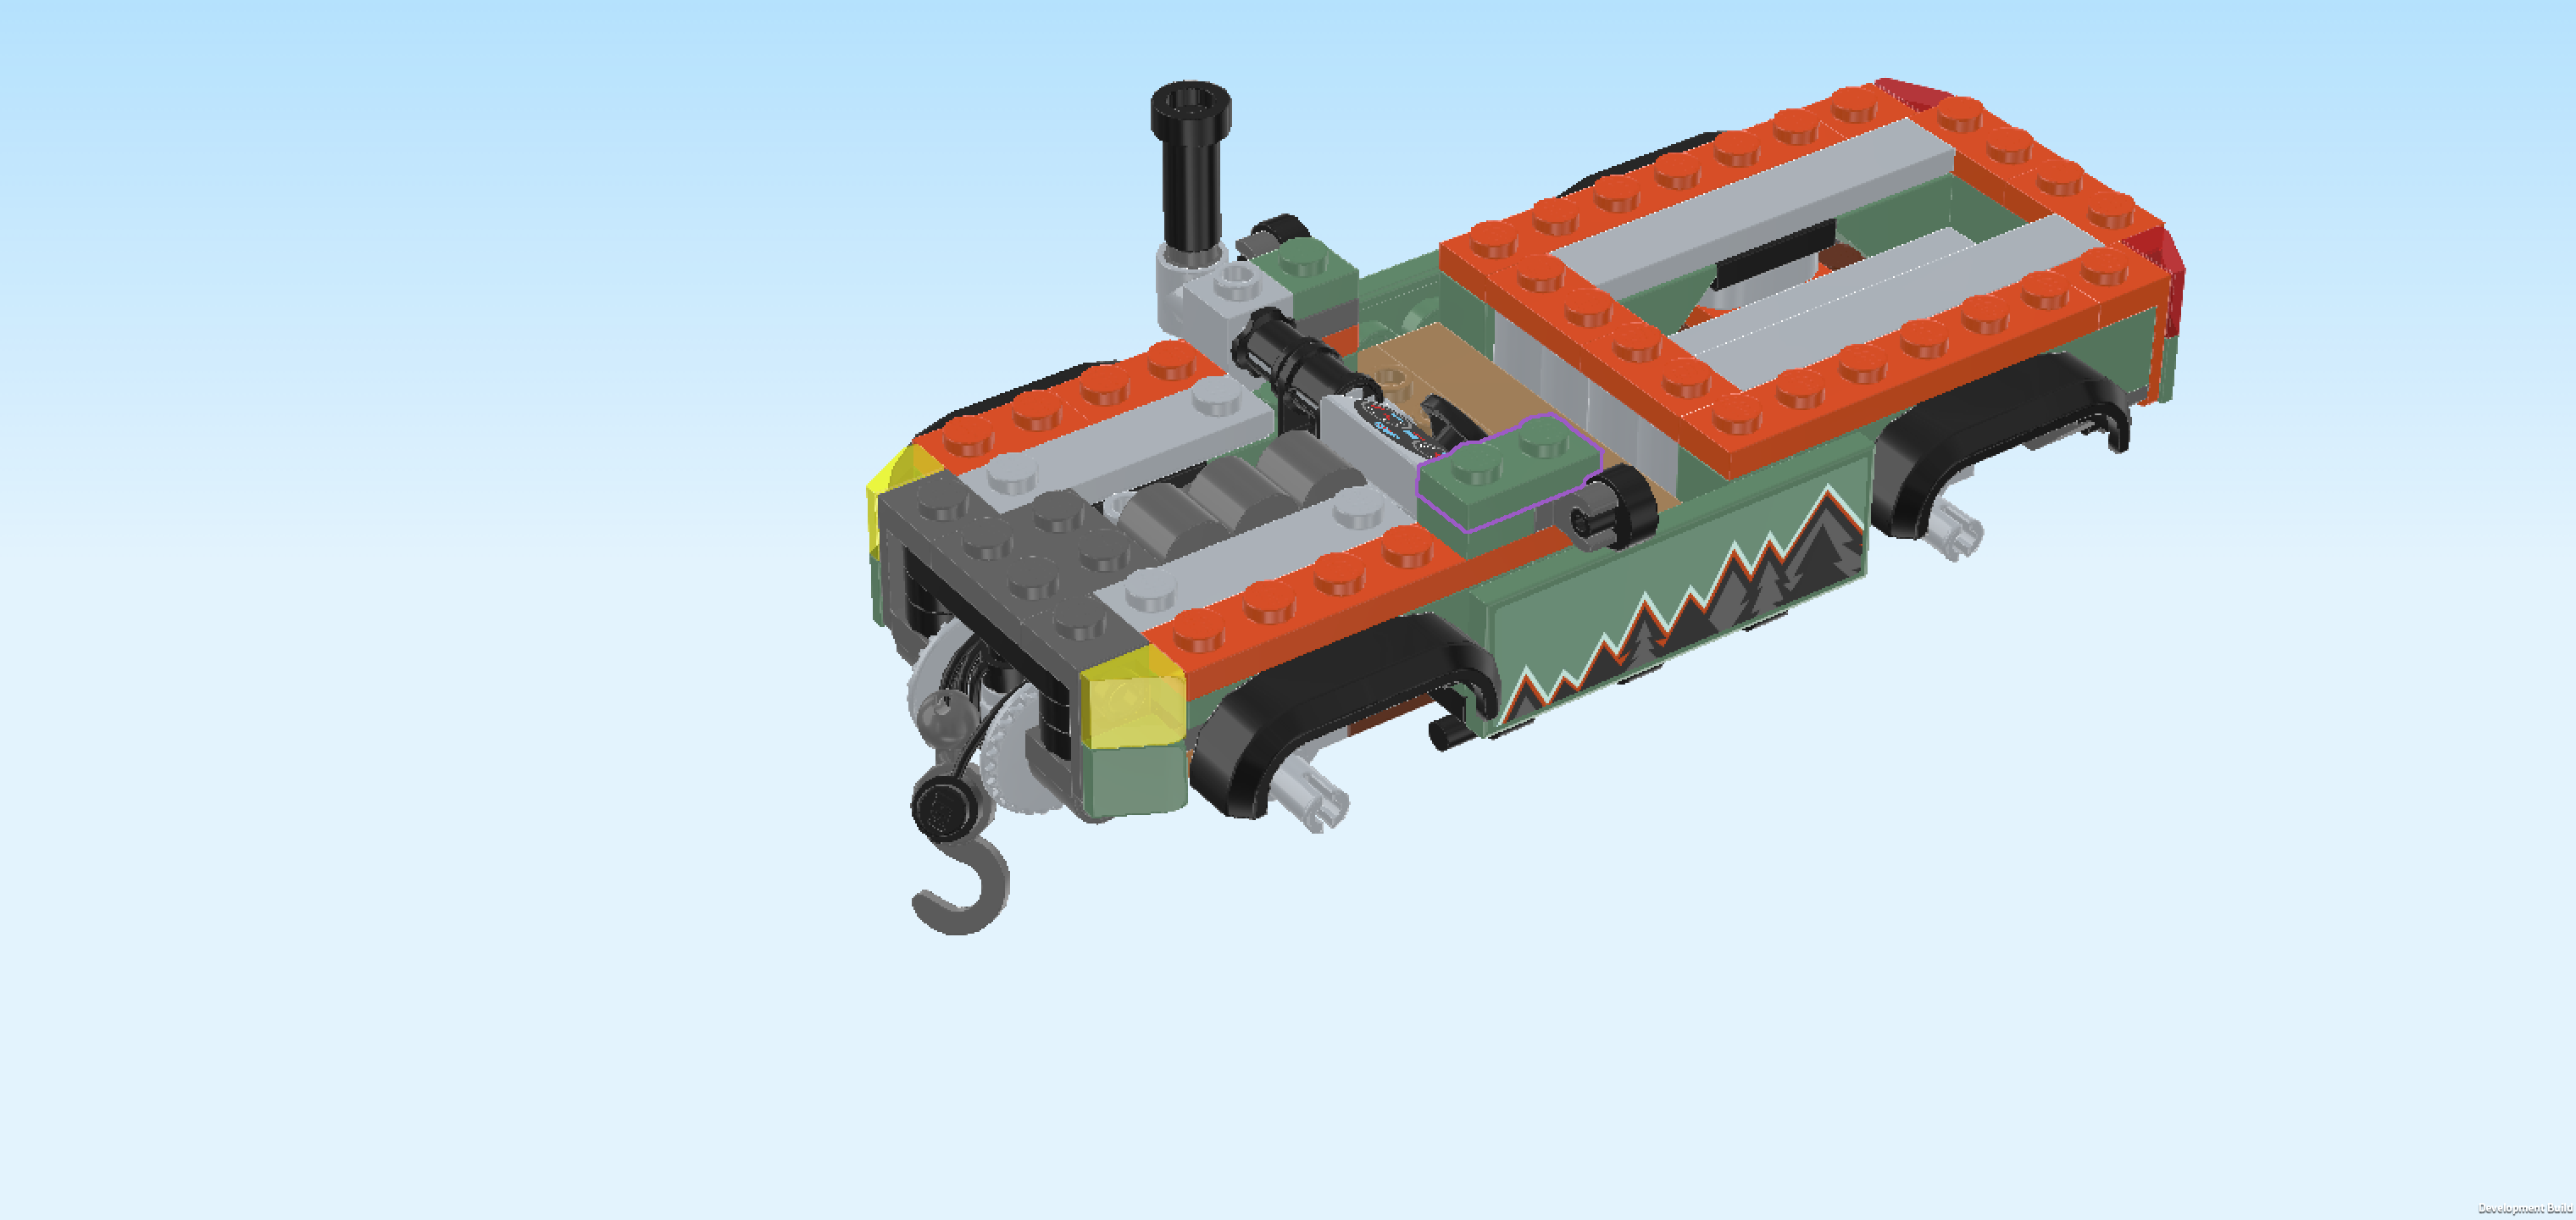
| Find 1 sand green plate 1x2. |
| Put it horizontally on the frontmost row on the rearview mirror and the plate 1x1 to its left. |
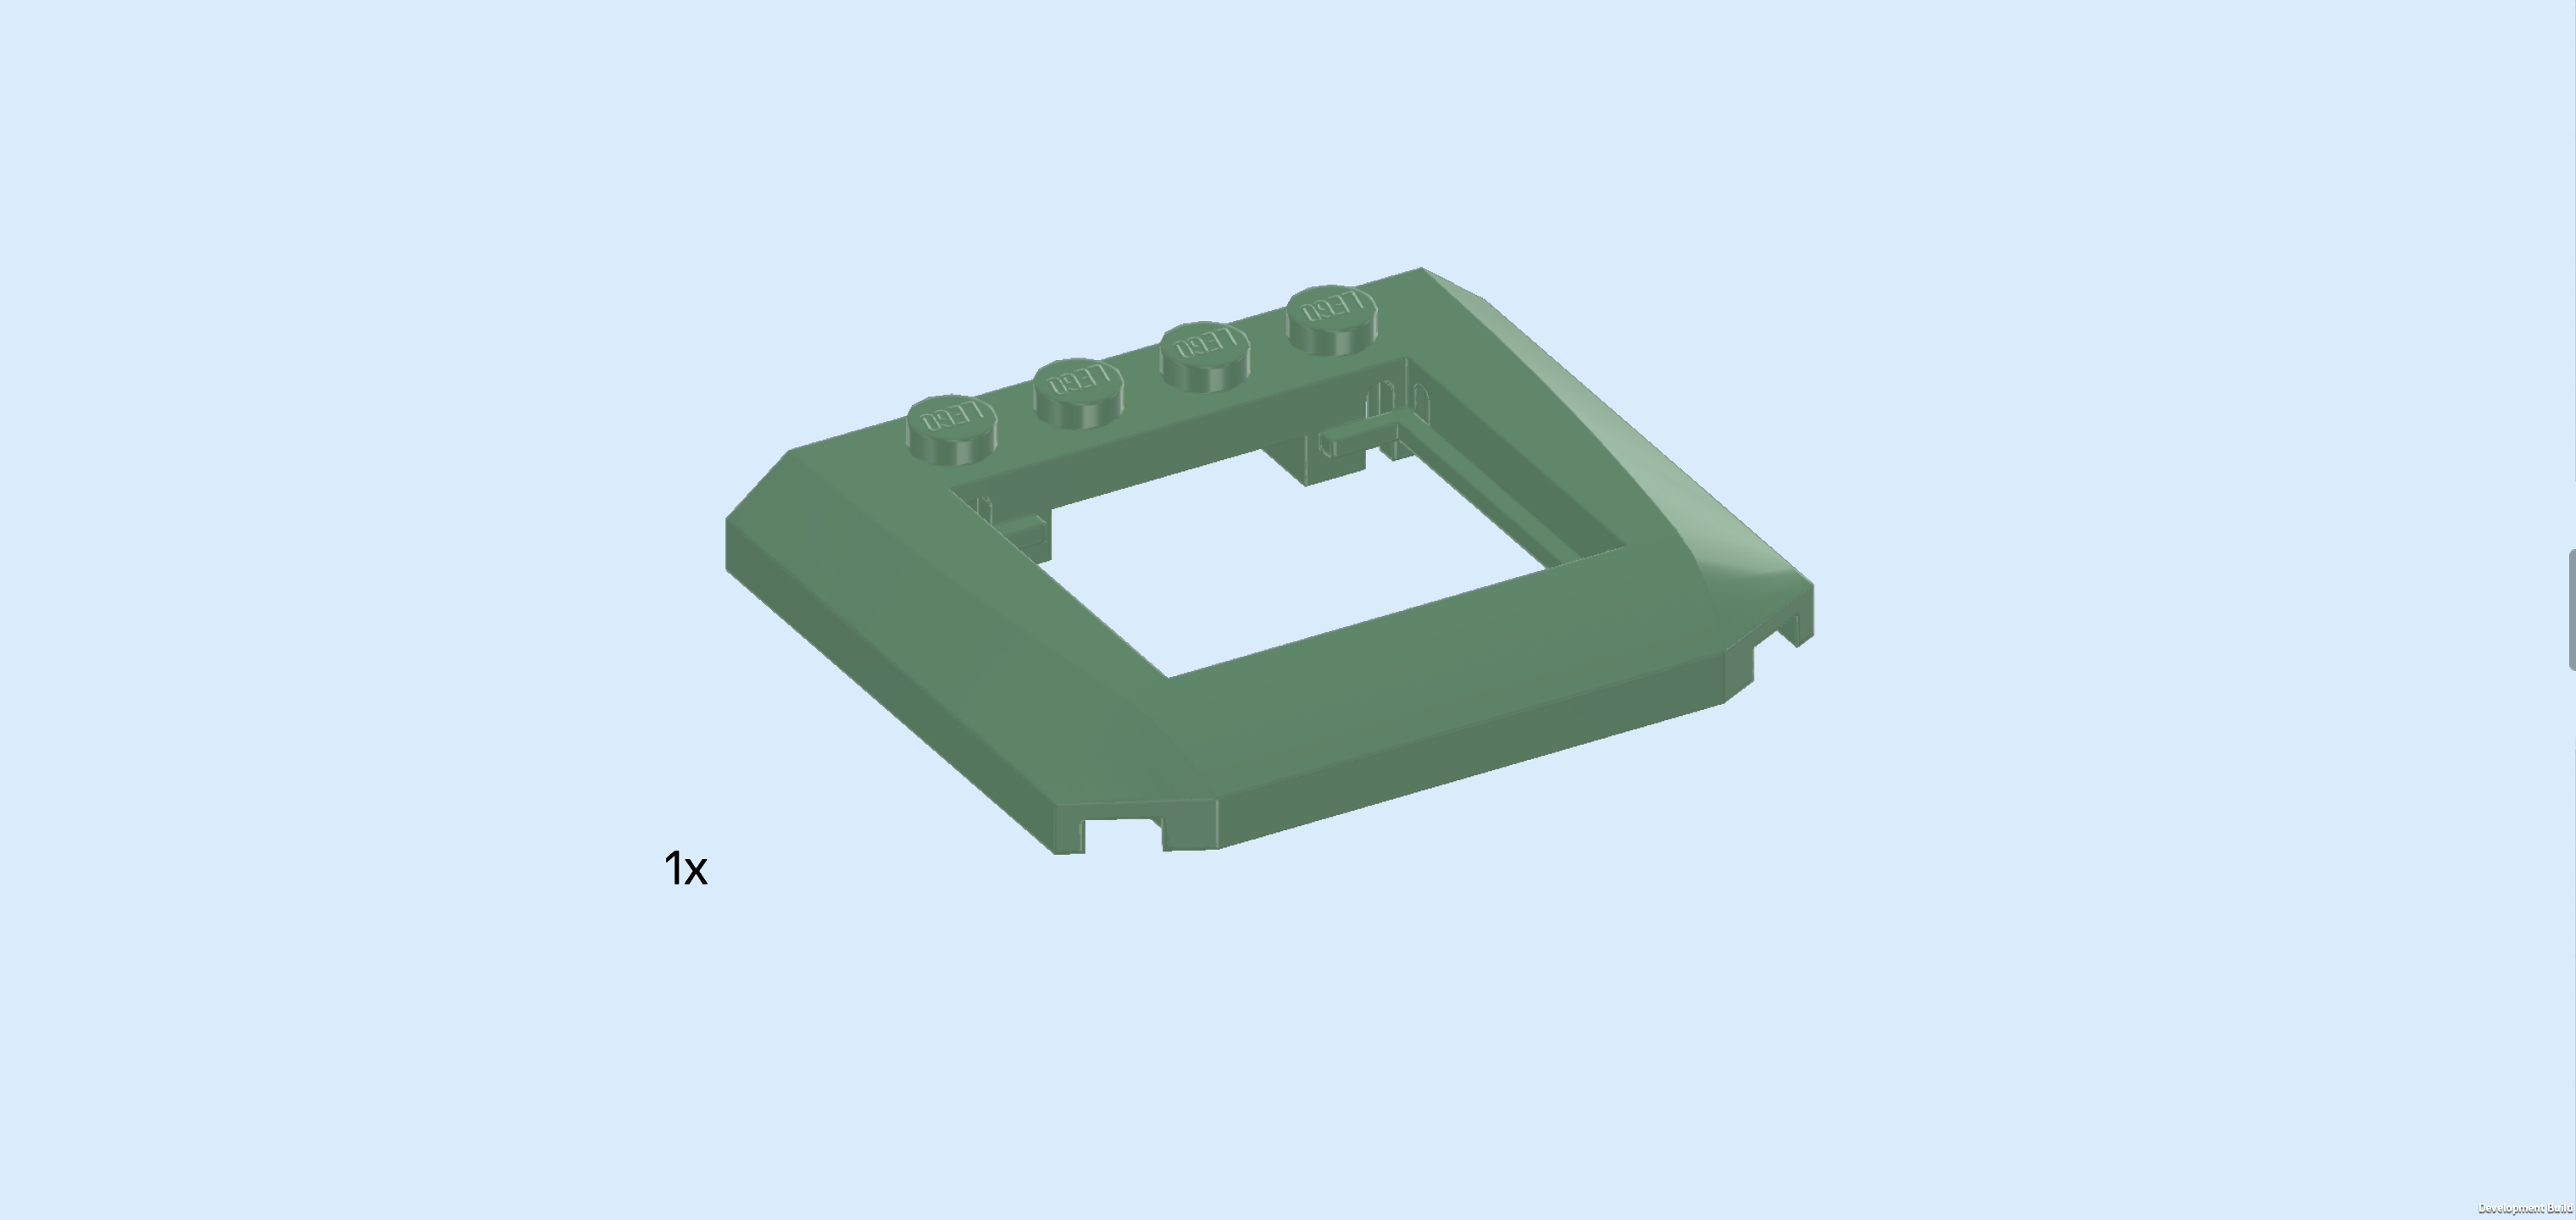
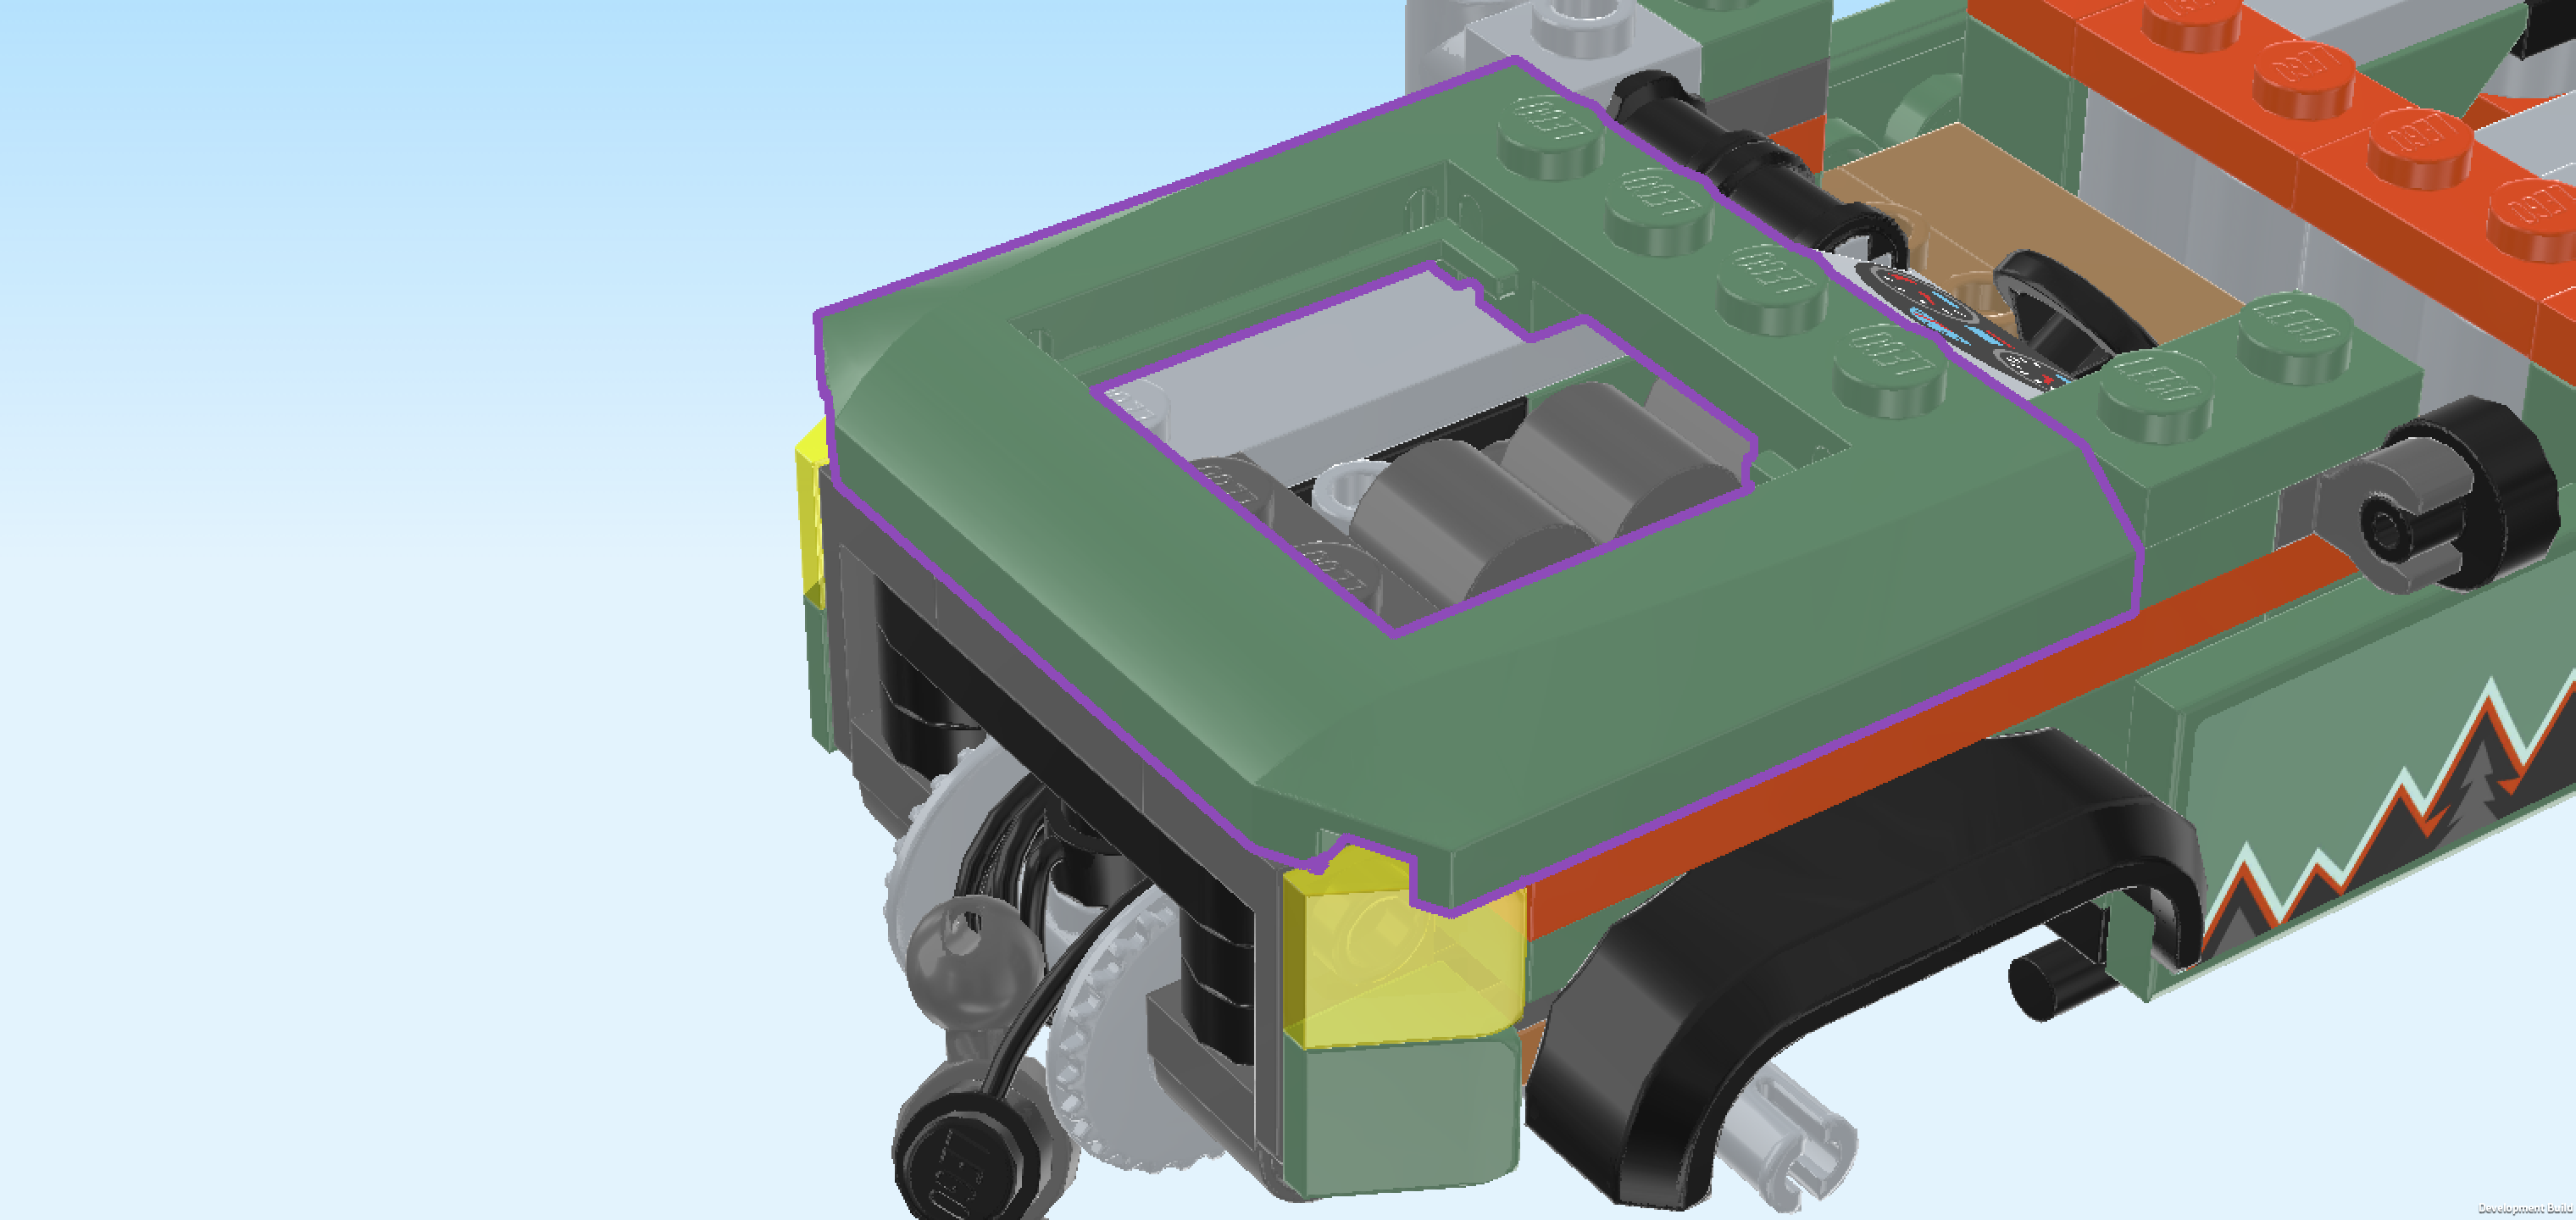
| Find 1 sand green car sunroof 5x6x⅔ with window. |
| Put it on the leftmost edge of the build, making sure that its 4 knobs form a column on the right. |
| This is the engine hood of the truck and right now you can even see the engine with its three cylinders! We still need a cover for the opening though, so let's move on. |
| Collect the following 2 pieces: |
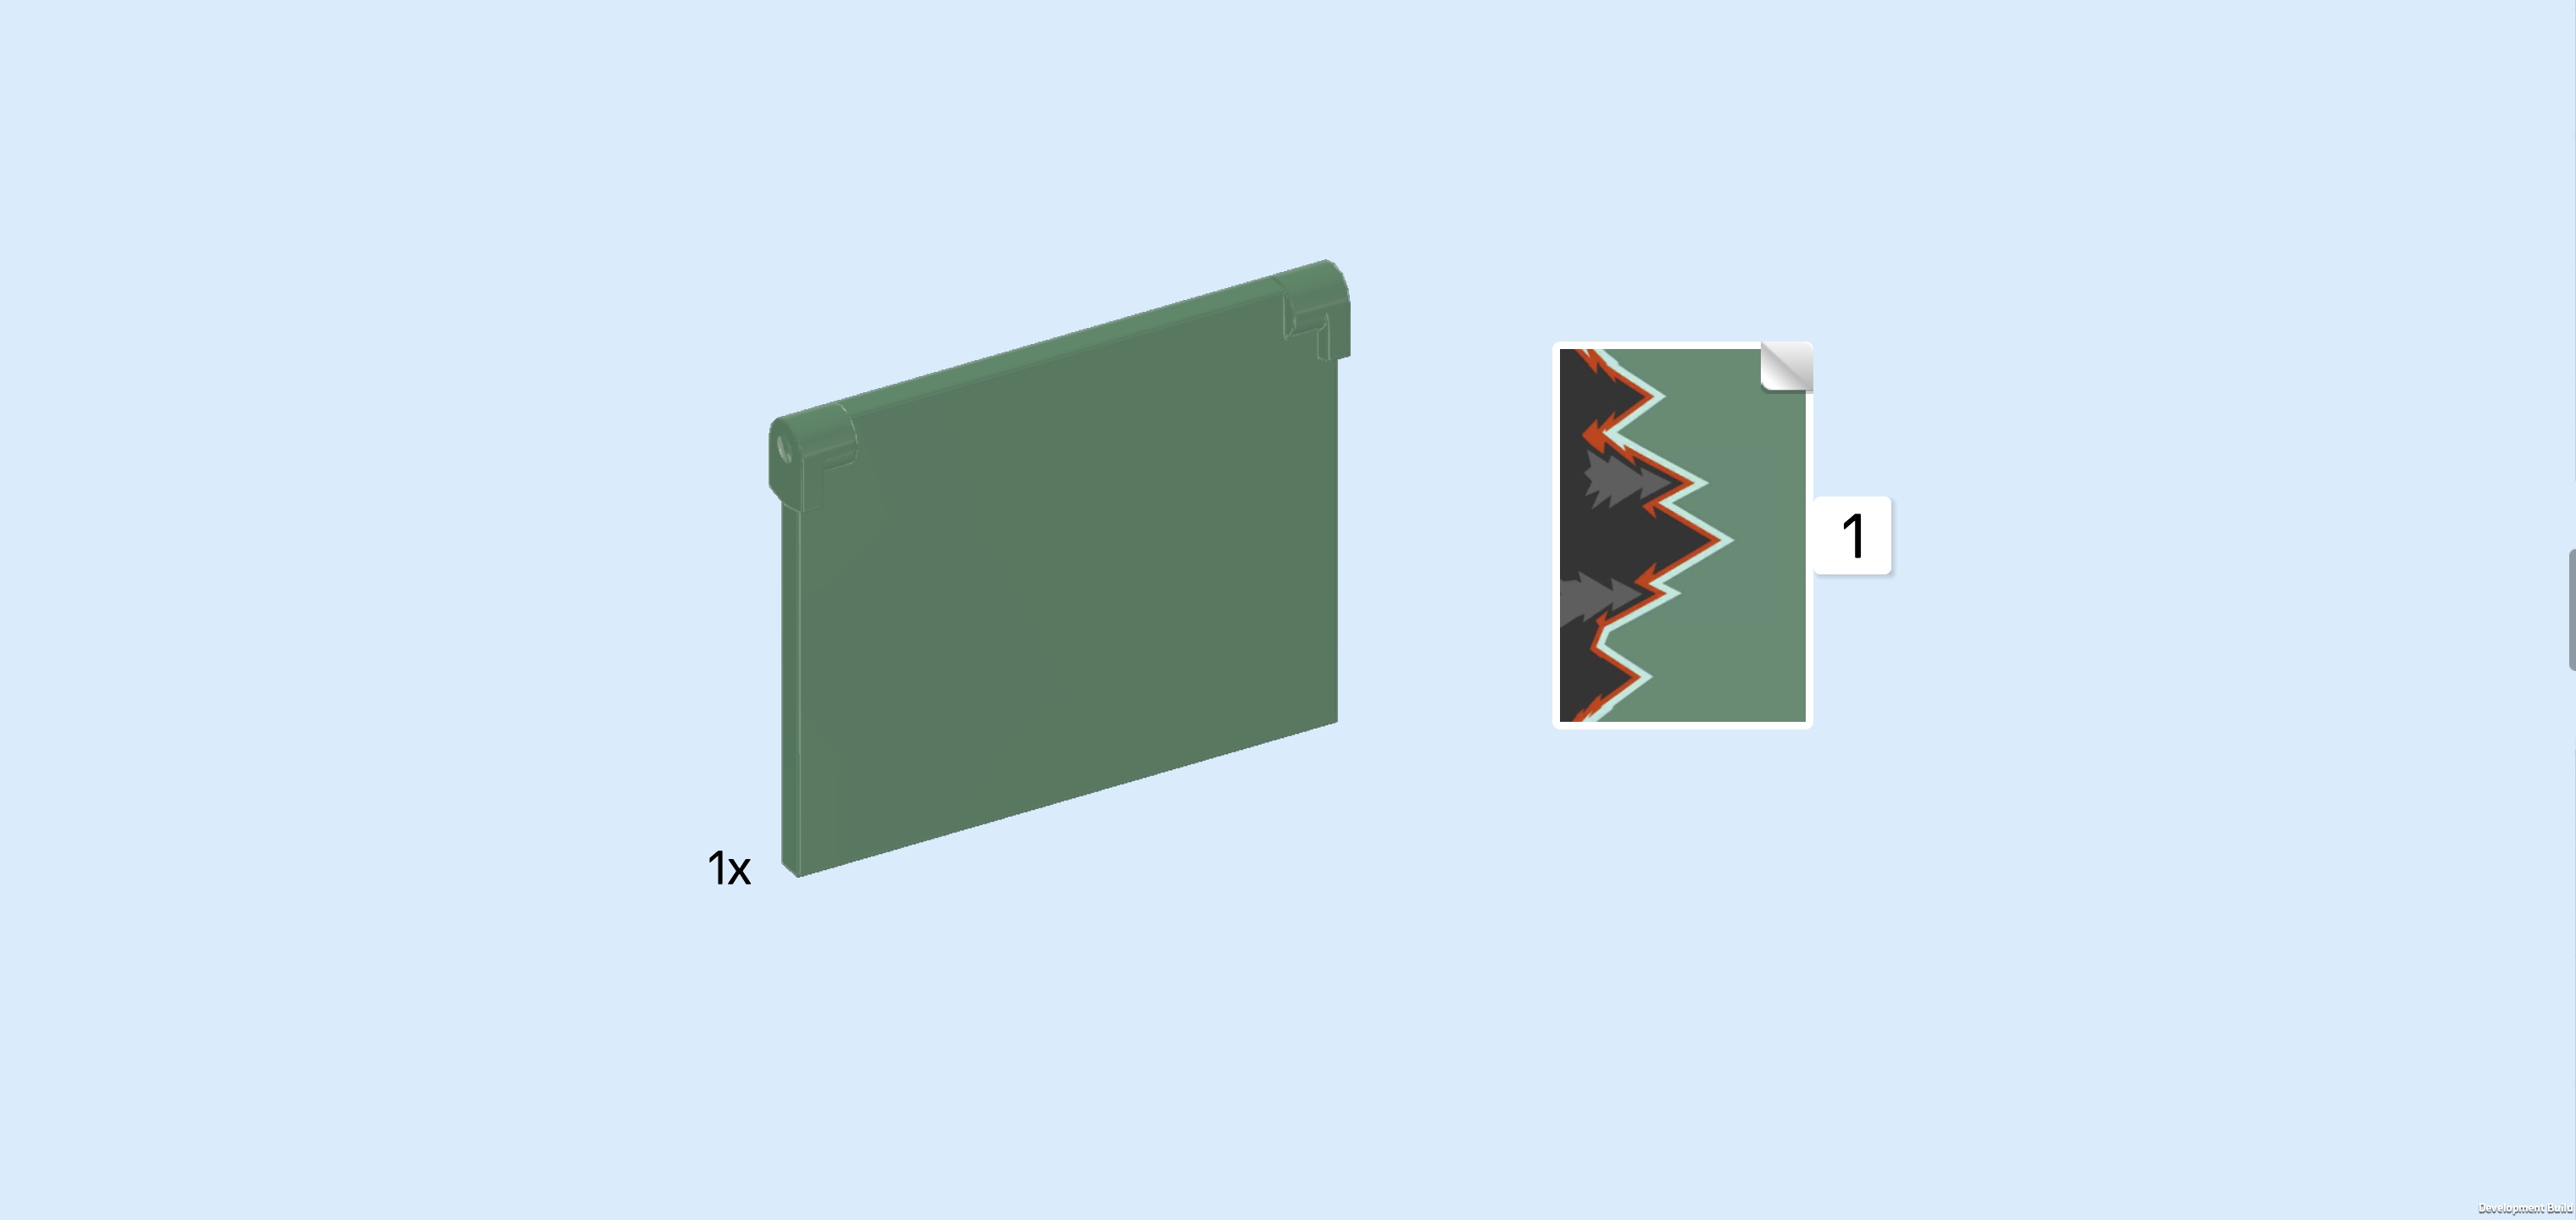
| 1 sand green insert 3x4 for window frame, |
| and 1 rectangular sticker 2x3. |
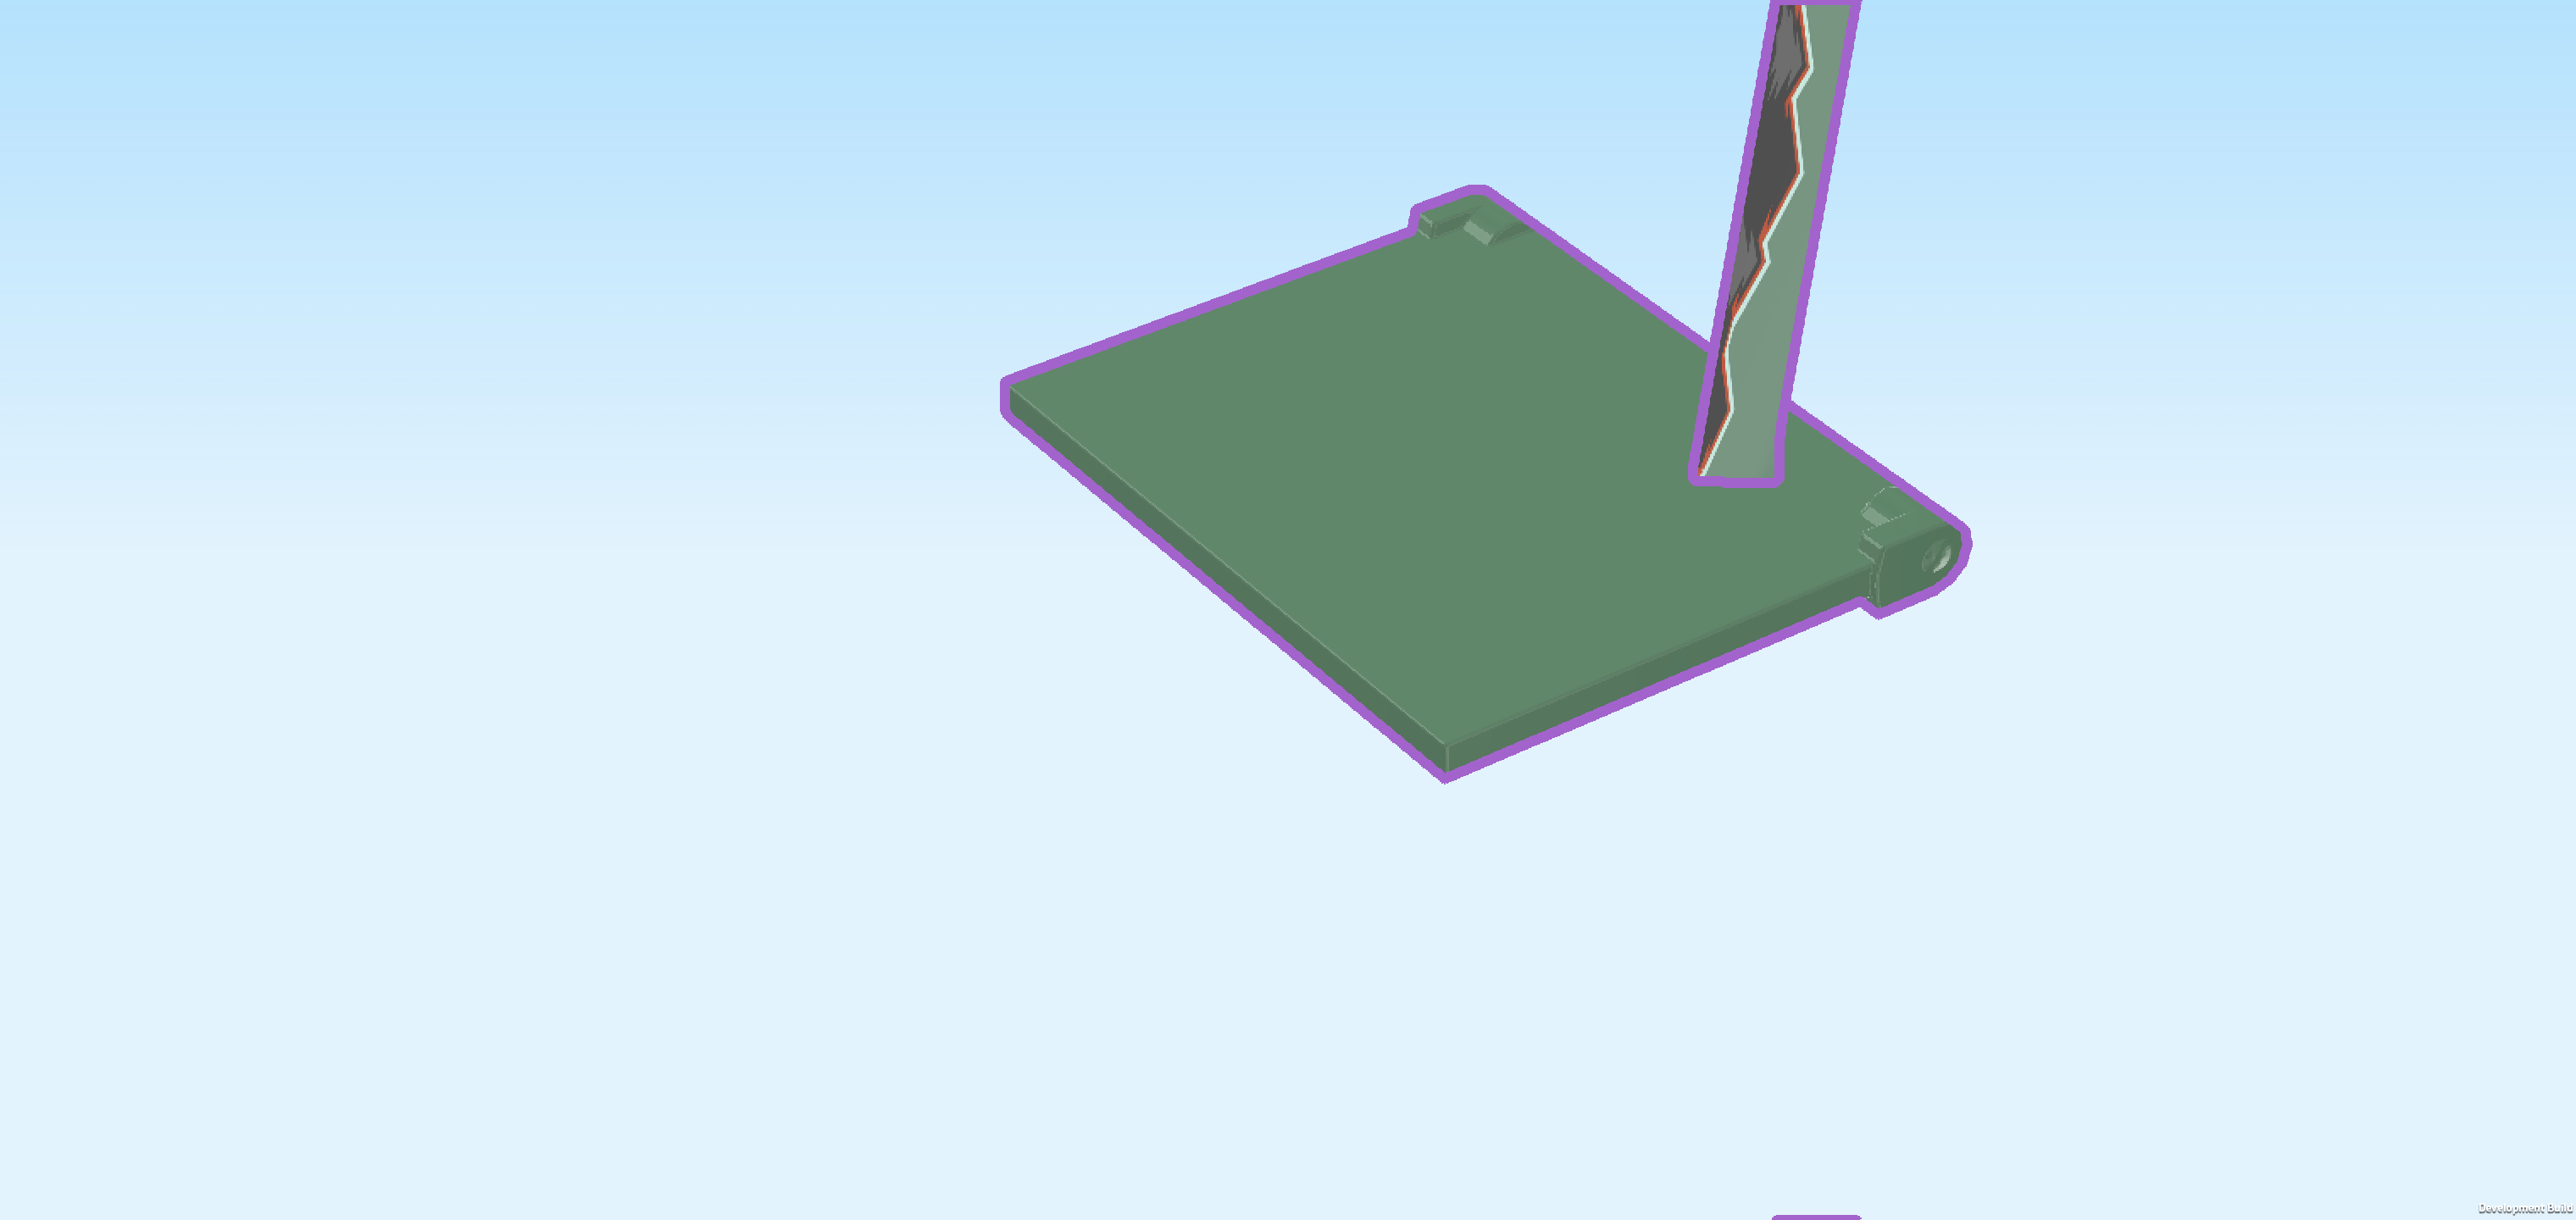
| Put the window insert horizontally on the table so that the thicker edge with the 2 mounting nubs is at the back edge. |
| Put the sticker horizontally on the window insert, aligning it with the front edge. This means that there will be a sticker-free strip at the back edge. |
| This sticker also shows a stylized mountain silhouette with jagged black peaks outlined in bright red and white. The tallest peak is placed near the center, flanked by two slightly lower ones on each side. Three grey pine trees stand in front of the mountains, and the background is the same solid sand green as in the previous stickers. |
| Snap the 2 thicker ends of the window insert into the right edge of the opening in the engine hood. |
| You can now tilt the snorkel to open the engine hood and check the engine or the oil level. What a nifty detail! |
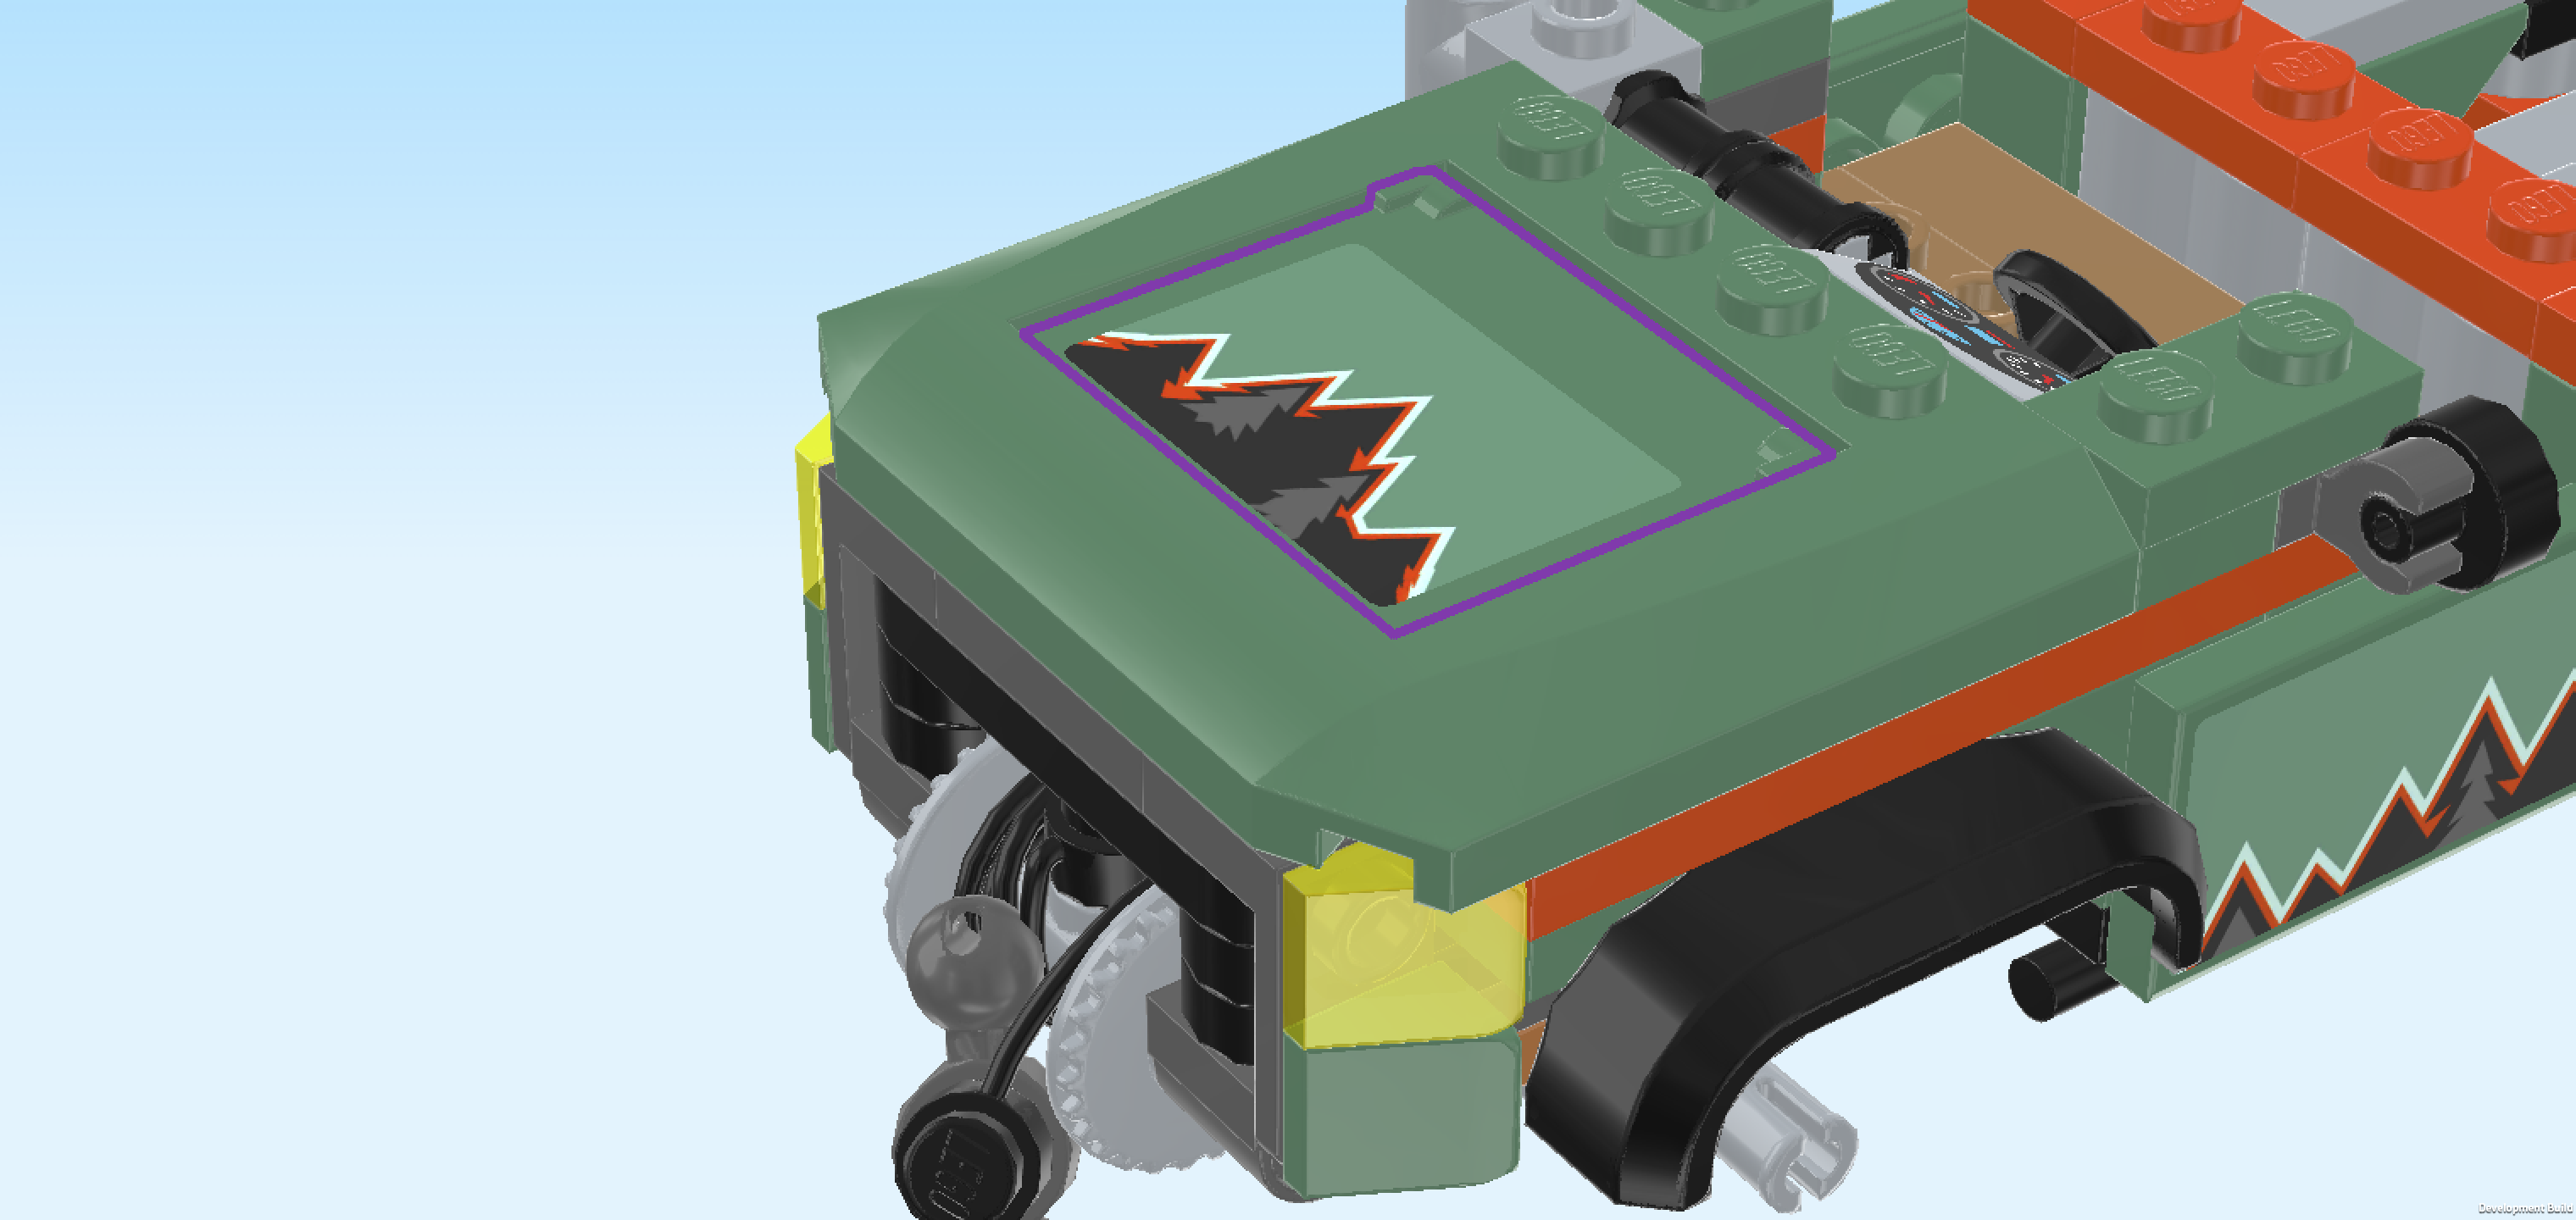
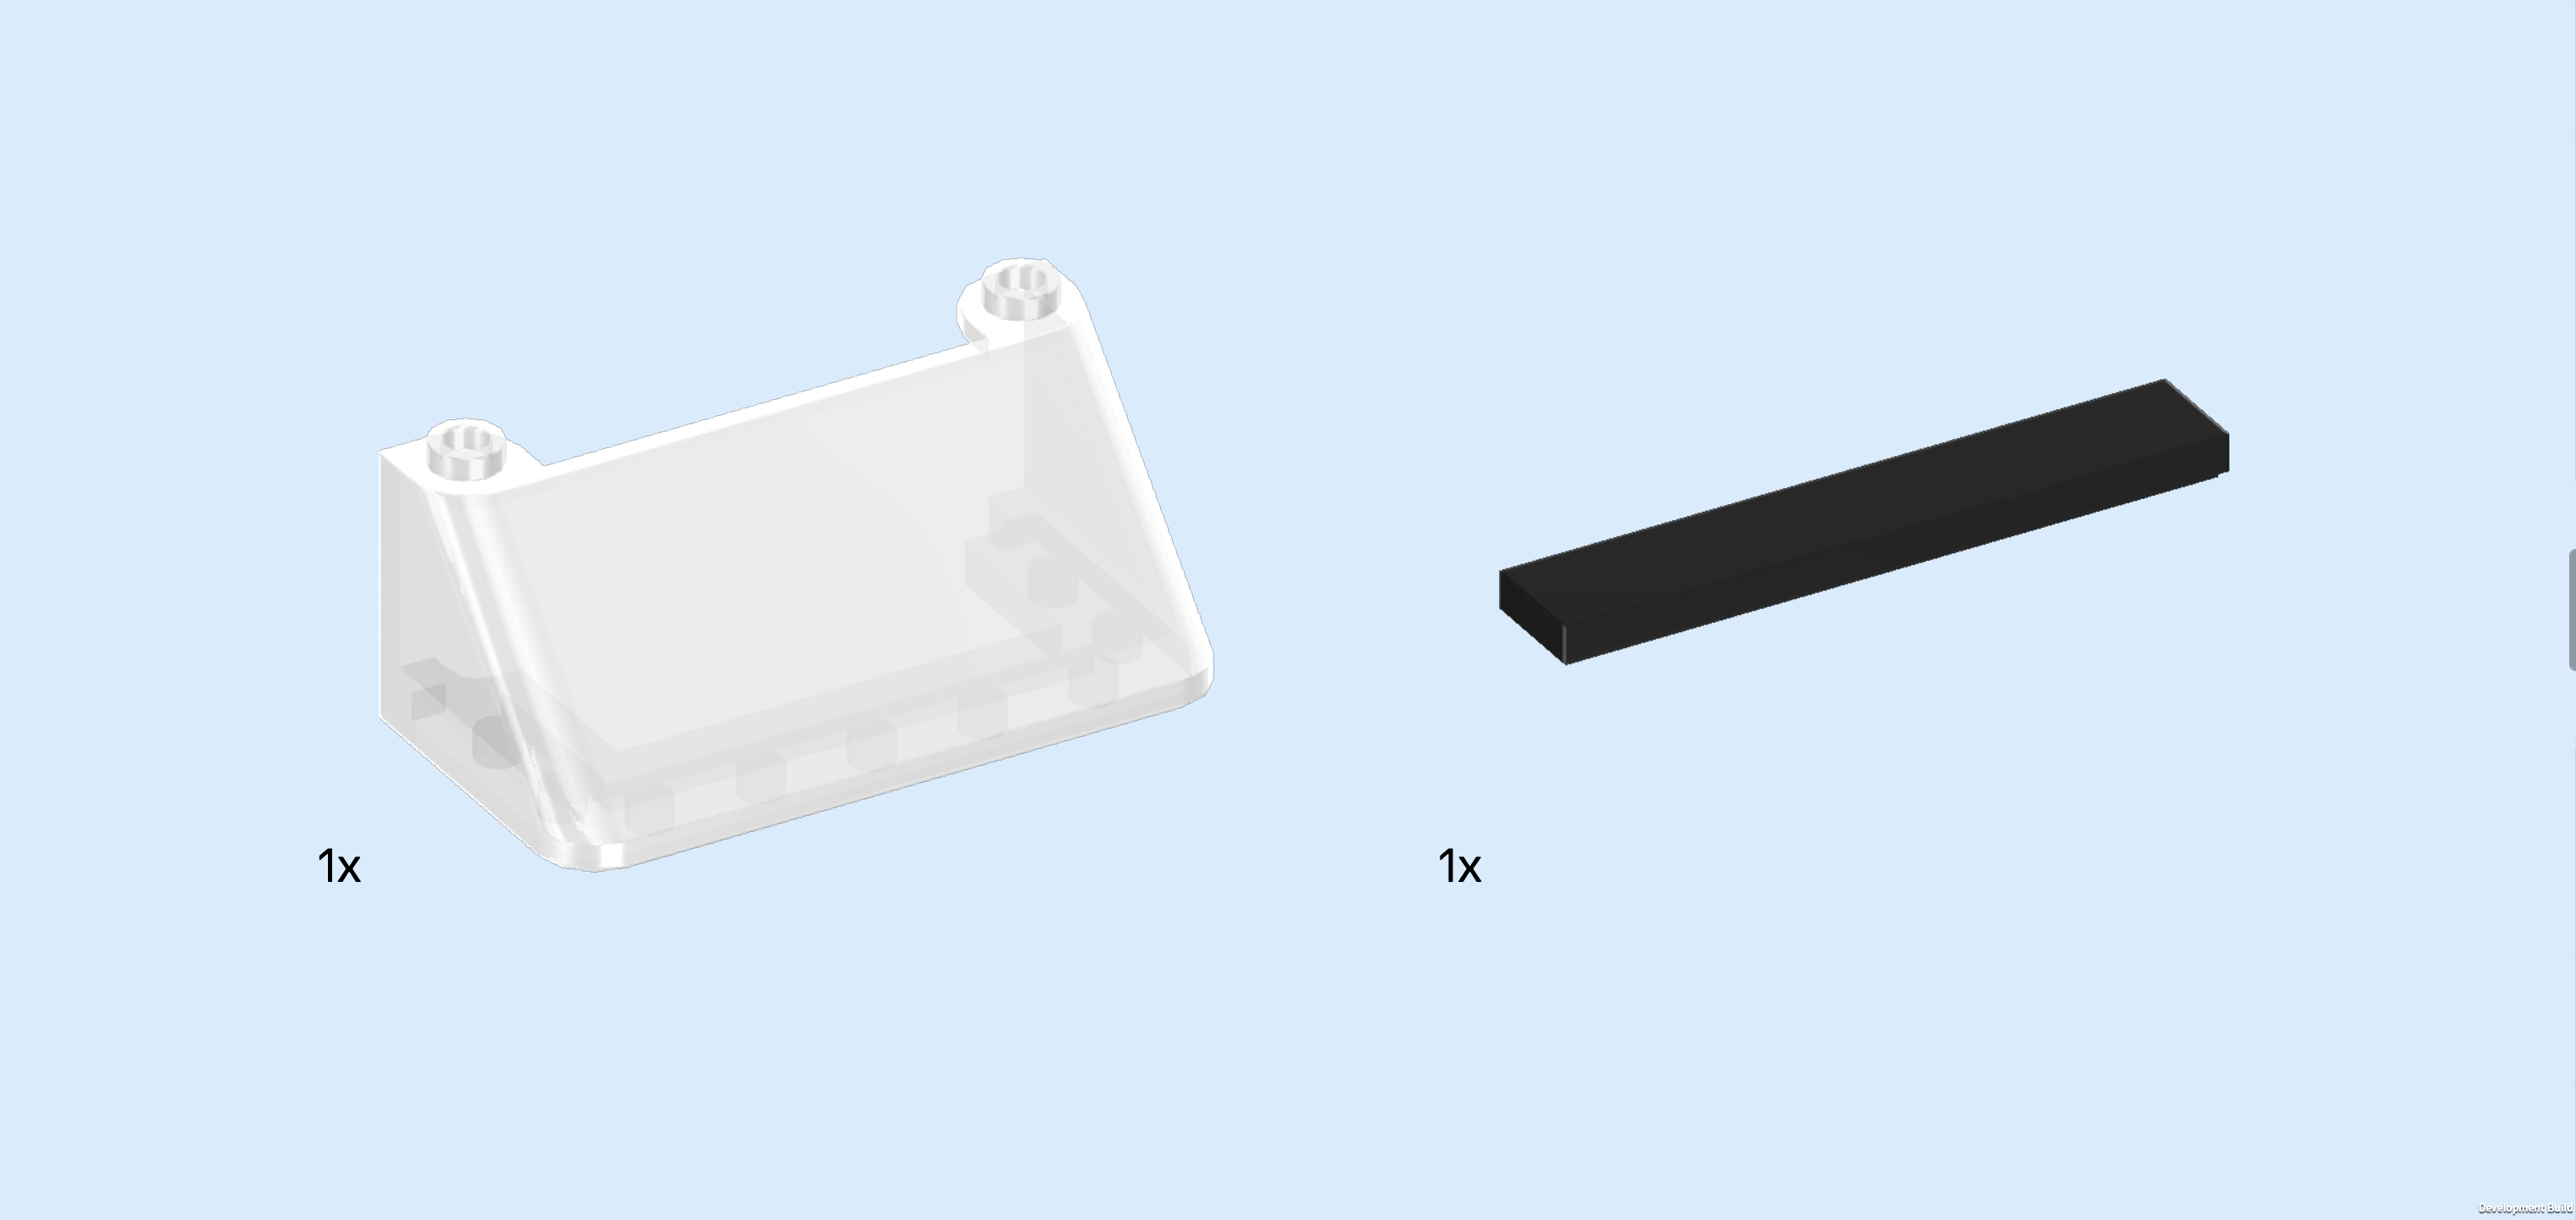
| Collect the following 2 pieces: |
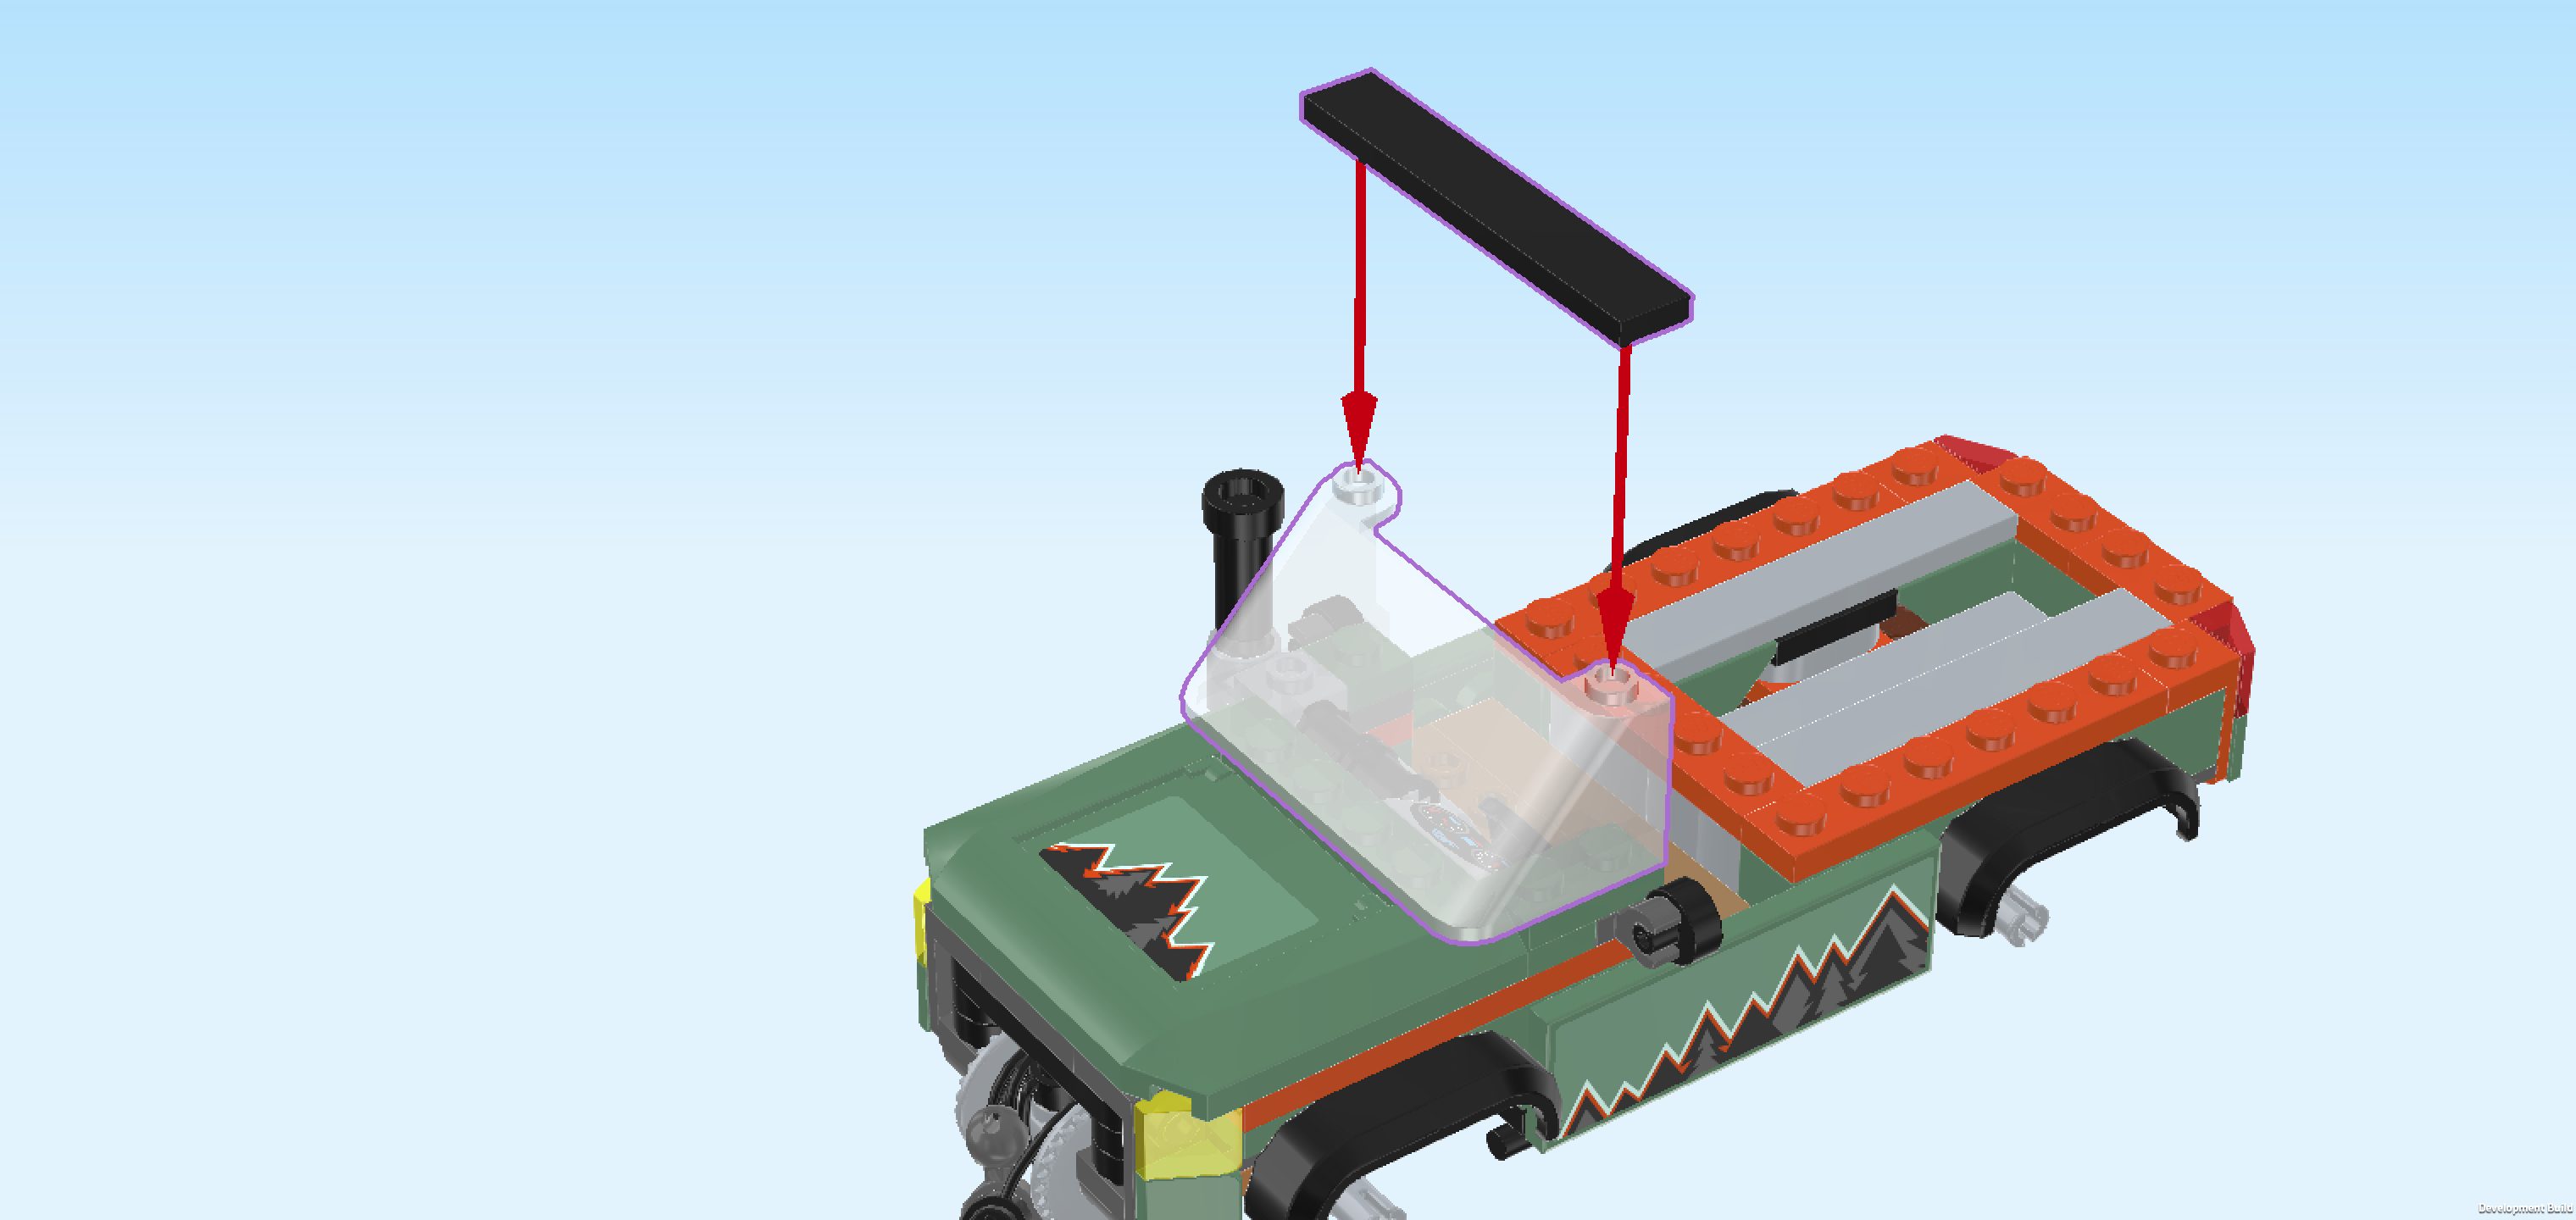
| 1 transparent windscreen 6x3x2, |
| and 1 black flat tile 1x6. |
| Put the windscreen 6x3x2 vertically centered on the 4 knobs of the engine hood, slope to the left. |
| Put the flat tile 1x6 vertically on top of the windscreen. |
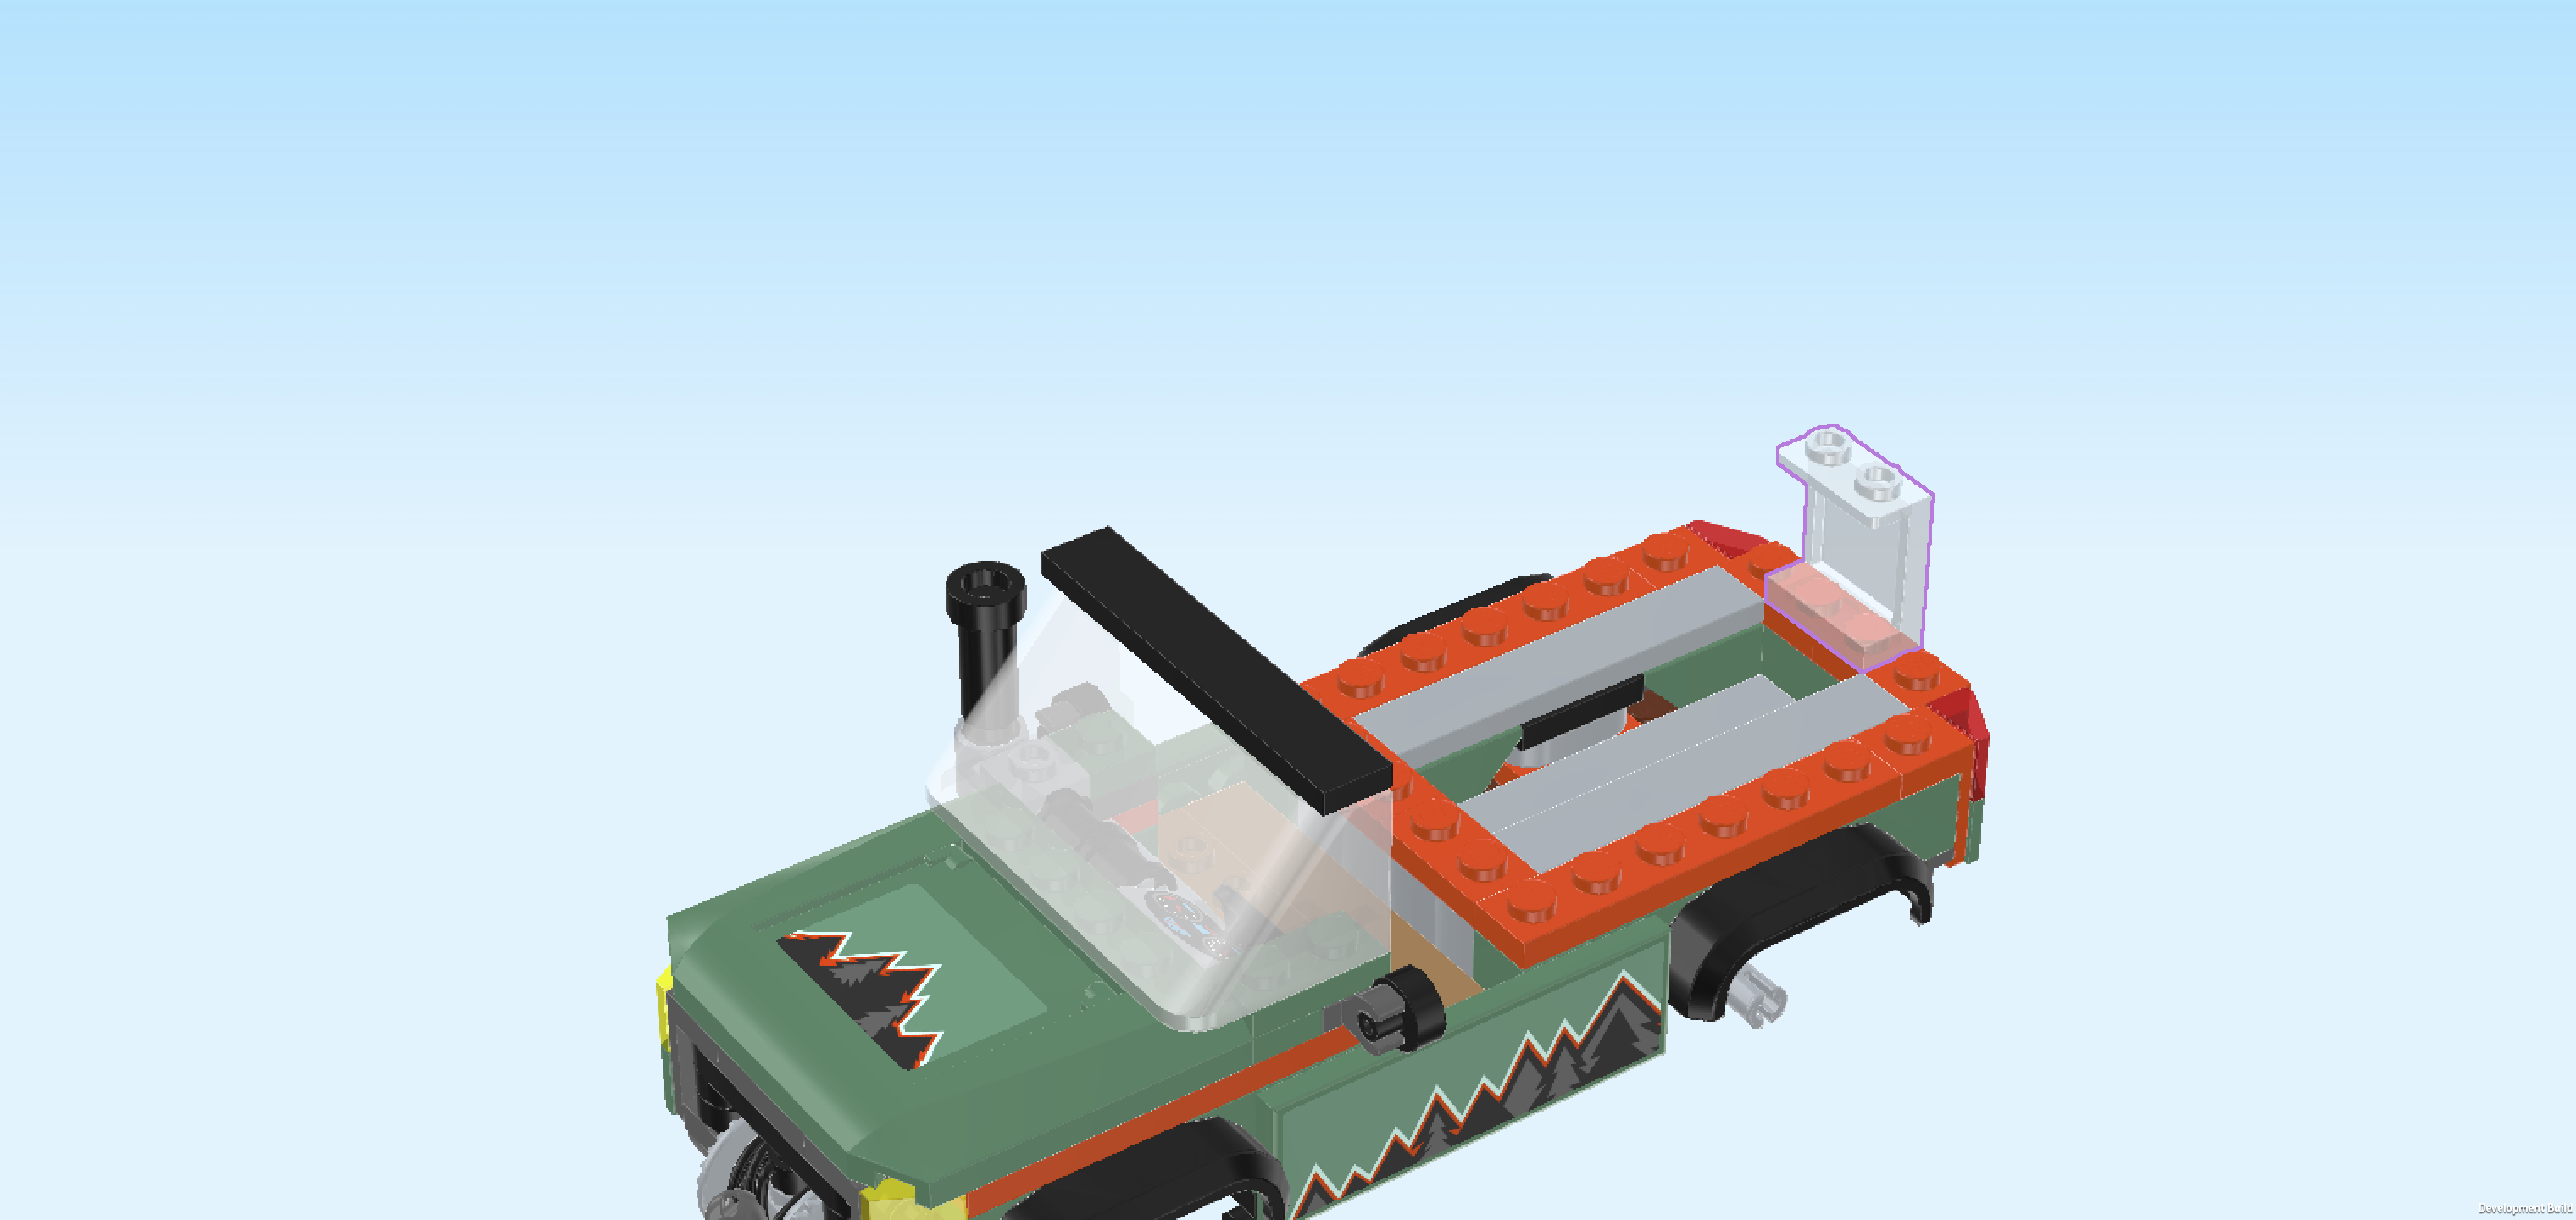
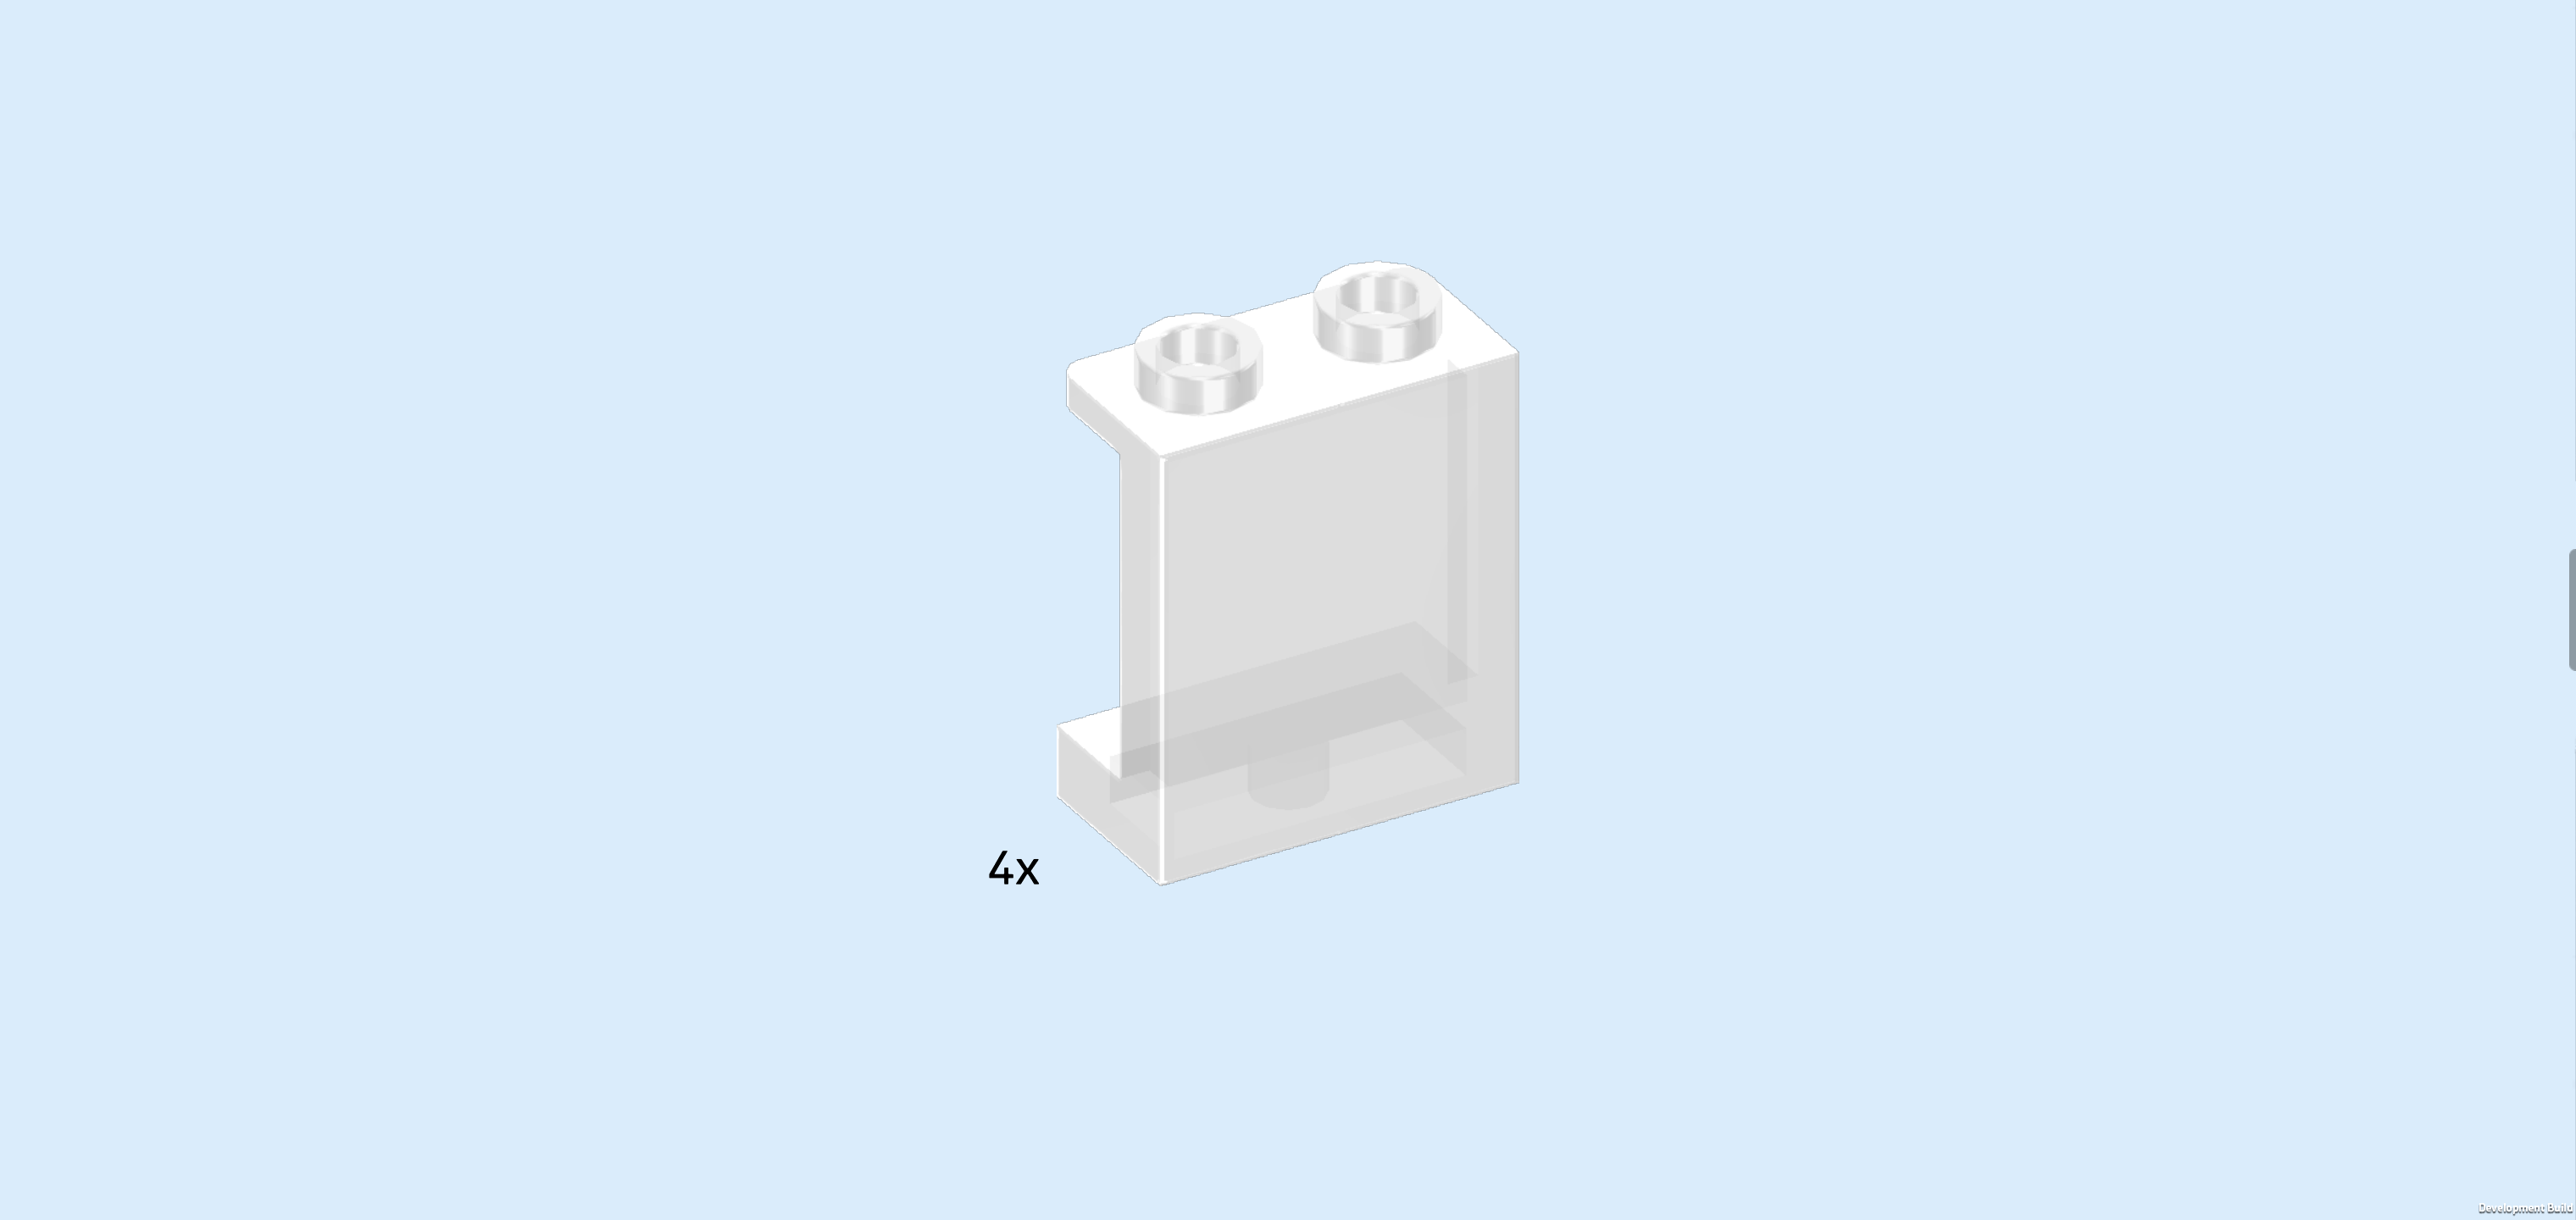
| Find 1 transparent wall element 1x2x2 with 2 top knobs. |
| Put it vertically centered on the rightmost column, panel side to the right. |
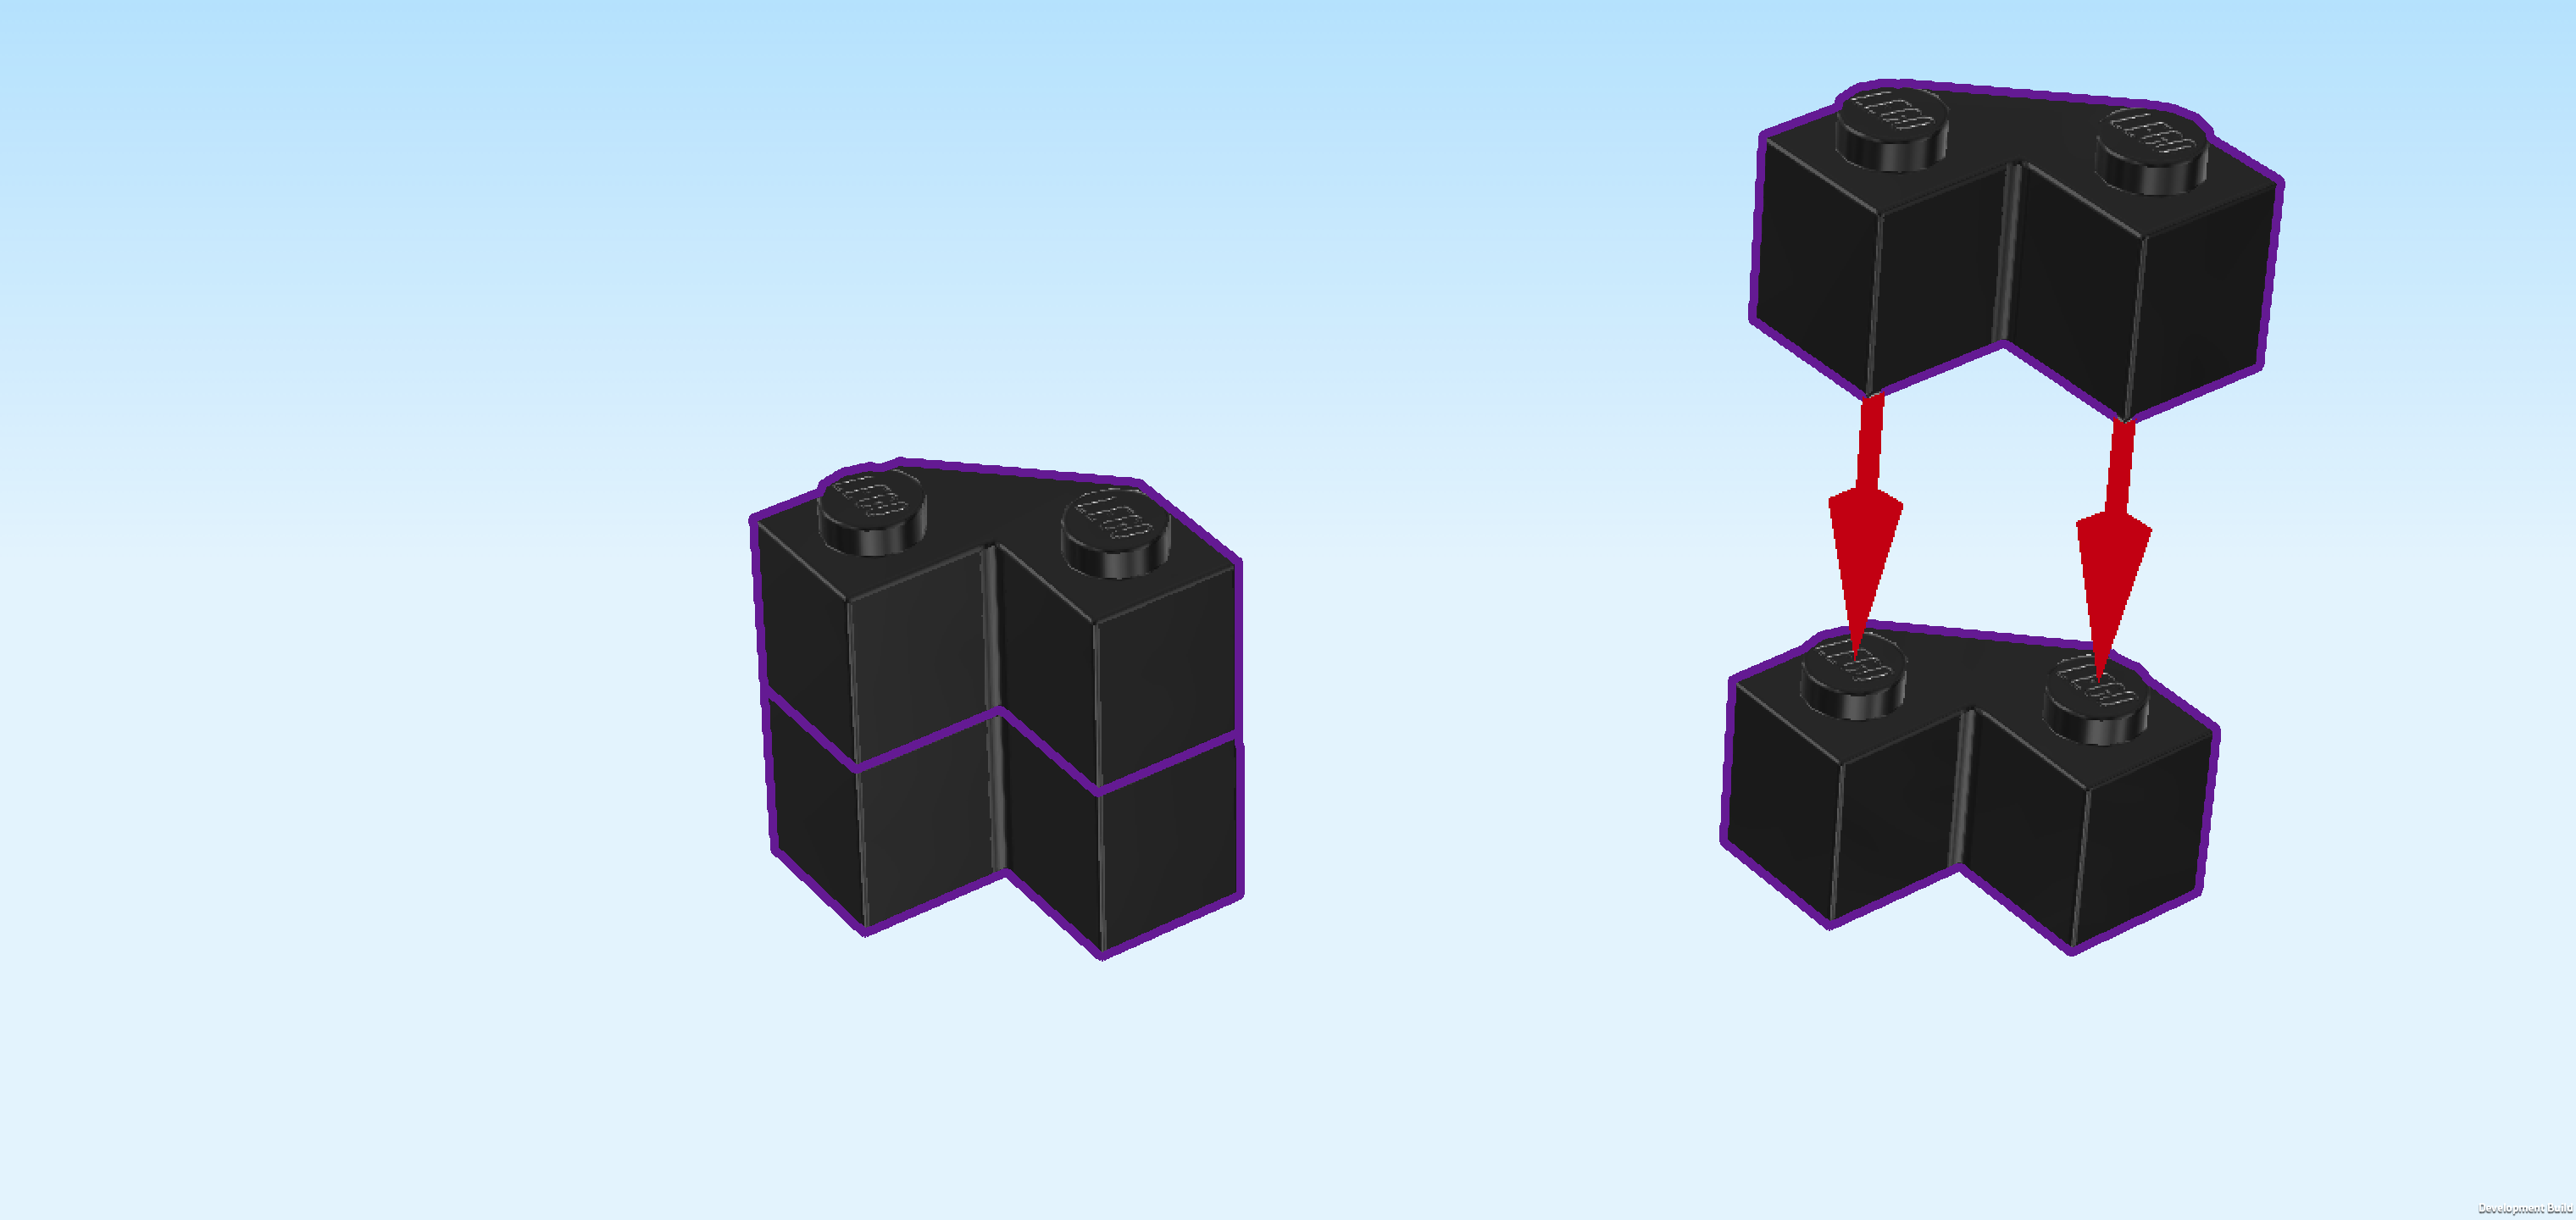
| Find 4 black corner bricks 1x2 - 1x2 with cut-off corner. |
| Stack 2 on top of each other, aligning their shapes, and then create a second stack with the 2 remaining pieces. |
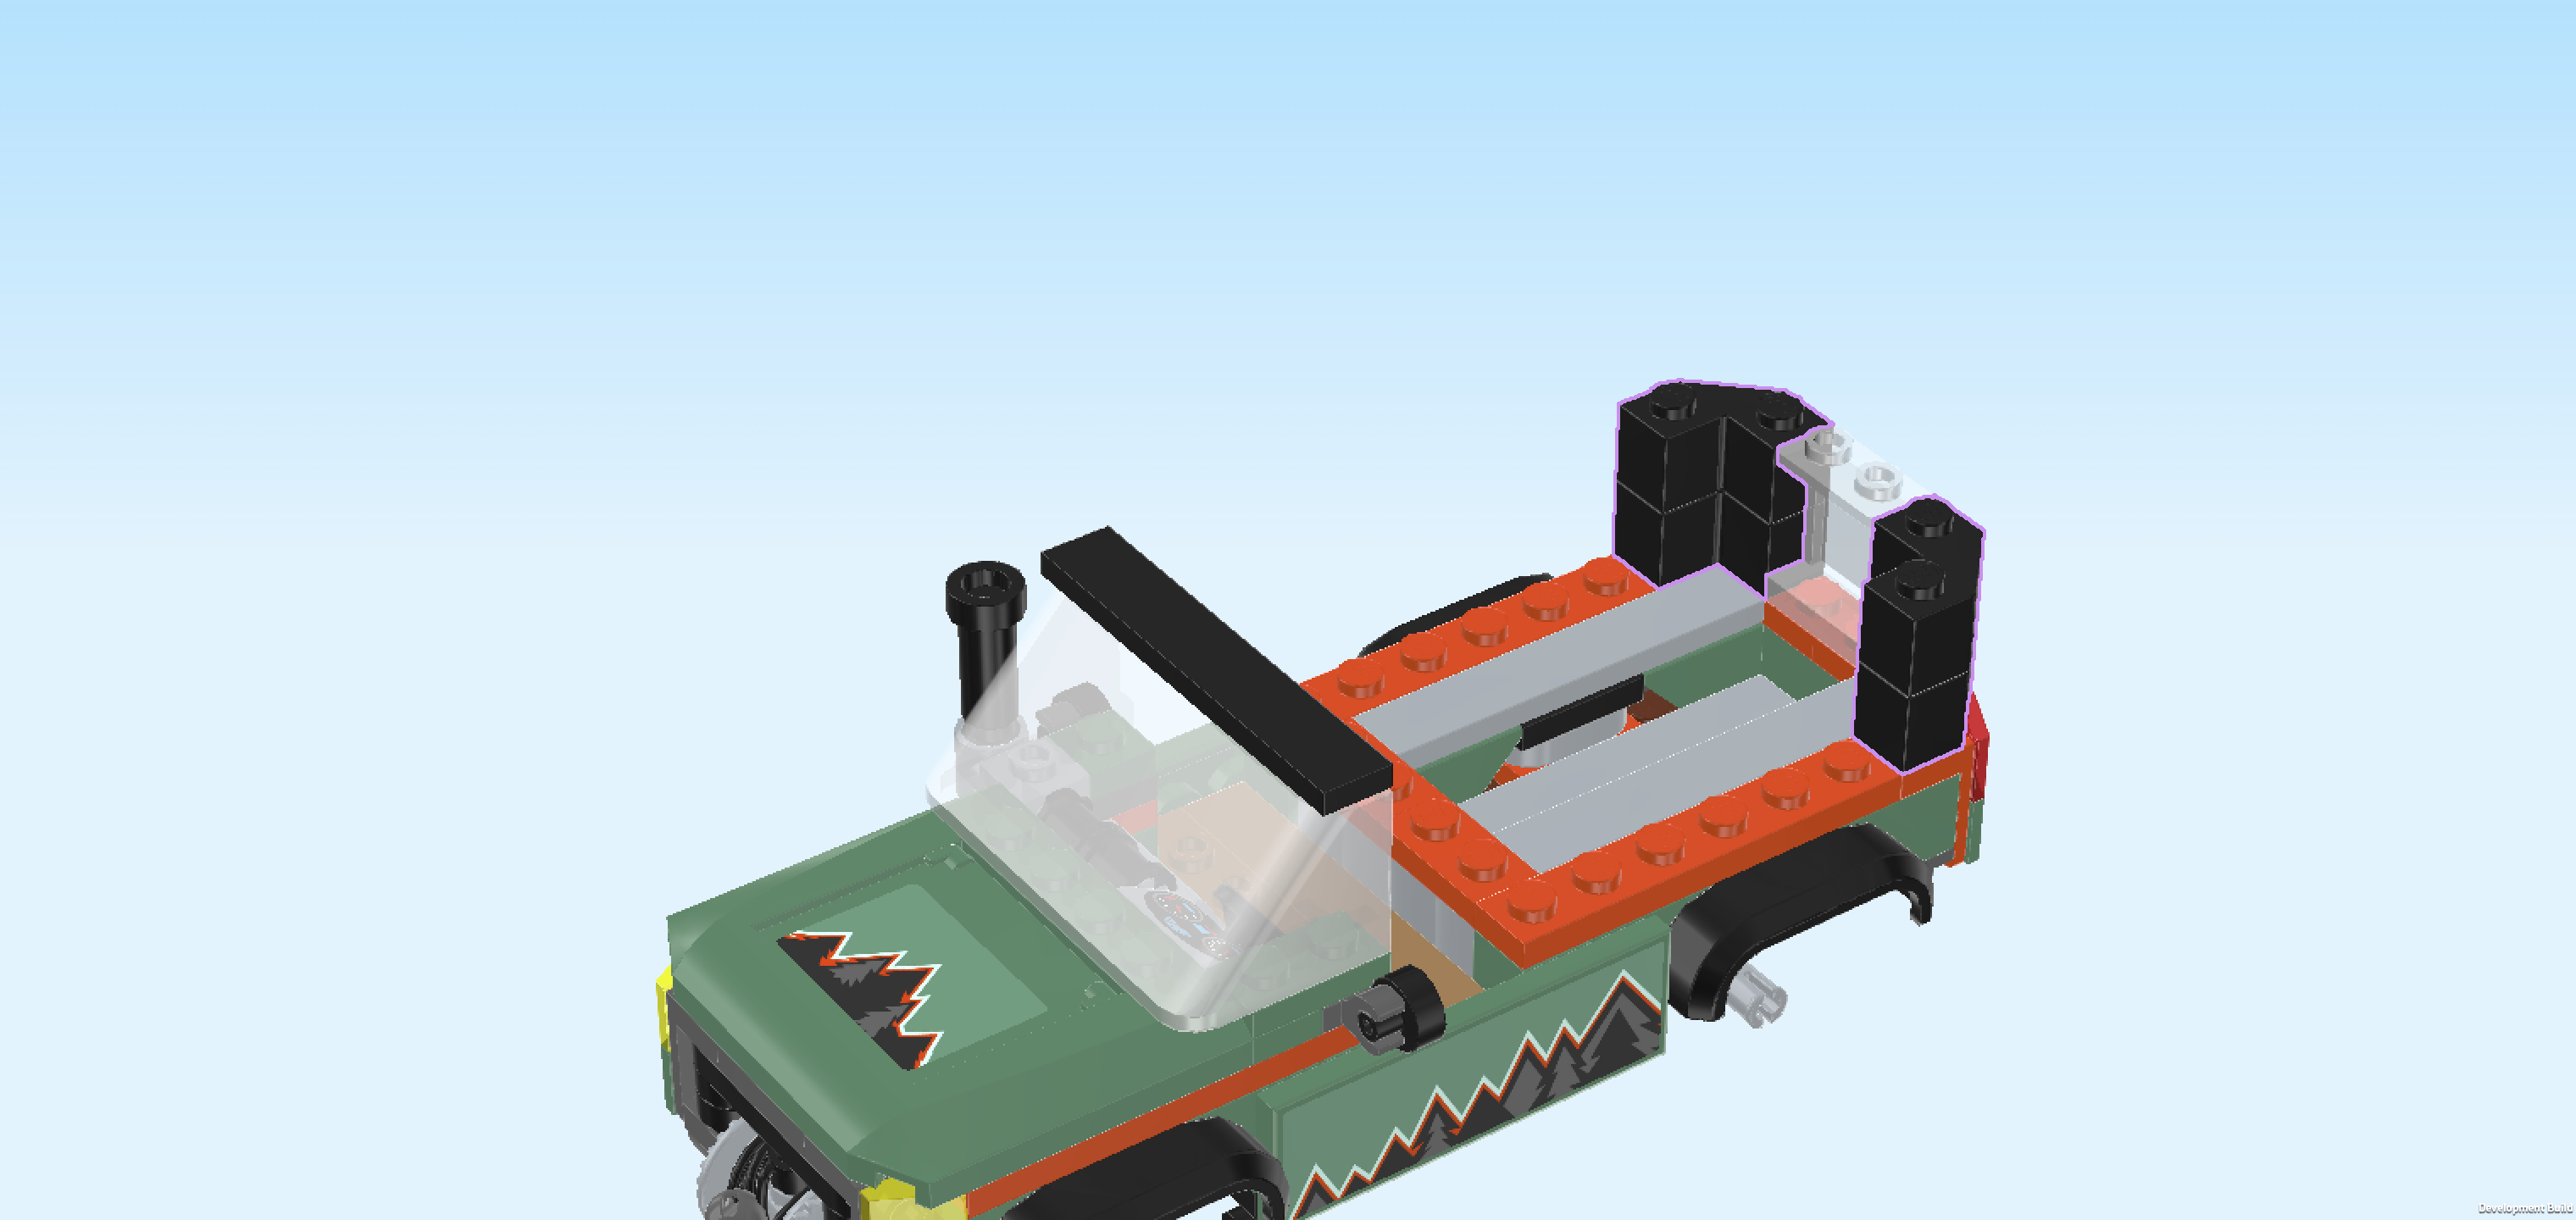
| Put 1 stack in front of the wall element we have just mounted, cut-off corner to the front right. |
| Repeat symmetrically at the back with the second stack. |
| Find 4 transparent wall elements 1x2x2 with 2 top knobs. |
| Put 1 horizontally to the left of the previous piece on the backmost row, panel side to the back. |
| Put 1 horizontally to the left of the previous piece, panel side to the back. |
| Repeat symmetrically at the front, panel sides to the front. |
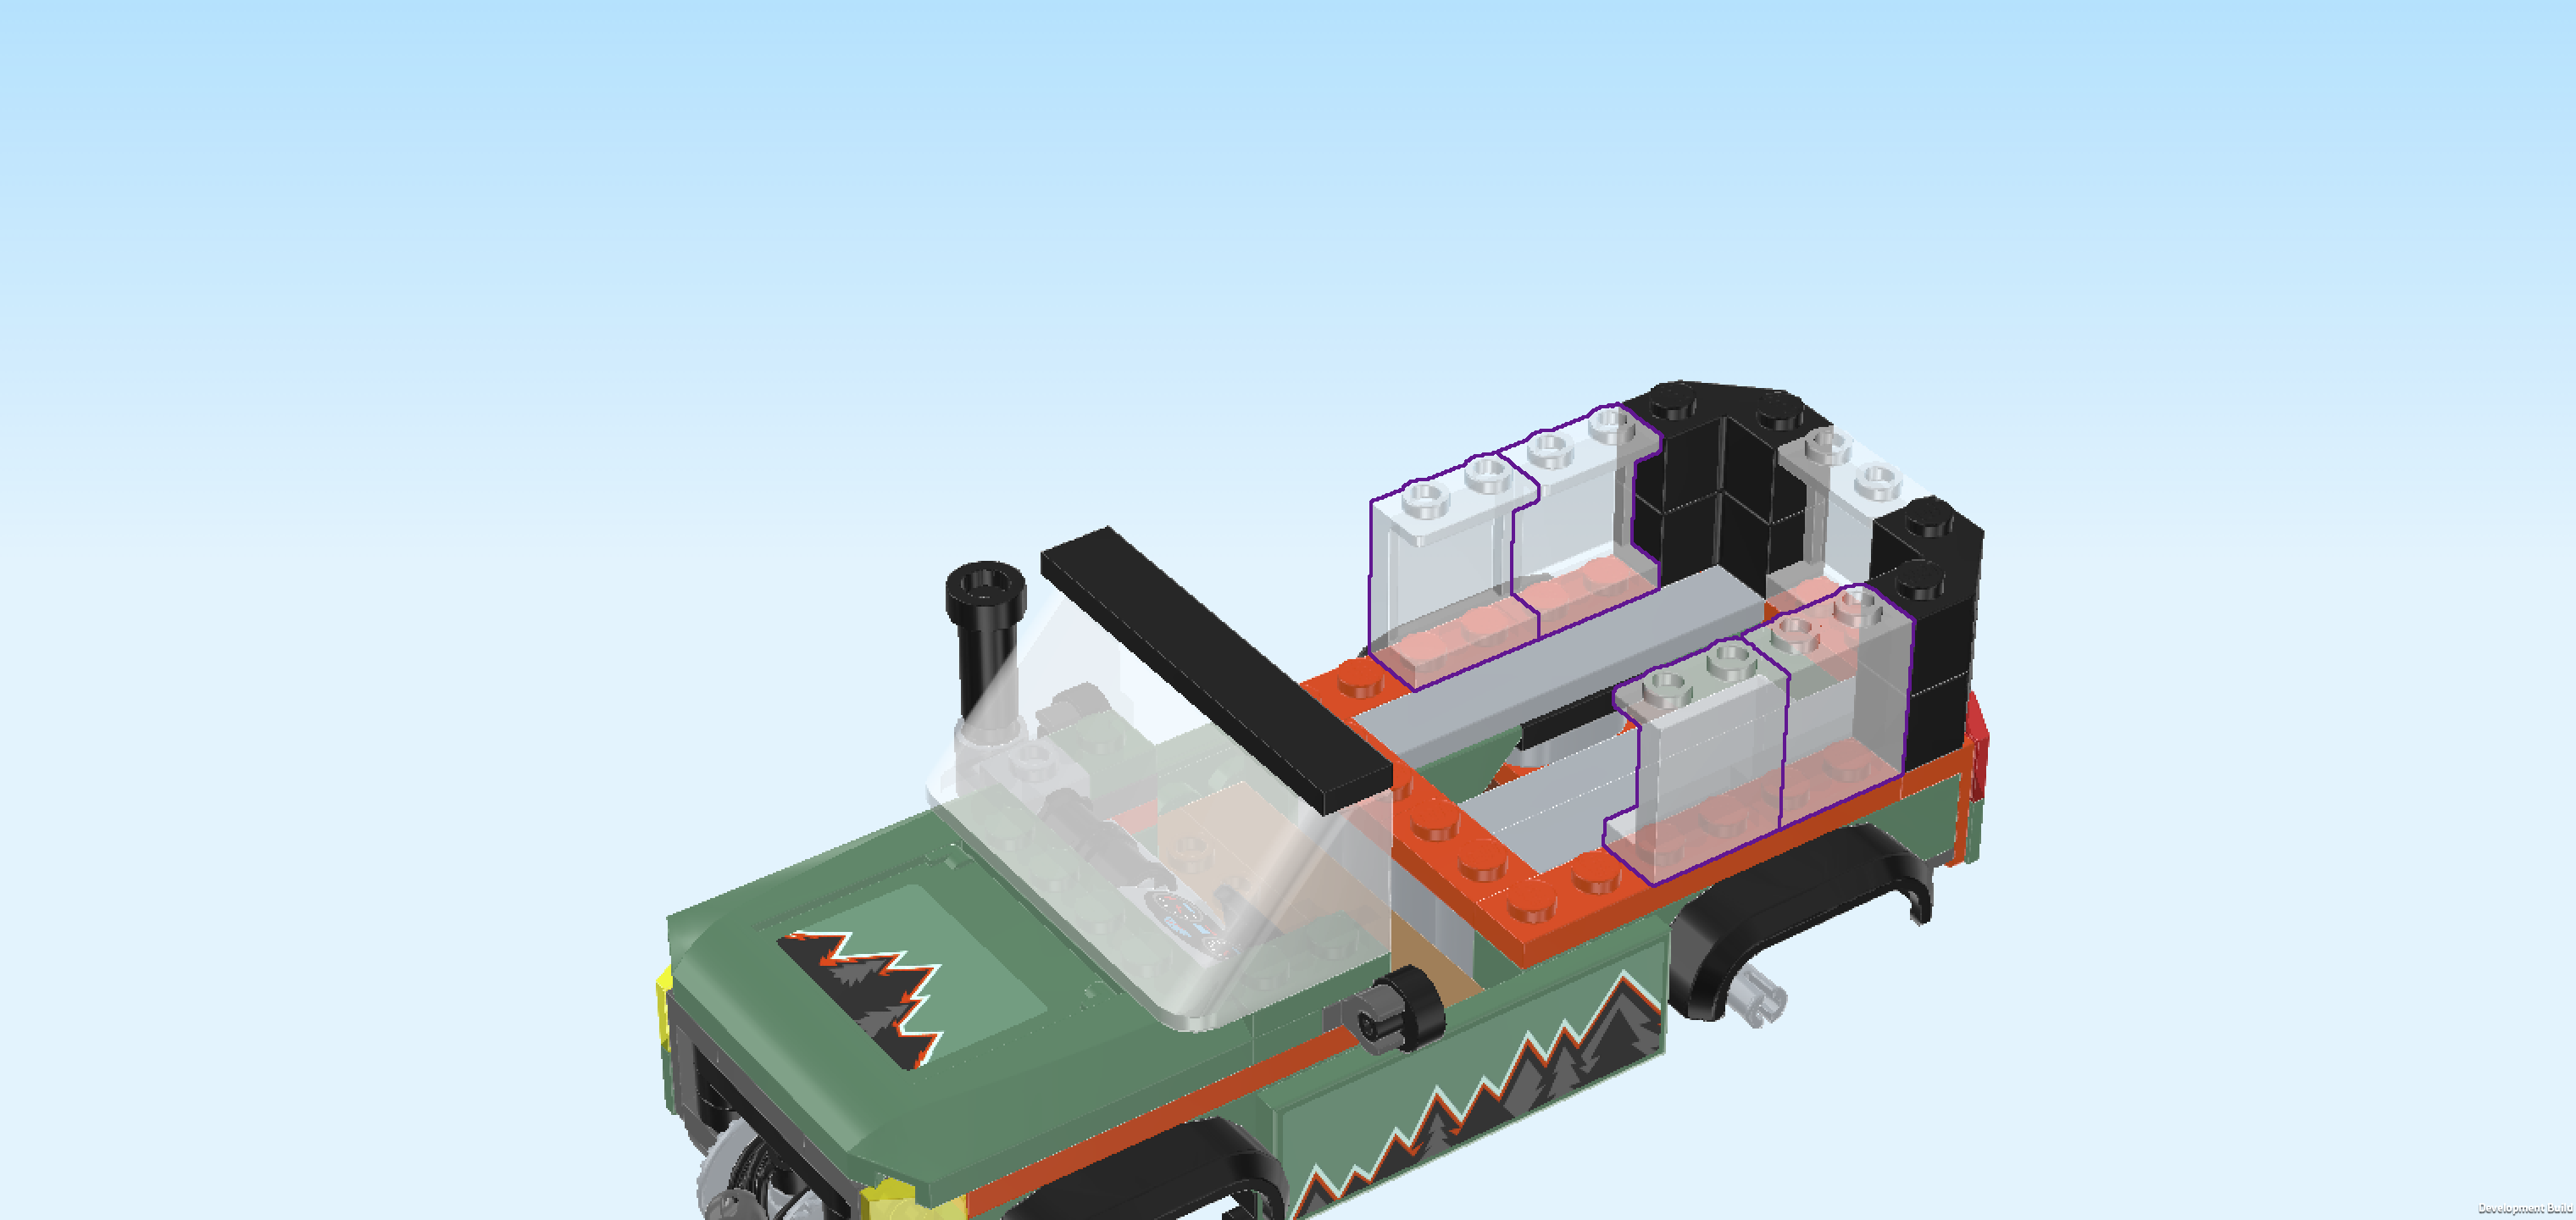
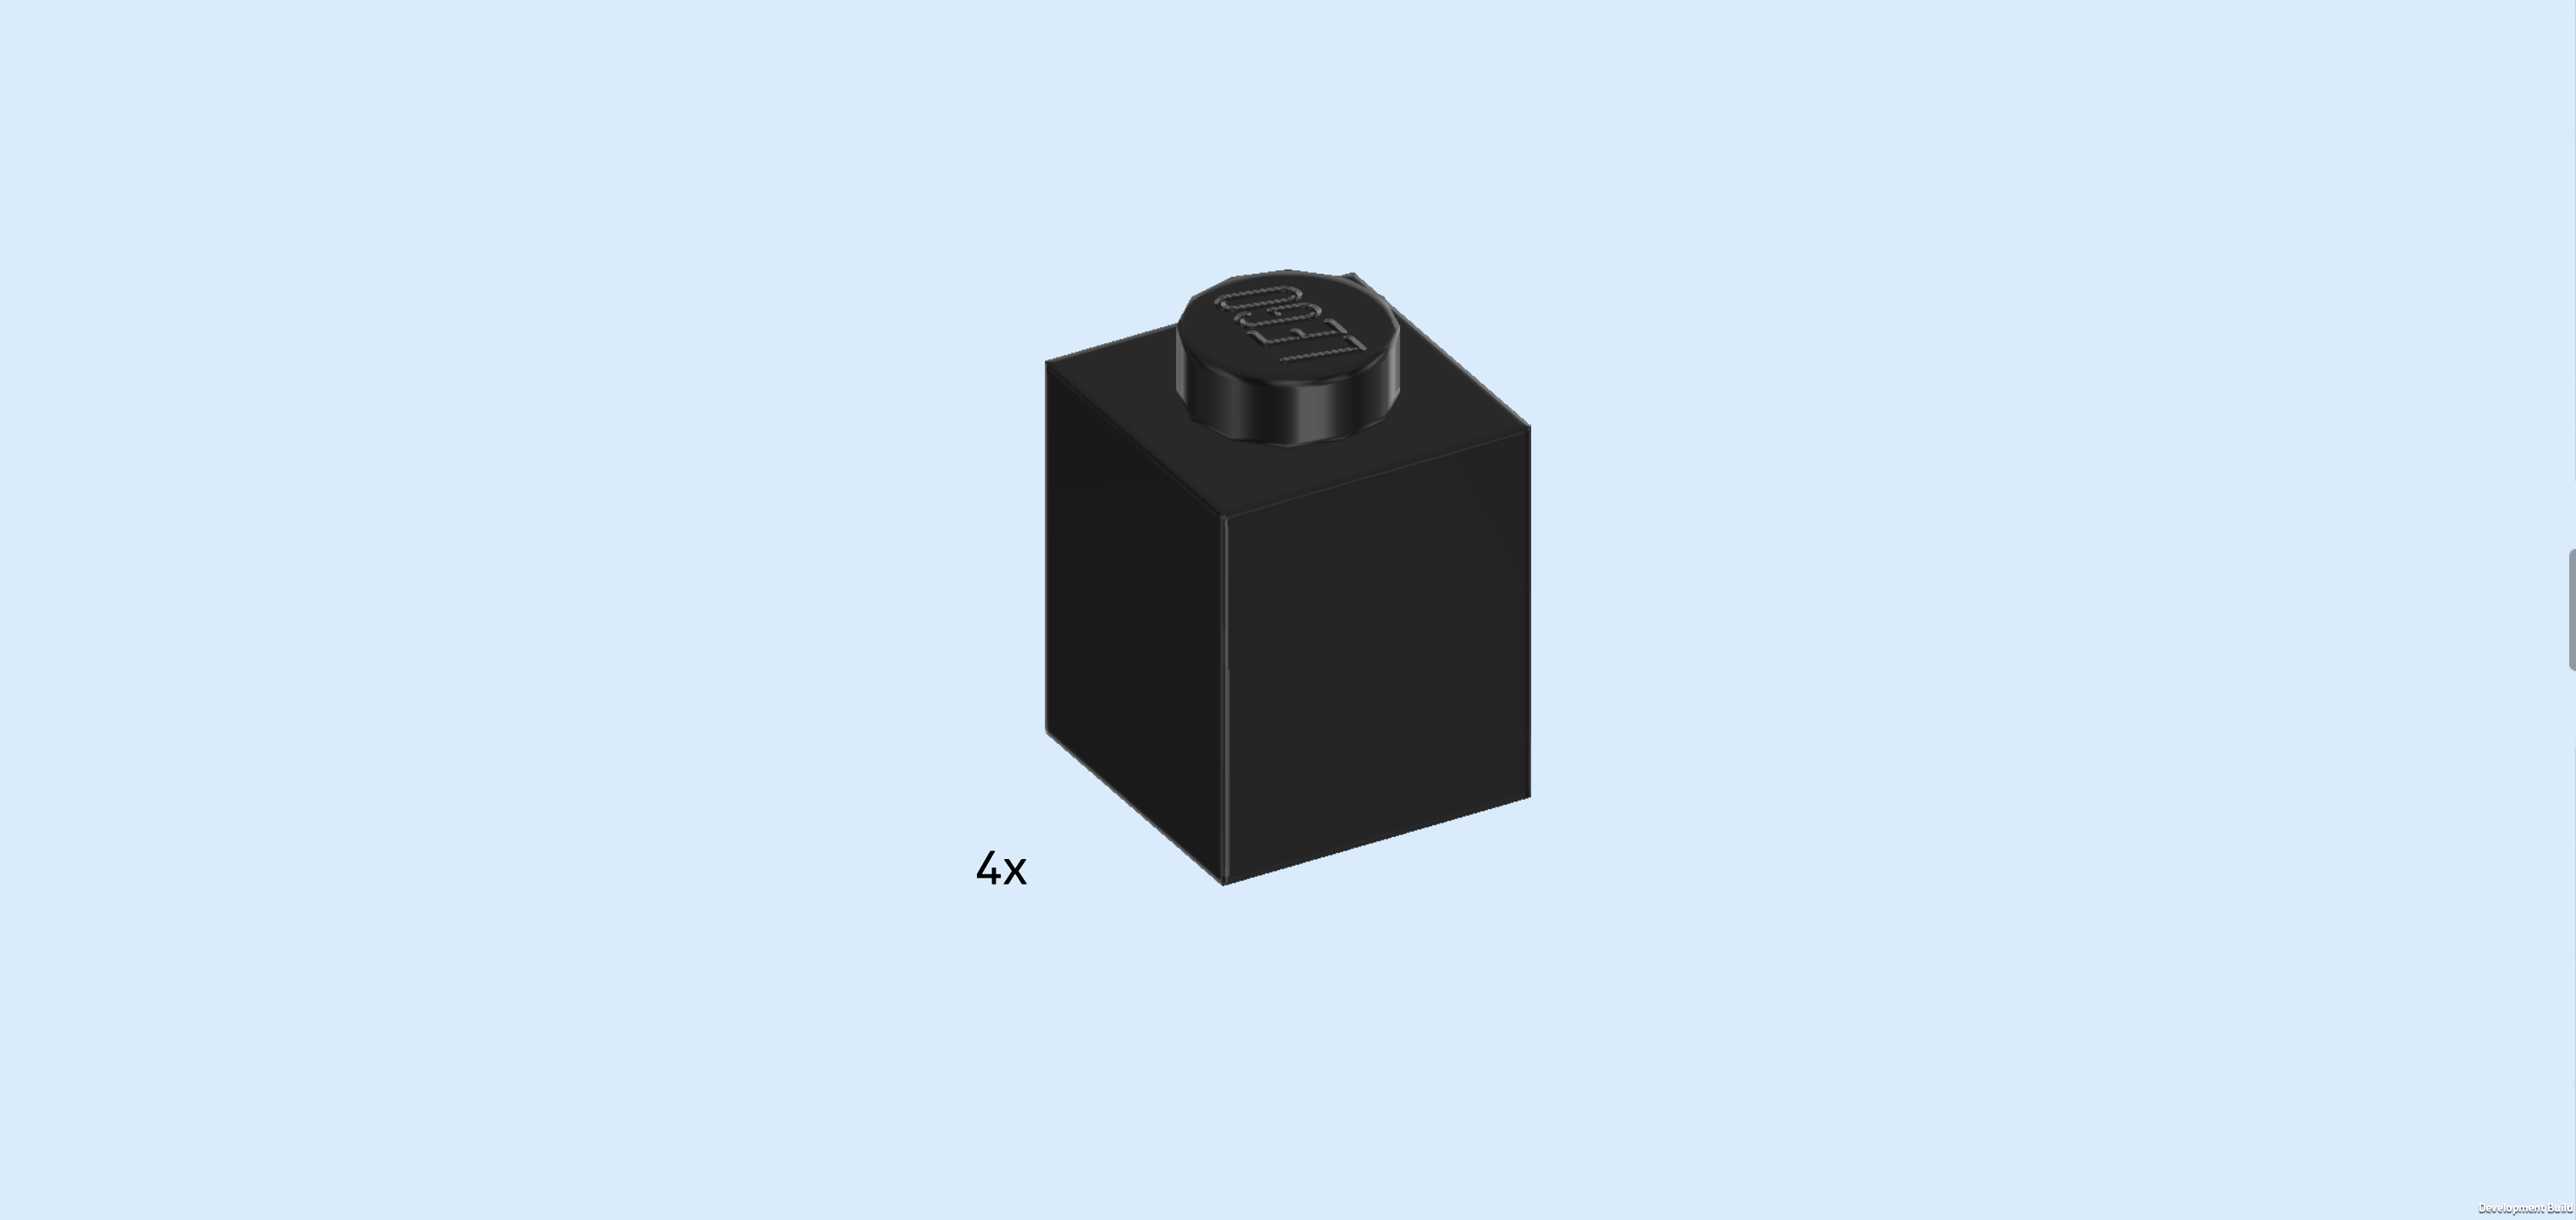
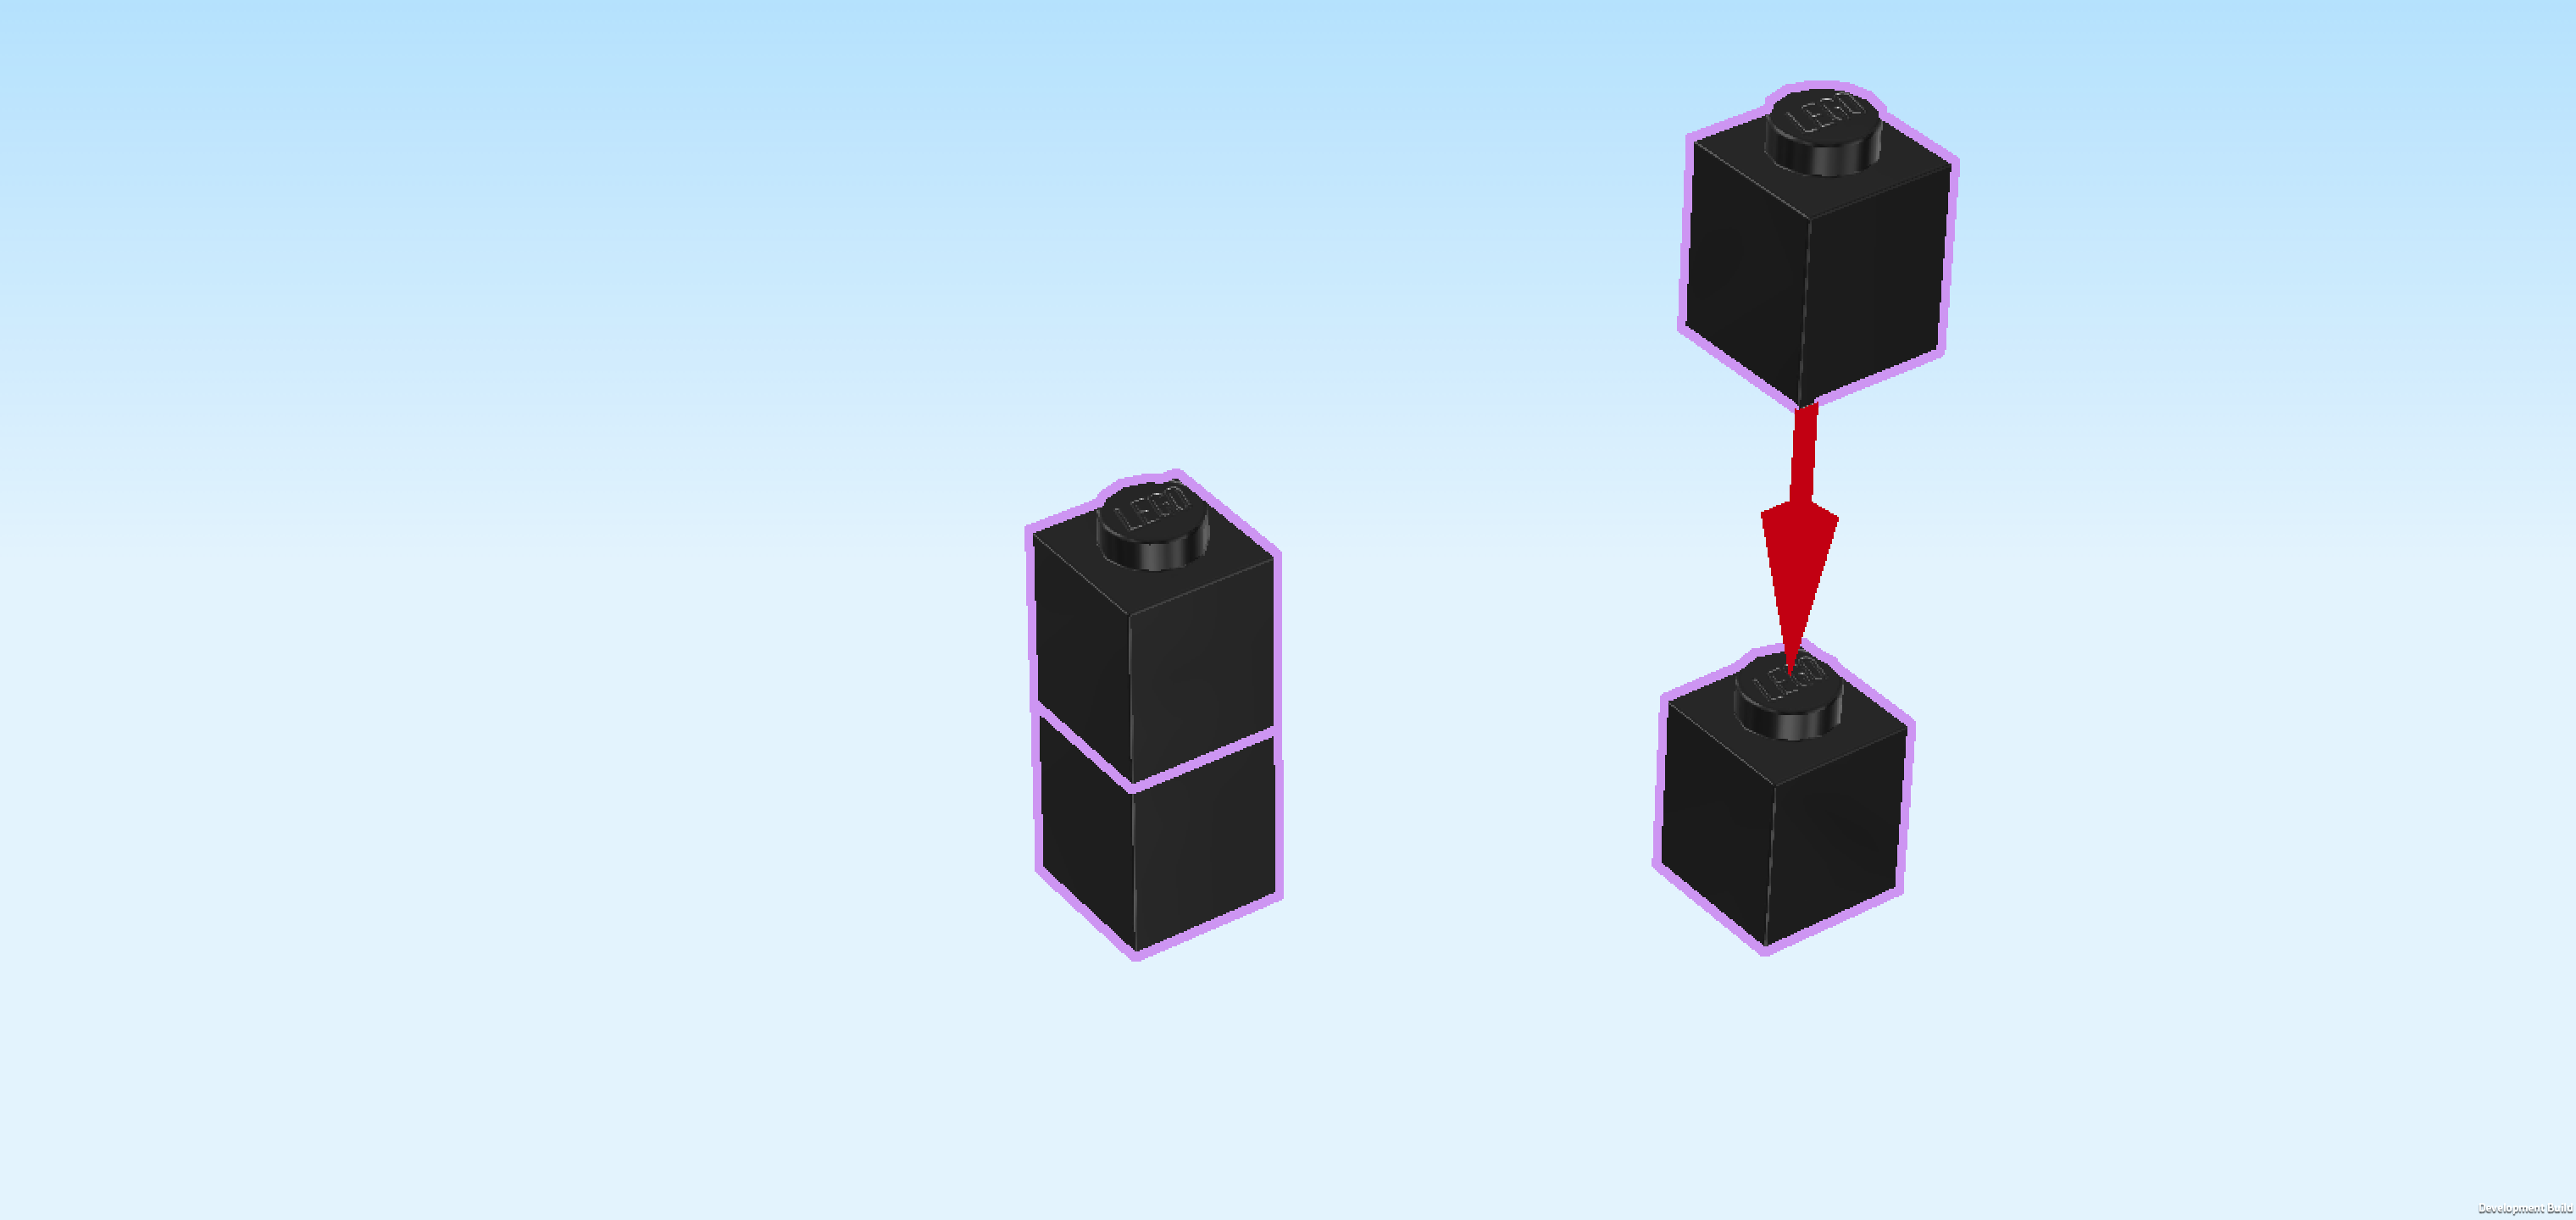
| Find 4 black bricks 1x1. |
| Stack 2 on top of each other, aligning their shapes, and then create a second stack with the 2 remaining pieces. |
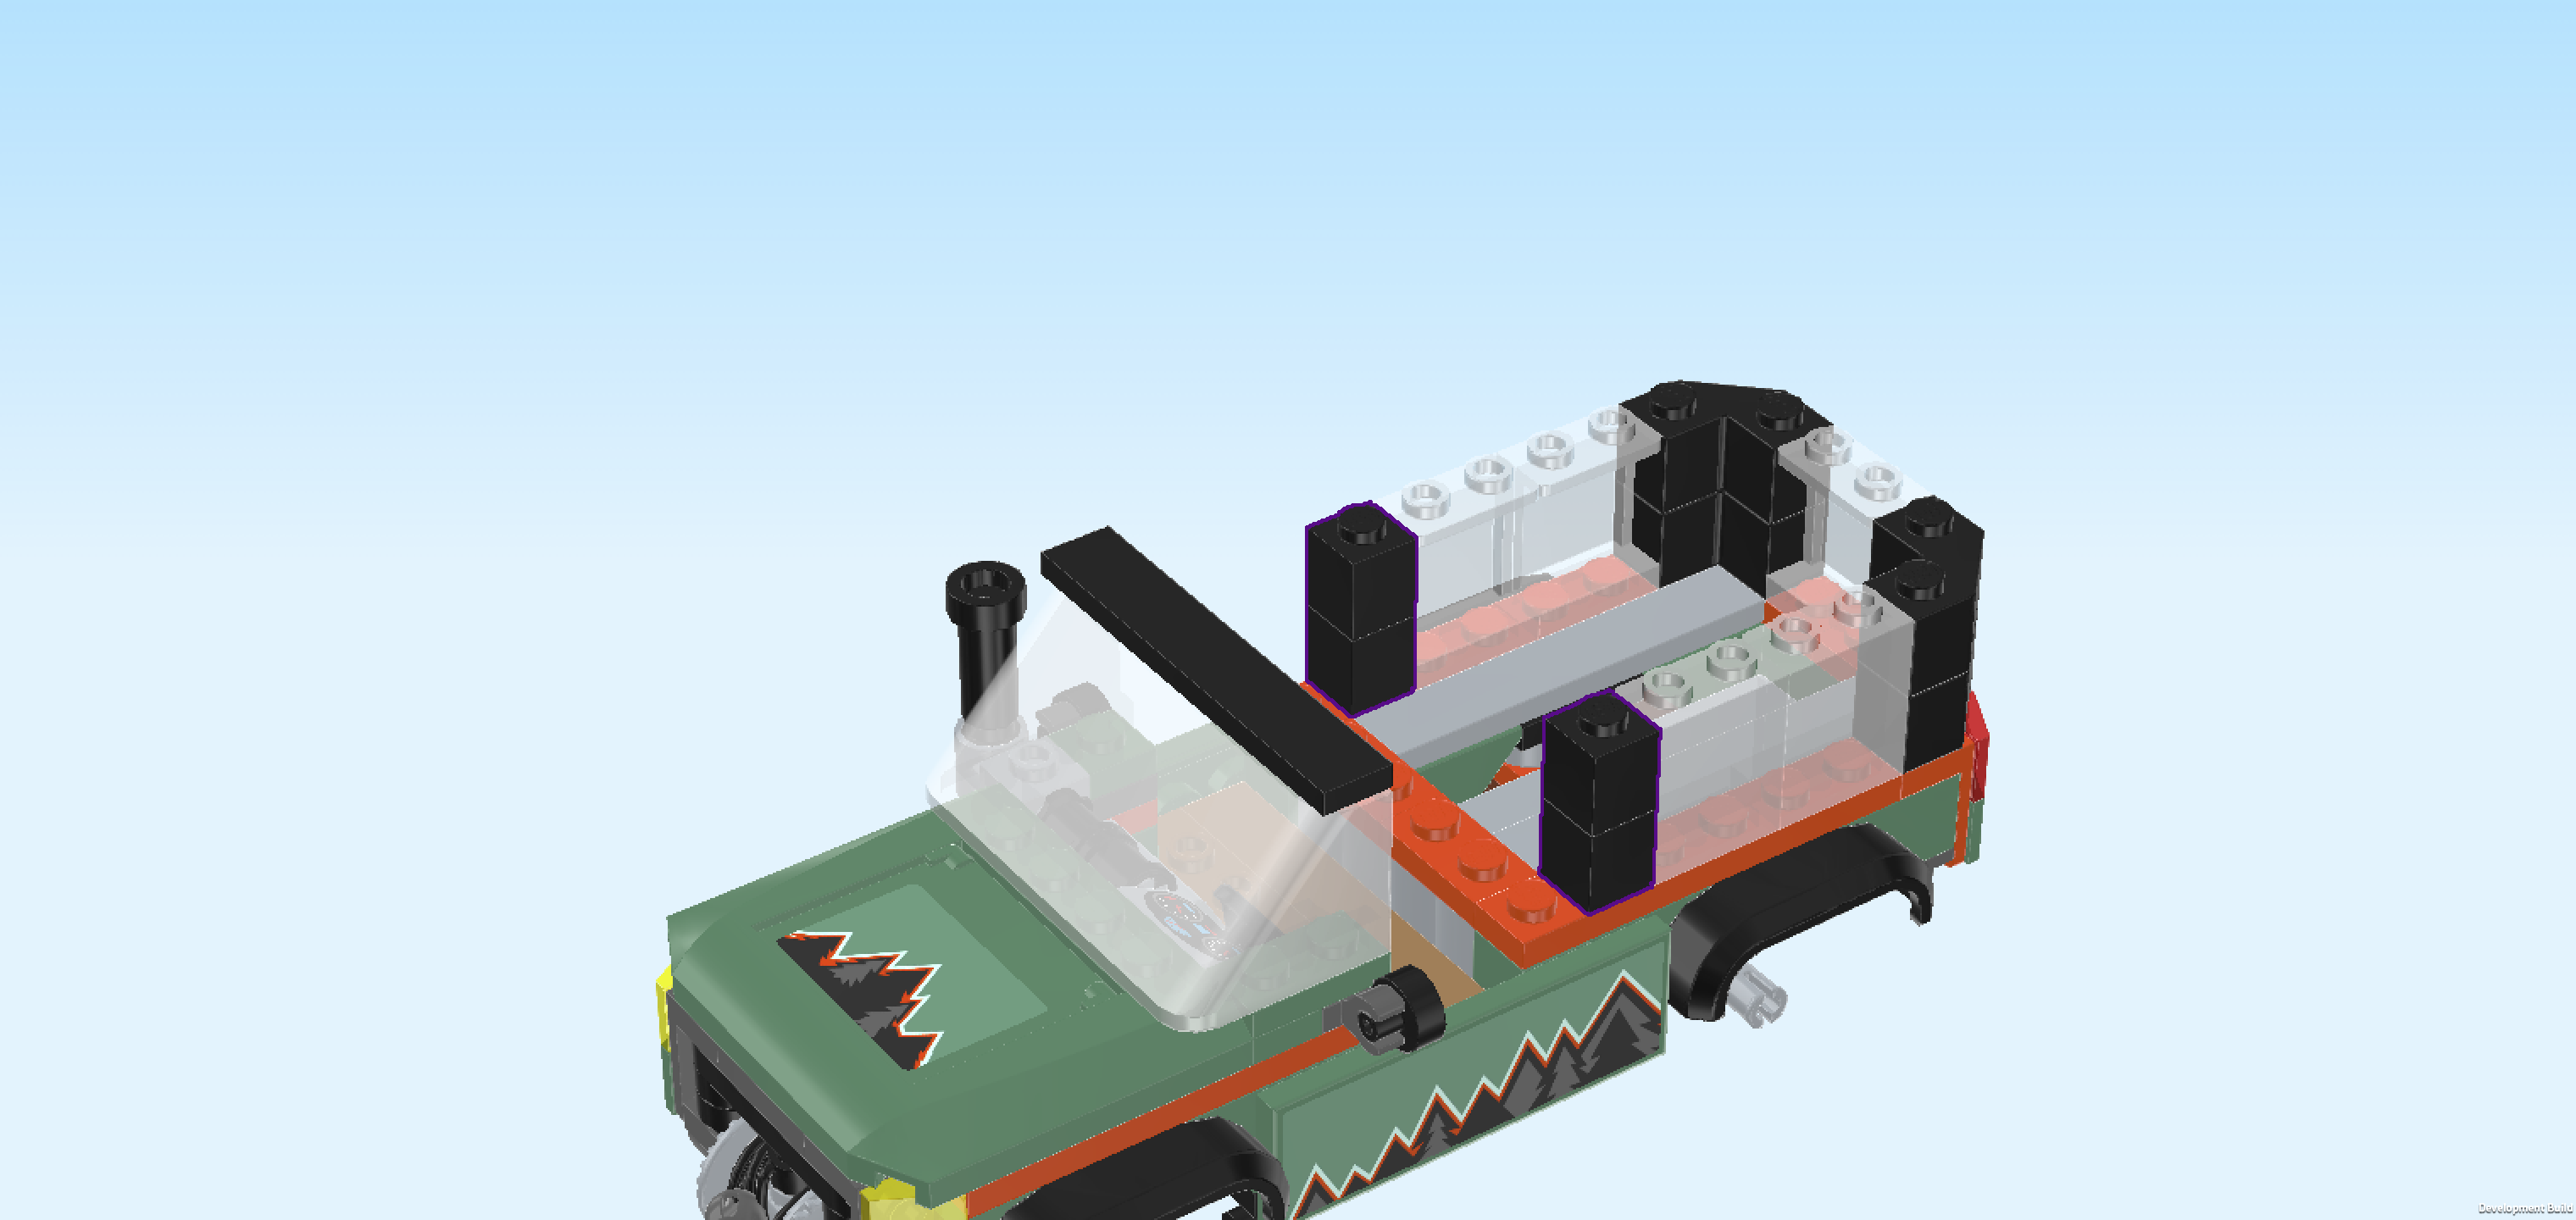
| Put 1 stack to the left of the wall elements on the frontmost row. |
| Repeat symmetrically at the back with the second stack. |
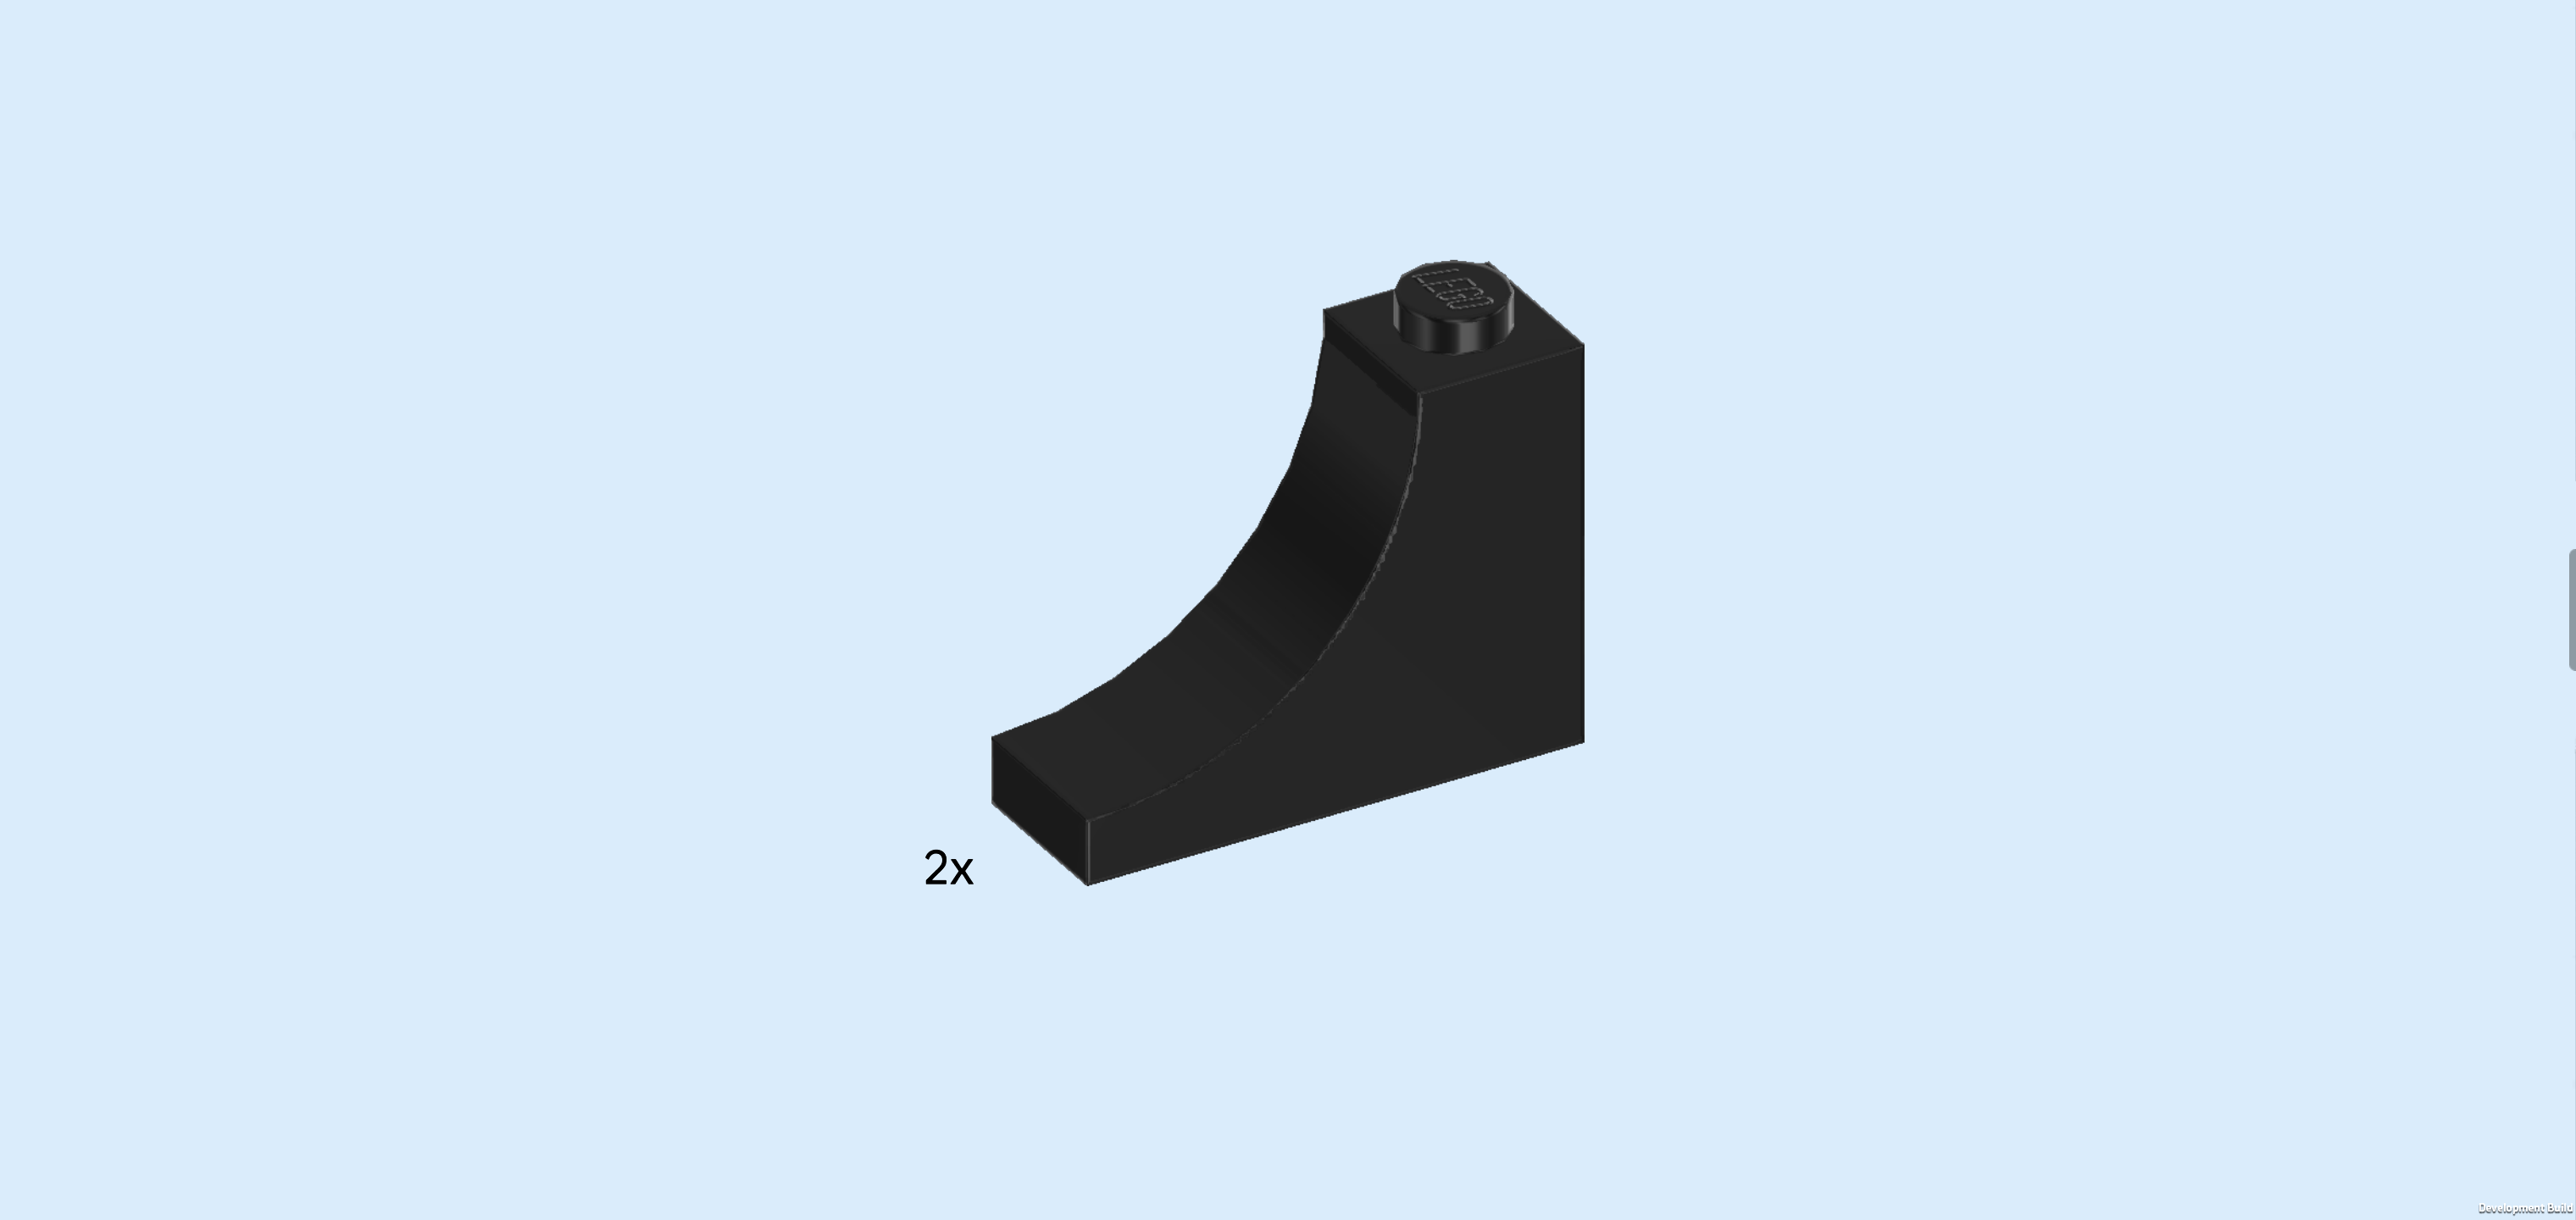
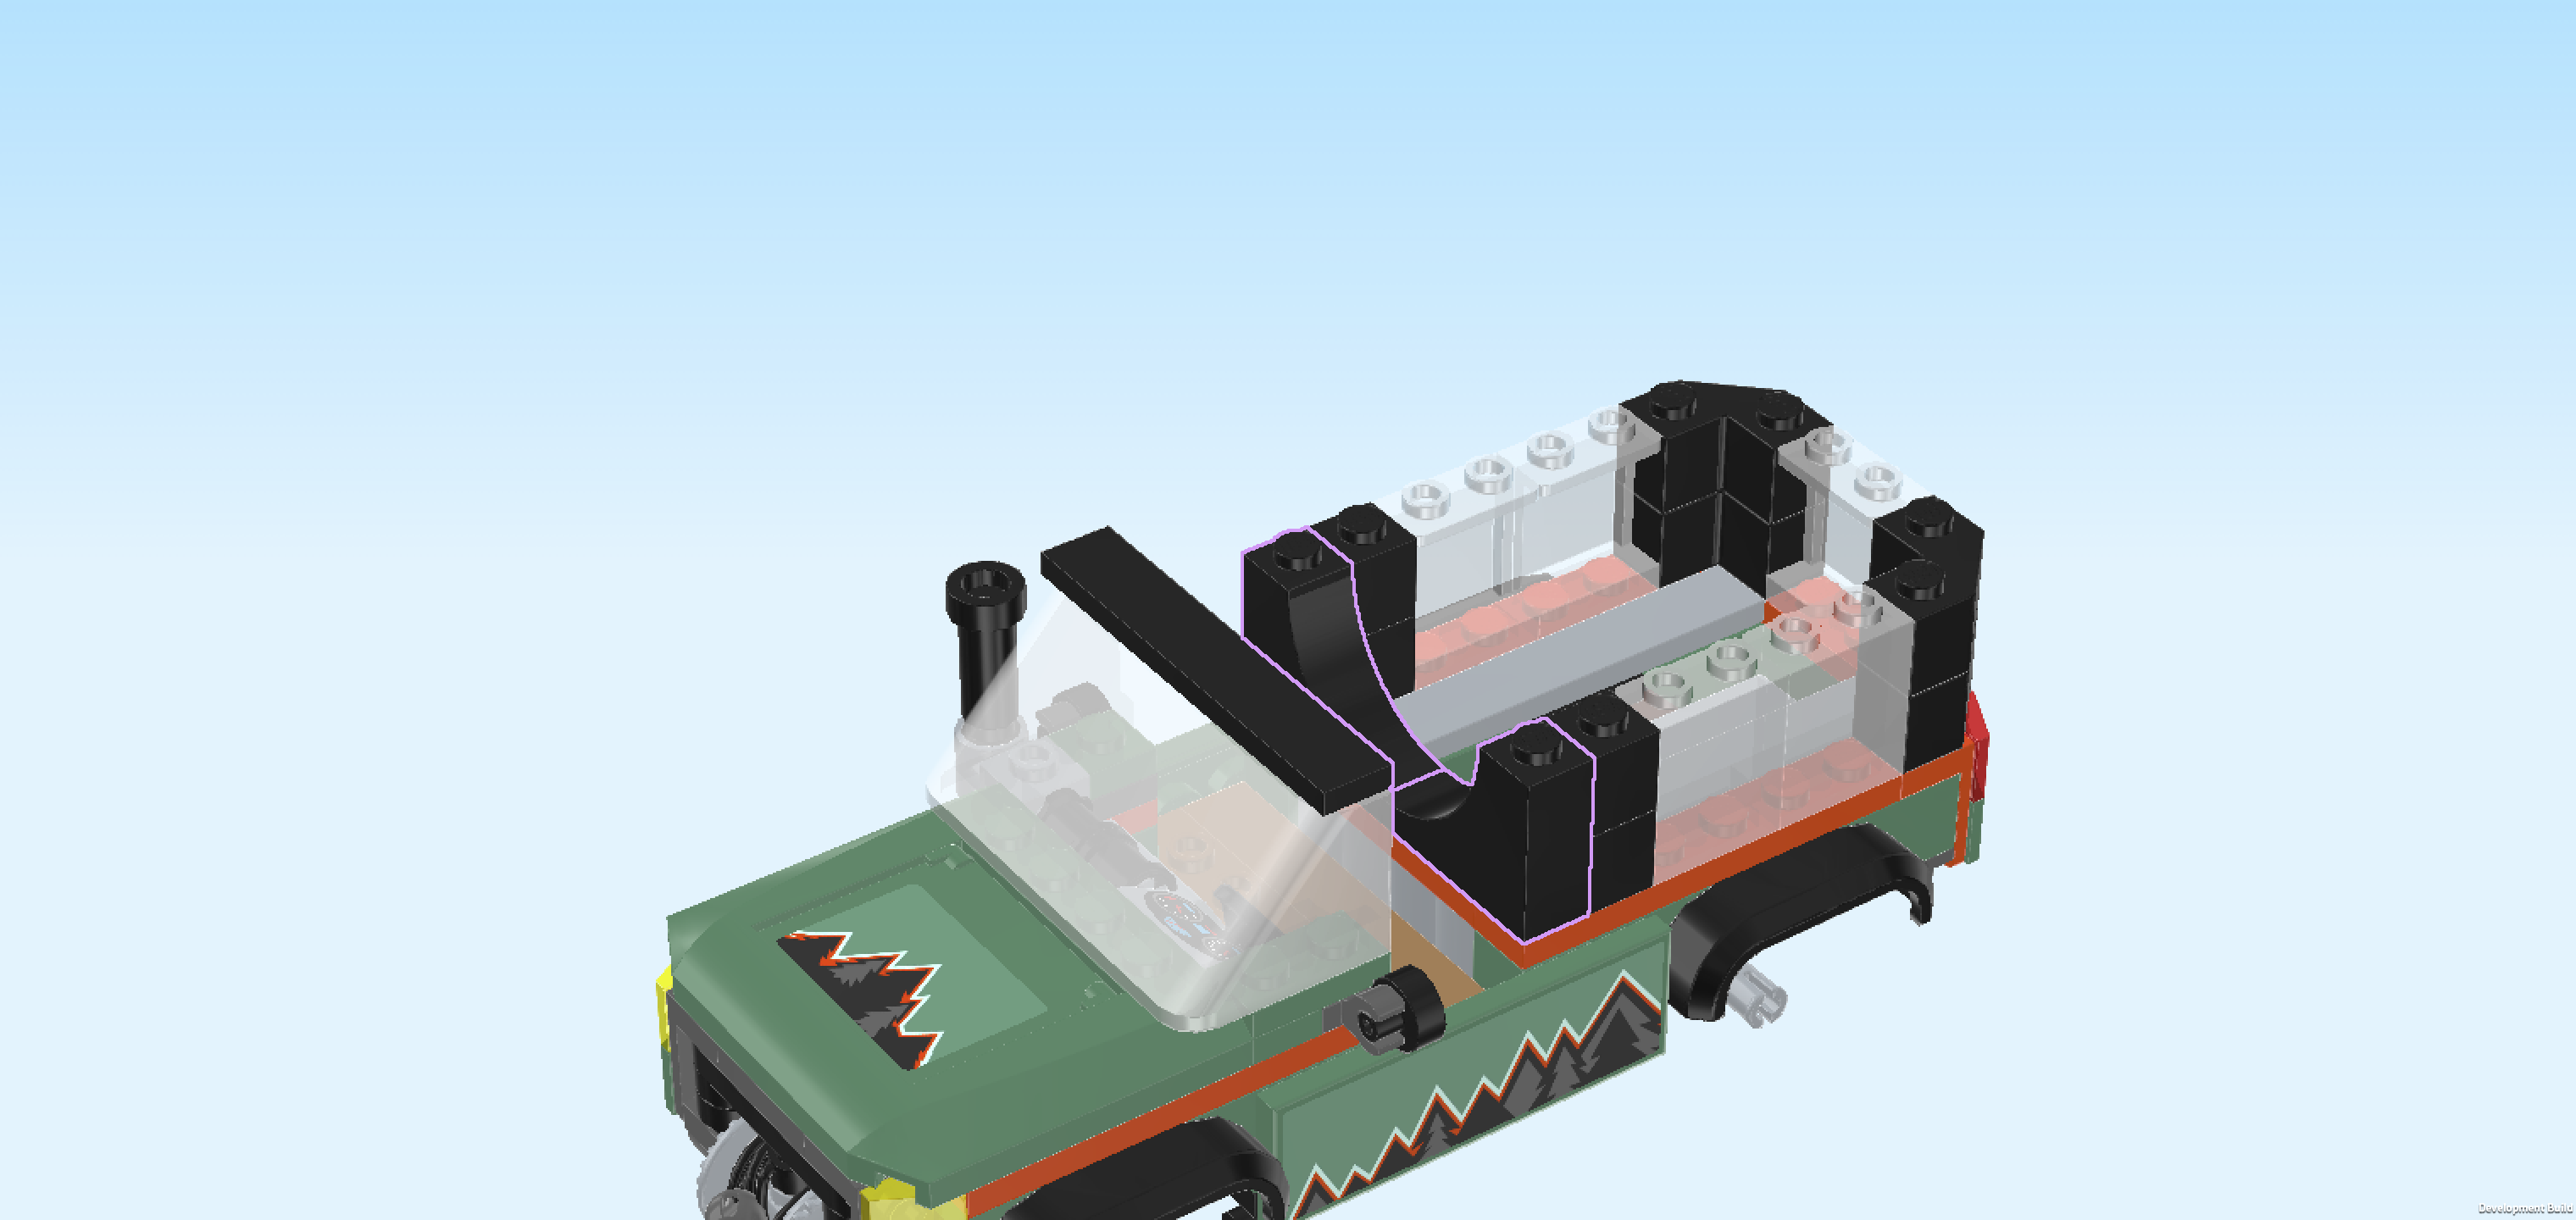
| Find 2 black bricks 1x3x2 with downward half arch. |
| Put 1 vertically to the left of the previous piece, downward arch to the front. |
| Put the other one vertically in front of the previous piece, downward arch to the back. |
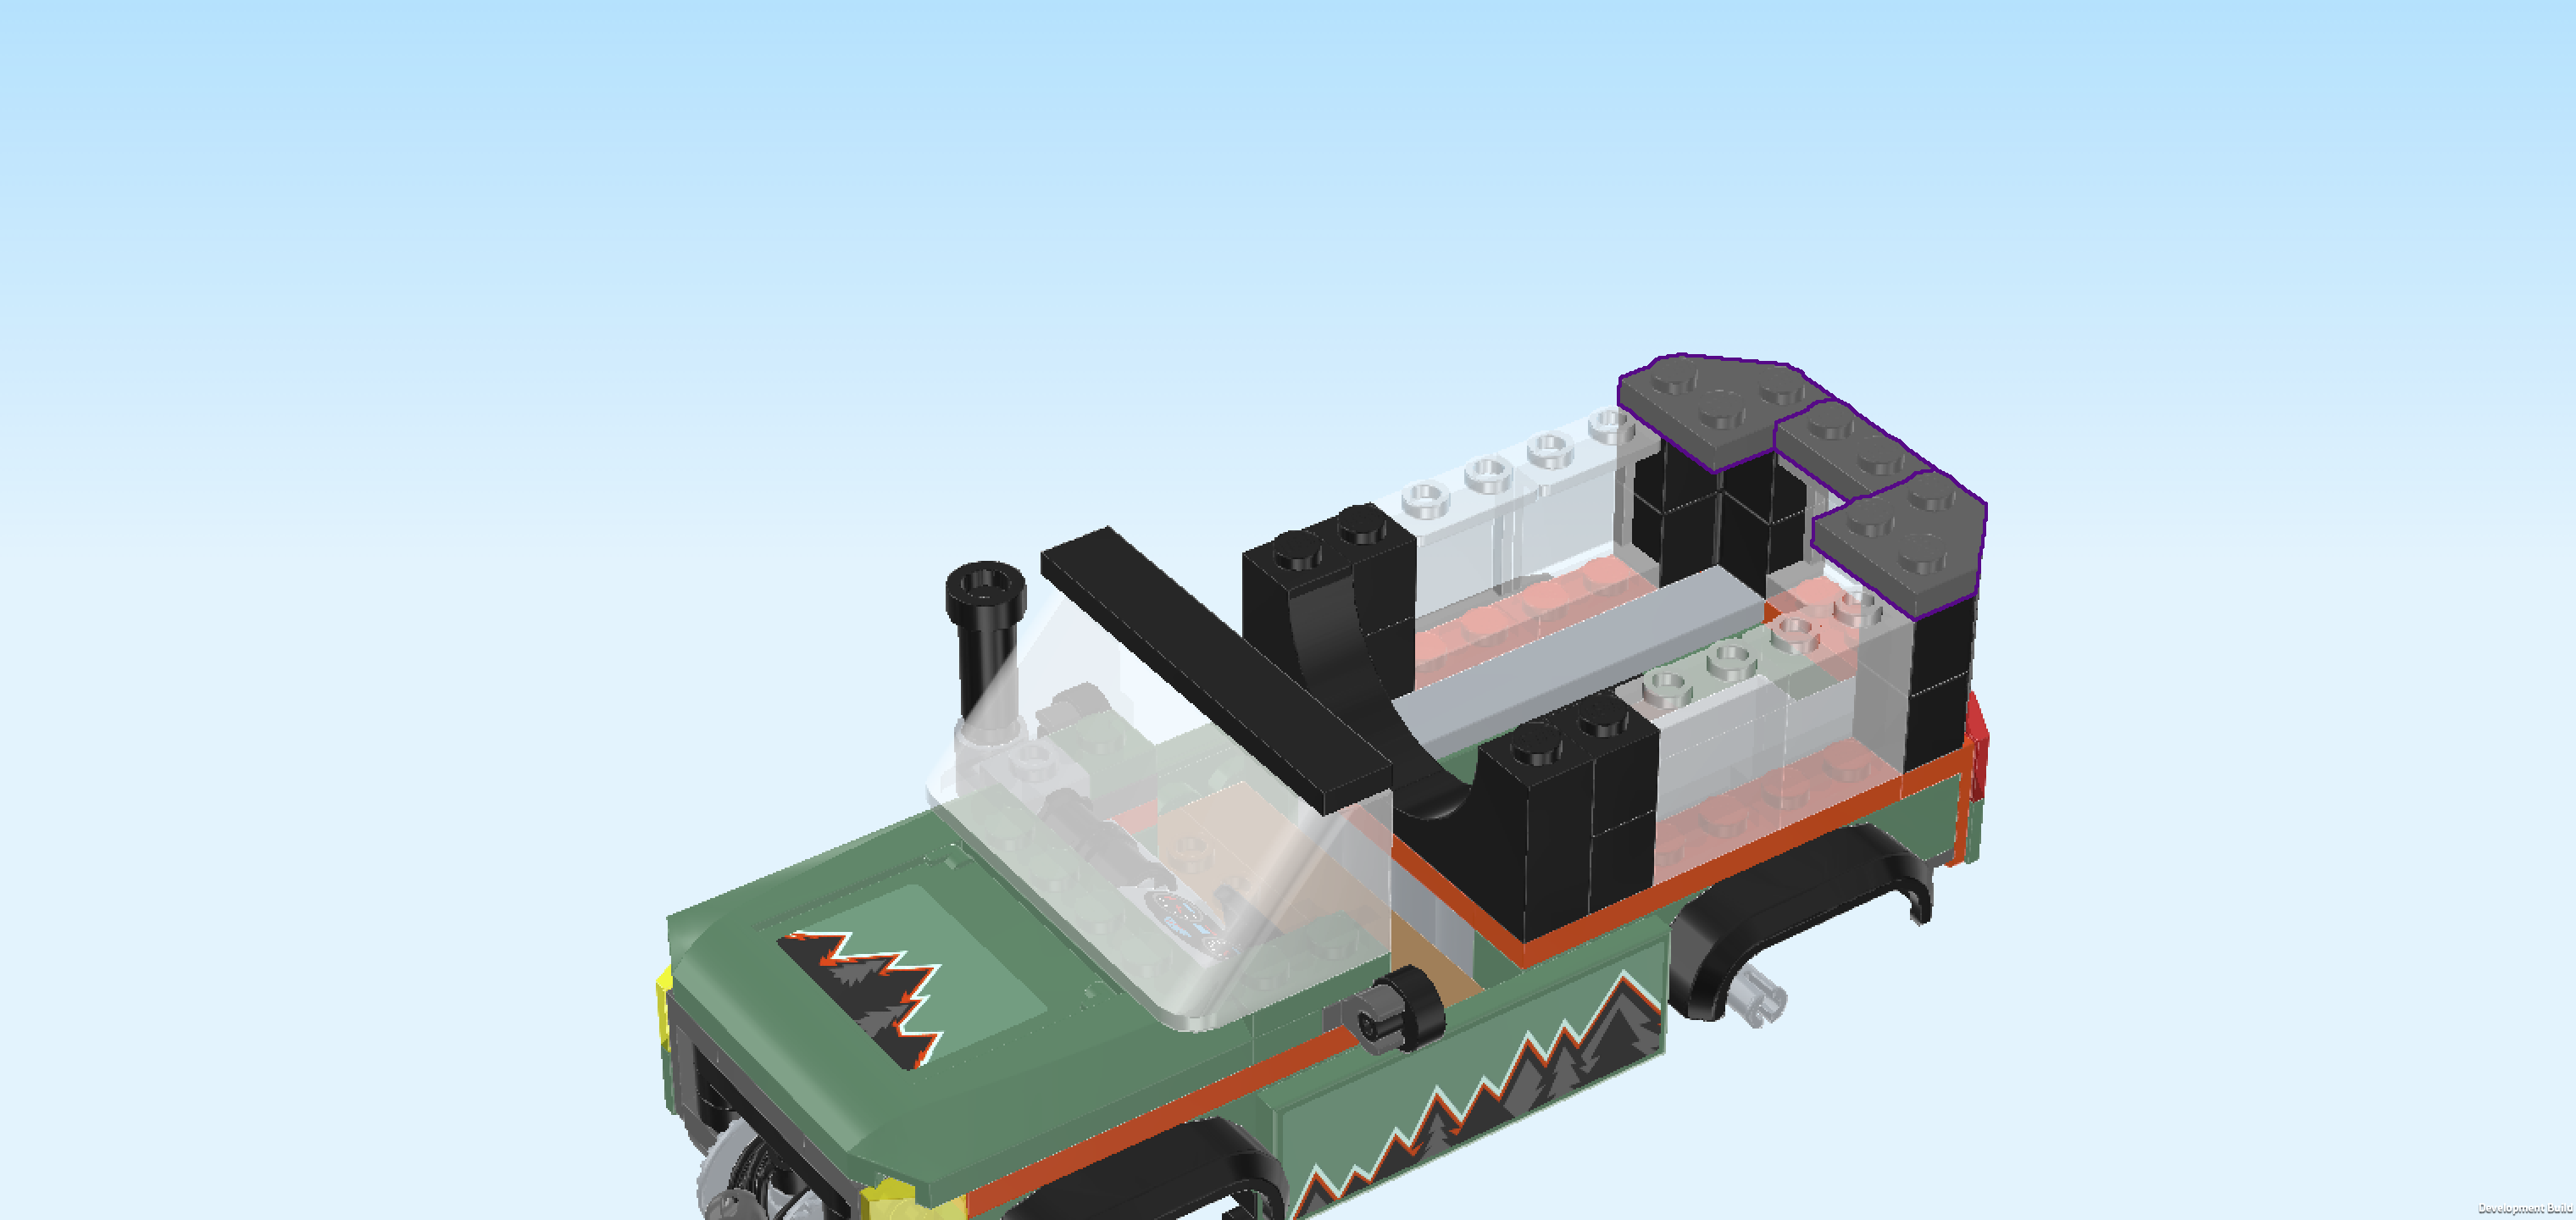
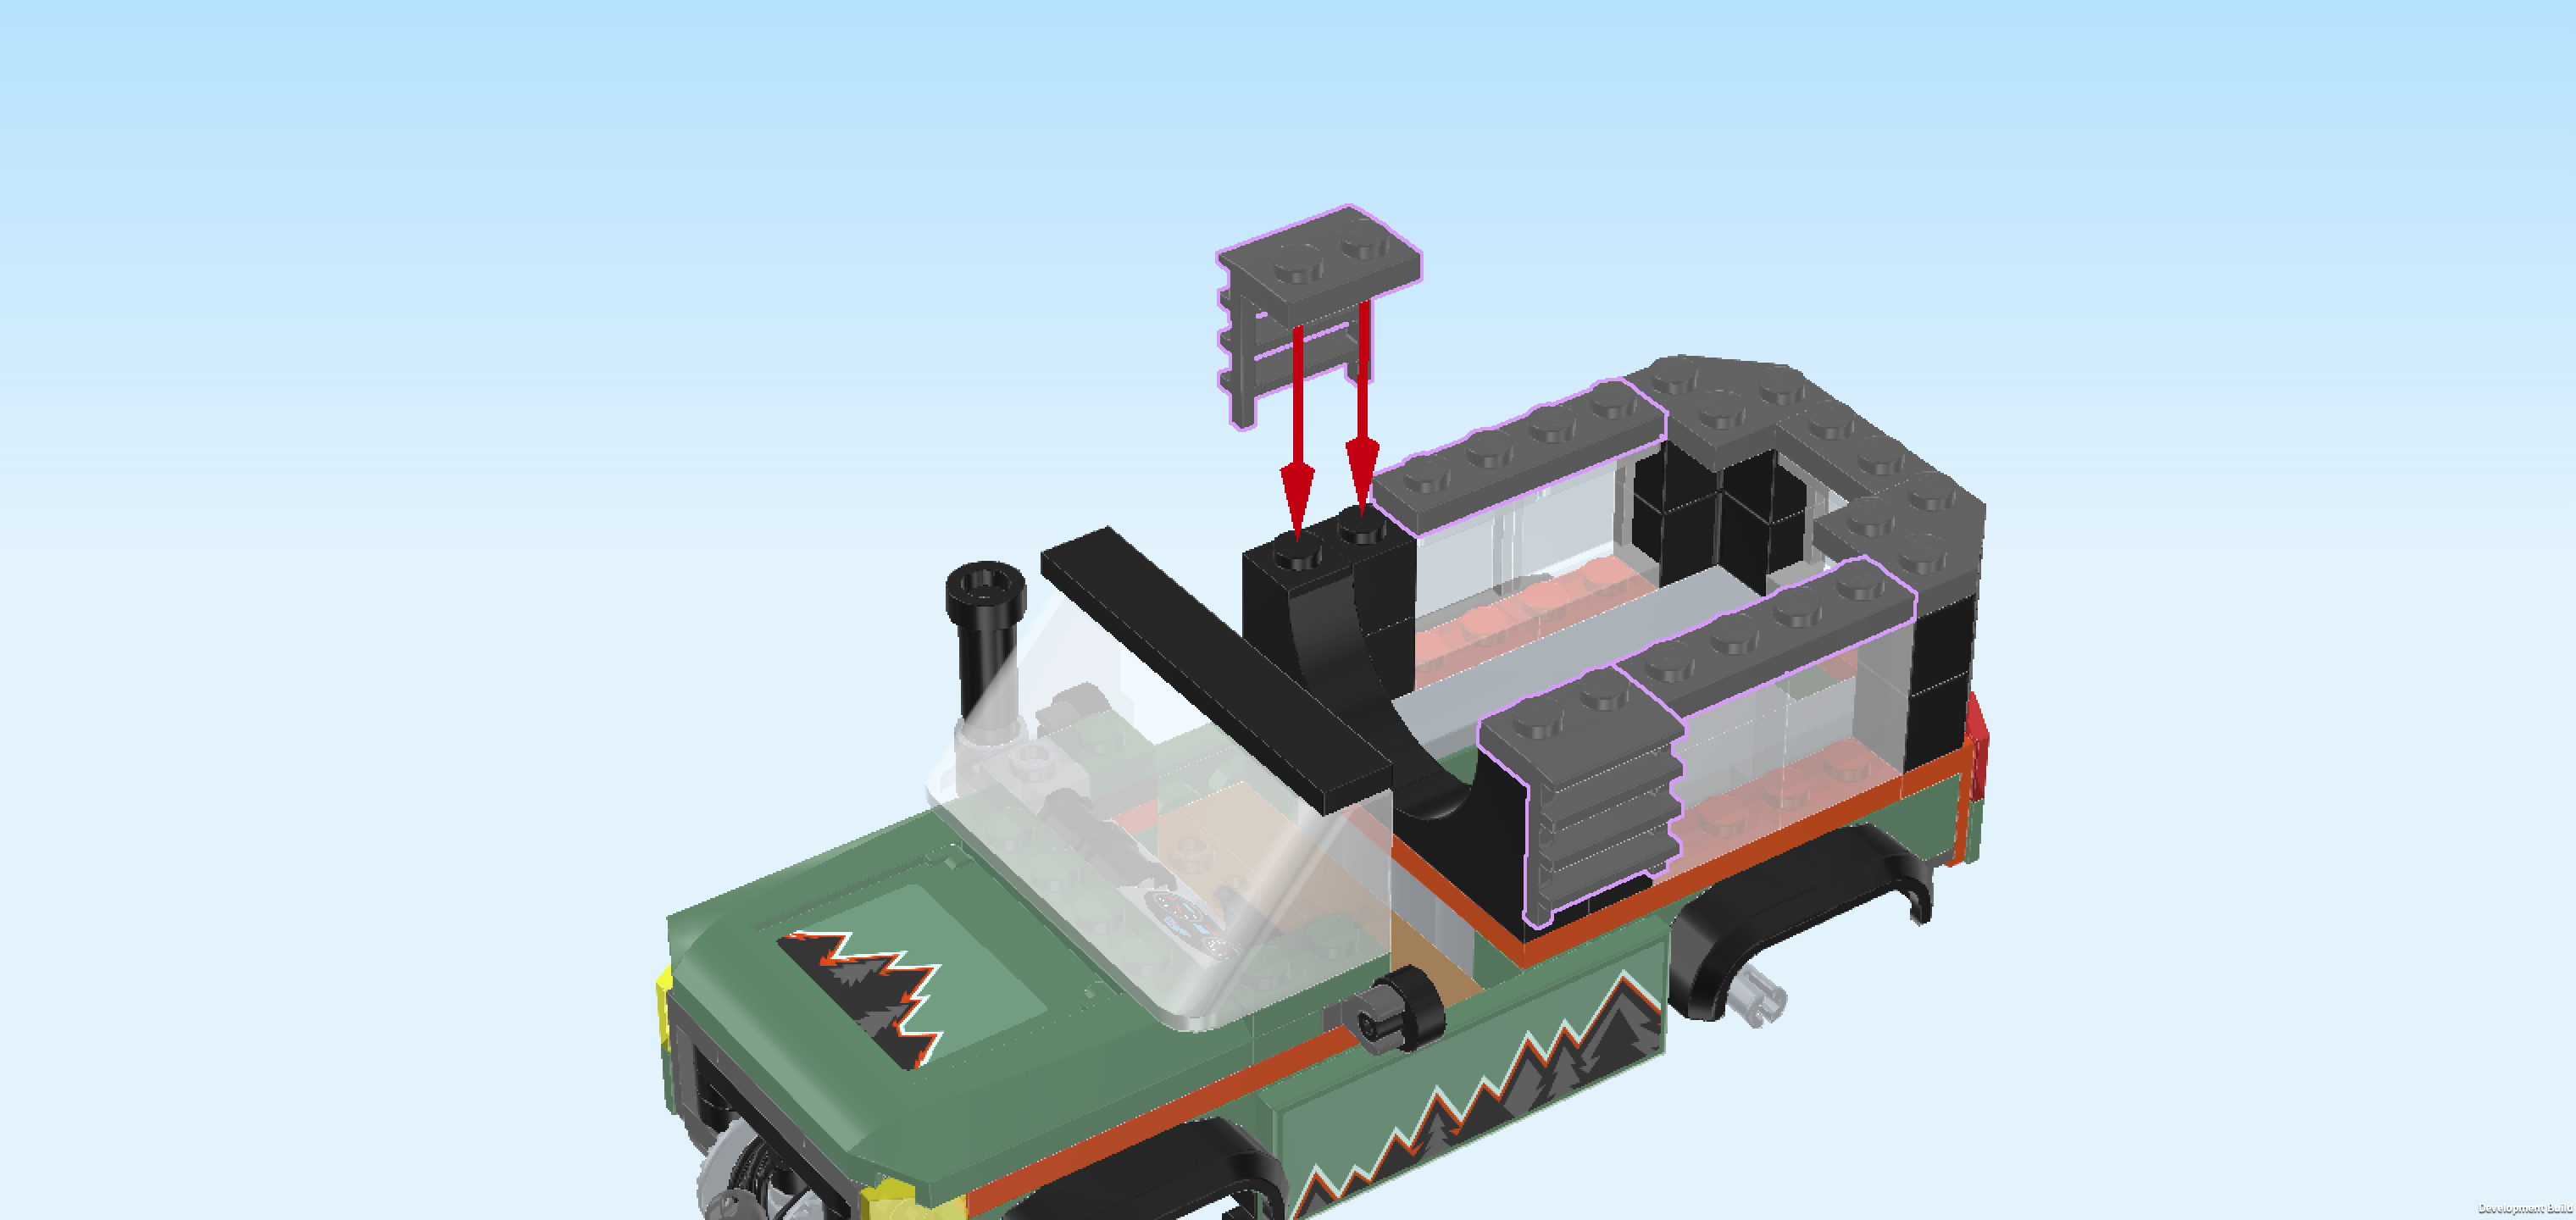
| Collect the following 3 pieces: |
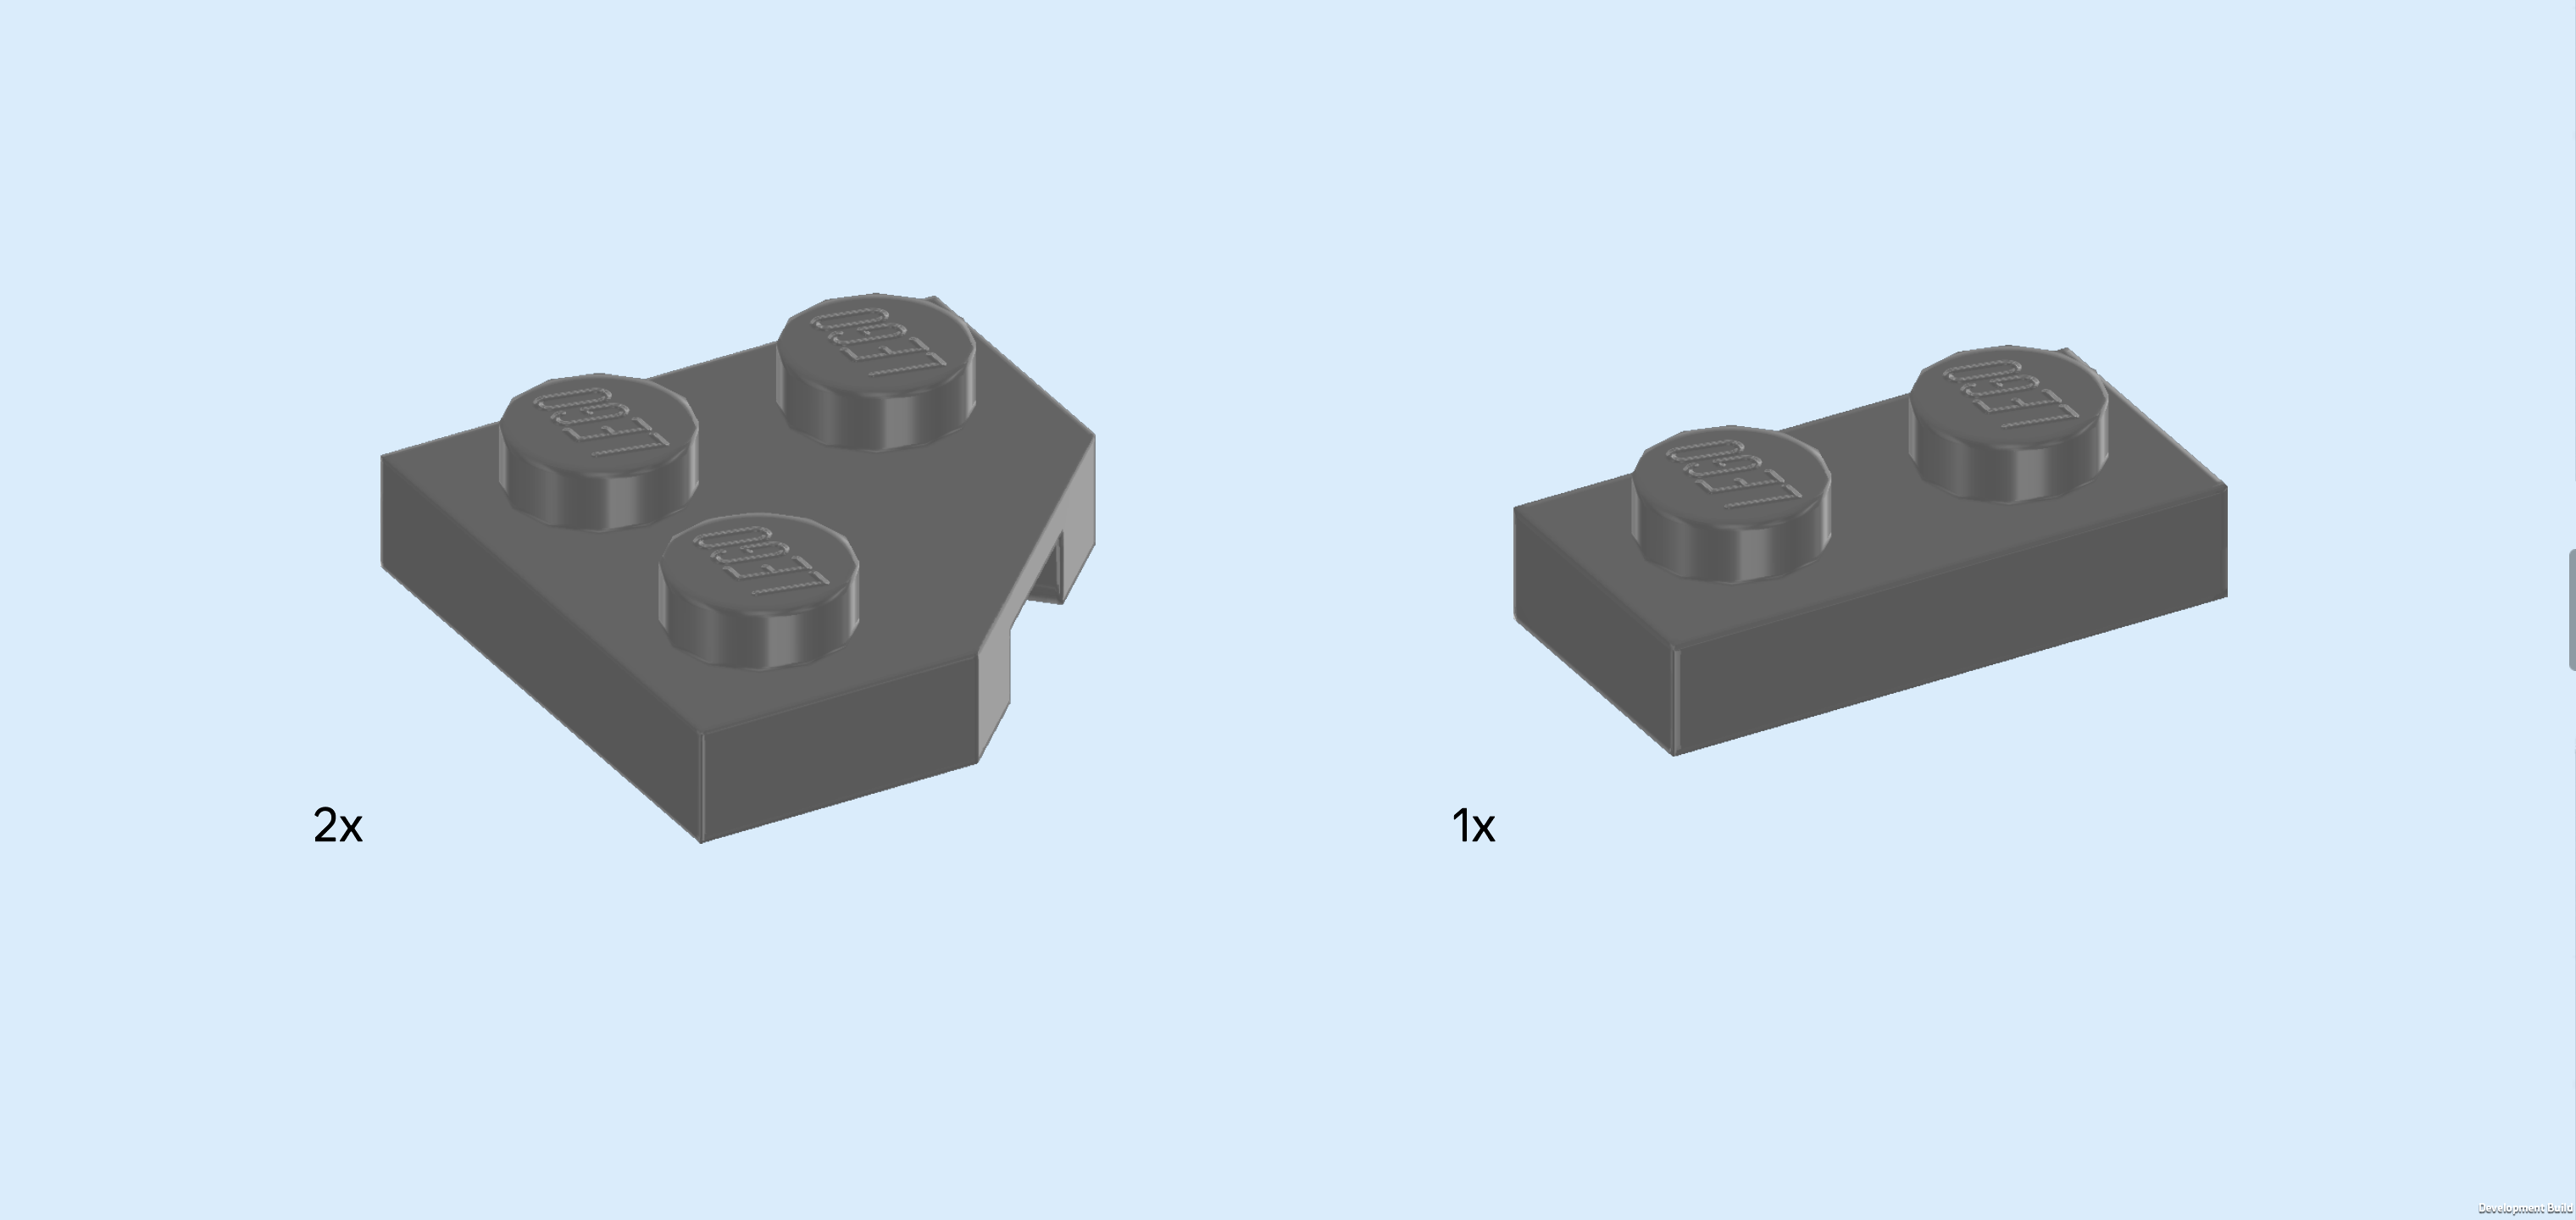
| 2 dark stone grey plates 2x2 with 1 cut-off corner, |
| and 1 dark stone grey plate 1x2. |
| Put 1 plate with cut-off corner on the back right corner of the vehicle, cut-off corner to the back right. It should match the shape of the corner bricks below. |
| Put the plate 1x2 vertically in front of the previous piece, this means on the rightmost column of the build. |
| Put the other plate with cut-off corner on the front right vehicle corner, matching the shape of the corner bricks below. |
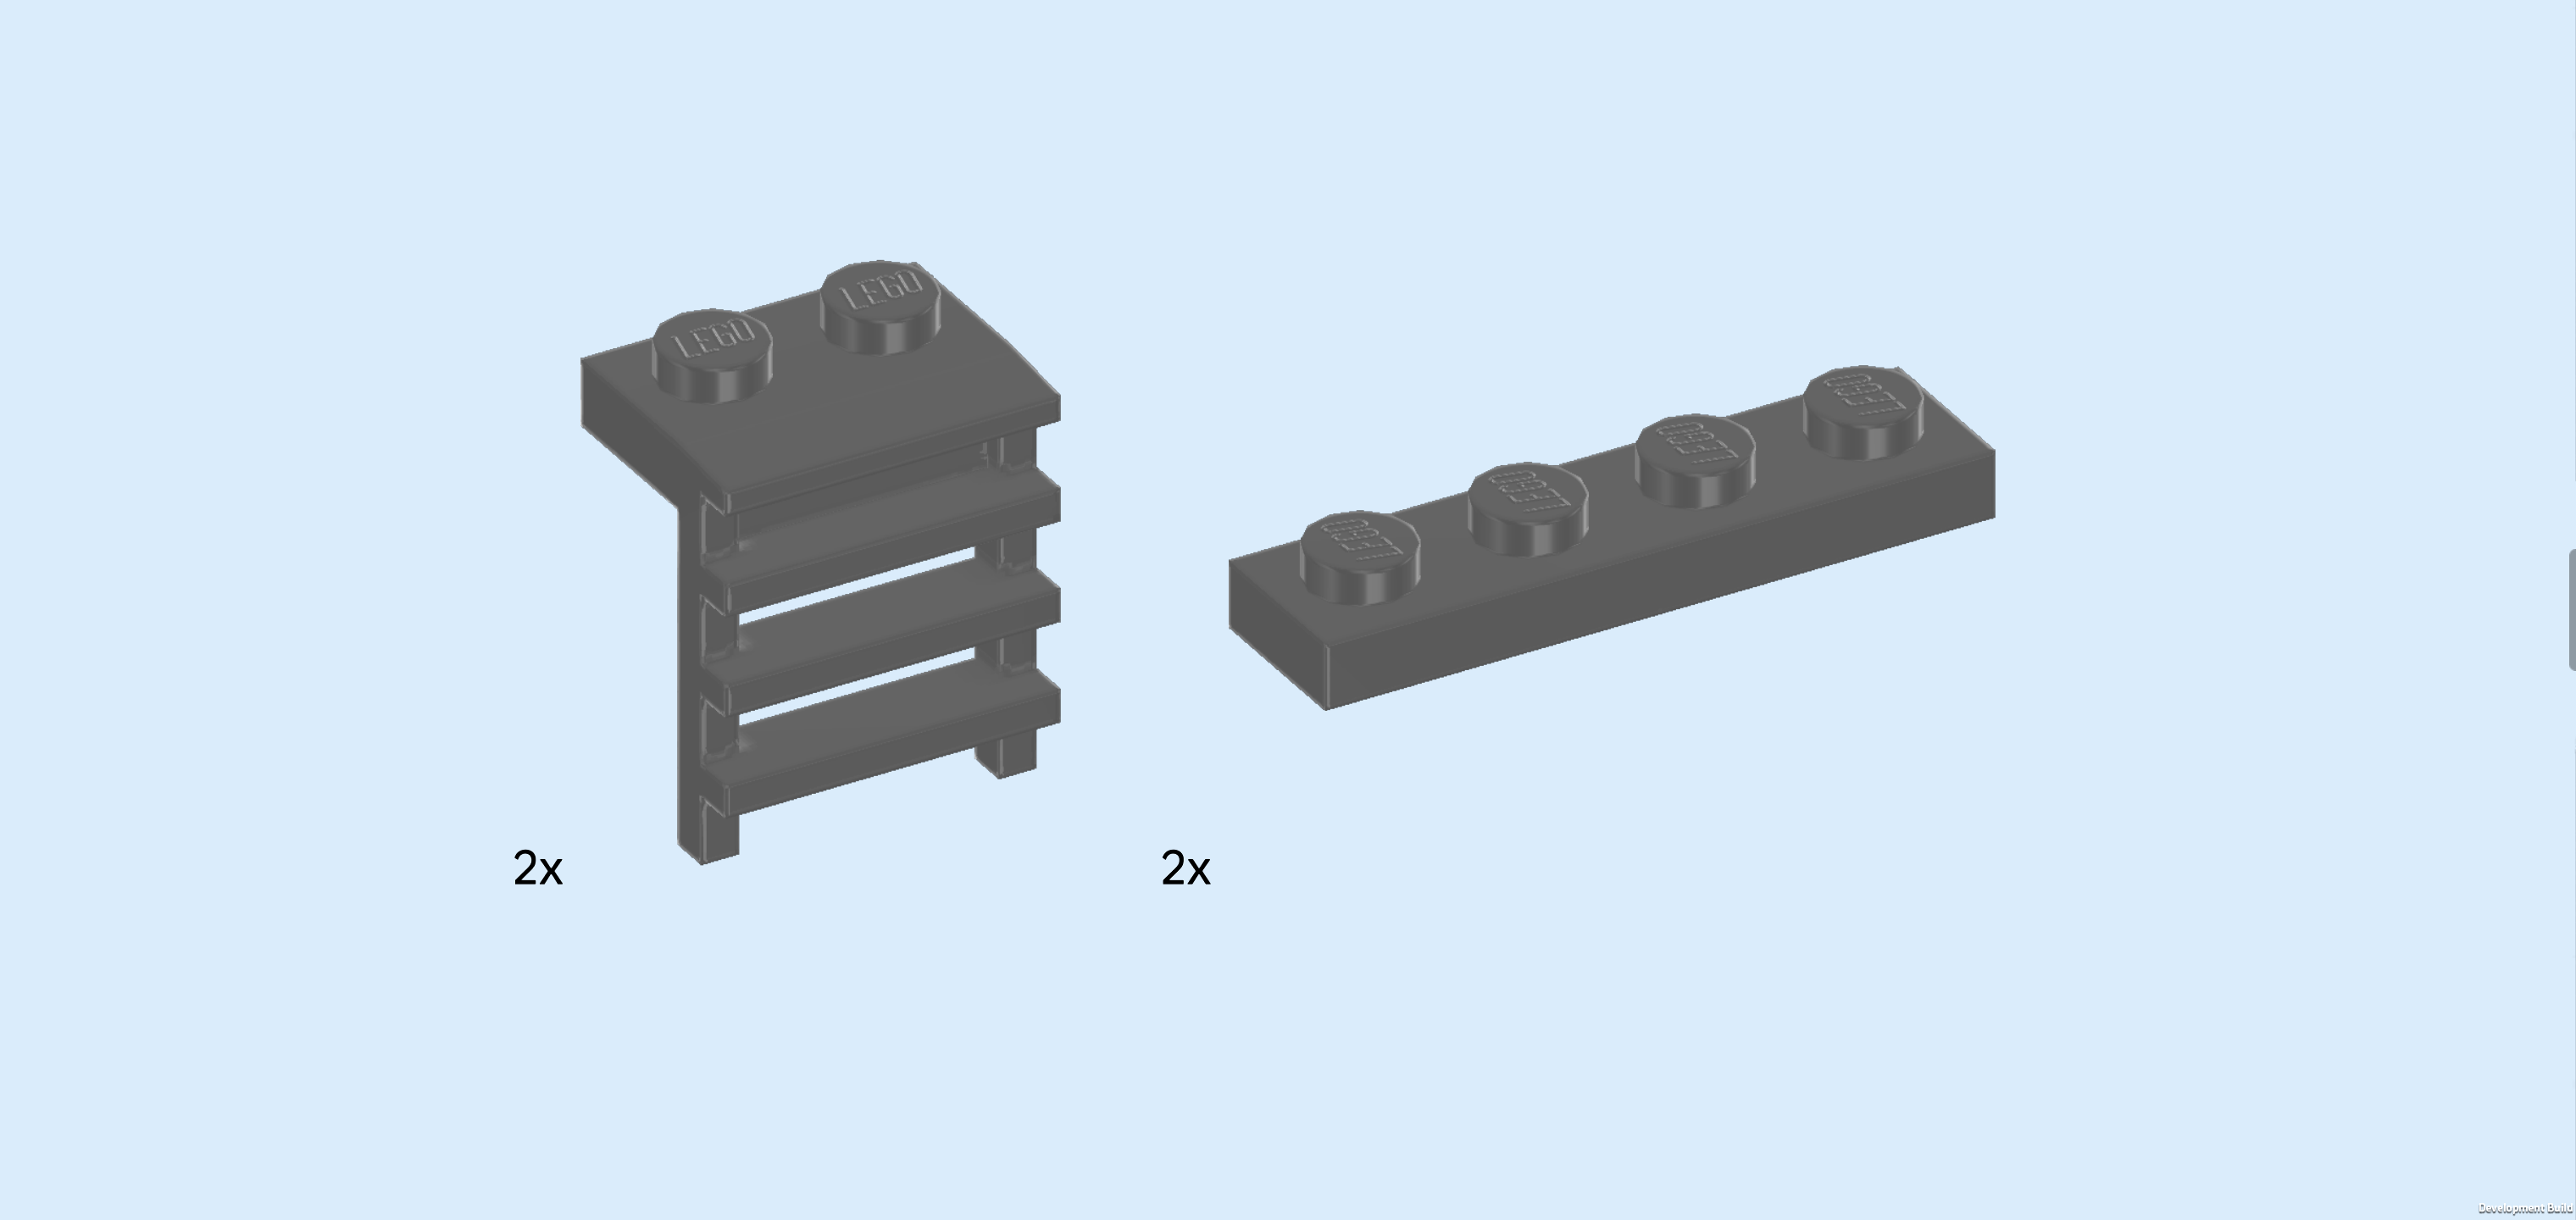
| Collect the following 4 pieces: |
| 2 dark stone grey plates 1x2 with downward ladder, |
| and 2 dark stone grey plates 1x4. |
| Put 1 plate 1x4 horizontally on the frontmost row directly to the left of the previous piece. |
| Put 1 plate 1x2 horizontally to the left of the previous piece, ladder overhanging to the front. |
| Repeat symmetrically at the back with the 2 remaining pieces. |
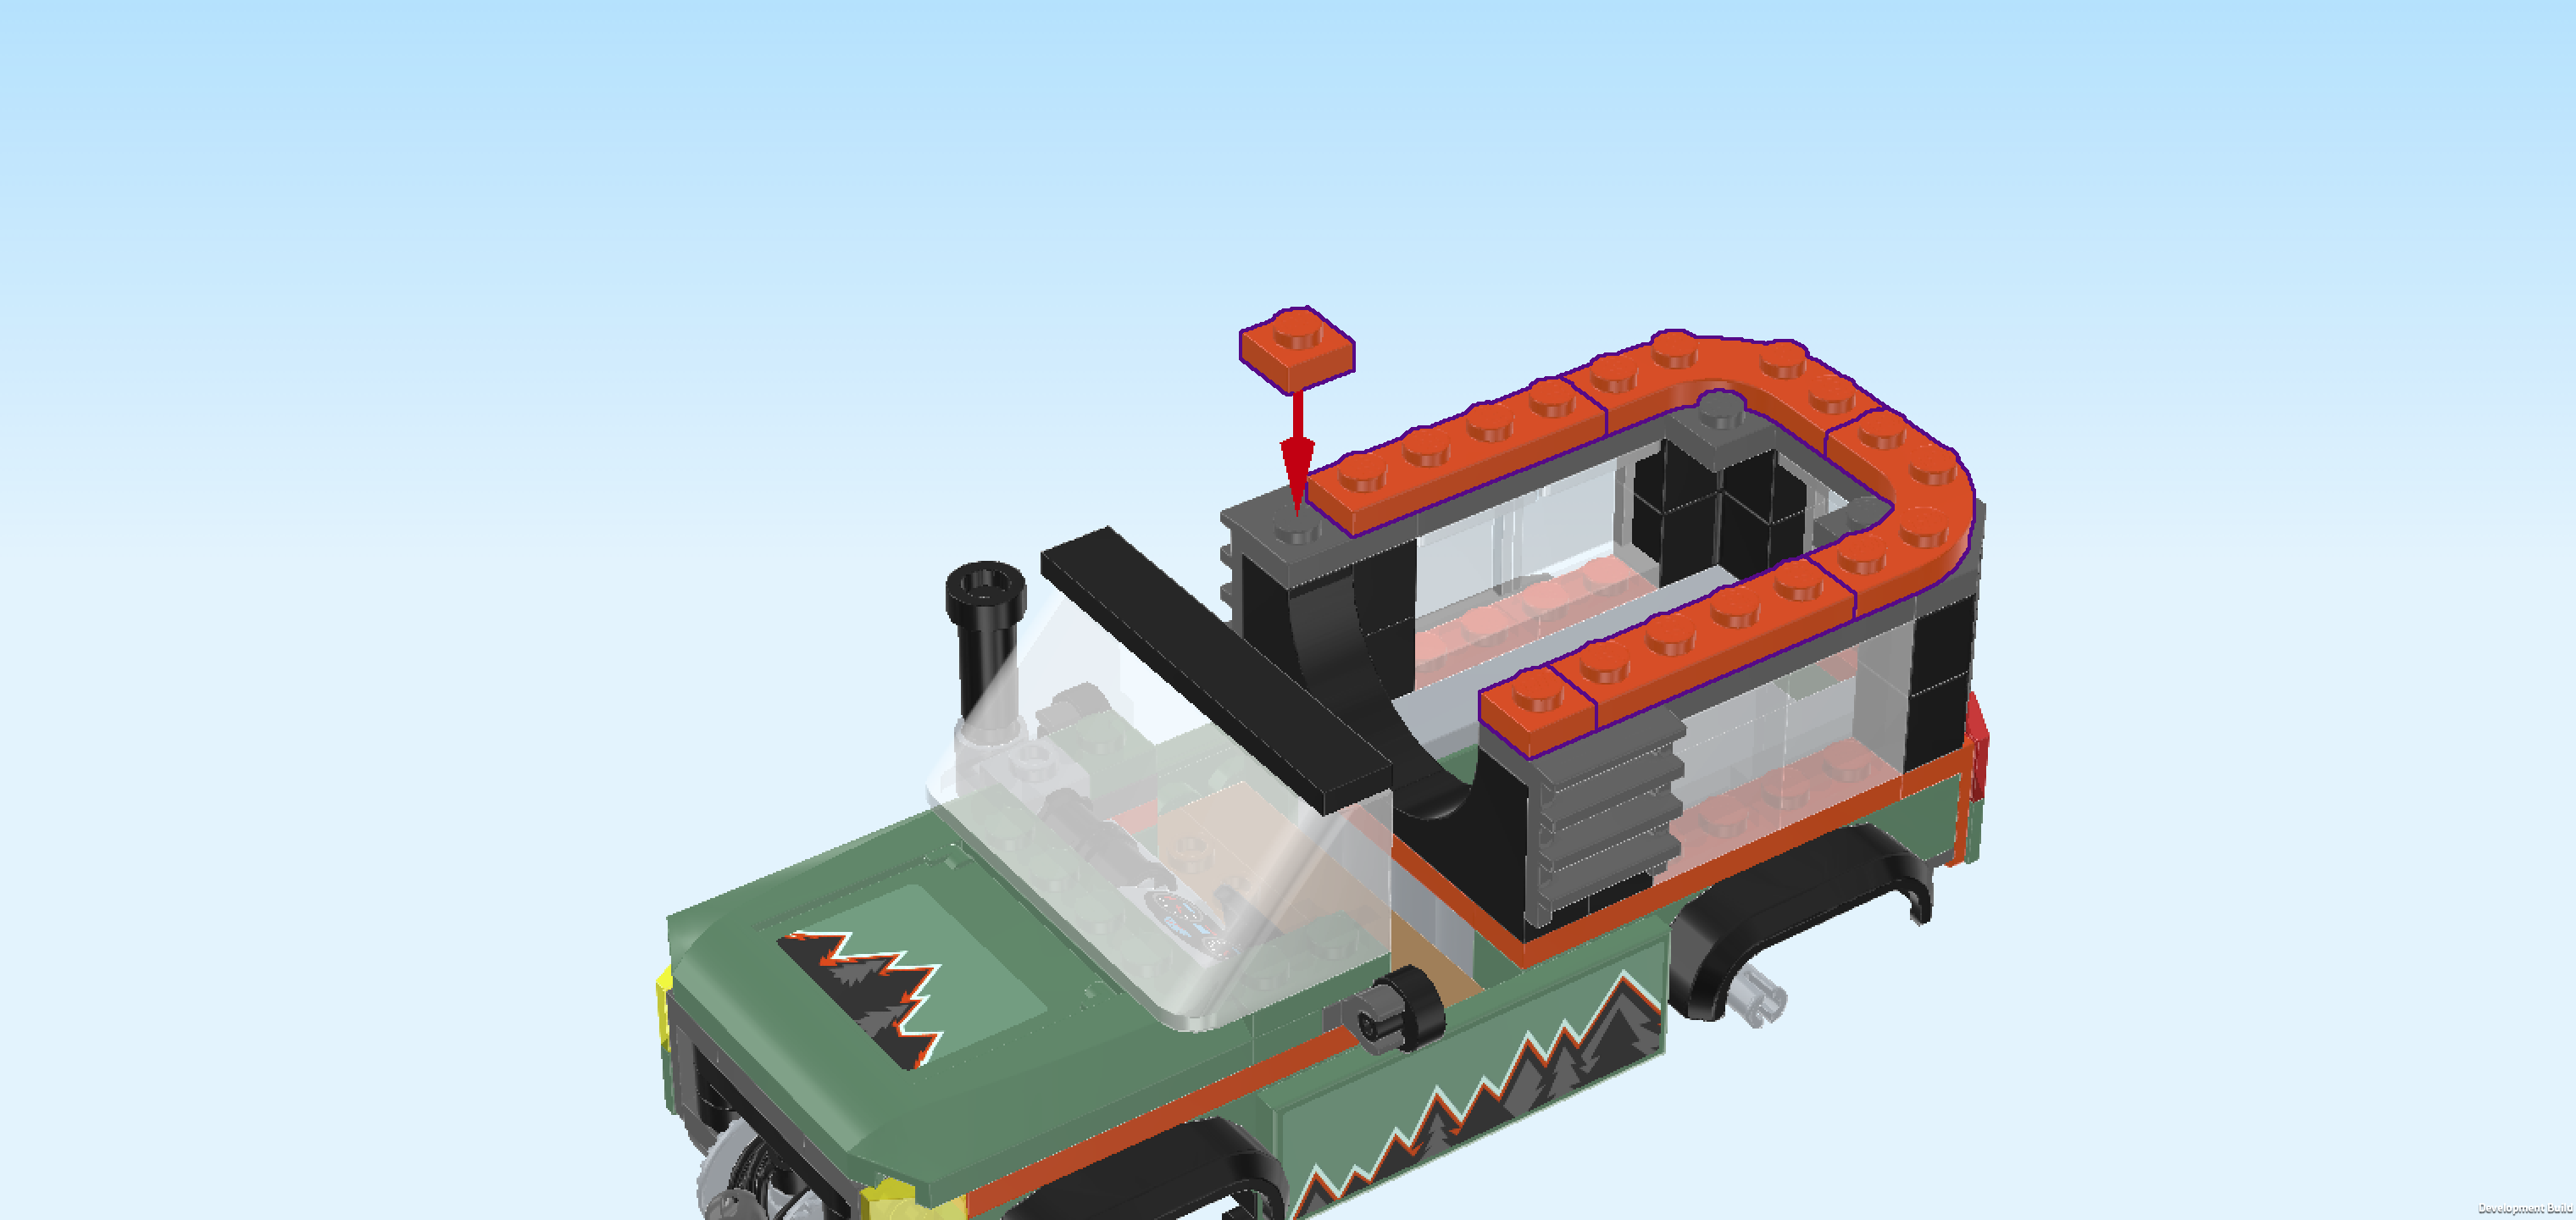
| Collect the following 6 pieces: |
| 2 reddish orange plates 1x1, |
| 2 reddish orange plates 1x4, |
| and 2 reddish orange quarter-arched plates 3x3. |
| Put 1 plate 1x1 on the leftmost knob of the previous piece. This means it will sit on the backmost row above the ladder piece. |
| Put 1 plate 1x4 horizontally to the right of the previous piece. |
| Put 1 quarter-arched plate 3x3 to the right of the previous piece, the arch matching the shape of the plate and corner bricks below. |
| Repeat symmetrically at the front with the 3 remaining pieces. |
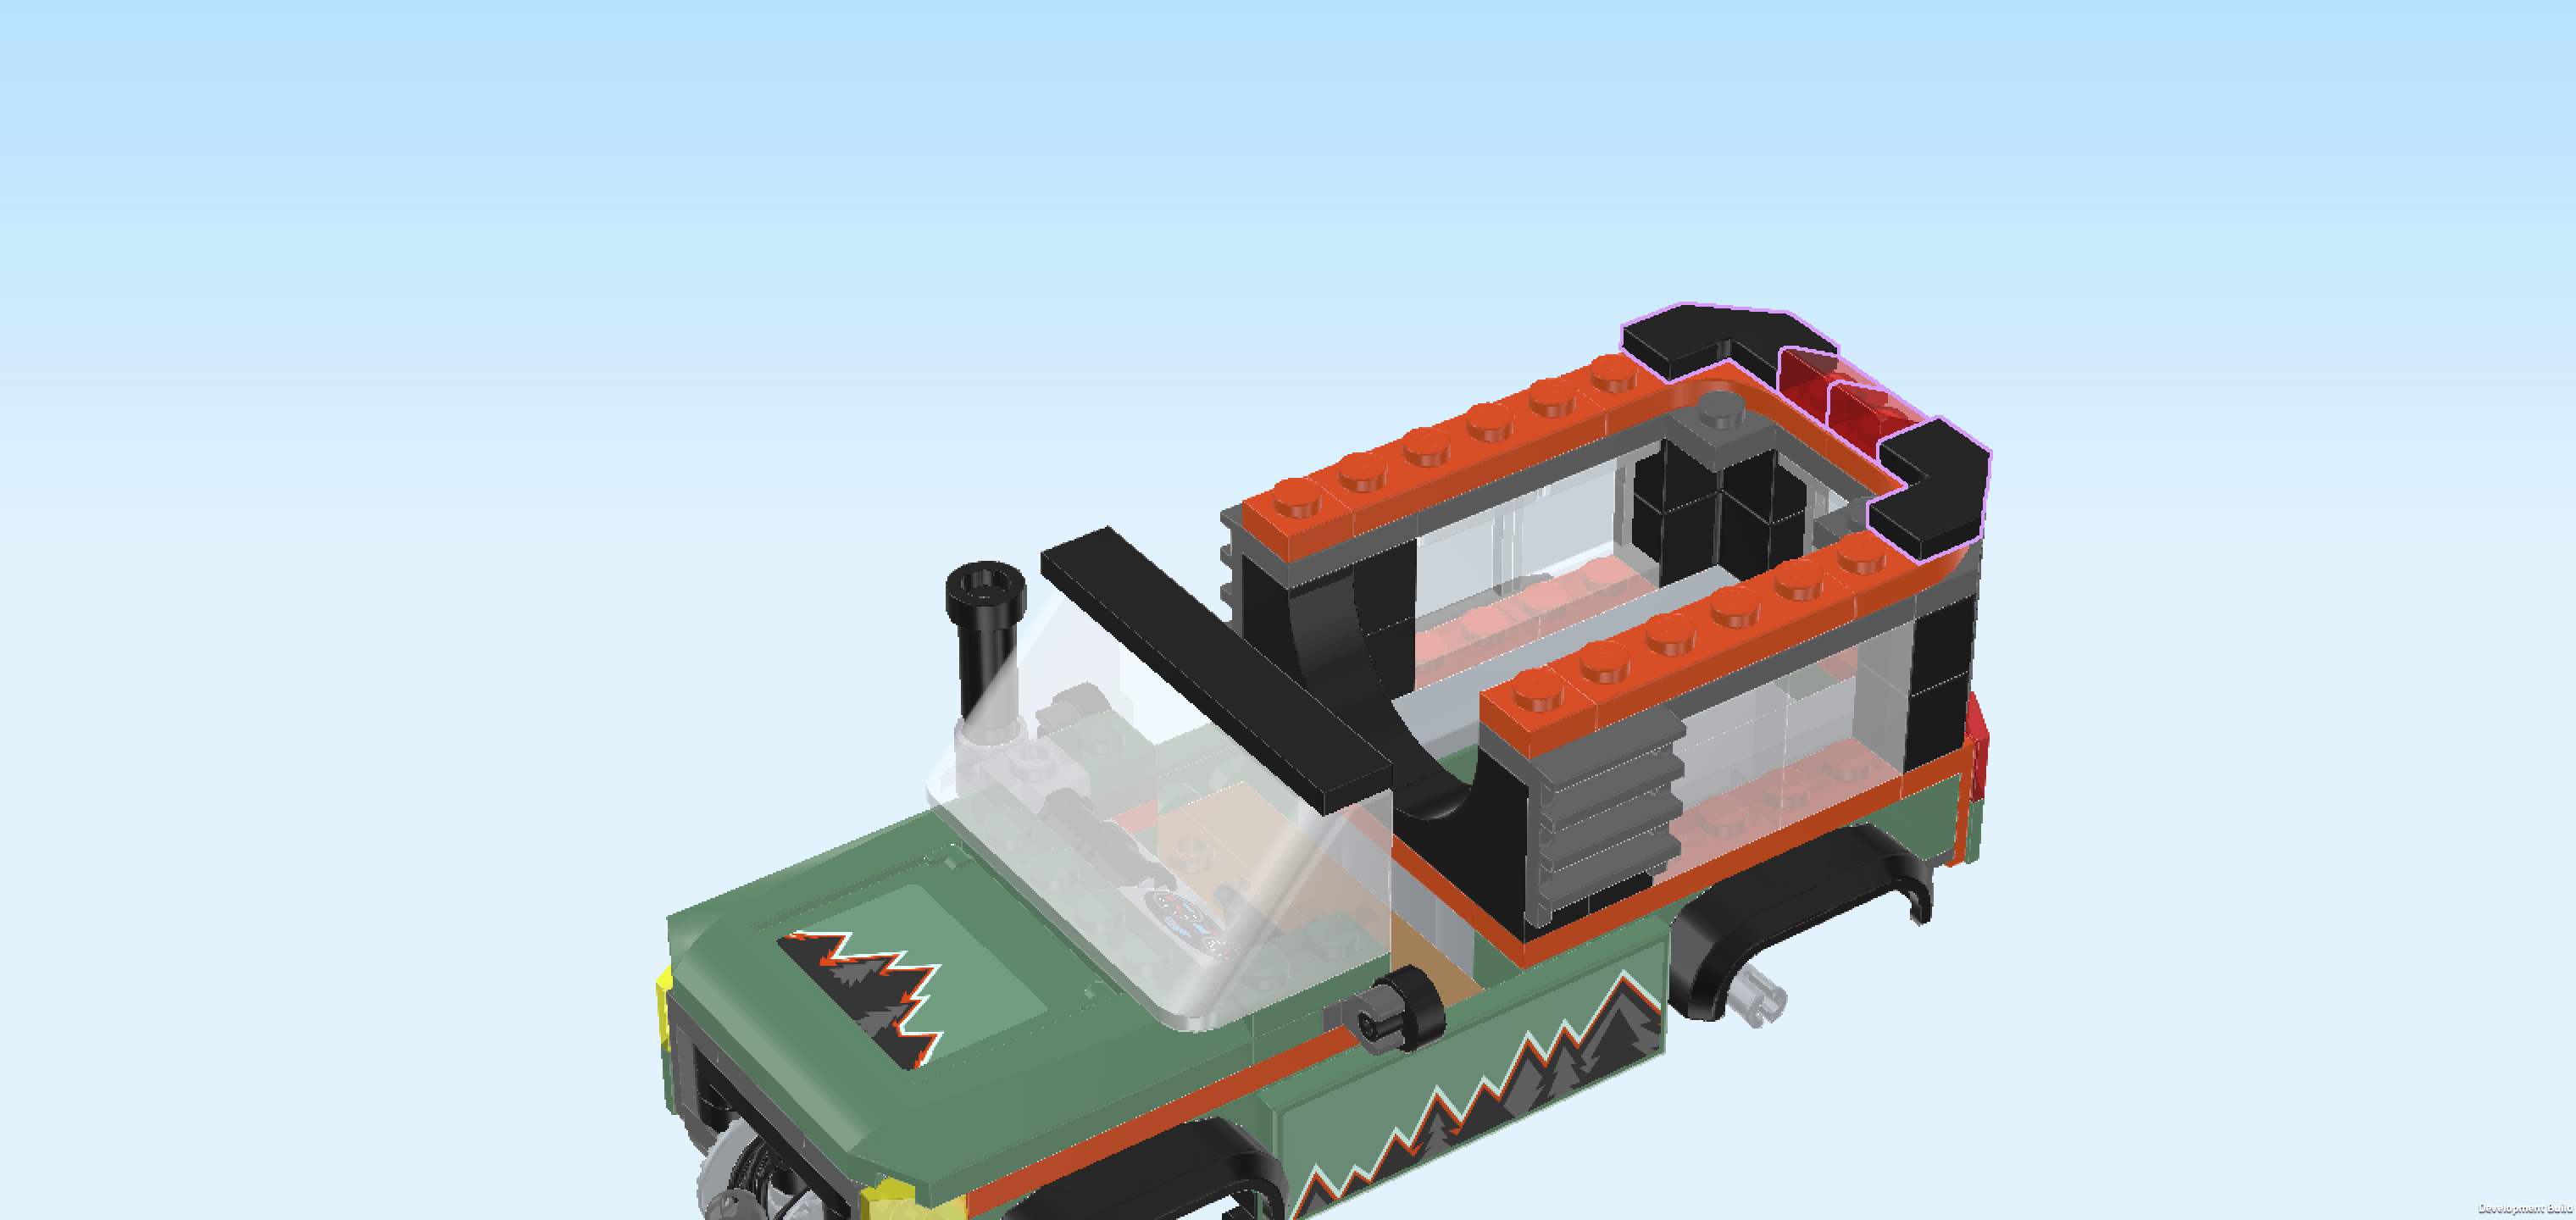
| Collect the following 4 pieces: |
| 2 transparent red smooth roof tiles 1x1x⅔, |
| and 2 black corner tiles 1x2 - 1x2 with cut-off corner. |
| Put the 2 smooth roof tiles on the 2 middle knobs of the rightmost column, slopes to the right. |
| Put 1 corner tile 1x2 in front of the previous piece, matching the shape of the quarter-arched tile below. |
| Repeat symmetrically at the back with the other corner tile. |
| Collect the following 4 pieces: |
| 2 black plates 1x4 with 2 knobs, |
| and 2 black flat tiles 1x2. |
| Put 1 flat tile 1x2 horizontally to the left of the previous piece on the backmost row. |
| Put 1 plate 1x4 horizontally to the left of the previous piece. |
| Repeat symmetrically at the front with the 2 remaining pieces. |
| With this, we have built everything from bag number 3. Great job! Only one more bag to go. |
| Open bag number 4. You can choose to have the bricks sorted by color again if you like. This bag contains all bricks and pieces for the vehicle roof with storage boxes and the truck wheels. |
| First, we will assemble the camper bed of the truck. |
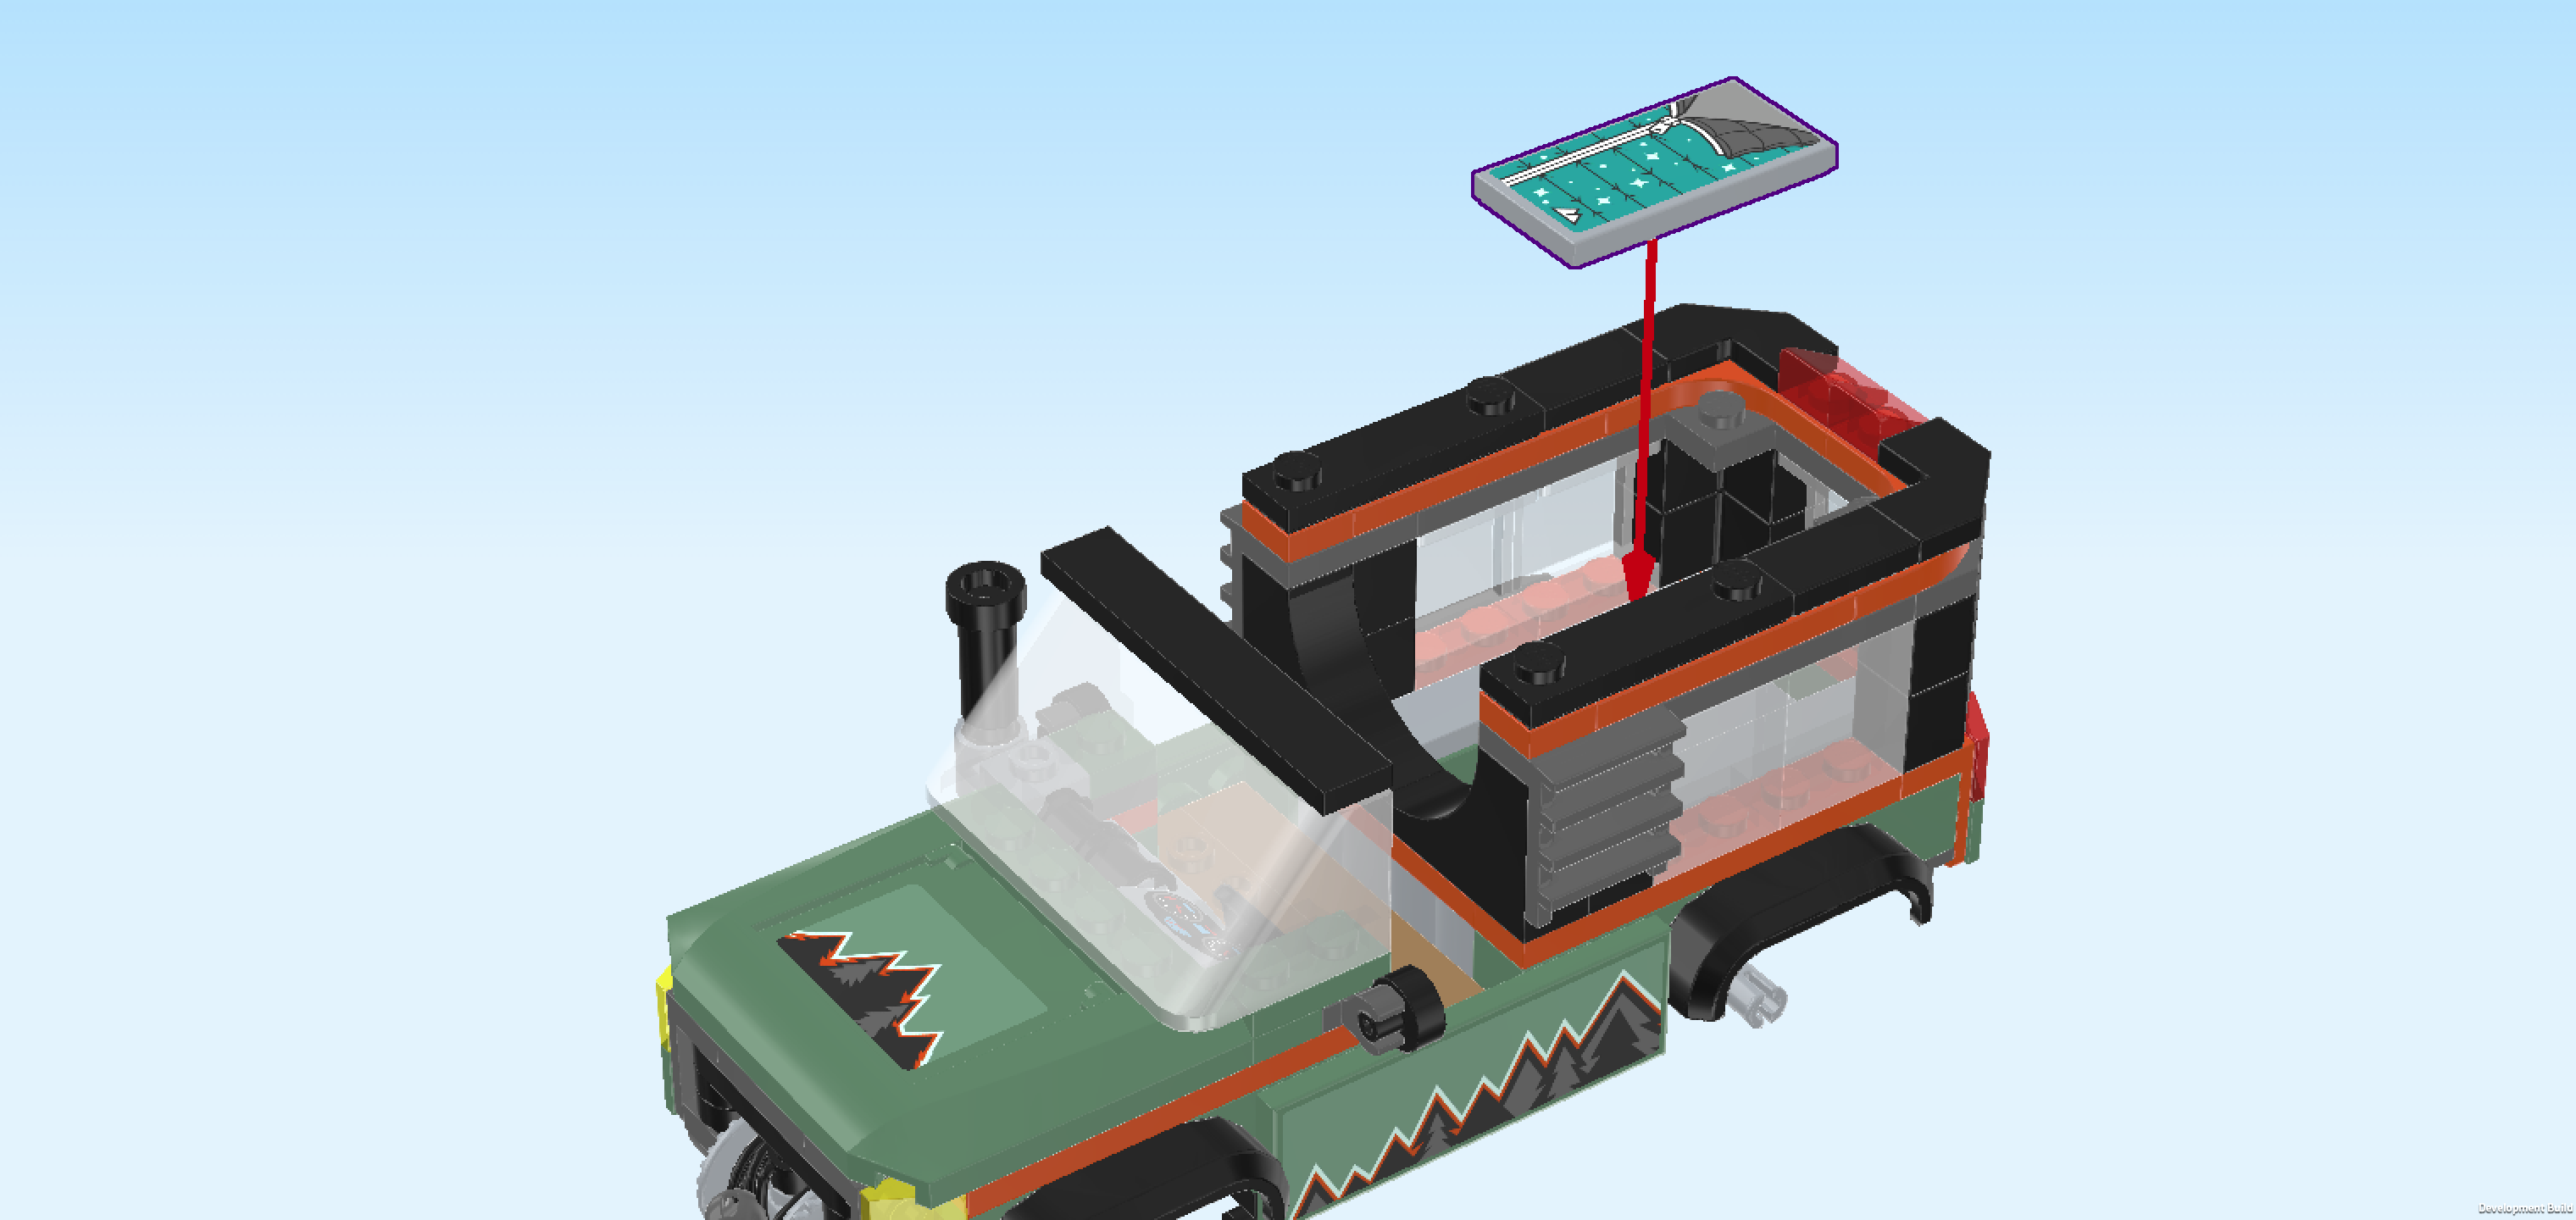
| Collect the following 2 pieces: |
| 1 medium stone grey flat tile 2x4, |
| and 1 rectangular sticker 2x4. |
| Put the flat tile vertically on the table, and then attach the sticker, matching its shape. |
| This sticker shows a teal sleeping bag with stitched seams and a grey hood section at the top. A white zipper runs down the left side, and the surface is decorated with small star shapes and a tiny white mountain in the bottom corner, suggesting a cozy night outdoors. |
| Put the flat tile horizontally into the inside of the cabin. This piece will not attach to any knobs. The explorer can simply take it out of the car whenever he feels like sleeping under the stars. A true adventurer! |
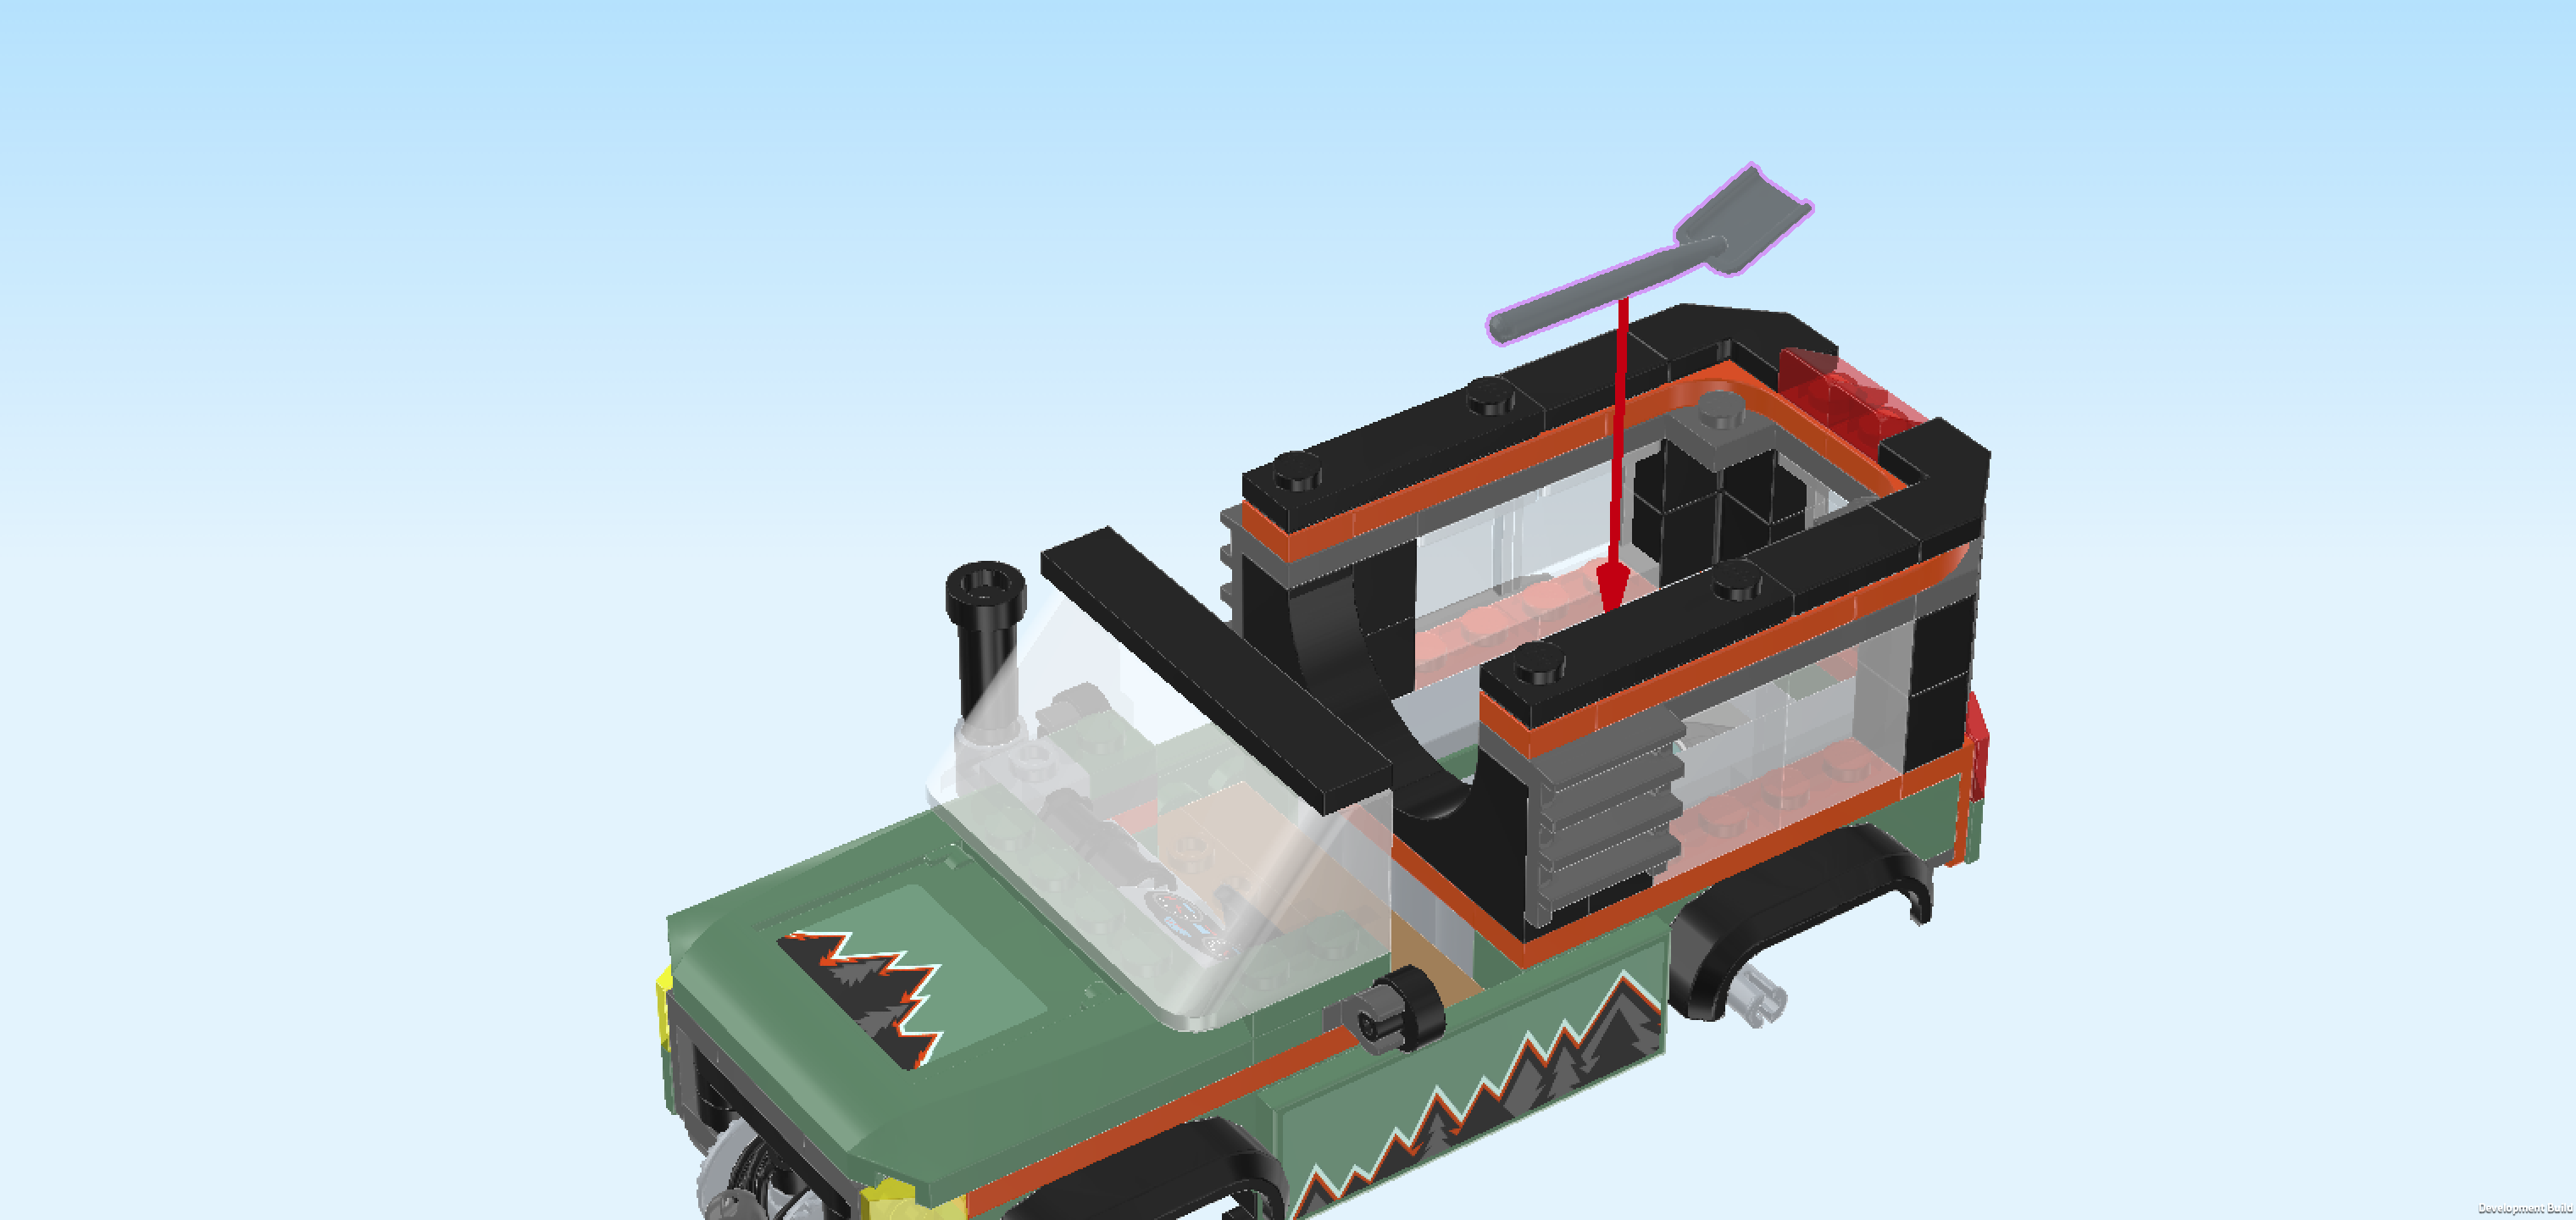
| Find 1 silver metallic shovel. |
| Place it inside the cabin, too. |
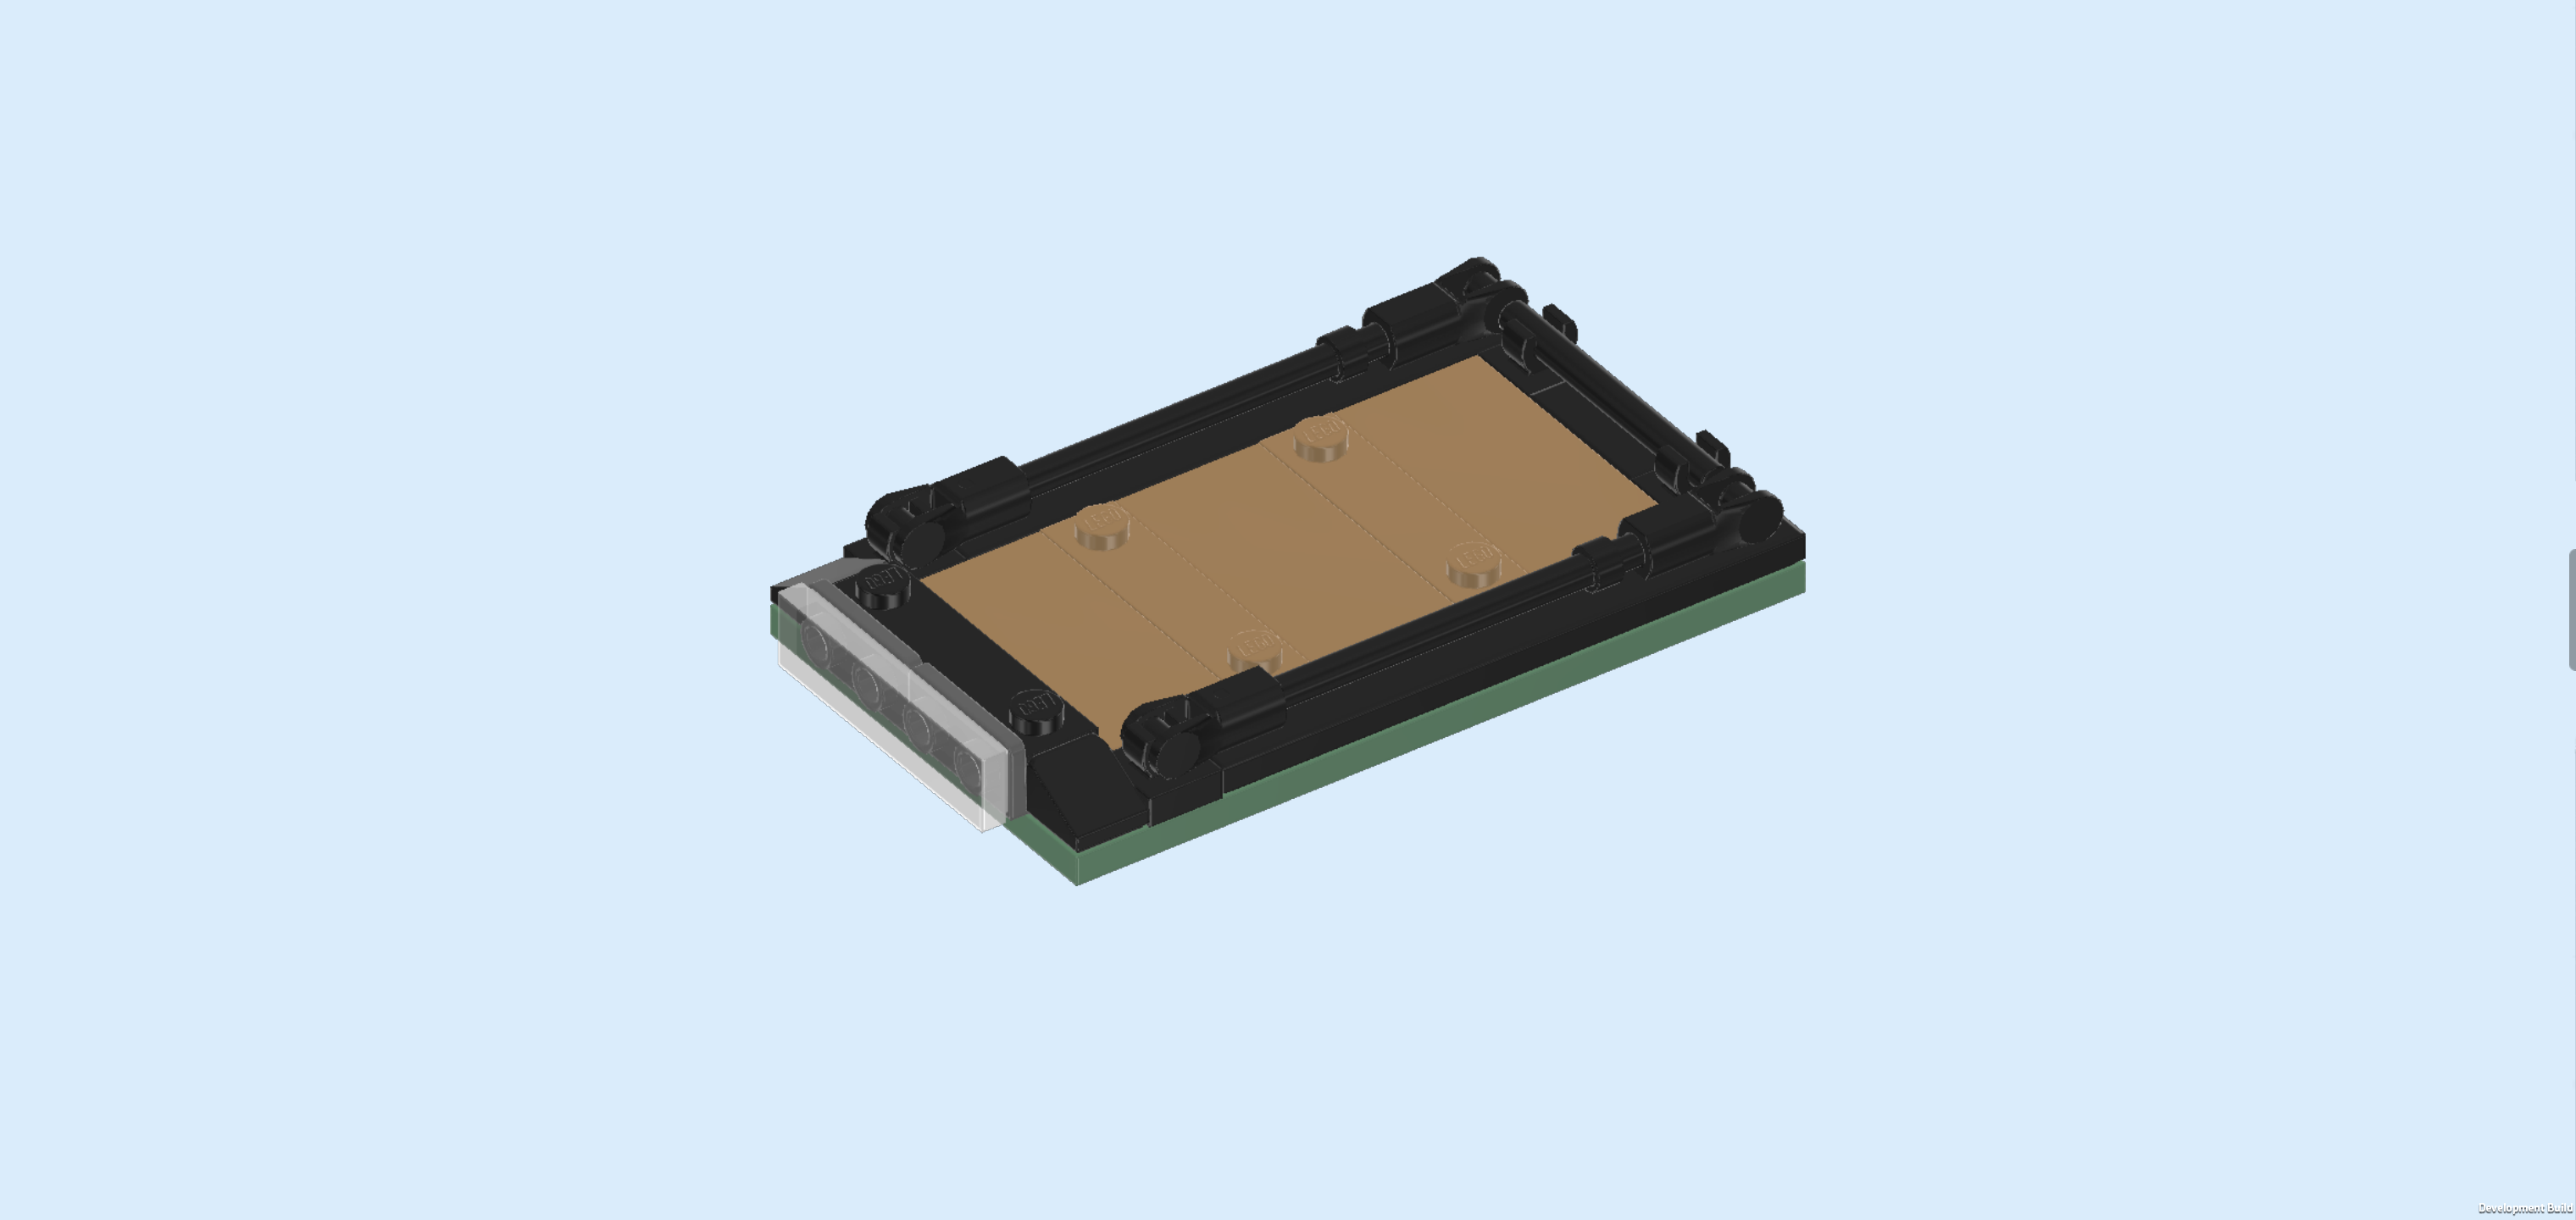
| Next up, we will build the vehicle roof. |
| Collect the following 2 pieces: |
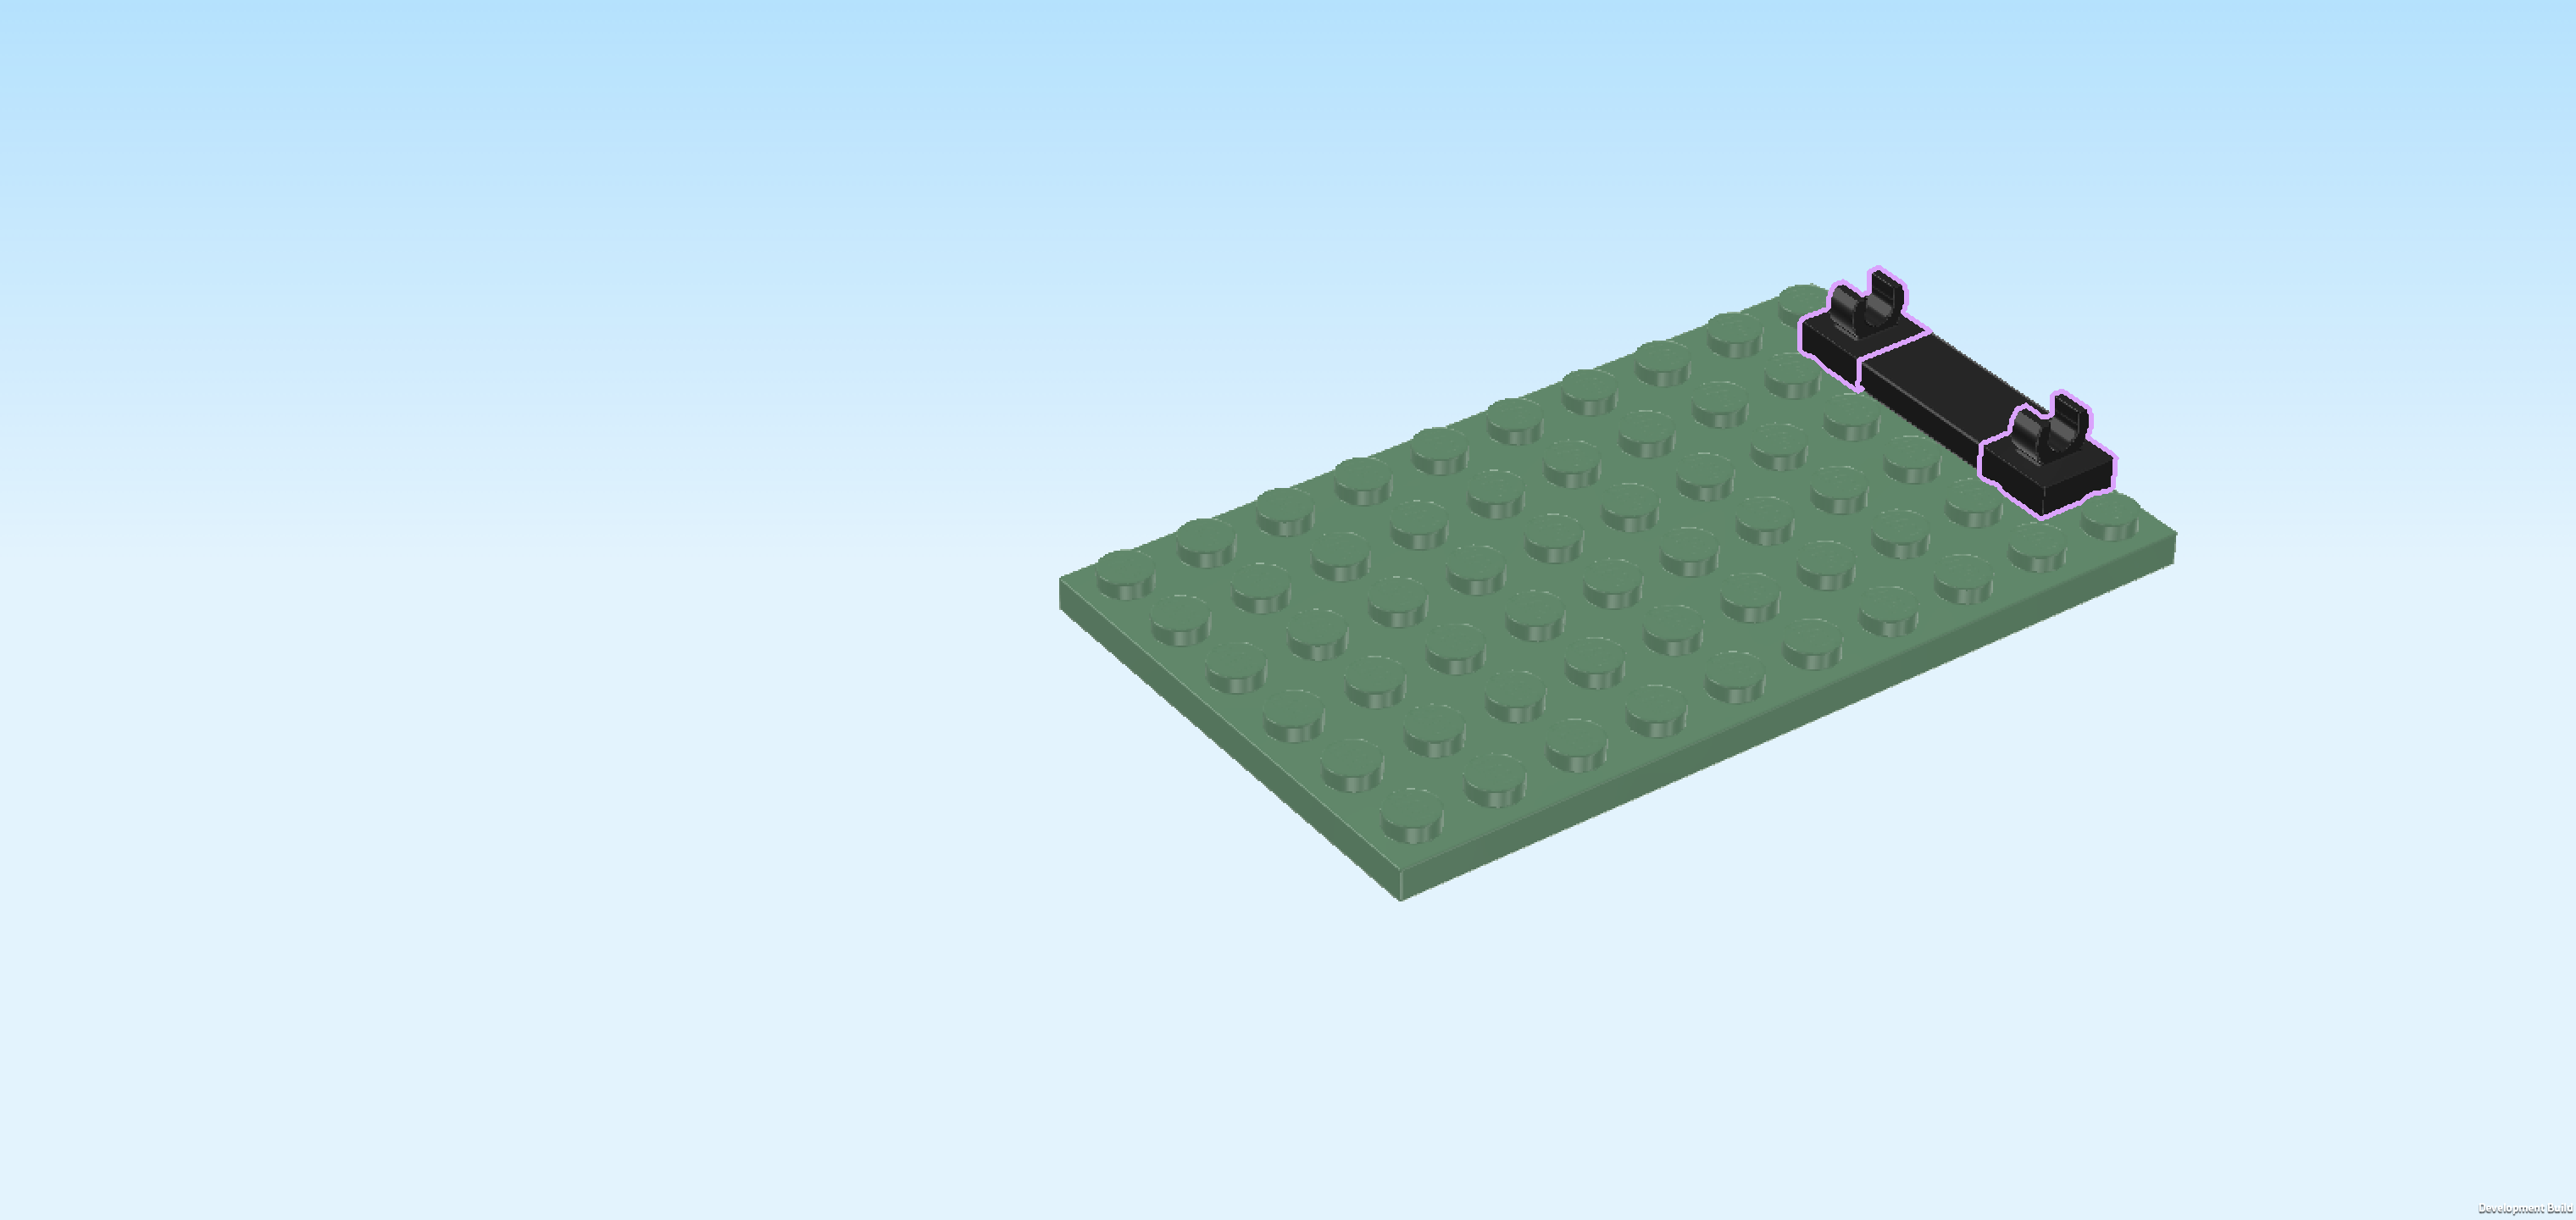
| 1 sand green plate 6x10, |
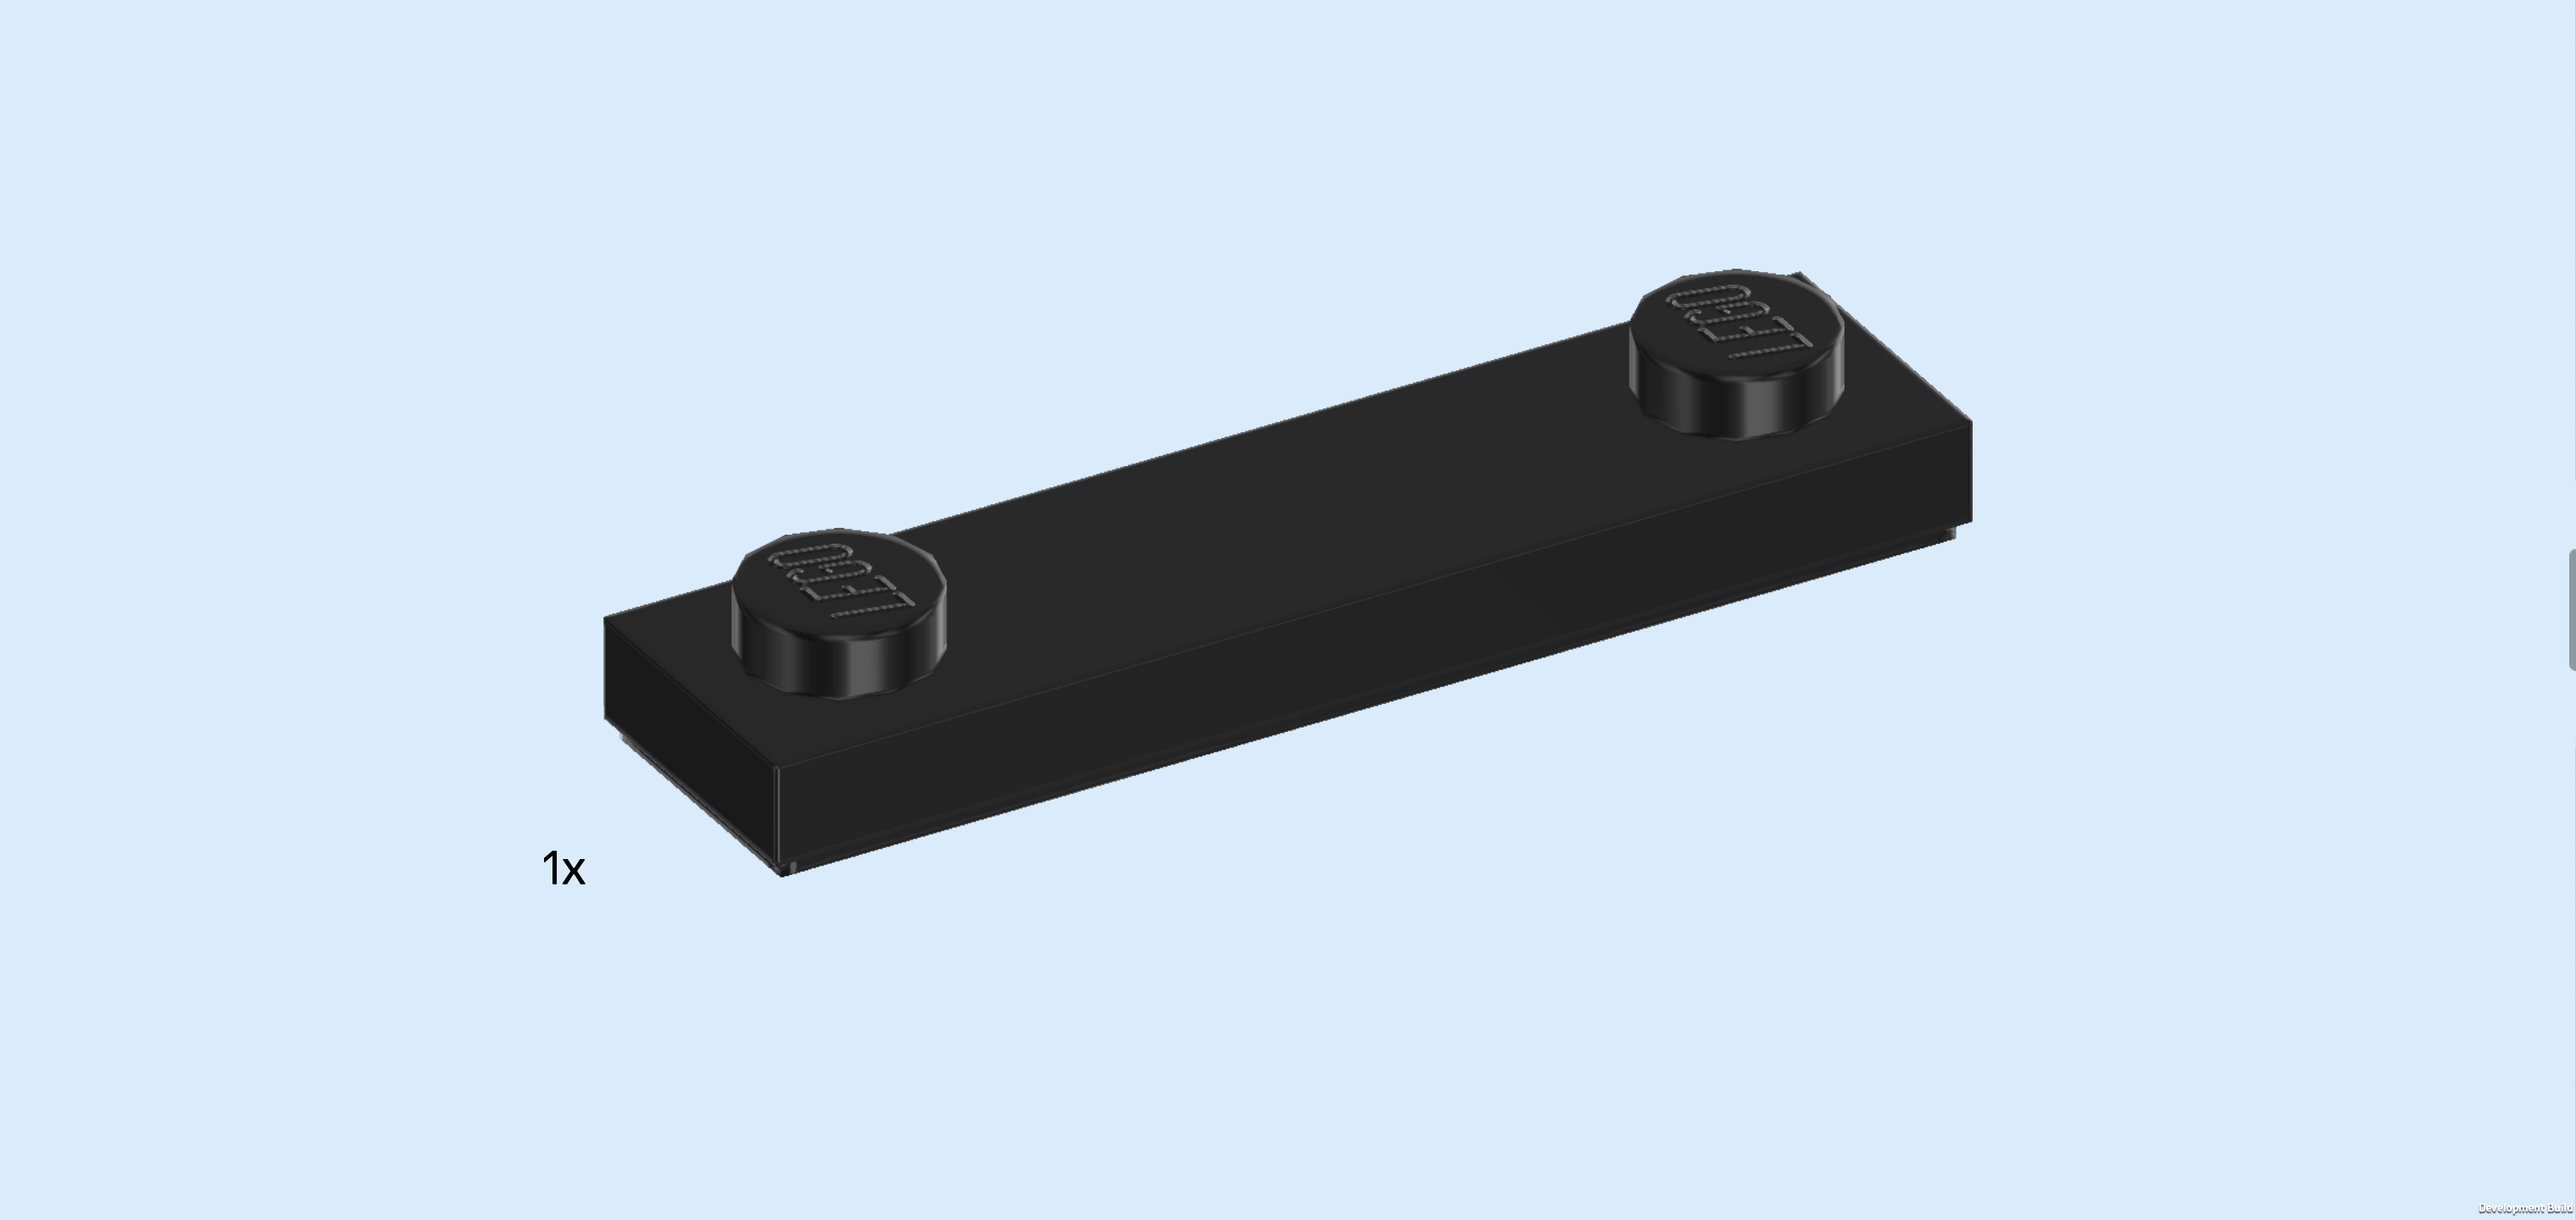
| and 1 black flat tile 1x2. |
| Put the plate 6x10 horizontally on the table. Make sure its knobs form straight rows and columns in front of you. |
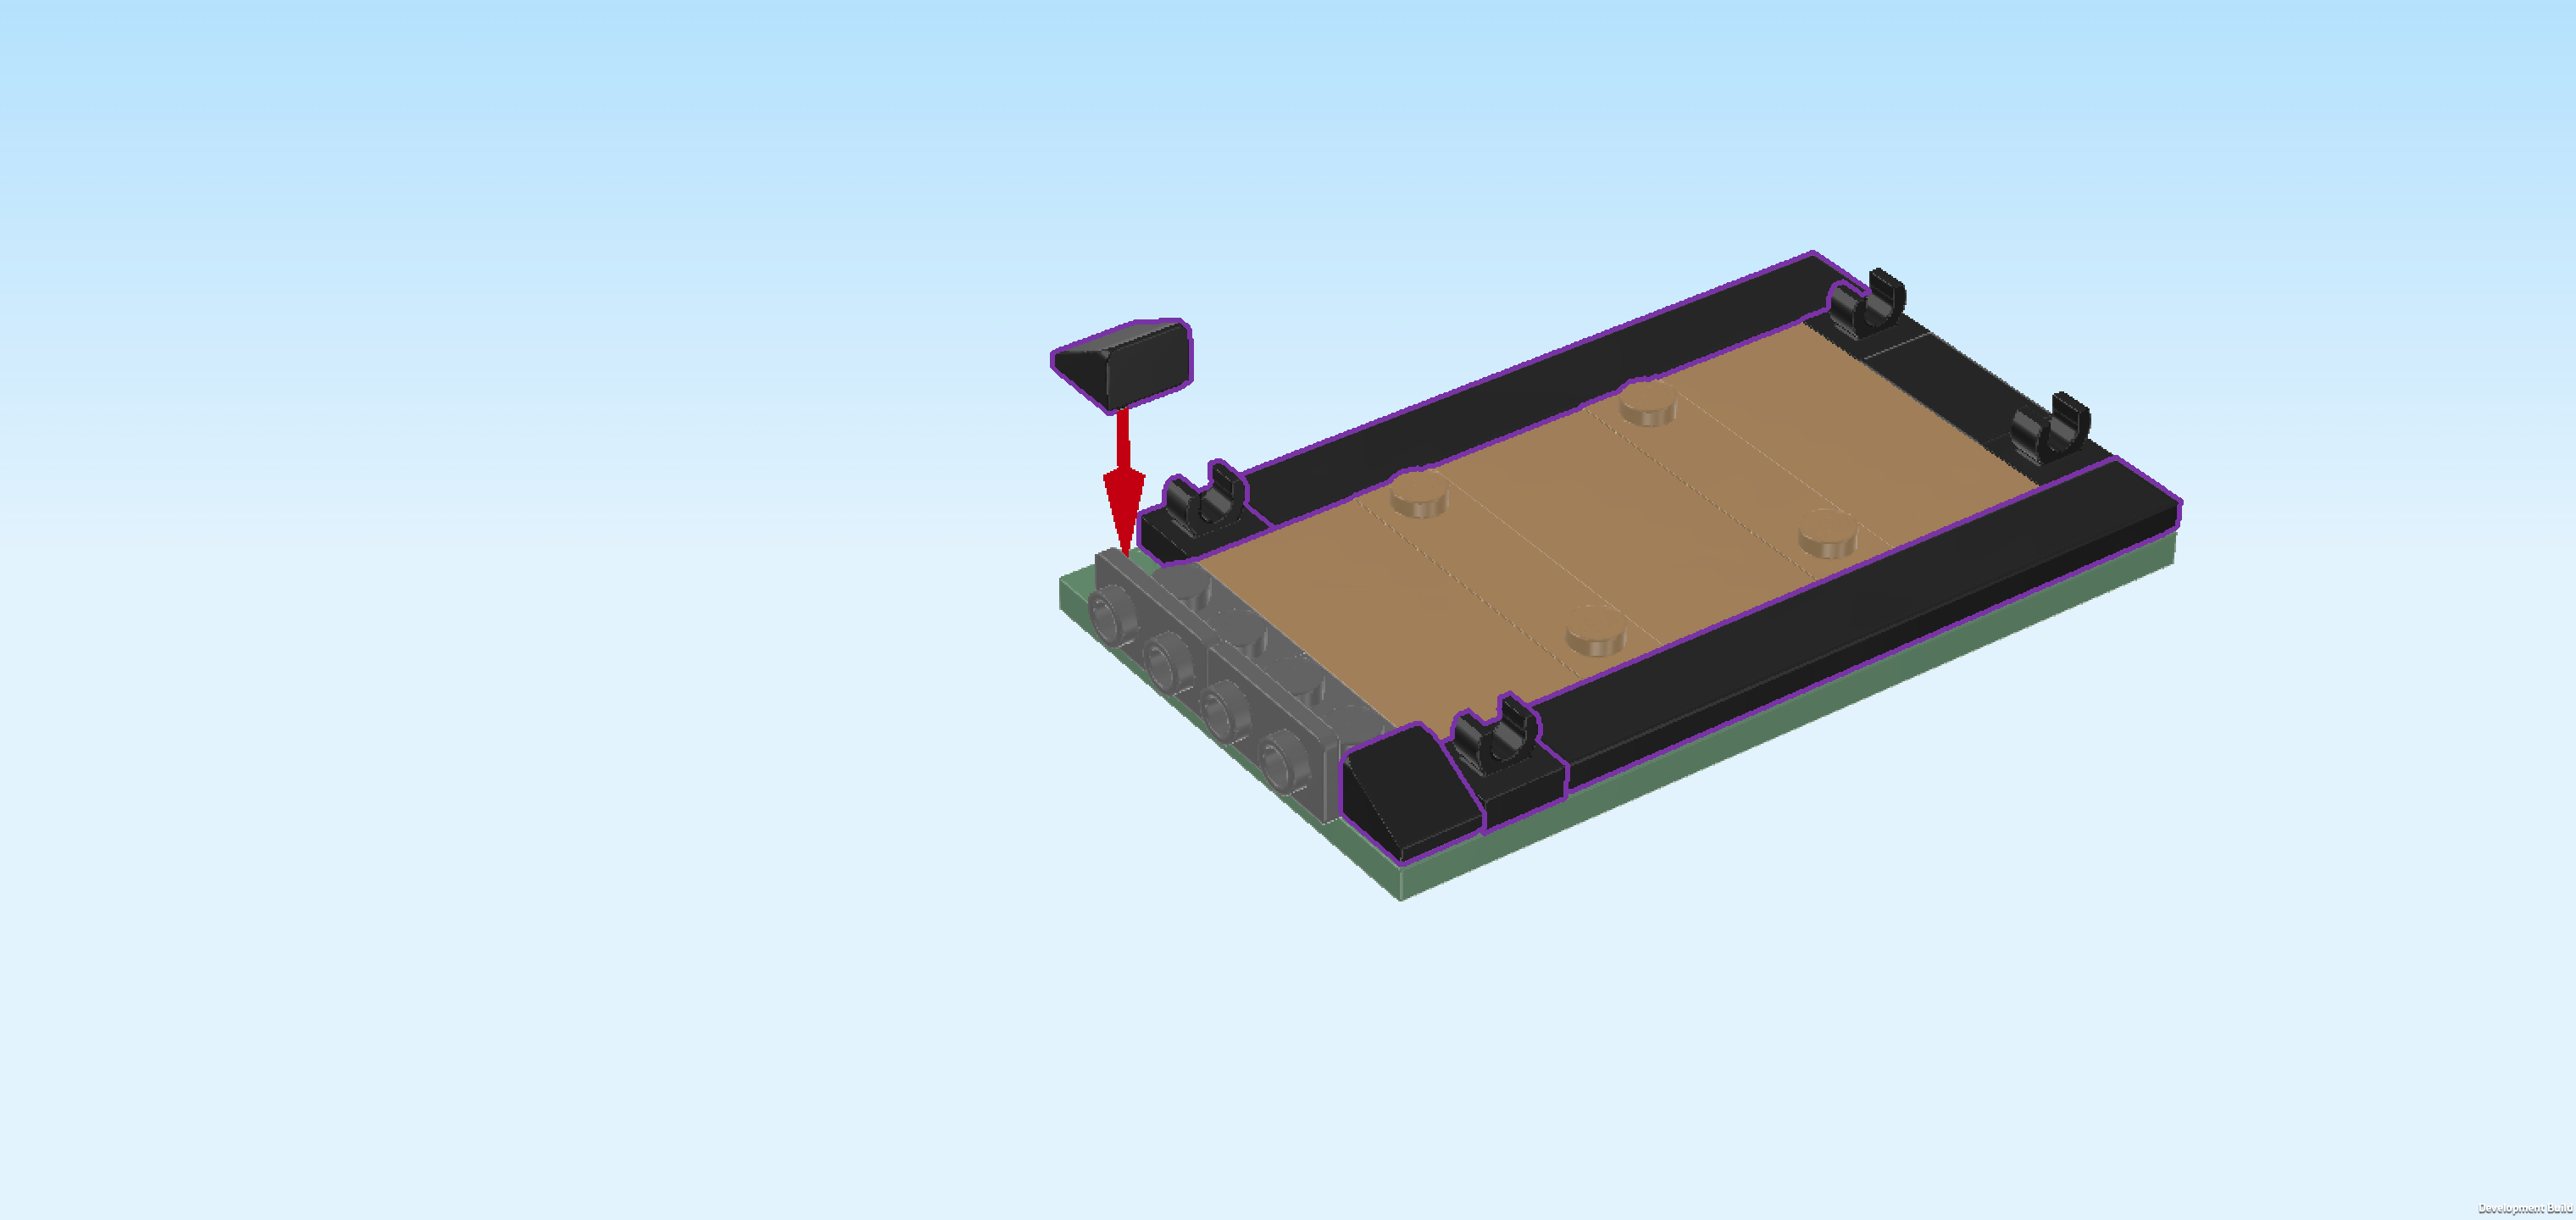
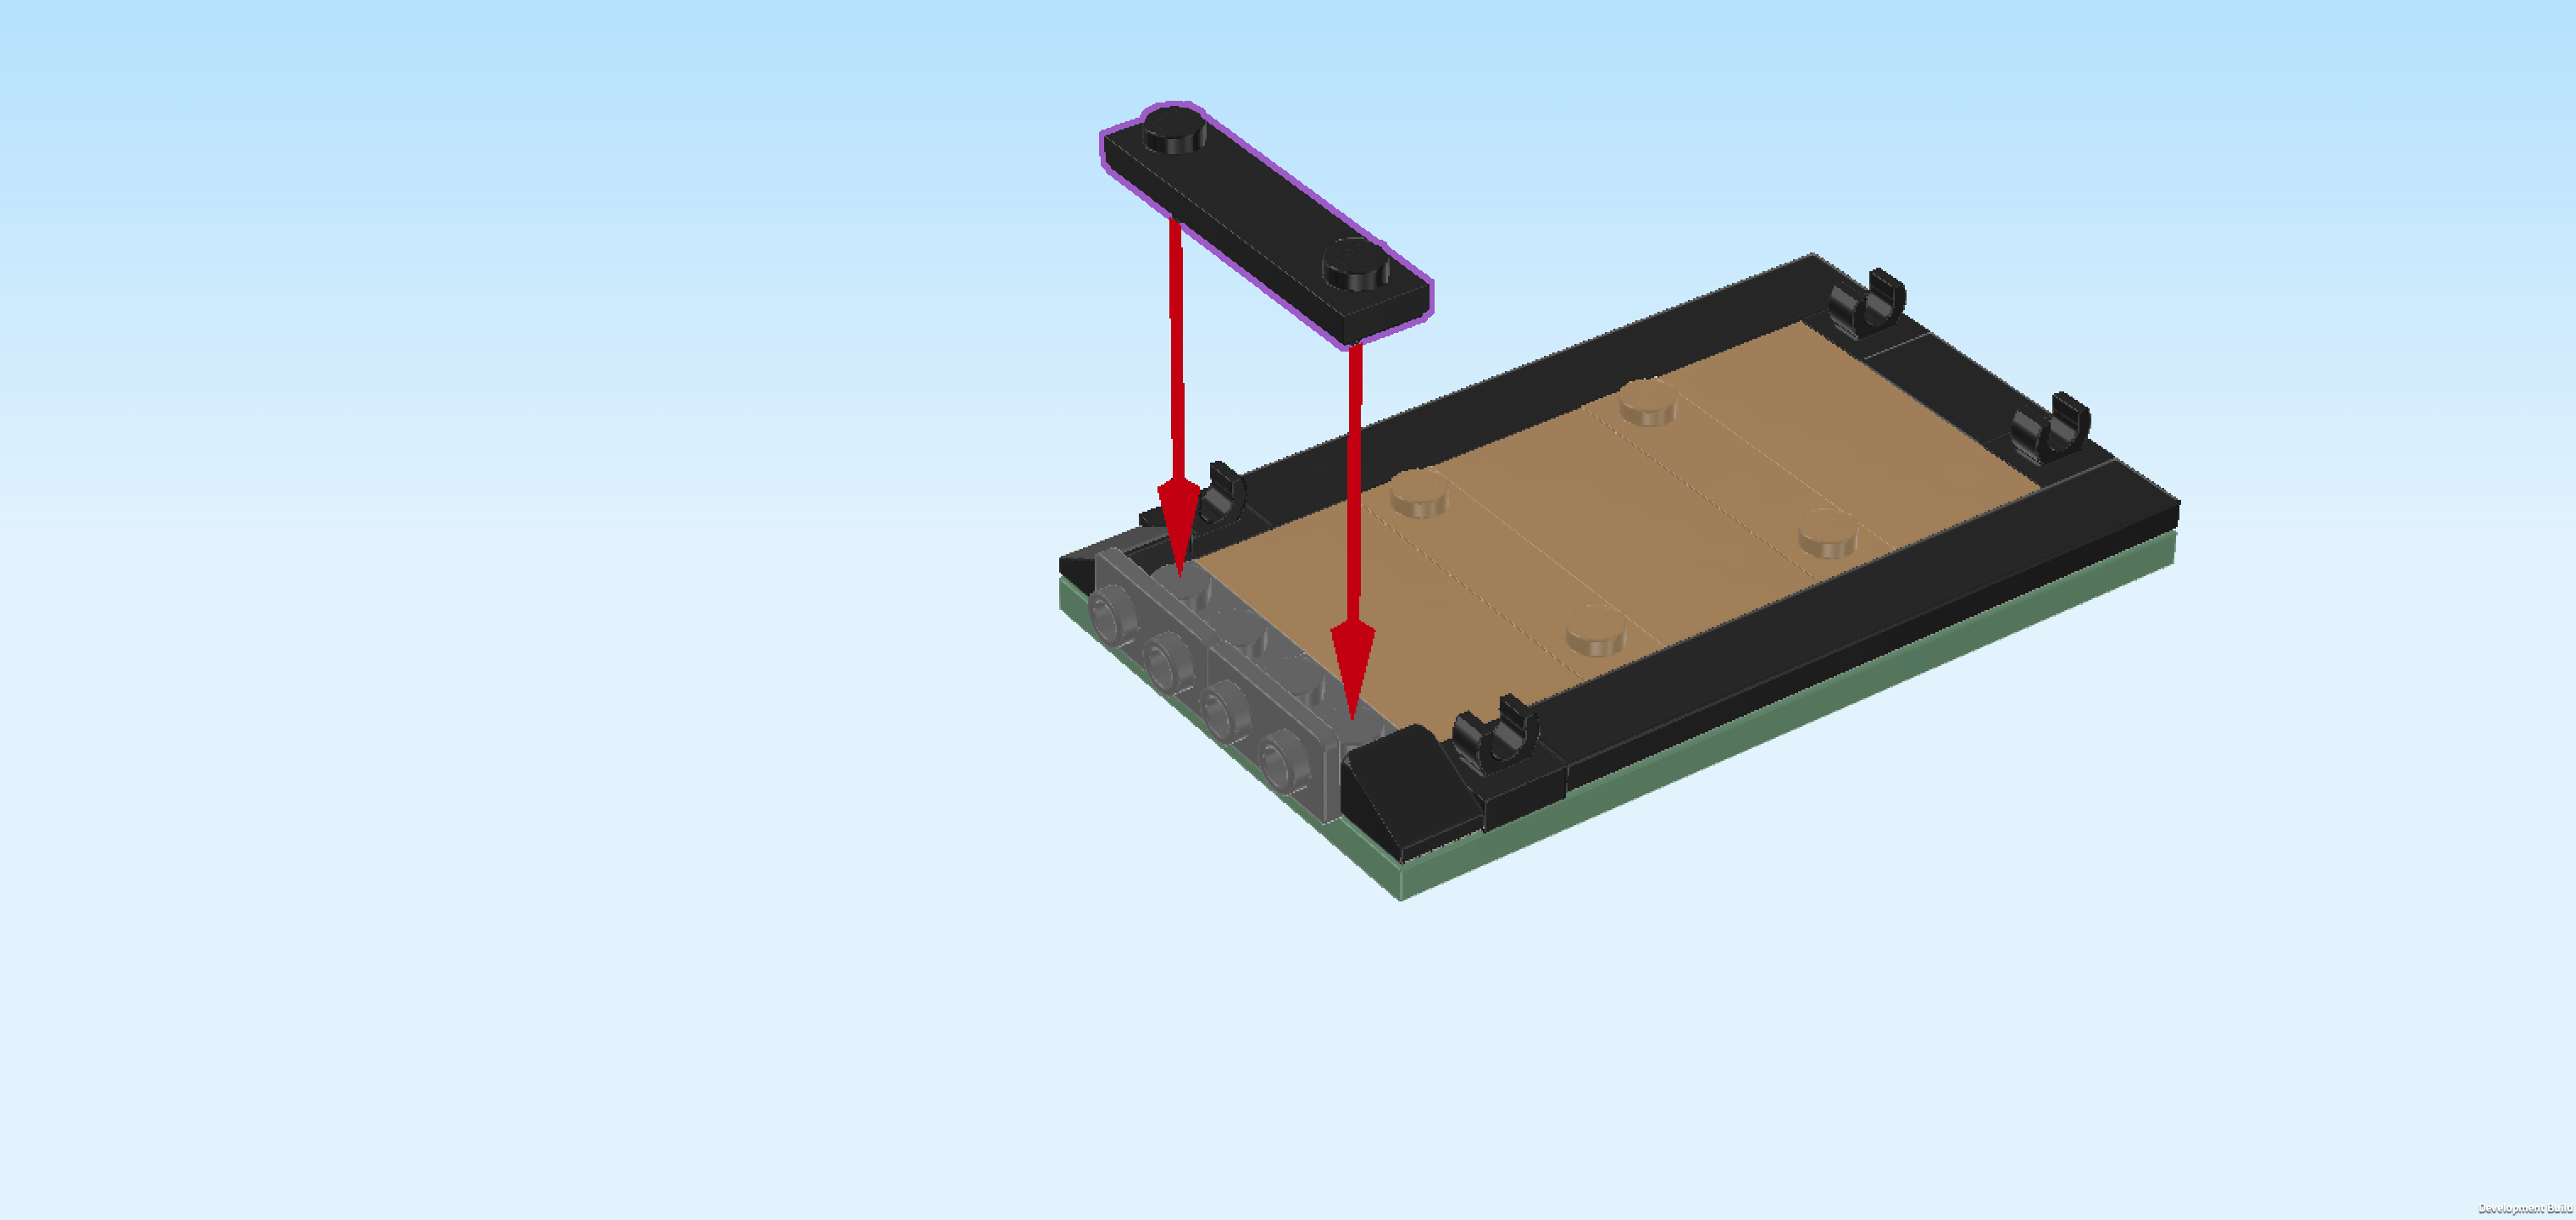
| Put the flat tile 1x2 vertically centered on the rightmost column. |
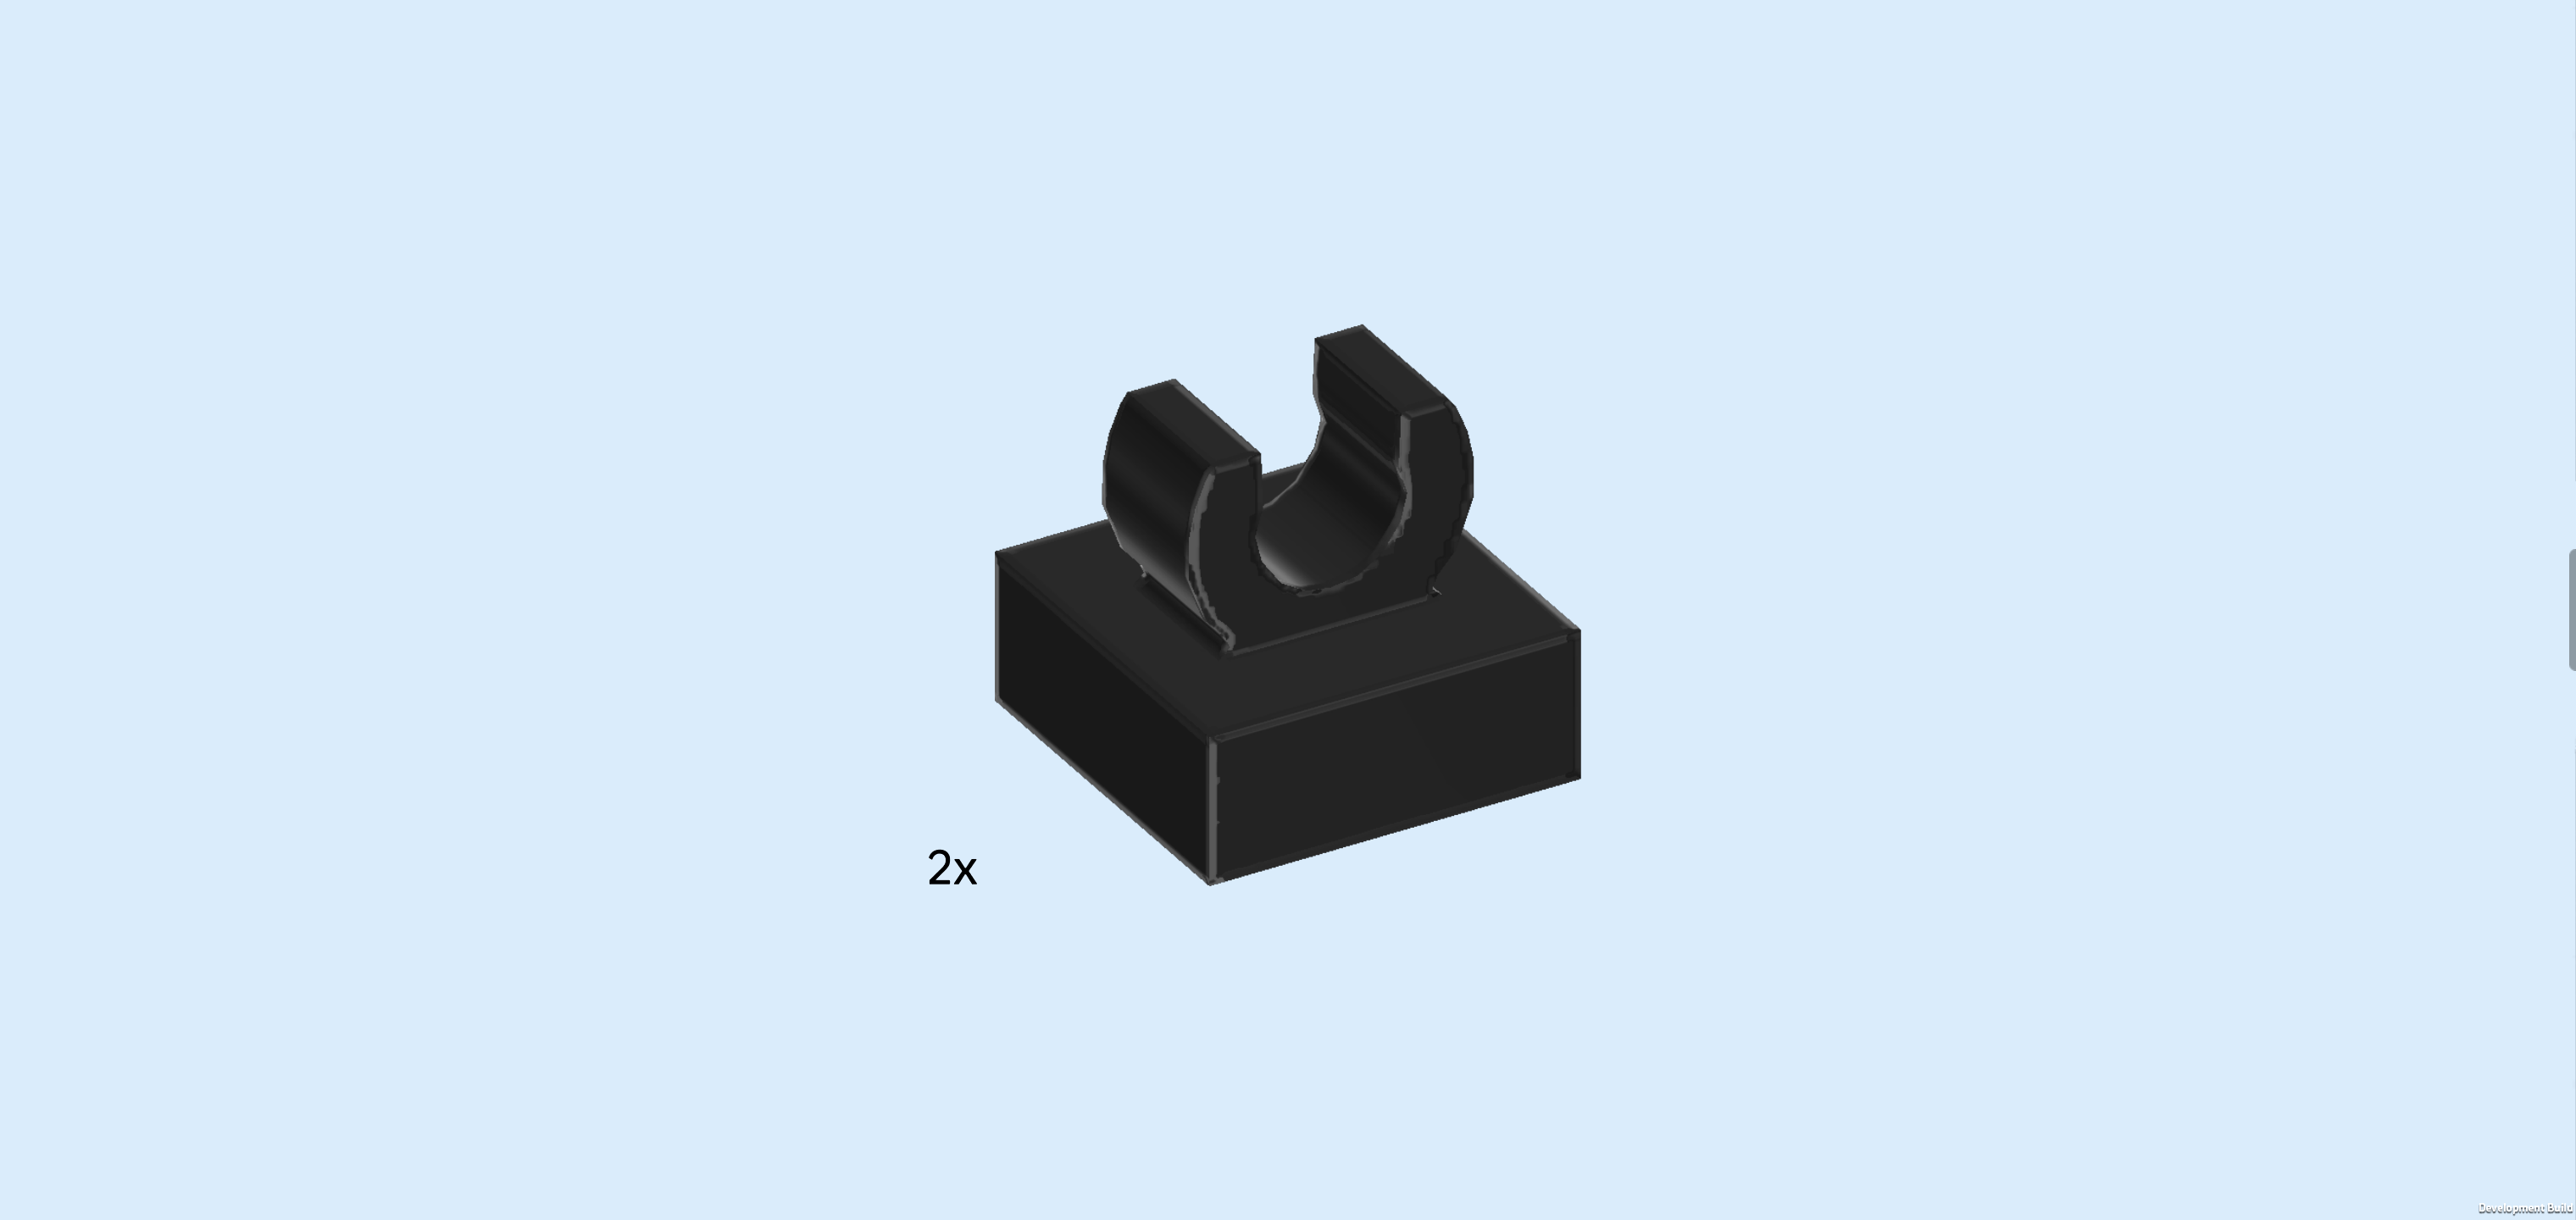
| Find 2 black plates 1x1 with top clasp. |
| Put 1 in front of the previous piece, making sure that the tips of the clasp are to the left and right, not to the front and back. |
| Repeat symmetrically at the back, clasp tips to the left and right. |
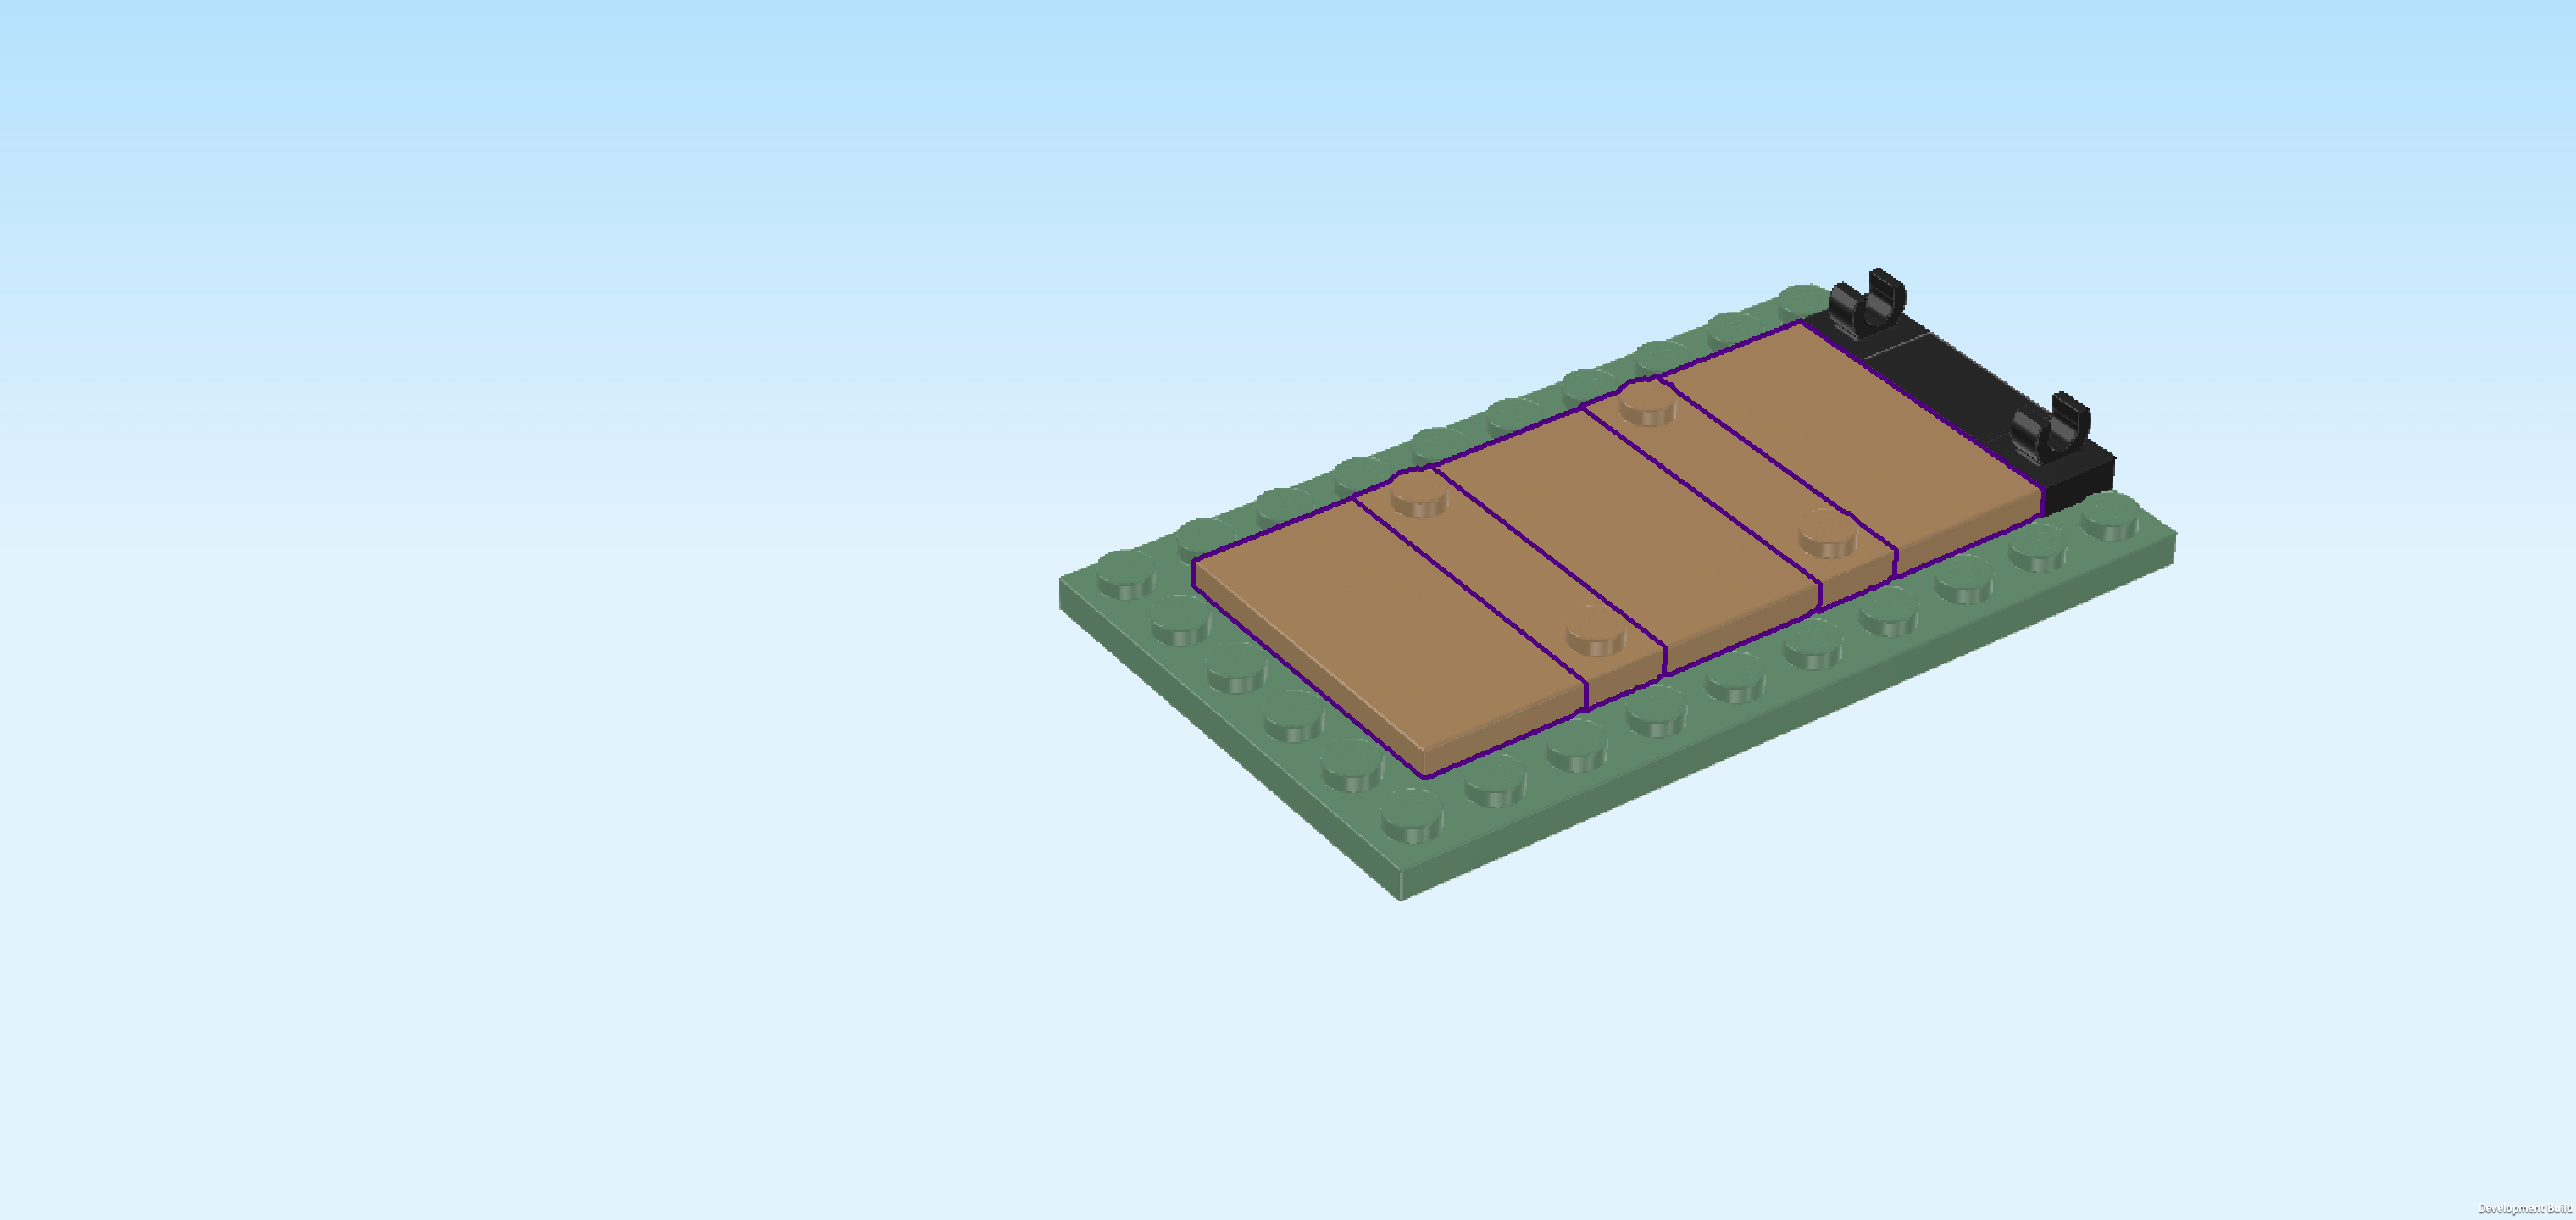
| Collect the following 5 pieces: |
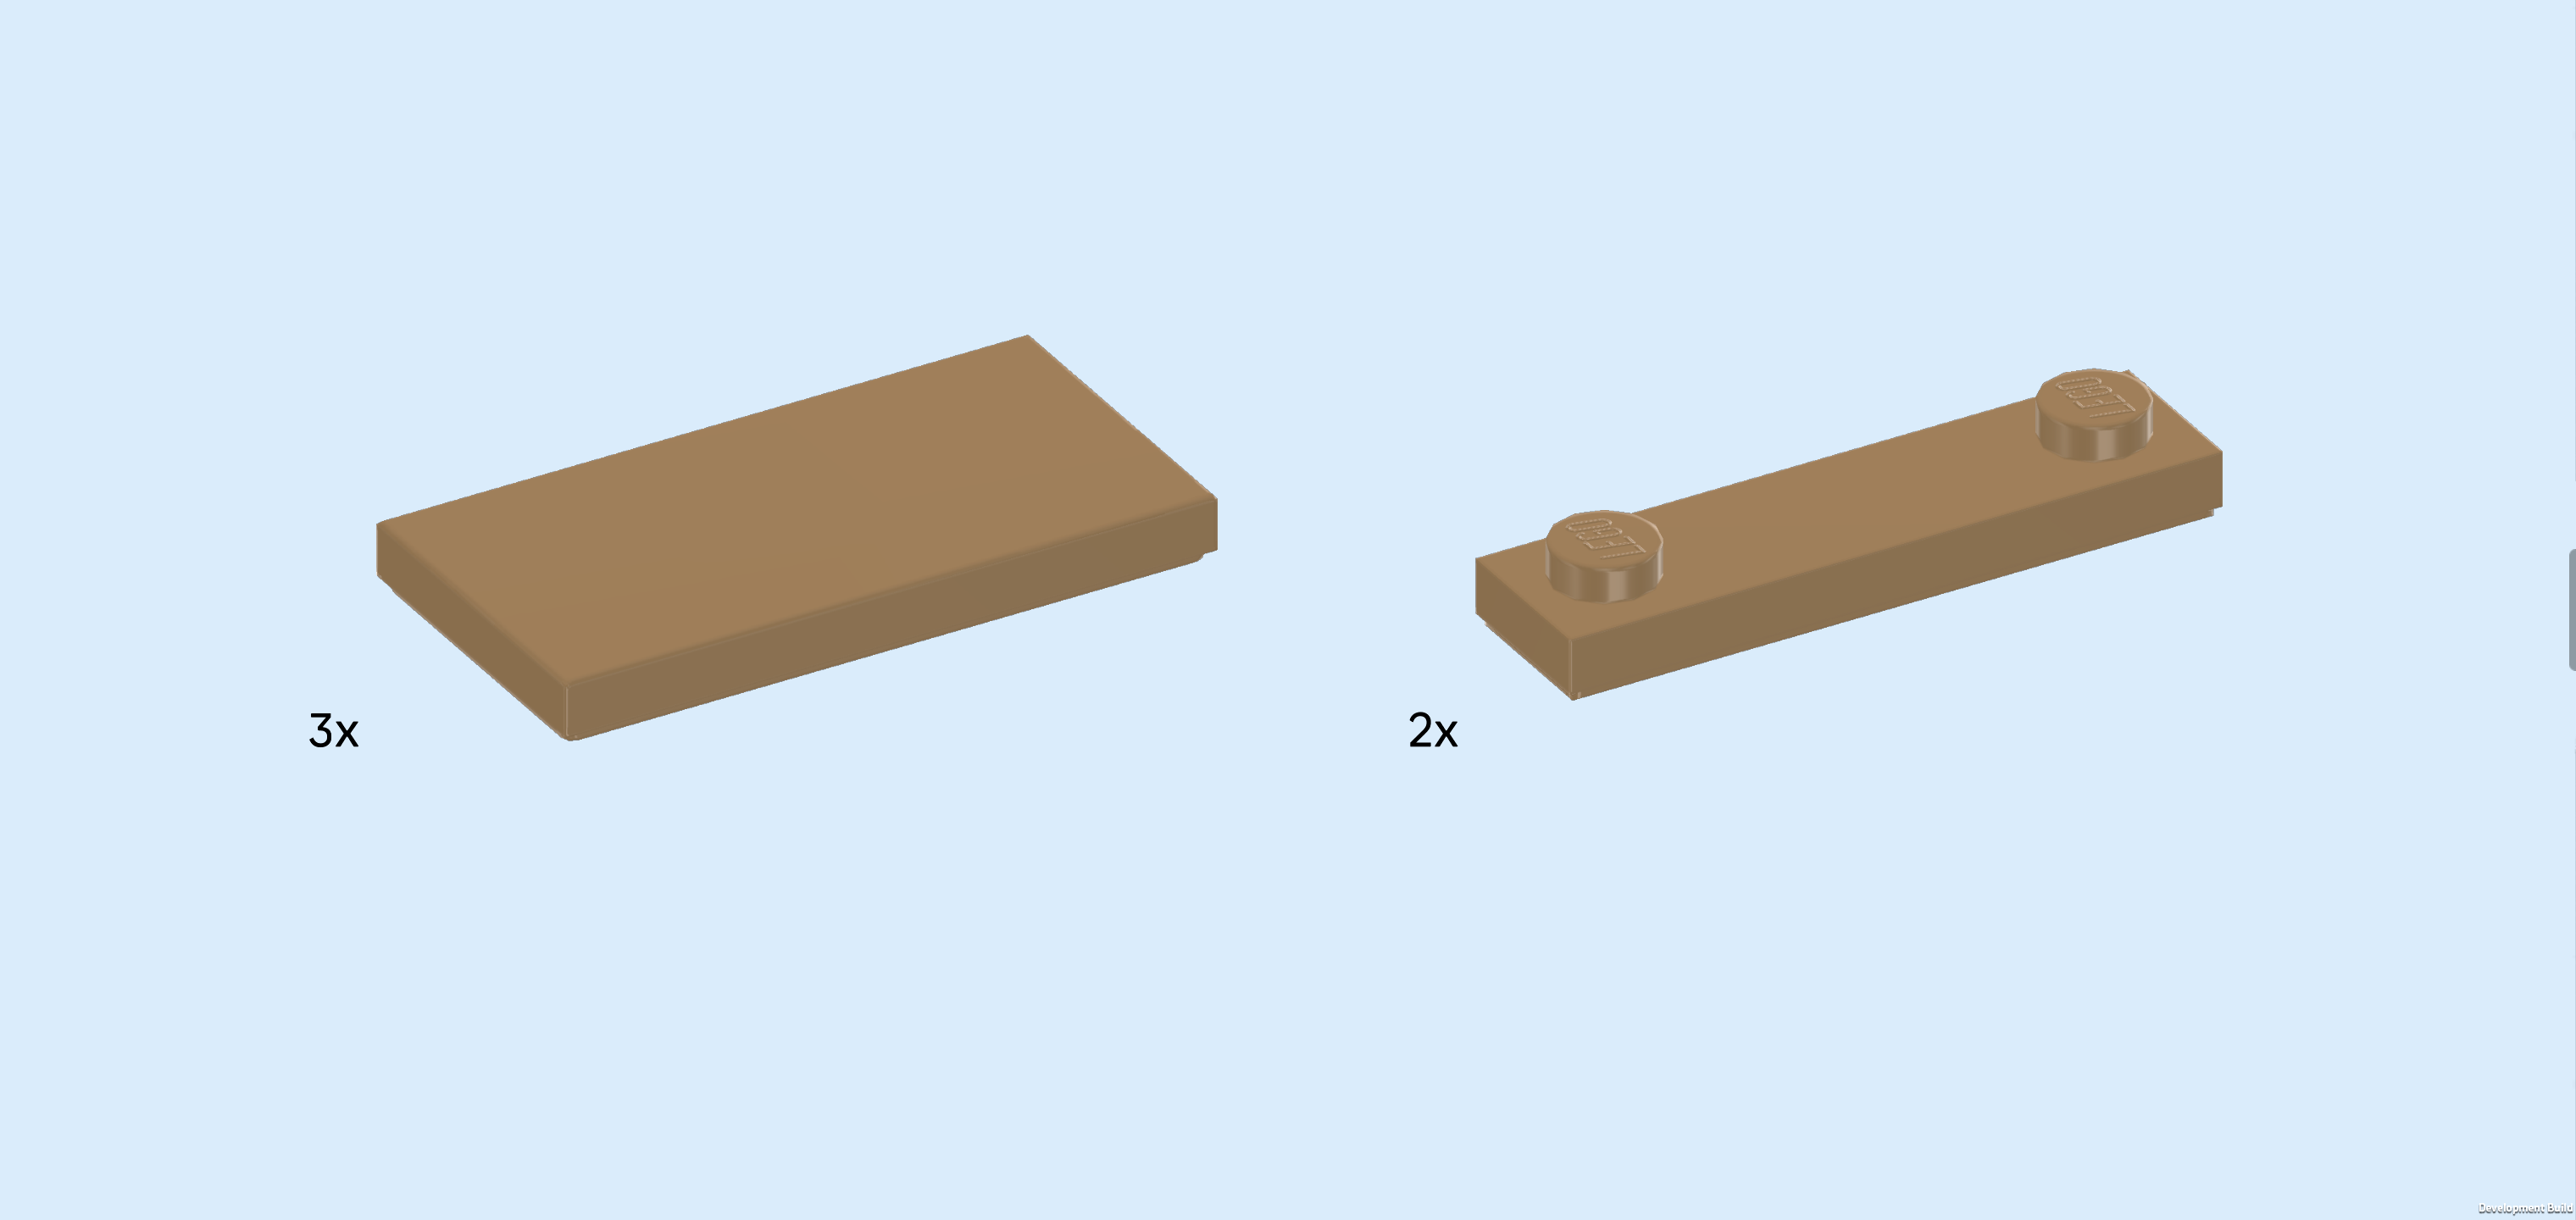
| 3 mud brown flat tiles 2x4, |
| and 2 mud brown plates 1x4 with 2 knobs. |
| Put 1 flat tile 2x4 vertically to the left of the 3 previous pieces. If done correctly, the frontmost and backmost rows remain empty. |
| Put 1 plate 1x4 vertically to the left of the previous piece. |
| Put 1 flat tile 2x4 vertically to the left of the previous piece. |
| Put the other plate 1x4 vertically to the left of the previous piece. |
| Put the remaining flat tile 2x4 vertically to the left of the previous piece. |
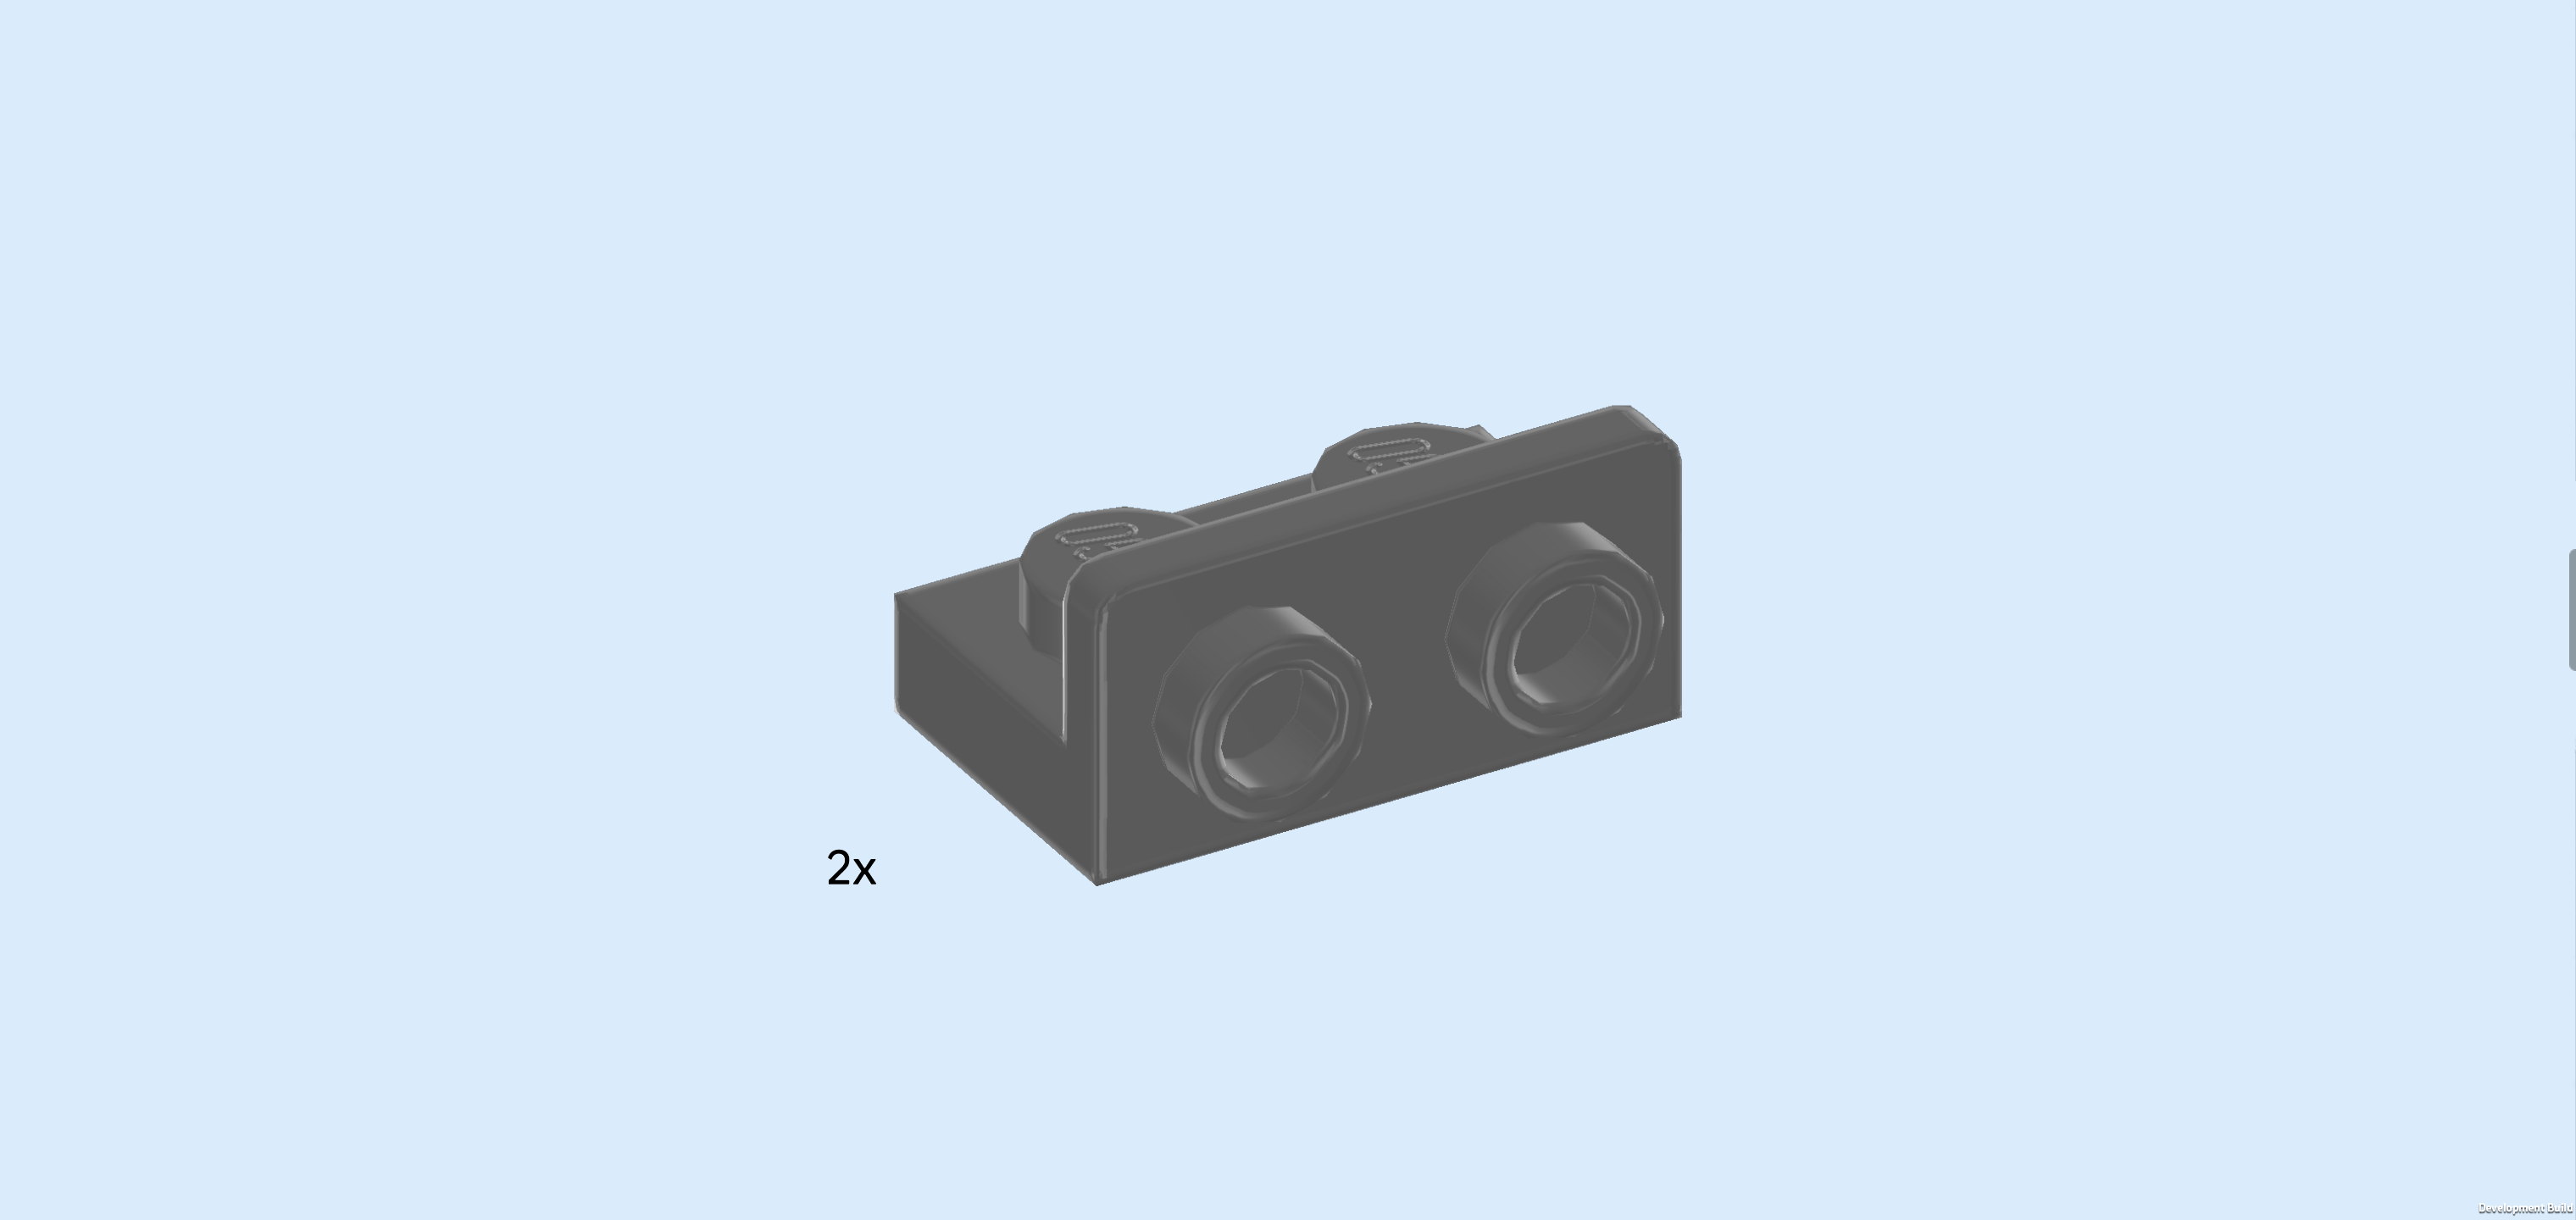
| Find 2 dark stone grey bottom angle plates 1x2 - 1x2 with 2 side knobs. |
| Put them vertically next to each other to the left of the previous piece, side knobs to the left. This means they will sit centered on the leftmost column. |
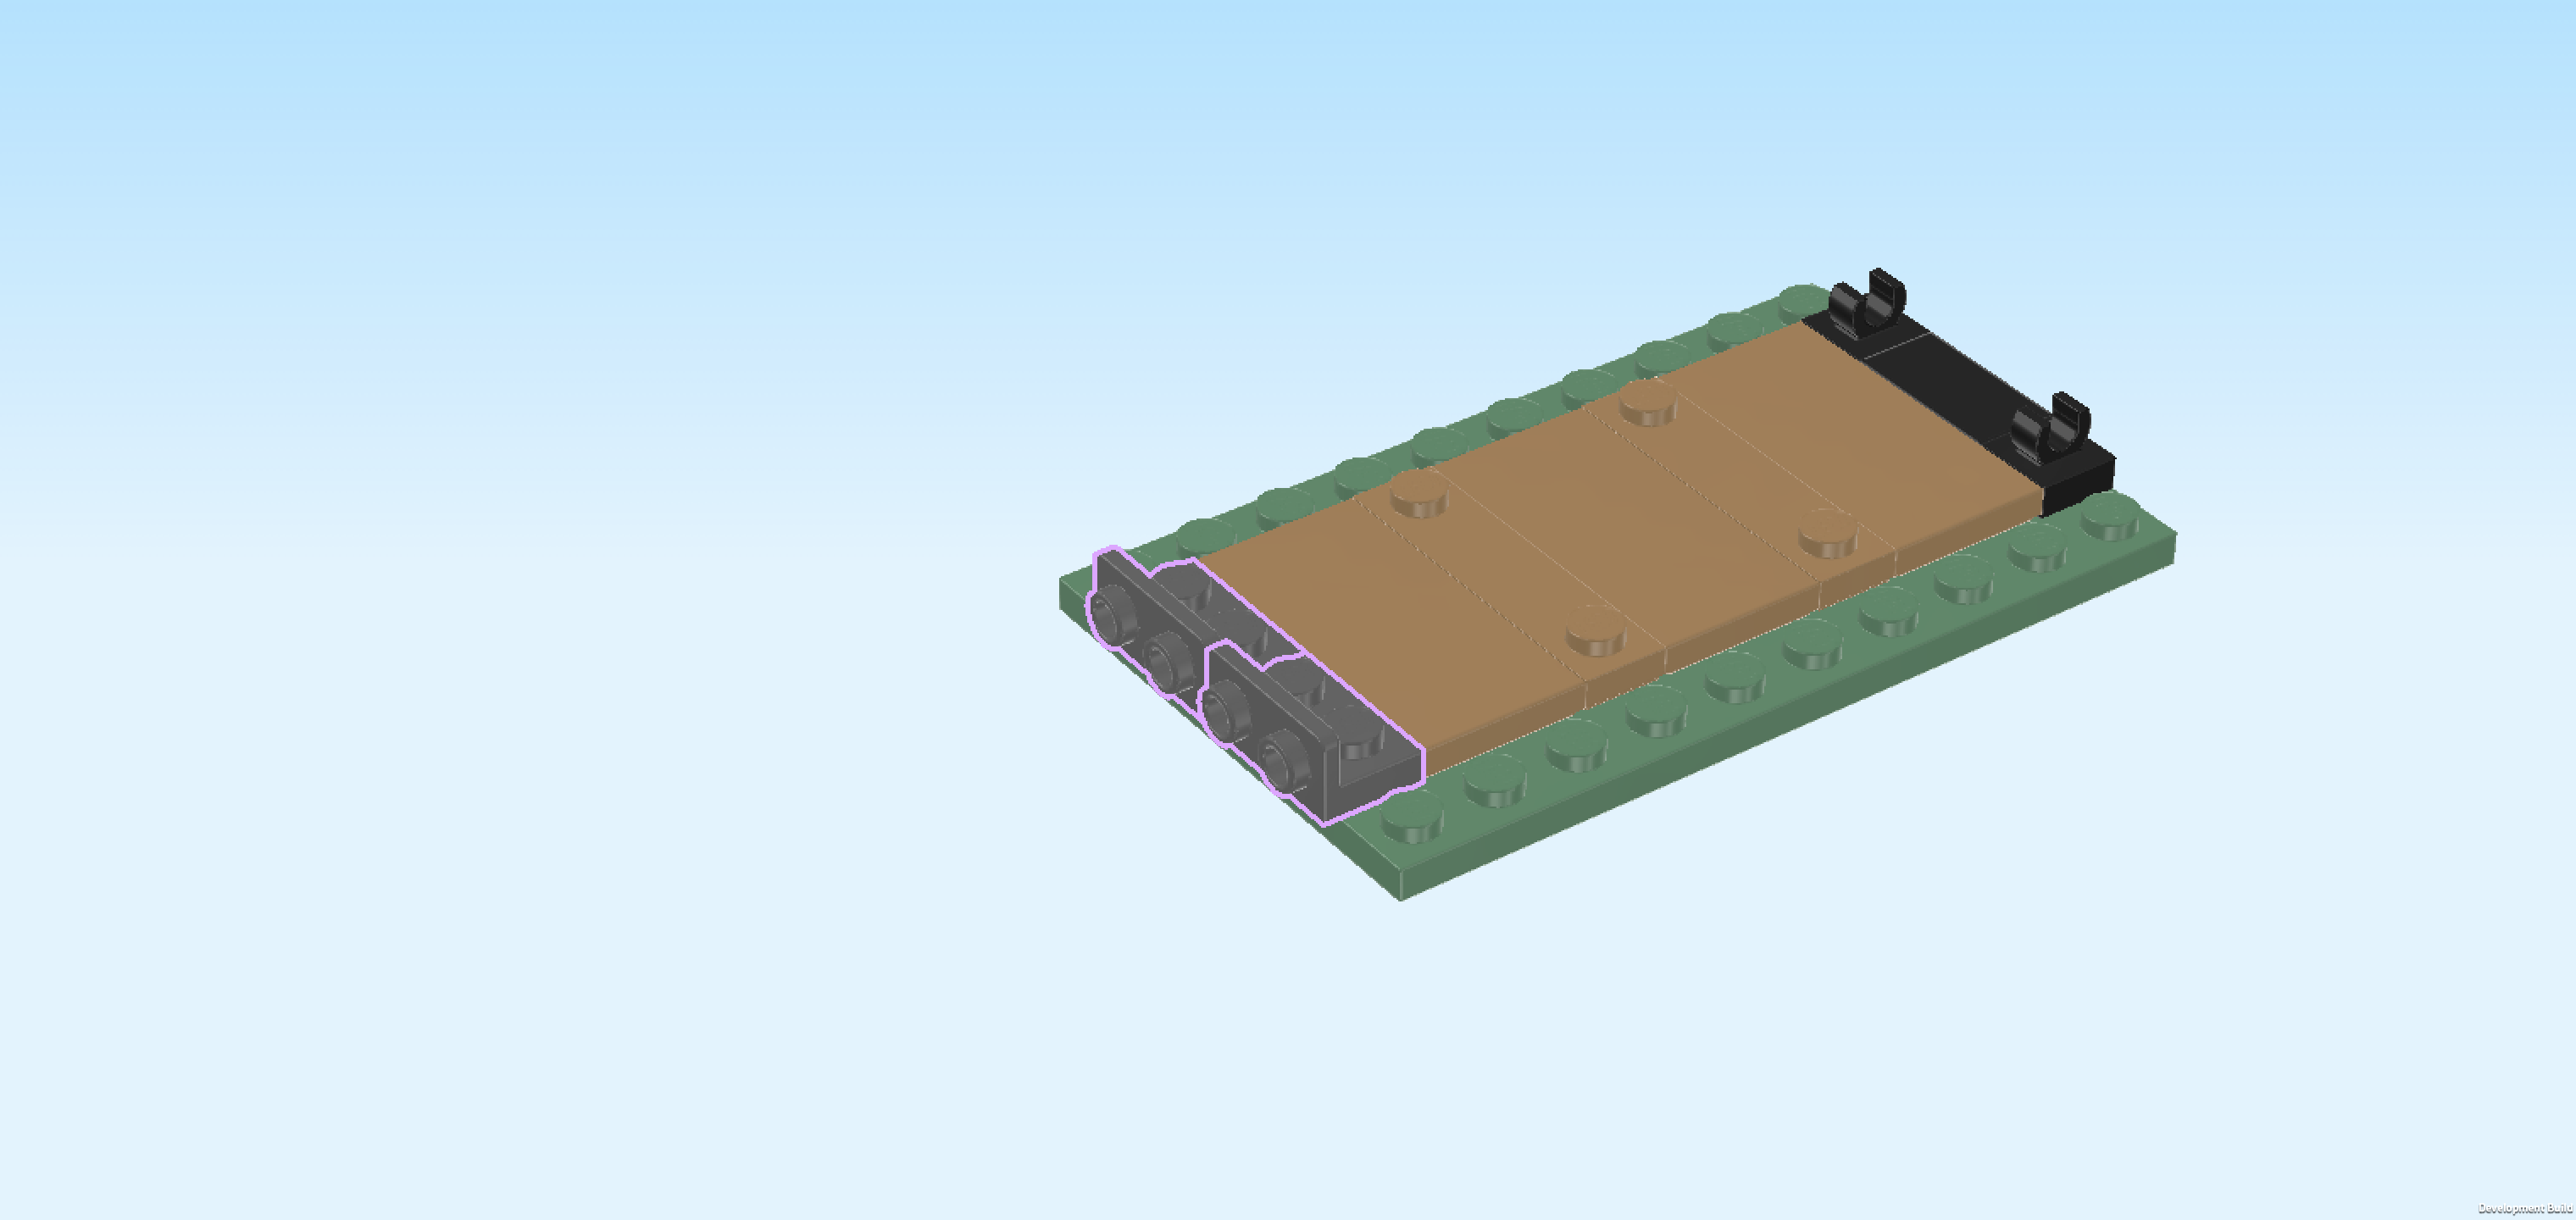
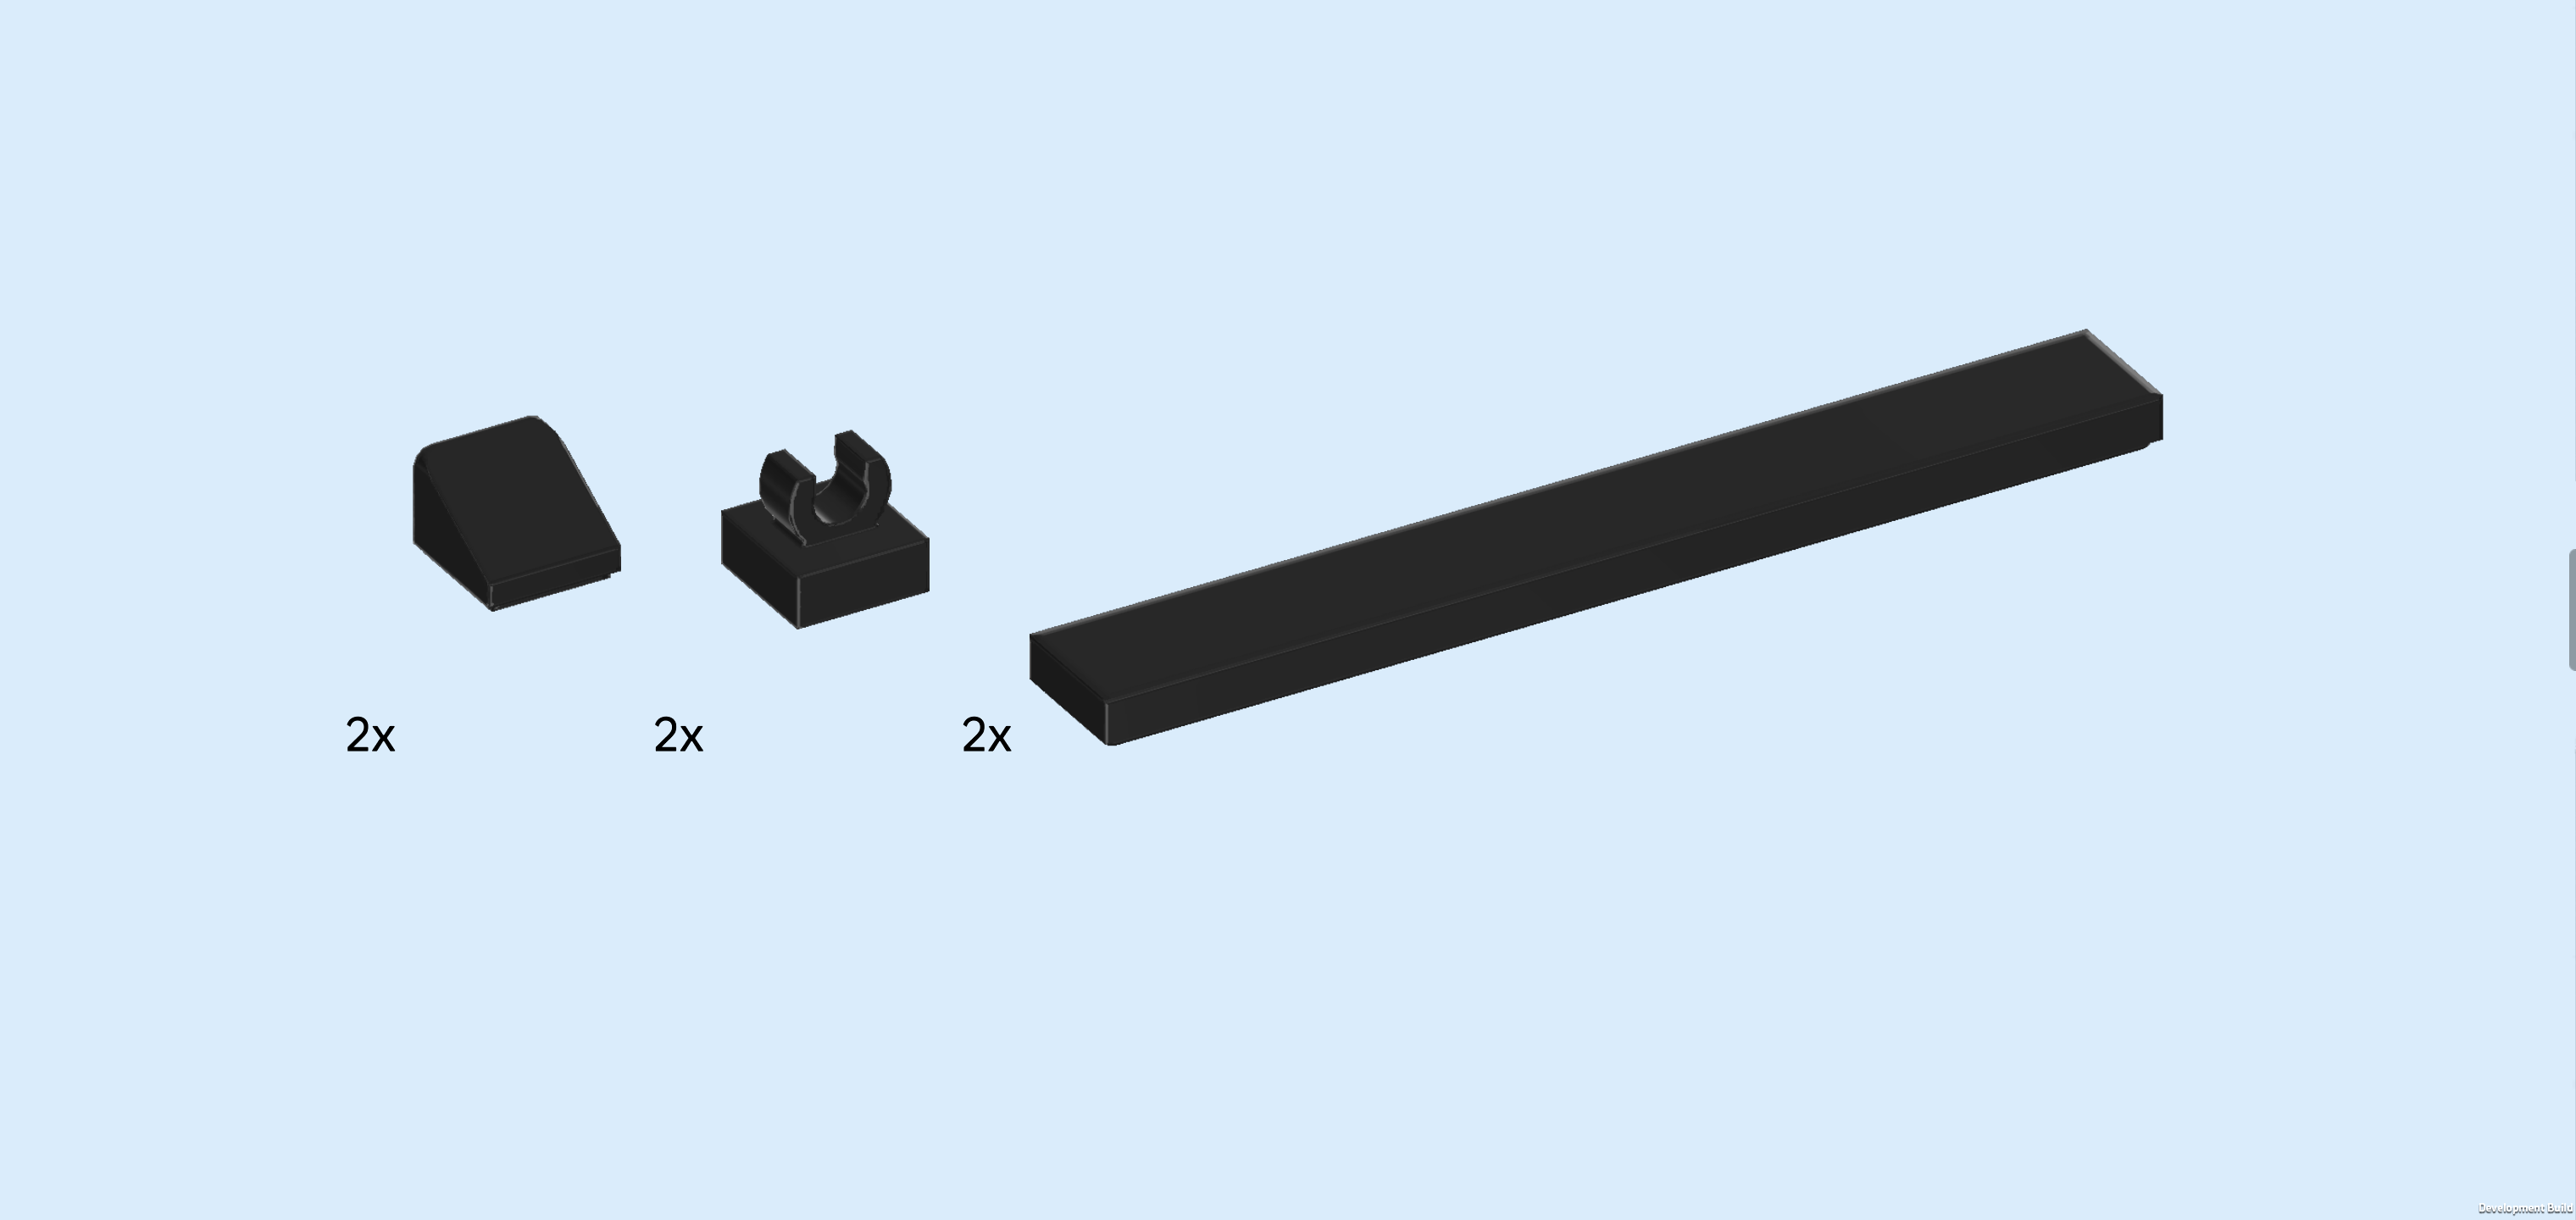
| Collect the following 6 pieces: |
| 2 black smooth roof tiles 1x1x⅔, |
| 2 black plates 1x1 with top clasp, |
| and 2 black flat tiles 1x8. |
| Put 1 roof tile 1x1 behind the 2 previous pieces, slope to the back. |
| Put 1 plate with clasp to the right of the previous piece, clasp tips to the left and right. |
| Put 1 flat tile 1x8 horizontally to the left of the previous piece. |
| Repeat symmetrically at the front with the 3 remaining pieces. Make sure that this time, the roof tile slope is to the front and the clasp tips are again to the left and right. |
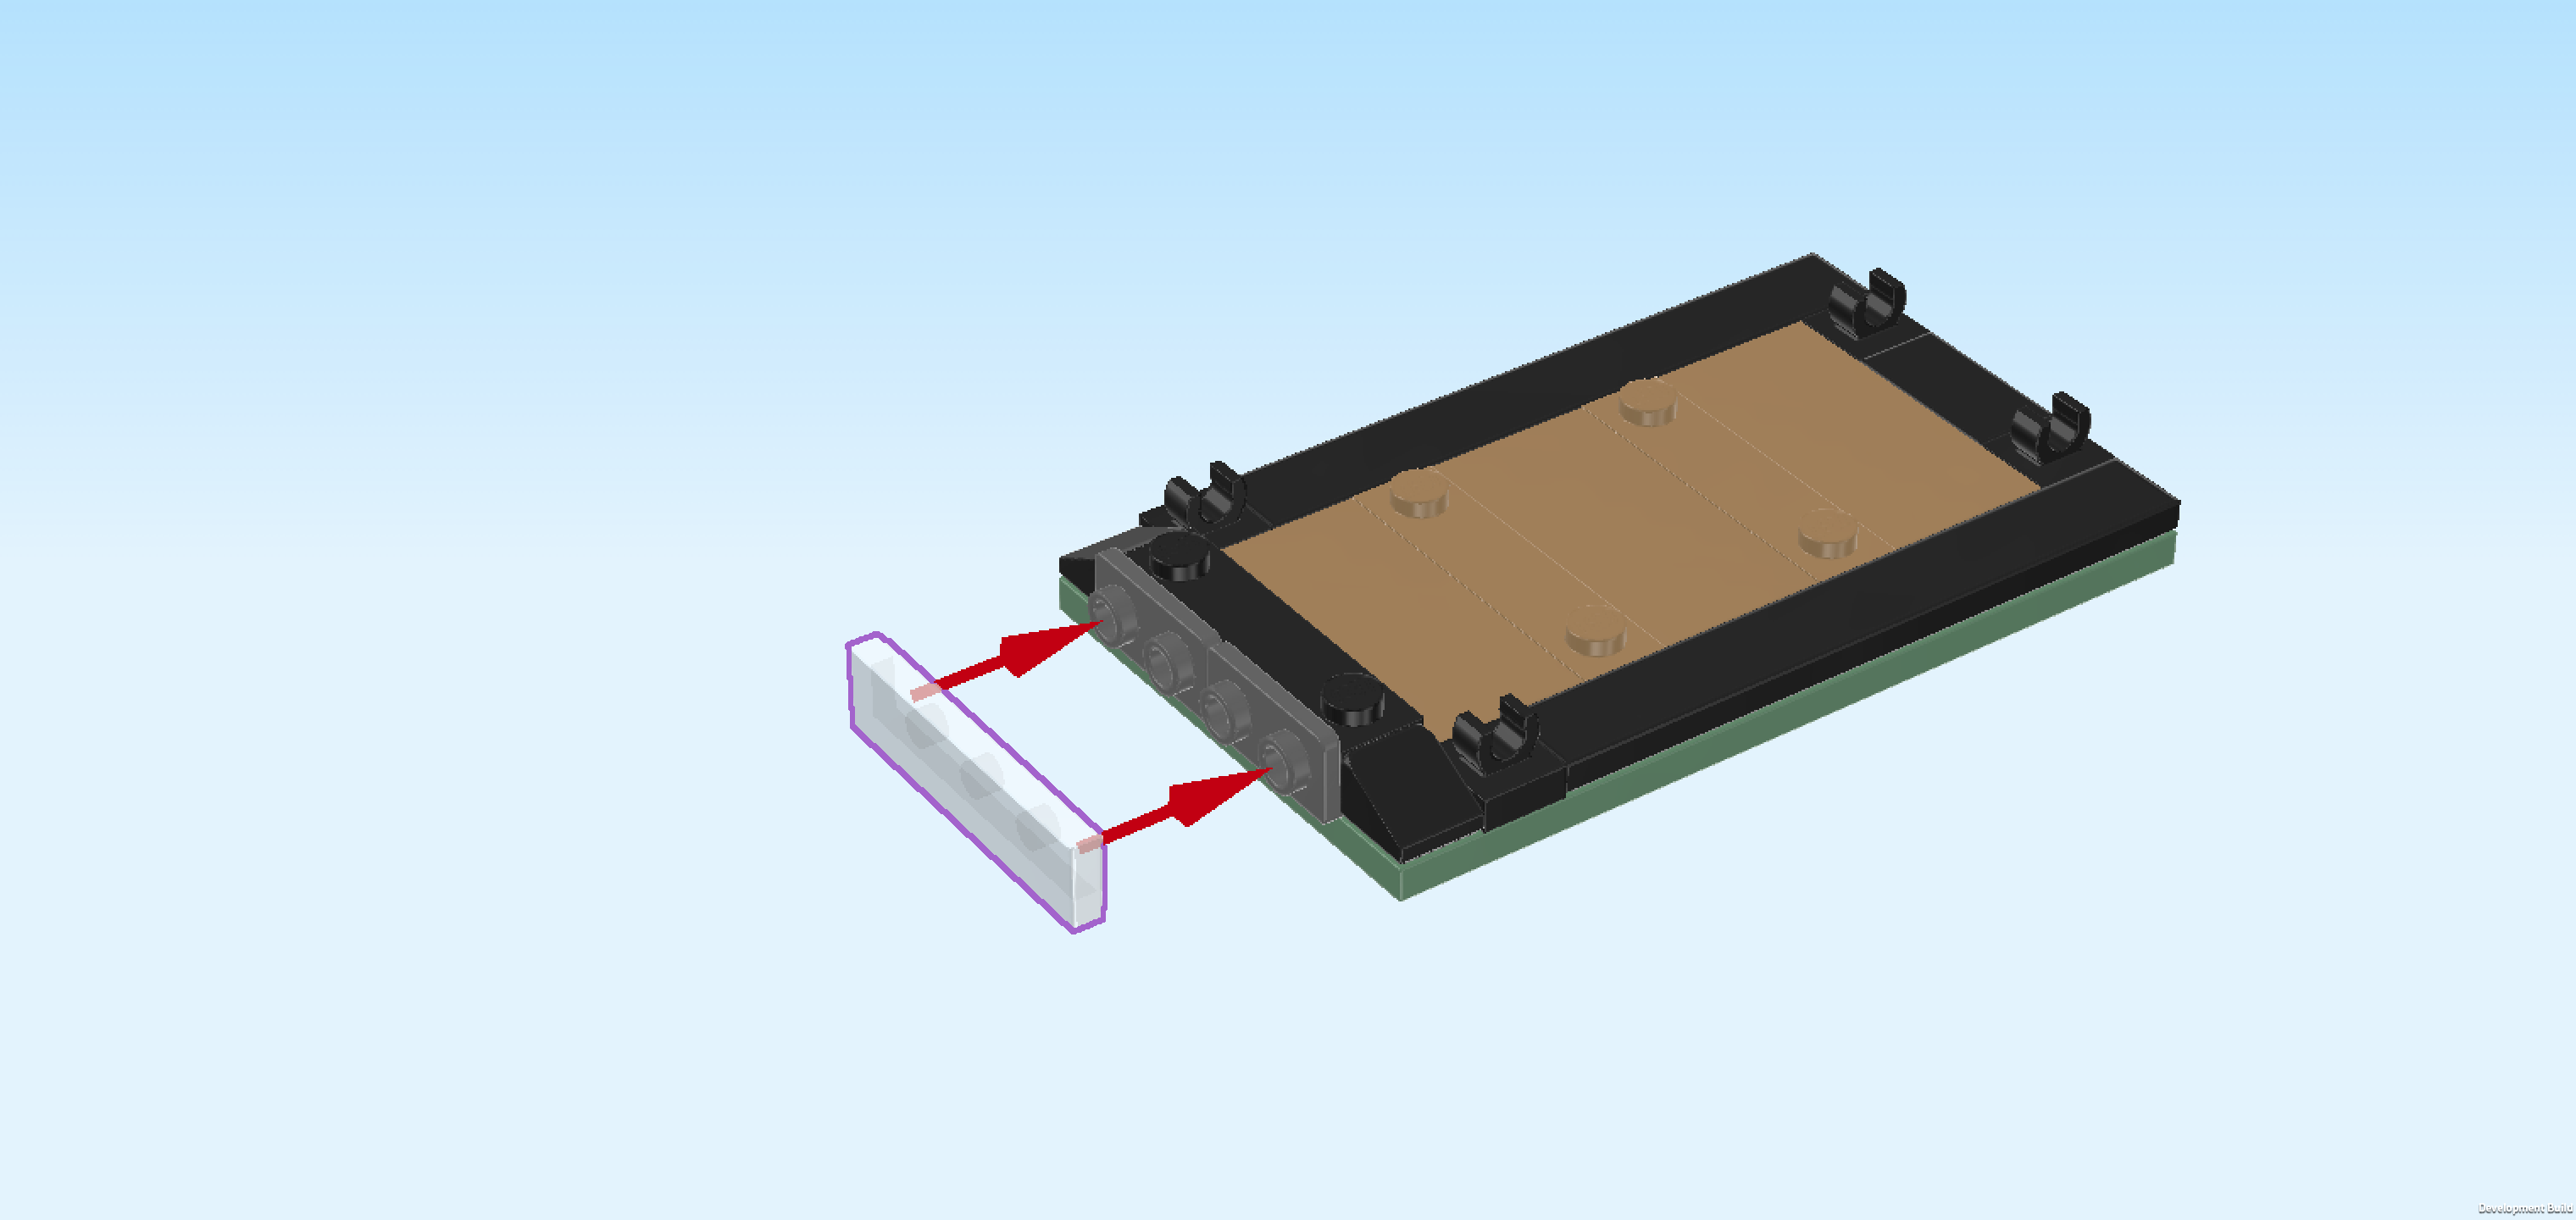
| Find 1 black plate 1x4 with 2 knobs. |
| Put it vertically centered on the leftmost column. |
| Find 1 transparent flat tile 1x4. |
| Flip it upright and mount it on the 4 side knobs pointing to the left. |
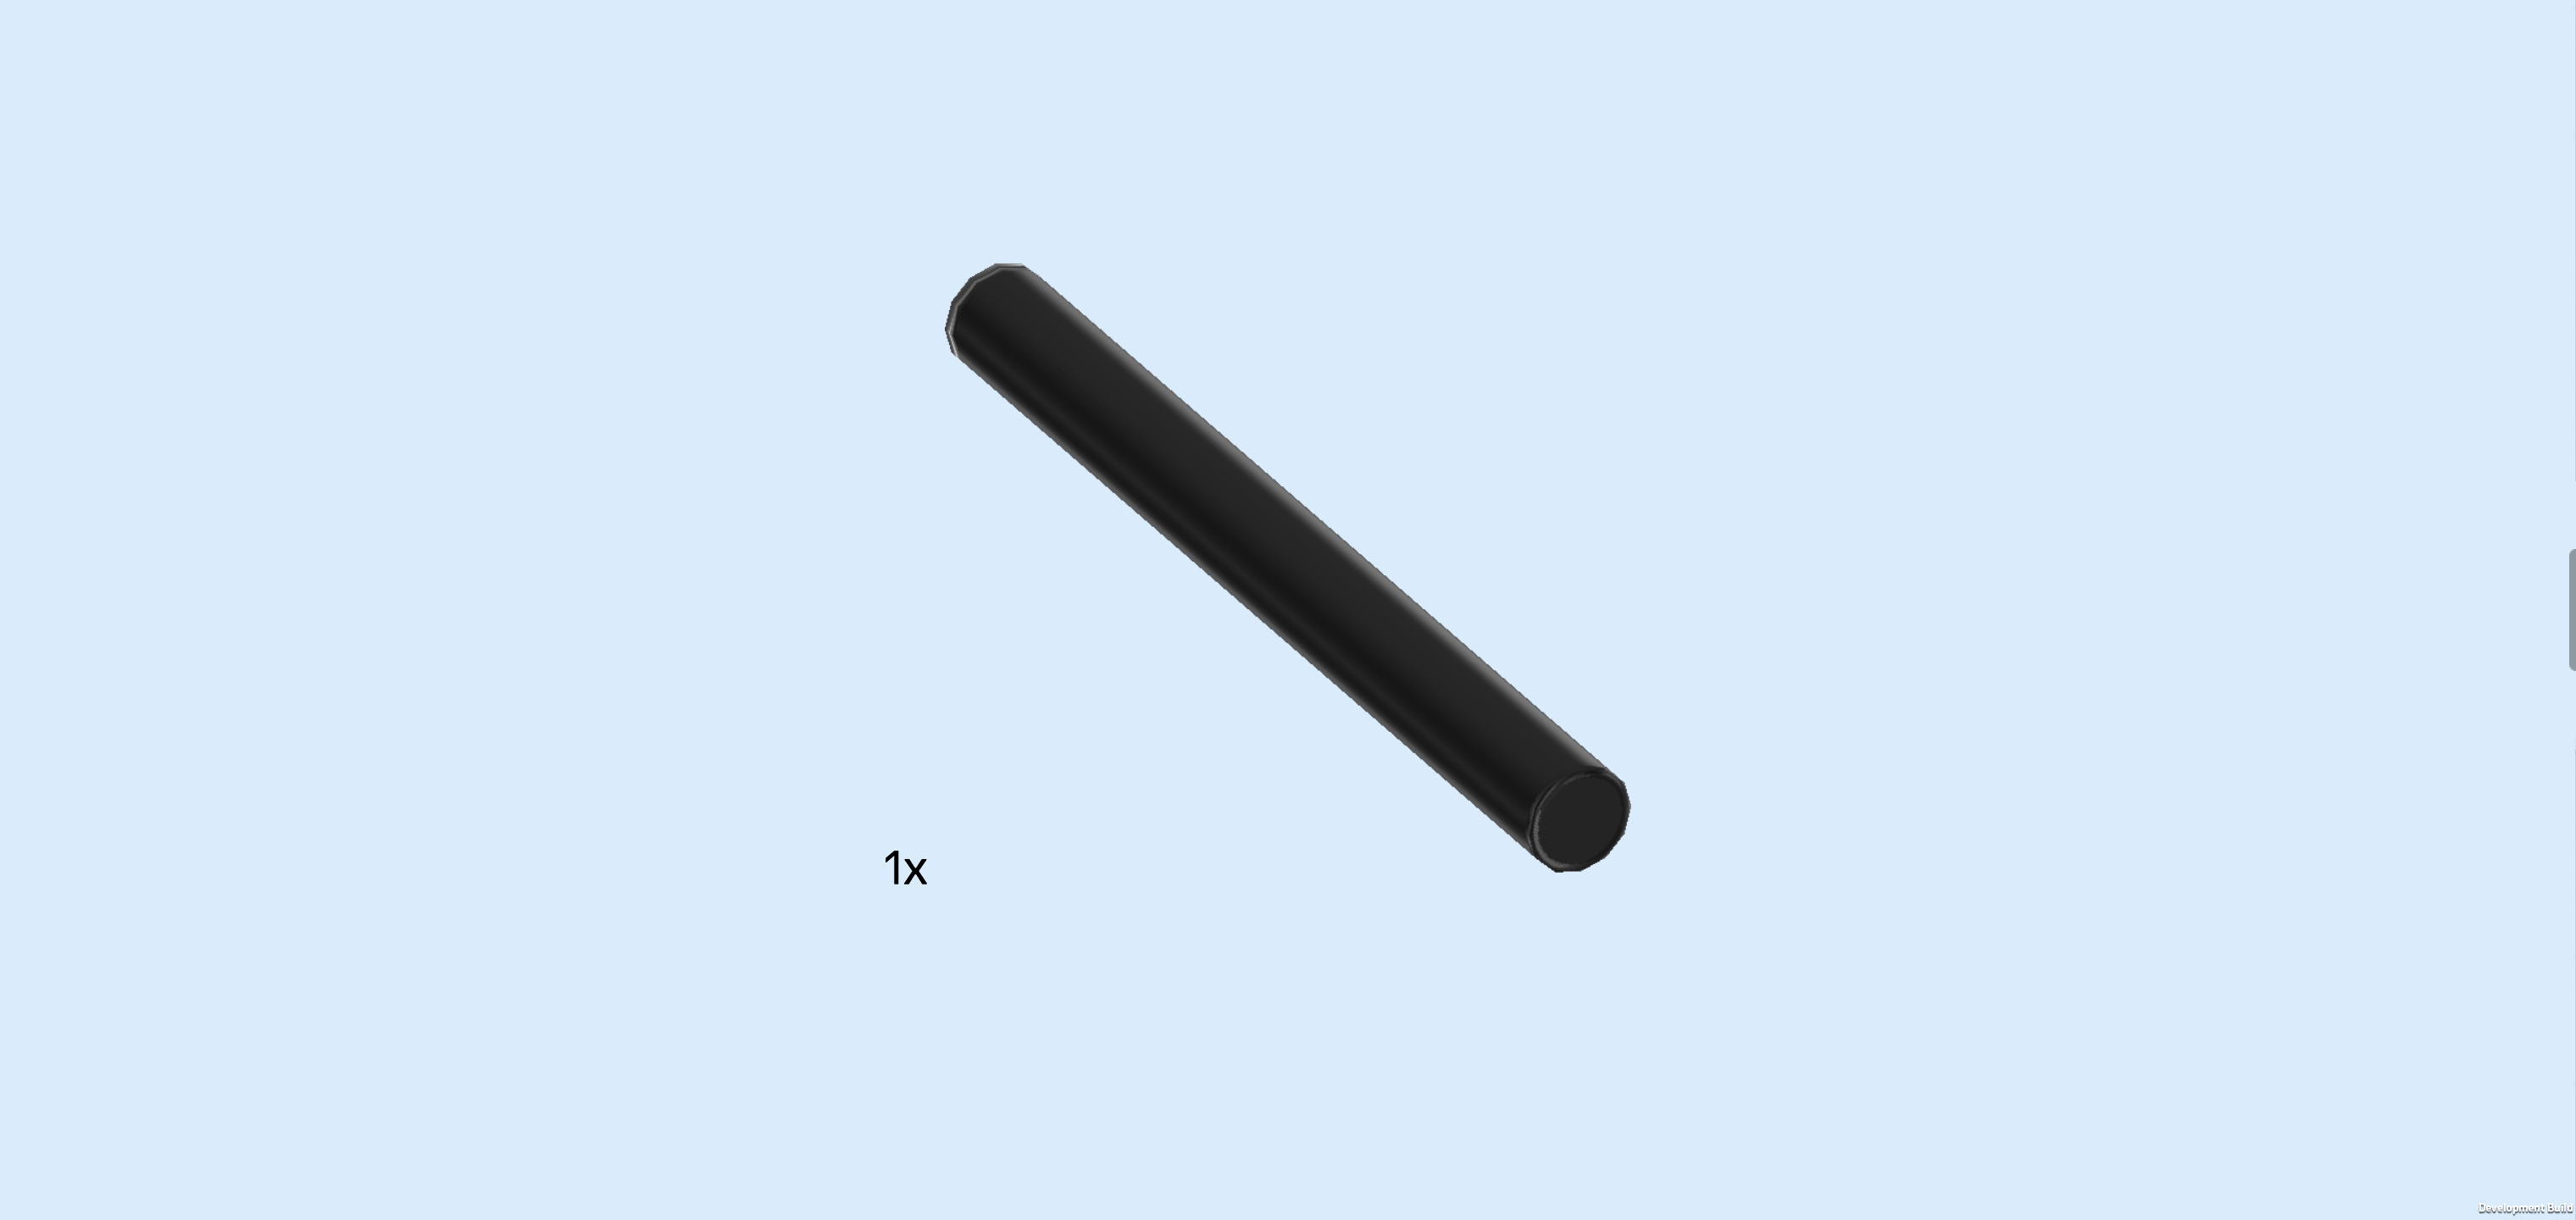
| Find 1 black shaft 4m. |
| Snap it vertically centered into the 2 clasps on the right edge. |
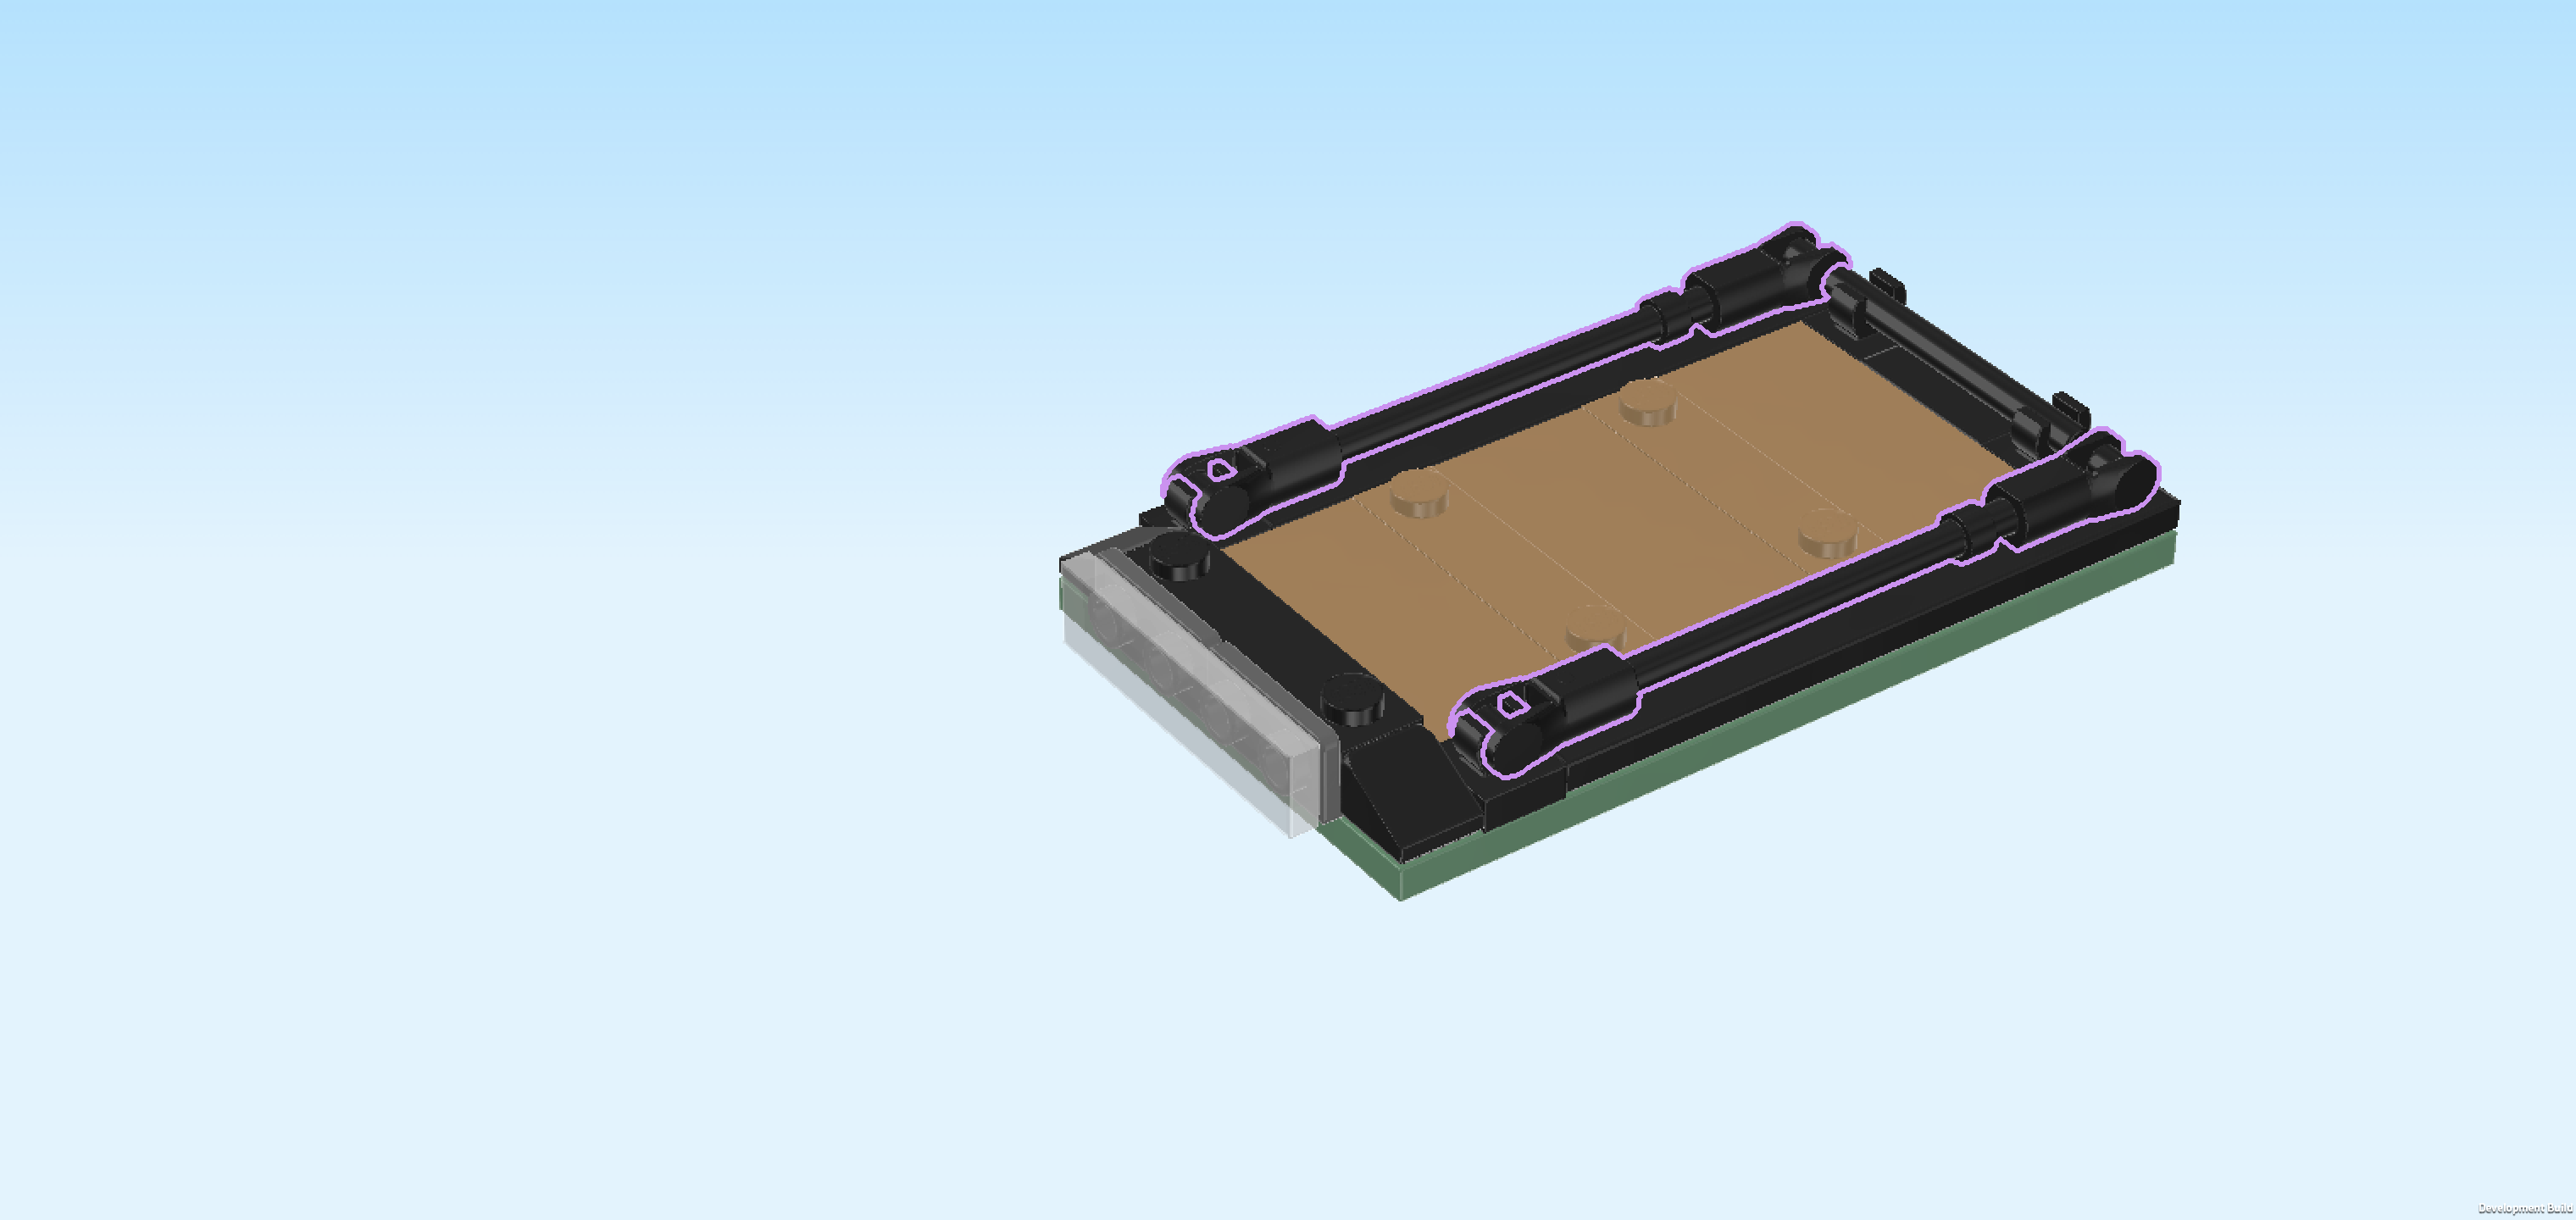
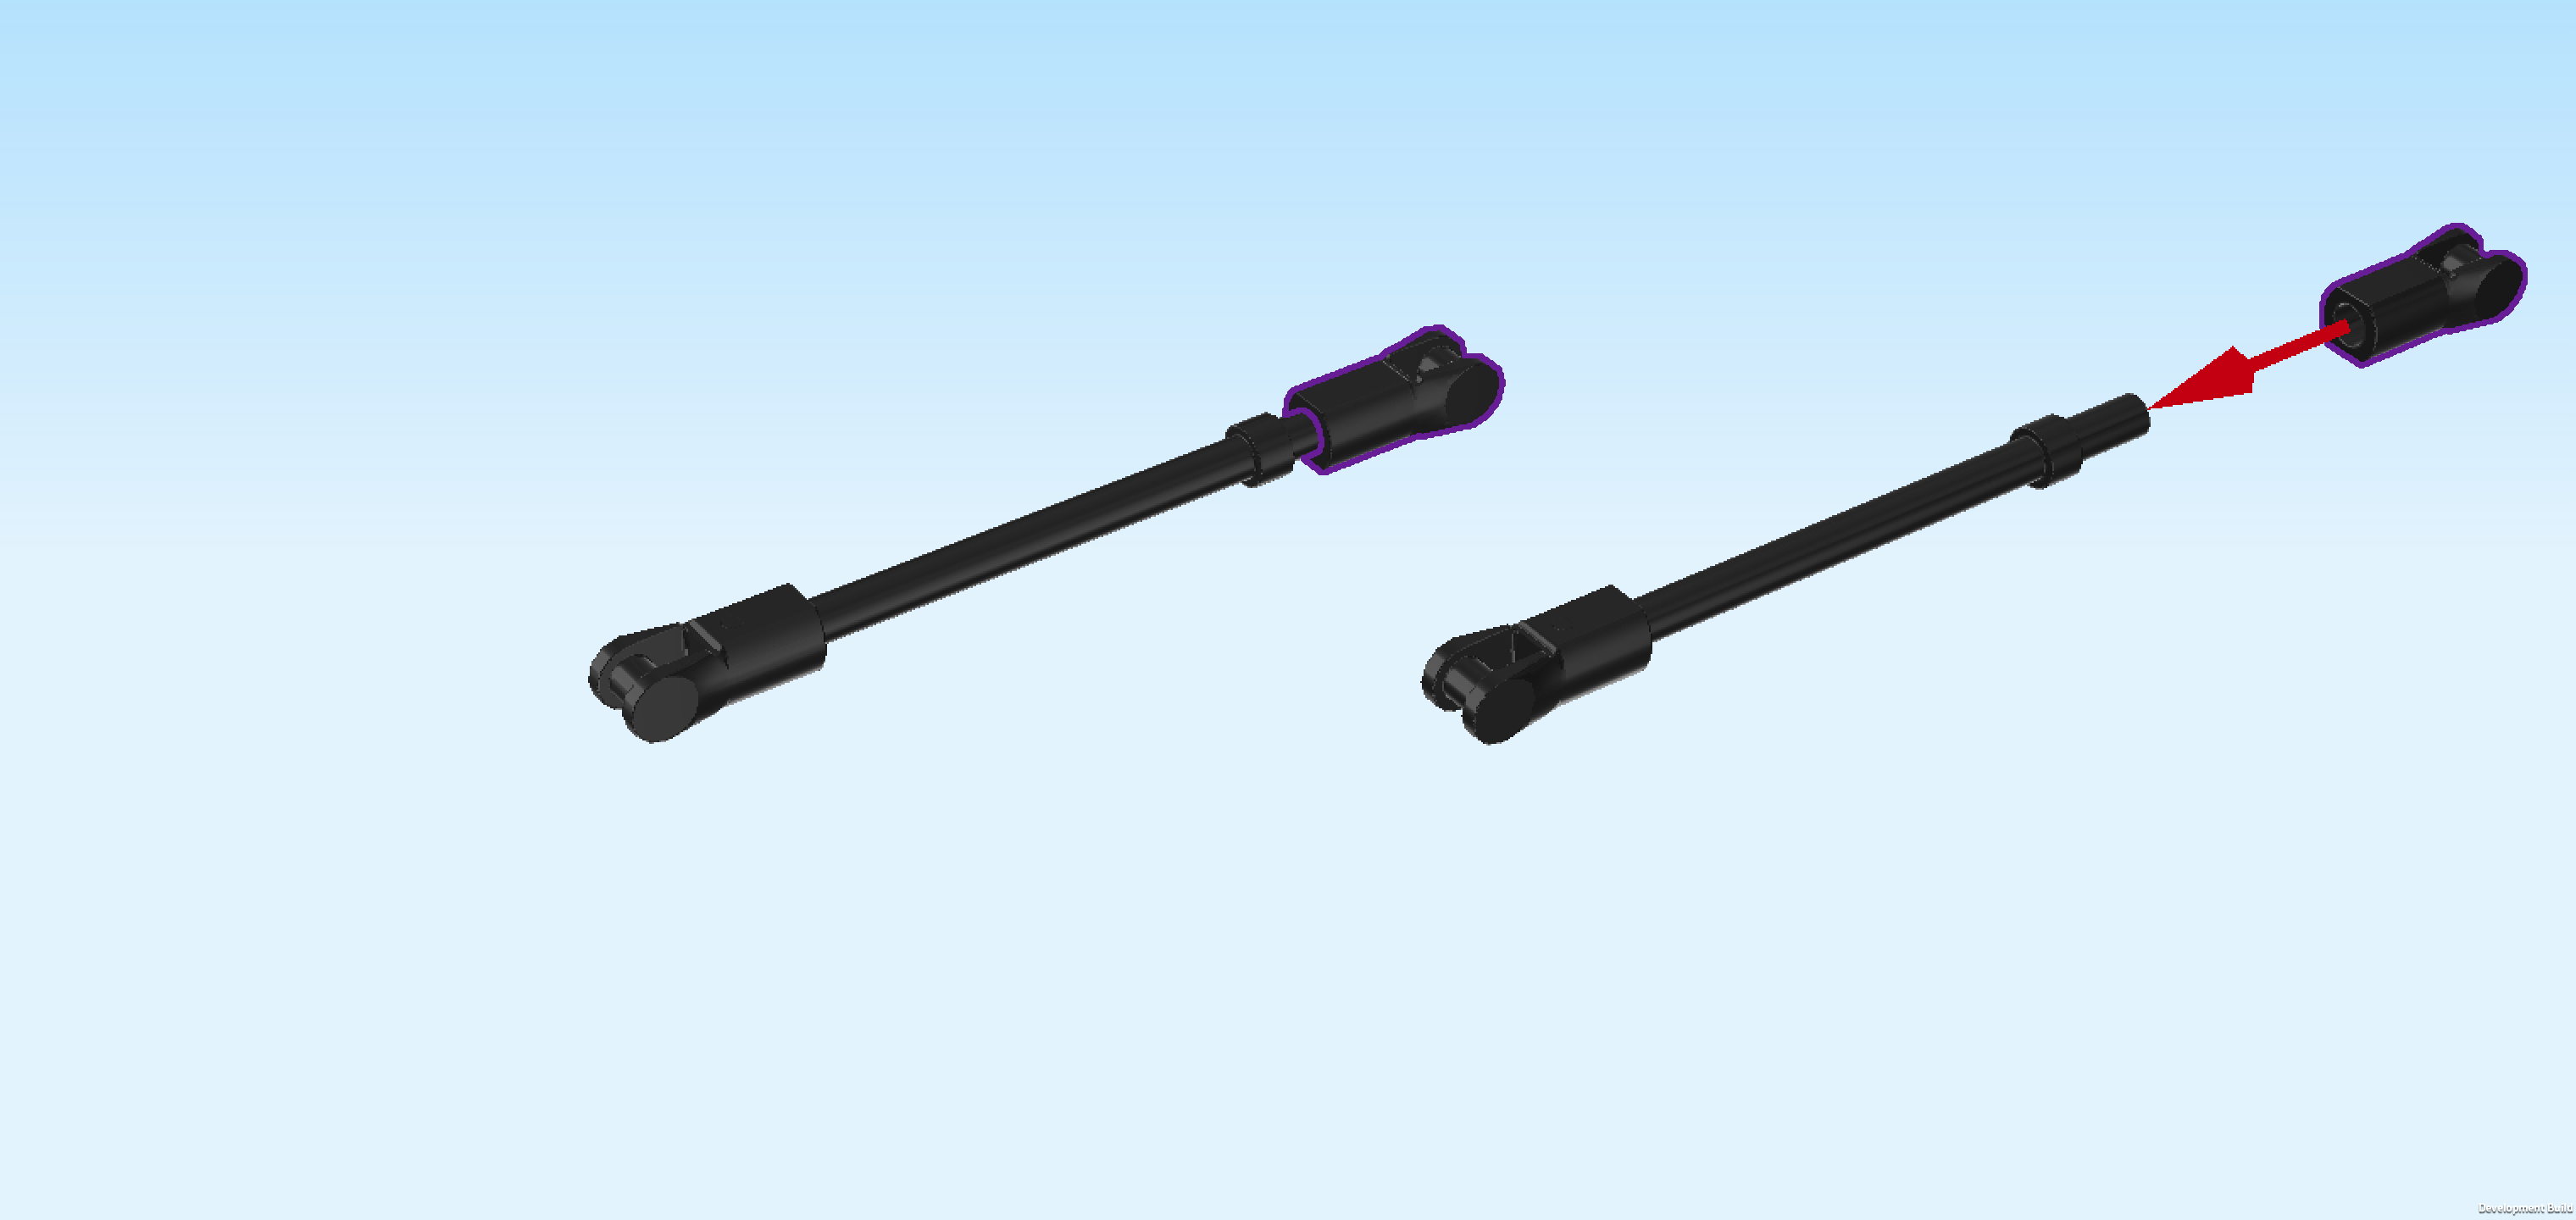
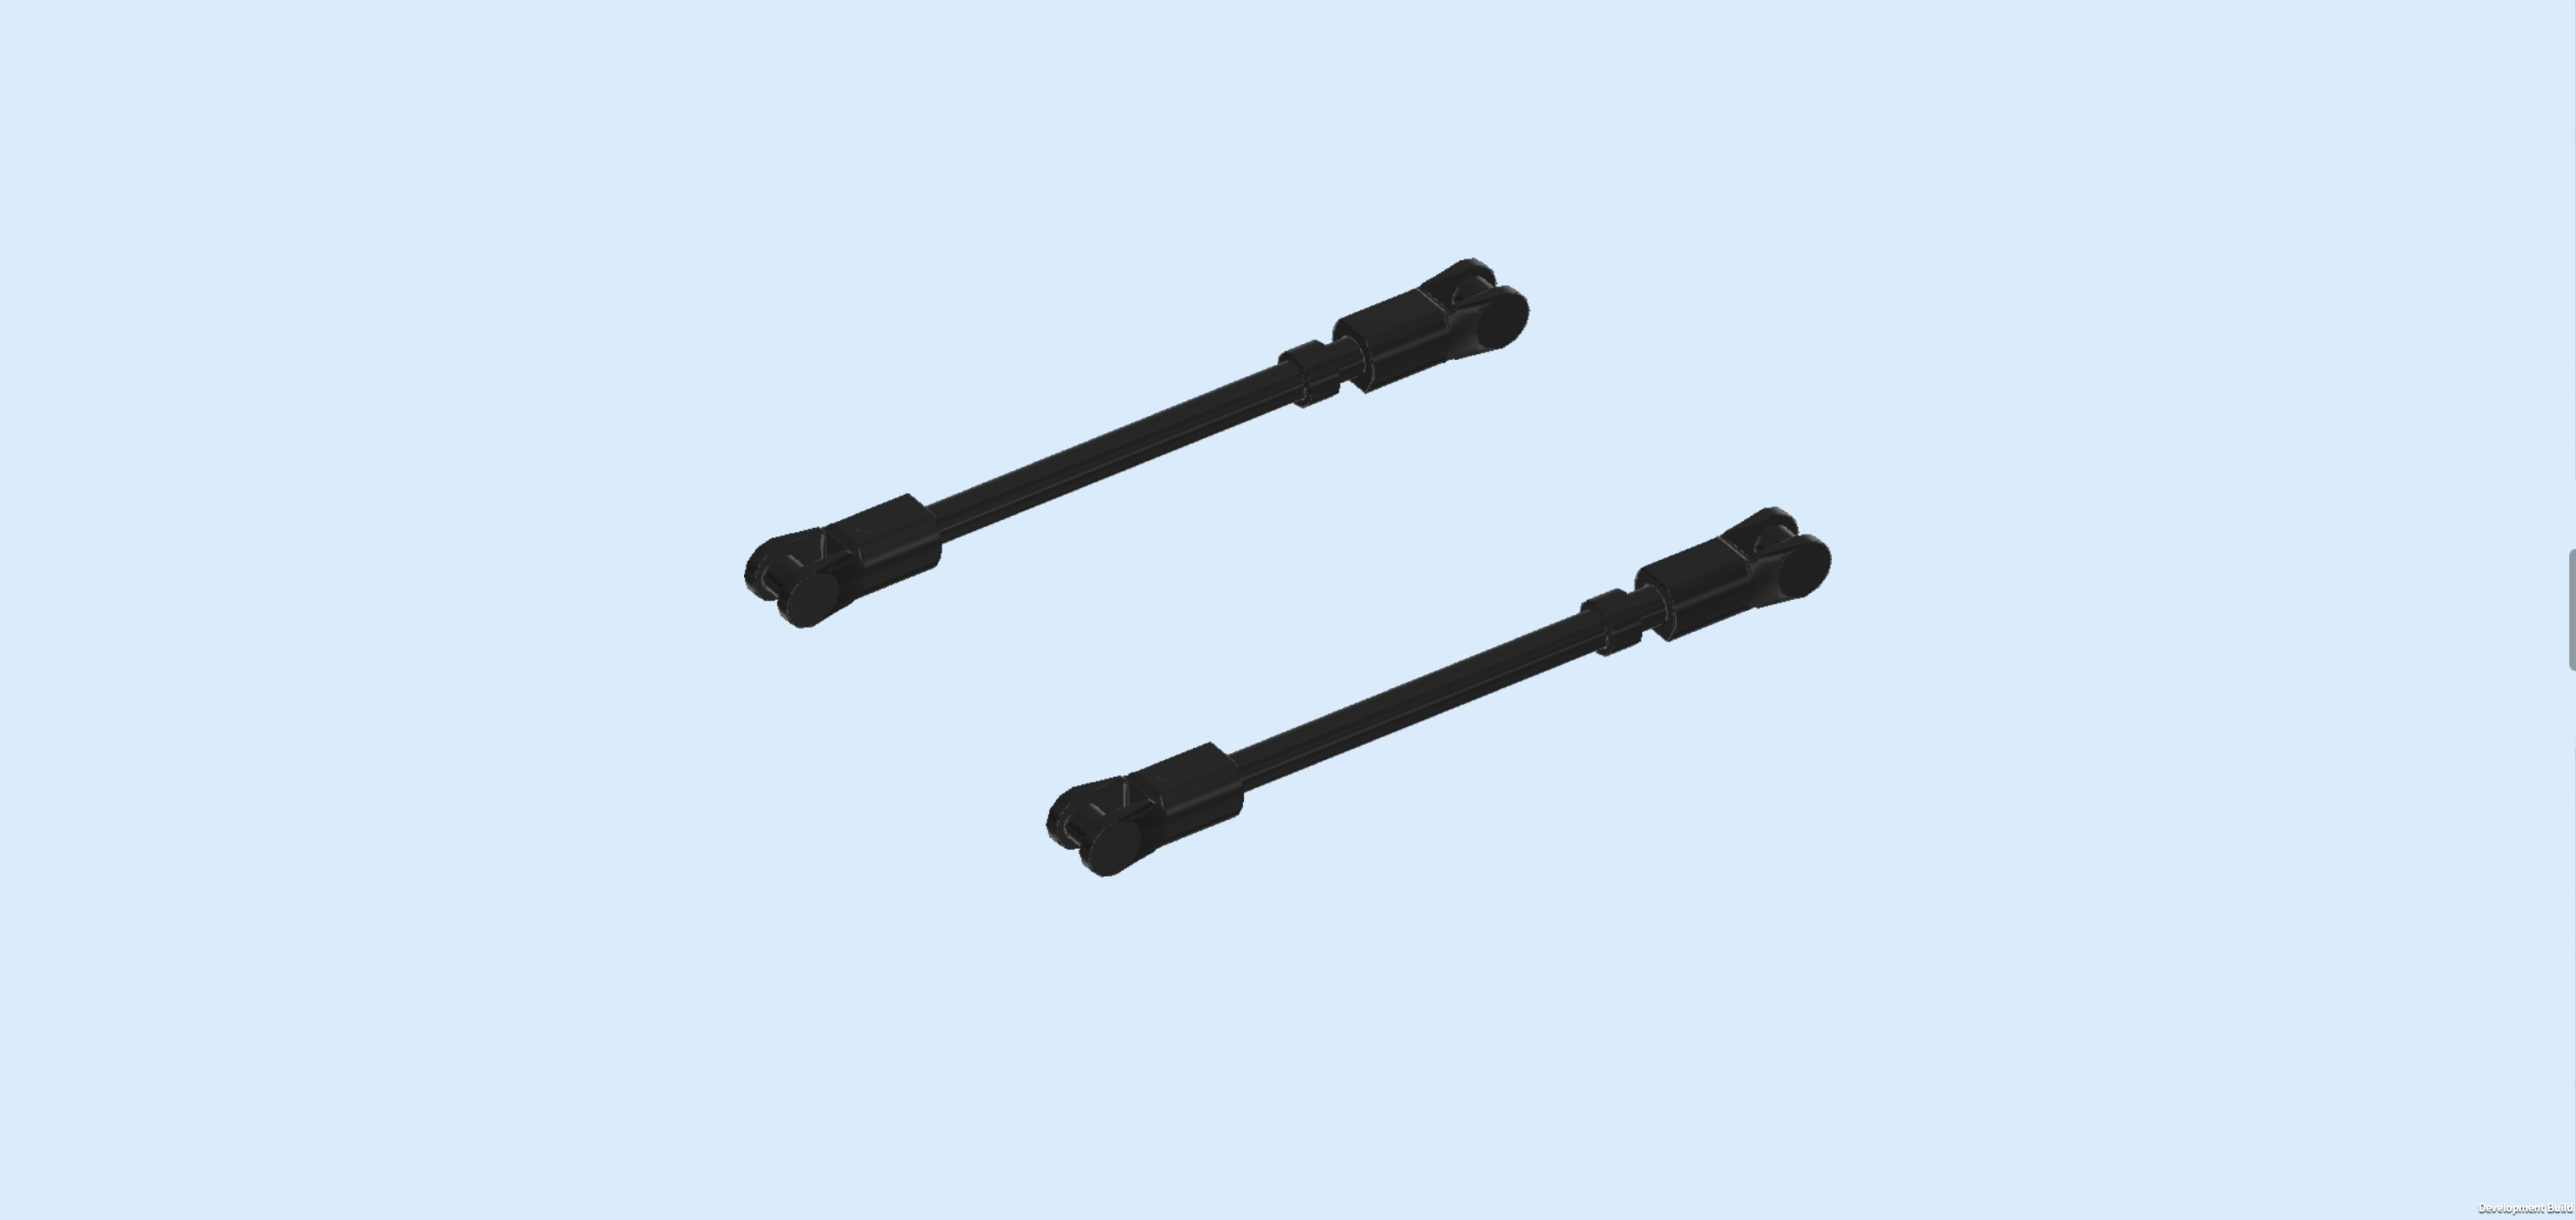
| Next, we will build 2 roof rack bars. |
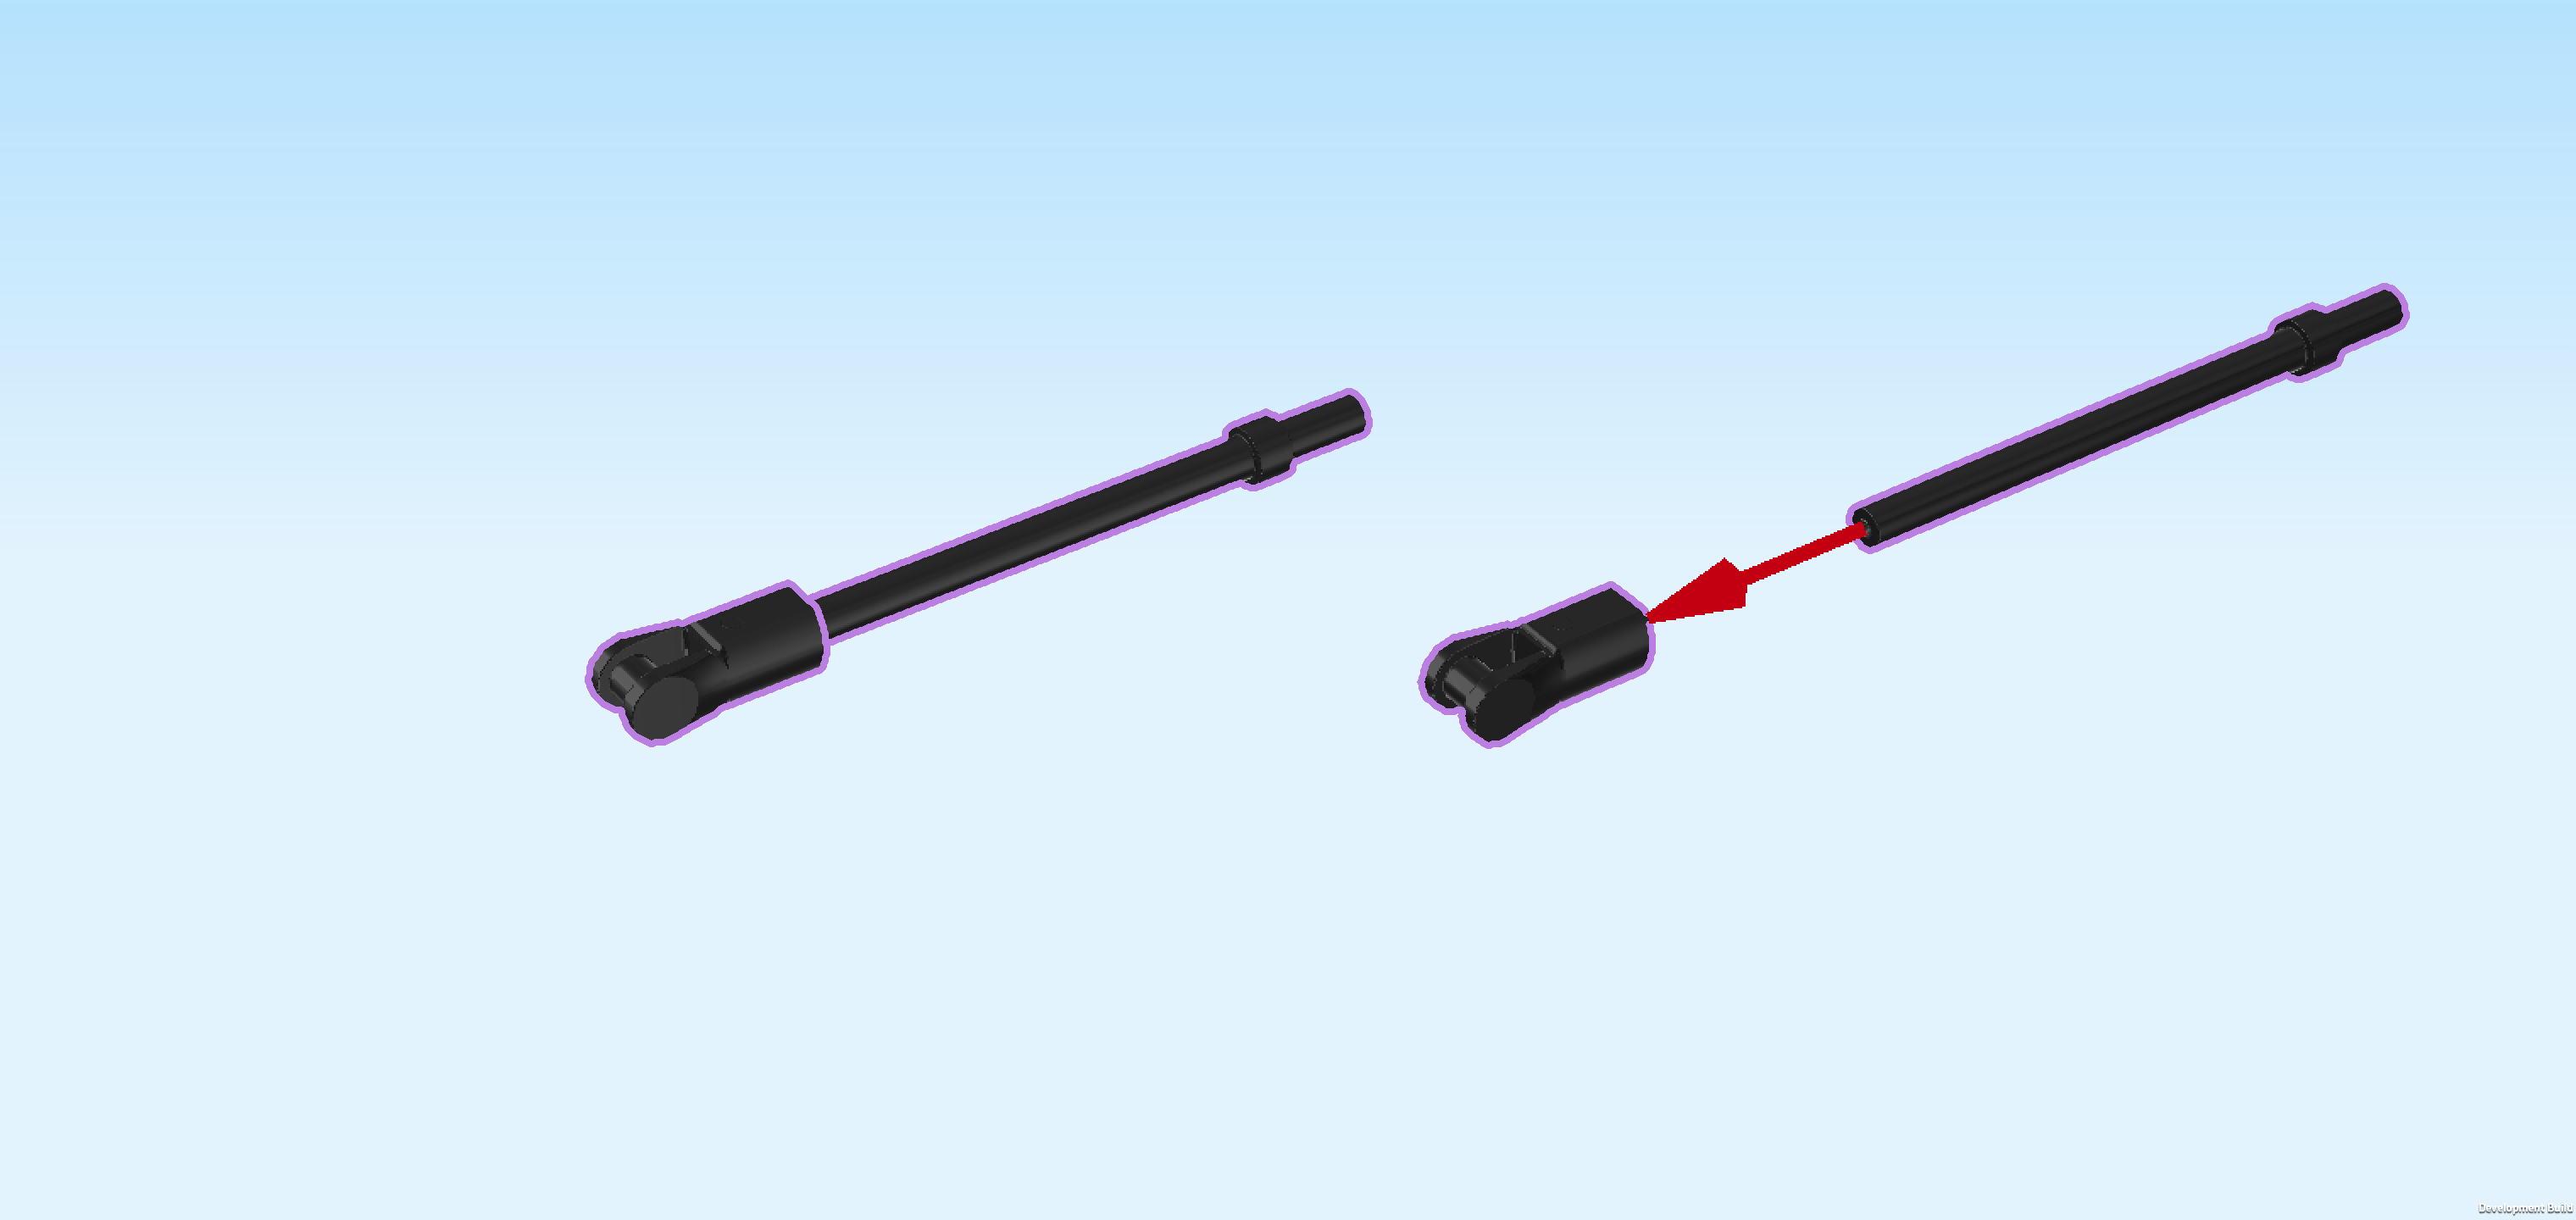
| Collect the following 4 pieces: |
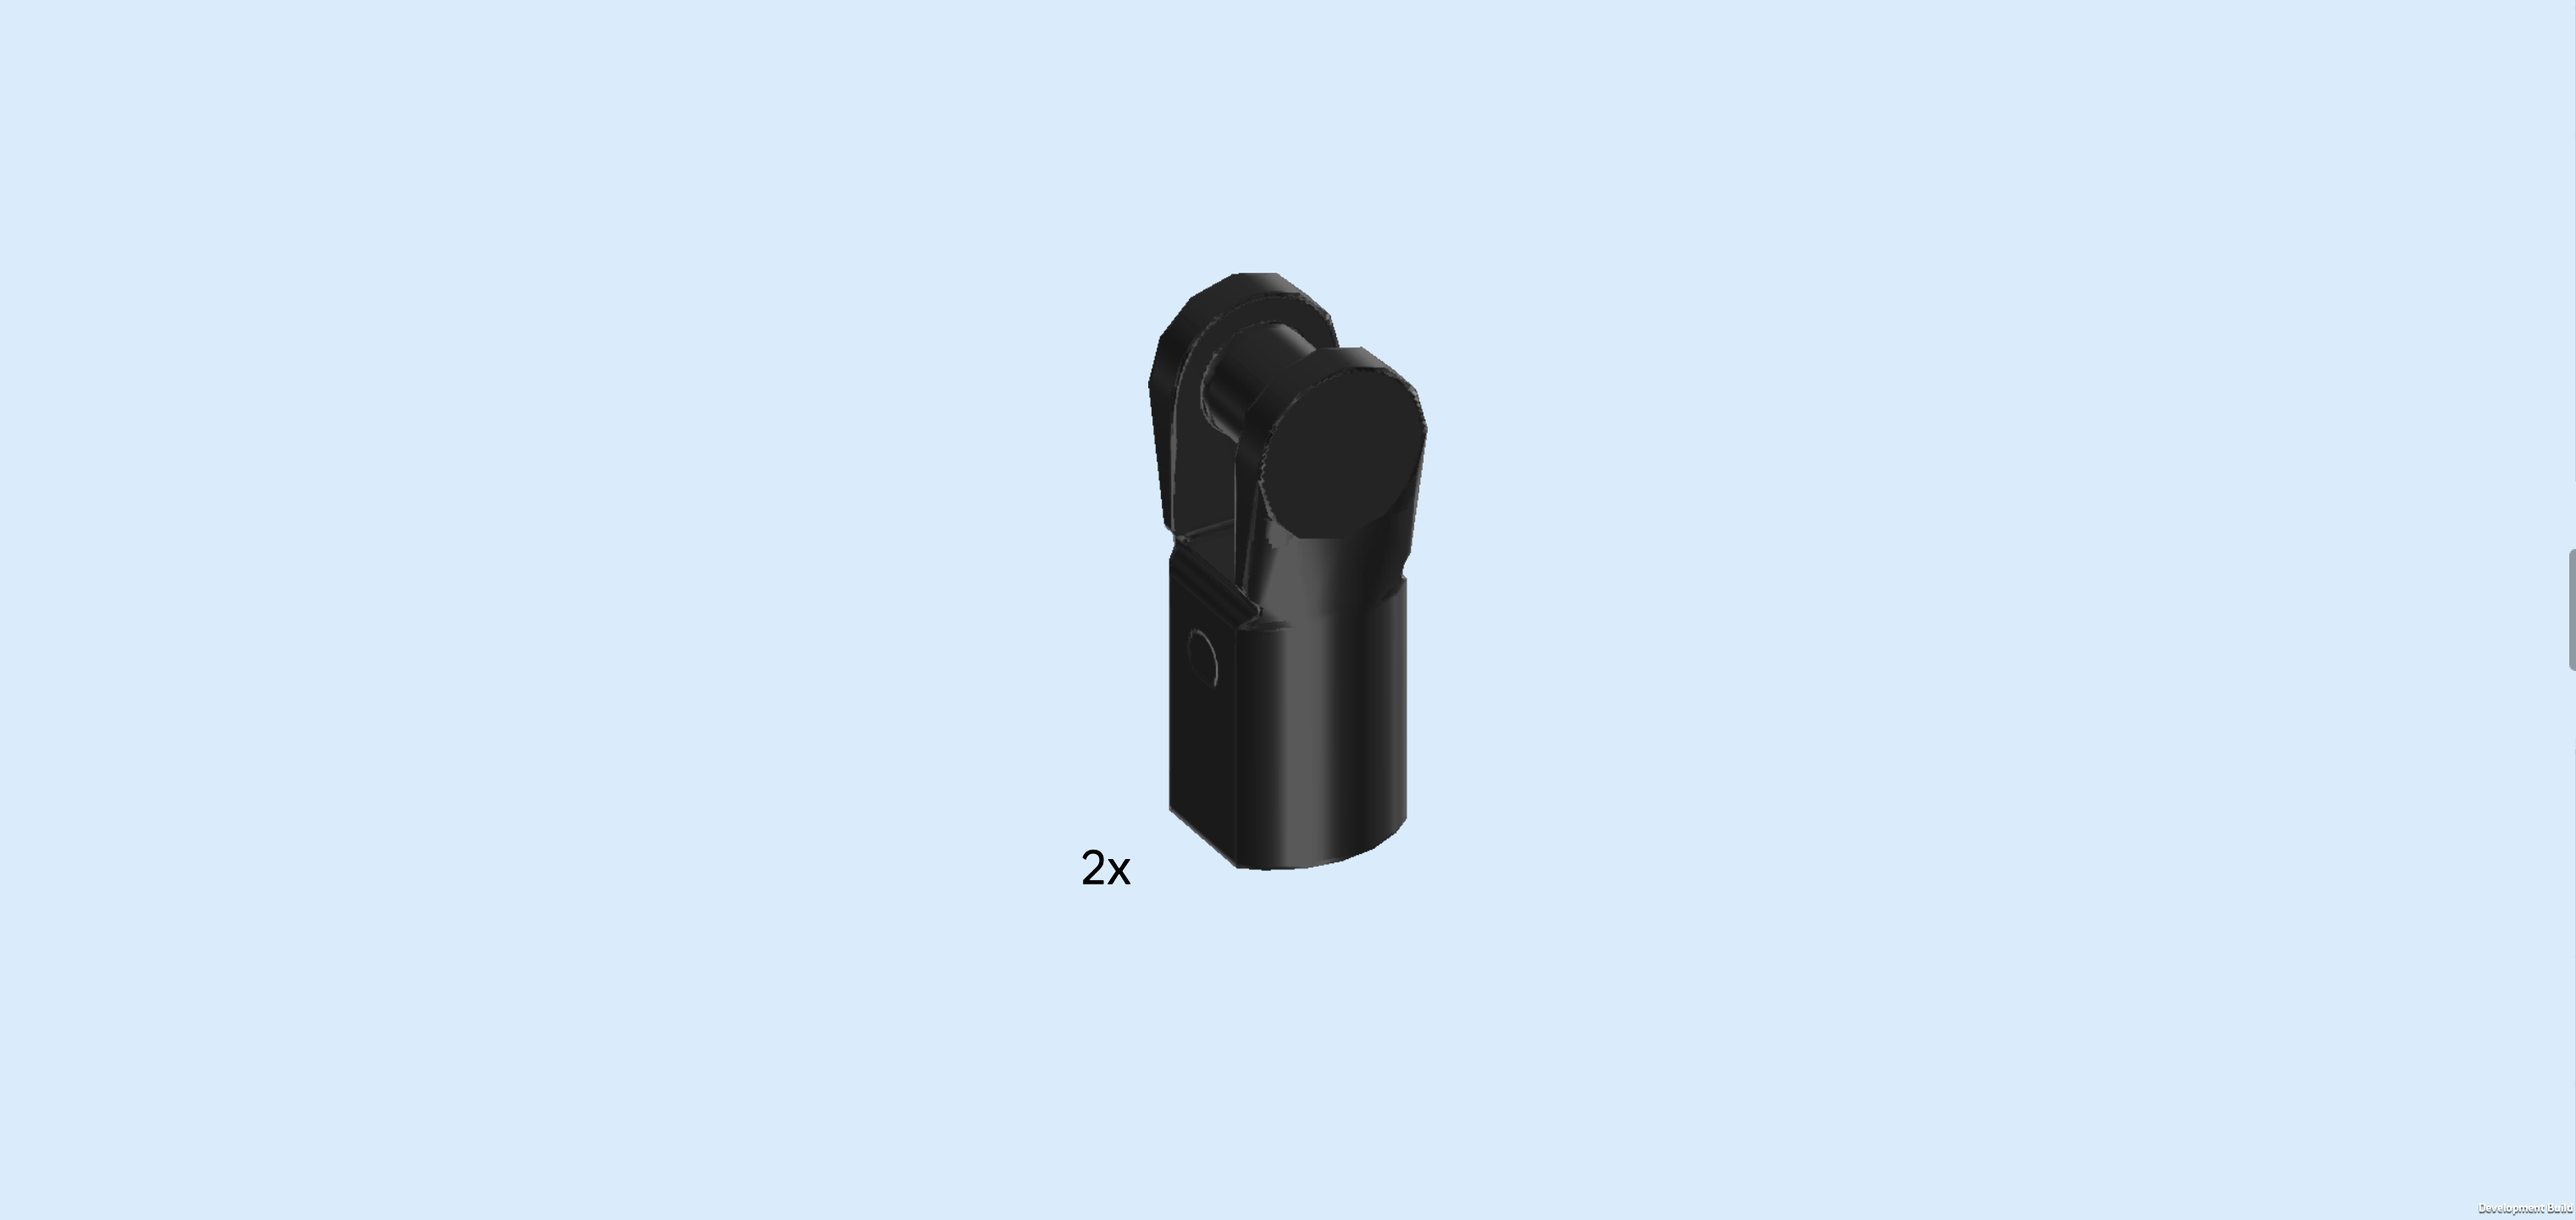
| 2 black small tubes 1m with side handle, |
| and 2 black shafts 6m with ring. |
| Insert the long end of 1 shaft into the small tube. This means the end with the ring is on the other side. |
| Repeat with the 2 remaining pieces. |
| Find another 2 black small tubes 1m with side handle. |
| Put them on the ring ends of the 2 shafts from the previous step. |
| The 2 roof rack bars are finished! Snap the small shaft of the left tube into the back clasp on the left edge of the roof. The roof rack bar extends towards the right, resting on the roof. |
| Repeat symmetrically at the front. |
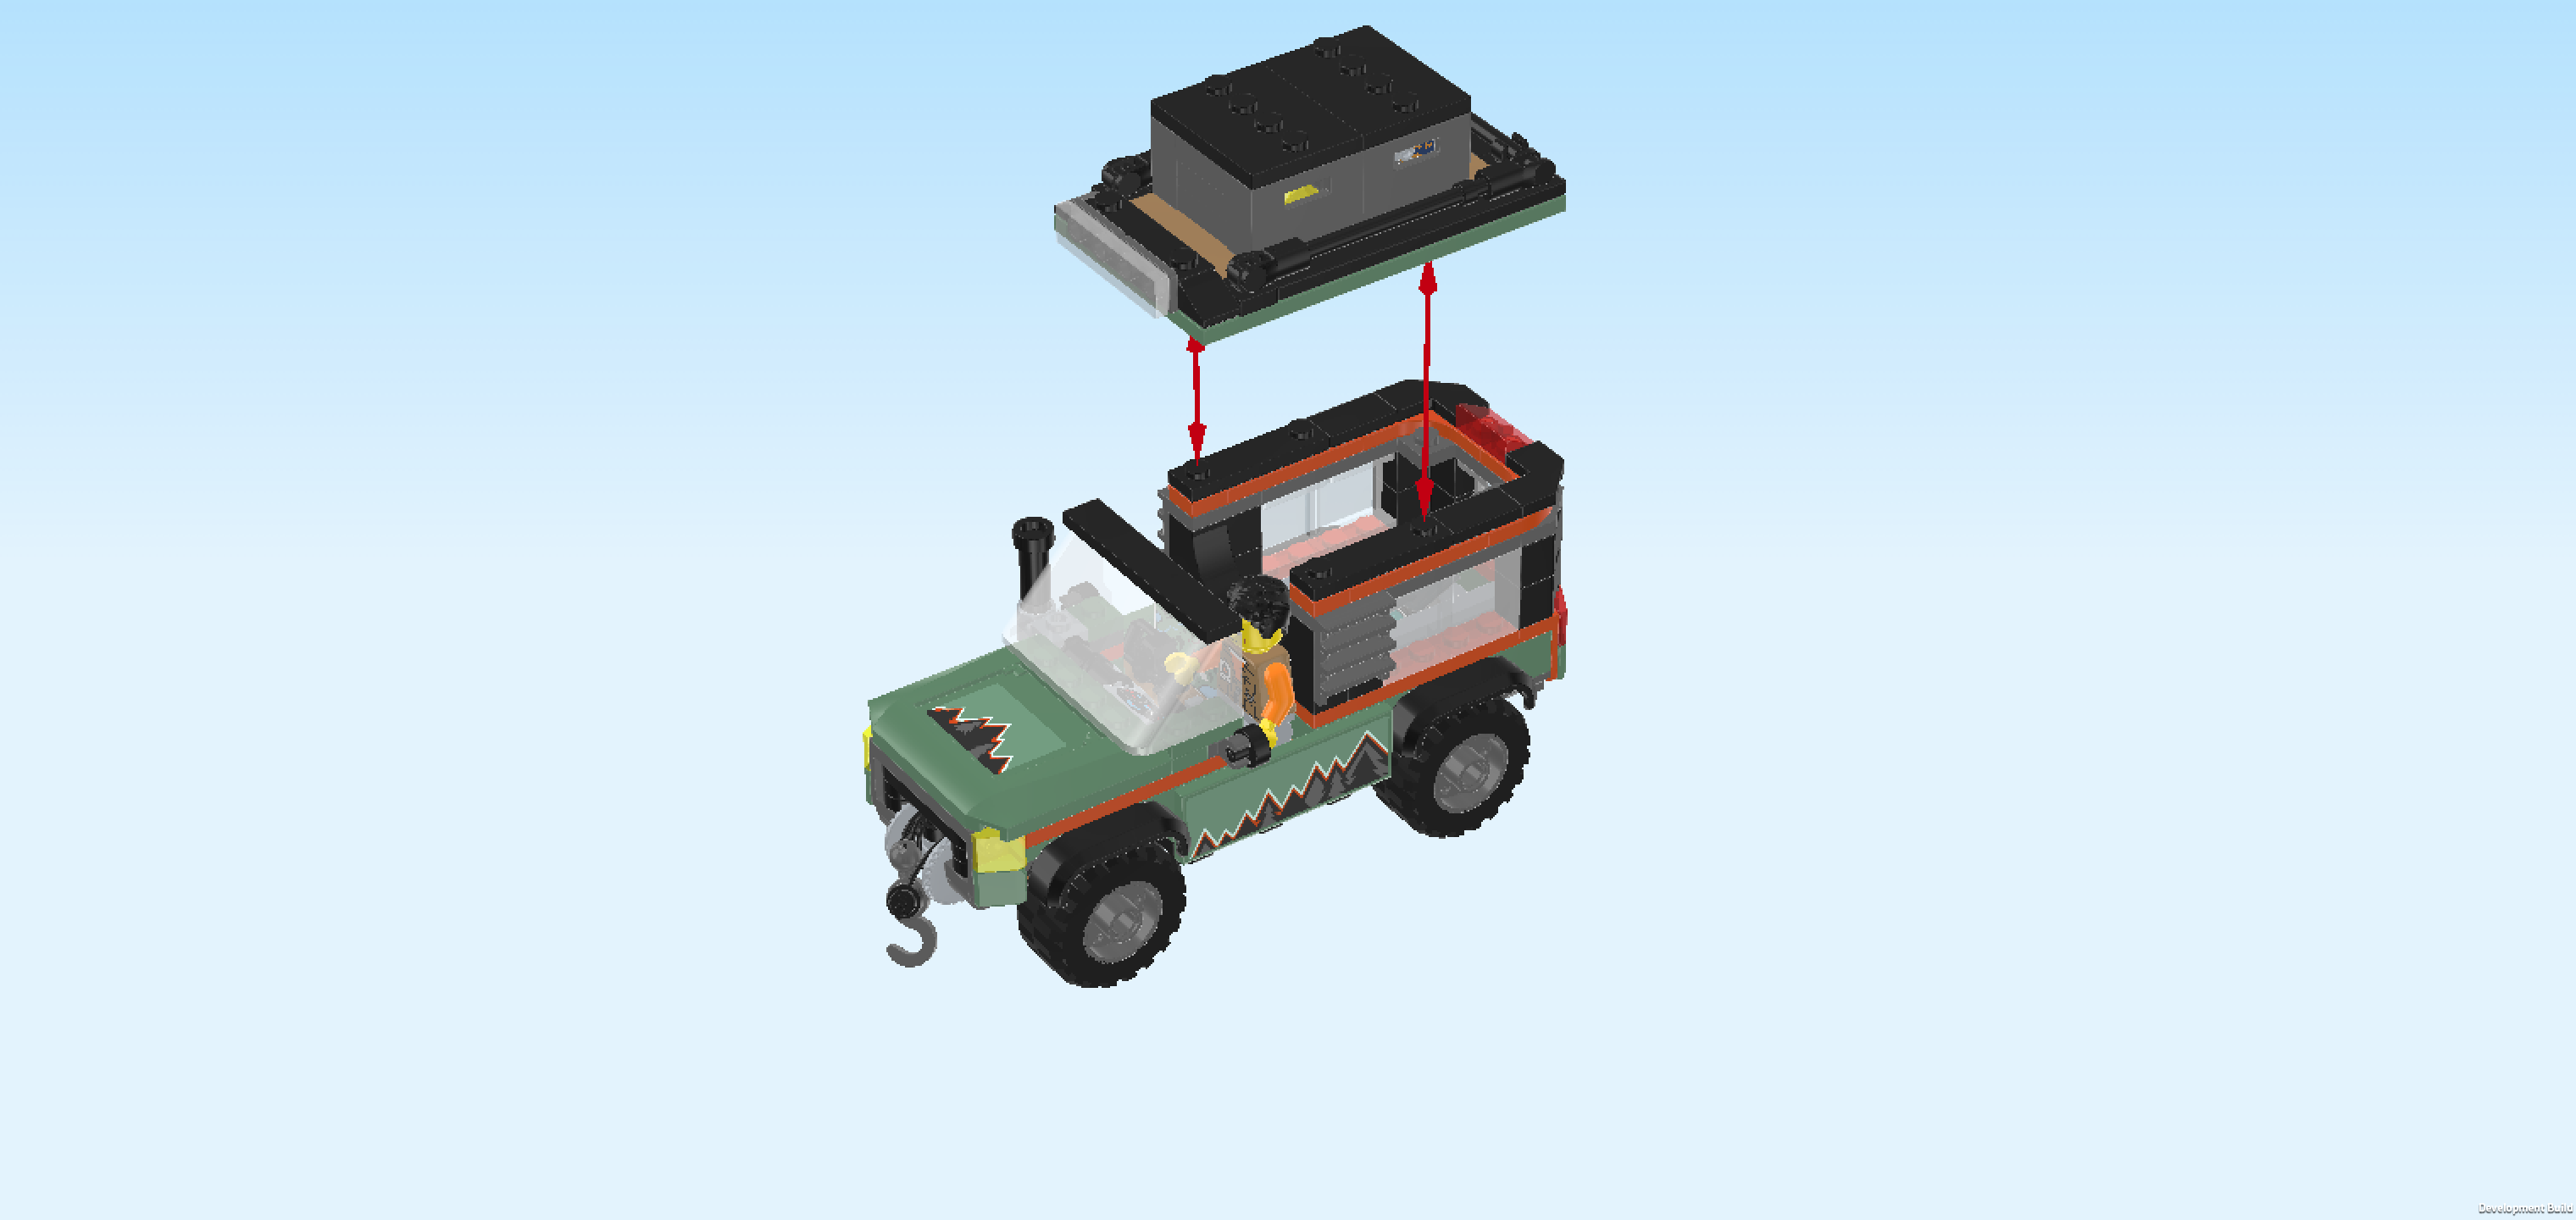
| The vehicle roof is finished! Well done! Mount it in its building orientation centered on top of the vehicle, making sure the left edge aligns with the windscreen and the right edge aligns with the vehicle's right edge. |
| Since the roof only connects to a few knobs, you can easily take it off and reattach it as needed. |
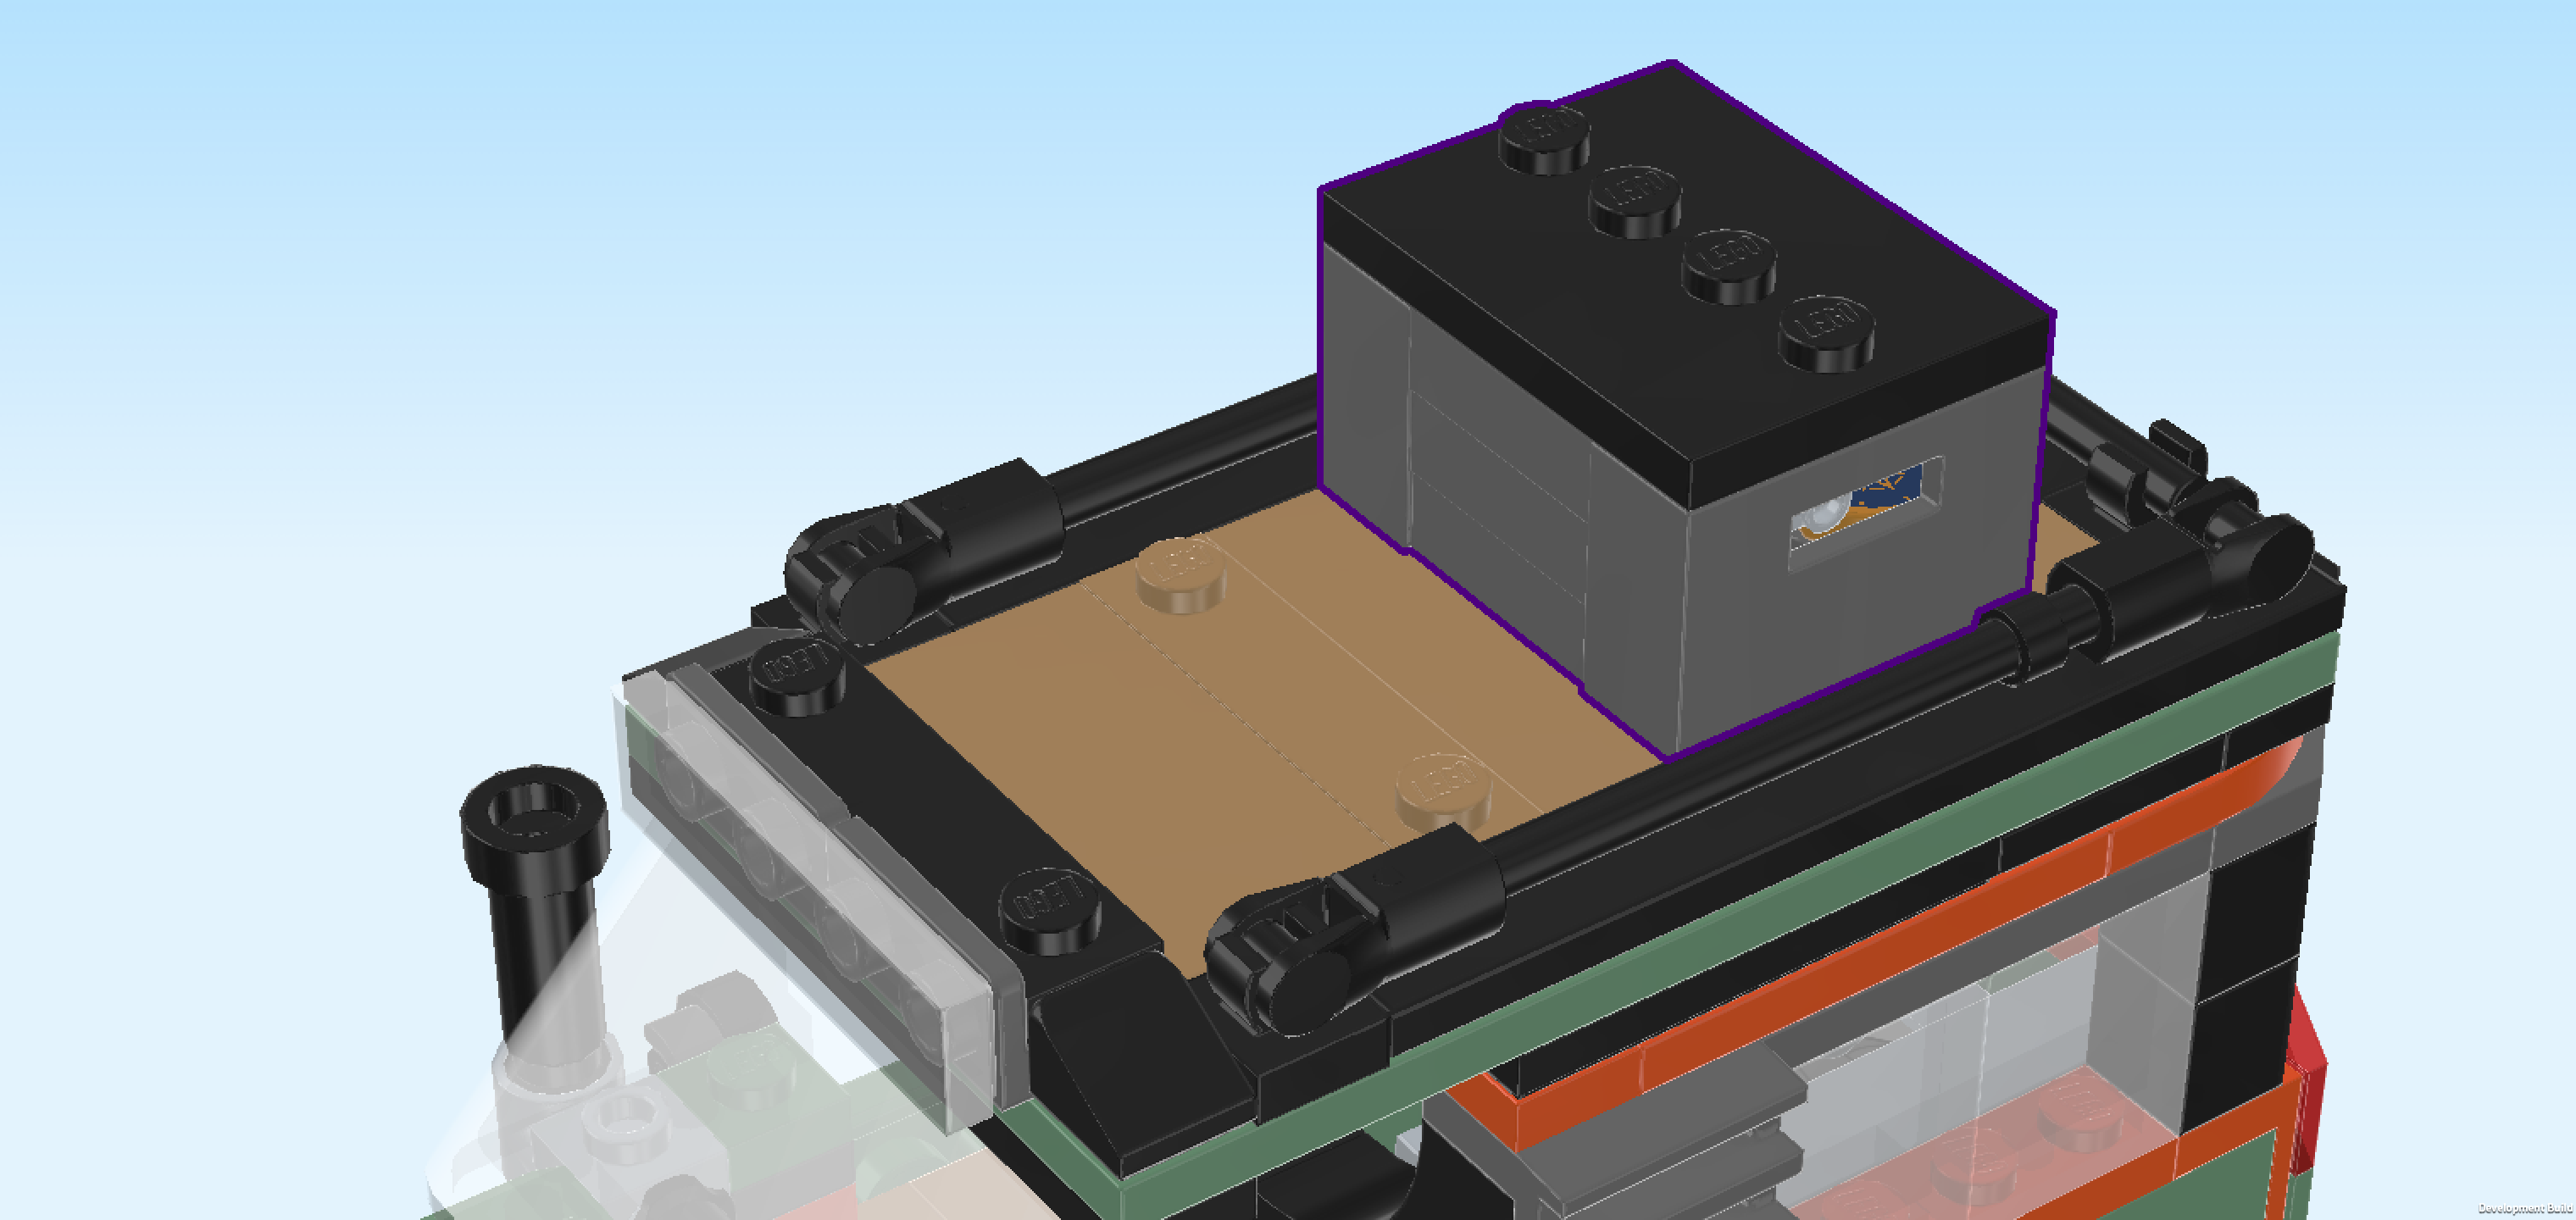
| Next, we will build the first storage box for the roof. |
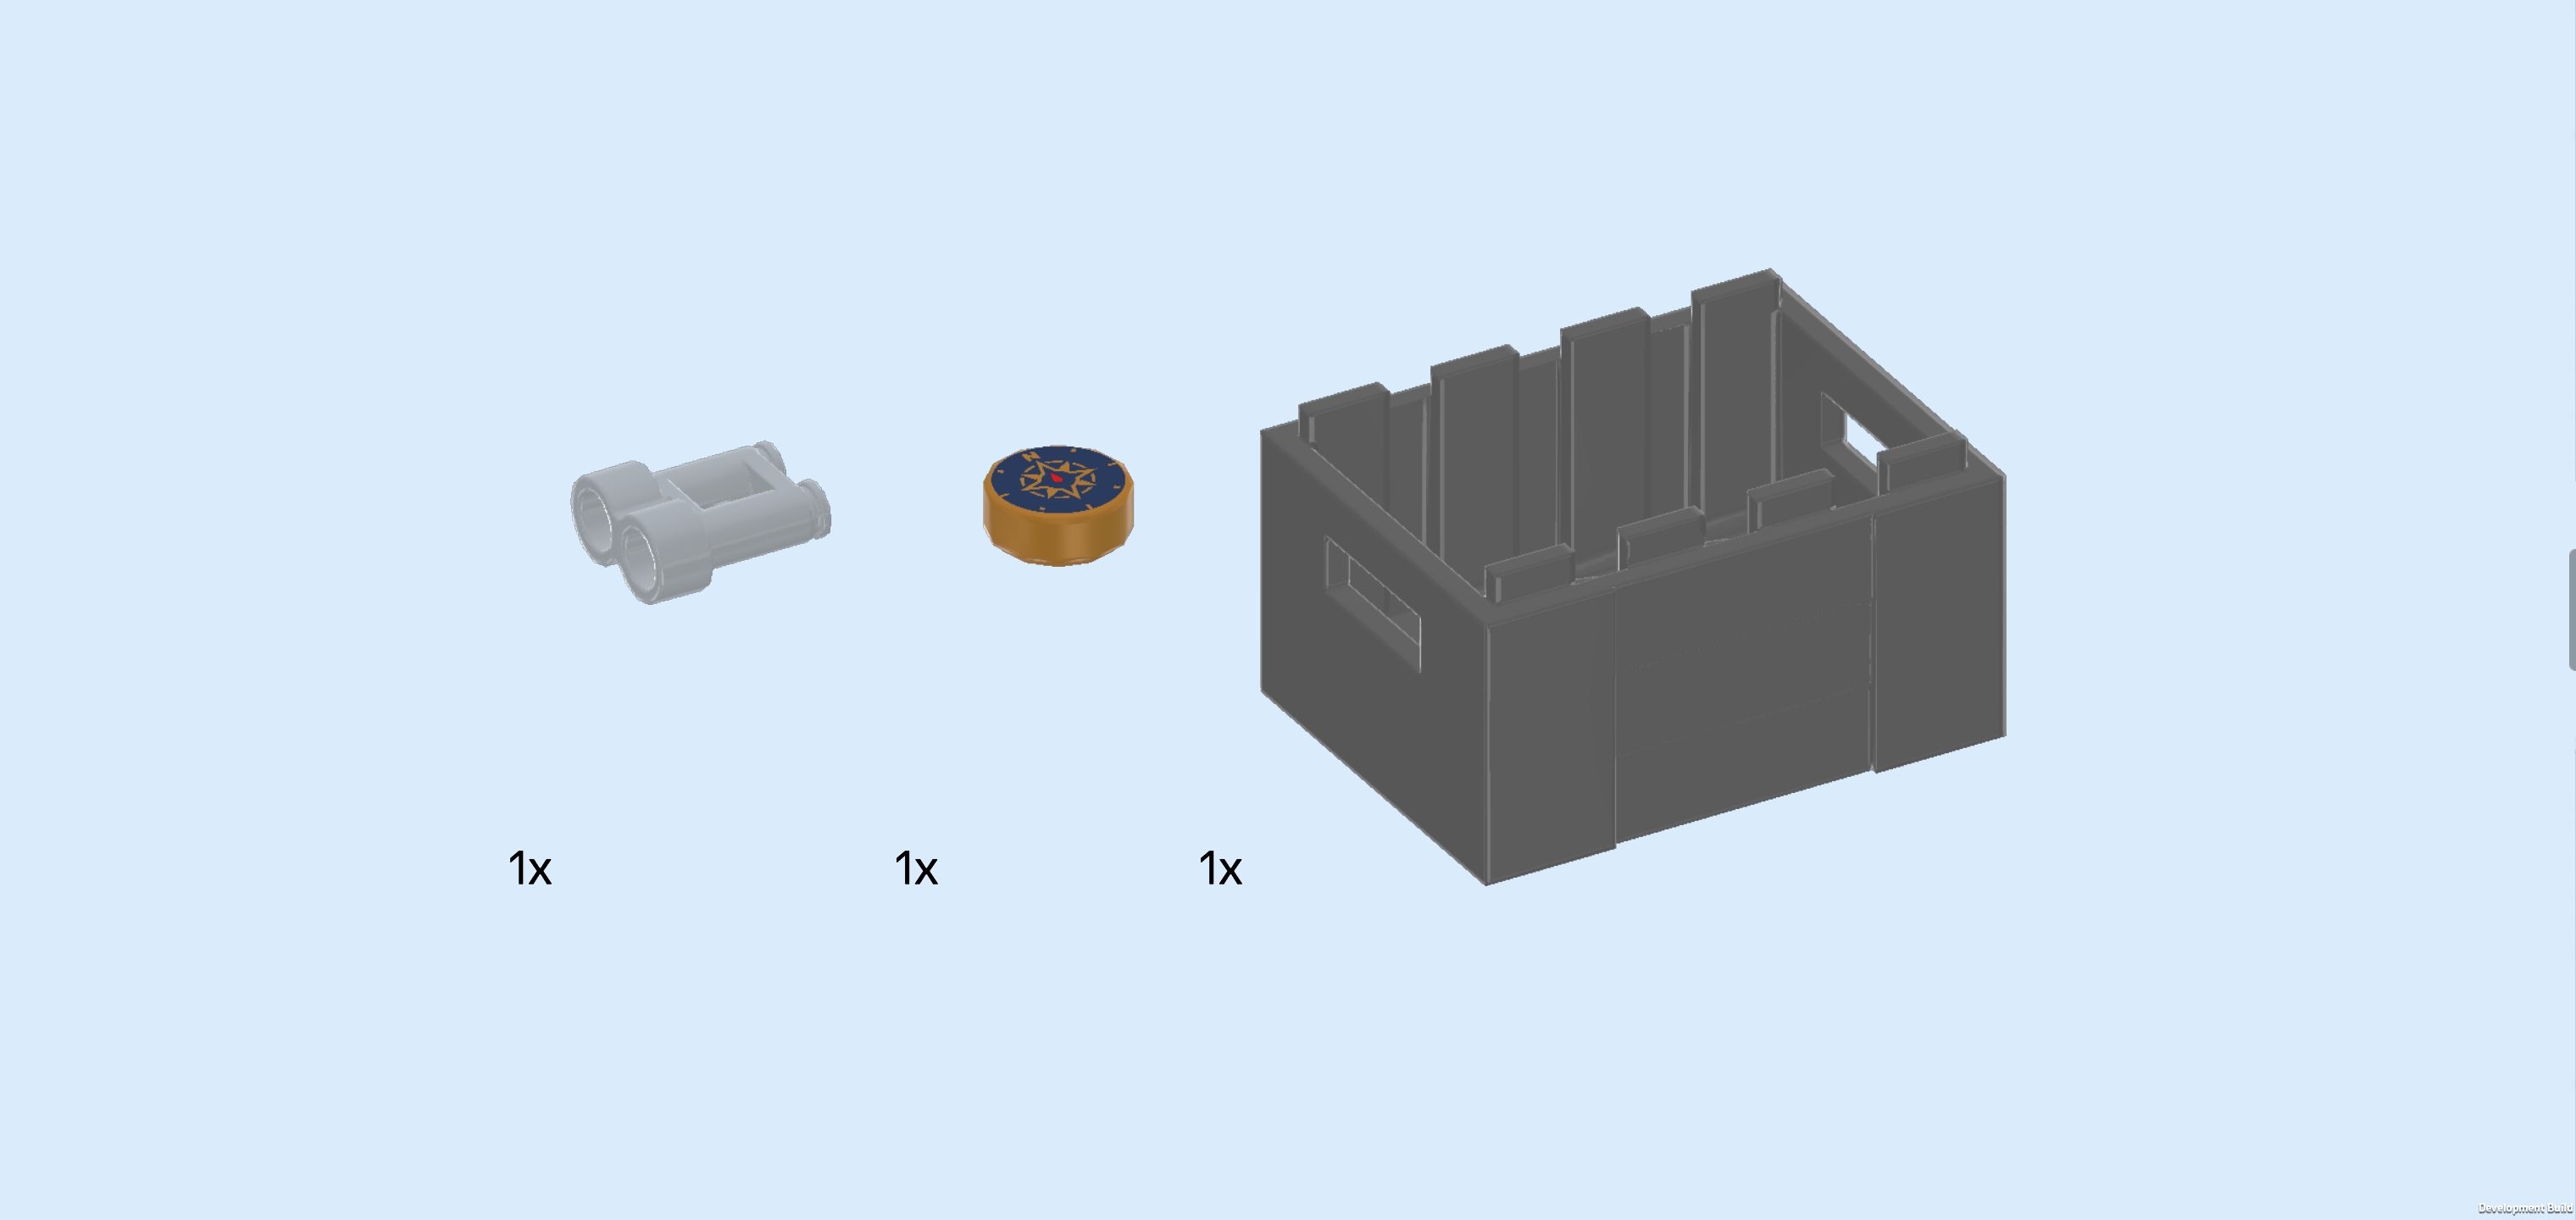
| Collect the following 3 pieces: |
| 1 medium stone grey pair of Minifigure binoculars, |
| 1 warm gold round tile 1x1, |
| and 1 dark stone grey crate 3x4 with handholds. |
| Place the binoculars and the round tile into the crate. |
| The print of the round tile is a beautifully ornamented compass. An indispensable piece of equipment for an outdoors explorer. |
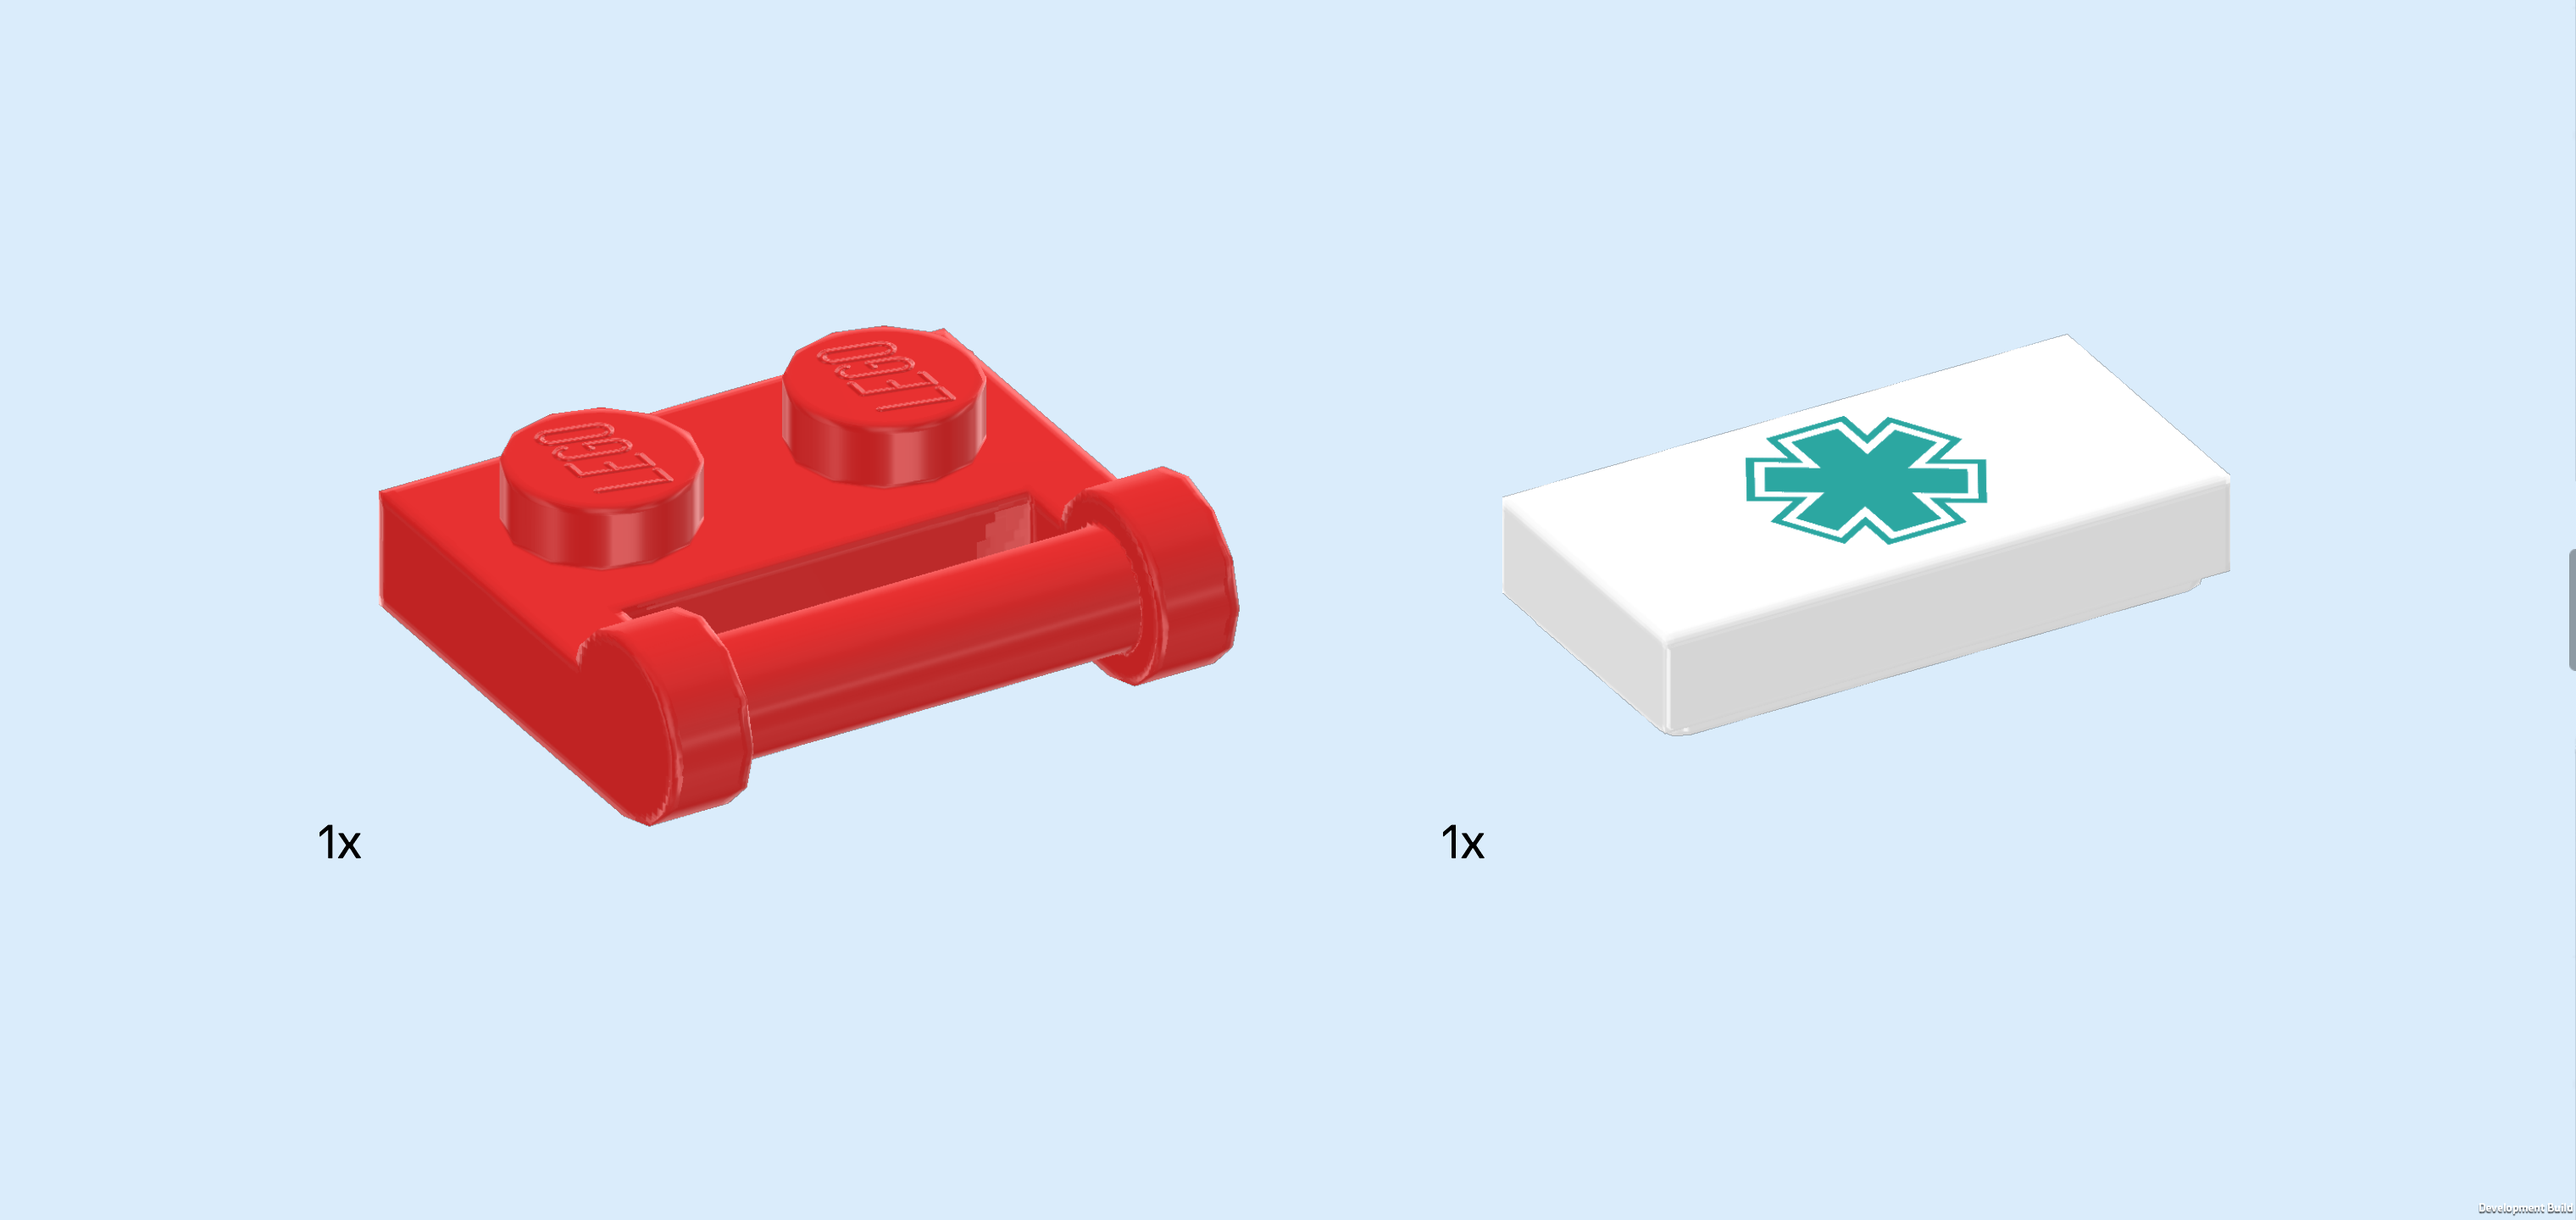
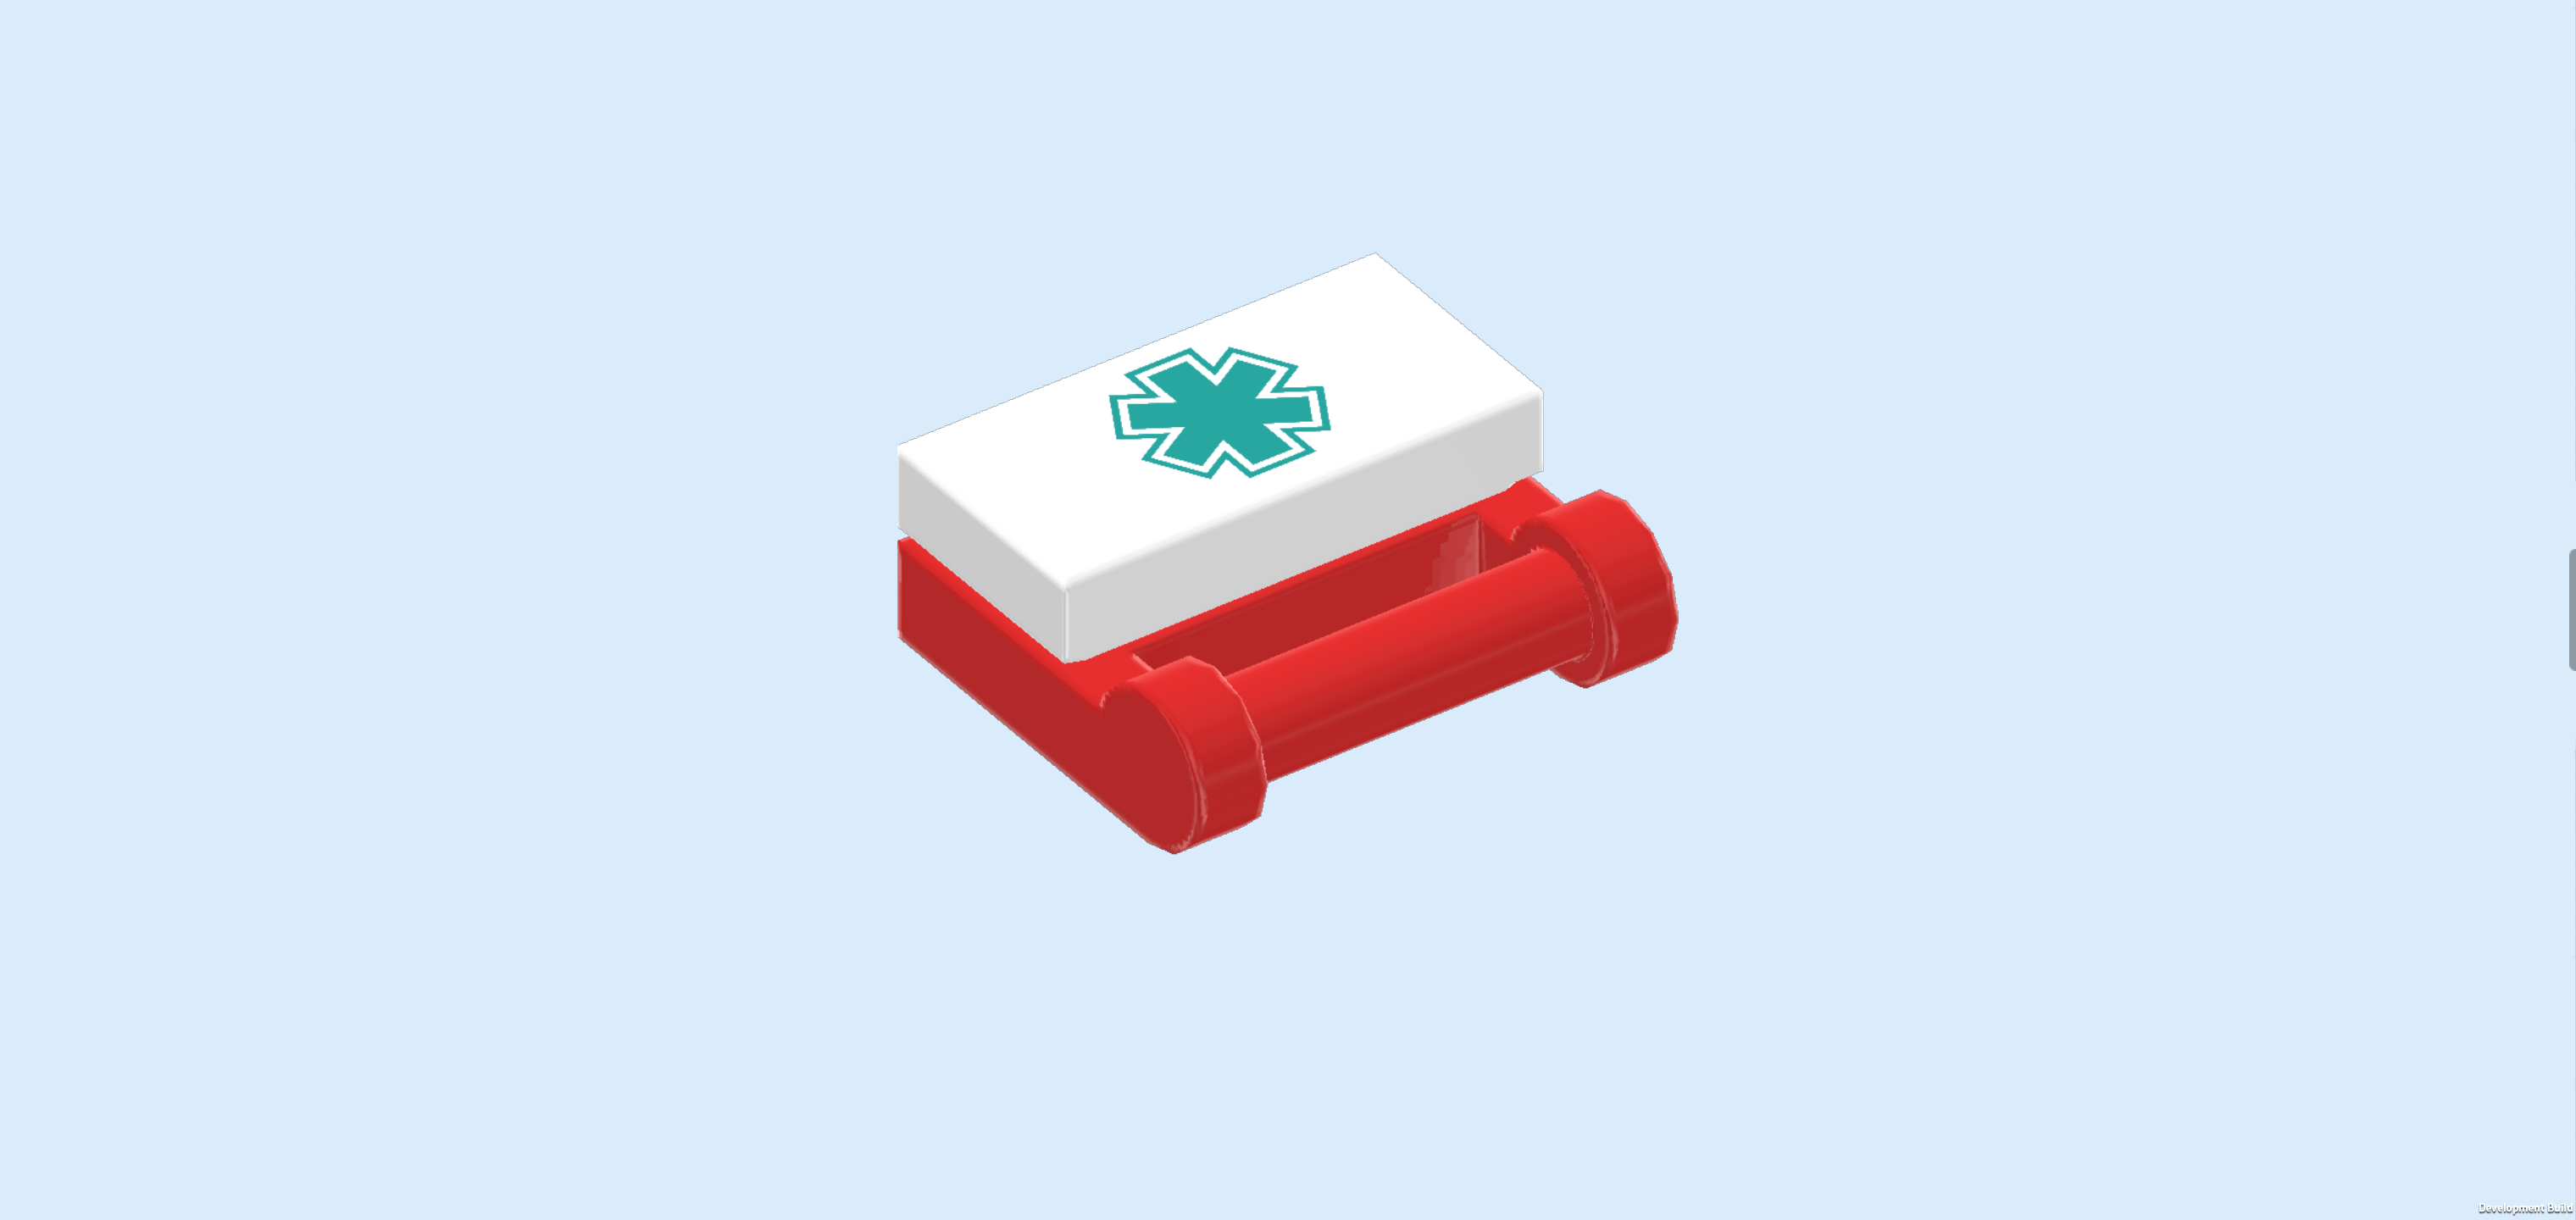
| Now, we will assemble the first aid kit. |
| Collect the following 2 pieces: |
| 1 bright red plate 1x2 with handle on long side, |
| and 1 white flat tile 1x2. |
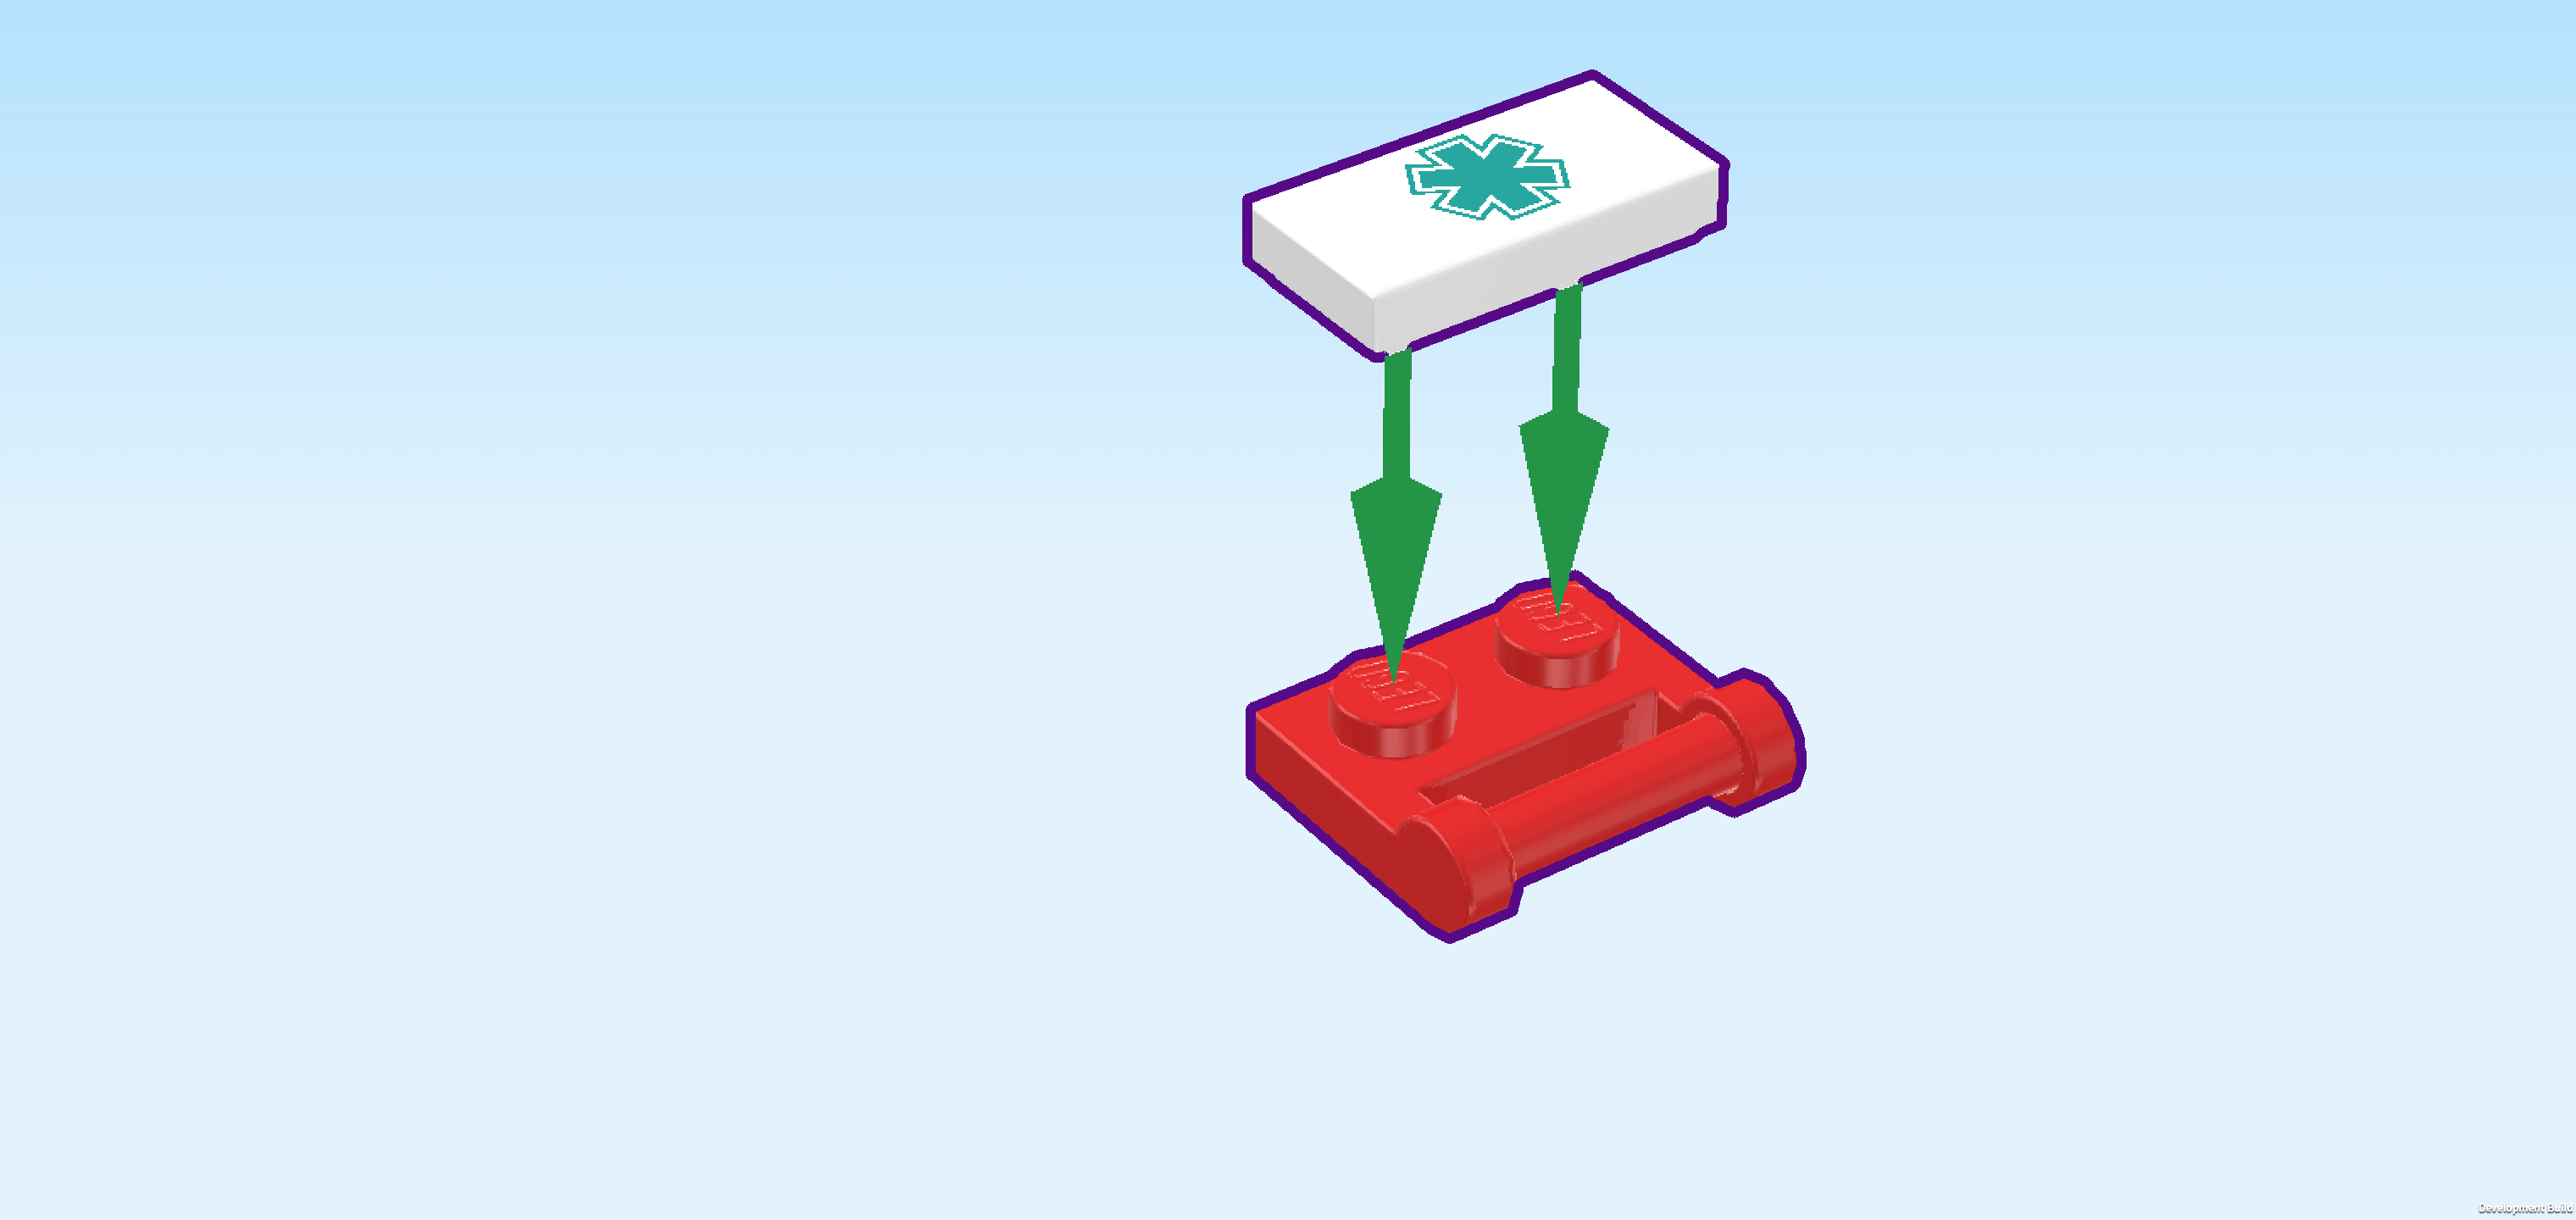
| Put the plate 1x2 horizontally on the table, handle to the front. |
| Put the flat tile on top. This tile is printed with a turquoise Star of Life, a symbol often used by medical emergency services. It is a star-shaped icon with 6 rays and blunt ends. |
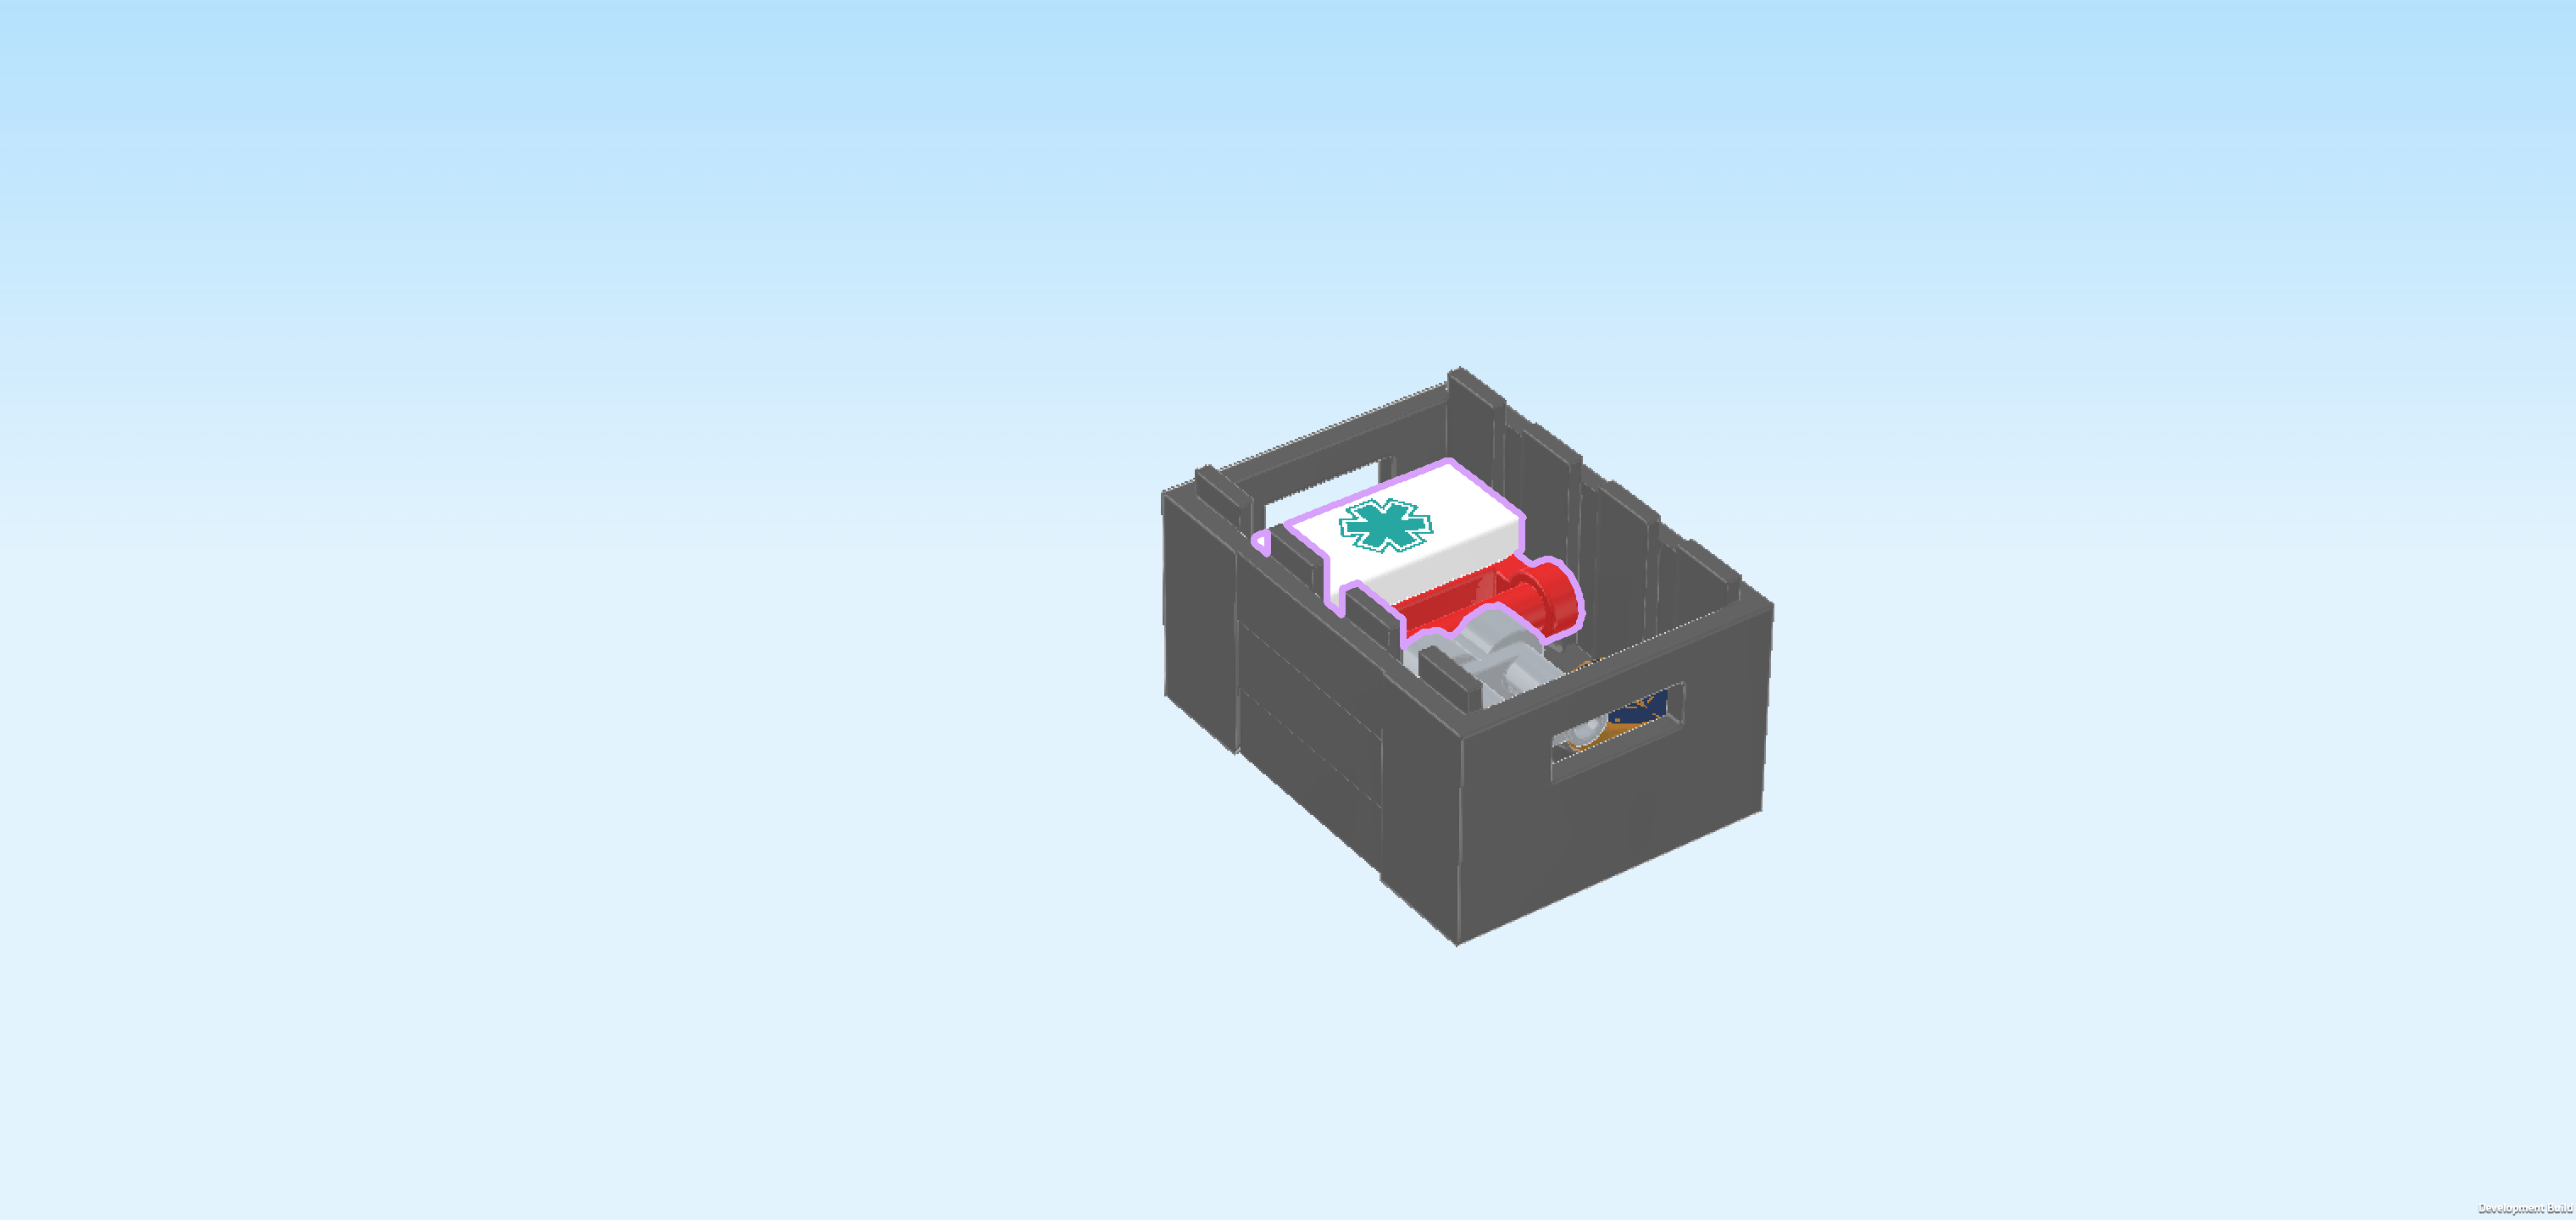
| Put it into the crate next to the other equipment. |
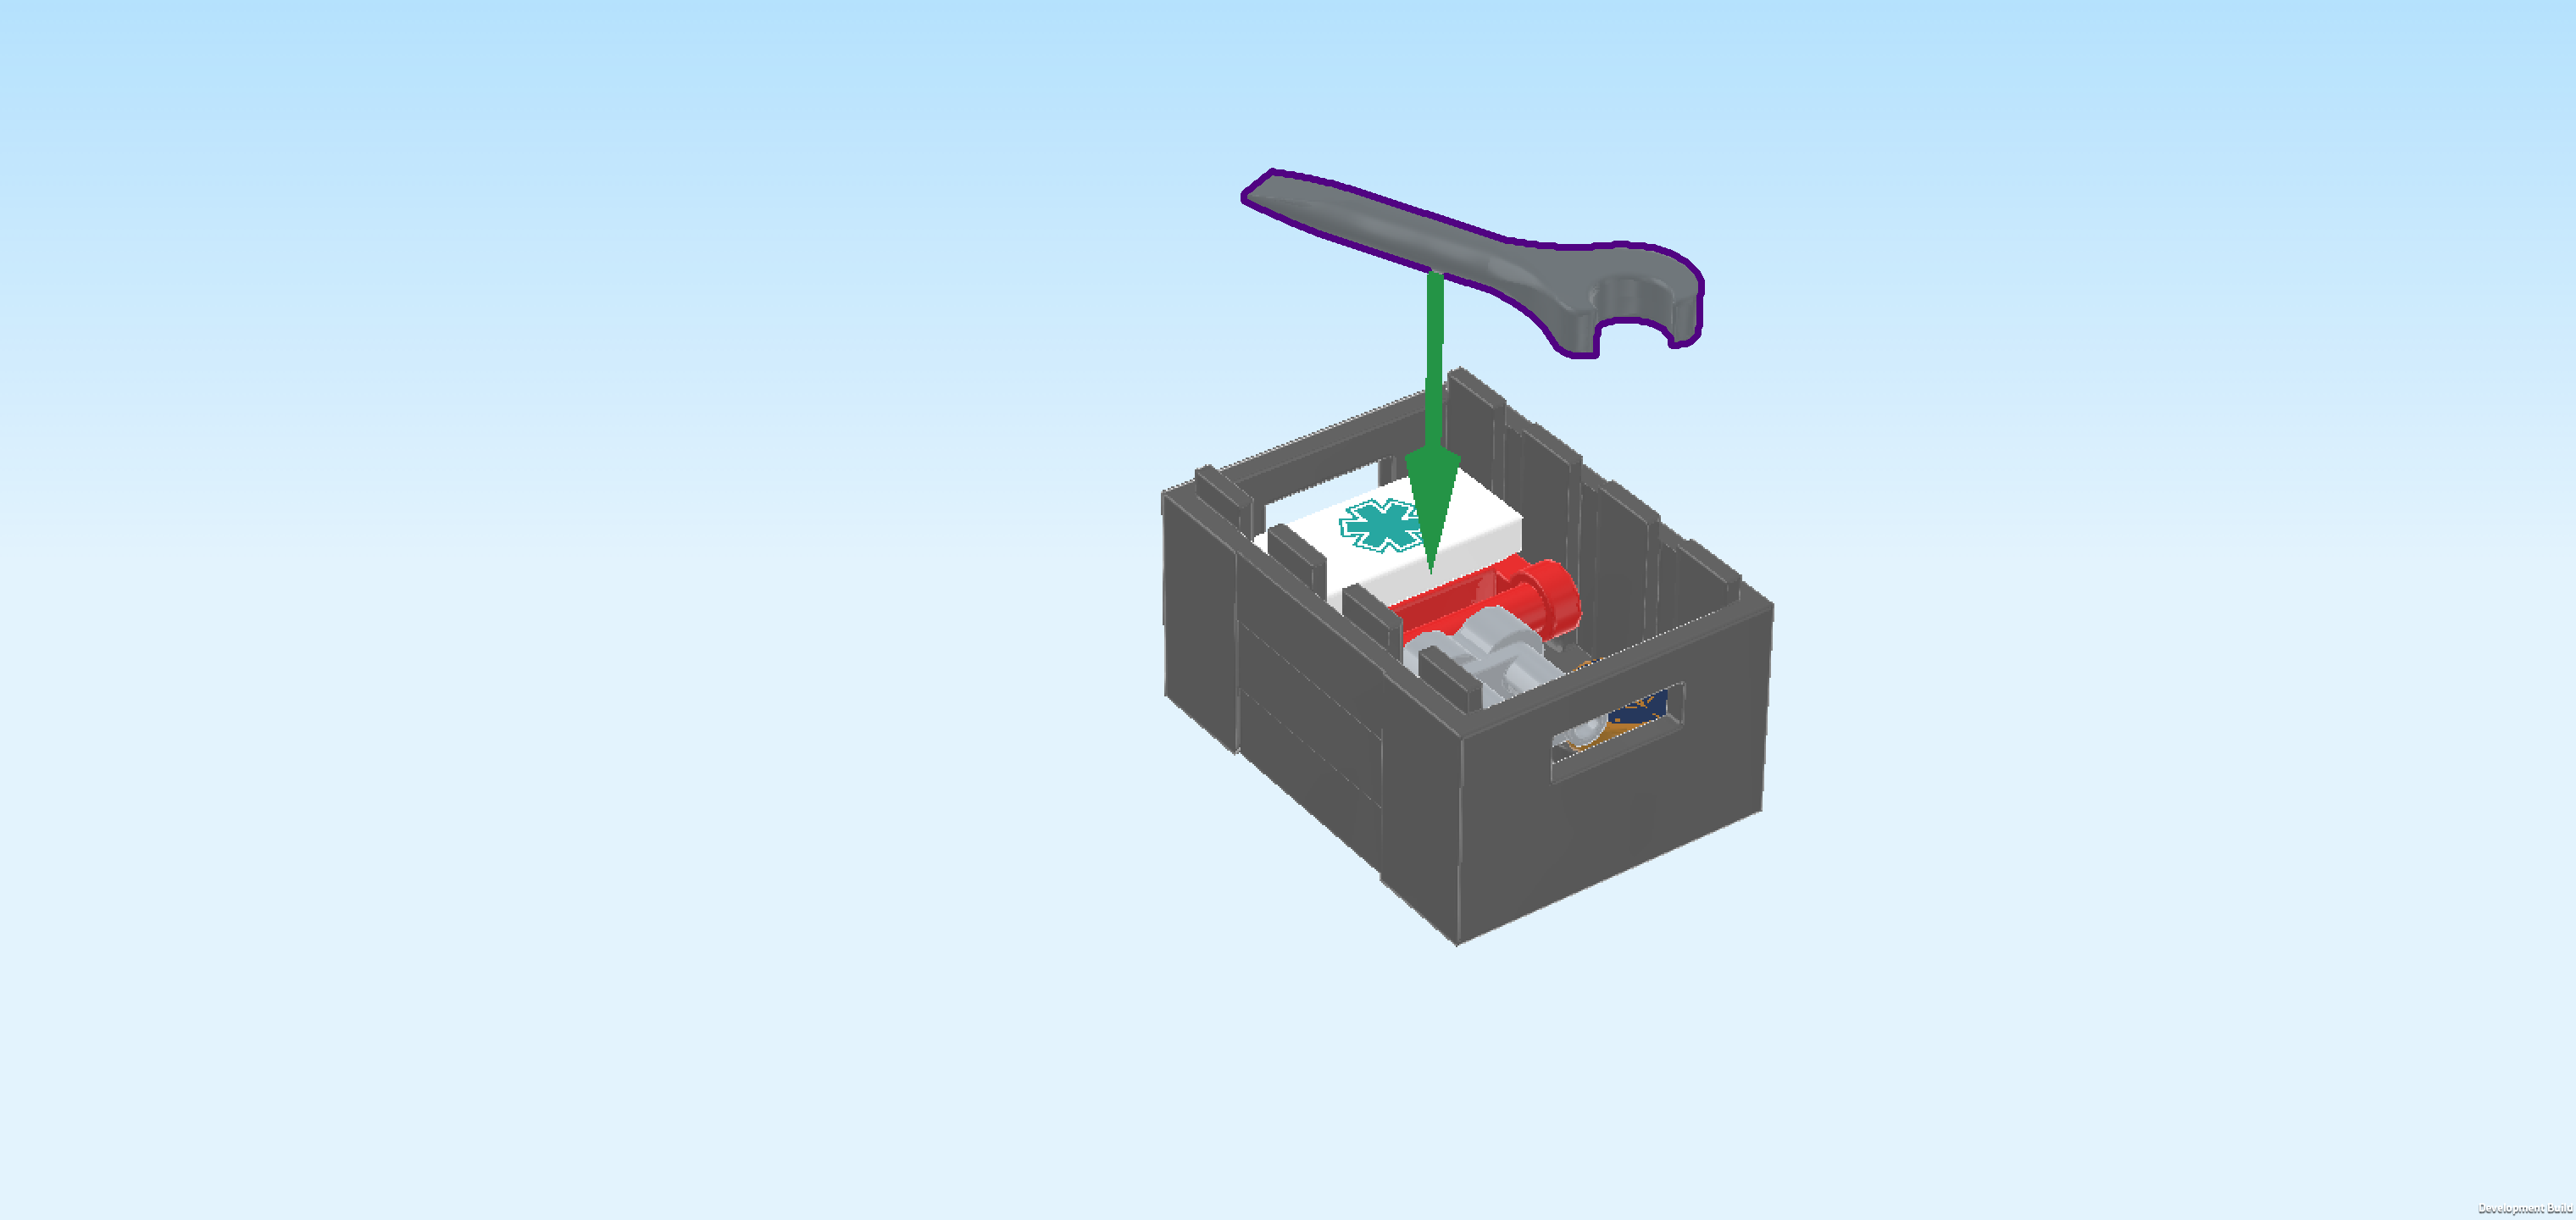
| Find 1 silver metallic wrench. |
| Put it into the crate. |
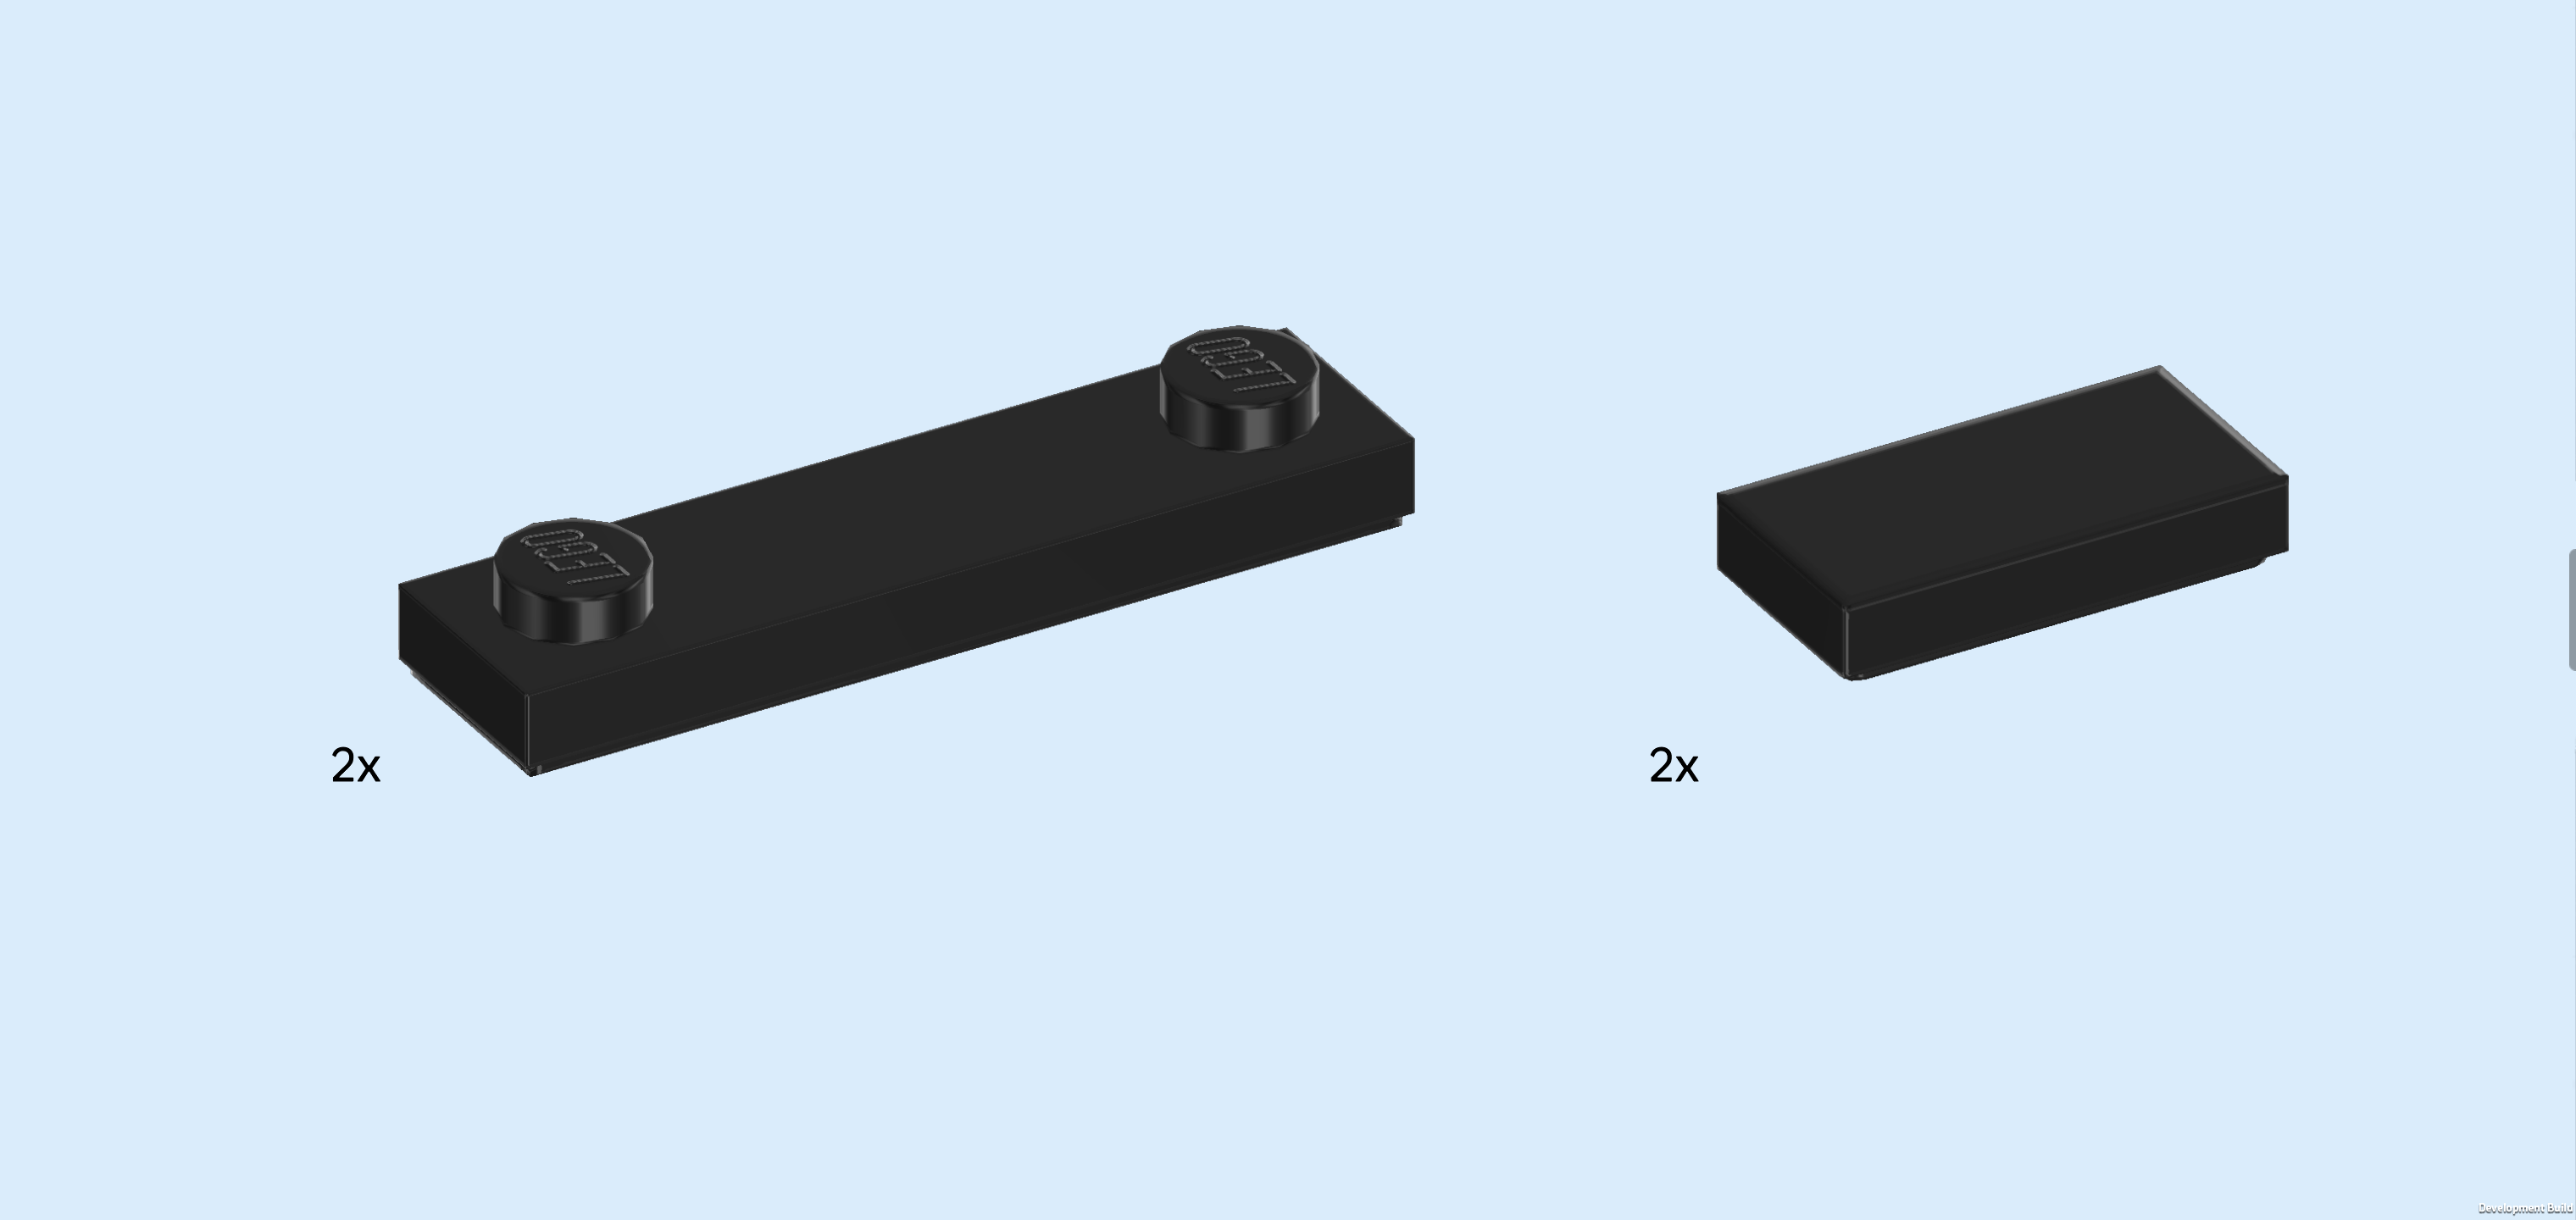
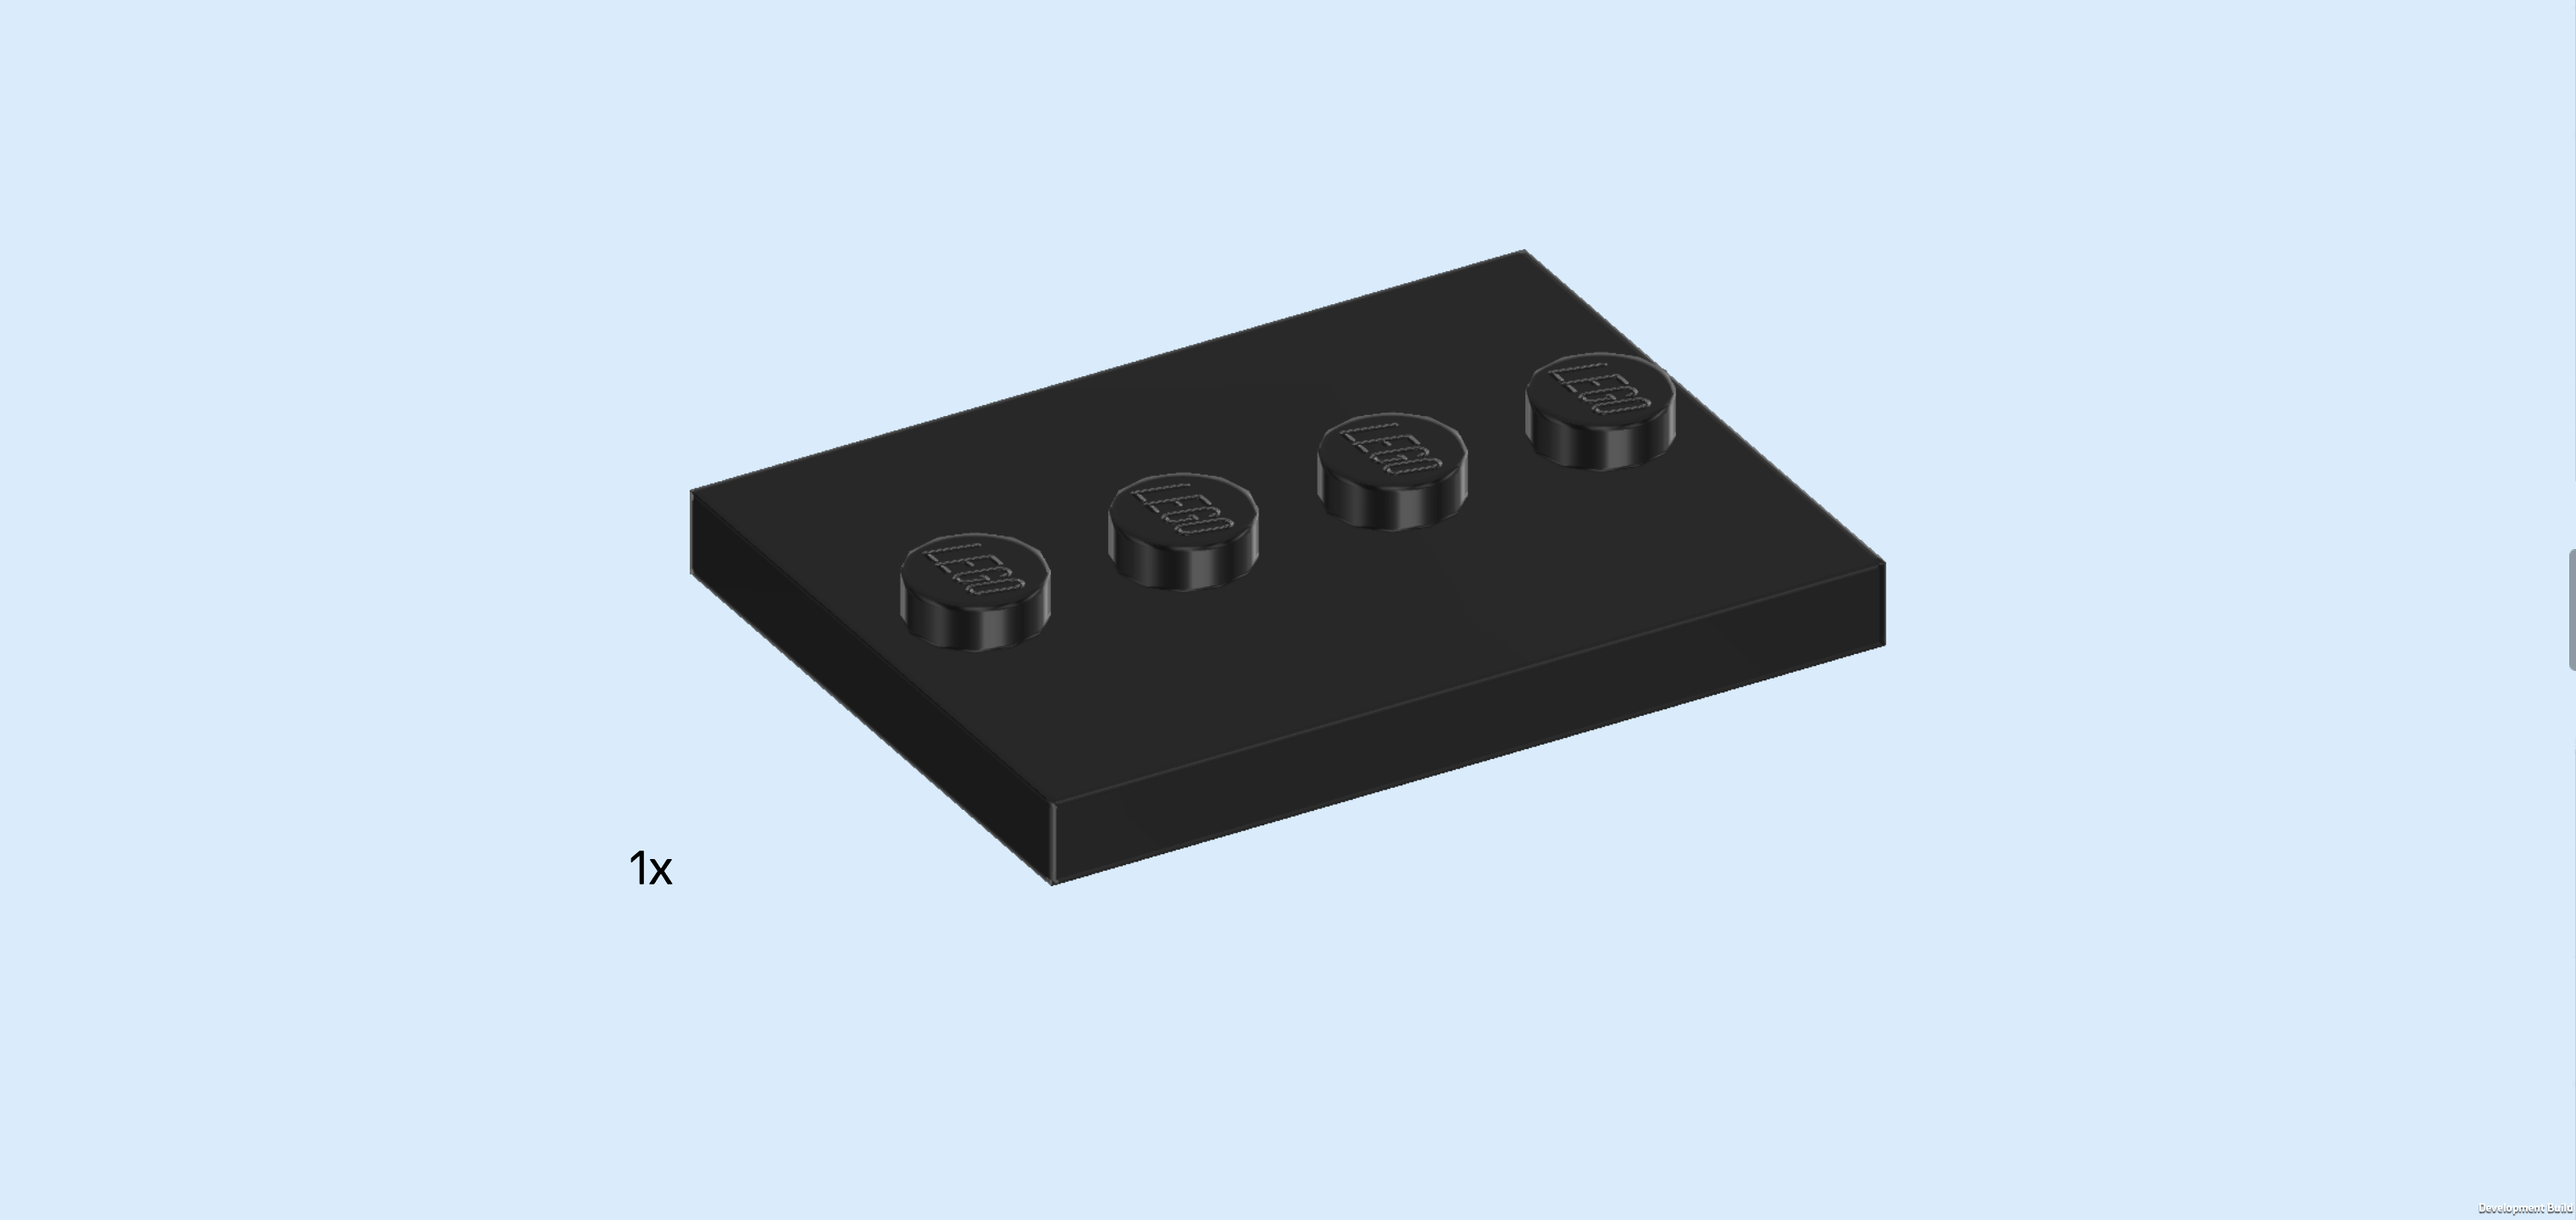
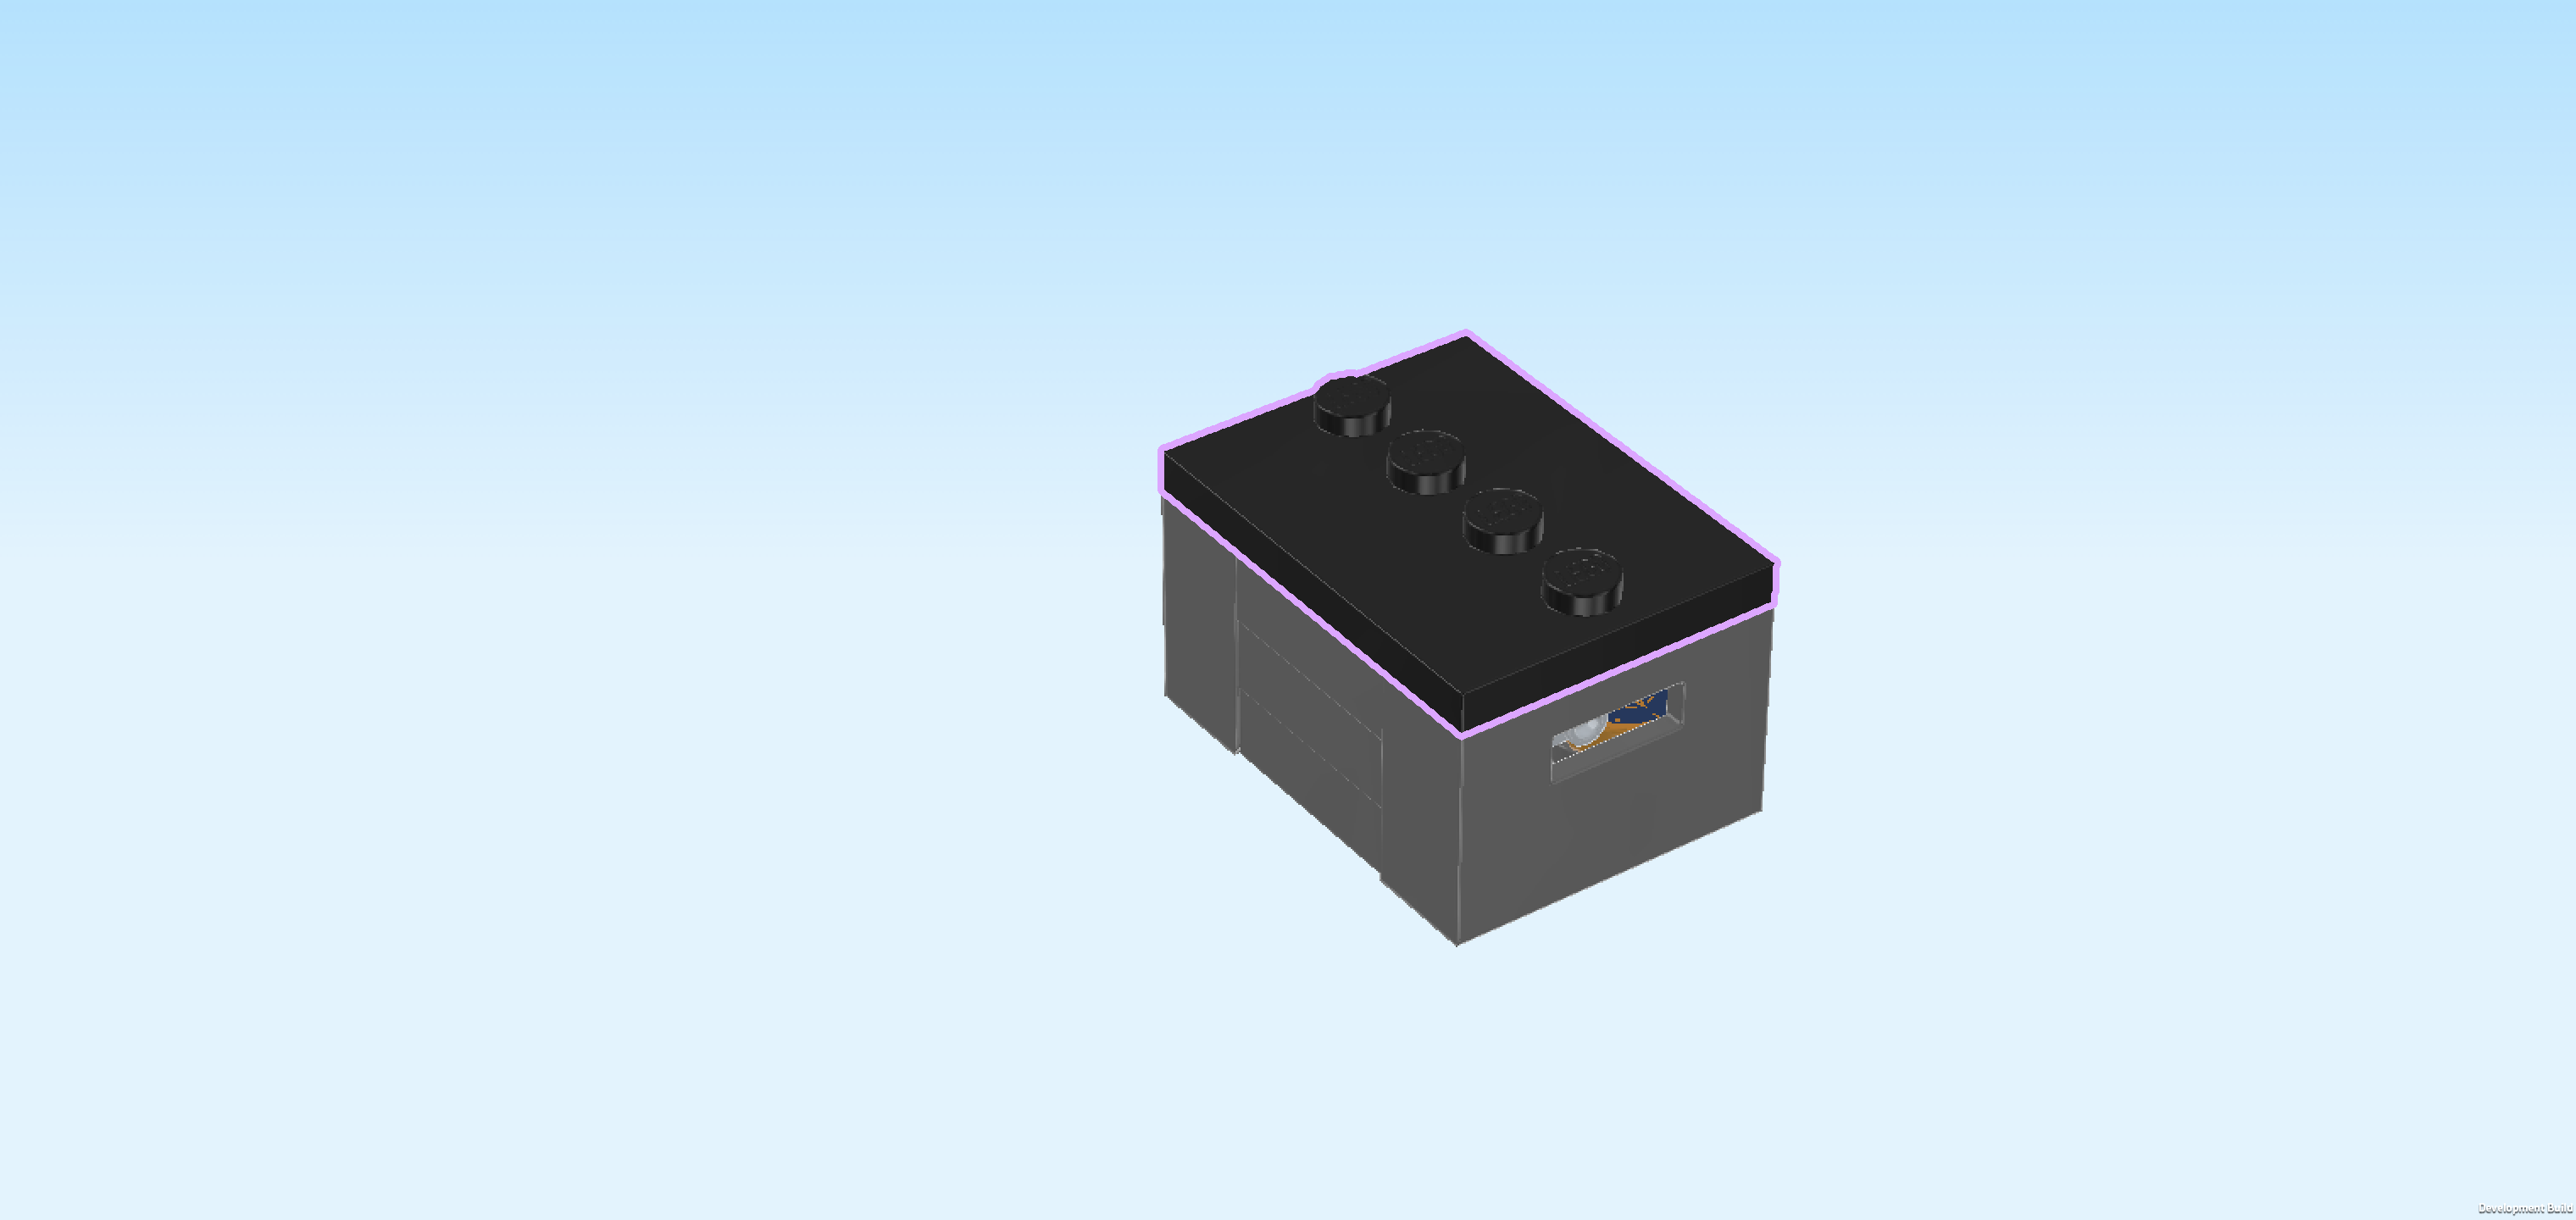
| Find 1 black plate 3x4 with 4 knobs in a middle line. |
| Put it on top of the crate. This is the lid of the crate. |
| The first storage box for the roof is finished! Well done! Mount it vertically in the right half of the truck roof. |
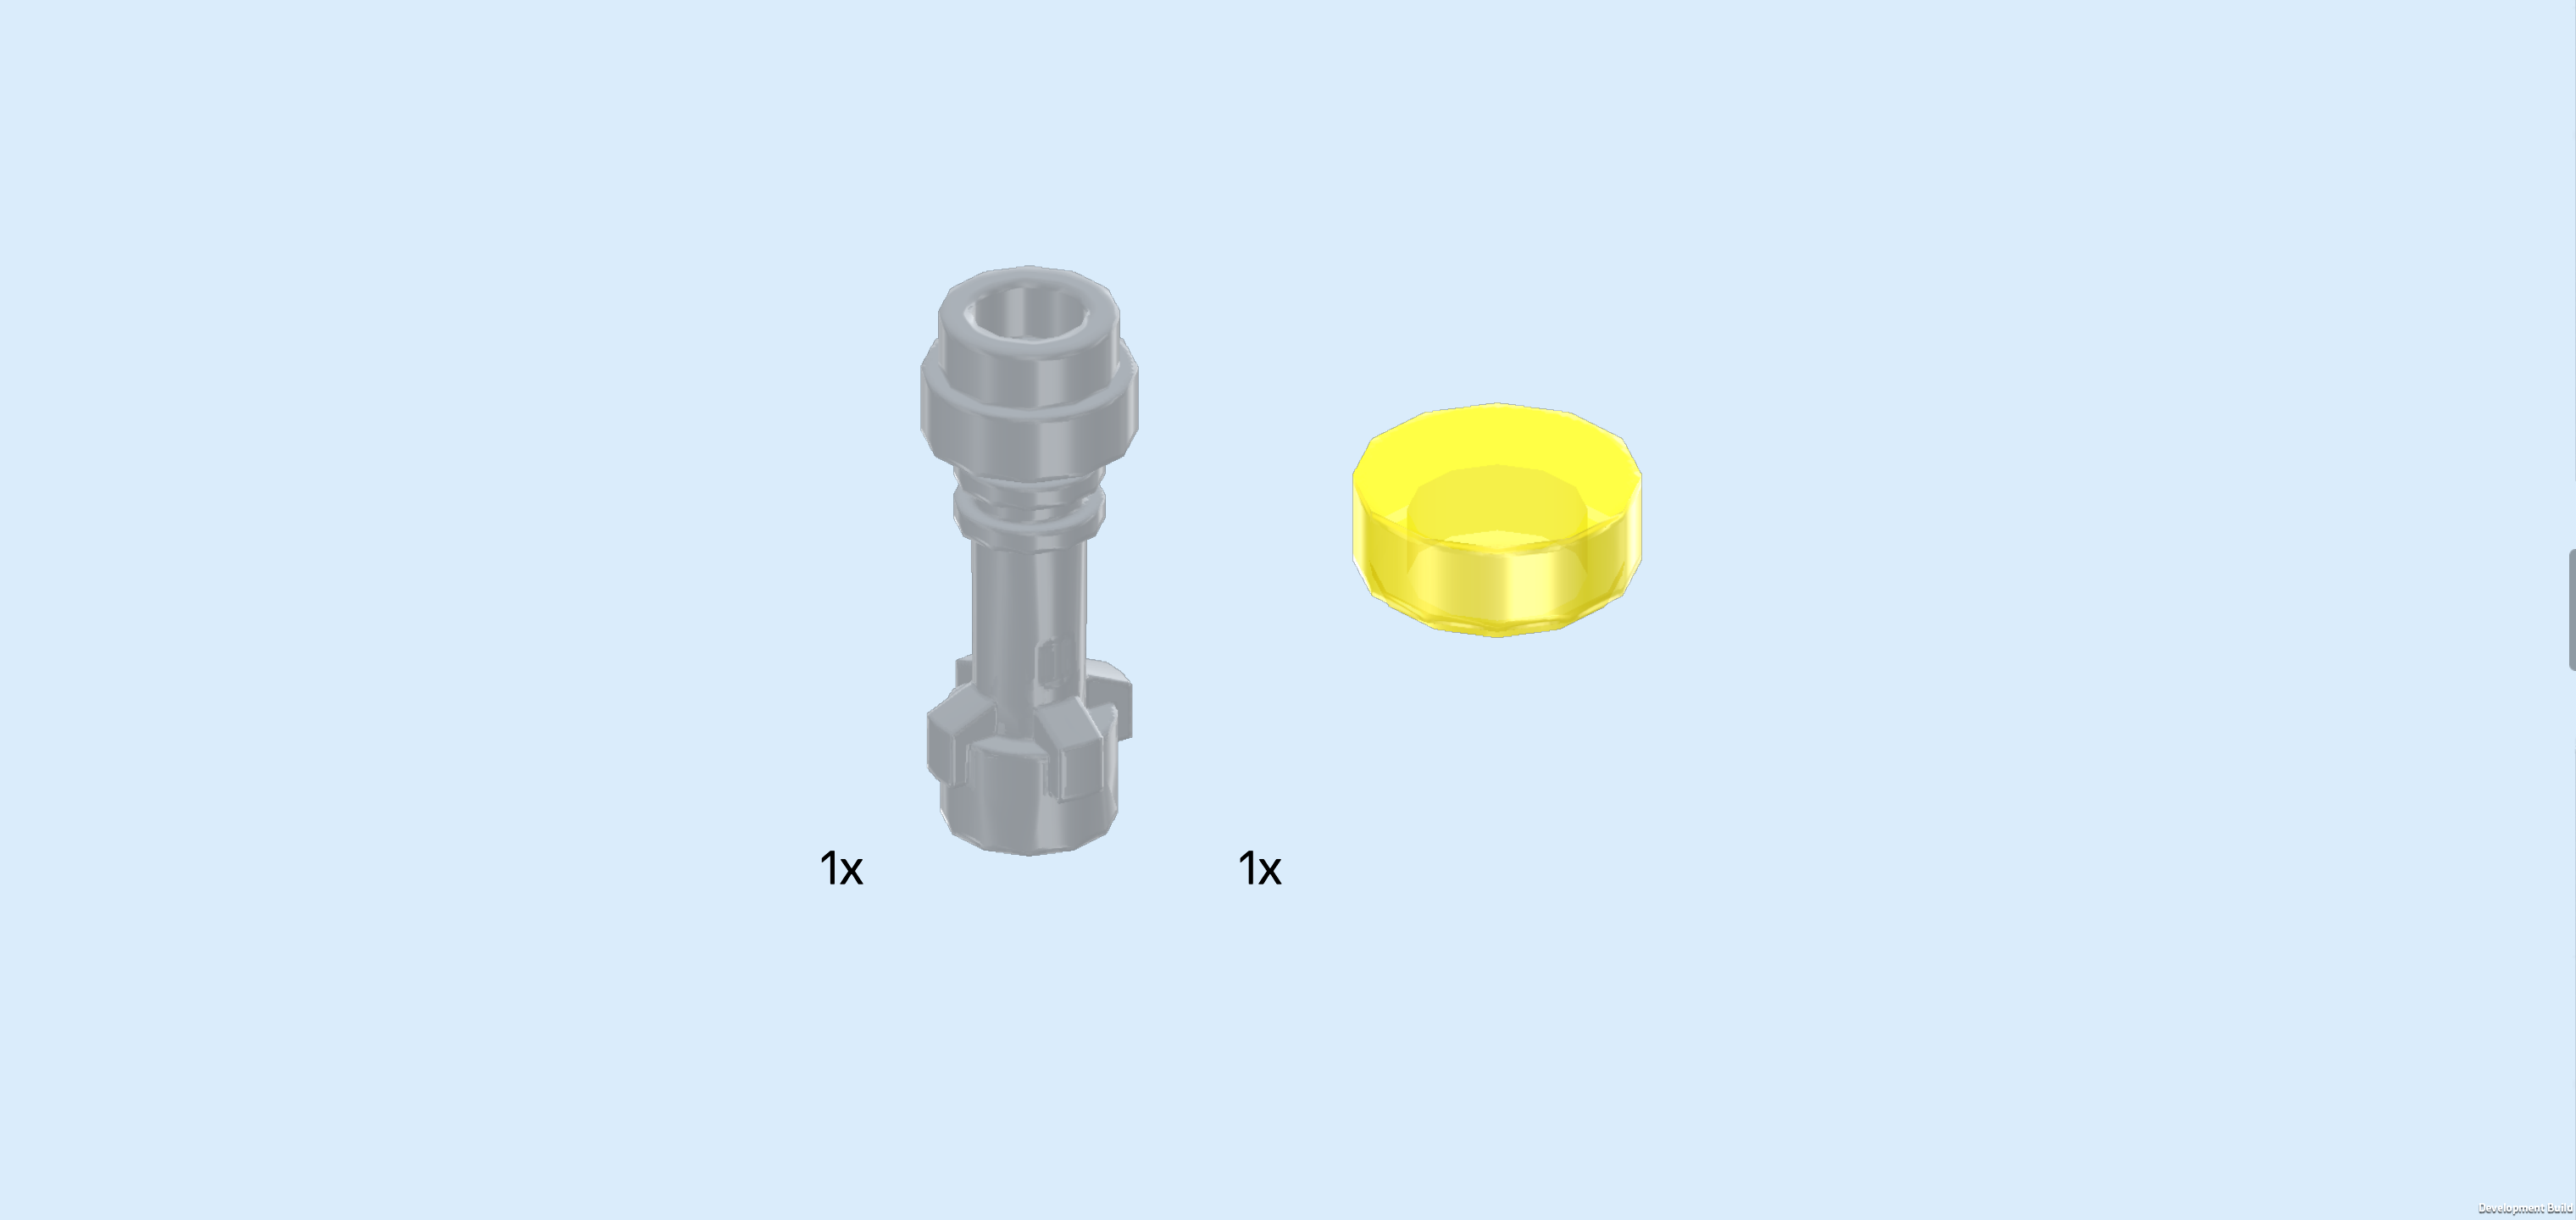
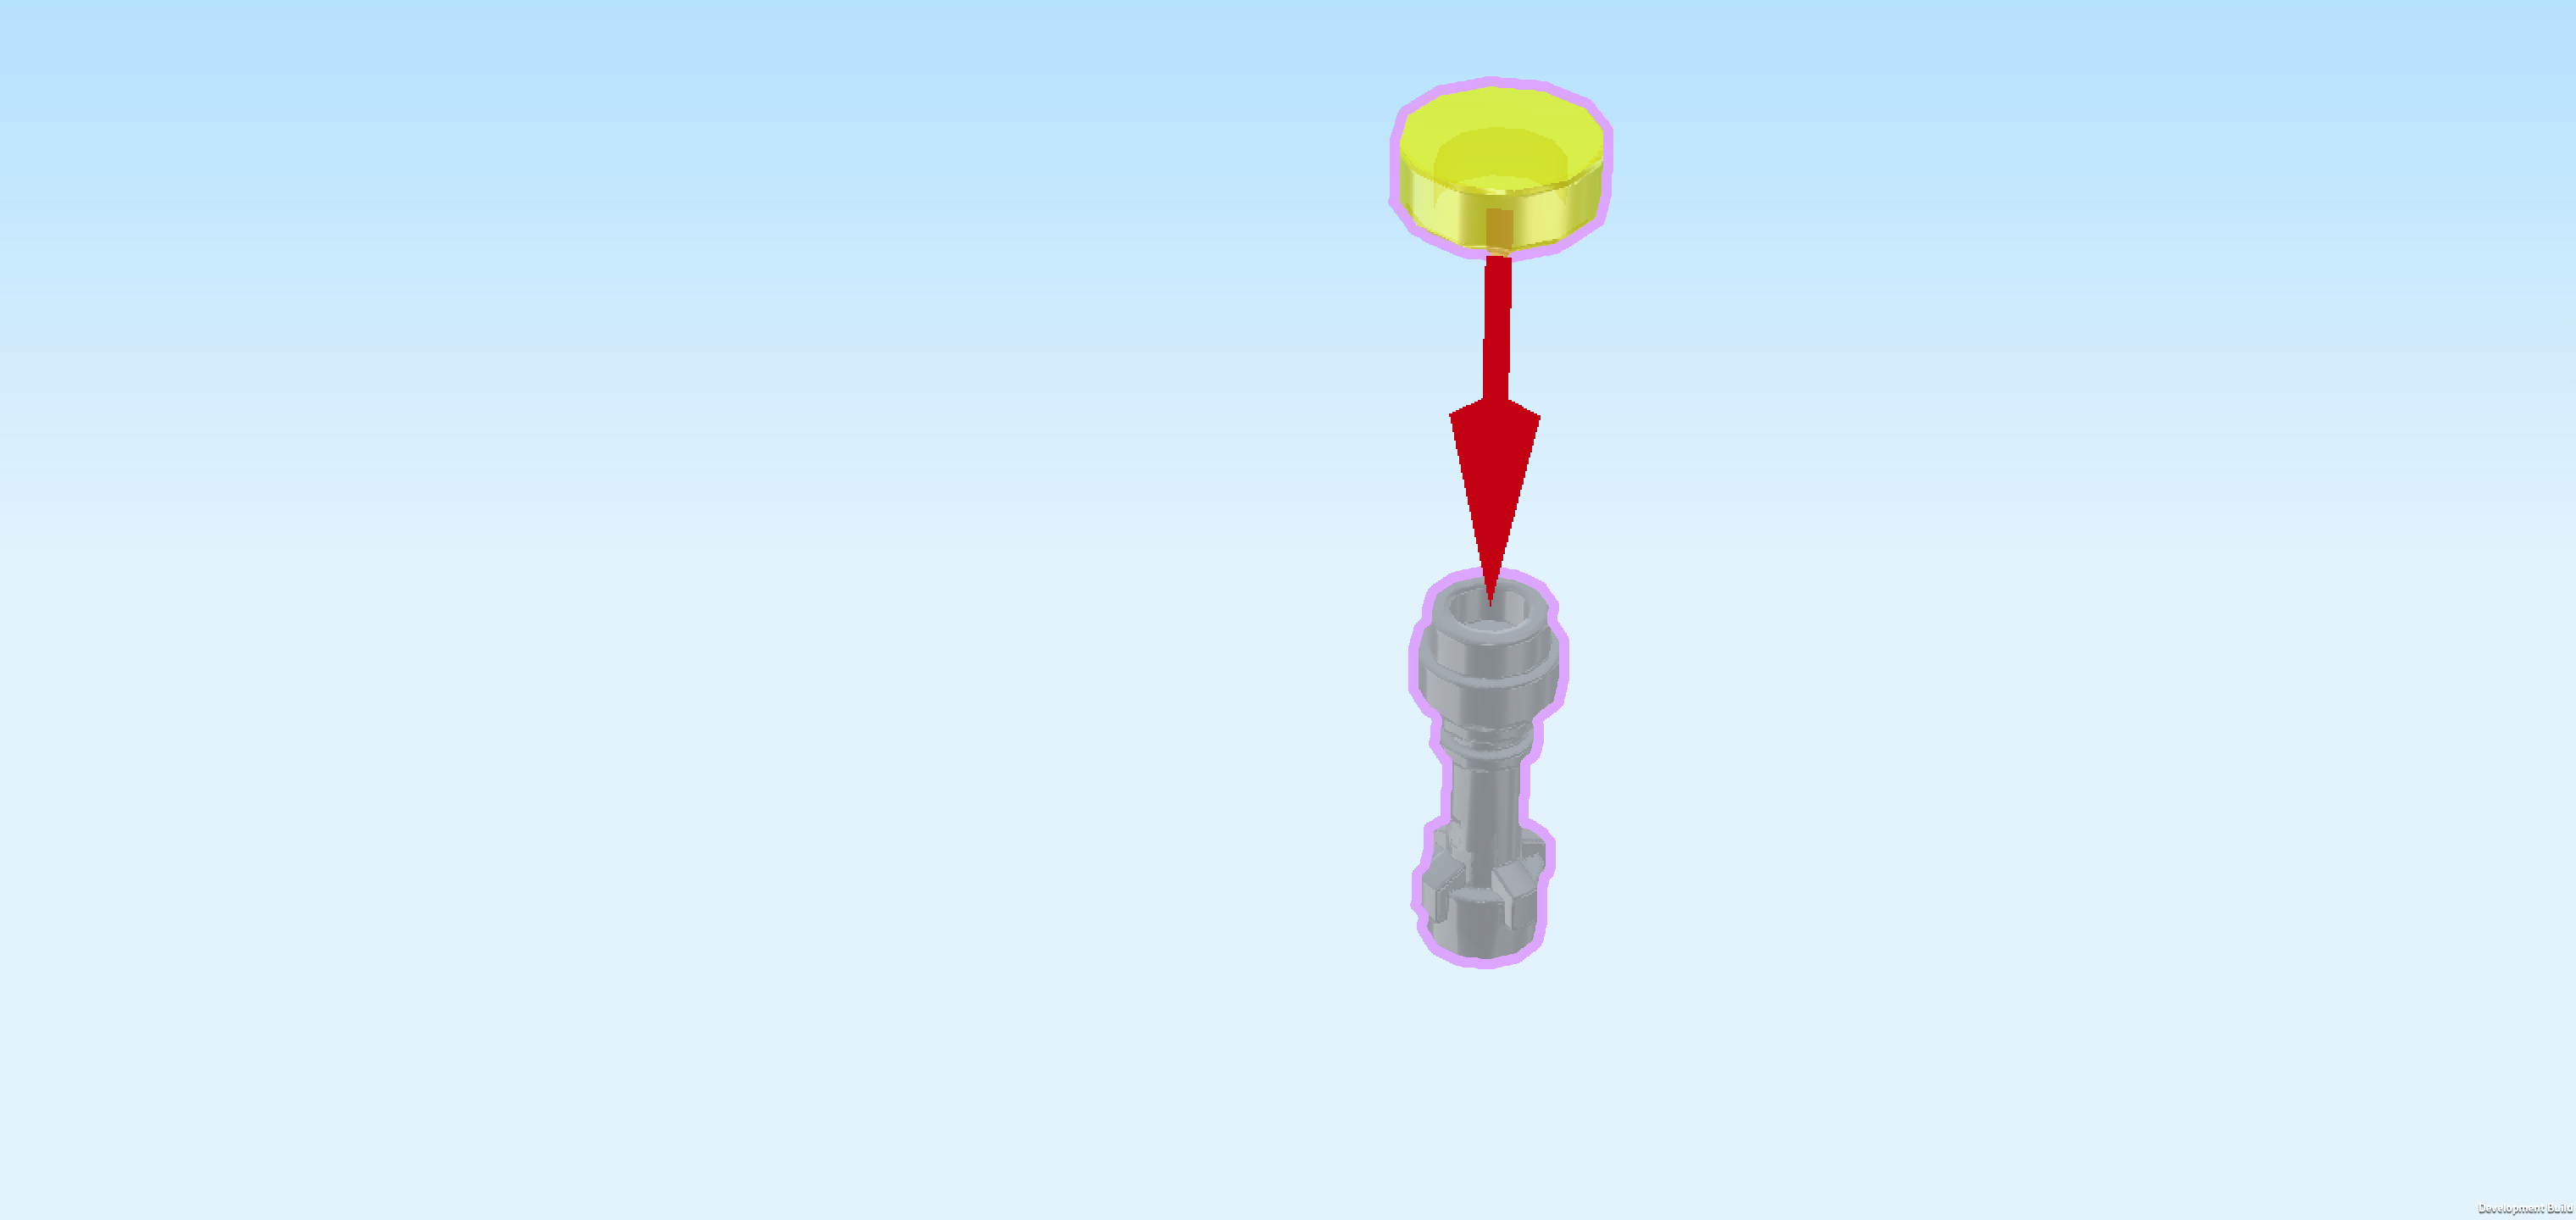
| Now, we will assemble a flashlight. |
| Collect the following 2 pieces: |
| 1 medium stone grey lightsaber holder, |
| and 1 transparent yellow round tile 1x1. |
| Put the round tile on the knob of the lightsaber holder. |
| The flashlight is finished! Put it aside for now. |
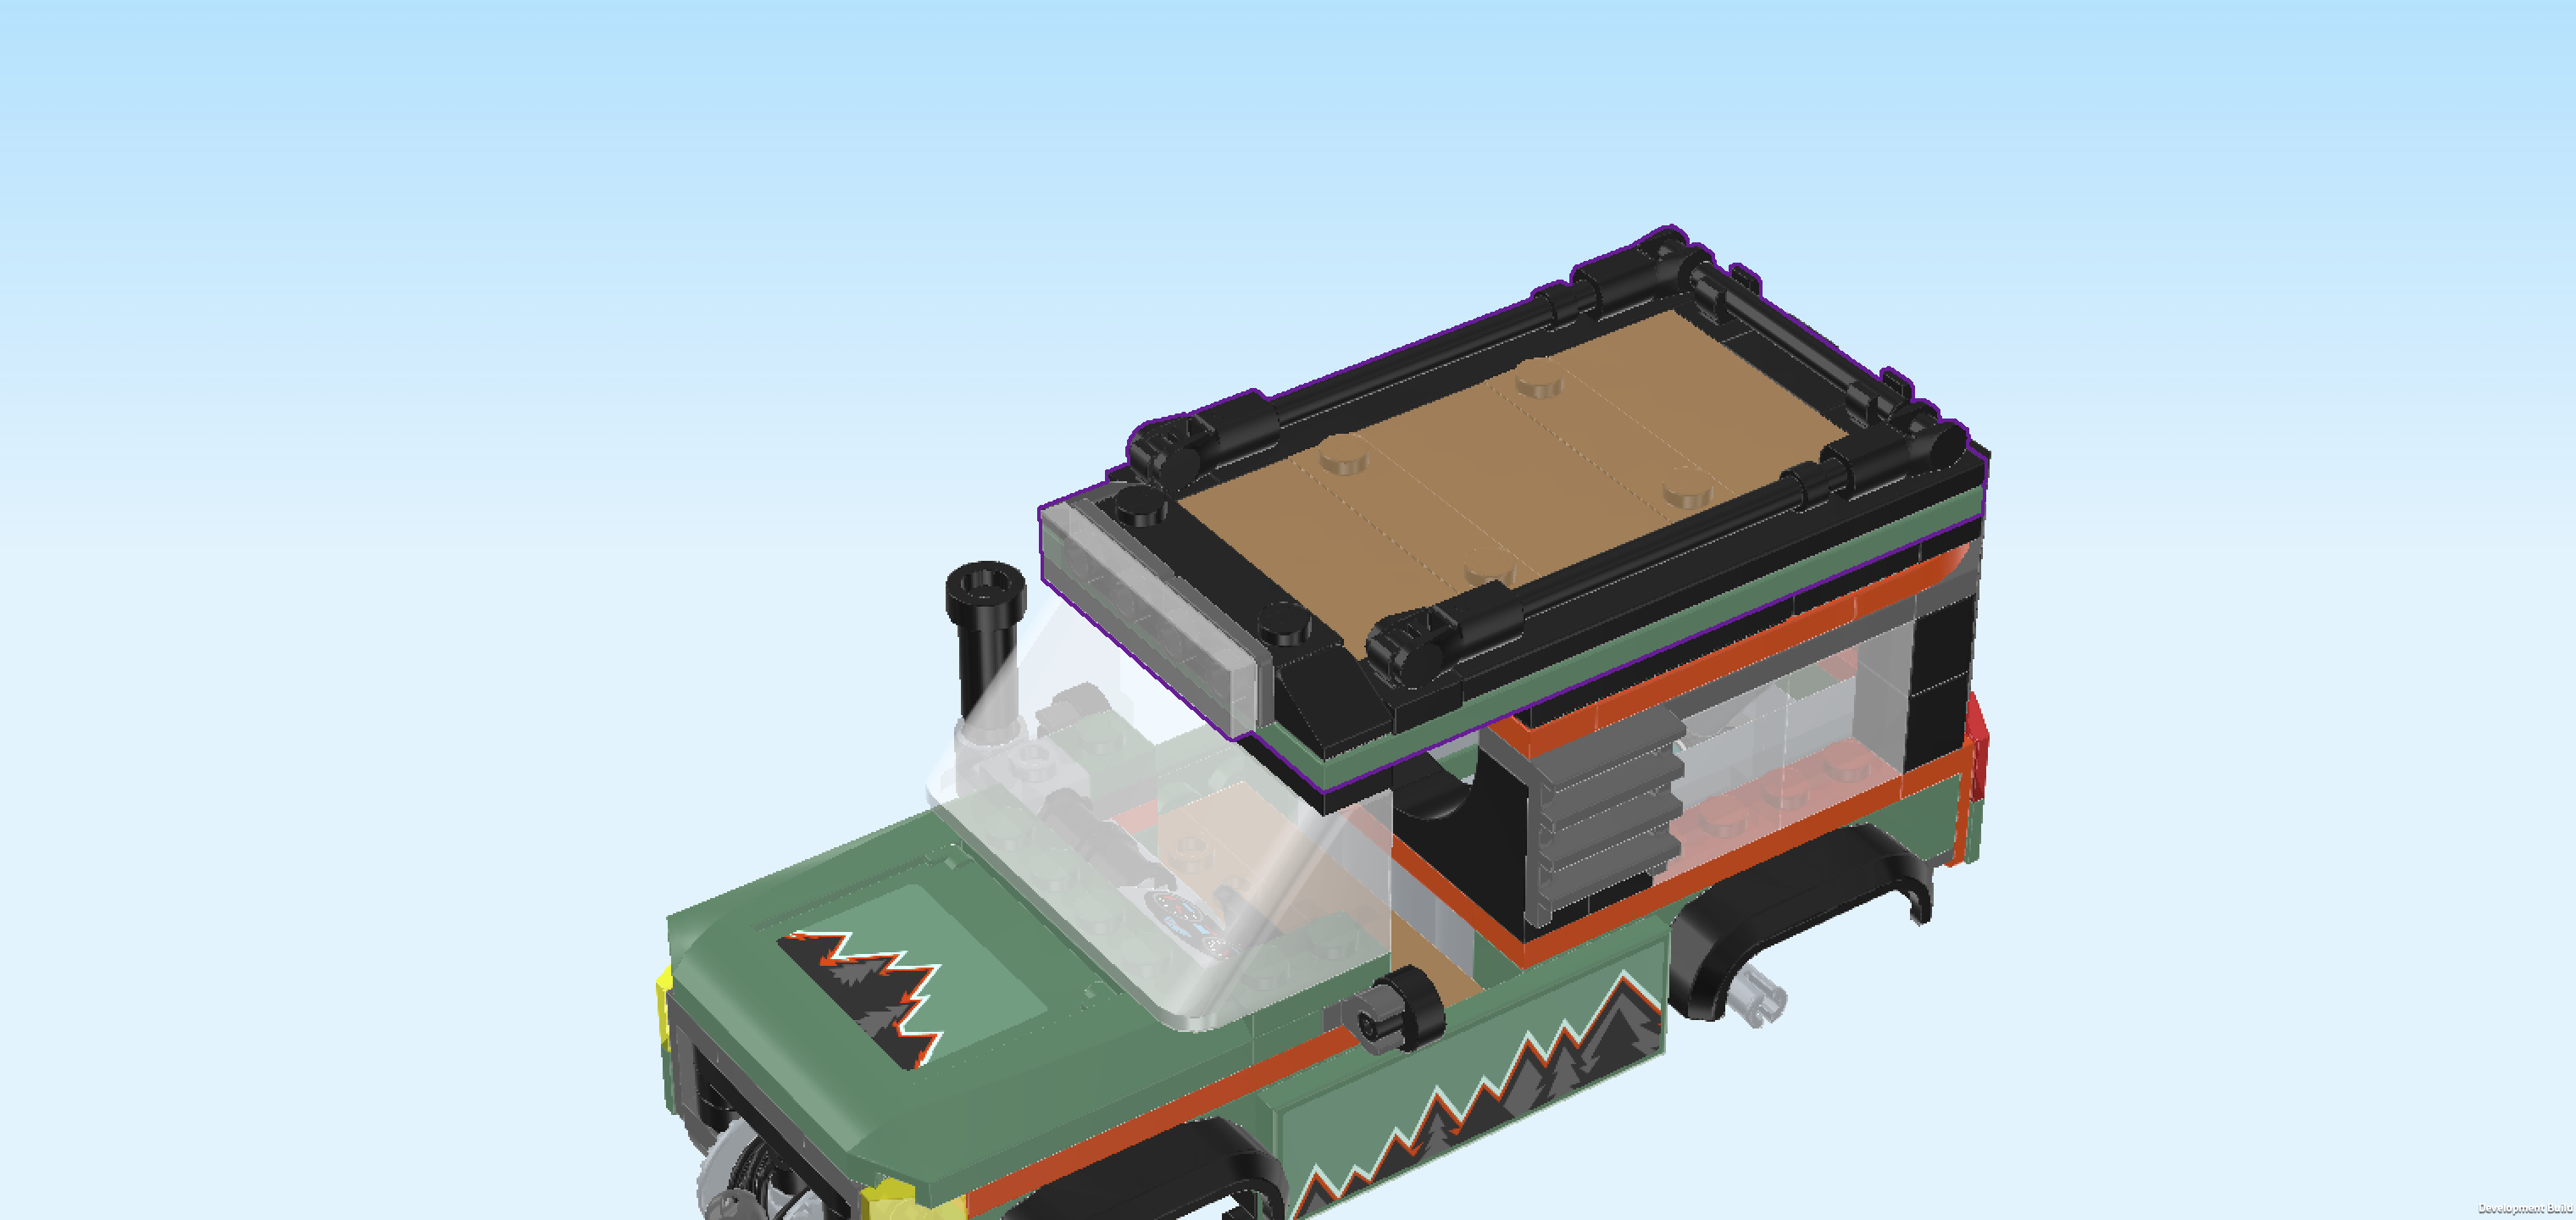
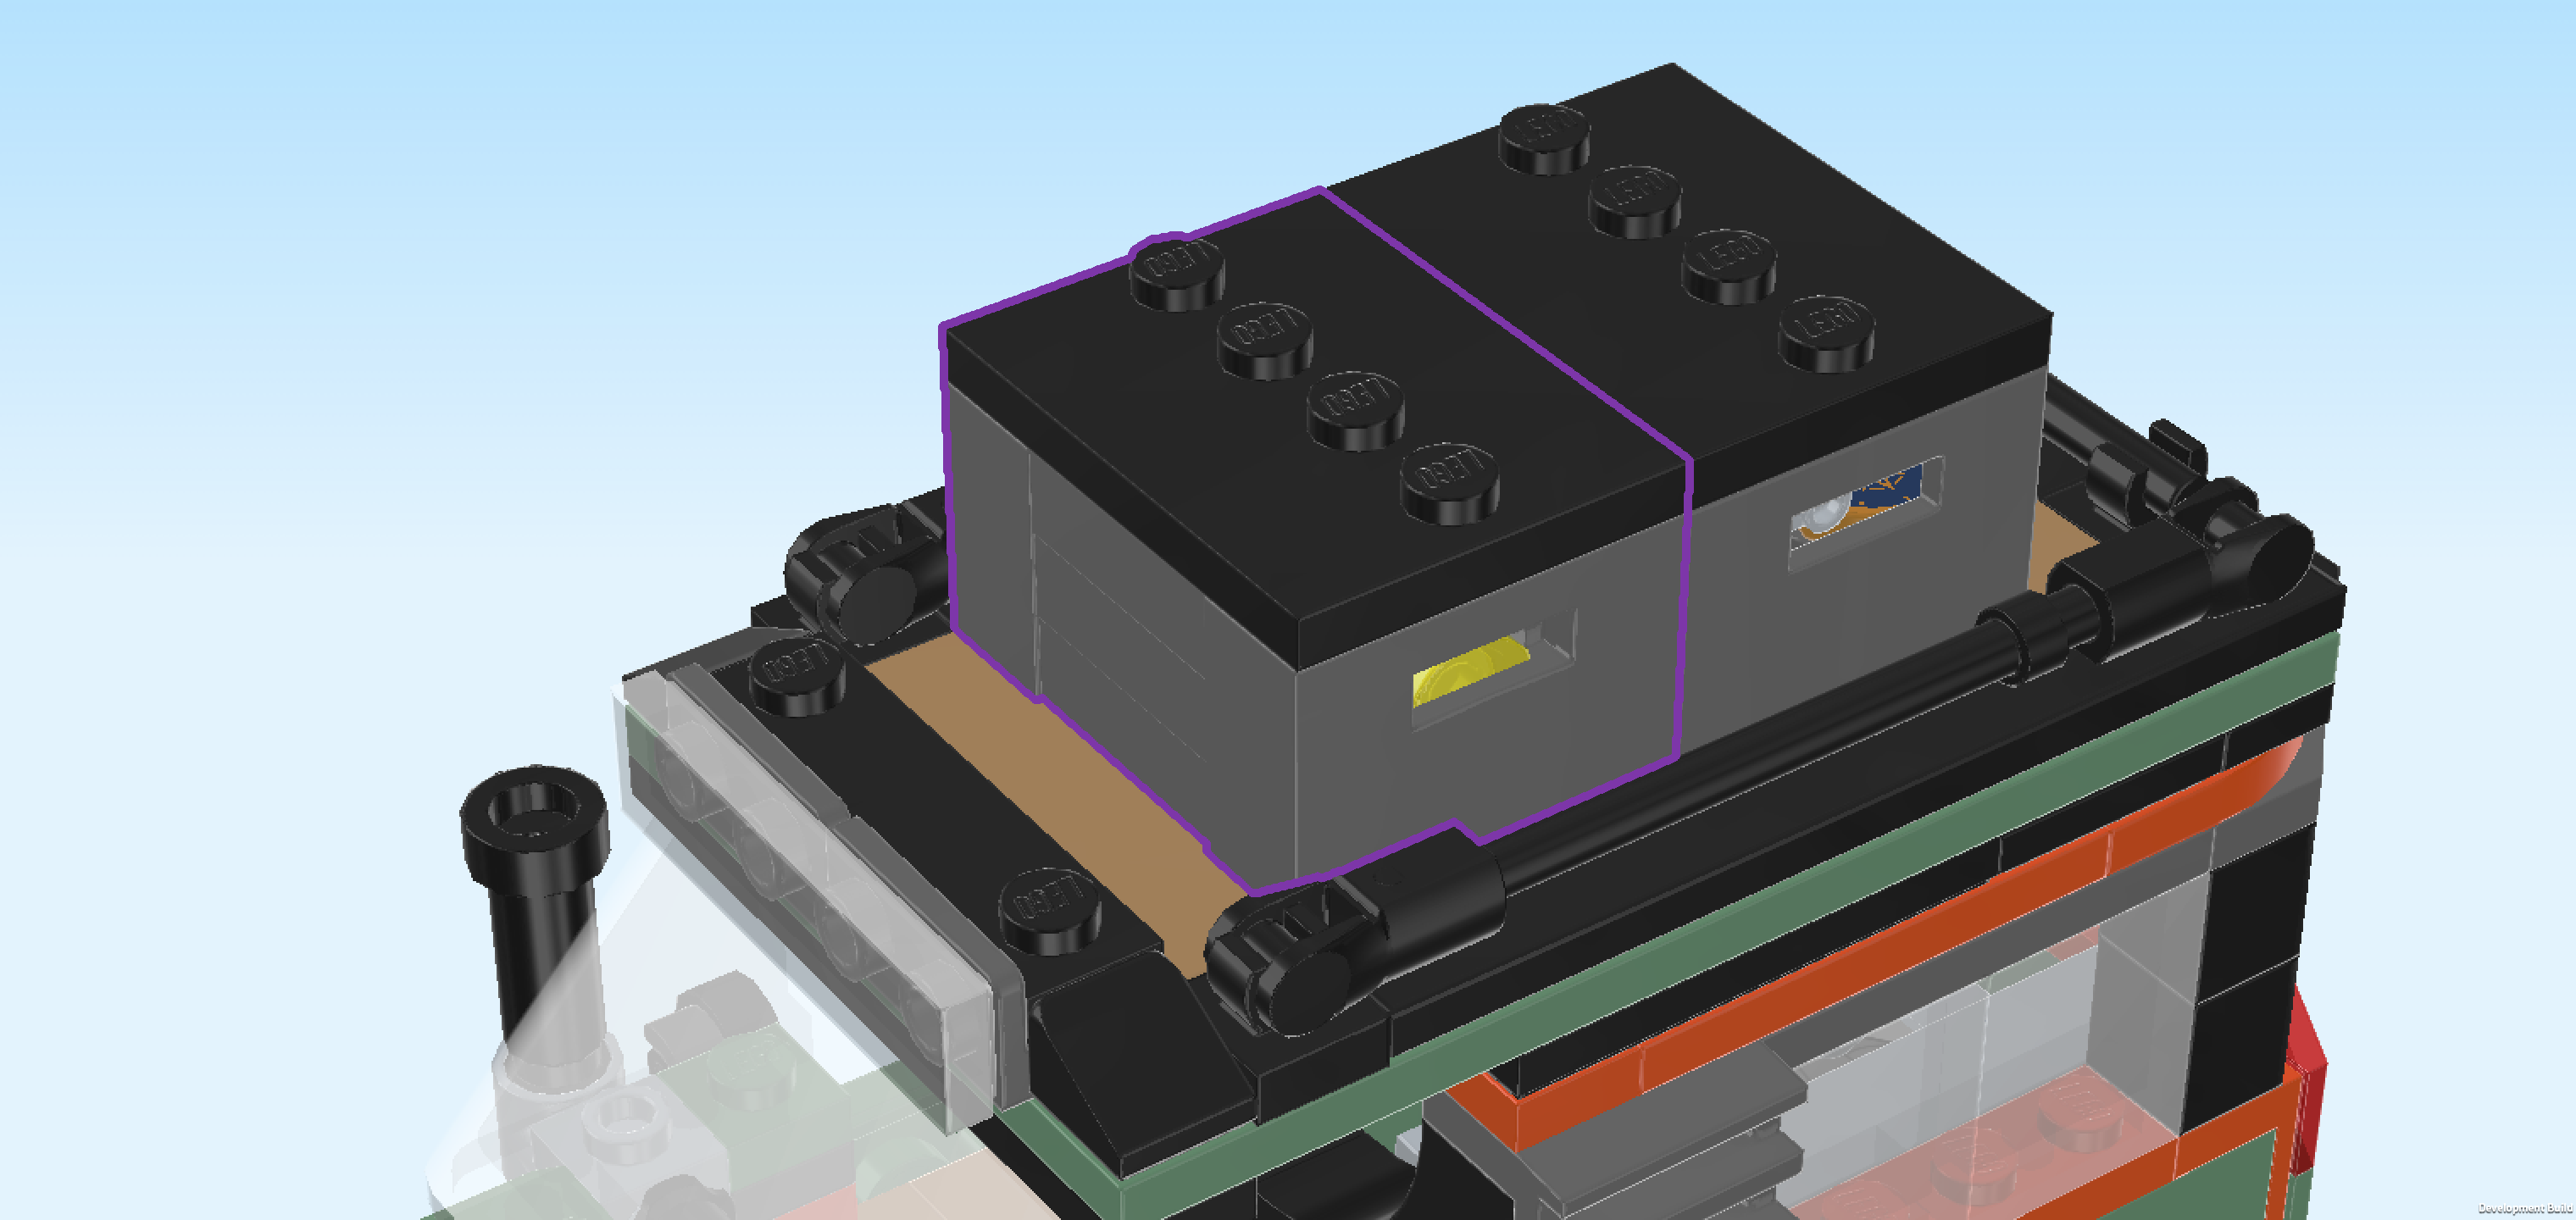
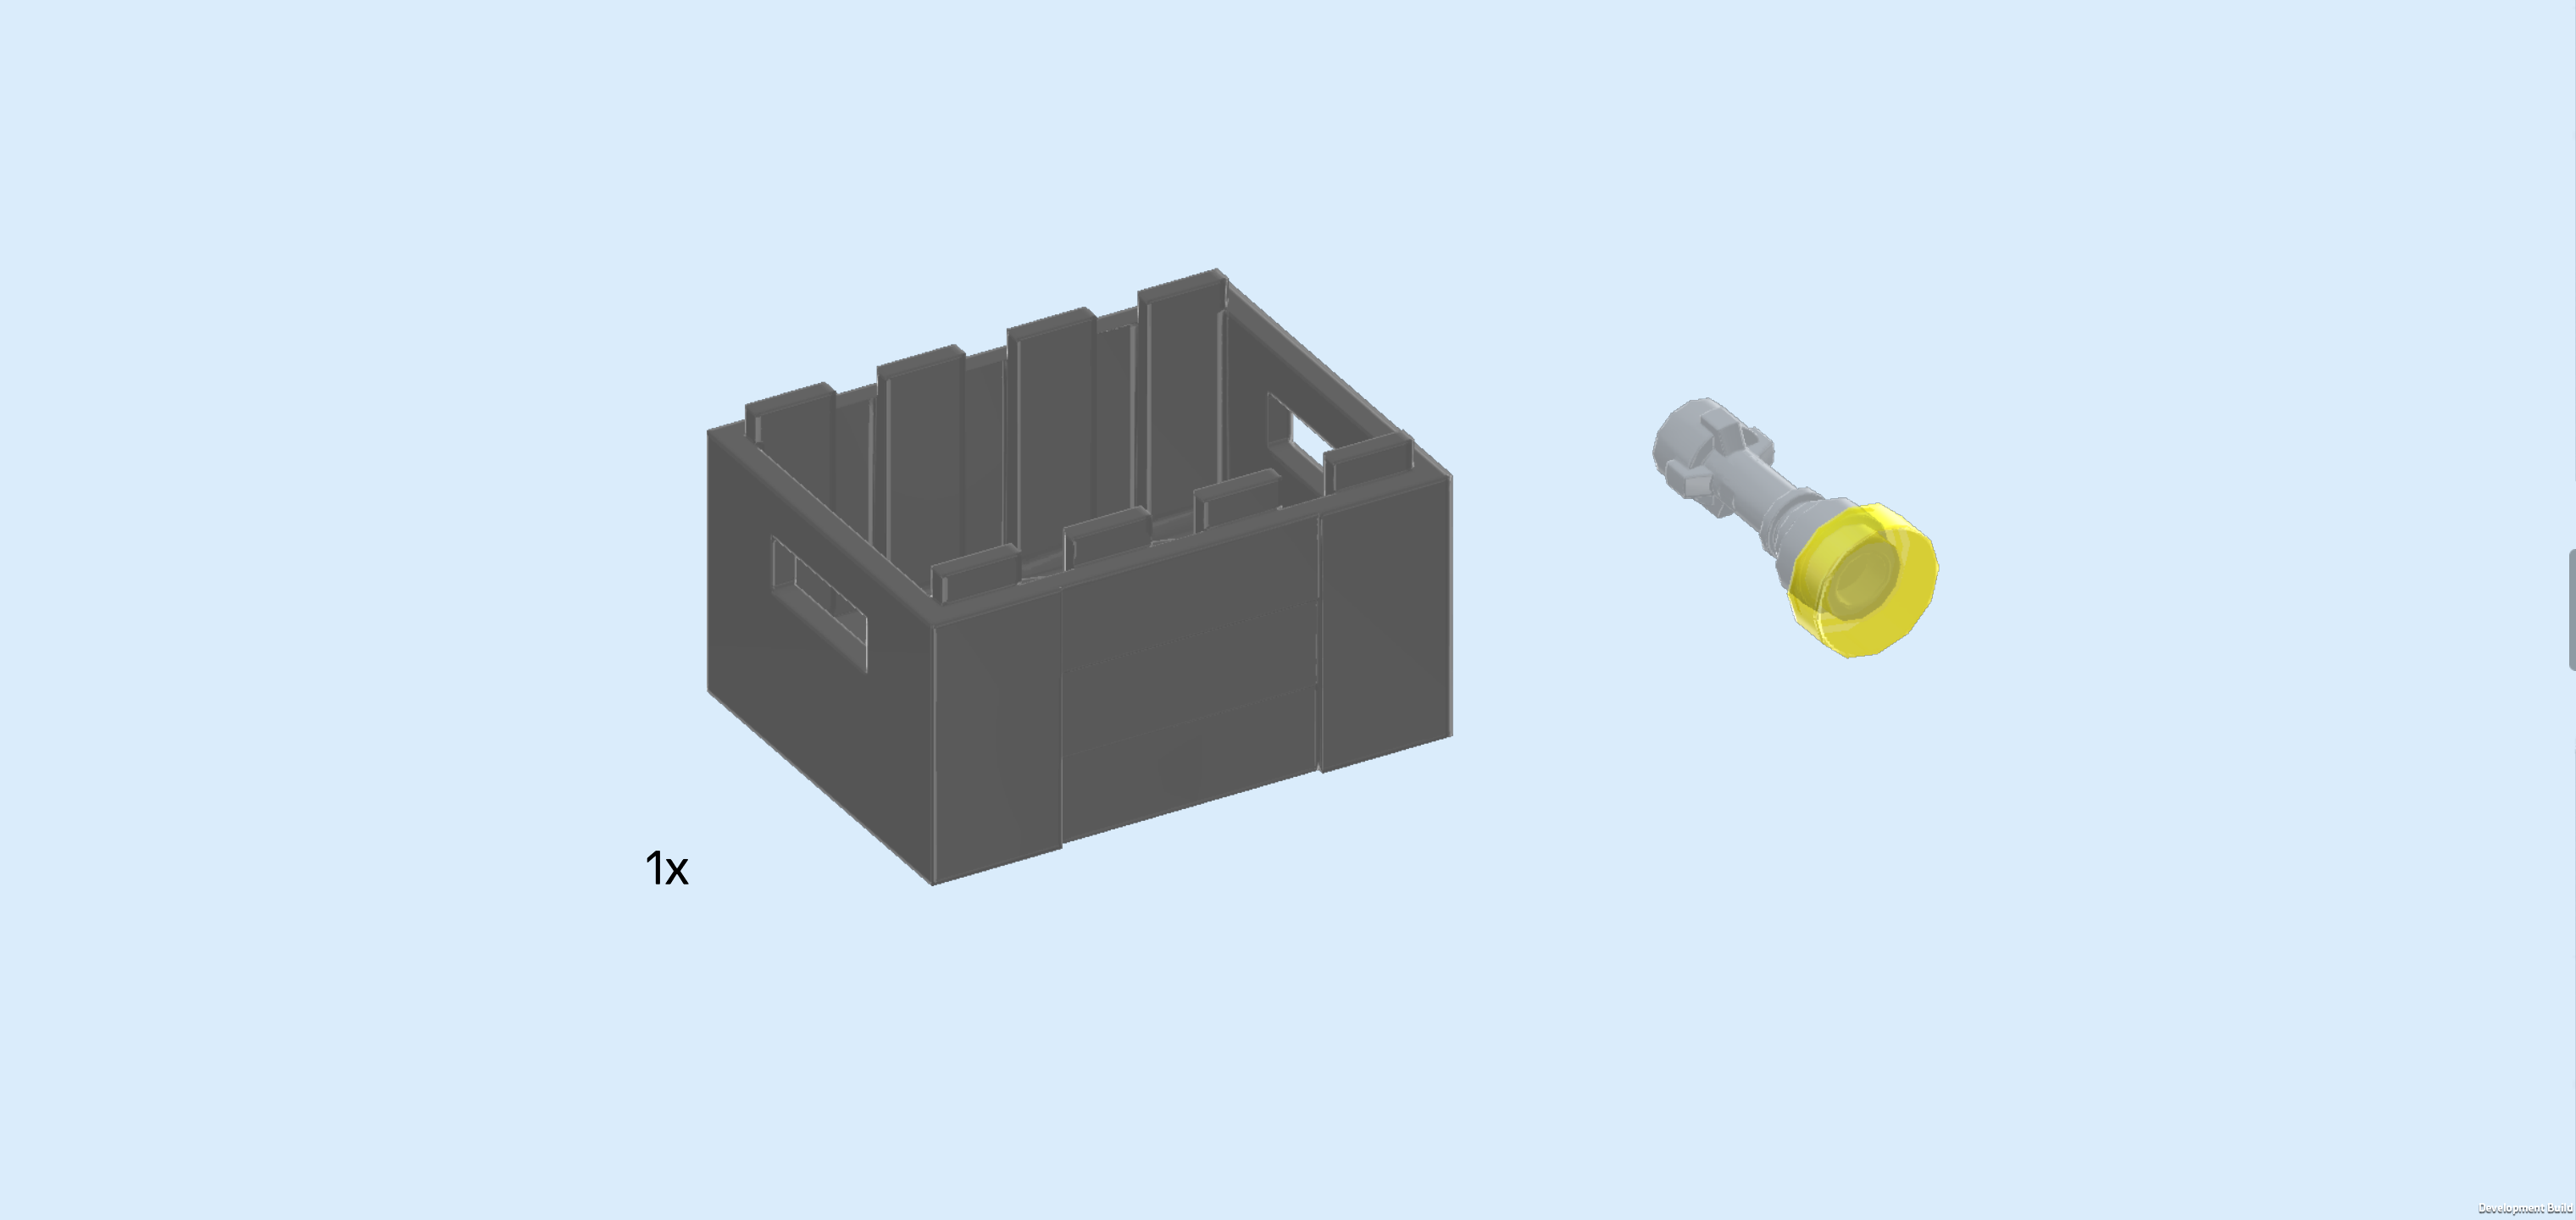
| Next, we will build the second roof storage box. |
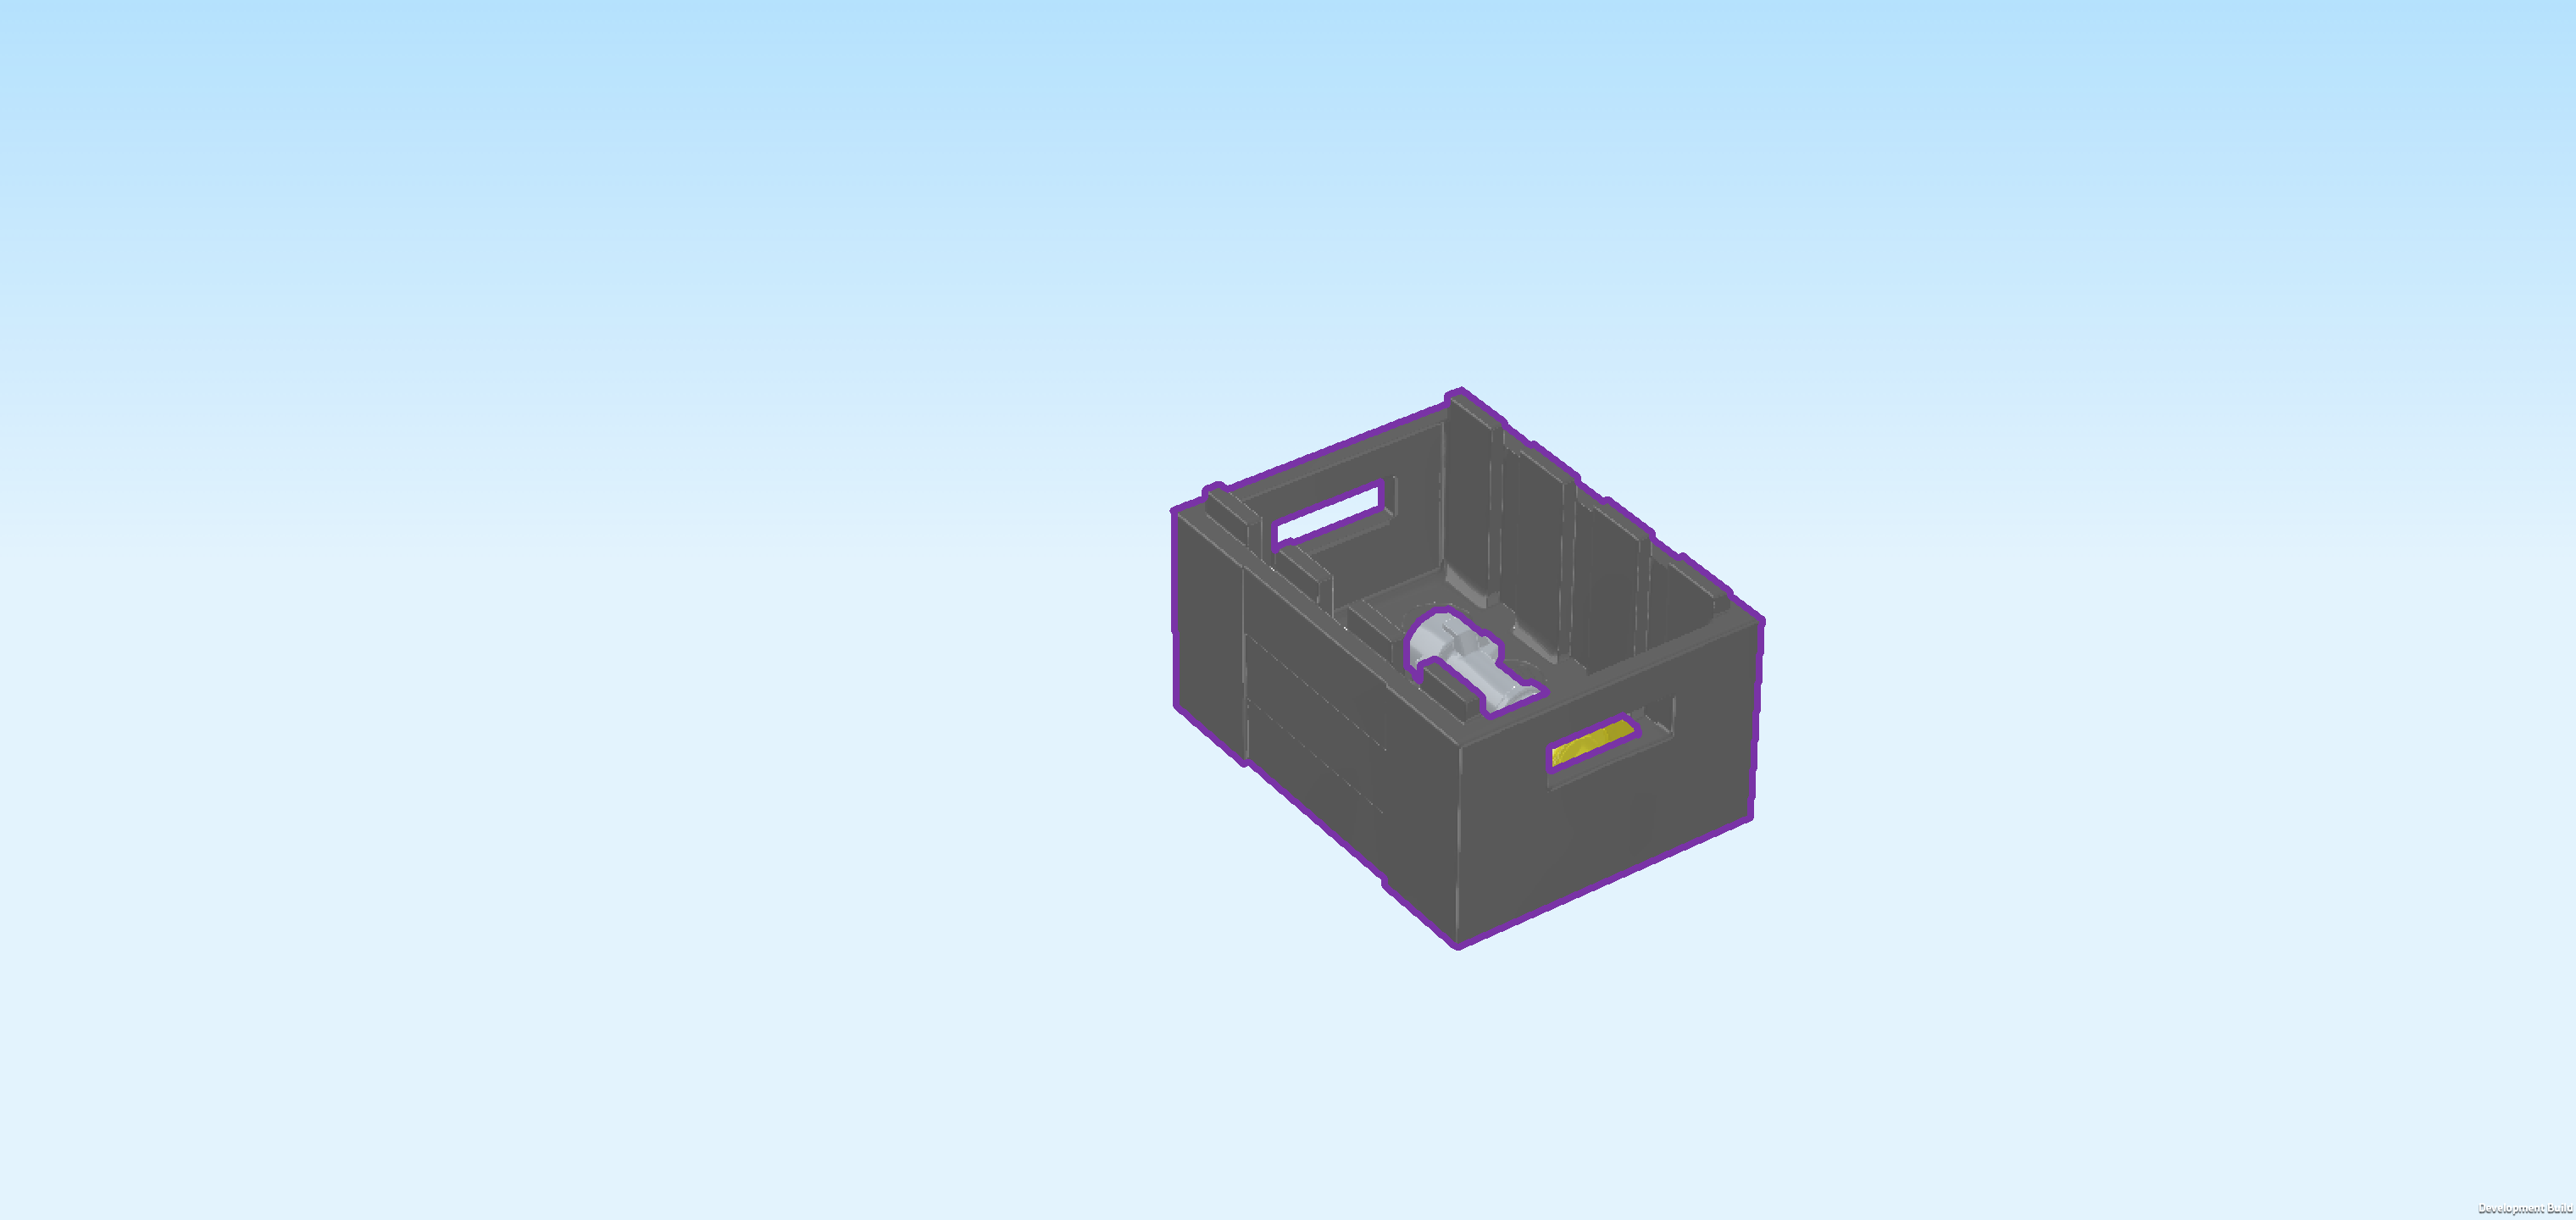
| Find 1 dark stone grey crate 3x4 with handholds. |
| Place the flashlight in the crate. |
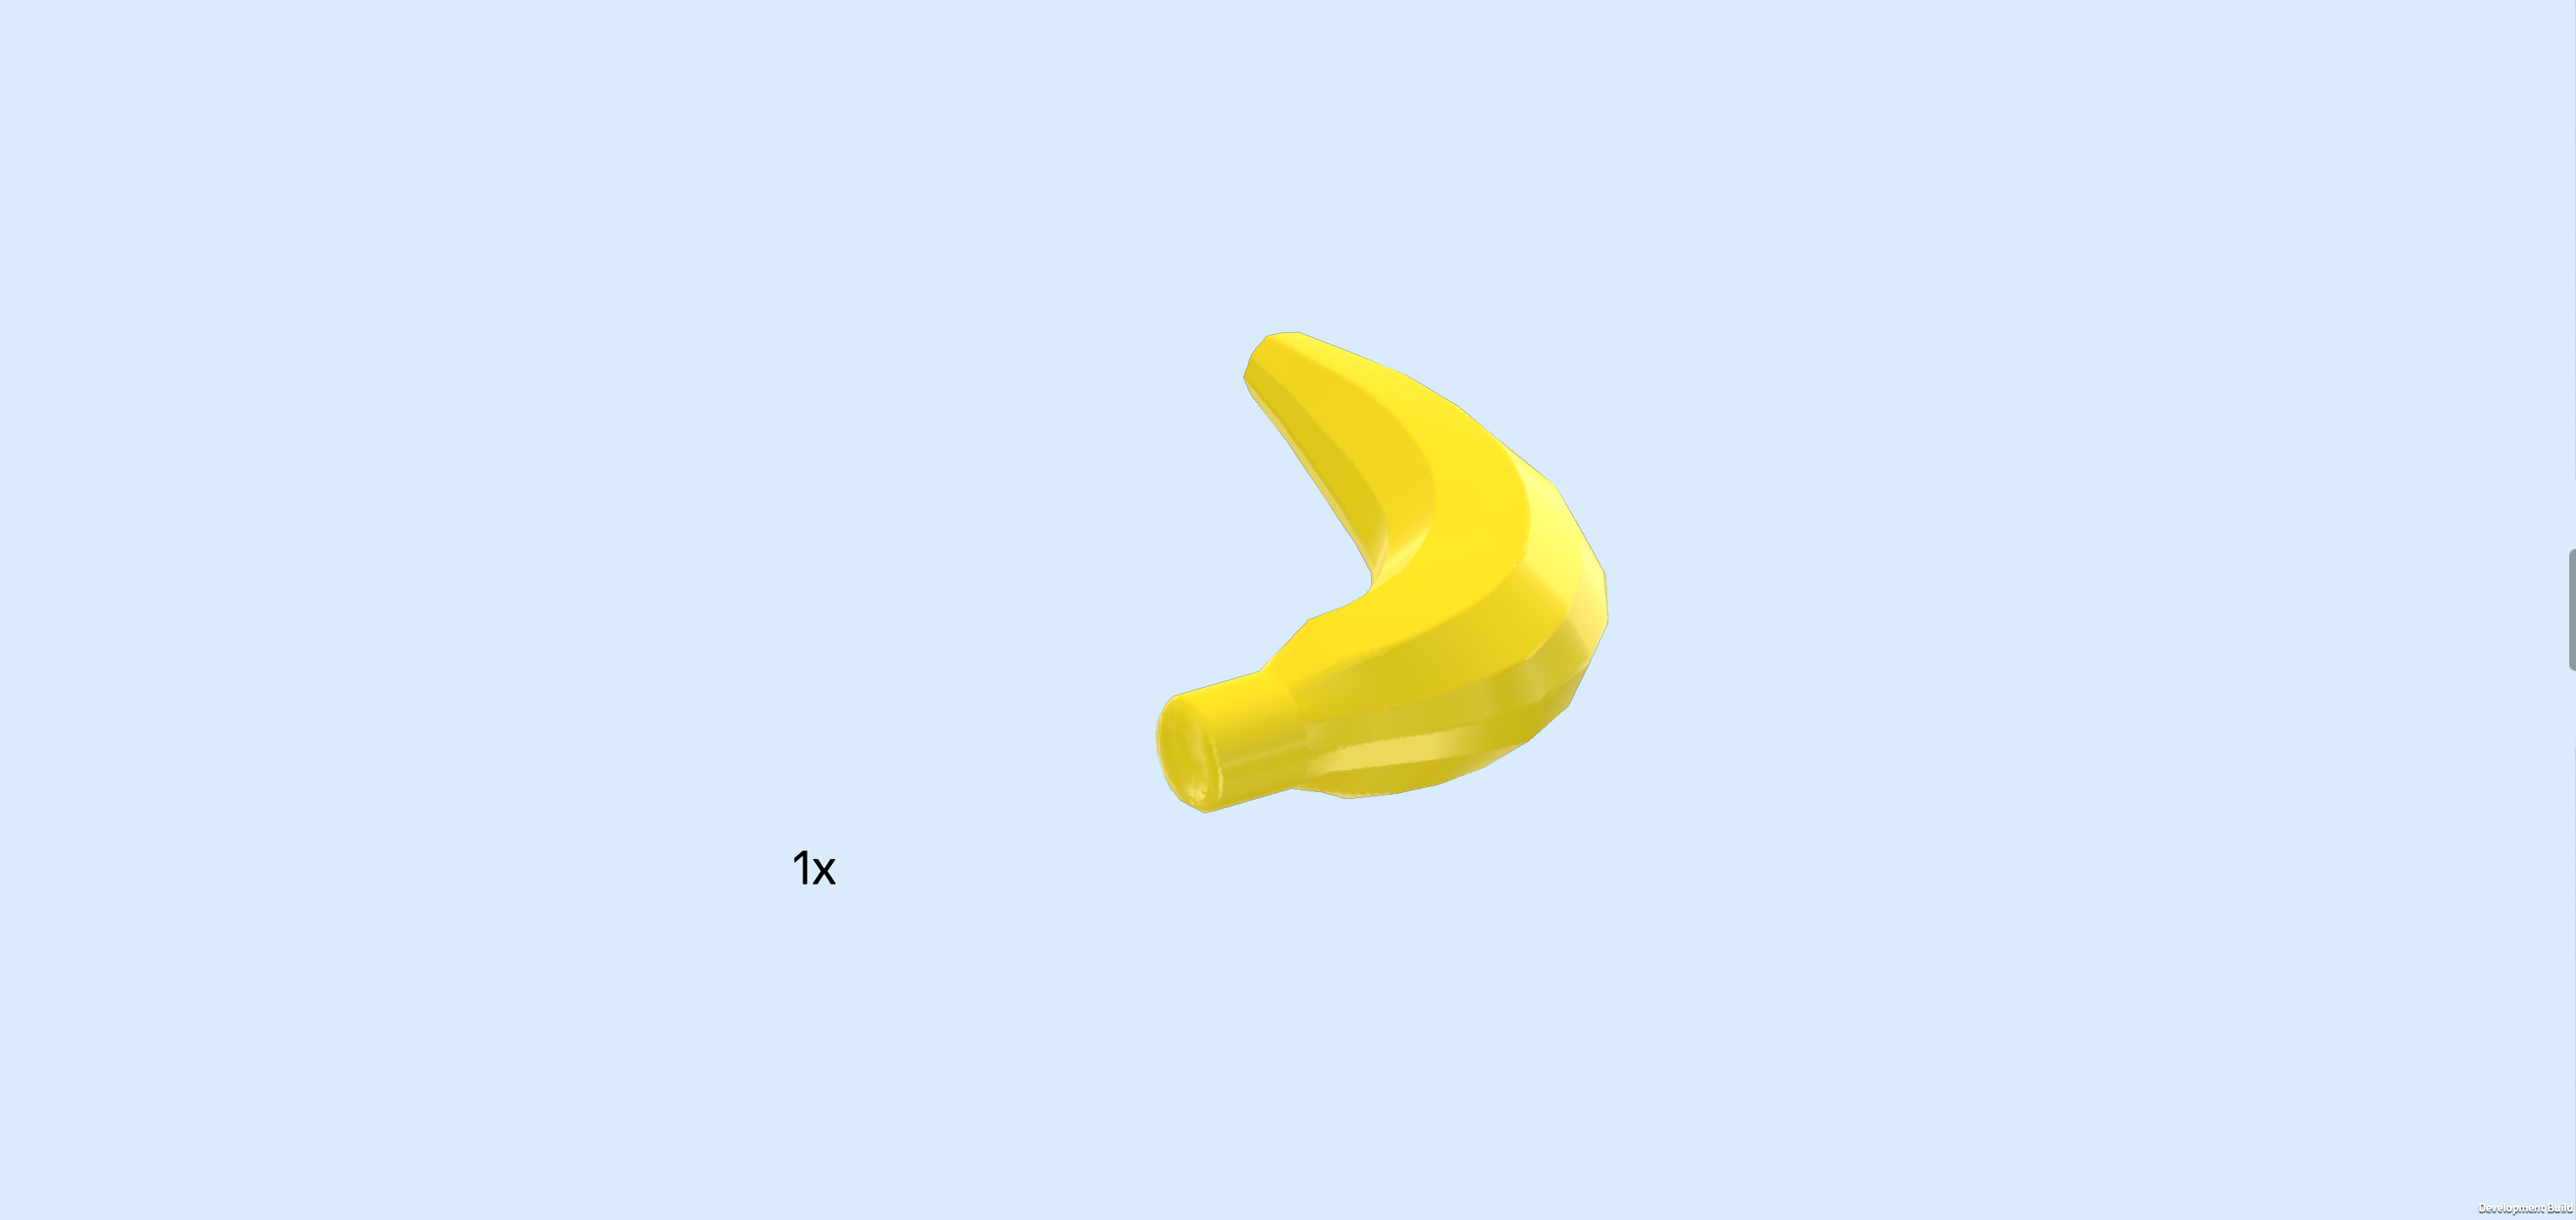
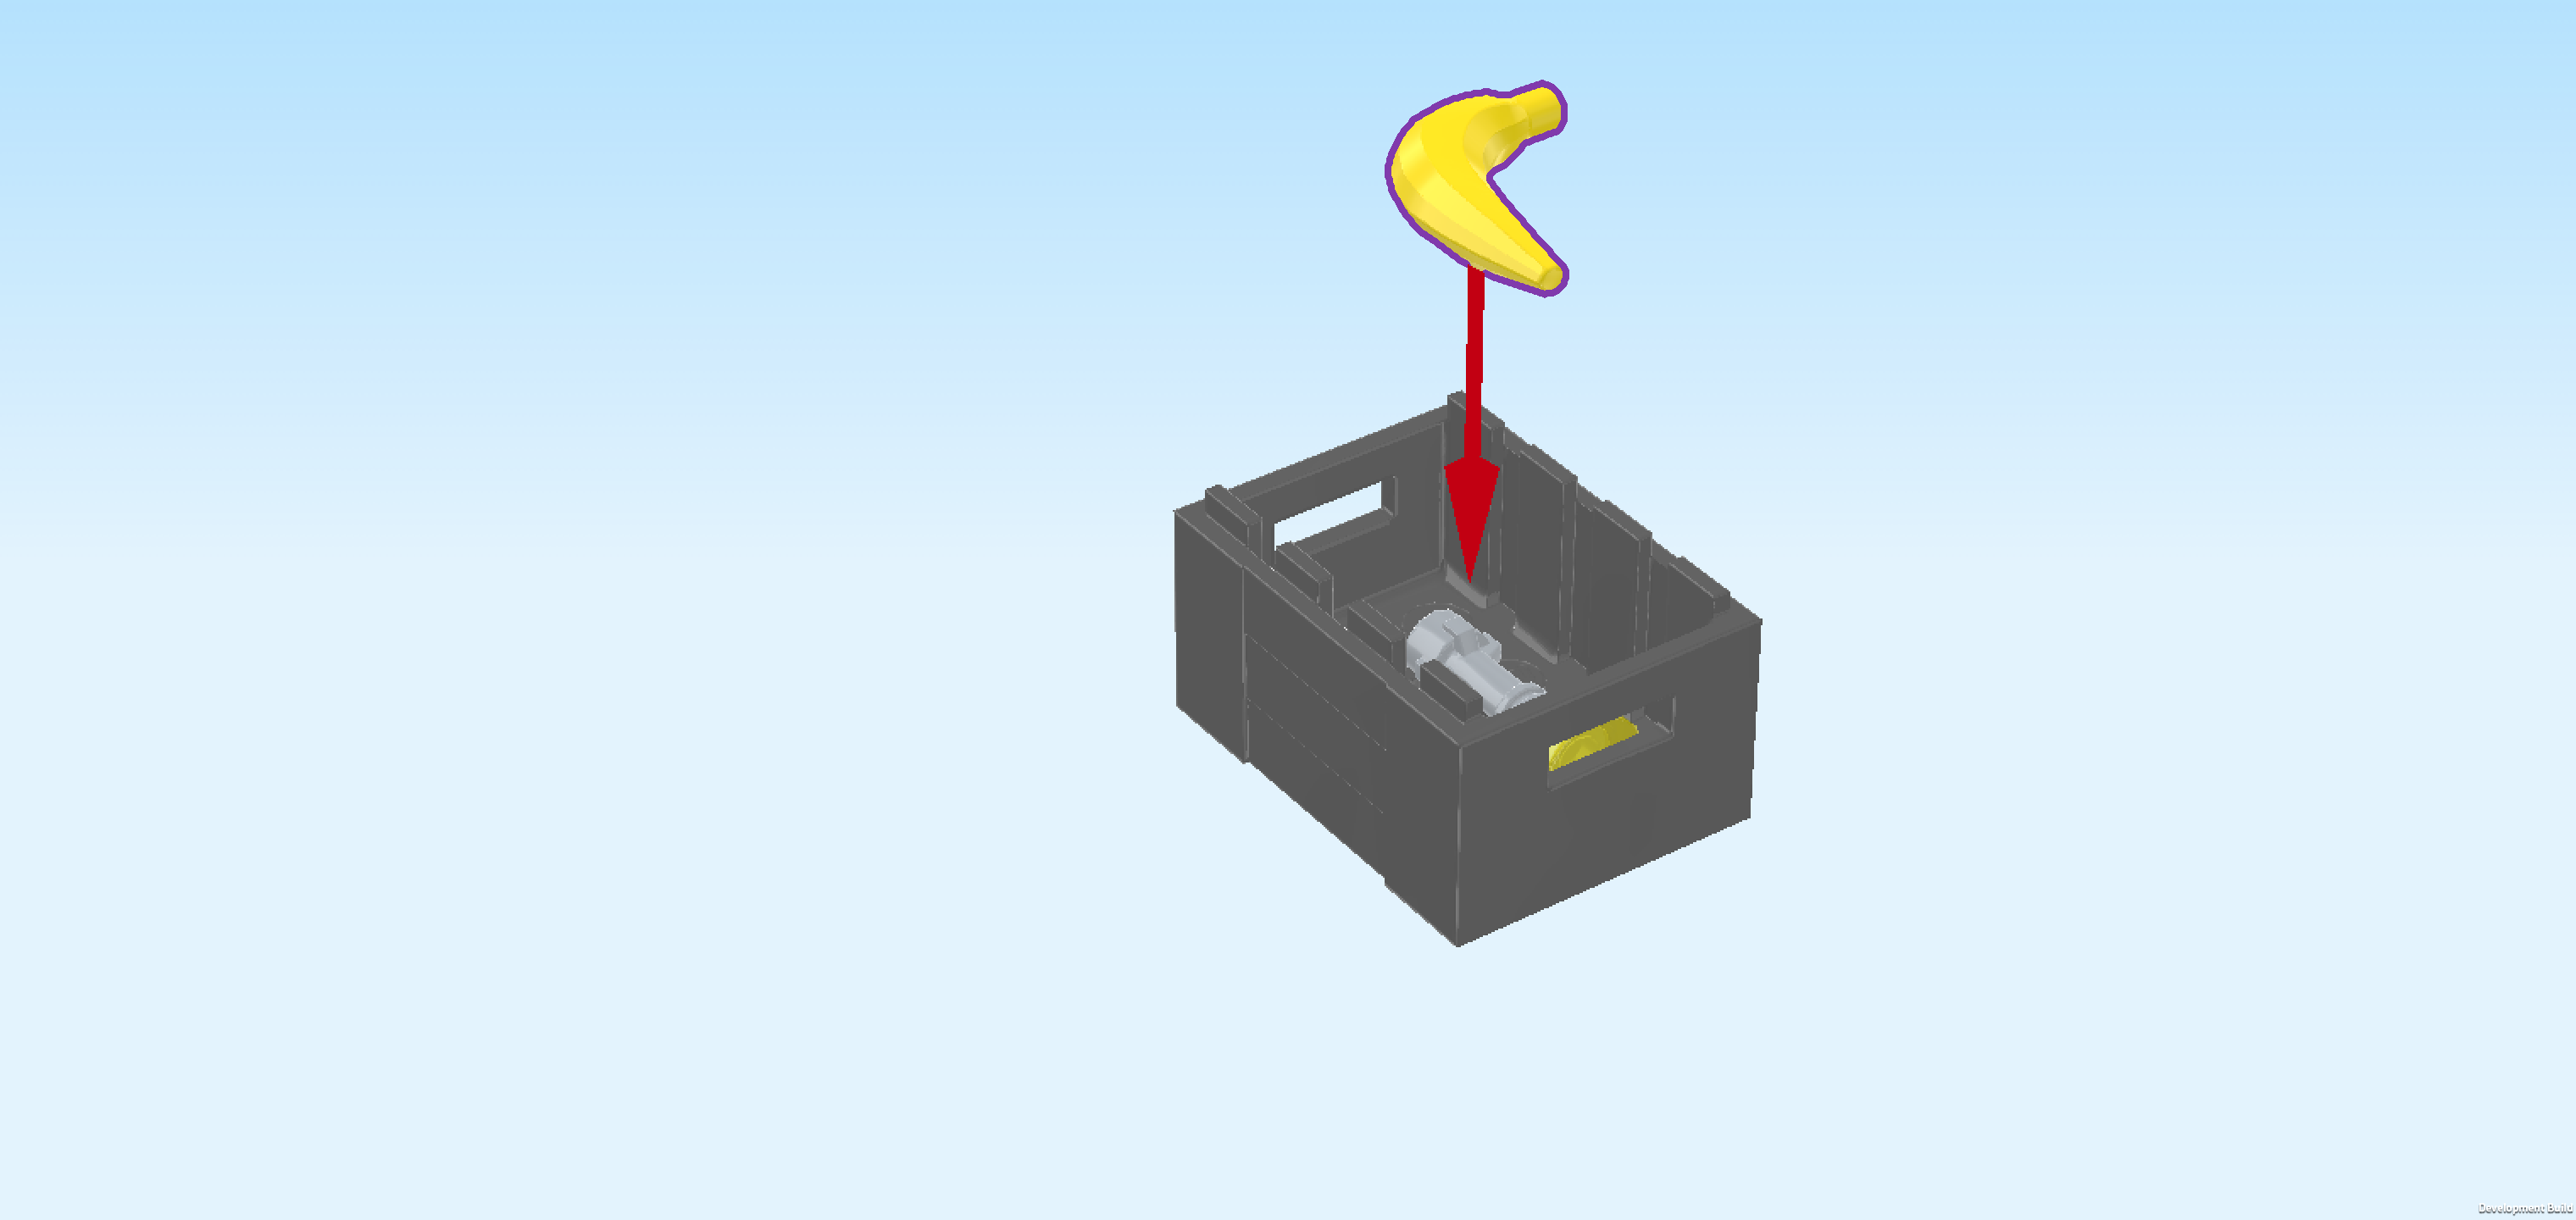
| Find 1 bright yellow banana. |
| Put it into the crate. When you're out in the wild, it's always a good idea to carry an emergency banana! |
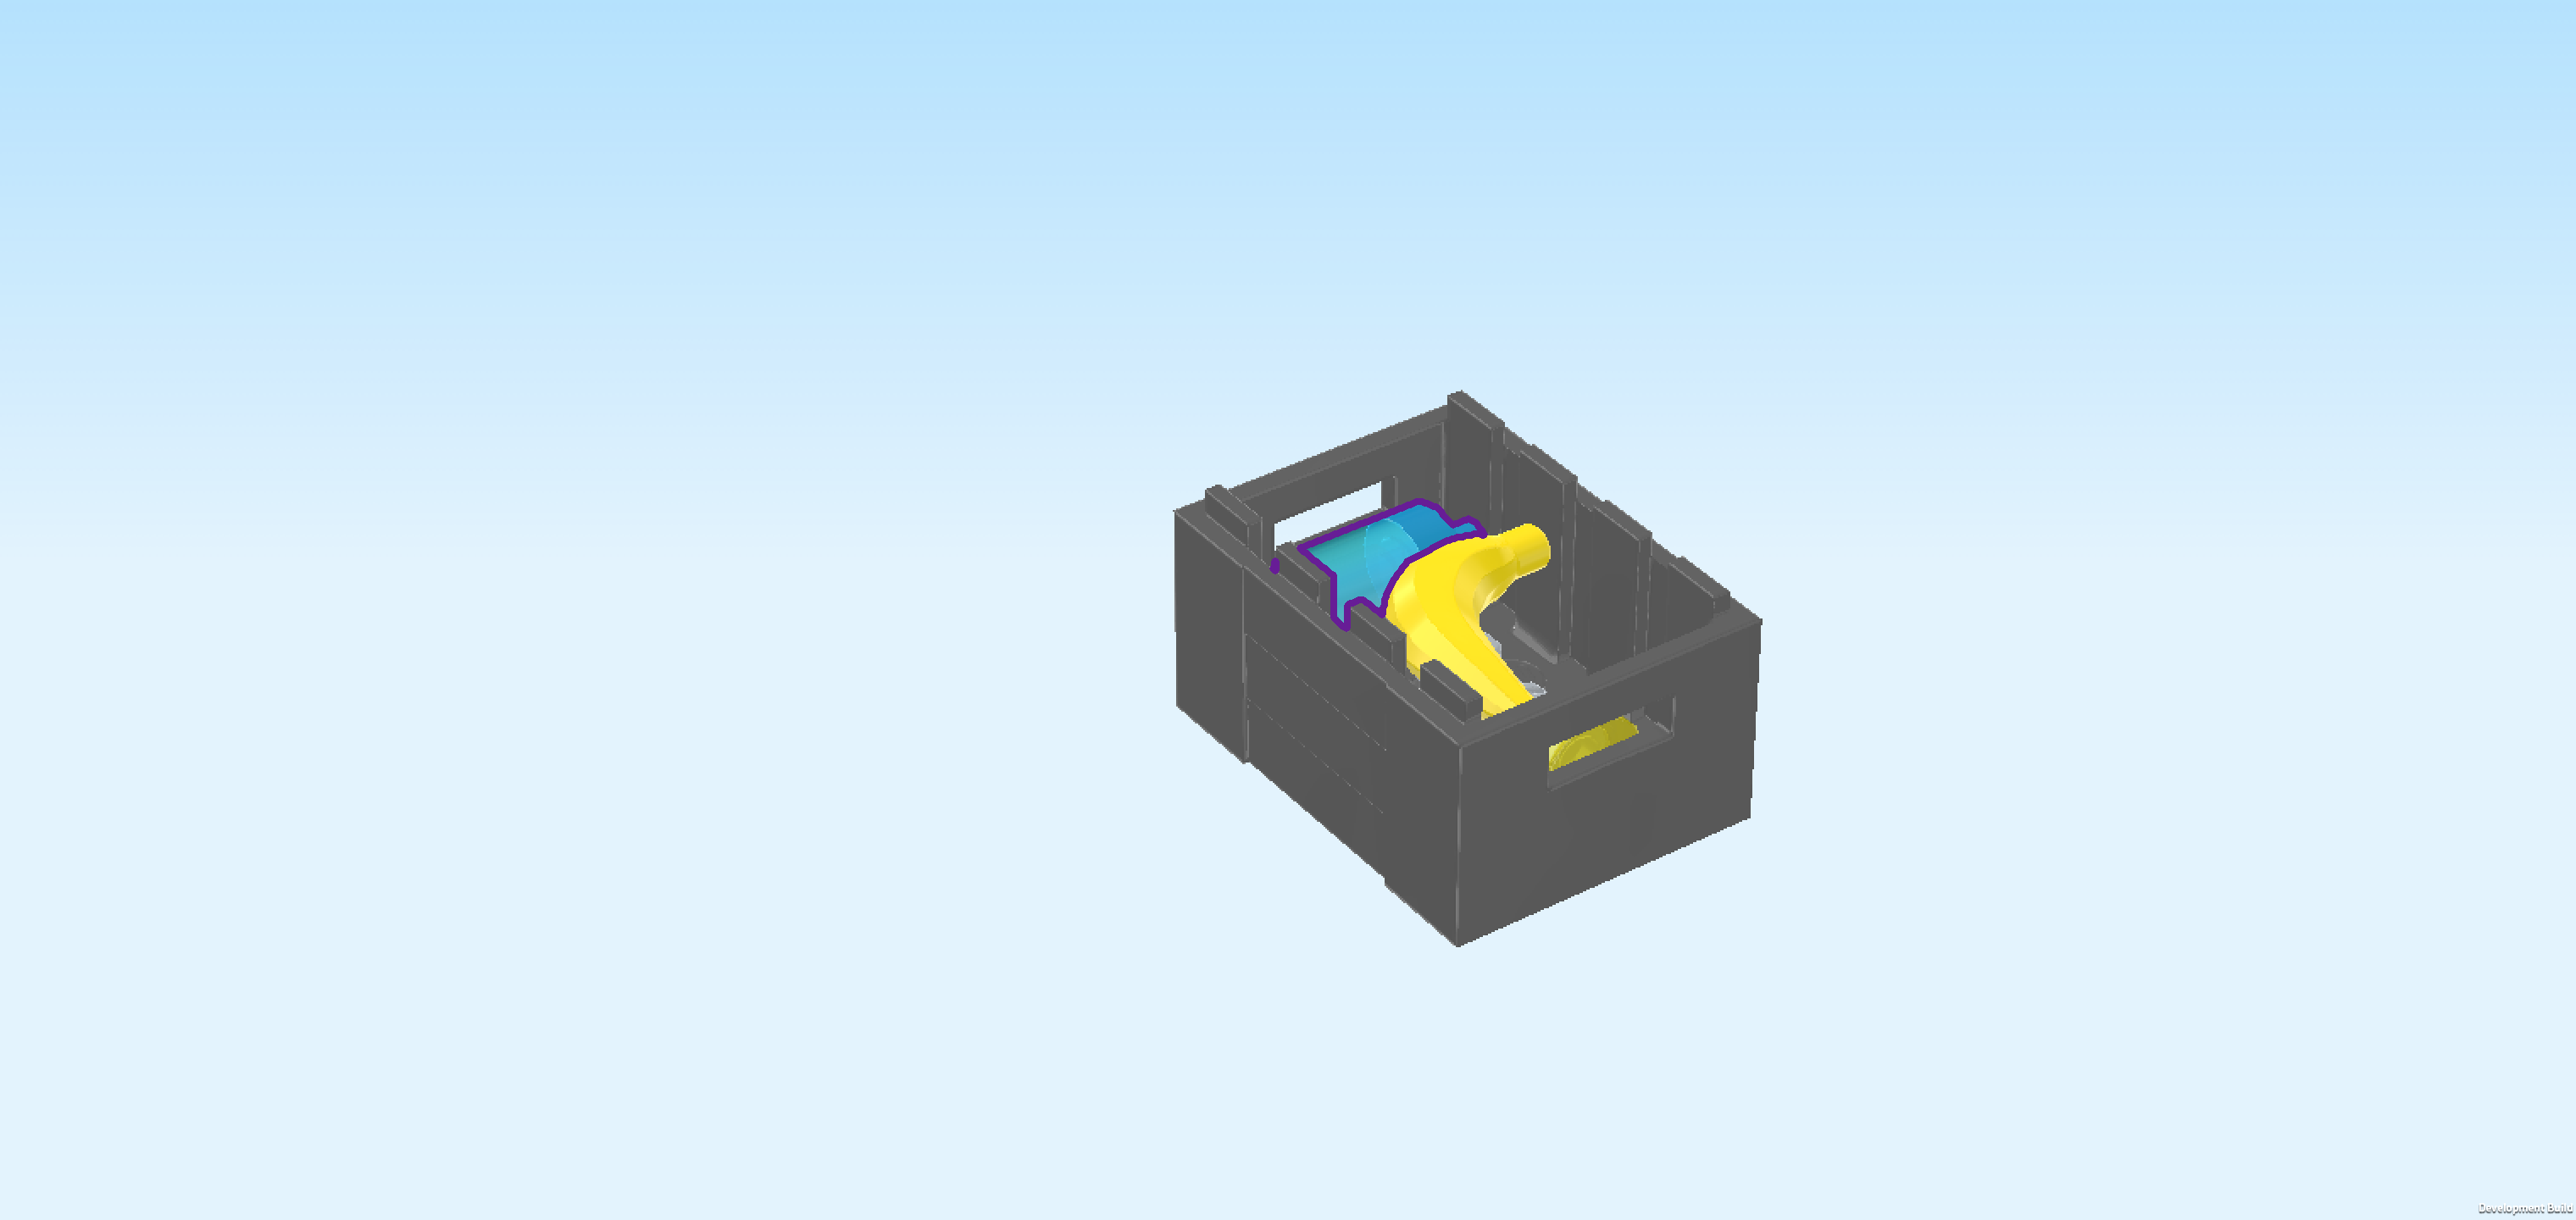
| Next, we will build a water bottle. |
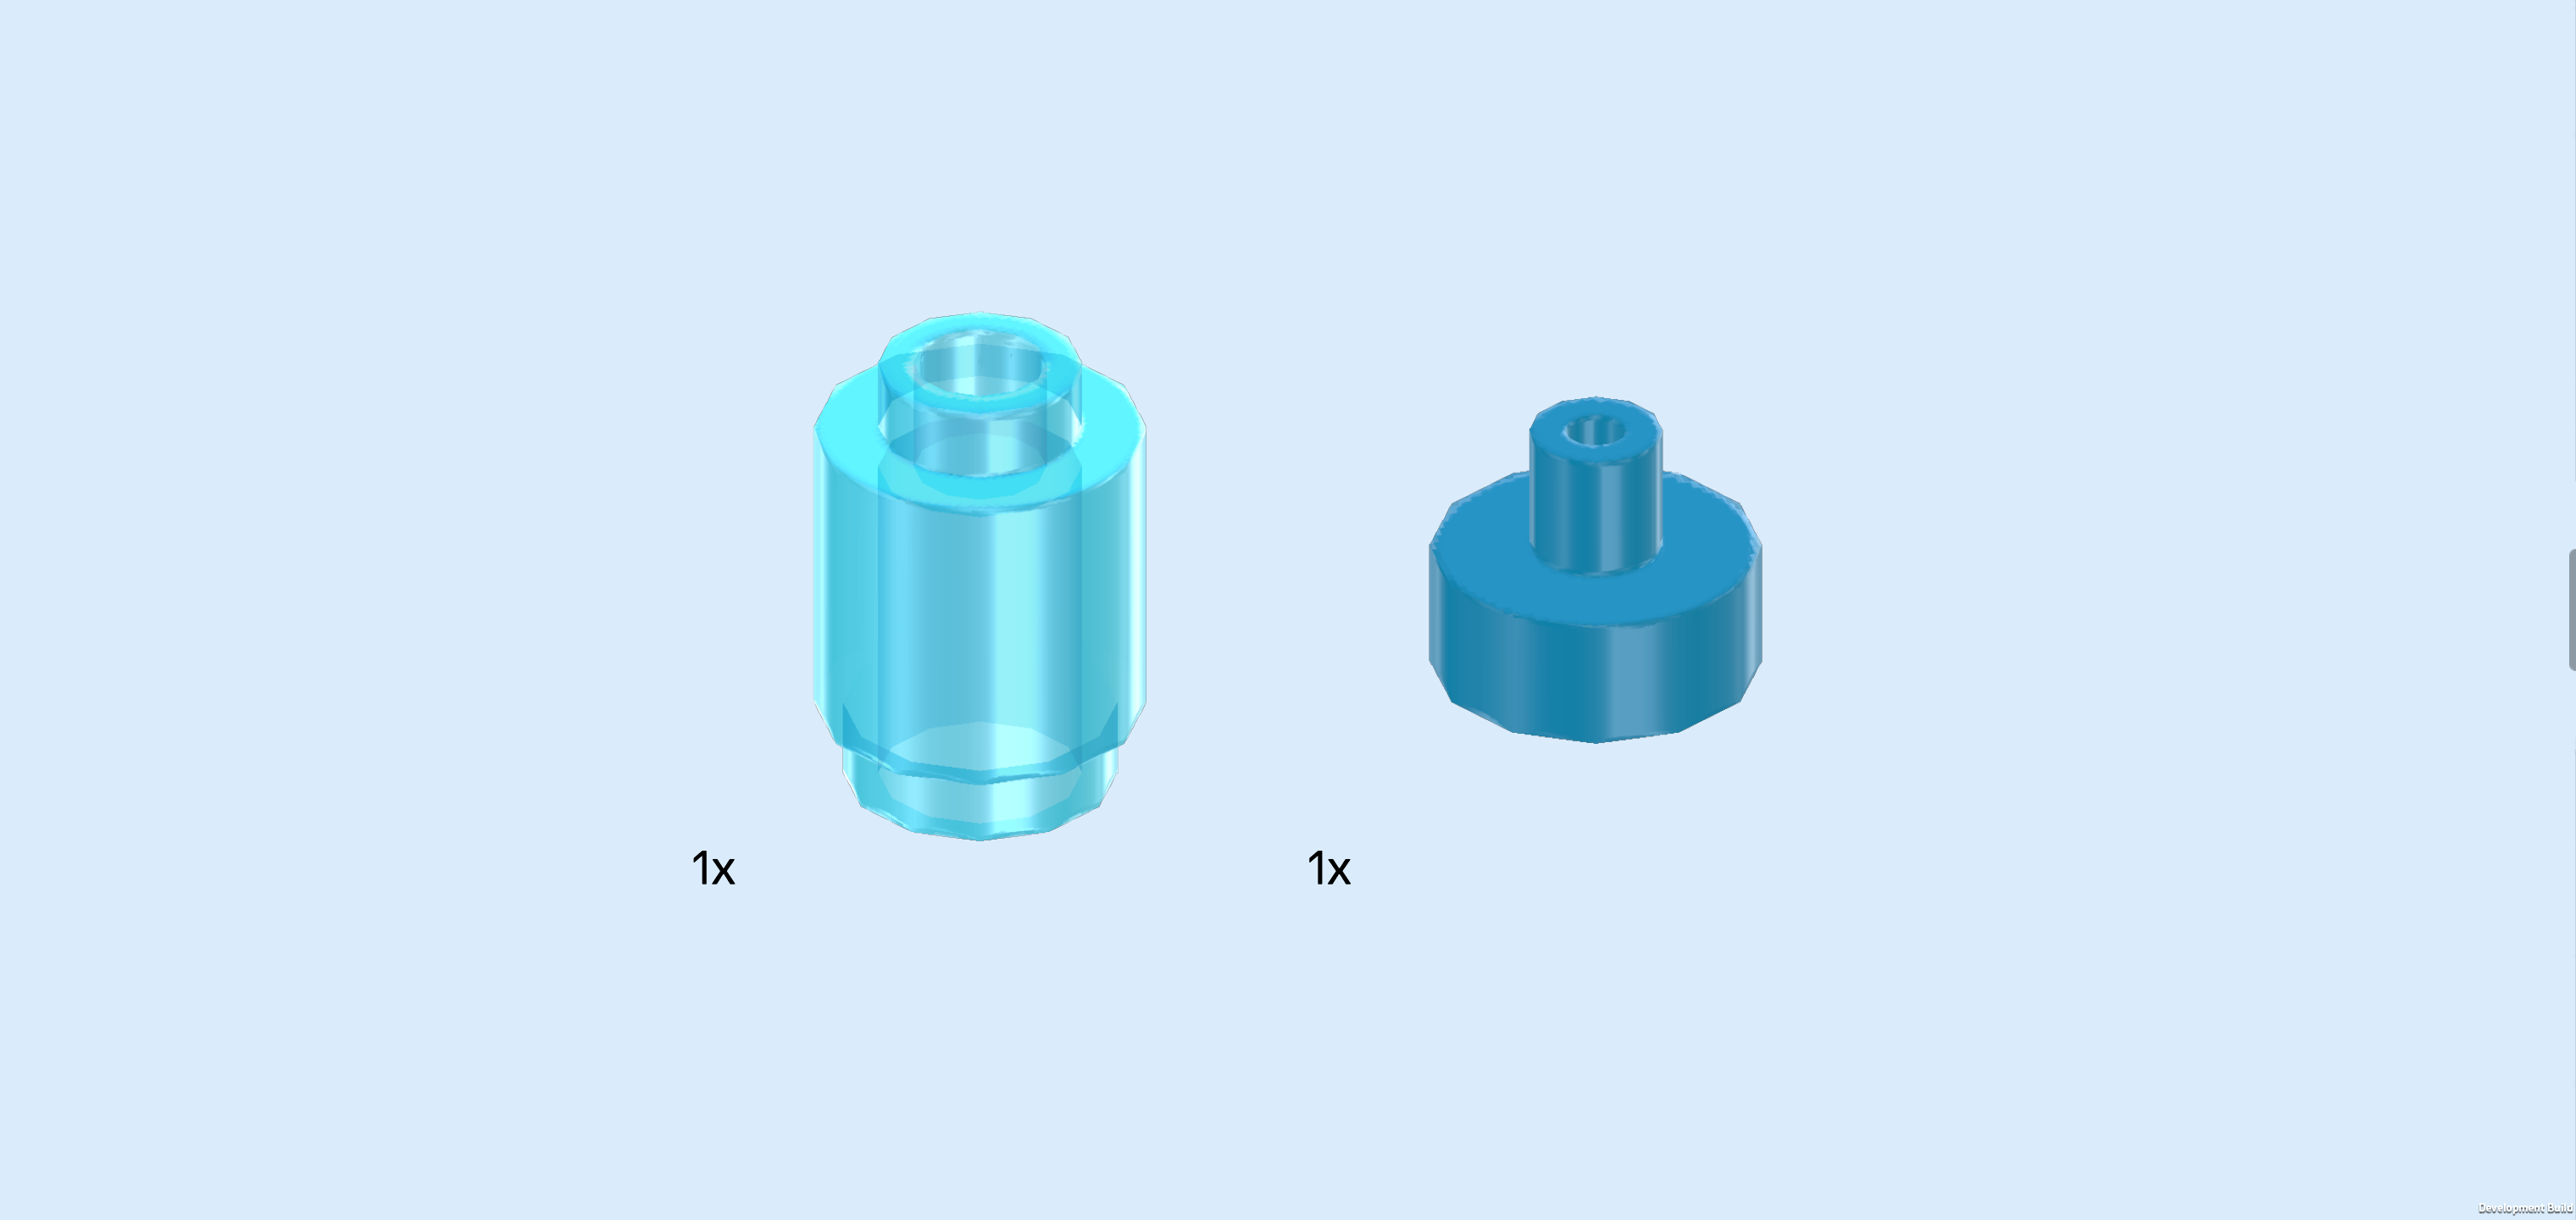
| Collect the following 2 pieces: |
| 1 transparent light blue round brick 1x1, |
| and 1 dark azure blue round tile 1x1 with small top shaft. |
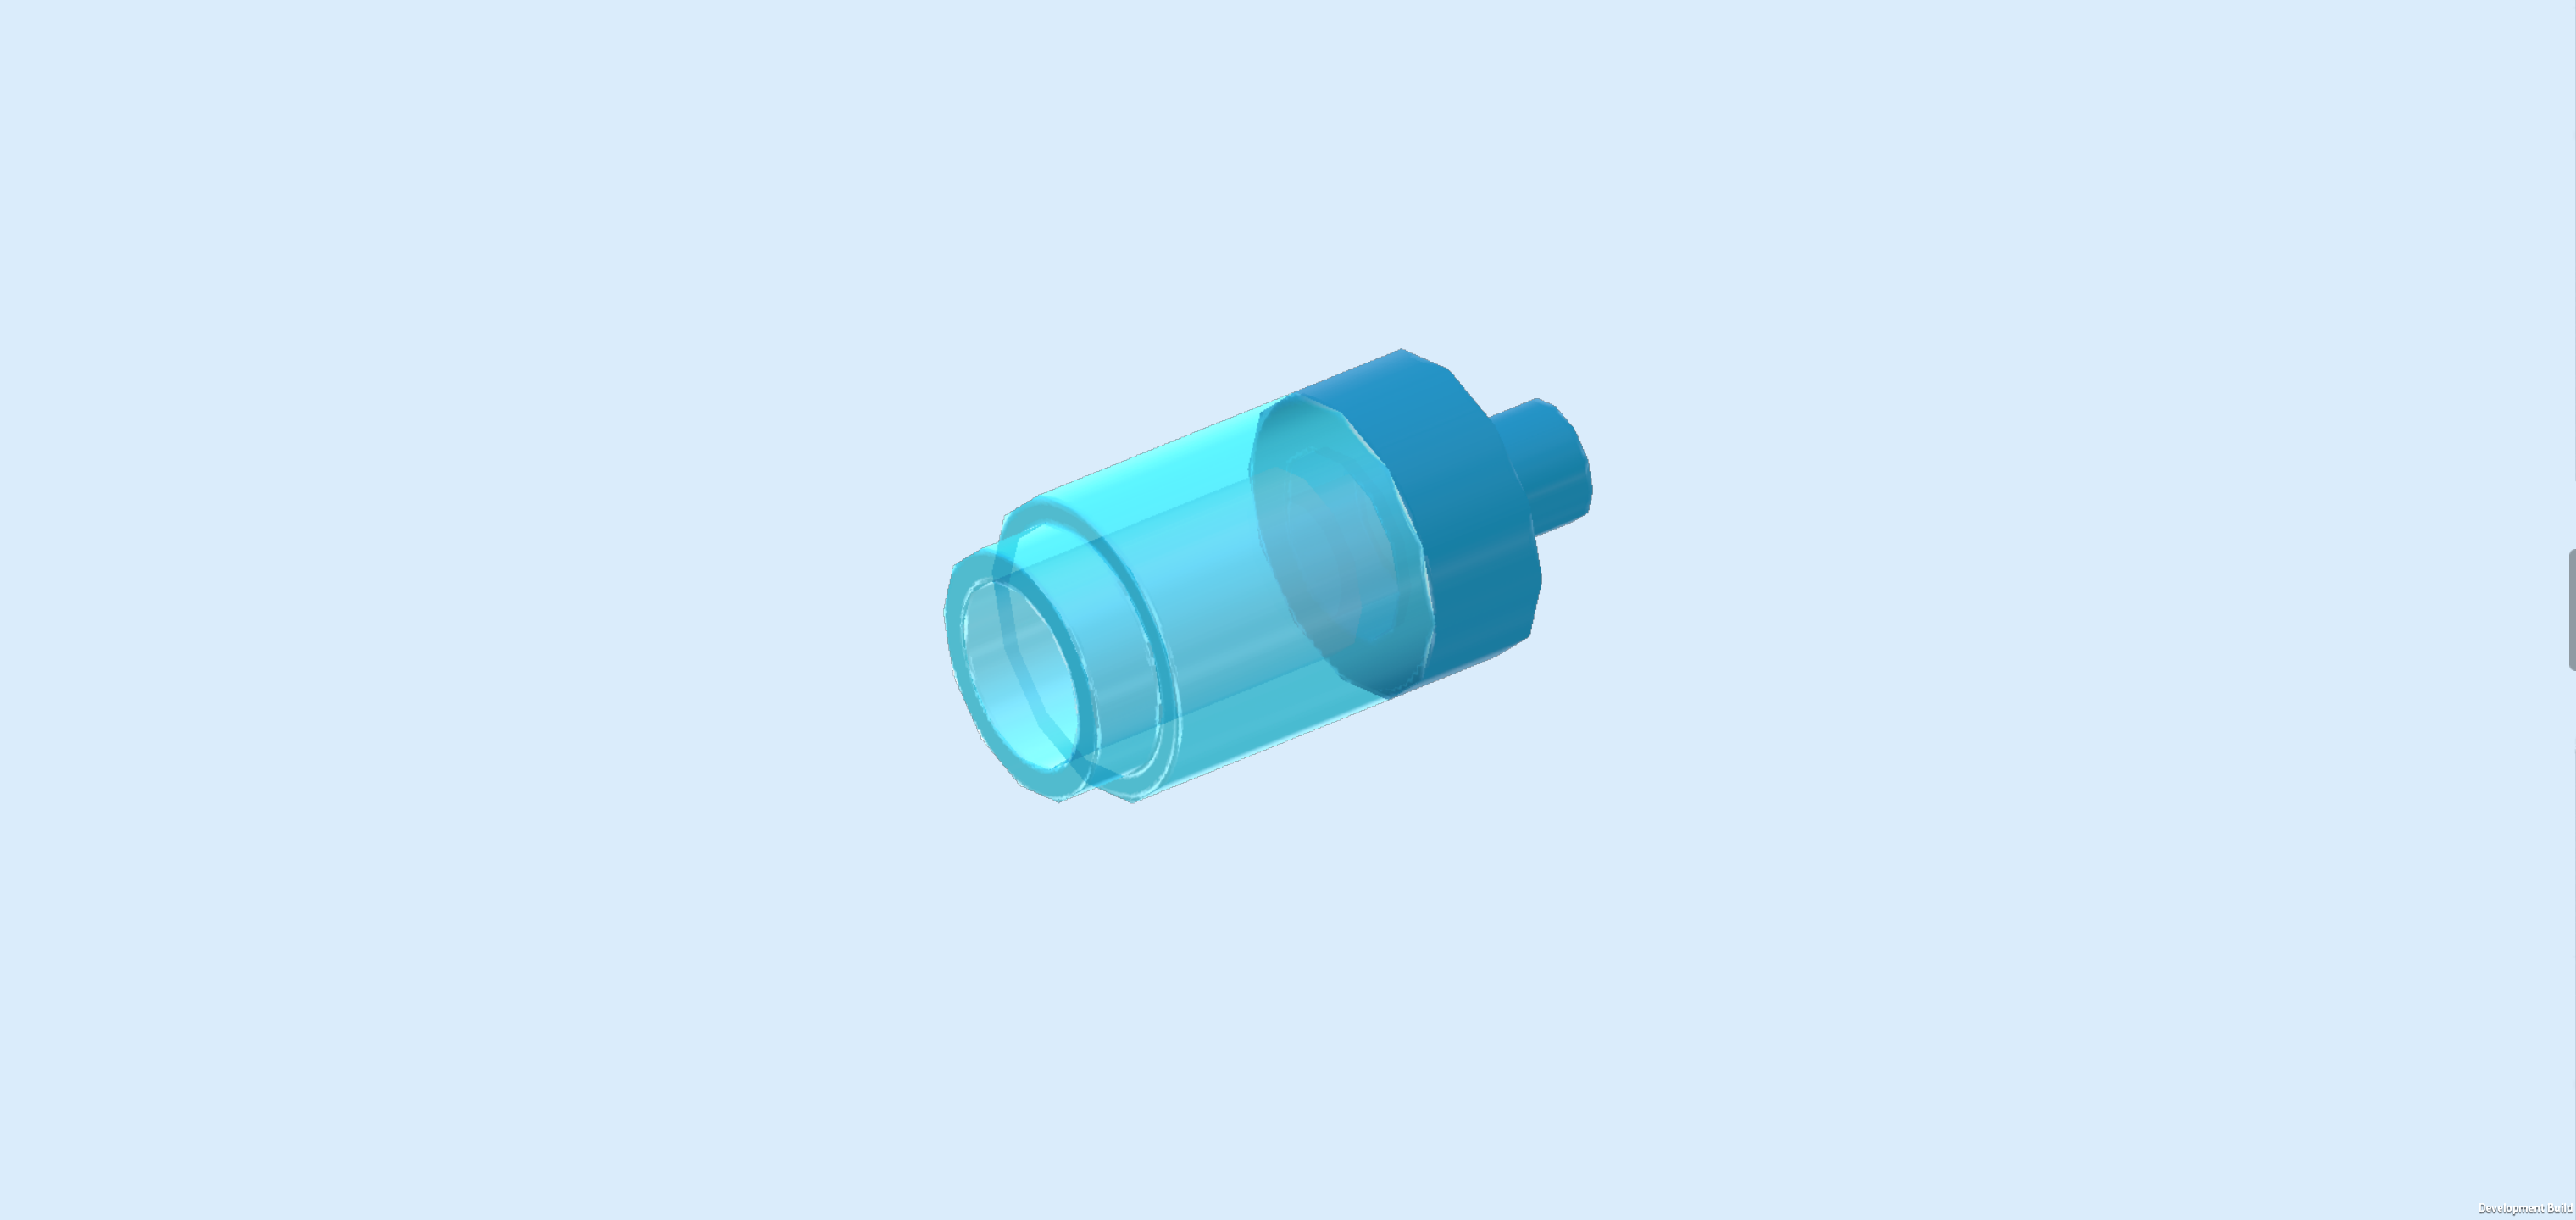
| Put the round tile on top of the round brick, shaft pointing to the top. |
| Place the water bottle in the crate. |
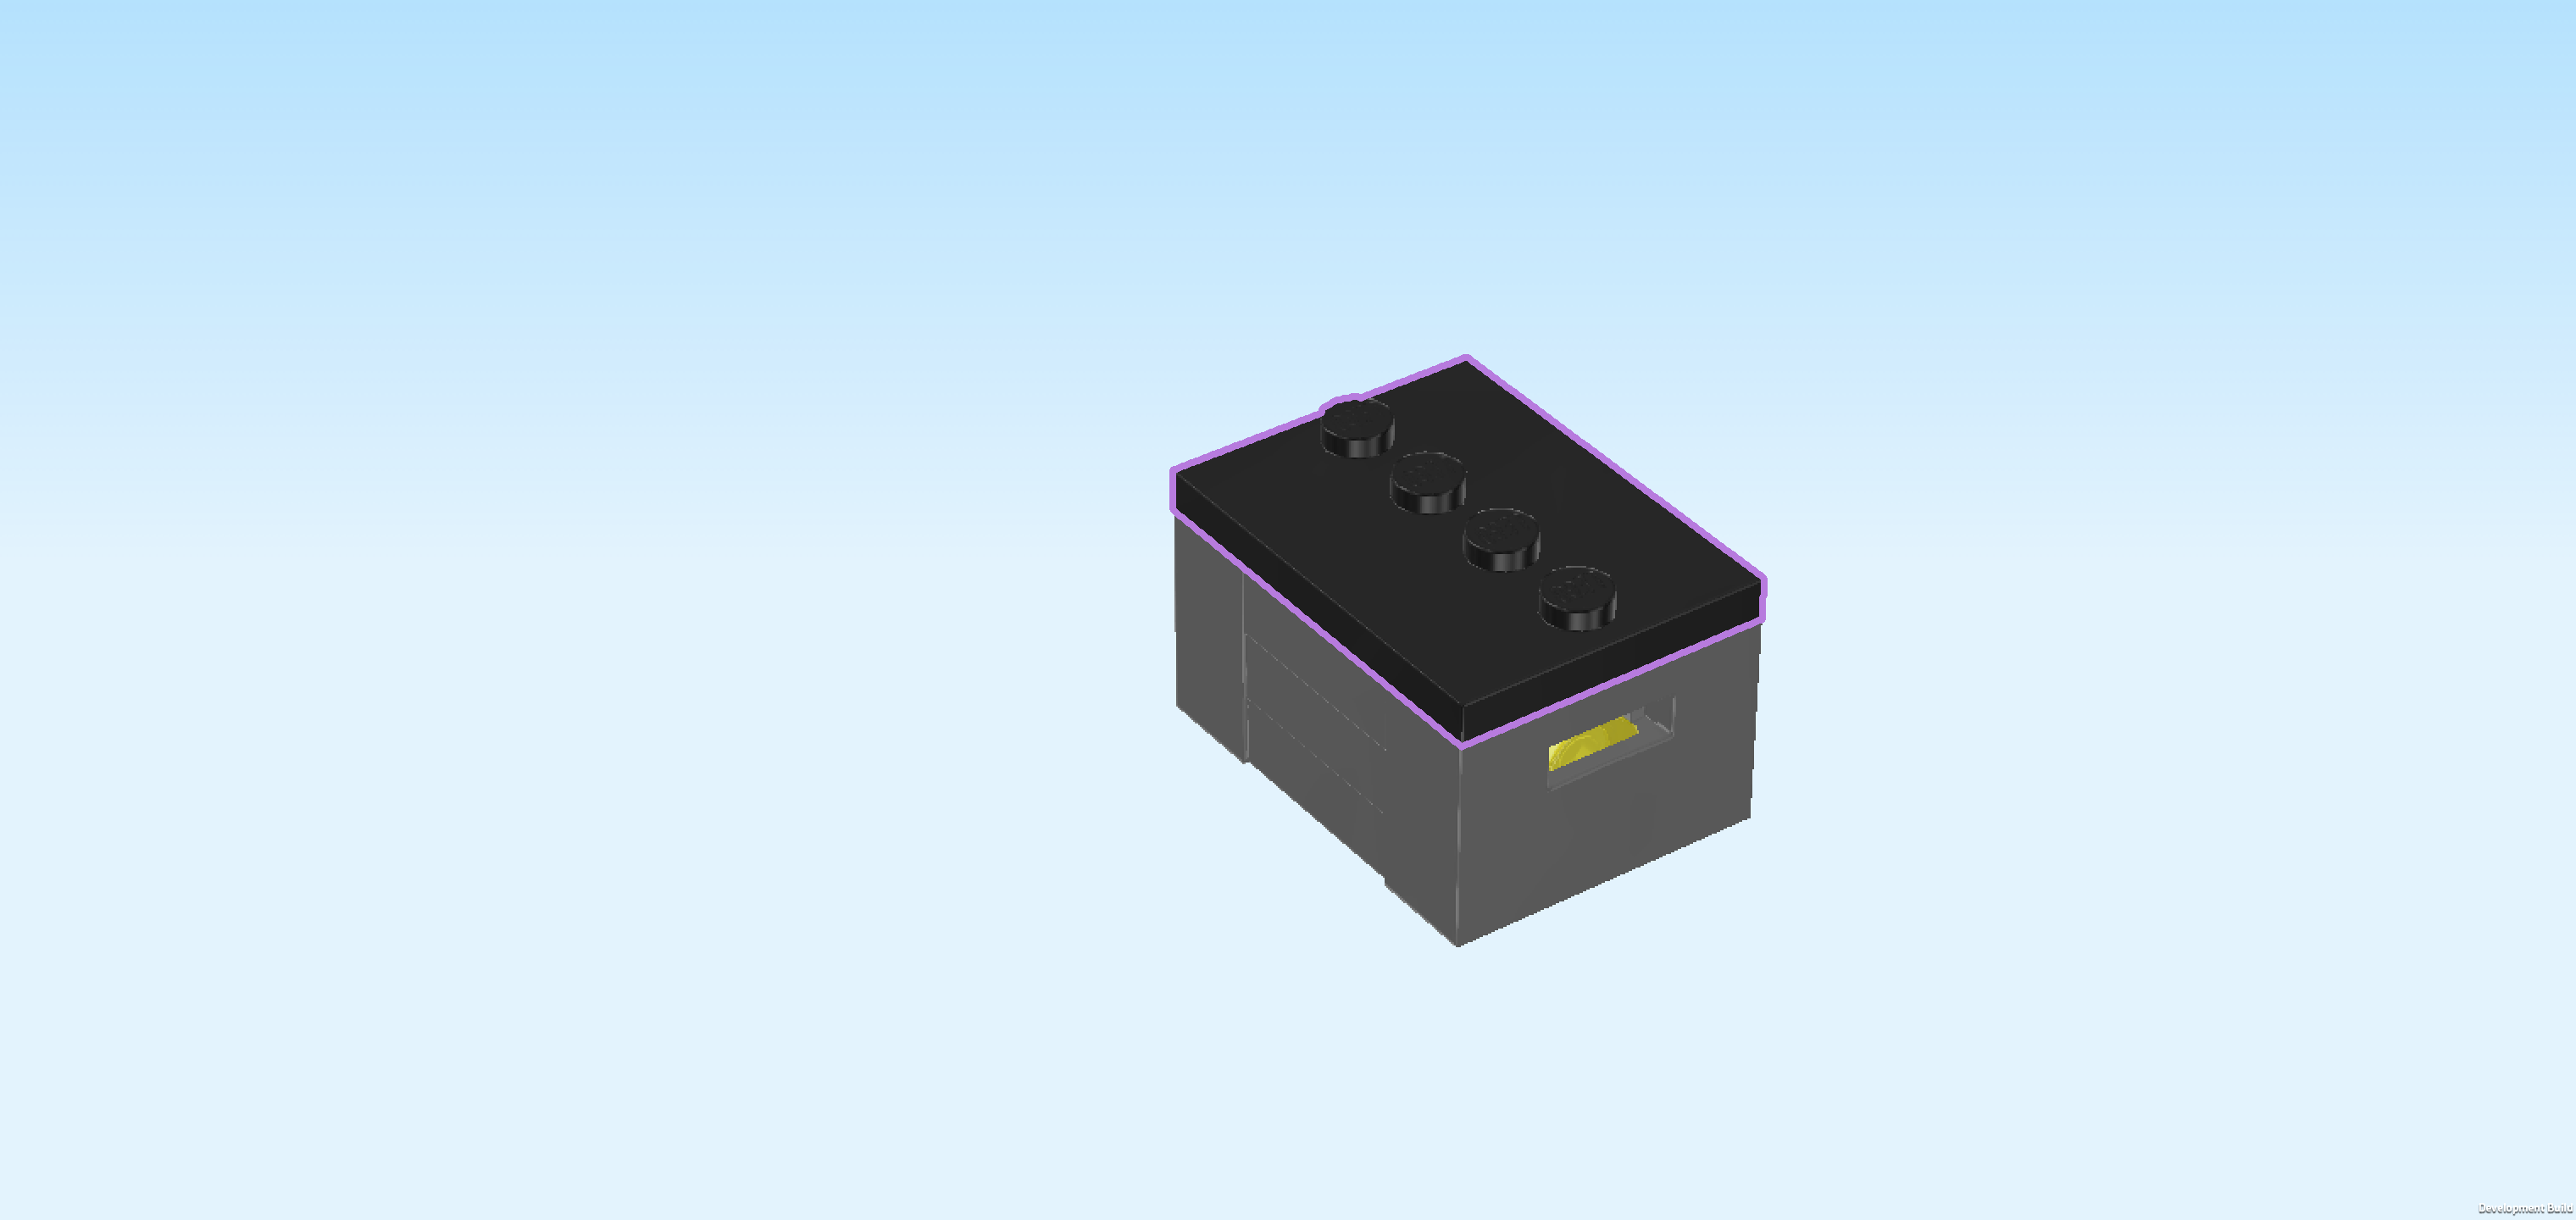
| Find 1 black plate 3x4 with 4 knobs in a middle line. |
| Put it on top of the crate. |
| The second roof storage box is finished! Well done! Mount it vertically in the left half of the roof. |
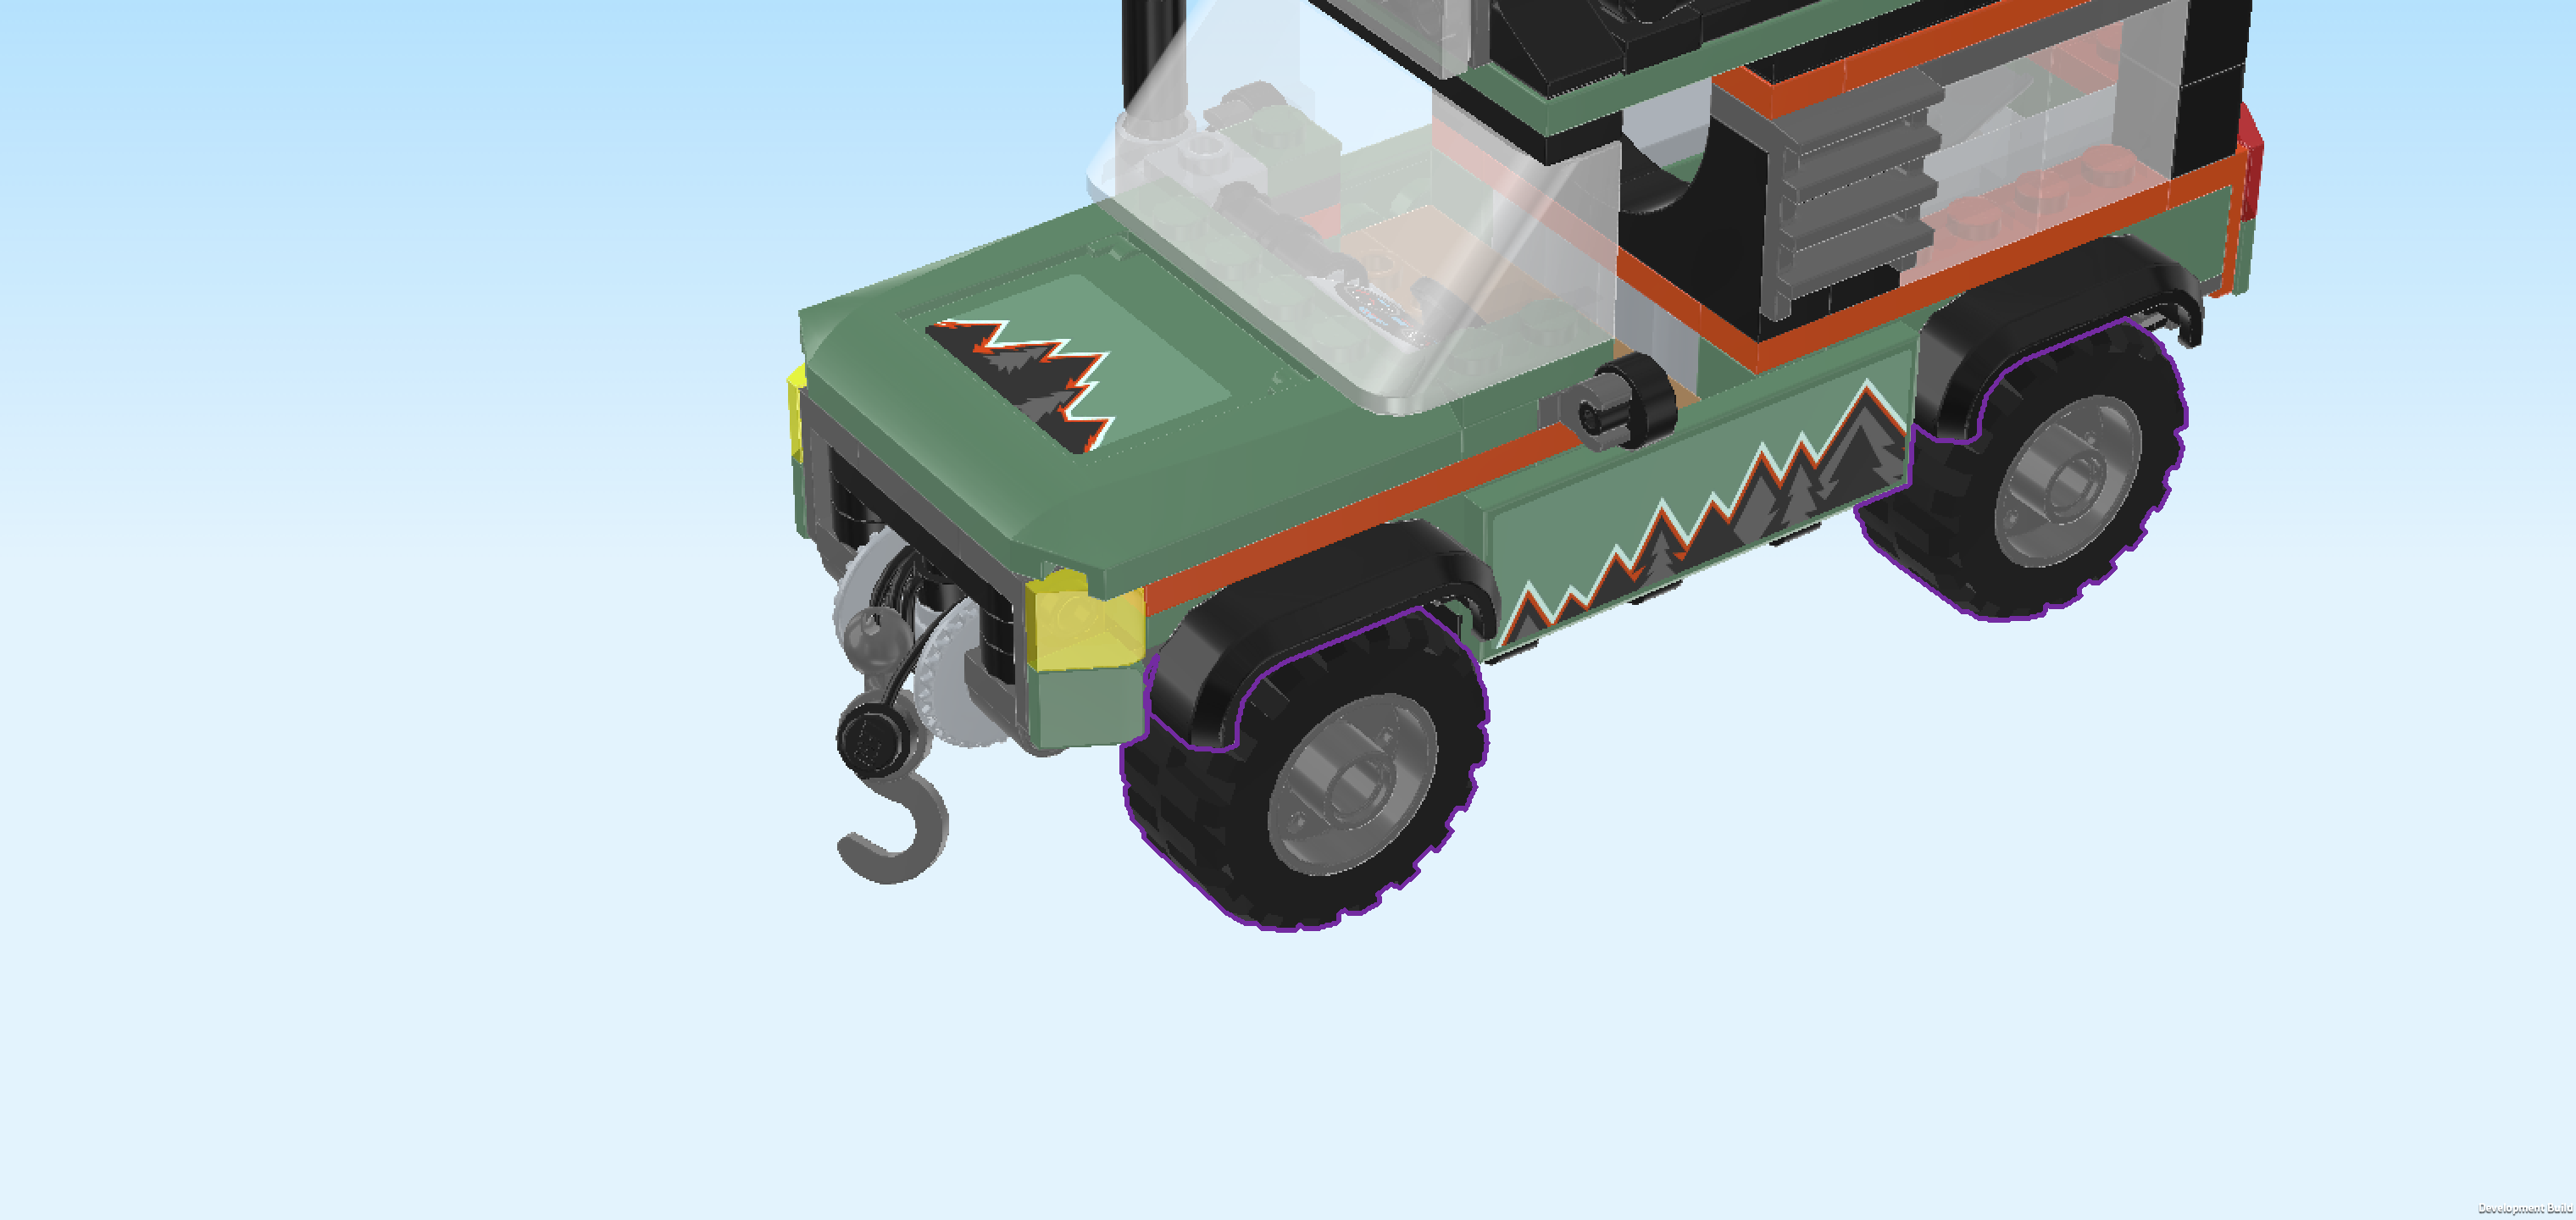
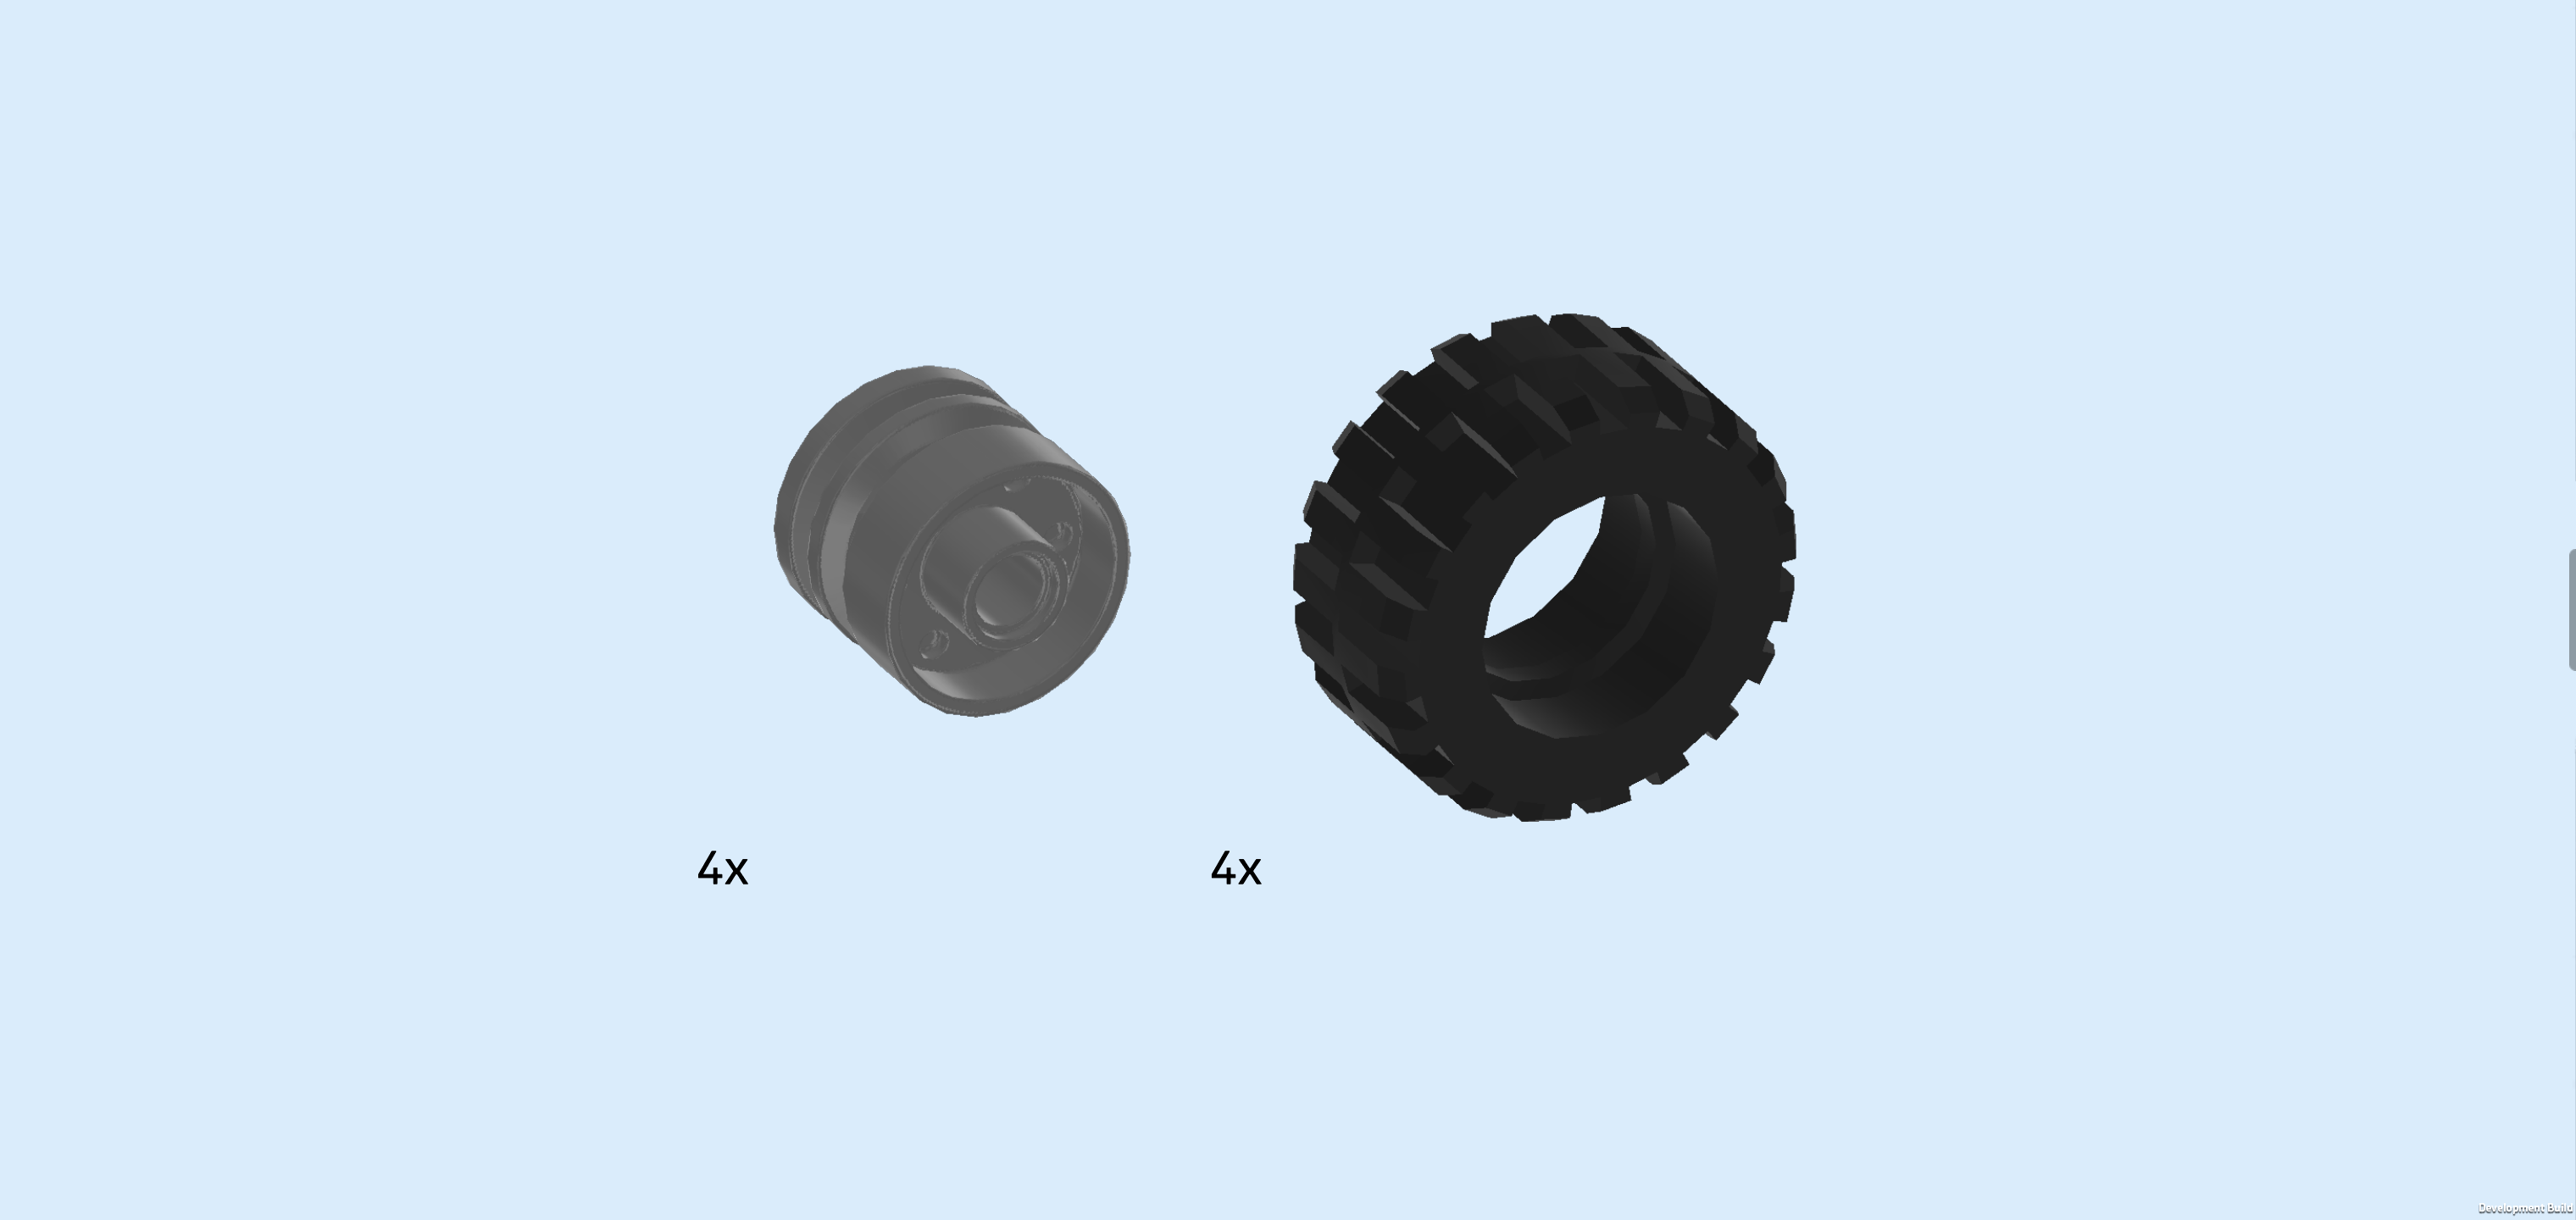
| Next, we will assemble the 4 wheels. |
| Collect the following 8 pieces: |
| 4 dark stone grey wide rims with hole and spokes, |
| and 4 black wide rubber tires with high profile. |
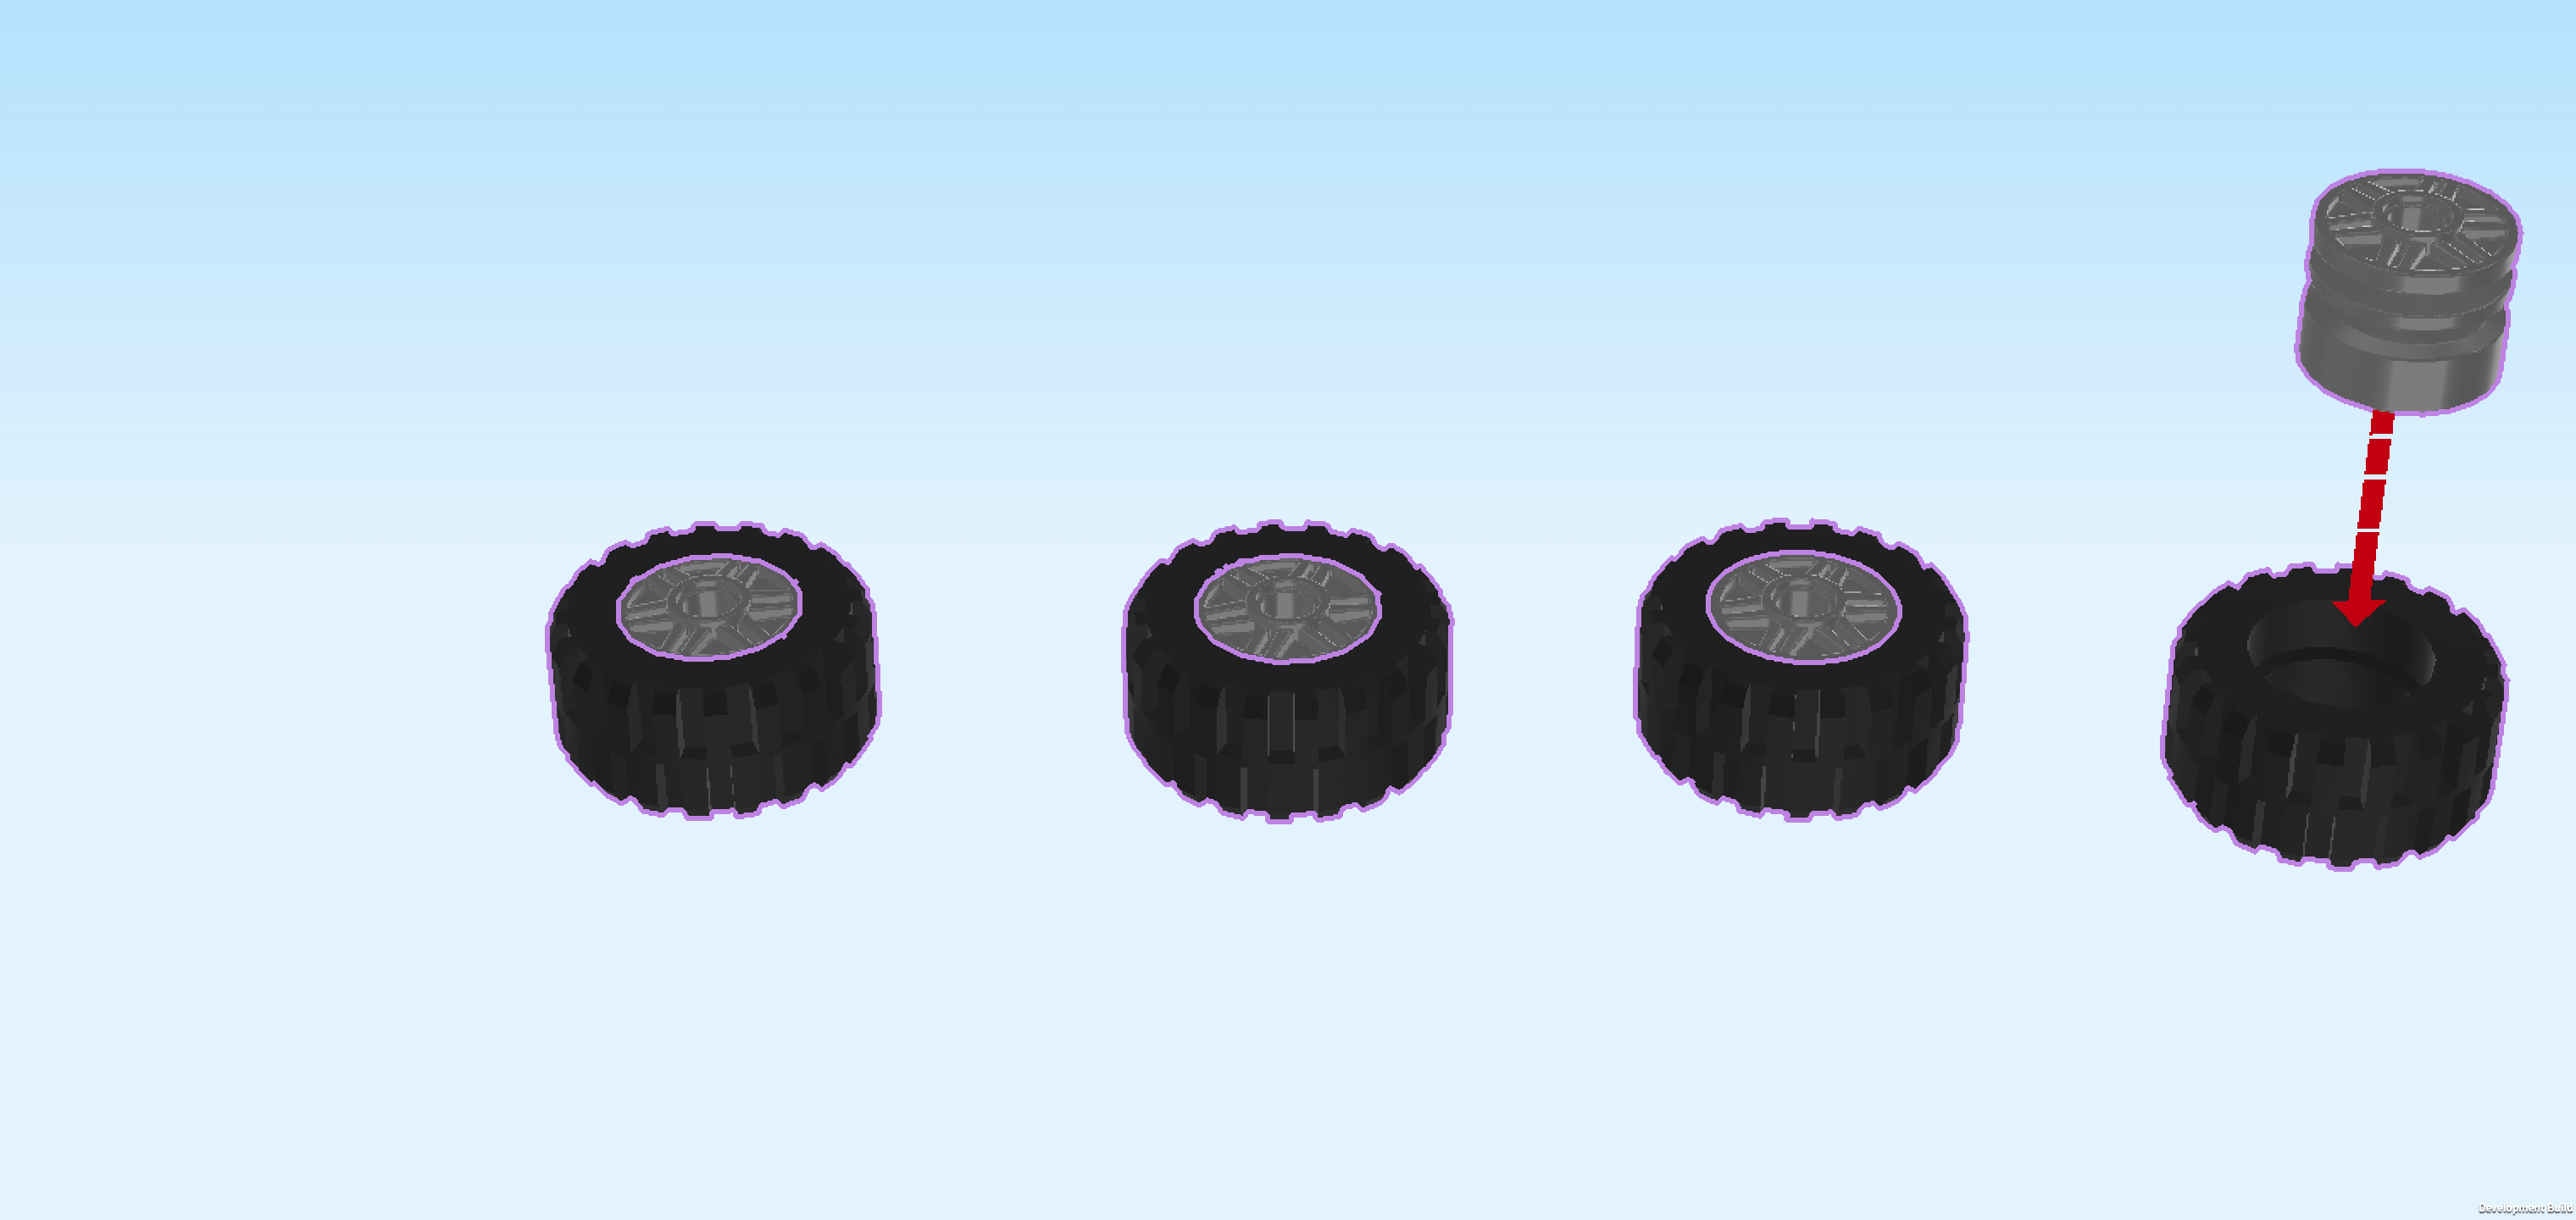
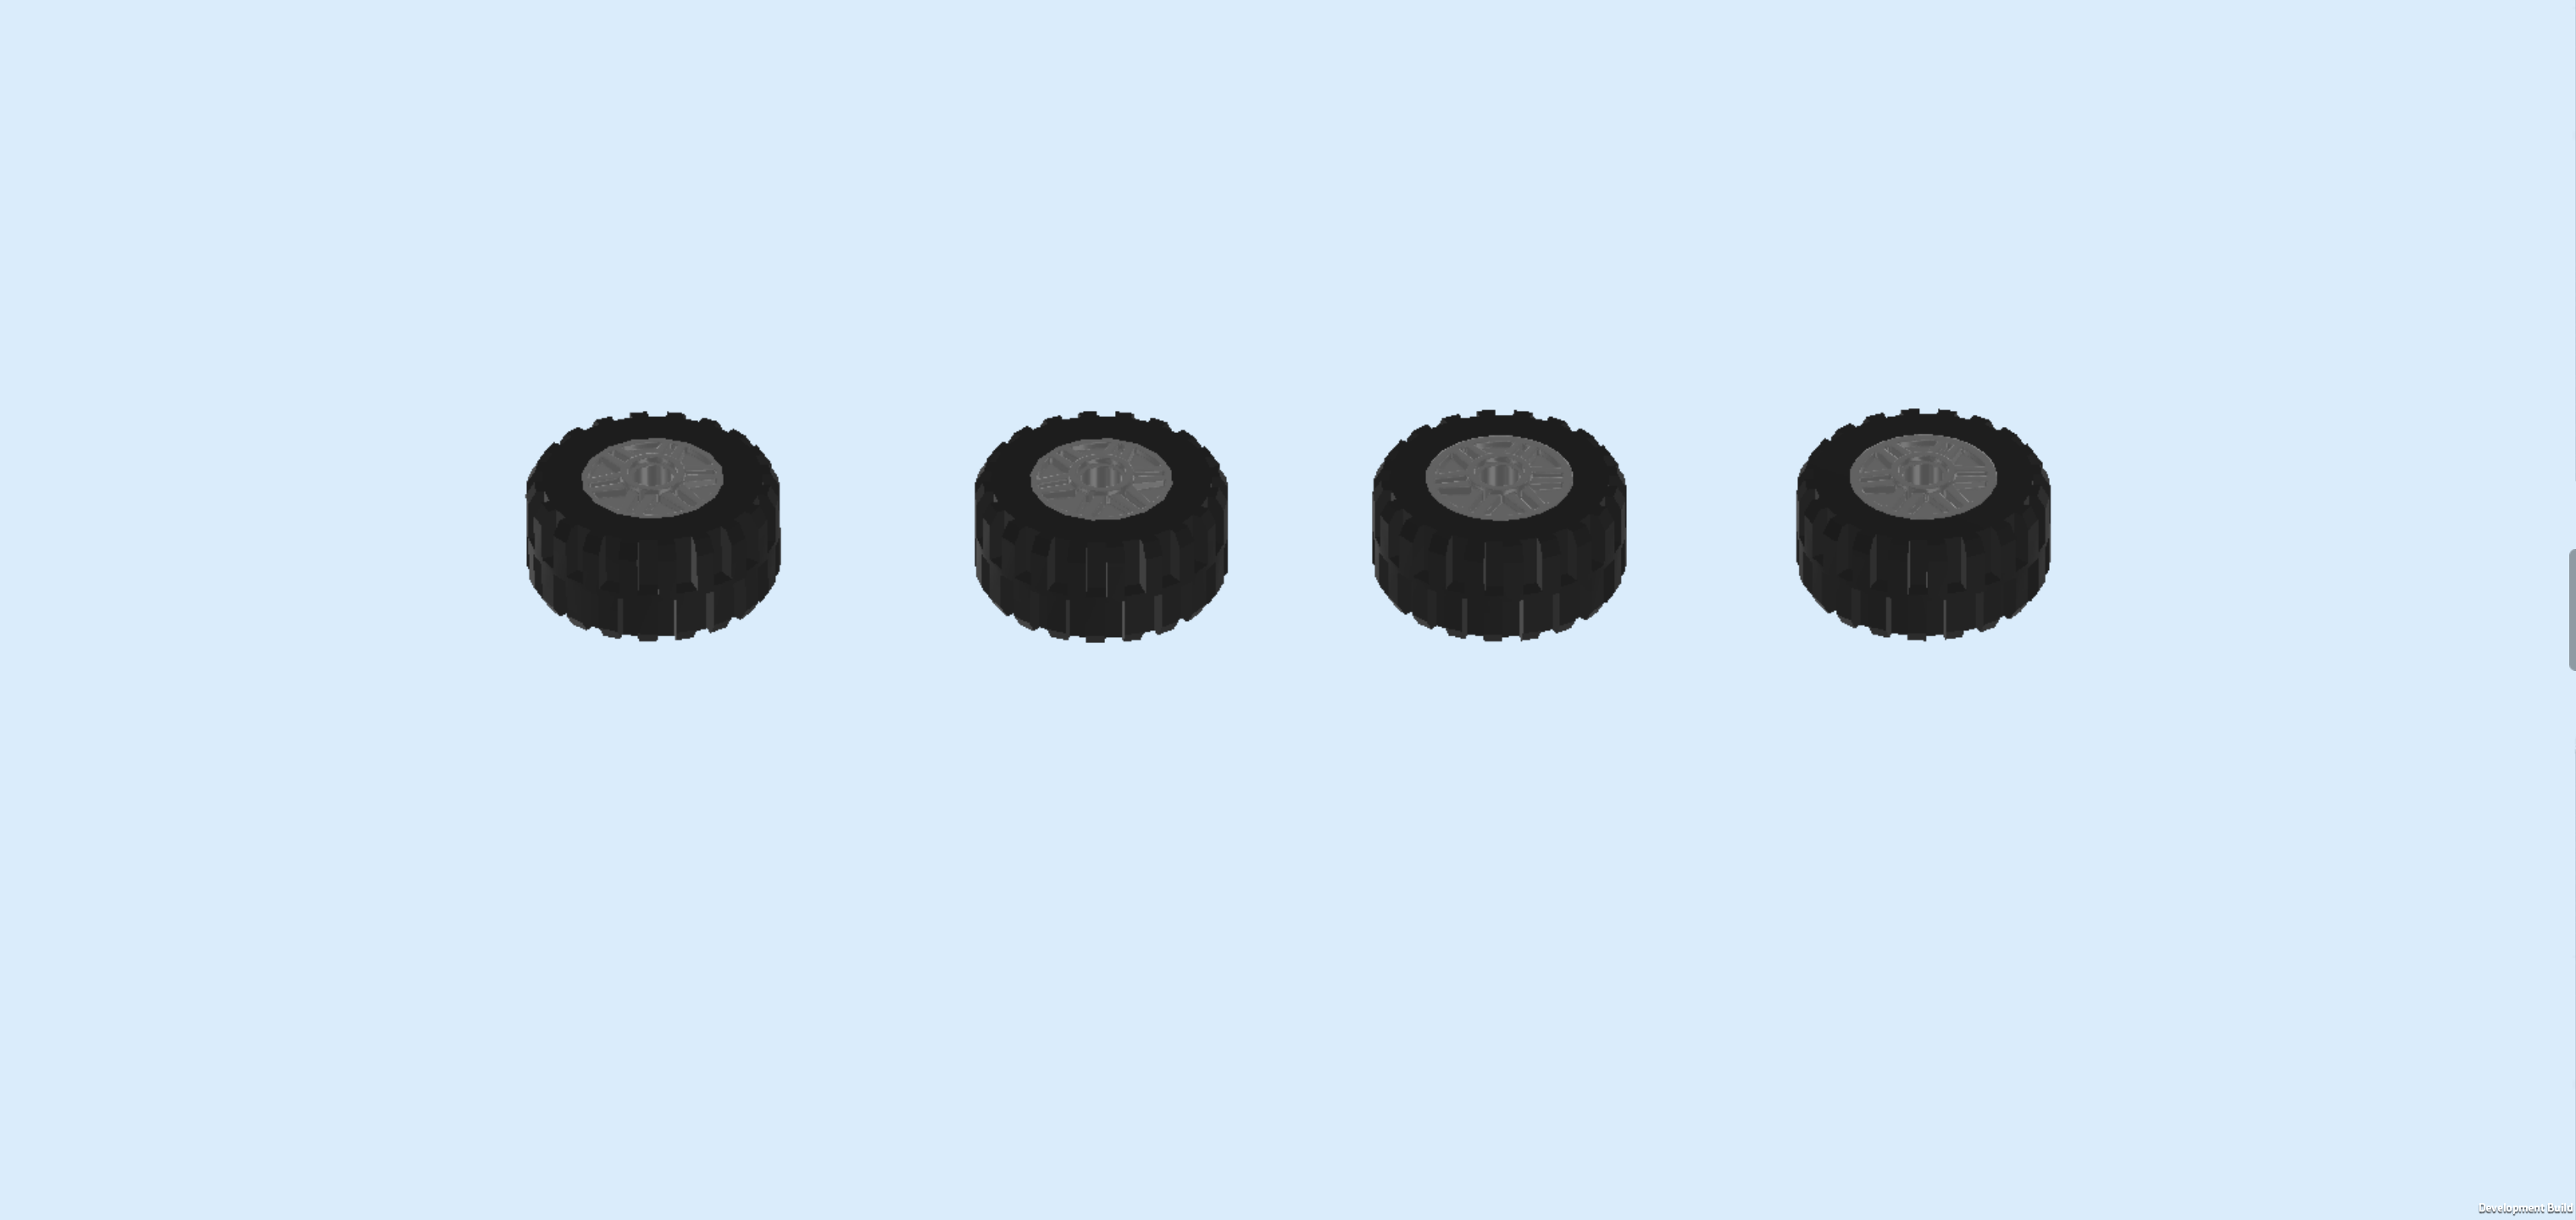
| Put the rims into the tires. |
| Snap the 4 wheels on the 4 connector pegs at the bottom of the undercarriage. Make sure that the spokes are facing inwards. |
| To put the Adventurer Minifigure into the driver's seat, take off the entire roof complete with storage boxes, fold the Minifigure into a seated position, and place him next to the steering wheel. Reattach the roof after that and off you go! |
| The Mountain Truck is finished! Fantastic job, that was a difficult build! As a matter of fact, you have finished building the entire set! Well done! Your explorer and his sturdy vehicle are ready for adventure. With the correct map at hand, the necessary provisions, supplies and equipment packed and a cozy sleeping bag in the back of the truck in case your adventure turns into an overnight gig, nothing can go wrong. Off you go, into the wild! |
| Enjoy! |