| LEGO Audio & Braille Building Instructions for the LEGO City Fire set "Fire Rescue Boat". |
| "Yikes!" SPLOOSH! A speedboat dinghy has caught fire and the pilot has jumped overboard! Mobilize the powerful City Fire Rescue Boat. Power through the waves and help the pilot to safety. Then send up the cool jetpack firefighter and use the boat’s extinguisher to blast those flames. When’s the next emergency? In LEGO City, you get to decide! |
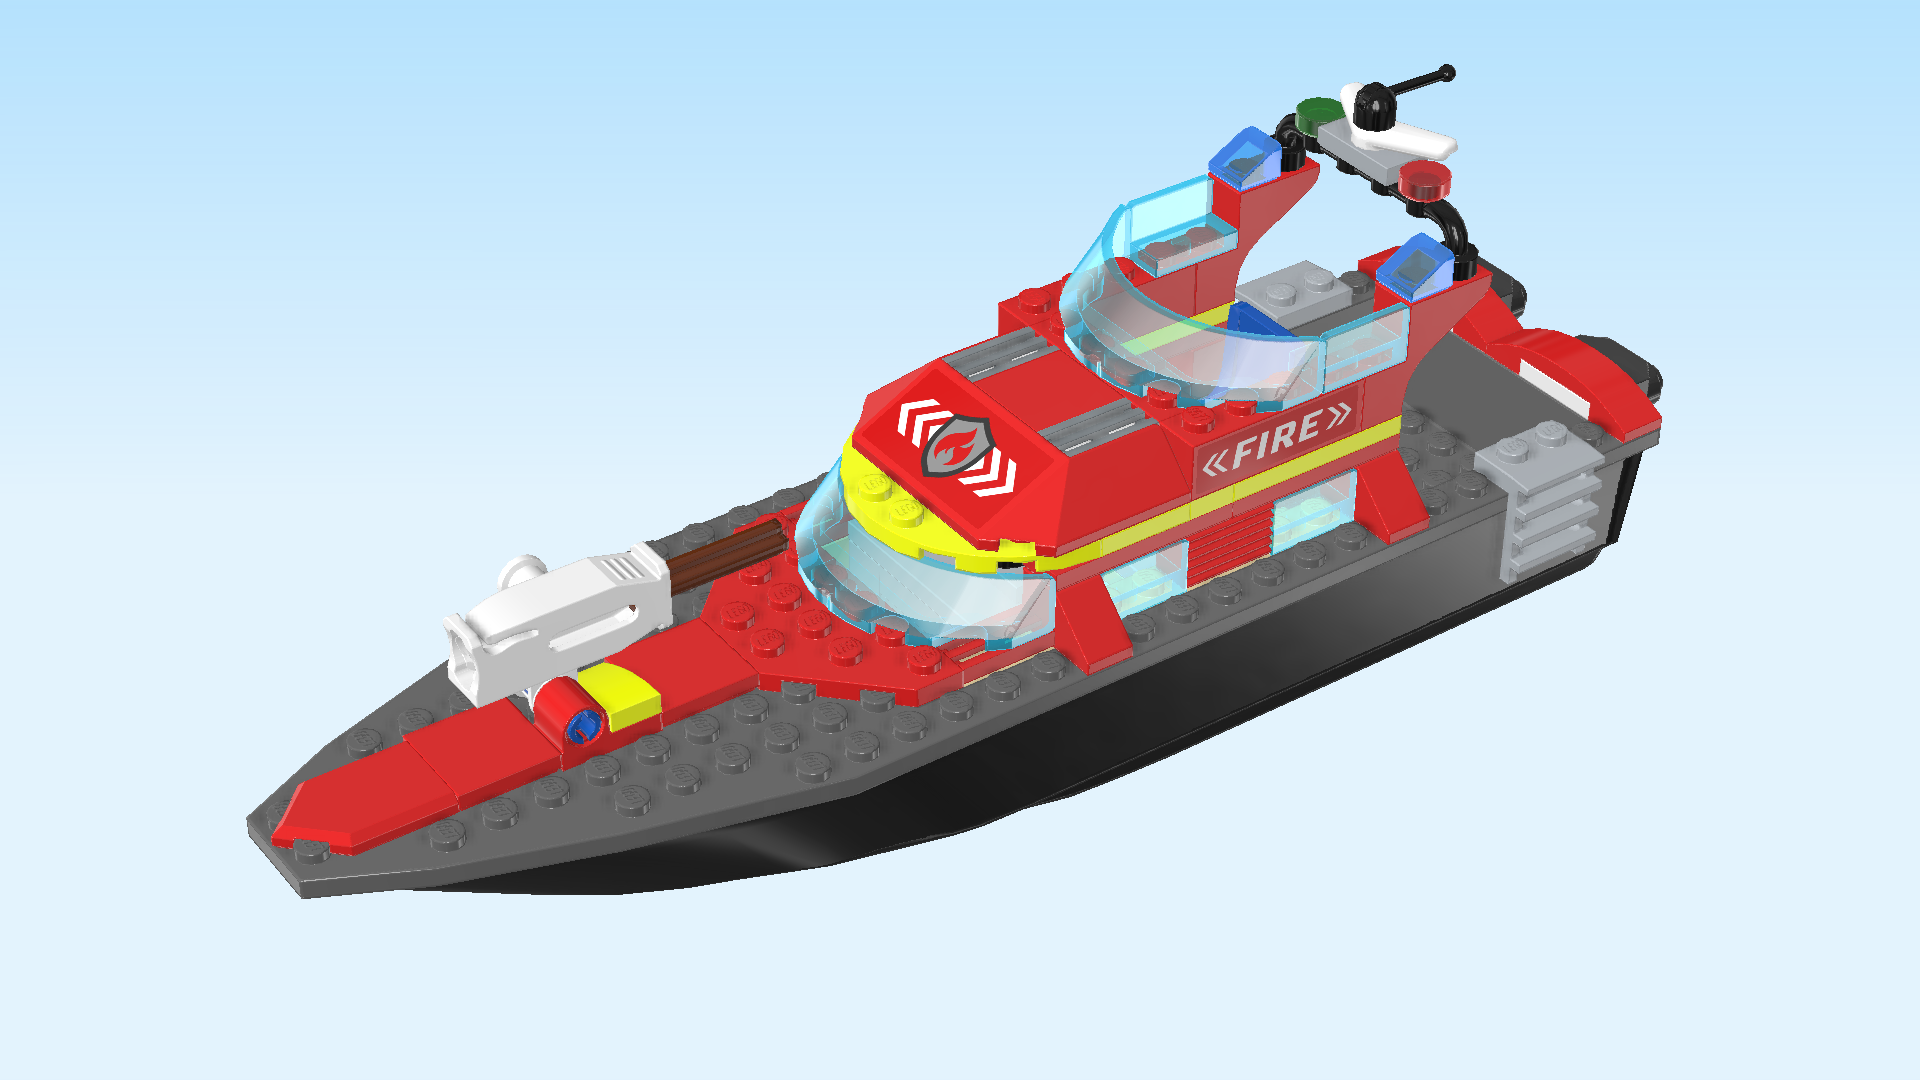
| The box cover shows the fire rescue boat in action: it is speeding towards the burning dinghy while shooting water out of its fire monitor mounted at the ship's bow. The boat has a black and grey hull with a red superstructure on top. The front half of the ship is rather flat with a red strip and the fire monitor in the middle. The superstructure in the rear half has two levels. The lower level includes a cabin below deck with 4 side windows and front windshield, the higher level is an open-roof operator stand with windshield, steering wheel and radio antenna. The firefighter captain is standing in the operator stand, using her megaphone to give instructions to the distressed dinghy pilot who is currently jumping from the dinghy into the water to save herself from the fire! Meanwhile, the jetpack firefighter is flying in mid air, blasting water from his jetpack water shooters to help put out the fire. The situation is critical, but the firefighters seem to have it under control. In the far distance of this action-packed scene we find the LEGO City skyline against a pastel-colored evening sky. |
| Open the box. This can be tricky; ask someone to help you! |
| The box contains 2 booklets with visual building instructions, 2 bags with numbers printed on them, a sheet with a total of 3 stickers, and 2 loose pieces: a rubber boat 6x12 and a ship underbody 8x28. Ask a sighted person to help you find the correct bag! |
| Carefully open bag number 1 and any small sub-bags in it. This bag contains all bricks and pieces for the speedboat dinghy with fire, the speedboat pilot Minifigure, and the jetpack firefighter Minifigure. |
| Before you start building, ask a sighted person to help you sort the pieces by color. This makes finding the correct pieces even easier! |
| First, we will build the speedboat pilot Minifigure. |
| Note that the upper bodies, legs, and heads of the two Minifigures included in this bag have identical shapes. They only differ in colors and print. If you are not sure whether you have the correct pieces, ask a sighted person for help. |
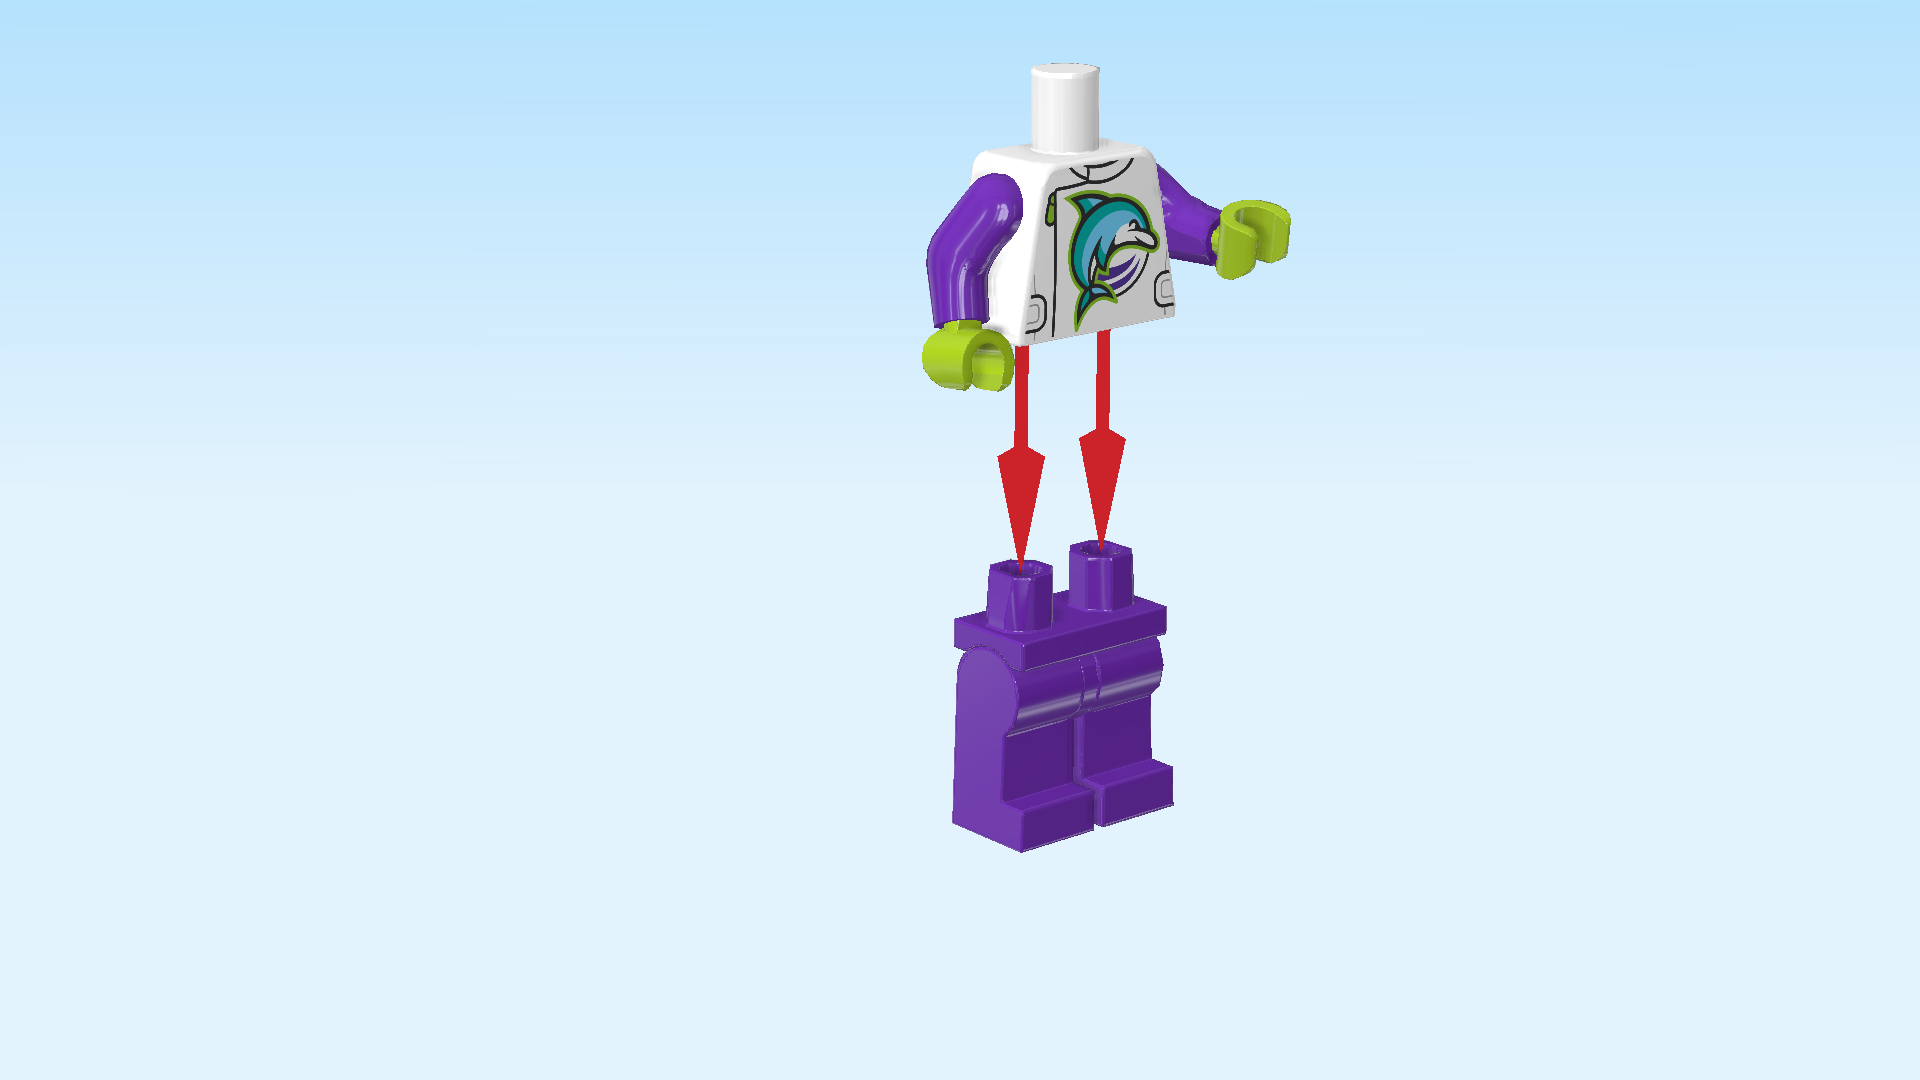
| Collect the following 2 pieces: |
| 1 medium lilac pair of legs, |
| and 1 white, medium lilac and bright yellowish green upper part of the body. |
| Put the upper body on the legs. |
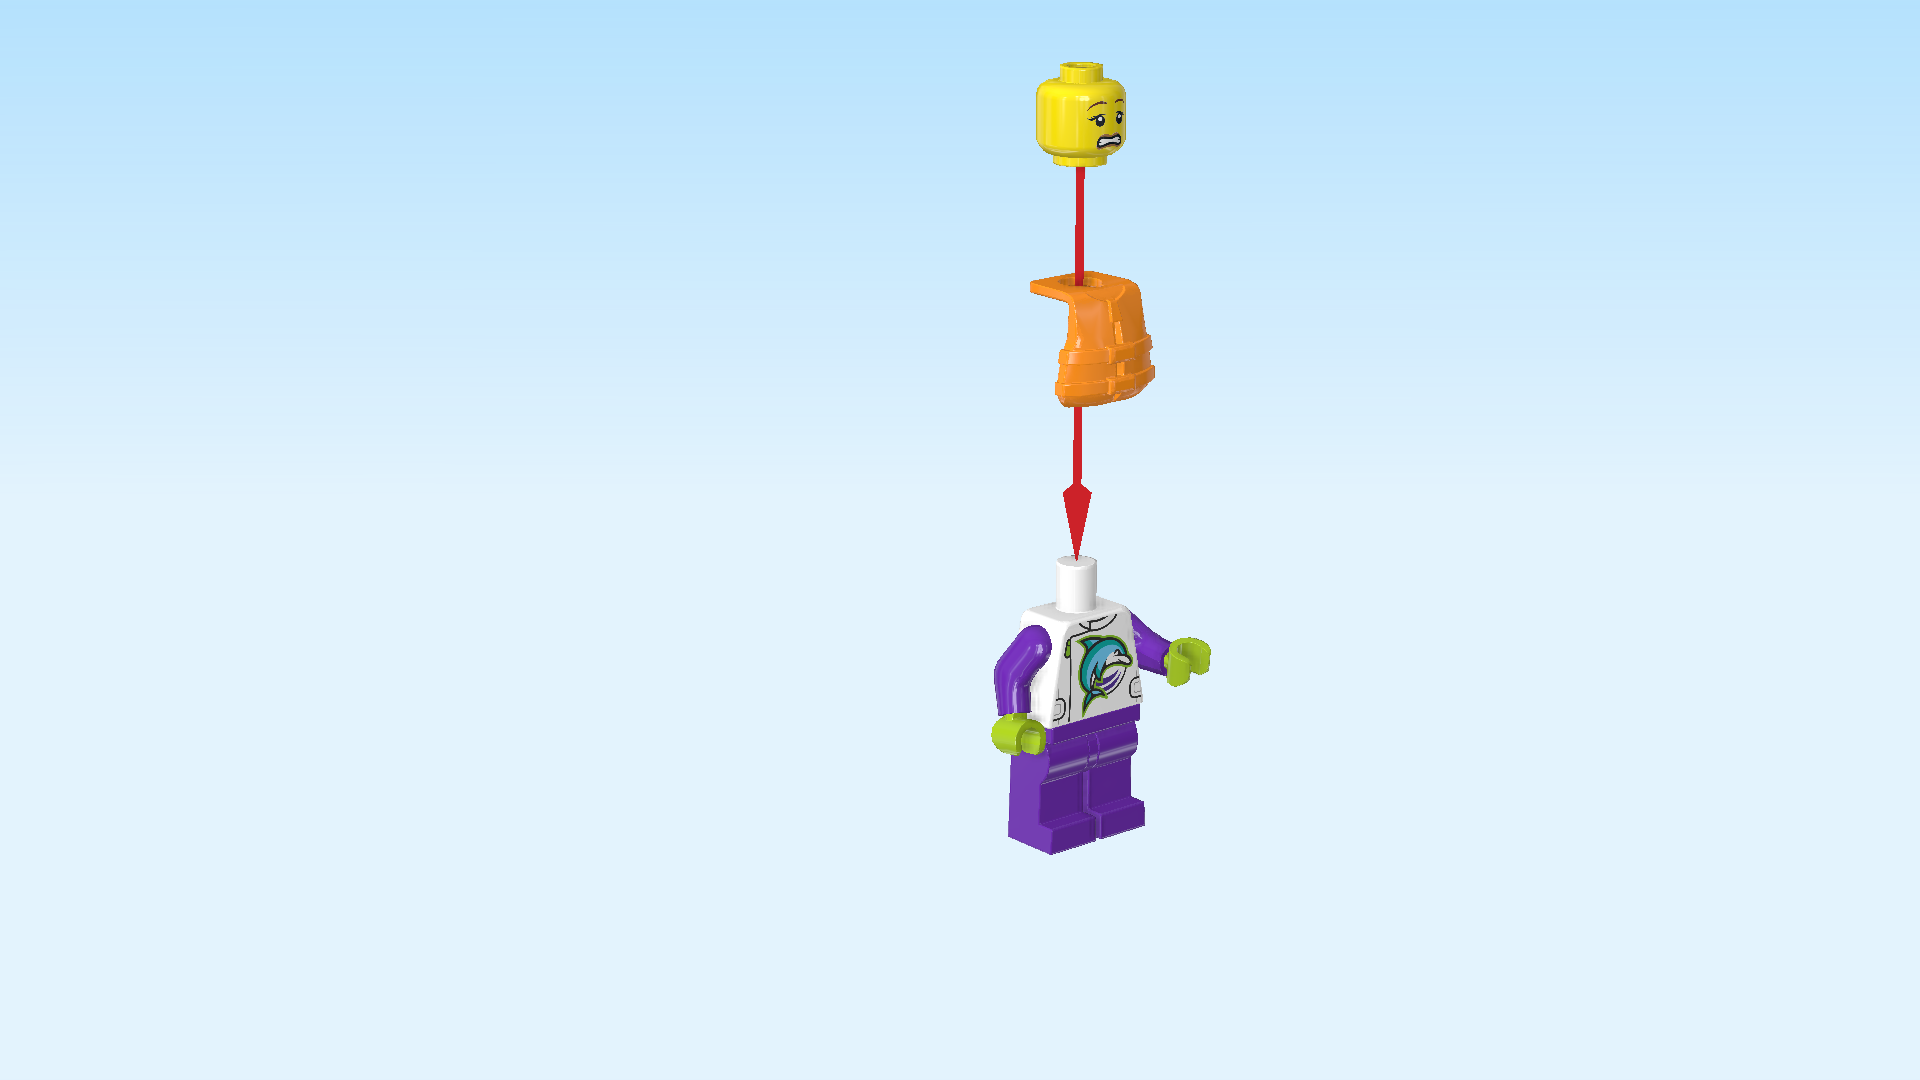
| Collect the following 2 pieces: |
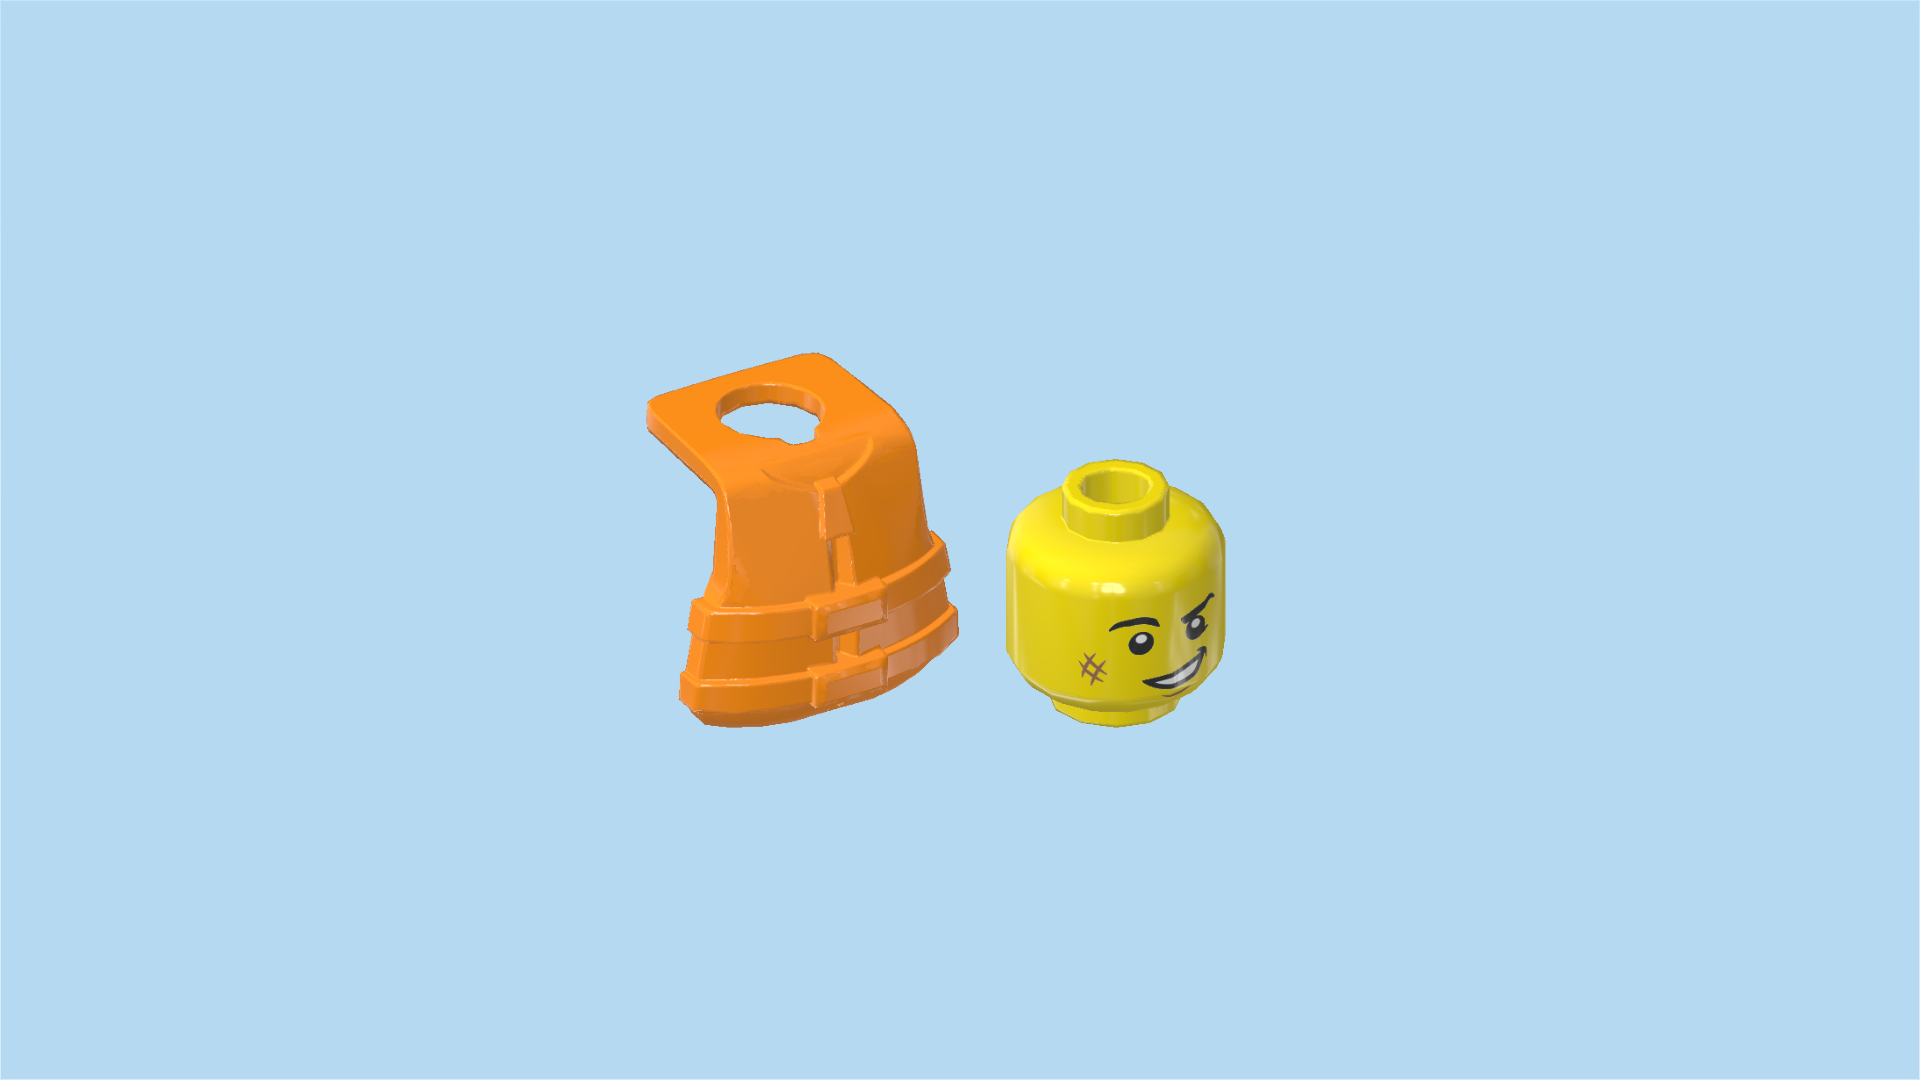
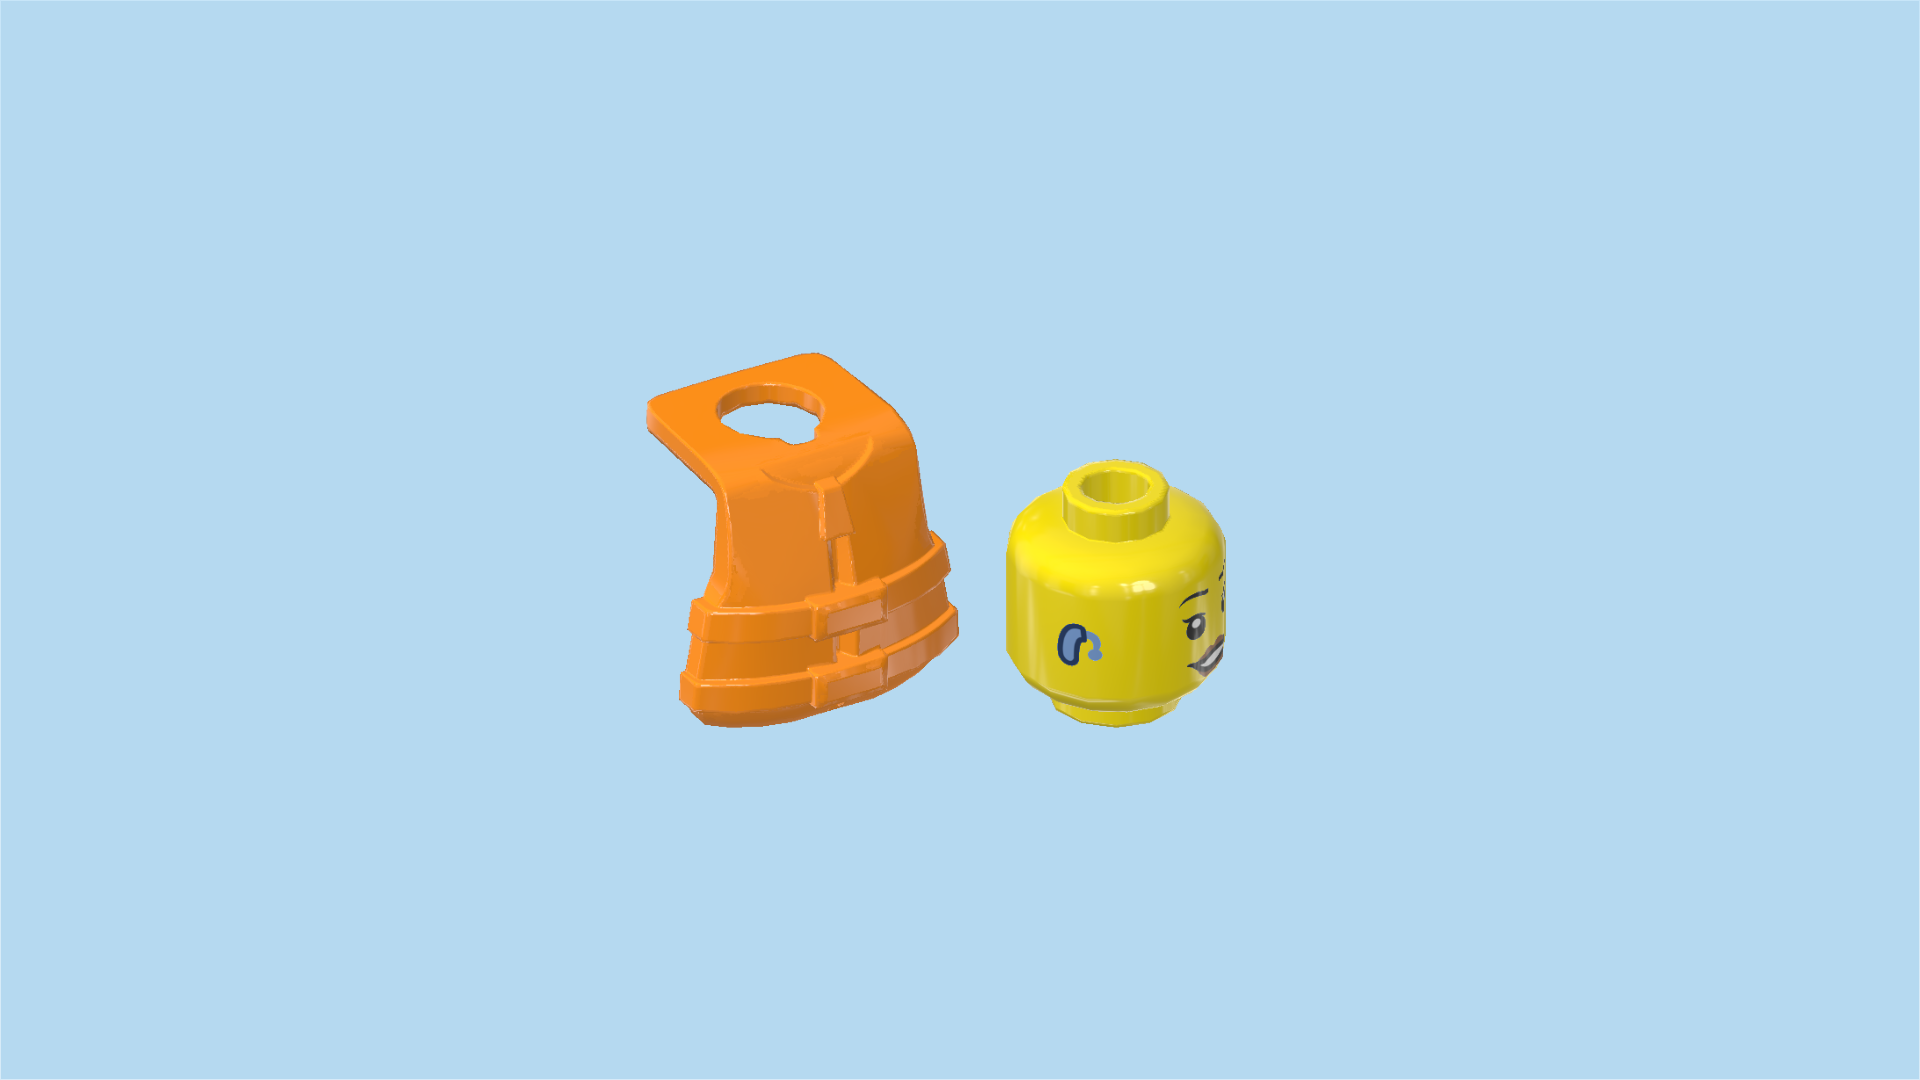
| 1 bright yellow Minifigure head, |
| and 1 bright orange life vest with neck bracket. |
| Put the bracket of the life vest around the neck, life vest hanging down on the Minifigure's chest. |
| Put the head on the body. |
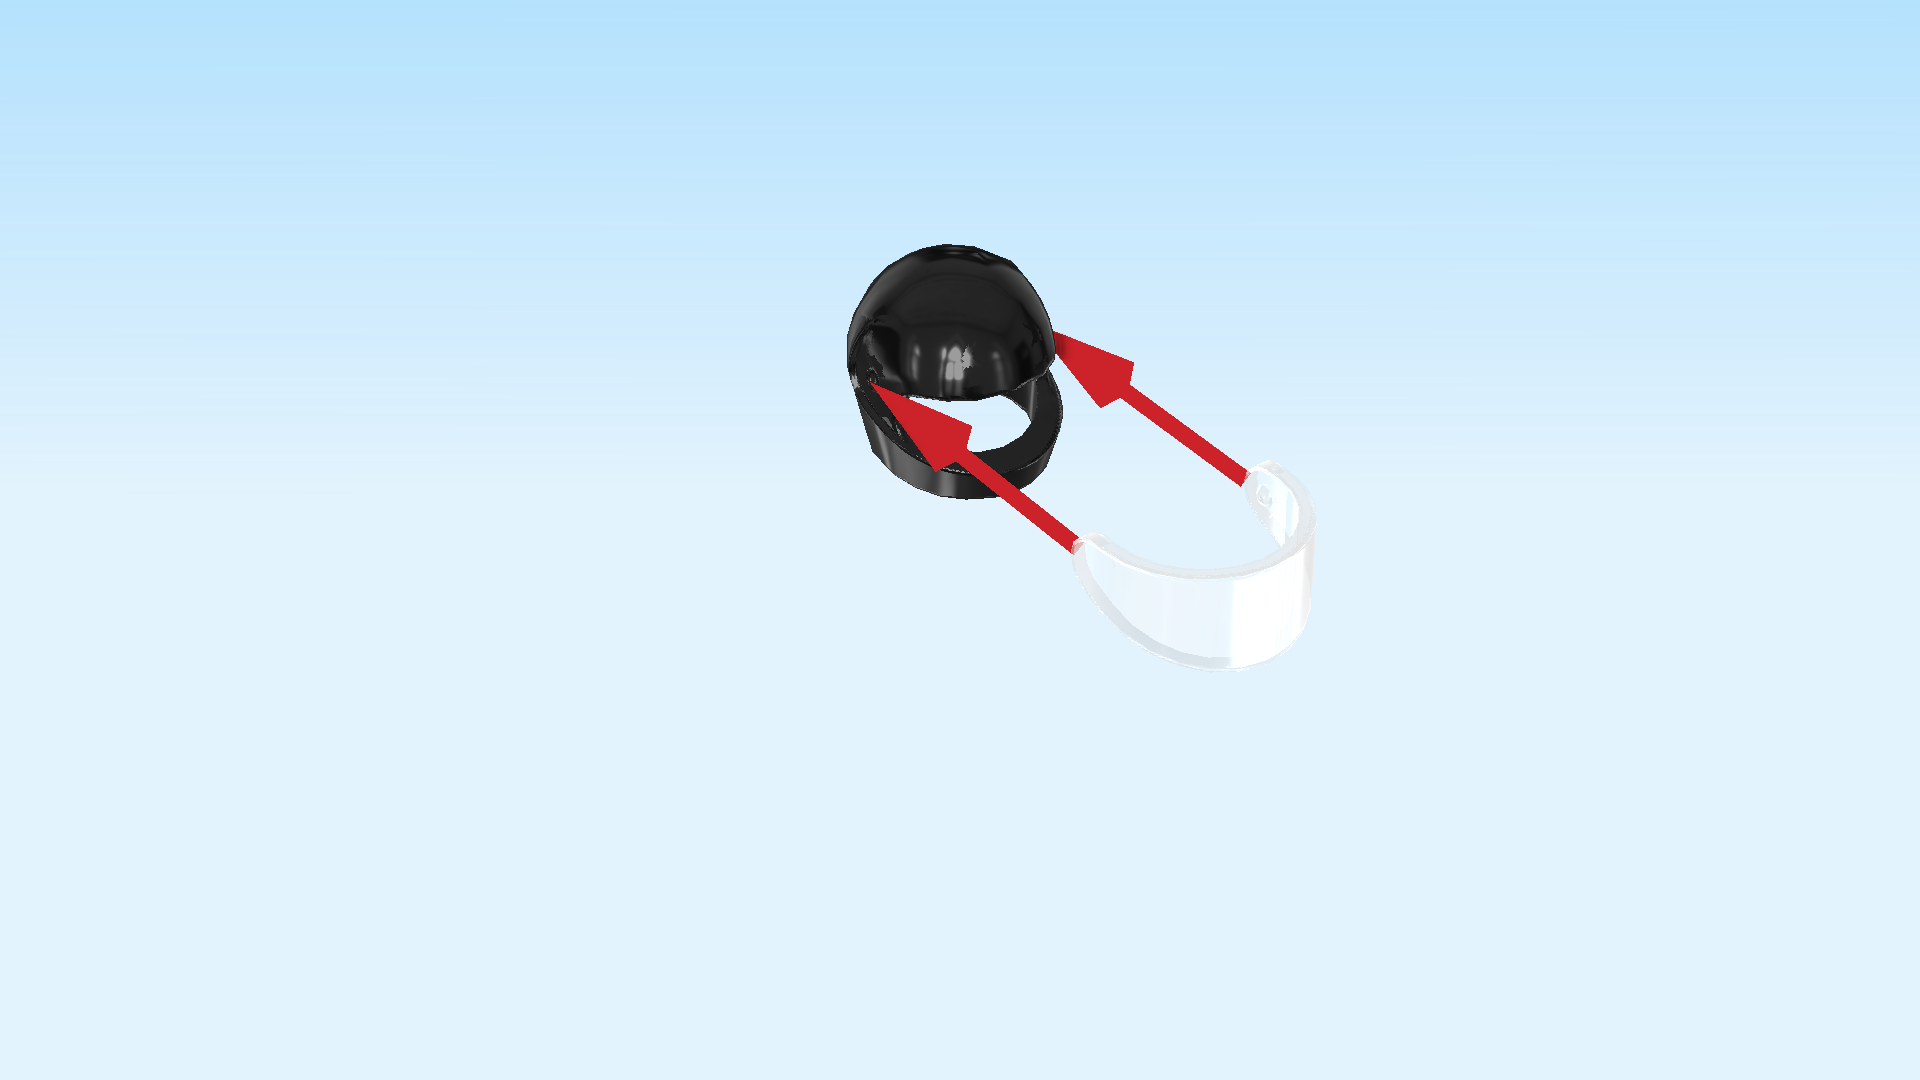
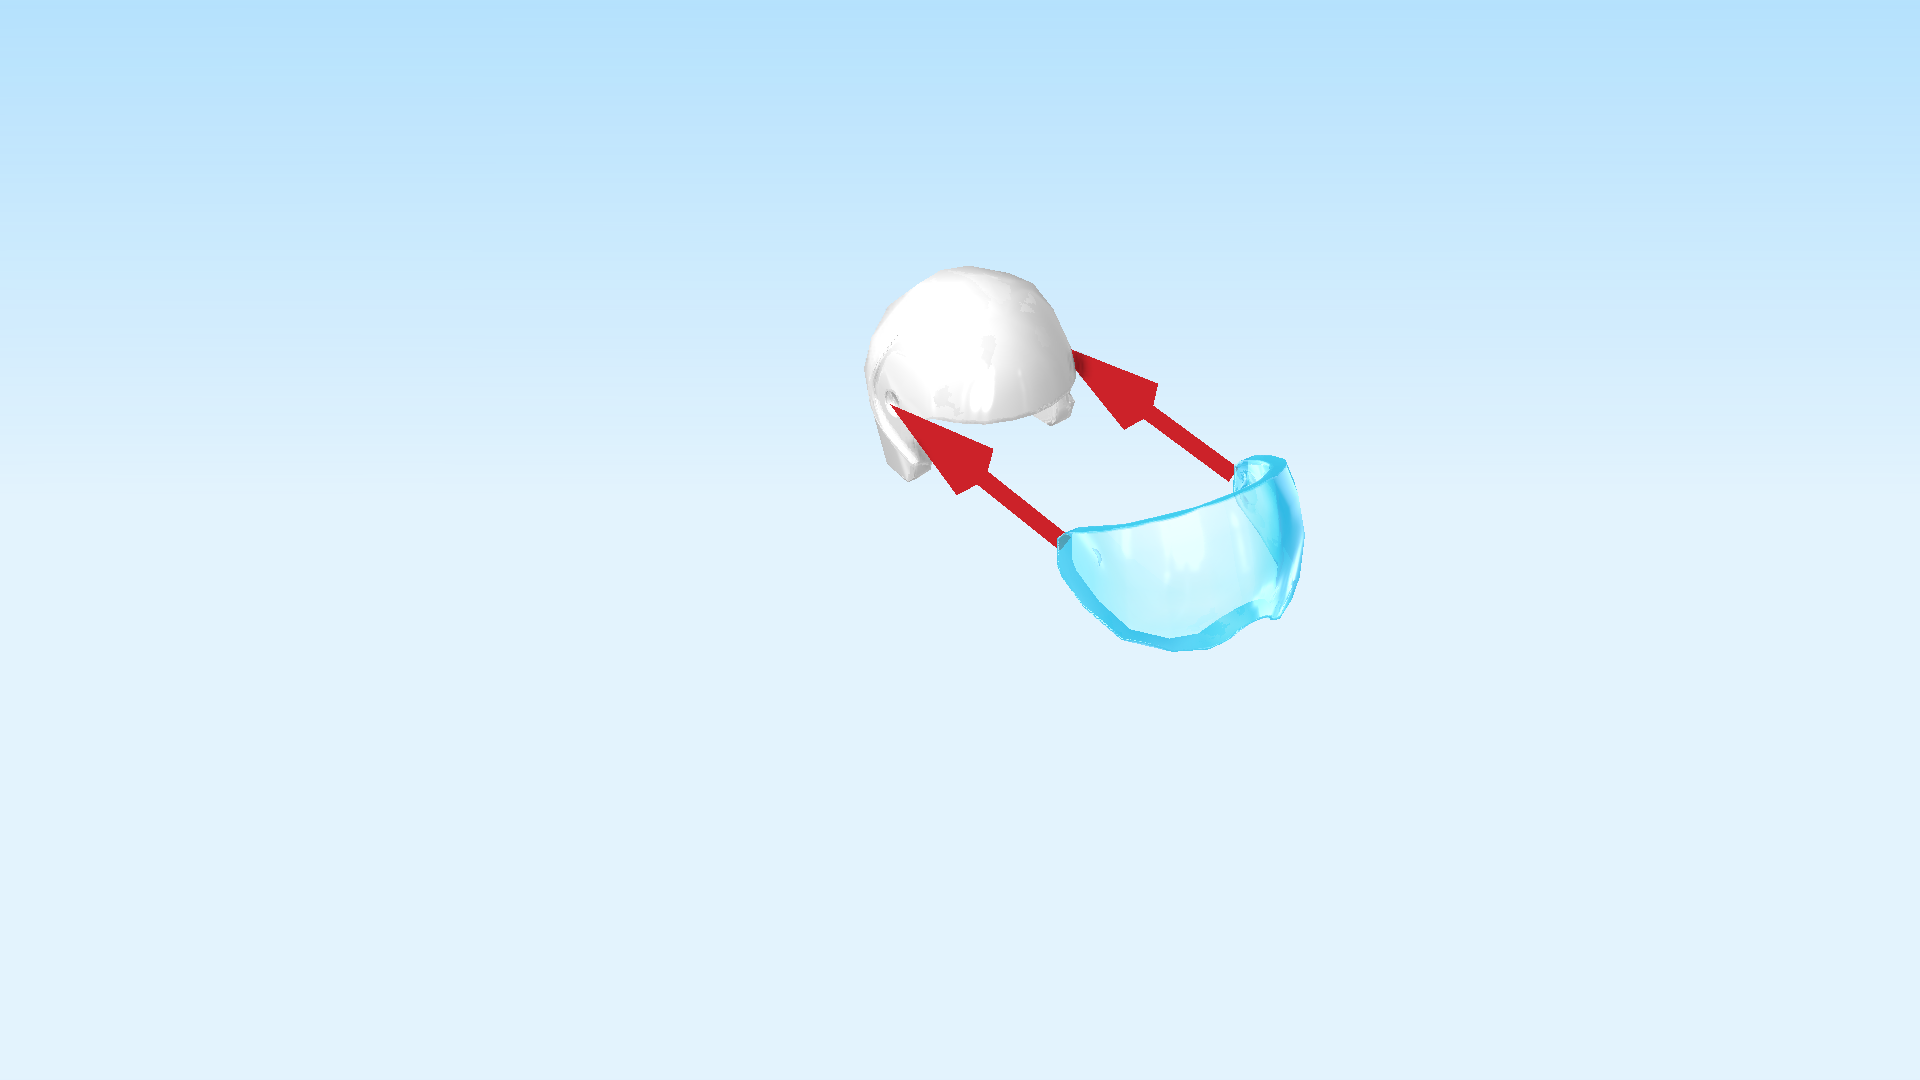
| Collect the following 2 pieces: |
| 1 black safety helmet, |
| and 1 transparent helmet visor. |
| Snap the visor into the opening of the safety helmet. It has two small bumps on its ends that fit neatly in the 2 small notches on the helmet. If the 2 pieces don't match, you might have the wrong helmet or visor. |
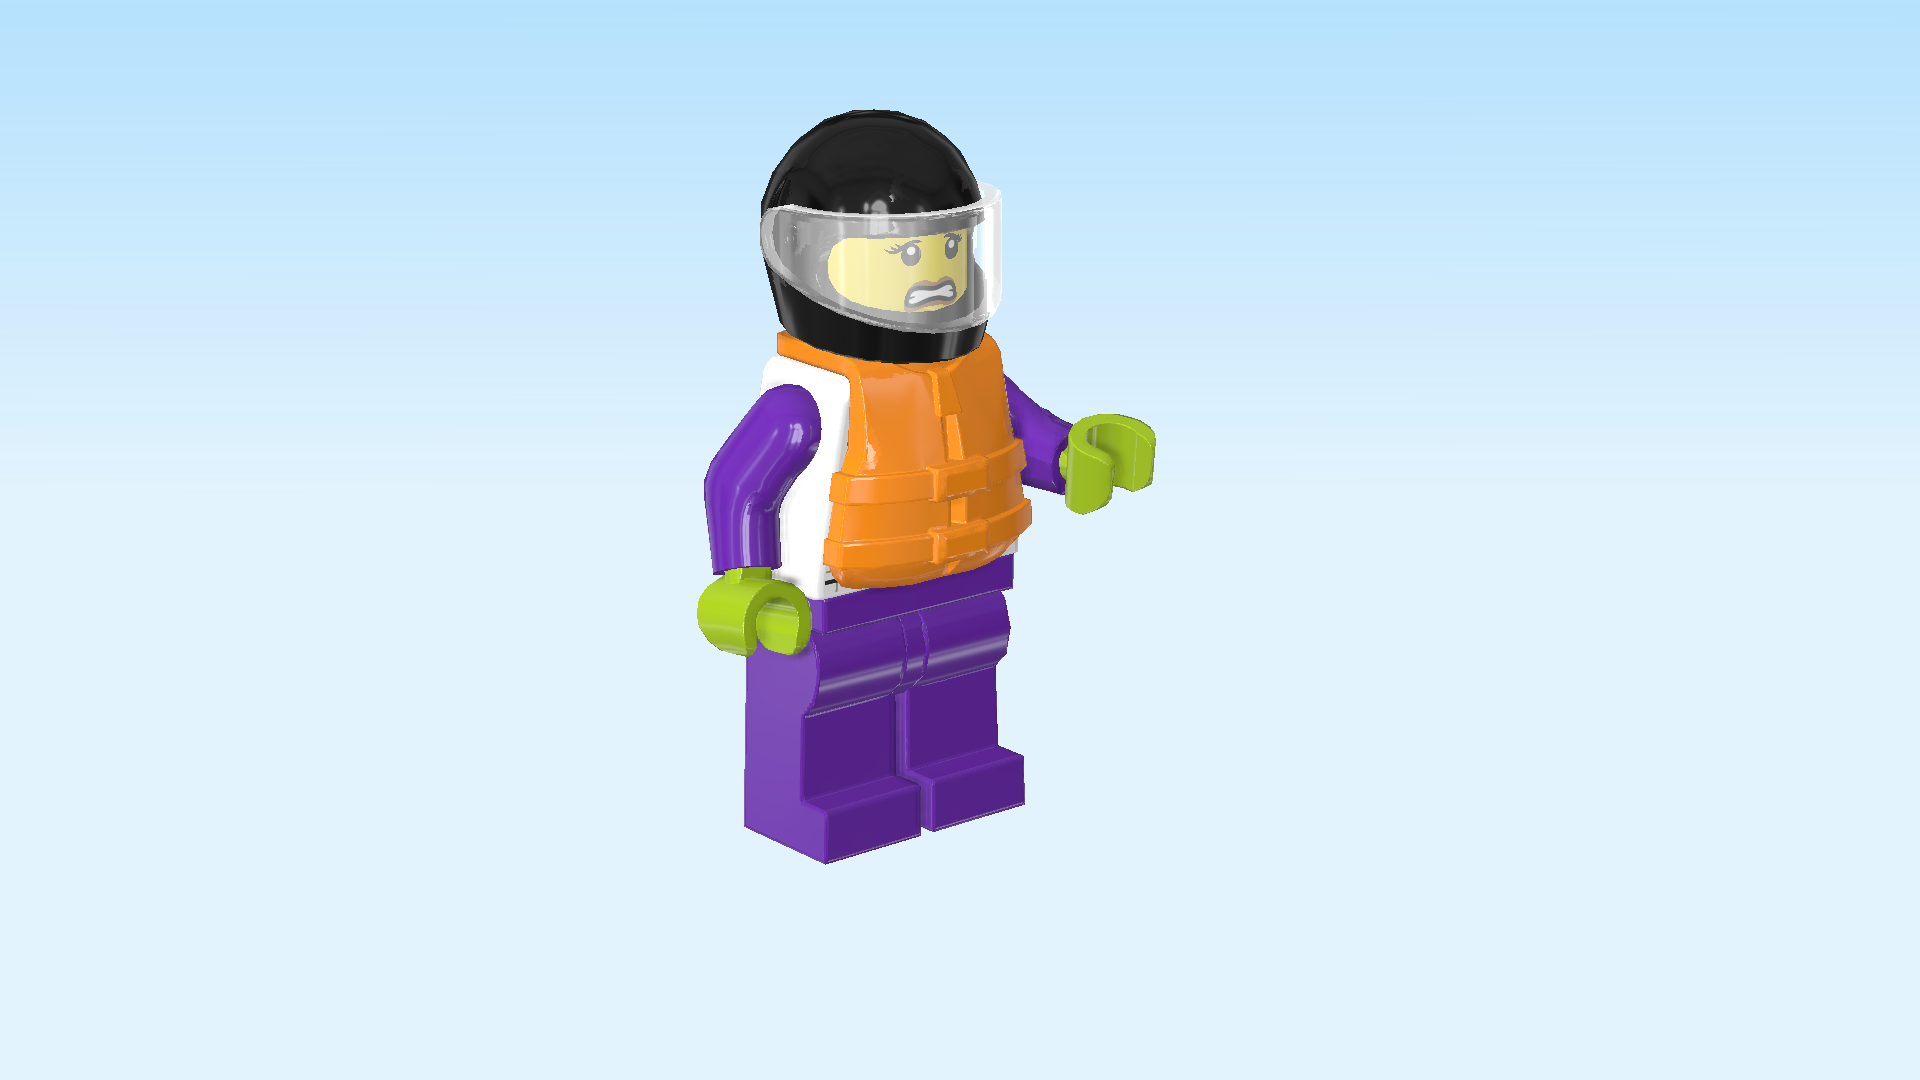
| Put the helmet on the Minifigure's head. |
| The speedboat pilot Minifigure is finished! Well done! She has a scared look on her face, clenching her teeth. It sure is a dangerous and stressful situation when your dinghy is on fire! She is wearing a white jacket with lilac sleeves, and the front of her jacket is printed with a dolphin jumping out of water. The jacket has several fastening elements to ensure that it is waterproof. Her head has a second face print that shows a relieved expression. Now it's time to build her a boat! |
| Collect the following 3 pieces: |
| 1 bright yellowish green rubber boat 6x12x2, |
| and 2 bright yellowish green curve bricks 1x2 without knobs. |
| Put the rubber boat 6x12x2 vertically on the table, narrow tip to the back. |
| Put 1 curve bricks vertically on the rightmost column of the 4 middle columns that are slightly lower, starting from the back edge, curve to the left. |
| Repeat symmetrically on the left, curve to the right. |
| Find 2 black roof tiles 1x4x1, 18°. |
| Put 1 vertically in front of the previous piece, slope to the front. |
| Repeat symmetrically on the right, slope to the front. |
| Collect the following 2 pieces: |
| 1 medium stone grey top angle plate 1x2 - 2x2 with 4 side knobs, |
| and 1 black and medium stone grey small steering wheel with plate 1x2. |
| Put the angle plate horizontally centered on the frontmost row, 4 side knobs to the front. |
| Put the small steering wheel with plate 1x2 horizontally centered on the third row from the back, steering wheel to the front. |
| Find 1 medium lilac plate 2x2. |
| Put it upright on the 4 side knobs pointing to the front. |
| Find 1 dark stone grey curve piece 2x2 with 2 knobs. |
| Put it upright on the previous piece, 2 knobs forming a row at the bottom. |
| Find 1 silver metallic plate 1x4x⅔ with 2 diagonal top tubes. |
| Put it horizontally on the frontmost row, top tubes to the left and right. |
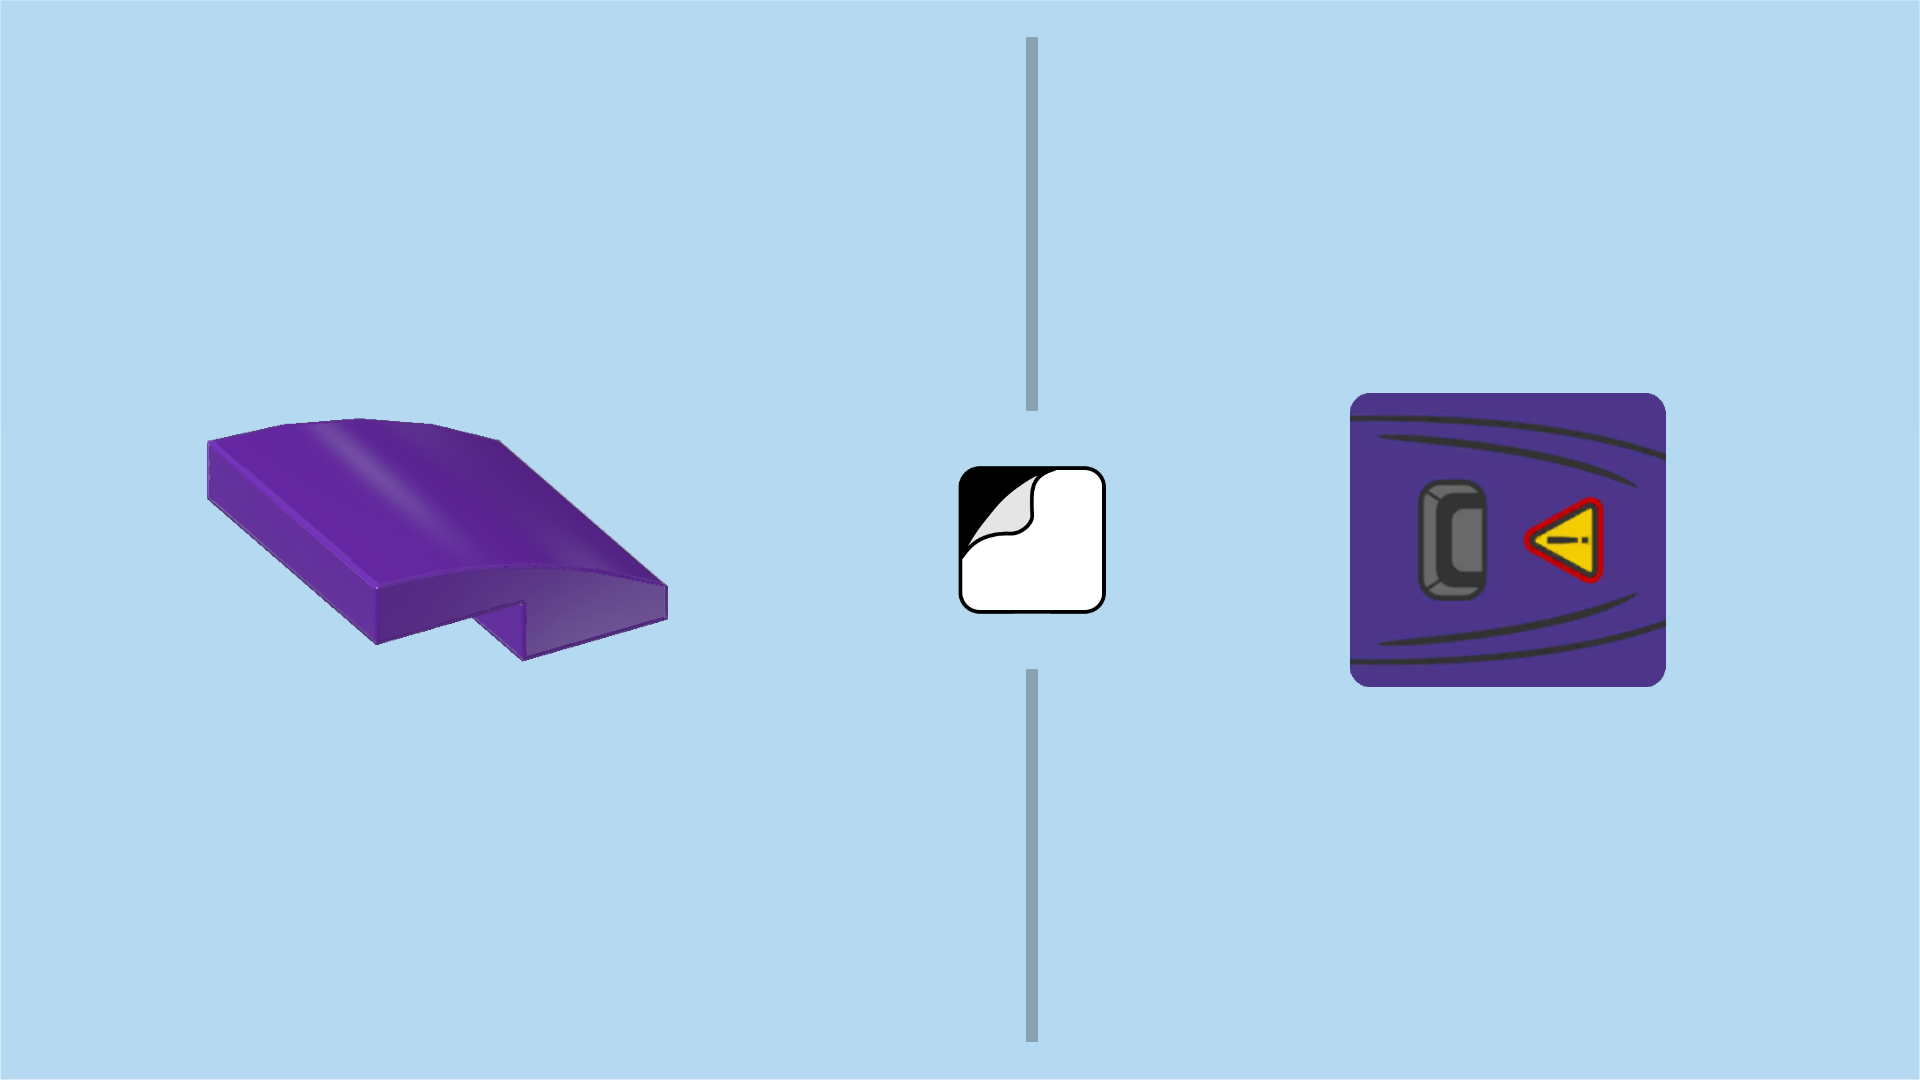
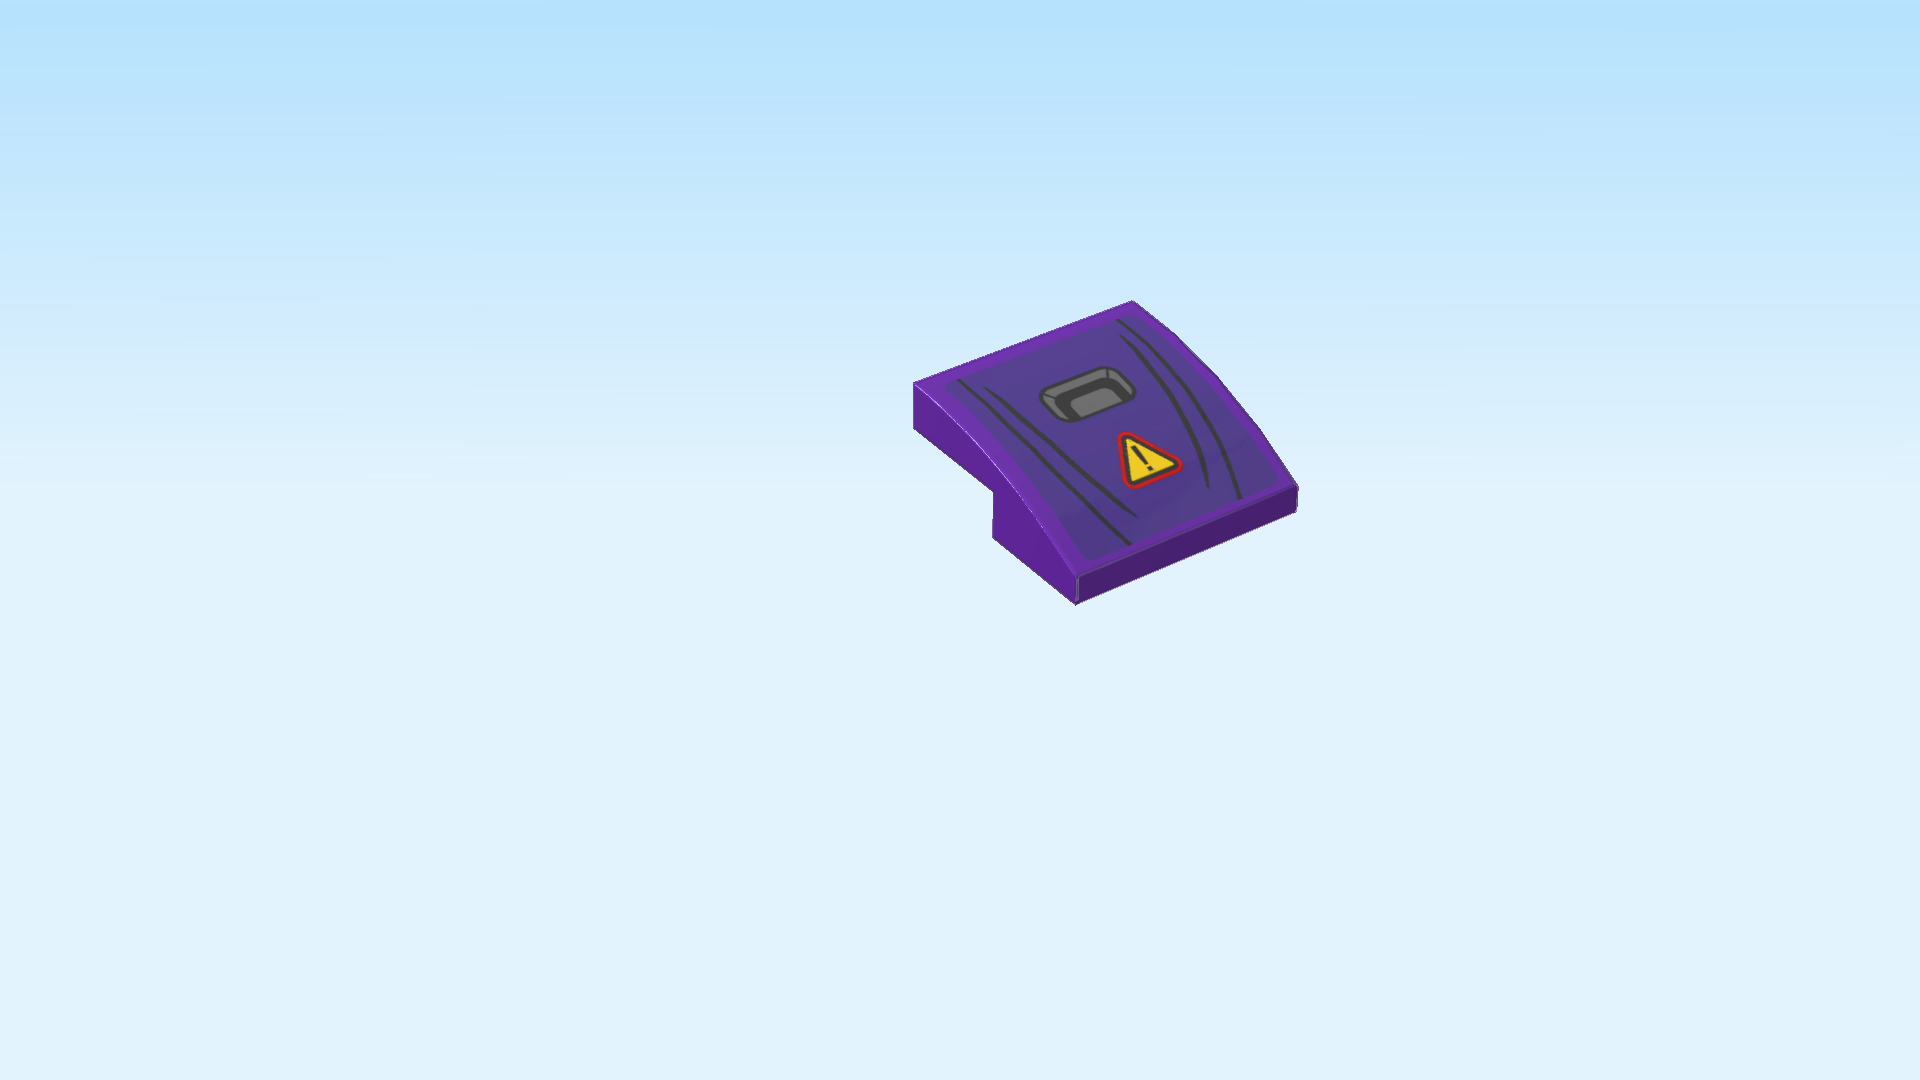
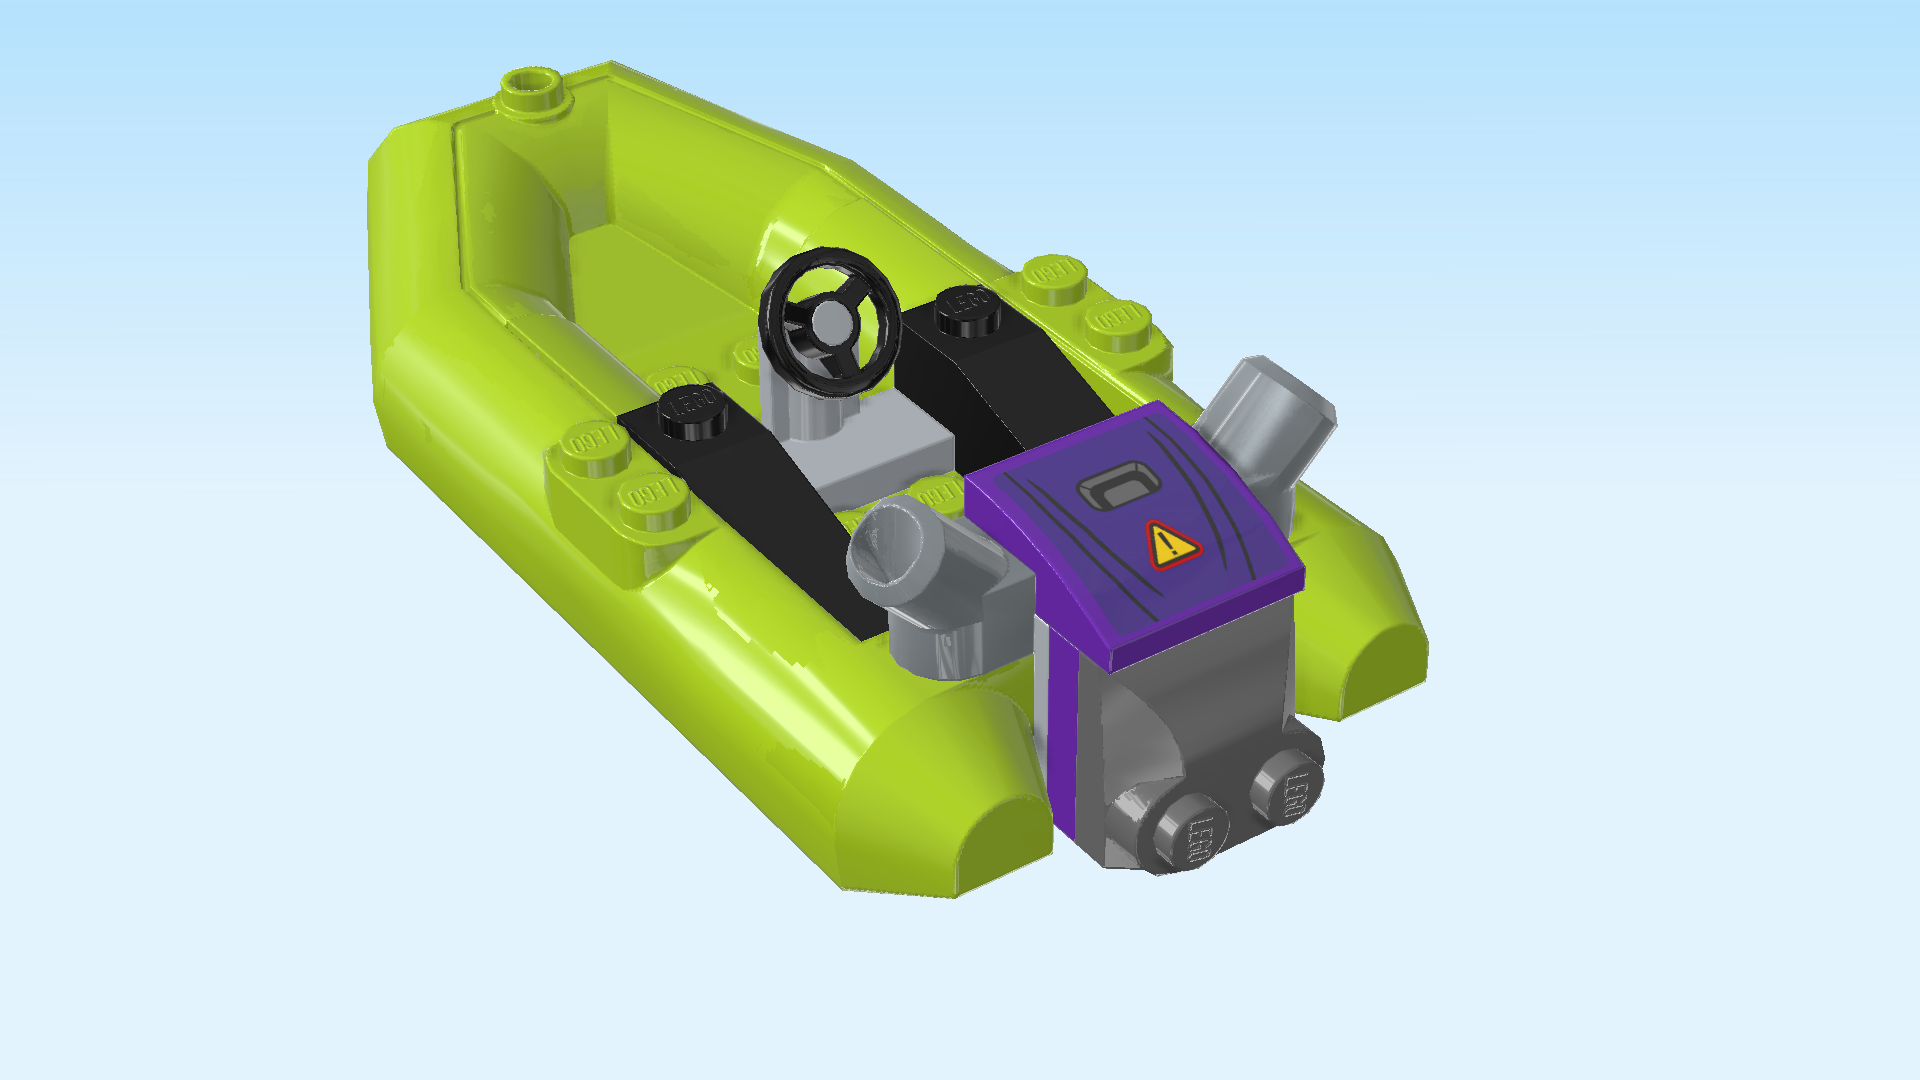
| Collect the following 2 pieces: |
| 1 medium lilac one-stepped curve tile 2x2x⅔, |
| and 1 square sticker 2x2 (number 1). |
| Put the sticker on top of the curve tile. Ask a sighted person for help if you want to ensure the correct orientation of the sticker. |
| The sticker is lilac and has 2 vertical black lines on each side, indicating the shape of the boat's engine. In the middle there is a yellow triangle with a red frame and a black exclamation point in its middle, a well-known sign for danger. Above the triangle there is a ventilation slit for the engine. |
| Mount the curve tile centered on the frontmost row, curve to the front. Its front half will sit on the smooth area in front of the front row. |
| Collect the following 2 pieces: |
| 1 dark stone grey rounded plate 1x2, |
| and 1 medium lilac smooth roof tile 1x2x⅔. |
| Turn the speedboat 90° to the left. Now, the narrow end of the speedboat should be pointing to the left. |
| Put the smooth roof tile vertically to the left of the previous piece (this is the curve tile 2x2 on the right edge), slope to the left. This means it will sit on a lower level than the previous piece. |
| Put the rounded plate 1x2 vertically to the left of the steering wheel. |
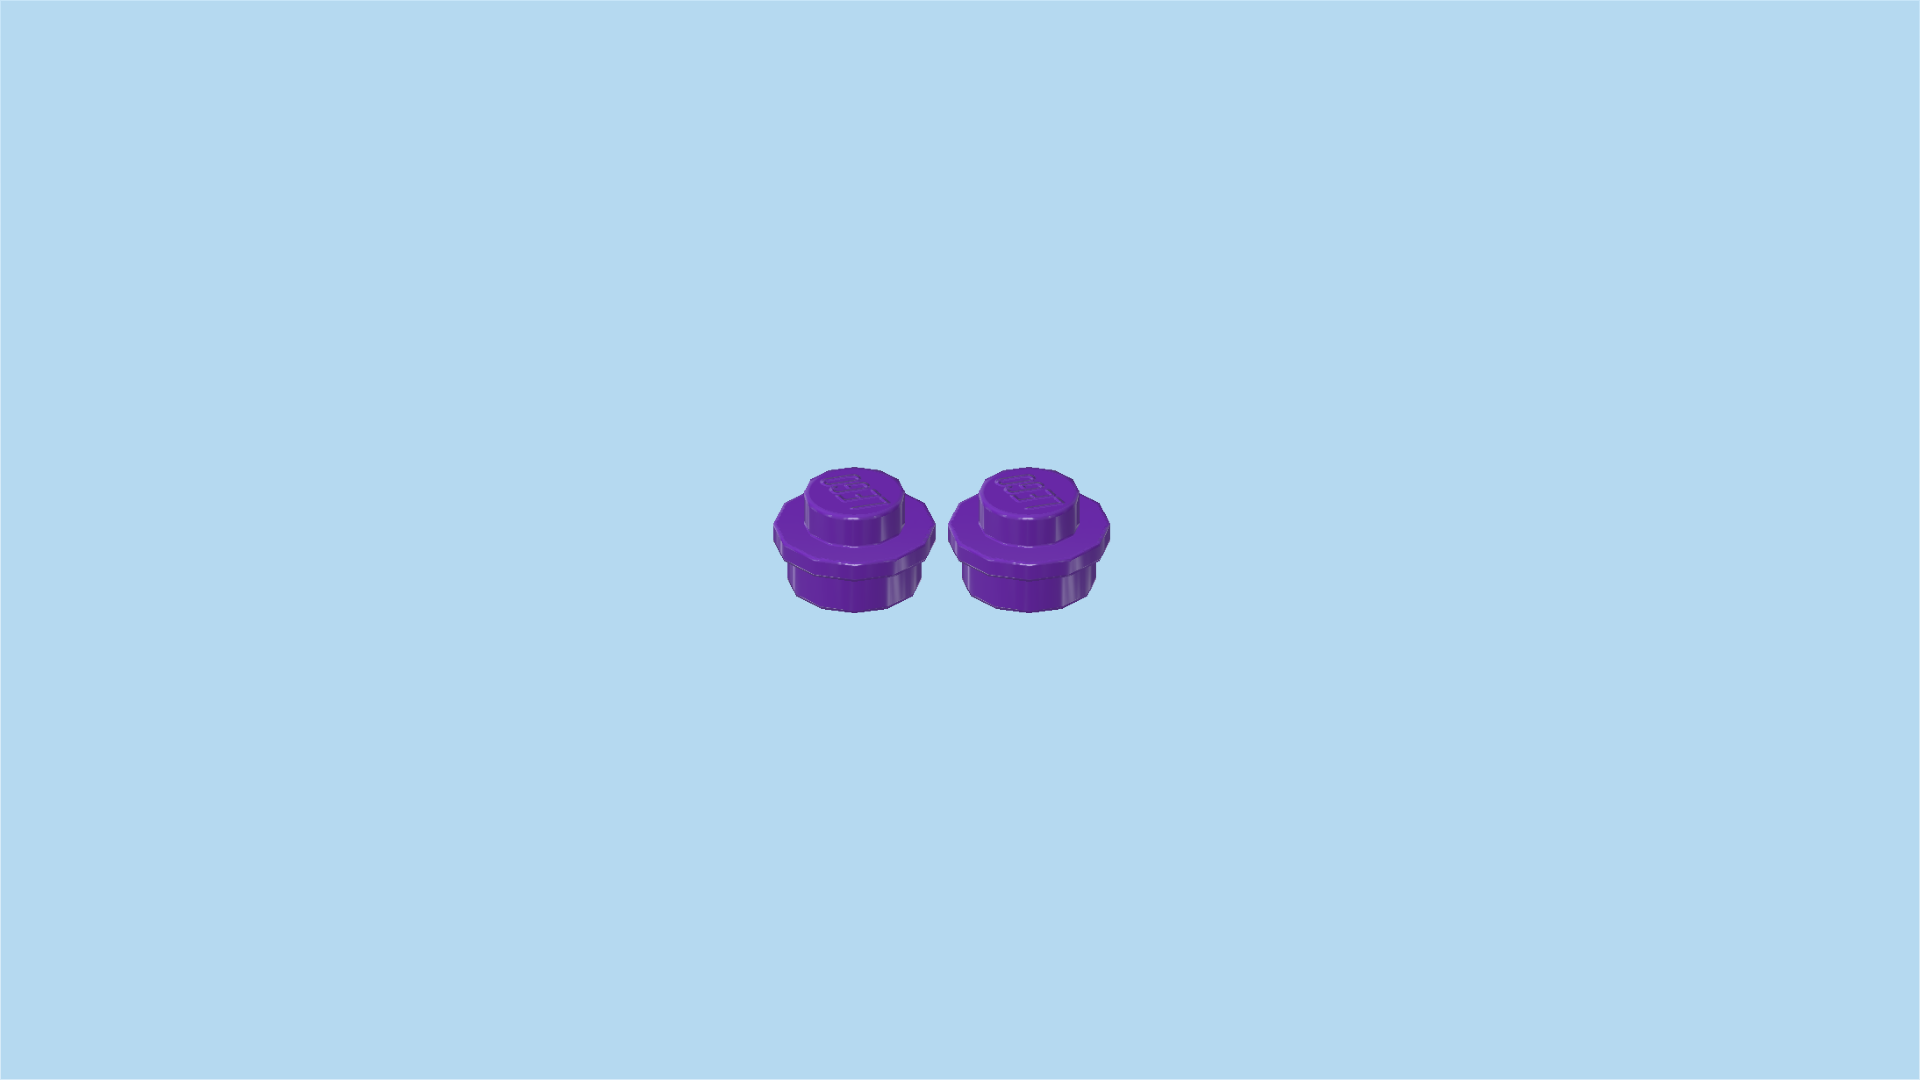
| Find 2 medium lilac round plates 1x1. |
| First, identify the 2 roof tiles 1x4 we have mounted earlier. They are mounted horizontally near the front and back edges. |
| Put 1 round plate 1x1 on the knob of each roof tile 1x4. |
| Find 1 black brick 1x2. |
| Put it vertically to the left of the steering wheel. |
| Collect the following 2 pieces: |
| 1 transparent brown windscreen 2x4, |
| and 1 transparent bright orange round tile 1x1. |
| Put the windscreen 2x4 vertically on top of 3 previous pieces, curve to the left. |
| Put the round tile 1x1 on the single knob at the leftmost edge of the speedboat. |
| The speedboat is finished! Great job! You can already seat the pilot in the boat and give it a test drive! |
| Now, we will assemble the fire. |
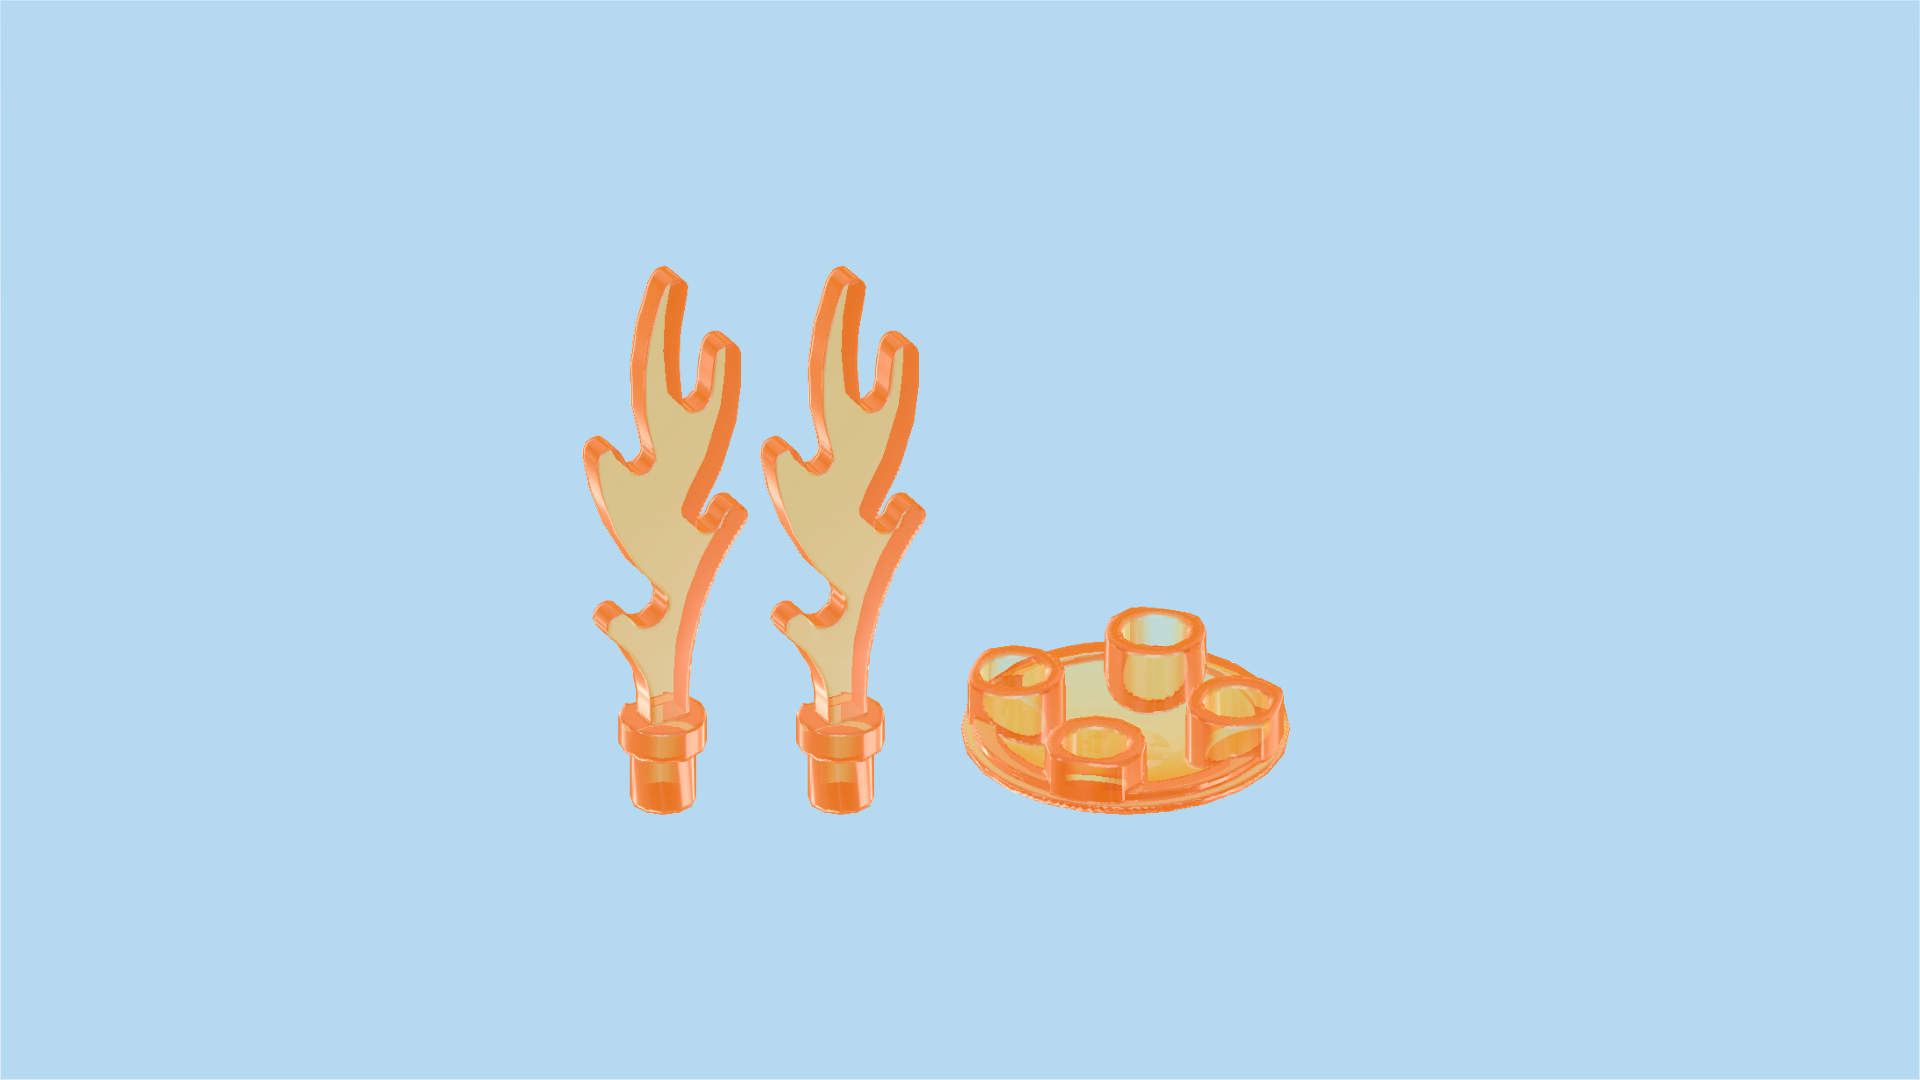
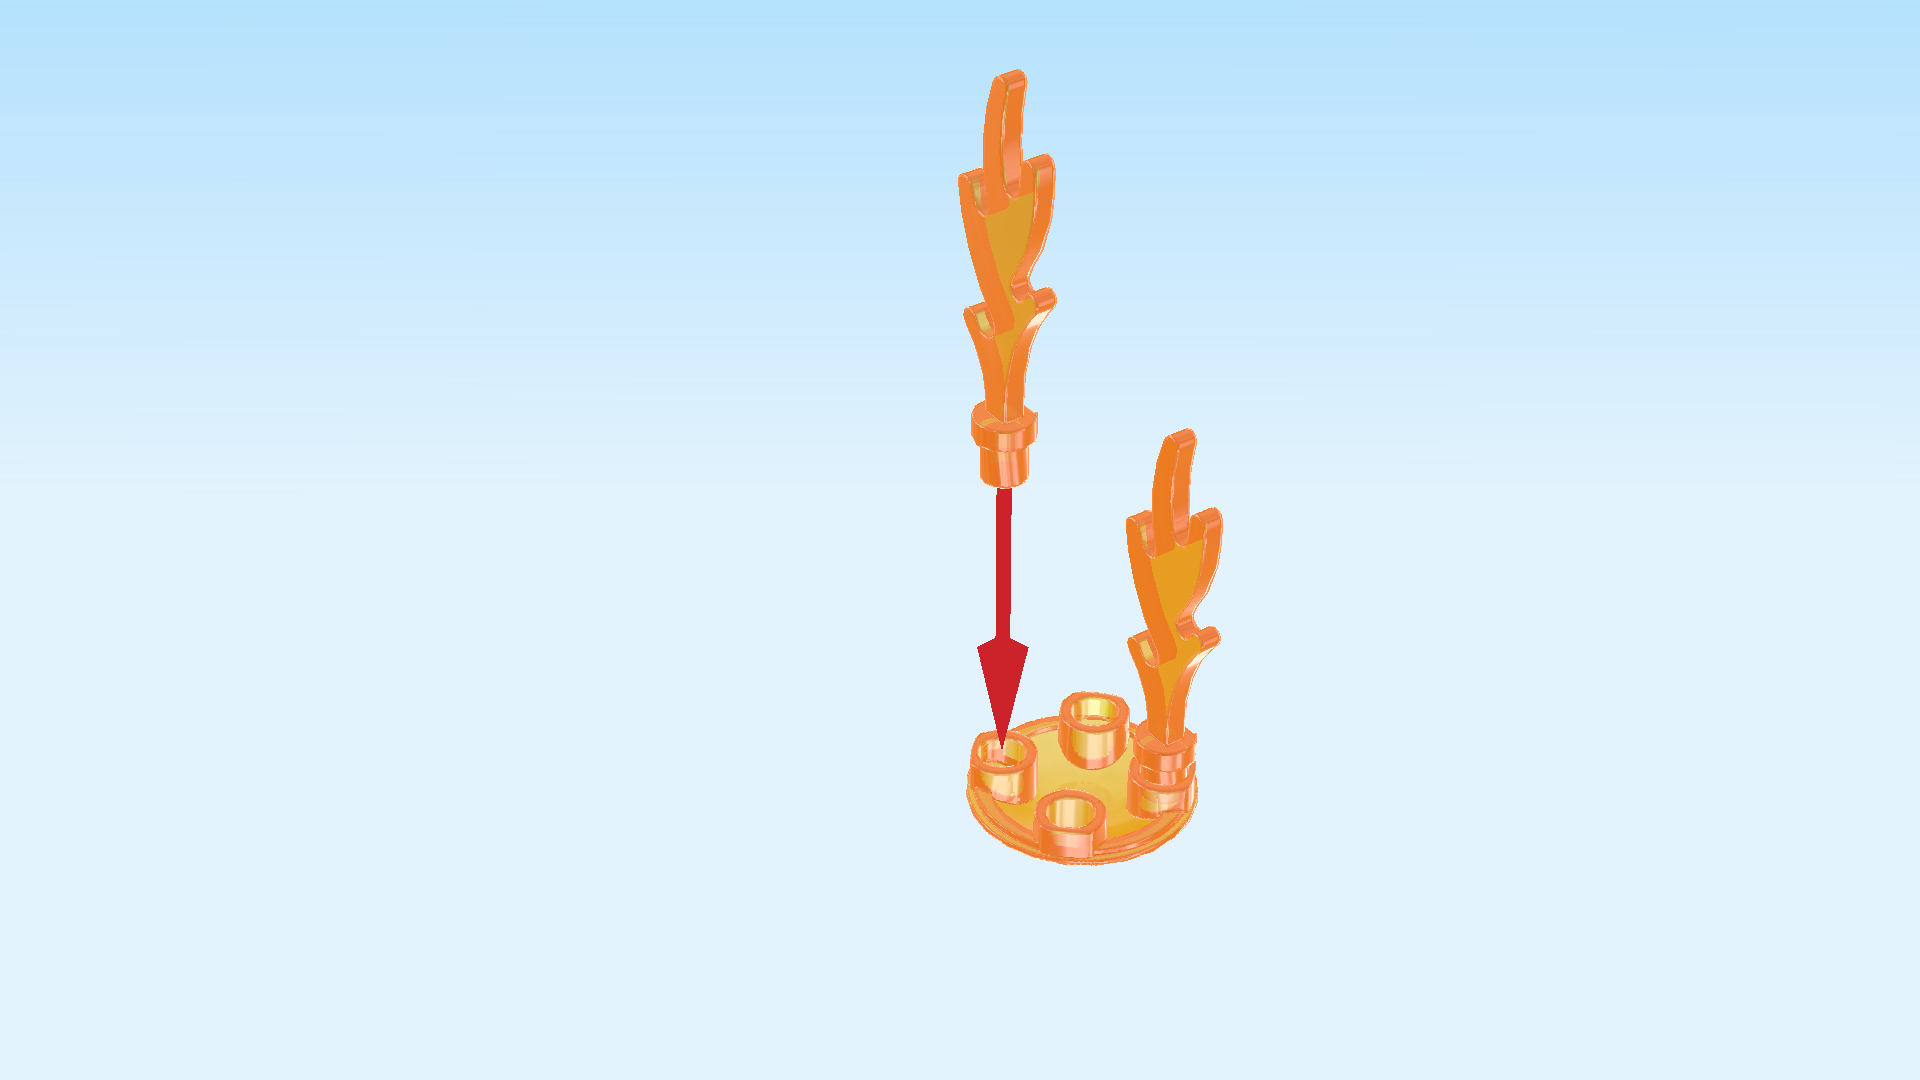
| Collect the following 3 pieces: |
| 1 transparent bright orange inverted curve disk 2x2 with 4 knobs, |
| and 2 transparent bright orange flames with 5 fire tongues. |
| Put the inverted curve disk on the table, curve to the bottom. |
| Insert the bottom shaft of 1 flame into the back left knob of the curve disk. |
| Insert the shaft of the other flame into the front right knob. |
| You can later put the fire into the speedboat as soon as you're ready for action. |
| Next, we will build the jetpack firefighter Minifigure. |
| Collect the following 2 pieces: |
| 1 black pair of legs, |
| and 1 black and dark stone grey upper part of the body. |
| Put the upper body on the legs. |
| Collect the following 2 pieces: |
| 1 bright orange life vest with neck bracket, |
| and 1 bright yellow Minifigure head. |
| Put the bracket of the life vest around the neck of the Minifigure body, life vest hanging down at the front of the Minifigure. |
| Put the head on the body. |
| Collect the following 2 pieces: |
| 1 white helmet without chin strap, |
| and 1 transparent light blue pair of bulging helmet goggles. |
| Snap the goggles onto the helmet. Make sure that the straight edge is at the top and the small recess for the nose is towards the bottom. |
| Put the helmet on the head. |
| Now, we will build the jetpack. |
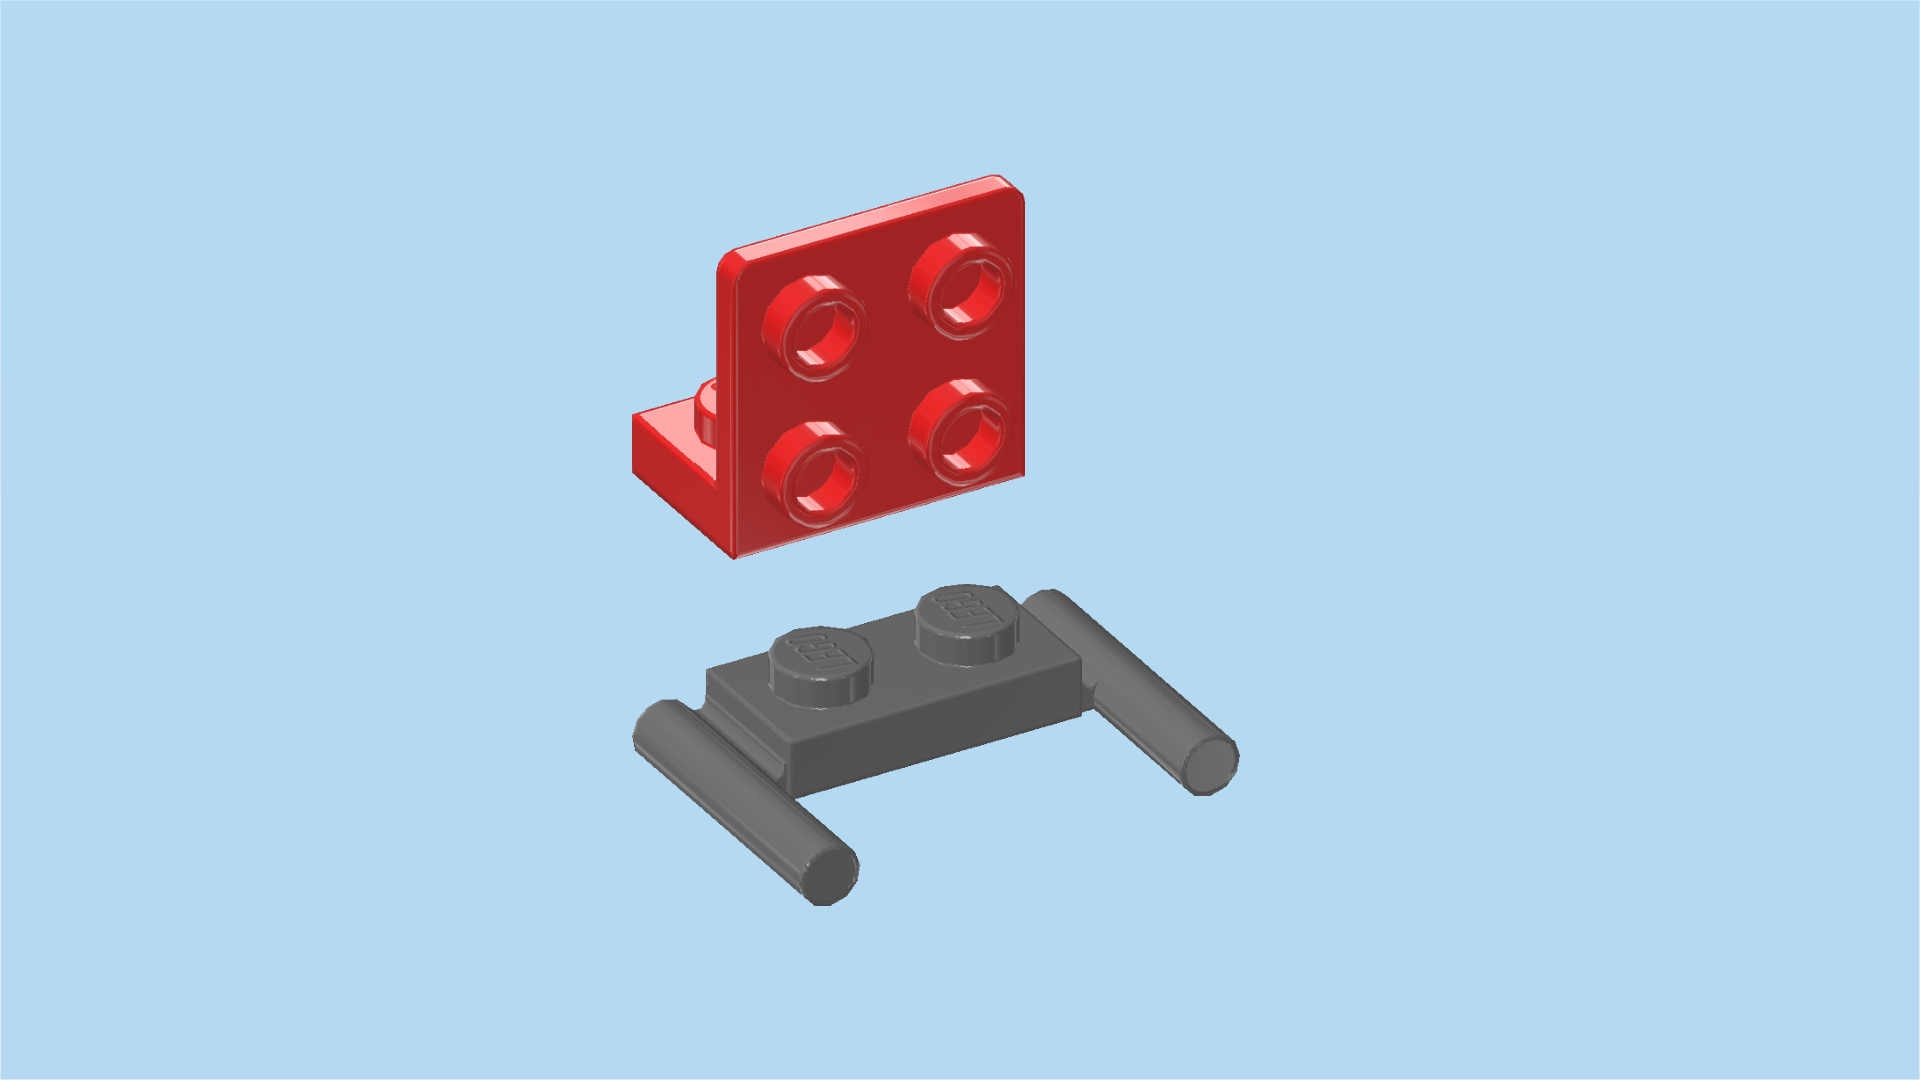
| Collect the following 2 pieces: |
| 1 bright red bottom angle plate 1x2 - 2x2 with 4 side knobs, |
| and 1 dark stone grey plate 1x2 with 2 side handles. |
| Put the bottom angle plate 1x2 horizontally on the table, side knobs to the back. |
| Put the plate 1x2 horizontally on the previous piece (the 1x2 portion), handles pointing to the front. |
| Find 2 bright red bricks 1x1 with side knob. |
| Put 1 on the left knob of the previous piece, side knob to the left. |
| Put the other one to the right of the previous piece, side knob to the right. |
| Find 1 white bottom angle plate 1x2 - 1x2 with 2 side knobs. |
| Put it horizontally on top, side knobs to the back. |
| Collect the following 2 pieces: |
| 1 dark stone grey round tile 2x2 with middle hole, |
| and 1 silver metallic grille tile 1x2. |
| Turn the jetpack build from left to right. Now, the 2 side handles are pointing to the back, and the 6 side knobs are towards the front. |
| Put the grille tile 1x2 upright horizontally on the bottom row of side knobs pointing to the front. |
| Put the round tile 2x2 upright above the previous piece. |
| The round tile is printed with the blades of the jetpack ventilator. |
| Find 2 transparent blue smooth roof tiles 1x1x⅔. |
| Turn the jetpack front to back again, handles pointing to the front. |
| Put 1 roof tile on the left top knob, slope to the front. |
| Put the other one to the right of the previous piece, slope to the front. |
| Find 2 dark stone grey and white shooters with handle and trigger. |
| Flip 1 upright so that its handle is pointing to the right and its opening is to the front. |
| Insert the handle into the hollow side knob pointing to the left. |
| Repeat symmetrically on the right: turn the shooter so that the handle is pointing to the left and the opening is to the front, and insert the handle into the right side knob. |
| The jetpack is finished! Well done! To mount it, put it on the table, handles and shooters pointing to the front. Stand the Minifigure between the handles with his back towards the jetpack. |
| Lift up the jetpack and snap the 2 handles into the hands of the Minifigure from below. |
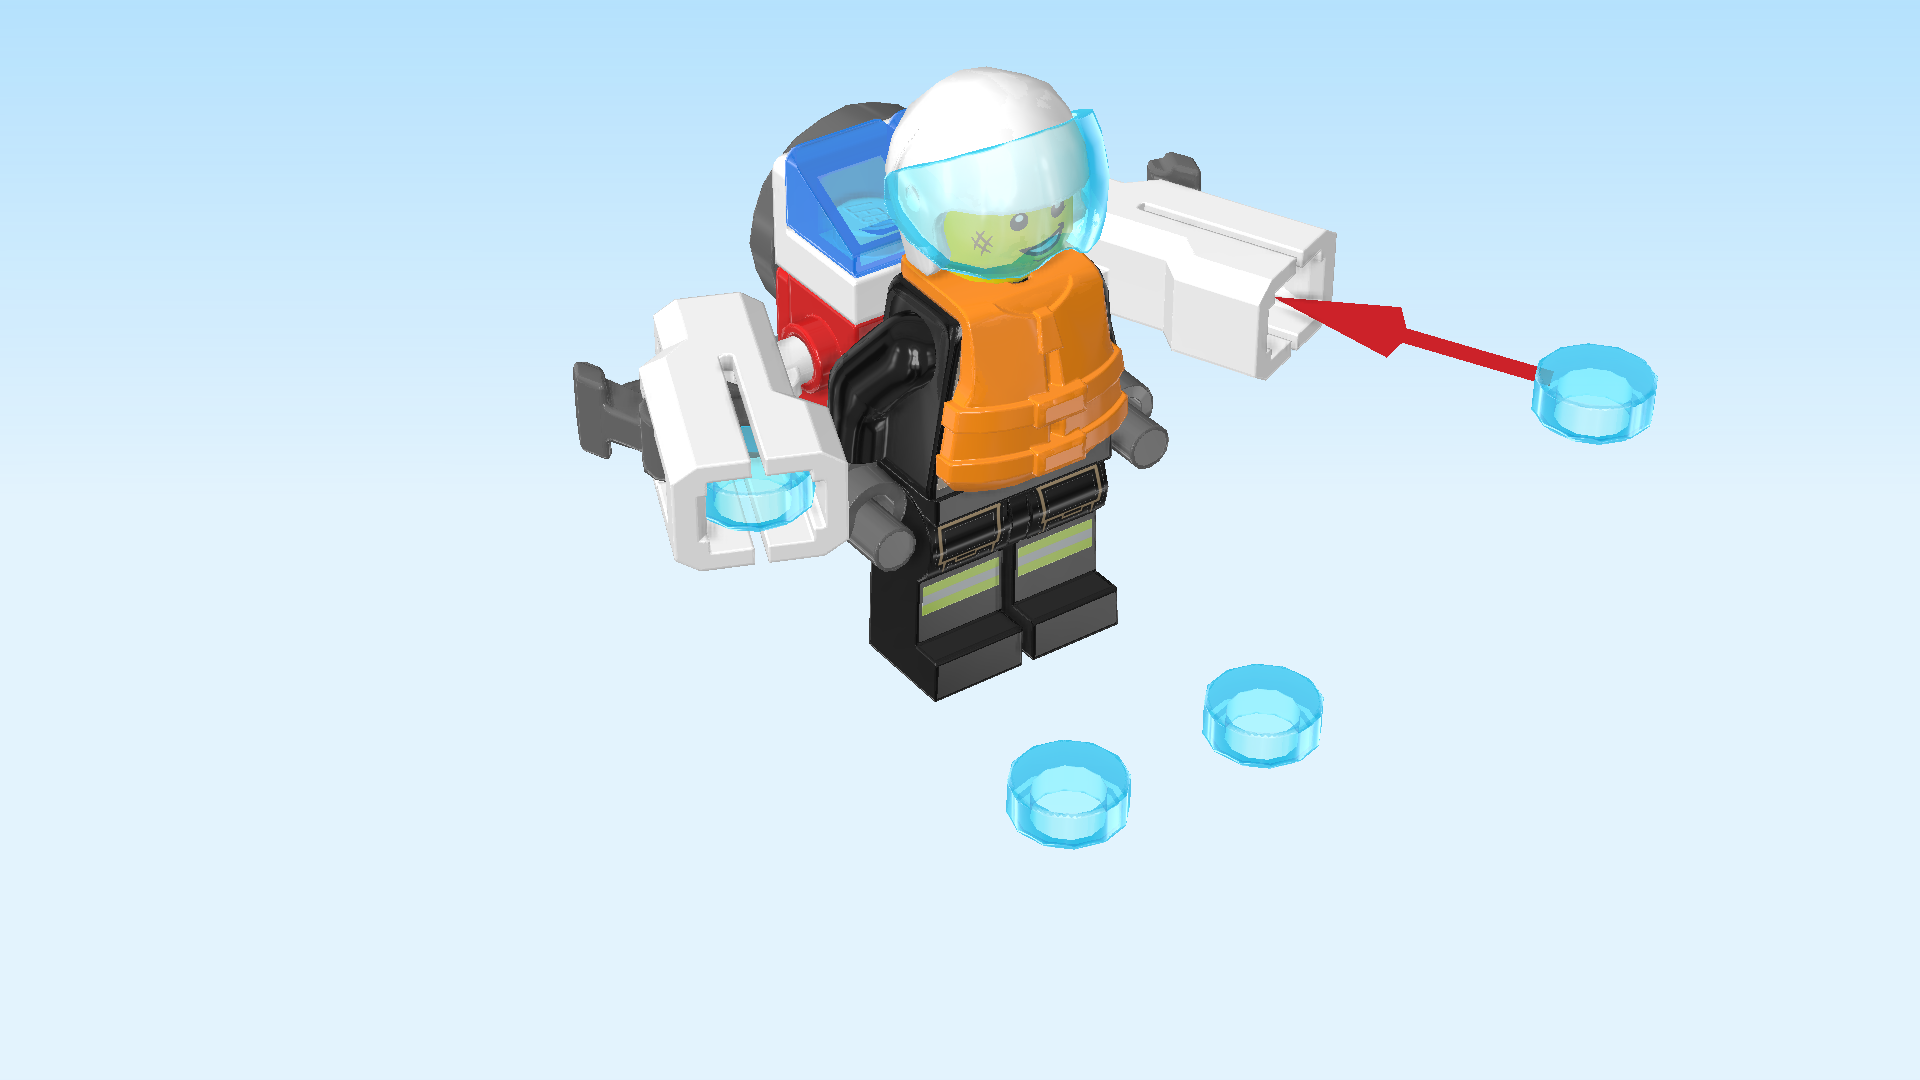
| Find 4 transparent light blue round tiles 1x1. |
| Carefully insert 1 into the shooter on the left and 1 into the shooter on the right. This will push out the triggers. However, do not push on the triggers yet. |
| Warning! Do not aim at eye or face. |
| To blast the water out of the shooters, push on the triggers of the shooters. This might take some practice. You can use the 2 remaining transparent blue round tiles as reserve ammunition. |
| The jetpack firefighter Minifigure is finished! Great job! He is wearing a black uniform with green reflective stripes on his knees and on his chest. The trousers have 2 big utility pockets at the front. He is also wearing a brown shoulder harness with belt that has a carabiner and a pressure gauge attached. The top part of the firefighter jacket is red. On its back, there is a reflective stripe with the fire department logo (a badge with a flame in the middle). |
| Open bag number 2. You can choose to have the bricks sorted by color again. This bag contains all bricks and pieces for the captain firefighter Minifigure, and the firefighter boat. |
| Next, let's build the captain firefighter Minifigure. |
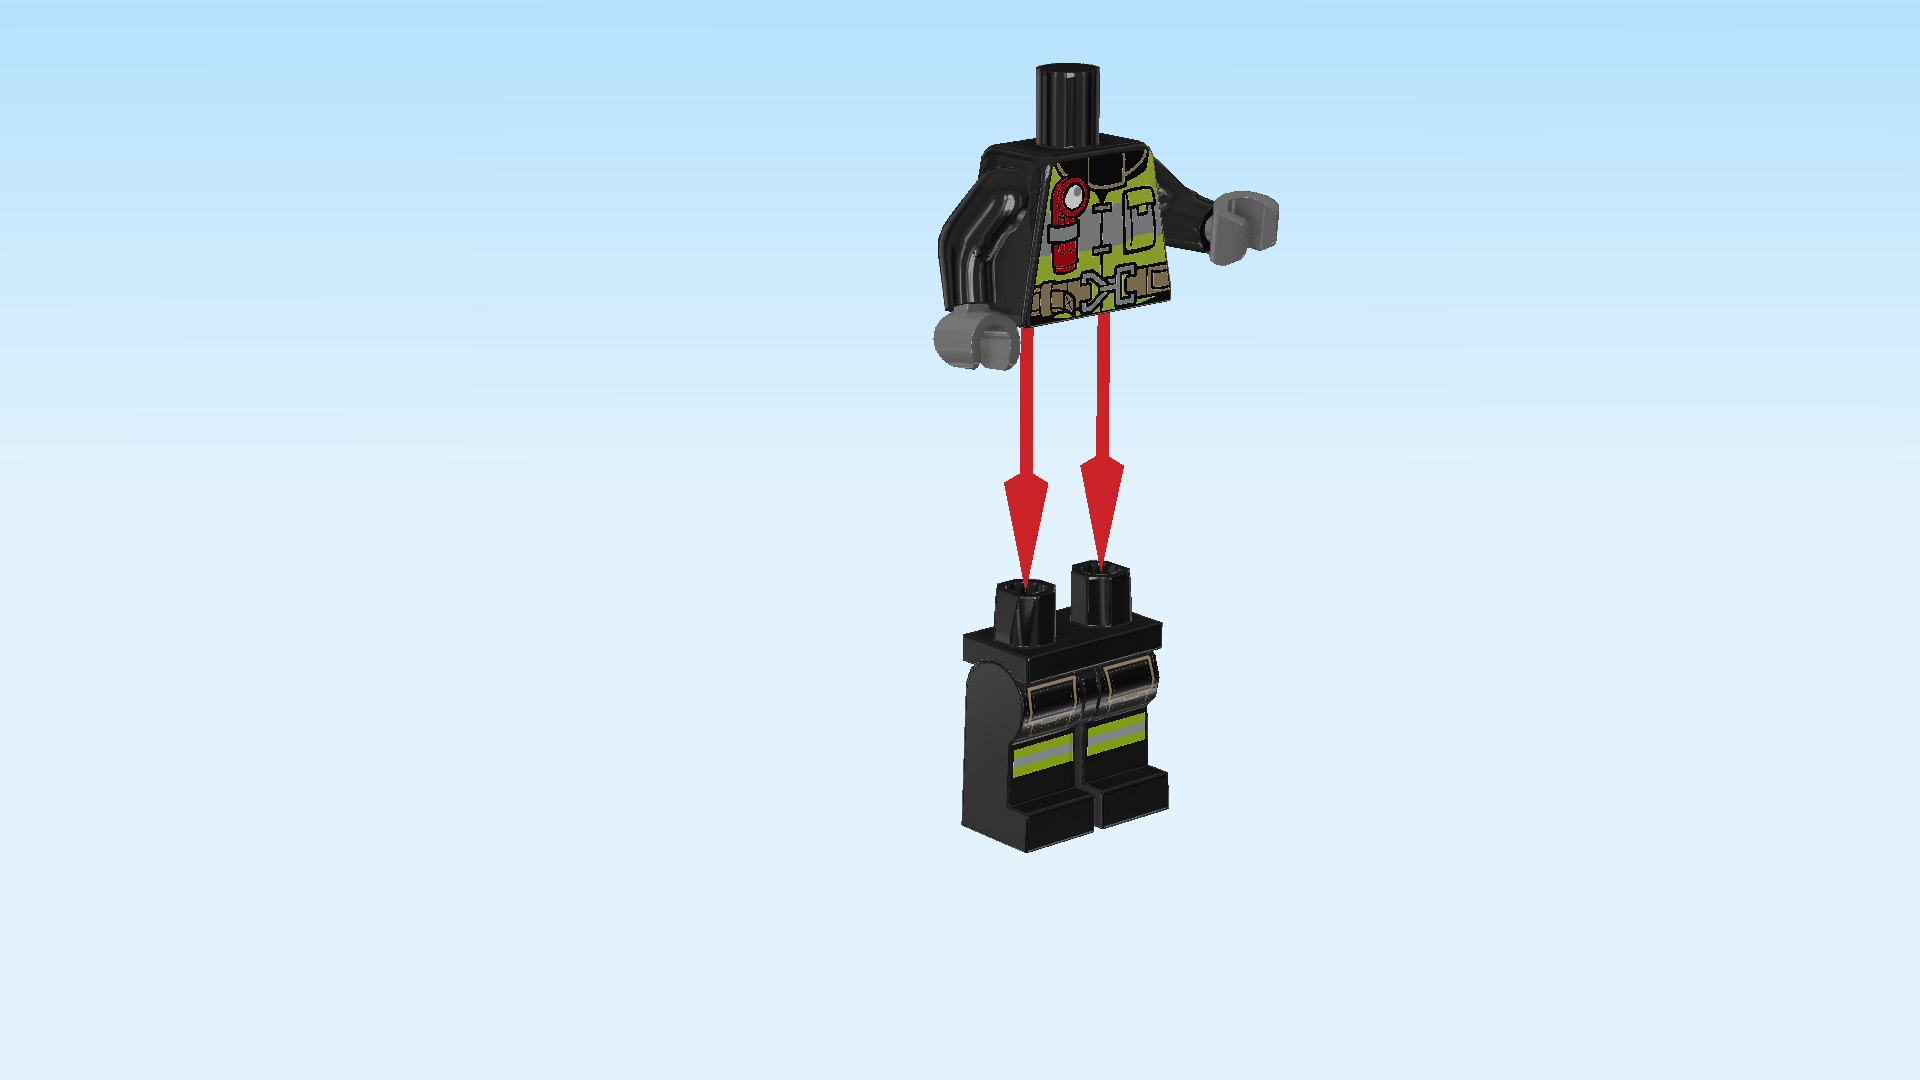
| Collect the following 2 pieces: |
| 1 black pair of legs, |
| and 1 black and dark stone grey upper part of the body. |
| Put the upper body on the legs. |
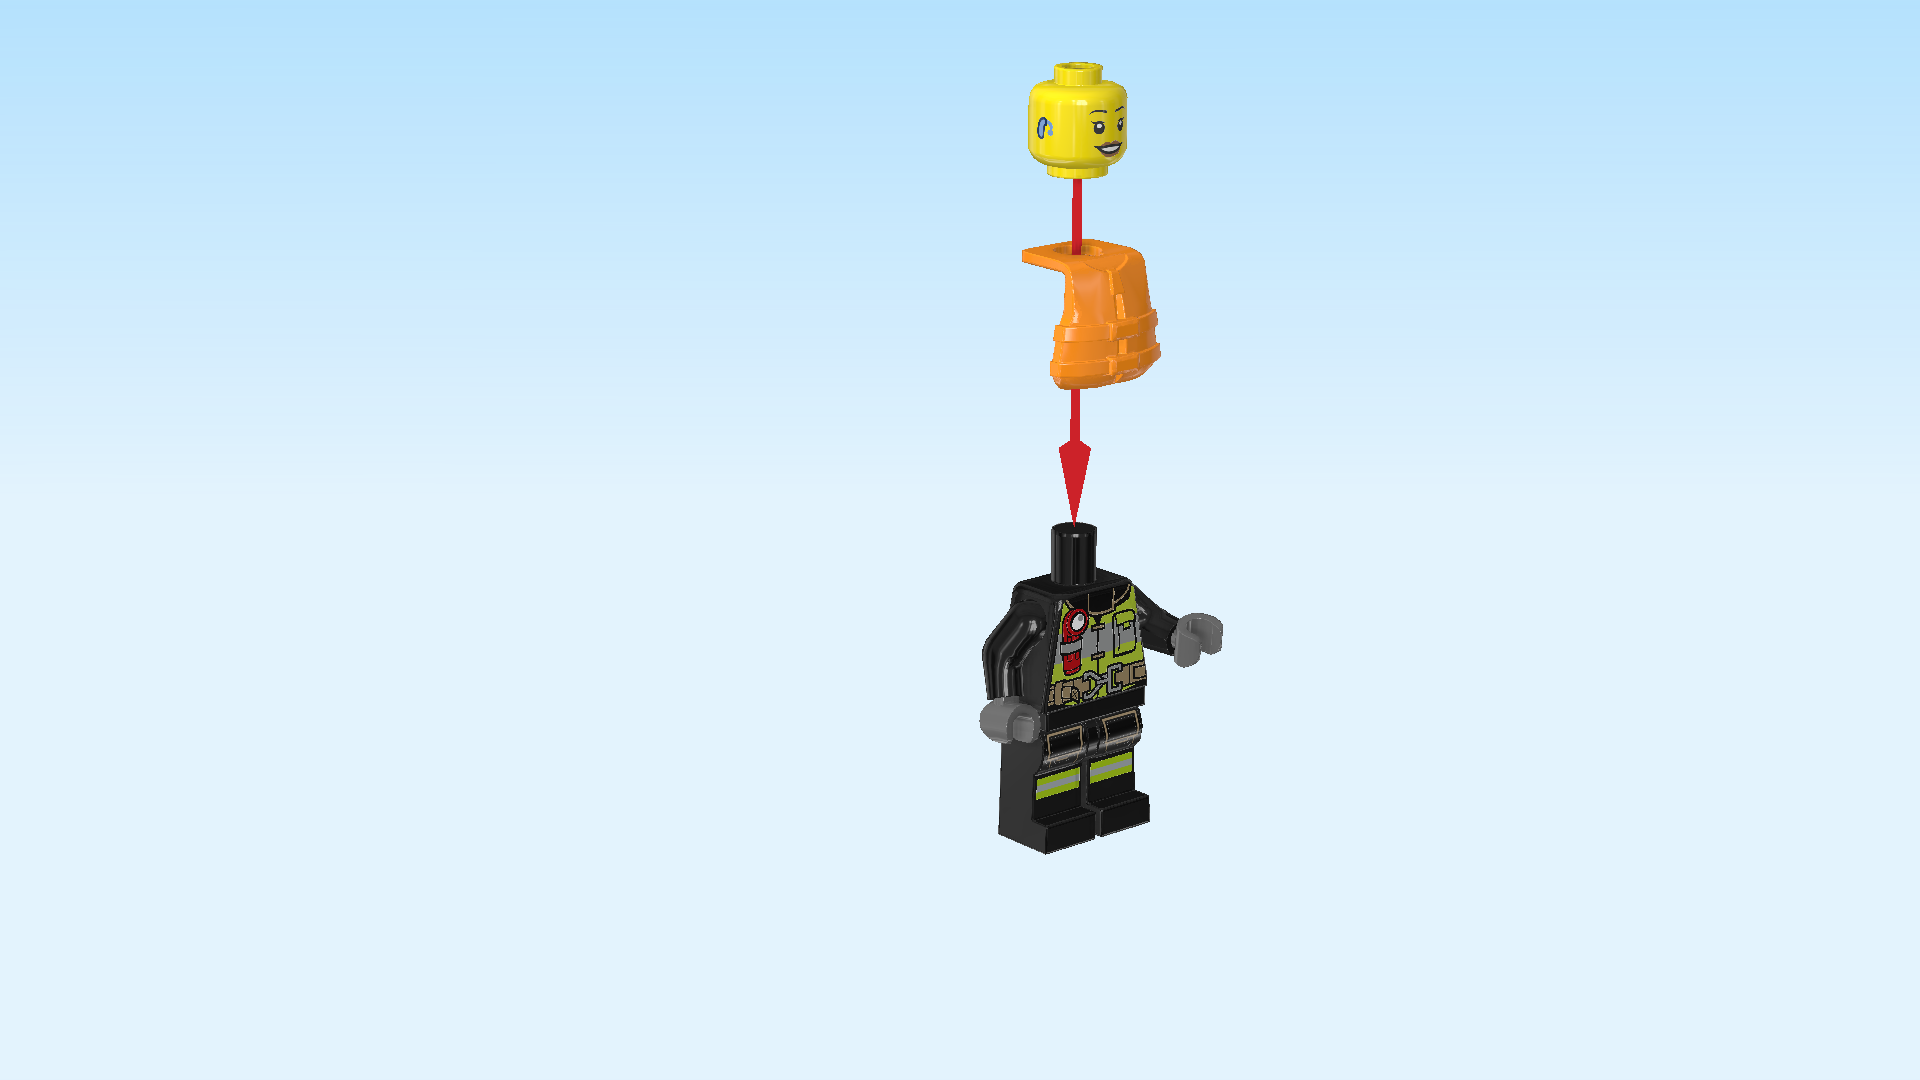
| Collect the following 2 pieces: |
| 1 bright yellow Minifigure head, |
| and 1 bright orange life vest with neck bracket. |
| Put the bracket of the life vest around the neck, life vest hanging down at the front of the torso. |
| Put the head on the body. |
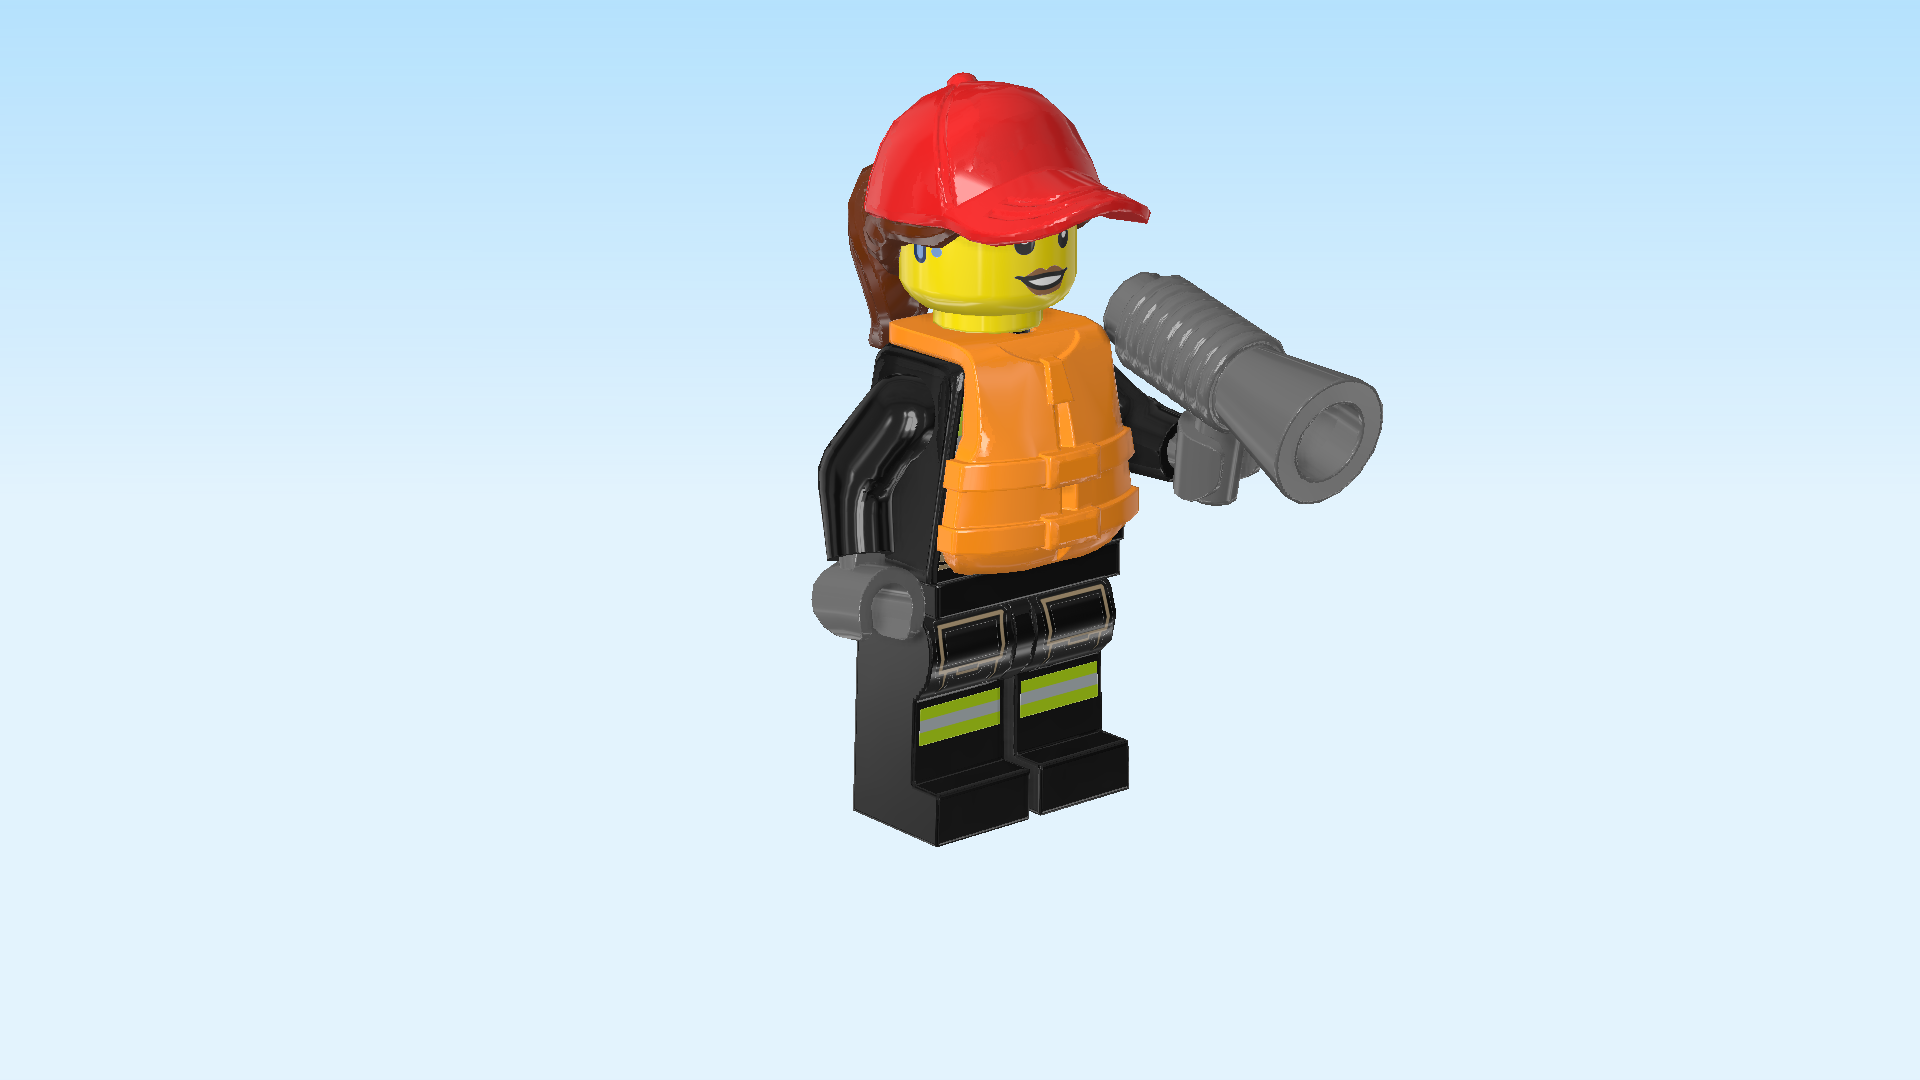
| Collect the following 2 pieces: |
| 1 reddish brown and bright red billed cap with ponytail, |
| and 1 dark stone grey megaphone with shaft. |
| Put the cap with ponytail on the head. |
| Snap the megaphone into the left hand of the Minifigure. |
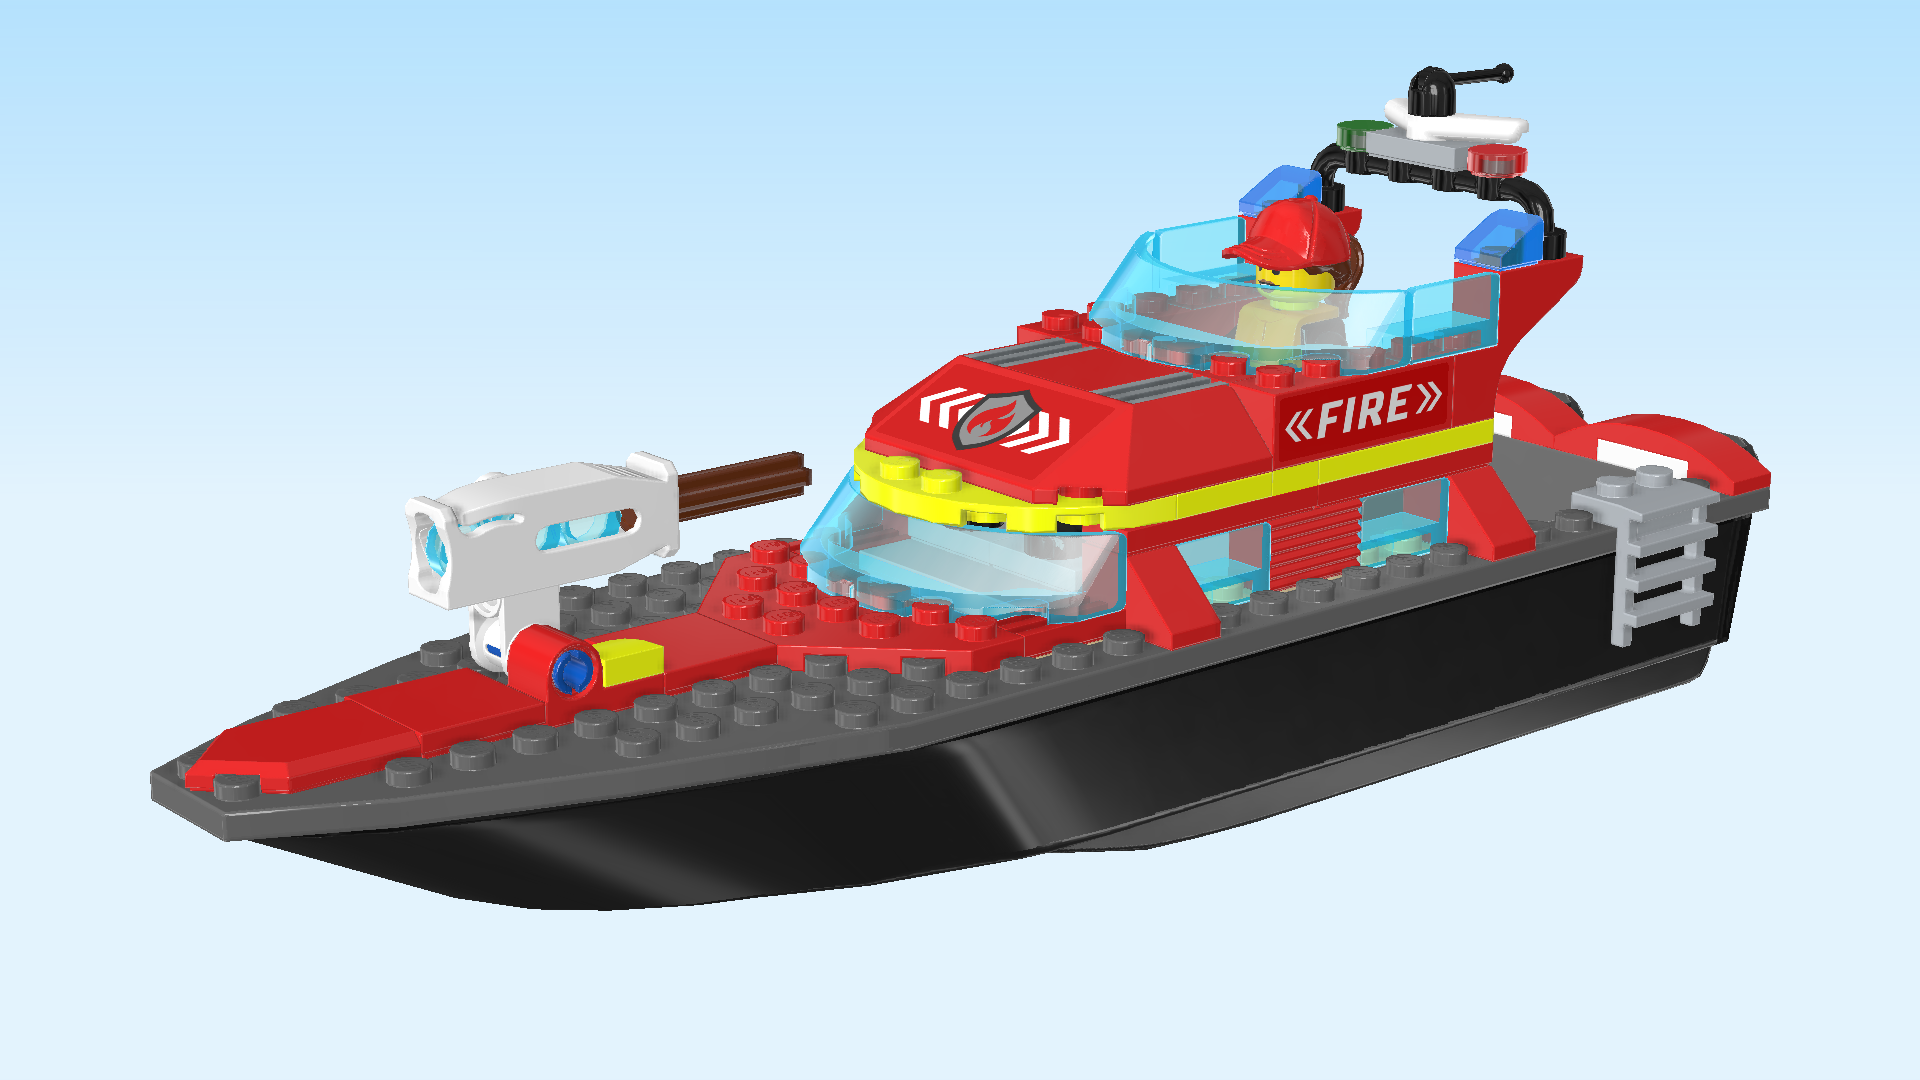
| The captain firefighter Minifigure is finished! Great job! She is wearing the same uniform as the jetpack firefighter. She has red lips and a friendly smile on her face, and she is wearing a hearing aid on her right ear. She looks like she is ready for the next emergency! Let's continue with the boat! |
| Now, we will build the Fire Rescue Boat. |
| Collect the following 2 pieces: |
| 1 dark stone grey and black ship underbody 8x28x3, |
| and 1 white brick 1x6. |
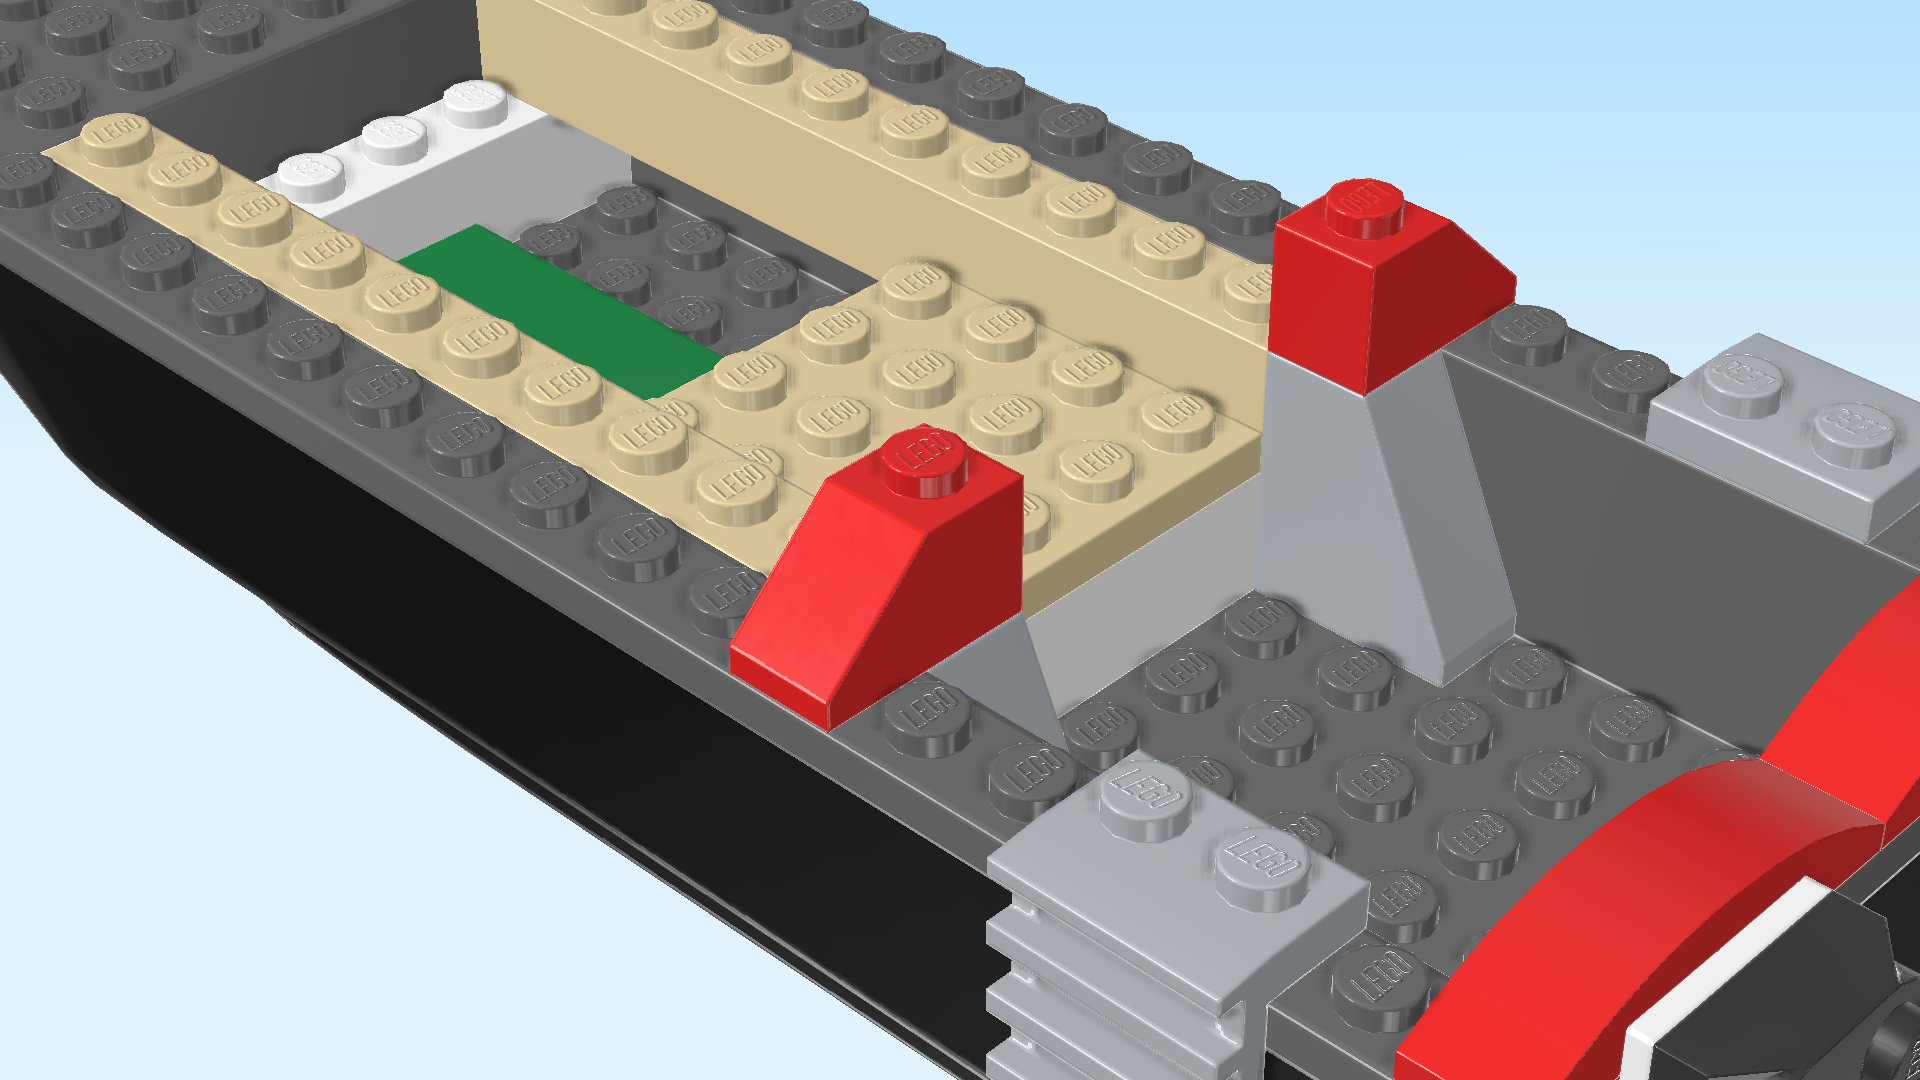
| Put the ship underbody vertically on the table, nose of the ship pointing to the back. |
| Put the brick 1x6 horizontally on the backmost row of the lower level. |
| If done correctly, the 11 rows of the higher level will remain empty for now. |
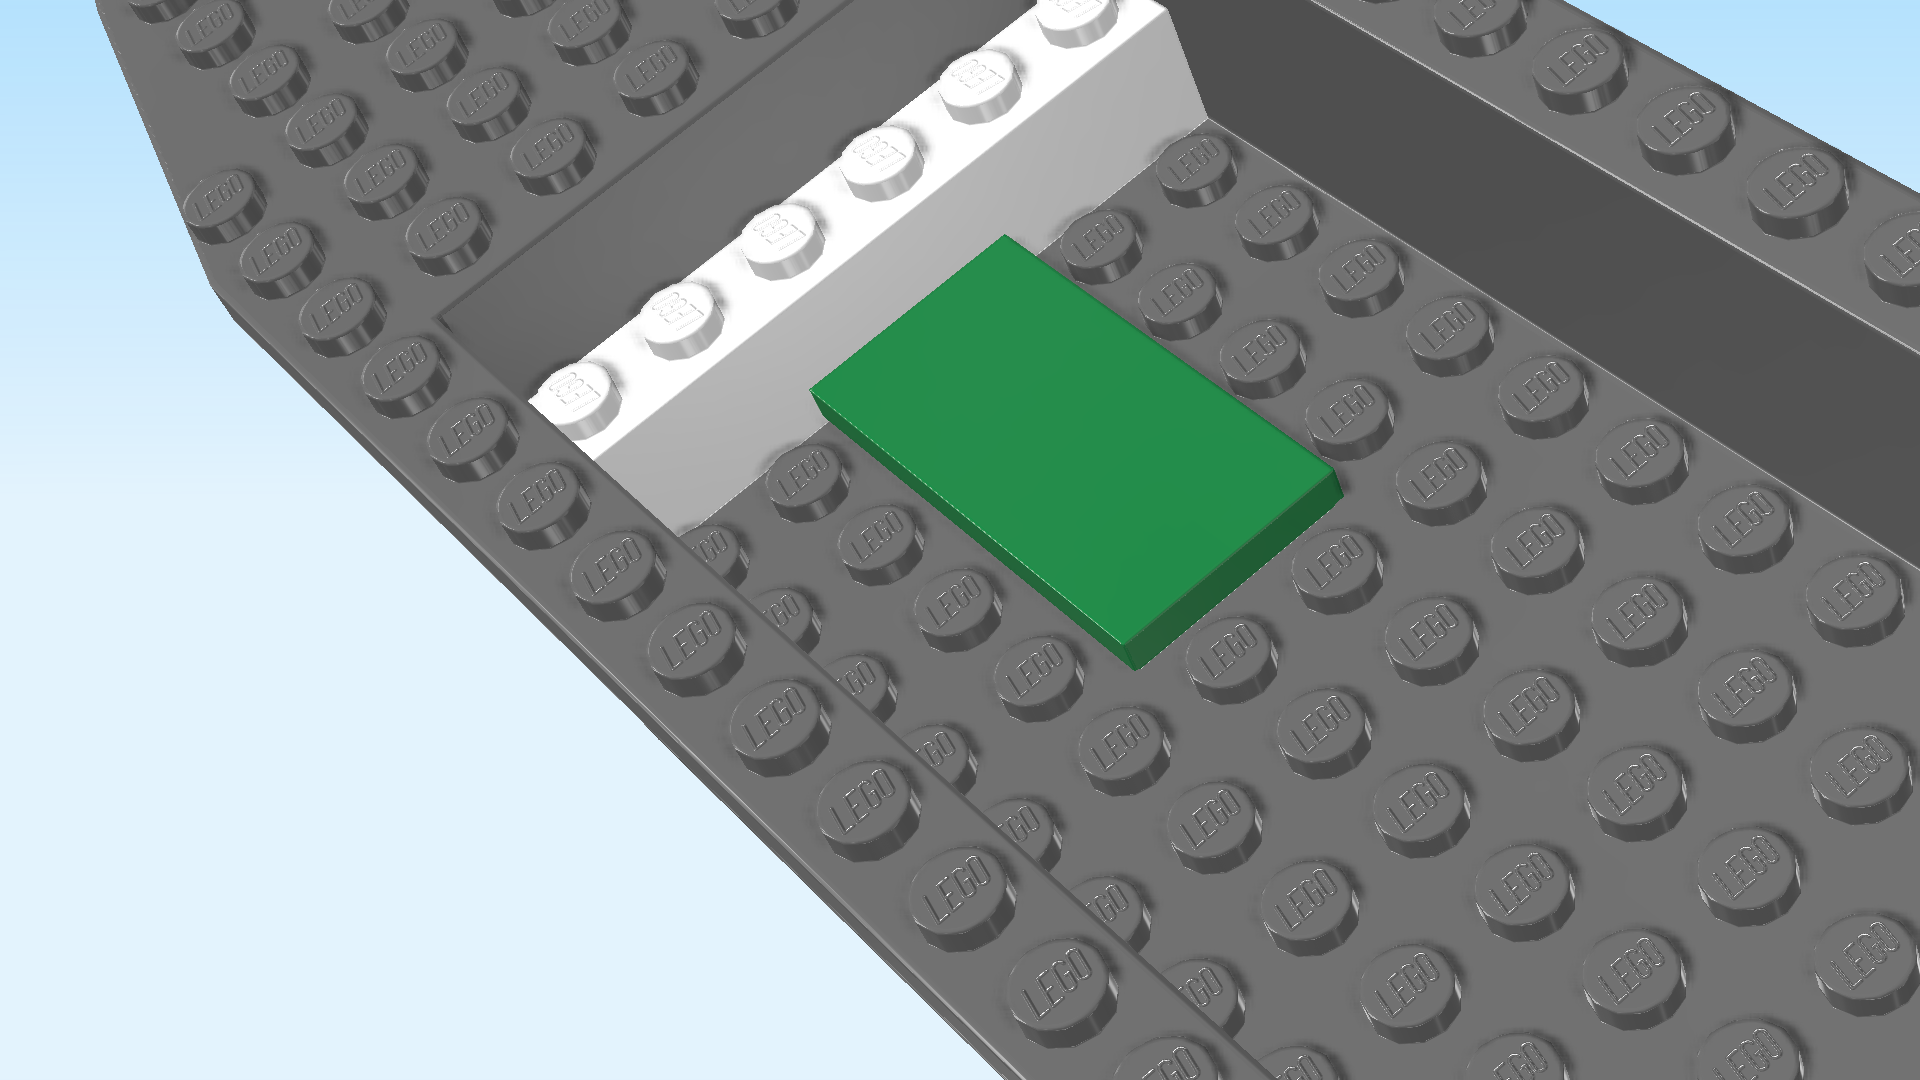
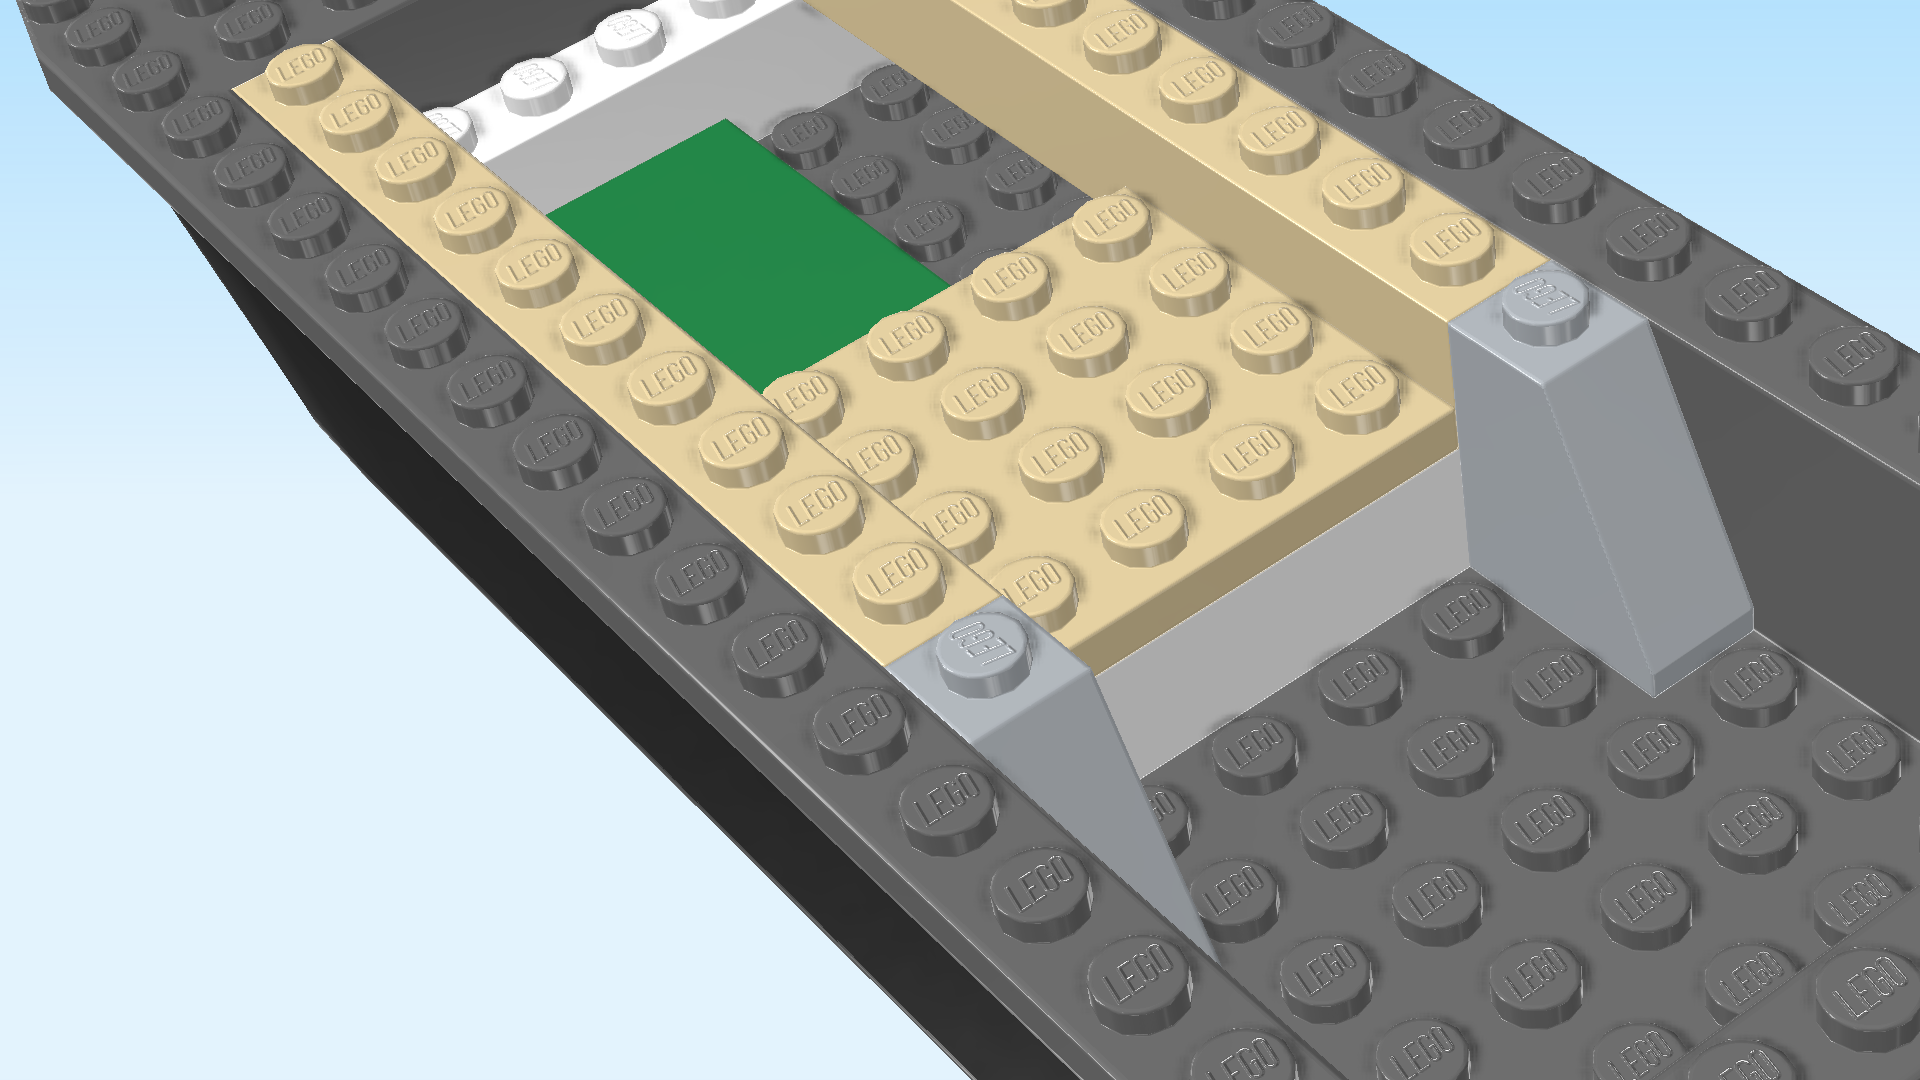
| Find 1 dark green flat tile 2x4. |
| Put it vertically centered in front of the previous piece. |
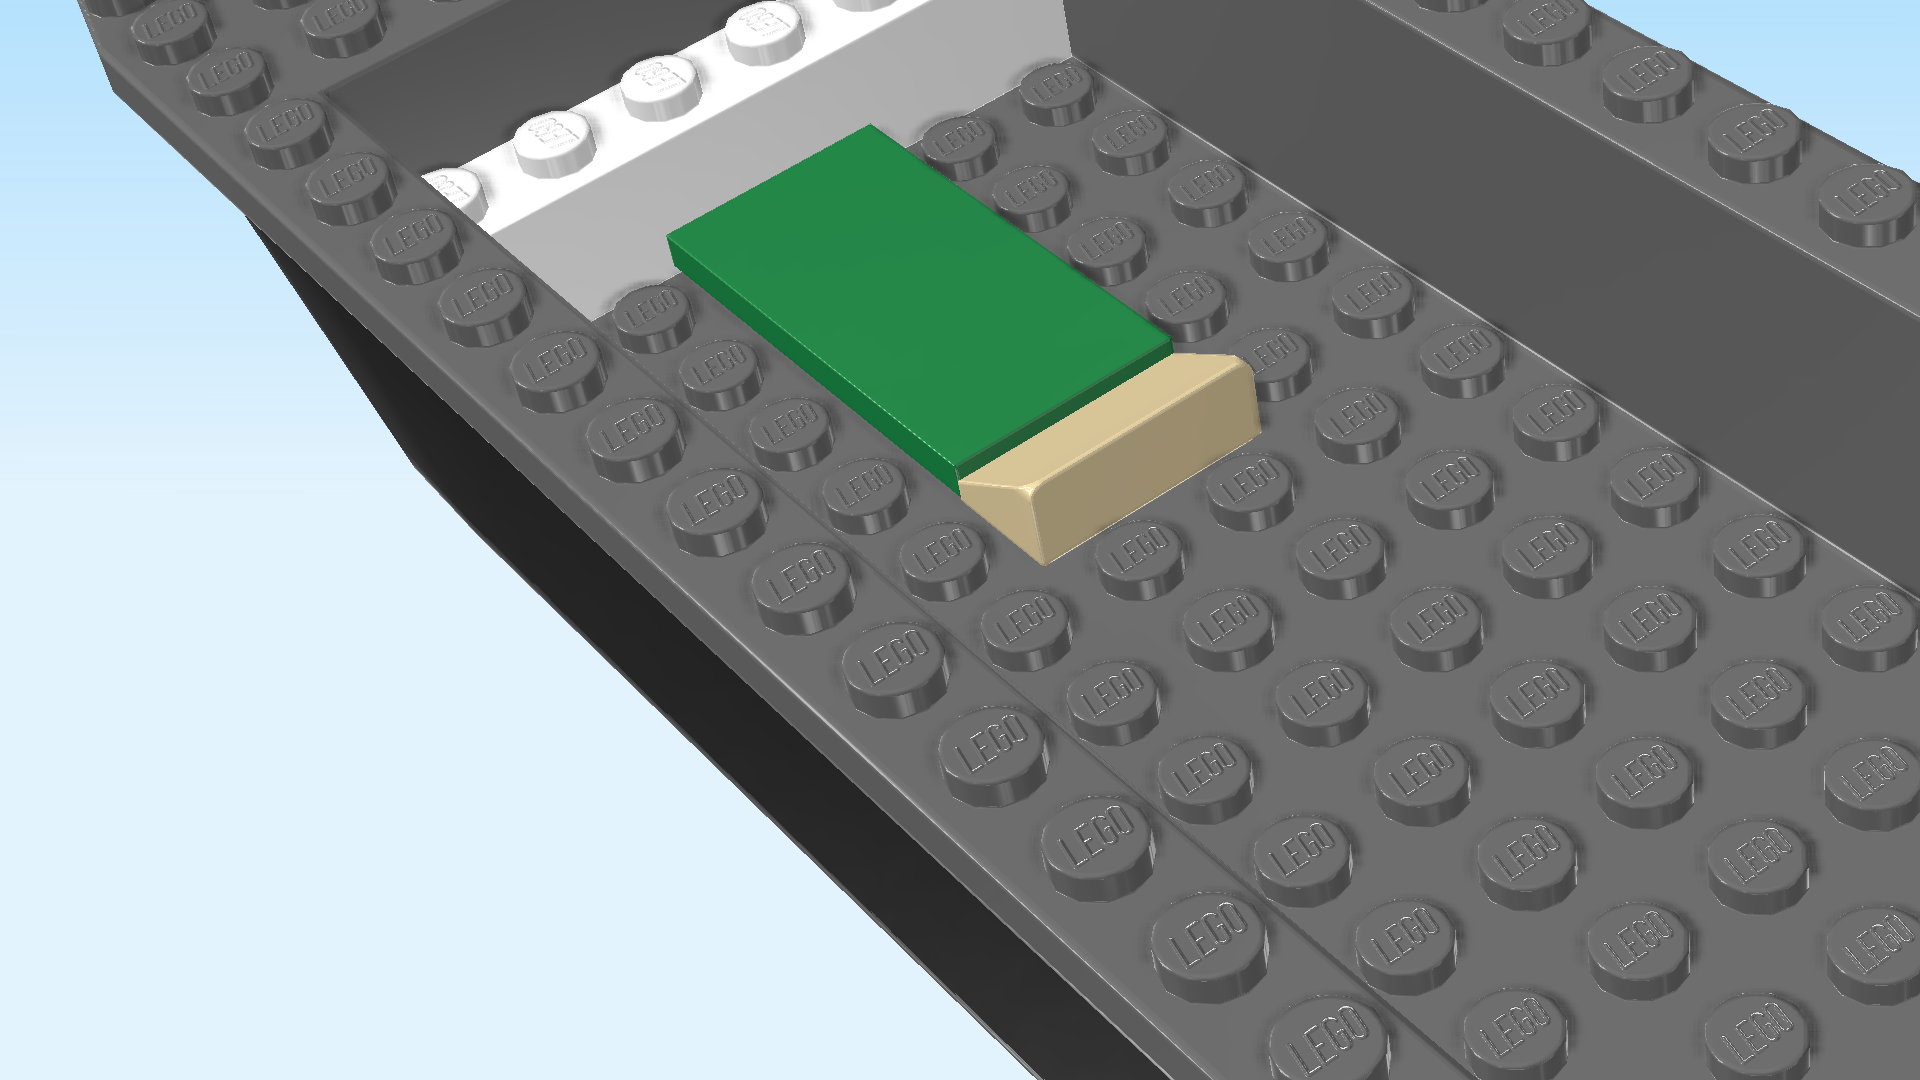
| Find 1 pale ocher yellow smooth roof tile 1x2x⅔. |
| Put it horizontally in front of the previous piece, slope to the back. |
| The flat tile from the previous step and this roof tile will serve as an emergency bed later. |
| Collect the following 3 pieces: |
| 2 white bricks 1x6, |
| and 1 bright red flat tile 2x2. |
| Put 1 brick 1x6 horizontally in front of the previous piece. |
| Put the flat tile 2x2 centered in front of the previous piece. |
| Put the other brick 1x6 horizontally in front of the previous piece. |
| Find 2 pale ocher yellow bricks 1x10. |
| Put 1 vertically on the rightmost knobs of the 3 bricks 1x6 we have mounted so far. |
| Repeat symmetrically on the left. |
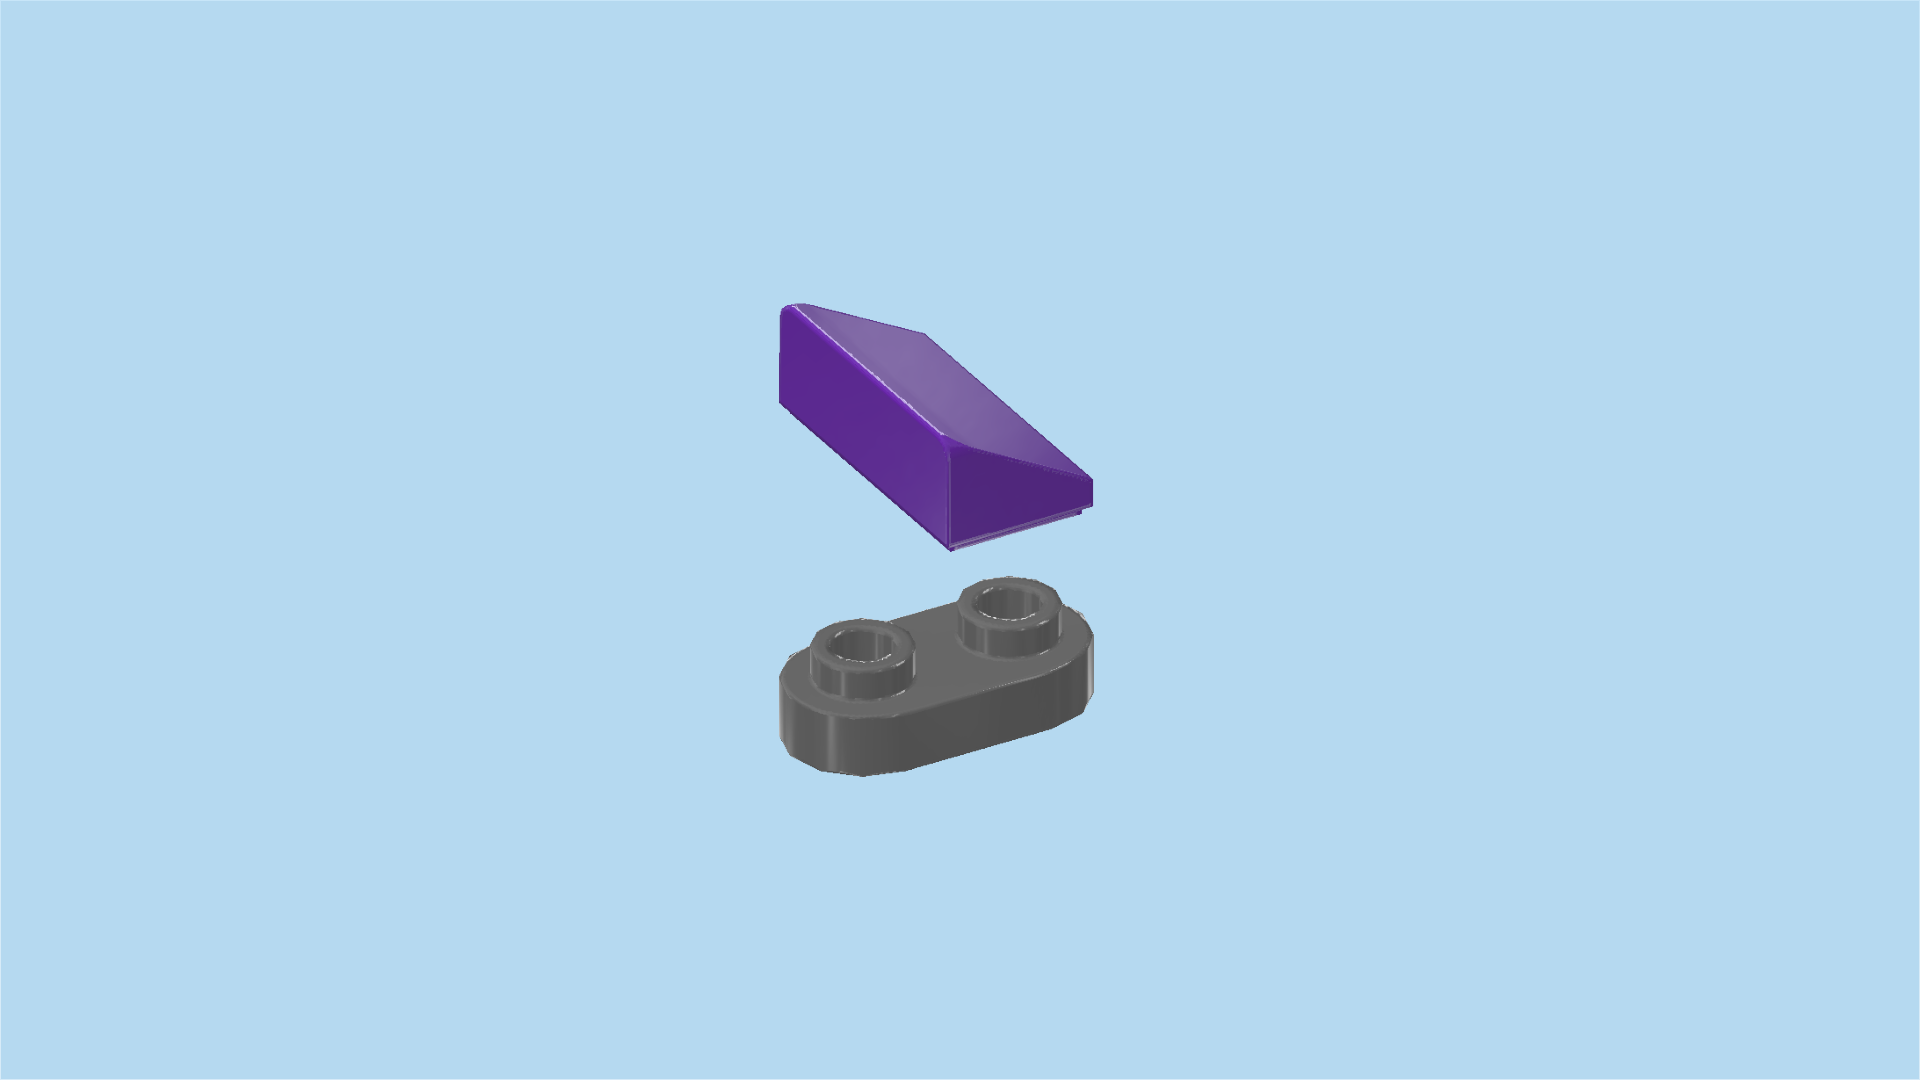
| Find 2 medium stone grey roof tiles 1x2x2, 65°. |
| Put 1 vertically in front of the previous piece, slope to the front. |
| Repeat symmetrically on the right. |
| Find 1 pale ocher yellow plate 4x4. |
| Put it on the 4 middle rows, starting with the frontmost brick 1x6. |
| Find 2 white top angle plates 1x2 - 2x2 with 4 side knobs. |
| Put 1 horizontally on the frontmost row of the ship underbody, skipping the rightmost knob, 4 side knobs to the front. |
| Repeat symmetrically on the left, side knobs to the front. |
| Find 2 bright red curve tiles 1x4. |
| Put them horizontally next to each other on the frontmost row to lock in the 2 previous pieces. |
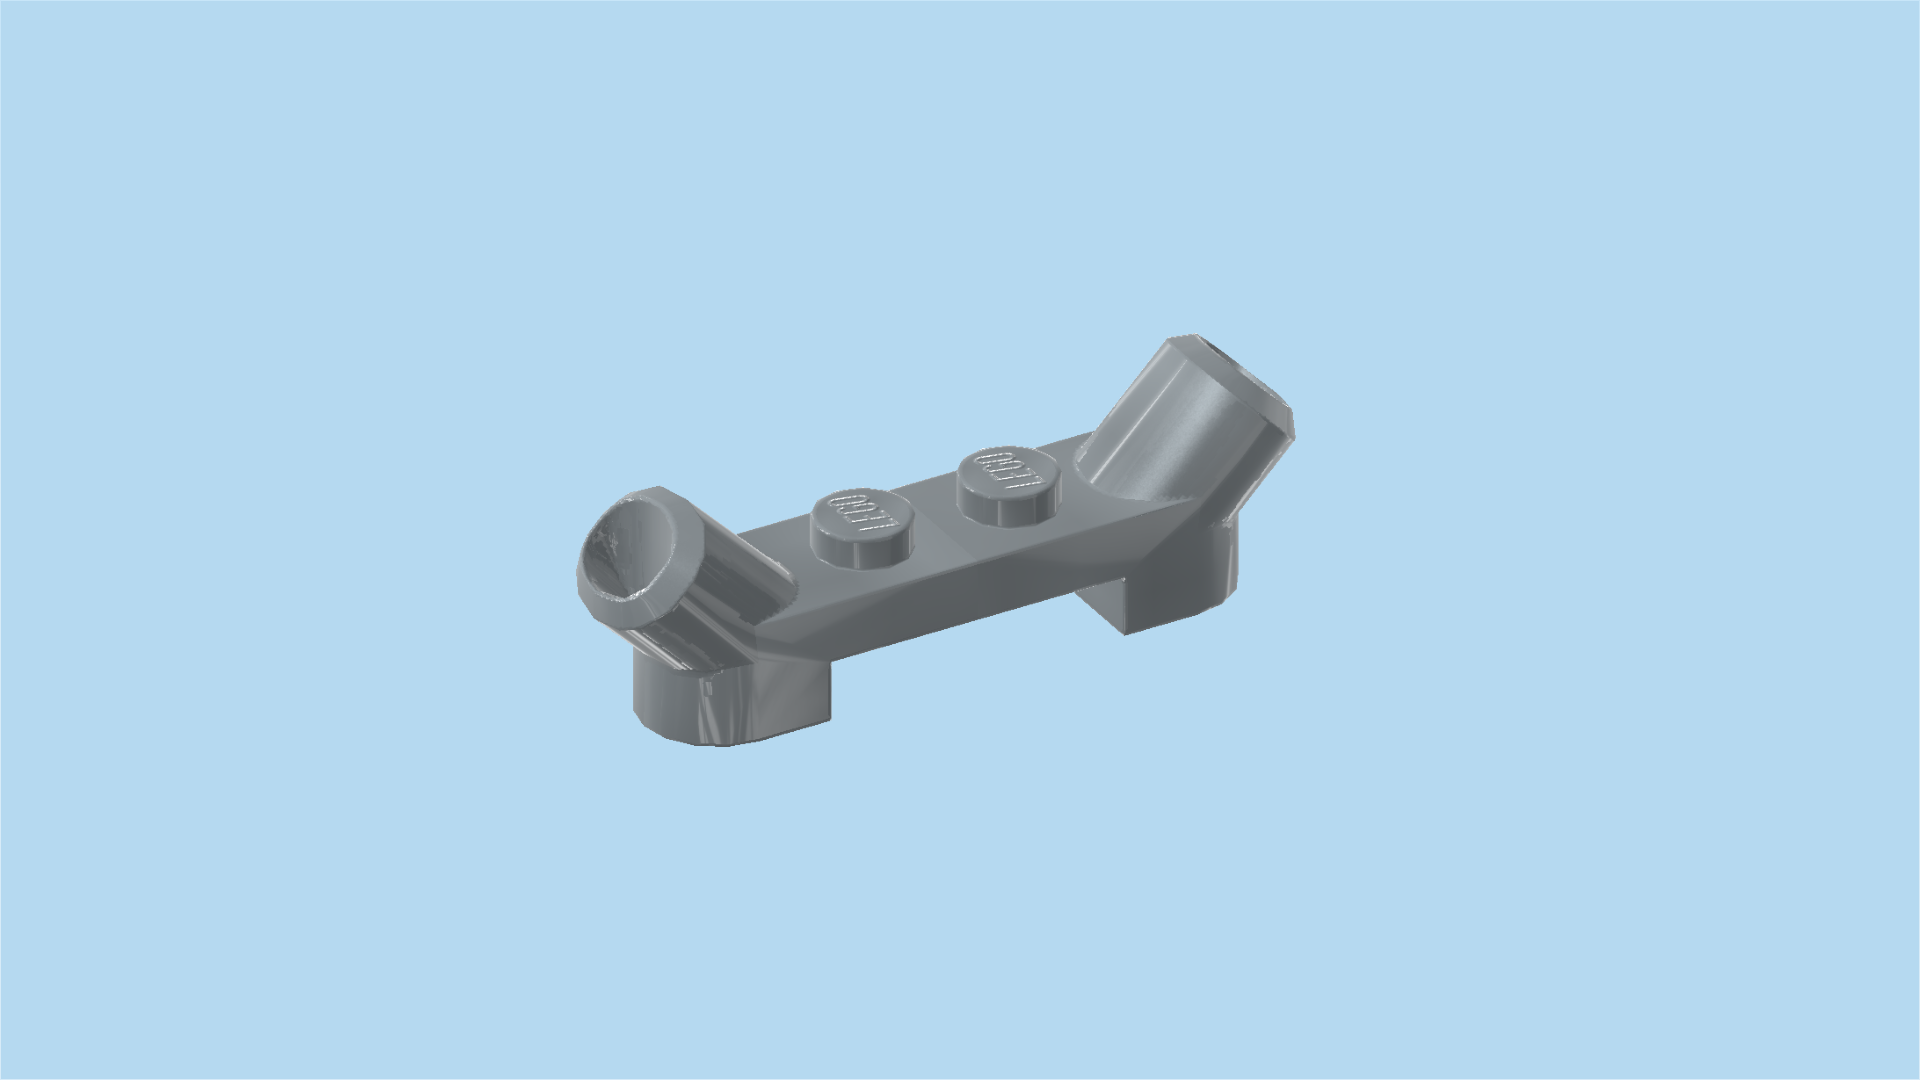
| Find 2 titanium metallic curve plates 2x3x⅔ with 2 knobs and fin. |
| Put 1 upright vertically on the left side knobs pointing to the front, 2 knobs towards the top, fin to the bottom. Make sure that its top edge is flush with the top edge of the angle plate. |
| Repeat symmetrically on the right. |
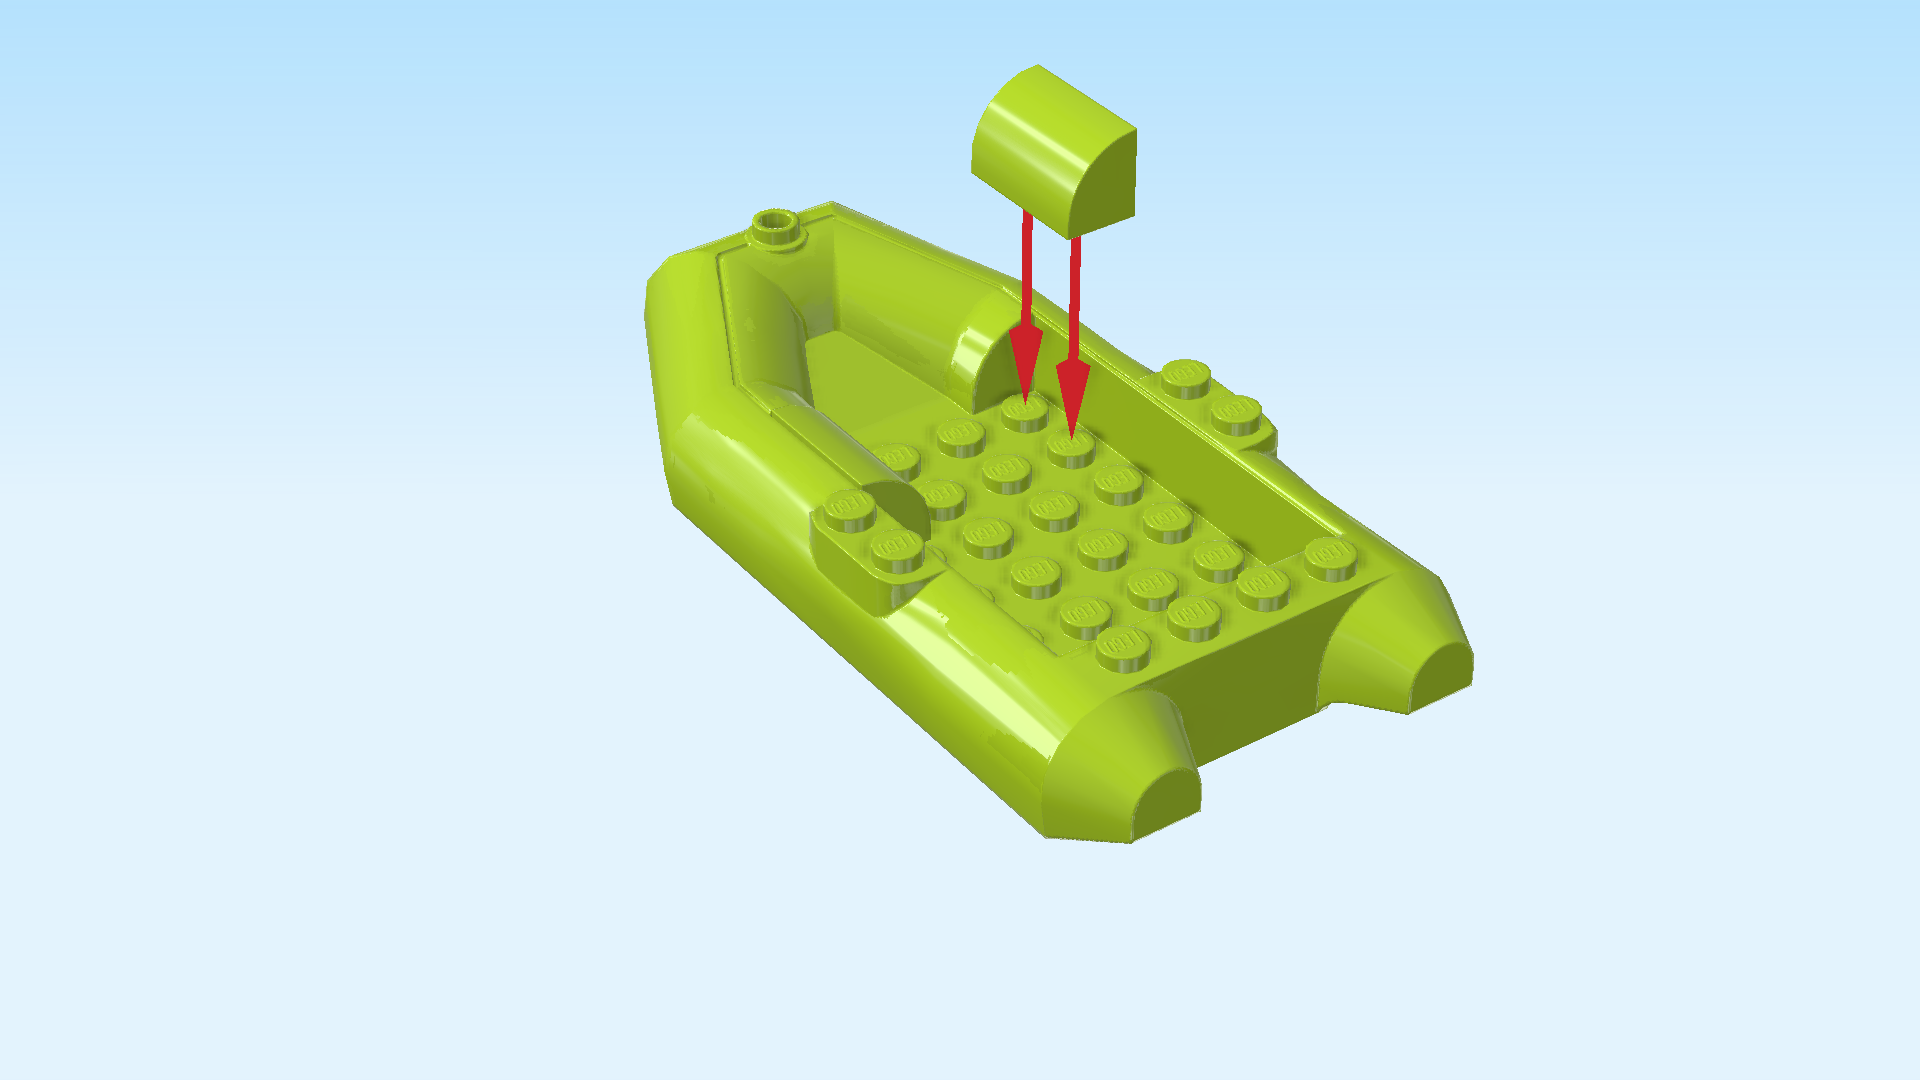
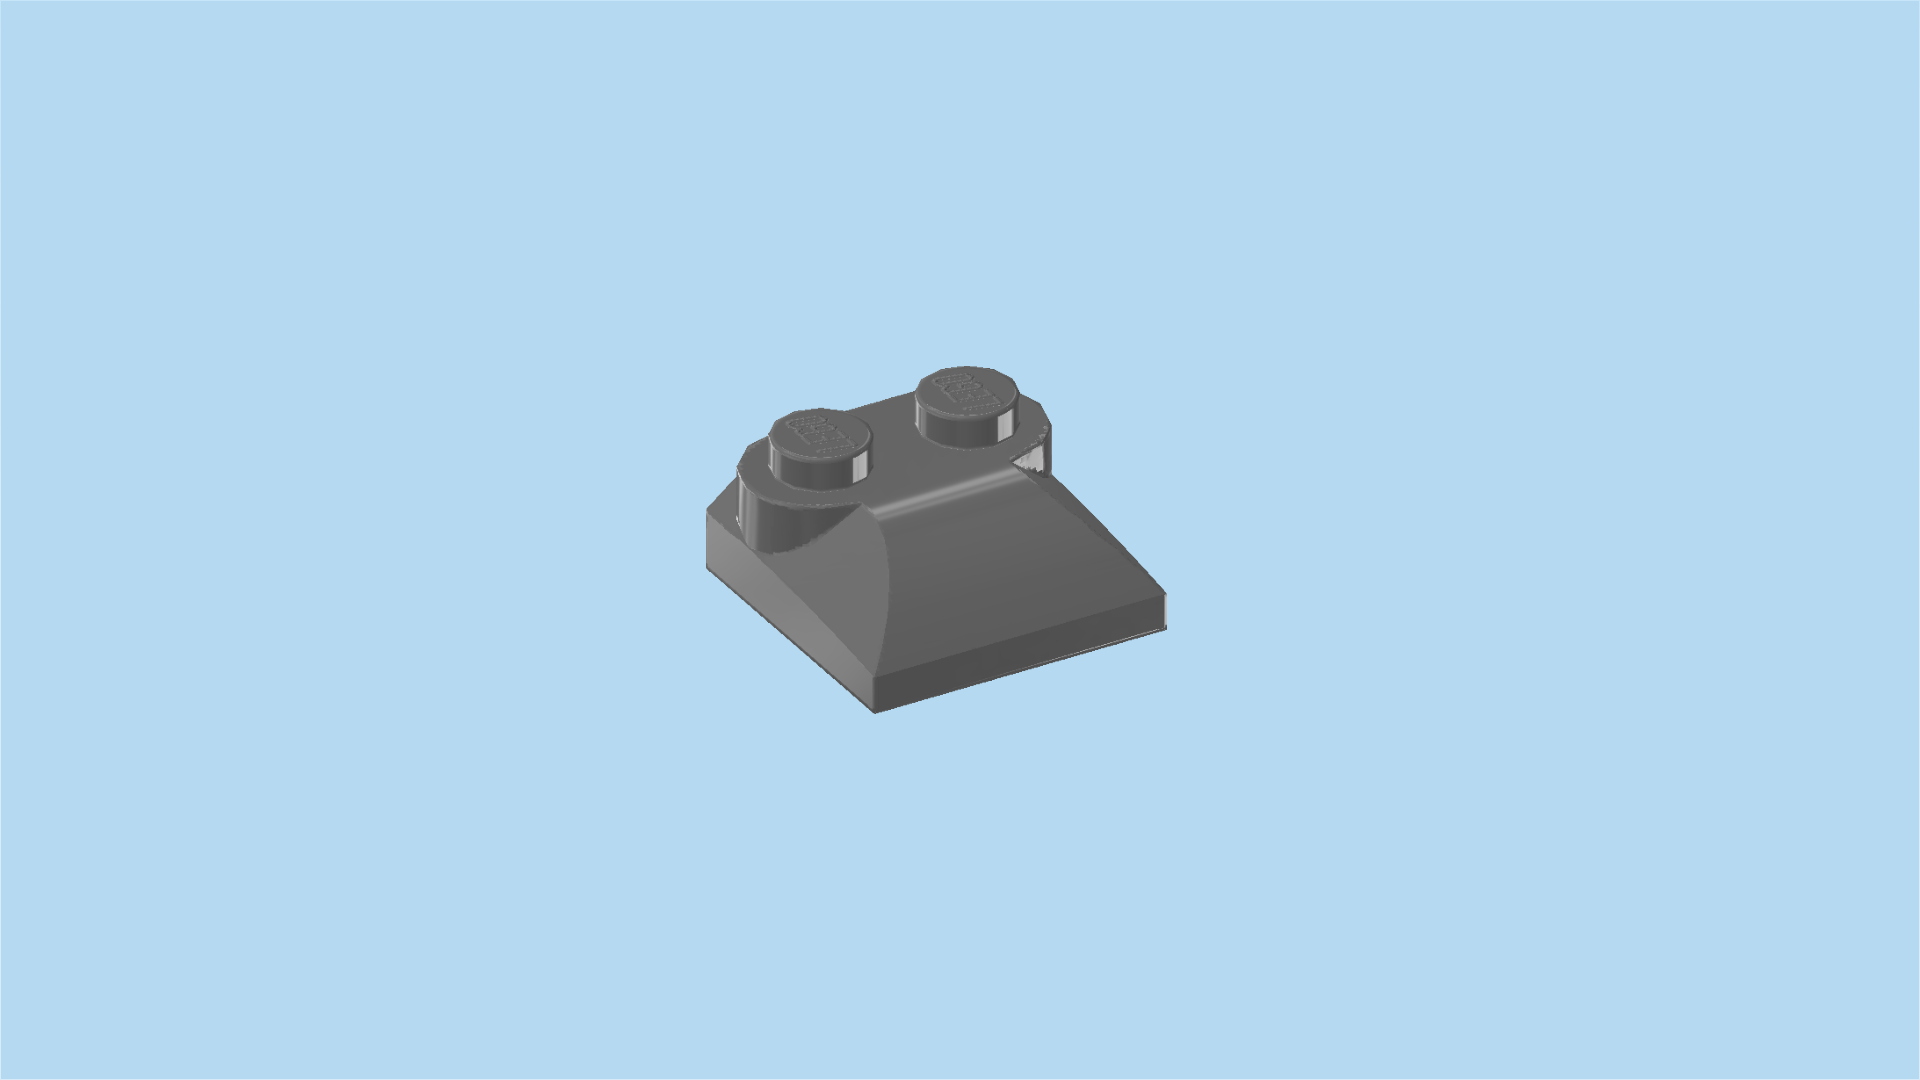
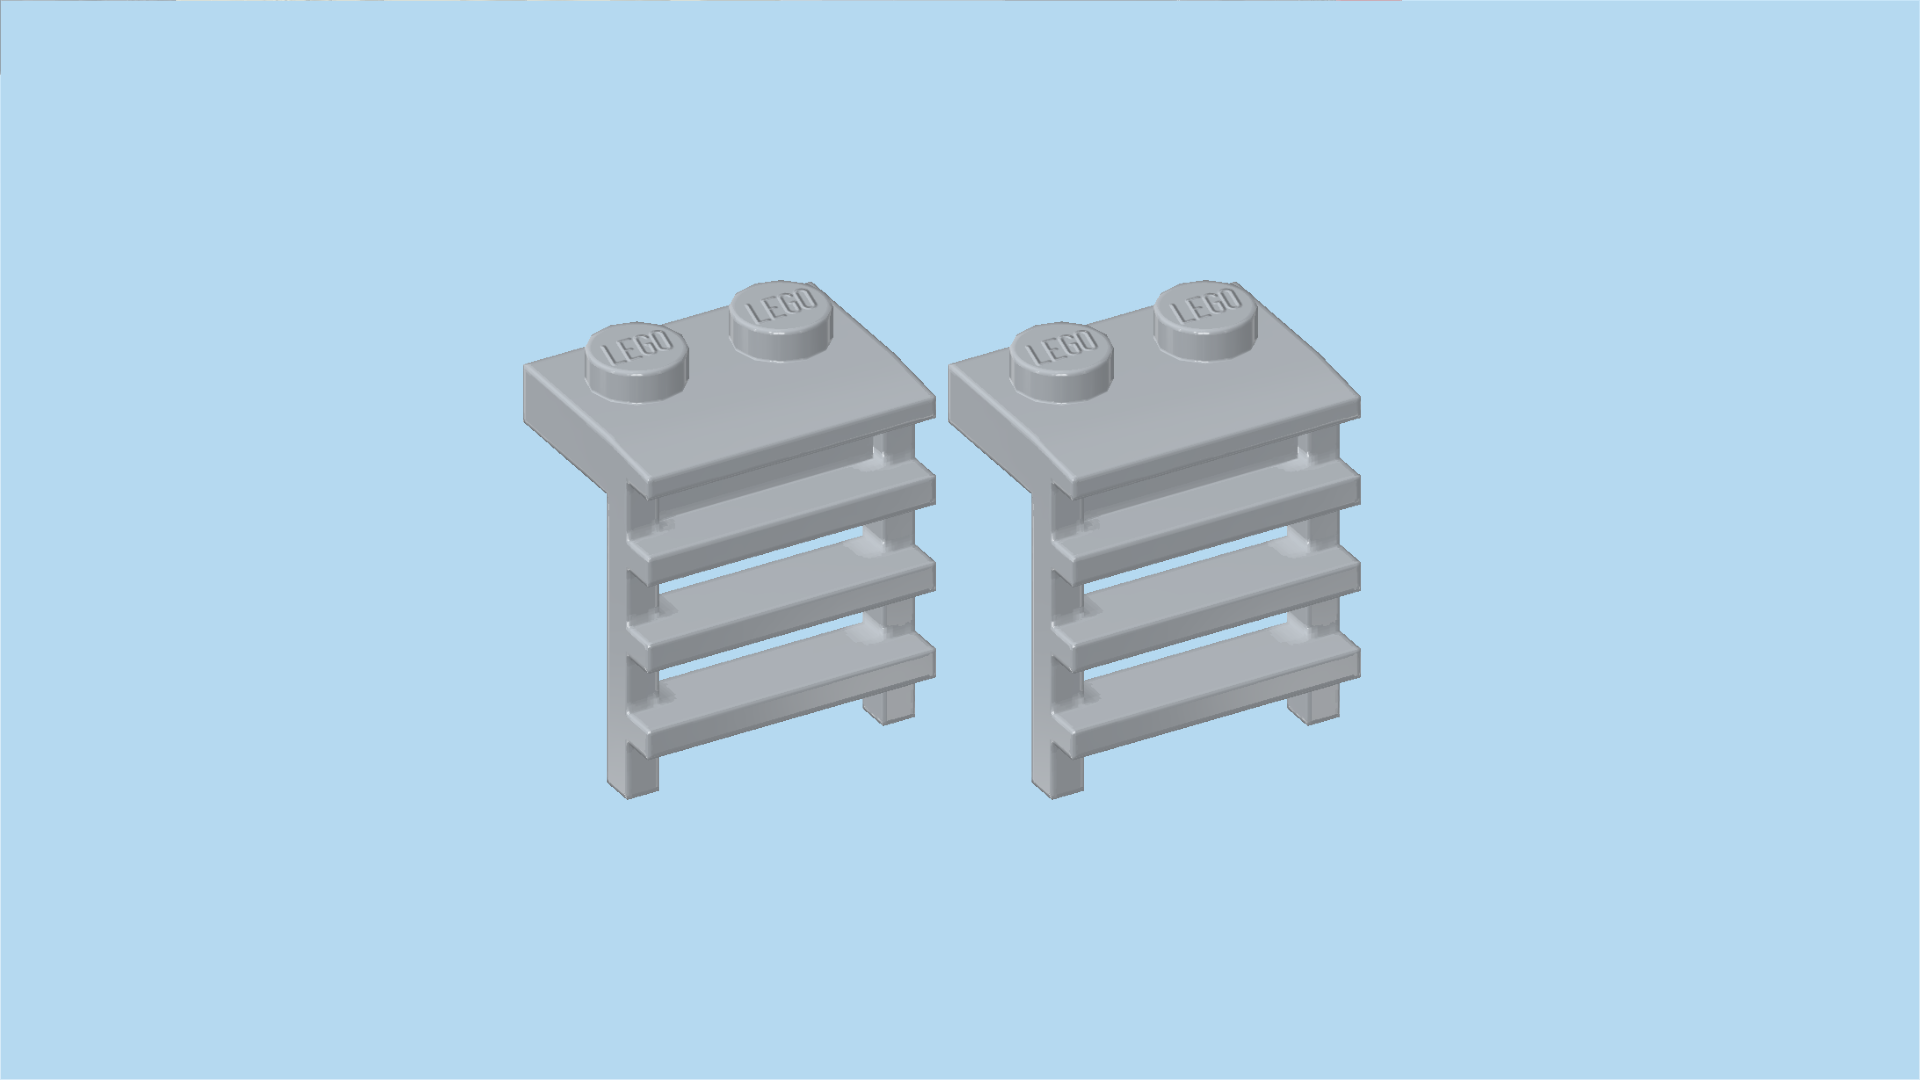
| Find 2 medium stone grey ladders 1x2x2. |
| Put 1 vertically on the rightmost column of the ship, skipping the frontmost knob of that column, ladder overhanging to the right. |
| If done correctly, there is 1 empty knob between the previous piece and the current ladder piece. |
| Repeat symmetrically on the left. |
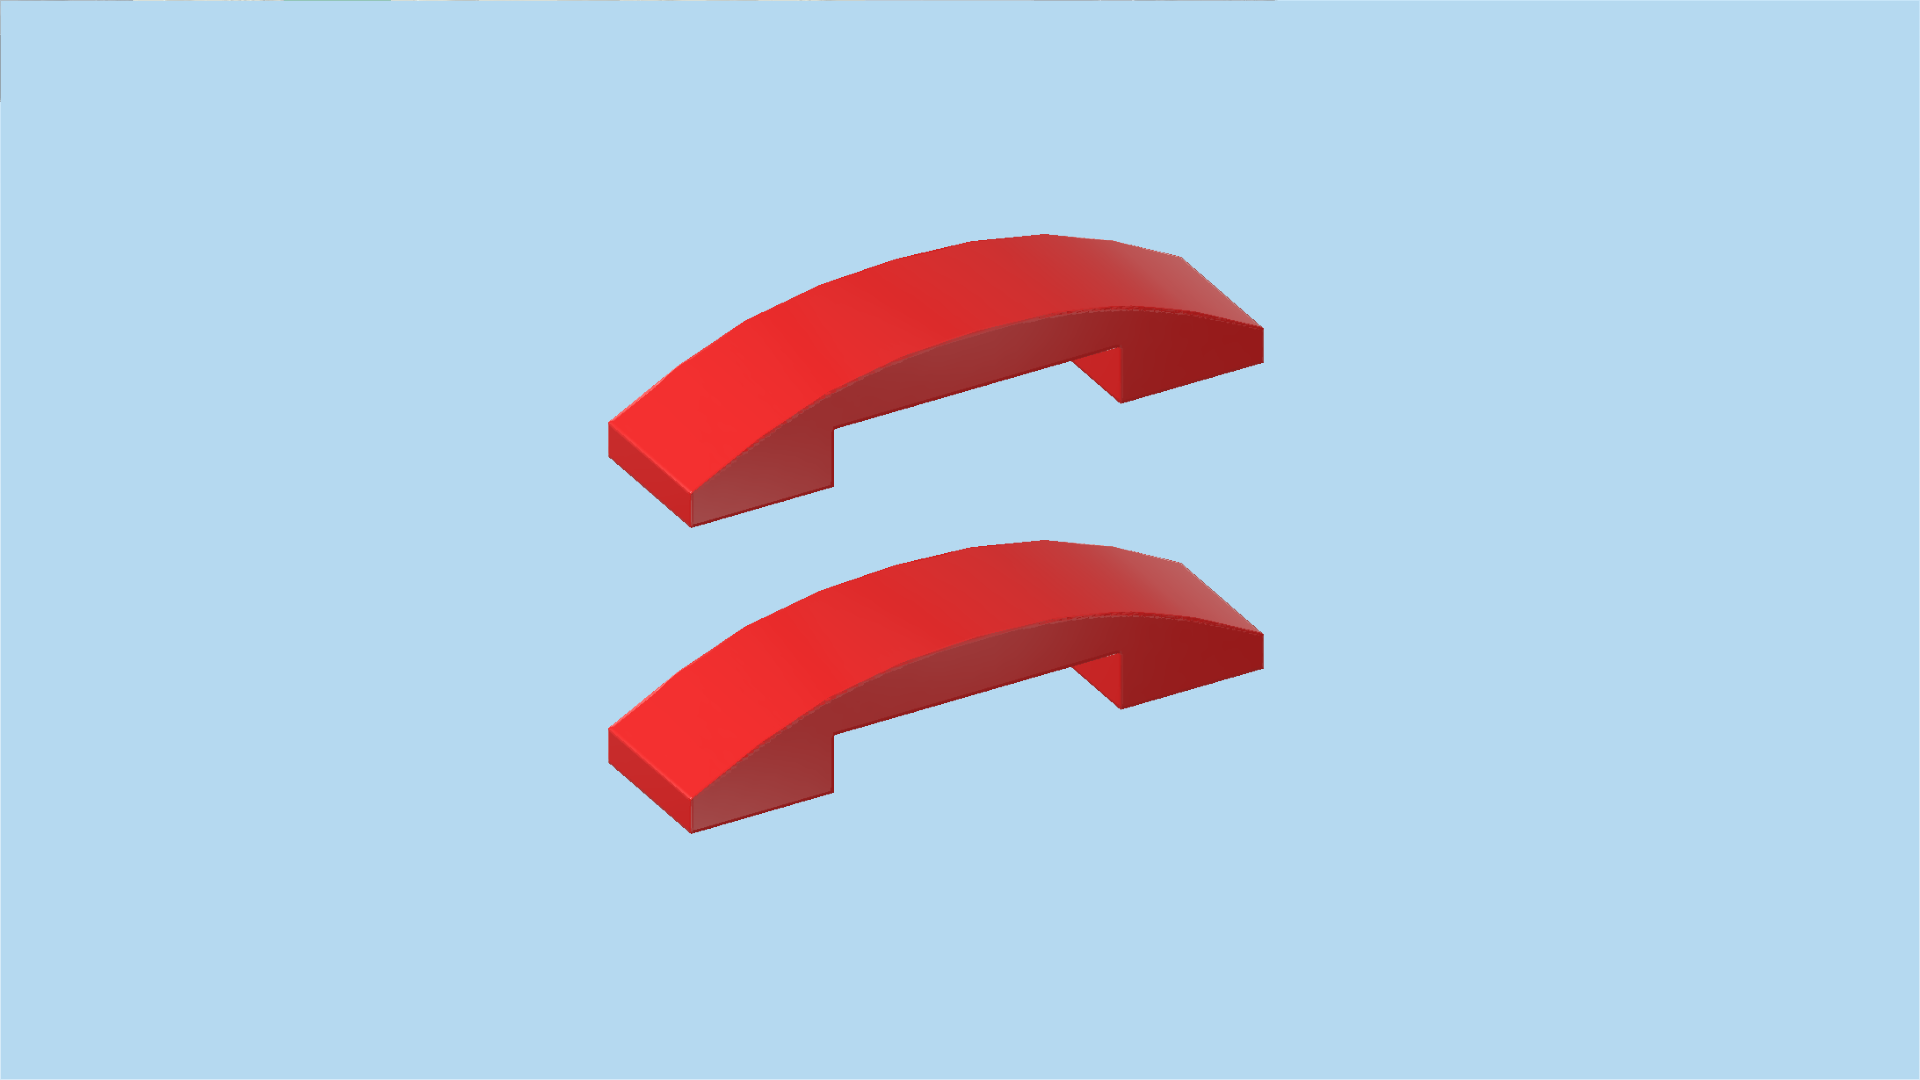
| Find 2 bright red roof tiles 1x2, 45°. |
| Skip 2 knobs to the back from the previous piece, and put 1 horizontally on the leftmost row and the top knob of the roof tile 1x2x2, slope to the left. |
| Repeat symmetrically on the right, slope to the right. |
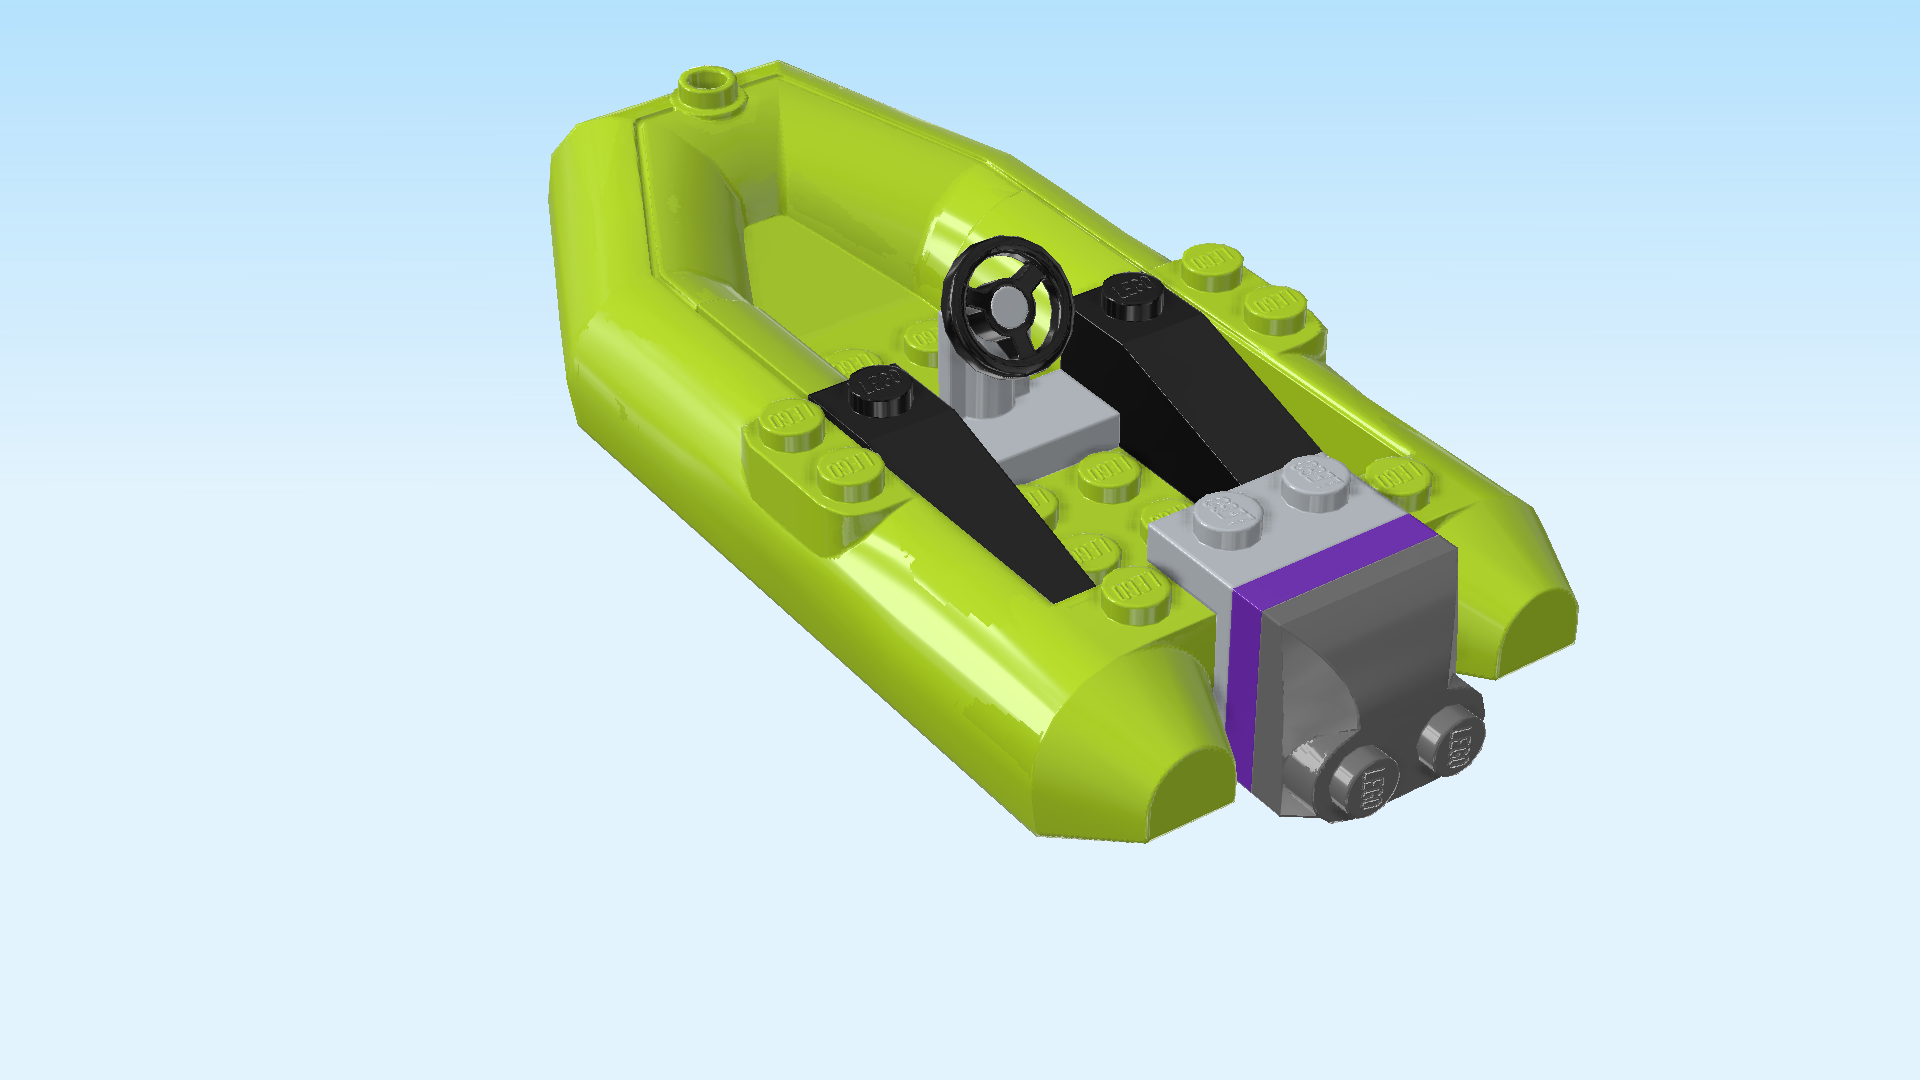
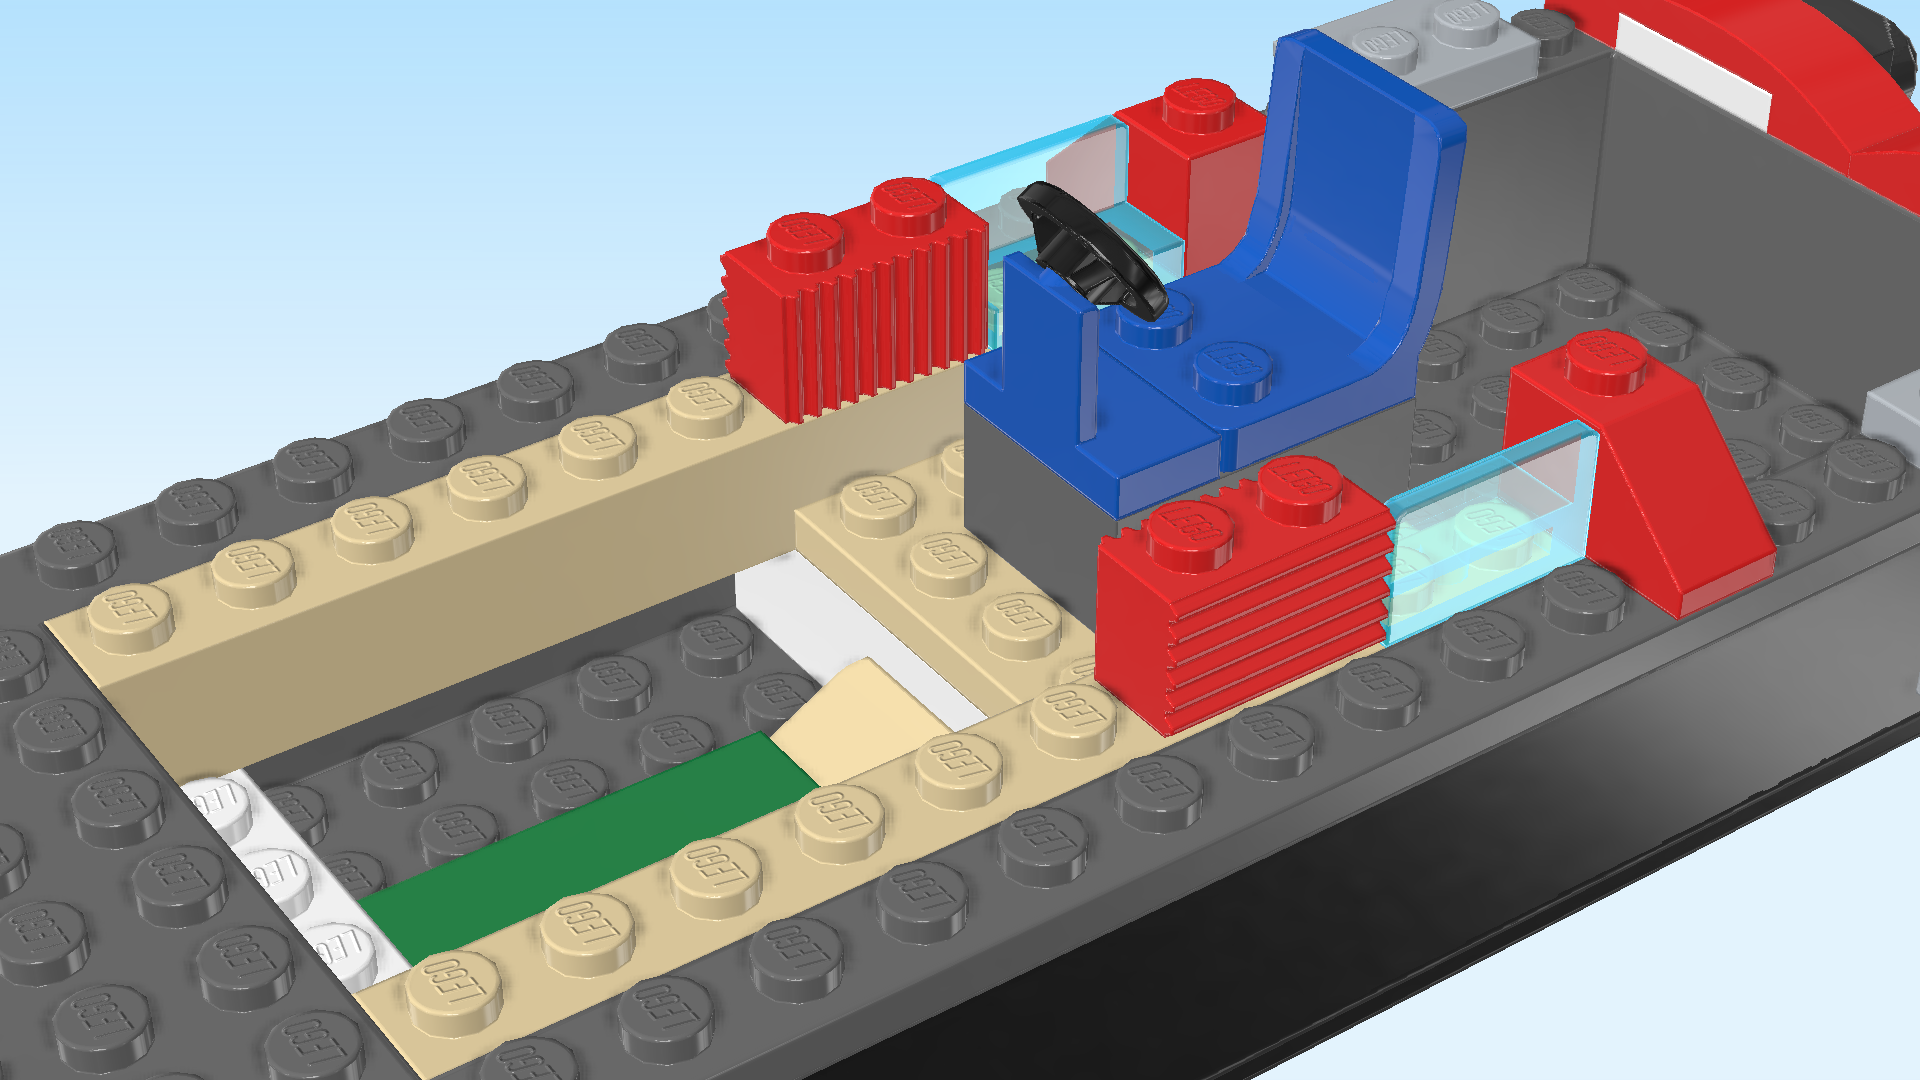
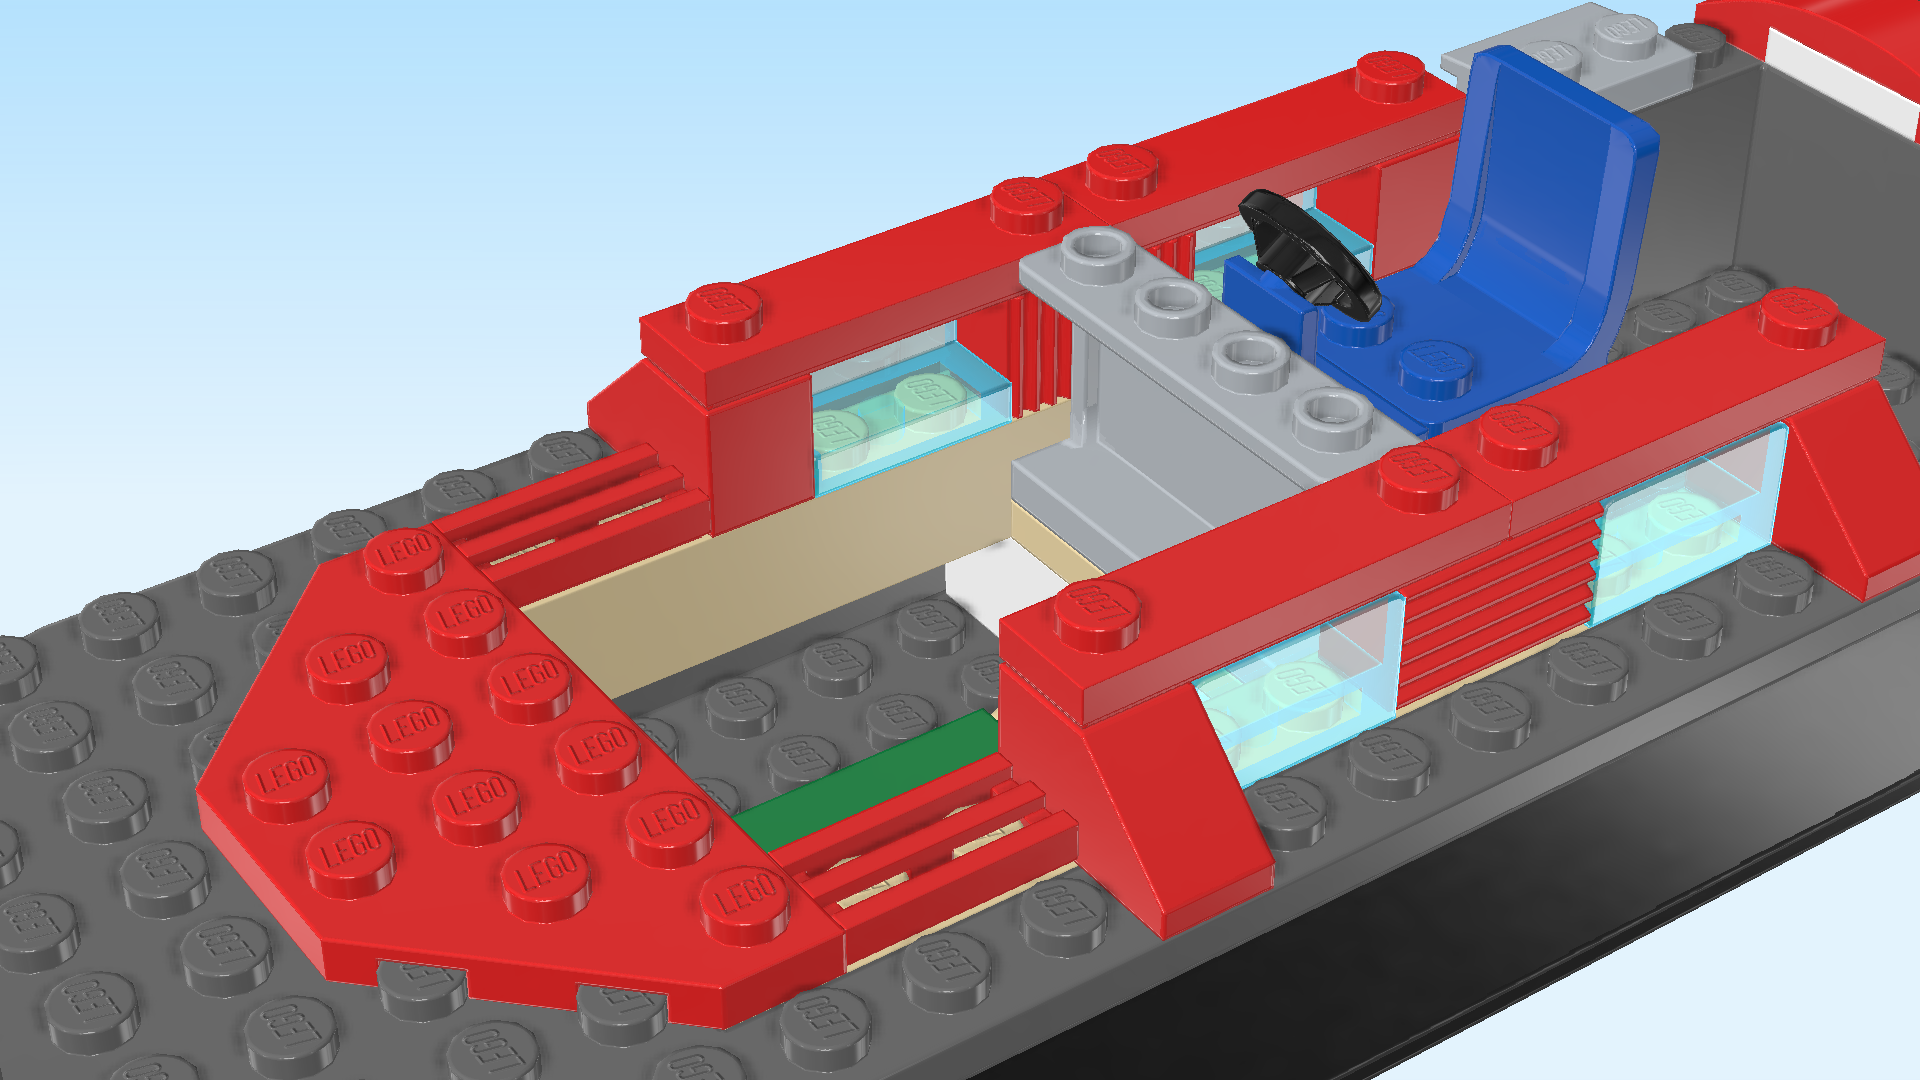
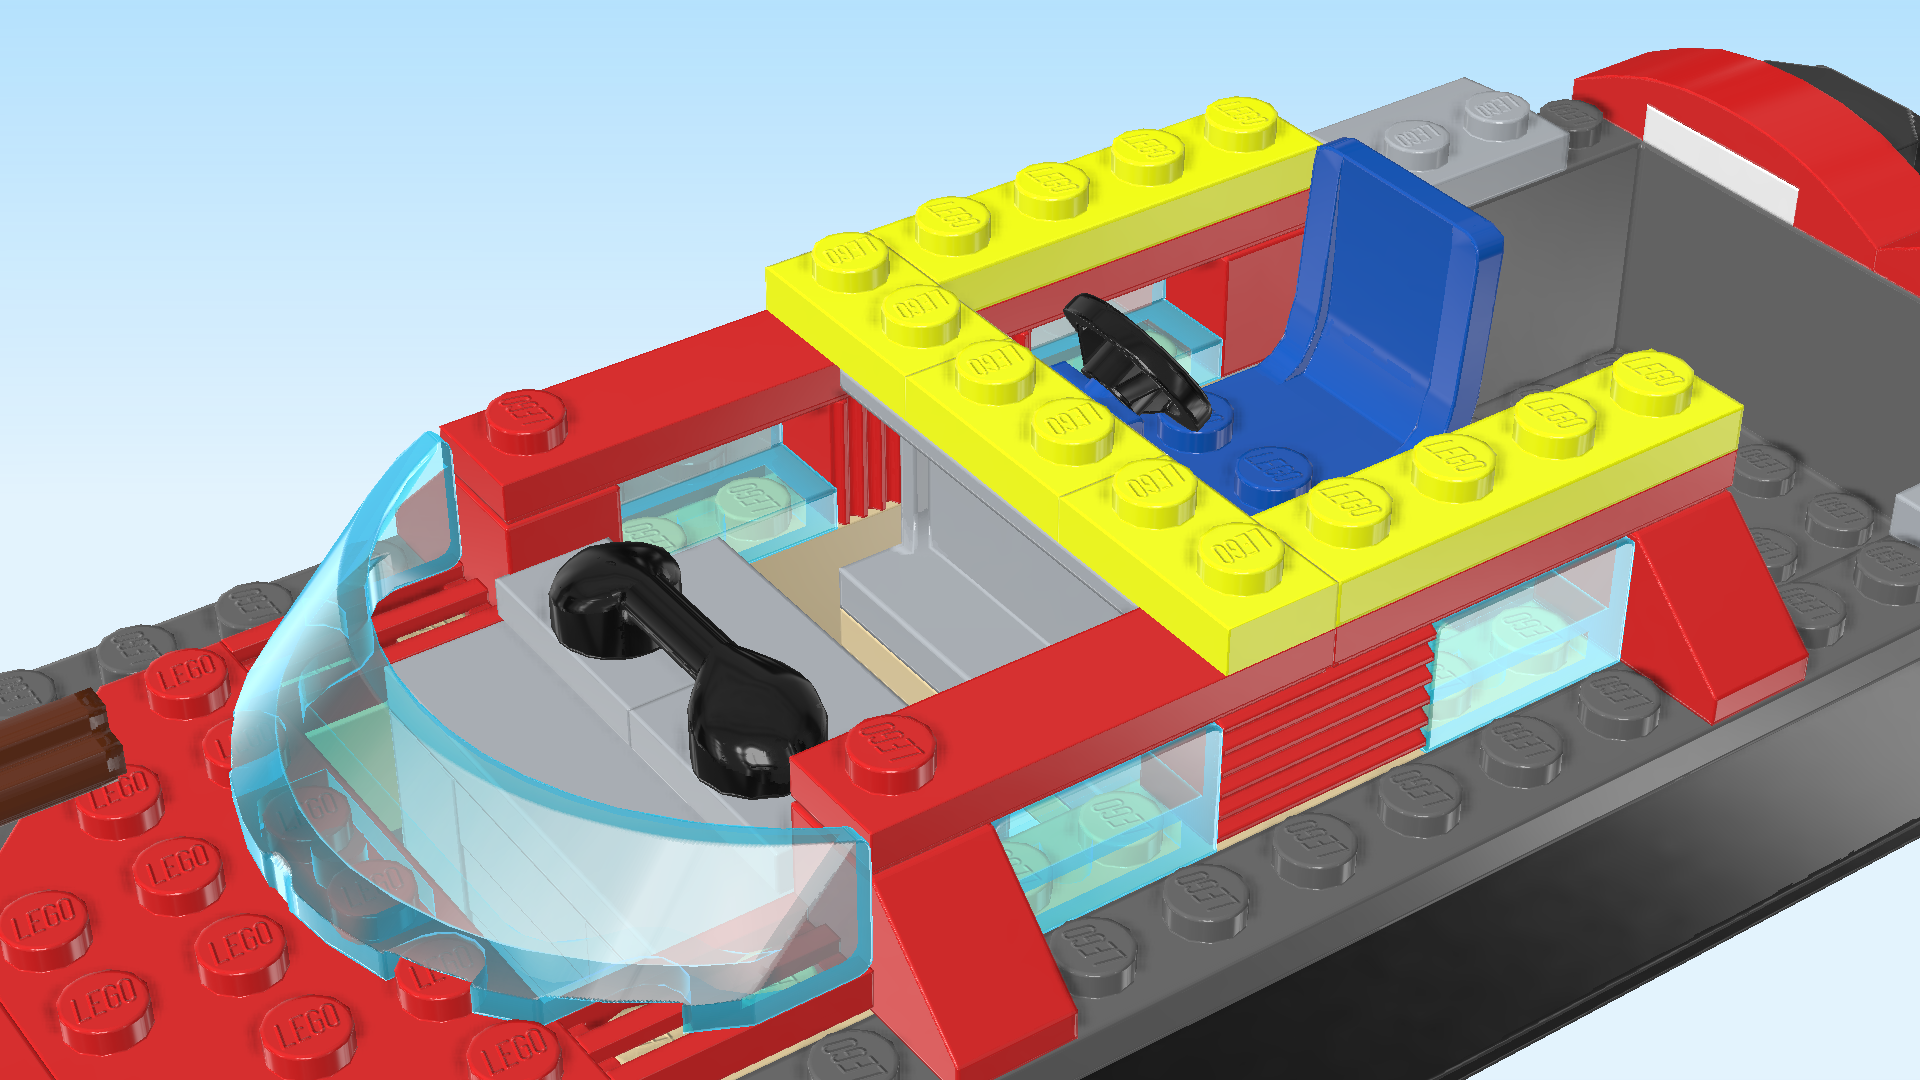
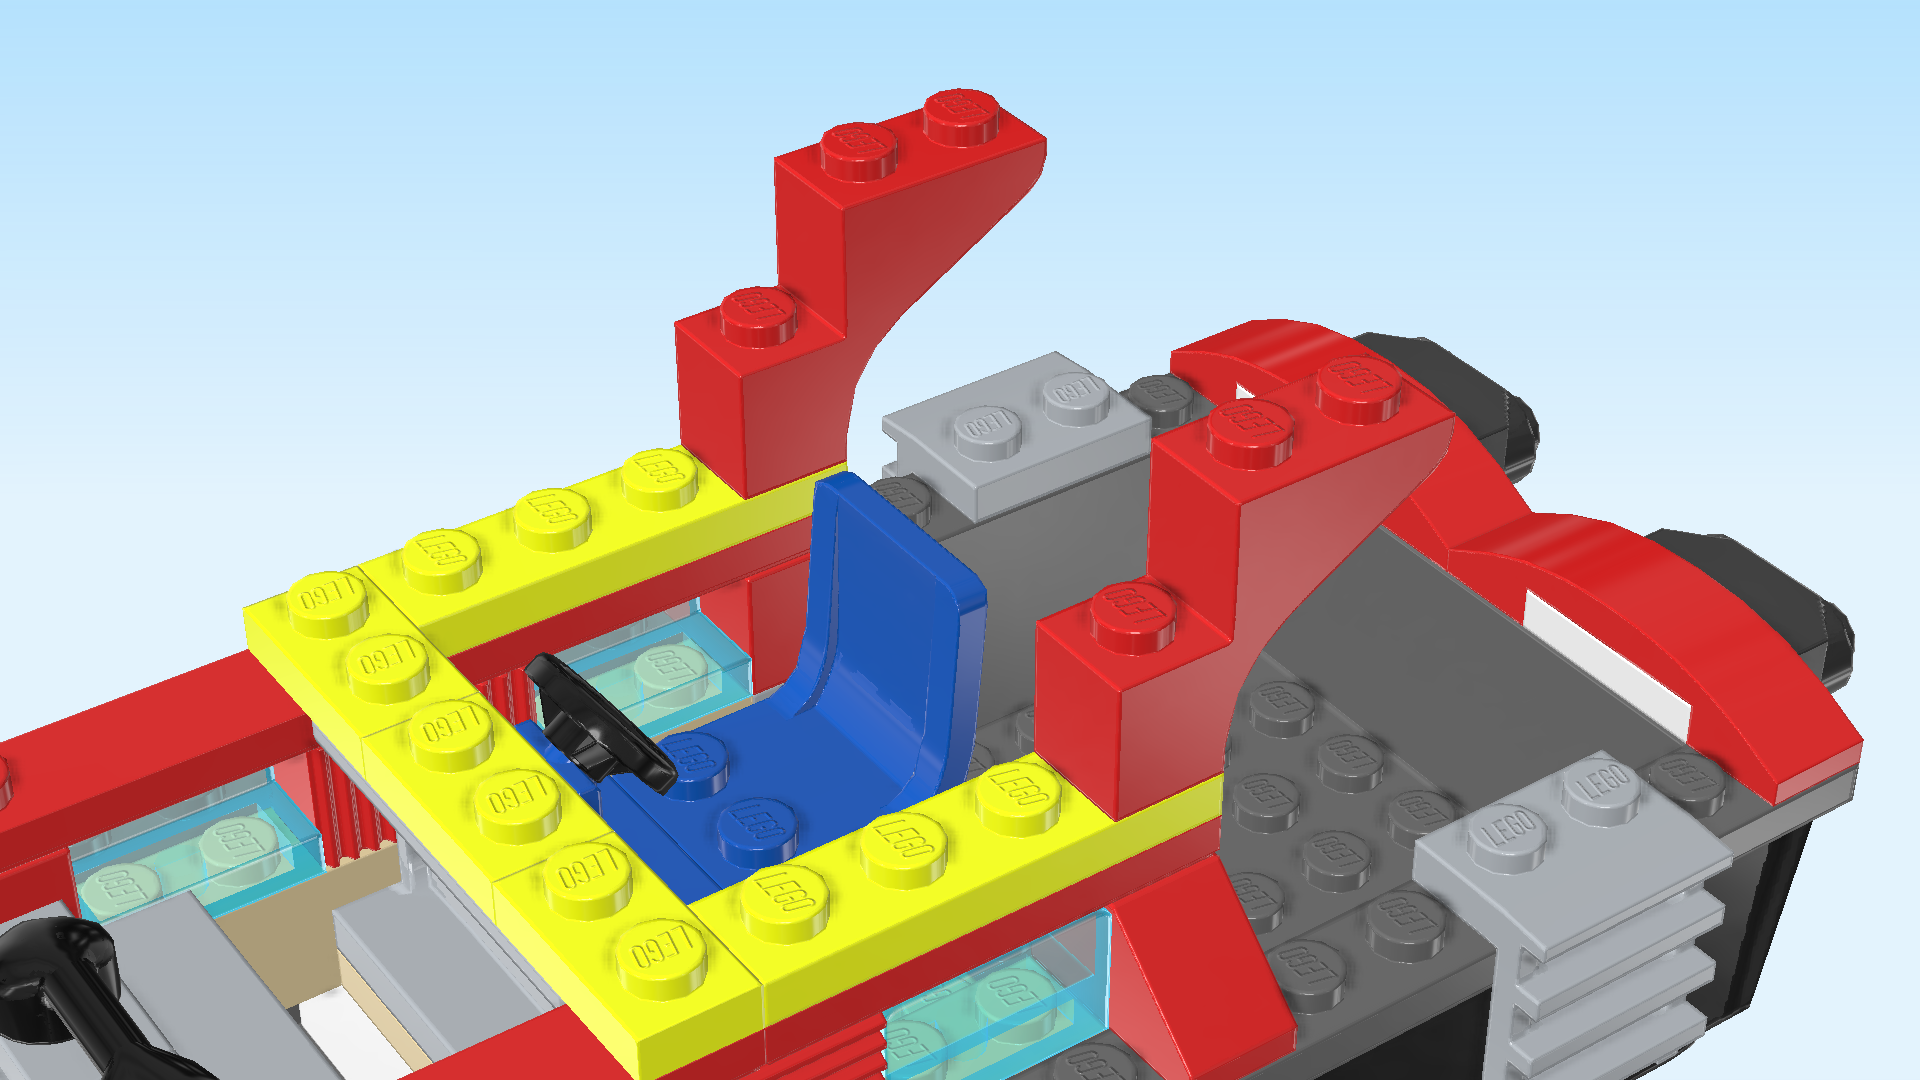
| Next, we will build the captain's seat. |
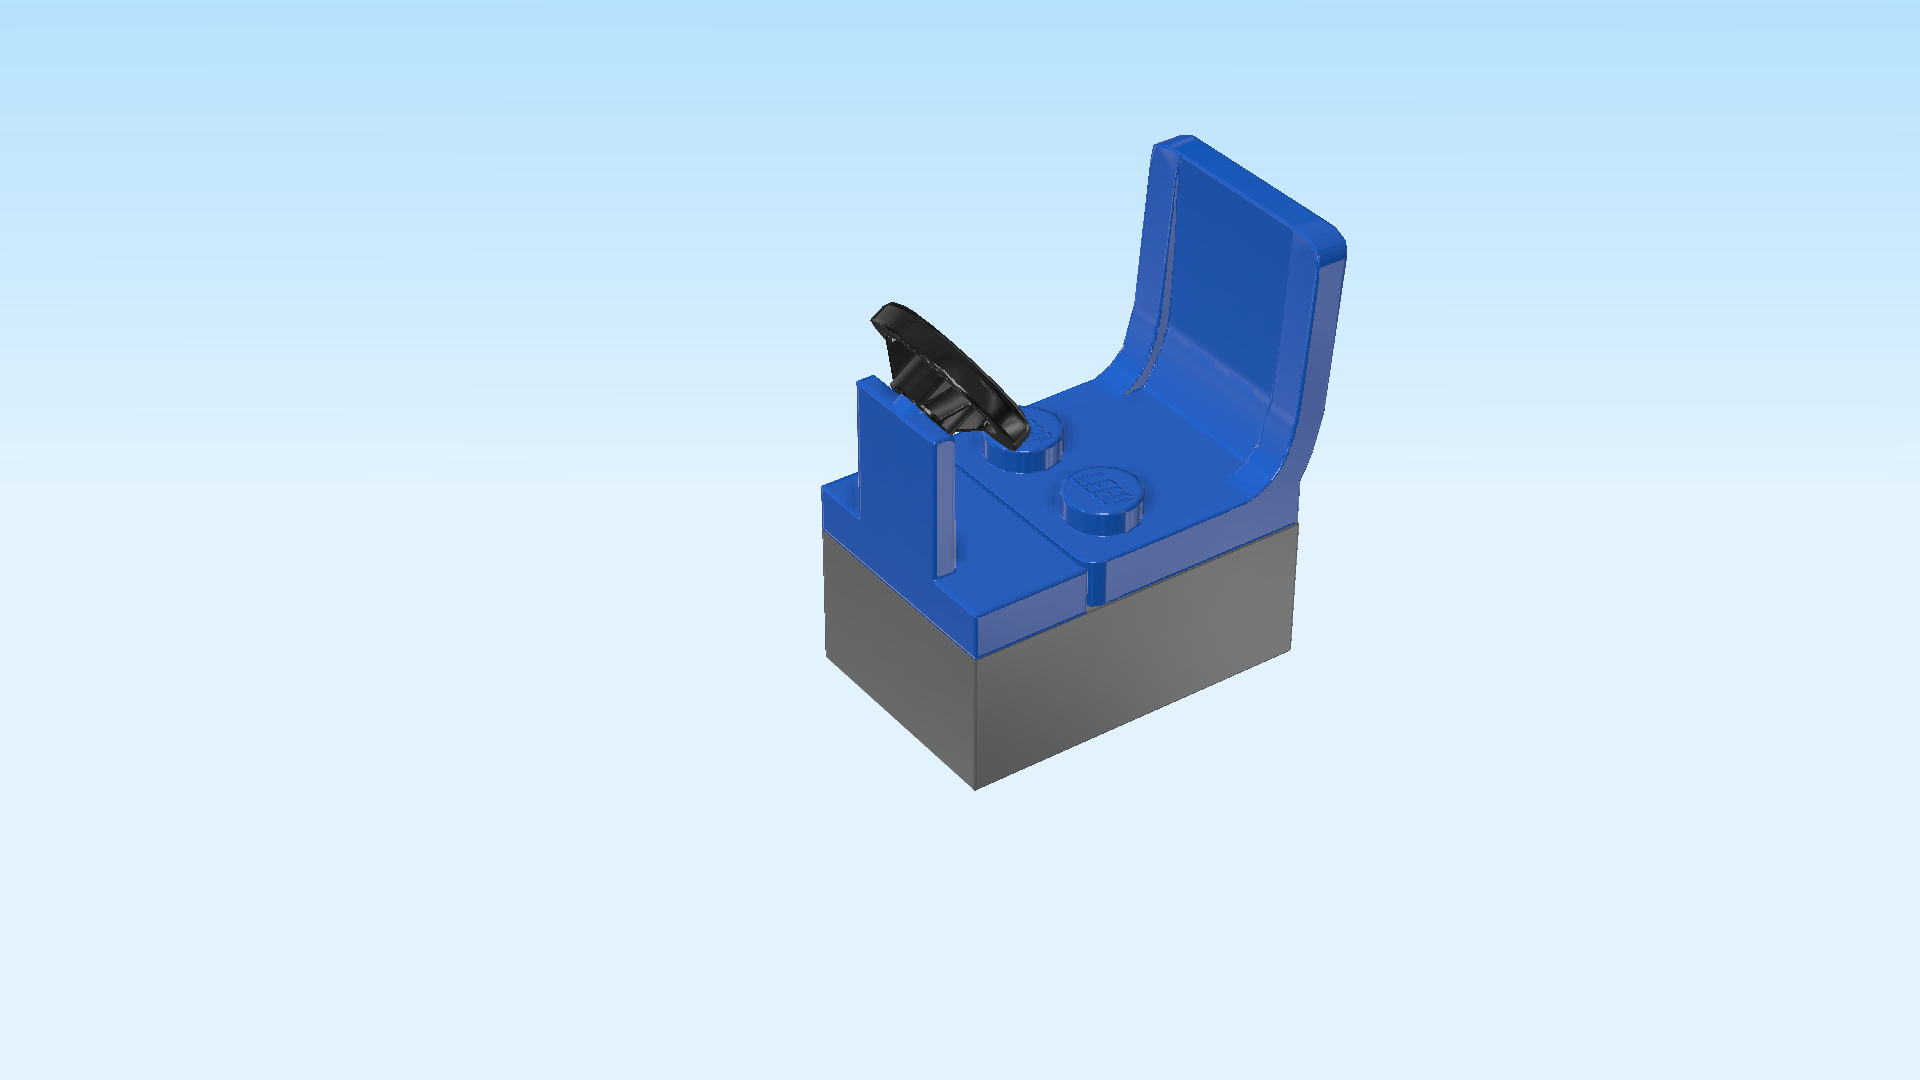
| Collect the following 3 pieces: |
| 1 dark stone grey brick 2x3, |
| 1 bright blue seat 2x2x2, |
| and 1 black and bright blue small steering wheel with plate 1x2. |
| Put the brick 2x3 horizontally on the table. |
| Put the seat 2x2x2 on the 4 rightmost knobs, seatback to the right. |
| Put the small steering wheel with plate 1x2 vertically on the leftmost column, steering wheel to the right. |
| Turn the ship underbody 90° so that it is oriented horizontally. Make sure the nose of the ship is pointing to the left. |
| The captain's seat is finished! Mount it horizontally on the 2 middle rows of the ship. Start from the right edge of the plate 4x4 mounted there. |
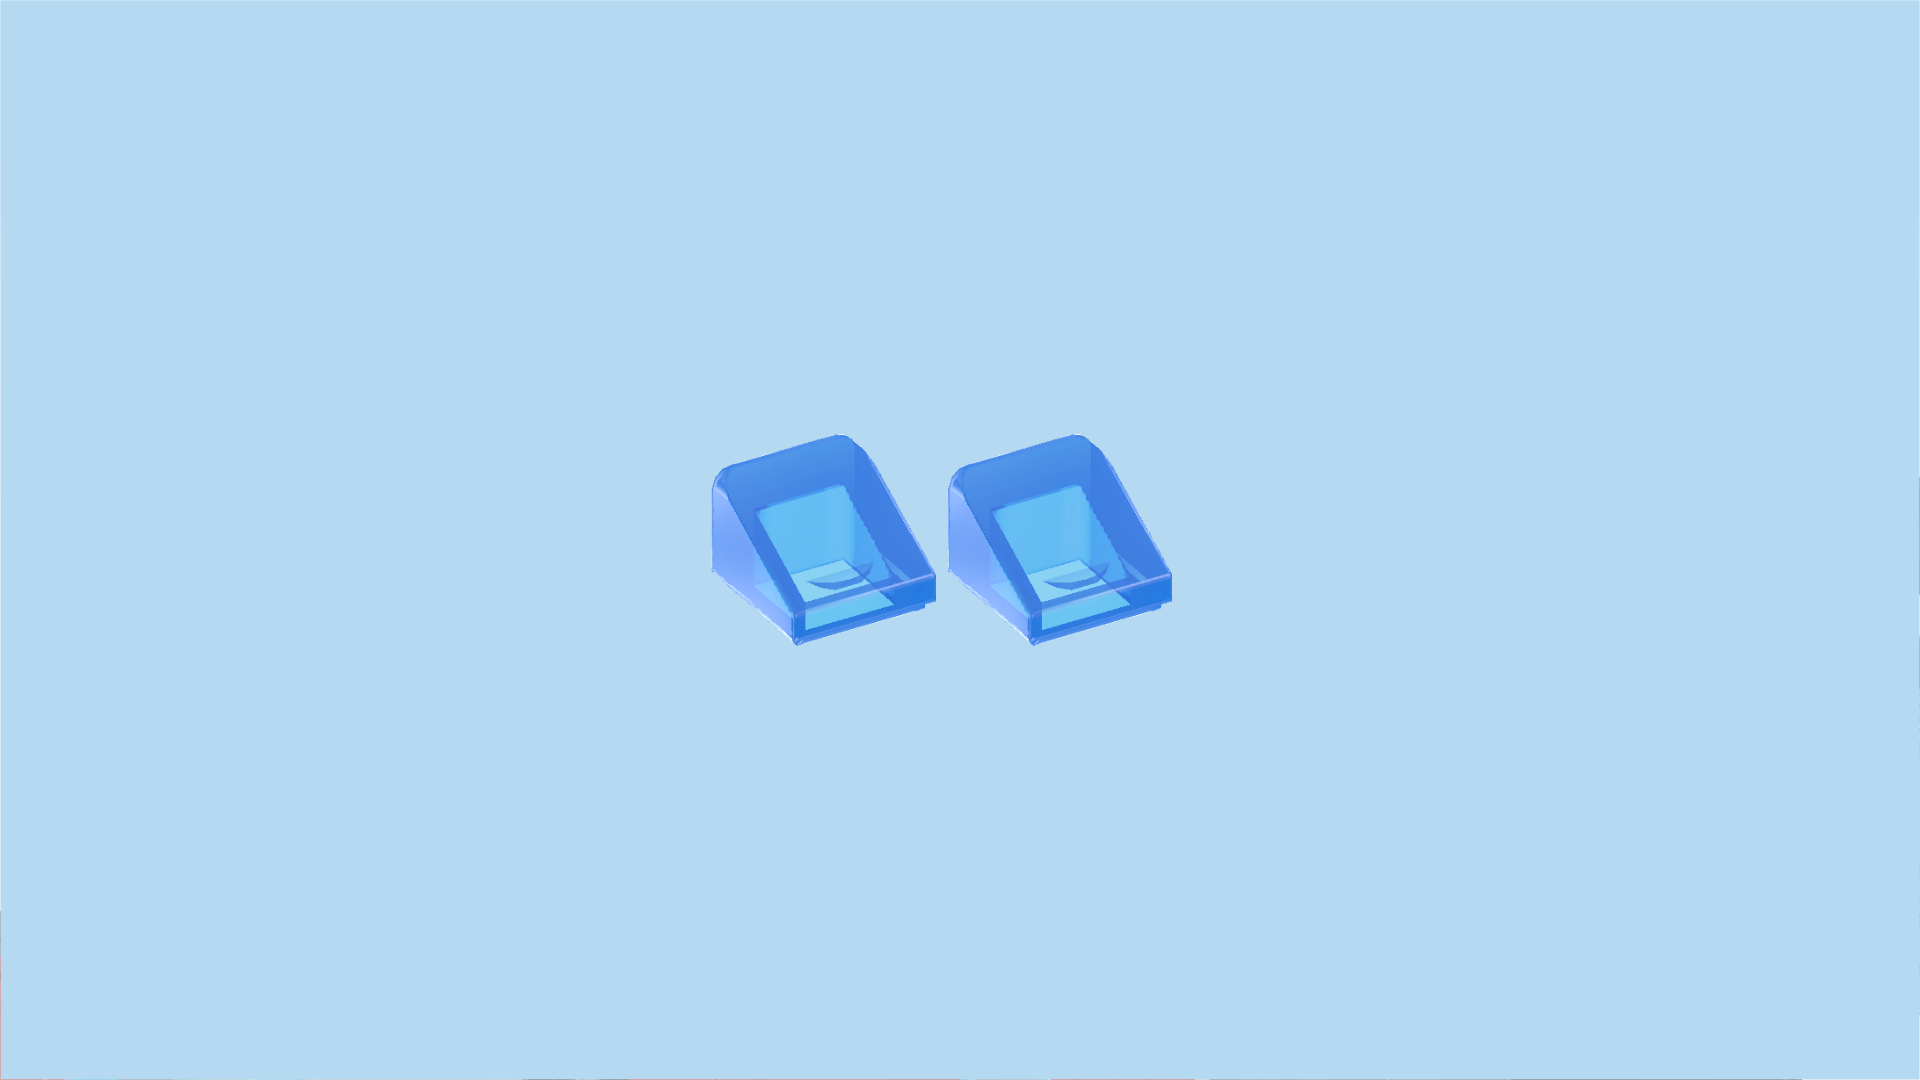
| Find 2 transparent light blue wall elements 1x2x1. |
| Put 1 horizontally on the second row from the front, directly to the left of the roof tile 1x2 mounted there, panel to the front. |
| Repeat symmetrically at the back, panel to the back. |
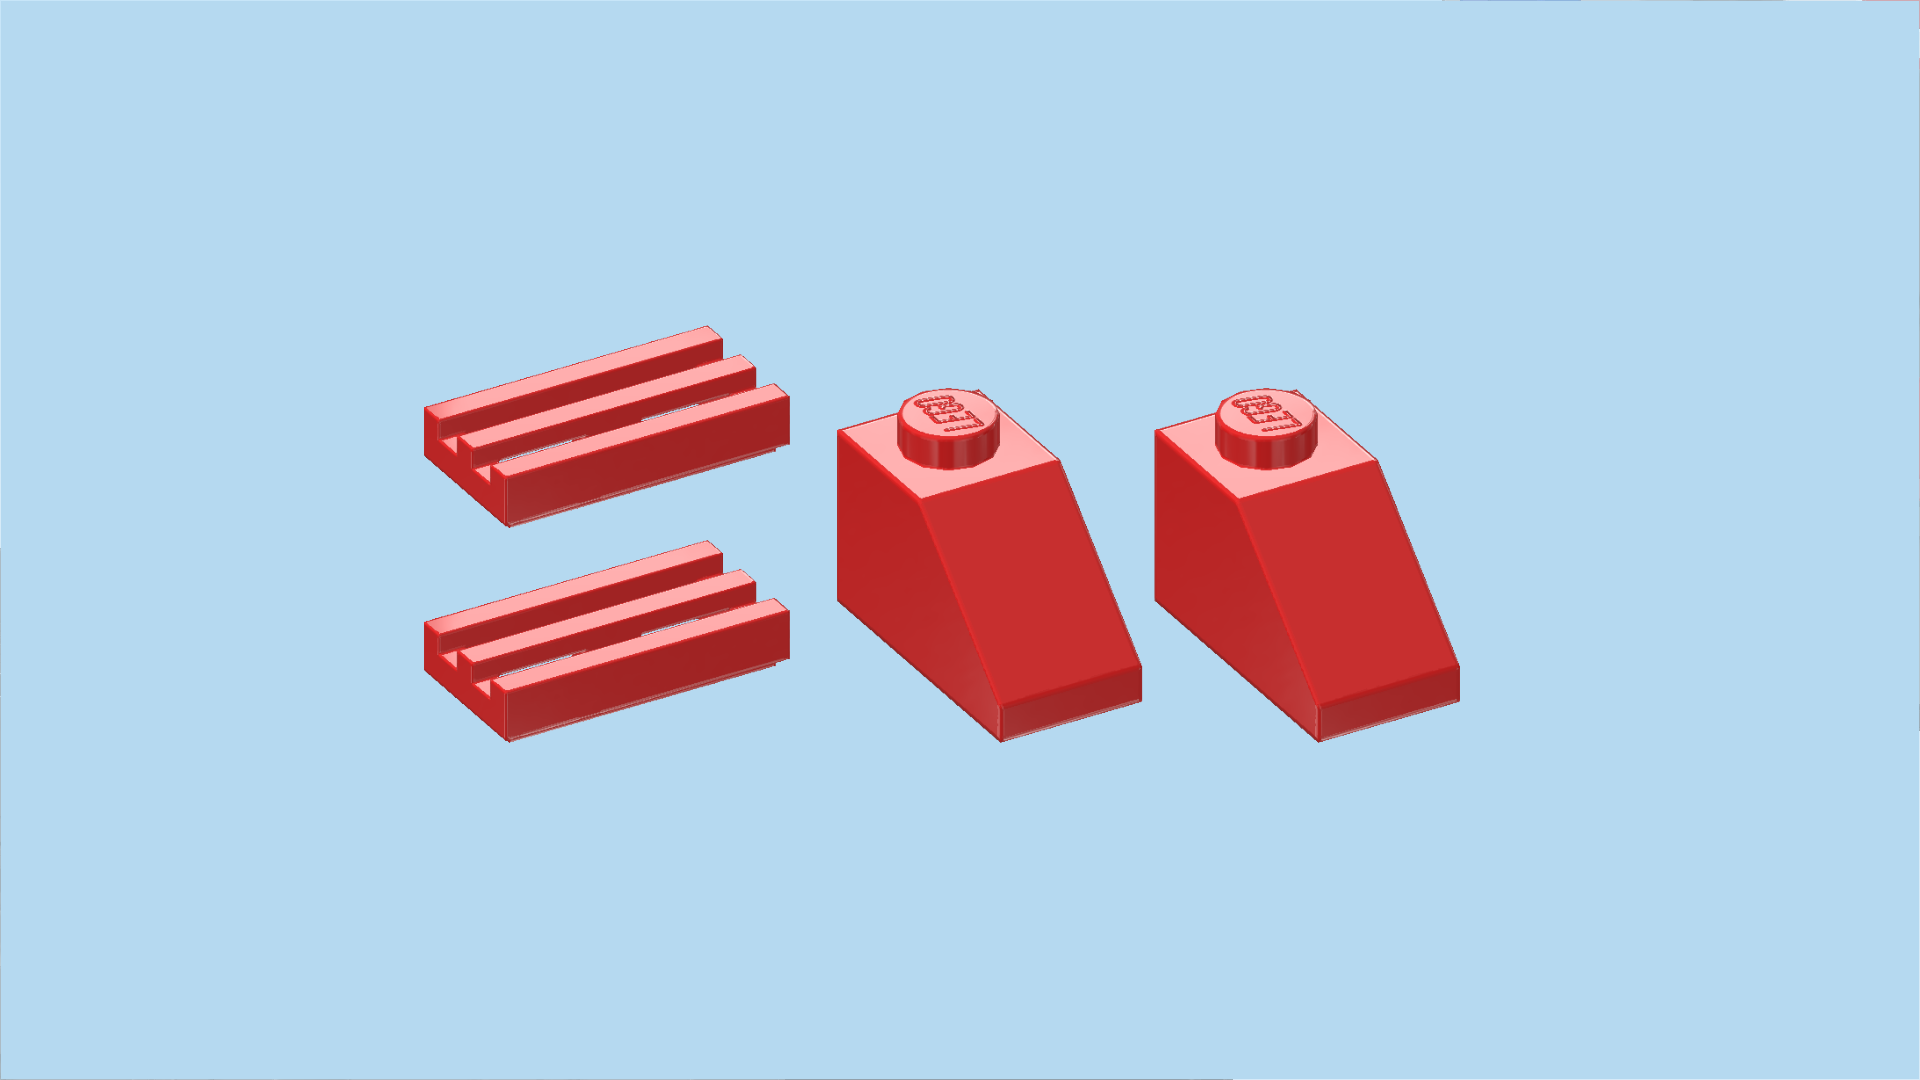
| Find 2 bright red profile bricks 1x2. |
| Put 1 horizontally to the left of the previous piece, horizontal grooves to the back. |
| Repeat symmetrically at the front, horizontal grooves to the front. |
| Find 2 transparent light blue wall elements 1x2x1. |
| Put 1 horizontally to the left of the previous piece, panel to the front. |
| Repeat symmetrically at the back, panel to the back. |
| Collect the following 4 pieces: |
| 2 bright red grille tiles 1x2, |
| and 2 bright red roof tiles 1x2, 45°. |
| Put 1 roof tile vertically to the left of the previous piece, slope to the back. Make sure its back connection point sits on the backmost row of the ship. |
| Put 1 grille tile horizontally on the second row from the back, directly to the left of the previous piece. |
| Repeat symmetrically at the front with the 2 remaining pieces. |
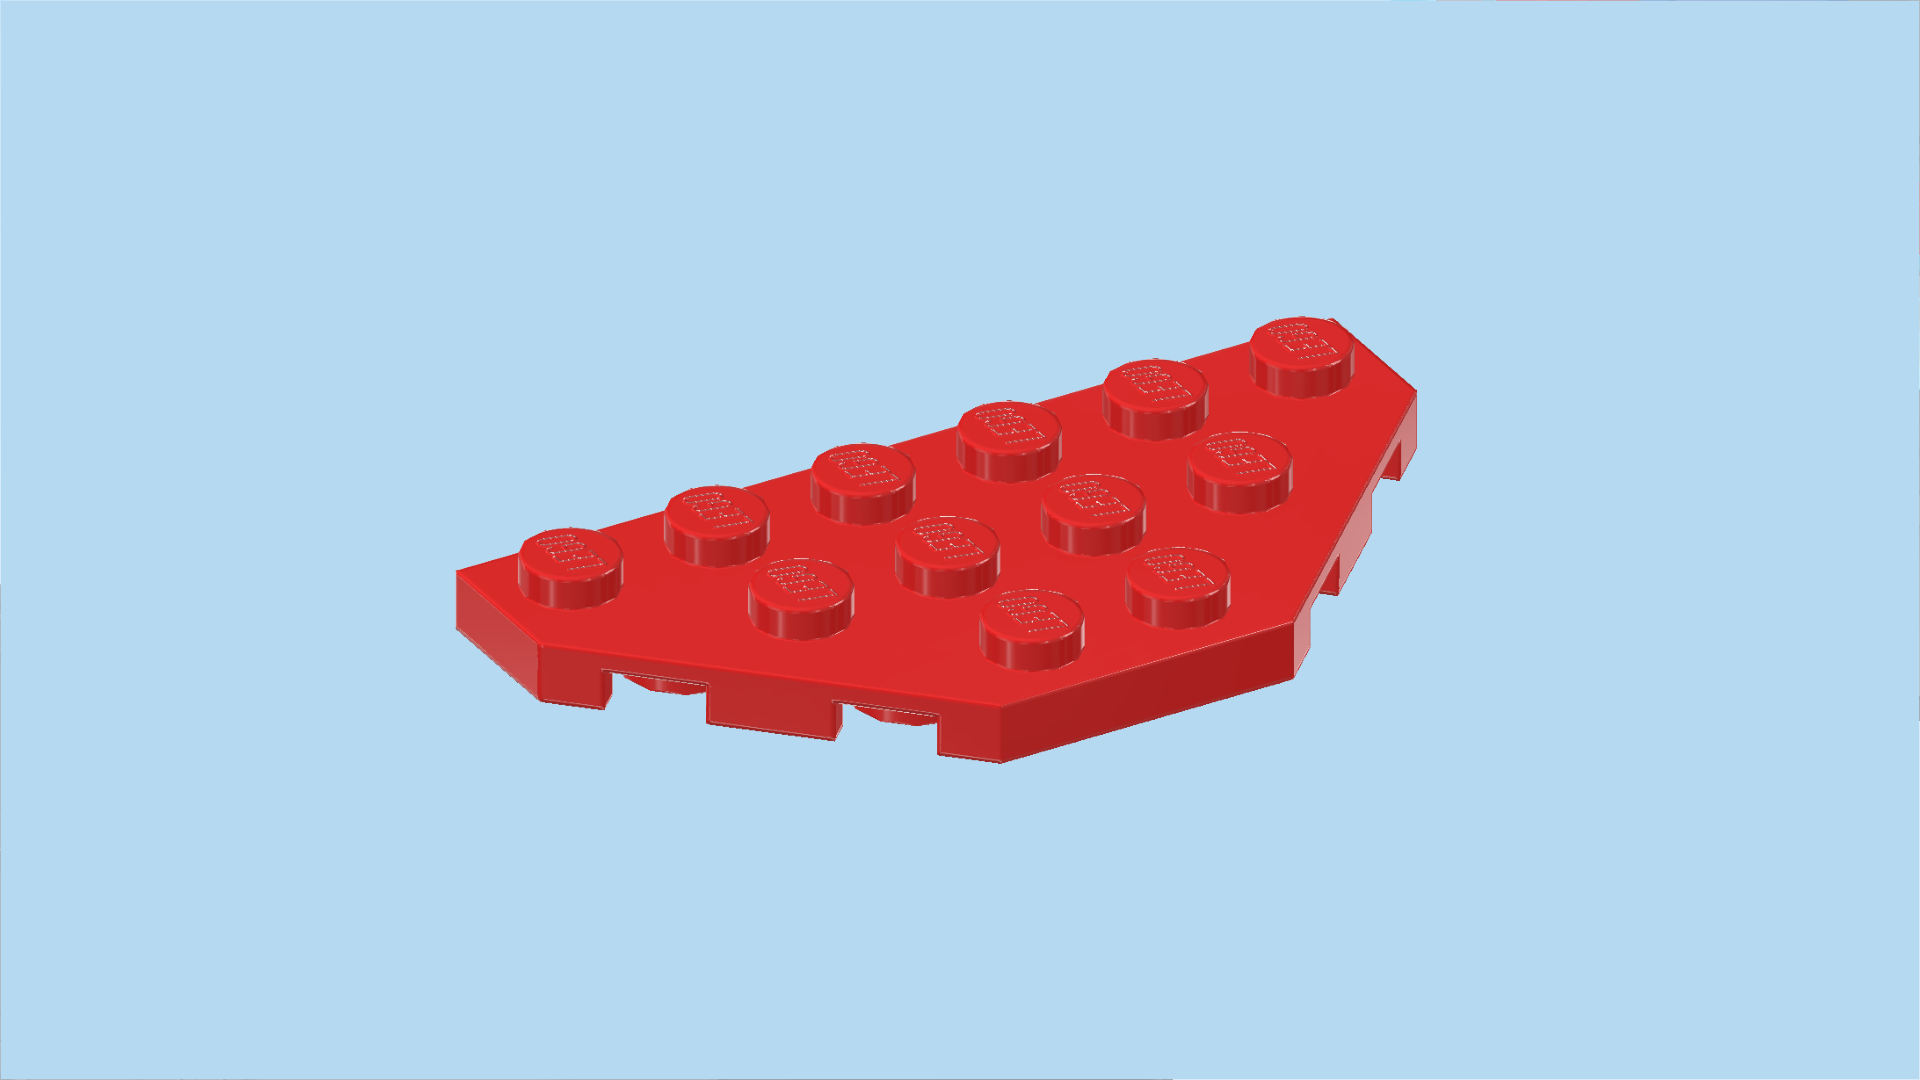
| Find 1 bright red wedge plate 3x6 with 2 cut-off corners. |
| Put it vertically centered to the left of the 4 previous pieces, its longest edge to the right. |
| If done correctly, the longest edge touches the grille tiles of the previous step. |
| Find 1 medium stone grey wall element 1x4x2 with 4 top knobs. |
| Put it vertically to the left of the steering wheel, panel to the right. |
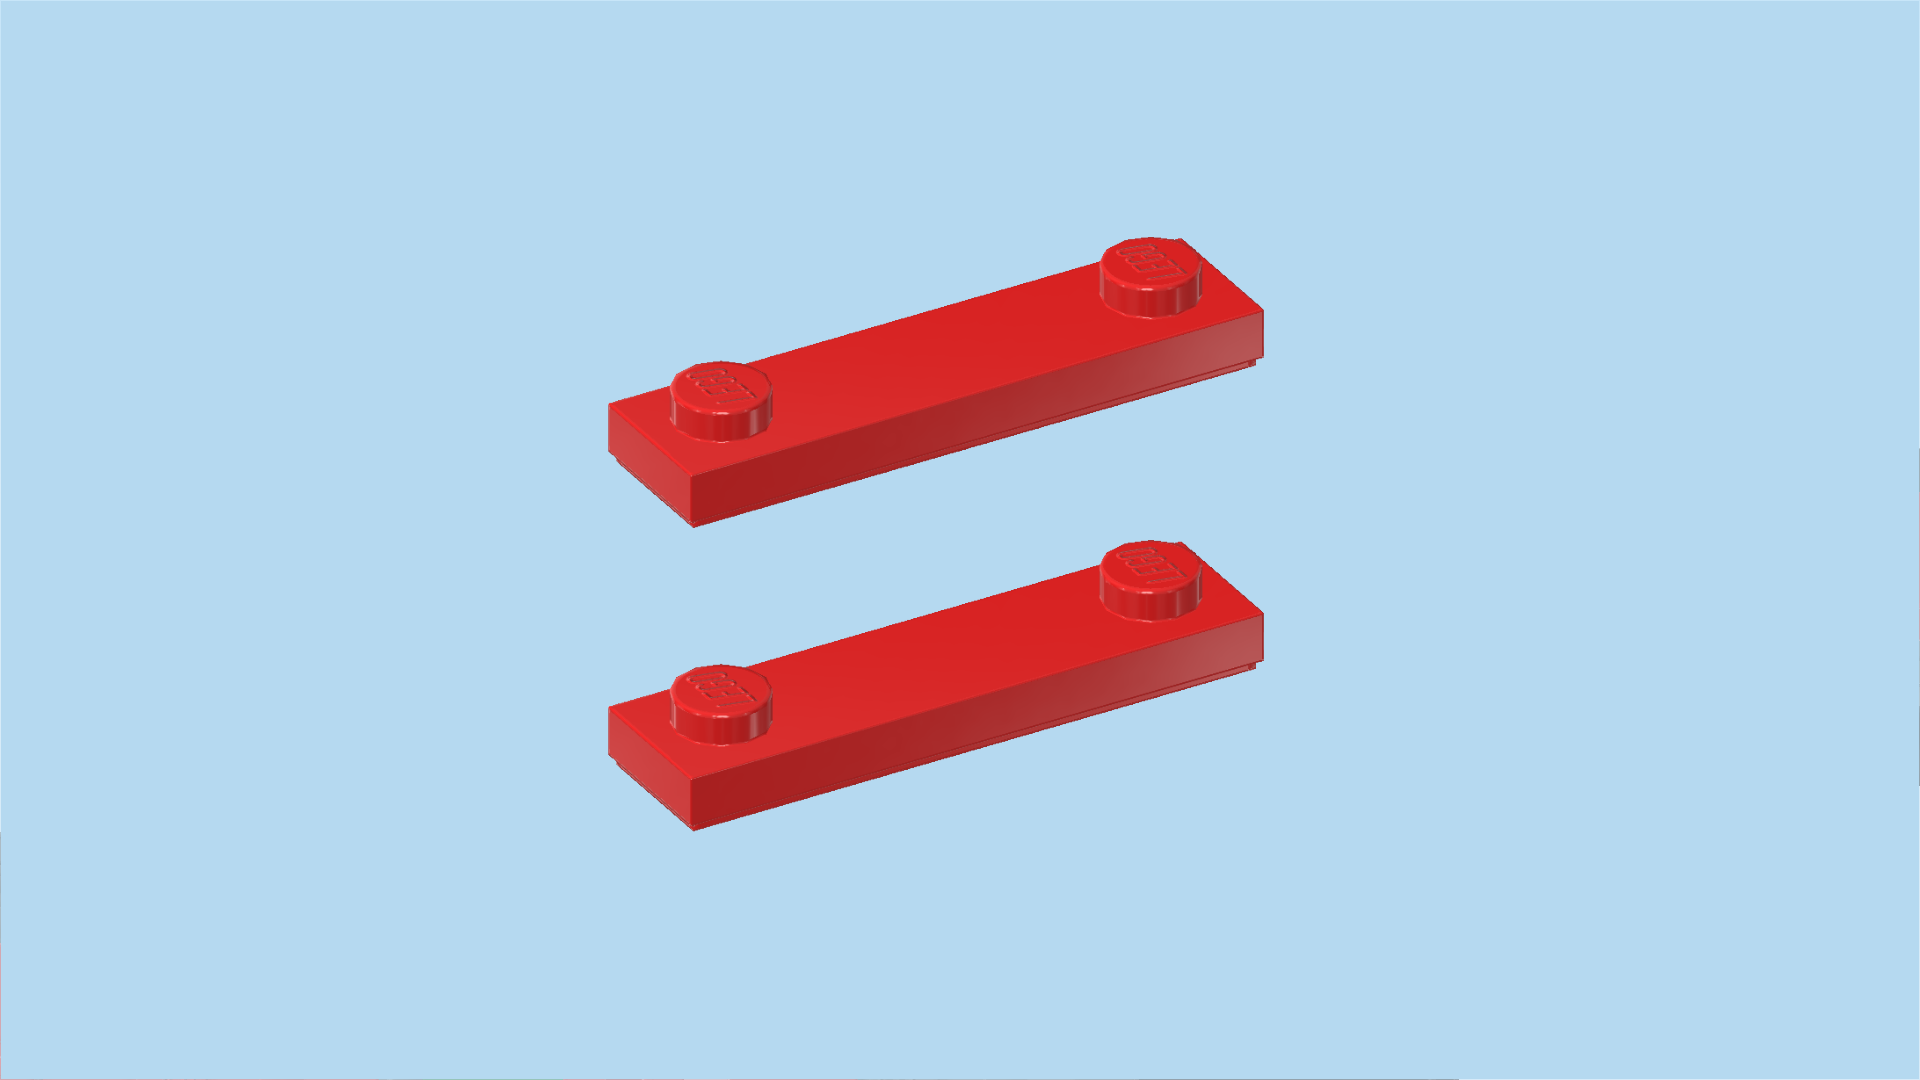
| Find 2 bright red plates 1x4 with 2 knobs. |
| Put 1 horizontally behind the captain's seat and steering wheel. It will sit on the knob of the vertically mounted roof tile 1x2, and on the right knob of the profile brick 1x2. |
| Repeat symmetrically at the front. |
| Find 2 bright red plates 1x4 with 2 knobs. |
| Put 1 horizontally to the left of the previous piece. |
| Repeat symmetrically at the back. |
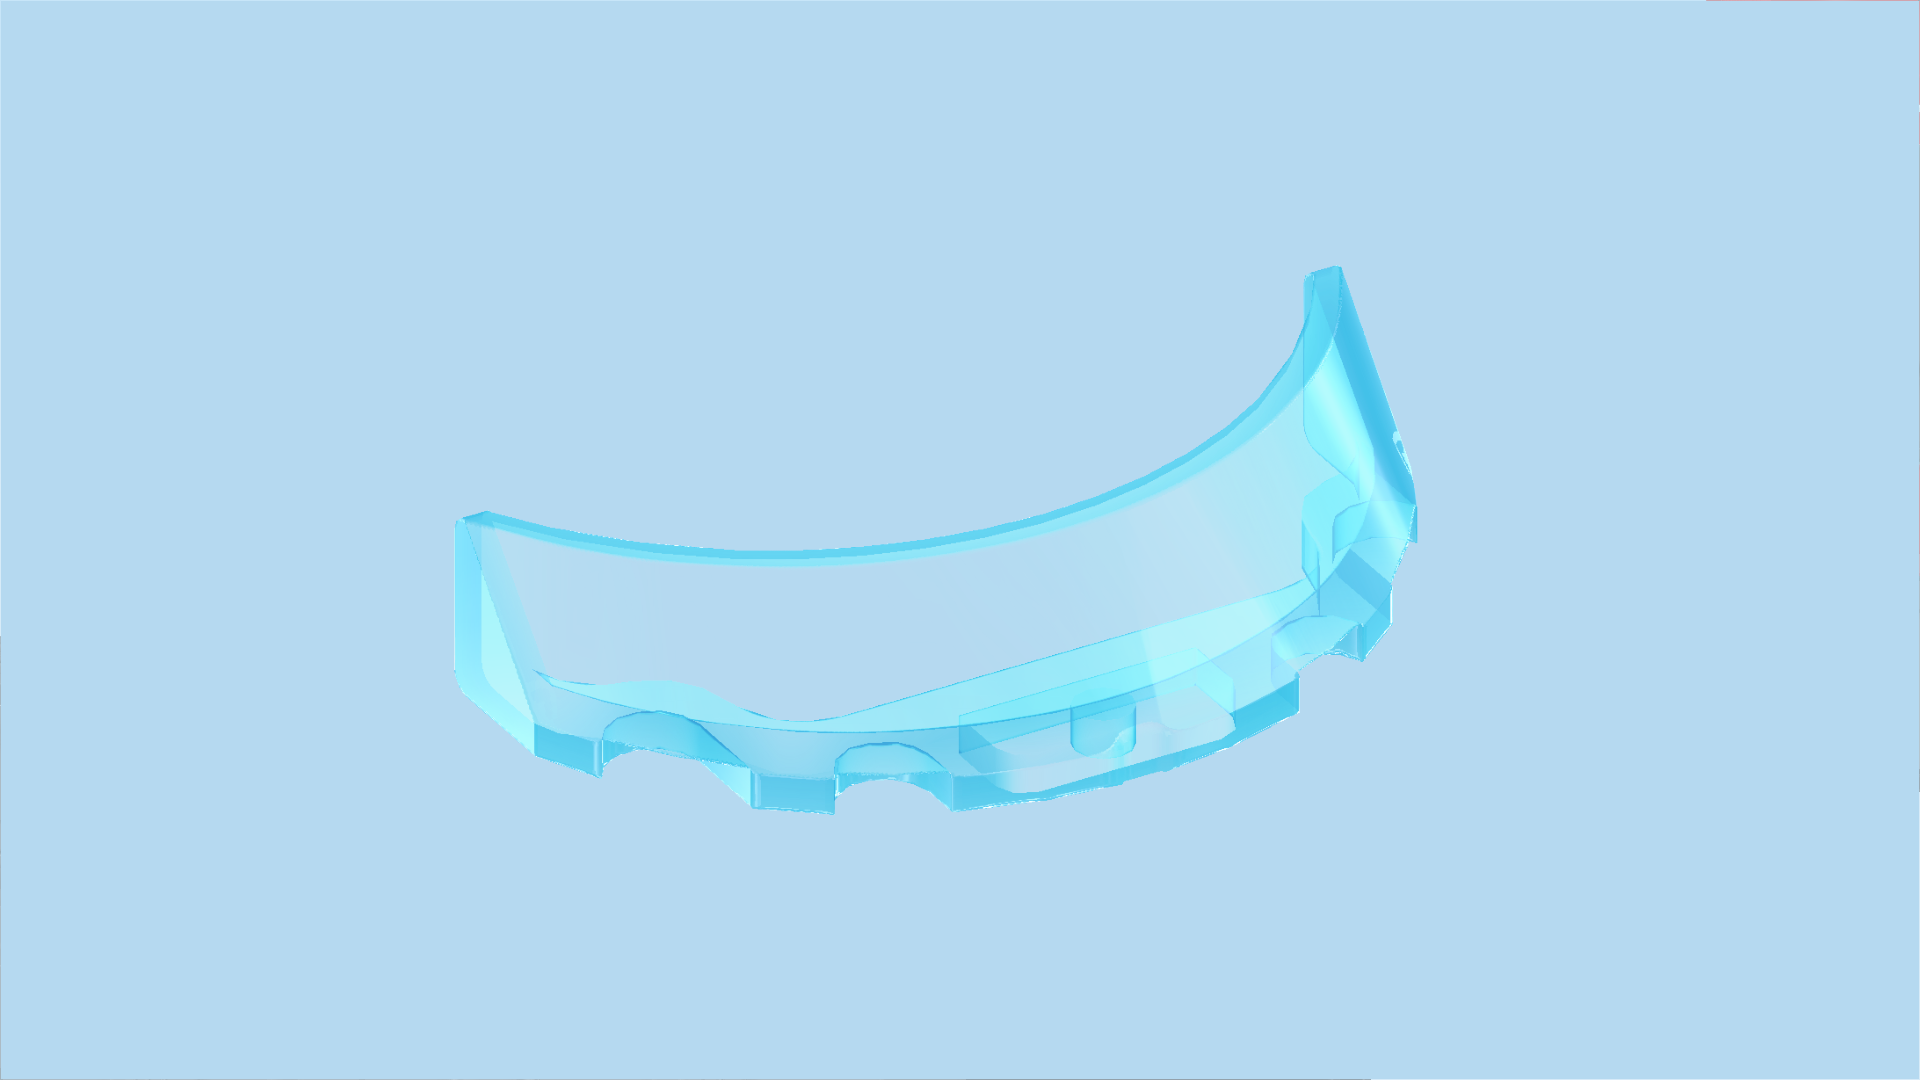
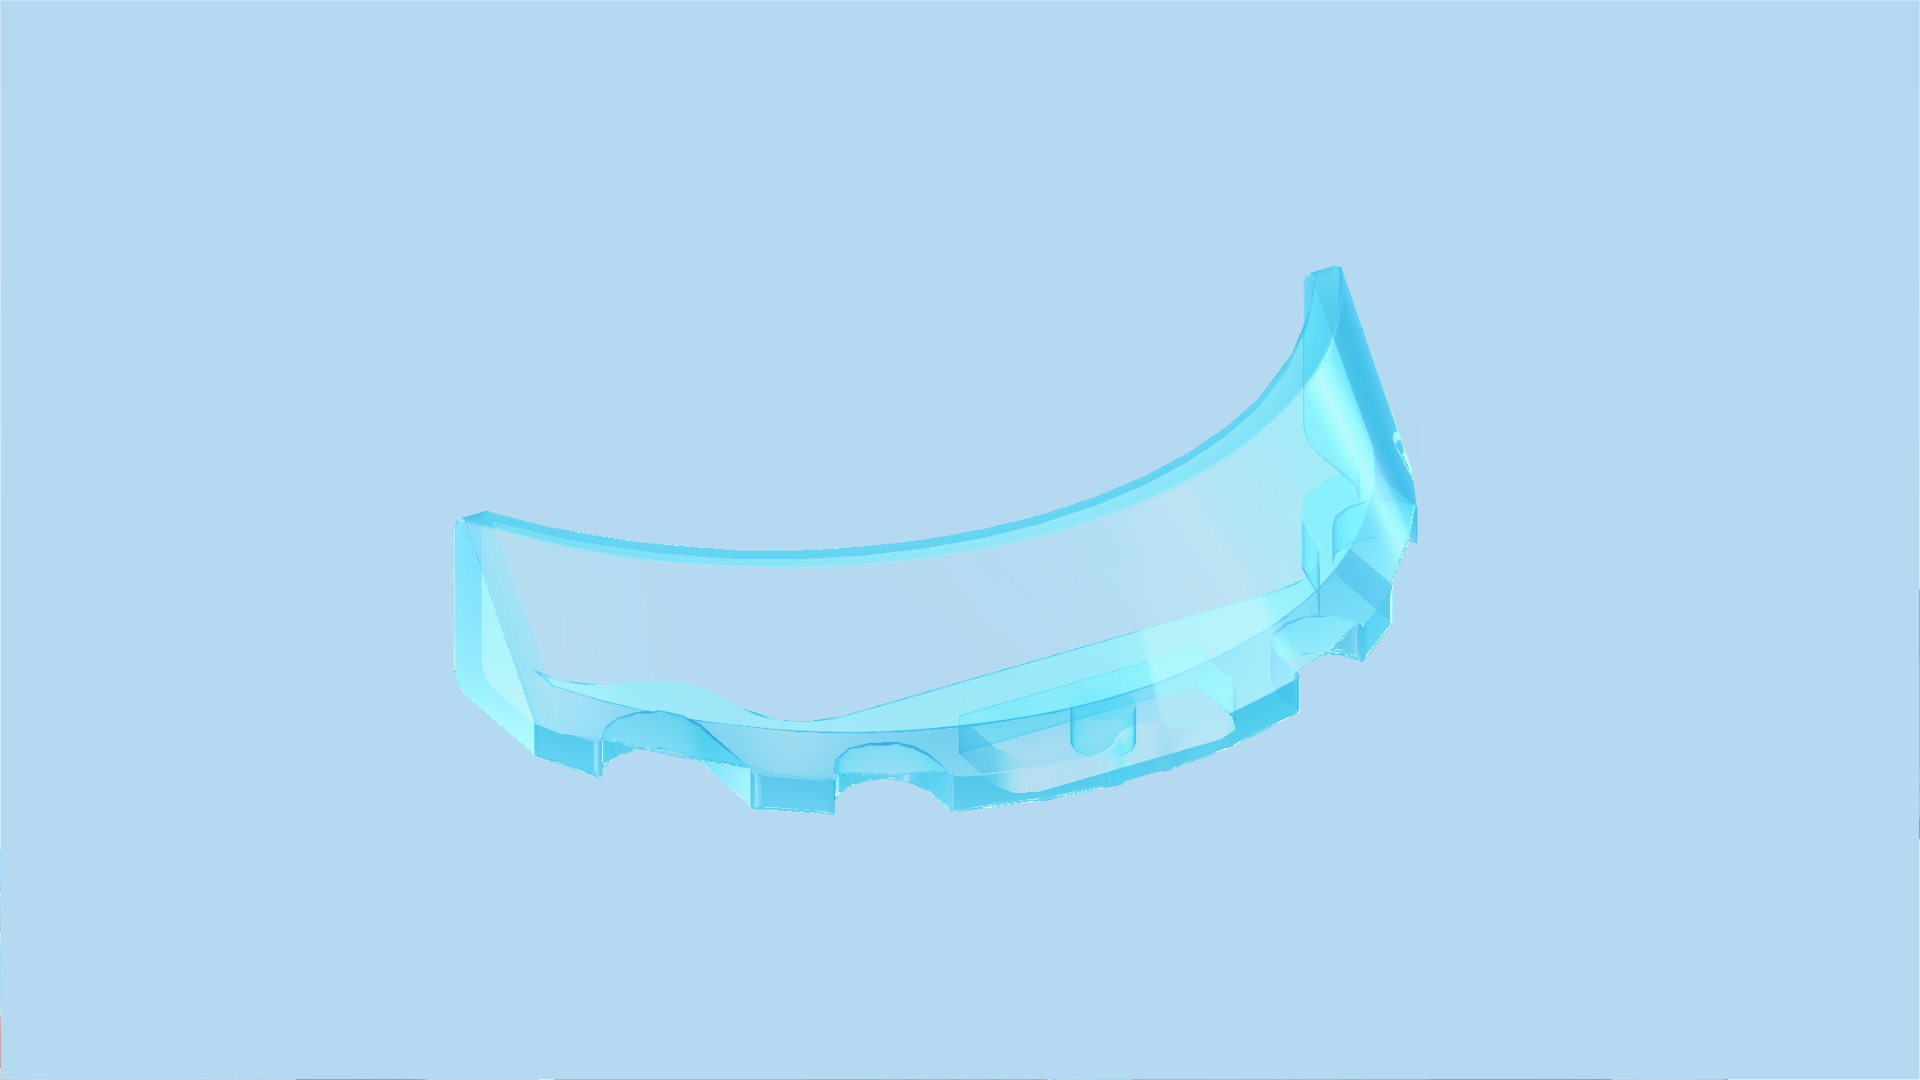
| Find 1 transparent light blue rounded cockpit 3x6x1. |
| Put it vertically to the left of the 2 previous pieces, curve to the left. |
| Collect the following 2 pieces: |
| 1 bright red flat tile 2x2, |
| and 1 bright red plate 1x2 with top tube. |
| Put the flat tile 2x2 centered to the left of the wedge plate with cut-off corners. |
| Put the plate 1x2 horizontally to the left of the previous piece, aligning it with the previous piece's front half, tube to the left. |
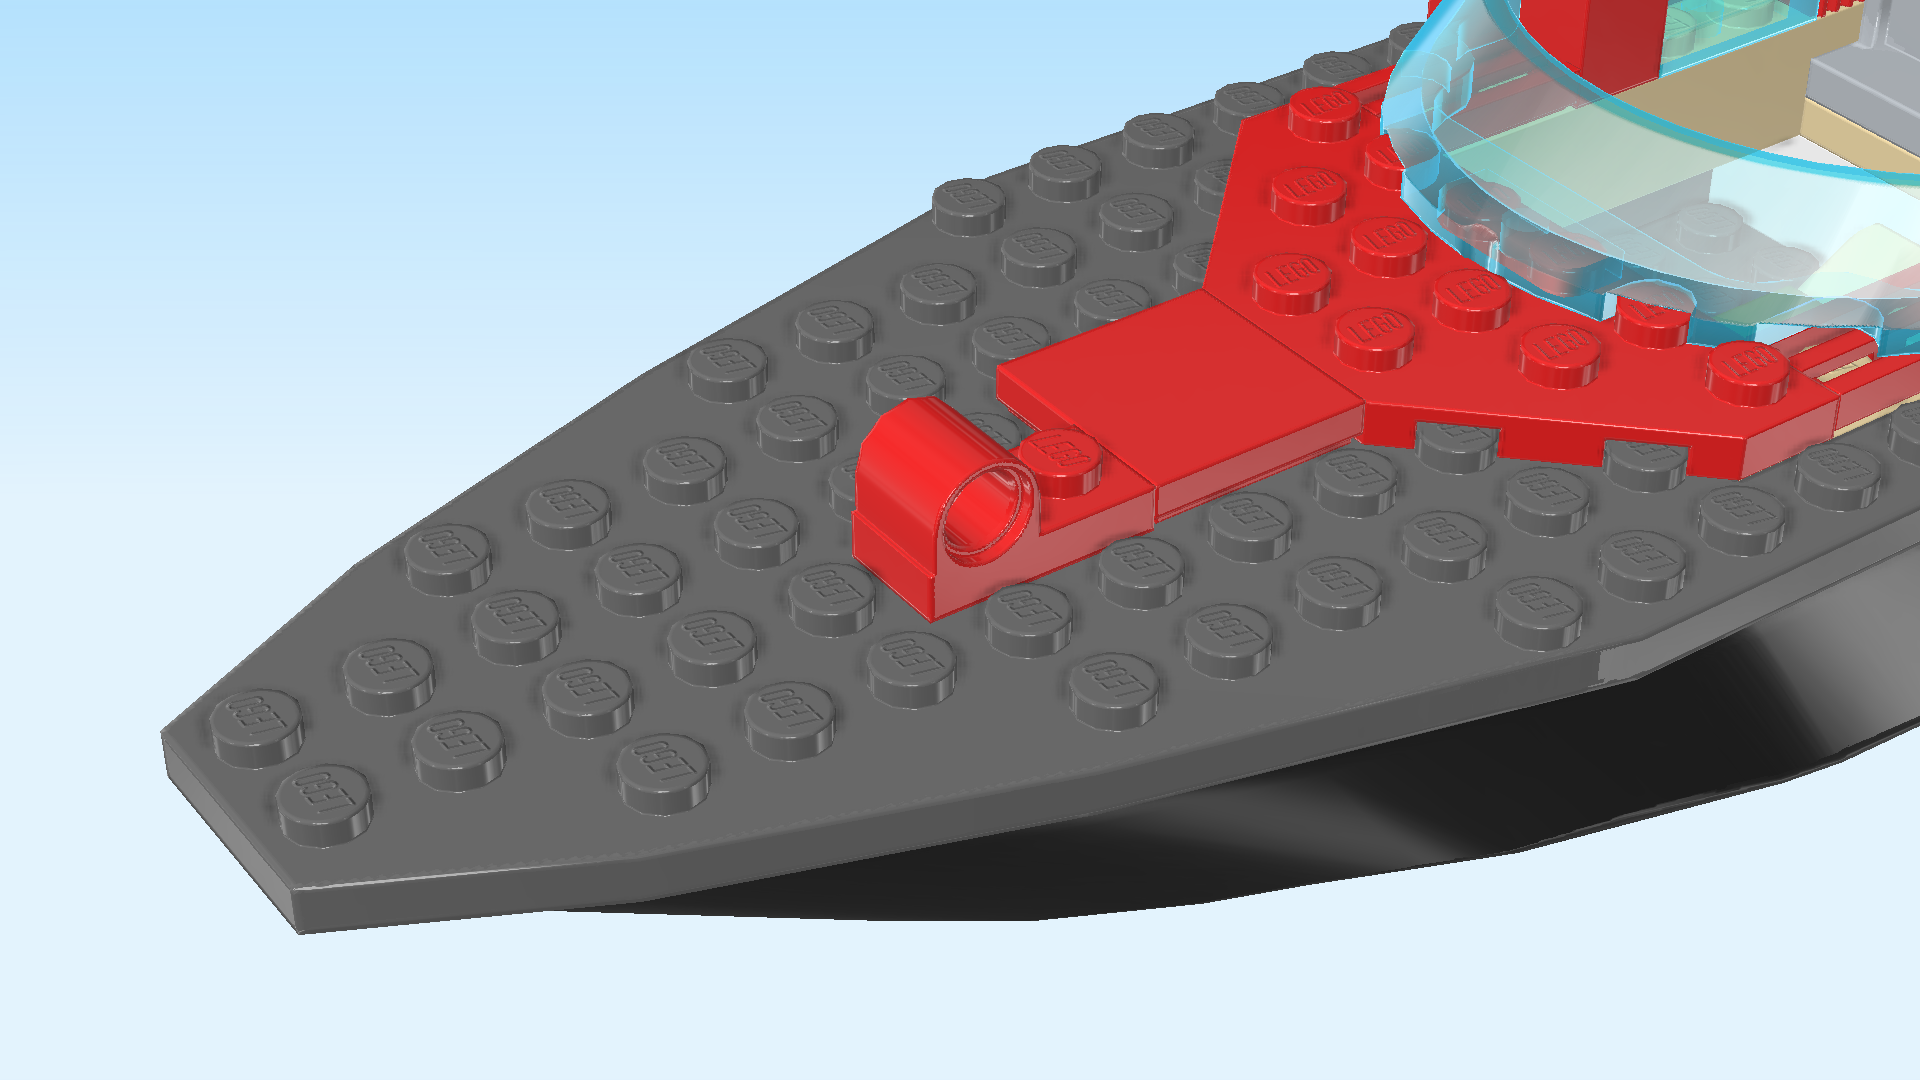
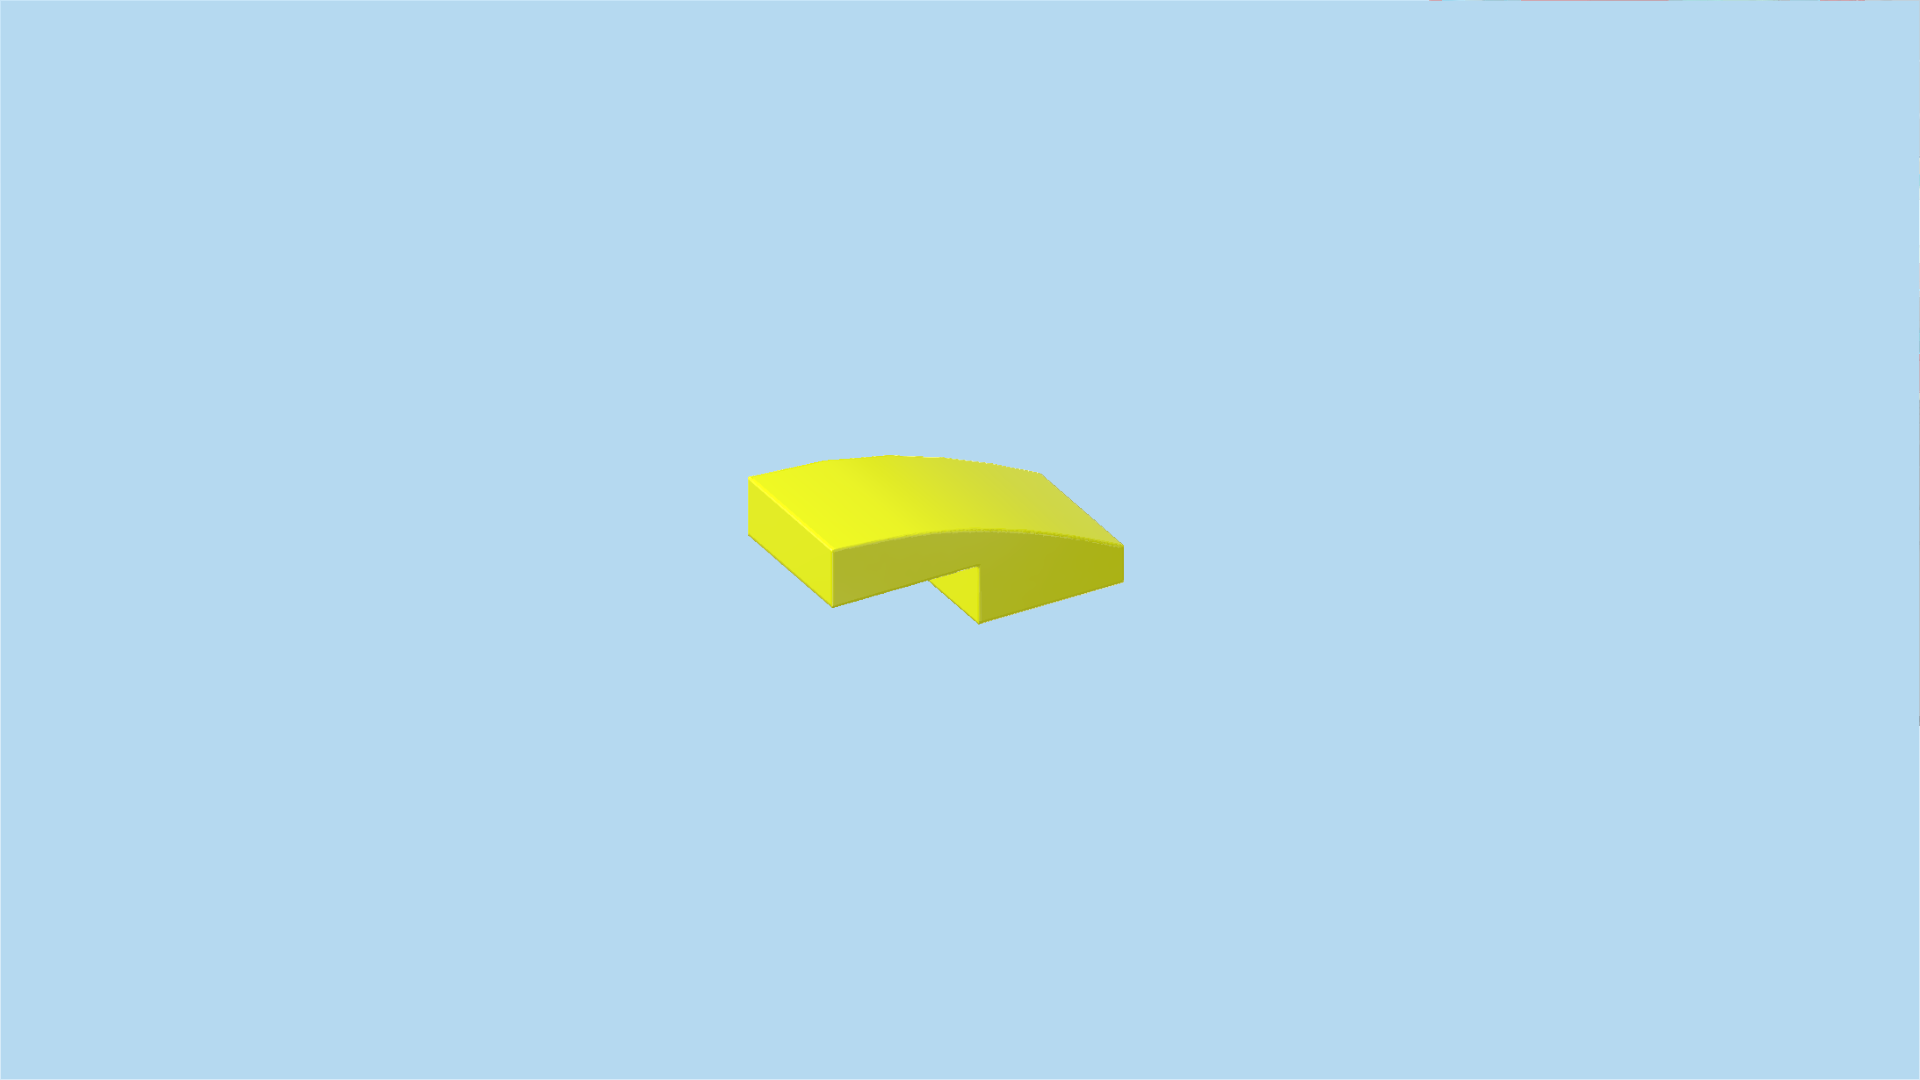
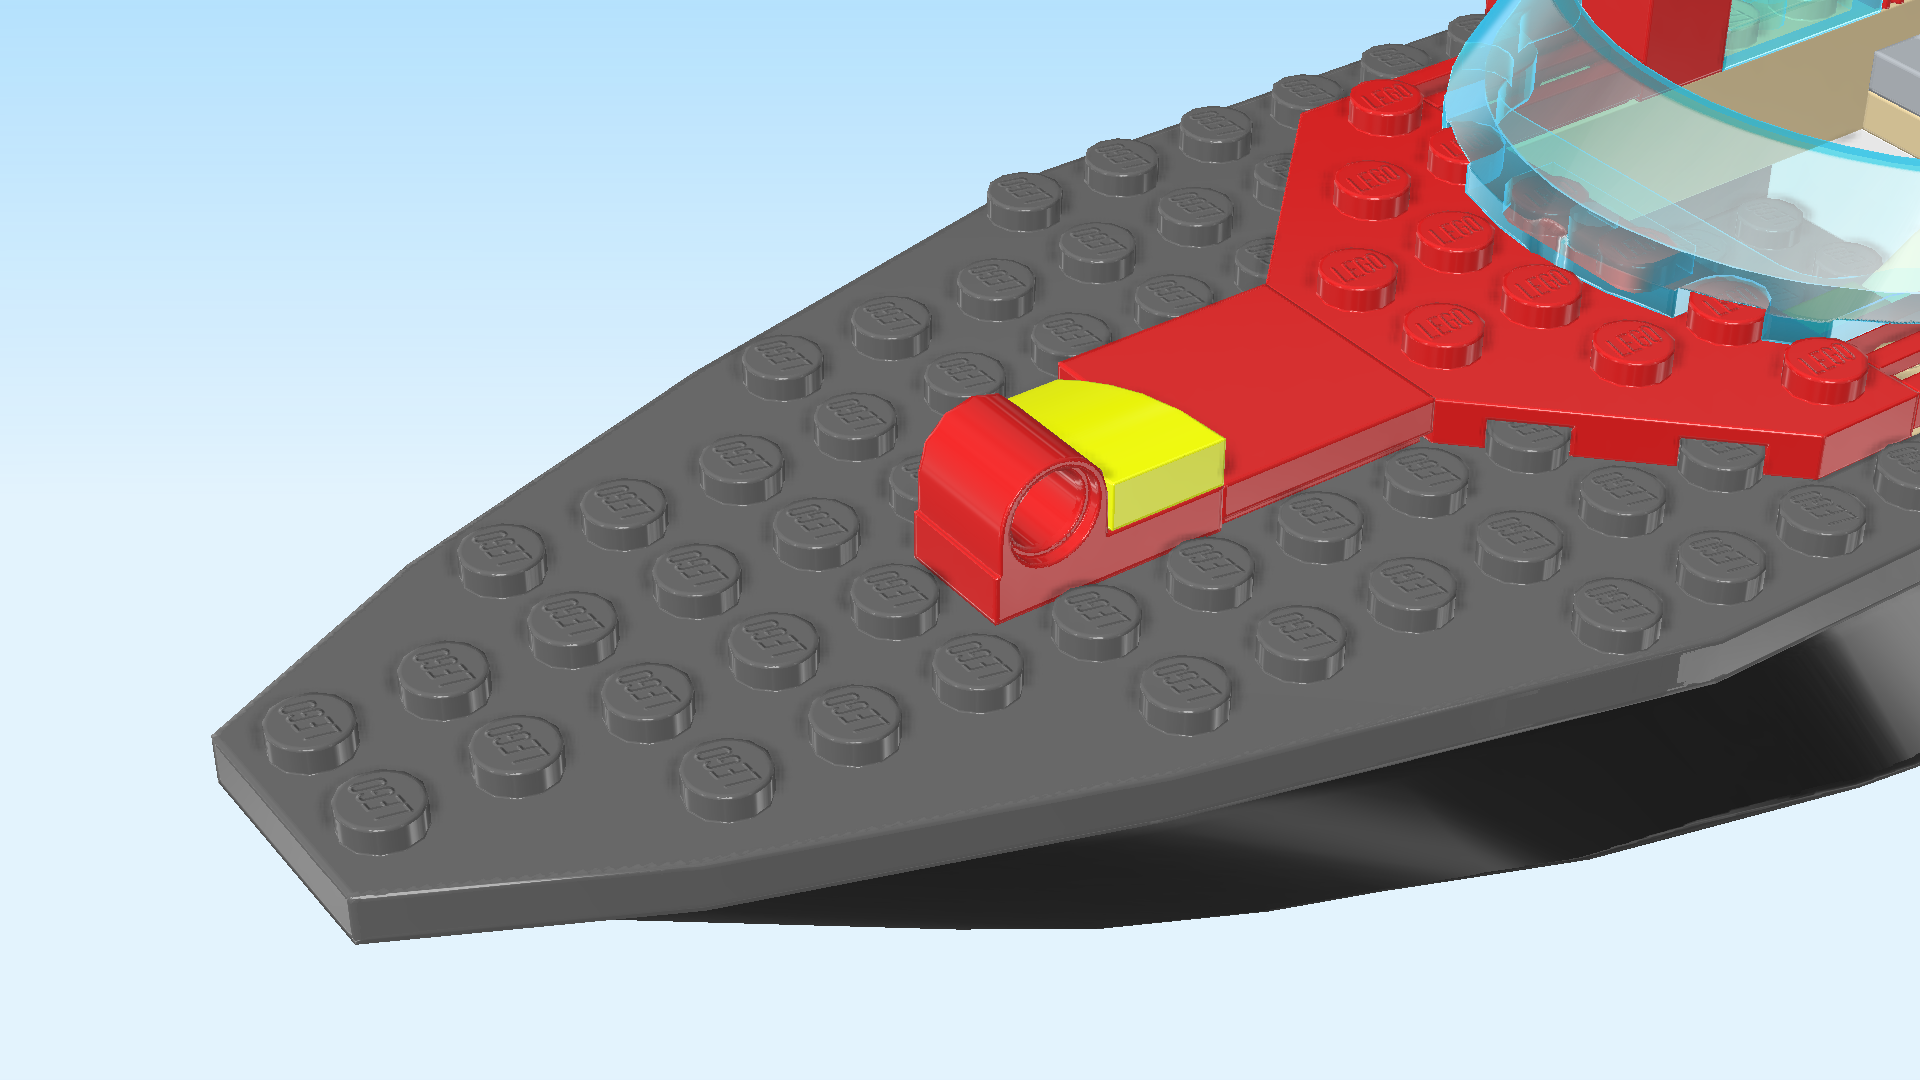
| Find 1 bright neon yellow one-stepped curve tile 1x2x⅔. |
| Put it vertically on the knob of the previous piece and the knob behind it, curve to the back. |
| Collect the following 2 pieces: |
| 1 bright red flat tile 2x3 with arrow-shaped end, |
| and 1 bright red flat tile 2x2. |
| Put the flat tile 2x2 to the left of the previous piece. Make sure it sits on the 2 middle rows of the ship. |
| Put the flat tile with arrow-shaped end horizontally to the left of the previous piece, arrow to the left. |
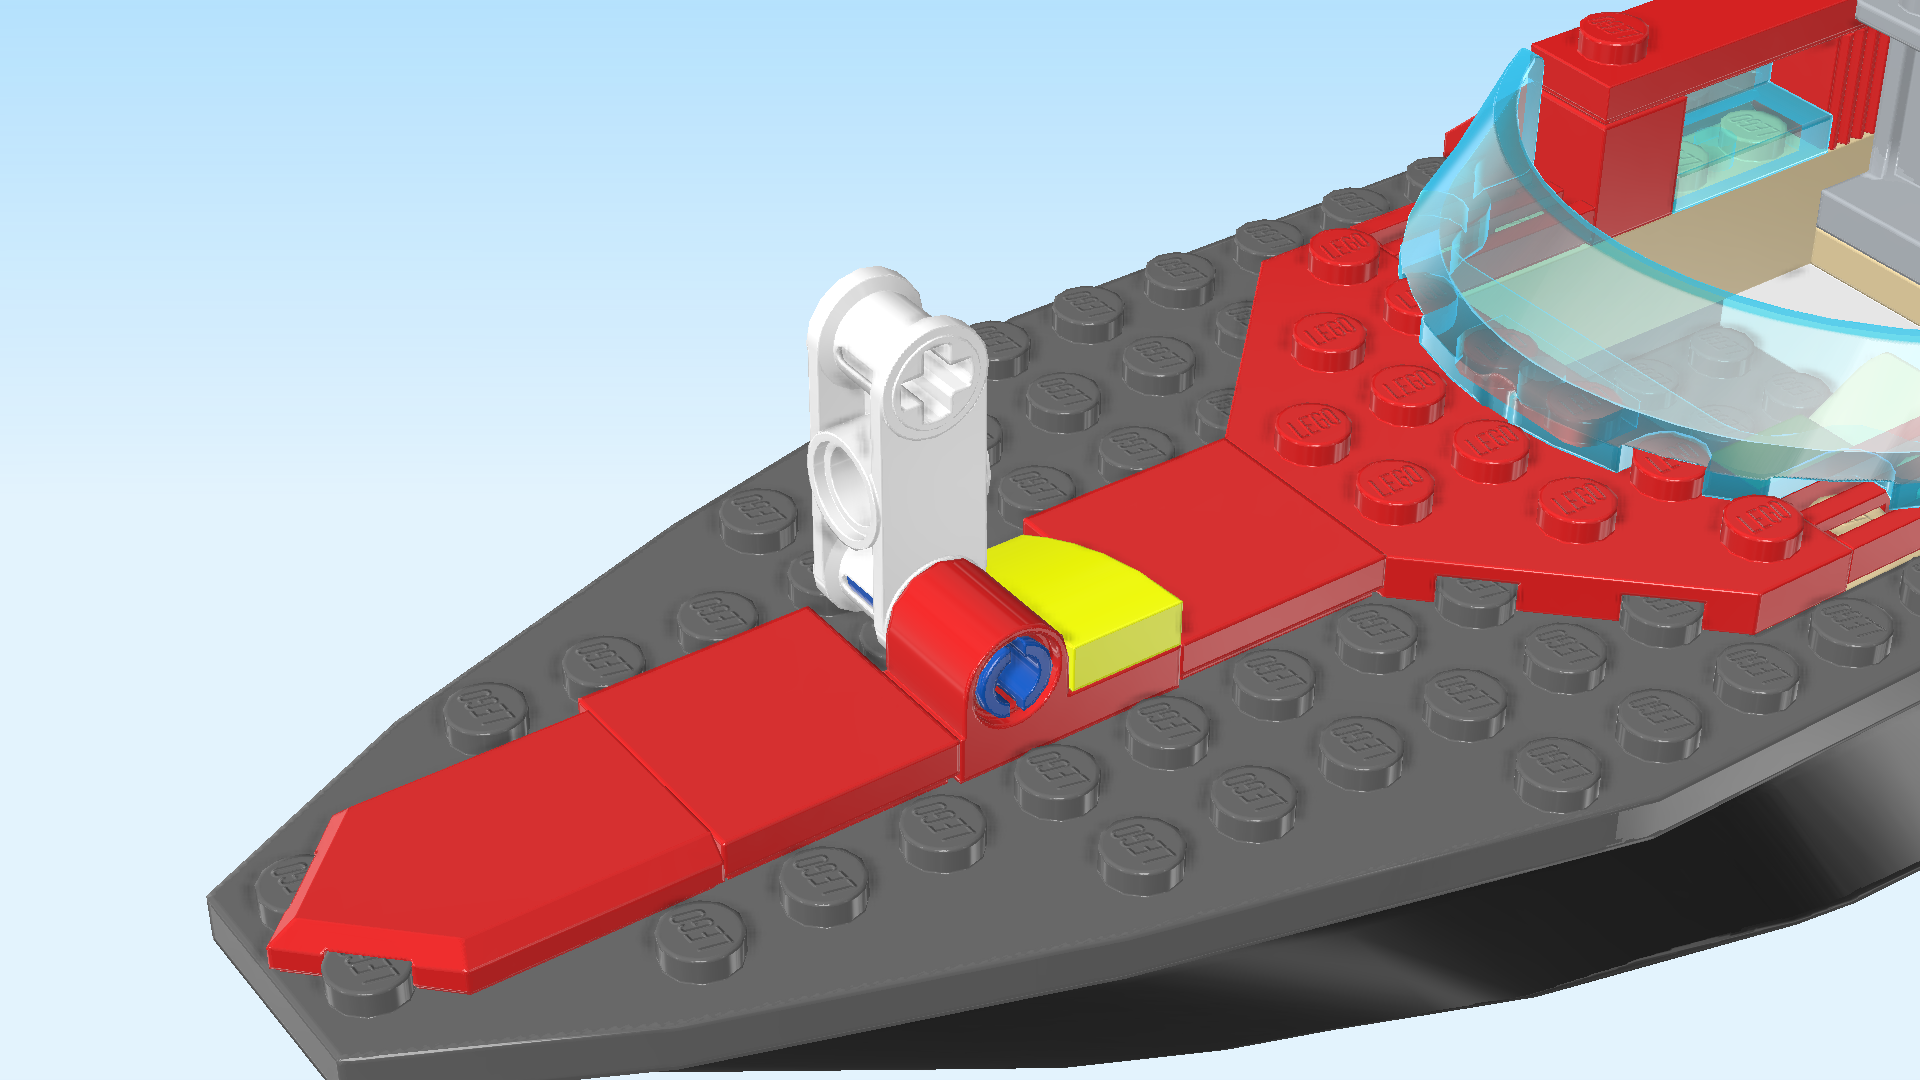
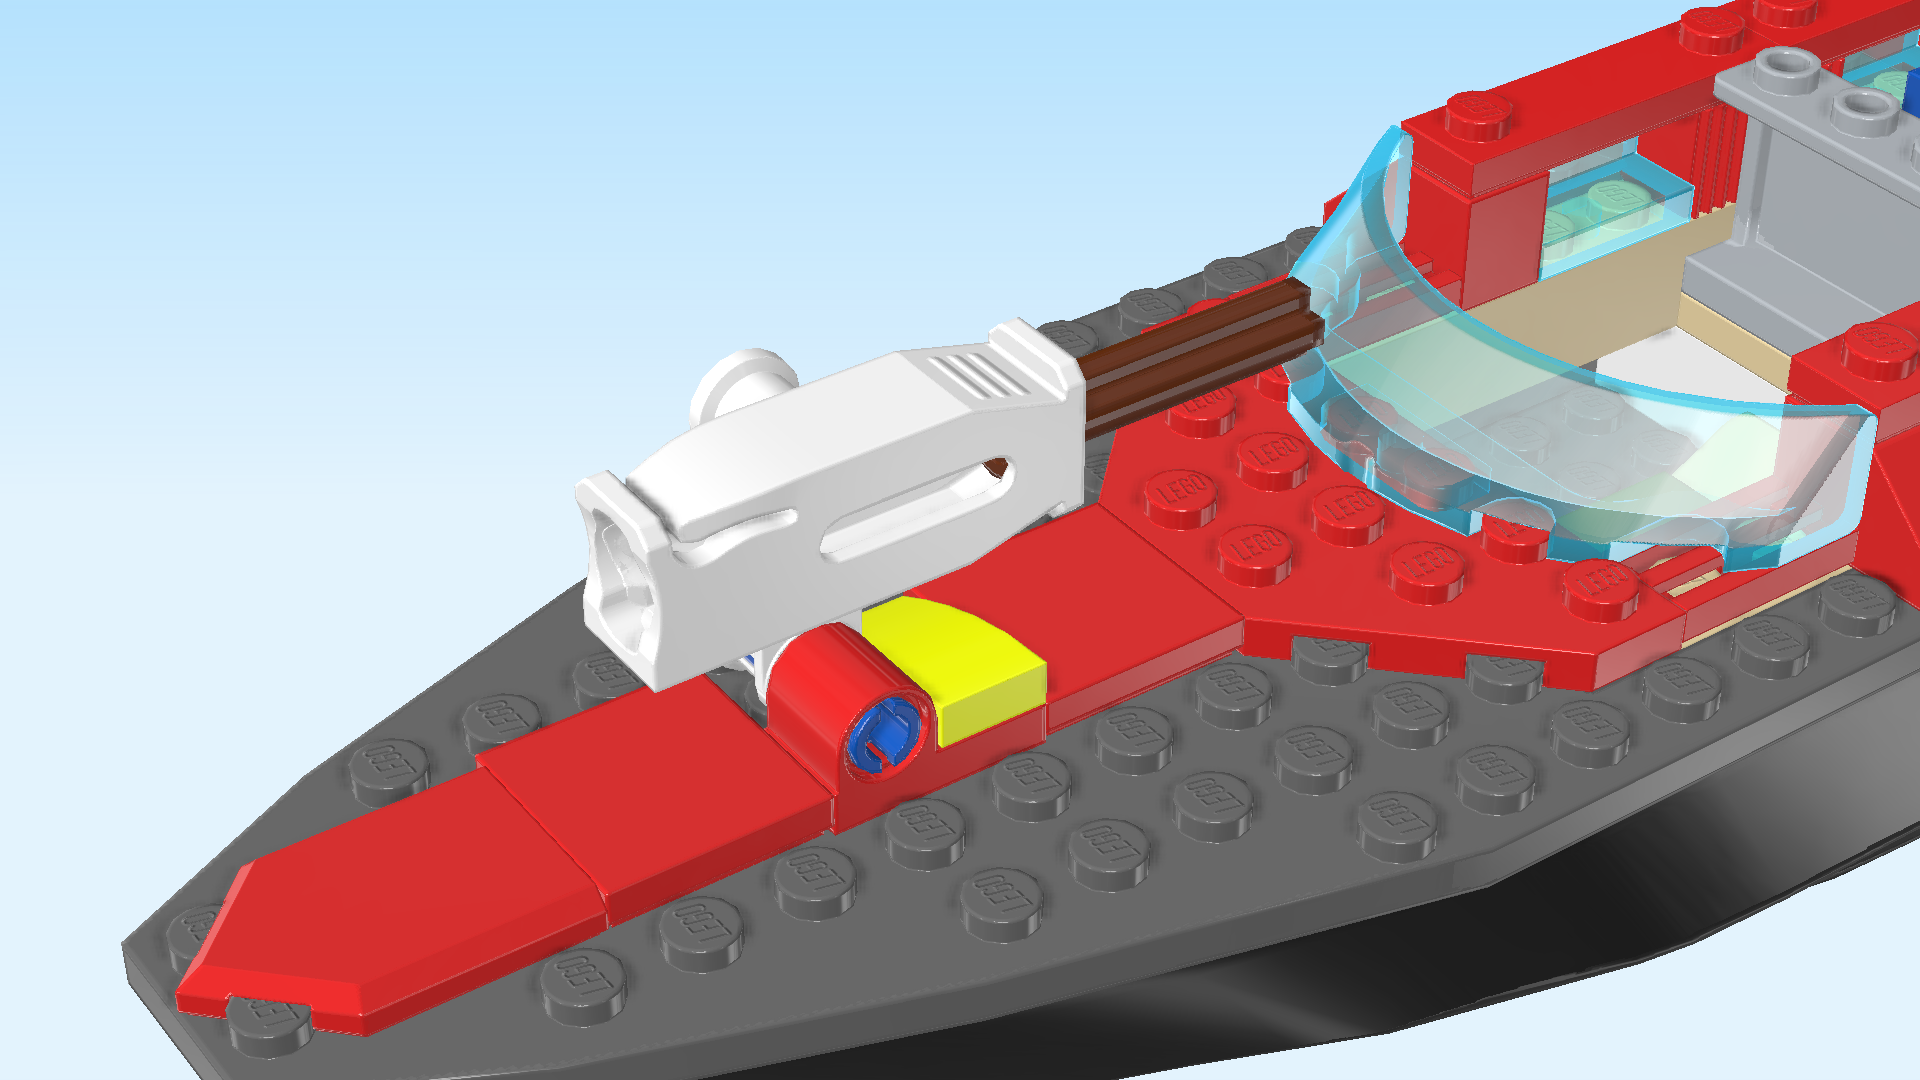
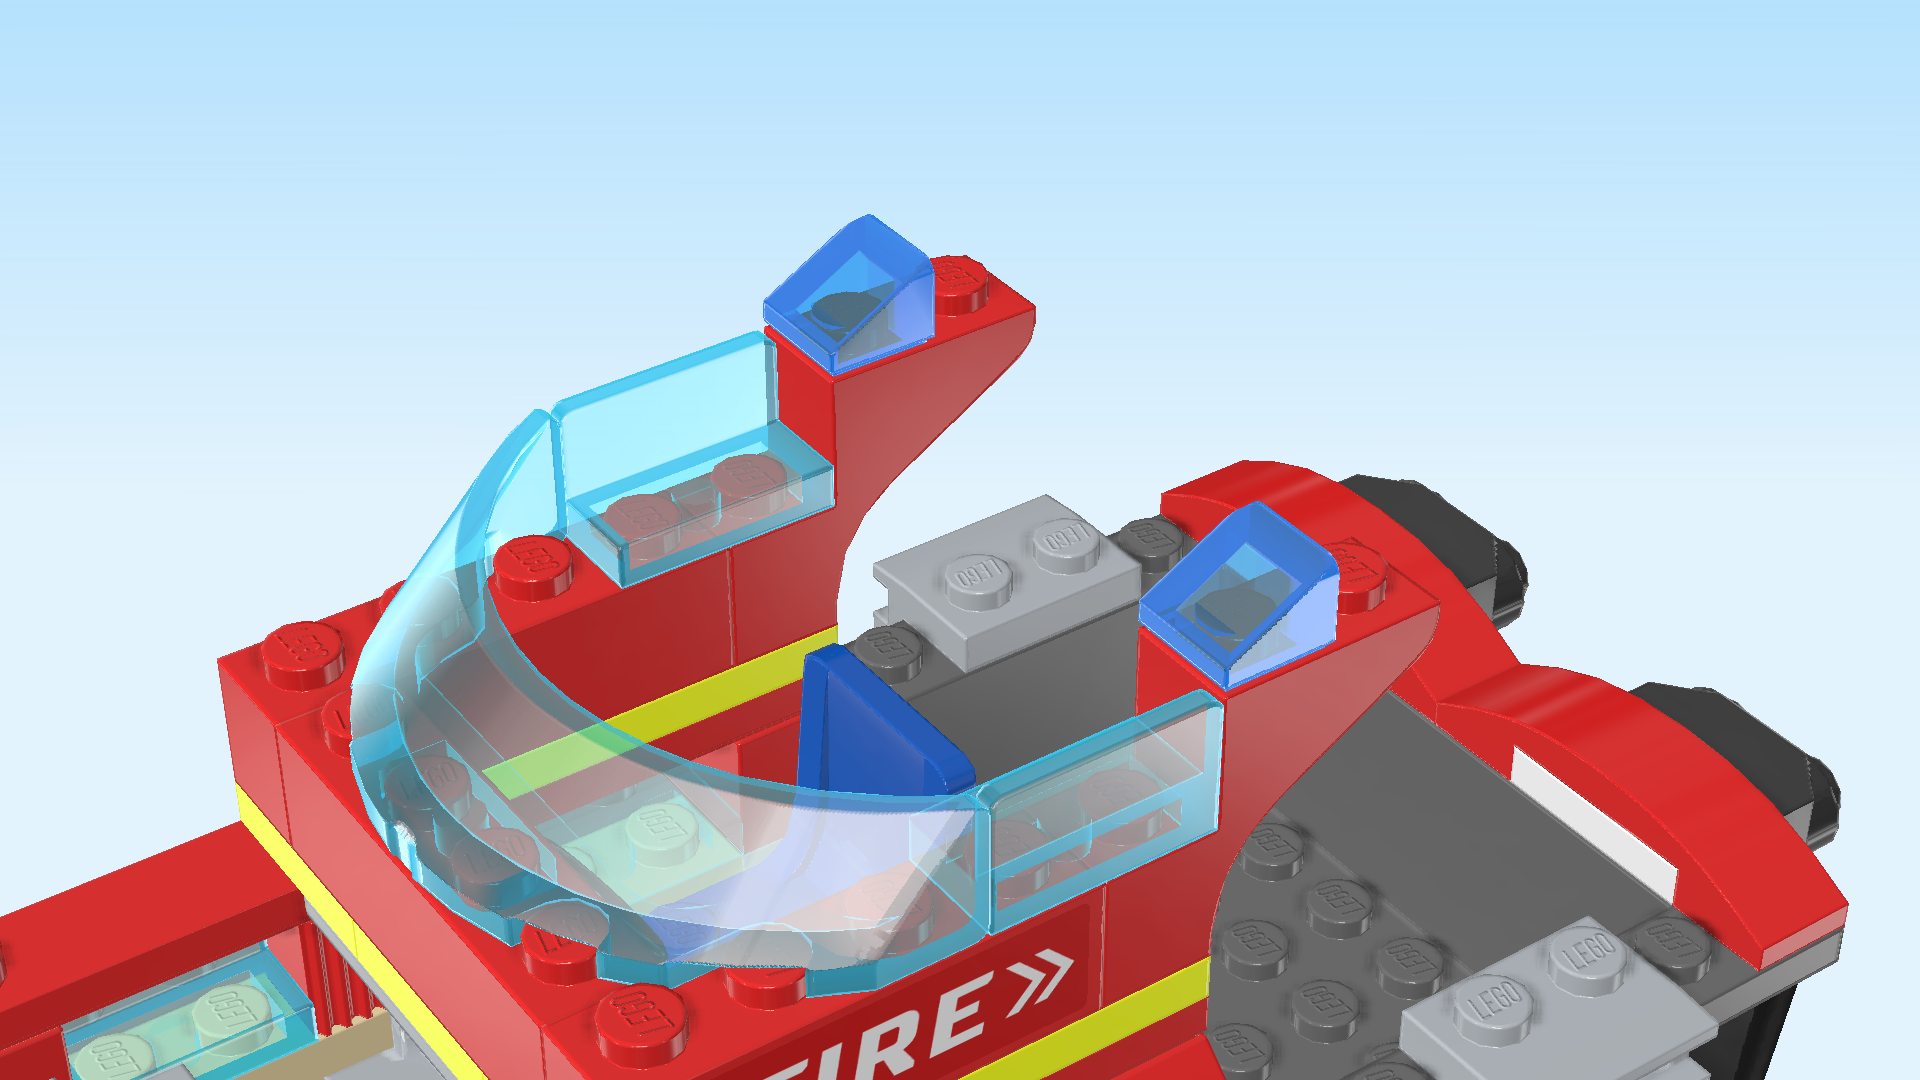
| Next, we will build the fire monitor stand. |
| Collect the following 2 pieces: |
| 1 white technic beam 3m with 2 cross holes and 1 round hole, |
| and 1 bright blue connector peg 2m with cross axle pin. |
| Put the technic beam horizontally on the table. Make sure the cross holes are running from top to bottom. |
| Insert the cross axle pin from the top into the right cross hole. The connector peg will stick out to the top. |
| Flip it upright so that the connector peg is at the bottom, pointing at you. |
| Insert the connector peg from the back into the tube of the plate with top tube. |
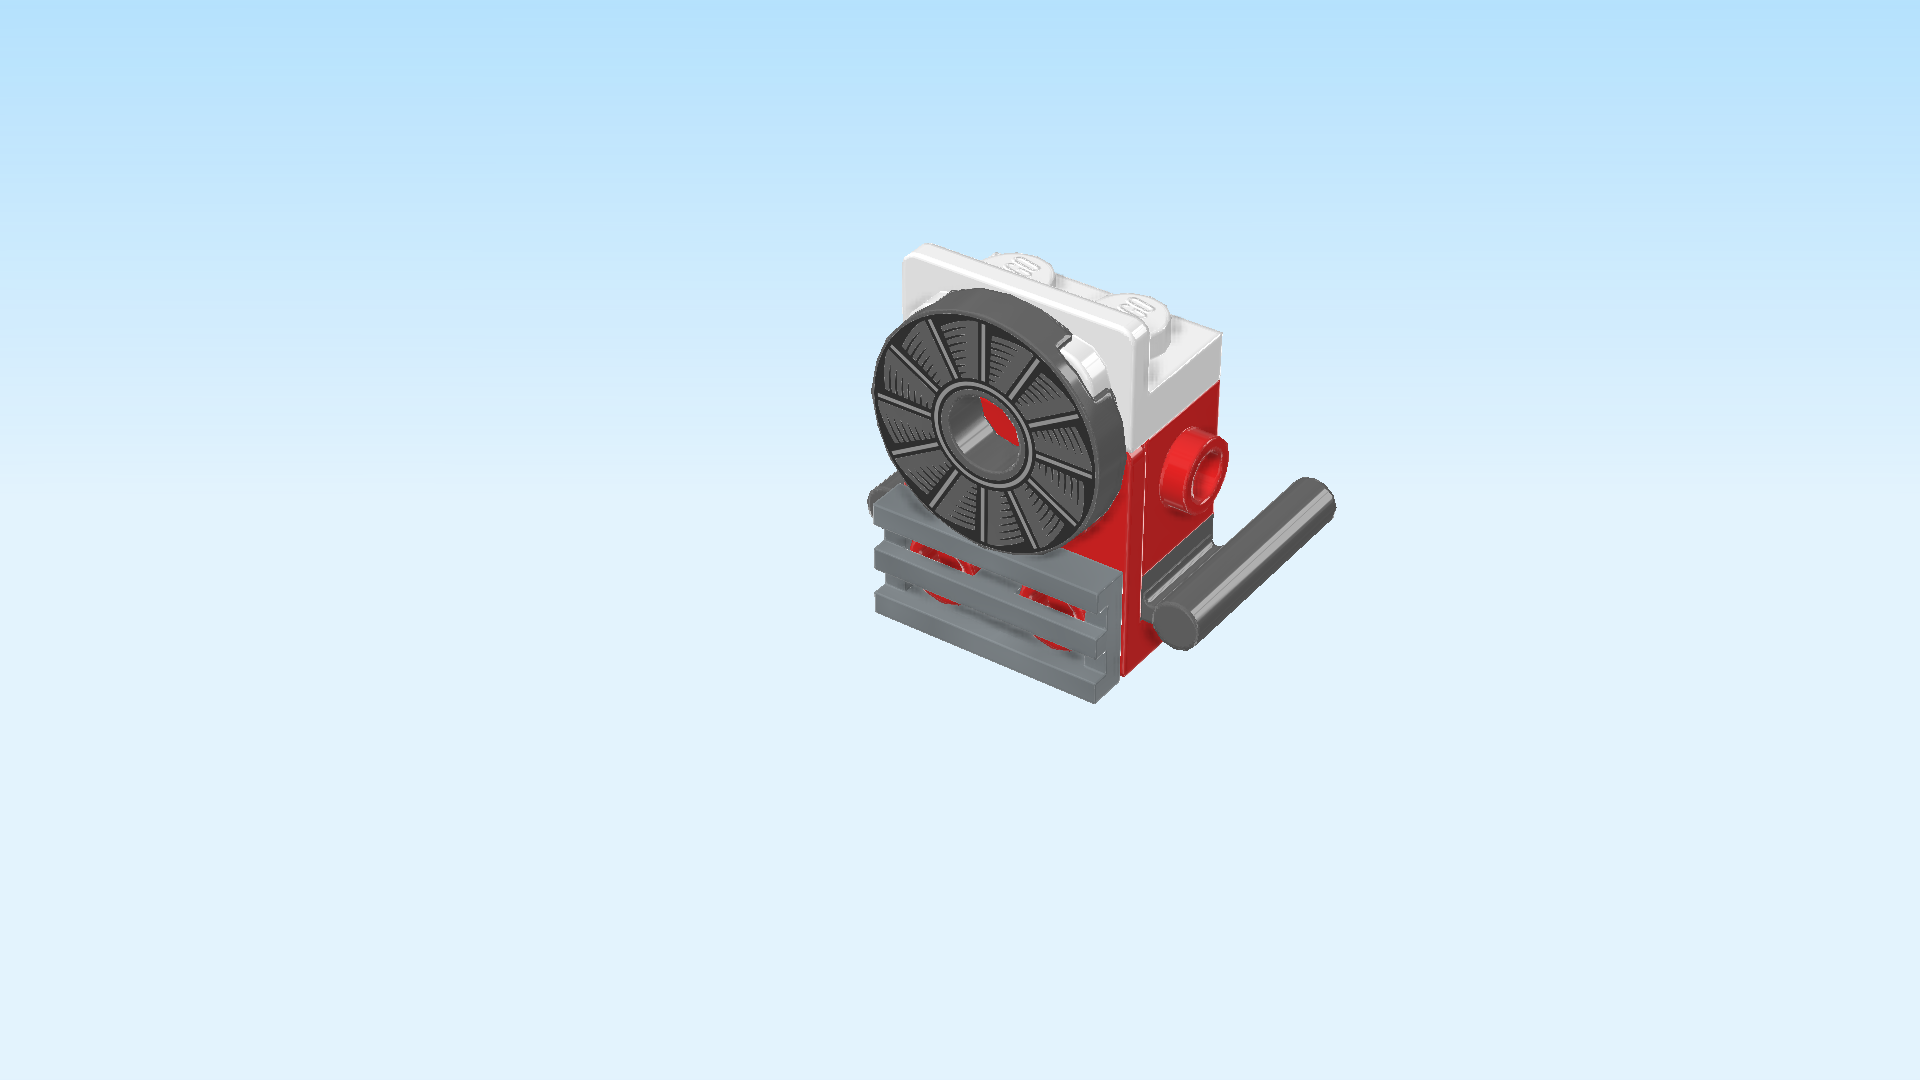
| Now, we will assemble the fire monitor. |
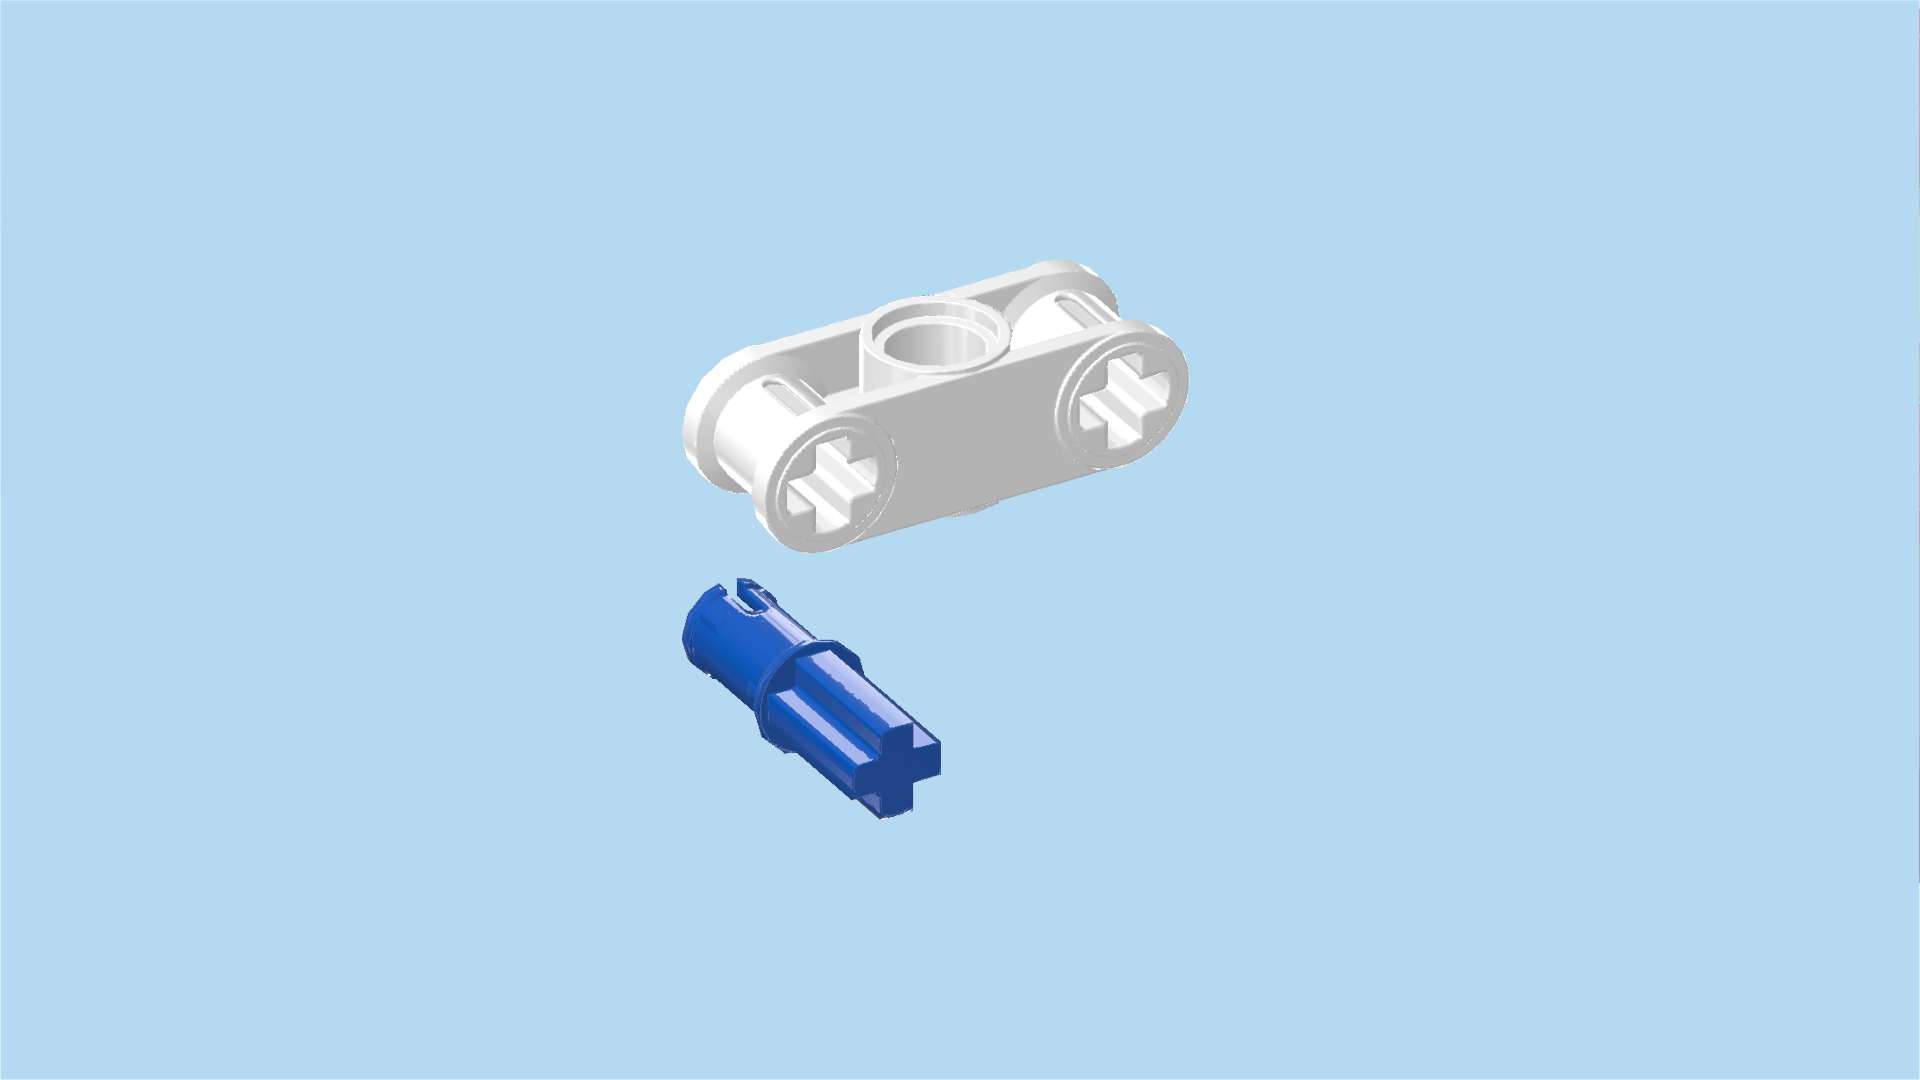
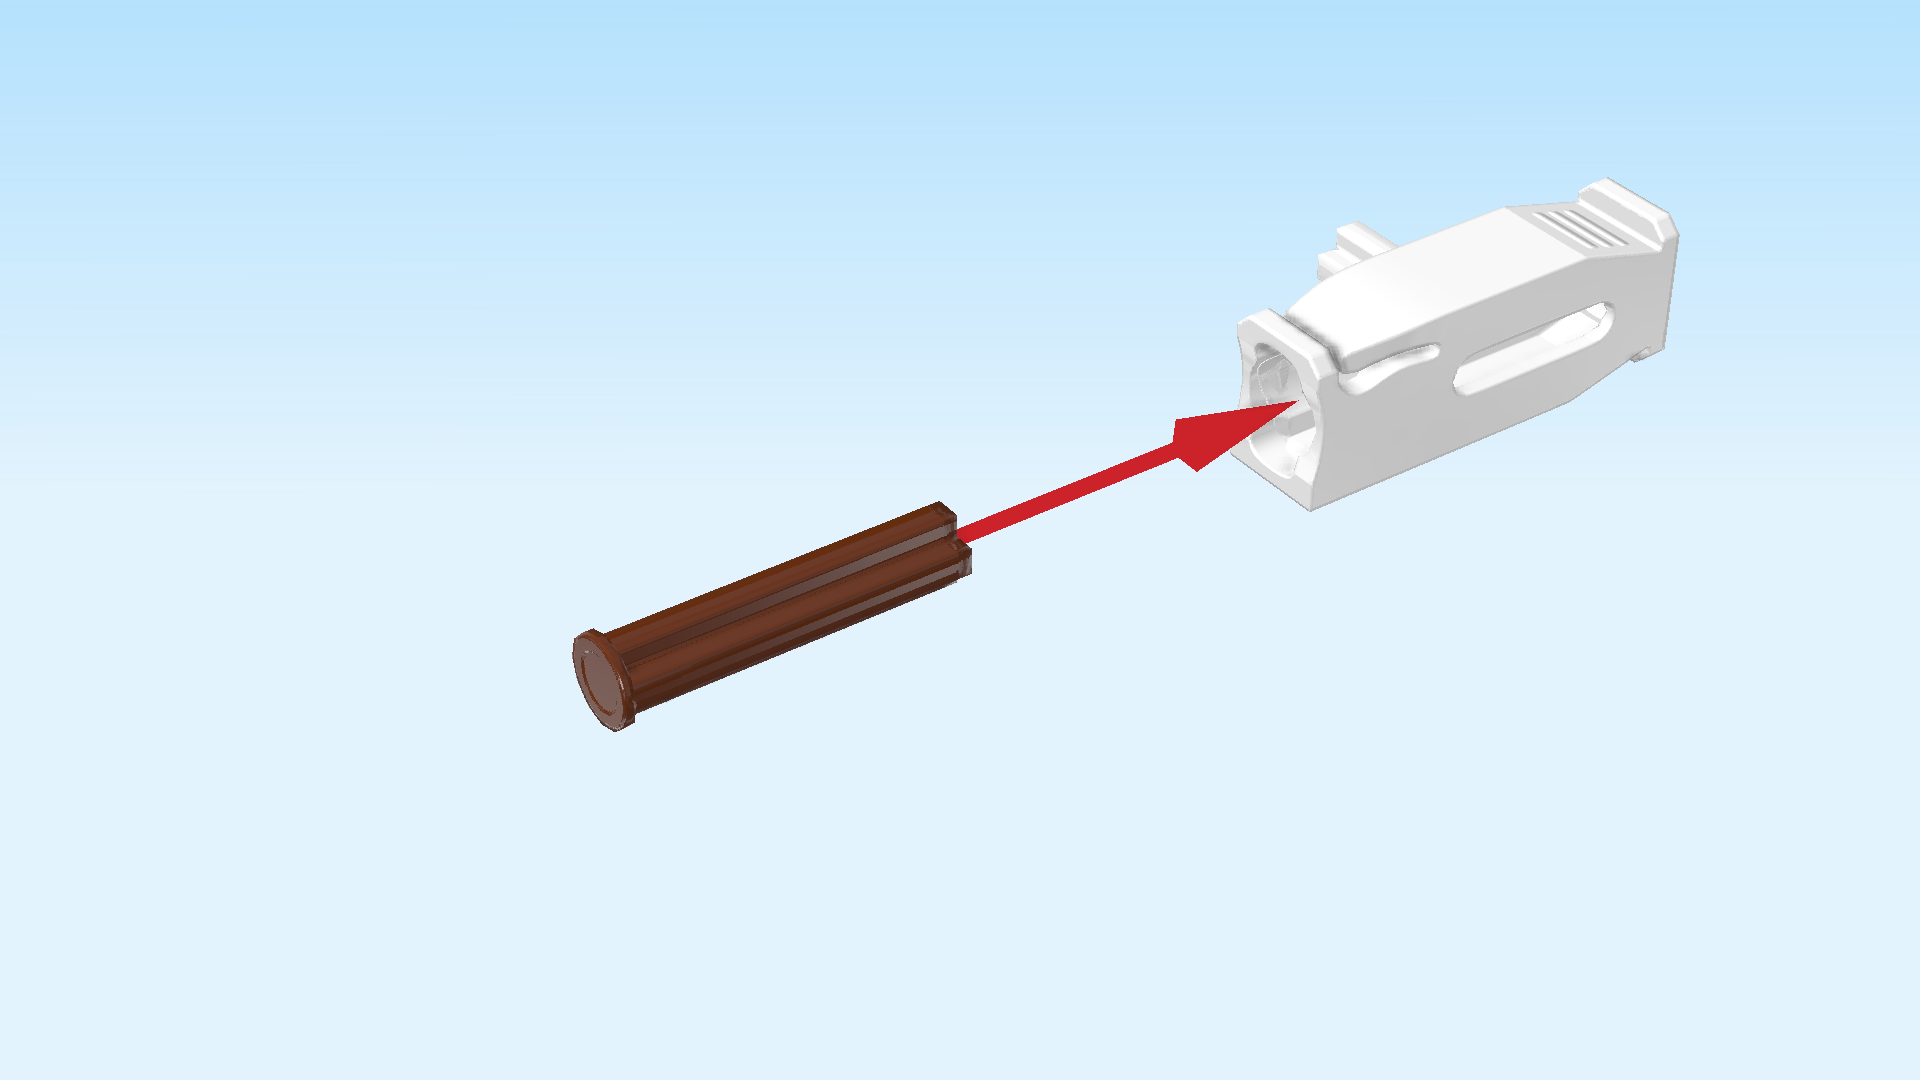
| Collect the following 2 pieces: |
| 1 reddish brown cross axle 3m with end stop, |
| and 1 white shooter with cross axle pin. |
| Hold the shooter horizontally so that its opening is to the left and the cross axle pin is pointing to the back. |
| Insert the cross axle into the shooter opening from the left. Slide it all the way in until the end stop hits the right edge. |
| Mount the shooter by inserting its cross axle pin into the empty cross hole of the fire monitor stand. The cross axle is sticking out towards the right, the opening is to the left. |
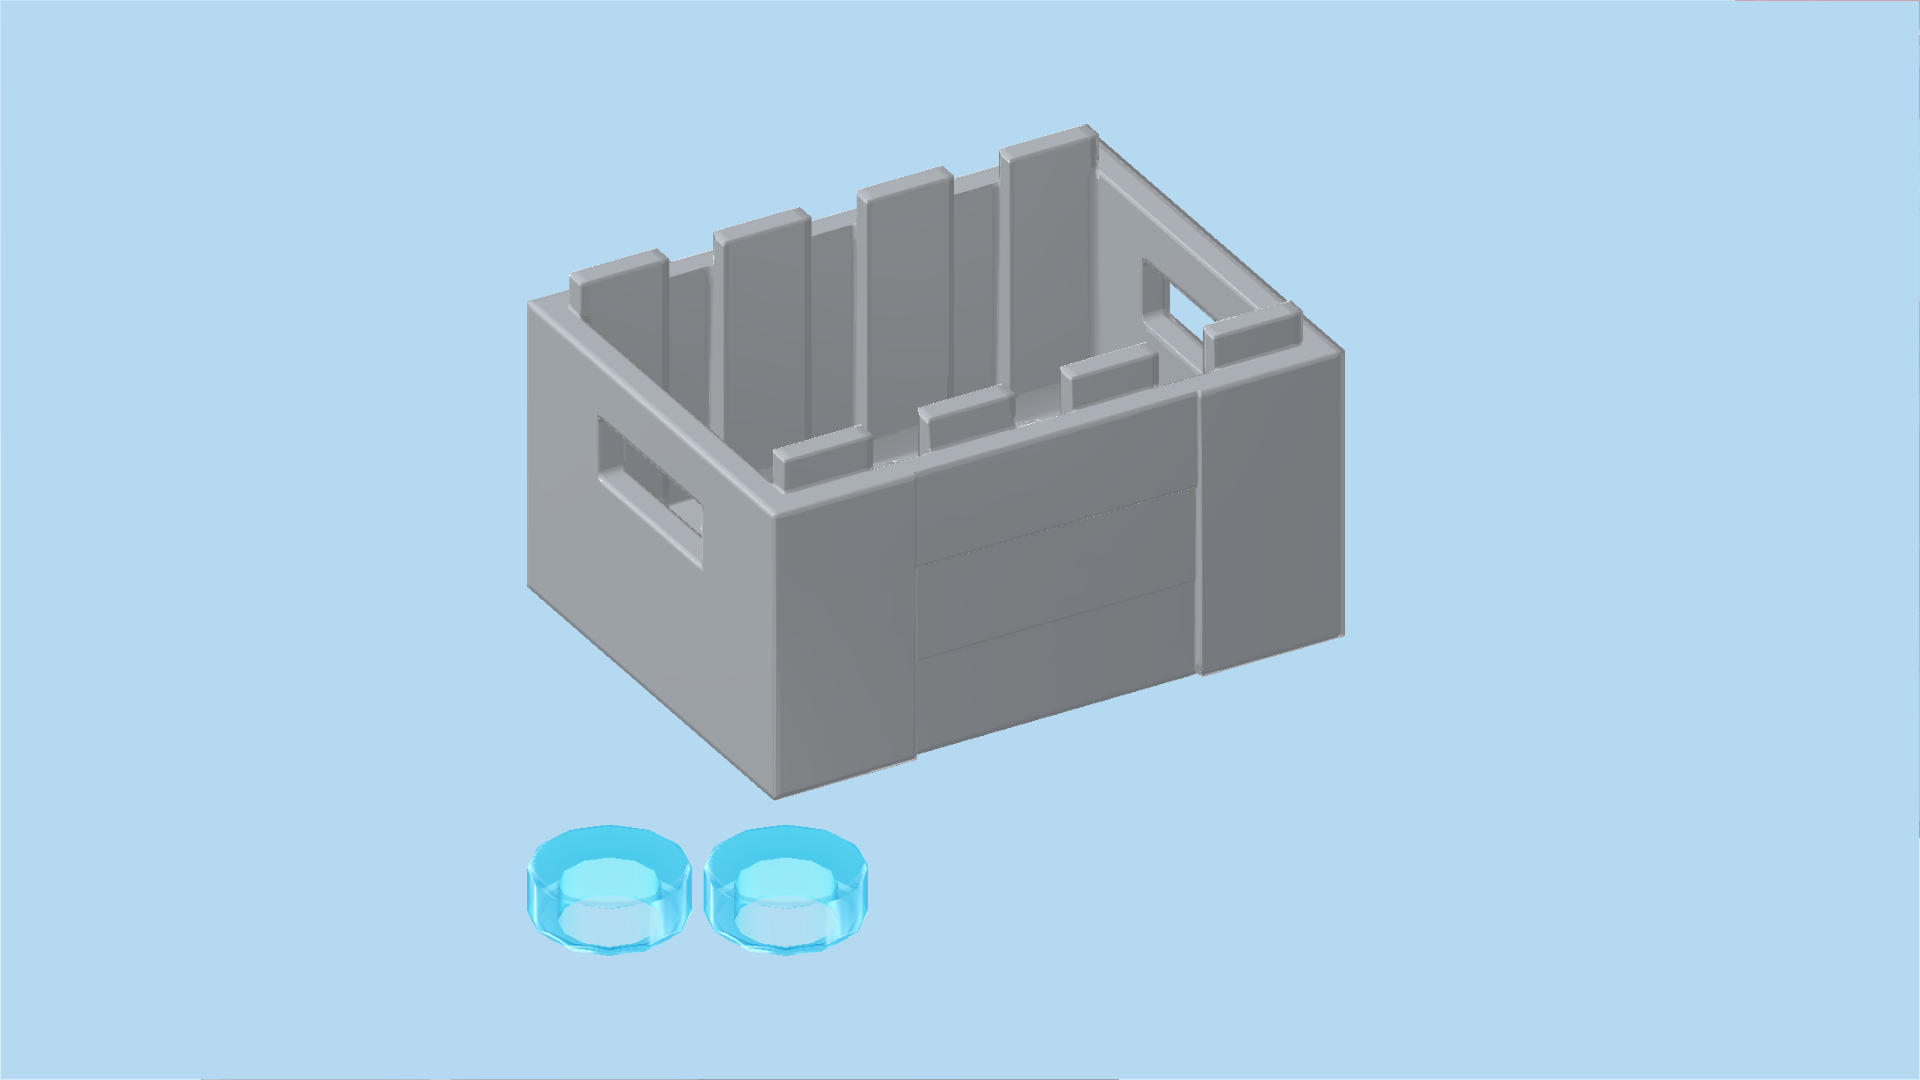
| Next, we will build the reserve water tank. |
| Collect the following 3 pieces: |
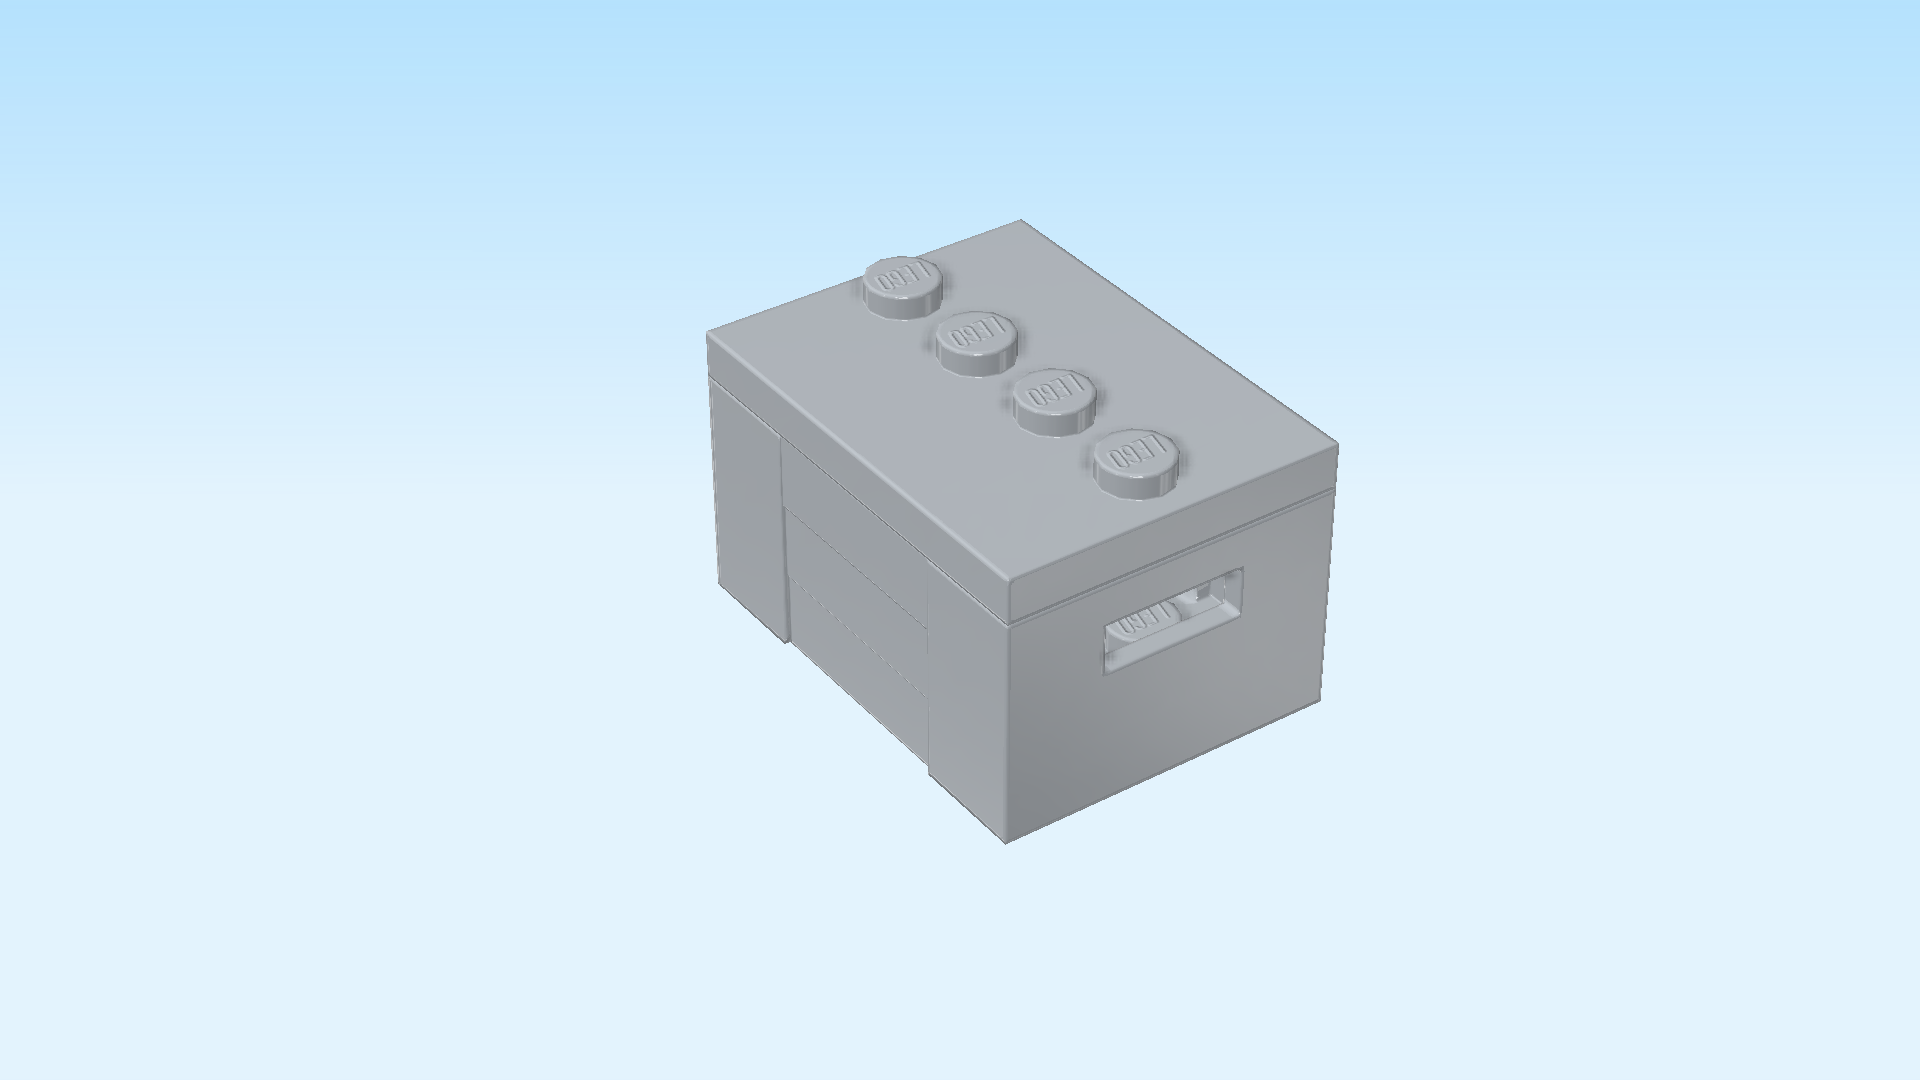
| 1 medium stone grey crate 3x4 with handholds, |
| and 2 transparent light blue round tiles 1x1. |
| Put the crate vertically on the table. |
| Put the round tiles loosely into the crate. |
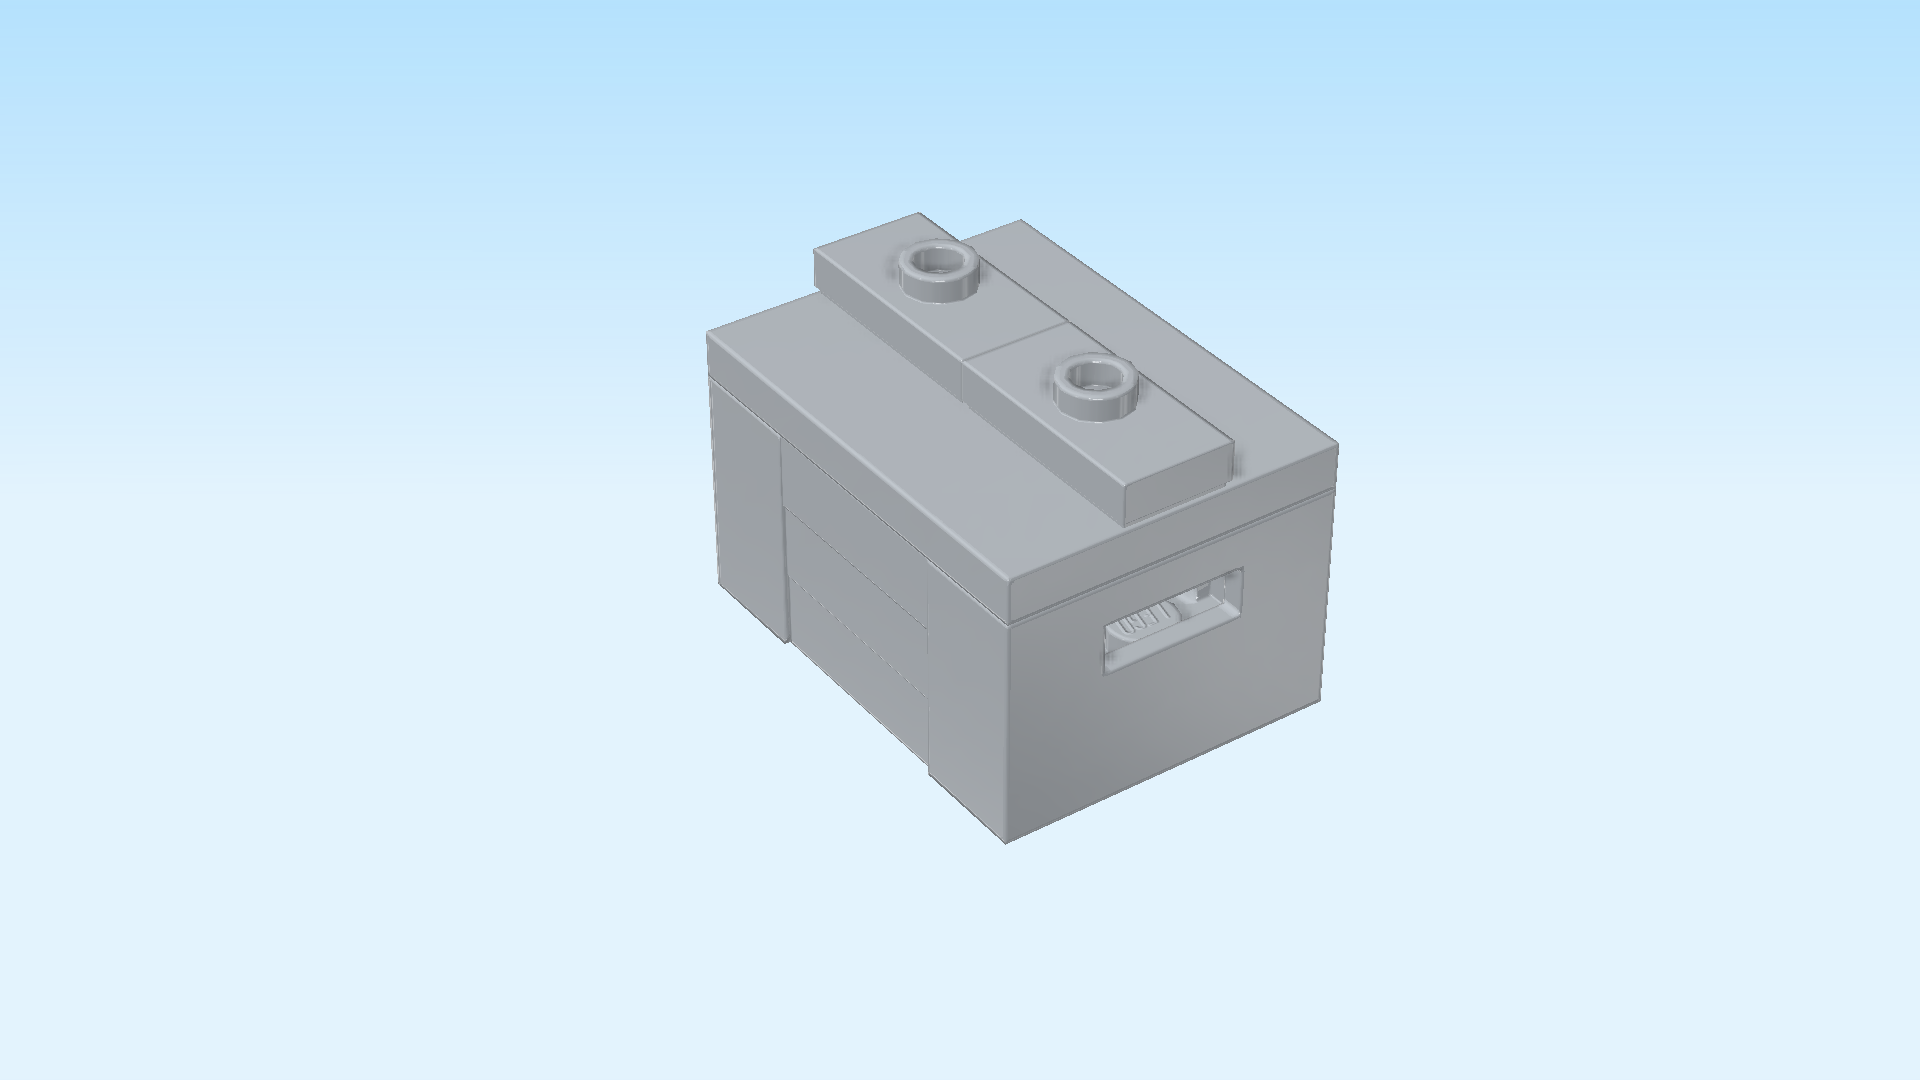
| Find 1 medium stone grey plate 3x4 with 4 knobs in a horizontal middle line. |
| Put it vertically on the crate. |
| Find 2 medium stone grey plates 1x2 with 1 knob. |
| Put them vertically next to each other on the 4 knobs of the previous piece. |
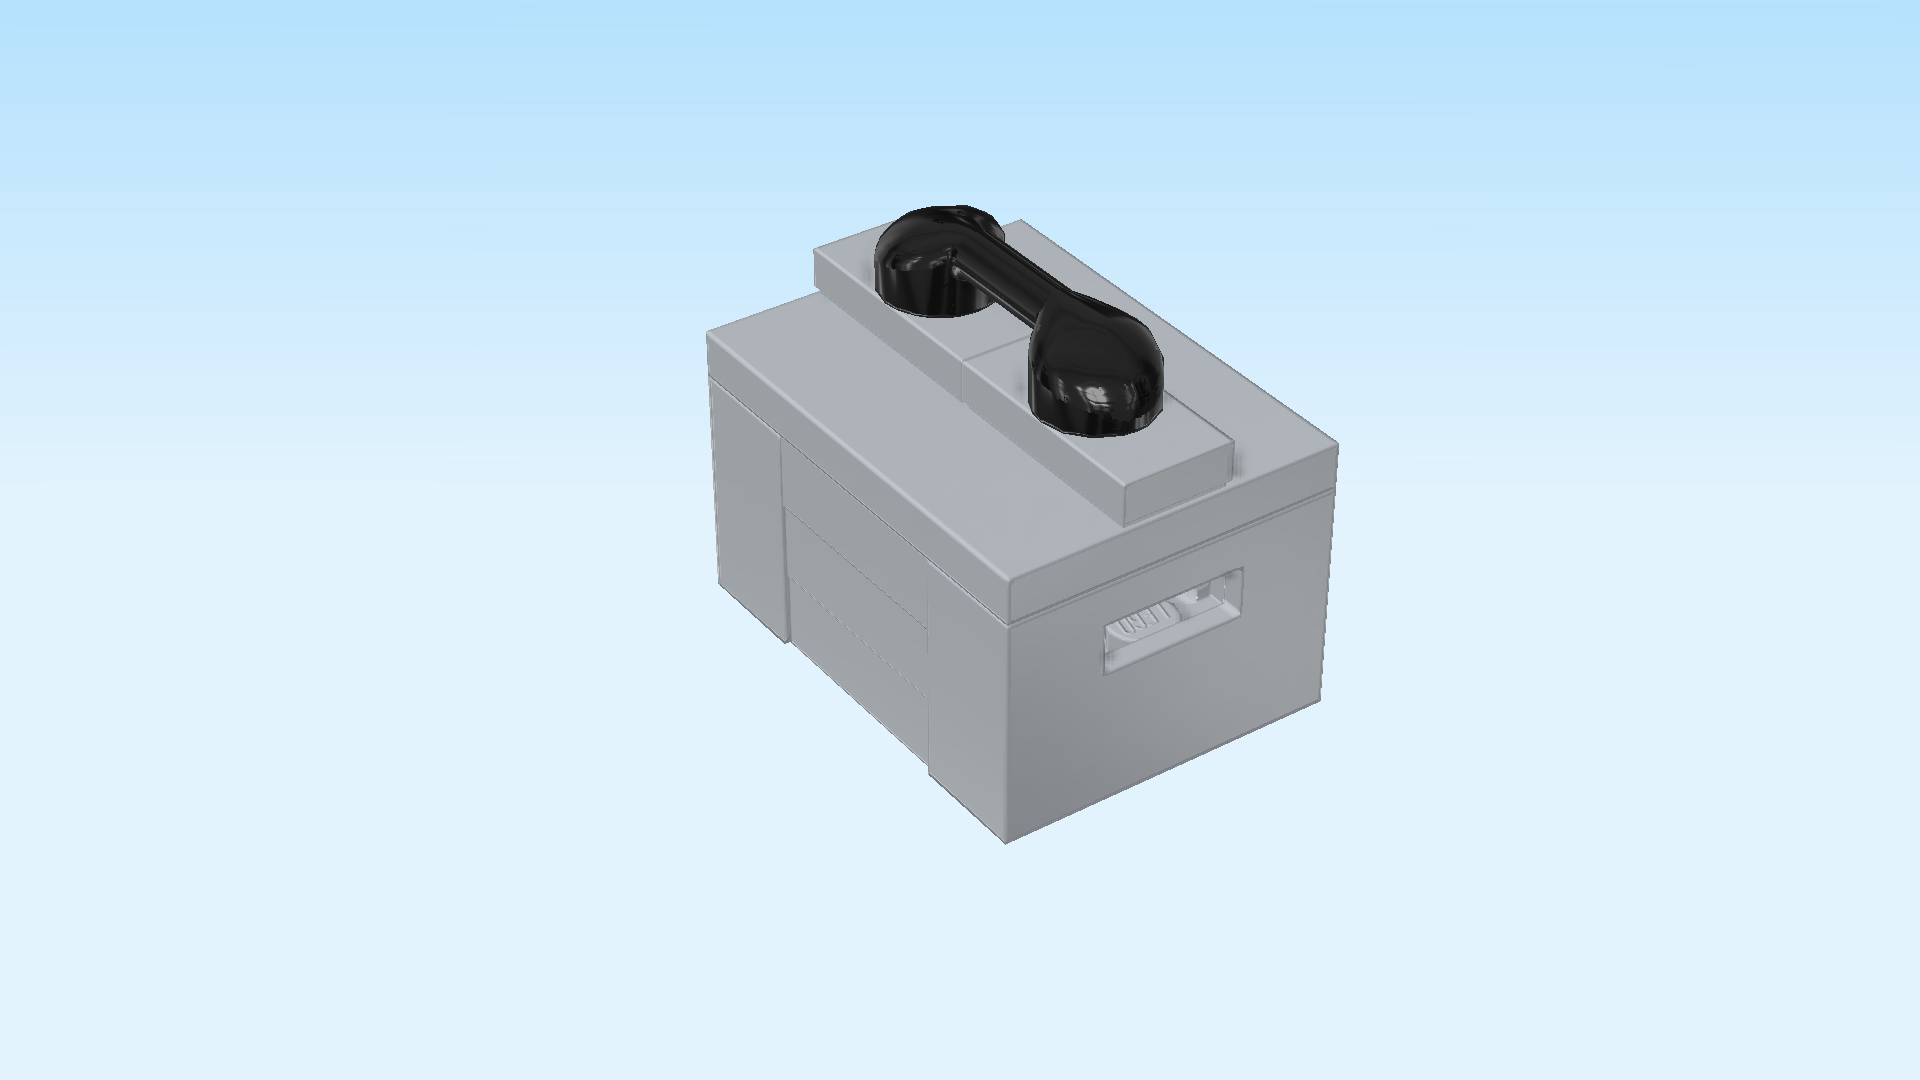
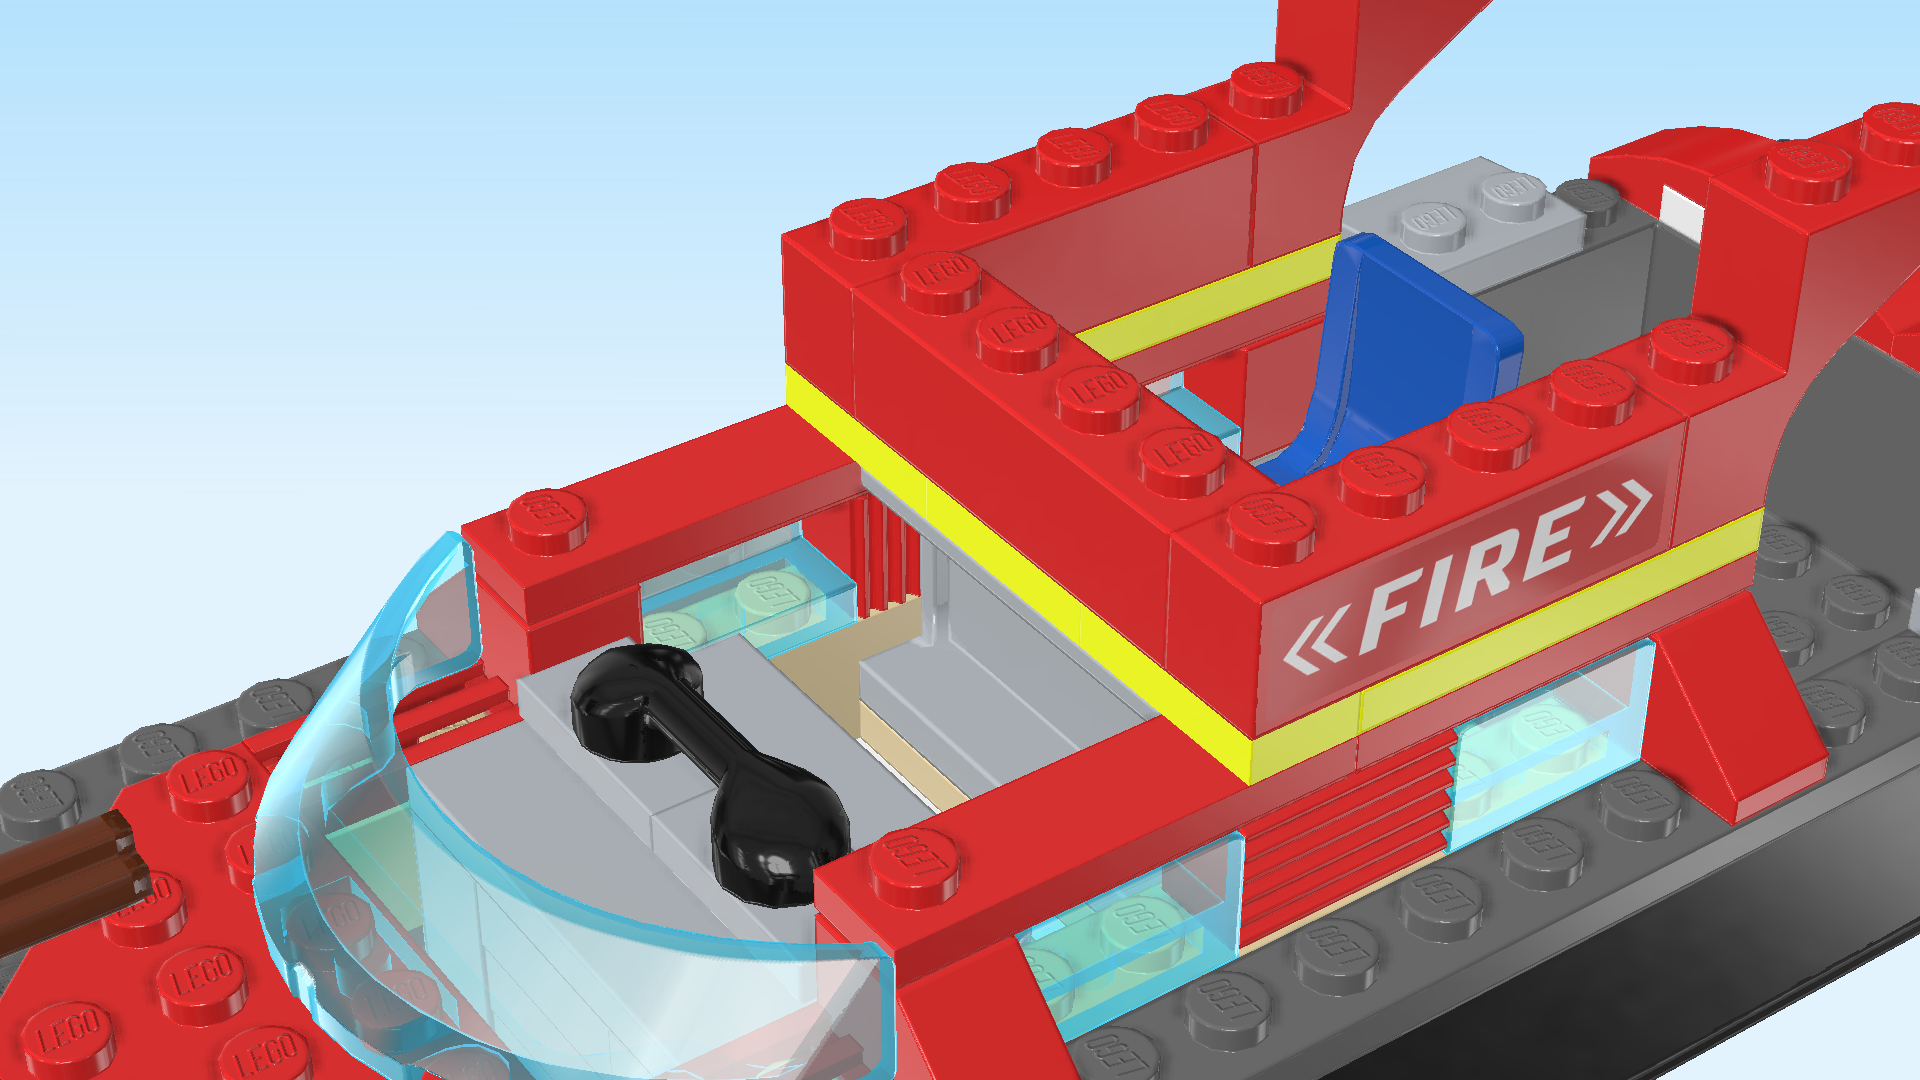
| Find 1 black telephone receiver. |
| Put it vertically on the 2 previous pieces. |
| The reserve tank is finished! Great job! Put it vertically into the empty space to the right of the windshield. It is stored on top of the emergency bed as long as the bed is not needed. |
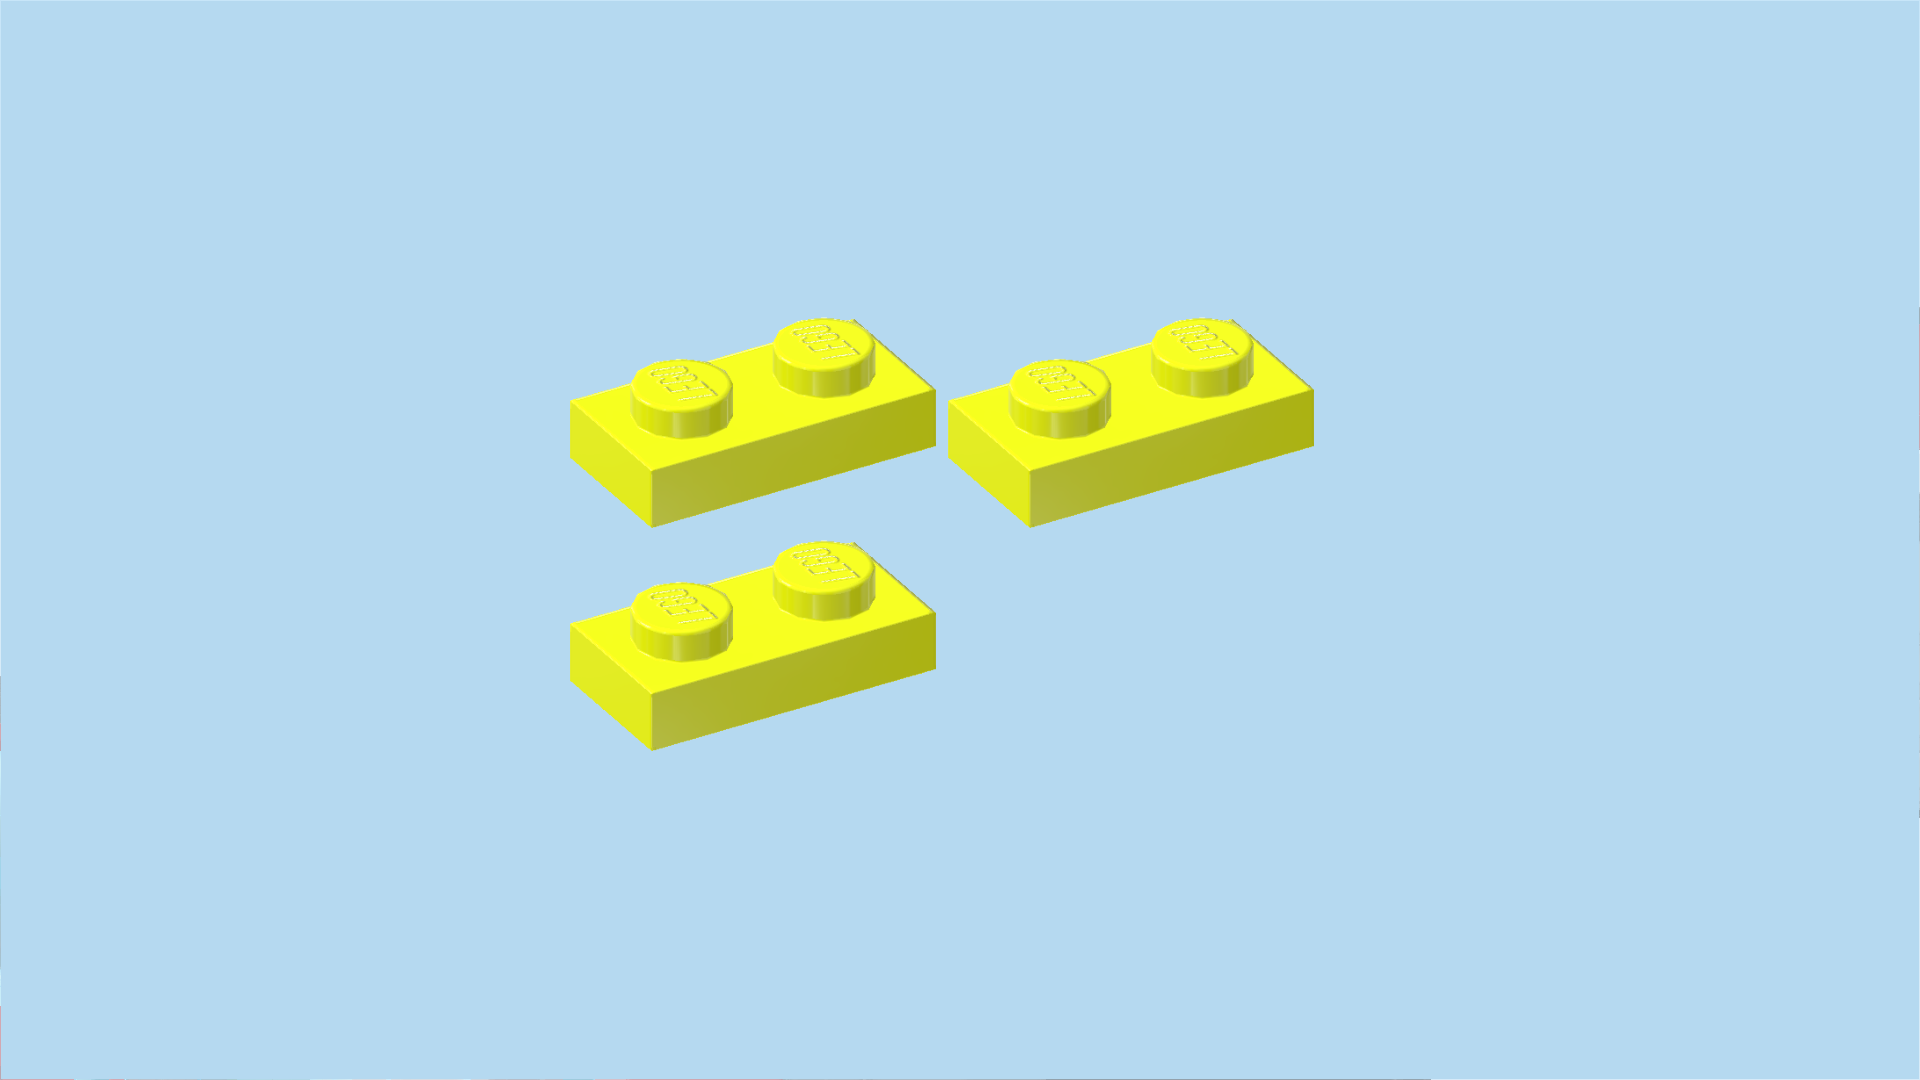
| Find 2 bright neon yellow plates 1x4. |
| Put 1 horizontally on the wall in front of the captain's seat, starting from the right edge of that wall. |
| Careful: make sure that you are using the horizontally oriented wall that is currently in front of the captain's seat. Do not use the vertical wall to its left. |
| Repeat symmetrically at the back. |
| Find 3 bright neon yellow plates 1x2. |
| Use them to cover the wall between the steering wheel and the reserve tank. Continue for detailed instructions. |
| Put 1 vertically to the left of the previous piece. |
| Put 1 vertically in front of the previous piece. |
| Put the last one vertically in front of the previous piece. |
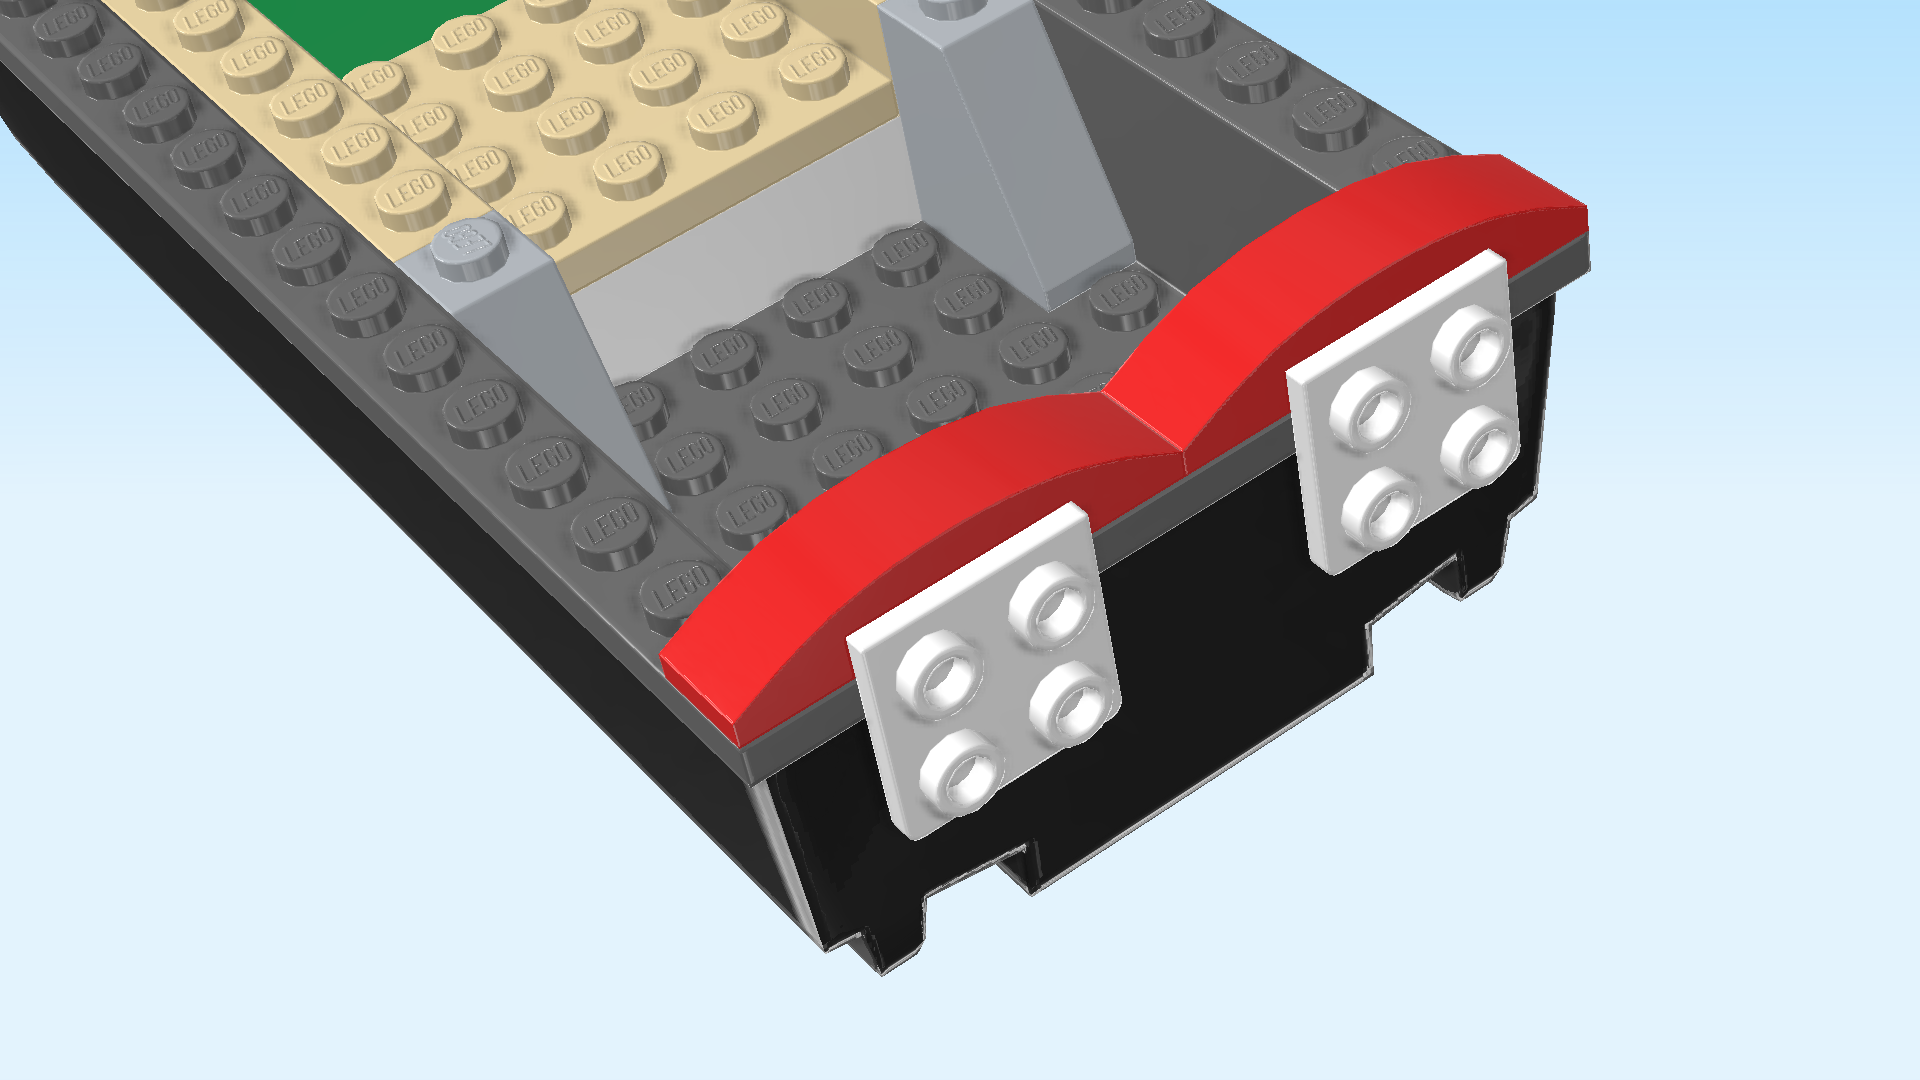
| Find 2 bright red stepped bricks 1x3x2 with half arch. |
| Put 1 horizontally on the rightmost knob of the wall behind the captain's seat, half arch overhanging to the right. |
| Repeat symmetrically at the front wall, half arch to the front. |
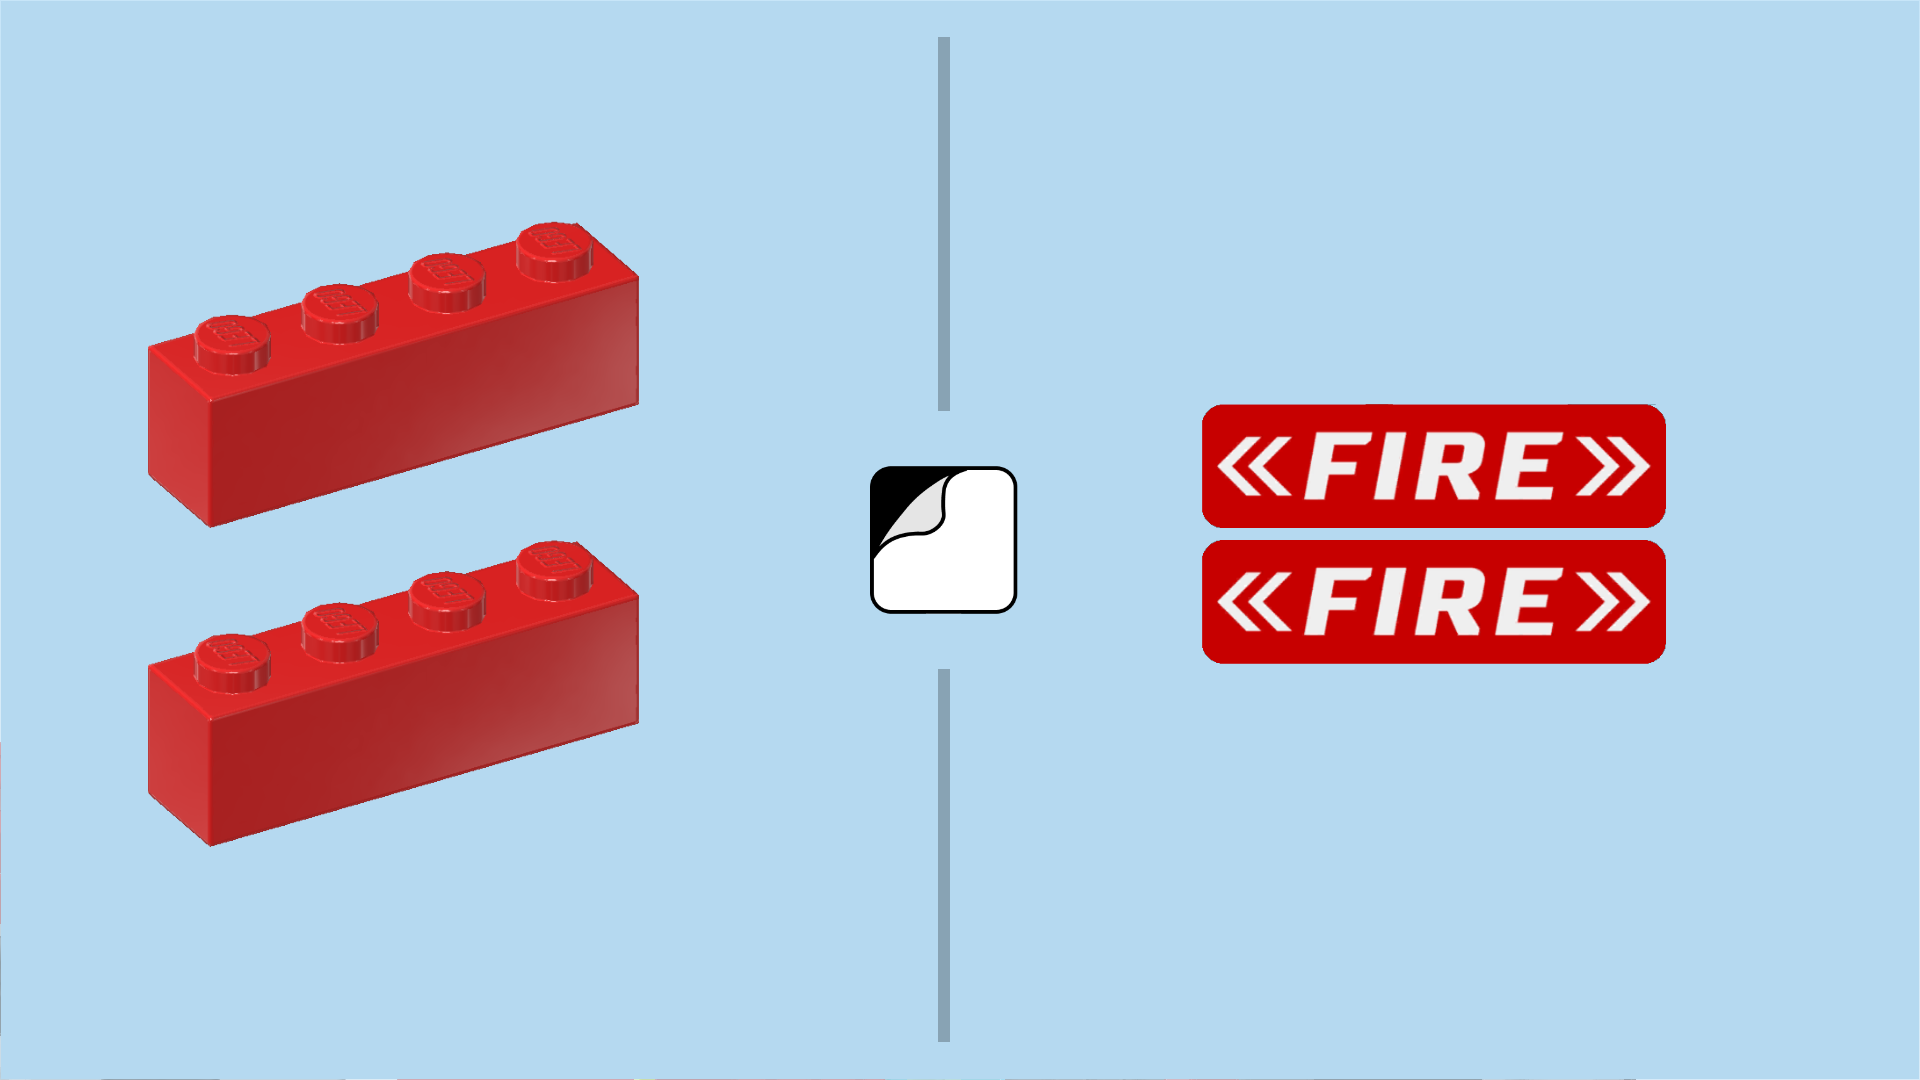
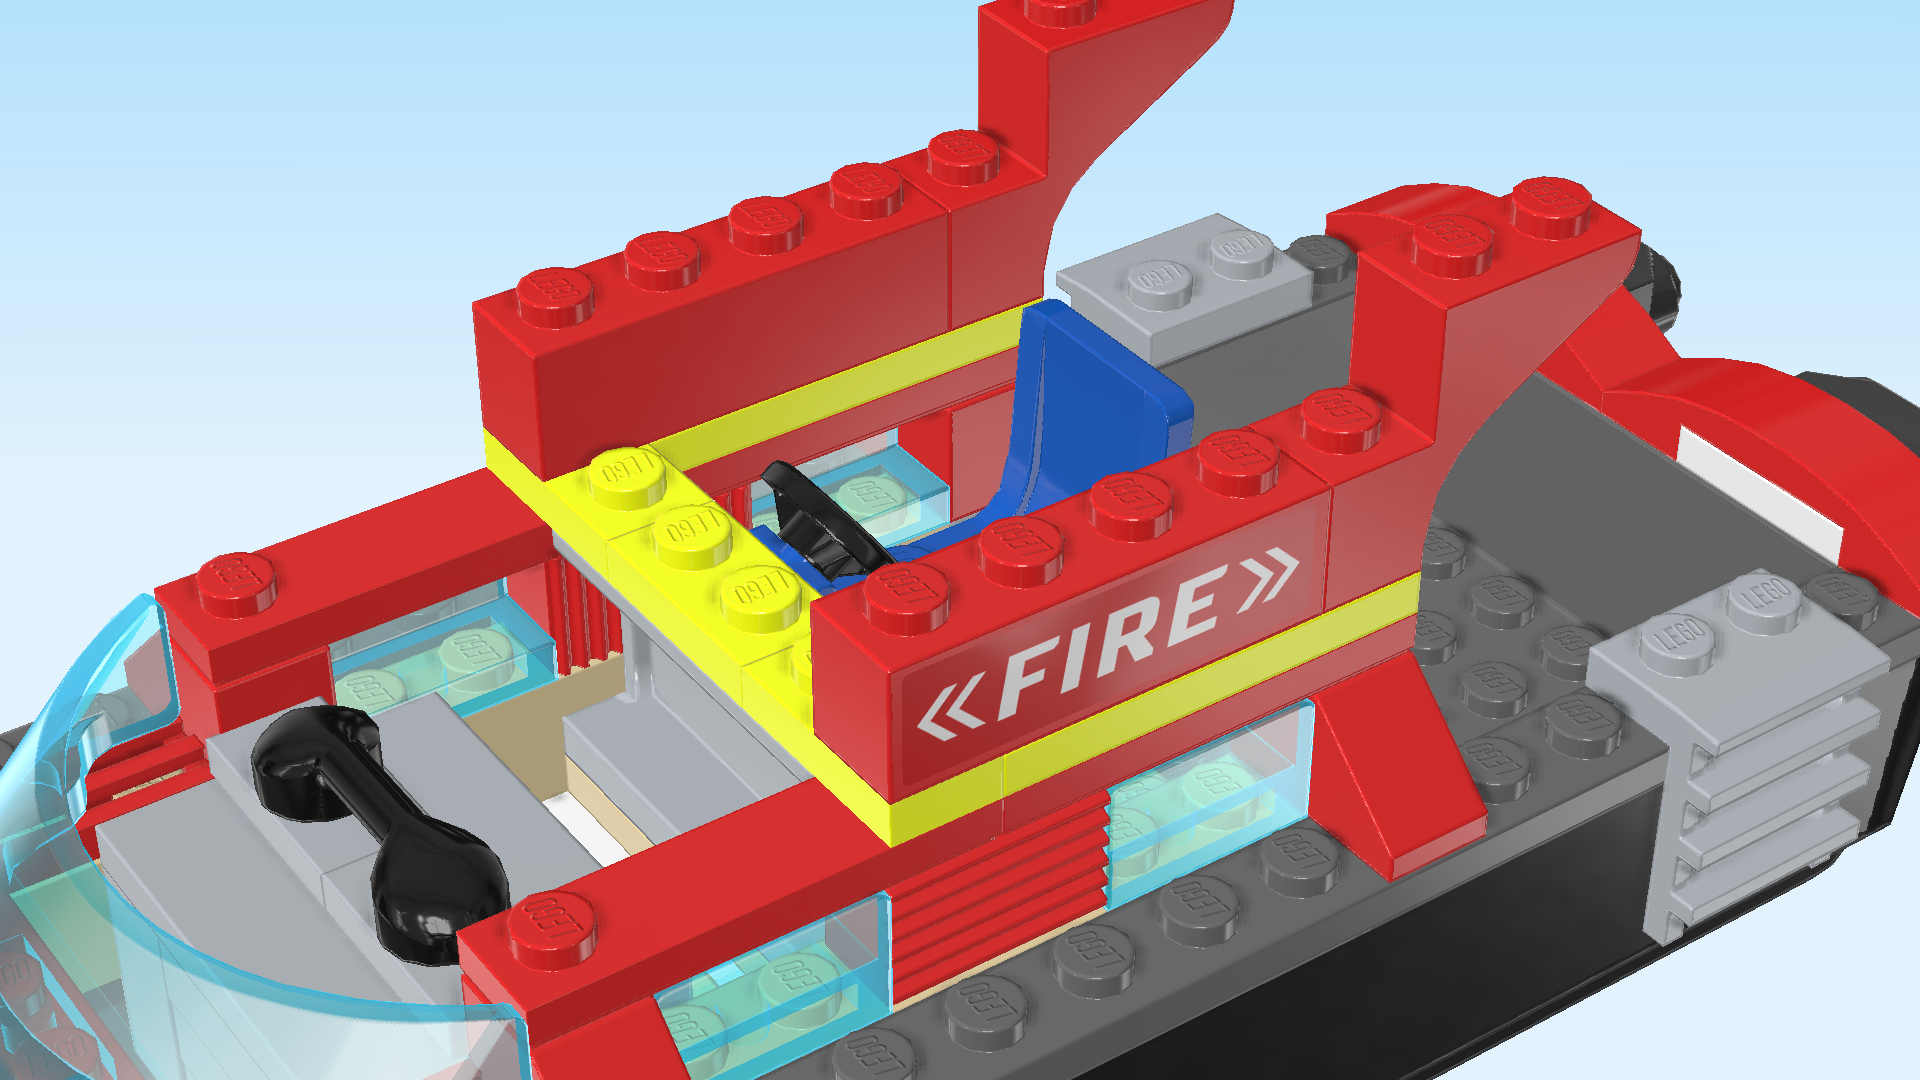
| Collect the following 4 pieces: |
| 2 bright red bricks 1x4, |
| and 2 rectangular stickers 1x2 (number 3). (These 2 stickers are identical and the smallest stickers in the set). |
| Put the 2 bricks horizontally next to each other on the table. |
| Attach the stickers on the front side surfaces of the bricks. |
| The stickers are red; they have the word "FIRE" written on them in white letters. There are two white arrows pointing to the left and two white arrows pointing to the right next to the writing. |
| Mount 1 brick horizontally to the left of the brick with half arch at the front, sticker to the front if you have already attached it. |
| Repeat symmetrically at the back, sticker to the back. |
| Find 1 bright red brick 1x4. |
| Put it vertically between the leftmost knobs of the 2 previous pieces. |
| Find 2 transparent light blue wall elements 1x2x1. |
| Put 1 horizontally to the left of the brick with half arch at the front, panel to the front. |
| Repeat symmetrically at the back, panel to the back. |
| Find 1 transparent light blue rounded cockpit 3x6x1. |
| Put it vertically to the left of the 2 previous pieces, curve to the left. |
| Find 2 transparent blue smooth roof tiles 1x1x⅔. |
| Put 1 on the left knob of the brick with half arch at the front, slope to the left. |
| Repeat symmetrically at the back, slope to the left. |
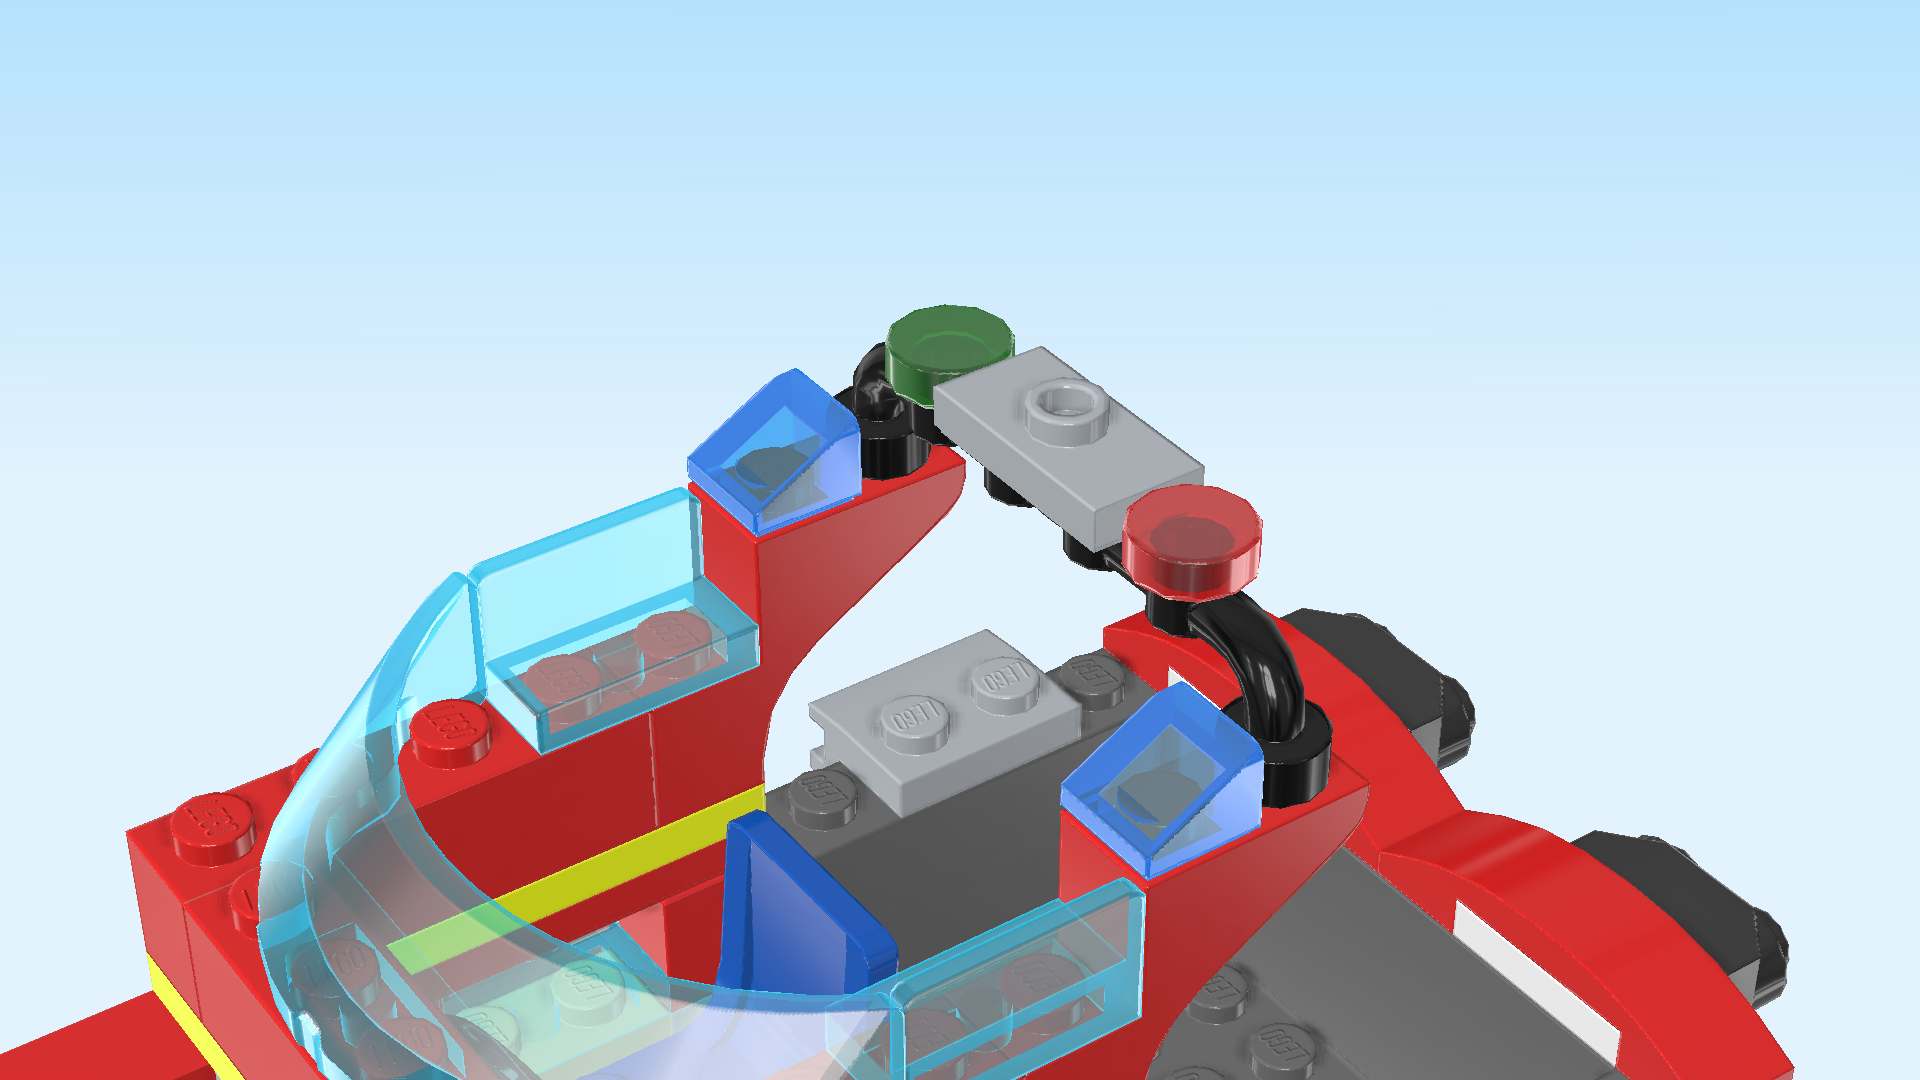
| Find 1 black bar 1x6 with 4 hollow knobs. |
| Put it vertically to the right of the 2 previous pieces, connecting the rightmost knobs of the bricks with half arch. |
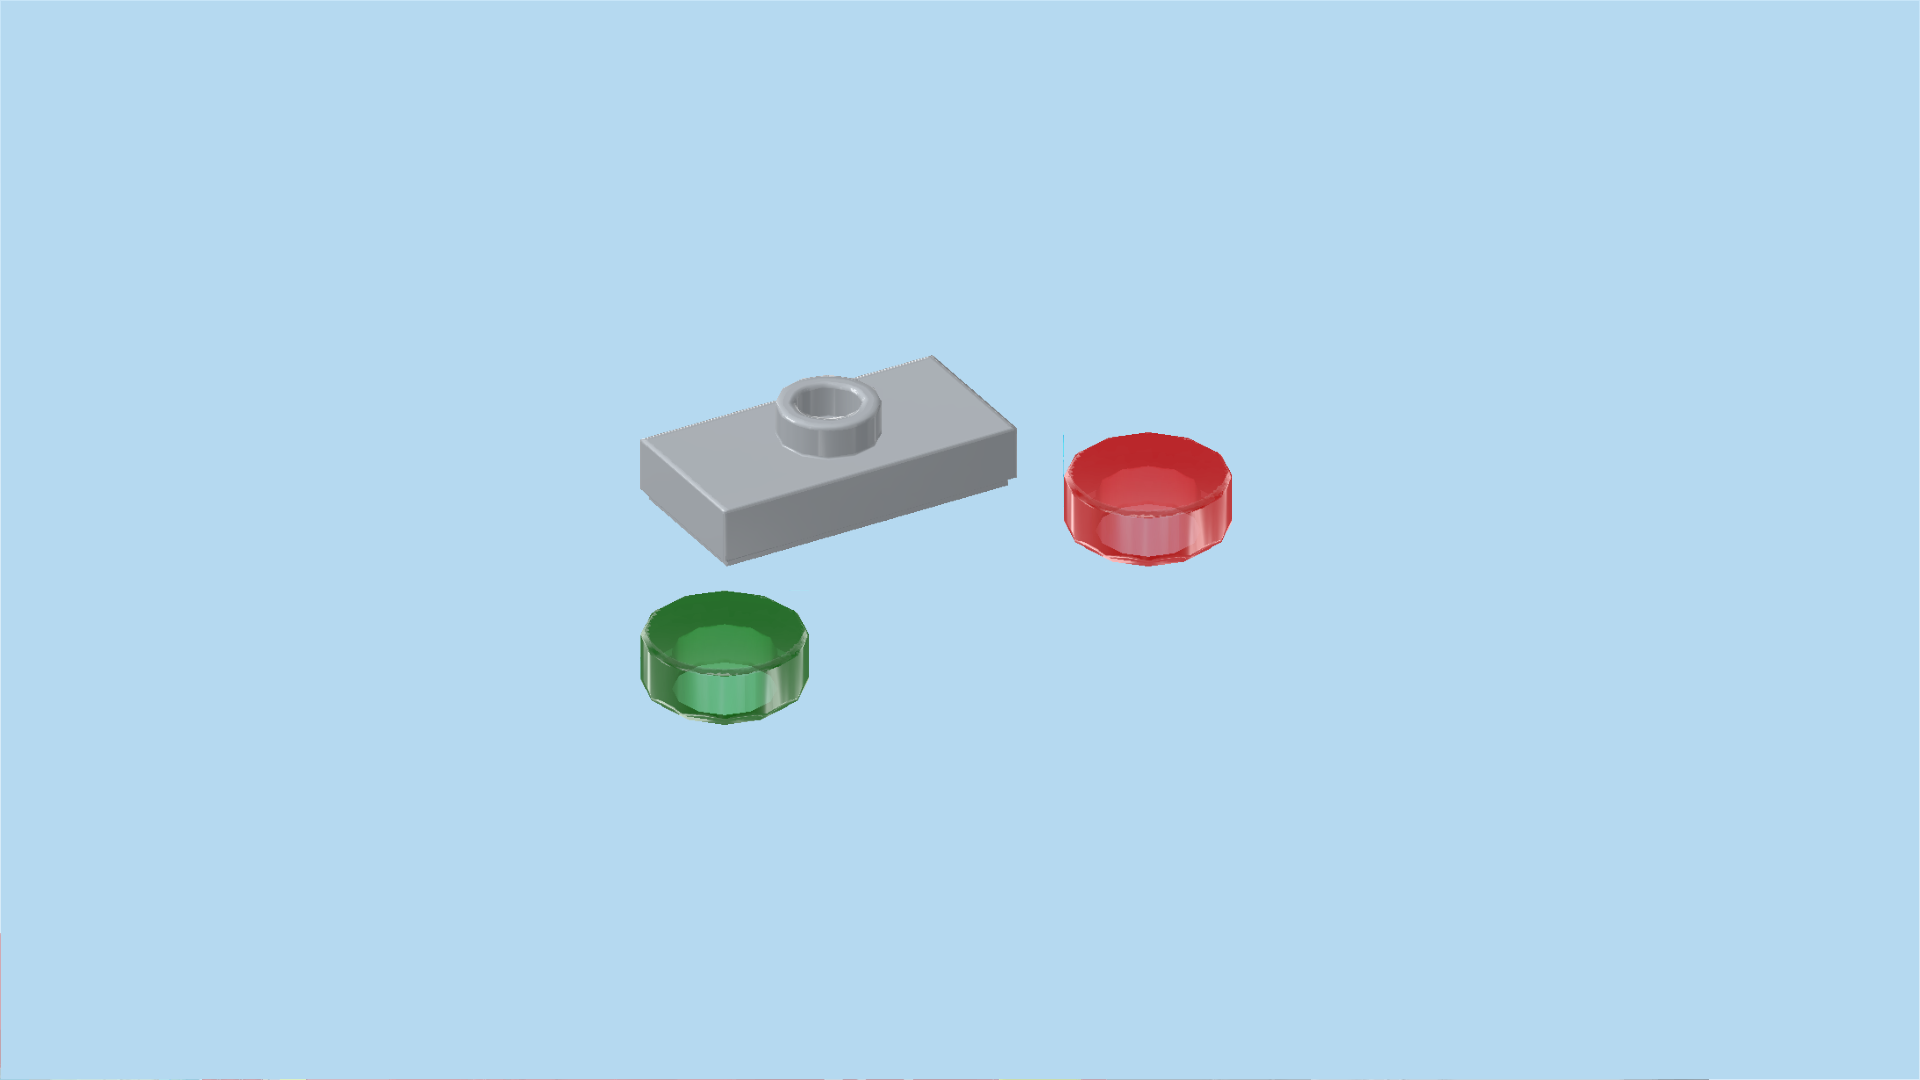
| Collect the following 3 pieces: |
| 1 transparent red round tile 1x1, |
| 1 medium stone grey plate 1x2 with 1 knob, |
| and 1 transparent green round tile 1x1. |
| Put the transparent red round tile on the frontmost knob of the previous piece. |
| Put the plate 1x2 vertically behind the previous piece. |
| Put the transparent green round tile behind the previous piece. |
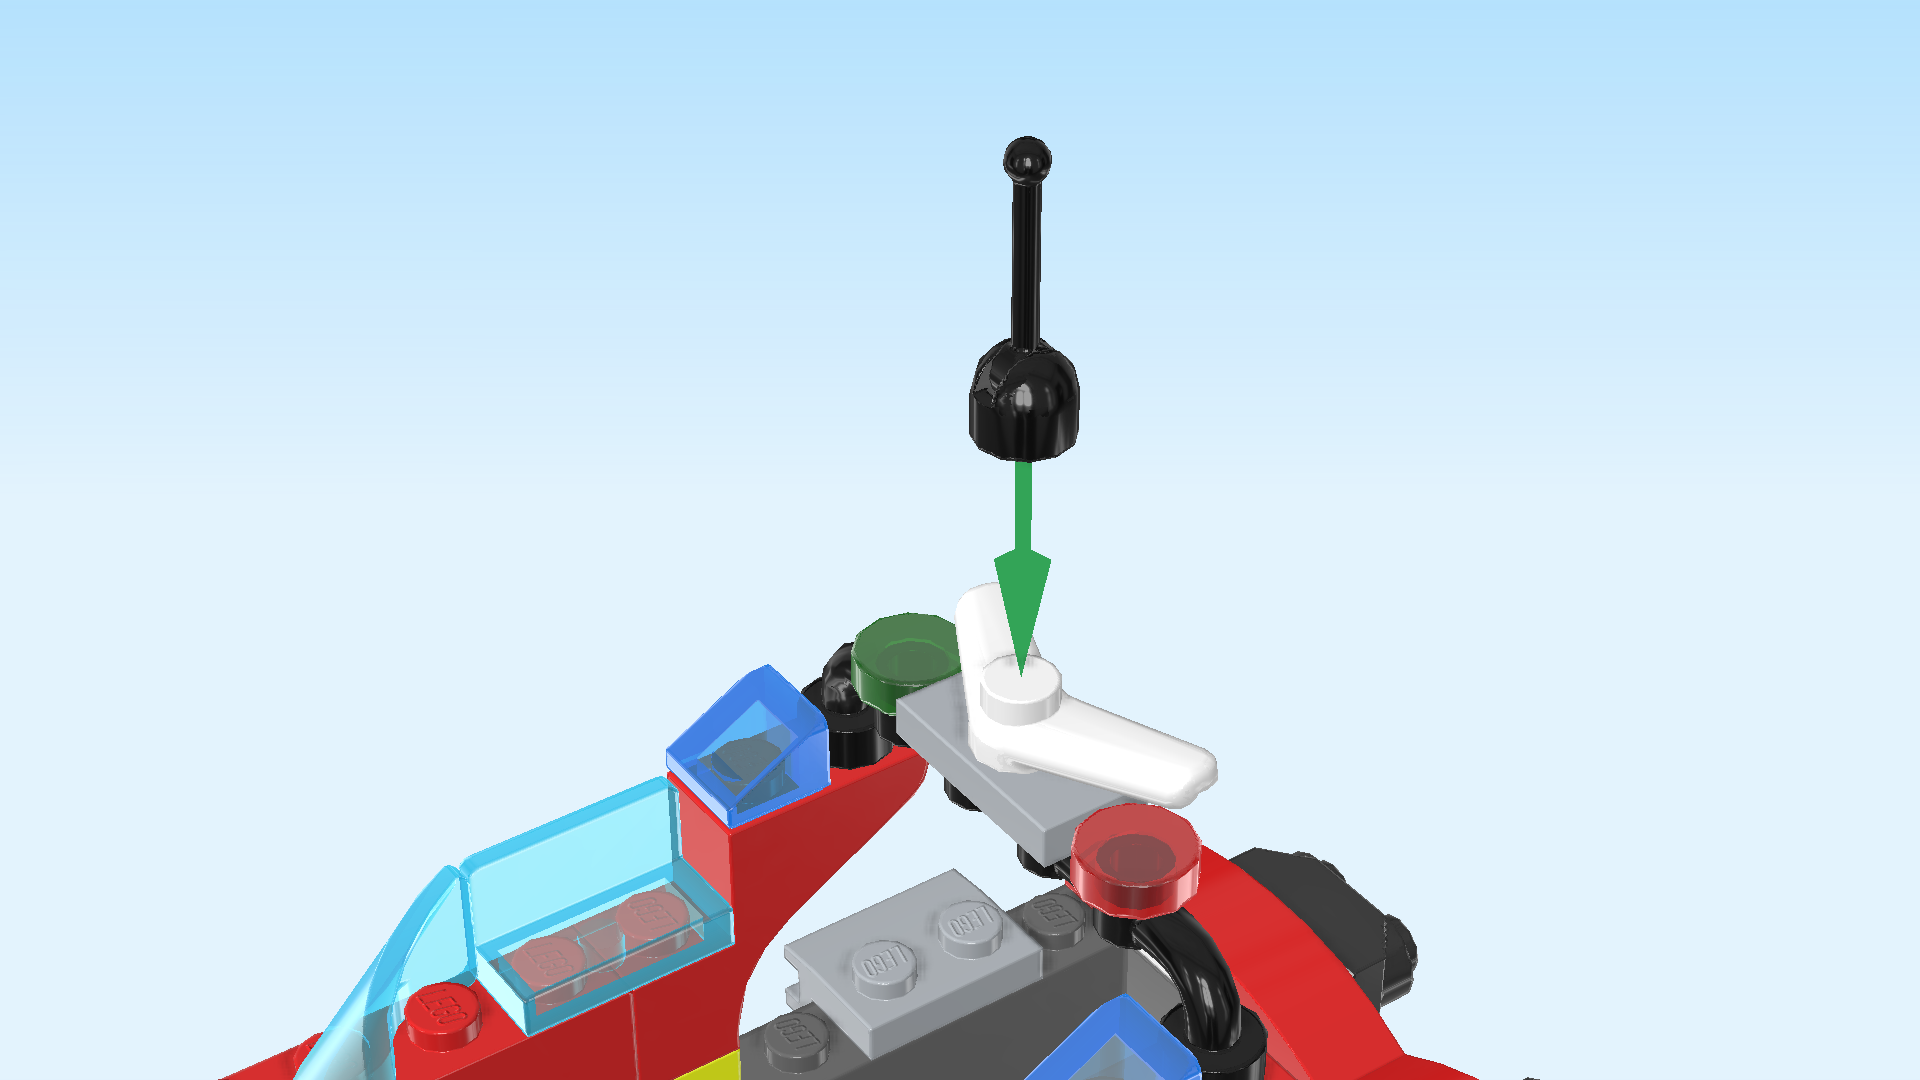
| Collect the following 2 pieces: |
| 1 white boomerang piece, |
| and 1 black joystick. |
| Put the boomerang on the knob of the plate 1x2 from the previous step, its two ends pointing to the right. |
| Put the joystick on top of the boomerang. |
| This is the radio antenna of the ship! |
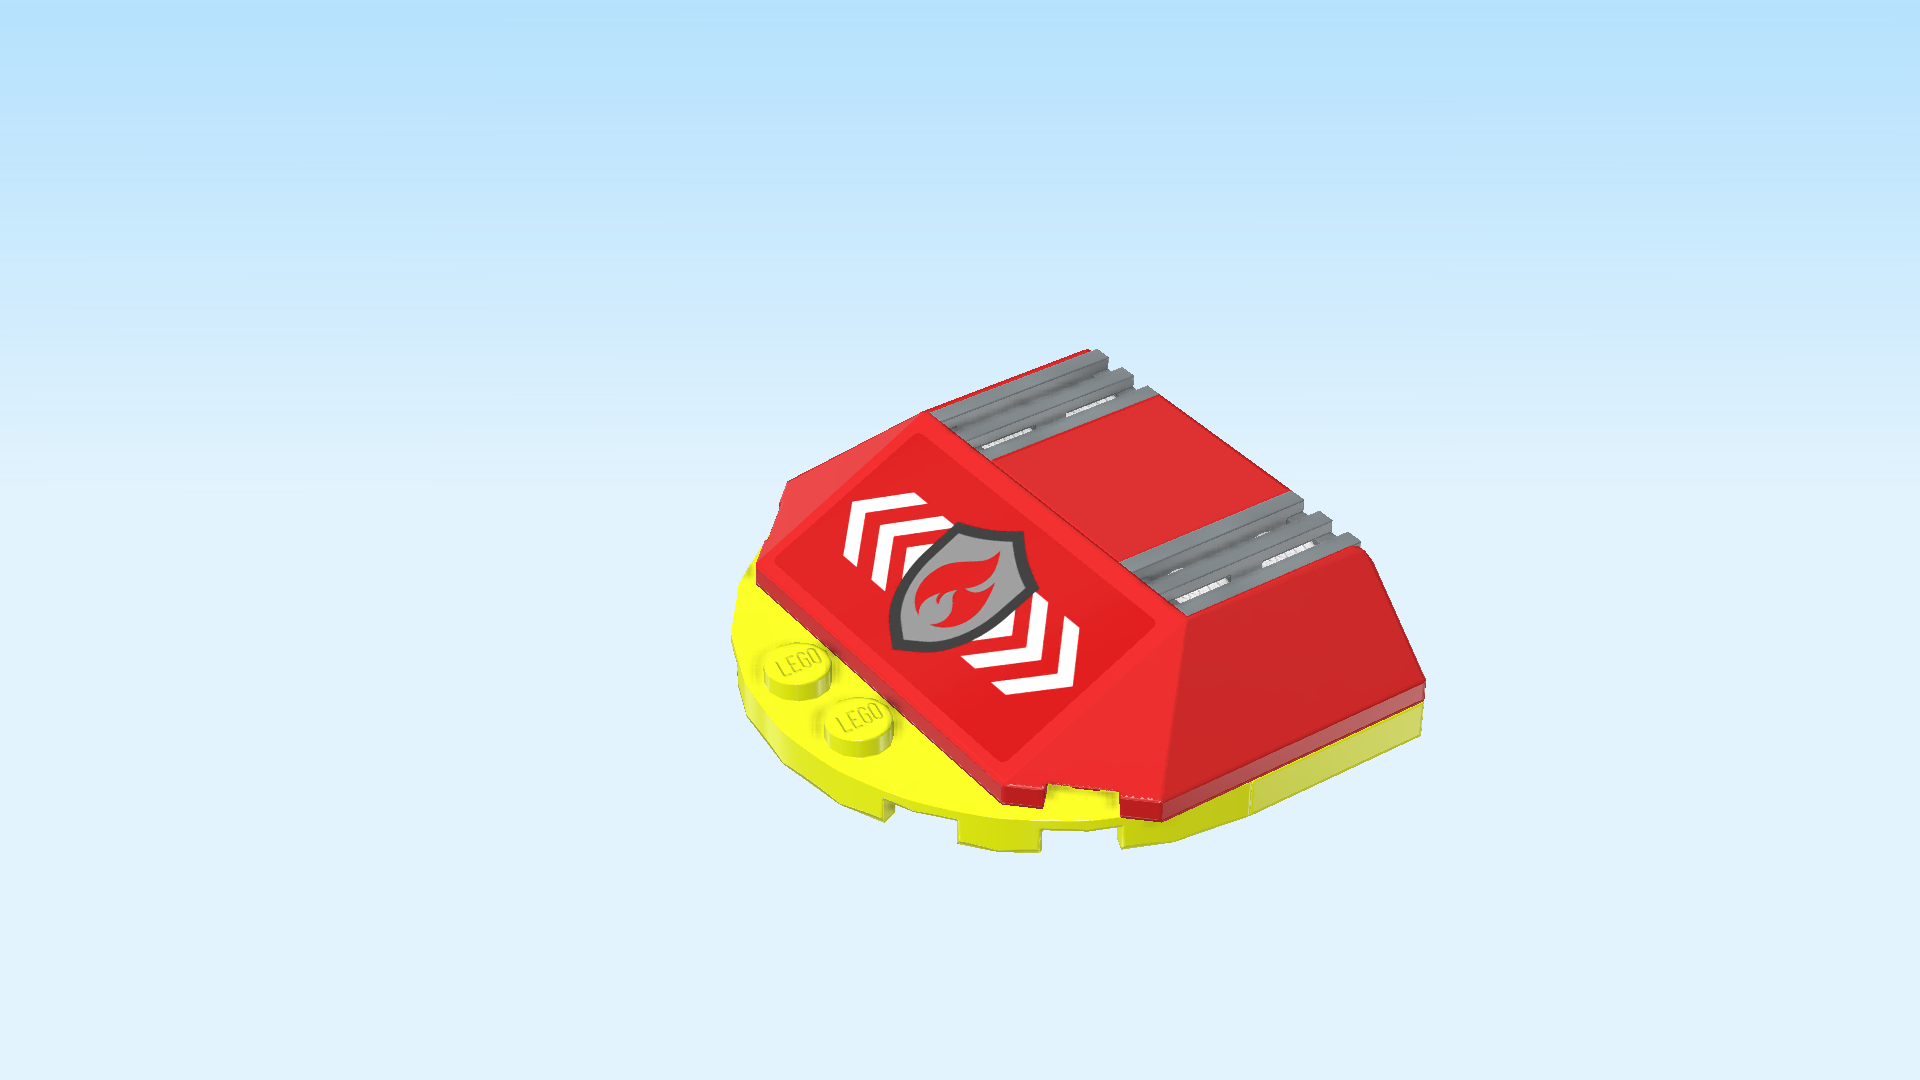
| Next, we will build a sub-part of the ship body. |
| Collect the following 2 pieces: |
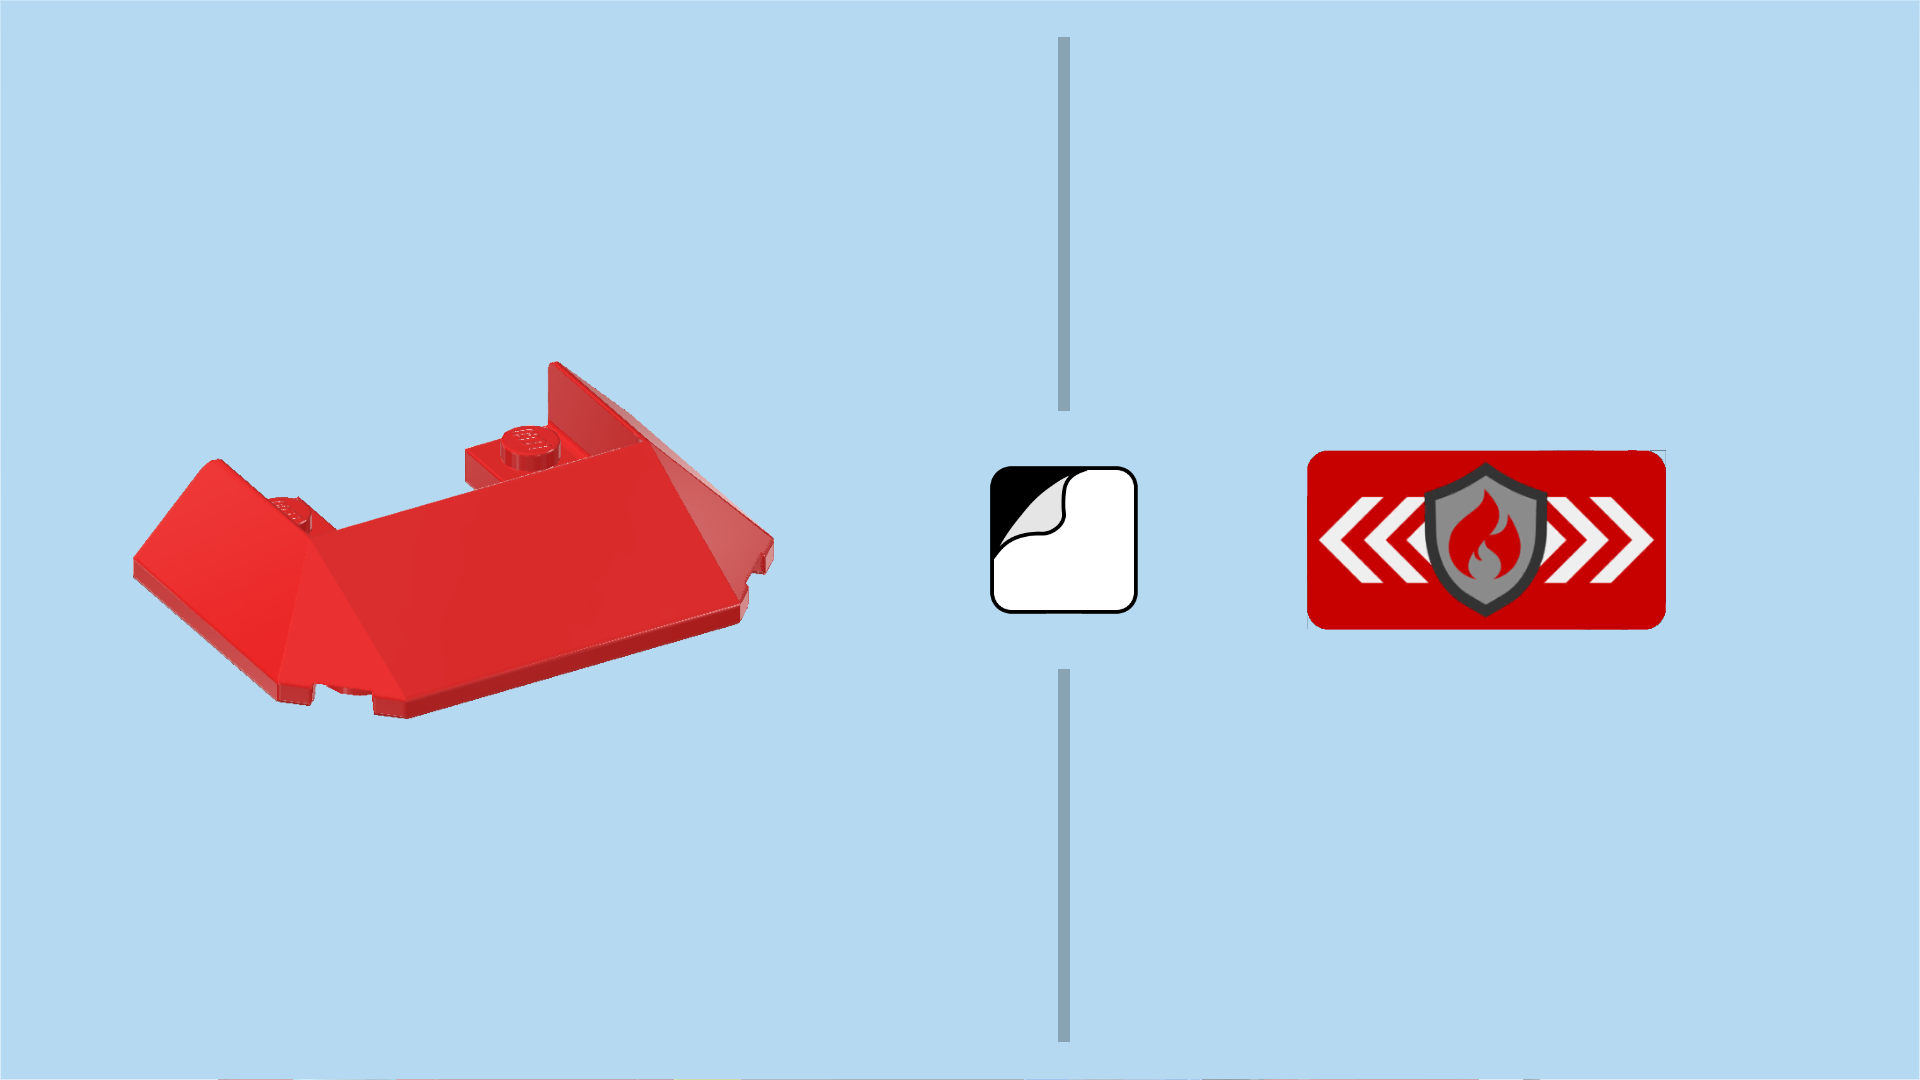
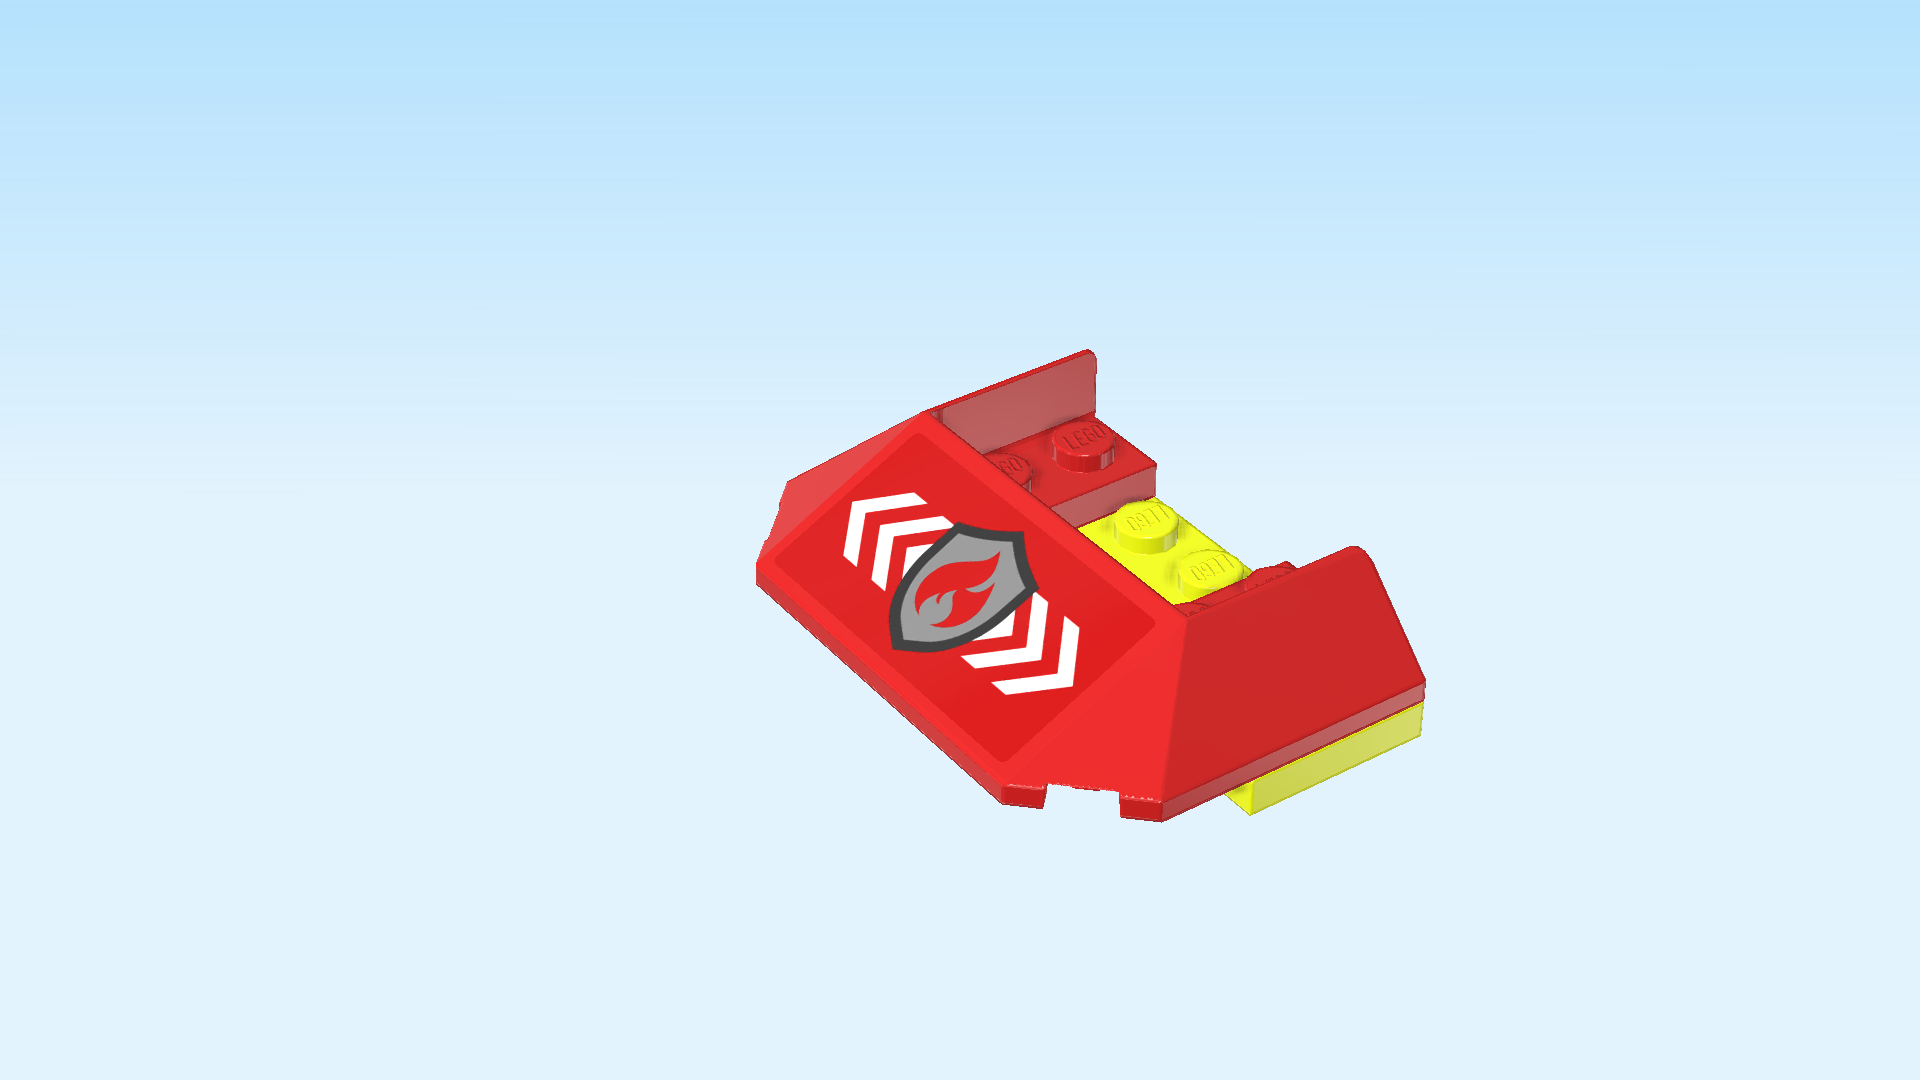
| 1 bright red 3-sided wedge piece 6x4x1, |
| and 1 rectangular sticker (This is the medium-sized sticker of this set). (If you do not want to attach the sticker now, skip the next 3 sentences). |
| Put the 3-sided wedge piece 6x4x1 horizontally on the table, opening to the back. |
| Put the rectangular sticker on the front slope. |
| The sticker is dark red with the fire department logo in the middle. It is a silver metallic badge with a black outline and a red flame in the center. On each side of the badge are three white arrows pointing outwards. |
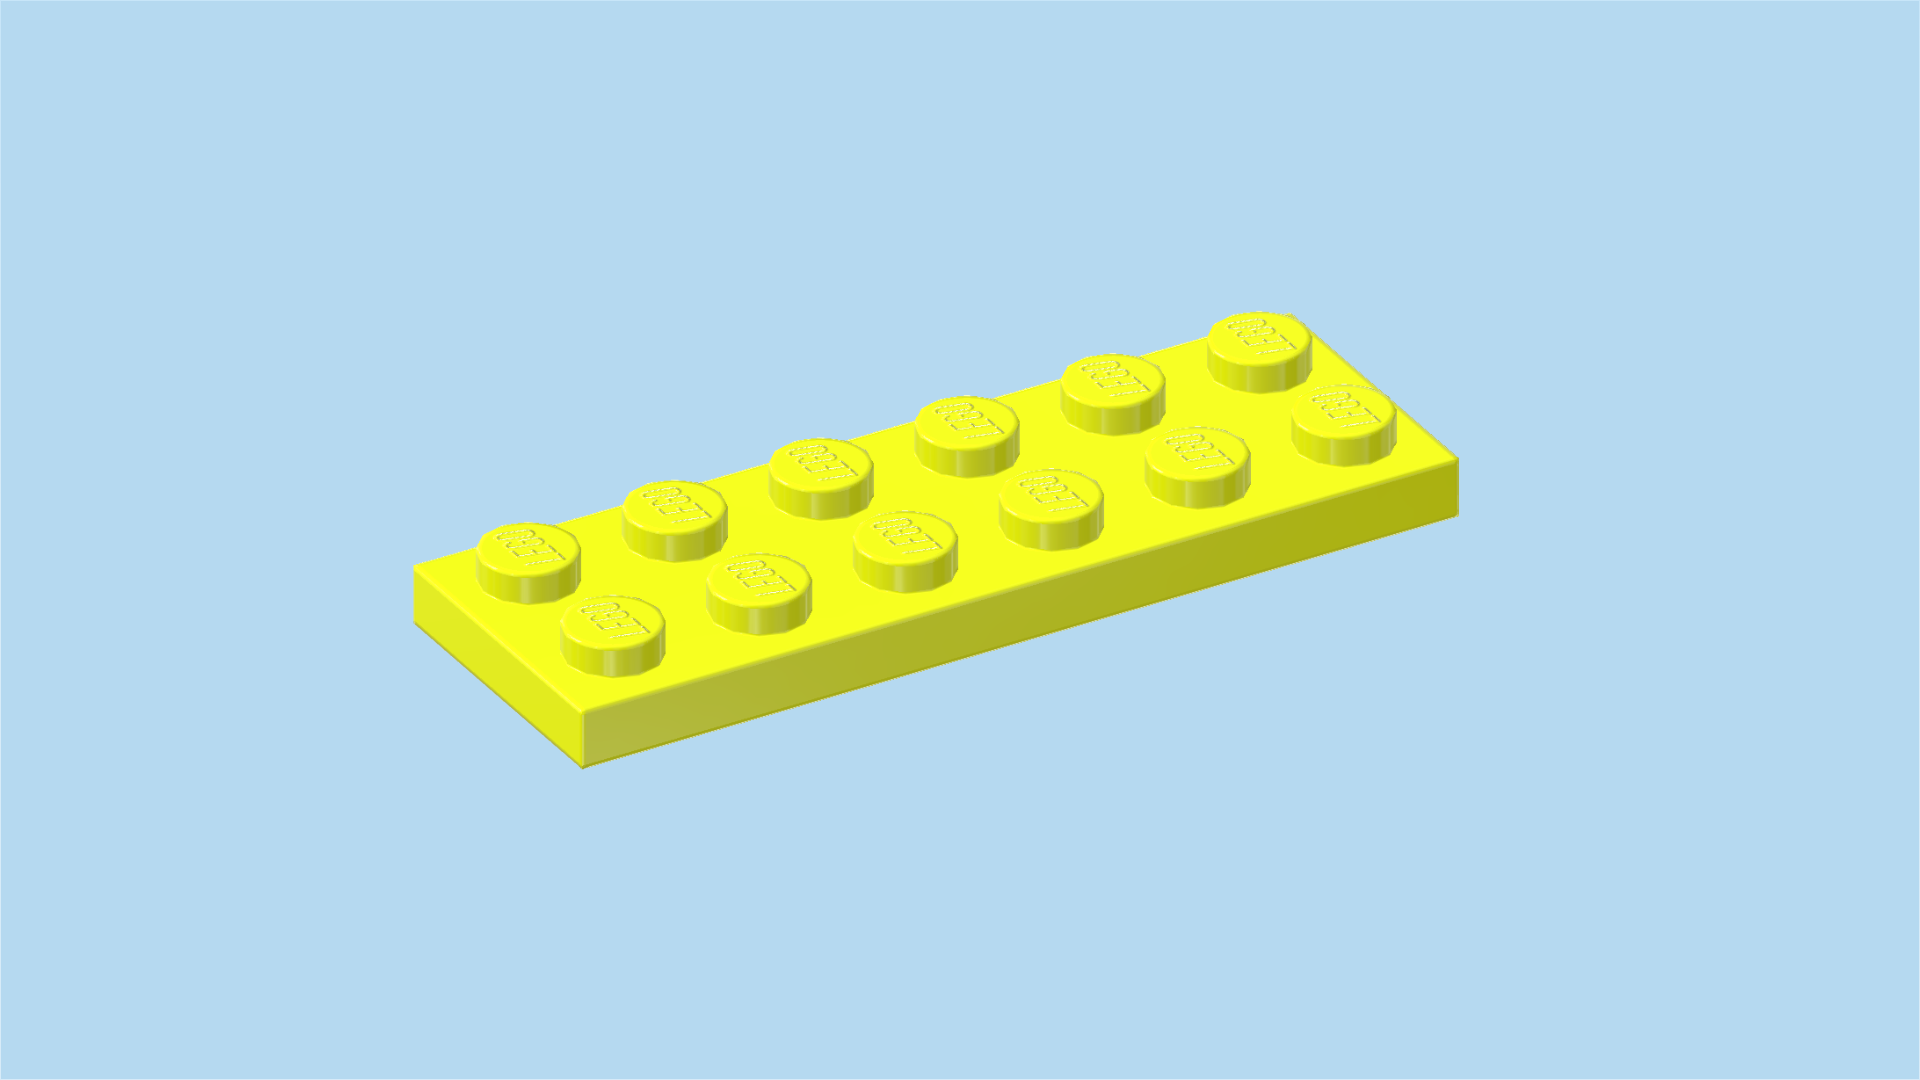
| Find 1 bright neon yellow plate 2x6. |
| Put the plate 2x6 vertically on the table. |
| Put the wedge piece vertically on top, opening to the right, 1/2 overhanging to the left. |
| Find 1 bright neon yellow half-circle plate 3x6 with cut-out 1x2. |
| Put it vertically underneath the left half of the previous piece, half circle to the left, 1 column protruding to the left. |
| Find 1 white plate 2x4. |
| Put it vertically on the 2 rightmost columns on the inside of the wedge piece opening. |
| Collect the following 3 pieces: |
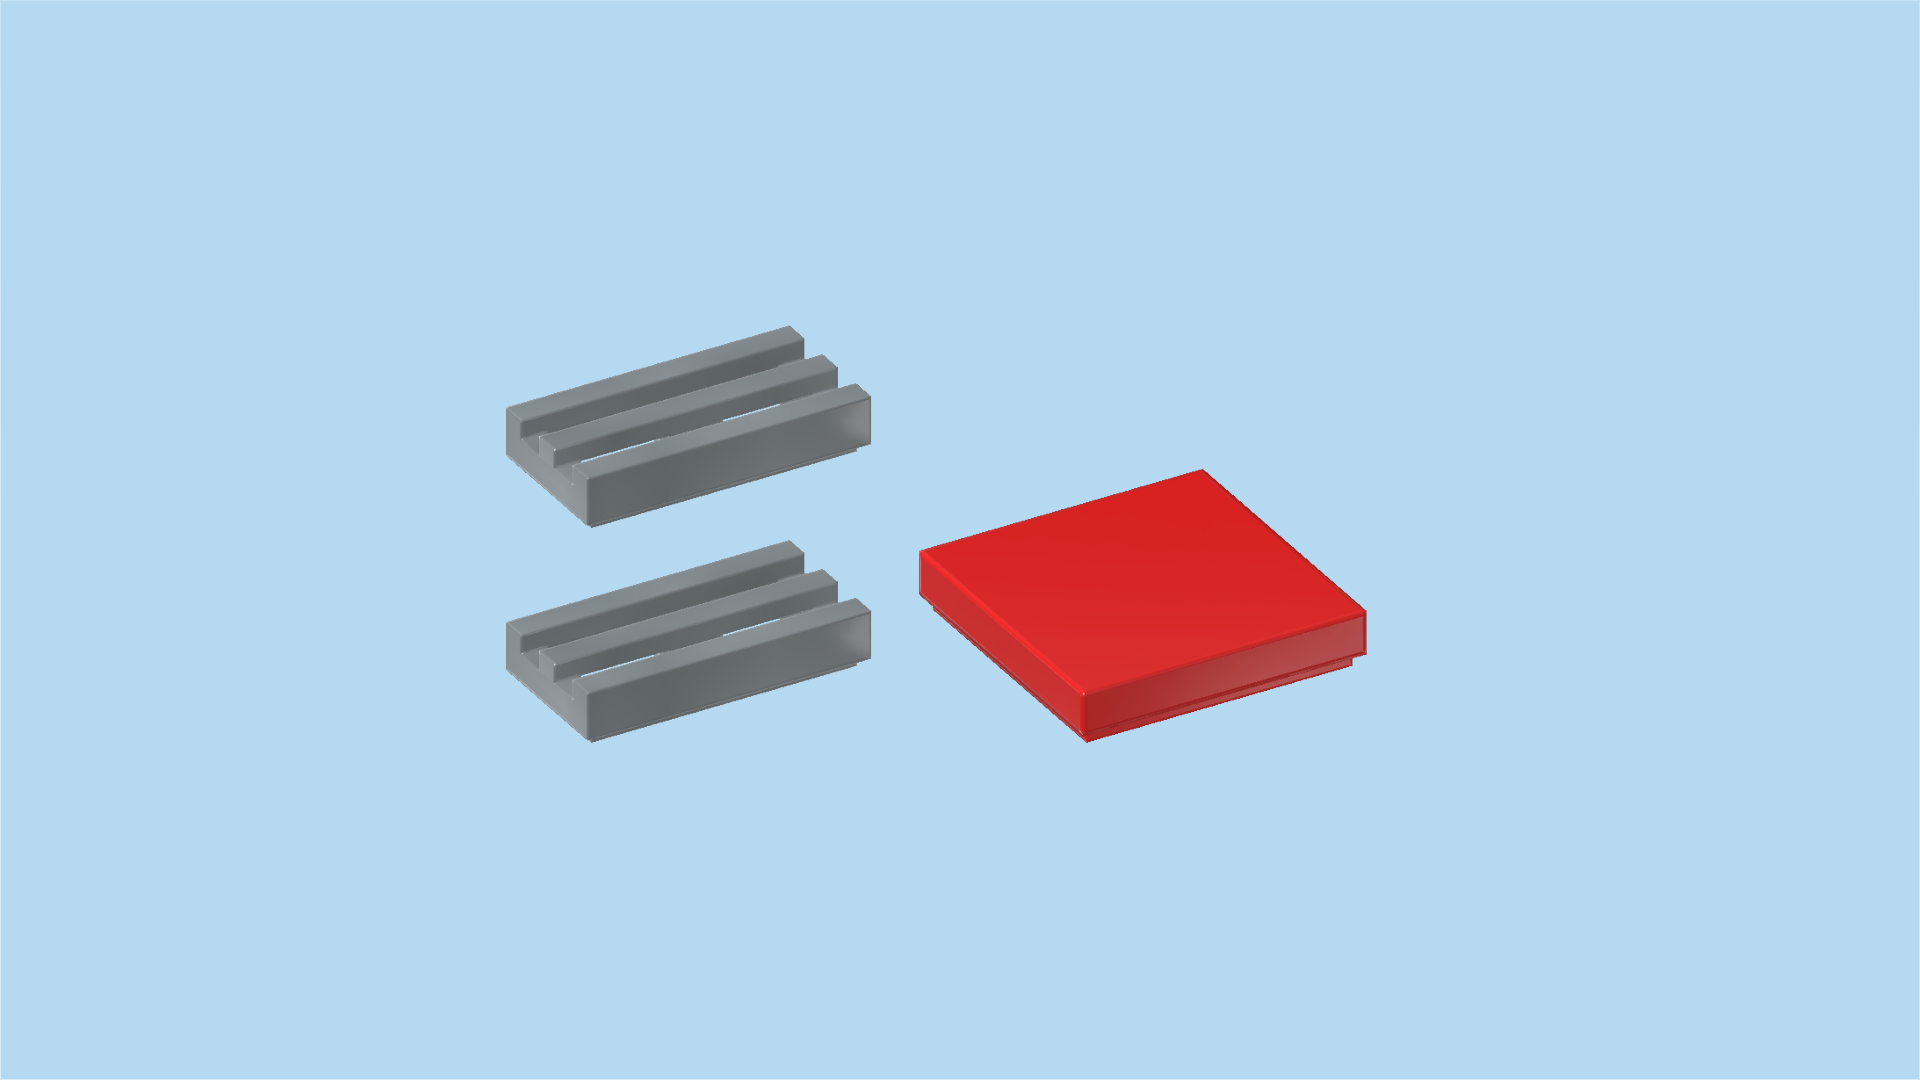
| 2 silver metallic grille tiles 1x2, |
| and 1 bright red flat tile 2x2. |
| Put 1 grille tile horizontally on the backmost row of the previous piece. |
| Put the flat tile 2x2 in front of the previous piece. |
| Put the other grille tile horizontally in front of the previous piece. |
| The sub-part of the ship body is finished! Mount it in its building orientation to the left of the operator stand. This means it is mounted between the 2 windshields. |
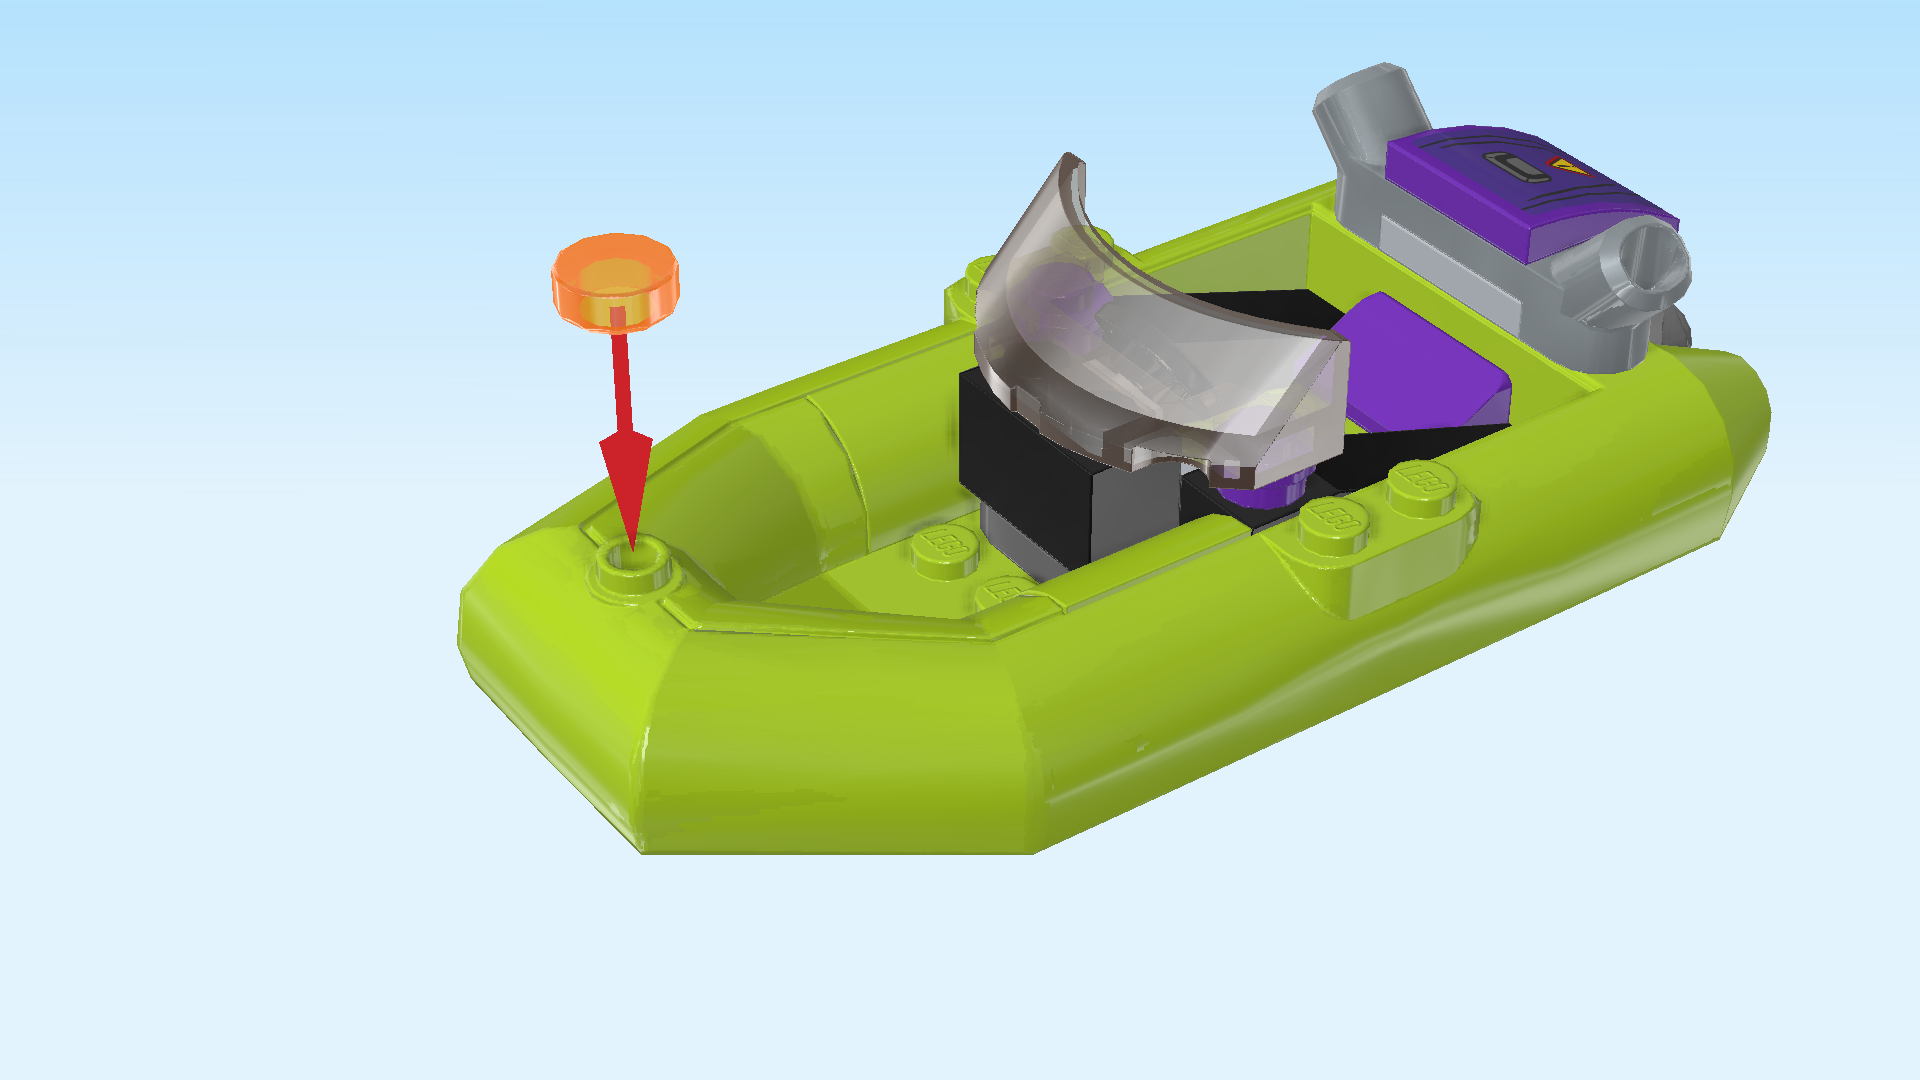
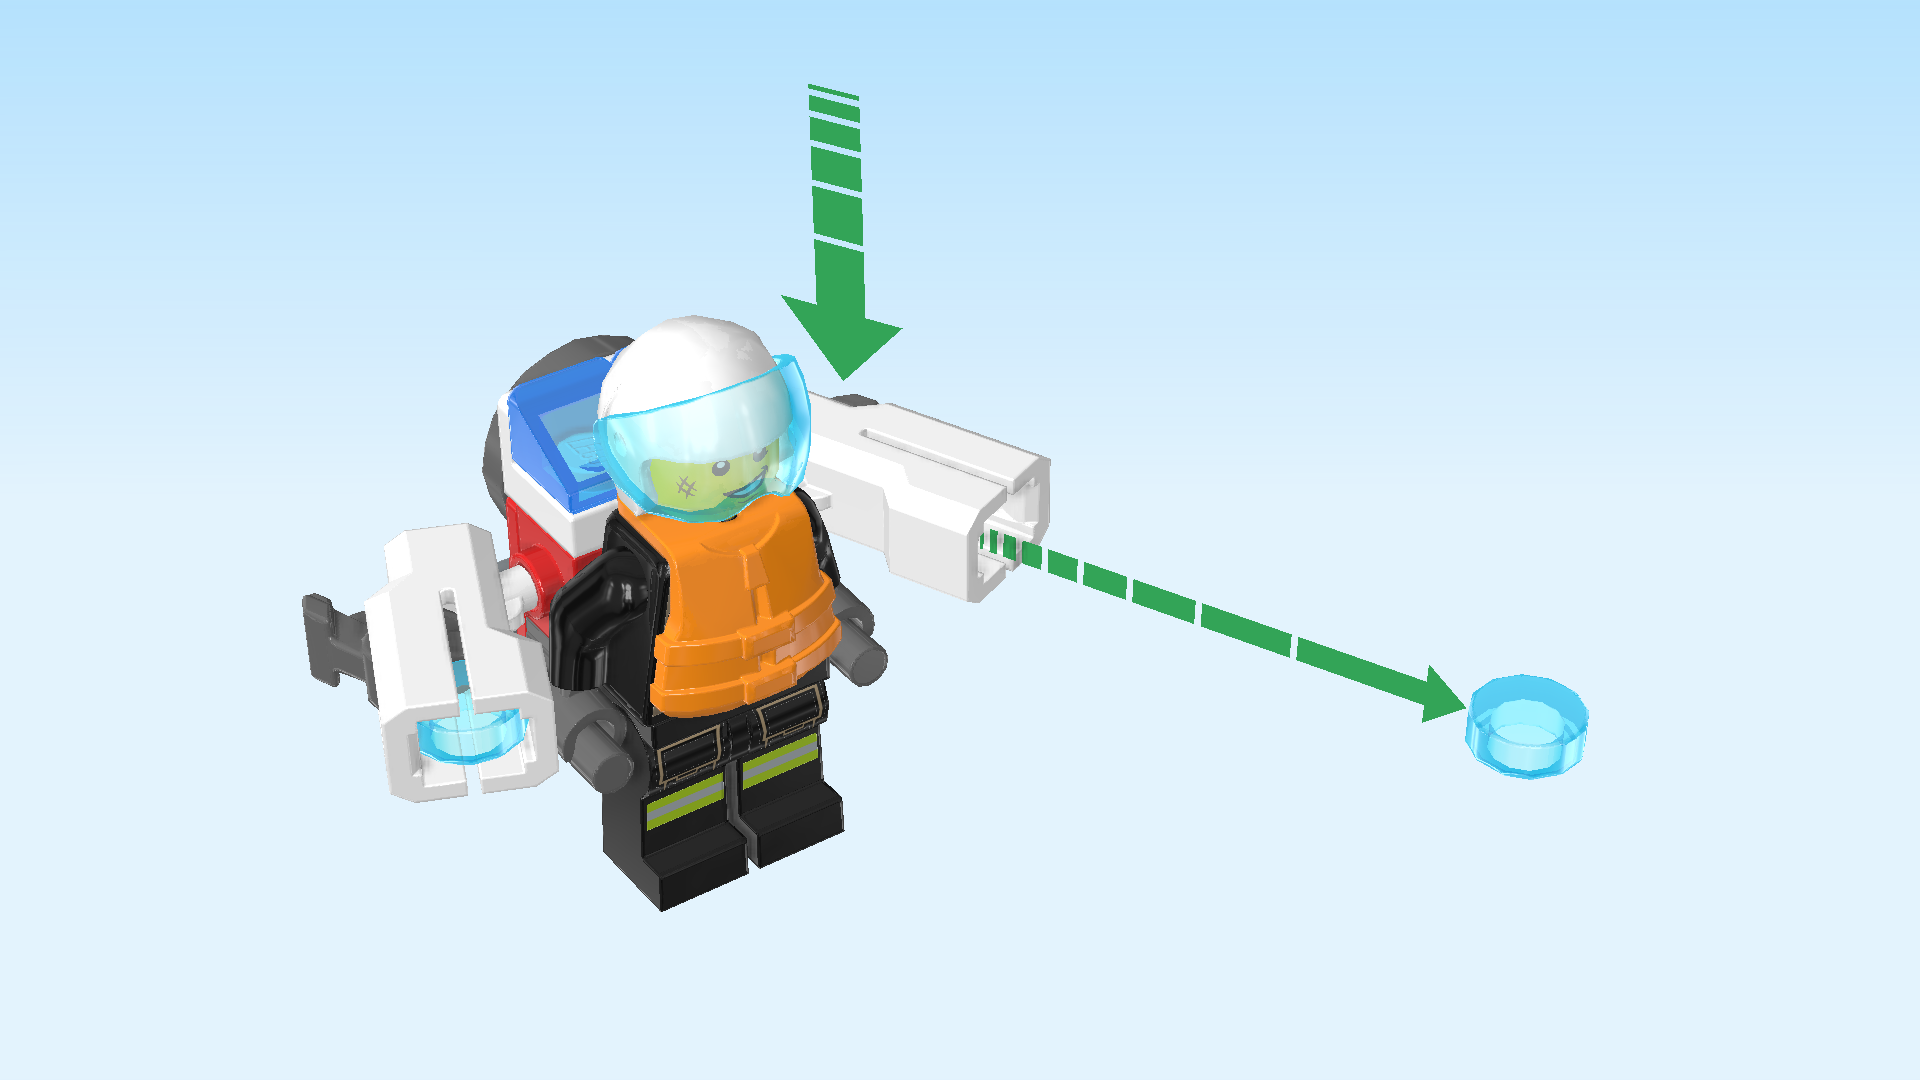
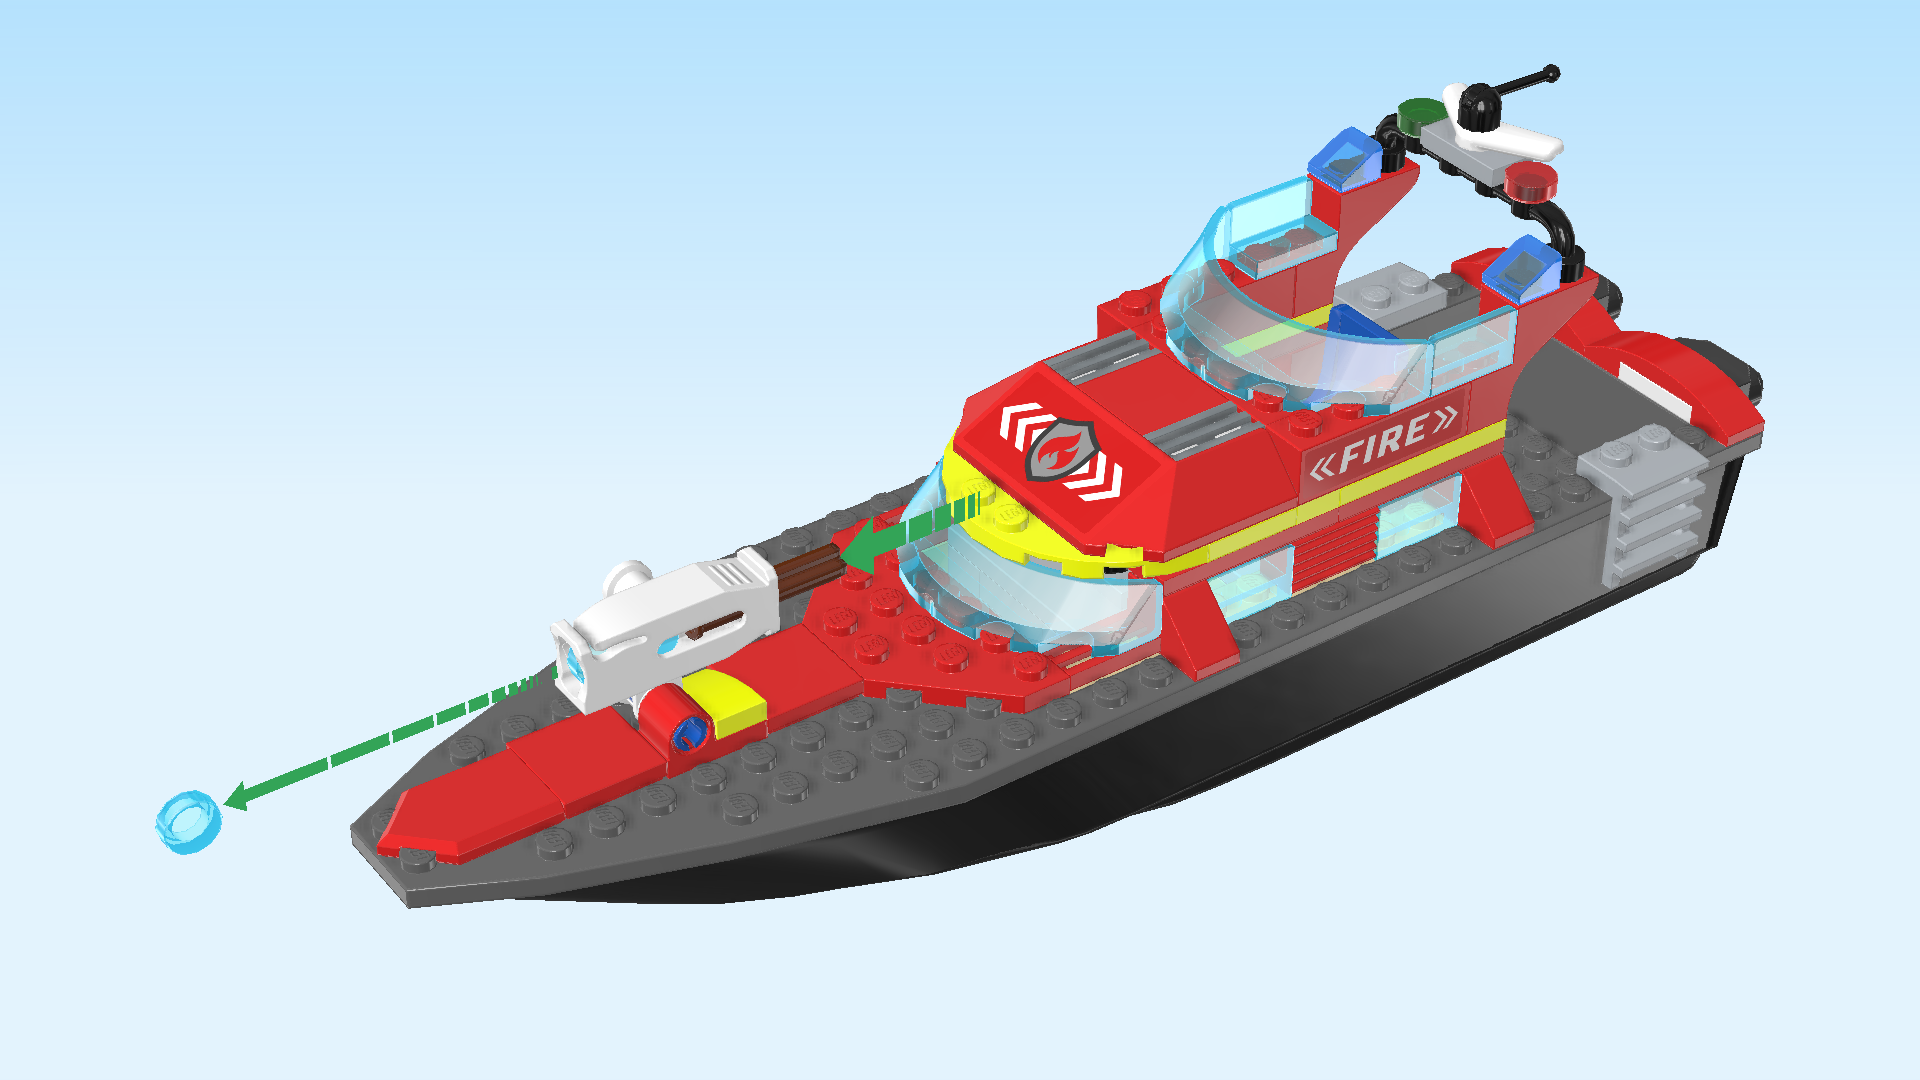
| Find 3 transparent light blue round tiles 1x1. |
| Insert them upright into the fire monitor near the nose of the ship. Be very careful and do not push the cross axle of the shooter yet. |
| Warning! Do not aim at eye or face. |
| To blast the water out of the fire monitor, push the cross axle to the left. This might need some practice. Every firefighter needs some training! |
| The City Fire Rescue Boat is finished! Very well done! You can take off the body part between the 2 windshields to access the below-deck cabin. Take out the reserve water tank to make space for victims who need to rest. Seat the captain firefighter in the captain's seat and put out to sea! It's time for a patrol, who knows which emergencies and fires are out there waiting for you! |
| As a matter of fact, this boat is floatable, meaning that it can float in actual water! You might want to give it a try! Just make sure that you do not attach anything heavy to one of its sides. That may cause the boat to tilt or even sink. |
| You have finished building the entire set! Very well done! Let's get to work: as soon as the dinghy catches fire, the LEGO City Fire Rescue Boat must spring to action and come to the rescue. Good thing that the jetpack firefighter can support the Rescue Boat and accurately target fires that are hard to reach. What a great invention! |
| Enjoy! |