| LEGO Audio & Braille Building Instructions for the LEGO City set "Picnic in the Park". |
| Pack your bike trailer with tasty treats and head out for a cozy picnic in the park. The gardener has arrived in his three-wheeled truck packed with tools and colorful flowers, and 2 cute squirrels are hopping around in a tree that shades a sturdy picnic bench. It’s the perfect place to eat lunch! Unpack your pizza and drinks, lay the table and settle down for the best picnic ever. |
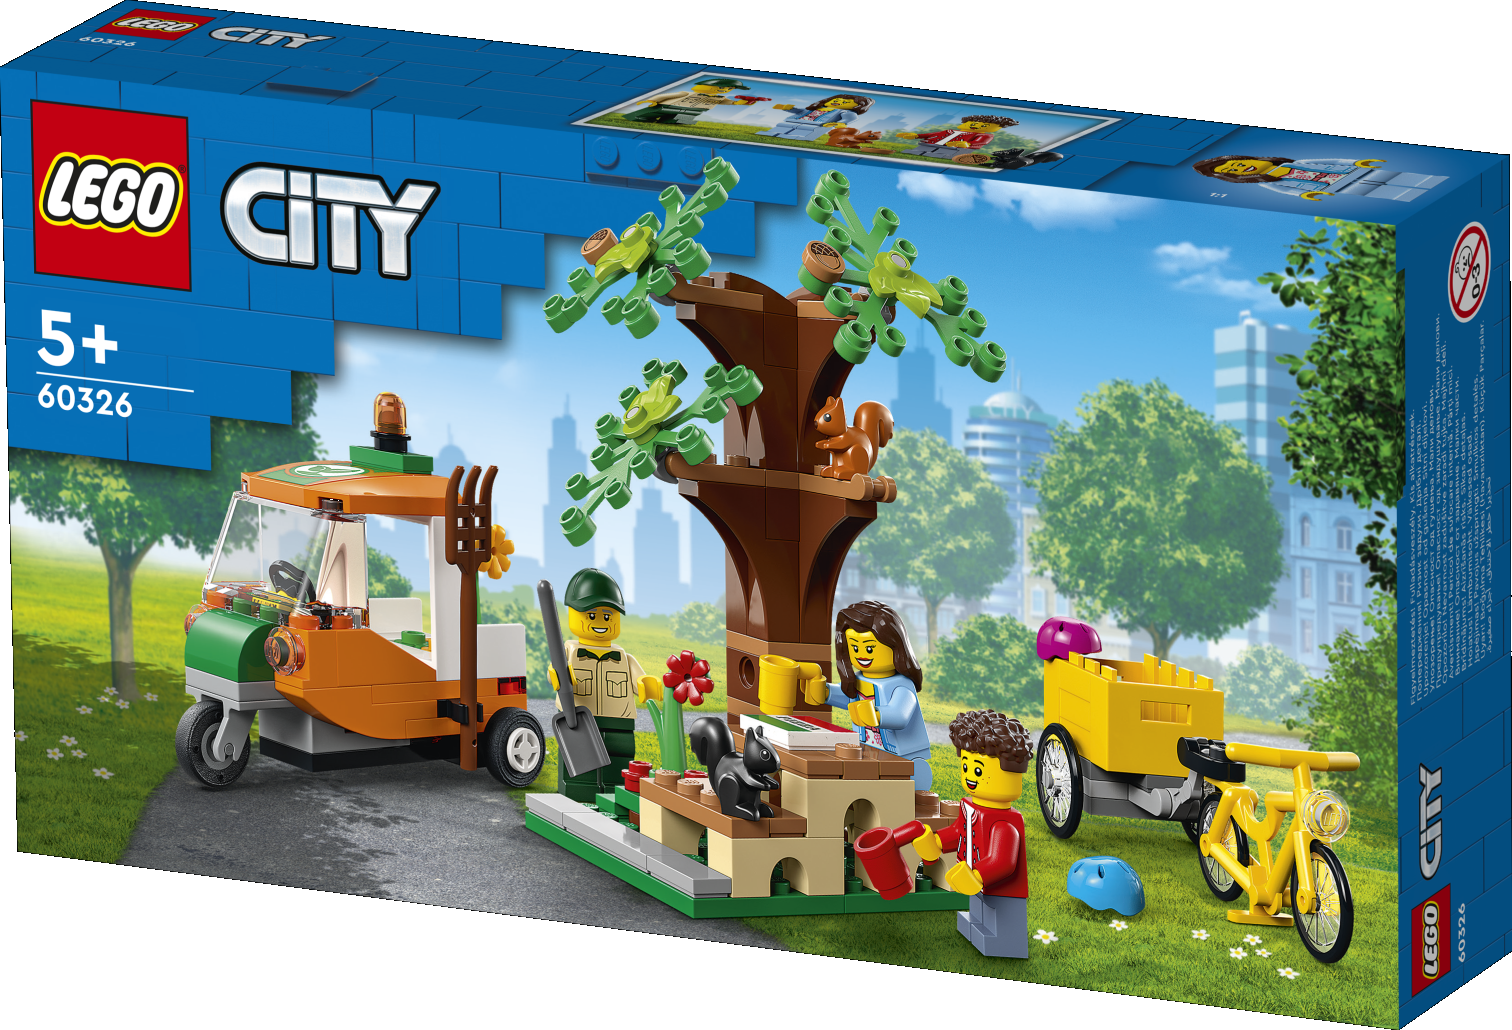
| The box cover shows a jolly picnic scene in a peaceful green park with lots of trees in front of the LEGO City skyline. It looks like it's going to be a summer picnic! On the left, the gardener's maintenance truck is parked; it is orange, green and white and equipped with a pitchfork and a flower bed that is to be planted. The gardener is holding the shovel, ready to dig a hole for the new flowers. The picnic bench is shown in the middle of the scene on the box cover. The cyclist is busy setting up a lovely picnic; there's even pizza! A black squirrel is sitting on the bench, munching on some acorns. The little boy is standing next to the bench at the front, sipping his drink. The bench is shaded by a huge oak tree which is home to another squirrel. There are even some acorns in the tree, ready to be collected! To the right of the picnic bench, the bright yellow bike with trailer is parked, and two bike helmets are waiting for the next ride. |
| Open the box. This can be tricky; ask someone to help you! |
| The box contains 2 booklets with visual building instructions, 2 plastic bags with numbers printed on them, and one sticker sheet. Ask a sighted person to help you find the correct bag! |
| Carefully open bag number 1 and the small sub-bags in it. This bag contains all bricks and pieces for the gardener Minifigure, the cyclist Minifigure, the bike with trailer, and the three-wheeled truck. |
| Before you start building, ask a sighted person to help you sort the pieces by color. This makes finding the correct pieces even easier! |
| First, we will build the gardener Minifigure. |
| The pieces for the gardener Minifigure and for the cyclist Minifigure have identical shapes. They can only be differentiated by their prints, and sometimes by color. If you are unsure about the correct pieces, ask a sighted person to help you. |
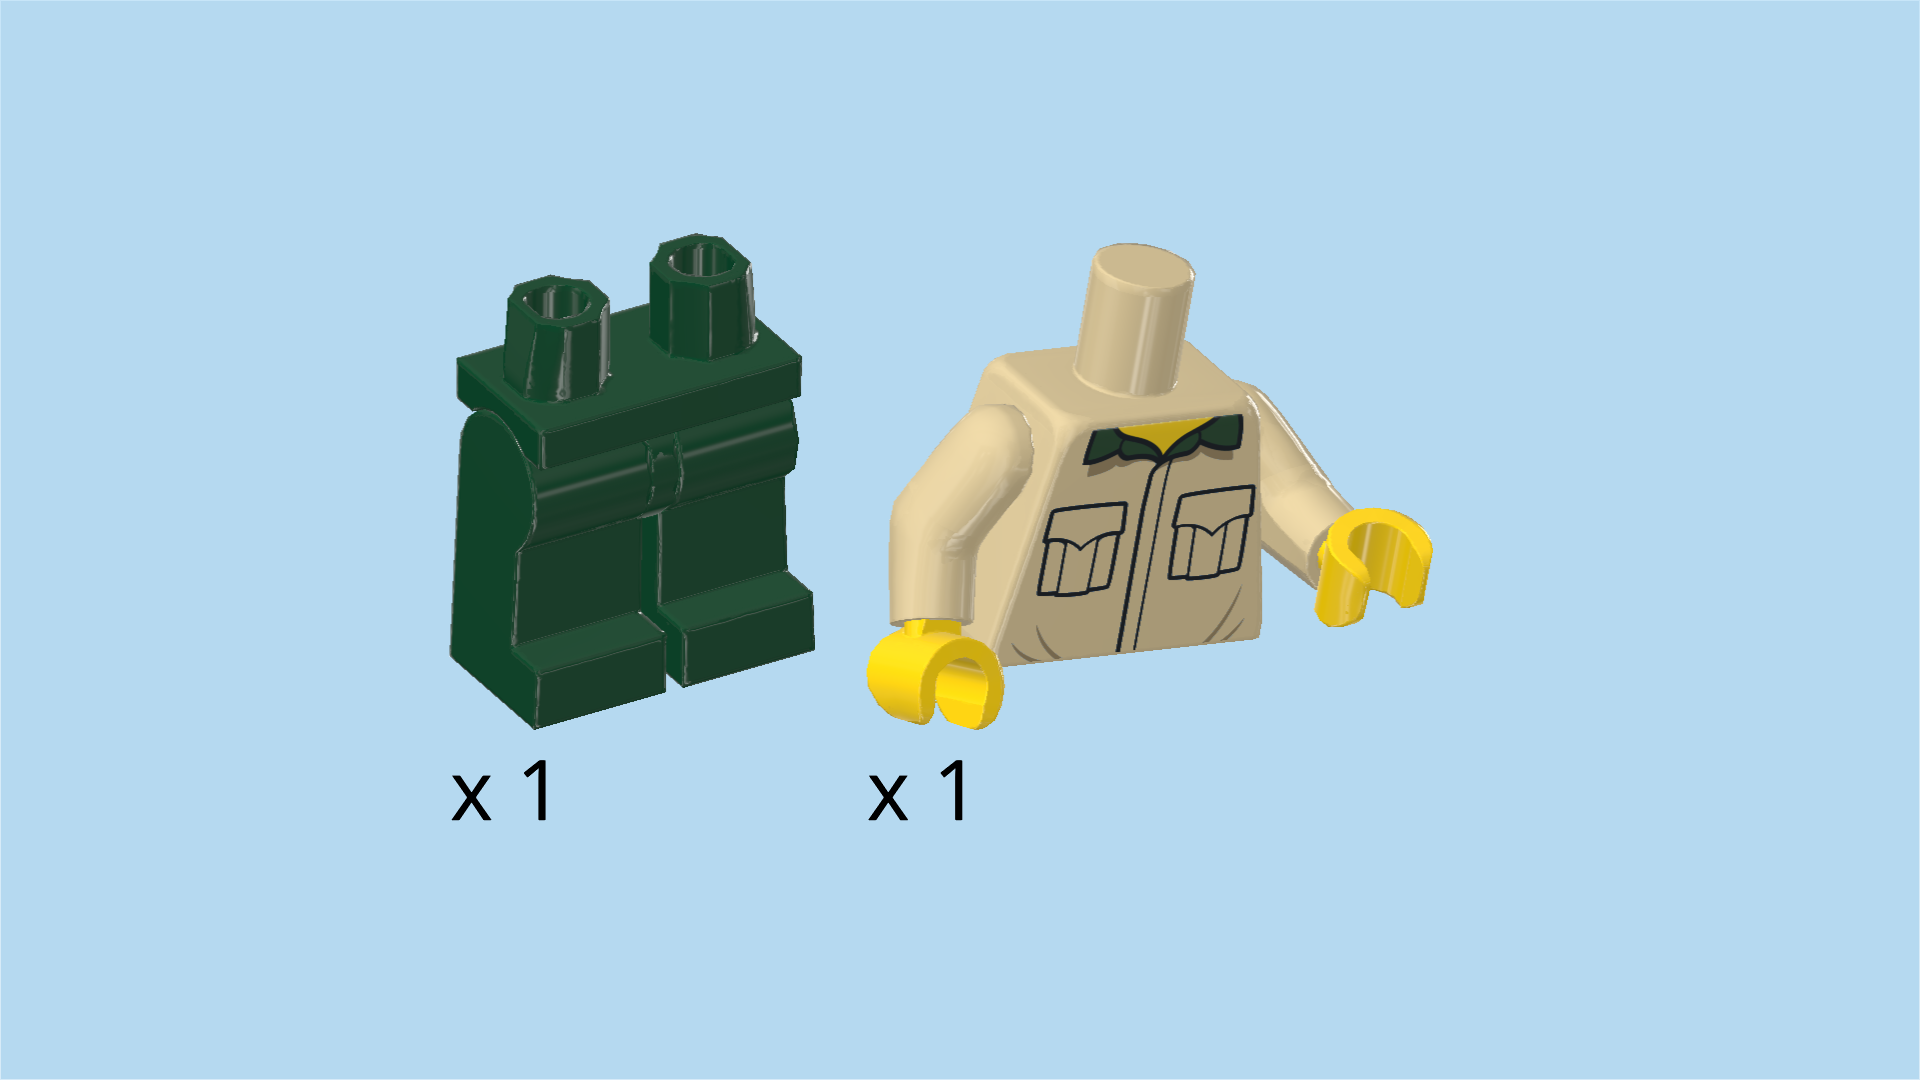
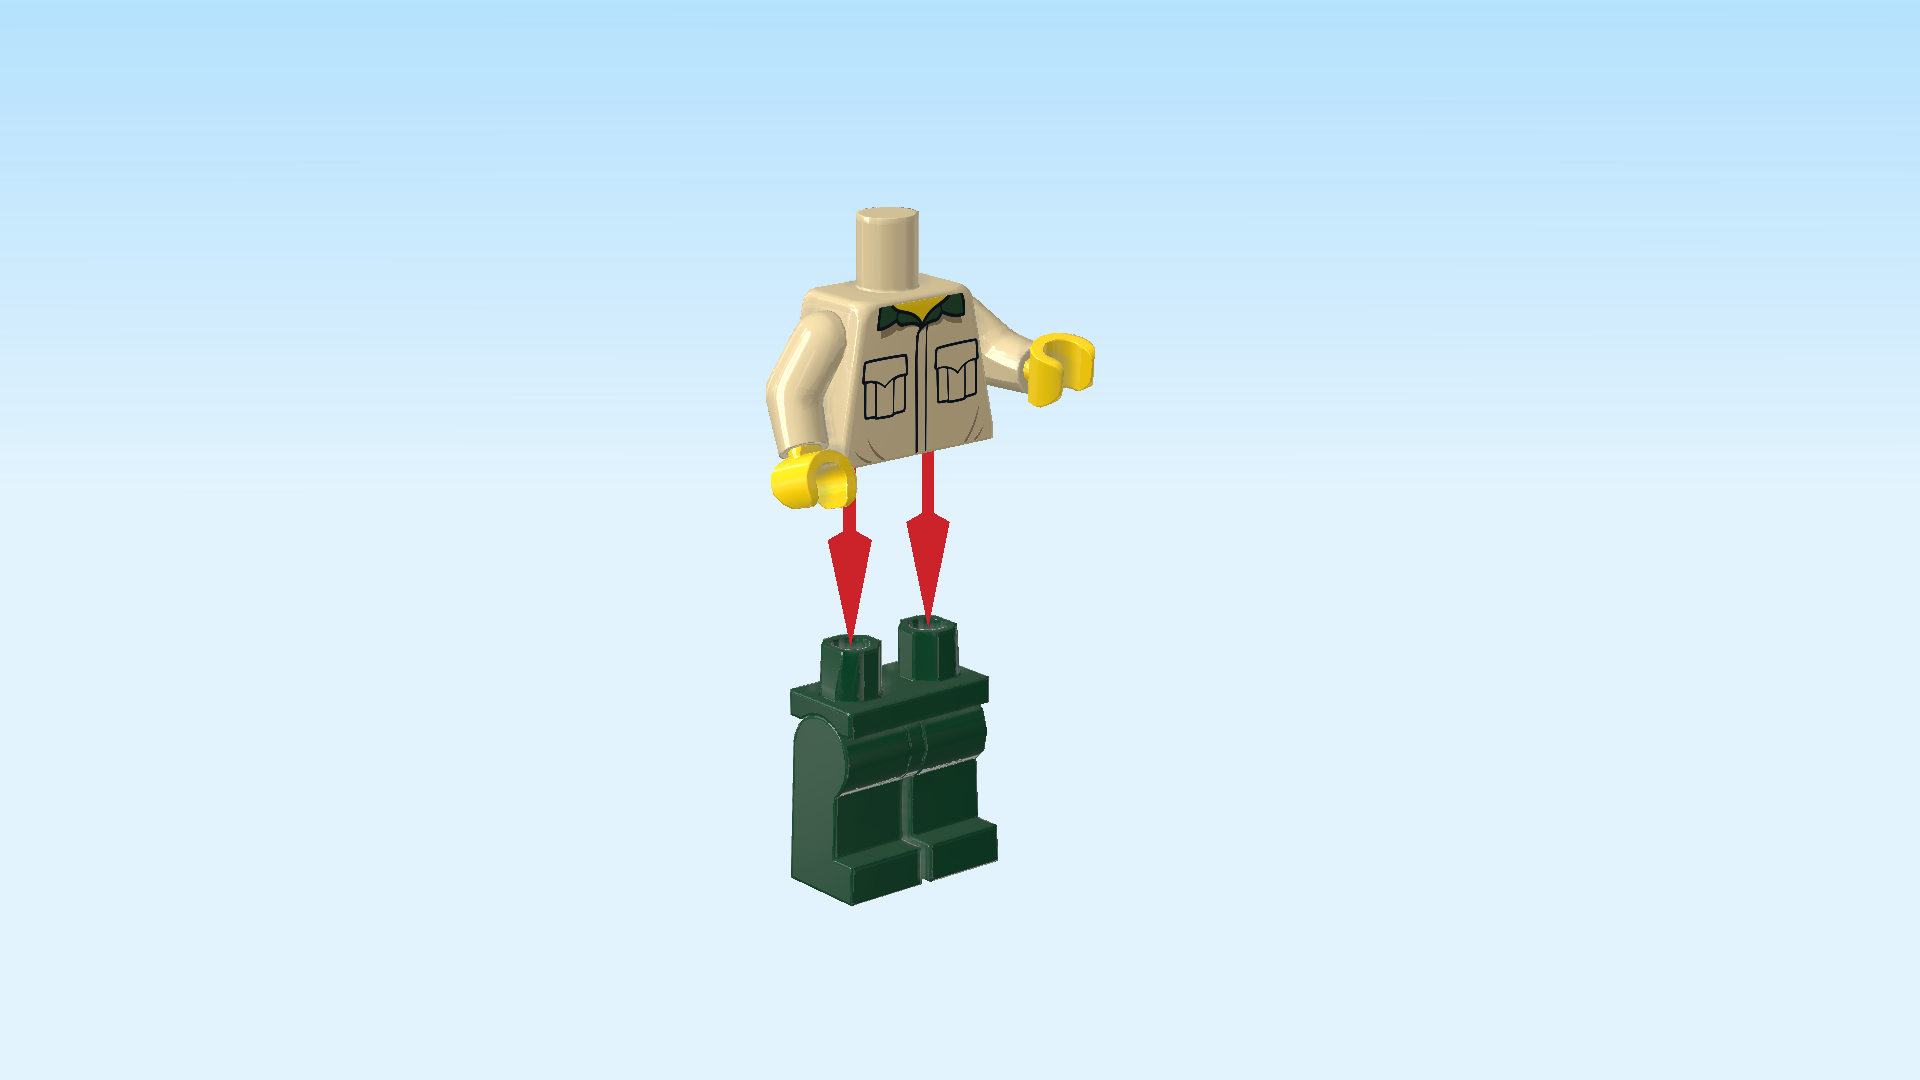
| Collect the following 2 pieces: |
| 1 pale ocher yellow and bright yellow upper part of the body, |
| and 1 mossy green pair of legs. |
| Put the upper body on the legs. |
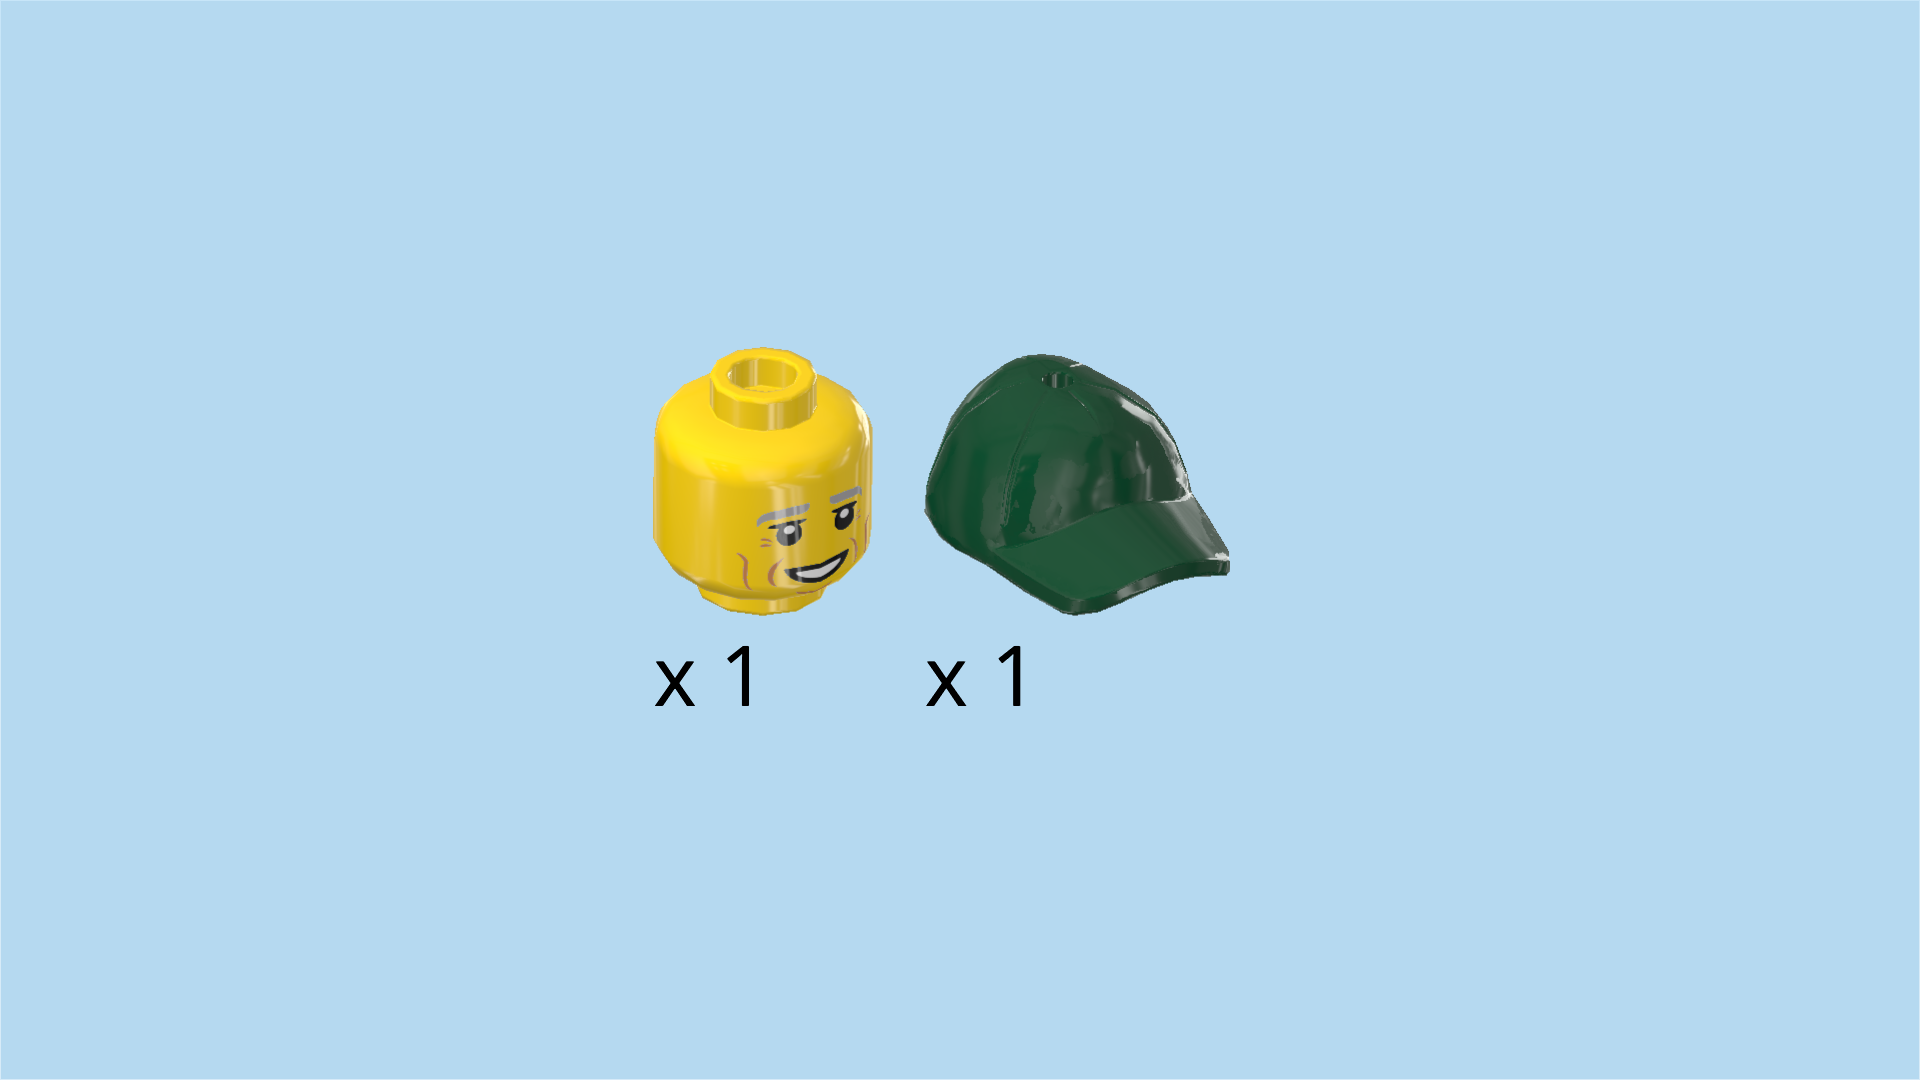
| Collect the following 2 pieces: |
| 1 bright yellow head, |
| and 1 mossy green billed cap. |
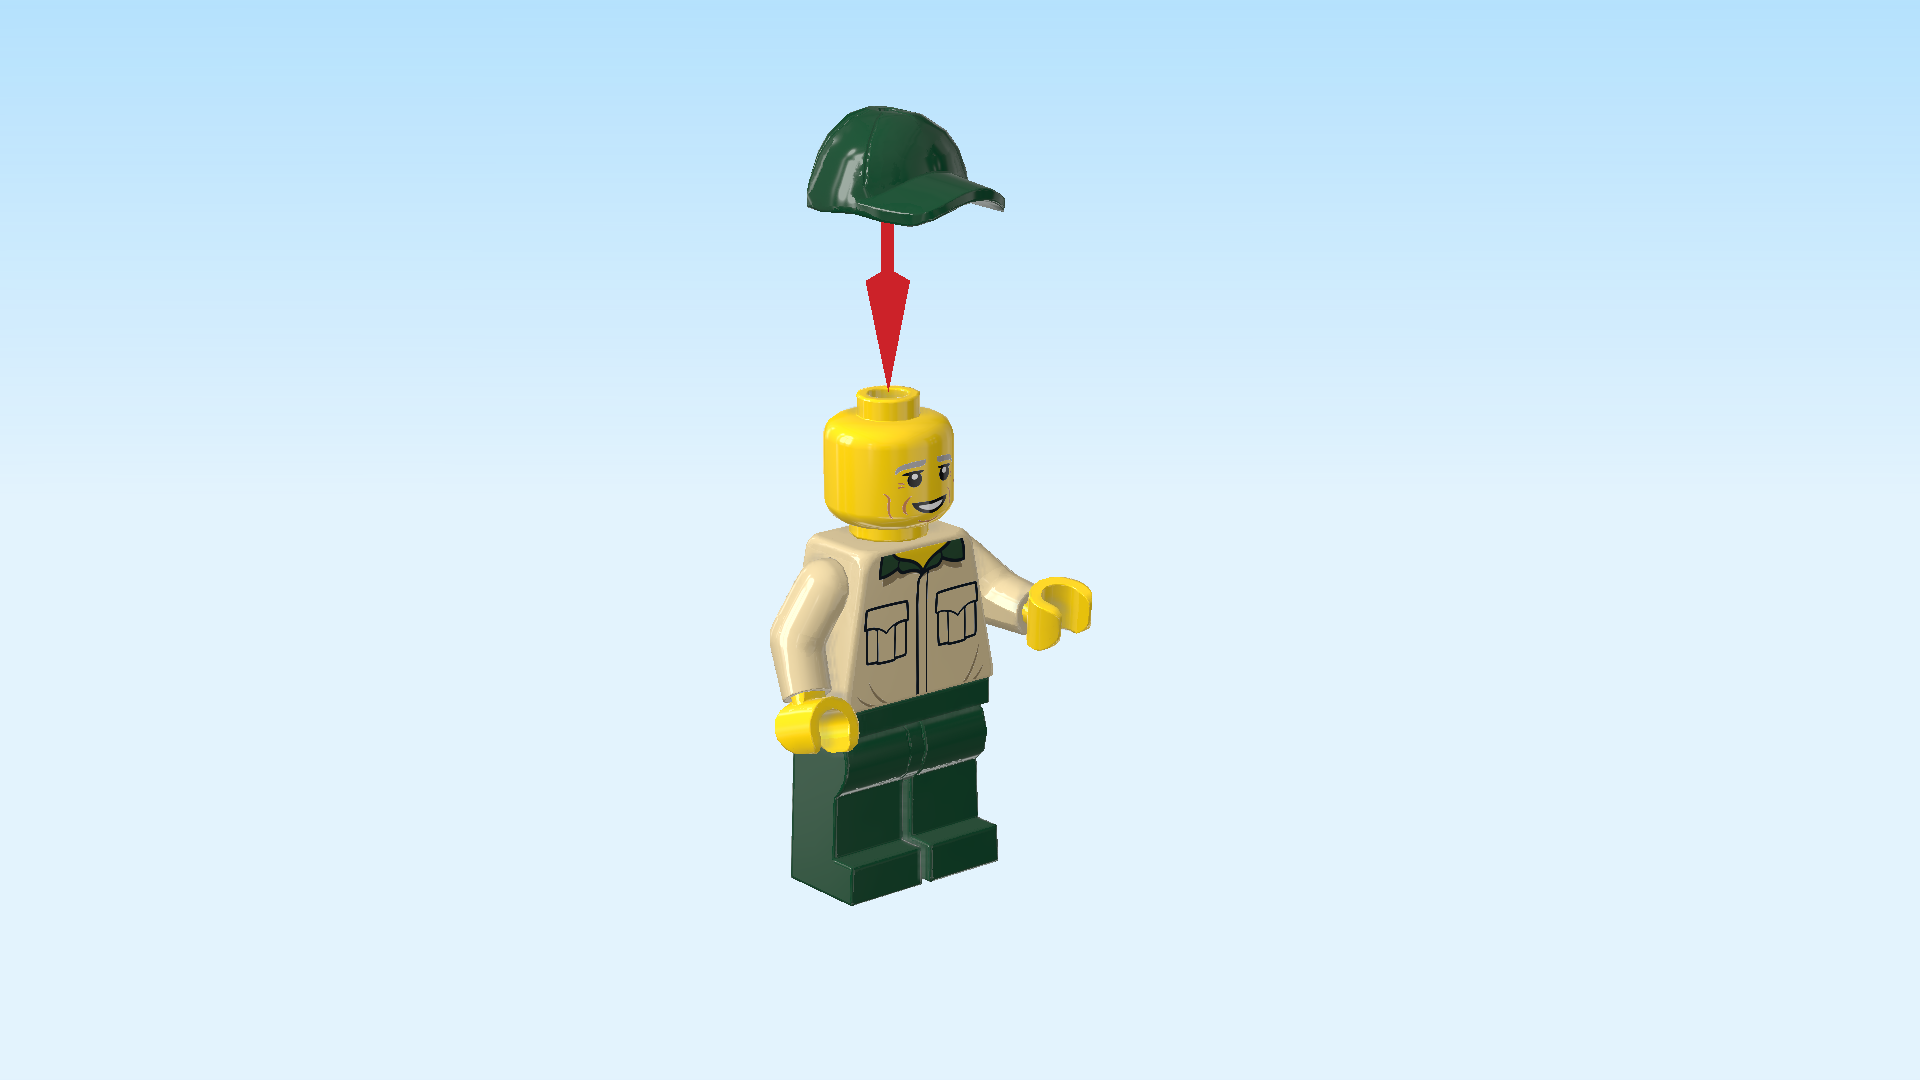
| Put the head on the body. |
| Put the billed cap on the head. |
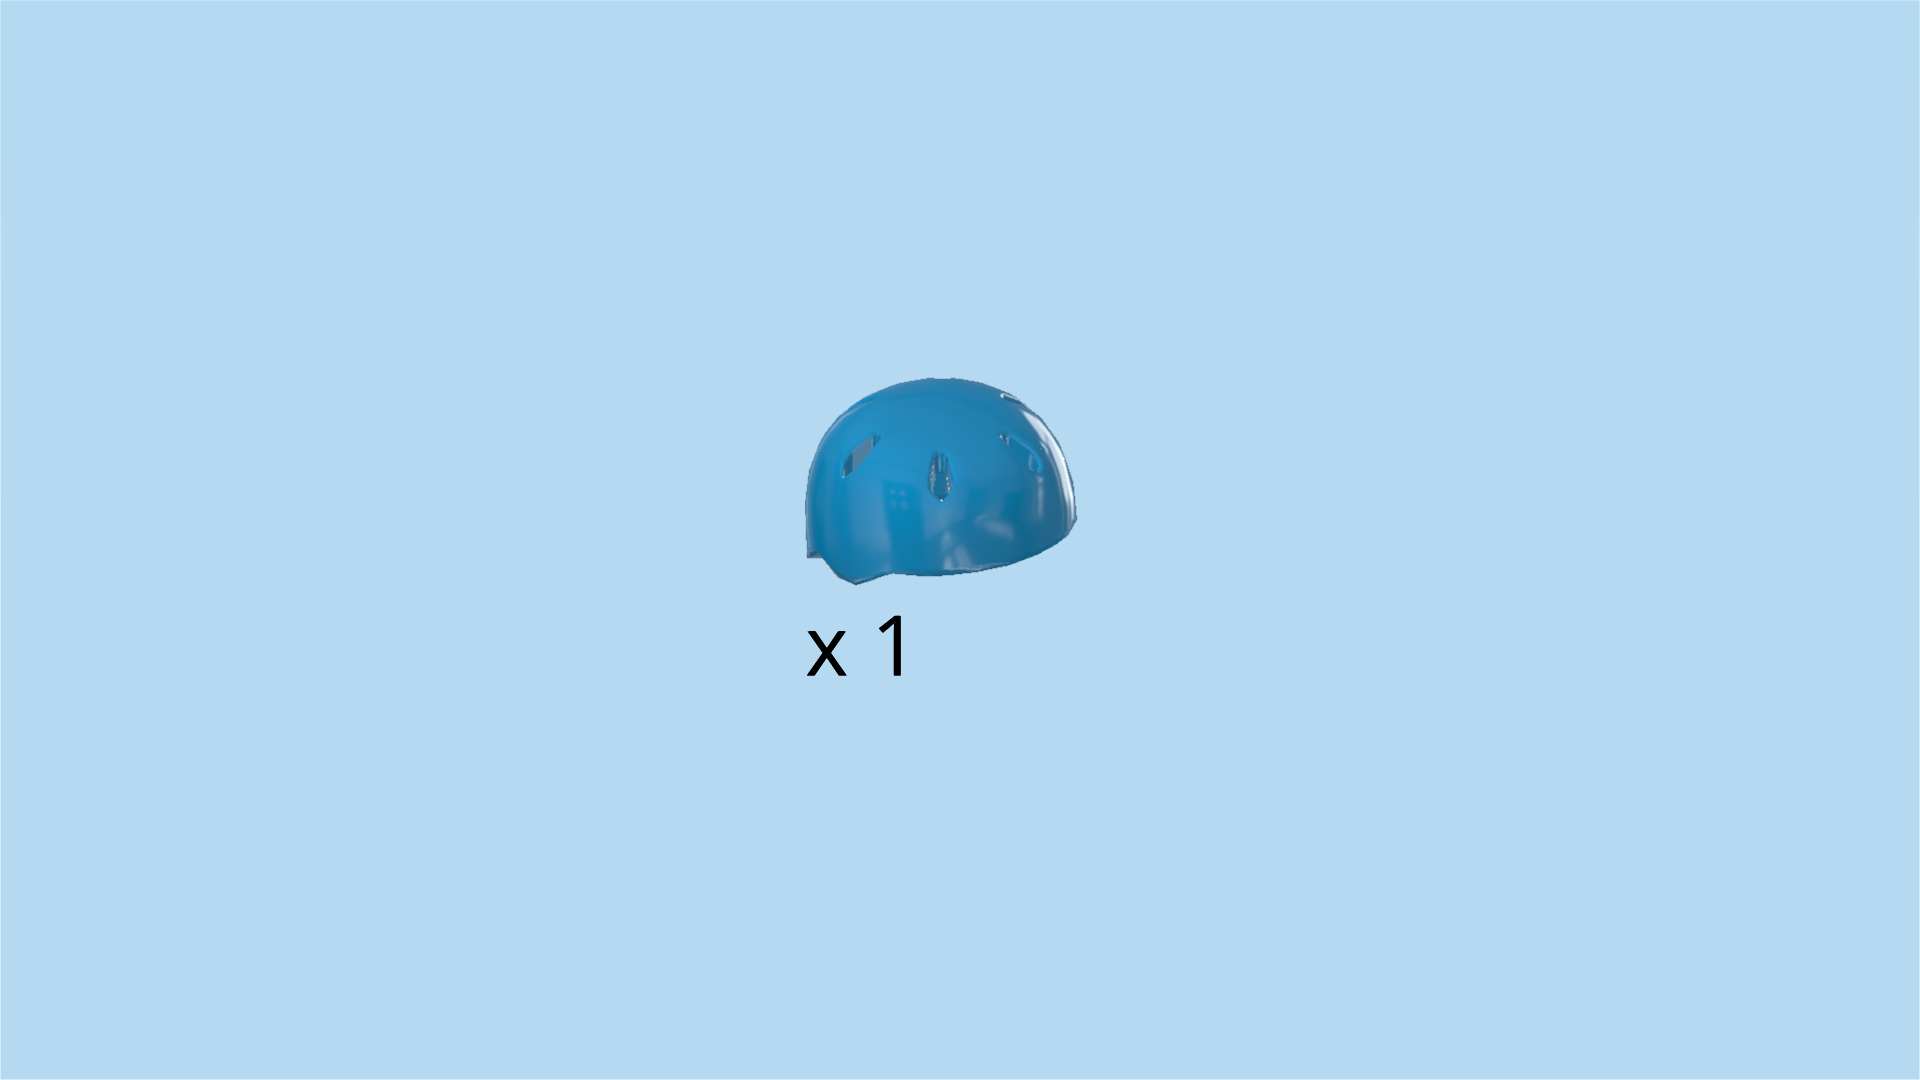
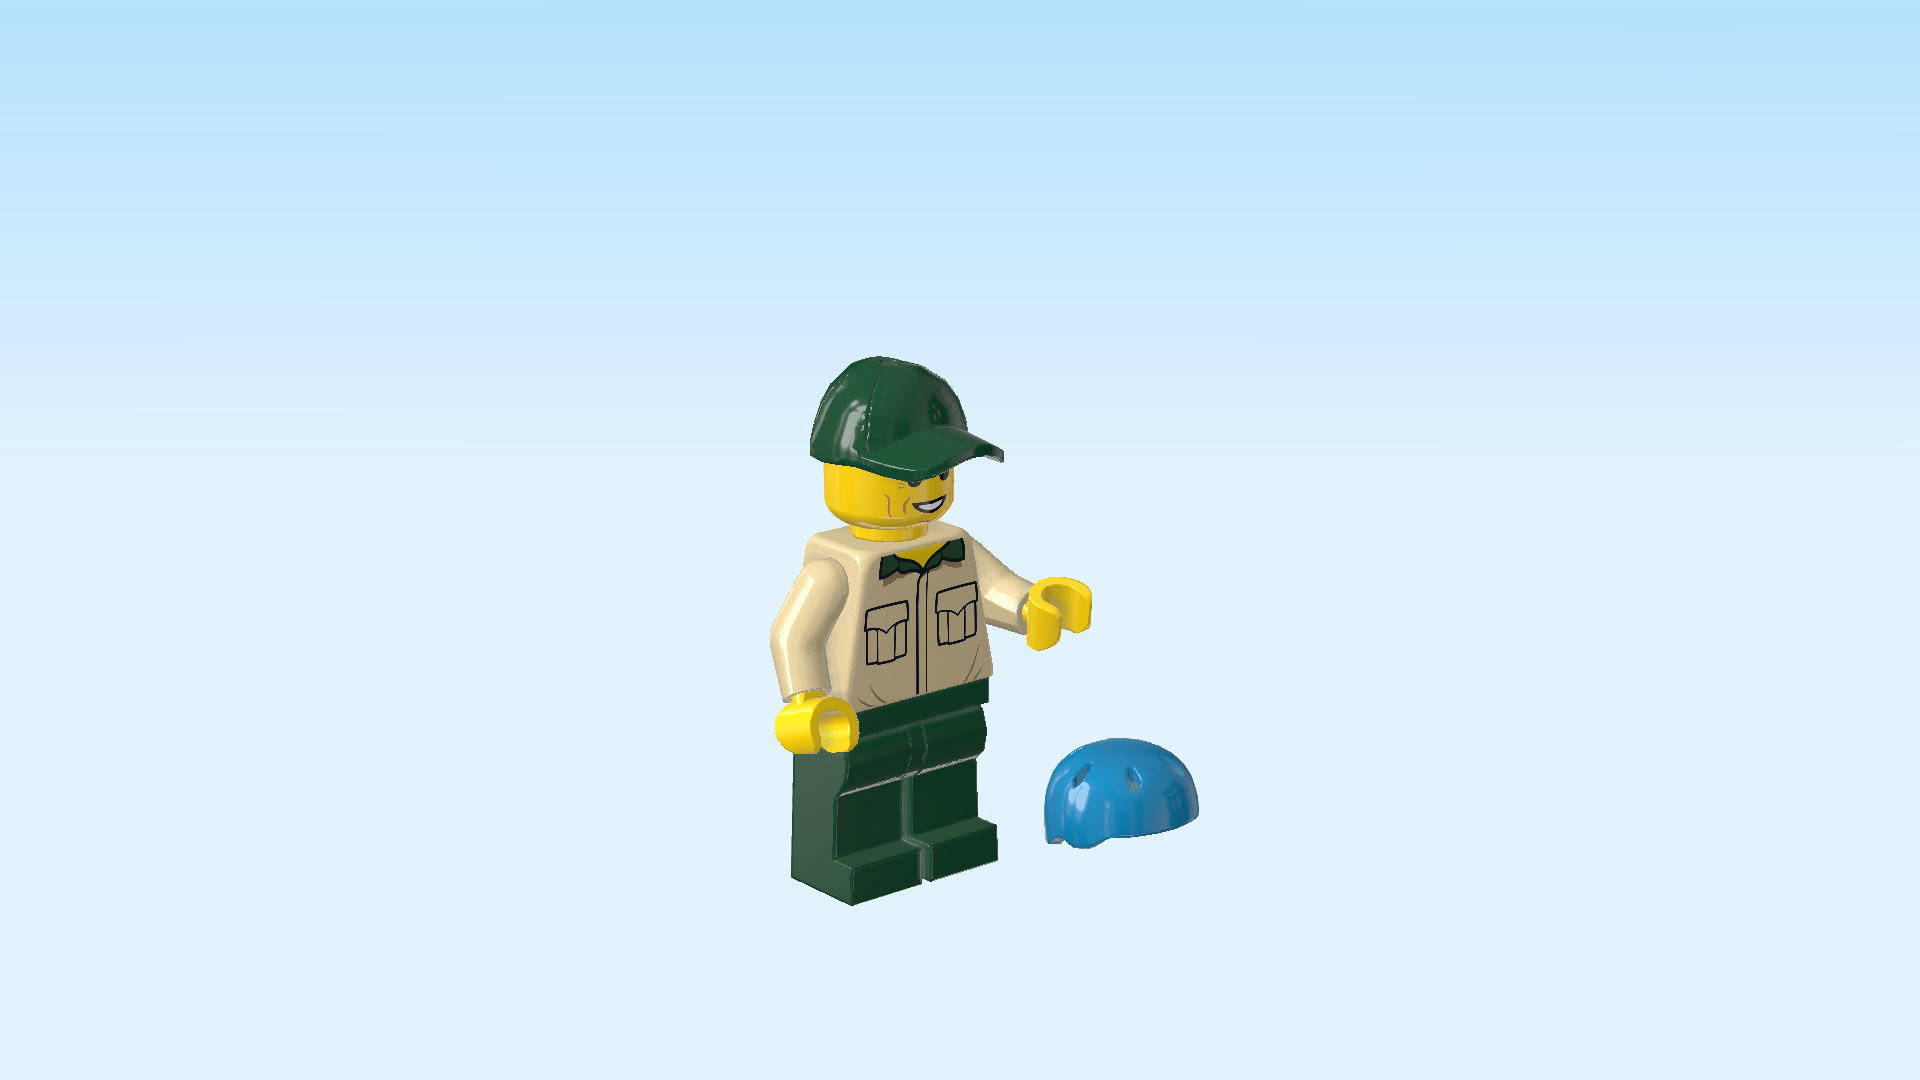
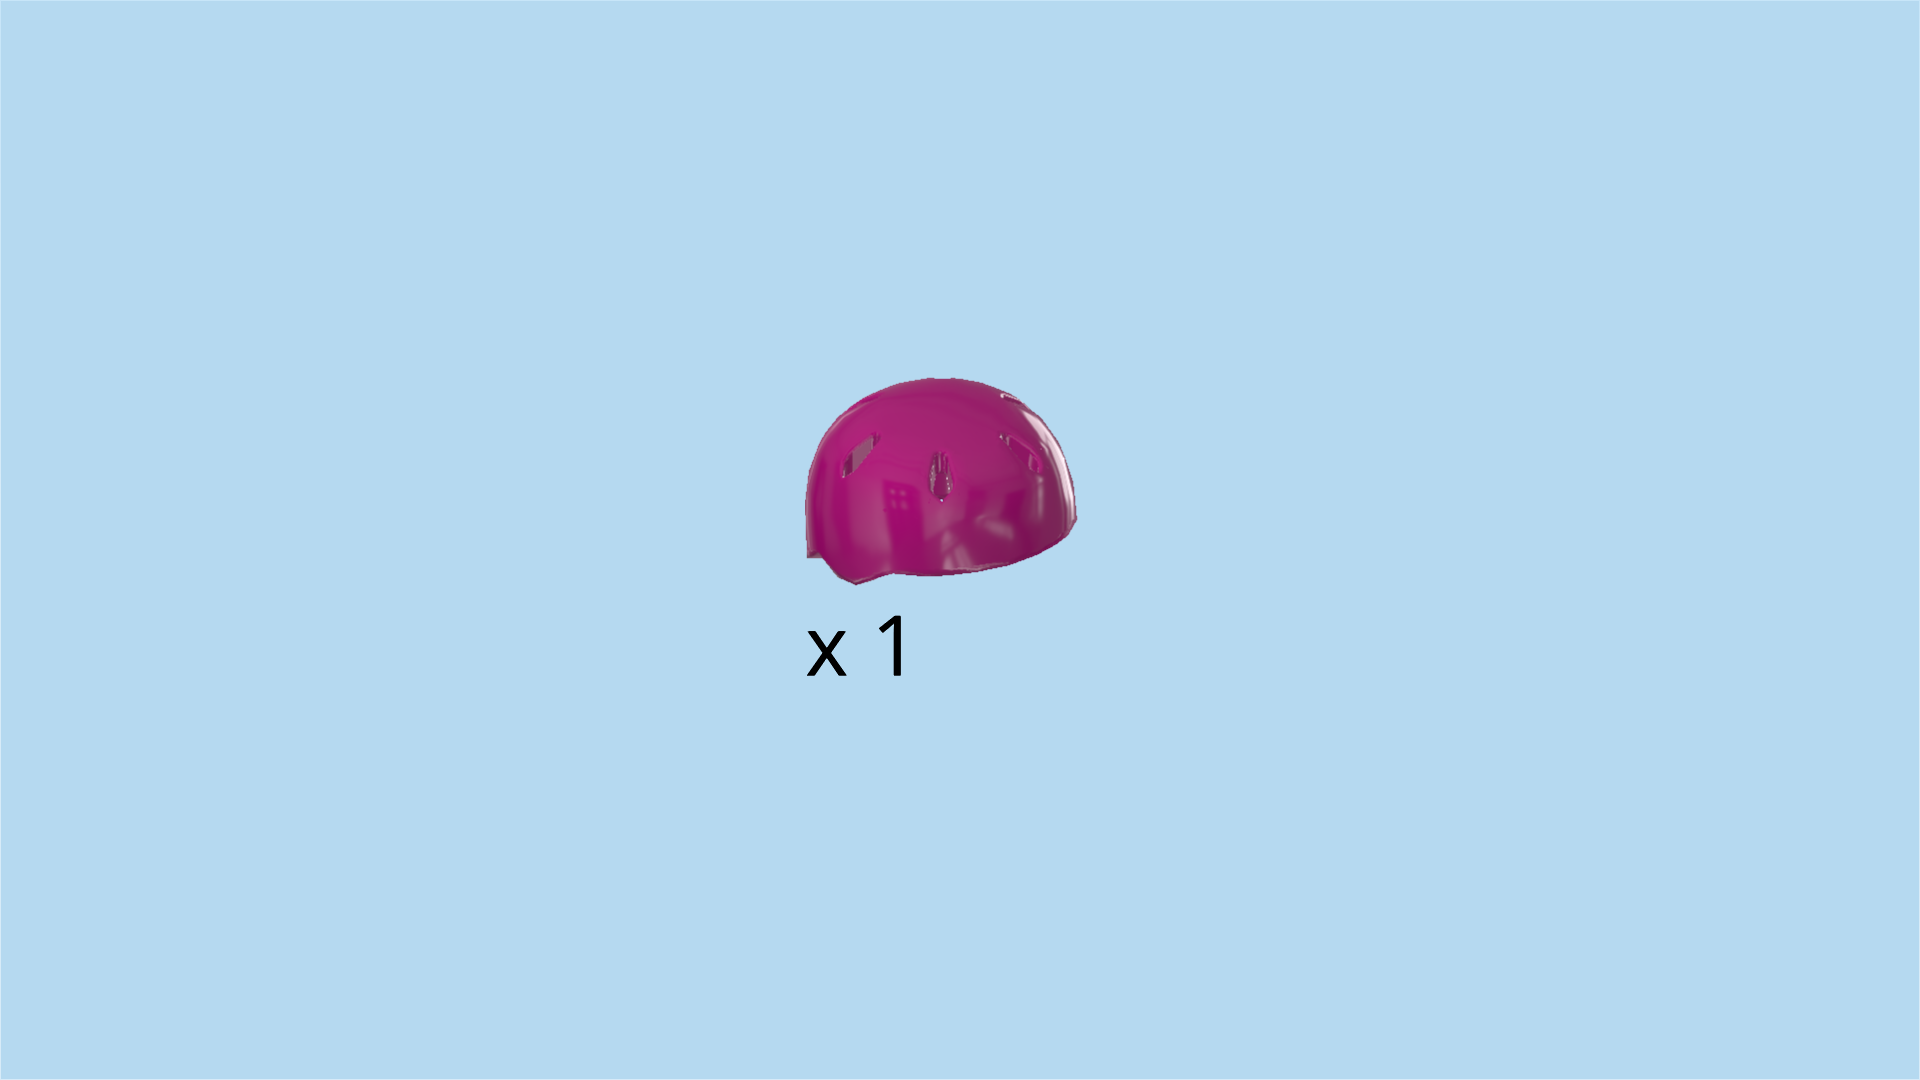
| Find 1 dark azure blue bike helmet. |
| You can swap the billed cap for the bike helmet whenever the gardener is going for a bike ride. |
| The gardener Minifigure is finished! Well done! He is wearing mossy green pants and a beige shirt with two breast pockets and a mossy green collar. The shirt is tucked in loosely; as a gardener, you need a wide range of motion! The gardener has a very friendly face with grey eyebrows and a few wrinkles. The fine weather and the beautiful flowers put a big smile on his face! |
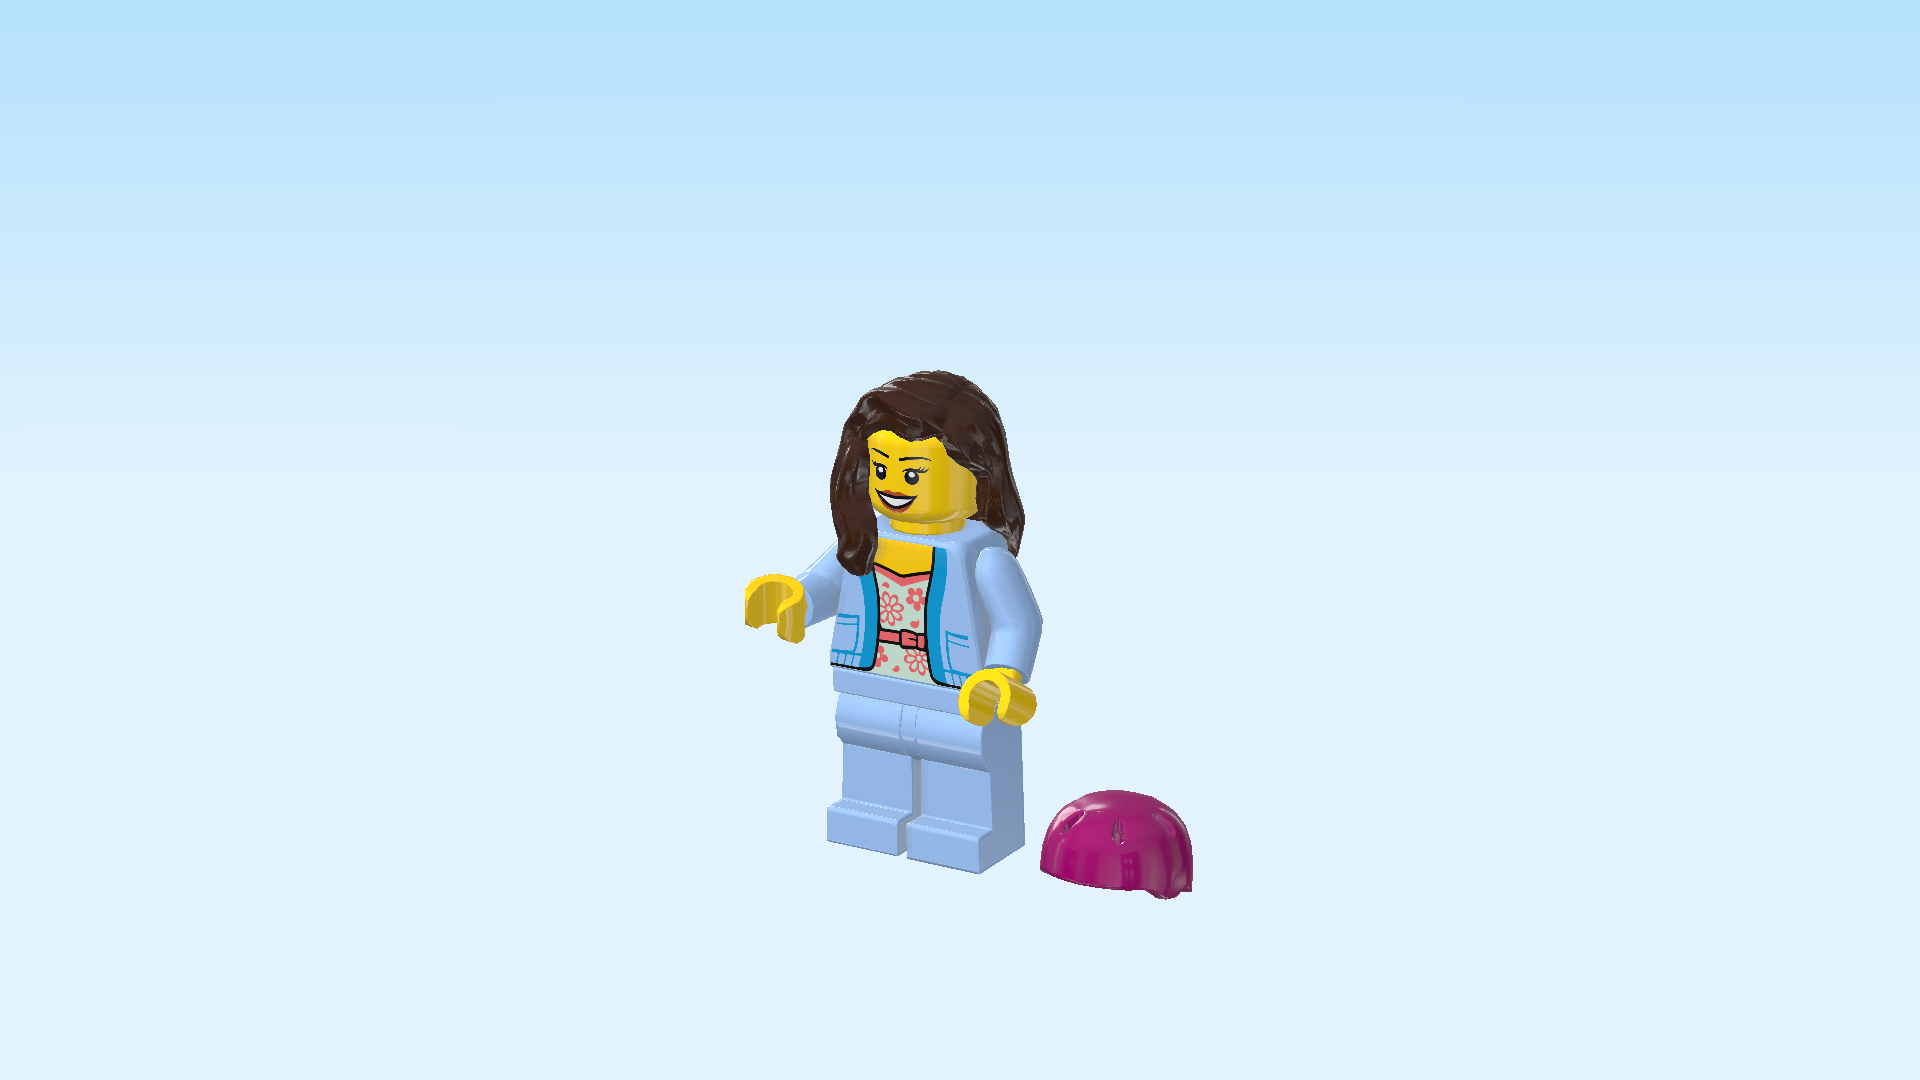
| Next, we will build the cyclist Minifigure. |
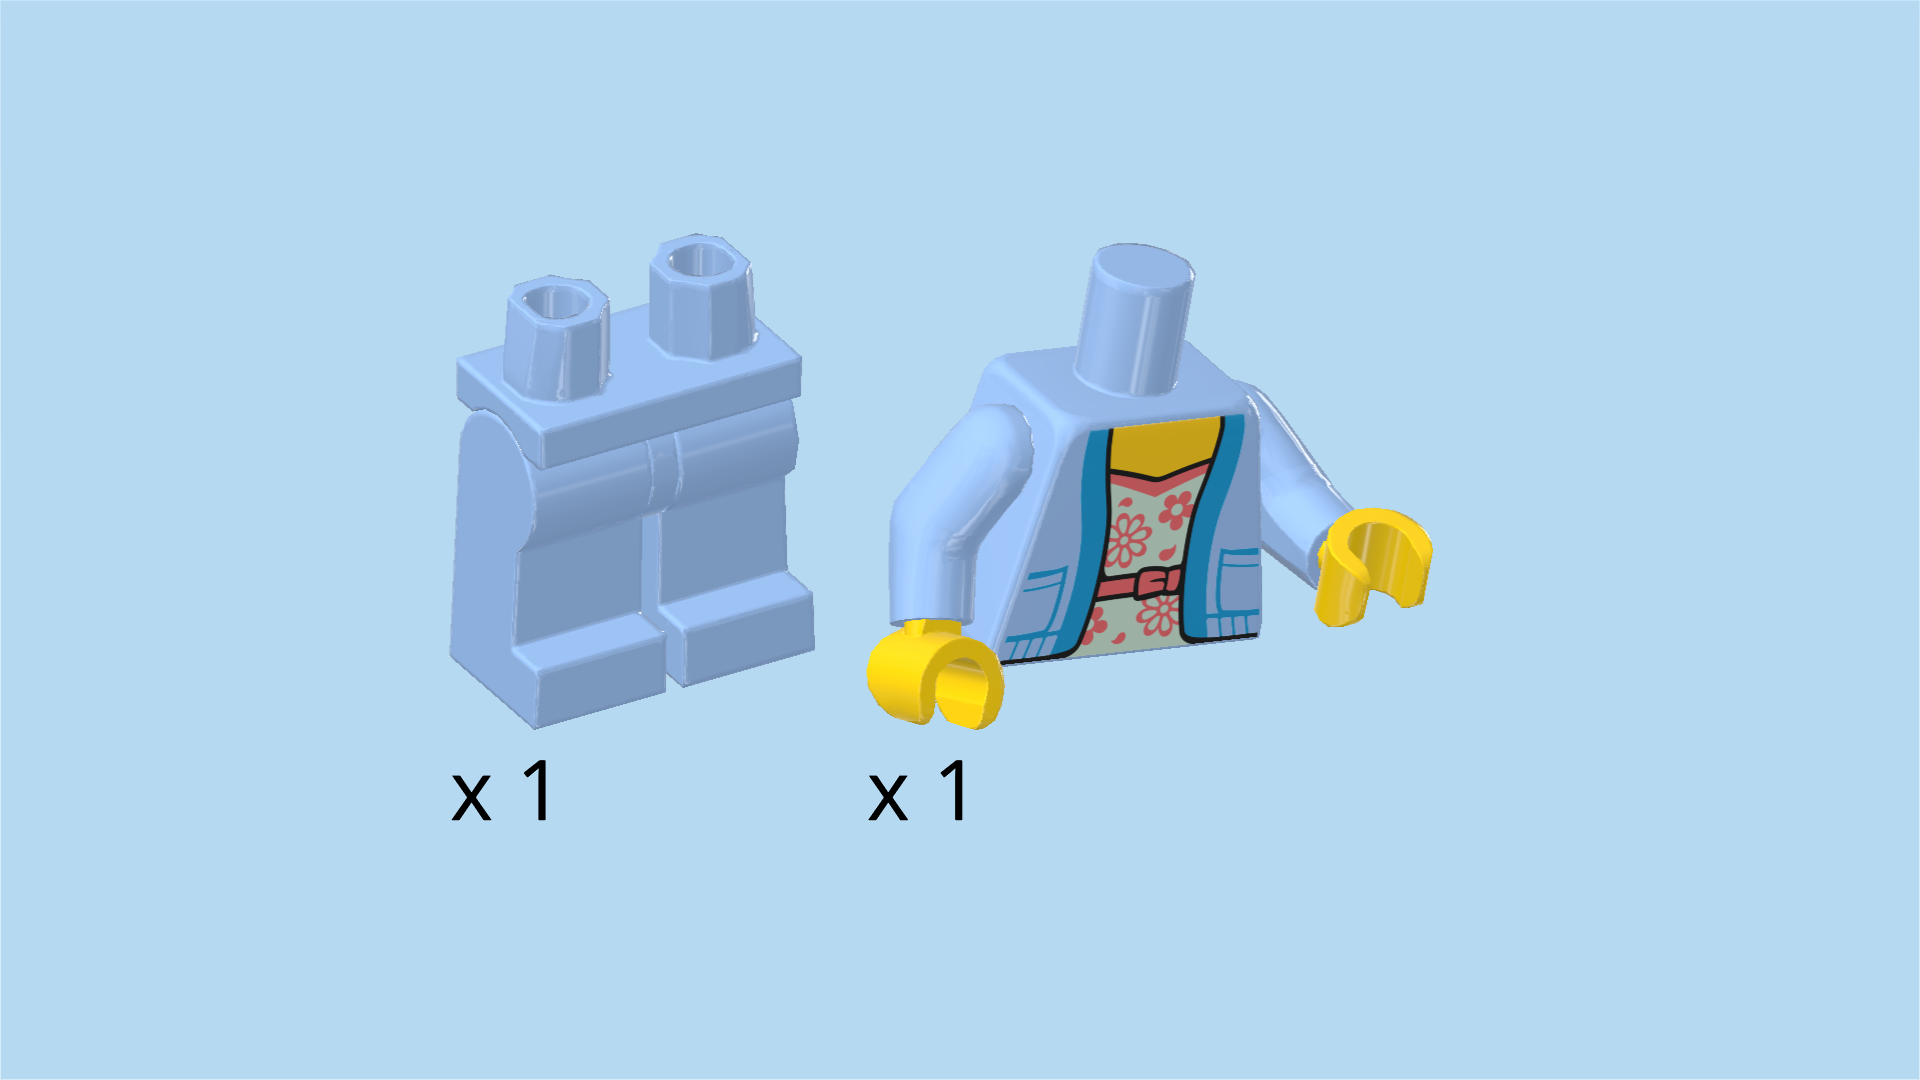
| Collect the following 2 pieces: |
| 1 baby blue and bright yellow upper part of the body, |
| and 1 baby blue pair of legs. |
| Put the upper body on the legs. |
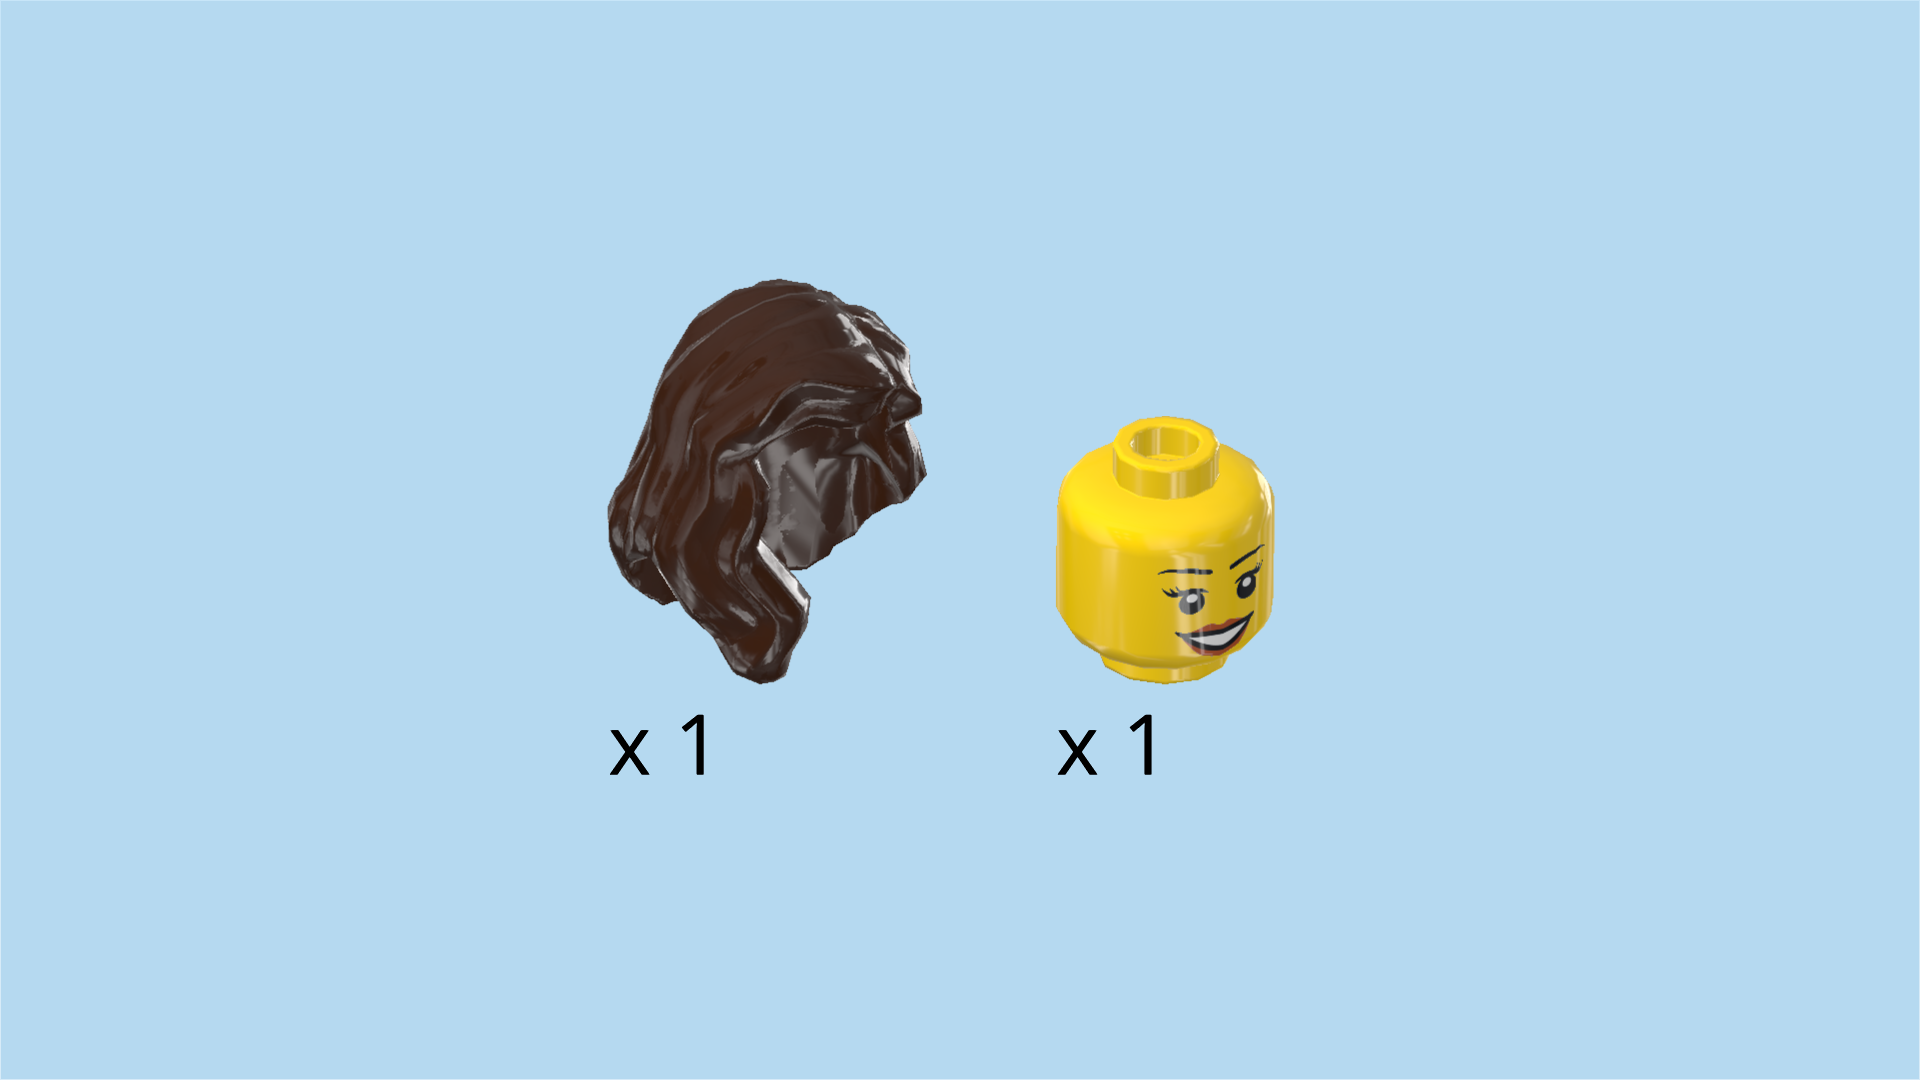
| Collect the following 2 pieces: |
| 1 bright yellow head, |
| and 1 dark brown hairpiece with long hair and side parting. |
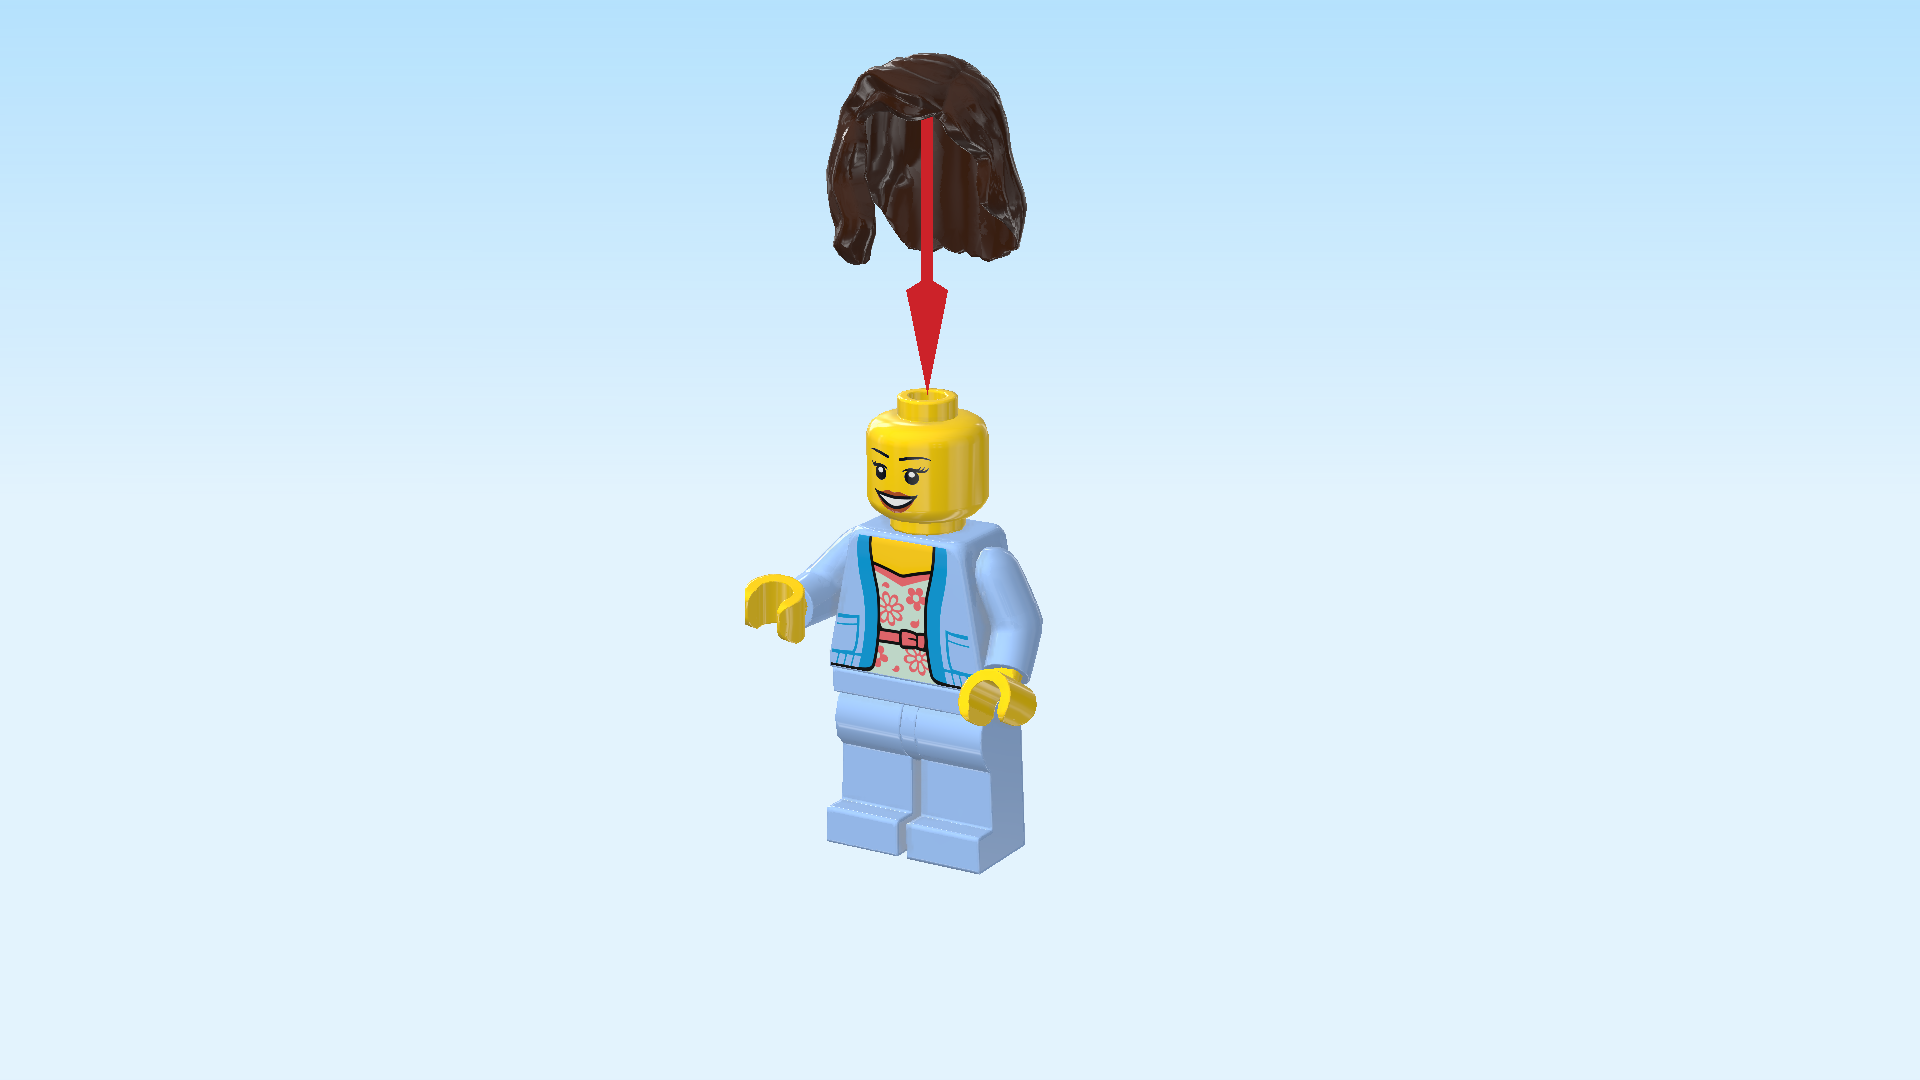
| Put the head on the body. |
| Put the hair on top. One strand of hair is falling over the shoulder towards the front of the upper body. |
| Find 1 purple violet bike helmet. |
| Whenever the cyclist is going for a ride, make sure to exchange the hairpiece with the bike helmet. Safety first! |
| The cyclist Minifigure is finished! Great job! She is wearing a light blue pantsuit and a white blouse with pink flowers, and a cute pink belt with a small bow tie. The jacket of the suit has two bright blue pockets and a bright blue collar. She has brown eyes and is wearing a pinkish lipstick. The cyclist also has a big smile on her face. But who wouldn't have when a lovely picnic is waiting on such a fine summer's day! |
| Next, we will build the bike with trailer. |
| Let's start with the trailer. |
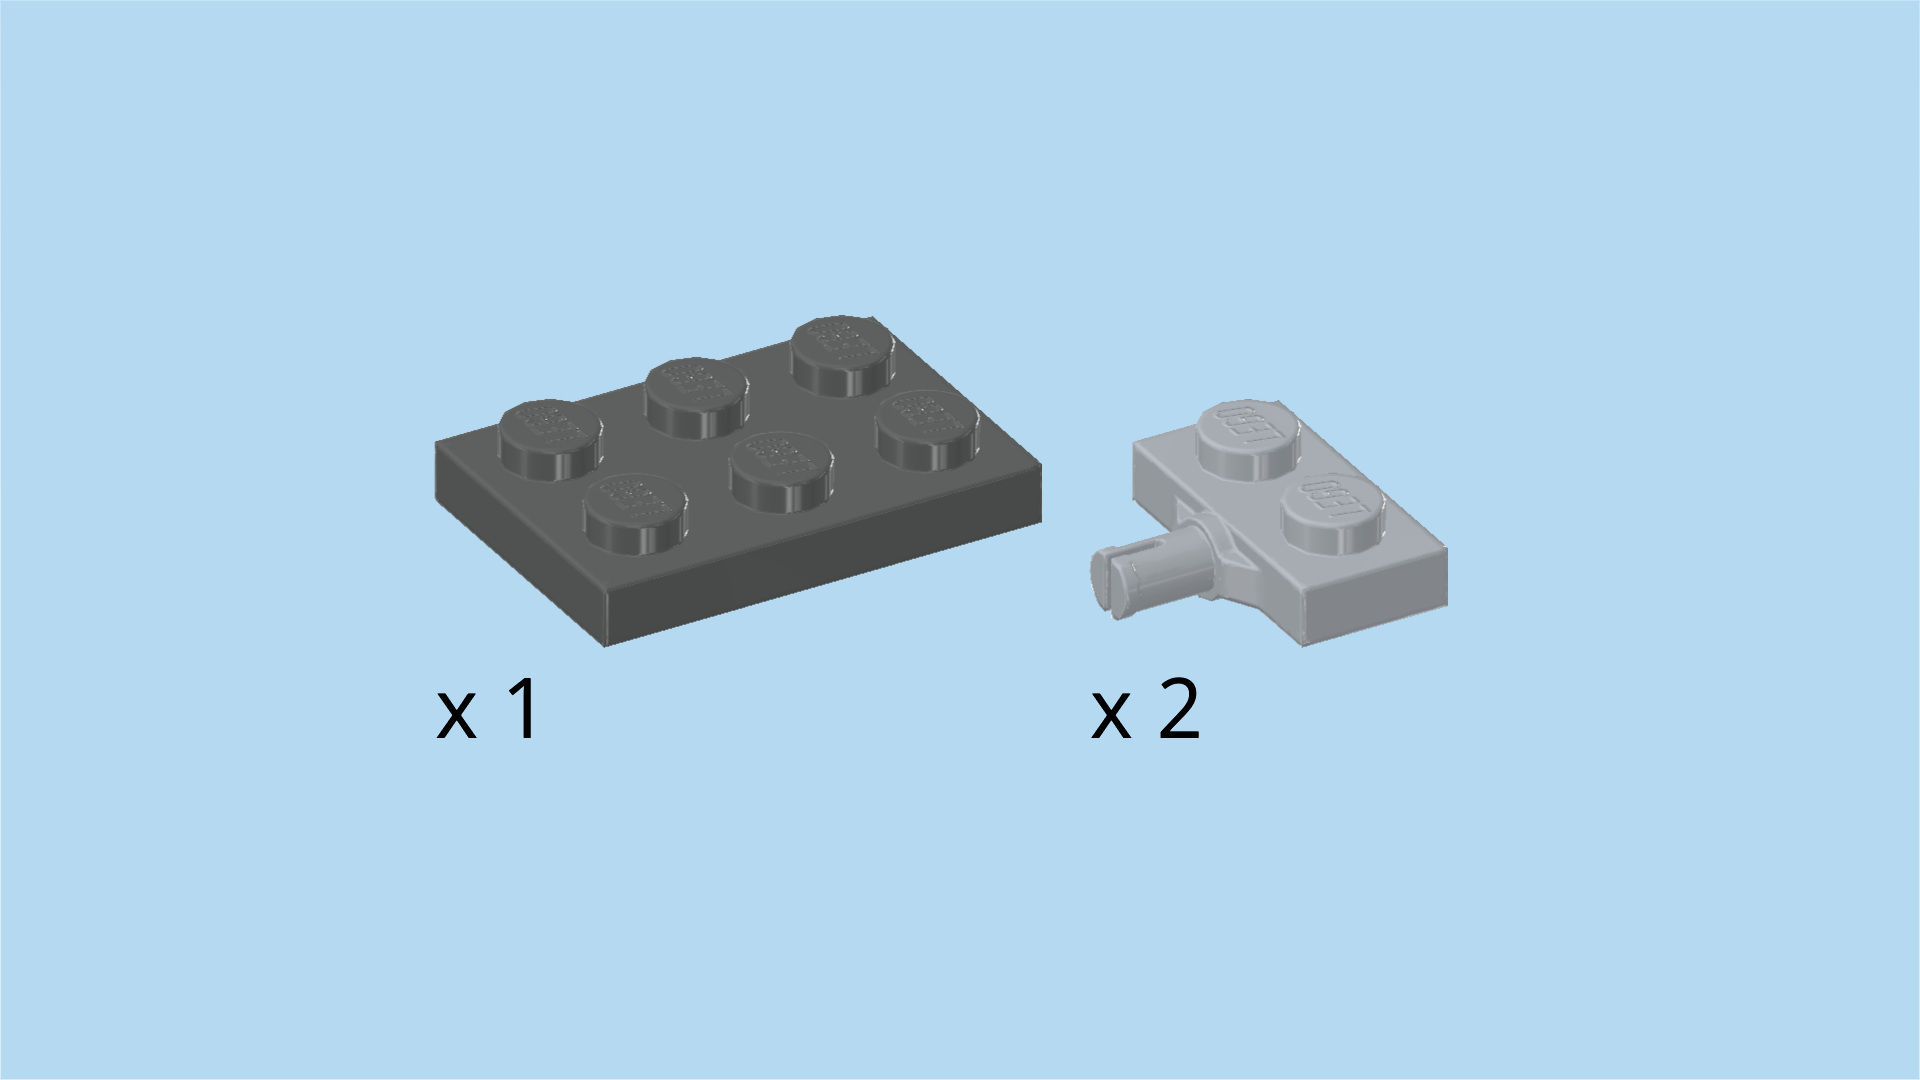
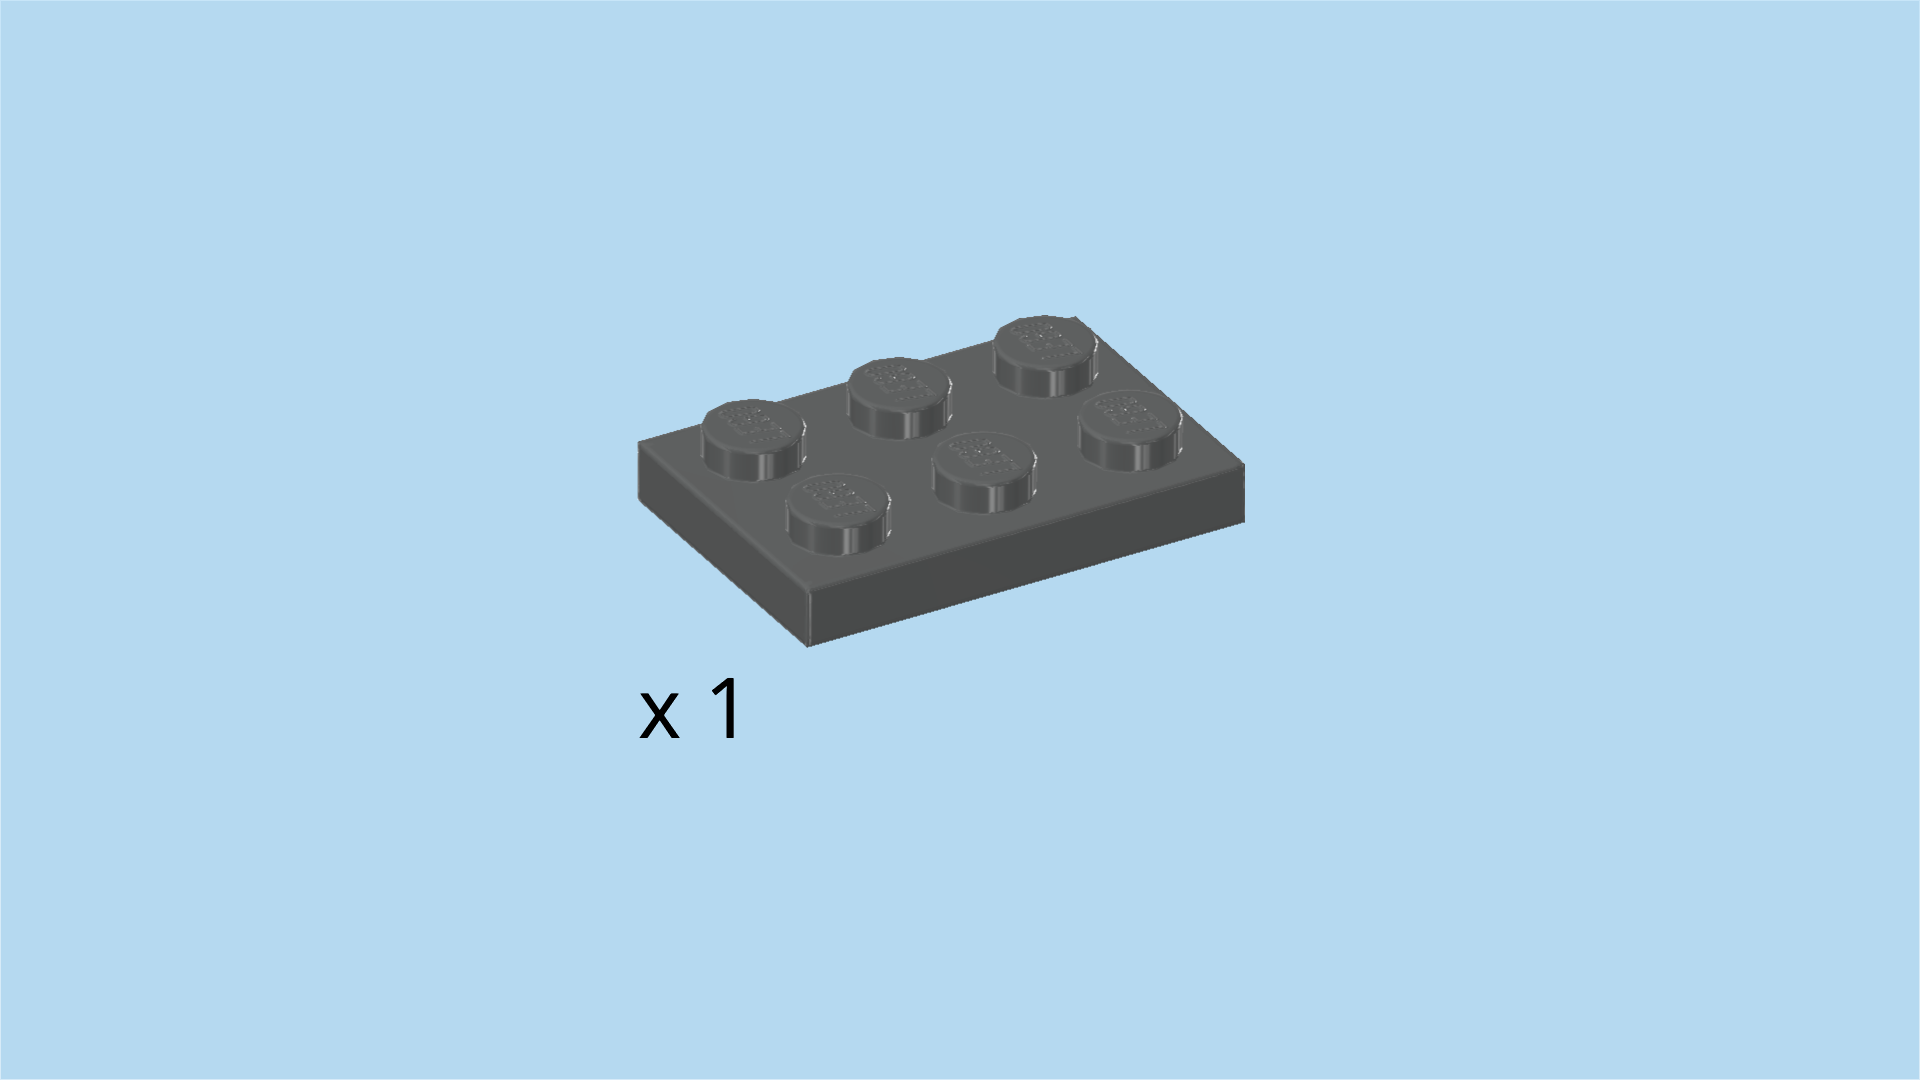
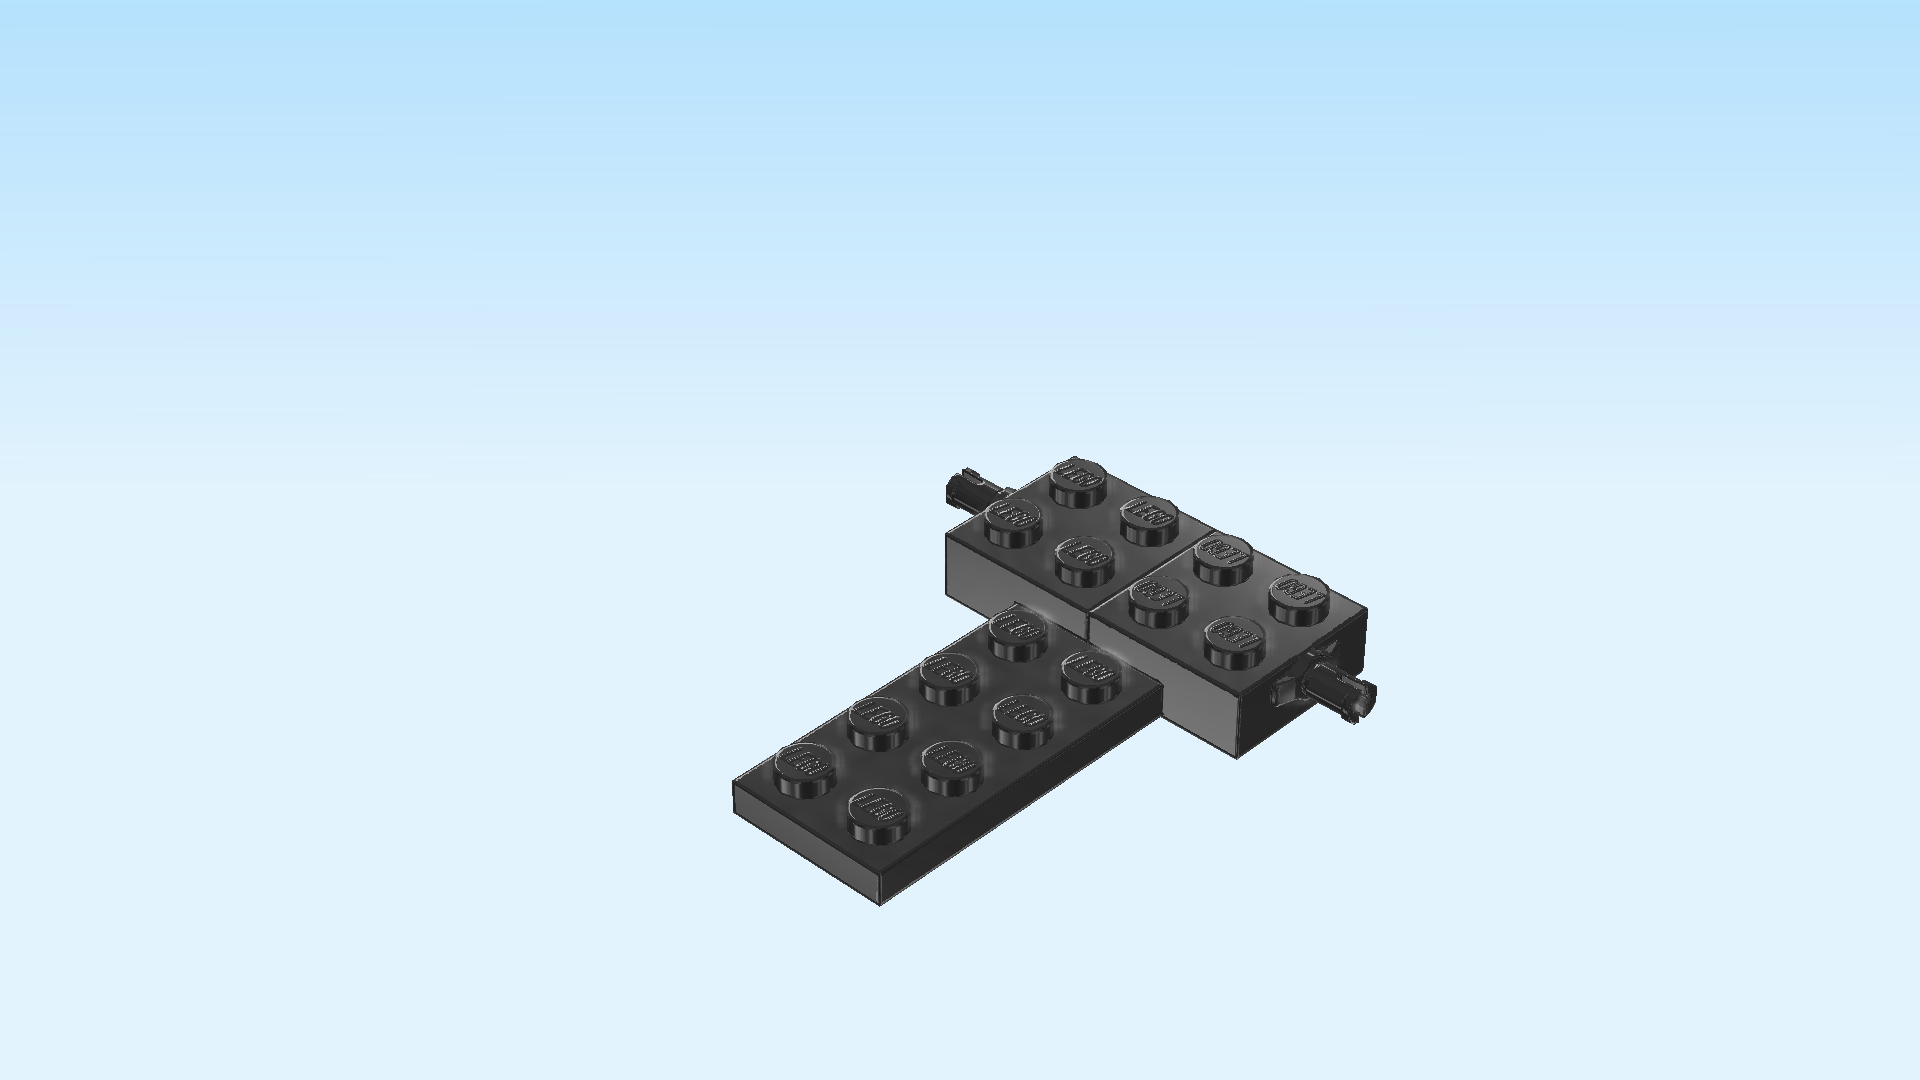
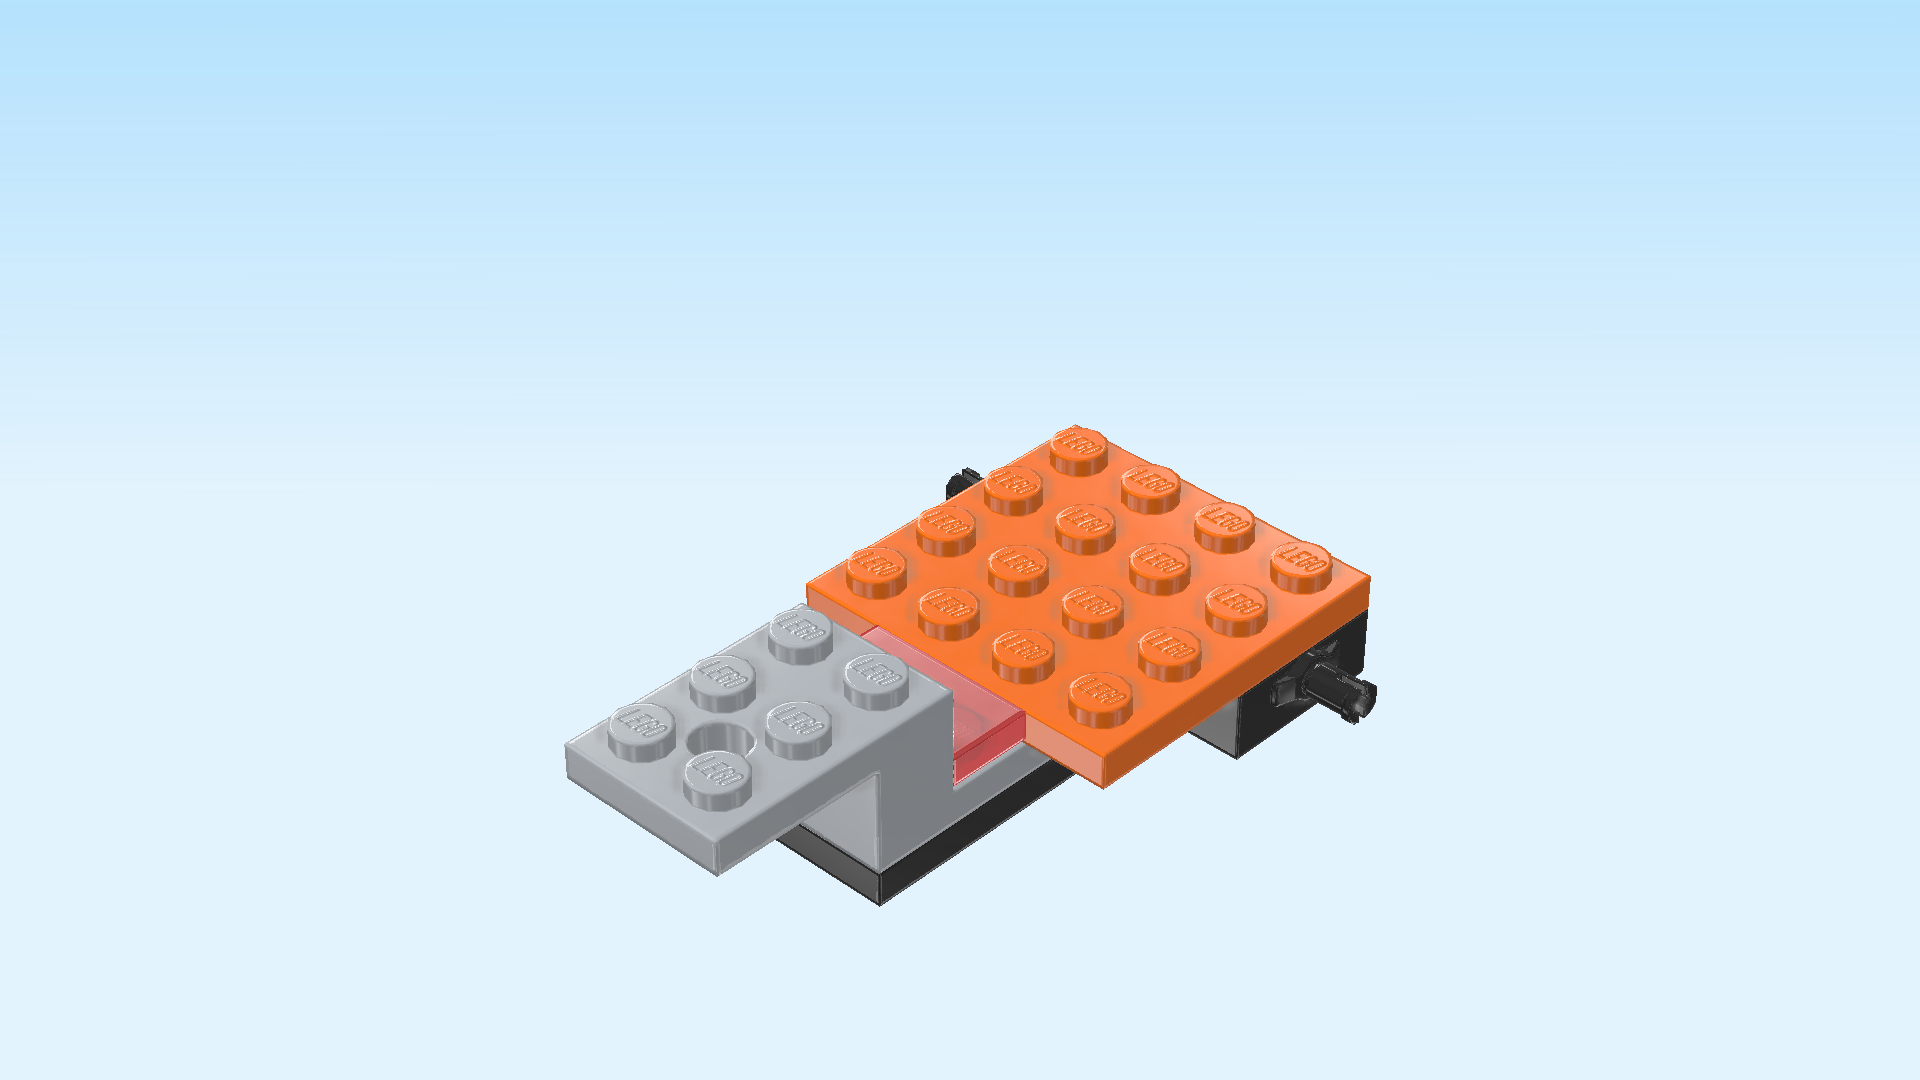
| Collect the following 3 pieces: |
| 1 dark stone grey plate 2x3, |
| and 2 medium stone grey plates 1x2 with side pin connector. |
| Put the plate 2x3 vertically on the table. |
| Put 1 plate with side pin horizontally on the frontmost row, pin to the front. |
| Repeat symmetrically on the backmost row. |
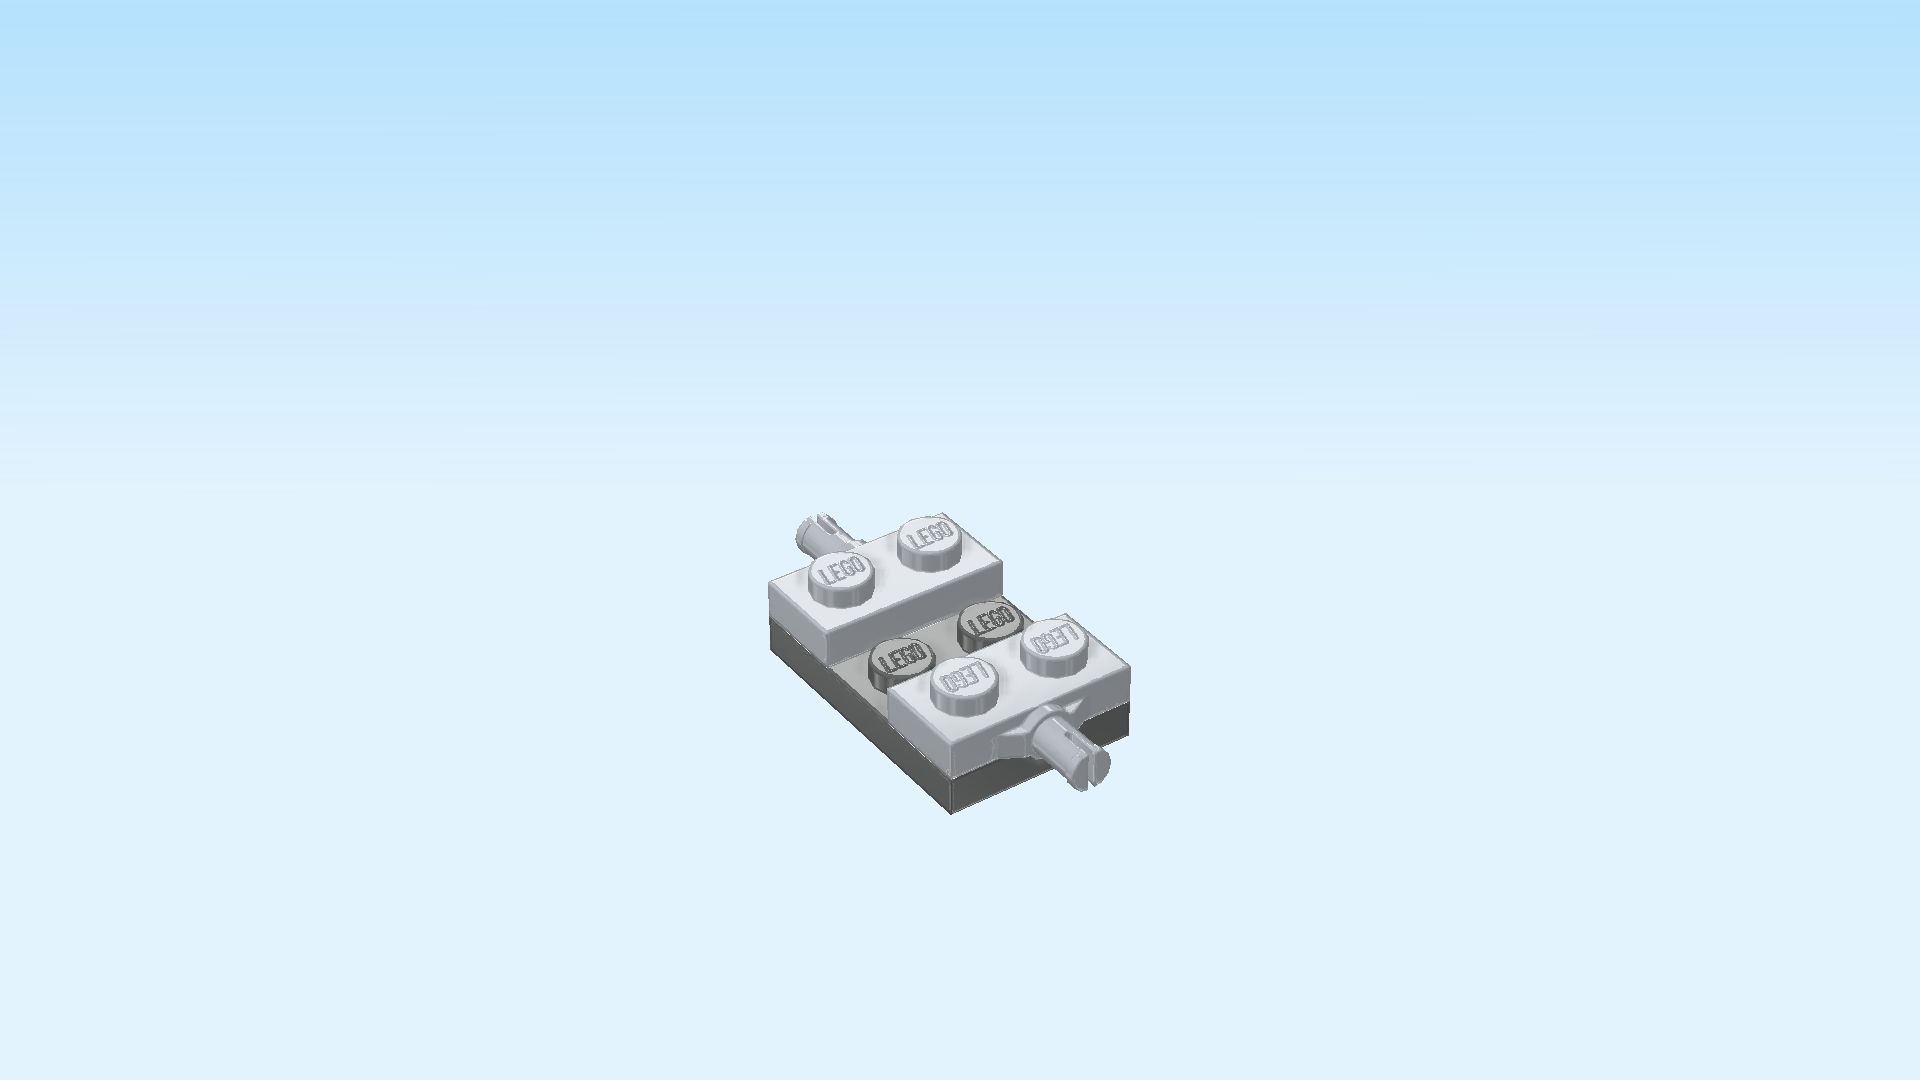
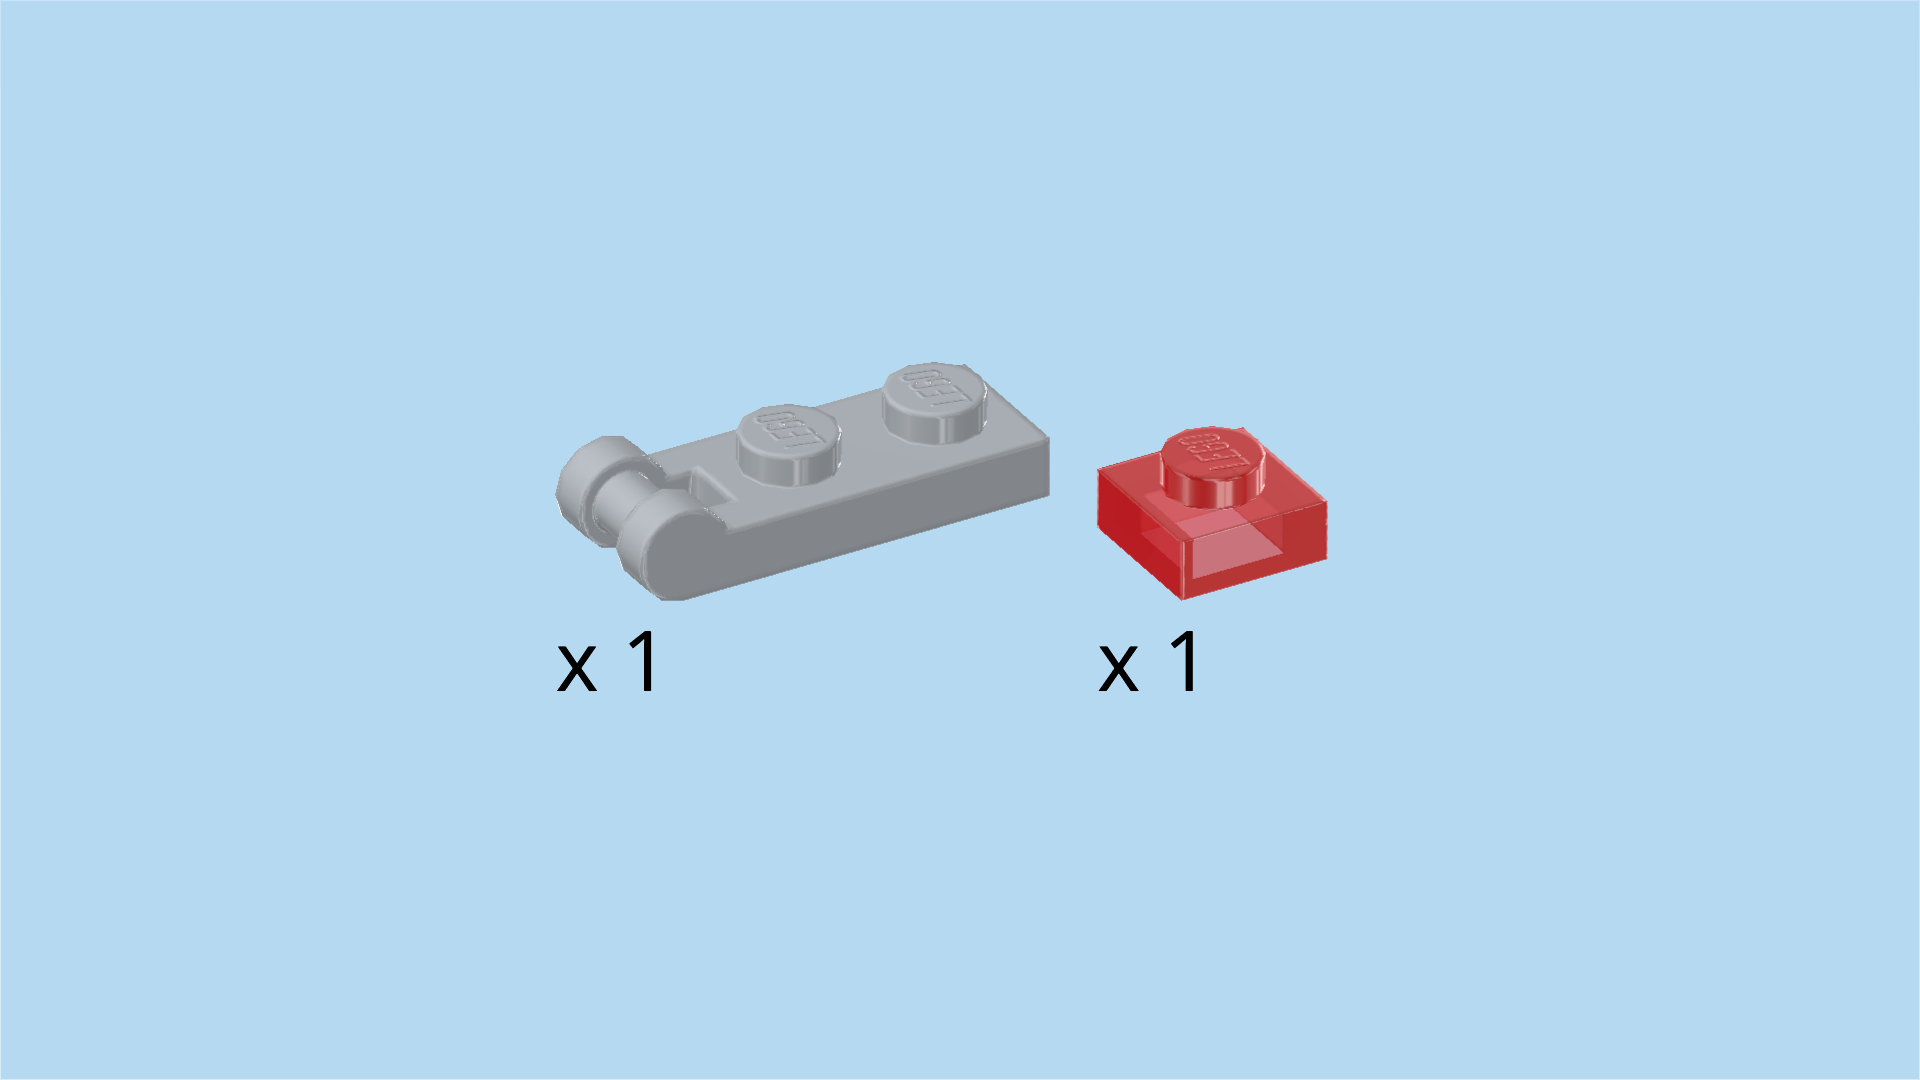
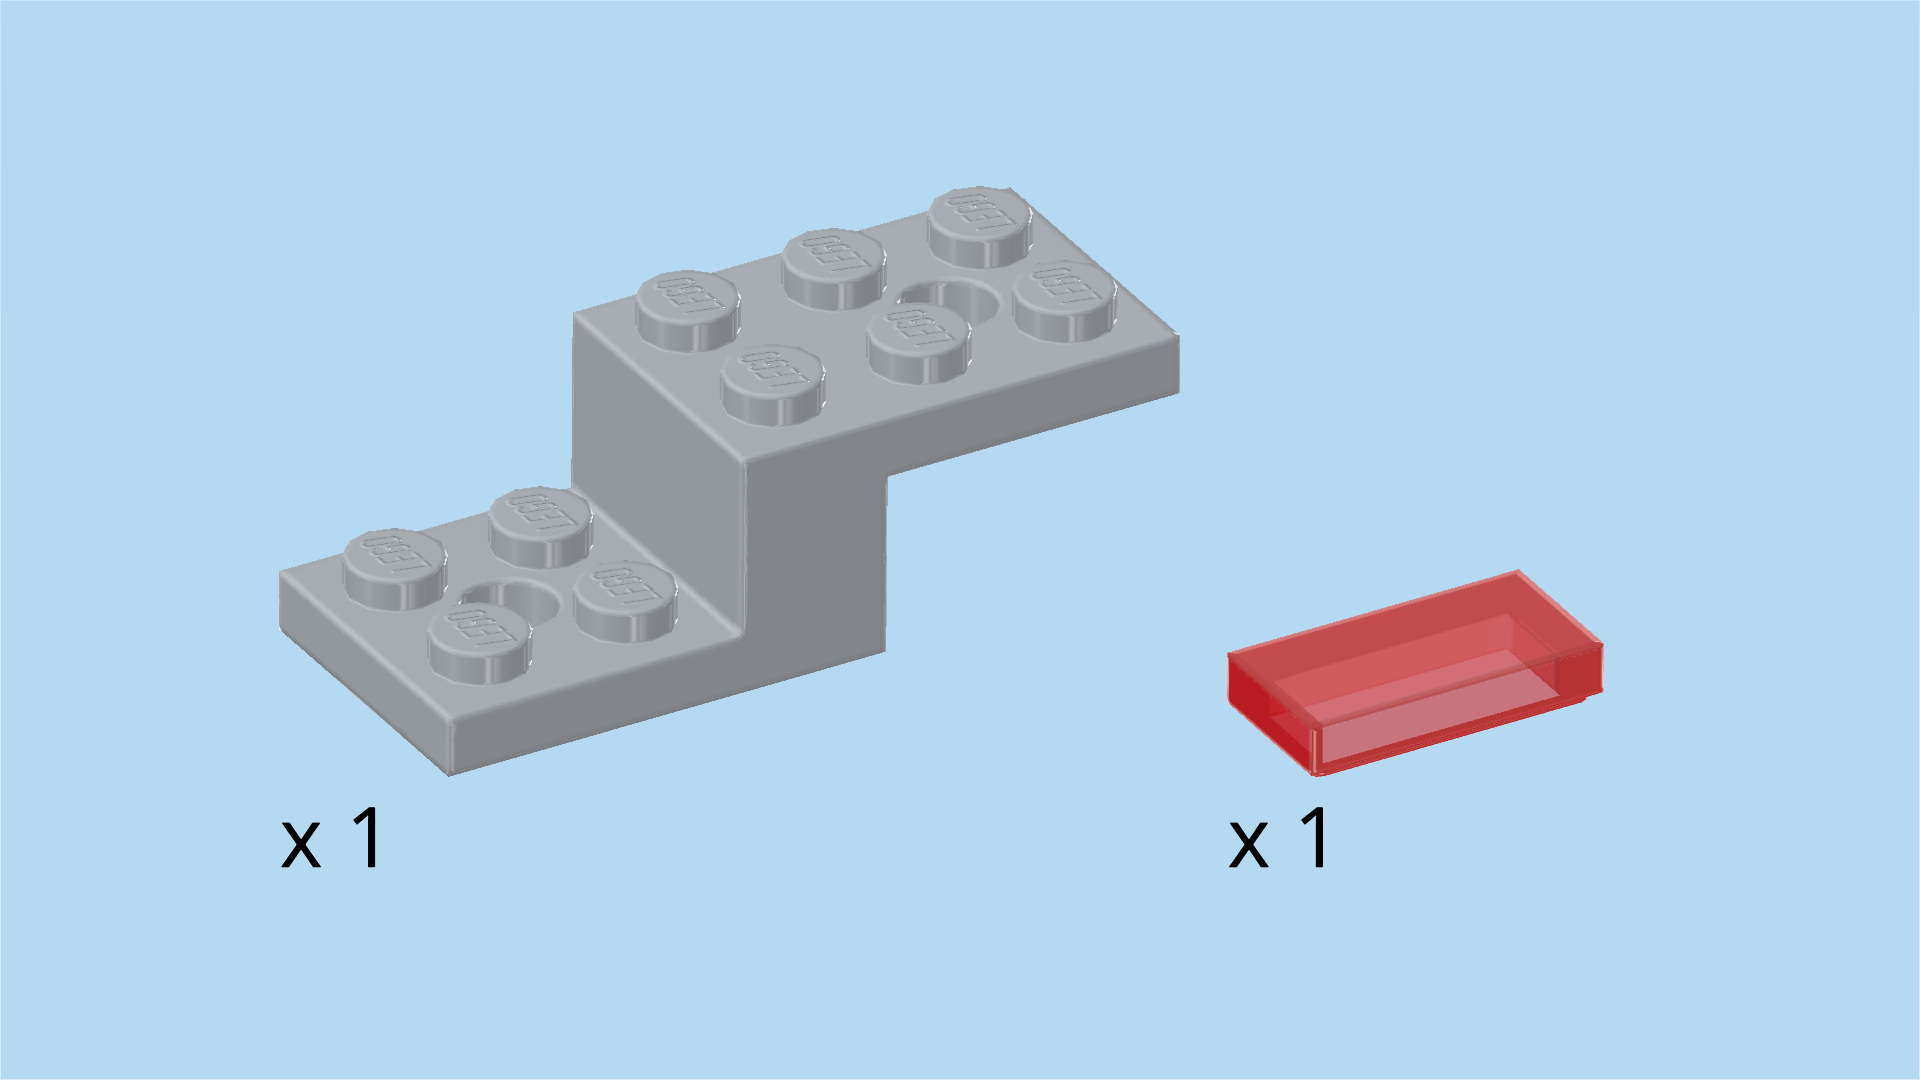
| Collect the following 2 pieces: |
| 1 medium stone grey plate 1x2 with shaft on short side, |
| and 1 transparent red plate 1x1. |
| Put the red plate 1x1 between the two previous pieces on the rightmost column. |
| Put the plate 1x2 horizontally to the left of the previous piece, 1 knob and shaft overhanging to the left. |
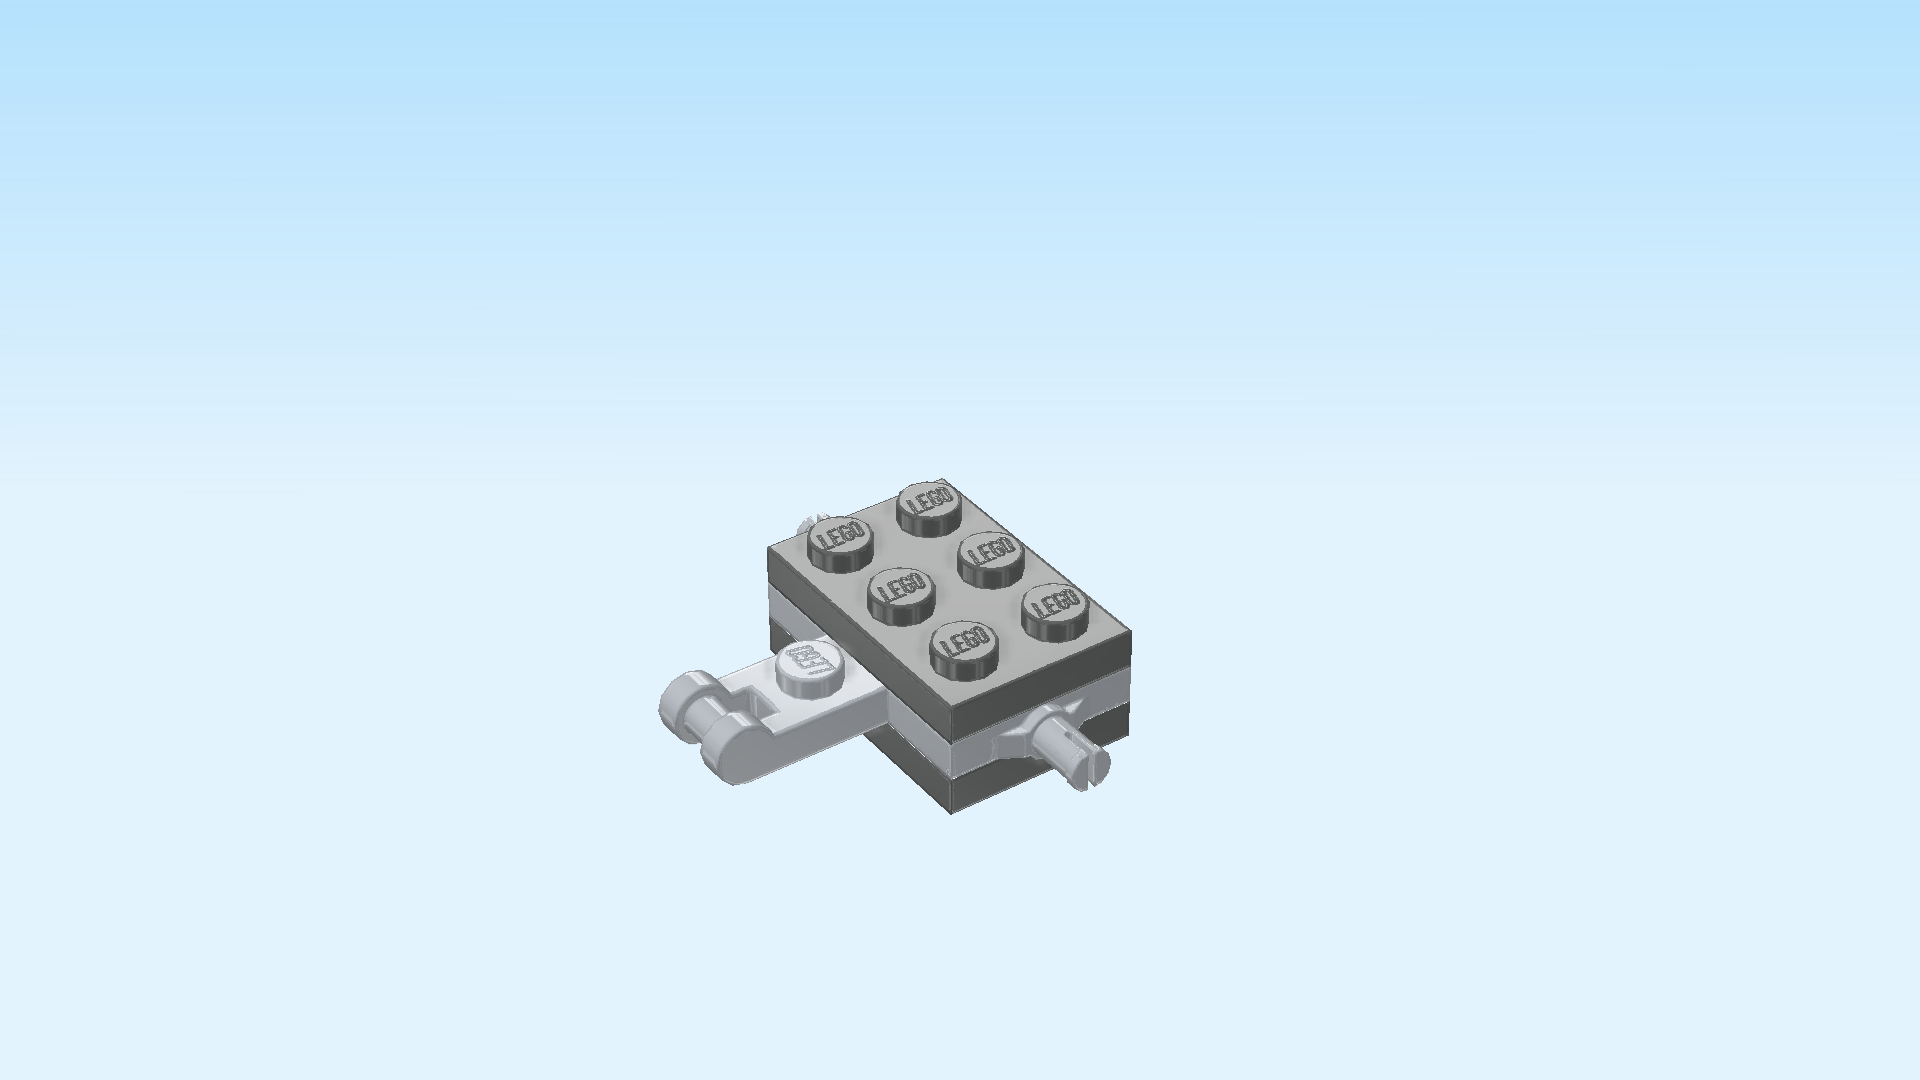
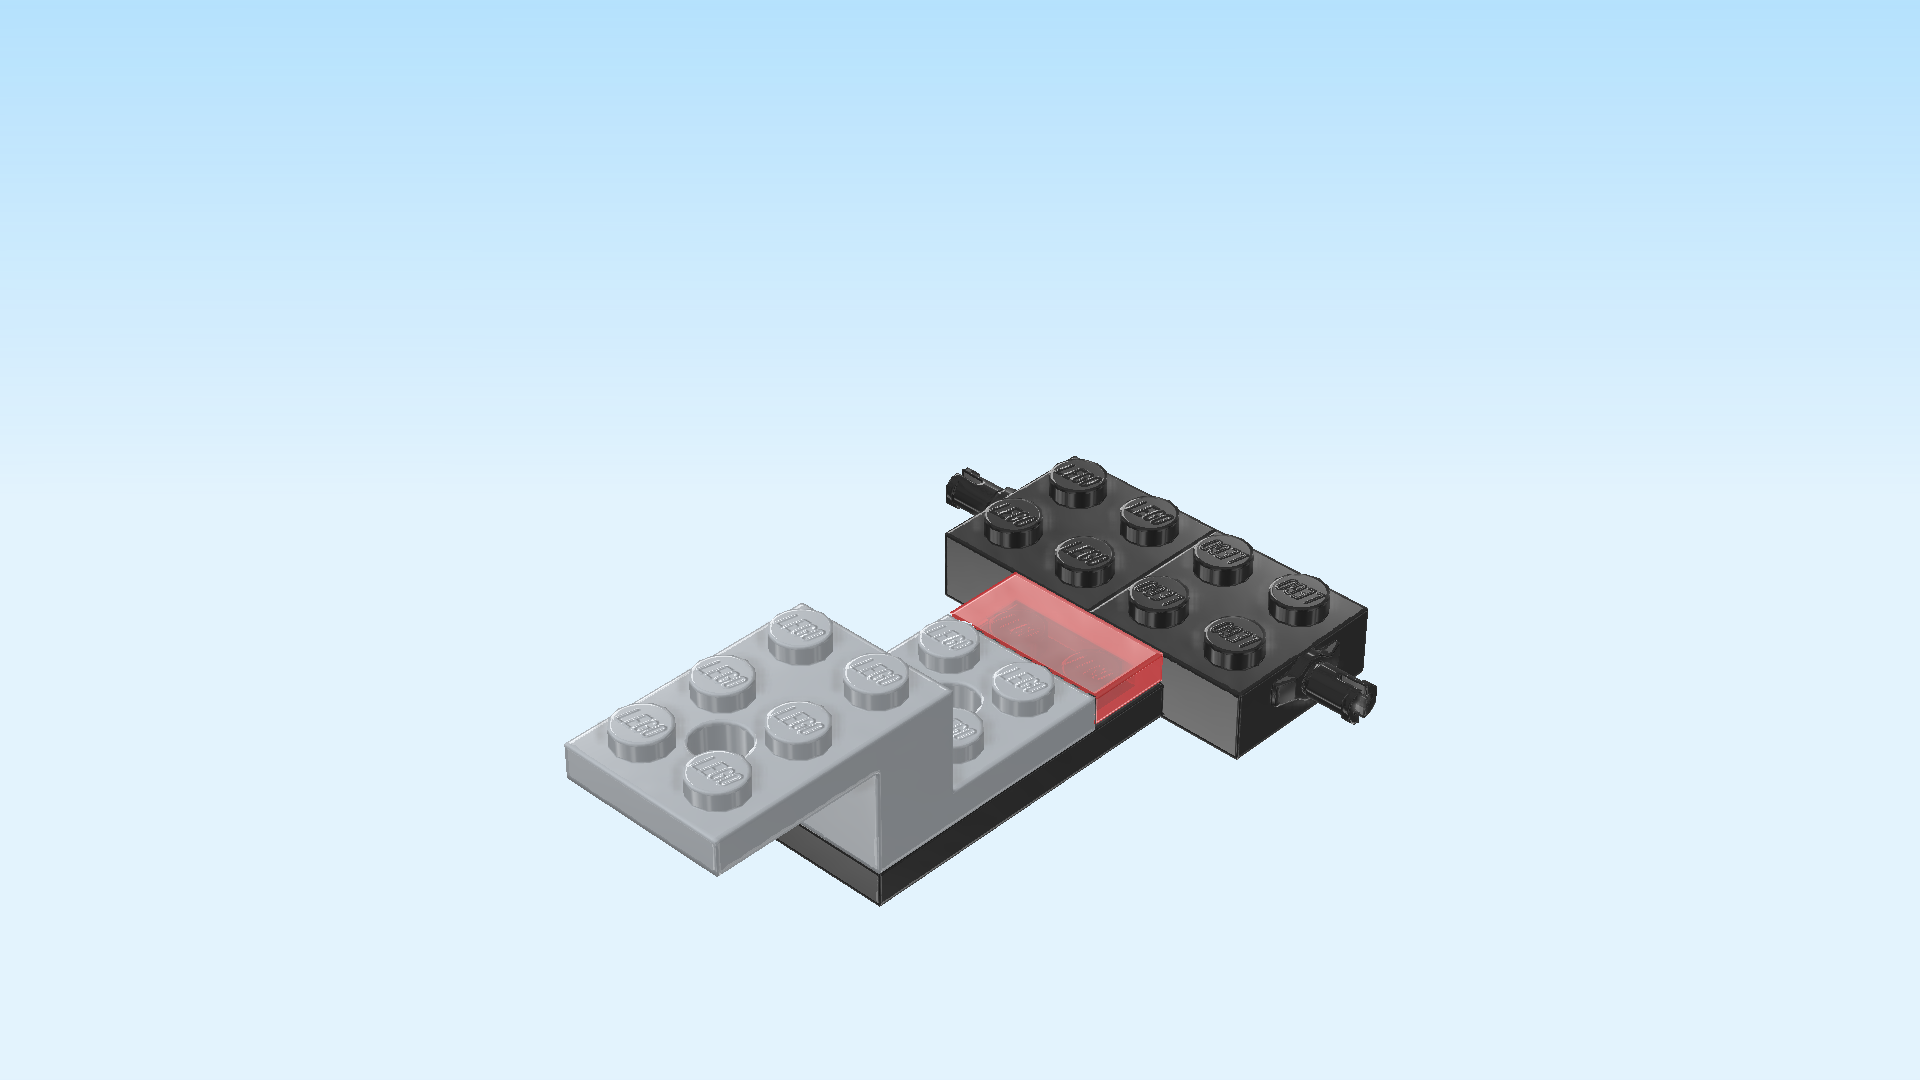
| Find 1 dark stone grey plate 2x3. |
| Put it vertically on top of the build, covering the previous pieces. |
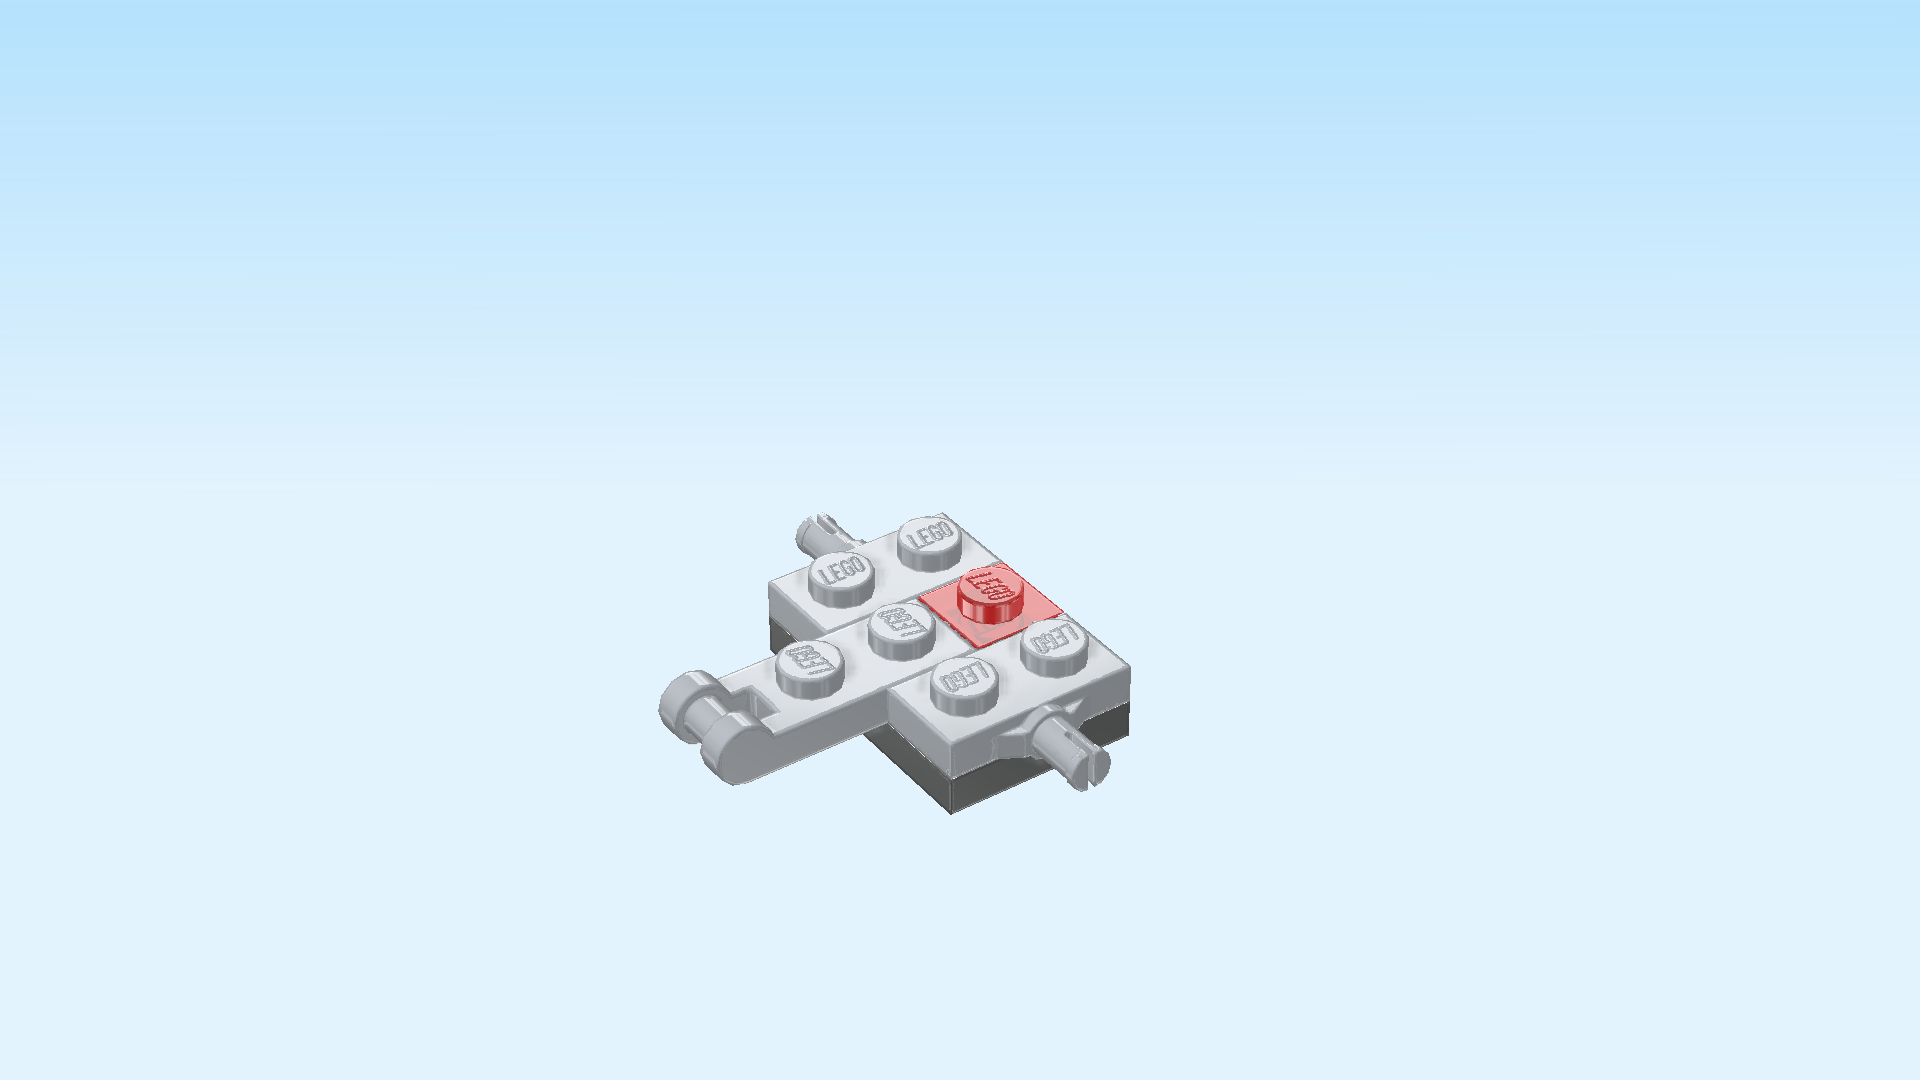
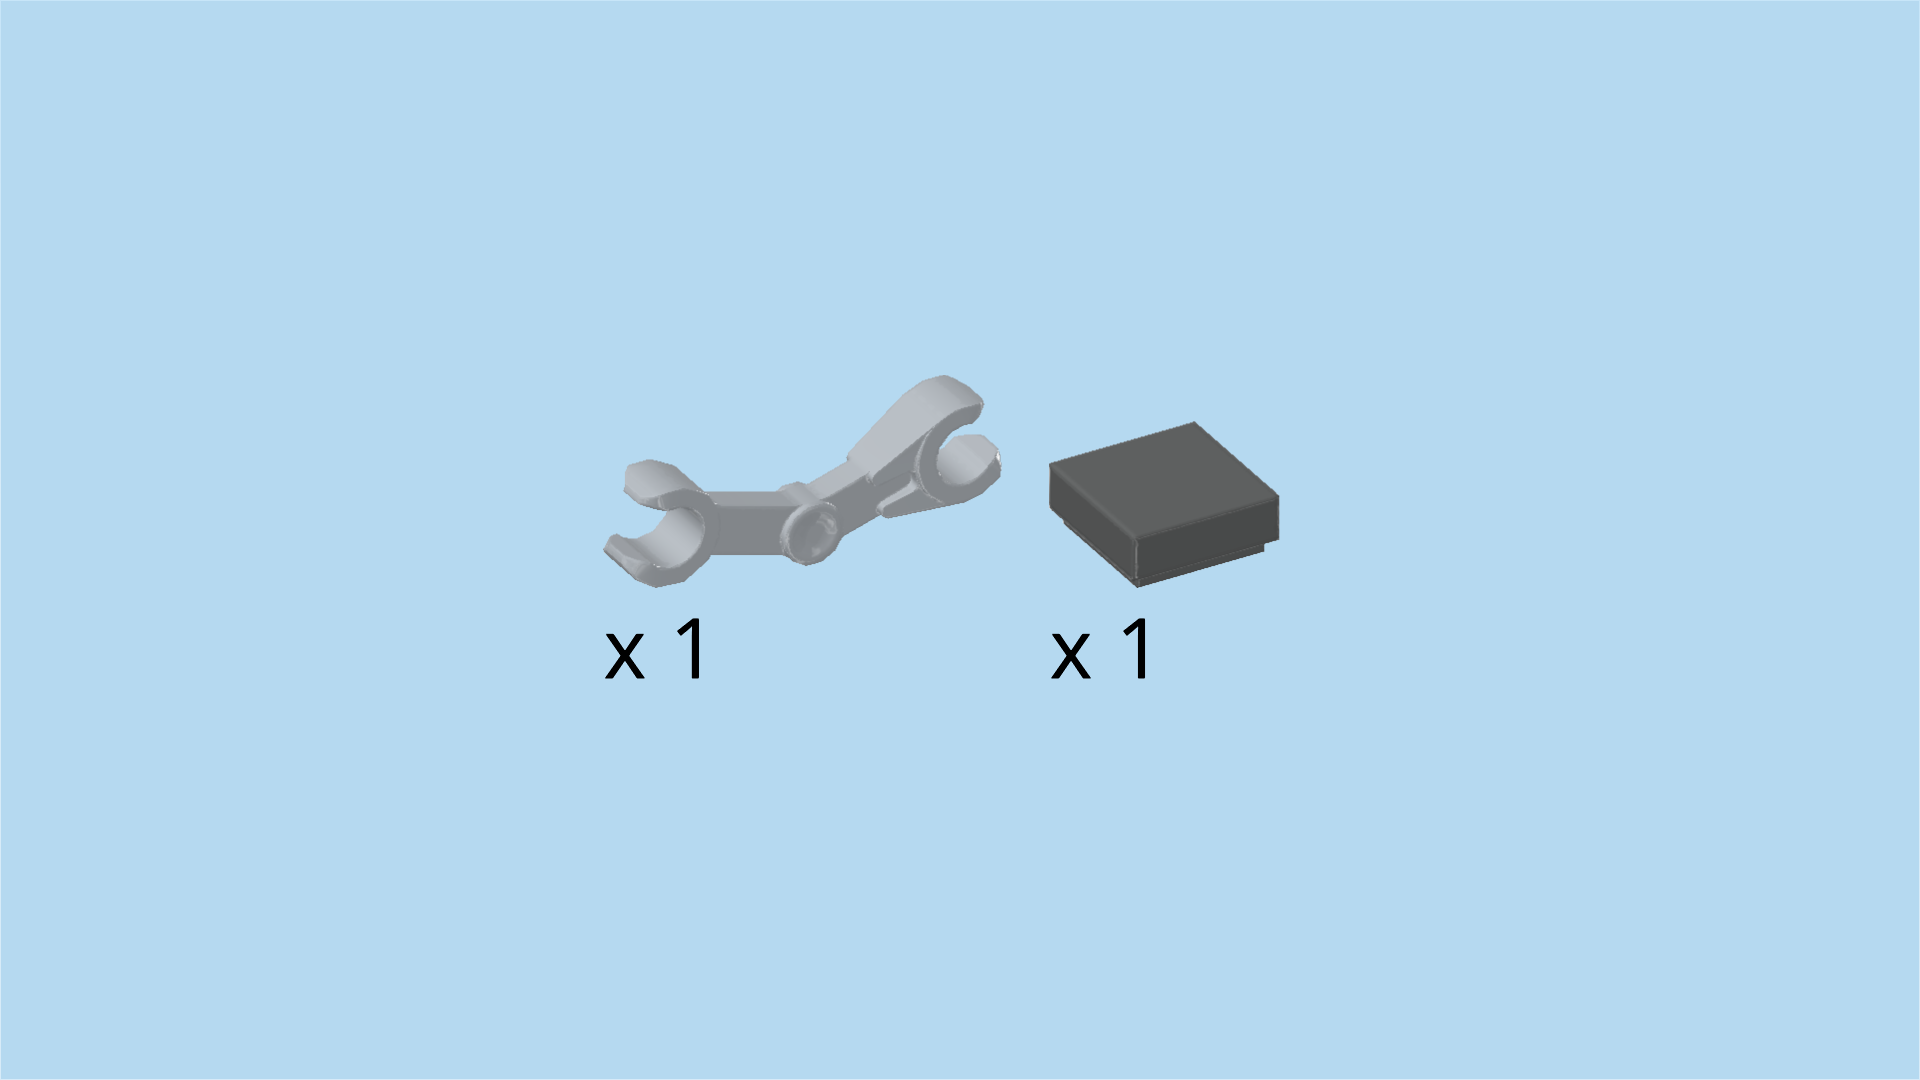
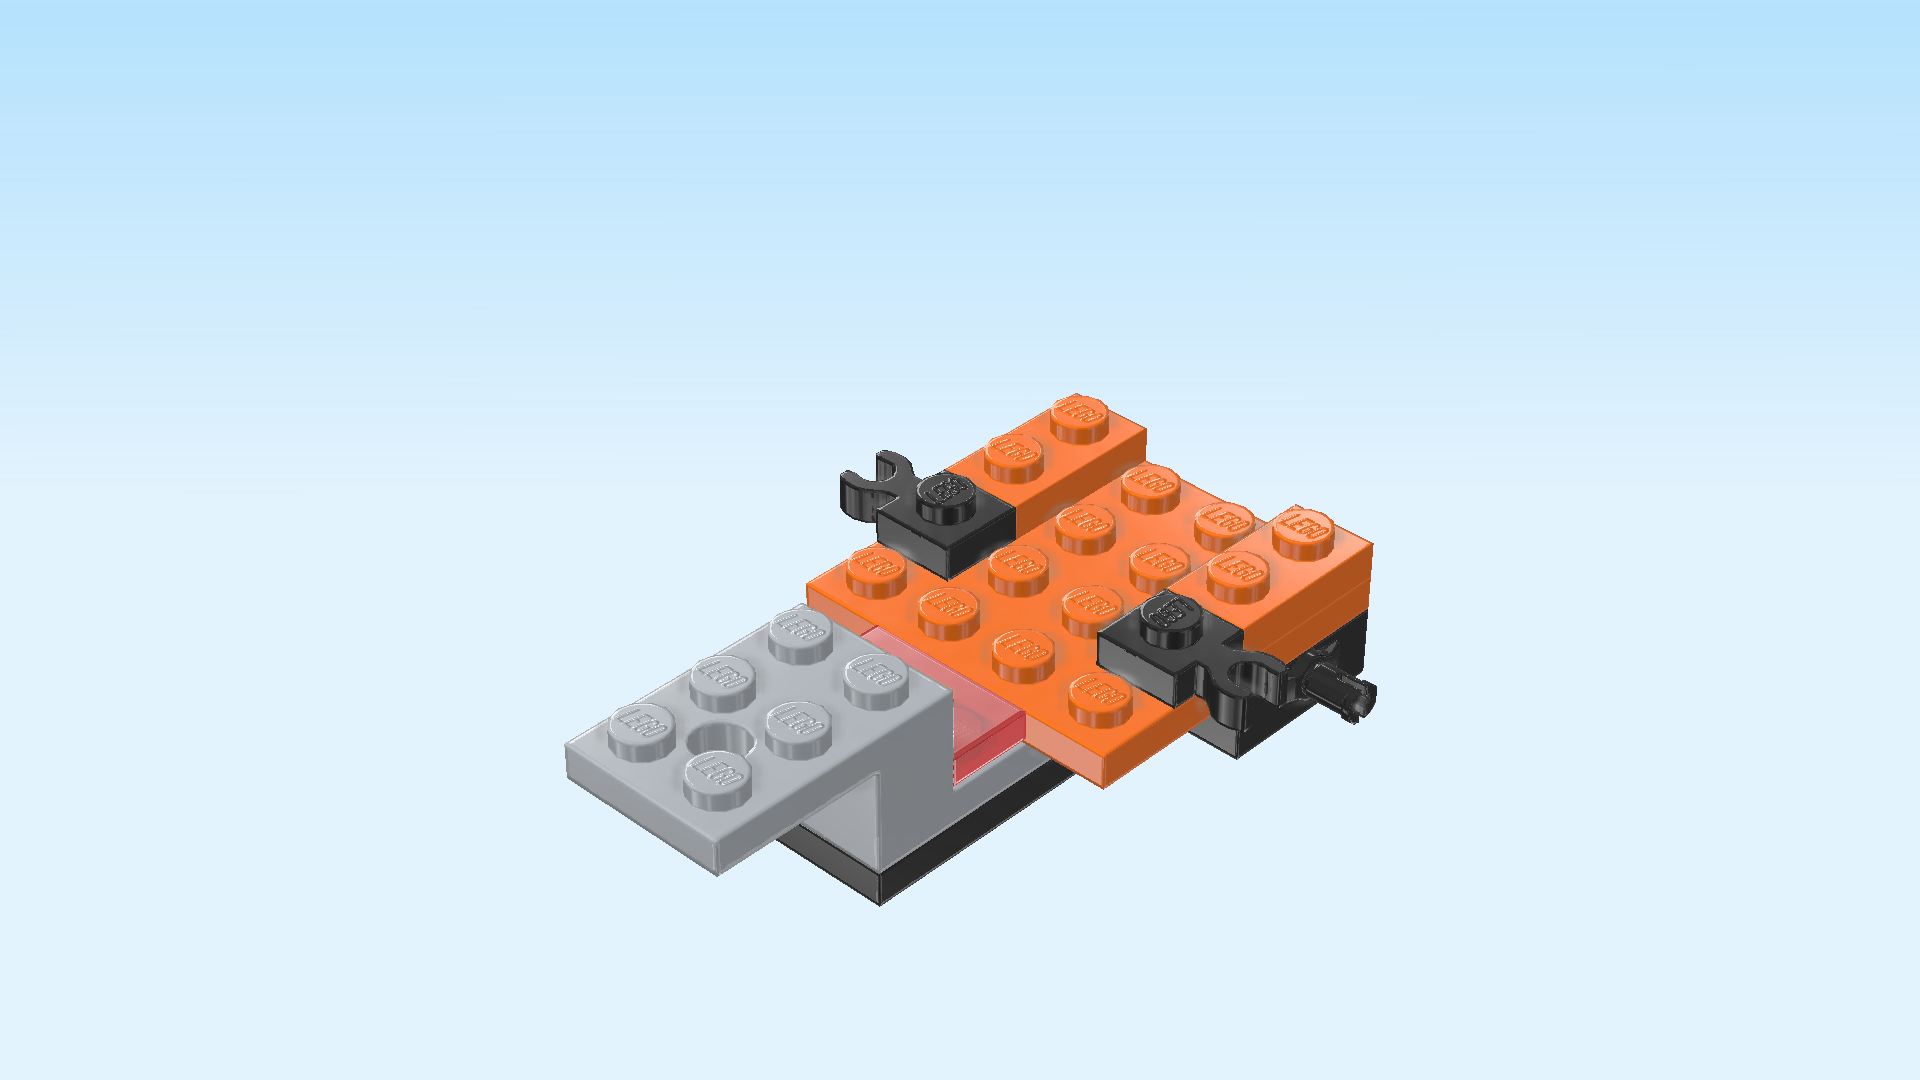
| Collect the following 2 pieces: |
| 1 medium stone grey skeleton arm with 1 thick clasp and 1 standard clasp, |
| and 1 dark stone grey flat tile 1x1. |
| Put the flat tile 1x1 on the single knob to the left of the previous piece. |
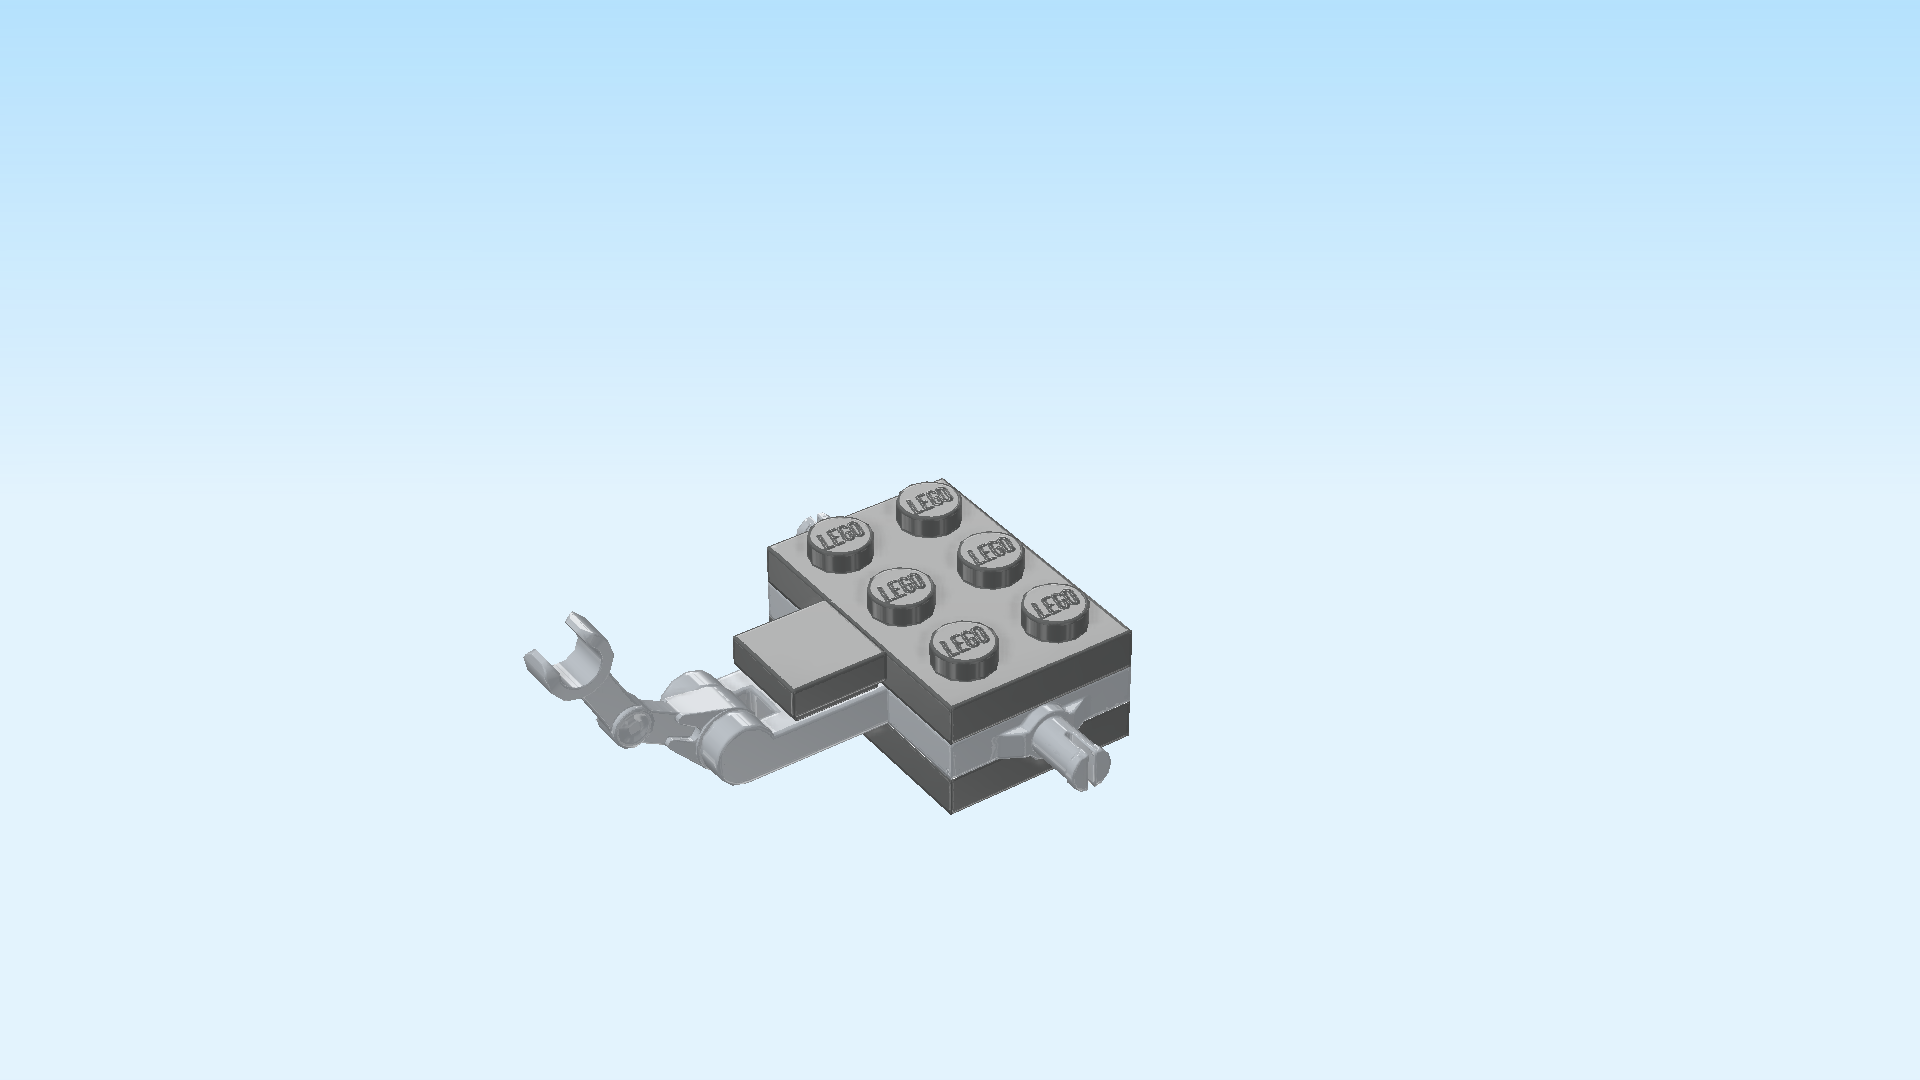
| Snap the thick clasp of the skeleton arm onto the shaft on the left side. Make sure the skeleton arm is pointing upwards. |
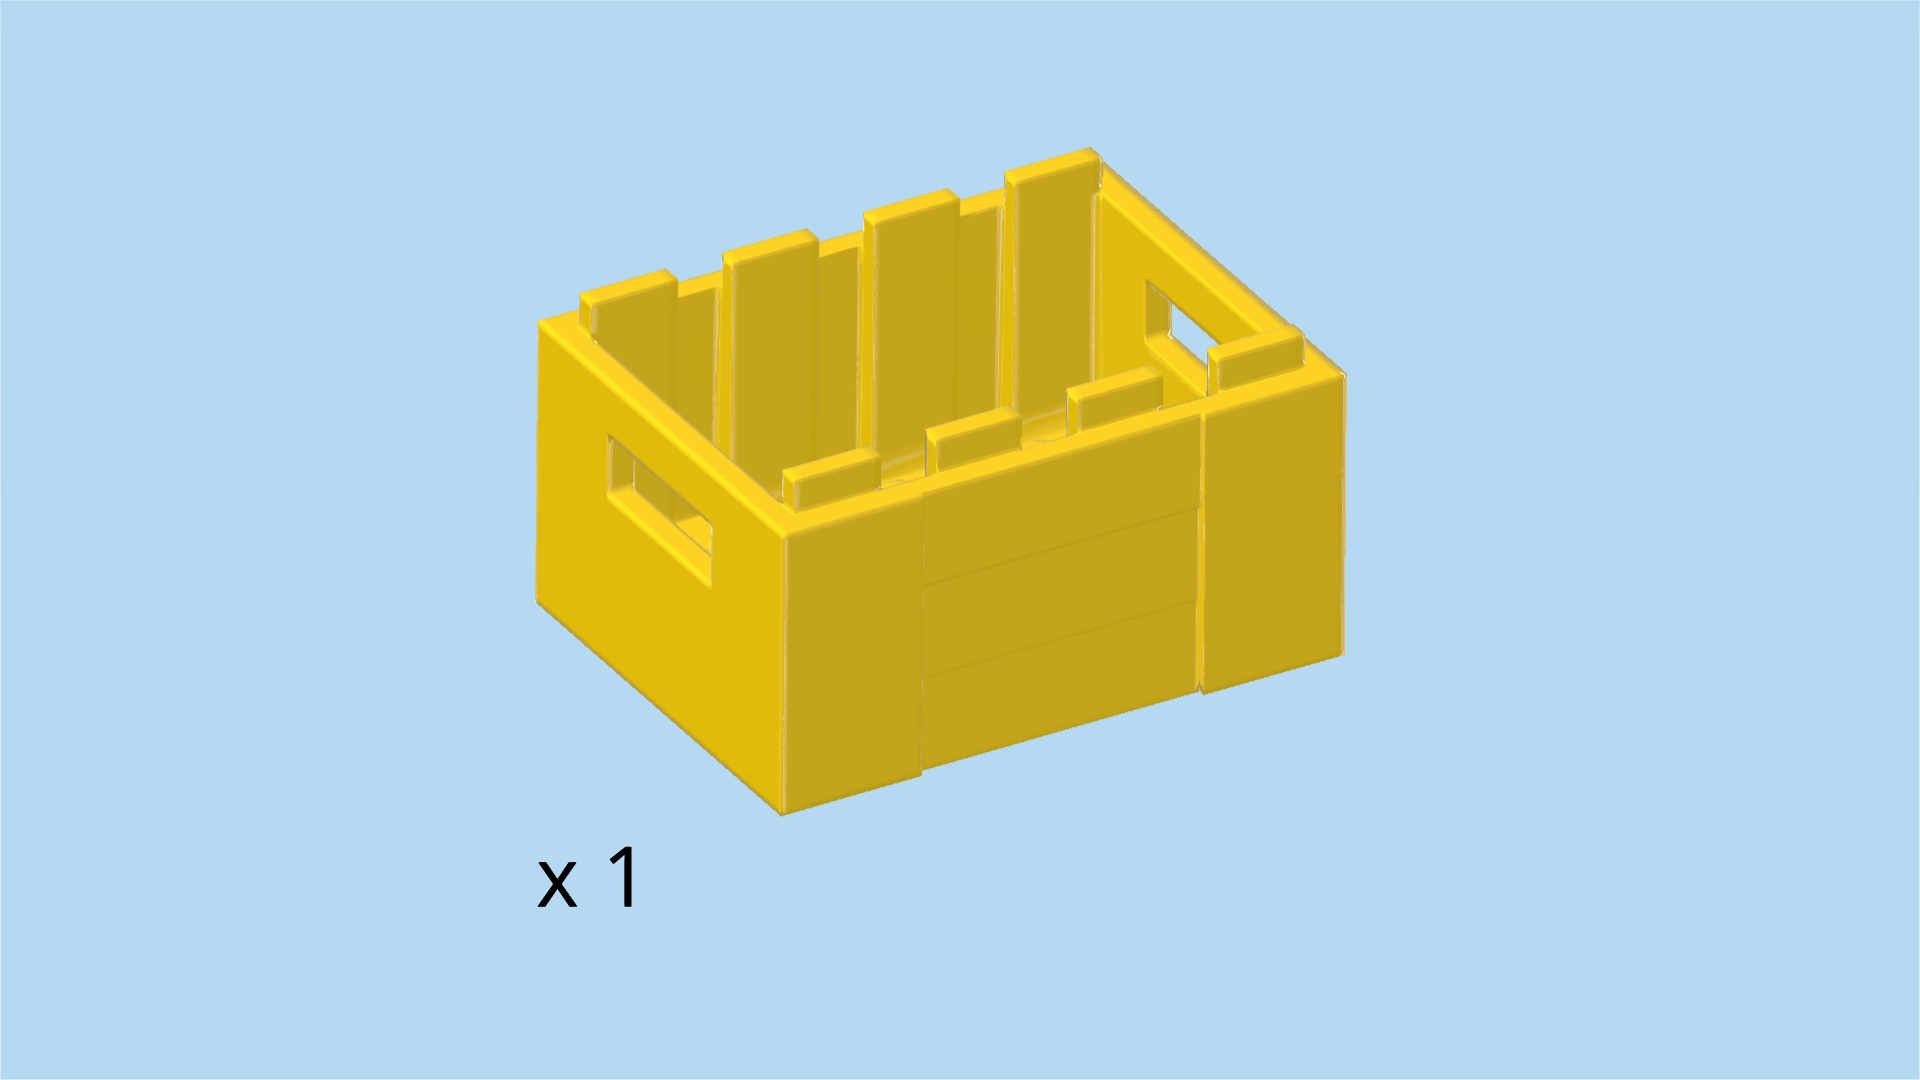
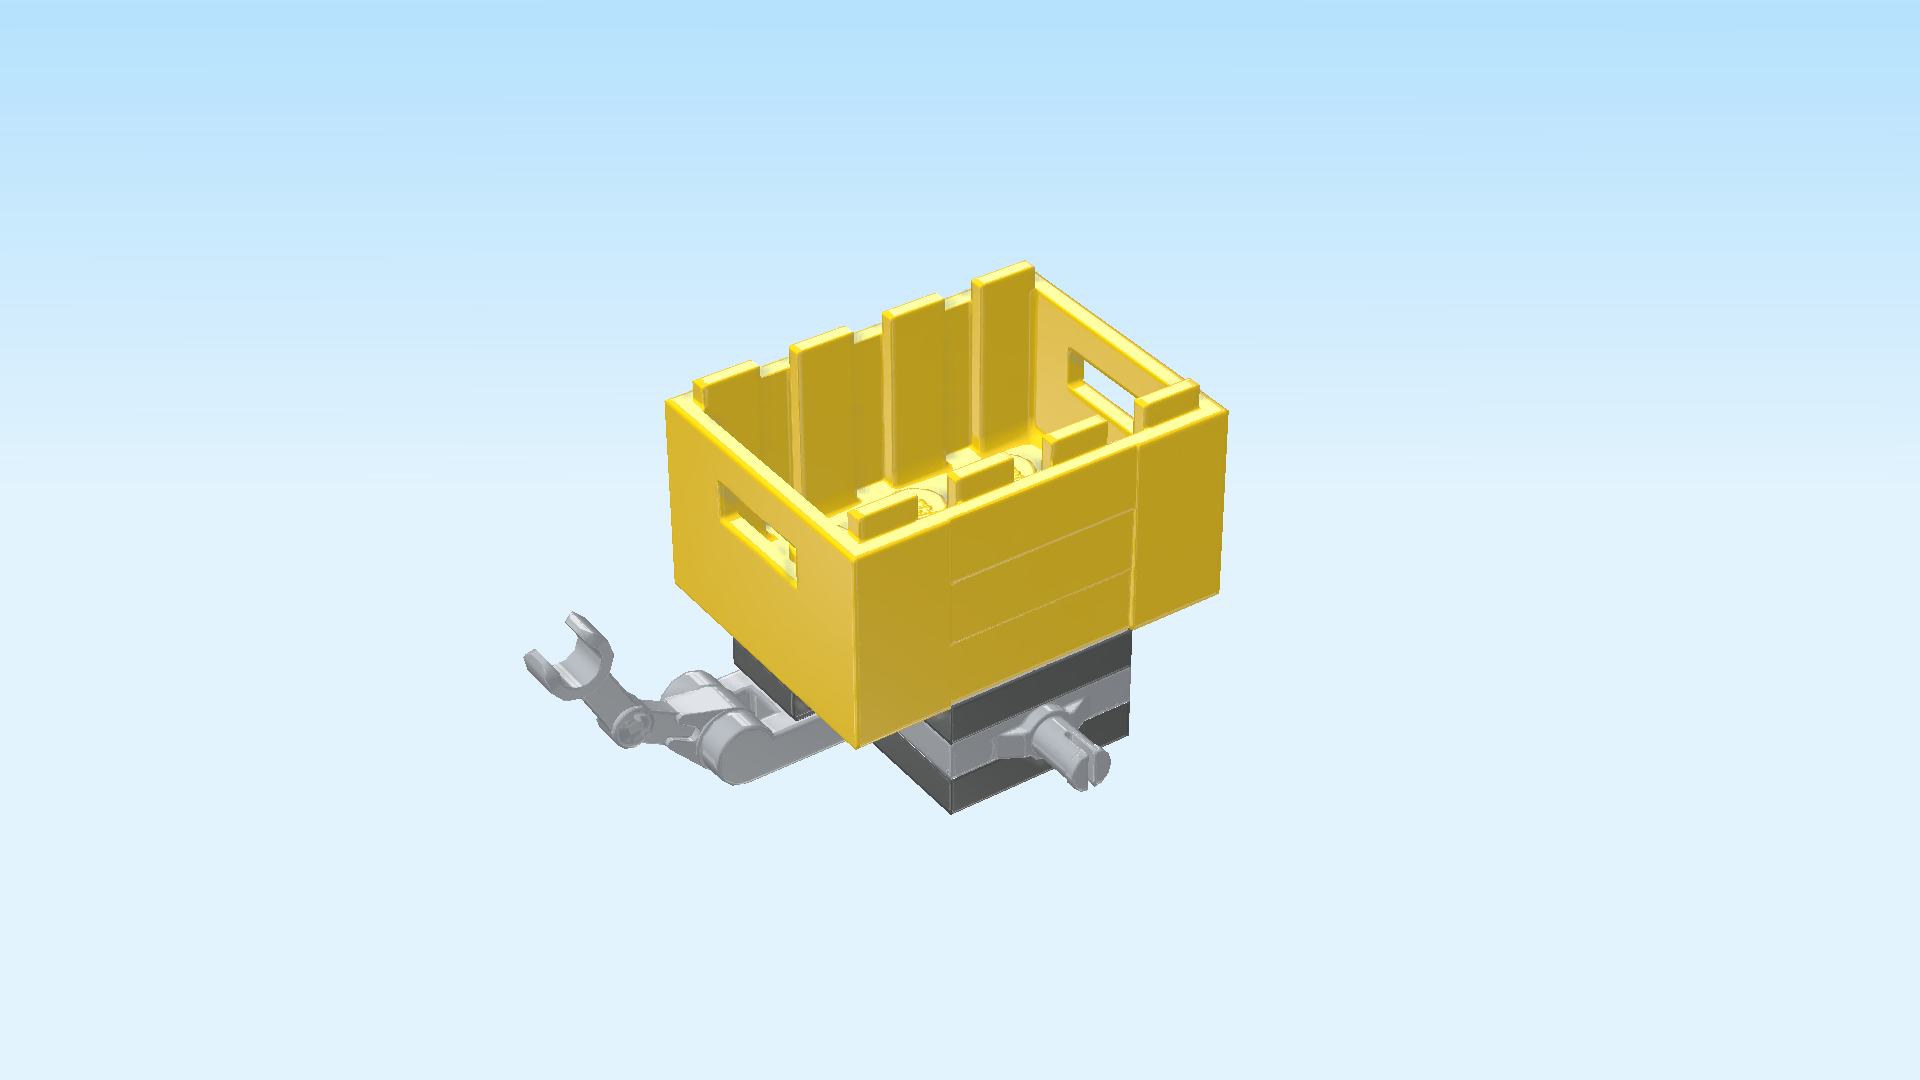
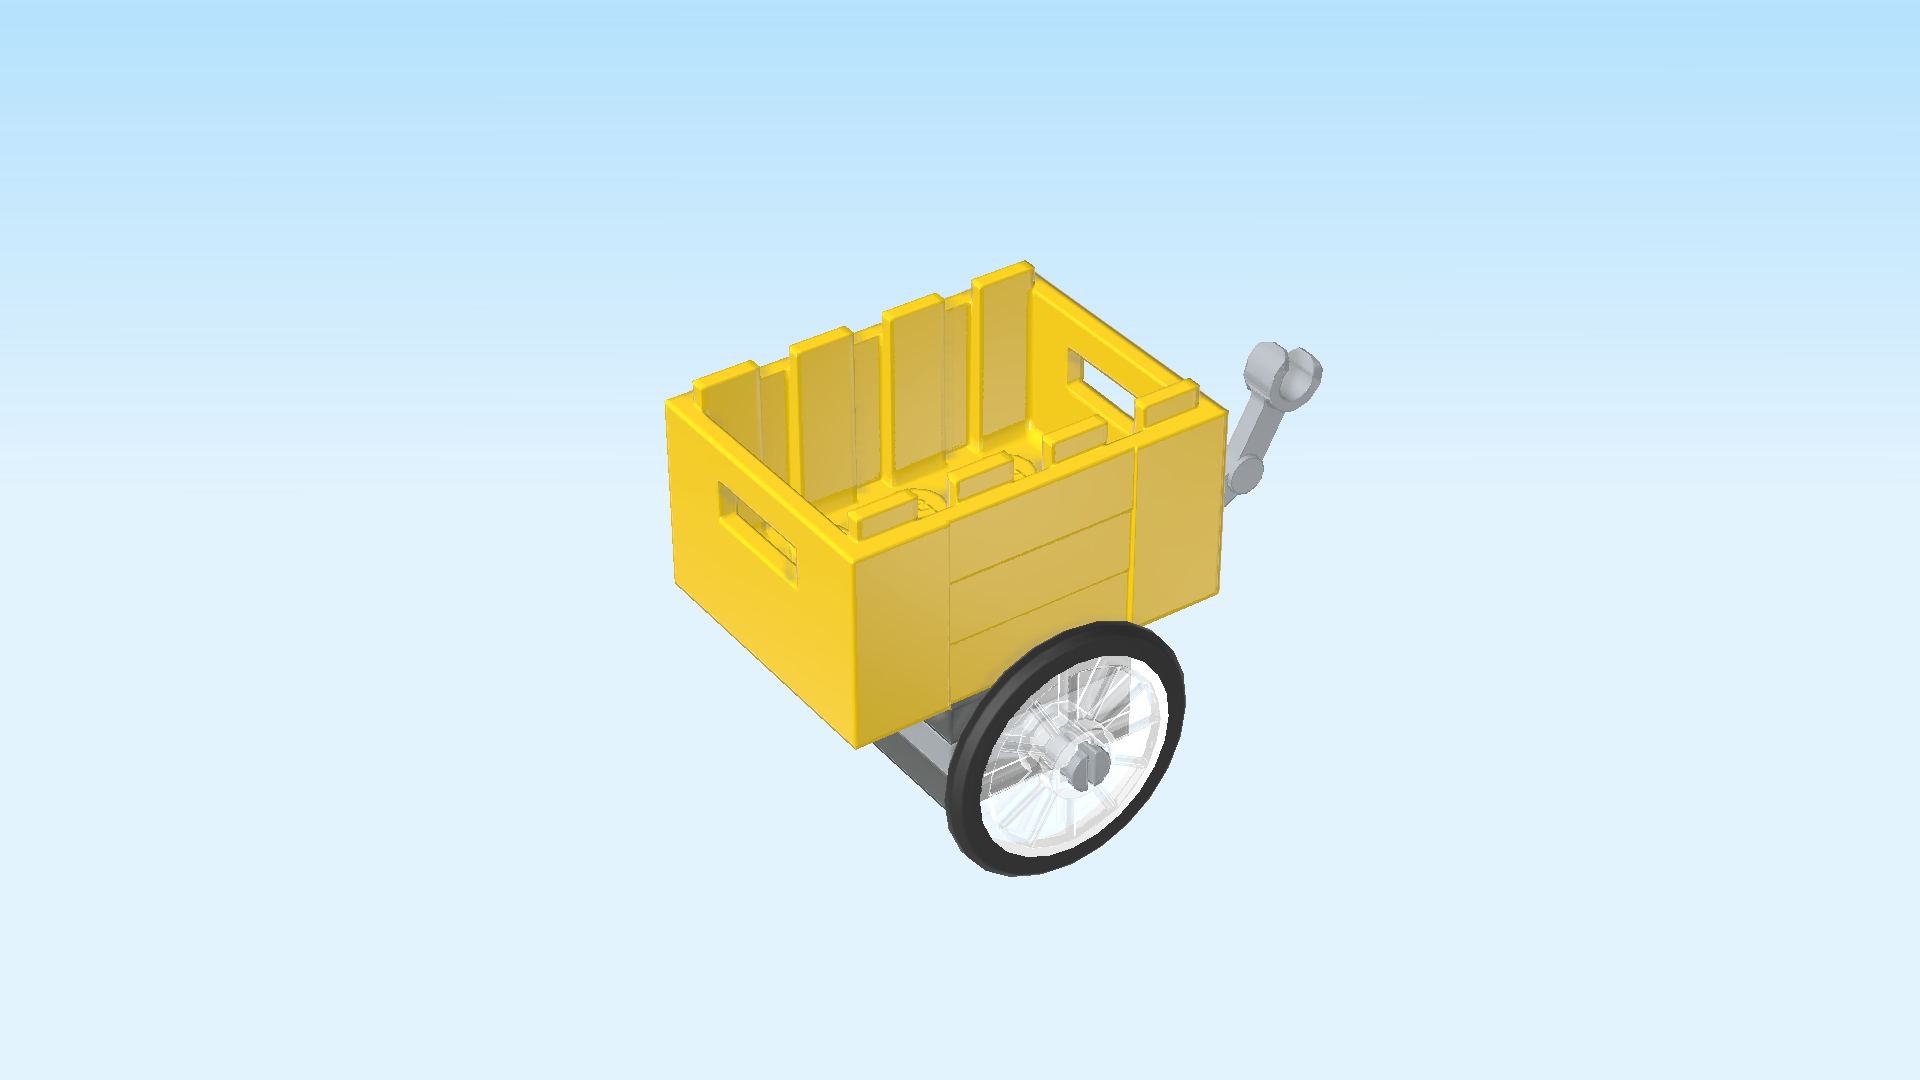
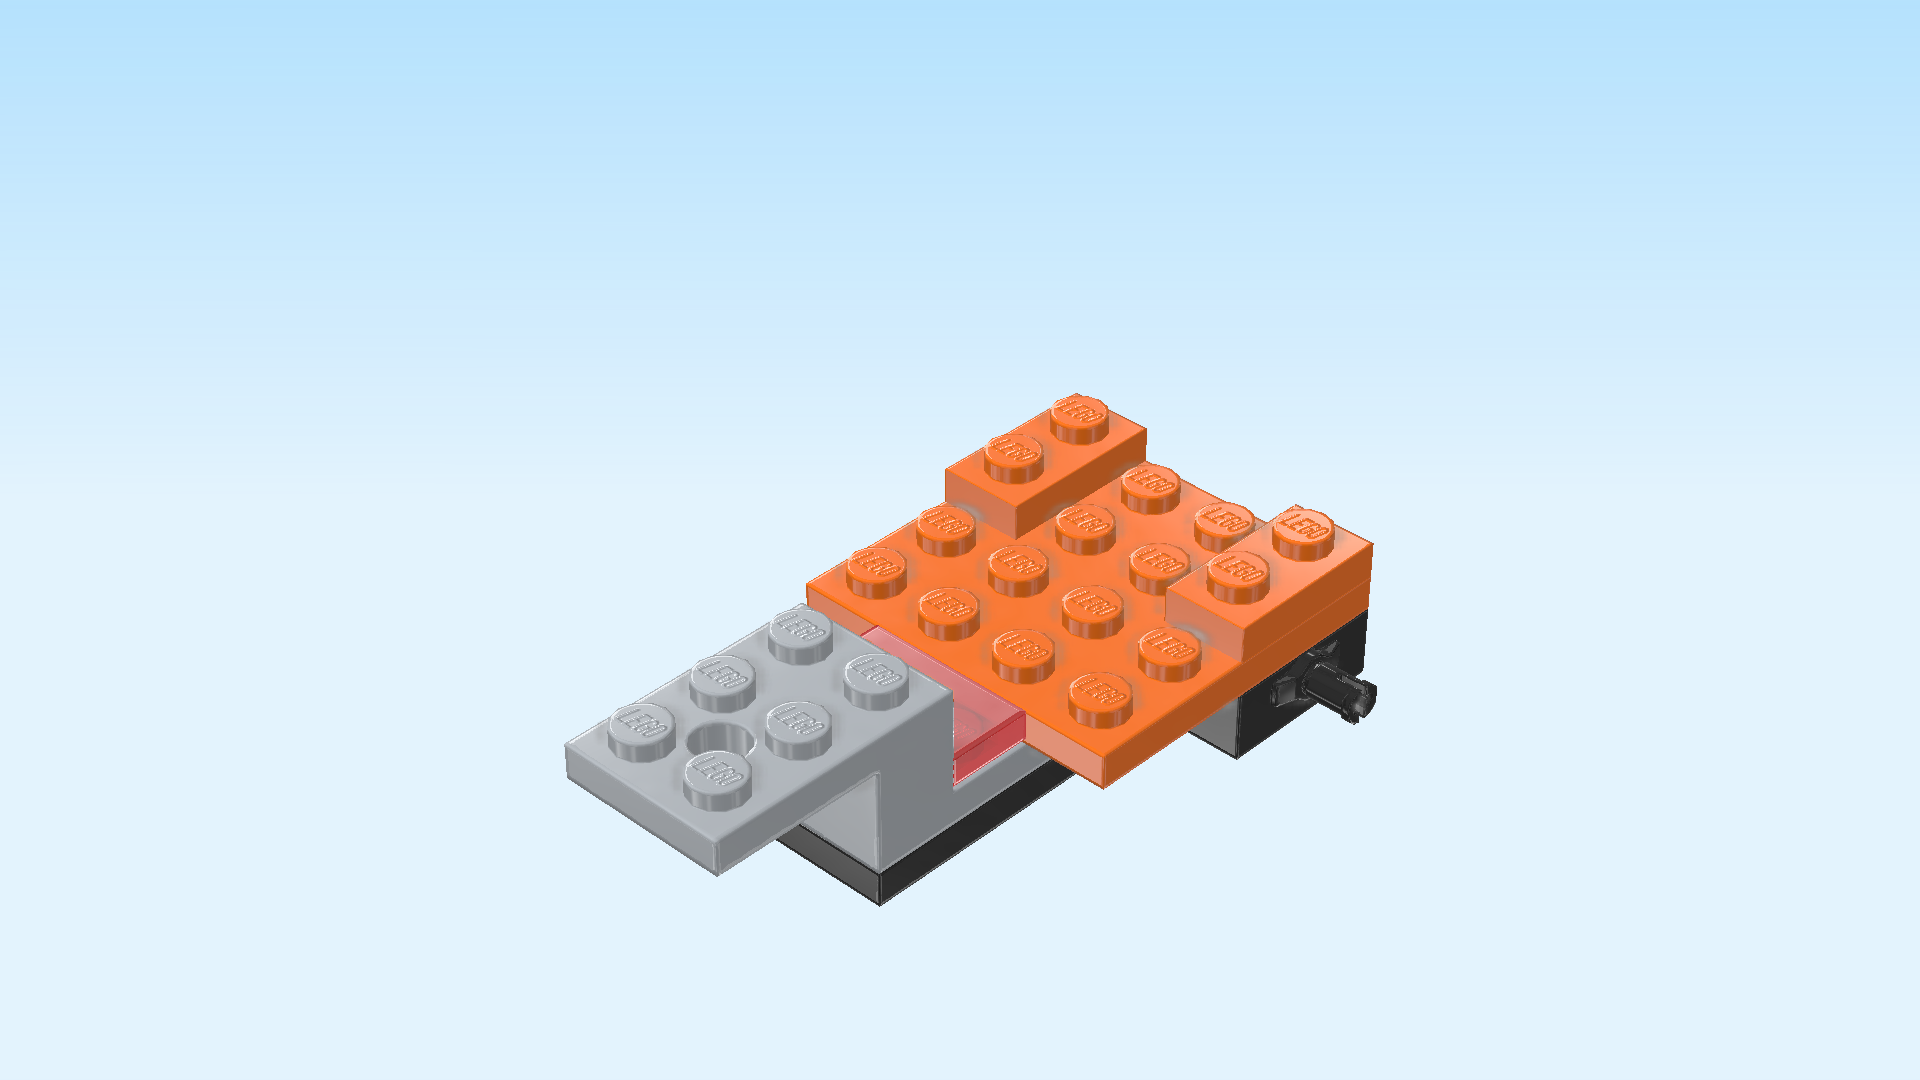
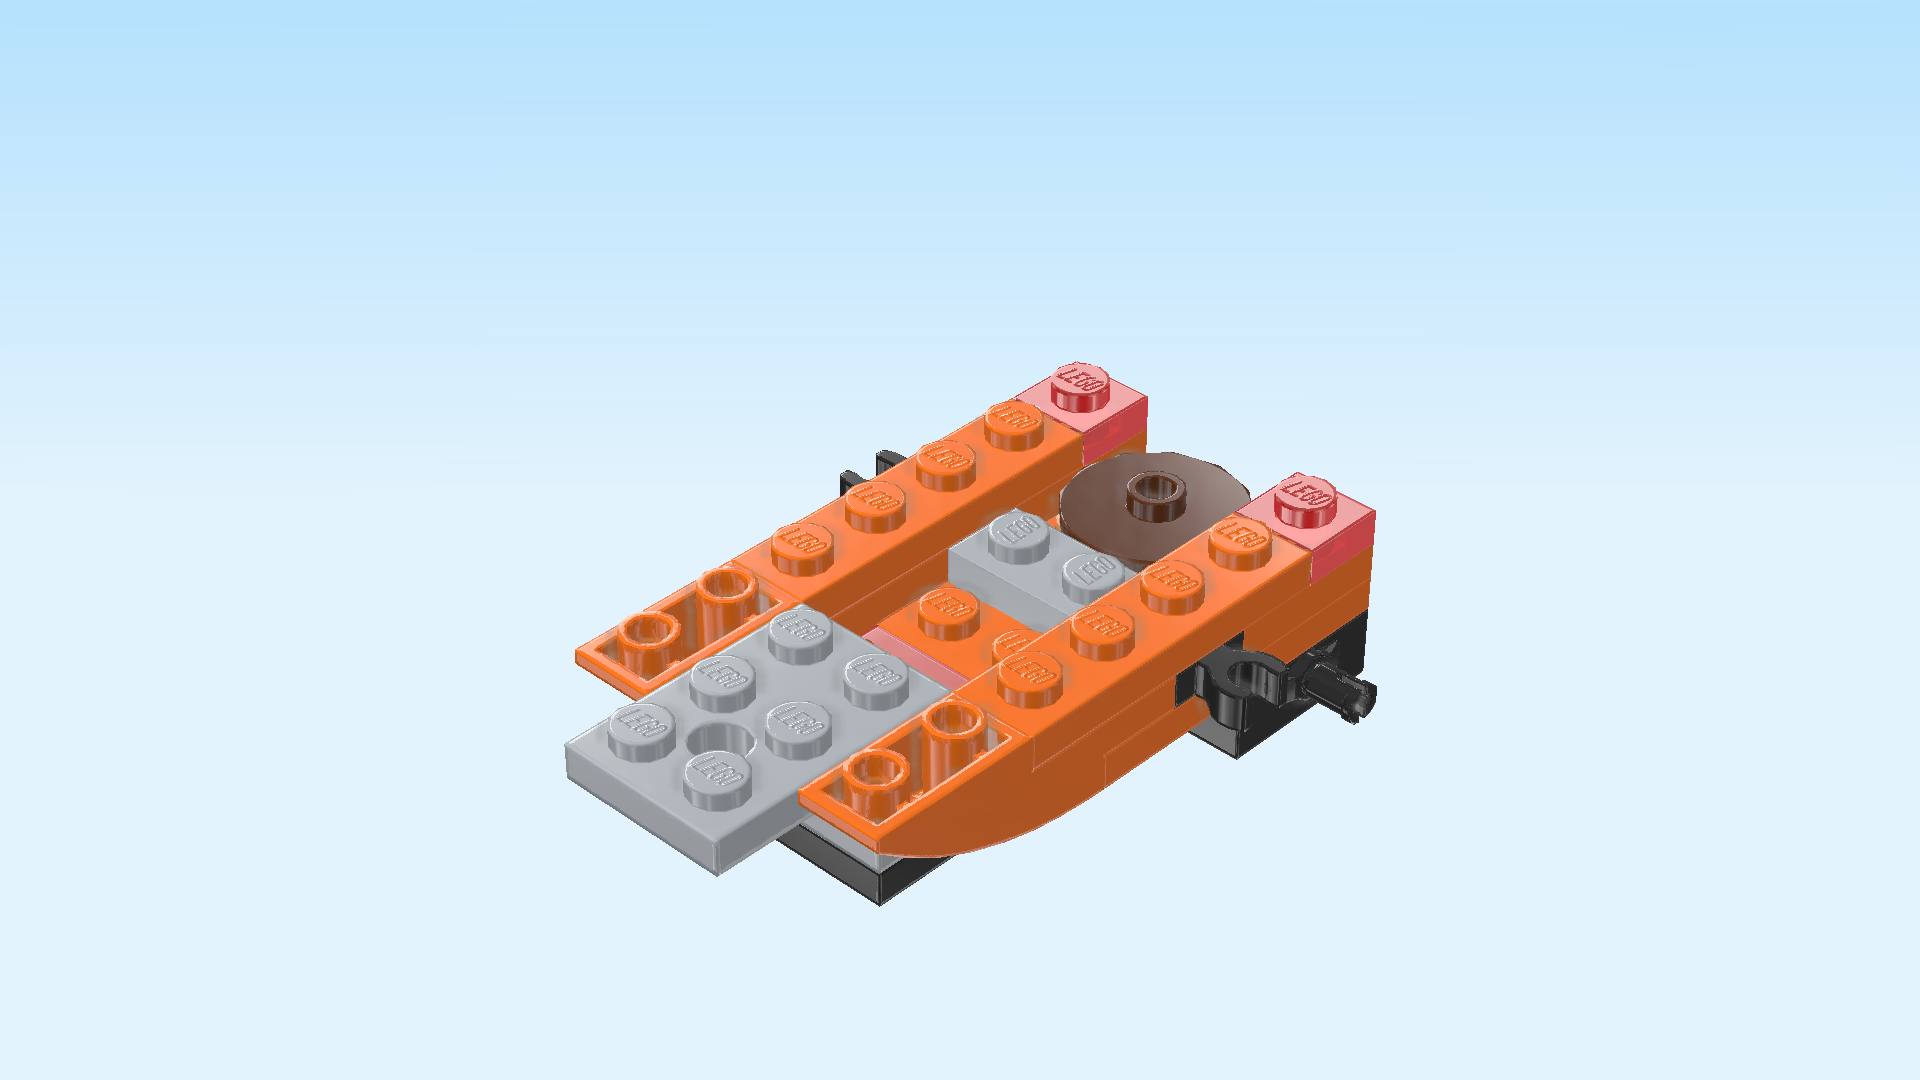
| Find 1 bright yellow crate 3x4 with handholds. |
| Put it horizontally centered on the build. One column of the crate is overhanging to the right, the leftmost column only rests on one flat tile 1x1. |
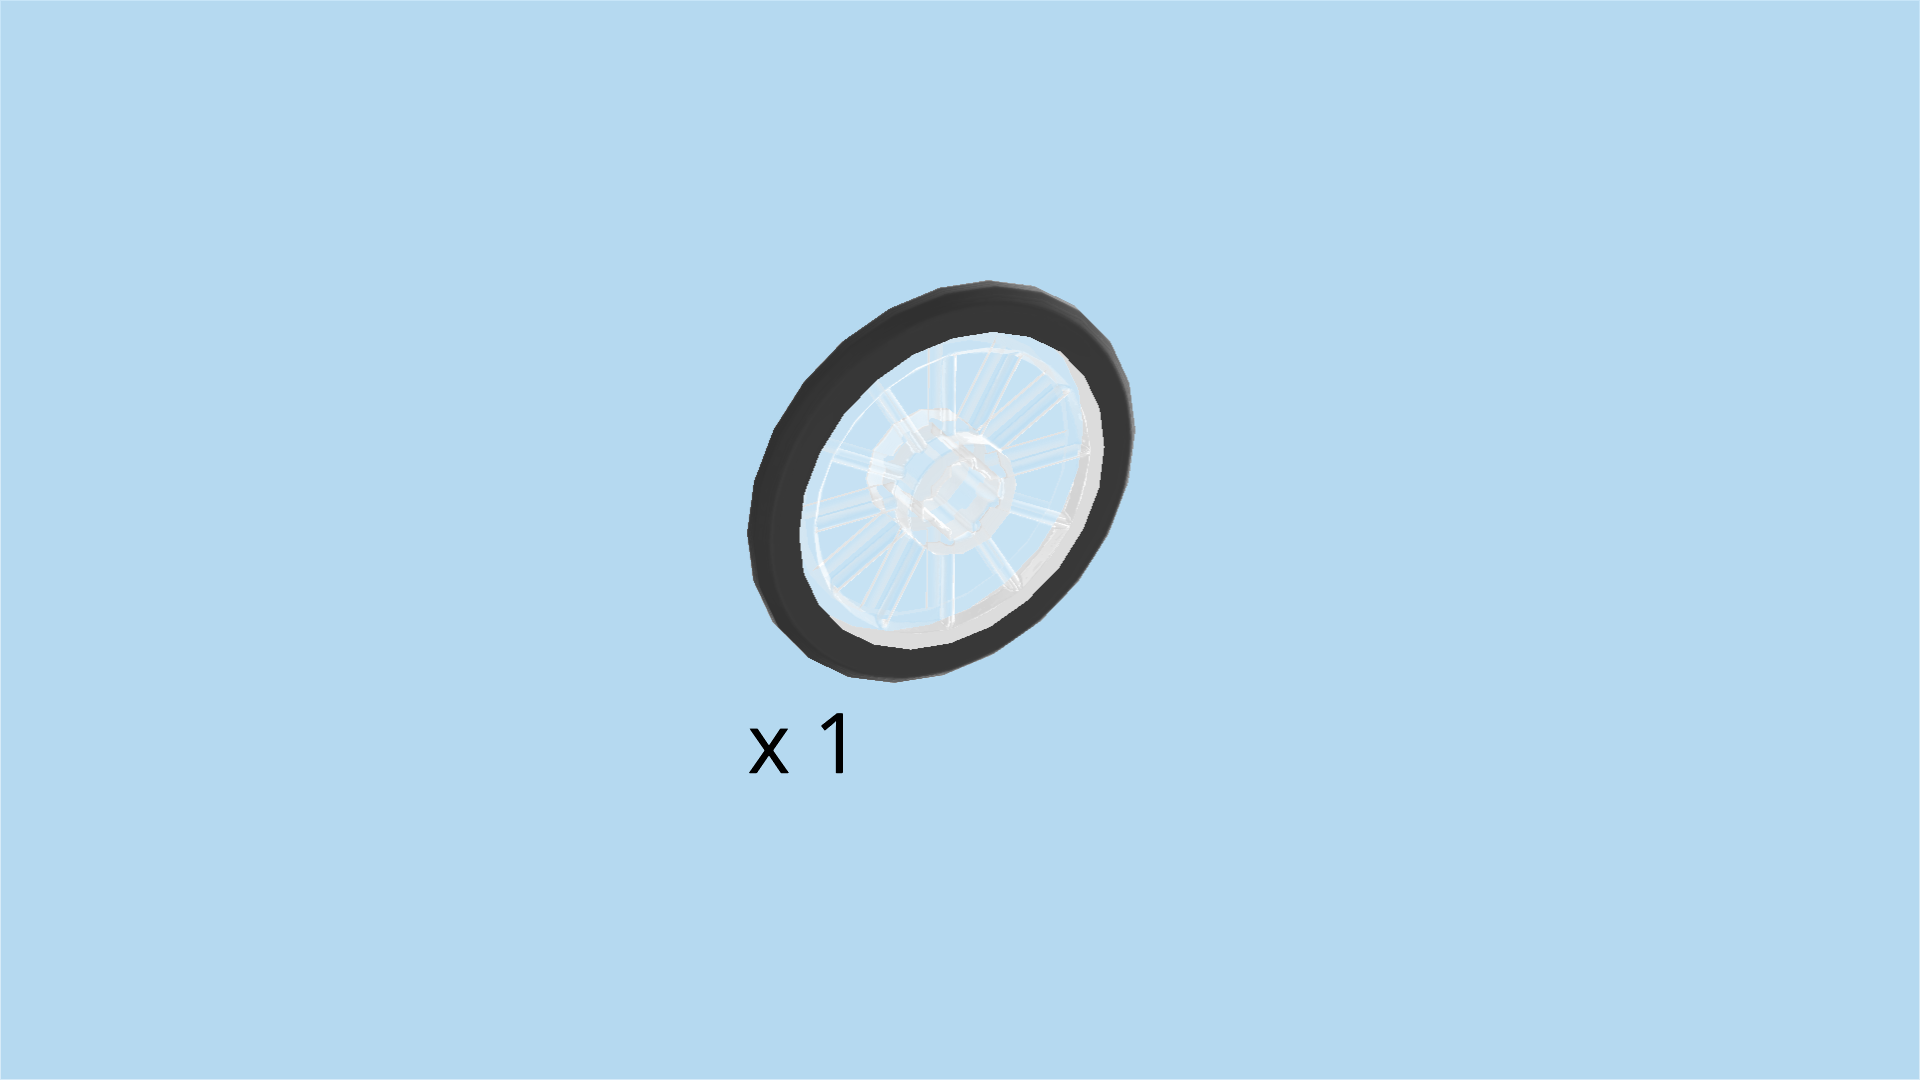
| Find 1 black and transparent wheel with rubber tire and cross hole. |
| Use the hole in the middle to snap the wheel on one of the two pin connectors pointing to the front and back. |
| Find another black and transparent wheel with rubber tire and cross hole. |
| Snap it on the other pin connector. |
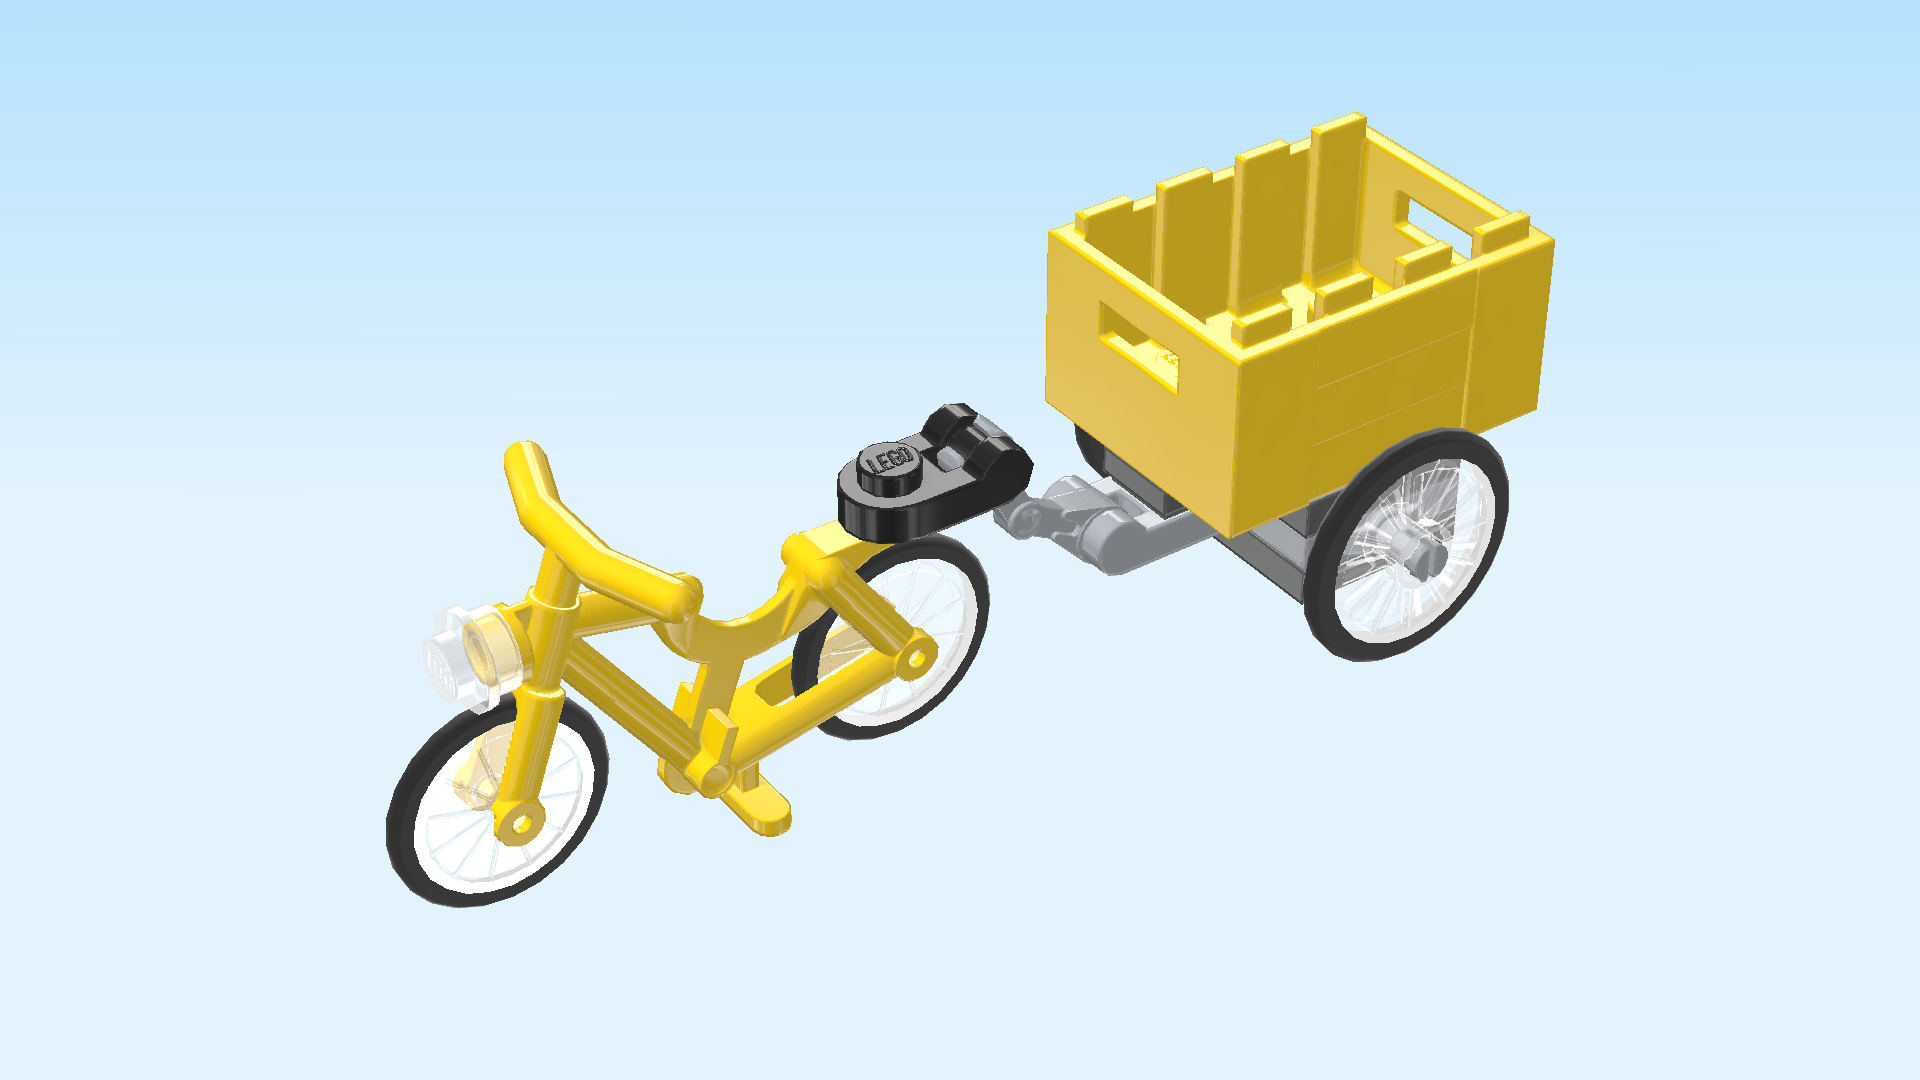
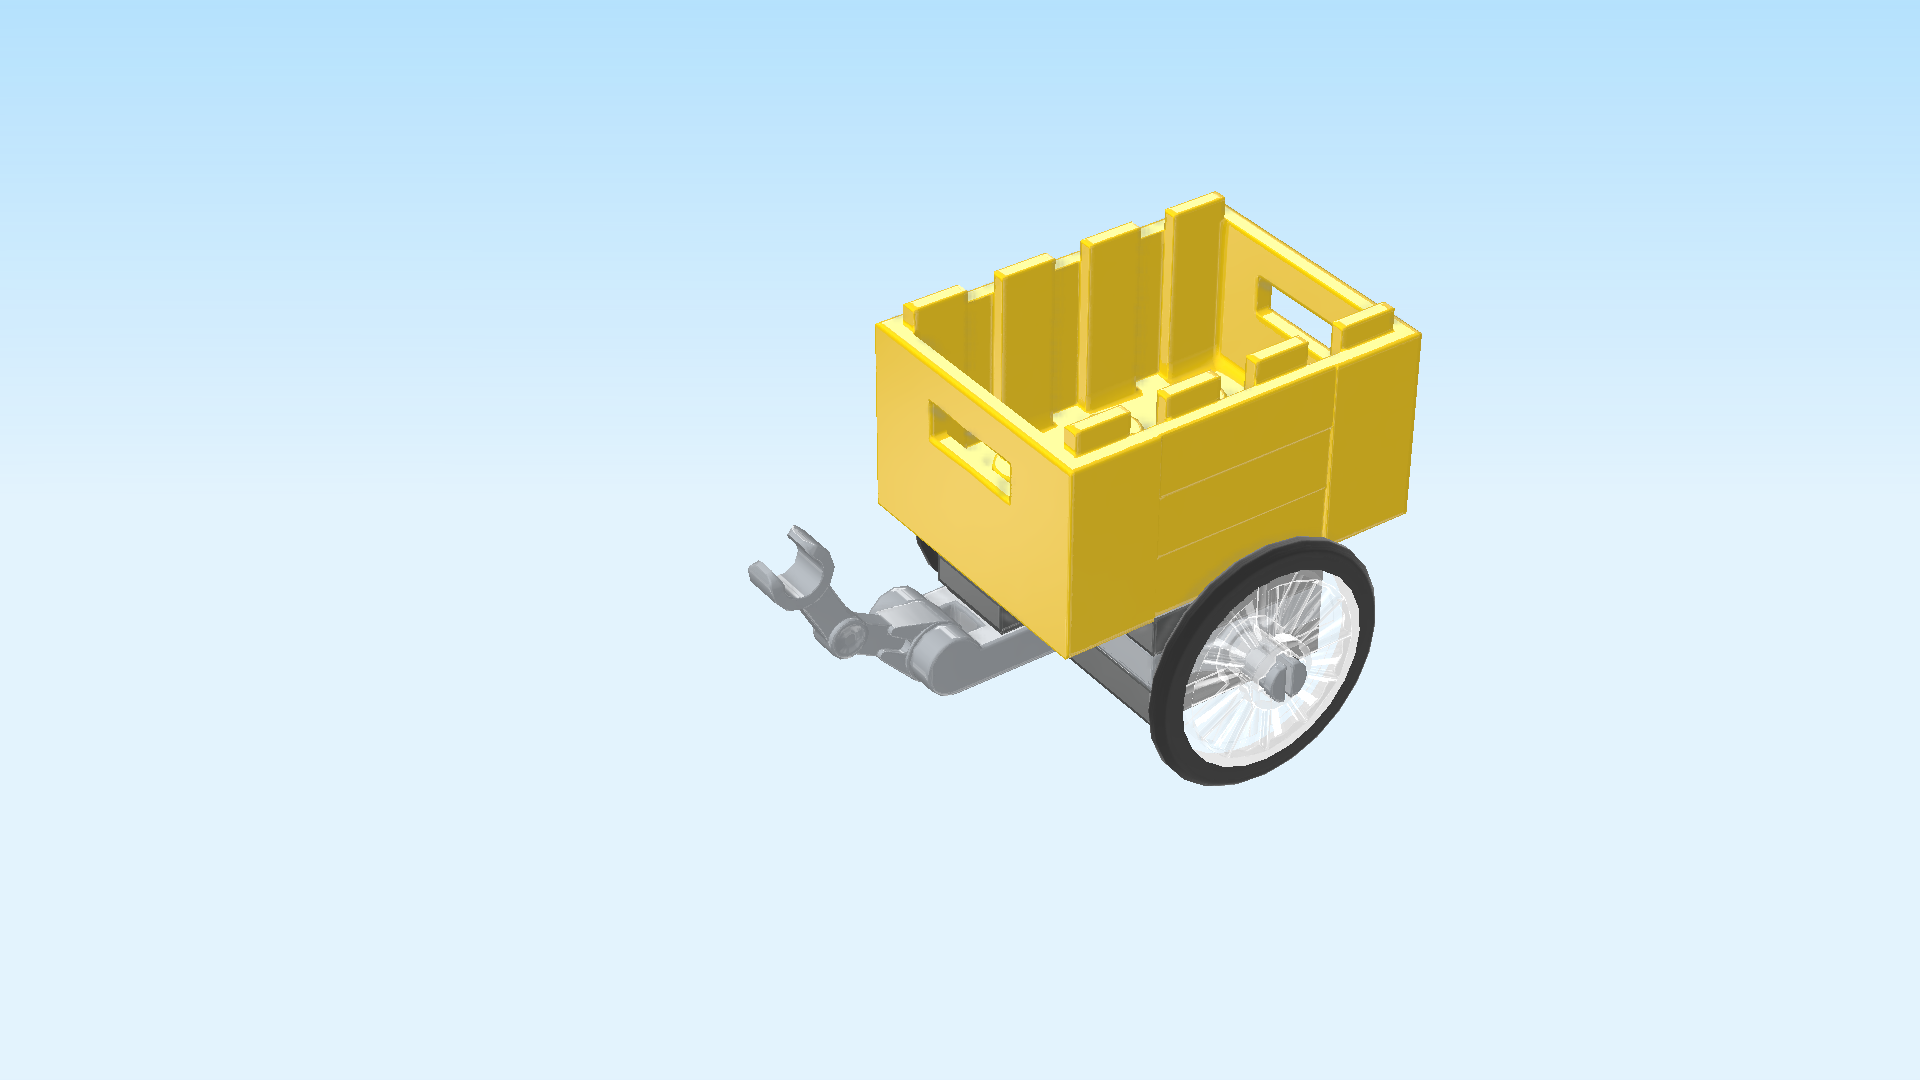
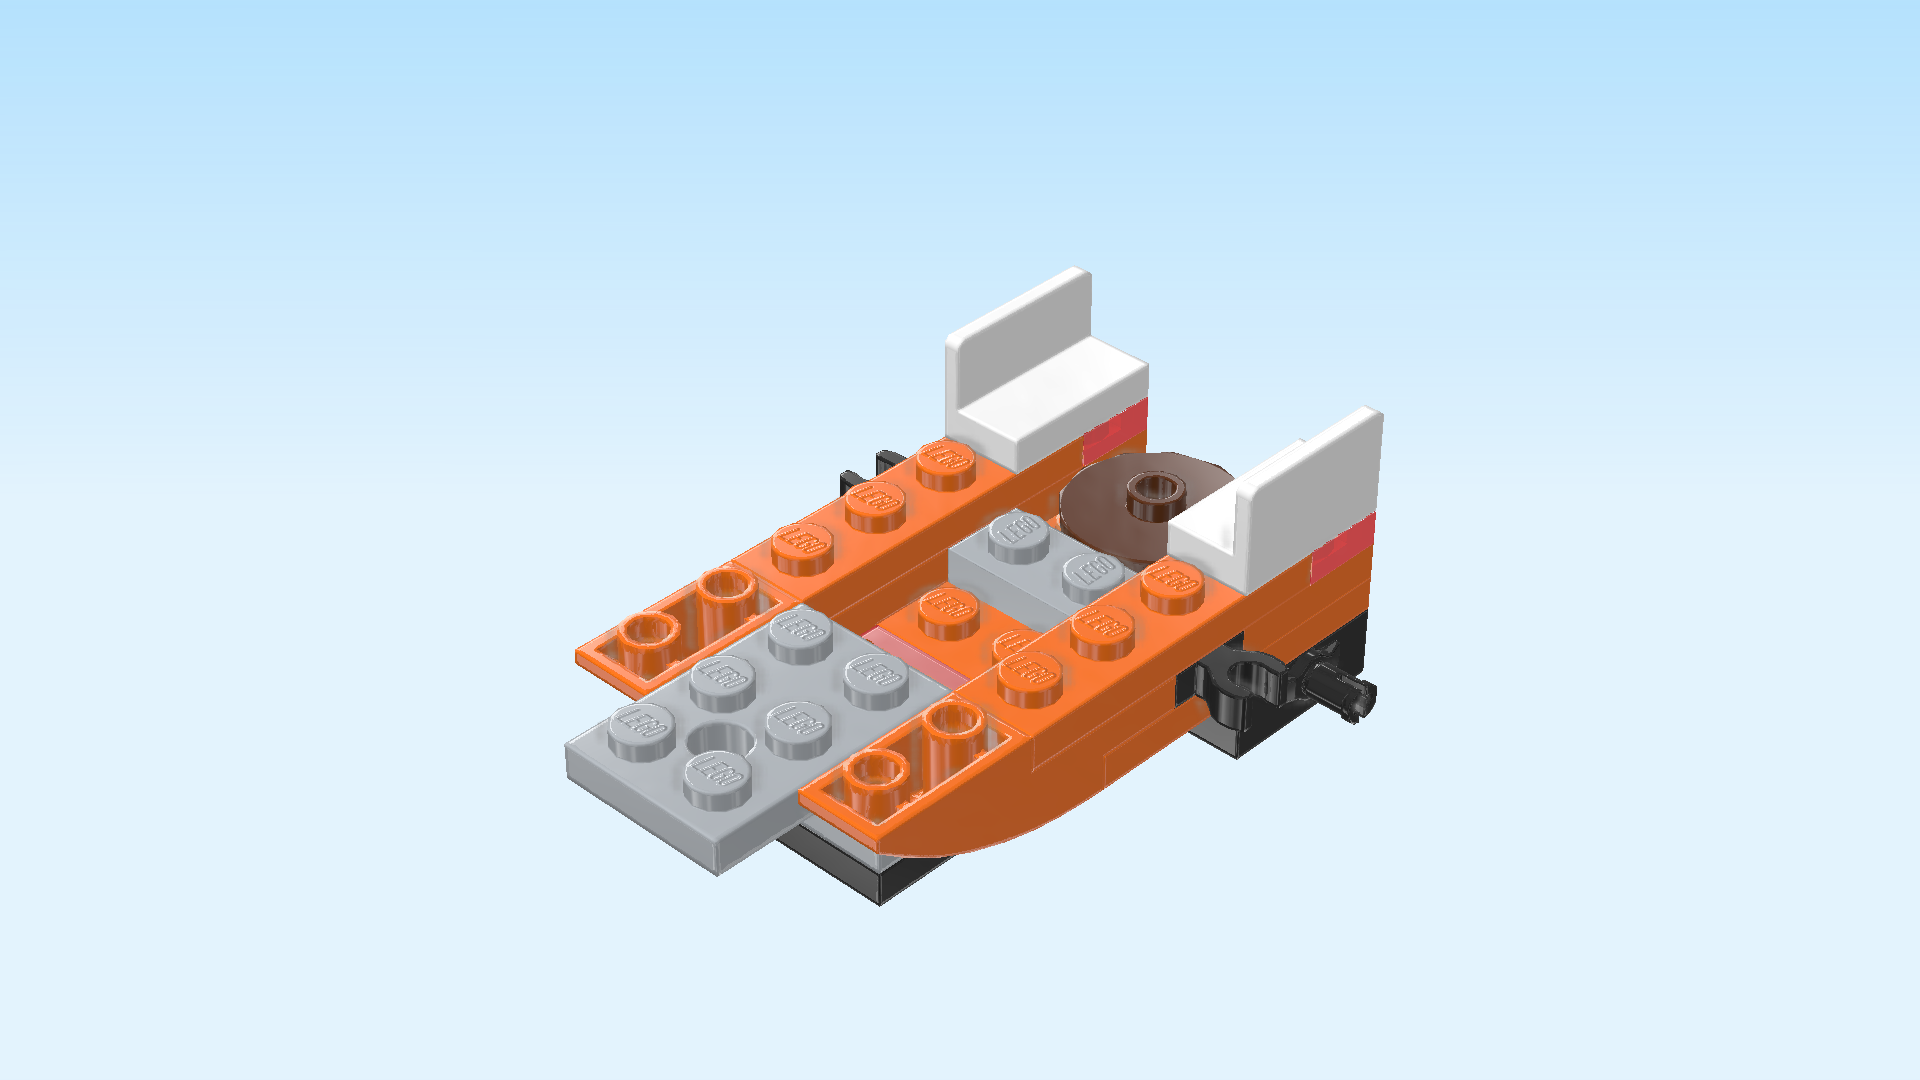
| The trailer is finished! Great job! But of course we can only use it once the bicycle is done. So let's continue! |
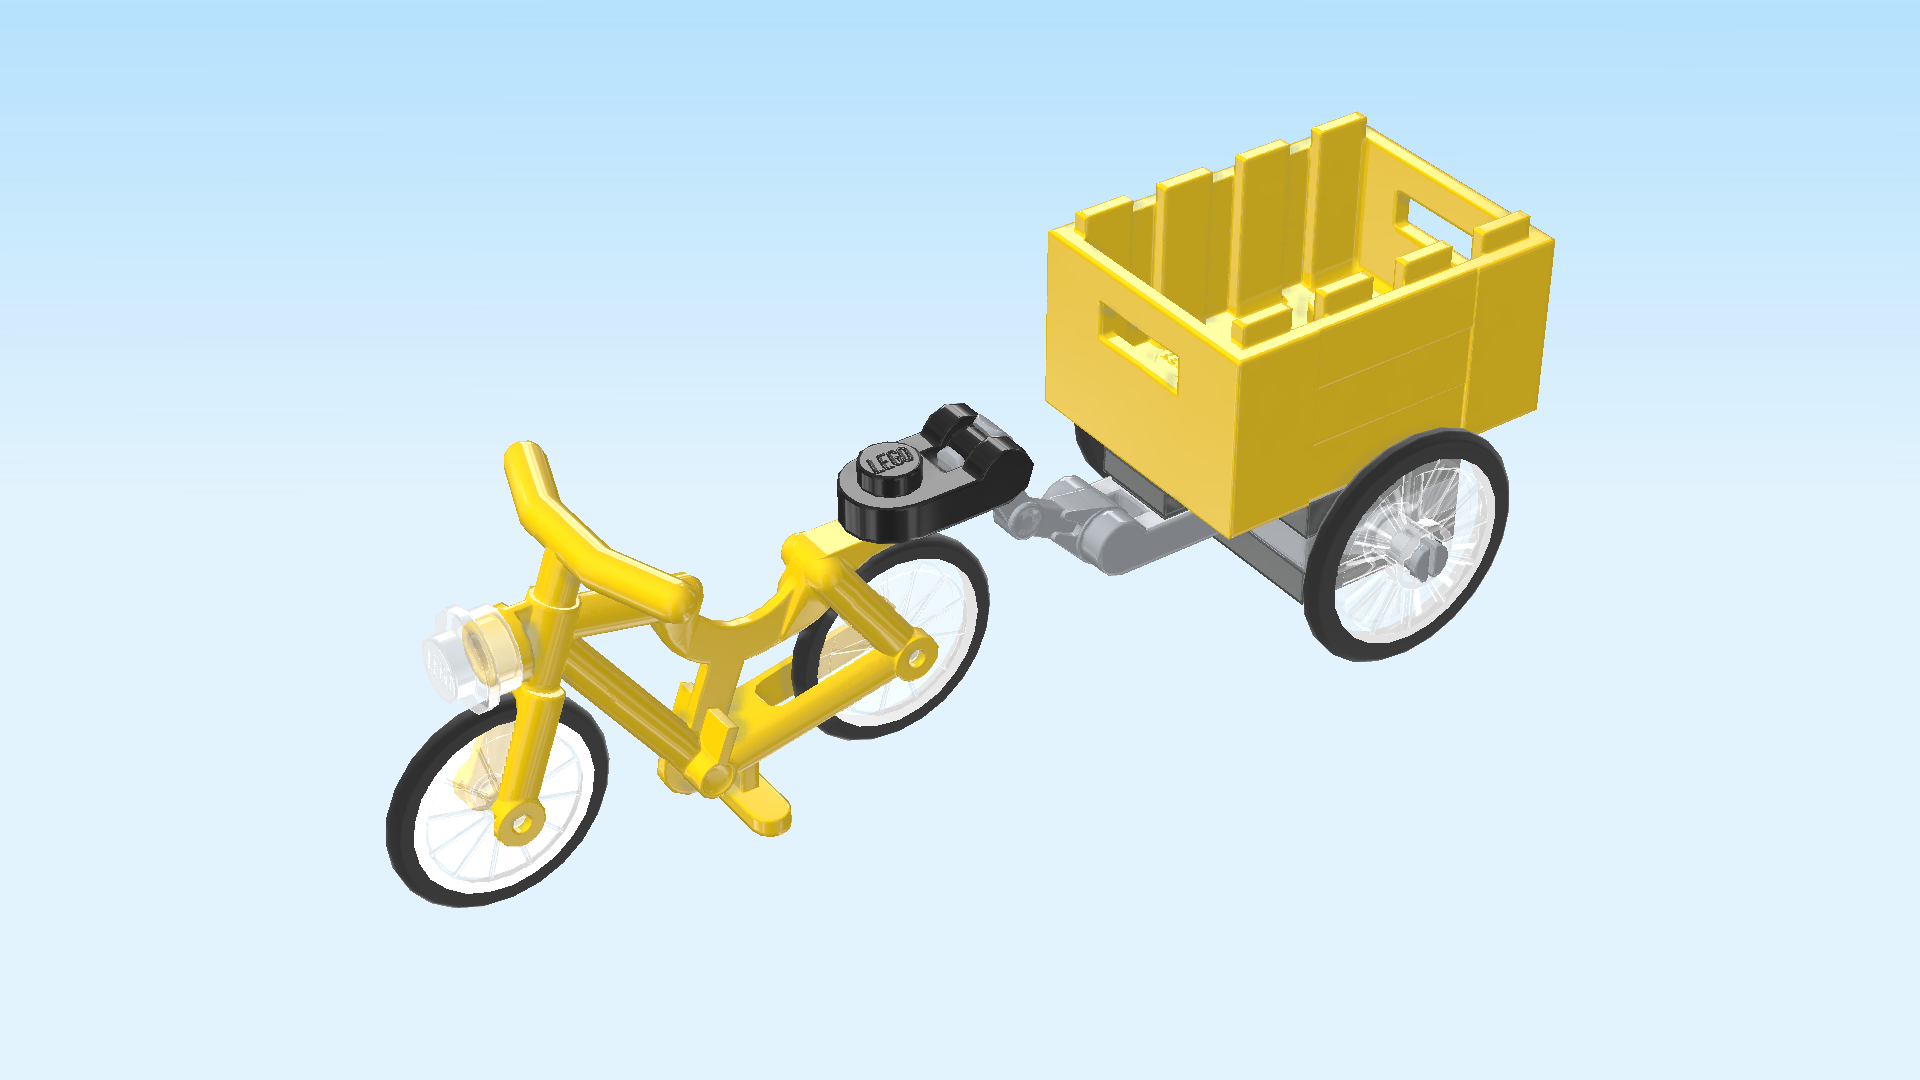
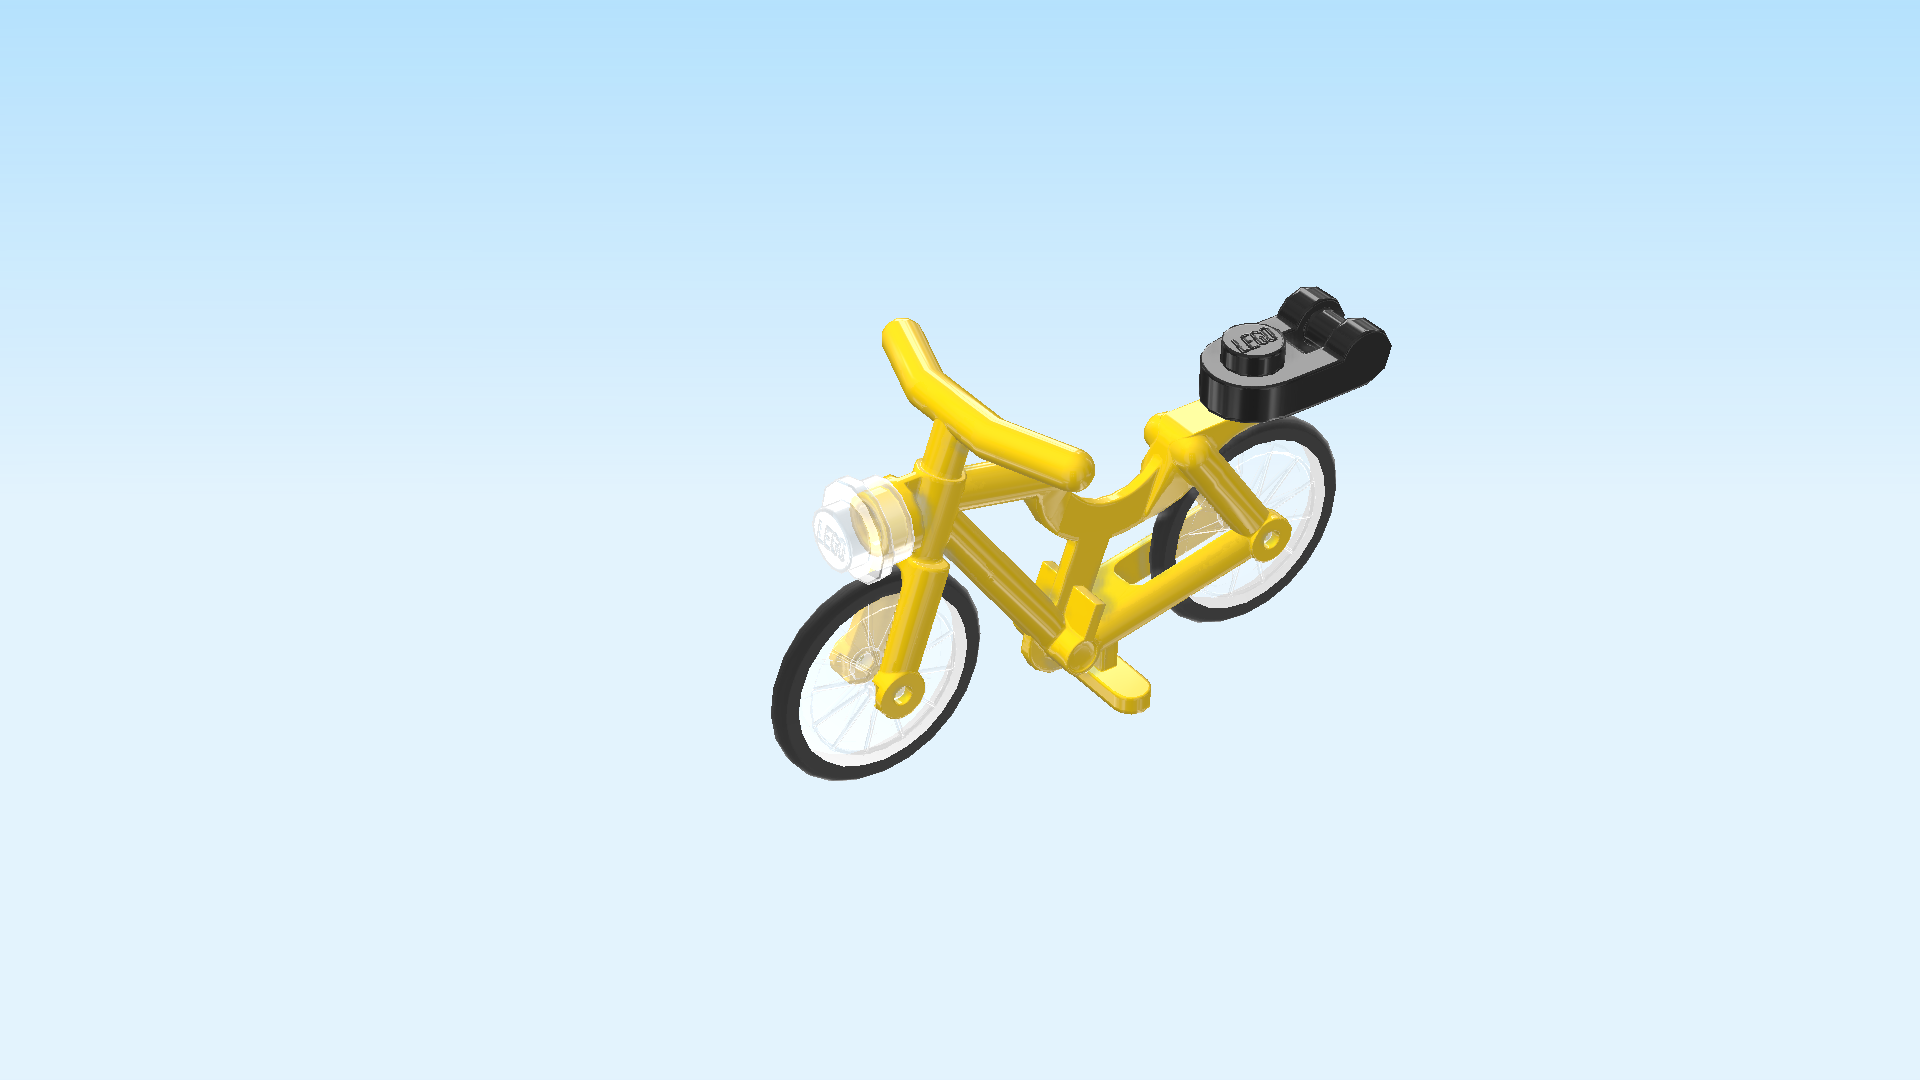
| Next, we will assemble the bicycle. |
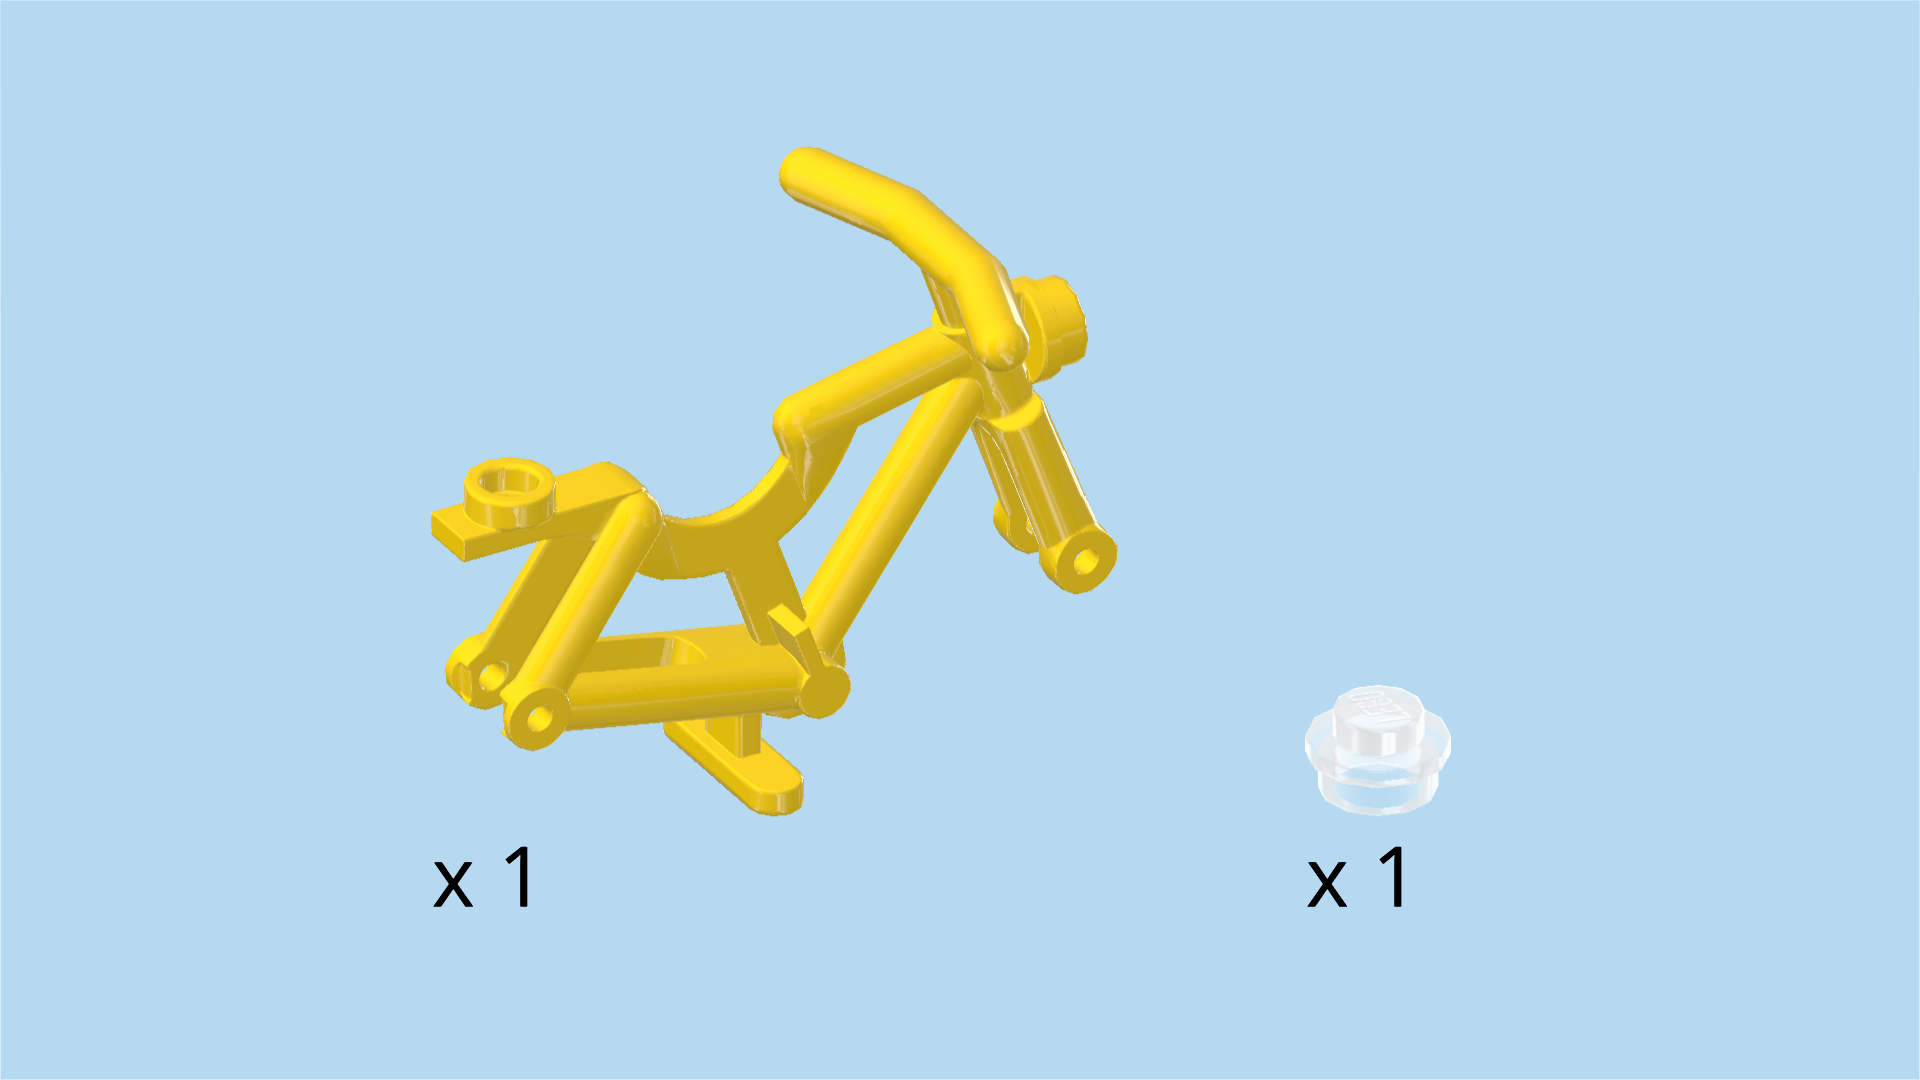
| Collect the following 2 pieces: |
| 1 transparent round plate 1x1, |
| and 1 bright yellow bicycle frame. |
| Put the bicycle frame horizontally, handlebar on the left. |
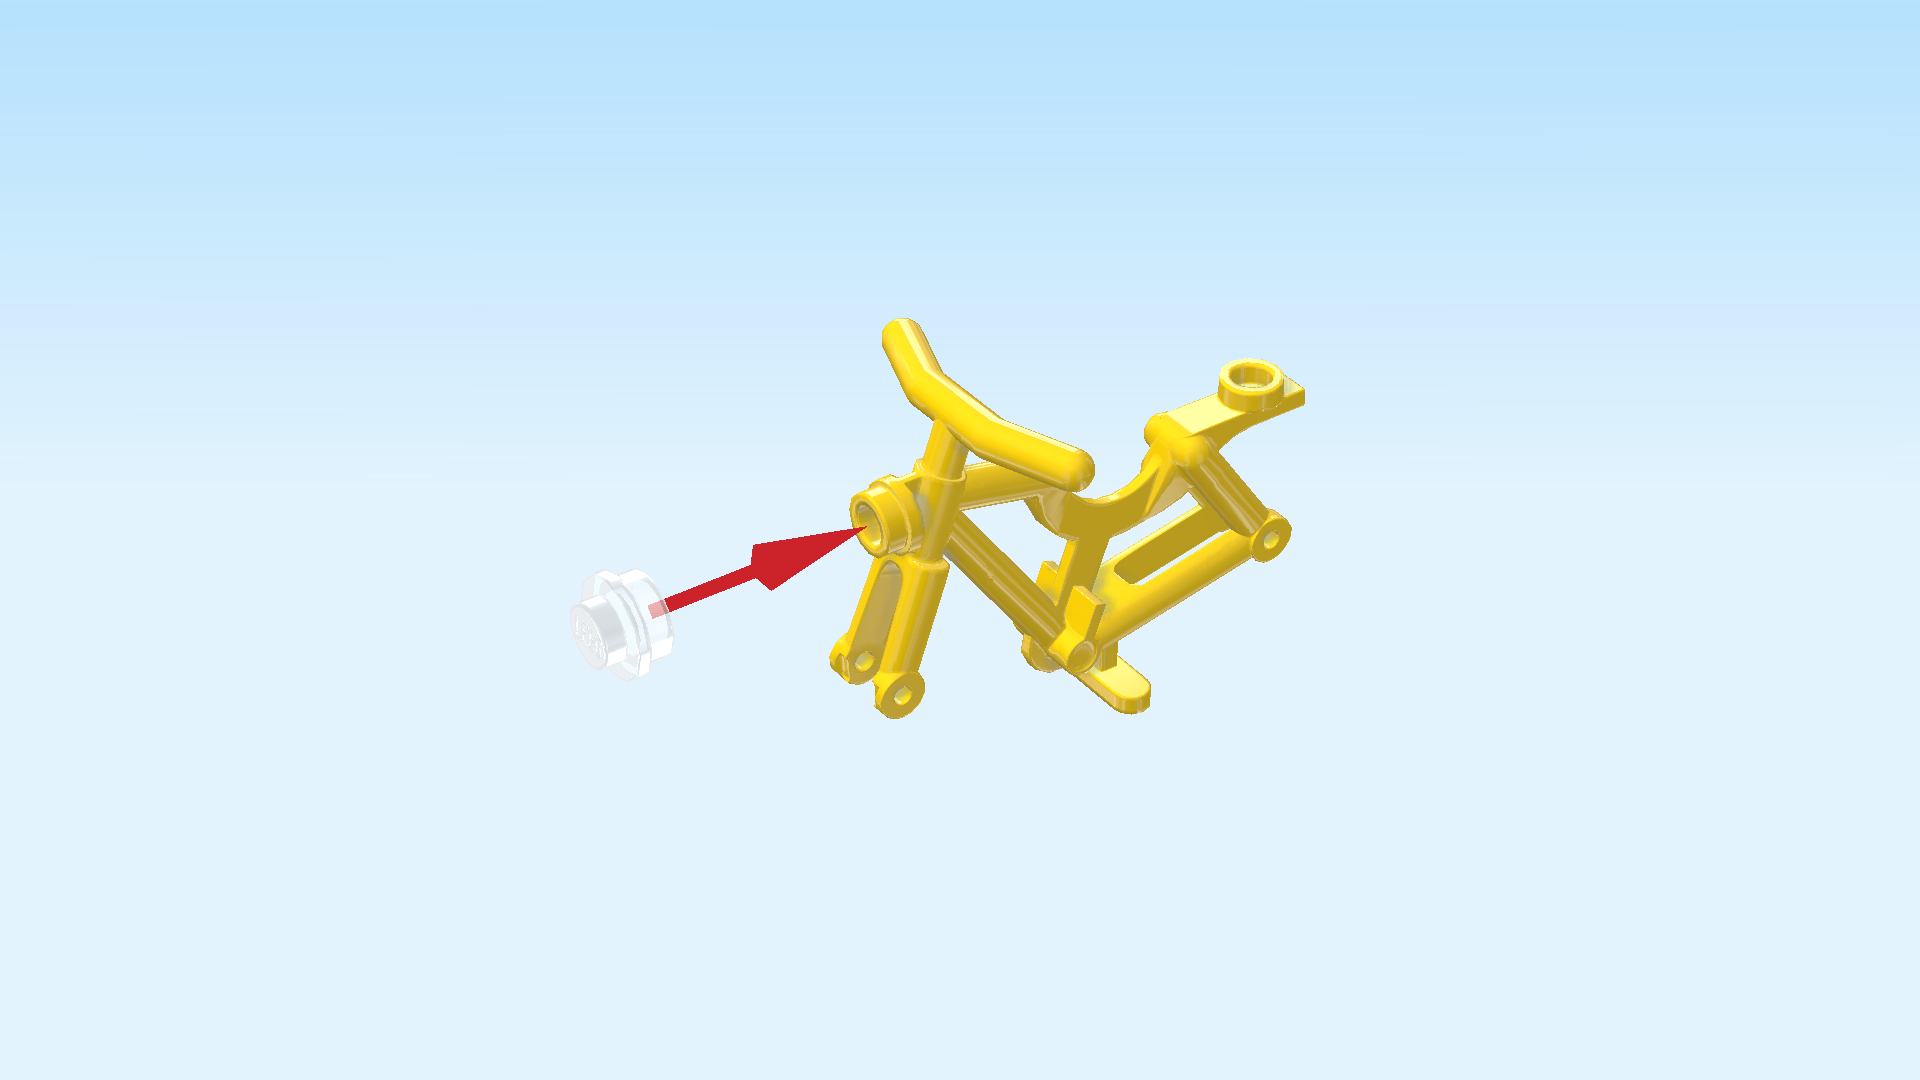
| Put the round plate 1x1 upright on the knob just below the handlebar. This is a side knob pointing to the left. |
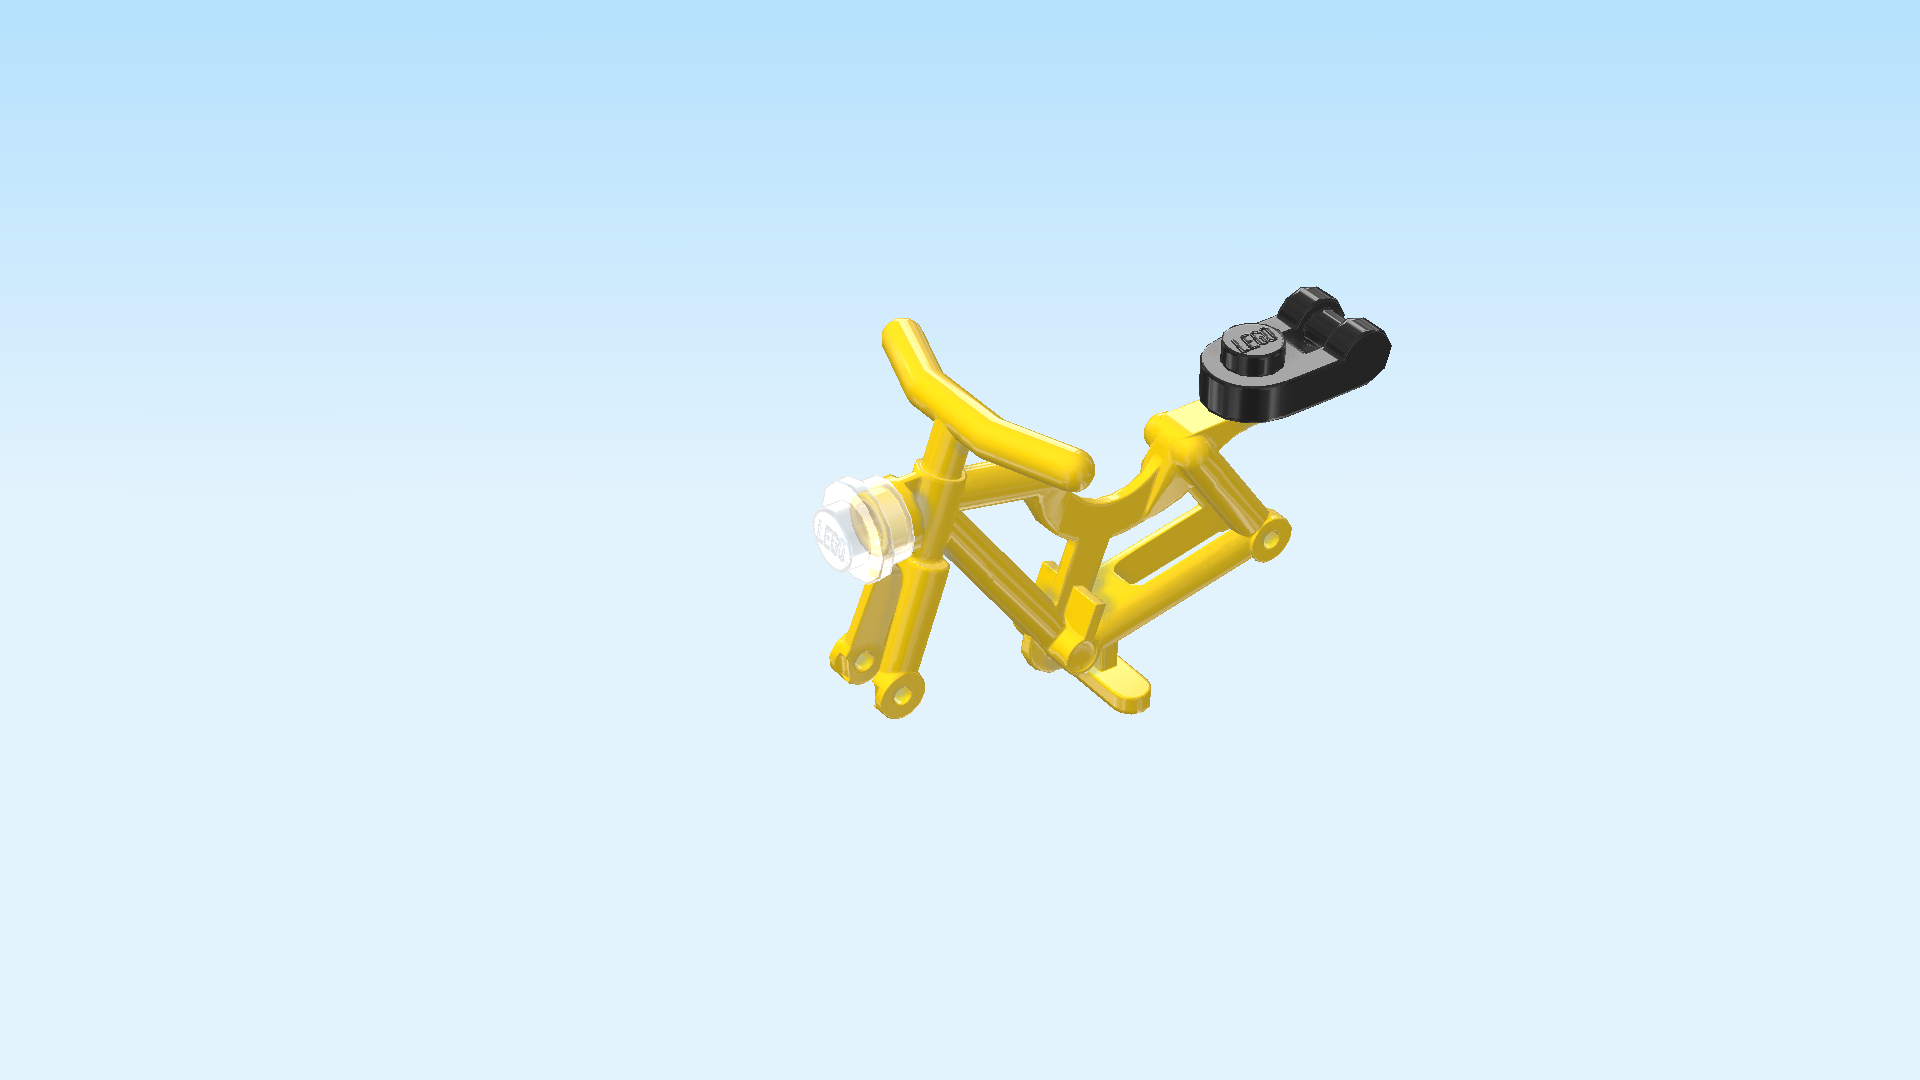
| Find 1 black round plate 1x1 with side shaft. |
| Put it on top of the knob on the right, shaft to the right. This is the luggage carrier of the bicycle! |
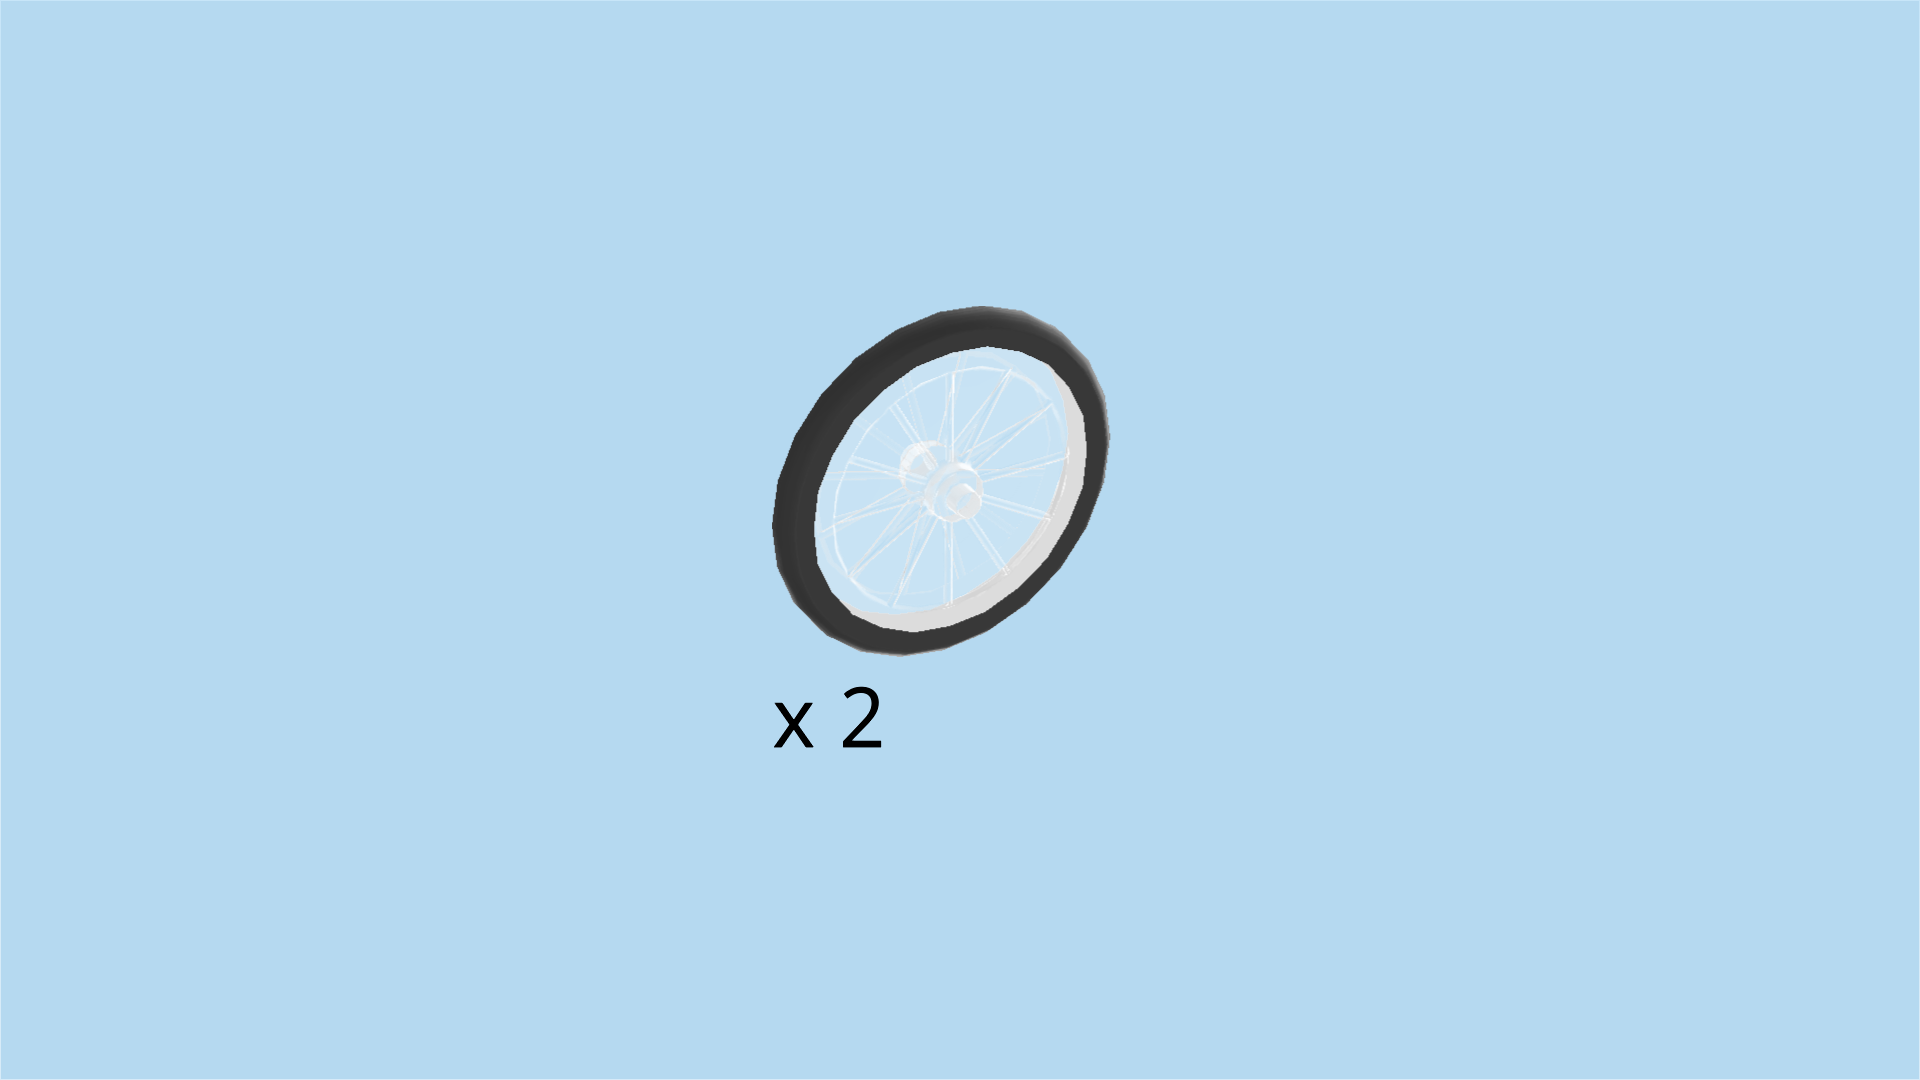
| Find 2 transparent and black bicycle wheels with rubber tire and 2 axle pins. |
| Snap the axle pins into the wheel forks at the bottom of the bicycle frame. One is below the handlebar, the other one is below the seat. |
| The bike is finished! Fantastic! |
| Now, connect the clasp of the trailer to the shaft on the bike seat. |
| The bike with trailer is finished! Great job! Now, we're ready to go on a bike ride. Put on the helmet and take the bike for a spin! You can later pack the trailer with things you will need for the picnic. |
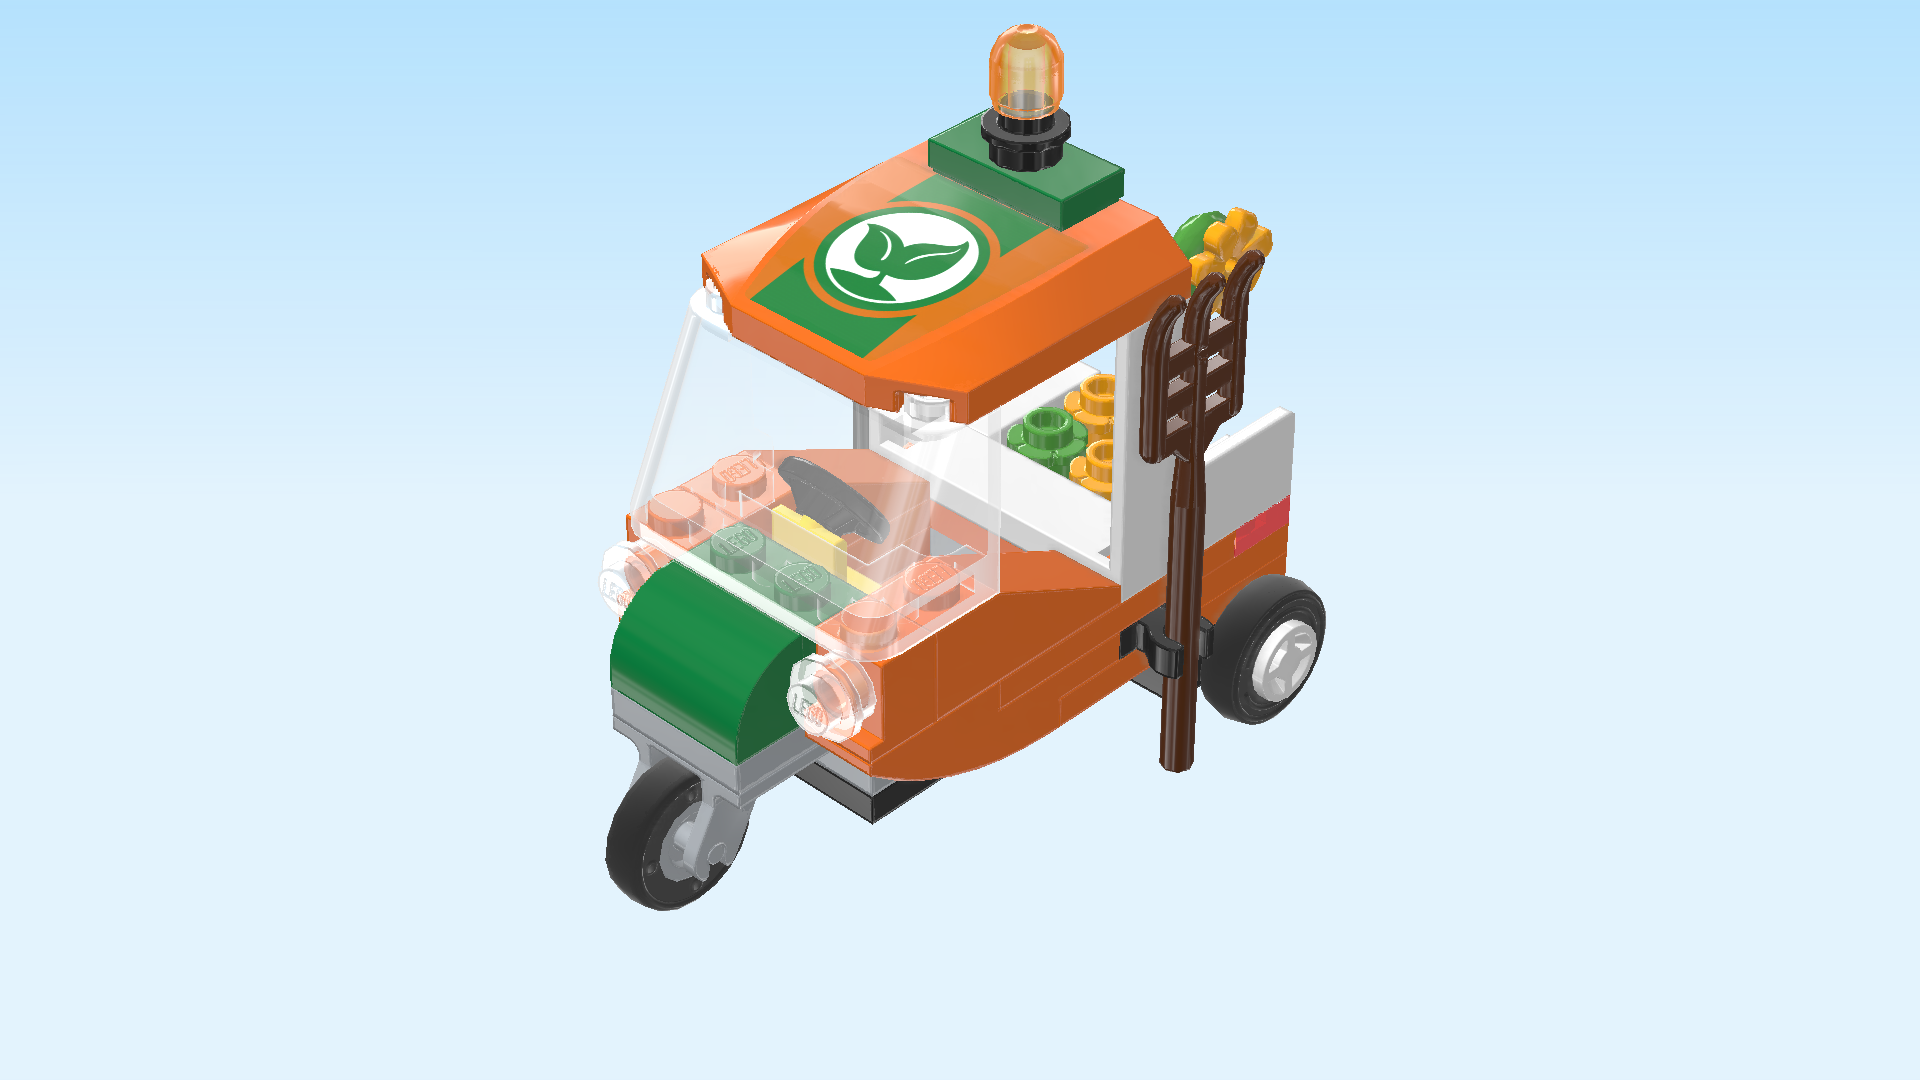
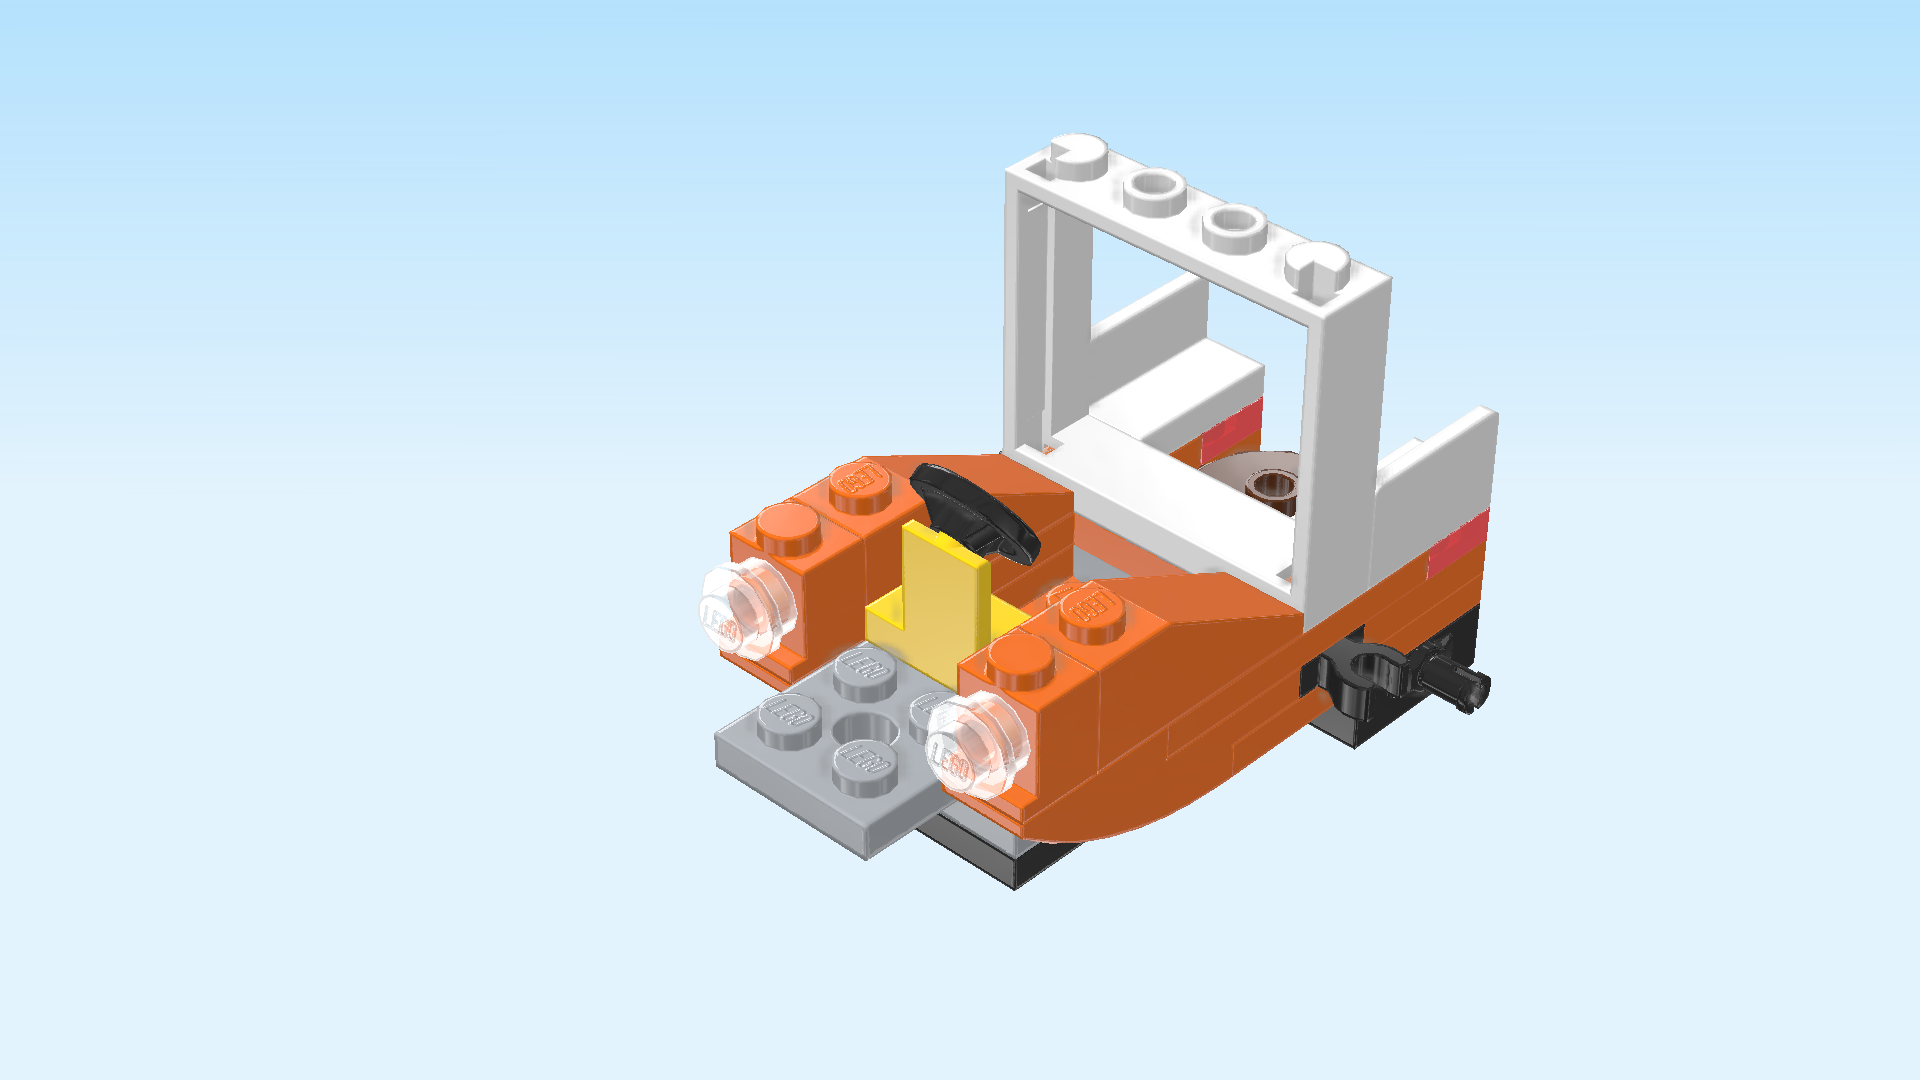
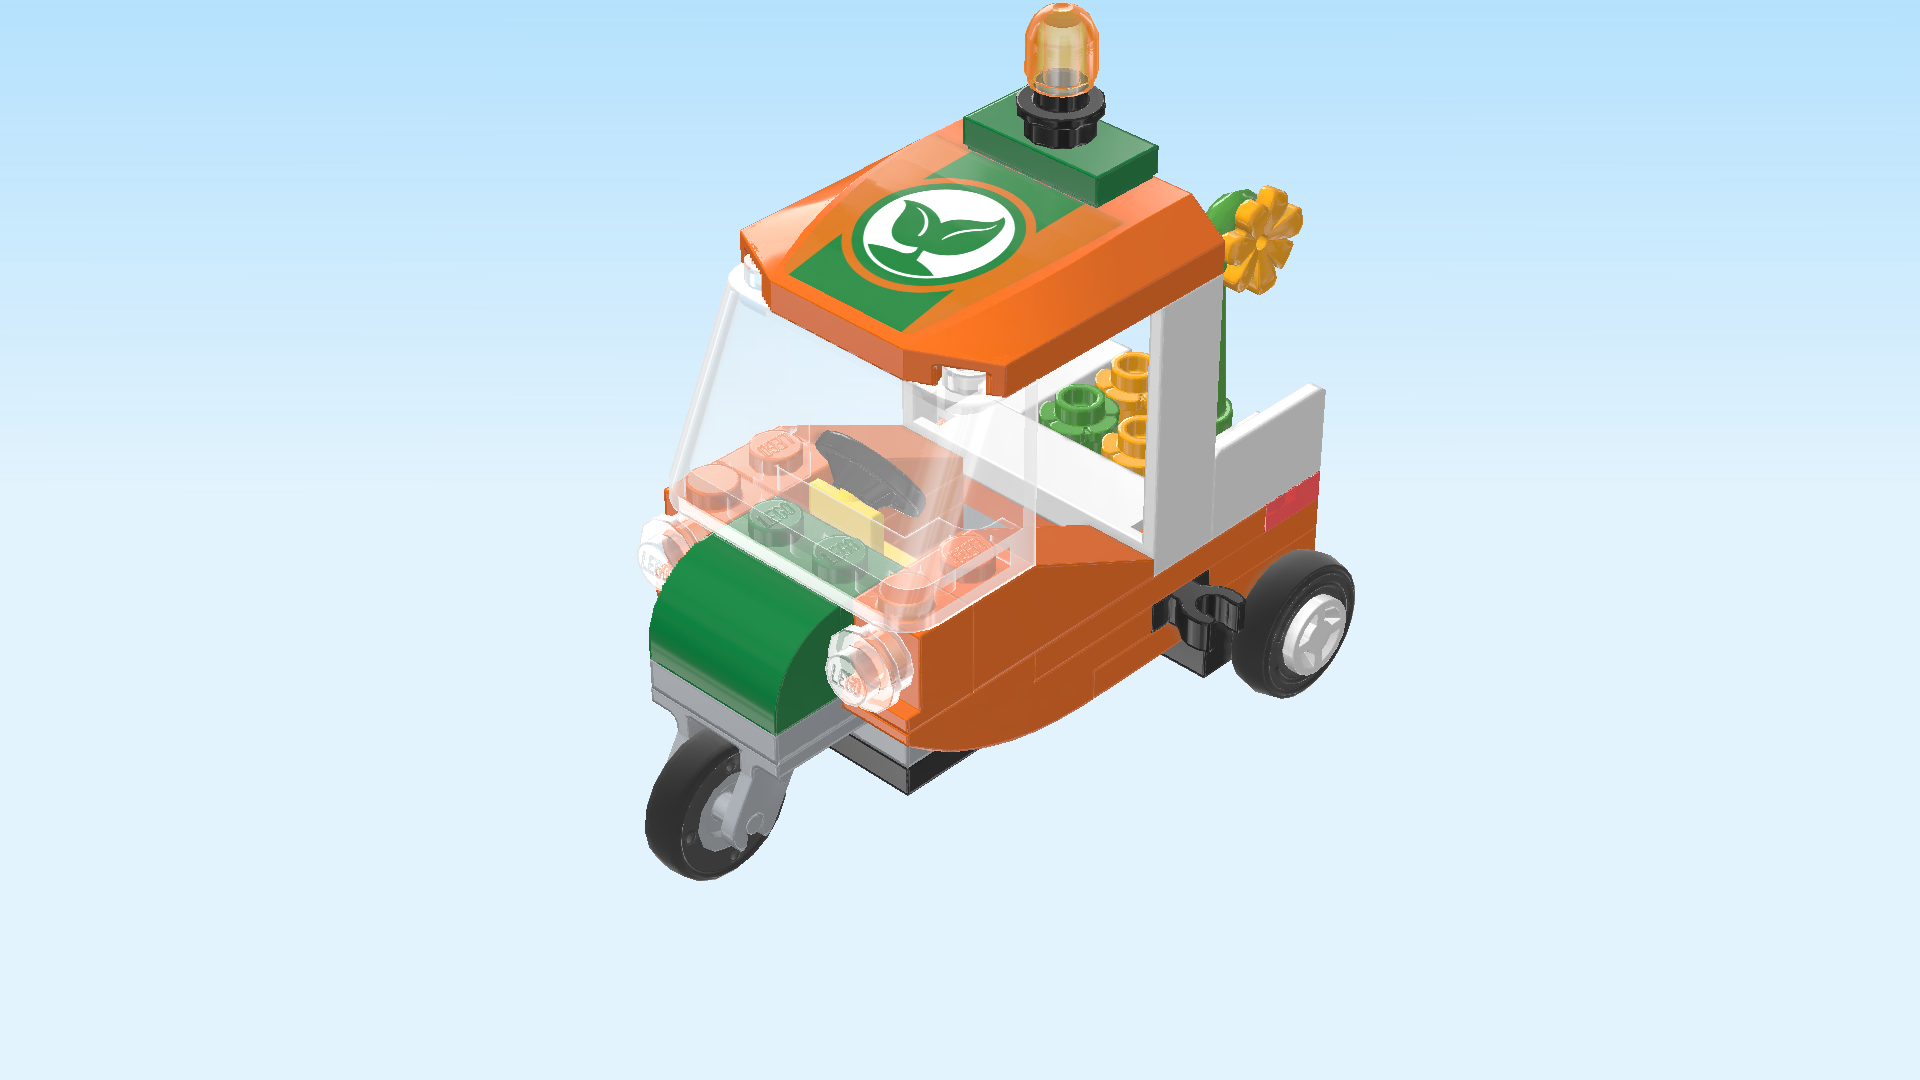
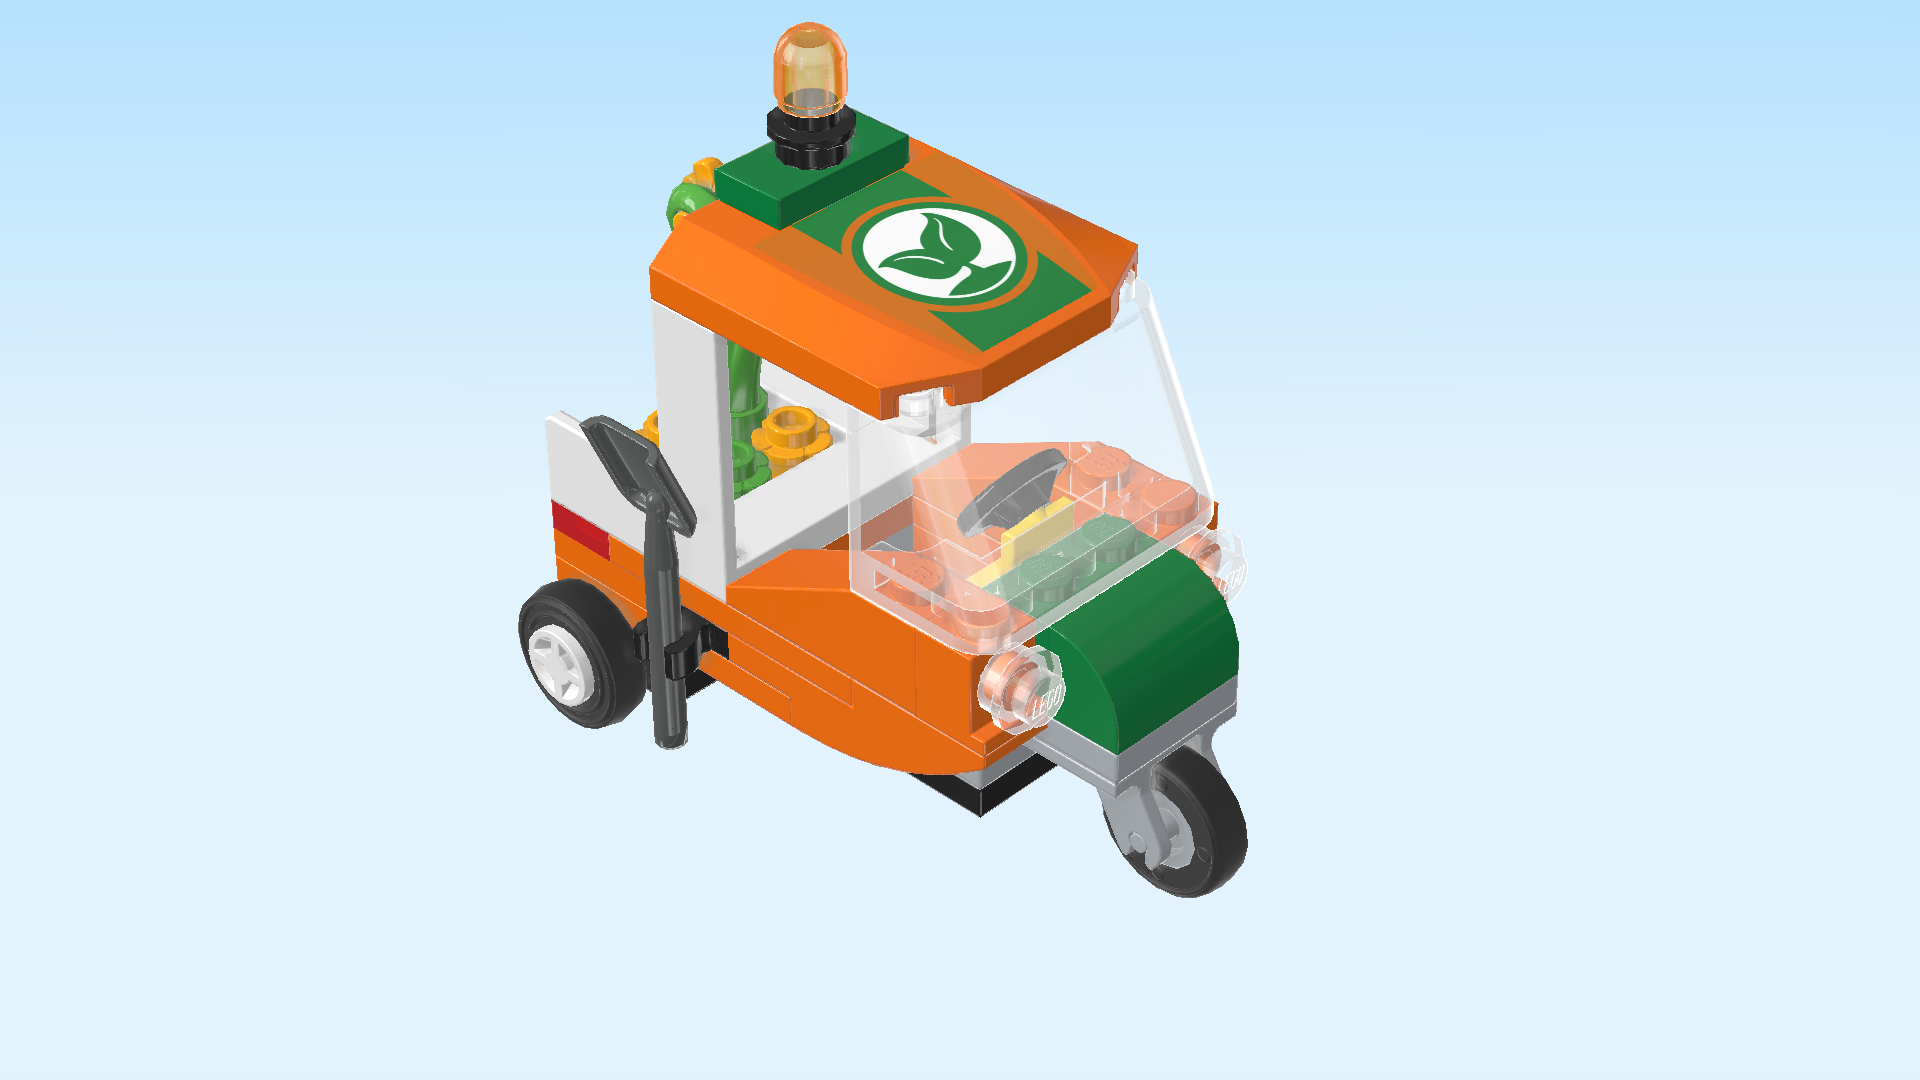
| Now, we will build the three-wheeled truck. |
| Collect the following 2 pieces: |
| 1 black one-stepped plate 2x2 with side pin connector, |
| and 1 black plate 2x6. |
| Put the plate 2x6 horizontally on the table. |
| Put the slimmer row of the one-stepped plate 2x2 on the back row, starting from the right edge, one row and pin connector overhanging to the back. |
| Find another black one-stepped plate 2x2 with side pin connector. |
| Put it in front of the previous piece, thicker row and pin connector overhanging to the front. |
| Collect the following 2 pieces: |
| 1 transparent red flat tile 1x2, |
| and 1 medium stone grey stepped brick 2x3 - 2x2 with top and bottom plate. |
| Put the flat tile 1x2 vertically to the left of the two previous pieces. |
| Put the stepped brick horizontally to the left of the previous piece, top plate overhanging to the left. |
| Collect the following 2 pieces: |
| 1 bright orange plate 4x4, |
| and 1 transparent red flat tile 1x2. |
| Put the plate 4x4 centered on the rightmost edge. |
| Put the flat tile 1x2 vertically to the left of the previous piece. |
| Find 2 bright orange plates 1x2. |
| Put 1 horizontally on the backmost row, starting from the right edge. |
| Repeat symmetrically at the front. |
| Find 2 black plates 1x1 with horizontal side clasp. |
| Put 1 to the left of the previous piece, clasp to the front. |
| Repeat symmetrically at the back. |
| Find 2 bright orange inverted curve tiles 1x4x1 with 2 solid and 2 open knobs. |
| Put 1 horizontally to the left of the previous piece, curve to the left. It will only connect with one knob. |
| Repeat symmetrically at the front. |
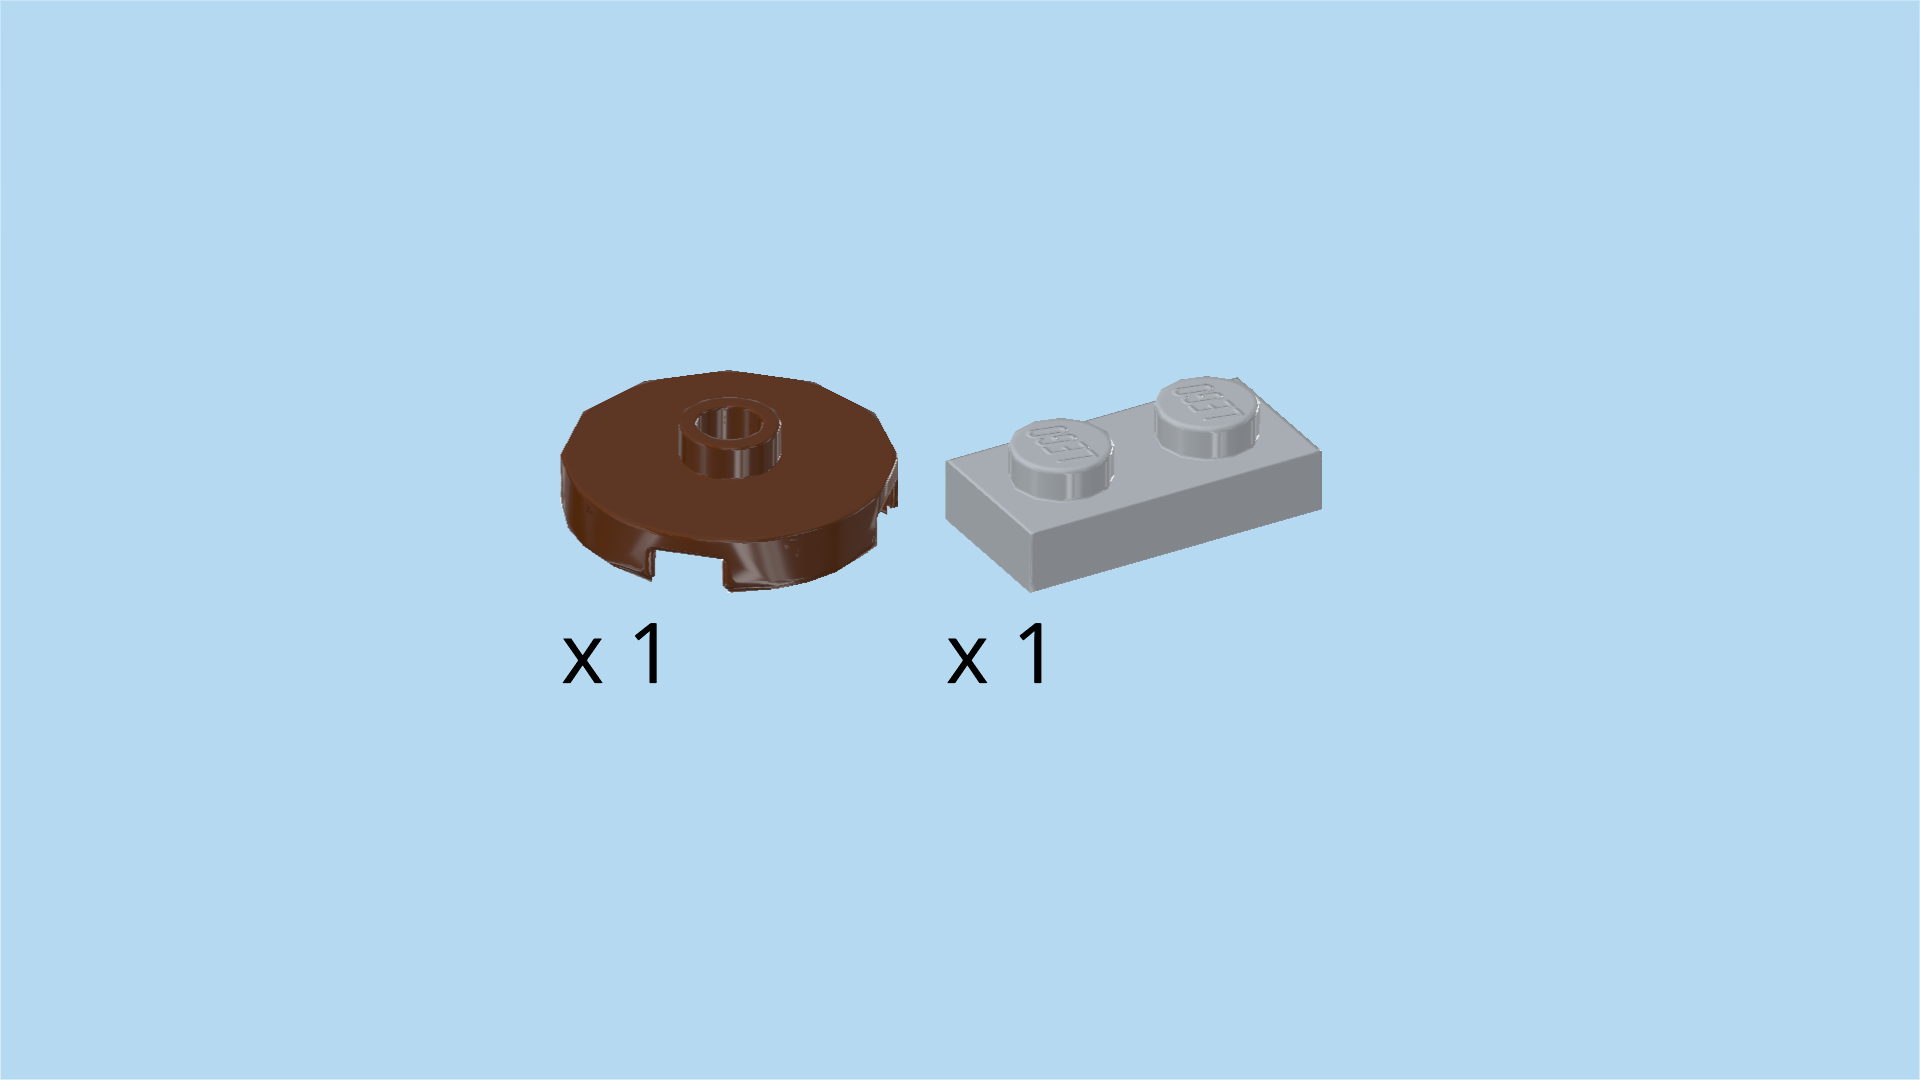
| Collect the following 2 pieces: |
| 1 reddish brown round plate 2x2 with 1 knob, |
| and 1 medium stone grey plate 1x2. |
| Put the round plate 2x2 on the rightmost edge in the middle. |
| Put the plate 1x2 vertically to the left of the previous piece. |
| Find 2 bright orange plates 1x4. |
| Skip the rightmost column, and put it horizontally on the backmost row. |
| Repeat symmetrically at the front. |
| Find 2 transparent red plates 1x1. |
| Put 1 to the right of the previous piece. This means it is mounted on the rightmost knob of the front row. |
| Repeat symmetrically at the back. |
| Find 2 white panel elements 1x2x1. |
| Put 1 horizontally on the backmost row, starting from the right edge, panel to the back. |
| Repeat symmetrically at the front. Make sure the panel is to the front this time. |
| Find 1 bright orange plate 1x2. |
| Put it vertically to the left of the two previous pieces in the middle. |
| Find 1 white window frame 1x4x3 with inner notch. |
| Put it vertically centered on top of the previous piece. Make sure the inner notch of the frame is on the left. |
| Find 2 bright orange roof tiles 1x3, 25°. |
| Put 1 horizontally to the left of the previous piece on the backmost row, slope to the right. |
| Repeat symmetrically at the front. |
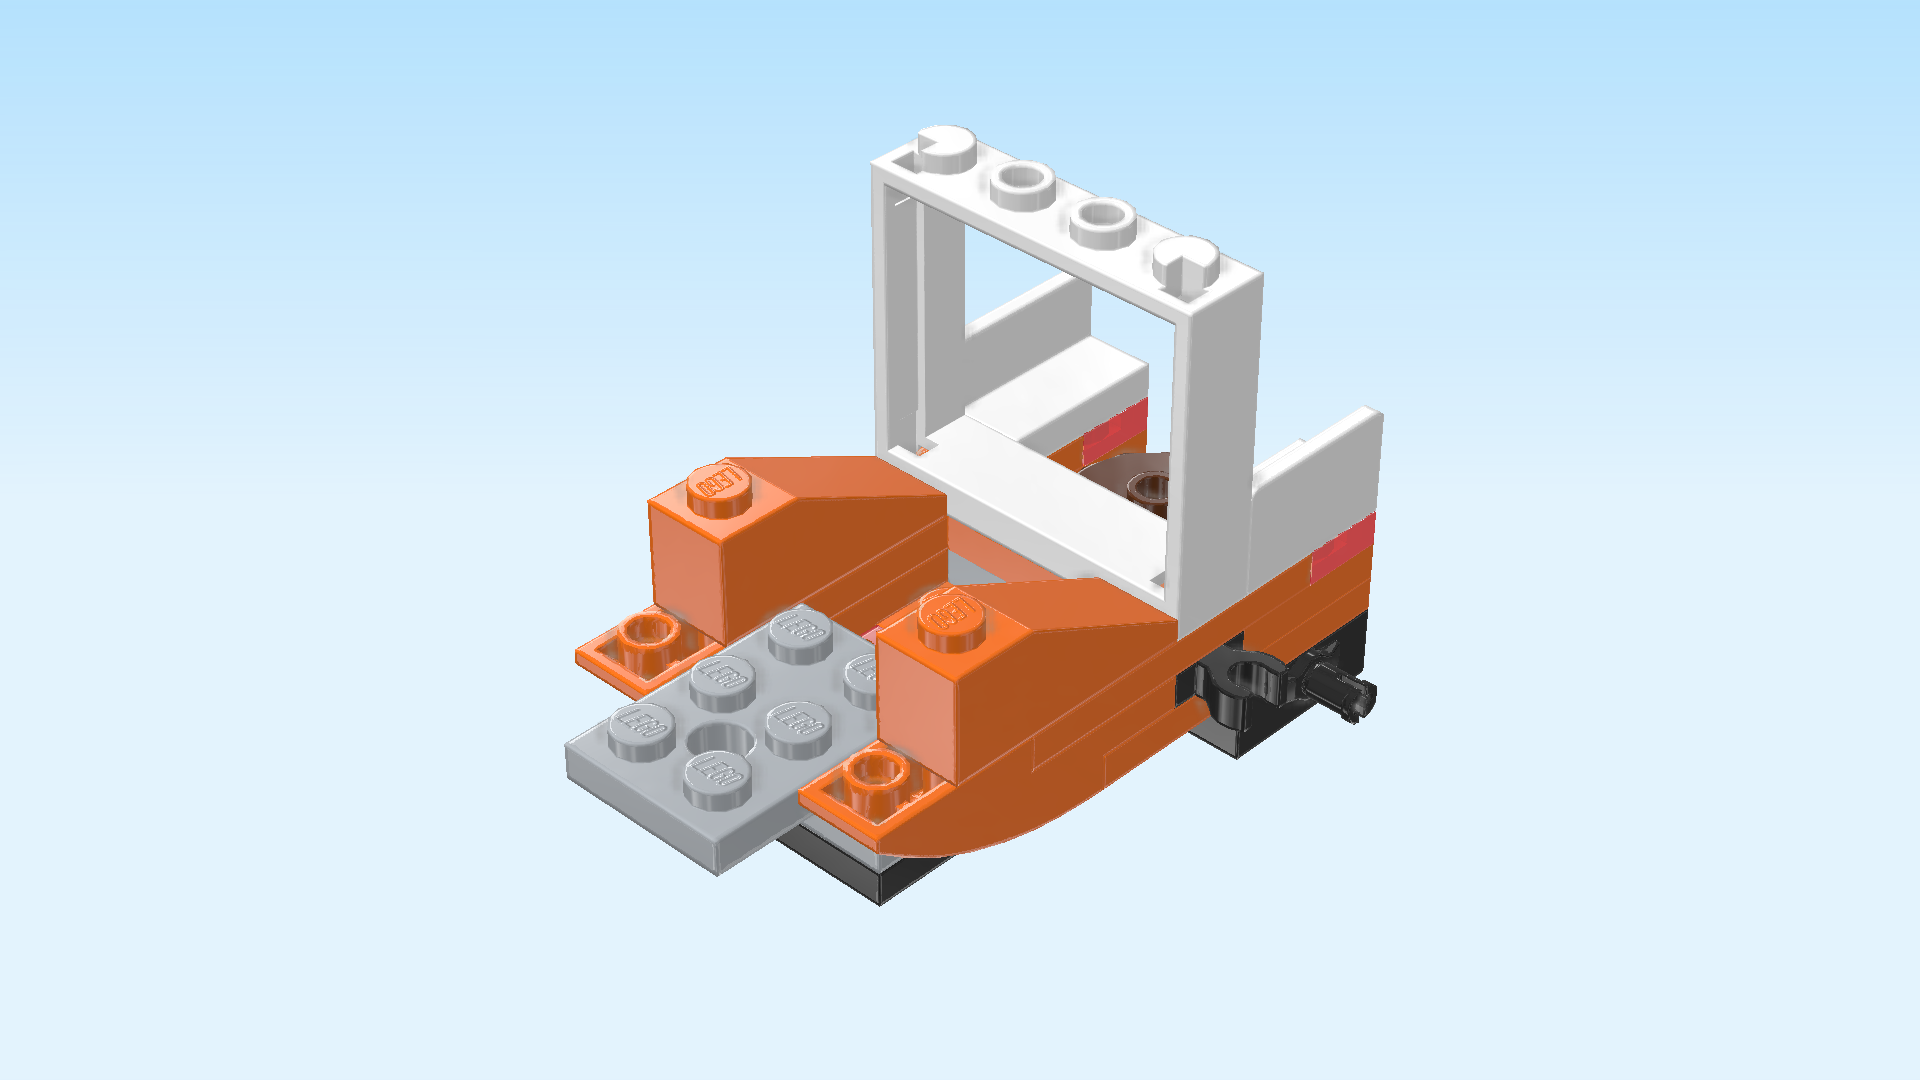
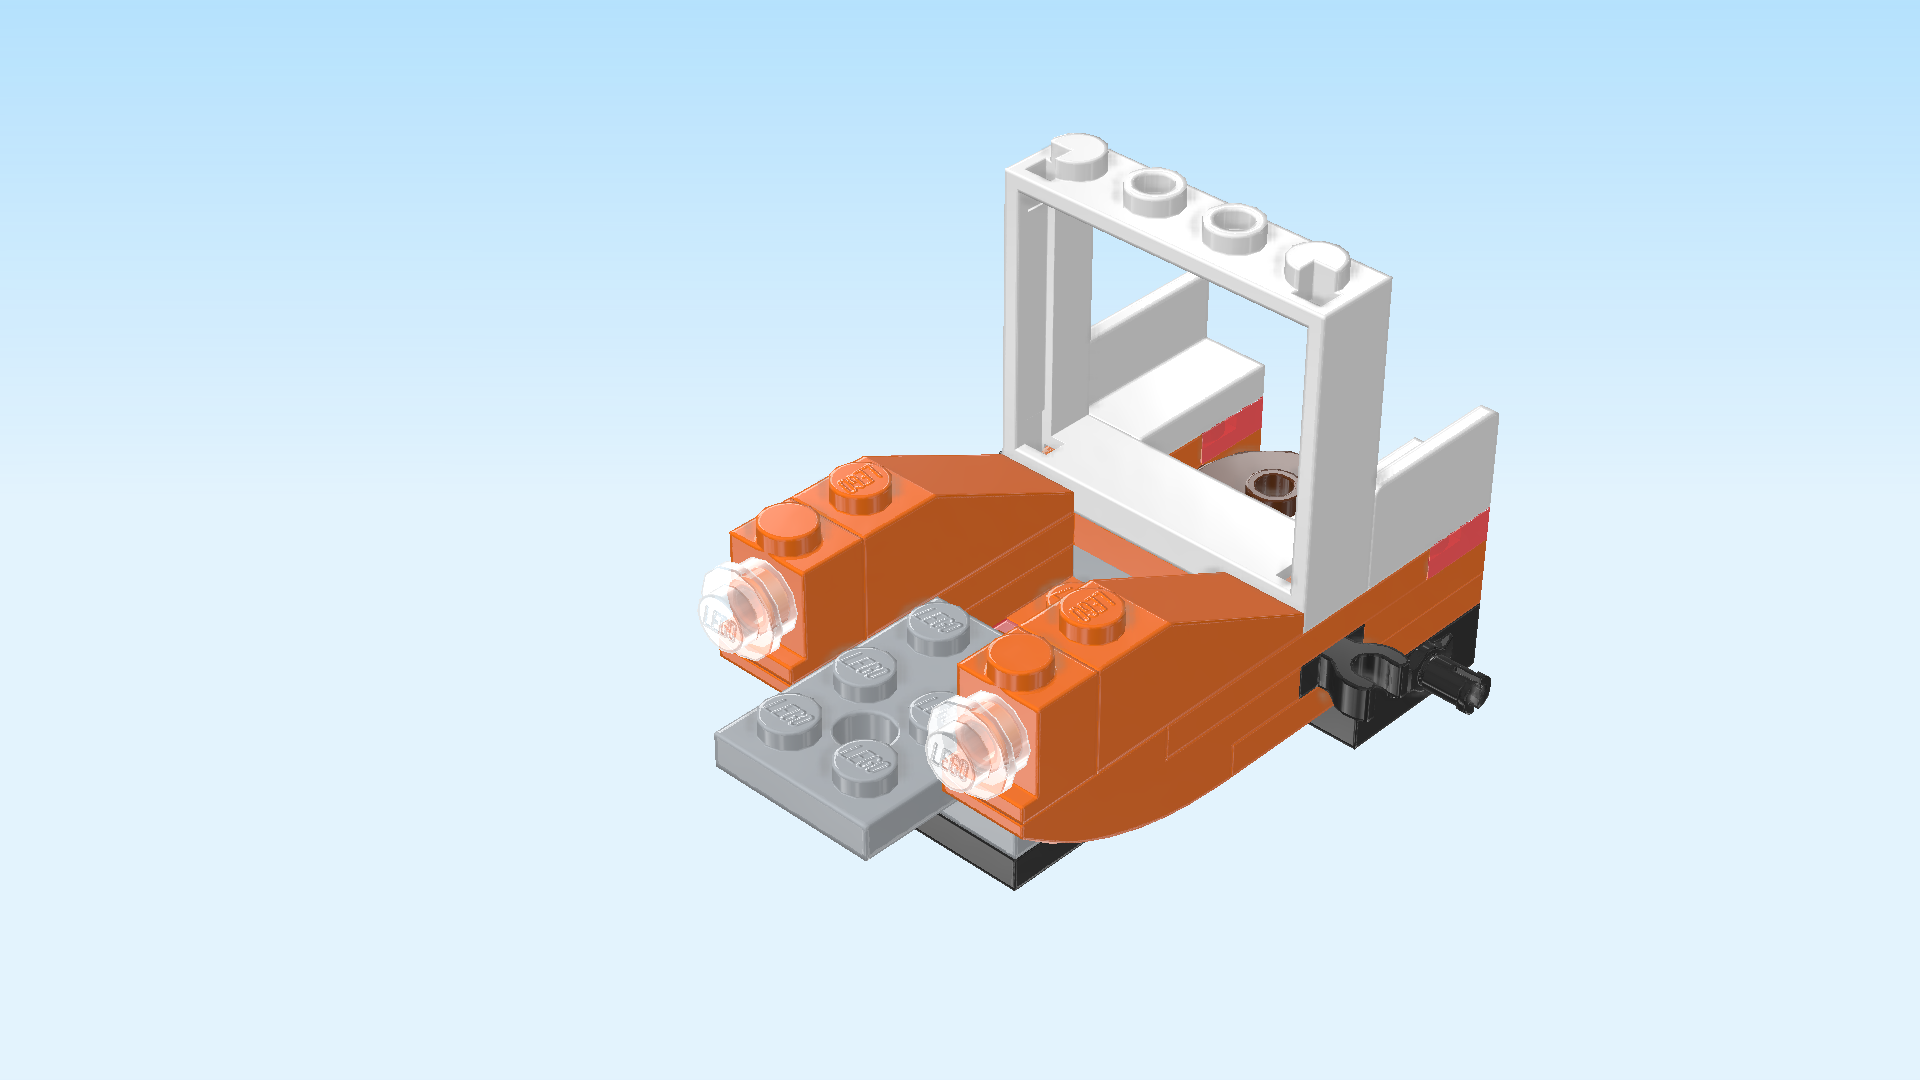
| Next up, we assemble the 2 truck headlights. |
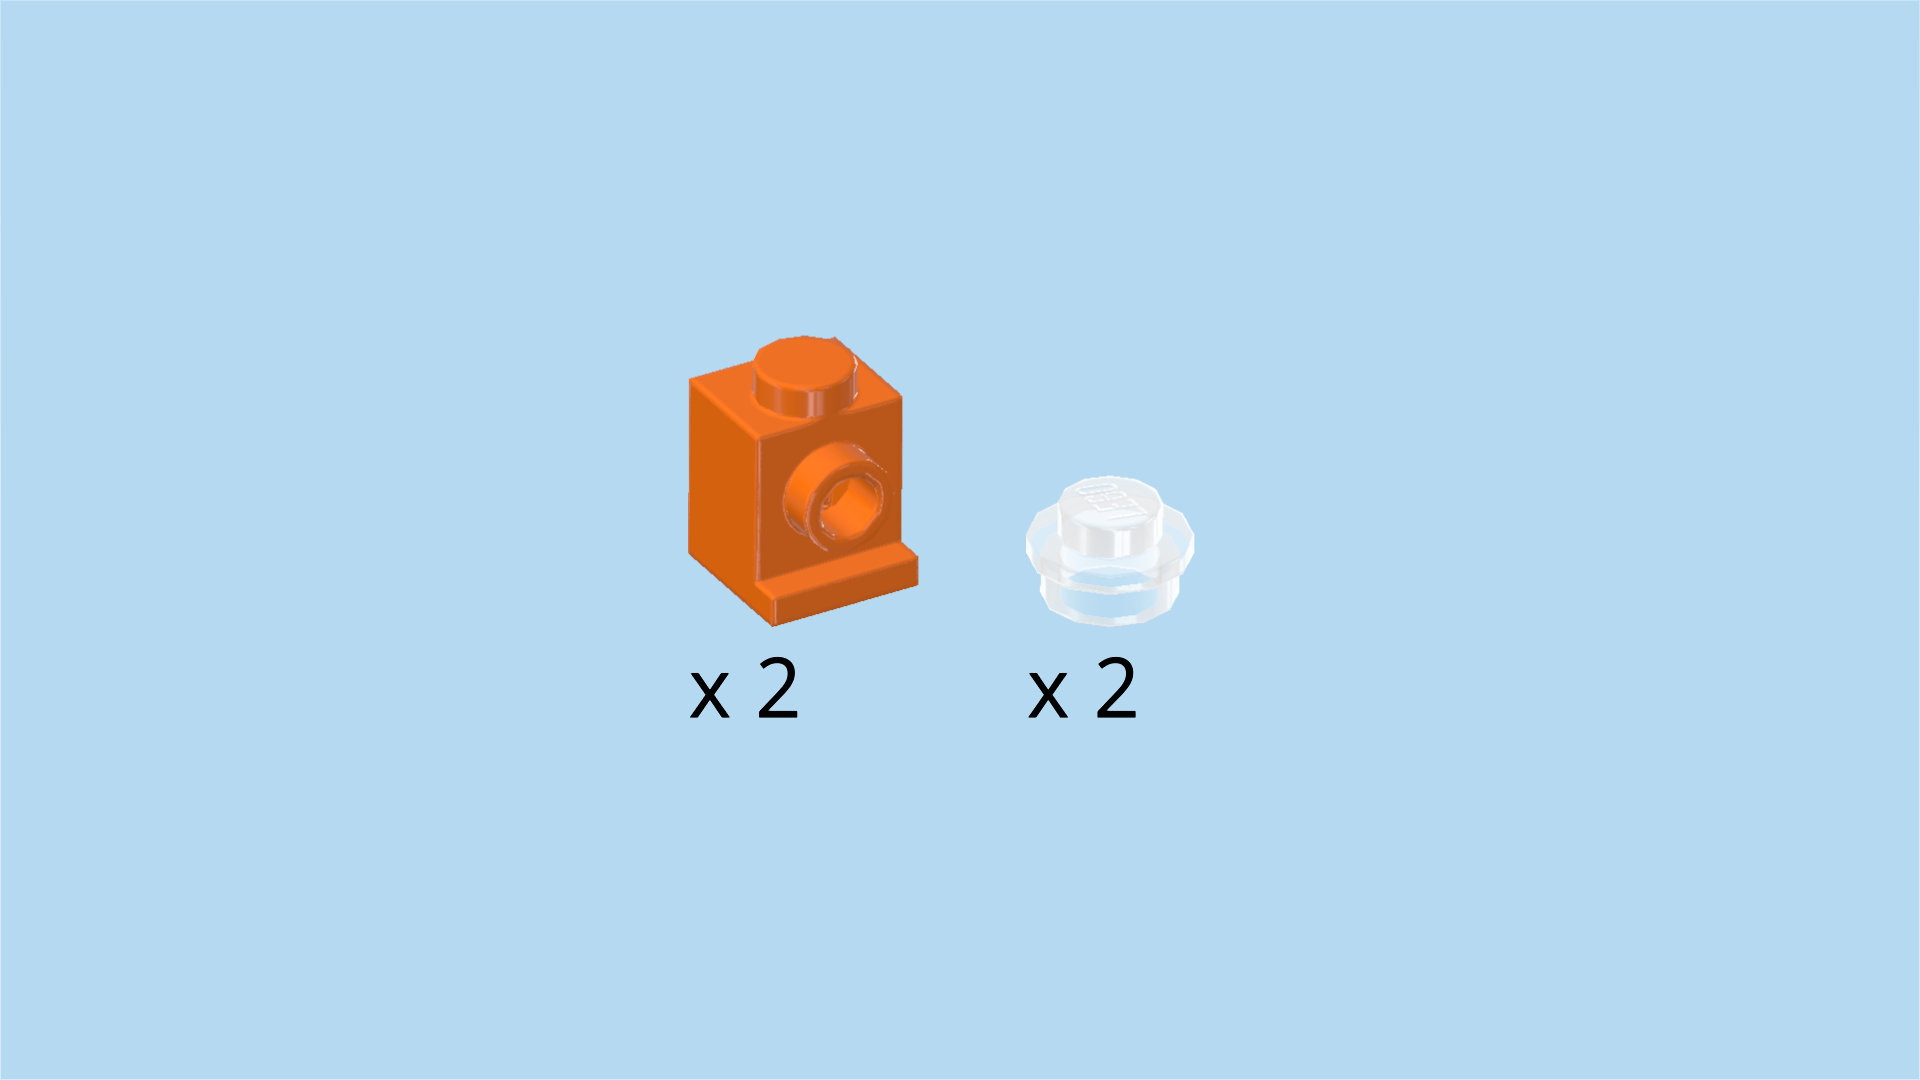
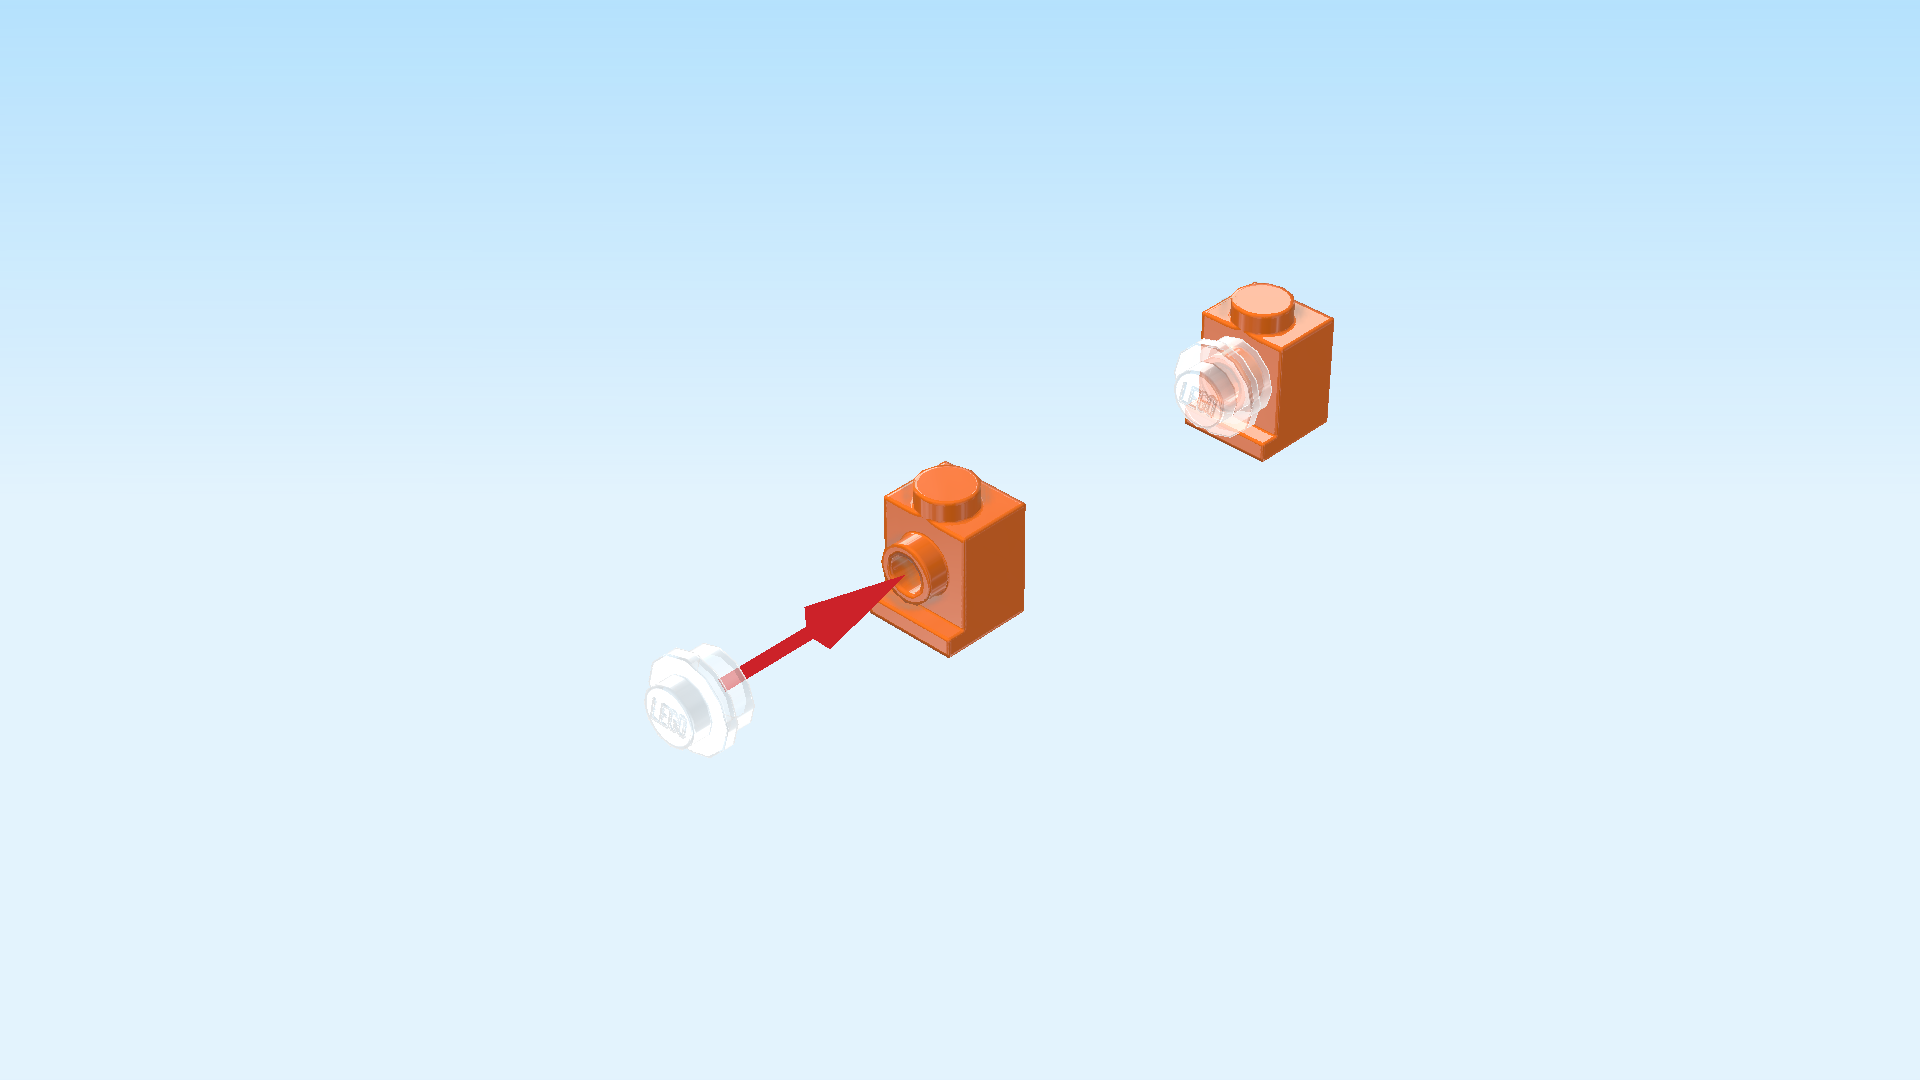
| Collect the following 4 pieces: |
| 2 bright orange bricks 1x1 with side knob and bottom foot, |
| and 2 transparent round plates 1x1. |
| Put the 2 round plates upright on the side knobs of the 2 bricks. |
| Mount the truck headlights on the leftmost knobs of the frontmost and backmost row, side knobs to the left. |
| If done correctly, there are still two empty knobs in the middle of the leftmost edge of the structure. |
| Find 1 black and bright yellow small steering wheel with plate 1x2. |
| Put it vertically in the middle of the third column from the left, steering wheel to the right. |
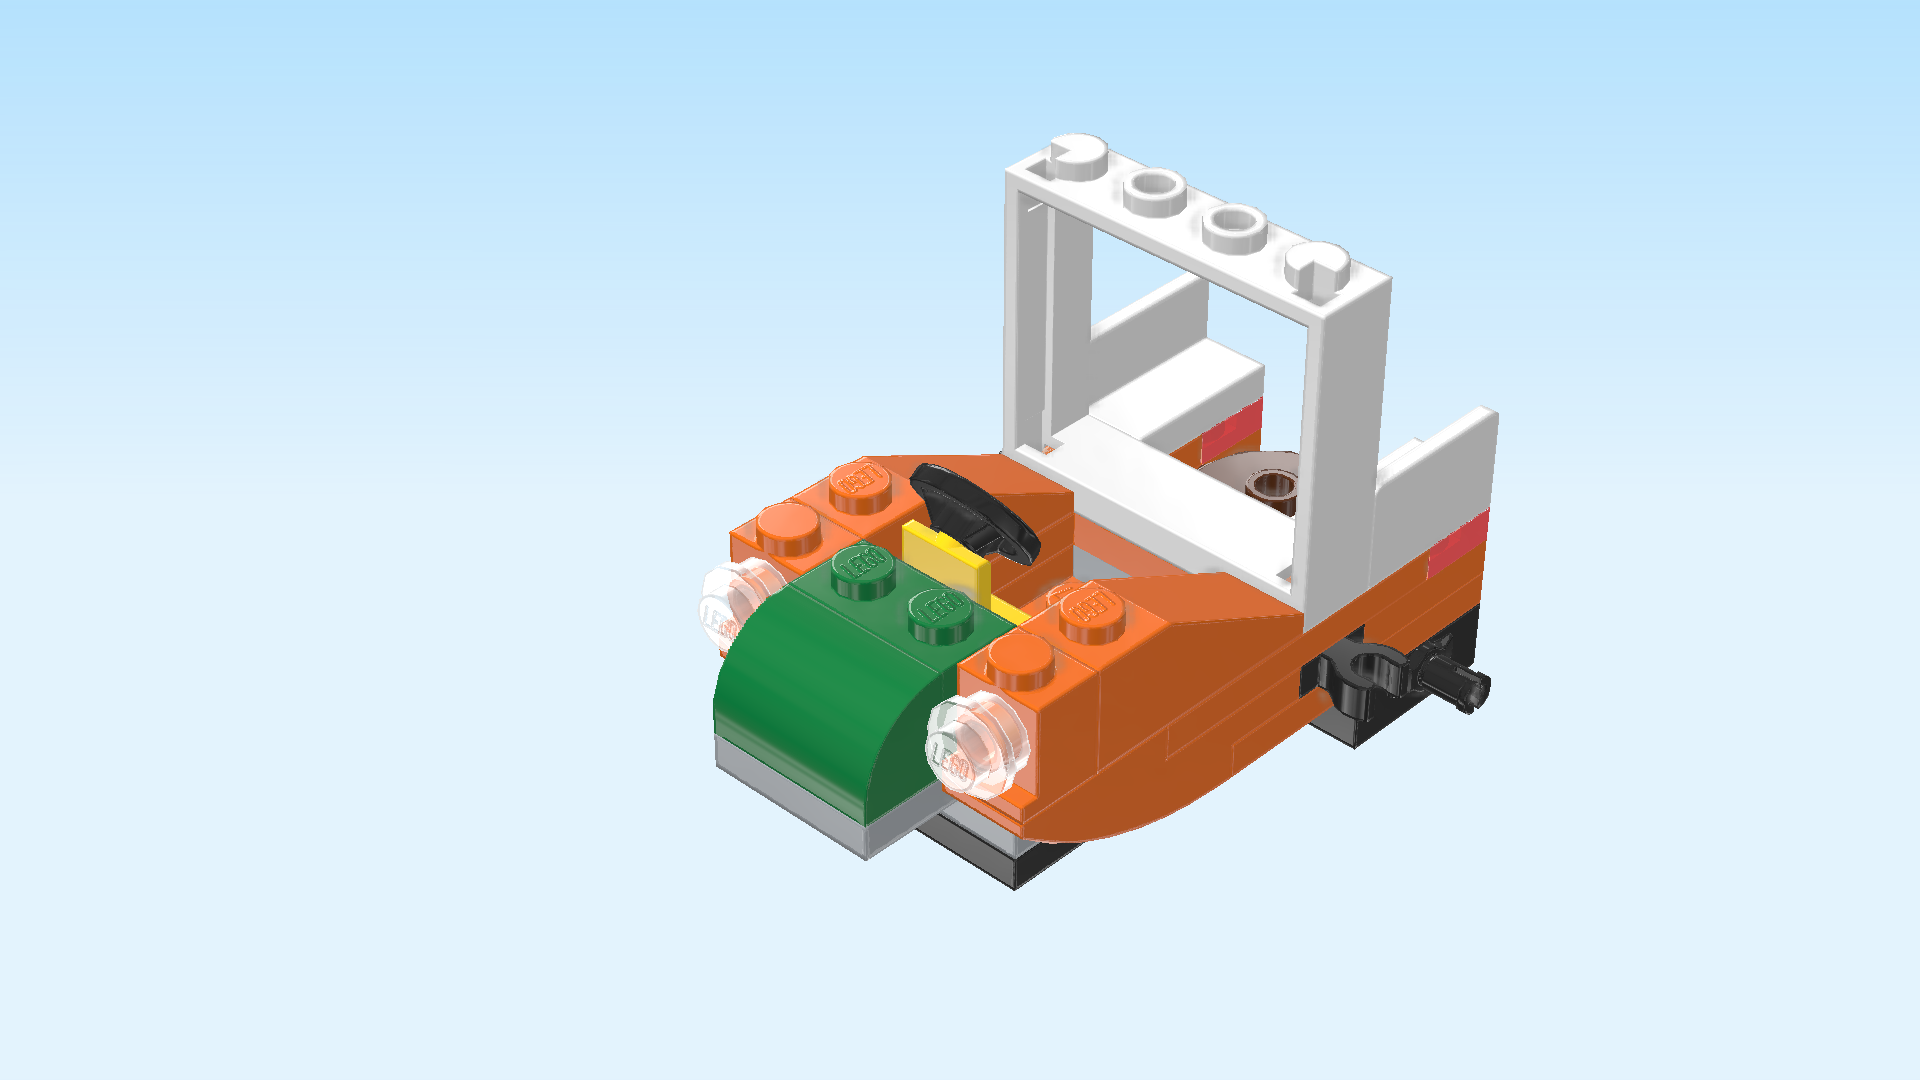
| Find 1 dark green brick 1x2. |
| Put it vertically to the left of the previous piece. |
| Find 1 dark green smooth curve brick 1x2. |
| Put it vertically to the left of the previous piece, curve to the left. |
| This is the engine hood of the truck. |
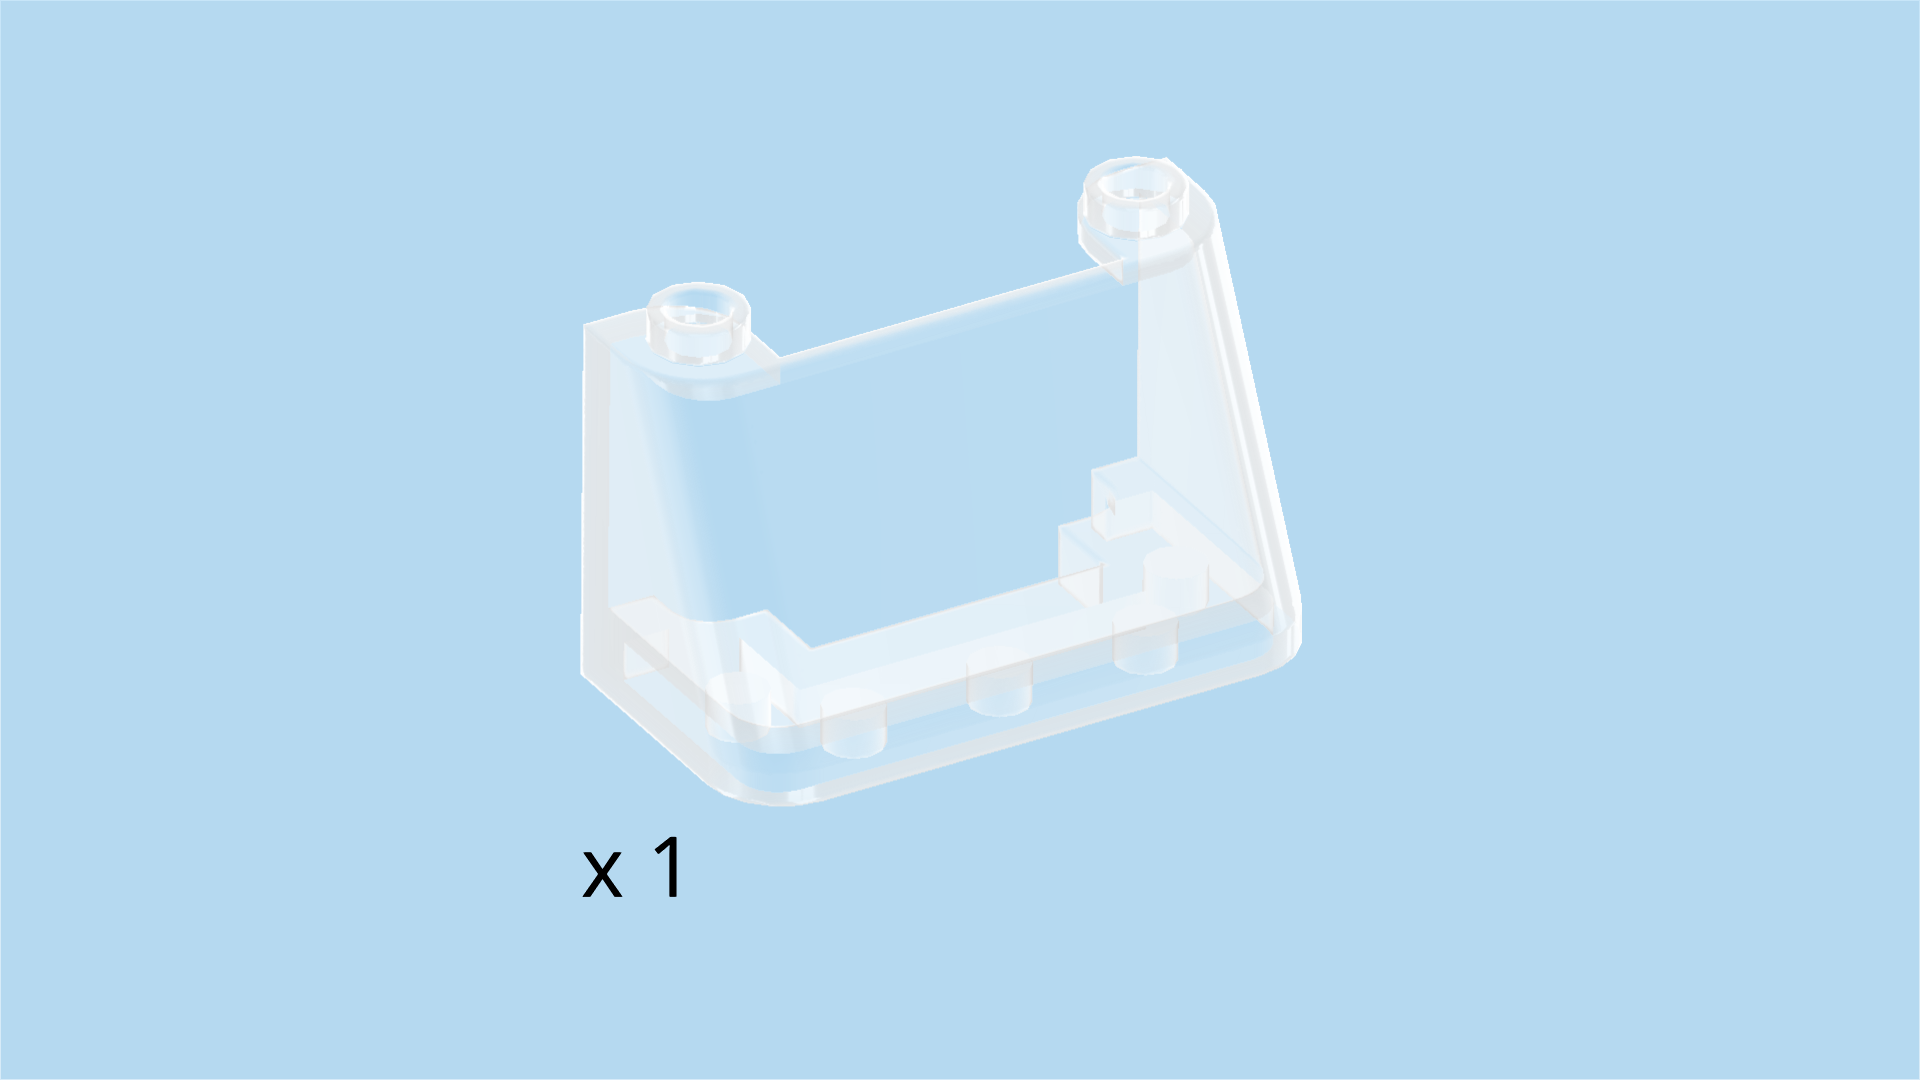
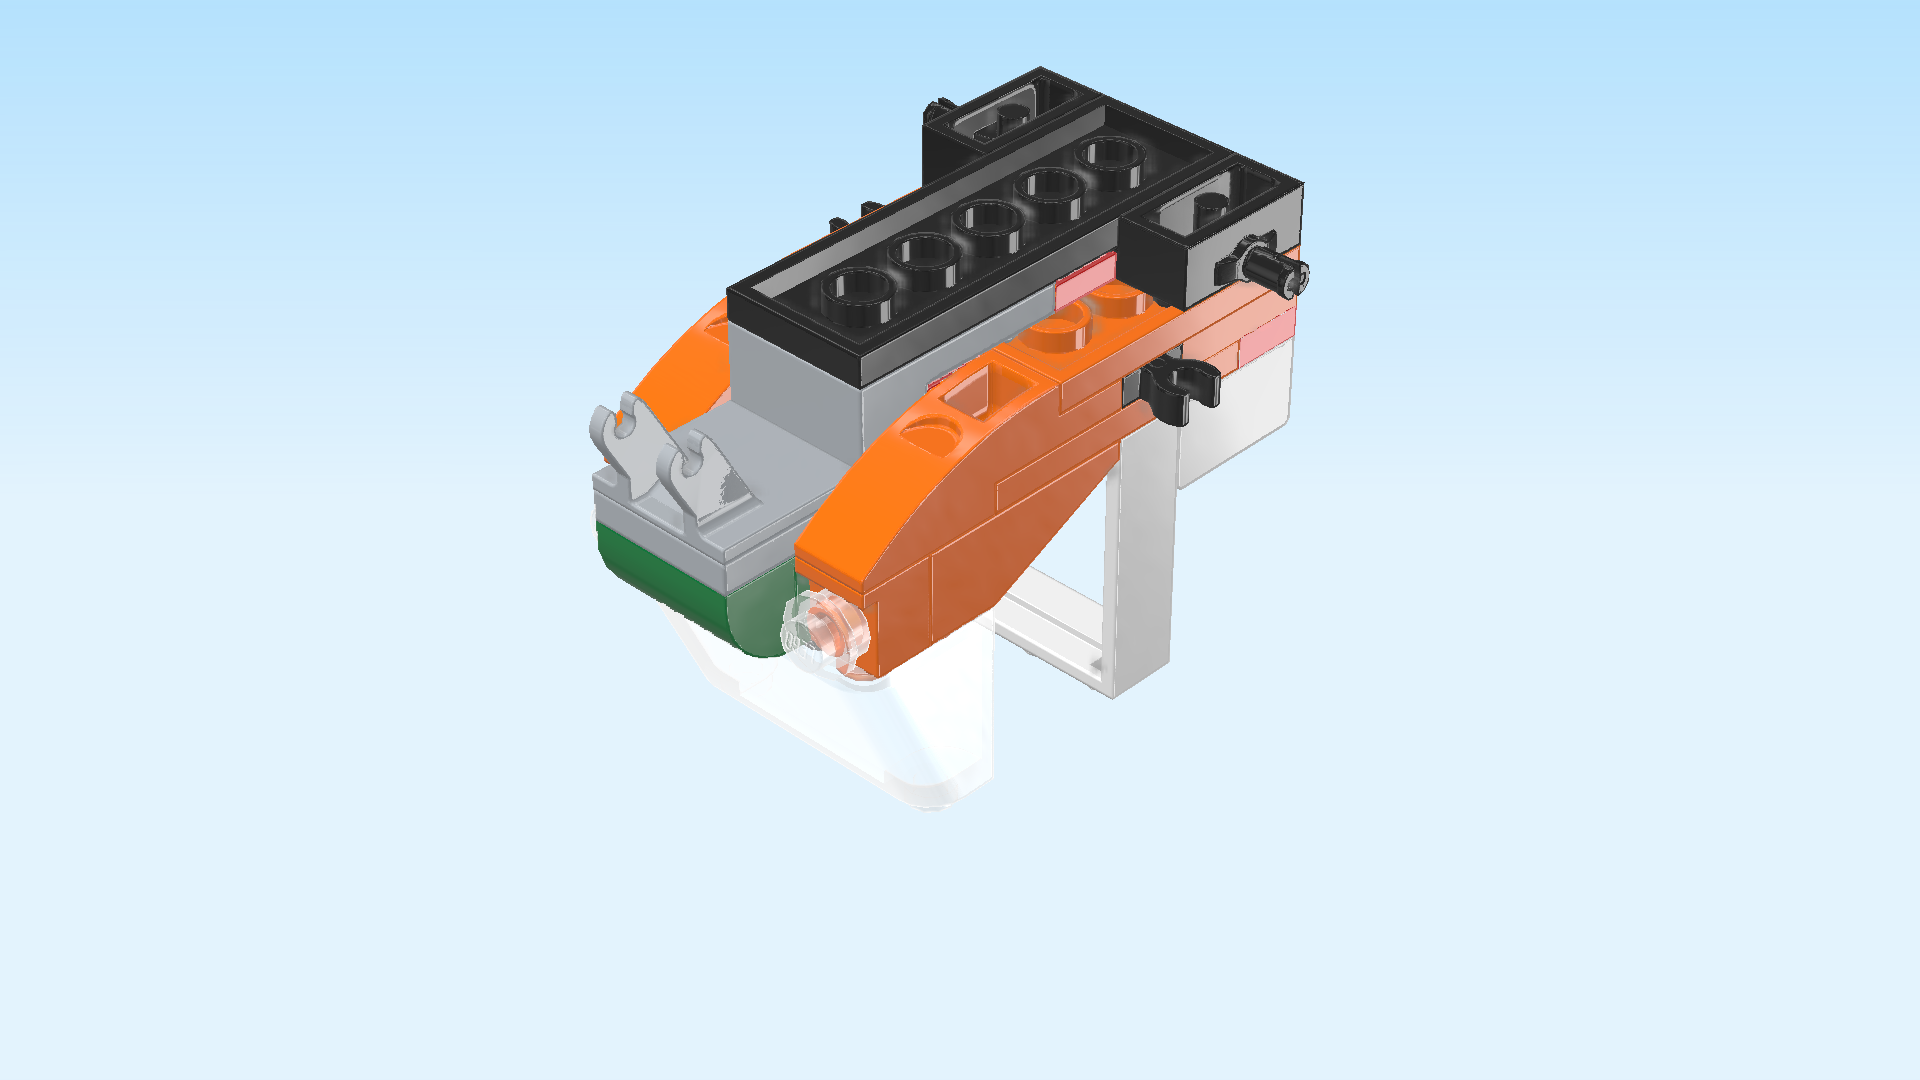
| Find 1 transparent windscreen 2x4x2. |
| Put it vertically on the left edge of the structure, slope to the left. Make sure that only the smooth curve brick and the headlights are sticking out towards the left. |
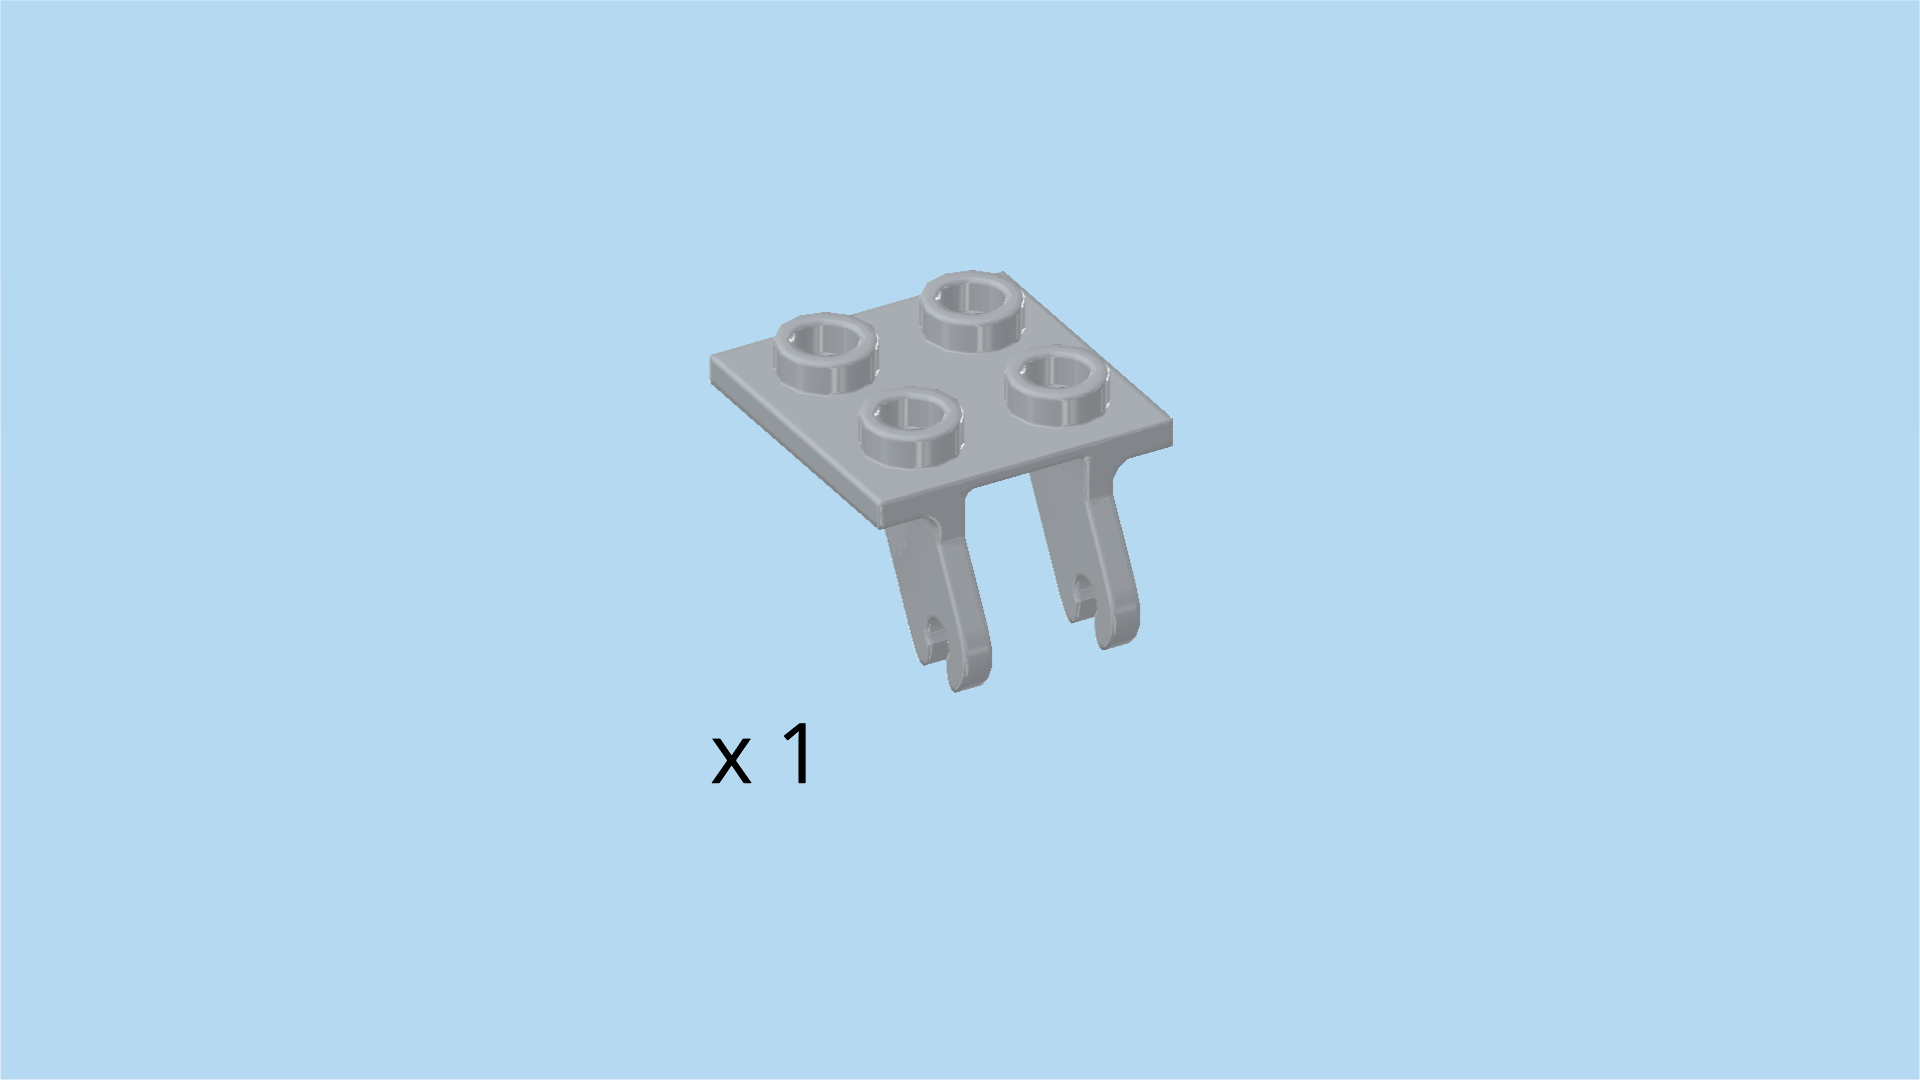
| Find 1 medium stone grey plate 2x2 with 2 bottom wheel forks. |
| Now, flip the whole structure upside down. Keep the structure horizontally. Make sure that the windshield is still on the left side of the build. |
| Put the plate 2x2 on the leftmost edge on the lower level, wheel forks pointing to the left. |
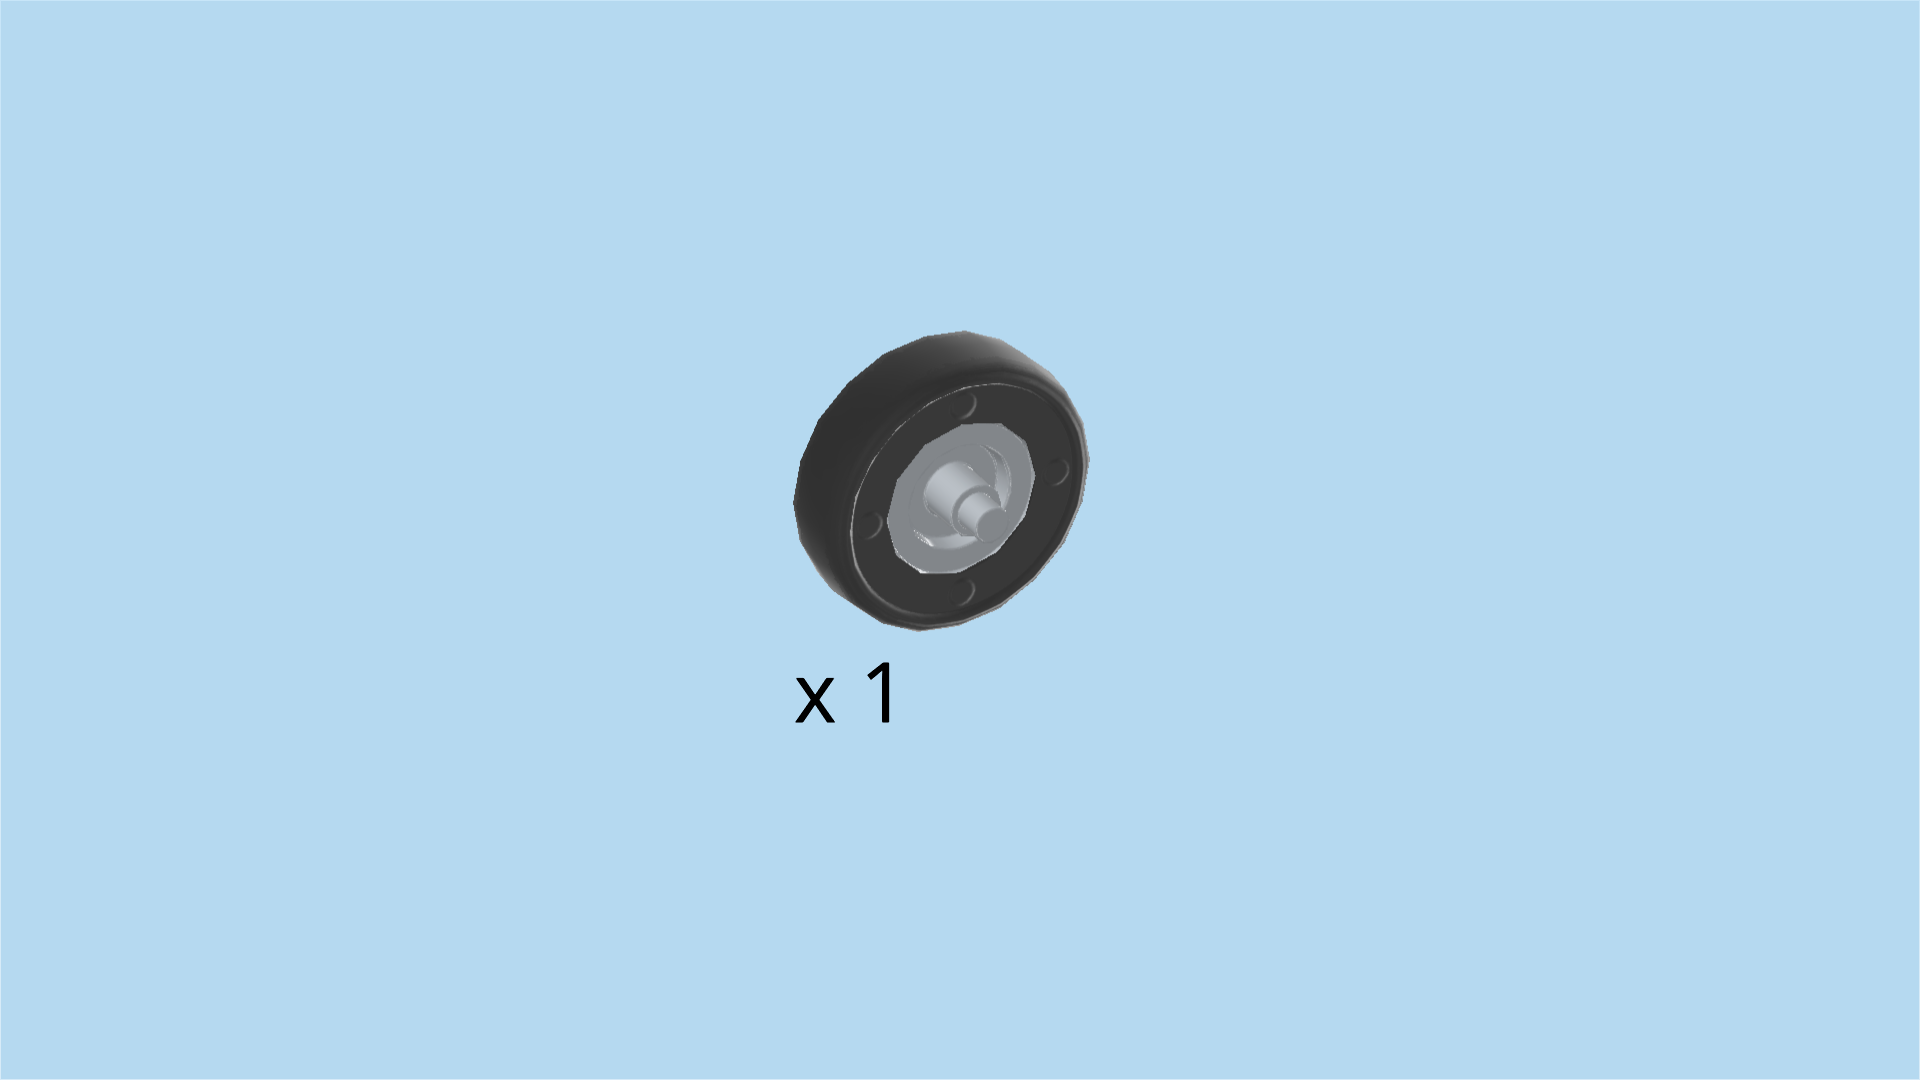
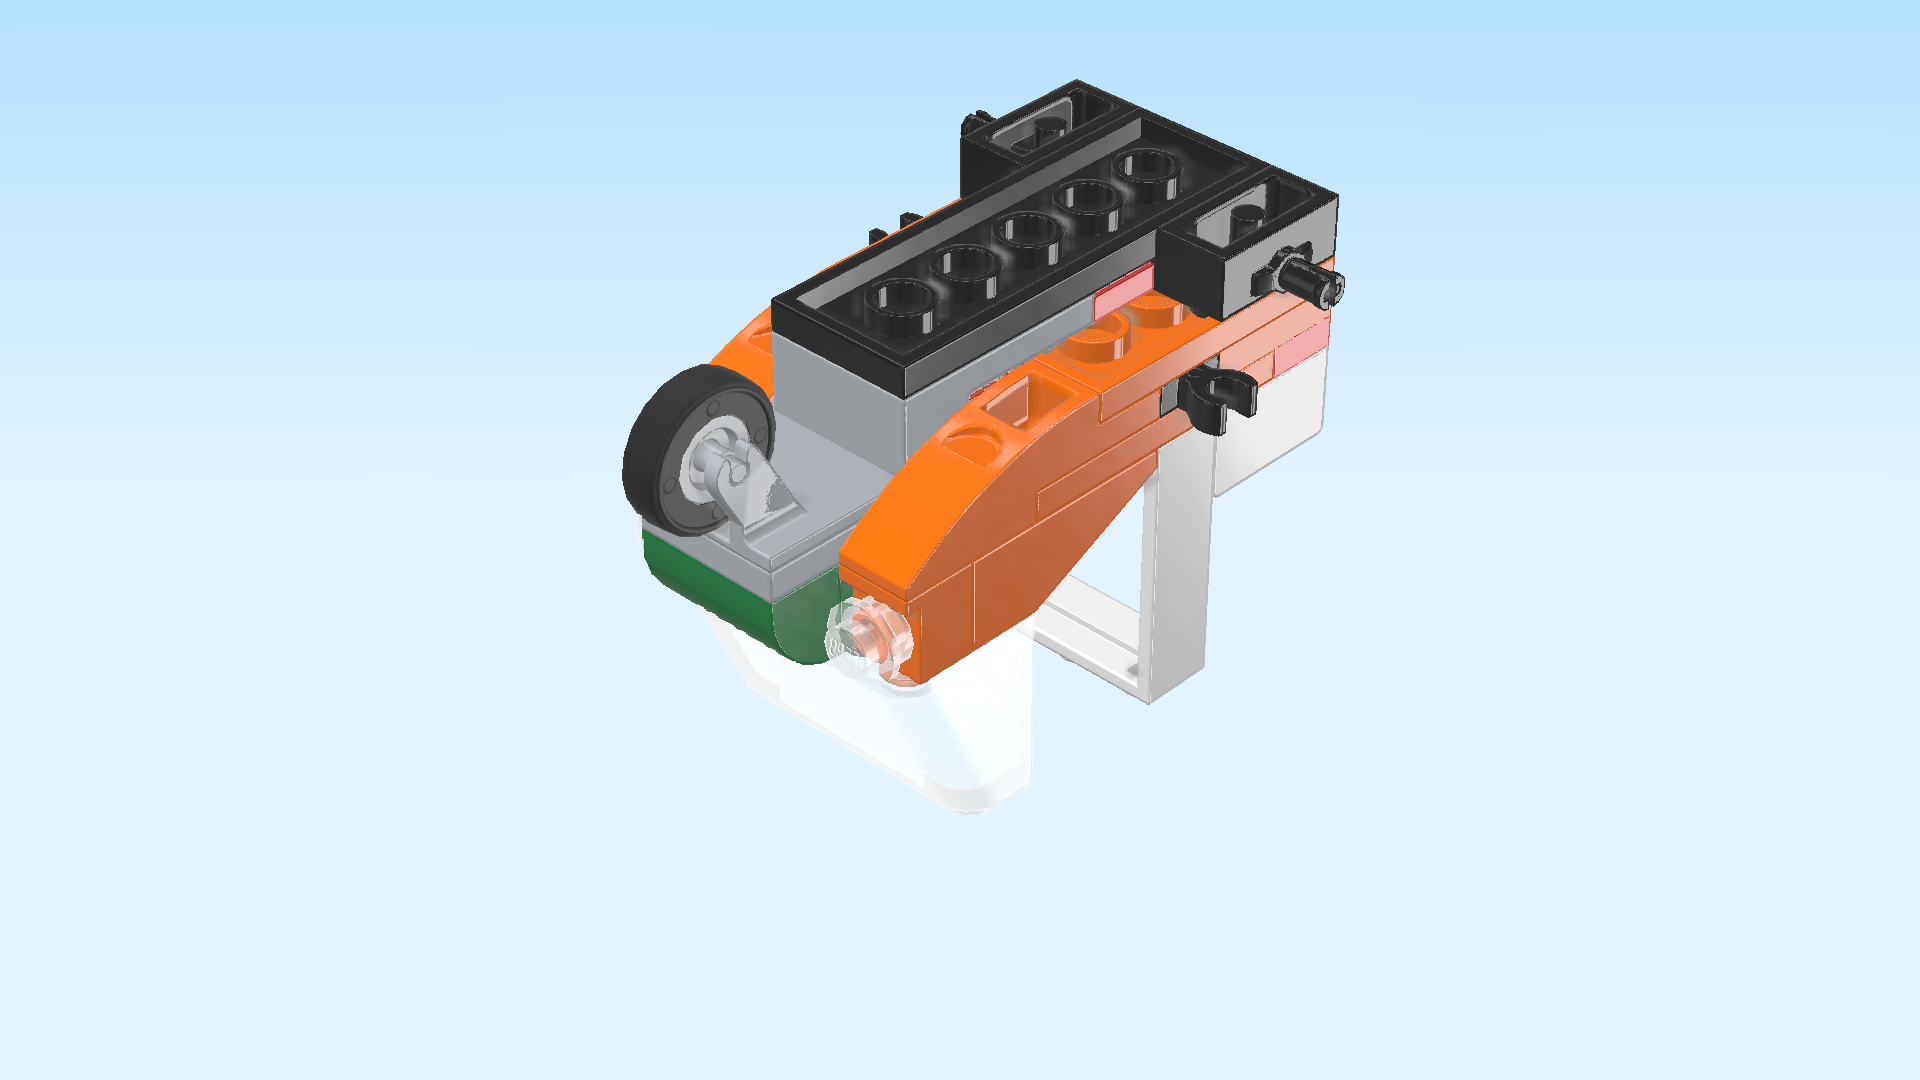
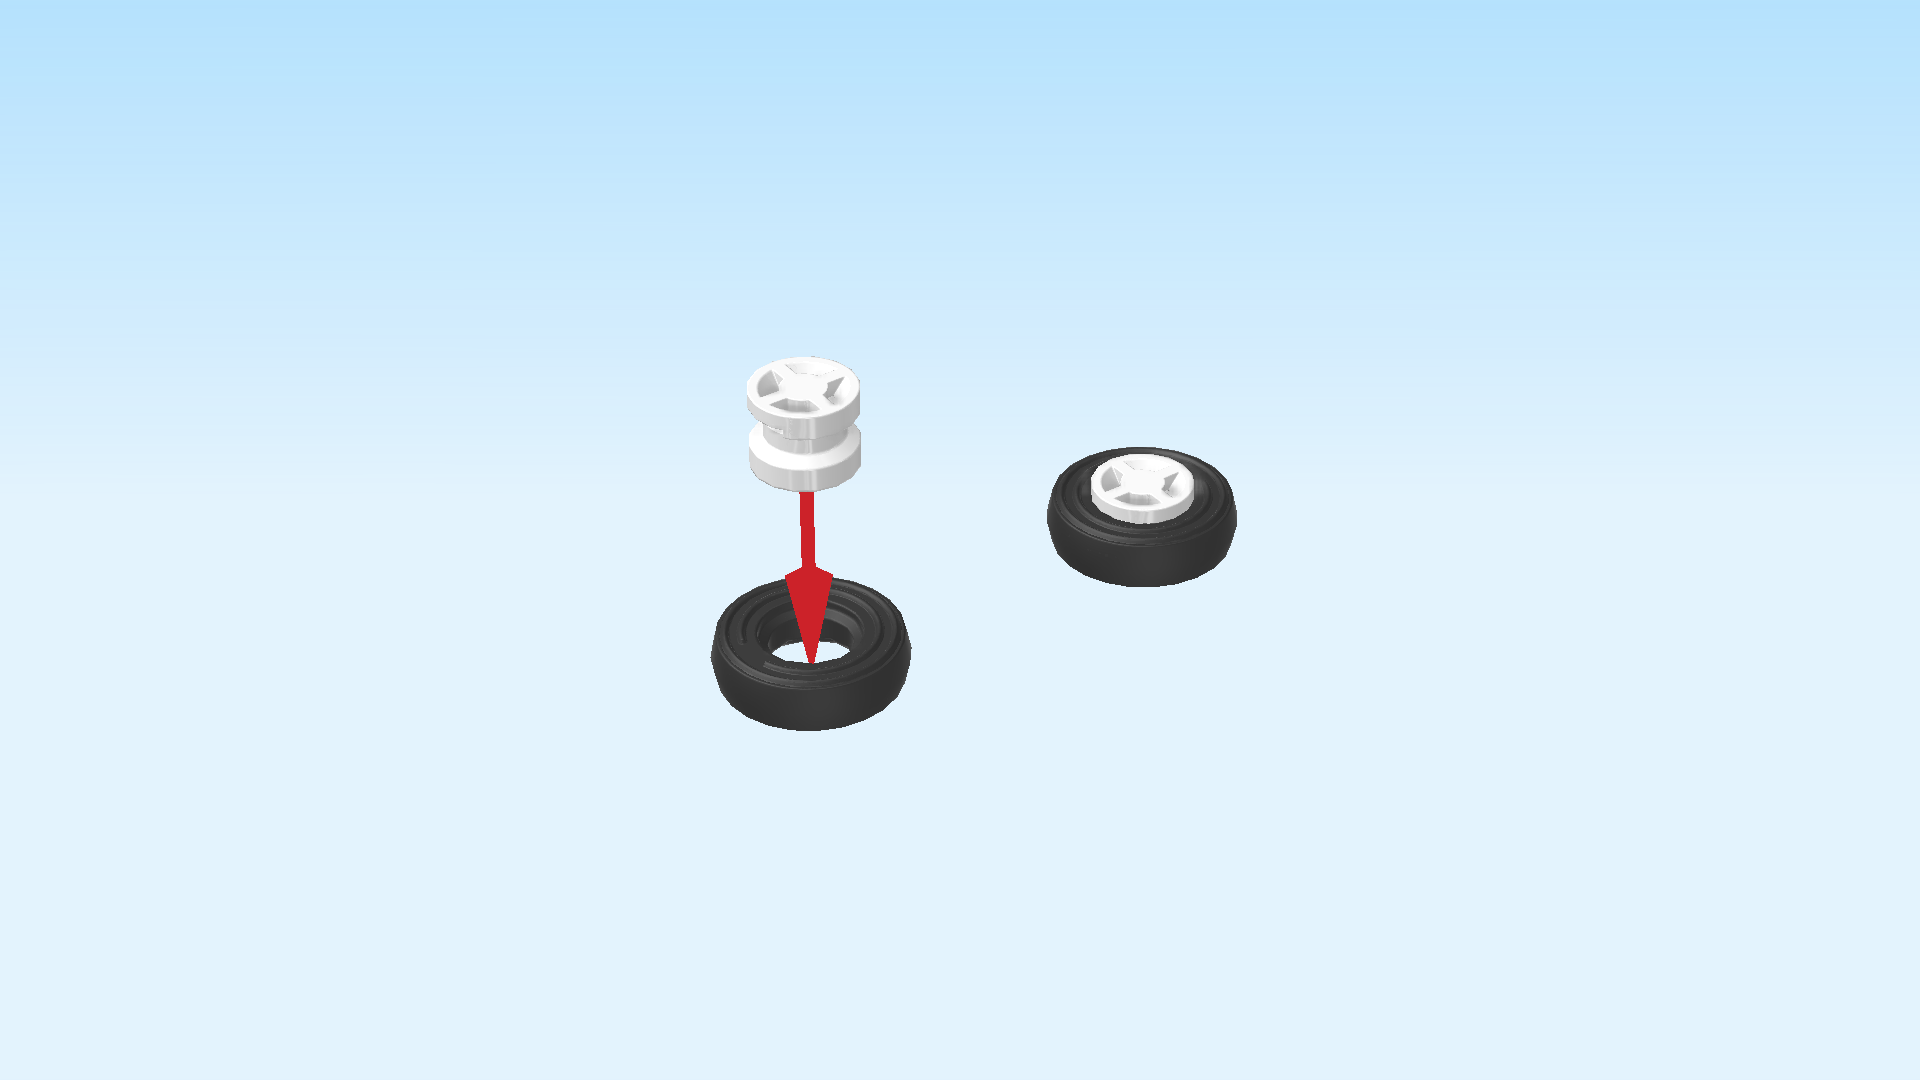
| Find 1 black and medium stone grey small slick rubber wheel with axle. |
| Snap the axle pins into the wheel forks on the left. |
| This is the front wheel of the truck! But we are not done yet, leave the truck upside down for now. |
| Next, we will assemble the 2 rear wheels. |
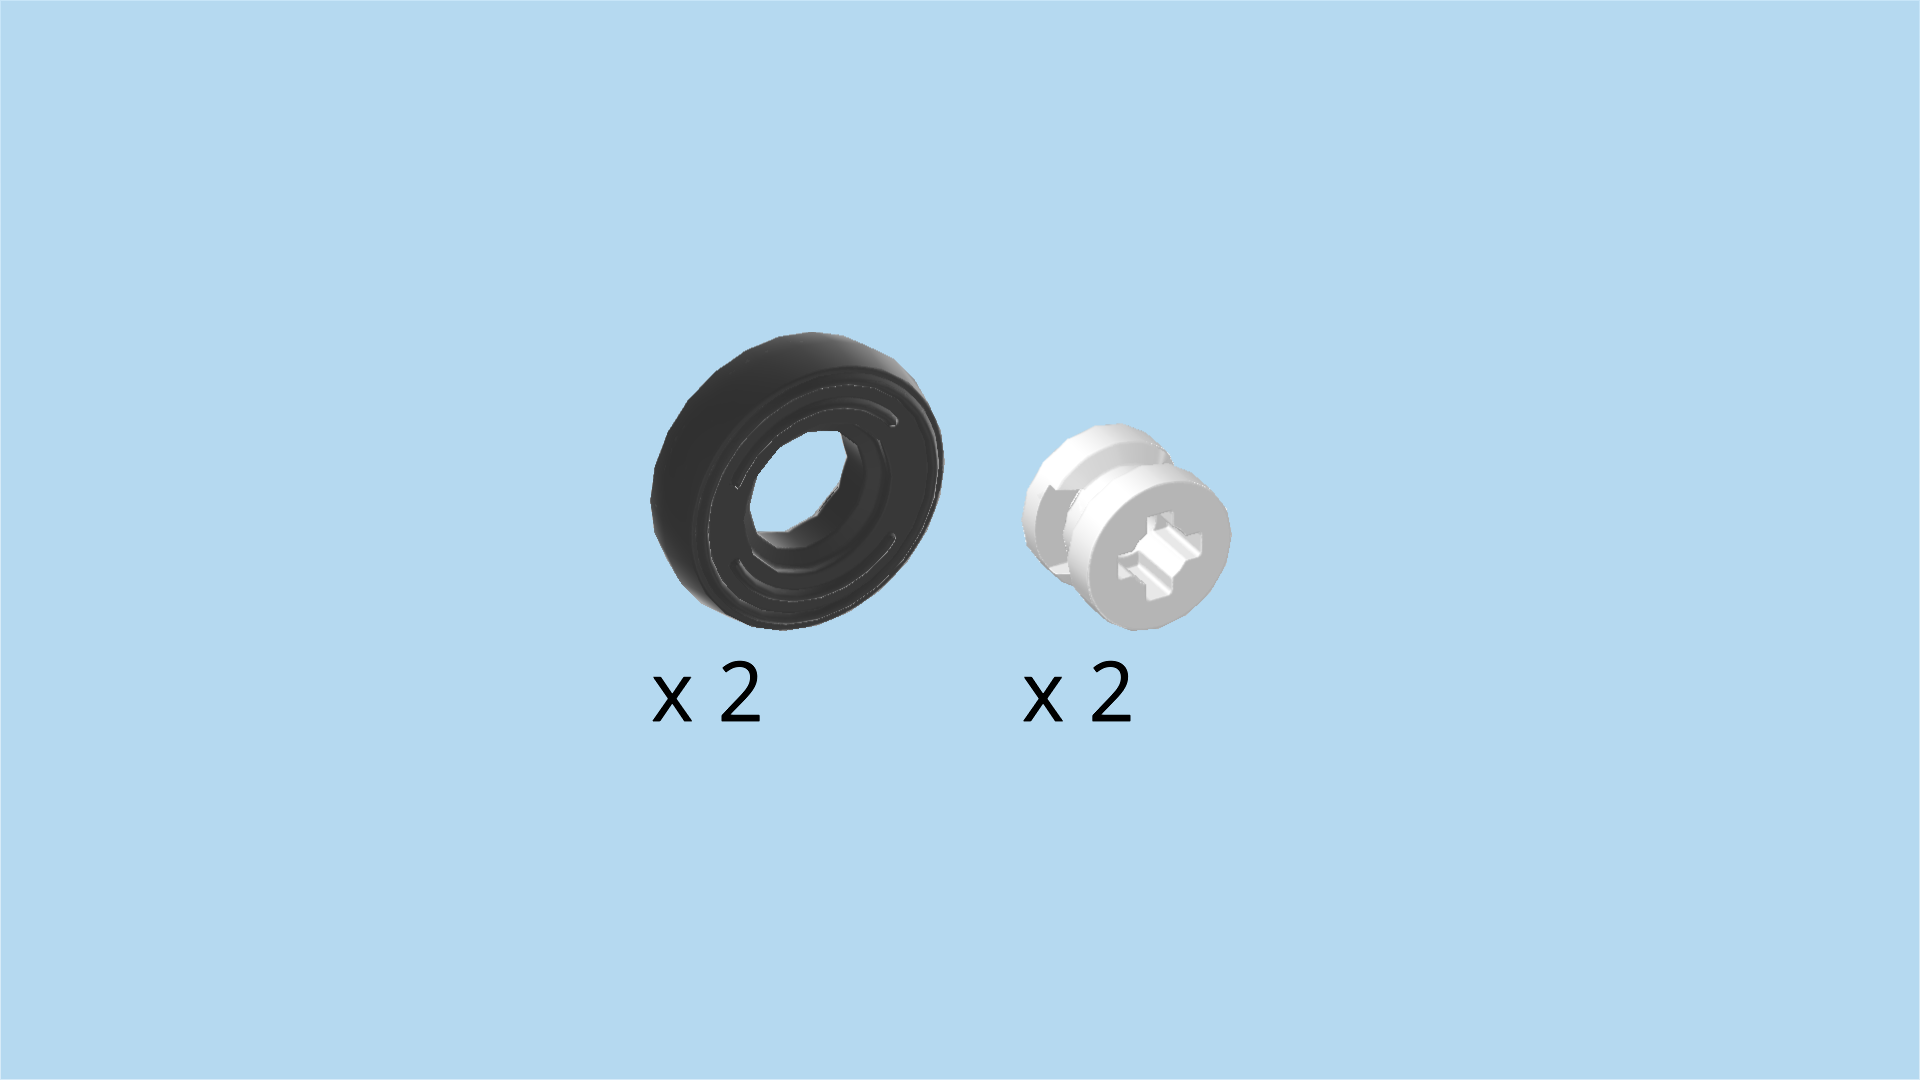
| Collect the following 4 pieces: |
| 2 white narrow rims with cross hole, |
| and 2 black small slick rubber tires. |
| Put the rims into the tires. |
| Snap the two rear wheels onto the 2 pin connectors sticking out towards the front and back on the right edge of the structure. |
| Great job! This was hard! Once all three wheels are mounted, you can flip the structure right side up again. |
| Find 1 transparent red flat tile 1x2. |
| Put it vertically centered on the window frame in the middle of the structure. |
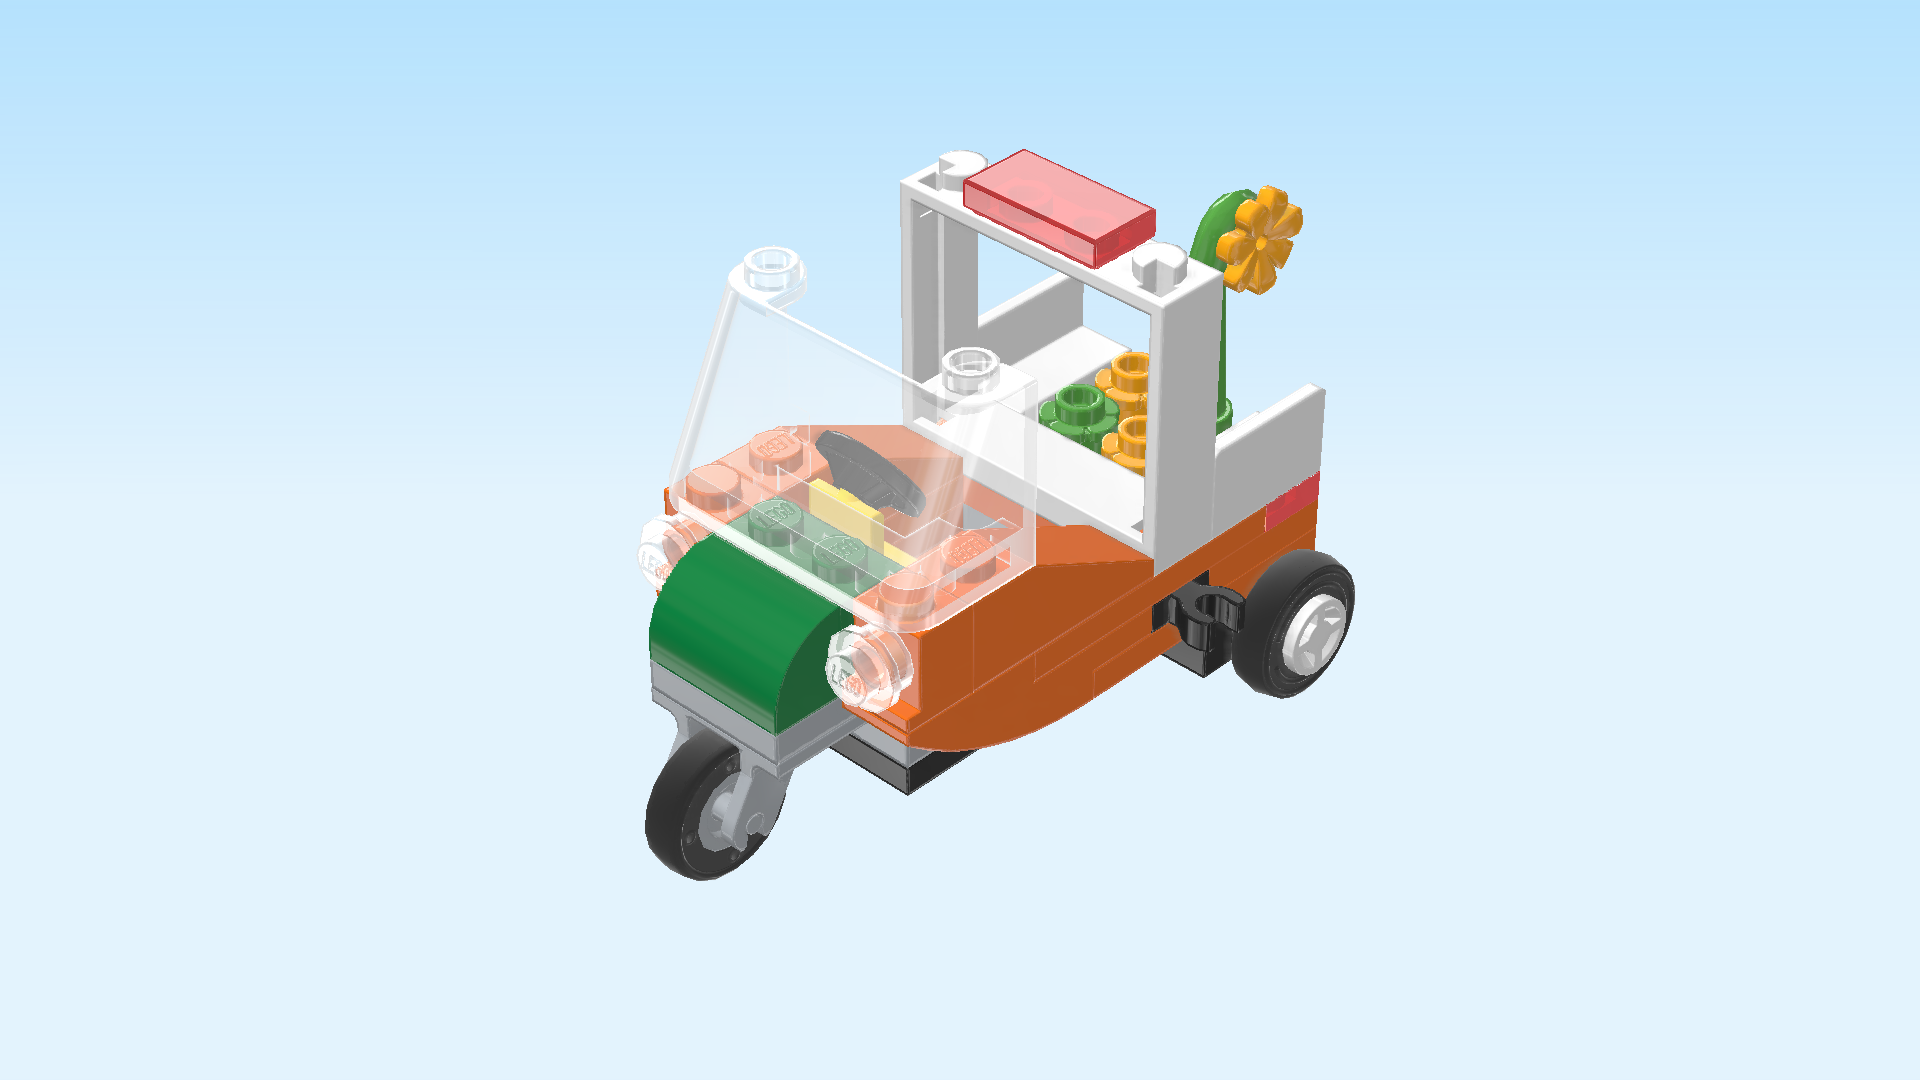
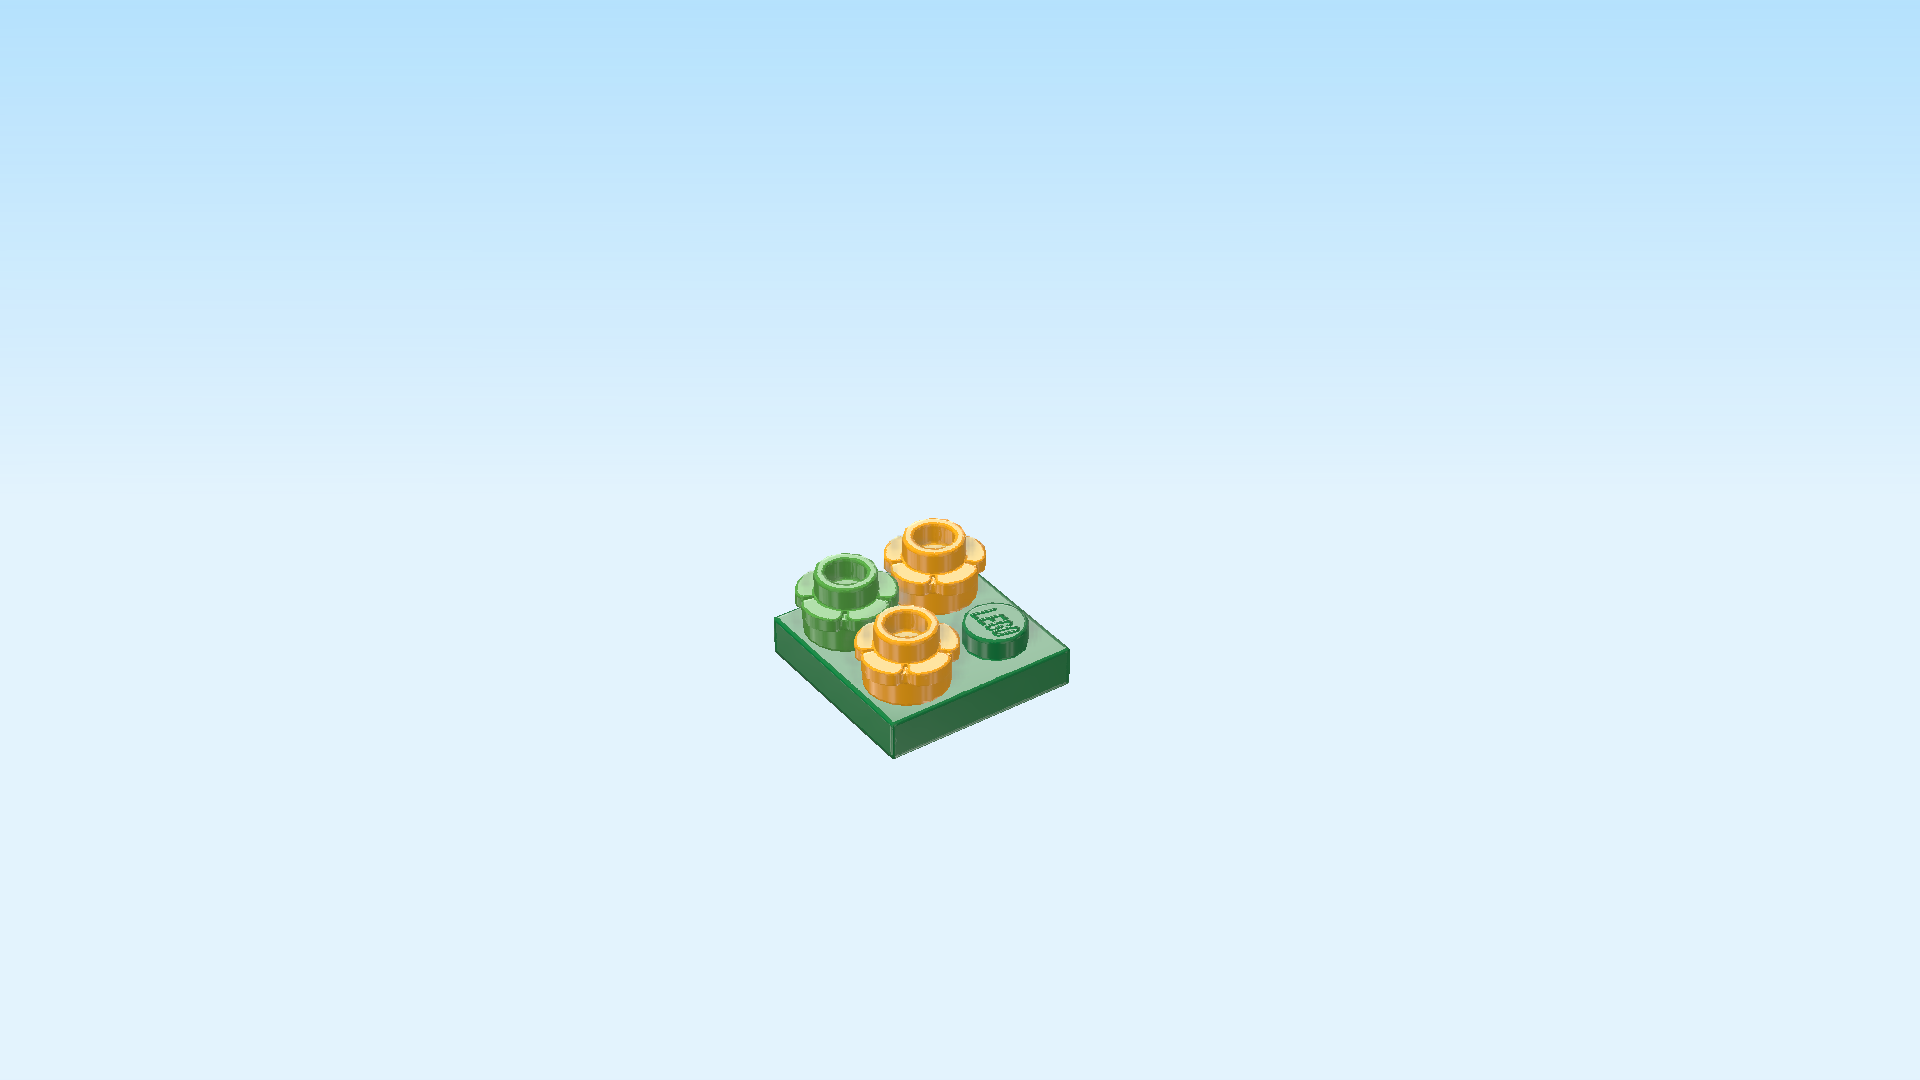
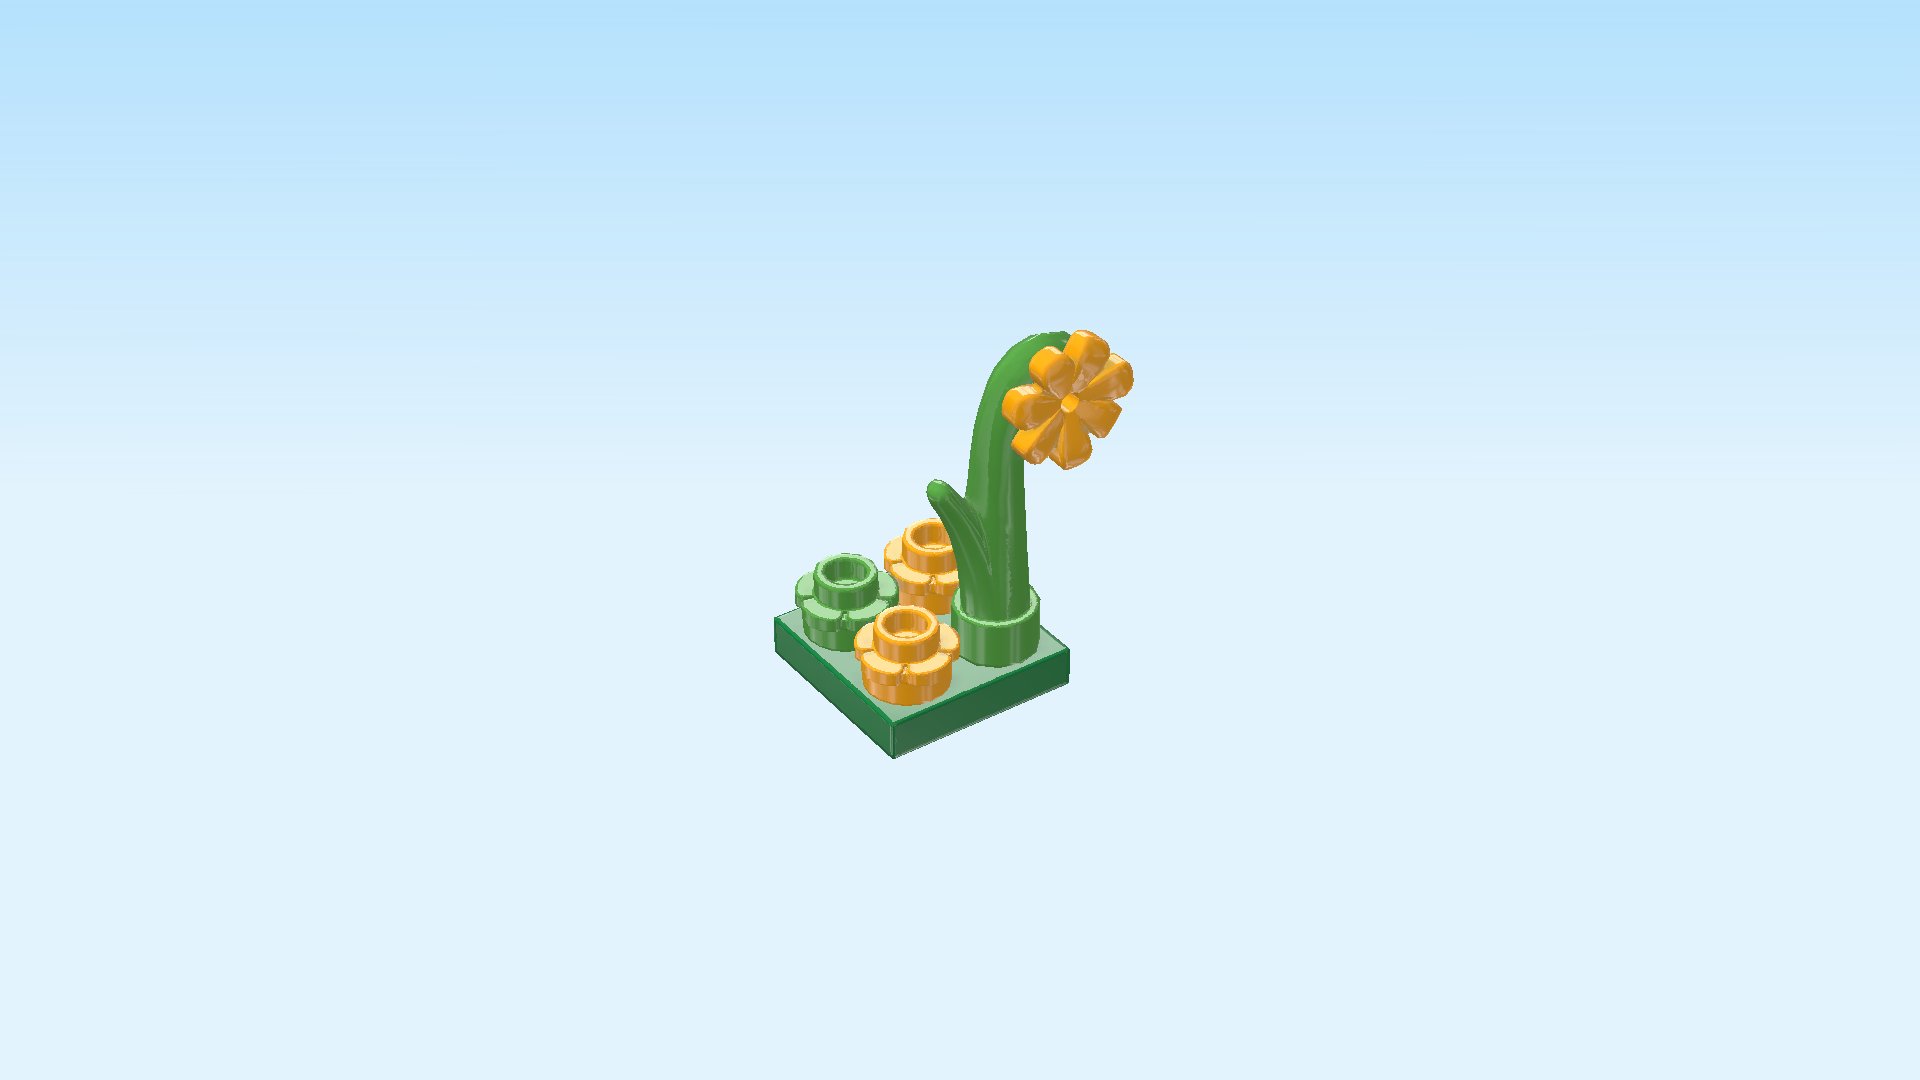
| Now, we will build the flower bed for the truck. |
| This flower bed will have some yellow flowers in it. You can place the flowers as instructed, or pick your own order. |
| Collect the following 2 pieces: |
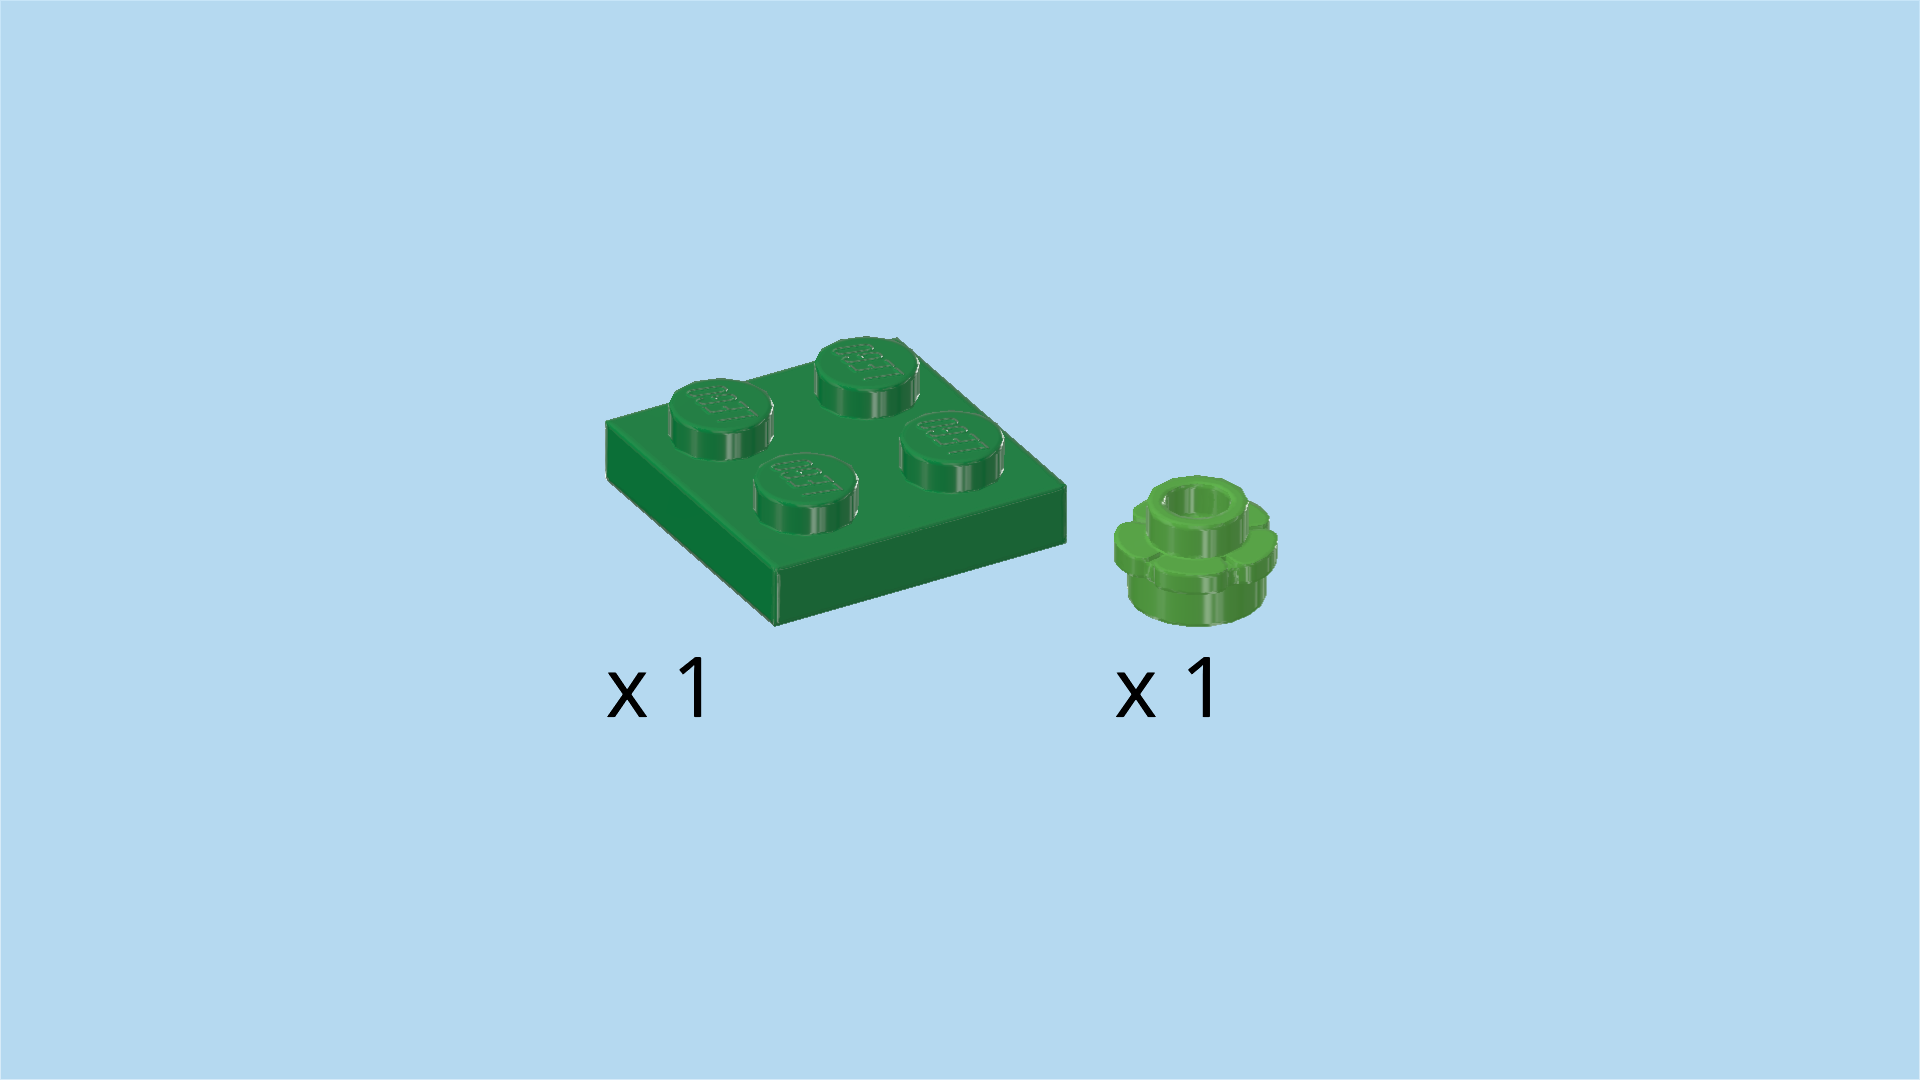
| 1 dark green plate 2x2, |
| and 1 bright green flower piece 1x1. |
| Put the plate 2x2 on the table. |
| Put the green flower piece on the left knob at the back. |
| Find 2 flame yellowish orange flower pieces 1x1. |
| Put 1 to the right and the other one in front of the previous piece. |
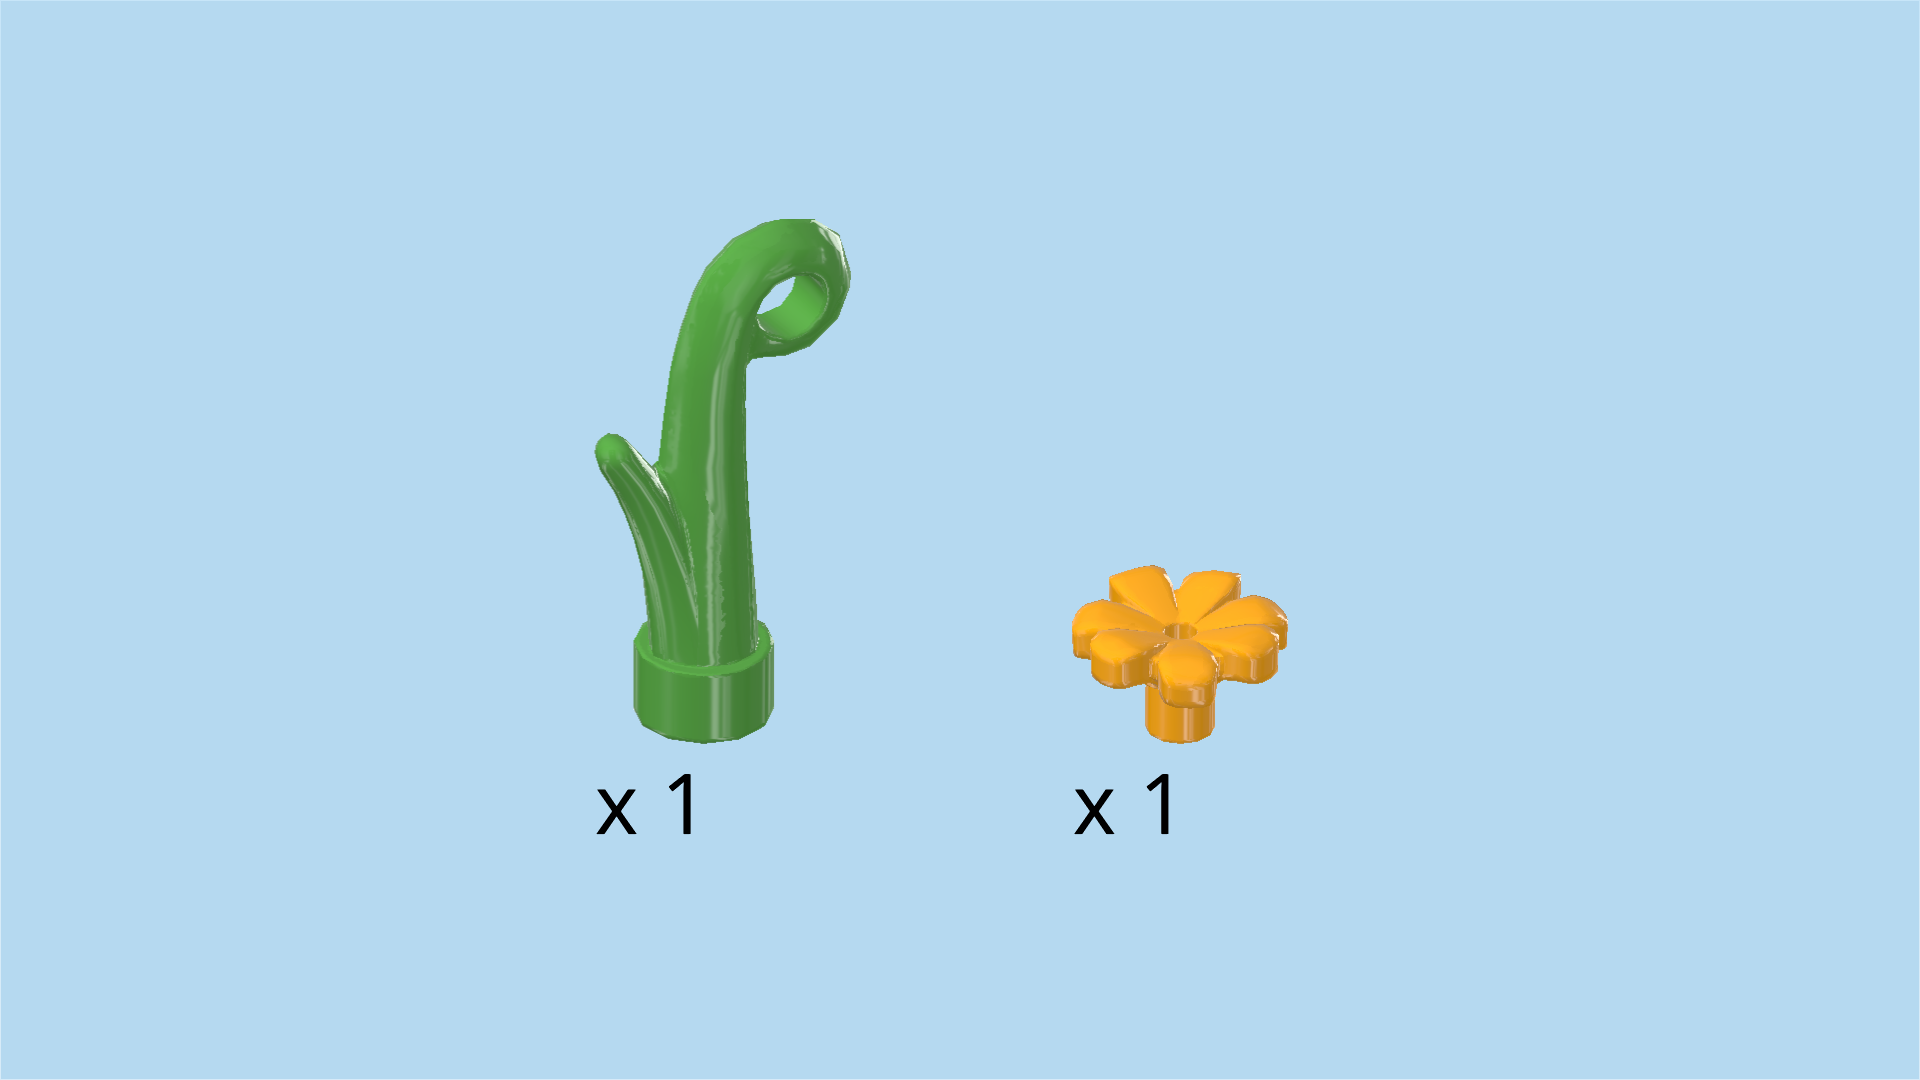
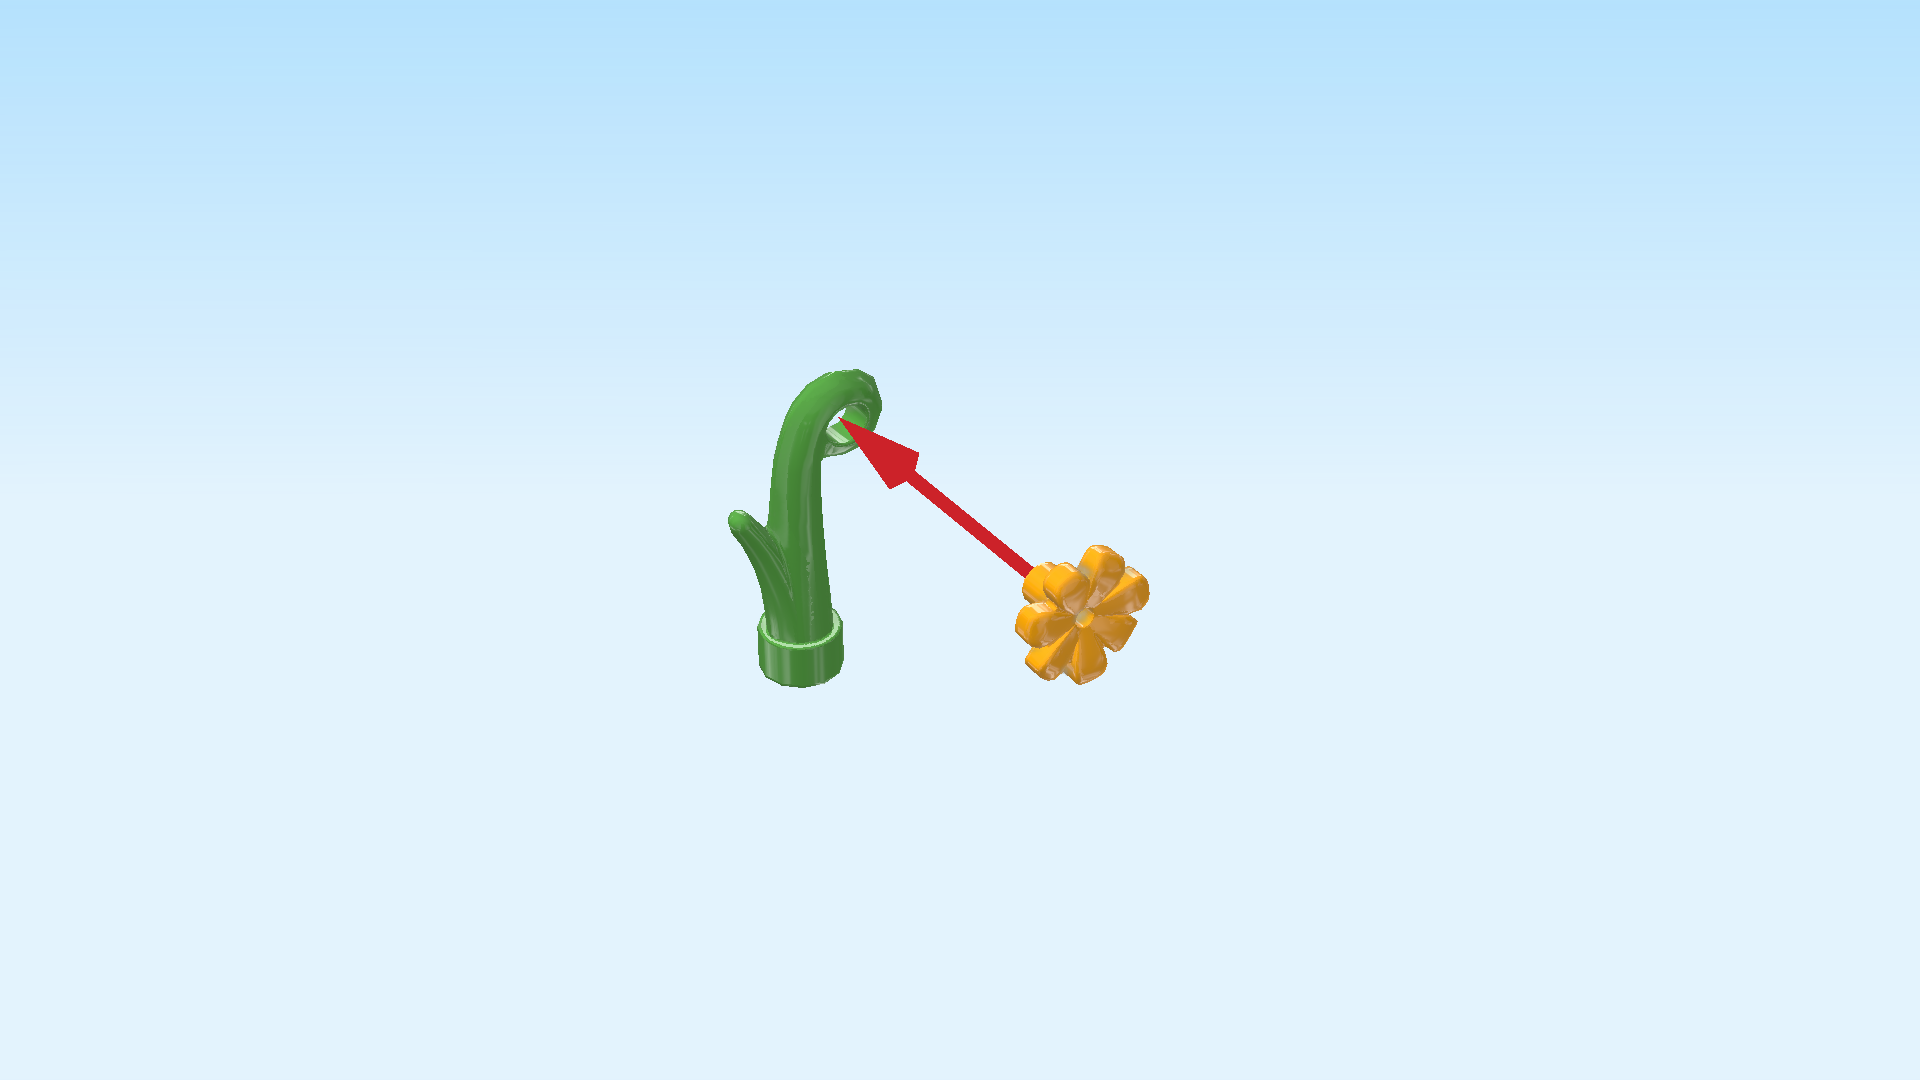
| Next, we will build a yellow blossoming flower. |
| Collect the following 2 pieces: |
| 1 bright green stem of curly grass, |
| and 1 flame yellowish orange decoration flower with small shaft. |
| Insert the small shaft of the flower into the curly part at the top of the stem. |
| Mount the blossoming flower on the front right knob. |
| The flower bed for the truck is finished! Well done! Put it on the round plate 2x2 with 1 knob on the right edge of the truck. |
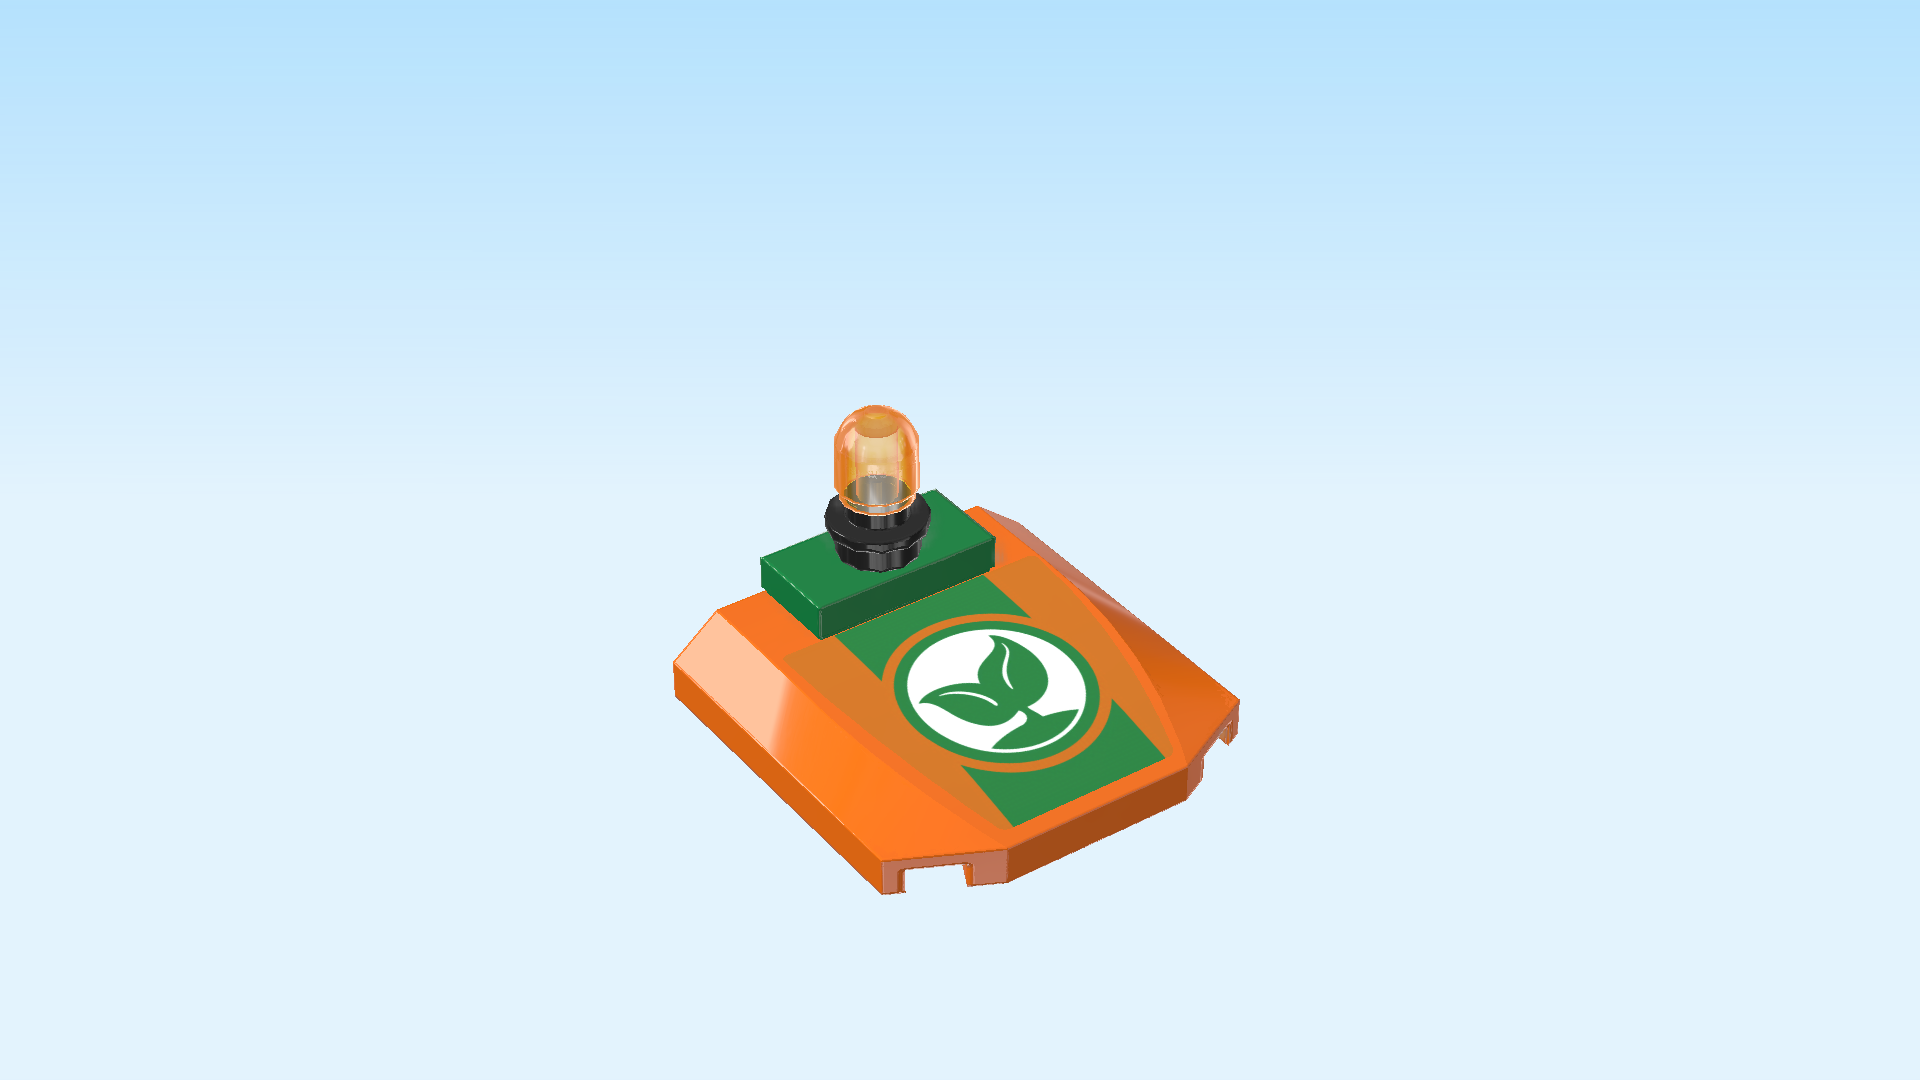
| Next, we will make the truck roof. |
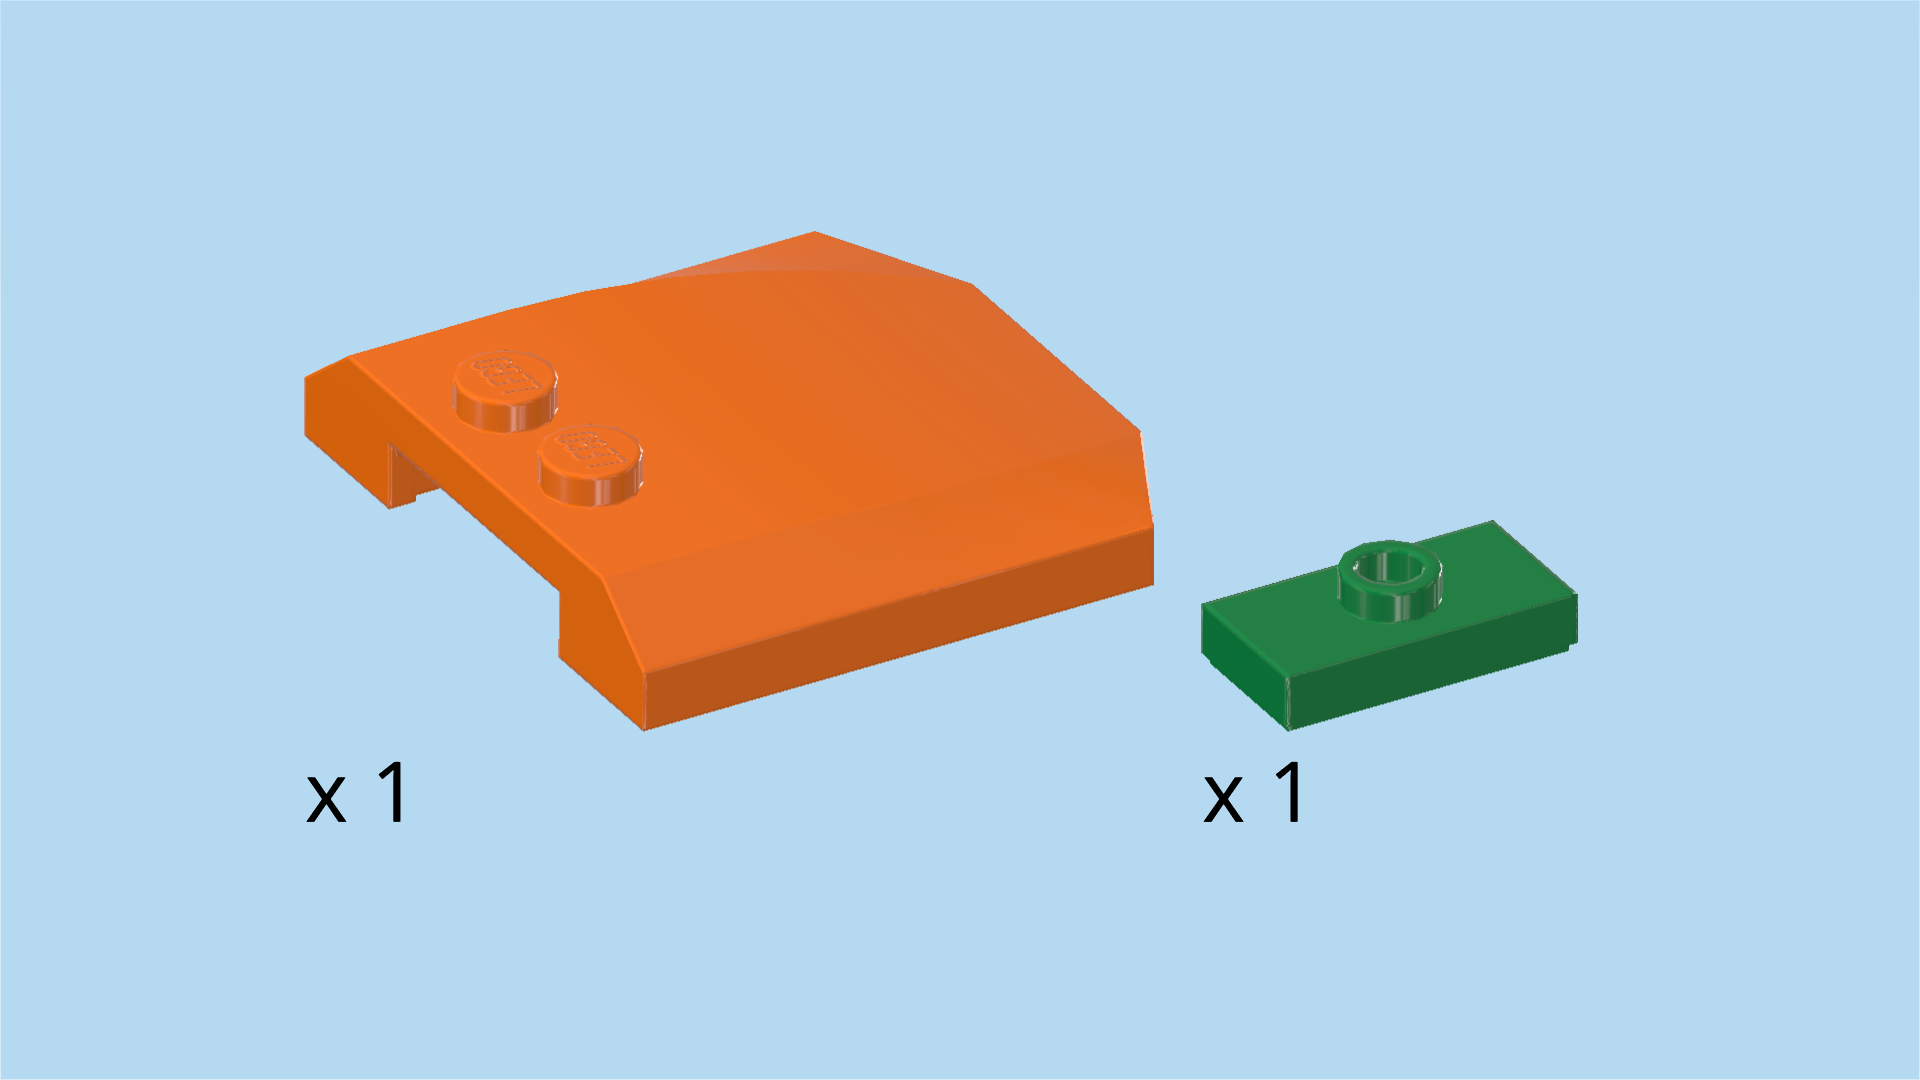
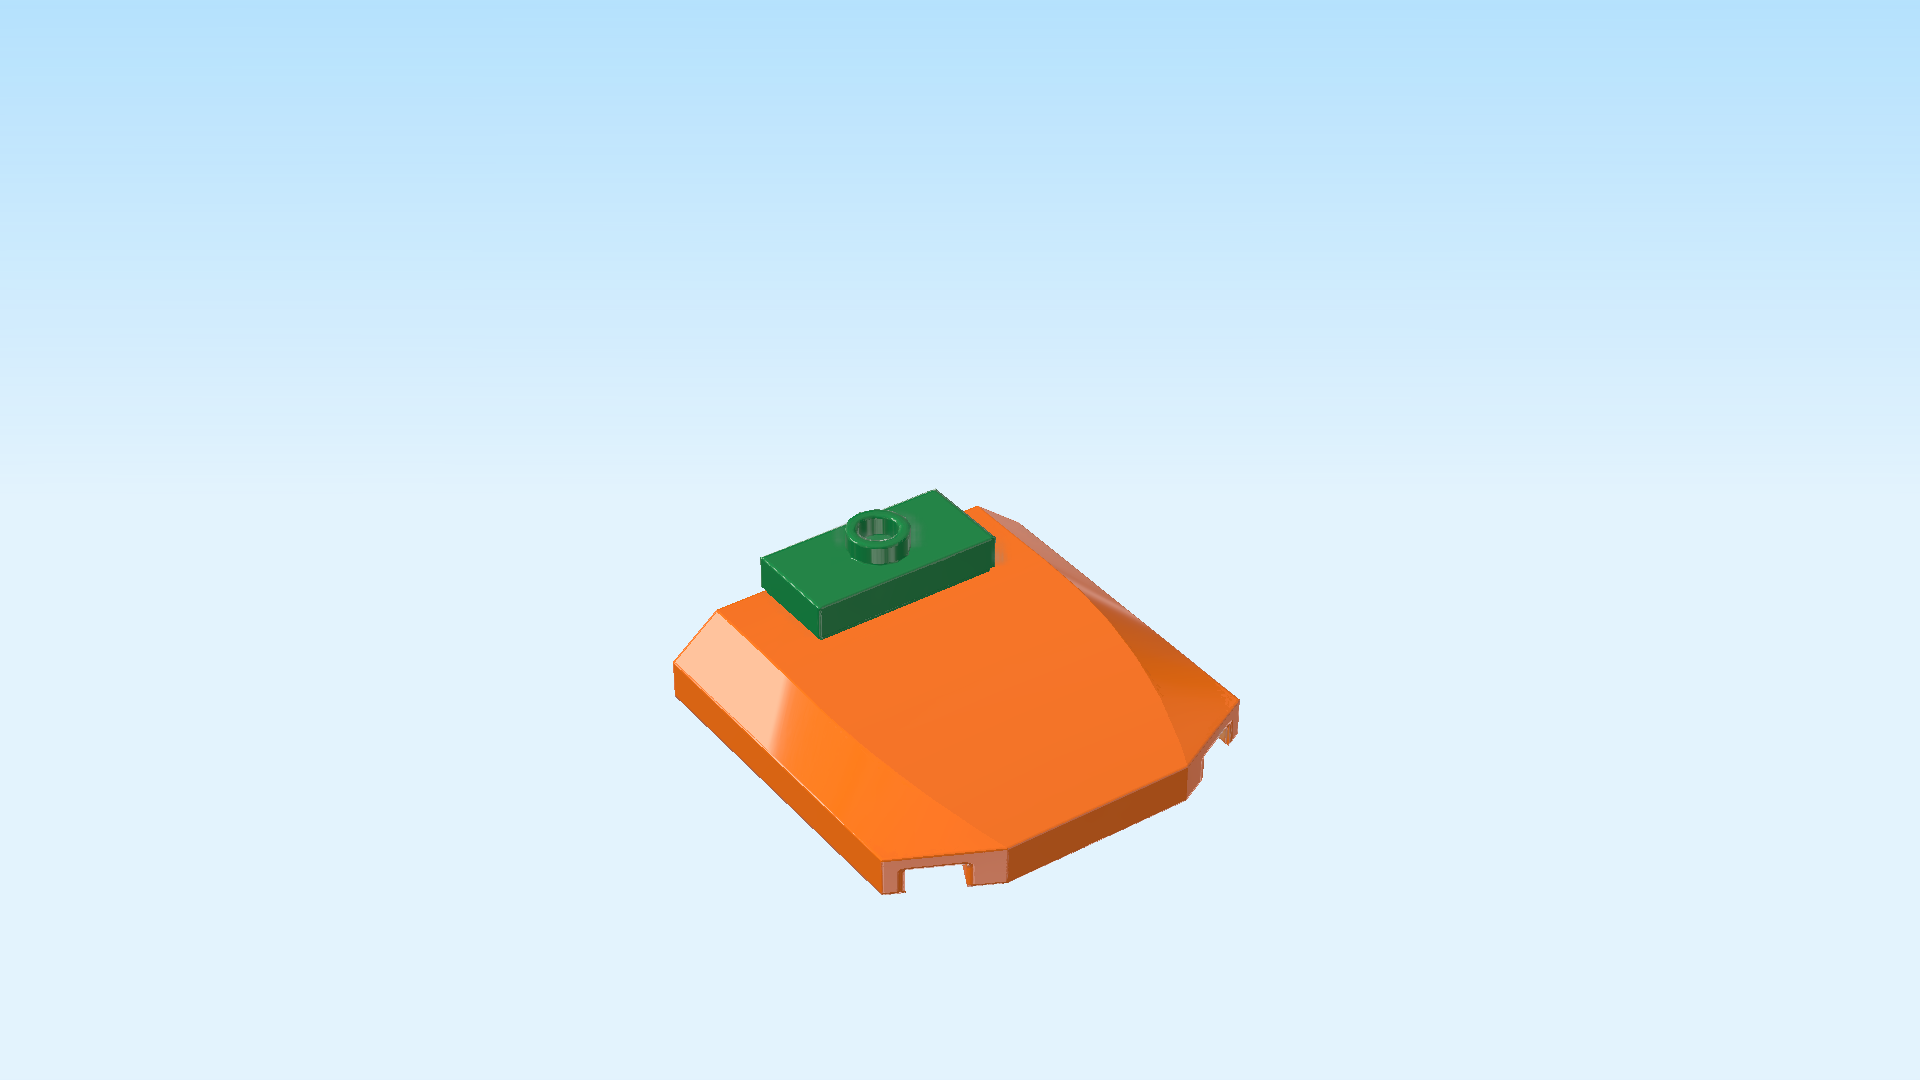
| Collect the following 2 pieces: |
| 1 bright orange hood plate 4x4x⅔ with 2 angled corners and 2 knobs, |
| and 1 dark green plate 1x2 with 1 knob. |
| Put the hood plate 4x4x⅔ on the table, angled corners to the front. |
| Put the plate 1x2 horizontally on the 2 knobs of the hood plate. |
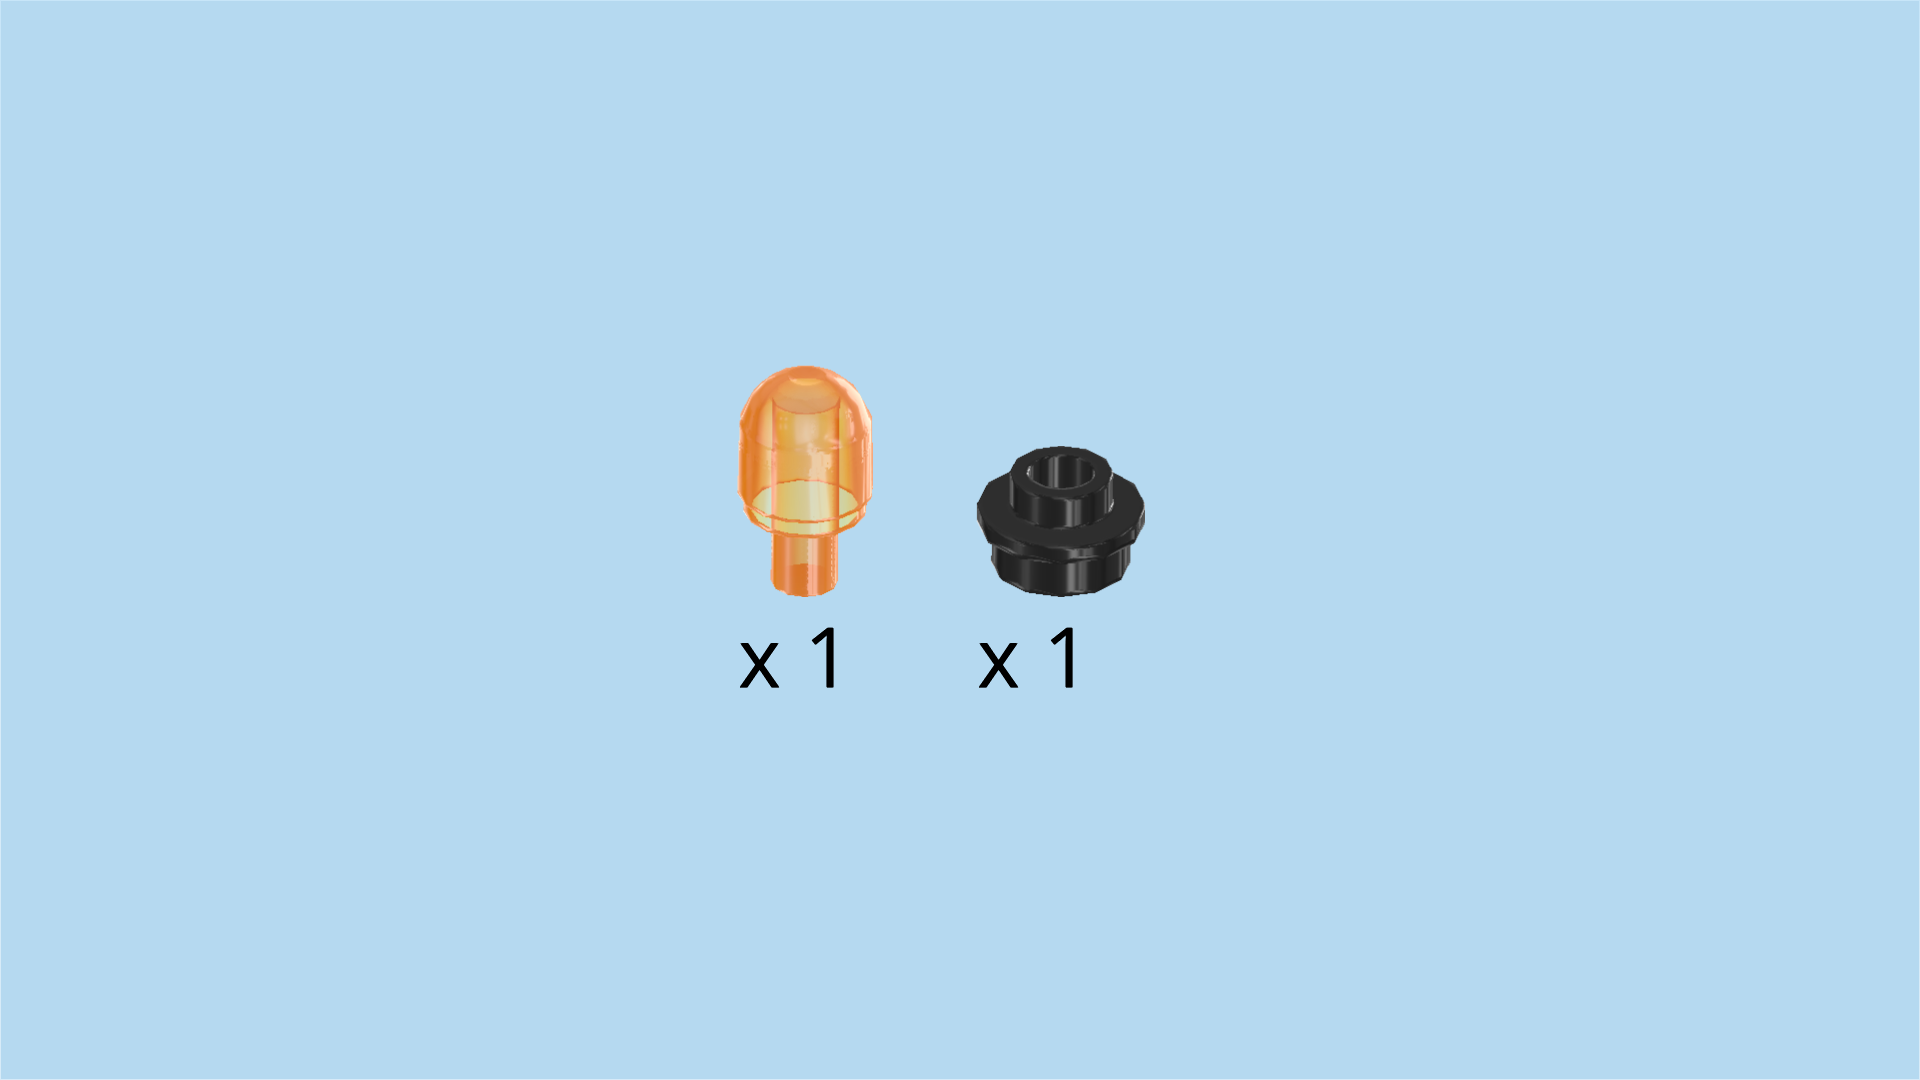
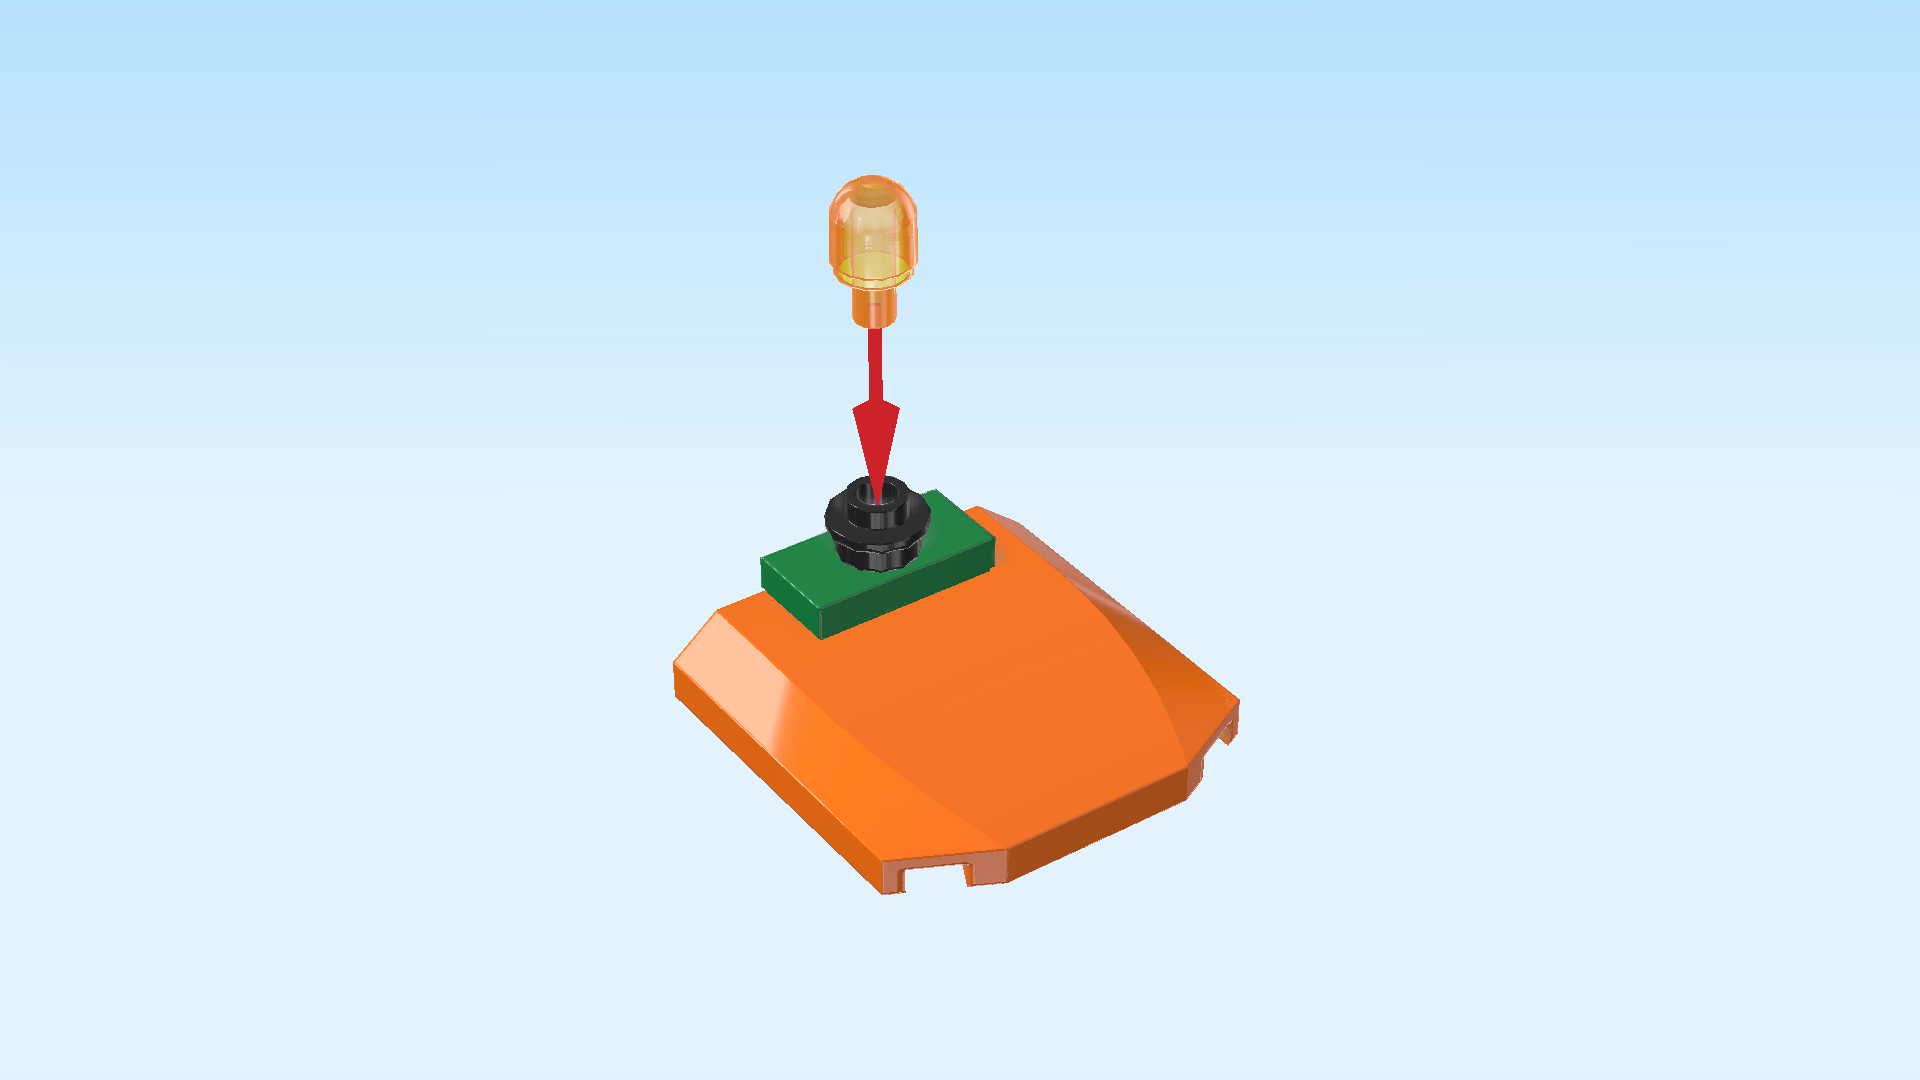
| Collect the following 2 pieces: |
| 1 black round plate 1x1 with through-hole, |
| and 1 transparent bright orange bulb with shaft. |
| Put the round plate 1x1 on top of the previous piece. |
| Insert the shaft of the bulb in the hole of the previous piece. |
| Continue if you want to decorate this piece with a sticker now. If not, skip the next 3 sentences. |
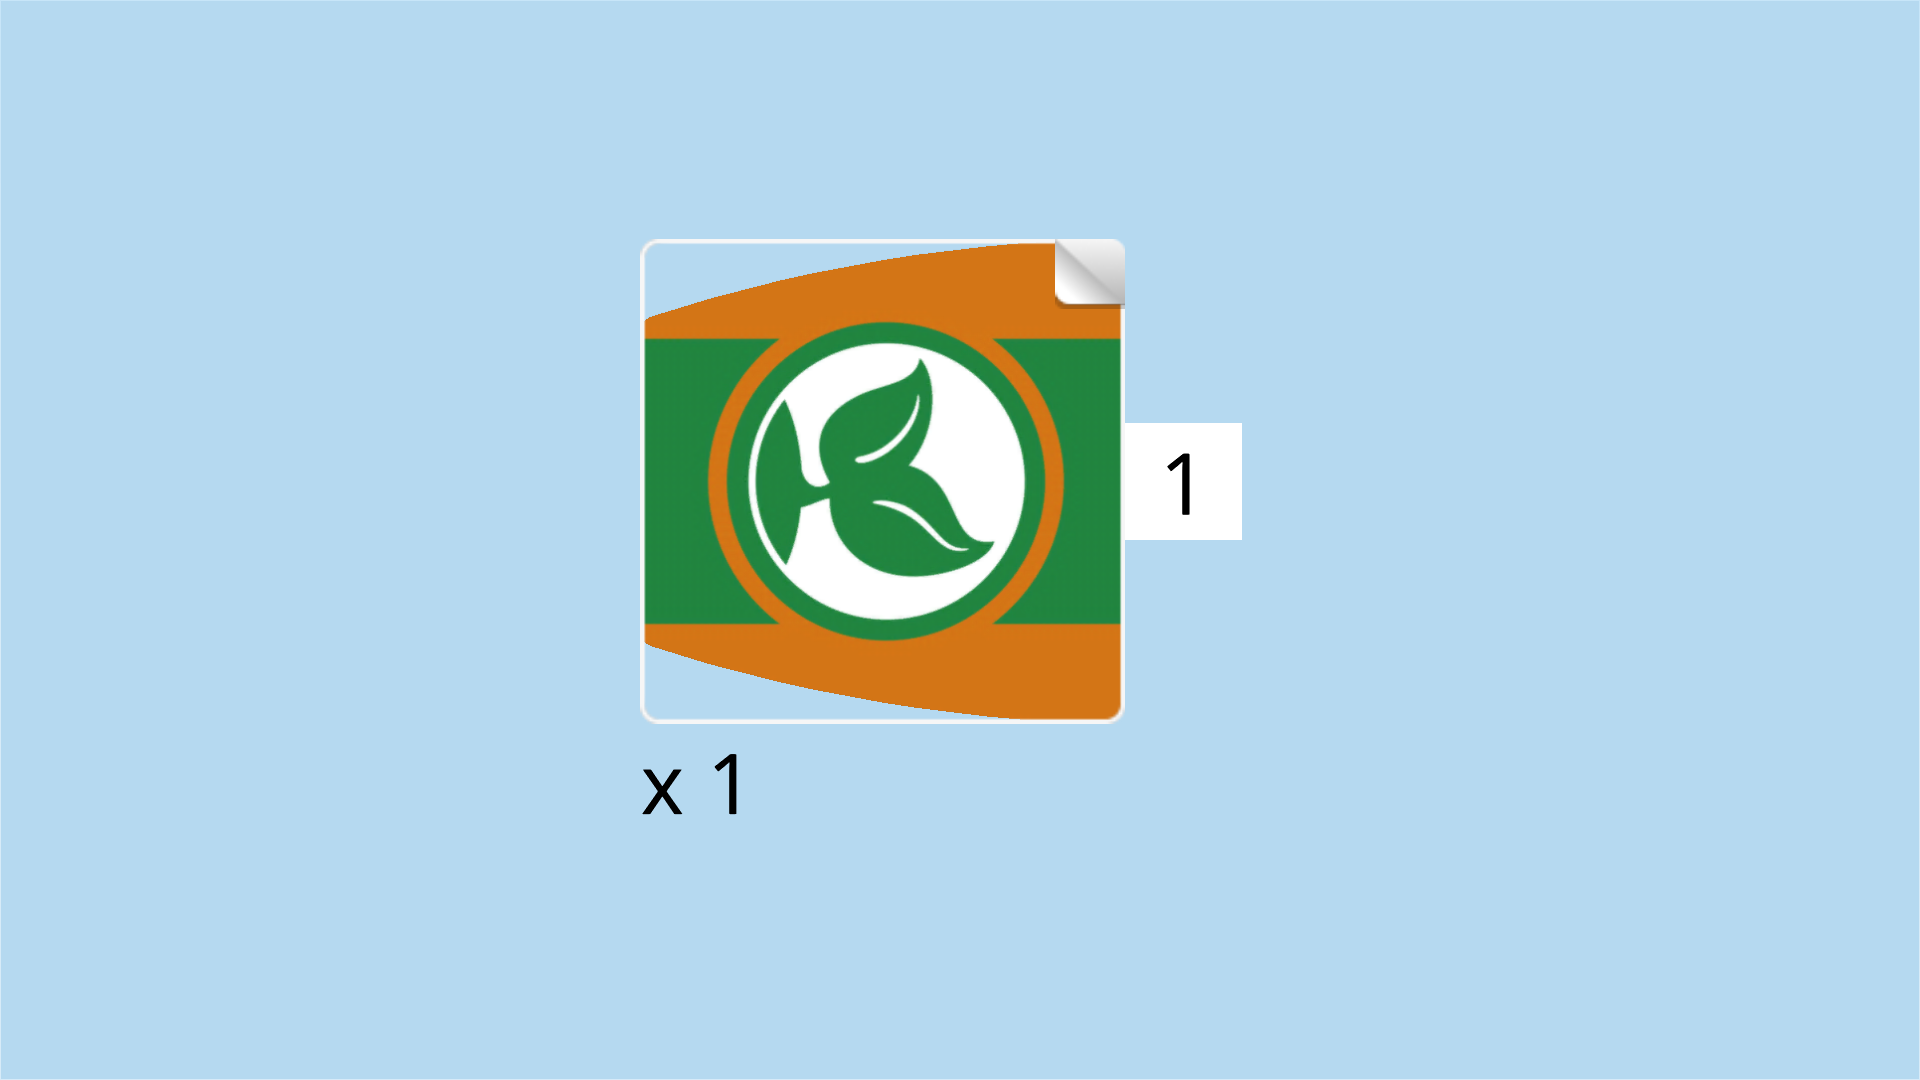
| Find 1 hood-shaped sticker number 1. It is the only sticker on the sticker sheet. Ask a sighted person to help you if needed. |
| Apply it at the front of the hood plate. The shapes of the sticker and the hood plate align. |
| The sticker is orange and green just like the truck itself, and it has a round emblem in the middle with a white background and a green plant on it. |
| The truck roof is finished! Great job! Mount it on top of the truck, angled corners to the left. Make sure the left edge of the roof is mounted on the windshield. |
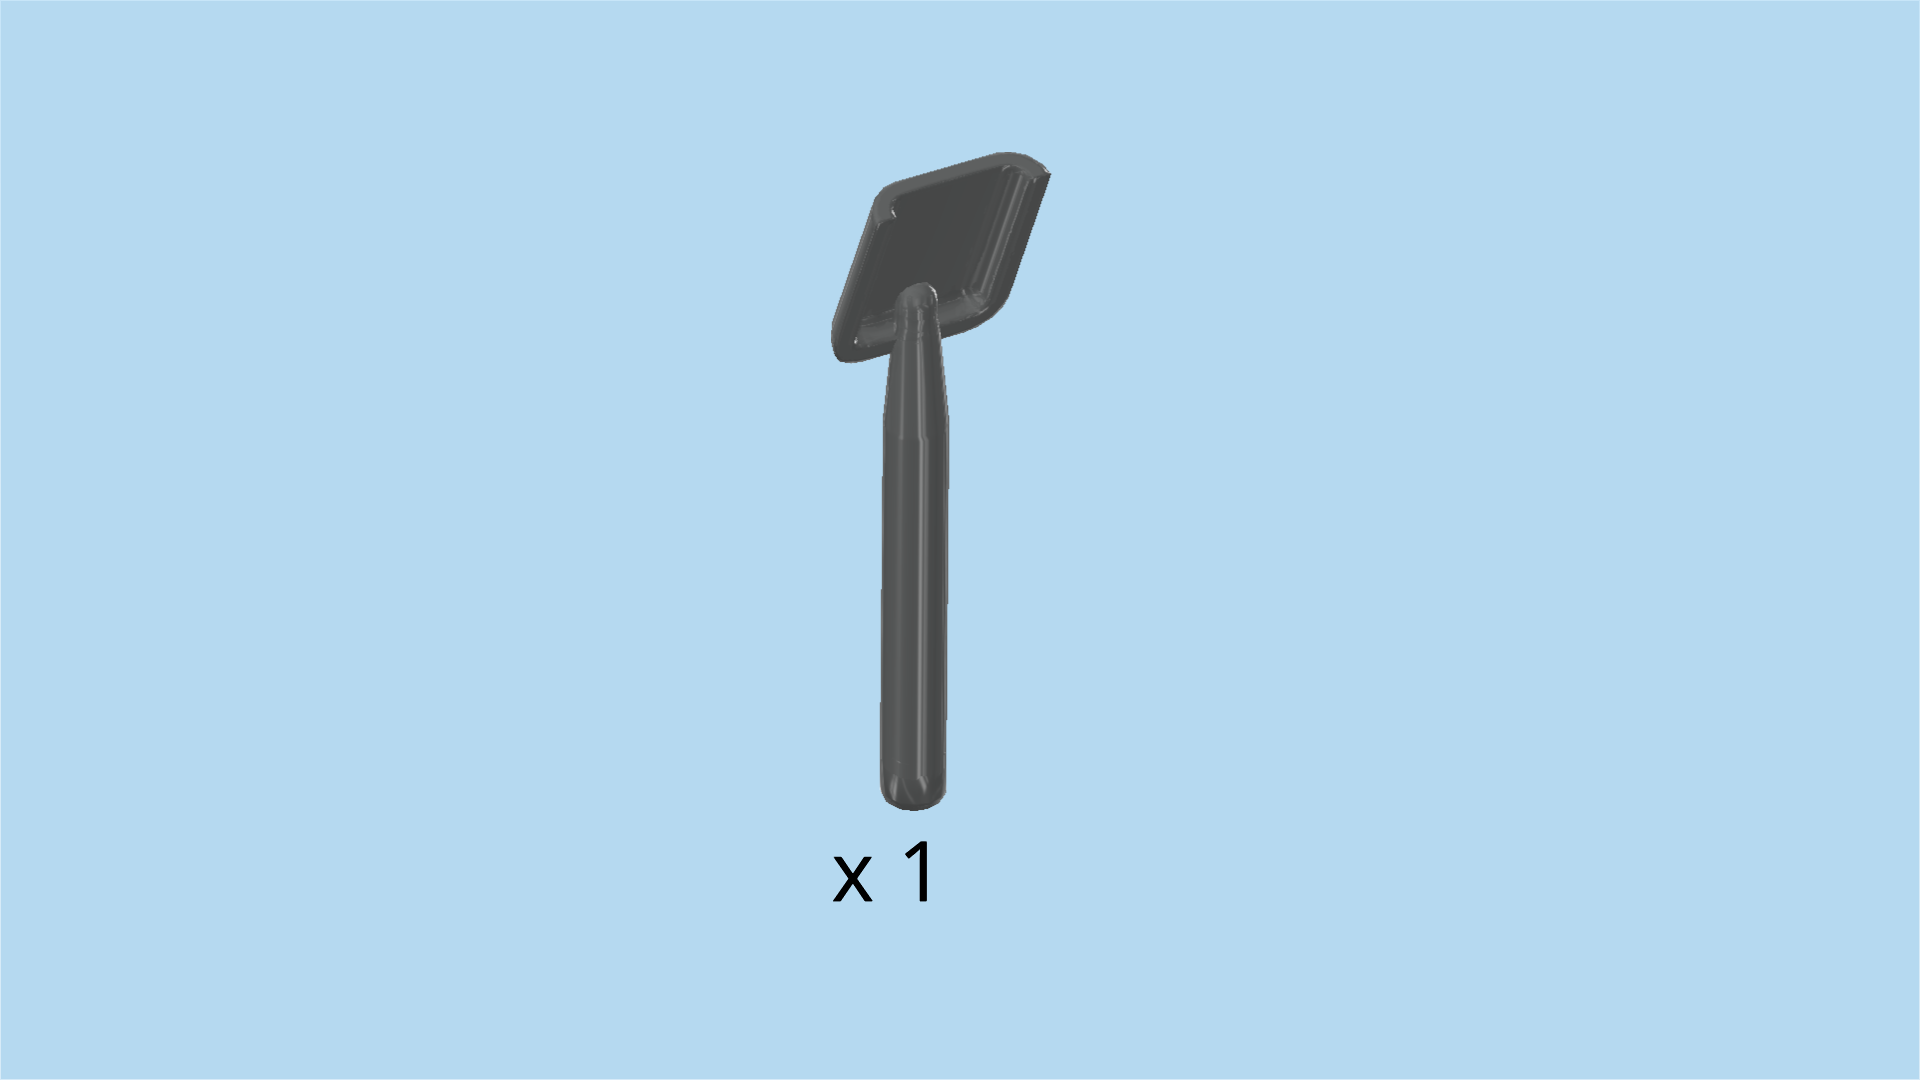
| Find 1 dark stone grey shovel. |
| Snap its handle into one of the clasps sticking out of the truck's sides; they are just below the window frame. |
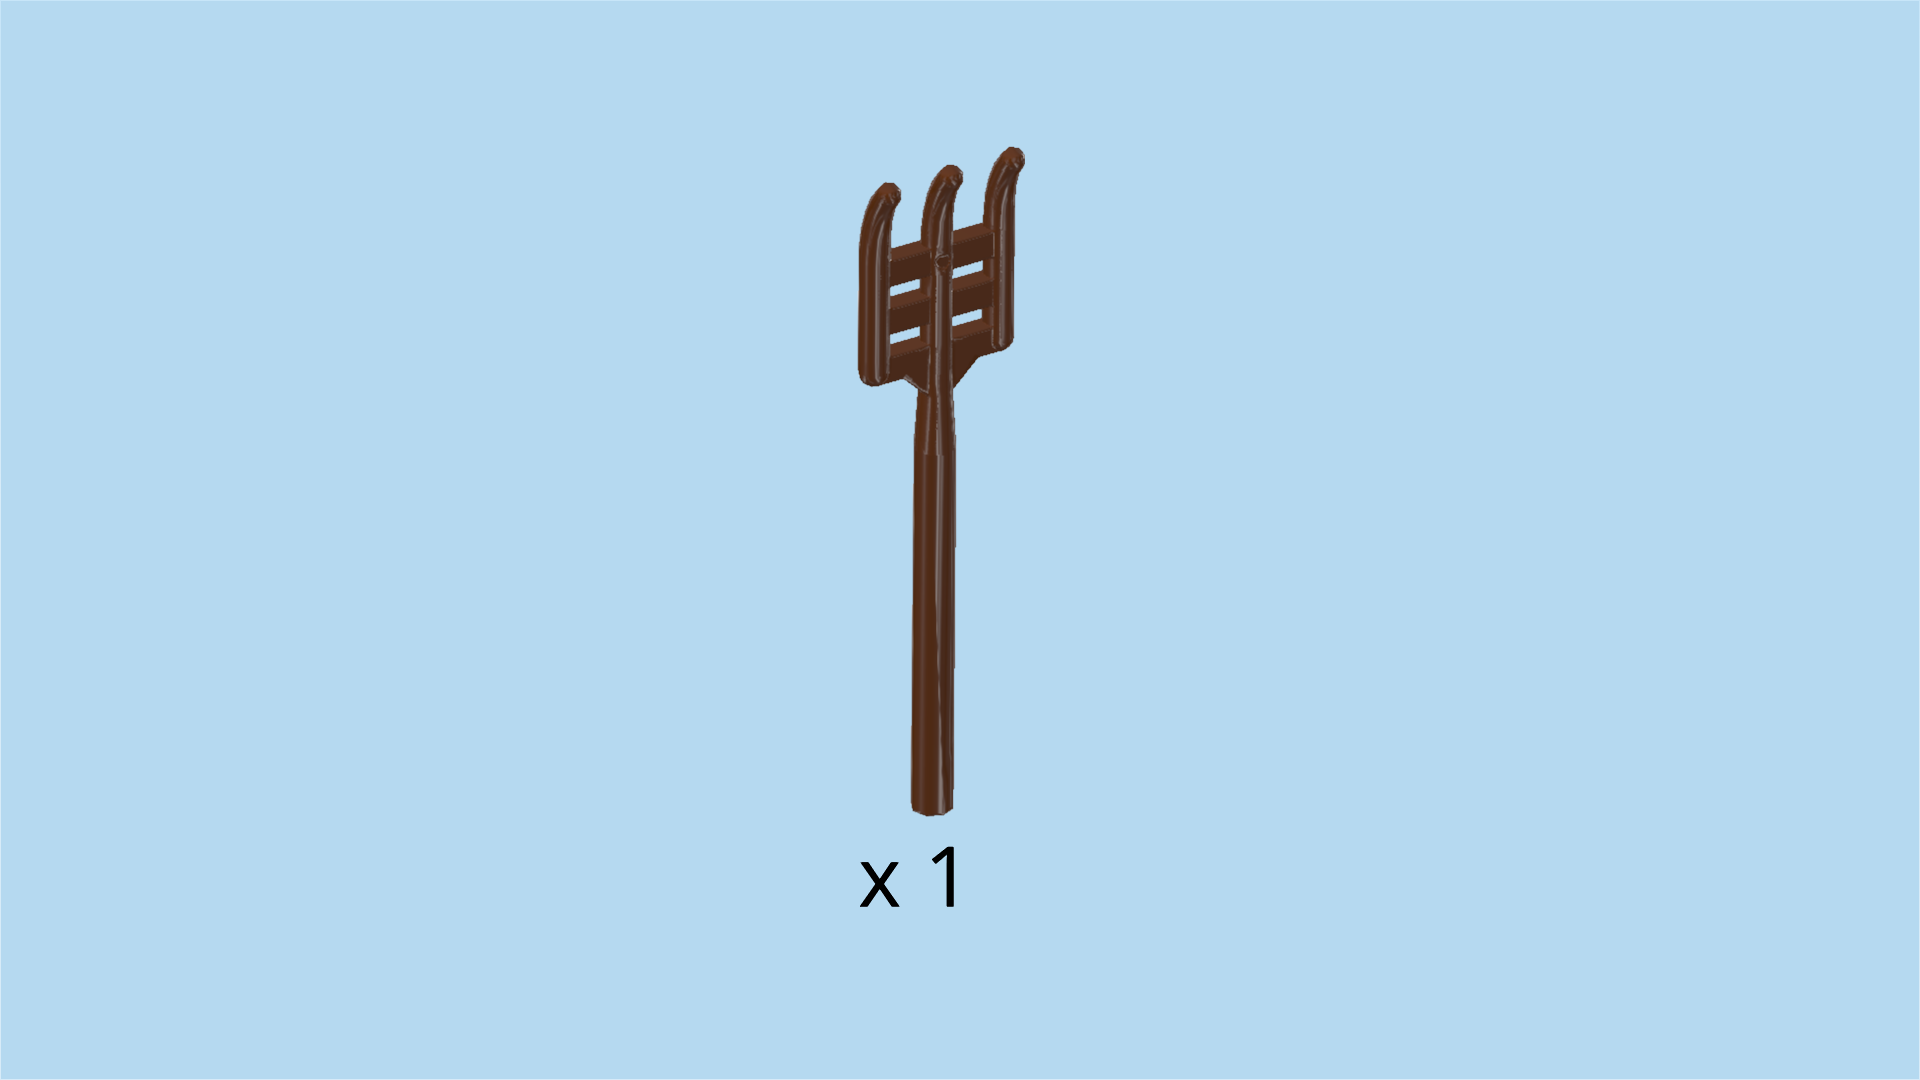
| Find 1 reddish brown pitchfork. |
| Snap it into the clasp on the other side of the truck. |
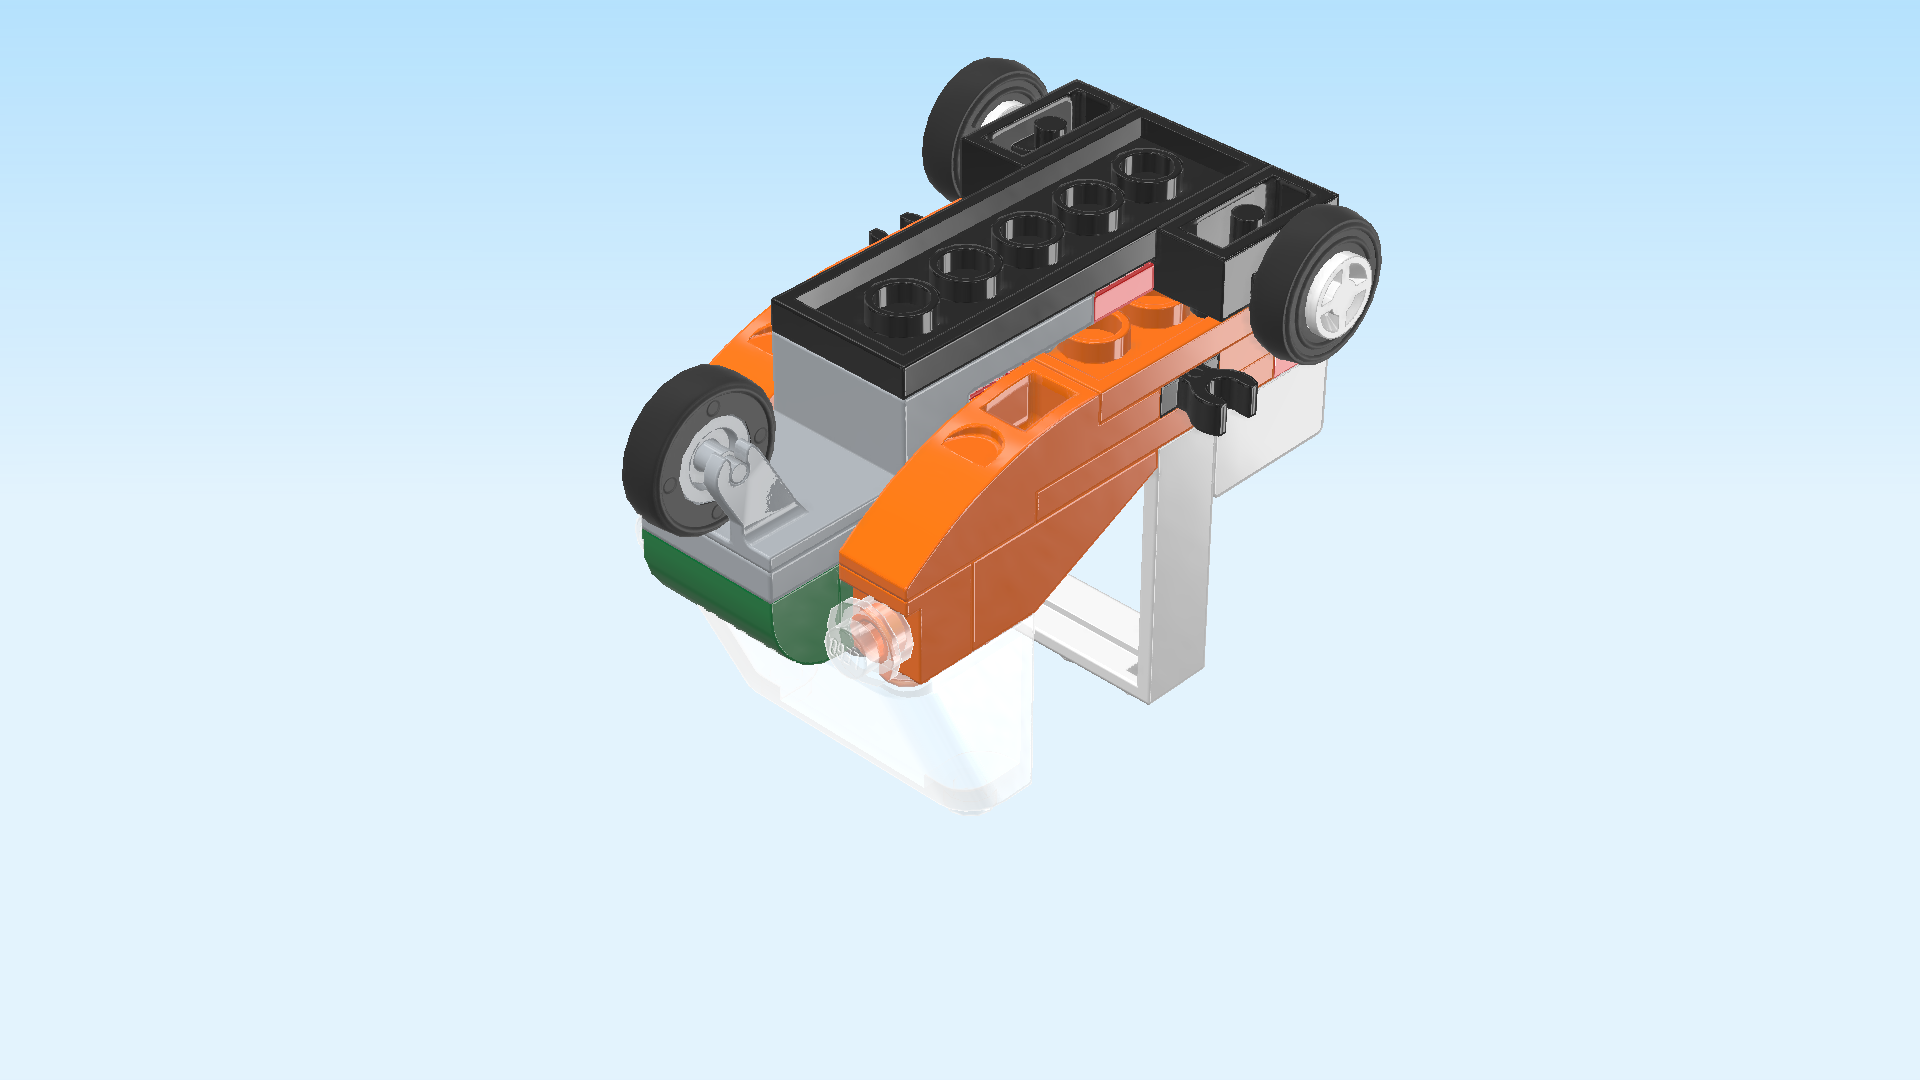
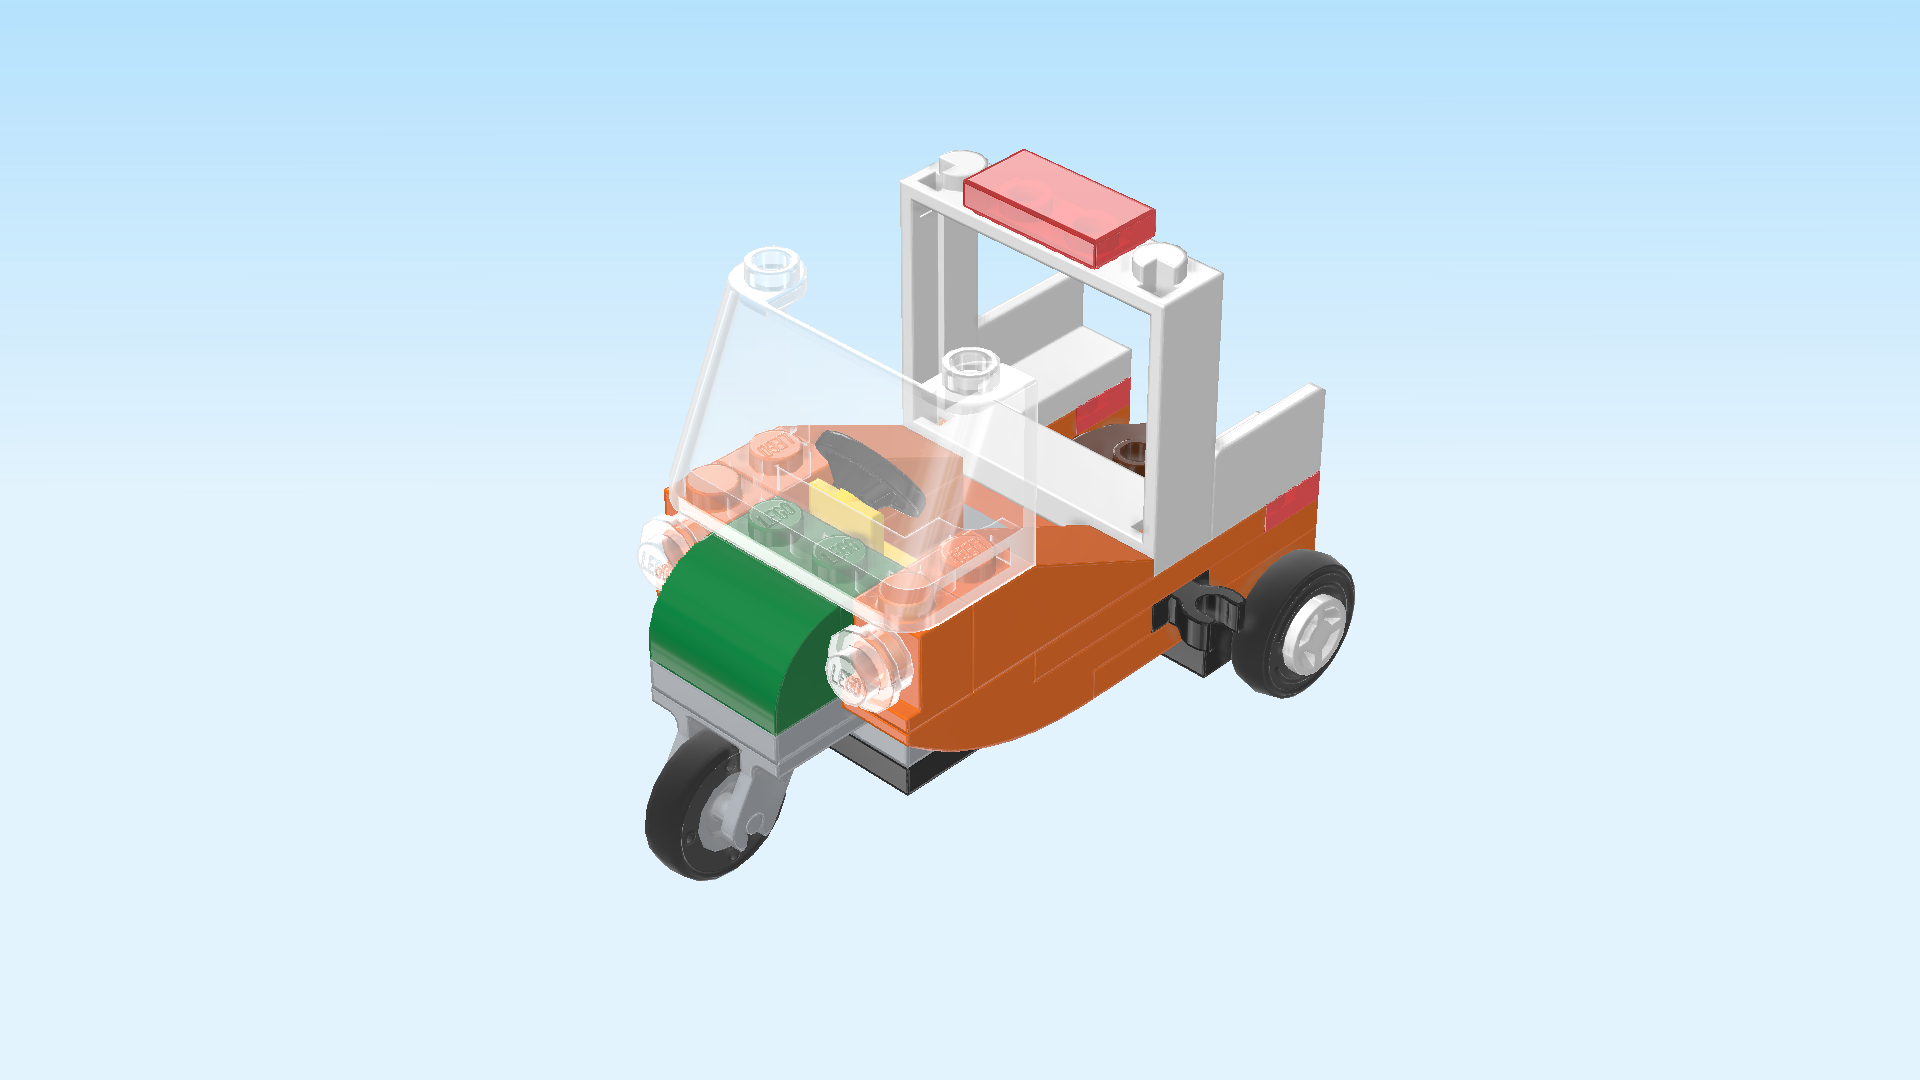
| The three-wheeled truck is finished! Well done! Now, the gardener can take his truck for a spin and start looking for spots in the park that could use some new flowers. To seat the gardener in the truck, it is best to take off the roof, place him in the driver's seat, and put the roof on again. |
| Open bag number 2. You can choose to have the bricks sorted by color again. This bag contains all bricks and pieces for the little boy Minifigure, and the picnic bench with oak tree and squirrels. |
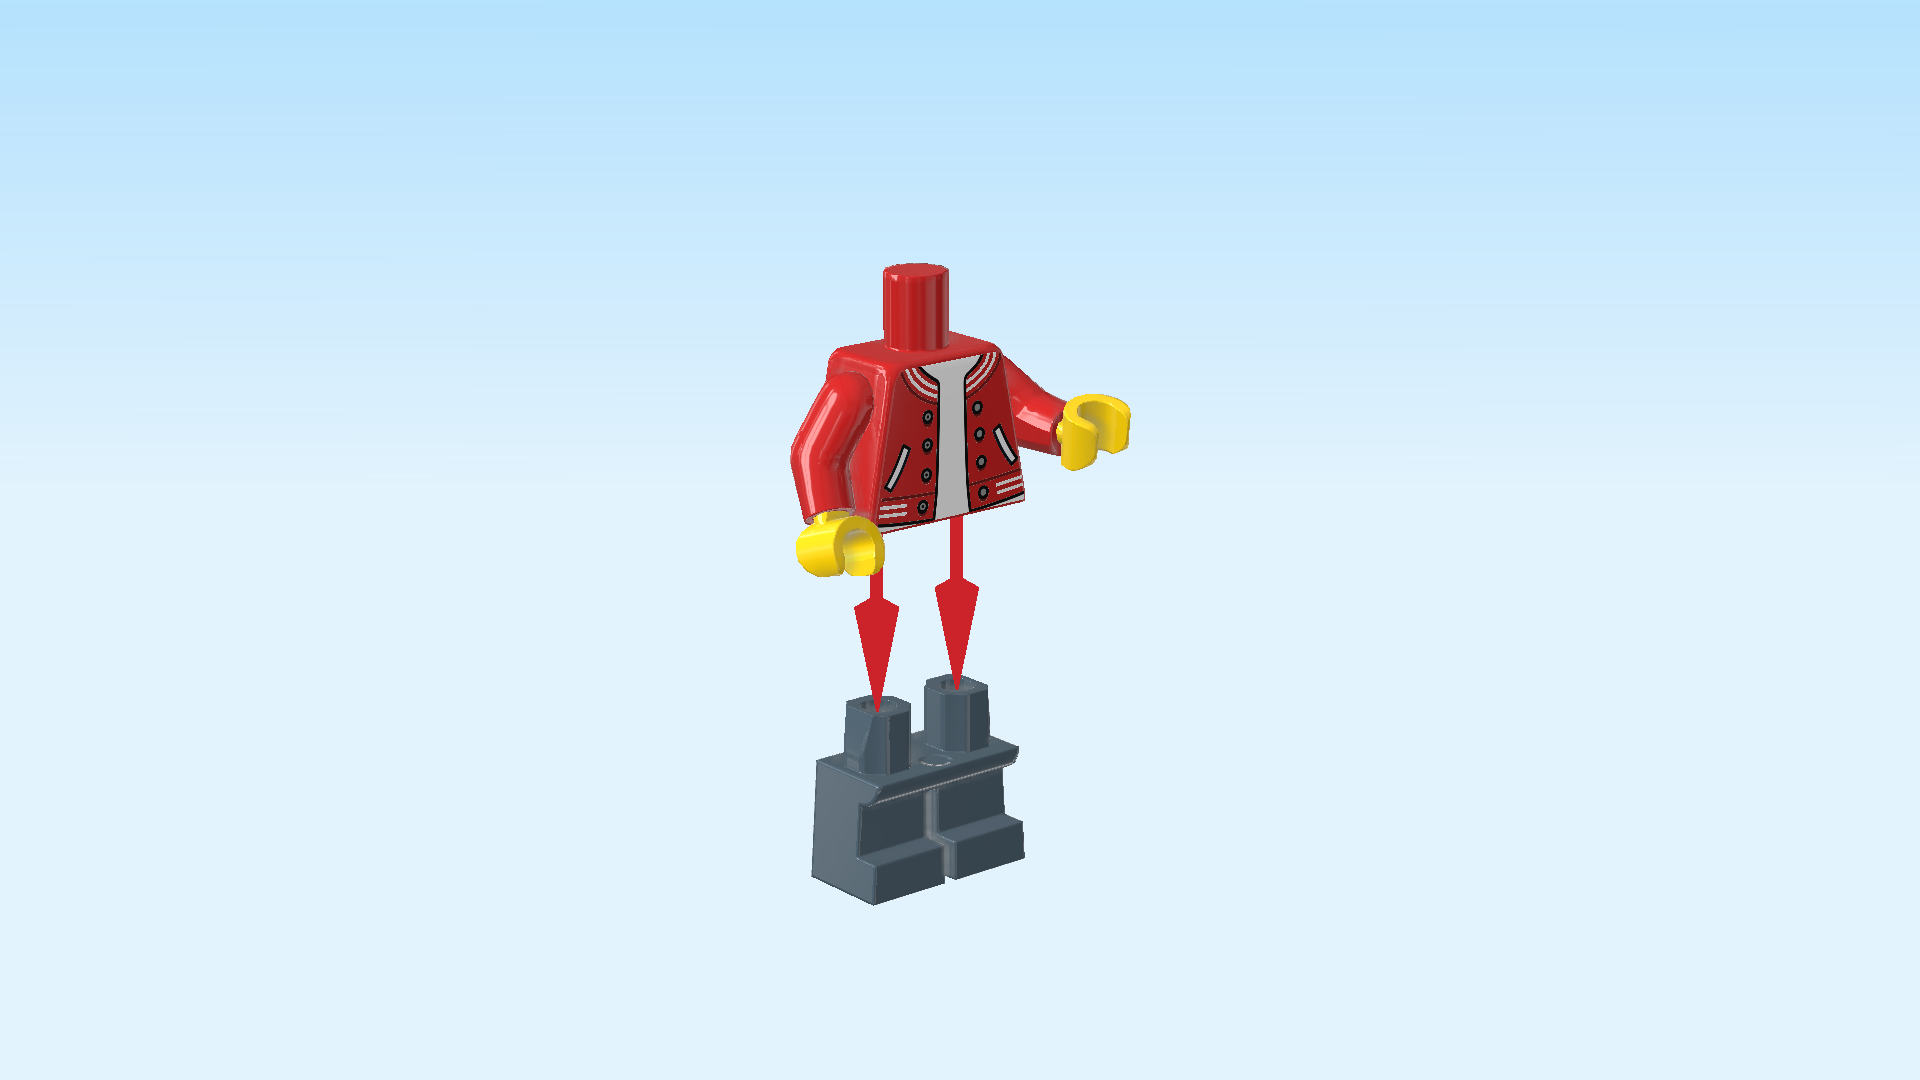
| Now, we will build the little boy Minifigure. |
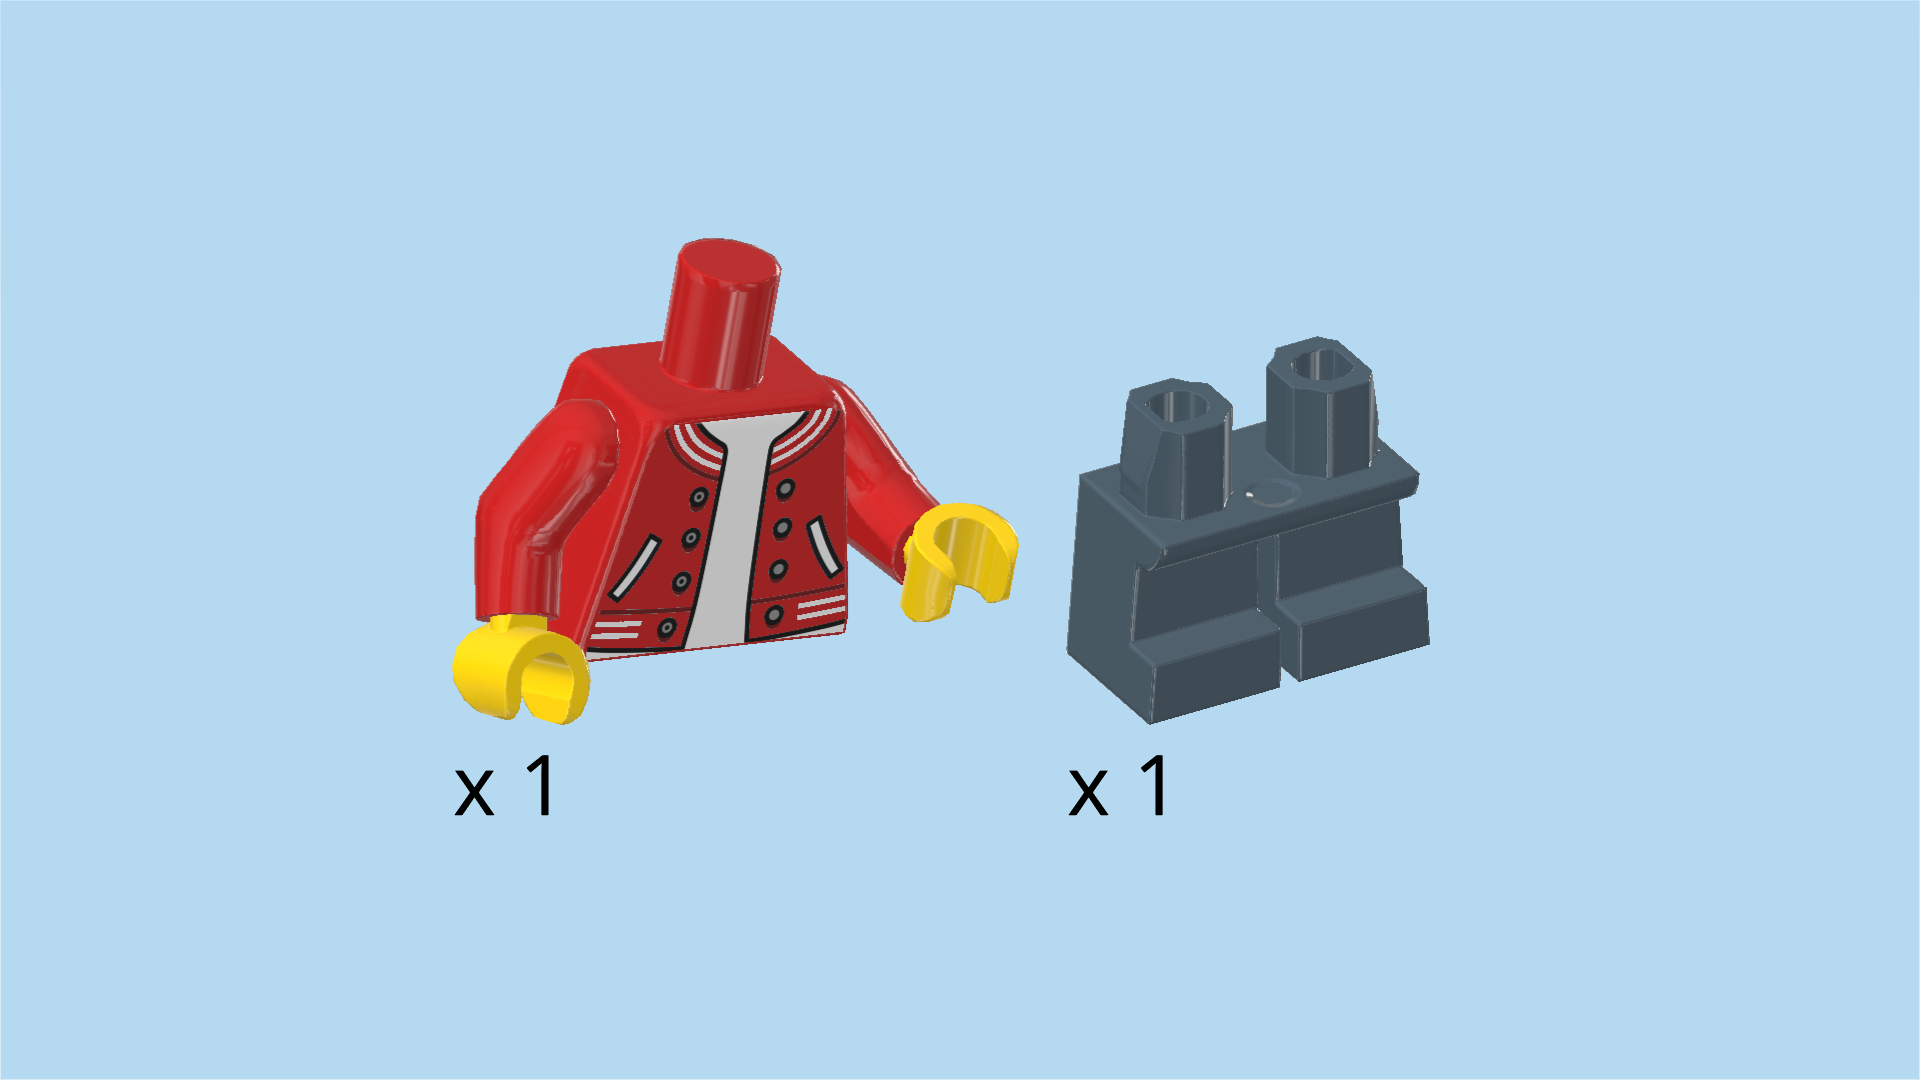
| Collect the following 2 pieces: |
| 1 sand blue pair of kid's legs, |
| and 1 bright red and bright yellow upper part of the body. |
| Put the upper body on the legs. |
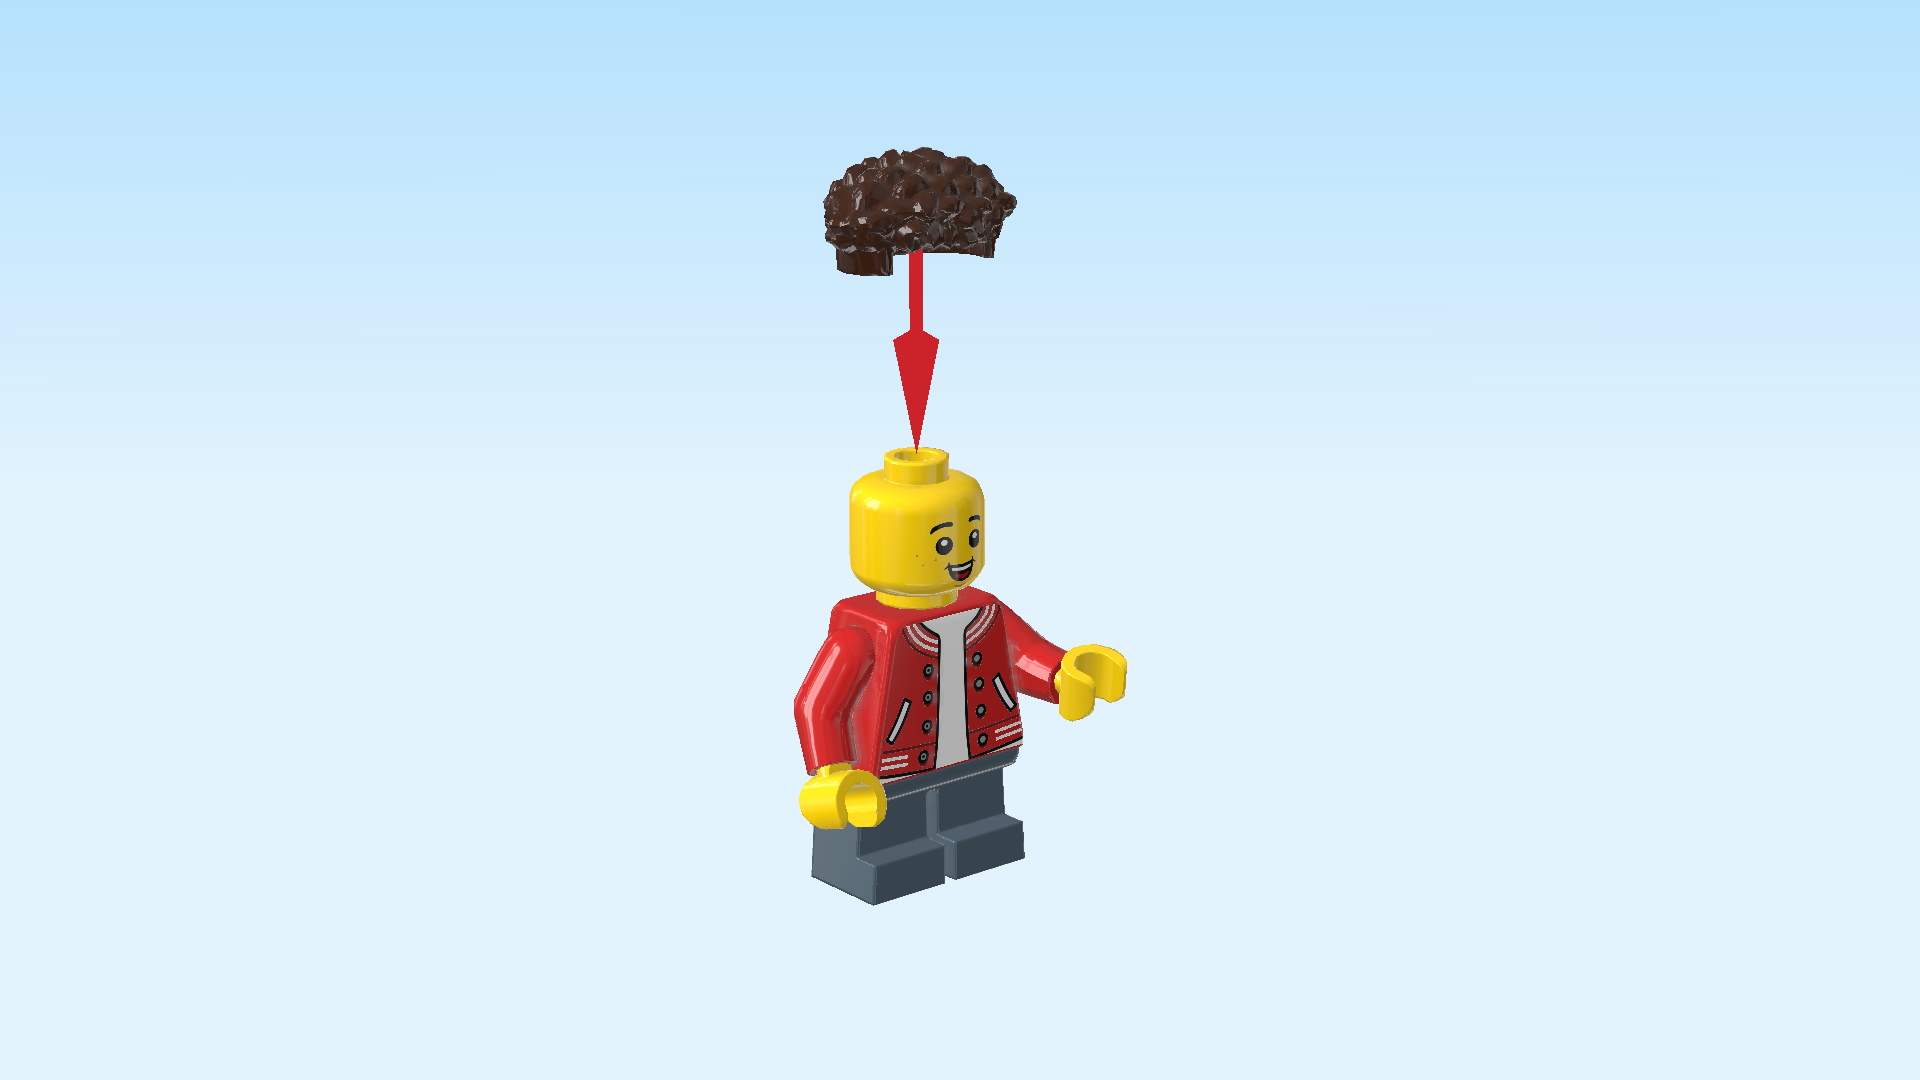
| Collect the following 2 pieces: |
| 1 bright yellow head, |
| and 1 dark brown hairpiece with short frizzy hair. |
| Put the head on the body. |
| Put the hair on the head. |
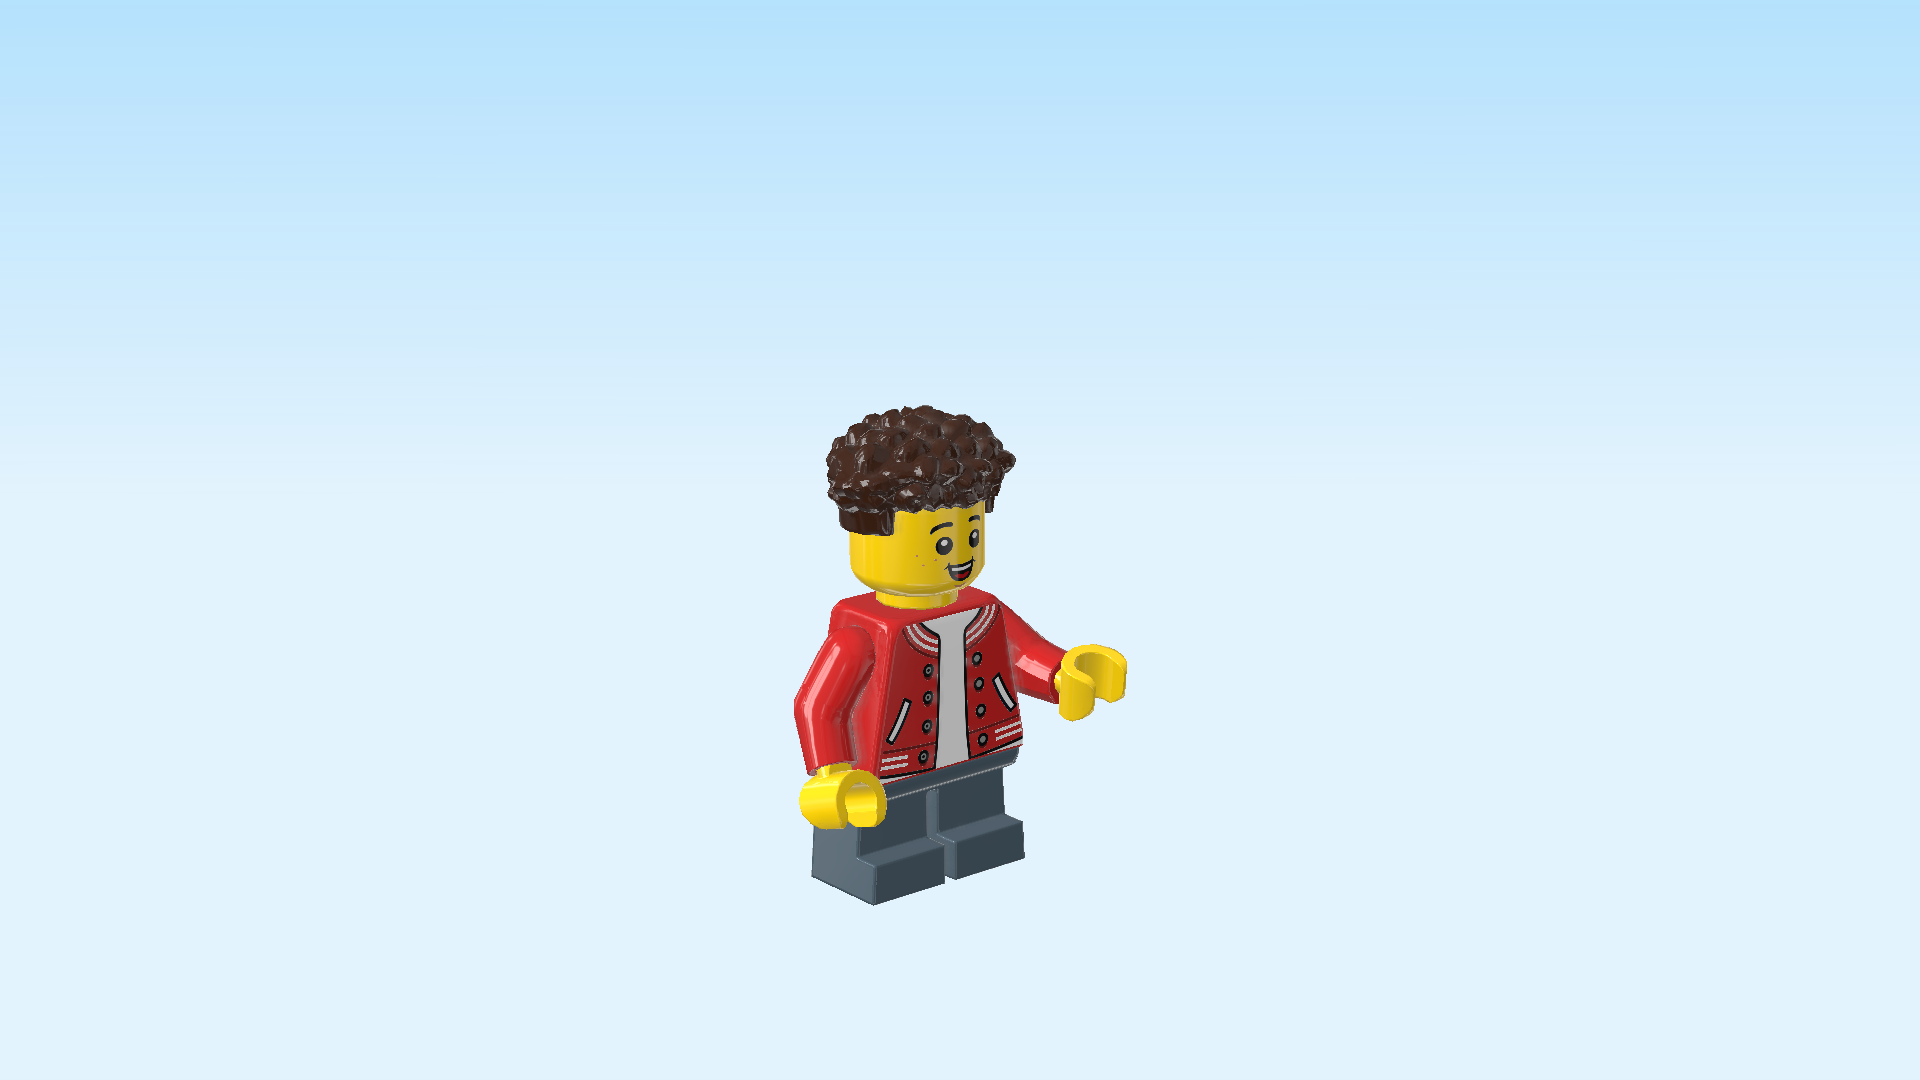
| The little boy Minifigure is finished! Well done! He has a happy face with a few freckles on his cheeks. He is wearing sand blue pants and a red college jacket with white buttons and two slanted pockets. The waistband and the collar have white stripes on them. The boy is wearing a white t-shirt underneath. |
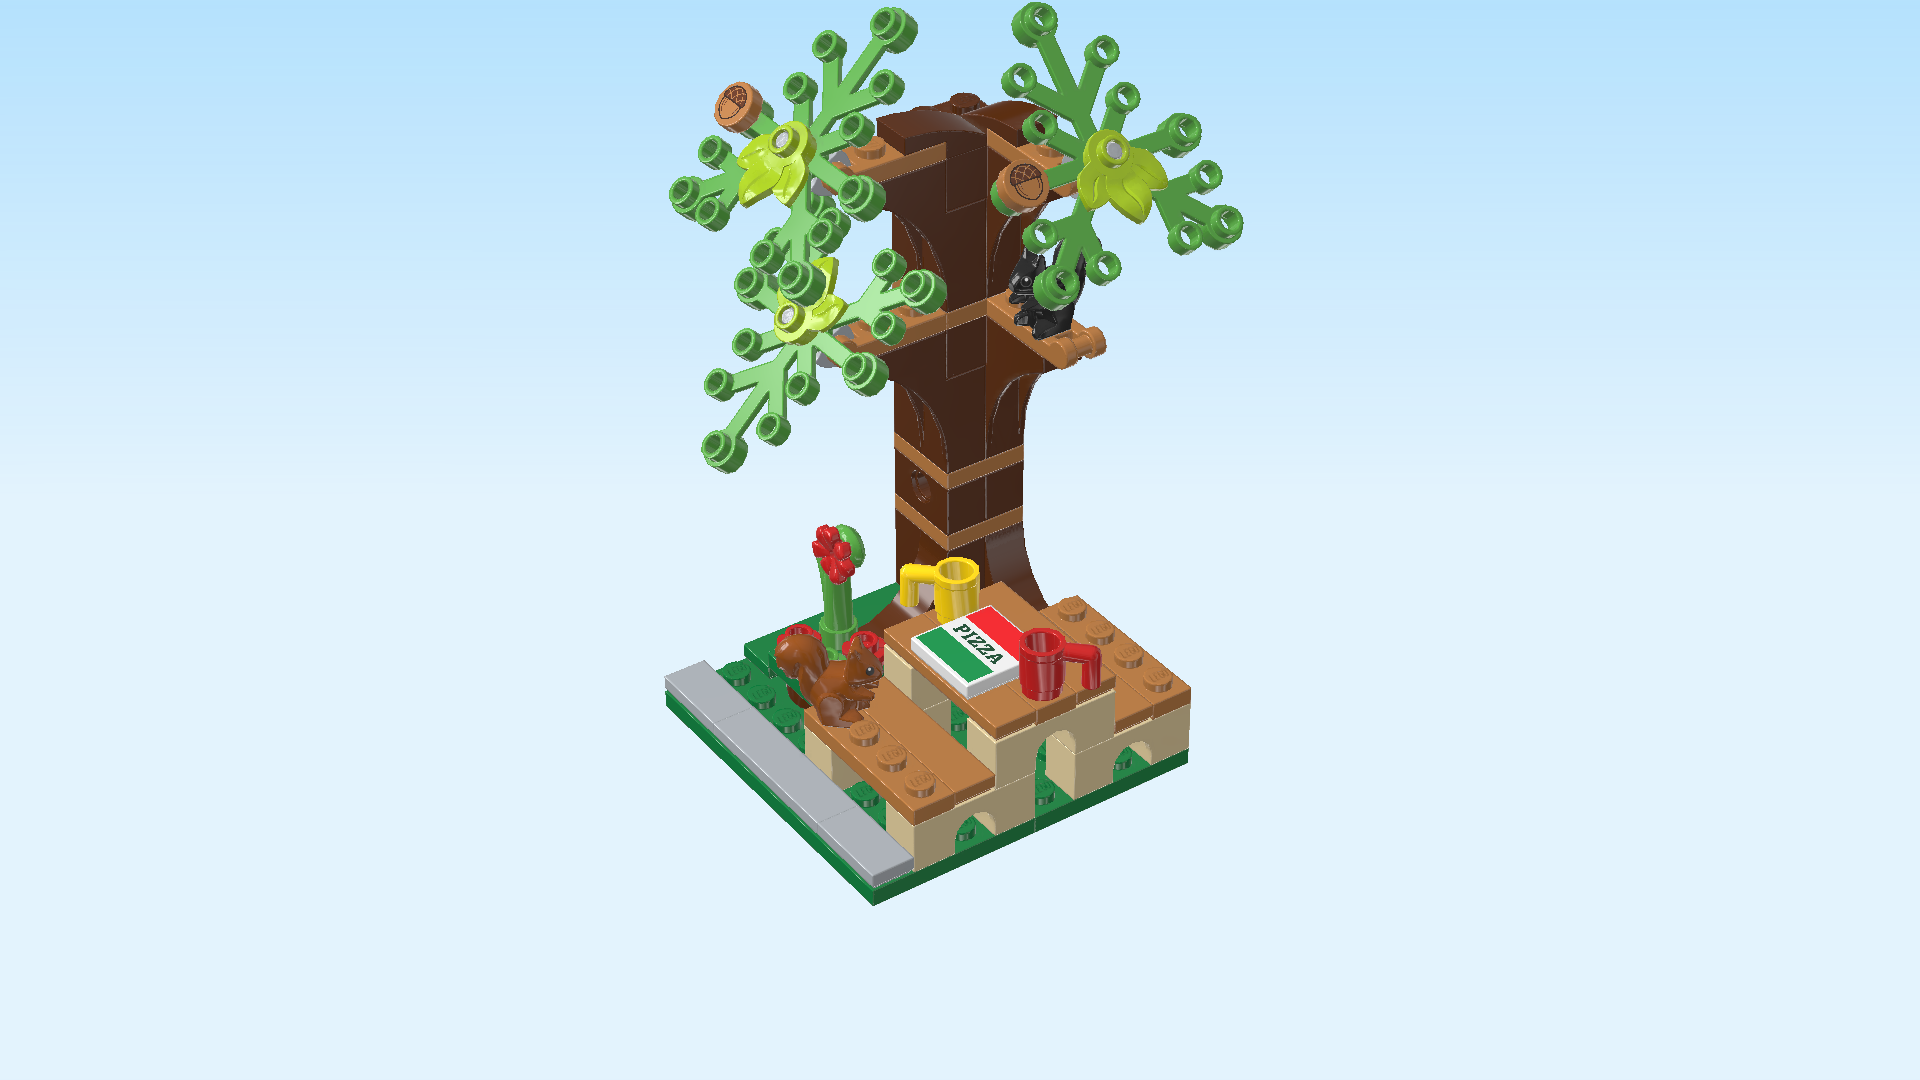
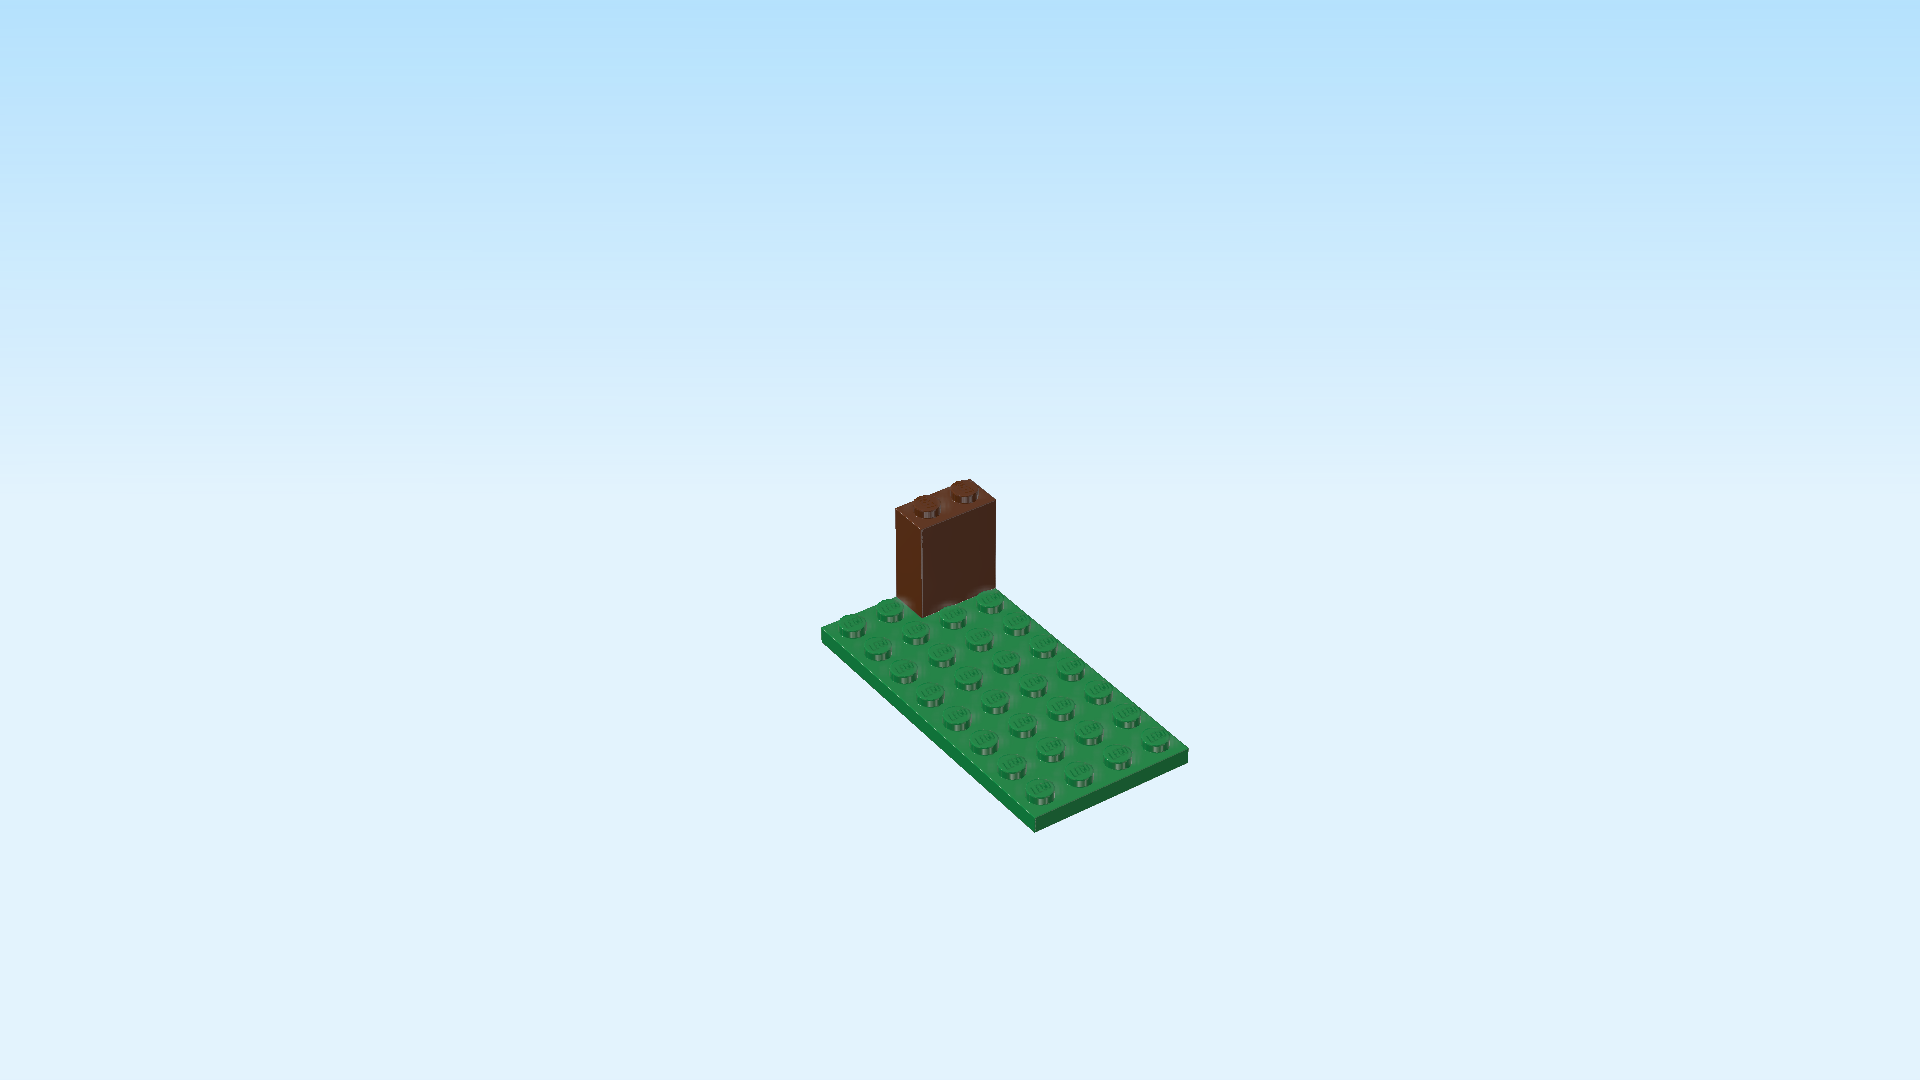
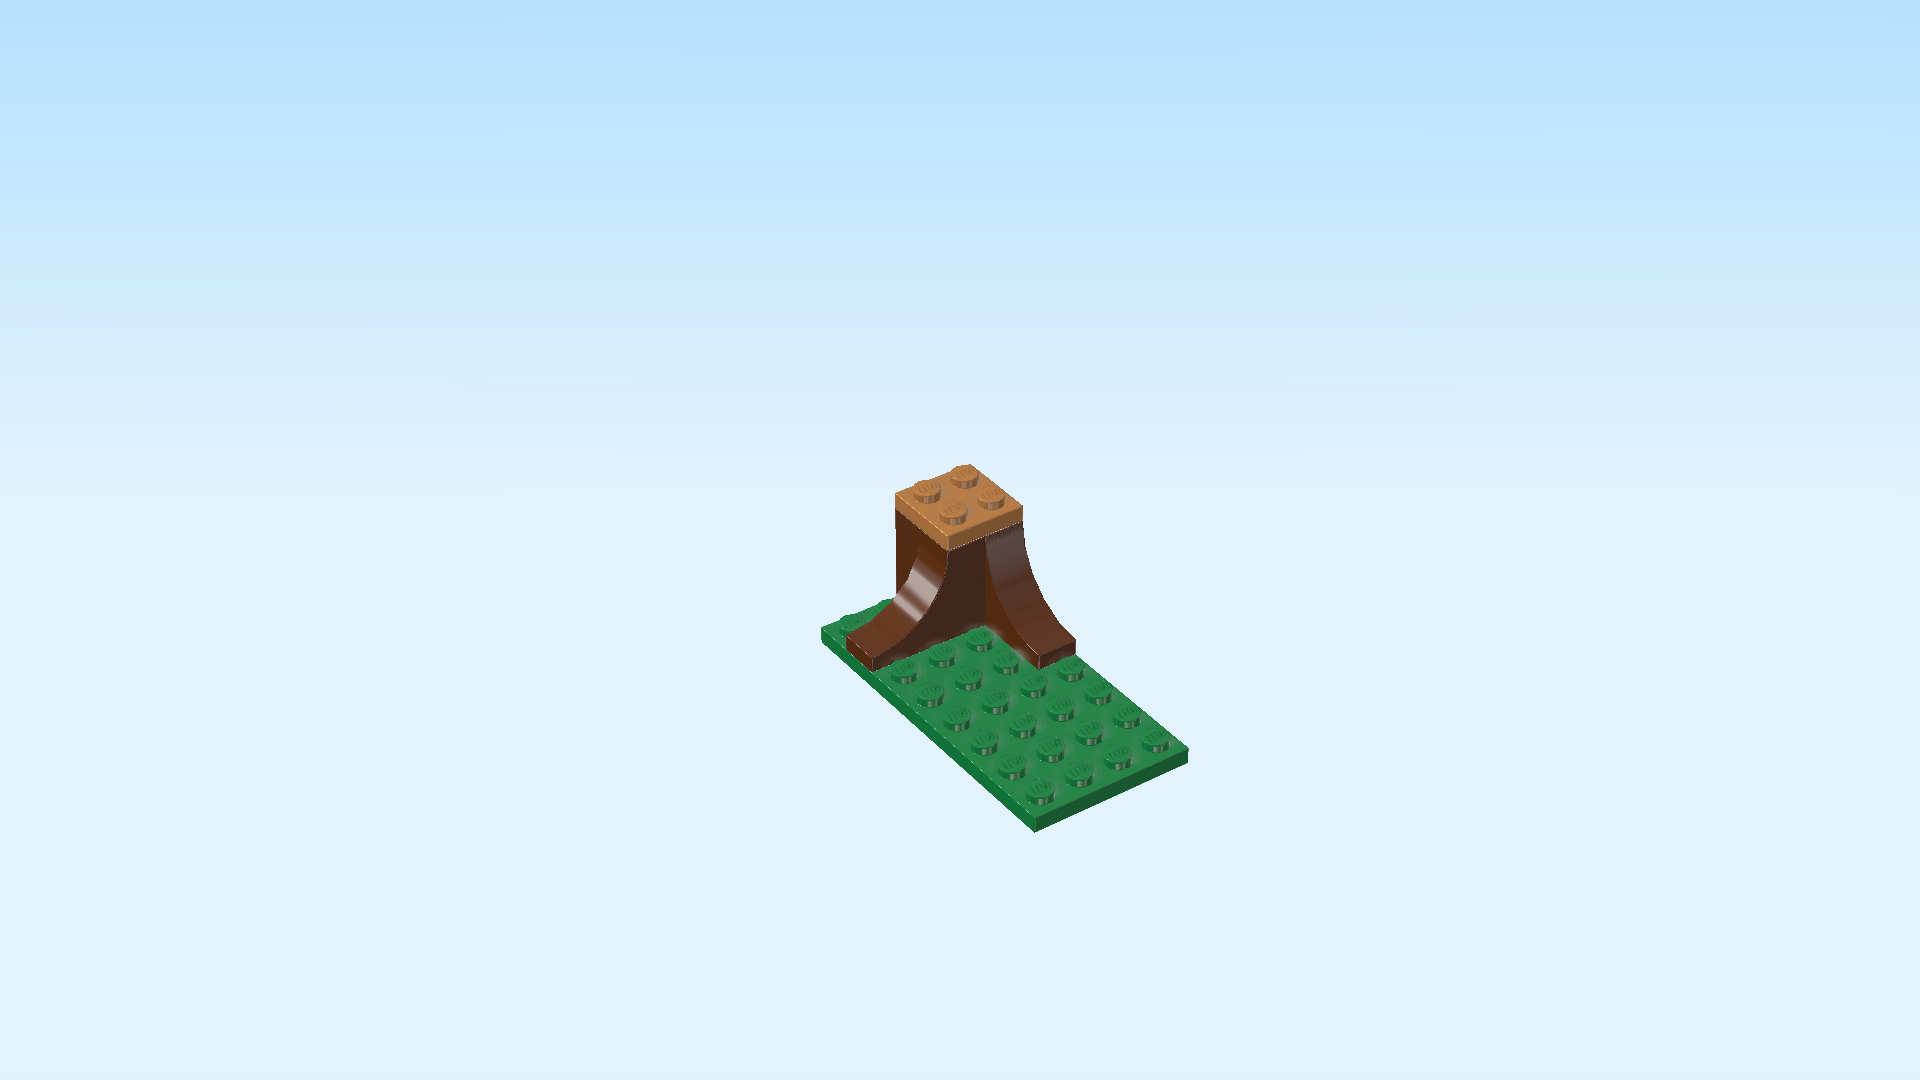
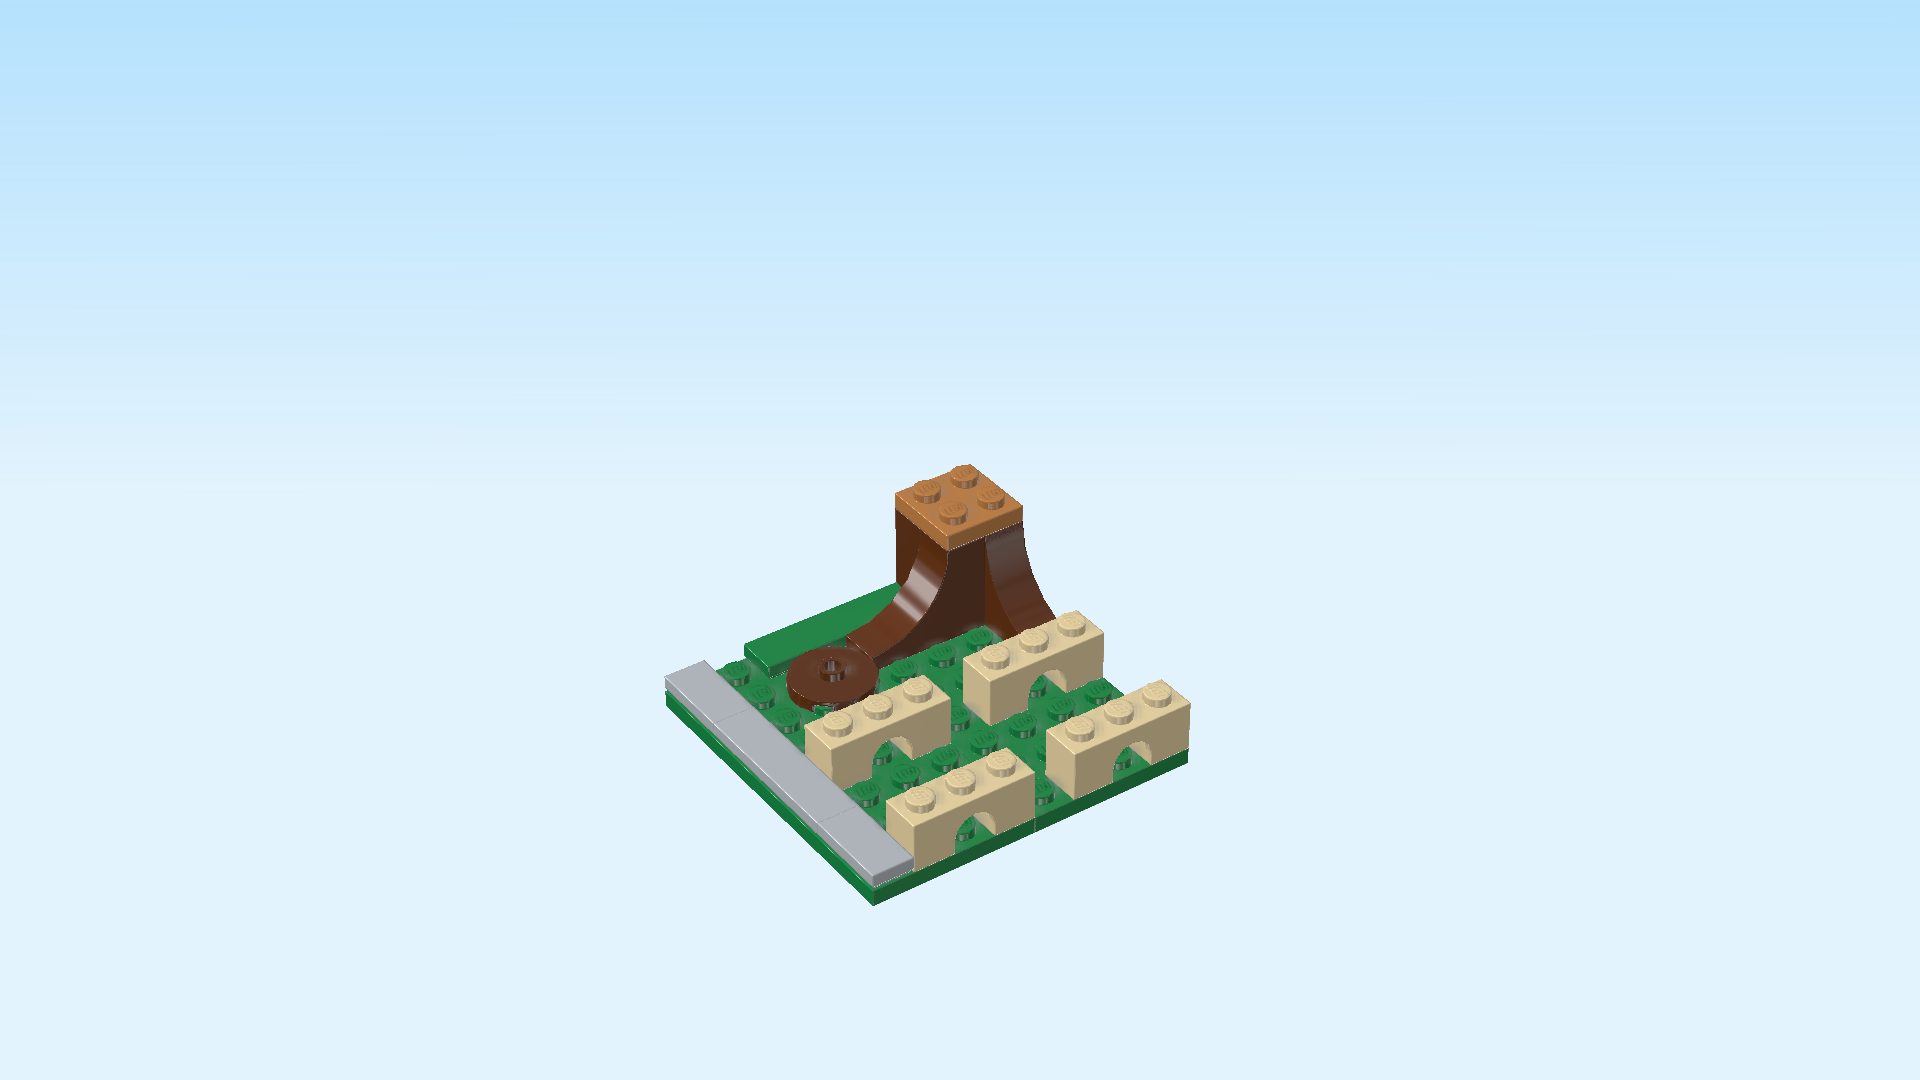
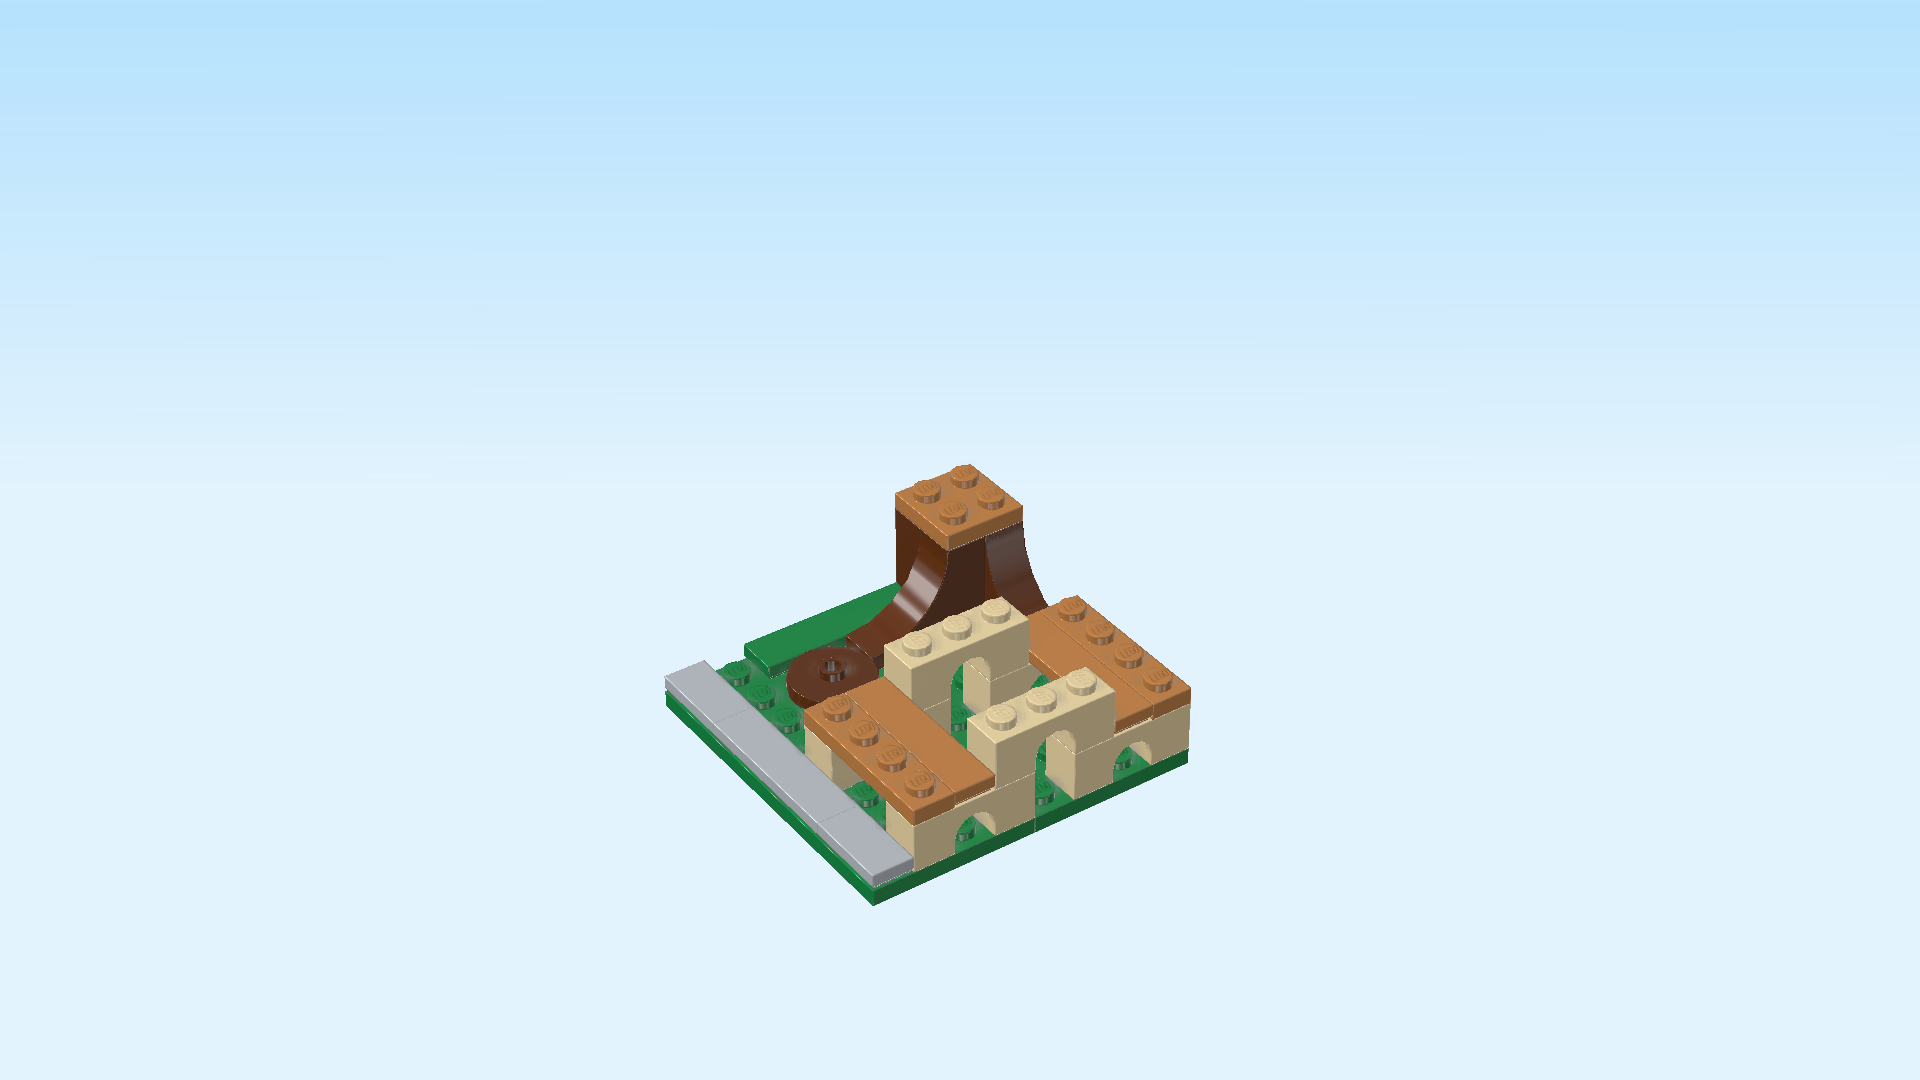
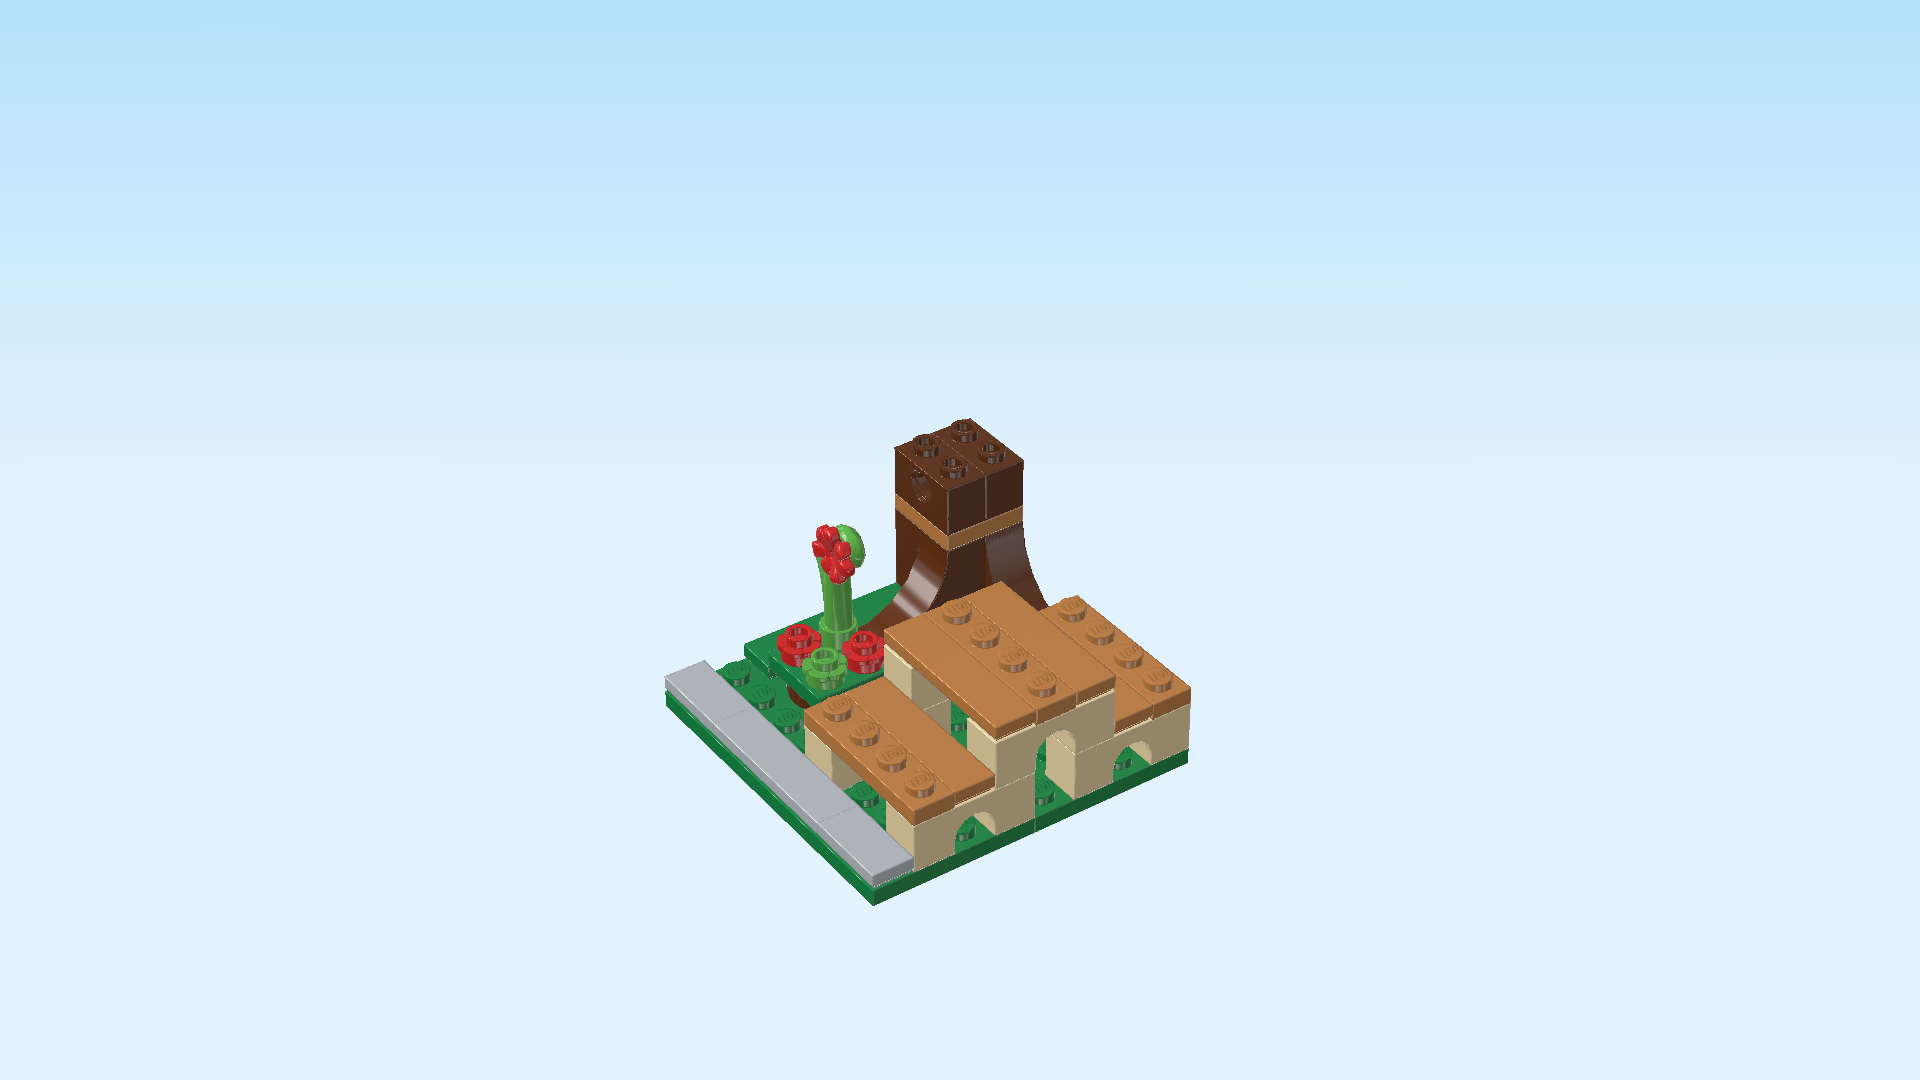
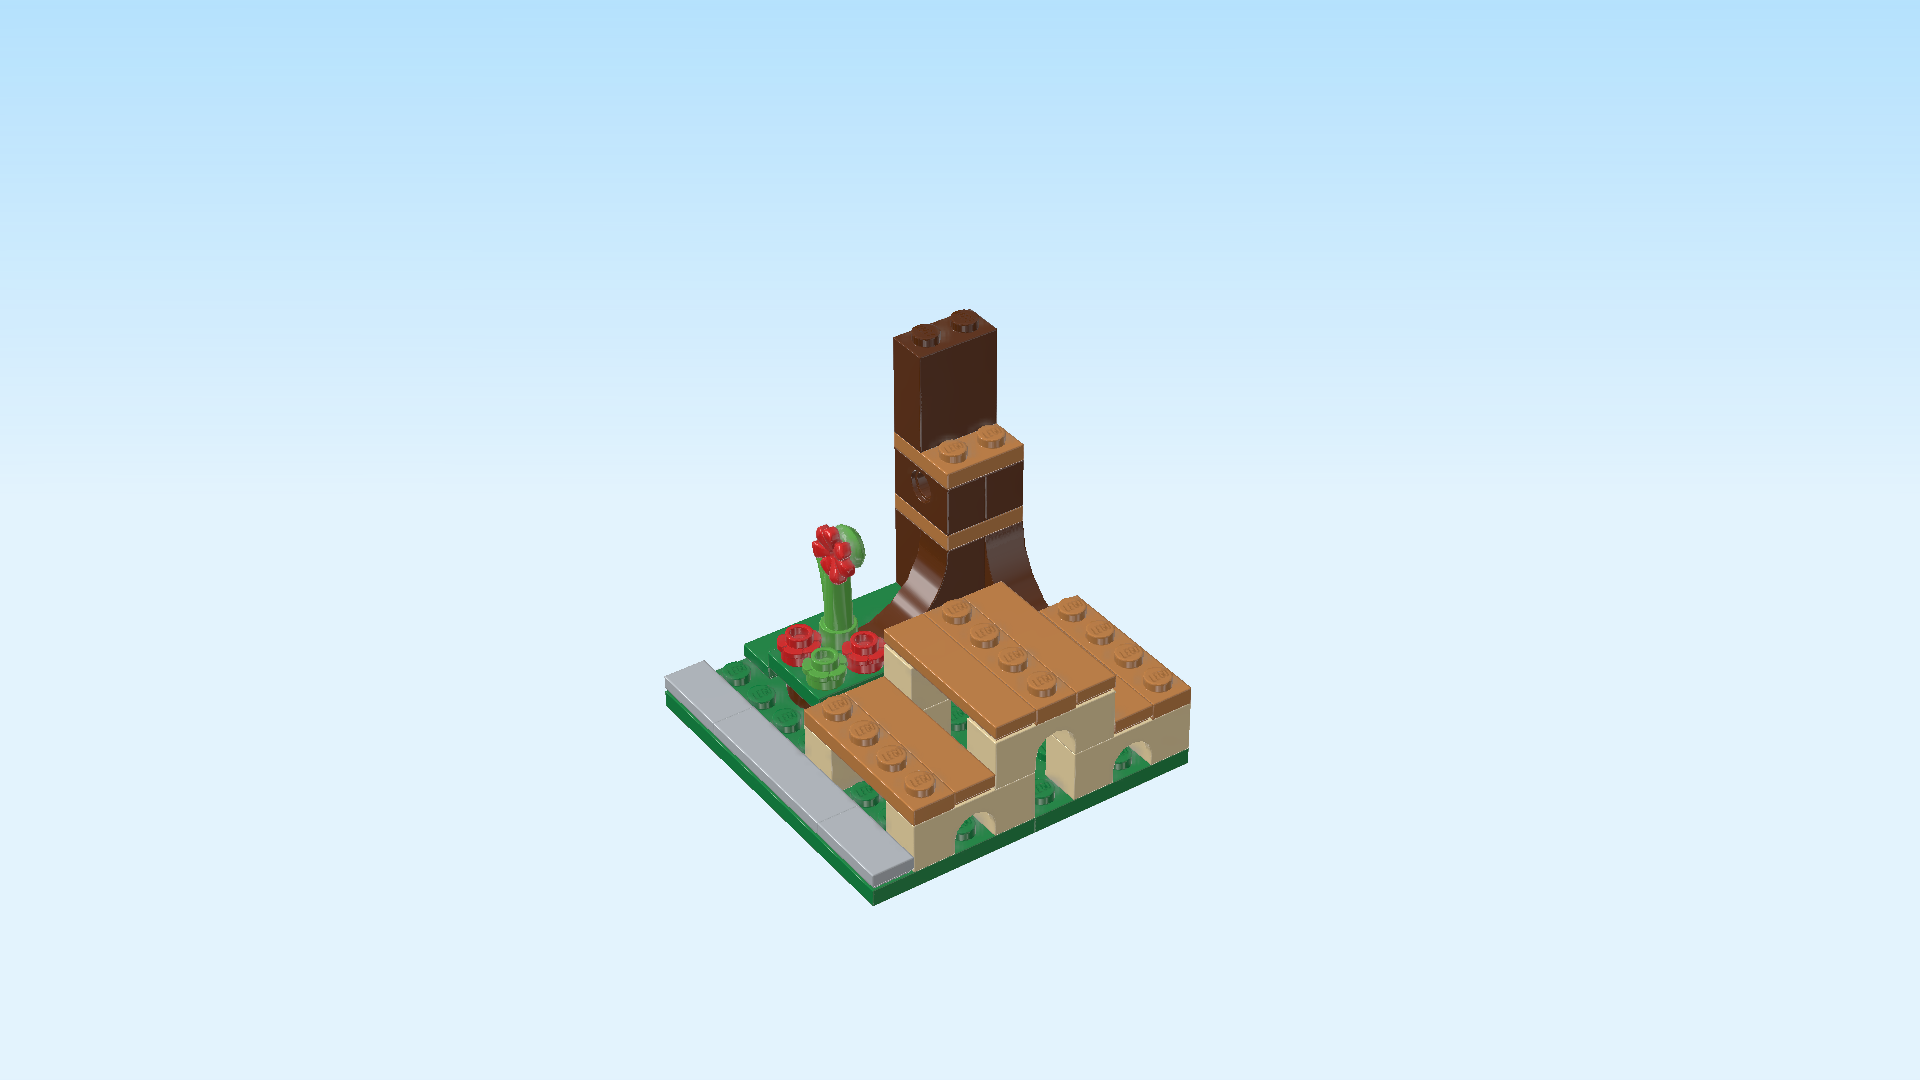
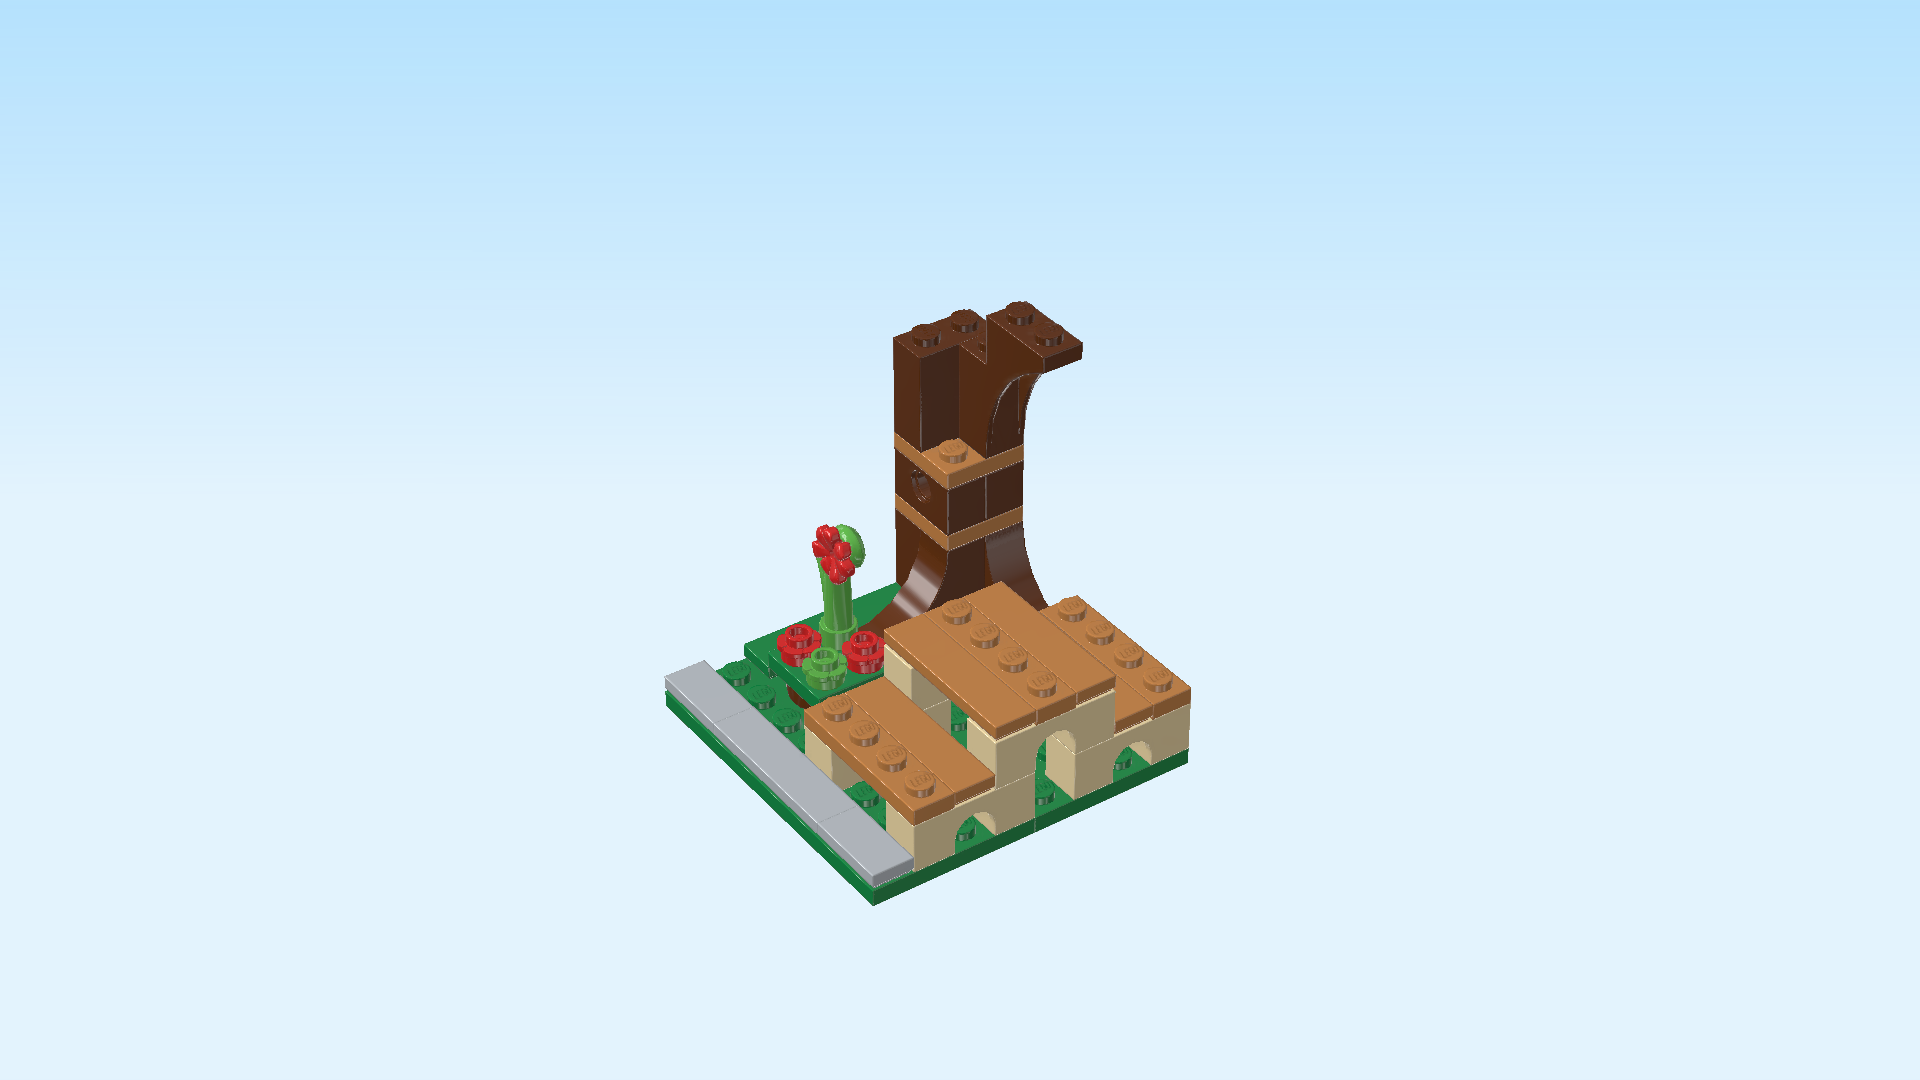
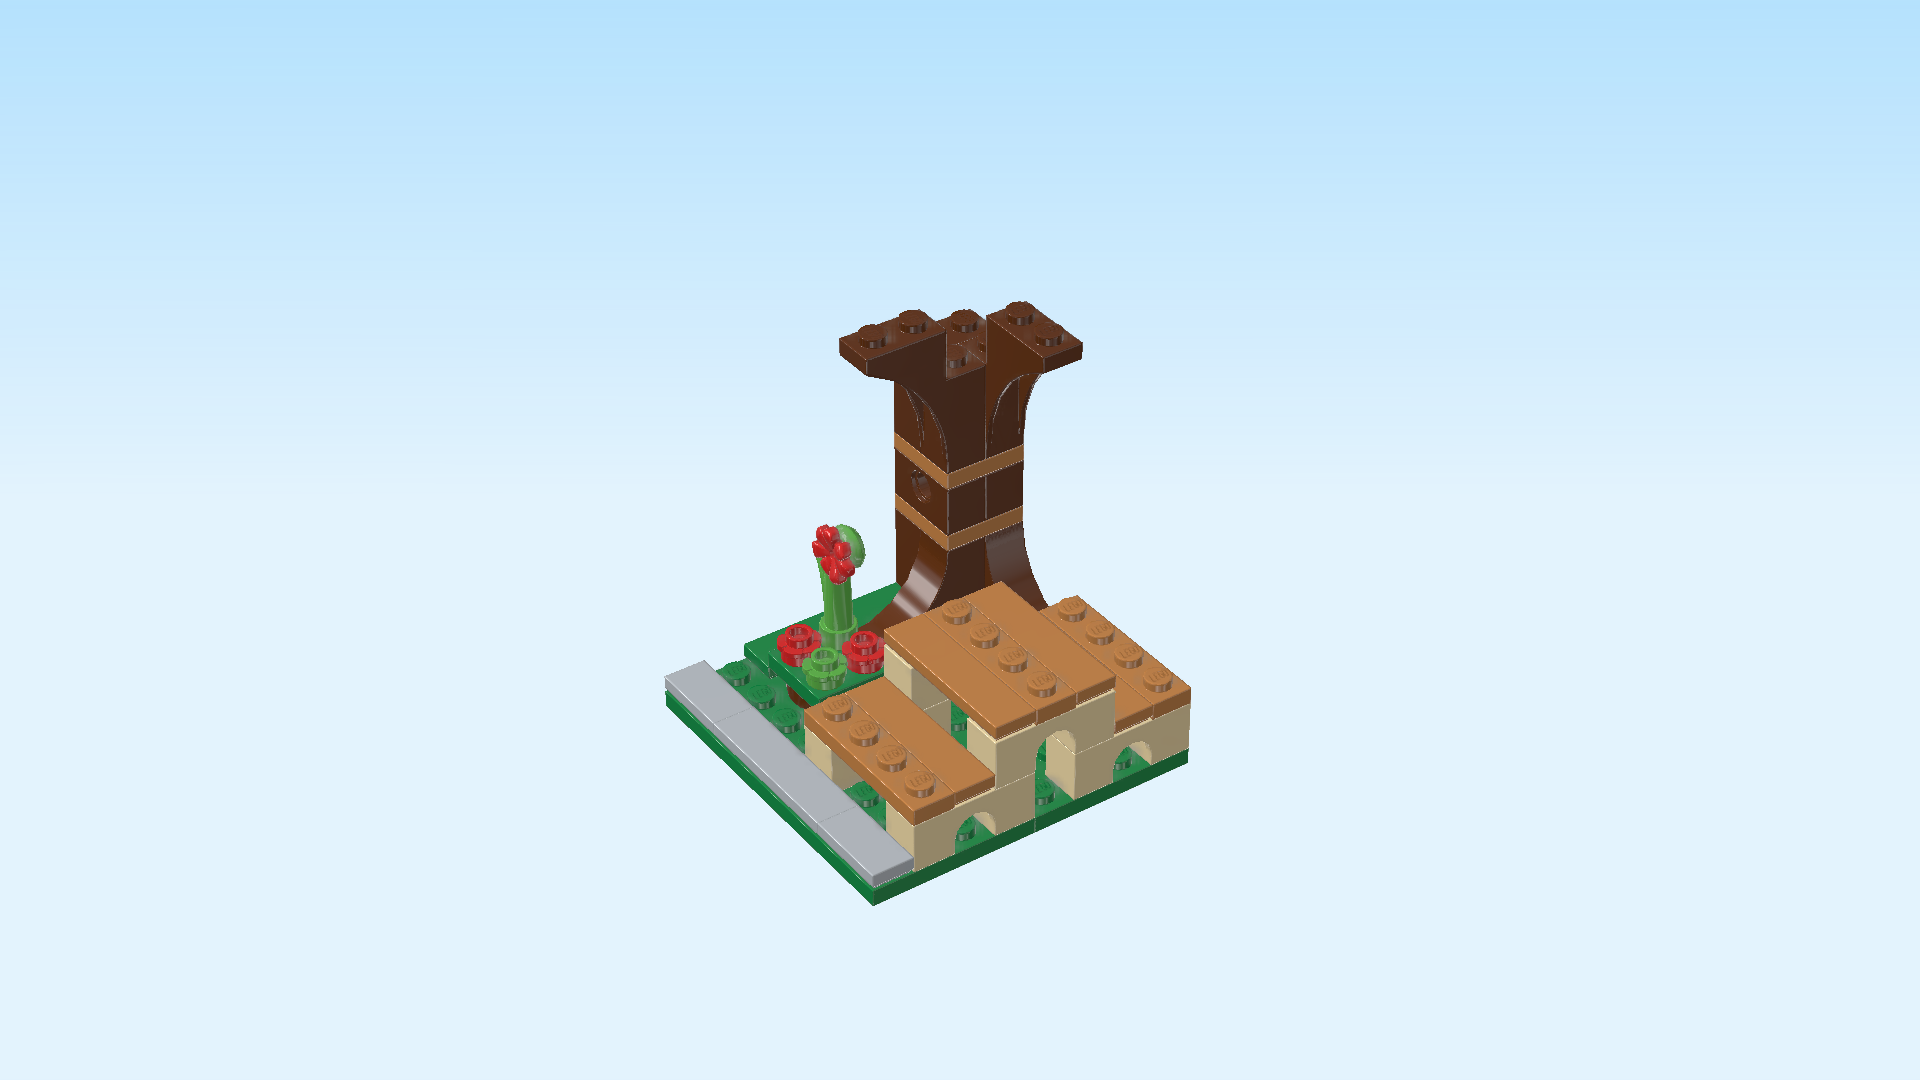
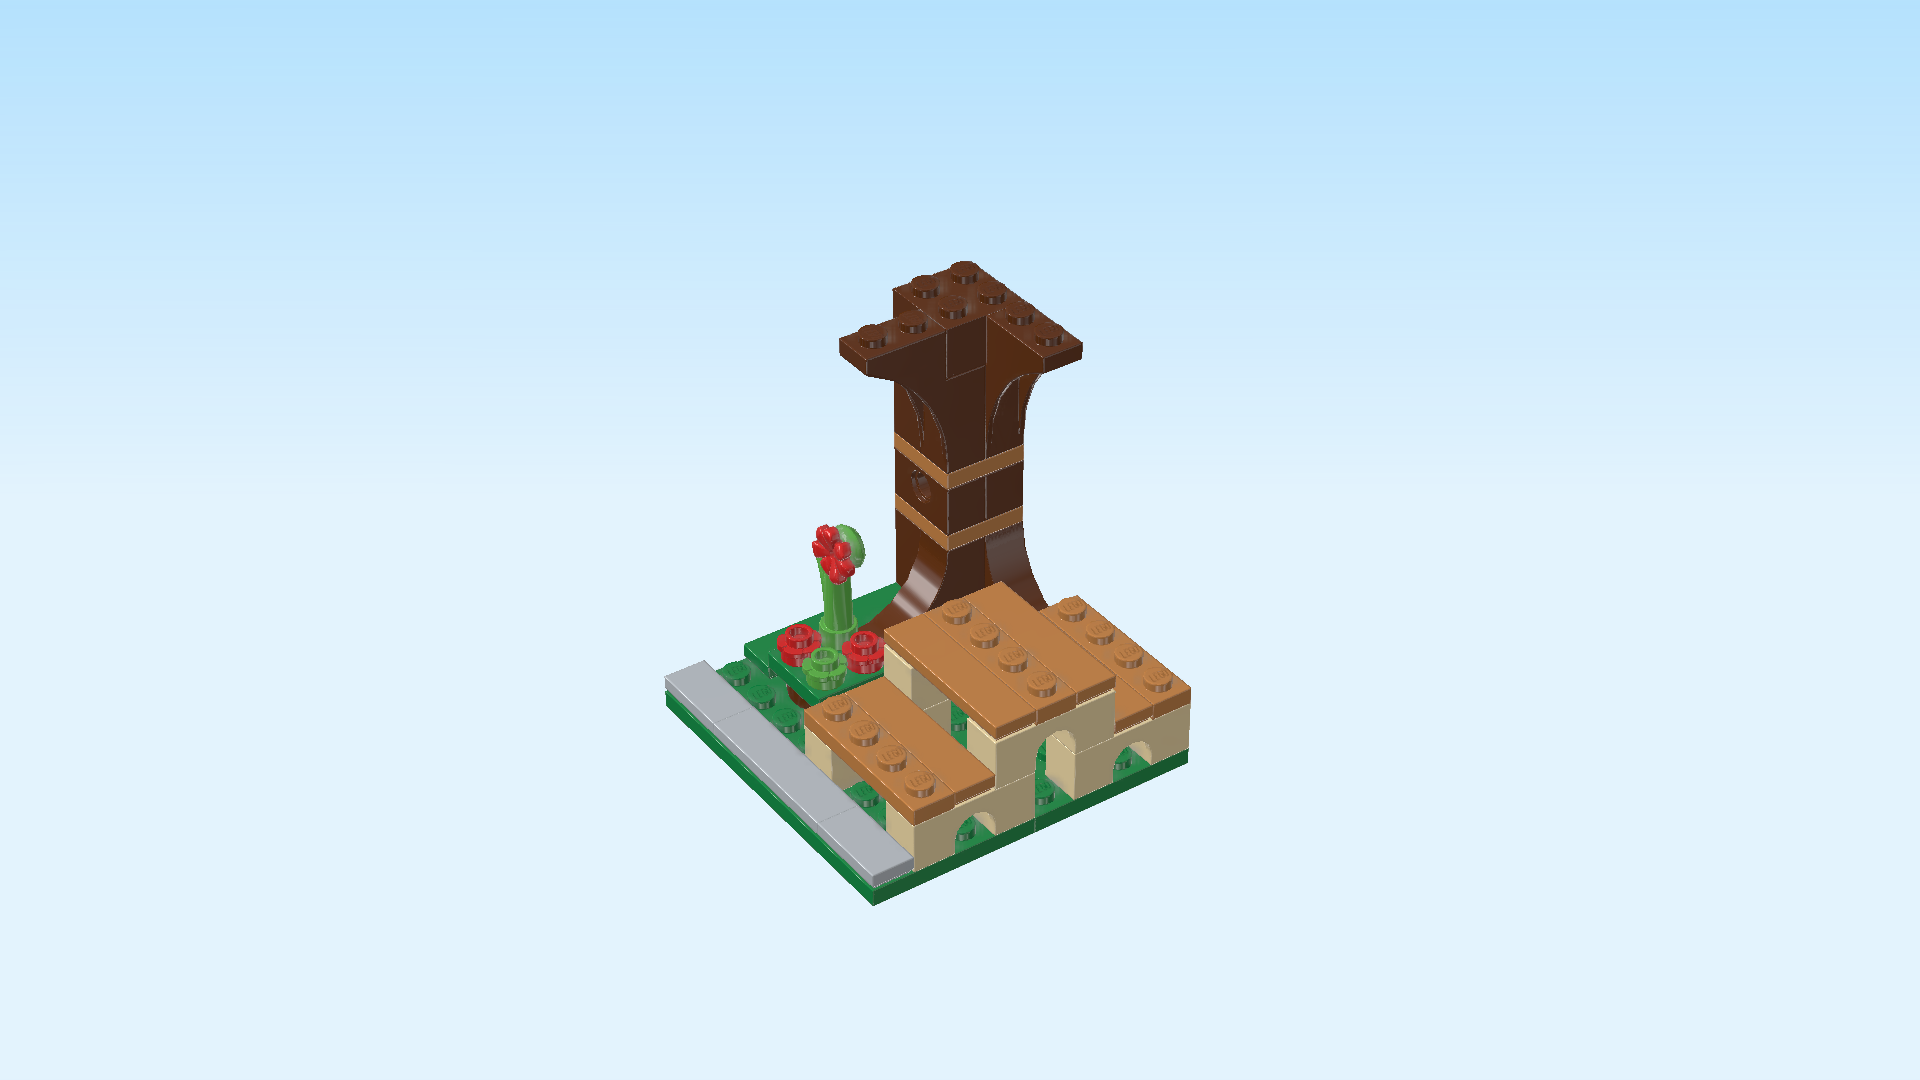
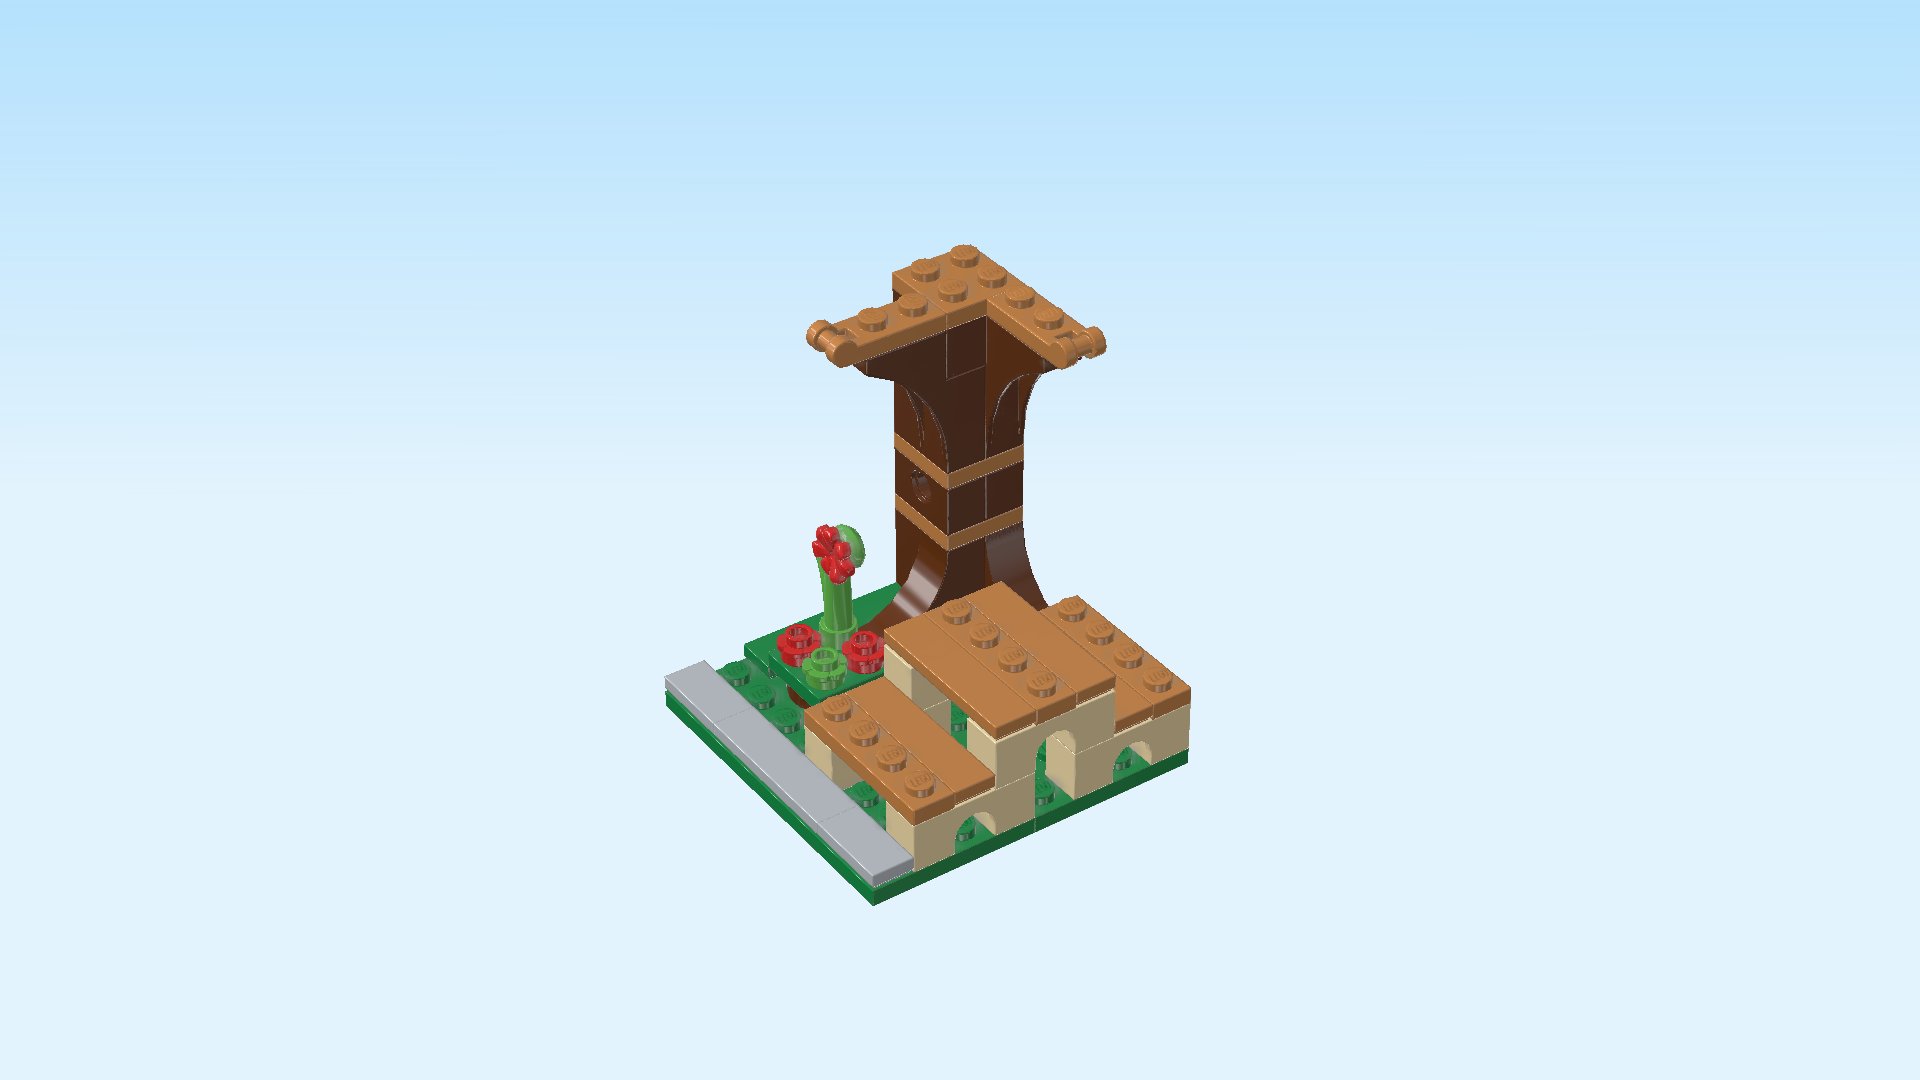
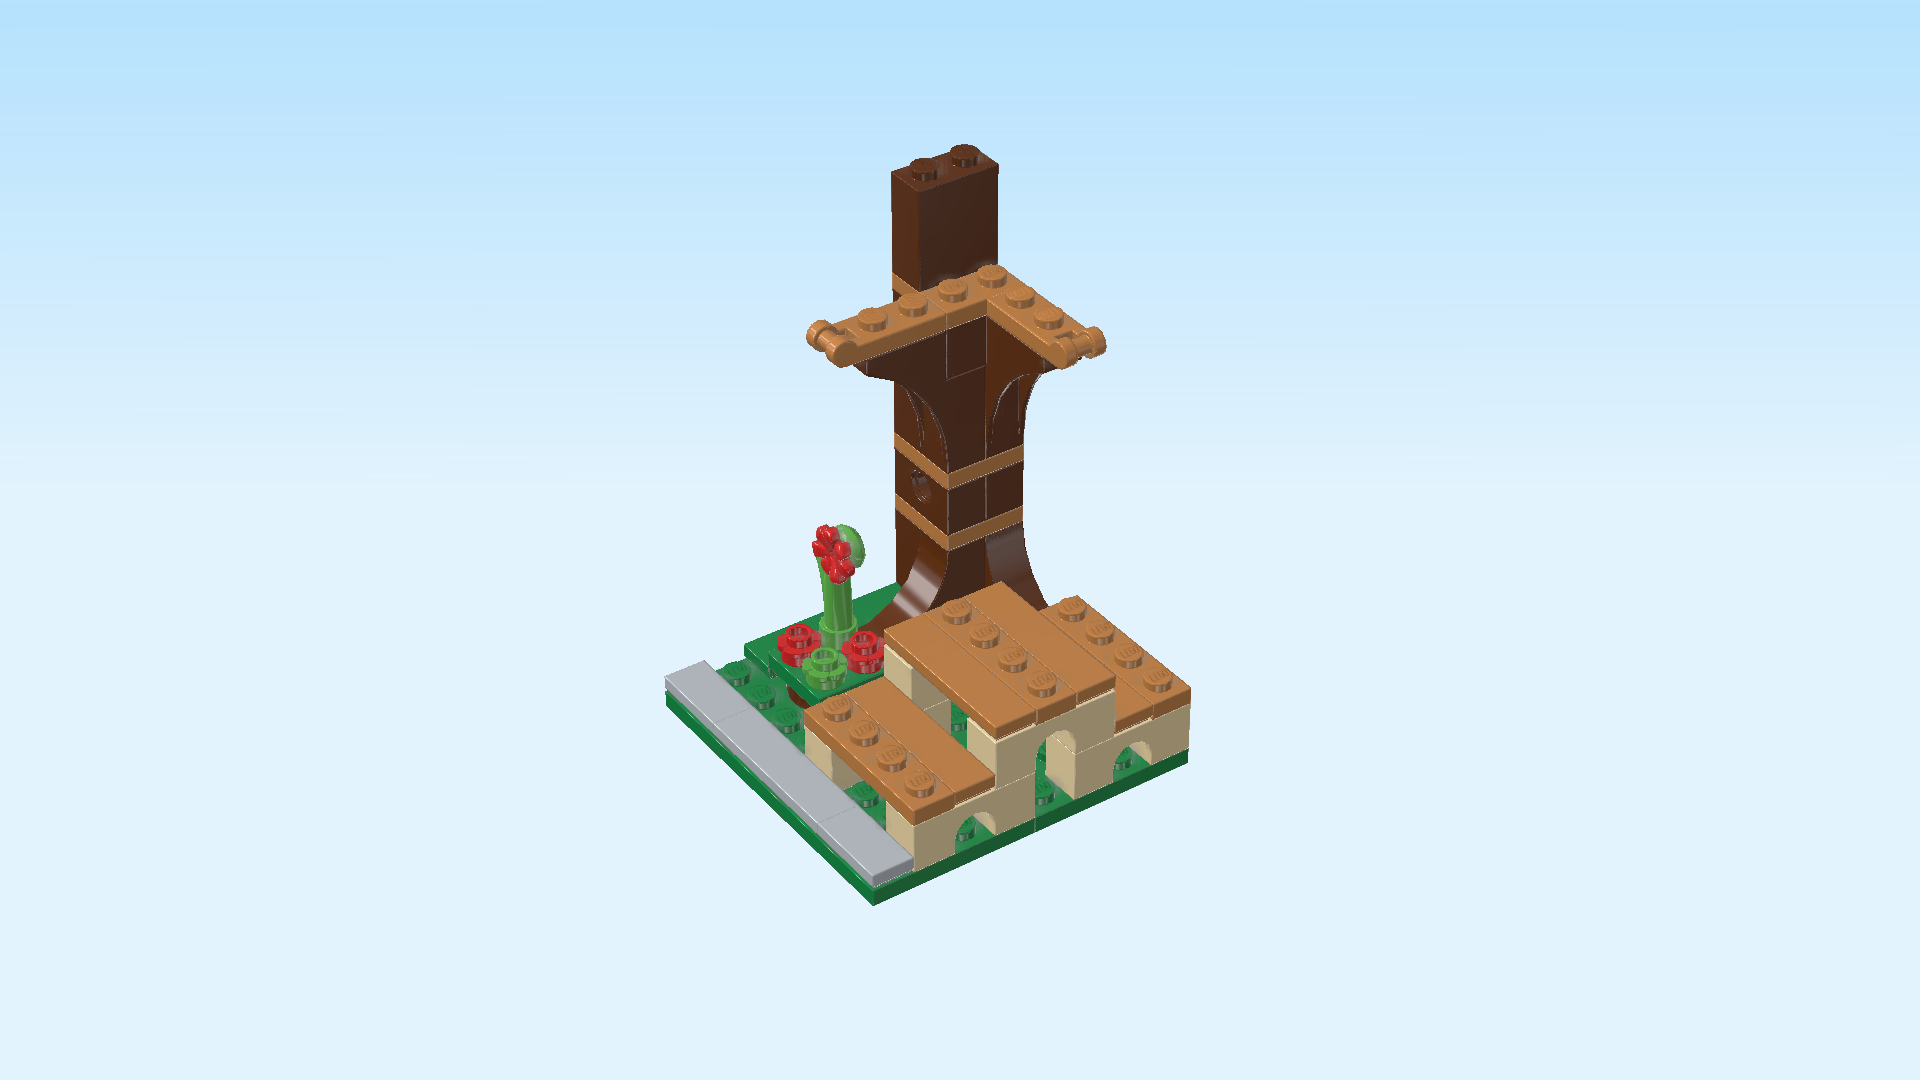
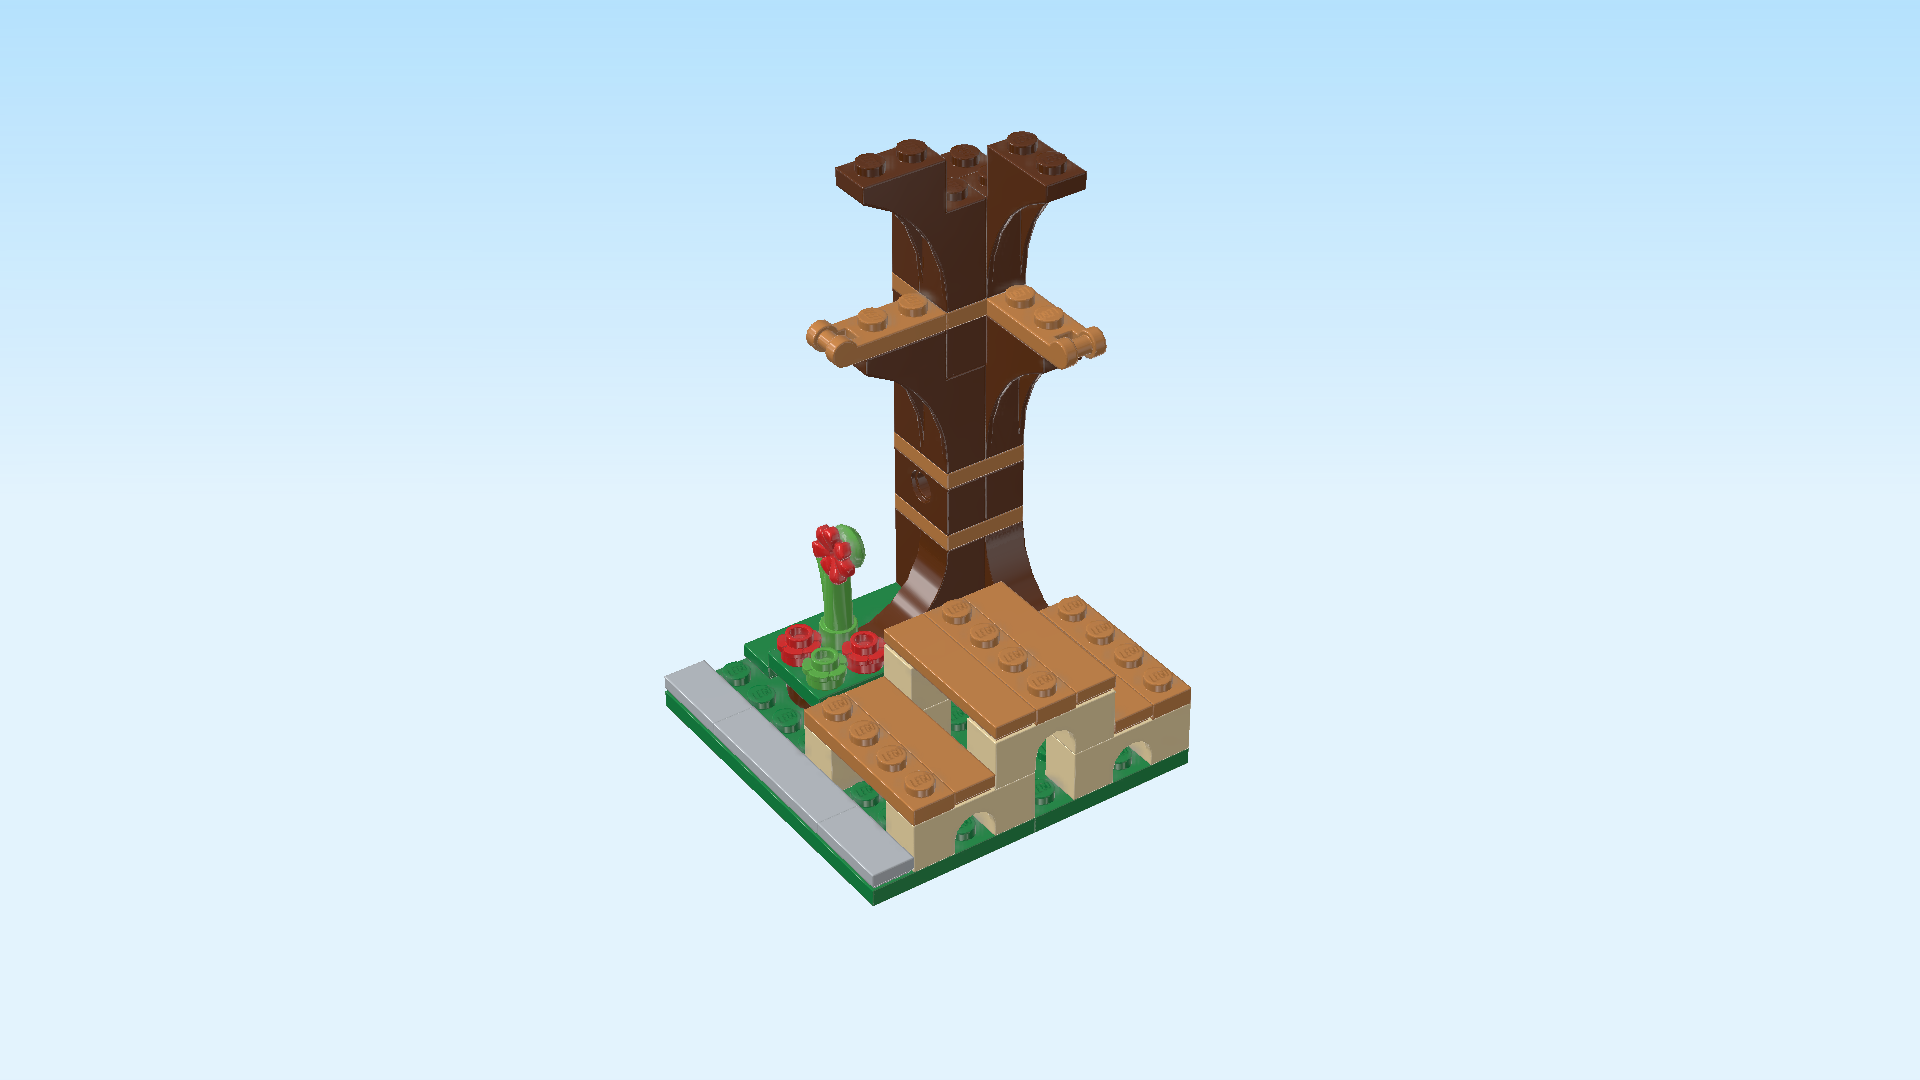
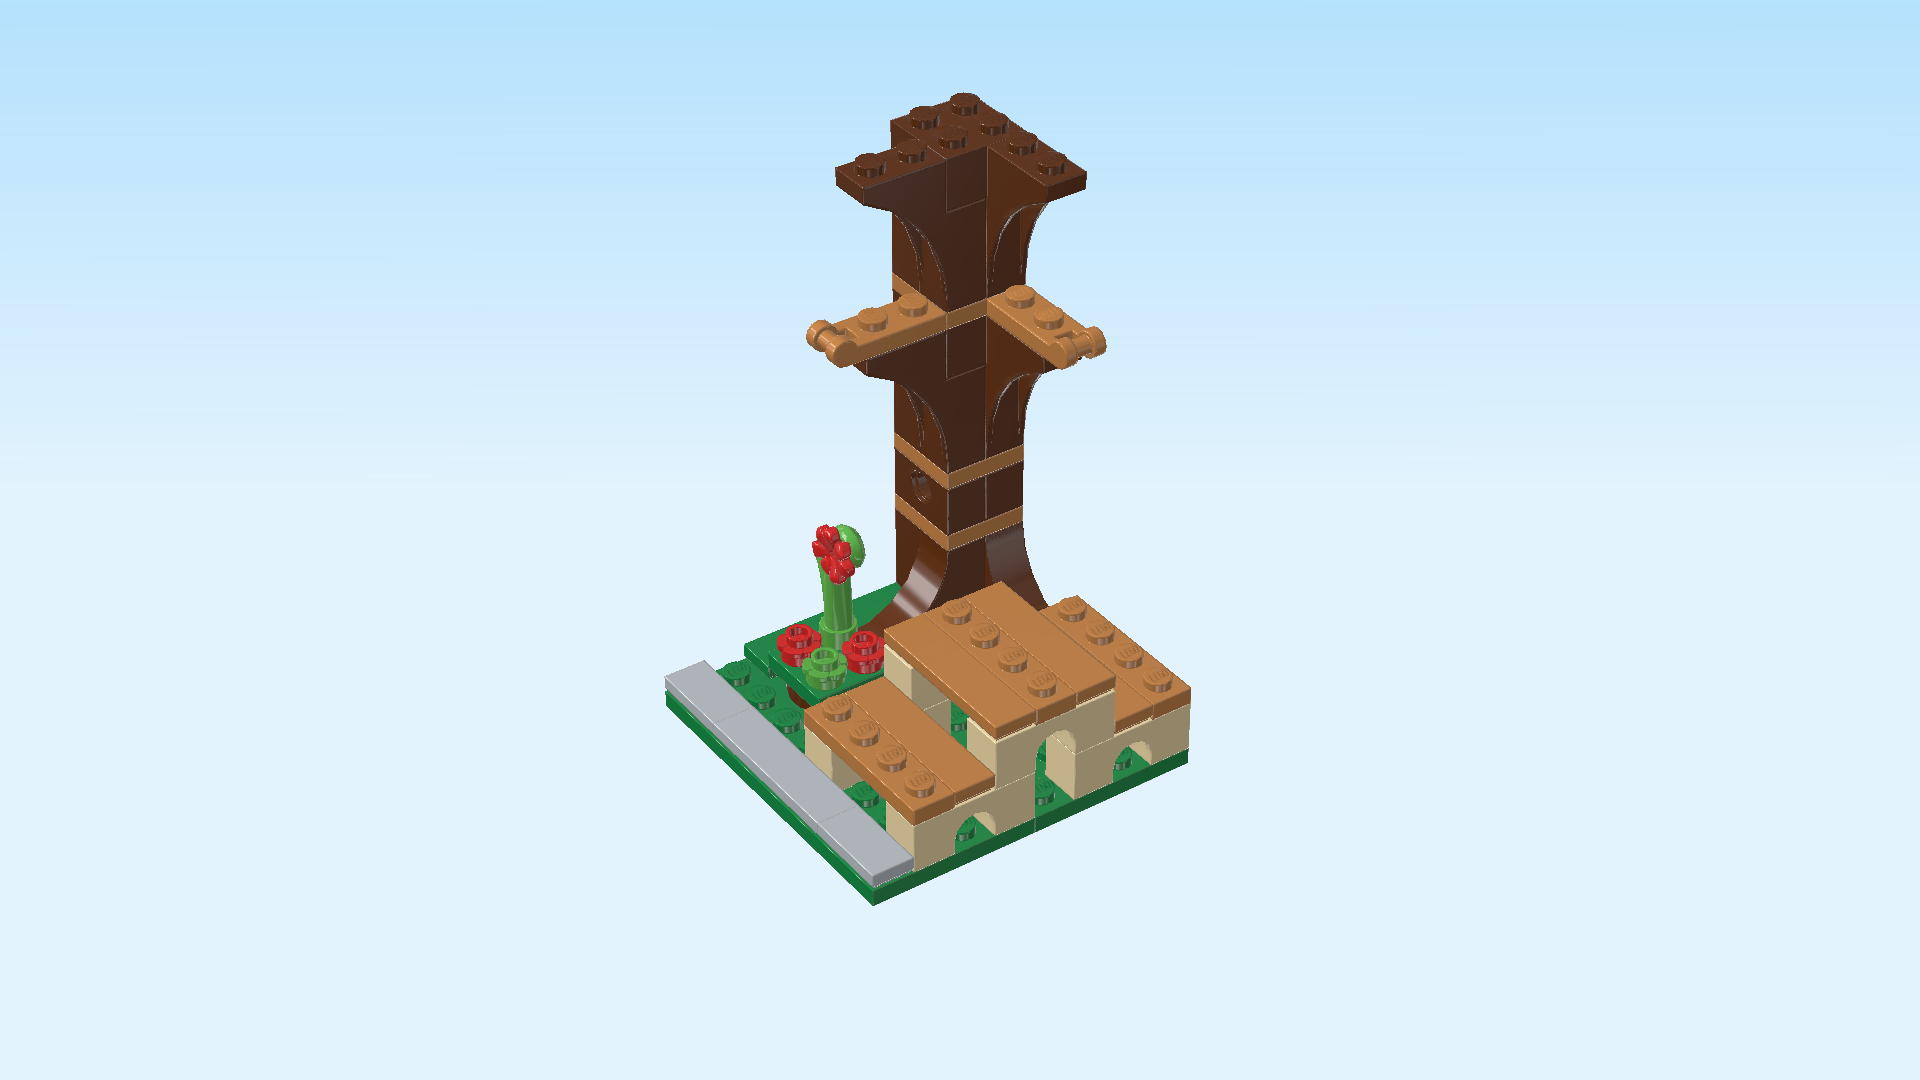
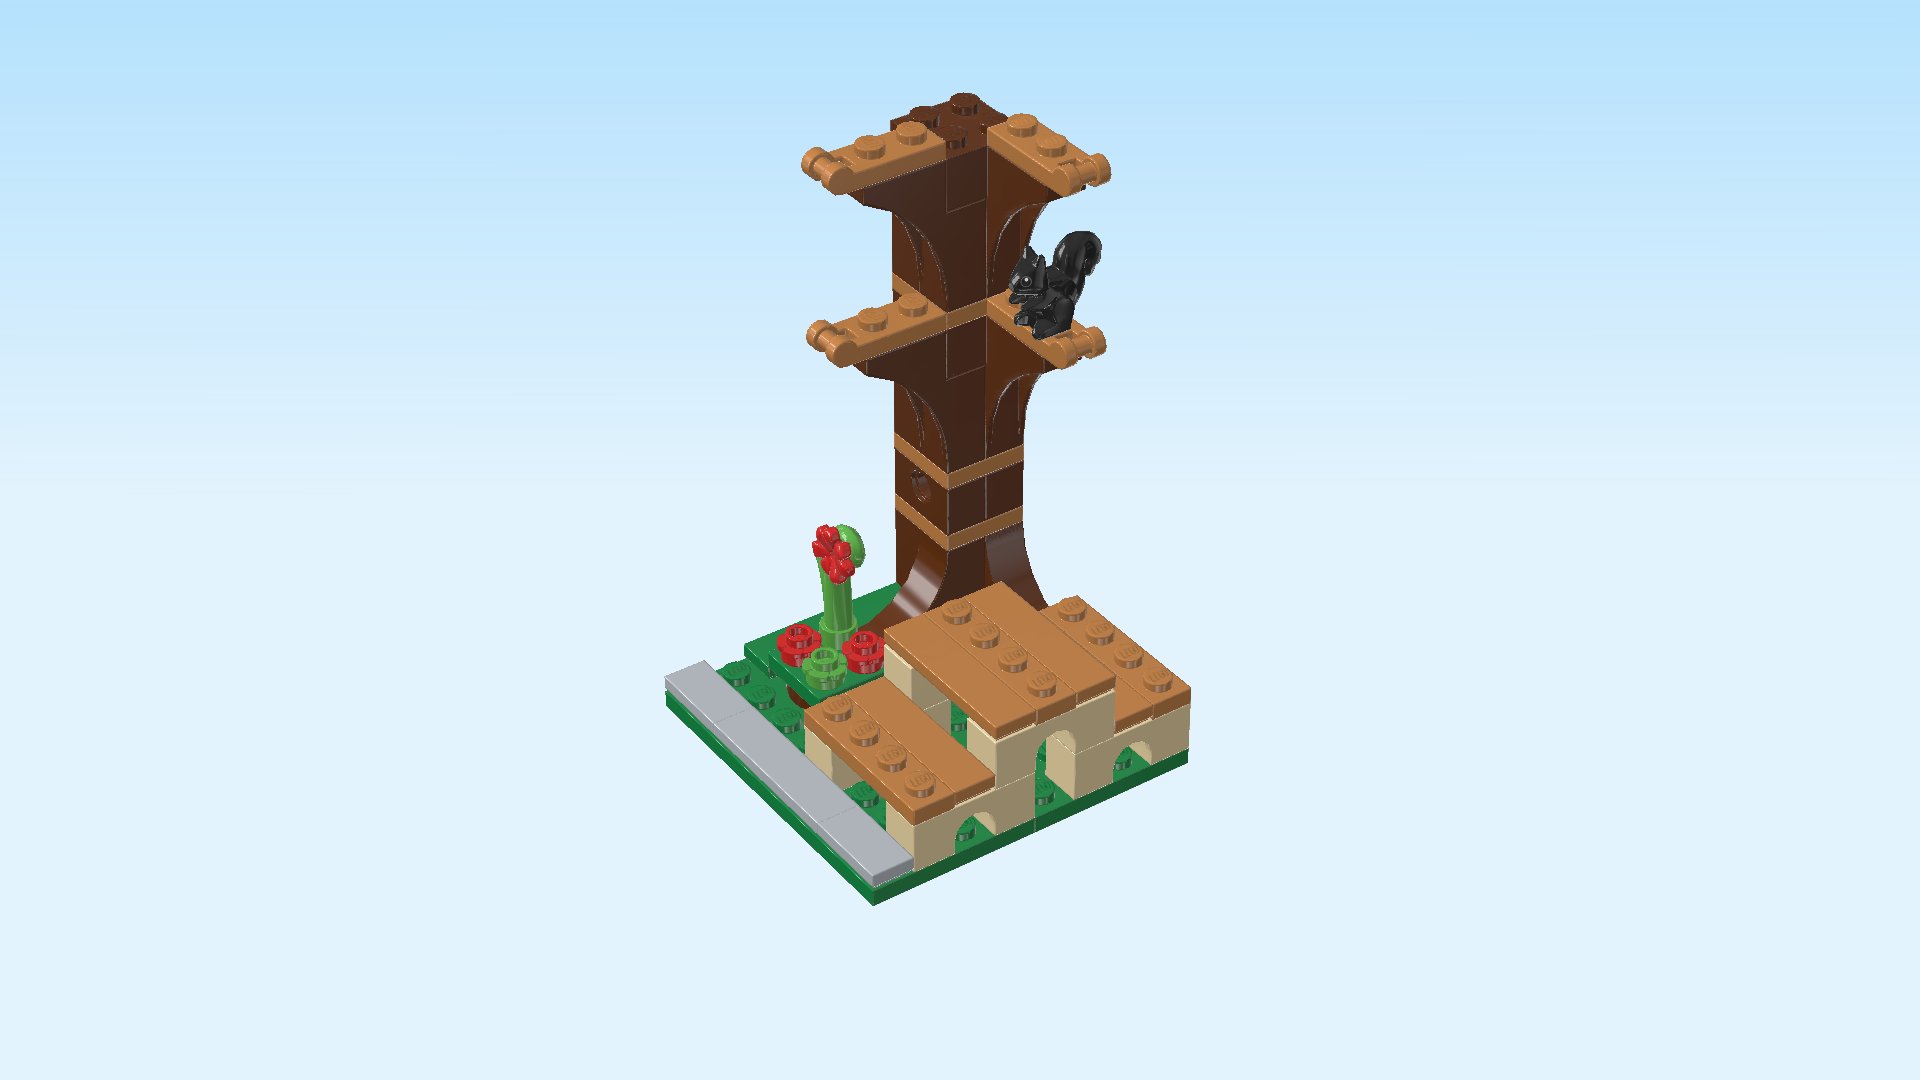
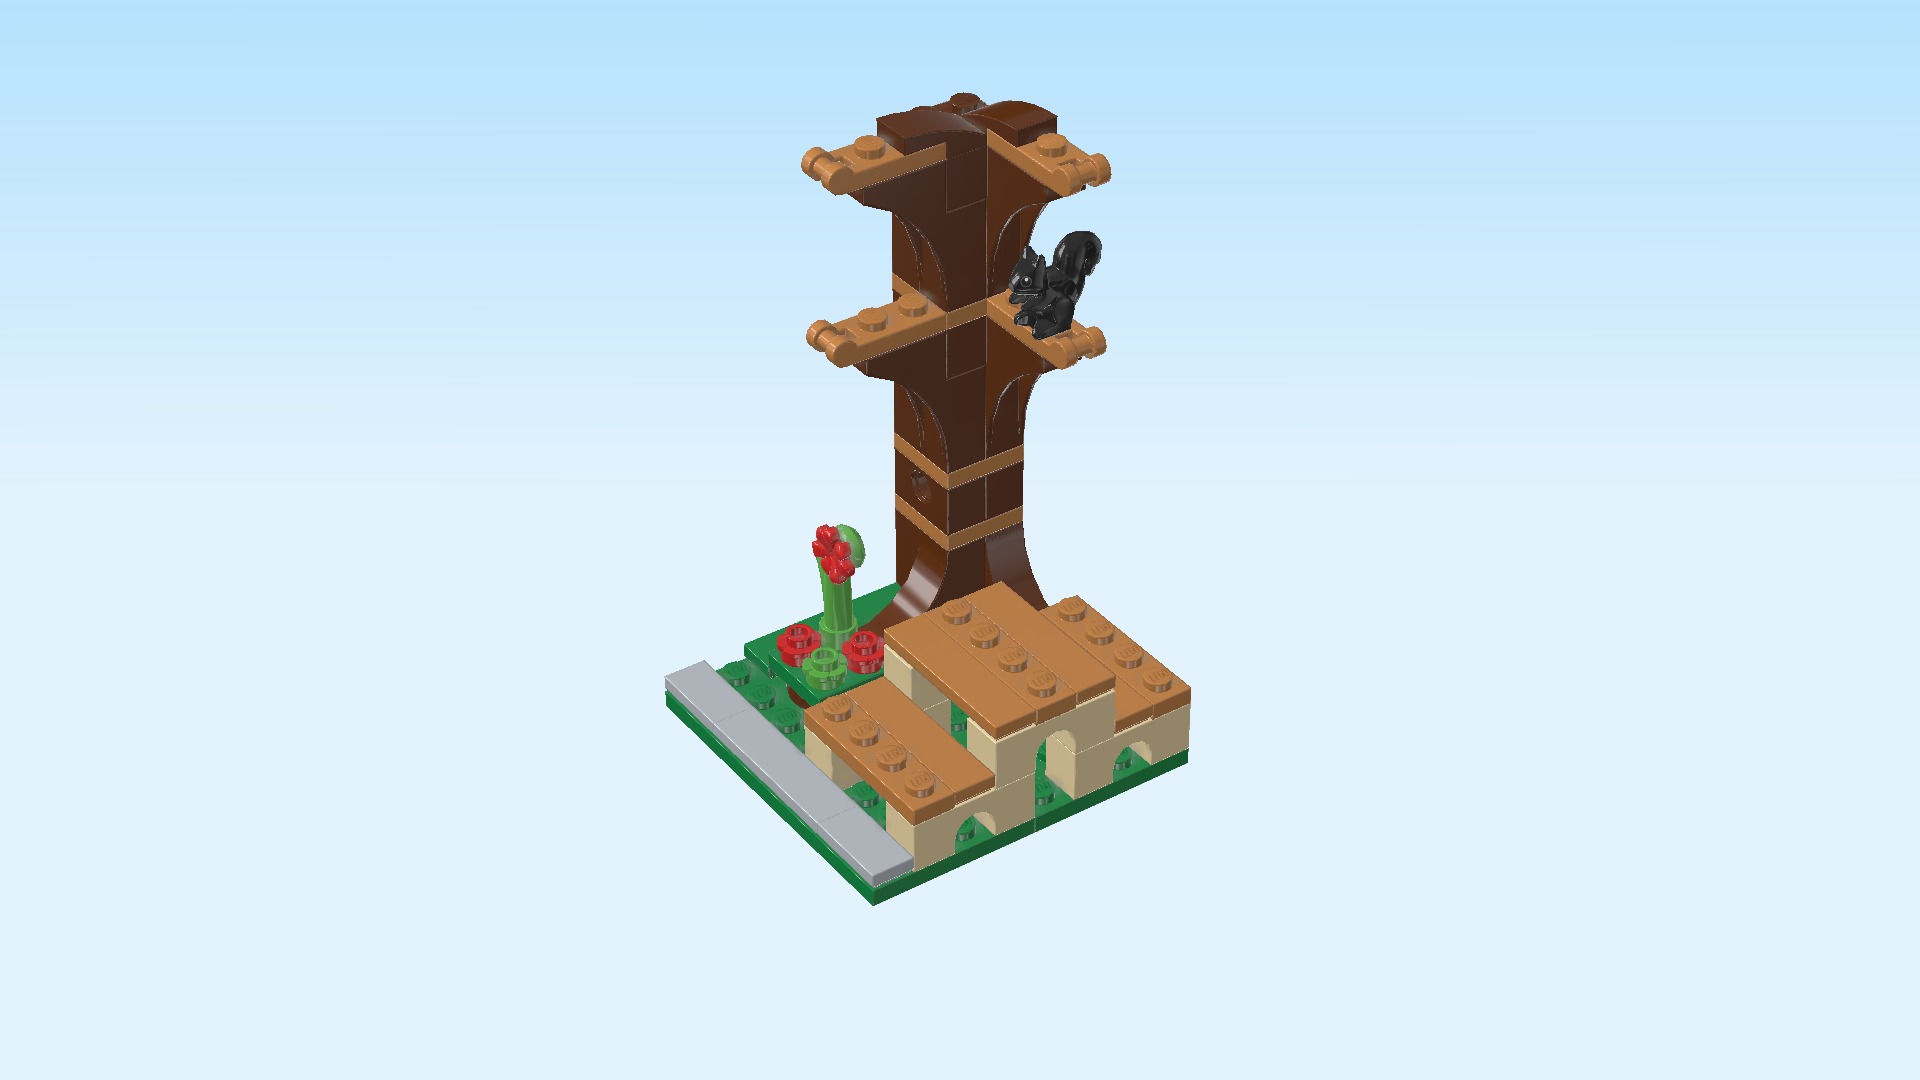
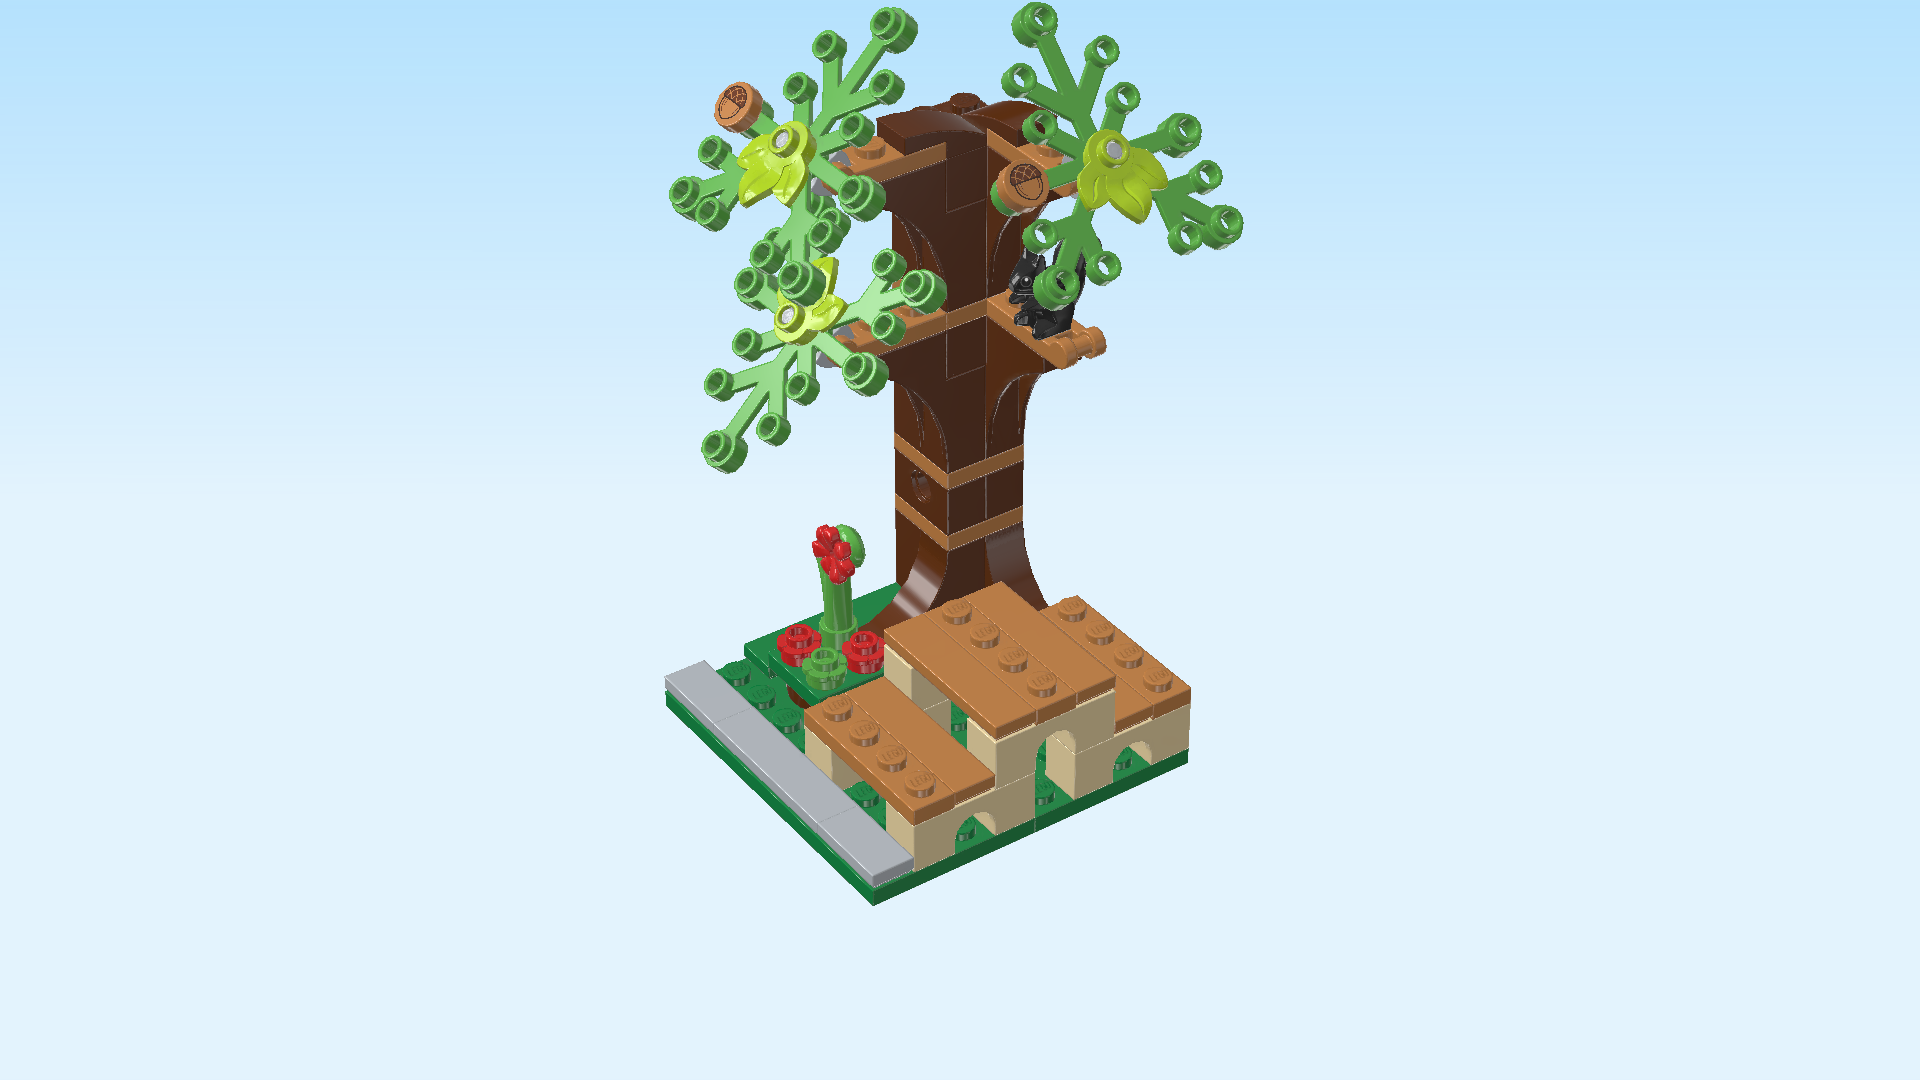
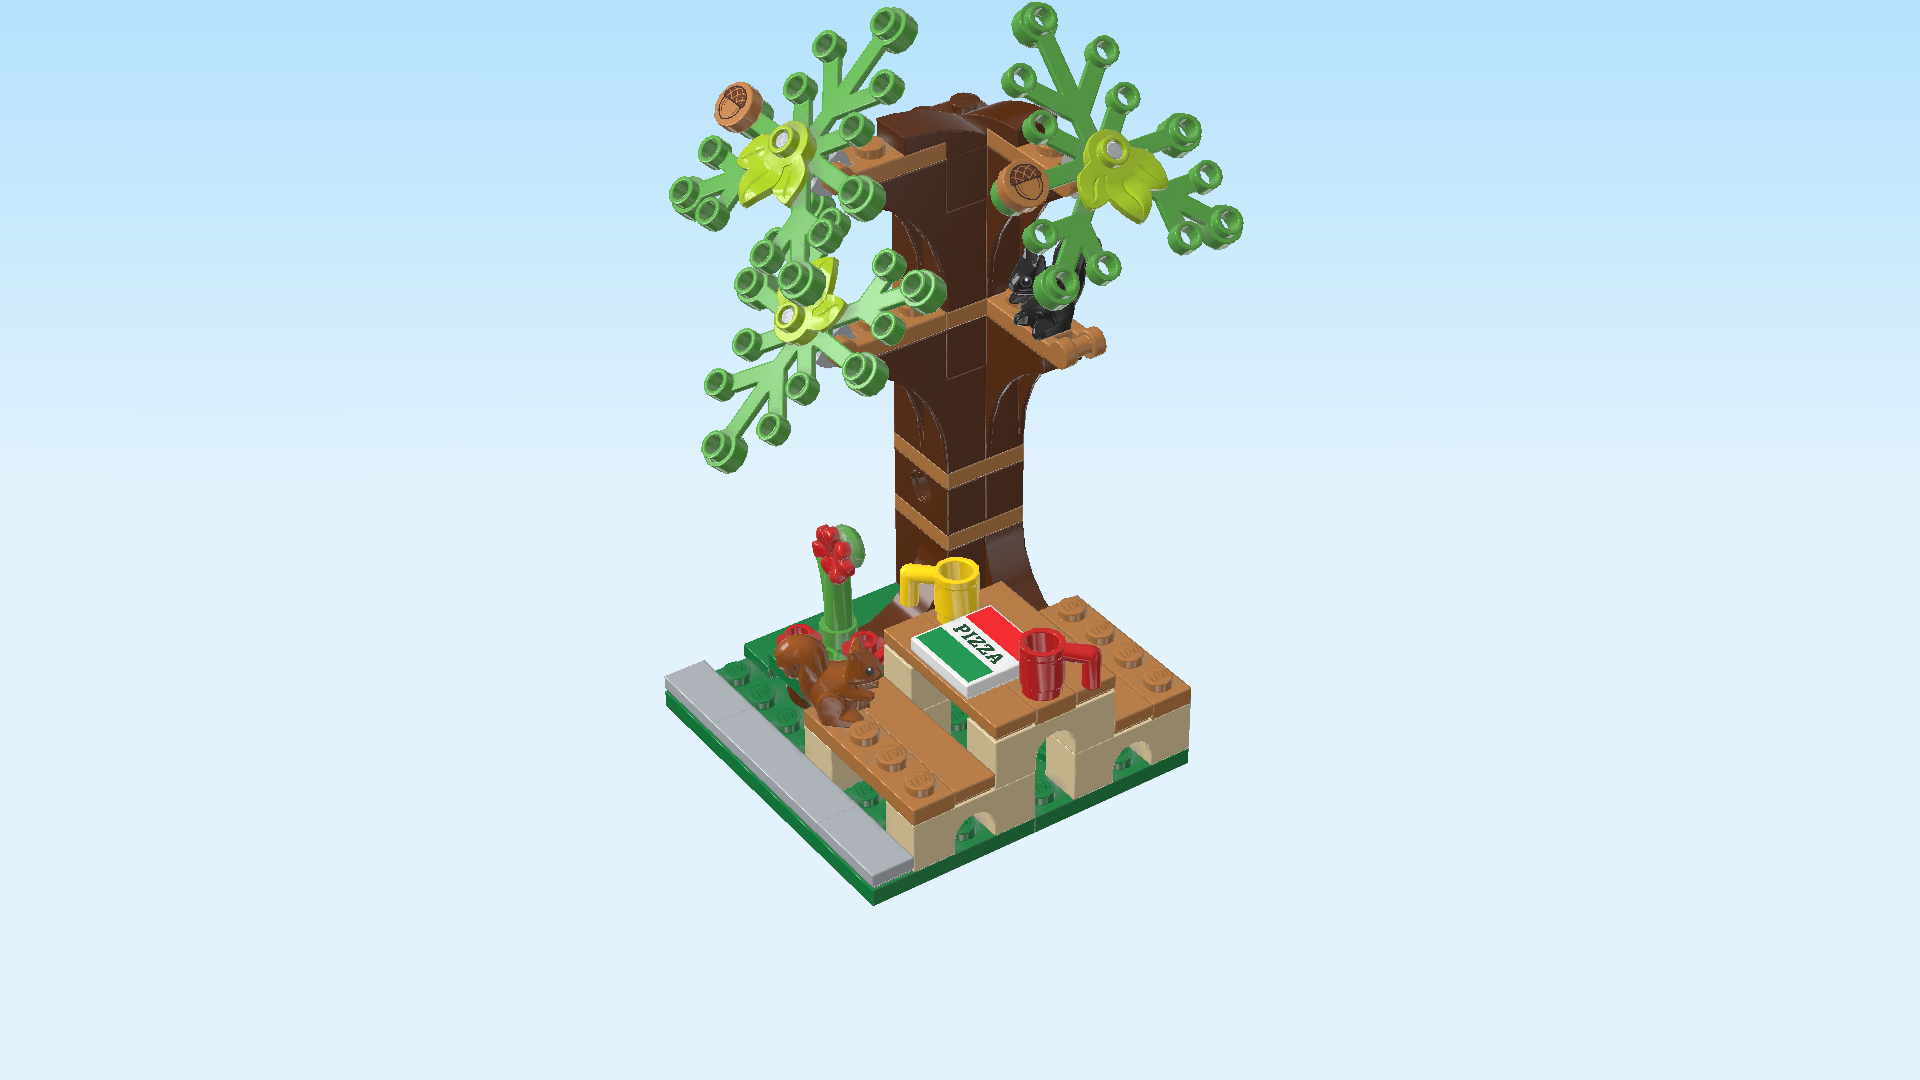
| Now, we will build the picnic bench with oak tree and squirrels. |
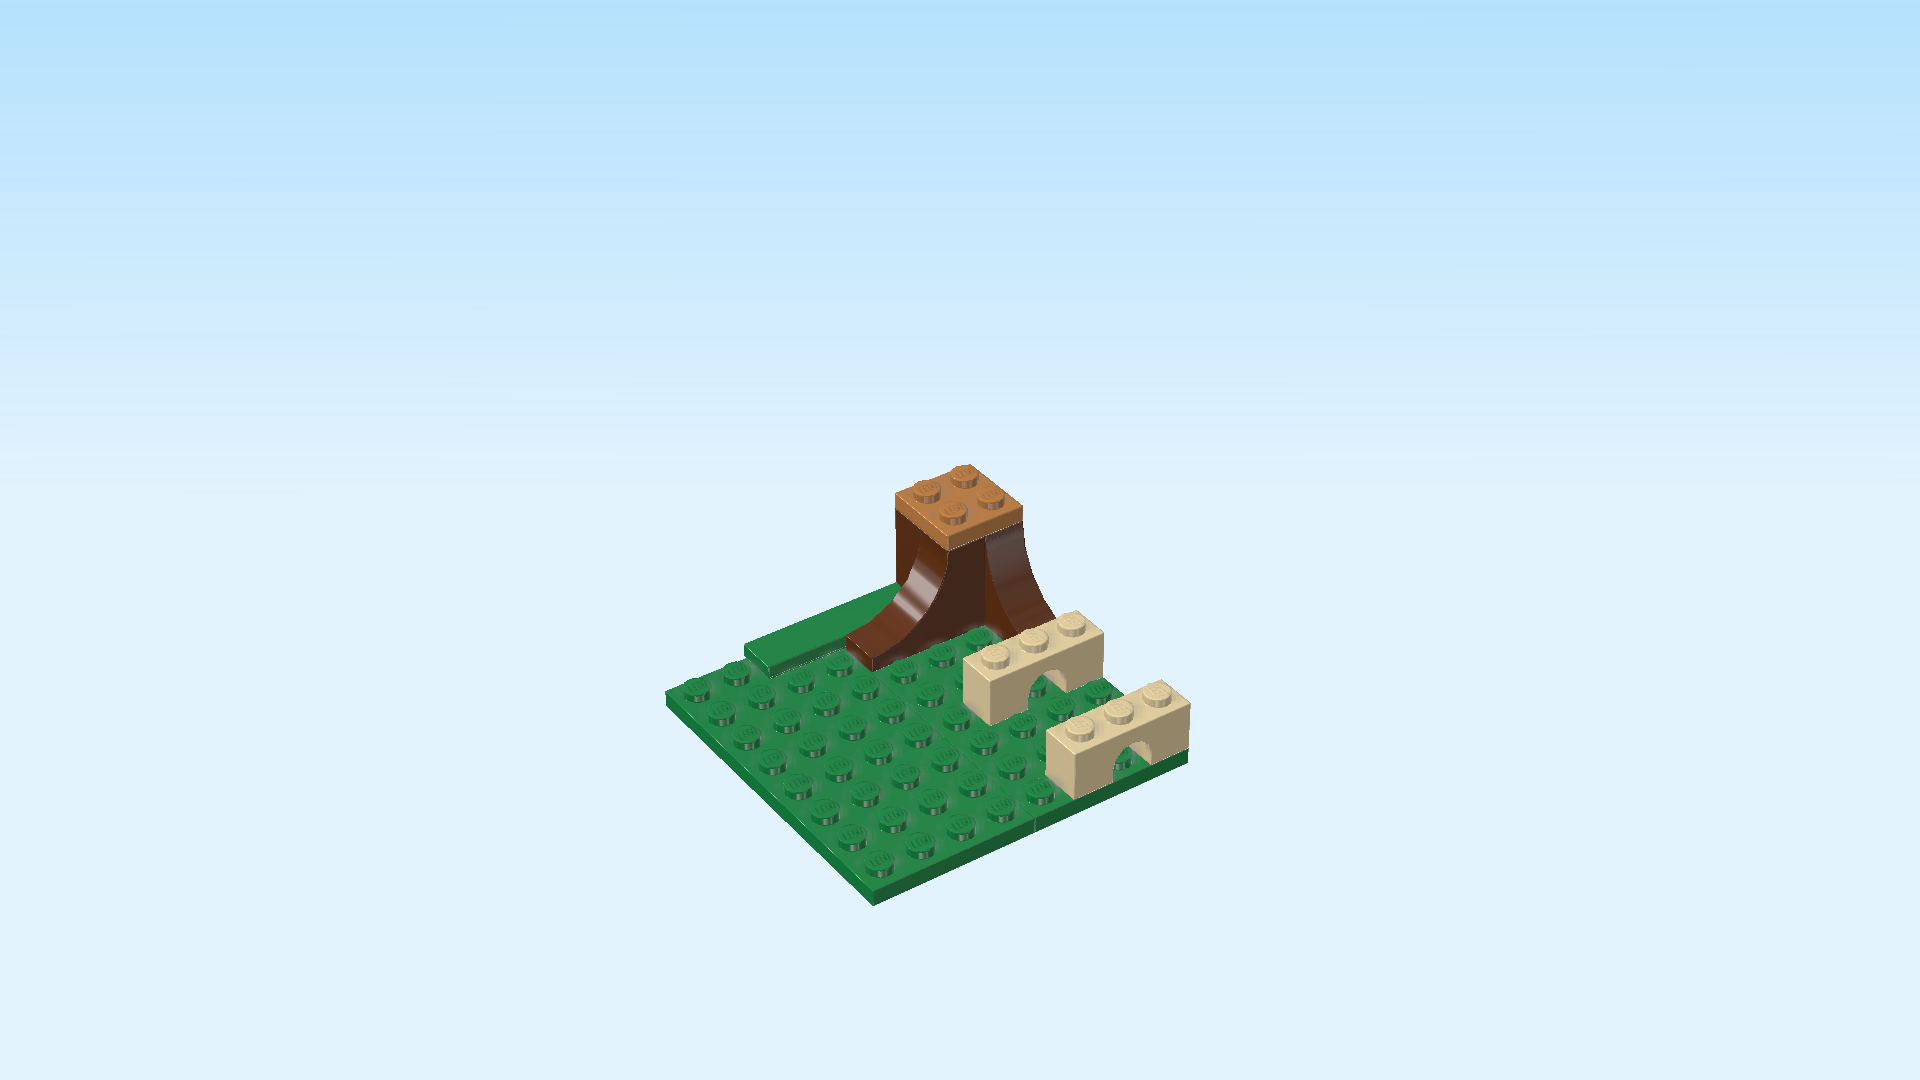
| Collect the following 2 pieces: |
| 1 dark green plate 4x8, |
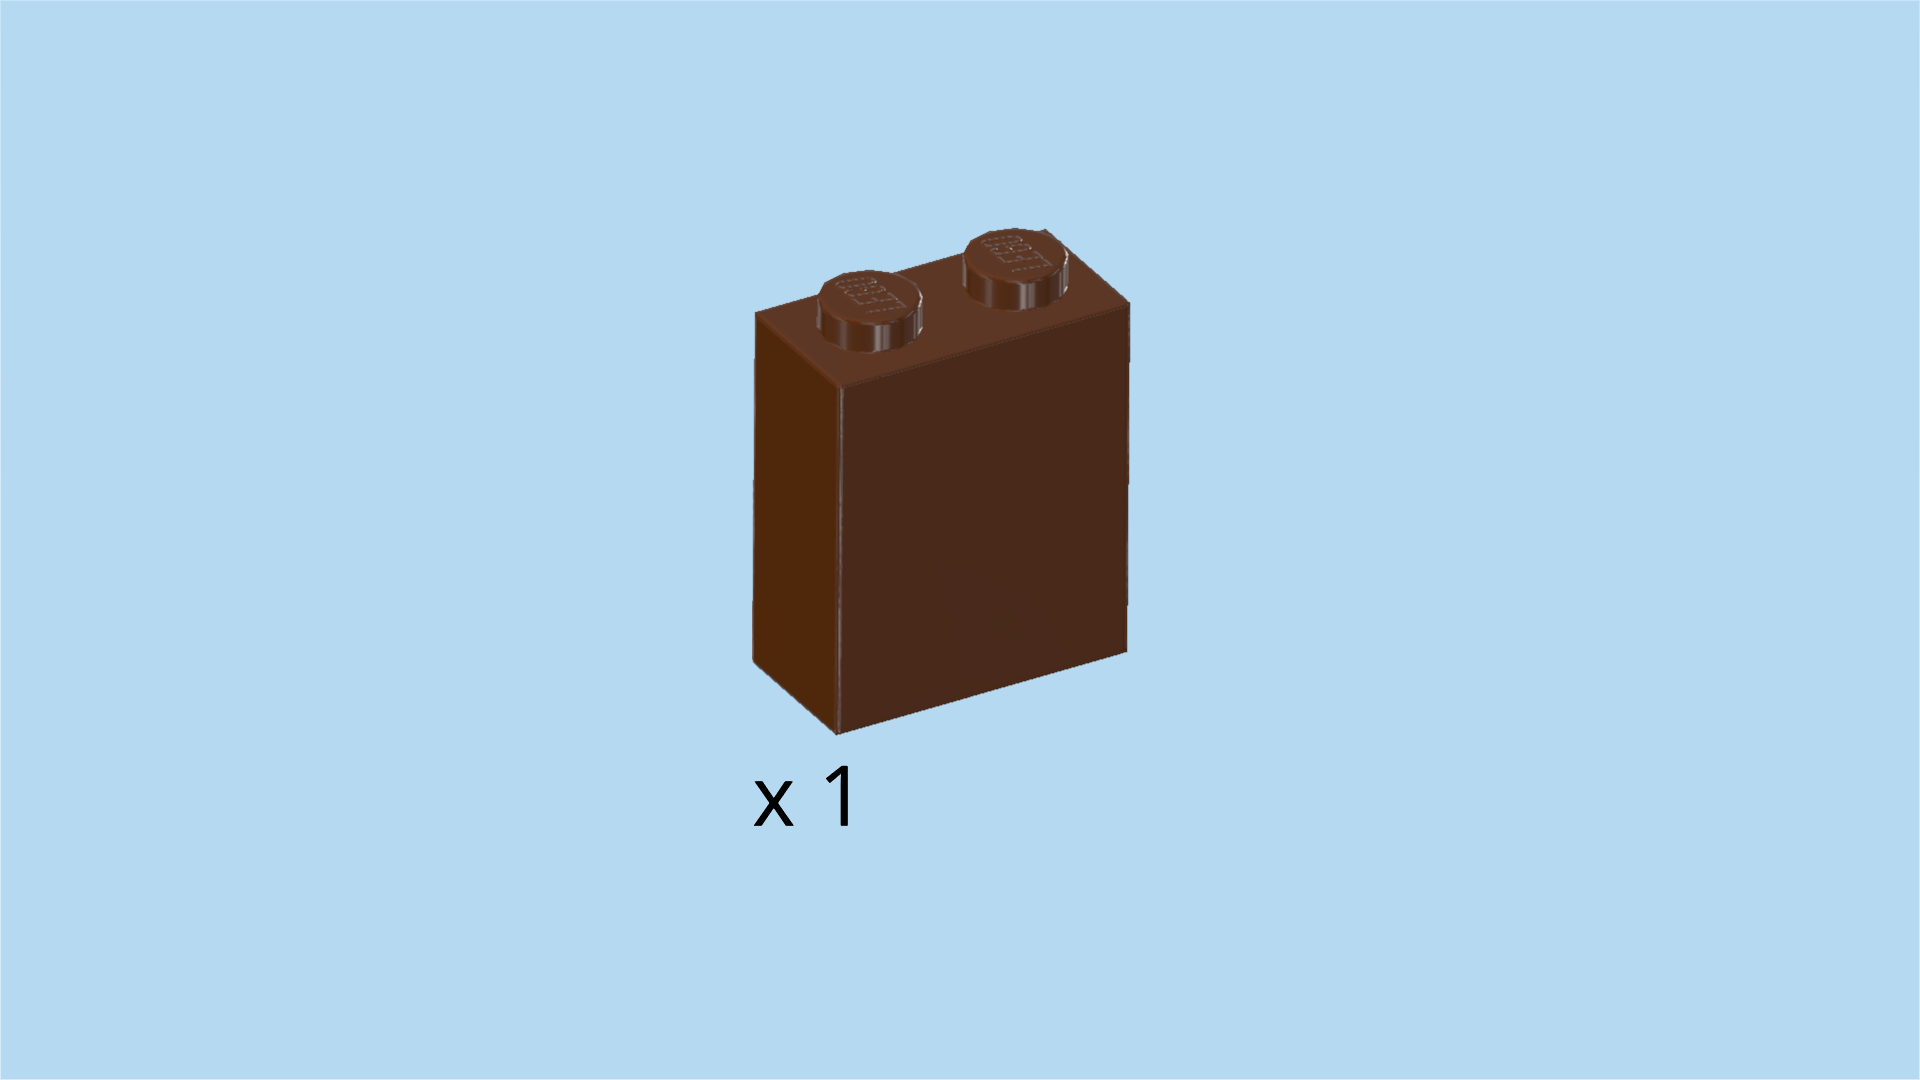
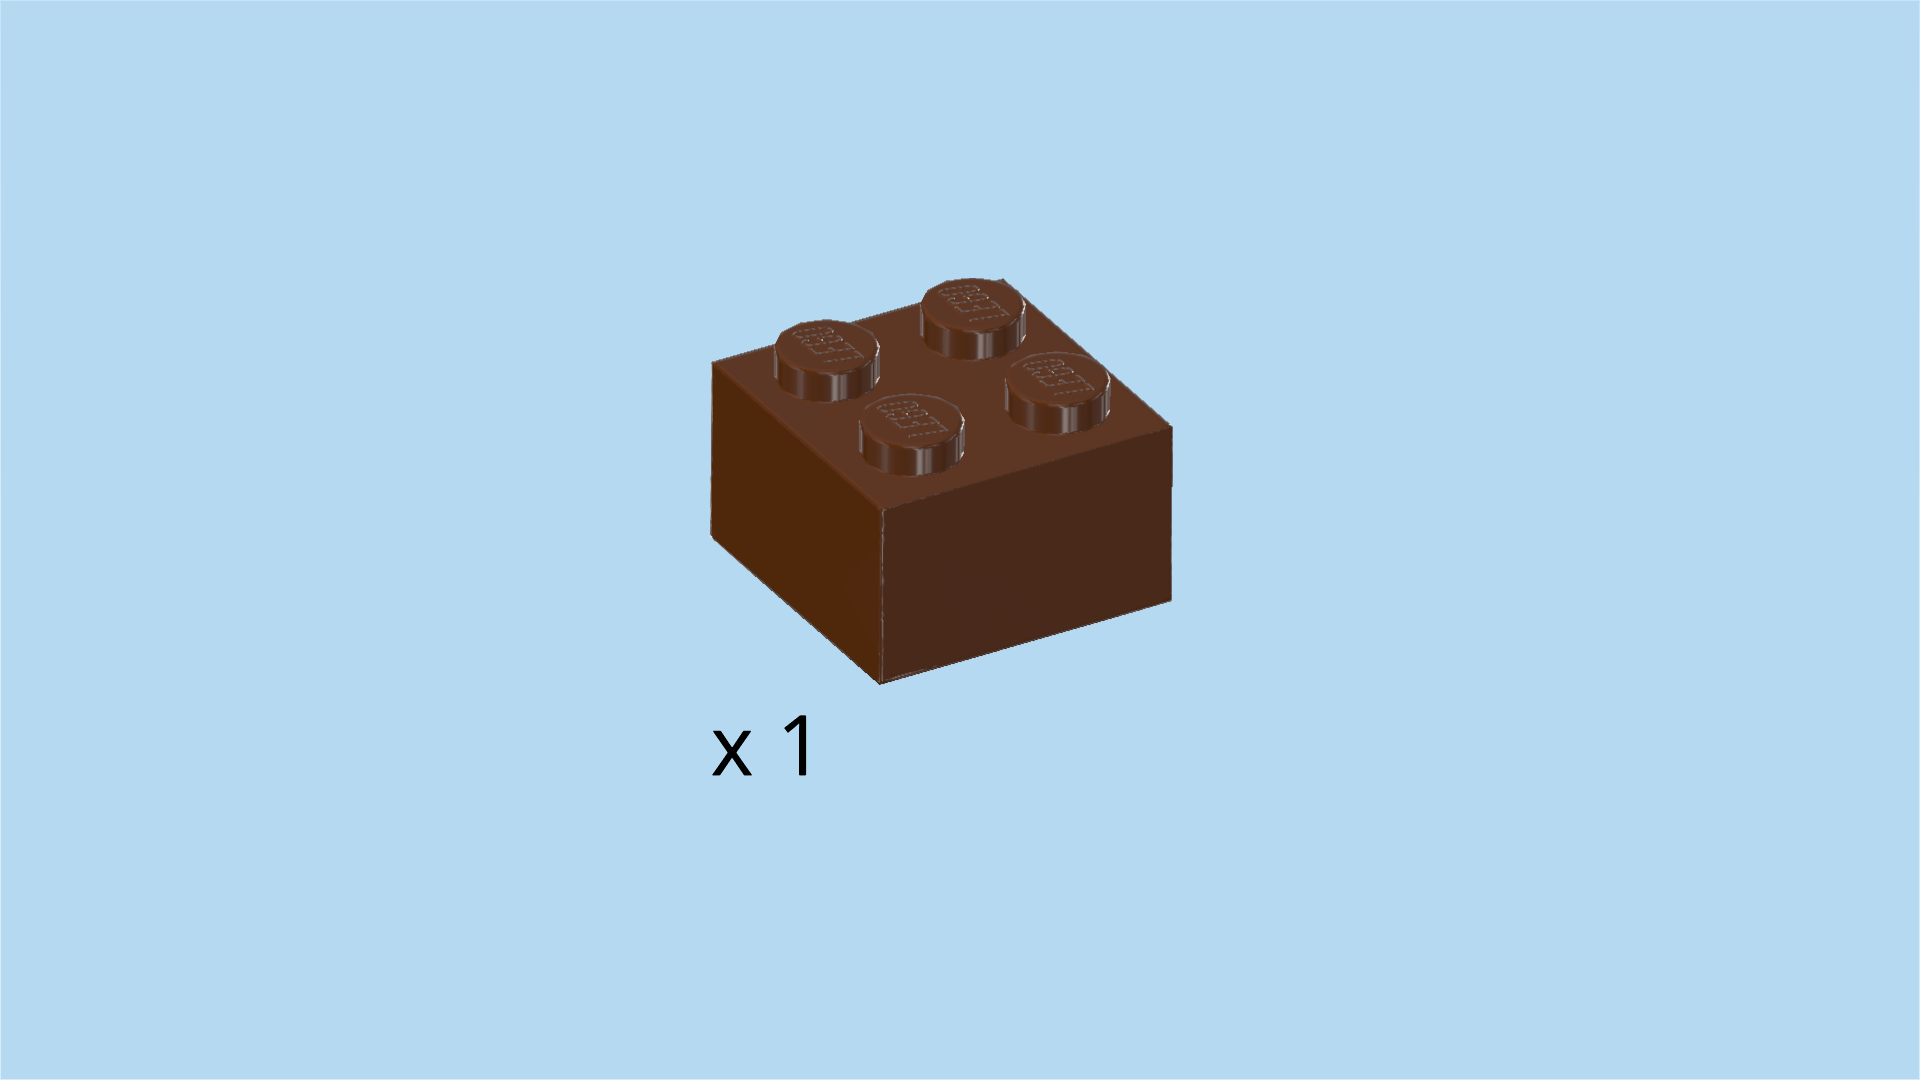
| and 1 reddish brown brick 1x2x2. |
| Put the plate 4x8 vertically on the table. |
| Put the brick 1x2x2 horizontally on the backmost row, starting from the right edge. |
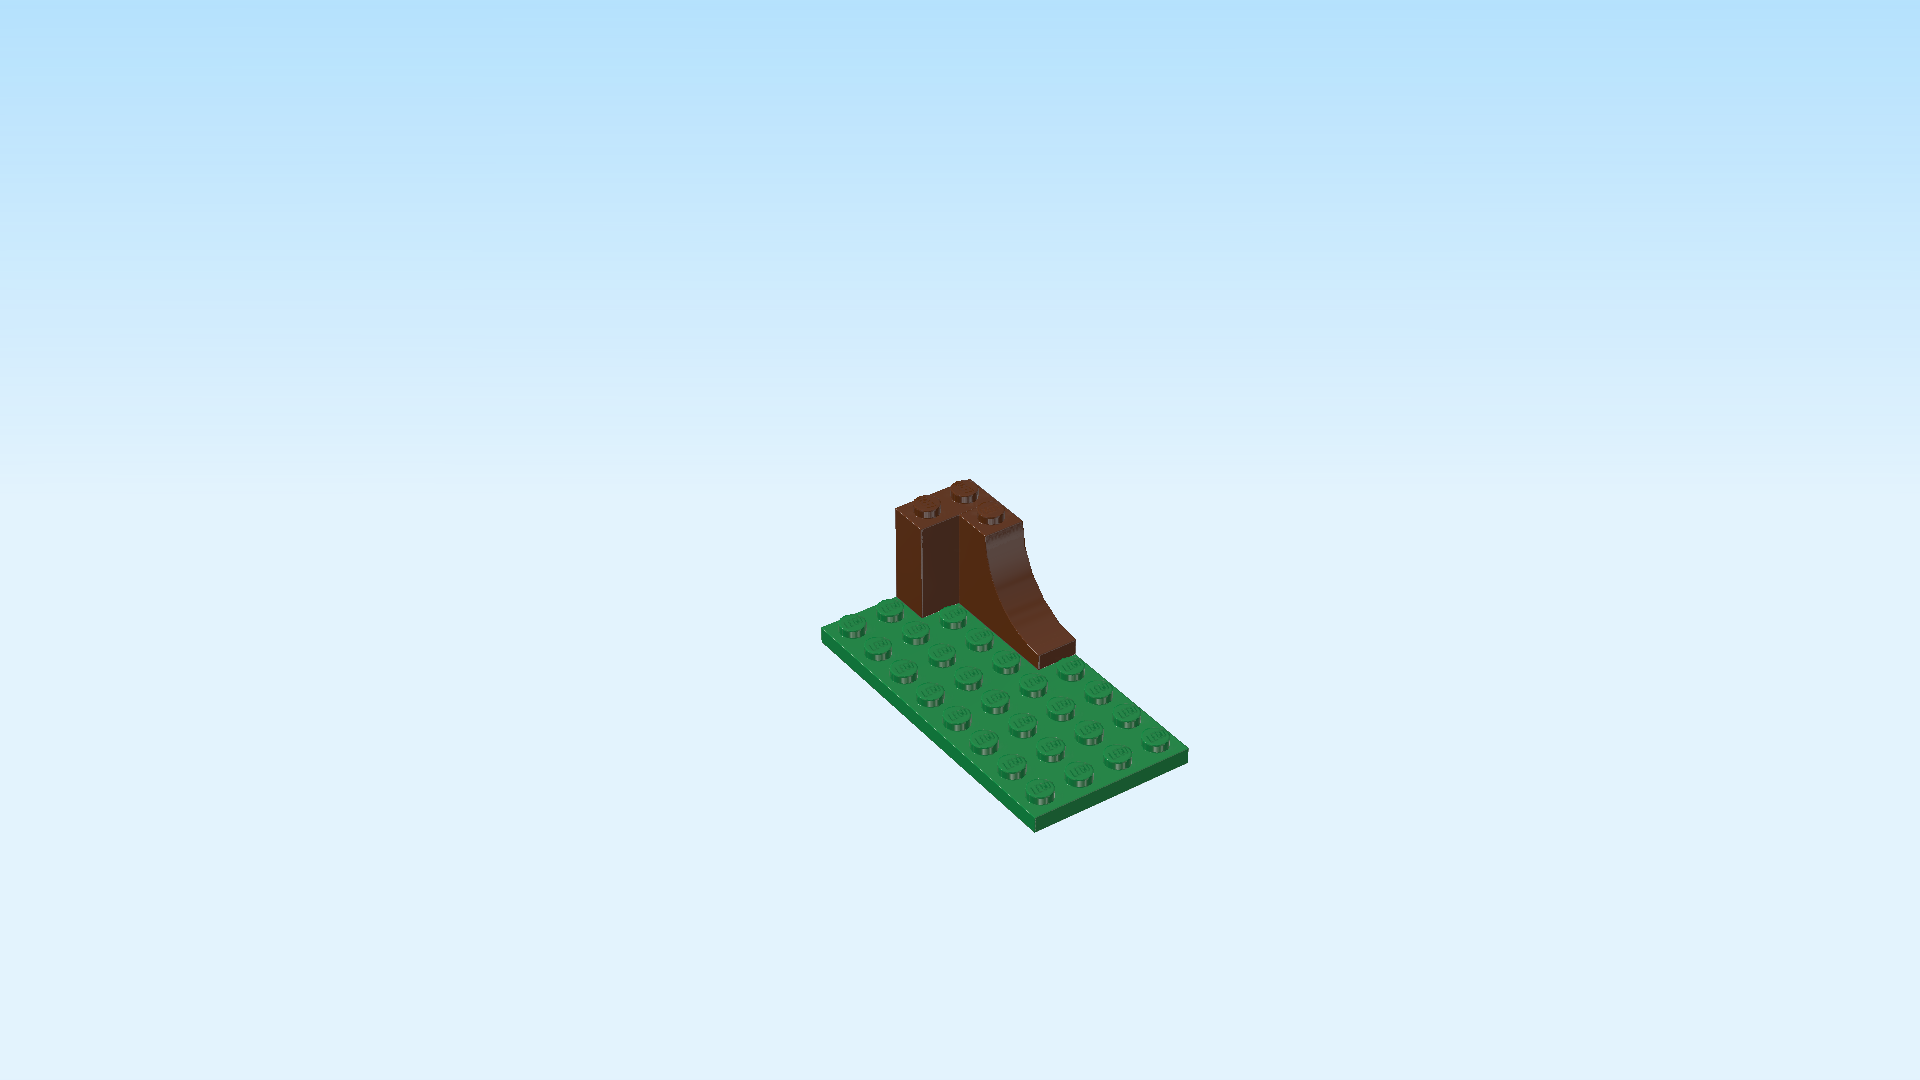
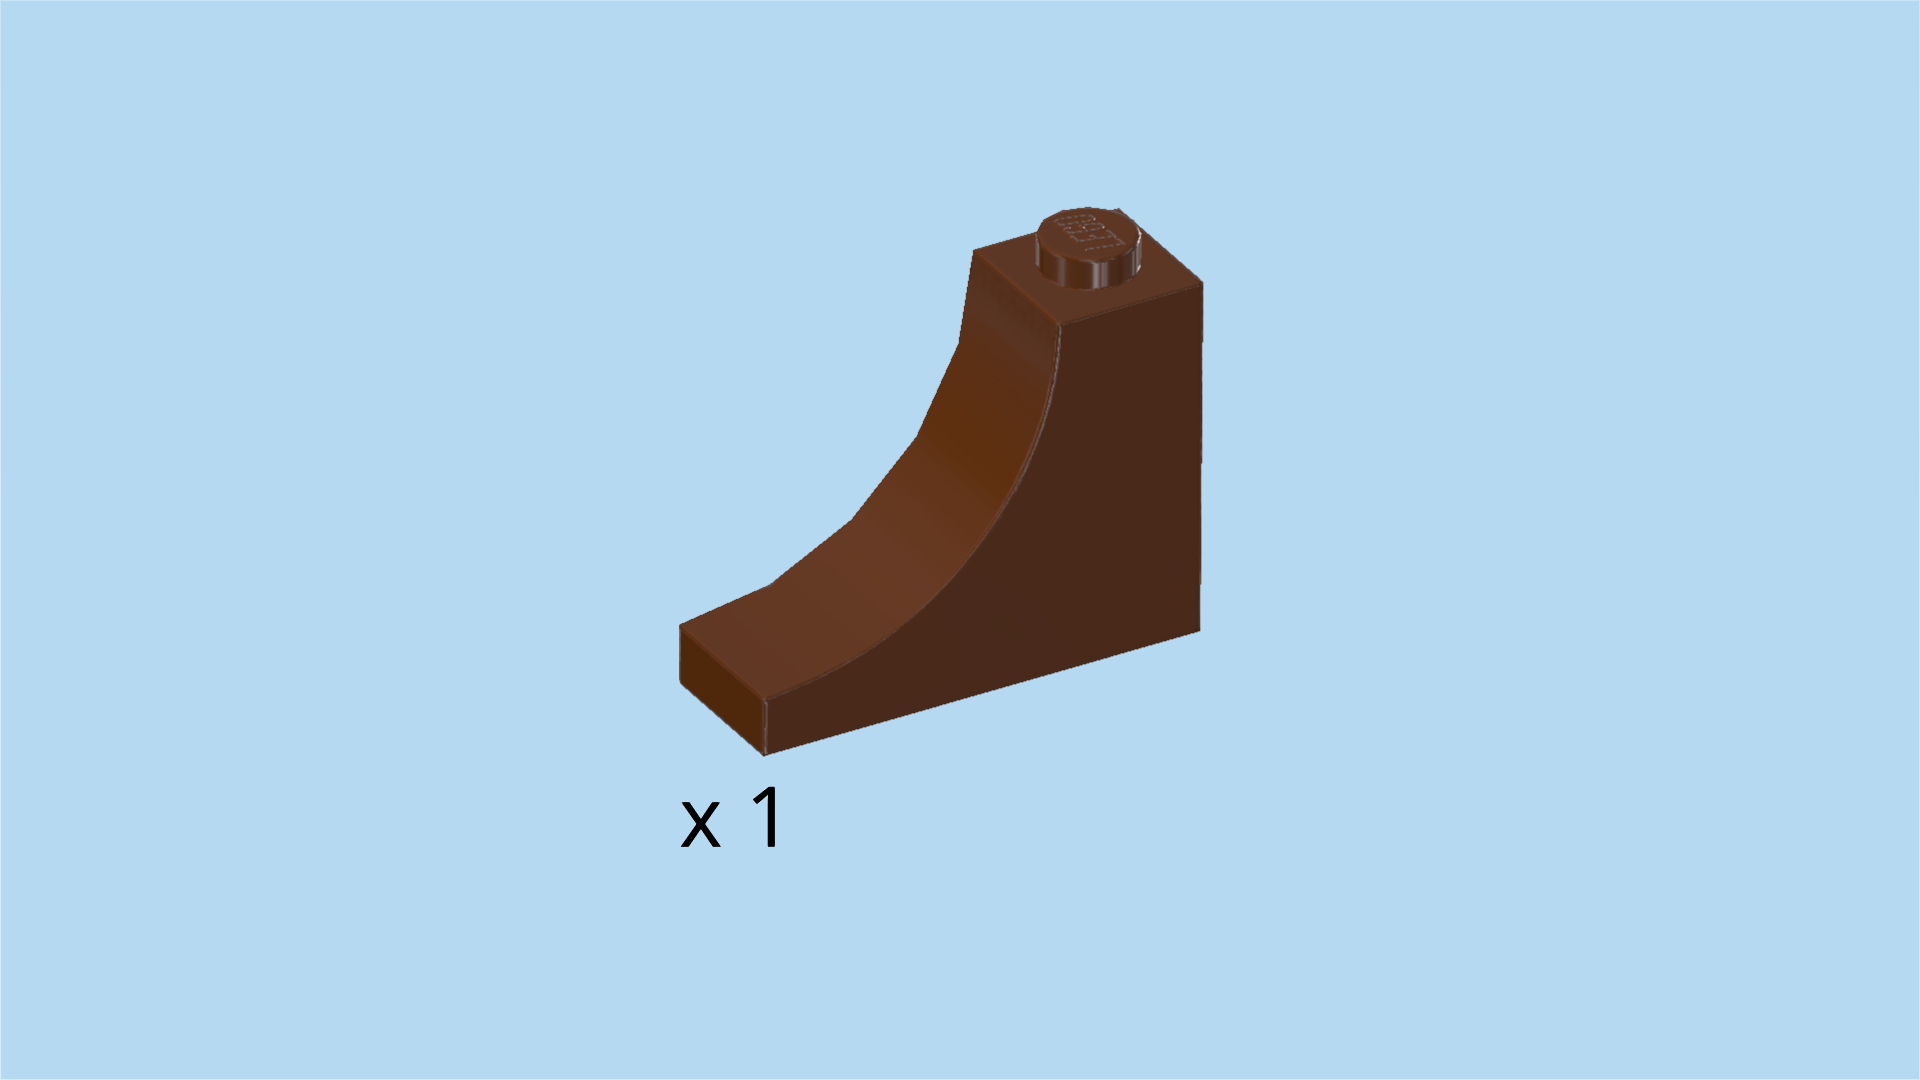
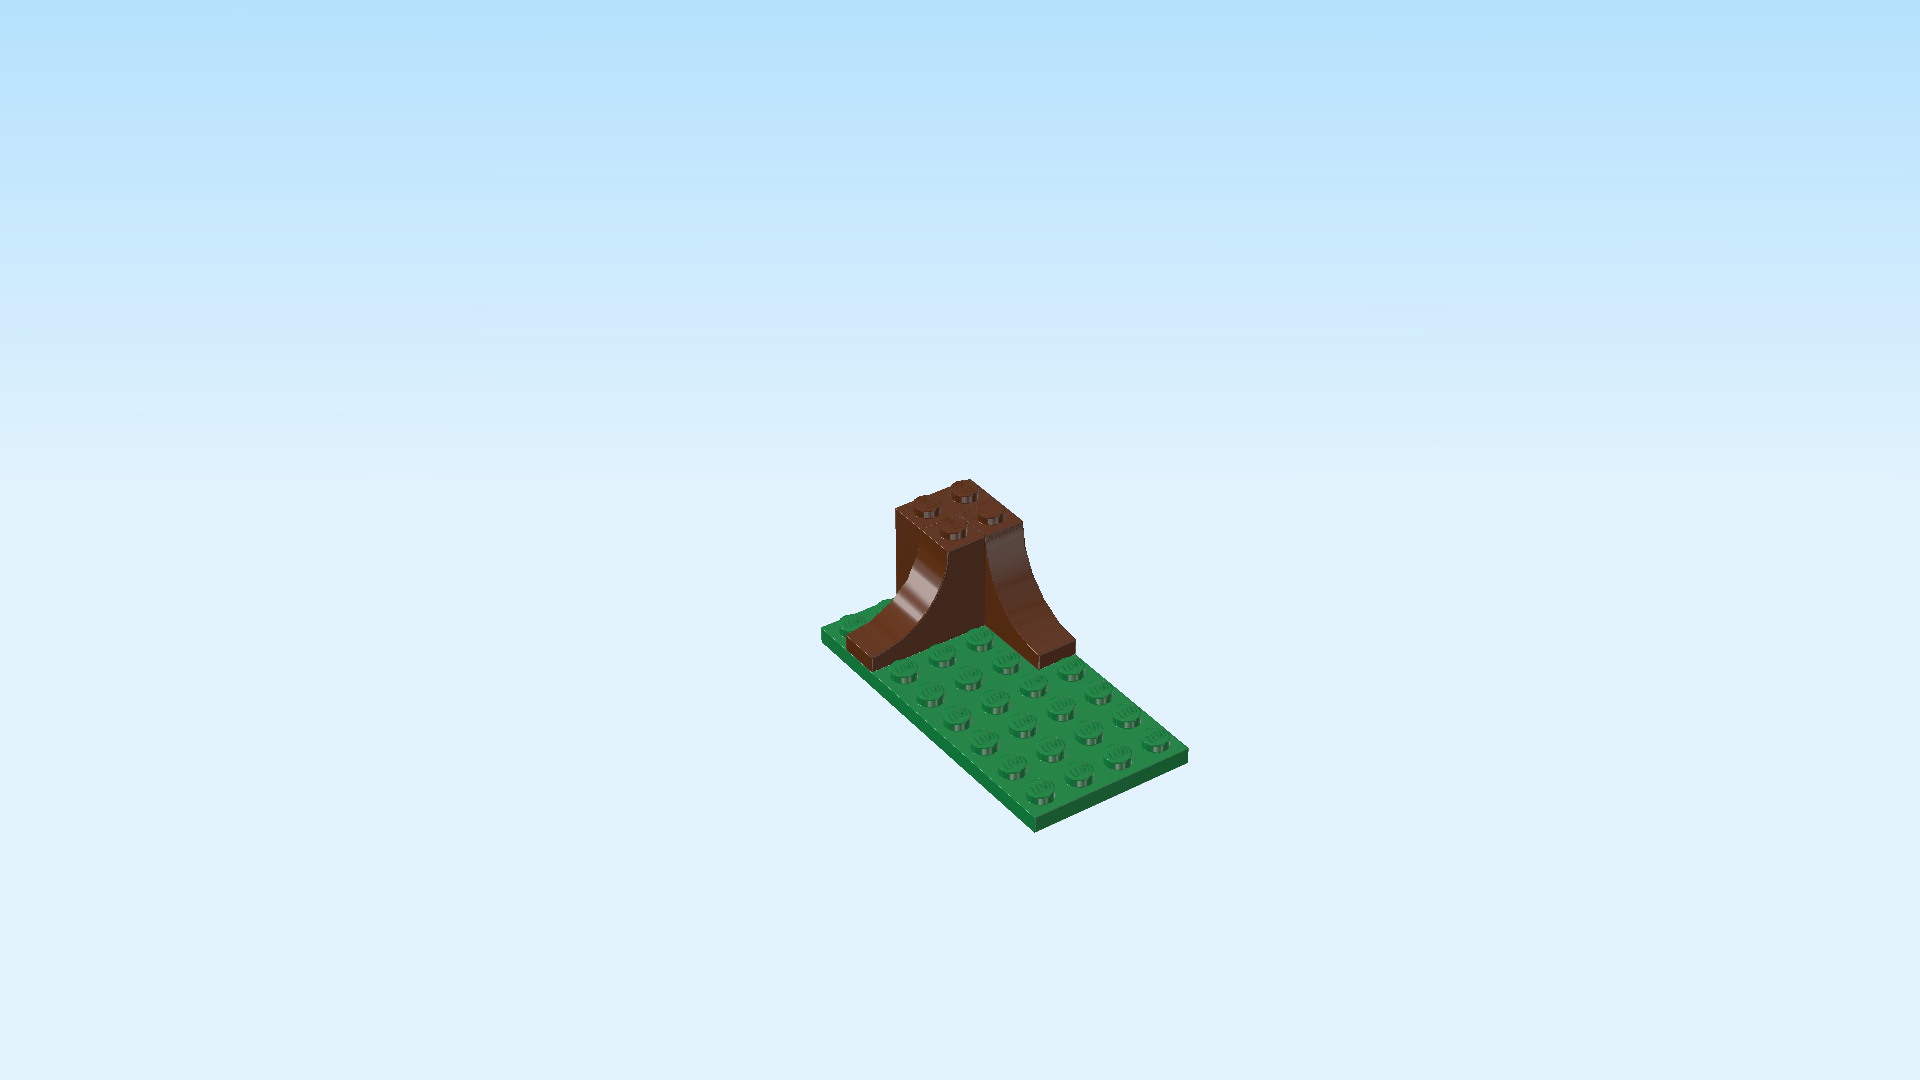
| Find 1 reddish brown brick 1x3x2 with inverted half-arch. |
| Put it vertically in front of the previous piece on the rightmost column, half-arch to the front. |
| Find 1 reddish brown brick 1x3x2 with inverted half-arch. |
| Put it horizontally to the left of the previous piece, half-arch to the left. |
| The three most recent pieces now form a top surface of 2x2 knobs. Behind the current piece, 2 empty knobs are left. |
| The two half-arches are actually the roots of the tree! |
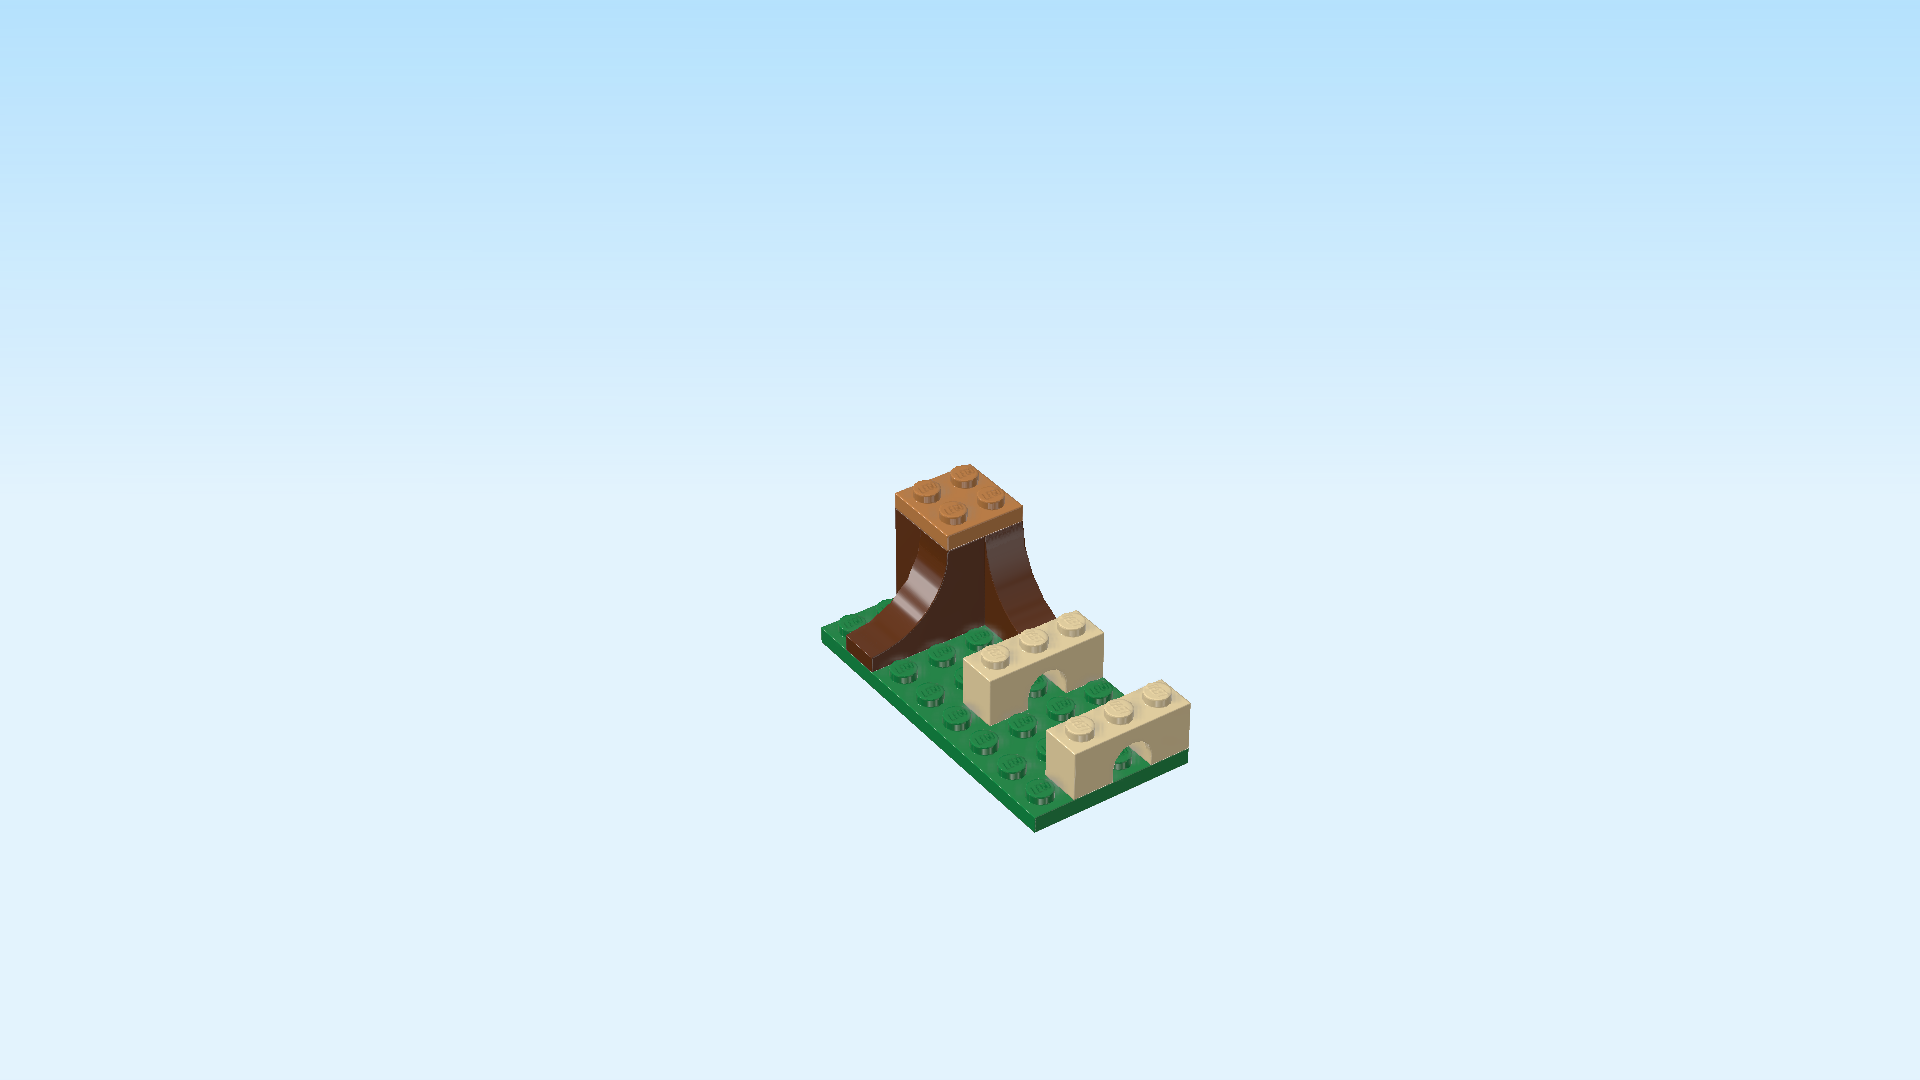
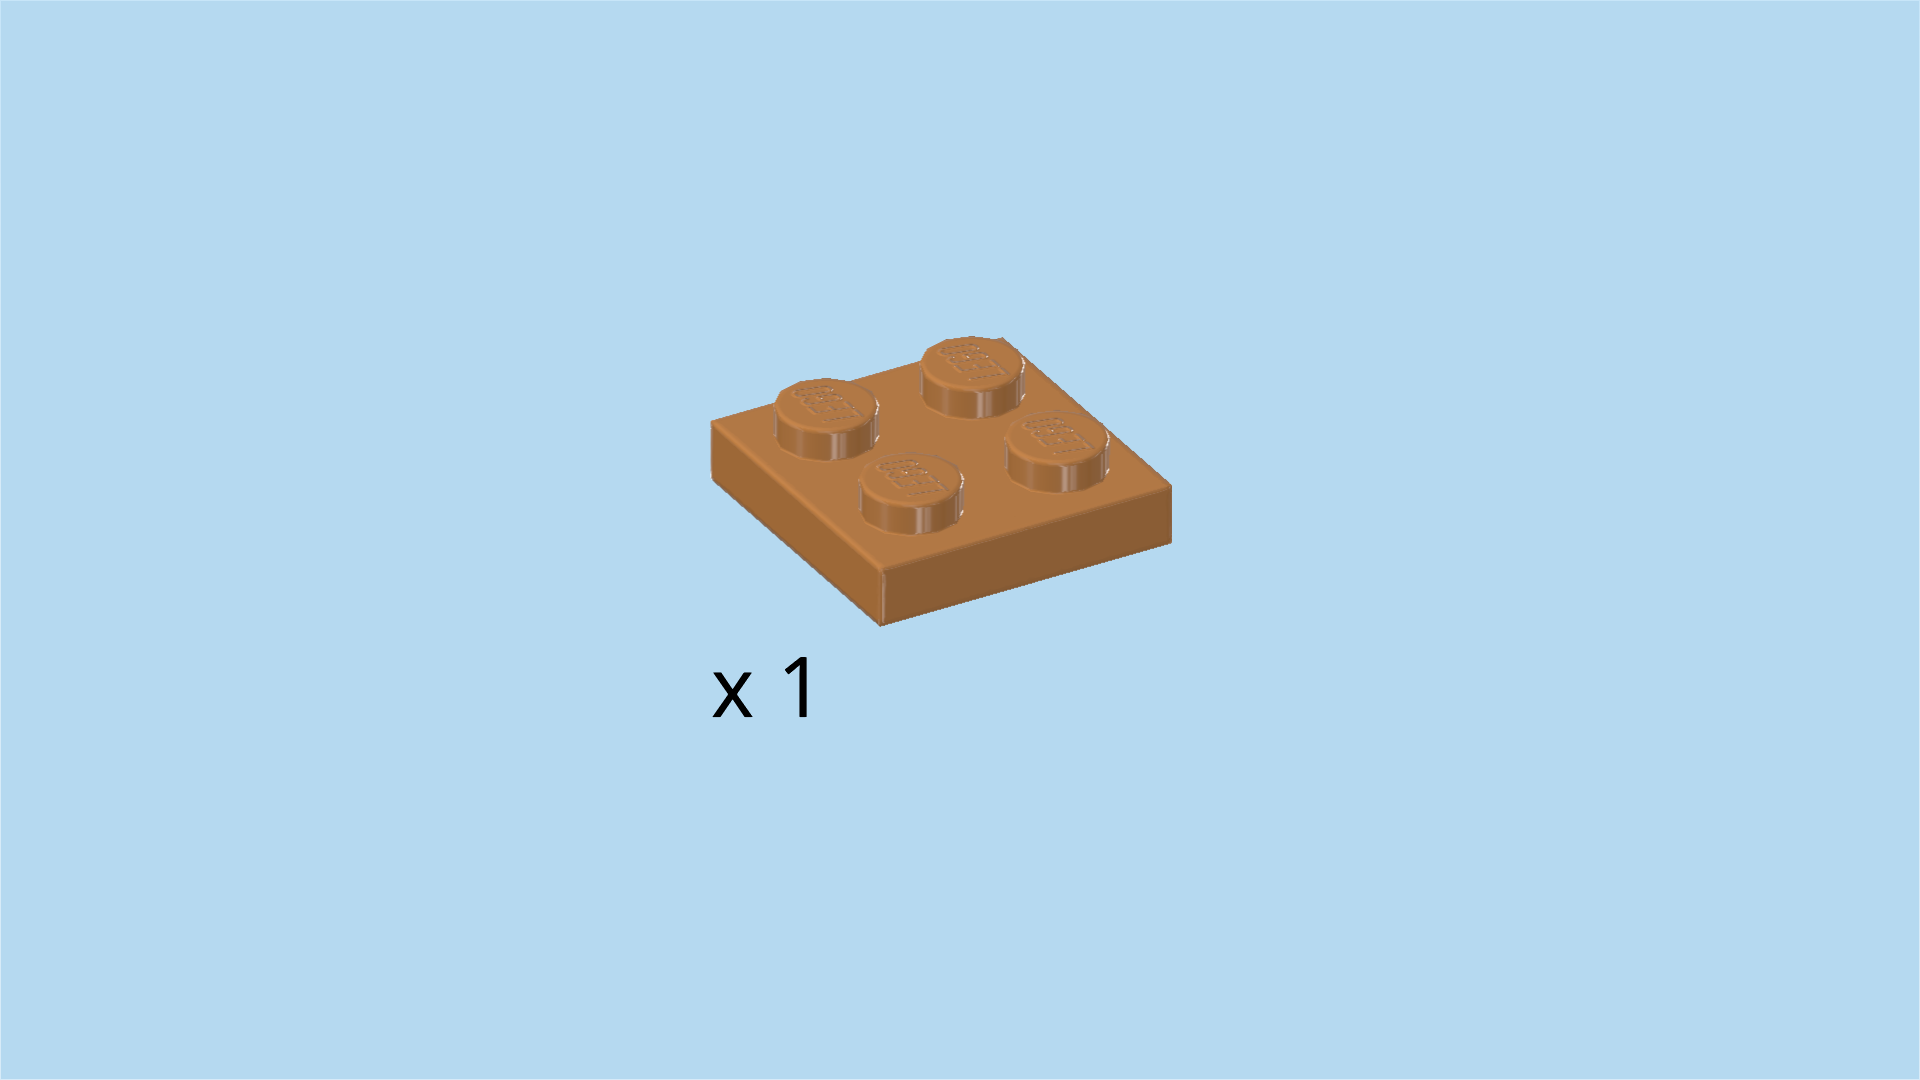
| Find 1 medium nougat brown plate 2x2. |
| Put it on the top 2x2 surface in the right back corner of the current structure. |
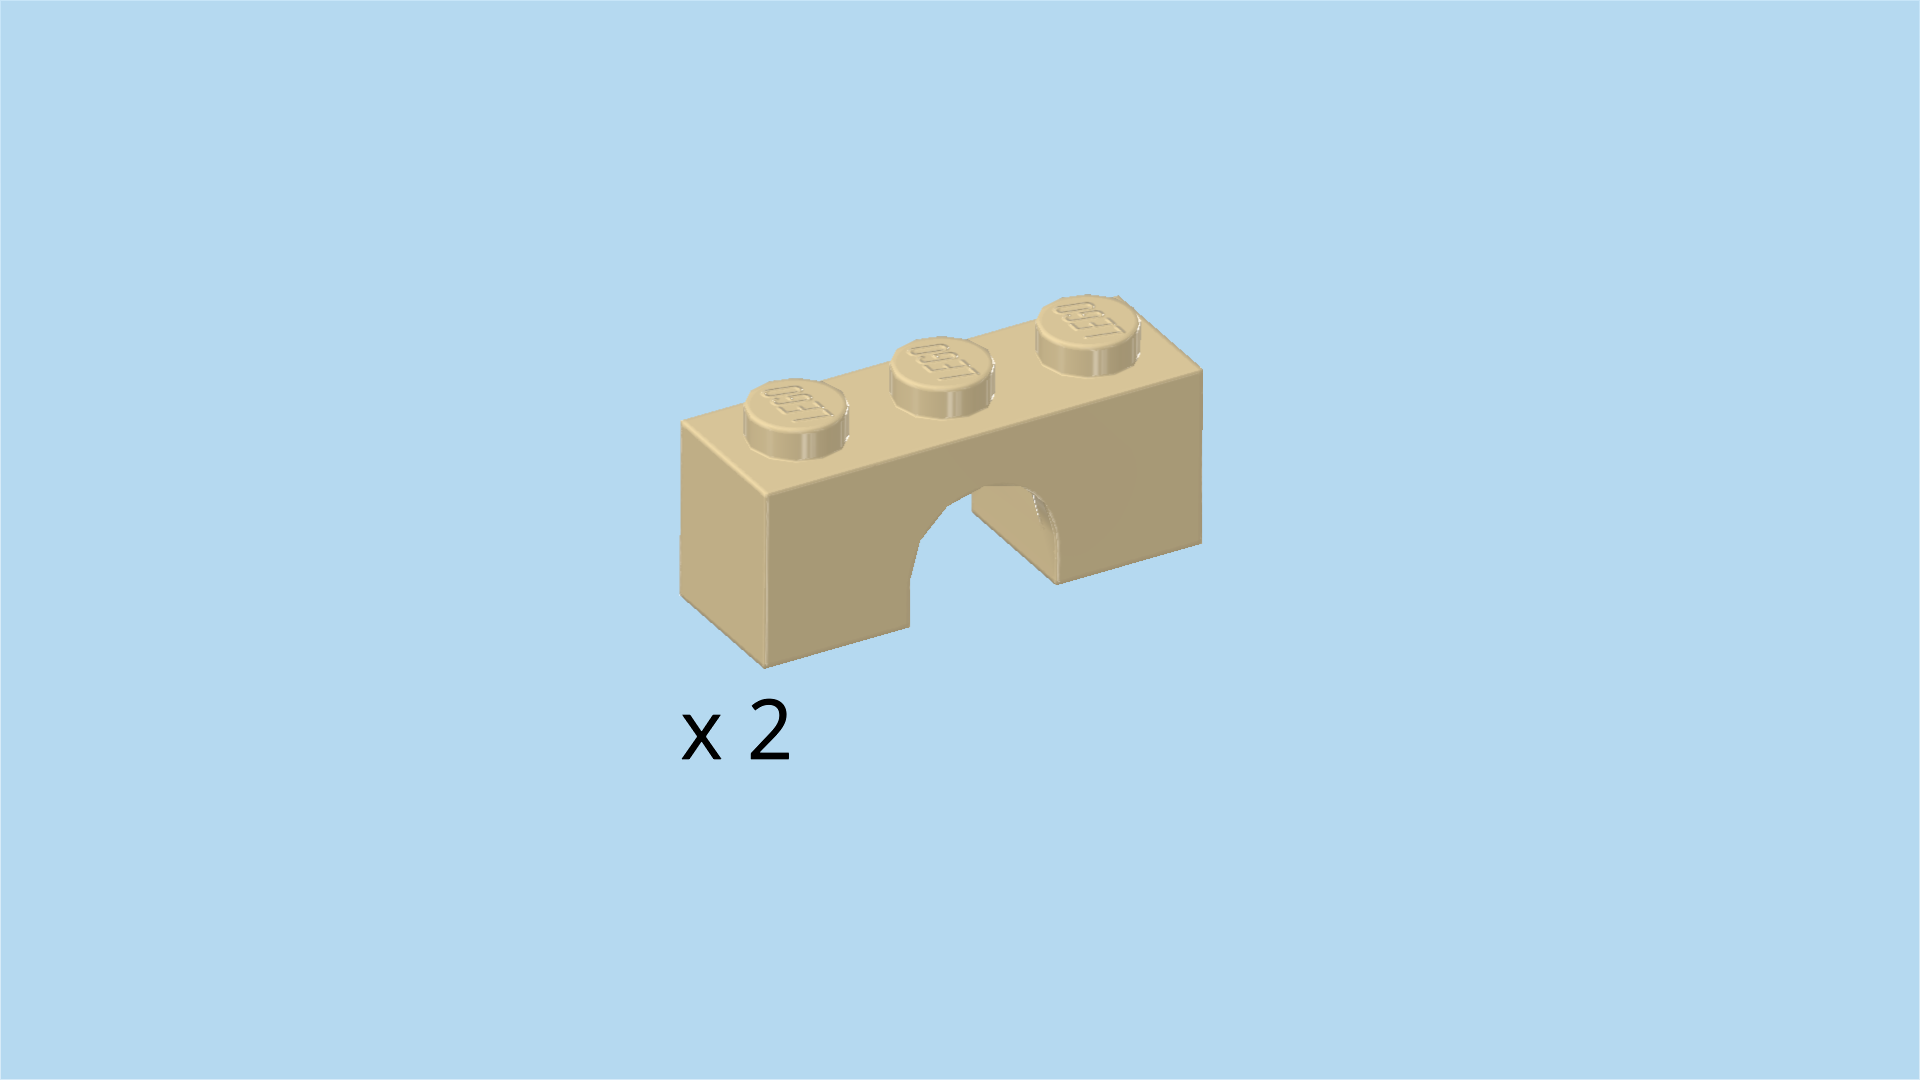
| Find 2 pale ocher yellow bricks 1x3 with inside arch. |
| Put 1 horizontally on the frontmost row, skipping the leftmost knob. |
| Skip 2 rows to the back, and put the other brick 1x3 horizontally, again skipping the leftmost column. |
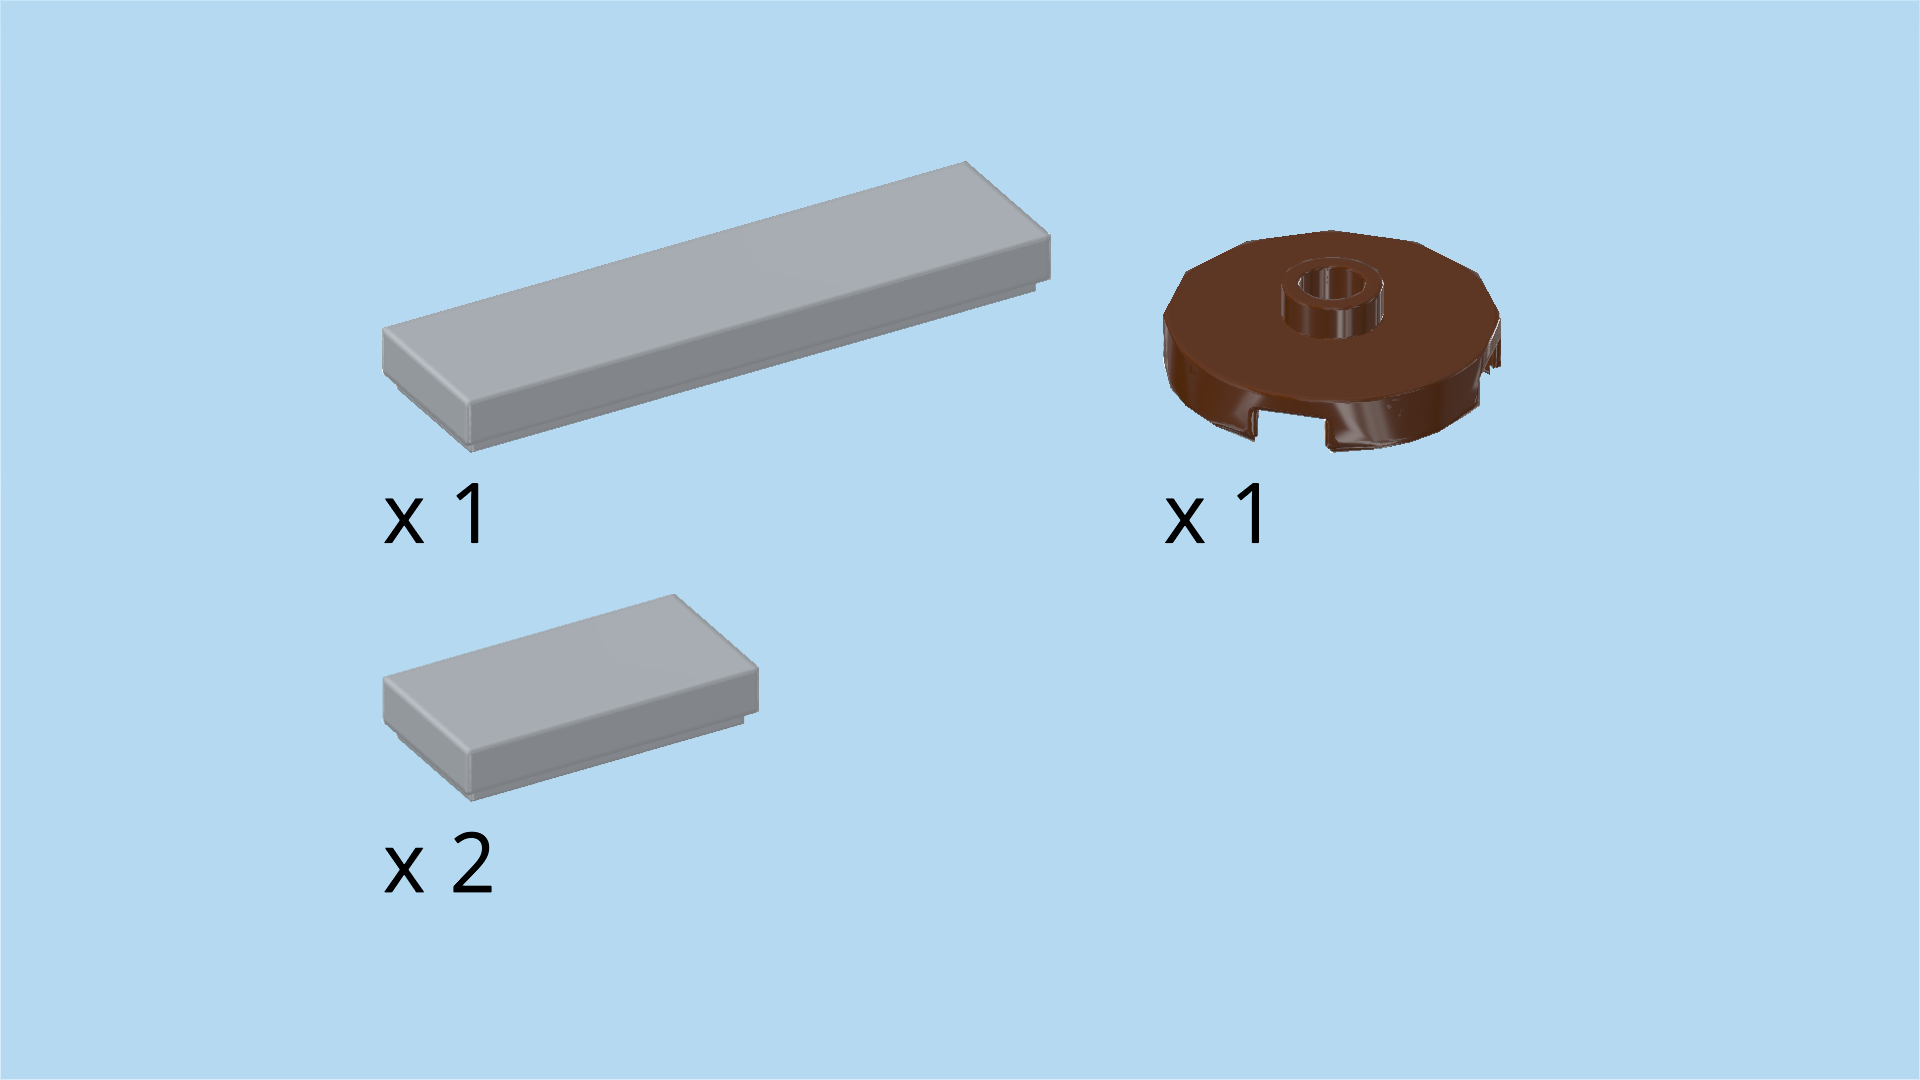
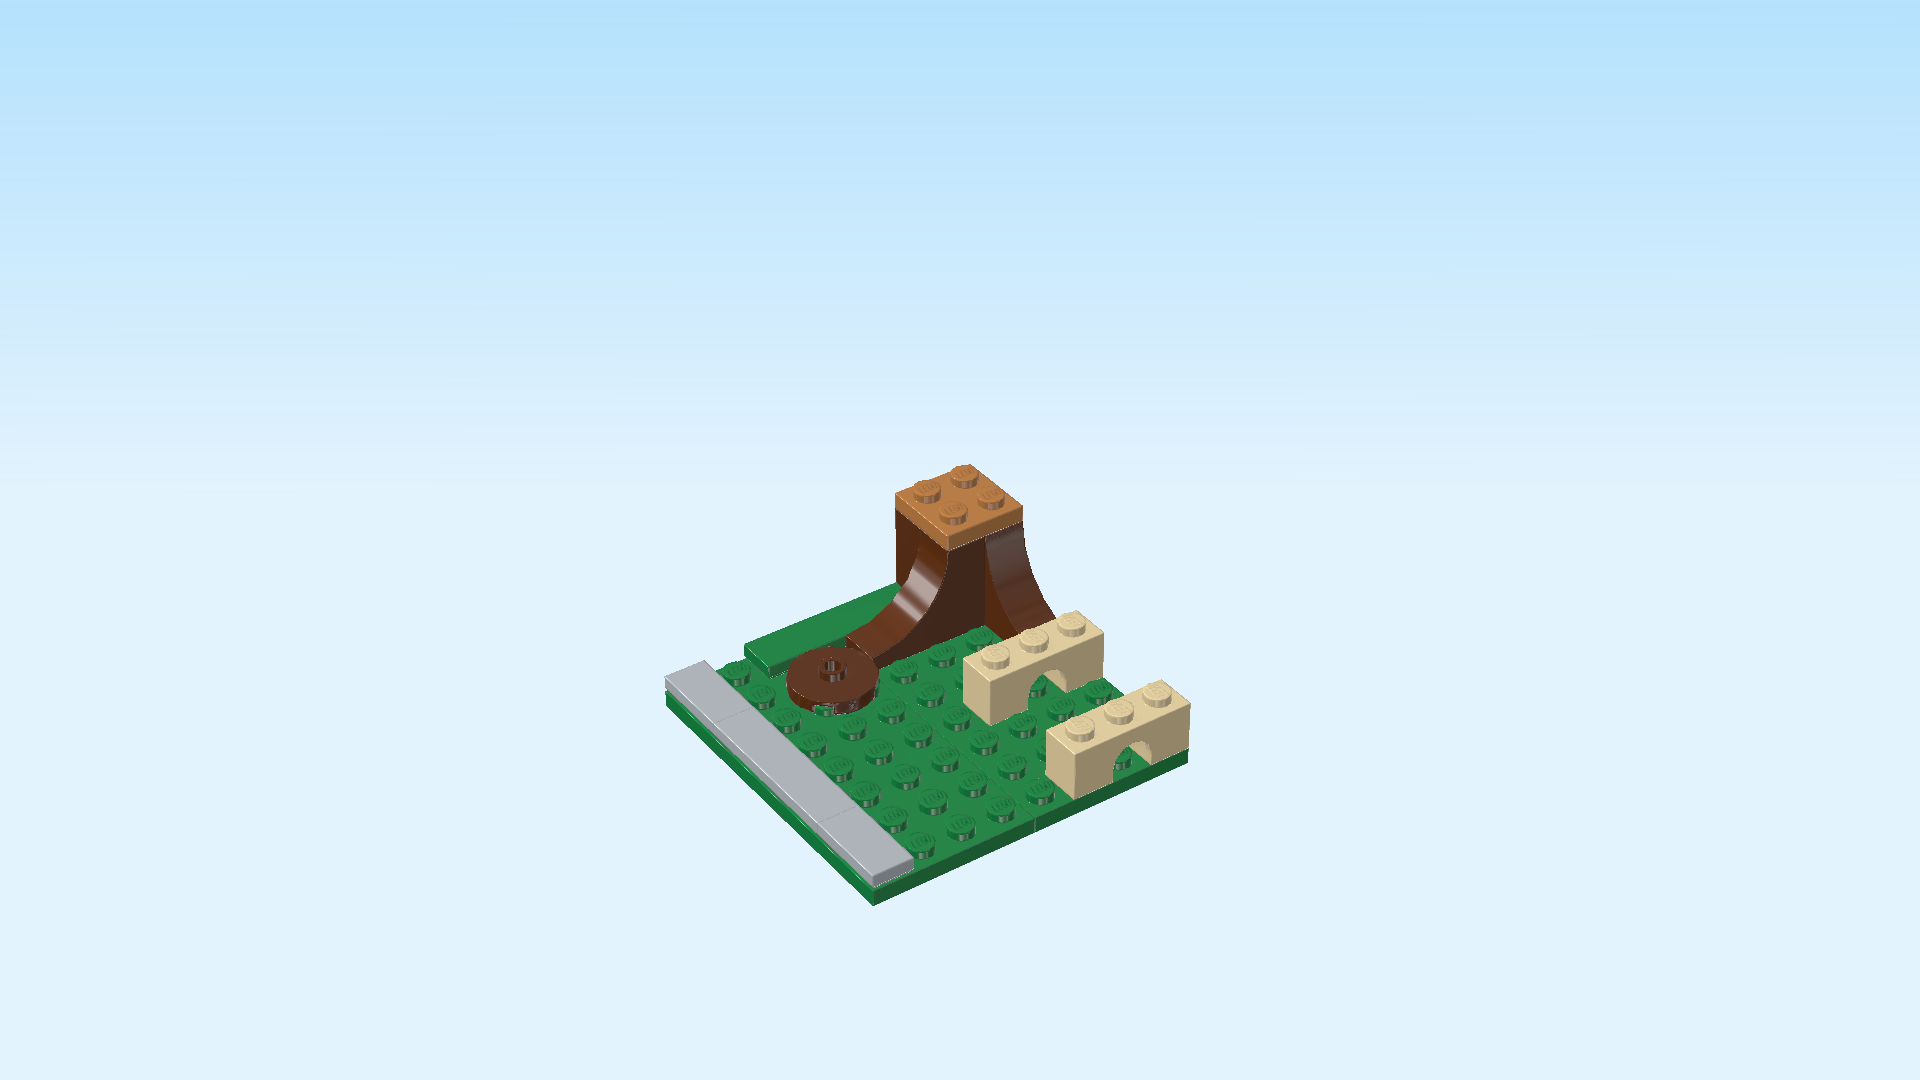
| Find 1 dark green flat tile 1x4. |
| Put it horizontally on the 2 left knobs of the backmost row. The other half of the piece is overhanging to the left. |
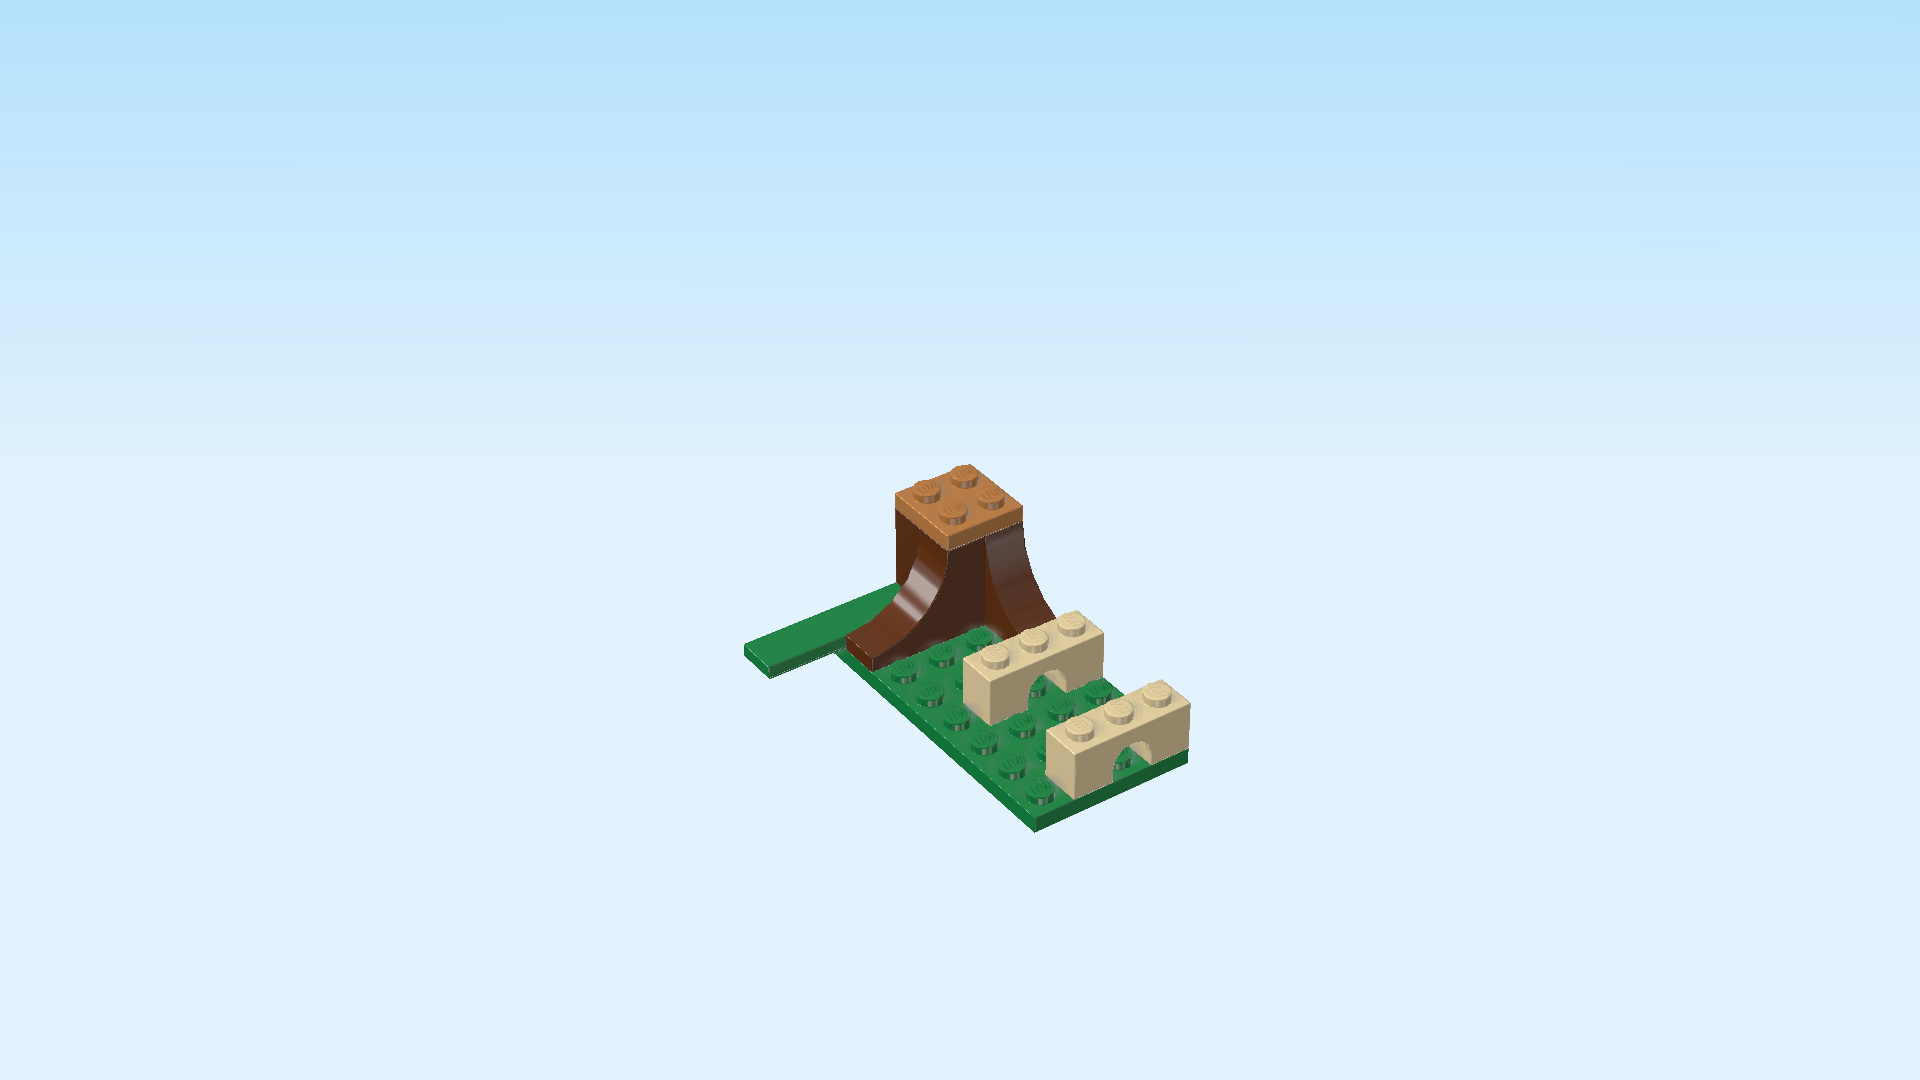
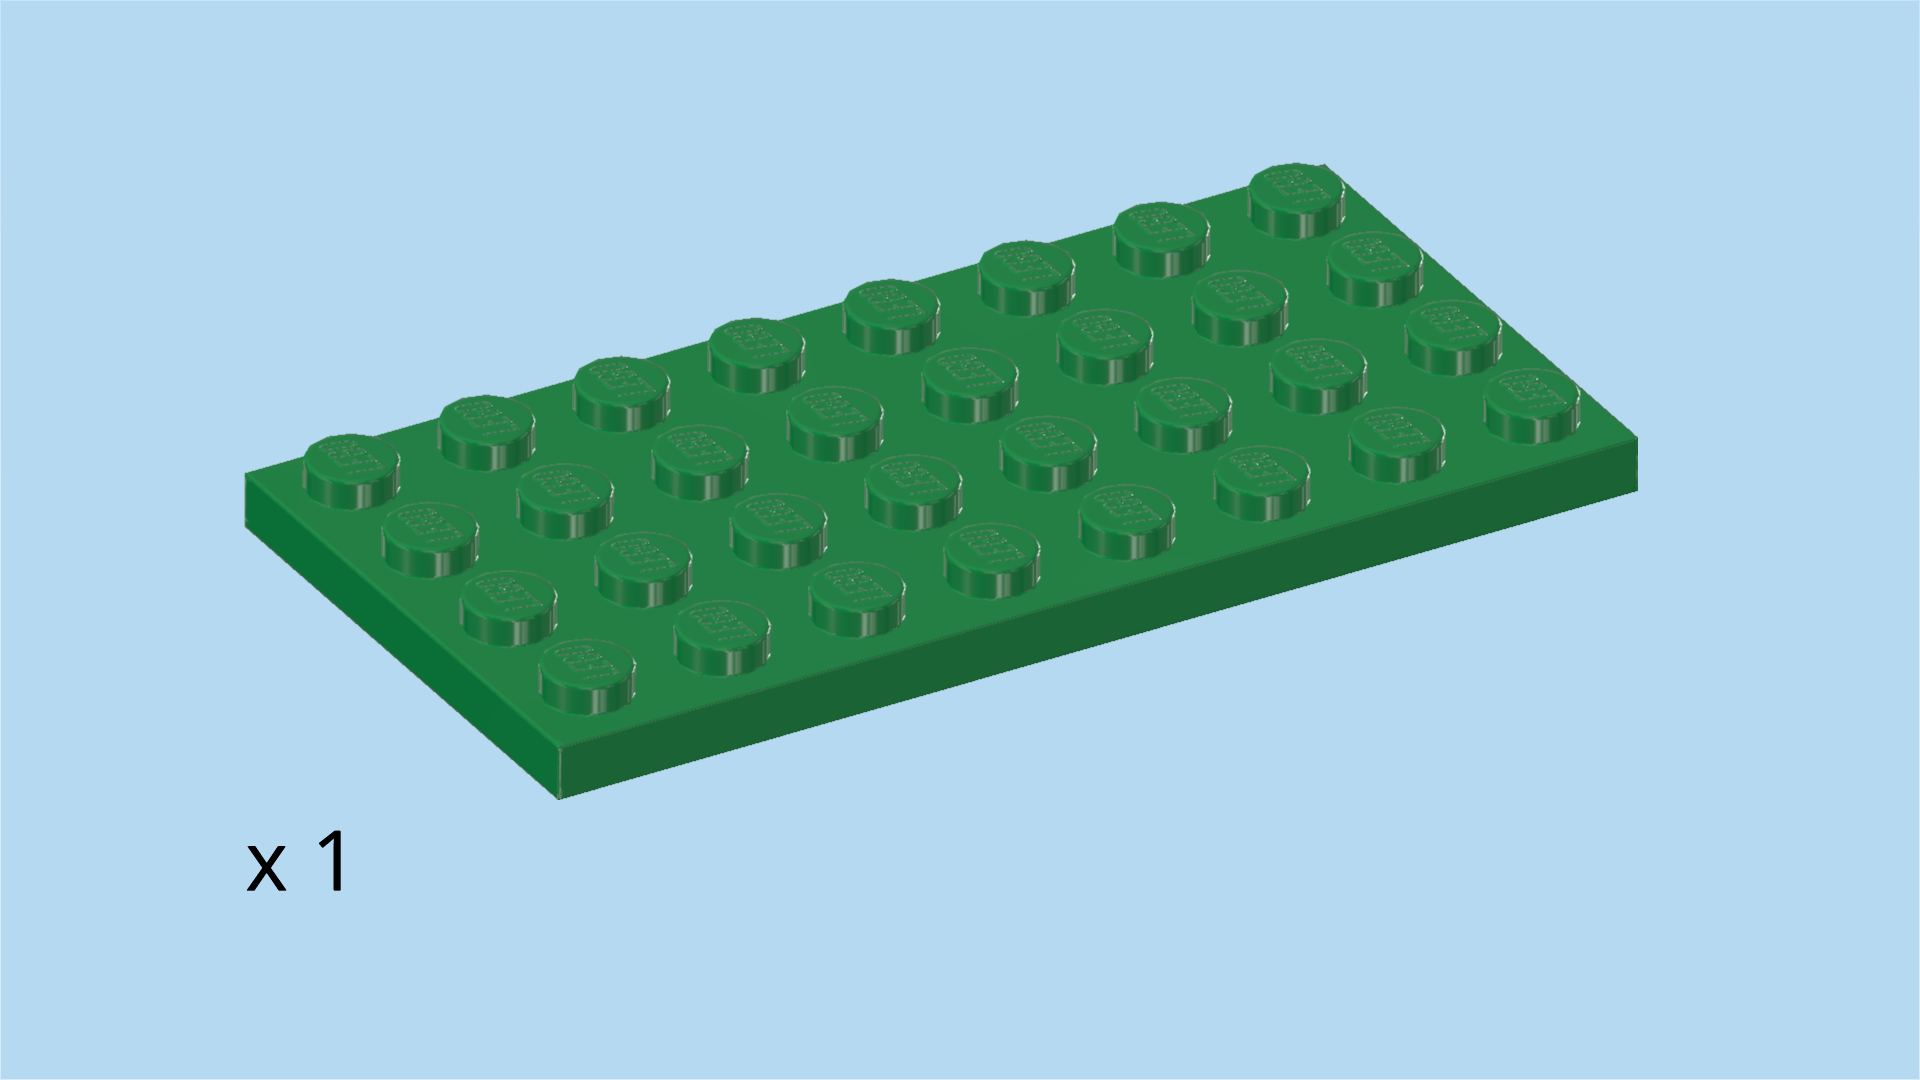
| Find 1 dark green plate 4x8. |
| Put it vertically underneath the previous piece so that the 2 base plates join perfectly. The flat tile 1x4 on the backmost row connects the two base plates. |
| If done correctly, the 2 leftmost knobs of the back row will be empty. |
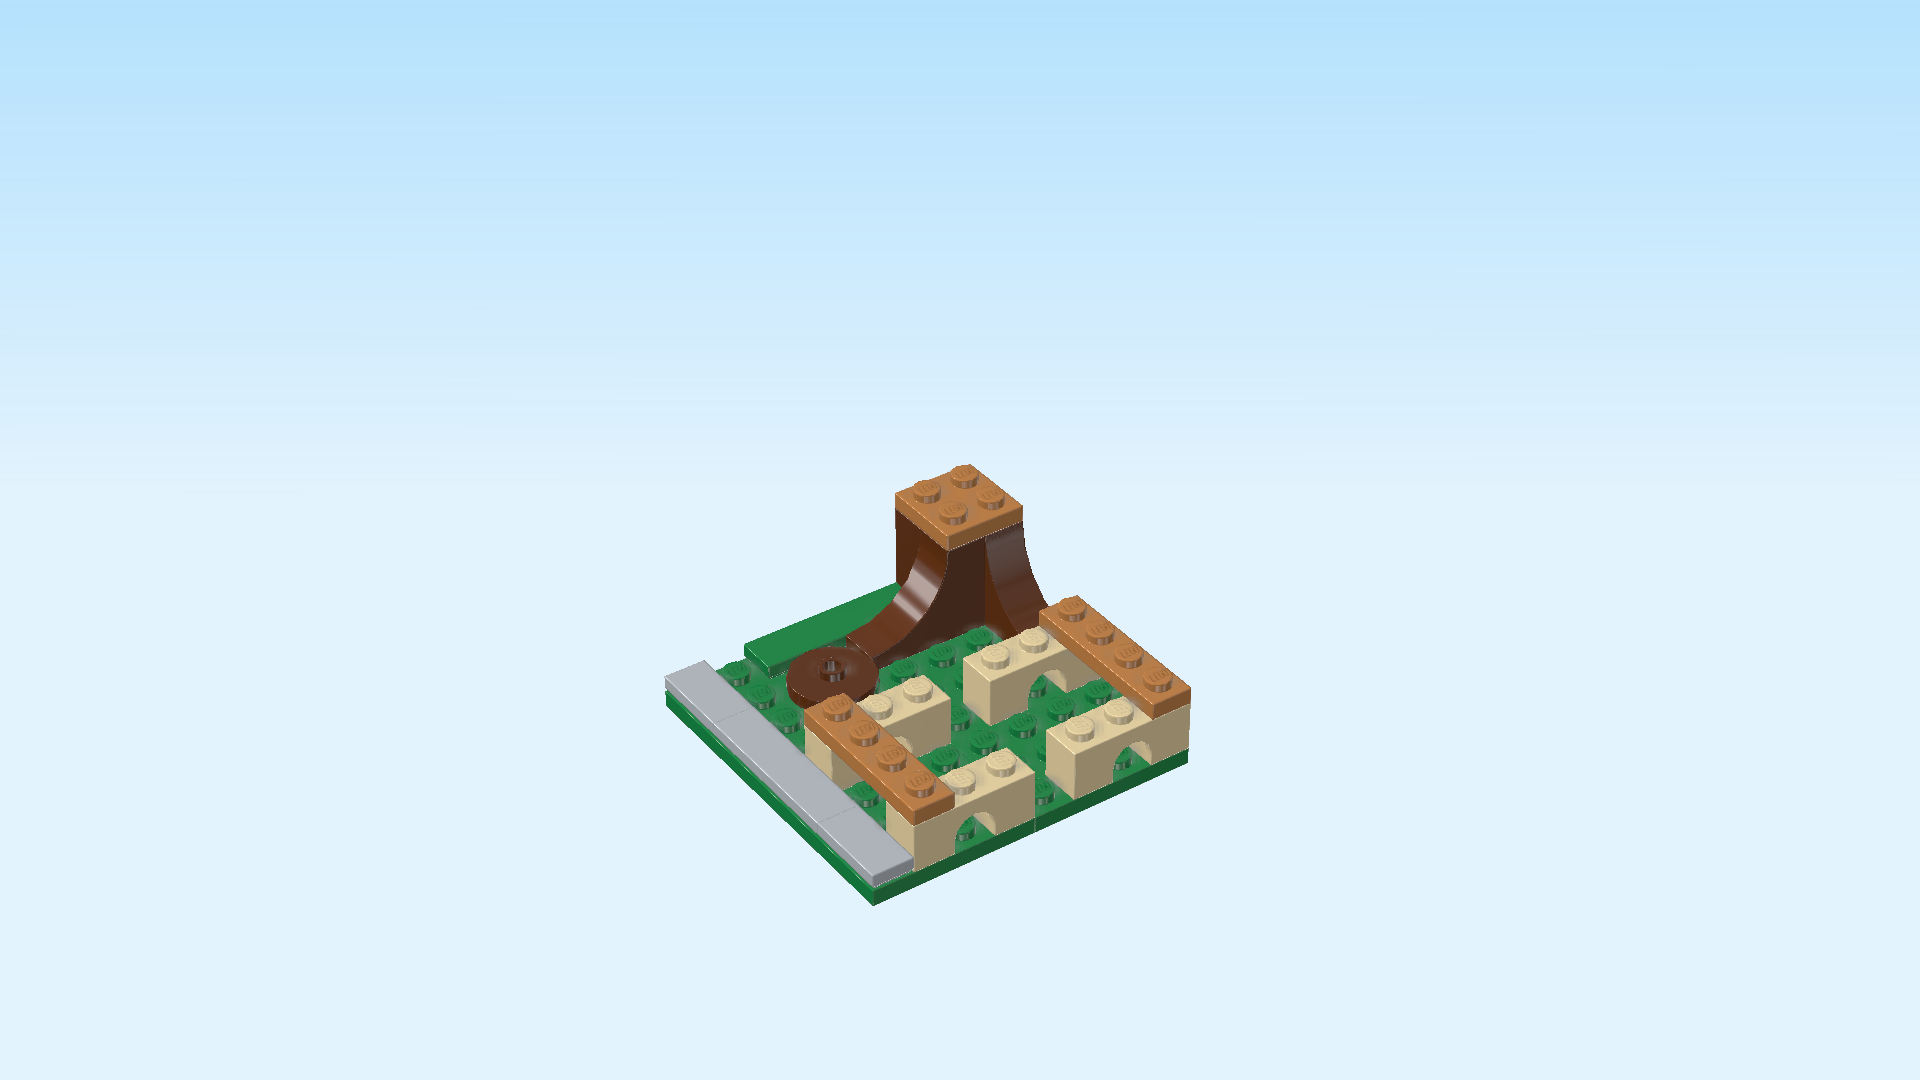
| Collect the following 4 pieces: |
| 2 medium stone grey flat tiles 1x2, |
| 1 medium stone grey flat tile 1x4, |
| and 1 reddish brown round plate 2x2 with 1 knob. |
| Put the round plate 2x2 to the left of the tree root pointing to the left. |
| If done correctly, there are two empty columns to the left of this piece, and one row with a previously mounted flat tile behind this piece. |
| Put 1 flat tile 1x2 vertically on the leftmost column, starting from the back. |
| Put the flat tile 1x4 vertically in front of the previous piece. |
| Put the other flat tile 1x2 vertically in front of the previous piece. These flat tiles now cover the entire leftmost column. |
| Find 2 pale ocher yellow bricks 1x3 with inside arch. |
| Put 1 horizontally to the right of the previous piece on the frontmost row. |
| Skip 2 rows to the back, and put the other brick with inside arch horizontally, again directly next to the column of flat tiles. |
| Find 2 medium nougat brown plates 1x4. |
| Put 1 vertically on the left edge of the 2 previous pieces, connecting them with each other. |
| Make sure that the front and back ends of this piece are flush with the front and back edges of the two bricks with inside arch. |
| Repeat symmetrically on the rightmost edge of the structure, using the two bricks with inside arch that have been placed earlier. |
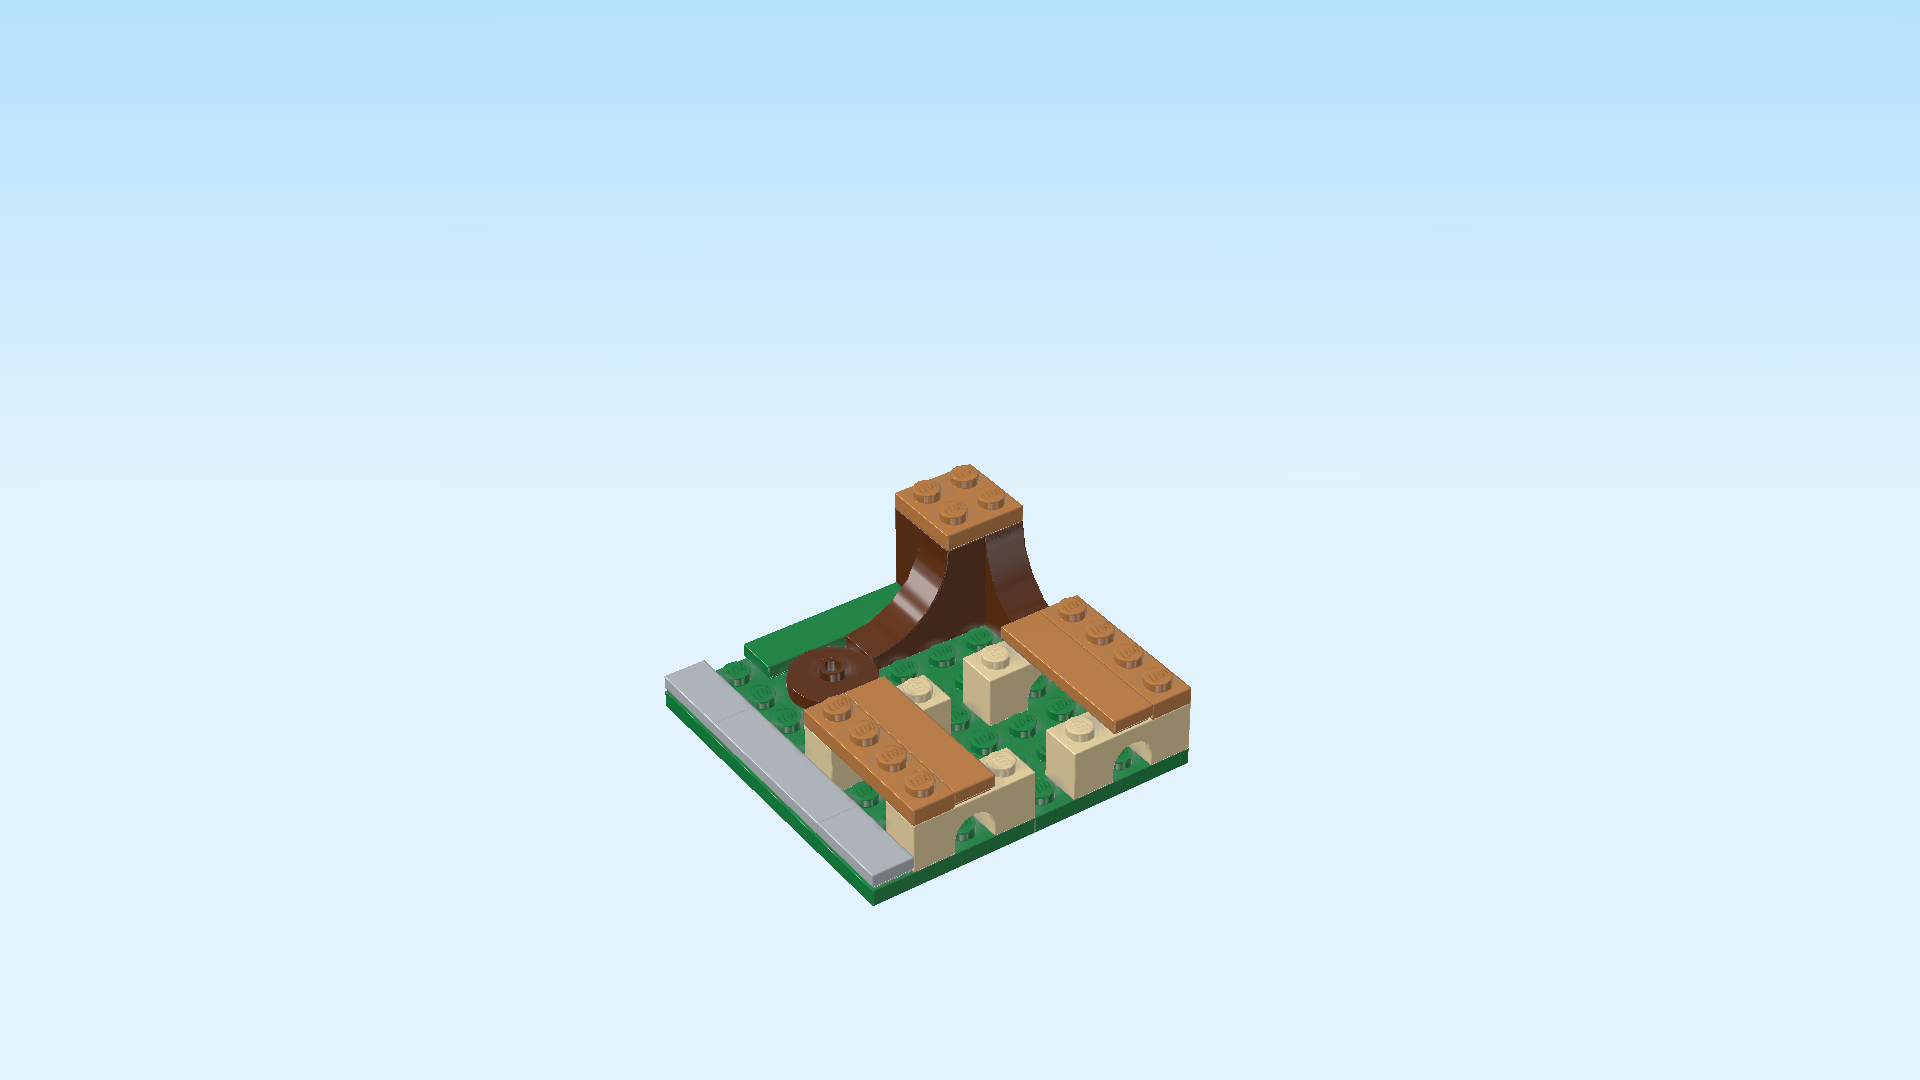
| Find 2 medium nougat brown flat tiles 1x4. |
| Put 1 vertically to the left of the previous piece. |
| Repeat symmetrically on the left. This means that there are three columns between these two pieces. |
| These will be the seats of the picnic bench. |
| Find 2 pale ocher yellow bricks 1x3 with inside arch. |
| Put 1 horizontally on the frontmost row between the two previous pieces. |
| Repeat symmetrically on the back edge of the seating surfaces. |
| Collect the following 3 pieces: |
| 2 medium nougat brown flat tiles 1x4, |
| and 1 medium nougat brown plate 1x4. |
| Put 1 flat tile 1x4 vertically on the right edge of the two previous pieces. |
| Put the plate 1x4 vertically to the left of the previous piece. |
| Put the other flat tile 1x4 vertically to the left of the previous piece. |
| This is the table of the picnic bench! |
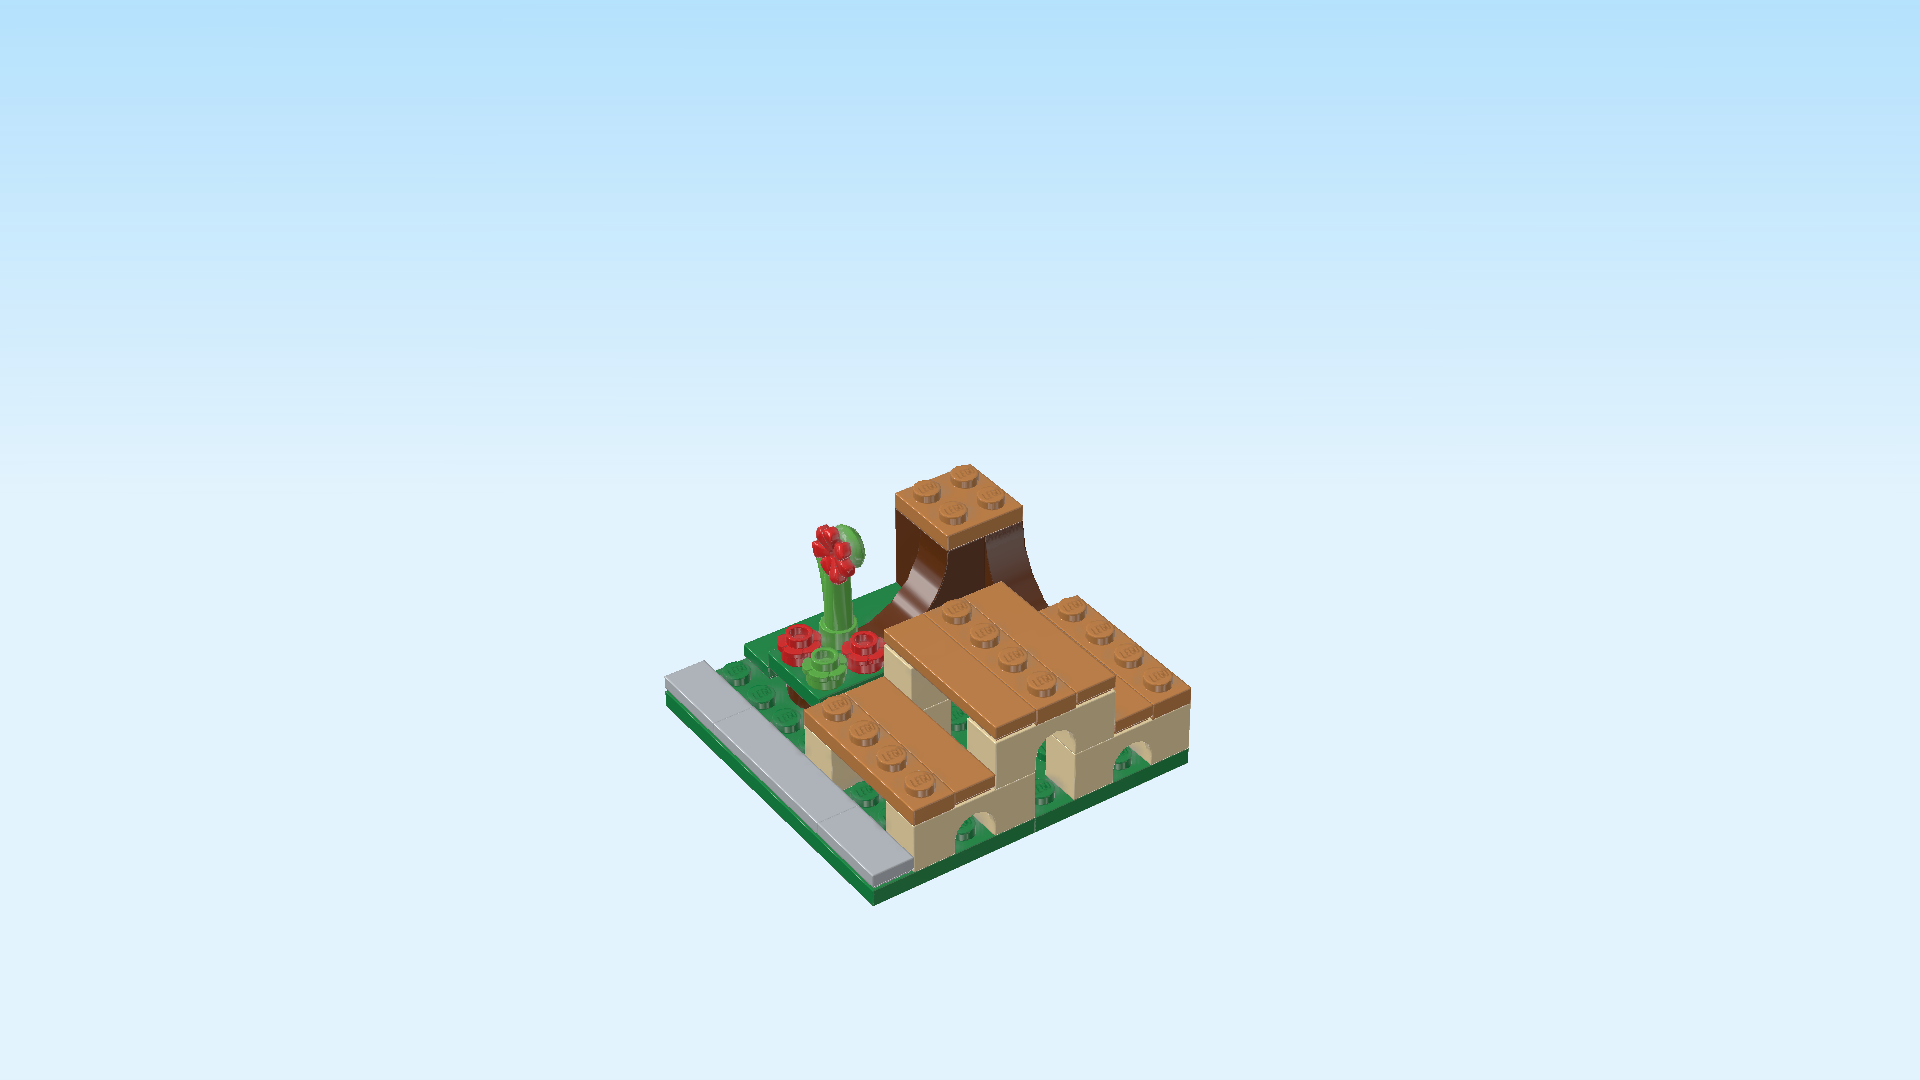
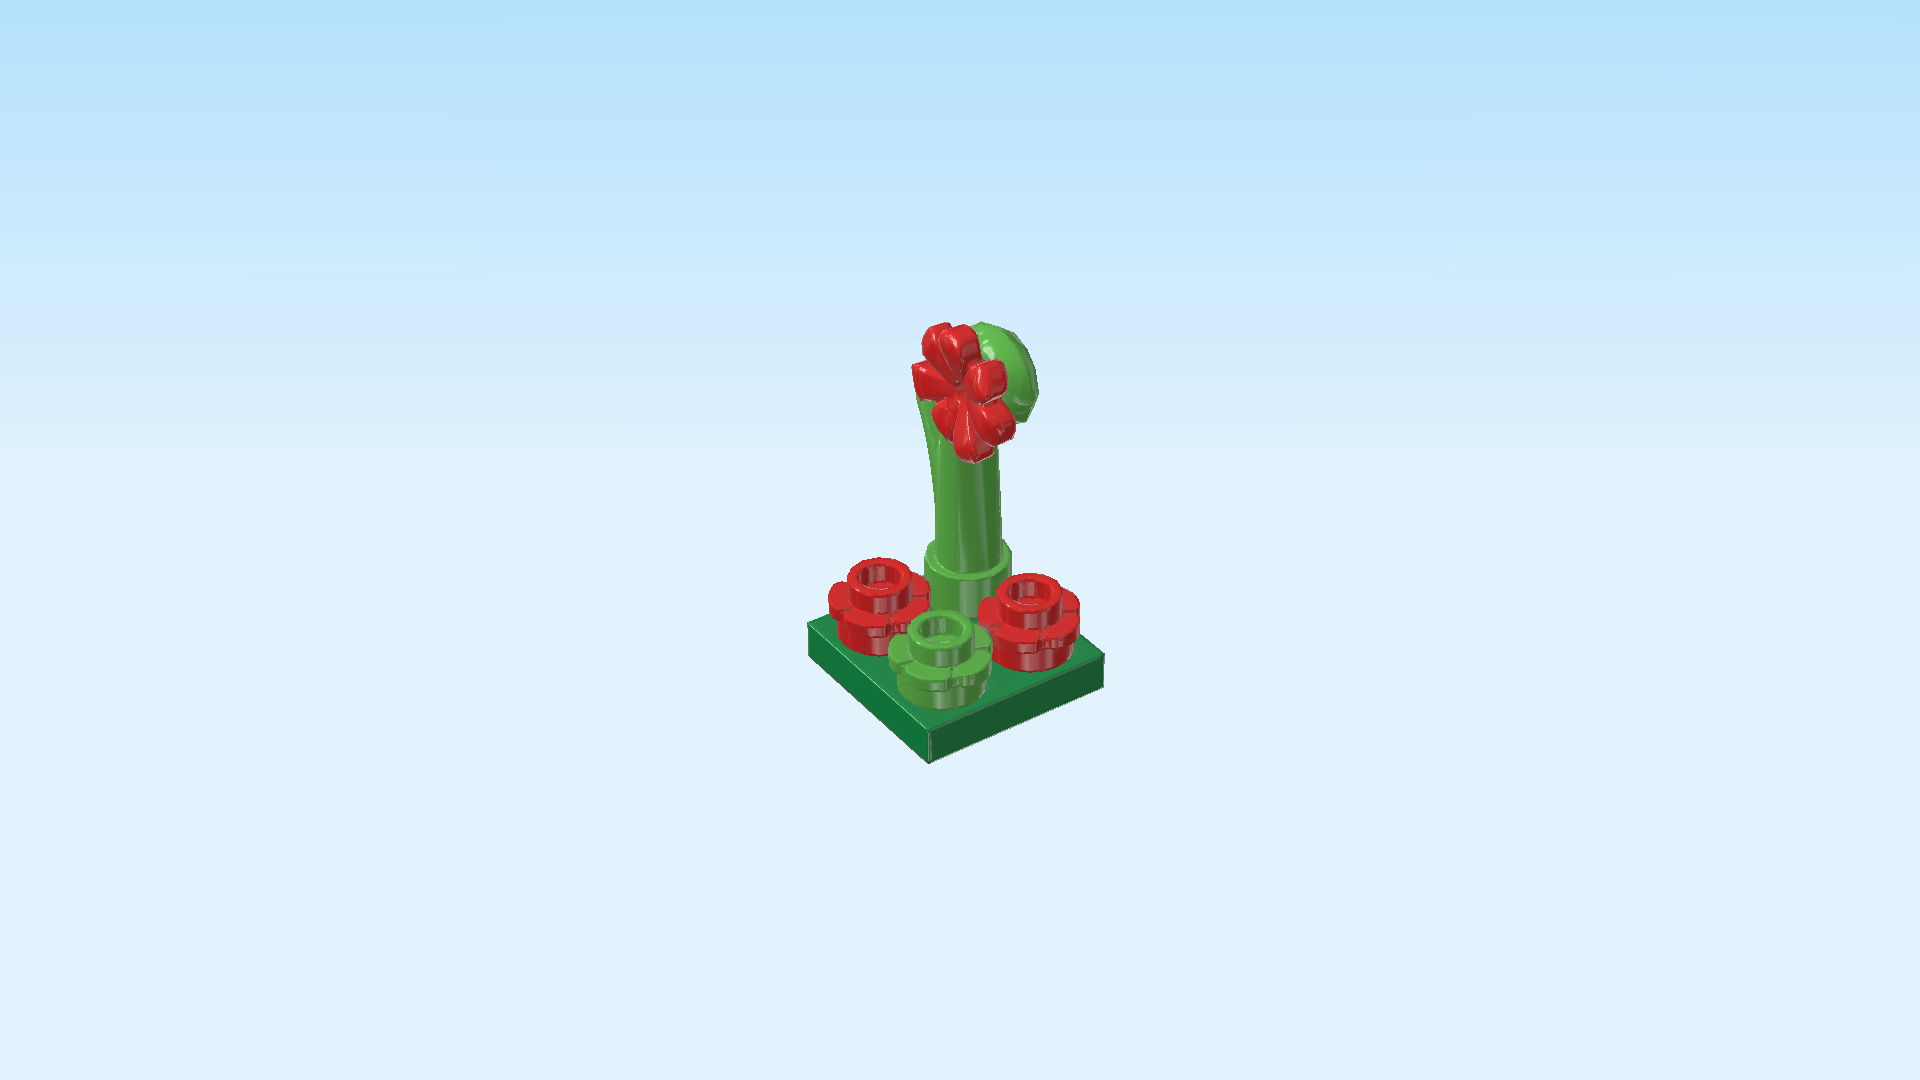
| Next, we will build the flower bed for the park. |
| This flower bed will feature red flowers. |
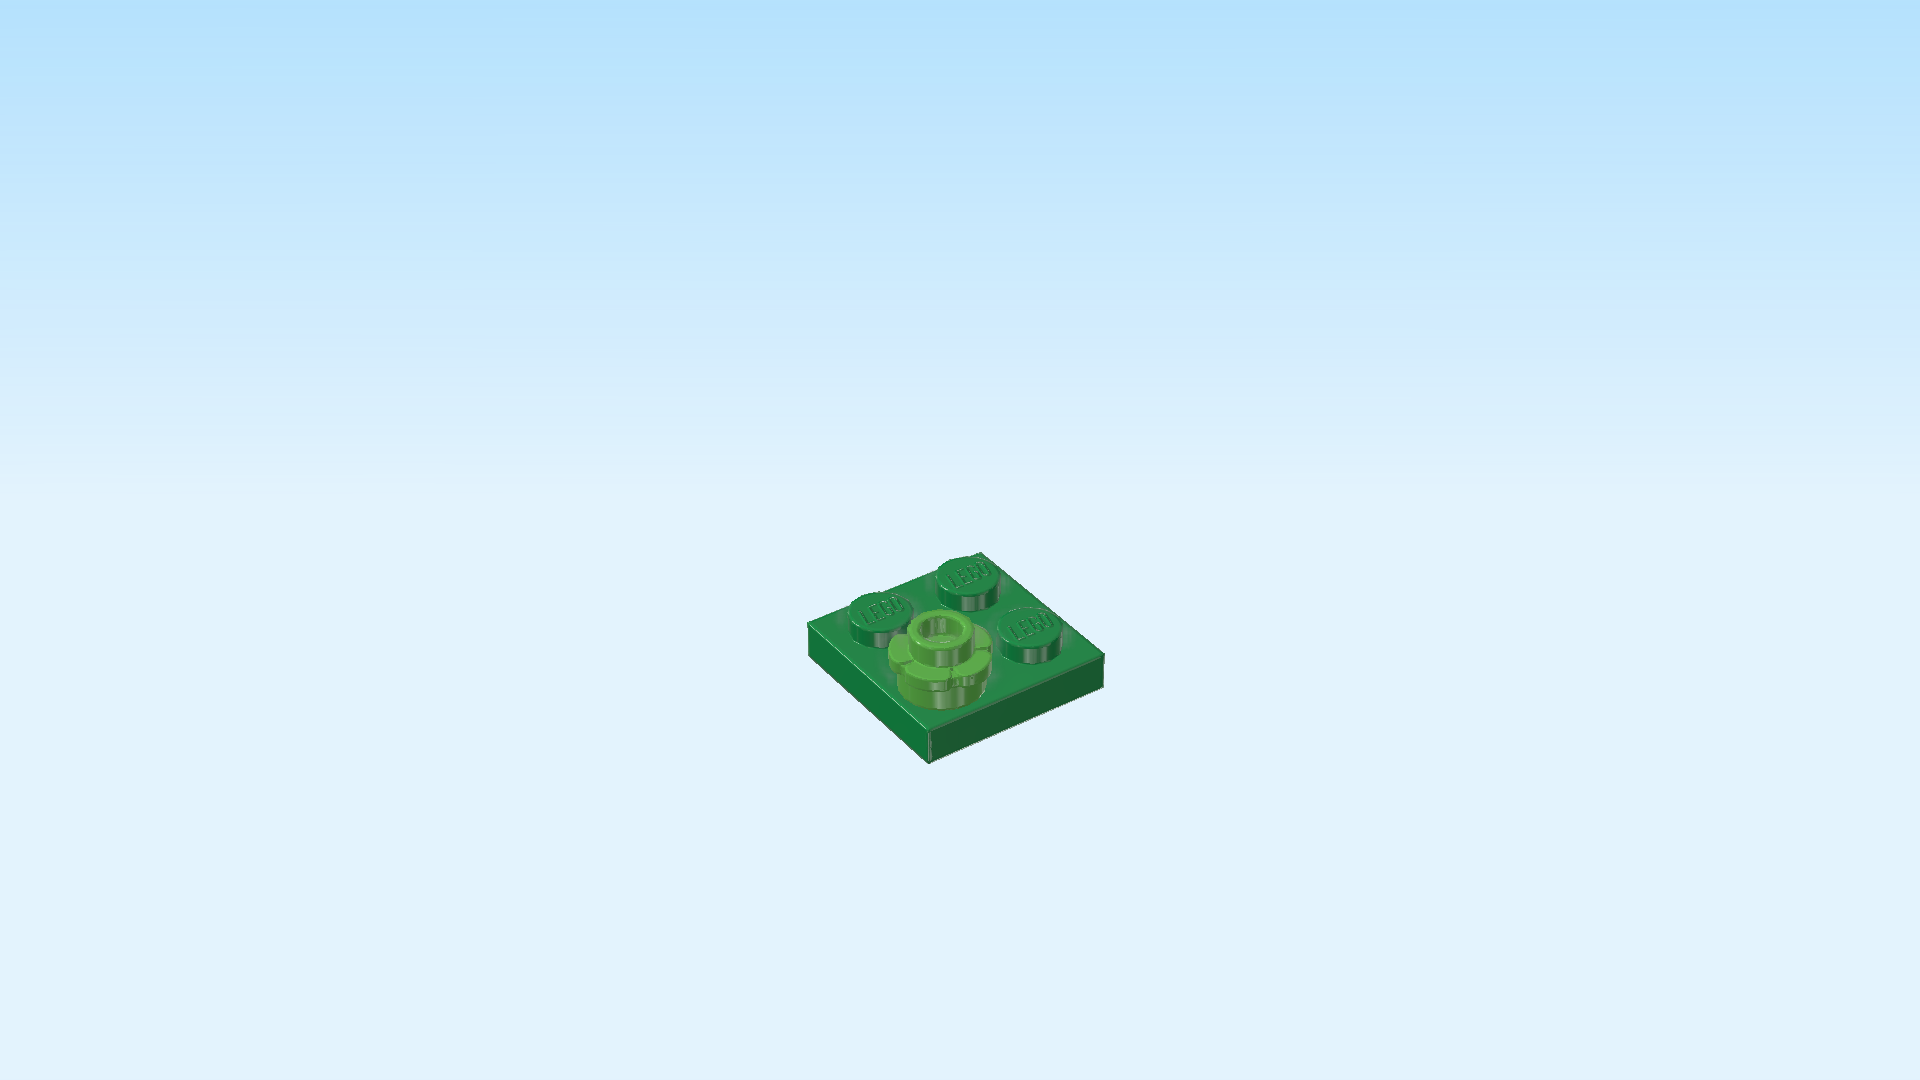
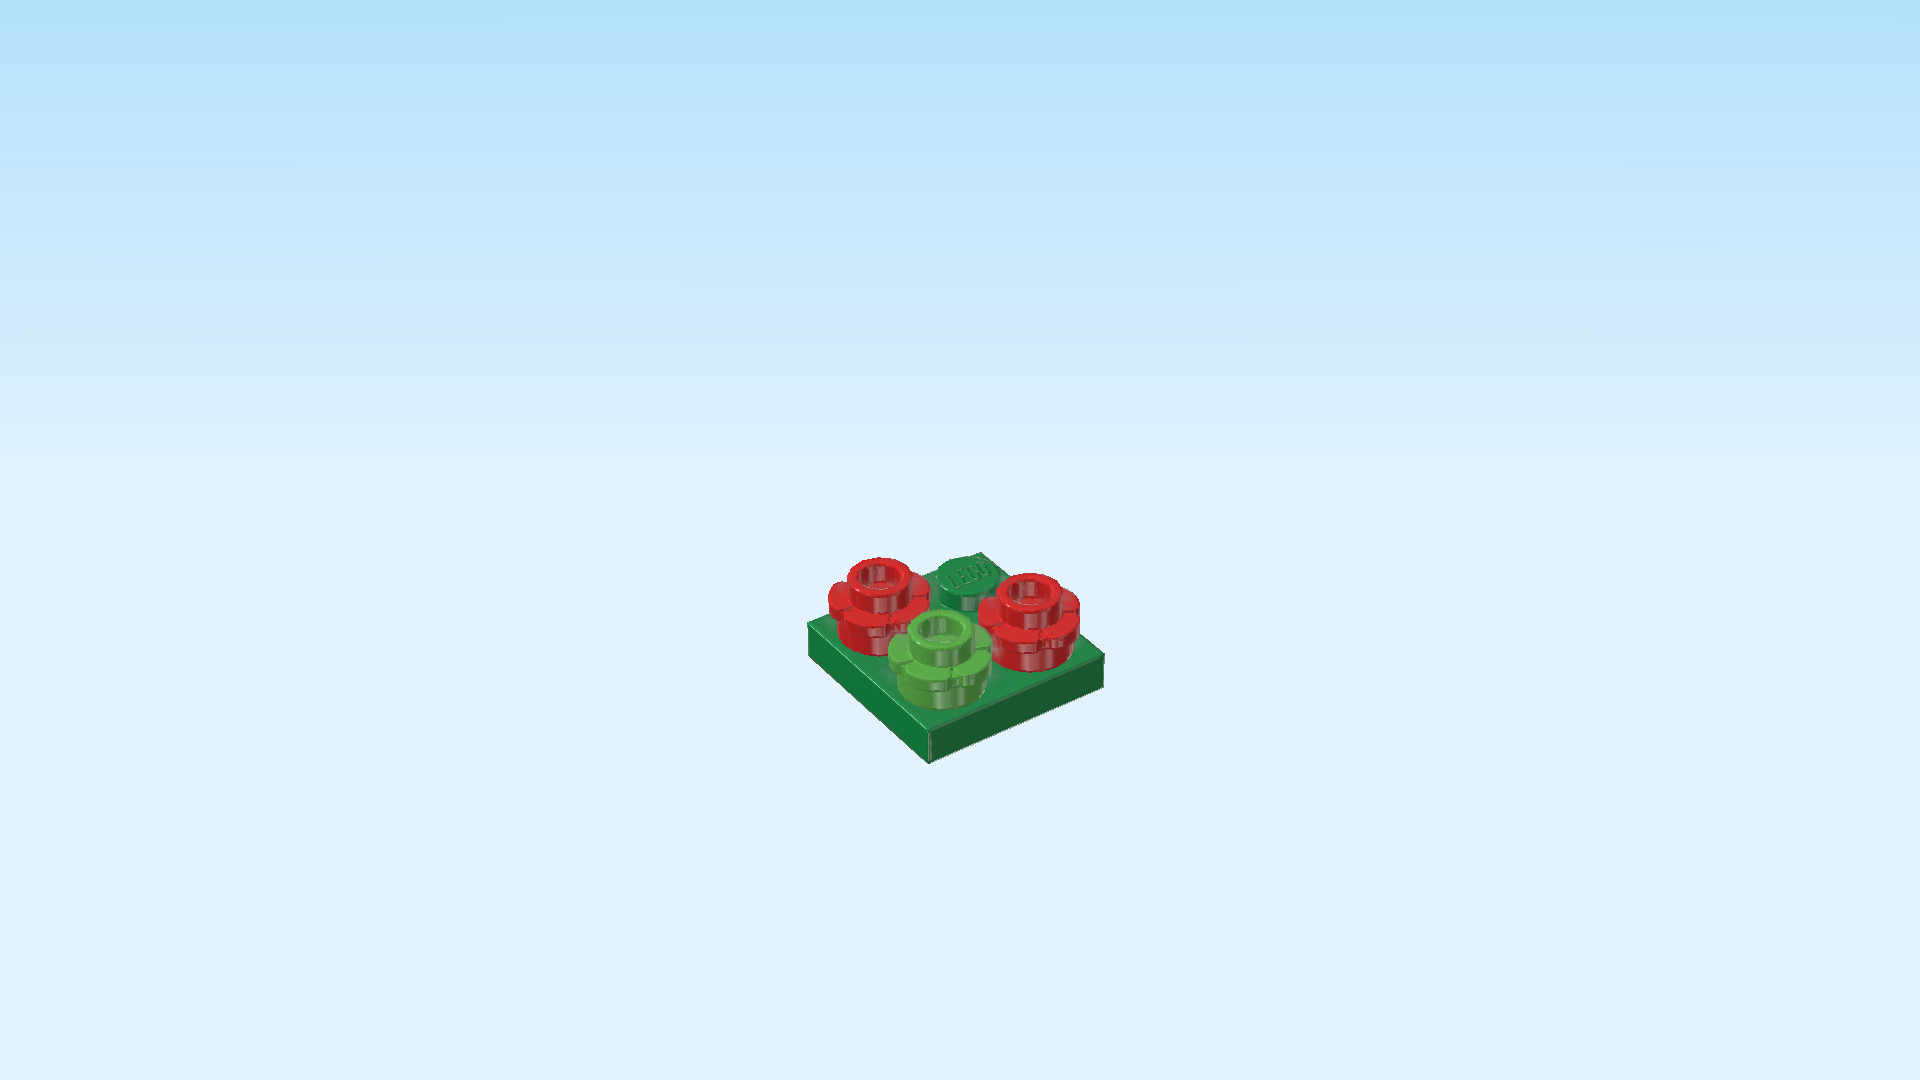
| Collect the following 2 pieces: |
| 1 dark green plate 2x2, |
| and 1 bright green flower piece 1x1. |
| Put the plate 2x2 on the table. |
| Put the flower piece 1x1 on the front left knob. |
| Find 2 bright red flower pieces 1x1. |
| Put 1 behind and the other one to the right of the previous piece. |
| Next, we will assemble the red blossoming flower. |
| Collect the following 2 pieces: |
| 1 bright red decoration flower with small shaft, |
| and 1 bright green stem of curly grass. |
| Insert the shaft of the decoration flower into the curly end at the top of the stem. |
| Put the red blossoming flower on the back right knob. |
| The flower bed for the park is finished! Put it on the round plate 2x2 to the left of the tree stump. The tree stump is the 2x2 surface in the back right corner of the whole structure. |
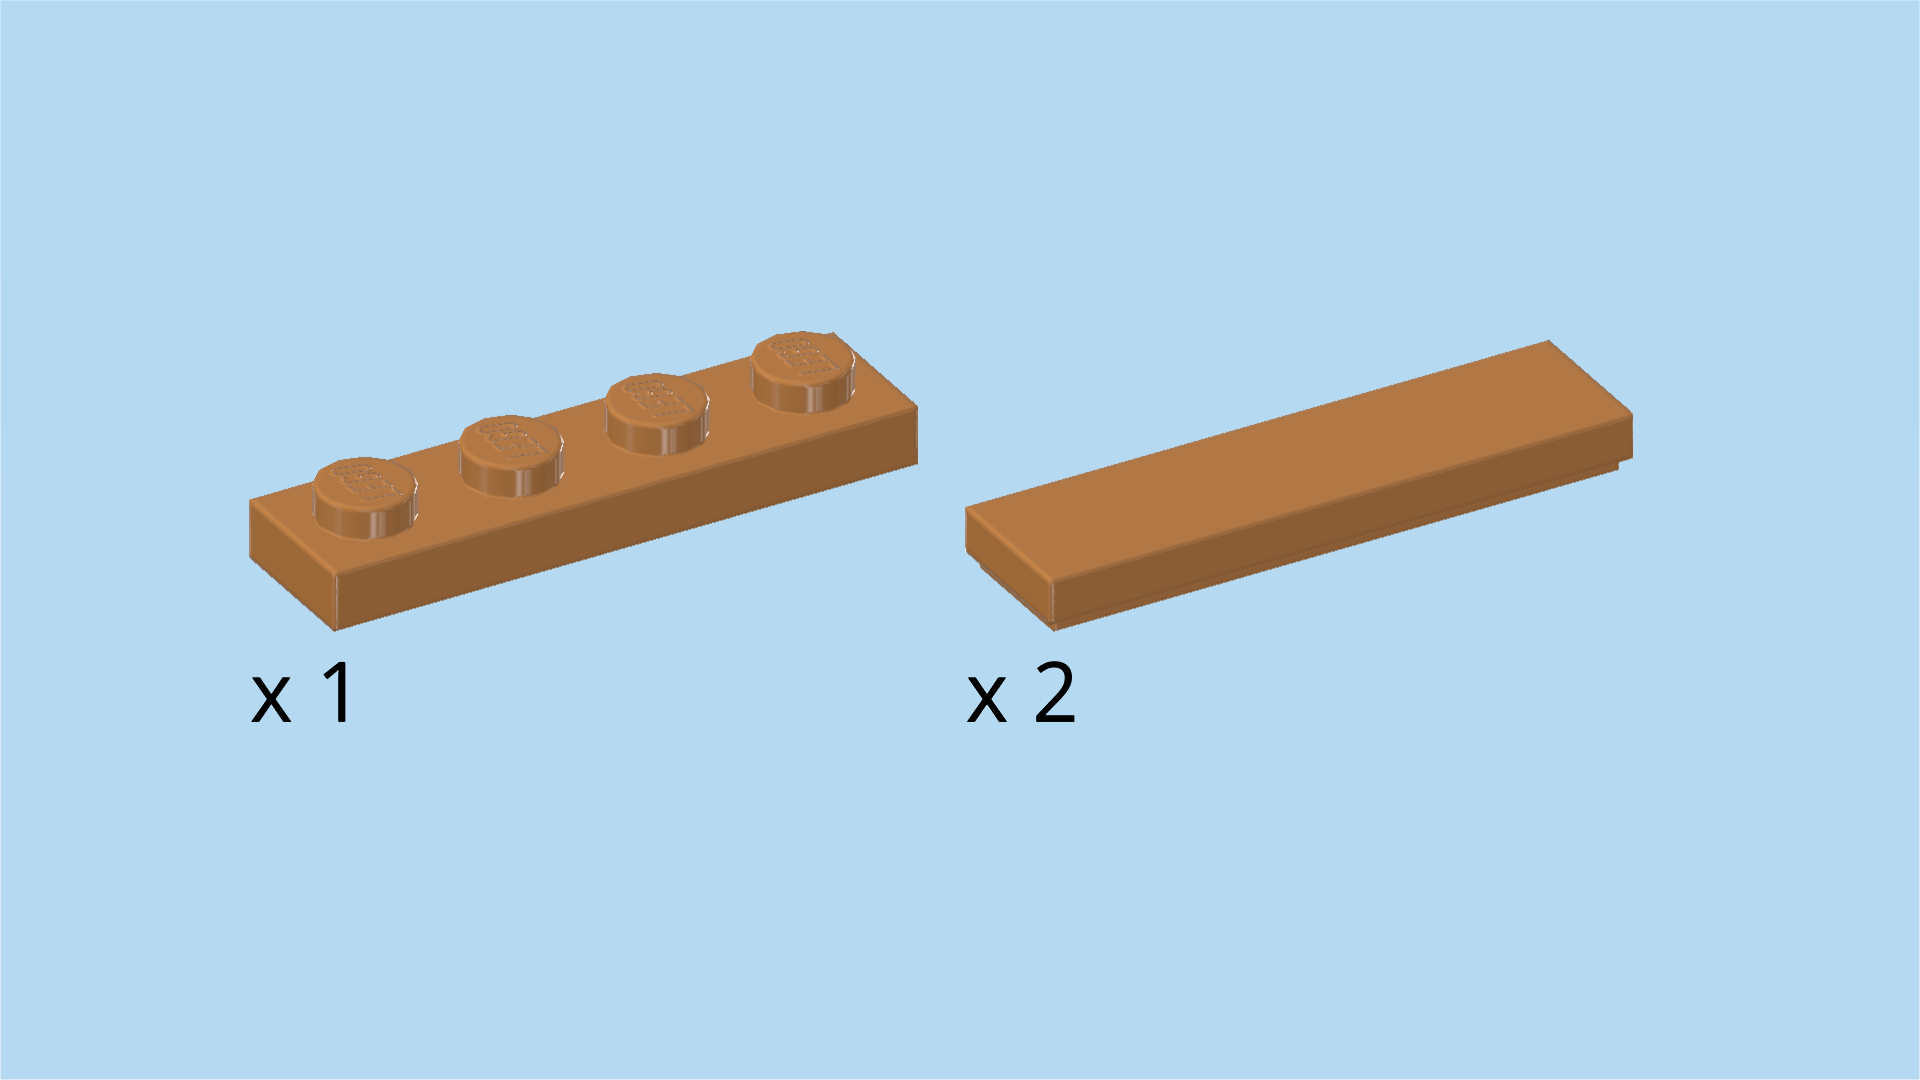
| Find 2 reddish brown bricks 1x2 with technic hole. |
| Put 1 horizontally on the back row of the tree stump. |
| Put the other one horizontally in front of the previous piece. |
| Find 1 medium nougat brown plate 2x2. |
| Put it on top of the 2 previous pieces. |
| Find 1 reddish brown brick 1x2x2. |
| Put it horizontally on the back row of the previous piece. |
| Find 1 reddish brown half-arch brick 1x3x3 with 1 step. |
| Put it vertically on the right knob in front of the previous piece, half-arch overhanging to the front. |
| Find another reddish brown half-arch brick 1x3x3 with 1 step. |
| Put it horizontally to the left of the previous piece, half-arch overhanging to the left. |
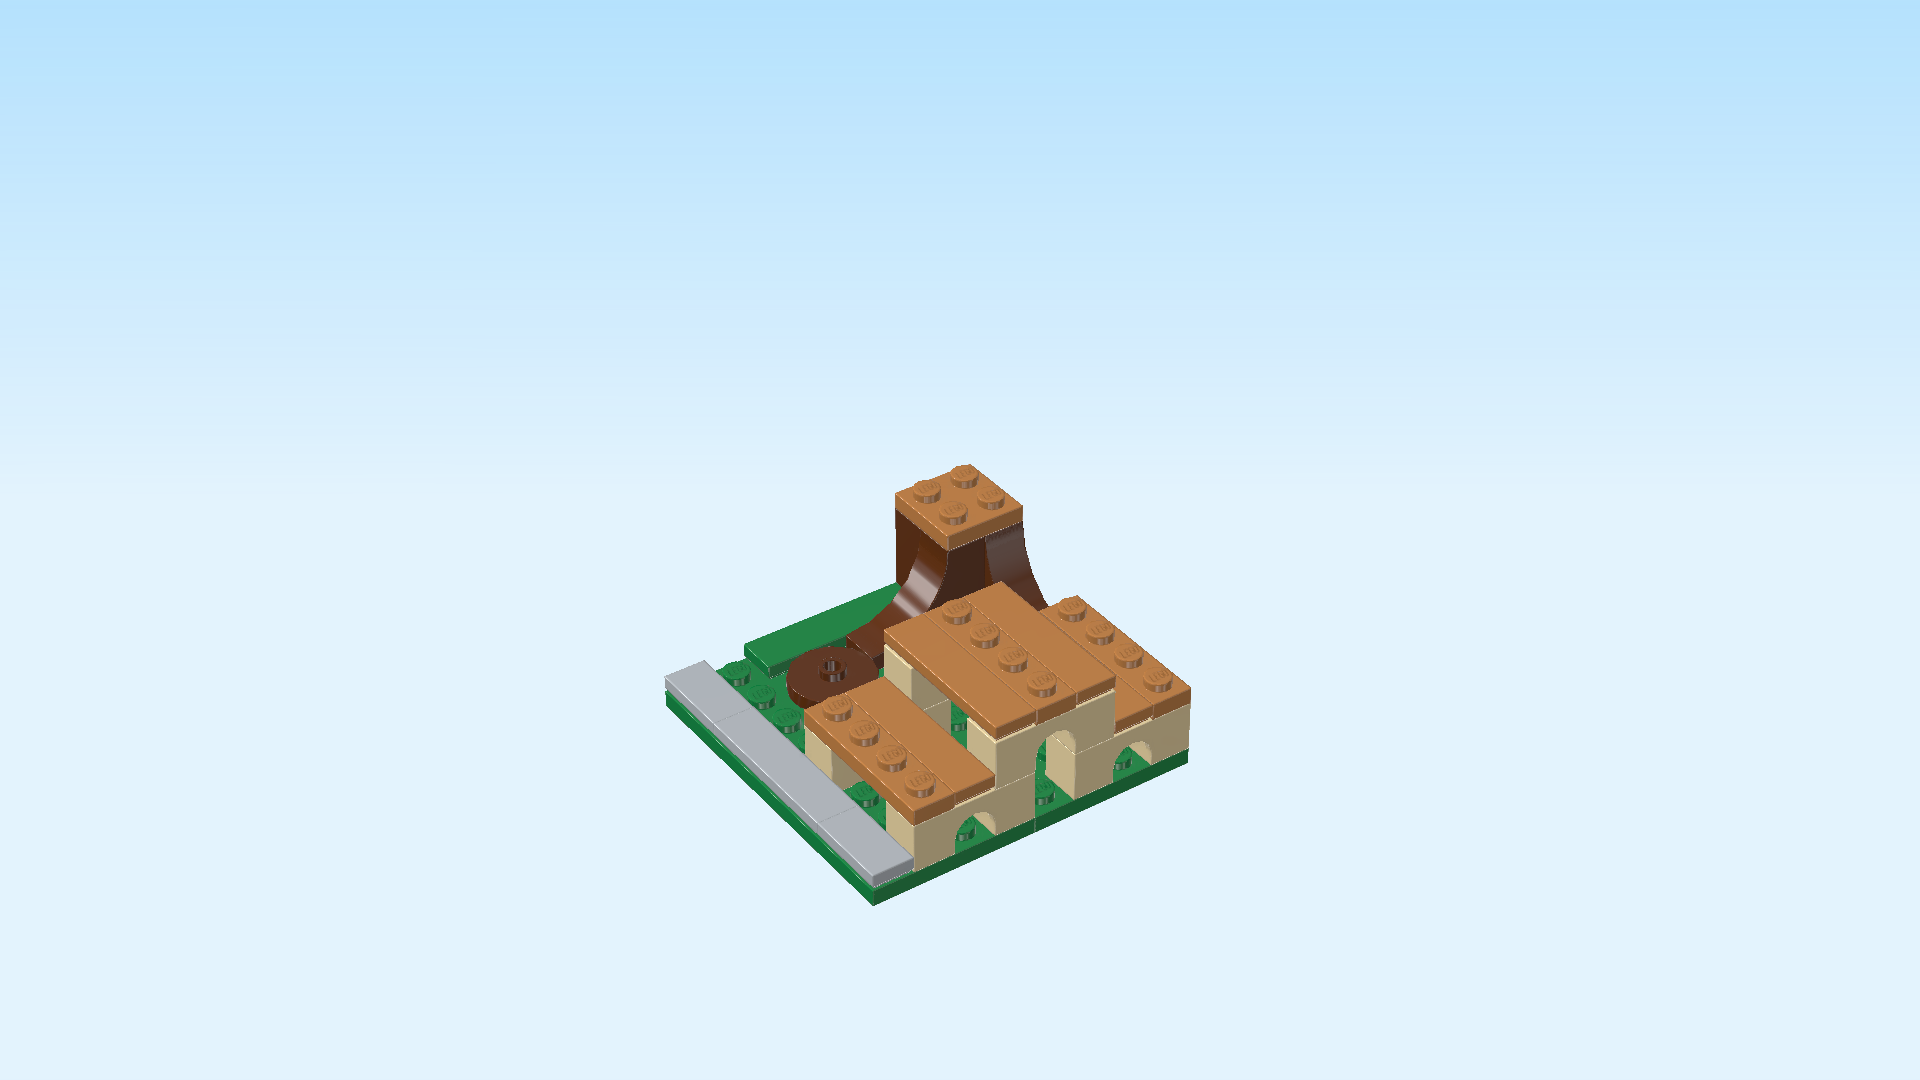
| Find 1 reddish brown brick 2x2. |
| Put it on top of the 3 previous pieces in the back right corner. |
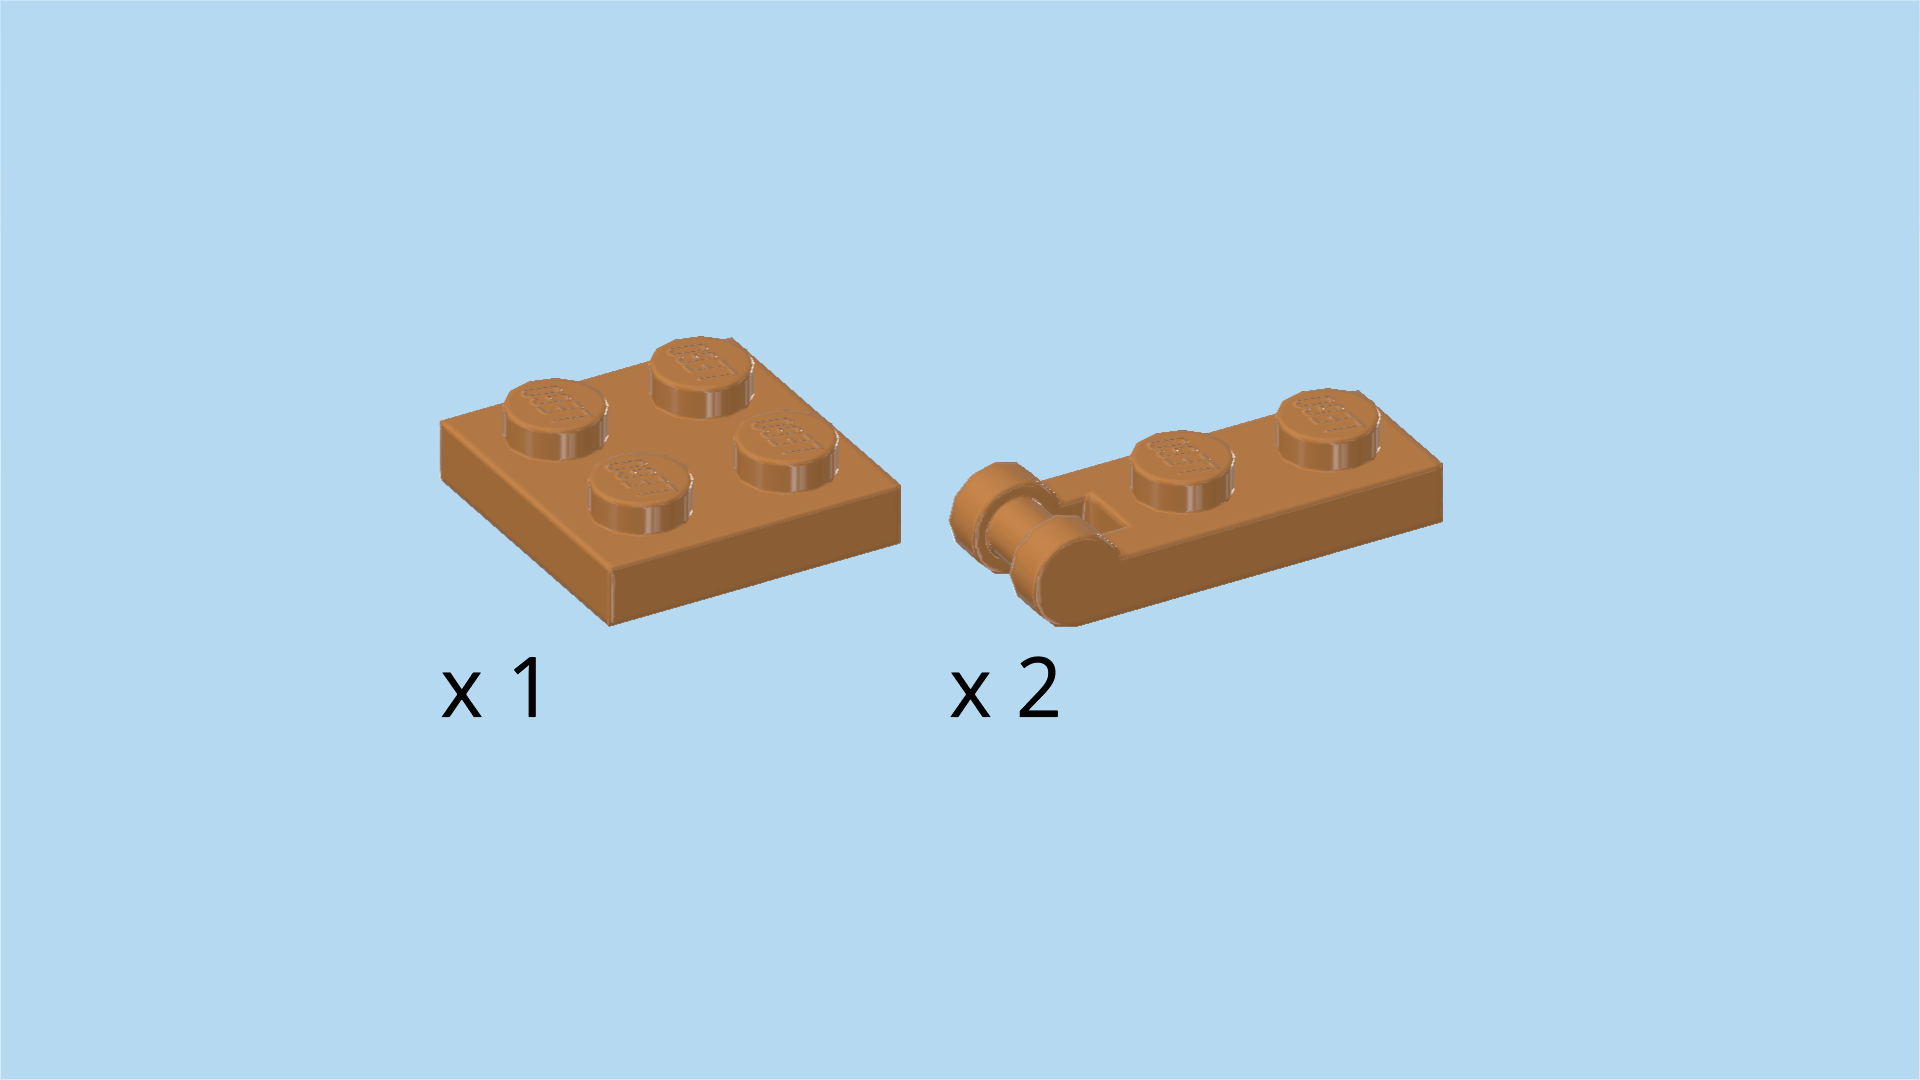
| Collect the following 3 pieces: |
| 1 medium nougat brown plate 2x2, |
| and 2 medium nougat brown plates 1x2 with shaft on short side. |
| Put the plate 2x2 on the previous piece. |
| Put 1 plate 1x2 vertically in front of the previous piece on the rightmost column, shaft to the front. |
| Put the other plate 1x2 horizontally to the left of the plate 2x2, shaft to the left. |
| These two small arches to the front and to the left are actually two of the tree's branches! And in later steps, we will be adding another two branches. |
| Find 1 reddish brown brick 1x2x2. |
| Put it horizontally on the 2 backmost knobs in the right back corner. |
| Find 1 reddish brown half-arch brick 1x3x3 with 1 step. |
| Put it vertically in front of the previous piece on the right knob, half-arch overhanging to the front. |
| Find another reddish brown half-arch brick 1x3x3 with 1 step. |
| Put it horizontally to the left of the previous piece, half-arch overhanging to the left. |
| Find 1 reddish brown brick 2x2. |
| Put it behind the 2 previous pieces on the backmost 4 knobs in the right back corner. |
| Collect the following 3 pieces: |
| 2 medium nougat brown plates 1x2 with shaft on short side, |
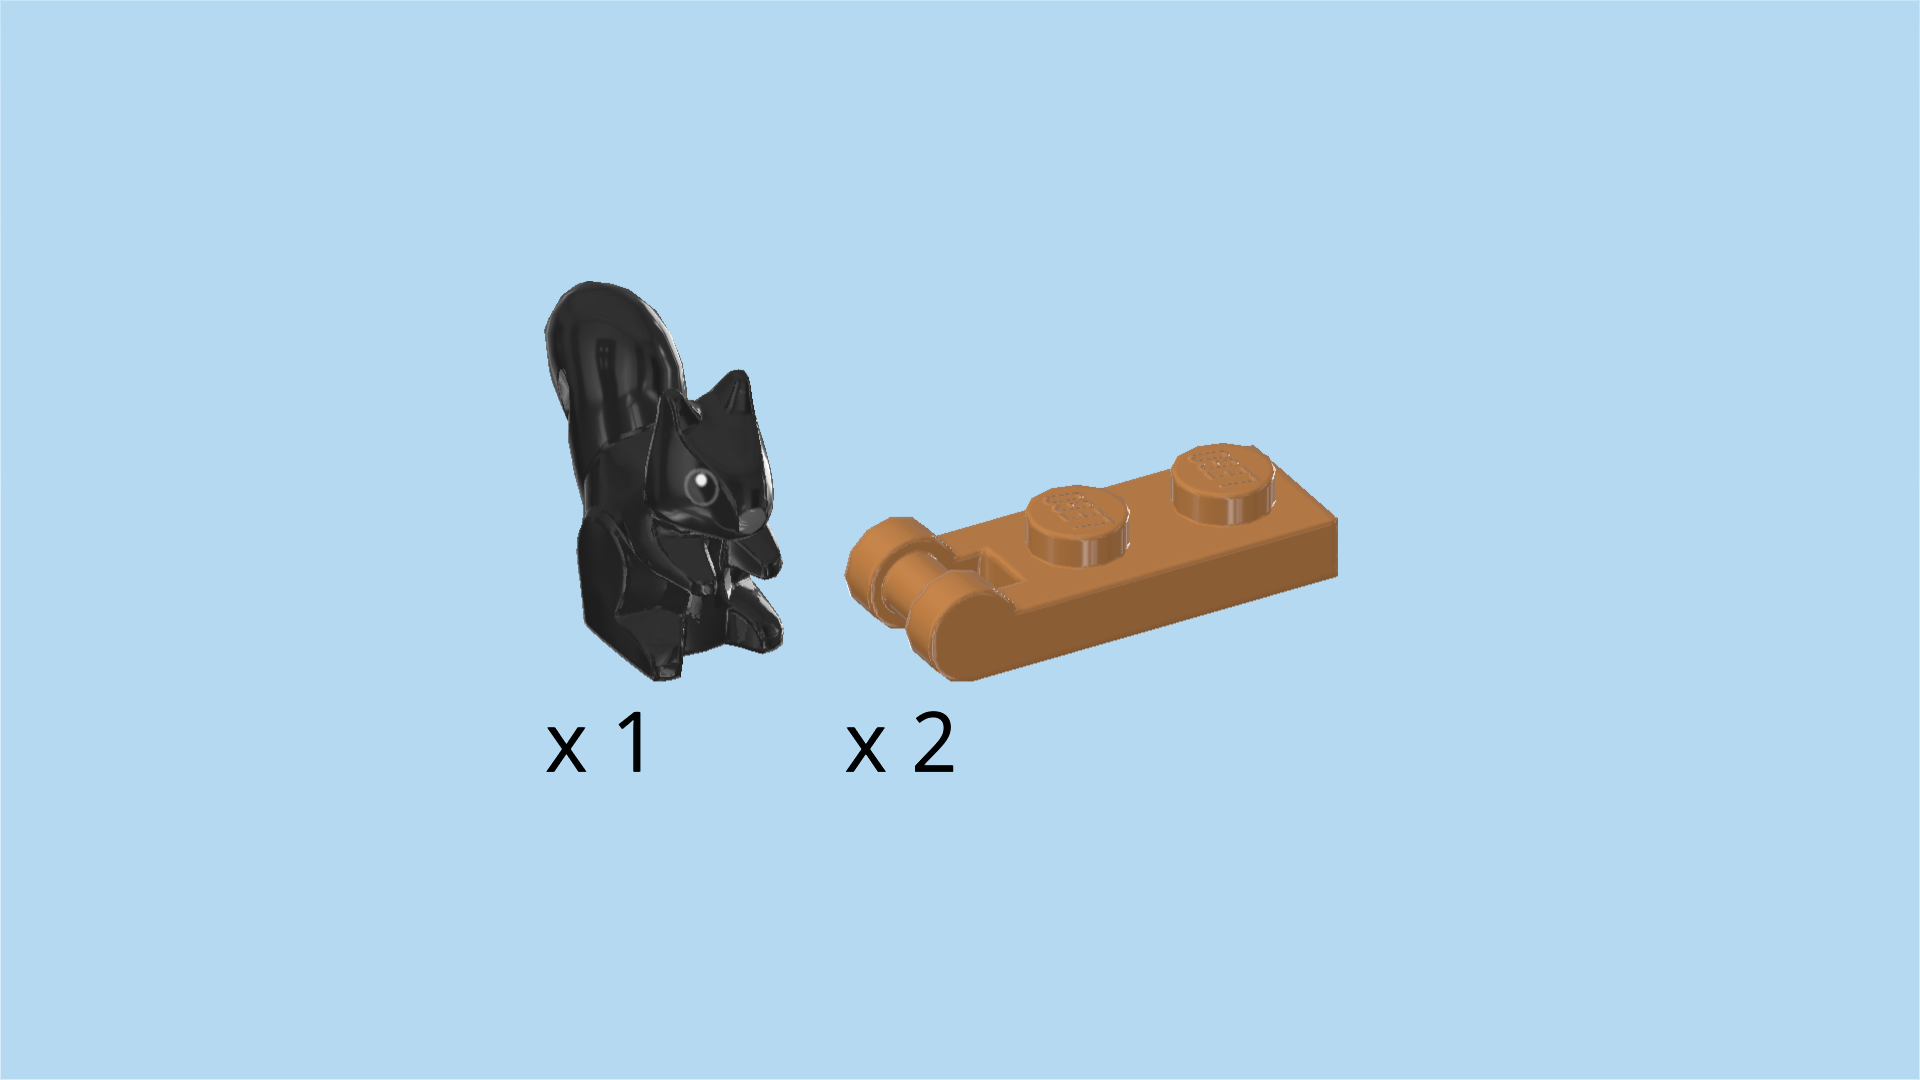
| and 1 black squirrel figure. |
| Put the squirrel figure on the lower branch pointing towards the front. |
| Put 1 plate 1x2 vertically on the higher branch pointing towards the front, shaft overhanging to the front. |
| Put the other plate 1x2 on the higher branch pointing towards the left, shaft overhanging to the left. |
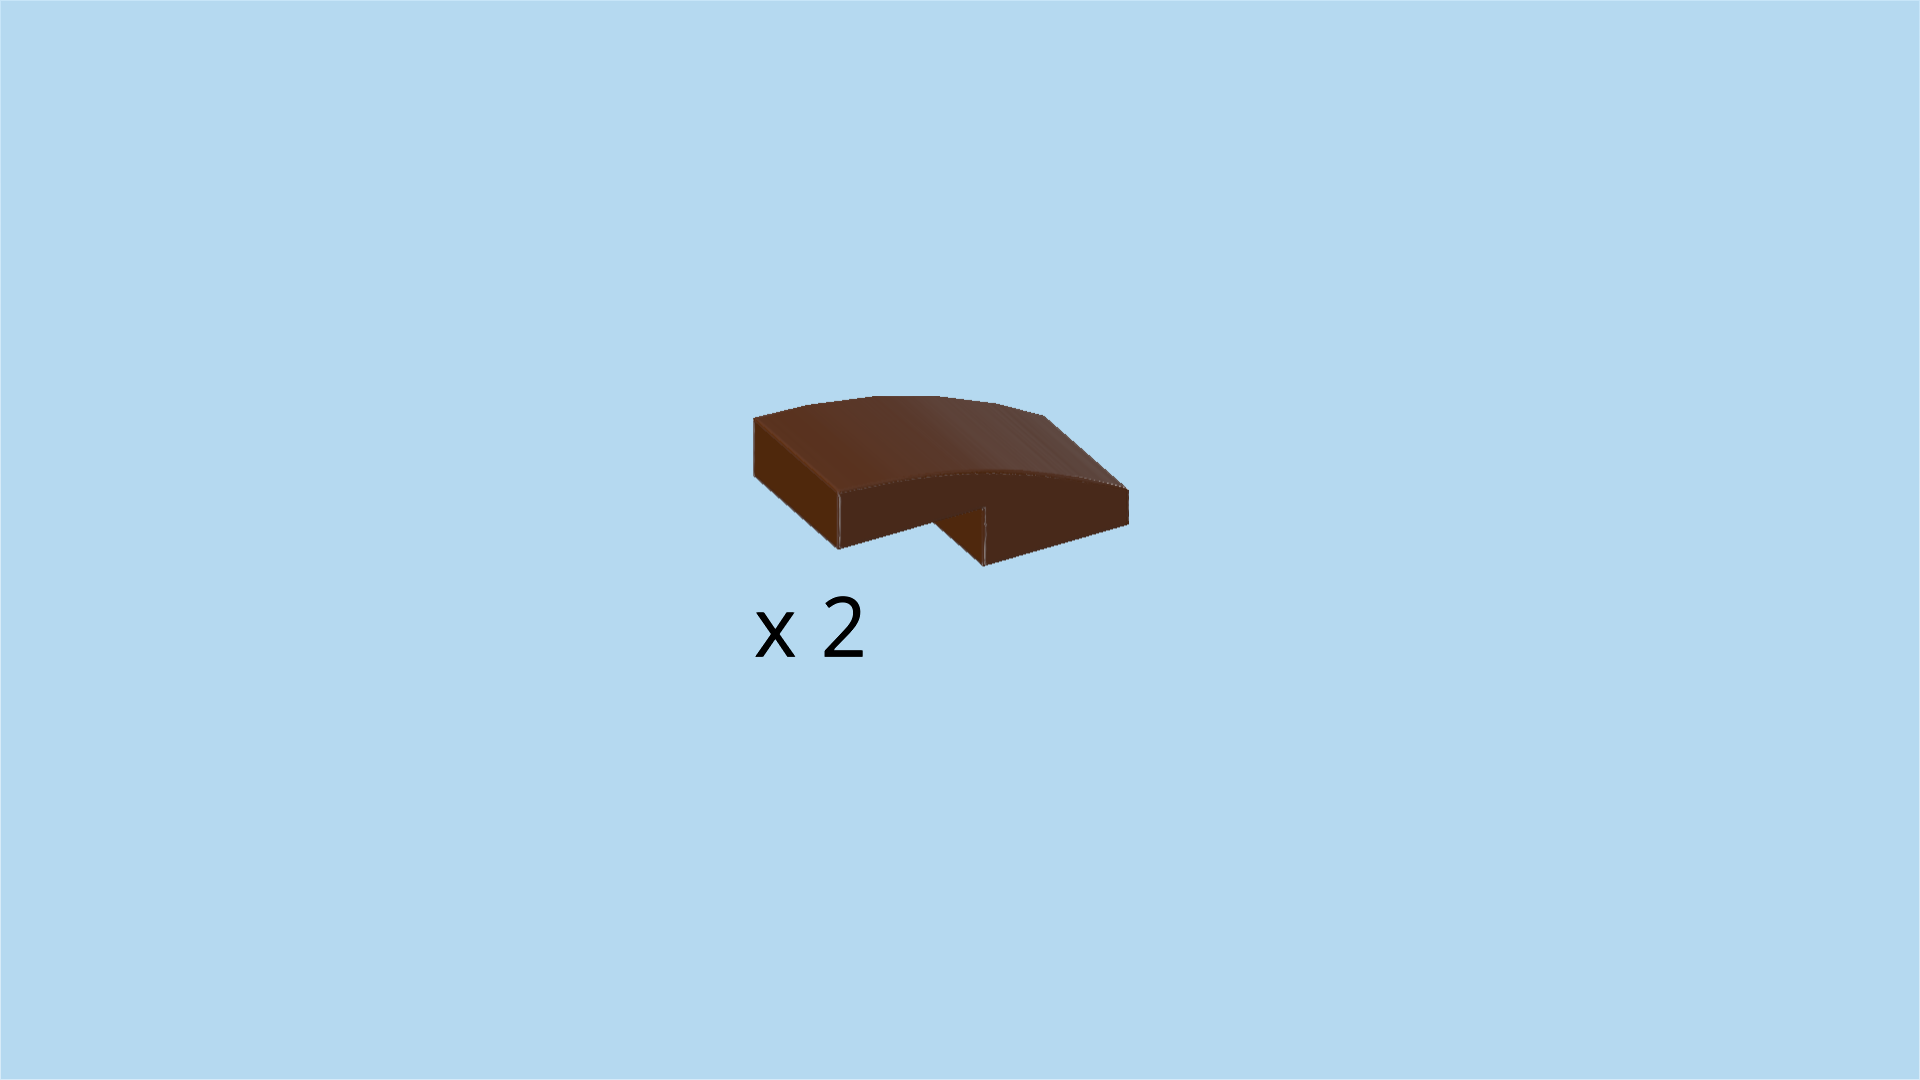
| Find 2 reddish brown one-stepped curve tiles 1x2x⅔. |
| Put 1 curve tile horizontally on the right knob of the previous piece and the knob to its right, curve to the right. |
| Put the other one vertically to the right of the previous piece, leaving one knob at the back and one at the front of that column empty. The curve is to the back. |
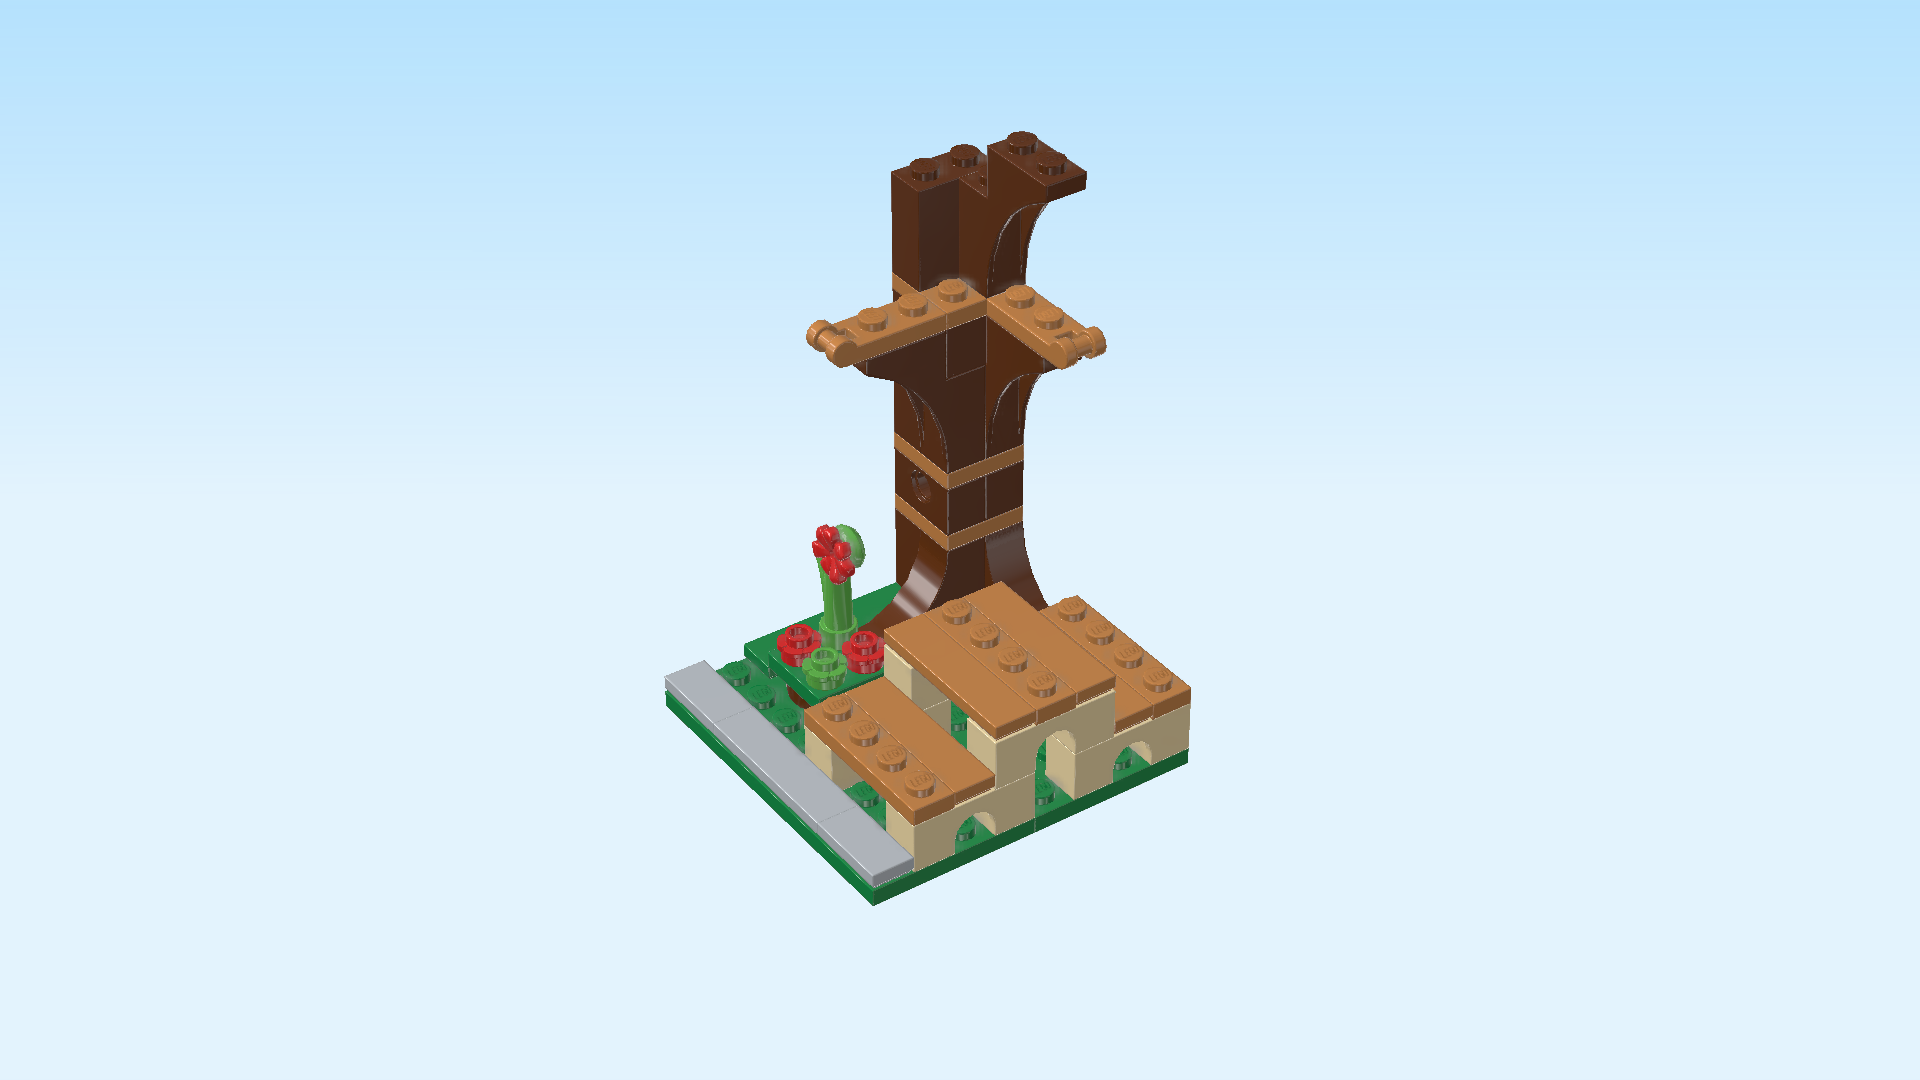
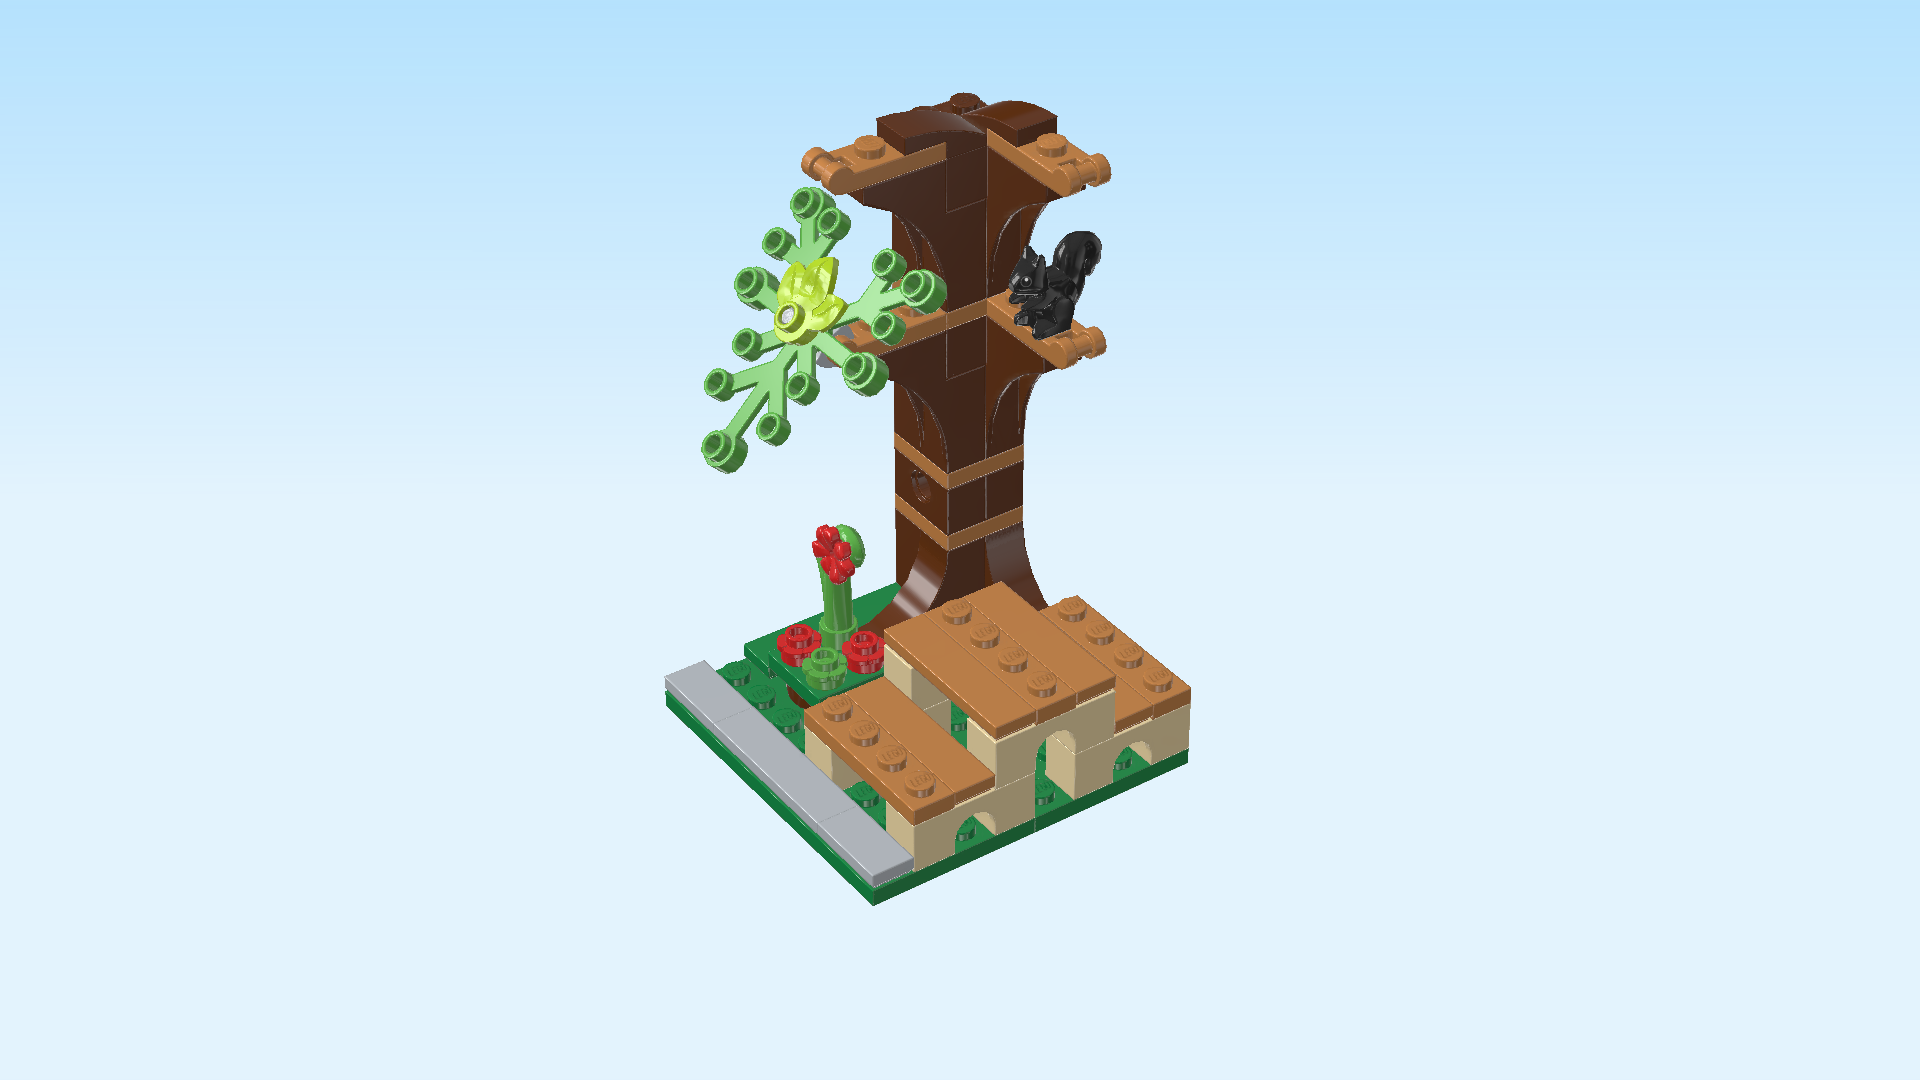
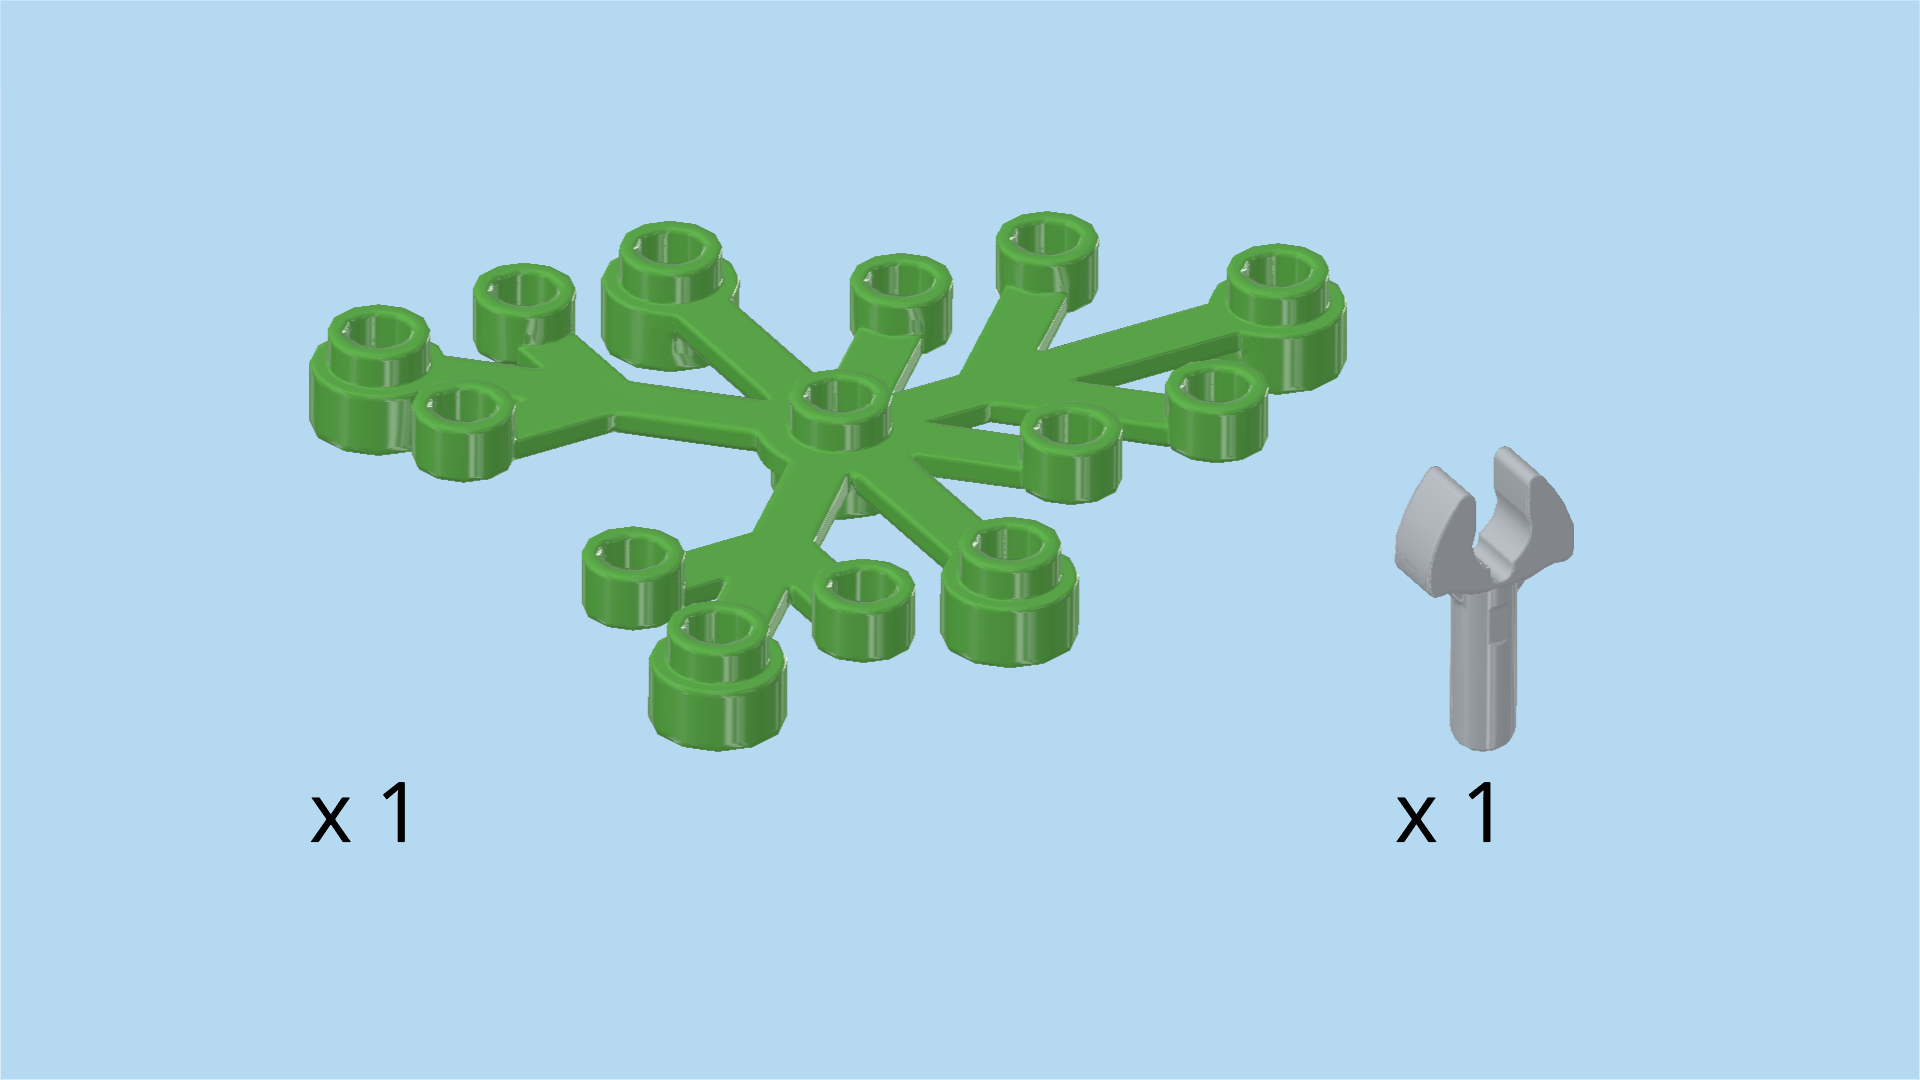
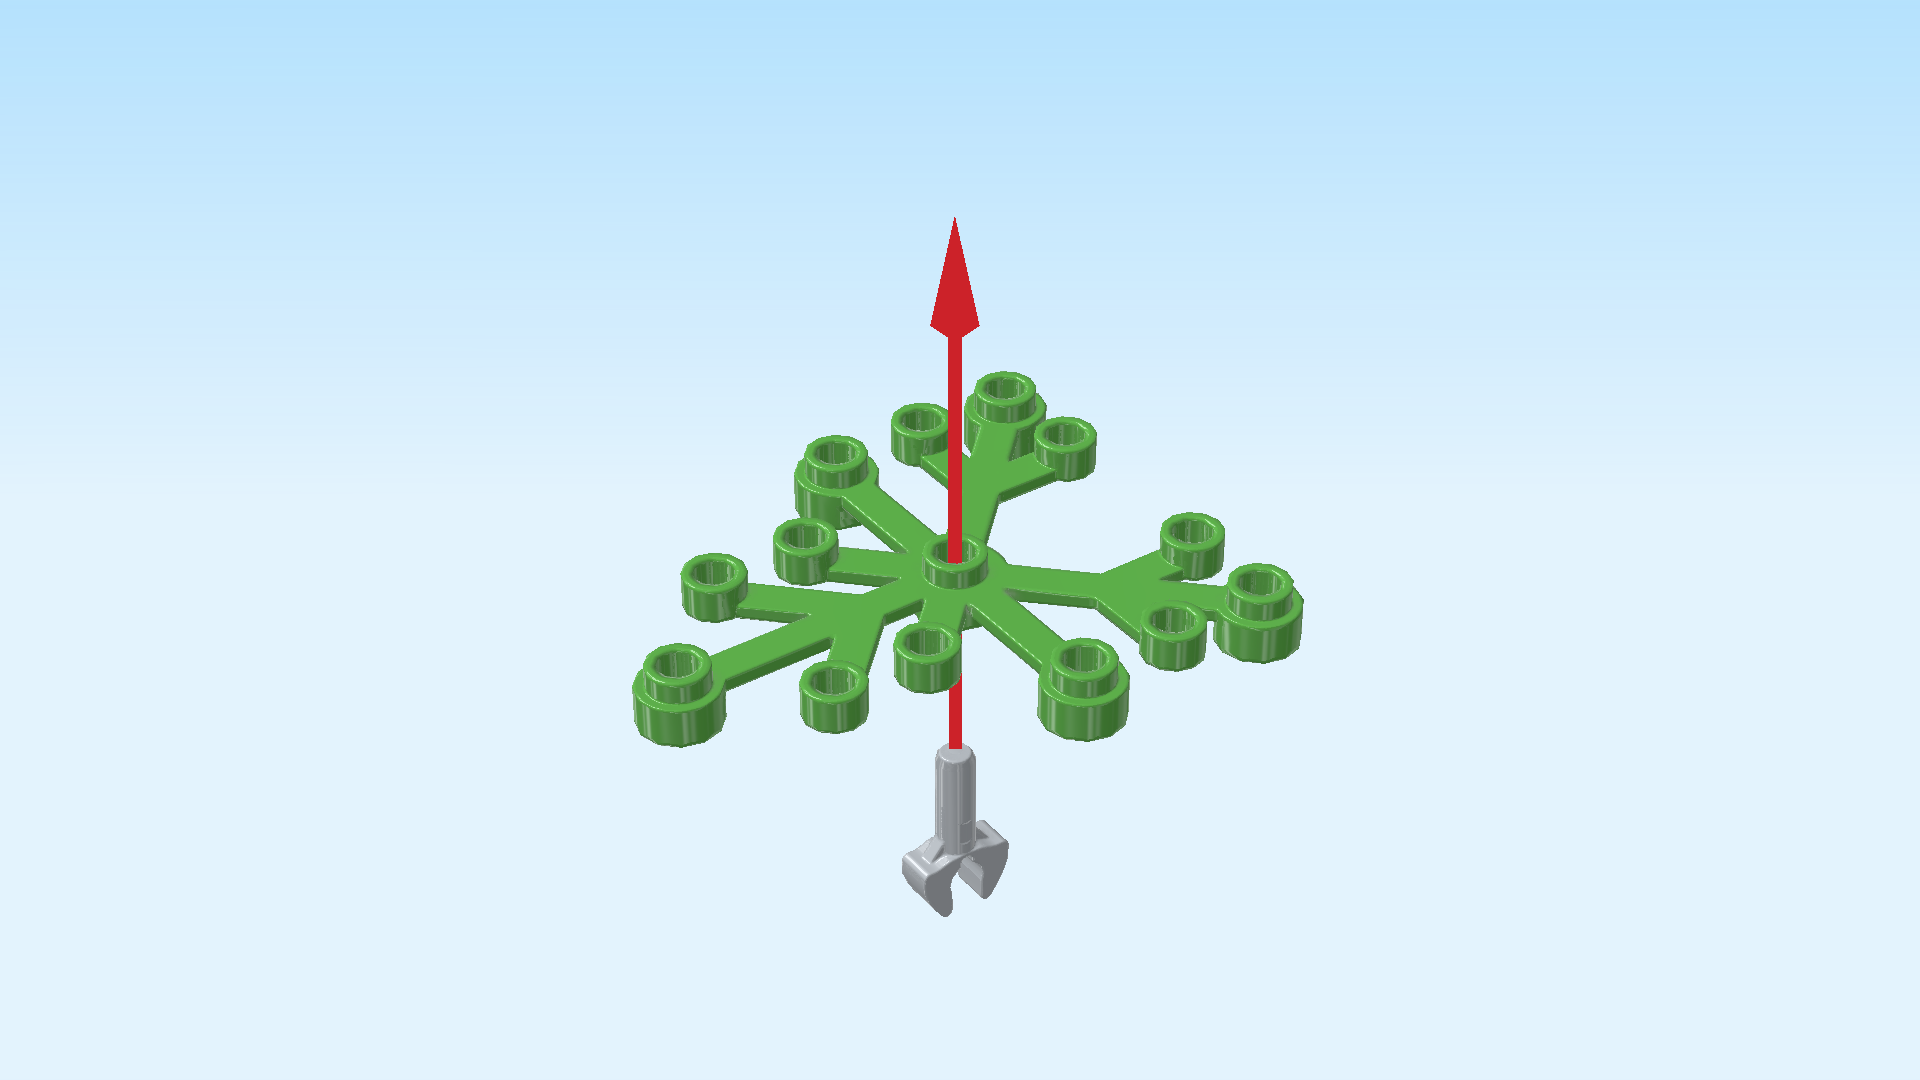
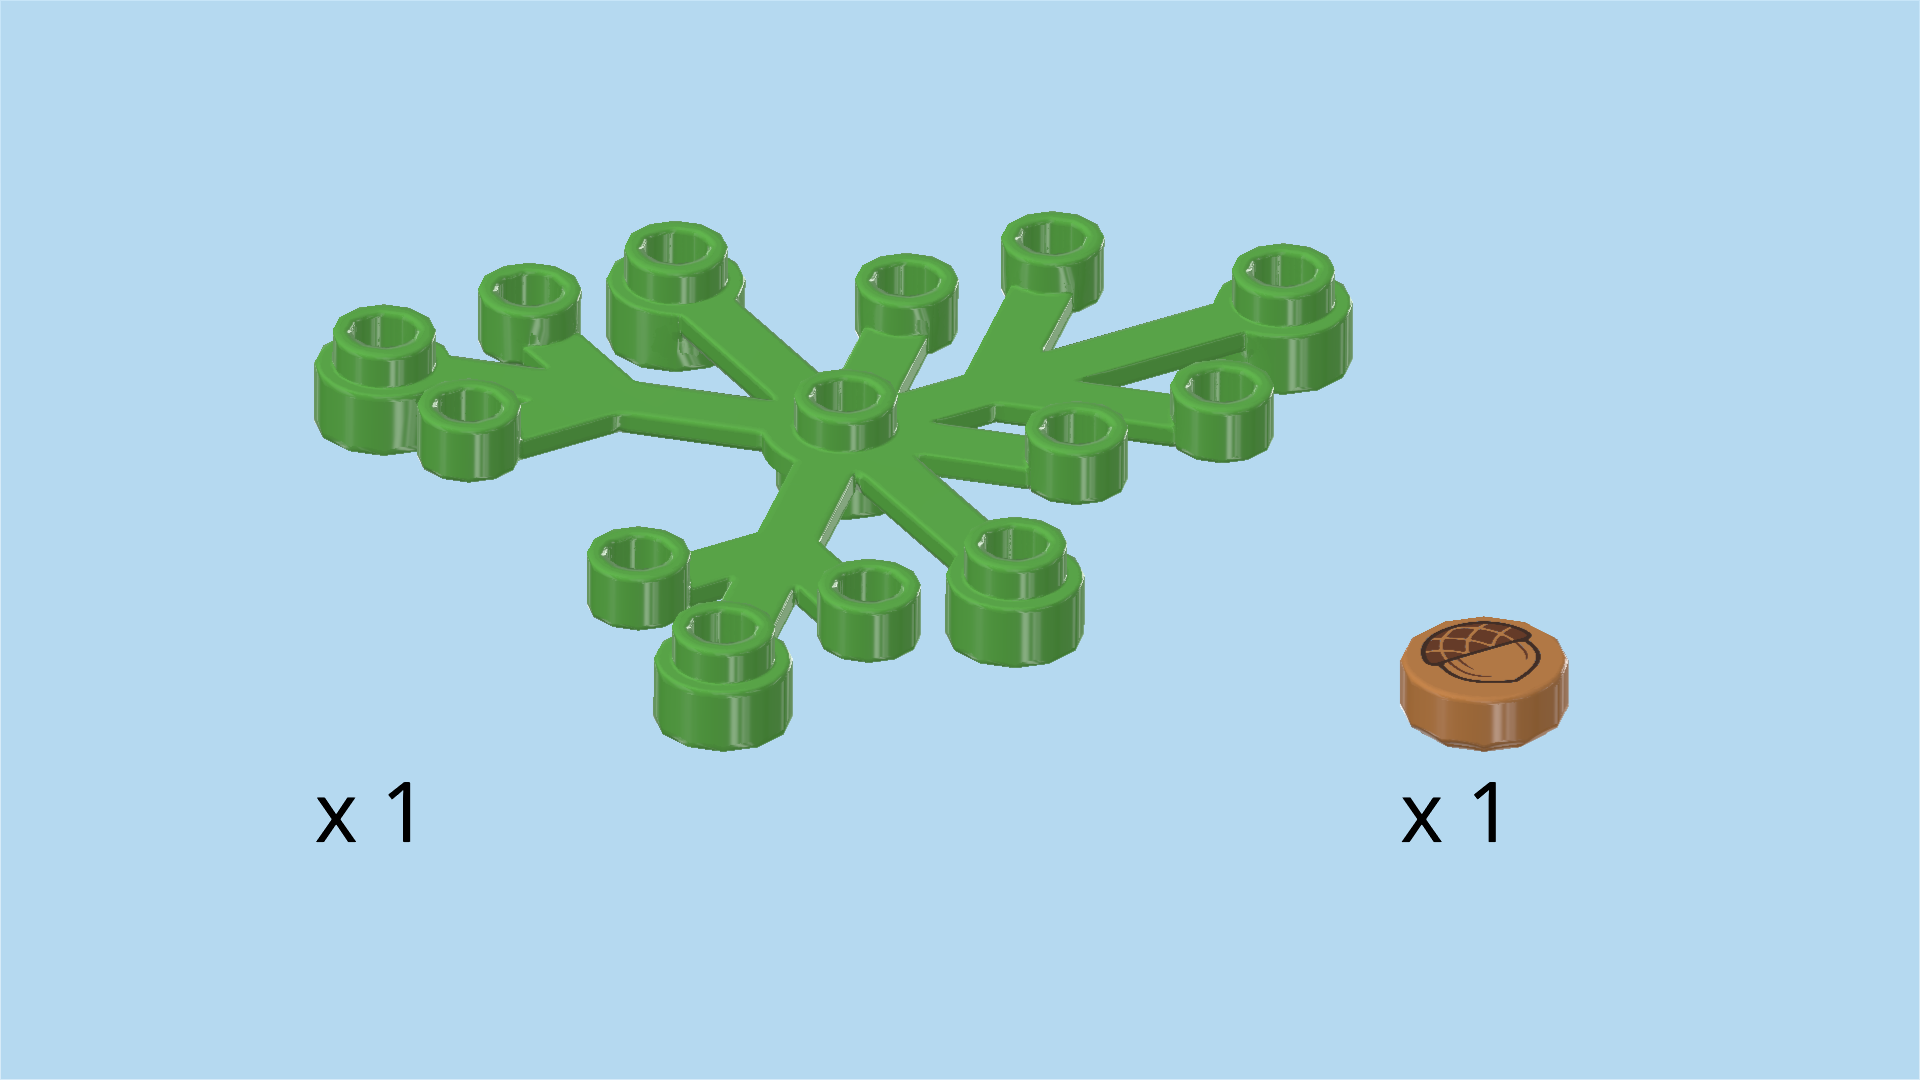
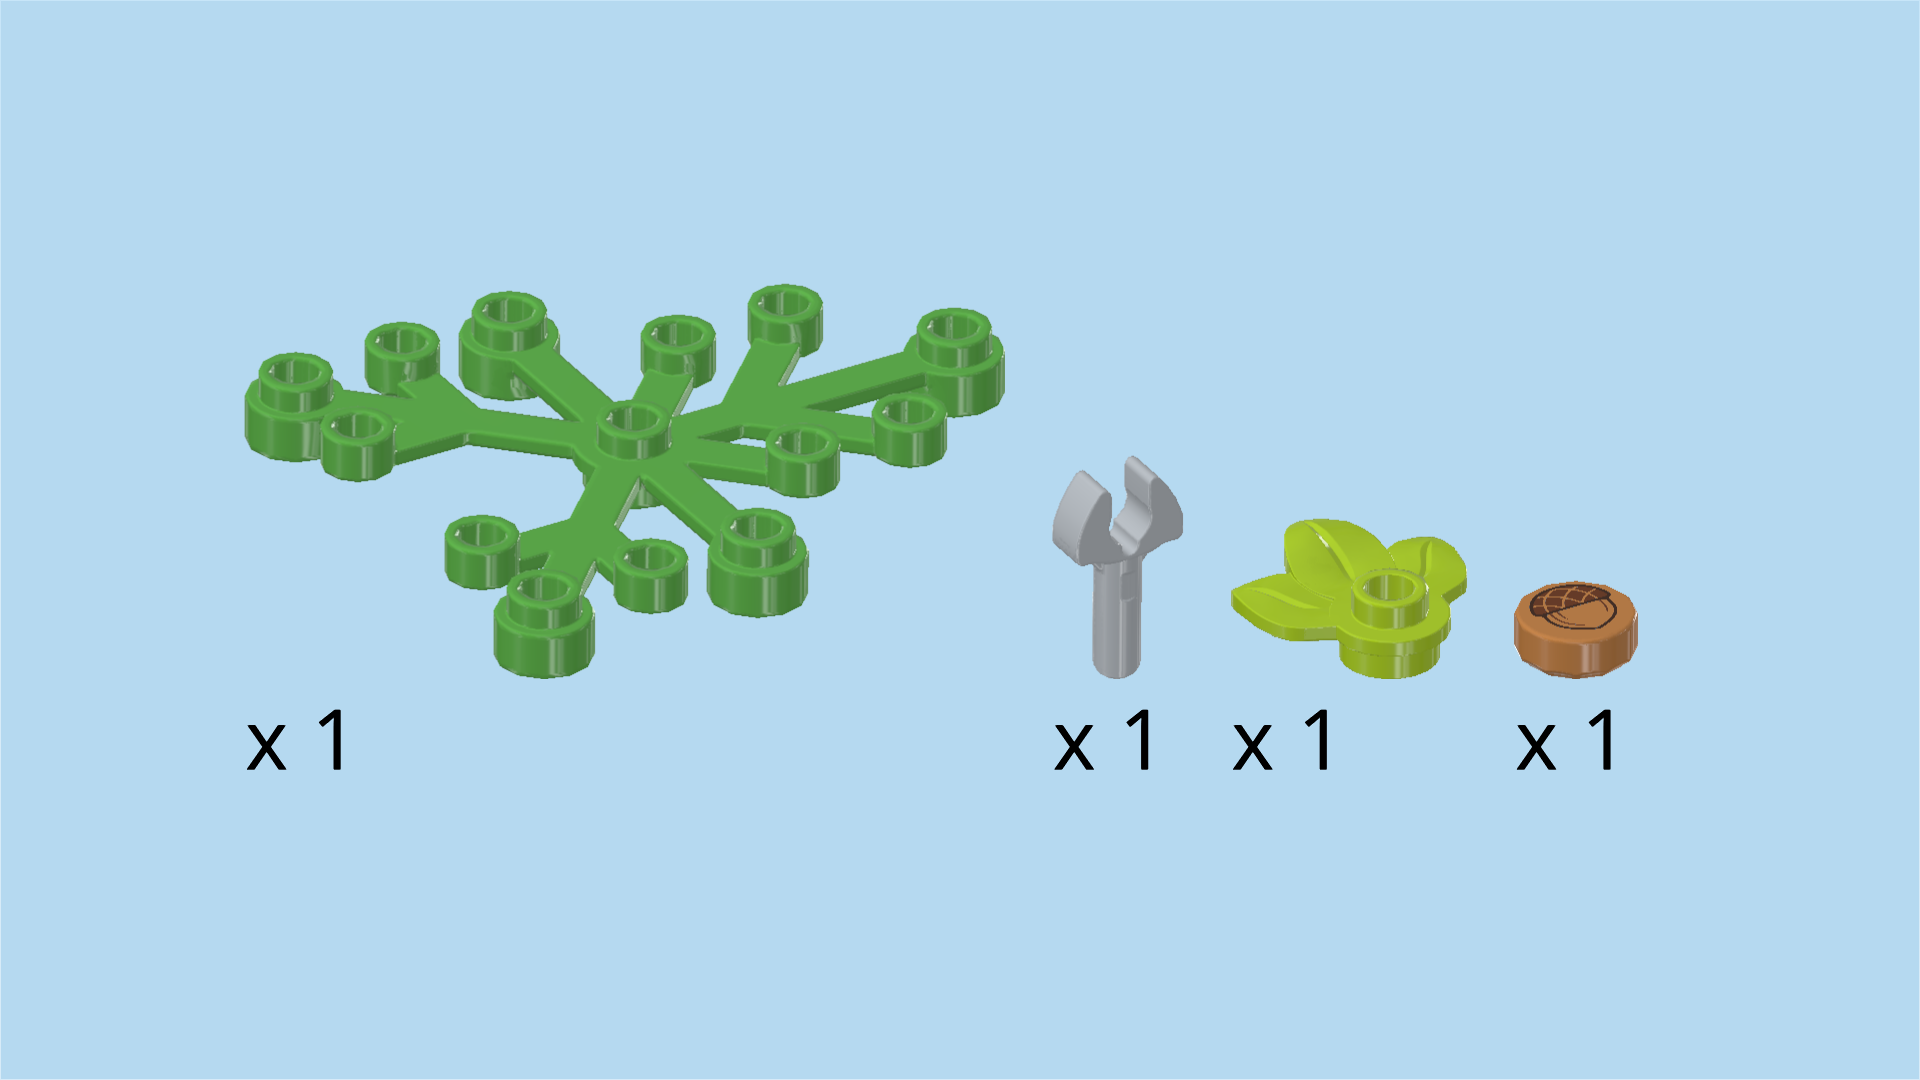
| Now, we will build the first of three leaf canopy elements. |
| Collect the following 2 pieces: |
| 1 bright green plant element with 14 knobs, |
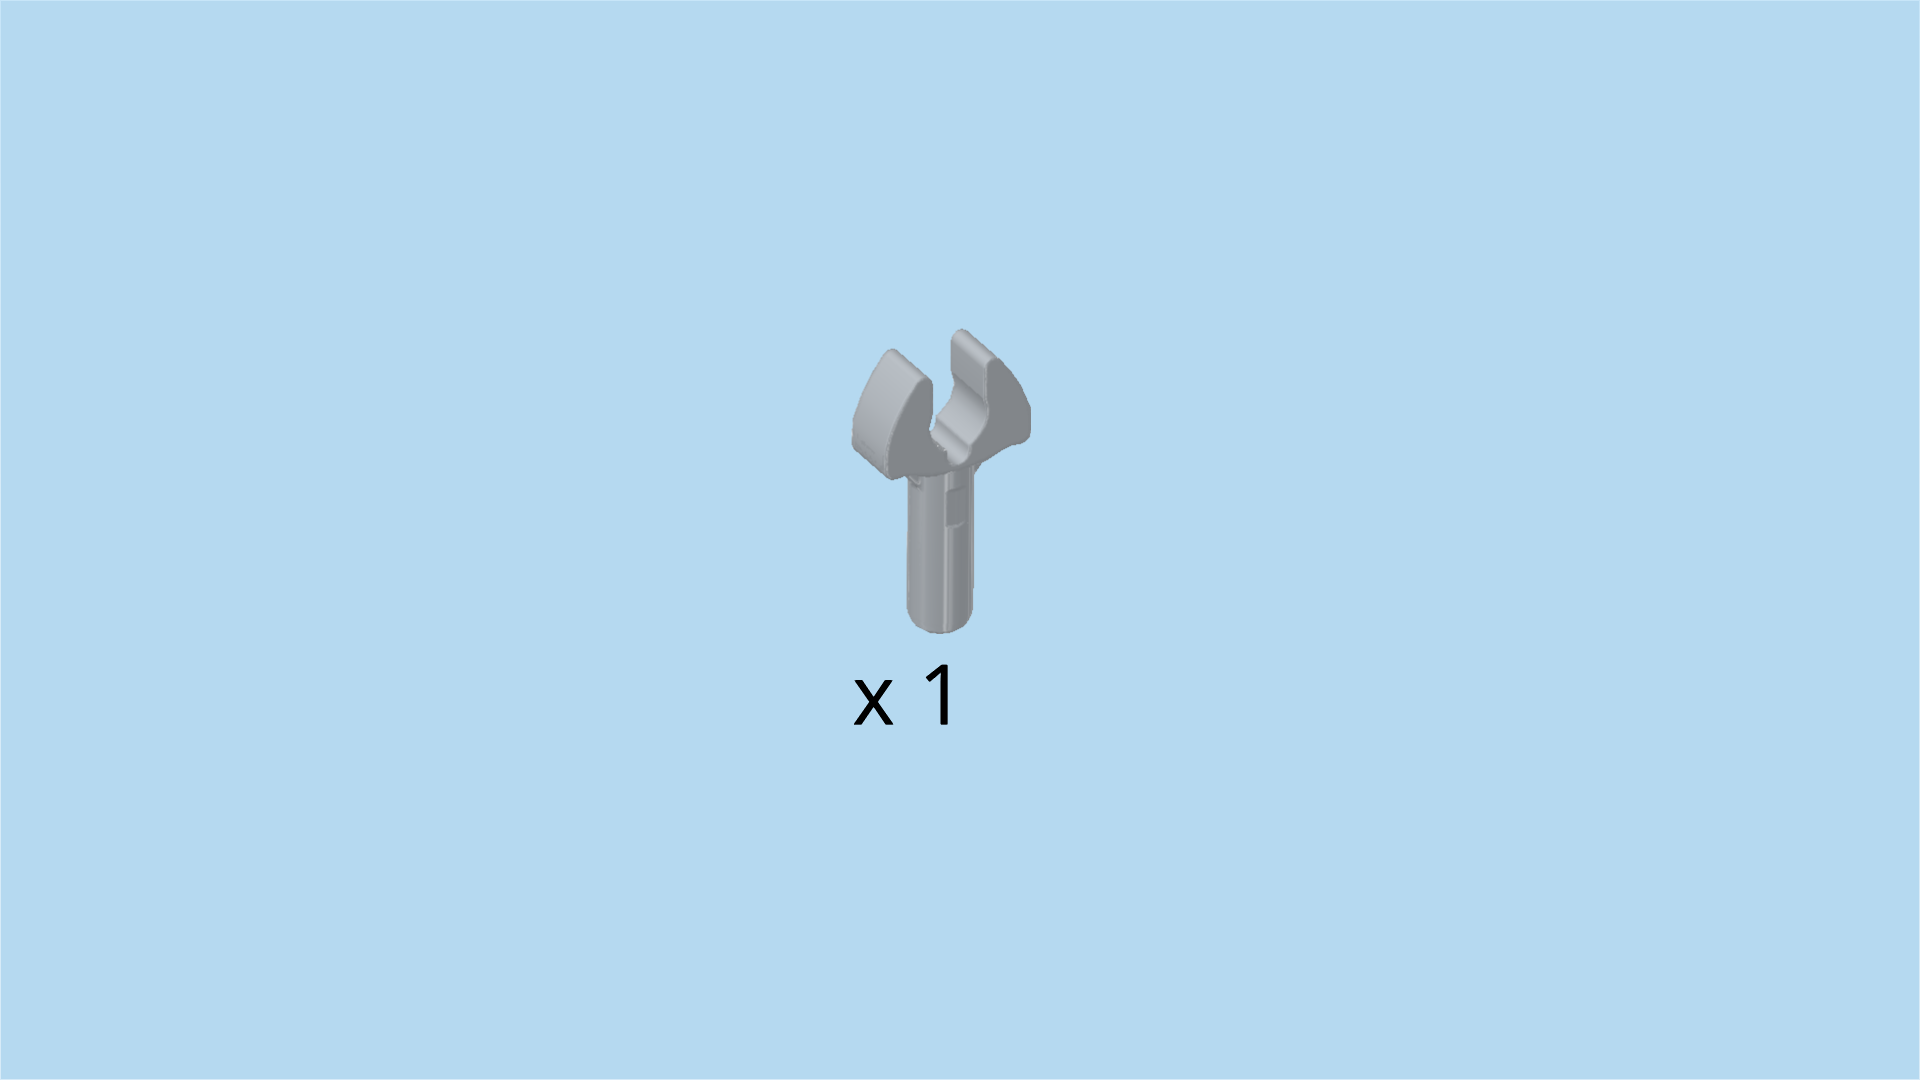
| and 1 medium stone grey open end wrench. |
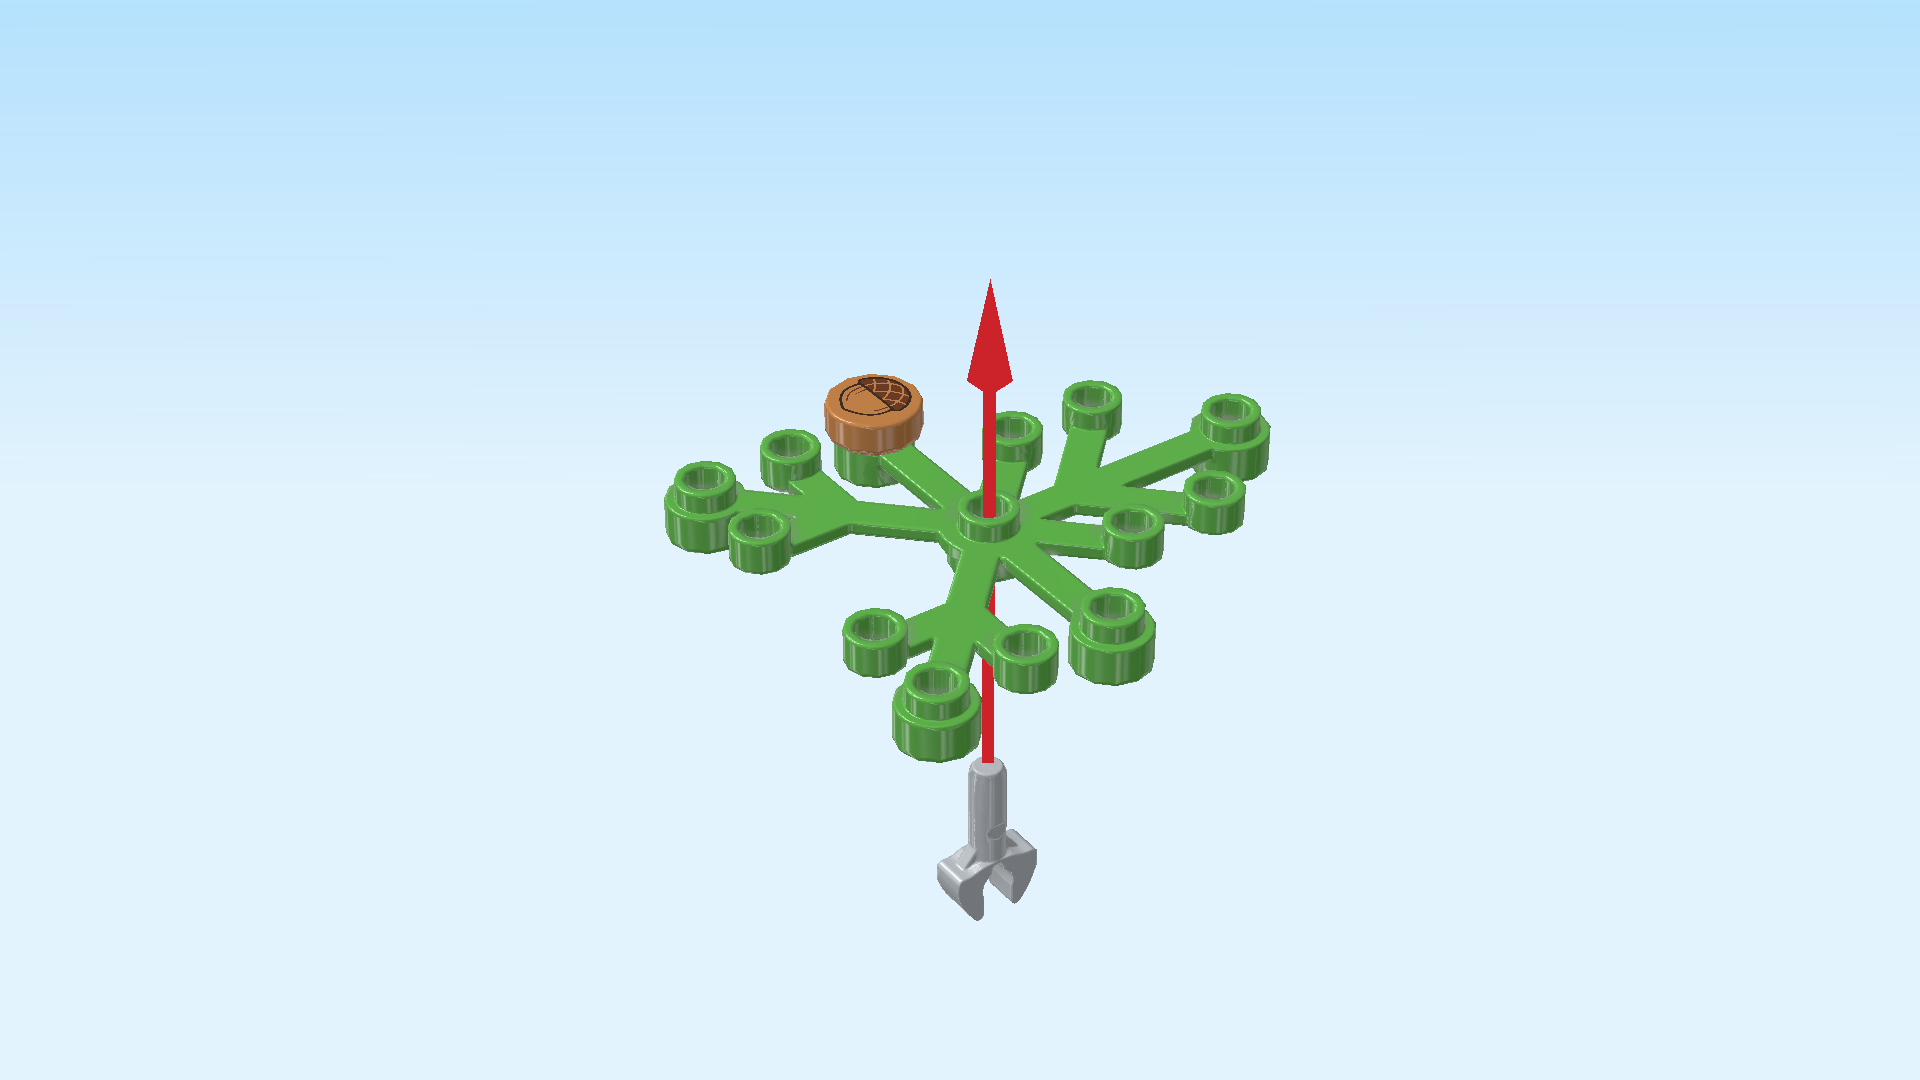
| Hold the plant element in your hand, knobs to the top. Identify the middle knob. |
| Insert the handle of the wrench from the bottom into the middle knob. Let the handle stick out towards the top. |
| Carefully put the plant element on the table, but make sure to keep this orientation. |
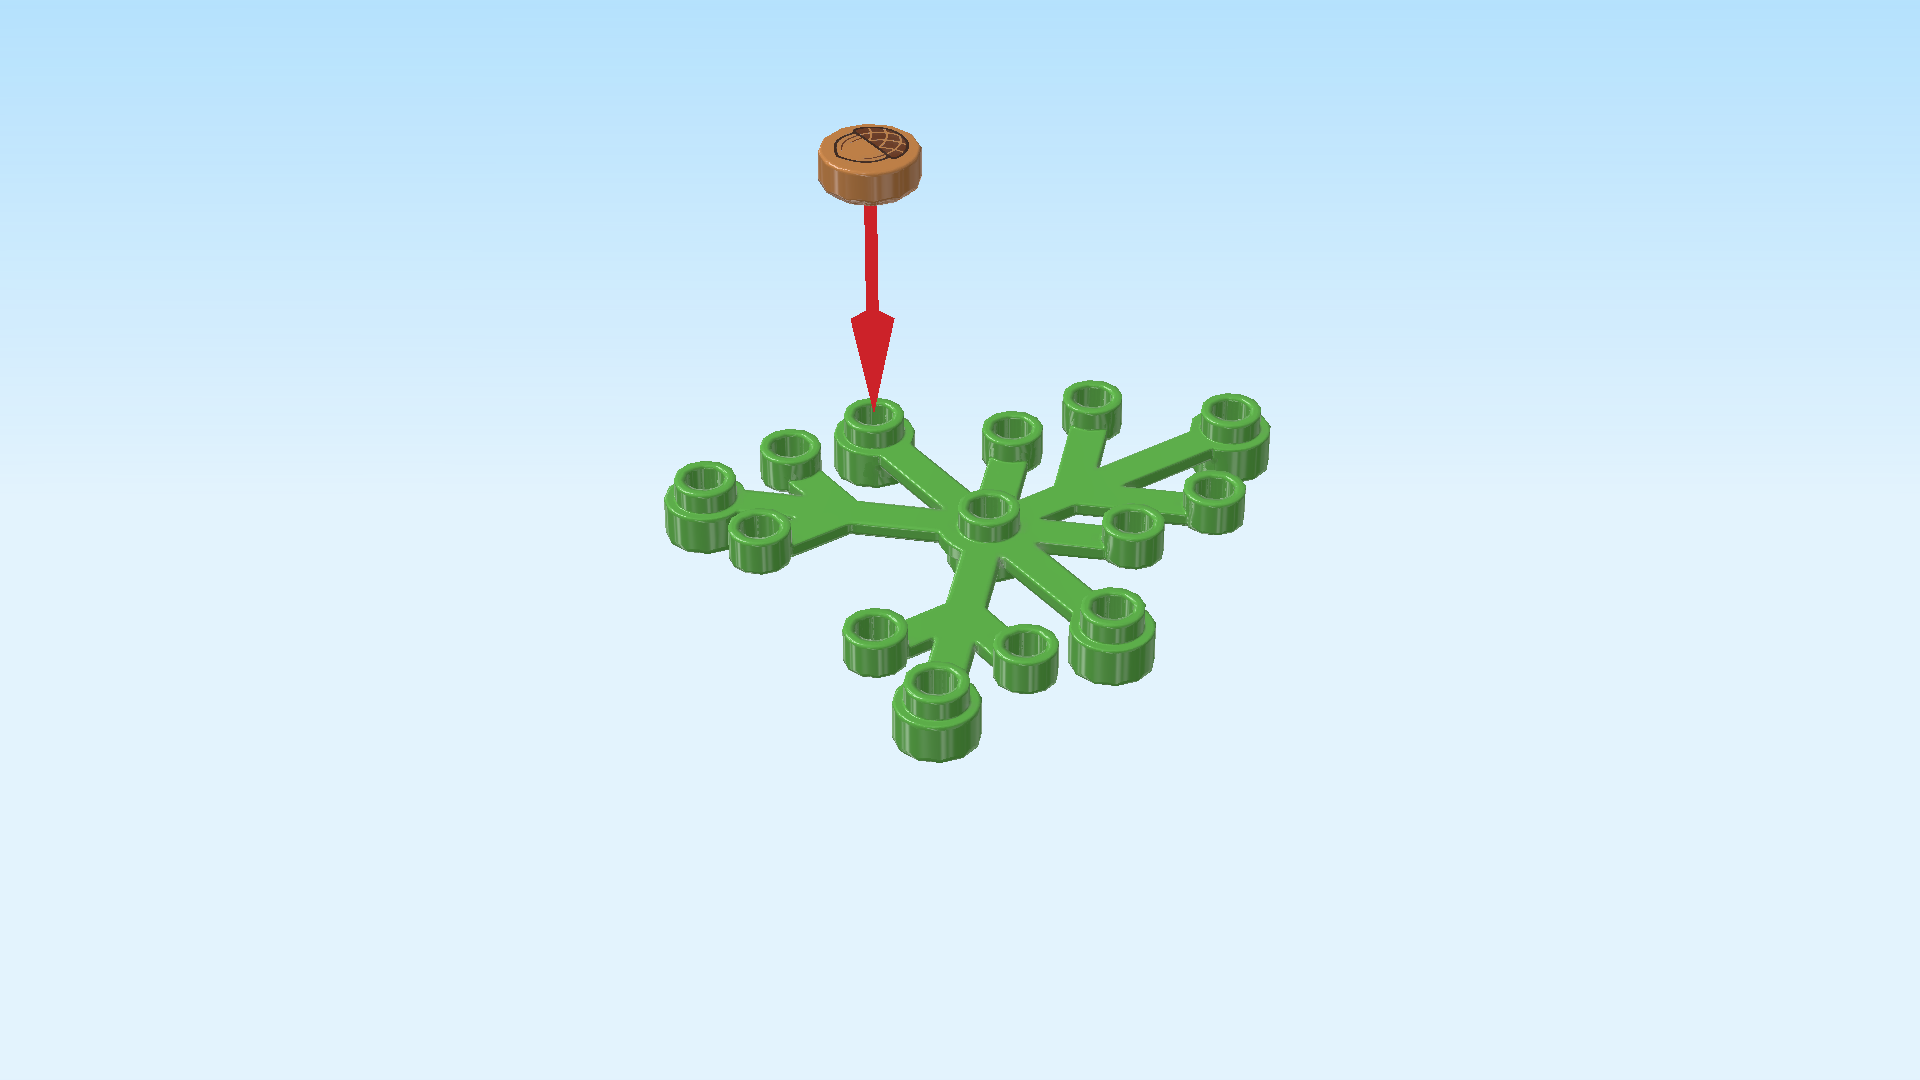
| Find 1 bright yellowish green round plate 1x1 with 3 leaves. |
| Put it on the middle knob of the plant element, leaves pointing to the right. |
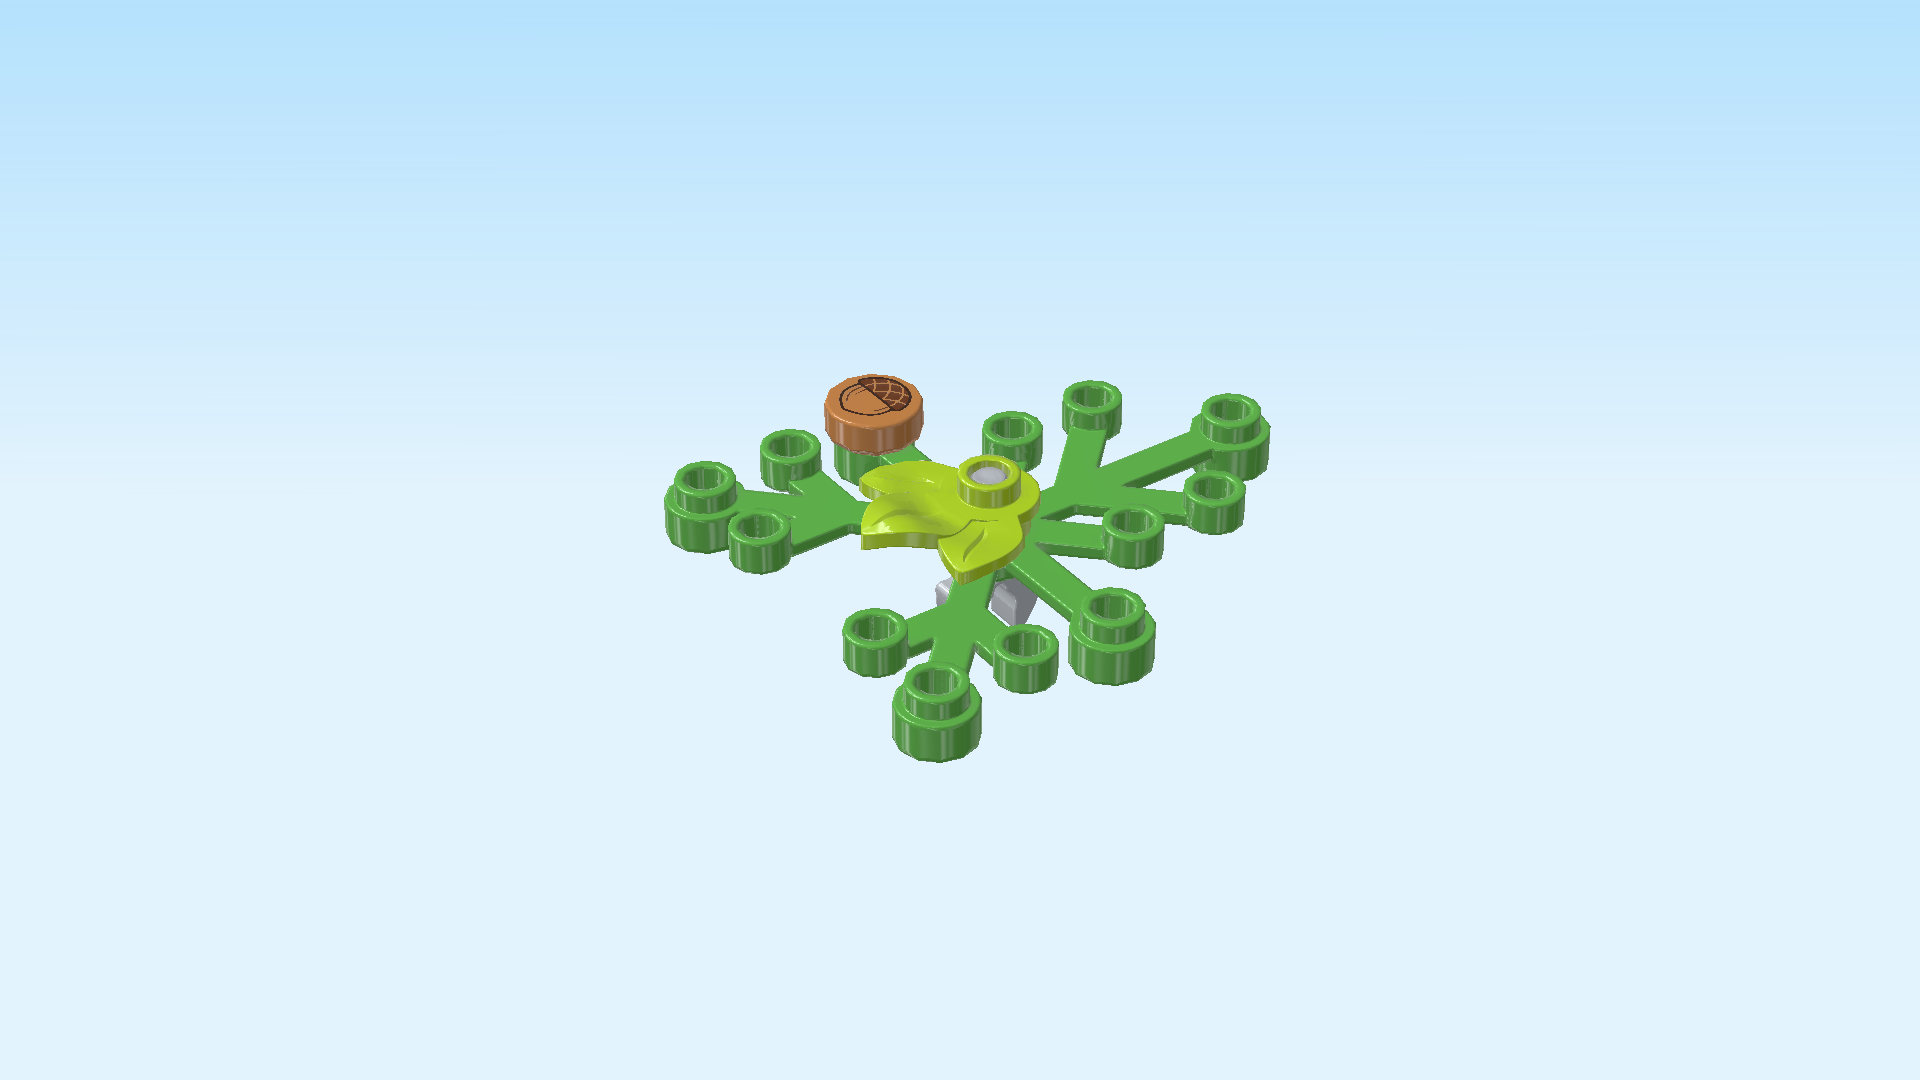
| The first of three leaf canopy elements is finished! Great job! Mount it by snapping the wrench clasp onto the shaft of the lower tree branch pointing to the left. |
| The plant element is kind of shaped like a triangle, one of its branches is a bit longer than the others. This longest branch should point down at an angle. You might have to adjust the wrench clasp a little. But really, any orientation of your choice is fine. |
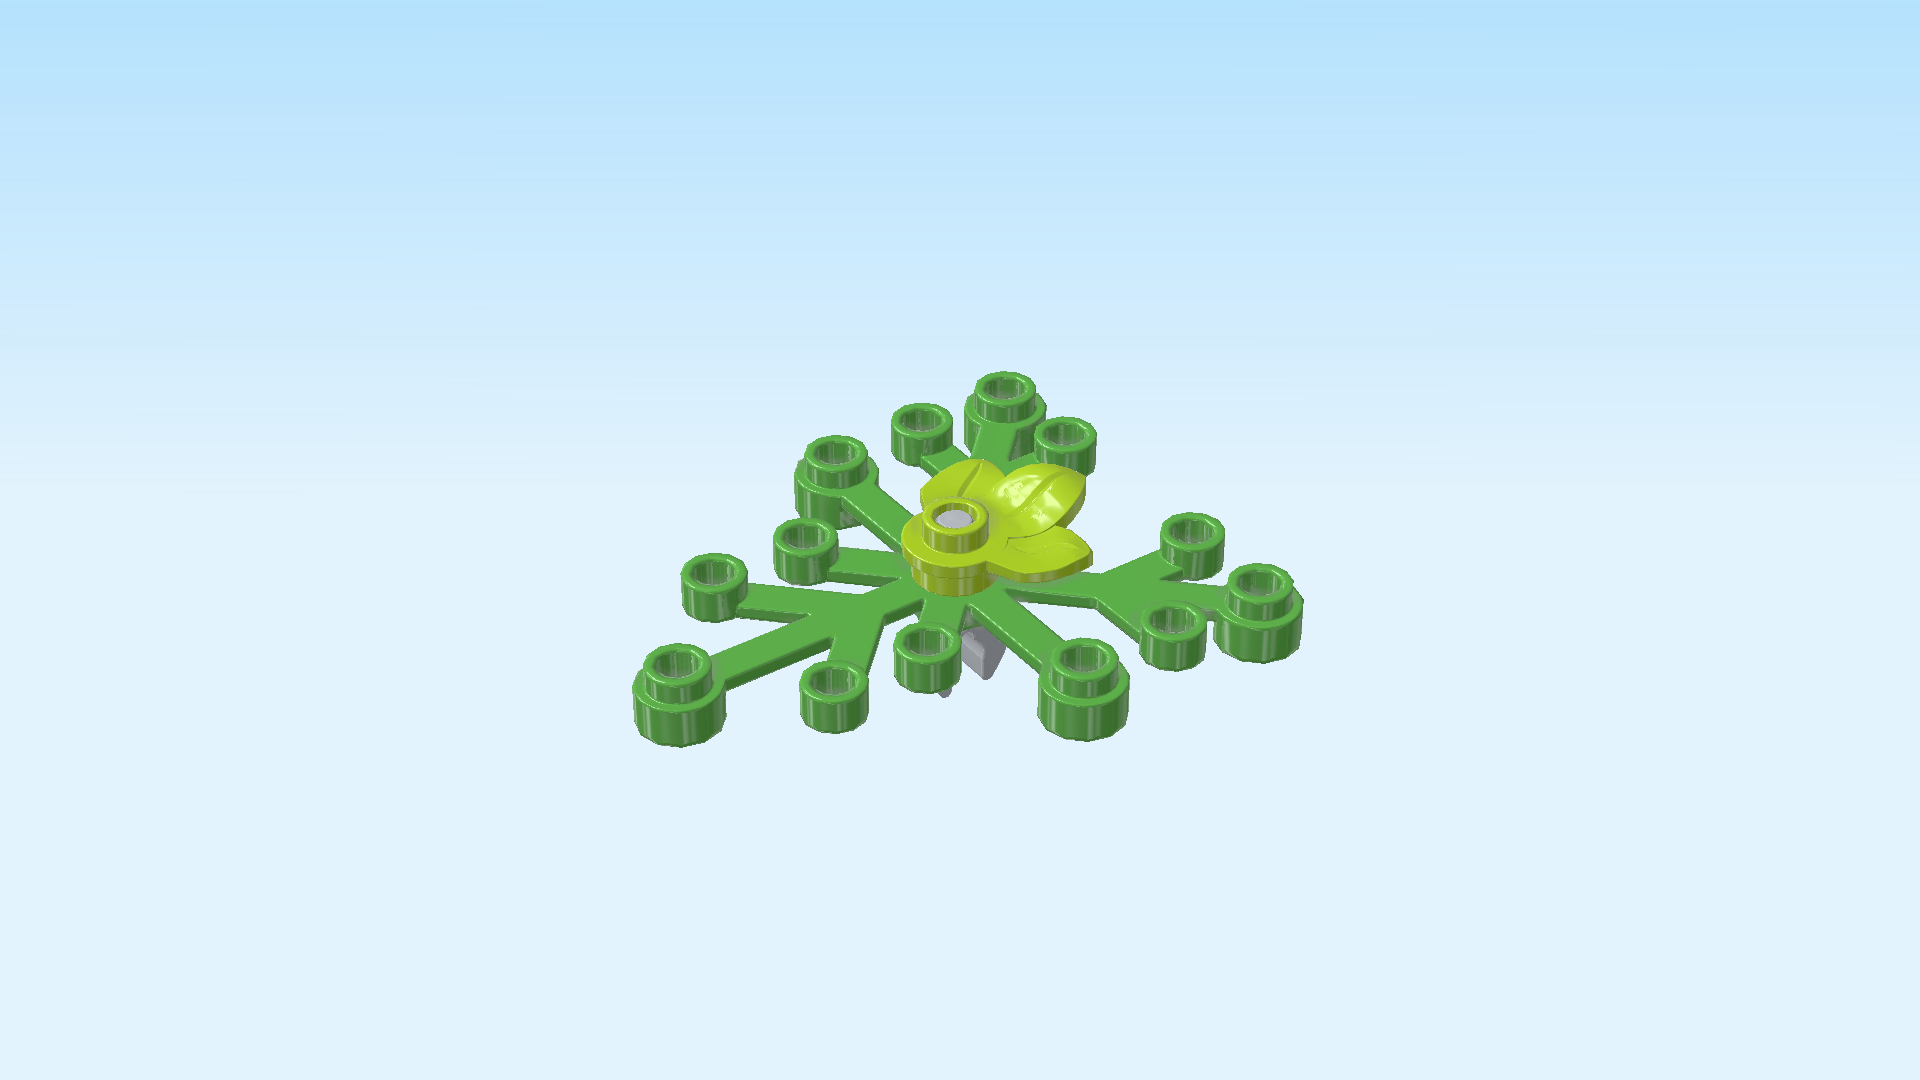
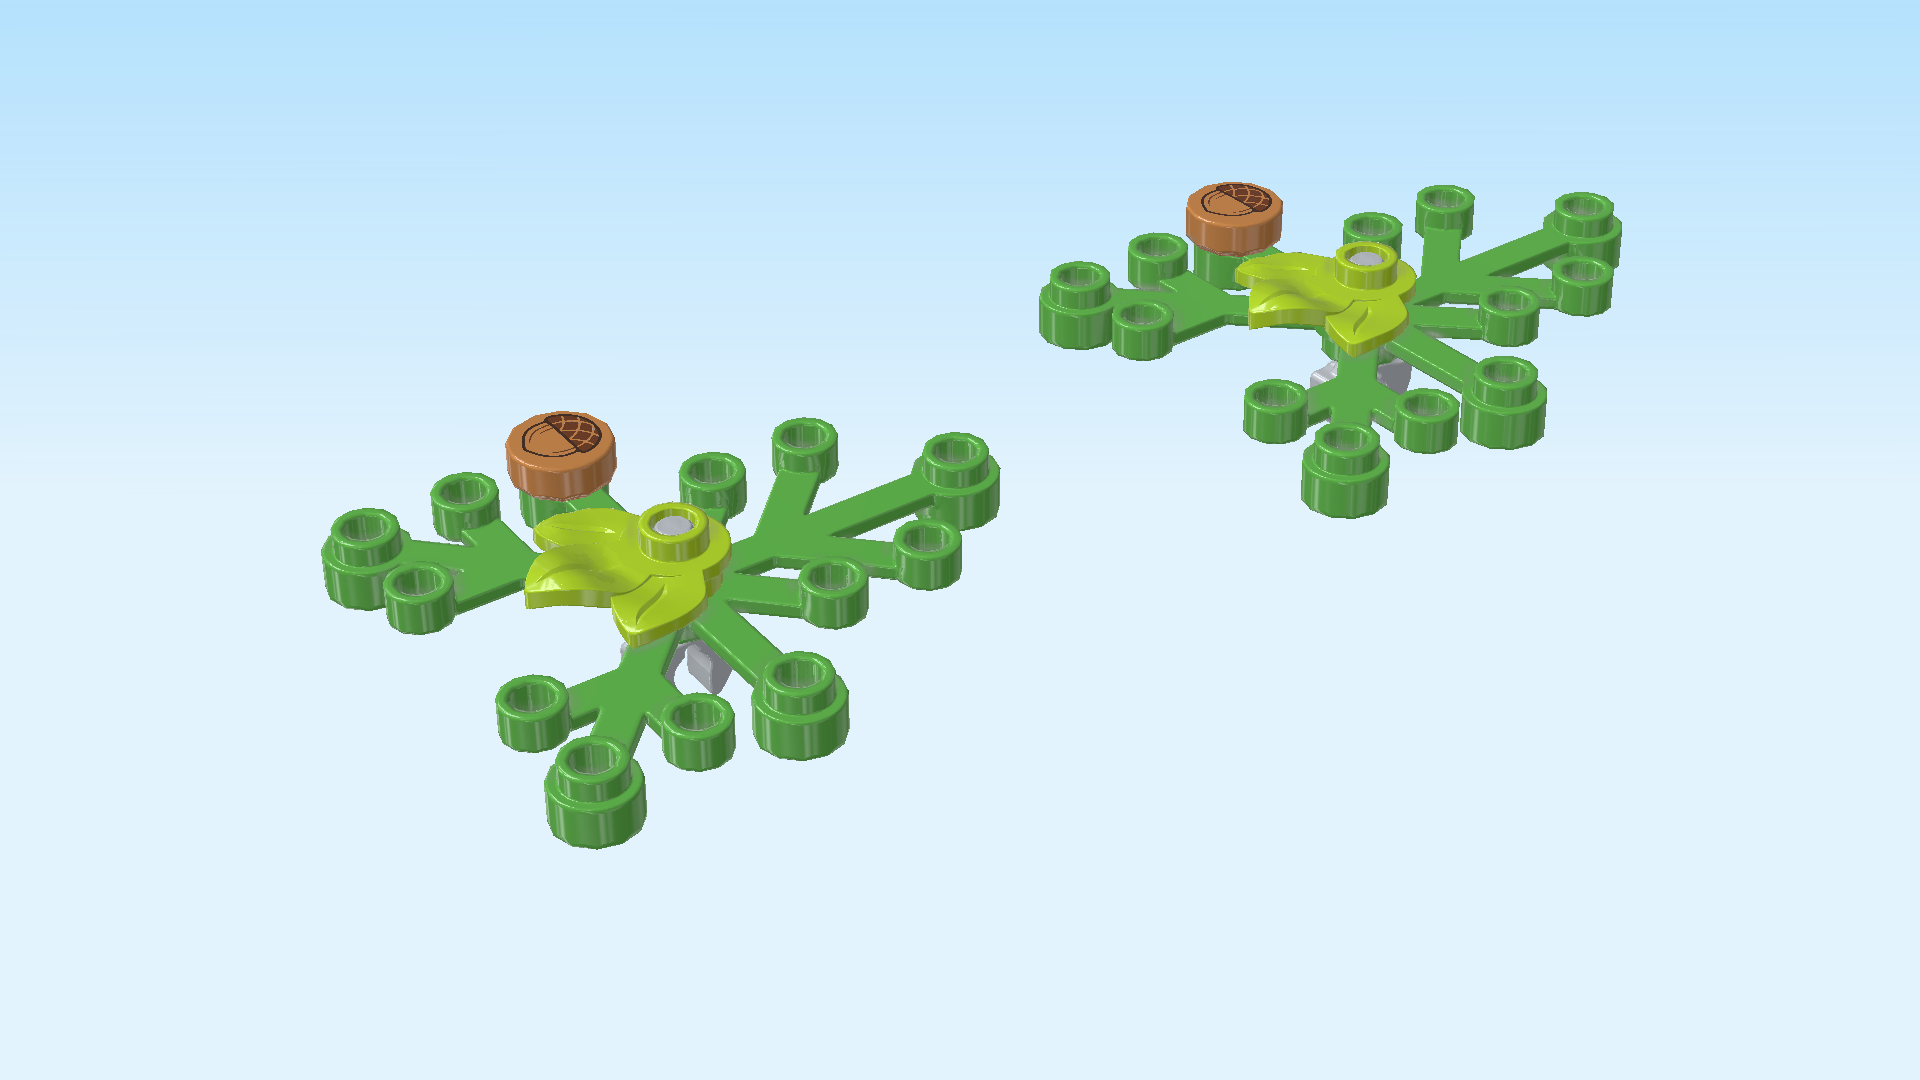
| Next, we will build 2 other tree canopy elements. |
| Collect the following 2 pieces: |
| 1 bright green plant element with 14 knobs, |
| and 1 medium nougat brown round tile 1x1. |
| Put the plant element on the table, longer branch pointing to the right. |
| Put the round tile 1x1 on the back knob of the middle branch that runs front to back. But you can also pick any knob other than the middle knob. |
| Find 1 medium stone grey open end wrench. |
| Hold the plant element in your hand, and insert the handle of the wrench into the middle knob of the plant element. Let the handle stick out towards the top. |
| Put the plant element down again, but keep it in this orientation. |
| Find 1 bright yellowish green round plate 1x1 with 3 leaves. |
| Put it on top of the middle knob, leaves pointing to the left. |
| Collect the following 4 pieces: |
| 1 bright yellowish green round plate 1x1 with 3 leaves, |
| 1 medium stone grey open end wrench, |
| 1 bright green plant element with 14 knobs, |
| and 1 medium nougat brown round tile 1x1. |
| Put the round tile 1x1 with print on a knob of your choice. You can pick the same as before, or a different one. Just leave the middle knob empty. |
| Insert the handle of the wrench from the bottom into the middle knob, handle sticking out towards the top. |
| Put the round plate with leaves on the middle knob of the plant element, leaves pointing away from the longest branch. |
| The 2 other tree canopy elements are finished! Very well done! Snap the wrench clasps onto the 2 handles of the 2 top tree branches. This time, you could let the longest branches of the plant elements point upwards, but it is up to you. |
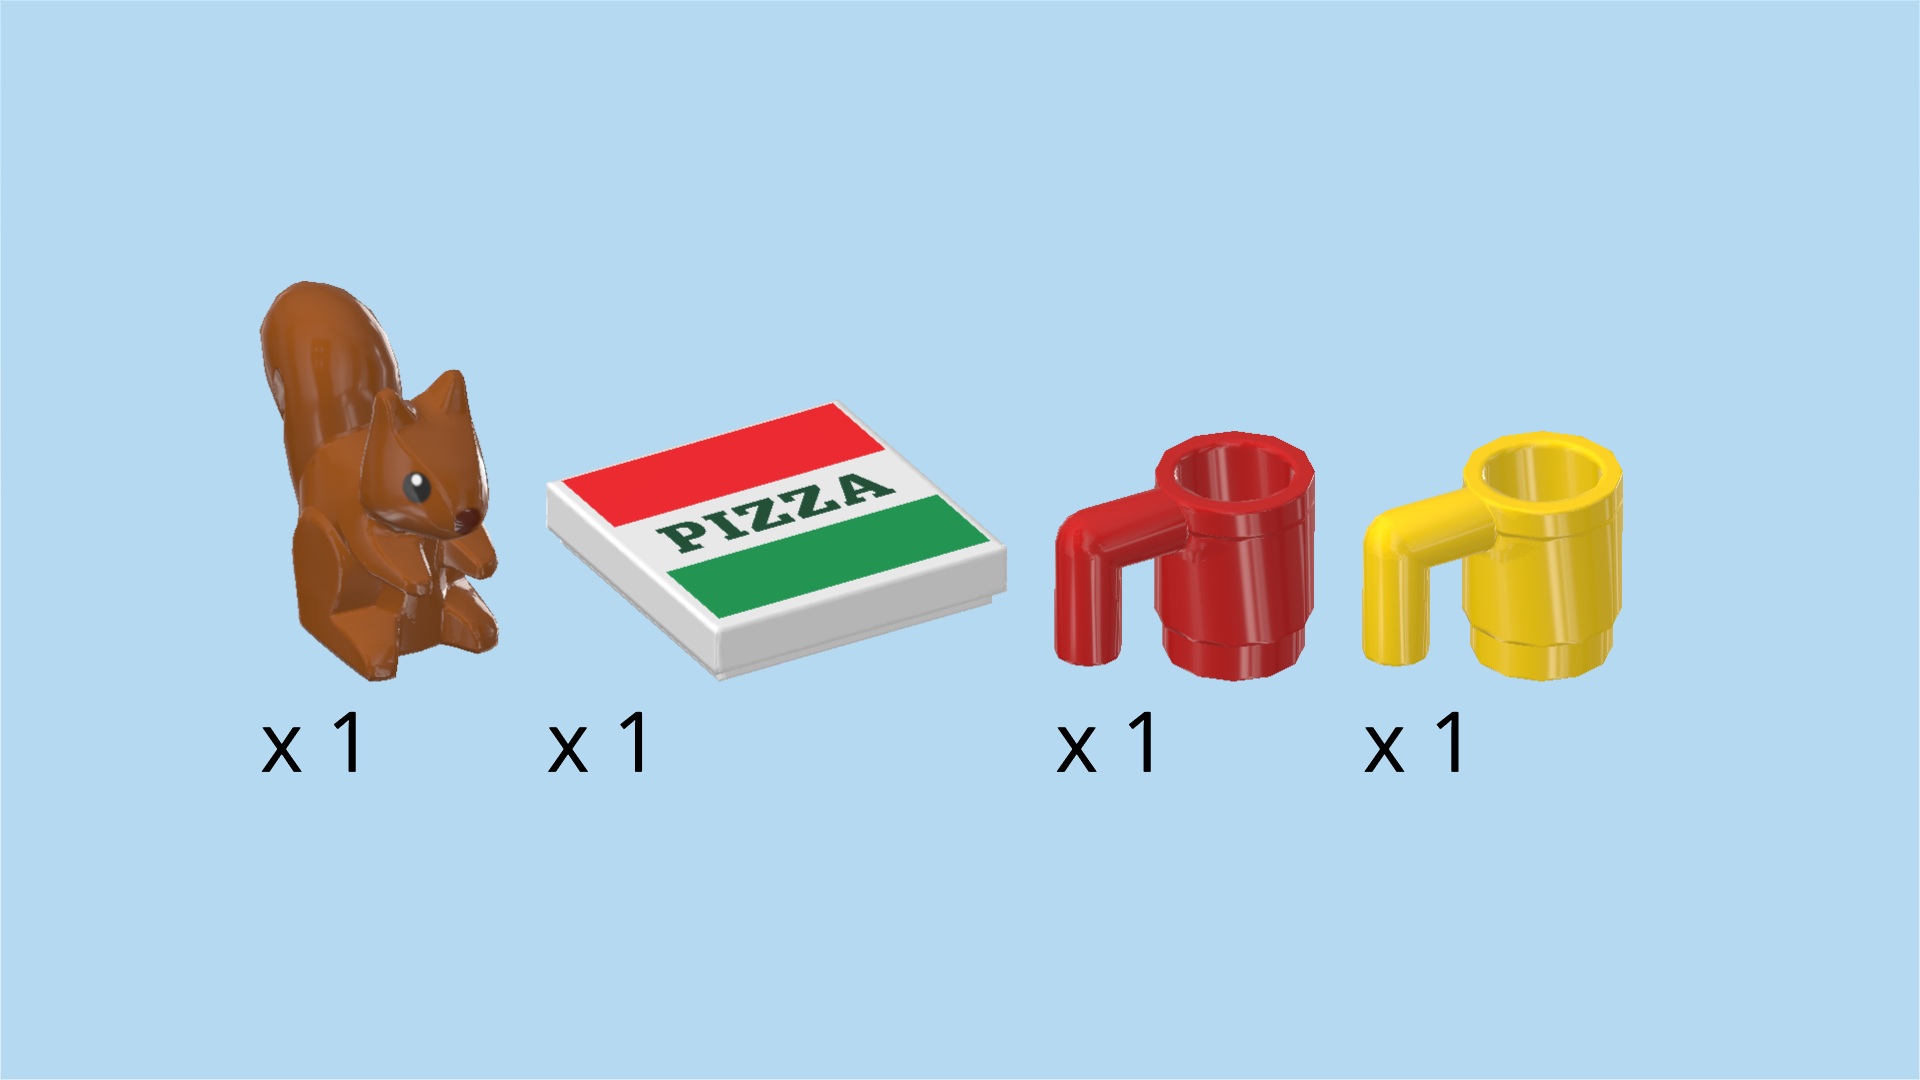
| Collect the following 4 pieces: |
| 1 bright red Minifigure mug, |
| 1 bright yellow Minifigure mug, |
| 1 white flat tile 2x2, |
| and 1 dark orange squirrel figure. |
| Put the flat tile 2x2 in the middle of the picnic table. This piece is printed with a pizza box! |
| Put the 2 mugs on the 2 knobs next to the pizza box. |
| Put the squirrel figure on the left picnic bench. |
| The picnic bench with oak tree and squirrels is finished! Good job! |
| You have finished building the whole set! Very well done! The gardener can now change between the red and the yellow flower bed as he pleases, the hot pizza is waiting for the cyclist and the little boy, and the bike with trailer is good to go, so maybe a little bike trip is the thing to do after the picnic! And don't forget to pack your bike helmets. |
| Enjoy! |