LEGO 60273 Elite Police Driller Chase 

LEGO Audio & Braille Building Instructions for the LEGO City set "Elite Police Driller Chase".

Yikes! The infamous crook Hacksaw Hank has drilled his way into the LEGO City Bank aboard a powerful mine driller and is making off into the night with a safe full of gold bars! Grab the night vision goggles and give chase with LEGO City TV hero Sam Grizzled in his cool armored police car. Enjoy hands-on LEGO City Adventures TV series action with this awesome Police playset!

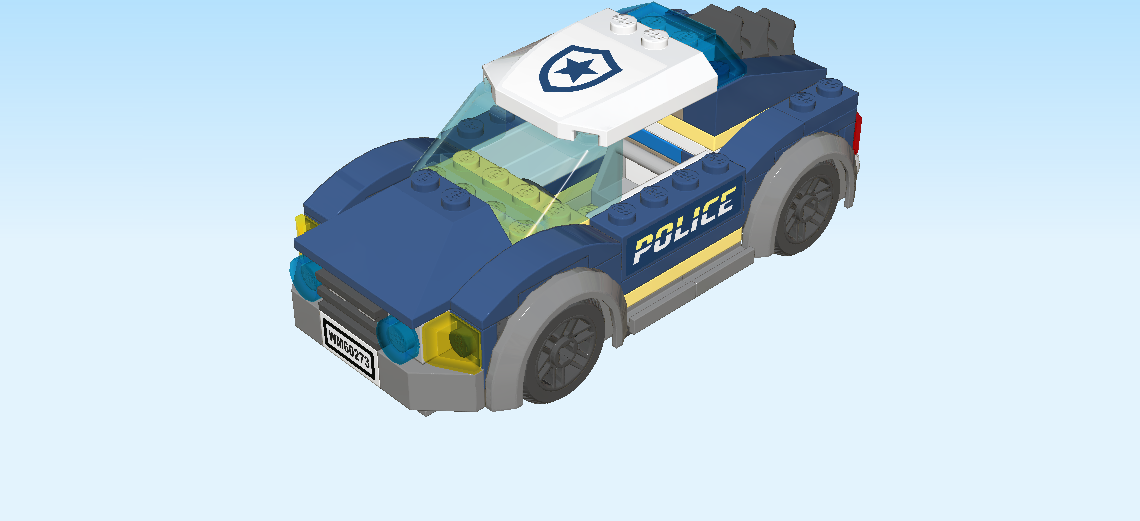
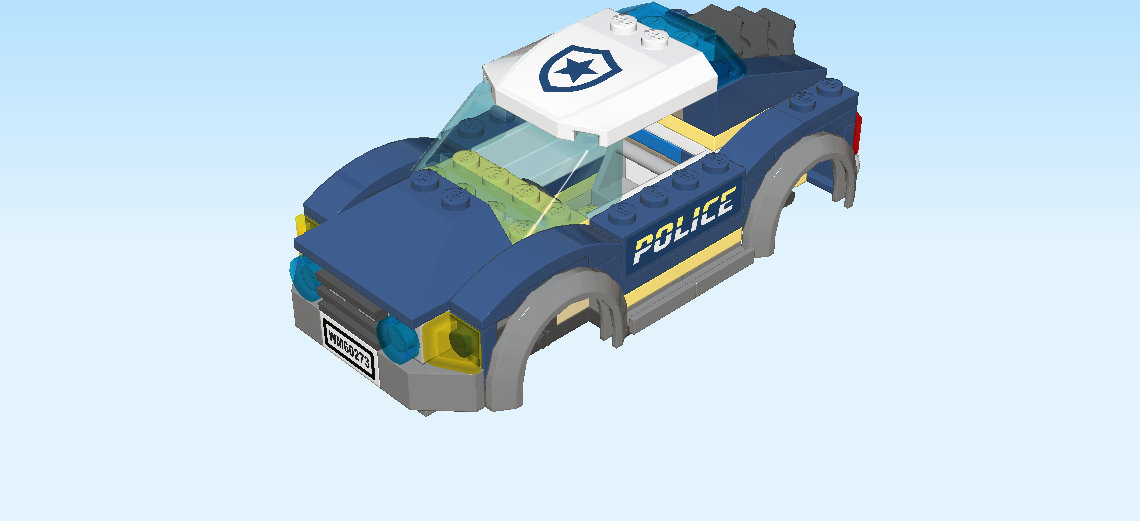
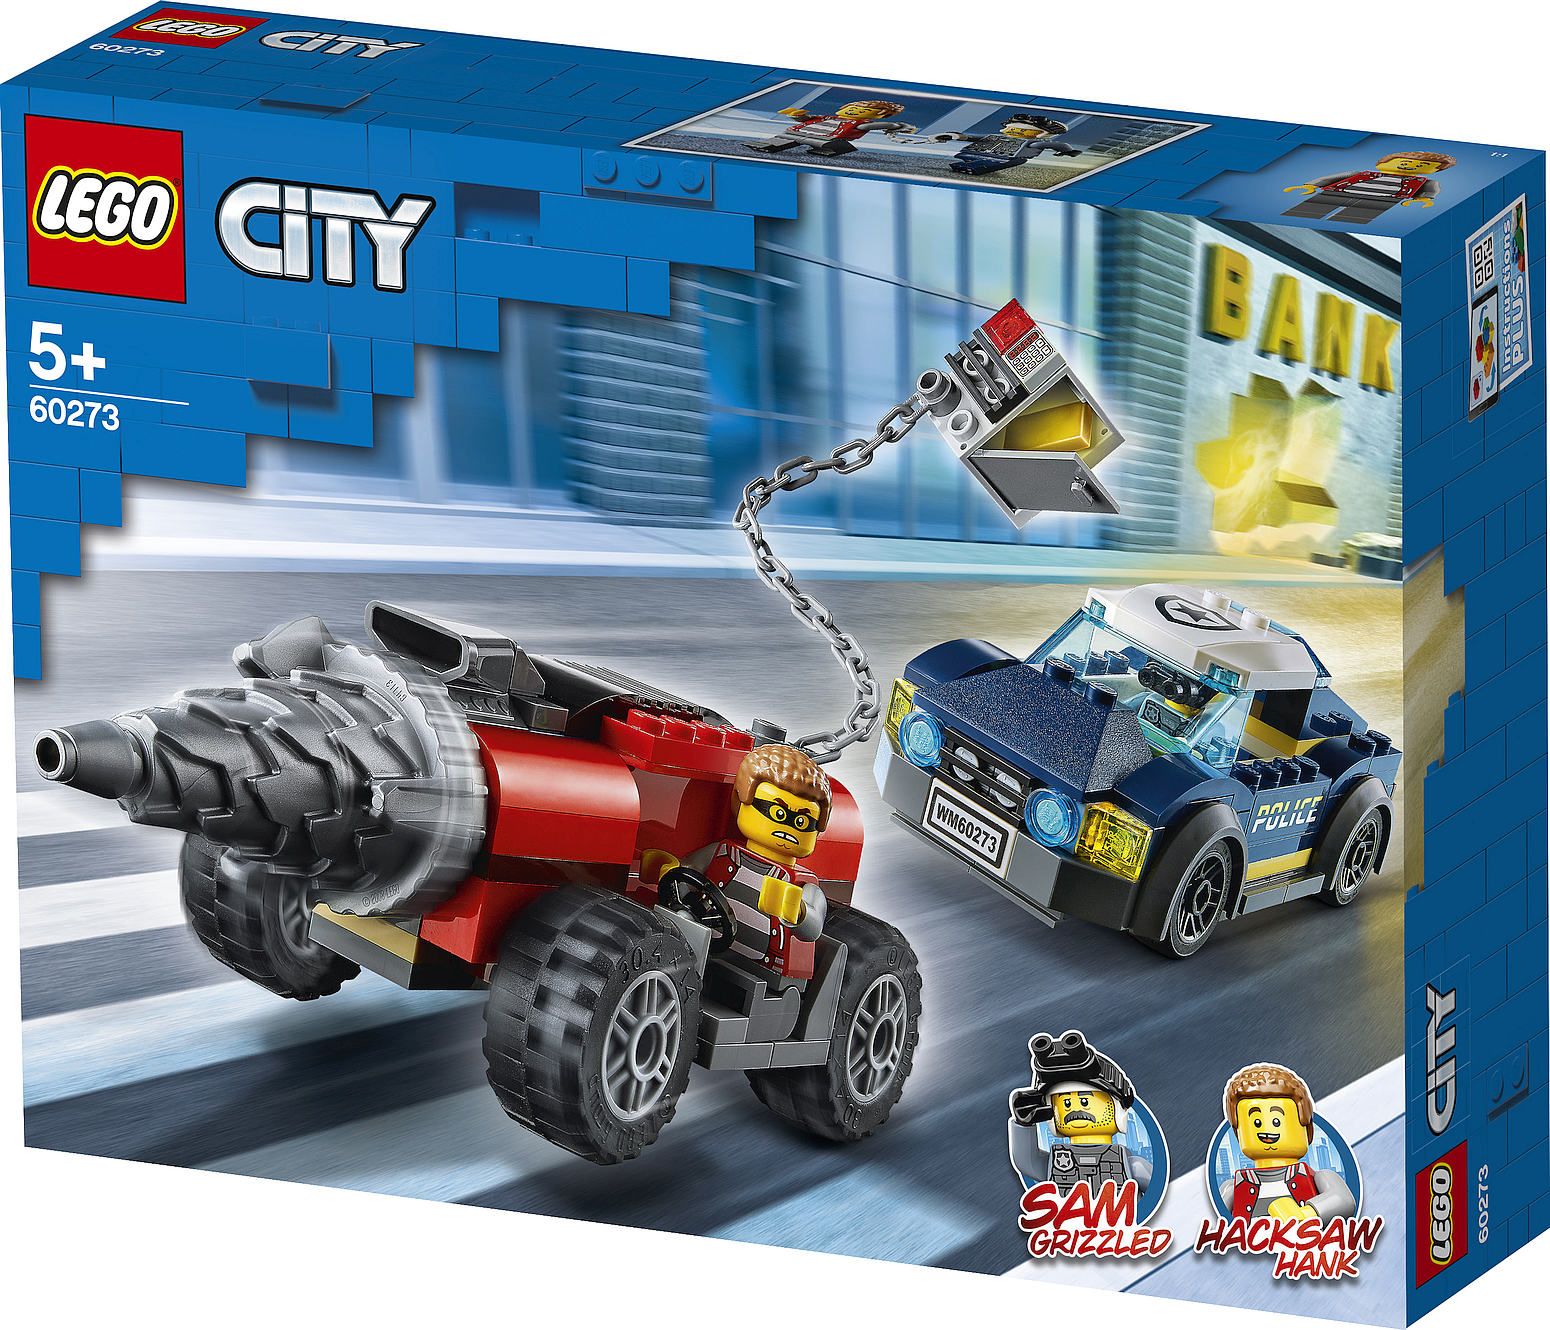
The box cover shows a rapid car chase through the streets of LEGO City: Hacksaw Hank is speeding off in his mine driller, the stolen bank safe is hanging on a chain and dangling in mid-air behind the vehicle. The mine driller is fire red and metallic grey, its driver's cabin is on the left side of the vehicle. Hard on Hank's heels, however, is the dark blue, white, and yellow City Police car with officer Sam Grizzled in it. He definitely isn't gonna let the thief get away with the stolen goods! At the right bottom of the box there are two portraits of Hacksaw Hank and Sam Grizzled.

Open the box. This can be tricky; ask someone to help you!

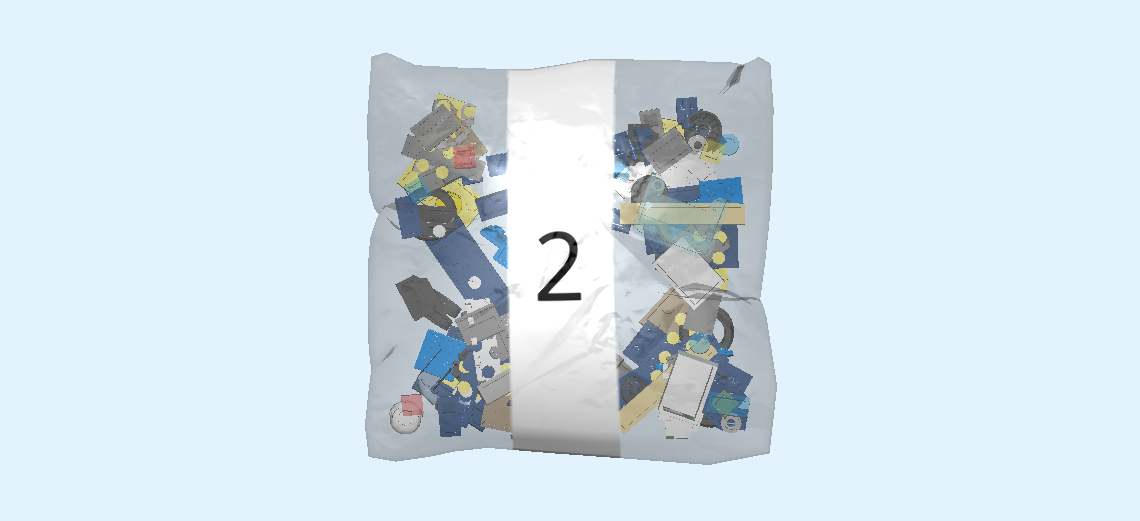
The box contains two booklets with visual building instructions, a small sheet with stickers, a loose wagon bottom piece, and two numbered bags. Ask a sighted person to help you find the correct bag!

Carefully open bag number 1 and any small sub-bags in it. This bag contains all bricks and pieces for the Hacksaw Hank Minifigure and the mine driller vehicle.

Before you start building, ask a sighted person to help you sort the pieces by color. This makes finding the correct pieces even easier!

First, we will build the Hacksaw Hank Minifigure.

Collect the following 3 pieces:

1 bright yellow head,

1 bright red, medium stone grey and bright yellow upper part of the body,

and 1 dark stone grey pair of legs.

Assemble the Minifigure: put the upper body on the legs, and the head on top.

Find 1 medium nougat brown hairpiece with short curly hair.

Put it on the head.

The Hacksaw Hank Minifigure is finished! Well done! Hacksaw Hank quite literally is two-faced: the head is printed with two different faces! On one side, Hacksaw Hank is laughing out loud, you can see that he has one tooth missing. His other face shows him clenching his teeth, brows knit, and he is wearing a black eye mask. He is wearing grey pants, a shirt with grey and white stripes, and a red sports jacket. You can clearly see that he has a bit of a belly. He seems pretty sure of himself. Do you think the City Police will catch him?

Next, we will build the mine driller.

Find 1 dark stone grey plate 2x12.

Put it horizontally on the table.

Find 1 pale ocher yellow plate 1x2.

Put it vertically on the rightmost column.

Find 1 reddish brown plate 2x4 with 2 side connector pins.

Put it vertically to the left, symmetrically overhanging at the front and back.

Find 3 bright orange plates 2x2 with 1 knob.

Put them next to each other to the left of the previous piece.

Collect the following 2 pieces:

1 pale ocher yellow plate 1x2,

and 1 reddish brown plate 2x4 with 2 side connector pins.

Put the plate 2x4 with side connector pins vertically to the left.

Put the plate 1x2 vertically on the leftmost column.

Find 1 dark stone grey plate 2x12.

Put it horizontally on top in the middle.

Find 2 white plates 1x4 with 2 knobs.

Put them horizontally on the two middle rows, one behind the other, starting from the right edge.

Find 2 medium stone grey bricks 2x3 - 2x2 with top and bottom plate.

Put 1 vertically to the left, bottom plate overhanging to the front.

Put the other one vertically to the left in the same orientation as the previous piece.

Find 2 white plates 1x4 with 2 knobs.

Put them horizontally on the two middle rows one behind the other, starting from the left edge.

Find 1 bright red brick 1x12.

Put it horizontally on the backmost row. This row only consists of 4 knobs in total, 2 at the left and 2 at the right.

Find 1 dark stone grey plate 2x12.

Put it horizontally in front of the previous piece.

Find 2 bright red bricks 1x4.

Put 1 horizontally on the two frontmost knobs on the left, symmetrically overhanging to the left and right.

Repeat symmetrically on the right.

Find 2 reddish brown plates 1x4.

Put 1 horizontally on the backmost row, starting from the right.

Repeat symmetrically at the front.

Next, we will make a small part.

Collect the following 2 pieces:

1 black roof tile 2x4, 45°,

and 1 medium stone grey top angle plate 1x2 - 1x2 with 2 side knobs.

Put the roof tile 2x4 vertically on the table, slope to the right.

Put the angle plate 1x2 vertically on the two knobs at the back, side knobs to the left.

Find another medium stone grey top angle plate 1x2 - 1x2 with 2 side knobs.

Put it vertically on the two front knobs, side knobs to the left.

Find 1 reddish brown plate 1x4.

Put it vertically on top.

Find 1 black toothed bar 1x4 with 10 teeth.

Careful! This piece has a special orientation.

Put it upright vertically on the four side knobs on the left, teeth to the left.

The small part is finished! Great job! Mount it horizontally on the two backmost rows in the middle, slope to the front.

Find 2 bright yellow smooth roof tiles 1x2x⅔.

Put them horizontally in front of the previous part, slopes to the back.

Find 2 reddish brown plates 1x4.

Put 1 horizontally on the backmost row, starting from the left.

Repeat symmetrically on the front row.

Now, we build the drive axle of the drill.

Collect the following 2 pieces:

1 black cross axle 8m. (This means the cross axle is 8 knobs long.)

and 1 bright yellow cross axle extension 2m.

Put the cross axle extension on one end of the cross axle.

Find another bright yellow cross axle extension 2m.

Put it on the other end of the cross axle.

Find 1 medium stone grey cross axle 3m.

Insert it into the right cross axle extension. Two thirds of the cross axle 3m will stick out to the right.

Find 1 bright orange brick 1x2 with technic hole.

Insert the short cross axle on the right into the technic hole of the brick. This is not a tight fit, so make sure the brick is steady on the table and does not move when you insert the axle or when you add more bricks later.

Put the axle momentarily aside.

Next up, let's make a small axle part.

Collect the following 2 pieces:

1 pale ocher yellow round profile brick 2x2 with top cross hole,

and 1 black round tile 2x2.

Put the round profile brick 2x2 on the table.

Put the round tile 2x2 on top.

This small part has a middle cross hole at the bottom. To mount it on the drive axle, turn the small part upright, and put it on the cross axle protruding at the right side.

The drive axle of the drill is finished! Great job! Time to mount it: put it horizontally in the middle of the structure. Mount the brick 1x2 centered on the rightmost column. The axle protrudes to the left into the vehicle.

Find 1 bright orange brick 1x2 with technic hole.

Put it vertically centered on the leftmost column of the structure.

Find 2 bright red bricks 1x4 with arch and protruding plate.

Put 1 horizontally on the back row of the high part on the right side, protruding plate to the front.

Repeat symmetrically at the front.

Find 1 dark stone grey plate 2x4.

Put it horizontally on top of the two previous pieces.

Find 1 bright red wall element 1x4x2 with 4 top knobs.

Skip the two frontmost rows at the very bottom, and put it horizontally centered on the third row from the front, wall panel to the back.

Find 1 bright red plate 4x4.

Put it on top of the previous piece so that it connects to the back row of the high part.

Find 2 bright red bricks 1x4 with arch and protruding plate.

Put 1 horizontally on the back row to the left of the highest part, protruding plate to the front.

Repeat symmetrically at the front.

Find 1 bright blue plate 2x2.

Put it on the third and fourth column from the left.

Find 2 black grille tiles 1x2.

Put them vertically centered on the two middle columns of the structure.

Find 2 black one-stepped curve tiles 2x2x⅔.

Put them to the left and right of the previous pieces, curves to the left and right.

Next, we will make a small part.

Collect the following 2 pieces:

1 dark stone grey plate 1x2 with 1 knob,

and 1 dark stone grey smooth roof tile 1x1x⅔.

Put the plate 1x2 vertically on the table.

Put the roof tile 1x1x⅔ on top, slope to the right.

Mount this part vertically on the third column from the left, slope to the right.

Find 1 dark stone grey engine 2x2x1⅓.

Put it on the leftmost four knobs, wide end to the left.

Collect the following 2 pieces:

1 medium stone grey plate 1x2 with angled top handle,

and 1 black and medium stone grey small steering wheel with plate 1x2.

Put the plate 1x2 vertically on the rightmost column of the lower part at the front, slope to the left.

Put the small steering wheel 1x2 vertically on the leftmost column of the lower part at the front, steering wheel to the right.

Next up, we assemble the 4 wheels.

Let's start with one.

Find 1 medium stone grey wide rim with hole and spokes.

Find 1 black wide rubber tire with high profile.

Put the tire around the rim.

Find 3 more wide rims with hole and spokes, and 3 more wide rubber tires with high profile.

Assemble the remaining 3 wheels just like the first one.

The wheels are finished! Snap them onto the four pin connectors sticking out at the bottom of the vehicle.

Find 1 bright yellow cross axle 9m.

While holding the drive shaft on the right, insert the cross axle into the hole on the left side of the vehicle until it stops. You might have to wriggle a bit.

Find 1 dark stone grey gear wheel with 24 teeth.

Put it on the cross axle from the left and push it all the way to the vehicle.

Find 1 silver metallic conical drill with spikes.

Put it upright on the cross axle, wide end to the right, and narrow end to the left. Push it all the way.

If done correctly, a small part of the cross axle is still sticking out on the left.

Find 1 silver metallic nose cone 1x1.

Put it upright on the cross axle, top knob to the left.

Next, we will build the bank safe with chain.

Collect the following 2 pieces:

1 medium stone grey cupboard 2x3x2,

and 1 dark stone grey cupboard door 3x2.

Put the cupboard horizontally on the table, opening to the front.

Snap the cupboard door into the small notches on the left. The handle of the door is on the right.

Find 3 warm gold flat tiles 1x2.

Stack them and put them into the safe. Close the safe door afterwards.

Collect the following 3 pieces:

1 transparent red flat tile 1x1,

1 black grille tile 1x2,

and 1 medium stone grey flat tile 1x1.

Put the grille tile 1x2 vertically on the middle column.

Put the transparent red flat tile 1x1 on the rightmost knob of the back row.

Put the grey flat tile 1x1 on the rightmost knob of the front row.

This tile is printed with a keypad and display for the safe code.

Find 1 dark stone grey chain 16m. (This piece is 16 knobs long.)

Put one of its knobs on the leftmost knob of the front row.

The bank safe with chain is finished! Great job! Mount it on the right edge on the back row, door to the front. Then, mount the second knob of the chain on one of the knobs in front of the safe. Even if the safe flies off during the chase, it's secured by the chain!

Actually, the whole mine driller is now finished! Very well done, that was quite difficult! Hacksaw Hank is ready to go. What are his evil plans?

You have built everything from bag 1 now. Time to move on to the next challenge!

Open bag 2 and any sub-bags in it. You can choose to have the bricks sorted by color again. This bag contains all bricks and pieces for the Sam Grizzled Minifigure and the police car.

Now, we will build the Sam Grizzled Minifigure.

Collect the following 3 pieces:

1 bright yellow head,

1 sand blue and black upper part of the body,

and 1 earth blue pair of legs.

Assemble the Minifigure: put the upper body on the legs, and the head on top.

Find 1 white football helmet.

Put it on the head.

Collect the following 2 pieces:

1 black pair of night vision goggles,

and 1 medium stone grey pair of handcuffs.

Snap the night vision goggles onto the helmet like a visor.

Put the handcuffs into Sam Grizzled's hand.

The Sam Grizzled Minifigure is finished! Great job! He is wearing dark blue pants, and a greyish blue shirt. On top of that, he is wearing a grey bulletproof police vest with plenty of pockets and zippers. Sam's police badge is pinned on the left strap of the vest. He has a grey moustache and looks a little tired. Those crooks and scoundrels sure keep him busy!

Now, we will build the Police car.

Find 1 black wagon bottom 6x10 with 4 pin connectors.

Put it horizontally on the table.

Find 1 lemon yellow plate 2x4.

Put it horizontally in the center of the wagon bottom.

Find 1 white brick 2x3.

Put it horizontally on the rightmost edge on the 2 middle rows.

Find 2 pale ocher yellow plates 1x6.

Put 1 horizontally centered on the second row from the back.

Repeat symmetrically at the front.

Find 4 dark stone grey plates 1x2 with side rail.

Put them horizontally on the frontmost and backmost row, side rails facing outwards.

Find 2 lemon yellow plates 2x4.

Put 1 horizontally on the two back rows in the middle.

Repeat symmetrically at the front.

Find 1 white brick 2x3.

Put it horizontally on the two middle rows, starting from the left edge.

Collect the following 2 pieces:

1 medium stone grey plate 1x2 with angled top handle,

and 1 black and medium stone grey small steering wheel with plate 1x2.

Put the plate 1x2 vertically centered on the fourth column from the right, slope to the left.

Put the small steering wheel 1x2 centered on the fourth column from the left, steering wheel to the right.

Find 2 mud grey plates 2x3.

Put 1 horizontally on the two middle rows on the right edge.

Repeat symmetrically on the left.

Find 2 dark stone grey bricks 2x4 with mudguard.

Put 1 horizontally on the backmost row on the right edge, mudguard overhanging to the back.

Repeat symmetrically at the front.

Find 1 bright blue plate 2x2.

Skip the rightmost column, and put it on top in the middle.

Next up, we build the rear plate.

Collect the following 2 pieces:

1 bright blue top angle plate 1x2 - 2x4 with 8 side knobs,

and 1 lemon yellow plate 2x4.

Put the plate 2x4 on the 8 side knobs of the angle plate.

Now, mount the top plate 1x2 vertically centered on the rightmost column, side plate overhanging to the right.

Find 2 earth blue inverted double roof tiles 2x6, 45°.

Put 1 horizontally centered on the two backmost rows, wings to the left and right.

Repeat symmetrically at the front.

Find 1 white plate 1x4 with 2 knobs.

Put it vertically centered on the third column from the right.

Find 2 earth blue plates 3x3.

Put them on the two rightmost columns, one column each overhanging to the right.

Find 2 earth blue one-stepped curve tiles 1x2x⅔.

Put 1 horizontally on the third and fourth knob from the right on the front row, slope to the left.

Repeat symmetrically on the back row.

Find 2 earth blue plates 1x2.

Put 1 horizontally to the right of the previous piece.

Repeat symmetrically at the front.

Find 2 white small panel elements 1x4x1.

Put 1 horizontally on the second row from the back, panel to the back.

Repeat symmetrically at the front.

Now, we will build 2 side police signs.

Find 1 earth blue brick 1x4.

Continue if you want to decorate the piece with a sticker now. If not, skip the next three sentences.

Find 1 rectangular sticker number 1.

Put it on one of the long side surfaces of the brick.

The sticker is dark blue and has the word "POLICE" written on it in all caps in a cool design: the top of the letters is lemon yellow, there is a dark blue horizontal line running through the middle of each letter, and the bottom half of the letters is white.

Put the side police sign horizontally on the backmost row in the middle, sticker to the back.

Find another earth blue brick 1x4 and another rectangular sticker number 1.

Make the side police sign like the first one.

Put it horizontally on the frontmost row, sticker to the front.

Find 2 dark stone grey bricks 2x4 with mudguard.

Put 1 horizontally on the backmost row on the left edge, mudguard overhanging to the back.

Repeat symmetrically at the front.

Find 1 bright blue plate 2x2.

Skip the leftmost column, and put it on top in the middle.

Next, we will build the front plate.

Collect the following 2 pieces:

1 bright blue top angle plate 1x2 - 2x4 with 8 side knobs,

and 1 lemon yellow plate 2x4.

Put the plate 2x4 on the 8 side knobs of the angle plate.

Now, mount the top plate 1x2 vertically centered on the leftmost column, side plate overhanging to the left.

Find 1 lemon yellow plate 2x4.

Put it vertically centered on the second and third column from the left.

Now, we will build the rear bumper.

Collect the following 2 pieces:

1 earth blue plate 2x6,

and 1 transparent red smooth roof tile 1x1x⅔.

Put the plate 2x6 horizontally on the table.

Put the smooth roof tile 1x1 on the rightmost knob of the back row, slope to the right.

Collect the following 2 pieces:

1 white plate 1x4 with 2 knobs,

and 1 transparent red smooth roof tile 1x1x⅔.

Put the plate 1x4 to the left of the previous piece.

Put the roof tile 1x1 to the left, slope to the left.

Find 2 transparent blue round tiles 1x1.

Put them on the 2 knobs of the plate 1x4.

Collect the following 3 pieces:

1 dark stone grey bow tile 1x4x⅔,

and 2 medium stone grey round plates 1x1 with through-hole.

Put the bow tile 1x4 horizontally on the front row in the middle.

Put the 2 round plates 1x1 to the left and right of the previous piece.

Turn the rear bumper upright, and mount it on the side knobs on the right side of the car. Make sure the bow plate is at the bottom.

Find 2 lemon yellow plates 2x4.

Put 1 horizontally on the two back rows, starting from the right edge.

Put the other one horizontally in front of the previous piece.

Find 1 earth blue roof tile 1x4x1, 18°.

Put it horizontally on the second row from the back, starting from the right, slope to the right.

Collect the following 2 pieces:

1 black curve tile 1x2 with fin,

and 1 mud grey plate 2x3.

Put the curve tile 1x2 vertically on the rightmost column in the middle, fin to the right.

Put the plate 2x3 horizontally to the left of the previous piece.

Find 1 bright blue plate 2x2.

Put it on the left and middle column of the previous piece.

Find 1 earth blue plate 1x2.

Put it vertically on the left column of the previous piece.

Find 2 black curve tiles 1x2 with fin.

Put 1 vertically centered on the second row from the right, fin to the right.

Put the other one vertically to the left of the previous piece, fin to the right.

Find 1 earth blue roof tile 1x4x1, 18°.

Put it horizontally on the second row from the front starting from the right, slope to the right.

Find 2 white plates 1x1 with 1 vertical tooth.

Put them on the fourth column from the right in the middle, teeth overhanging to the left.

Collect the following 3 pieces:

2 transparent blue smooth roof tiles 1x1x⅔,

and 1 transparent blue flat tile 1x2.

Put the flat tile 1x2 vertically on the two previous pieces.

Put 1 roof tile 1x1 in front of the previous piece, slope to the front.

Repeat symmetrically at the back.

Find 2 earth blue plates 1x2.

Put 1 horizontally on the backmost row on the left edge.

Repeat symmetrically at the front.

Find 2 earth blue bow tiles 1x4x⅔.

Put them horizontally on top of the two previous pieces. This means that one knob each is overhanging to the left.

Next, we will build the front grille.

Collect the following 2 pieces:

1 earth blue plate 2x6,

and 1 transparent yellow smooth roof tile 1x1x⅔.

Put the plate 2x6 horizontally on the table.

Put the roof tile 1x1 on the leftmost knob of the back row, slope to the left.

Find 2 medium stone grey one-stepped plates 2x2x⅔ with 2 side knobs.

Put them in the middle of the plate. At the back, the higher steps form a row, the side knobs are pointing to the back.

Find 1 transparent yellow smooth roof tile 1x1x⅔.

Put it on the rightmost knob of the back row, slope to the right.

Collect the following 3 pieces:

2 transparent blue round tiles 1x1,

and 1 black grille tile 1x2.

Put the grille tile 1x2 horizontally centered on the back row.

Put the 2 round tiles 1x1 to the left and right of the previous piece.

Find 2 dark stone grey plates 1x2 with side rail.

Put them horizontally on the front row in the middle, side rails overhanging to the front.

Now, we will make the license plate.

Find 1 white flat tile 1x2.

Put it on the table.

Continue if you want to decorate the piece with a sticker now. If not, skip the next three sentences.

Find 1 small rectangular sticker number 3.

Put it on the flat tile.

The sticker shows the license plate. It is white with a thick black frame and black writing on it. The license number is "W M 6 0 2 7 3".

Put the license plate horizontally in the middle of the front row.

Find 2 dark stone grey smooth roof tiles 1x1 with overhanging top tile.

Put 1 horizontally on the right edge of the front row, top tile to the left.

Repeat symmetrically on the left edge.

These two pieces form the front bumper of the Police car.

The front grille is finished! Well done! Turn it upright and mount it on the 8 side knobs on the left side. Make sure the license plate is at the bottom and the grille tile at the top.

Find 1 transparent light blue windscreen 4x3x1⅓.

Put it vertically on the two columns left of the steering wheel, slope to the left.

Find 1 earth blue roof tile 3x4, 25° and 45°.

Put it horizontally to the left of the windscreen, knobs to the right.

Next, we will build the police car roof.

Find 1 white engine hood plate 4x4x⅔ with 2 angled corners.

Put it horizontally on the table, knobs on the right.

Continue if you want to decorate the piece with a sticker now. If not, skip the next three sentences.

Find 1 square sticker number 2.

Put it on the engine hood plate left of the knobs.

The sticker is white with two light blue wedged lines on the left and right sides. In the middle of the sticker there is the dark blue silhouette of a police badge with a dark blue star in it.

Mount the police car roof on the windscreen, knobs on the right. On the right edge, the roof rests on top of the 2 teeth.

Next, we will assemble the 4 wheels.

Let's start with one.

Find 1 black narrow rim with hole and spokes.

Find 1 black narrow rubber tire with low profile.

Put the tire around the rim.

Find another 3 rims and another 3 tires. Assemble the 3 remaining wheels just like the first one.

Now, snap the 4 wheels on the 4 connectors at the bottom of the vehicle.

The Police car is finished! Well done! Finally, Sam Grizzled is ready to chase after Hacksaw Hank. Don't let him get away!

You have finished building the whole set! Very well done! Will Hacksaw Hank be able to drill his way to LEGO City's most precious treasures and valuables, or will Sam Grizzled be able to stop him? Let's find out!

Enjoy!