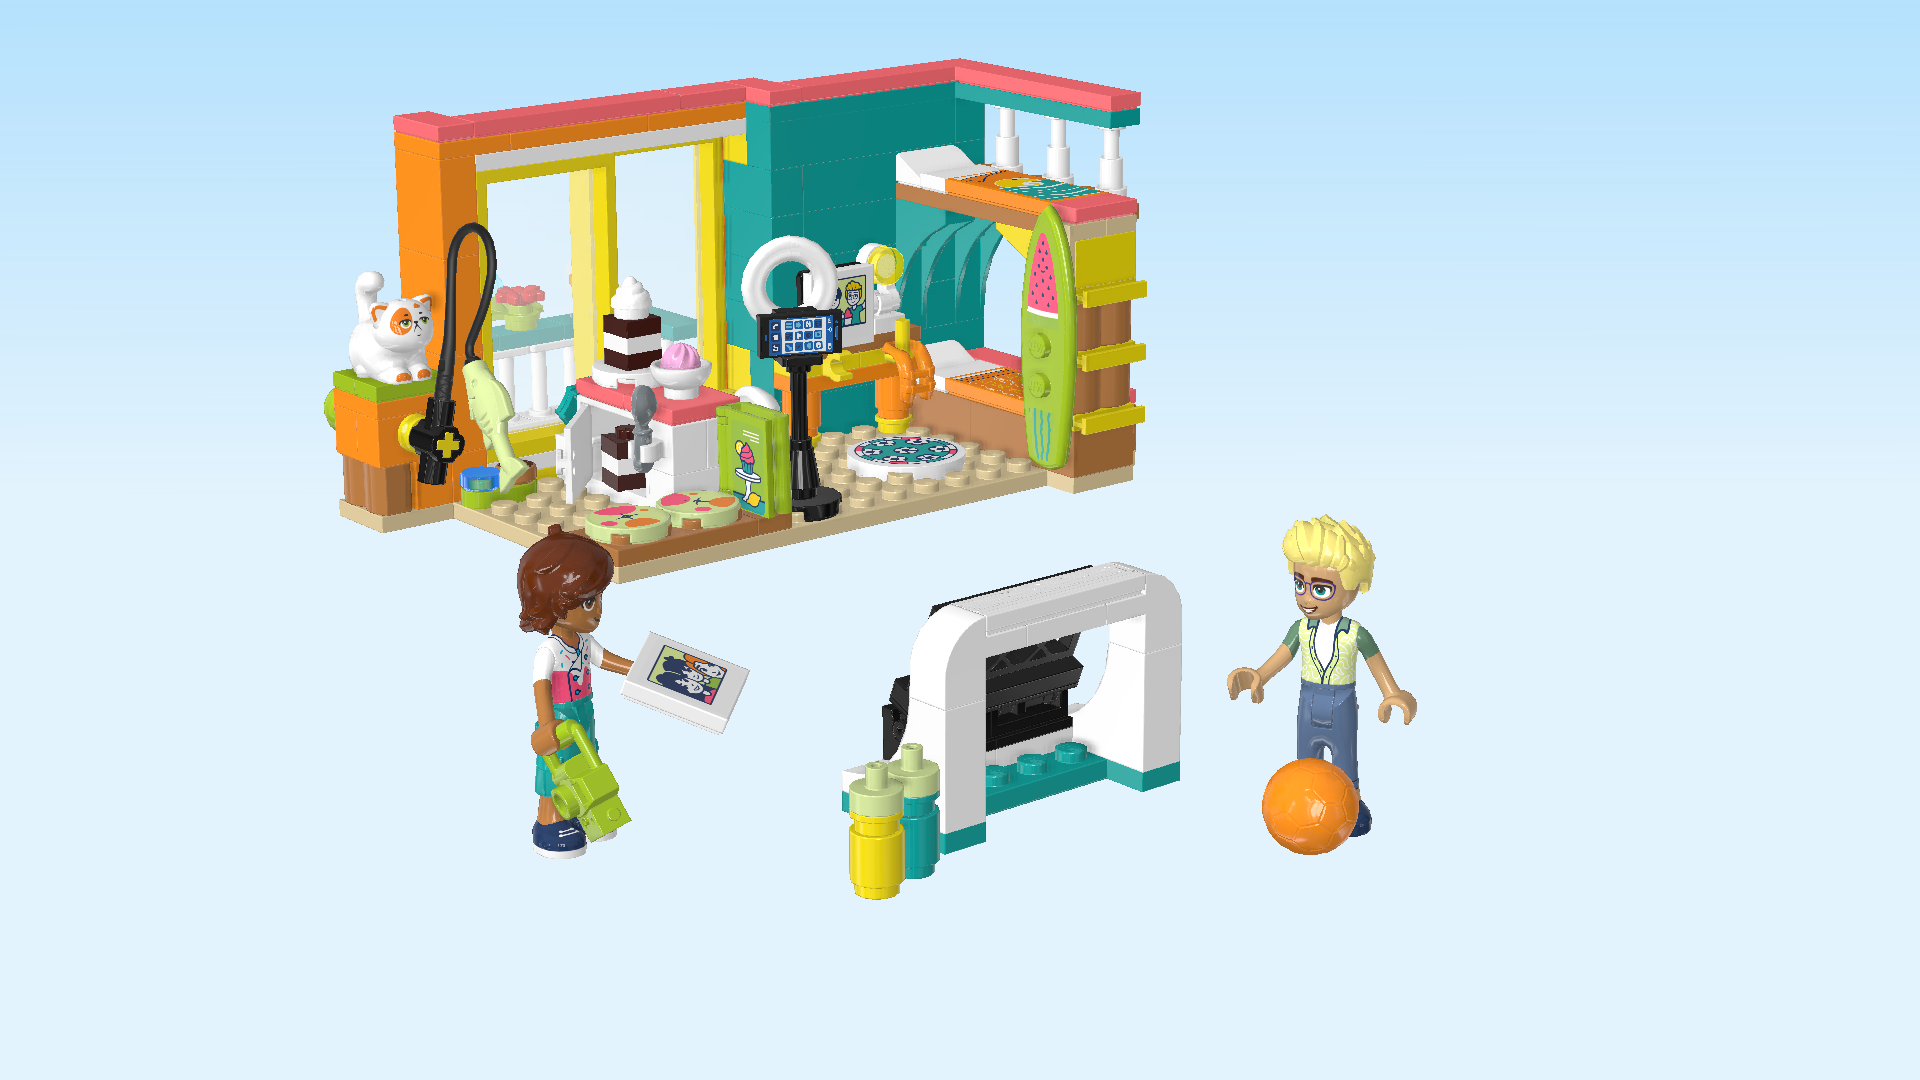
| LEGO Audio & Braille Building Instructions for the LEGO Friends set "Leo's Room". |
| Get to know Leo with a visit to his room. He's invited his friend Olly round to film fresh content for his baking channel. Bake a cake in Leo's bedroom studio. Use the fish toy to keep Churro the cat out of the cake mix. Once filming is done, relax on the balcony or practice soccer with the goal set up outside. Pretend to try the cake – if Churro doesn't get there first! |
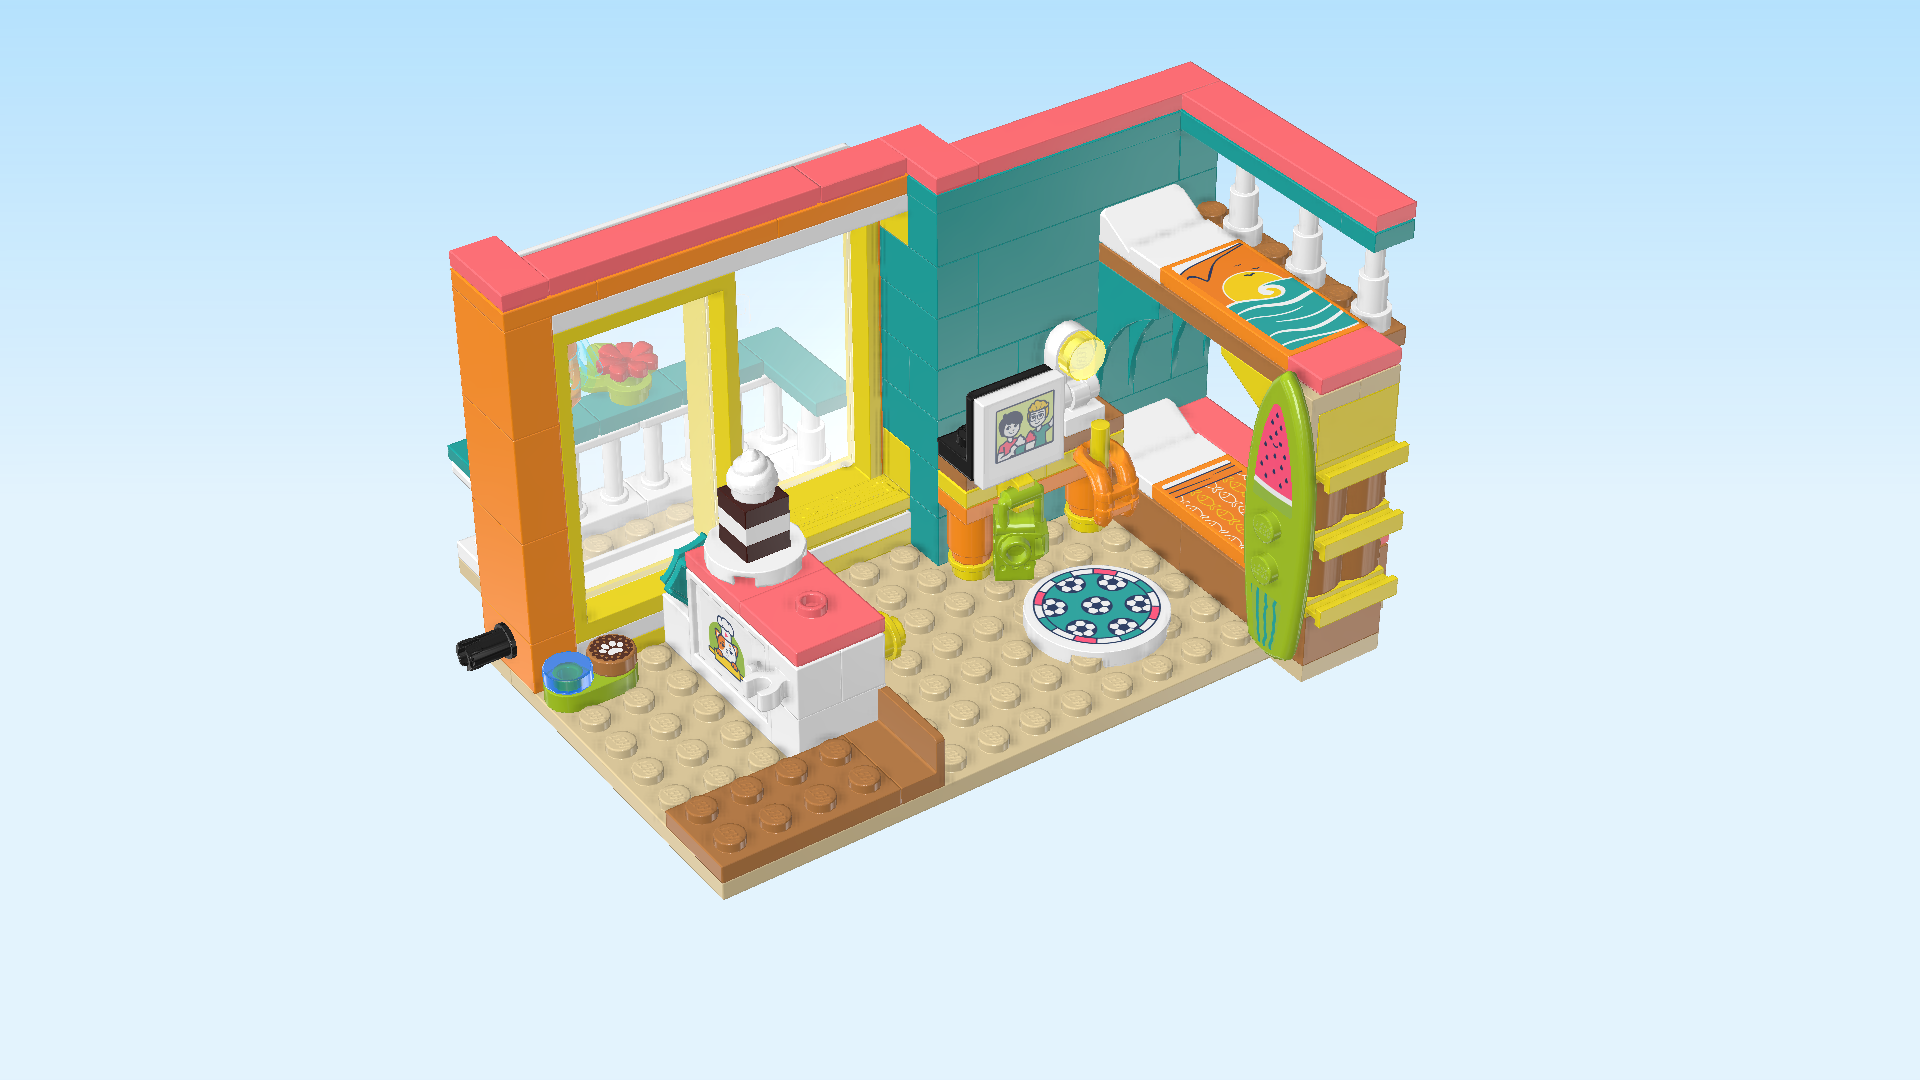
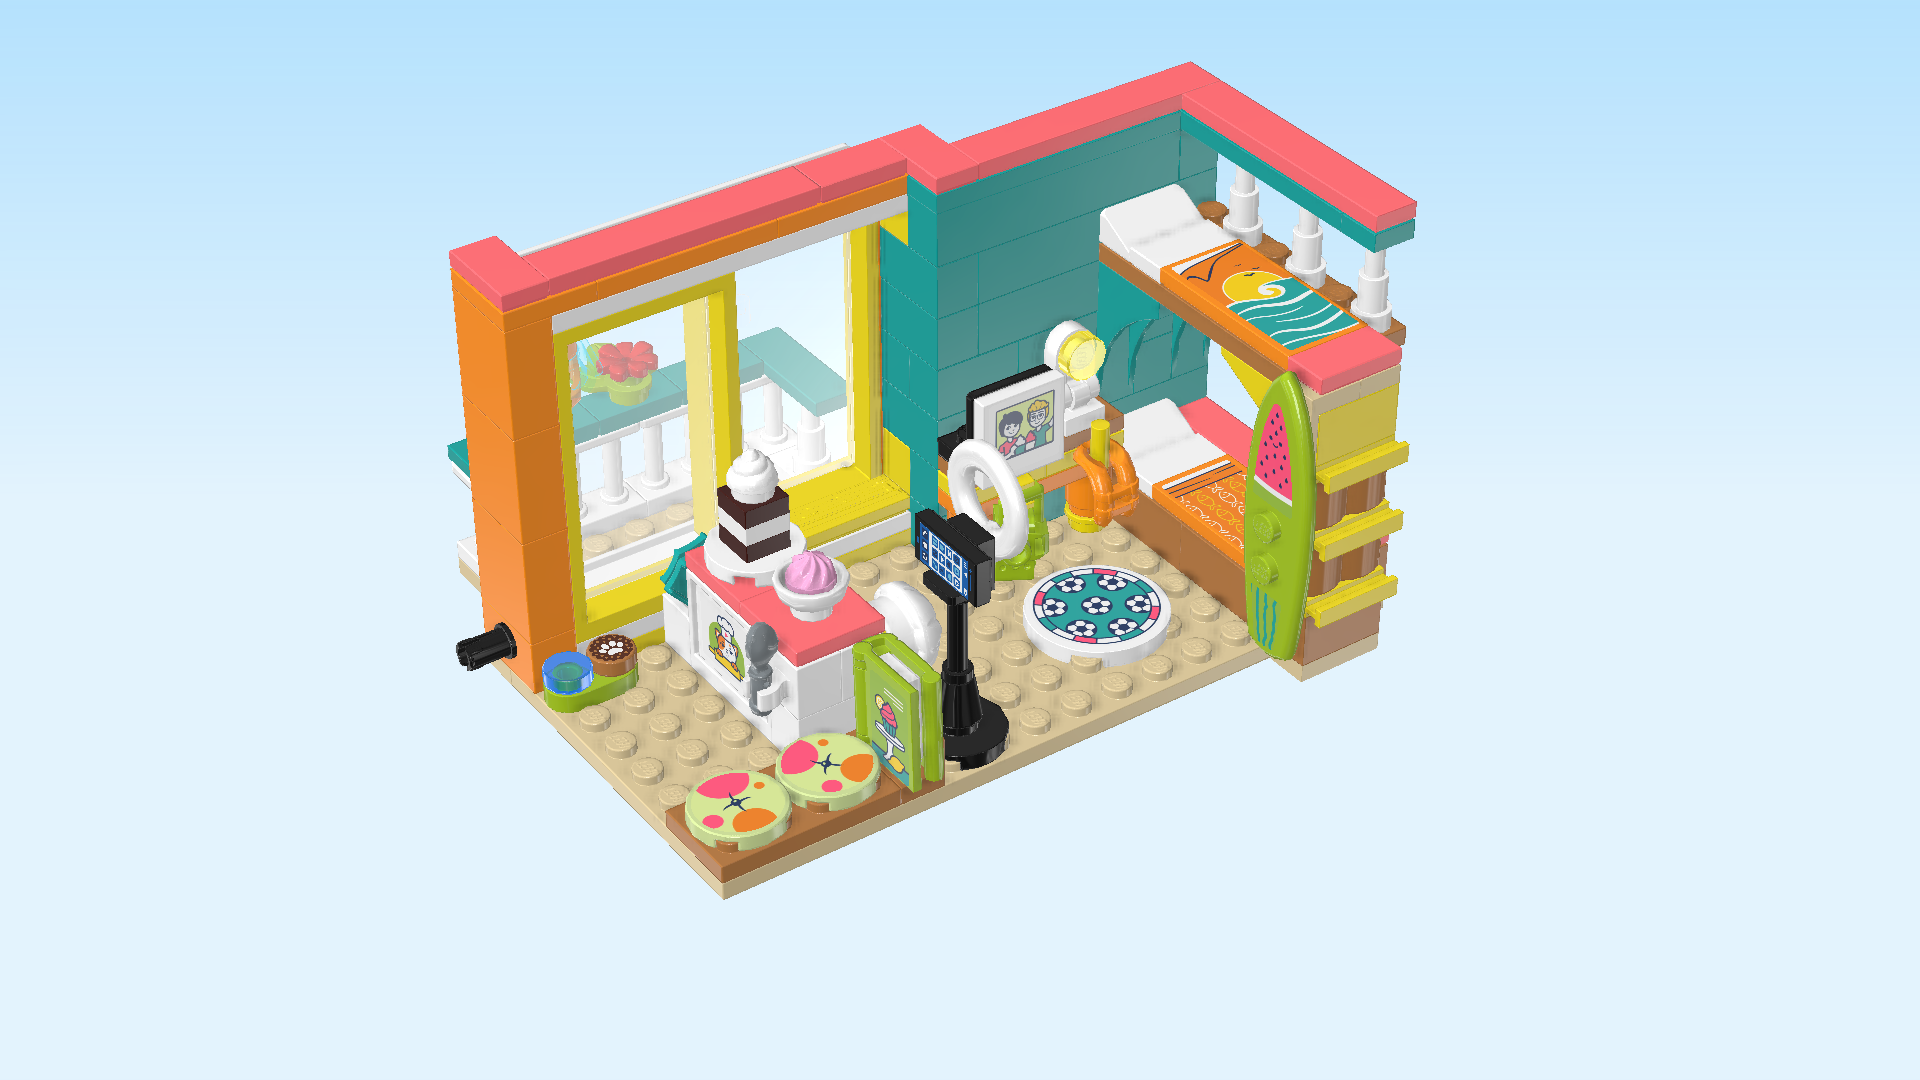
| The box cover's background colors are teal and blue. In the top right corner is a portrait shot of Leo and Olly: Leo has a bit darker skin and brown hair; he is wearing his chef's jacket. Olly has lighter skin and is blonde. He is wearing glasses! The two seem to be best friends! In the lower half of the box cover, Leo's room is shown. It's a bedroom studio with bunk beds for sleepovers, a cute bedside table, a sofa, and a baking station complete with tripod and ring light for filming. Leo's grumpy little cat Churro is currently playing with its fish toy. And guess what: at the back of the room, there is a sliding door leading to the lovely balcony. What a great bedroom studio! |
| Open the box. This can be tricky; ask someone to help you! |
| The box contains 1 booklet with visual building instructions, 3 bags with numbers printed on them, a sheet with stickers, and 1 loose piece: a base plate 8x16. Ask a sighted person to help you find the correct bag! |
| Carefully open the two bags with the number 1 print. These bags contain all bricks and pieces for the Leo Minidoll, the fish toy, Churro the cat, and the first half of Leo's room with bunk beds, sliding door and balcony. |
| Before you start building, ask a sighted person to help you sort the pieces by color. This makes finding the correct pieces even easier! |
| First, we will build the Leo Minidoll. |
| Collect the following 2 pieces: |
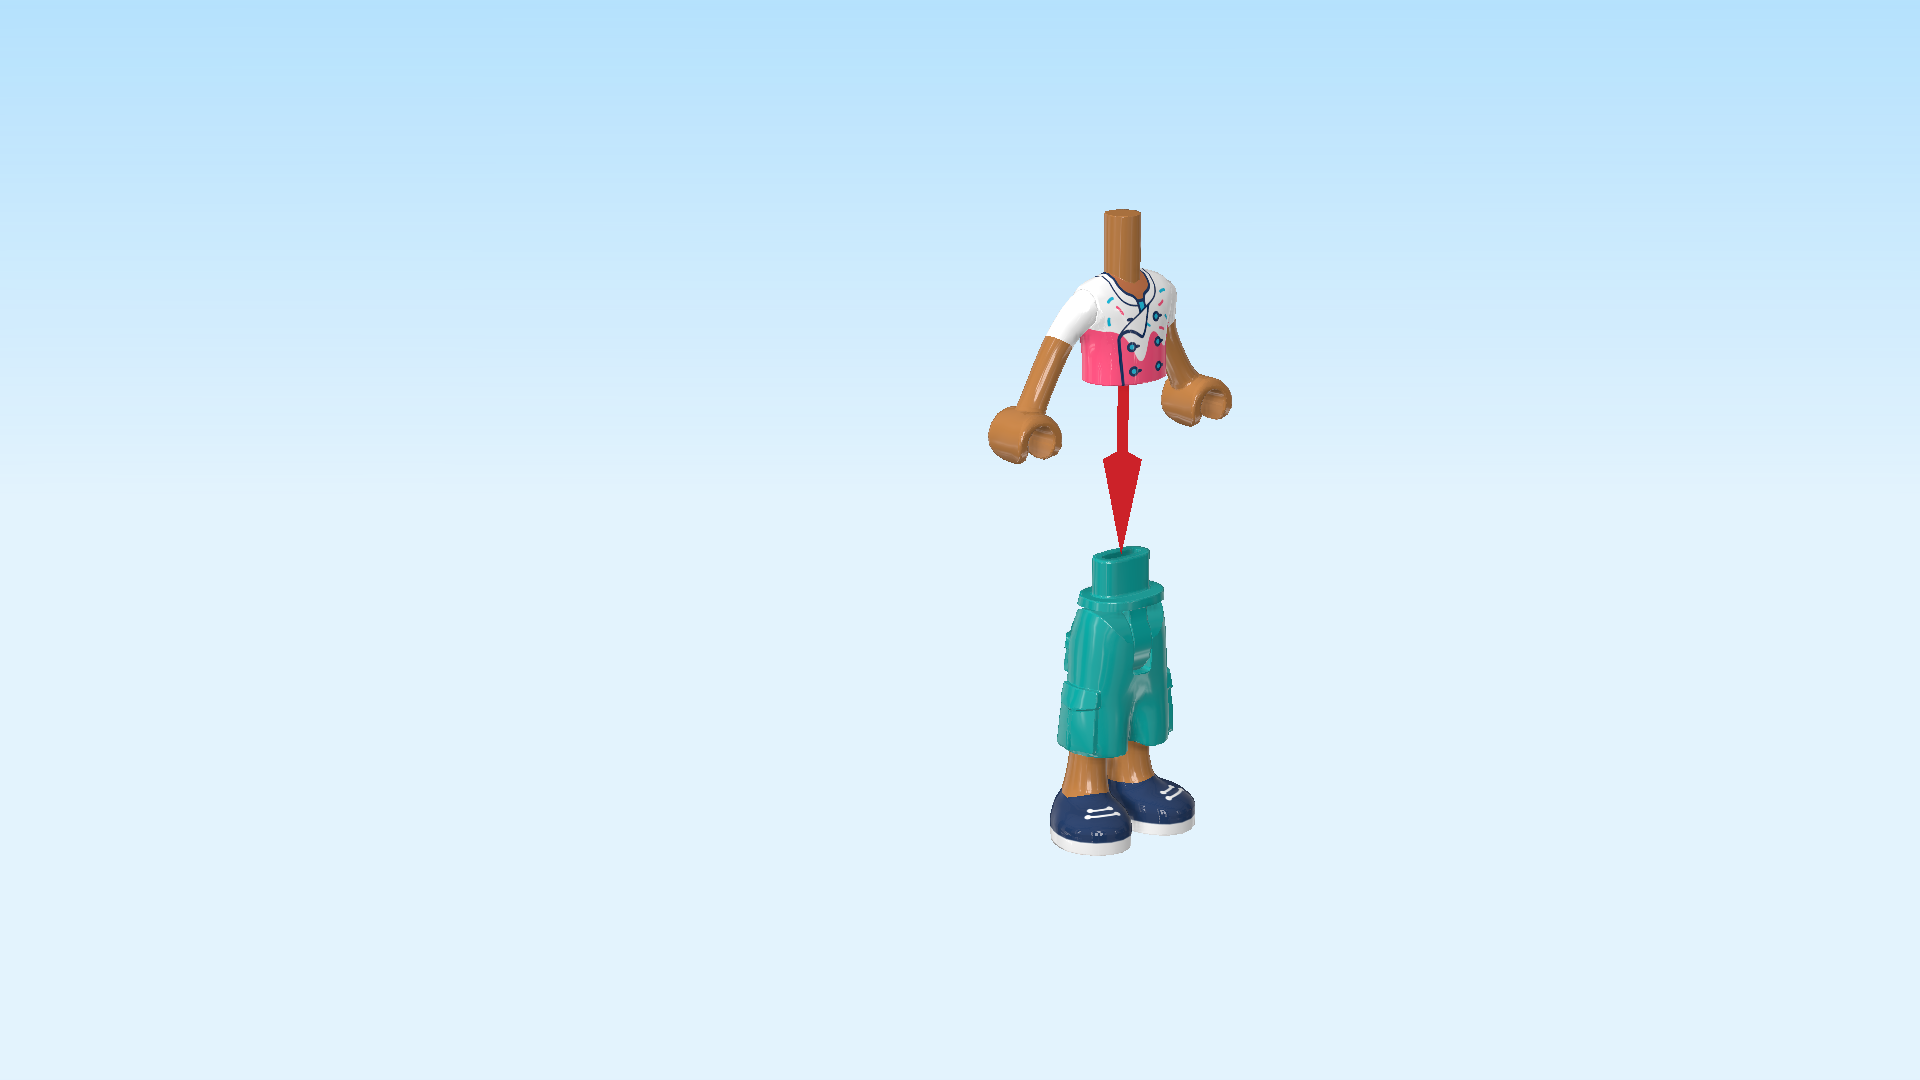
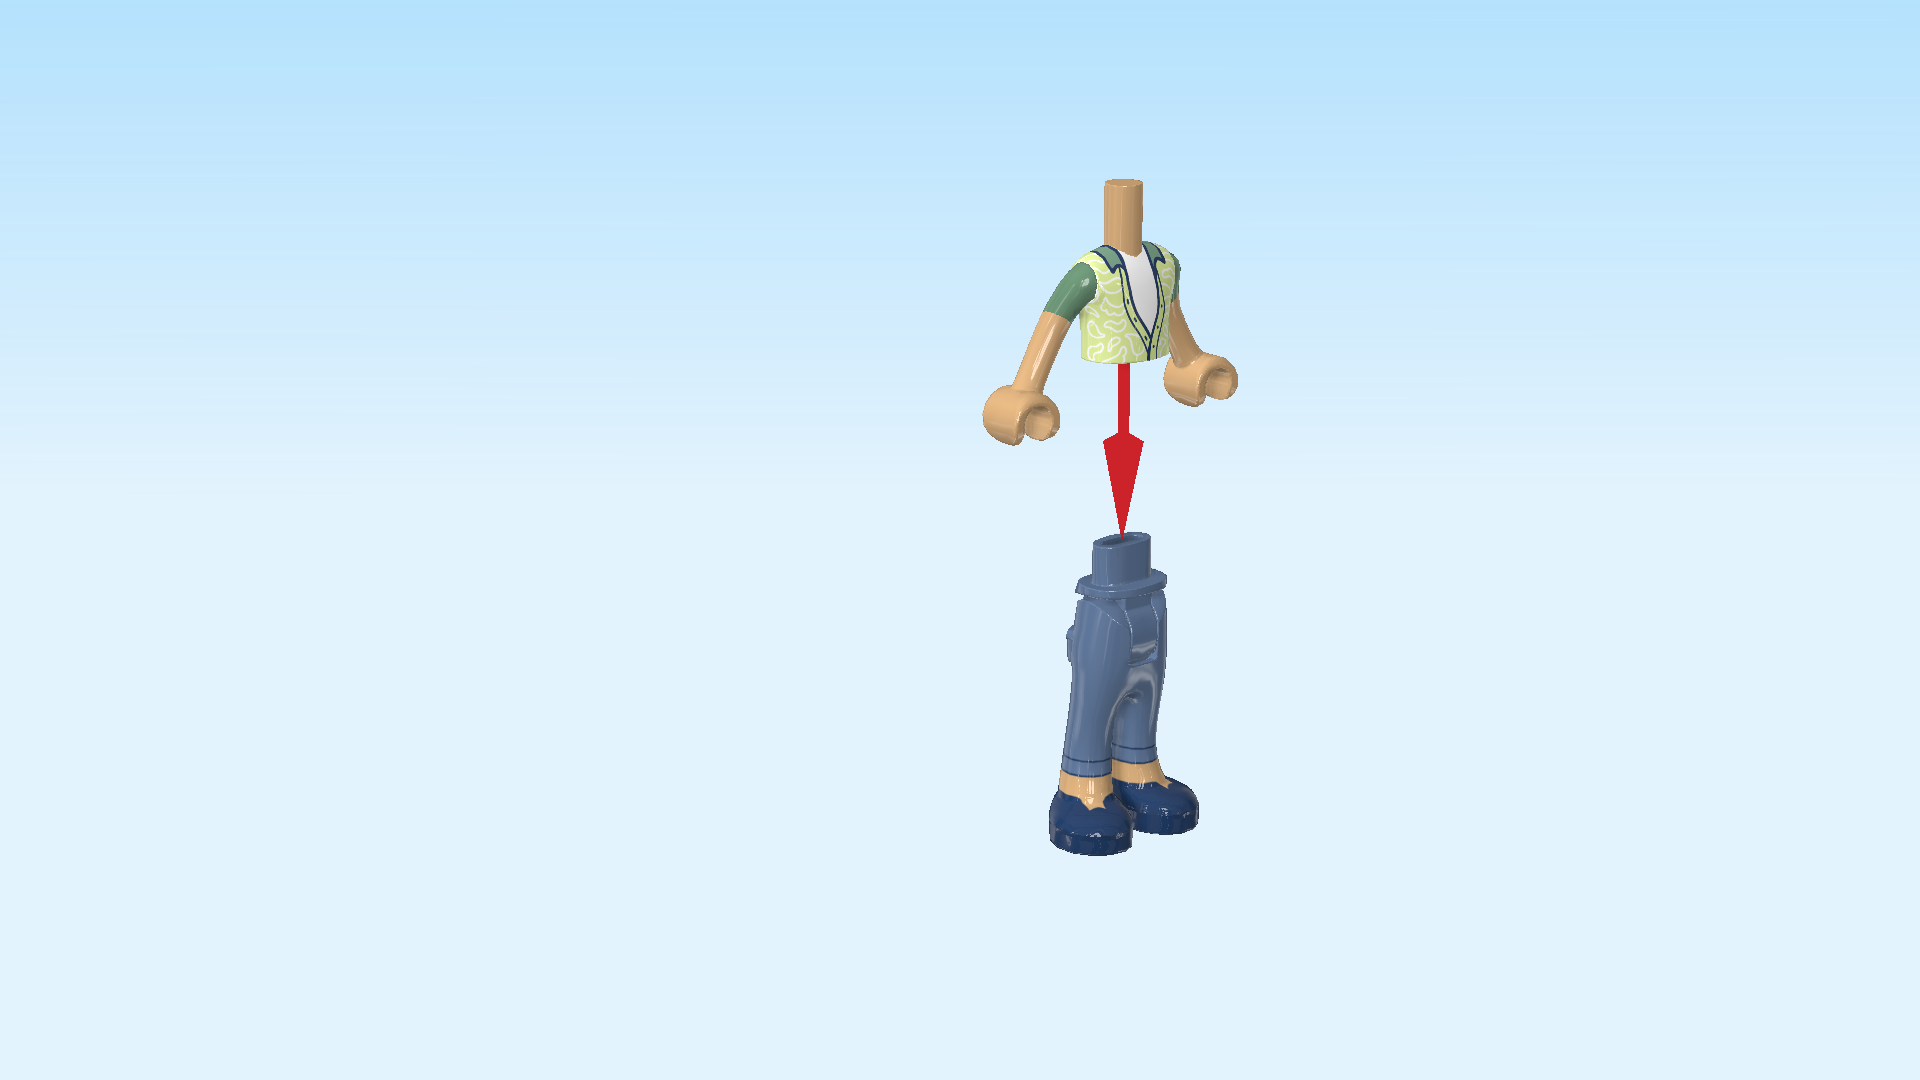
| 1 medium nougat brown and white Minidoll upper body, |
| and 1 teal blue and medium nougat brown Minidoll pair of legs with baggy shorts. |
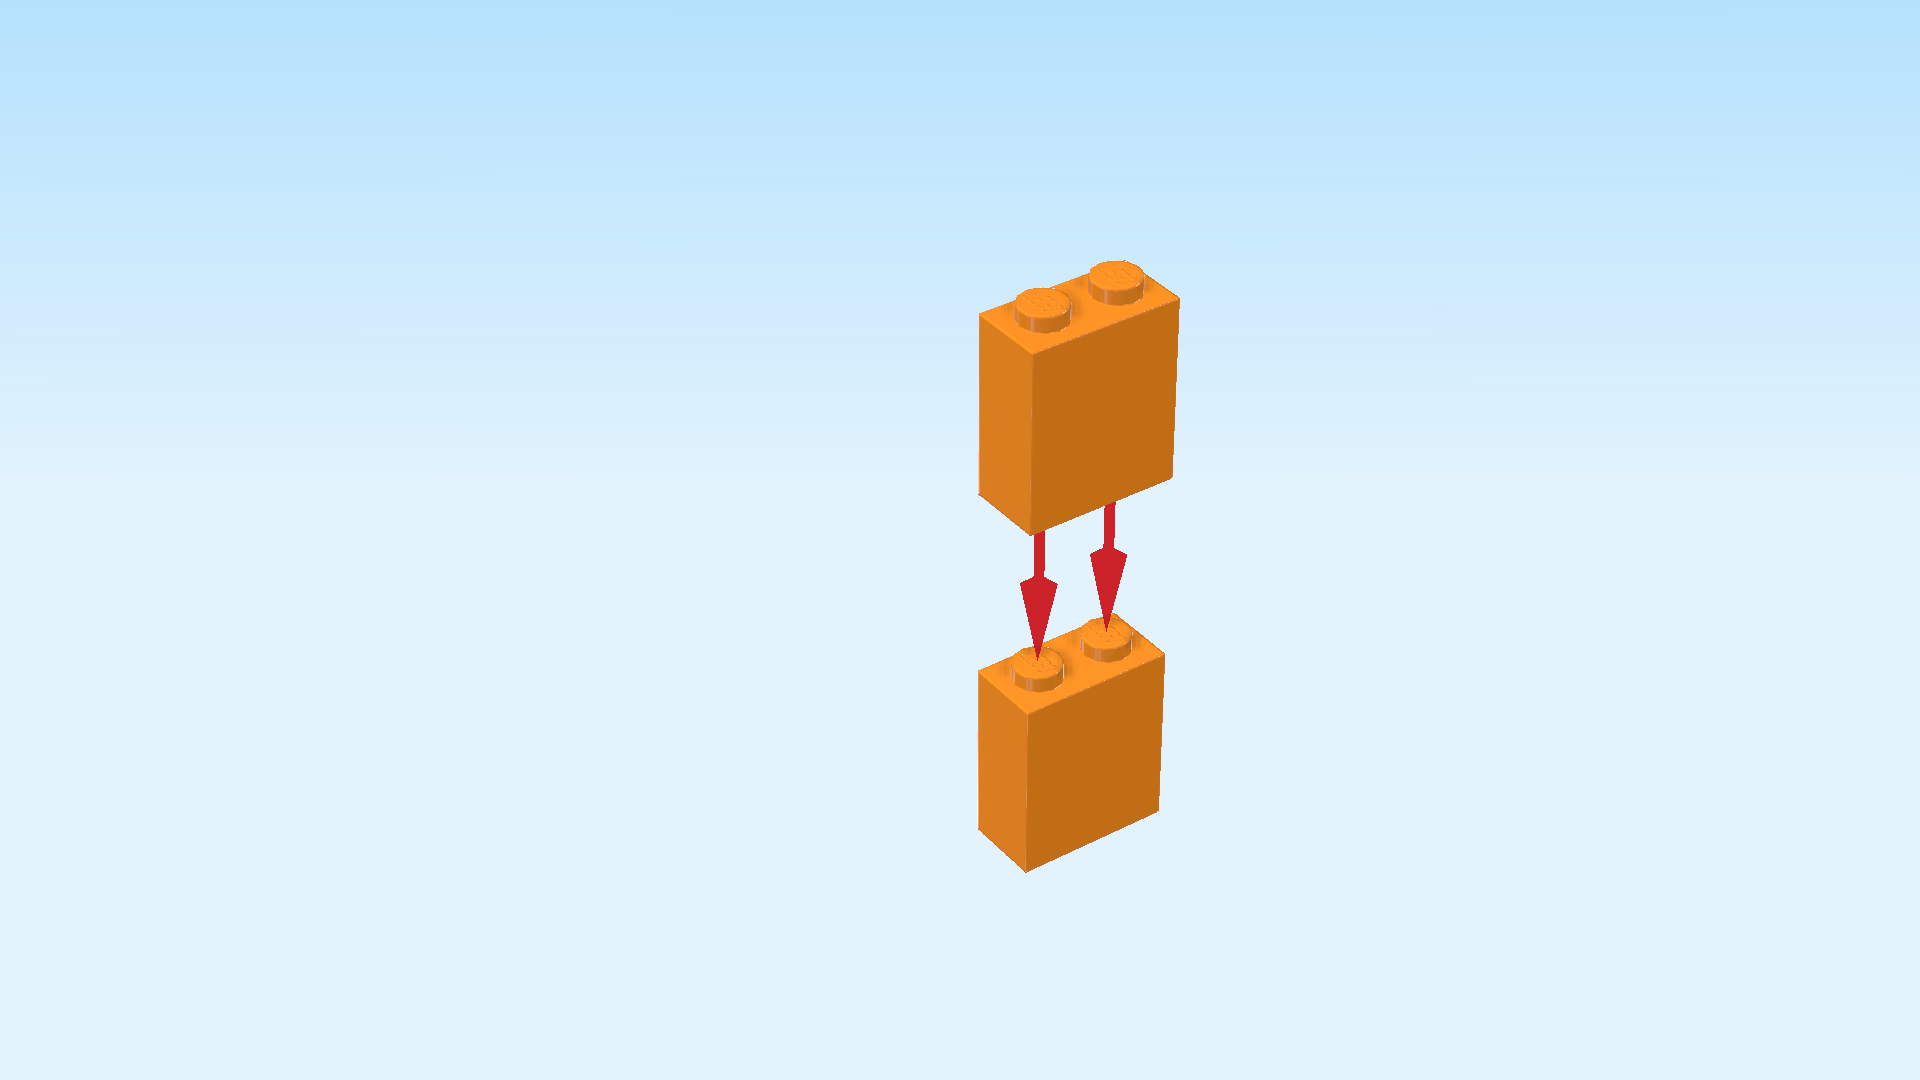
| Put the upper body on top of the legs with baggy shorts. |
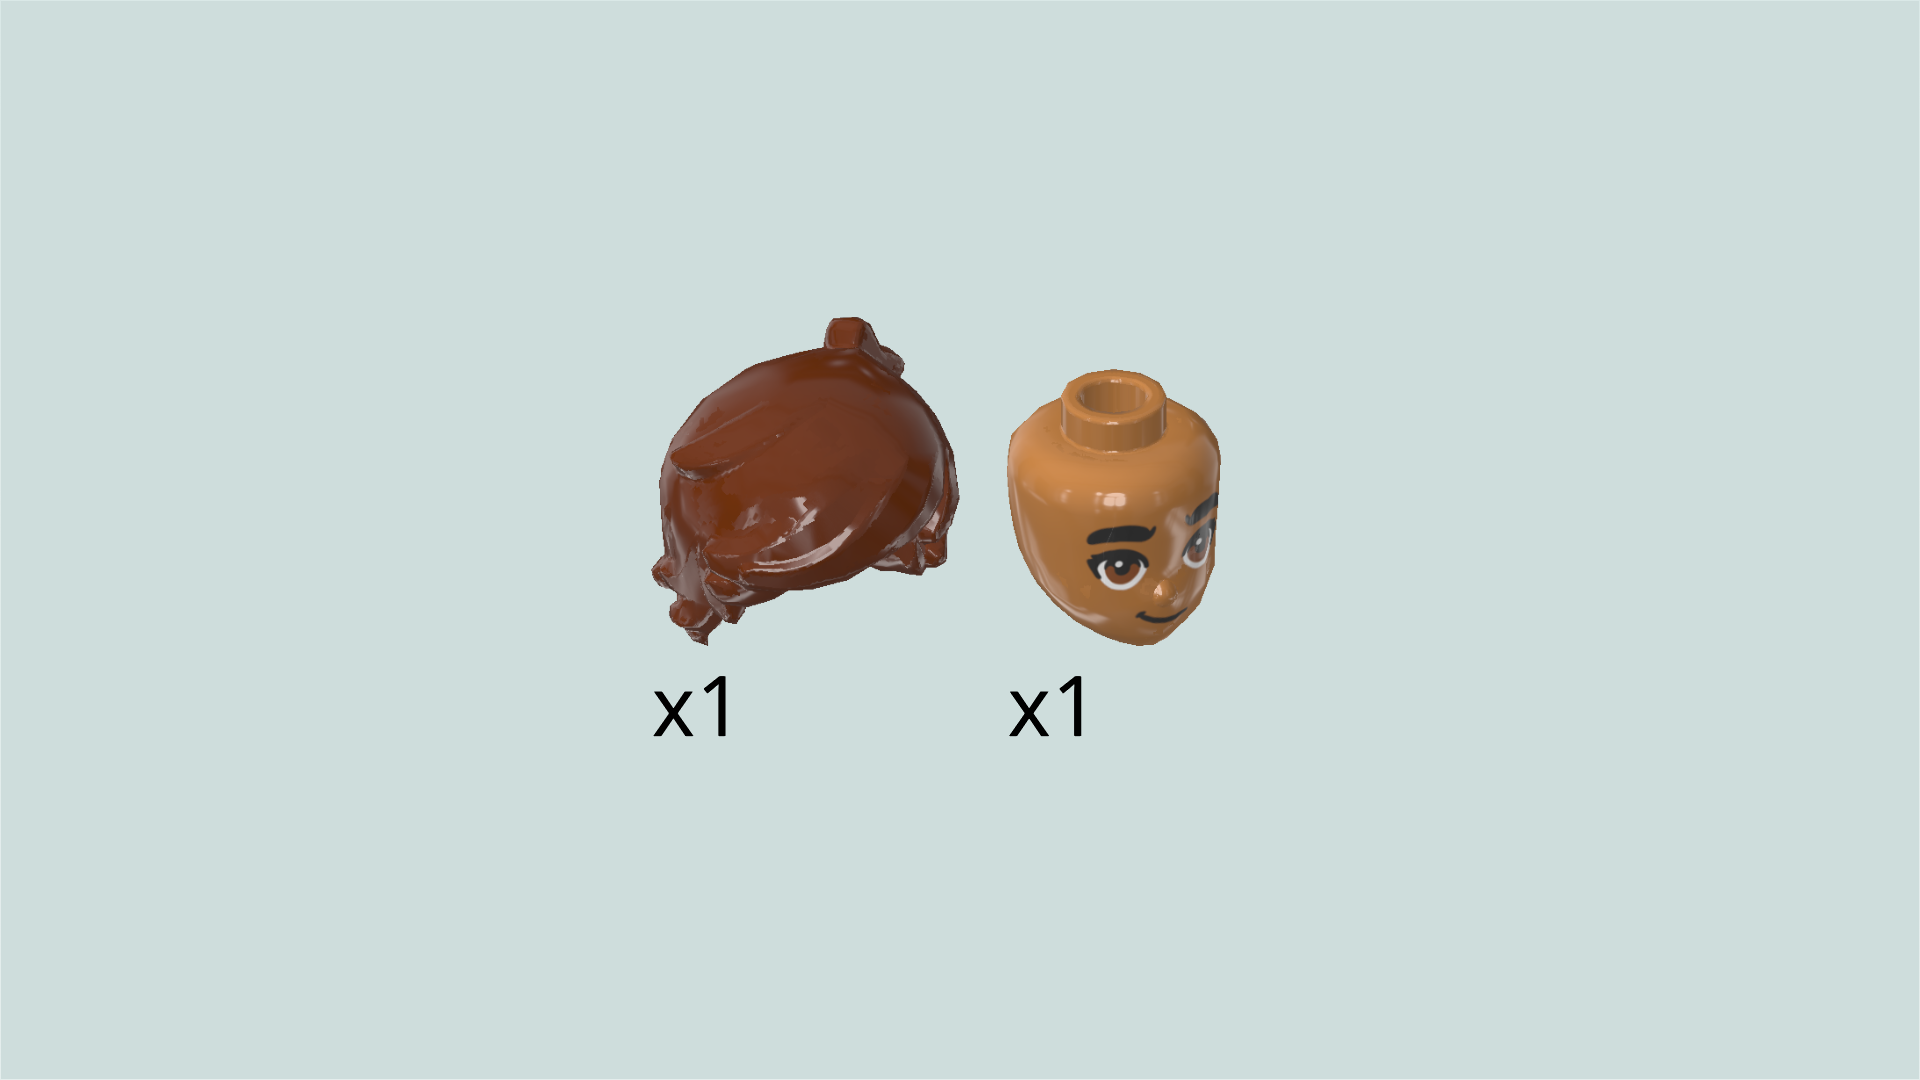
| Collect the following 2 pieces: |
| 1 medium nougat brown Minidoll head, |
| and 1 reddish brown Minidoll hairpiece with side parting. |
| Put the head on the body. |
| Put the hair on the head. |
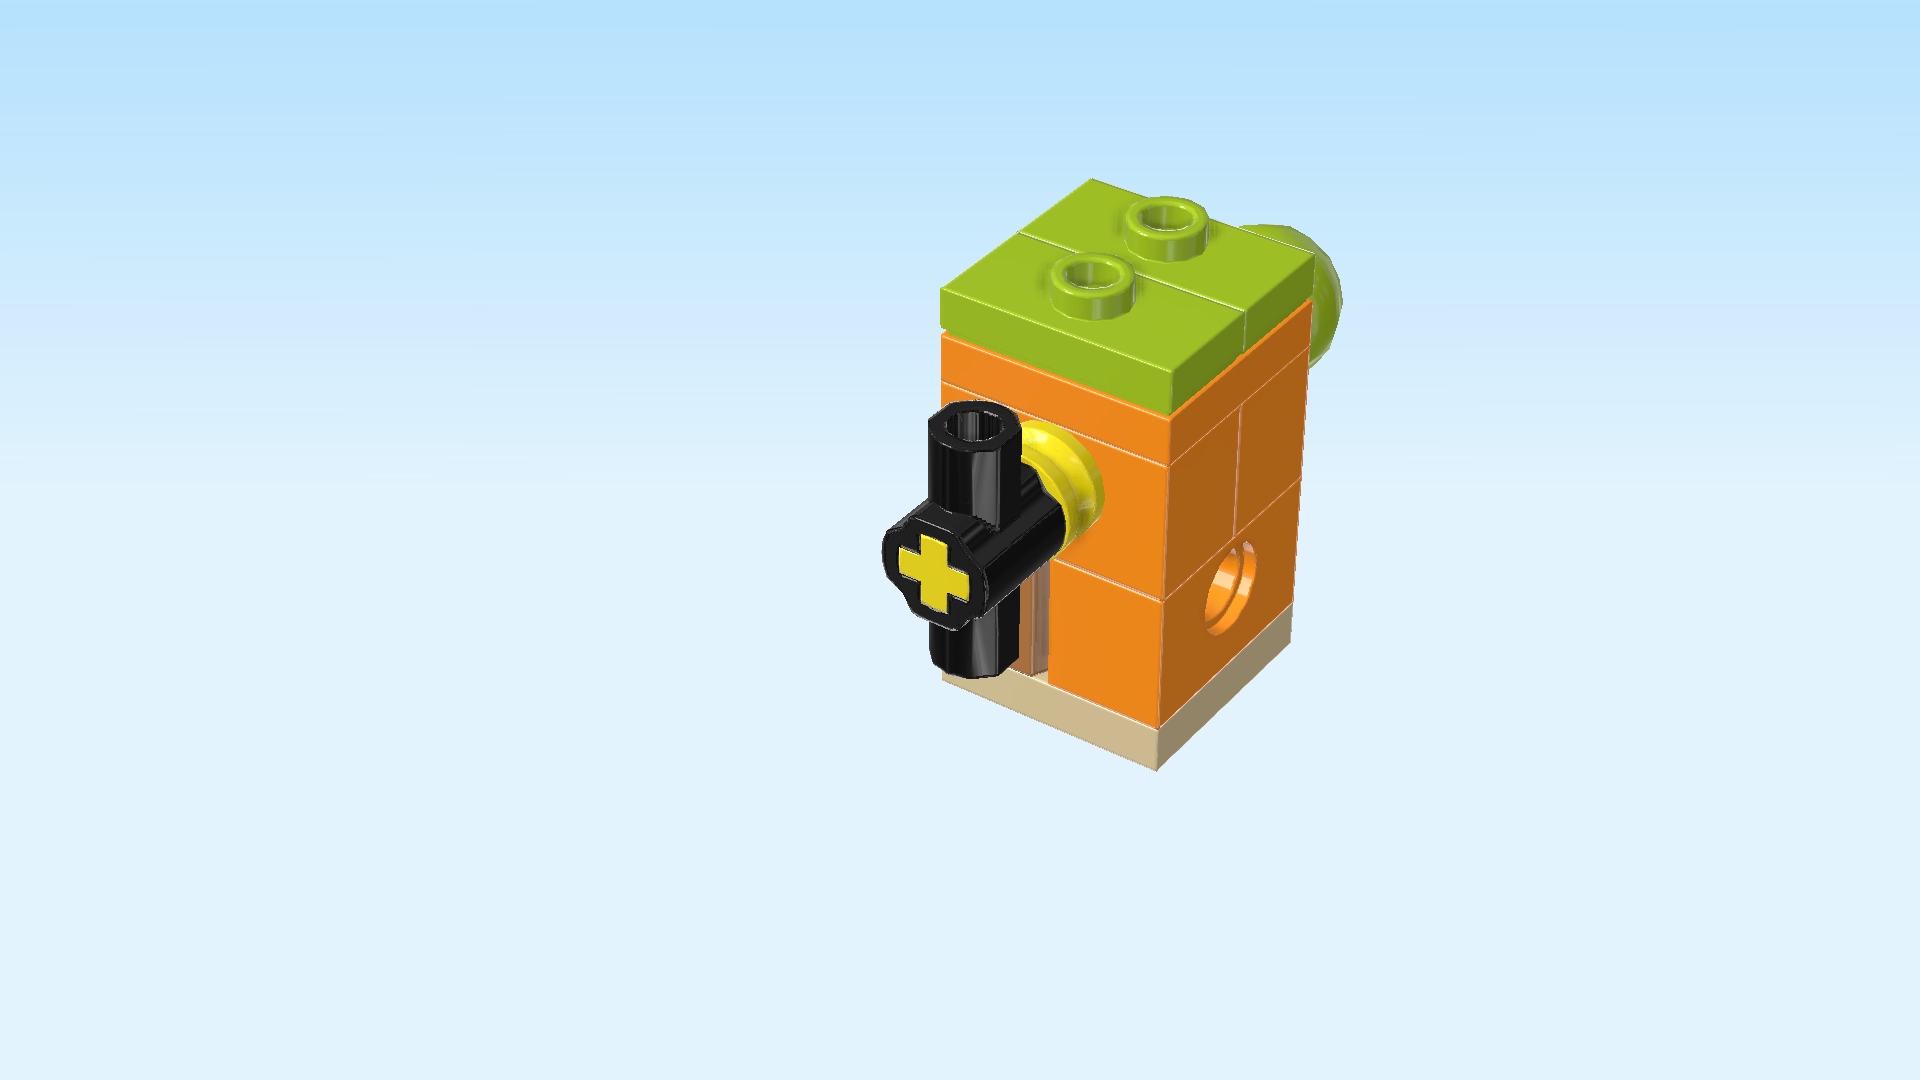
| Next, we will make the fish toy for Churro the cat. |
| Collect the following 2 pieces: |
| 1 pale ocher yellow plate 2x2, |
| and 1 medium nougat brown palisade brick 1x2. |
| Put the plate 2x2 on the table. |
| Put the palisade brick 1x2 vertically on the two left knobs. |
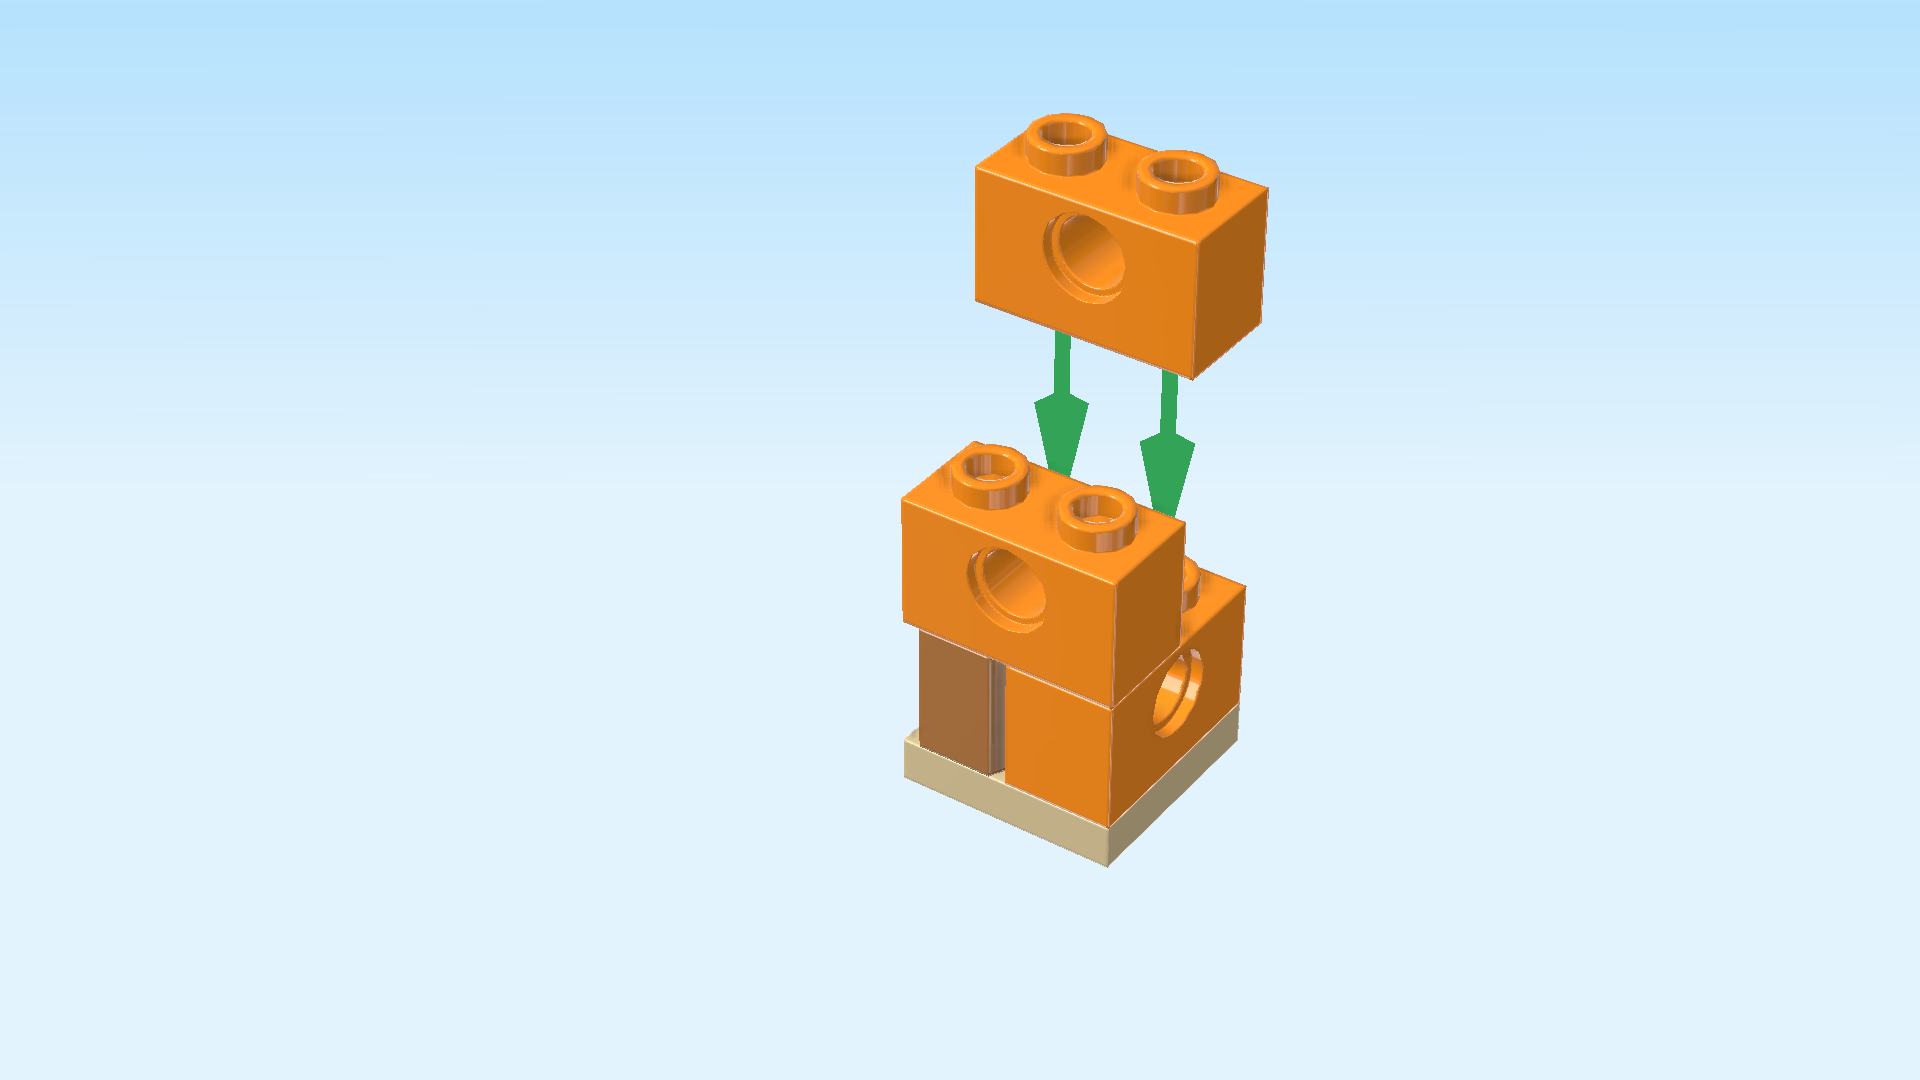
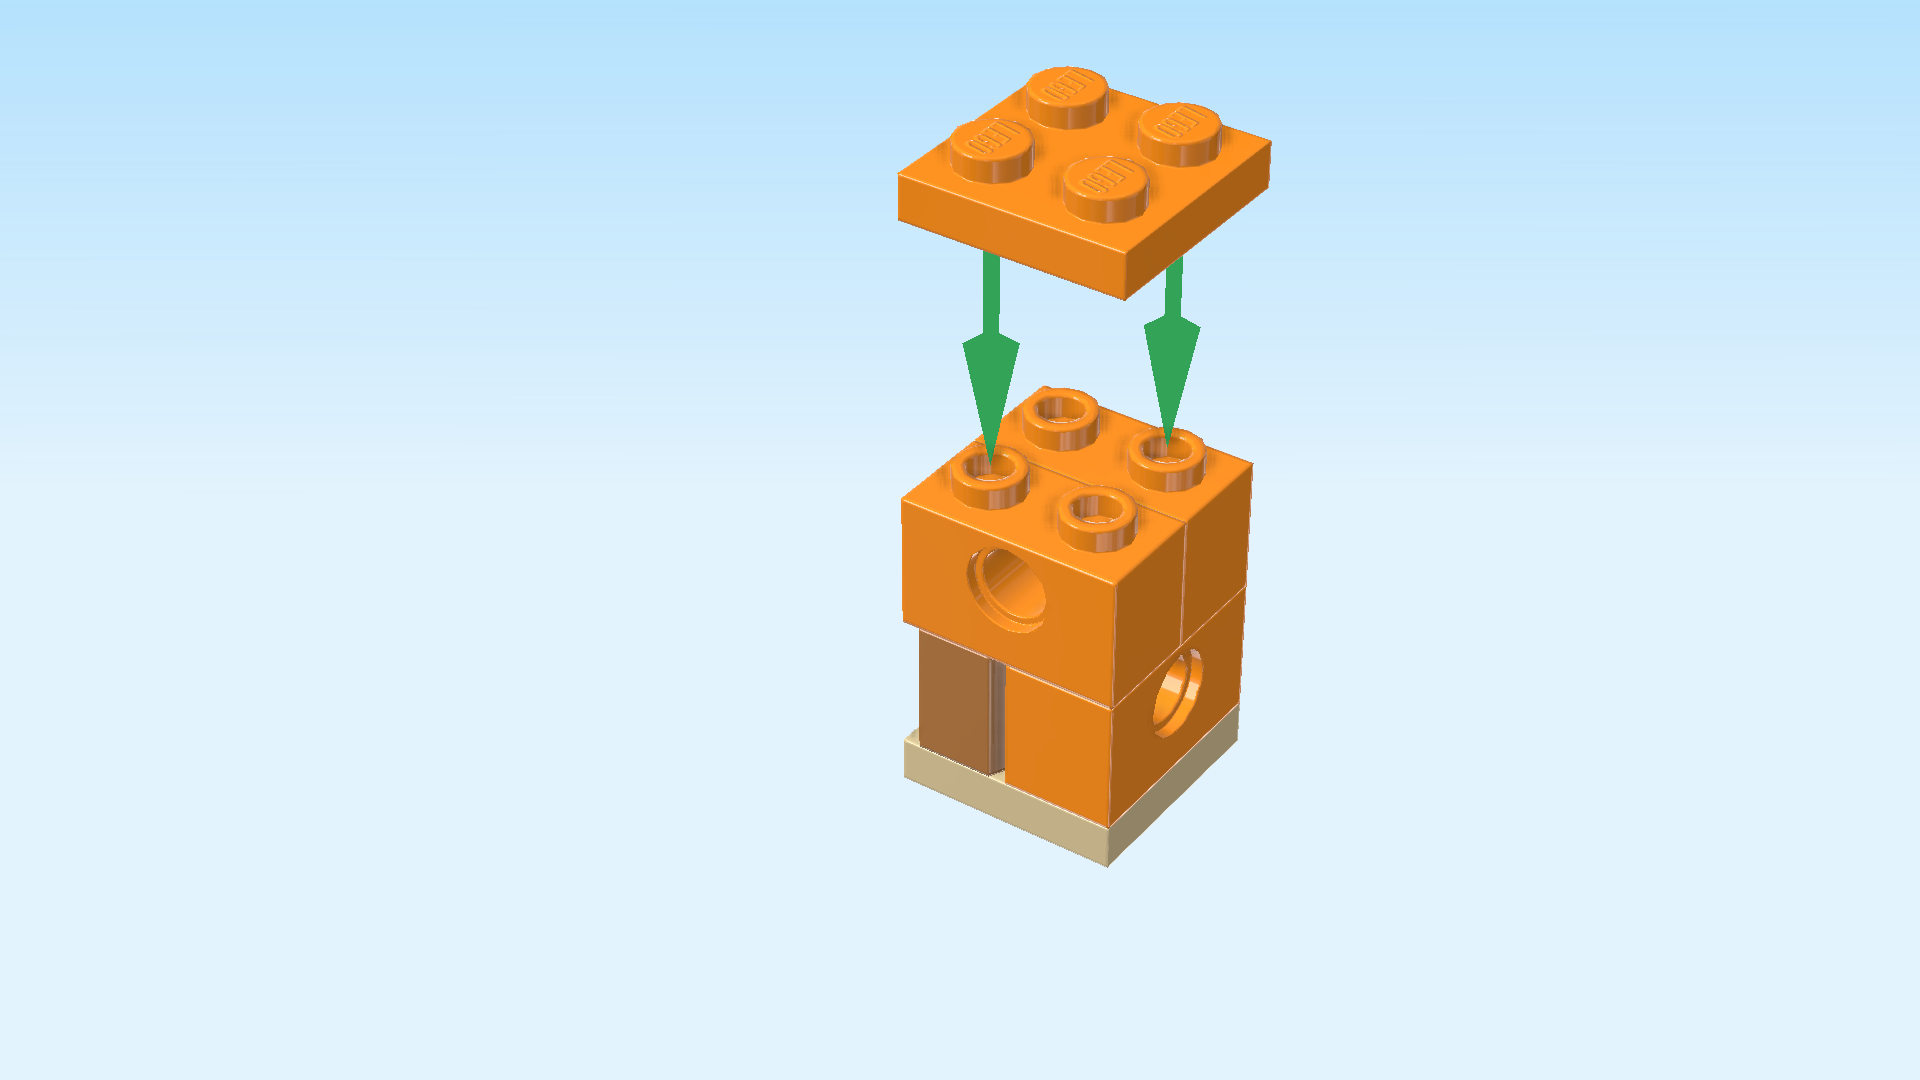
| Find 1 bright orange brick 1x2 with technic hole. |
| Put it vertically to the right of the previous piece. |
| Find 2 bright orange bricks 1x2 with technic hole. |
| Put 1 horizontally on the back row. |
| Put the other one horizontally on the front row. |
| Find 1 bright orange plate 2x2. |
| Put it on top of the two previous pieces. |
| Find 2 bright yellowish green plates 1x2 with 1 knob. |
| Put 1 horizontally on the back row. |
| Put the other one horizontally on the front row. |
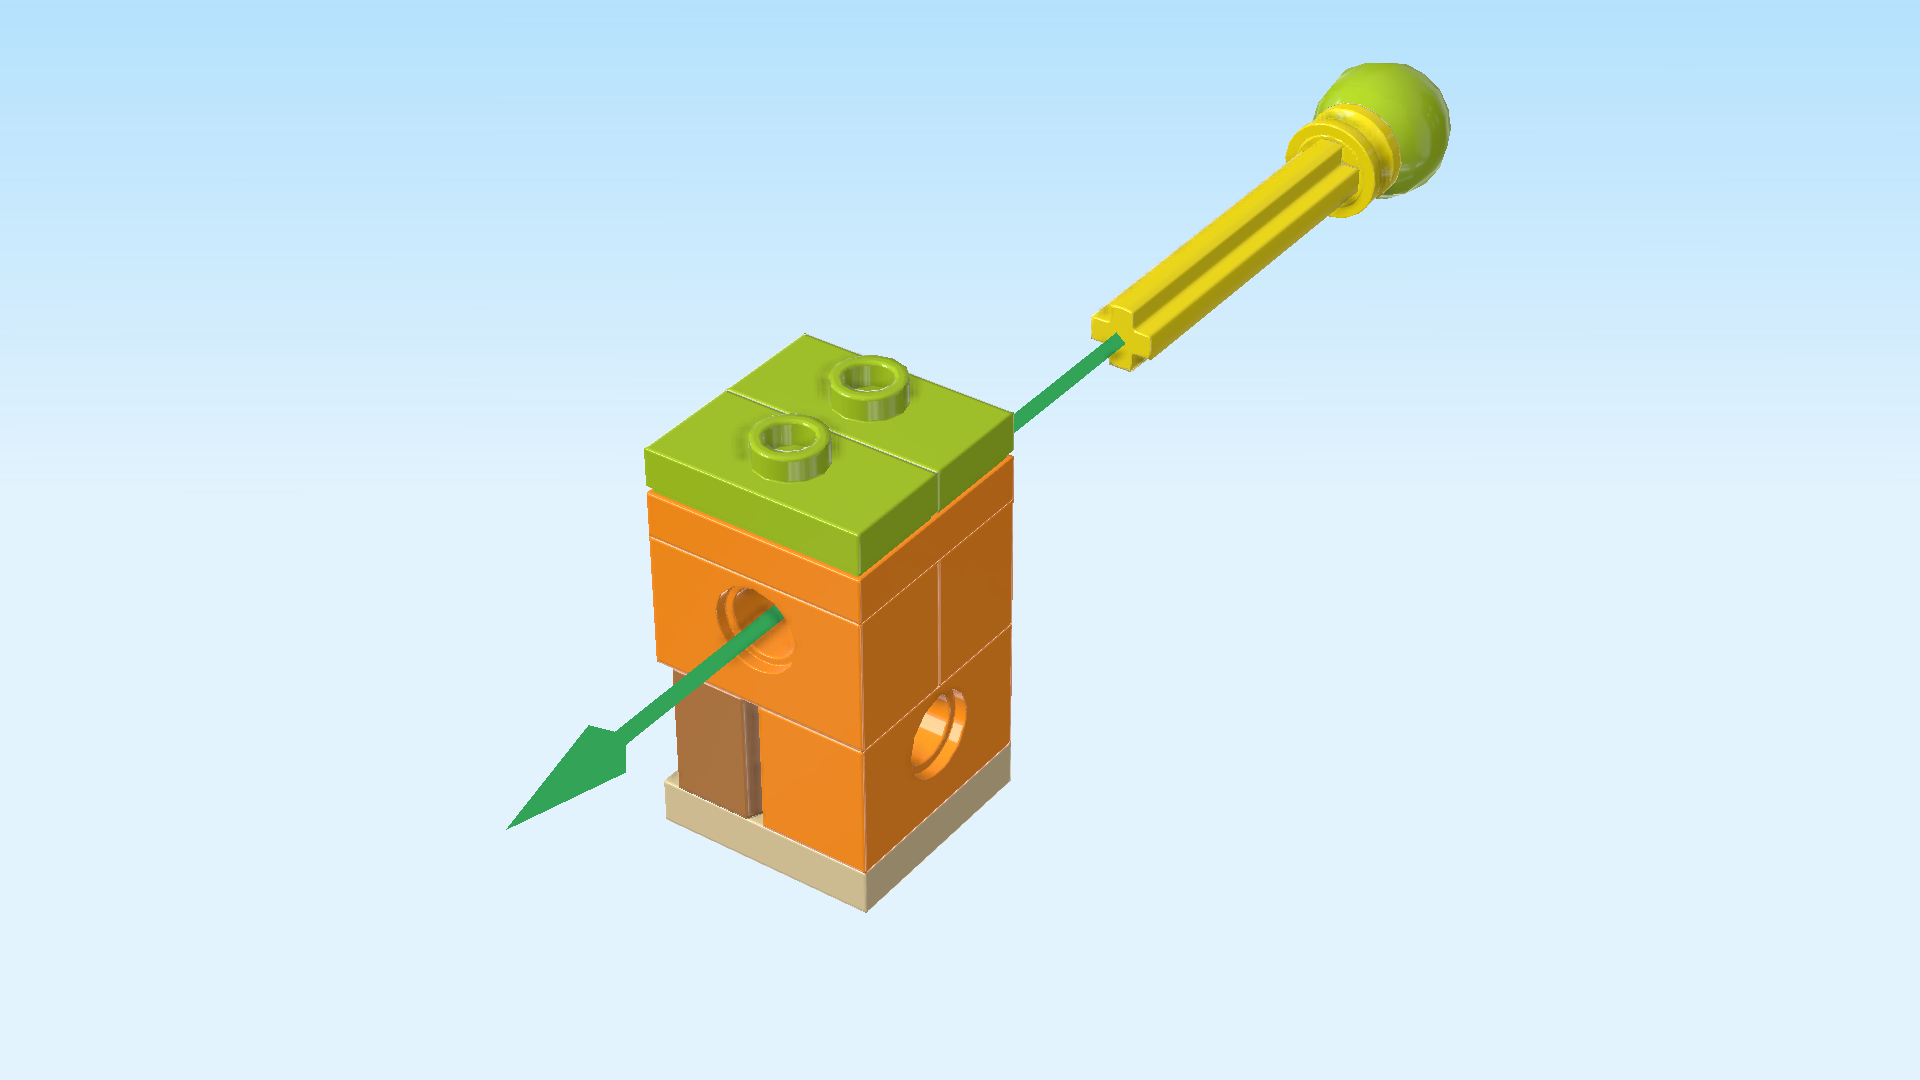
| Now, we build the swivel pin for the fish toy. |
| Collect the following 2 pieces: |
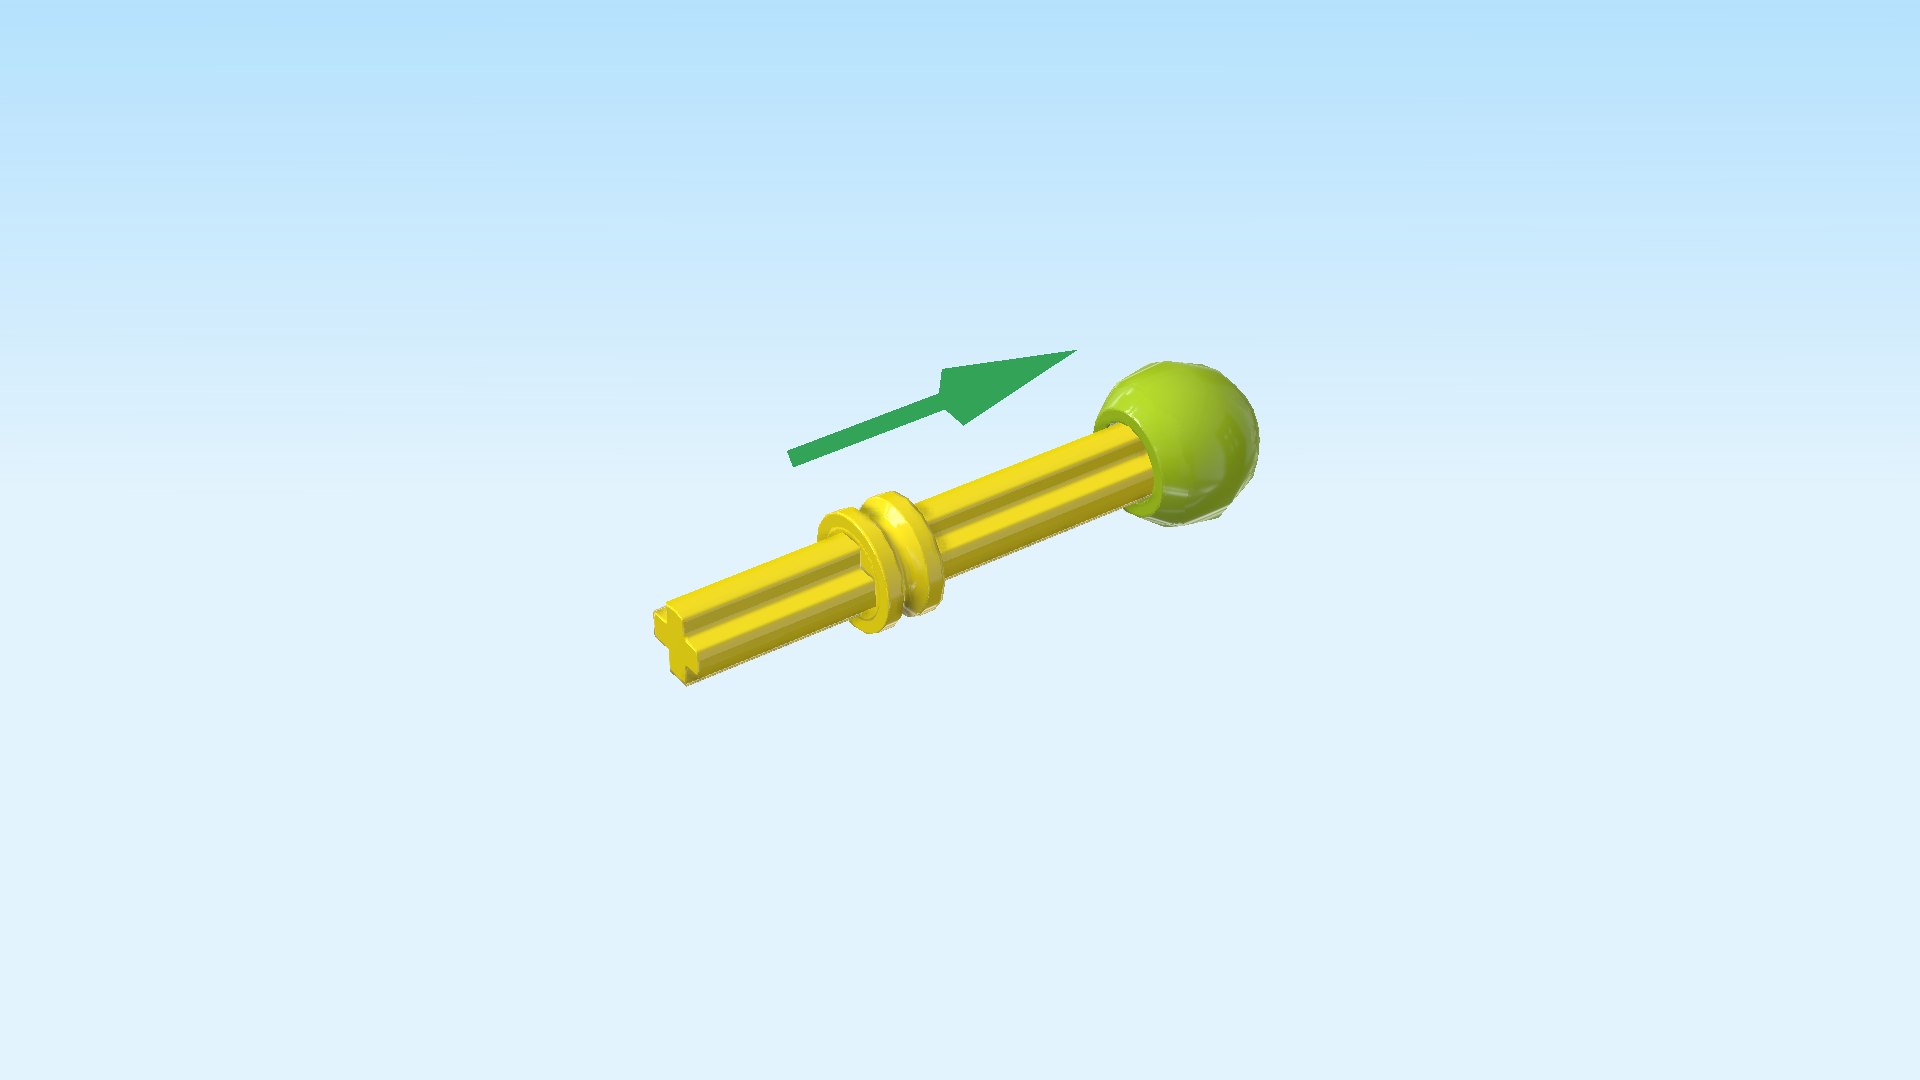
| 1 bright yellowish green technic ball 1m with hole, |
| and 1 bright yellow cross axle 5m. |
| Hold the cross axle horizontally in your hand. Put the technic ball on the right end of the axle. |
| Find 1 bright yellow cross bushing 1x½. |
| Put it on the cross axle coming from the left and push it all the way to the technic ball. |
| The swivel pin for the fish toy is finished! Insert it into the upper hole of the fish toy coming from the back. If done correctly, the cross axle is sticking out towards the front and the technic ball is at the back. |
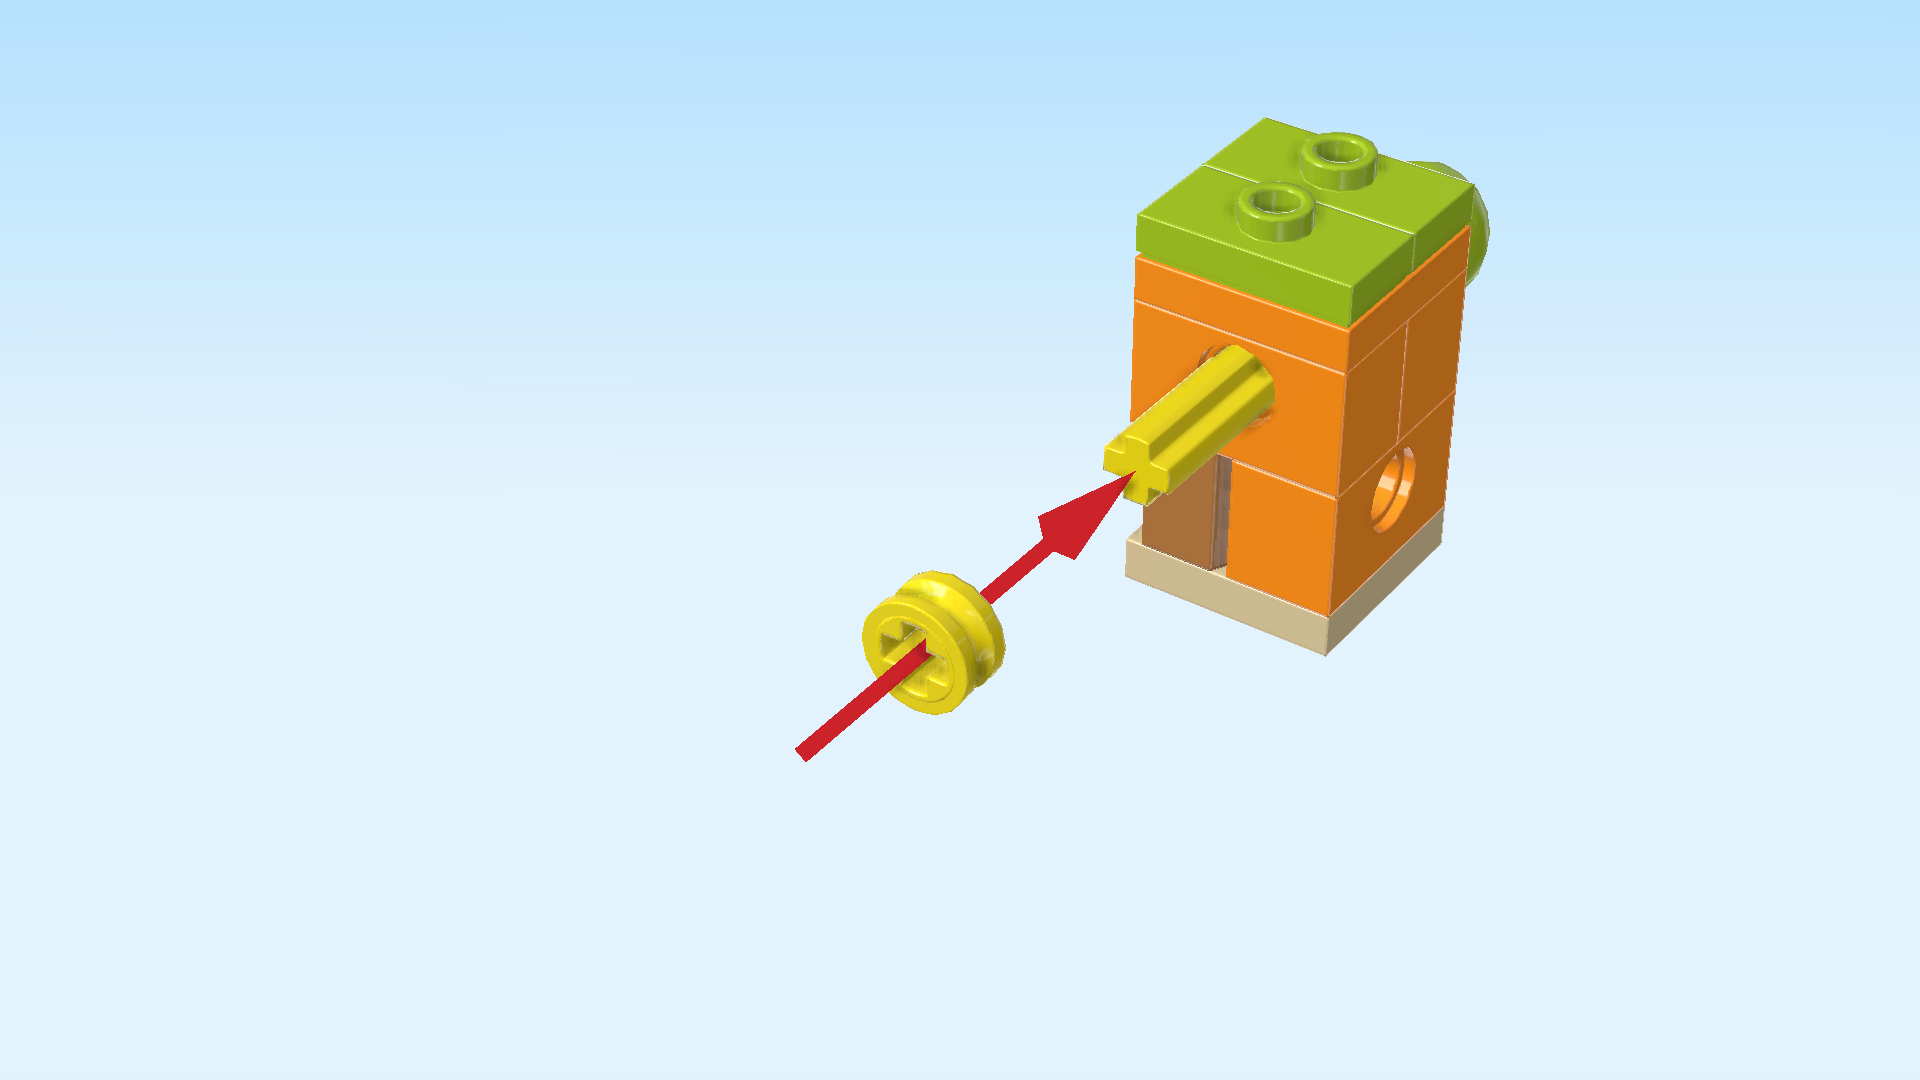
| Find 1 bright yellow cross bushing 1x½. |
| Hold the technic ball at the back, and put the bushing on the cross axle coming from the front and push it all the way in. |
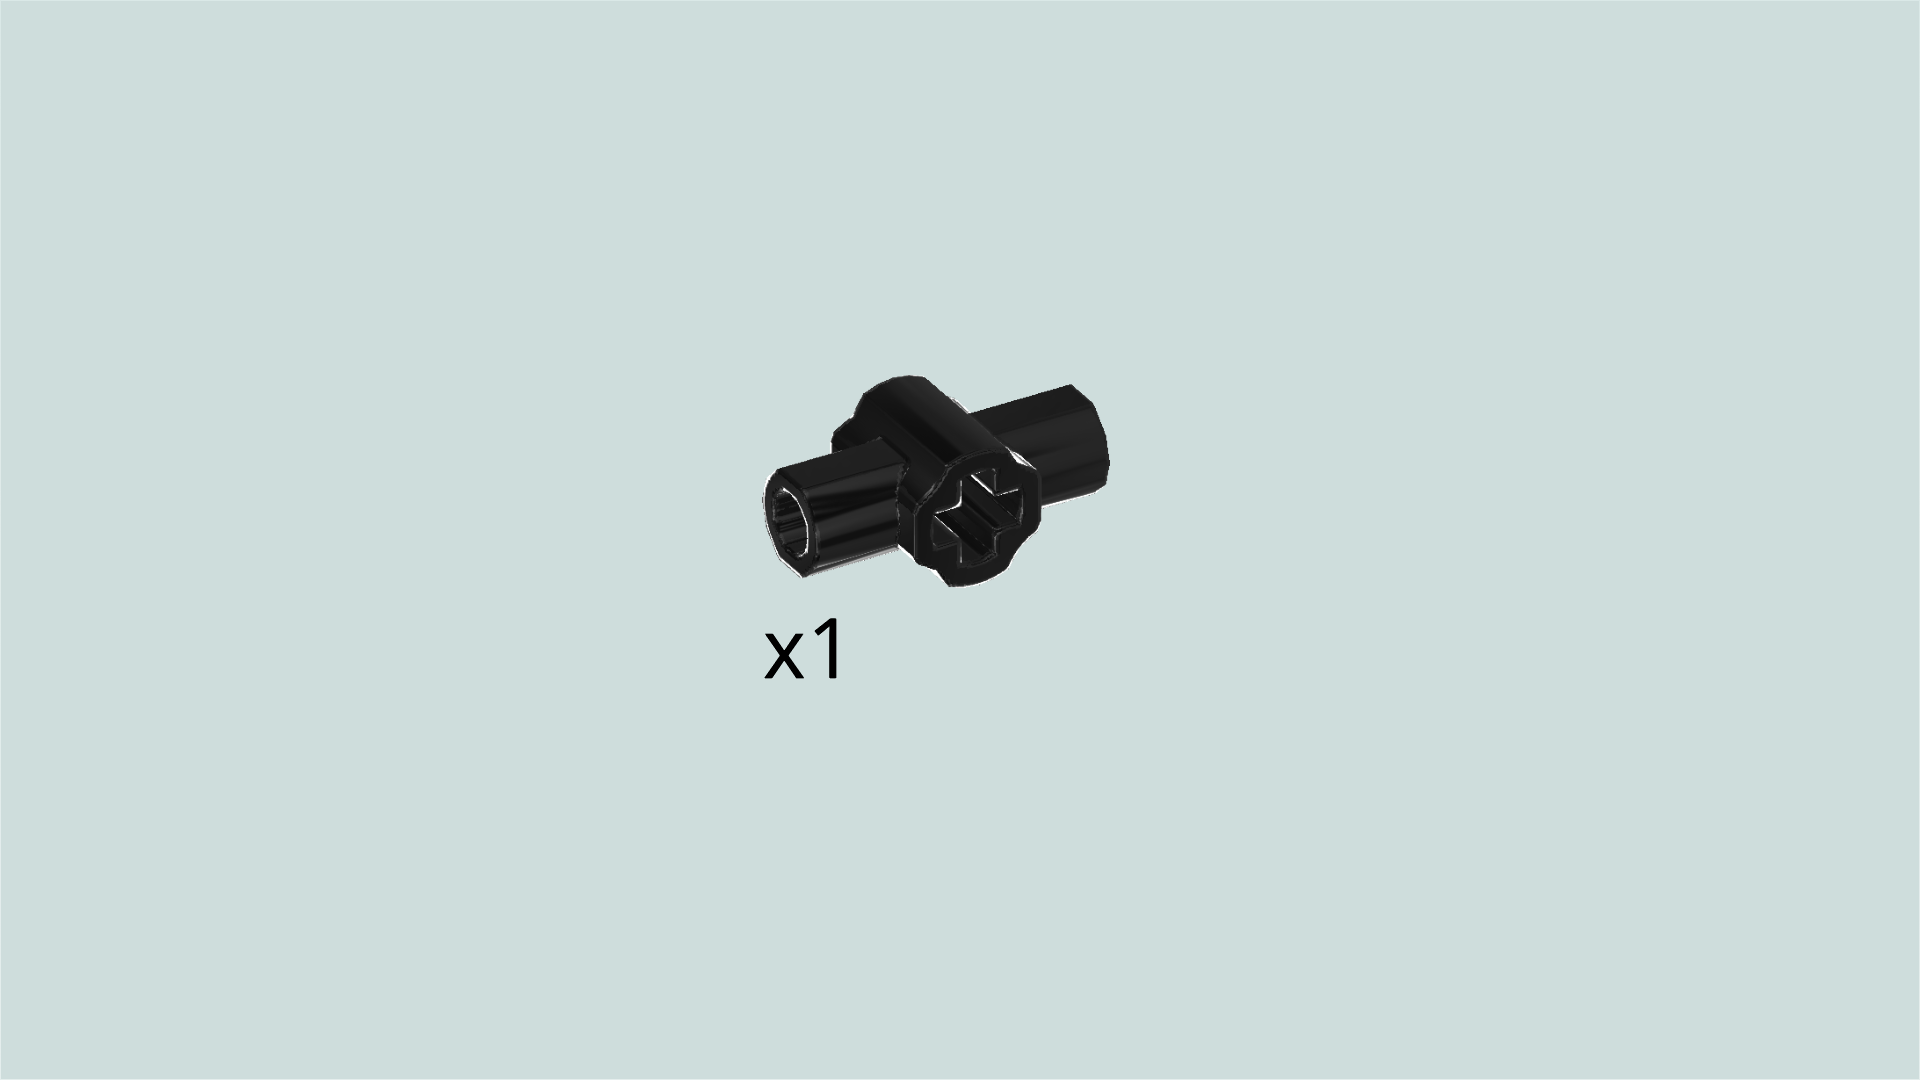
| Find 1 black cross-shaped cross axle extension 1m with shaft holder. |
| Hold it so that the shaft holder is running from top to bottom and the cross axle hole is facing you. Put the cross axle extension on the cross axle at the front of the fish toy. |
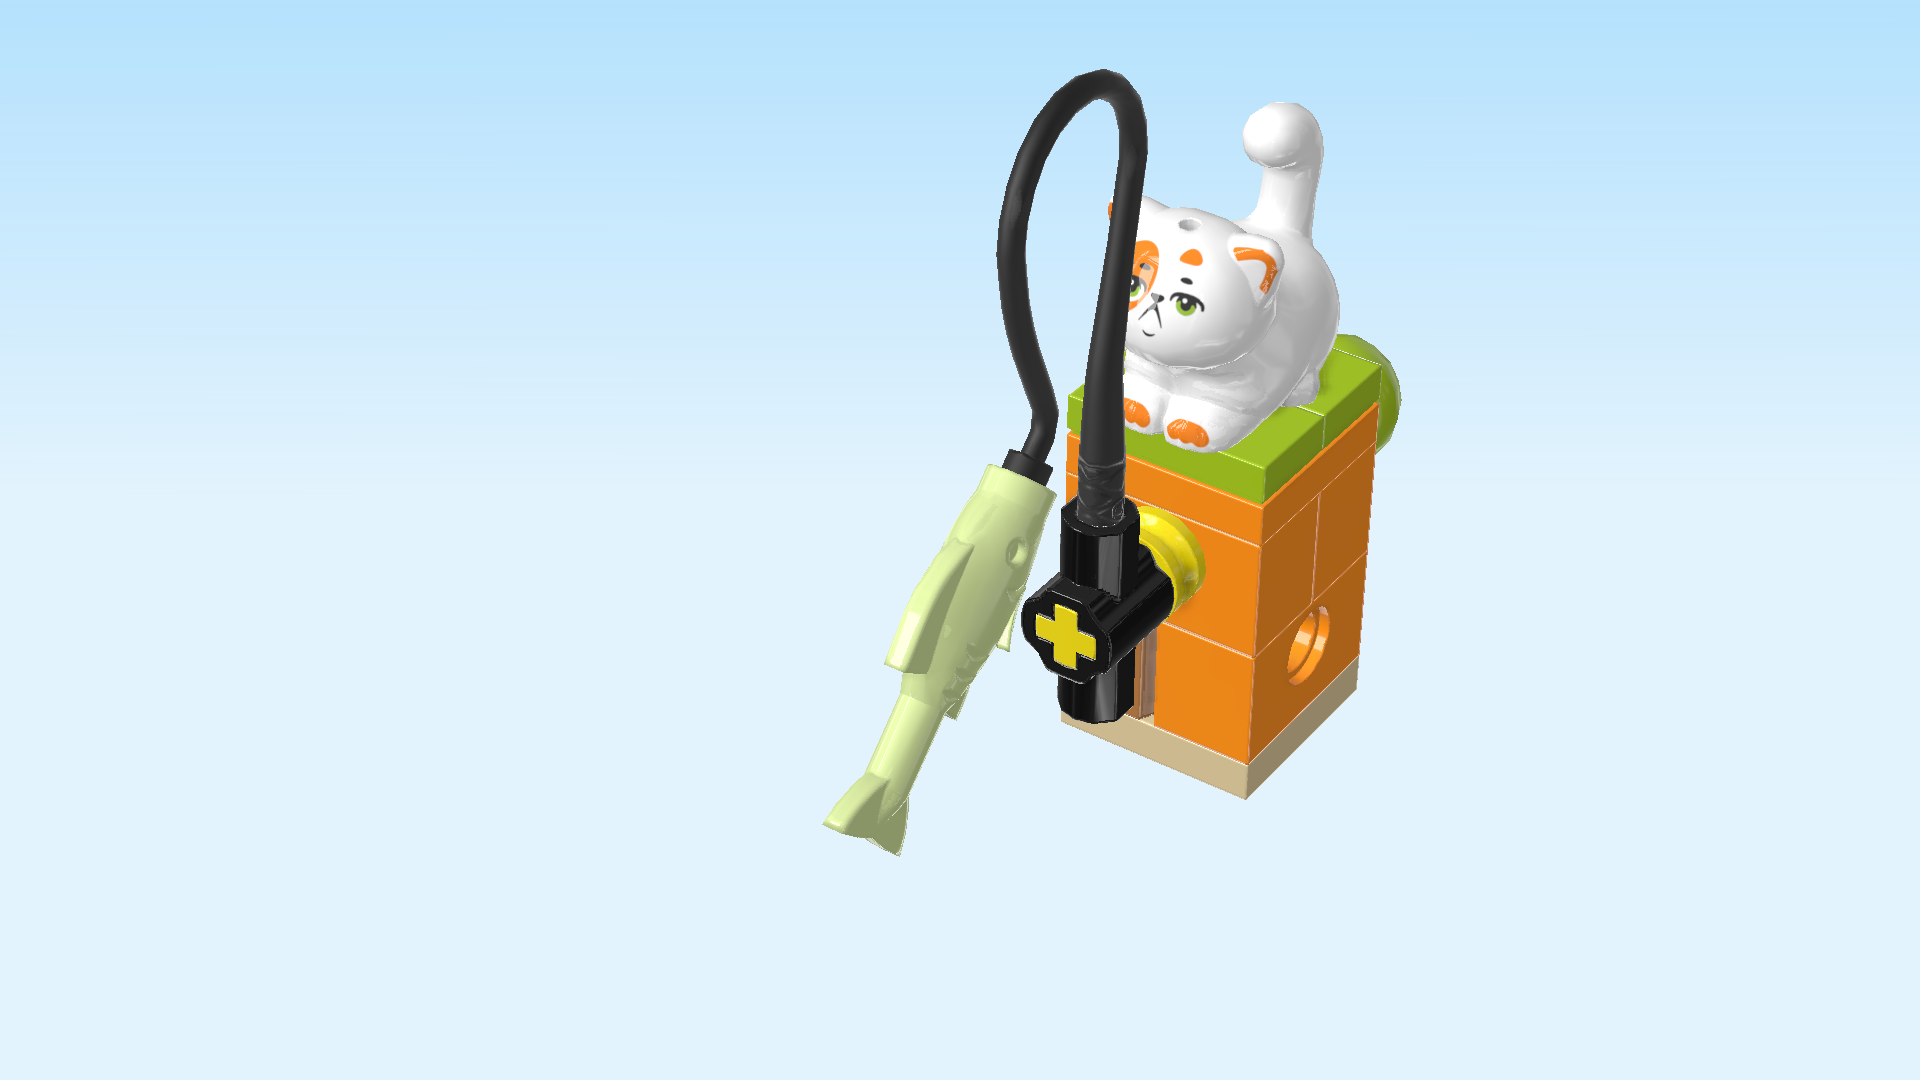
| Next, we will assemble the fish rod with fish. |
| Collect the following 2 pieces: |
| 1 black Minifigure whip with small knob at the end, |
| and 1 pale lime green fish figurine with knob. |
| Put the knob of the fish on the small knob at the end of the whip. |
| Insert the handle of the whip into the shaft holder of the cross axle extension from the top. The fish should be hanging freely from the fish toy now. Use the technic ball at the back to move the fish rod around. |
| Find 1 white cat figurine. |
| Put it on top of the fish toy. |
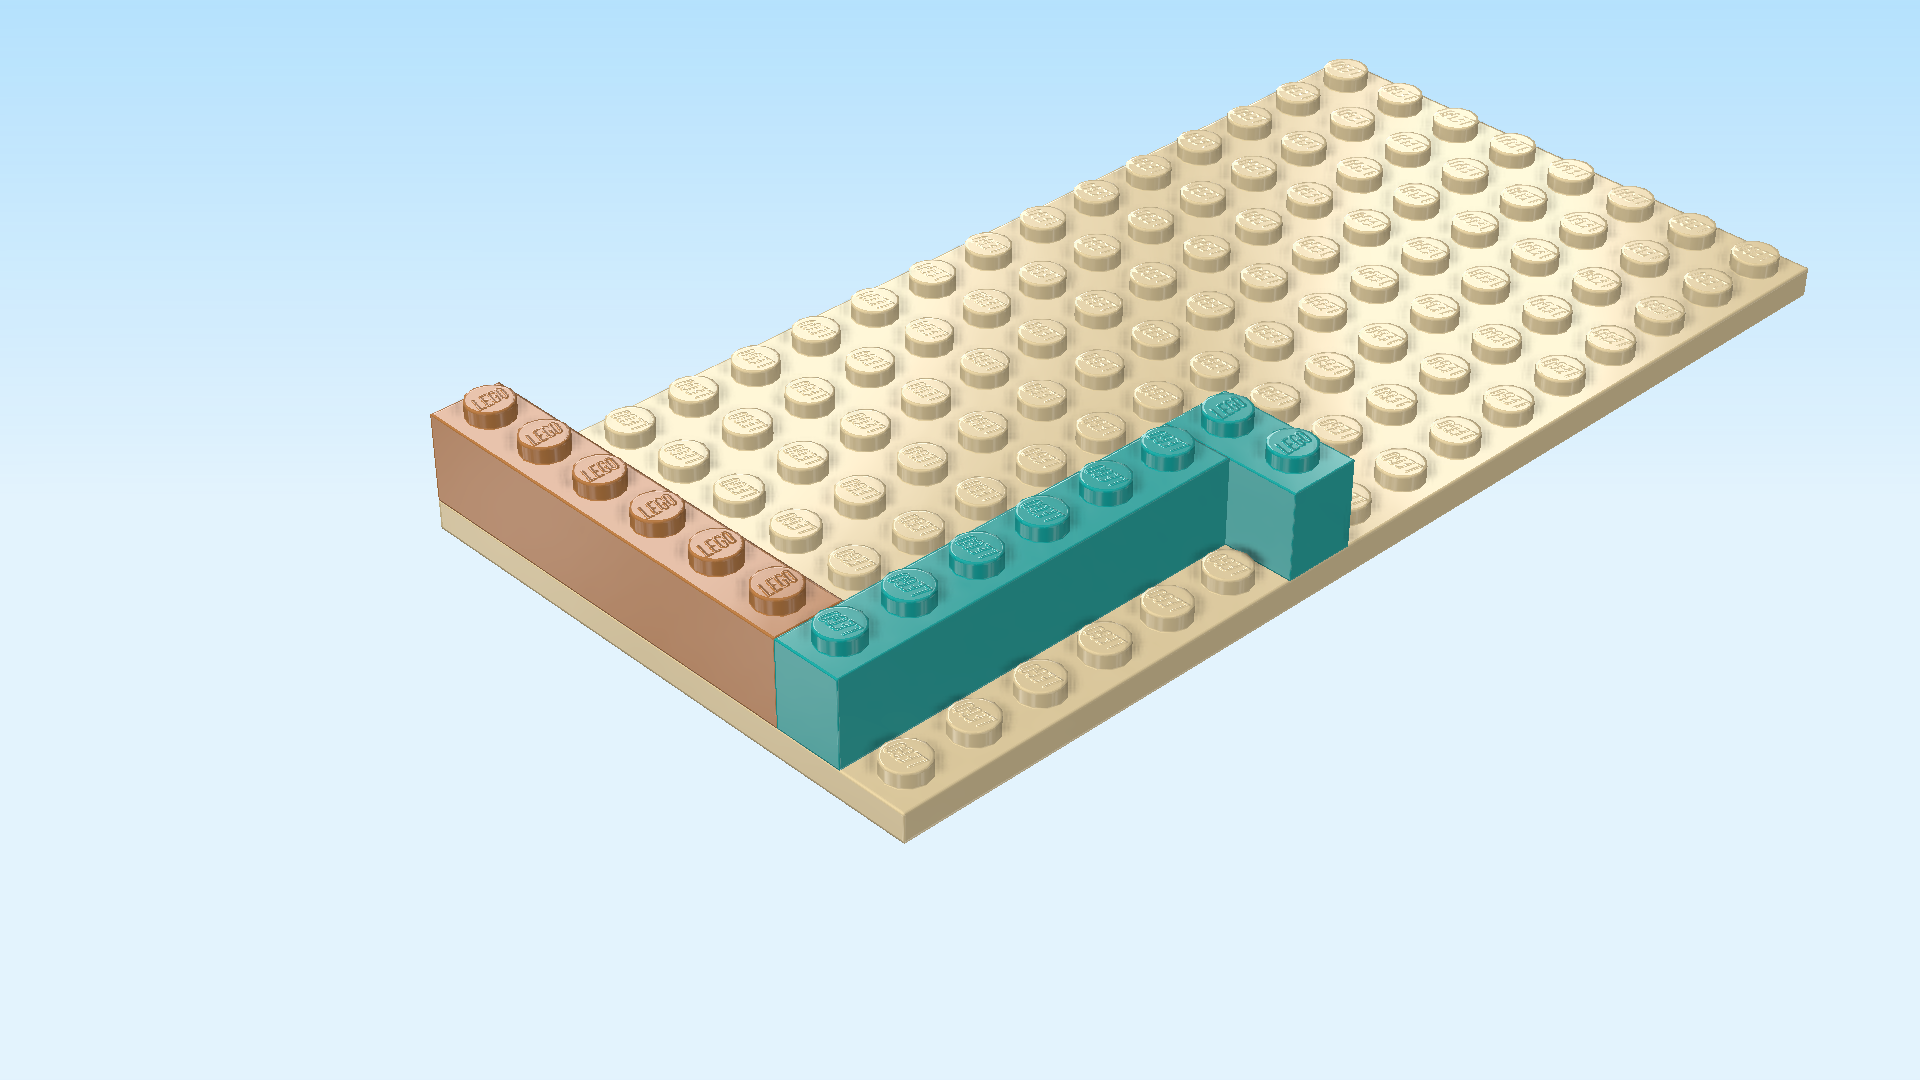
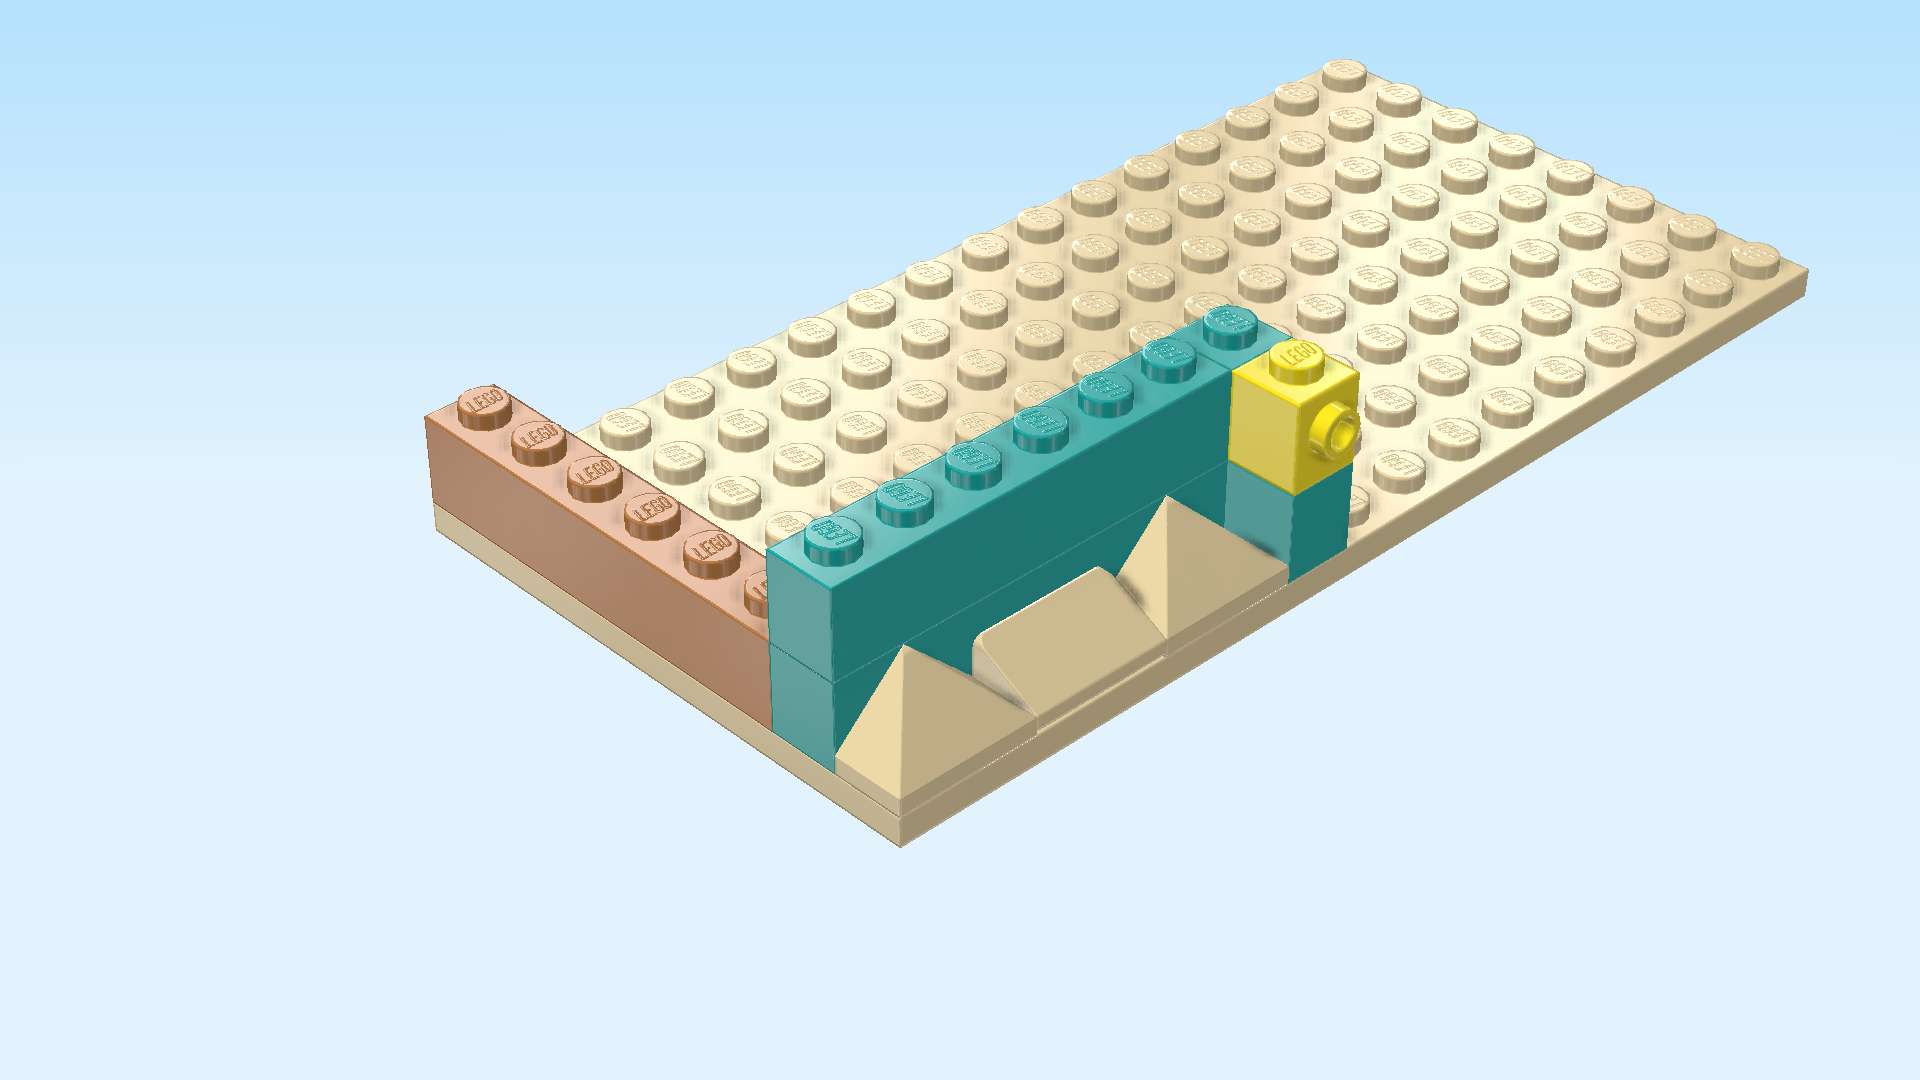
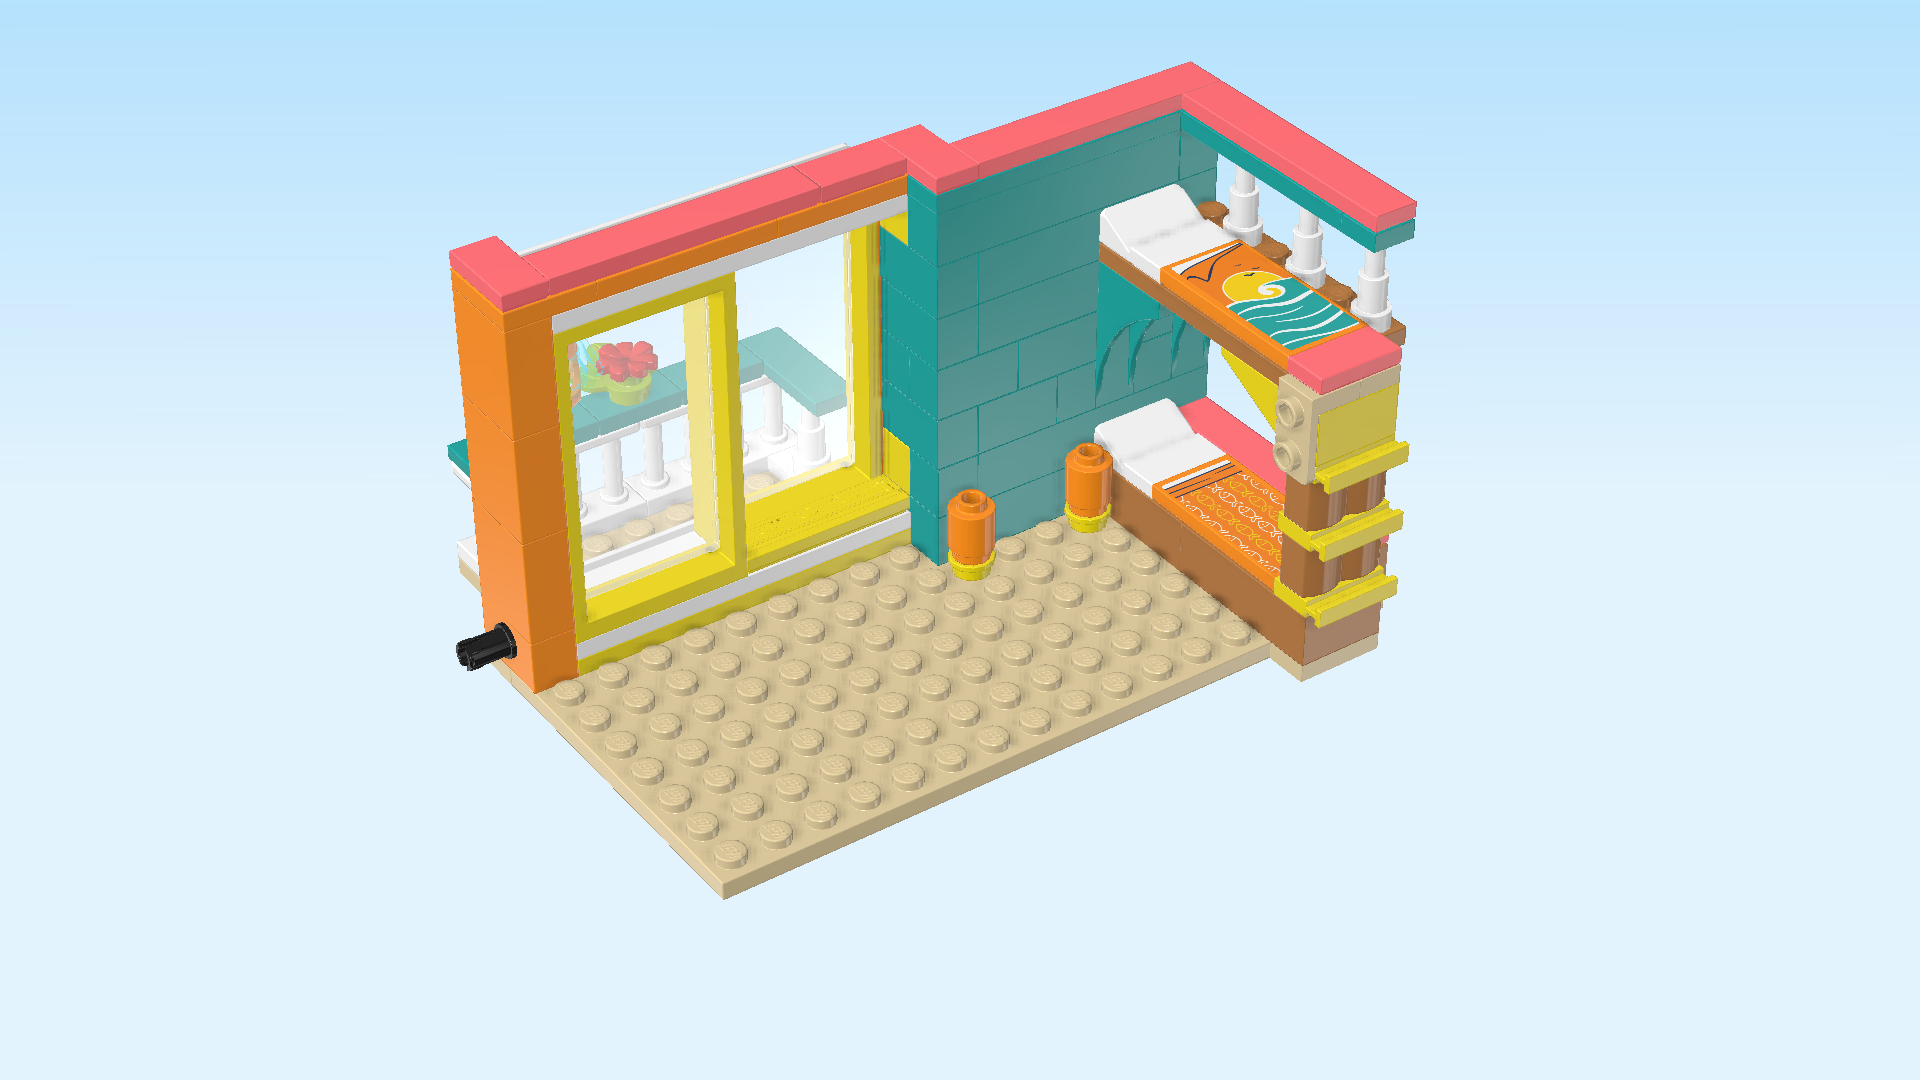
| Now, we will build the first half of Leo's room. This means we will build the right side wall of the room with 2 bunk beds and the back wall with sliding doors and balcony. |
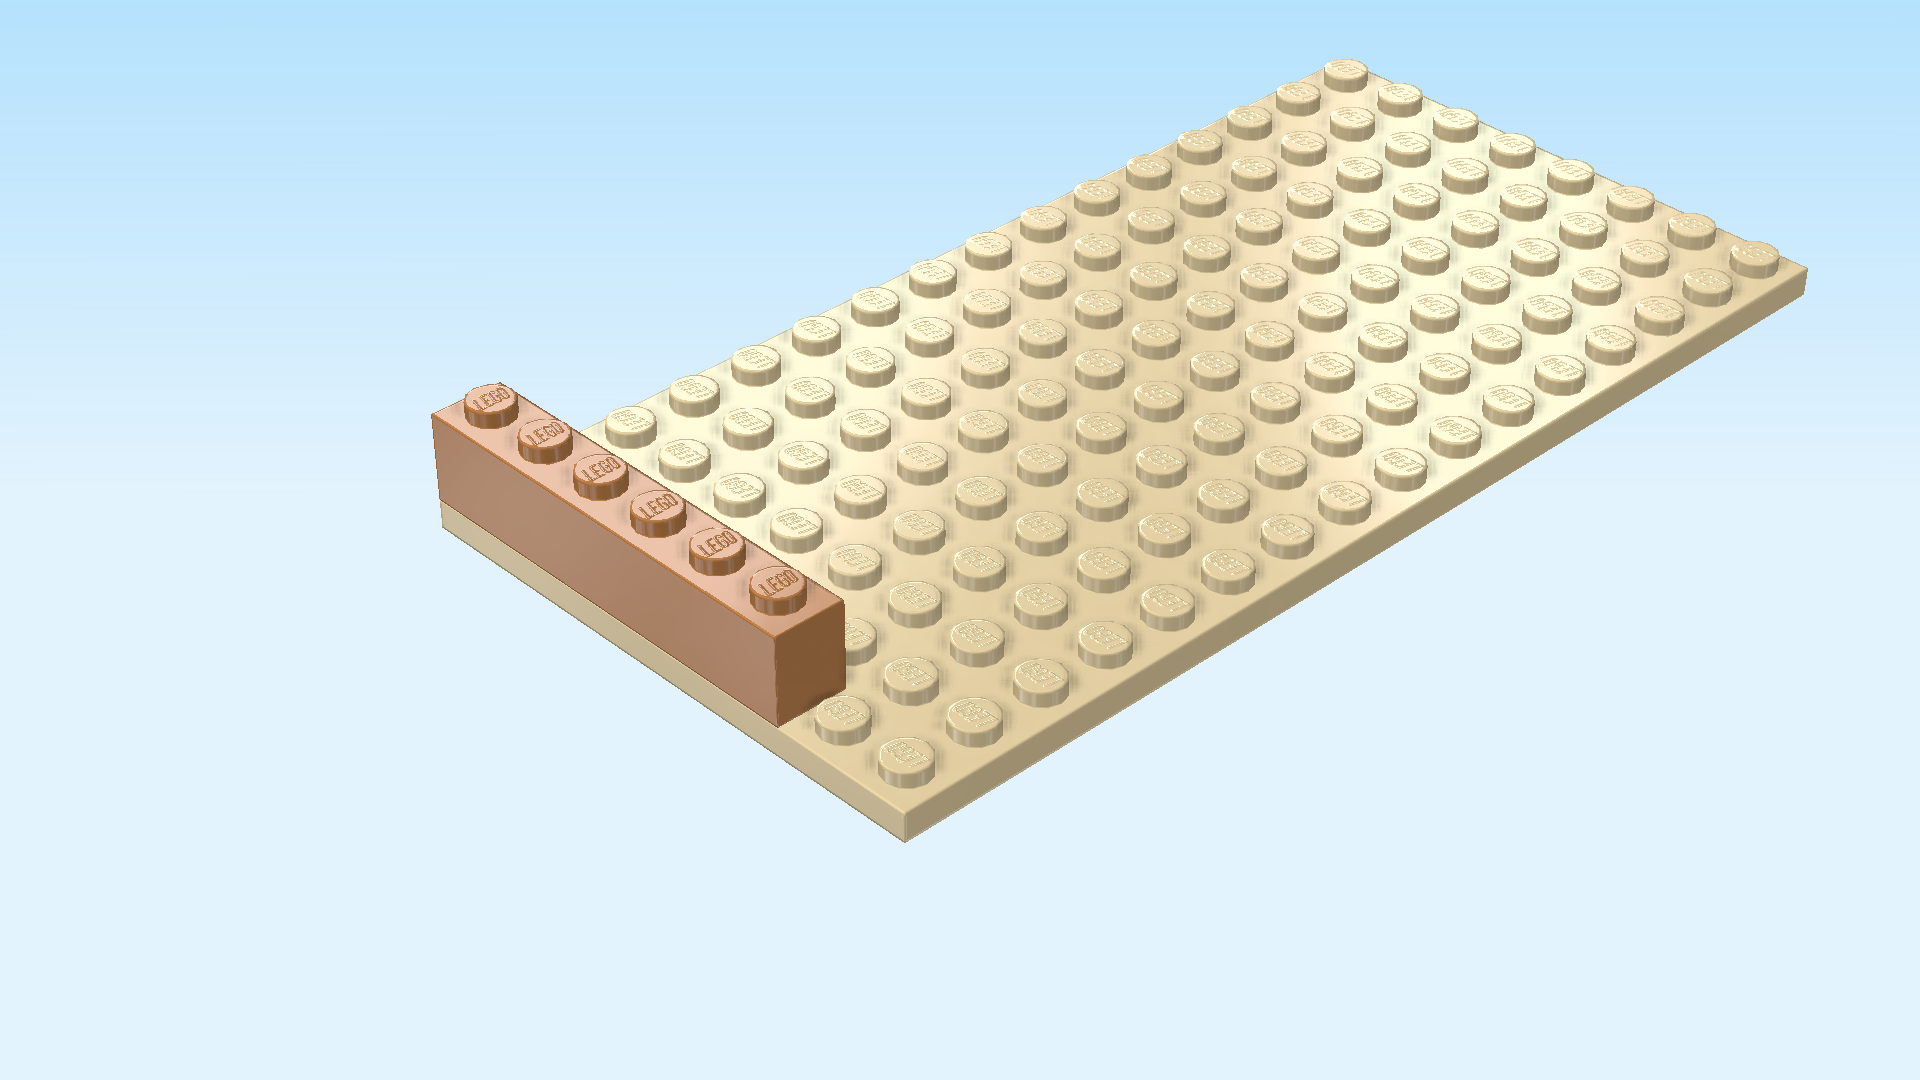
| Collect the following 2 pieces: |
| 1 pale ocher yellow plate 8x16, |
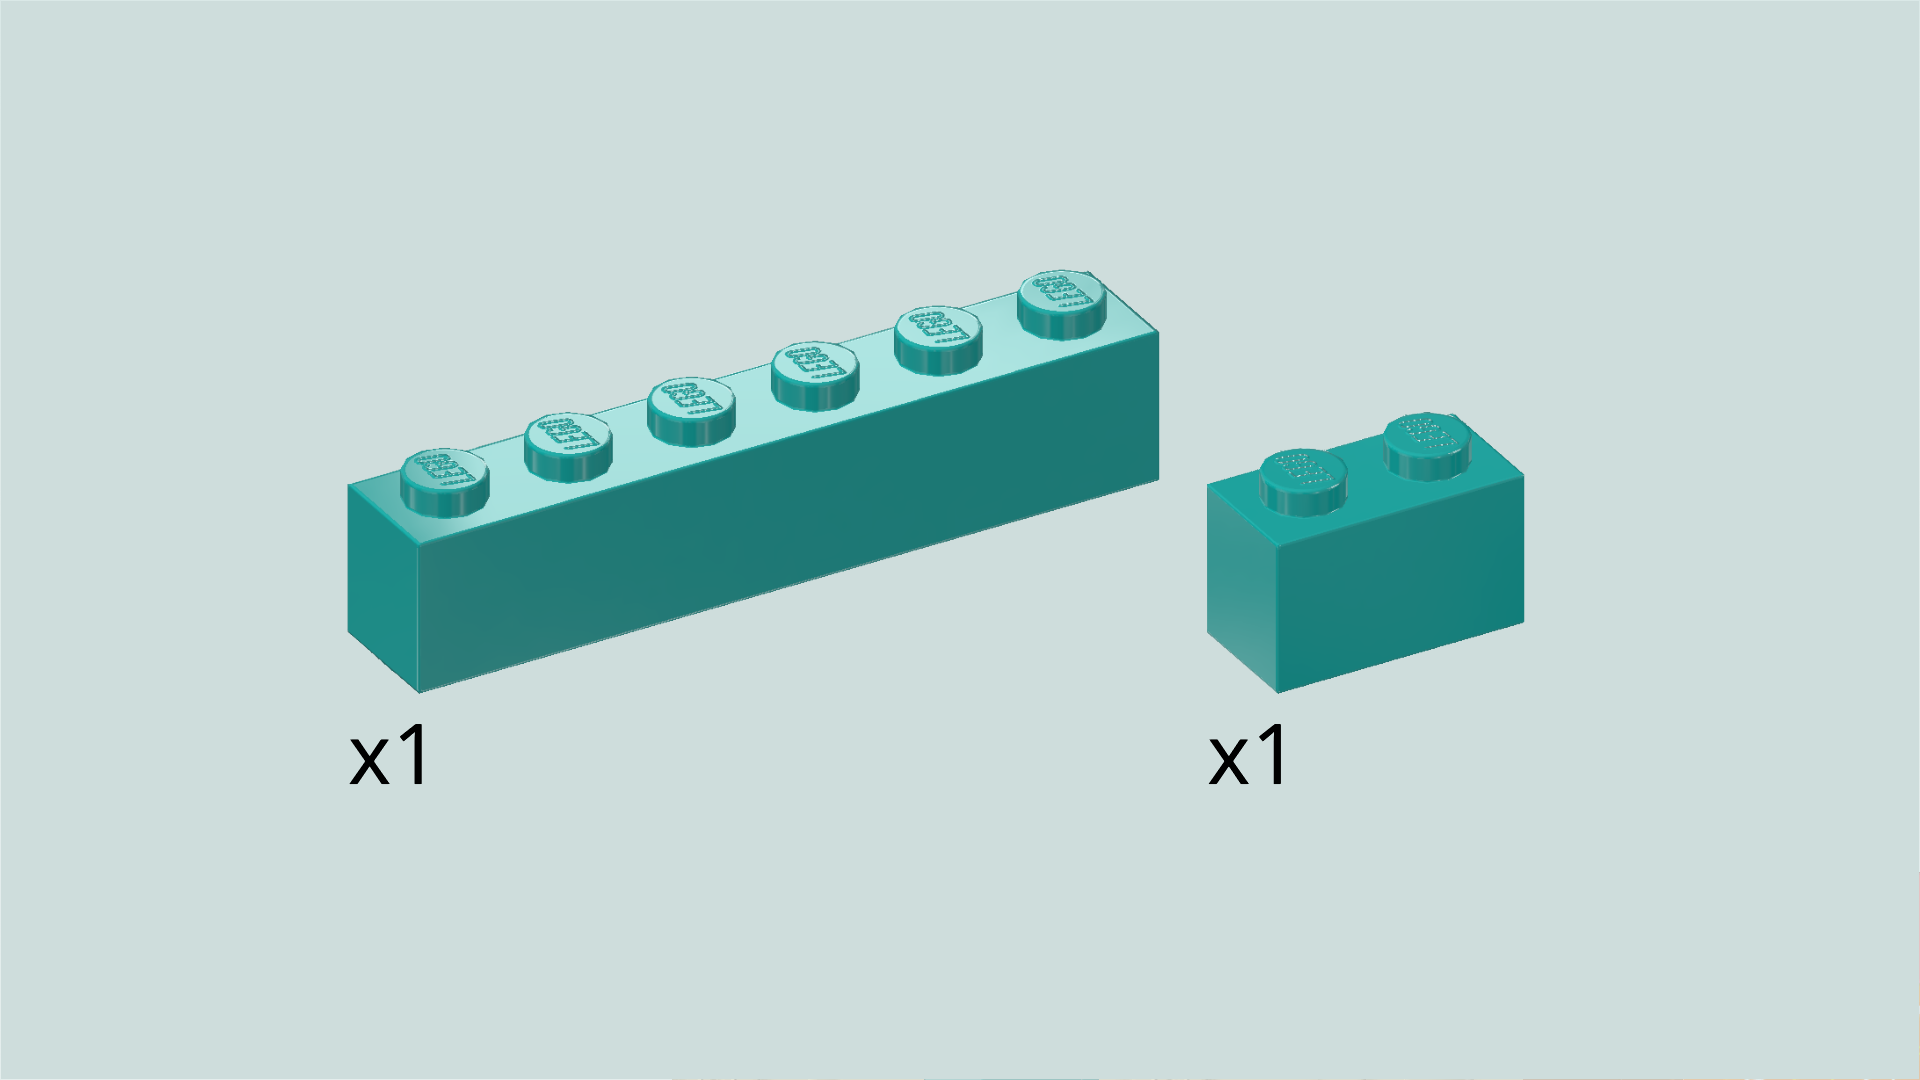
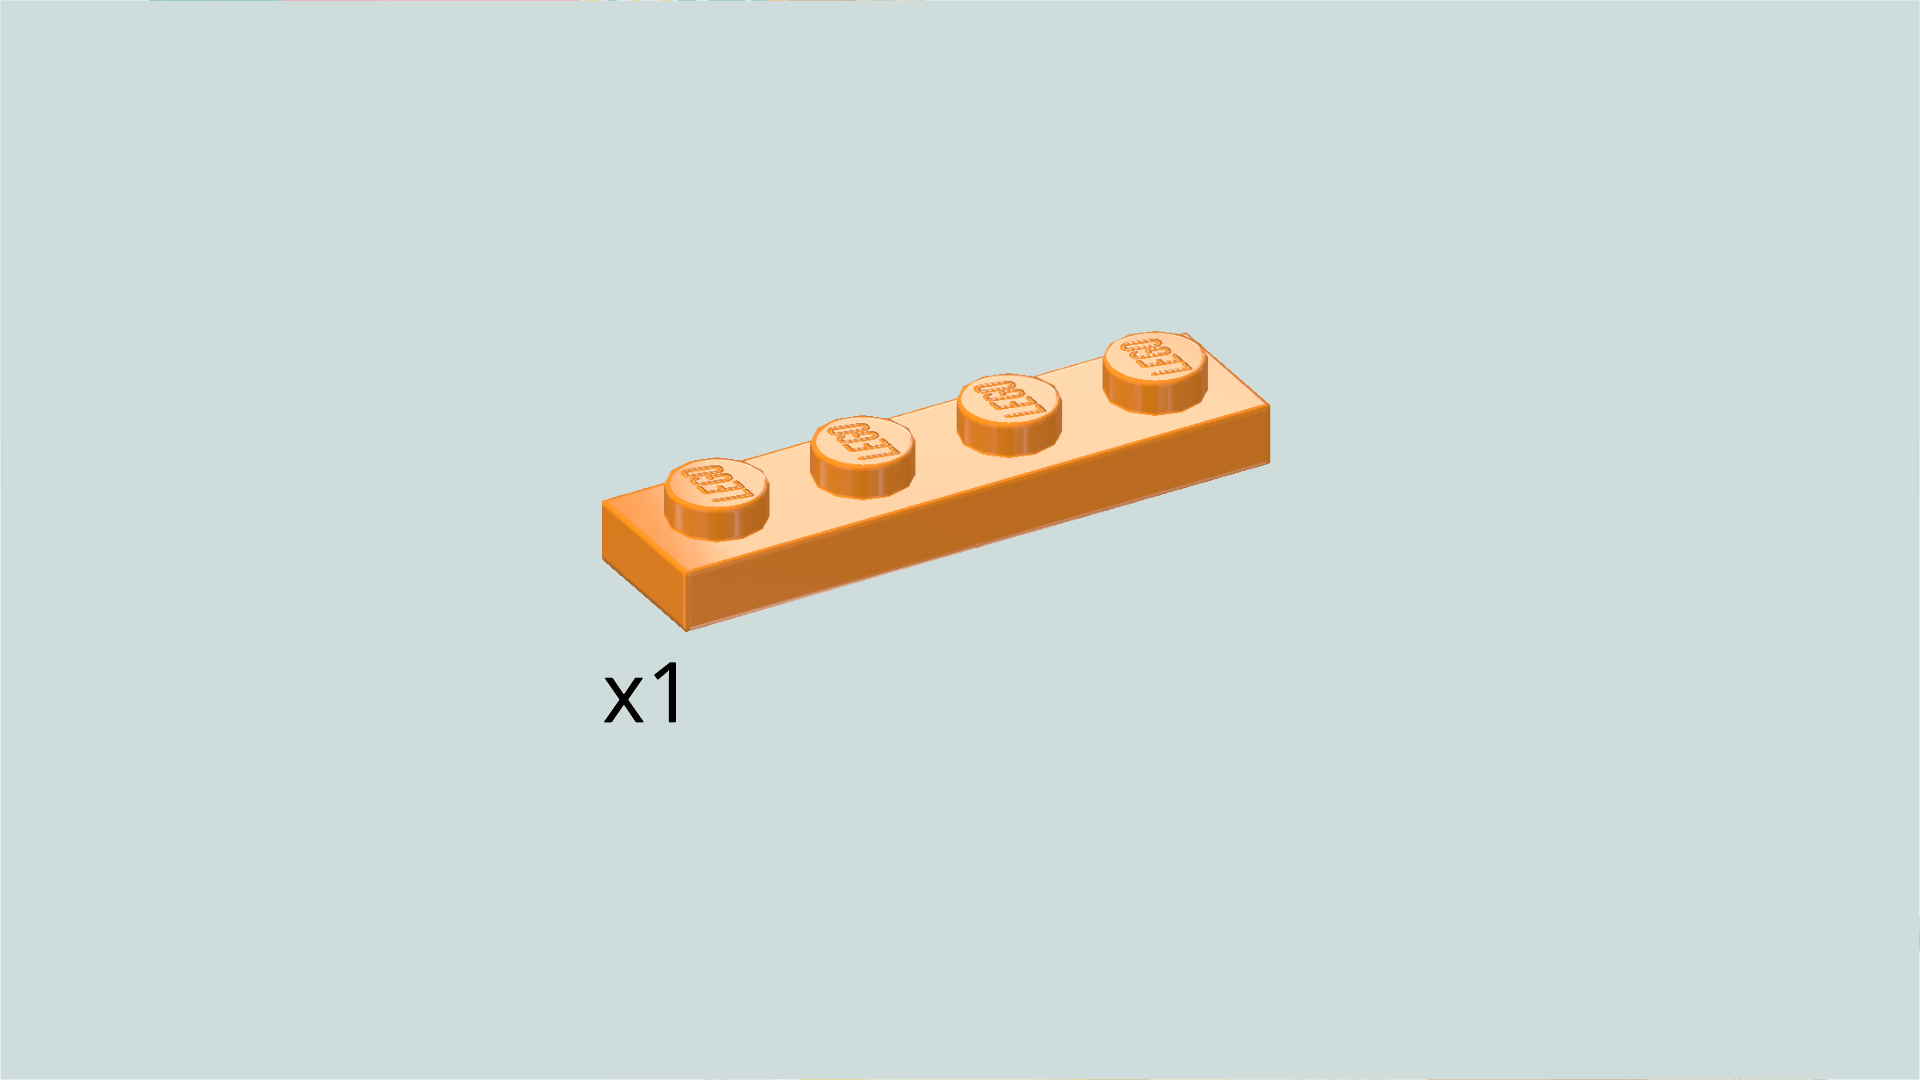
| and 1 medium nougat brown brick 1x6. |
| Put the plate 8x16 vertically on the table. |
| Put the brick 1x6 horizontally on the front row, starting from the left edge. |
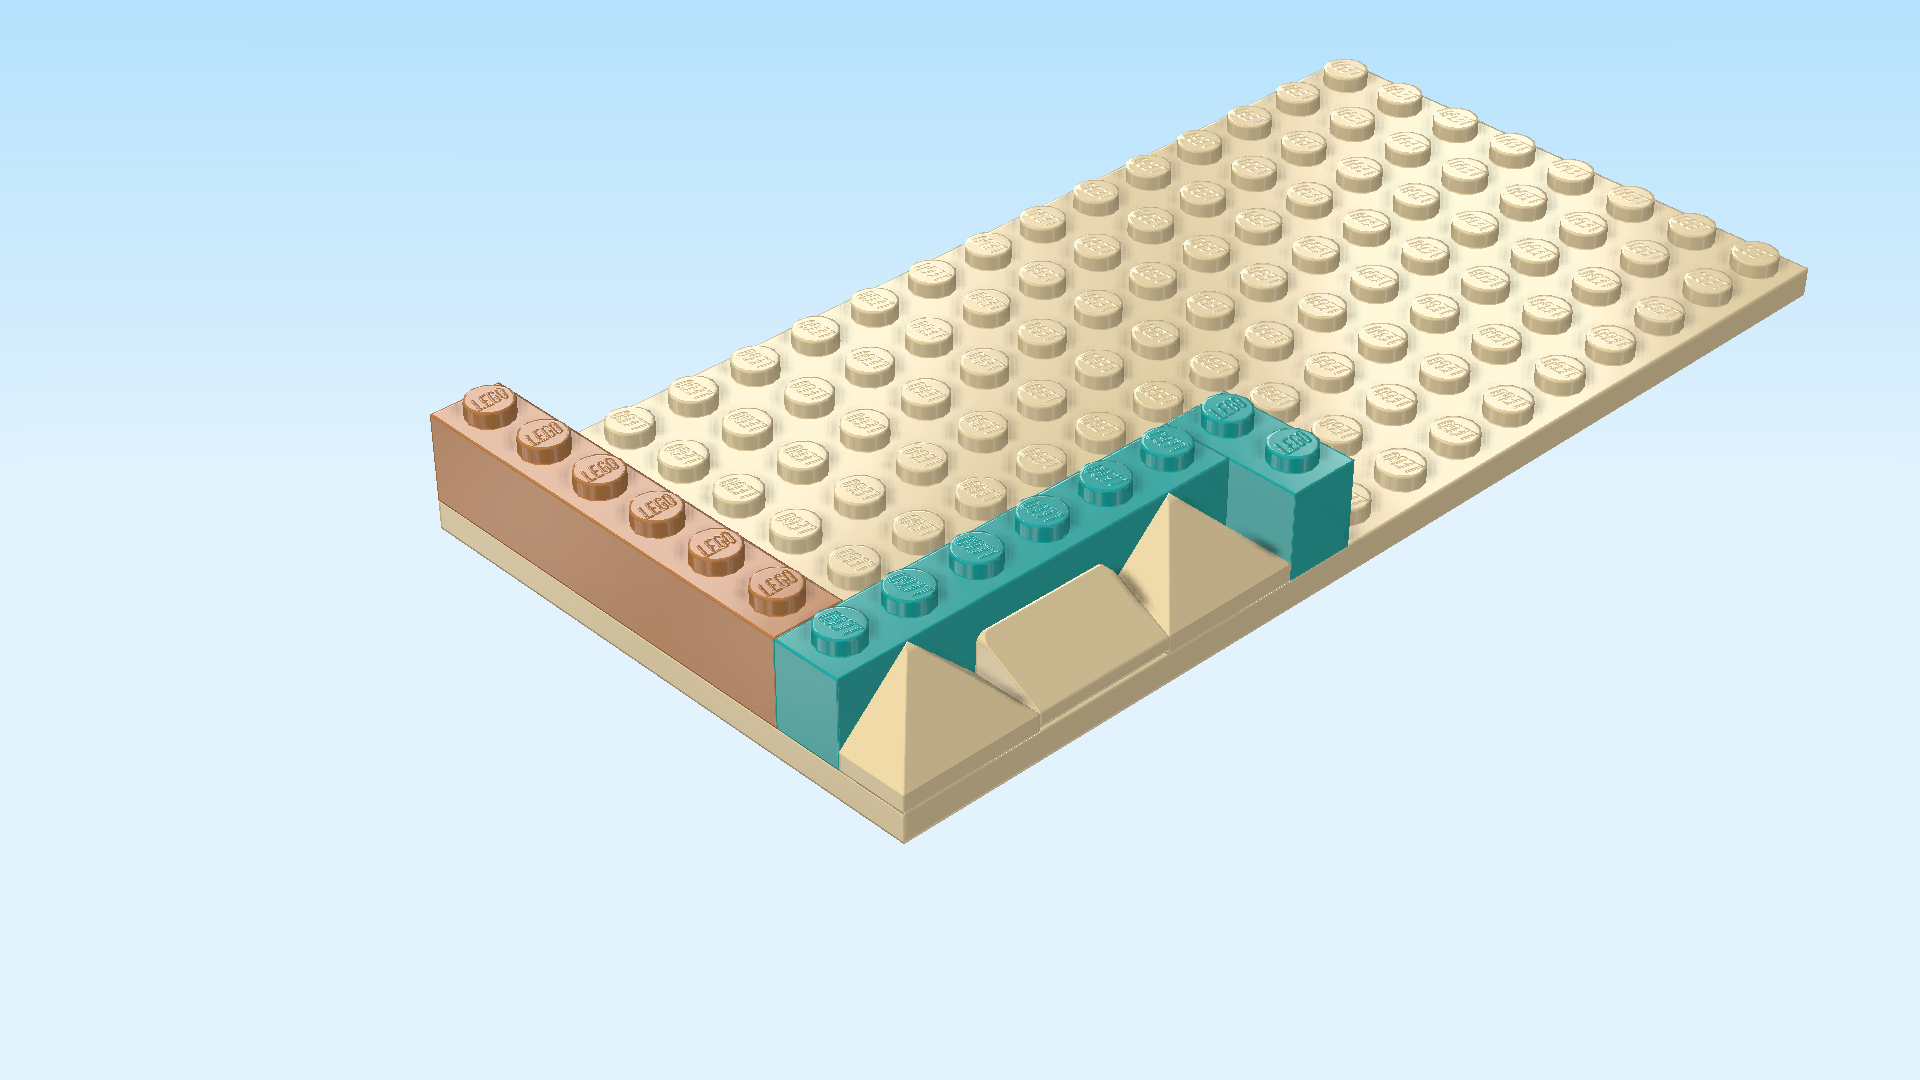
| Collect the following 2 pieces: |
| 1 teal blue brick 1x6, |
| and 1 teal blue brick 1x2. |
| Put the brick 1x6 vertically to the right of the previous piece, starting from the front edge. |
| Put the brick 1x2 horizontally behind the previous piece. Make sure its right edge is flush with the right edge of the base plate. |
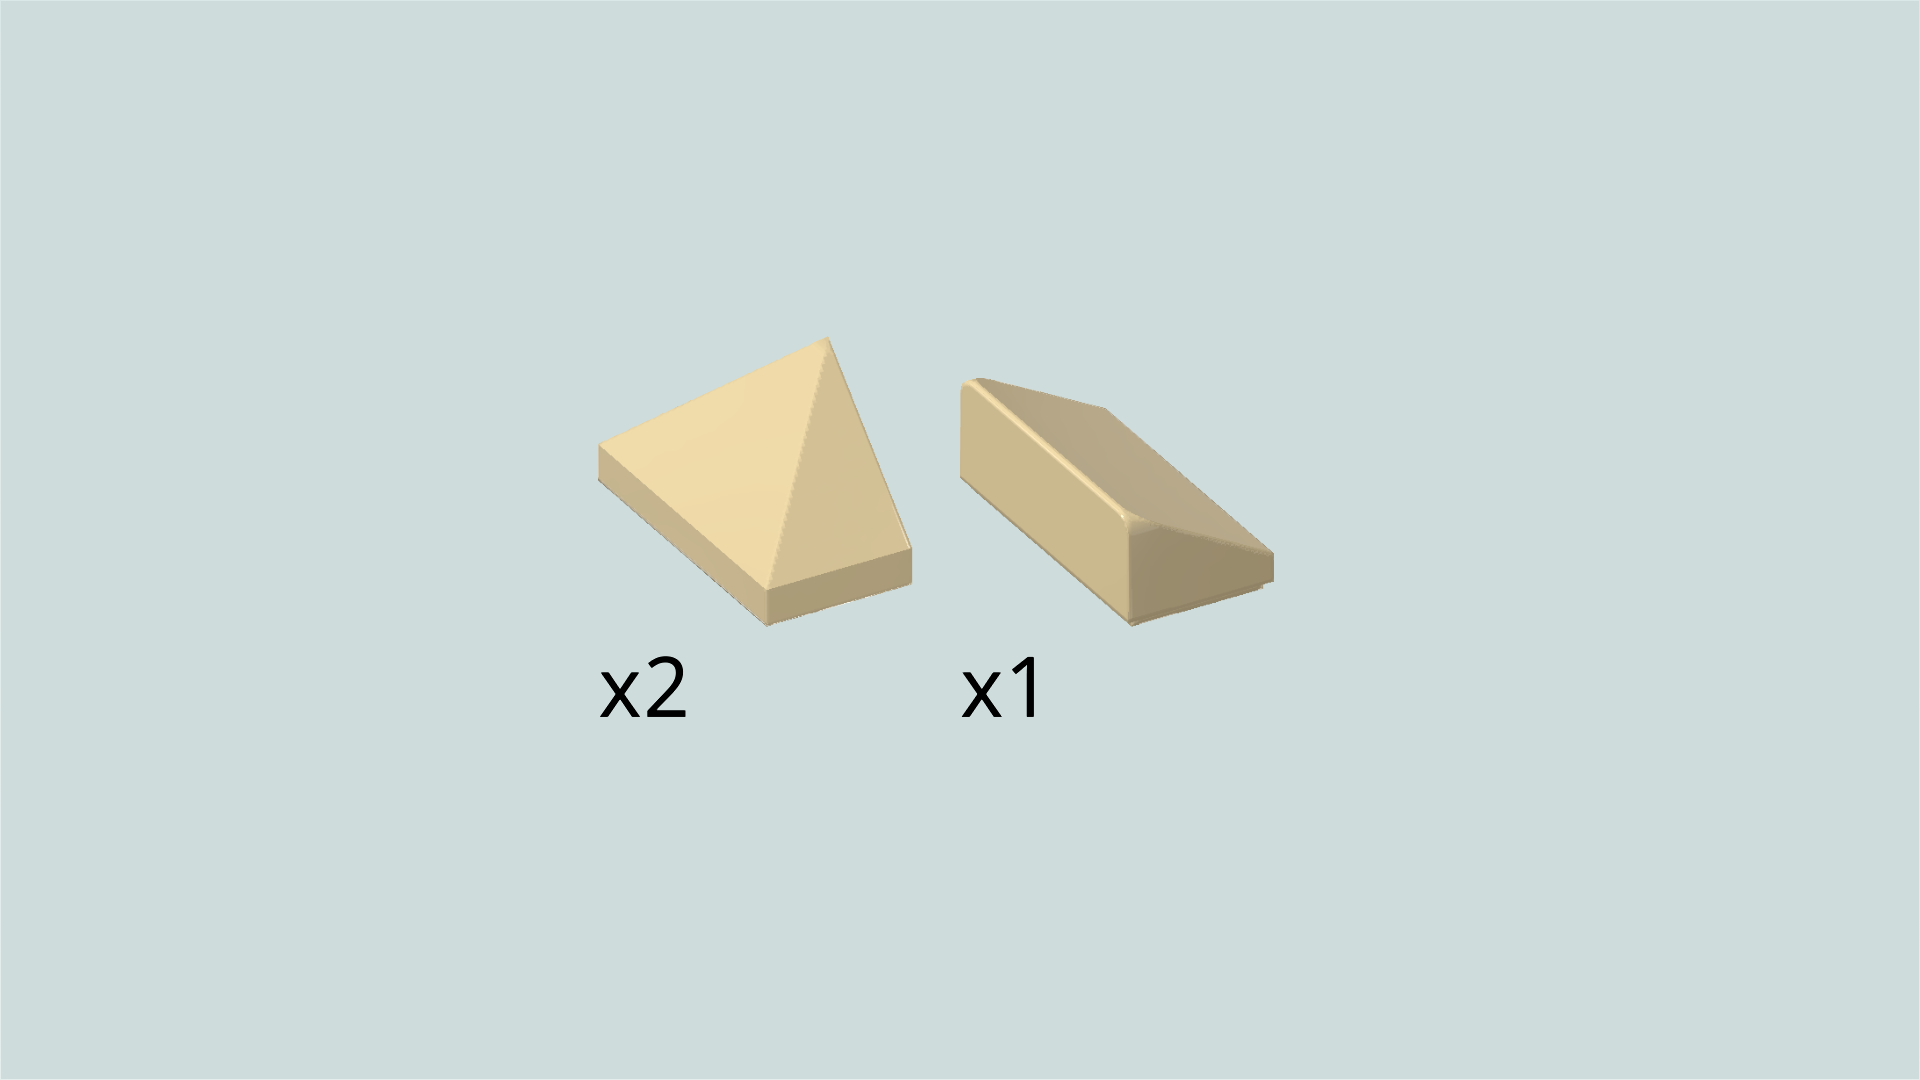
| Collect the following 3 pieces: |
| 2 pale ocher yellow triple-sloped roof tiles 1x2 45°, |
| and 1 pale ocher yellow smooth roof tile 1x2x⅔. |
| Put 1 triple-sloped roof tile vertically in front of the previous piece on the rightmost column, slopes to the front, back, and right. |
| Put the smooth roof tile 1x2 vertically in front of the previous piece, slope to the right. |
| Put the other triple-sloped roof tile 1x2 vertically in front of the previous piece, slopes again to the front, back, and right. |
| Collect the following 2 pieces: |
| 1 teal blue brick 1x1, |
| and 1 teal blue brick 1x6. |
| Put the brick 1x6 vertically to the left of the 3 previous pieces. |
| Put the brick 1x1 behind the previous piece. |
| Find 1 bright yellow brick 1x1 with side knob. |
| Put it to the right of the previous piece, side knob pointing to the right. |
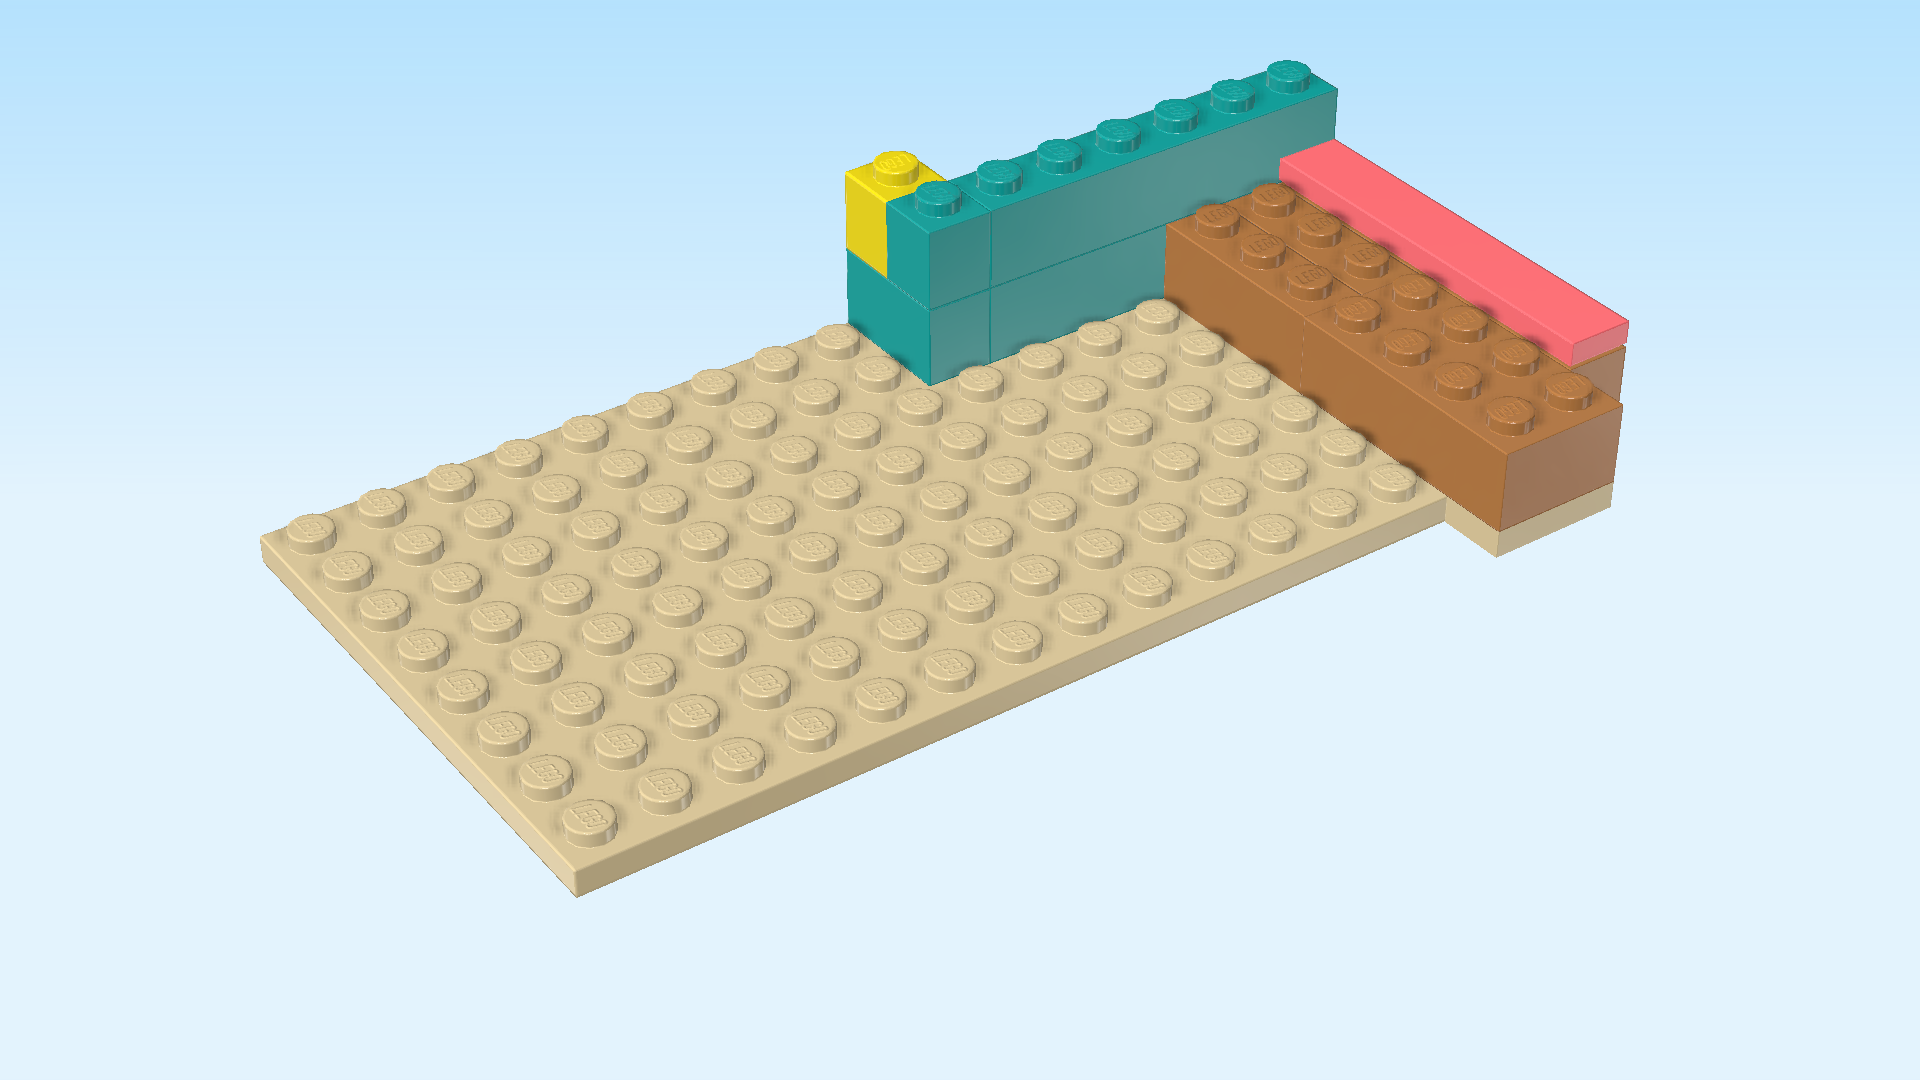
| Find 1 salmon pink flat tile 1x6. |
| Before we continue, turn the structure 90° to the right. The longer side of the base plate should now be facing you. Make sure that the bricks we have mounted so far are now forming the back corner on the right side. |
| Put the flat tile 1x6 vertically on the rightmost column, starting from the front edge. |
| Find 2 medium nougat brown bricks 1x3. |
| Put 1 vertically to the left of the previous piece starting from the back wall. If done correctly, 3 knobs will remain empty in front of this piece. |
| Put the other one vertically to the left of the previous piece. |
| Next, we will make another sub-part of the lower bunk bed. |
| Collect the following 2 pieces: |
| 1 pale ocher yellow plate 1x2, |
| and 1 medium nougat brown brick 2x4. |
| Put the plate 1x2 horizontally on the table. |
| Hold the brick 2x4 vertically and mount its frontmost row on the plate 1x2, 3 rows overhanging to the back. |
| Mount this sub-part vertically in front of the 2 previously mounted bricks 1x3. If done correctly, the frontmost row of this sub-part is overhanging to the front. |
| Collect the following 3 pieces: |
| 1 white flat tile 1x2, |
| 1 white smooth roof tile 1x2x⅔, |
| and 1 bright yellow plate 1x2 with side rail. |
| Put the plate with side rail horizontally on the frontmost row of the sub-part we have just mounted, side rail overhanging to the front. |
| Put the roof tile 1x2x⅔ horizontally on the bunk bed base directly in front of the back wall, slope to the front. |
| Put the flat tile 1x2 horizontally in front of the previous piece. |
| Collect the following 2 pieces: |
| 1 bright orange flat tile 2x4, |
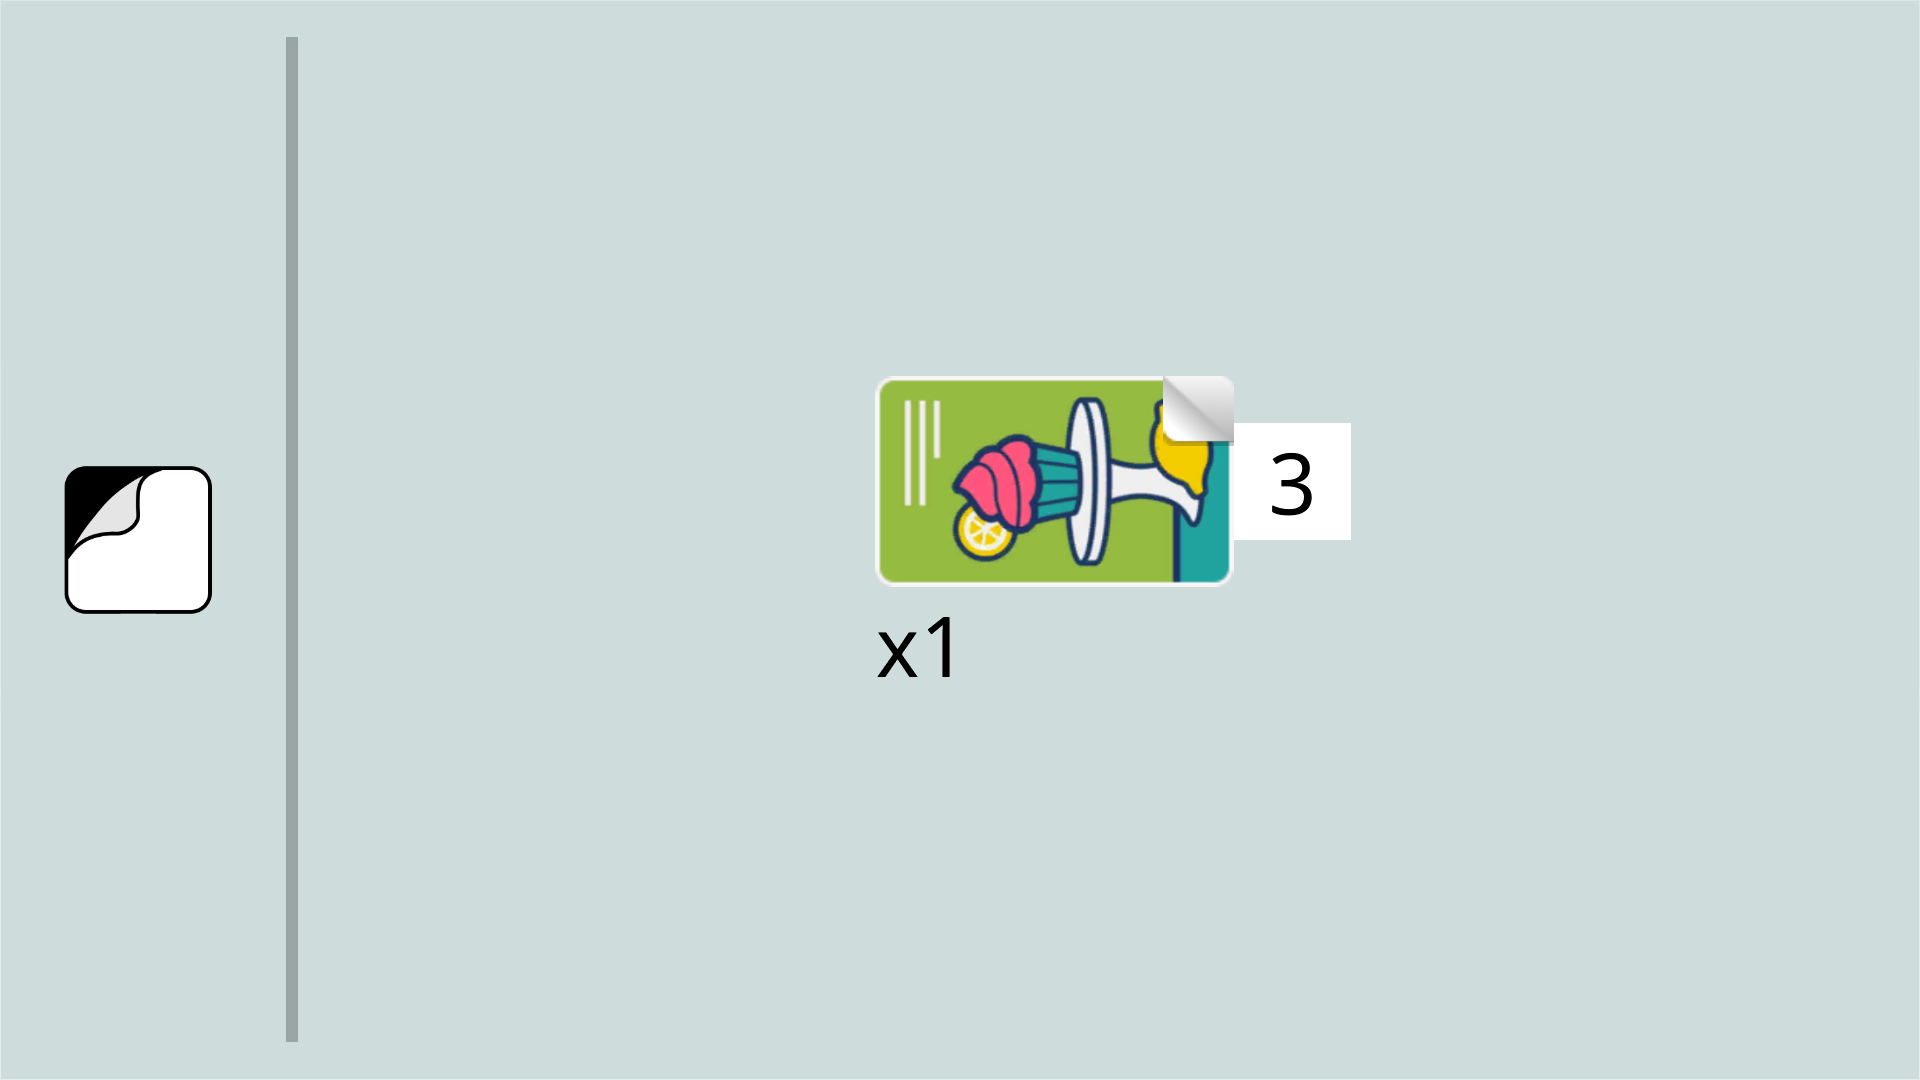
| and 1 rectangular sticker 2x4 (number 10). |
| Put the flat tile 2x4 vertically on the table. |
| Put the sticker vertically on top. |
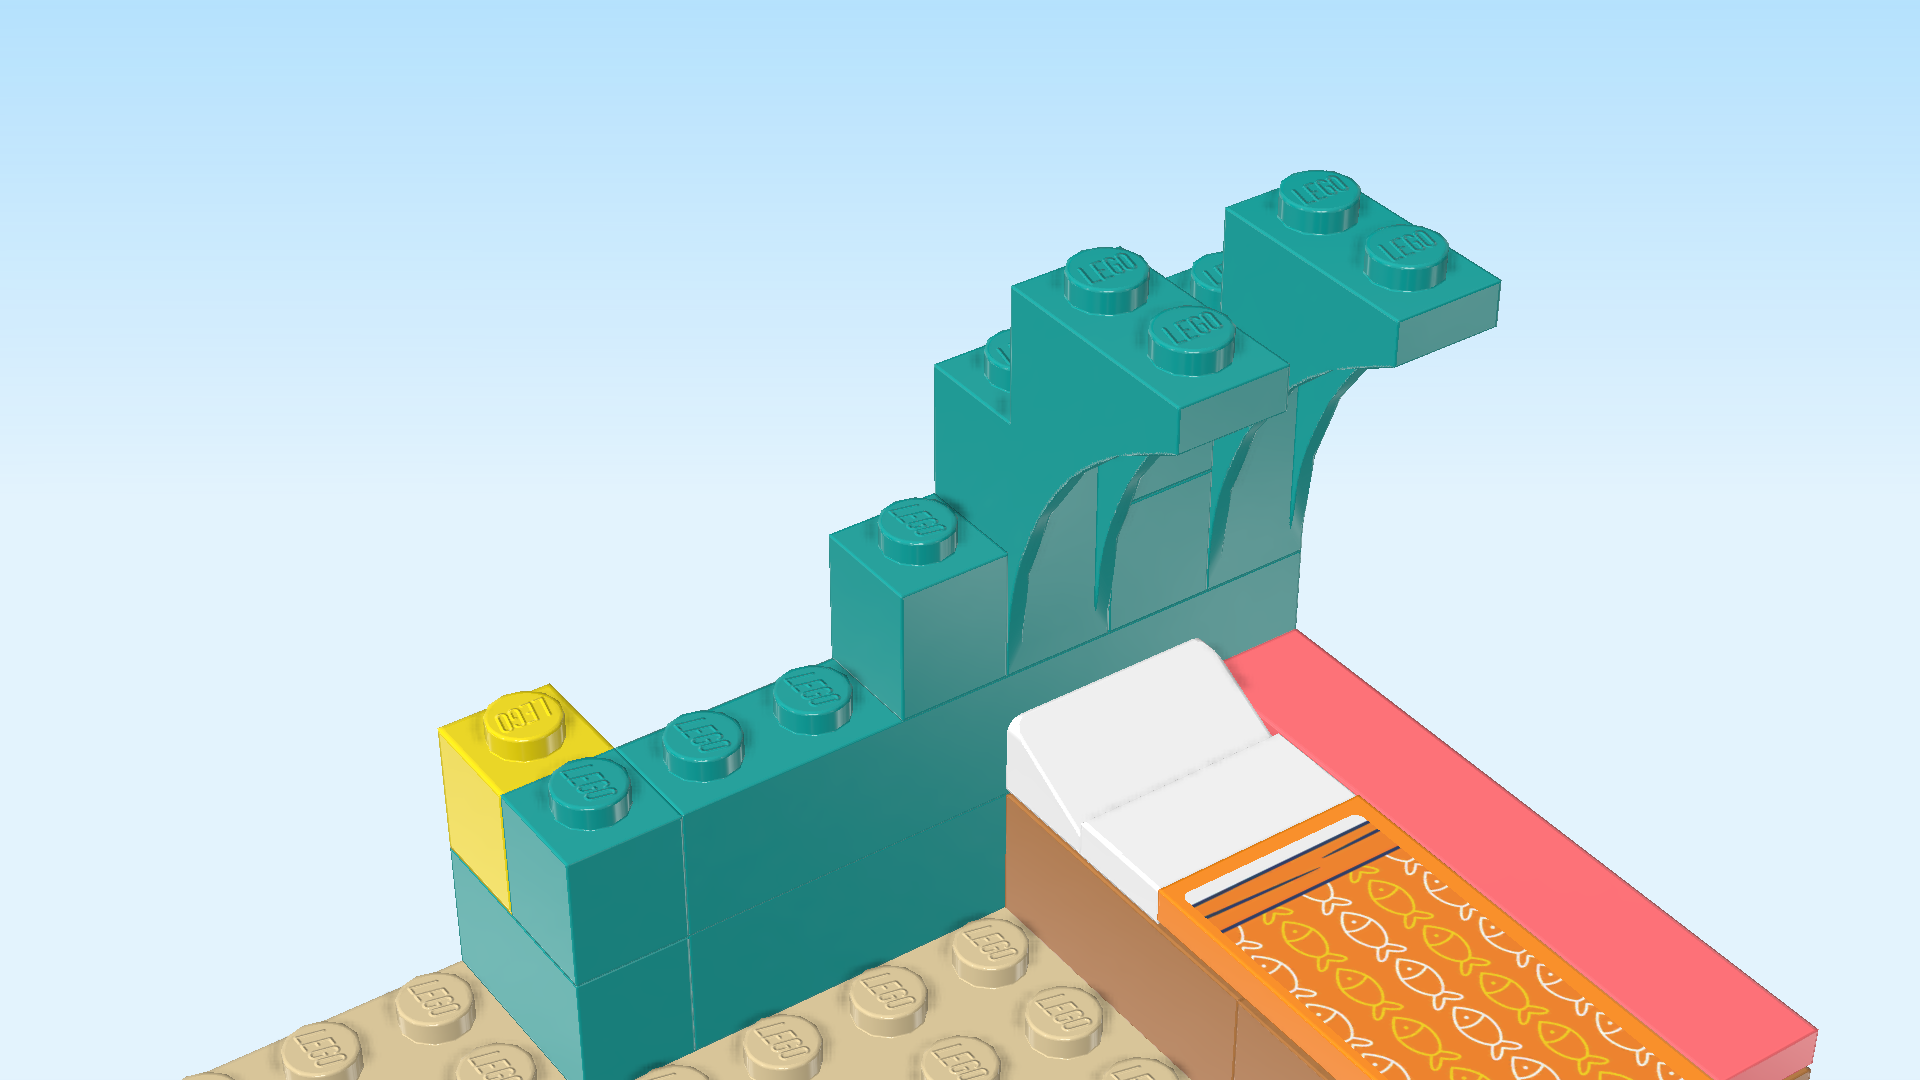
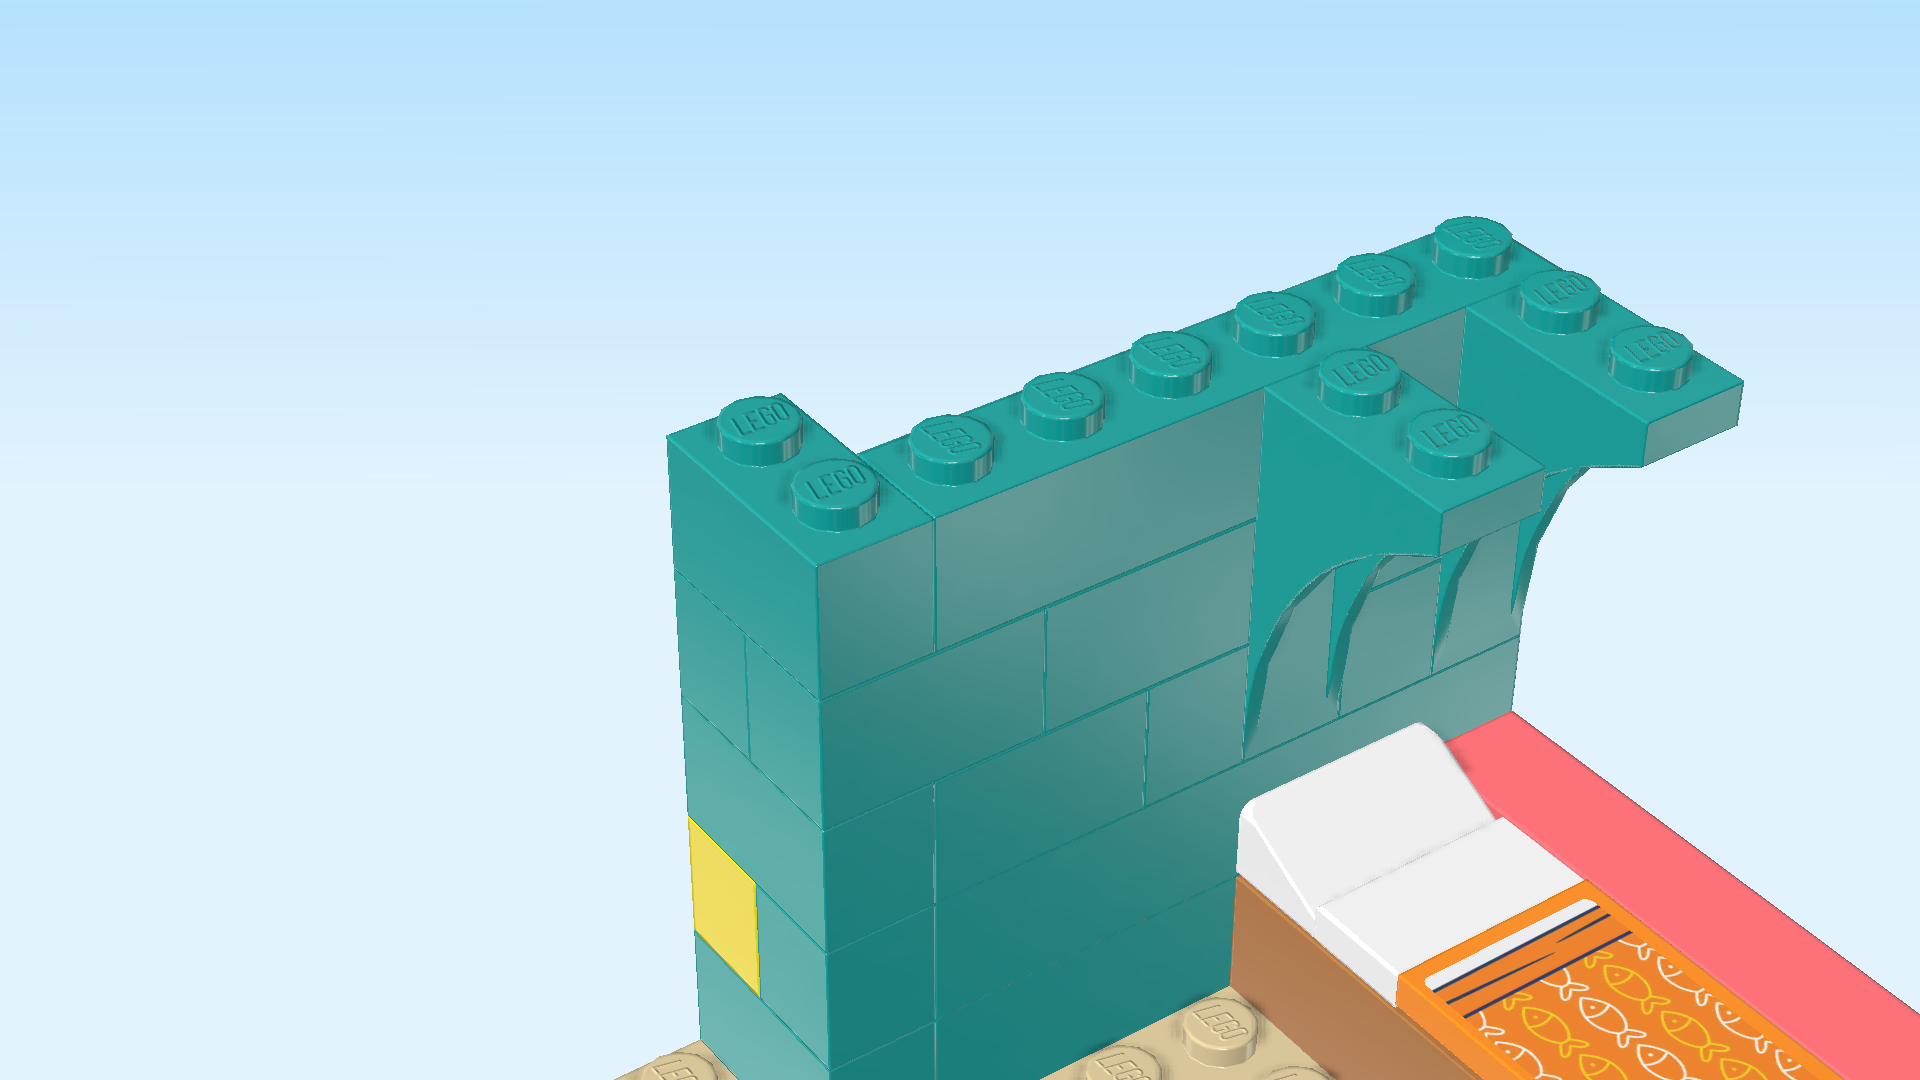
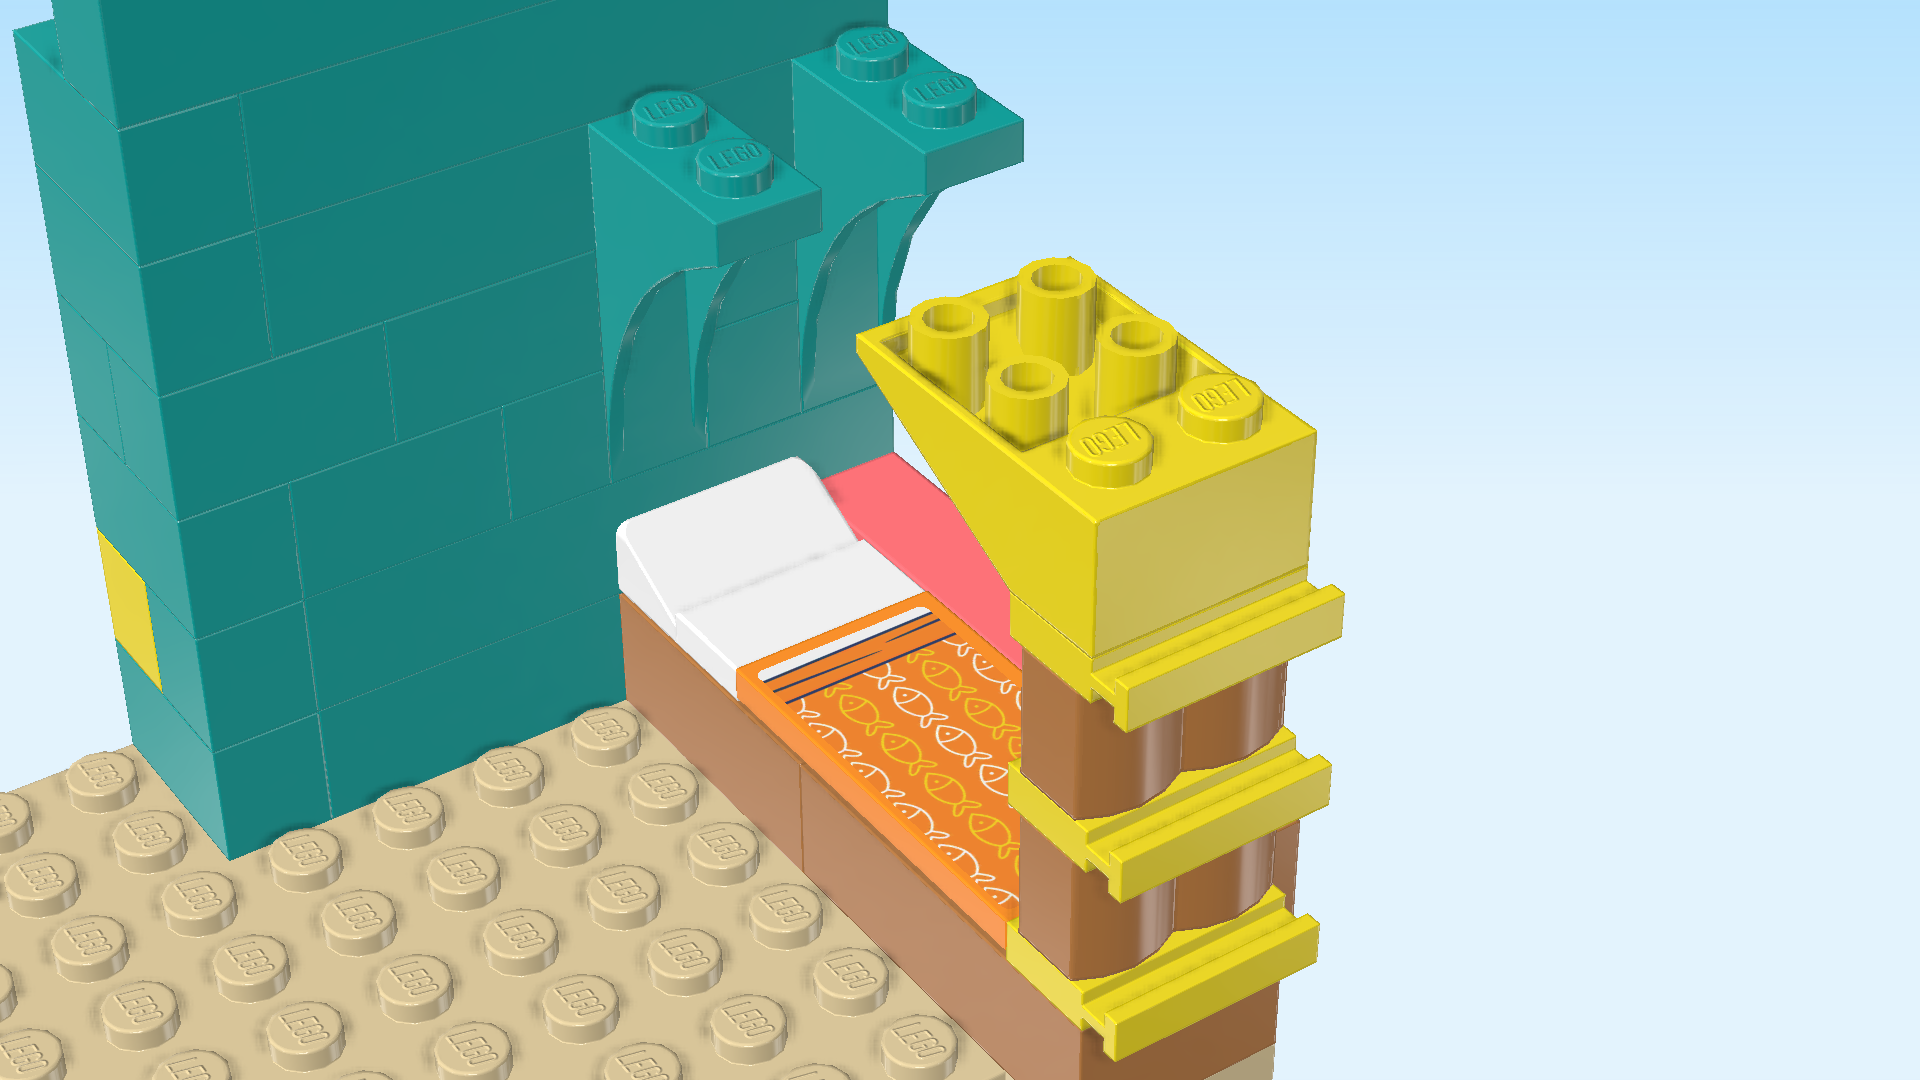
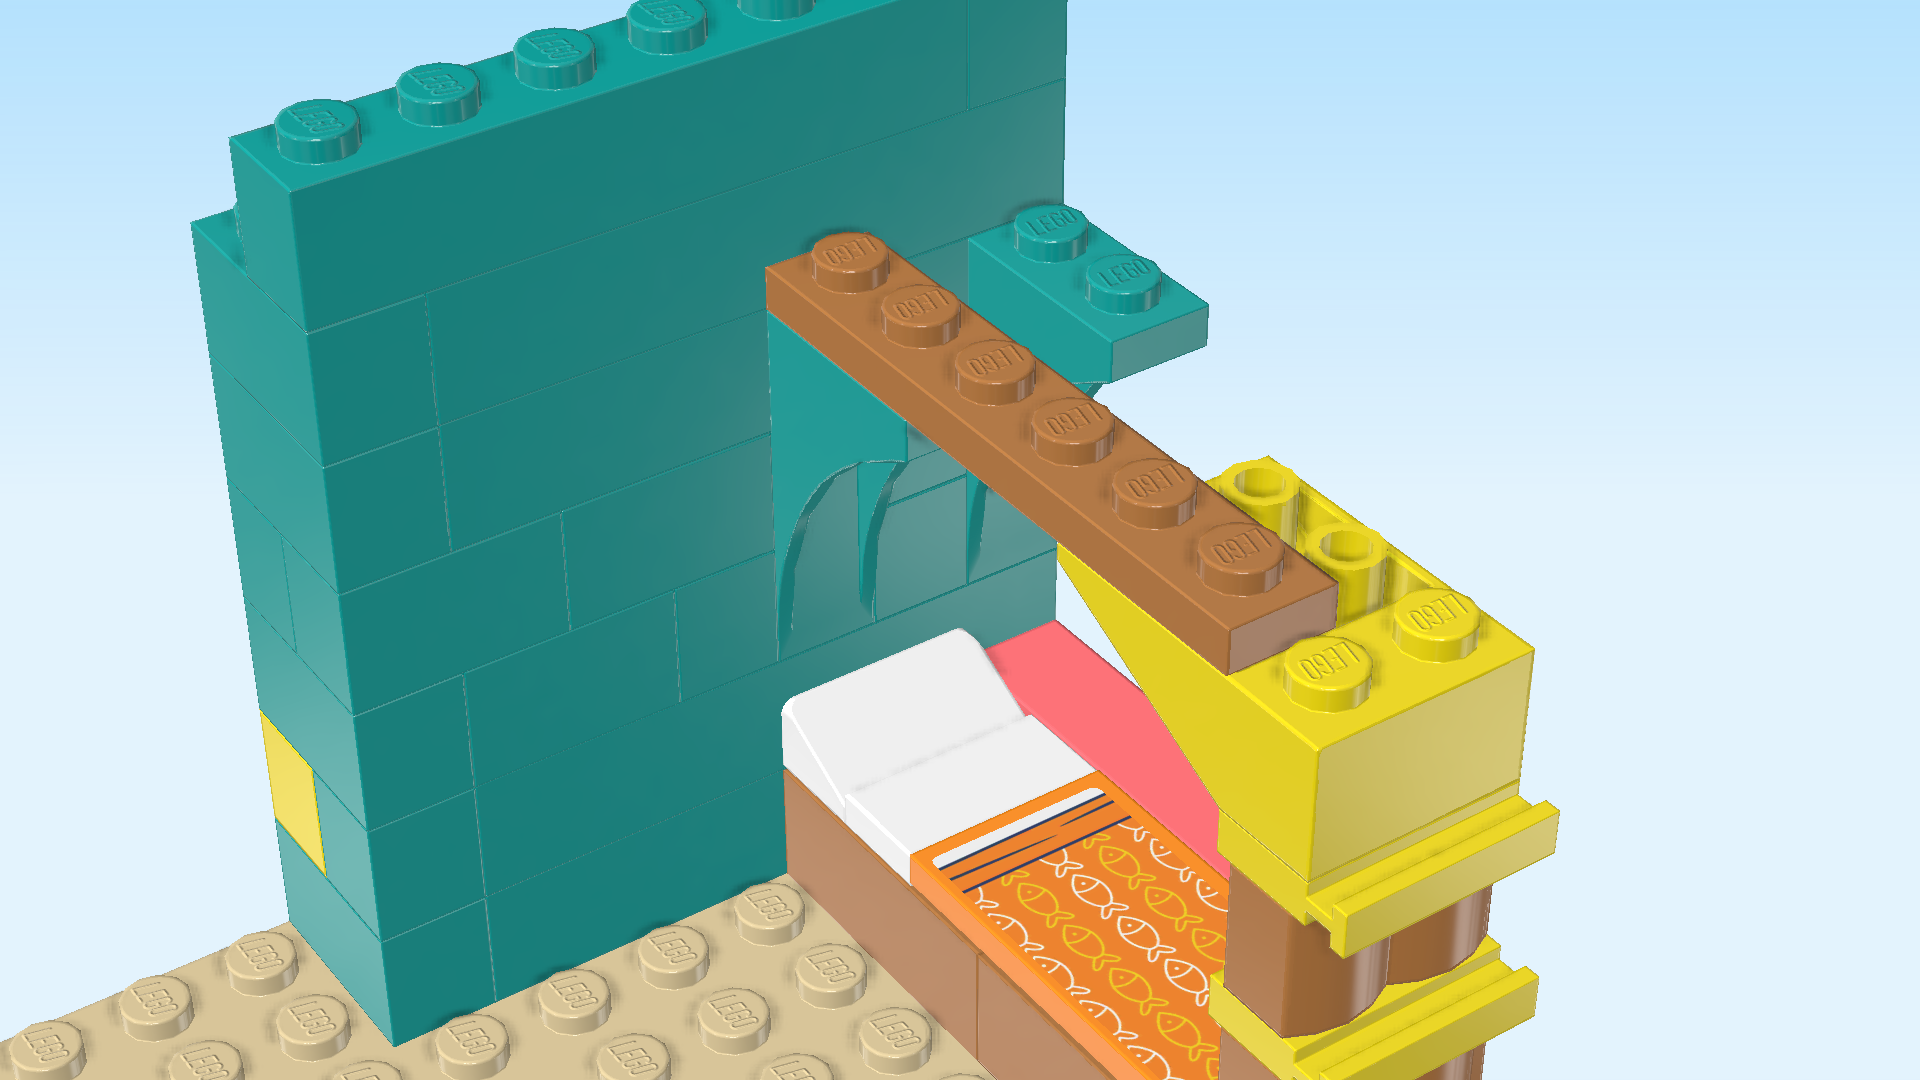
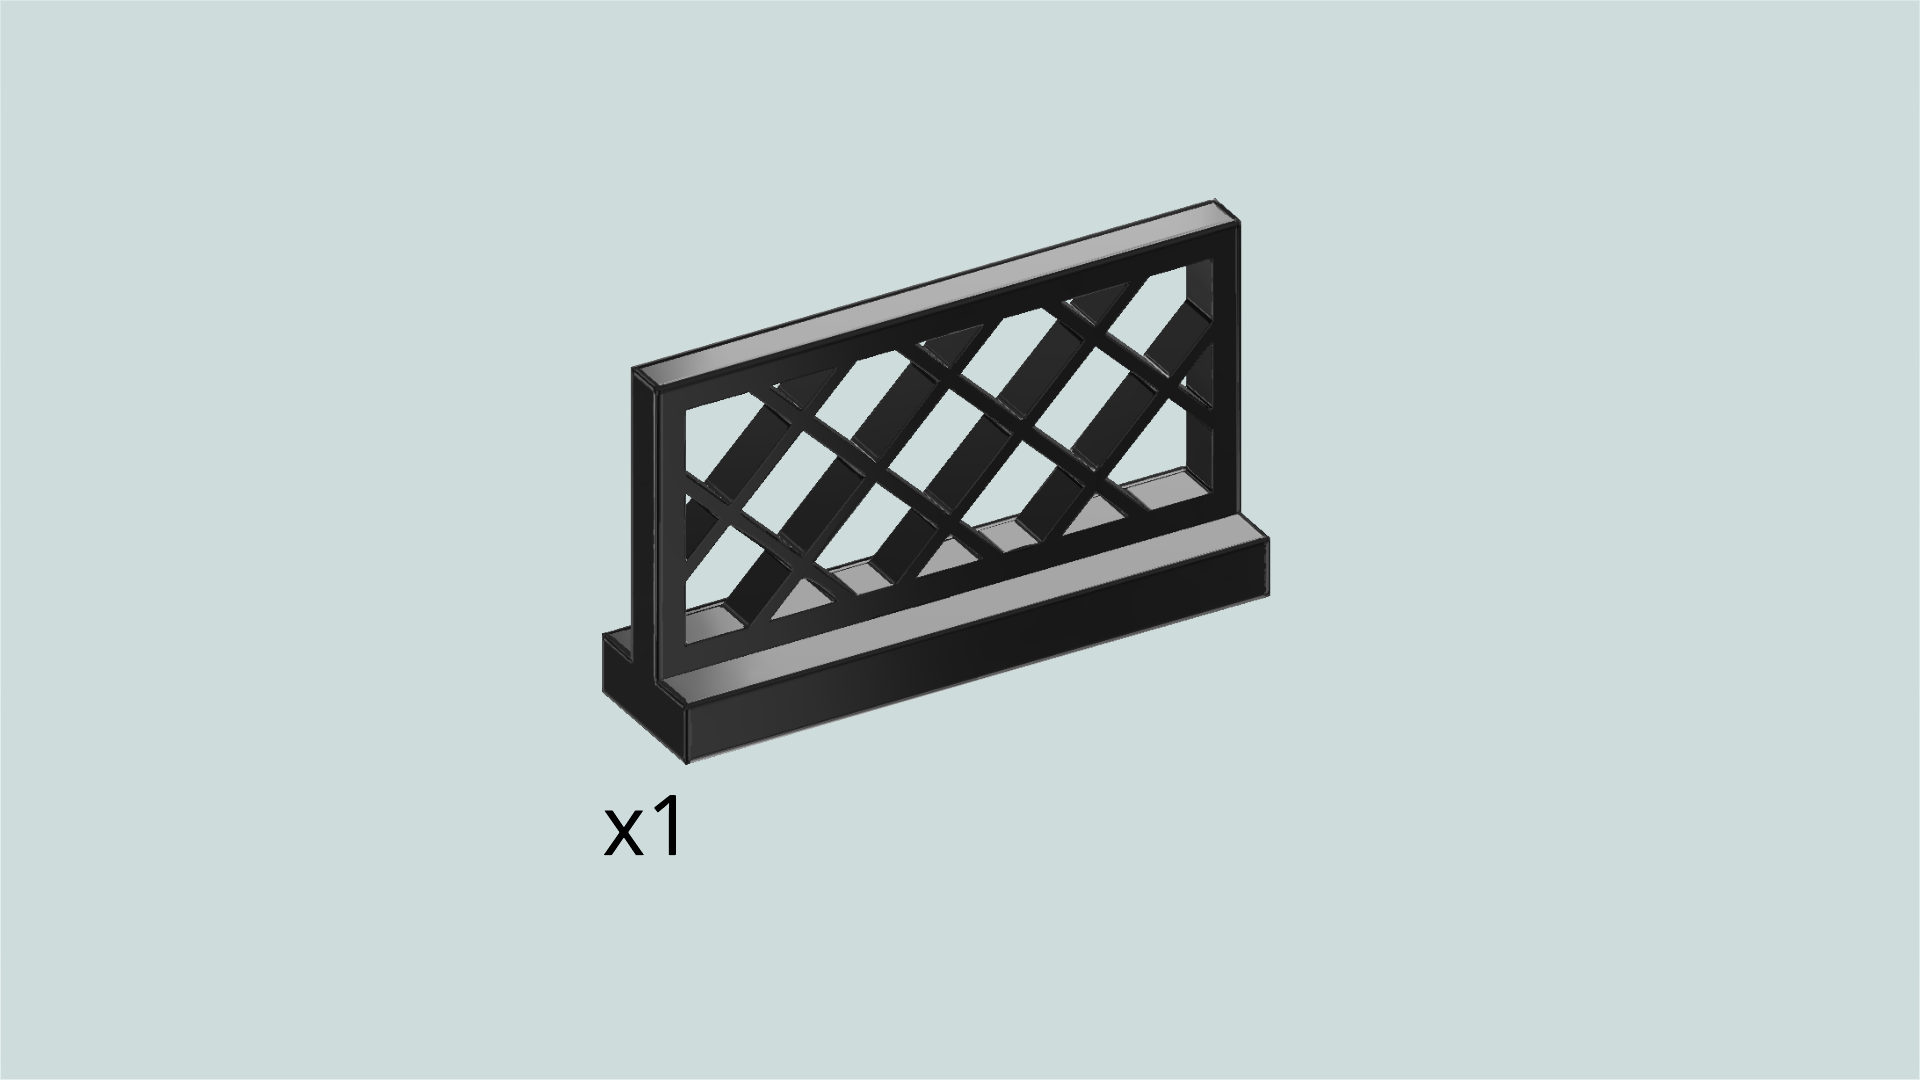
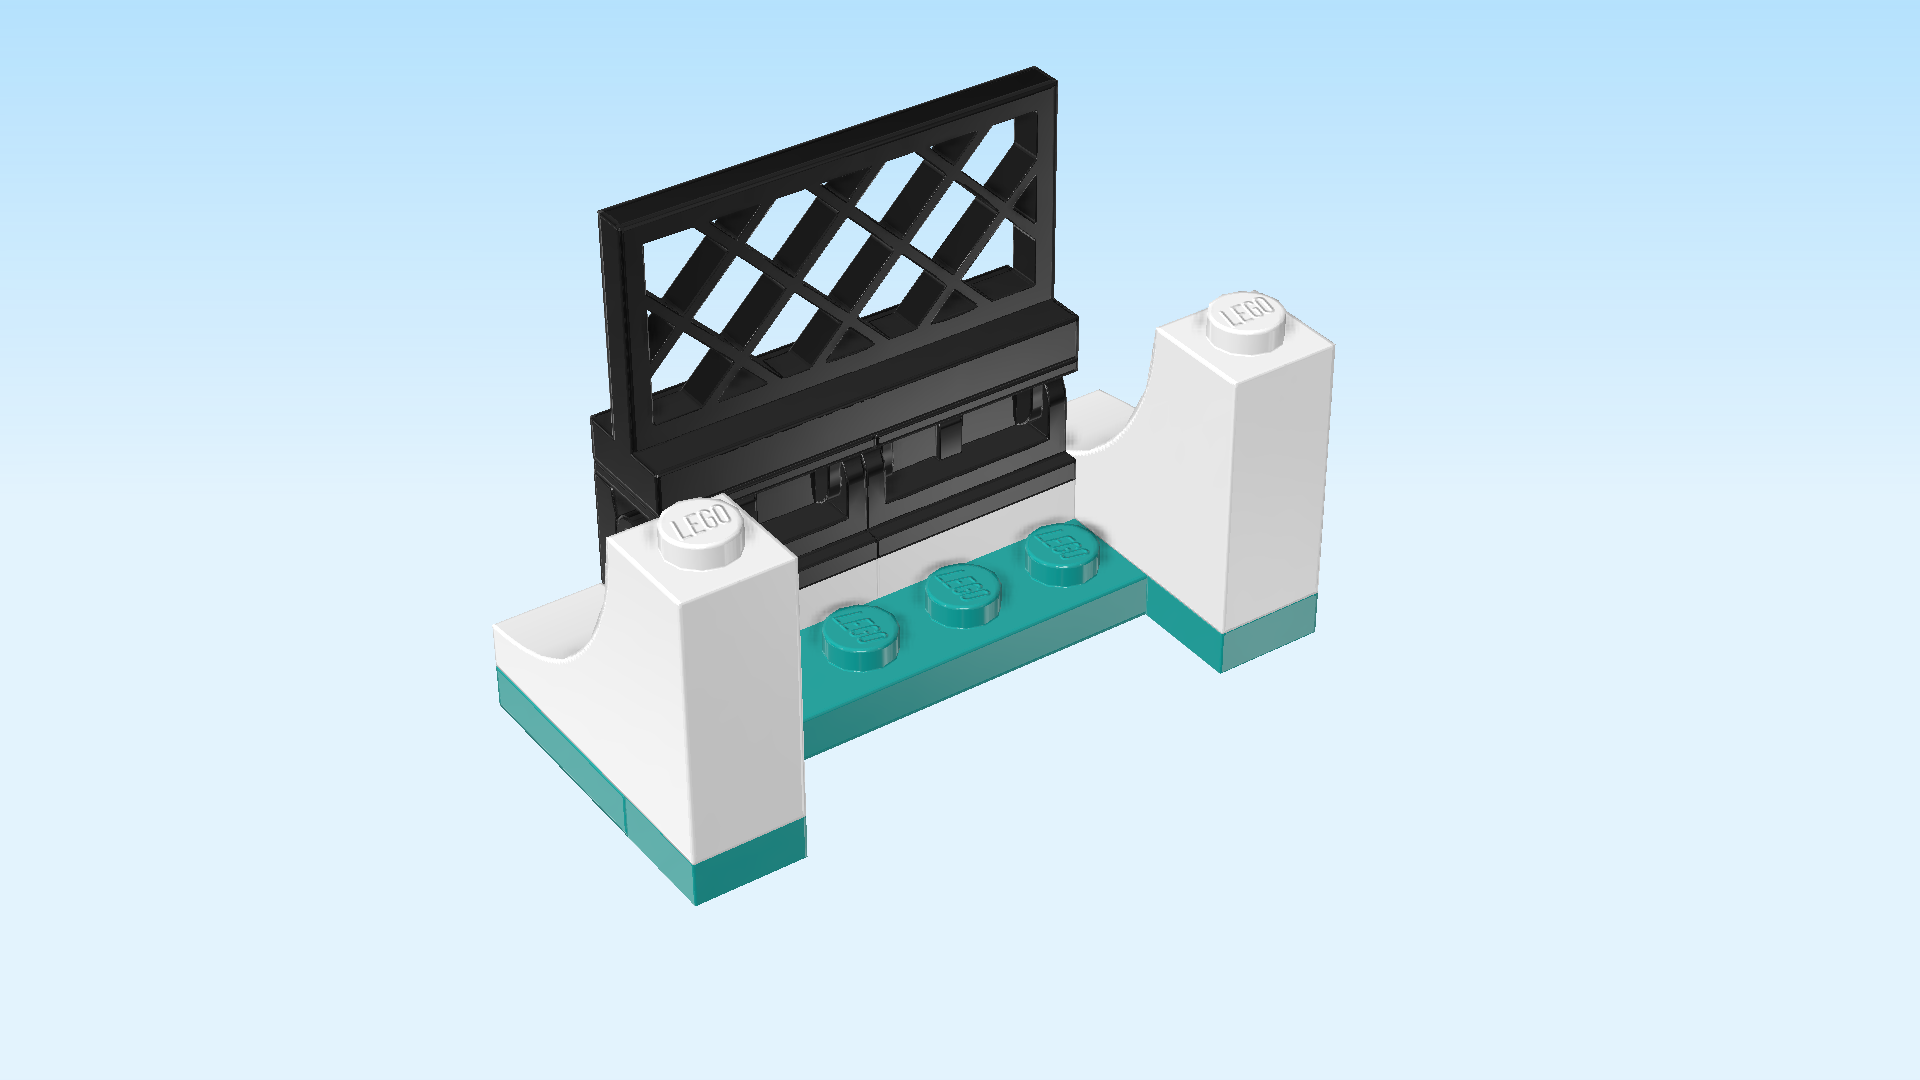
| Find 1 teal blue half-arch brick 1x3x3 with 1 step. |
| Put it vertically on the rightmost knob of the back wall, arch to the front. This means that the arch will partly roof the flat tile 1x6 on the rightmost column of the structure. |
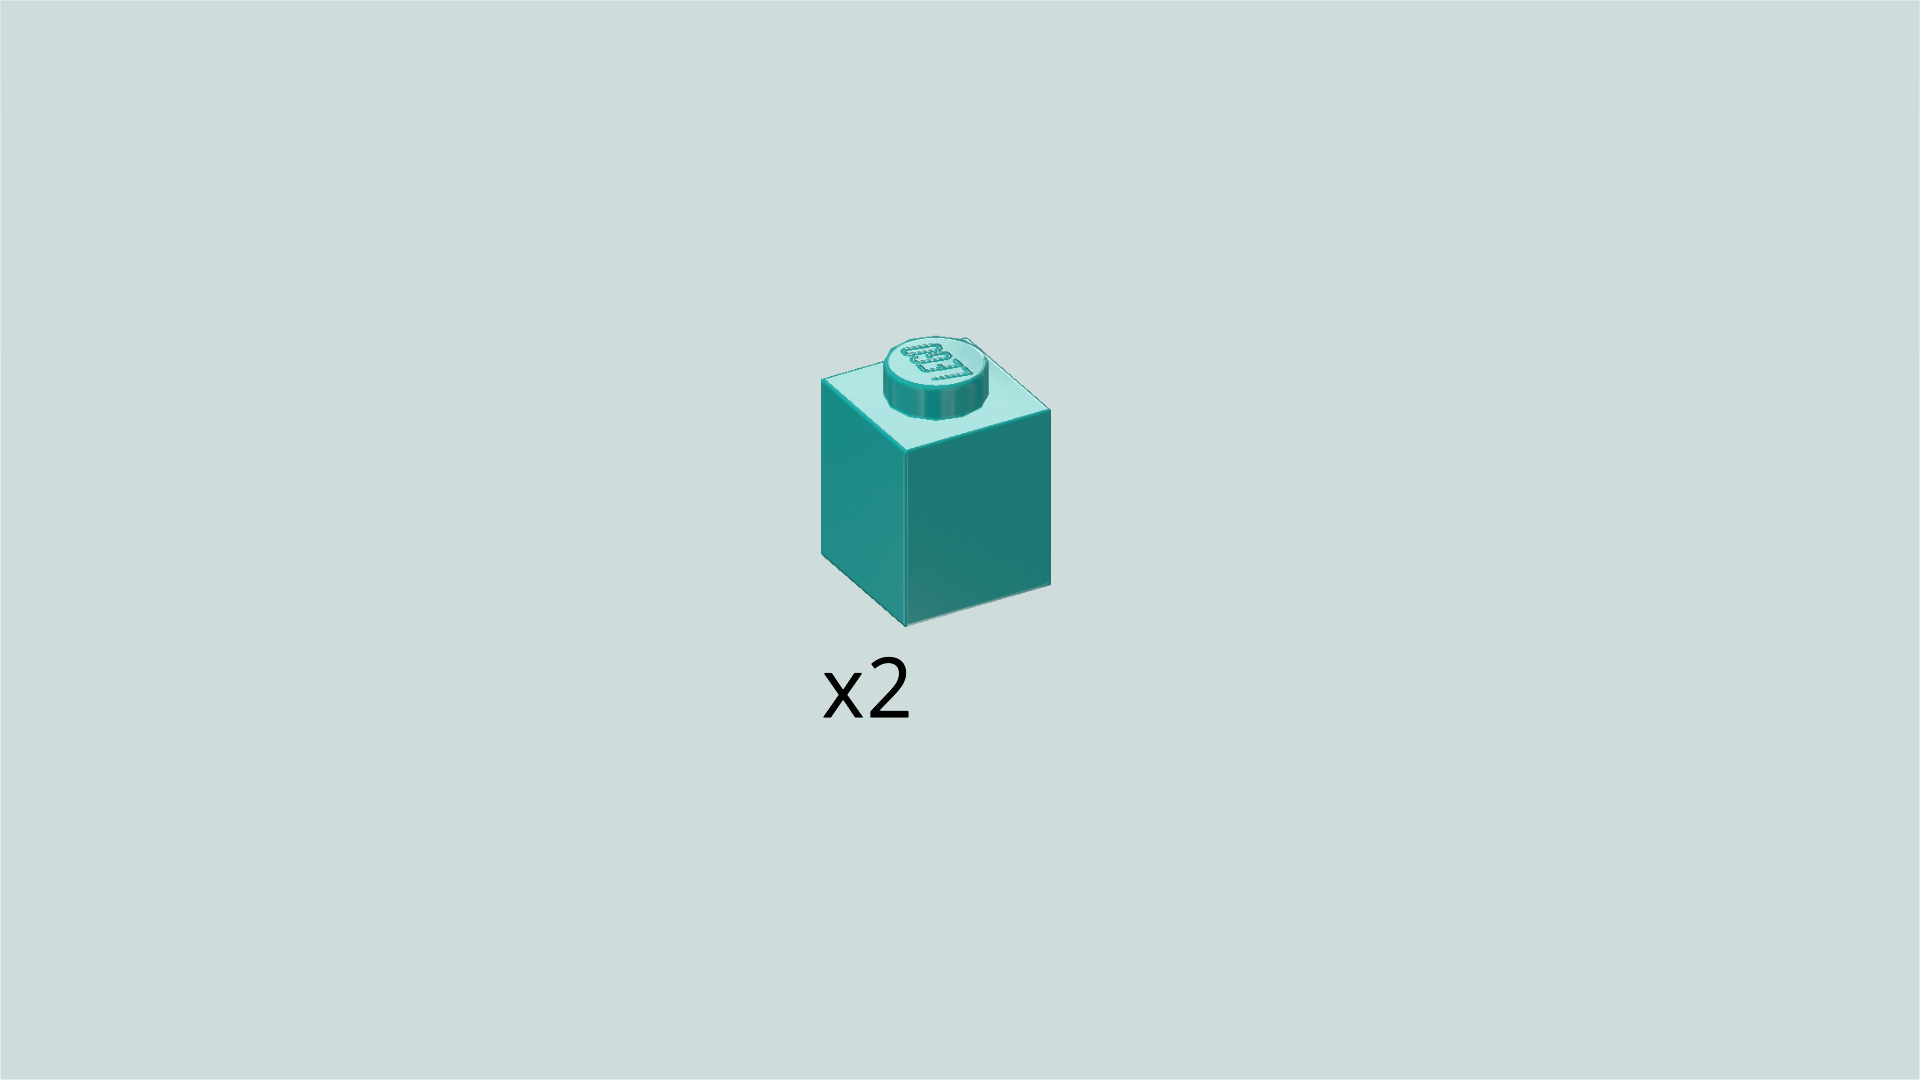
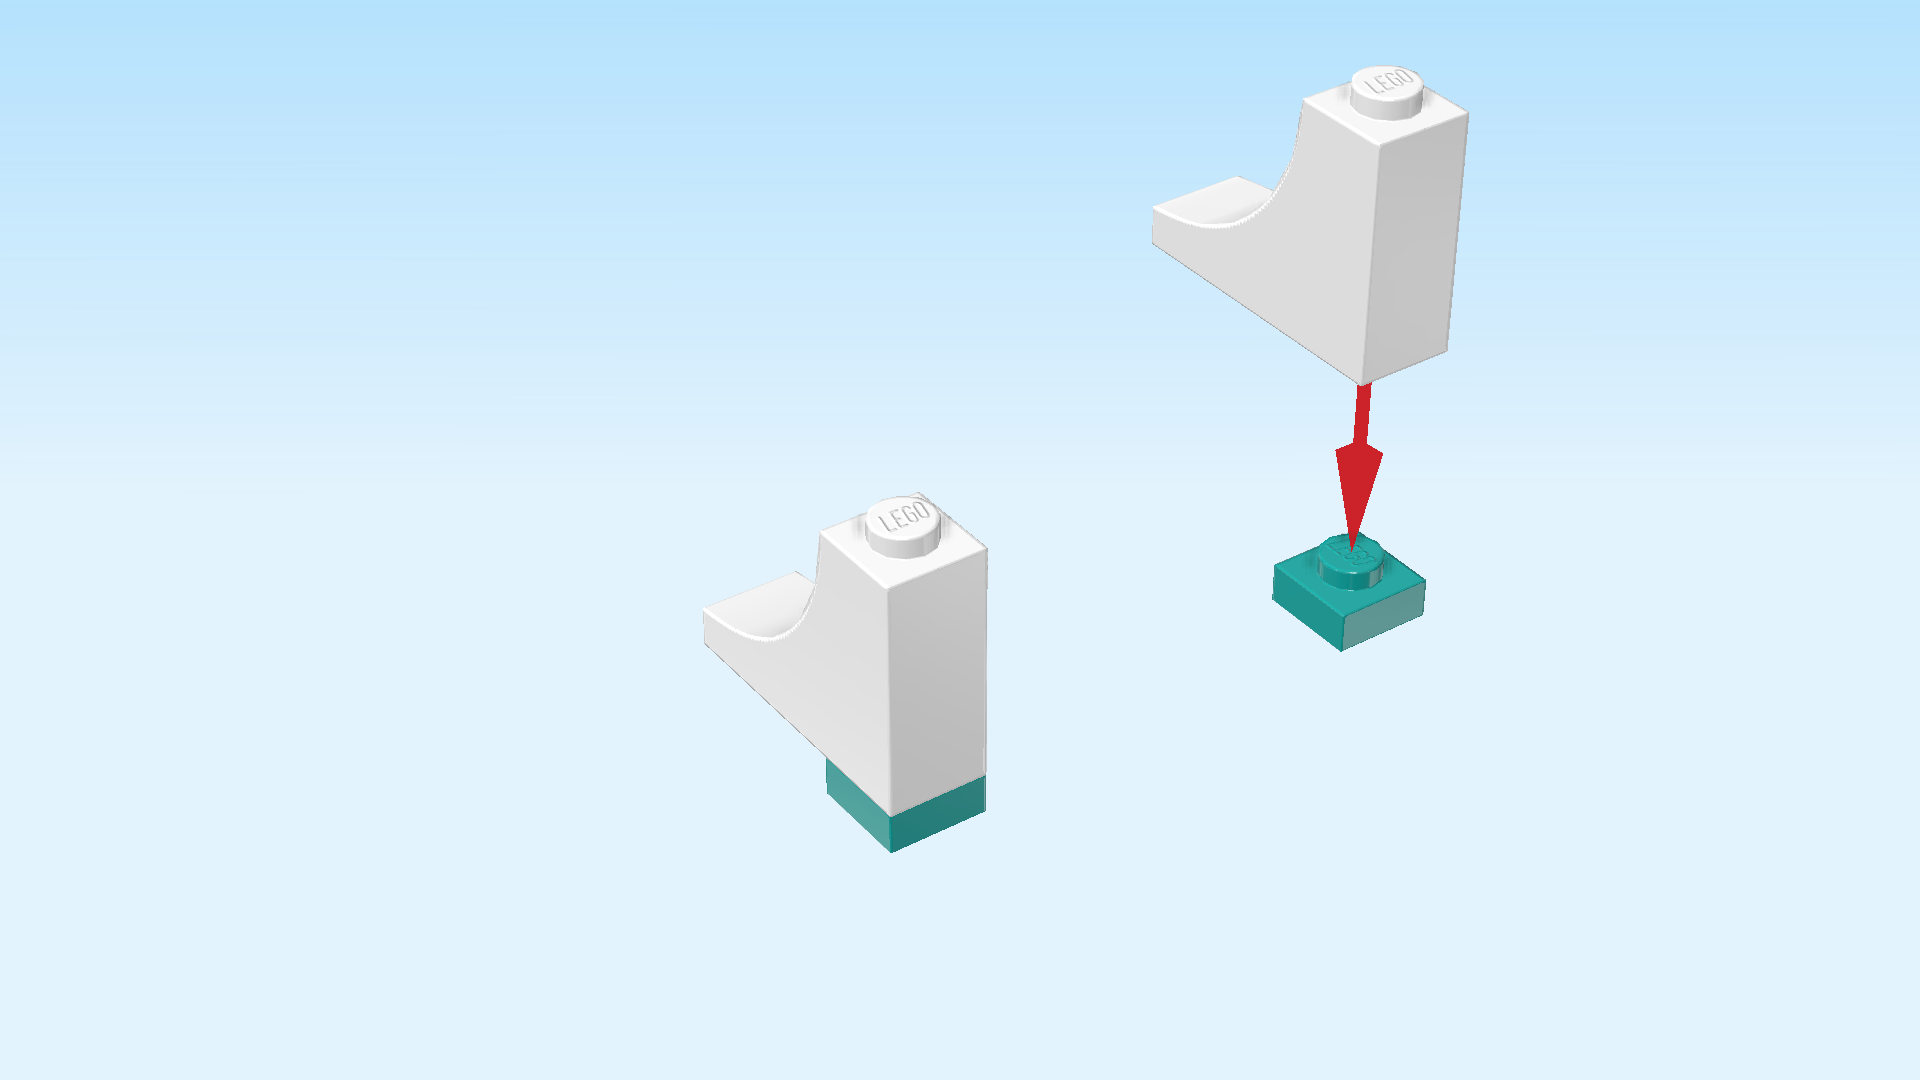
| Find 2 teal blue bricks 1x1. |
| Stack them on top of each other. |
| Collect the following 2 pieces: |
| 1 teal blue brick 1x1, |
| and 1 teal blue half-arch brick 1x3x3 with 1 step. |
| Put the half-arch brick 1x3x3 vertically to the left of the previous piece, arch overhanging towards the front. |
| Put the brick 1x1 to the left of the previous piece. |
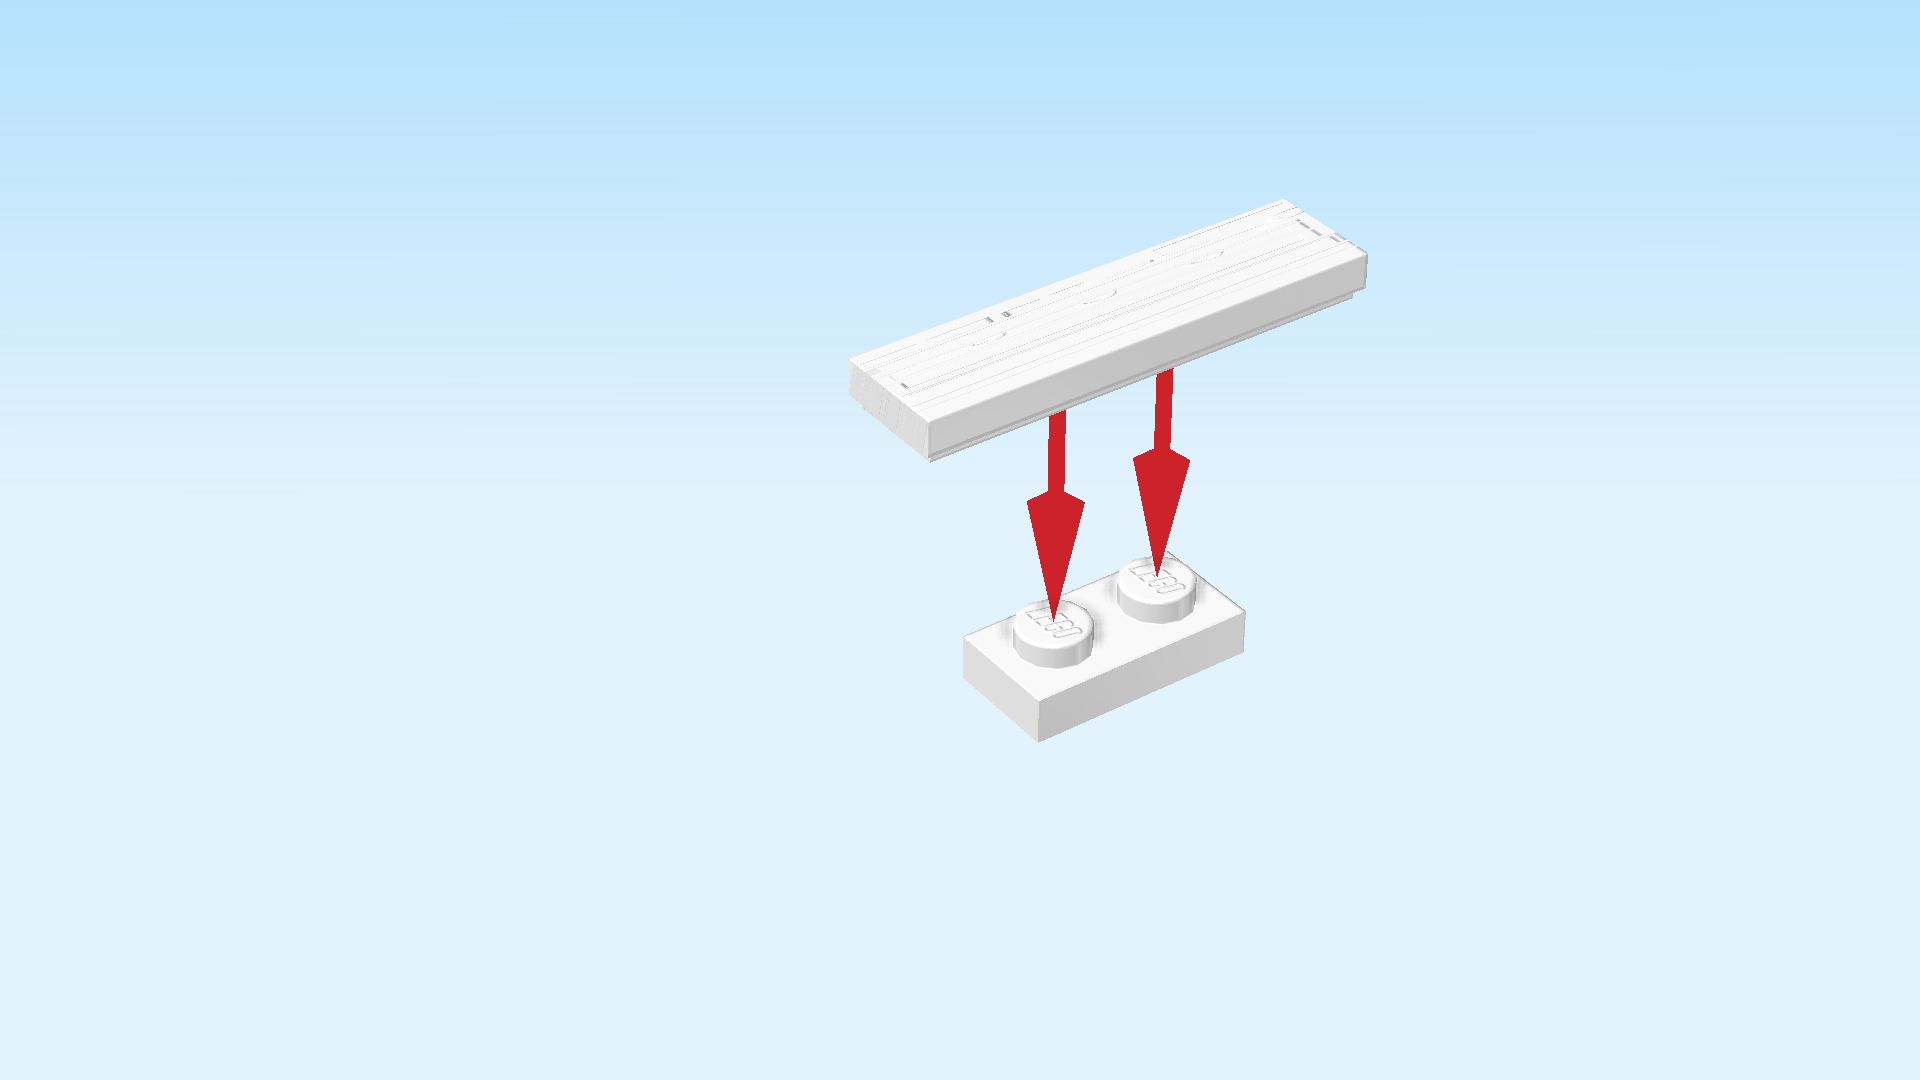
| Find 2 teal blue bricks 1x2. |
| Put 1 horizontally to the left of the previous piece. |
| Put the other one vertically to the left of the previous piece, starting from the back edge. |
| Collect the following 3 pieces: |
| 1 teal blue brick 1x1, |
| and 2 teal blue bricks 1x2. |
| Put the brick 1x1 on the back knob of the previous piece. |
| Put 1 brick 1x2 horizontally in front of the previous piece on the back wall. |
| Put the other brick 1x2 horizontally to the right of the previous piece. |
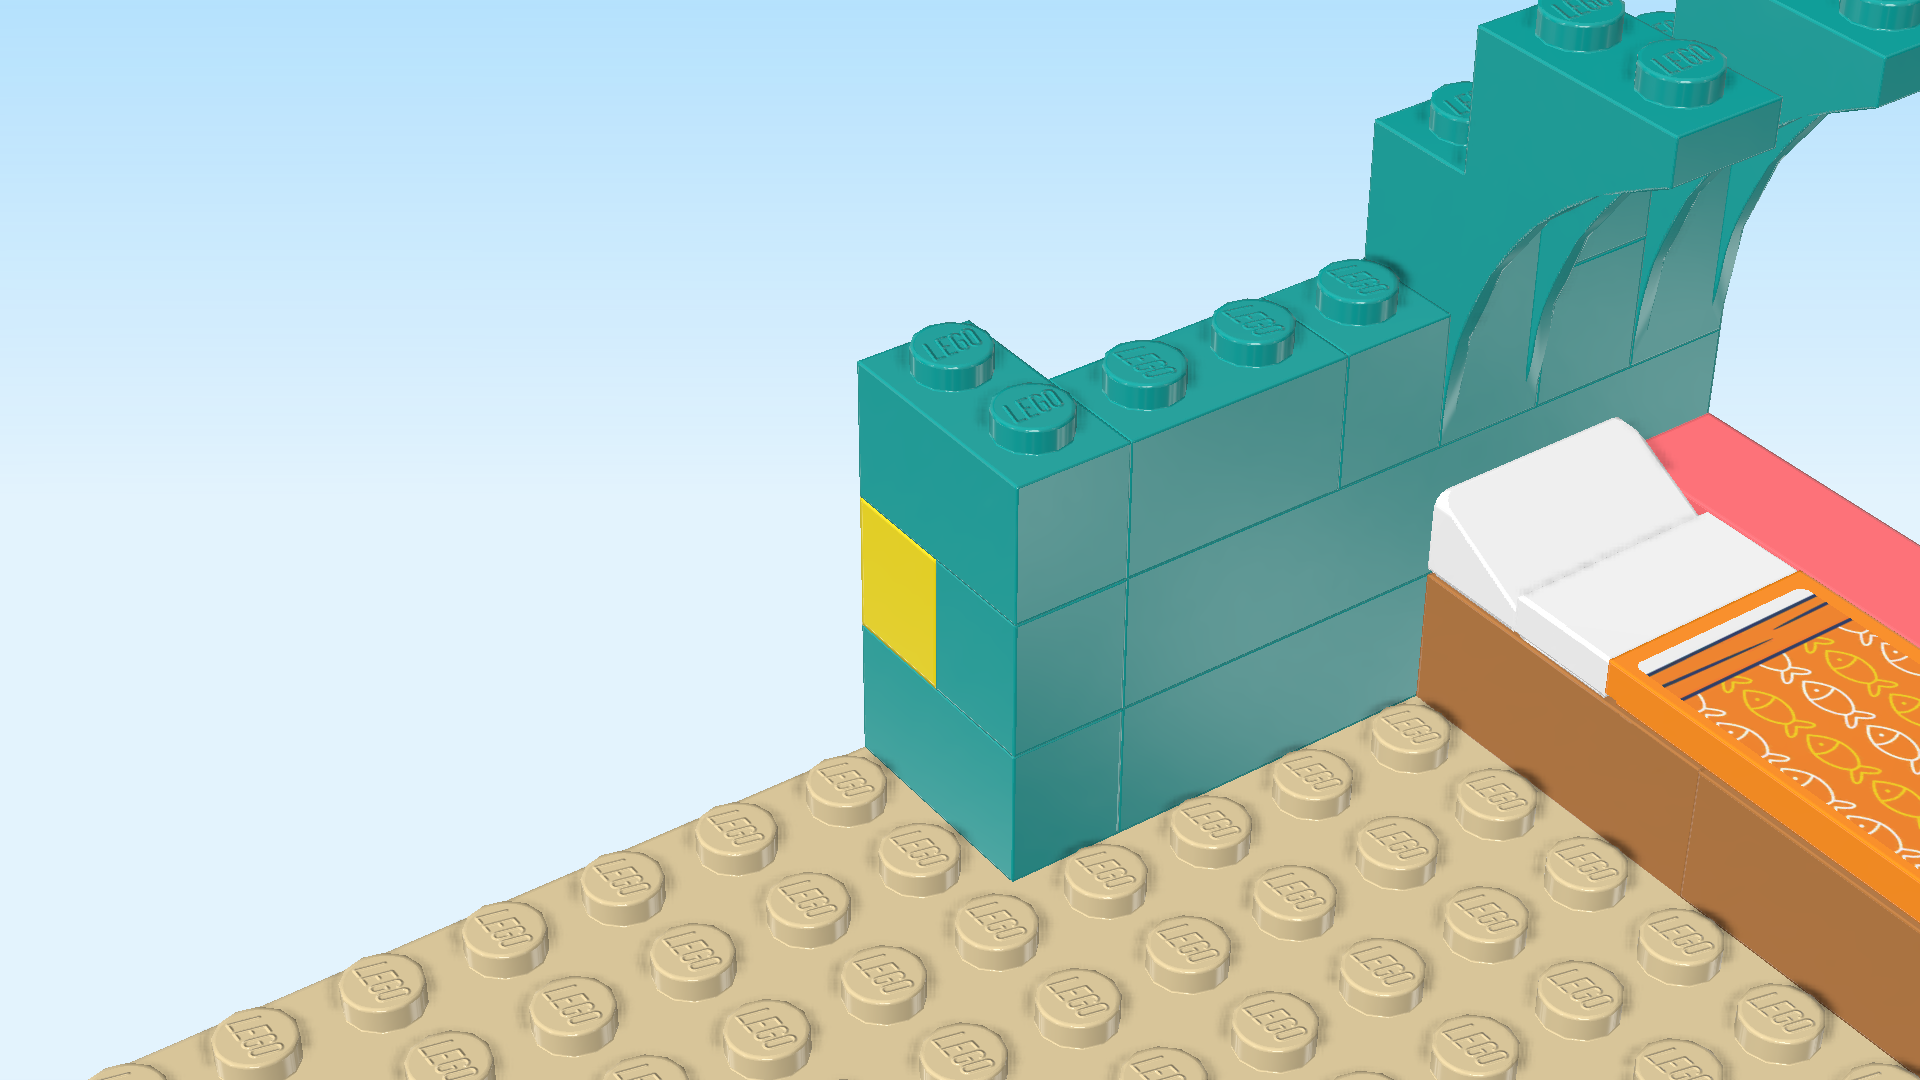
| Collect the following 2 pieces: |
| 1 teal blue brick 1x2, |
| and 1 teal blue brick 1x6. |
| Put the brick 1x2 vertically on the left edge of the back wall. |
| Put the brick 1x6 horizontally to the right of the previous piece on the back wall. |
| Collect the following 2 pieces: |
| Another teal blue brick 1x2, |
| and another teal blue brick 1x6. |
| Again, put the brick 1x2 vertically on the left edge of the back wall. |
| Put the brick 1x6 horizontally to the left of the previous piece, again on the back wall. |
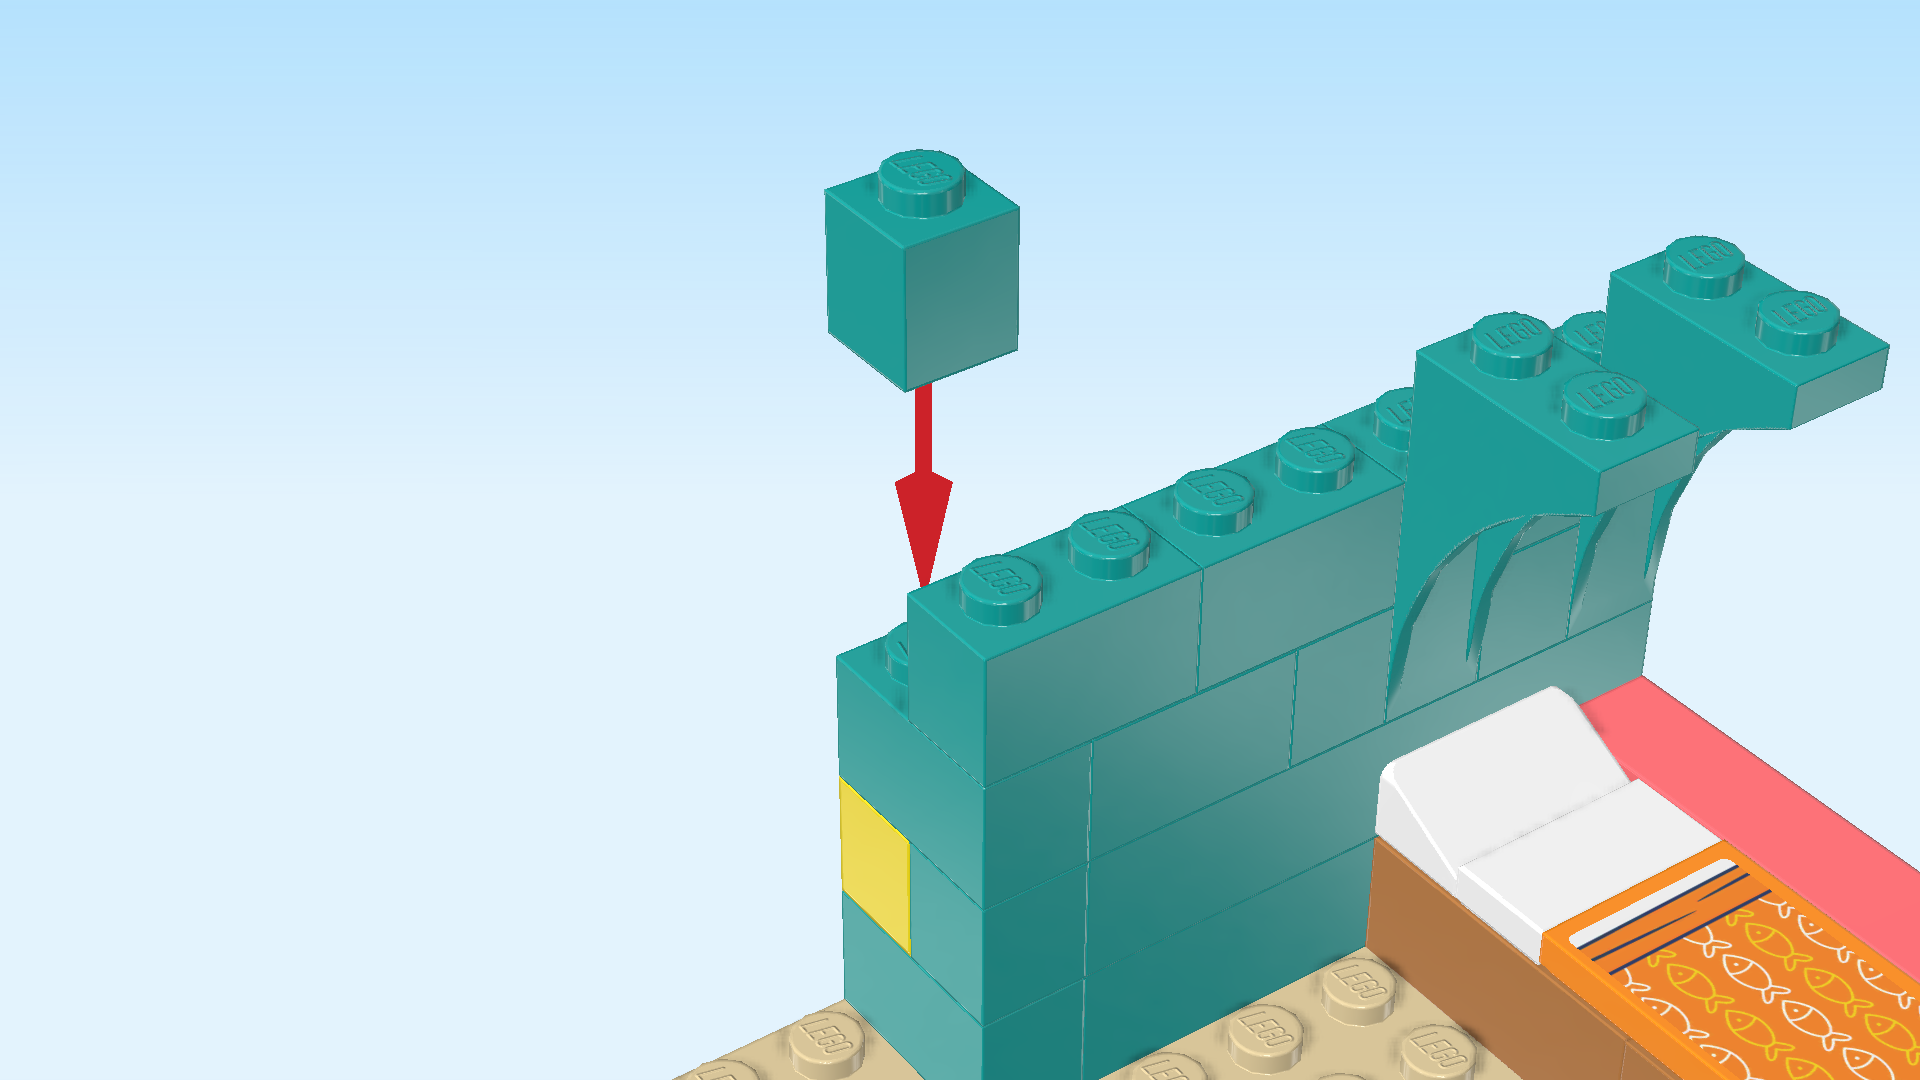
| Collect the following 2 pieces: |
| 1 teal blue brick 1x1, |
| and another teal blue brick 1x6. |
| Put the brick 1x1 on the rightmost knob of the back wall. |
| Put the brick 1x6 horizontally to the left of the previous piece. |
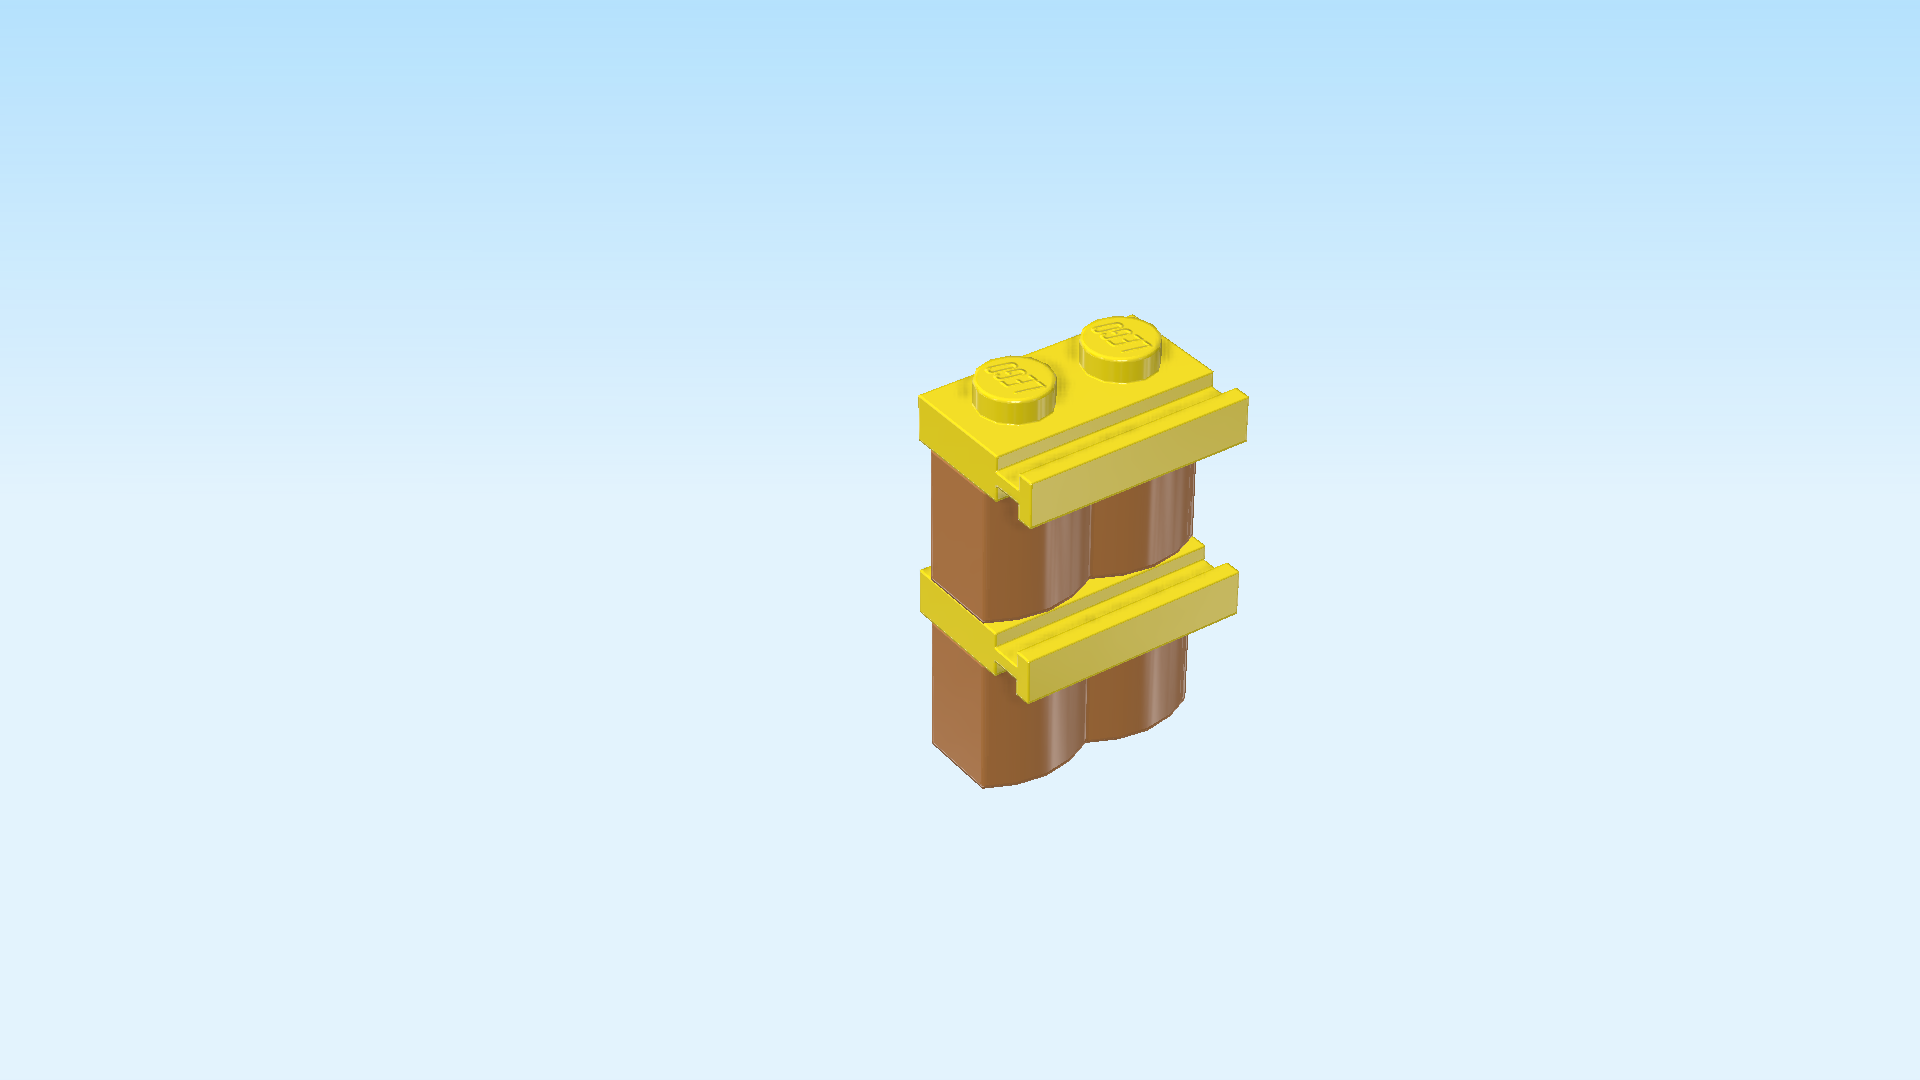
| Next up, we will build the ladder to the top bunk bed. |
| Collect the following 2 pieces: |
| 1 bright yellow plate 1x2 with side rail, |
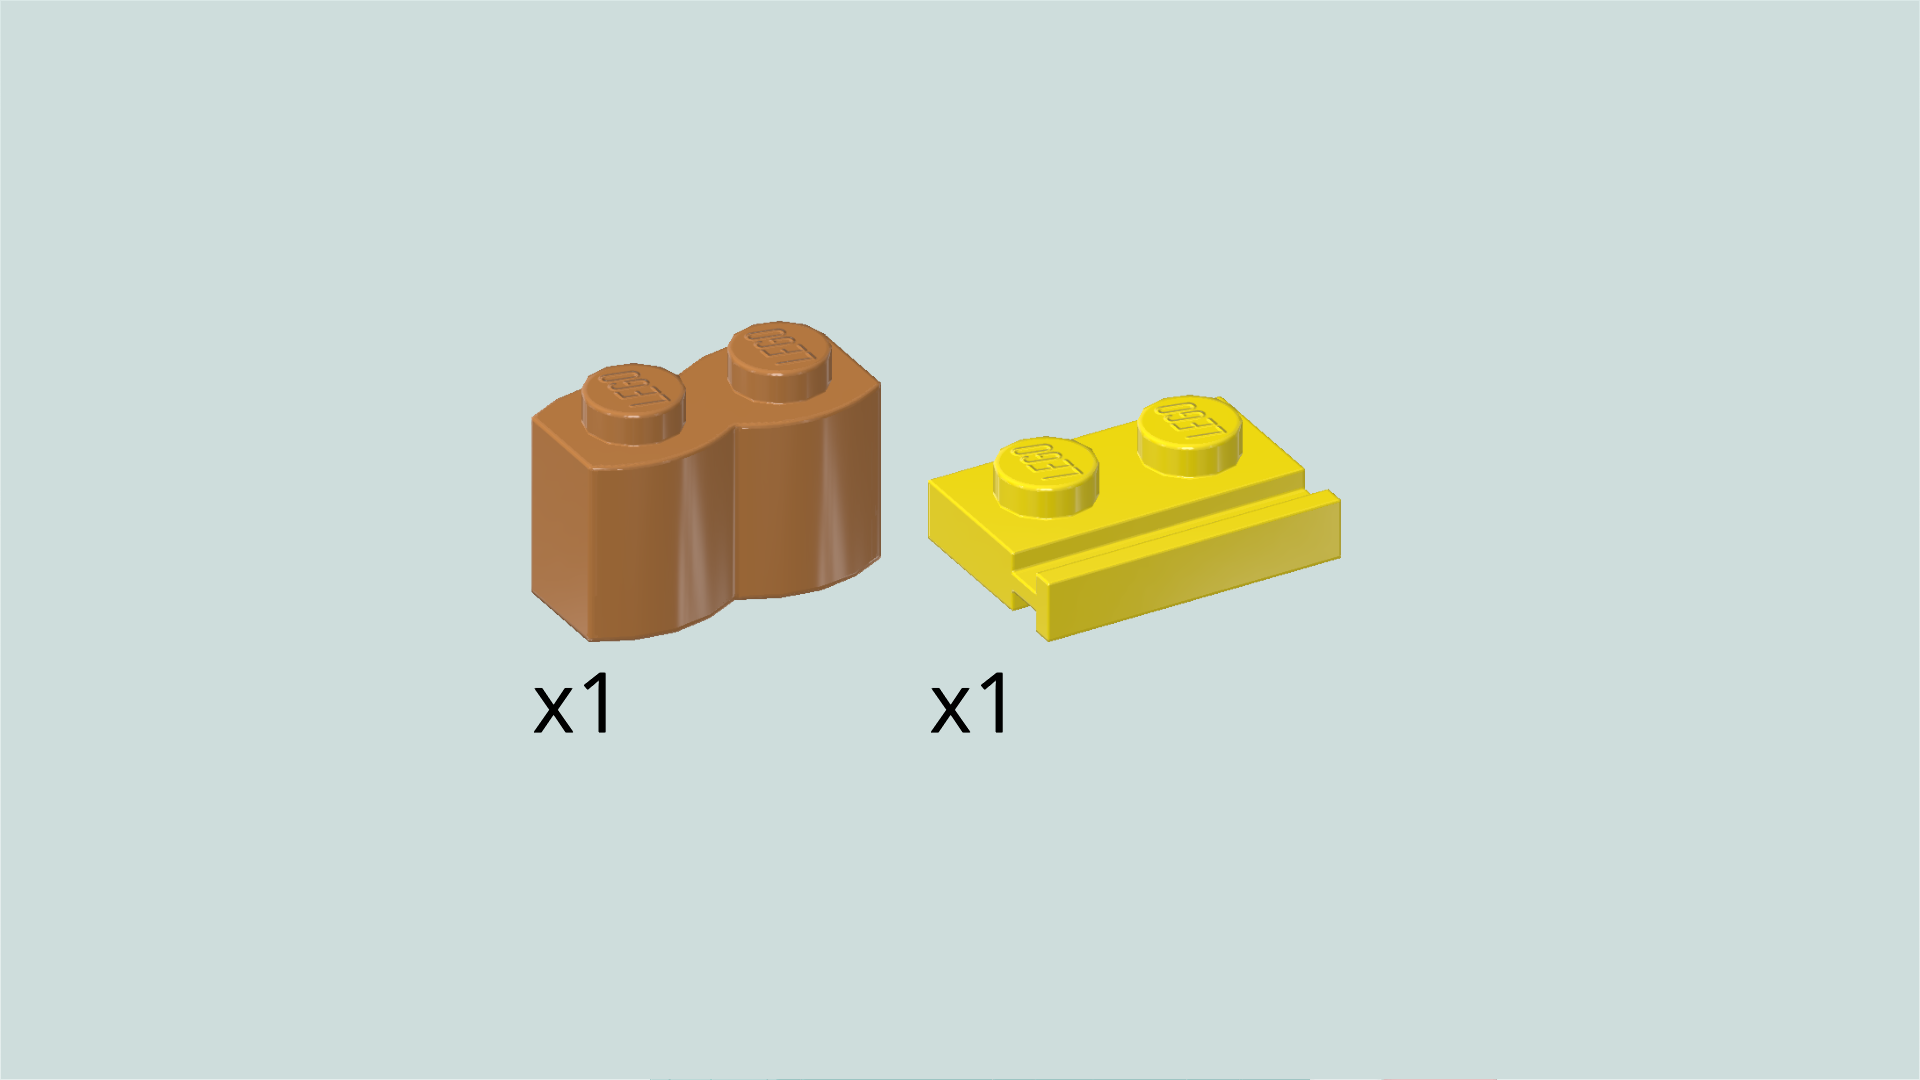
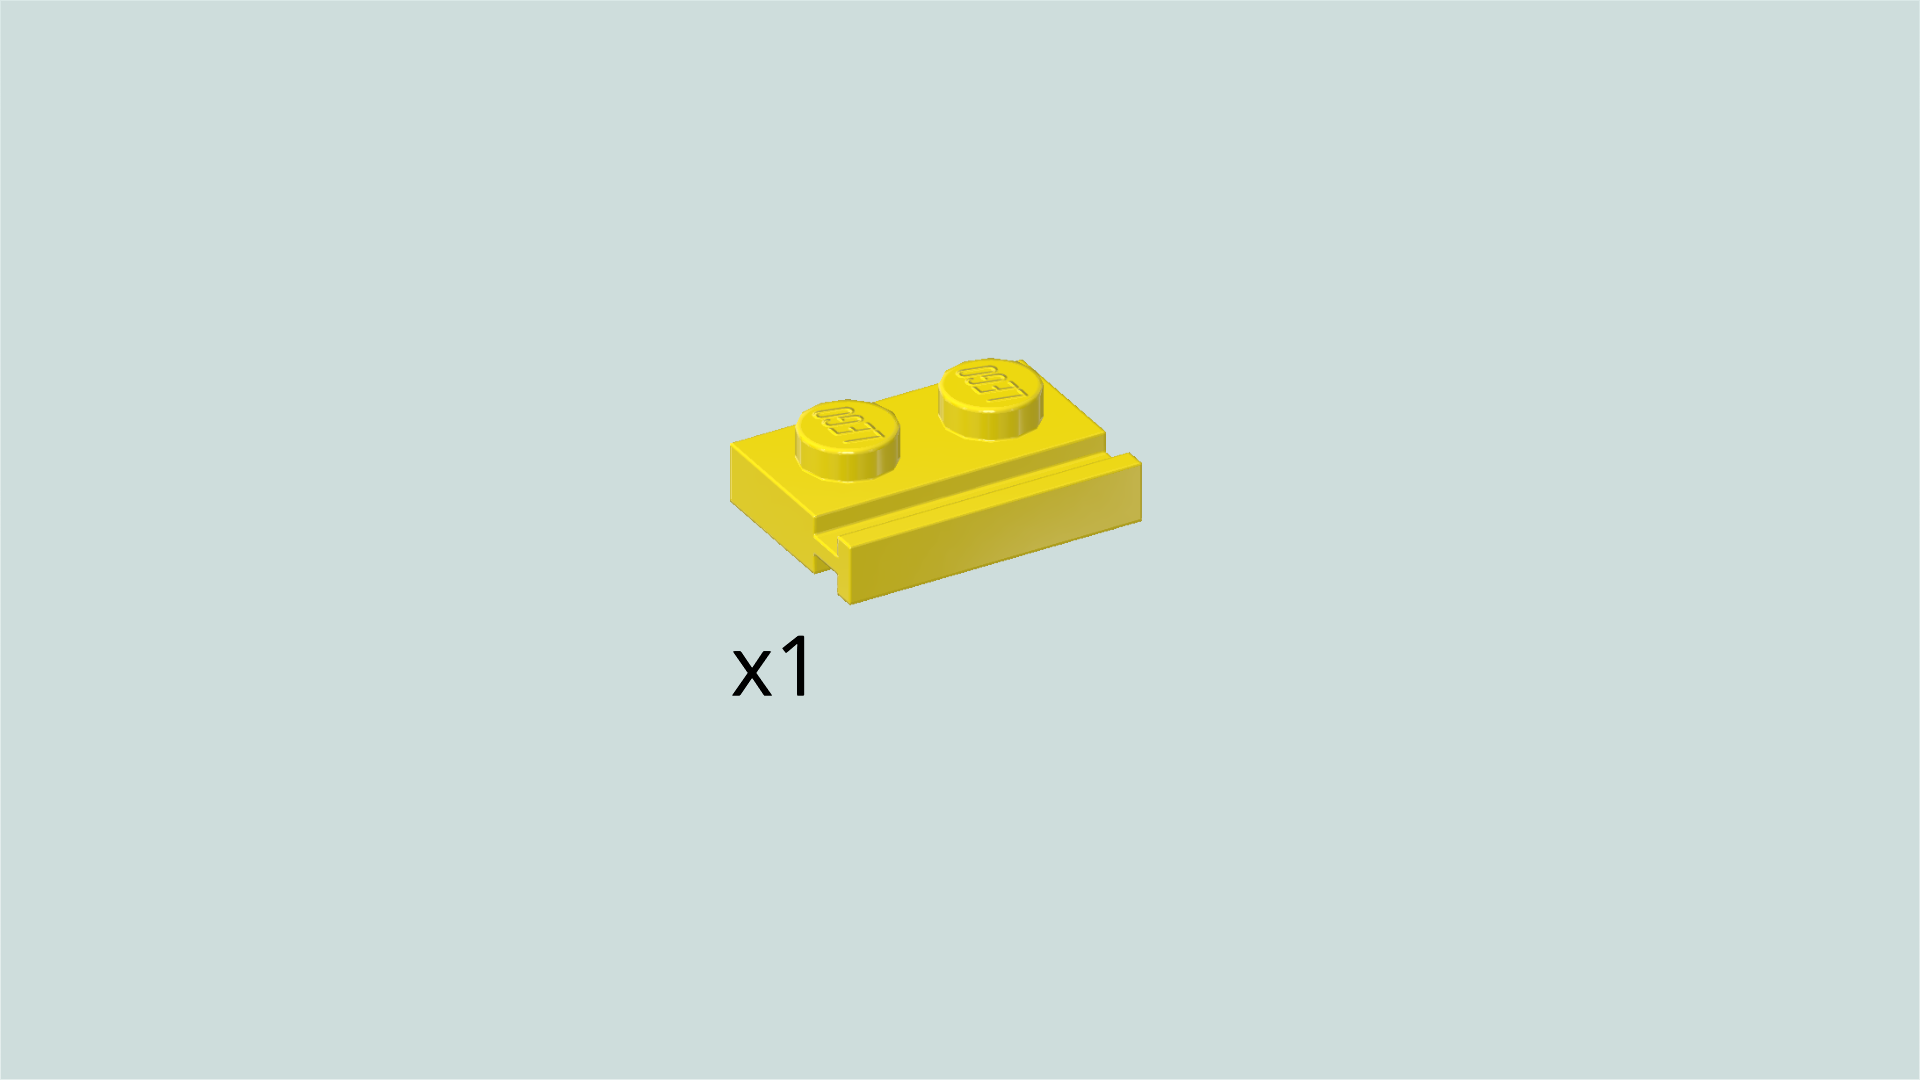
| and 1 medium nougat brown palisade brick 1x2. |
| Put the palisade brick 1x2 horizontally on the table. |
| Put the plate 1x2 horizontally on top, side rail to the front. |
| Find another medium nougat brown palisade brick 1x2. |
| Put it horizontally on top of the previous piece. |
| Find another bright yellow plate 1x2 with side rail. |
| Put it horizontally on top of the previous piece, side rail to the front. |
| The ladder to the top bunk bed is finished! Mount it horizontally on the frontmost row of the bunk bed, side rails to the front. |
| Find 1 bright yellow inverted roof tile 2x3, 25°. |
| Put it on top of the ladder, slope overhanging to the back. |
| Find 1 medium nougat brown plate 1x6. |
| Put it vertically on the 2 back knobs of the left column of the previous piece and the left brick arch on the back wall. |
| Find 1 medium nougat brown plate 2x6. |
| Put it vertically to the right of the previous piece, 1 column overhanging to the right. |
| Collect the following 2 pieces: |
| 1 pale ocher yellow plate 1x1, |
| and 1 pale ocher yellow top angle plate 1x1 - 1x2 with 2 side knobs. |
| Put the plate 1x1 on the right knob of the frontmost row. This row is on top of the bunk bed ladder. |
| Put the angle plate to the left of the previous piece, 2 side knobs to the left. |
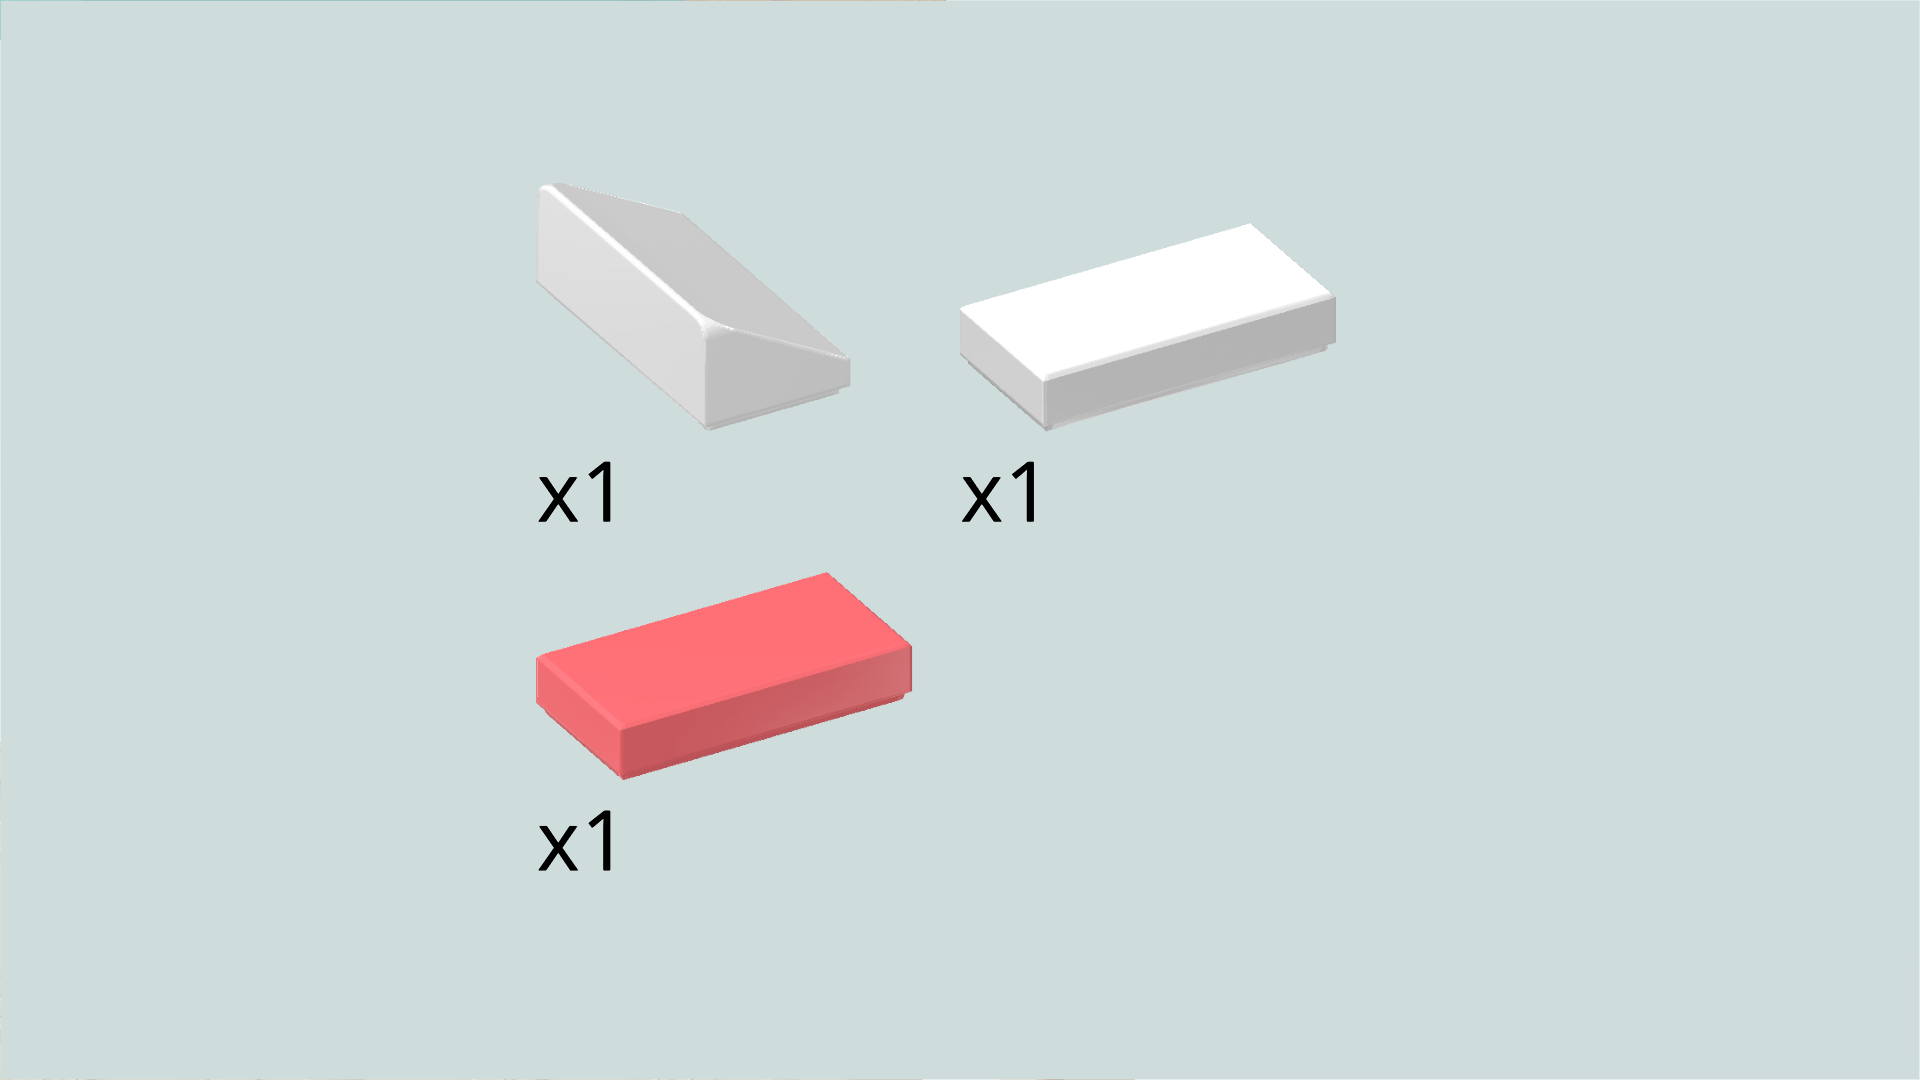
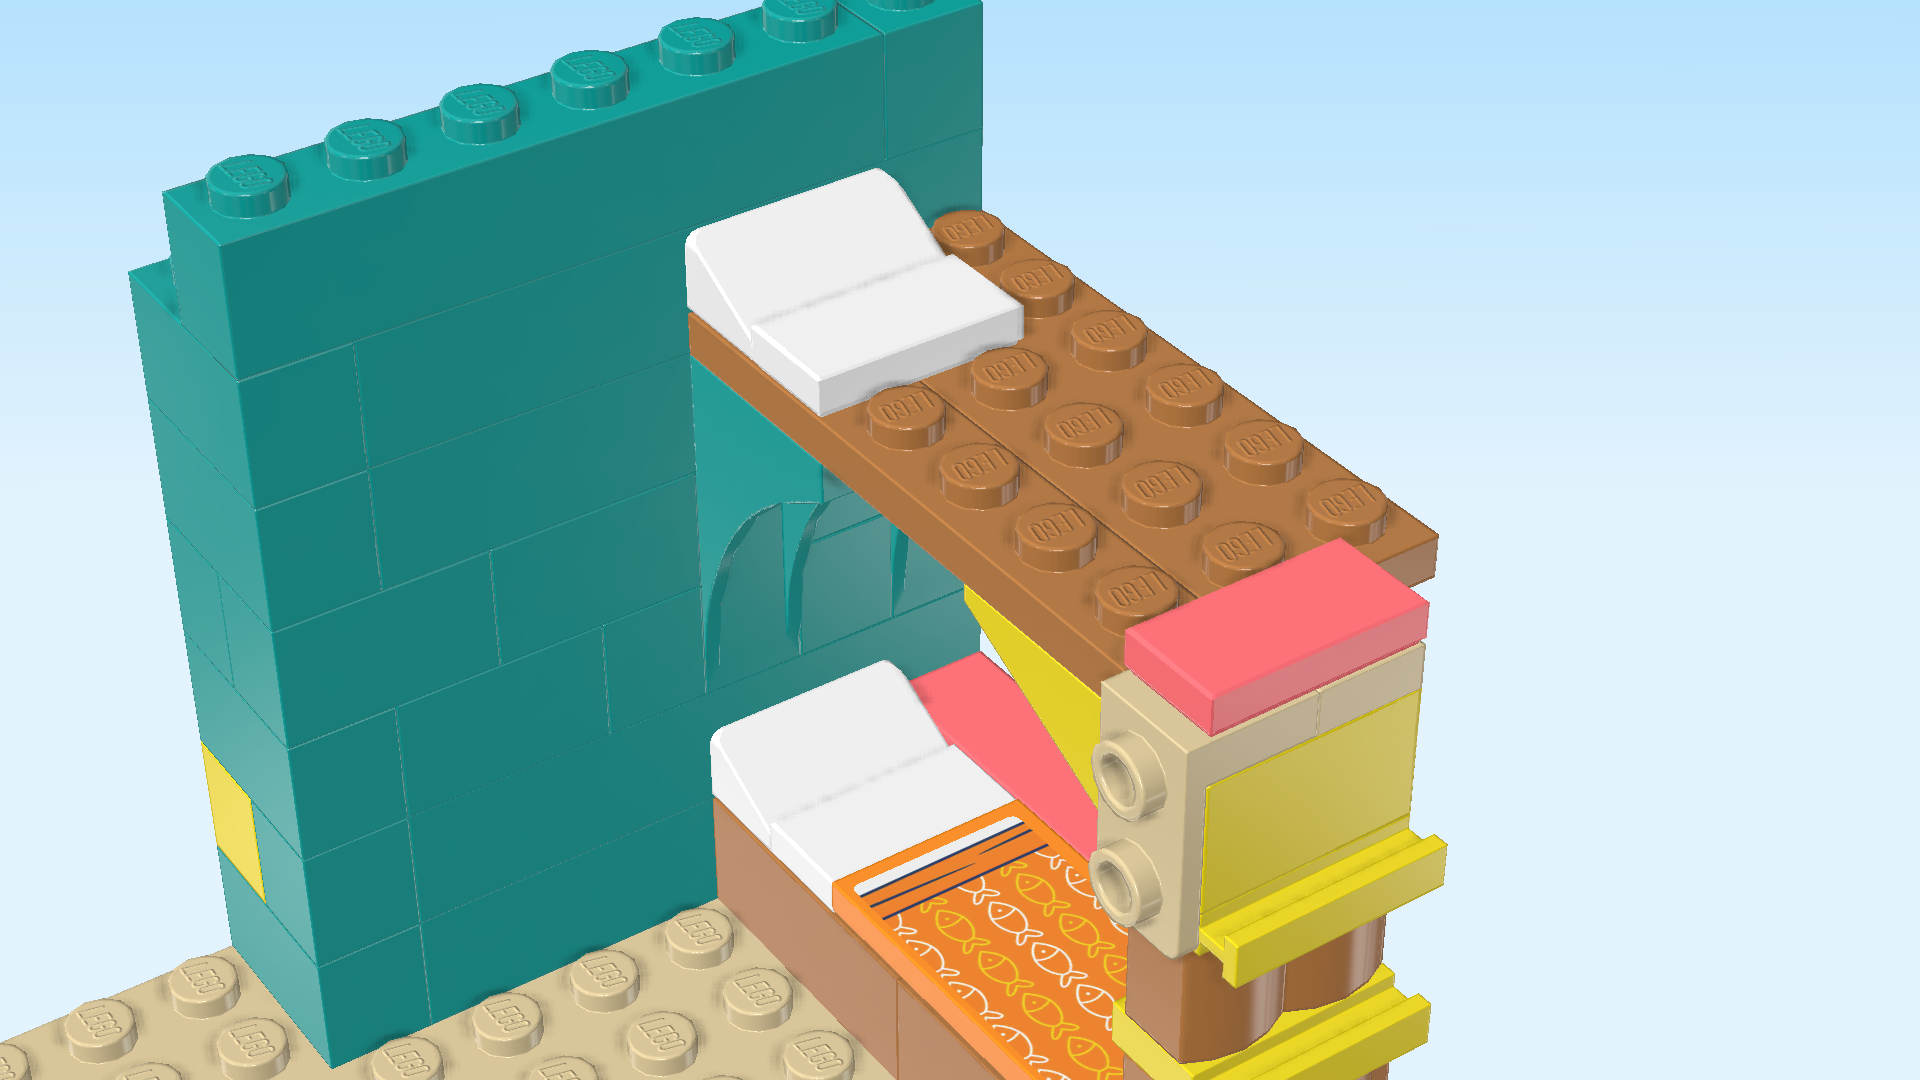
| Collect the following 3 pieces: |
| 1 white flat tile 1x2, |
| 1 white smooth roof tile 1x2x⅔, |
| and 1 salmon pink flat tile 1x2. |
| Put the salmon pink flat tile 1x2 horizontally on the frontmost row. Again, this row is on top of the bunk bed ladder. |
| Put the roof tile 1x2x⅔ horizontally on the row directly in front of the back wall, slope to the front, leaving one knob to the right empty. |
| Put the white flat tile 1x2 horizontally in front of the previous piece. This is the pillow of the top bunk bed. |
| Collect the following 2 pieces: |
| 1 bright orange flat tile 2x4, |
| and 1 rectangular sticker 2x4 (number 9). |
| Put the flat tile 2x4 vertically on the table. |
| Put the rectangular sticker vertically on top. |
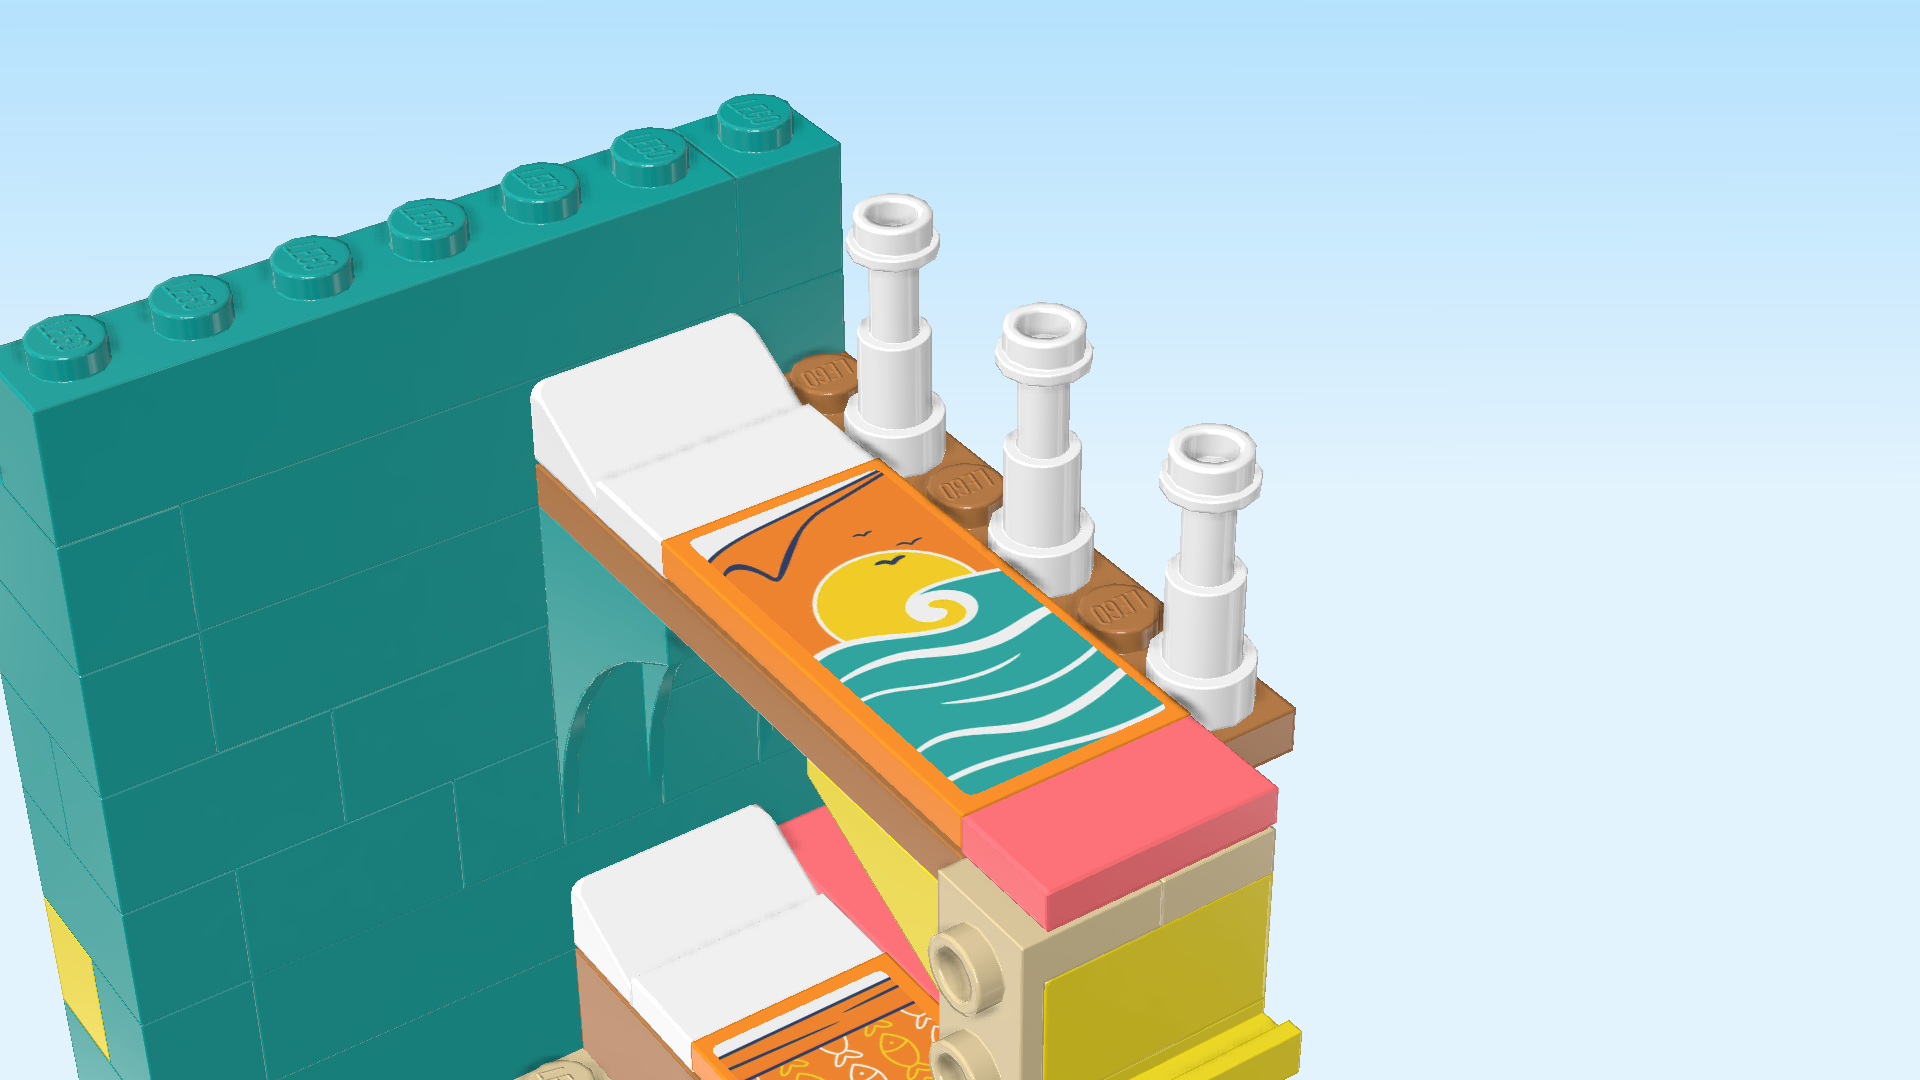
| Find 3 white telescope pieces 1x1x1½ with knob. |
| Put 1 on the frontmost knob of the empty column to the right of the top bunk bed. |
| Skip one knob to the back, and mount the second telescope piece. |
| Again, skip one knob to the back, and mount the last telescope piece. |
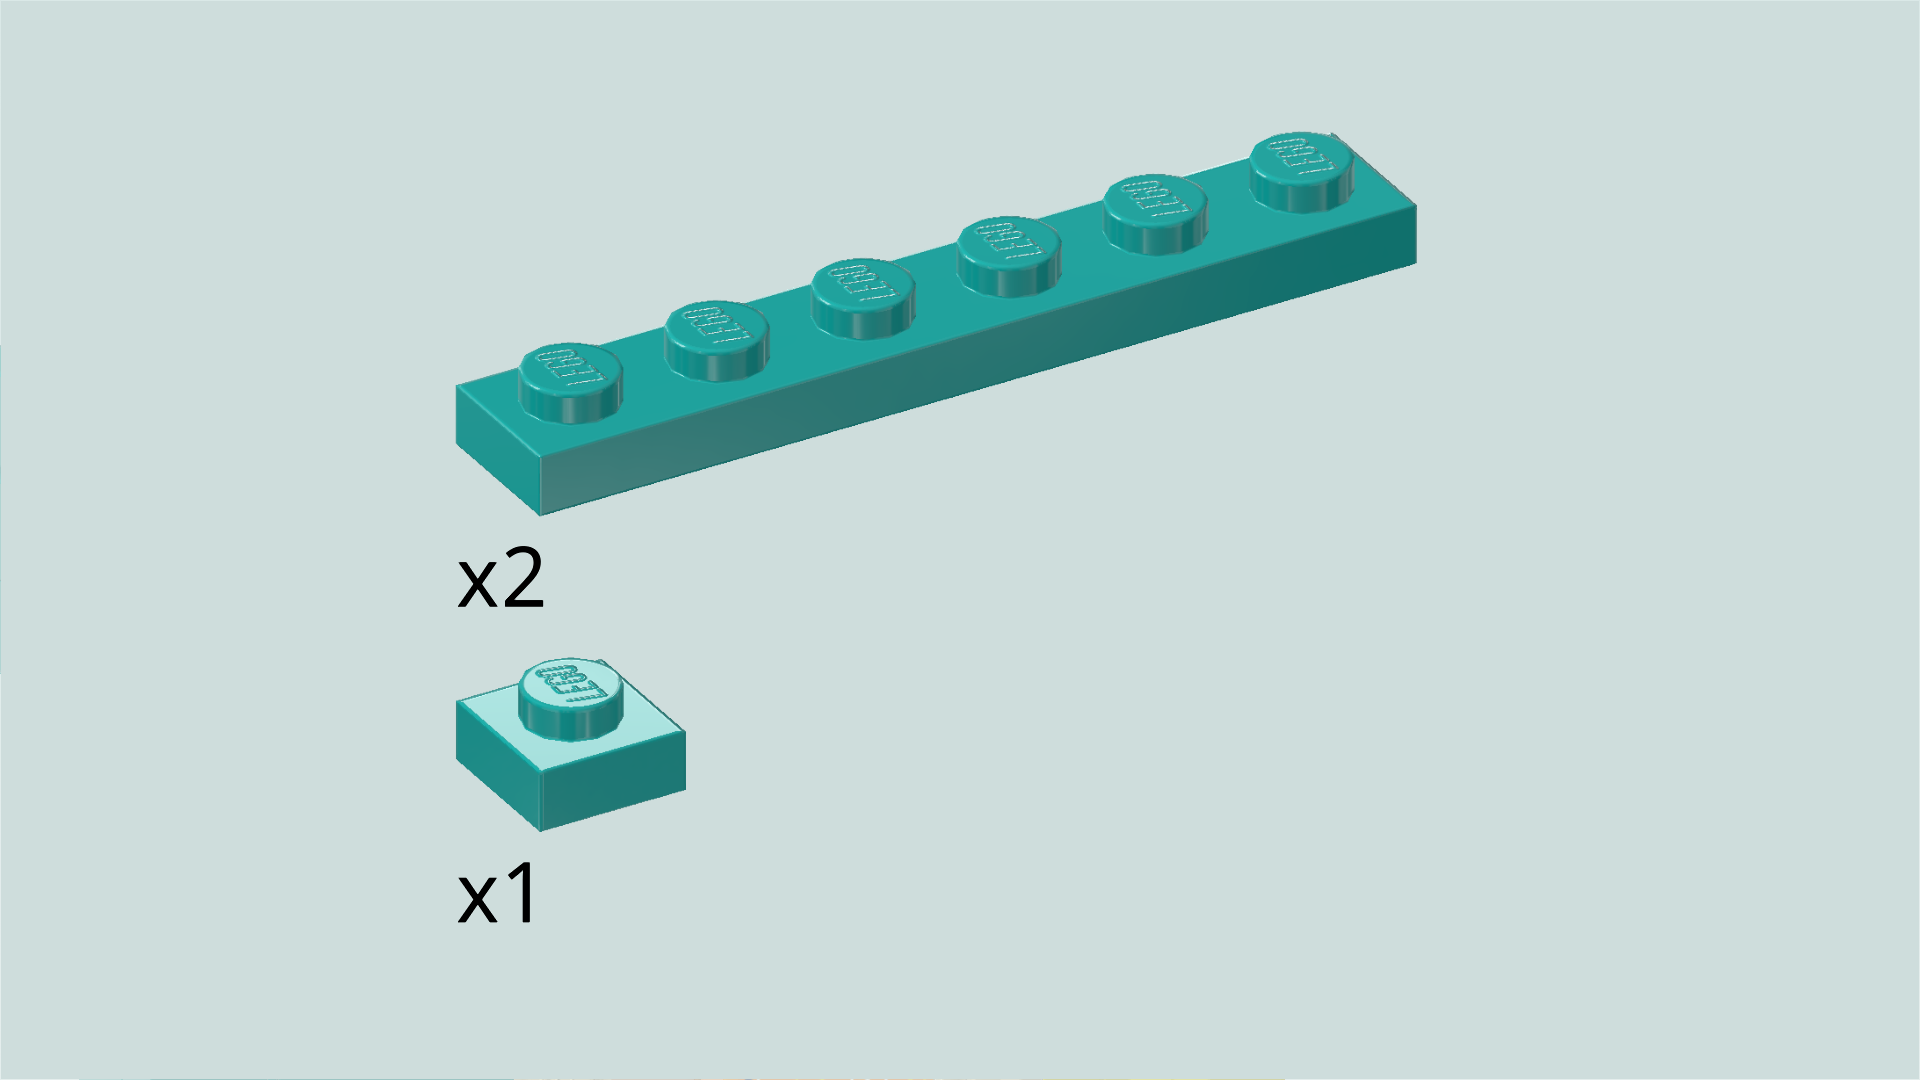
| Collect the following 3 pieces: |
| 1 teal blue plate 1x1, |
| and 2 teal blue plates 1x6. |
| Put the plate 1x1 on the frontmost telescope piece. |
| Put 1 plate 1x6 vertically behind the previous piece. This is probably a bit wobbly, so be careful and take your time. |
| Put the other plate 1x6 horizontally to the left of the previous piece, covering the back wall. |
| Find 2 salmon pink flat tiles 1x6. |
| Put 1 vertically on top of the telescope pieces and covering plates, starting from the front. |
| Put the other one horizontally behind the previous piece on the back wall, leaving the leftmost knob of the back wall empty. |
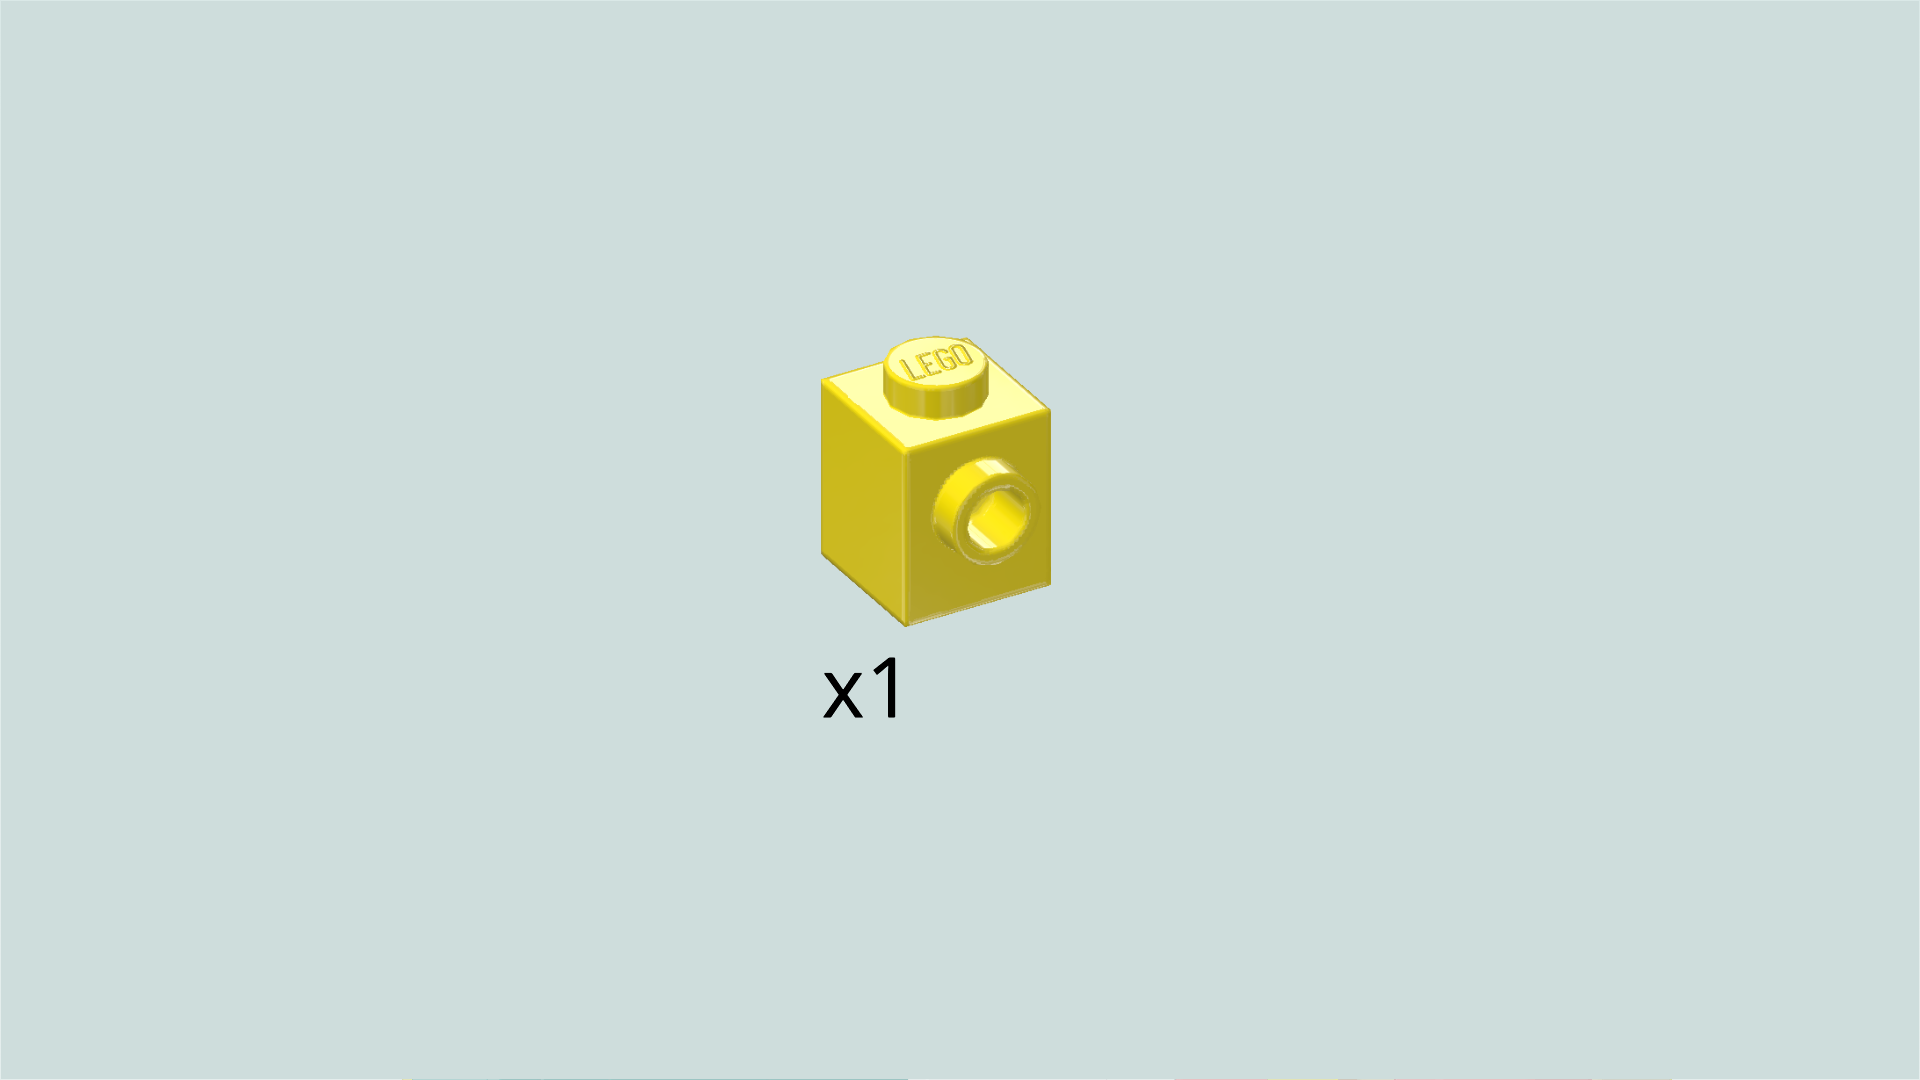
| Find 1 bright yellow brick 1x1 with side knob. |
| Before we mount this piece, turn the structure from left to right. It should still be oriented horizontally, but now everything we have built so far is on the left side. |
| Put the brick 1x1 on the leftmost knob of the frontmost row, side knob pointing to the front. This means that it sits on the 1x2 corner extension of the back wall that is now extending towards the front. |
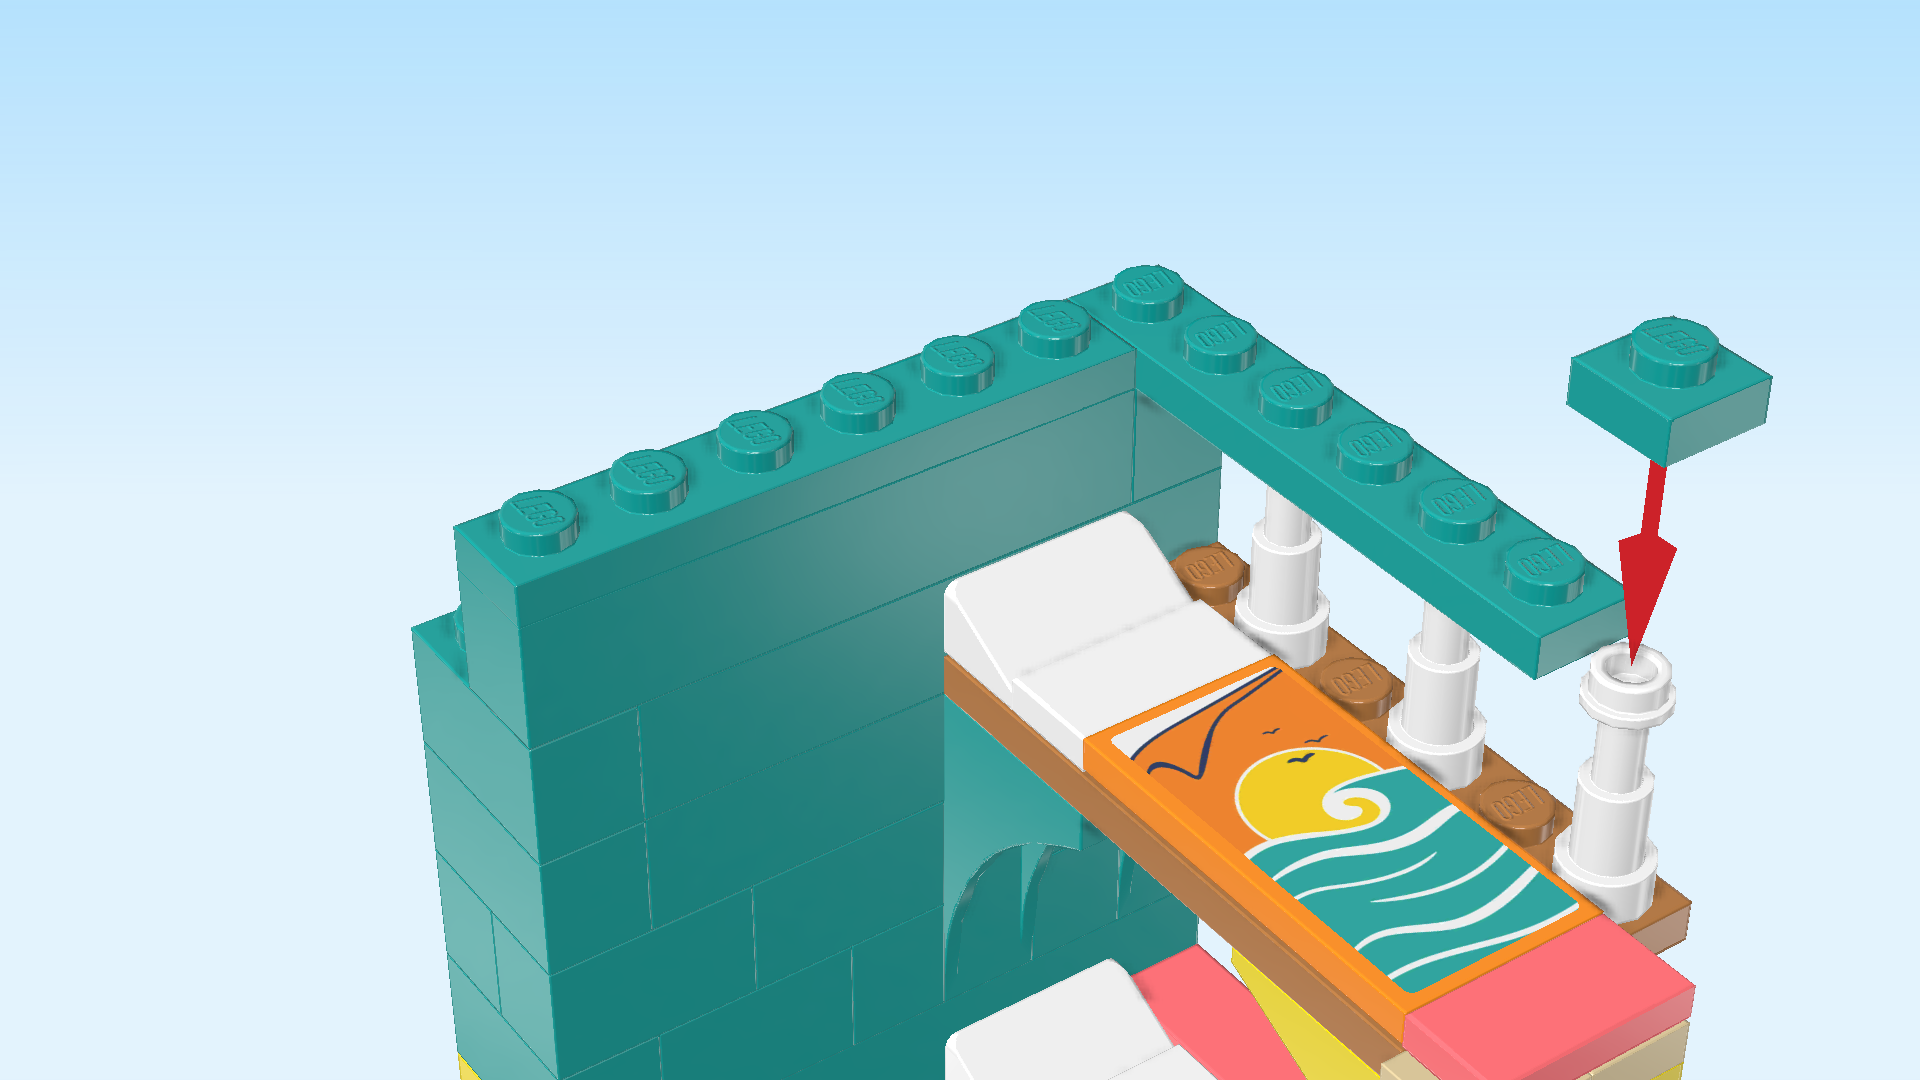
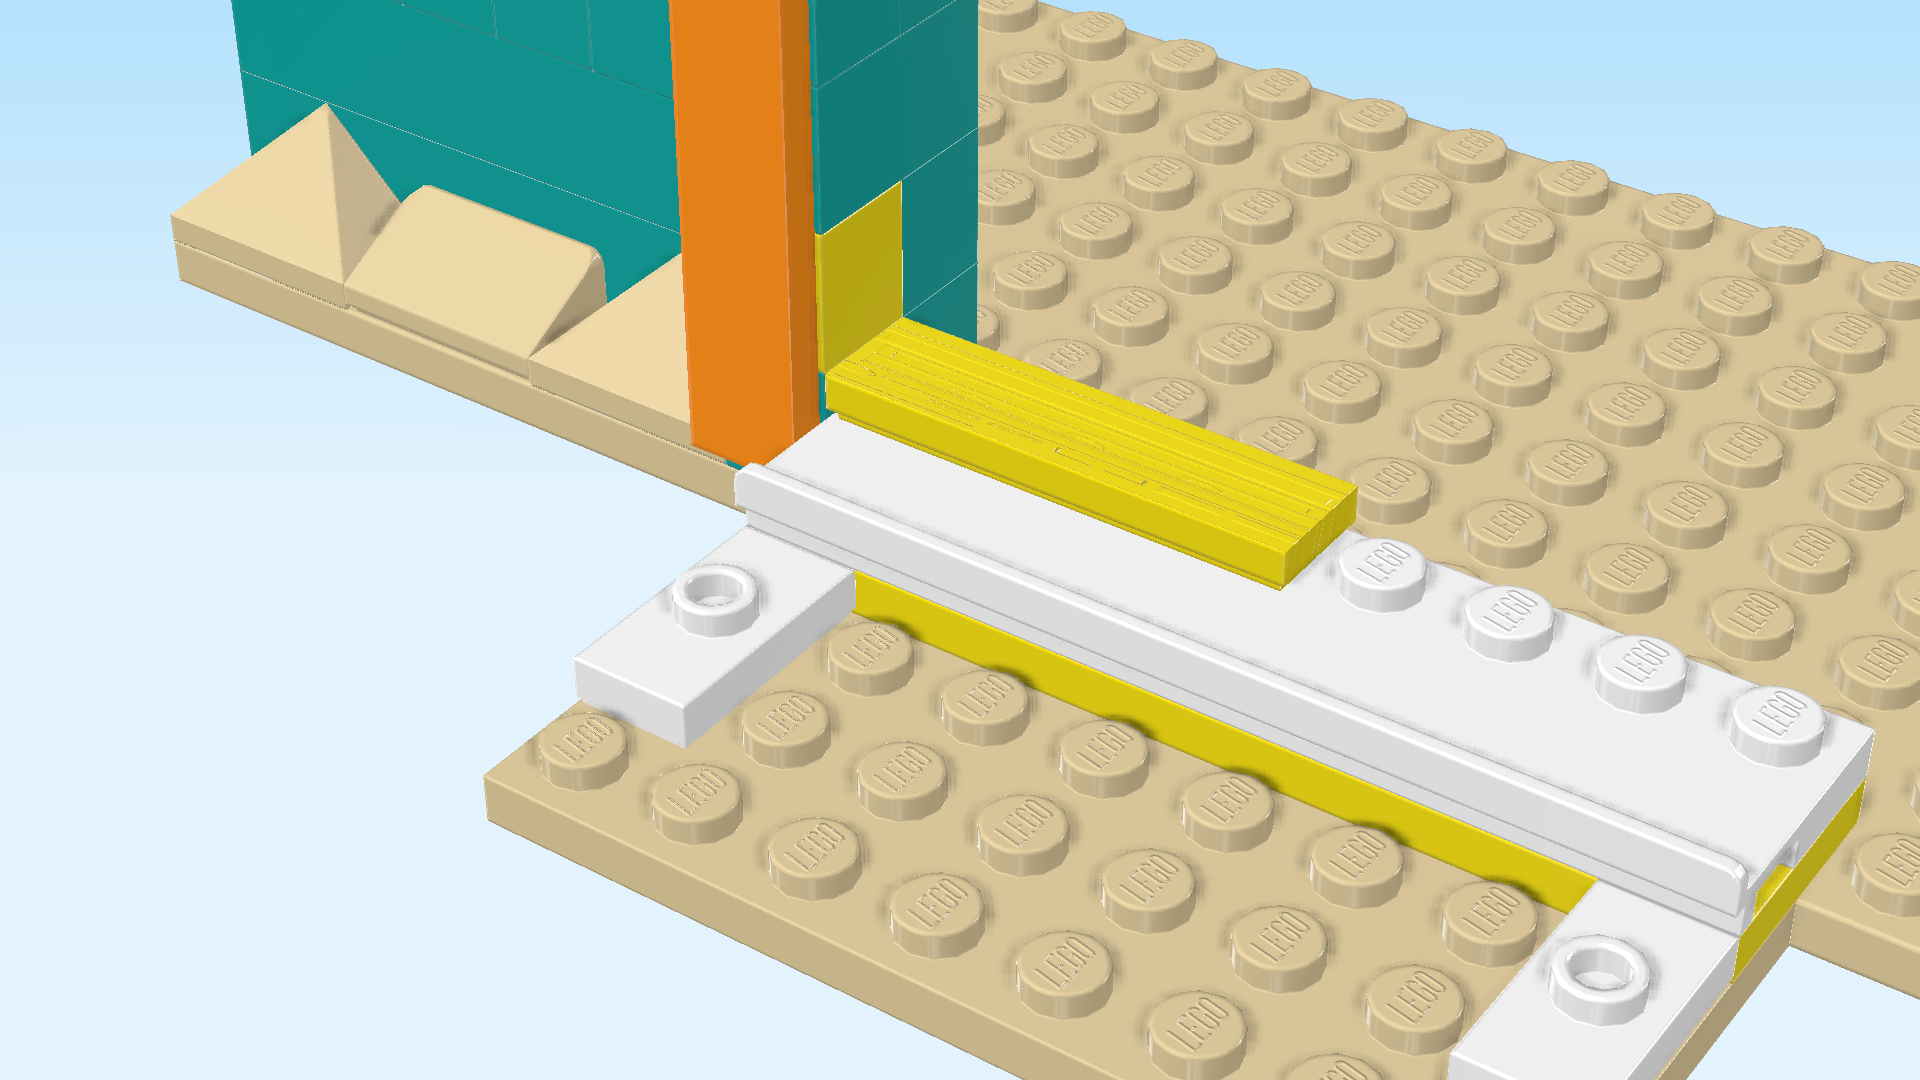
| Find 1 bright orange flat tile 1x8. |
| Flip it upright and mount it vertically on the 2 side knobs pointing to the front. Make sure it is not protruding to the top or bottom. |
| Now, we will build the base of the balcony. |
| Collect the following 3 pieces: |
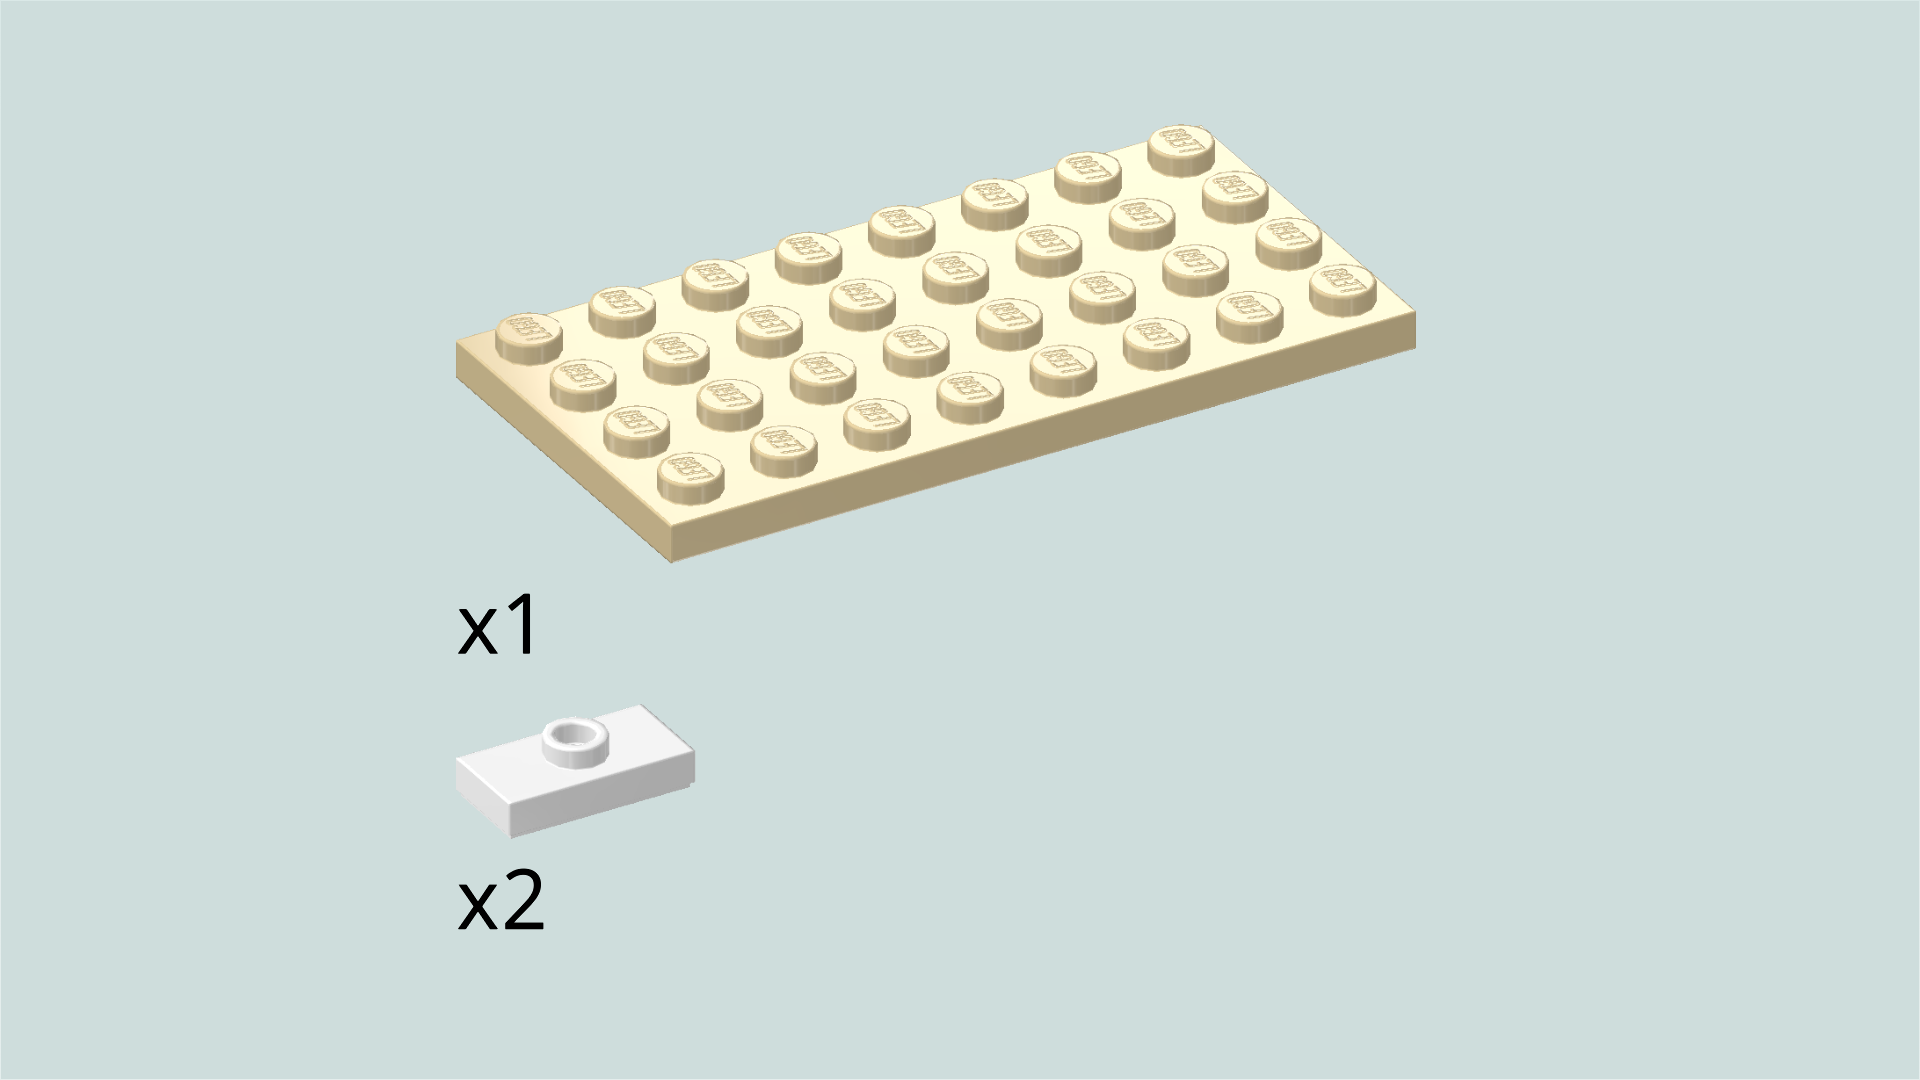
| 1 pale ocher yellow plate 4x8, |
| and 2 white plates 1x2 with 1 knob. |
| Put the plate 4x8 horizontally on the table. |
| Put 1 plate 1x2 vertically centered on the leftmost column. |
| Repeat symmetrically on the rightmost column. |
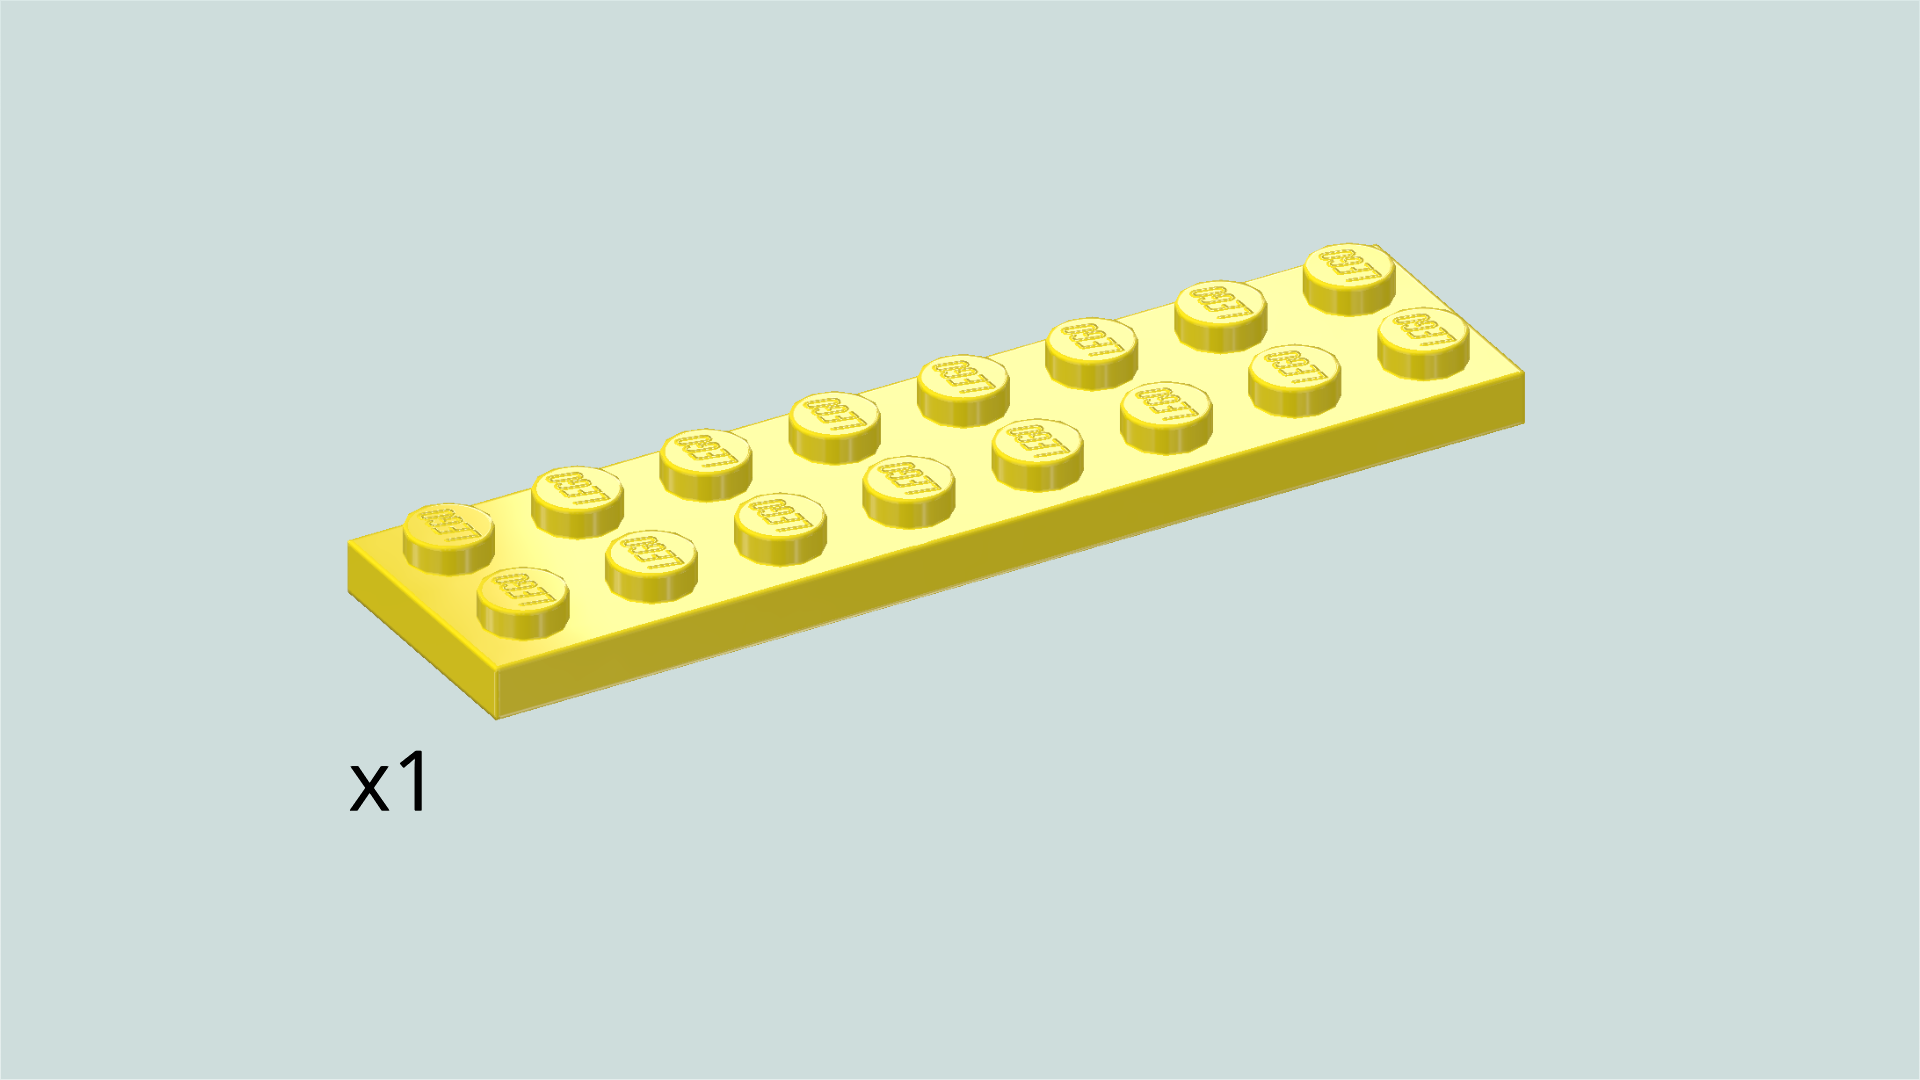
| Find 1 bright yellow plate 2x8. |
| Put it horizontally on the backmost row, one row overhanging to the back. |
| The balcony base is finished! To mount it, put the overhanging row of the previous piece on the frontmost row of the main structure to the right of the back wall pillar. |
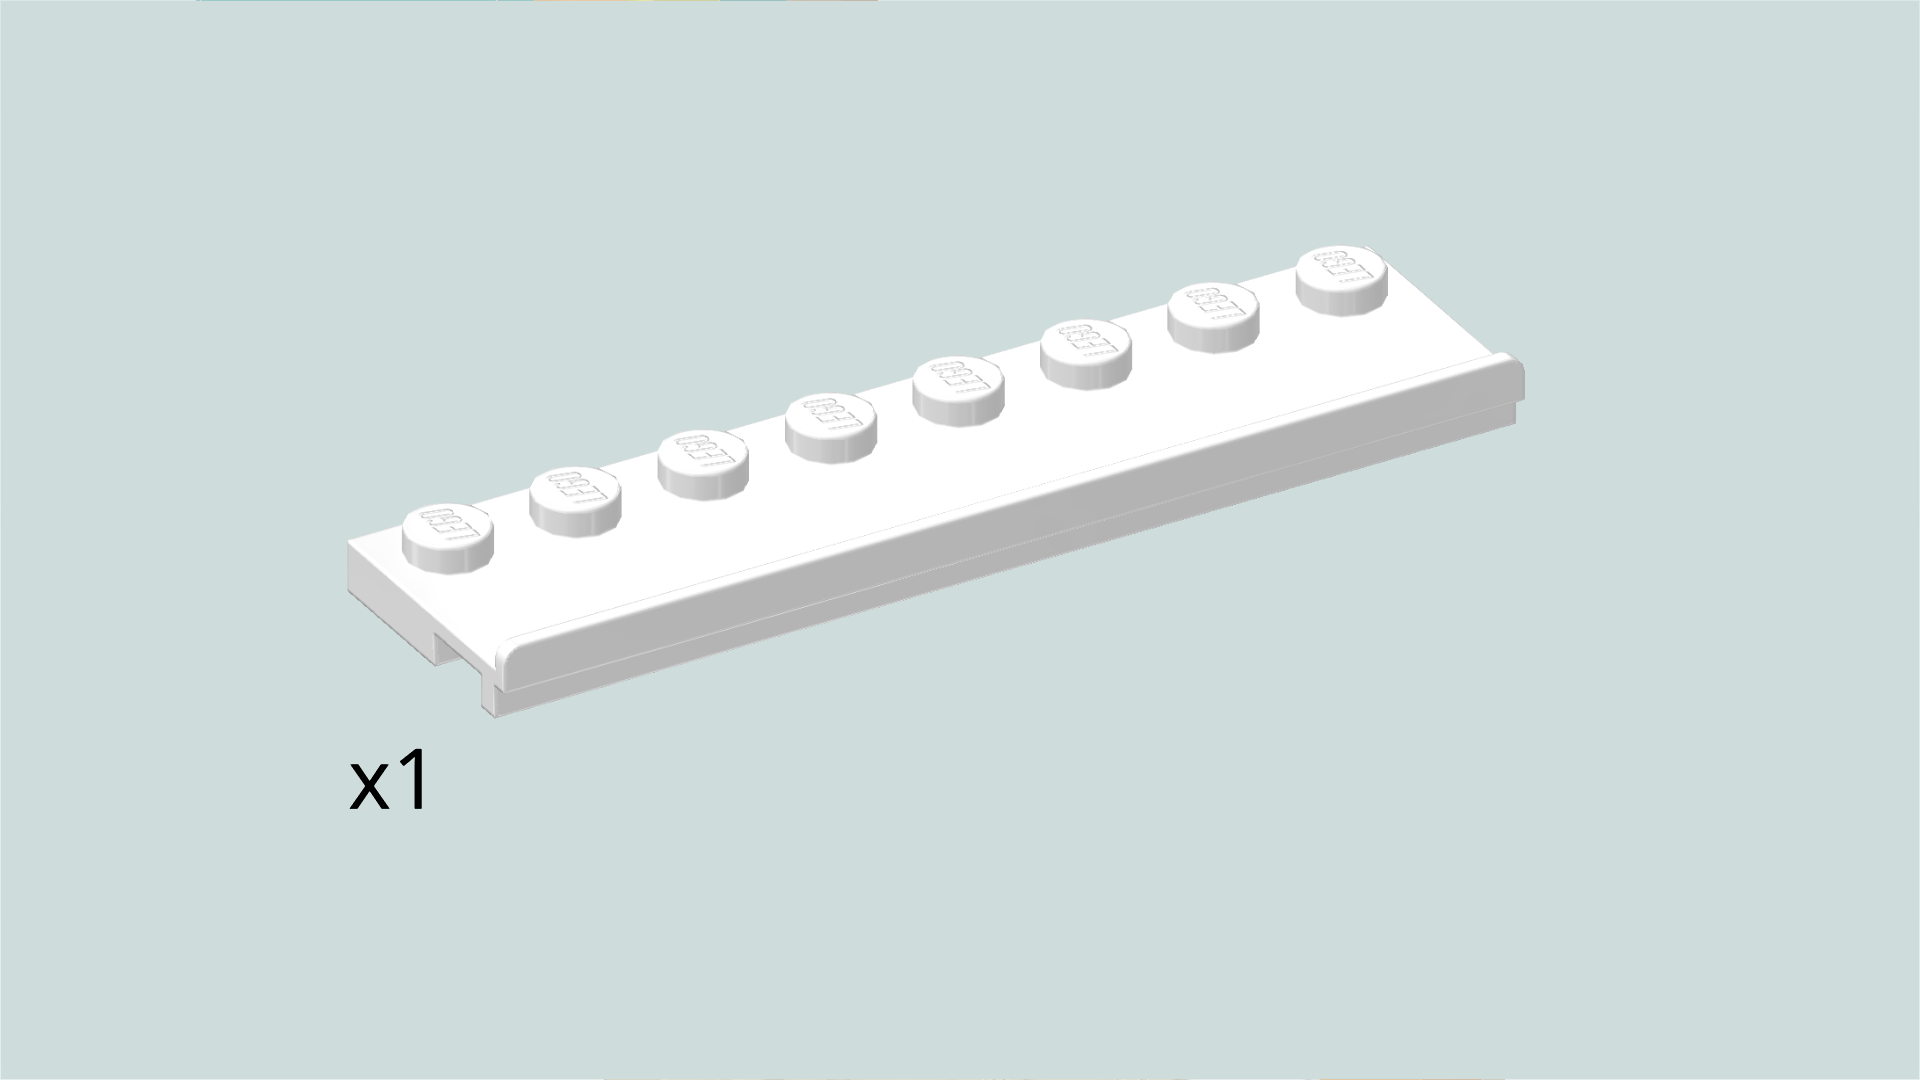
| Find 1 white plate 2x8 with gliding groove. |
| Put it horizontally on the plate 2x8 of the previous step that connects the balcony base with the main room, gliding groove to the front. |
| Find 1 bright yellow flat tile 1x4. |
| Put it horizontally on the left half of the previous piece. |
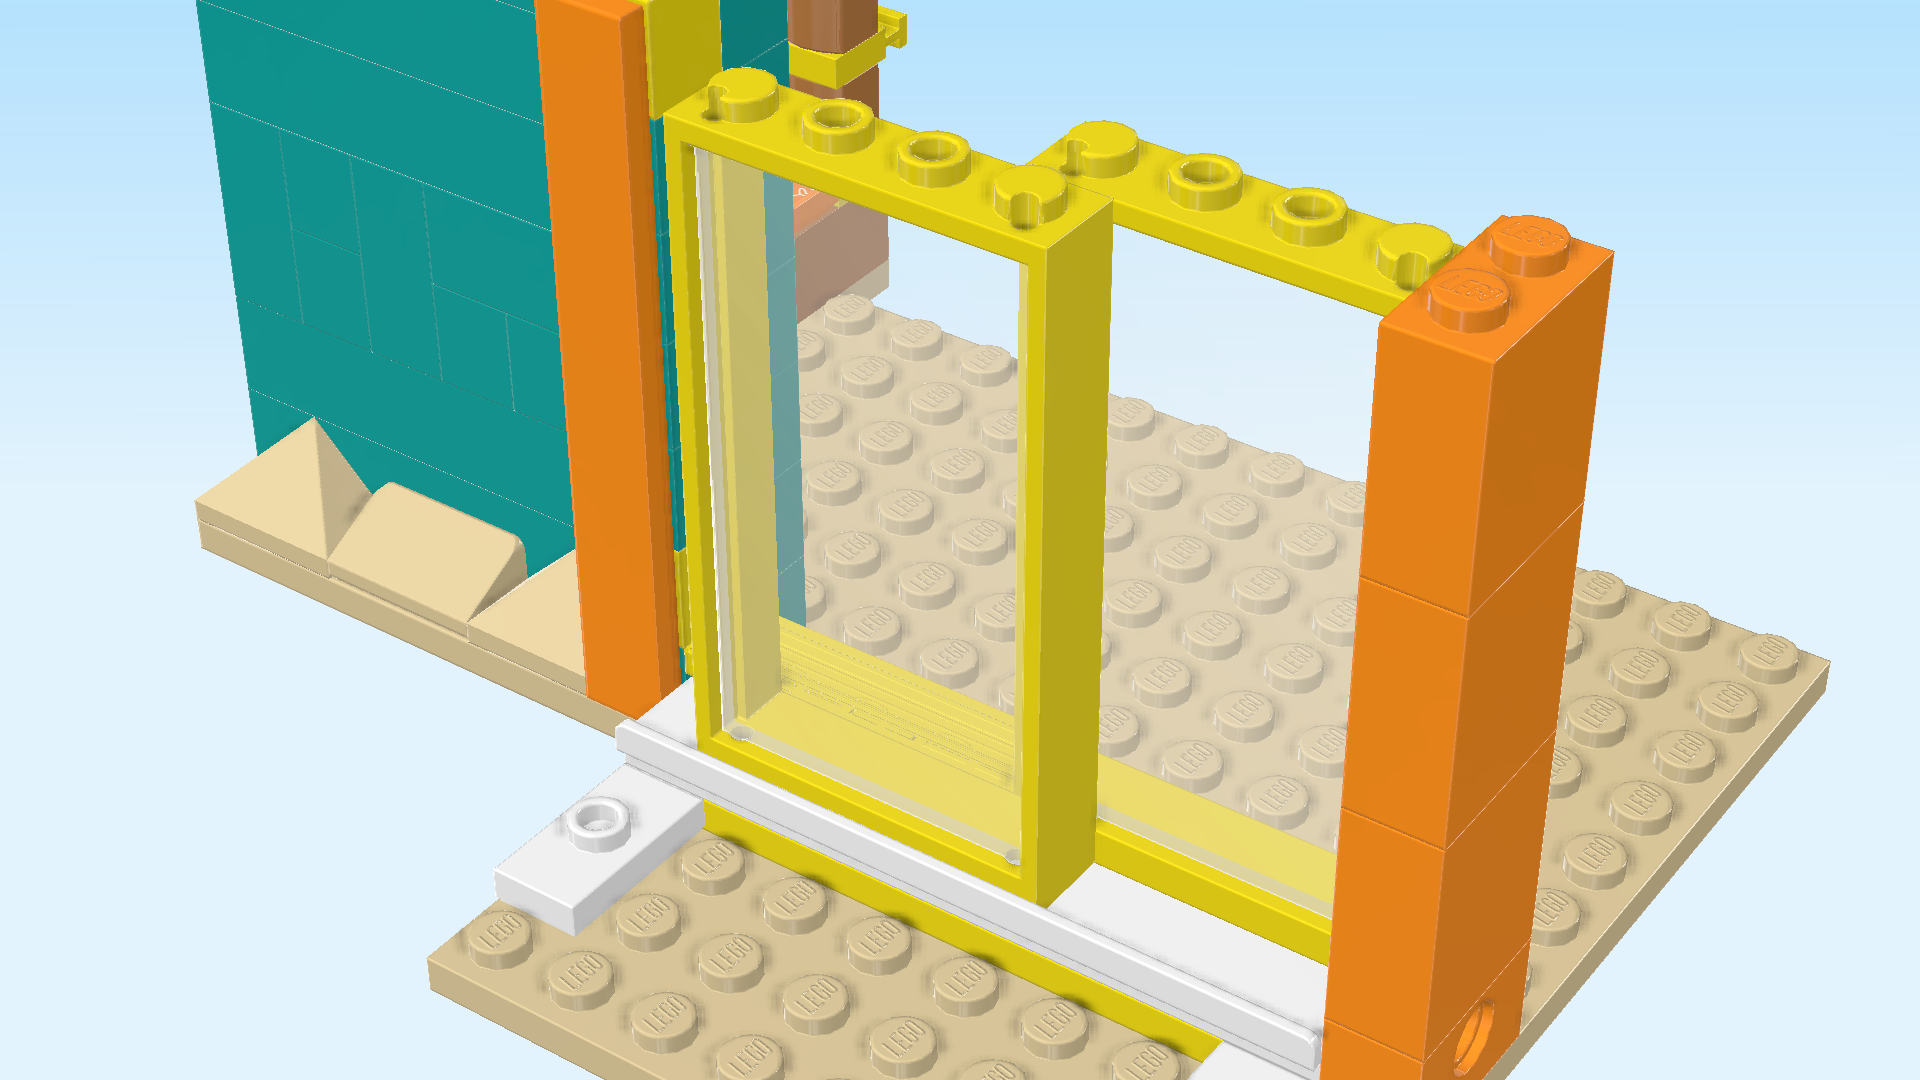
| Next, we will assemble the fixed door. |
| Collect the following 2 pieces: |
| 1 bright yellow door frame 1x4x6, |
| and 1 transparent glass for frame 1x4x6. |
| Windows and doors can be a bit tricky to assemble. You can ask for help if it doesn't work out, but let's give it a try first! |
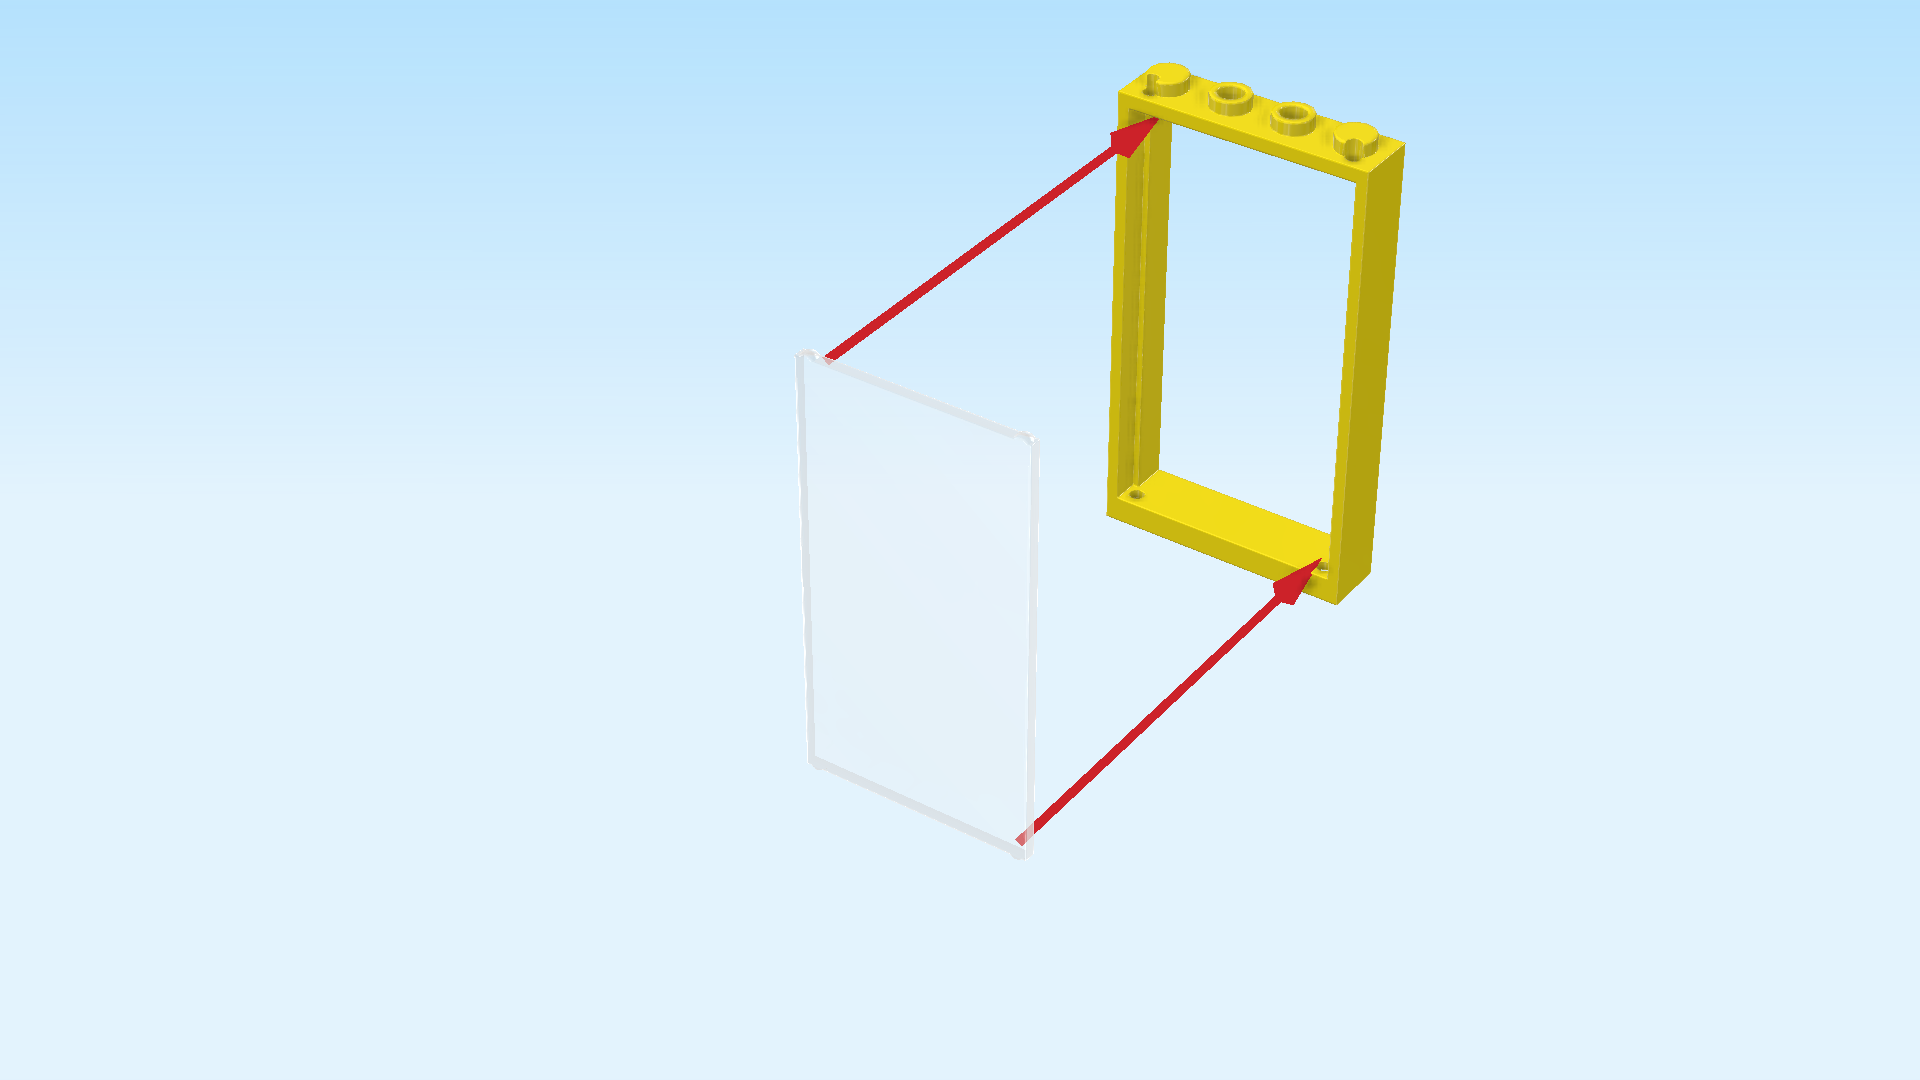
| Put the door frame 1x4x6 vertically flat on the table, knobs pointing to the back. Make sure that the notches on the inner side of the frame are at the top. |
| The glass has four tiny bumps on its corners. They fit neatly into four small notches inside the door frame. Snap the glass into the frame using those bumps and notches. |
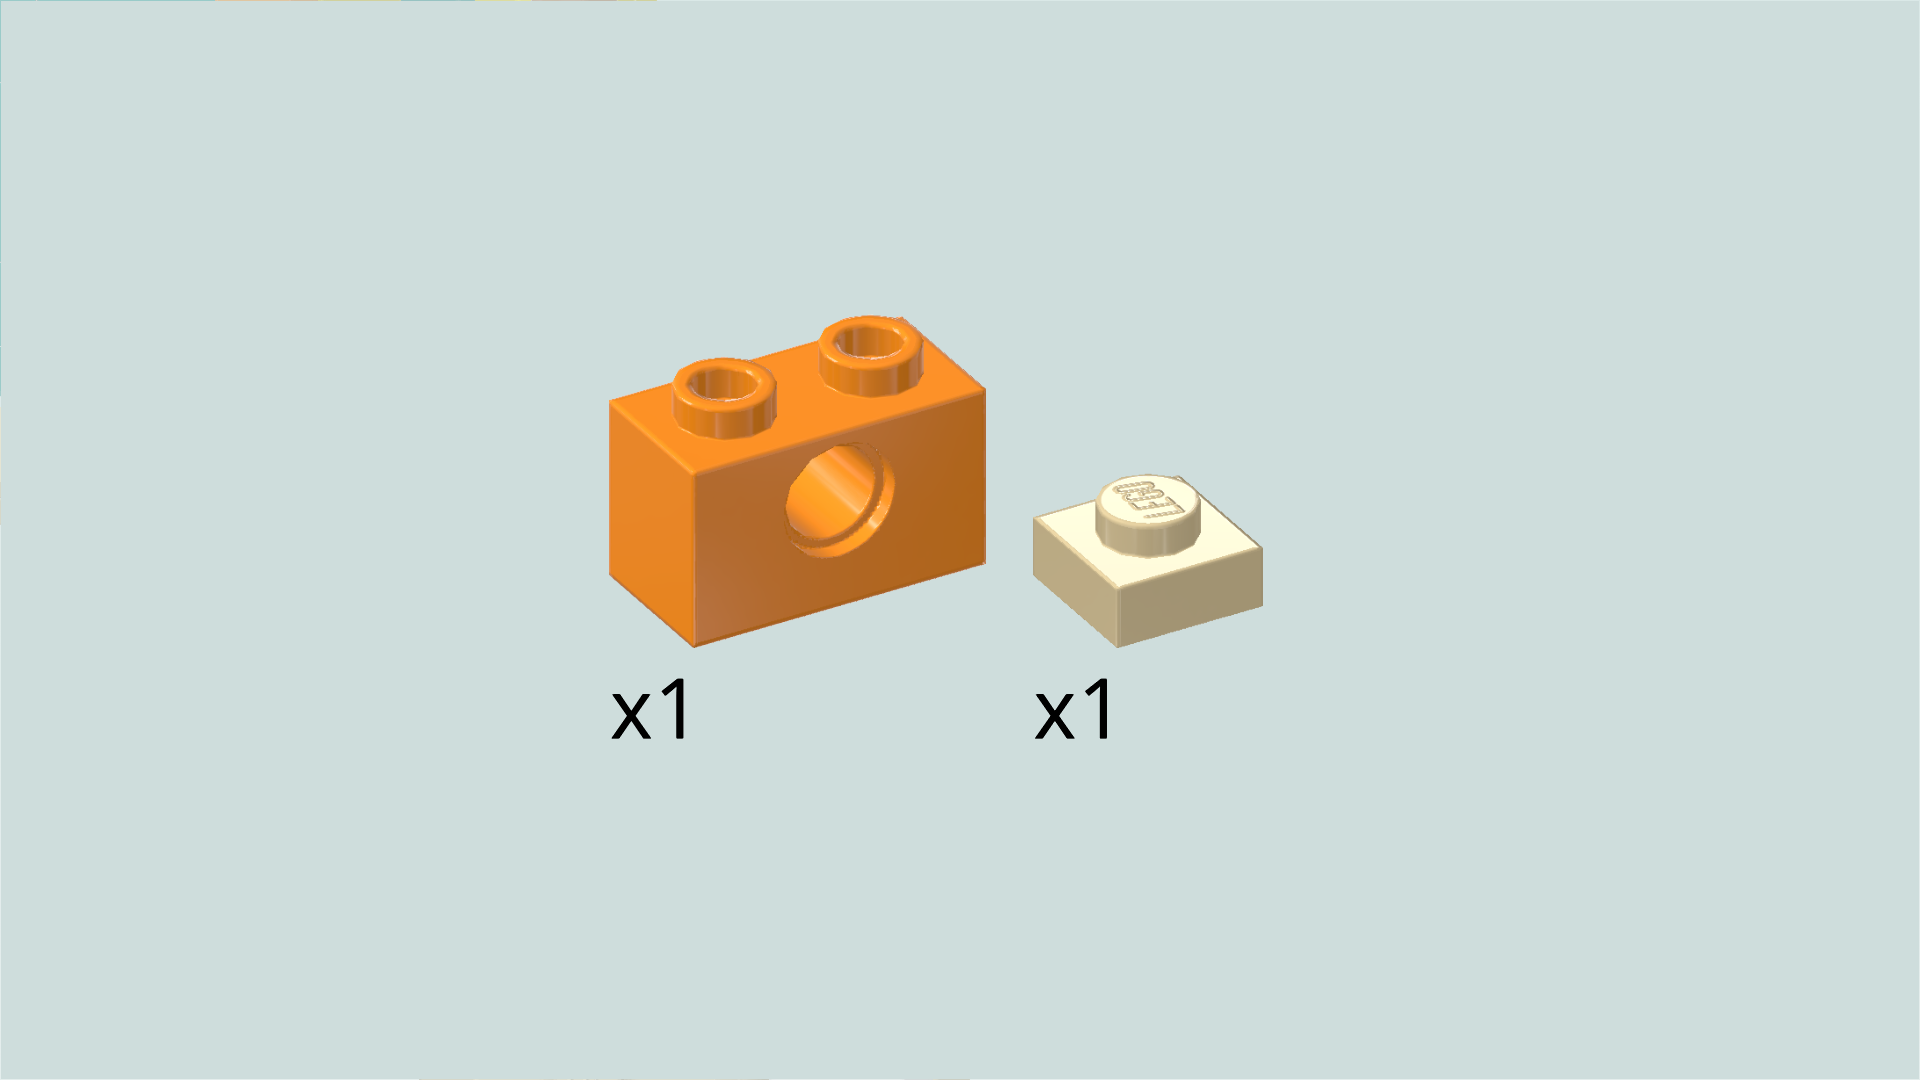
| Collect the following 2 pieces: |
| 1 pale ocher yellow plate 1x1, |
| and 1 bright orange brick 1x2 with technic hole. |
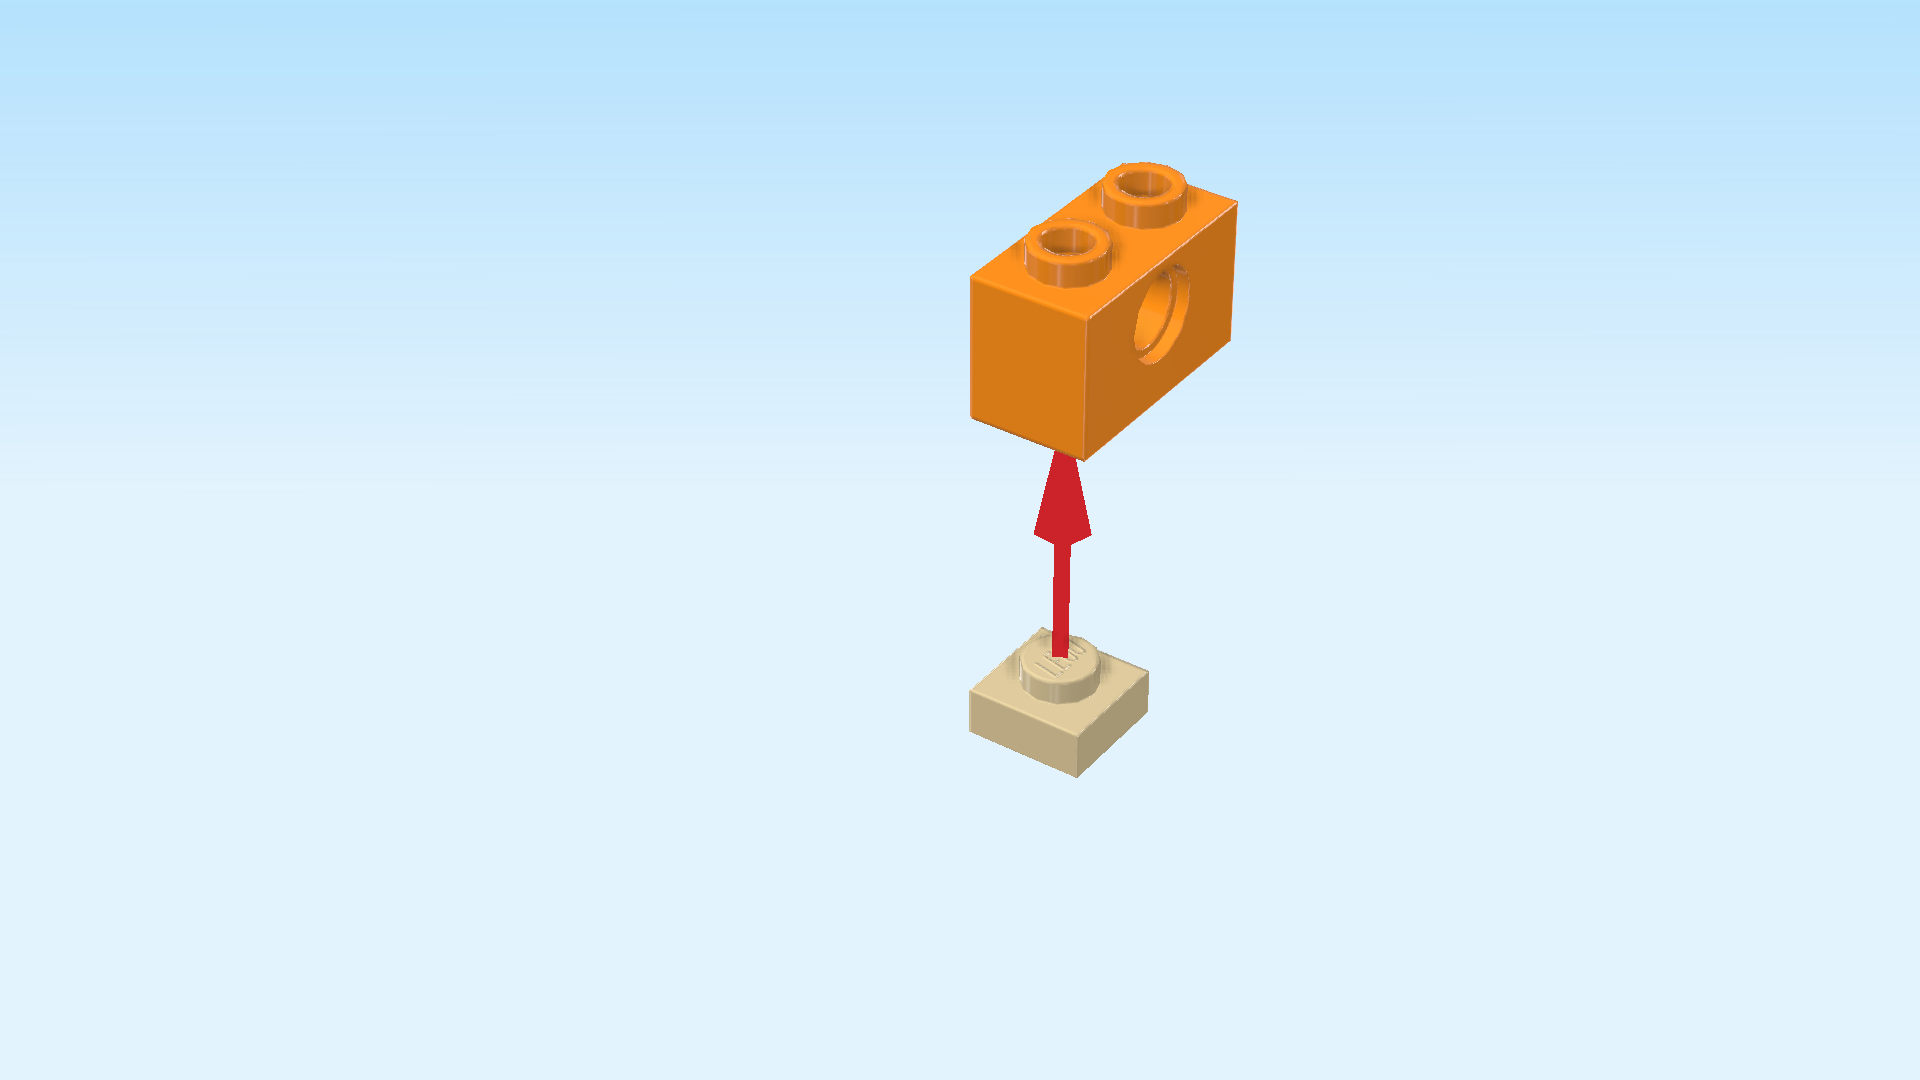
| Put the plate 1x1 on the table. |
| Put the brick 1x2 vertically on top, one knob overhanging to the back. |
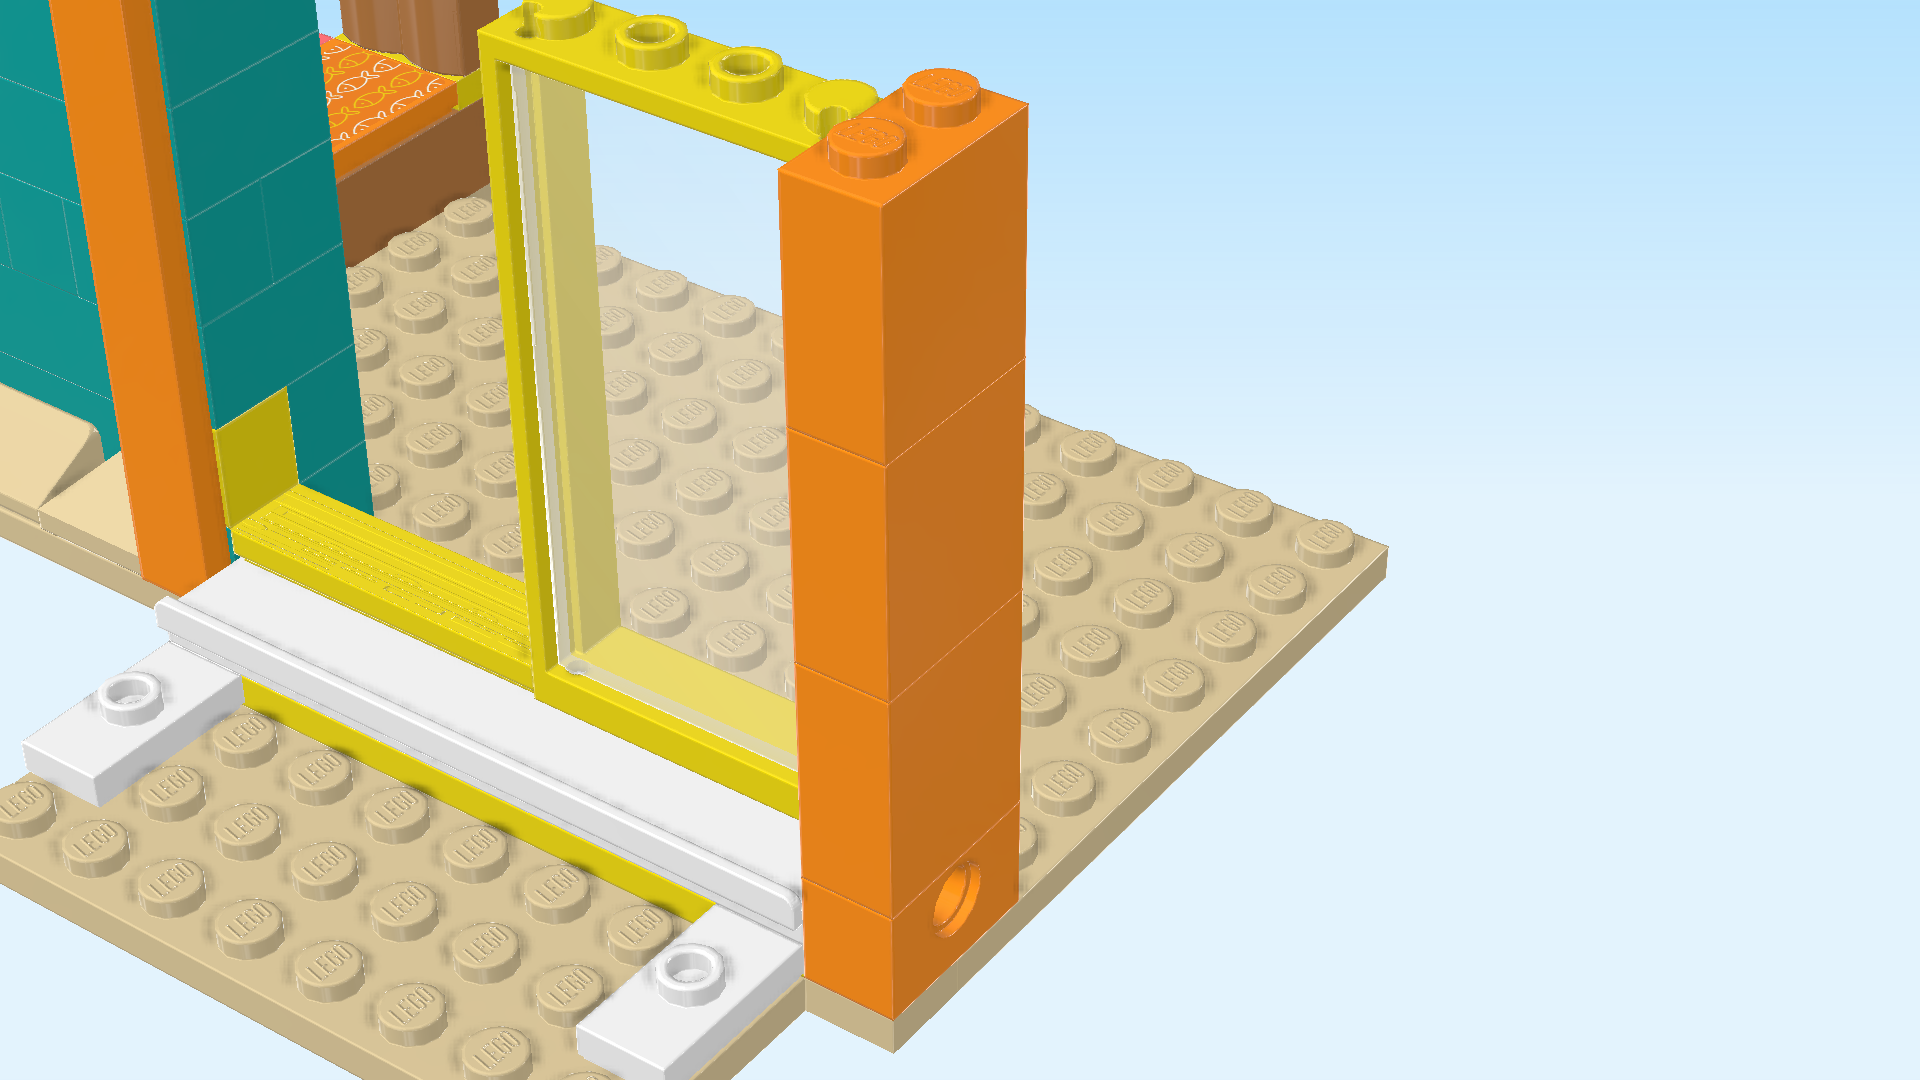
| Next, we will build a pillar of the side wall. |
| Find 2 bright orange bricks 1x2x2. |
| Stack them on top of each other. |
| Find 1 bright orange brick 1x2x2. |
| Put it on top of the two previous pieces. |
| The pillar of the side wall is finished! Mount it vertically on the rightmost column at the front, matching the small part you have mounted in the previous mount. |
| Next, we will build the sliding door. |
| Collect the following 2 pieces: |
| 1 transparent glass for frame 1x4x6, |
| and 1 bright yellow door frame 1x4x6. |
| Put the door frame 1x4x6 flat on the table, inner notches to the top. |
| Snap the bumps of the glass into the notches of the frame again. |
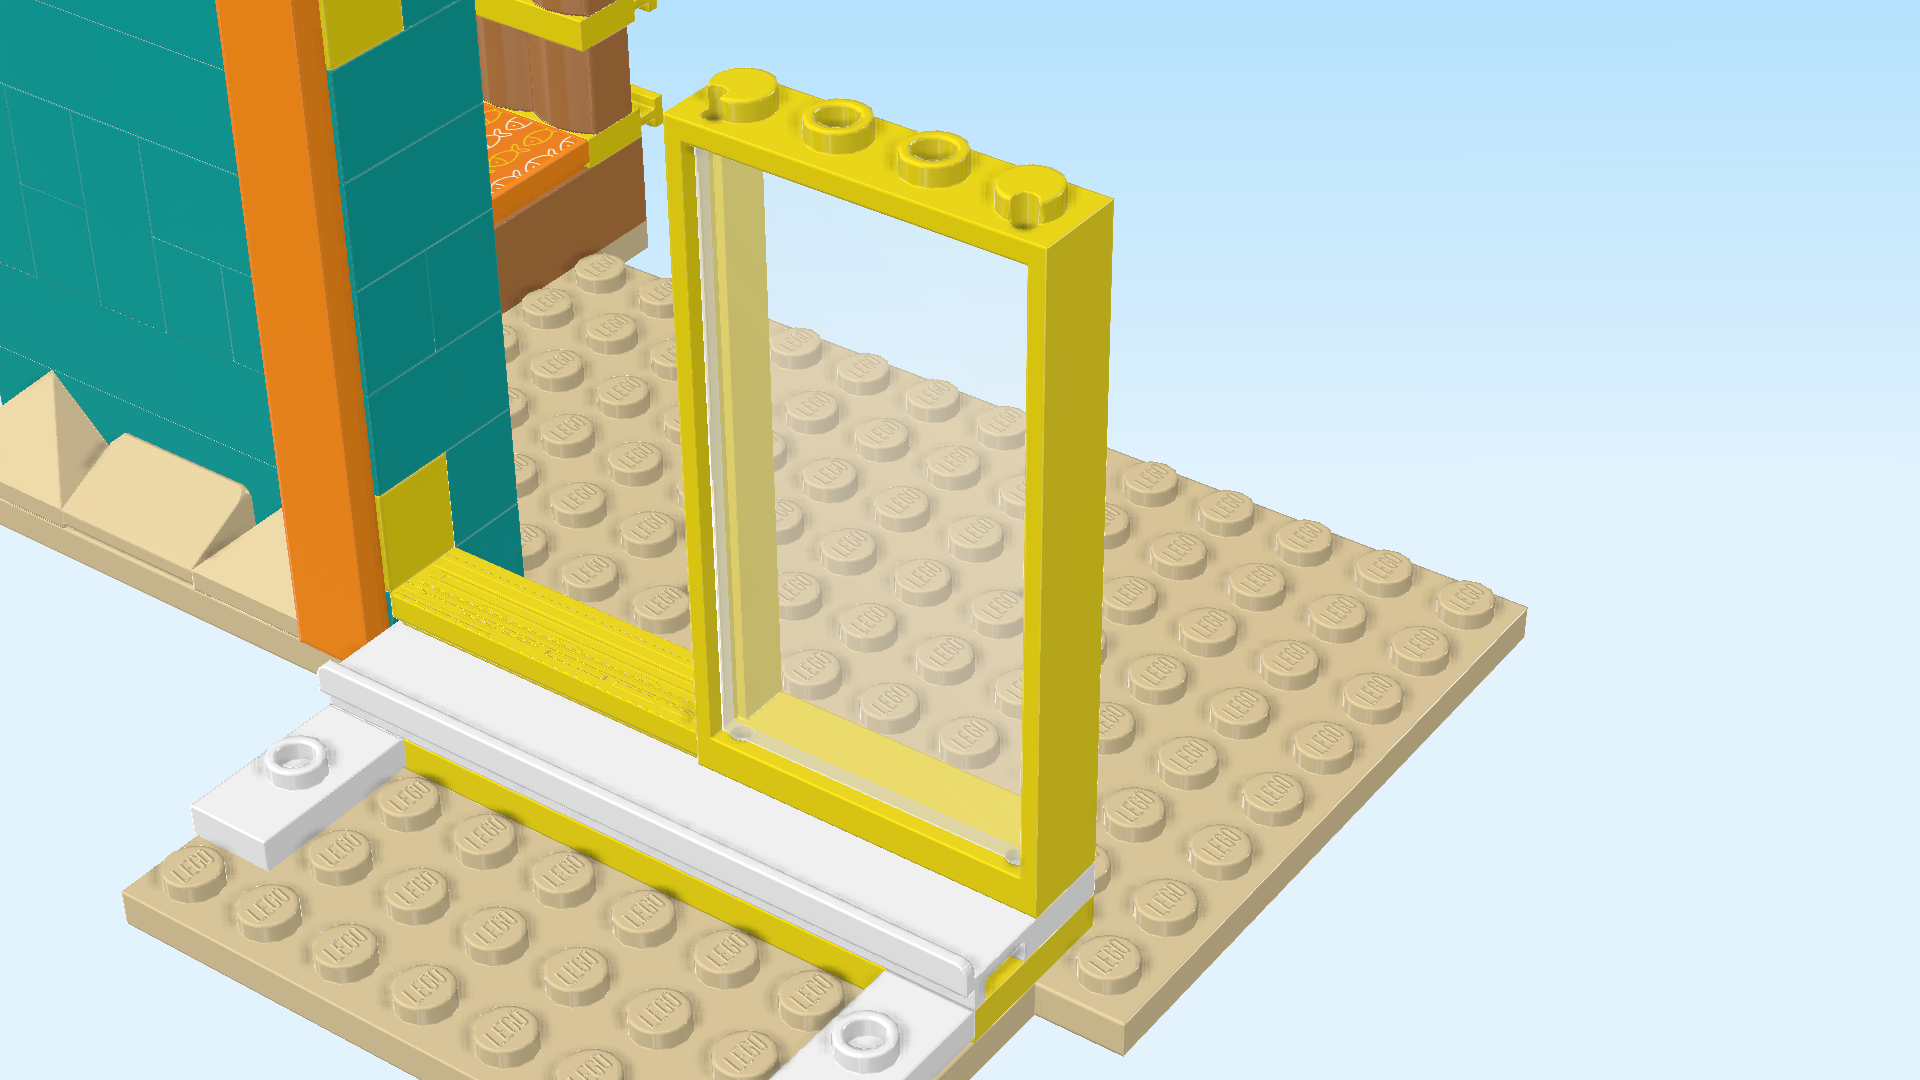
| The sliding door is finished! Great job! Put it on the smooth part of the plate with gliding groove, glass to the front. It can already slide from left to right but is still loose. The following piece will fix it in place. |
| Find 1 white plate 2x8 with gliding groove. |
| Put it horizontally on top of the fixed door and the sliding door. Be careful that only the knobs of the fixed door connect and that the sliding door stays underneath the smooth part. |
| Find 1 bright orange plate 1x4. |
| Put it horizontally on the 3 leftmost knobs of the previous piece and 1 knob to its left. |
| Collect the following 2 pieces: |
| 1 bright orange plate 1x4, |
| and 1 bright orange corner plate 2x2. |
| Put the plate 1x4 horizontally to the right of the previous piece. |
| Put the corner plate to the right of the previous piece, making sure that its outer corner is pointing to the right back. |
| Collect the following 4 pieces: |
| 3 salmon pink flat tiles 1x2, |
| and 1 salmon pink flat tile 1x6. |
| Put 1 flat tile 1x2 vertically on top of the pillar at the right front edge. |
| Put the flat tile 1x6 horizontally to the left of the previous piece on top of the door frame. |
| Put 1 flat tile 1x2 horizontally to the left of the previous piece. |
| Put the last flat tile 1x2 vertically to the left of the previous piece. |
| Find 1 black connector peg 2m with middle ring. |
| Insert it from the right into the hole at the bottom right side of the pillar on the rightmost edge. |
| Find 2 white telescope pieces 1x1x1½ with knob. |
| Put 1 on the right plate 1x2 with 1 knob that is mounted on the balcony base plate. |
| Repeat with the other telescope piece on the left plate 1x2 with 1 knob. |
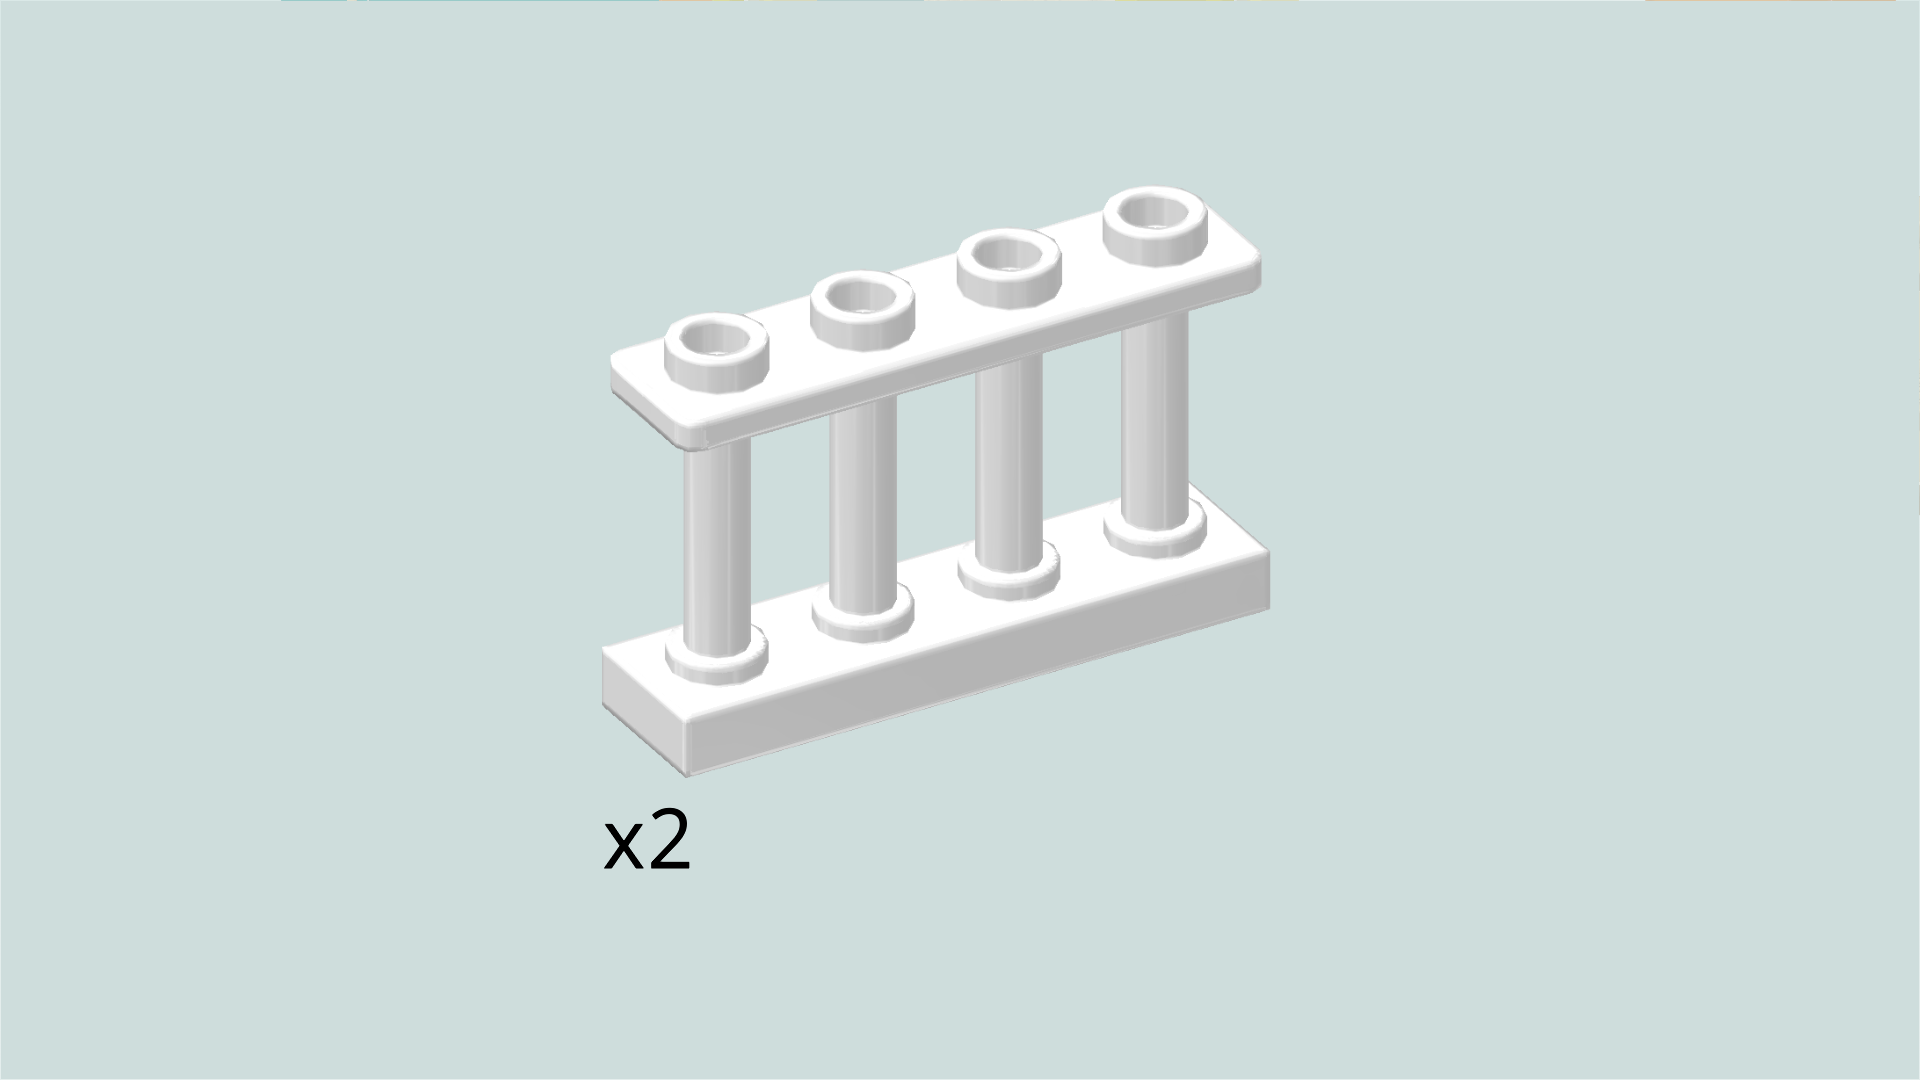
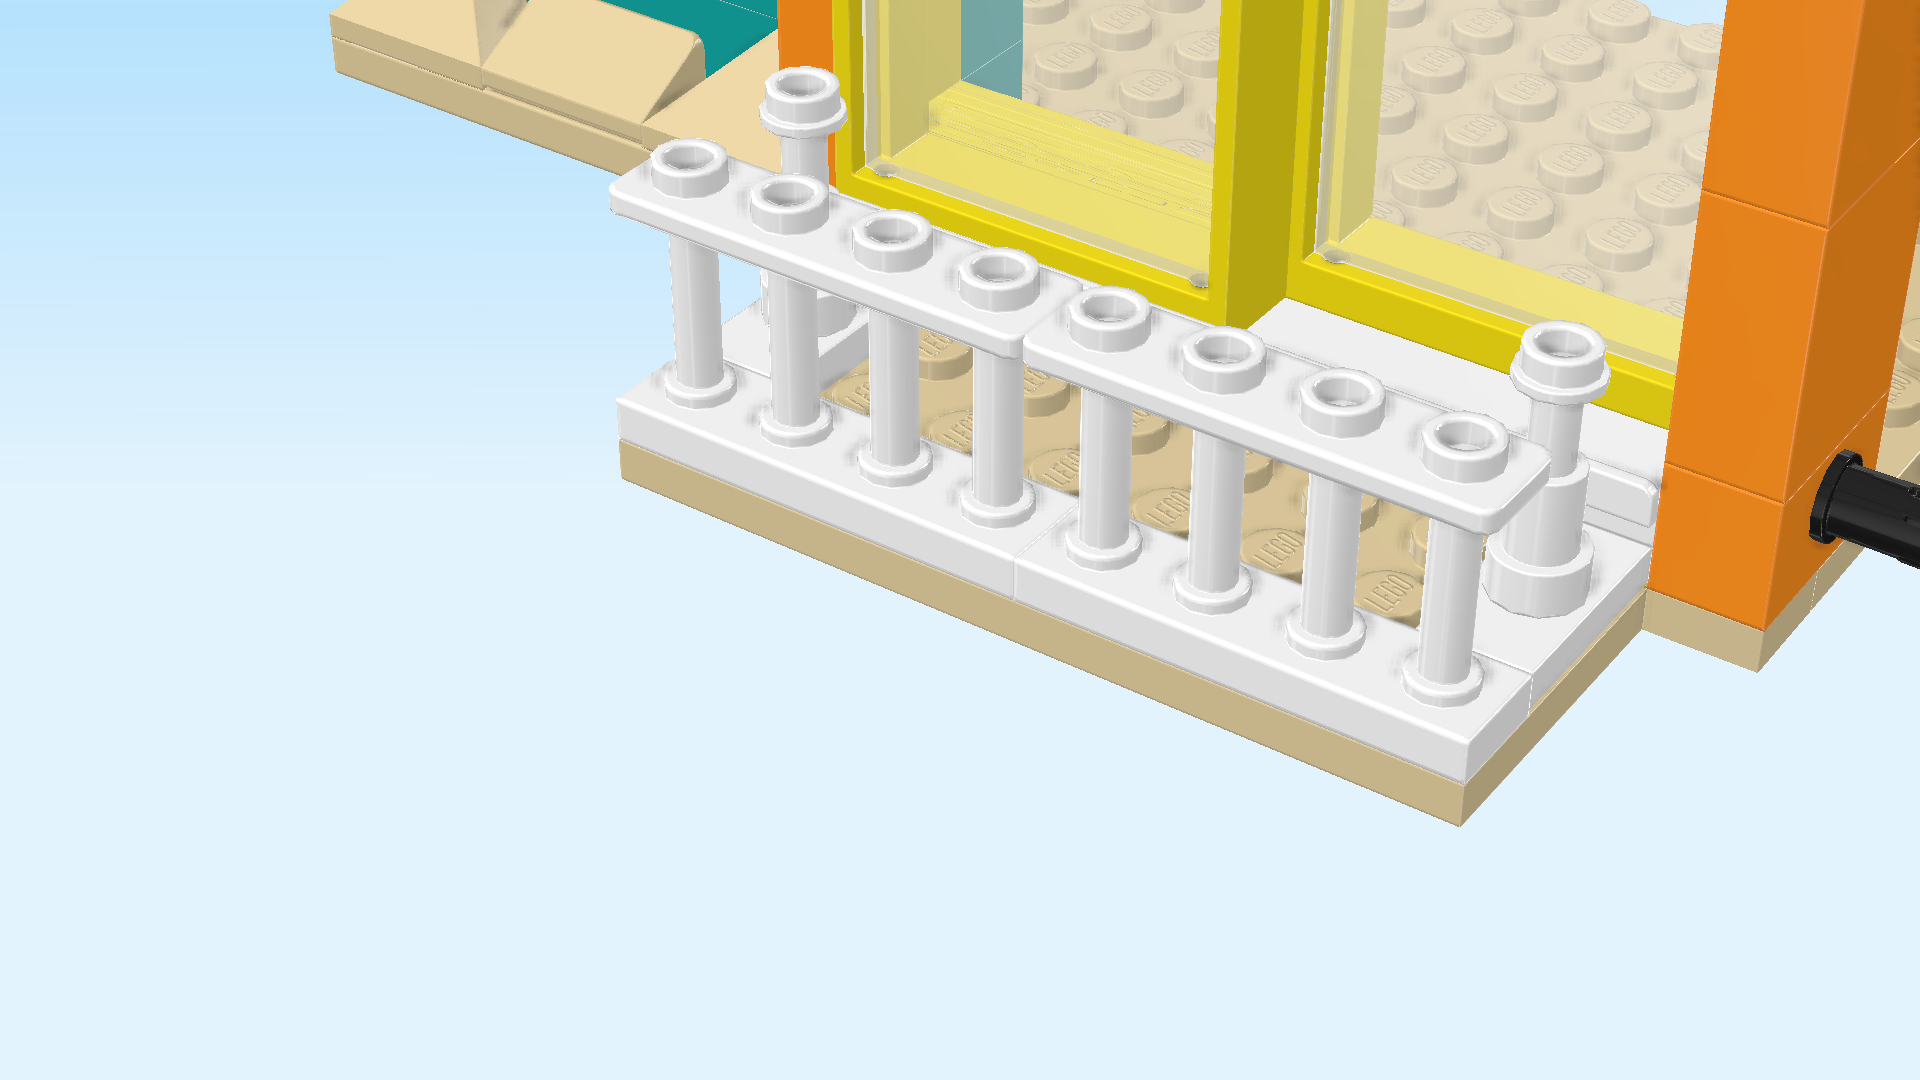
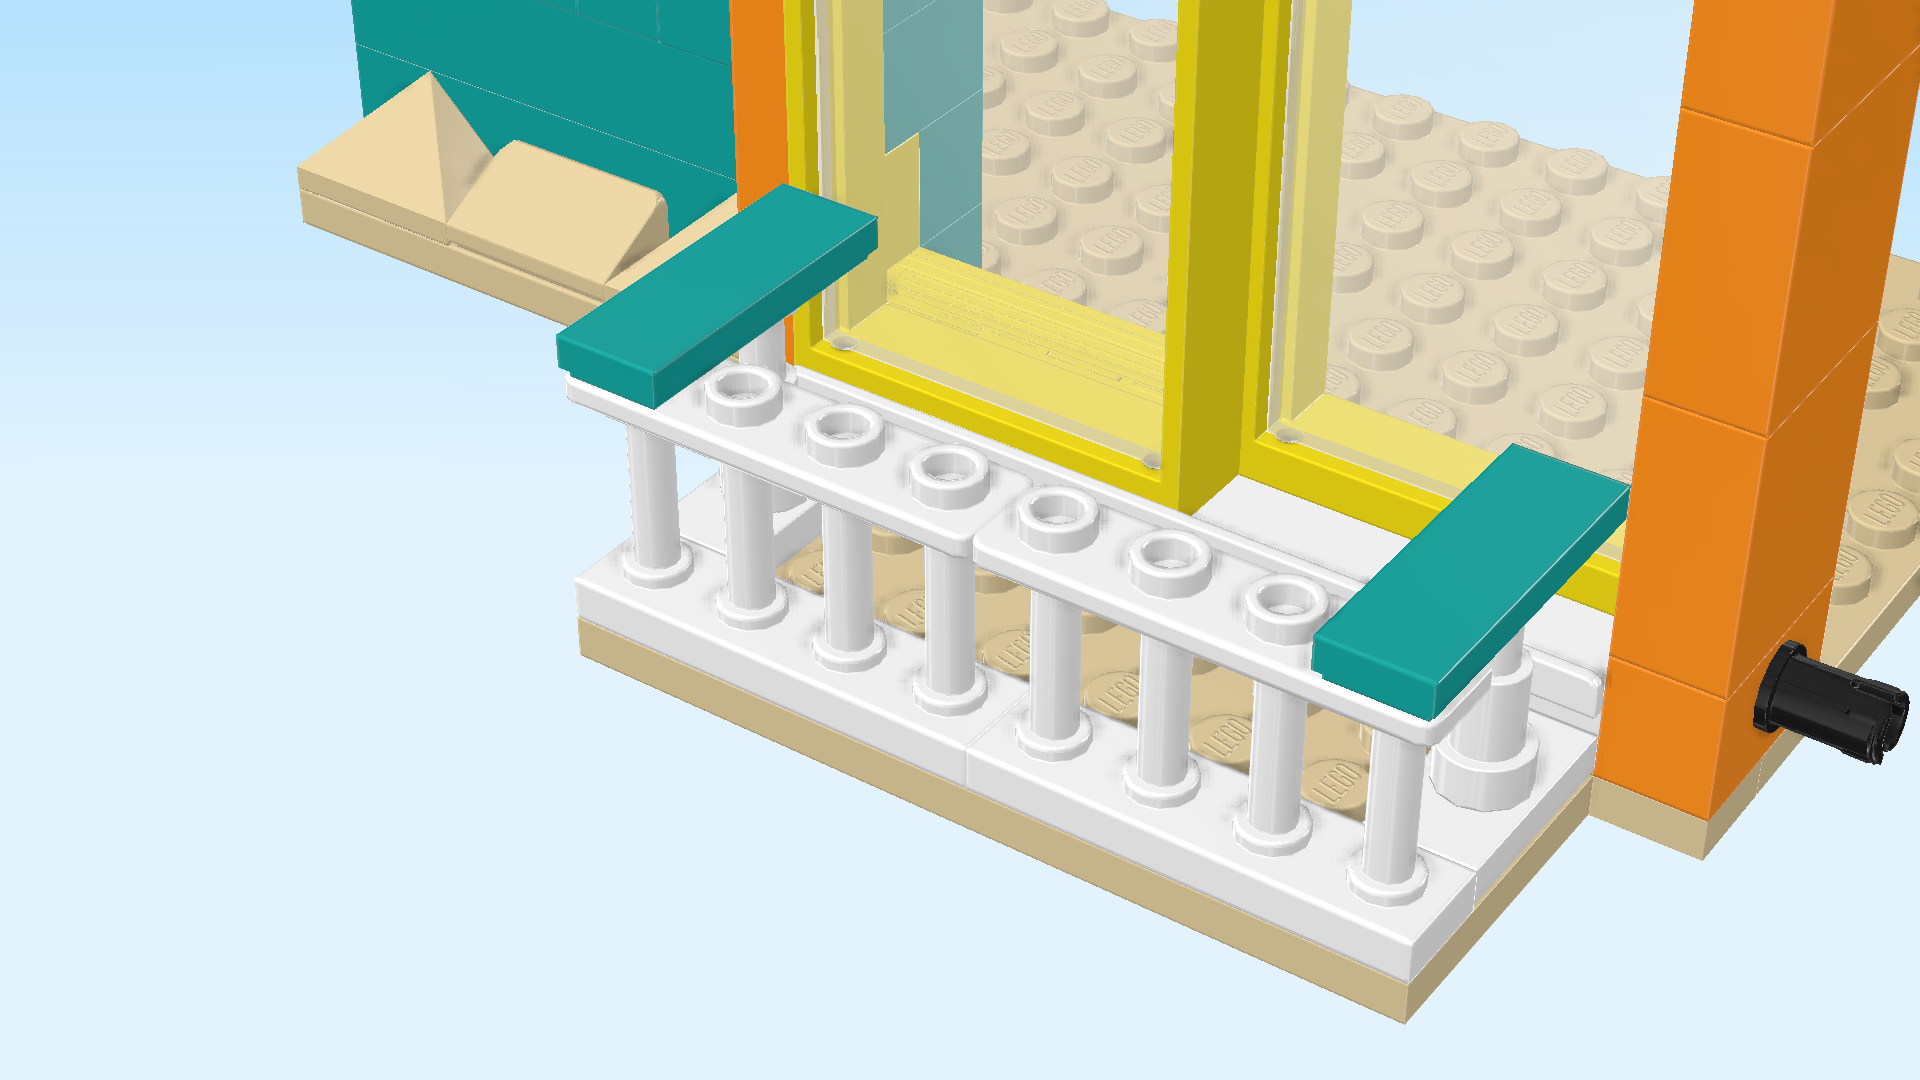
| Find 2 white spindle fence elements 1x4x2. |
| Put them horizontally next to each other on the frontmost row of the balcony base plate. |
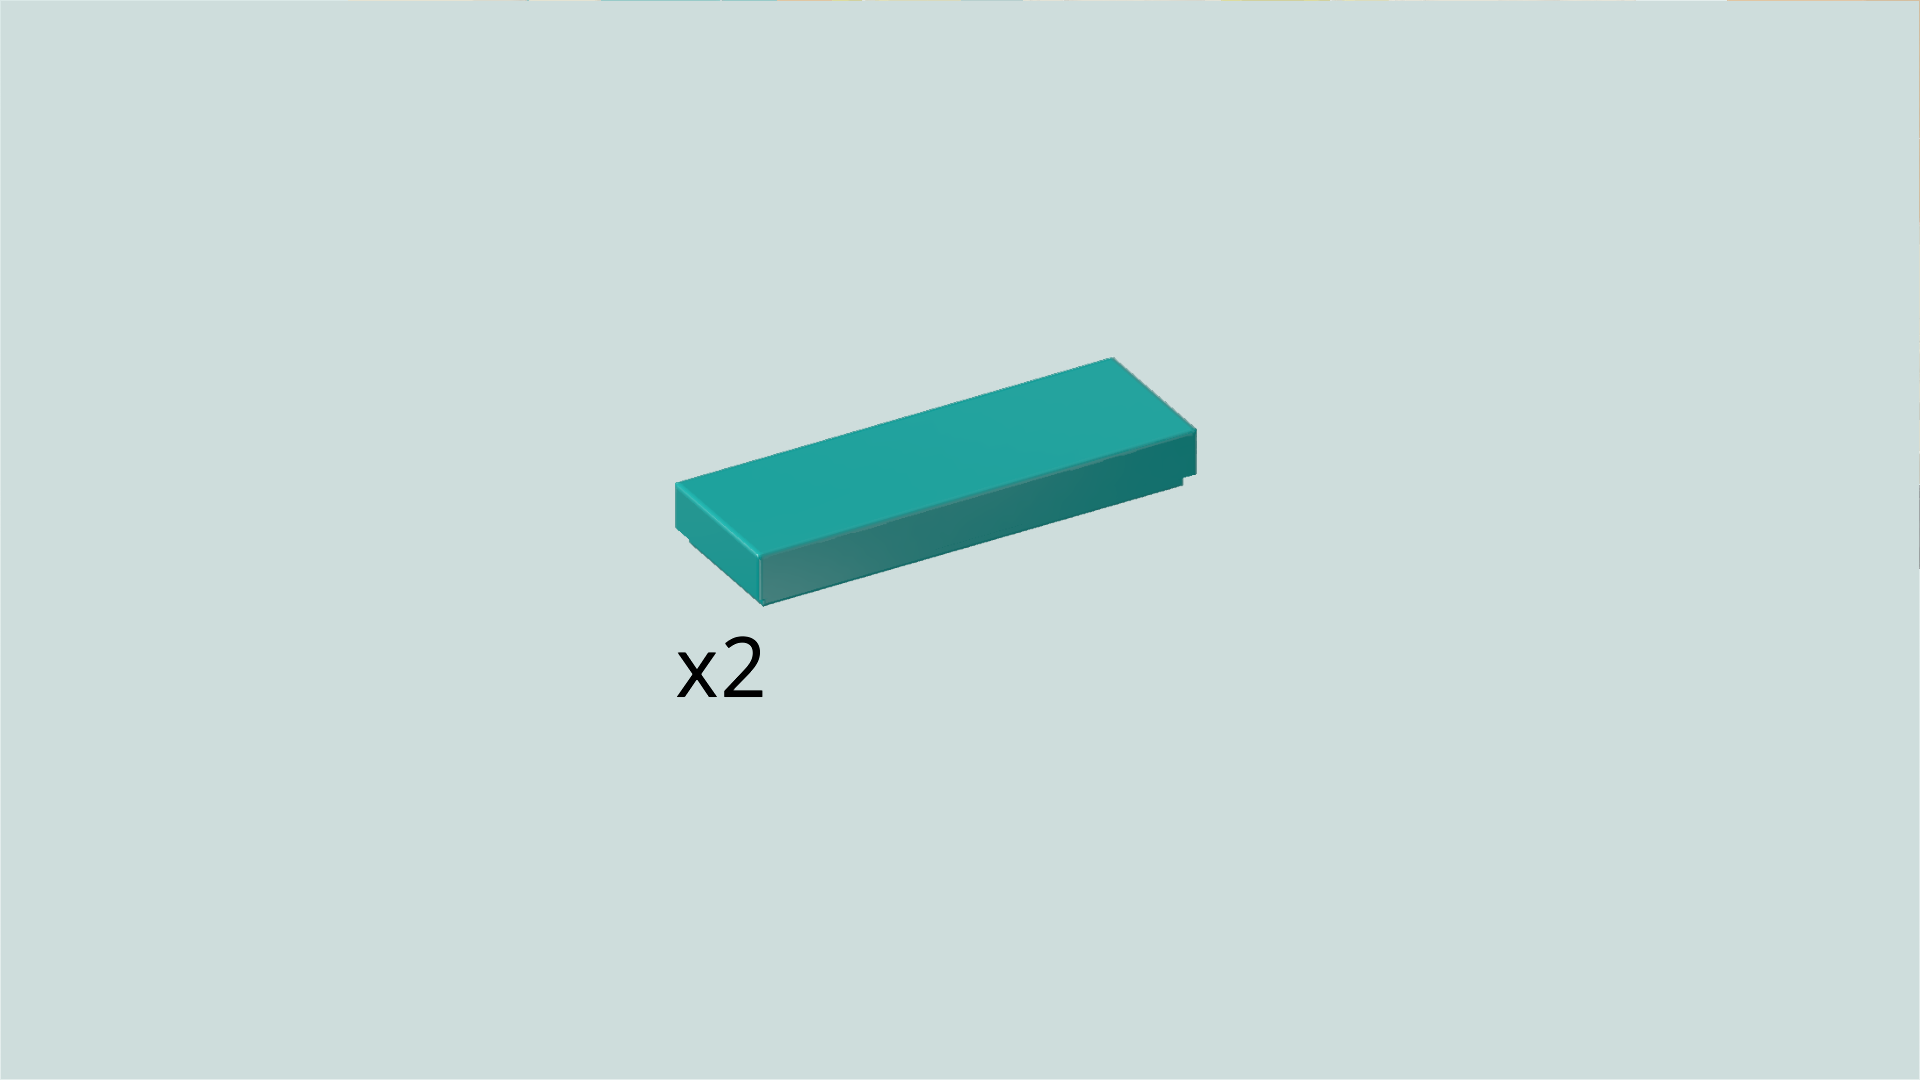
| Find 2 teal blue flat tiles 1x3. |
| Put 1 vertically on the rightmost knob of the spindle fence, connecting it to the right telescope piece. Make sure it does not overhang at the front. |
| Repeat symmetrically on the left side of the balcony. |
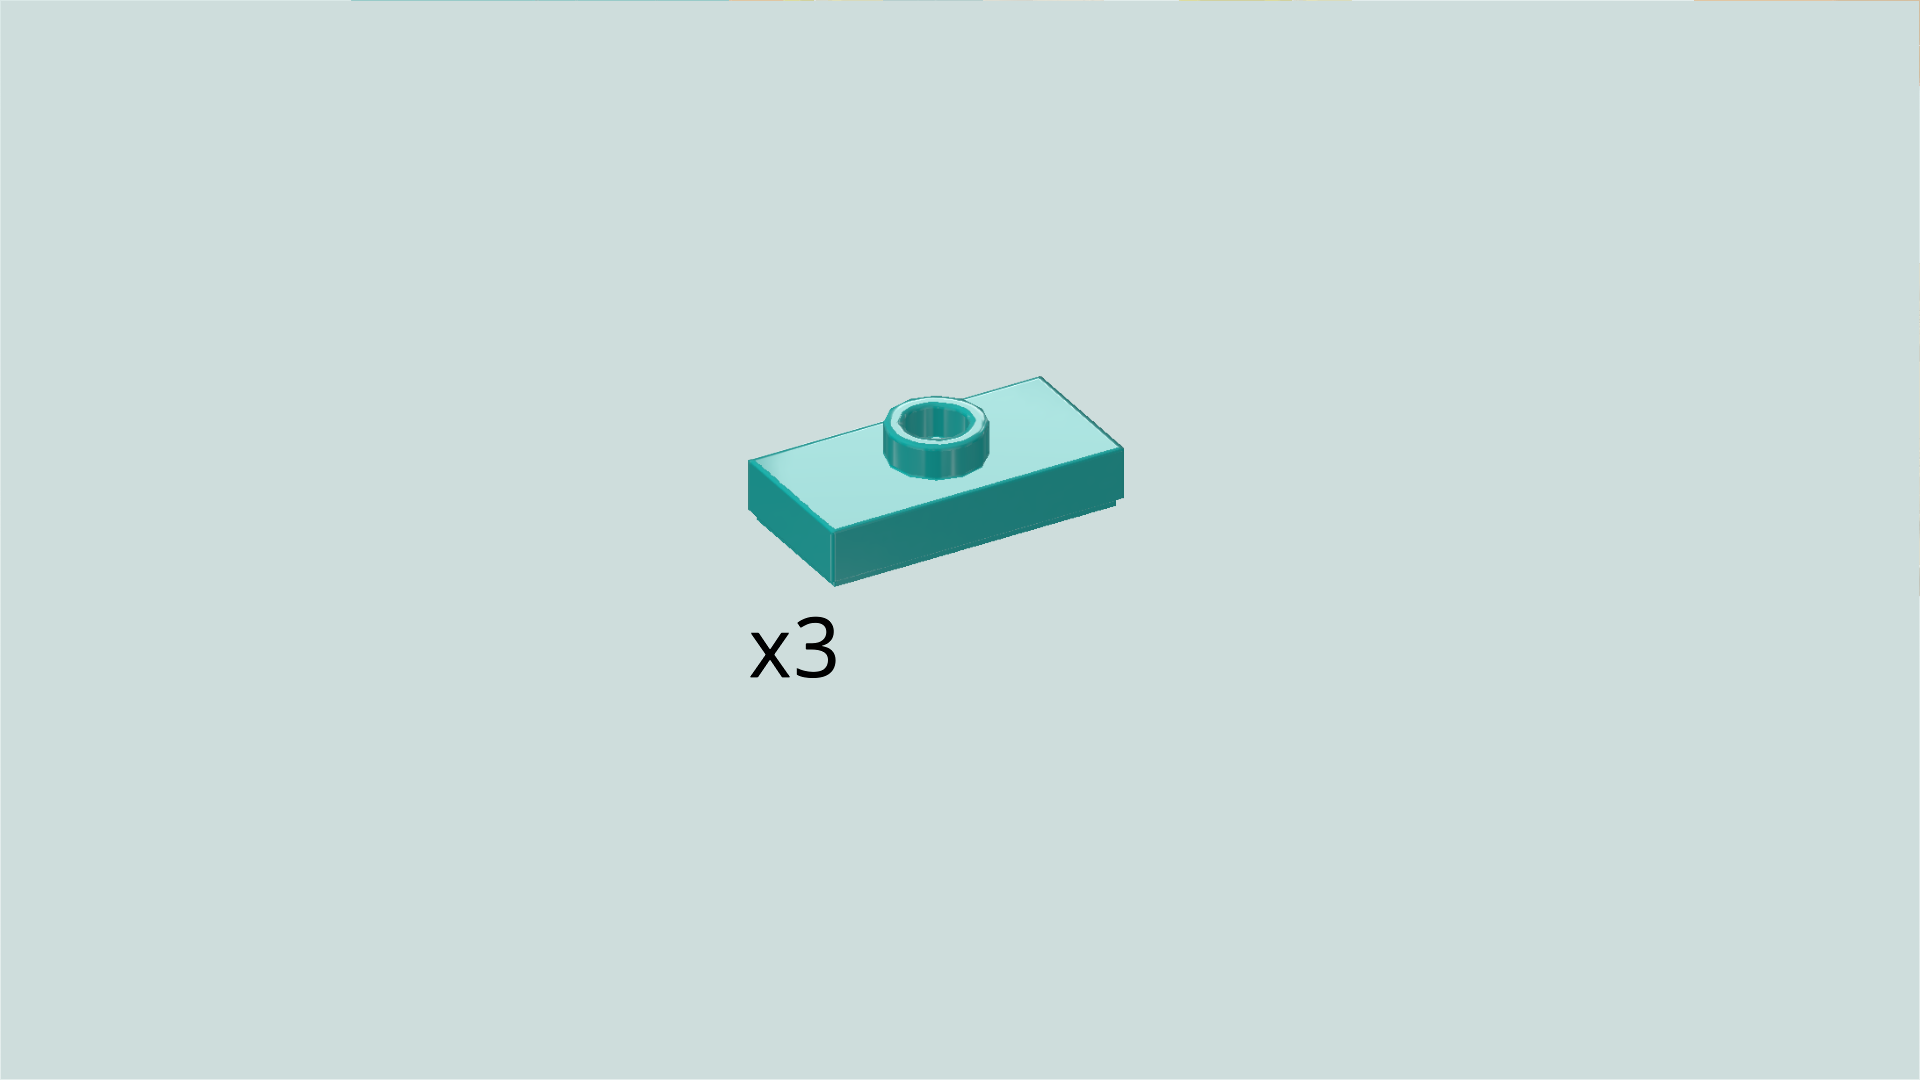
| Find 3 teal blue plates 1x2 with 1 knob. |
| Put them horizontally next to each other on the remaining empty knobs of the spindle fence. |
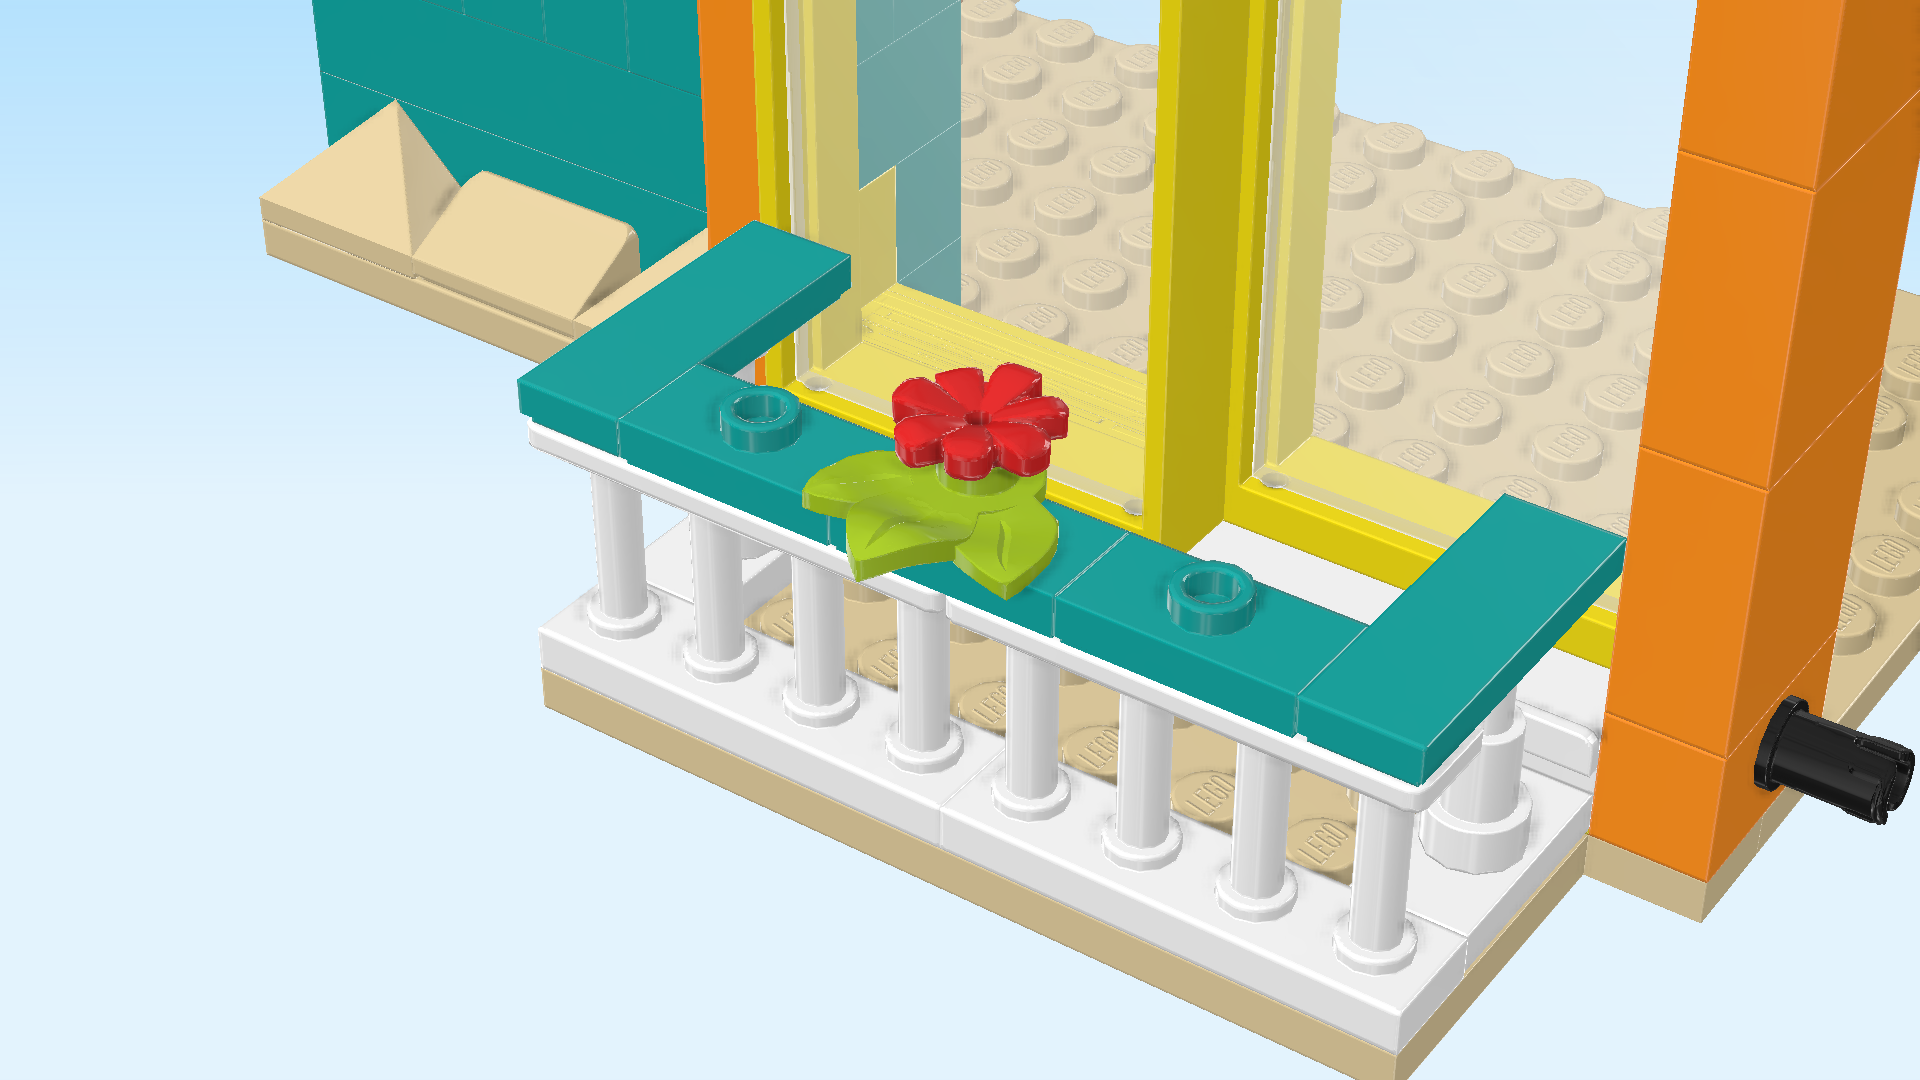
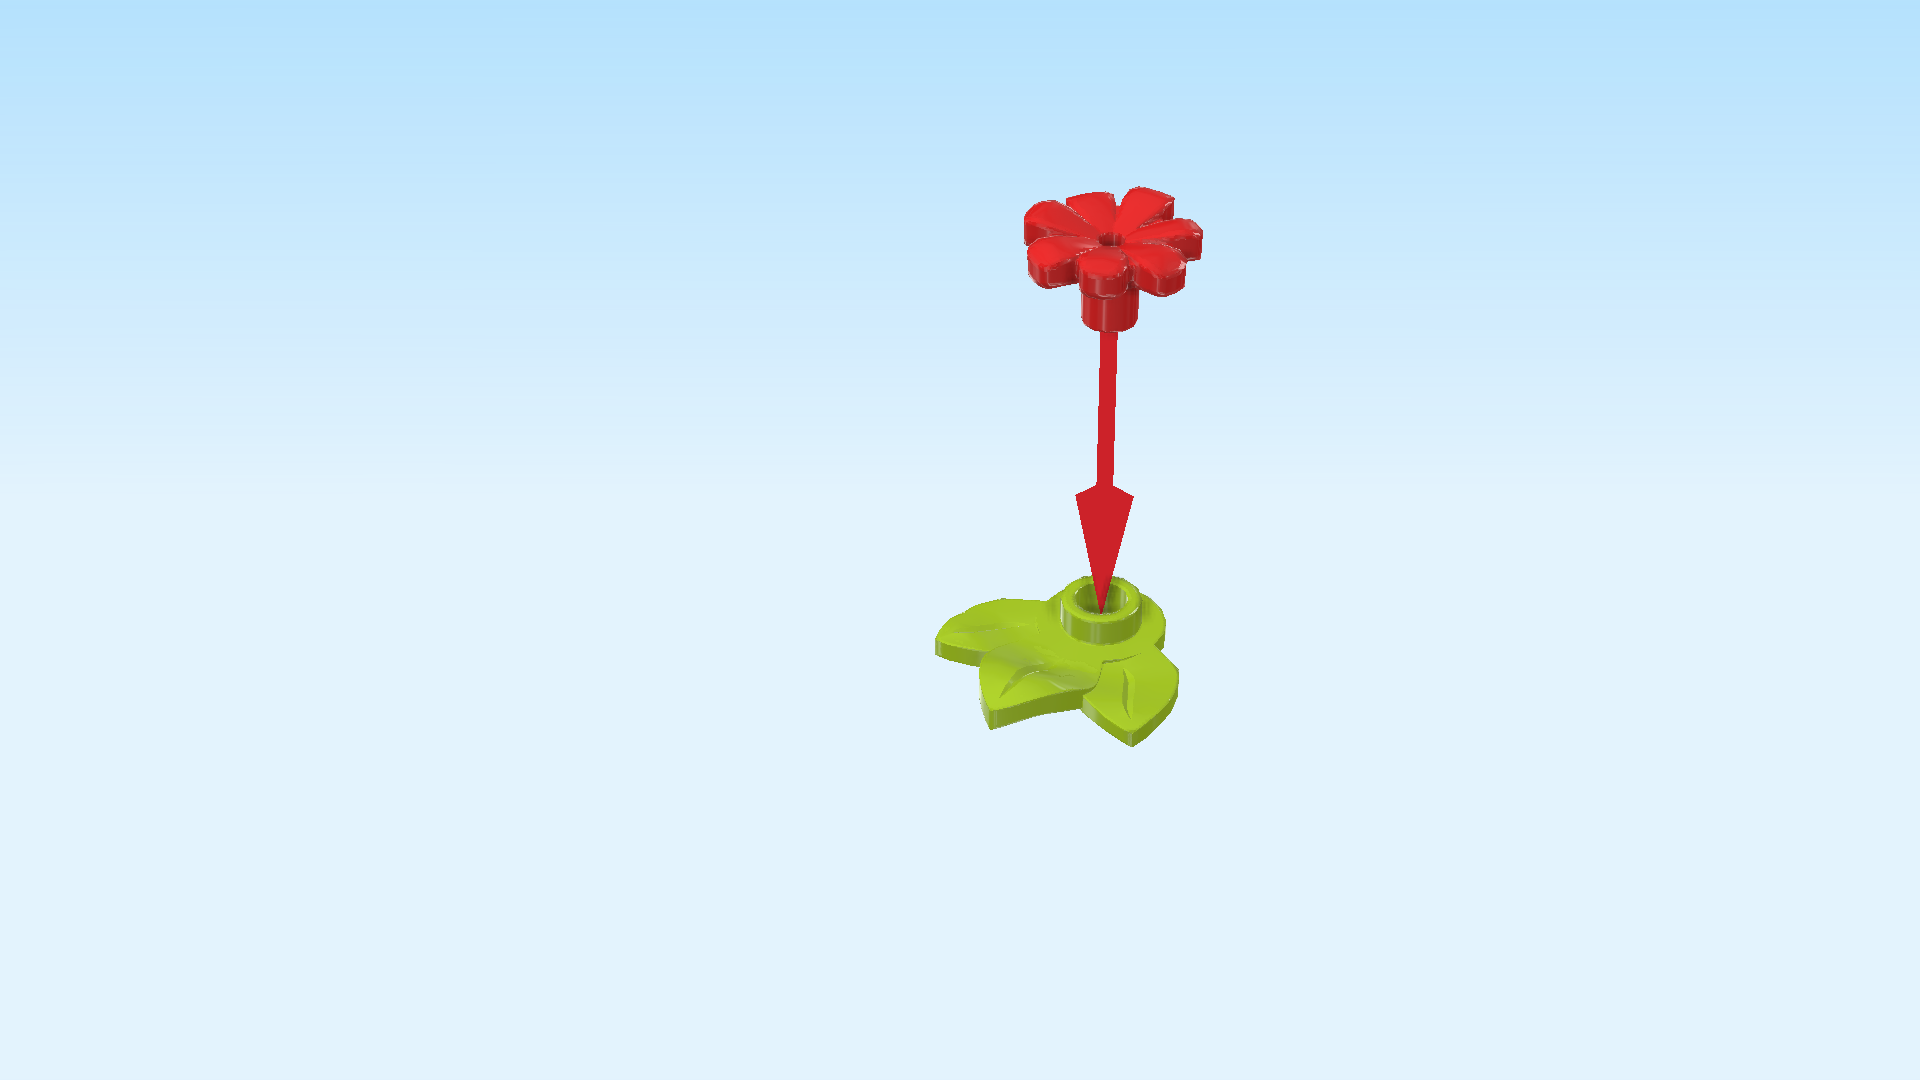
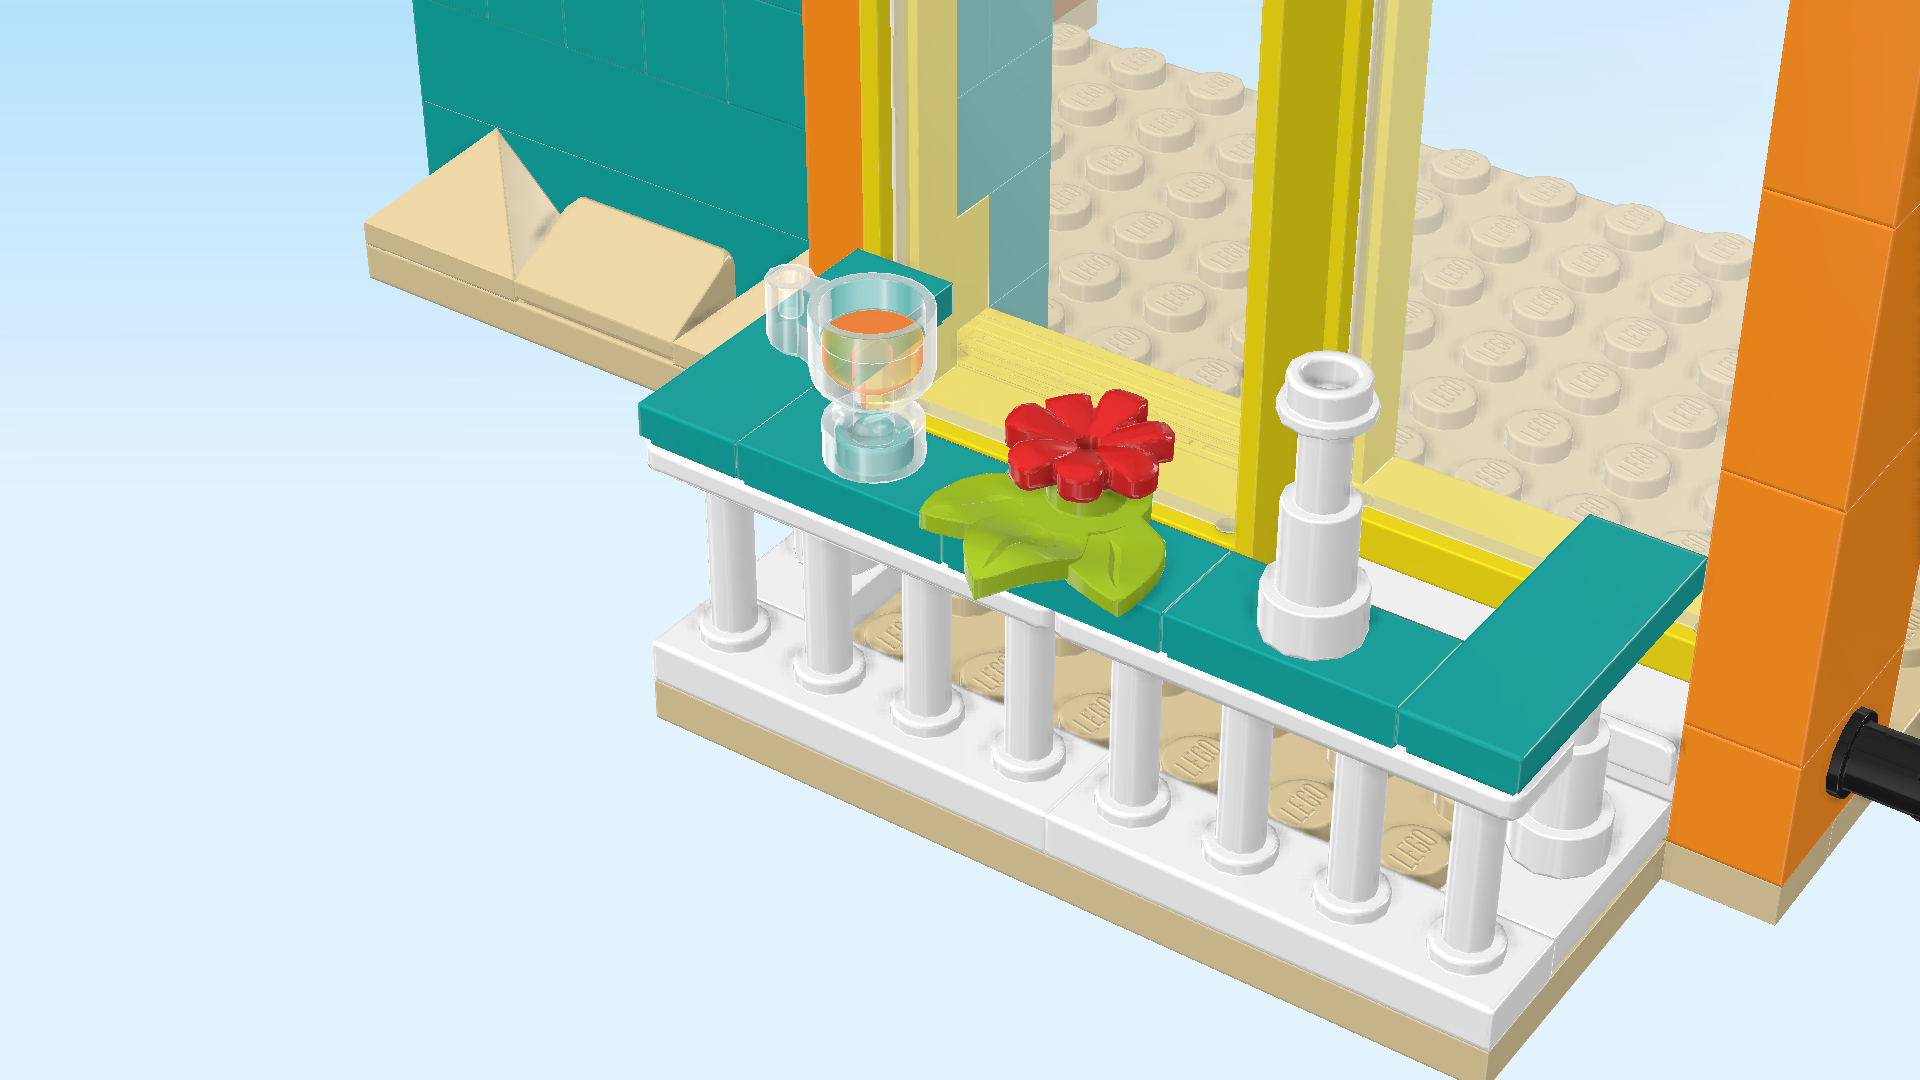
| Next, we will make a small flower. |
| Collect the following 2 pieces: |
| 1 bright yellowish green round plate 1x1 with 3 leaves, |
| and 1 bright red decoration flower with small shaft. |
| Put the round plate with leaves on the table. |
| Insert the small shaft of the flower into its knob. |
| Mount the small flower on the middle knob of the balcony fence, leaves to the front. |
| Collect the following 2 pieces: |
| 1 transparent bright orange and transparent Minifigure cup with stem and handle, |
| and 1 white telescope piece 1x1x1½ with knob. |
| Mount the Minifigure cup to the left of the small flower. |
| Mount the telescope piece to the right of the flower. |
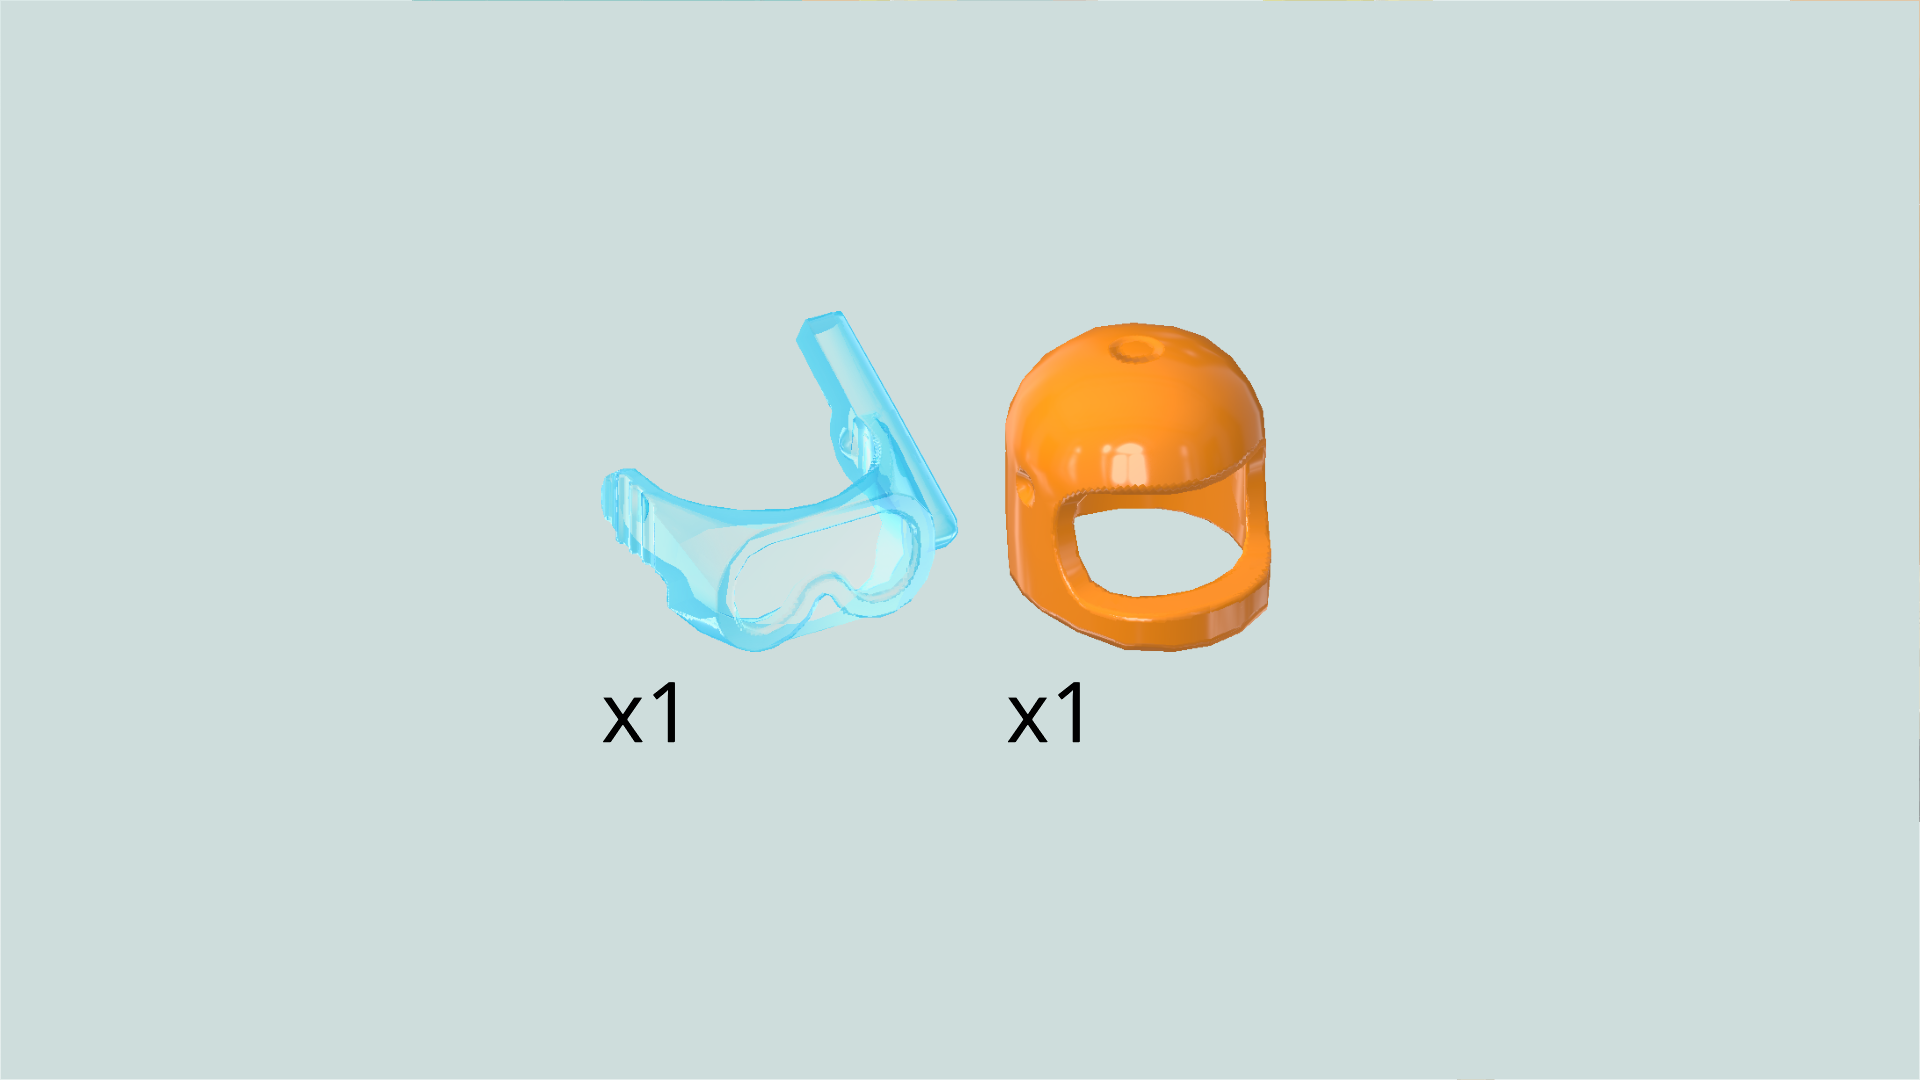
| Collect the following 2 pieces: |
| 1 bright orange helmet with opening and chin protector, |
| and 1 transparent light blue diver's mask with snorkel. |
| Snap the diver's mask on the opening of the helmet. The helmet has small notches that fit the small bumps on the inside of the diver's mask. |
| Open bag number 2. You can choose to have the bricks sorted by color again. This bag contains all bricks and pieces for the Olly Minidoll, the second half of Leo's room with bedside table, baking station, filming equipment and sofa, as well as the soccer goal. |
| First, we will build the Olly Minidoll. |
| Collect the following 2 pieces: |
| 1 sand green and white Minidoll upper body, |
| Put the upper body on top of the legs. |
| Collect the following 2 pieces: |
| 1 Minidoll head, |
| and 1 lemon yellow hairpiece with short gel hair. |
| Put the head on the body. |
| Put the hair on the head. |
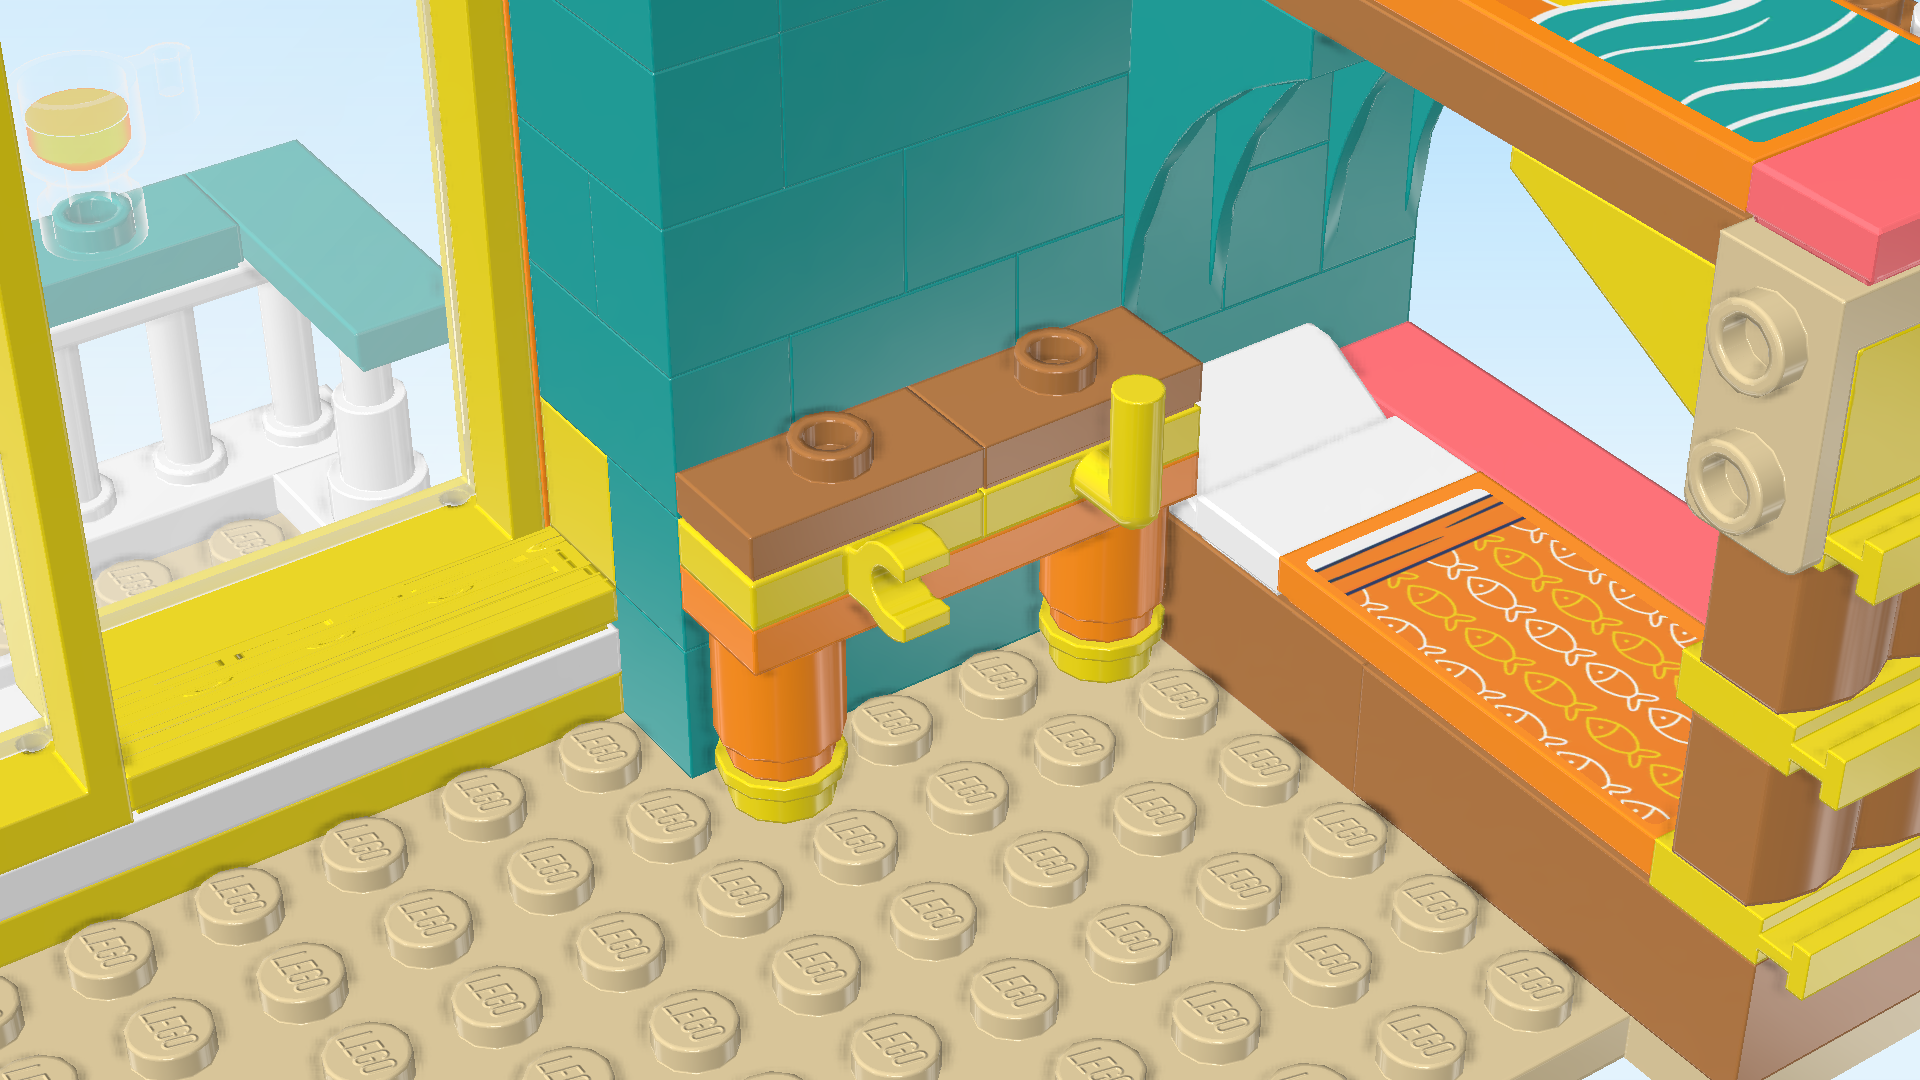
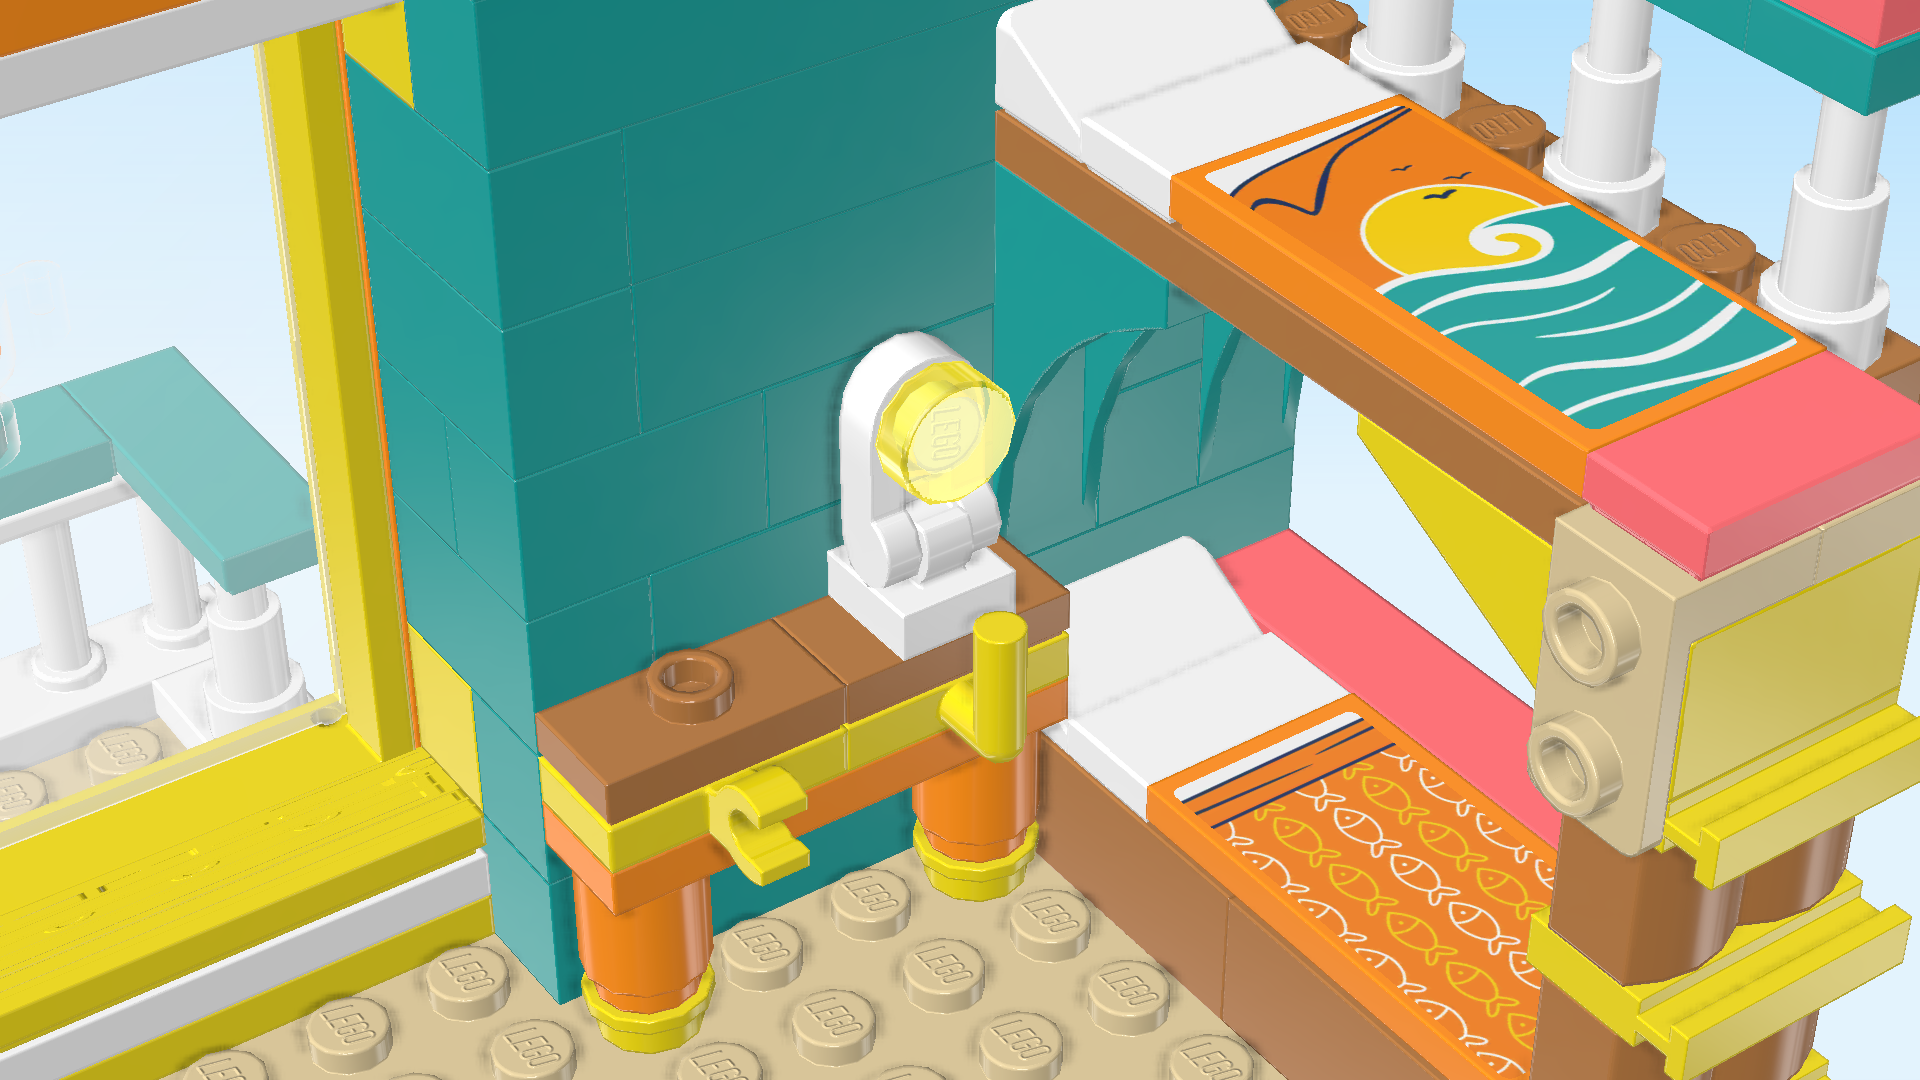
| Next, we will build the bedside table. |
| Collect the following 4 pieces: |
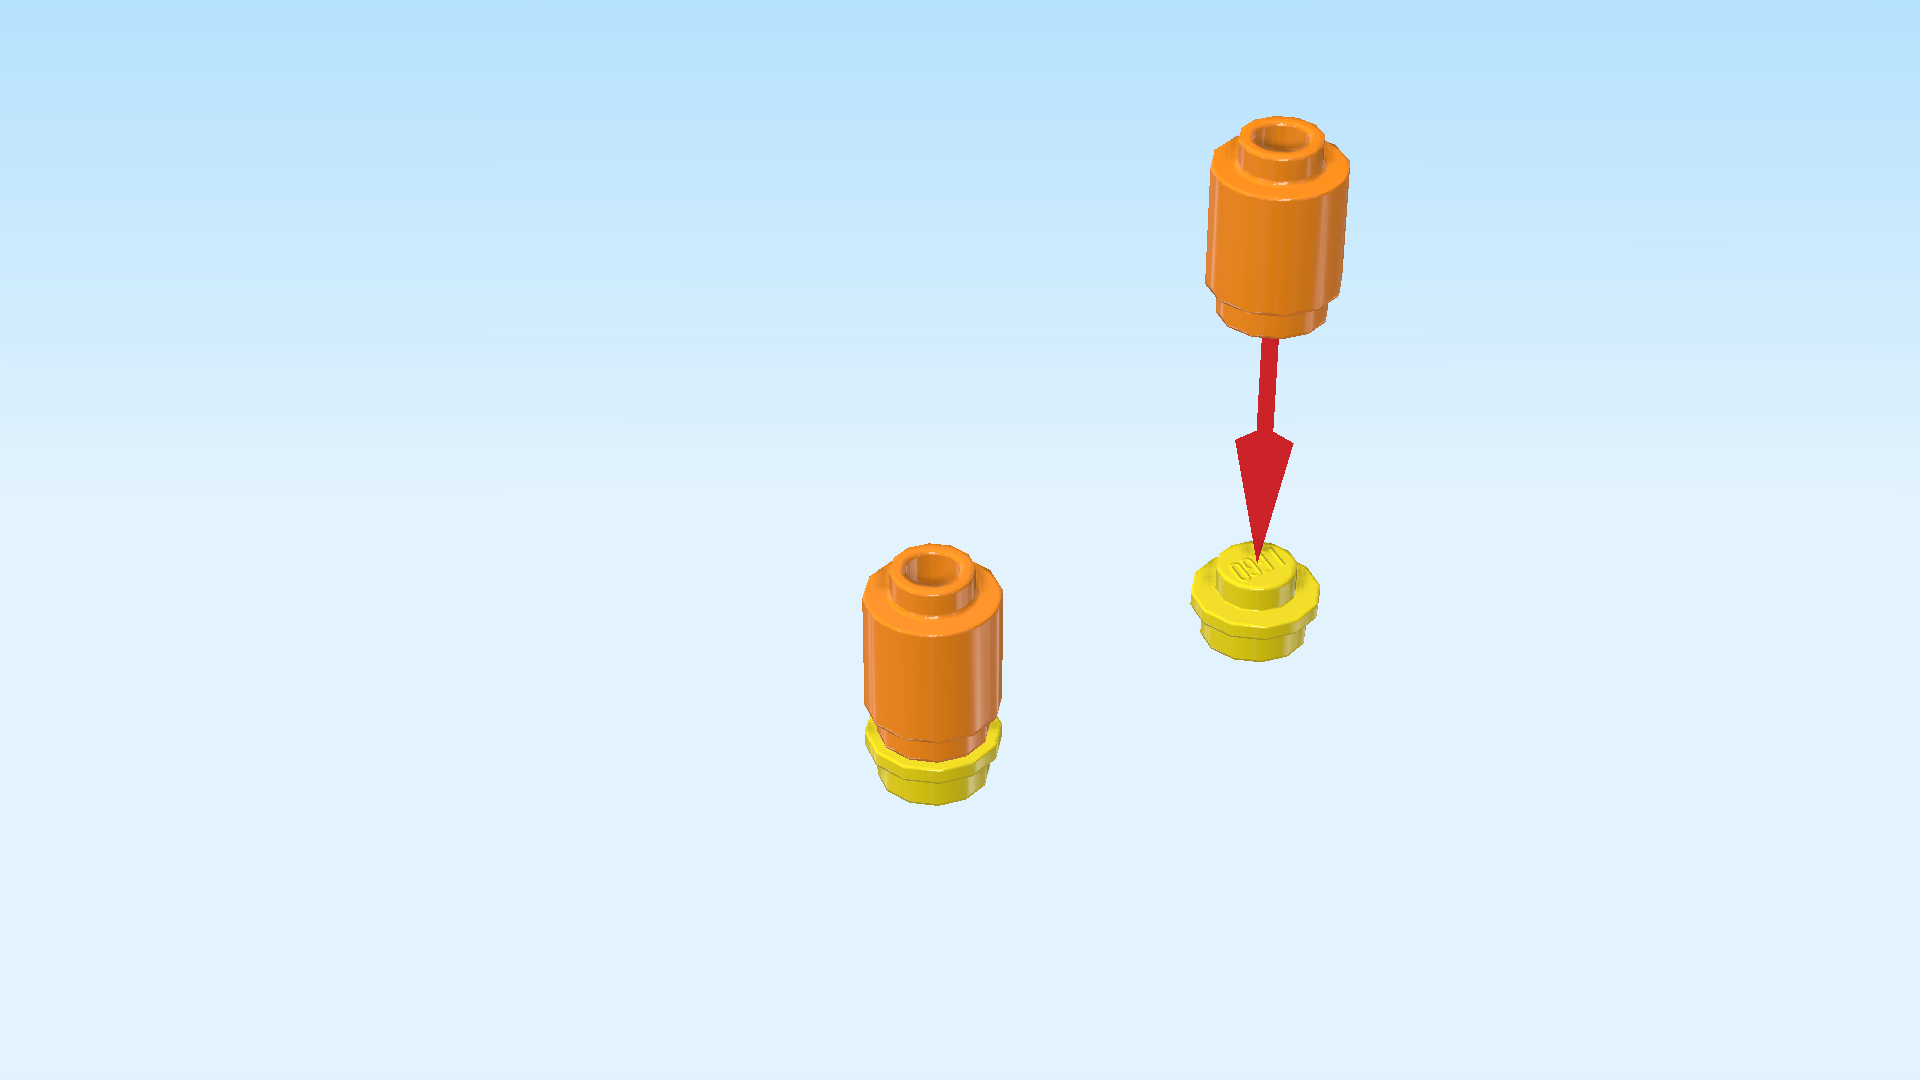
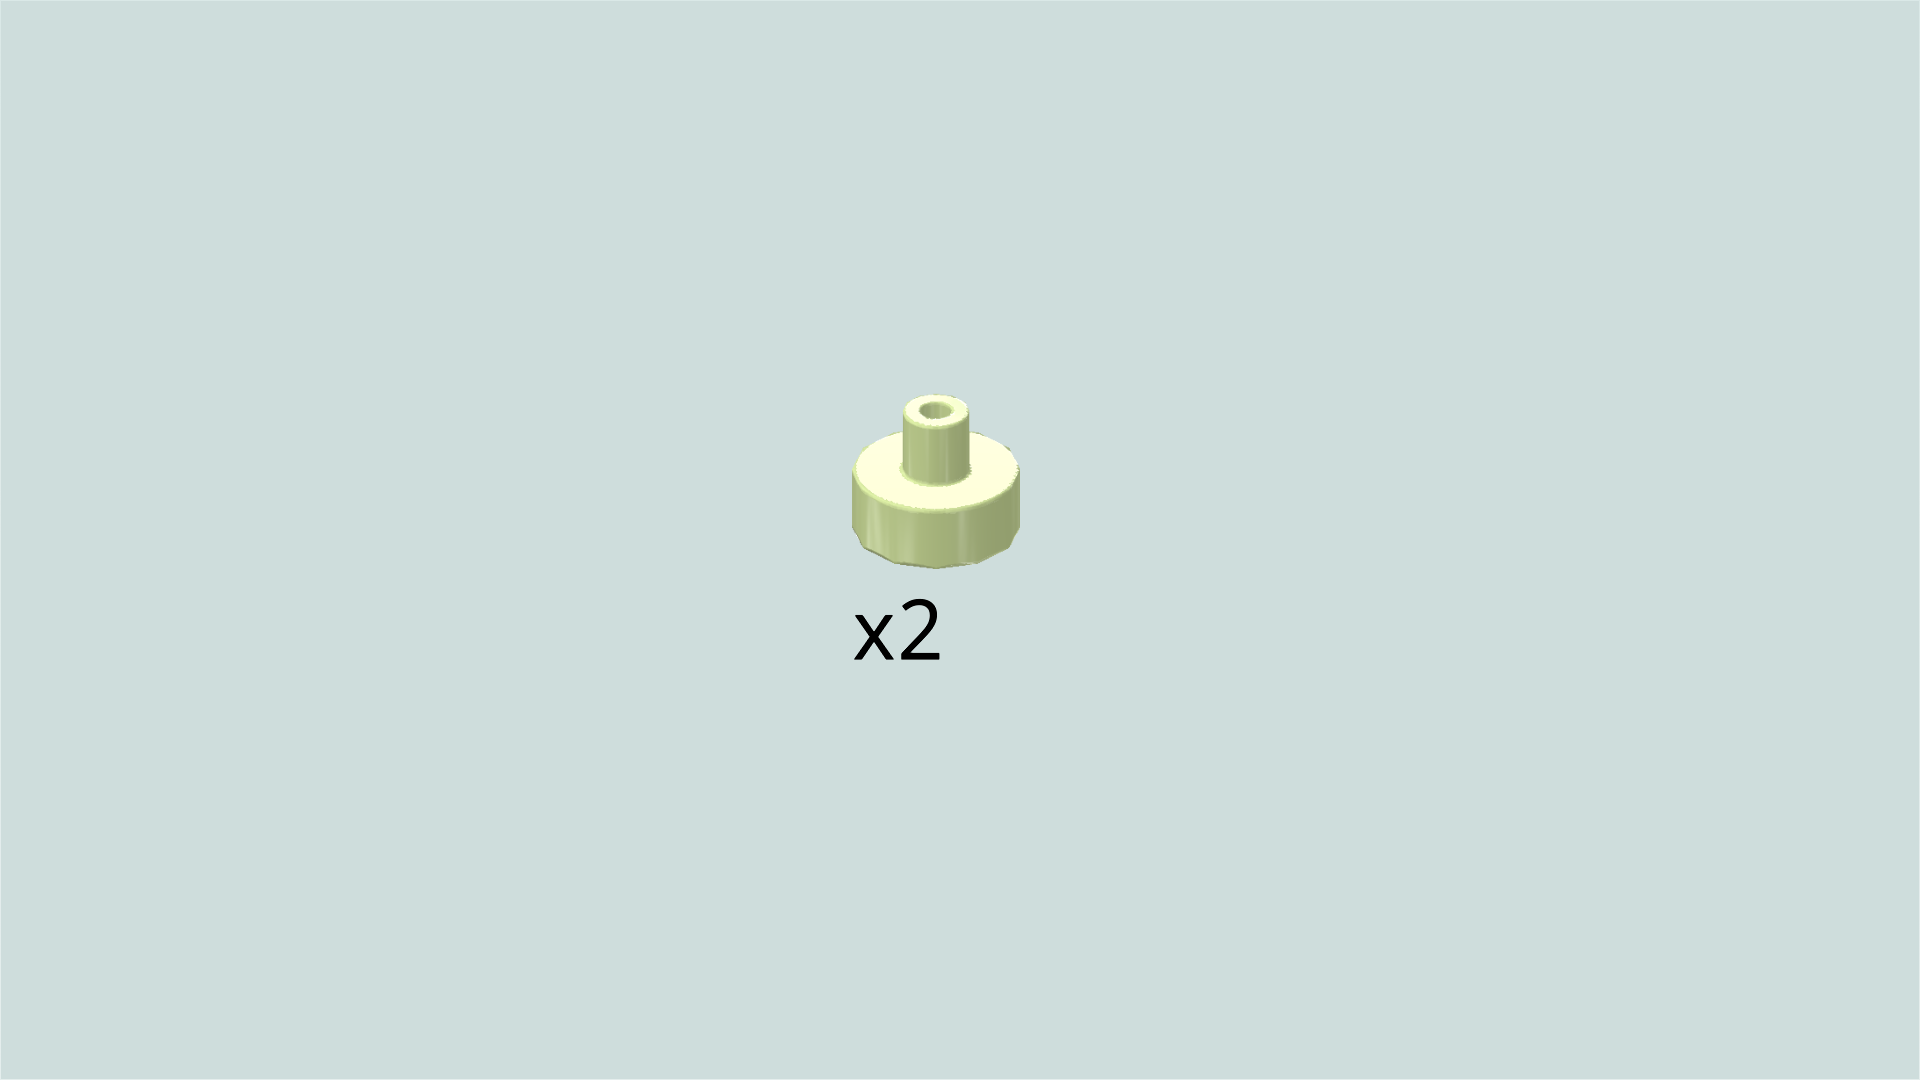
| 2 bright orange round bricks 1x1, |
| and 2 bright yellow round plates 1x1. |
| Put the round plates next to each other on the table. |
| Put the round bricks on top to make the 2 feet of the bedside table. |
| Mount the first table foot to the left of the lower bunk bed directly in front of the back wall. |
| Now, we will build the bedside tabletop. |
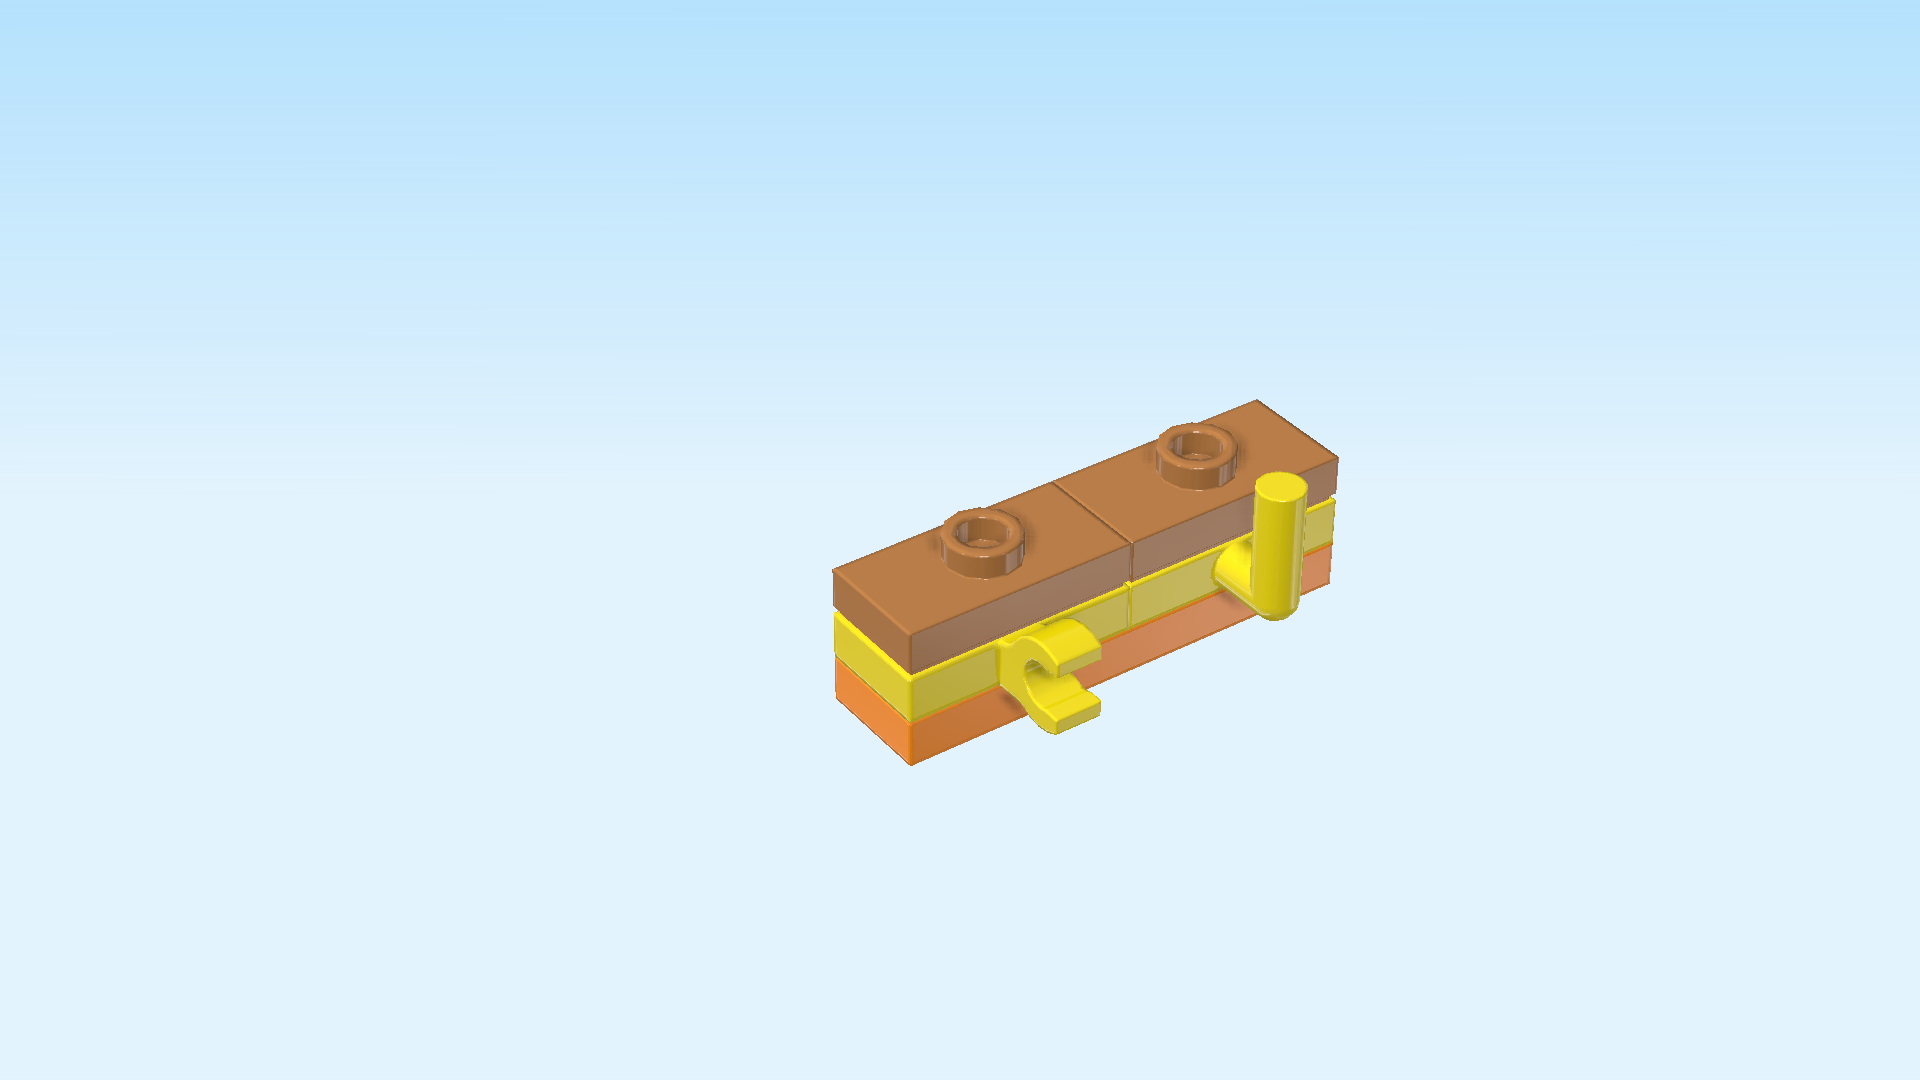
| Collect the following 2 pieces: |
| 1 bright orange plate 1x4, |
| and 1 bright yellow plate 1x2 with upward hook on long side. |
| Put the plate 1x4 horizontally on the table. |
| Put the plate 1x2 horizontally on the 2 right knobs of the previous piece, upward hook to the front. |
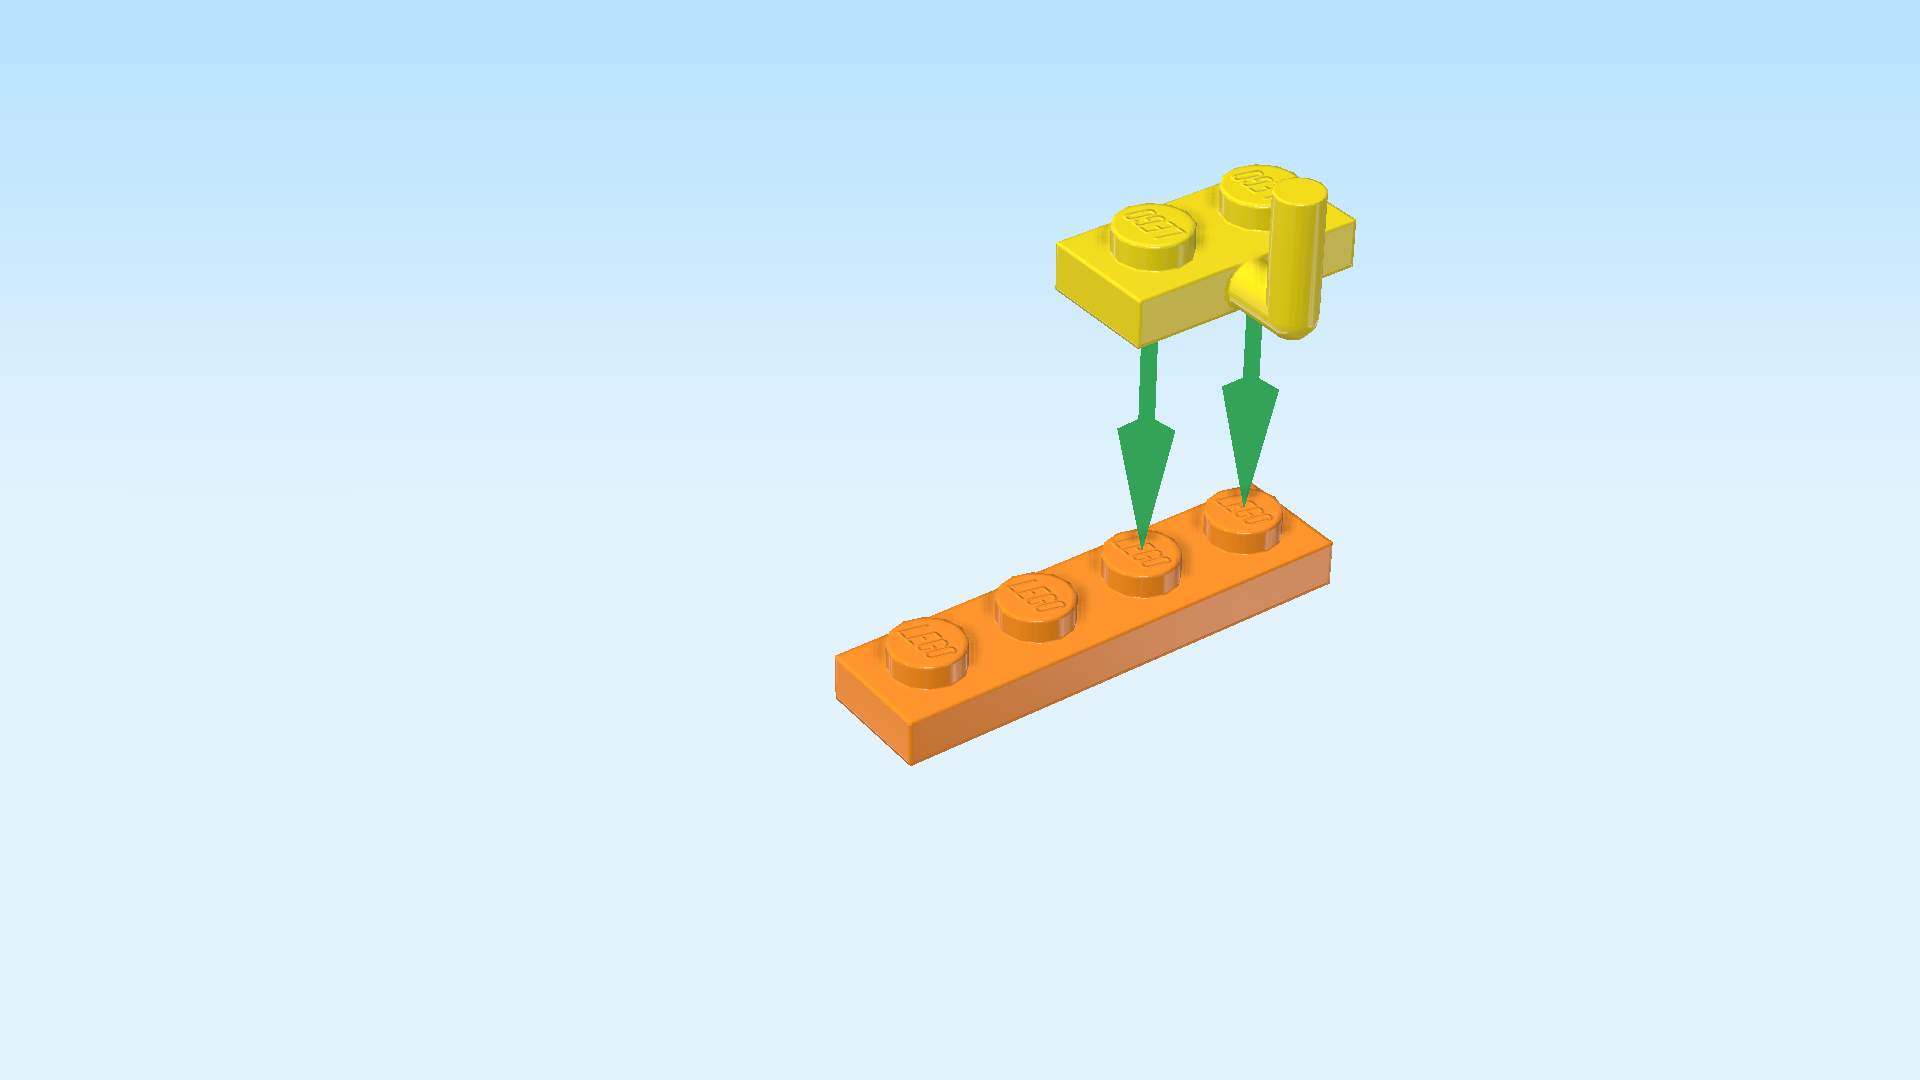
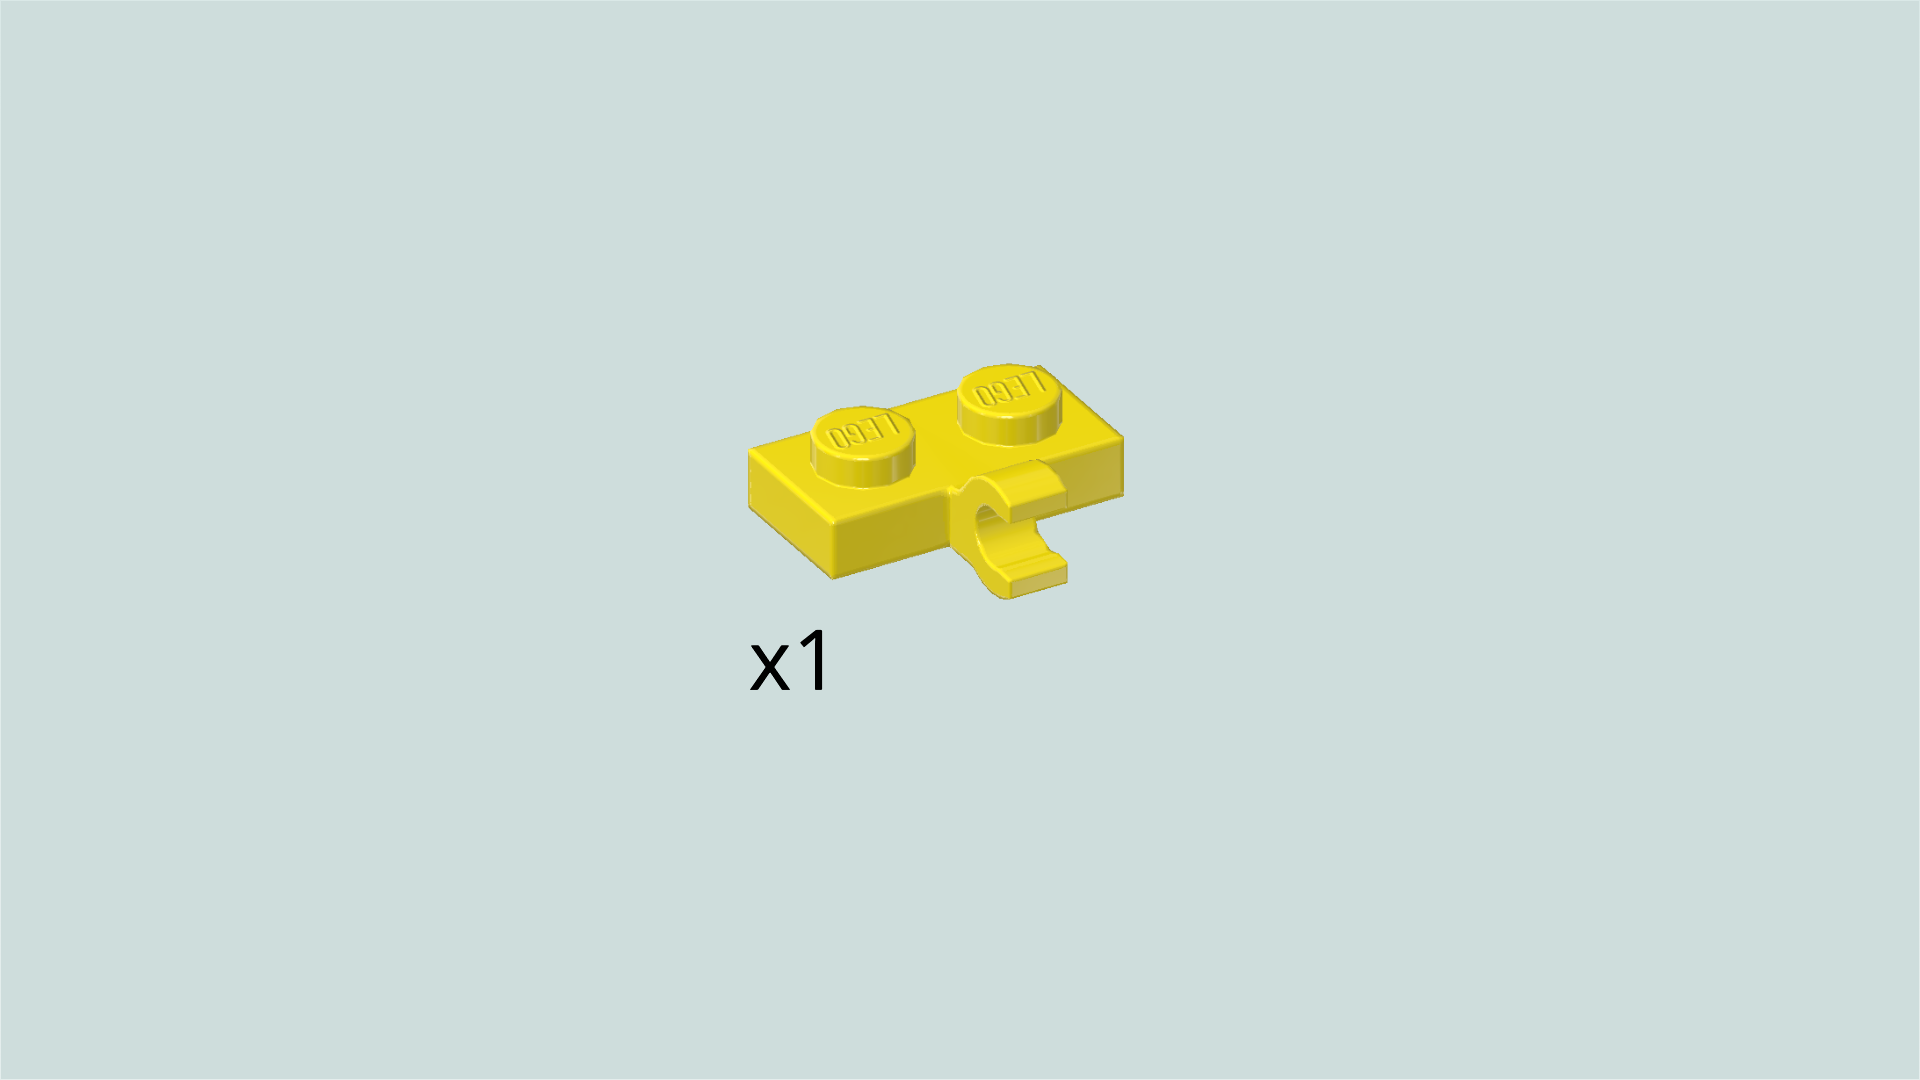
| Find 1 bright yellow plate 1x2 with vertical clasp on long side. |
| Put it horizontally to the left of the previous piece, clasp to the front. |
| Find 2 medium nougat brown plates 1x2 with 1 knob. |
| Put them horizontally next to each other on the 2 previous pieces. |
| The bedside tabletop is finished! Mount it horizontally in its building orientation on the 2 table feet. |
| Now, we will build the bedside lamp. |
| Collect the following 2 pieces: |
| 1 transparent yellow round tile 1x1, |
| and 1 white round plate 1x1 with side shaft. |
| Put the round plate with shaft on the table. |
| Put the round tile on top. |
| Find 1 white plate 1x1 with top clasp. |
| Put it on the table. |
| The bedside lamp is finished! Well done! Mount it on the right knob of the bedside table and make sure that the round tile 1x1 is pointing to the front. |
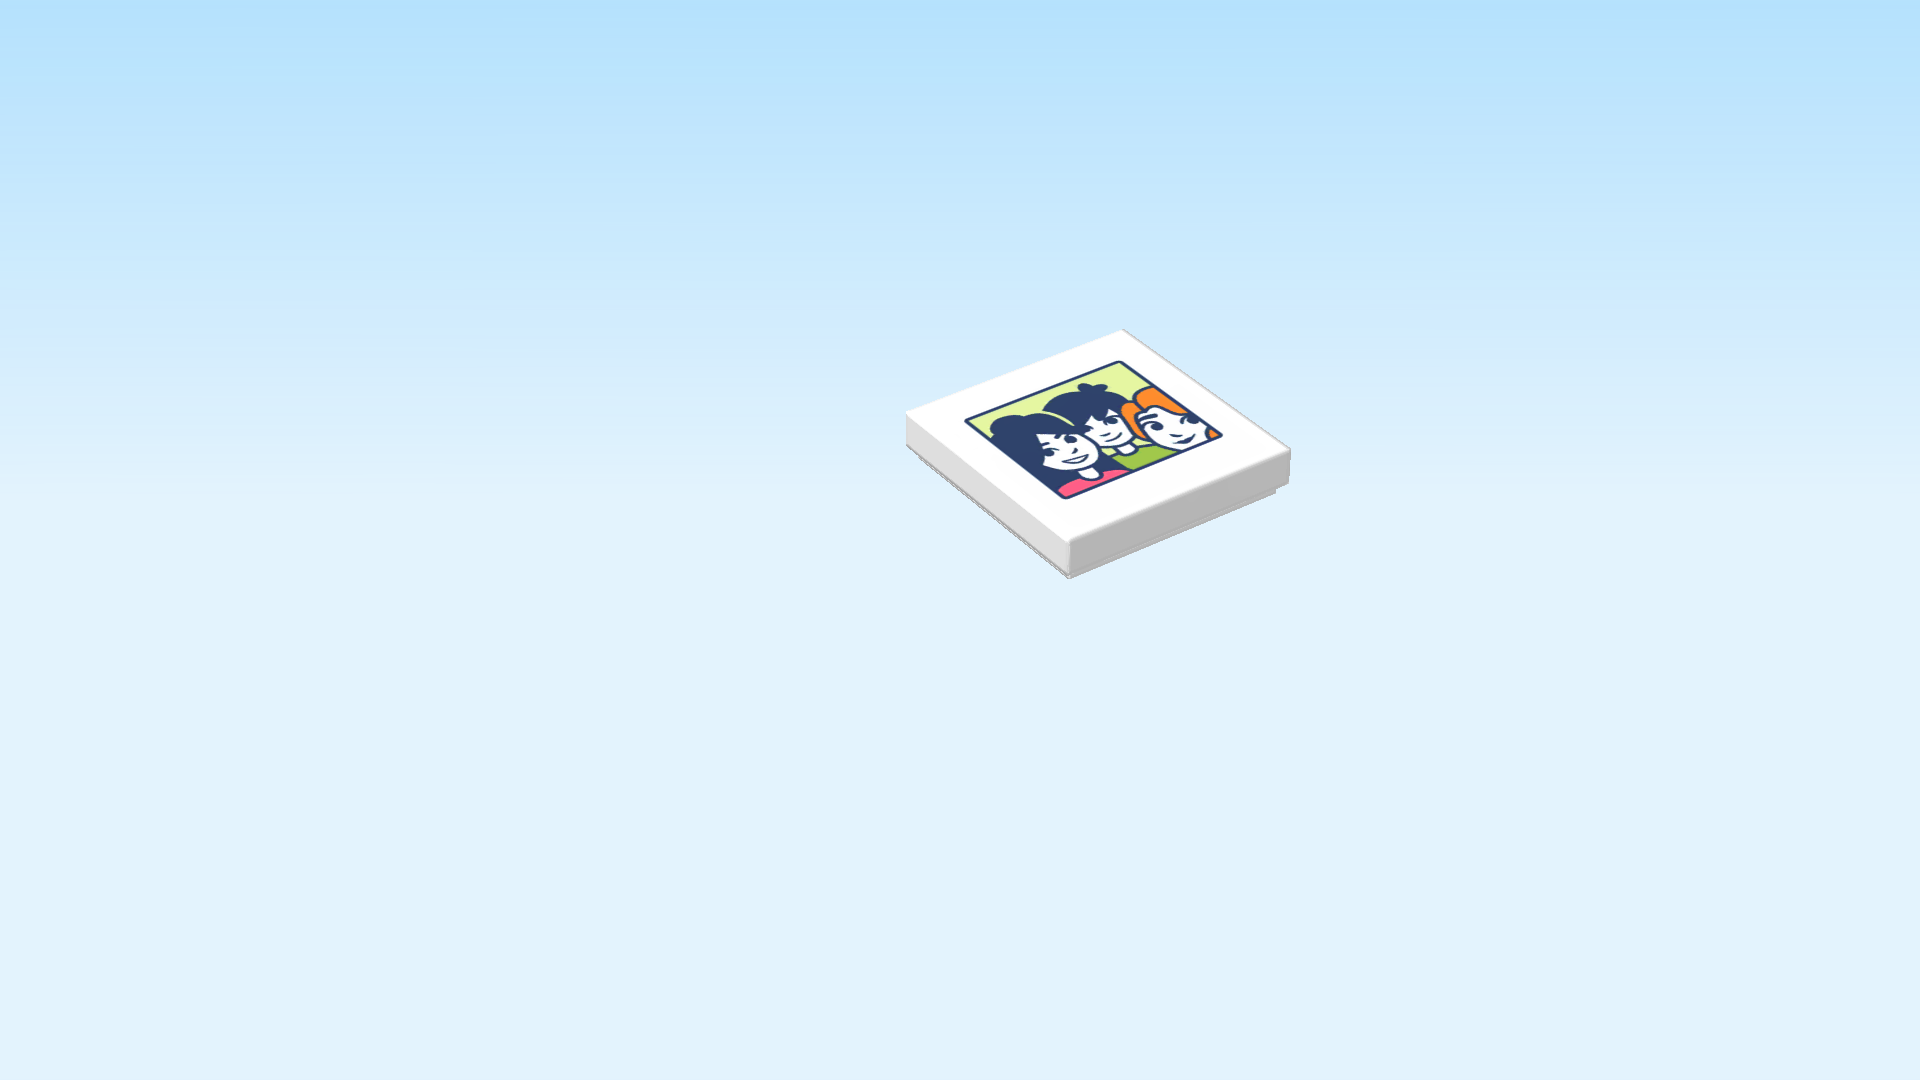
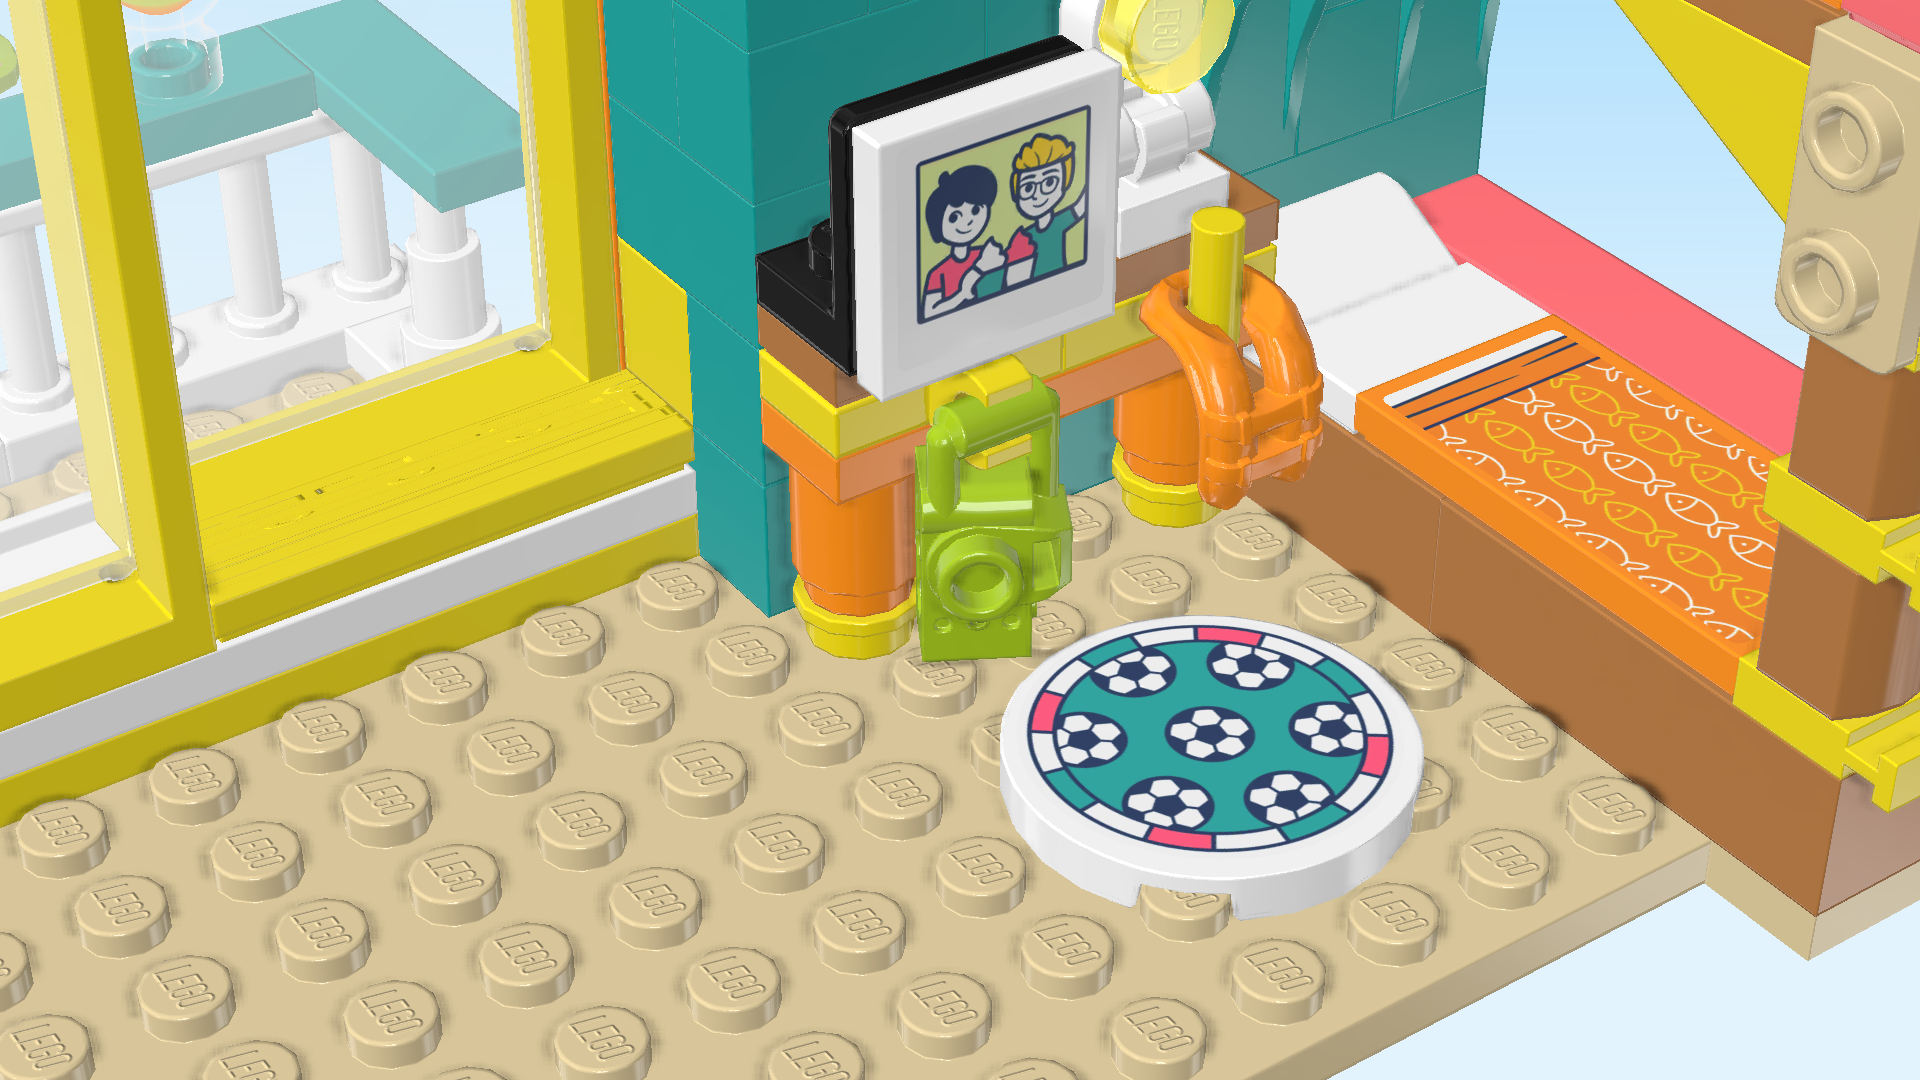
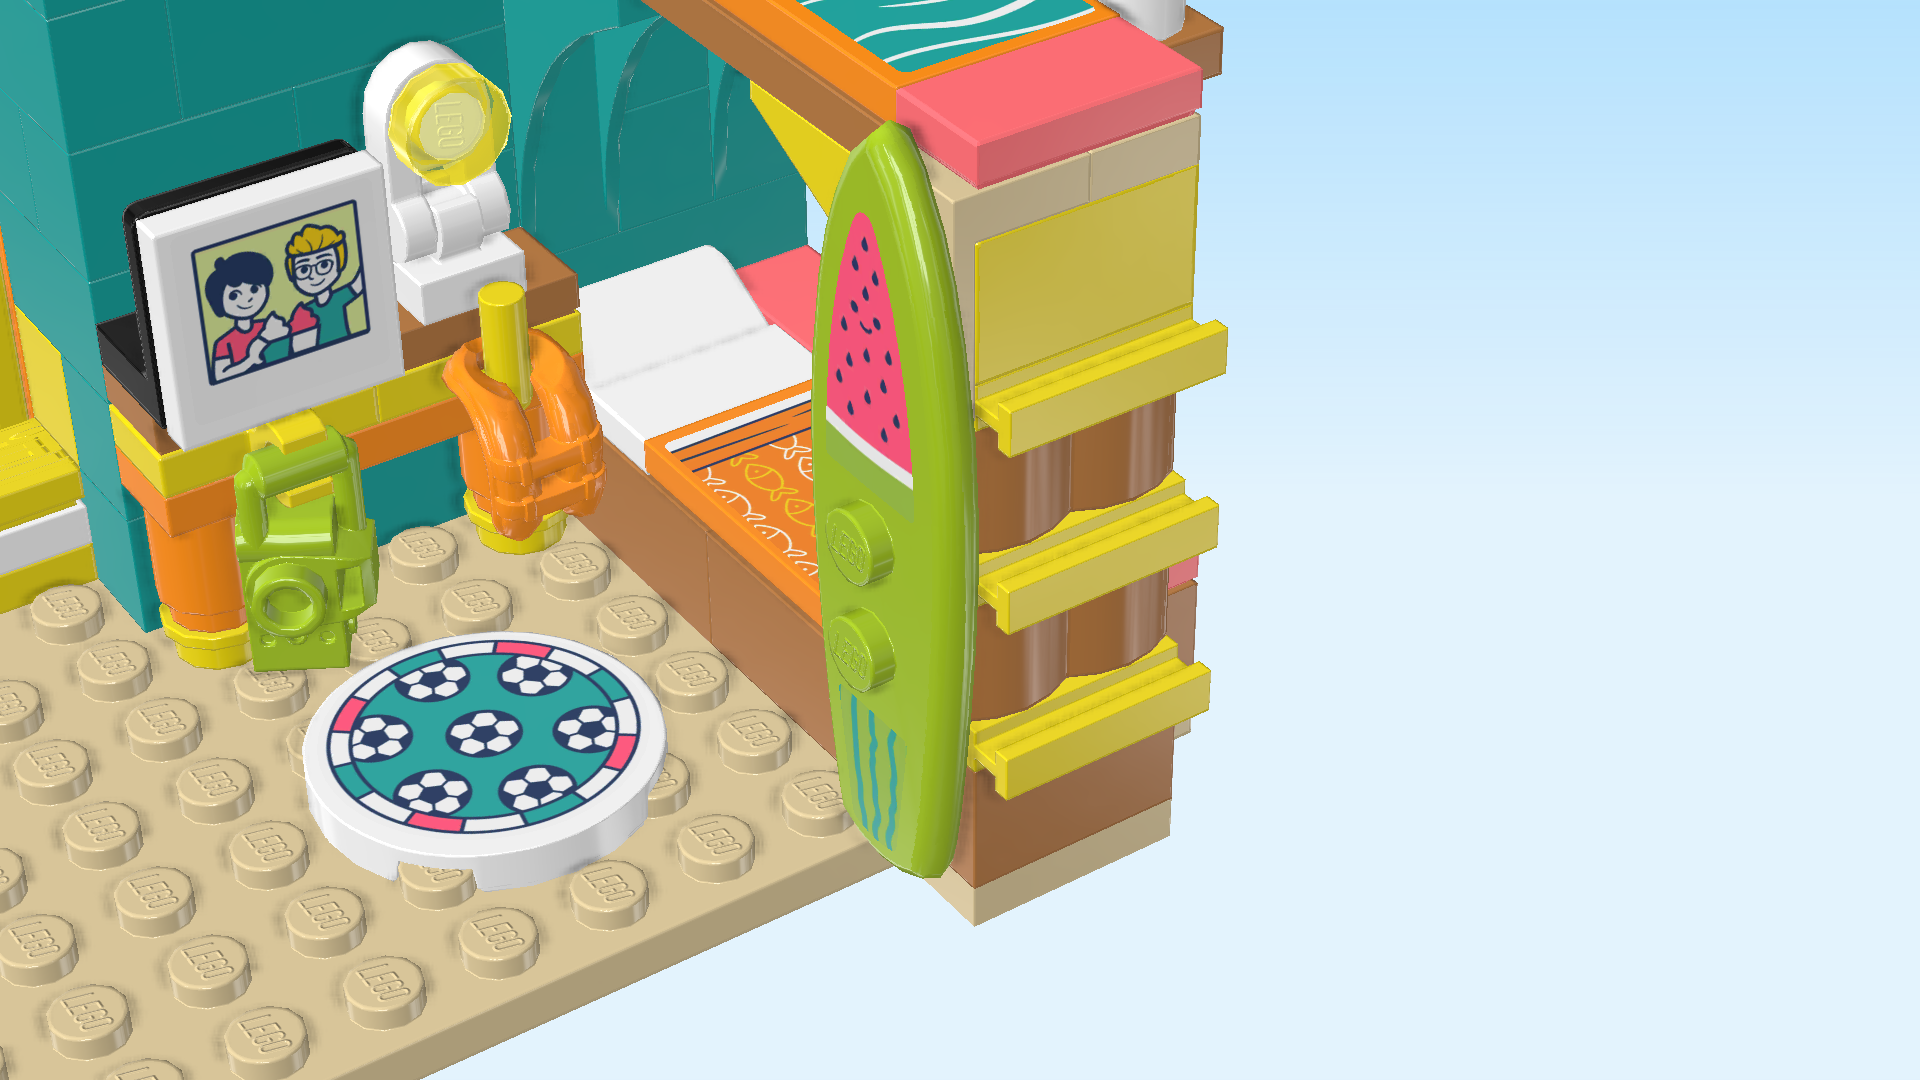
| Next, we will make a picture frame. |
| Collect the following 2 pieces: |
| 1 white flat tile 2x2, |
| and 1 square sticker 2x2 (number 8). |
| Put the flat tile 2x2 on the table. |
| Put the square sticker on top. |
| Now, let's make a second photo for the photo frame. |
| Collect the following 2 pieces: |
| 1 white flat tile 2x2, |
| and 1 square sticker 2x2 (number 11). |
| Put the flat tile 2x2 on the table. |
| Put the sticker on top. |
| You can choose yourself which photo you prefer and exchange them as you please. |
| The picture frame is finished! Mount it on the left knob of the bedside table, photo to the front. |
| Collect the following 2 pieces: |
| 1 white round tile 3x3, |
| and 1 round sticker 3x3 (number 5). |
| Put the round tile 3x3 on the table. |
| Put the sticker 3x3 on top. |
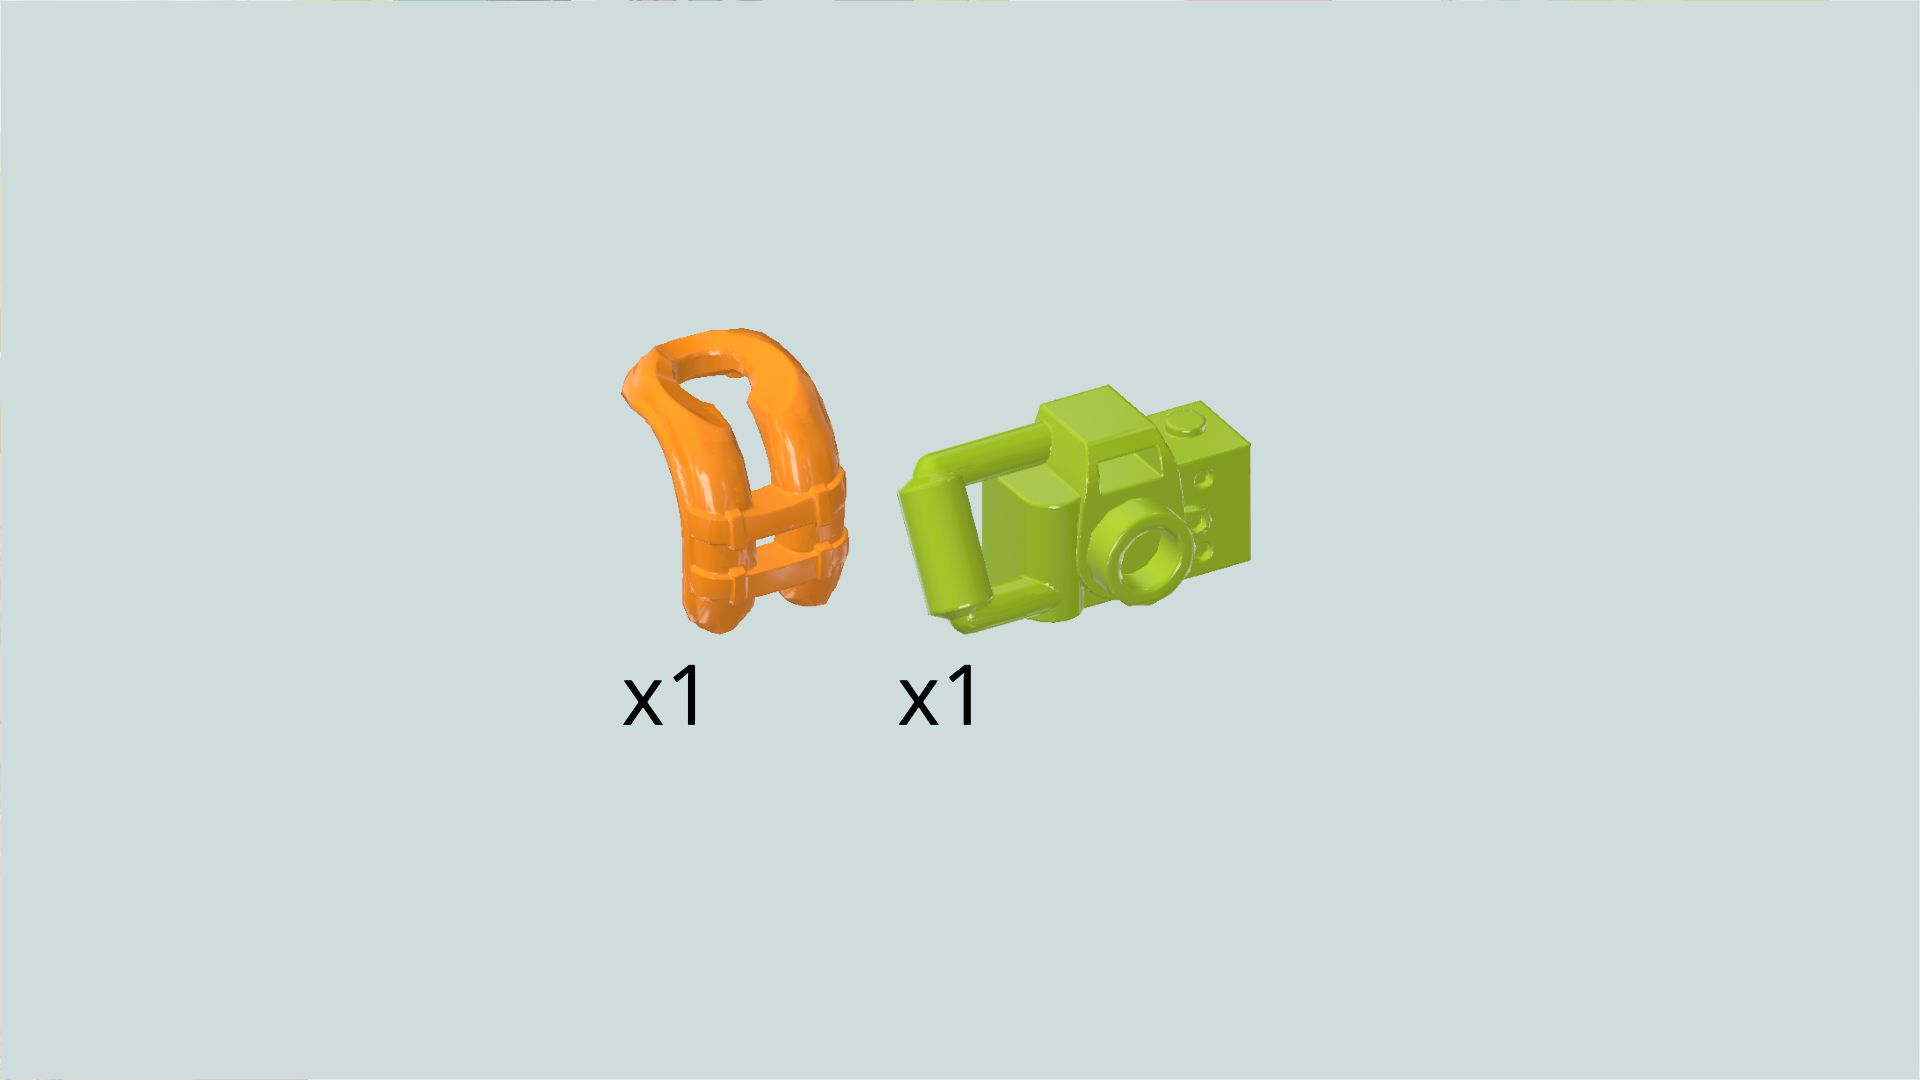
| Collect the following 2 pieces: |
| 1 bright orange life jacket, |
| and 1 bright yellowish green camera. |
| Hang the life jacket on the elbow hook of the bedside table. By the way: to put it on, you have to remove Leo's head first. |
| Snap the side handle of the camera into the clasp on the bedside table, camera hanging towards the bottom. |
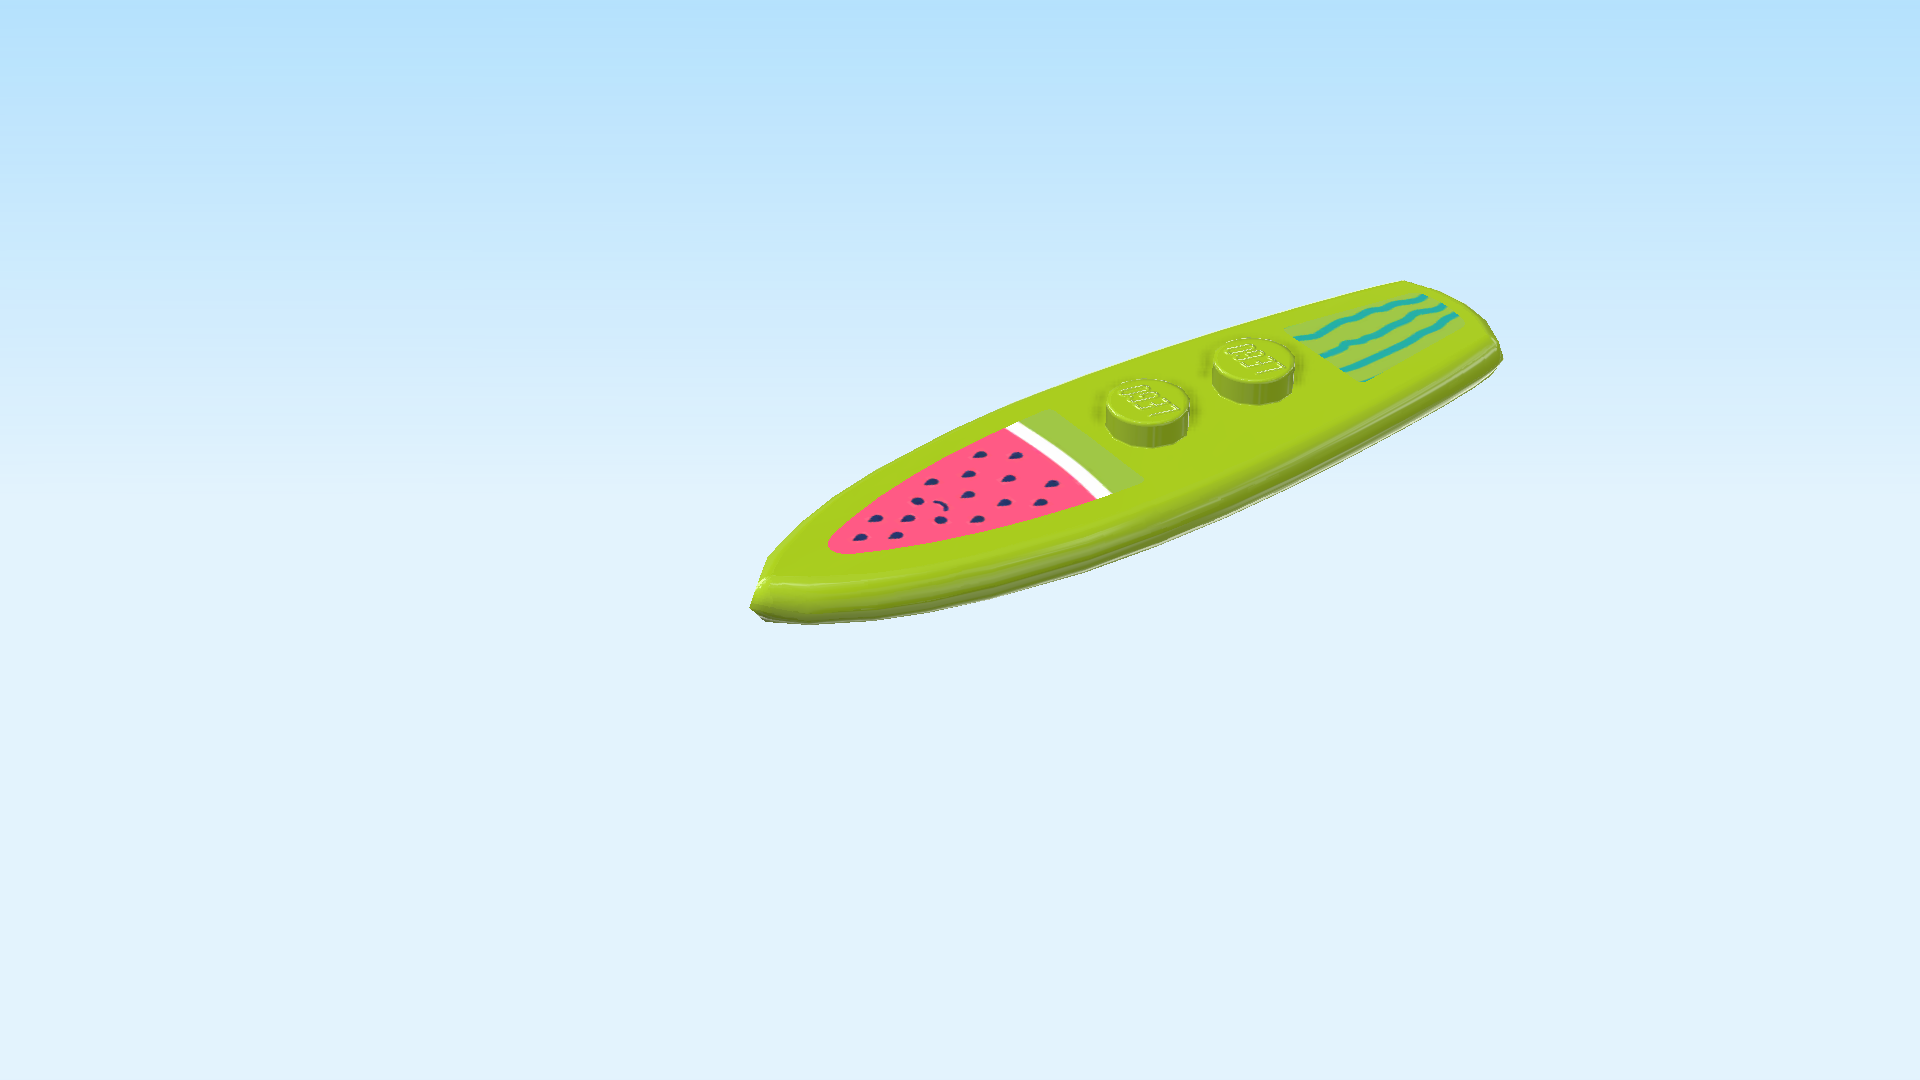
| Next, let's decorate the surfboard. |
| Collect the following 3 pieces: |
| 1 bright yellowish green surfboard with 2 knobs, |
| 1 tip-shaped sticker (number 6), |
| and 1 trapeze-shaped sticker (number 7). |
| Put the surfboard on the table, pointy tip to the left. |
| Put the tip-shaped sticker centered on the left half of the surfboard, matching the shape of the surfboard. Do not attach it directly at the edge of the tip but leave a bit of a margin on all sides. |
| Put the trapeze-shaped sticker on the right end of the surfboard, again matching its shape. The narrow end of the sticker is towards the edge of the surfboard, the wider end is towards the middle. |
| Flip the surfboard upright, knobs pointing to the left, and mount it on the 2 side knobs pointing to the left on the ladder of the bunk beds. |
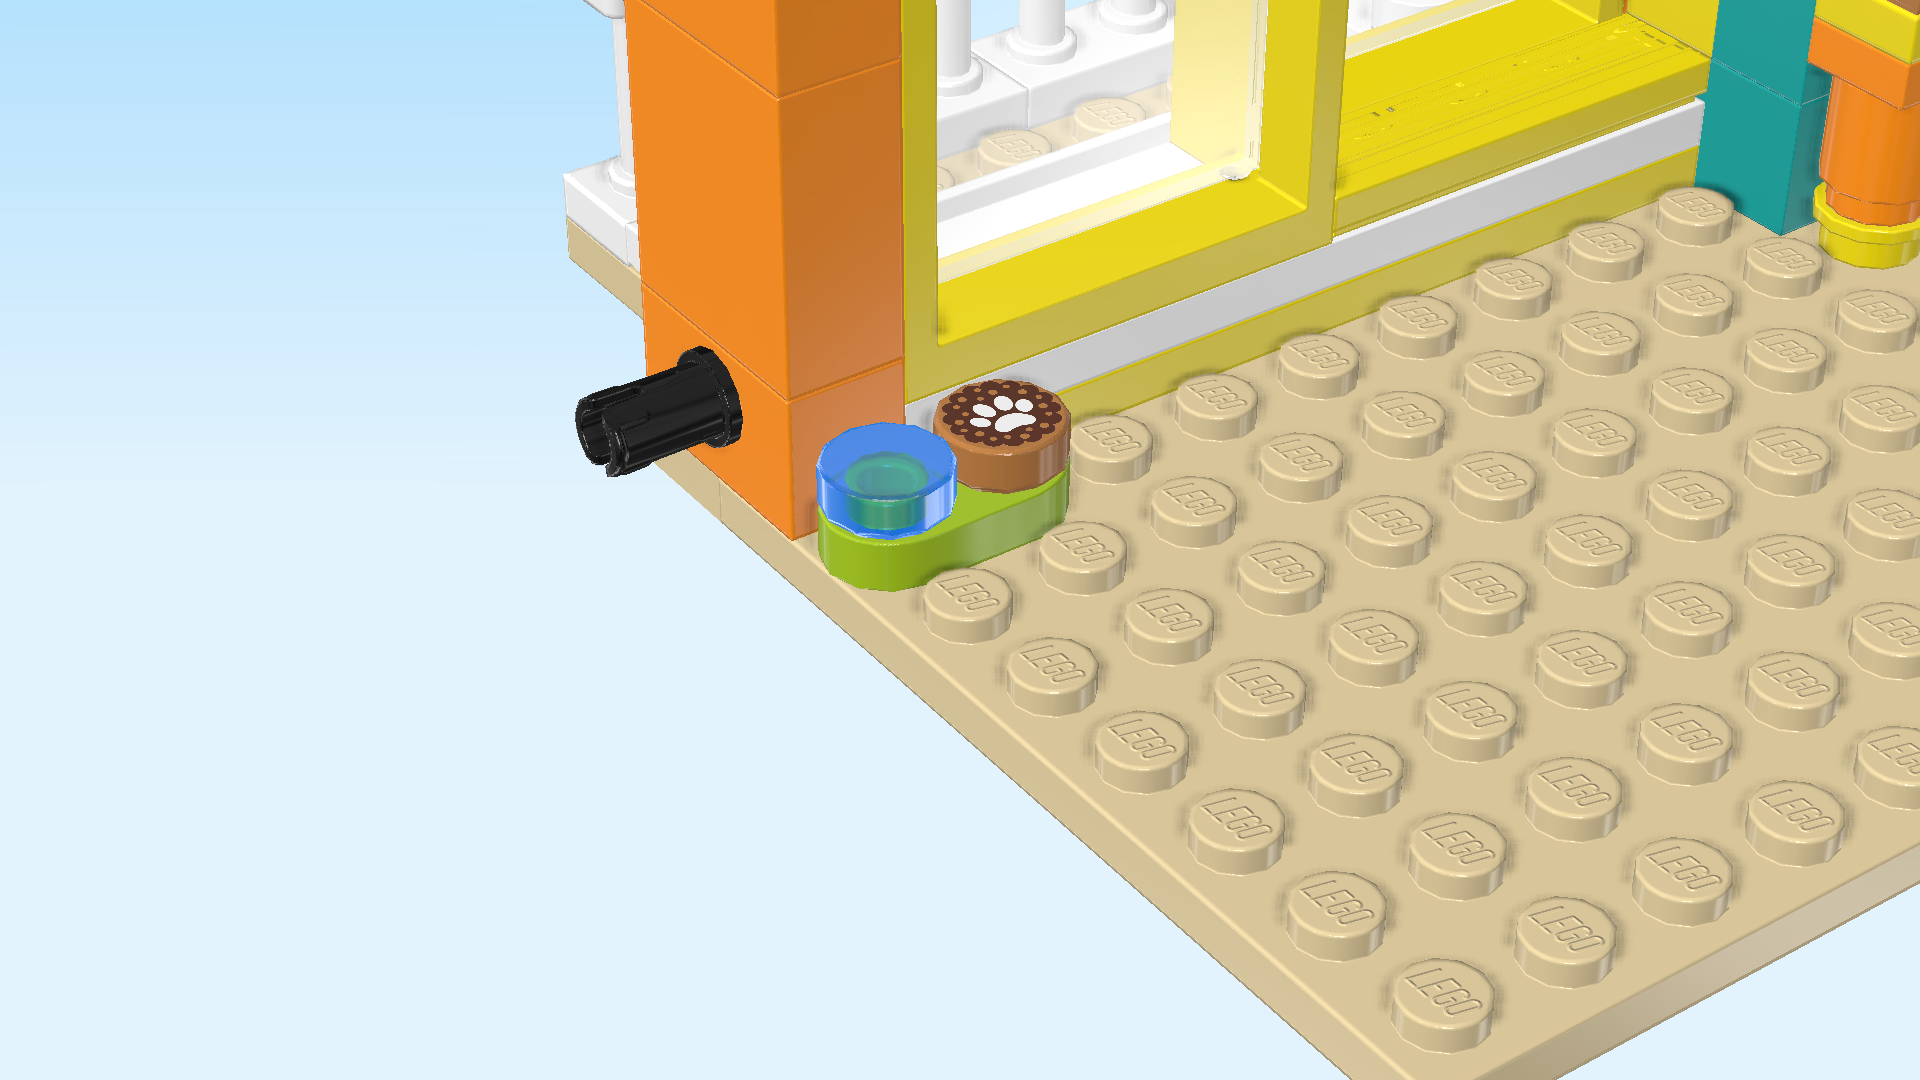
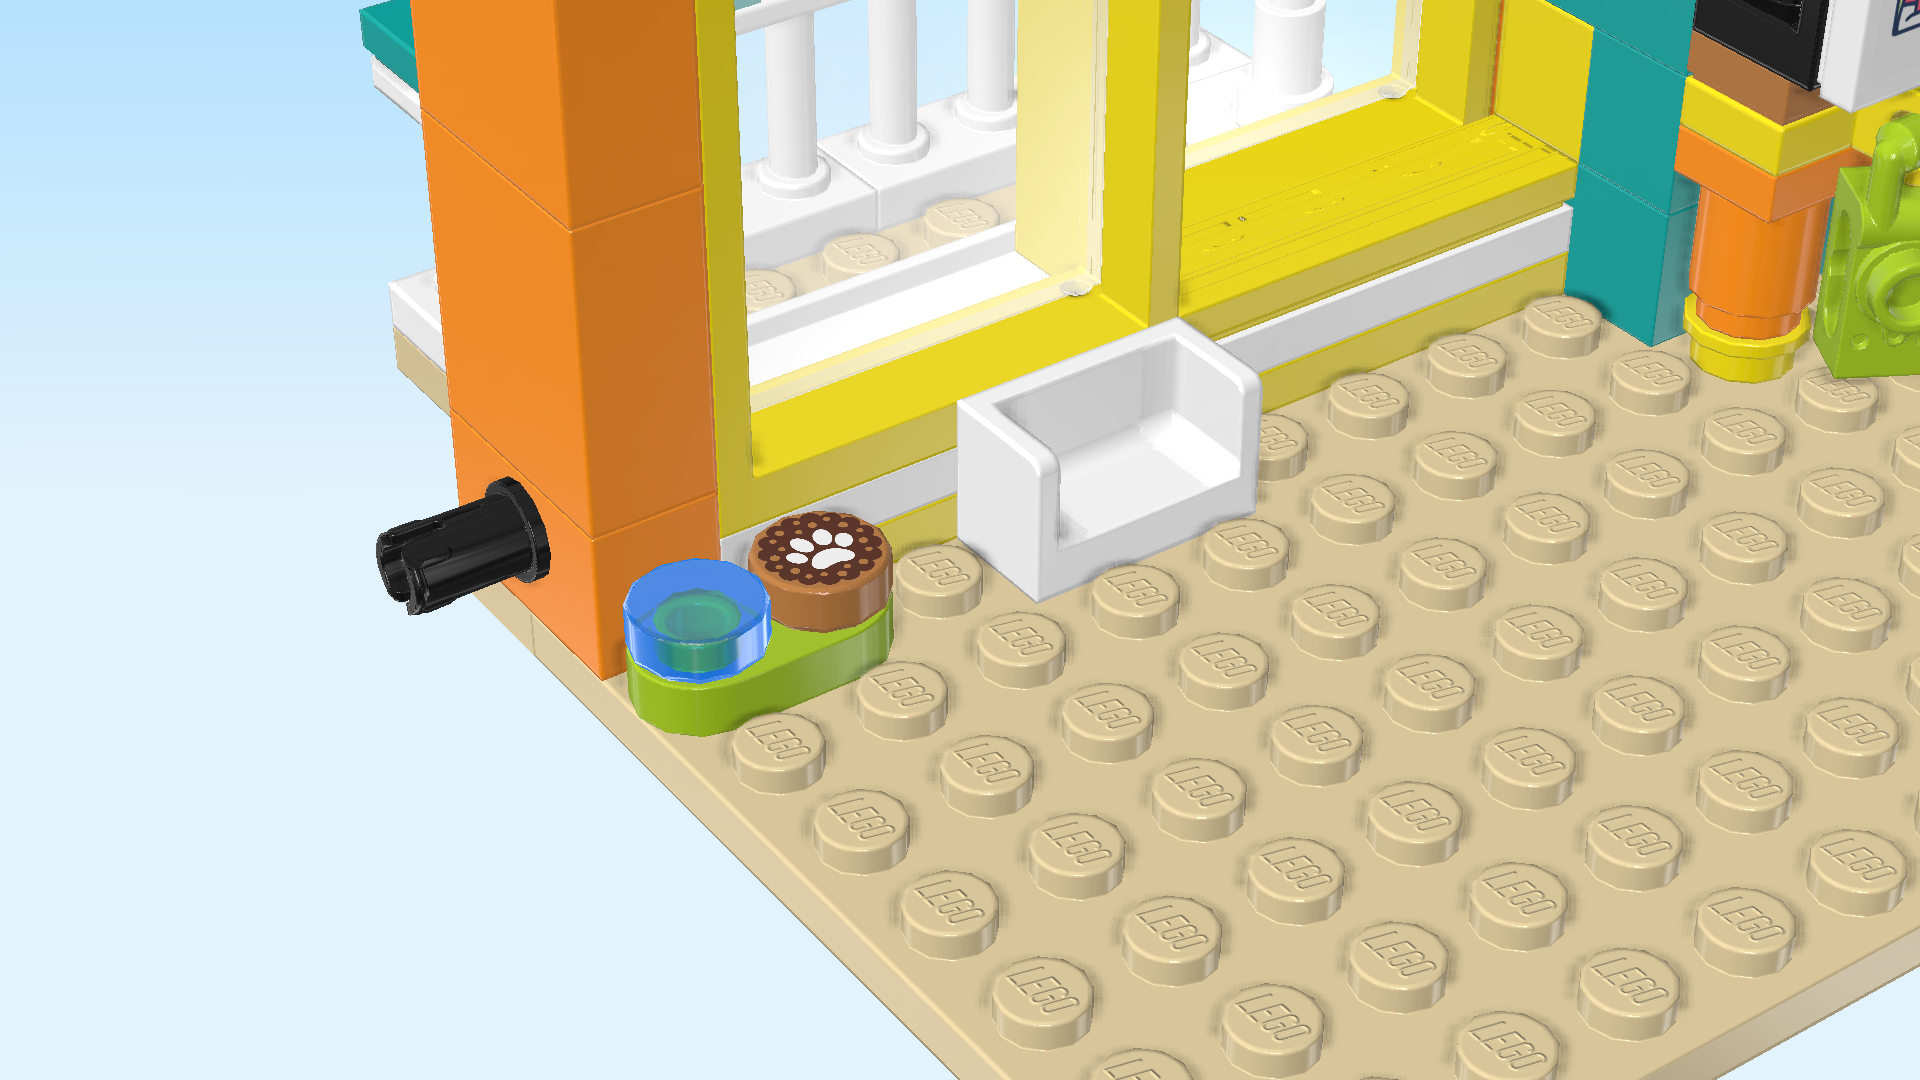
| Next, we will build Churro's food bowls. |
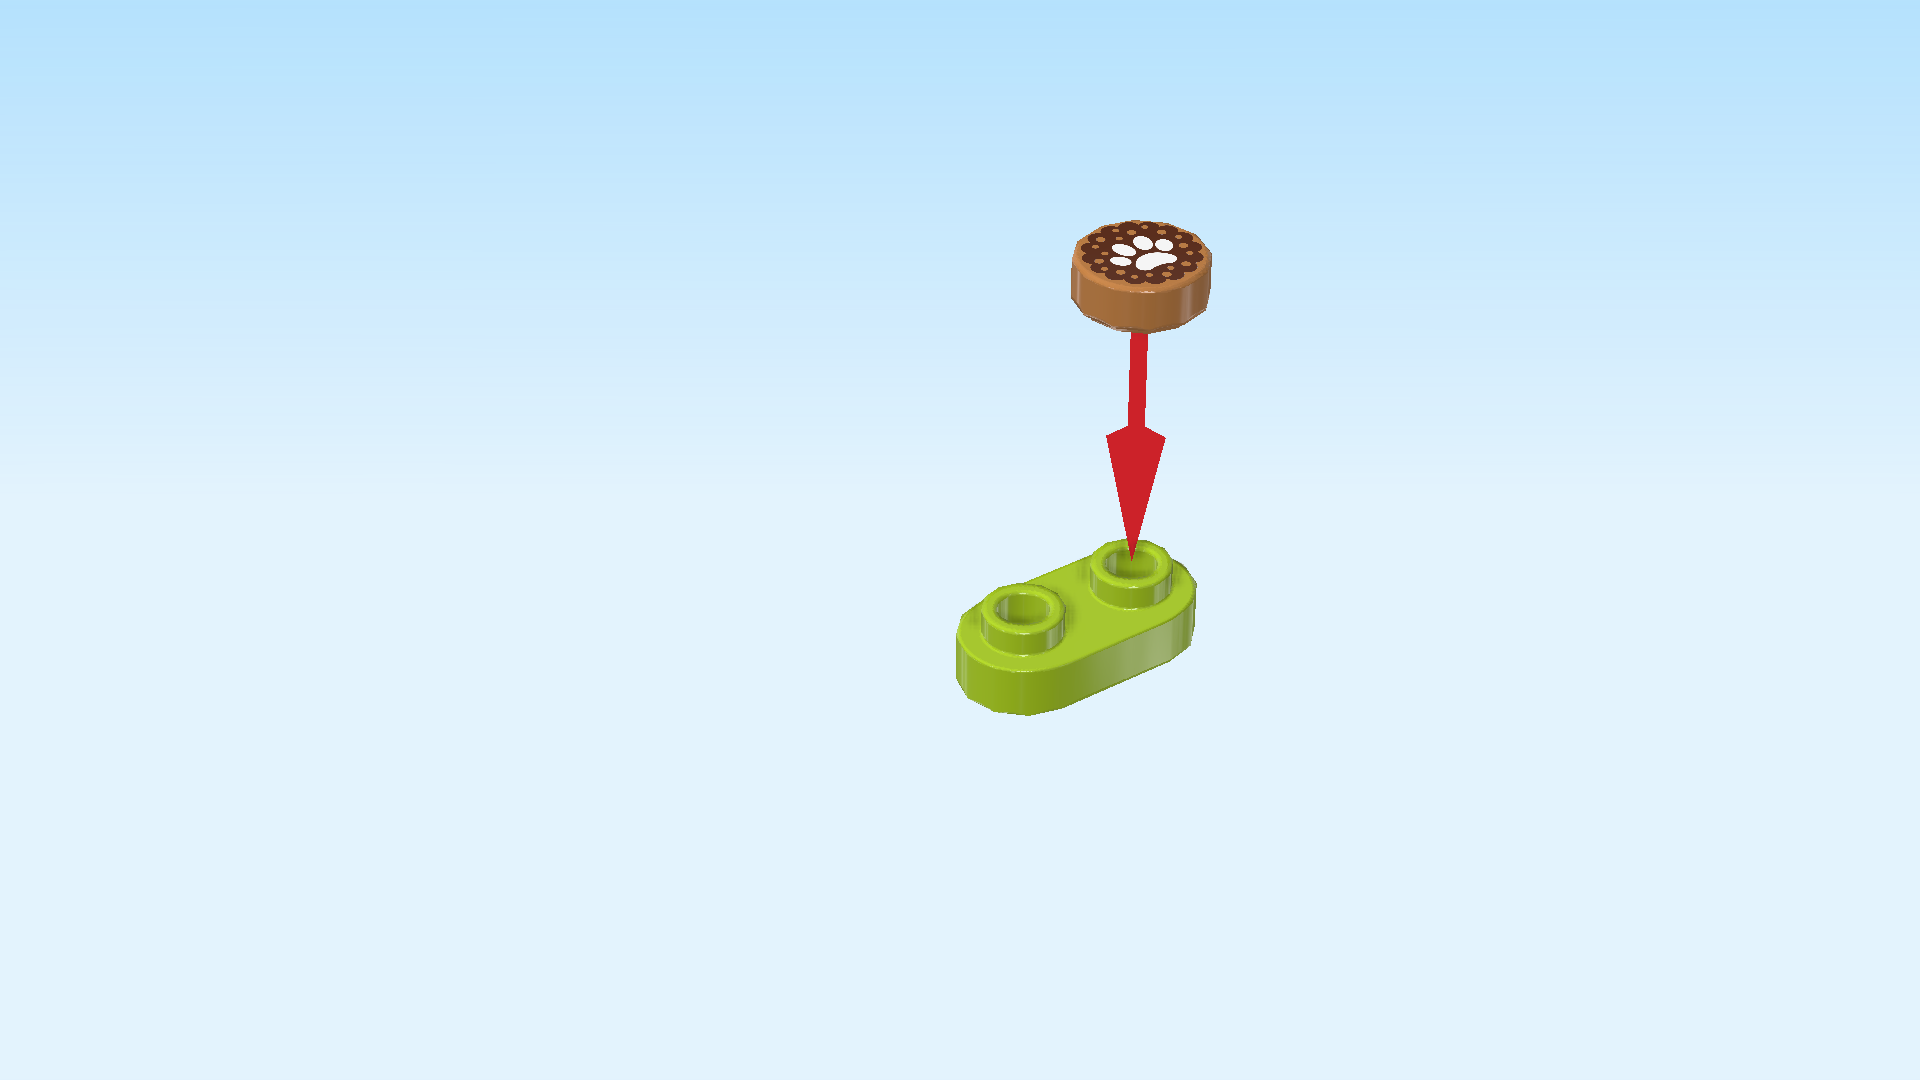
| Collect the following 2 pieces: |
| 1 bright yellowish green rounded plate 1x2, |
| and 1 medium nougat brown round tile 1x1. |
| Put the rounded plate 1x2 horizontally on the table. |
| Put the round tile 1x1 on the right knob. This tile is printed with a dog cookie: it is dark brown and has a white dog paw on it. |
| Find 1 transparent blue round tile 1x1. |
| Put it on the left knob. This is Churro's water! |
| Mount Churro's food bowls horizontally directly in front of the pillar and sliding door, starting from the left edge. |
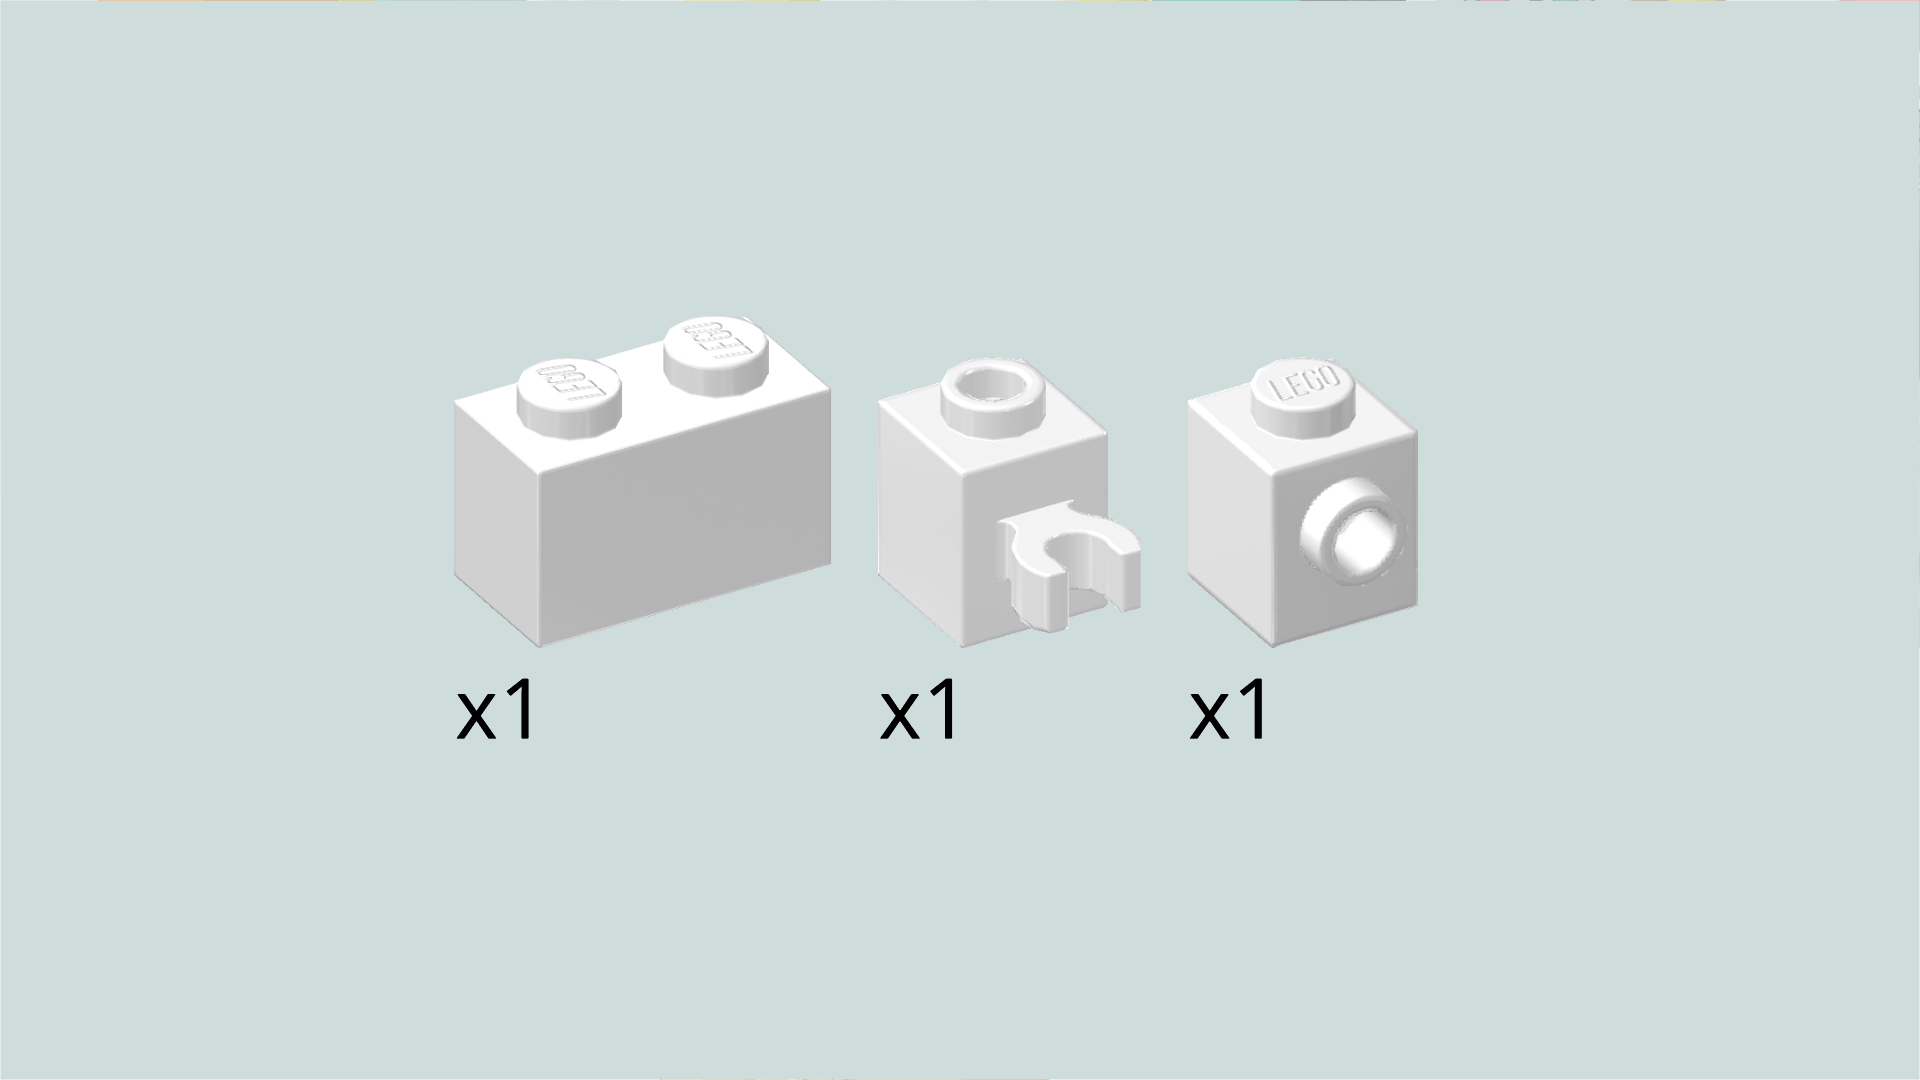
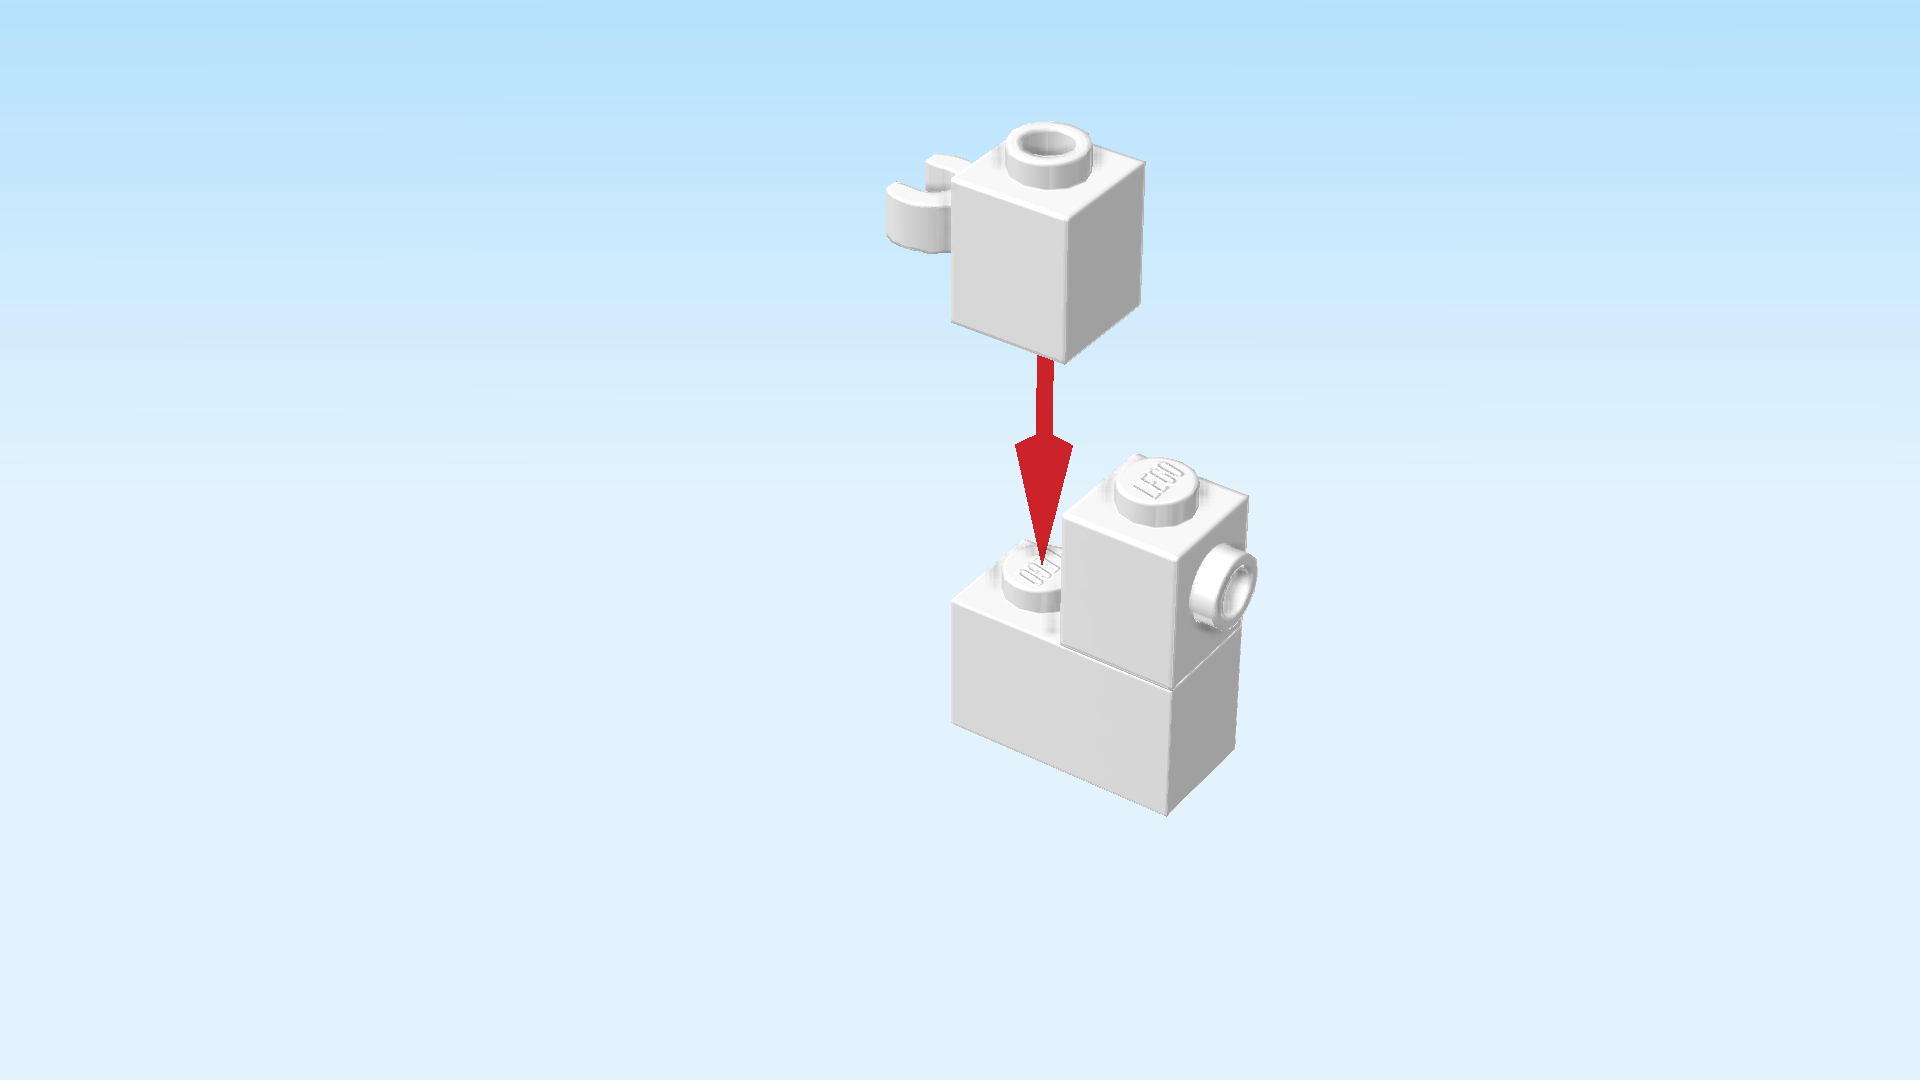
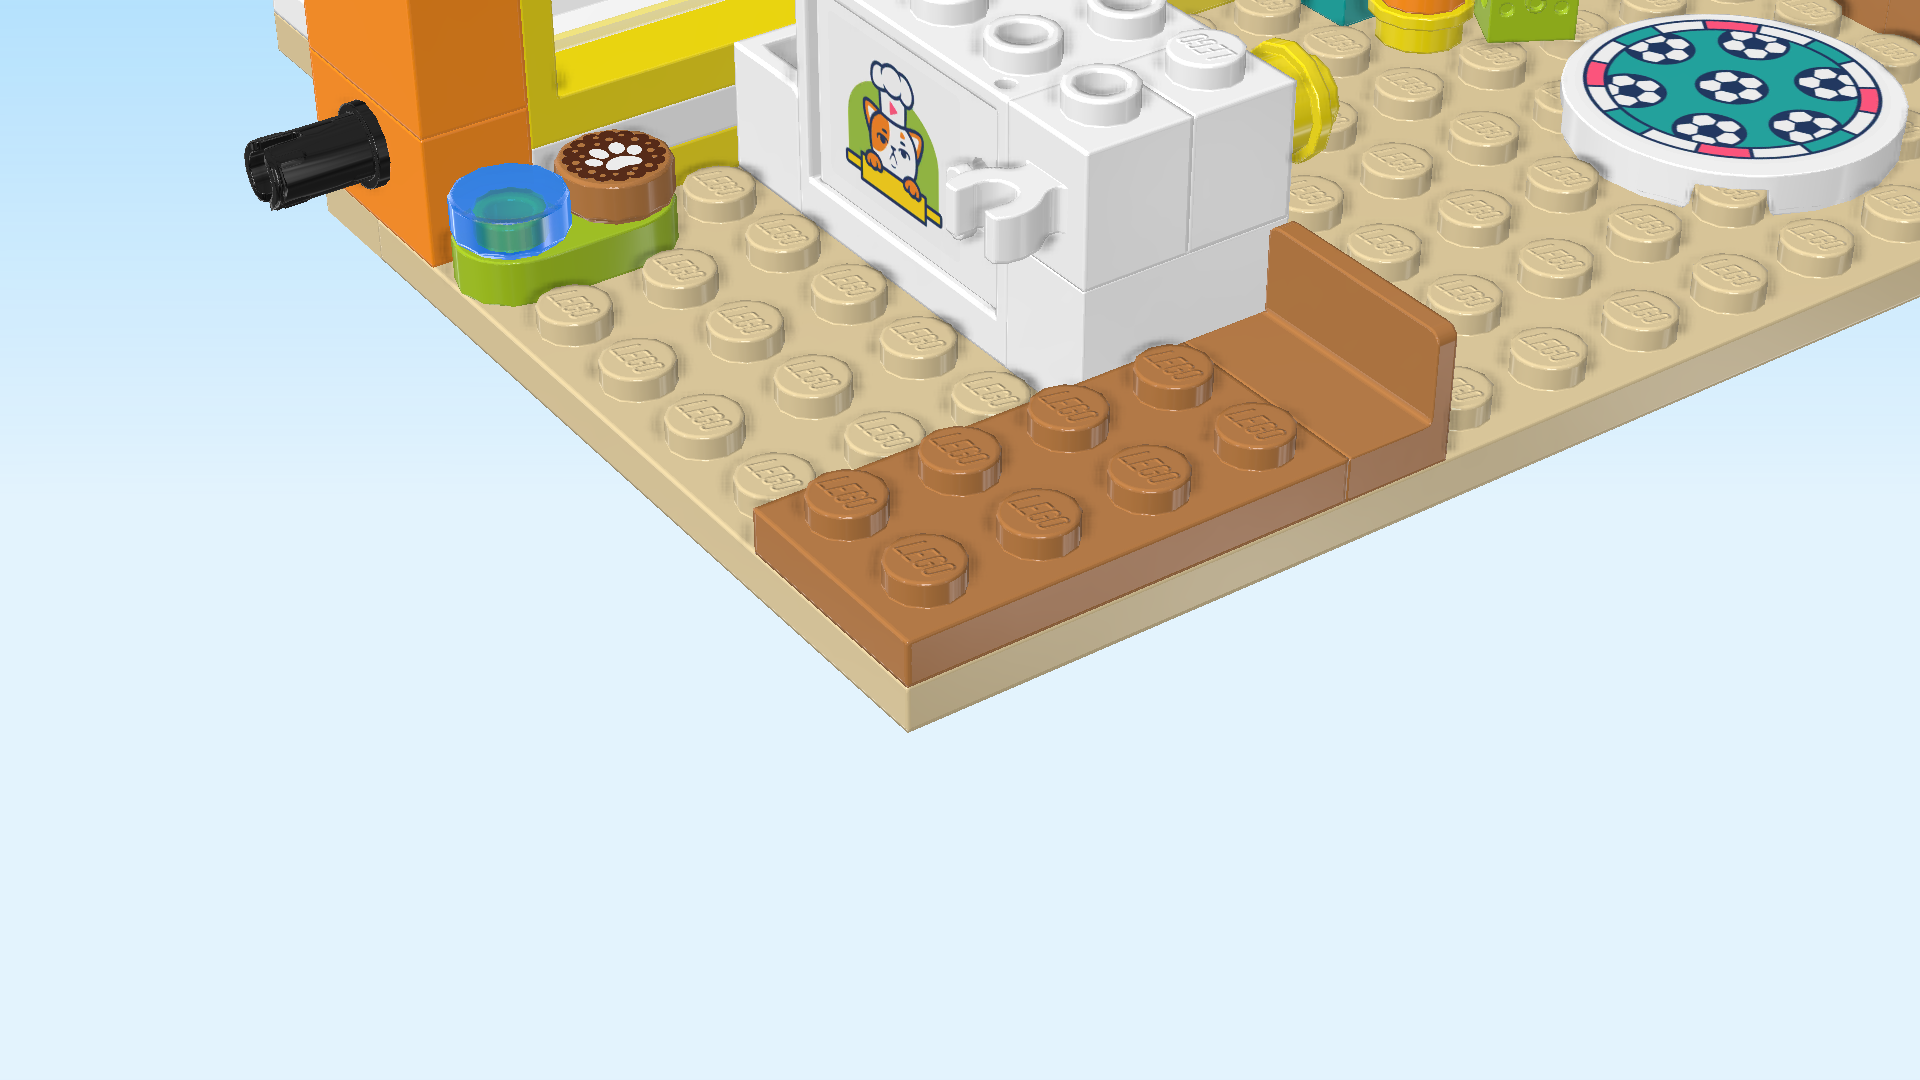
| Find 1 white panel element 1x2x1 with back and side panels. |
| Skip 1 knob to the right on the same row and mount it horizontally, long panel to the back. |
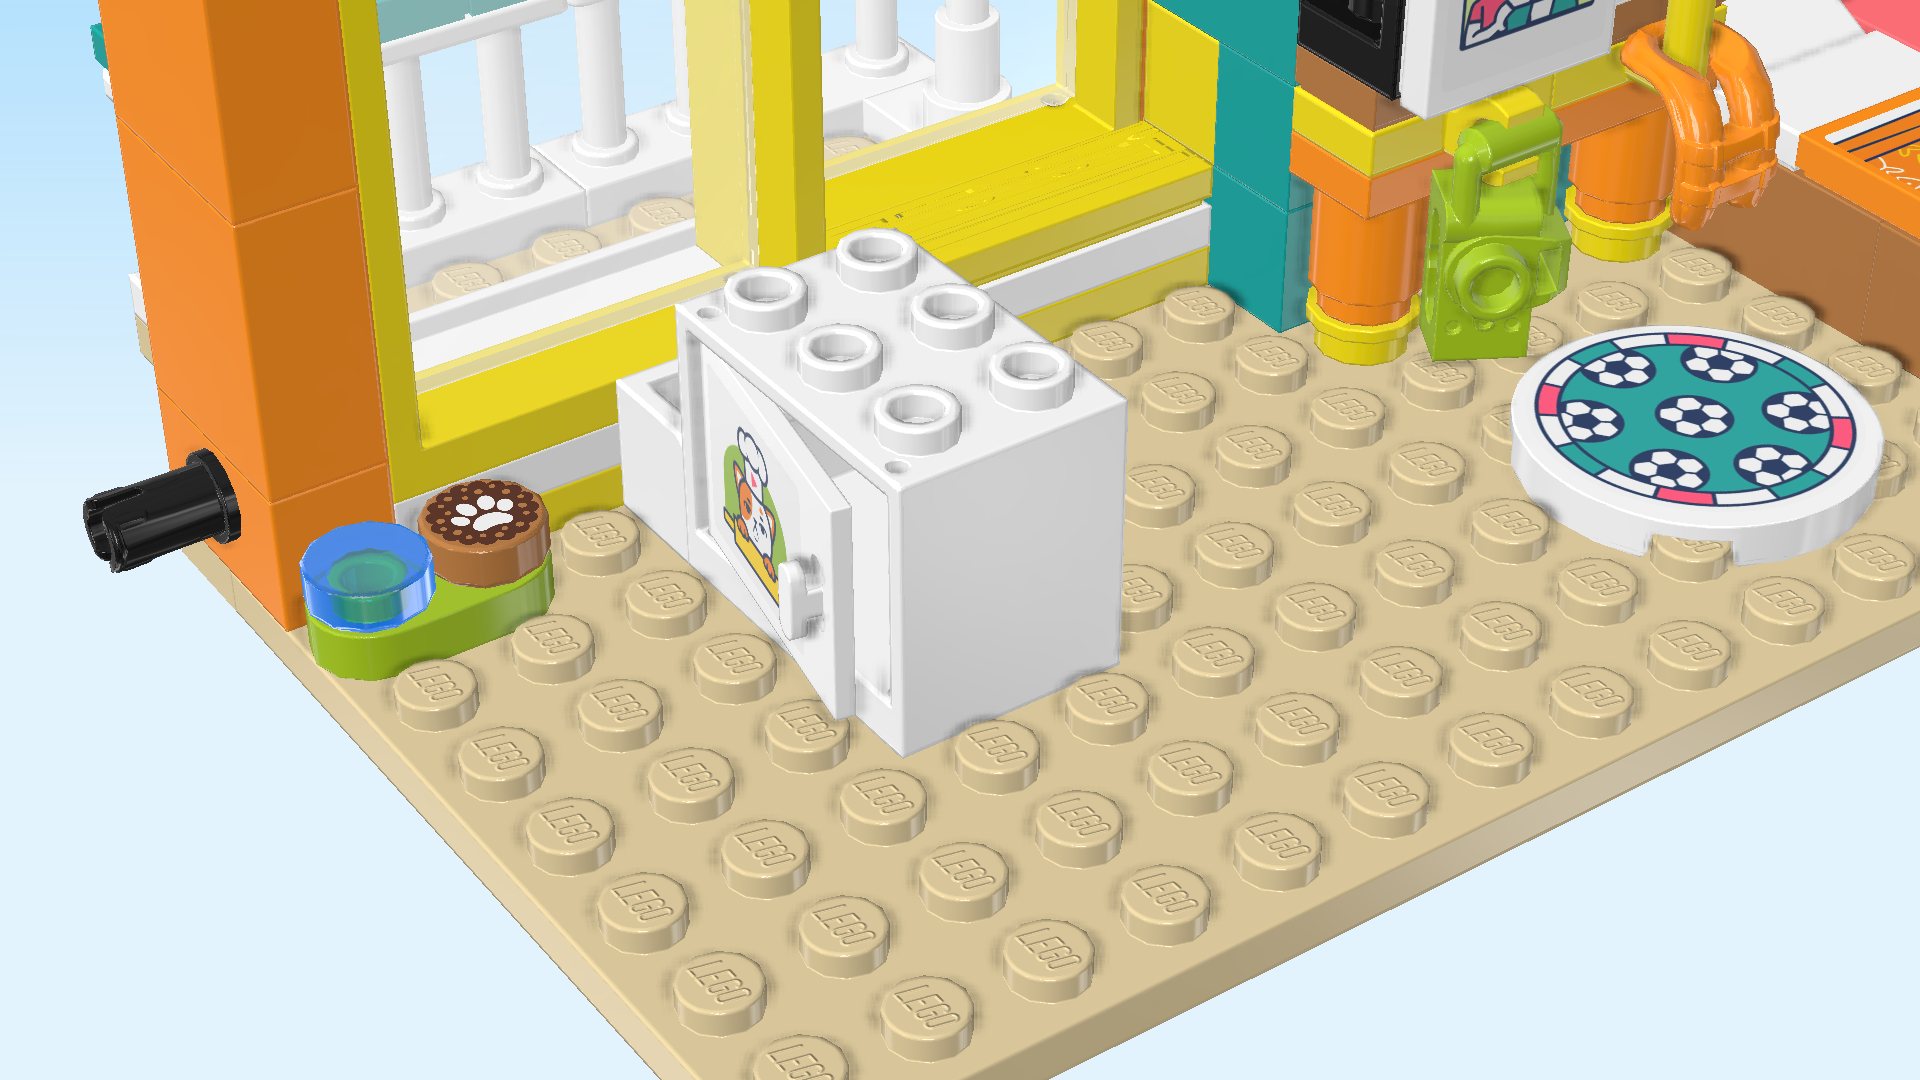
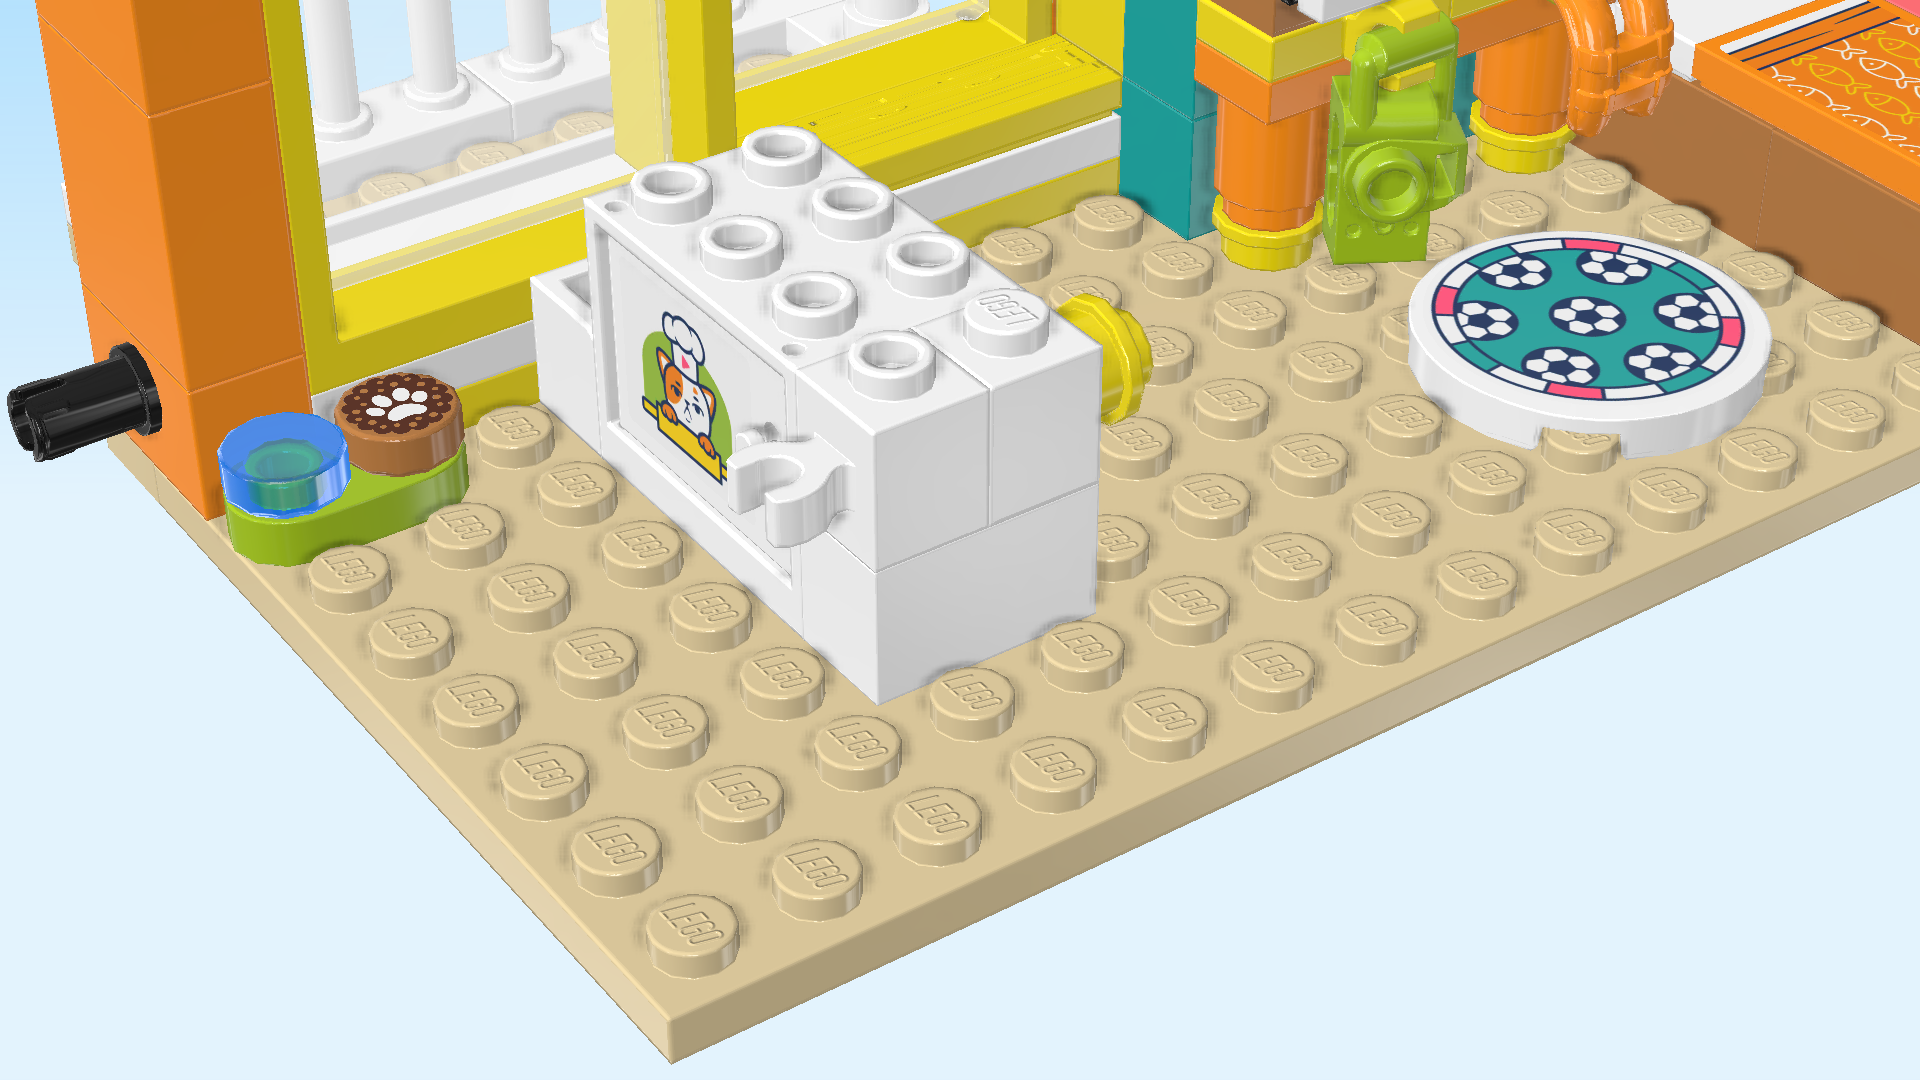
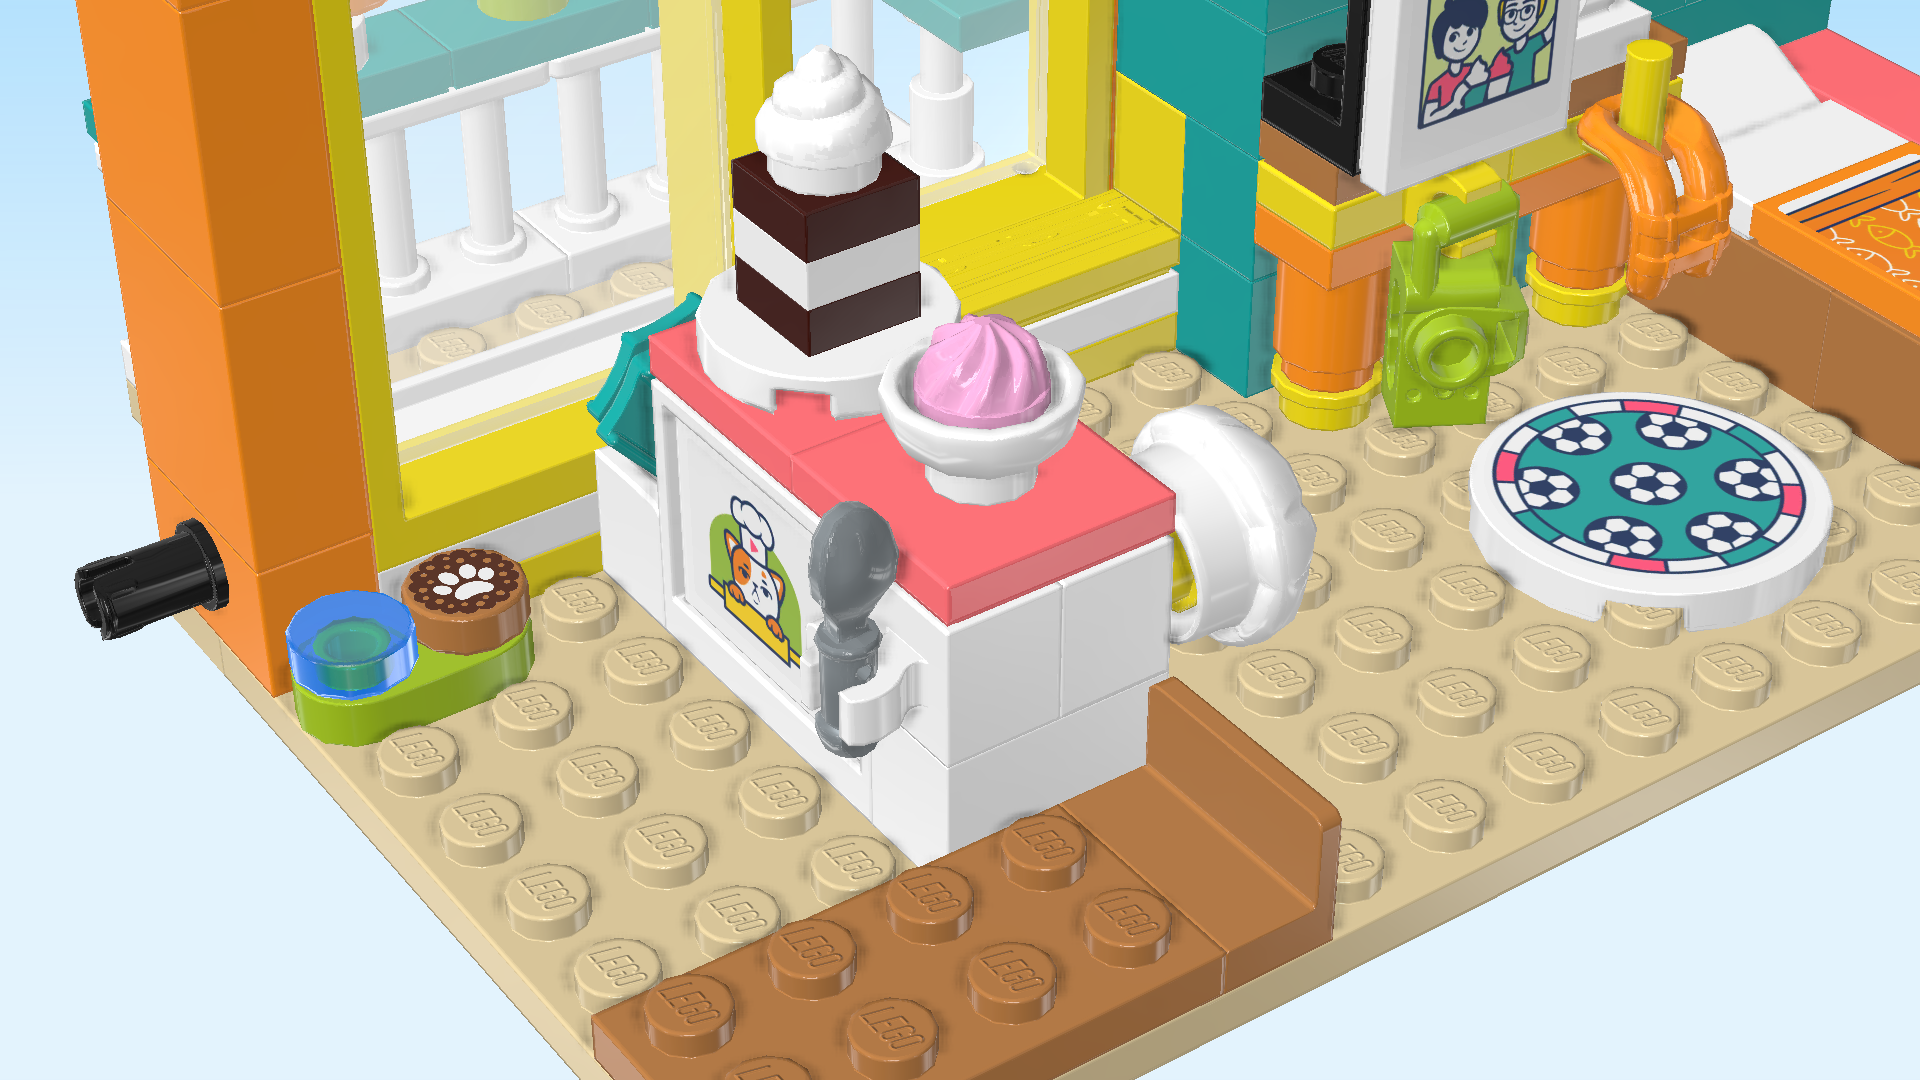
| Next, we will build the baking oven. |
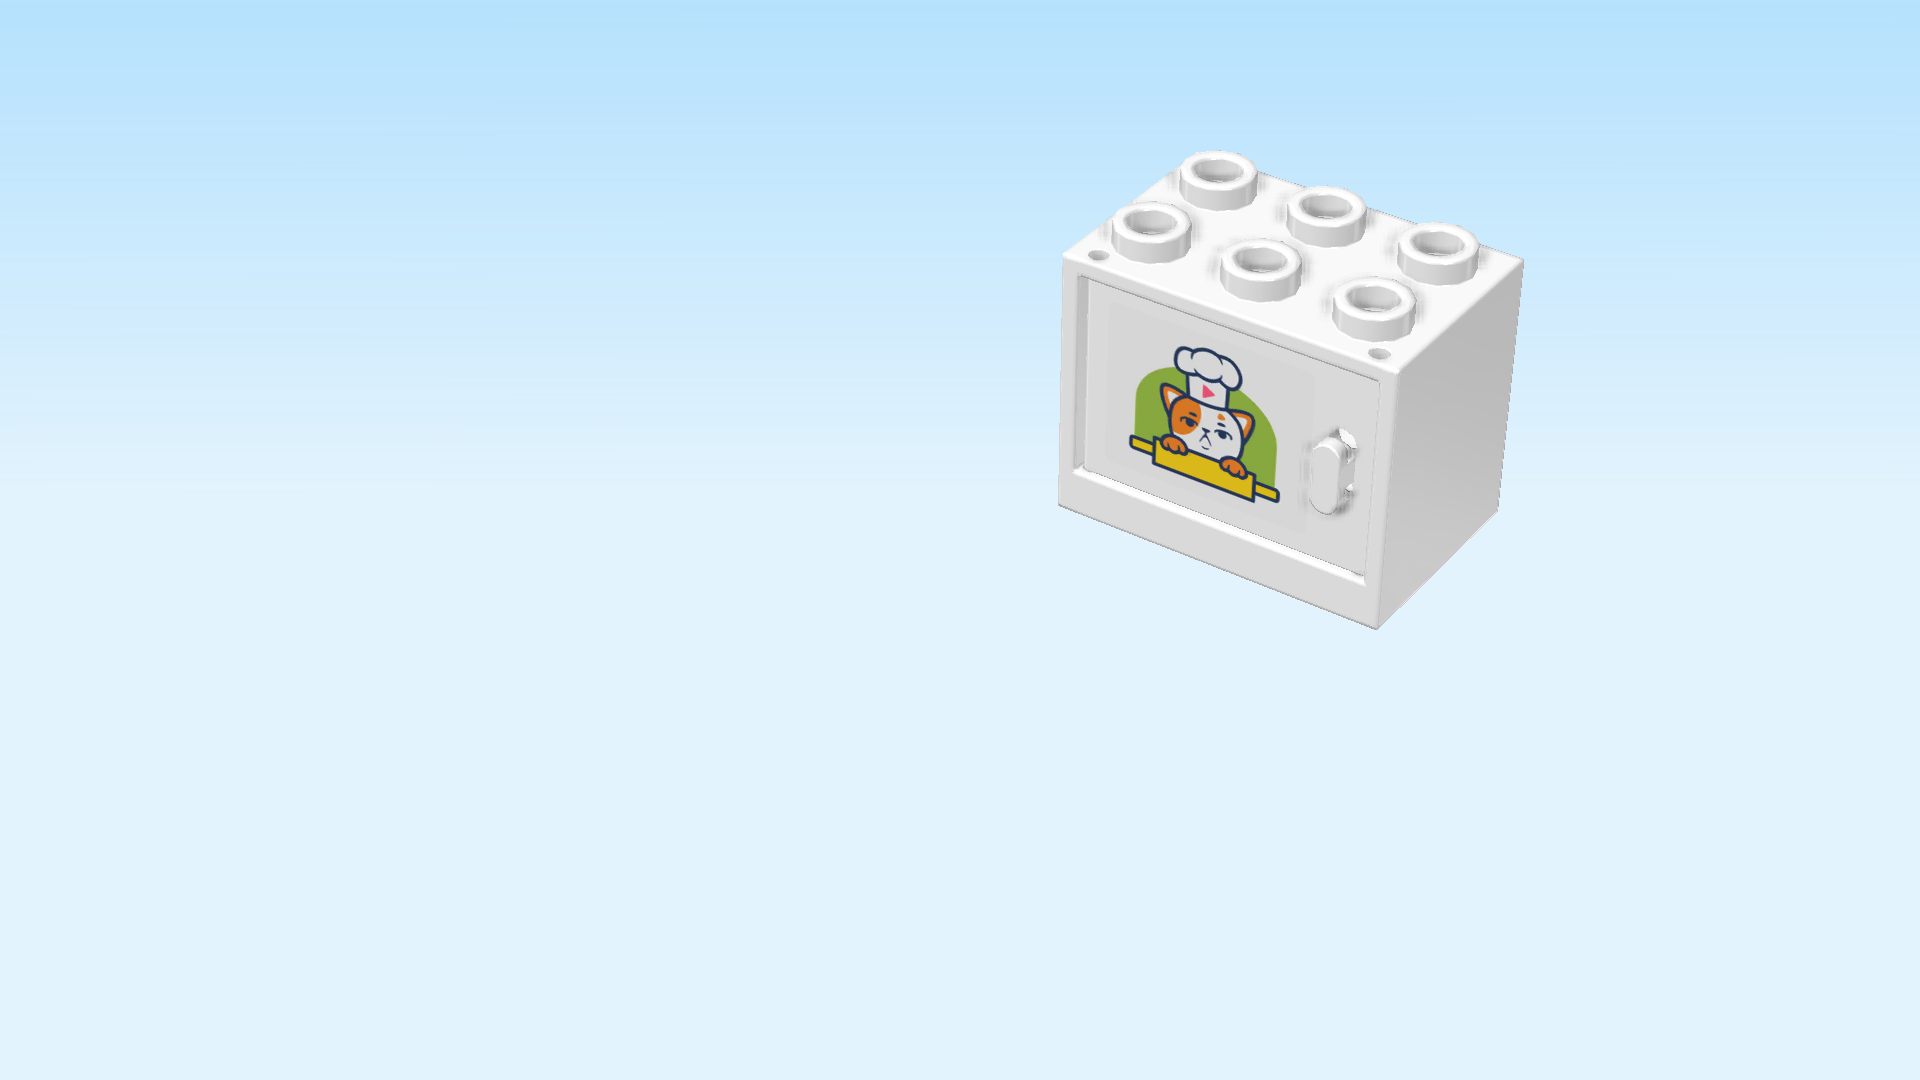
| Collect the following 2 pieces: |
| 1 white cupboard door 3x2, |
| and 1 white cupboard 2x3x2. |
| Put the cupboard 2x3x2 horizontally on the table, opening towards you. |
| Hold the cupboard door so that the handle is on the right side, pointing towards you. |
| Continue if you want to decorate this piece with a sticker now. If not, skip the next 3 sentences. |
| Apply it upright on the door of the baking oven. |
| The baking oven is finished! Well done! Turn it vertically so that the door is pointing to the left. Mount it in front of the panel element with back and side panels. |
| Next, we will make the sub-part of the baking station. |
| Collect the following 3 pieces: |
| 1 white brick 1x2, |
| 1 white brick 1x1 with side knob, |
| and 1 white brick 1x1 with horizontal side clasp. |
| Put the brick 1x2 horizontally on the table. |
| Put the brick with side knob on the right knob, side knob to the right. |
| Put the brick with side clasp to the left of the previous piece, clasp to the left. |
| Find 1 bright yellow round plate 1x1. |
| Put it upright on the side knob pointing to the right. |
| Mount this part horizontally in front of the baking oven, clasp to the left and round knob 1x1 pointing to the right. |
| Collect the following 2 pieces: |
| 1 medium nougat brown panel element 1x2x1 with panel on long side, |
| and 1 medium nougat brown plate 2x4. |
| Put the plate 2x4 horizontally on the 2 frontmost rows of the room, starting from the left edge. |
| Put the panel element vertically to the right of the previous piece, panel to the right. |
| Find 2 salmon pink plates 2x2 with 1 knob. |
| Put them next to each other on the top surface of the baking station. |
| Find 2 teal blue flippers. |
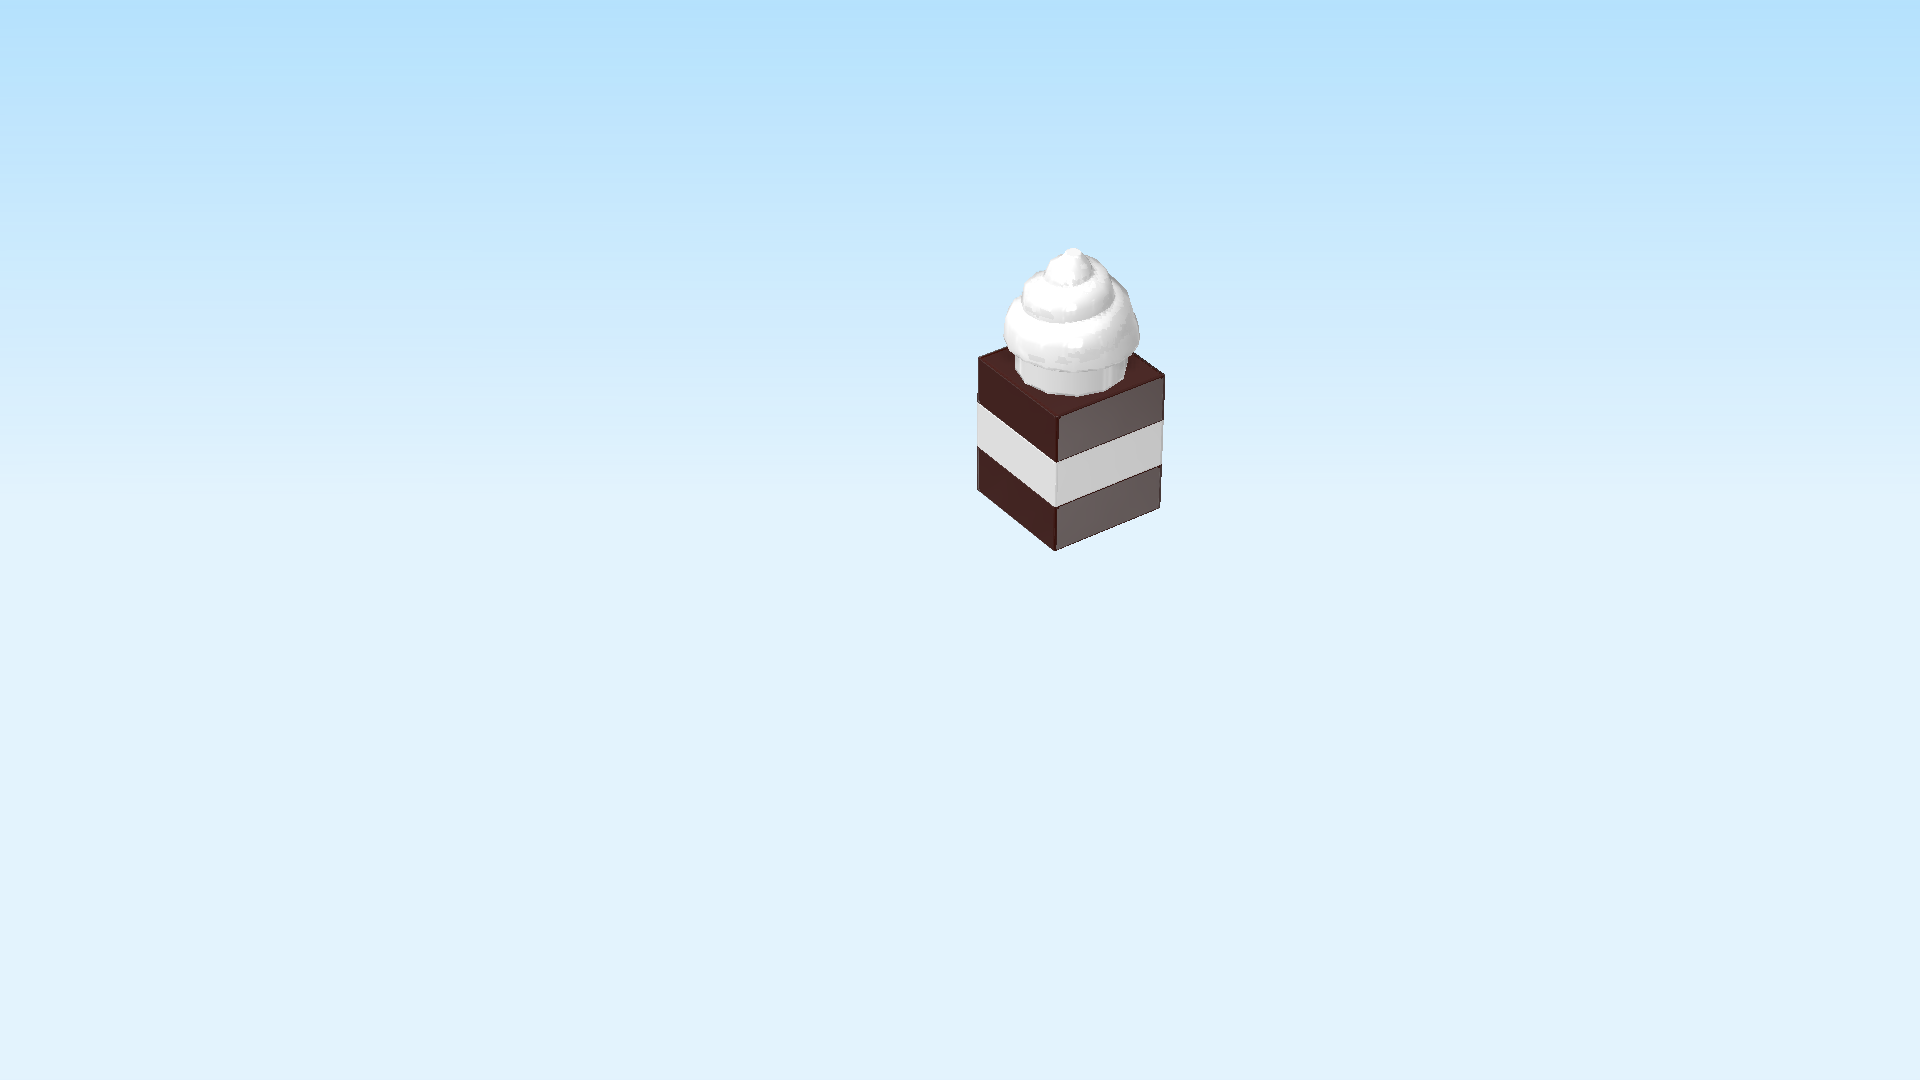
| Next, we will build a chocolate cake with whipped cream topping. |
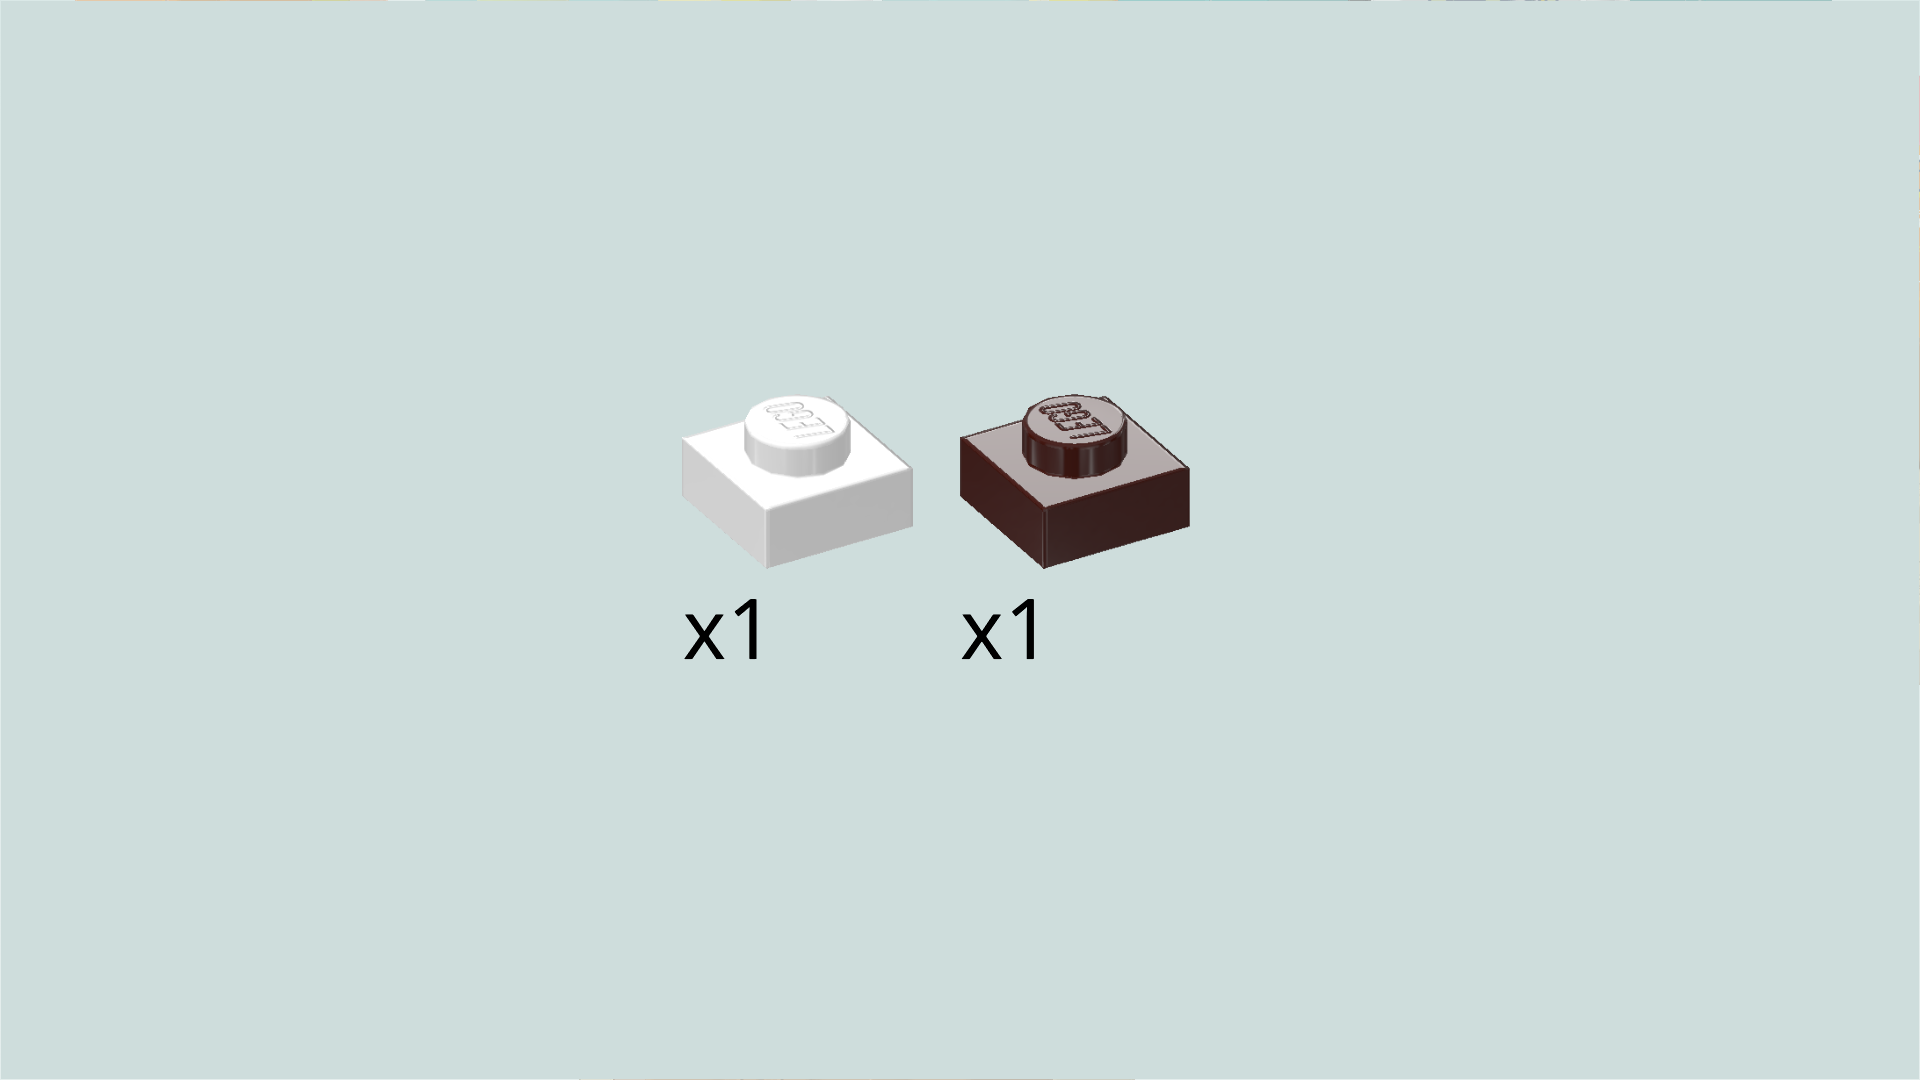
| Collect the following 2 pieces: |
| 1 dark brown plate 1x1, |
| and 1 white plate 1x1. |
| Put the dark brown plate 1x1 on the table. |
| Put the white plate 1x1 on top. Make sure their shapes align. |
| Find another dark brown plate 1x1. |
| Put it on top of the 2 previous pieces. |
| Find 1 white swirly whipped cream topping 1x1. |
| Put it on top. |
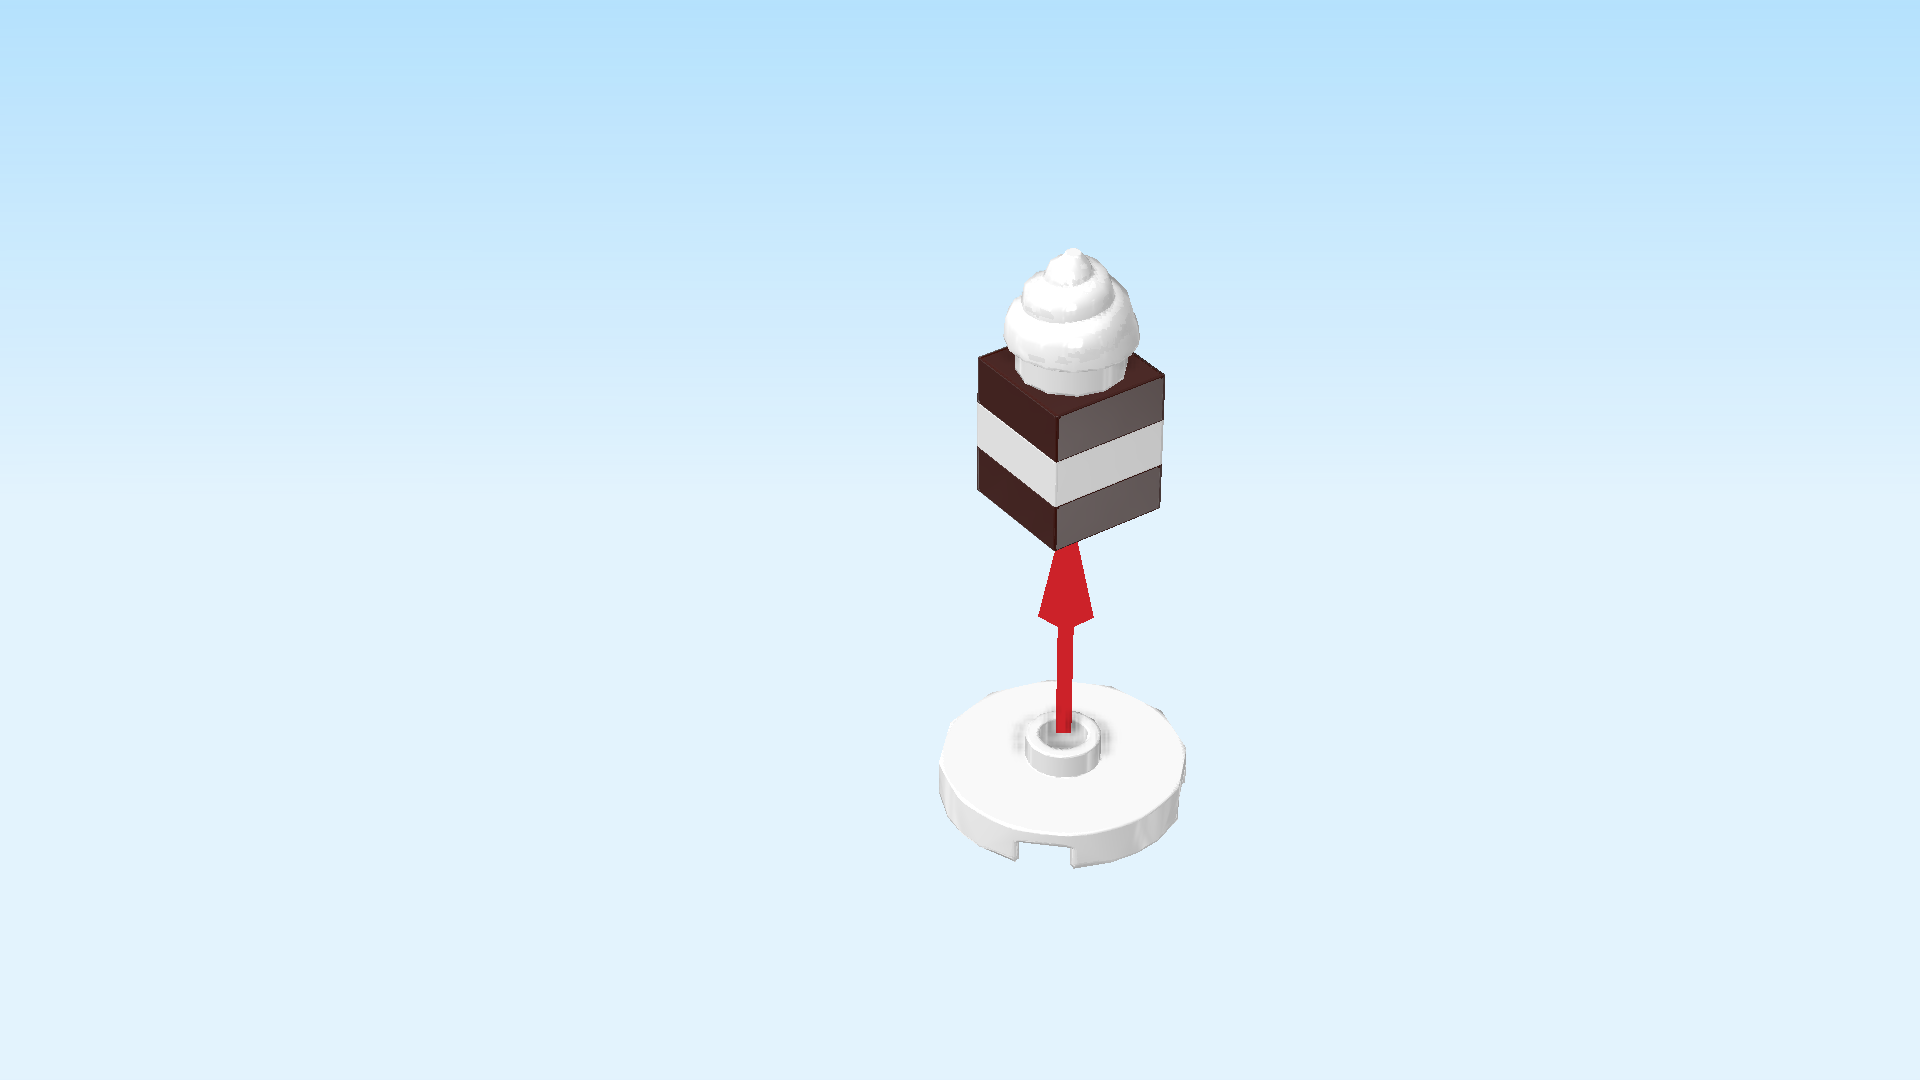
| Find 1 white round plate 2x2 with 1 knob. |
| Put it on the table, and mount the cake on its knob. |
| The chocolate cake with whipped cream topping is finished! Great job! Put it on the back knob of the baking station. |
| Collect the following 2 pieces: |
| 1 white round bowl, |
| and 1 silver metallic kitchen spoon. |
| Put the round bowl on the front knob of the baking station. |
| Snap the handle of the kitchen spoon into the clasp on the left side of the baking station. |
| Collect the following 2 pieces: |
| 1 white chef's hat, |
| and 1 light purple swirly cupcake top 1x1. |
| Put the chef's hat on the round plate 1x1 pointing to the right. |
| Put the swirly cupcake top 1x1 into the bowl on the baking station. |
| Next, we will build a dough piece for in the oven. |
| Collect the following 2 pieces: |
| 1 white plate 1x1, |
| and 1 dark brown plate 1x1. |
| Put the dark brown plate 1x1 on the table. |
| Put the white plate 1x1 on top. |
| Find another dark brown plate 1x1. |
| Put it on top of the two previous pieces. |
| The dough piece for in the oven is finished! Well done! Open the door of the baking oven and put the dough piece inside. |
| Now, we will make the sofa cushions. |
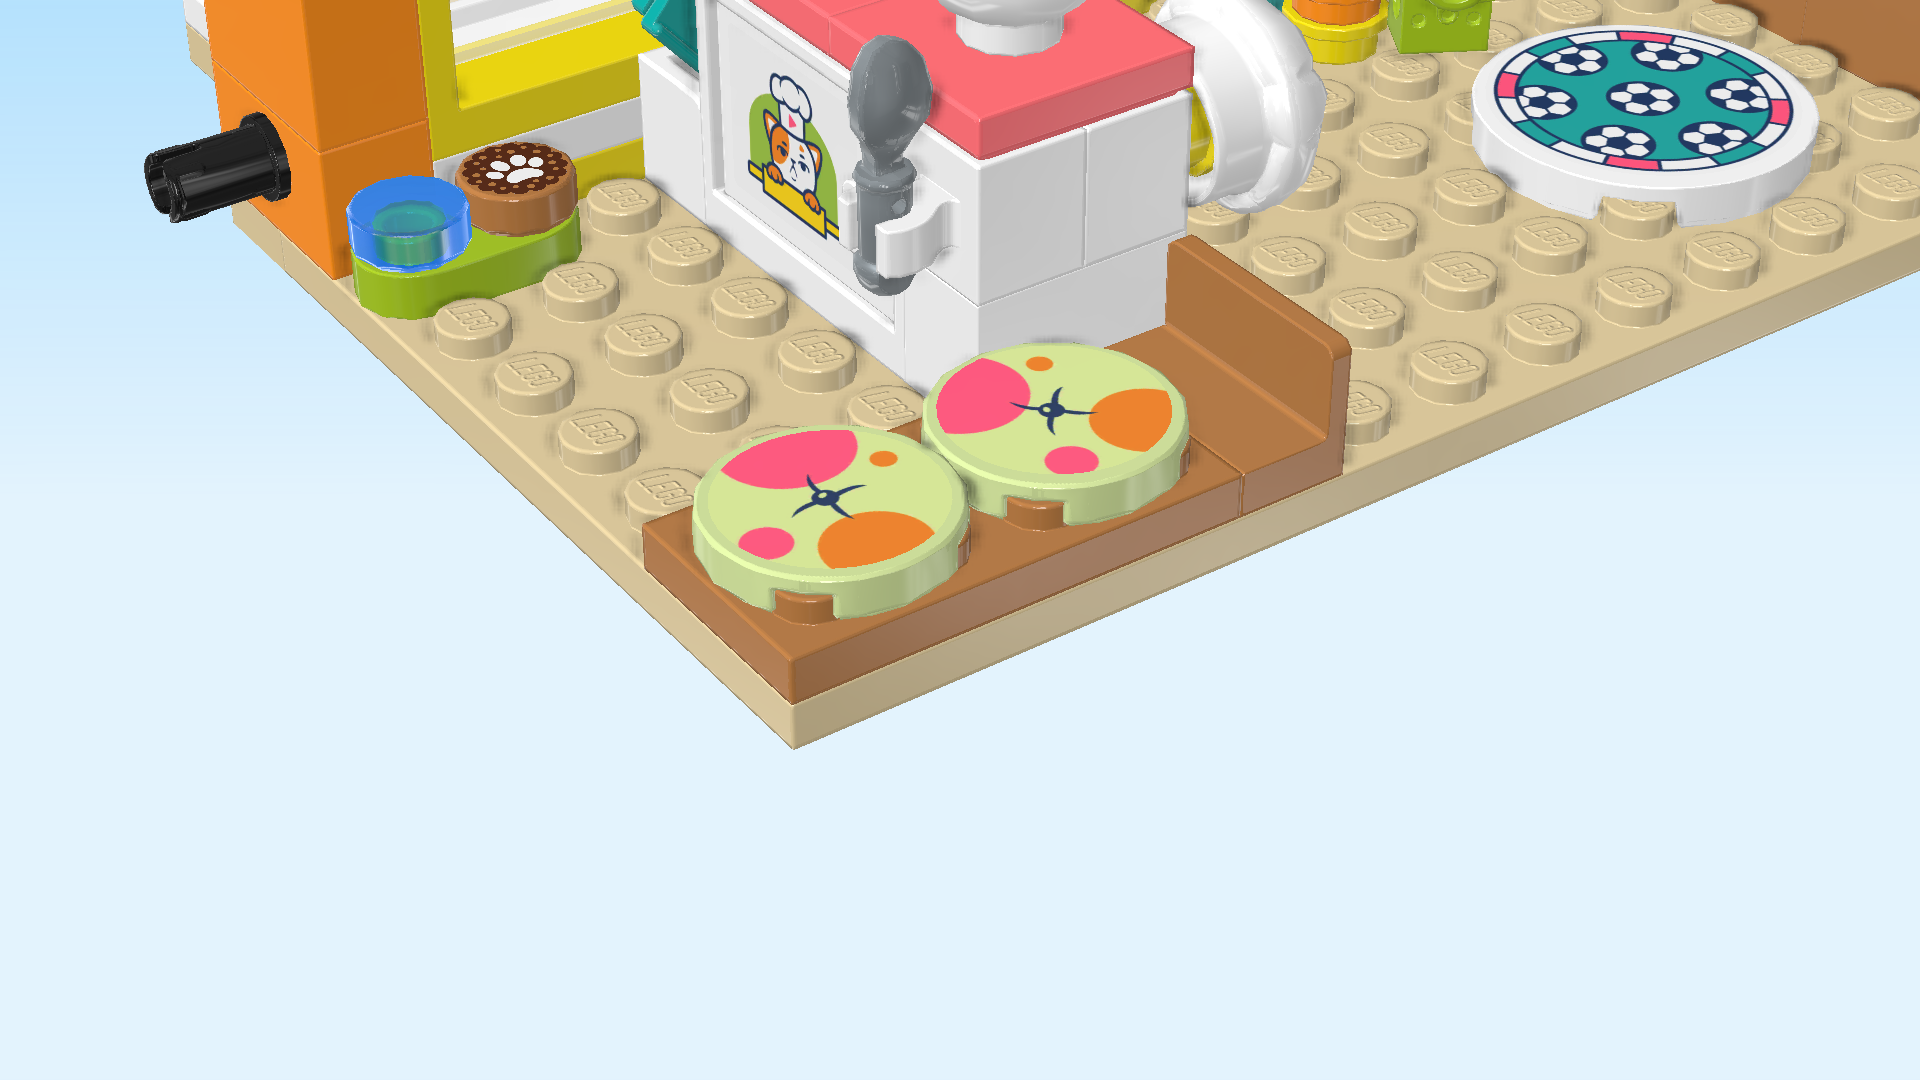
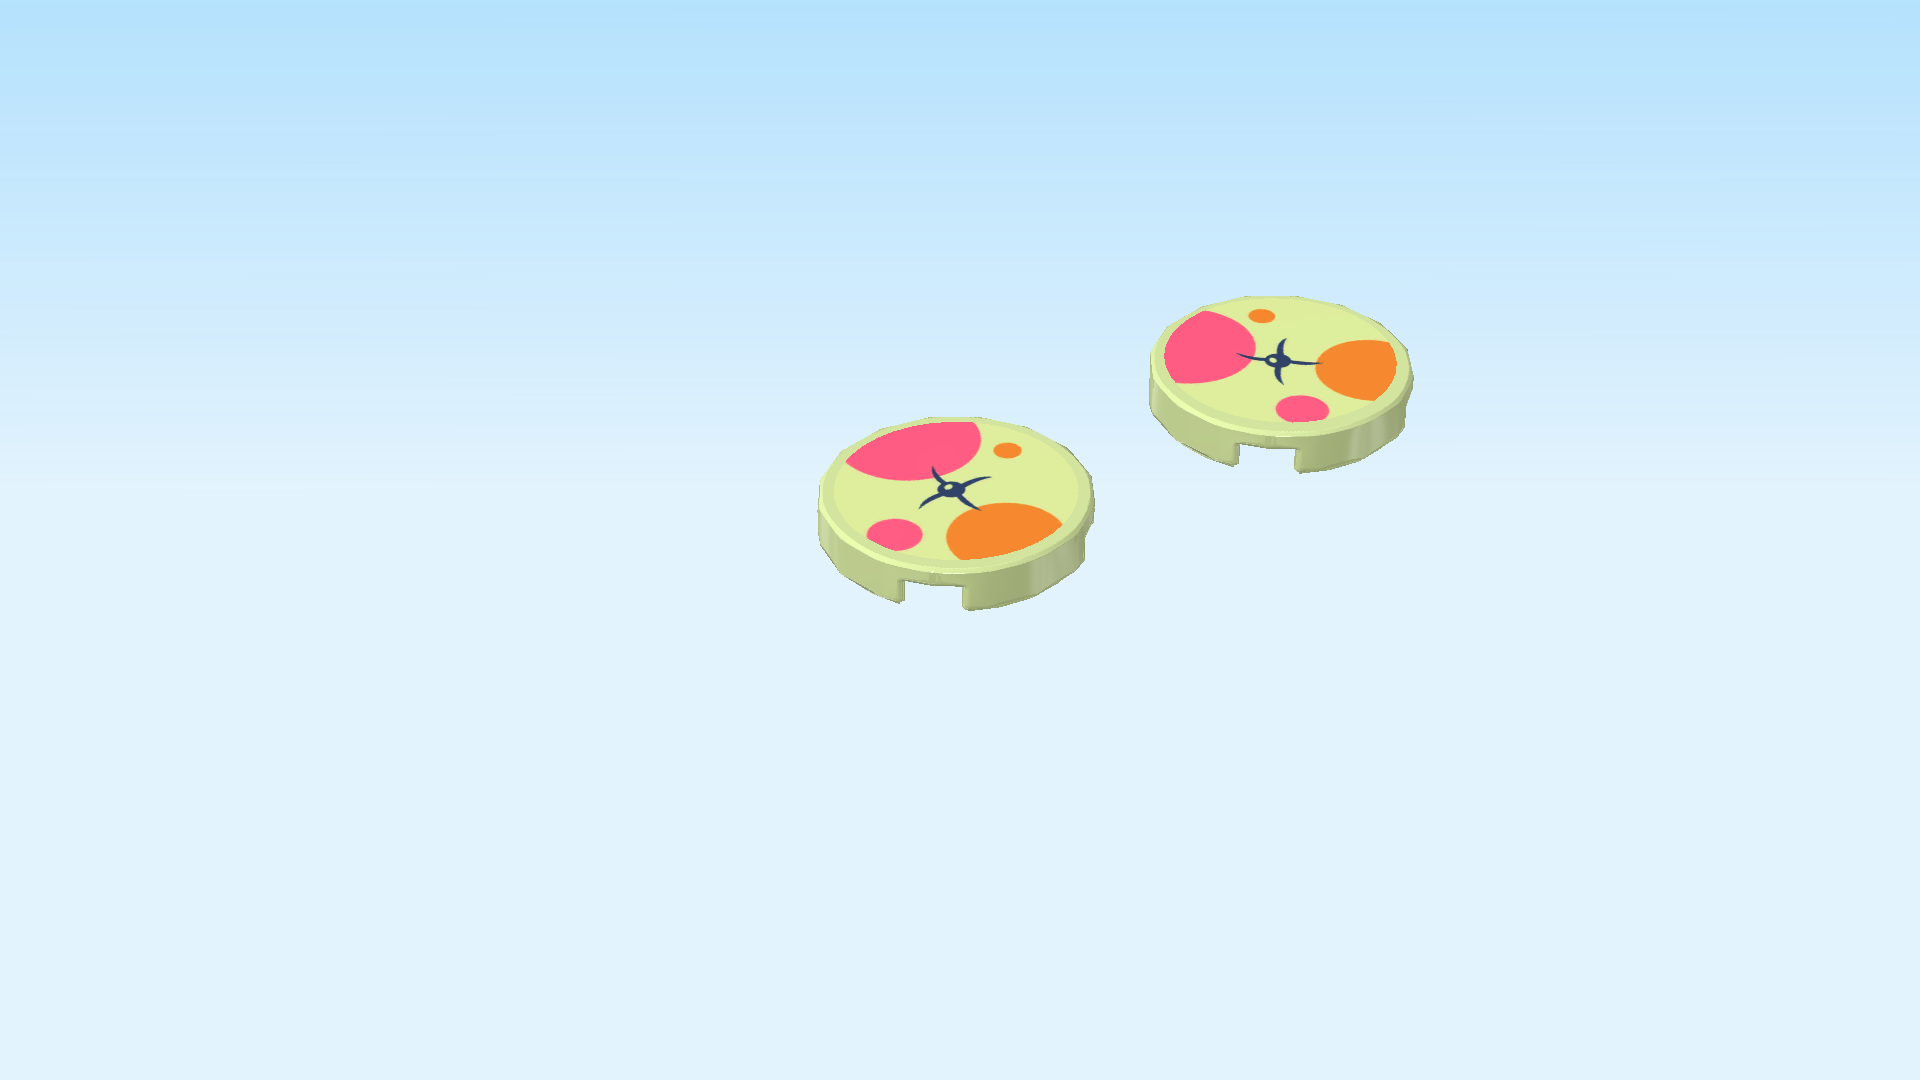
| Collect the following 4 pieces: |
| 2 pale lime green round tiles 2x2, |
| and 2 round stickers 2x2 (number 2). |
| Put the round tiles next to each other on the table. |
| Apply one sticker each. |
| The stickers are printed with the sofa cushion design: they are lime green with a big pink dot and a small pink dot as well as a big orange dot and a small orange dot. There is a small indentation on each cushion from the cushion button in the middle. |
| Mount the 2 round tiles next to each other on the sofa base. That is the plate 2x8 in the front left corner of the room. |
| Next, we make a cookbook. |
| Collect the following 2 pieces: |
| 1 bright yellowish green back of a book cover 2x2½ with 2 hinge pins. |
| and 1 white flat tile 1x2. |
| Put the back of a book cover vertically on the table. |
| Put the flat tile 1x2 vertically on top. |
| Continue if you want to decorate this piece with a sticker now. If not, skip the next 3 sentences. |
| Put it vertically on top of the previous piece. |
| Find 1 bright yellowish green front of a book cover 2x2½ with side shaft and hinge indentations. |
| Snap the hinges of the back of the book into the indentations of the book cover. Close the cookbook. |
| Continue if you want to decorate this piece with a sticker now. If not, skip the next 3 sentences. |
| Put it vertically on top of the book cover. |
| The cookbook is finished! Great job! Flip it upright and put it between the sofa cushions and the small panel to their right. The small panel will serve as the bookend. |
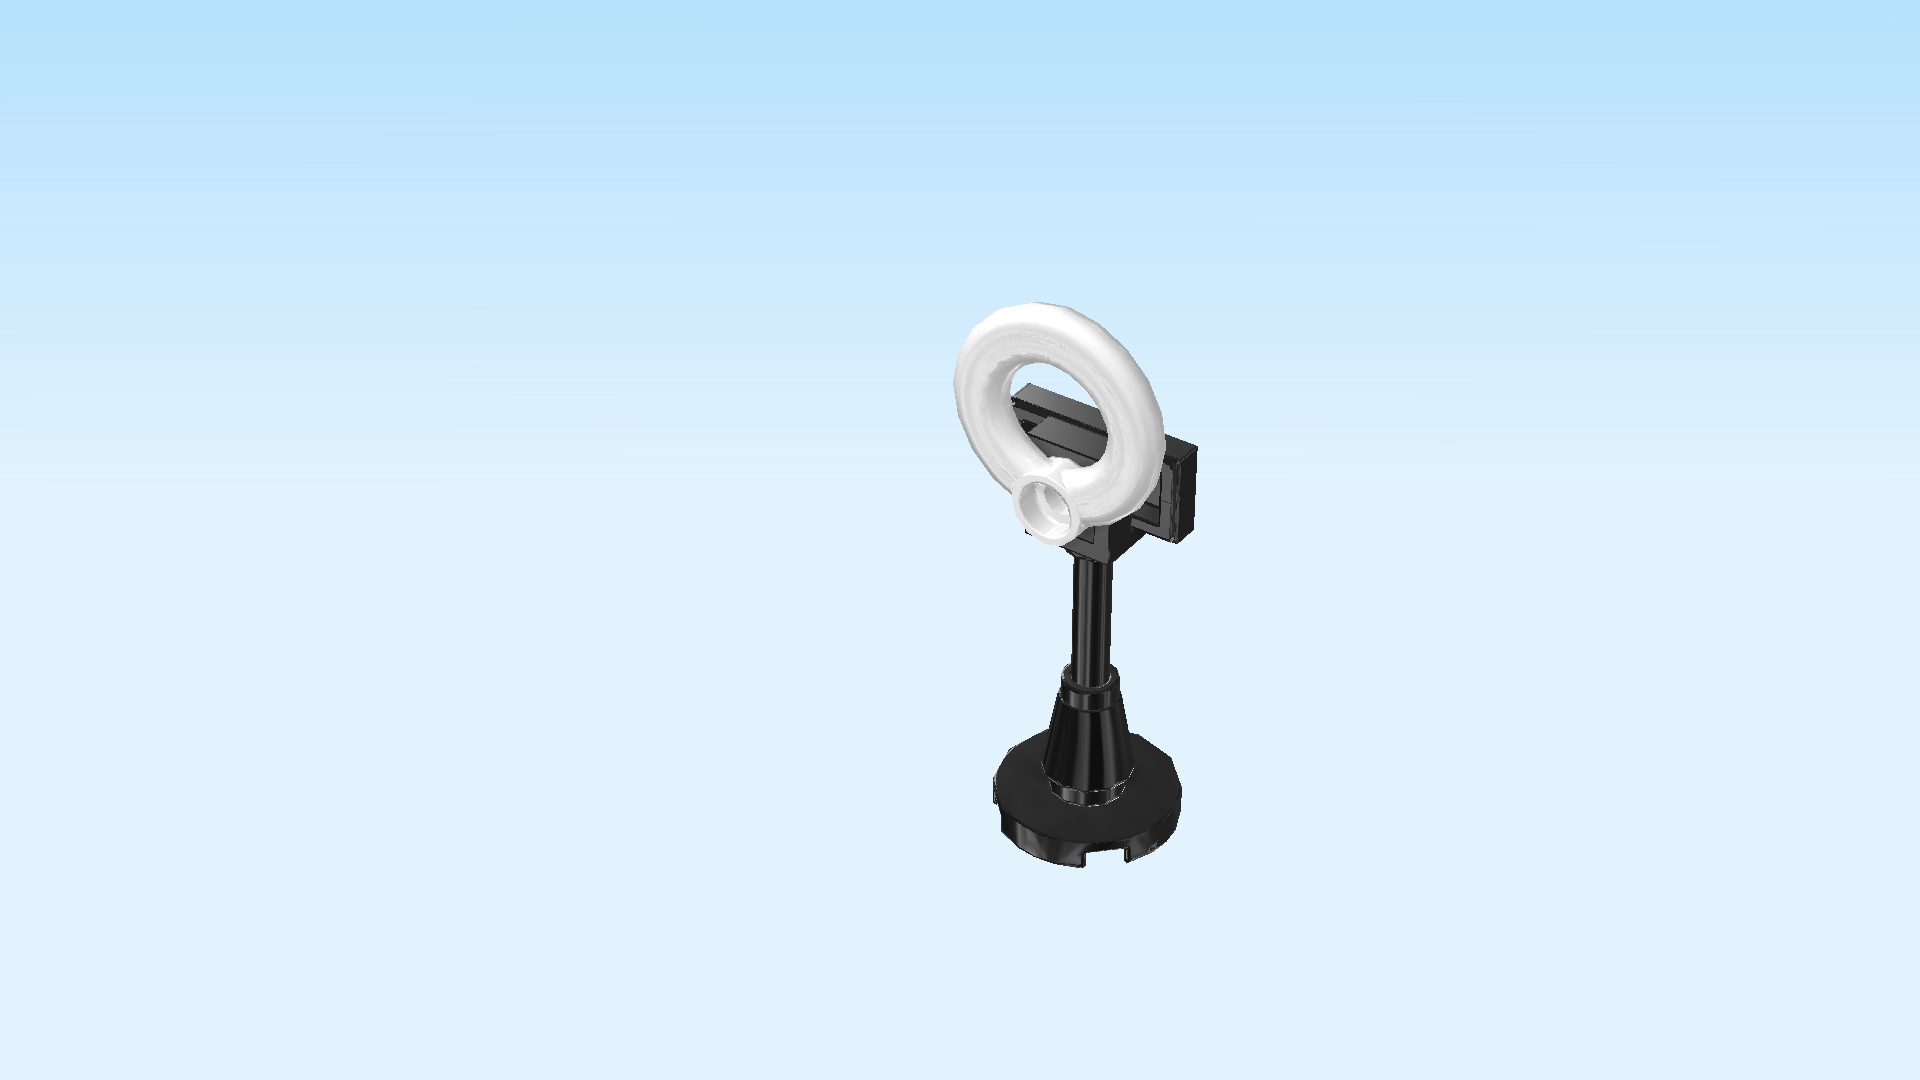
| Next, we will build the tripod for the smartphone. |
| Collect the following 2 pieces: |
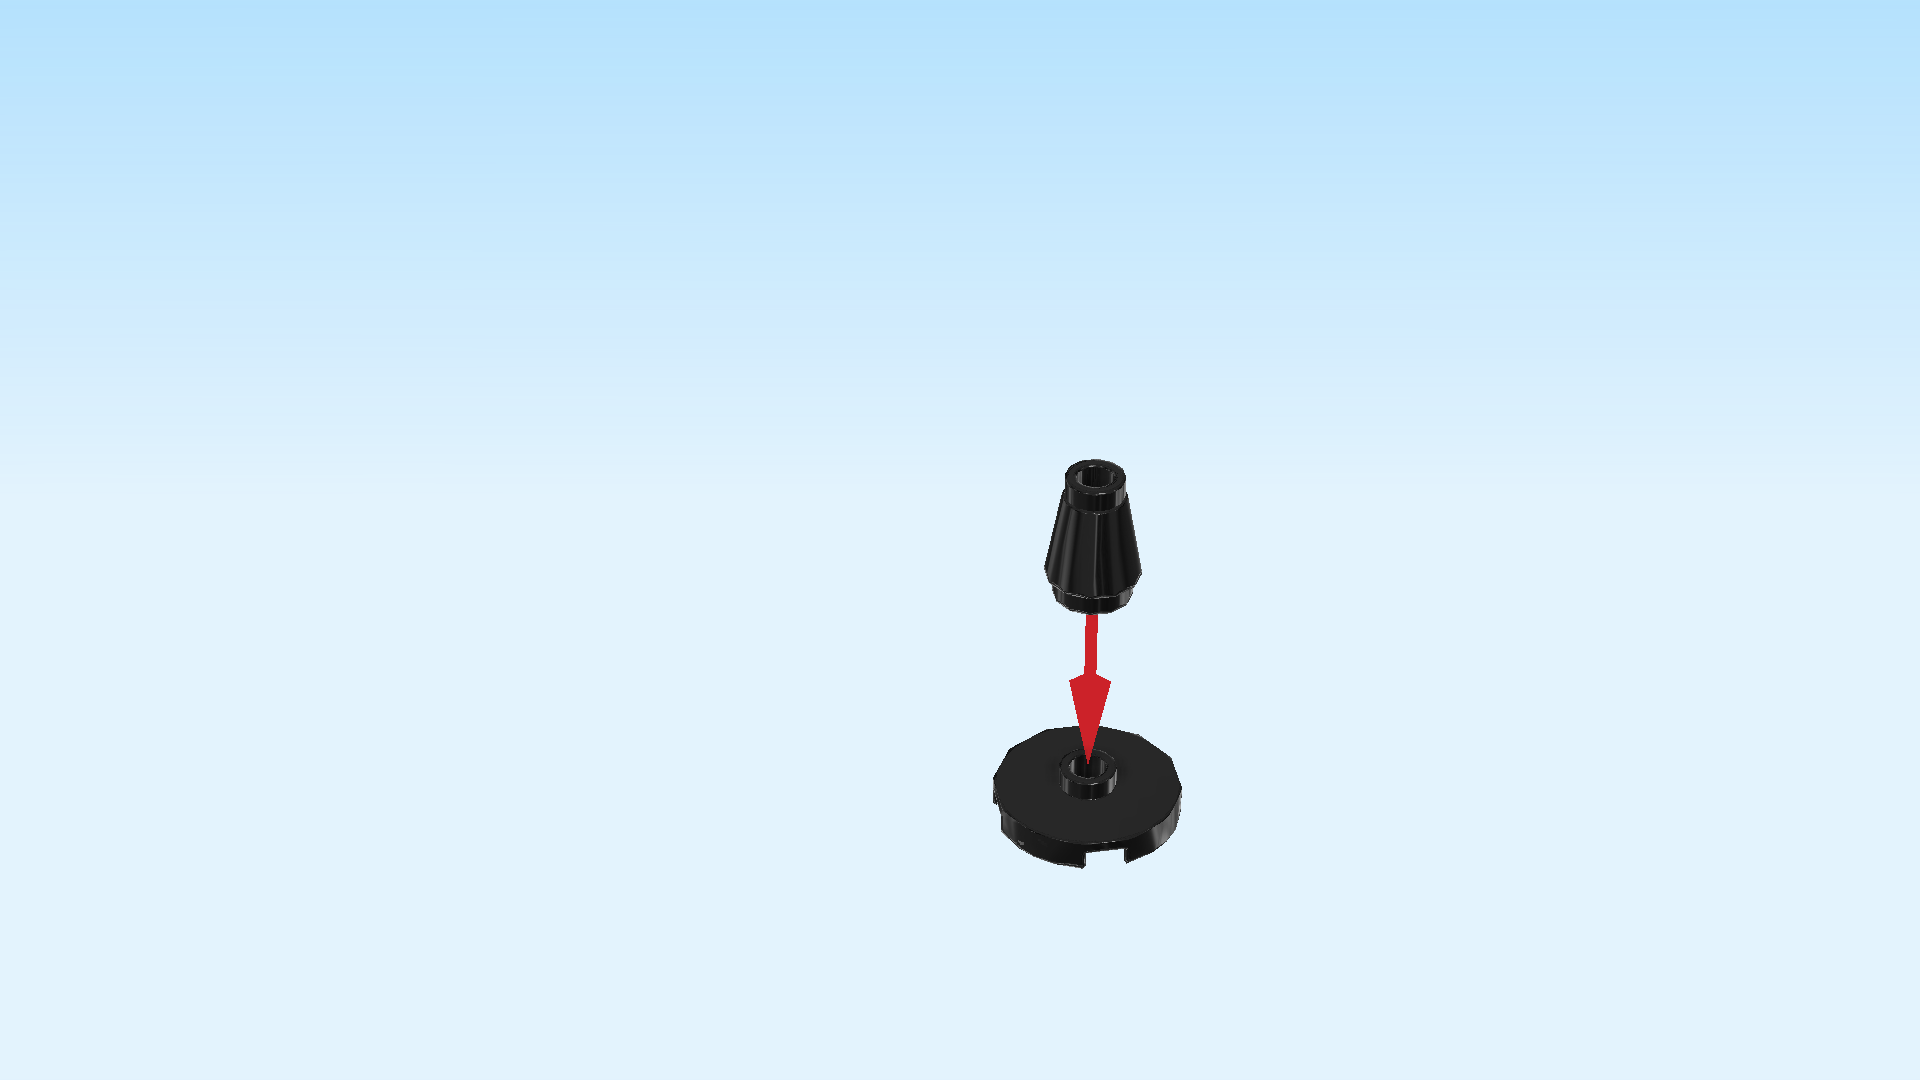
| 1 black round plate 2x2 with 1 knob, |
| and 1 black nose cone 1x1. |
| Put the round plate 2x2 on the table. |
| Put the nose cone 1x1 on top. |
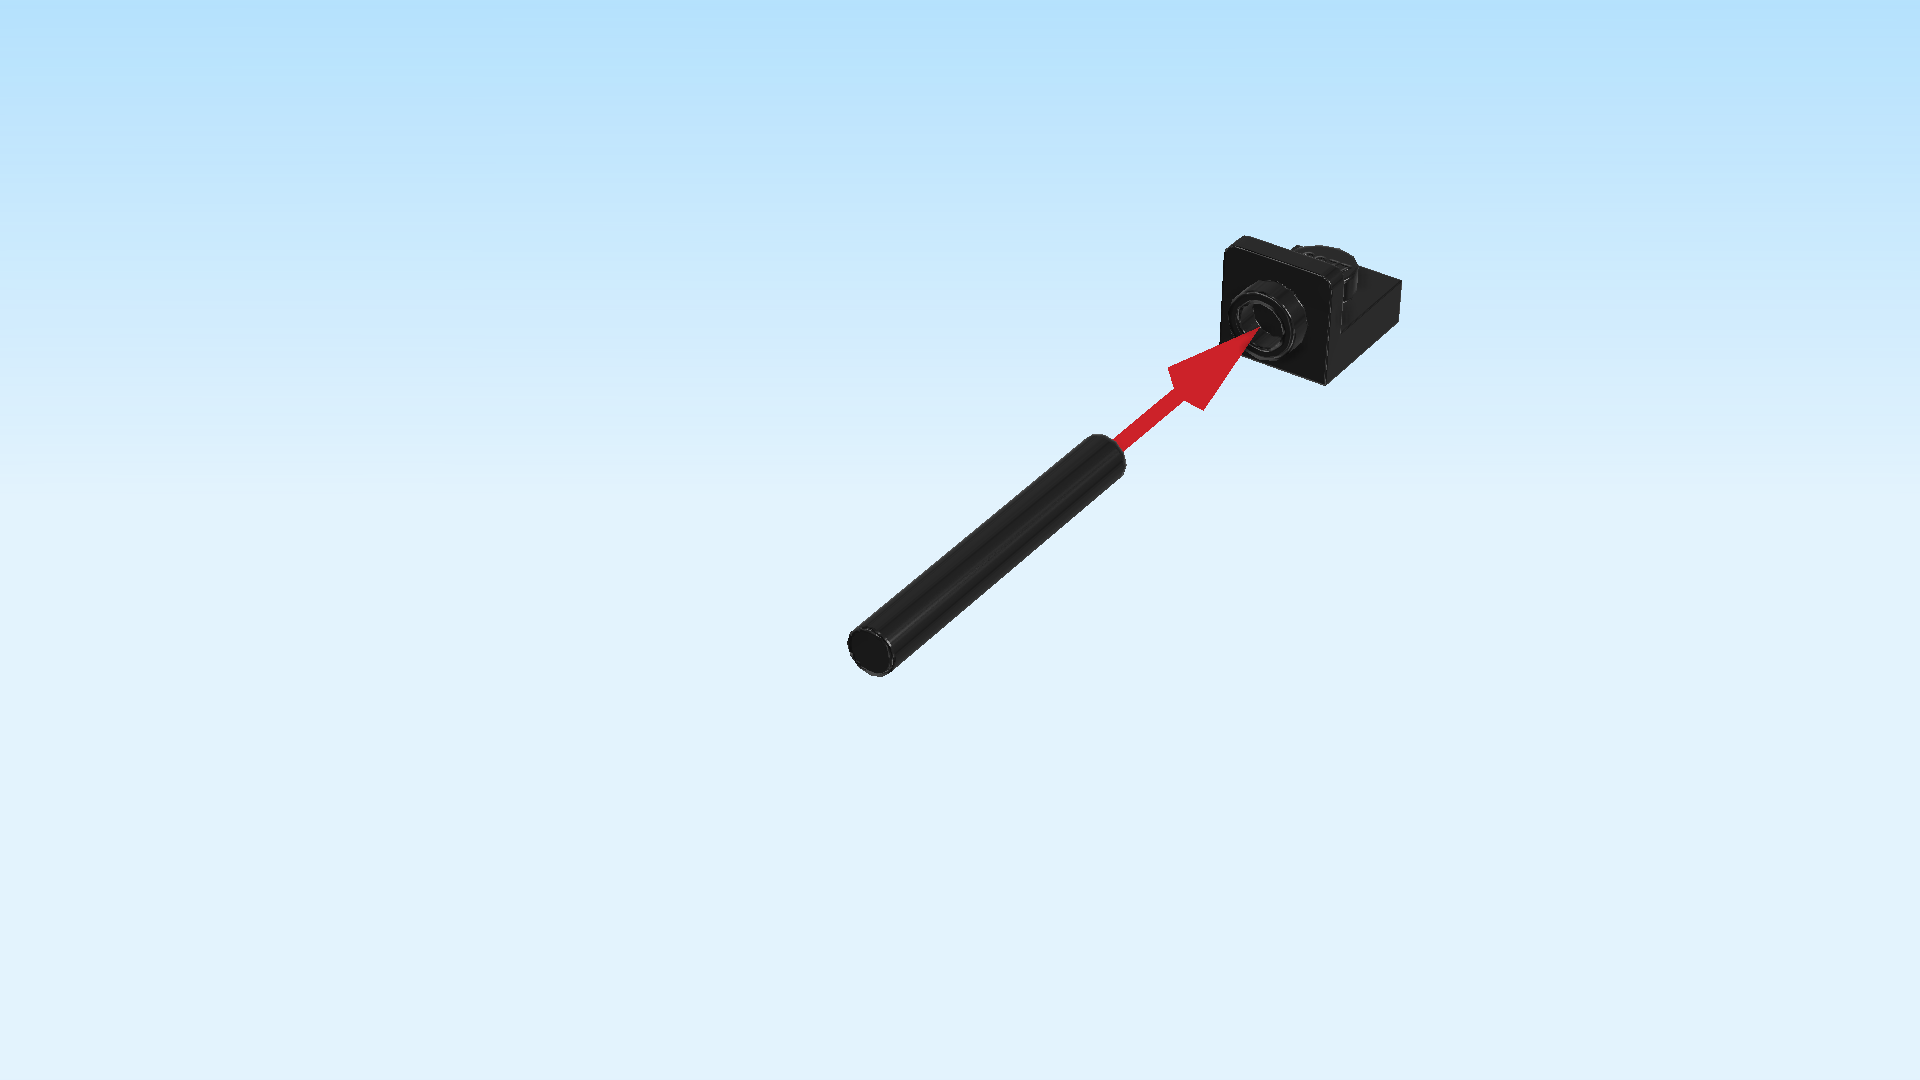
| Collect the following 2 pieces: |
| 1 black shaft 3m, |
| and 1 black bottom angle plate 1x1 - 1x1 with side knob. |
| Put the angle plate 1x1 on the table, hollow side knob to the left. |
| Insert the shaft into the hollow side knob coming from the left. |
| Find 1 black flat tile 1x2. |
| Mount it upright horizontally on the knob of the angle plate. |
| Find 1 white thick ring with 1 knob. |
| Mount it upright at the back of the smartphone. Use its knob and put it on the back side of the angular plate 1x1. |
| The tripod for the smartphone is finished! Well done! Mount it to the right of the cookbook on the 2 frontmost rows. Make sure the smartphone is pointing to the left back. This is where Leo will later bake and film. |
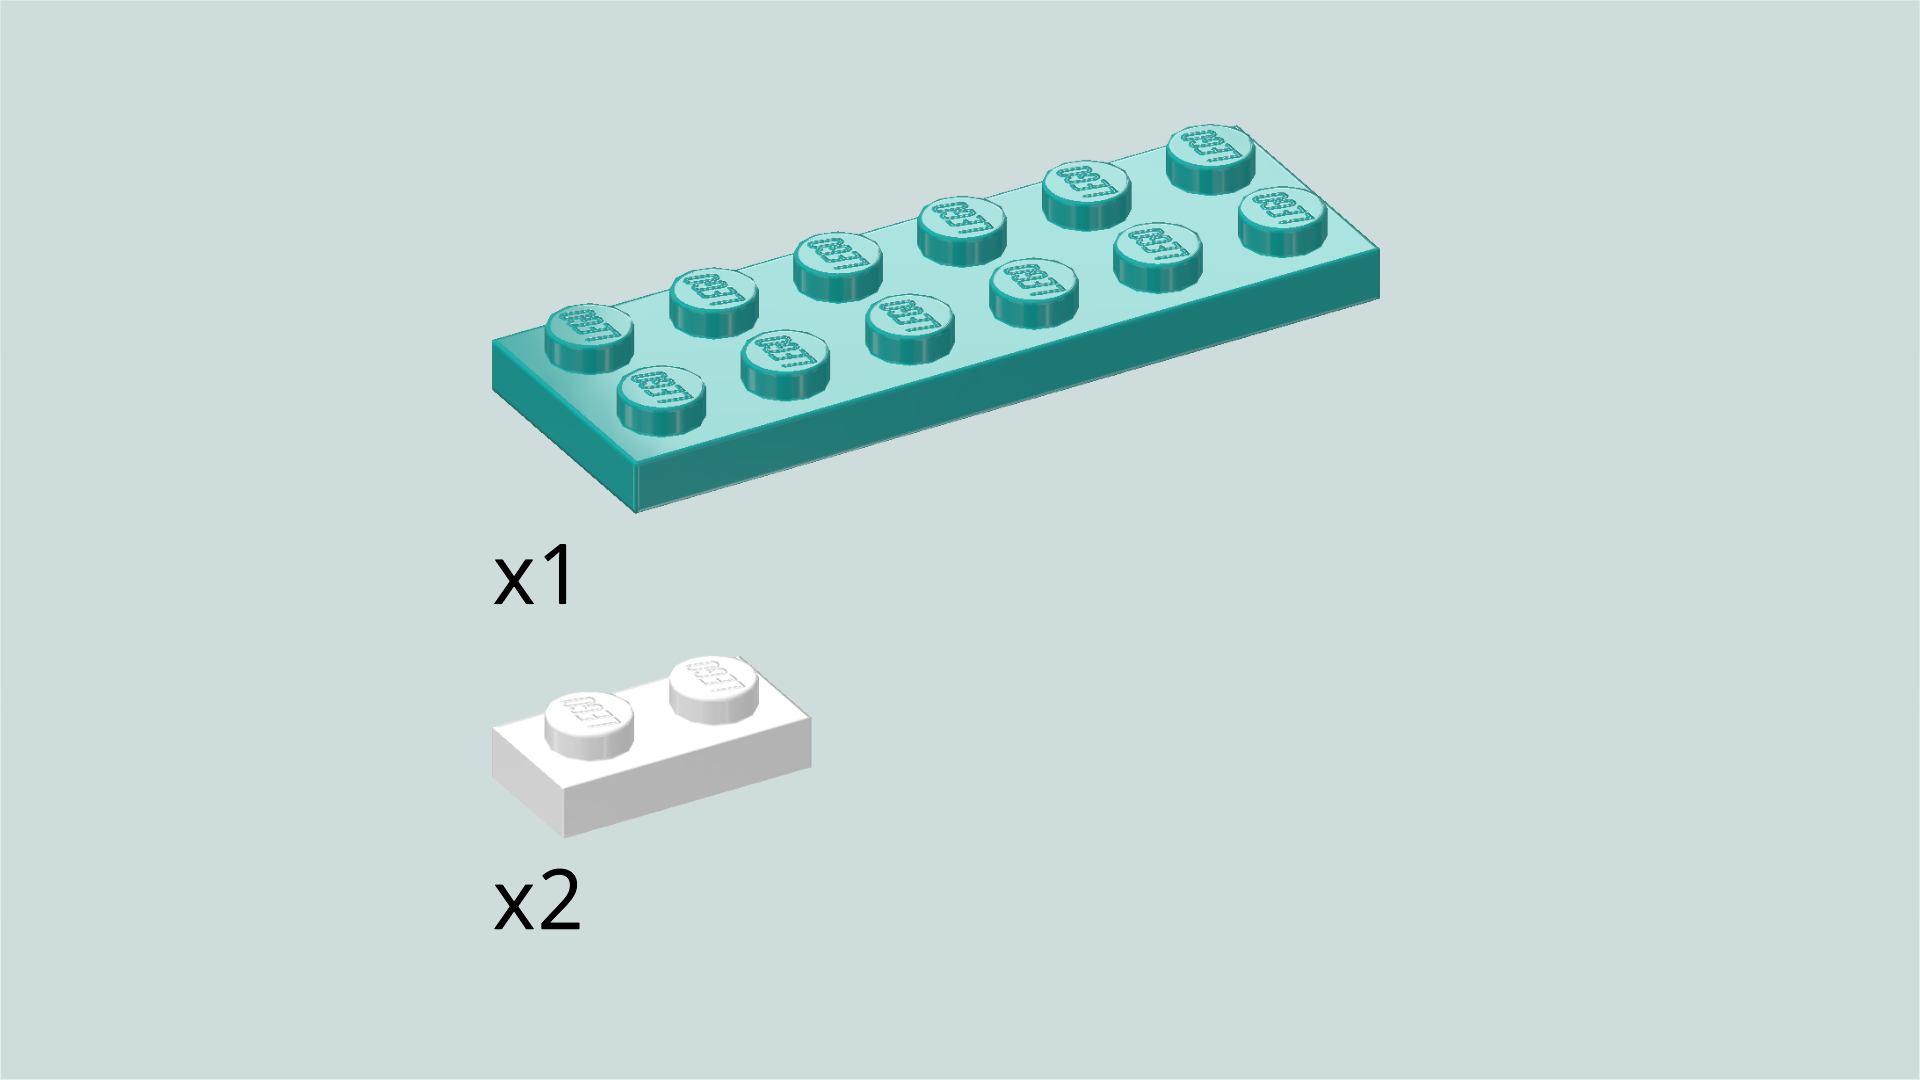
| Next, we will build the soccer goal. |
| Collect the following 3 pieces: |
| 1 teal blue plate 2x6, |
| and 2 white plates 1x2. |
| Put the plate 2x6 horizontally on the table. |
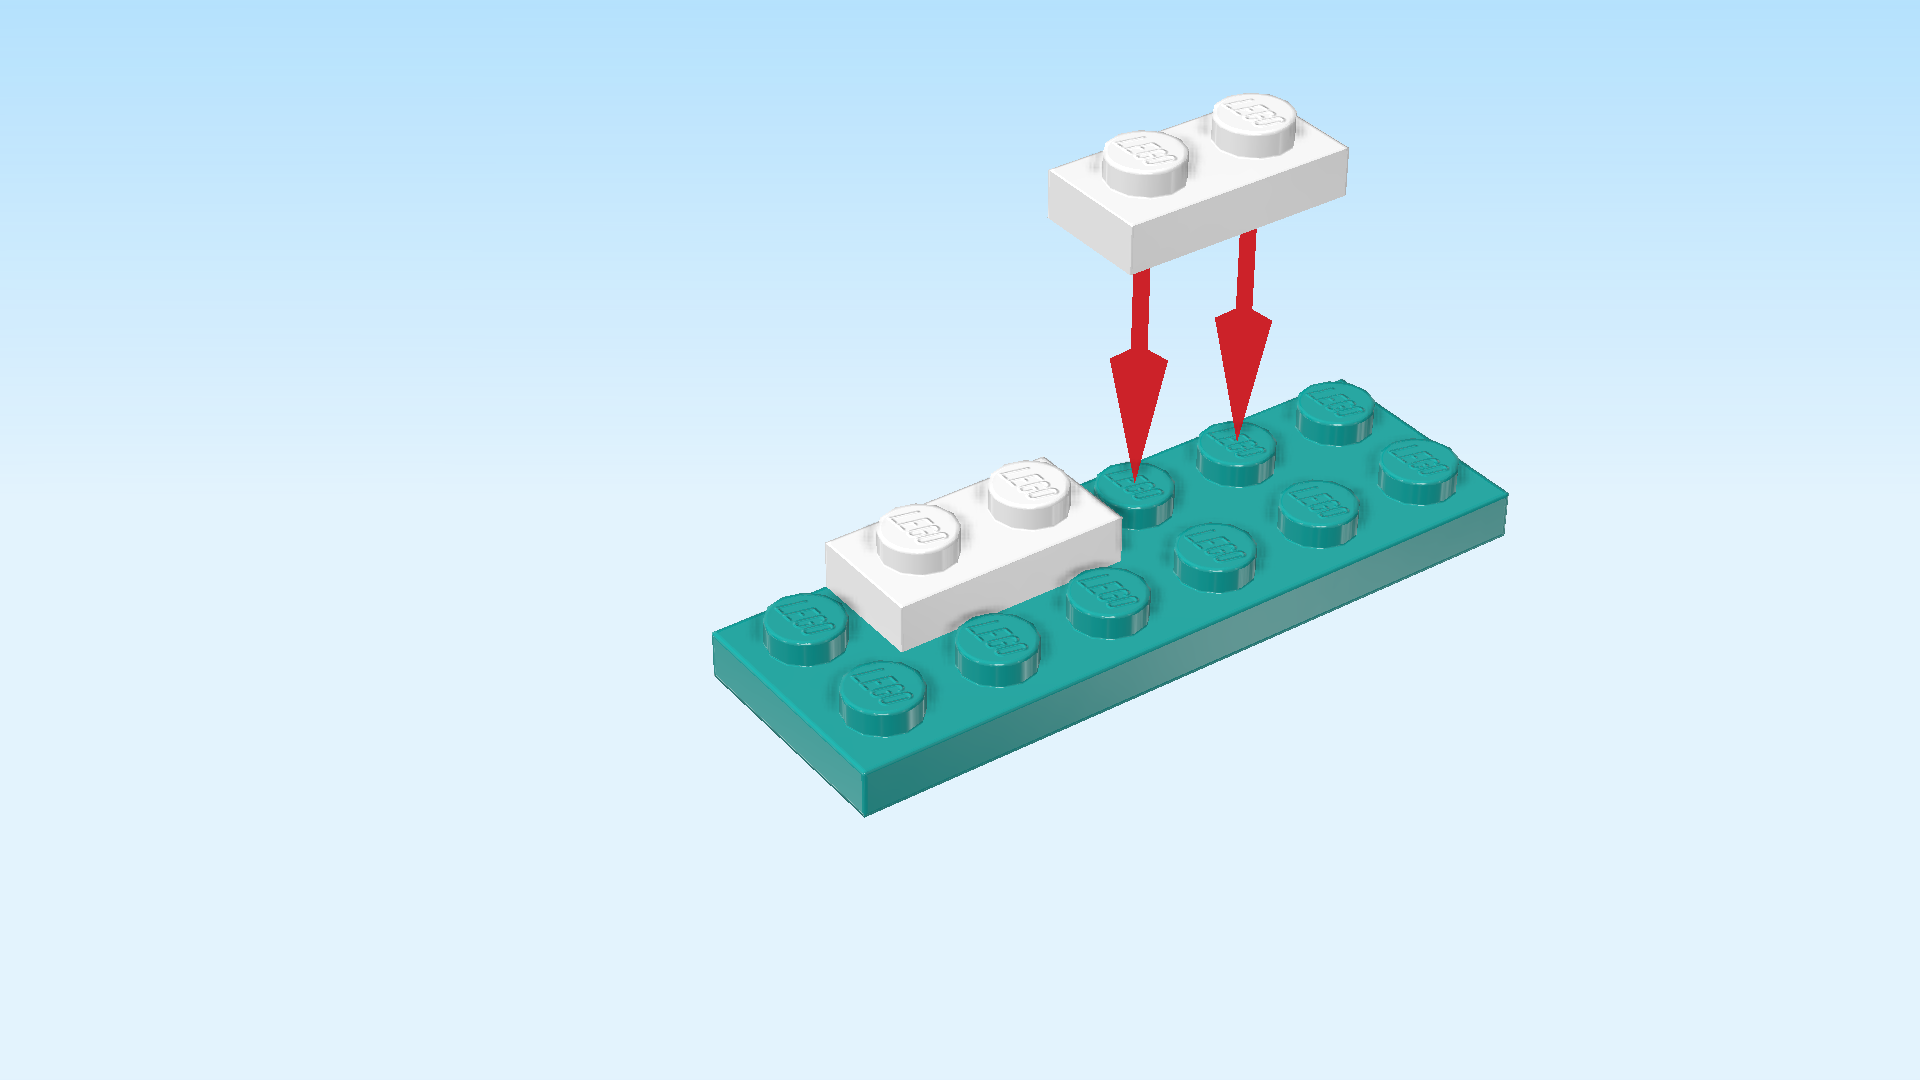
| Skip the leftmost column, and put 1 plate 1x2 horizontally on the back row. |
| Put the other plate 1x2 horizontally to the right of the previous piece, leaving the rightmost knob empty. |
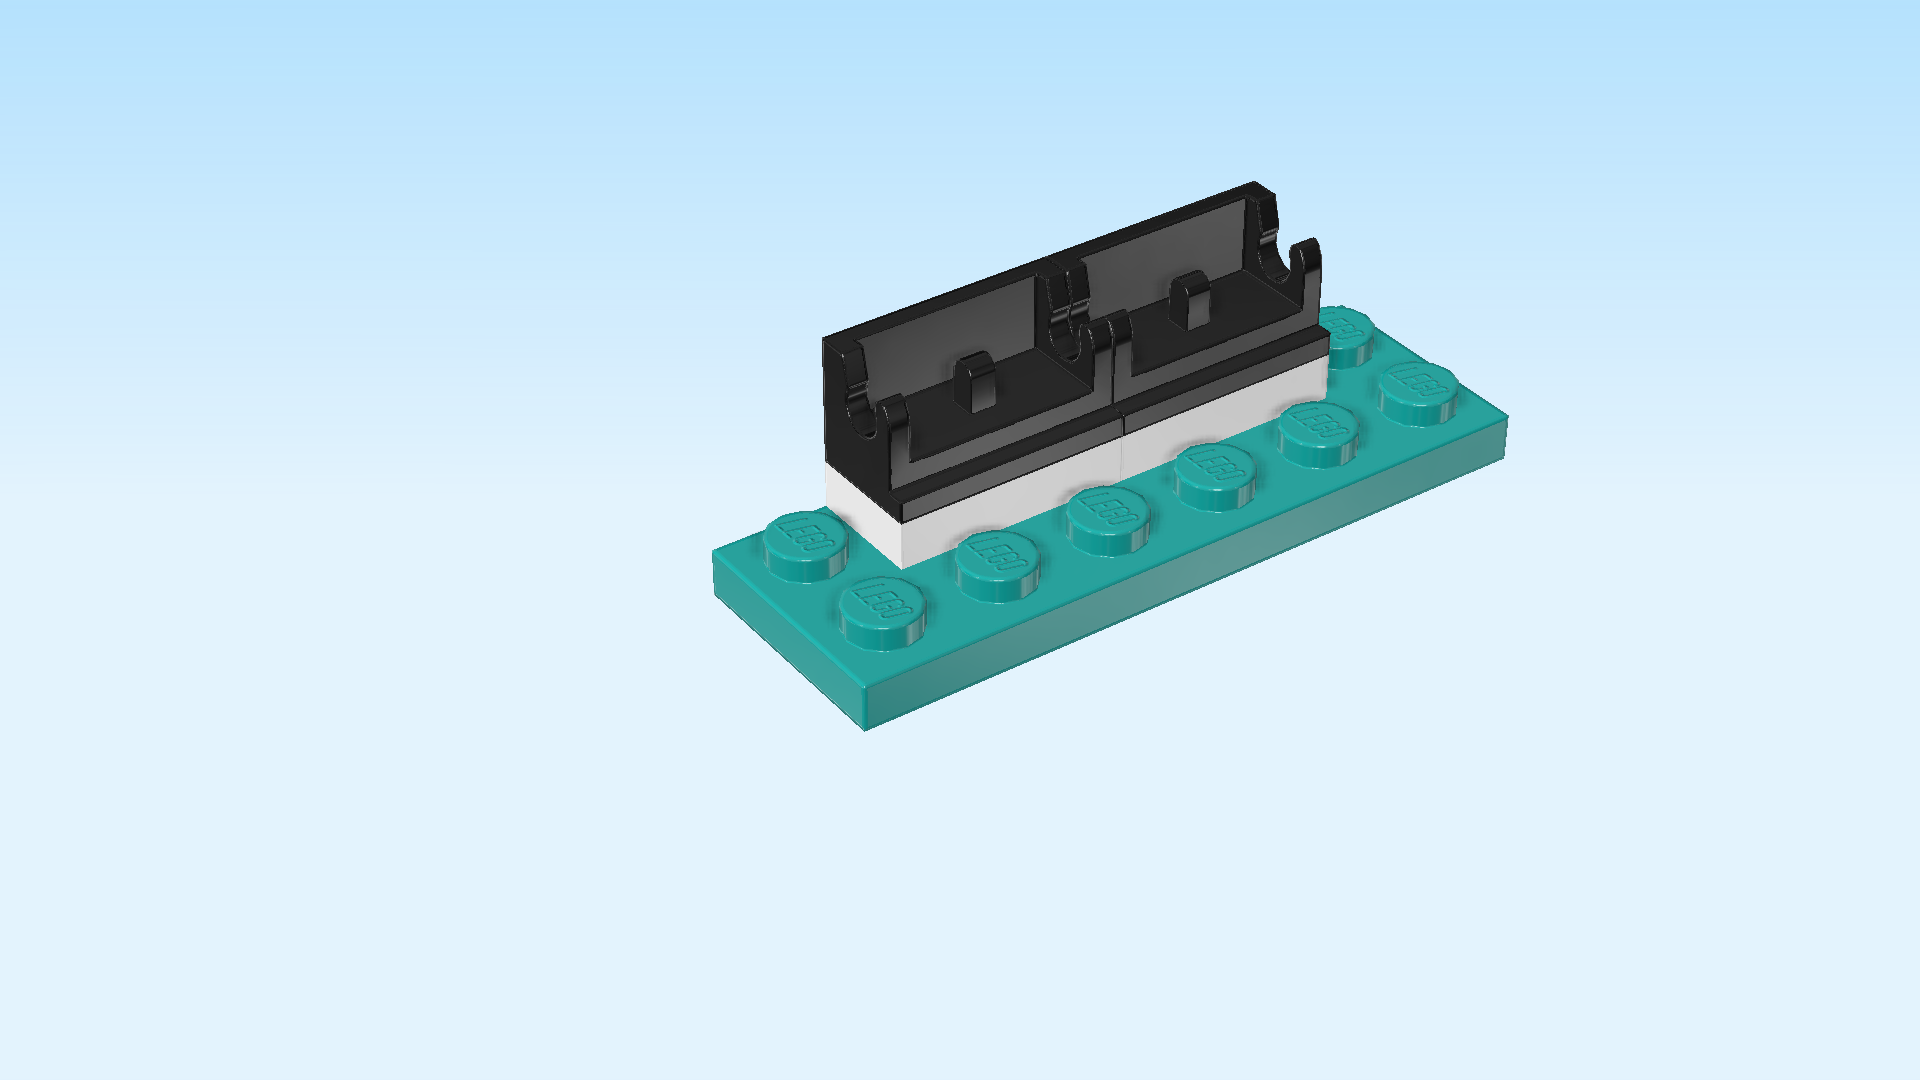
| Find 2 black panel elements 1x2 with top hinge mounting. |
| Put them horizontally next to each other on top of the two previous pieces, side panels to the back. |
| Find 2 black plates 1x2 with 2 bottom hinge stubs. |
| Snap the bottom hinge stubs of those plates into the hinge mountings of the 2 previous pieces. |
| If done correctly, you should be able to move the plates in their hinges. The knobs can point to the top or more to the front. For now, however, make sure they are both in their top position. |
| Find 1 black fence element 1x4x2. |
| Put it horizontally on top of the 2 previous pieces. For now, keep the hinges in their topmost position. |
| Next, we build the 2 side goalposts. |
| Collect the following 4 pieces: |
| 2 teal blue plates 1x1, |
| and 2 white bricks 1x3x2 with inverted half-arch. |
| Put the 2 plates 1x1 next to each other on the table. |
| Turn 1 brick 1x3x2 vertically so that its half-arch is towards the back. |
| Repeat symmetrically with the other pieces. |
| Mount one side goalpost vertically on the leftmost column of the soccer goal, its highest third overhanging to the front. |
| Next up, we will build the top goalpost. |
| Collect the following 2 pieces: |
| 1 white flat tile 1x4, |
| and 1 white plate 1x2. |
| Put the plate 1x2 horizontally on the table. |
| Put the flat tile 1x4 horizontally centered on top, symmetrically overhanging to the left and right. |
| Find 2 white curve bricks 1x1 with protruding plate. |
| Put one horizontally on the left side goalpost, curve to the left, protruding plate to the right. |
| Next, we will build 2 water bottles. |
| Collect the following 4 pieces: |
| 1 teal blue round plate 1x1, |
| 1 teal blue round brick 1x1, |
| 1 bright yellow round brick 1x1, |
| and 1 bright yellow round plate 1x1. |
| Put the 2 round bricks next to each other on the table. |
| Put the 2 round plates on top of one round brick each. If you want, you can mix and match the colors or make one teal-colored and one yellow bottle. |
| Find 2 pale lime green round tiles 1x1 with small top shaft. |
| Put one on each water bottle. |
| The 2 water bottles are finished! Great job! |
| Find 1 bright orange ball with soccer ball carvings. |
| The soccer goal is finished! Well done! Now it's time to score some goals! Who goes first? |
| You have actually finished building the entire set. Very well done, what an intricate, yet fun build! Time to film some baking videos for Leo's baking channel, play with Churro the grumpy cat, play some soccer, or, if the weather is nice, go to the beach to surf or go for a dive! When everything is said, played and done, it's time to get into the bunk beds and say good night. |
| Enjoy! |