| LEGO Audio & Braille Building Instructions for the LEGO Friends set "Baby Elephant Jungle Rescue". |
| Prepare for a race against the clock. Stephanie has discovered a baby elephant who has gotten trapped in quicksand. It's beginning to sink - and worse - there's a giant, scary spider climbing towards it. There's not a minute to lose! |
| Use your cunning to work with Stephanie and Emma to figure out how to use the truck to free the elephant. It will need some special care when it's freed - feed it a soothing bottle then load it onto the trailer and take it back to the Jungle Rescue Base. |
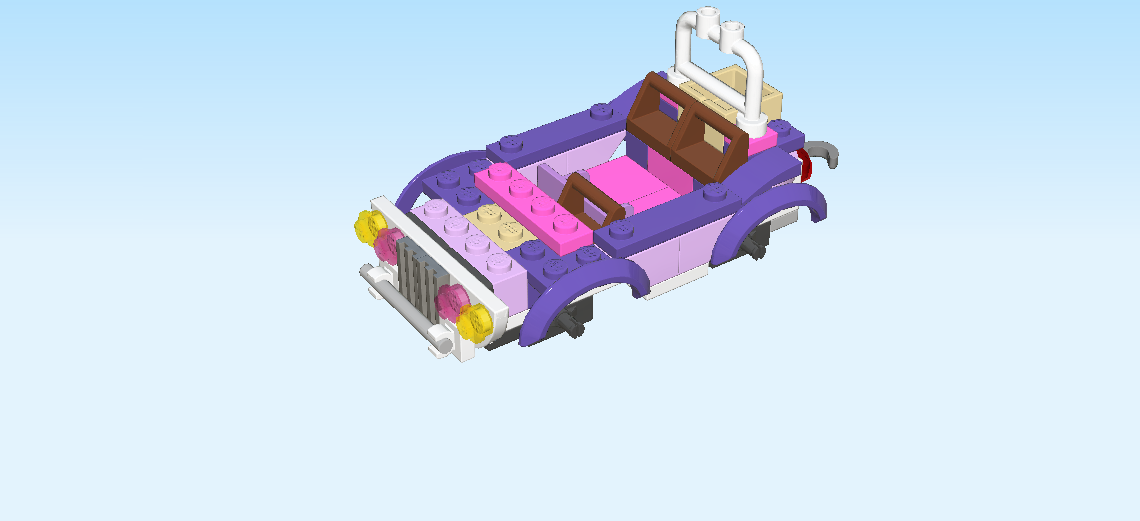
| On the box cover, the lilac Jungle Rescue truck with trailer is at the very front. Emma is sitting behind the steering wheel. Stephanie is standing next to the truck holding the walkie talkie to ask for help. At the back of the scene, the baby blue baby elephant is trapped in the quicksand surrounded by a rock formation. The quicksand pit has a sliding function, so there will be a way to free the baby elephant! There also is a beautiful huge palm tree and many jungle flowers, and a warning sign for quicksand. |
| Open the box. This can be tricky; ask someone to help you! |
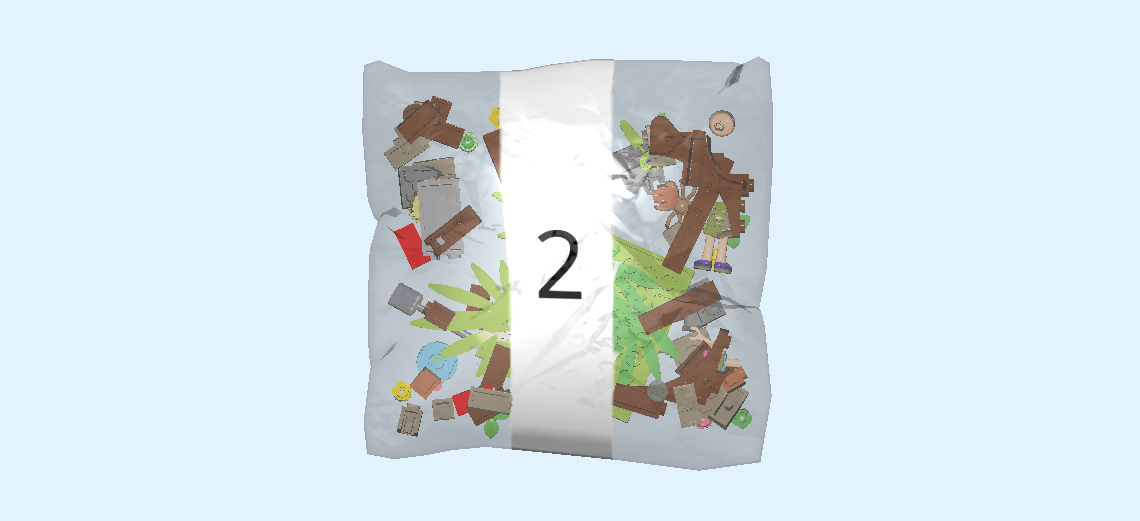
| The box contains two booklets with visual building instructions, a small sheet with stickers, and two plastic bags with numbers 1 and 2 printed on them; ask a sighted person to help you find the correct bag! |
| Carefully open bag number 1 and any small sub-bags in it. This bag contains all bricks and pieces for the Emma Minidoll and the Jungle Rescue truck plus trailer. |
| Before you start building, ask a sighted person to help you sort the pieces by color. This makes finding the correct pieces even easier! |
| First, we will build the Emma Minidoll. |
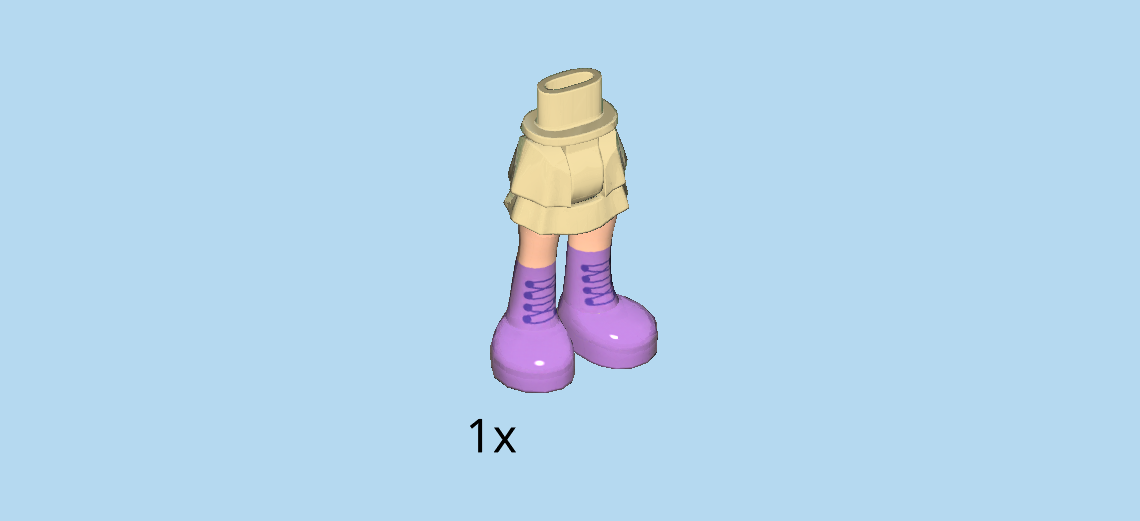
| Find 1 light nougat brown and pale ocher yellow pair of legs with skirt. |
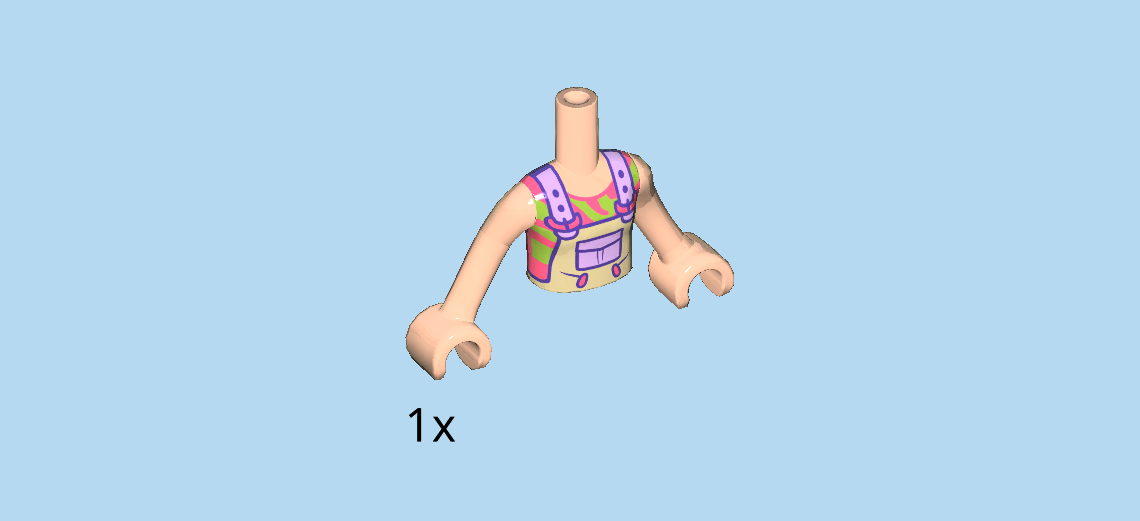
| Find 1 light nougat brown and pale ocher yellow Minidoll upper body. |
| Put it on top of the legs. |
| Find 1 light nougat brown head. |
| Put it on top. |
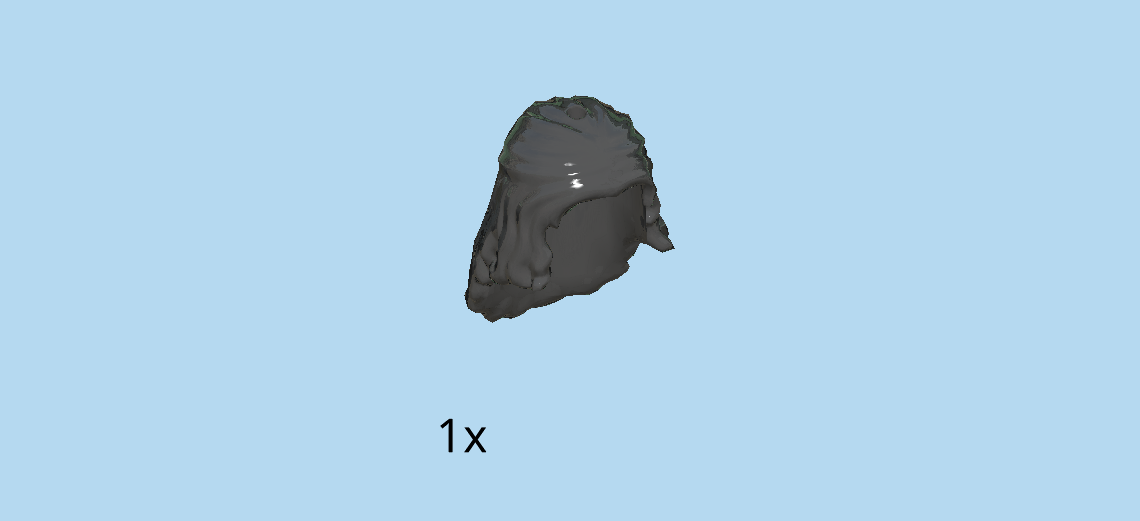
| Find 1 black hairpiece with tied-back bangs. |
| Put it on the head. |
| Next, we will build Emma's walkie-talkie. |
| Find 1 black walkie-talkie plate 1x2 with antenna. |
| Put it on the table. |
| Find 1 salmon pink heart-shaped tile 1x1. |
| Put it on the knob next to the antenna. |
| Now, snap the handle of the walkie-talkie into Emma's hand. |
| The Emma Minidoll is finished! Well done! Emma has black curly hair, and she is wearing lavender-colored boots, as well as a khaki pinafore dress with lavender straps and a lavender chest pocket. Underneath, she wears a tank top with neon green and pink stripes. She has brown eyes and a friendly smile on her face. Emma really loves animals. What about you? |
| Next, we will build the truck trailer. |
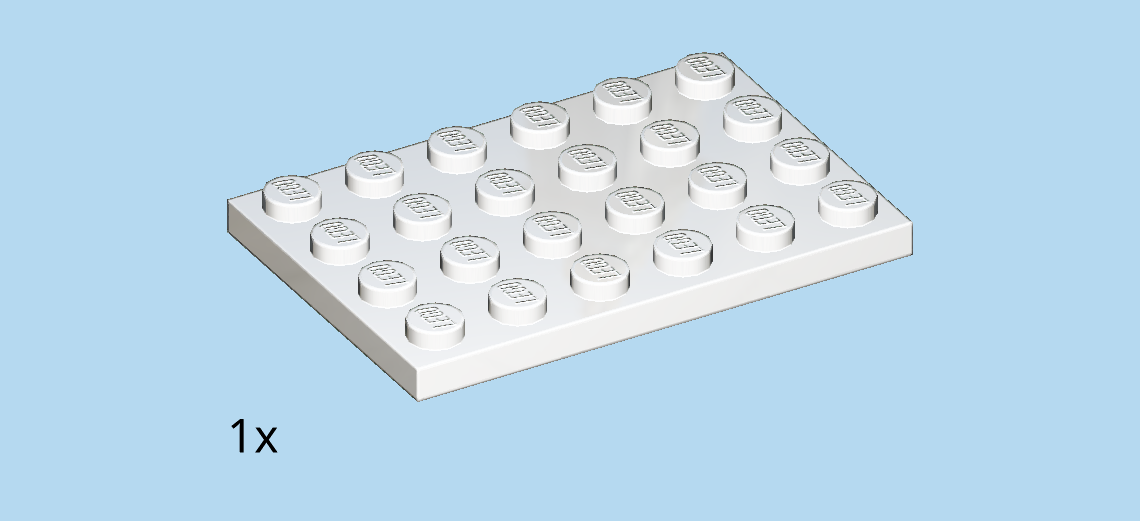
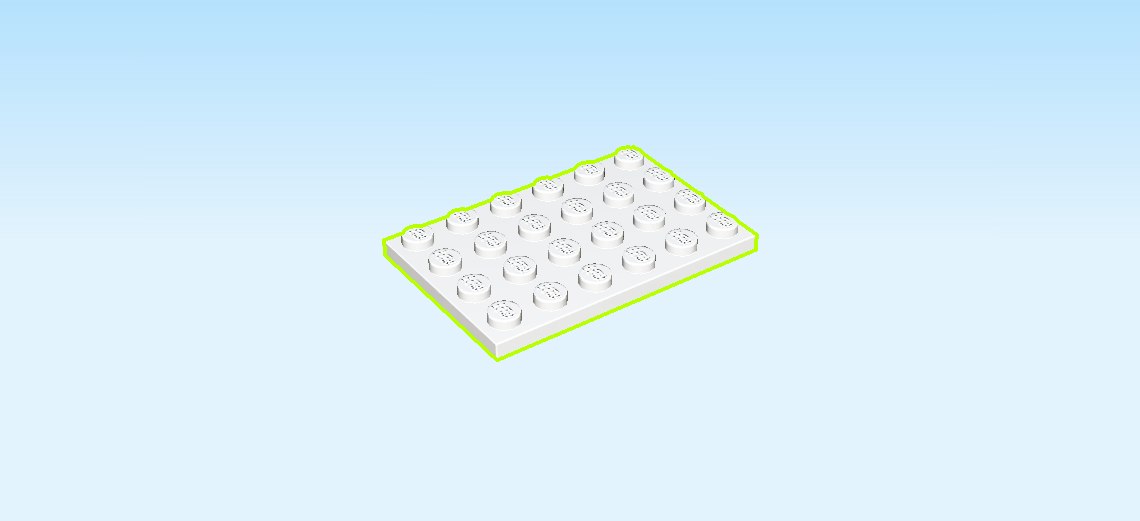
| Find 1 white plate 4x6. |
| Put it horizontally on the table. |
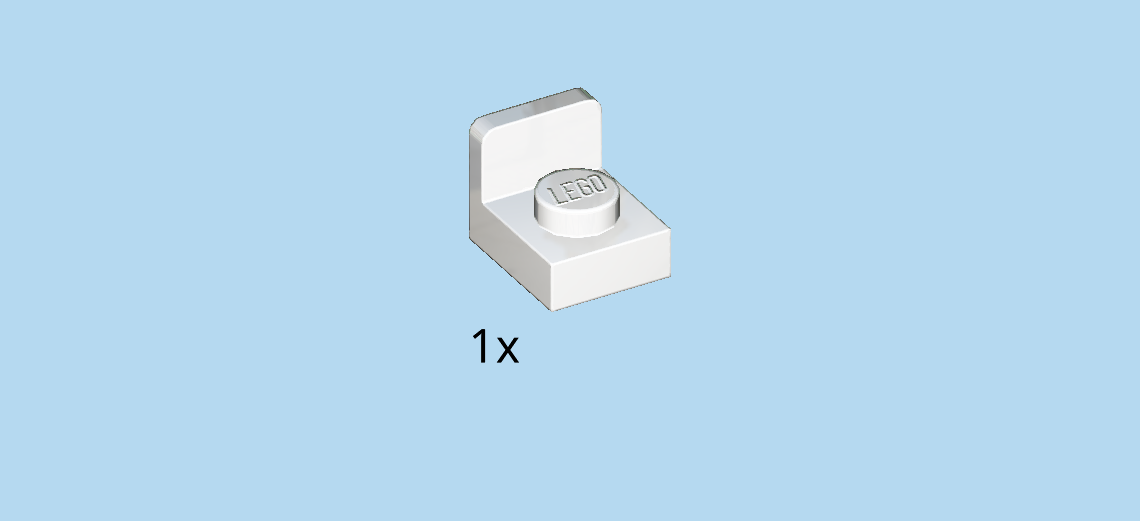
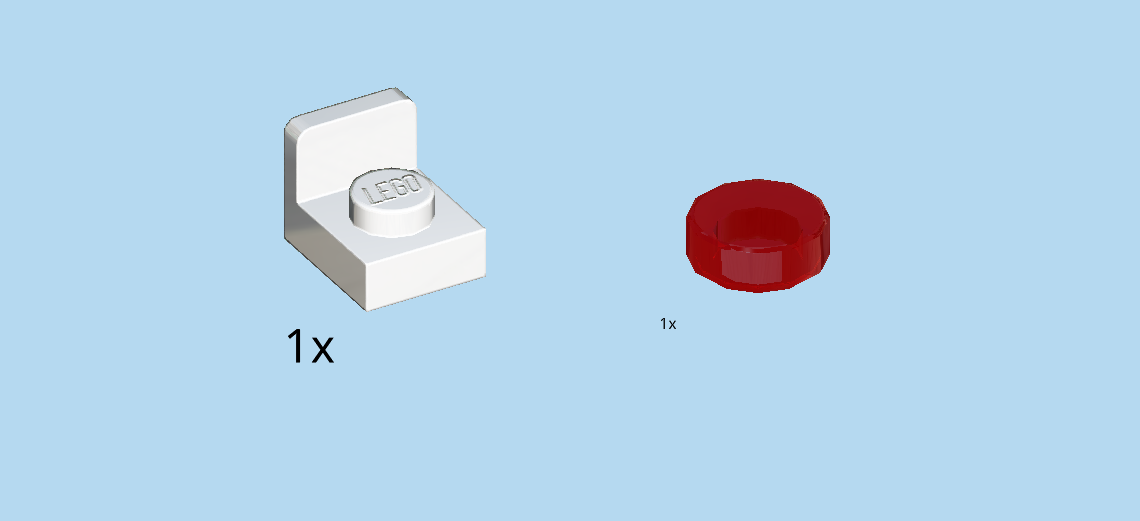
| Find 1 white bottom angle plate 1x1 - 1x1 with side knob. |
| Put it on the table. Make sure the hollow is to the bottom, and the side panel with side knob is to the right. |
| Find 1 transparent red round tile 1x1. |
| Put it upright on the side knob of the angle plate 1x1. |
| Now, put this small part on the rightmost knob of the front row, side knob and round tile to the right. |
| Collect the following 2 pieces: |
| 1 white bottom angle plate 1x1 - 1x1 with side knob, |
| and 1 transparent red round tile 1x1. |
| Repeat what you did before: put the round tile 1x1 on the side knob of the angle plate. |
| Put this part on the rightmost knob of the back row, round tile to the right. |
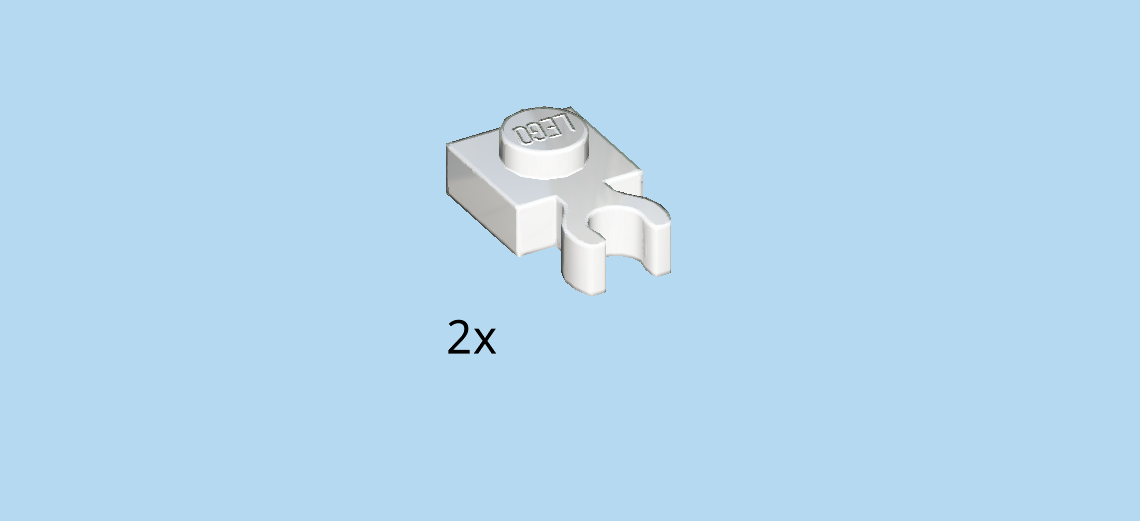
| Find 2 white plates 1x1 with horizontal side clasp. |
| Put 1 to the left of the previous piece, clasp to the back. |
| Repeat symmetrically at the front. |
| Collect the following 3 pieces: |
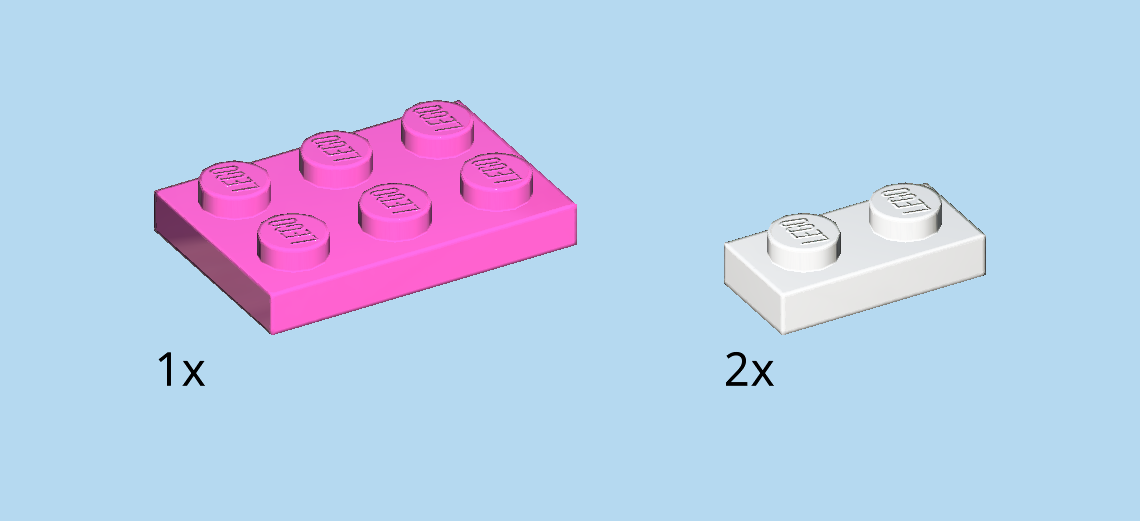
| 2 white plates 1x2, |
| and 1 bright purple plate 2x3. |
| Skip the leftmost column, and put the plate 2x3 horizontally on the two middle rows. |
| Put 1 plate 1x2 horizontally to the left of the previous piece. |
| Repeat symmetrically at the front. |
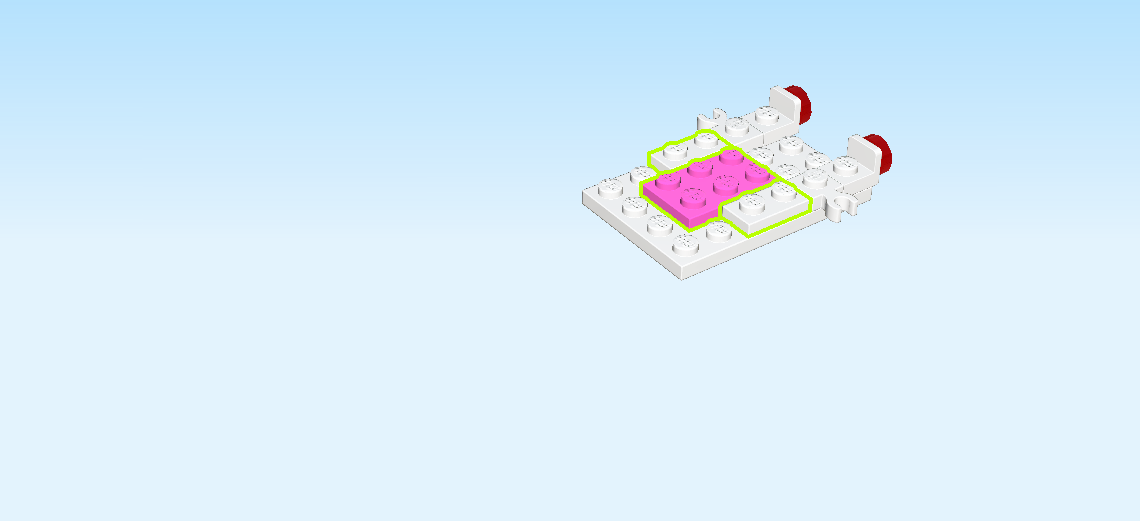
| Collect the following 3 pieces: |
| 2 white plates 1x2 with vertical clasp on long side, |
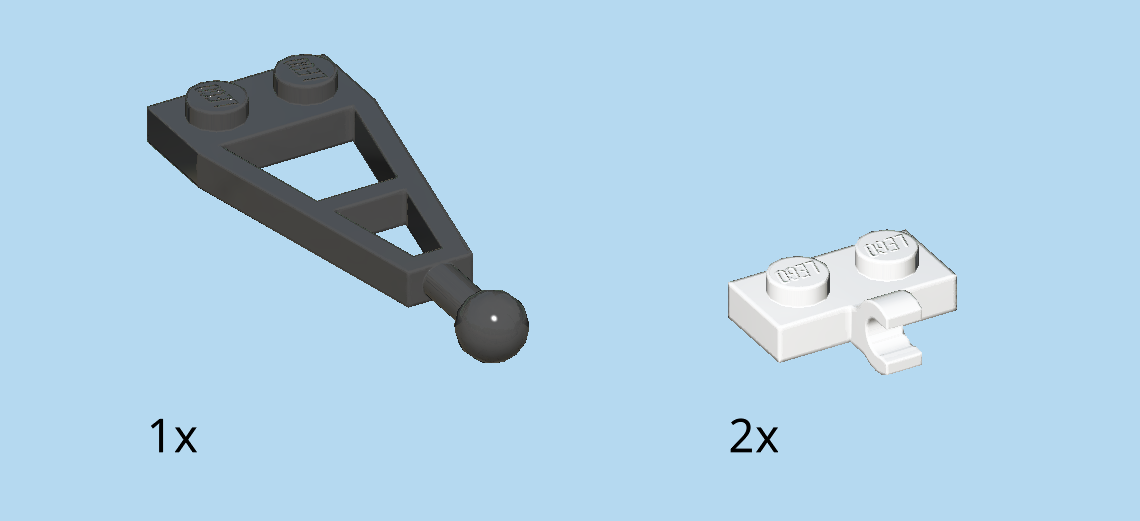
| and 1 black plate 1x2 with towing extension and ball. |
| Put the plate 1x2 with towing extension and ball vertically centered on the leftmost column, towing extension overhanging to the left. |
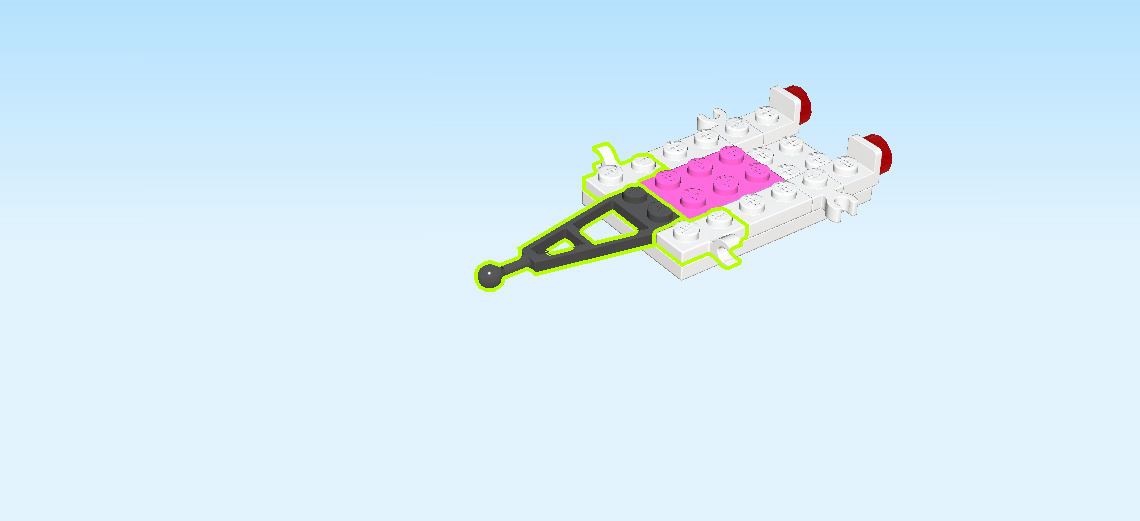
| Put 1 plate 1x2 with clasp horizontally on the back row on the left edge, clasp to the back. |
| Repeat symmetrically at the front. |
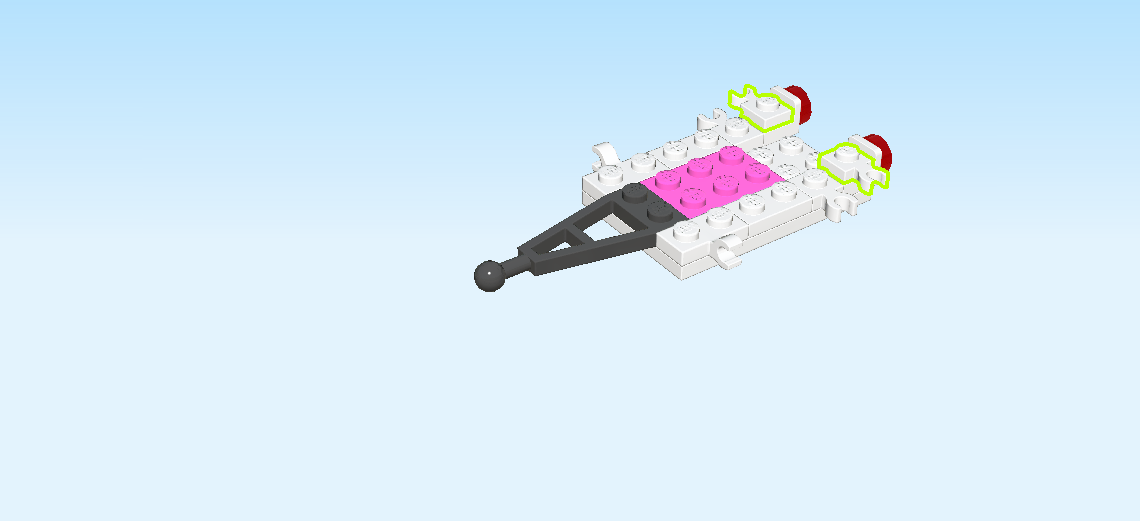
| Find 2 white plates 1x1 with horizontal side clasp. |
| Put 1 on the rightmost knob of the back row, clasp to the back. |
| Repeat symmetrically at the front. |
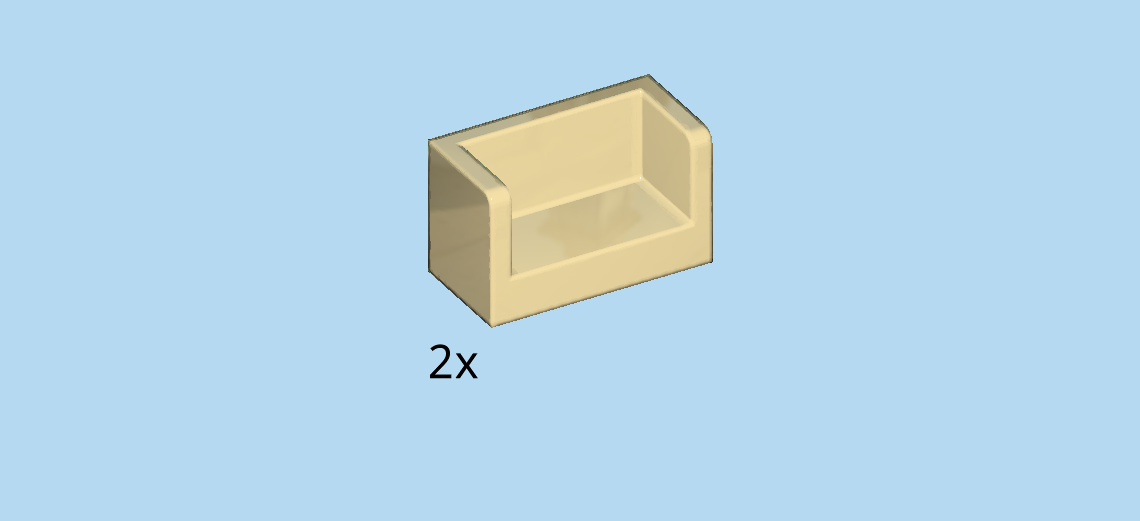
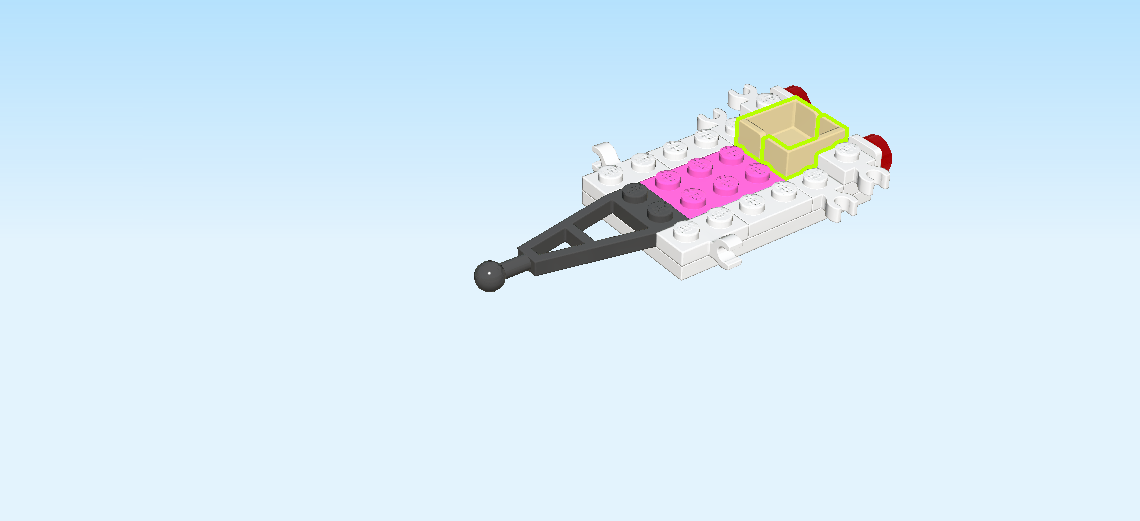
| Find 2 pale ocher yellow small panel elements 1x2x1 with sides. |
| Let's make a little box with them. Put 1 horizontally on the second row from the front on the right edge, long panel to the front. |
| Put the other one horizontally behind the previous piece, long panel to the back. |
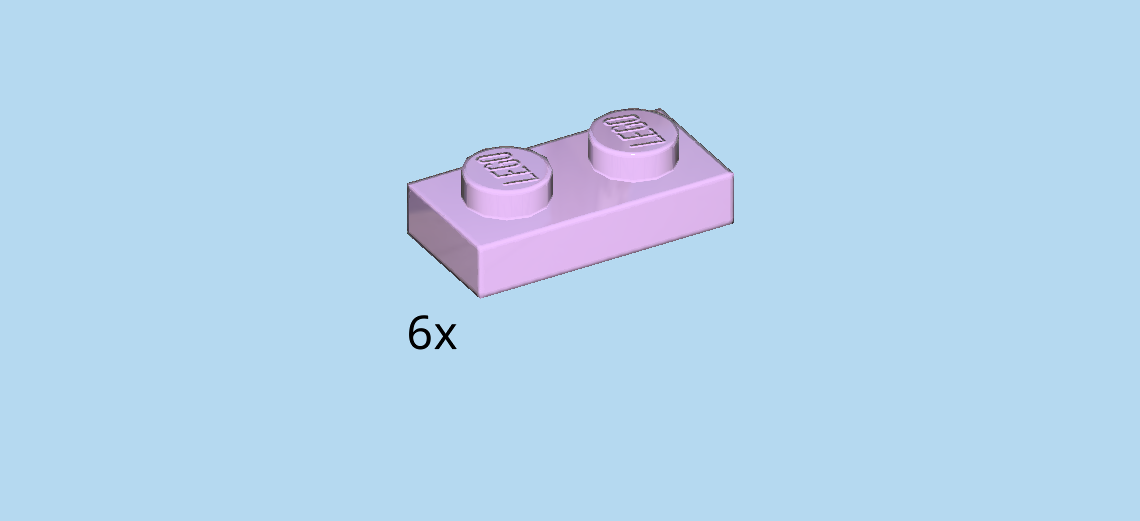
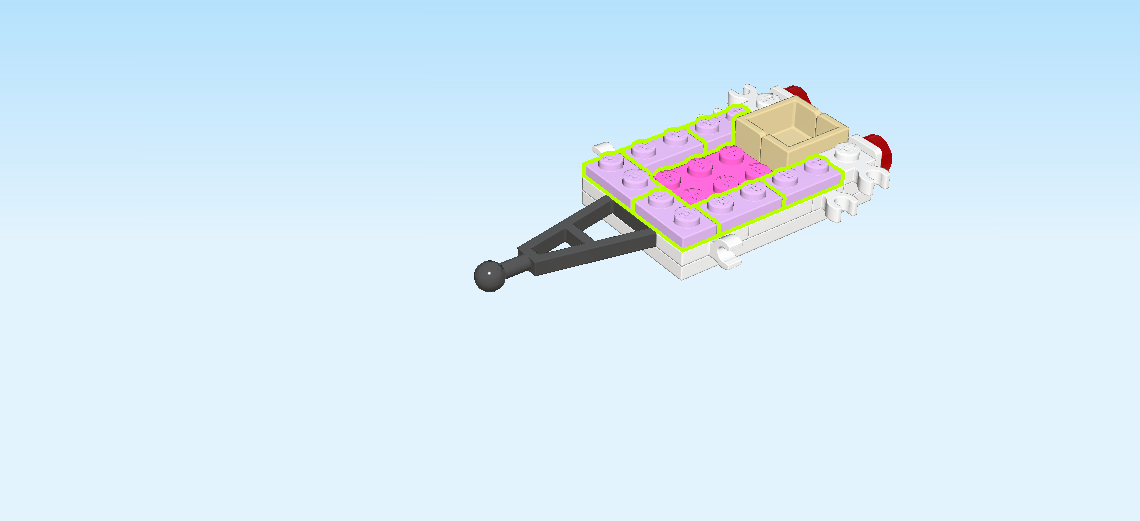
| Find 6 light lavender plates 1x2. |
| Put 2 horizontally next to each other on the back row in the middle. |
| Repeat symmetrically at the front. |
| Put 2 vertically on the leftmost column. |
| Collect the following 3 pieces: |
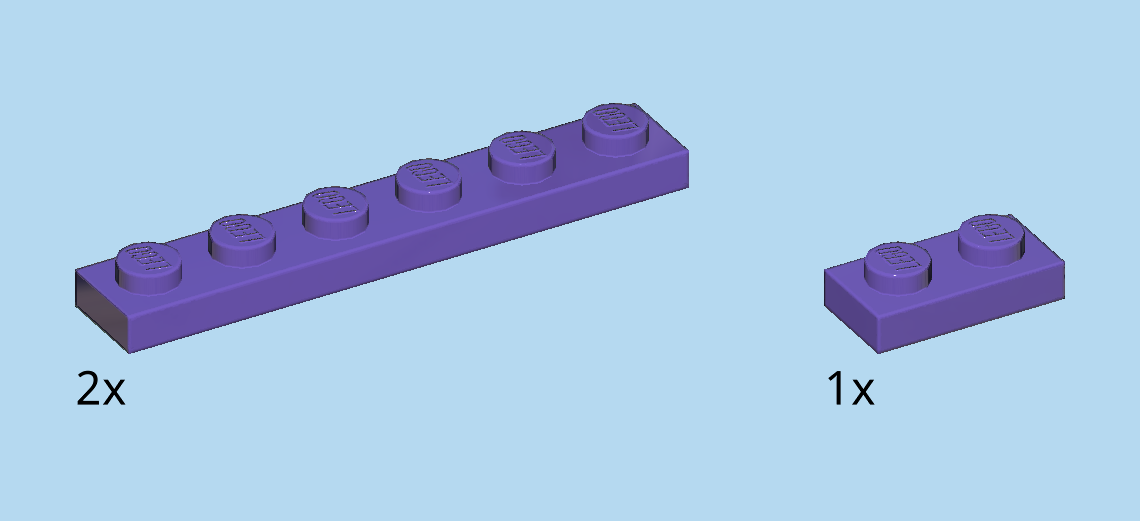
| 2 medium lilac plates 1x6, |
| and 1 medium lilac plate 1x2. |
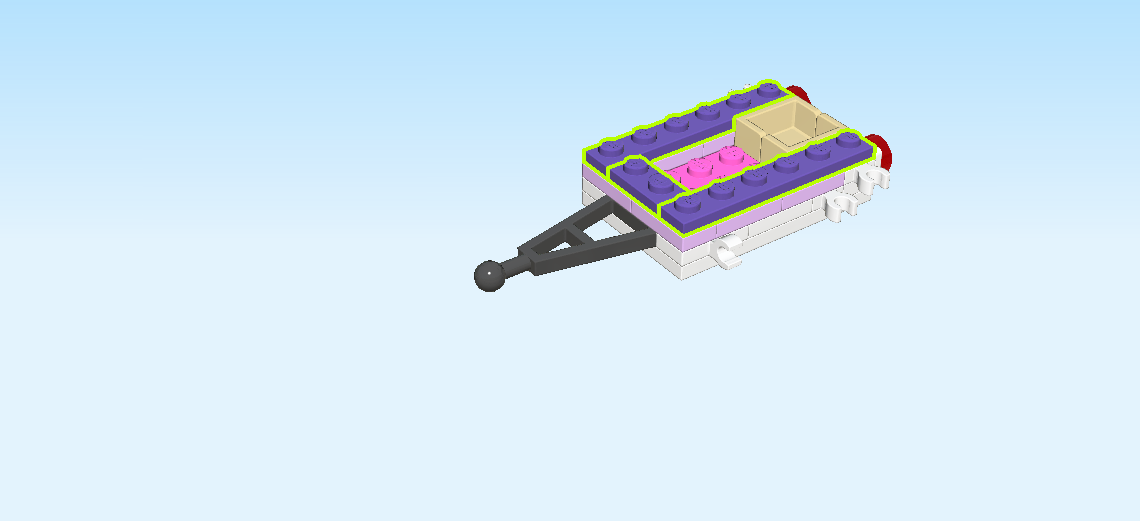
| Put 1 plate 1x6 horizontally on the back row. |
| Put the plate 1x2 vertically centered on the leftmost column. |
| Put the other plate 1x6 horizontally on the front row. |
| Next up, we will build the trailer axle. |
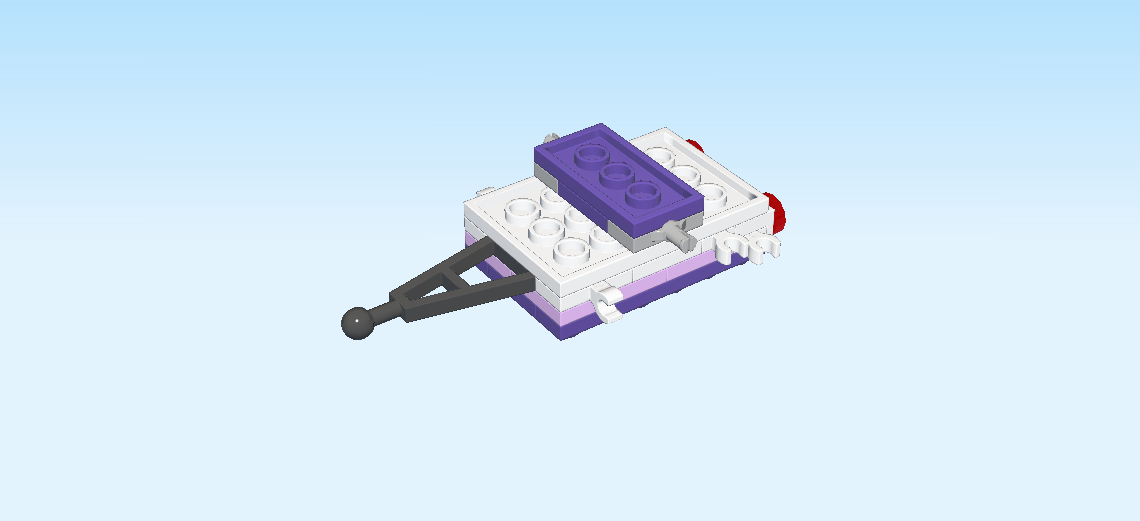
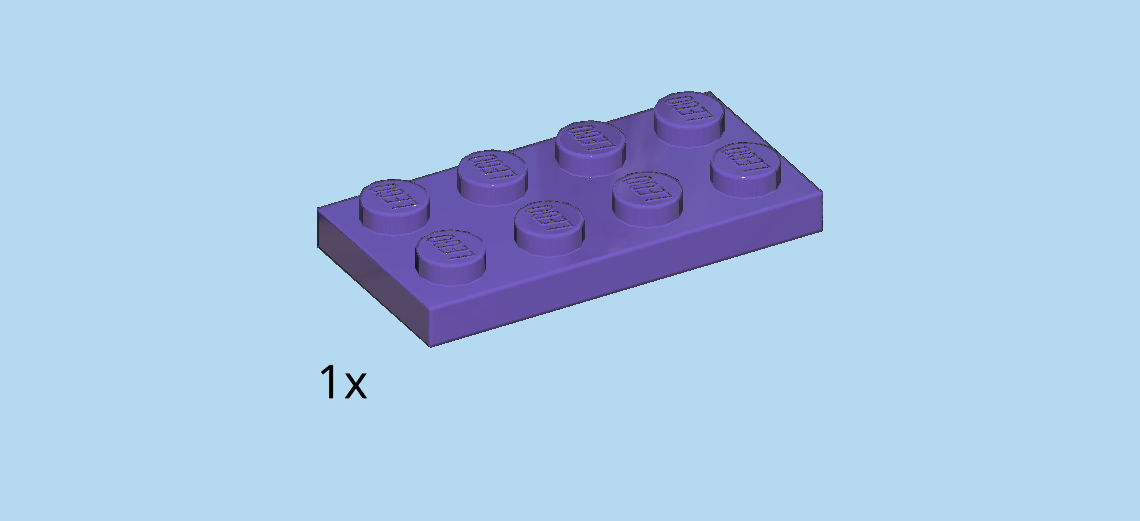
| Find 1 medium lilac plate 2x4. |
| Put it horizontally on the table. |
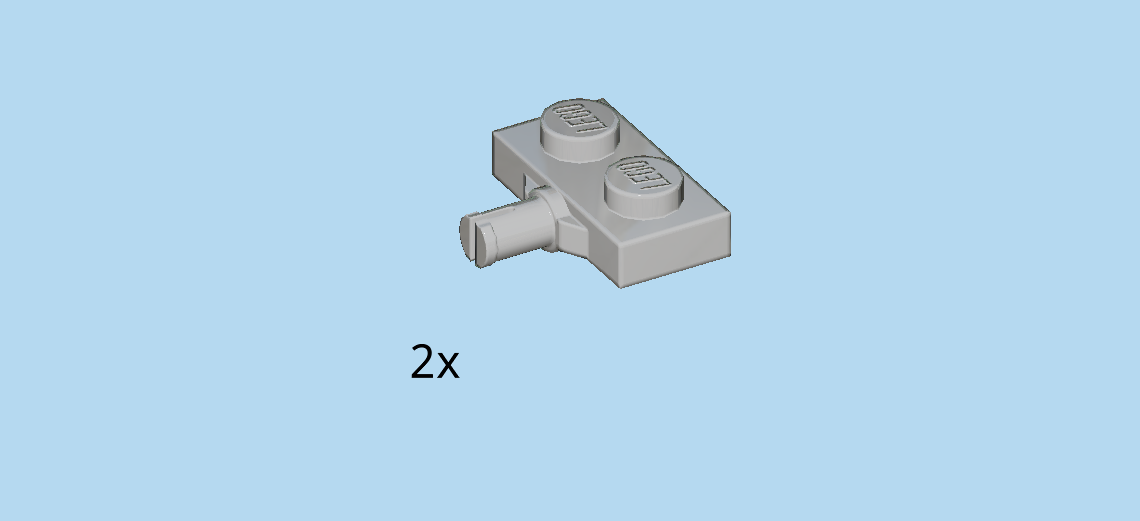
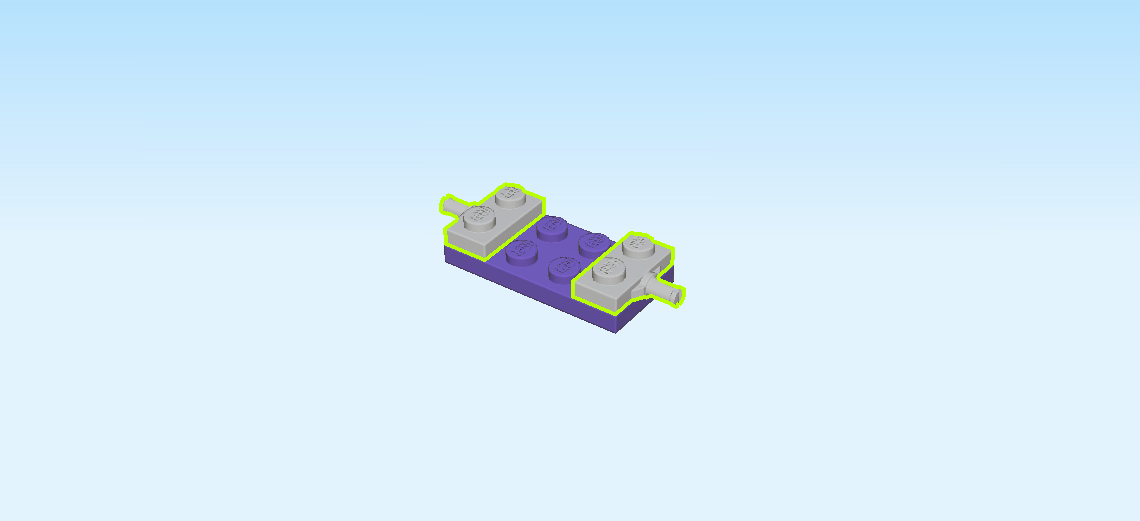
| Find 2 medium stone grey plates 1x2x⅓ with side pin connector. |
| Put 1 vertically on the rightmost column, pin connector to the right. |
| Repeat symmetrically on the left. |
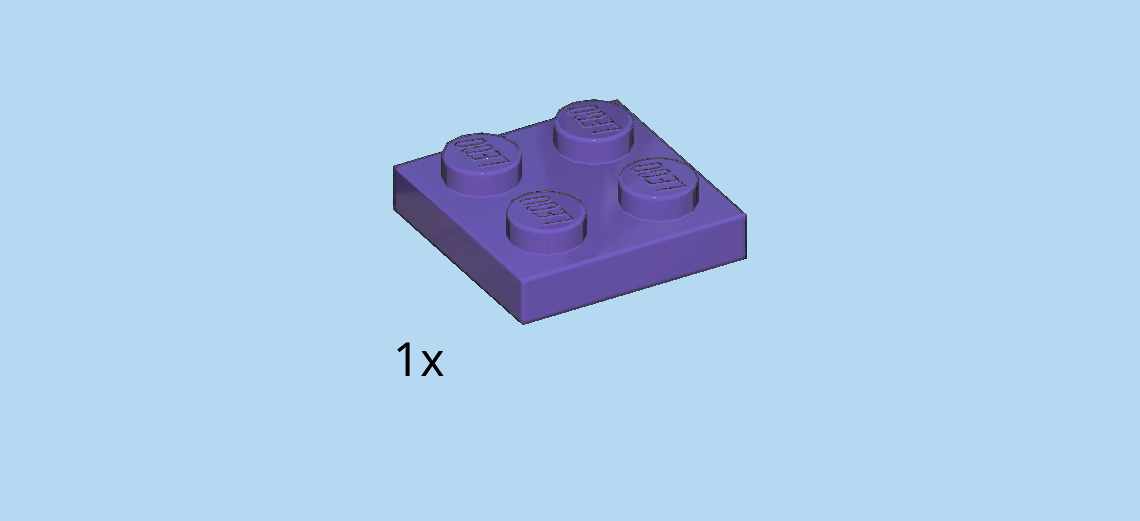
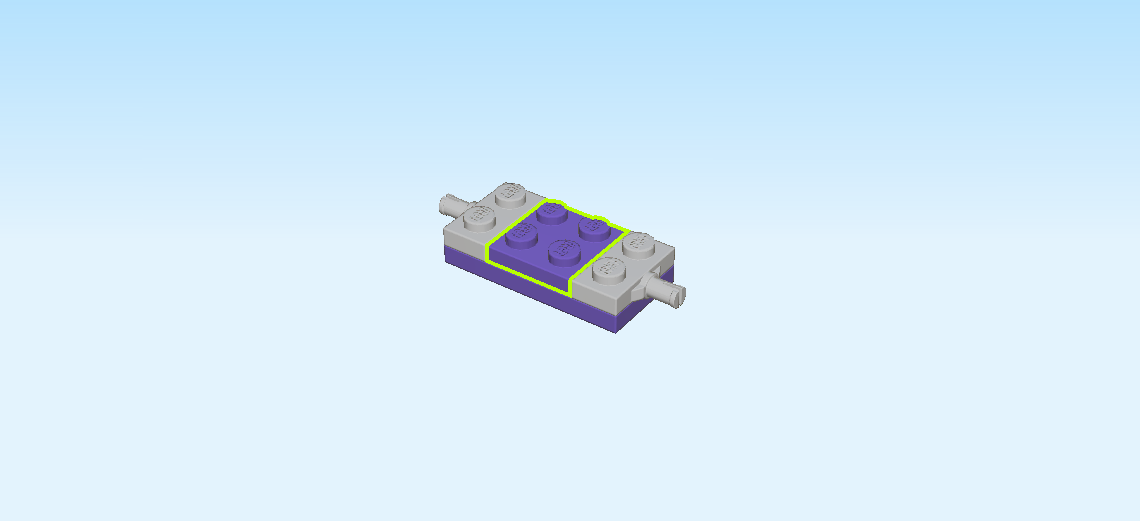
| Find 1 medium lilac plate 2x2. |
| Put it between the two previous pieces. |
| The trailer axle is finished! Well done! |
| First, flip the trailer itself upside down. Make sure the towing extension remains on the left. |
| Then, flip the trailer axle upside down, and mount it vertically centered on the two middle columns, pin connectors to the front and back. Great job! |
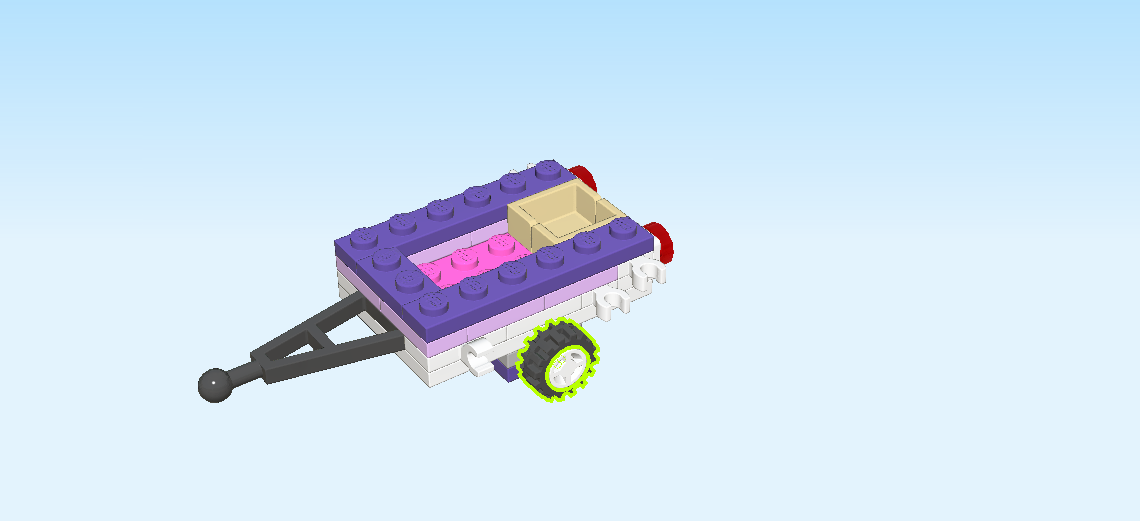
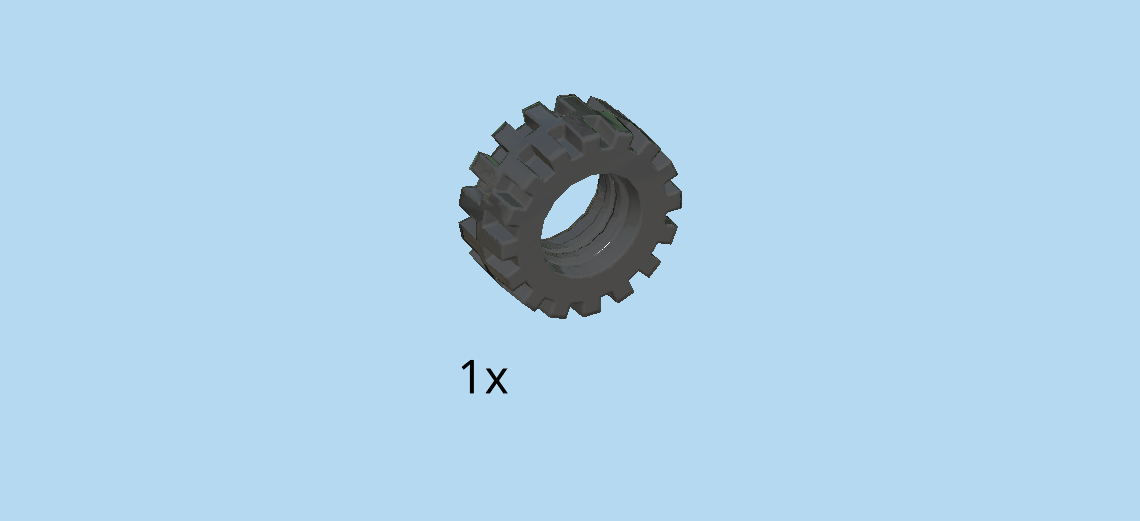
| Next, we will build 2 wheels. |
| Find 1 white narrow rim with cross hole. This is a small rim; don't confuse it with the large rims for the truck. |
| Find 1 black narrow rubber tire with high profile. This is a small tire; don't confuse it with the large tires for the truck. |
| Put the tire around the rim. |
| Now, find another rim and another tire. Assemble the second wheel just like the first one. |
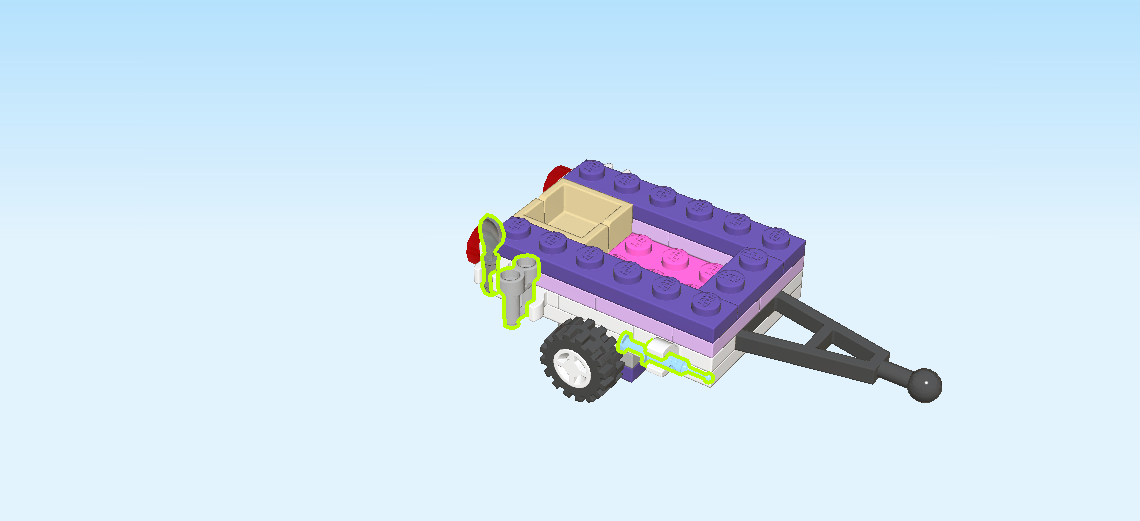
| The wheels are finished! Good job! Snap the two wheels on the connectors of the truck trailer. |
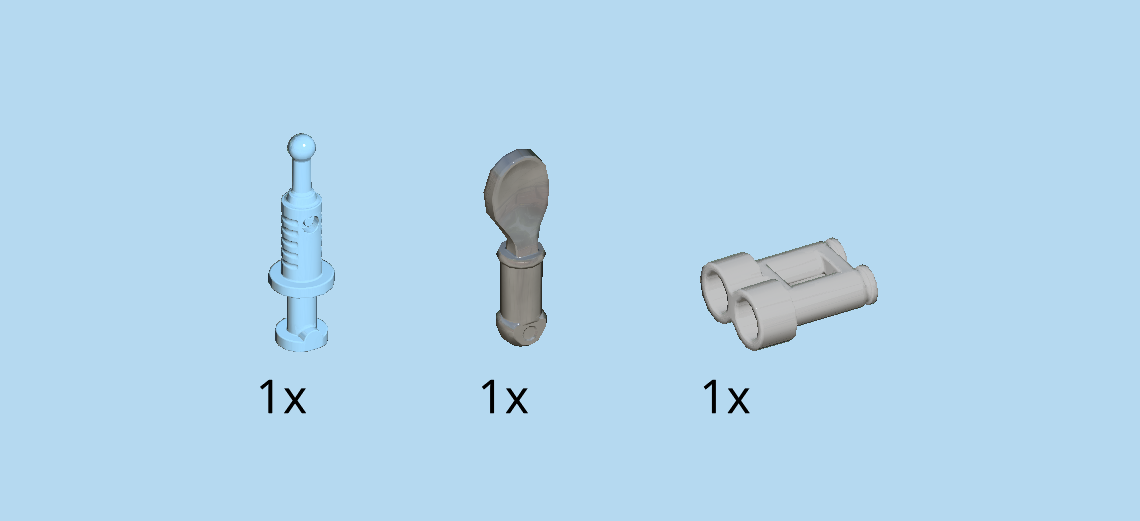
| Collect the following 3 pieces: |
| 1 silver metallic kitchen spoon, |
| 1 medium stone grey pair of binoculars, |
| and 1 baby blue injection syringe. |
| Snap these three items into the side clasps on either side of the truck trailer. This way, Emma and Stephanie will have all their equipment at the ready. |
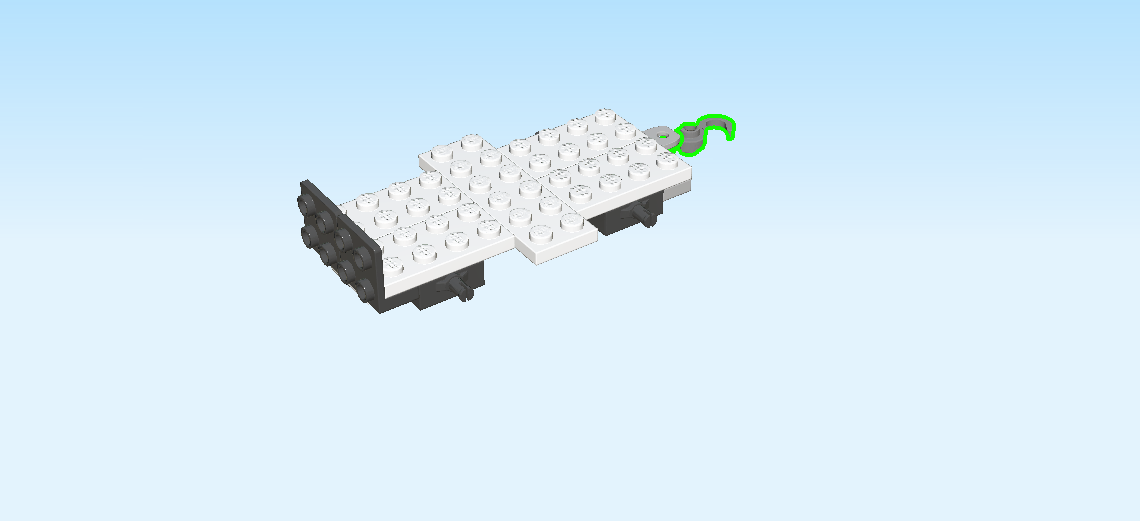
| Collect the following 2 pieces: |
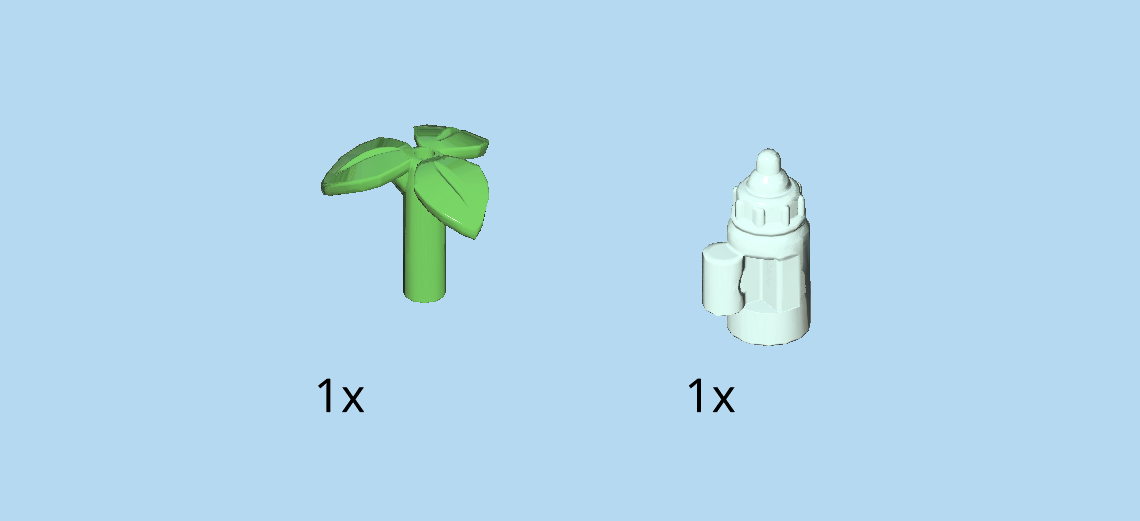
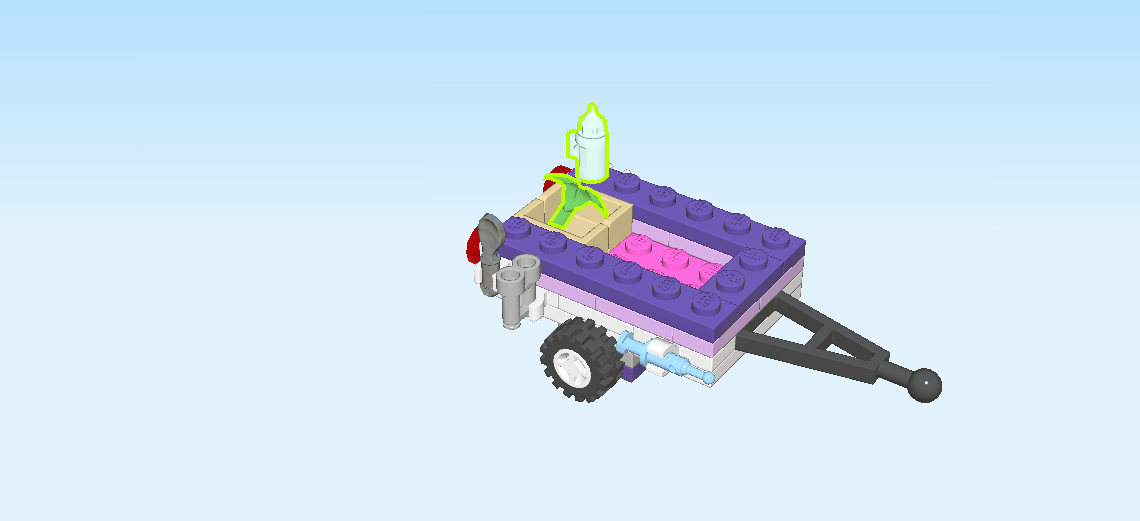
| 1 aqua blue feeding bottle with small shaft, |
| and 1 bright green plant with shaft and 3 leaves. |
| Put the feeding bottle on one of the knobs of the trailer. |
| Put the plant into the little box on the trailer. |
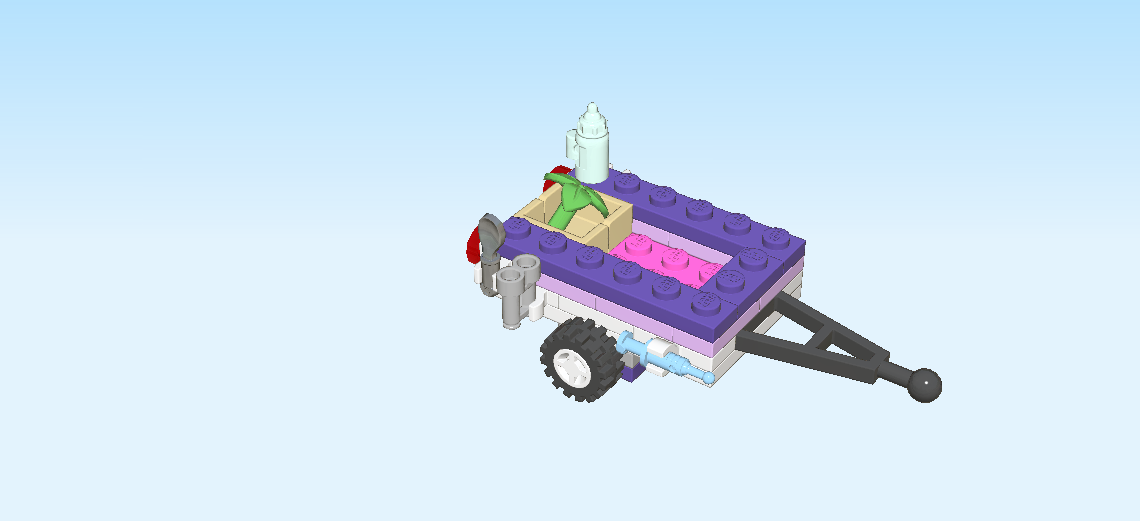
| The truck trailer is finished! Well done! This will come in handy for transporting rescued animals and storing all your Jungle Rescue equipment. |
| Now, we will build the Jungle Rescue truck. |
| Collect the following 2 pieces: |
| 1 medium stone grey plate 1x4 with ball socket on long side, |
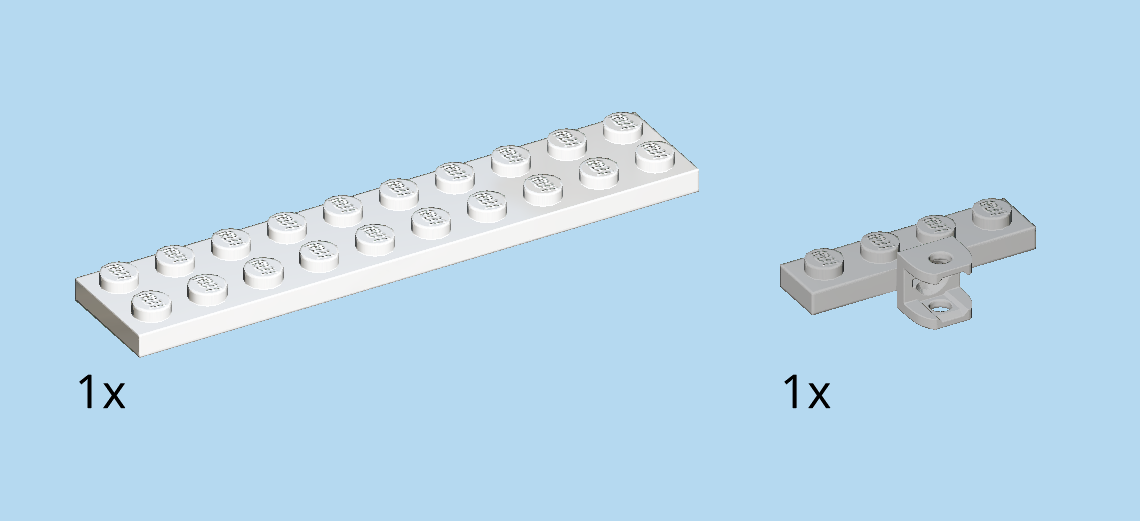
| and 1 white plate 2x10. |
| Put the plate 2x10 horizontally on the table. |
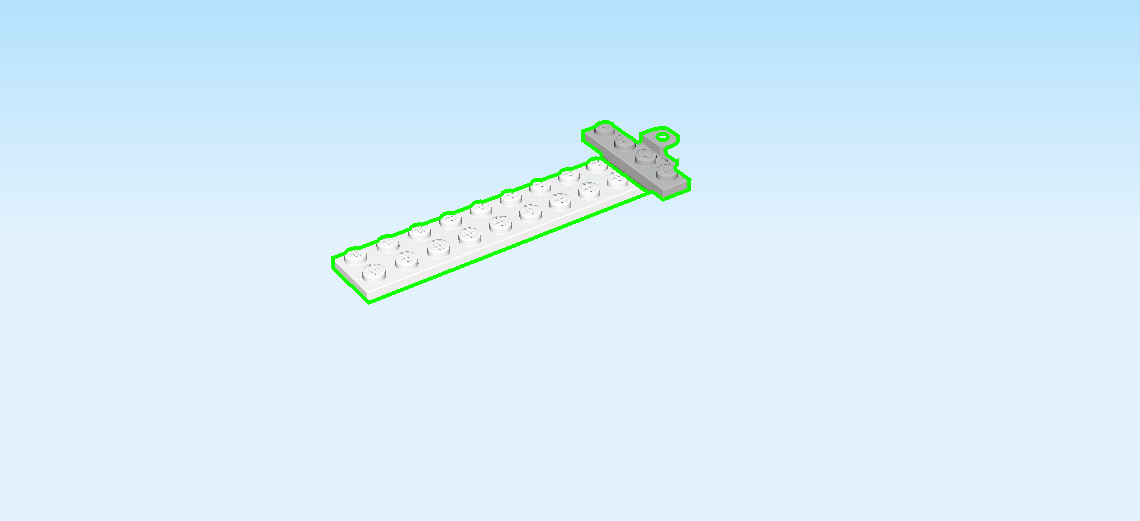
| Put the plate 1x4 with ball socket vertically centered on the rightmost column, ball socket to the right. This is where you can later mount the trailer or the rescuing hook. |
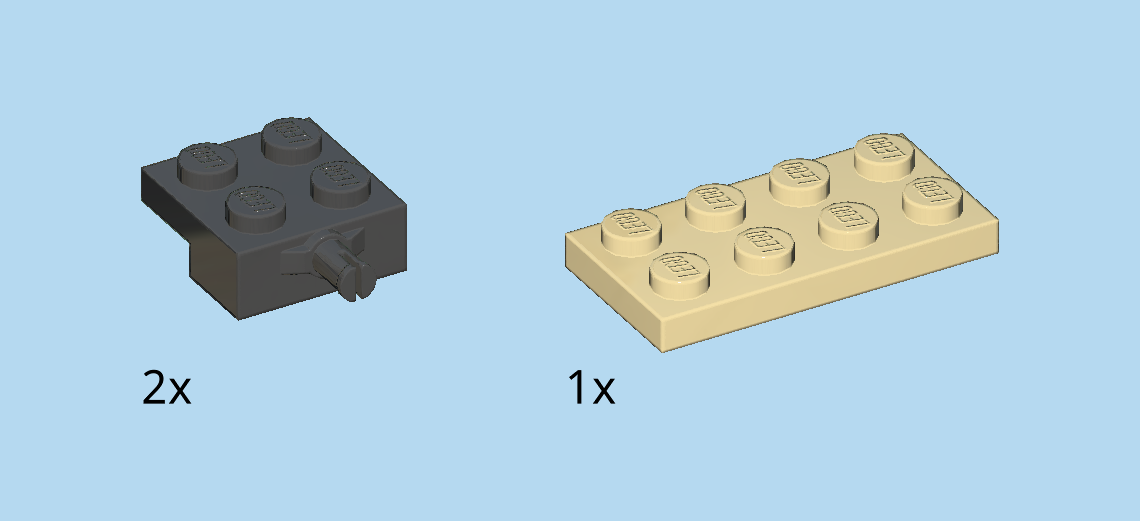
| Collect the following 3 pieces: |
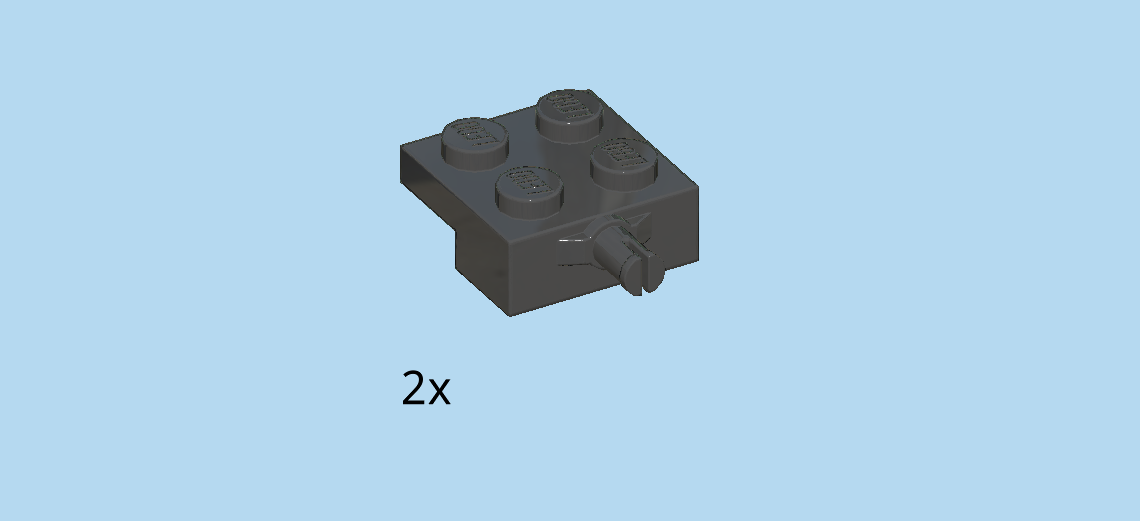
| 2 black one-stepped bearing elements 2x2 with side pin connector, |
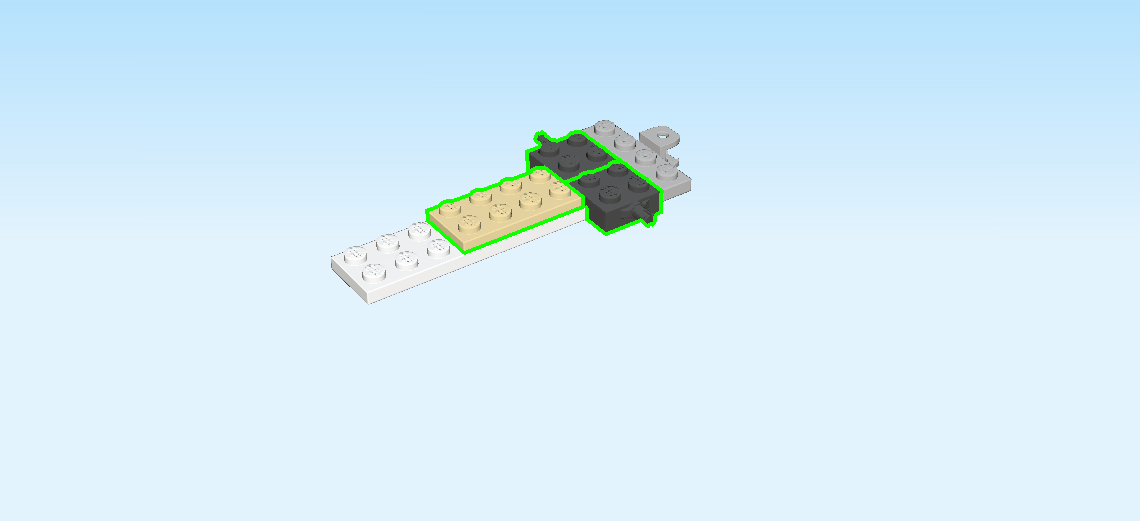
| and 1 pale ocher yellow plate 2x4. |
| Put 1 bearing element 2x2 to the left of the previous piece on the frontmost row, connector pin and front row overhanging to the front. |
| Repeat symmetrically at the back. |
| Put the plate 2x4 horizontally to the left. |
| Find 2 black one-stepped bearing elements 2x2 with side pin connector. |
| Put 1 to the left on the front row, pin connector and front row overhanging to the front. |
| Repeat symmetrically at the back. |
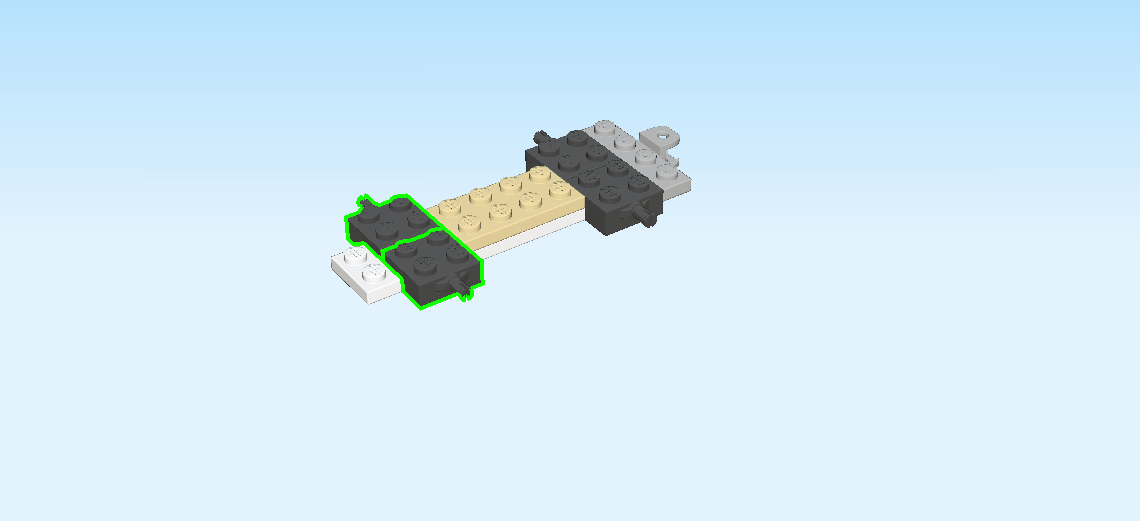
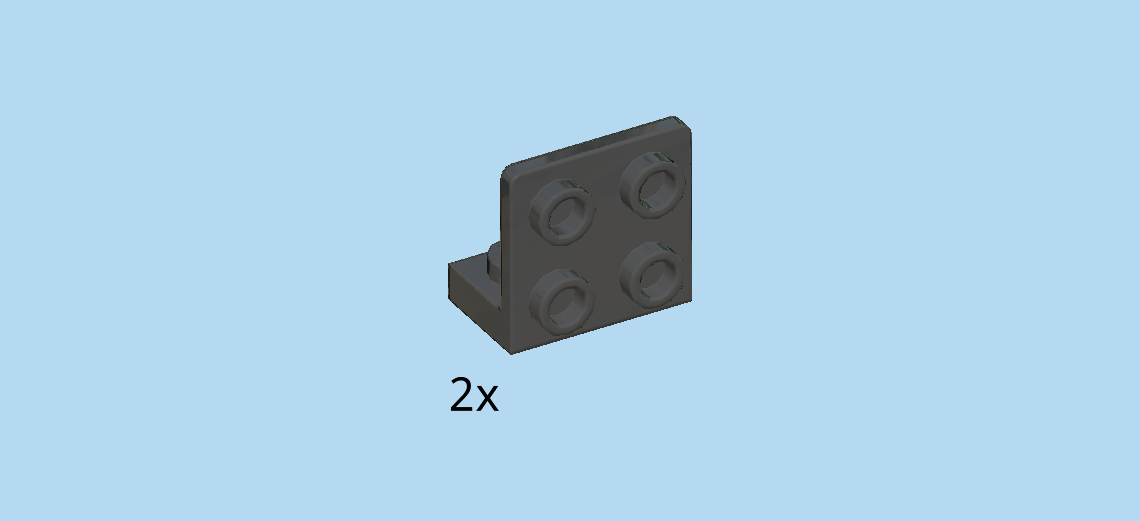
| Find 2 black bottom angle plates 1x2 - 2x2 with 4 side knobs. |
| Put 1 vertically on the front knob of the leftmost column, piece overhanging to the front, and side knobs to the left. |
| Put the other one vertically behind the previous piece, piece overhanging to the back, and side knobs to the left. |
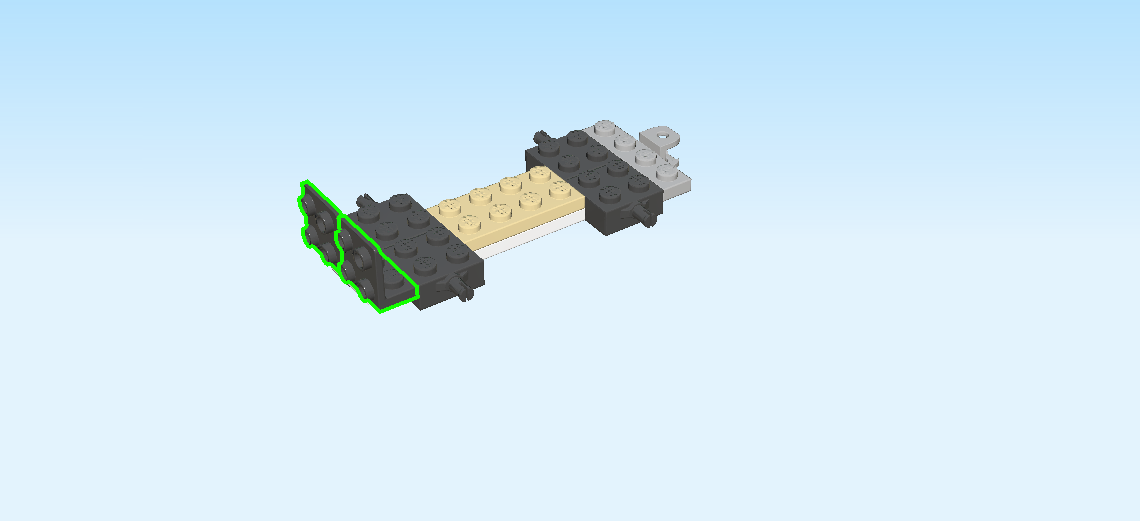
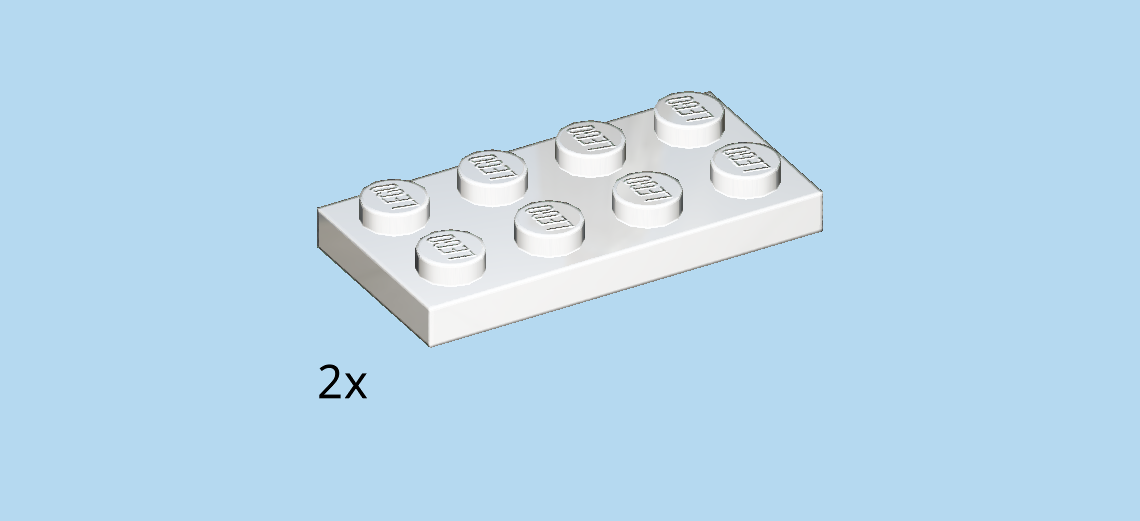
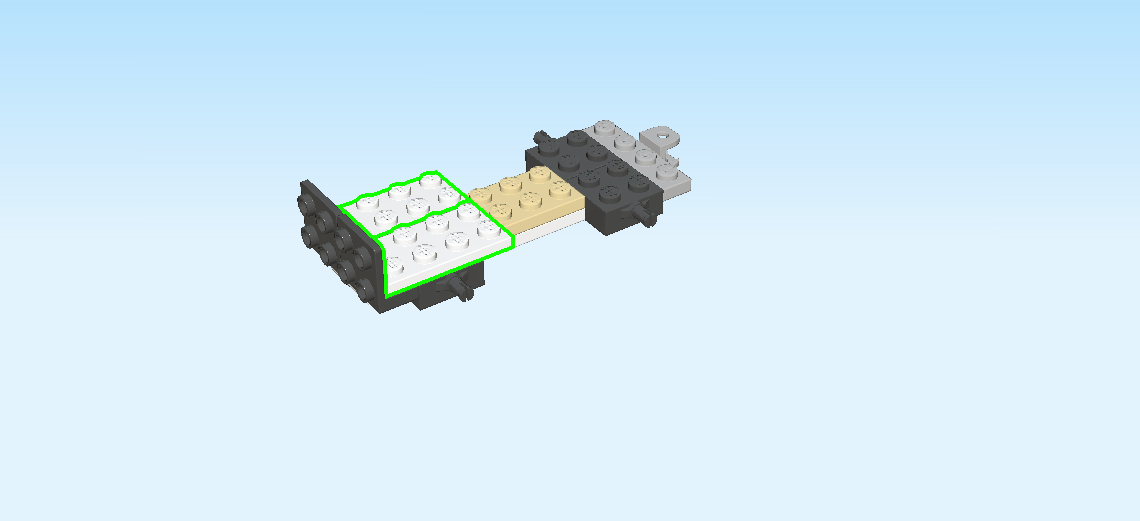
| Find 2 white plates 2x4. |
| Put 1 horizontally on the back two rows on the left edge. |
| Put the other one horizontally in front of the previous piece. |
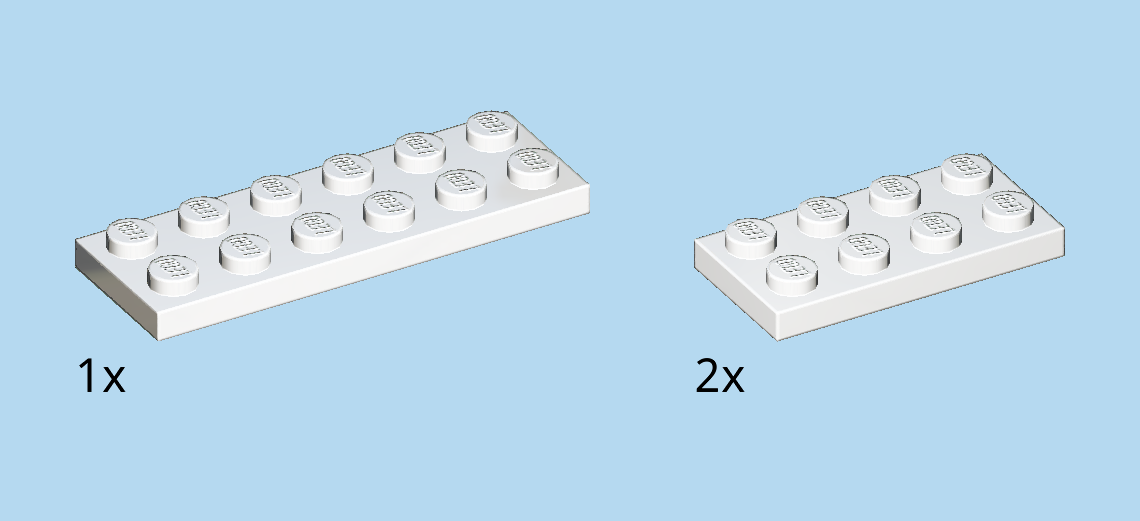
| Collect the following 3 pieces: |
| 1 white plate 2x6, |
| and 2 white plates 2x4. |
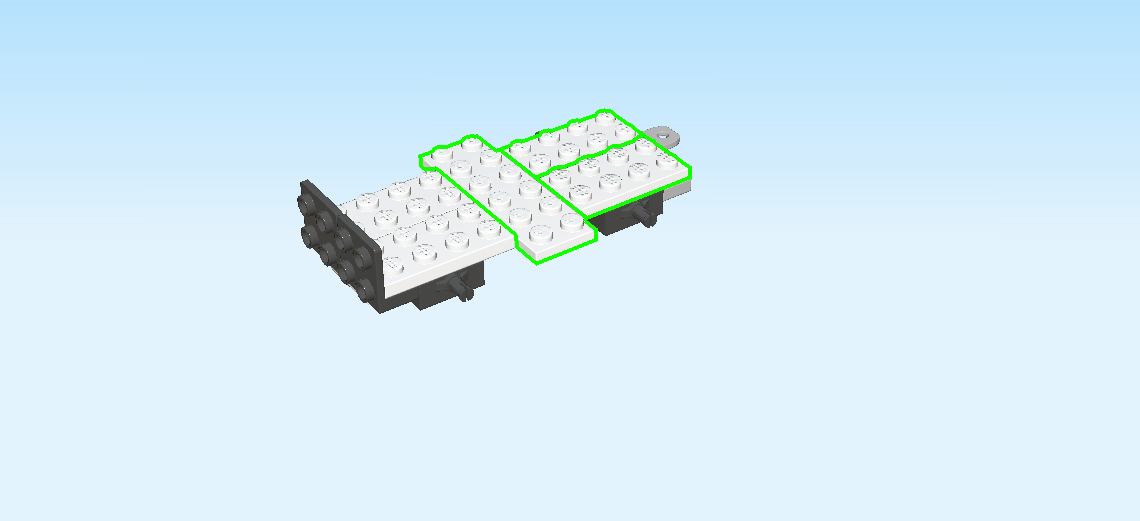
| Put the plate 2x6 vertically to the right of the two previous pieces, symmetrically overhanging to the front and back. |
| Put 1 plate 2x4 horizontally to the right on the back two rows. |
| Repeat symmetrically at the front. |
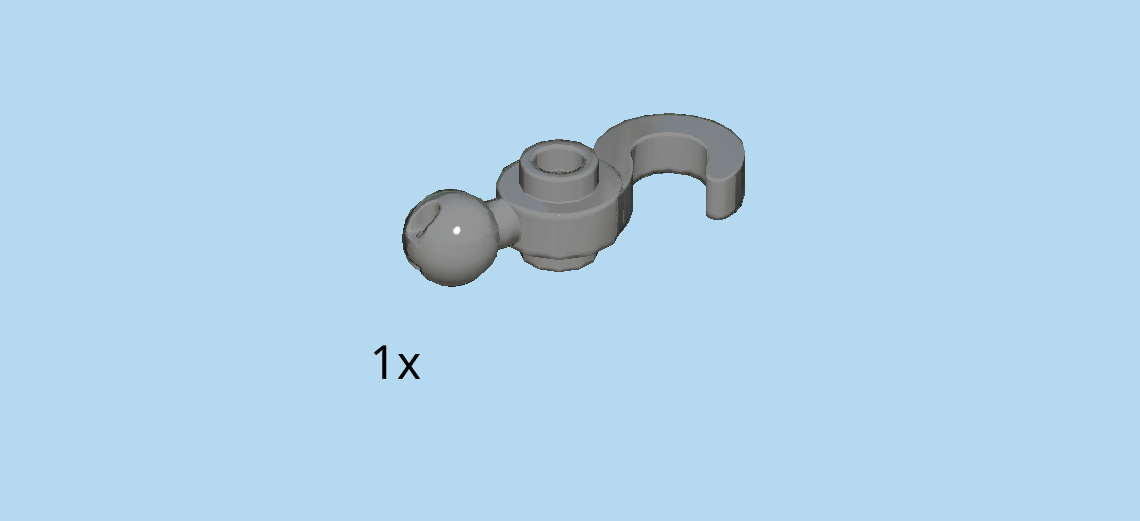
| Find 1 dark stone grey twin knob 1x1 with hook and ball. |
| Snap the ball into the ball socket on the right side of the structure. |
| This is the rescuing hook! If you do not need to rescue or tow anyone, you can remove it and snap the trailer into the ball socket instead. |
| Next, we will build the rear of the truck. |
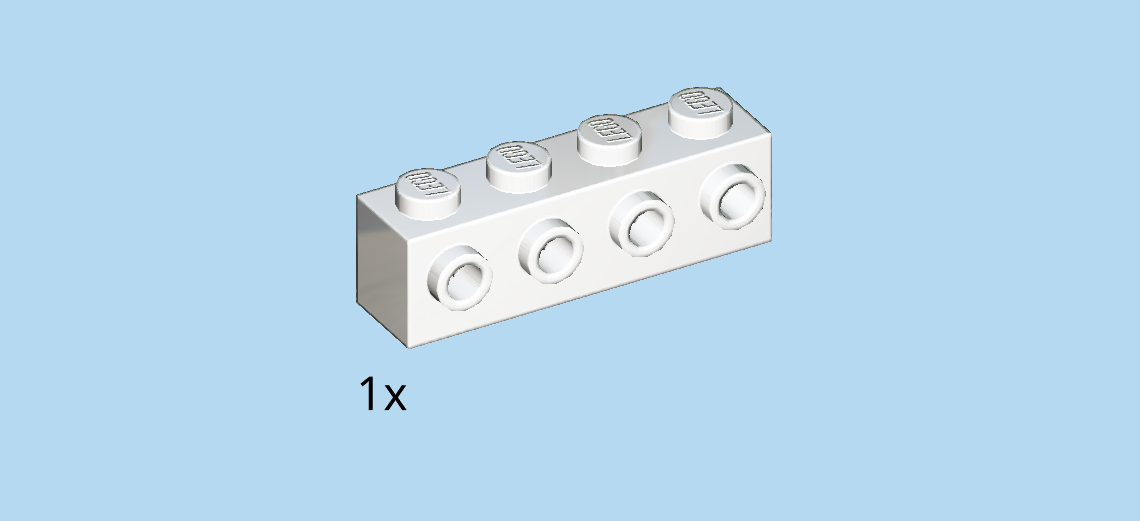
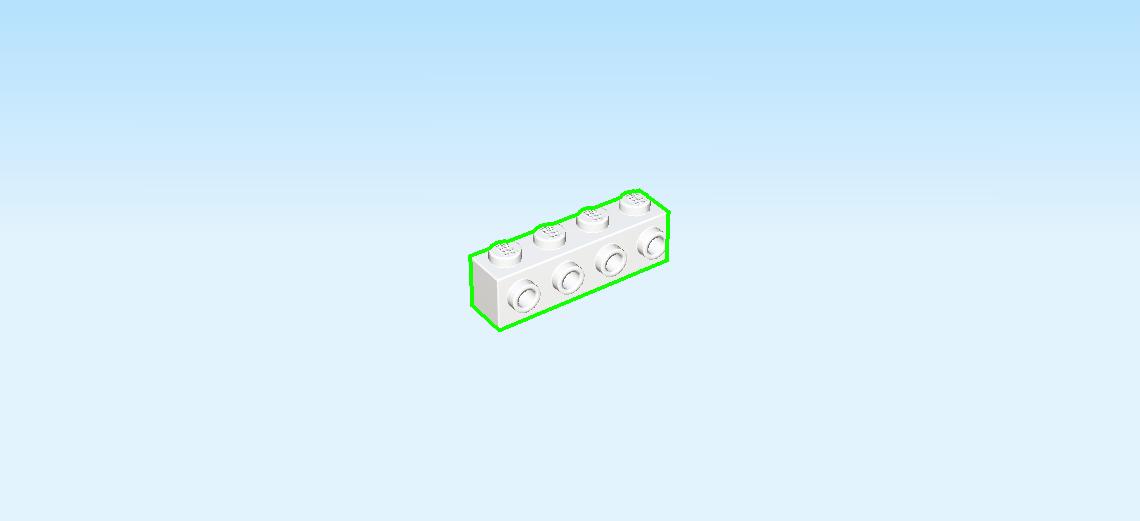
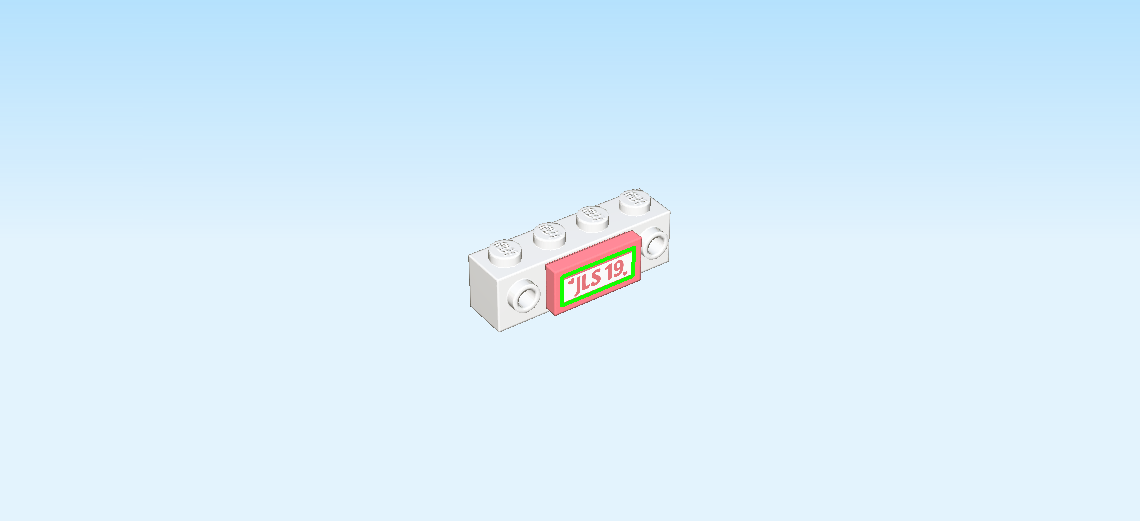
| Find 1 white brick 1x4 with 4 side knobs. |
| Put it horizontally on the table. |
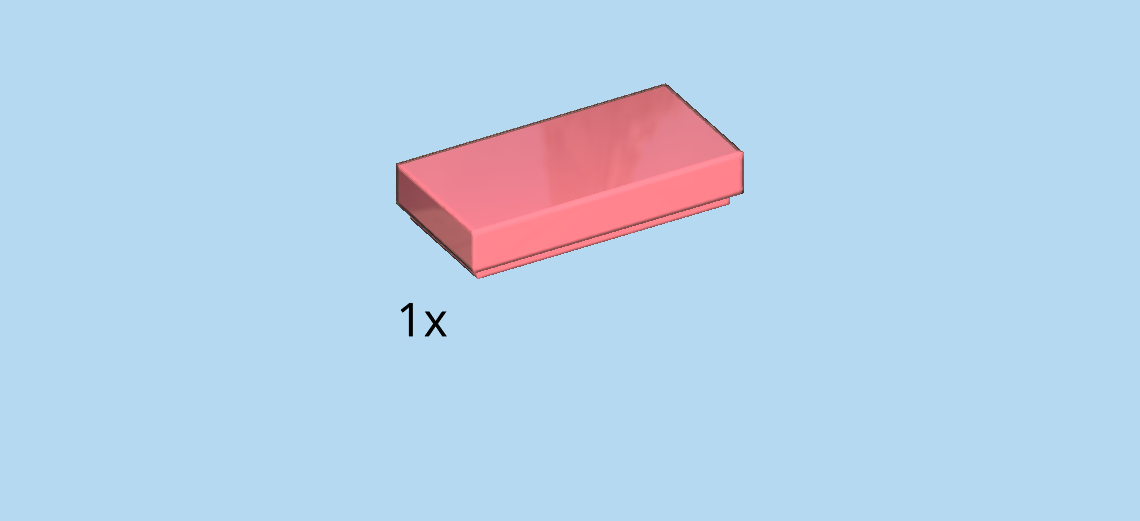
| Find 1 salmon pink flat tile 1x2. |
| Put it upright horizontally on the two middle side knobs. |
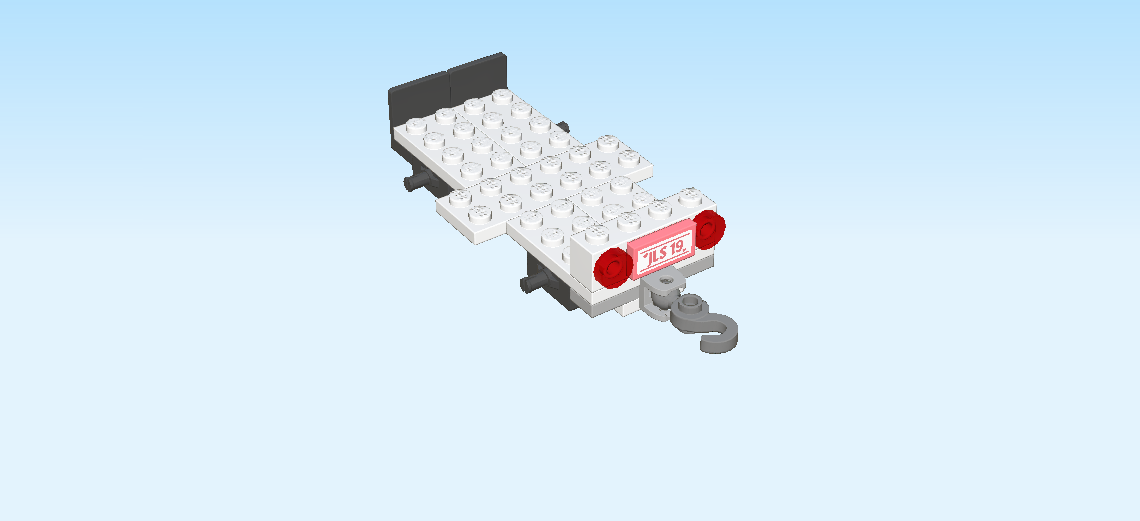
| Continue if you want to decorate the flat tile with a license plate sticker now. If not, skip the next three sentences. |
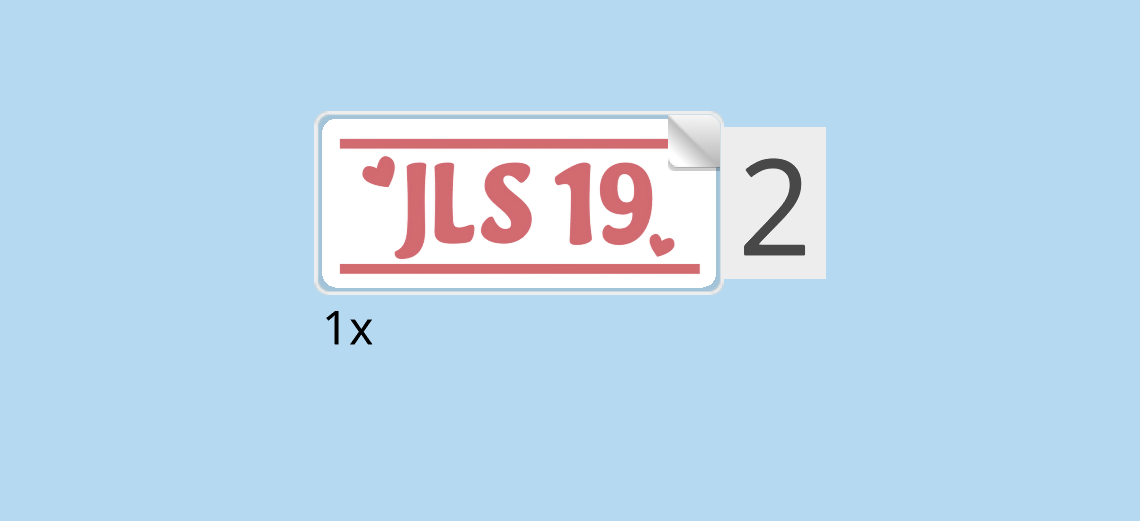
| Find 1 small rectangular sticker number 2. Ask a sighted person to help you find the correct sticker. |
| Put it horizontally on the flat tile 1x2. |
| The sticker is white with salmon pink writing on it. The license plate reads: "J L S 19". There are also two small hearts on it and horizontal lines at the top and bottom. |
| Find 2 transparent red round tiles 1x1. |
| Put 1 upright on the rightmost side knob. |
| Put the other one upright on the leftmost side knob. |
| Great! These are the taillights of the truck. |
| The rear of the truck is finished! Neat! |
| Mount it vertically on the rightmost column of the structure. Make sure the taillights and license plate are pointing to the right. |
| Collect the following 3 pieces: |
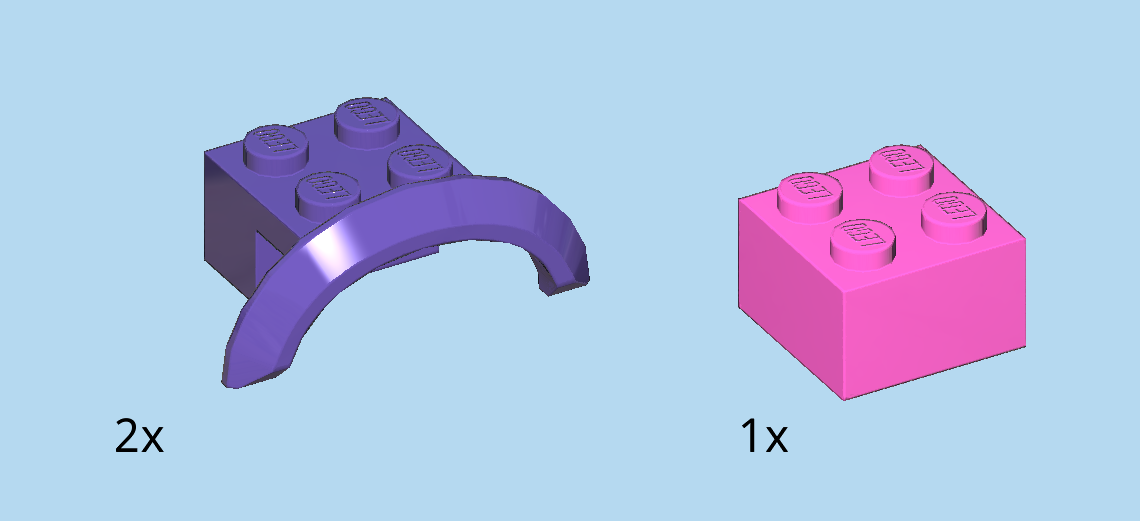
| 1 bright purple brick 2x2, |
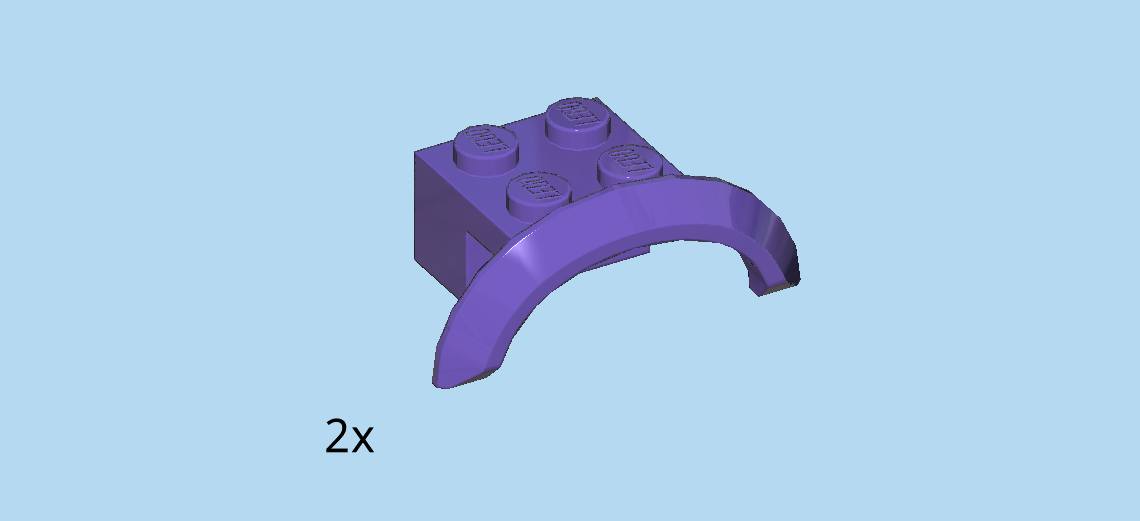
| and 2 medium lilac bricks 2x4x1 with fender. |
| Skip the rightmost column, and put 1 brick with fender on the backmost row, fender overhanging to the back. |
| Put the brick 2x2 in front of the previous piece. |
| Put the other brick with fender in front of the previous piece, fender overhanging to the front. |
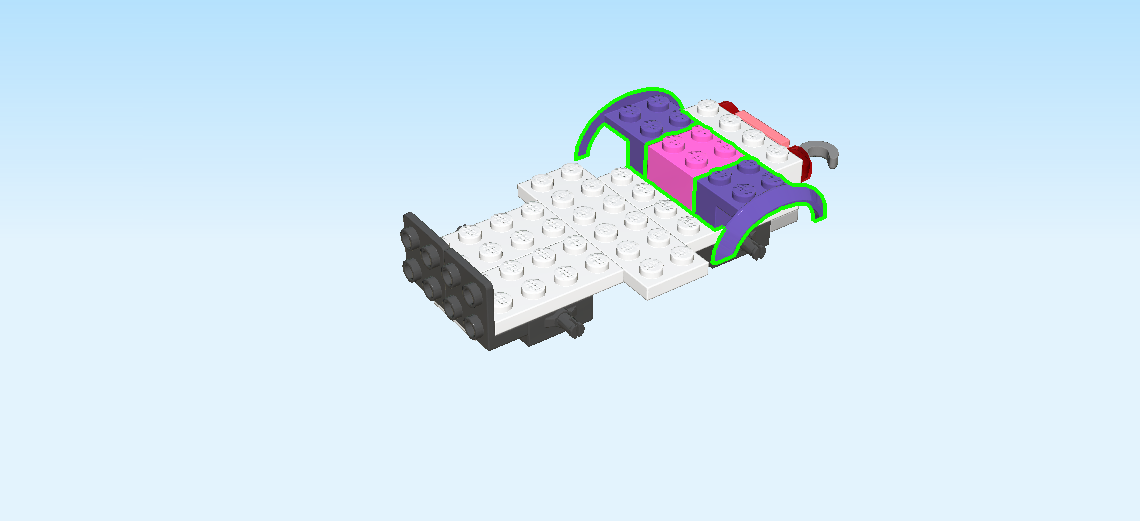
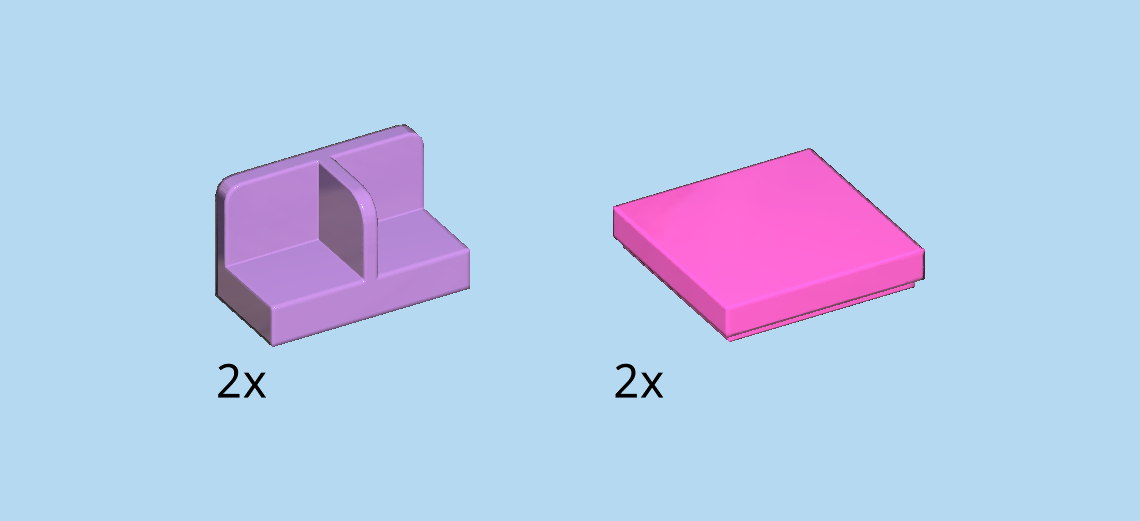
| Collect the following 4 pieces: |
| 2 bright purple flat tiles 2x2, |
| and 2 lavender foot plates 1x2x1. These are panel elements with a back panel and a middle divider. |
| Put the 2 flat tiles 2x2 on the two columns to the left of the three previous pieces. |
| Put the 2 foot plates 1x2x1 vertically to the left of the 2 previous pieces, back panels to the left. |
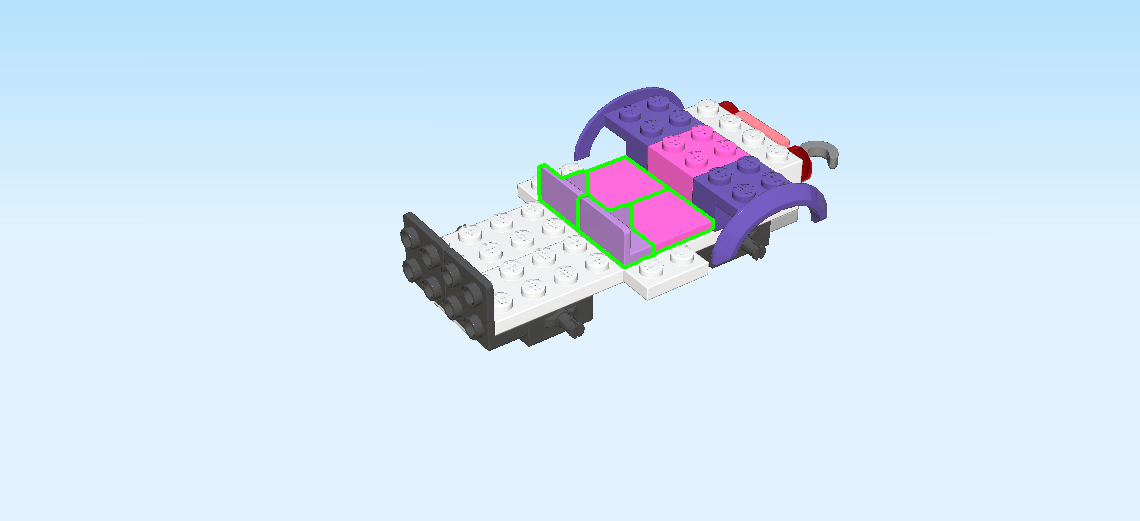
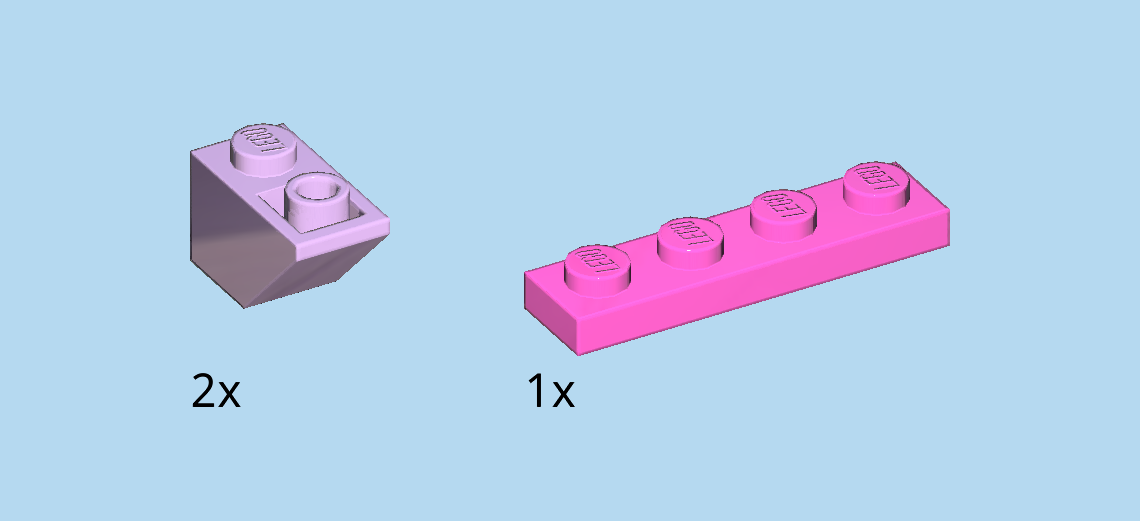
| Collect the following 3 pieces: |
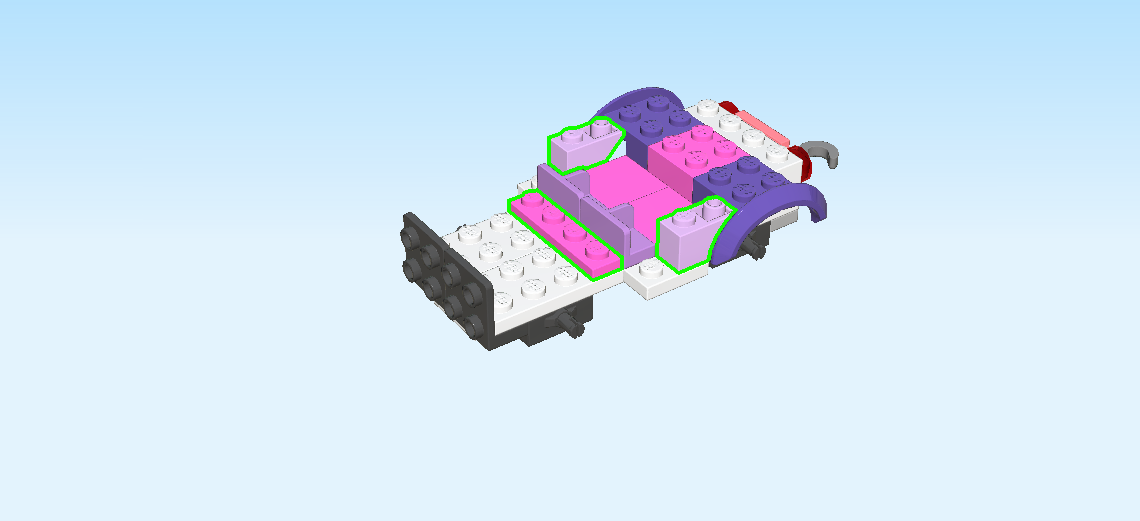
| 2 light lavender inverted roof tiles 1x2, 45°, |
| and 1 bright purple plate 1x4. |
| Put 1 inverted roof tile 1x2 horizontally on the second knob of the backmost row from the left, slope to the right. |
| Repeat symmetrically at the front. |
| Put the plate 1x4 vertically on the fourth column from the left. |
| Collect the following 3 pieces: |
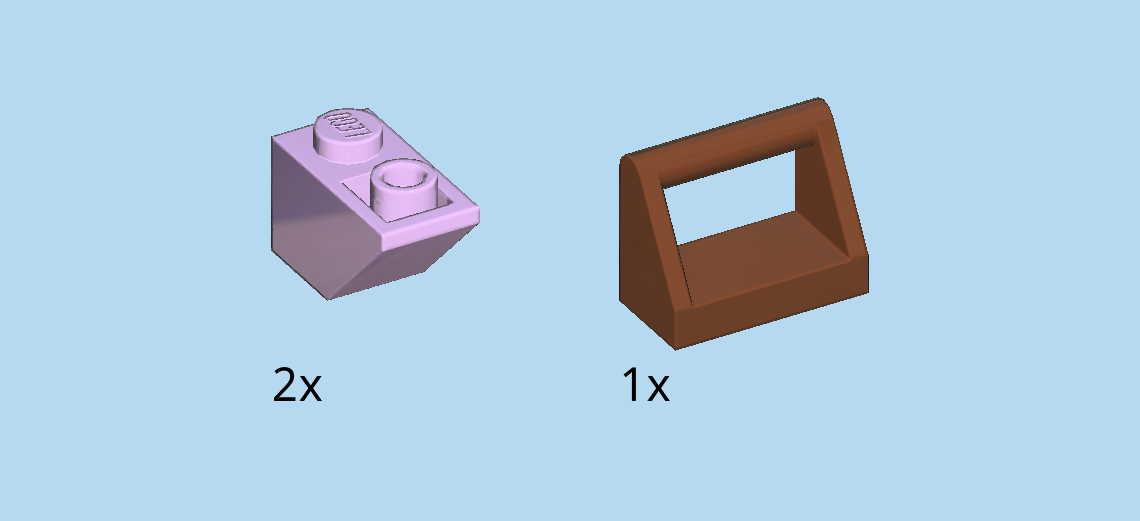
| 2 light lavender inverted roof tiles 1x2, 45°, |
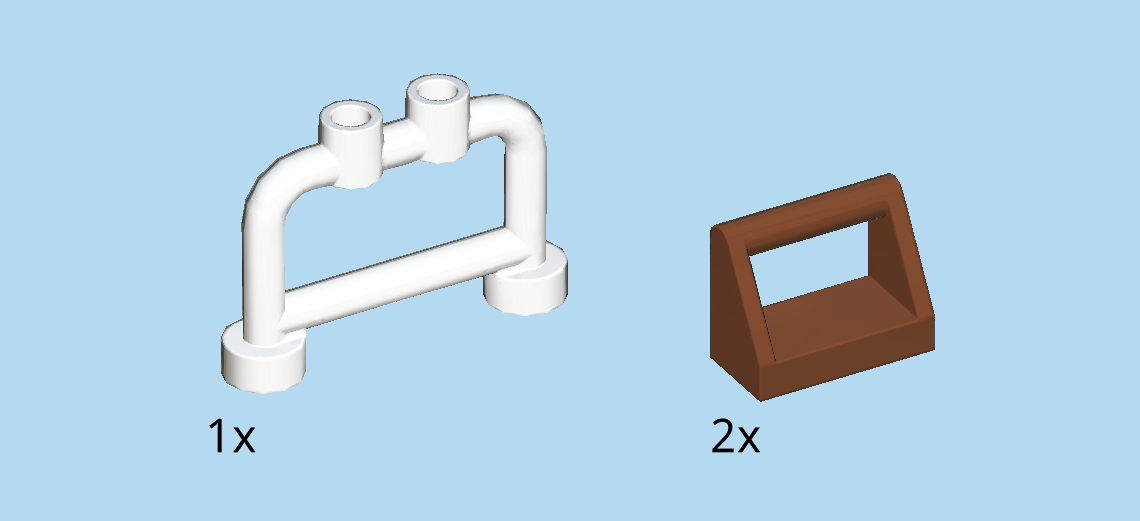
| and 1 reddish brown plate 1x2 with angled top handle. |
| Put 1 inverted roof tile 1x2 horizontally on the leftmost knob of the frontmost row, slope to the left. |
| Repeat symmetrically at the back. |
| Skip the frontmost row, and put the plate with top handle vertically on the fourth column from the left, slope to the left. |
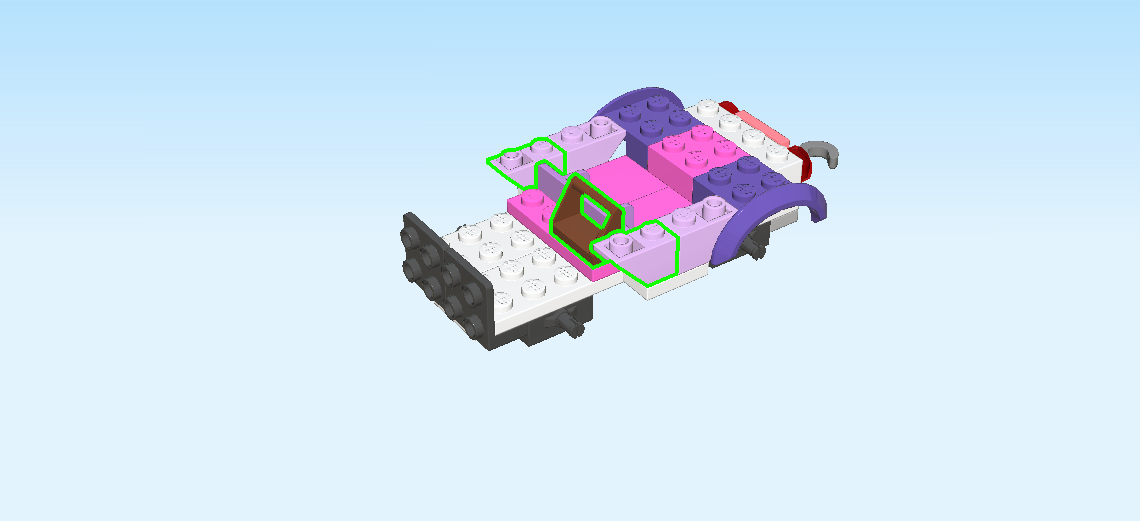
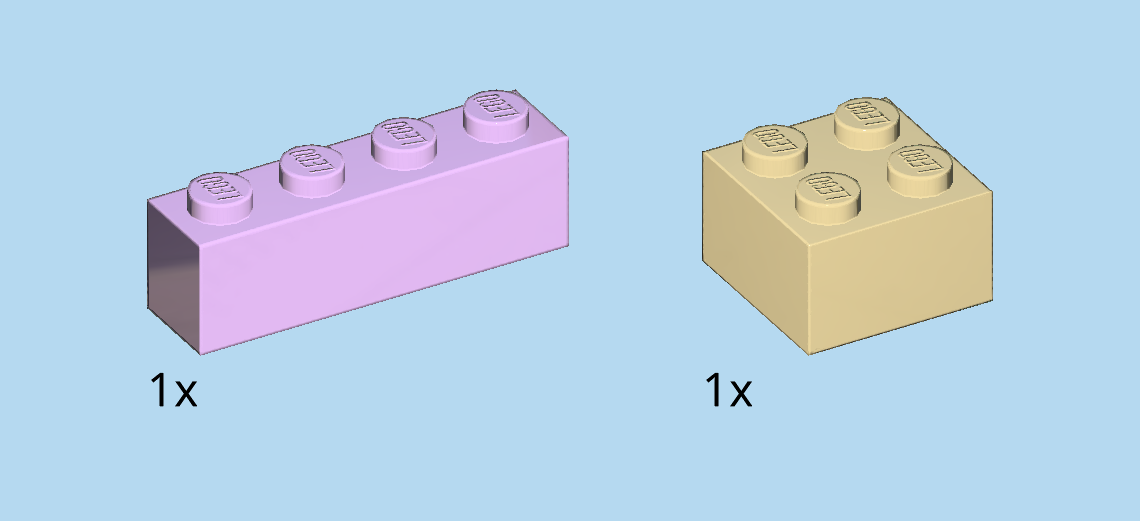
| Collect the following 2 pieces: |
| 1 pale ocher yellow brick 2x2, |
| and 1 light lavender brick 1x4. |
| Put the brick 1x4 vertically on the leftmost column. |
| Put the brick 2x2 to the right in the middle. |
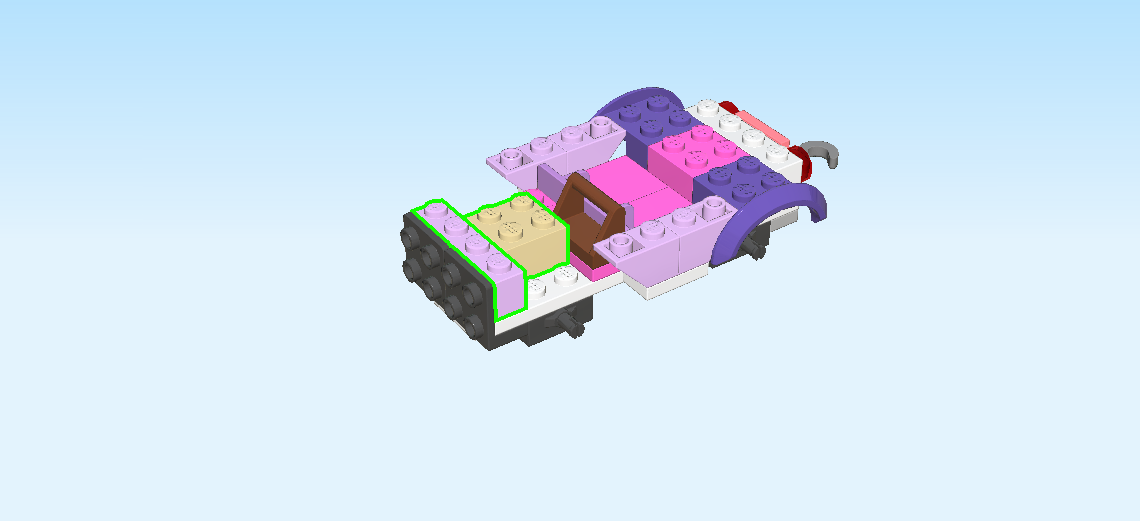
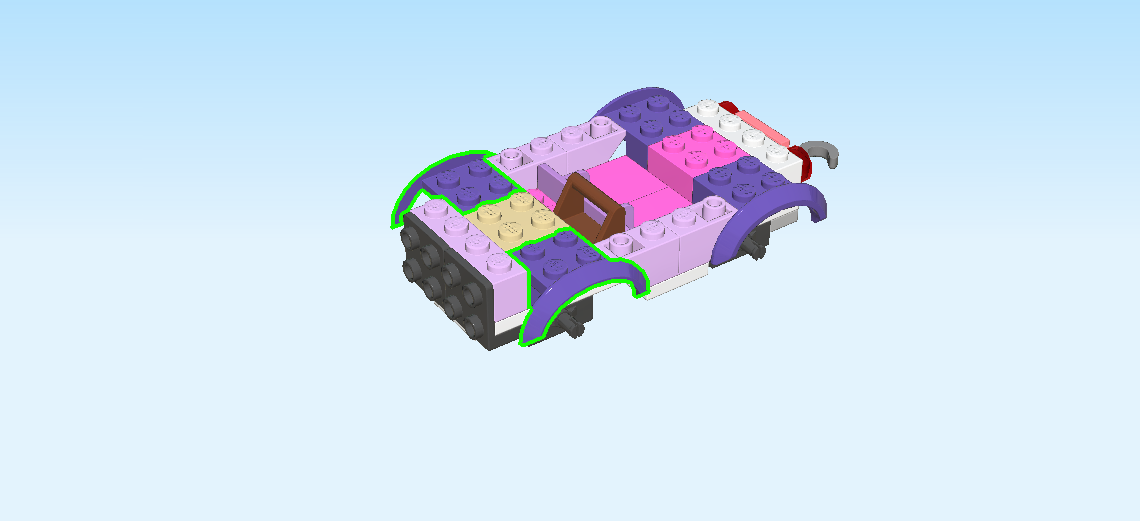
| Find 2 medium lilac bricks 2x4x1 with fender. |
| Put 1 horizontally in front of the previous piece, fender overhanging to the front. |
| Repeat symmetrically at the back. |
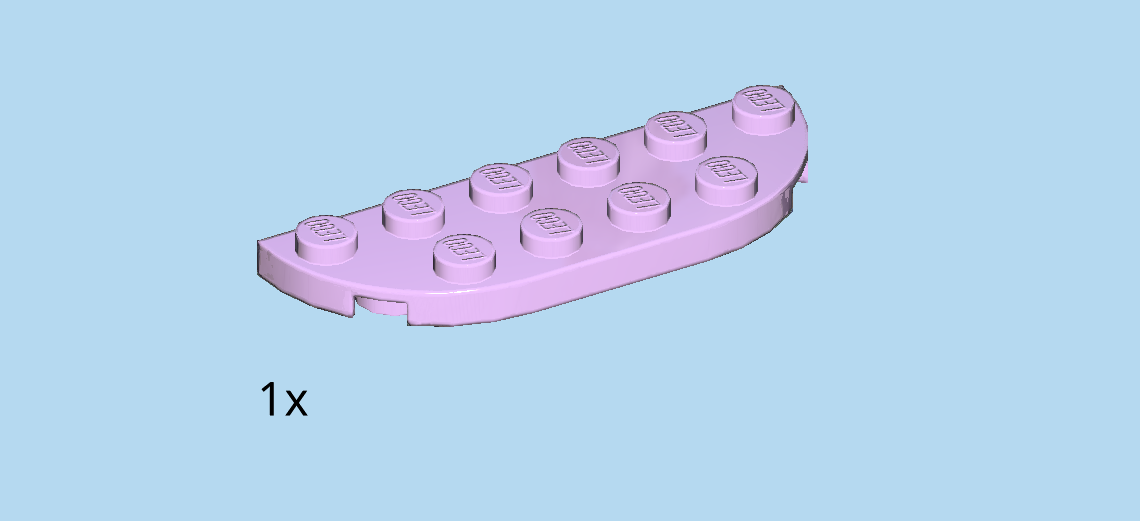
| Find 1 light lavender plate 2x6 with 2 round corners. |
| Put it vertically on the two rightmost columns, round corners to the right. |
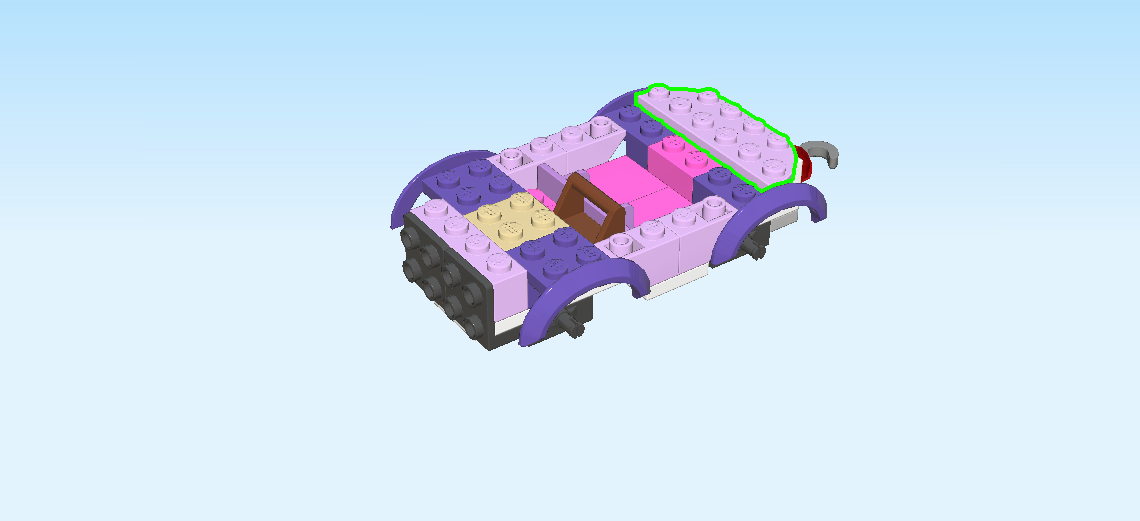
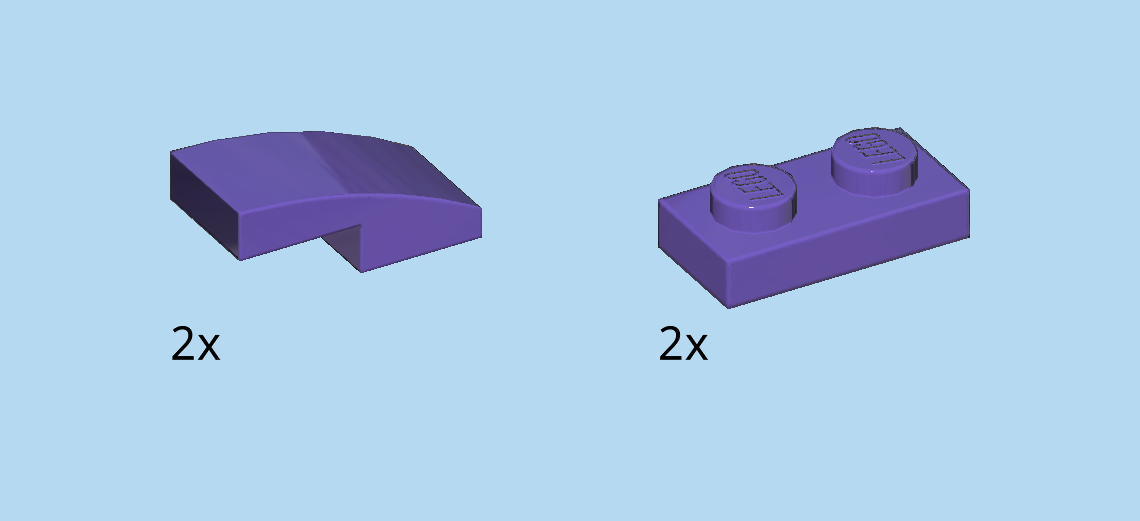
| Collect the following 4 pieces: |
| 2 medium lilac one-stepped curve tiles 1x2x⅔, |
| and 2 medium lilac plates 1x2. |
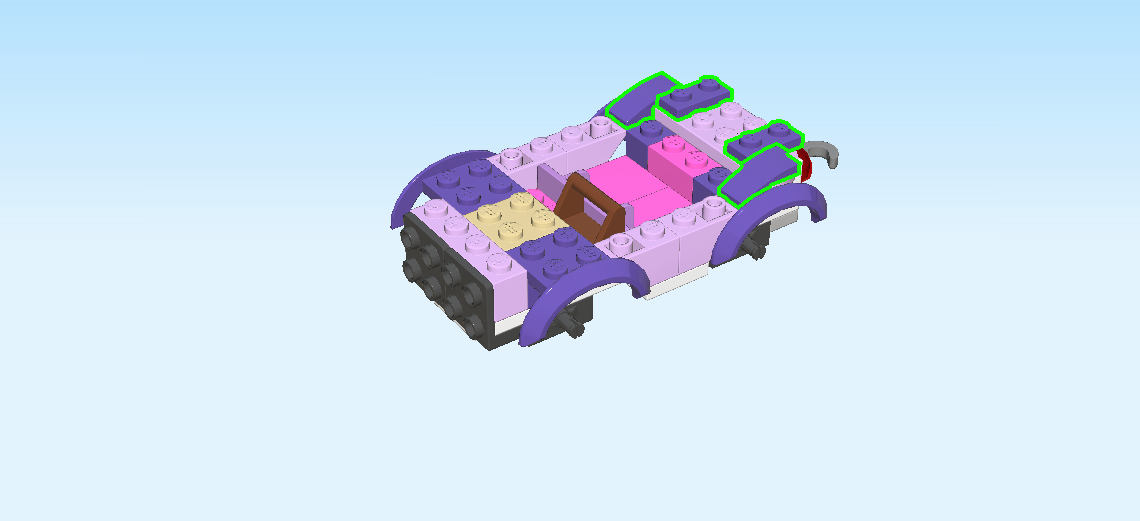
| Put 1 curve tile horizontally on the front row on the right edge, curve to the left. |
| Repeat symmetrically at the back. |
| Put 1 plate 1x2 horizontally on the second row from the back on the right edge. |
| Repeat symmetrically at the front. |
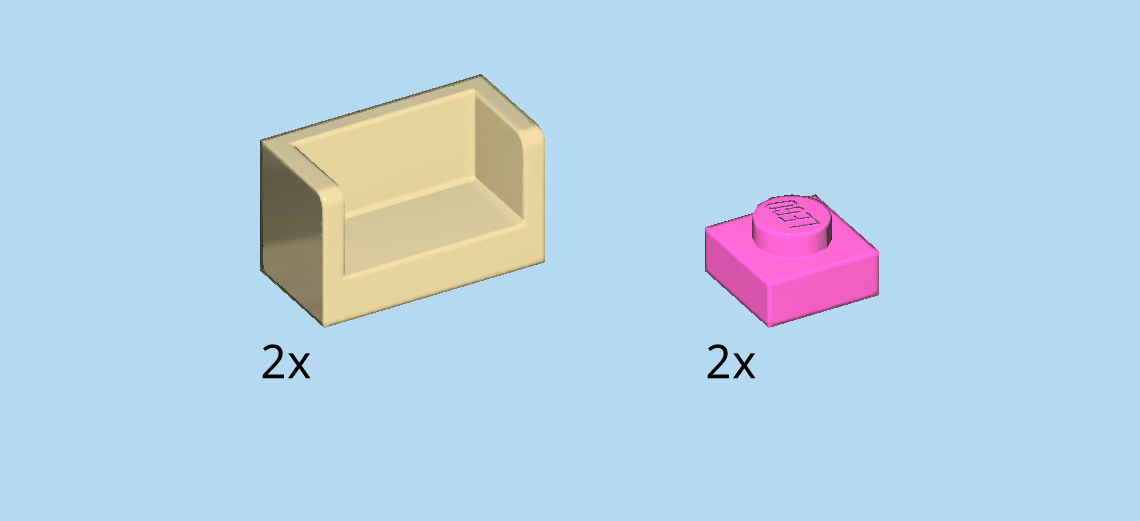
| Collect the following 4 pieces: |
| 2 pale ocher yellow small panel elements 1x2x1 with sides, |
| and 2 bright purple plates 1x1. |
| Put 1 panel element horizontally behind the previous piece, long panel to the front. |
| Put the other panel element horizontally behind the previous piece, long panel to the back. |
| Put 1 plate 1x1 on the left knob behind the previous piece. |
| Repeat symmetrically at the front. |
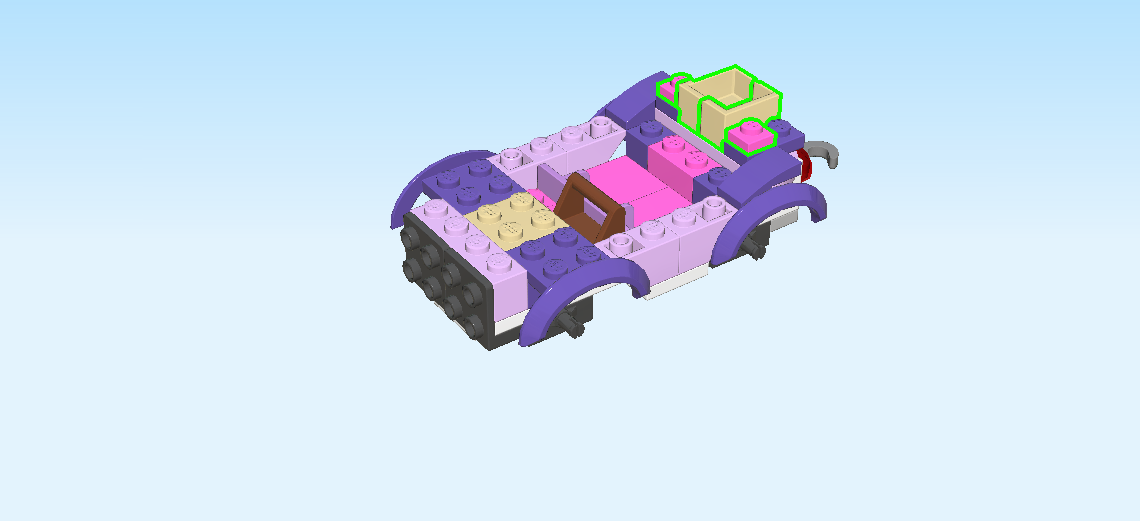
| Collect the following 3 pieces: |
| 2 reddish brown plates 1x2 with angled top handle, |
| and 1 white handrail 1x4x2 with 2 top holes. |
| Put the handrail 1x4x2 vertically on top of the 2 previous pieces. |
| Put the 2 plates with top handle vertically to the left of the previous piece, slopes to the left. |
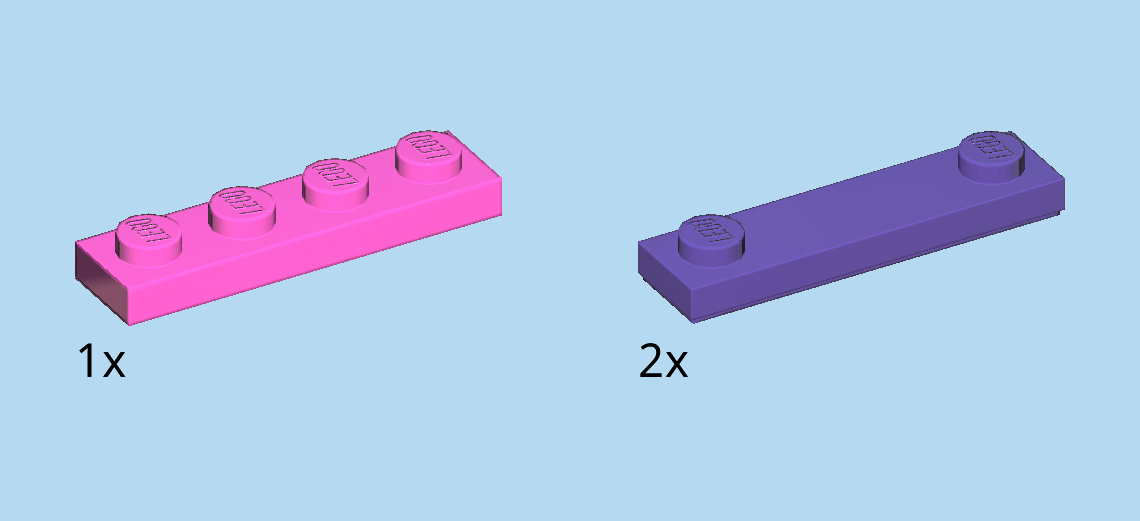
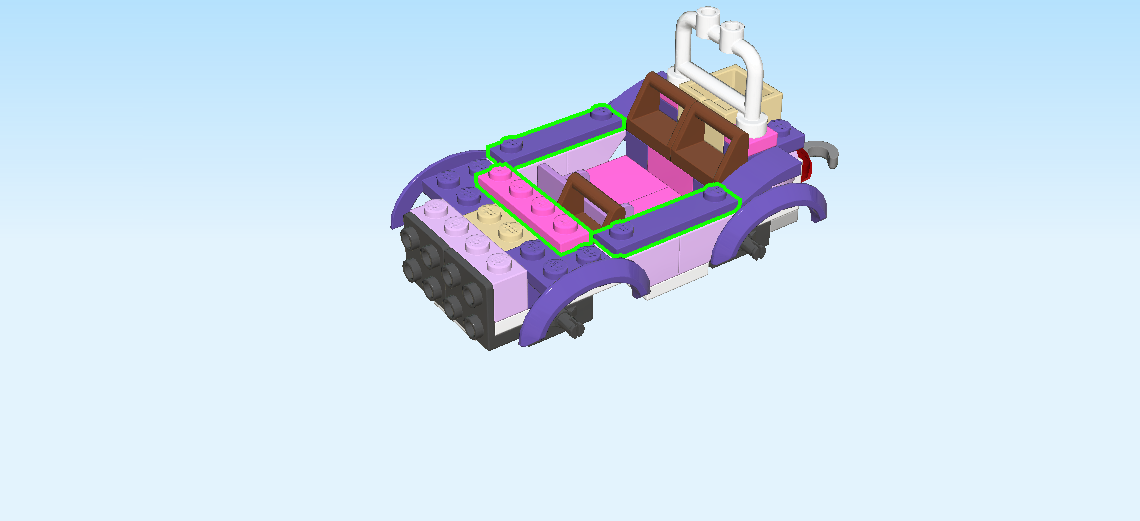
| Collect the following 3 pieces: |
| 2 medium lilac plates 1x4 with 2 knobs, |
| and 1 bright purple plate 1x4. |
| Put 1 plate 1x4 with 2 knobs horizontally on the back row to the left of the curved tile. |
| Repeat symmetrically at the front. |
| Put the plate 1x4 vertically centered on the third column from the left. |
| Next, we will build the front spoiler and grille. |
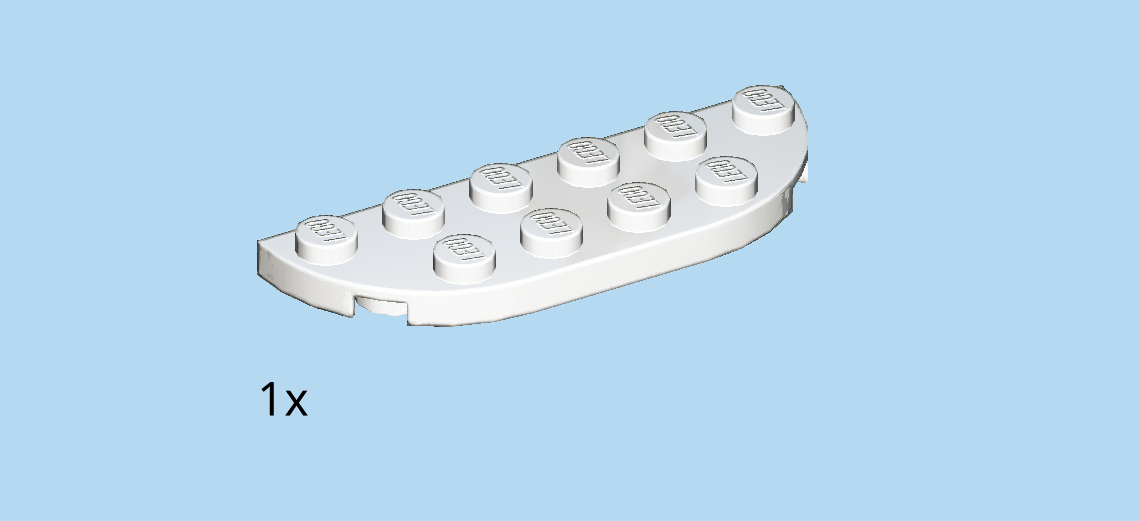
| Find 1 white plate 2x6 with 2 round corners. |
| Put it horizontally on the table, round corners to the front. |
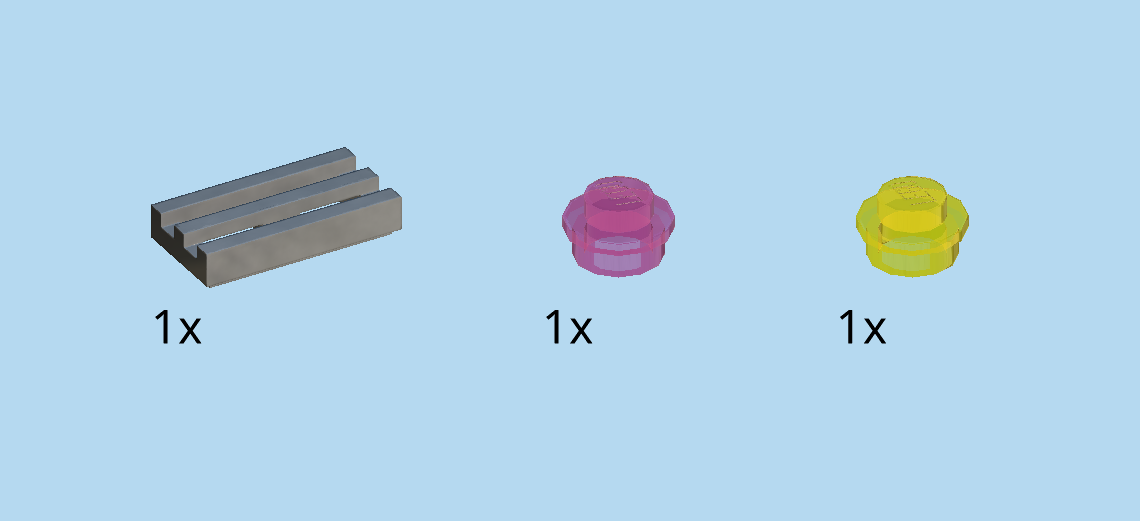
| Collect the following 3 pieces: |
| 1 transparent yellow round plate 1x1, |
| 1 transparent raspberry red round plate 1x1, |
| and 1 silver metallic grille tile 1x2. |
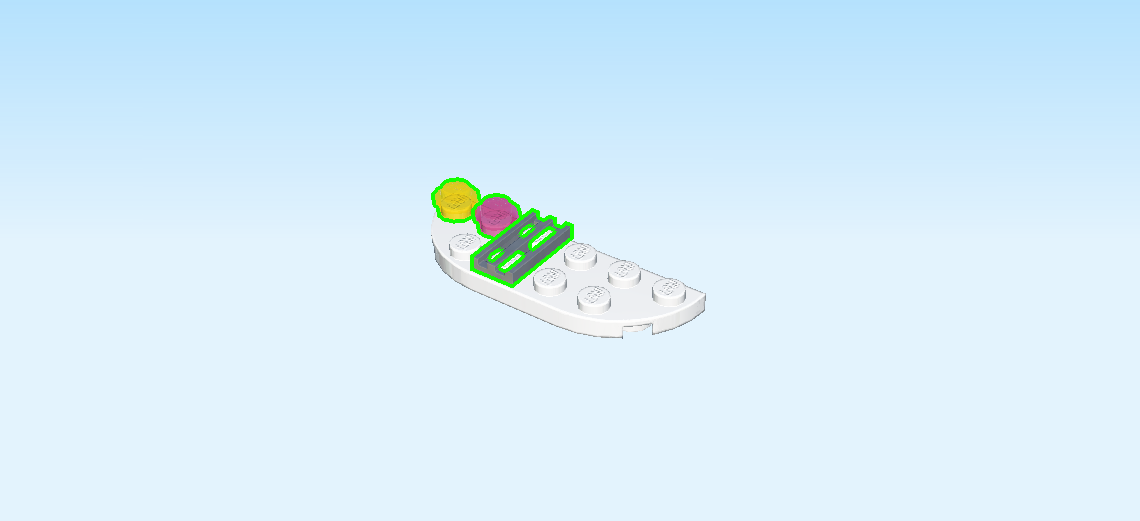
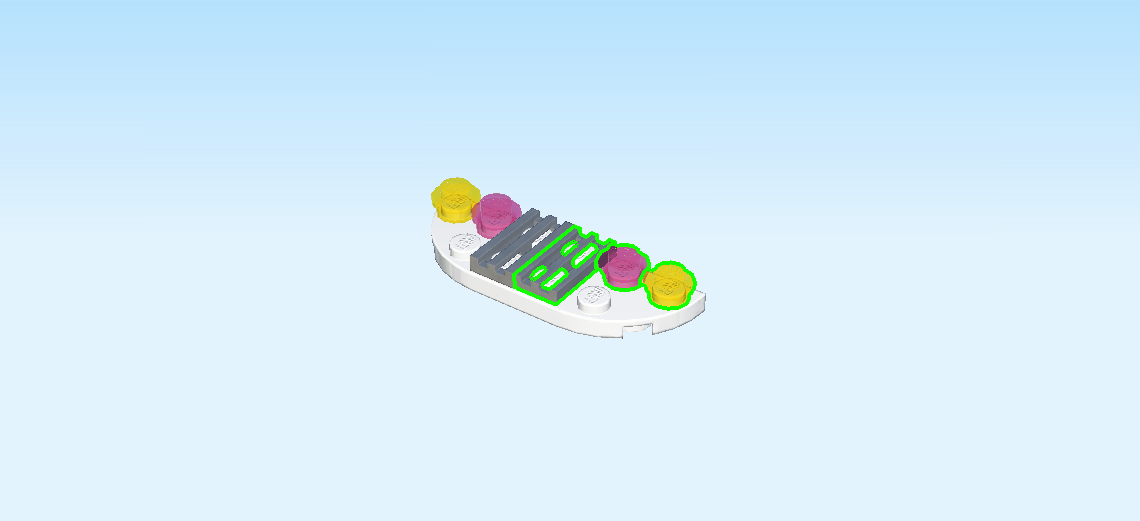
| Put the yellow round plate 1x1 on the leftmost knob at the back. |
| Put the raspberry red round plate 1x1 to the right. |
| Put the grille tile 1x2 vertically to the right. |
| Collect the following 3 pieces: |
| 1 transparent yellow round plate 1x1, |
| 1 transparent raspberry red round plate 1x1, |
| and 1 silver metallic grille tile 1x2. |
| Put the grille tile 1x2 vertically to the right of the previous piece. |
| Put the raspberry red round plate 1x1 to the right. |
| Put the yellow round plate 1x1 to the right. |
| Careful, the next few steps are a bit tricky. Listen carefully, and don't hesitate to ask for help if needed. |
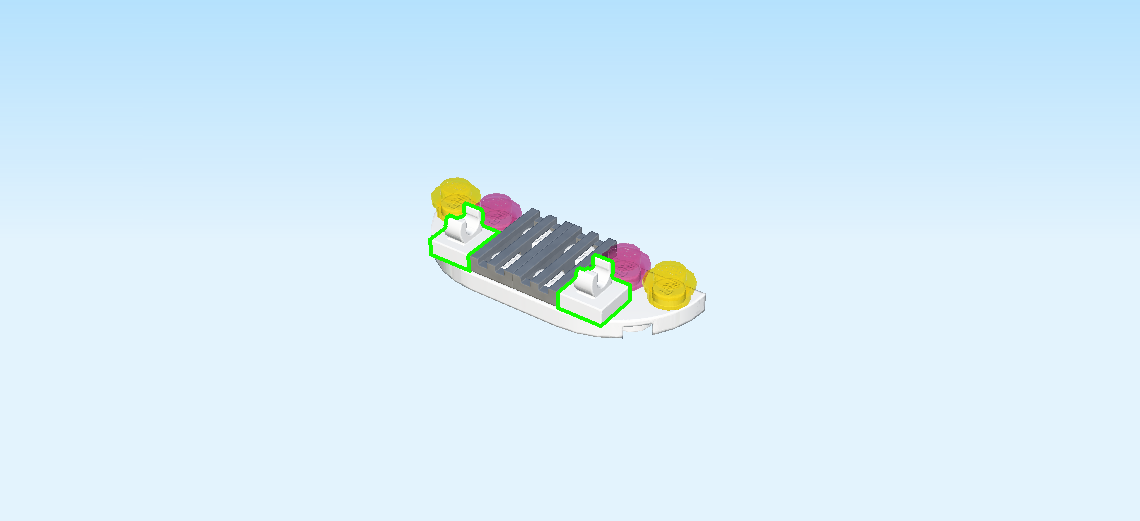
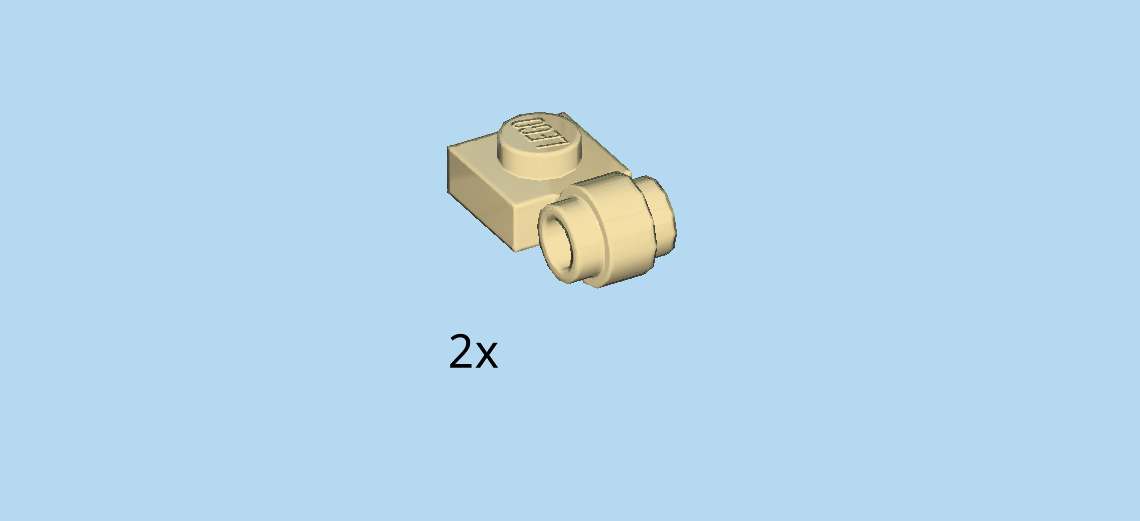
| Find 2 white plates 1x1 with top clasp. |
| Put 1 on the rightmost knob at the front. The clasp must be vertical, so the clasp ends are at the front and back. |
| Repeat symmetrically on the left. |
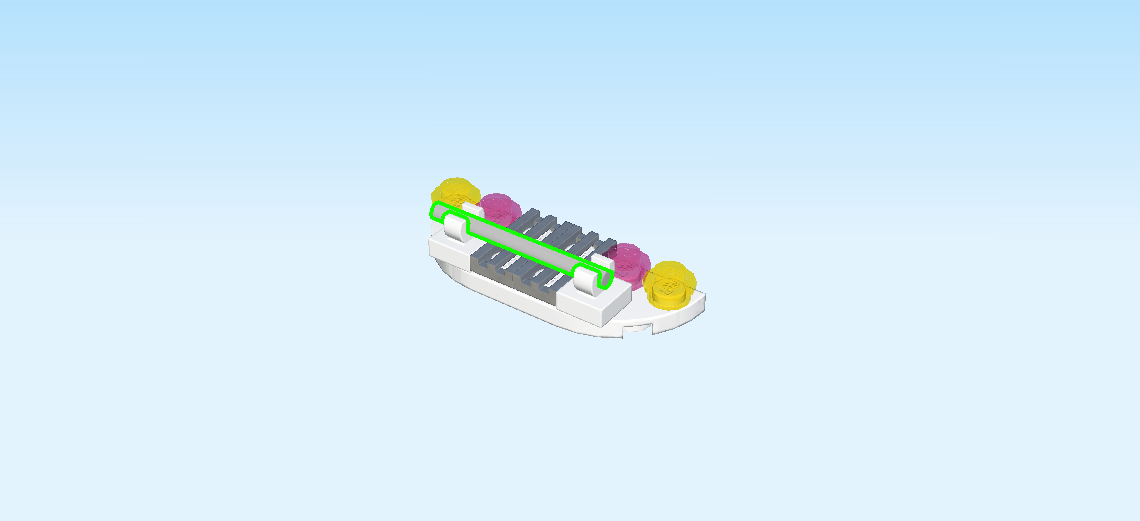
| Find 1 medium stone grey shaft, 4 knobs long. |
| Snap it horizontally into the two clasps. If this does not work, you might have to adjust the orientation of the clasps. |
| The front spoiler and grille are finished! Very well done! |
| Turn the part upright and mount it horizontally on the side knobs on the left side of the vehicle. Make sure the bumper bar is at the bottom, and the headlights are at the top. |
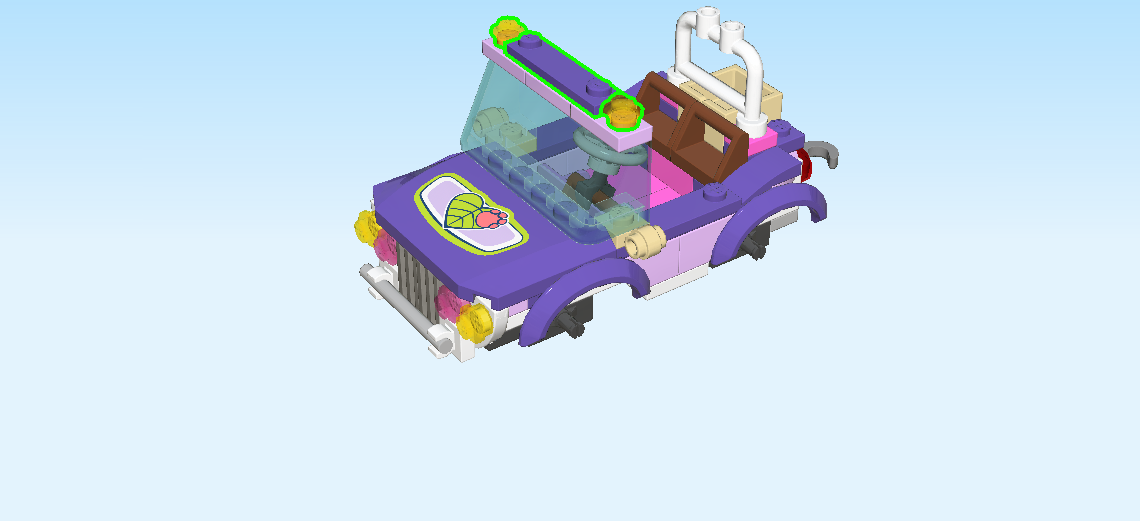
| Find 2 pale ocher yellow plates 1x1 with twin knob collar. |
| Put 1 the front row on the left button of the plate 1x4 with 2 knobs, twin knob collar overhanging to the front. |
| Repeat symmetrically at the back. |
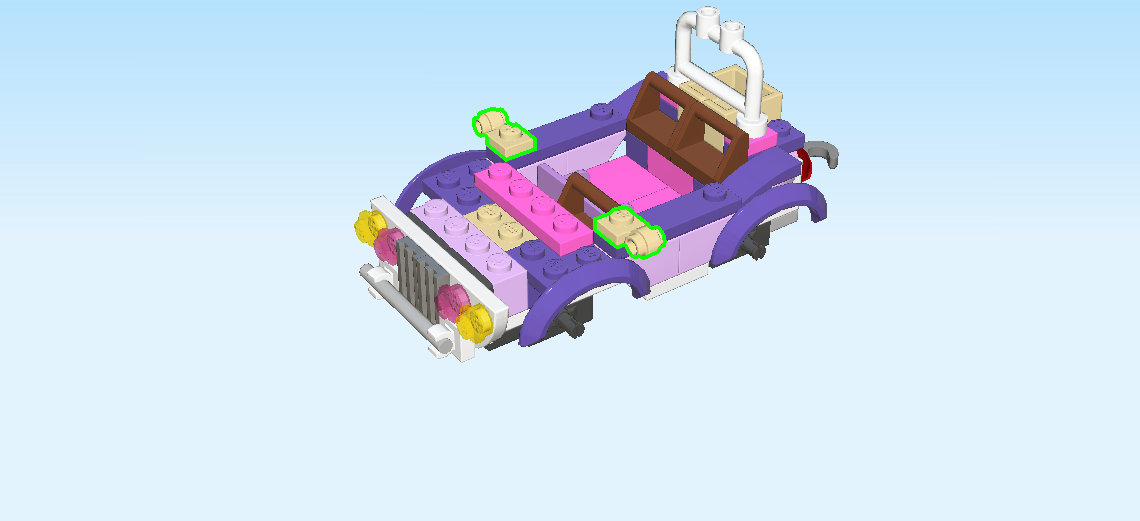
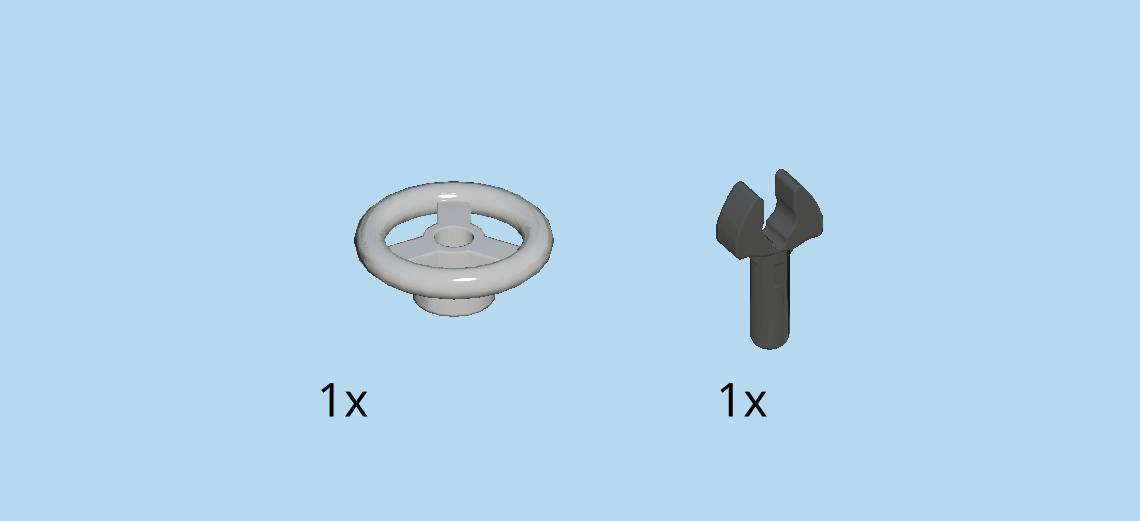
| Collect the following 2 pieces: |
| 1 black open end wrench, |
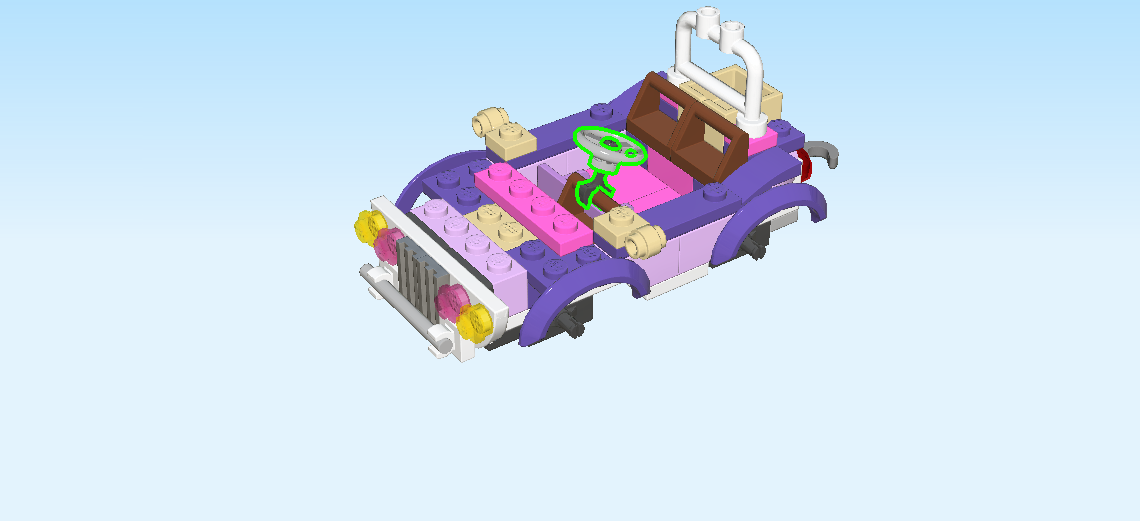
| and 1 medium stone grey steering wheel 2x2. |
| Snap the open end wrench onto the handle in the center of the vehicle. Don't confuse it with the handles on the right side of the vehicle. |
| Insert the handle of the wrench into the middle hole of the steering wheel 2x2. |
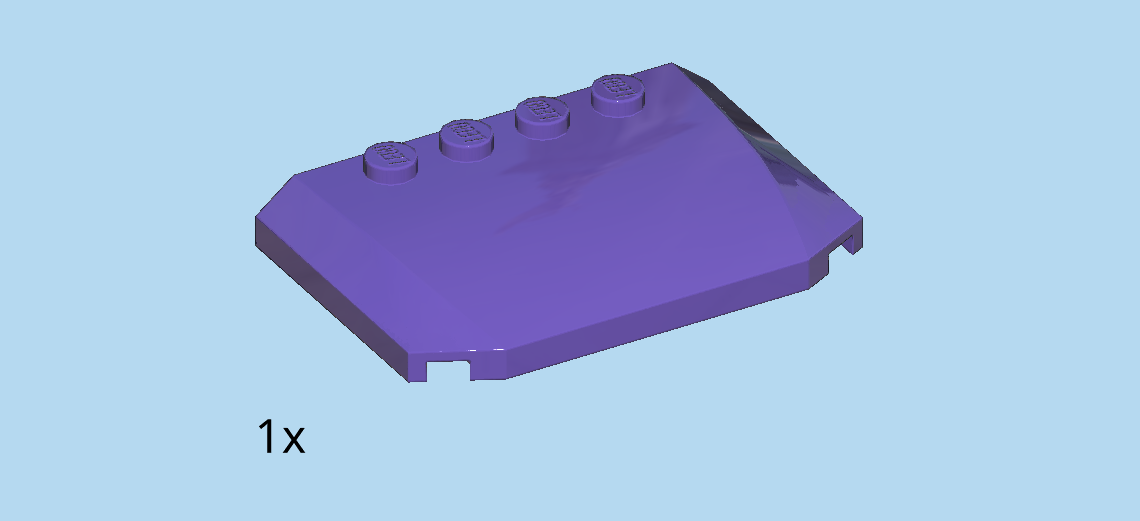
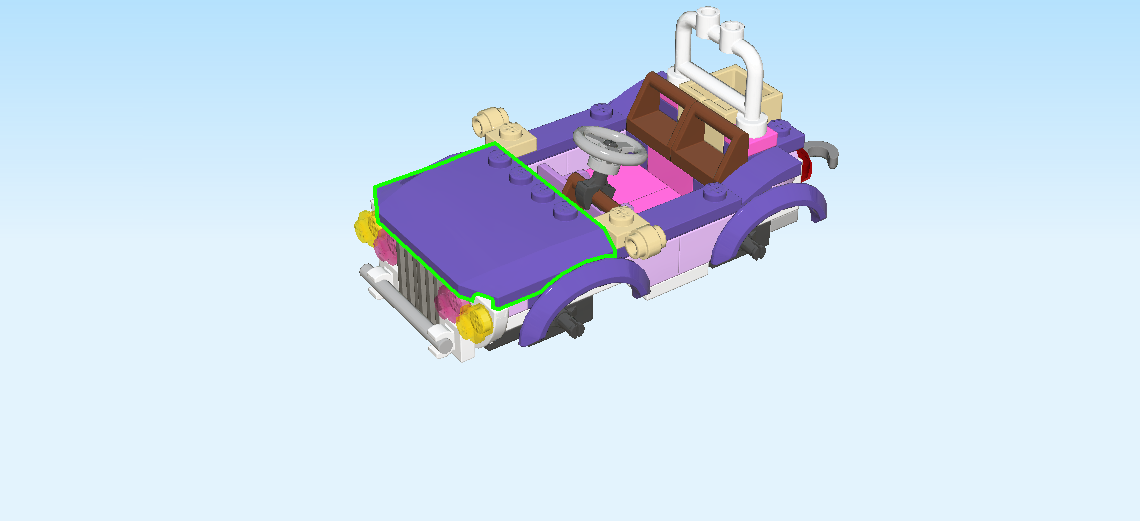
| Find 1 medium lilac plate 4x6x⅔ with sloped sides and 4 knobs. |
| Put it vertically centered to the left of the steering wheel, top knobs on the right side. |
| You have just created the engine hood of the truck. Well done! |
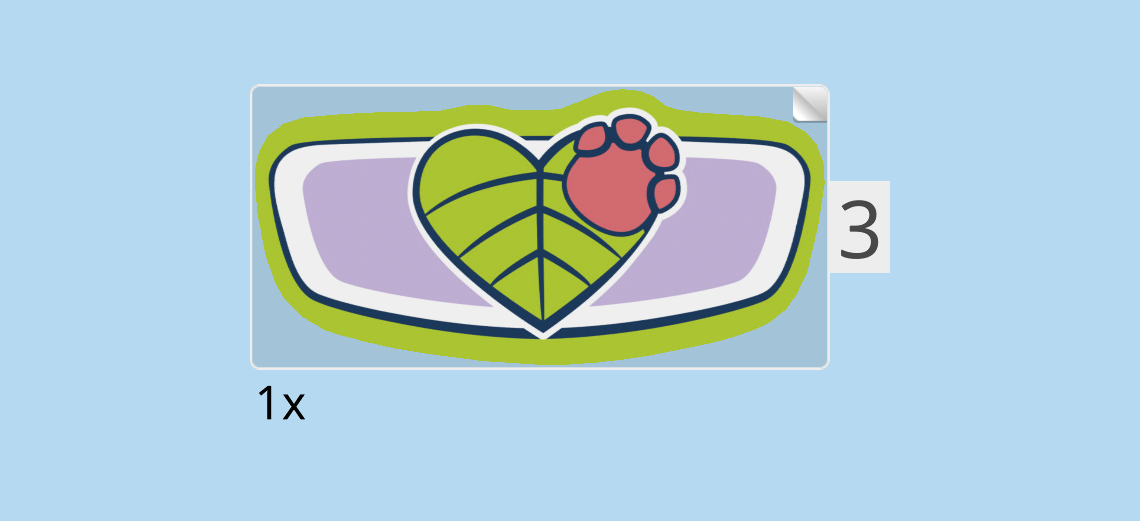
| Continue if you want to decorate the engine hood with a sticker now. If not, skip the next three sentences. |
| Find 1 large rectangular sticker number 3. Ask a sighted person to help you find the correct sticker. |
| Put it vertically in the middle of the engine hood. |
| The sticker shows a rectangular emblem. Its outline consists of bright green, dark blue, and white lines. The center area is pale lavender, and in the middle there is a green heart with leaf veins. It looks just like a heart-shaped leaf! And on the right half of the heart there is a small pink paw. |
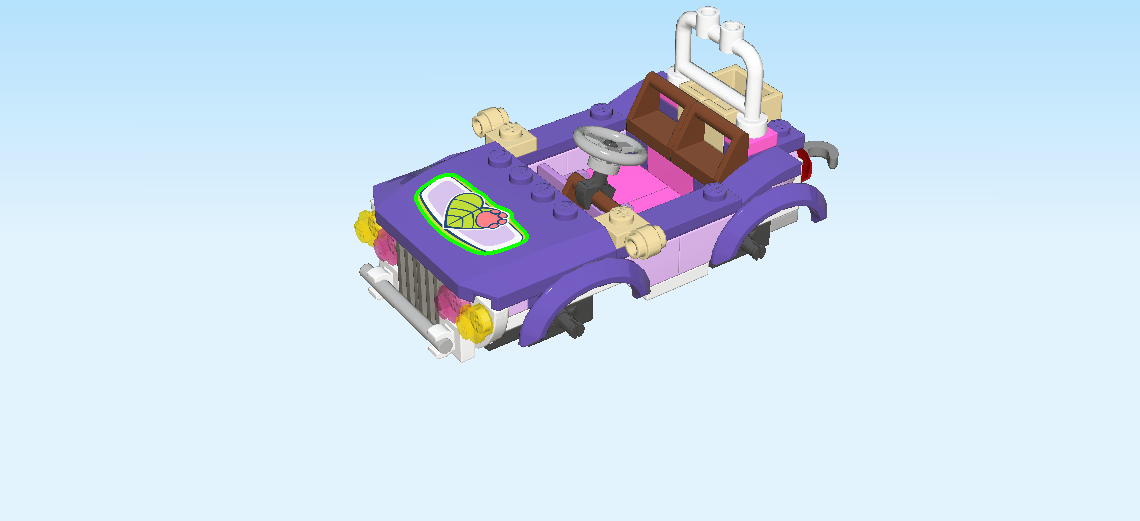
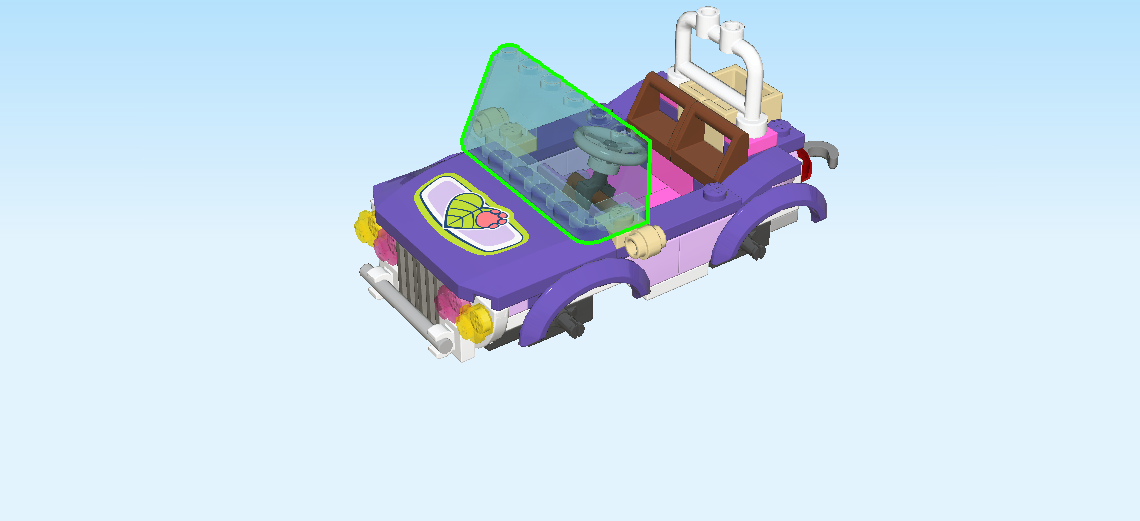
| Find 1 transparent light blue windscreen 2x6x2. |
| Put it vertically on the 4 knobs of the engine hood, slope to the left. |
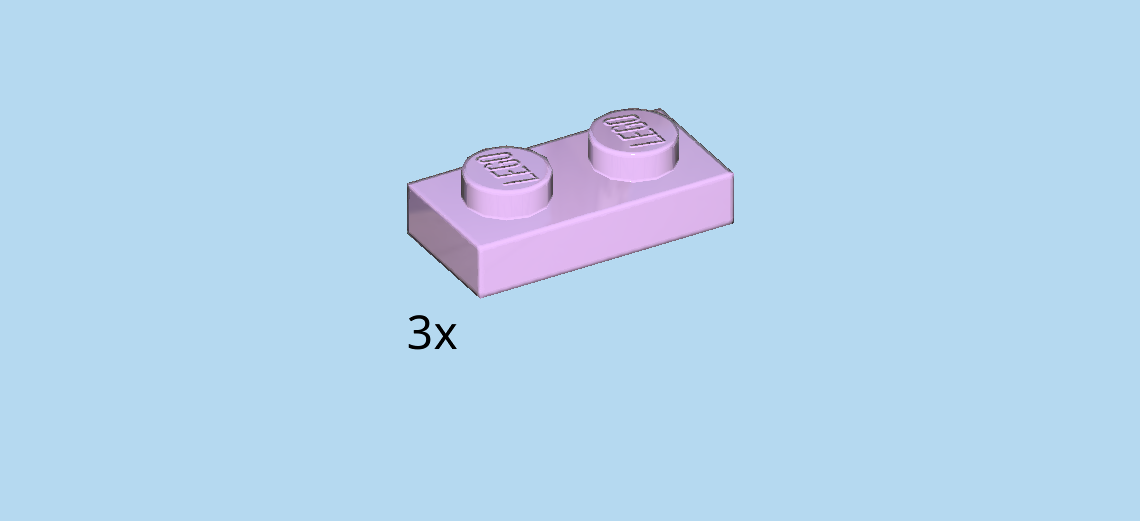
| Find 3 light lavender plates 1x2. |
| Put them vertically on top of the windscreen. |
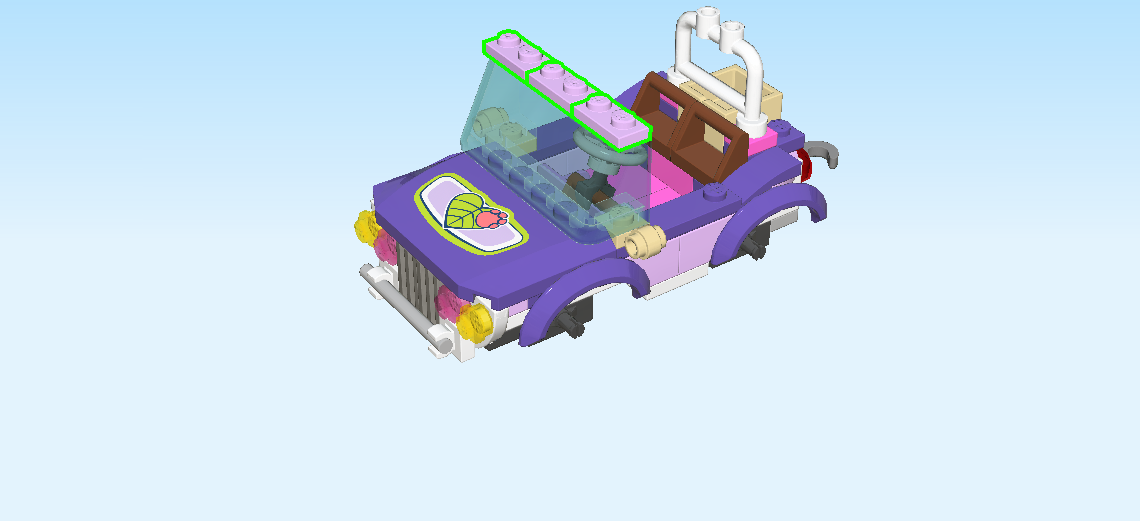
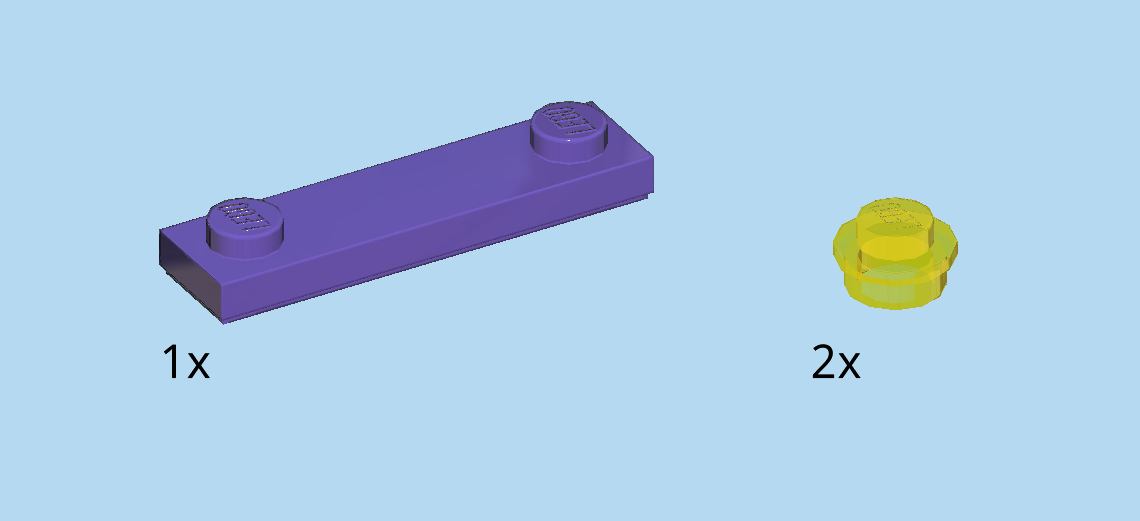
| Collect the following 3 pieces: |
| 1 medium lilac plate 1x4 with 2 knobs, |
| and 2 transparent yellow round plates 1x1. |
| Put the plate 1x4 vertically centered on top of the windscreen. |
| Put the 2 round plates 1x1 in front of and behind the previous piece. |
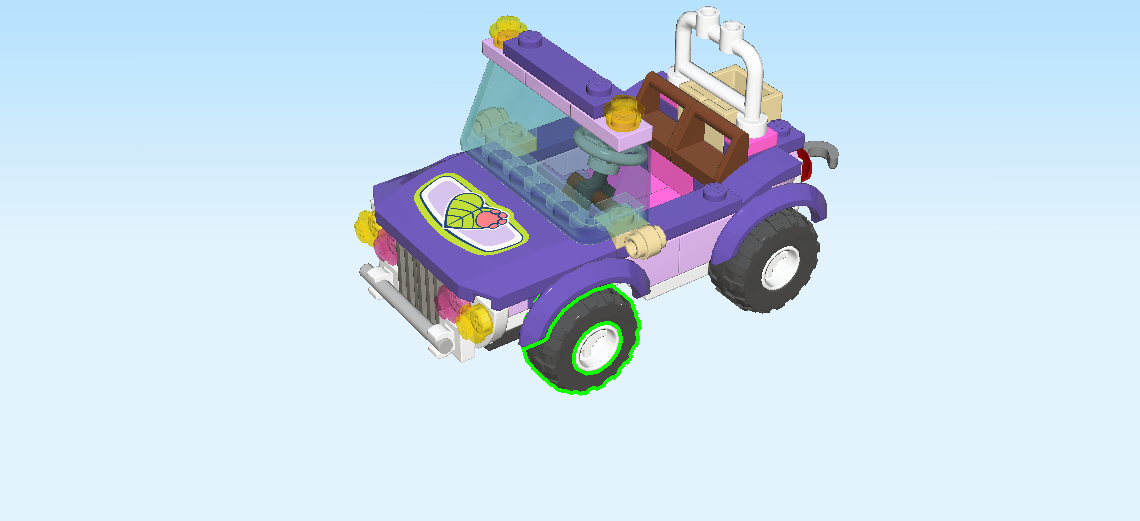
| Now, let's assemble the 4 wheels. |
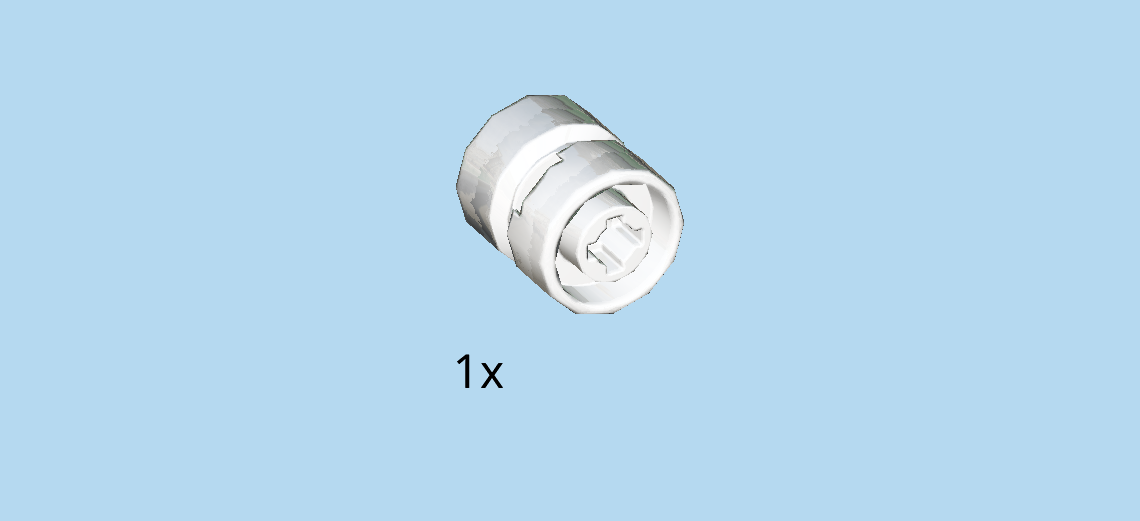
| Find 1 white wide rim with hole. |
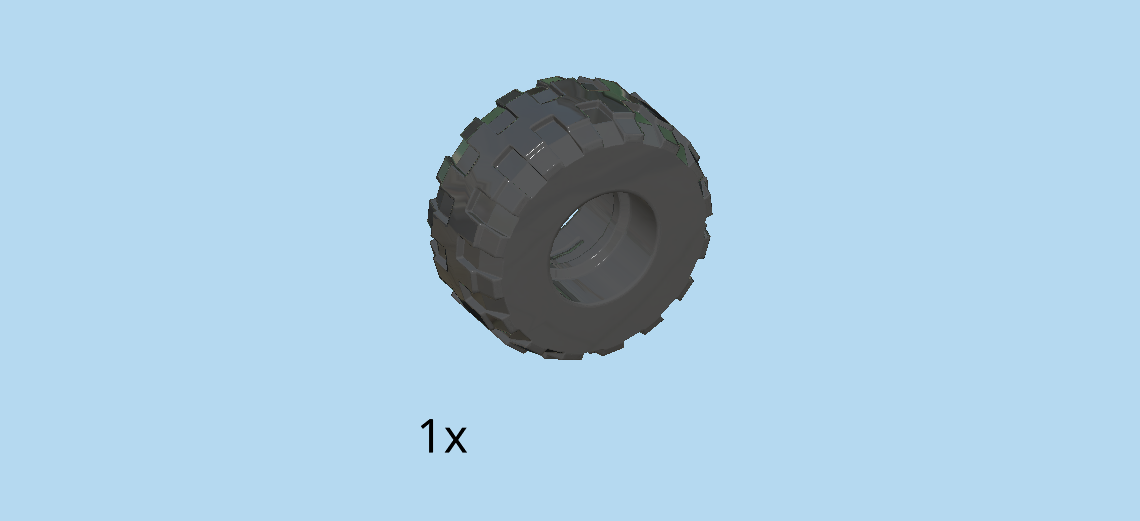
| Find 1 black wide balloon tire with profile. |
| Put the tire around the rim. |
| Now find 3 more rims and 3 more tires. Assemble the remaining wheels just like the first one. |
| The 4 wheels are done! Now snap them onto the 4 connectors at the bottom of the truck. |
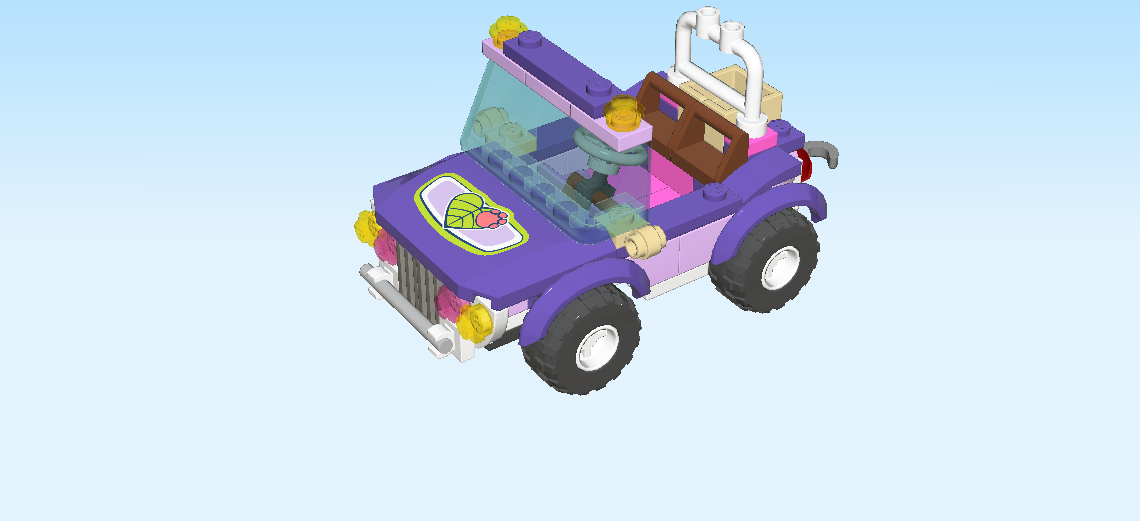
| The Jungle Rescue truck is finished! Great job! The truck is ready for action: Emma can already get behind the steering wheel and take it for a spin. Maybe you also want to try snapping on the trailer. |
| We have built everything from bag 1 now. Time for bag 2! |
| Open bag 2 and any sub-bags in it. You can choose to have the bricks sorted by color again. |
| In the next step, we will build the Stephanie Minidoll. |
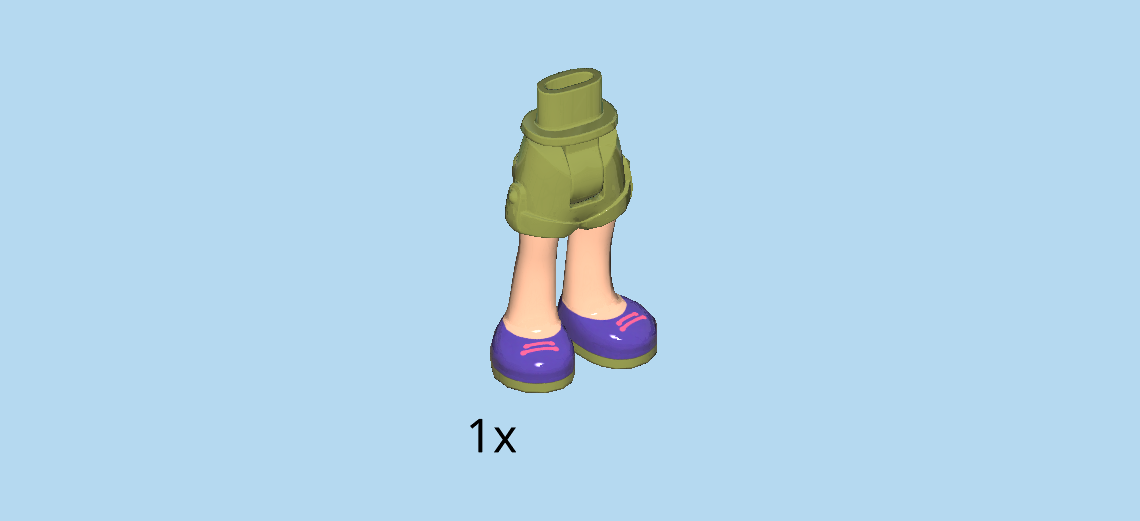
| Find 1 light nougat brown and olive green pair of legs with shorts. |
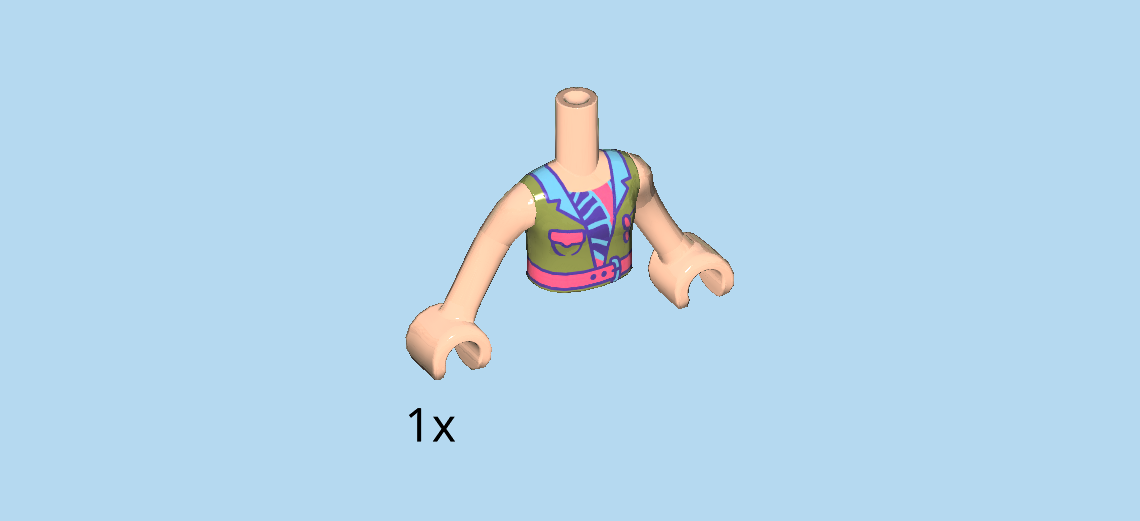
| Find 1 light nougat brown and olive green Minidoll upper body. |
| Put it on top of the legs. |
| Find 1 light nougat brown head. |
| Put it on top. |
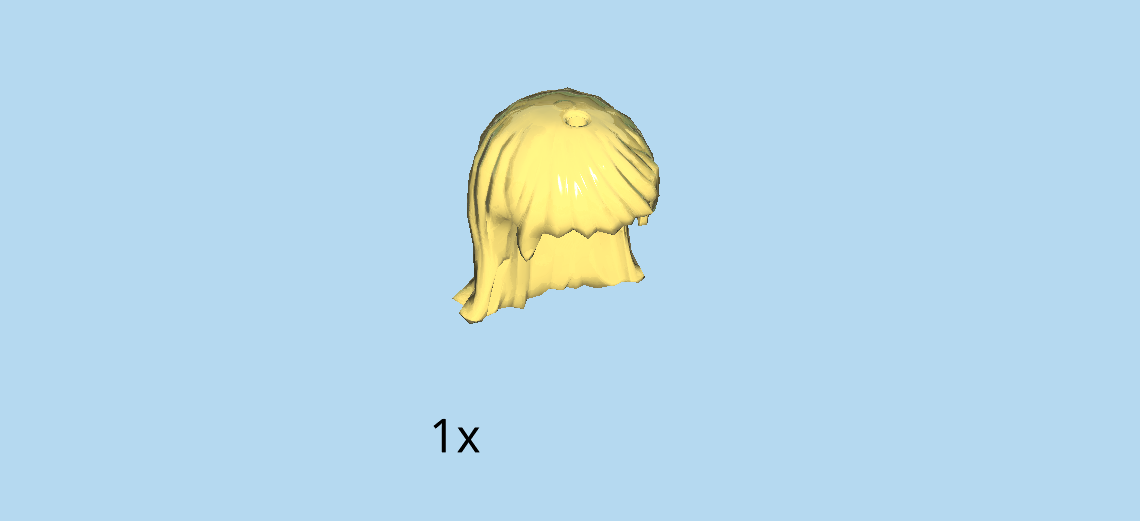
| Find 1 lemon yellow medium long hairpiece with bangs. |
| Put it on the head. |
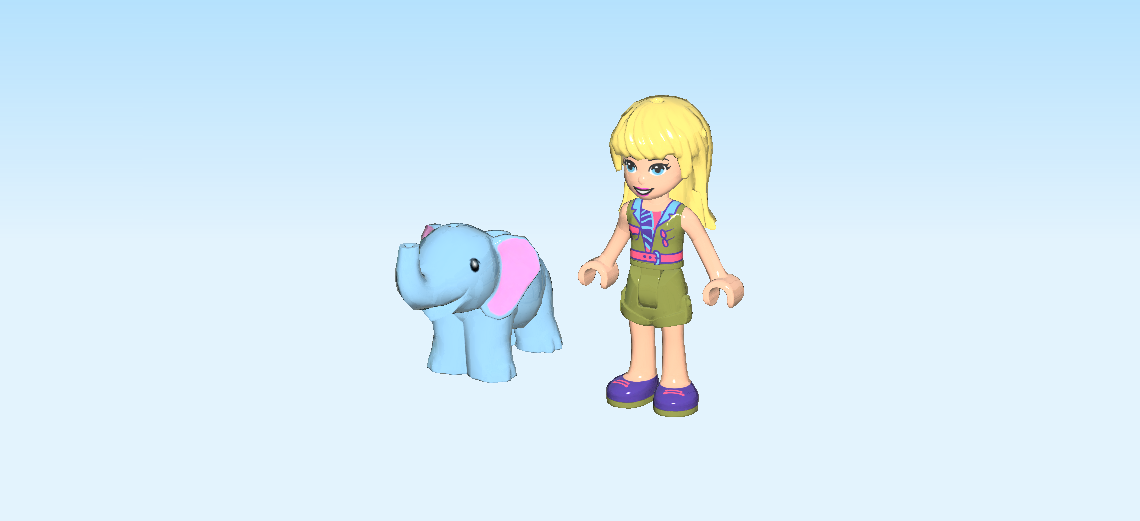
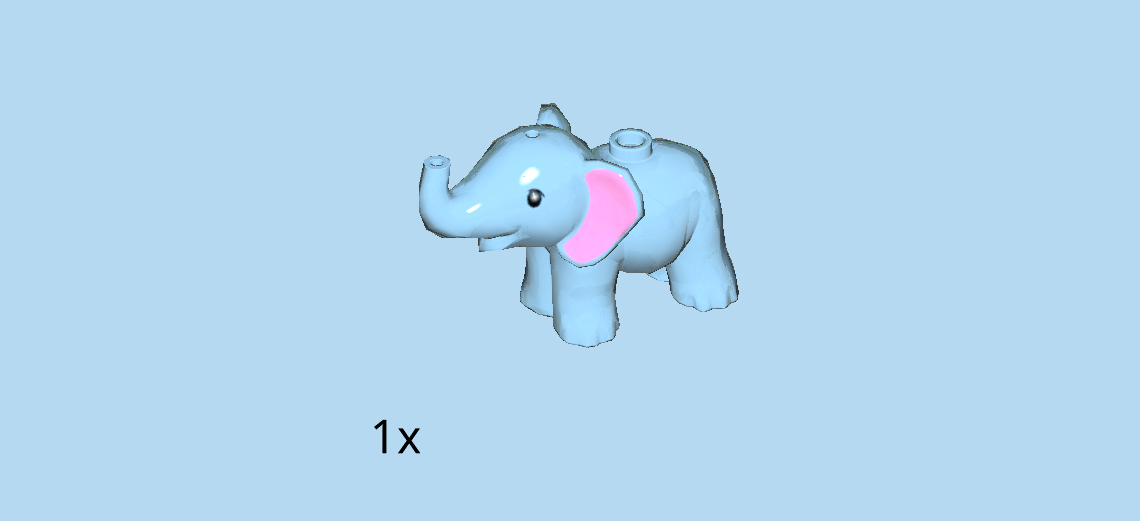
| Find 1 baby blue baby elephant. |
| The Stephanie Minidoll is finished! Great job! Stephanie is wearing olive green sleeveless overalls with a pink belt and chest pocket and a bright blue collar. Underneath she is wearing a tank top with a blue, pink, and lilac pattern. Stephanie is smiling and her blue eyes are very friendly. The baby elephant is one of her best friends. |
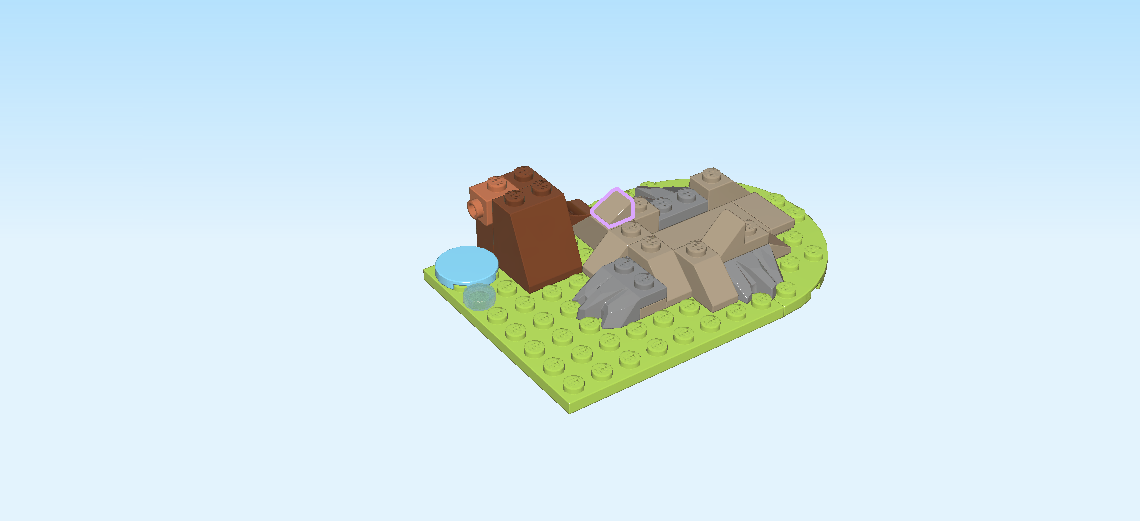
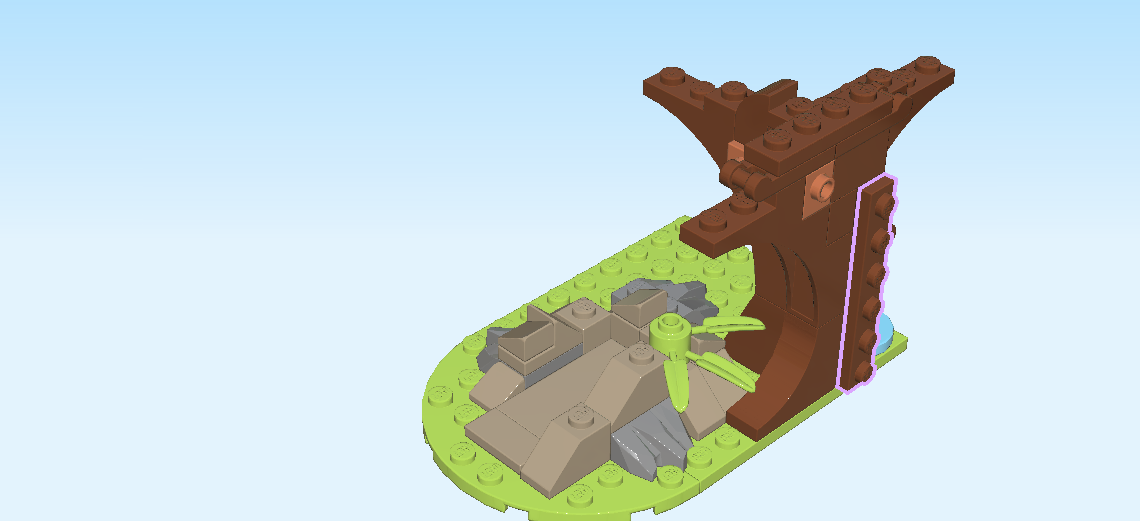
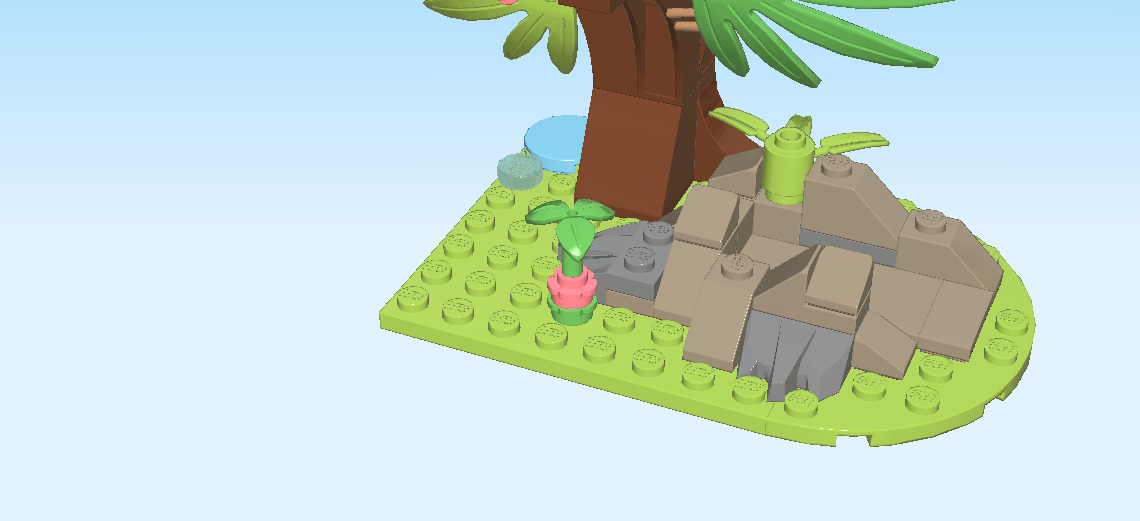
| Next up, we will build the jungle tree with sand pit. |
| This build is a little green jungle oasis built on a green plate with a half circle shape on the right. On the right half of this oasis we will build a rock formation with the quicksand pit in the middle, and on the left half at the back, we will build a beautiful large palm tree. |
| The sand pit and the palm tree consist of many different bricks, pieces, and elements. Of course, we will tell you exactly where each brick and piece goes. However, finding the exact locations and orientations might sometimes be hard. So naturally, you can also choose to build your very own rock formation and tree as you please! Let's get started! |
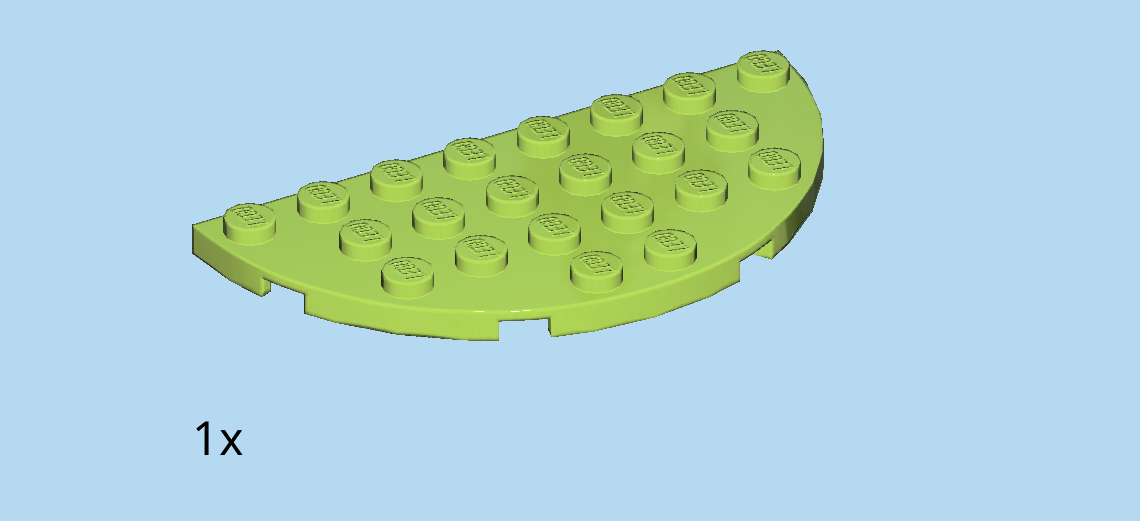
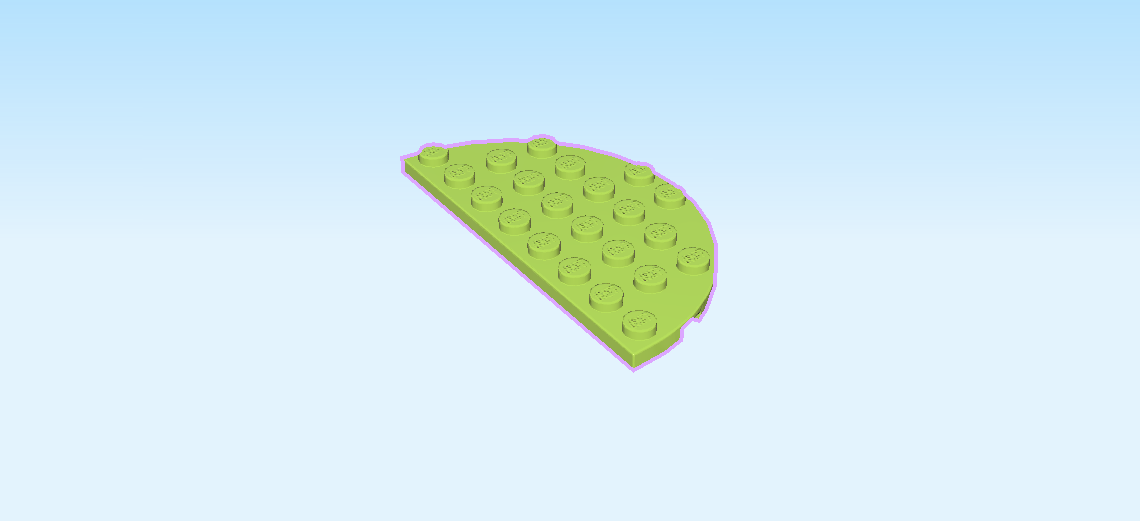
| Find 1 bright yellowish green half-circle plate 4x8. |
| Put it vertically on the table, straight side to the left. |
| Collect the following 2 pieces: |
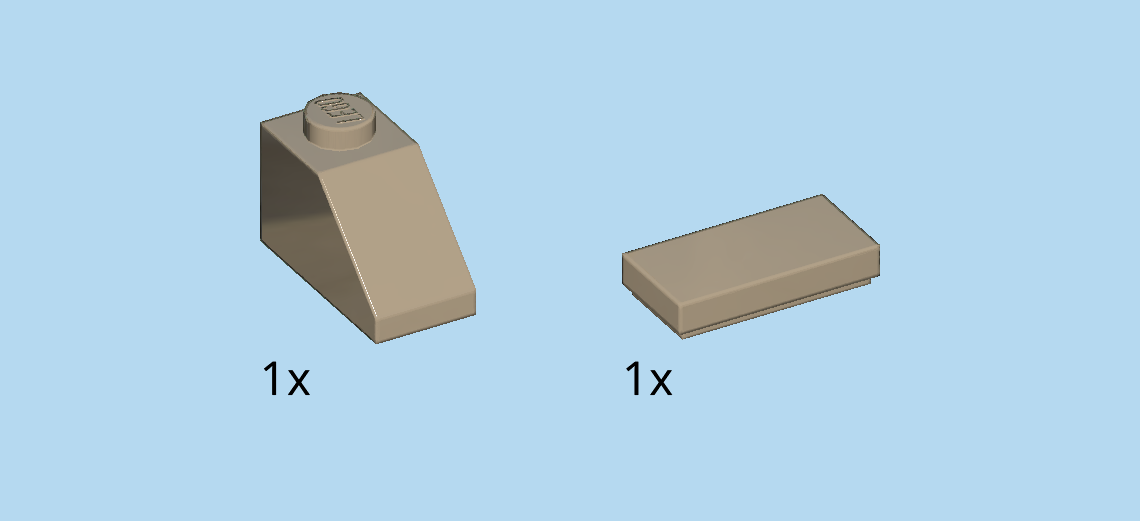
| 1 mud grey flat tile 1x2, |
| and 1 mud grey roof tile 1x2, 45°. |
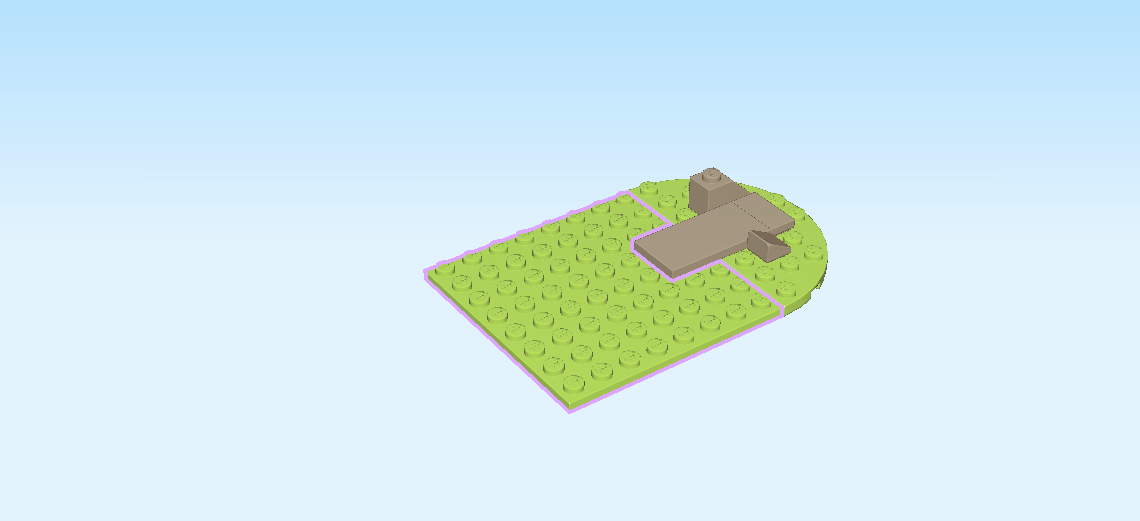
| Put the flat tile 1x2 vertically centered on the second column from the right. |
| Put the roof tile 1x2 horizontally behind the previous piece, slope to the right. Make sure the two pieces are flush on the right side, not on the left. |
| Collect the following 2 pieces: |
| 1 mud grey flat tile 2x4, |
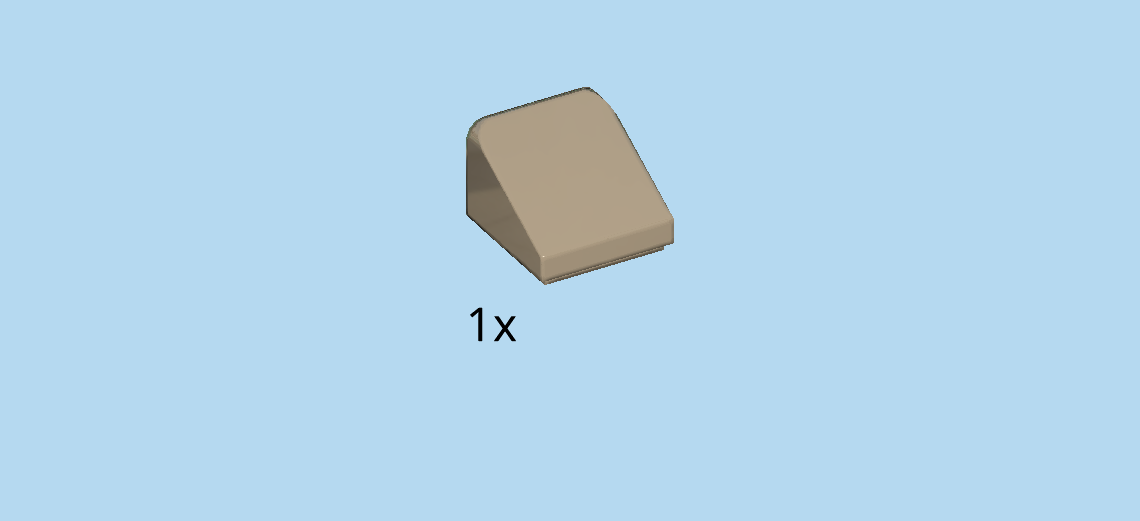
| and 1 mud grey smooth roof tile 1x1x⅔. |
| Put the flat tile 2x4 horizontally centered to the left of the flat tile 1x2, overhanging to the left. |
| Put the roof tile 1x1x⅔ in front of the previous piece on the second knob from the left, slope to the right. |
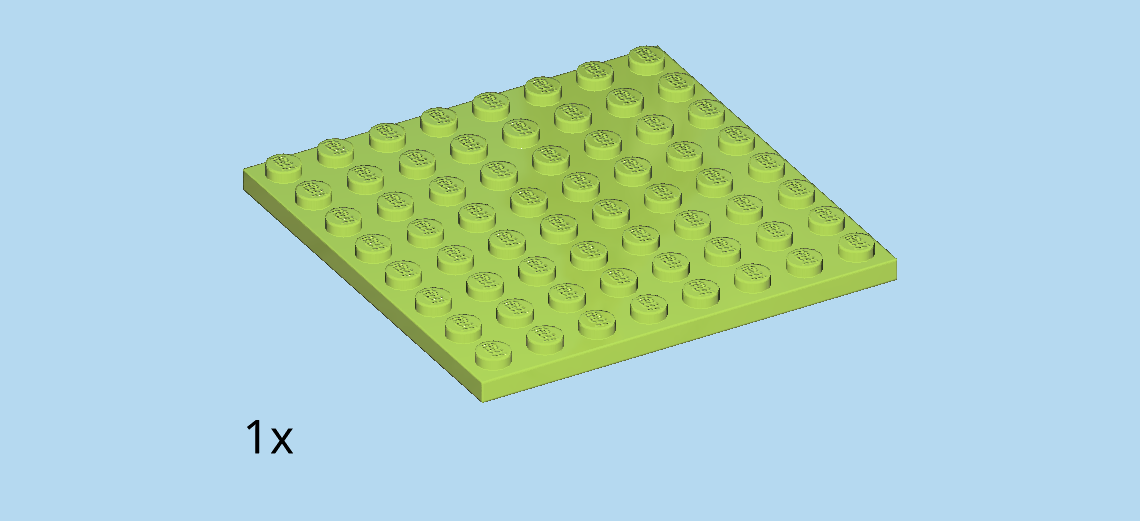
| Find 1 bright yellowish green plate 8x8. |
| Connect it with the structure from the left: put it underneath the flat tile 2x4. The edge of this plate lines up with the flat edge of the half-circle plate. |
| The 2 flat tiles will be the center of the rock formation. This means that we will use grey and mud-colored pieces to build around these flat tiles. Brown bricks will be used for the tree. |
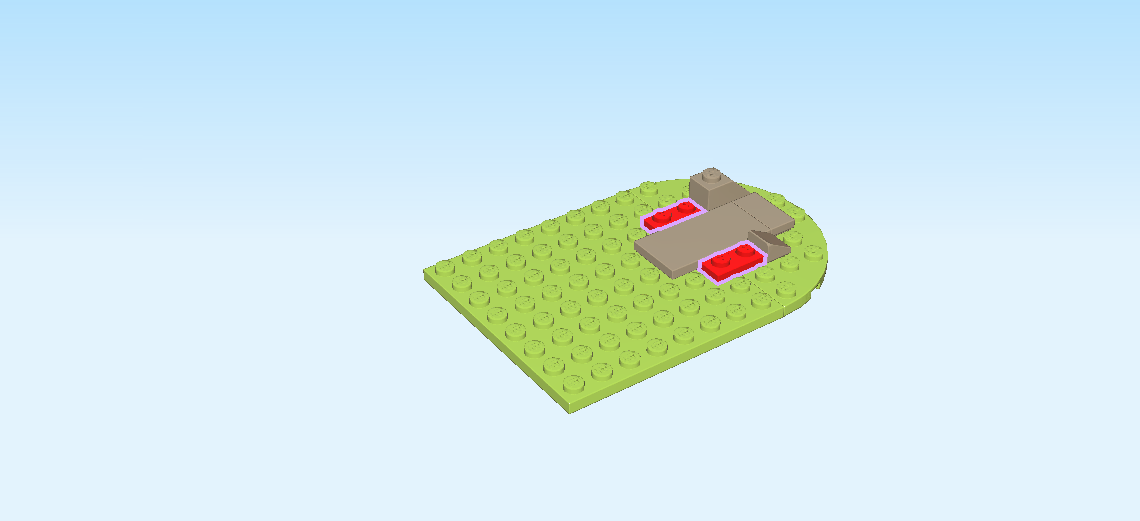
| Find 2 bright red plates 1x2. |
| Put 1 horizontally to the left of the roof tile 1x2. |
| Put the other one horizontally to the left of the smooth roof tile 1x1. |
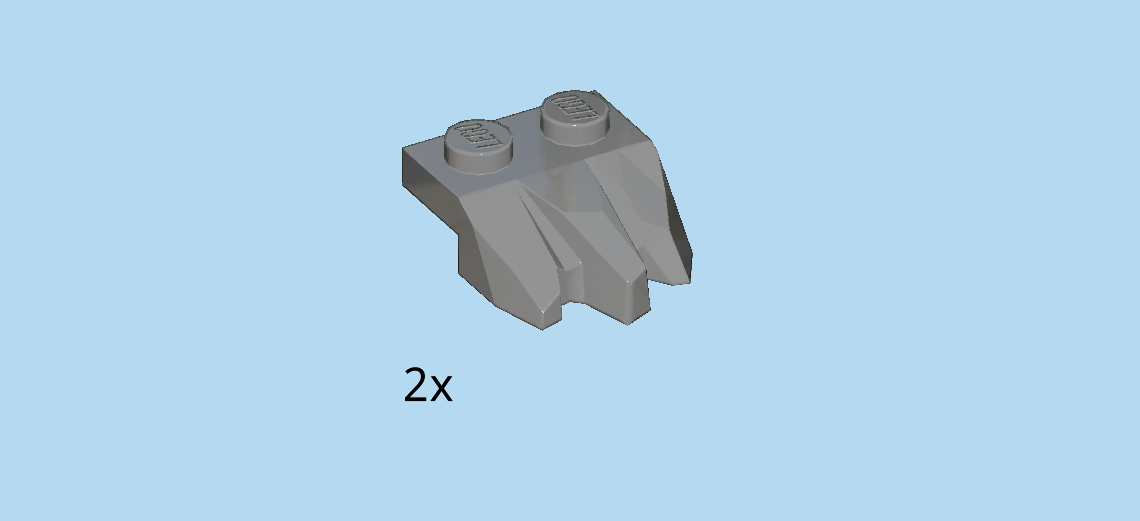
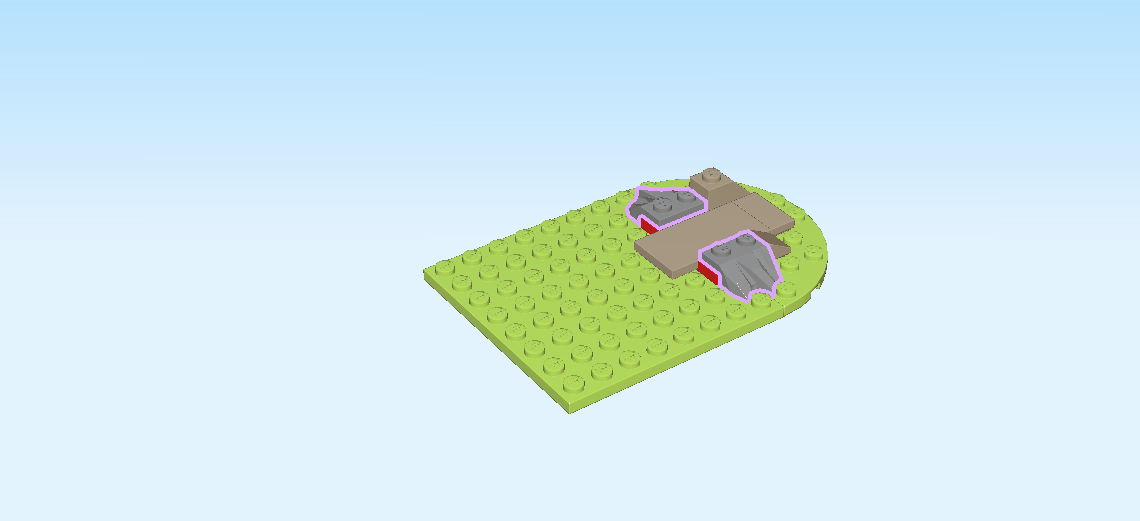
| Find 2 dark stone grey design plates 1x2 with side rocks. |
| Put them horizontally on top of the previous pieces, rocks to the front and back. |
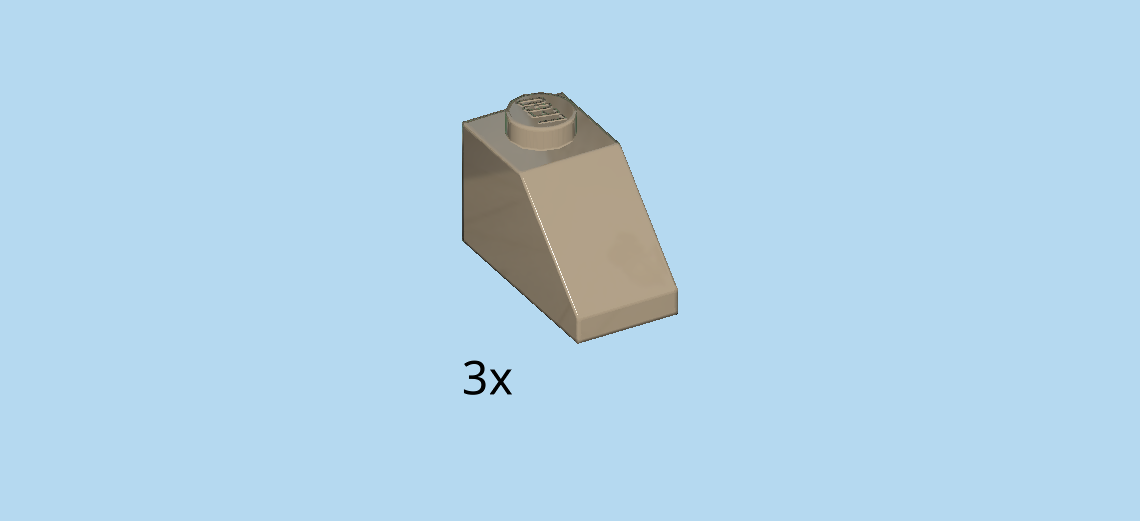
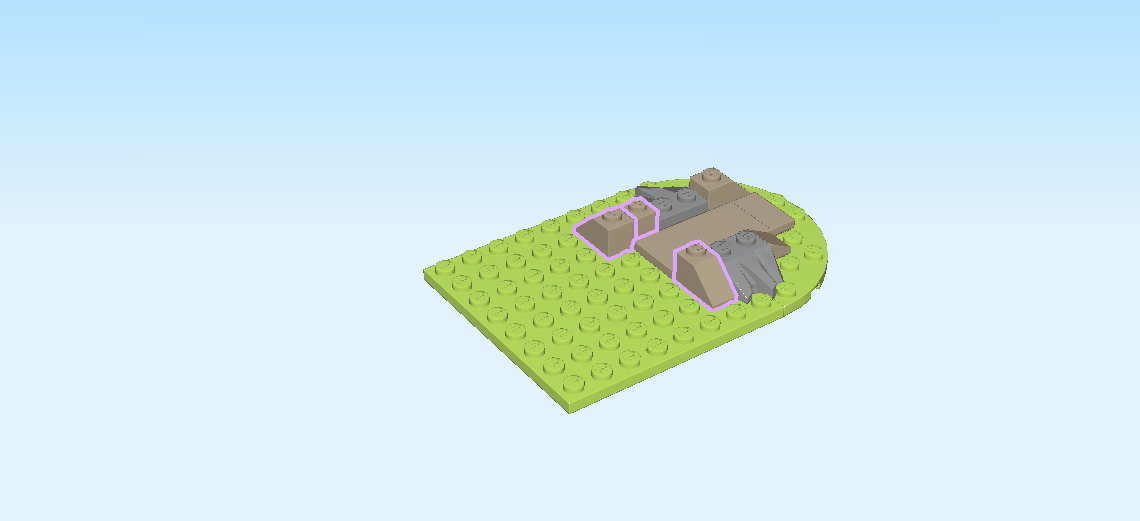
| Find 3 mud grey roof tiles 1x2, 45°. |
| Put 2 of them vertically to the left of the rock plate at the back, slopes to the back. Make sure that the backmost row of the base plate remains empty. |
| Put 1 vertically to the left of the rock plate at the front, slope to the front. |
| Find 2 mud grey roof tiles 1x2, 45°. |
| Put 1 horizontally on the fifth row from the front, to the left of the flat tiles, slope to the left. |
| Put the other one vertically in front of the previous piece, also touching the flat tile, slope to the front. |
| Collect the following 2 pieces: |
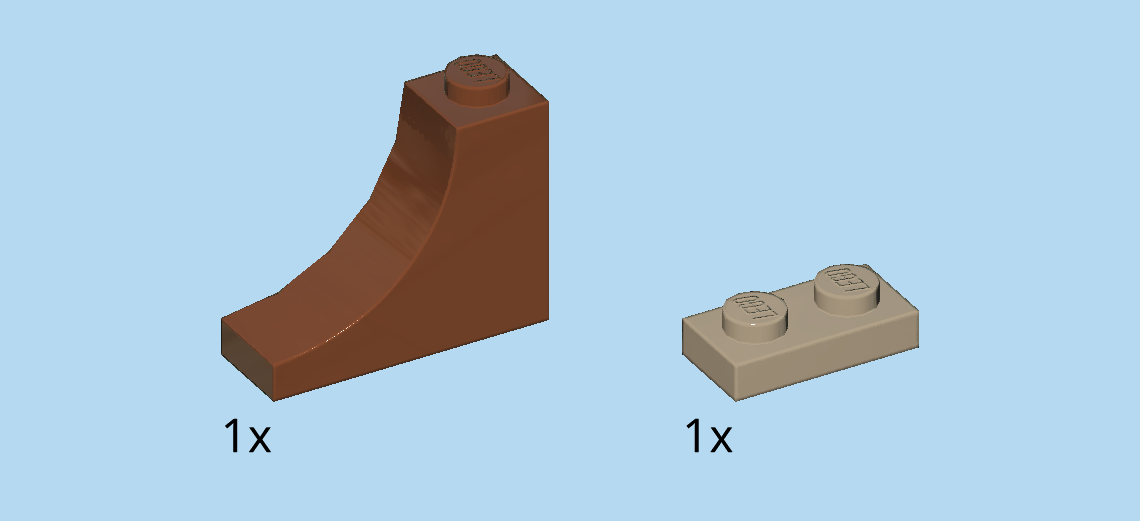
| 1 reddish brown brick 1x3x2 with inverted half-arch, |
| and 1 mud grey plate 1x2. |
| Put the plate 1x2 vertically to the left of the previous piece. |
| Skip 3 columns from the left edge, and put the brick with inverted half arch horizontally on the backmost row, inverted arch to the right. |
| Find 1 reddish brown brick 1x1x1⅔ with 2 side knobs. |
| Put it to the left of the previous piece, side knobs to the back. |
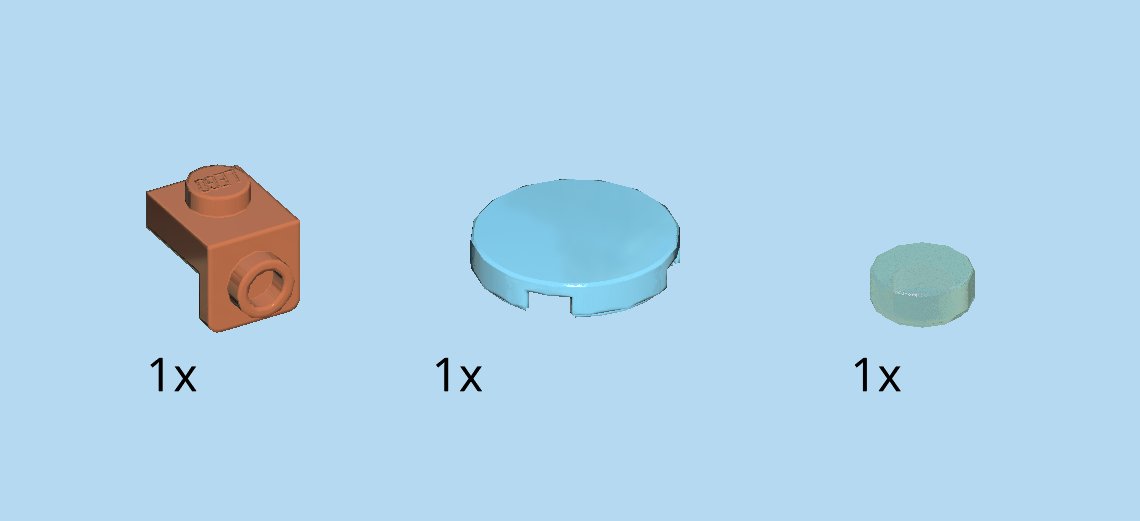
| Collect the following 3 pieces: |
| 1 medium azure blue round tile 2x2, |
| 1 dark orange top angle plate 1x1 - 1x1 with side knob, |
| and 1 transparent light blue round tile 1x1. |
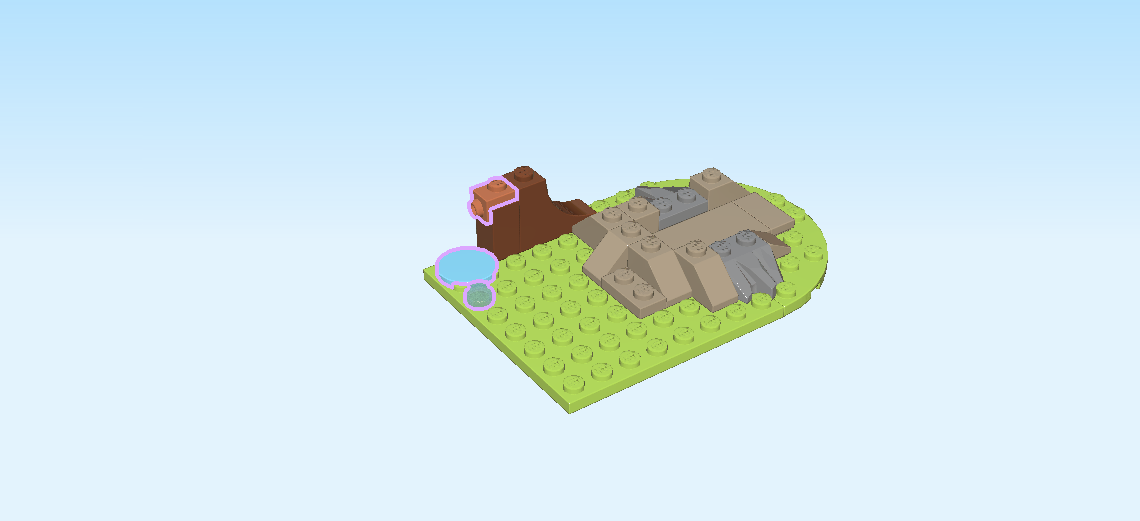
| Put the angle plate 1x1 on top of the previous piece, side knob to the left. |
| Put the round tile 2x2 into the back left corner. |
| Put the round tile 1x1 in front of the previous piece on the leftmost column. |
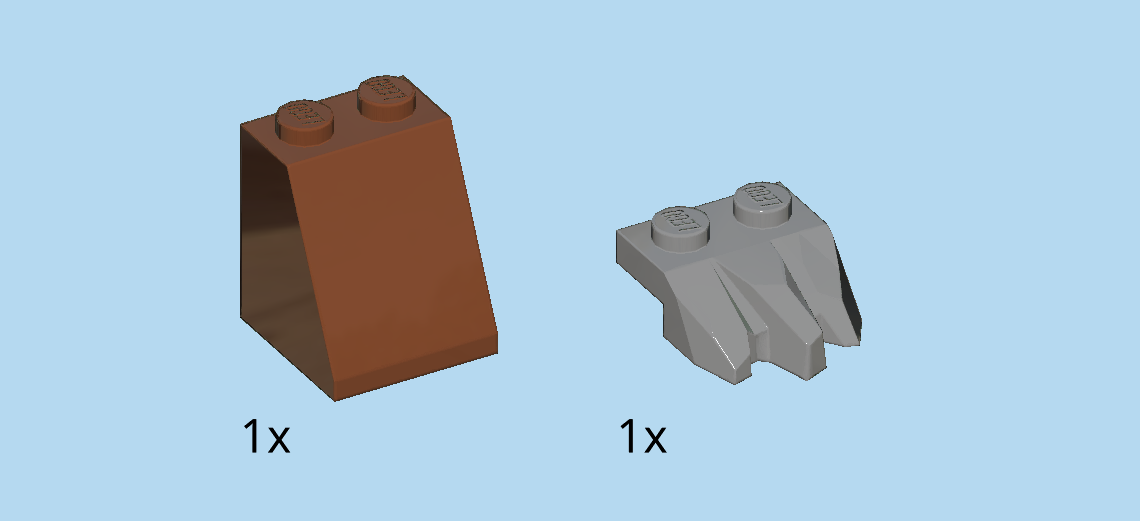
| Collect the following 2 pieces: |
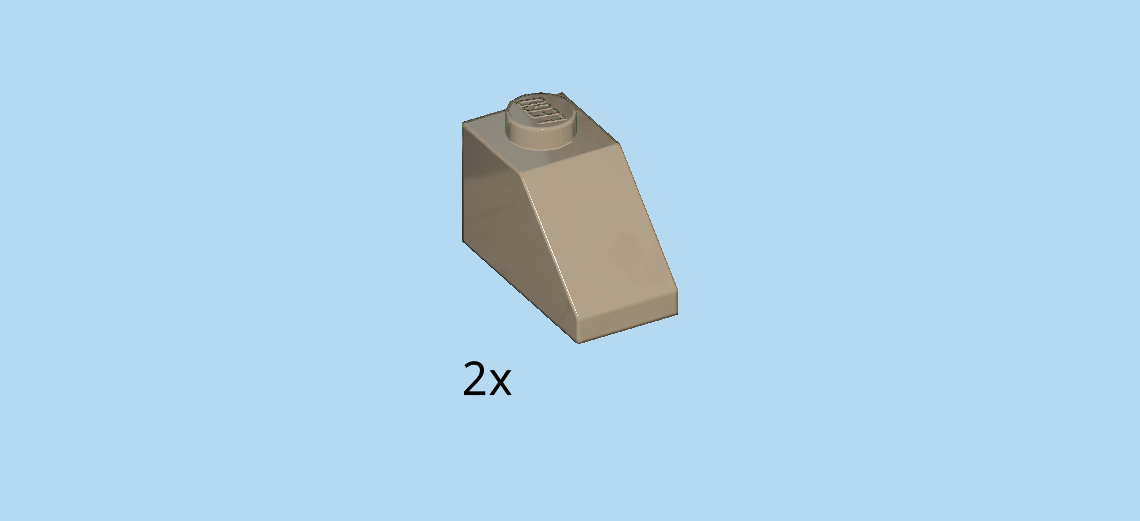
| 1 reddish brown roof tile 2x2x2, 65°, |
| and 1 dark stone grey design plate 1x2 with side rocks. |
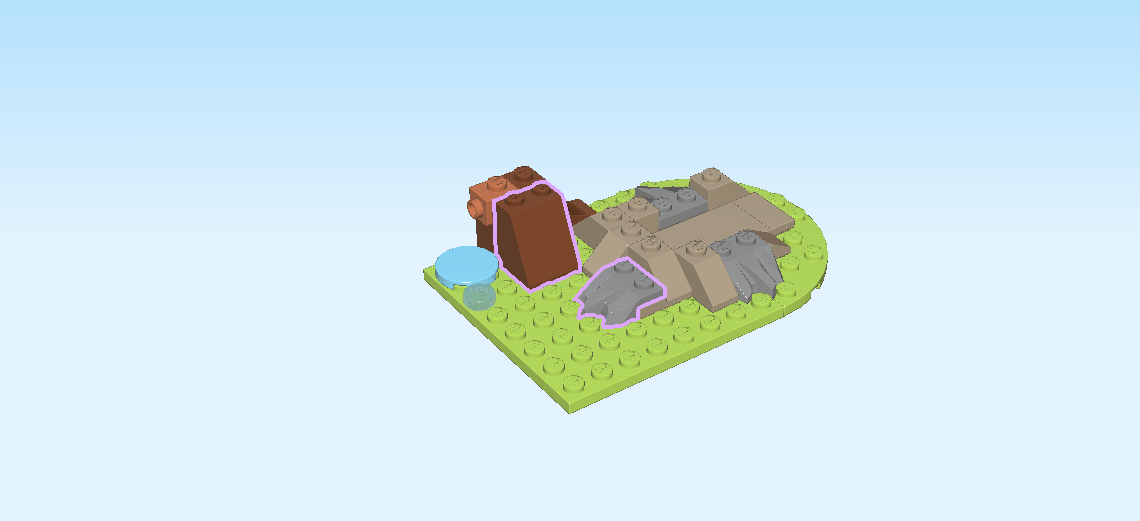
| Put the roof tile 2x2x2 directly in front of the highest part of the structure at the left back, slope to the front. |
| This is the base of your tree trunk! We'll keep building here with brown bricks later. |
| Put the rock plate vertically on the fifth column from the left, on top of the plate 1x2, side rocks to the left. |
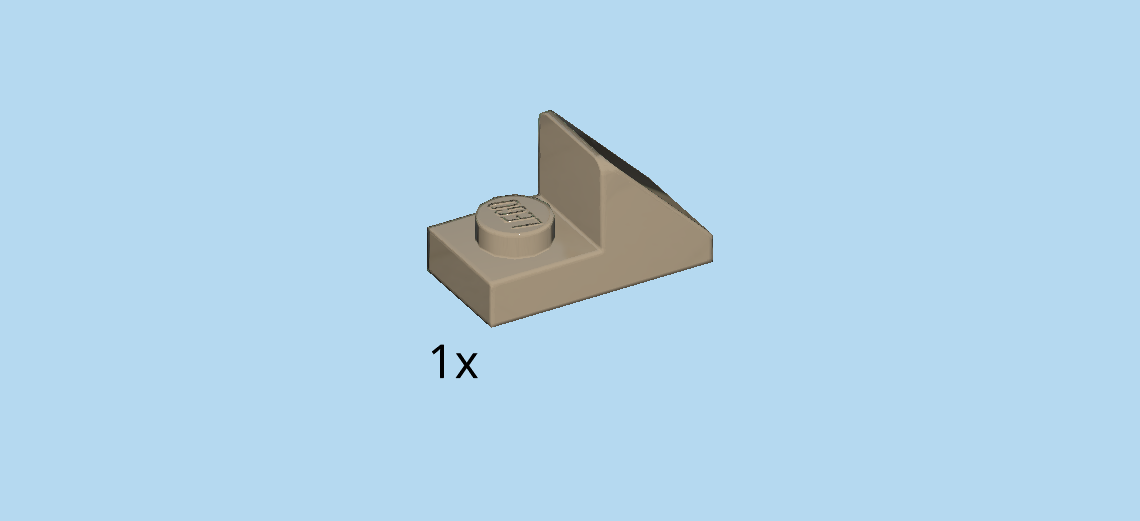
| Find 1 mud grey plate 1x2 with top roof tile, 45°. |
| Put it horizontally behind the rocky part pointing to the front, top roof tile to the left. If you count, this is the third row from the front. |
| Find 1 mud grey smooth roof tile 1x1x⅔. |
| Put it on the knob in the back left corner of the rock formation you are building, slope to the left. |
| Like we said before: if you prefer a slightly different location for this, or similar pieces, that's fine, too! |
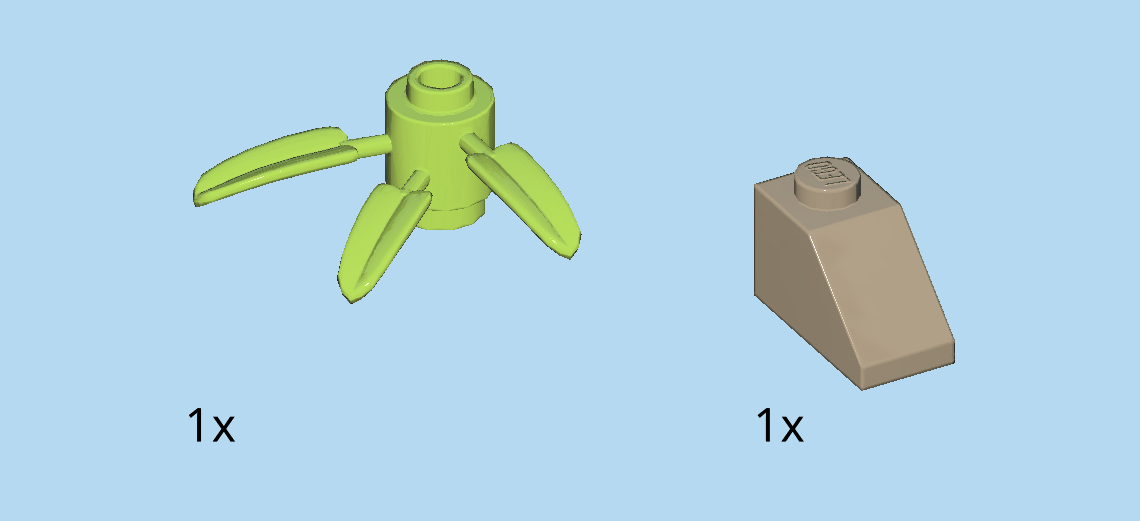
| Collect the following 2 pieces: |
| 1 mud grey roof tile 1x2, 45°, |
| and 1 bright yellowish green round brick 1x1 with 3 bamboo leaves. |
| Put the round brick with leaves to the right of the previous piece, leaves to the back. |
| Put the roof tile 1x2 horizontally to the right, slope to the right. |
| Find 2 mud grey smooth roof tiles 1x1x⅔. |
| Put 1 on the frontmost rightmost knob of the rock formation, slope to the front. |
| Skip 2 columns to the left and 1 row to the back, and put the other one on top, slope to the front. |
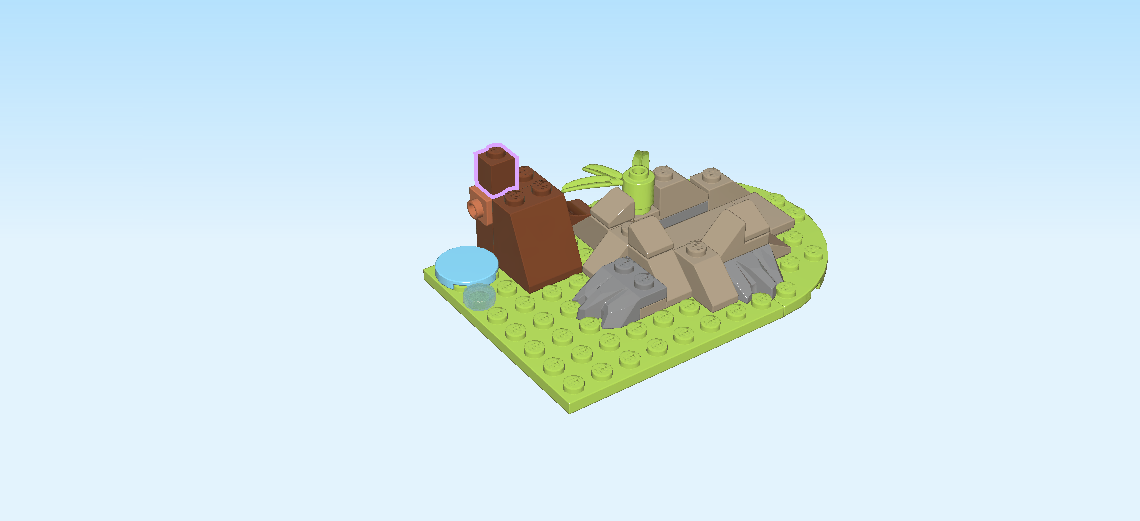
| Find 1 reddish brown brick 1x1. |
| Put it in the back left corner of the tree trunk. The tree trunk is the higher part at the back of the structure. |
| Find 1 reddish brown round plate 1x1 with side shaft. |
| Put it on top of the previous piece, shaft to the left. |
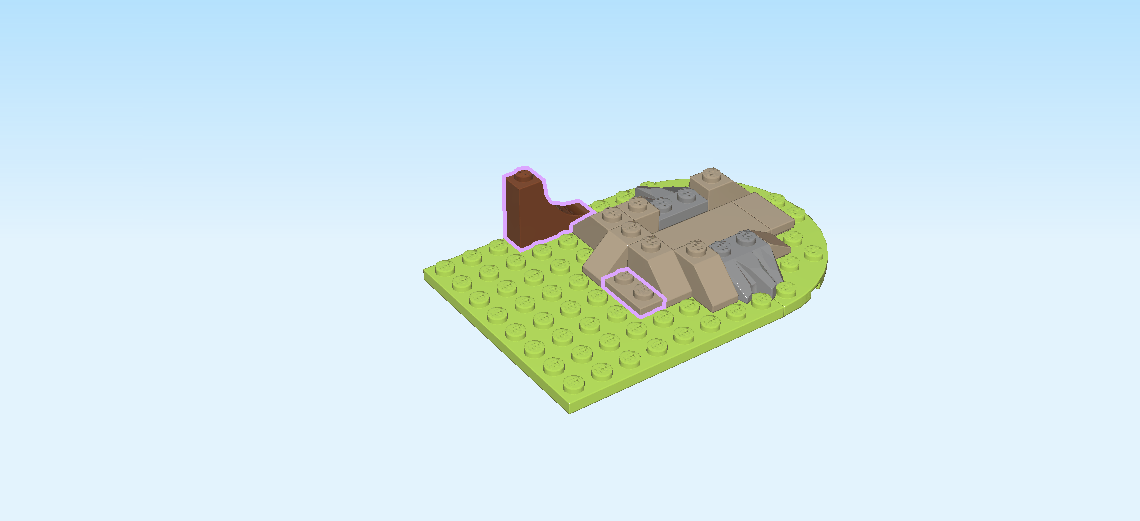
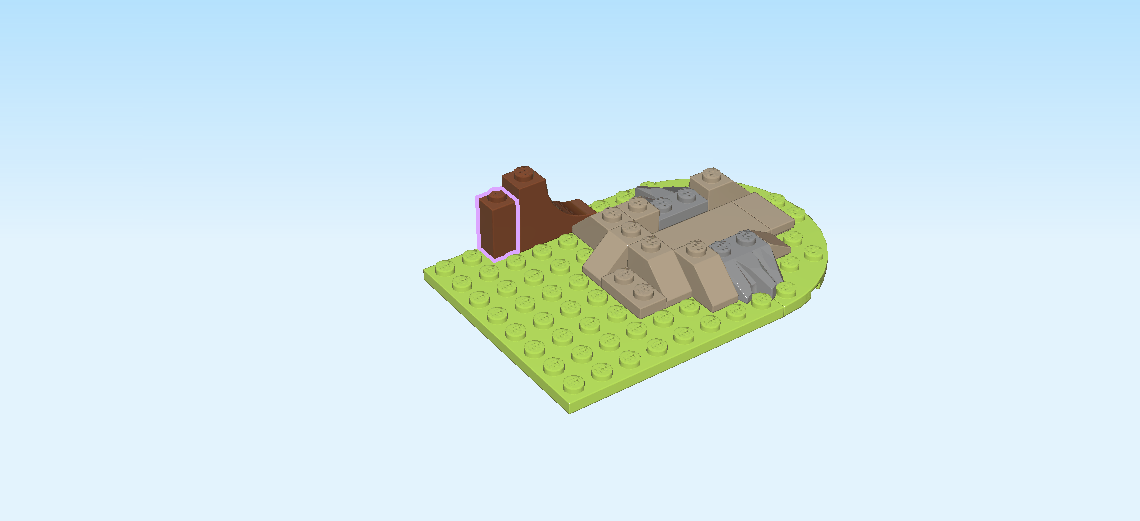
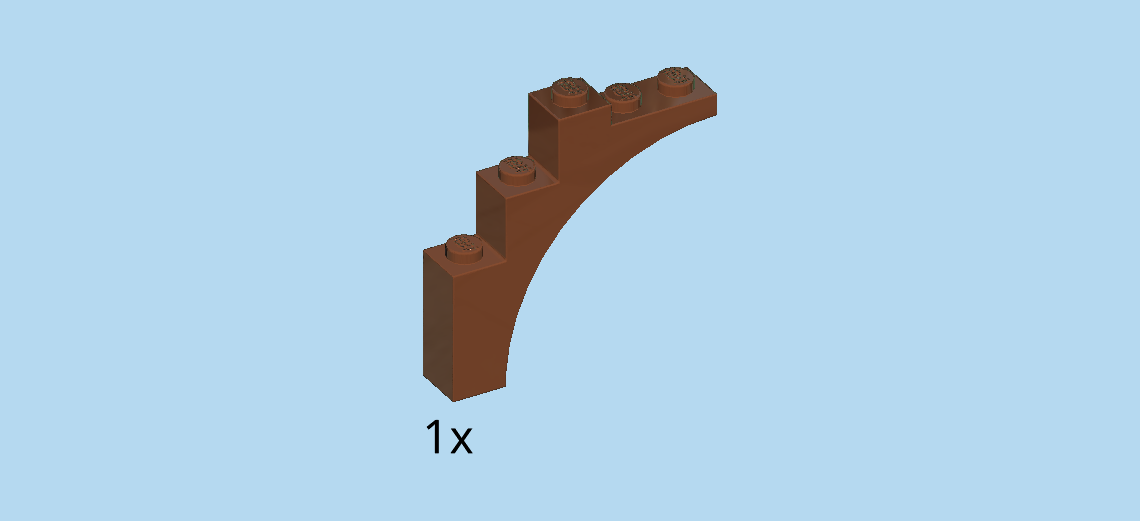
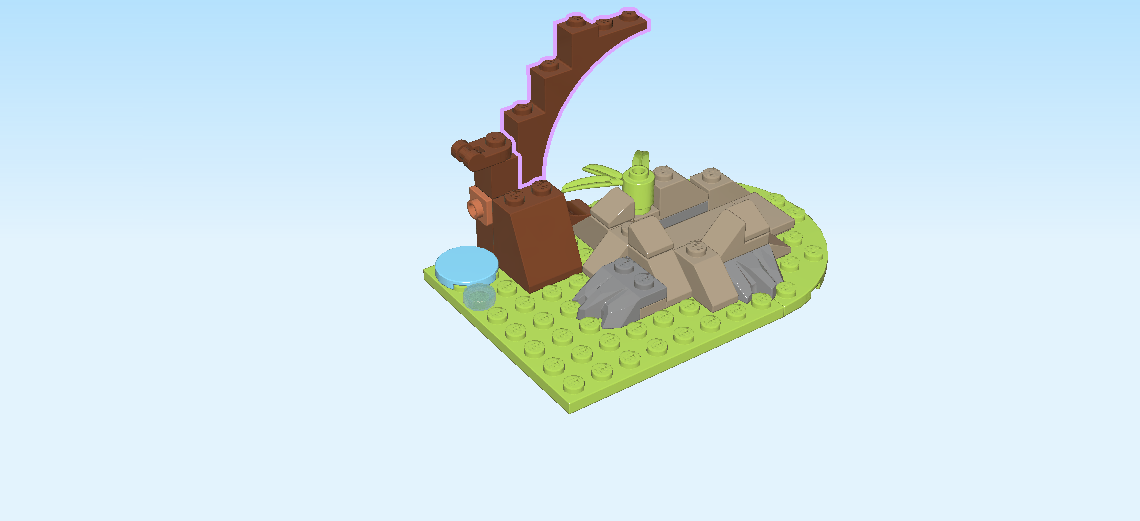
| Find 1 reddish brown half-arch brick 1x5x4 with 3 steps. |
| Put it to the right of the previous piece, half-arch overhanging to the right. |
| Find 1 reddish brown brick 1x1x1⅔ with 2 side knobs. |
| Put it to the left of the previous piece. Make sure the side knobs are pointing to the back. |
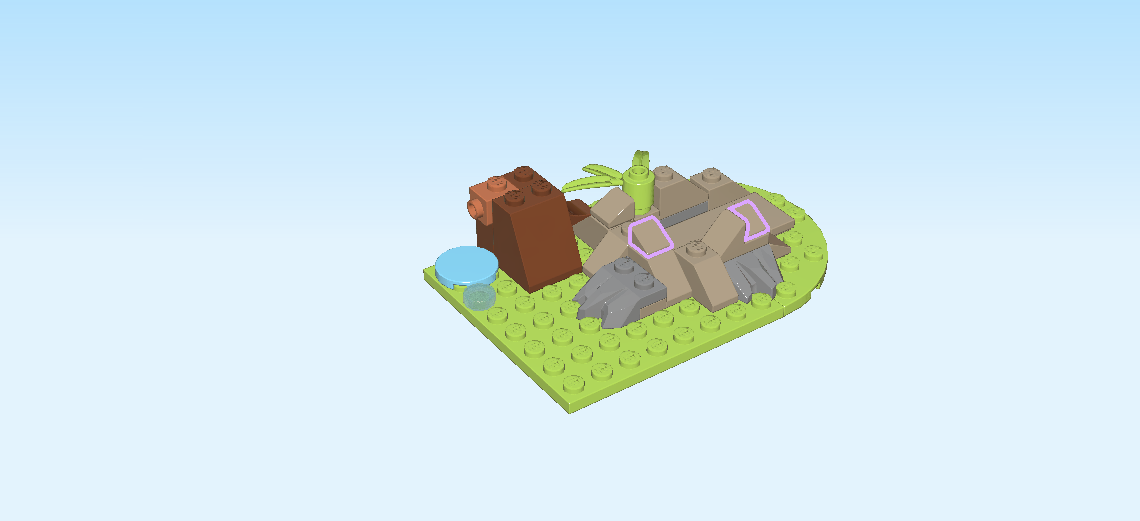
| Find 2 reddish brown half-arch bricks 1x5x4 with 3 steps. |
| Put 1 horizontally in front of the previous piece, arch overhanging to the left. |
| Put the other one vertically to the right of the previous piece, arch overhanging to the front. |
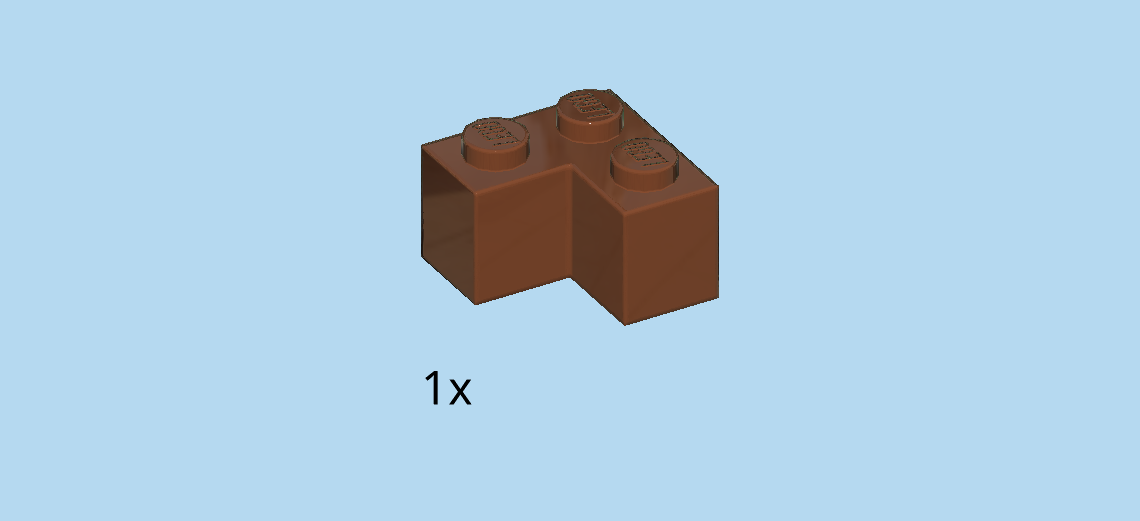
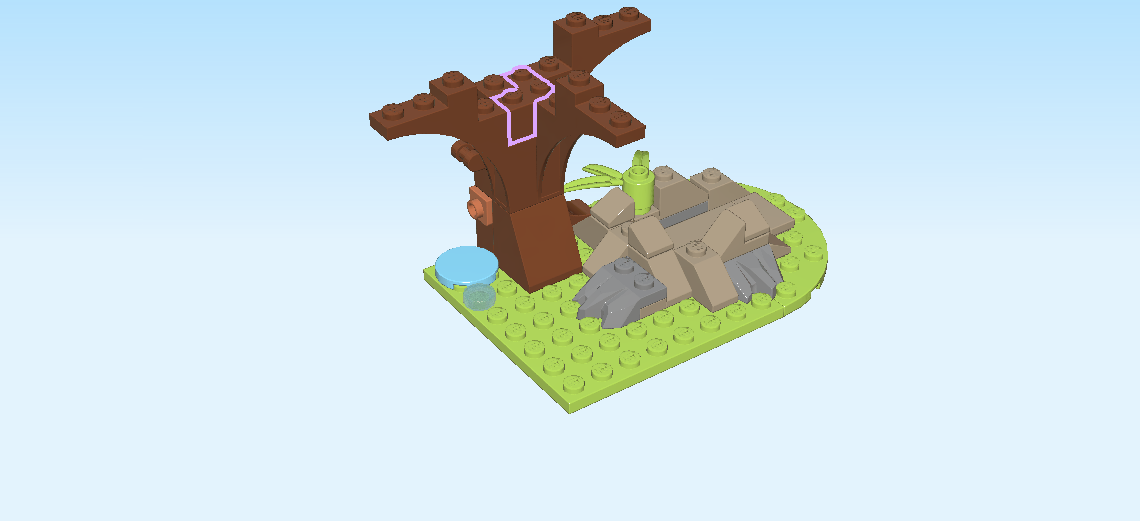
| Find 1 reddish brown corner brick 2x2. |
| In between the branches you have already mounted, you can now find a corner-shaped cut-out. The corner brick 2x2 fits perfectly into this opening. |
| Find 1 reddish brown brick 1x1. |
| Put it on the fourth knob from the left of the left branch. |
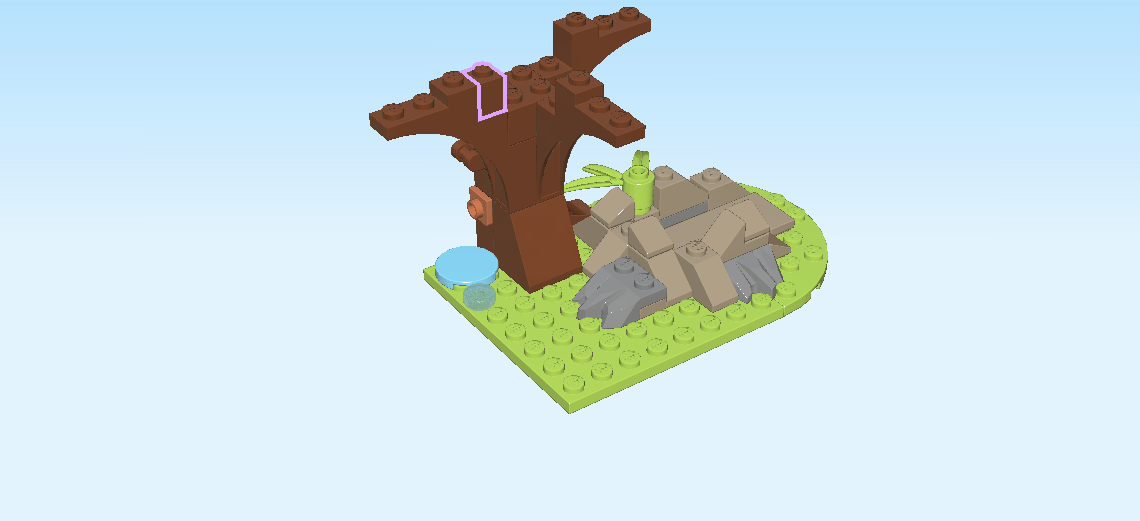
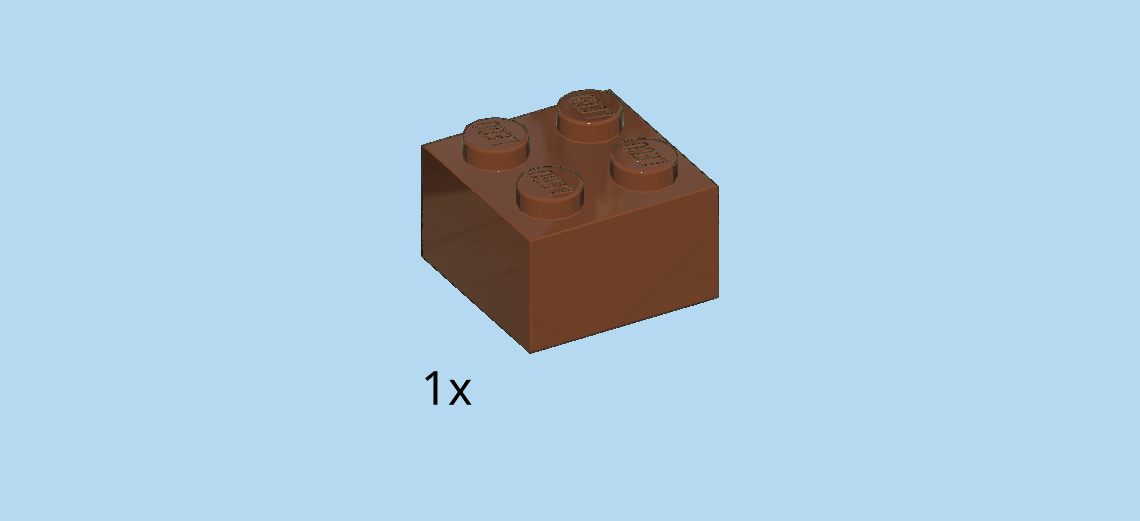
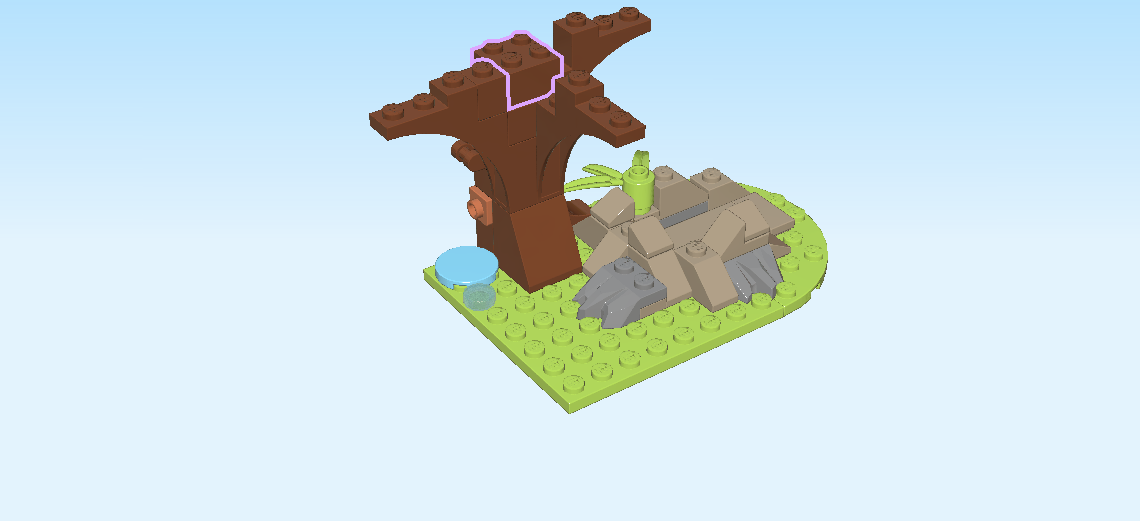
| Find 1 reddish brown brick 2x2. |
| Put it to the right of the previous piece. |
| Collect the following 2 pieces: |
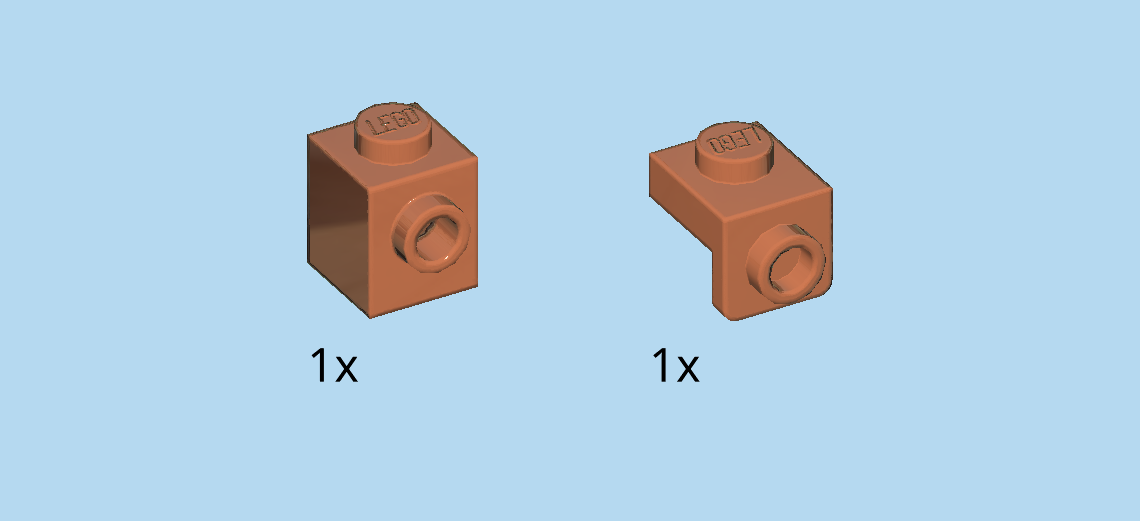
| 1 dark orange brick 1x1 with side knob, |
| and 1 dark orange top angle plate 1x1 - 1x1 with side knob. |
| Put the brick 1x1 to the right of the previous piece, side knob to the back. |
| Put the angle plate on the fourth knob from the front of the front branch, side knob to the right. |
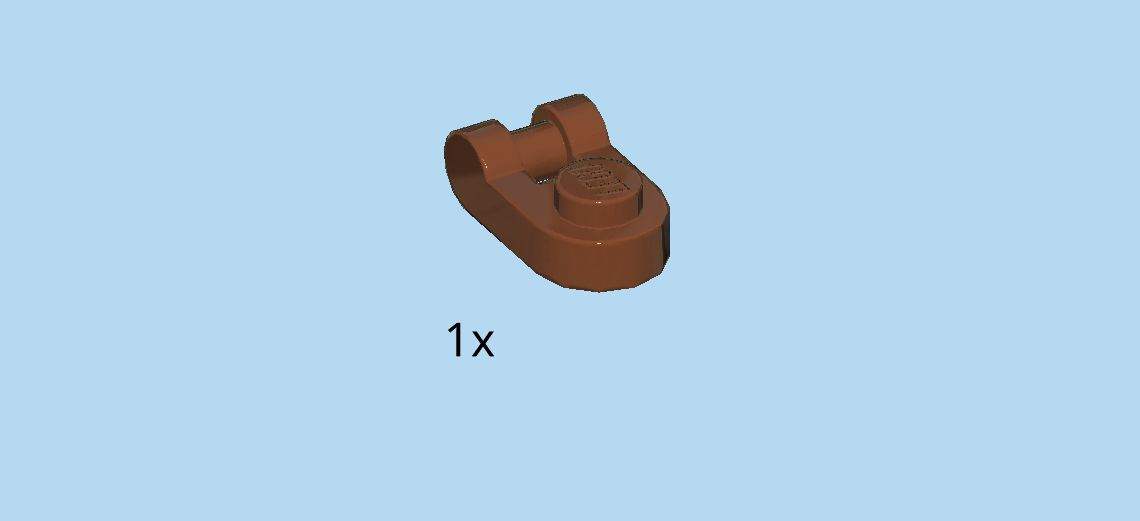
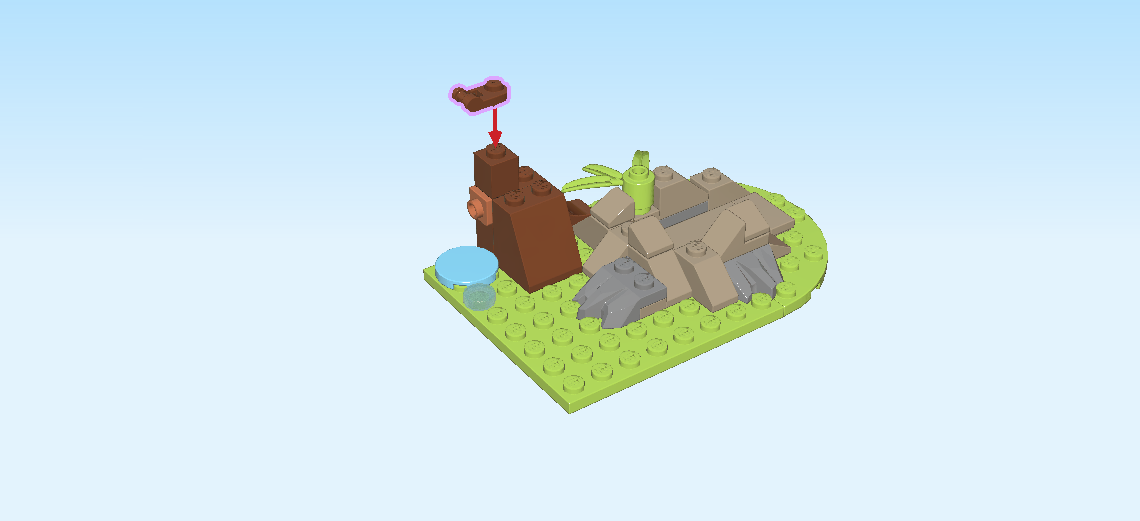
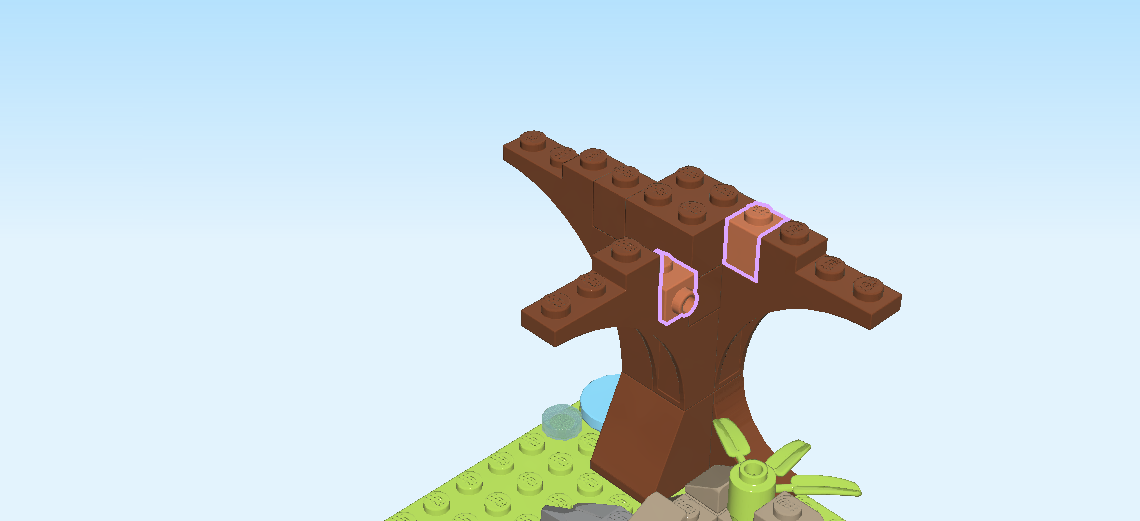
| Find 1 reddish brown brick 1x1x1⅓ with arch and side plate. |
| Put it on top of the previous piece, side plate to the back. |
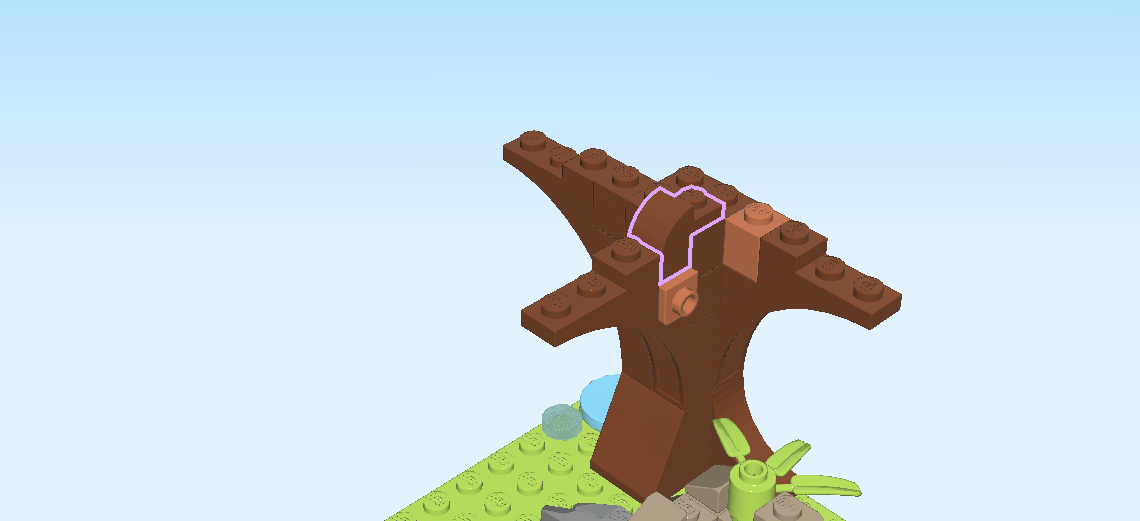
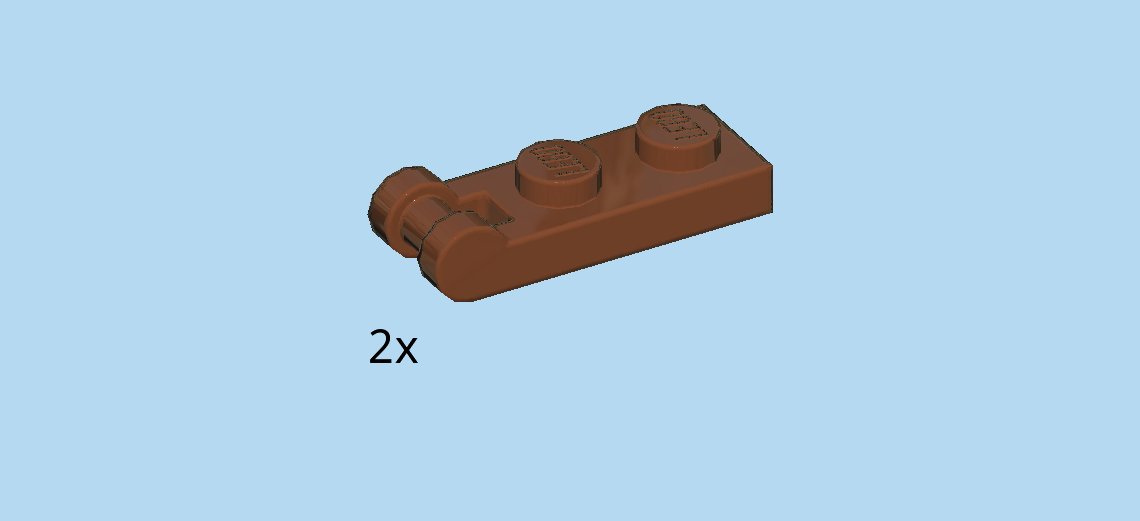
| Find 2 reddish brown plates 1x2 with shaft on short side. |
| Put them horizontally on the highest part of the backmost row, side shafts to the left and right. |
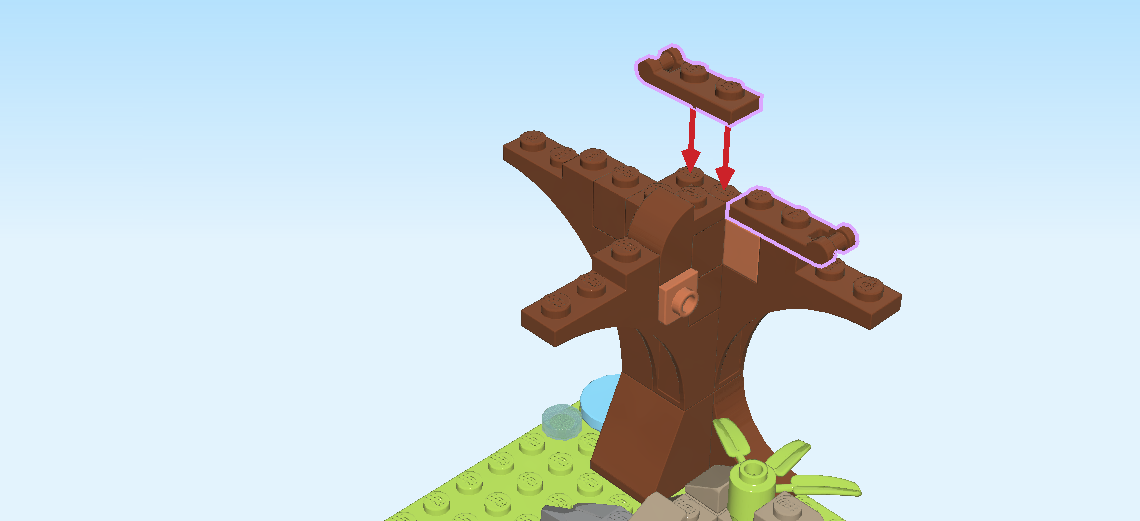
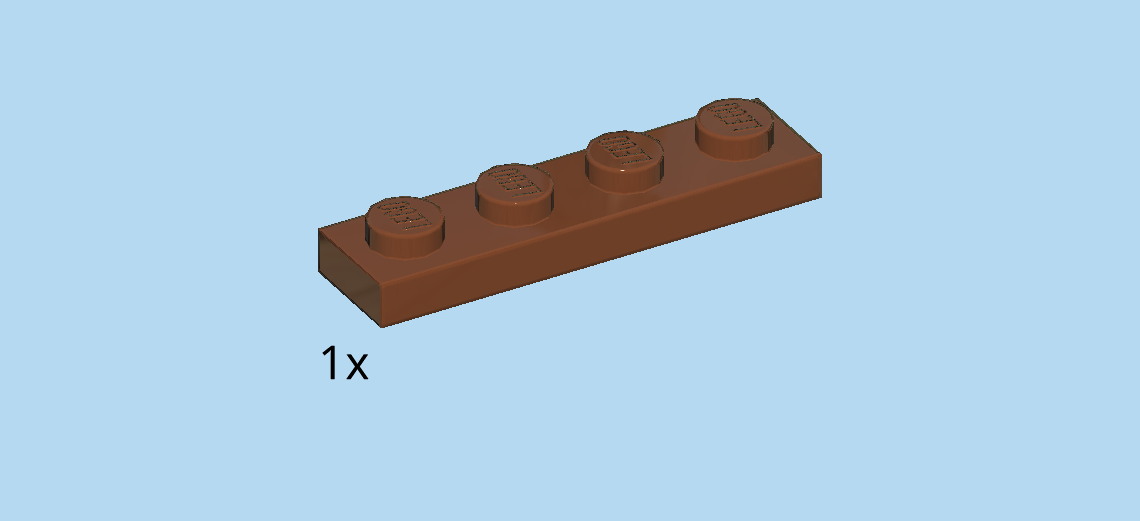
| Find 1 reddish brown plate 1x4. |
| Put it horizontally on top. |
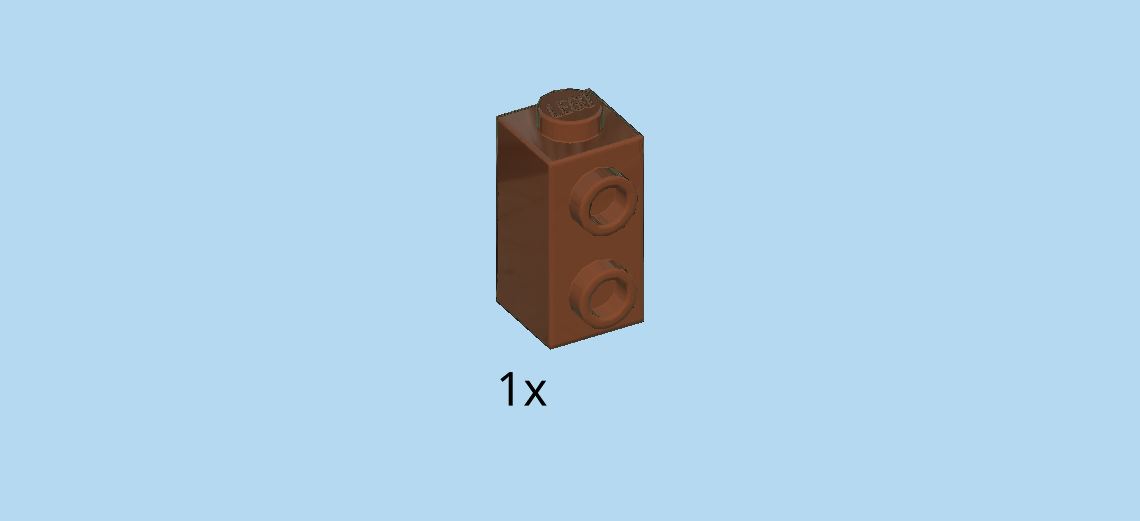
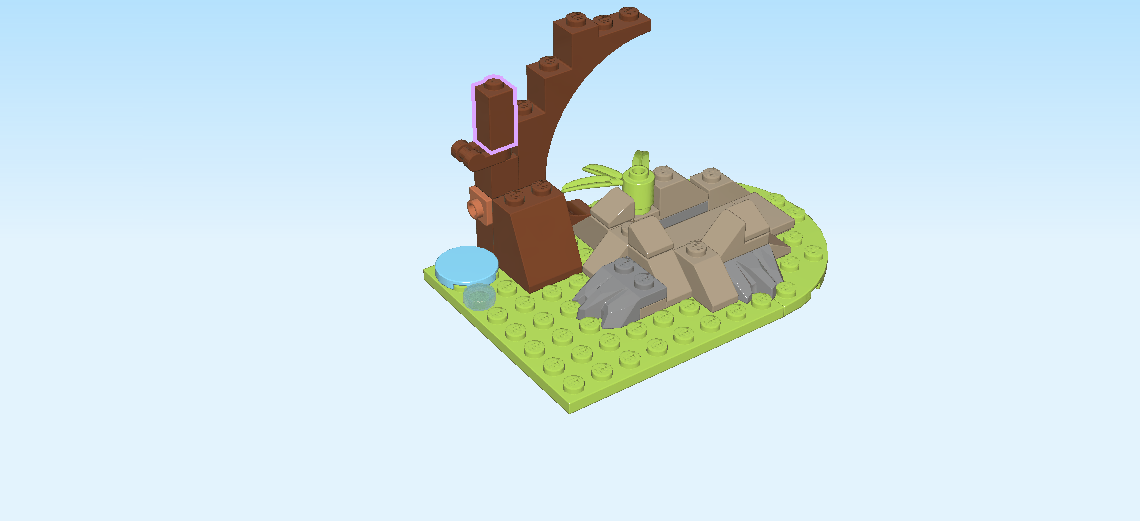
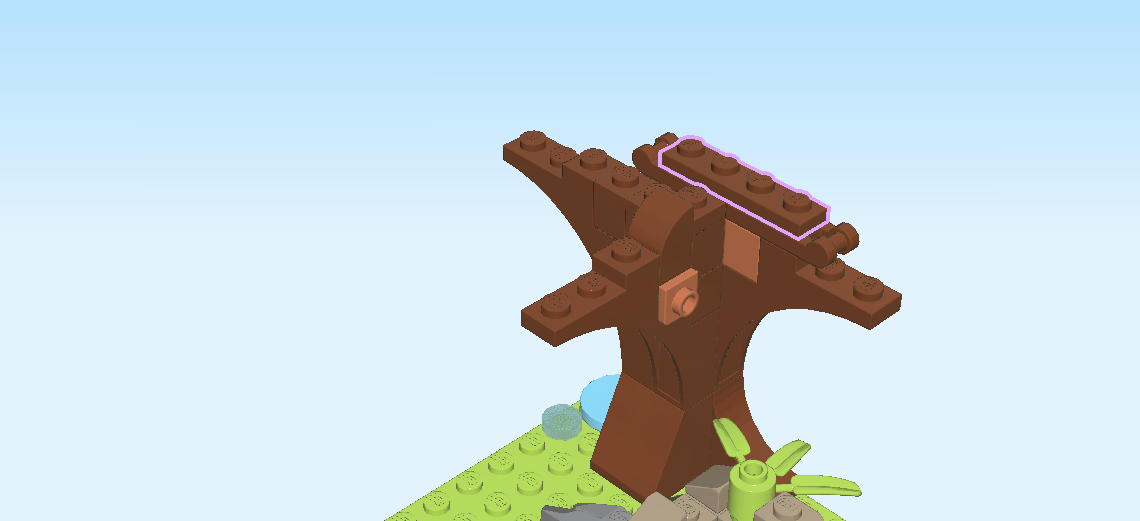
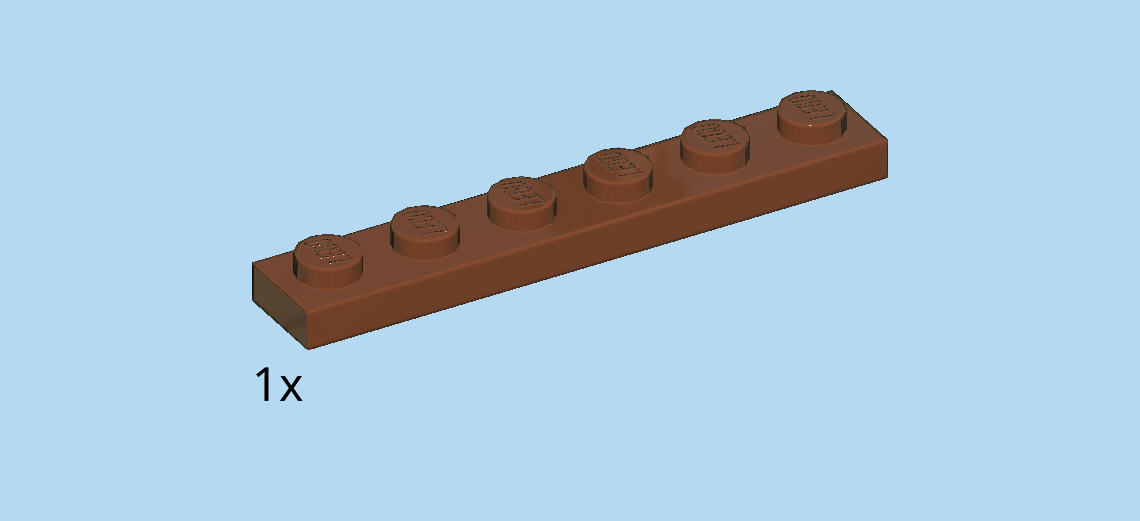
| Find 1 reddish brown plate 1x6. |
| Put it upright vertically on the 4 side knobs at the back of the structure. Start from the bottom. |
| Find 1 reddish brown round plate 1x1 with side shaft. |
| Put it on the second knob of the front branch, shaft to the right. |
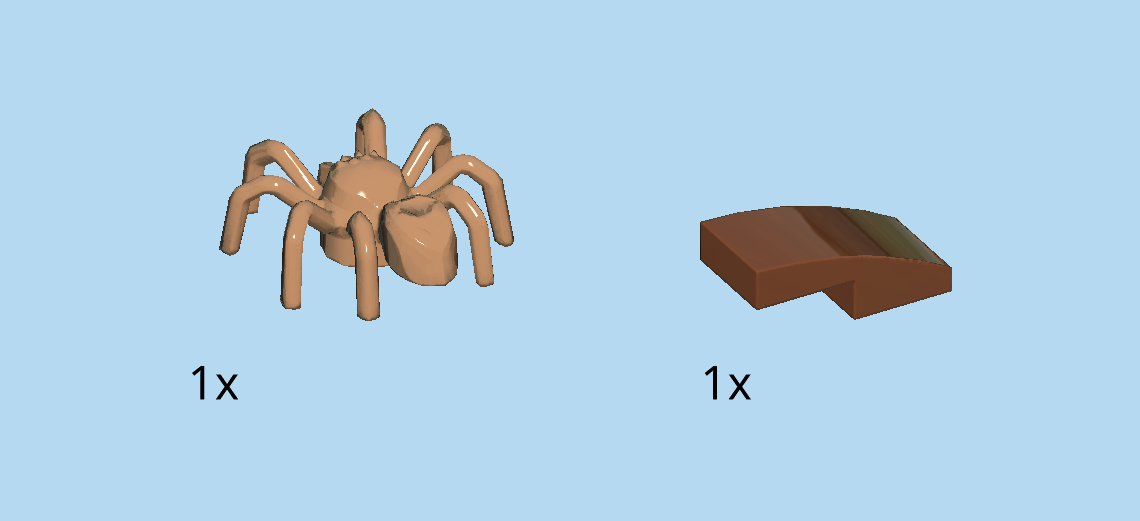
| Collect the following 2 pieces: |
| 1 reddish brown one-stepped curve tile 1x2x⅔, |
| and 1 medium nougat brown spider. |
| Put the curve tile vertically on the first two knobs of the front branch, curve to the front. |
| Mount the spider on the right side knob of the front branch. |
| The trunk of the tree is now finished! Only the beautiful leaves are still missing. Almost done! |
| Next, we will make 4 large palm tree leaves. |
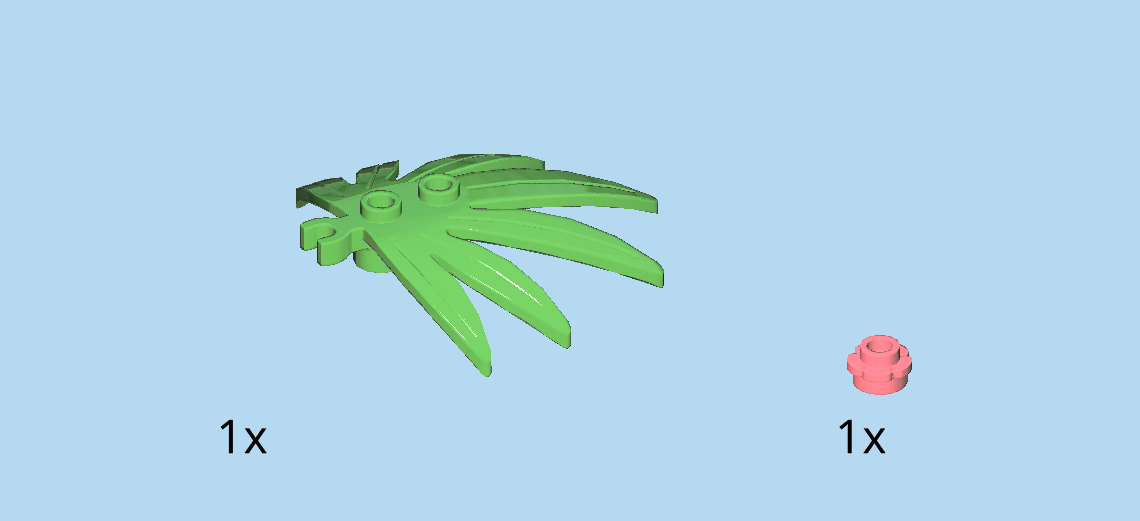
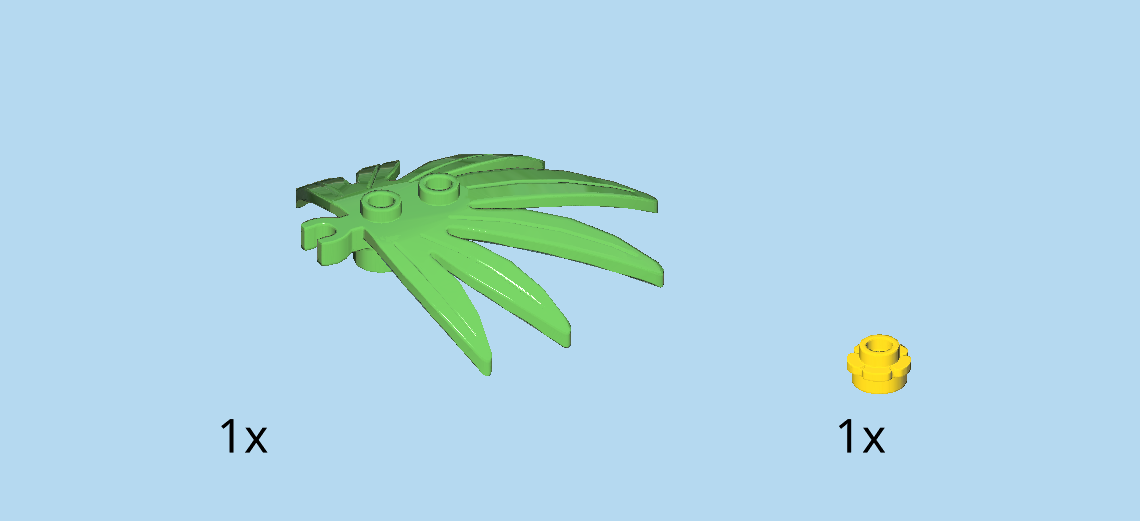
| Collect the following 2 pieces: |
| 1 bright green palm tree leaf with 7 leaves and clasp, |
| and 1 salmon pink flower piece 1x1. |
| Put the flower piece on one of the knobs of the leaf. |
| Snap the clasp of the leaf onto the small shaft on the top left of the tree, flower to the front and leaf fingers to the top. |
| Now, let's make 3 more of those leaves. You can follow the instructions step by step, or assemble and attach the leaves as you please and jump to the next section. |
| Collect the following 2 pieces: |
| 1 bright yellowish green palm tree leaf with 7 leaves and clasp, |
| and 1 salmon pink flower piece 1x1. |
| Put the flower piece on one of the knobs of the leaf. |
| Snap the clasp of this leaf onto the shaft below the left branch. |
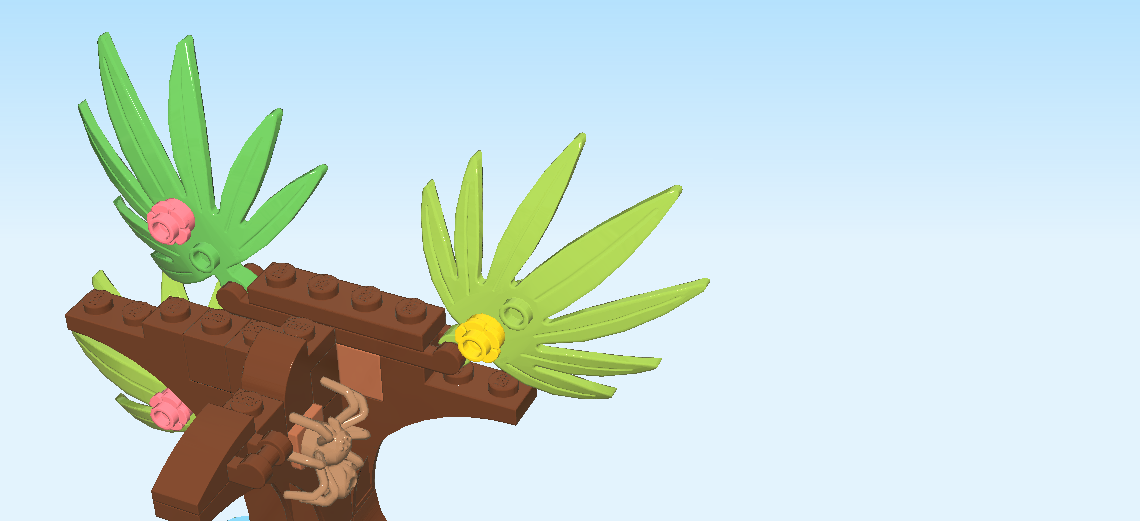
| Collect the following 2 pieces: |
| 1 bright yellow flower piece 1x1, |
| and 1 bright yellowish green palm tree leaf with 7 leaves and clasp. |
| Put the flower piece on one of the knobs of the leaf. |
| Snap the clasp of this leaf onto the shaft on the top right of the tree. |
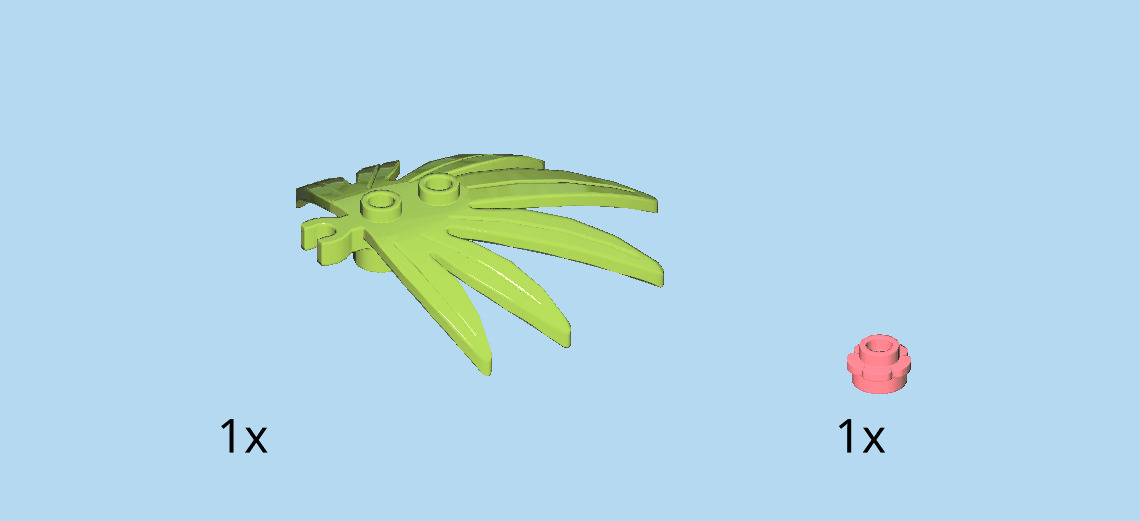
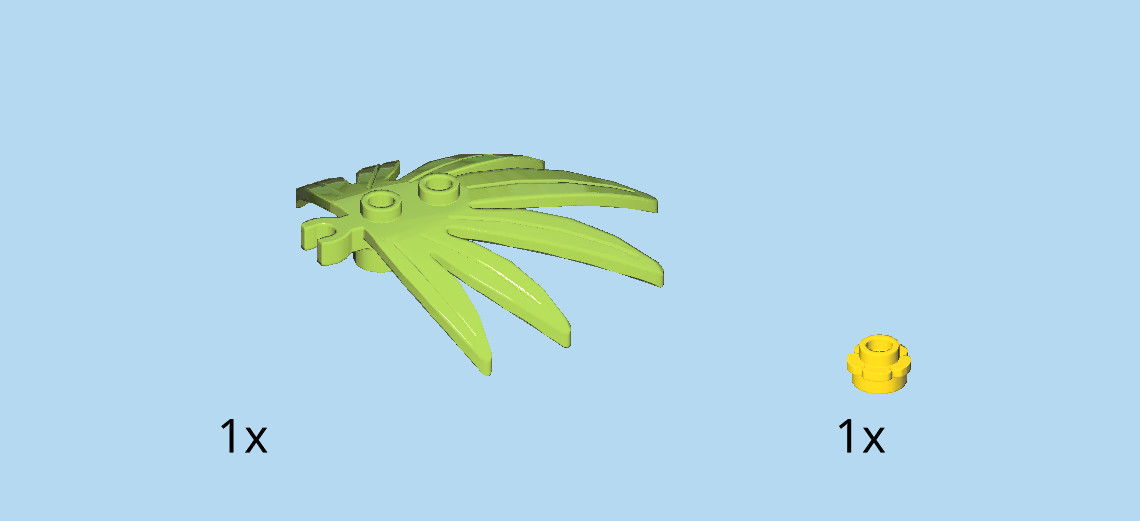
| Collect the following 2 pieces: |
| 1 bright yellow flower piece 1x1, |
| and 1 bright green palm tree leaf with 7 leaves and clasp. |
| Put the flower piece on one of the knobs of the leaf. |
| The last leaf is mounted on the right side shaft on the front branch. |
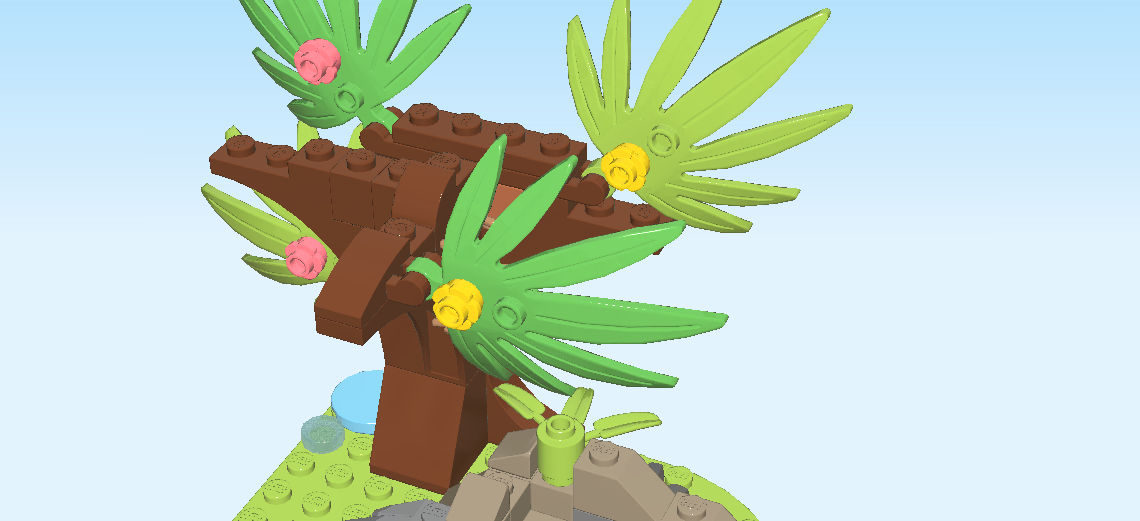
| You have finished the whole palm tree! Excellent! Isn't it marvelous? |
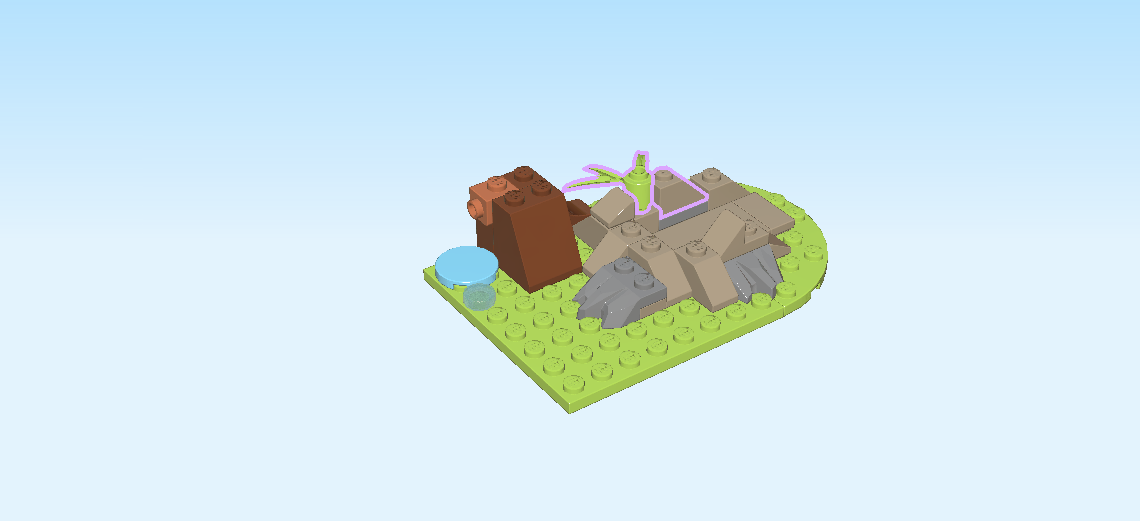
| Now, let's make a baby palm tree. |
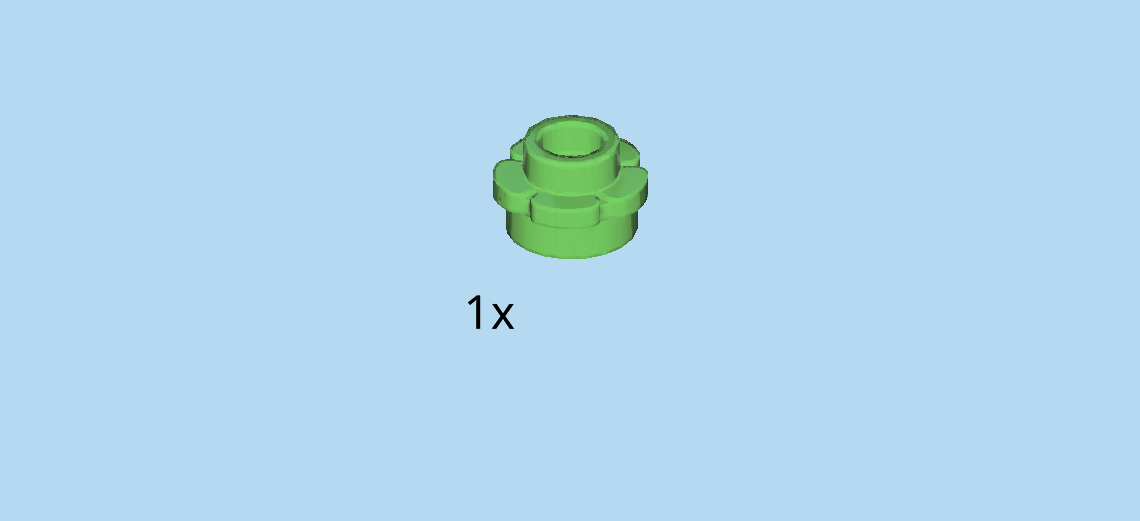
| Find 1 bright green flower piece 1x1. |
| Find 1 salmon pink flower piece 1x1. |
| Stack them on top of each other, green flower at the bottom. |
| Find 1 bright green plant with shaft and 3 leaves. |
| Insert the shaft into the two flower pieces. |
| The baby palm tree is finished! Nice! |
| Skip three columns from the left, and put it on the second knob from the front. |
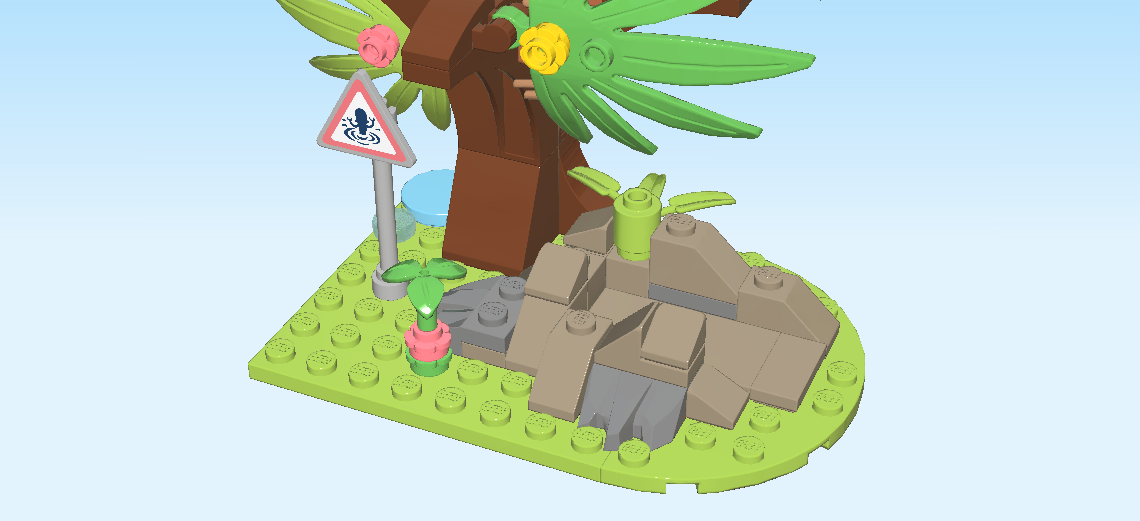
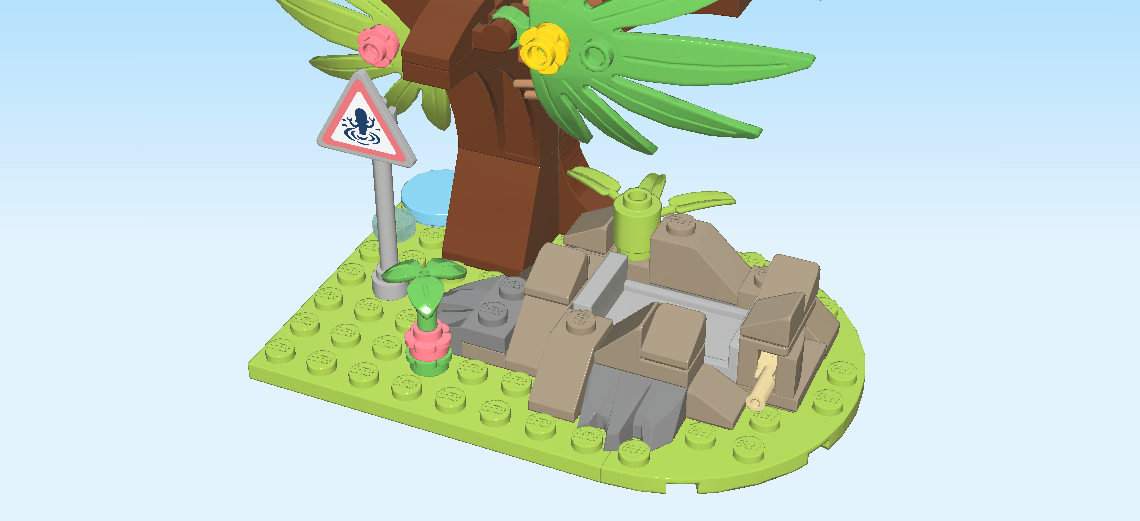
| Now, it's time to make the quicksand warning sign. |
| Find 1 medium stone grey flagpole 1x1x3. |
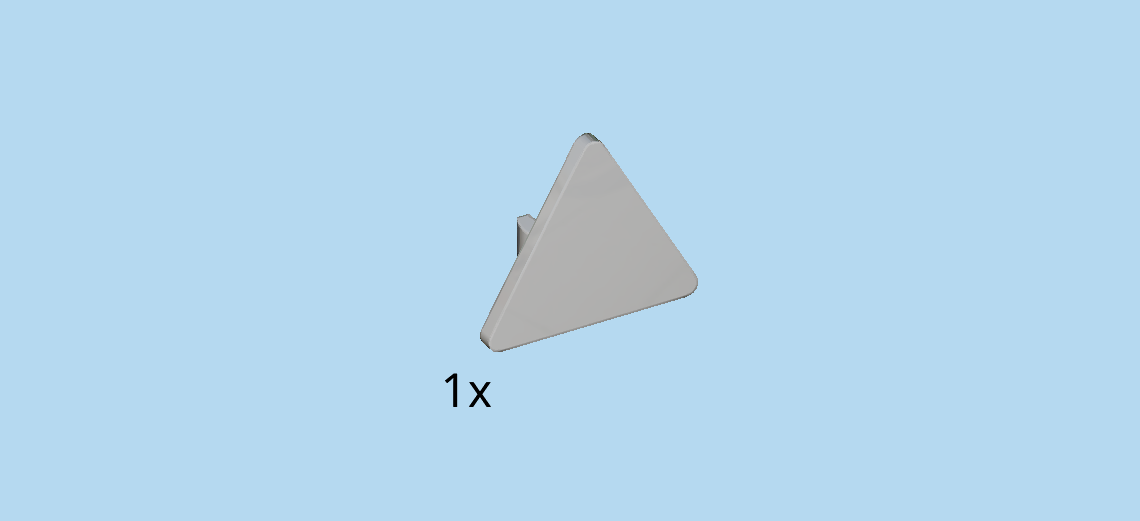
| Find 1 medium stone grey triangular sign with clasp. |
| Snap the clasp onto the top part of the flagpole, pointy end of the sign pointing to the top. |
| Continue if you want to decorate the sign with a sticker now. If not, skip the next three sentences. |
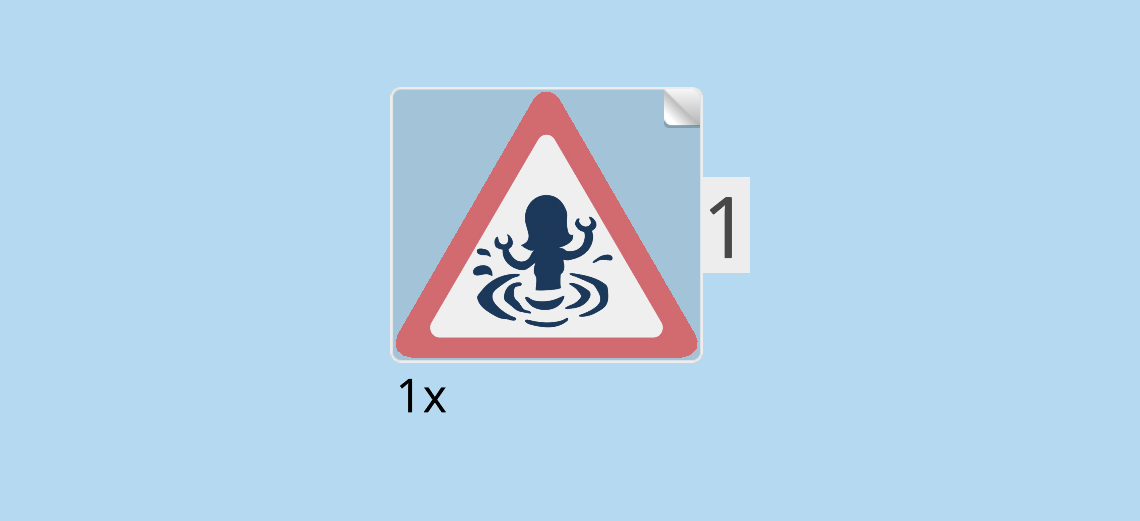
| Find a triangular sticker number 1. Ask a sighted person to help you find the correct sticker. |
| Put it on the triangular sign. |
| The sign is white with a red frame. In the middle, there is a black drawing of a person sinking in quicksand. |
| The quicksand warning sign is finished! Well done! Skip the leftmost row, and put it on the fourth knob from the front. |
| Next up is the quicksand pit. |
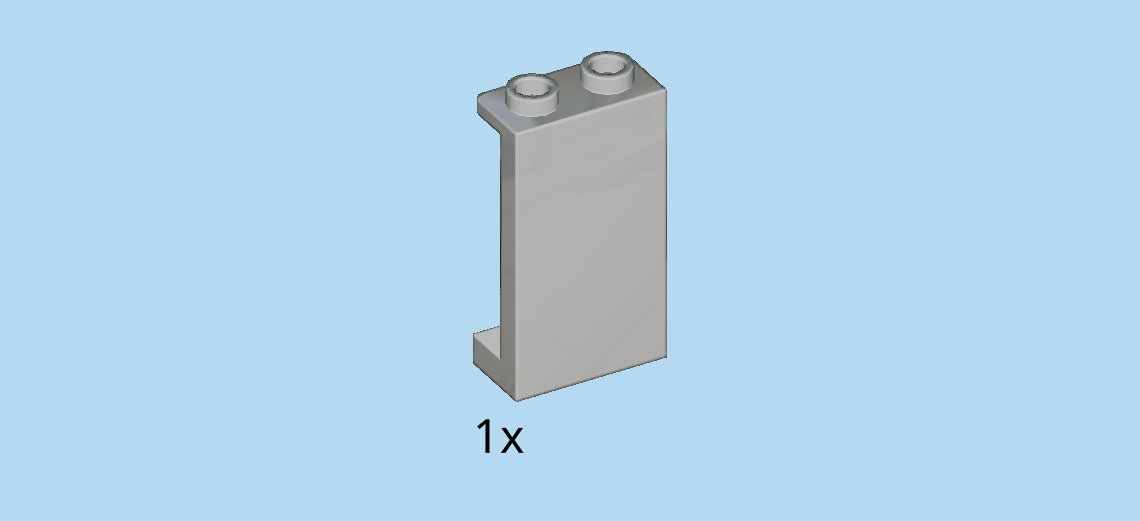
| Find 1 medium stone grey wall element 1x2x3 with 2 top knobs. |
| Put it flat on the table and turn it horizontally, knobs pointing to the right. |
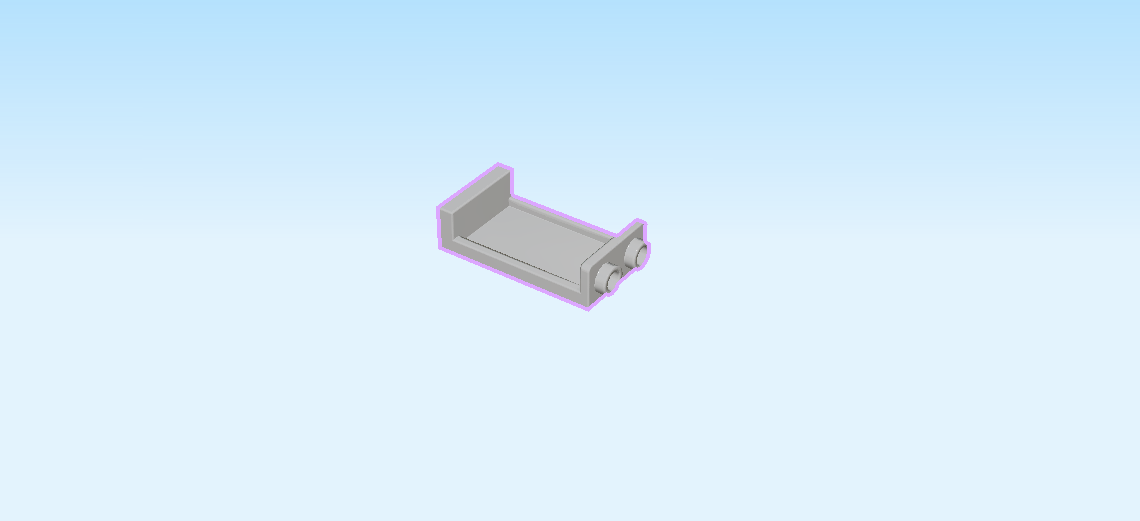
| Find 1 mud grey bottom angle plate 1x2 - 1x2 with 2 side knobs. |
| Put it upright horizontally on the knobs on the right side. Make sure its 2 side knobs are pointing to the top. |
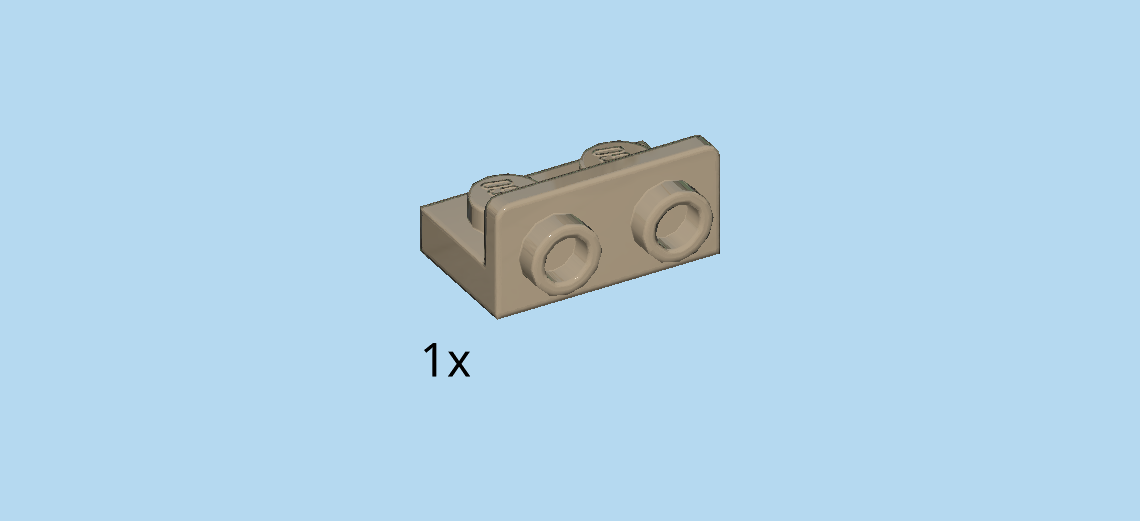
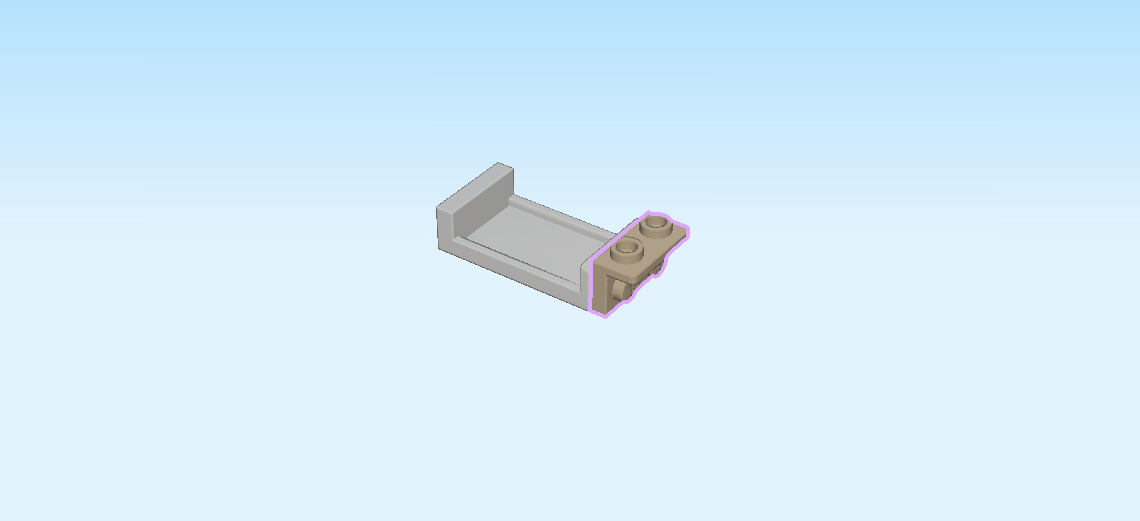
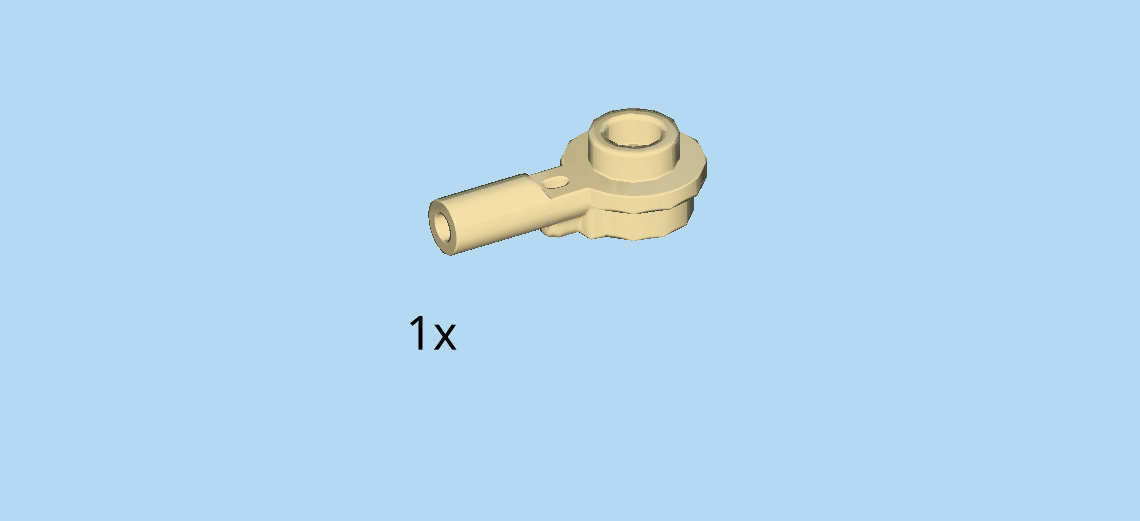
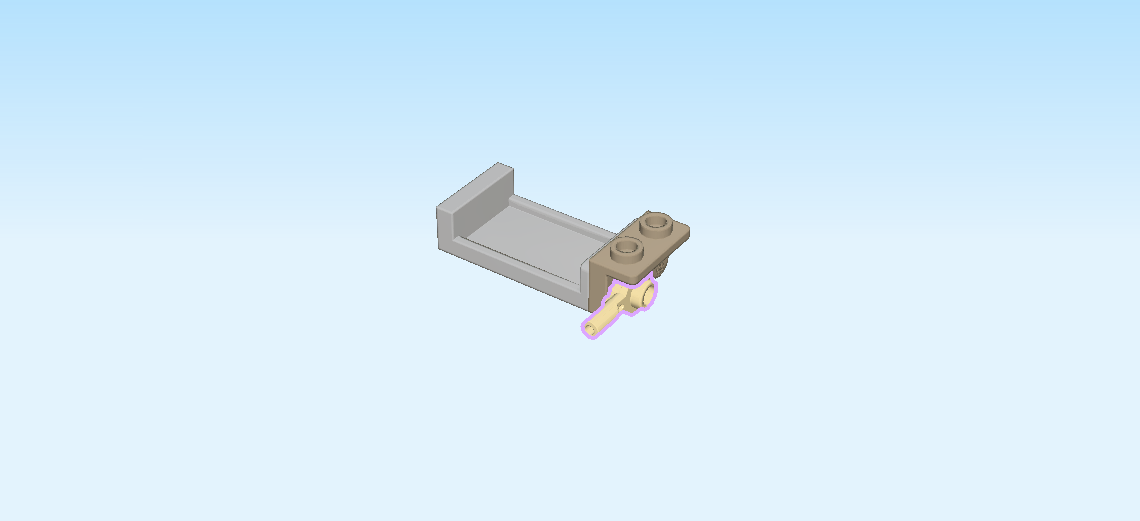
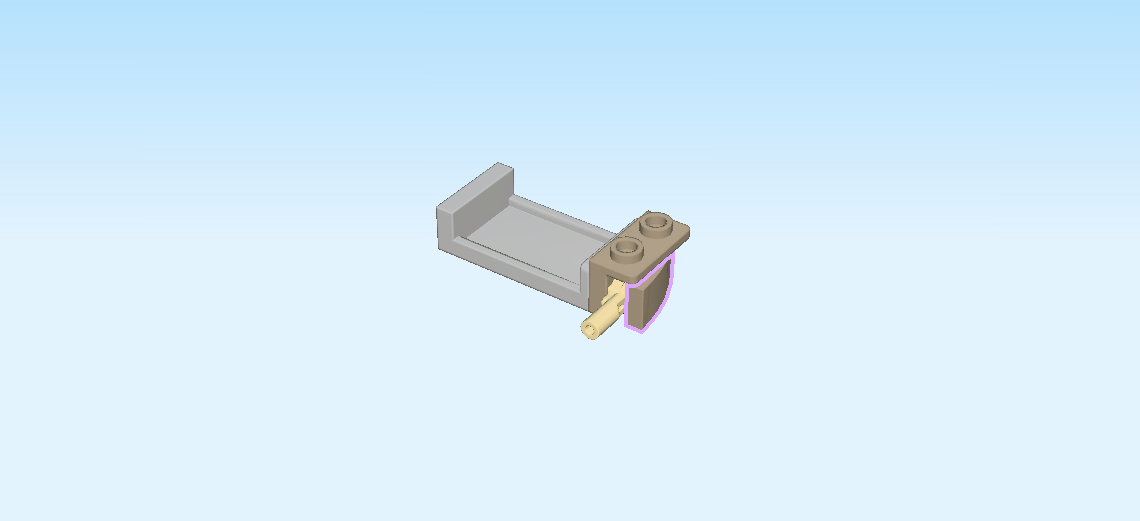
| Find 1 pale ocher yellow round plate 1x2 with side handle. |
| Mount it underneath the top plate on the front knob on the right side, handle overhanging to the front. |
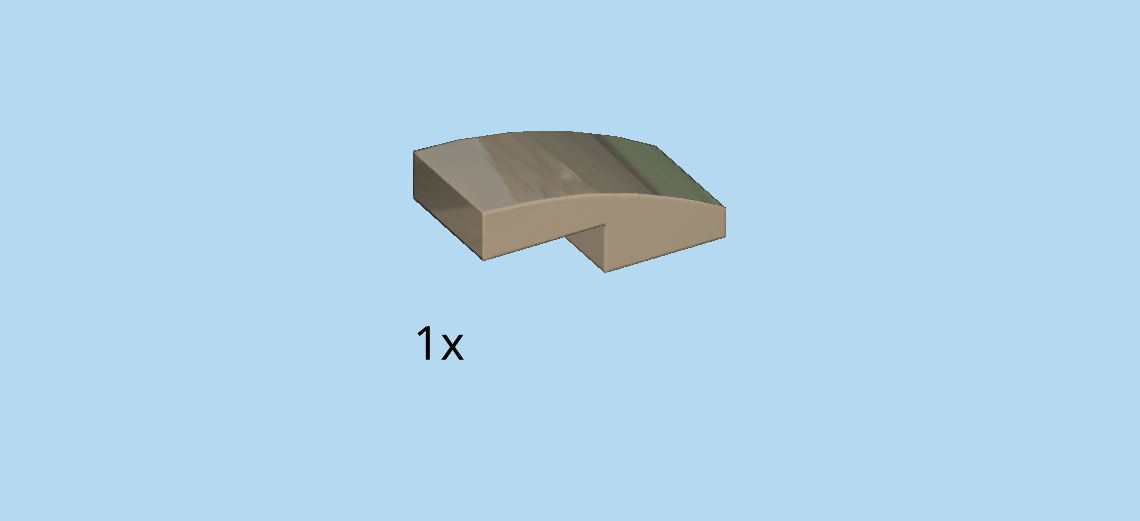
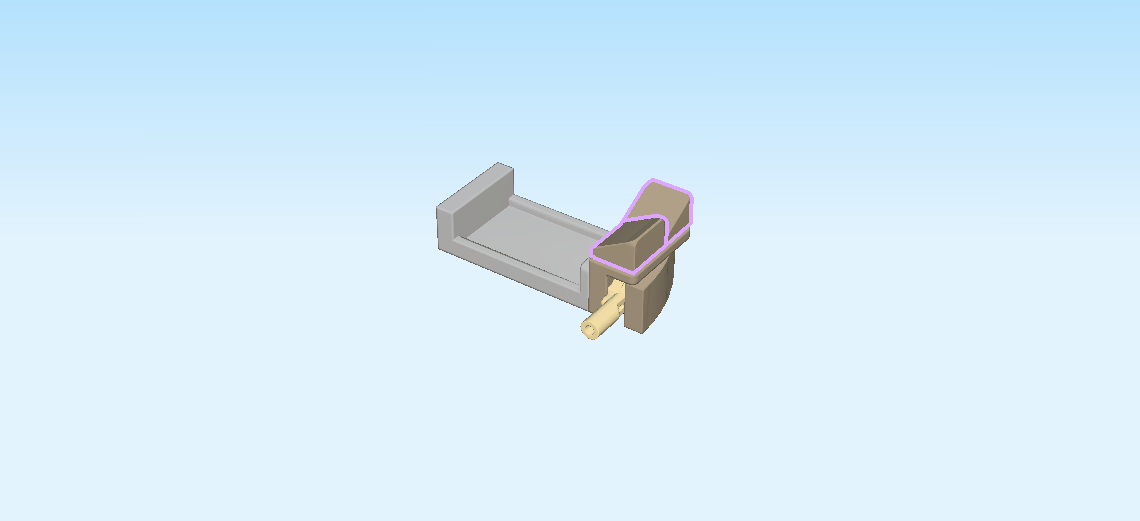
| Find 1 mud grey one-stepped curve tile 1x2x⅔. |
| Put it upright horizontally on the right side knobs, curve to the back. |
| Find 2 mud grey smooth roof tiles 1x1x⅔. |
| Put 1 on the frontmost top knob, slope to the left. |
| Put the other one on the backmost top knob, slope to the front. |
| The quicksand pit is finished! Well done! Insert it horizontally into the rock formation on the jungle oasis. The handle is sticking out towards the front on the right side. If the baby elephant gets trapped in the quicksand, you can put the hook of the truck on the handle and pull it out! The elephant will slide right into safety! |
| Finally, let's make another baby palm tree. |
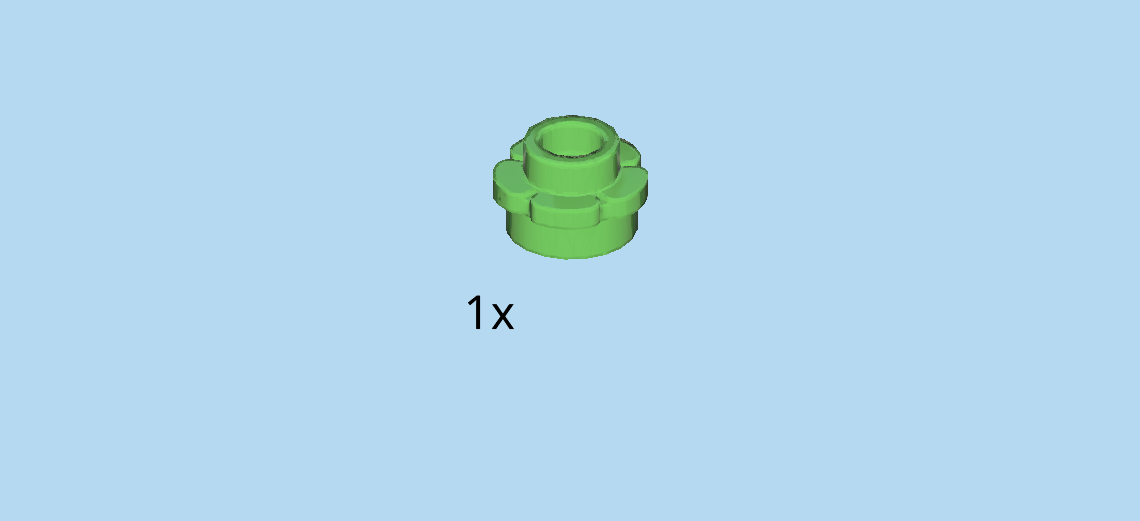
| Find 1 bright green flower piece 1x1. |
| Find 1 bright yellow flower piece 1x1. |
| Stack them on top of each other, green flower at the bottom. |
| Find 1 bright green plant with shaft and 3 leaves. |
| Insert the shaft into the 2 flower pieces. |
| The baby palm tree is finished! Awesome! Put it on the leftmost frontmost knob of the rock formation. |
| Find 1 silver metallic shovel. |
| Lean it against the tree. |
| The jungle tree with sand pit is finished! Really well done! |
| You are all done! The Baby Elephant Jungle Rescue set is finished and ready for action! Take the Jungle Rescue truck for a spin, take care of the jungle animals, and use all your jungle ranger knowledge and tools to get the baby elephant out of danger! |
| Enjoy! |