| LEGO Audio & Braille Building Instructions for the LEGO Creator set "Sunken Treasure Mission" – giant manta ray with deep-sea diver, skeleton, and coral reef. |
| Enjoy incredible underwater adventures with 3 different LEGO playsets. Dive to the bottom of the sea in a submarine to search for sunken treasure guarded by an octopus. Later, rebuild it into a smaller submarine for more action with a giant lobster – or turn it into a giant manta ray for fun with a diver and coral reef. The play possibilities are endless with this brilliant 3in1 set. |
| Note: if you have already built one of the other two playsets, you have to disassemble it before you can start building the current one. |
| The box cover shows a scene at the bottom of the sea. A giant dark red octopus is resting its eight tentacles on the seabed in the center of the scene. Approaching from behind on the right is a high-tech submarine. It is a propeller-driven vessel with a grey body, big yellow oxygen tanks, a camera, and 2 remote control arms. It's perfect for exploring the deep blue sea. The submarine pilot is sitting in the cockpit, which is a glass bubble providing a 180° view. At the very bottom of the box cover, there is a sunken gold safe. However, it seems like the sturdy safe door broke open and 2 gold ingots fell out! A skeleton scuba diver is leaning on the side of the safe, probably hiding from the submarine and the octopus. On the right side of the box cover, there is a vertical yellow banner with the 3-in-1 logo on top as well as small images of the 2 rebuild options of this set. The first rebuild option is a giant red lobster with a compact submarine and underwater ruins, and the second rebuild option is a giant red manta ray with a skeleton and a colorful coral reef. The current instructions are for the latter playset. |
| If you haven't done that already, open the box. This can be tricky; ask someone to help you! |
| The box contains 3 booklets with visual building instructions (one for each 3-in-1 option) and 4 bags with numbers printed on them. Ask a sighted person to help you find the correct bag! |
| Carefully open the bags or disassemble the previous build. |
| Before you start building, ask a sighted person to help you sort the pieces by color. This makes finding the correct pieces even easier! |
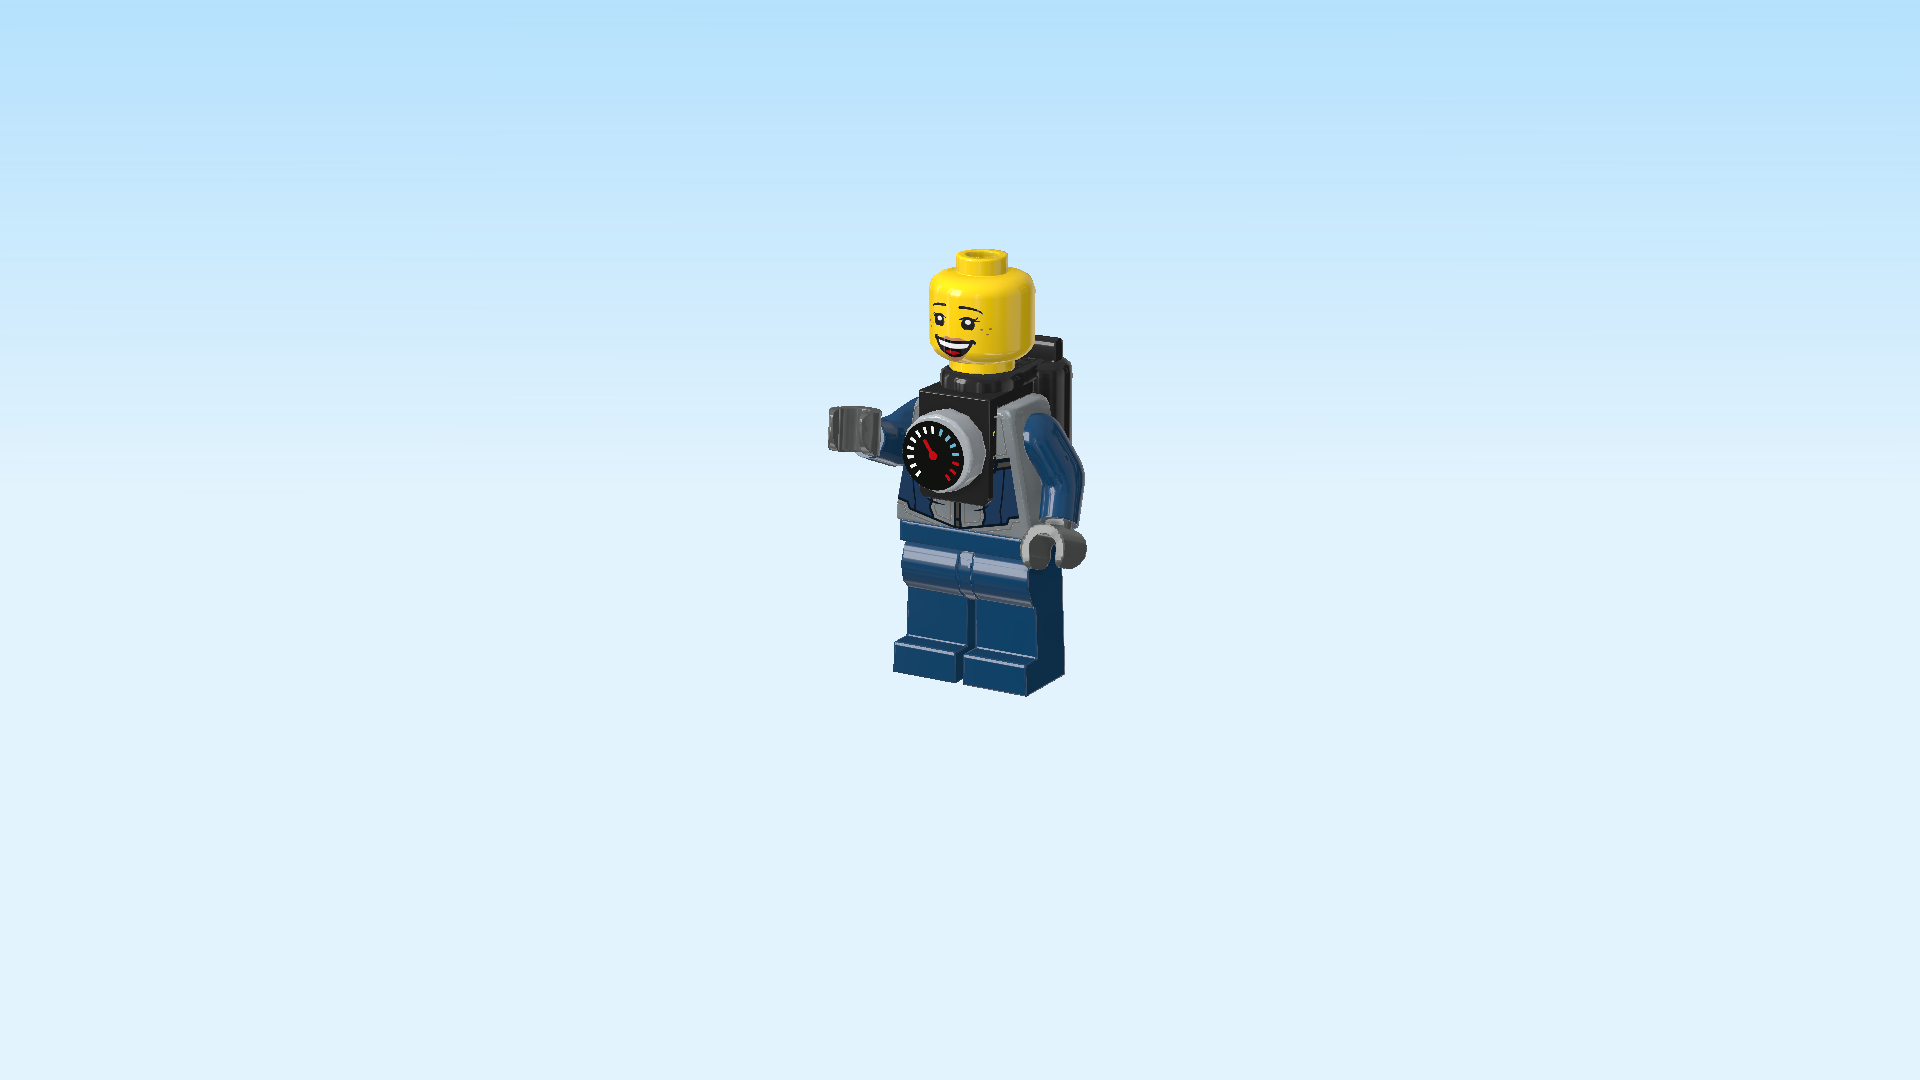
| First, we will build the deep-sea diver Minifigure. |
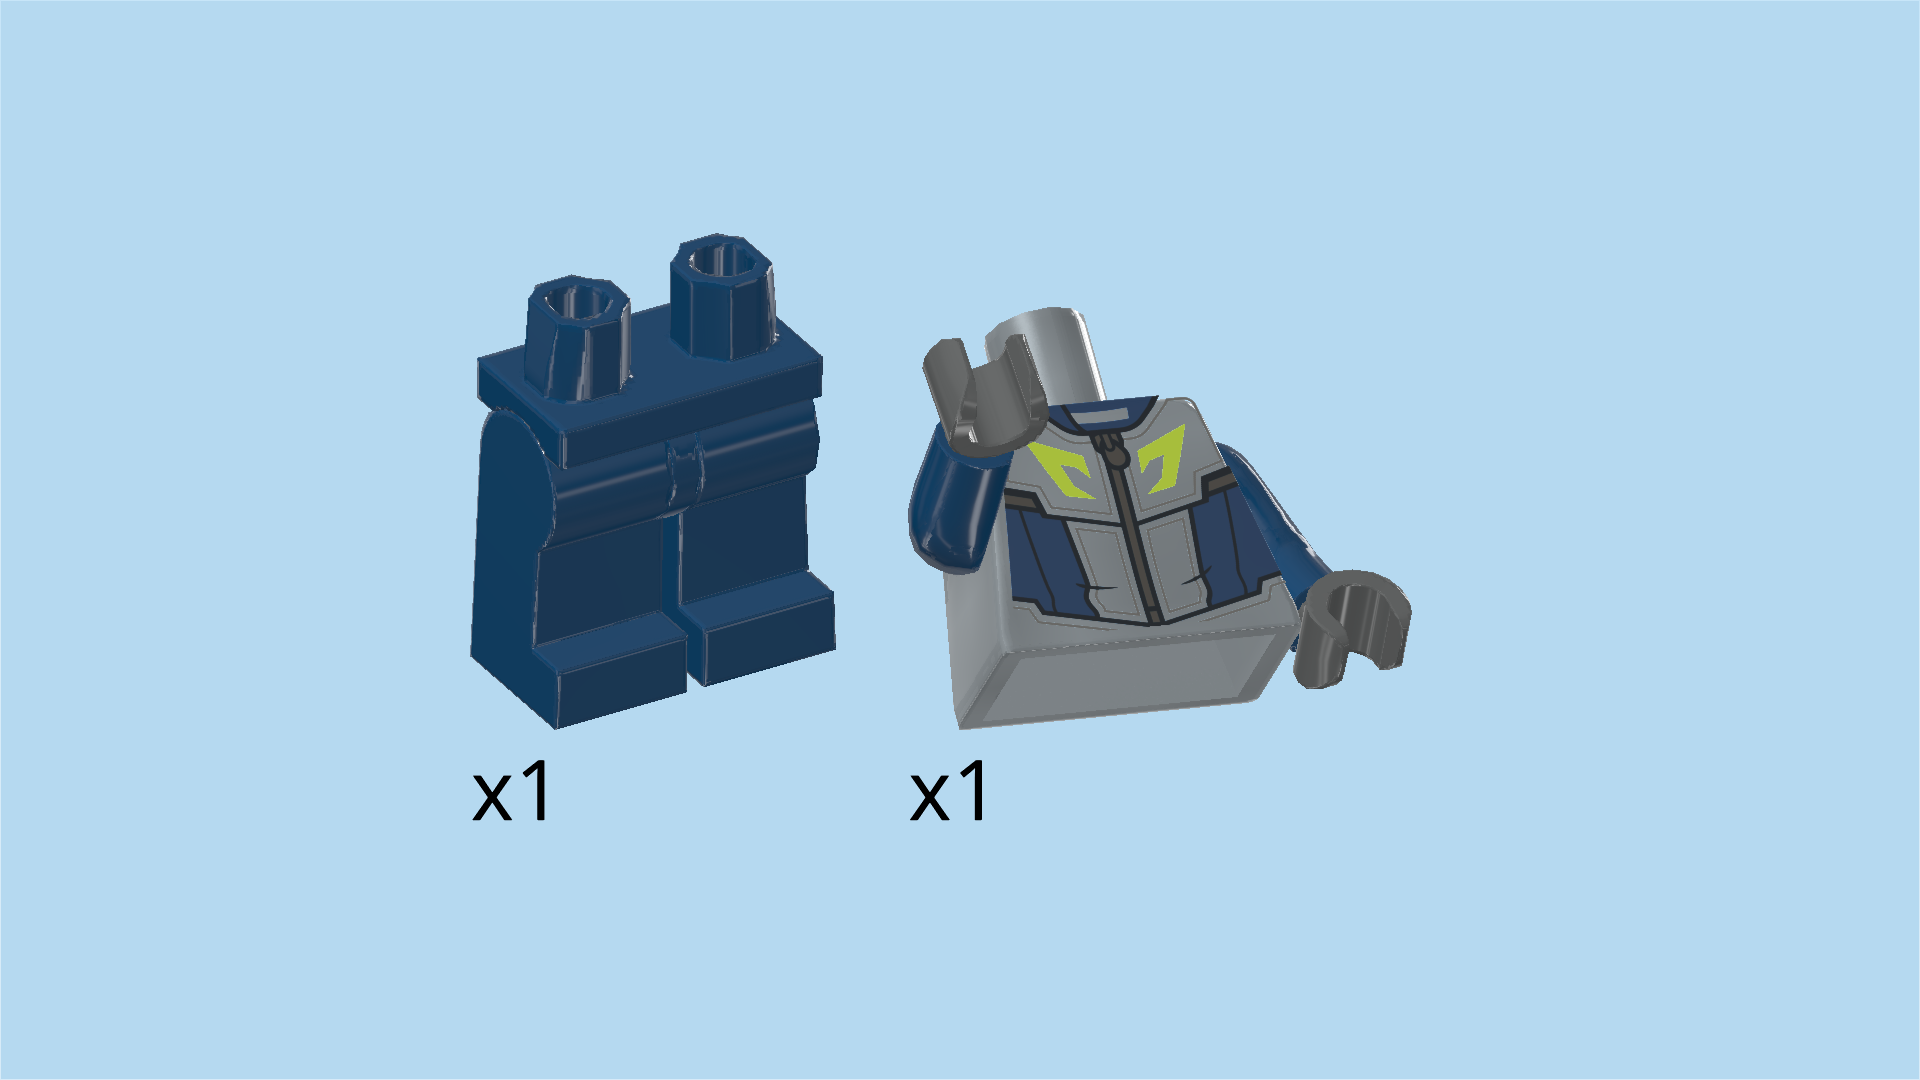
| Collect the following 2 pieces: |
| 1 silver metallic, earth blue and dark stone grey upper part of the body, |
| and 1 earth blue pair of legs. |
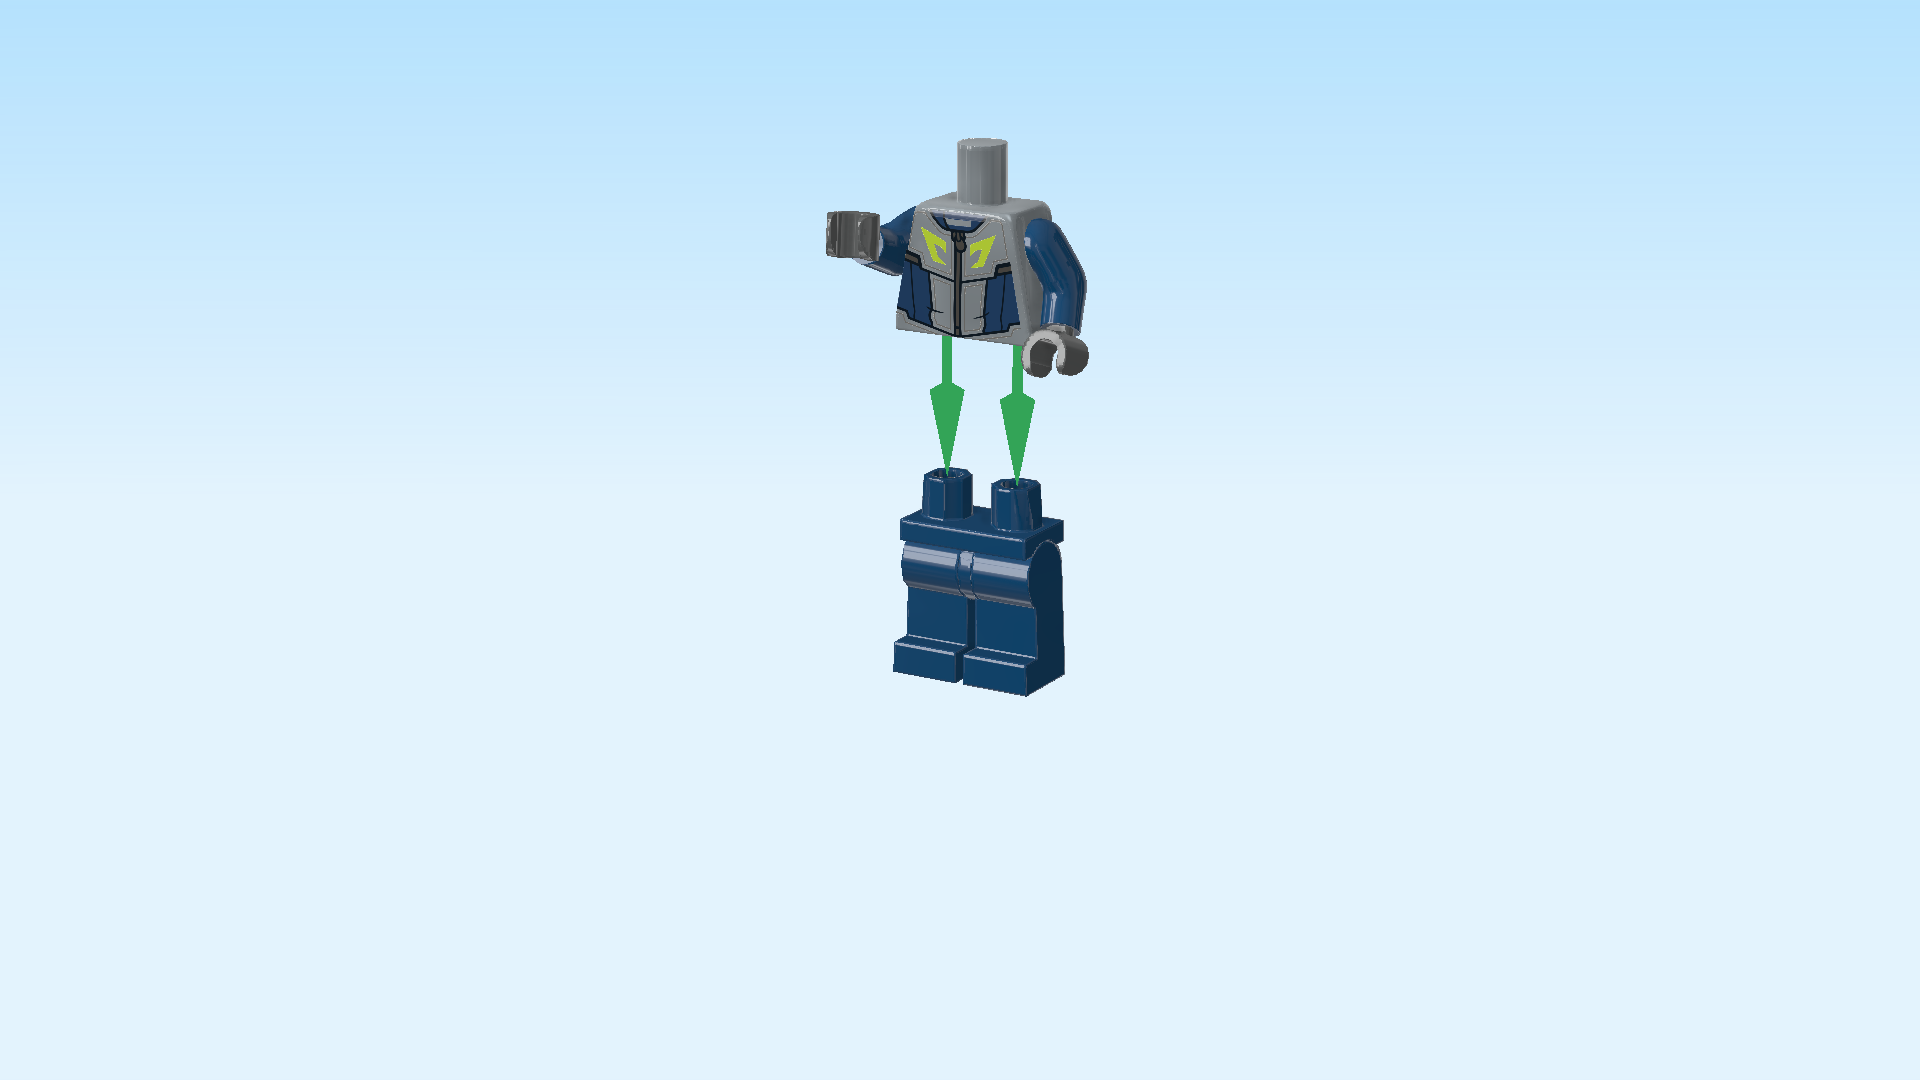
| Put the upper body on the legs. |
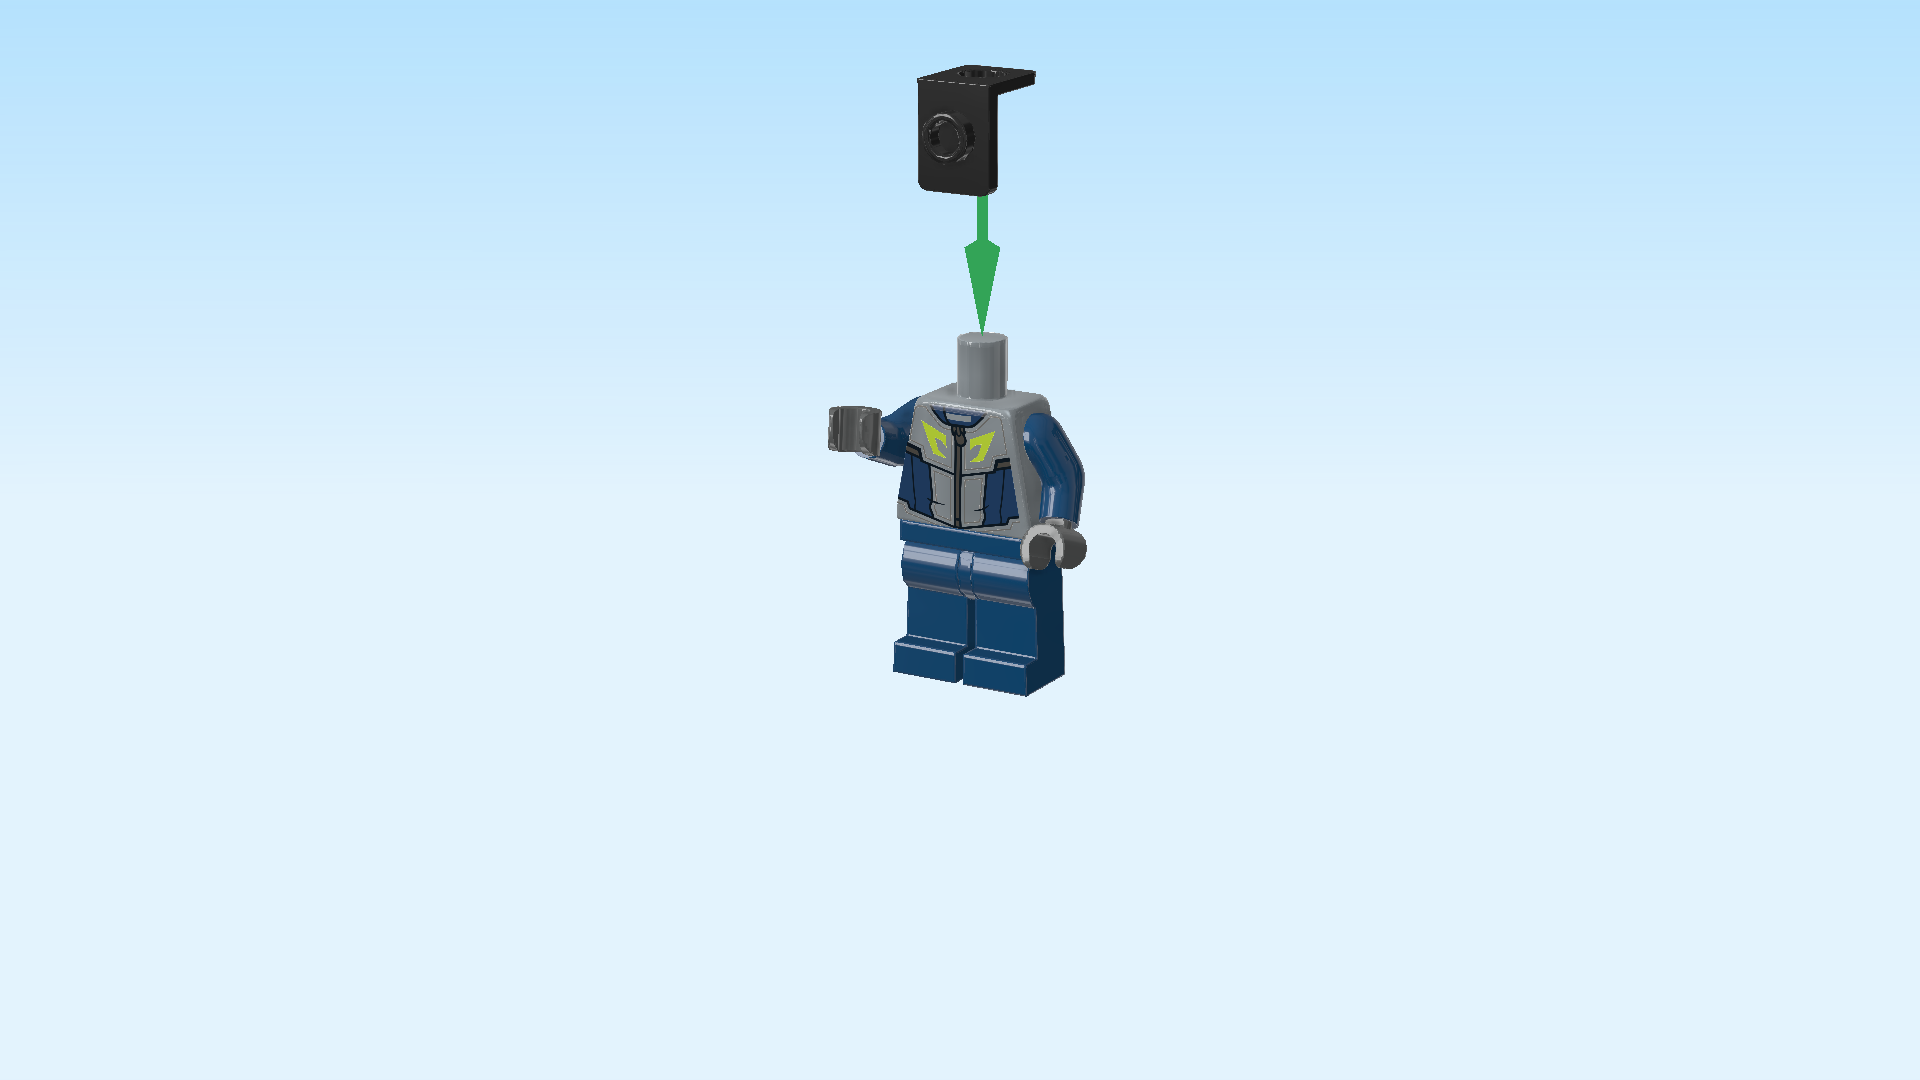
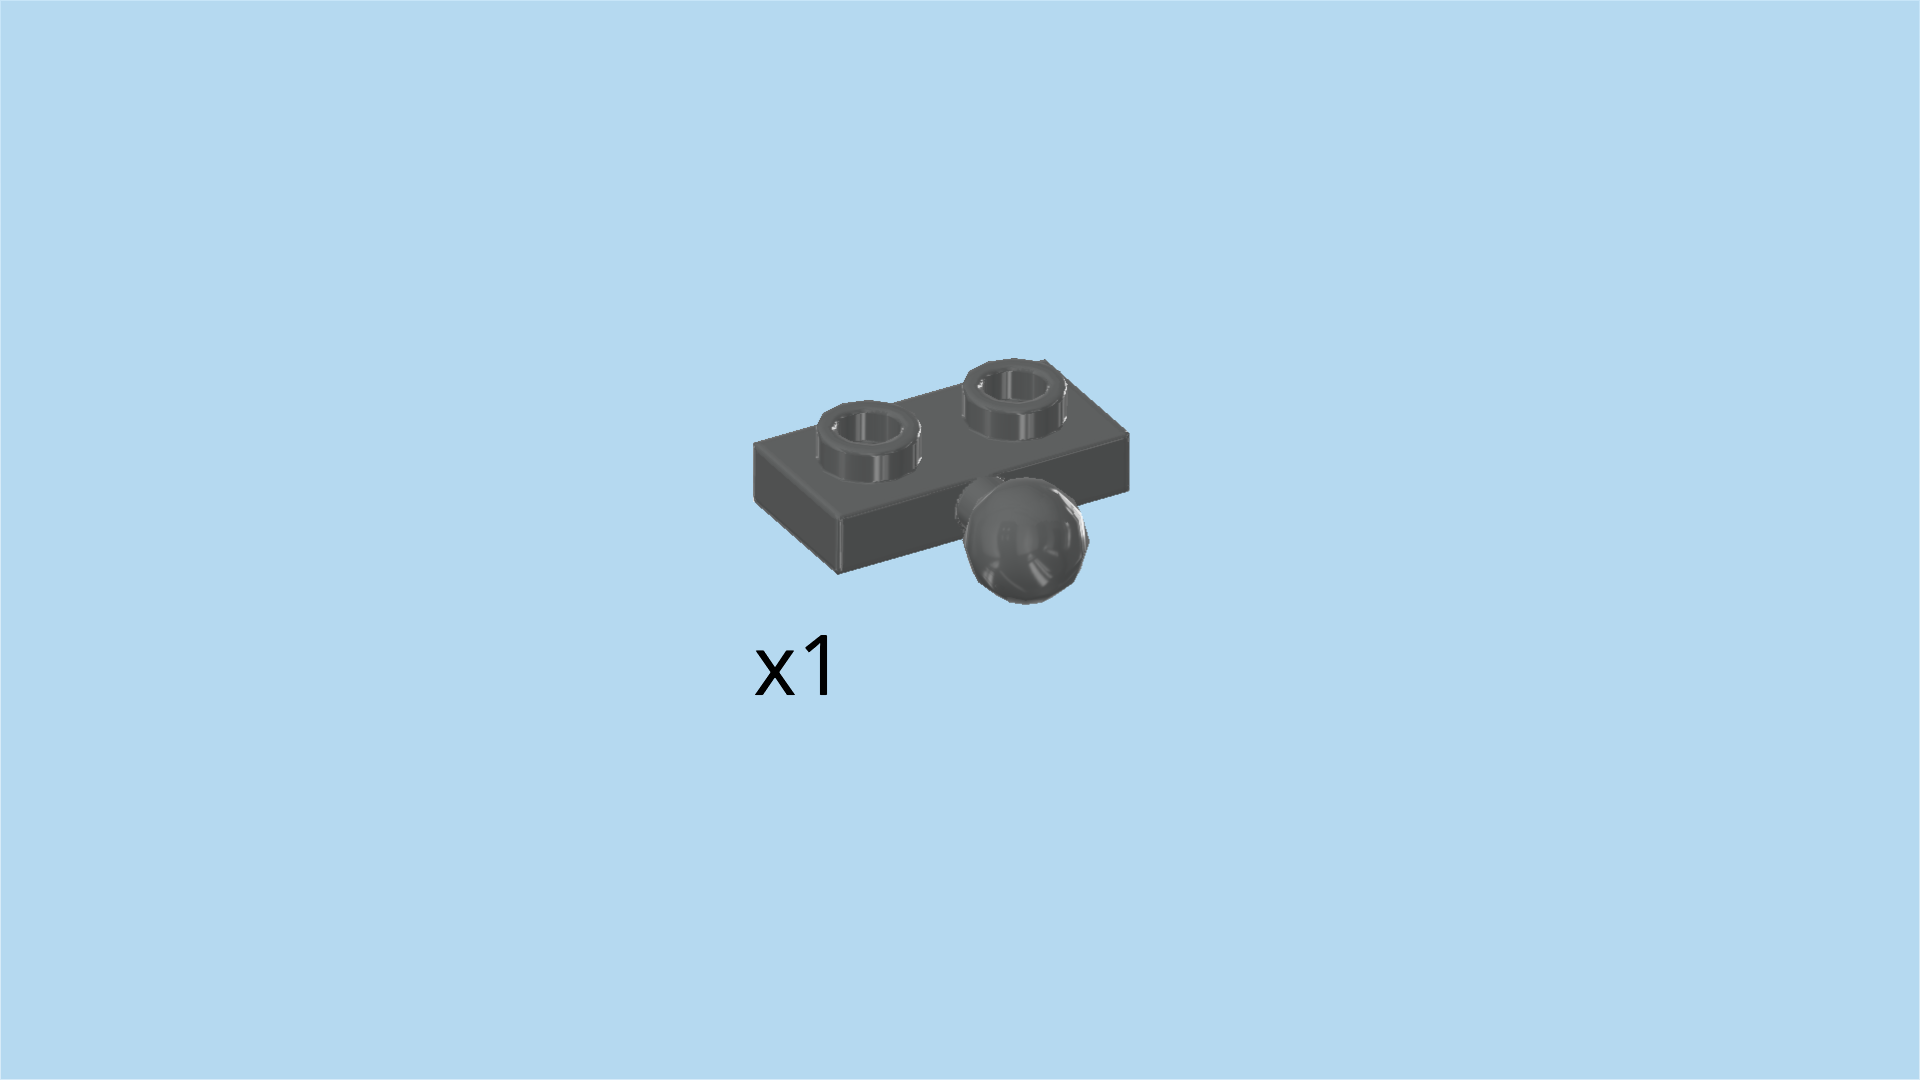
| Find 1 black top angle plate 1x2 - 1x2 with top hole and 1 side knob. |
| Put the top hole around the neck, side knob overhanging to the front. |
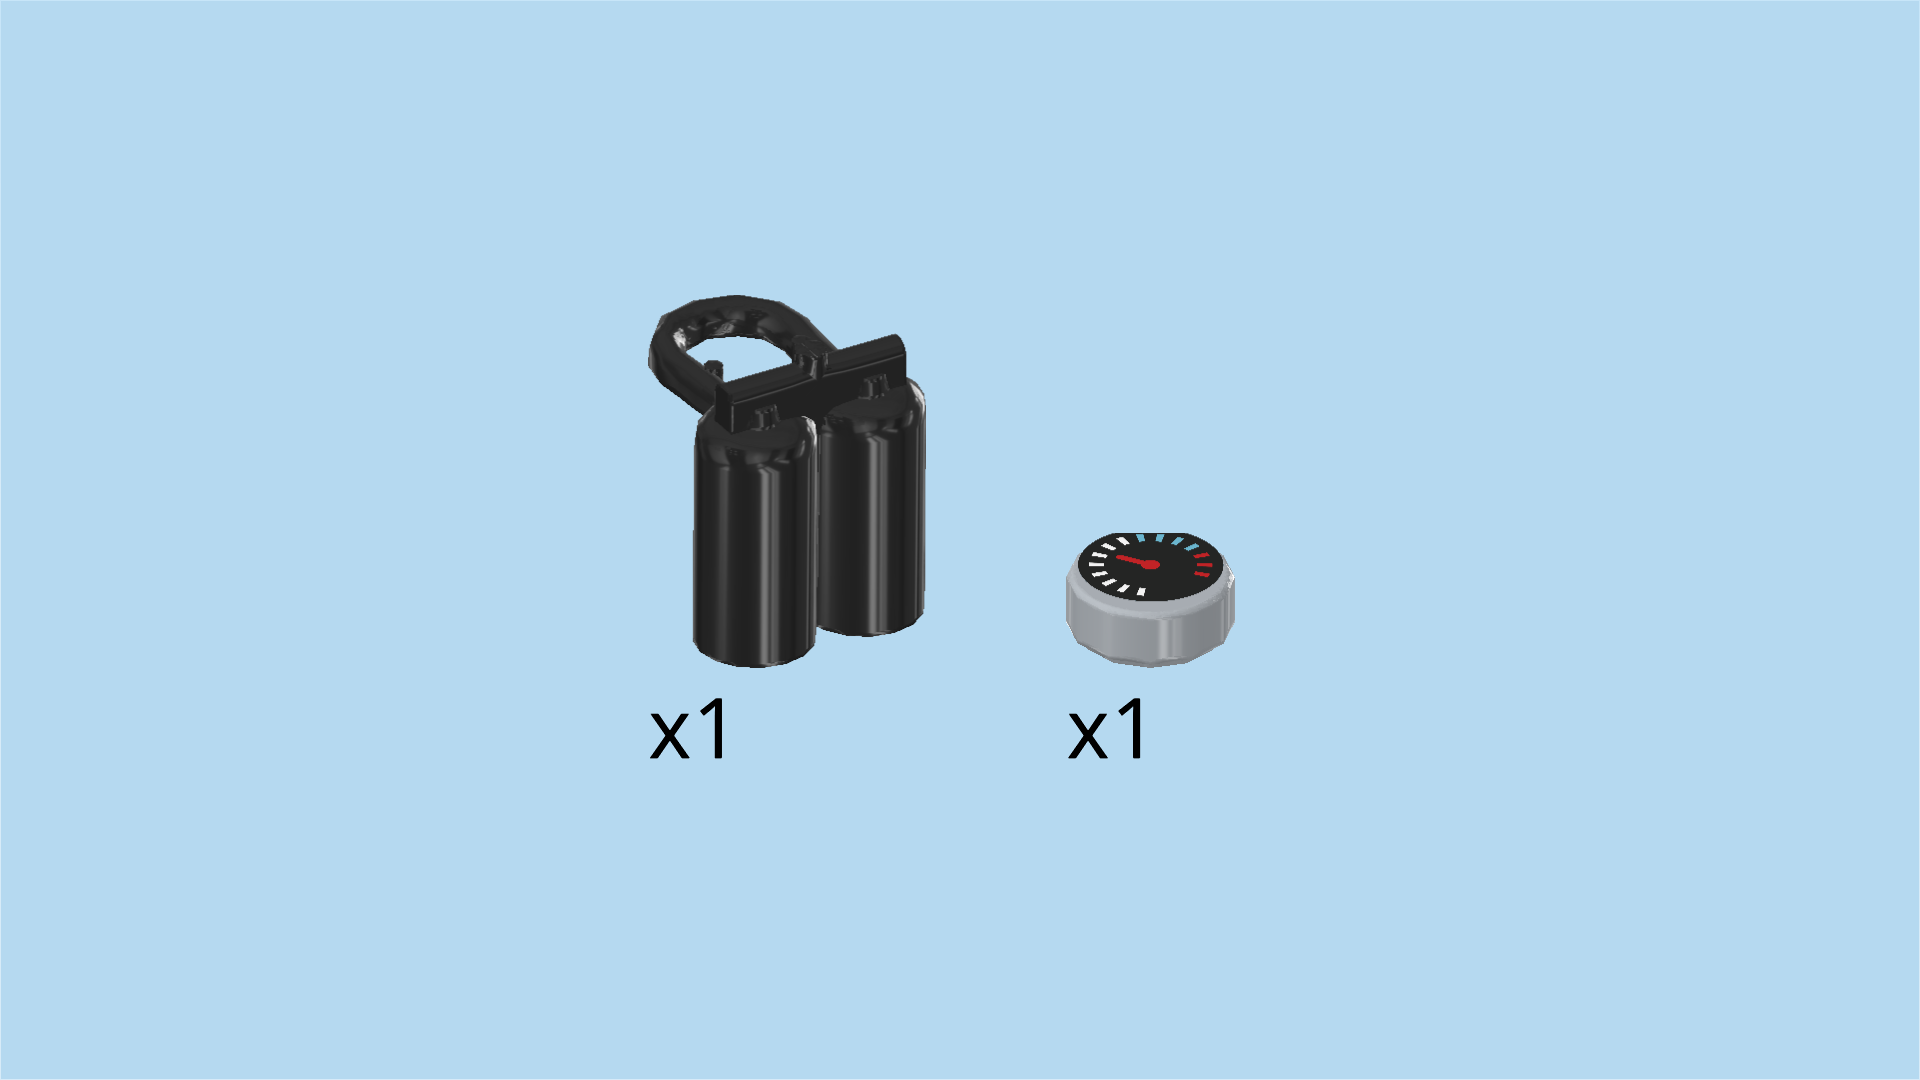
| Collect the following 2 pieces: |
| 1 black pair of oxygen bottles, |
| and 1 medium stone grey round tile 1x1. |
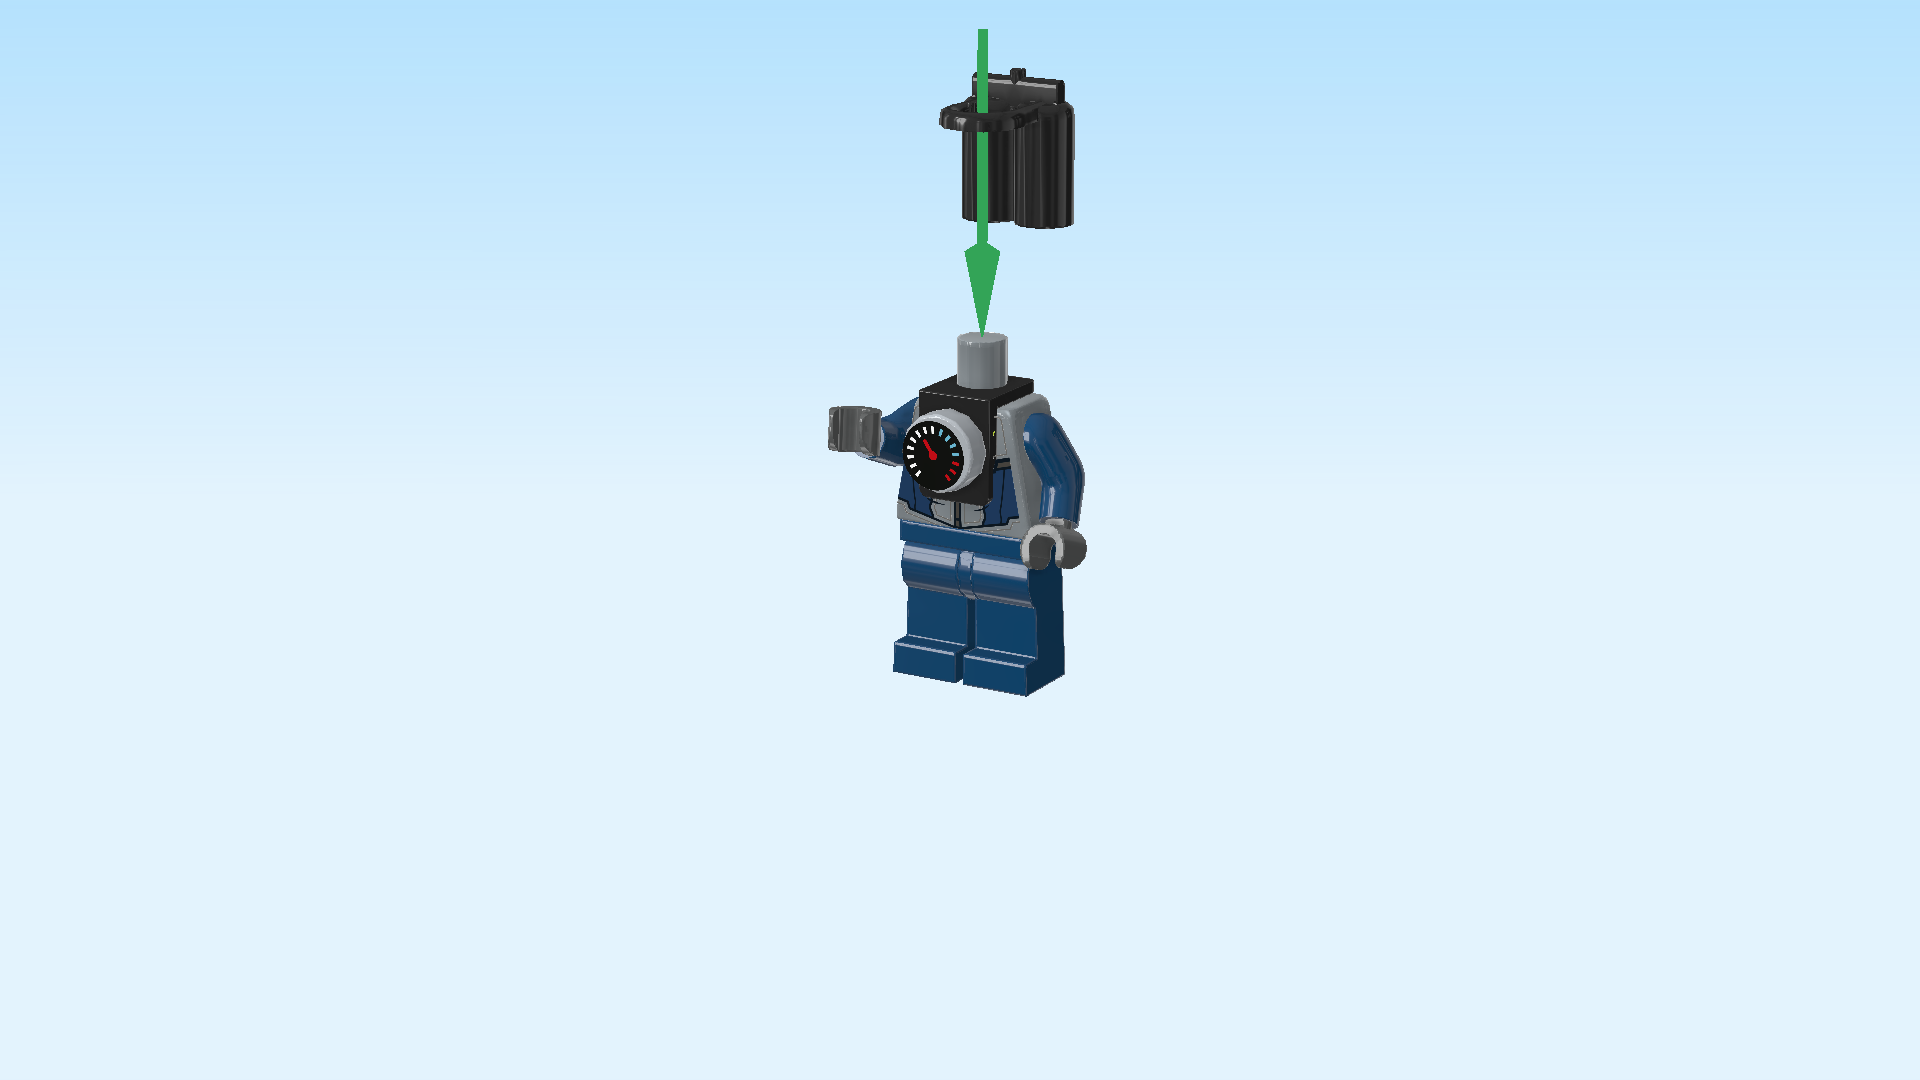
| Put the top hole of the oxygen bottles around the neck, oxygen bottles to the back. |
| Put the round tile 1x1 upright on the side knob pointing to the front. |
| This piece is printed with a black dial indicator with red needle and white, green, and red sections indicating the pressure in the oxygen bottles. |
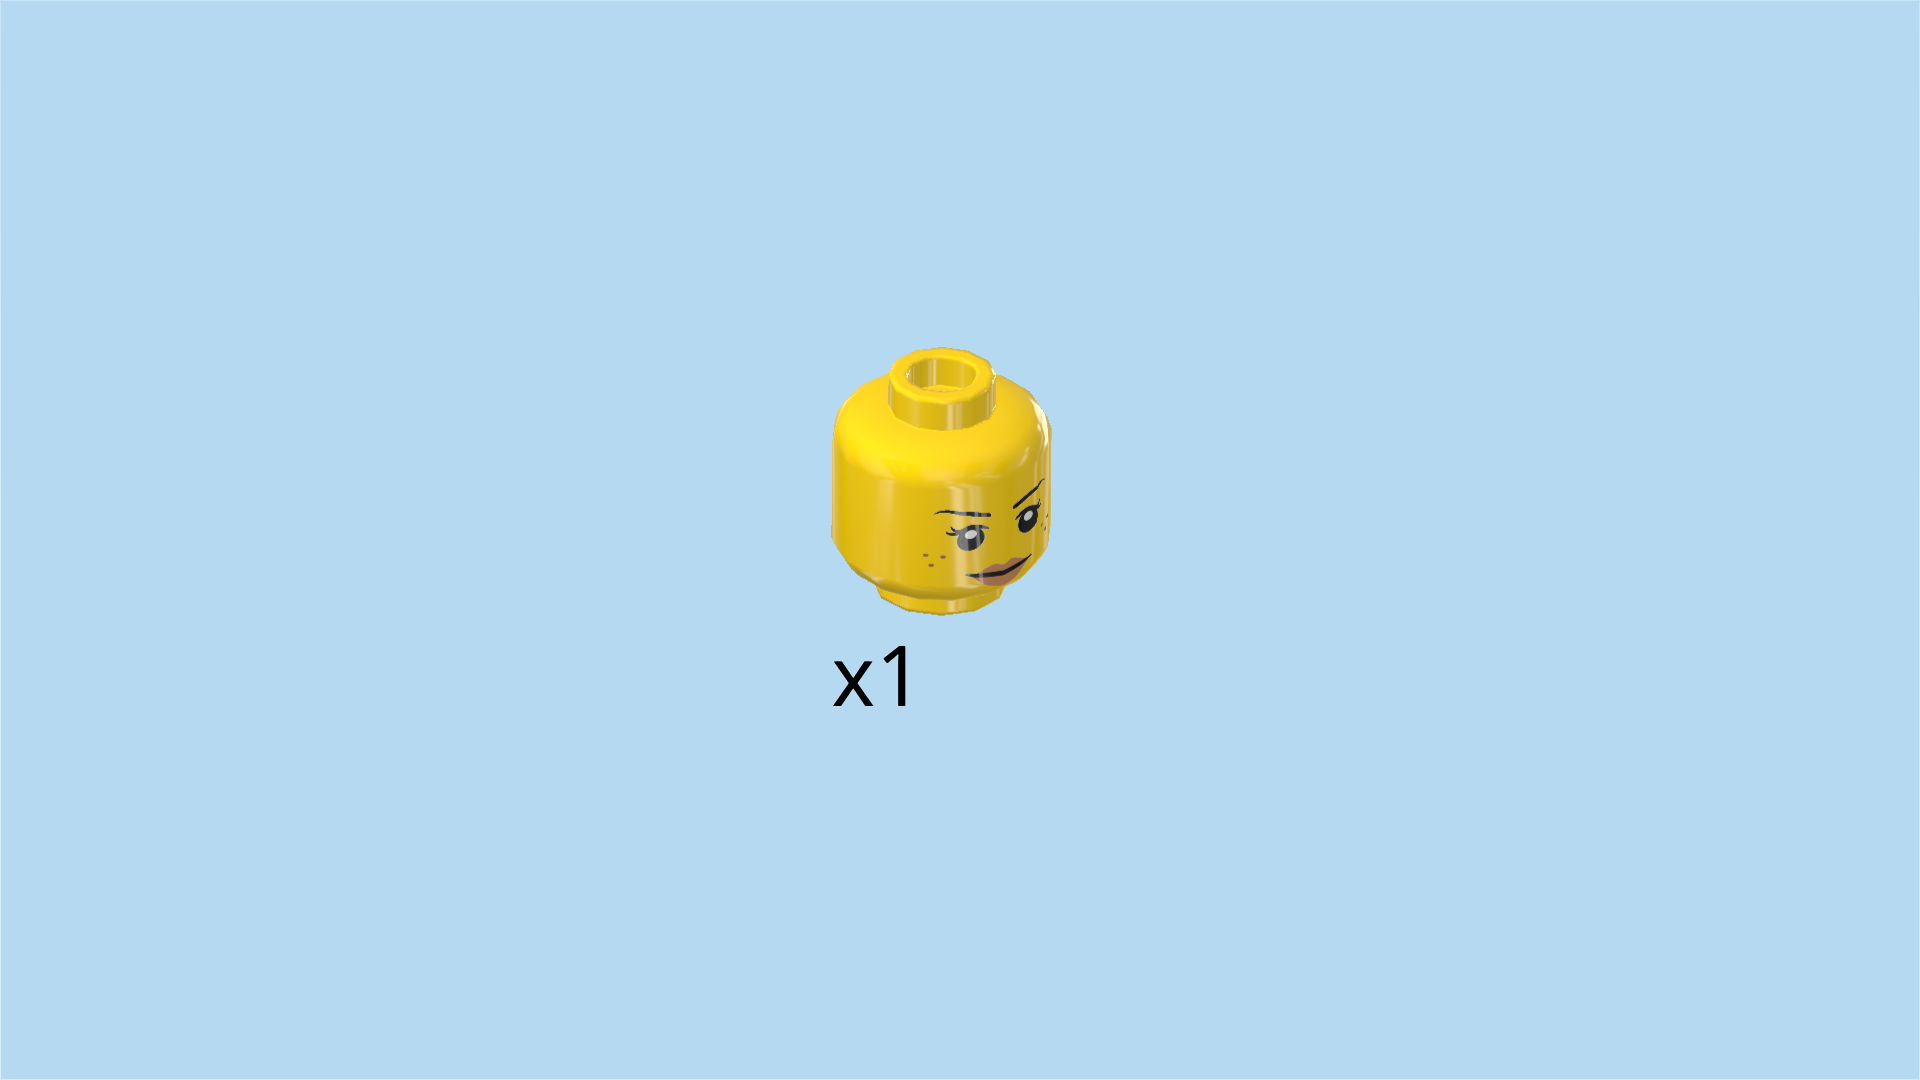
| Find 1 bright yellow Minifigure head. |
| Put the head on the body. |
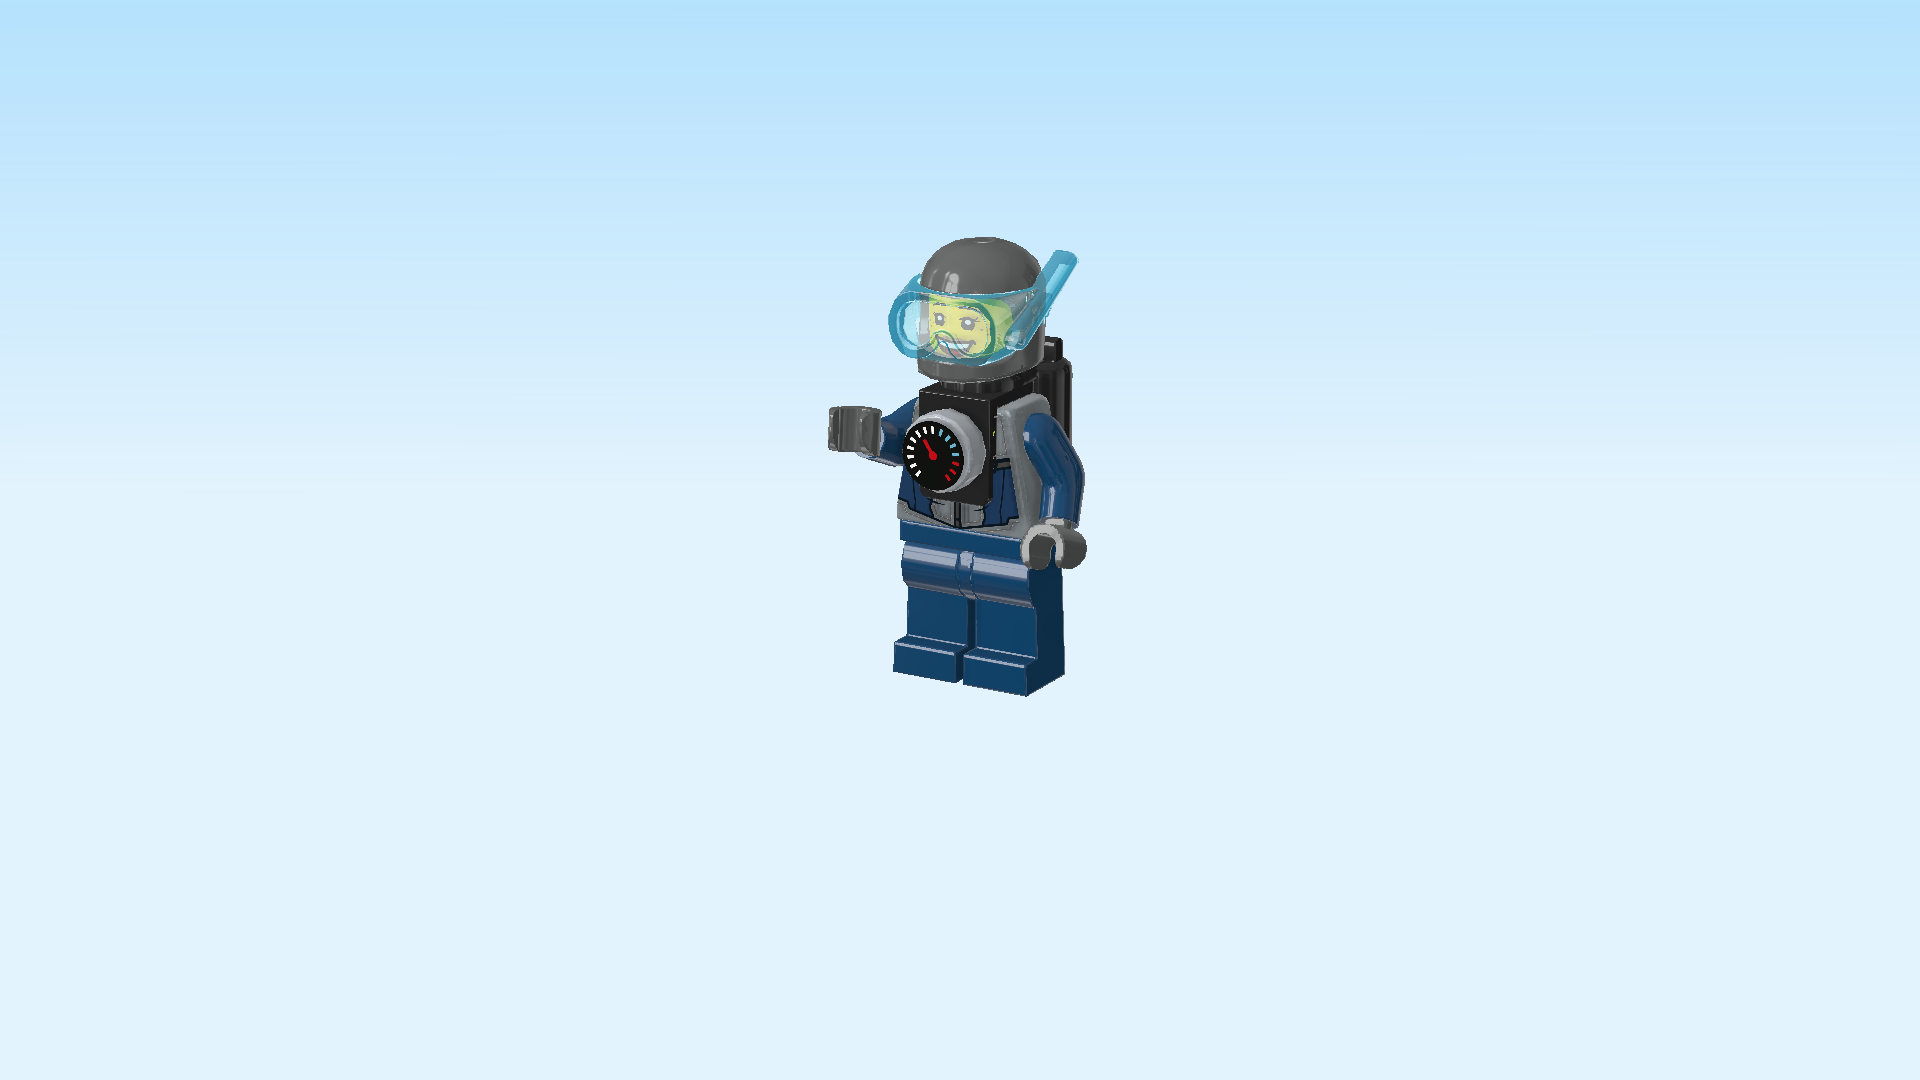
| Next, we will assemble the diving helmet. |
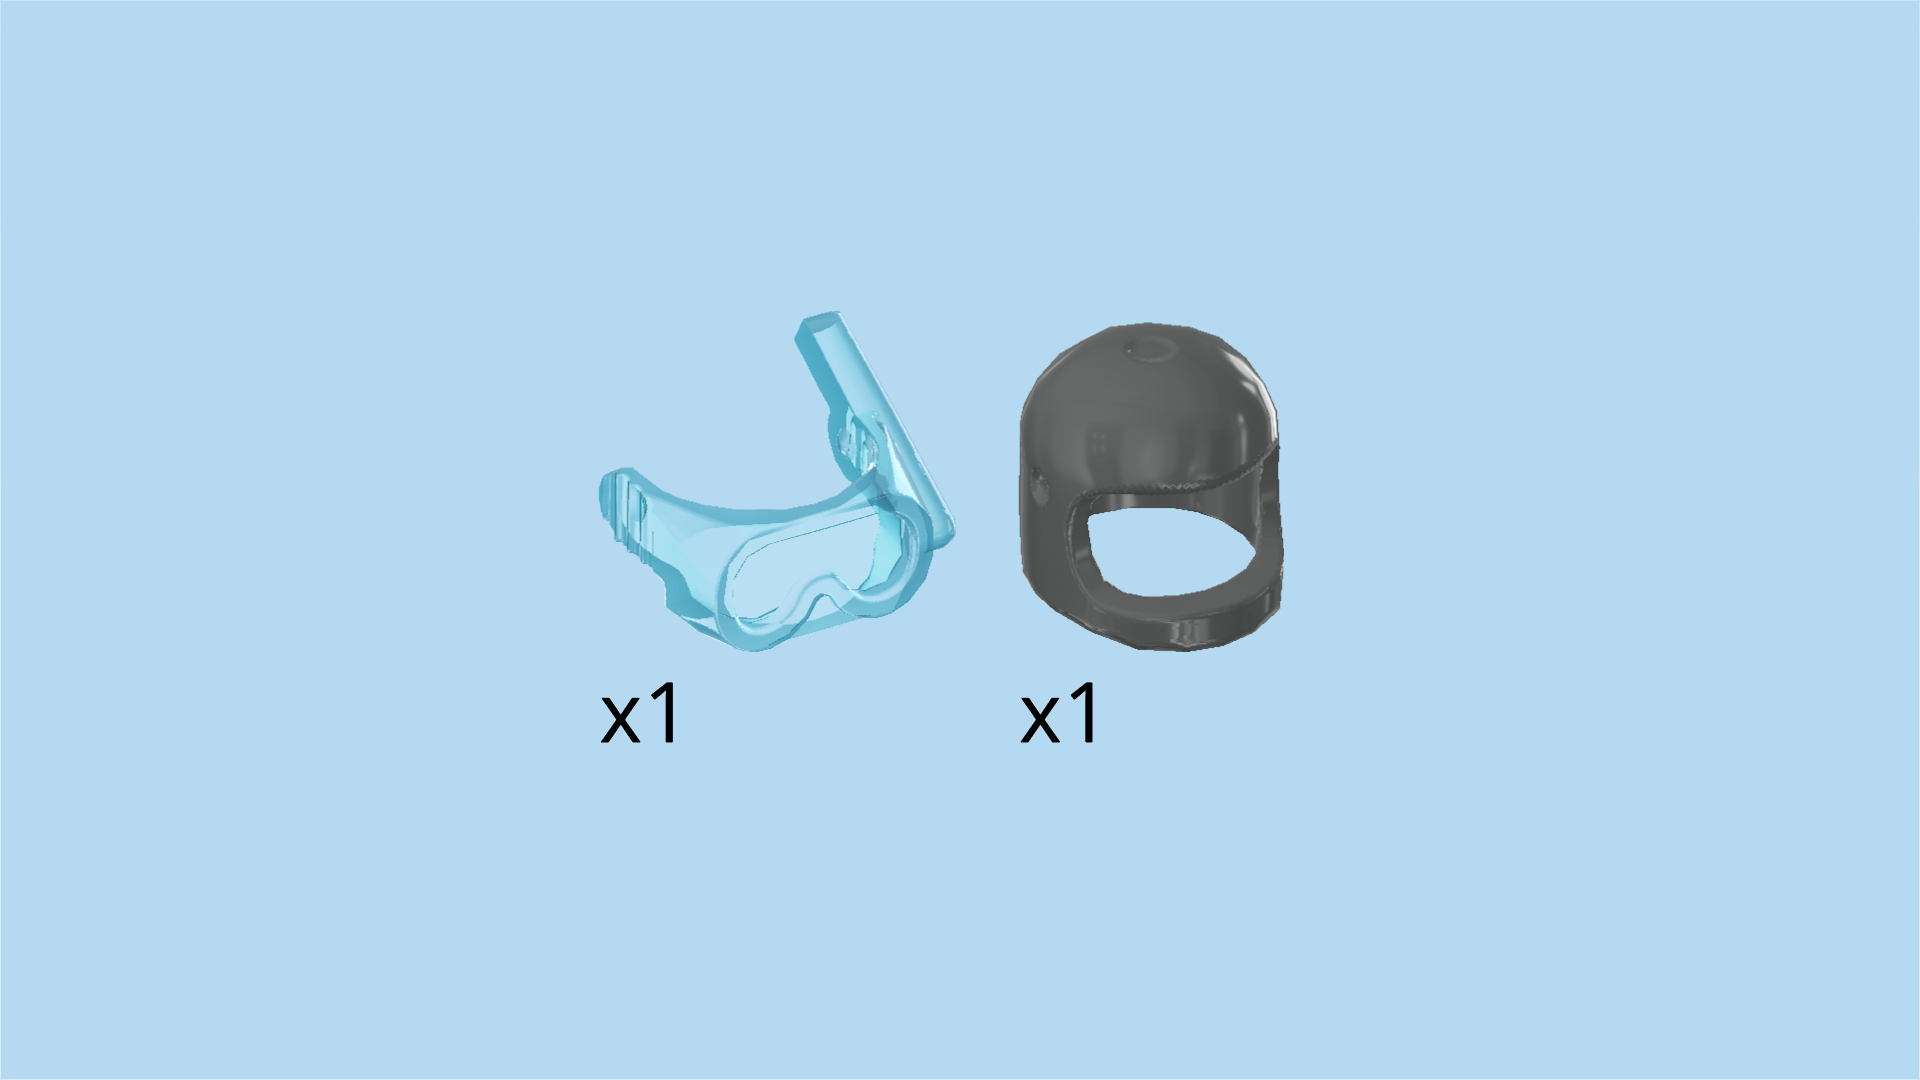
| Collect the following 2 pieces: |
| 1 transparent light blue pair of diving goggles with snorkel, |
| and 1 dark stone grey helmet with thick chin strap. |
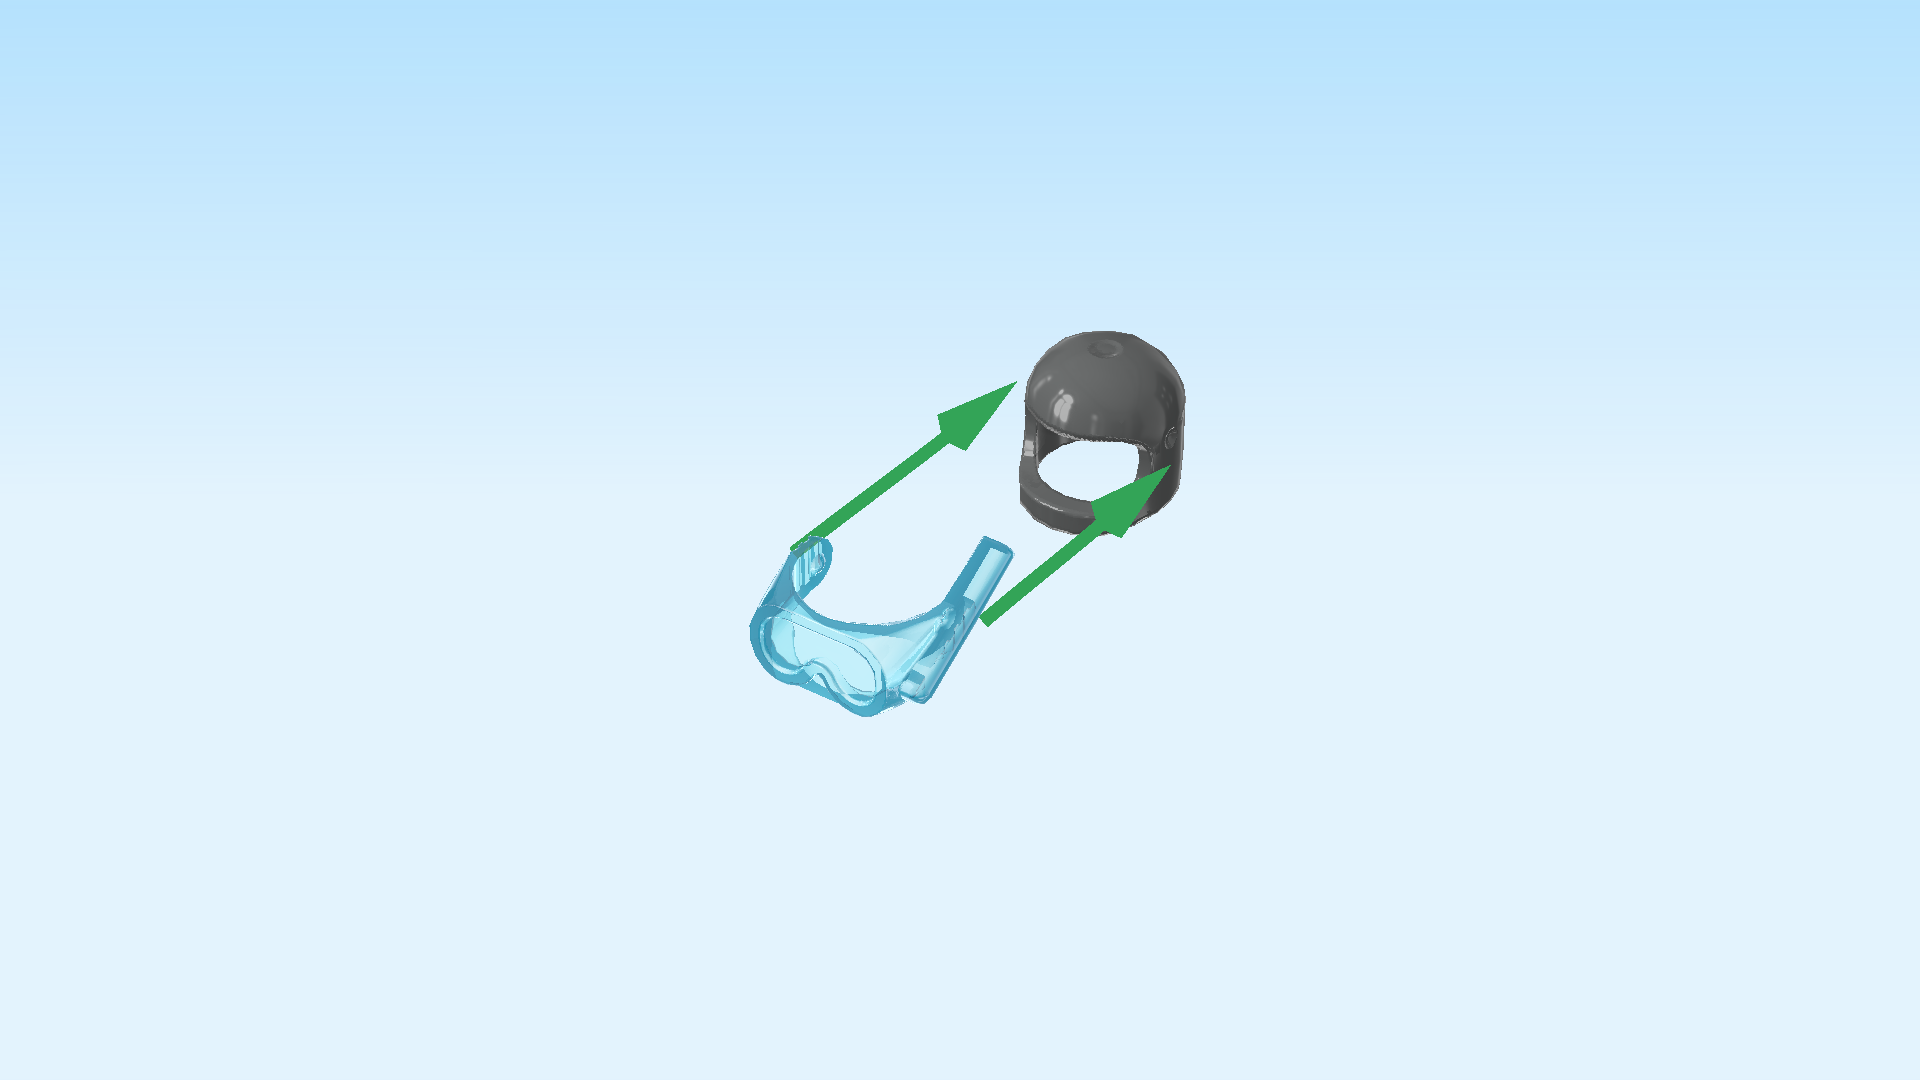
| Hold the helmet in your hand, opening to the right. |
| Put the diving goggles on from the right, snorkel to the back. |
| Put the diving helmet on the head. |
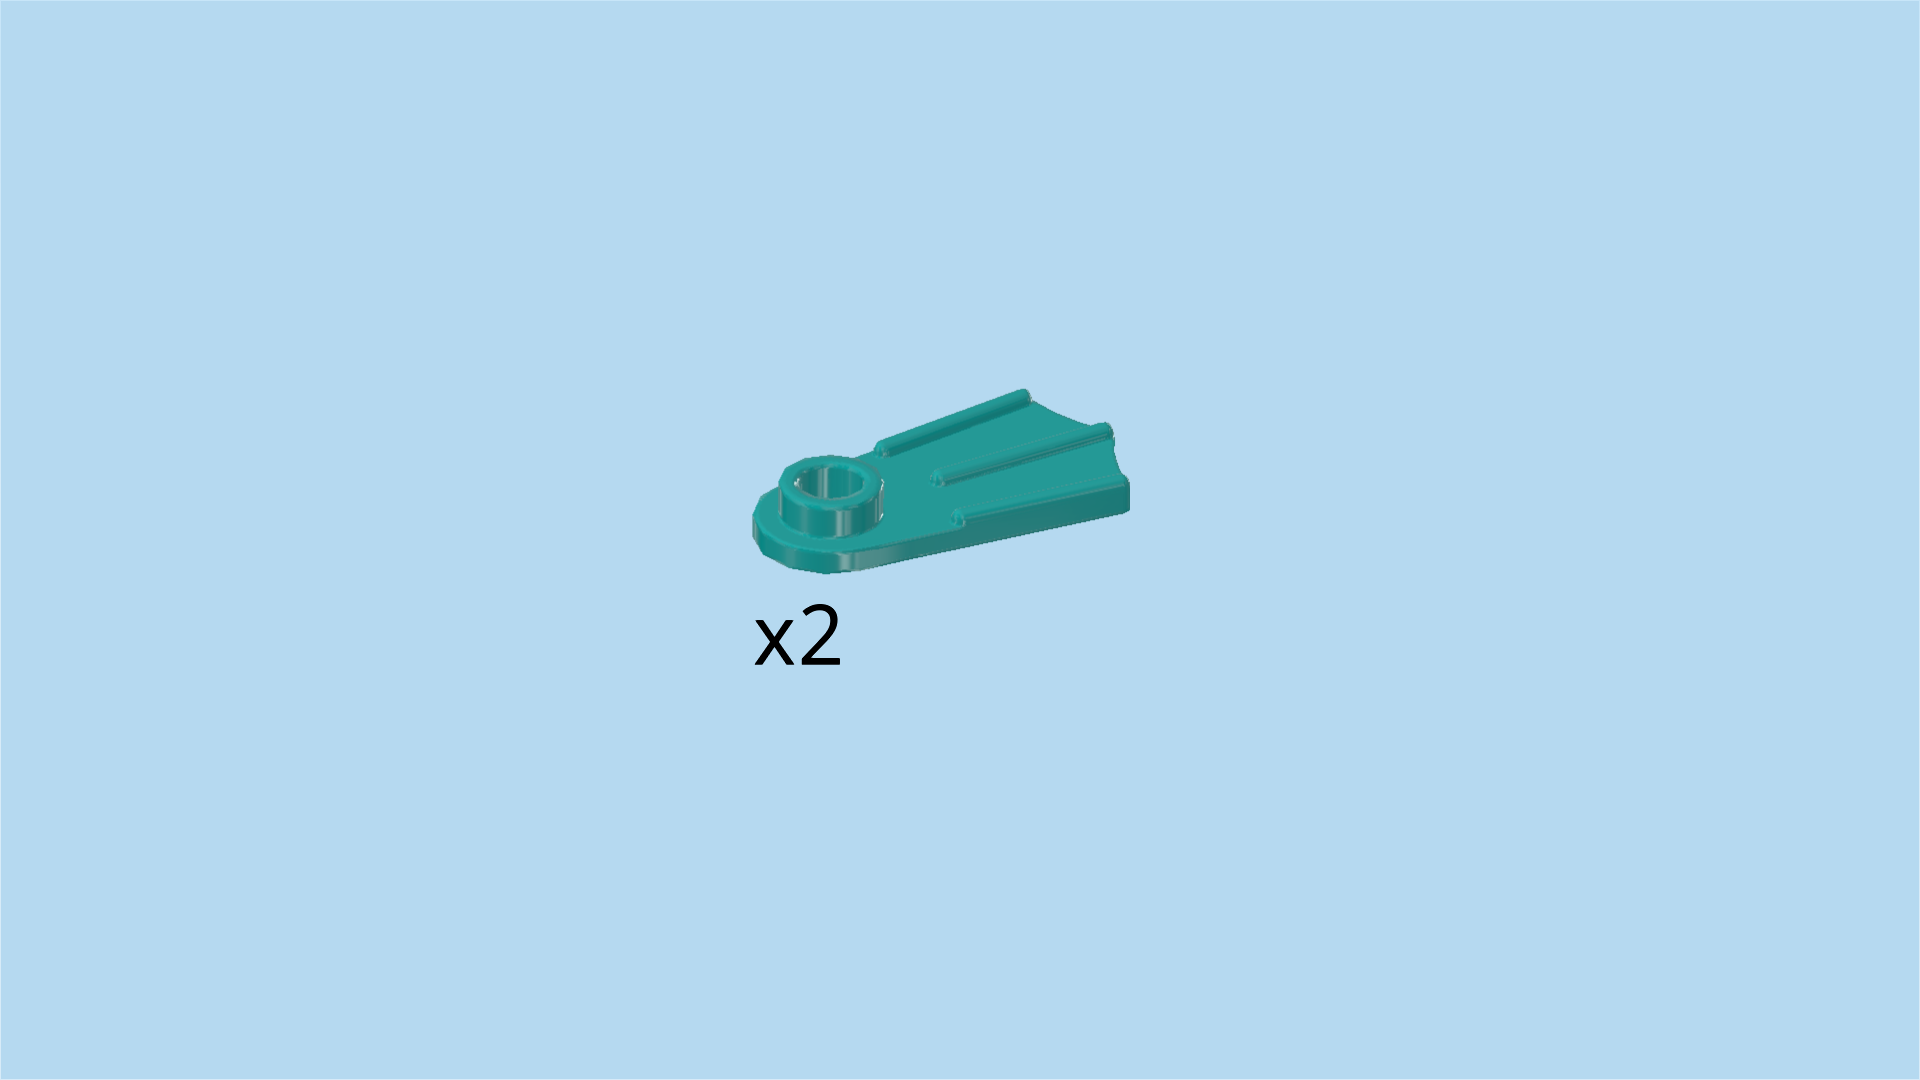
| Find 2 teal blue flippers. |
| Mount the flippers underneath the legs of the diver, flippers pointing to the front. |
| Next, we will build the underwater camera with floodlight. |
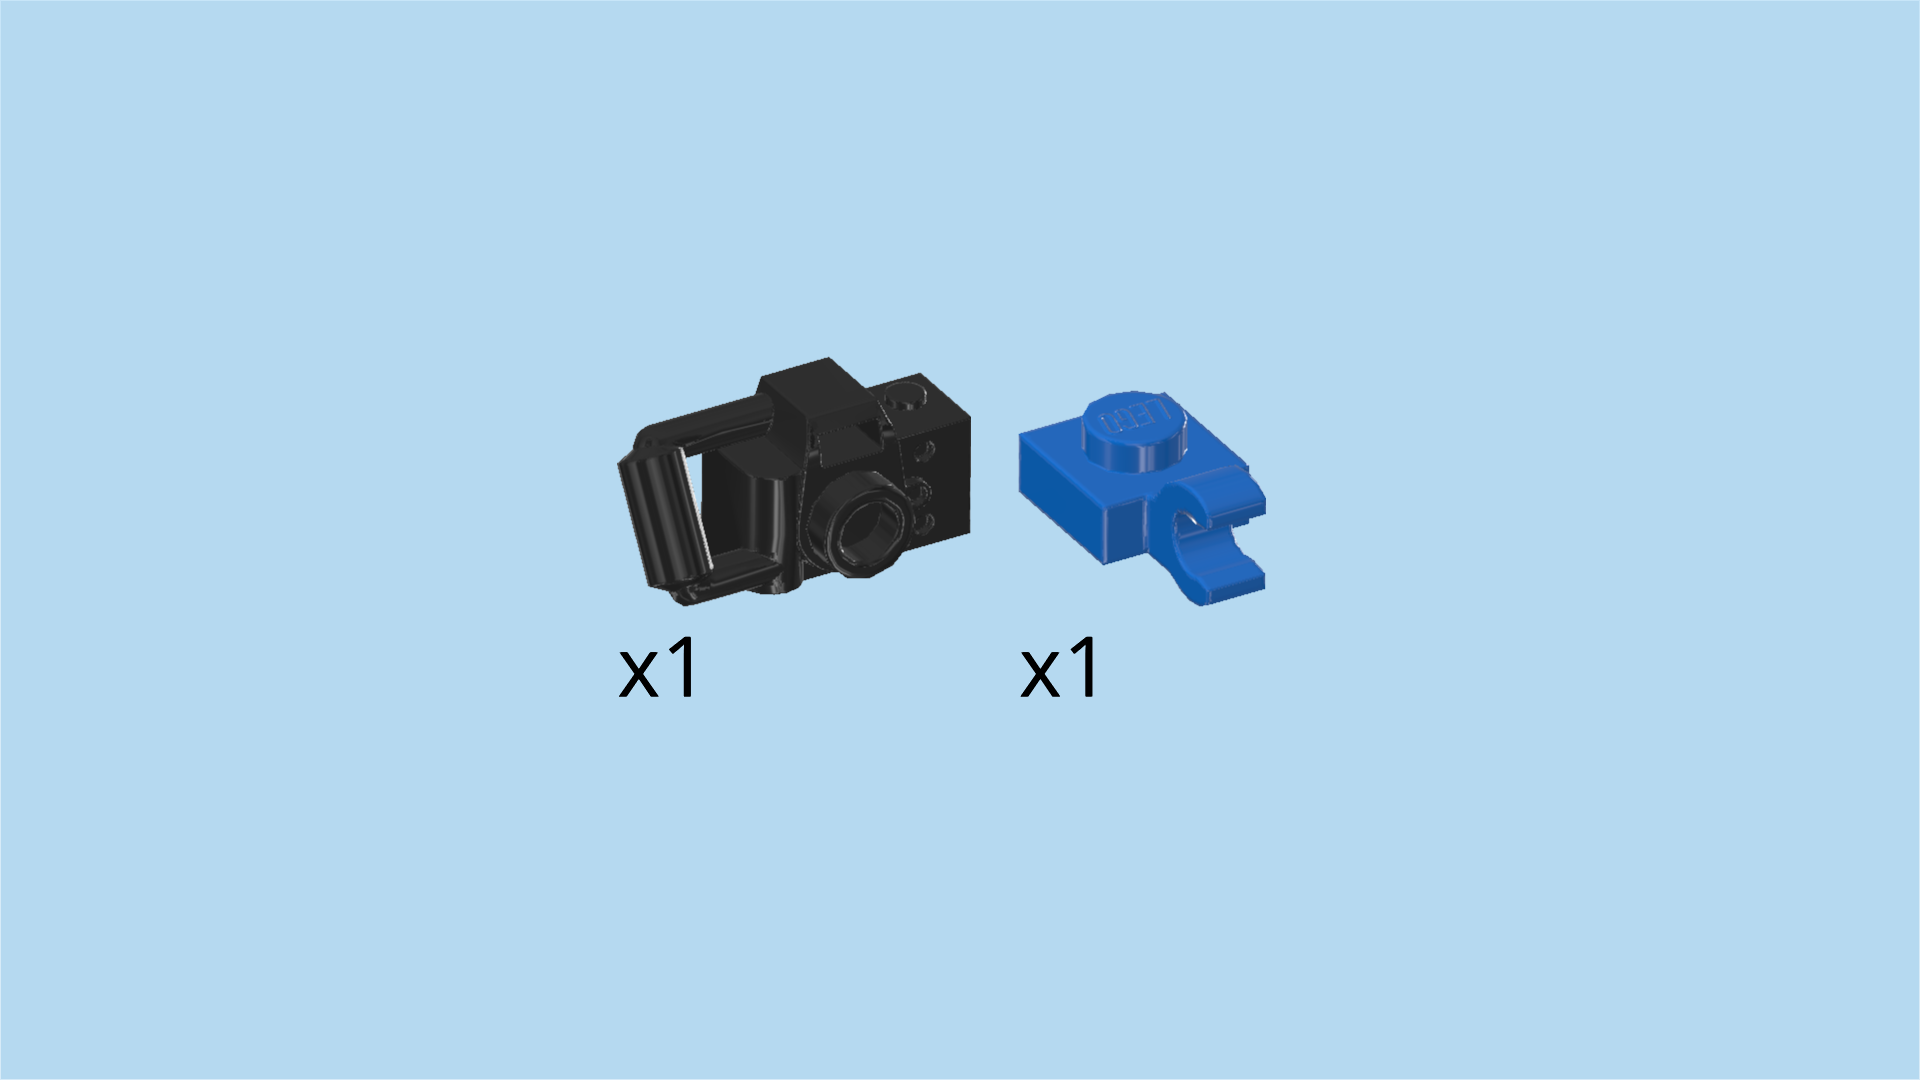
| Collect the following 2 pieces: |
| 1 black camera piece, |
| and 1 bright blue plate 1x1 with vertical side clasp. |
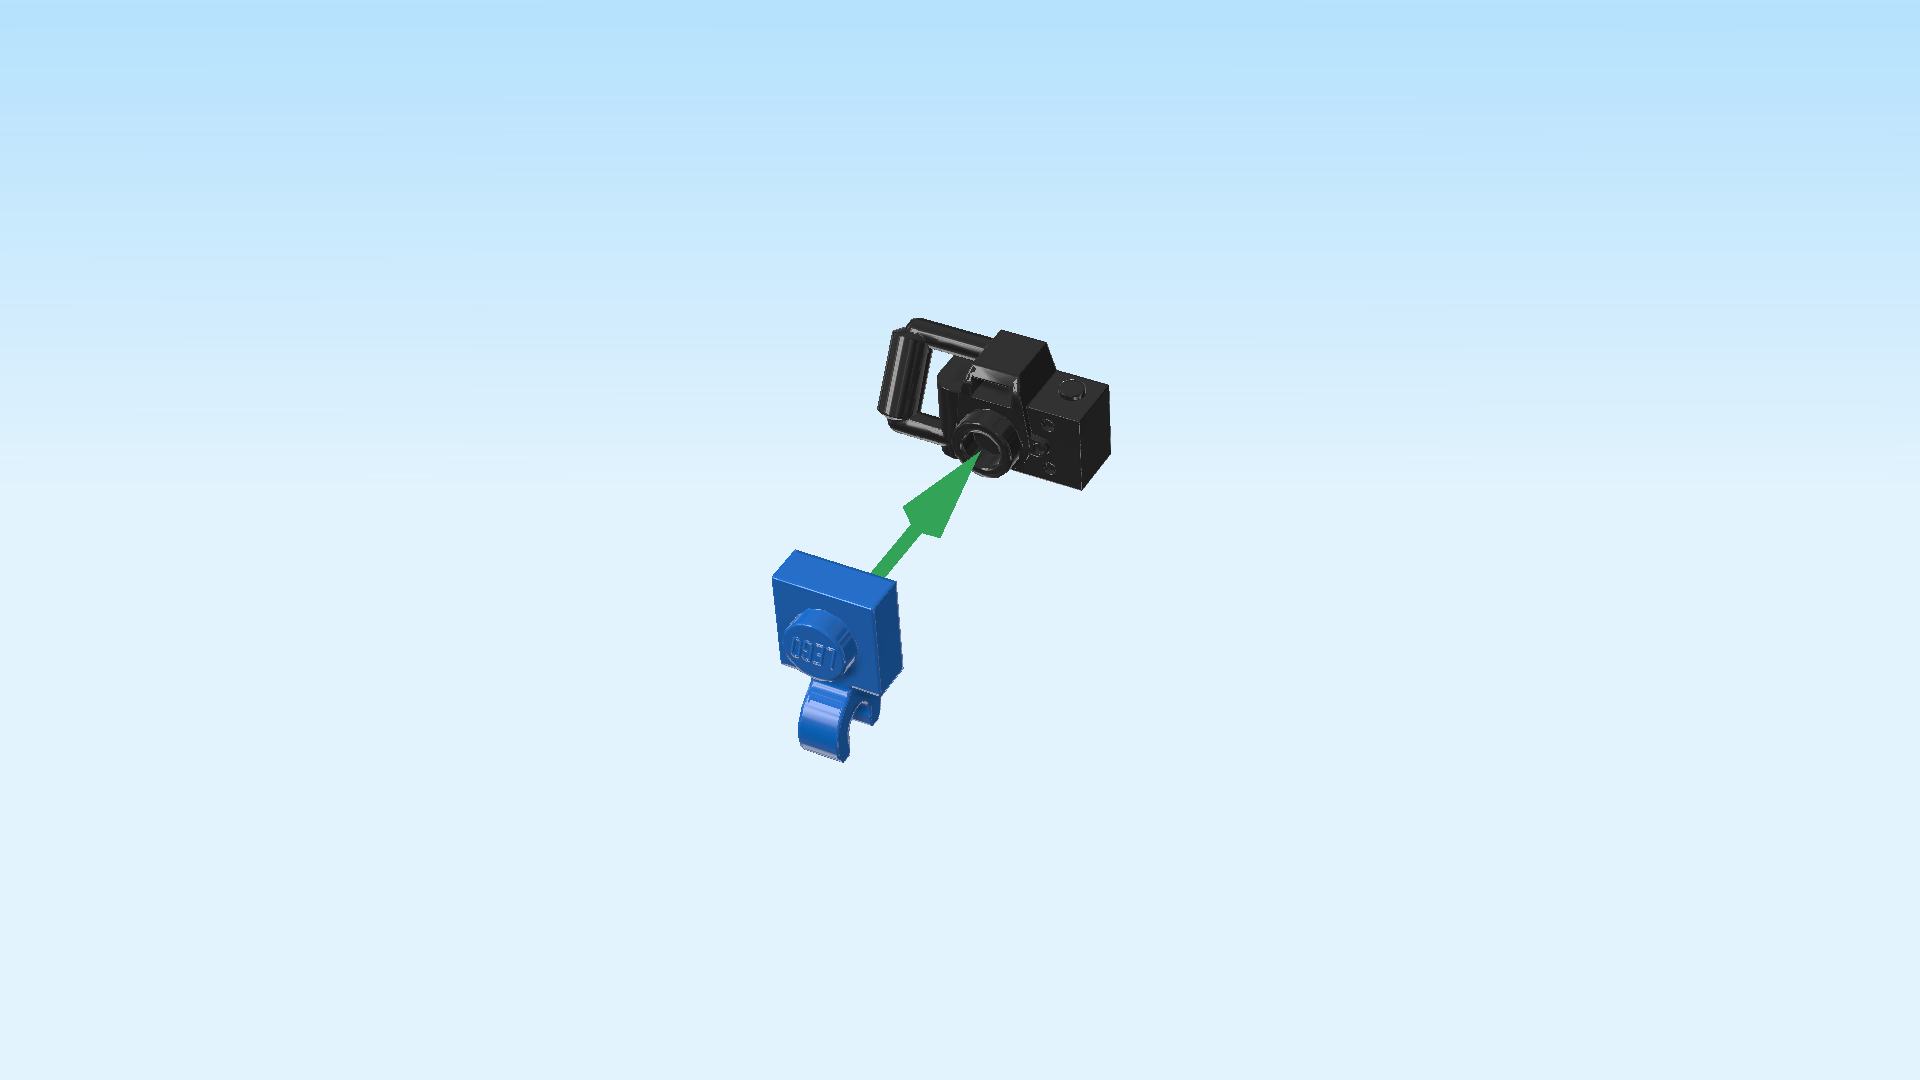
| Put the camera piece horizontally on the table, knob to the top, camera handle to the left. |
| Put the plate 1x1 on top, clasp pointing to the front. |
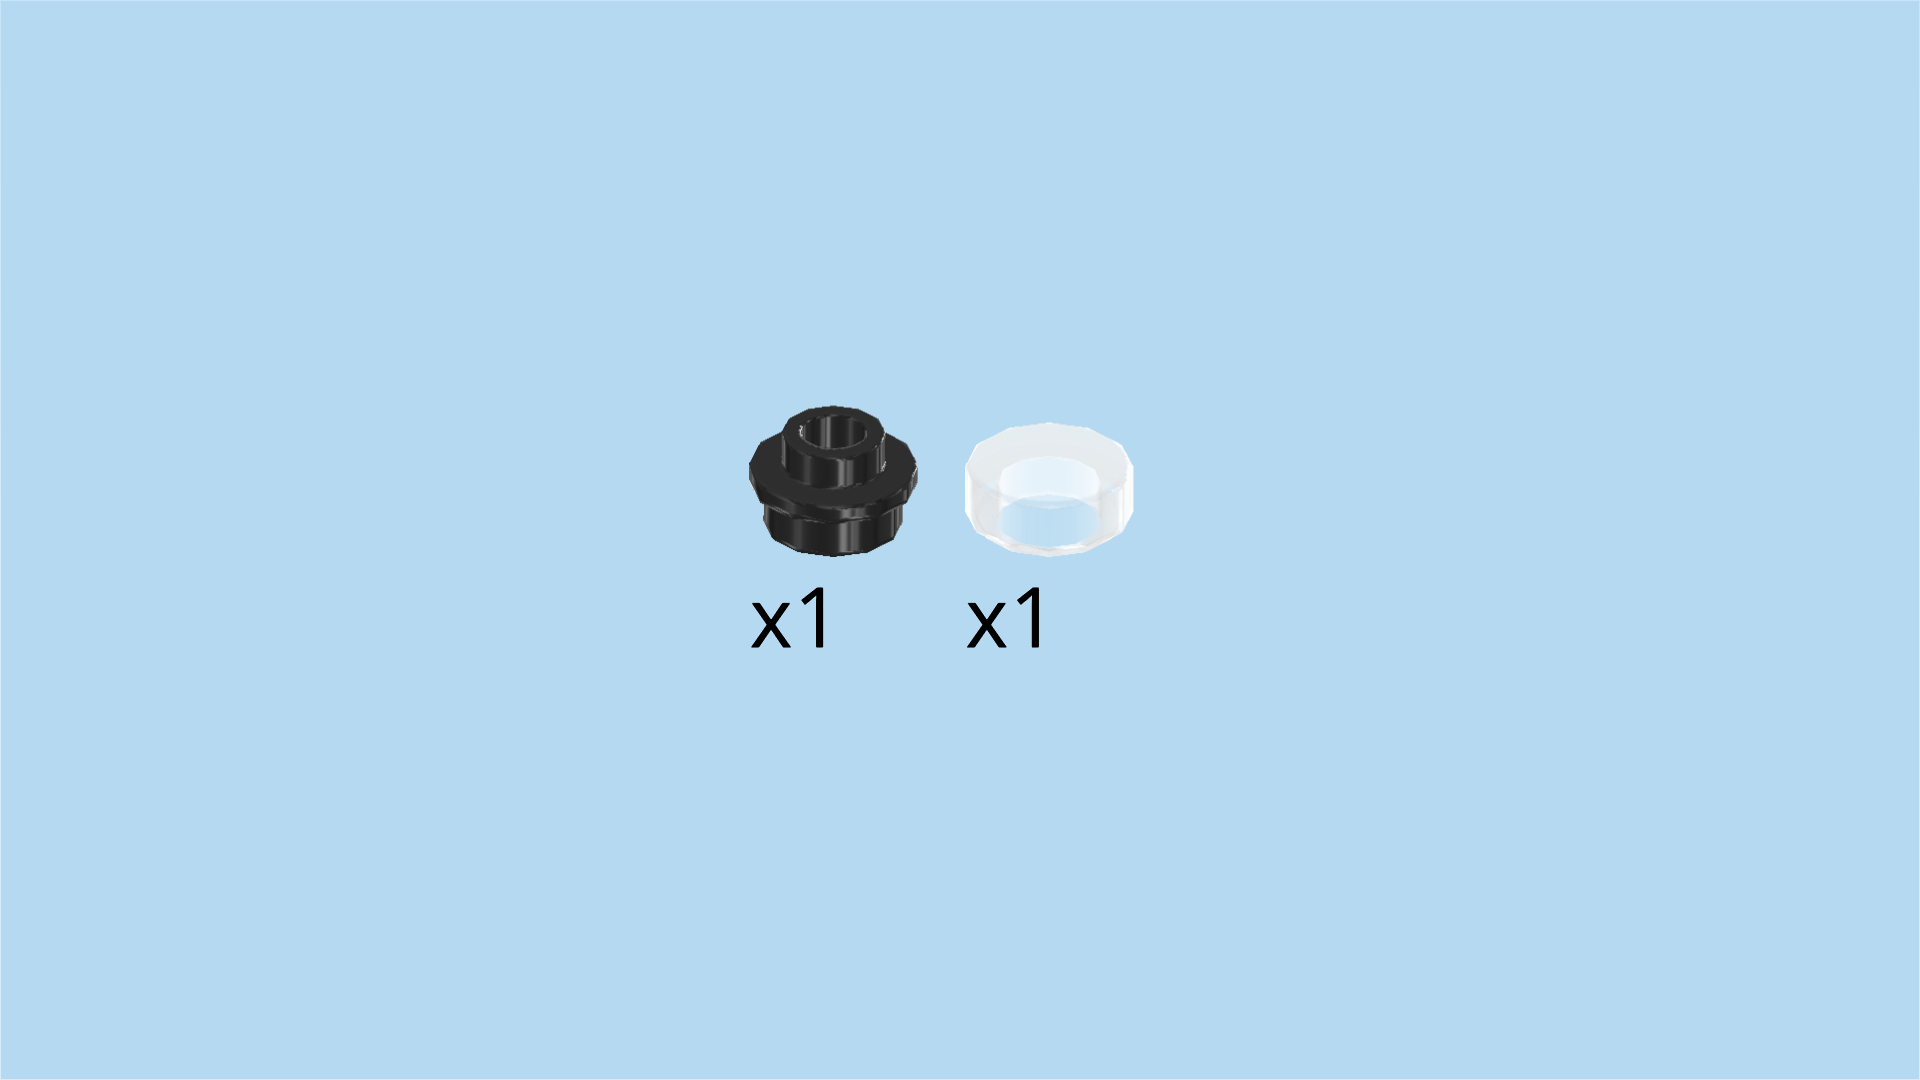
| Collect the following 2 pieces: |
| 1 black round plate 1x1 with through-hole, |
| and 1 transparent round tile 1x1. |
| Put the black round plate on the knob of the previous piece. |
| Put the round tile on the previous piece. This is the camera lens! |
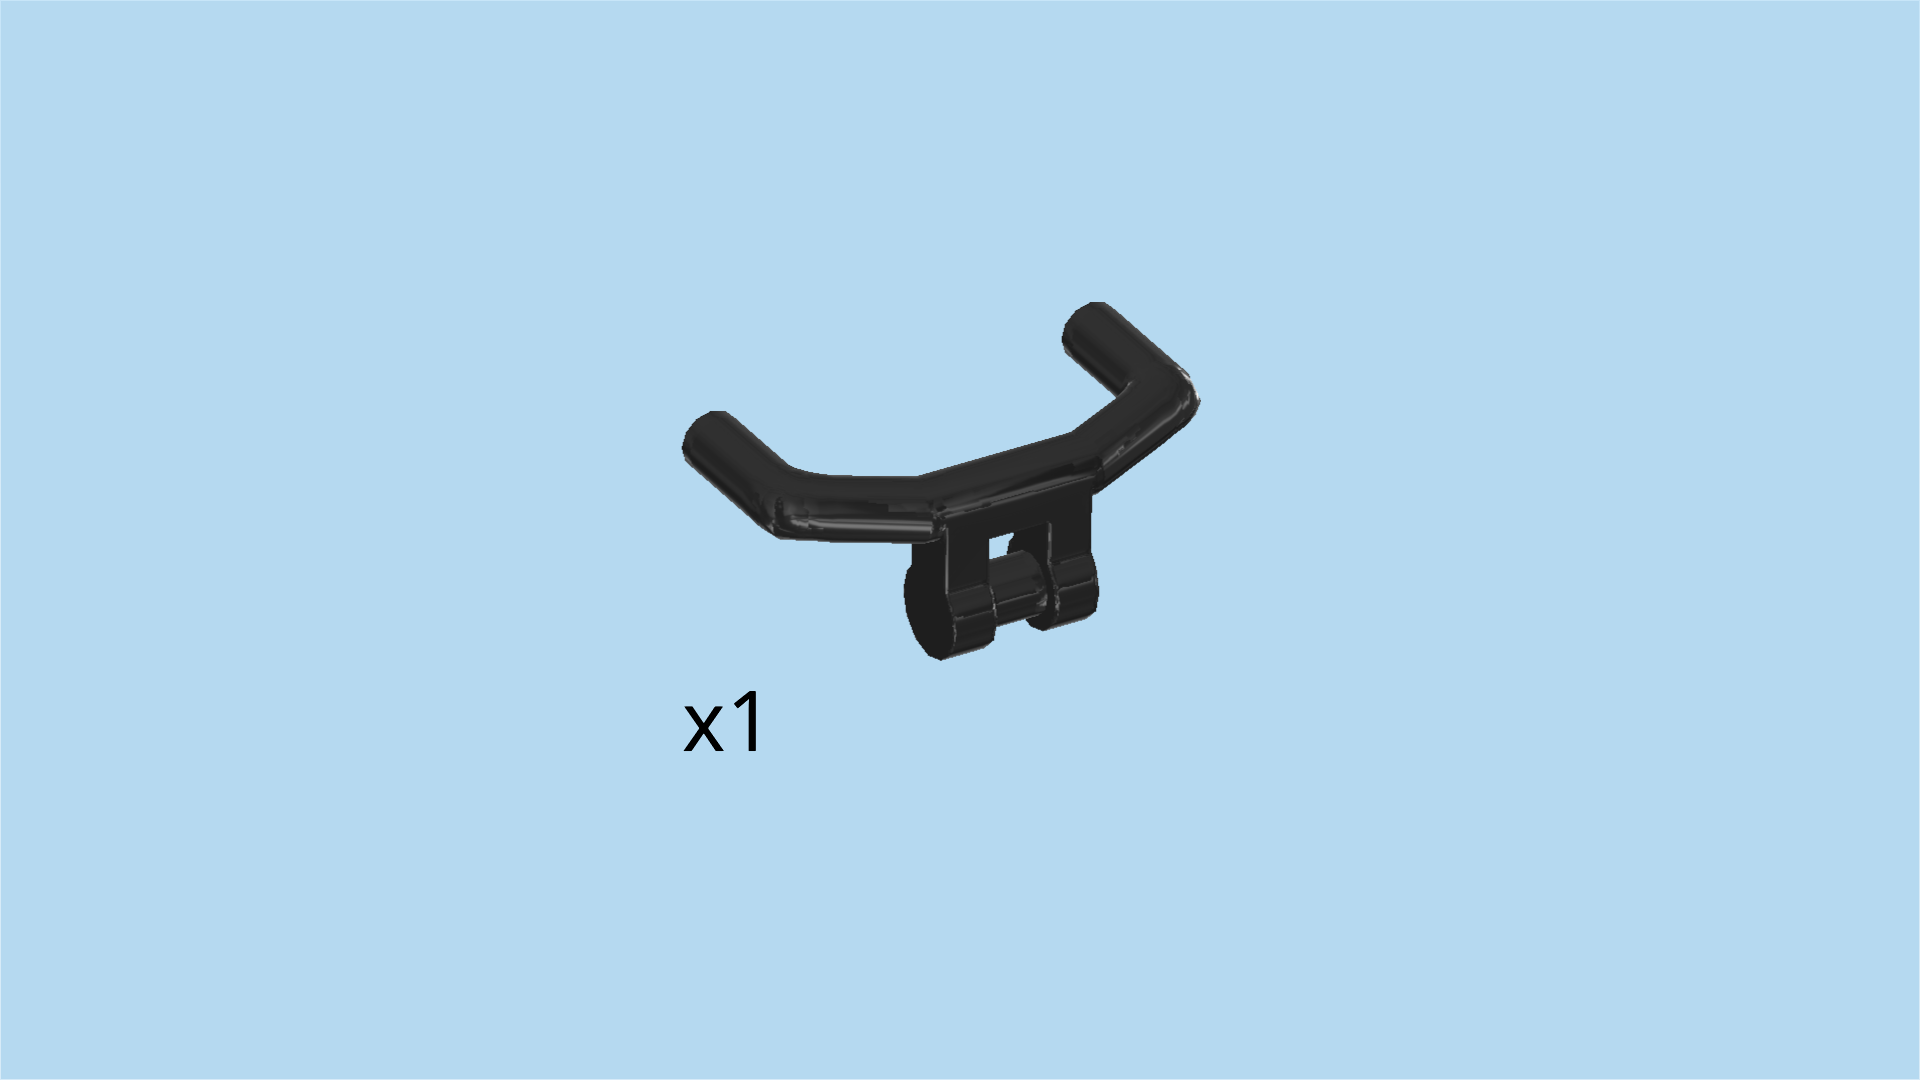
| Find 1 black angled handlebar with bottom shaft. |
| Hold it in your hand so that the small bottom shaft is pointing to the top and the 2 ends of the handlebar are pointing to the back. |
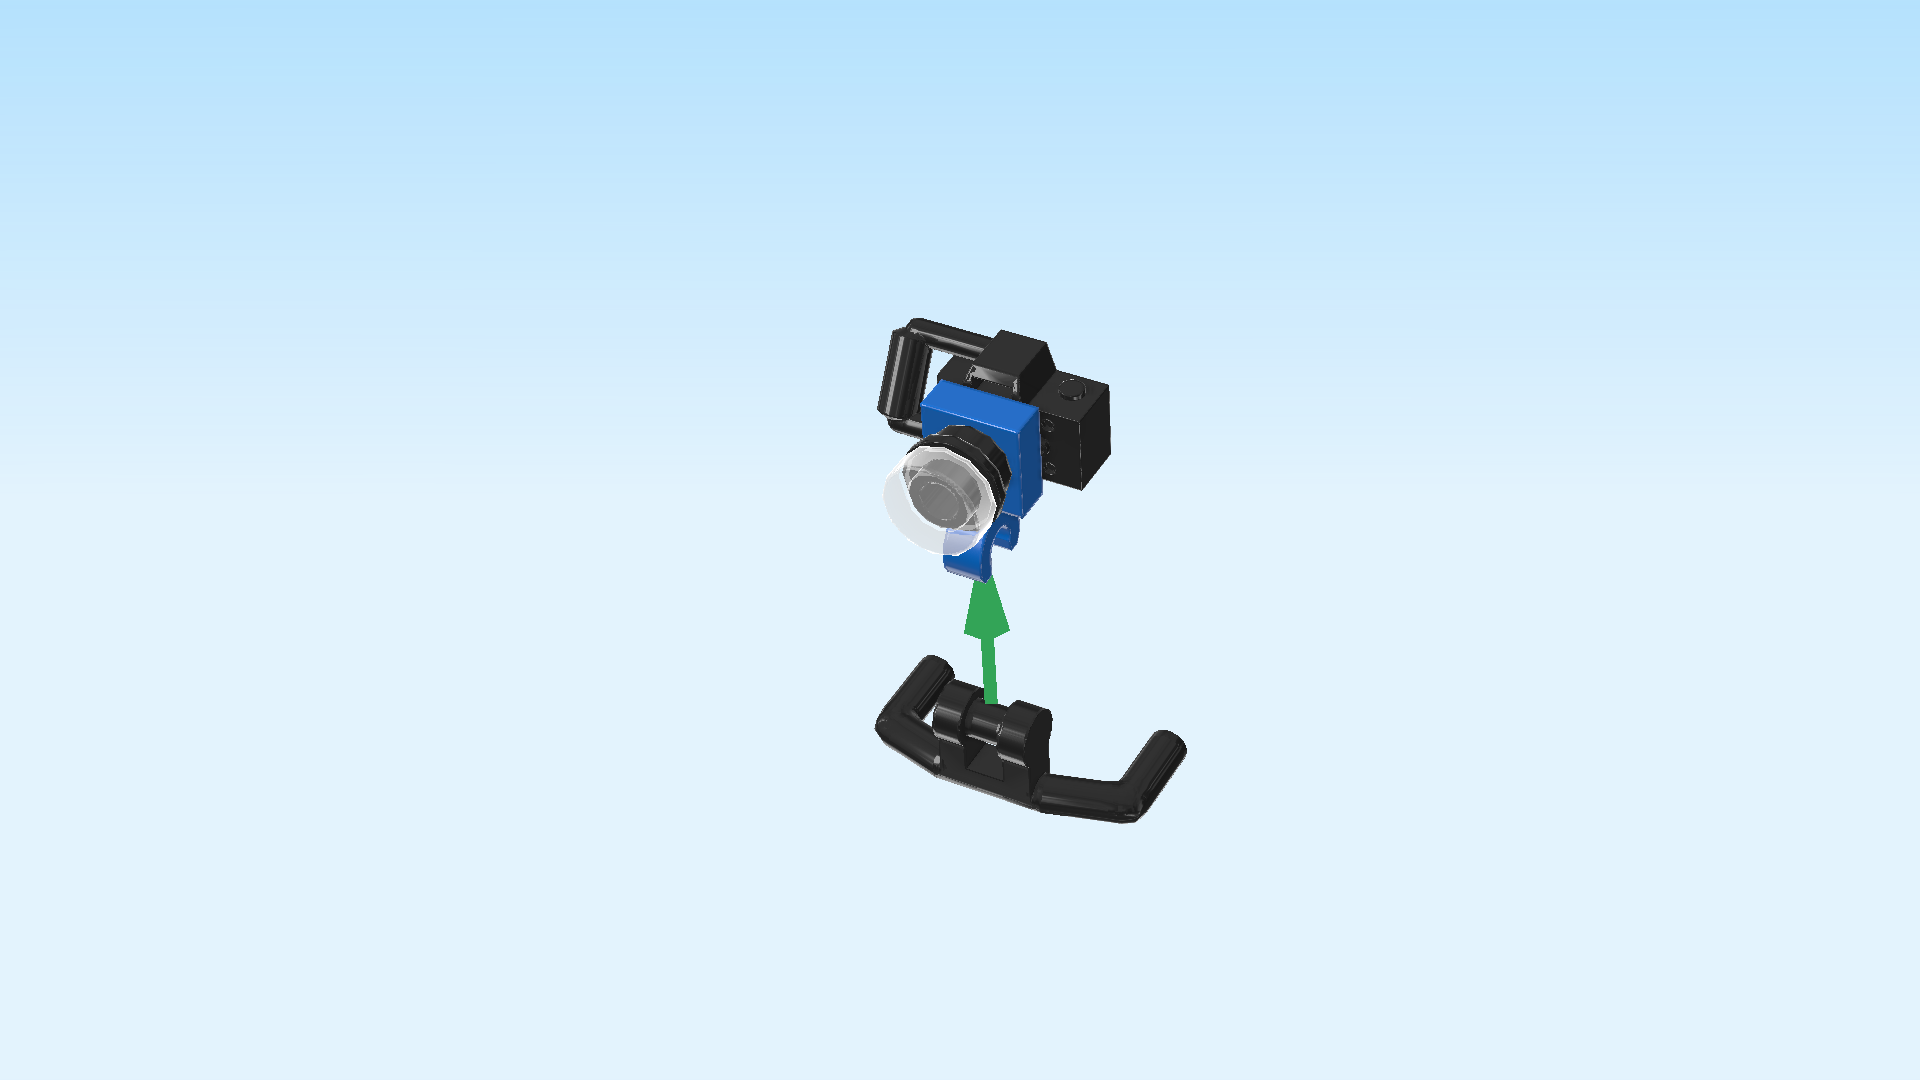
| Now, pick up the camera and hold it so that its clasp is to the bottom and the lens is pointing to the front. Snap the clasp onto the small shaft of the handlebar. |
| Then, flip the ends of the handlebars up so that they point to the top. This build will be a bit wobbly, but that's ok. |
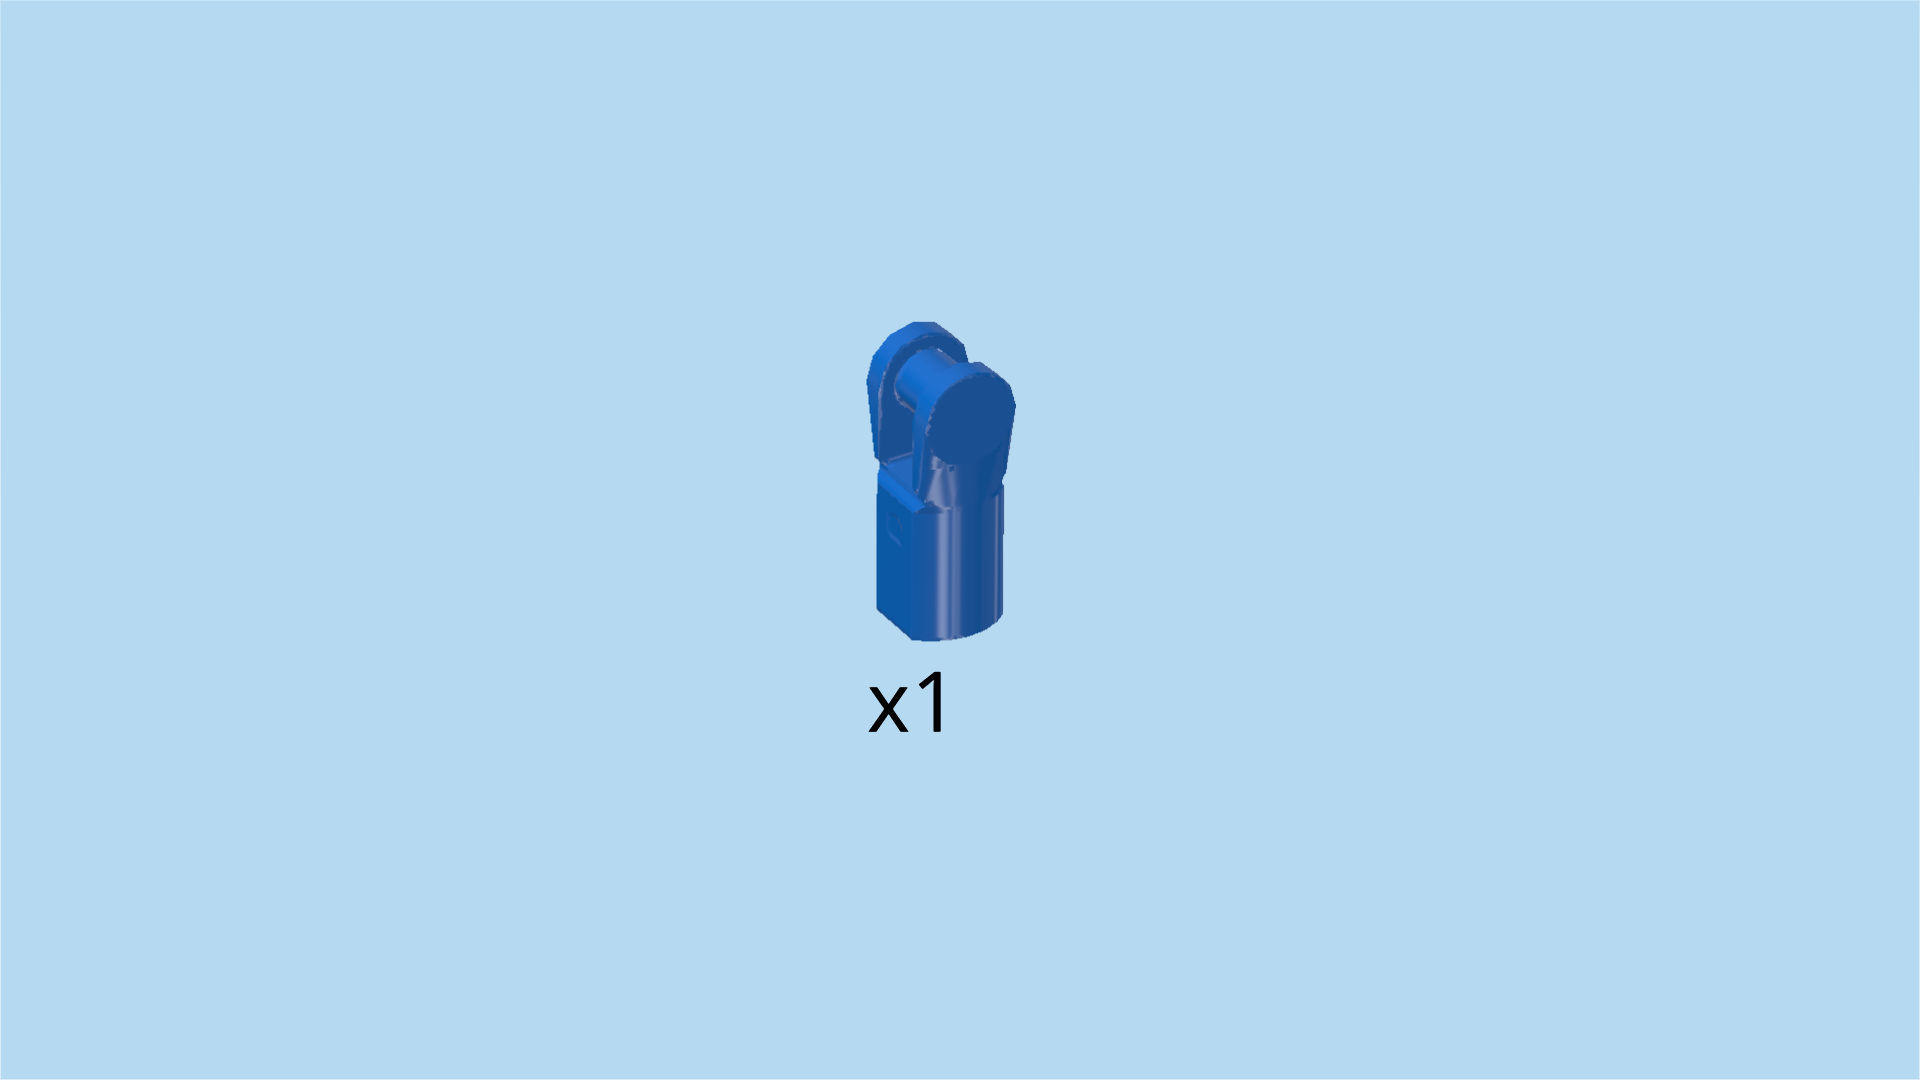
| Find 1 bright blue small tube with shaft. |
| Put the small tube on the handlebar end on the right. This will be the floodlight base. |
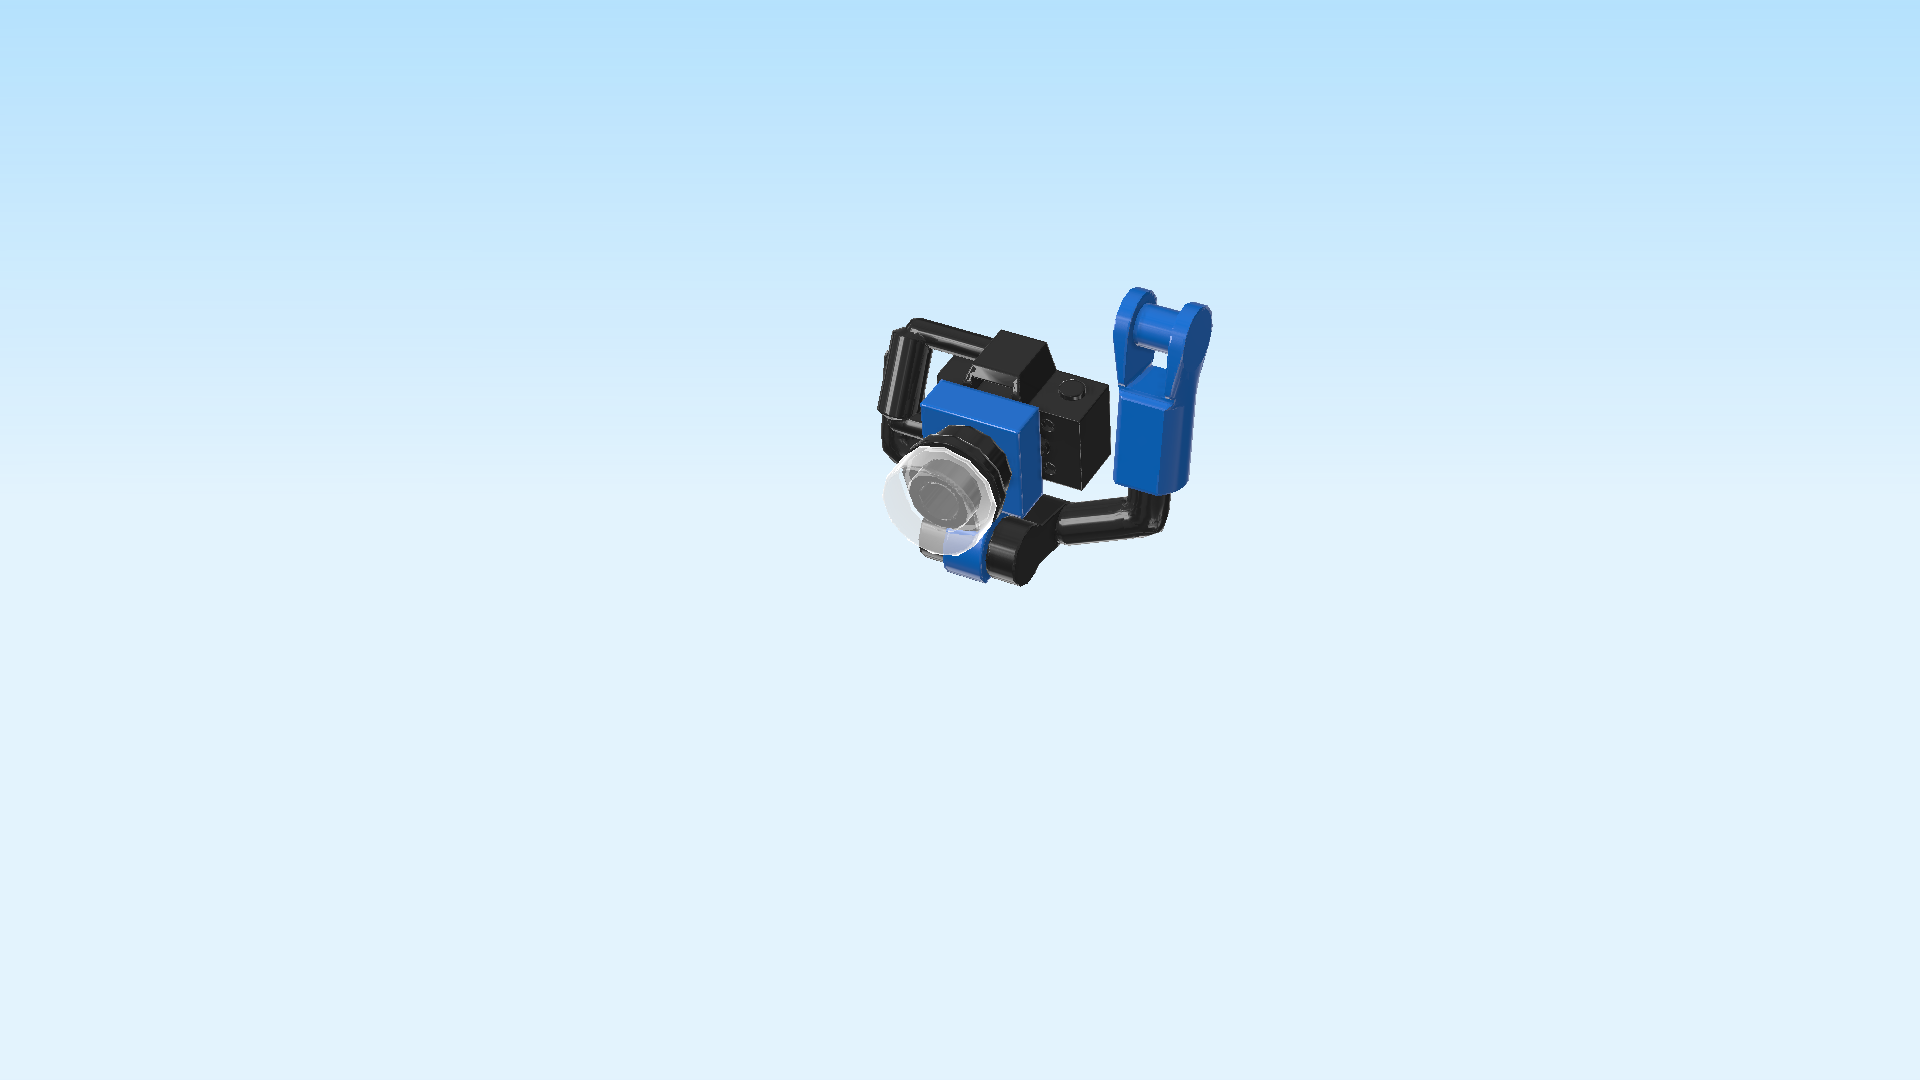
| Next, let's make the lense of the floodlight. |
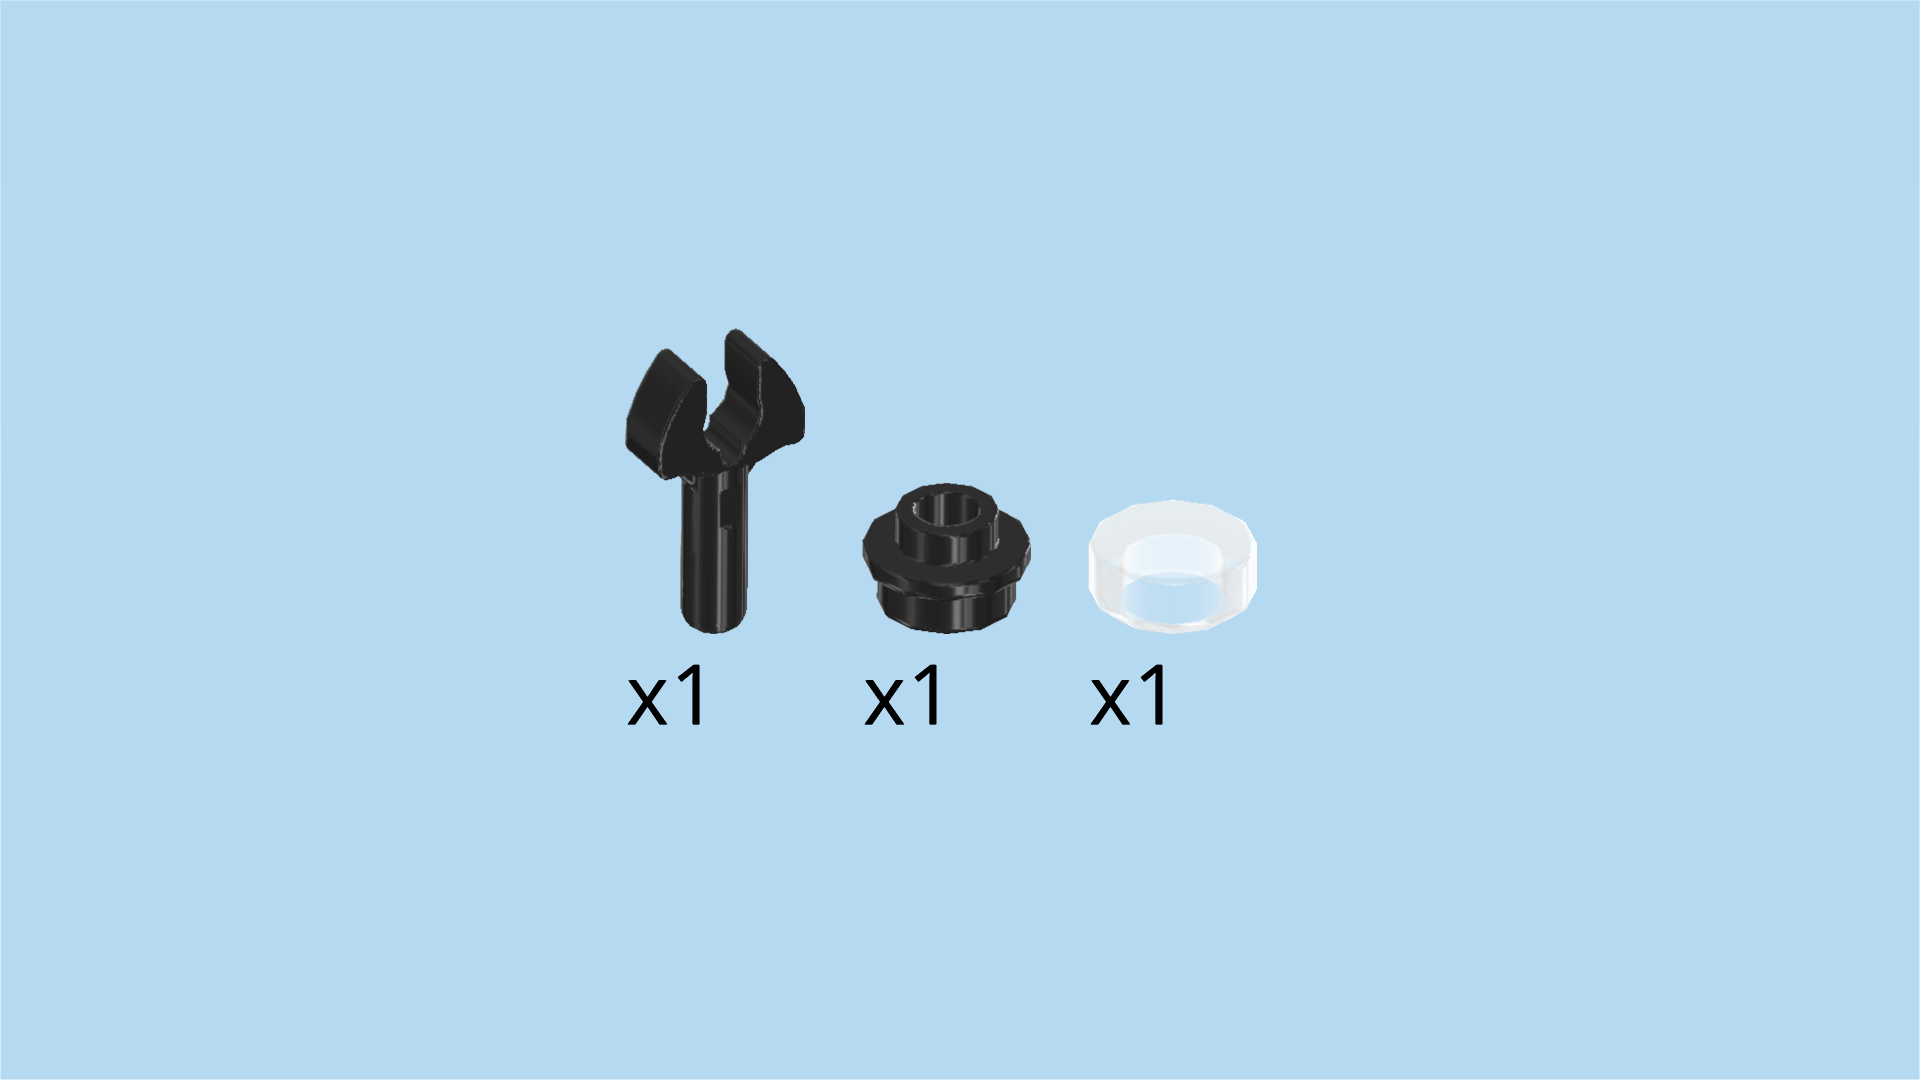
| Collect the following 3 pieces: |
| 1 transparent round tile 1x1, |
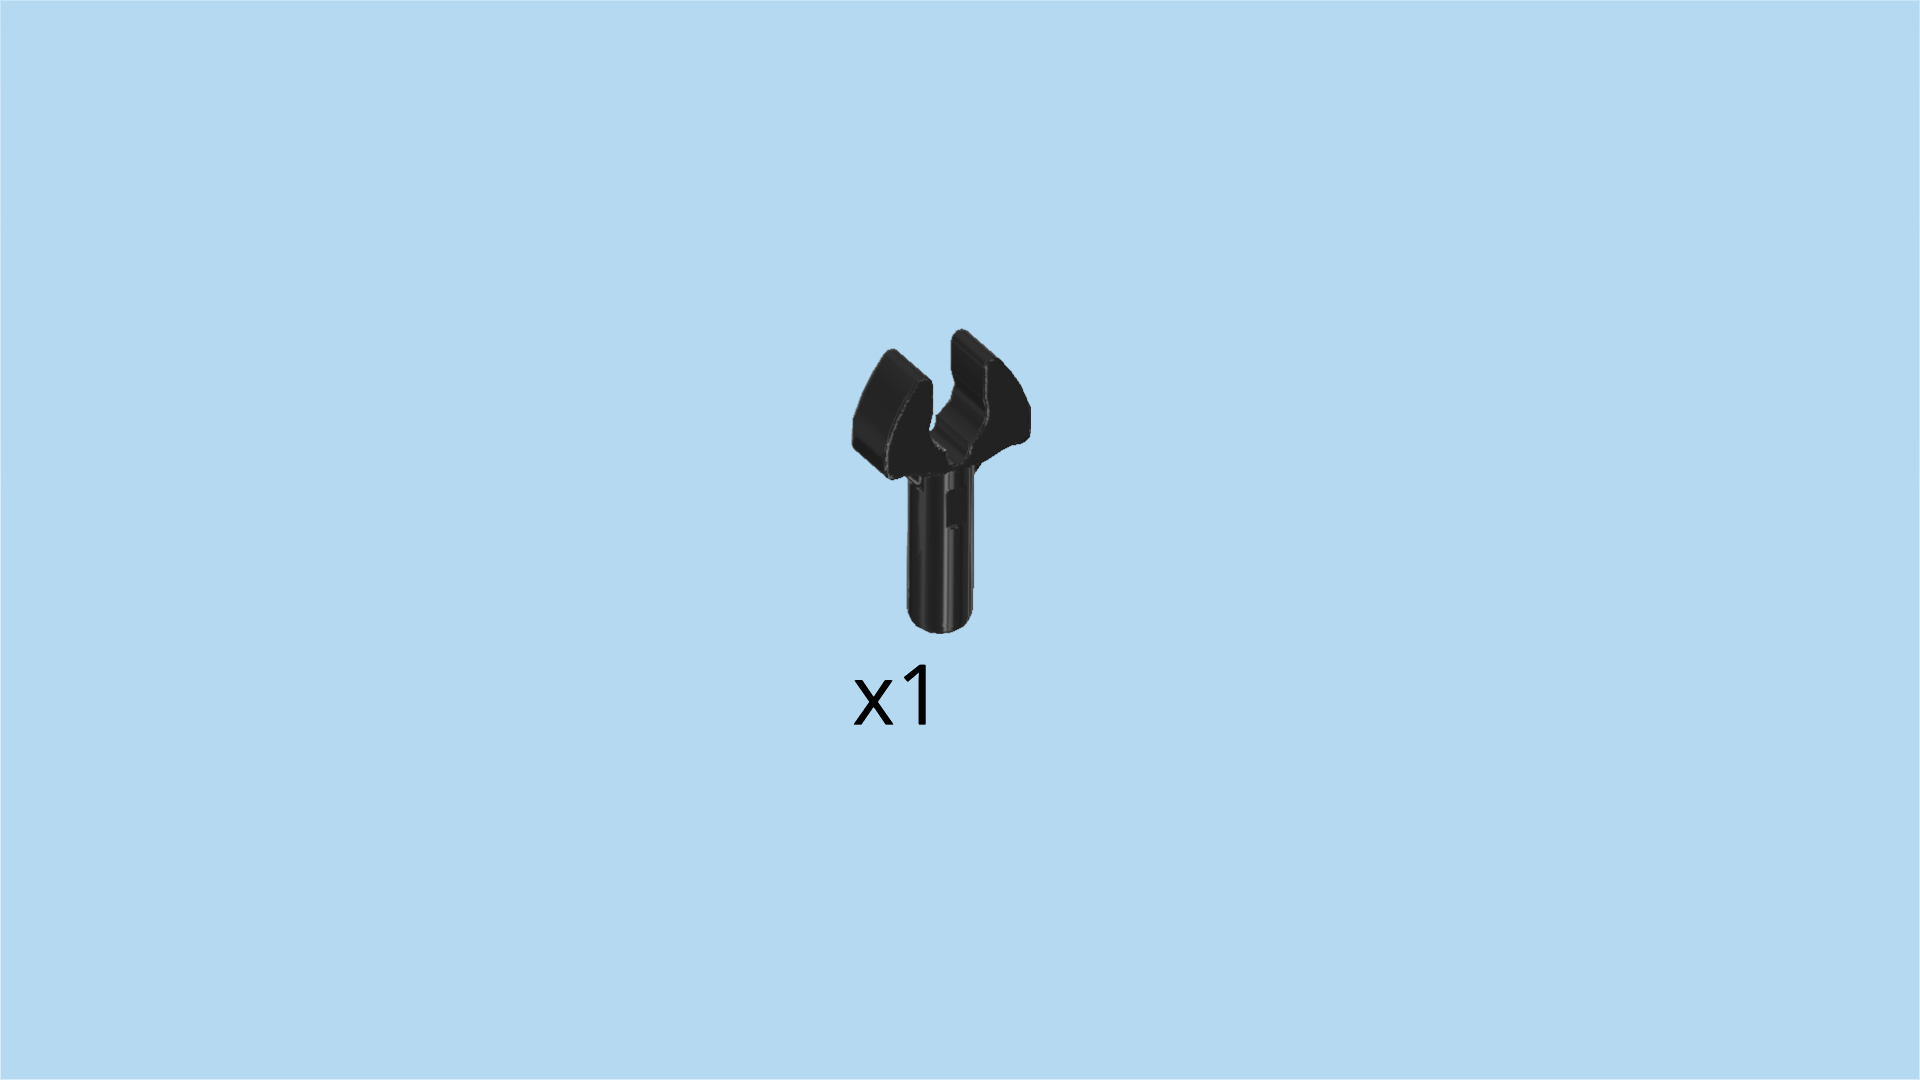
| 1 black open end wrench, |
| and 1 black round plate 1x1 with through-hole. |
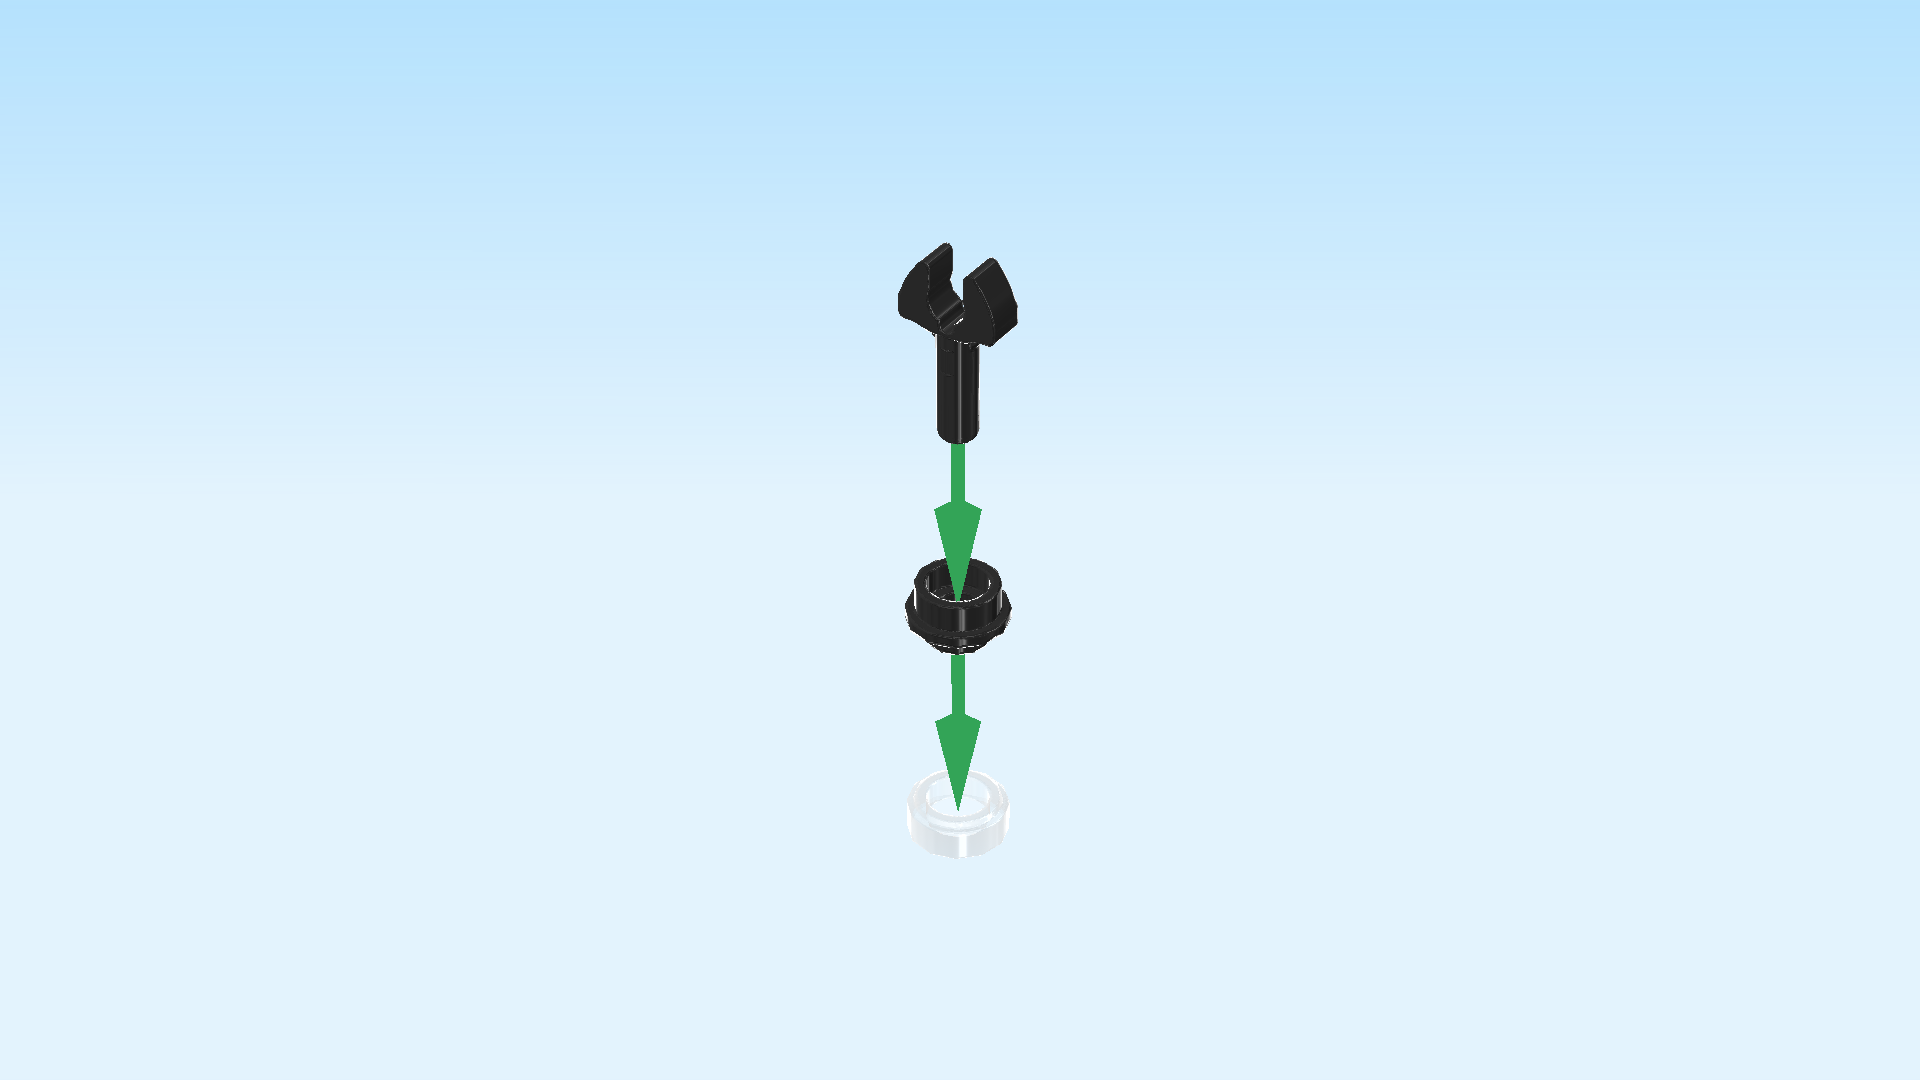
| Put the round tile 1x1 upside down on the table. This means the flat surface touches the table and the opening is to the top. |
| Put the round plate with through-hole upside down on the previous piece. |
| Insert the handle of the wrench from the top into the hole of the previous piece. The wrench head will stick out towards the top. |
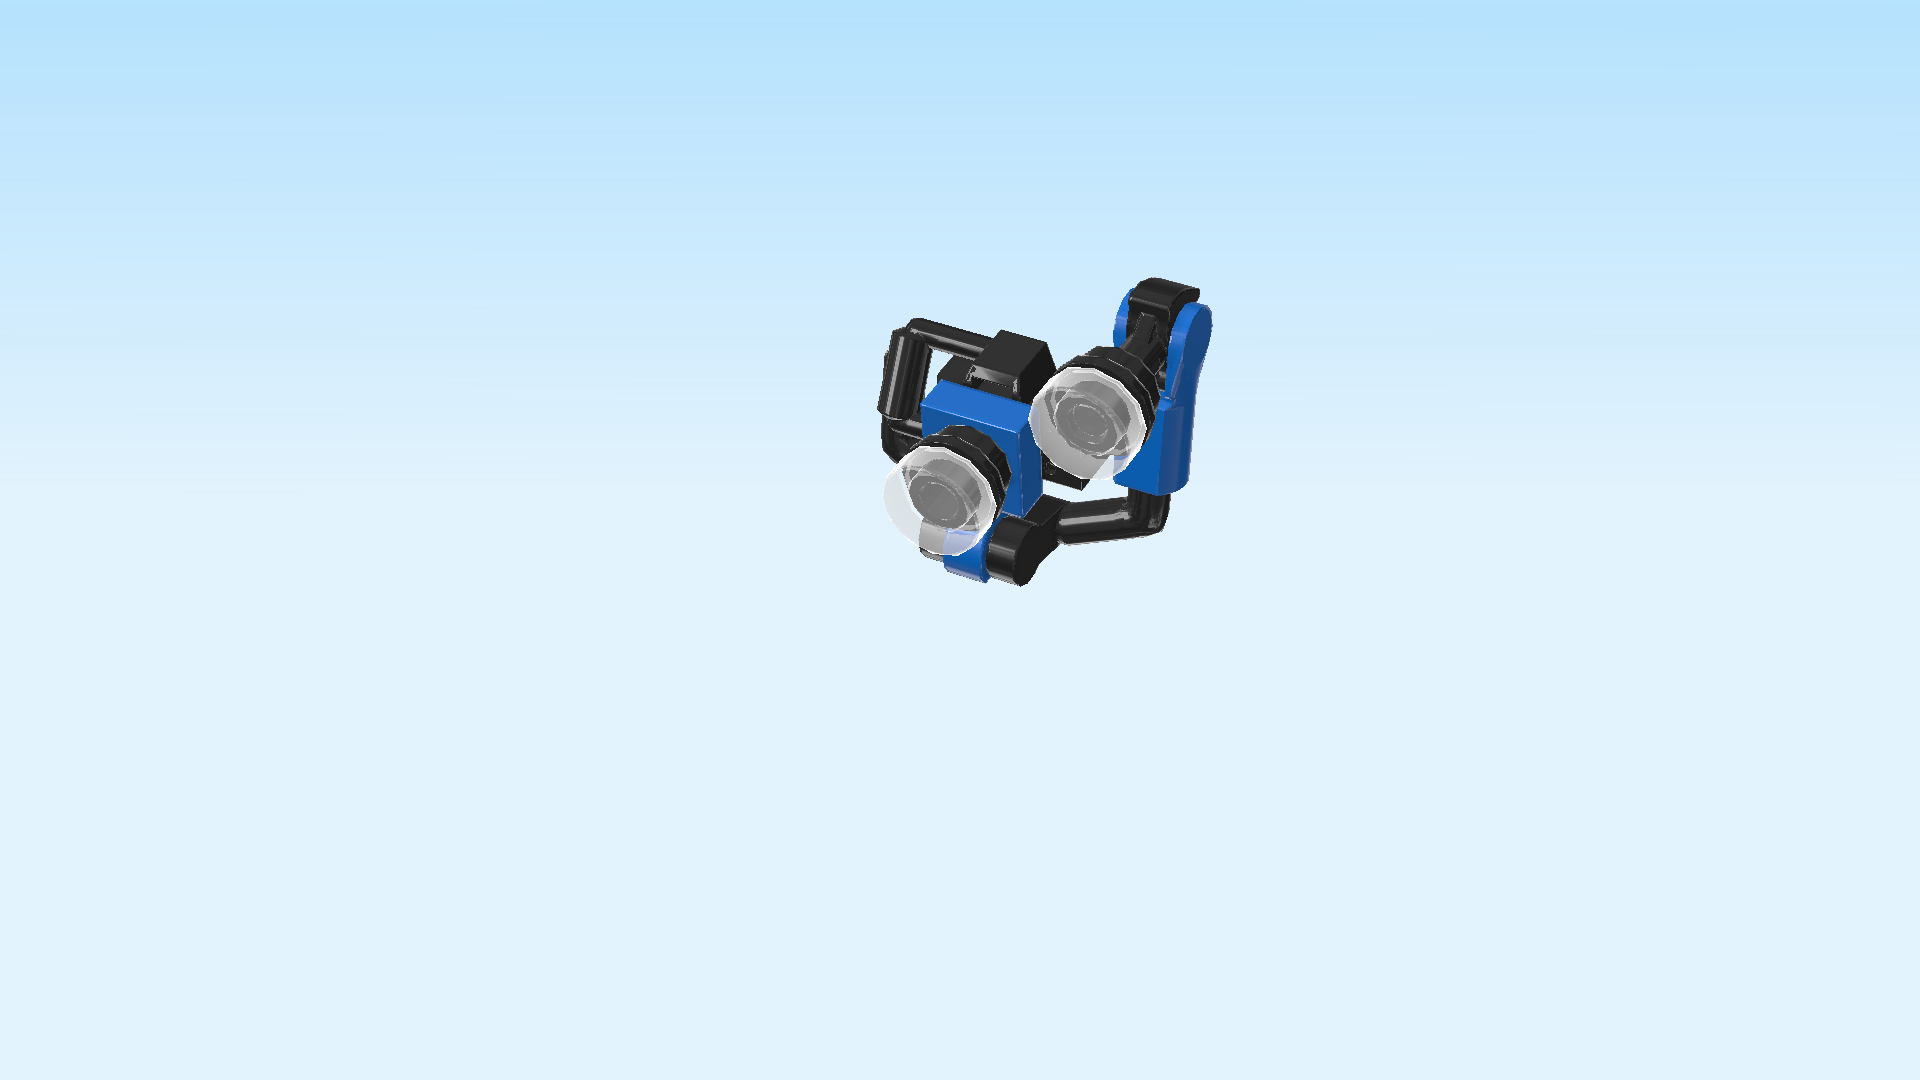
| The lense of the floodlight is finished! Great job! Snap the wrench head on the small shaft of the floodlight base and adjust them so that the transparent round tile 1x1 is pointing to the front. |
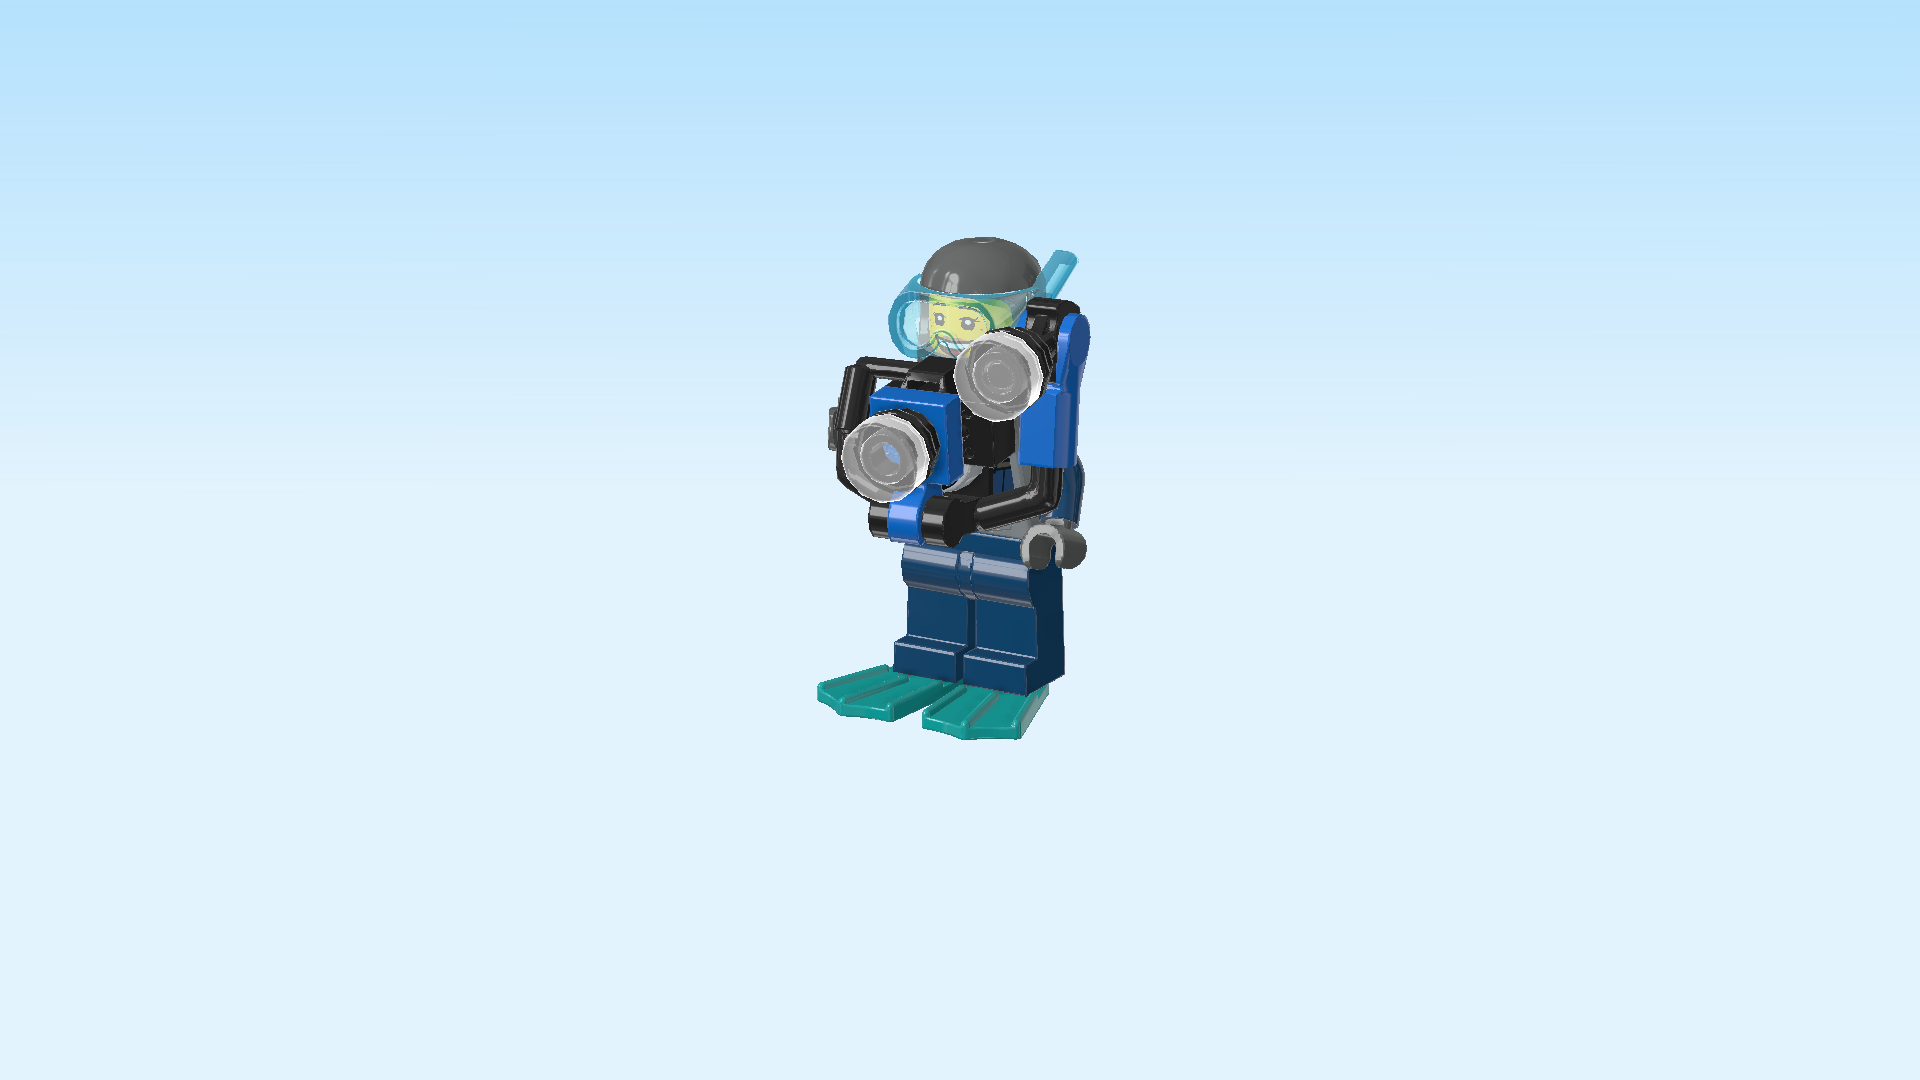
| The underwater camera with floodlight is finished! Snap the handle of the camera into the diver's hand and start taking pictures of the breathtaking underwater world. |
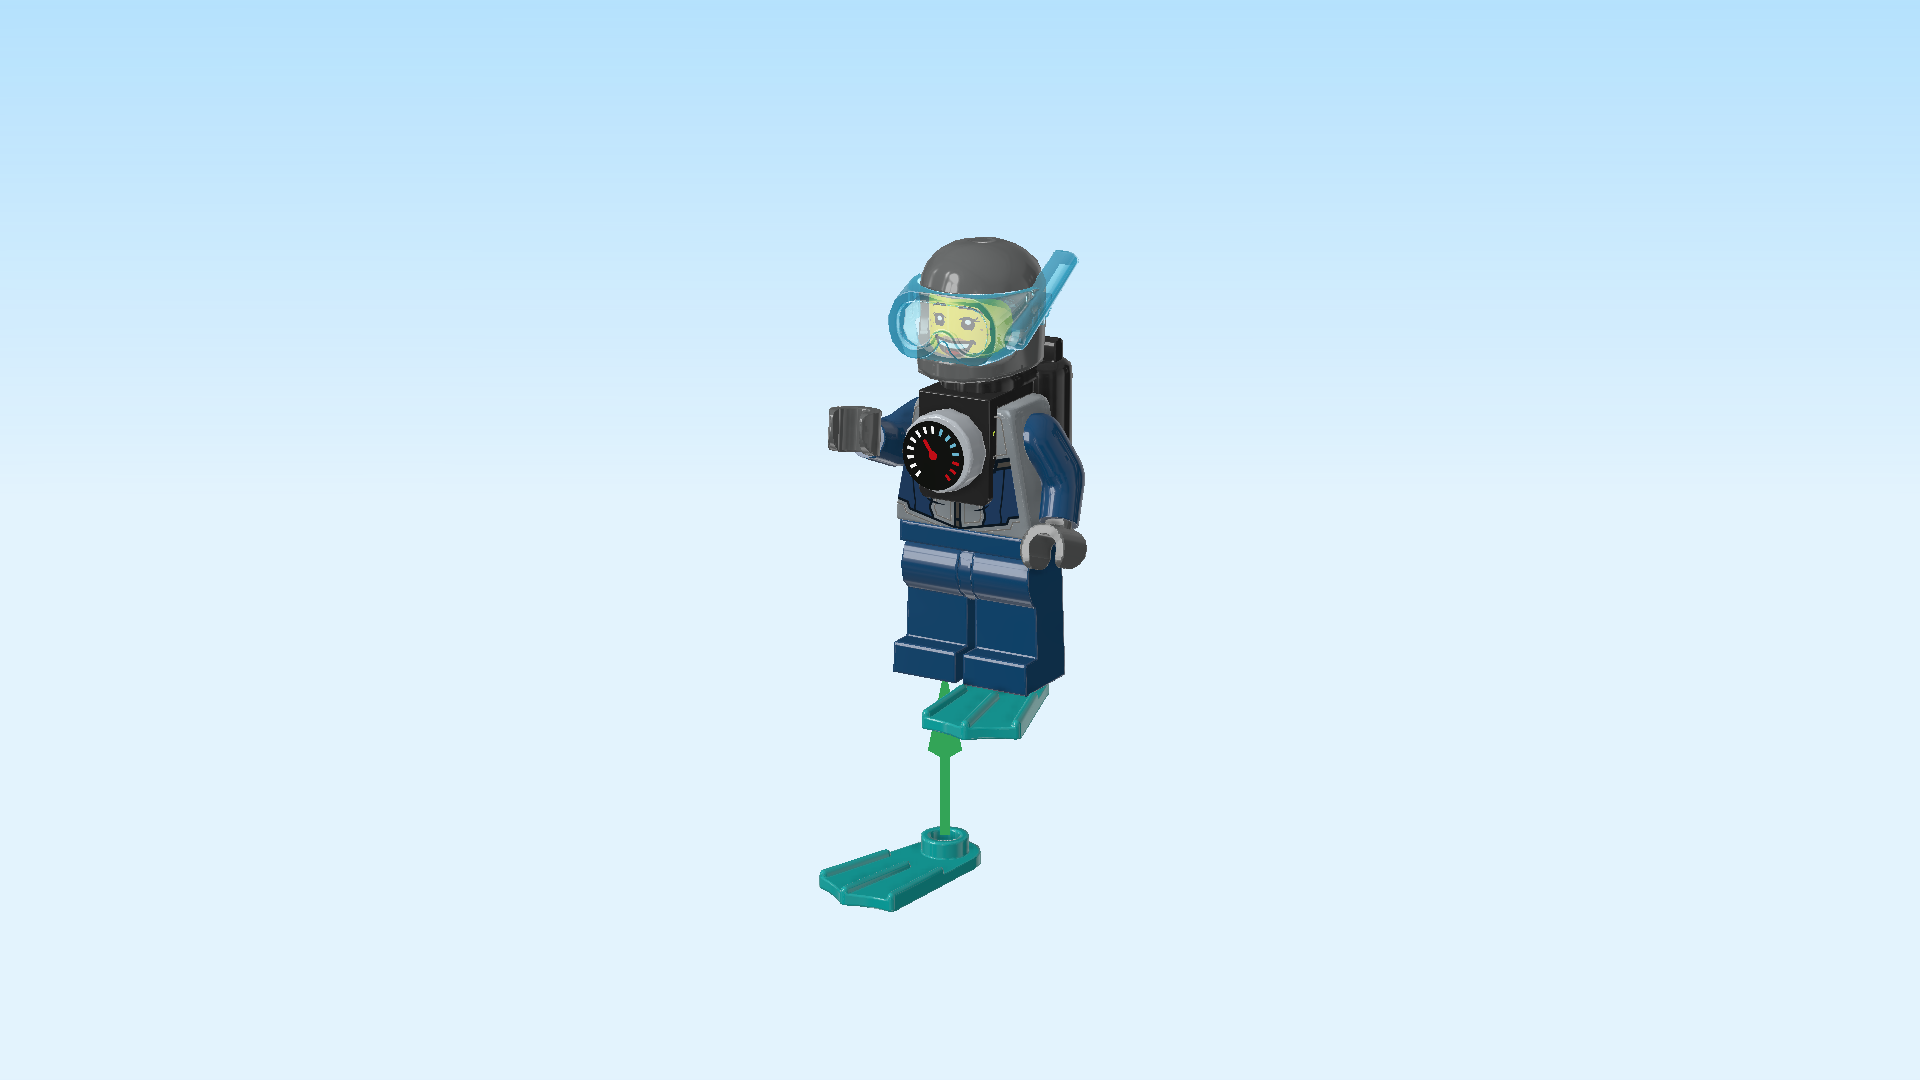
| The deep-sea diver Minifigure is finished! Well done! She is wearing a dark blue diving suit. The jacket of the suit has grey inserts and two neon-green arrows on it. It has functional pockets and zippers; as a deep-sea diver you need practical clothing for sure! The head of the diver is printed with two different faces: one has a determined and exploratory look, the other one has an expression of positive surprise. The treasures of the sea are marvelous! |
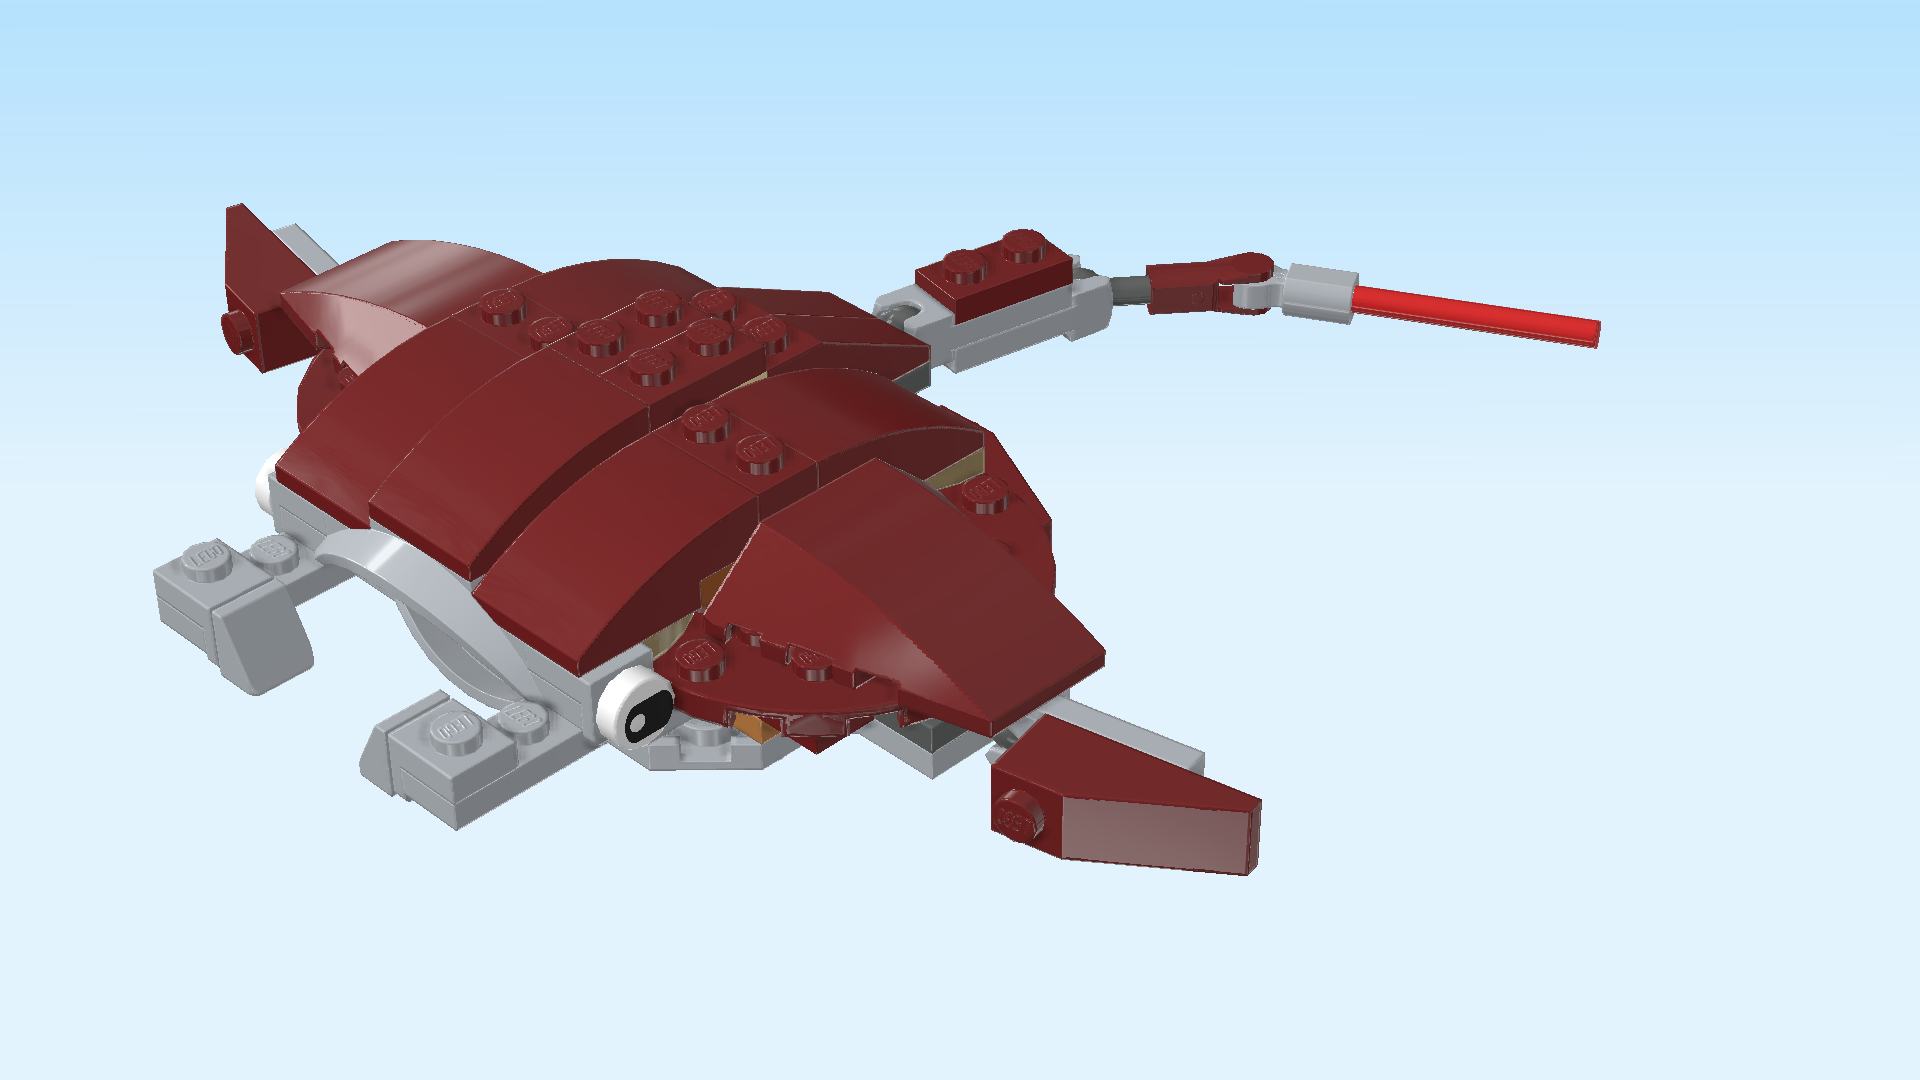
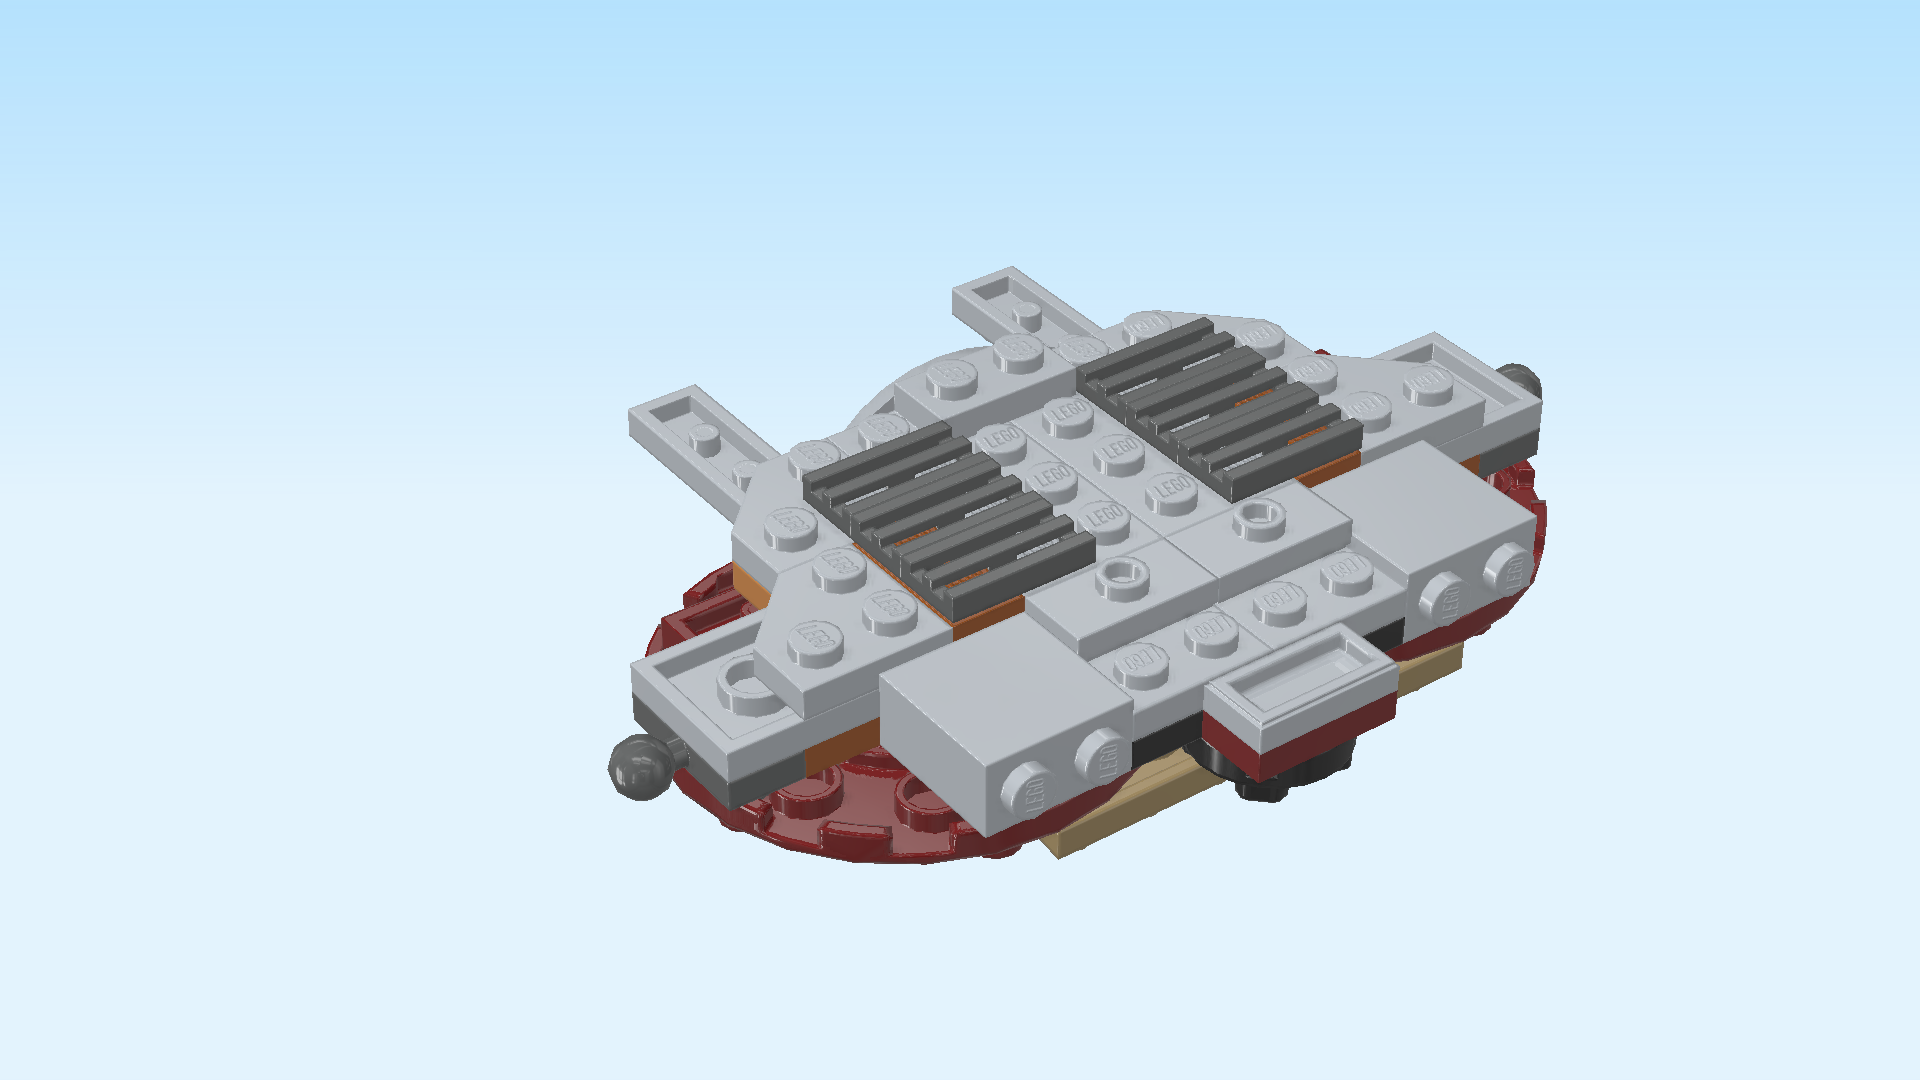
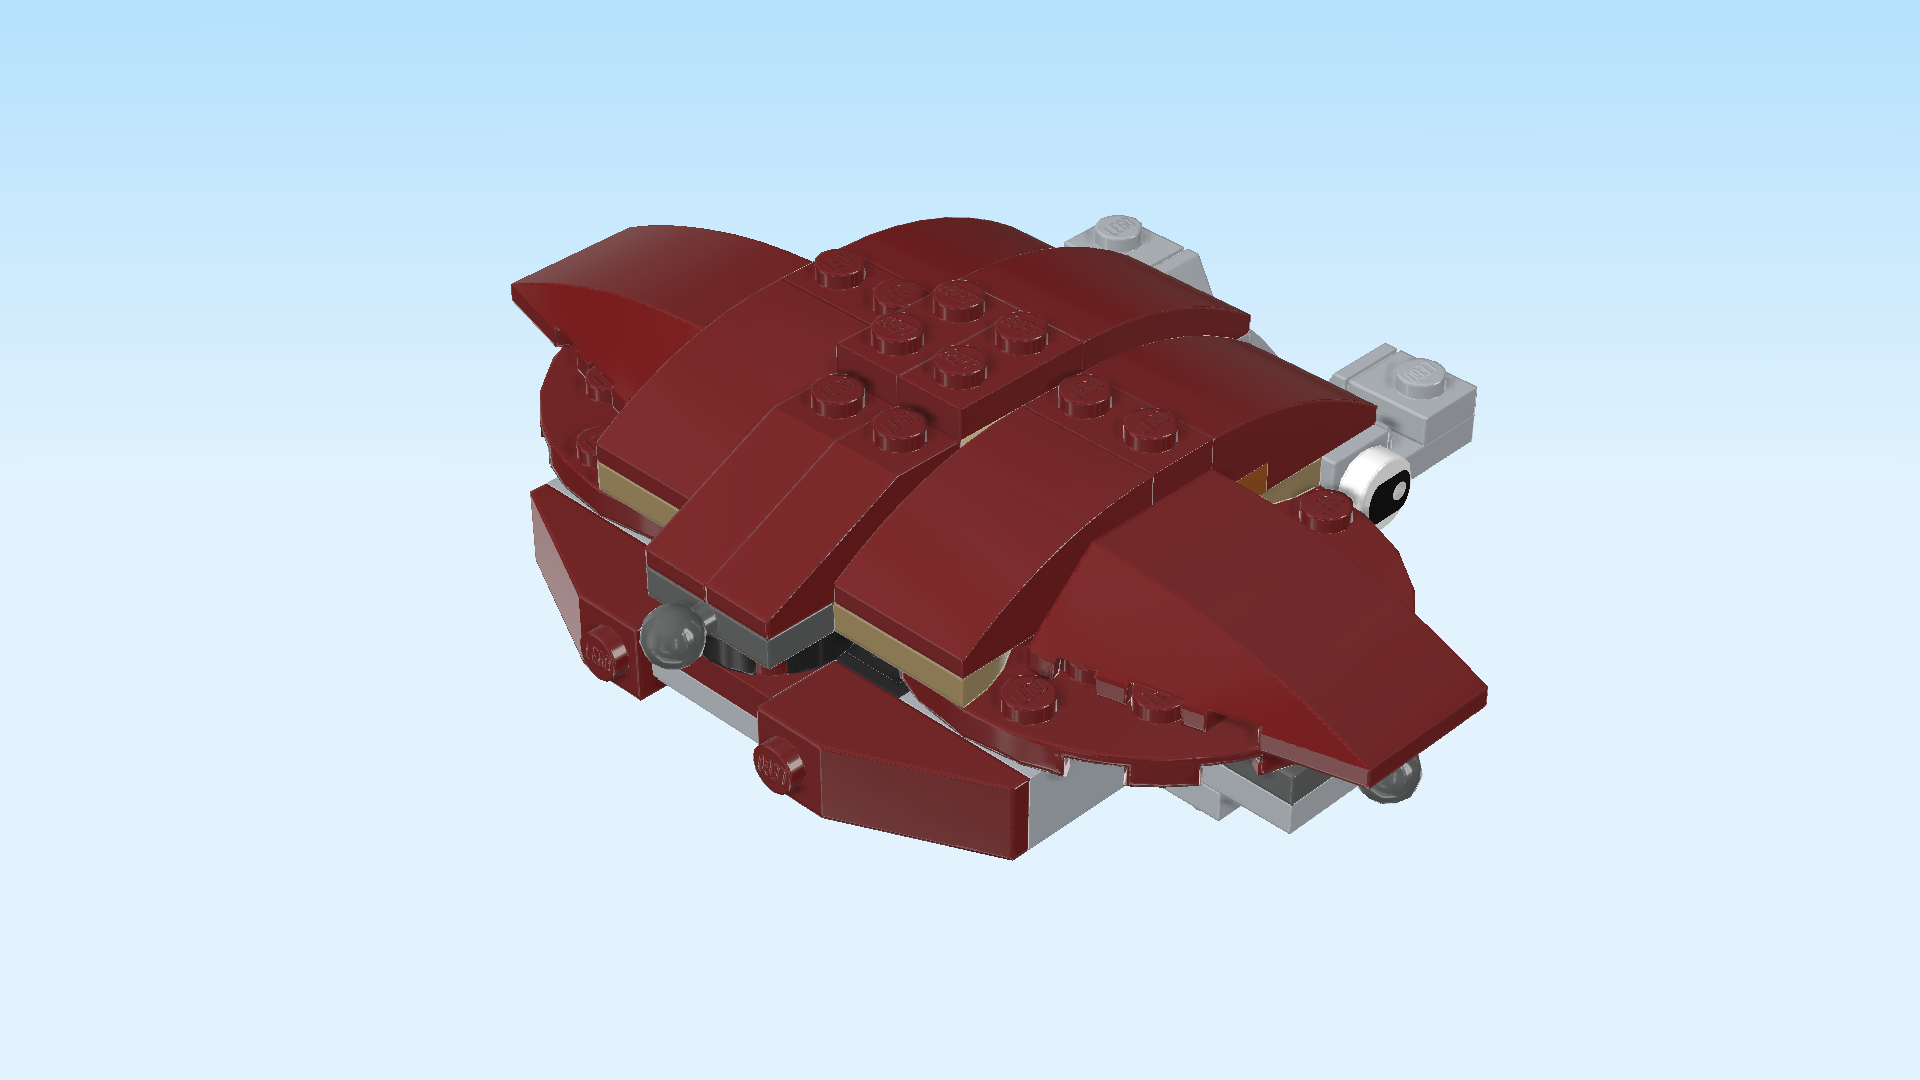
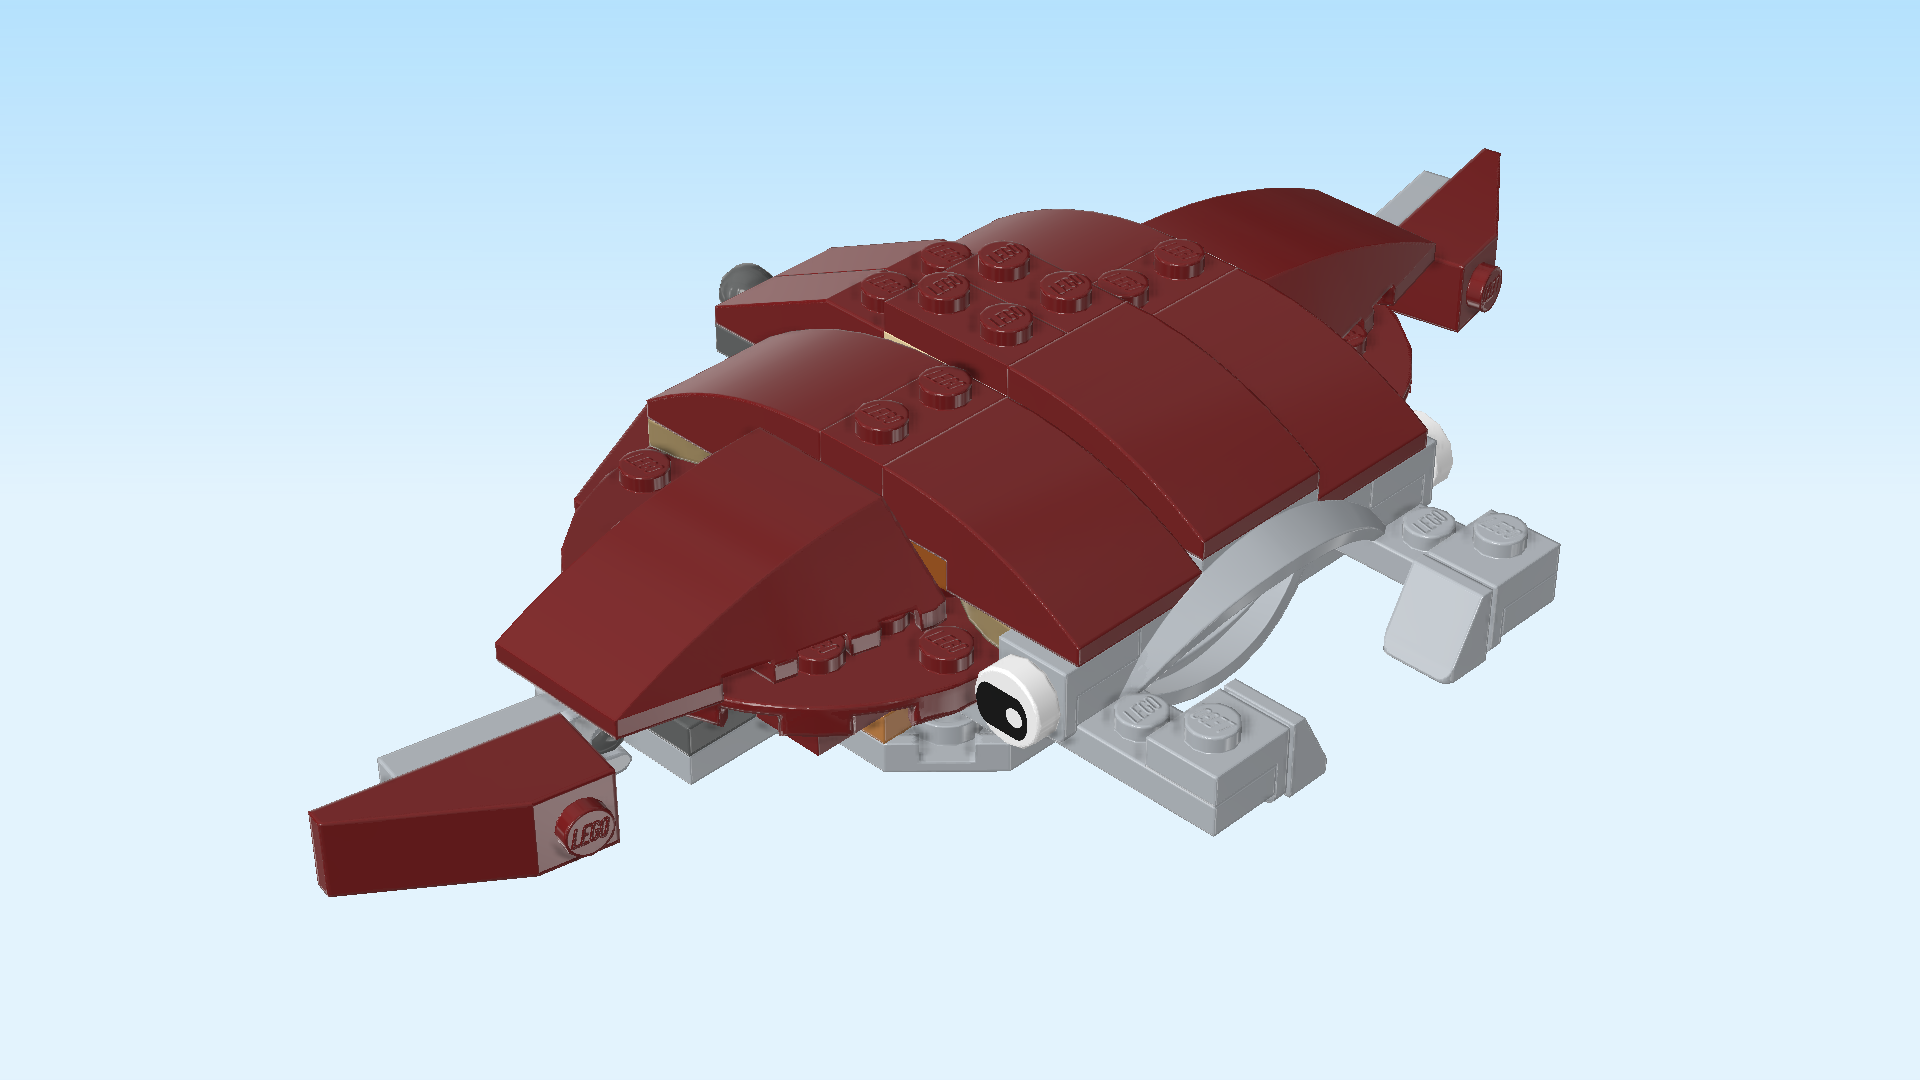
| Next, we will build the giant manta ray. |
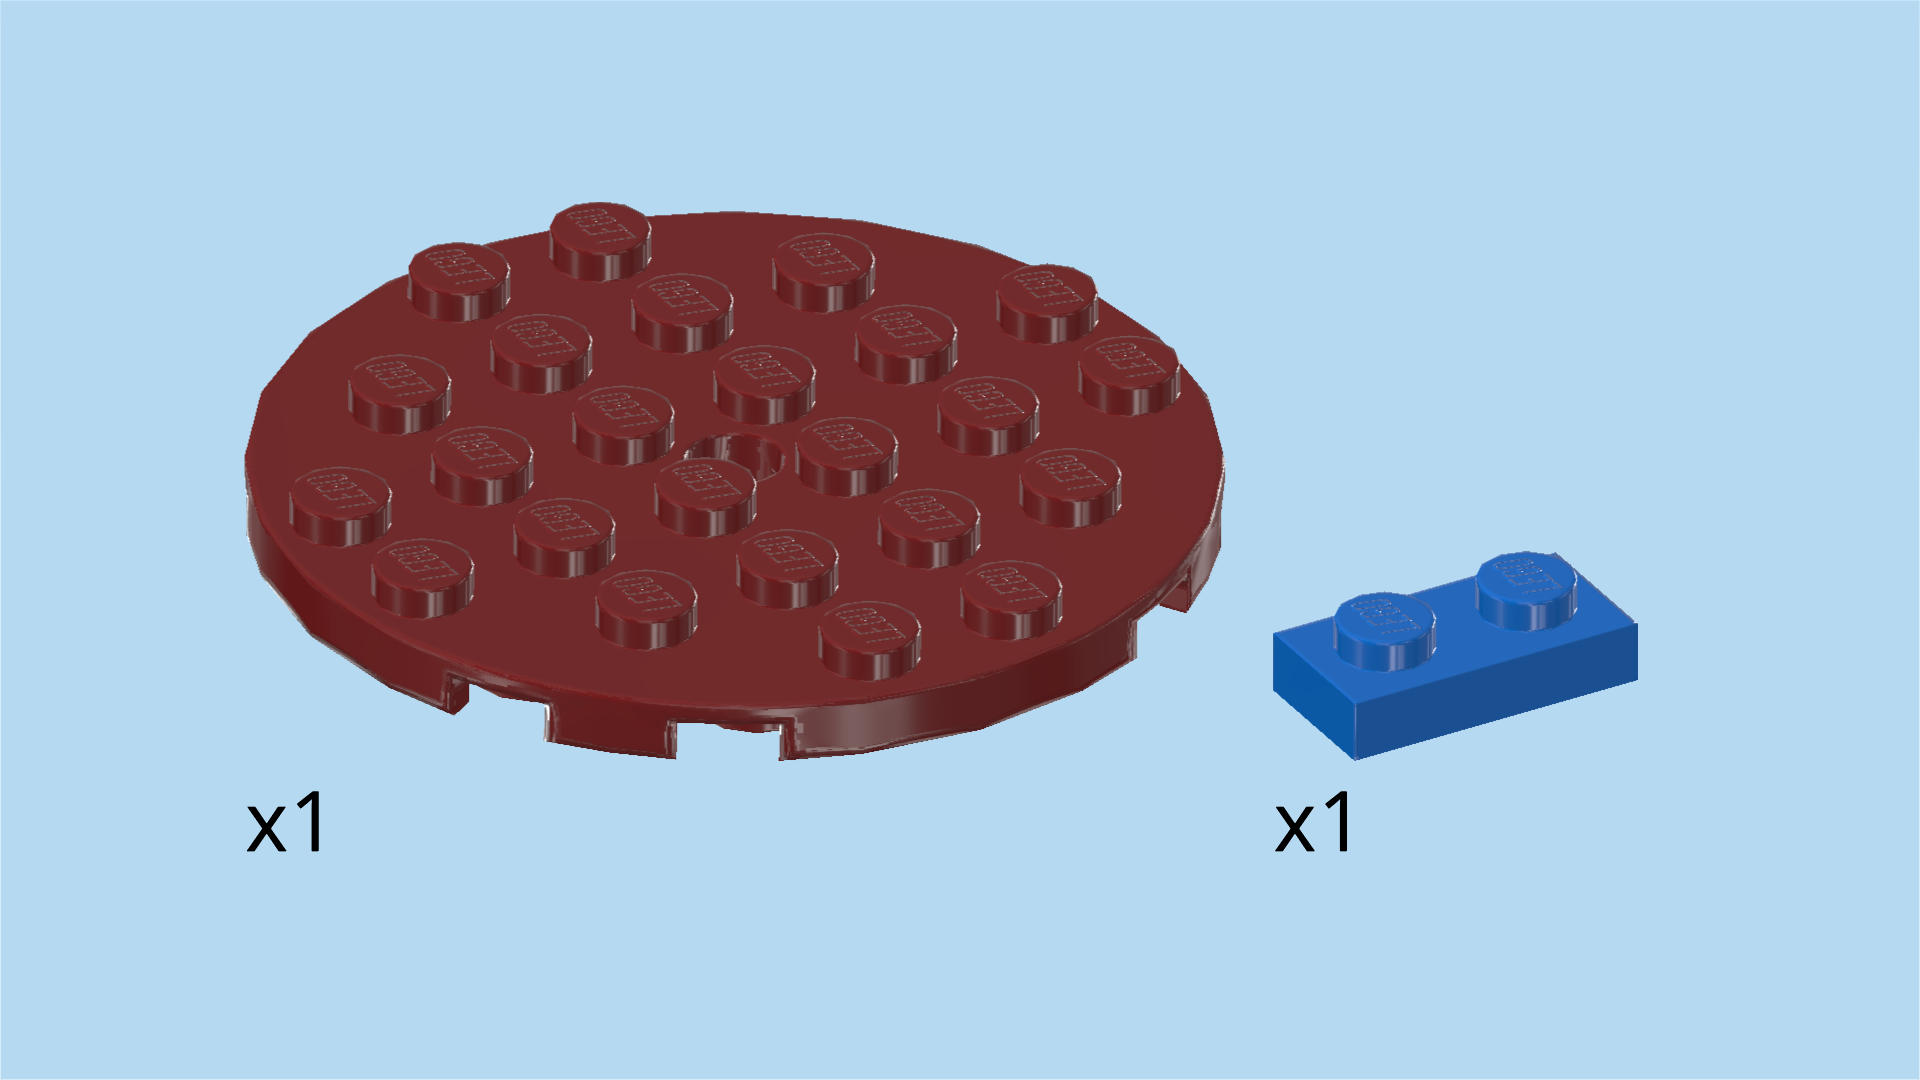
| Collect the following 2 pieces: |
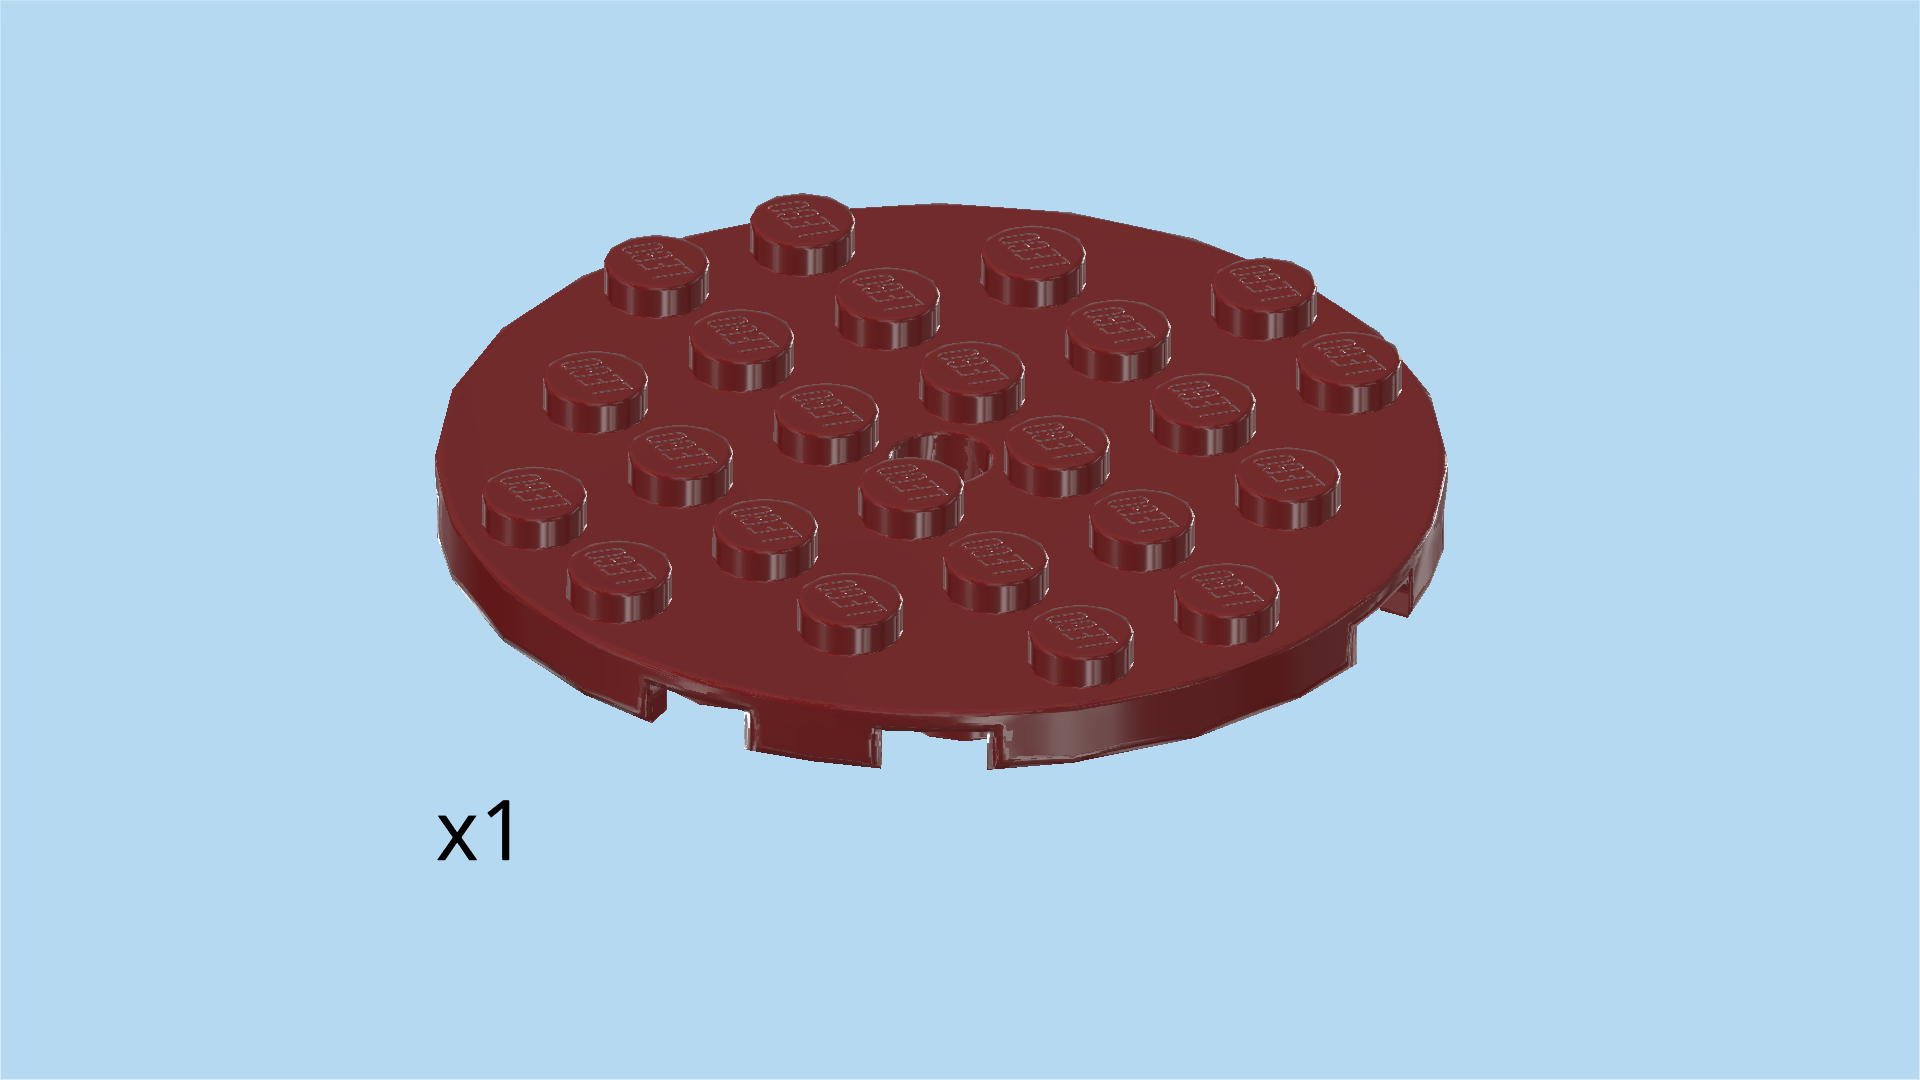
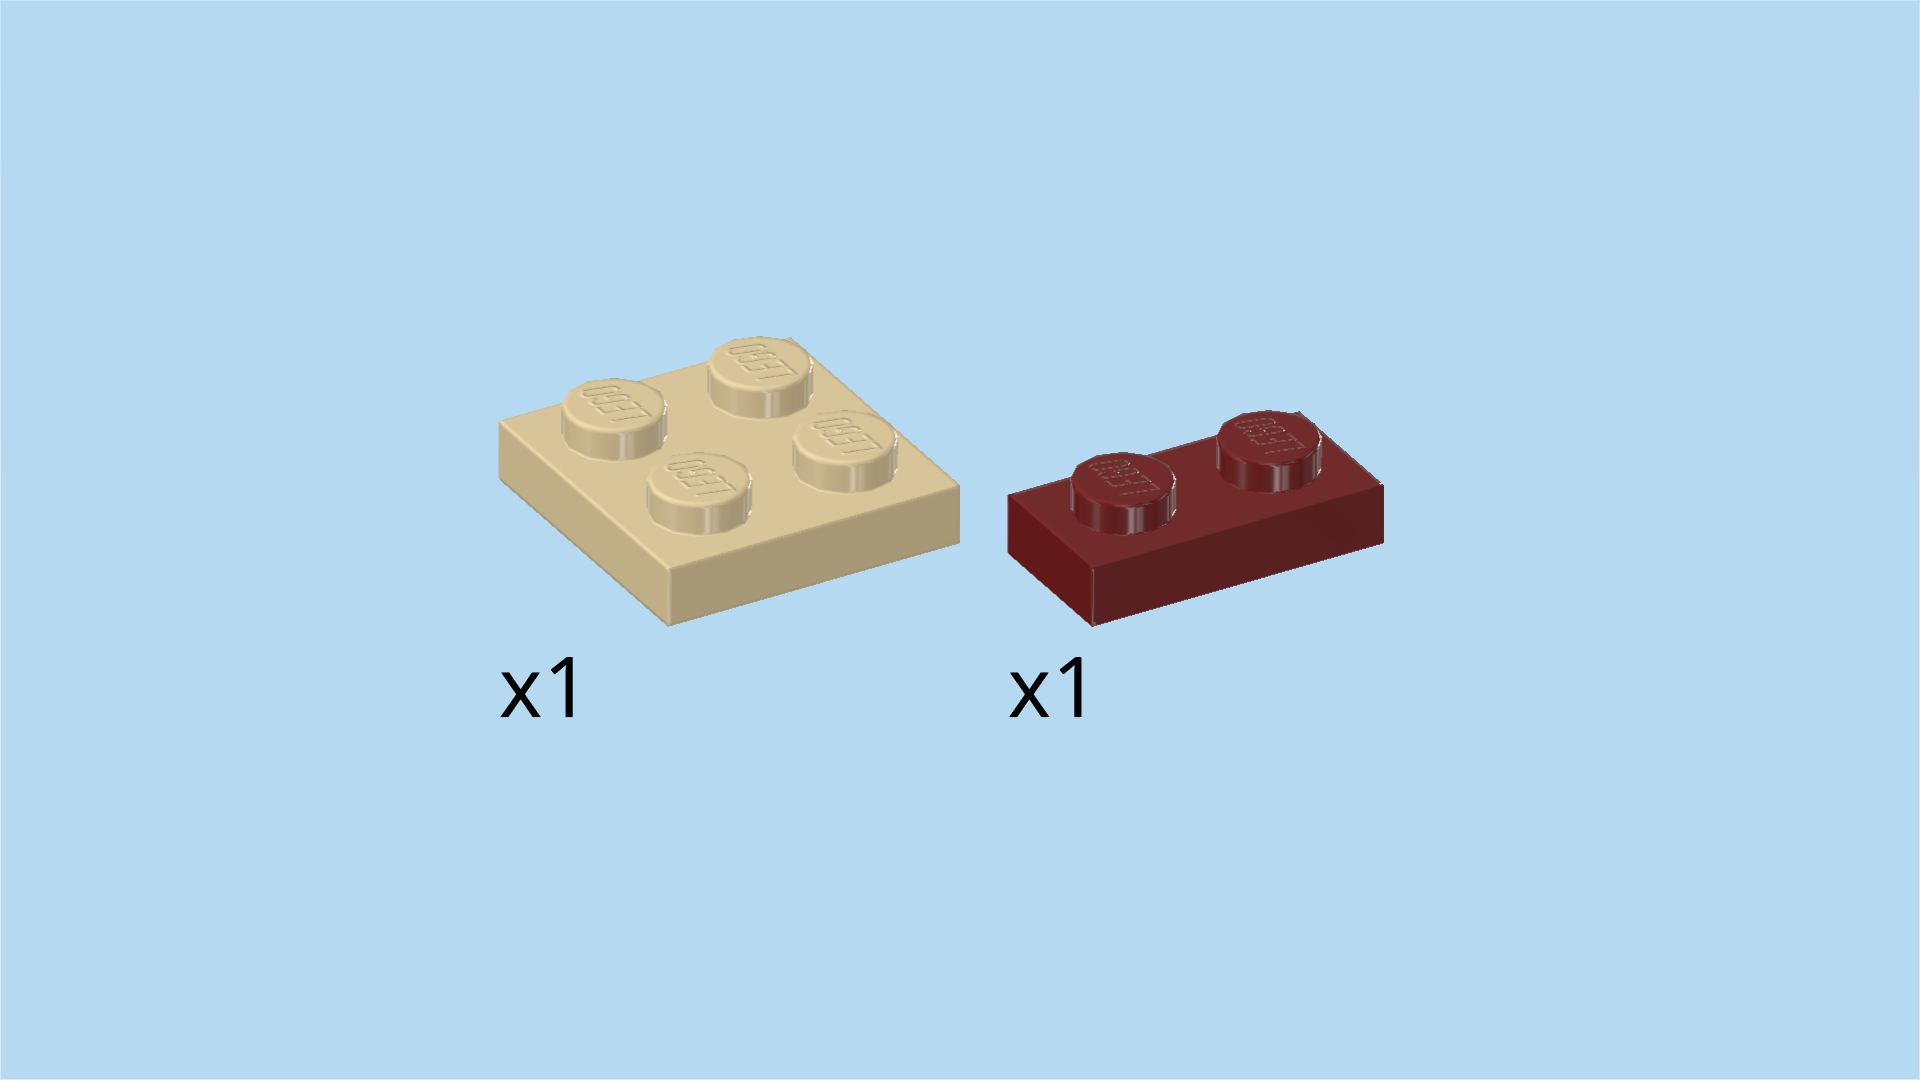
| 1 maroon red round plate 6x6 with middle hole, |
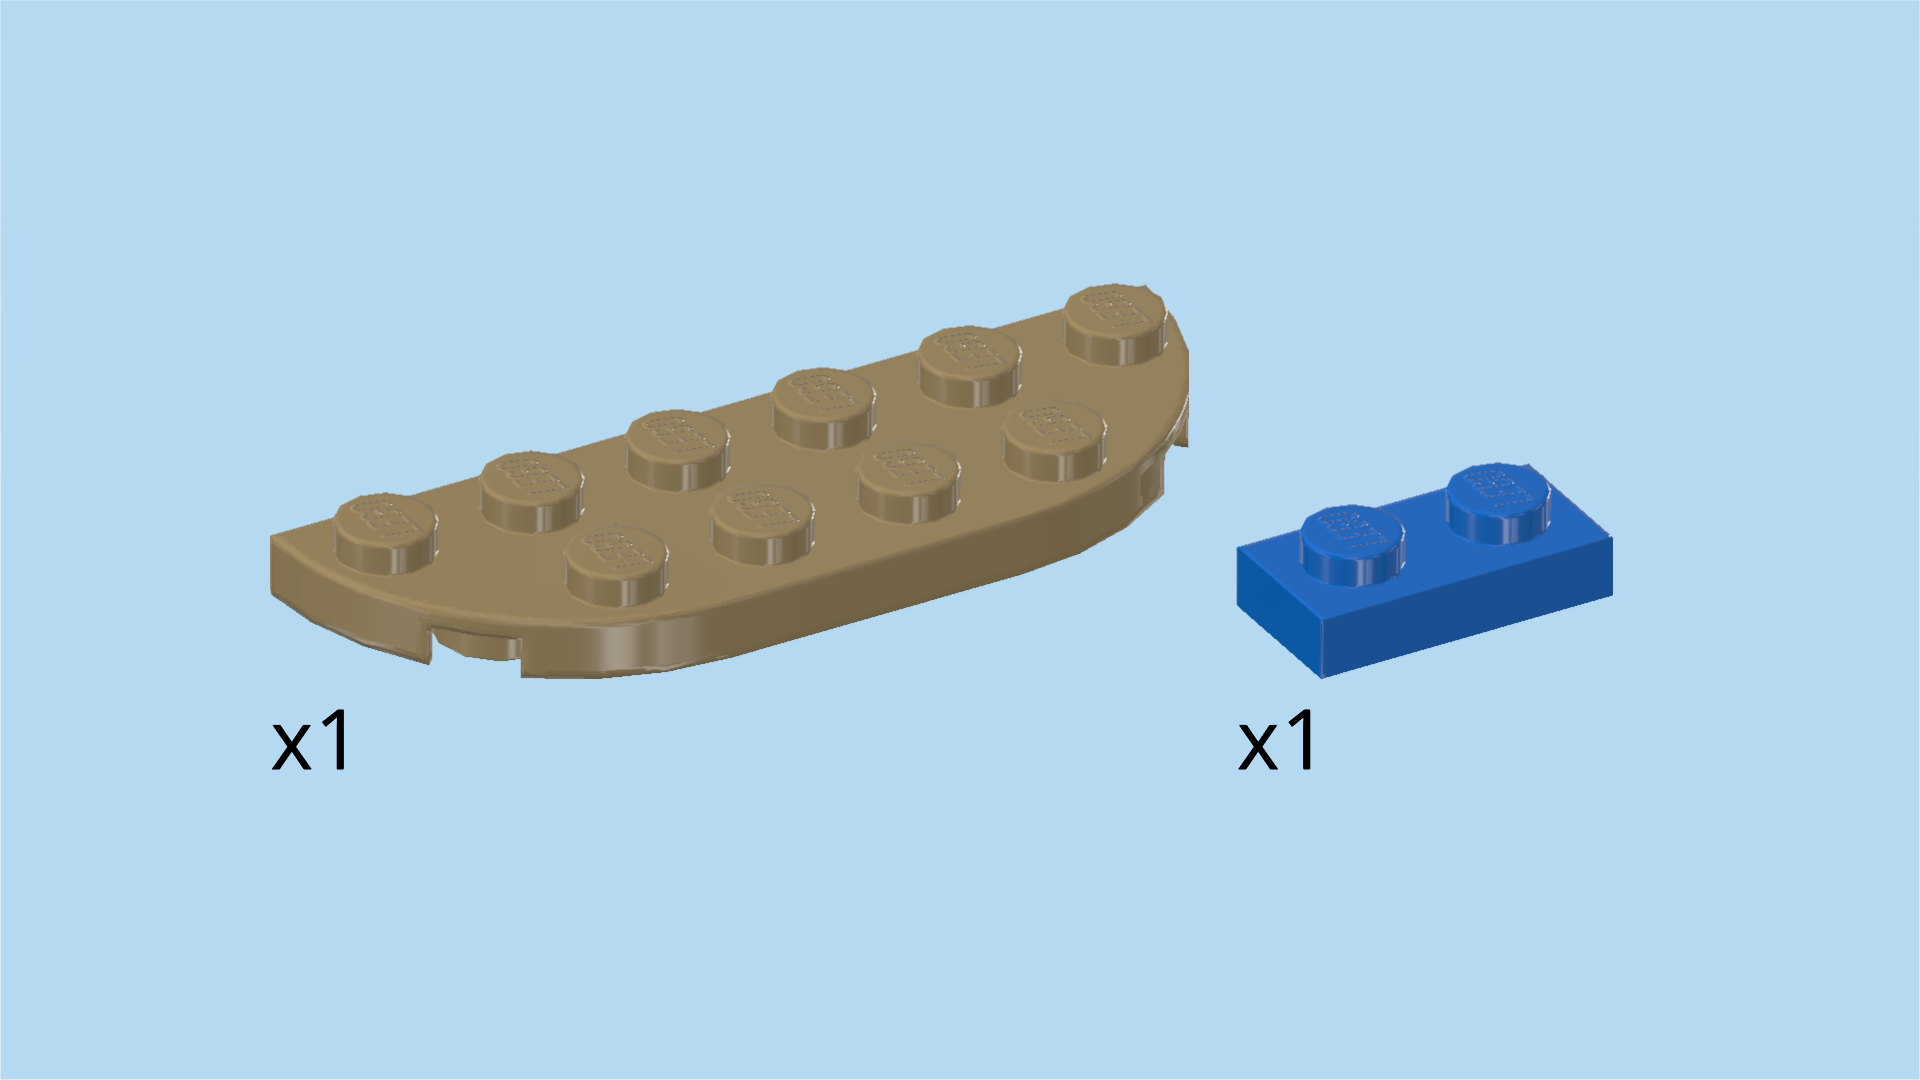
| and 1 bright blue plate 1x2. |
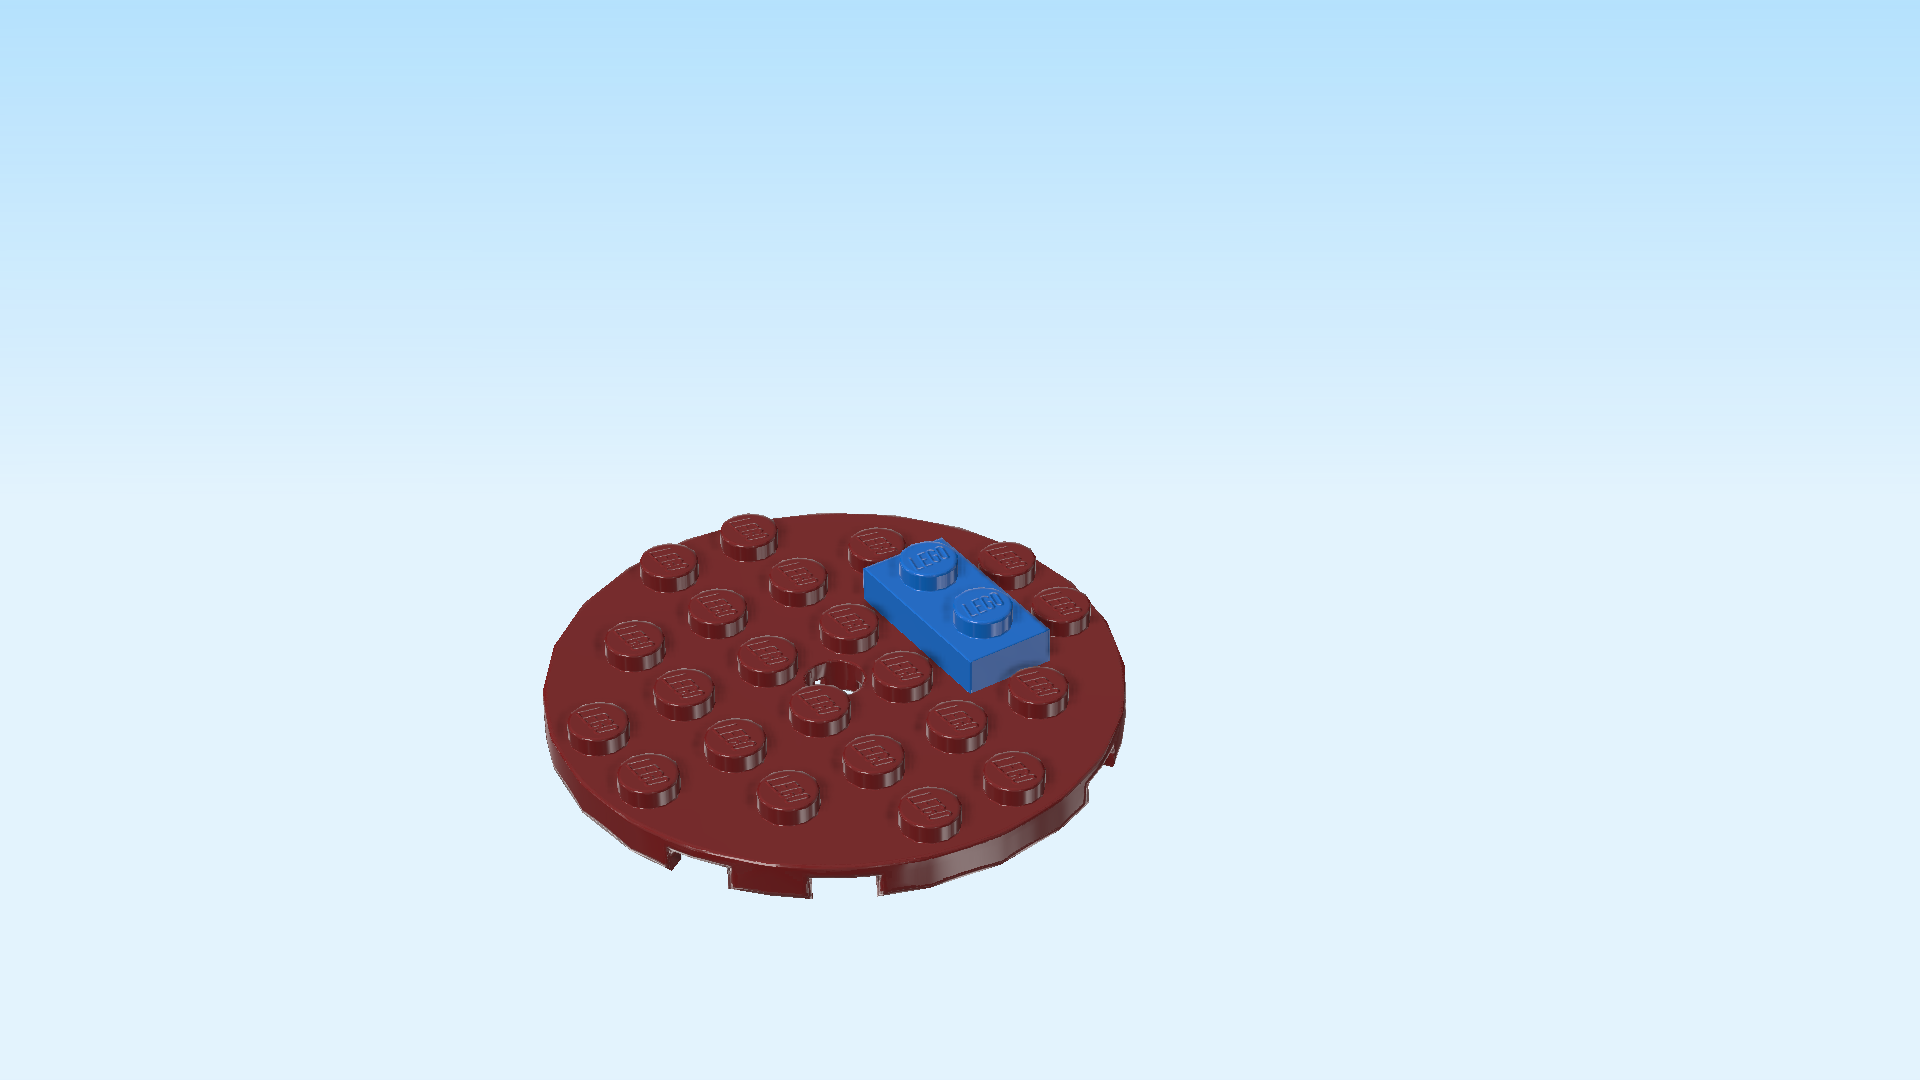
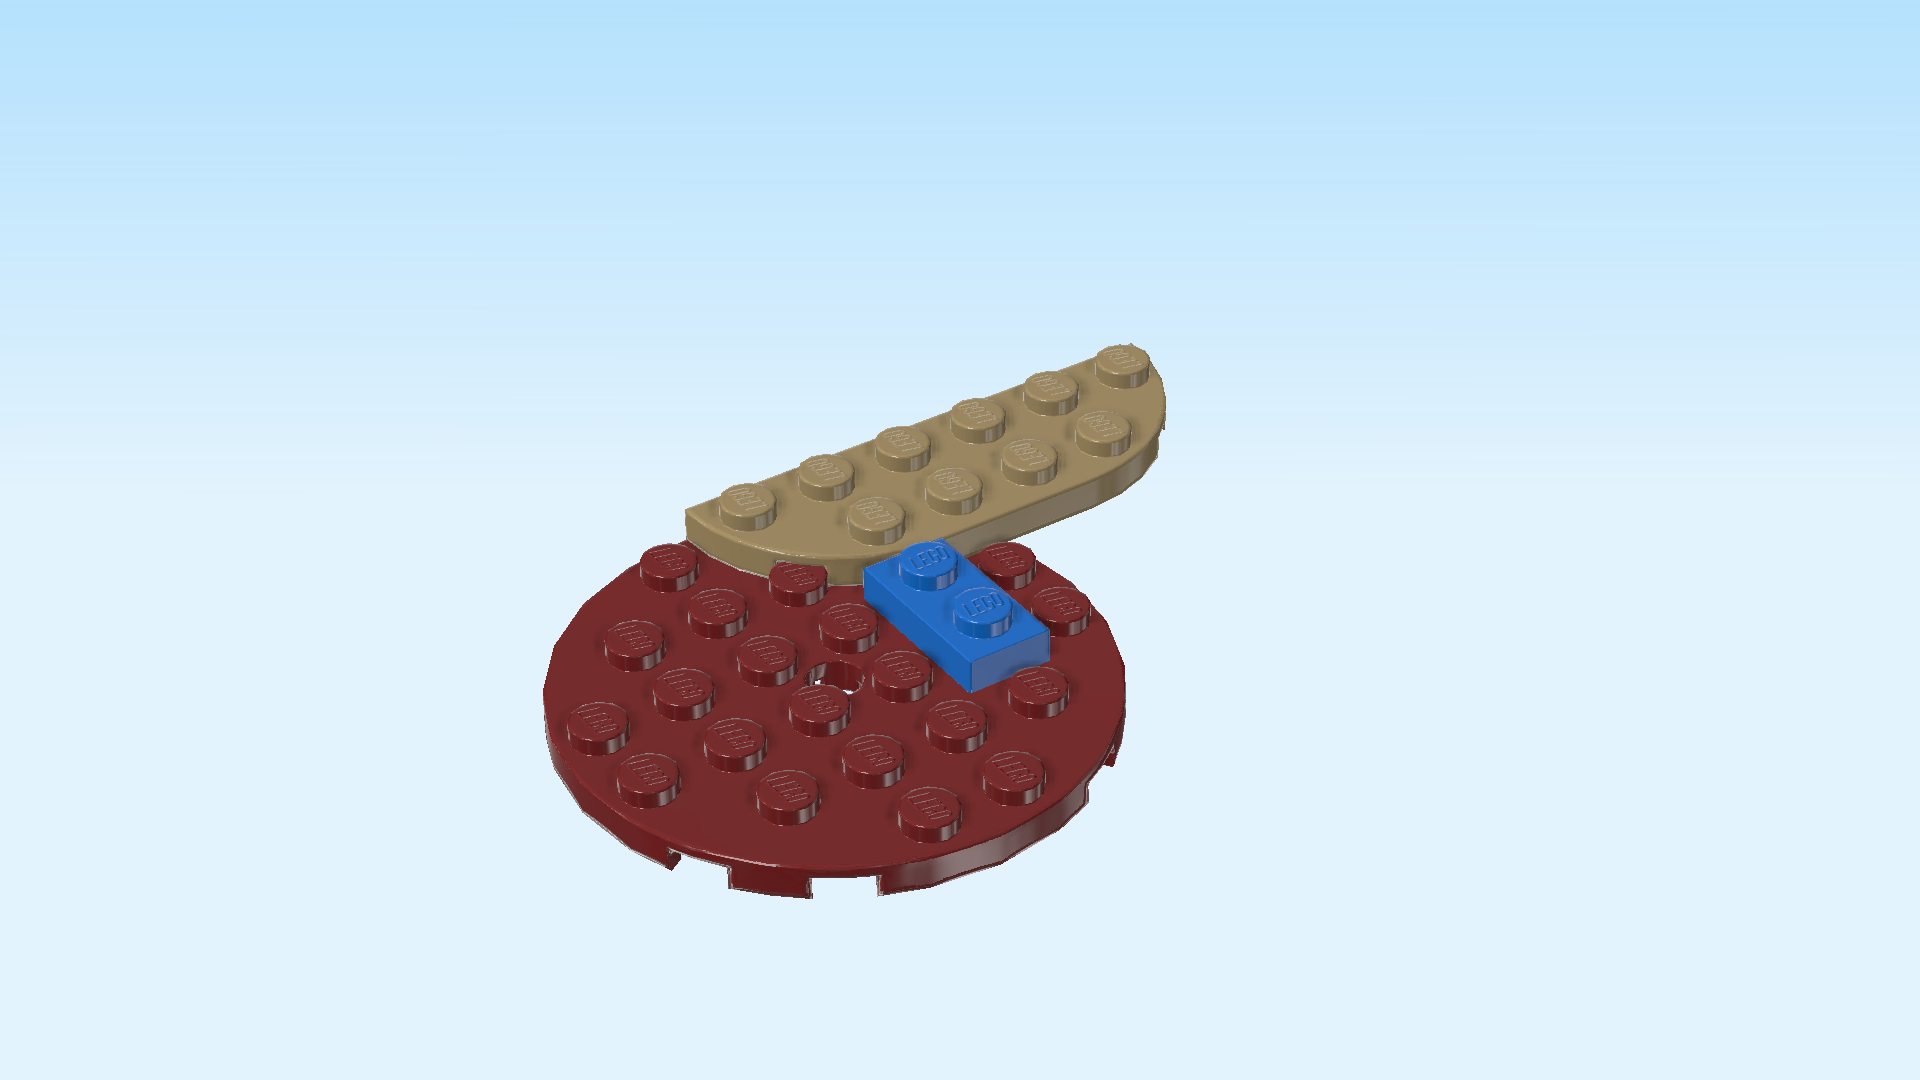
| Put the round plate 6x6 on the table. Make sure its knobs form straight rows and columns in front of you. |
| Put the plate 1x2 vertically centered on the second column from the right. Note that the rightmost column only consists of 2 knobs. |
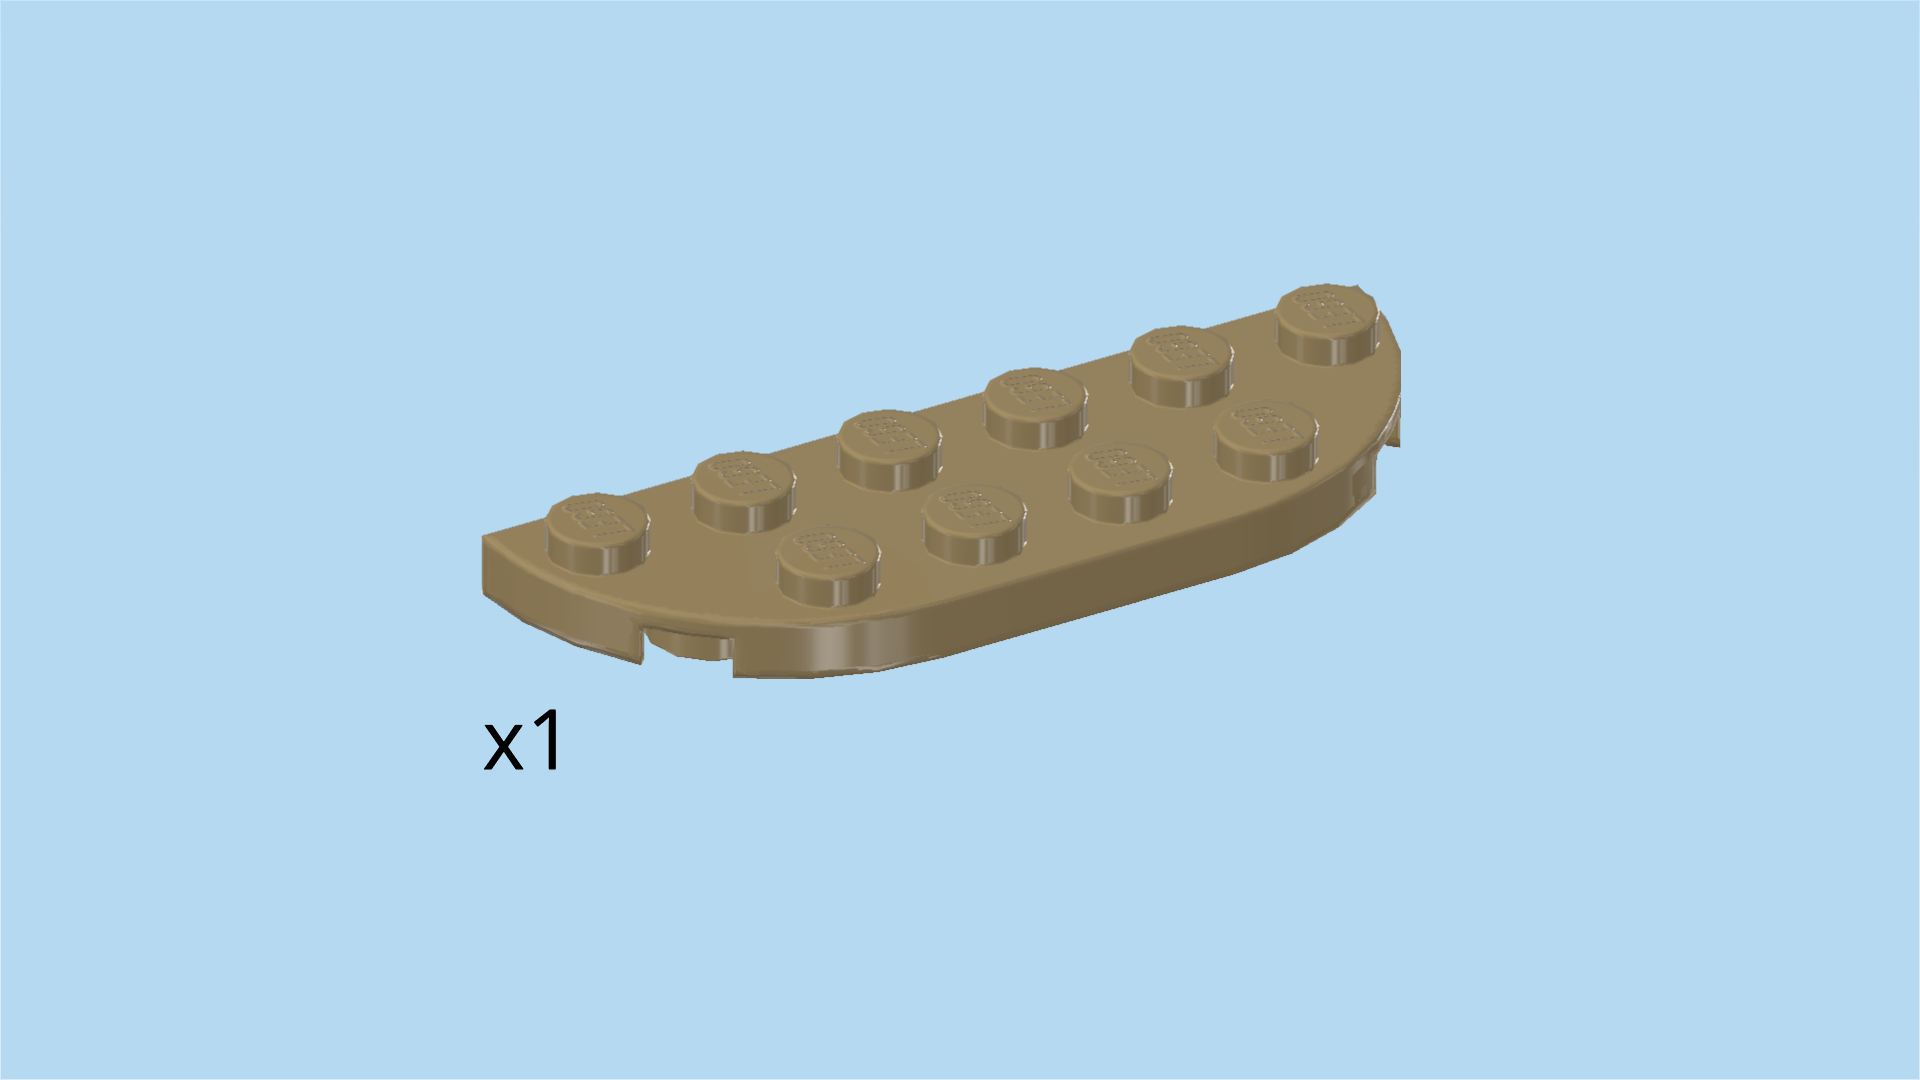
| Find 1 mud grey plate 2x6 with 2 round corners. |
| Turn it horizontally, 2 round corners to the front. Mount it behind the previous piece, ½ overhanging to the right. If done correctly, the previous piece aligns with the current plate's second column from the left (bear in mind that the leftmost column of the current plate only consists of 1 knob). |
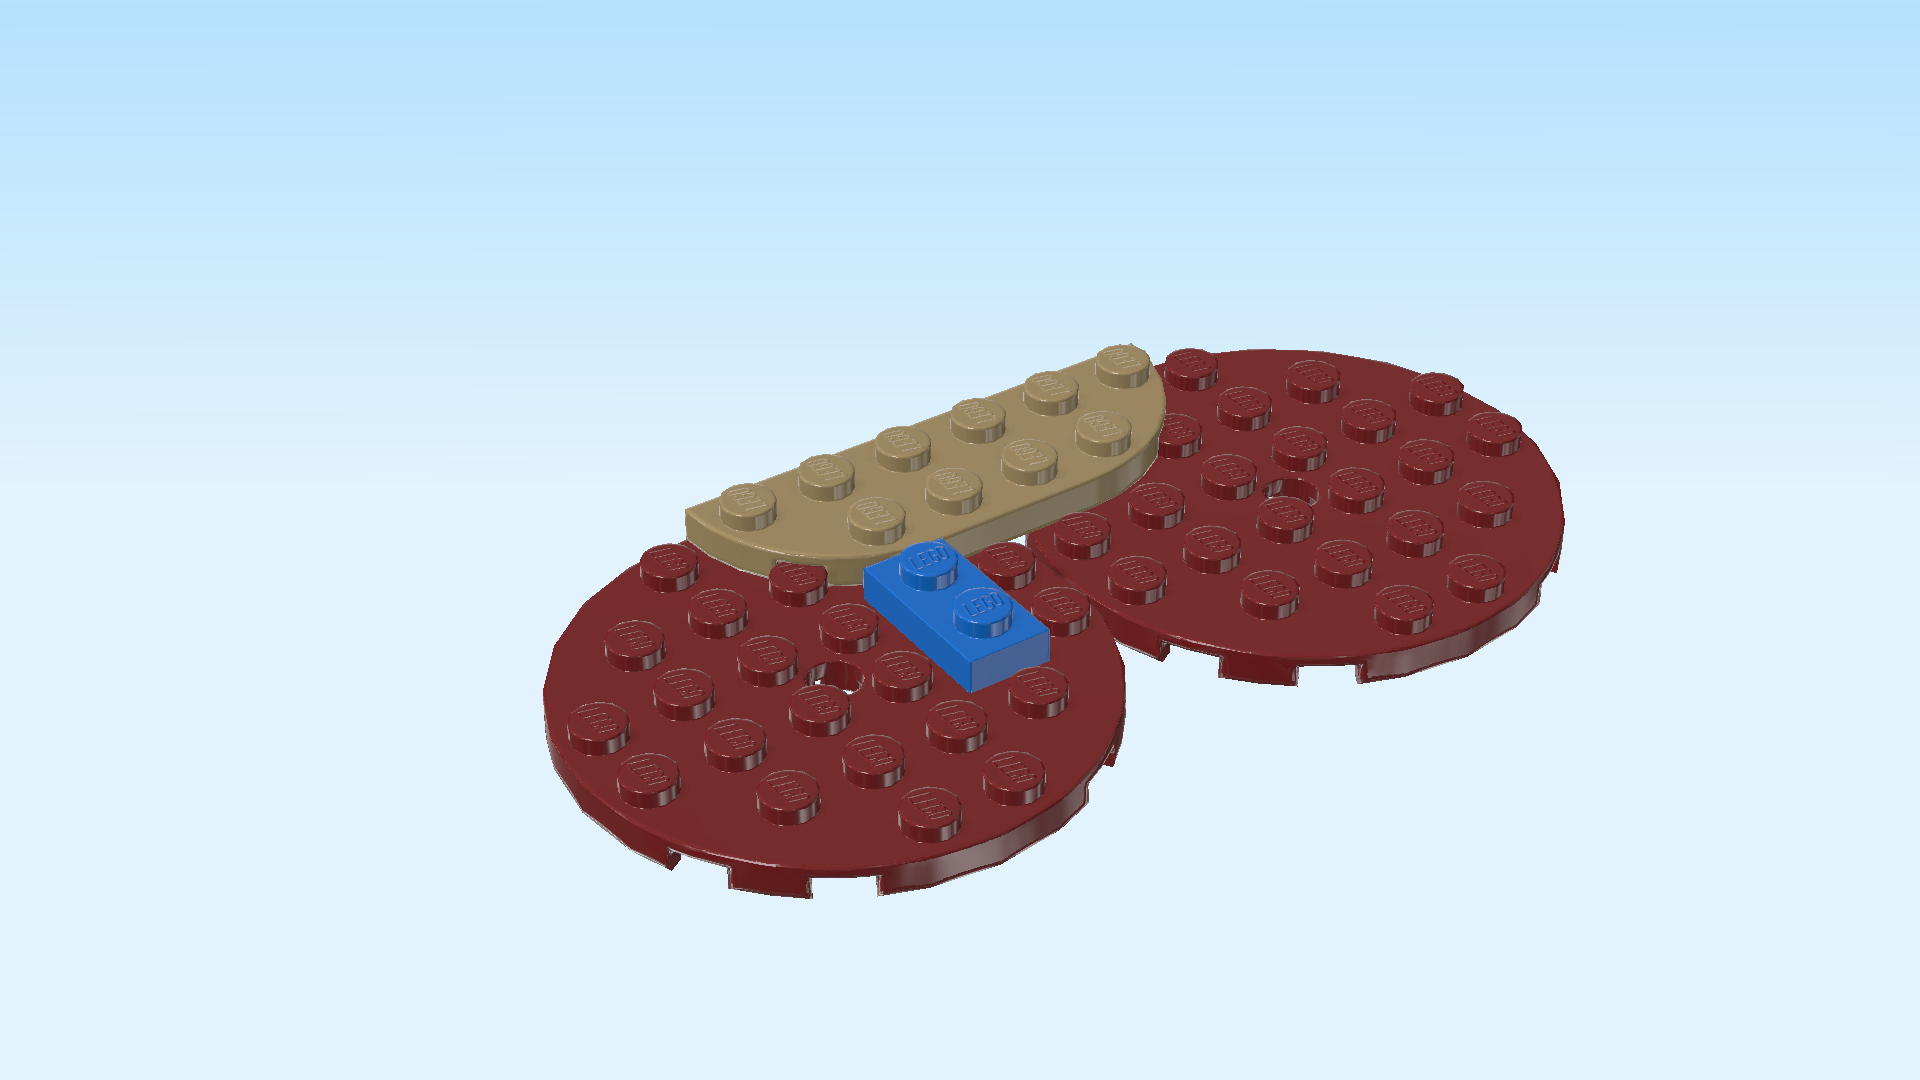
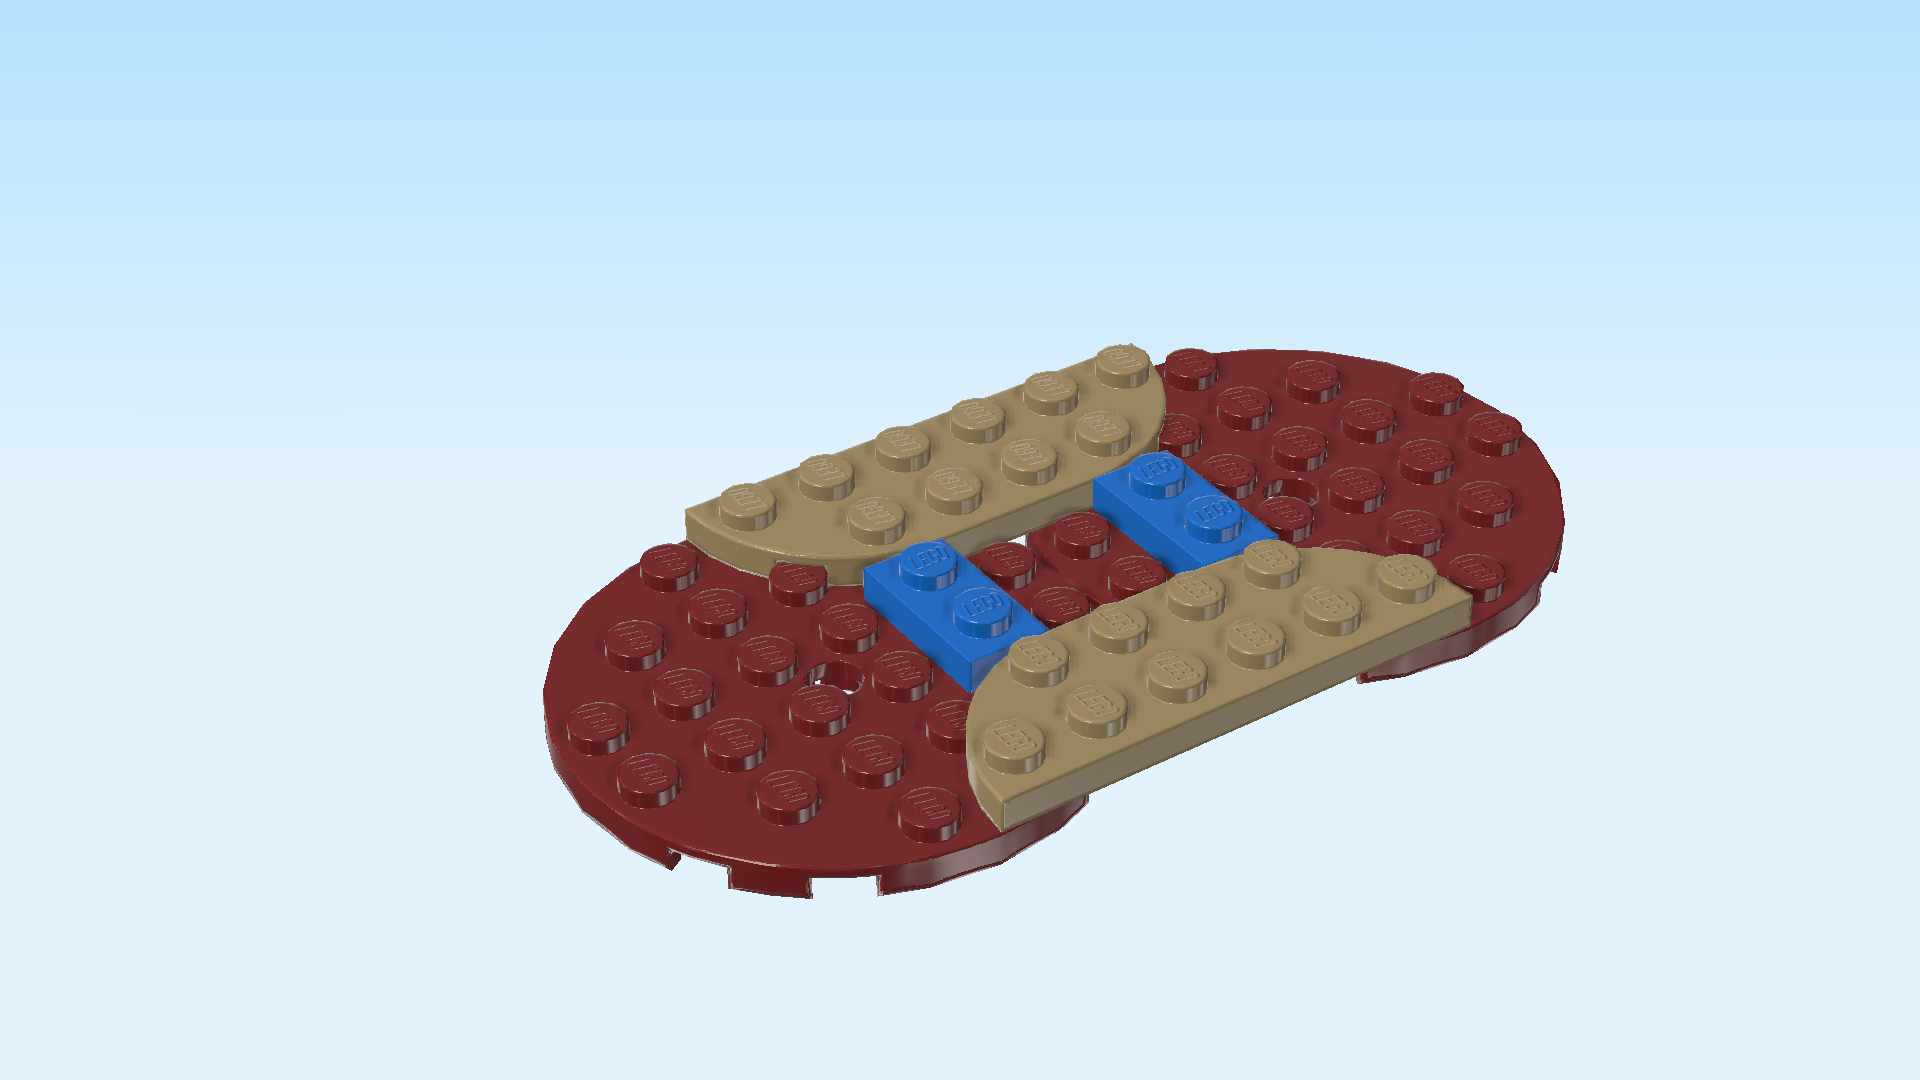
| Find 1 maroon red round plate 6x6 with middle hole. |
| Put it on the table and make sure its knobs also form straight rows and columns in front of you. |
| Mount it underneath the right half of the previous piece. Make sure that the 2 round plates 6x6 are precisely next to each other in the same orientation. |
| Collect the following 2 pieces: |
| 1 mud grey plate 2x6 with 2 round corners, |
| and 1 bright blue plate 1x2. |
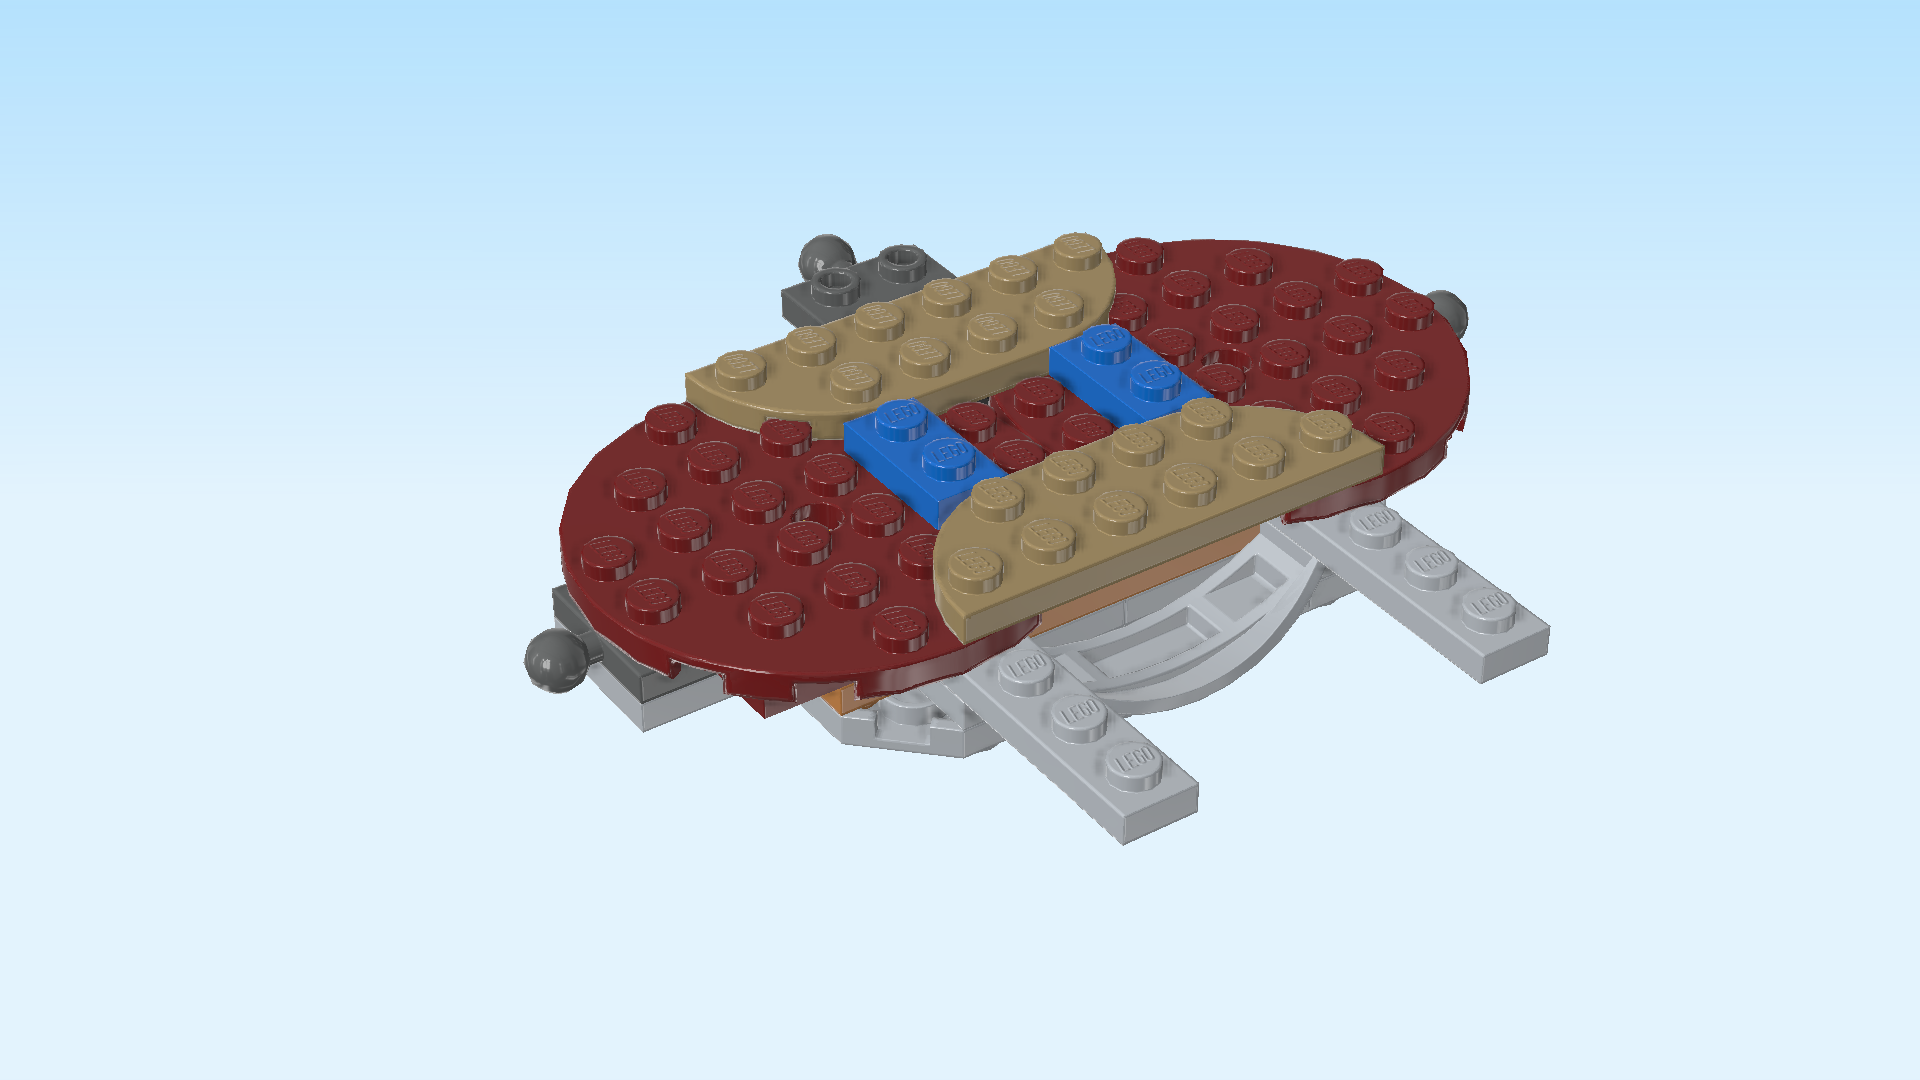
| Put the plate 2x6 horizontally on the front edge of the 2 round plates 6x6, round corners to the back. You have to exactly mirror the identical plate at the back. |
| Put the plate 1x2 vertically behind the previous piece. Align it with the previous piece's second column from the right. If done correctly, there will be an empty 2x2 space between the two plates 1x2. |
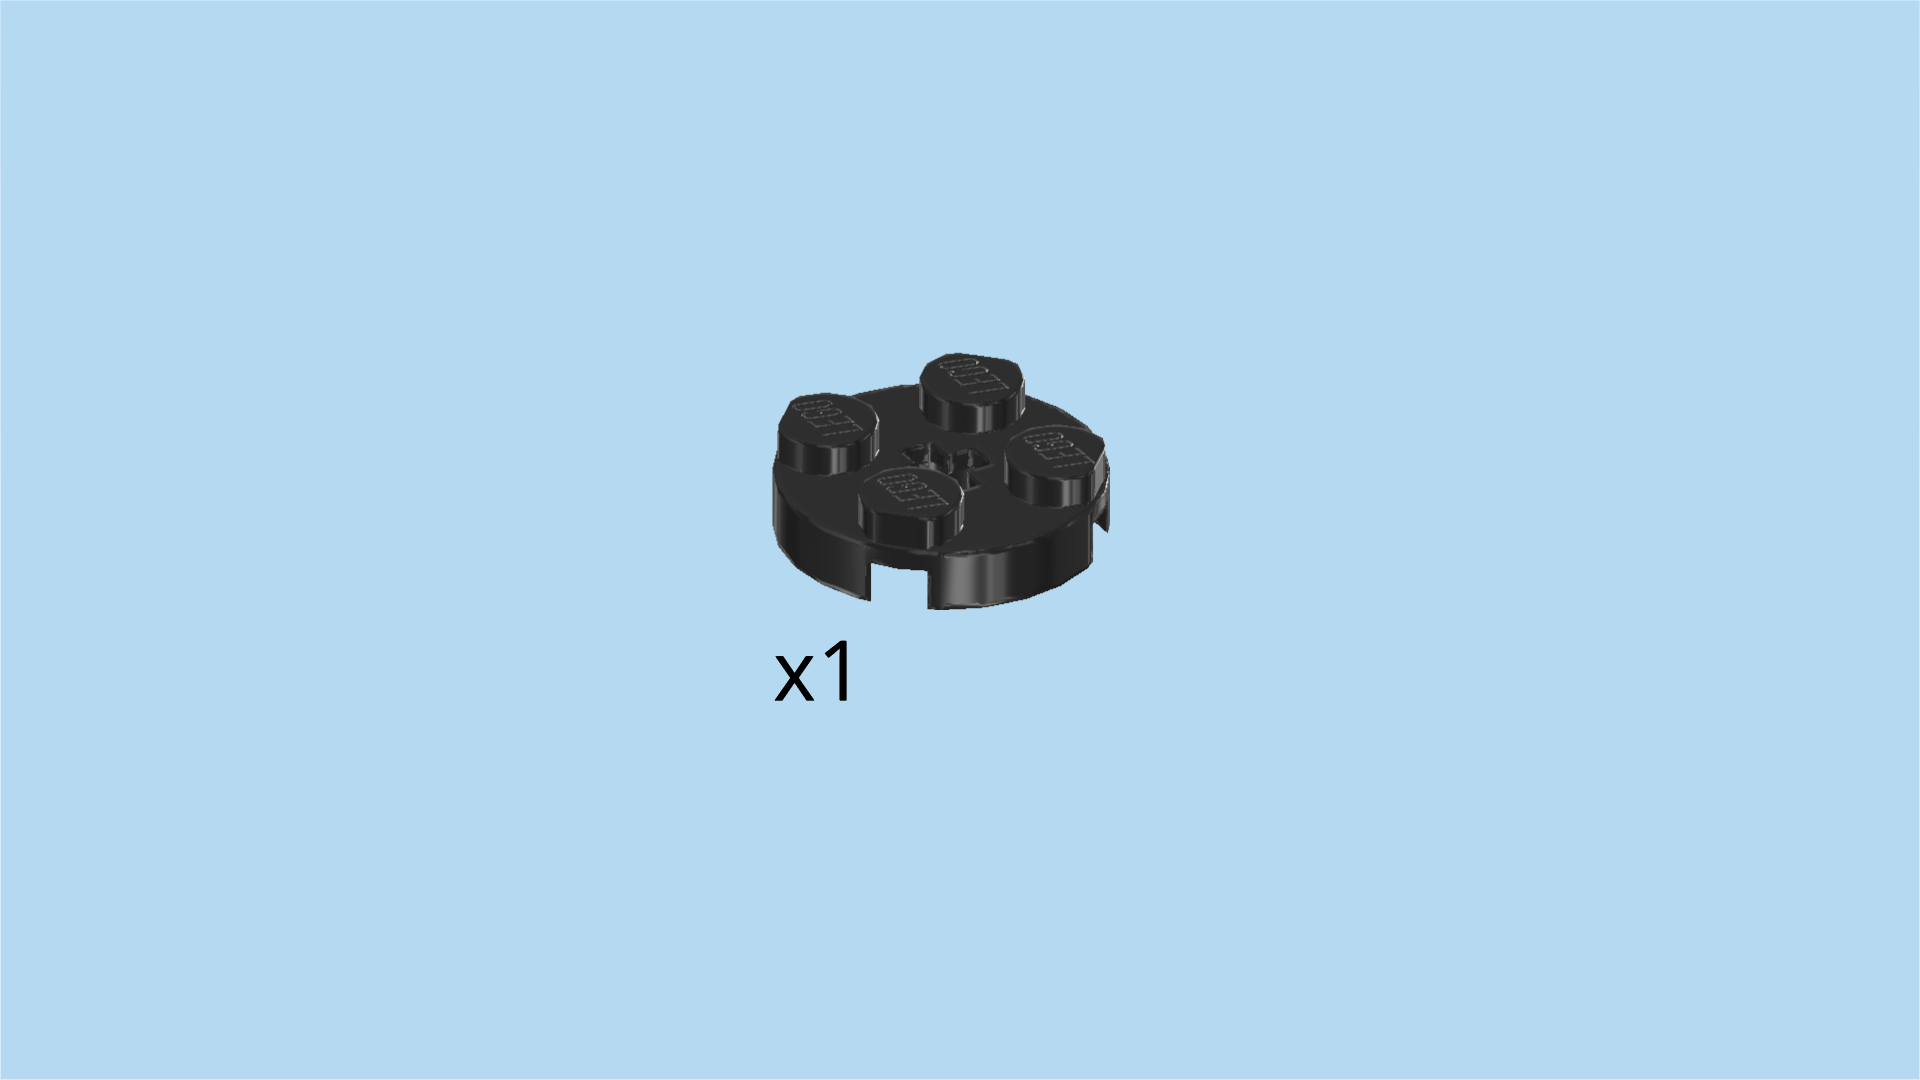
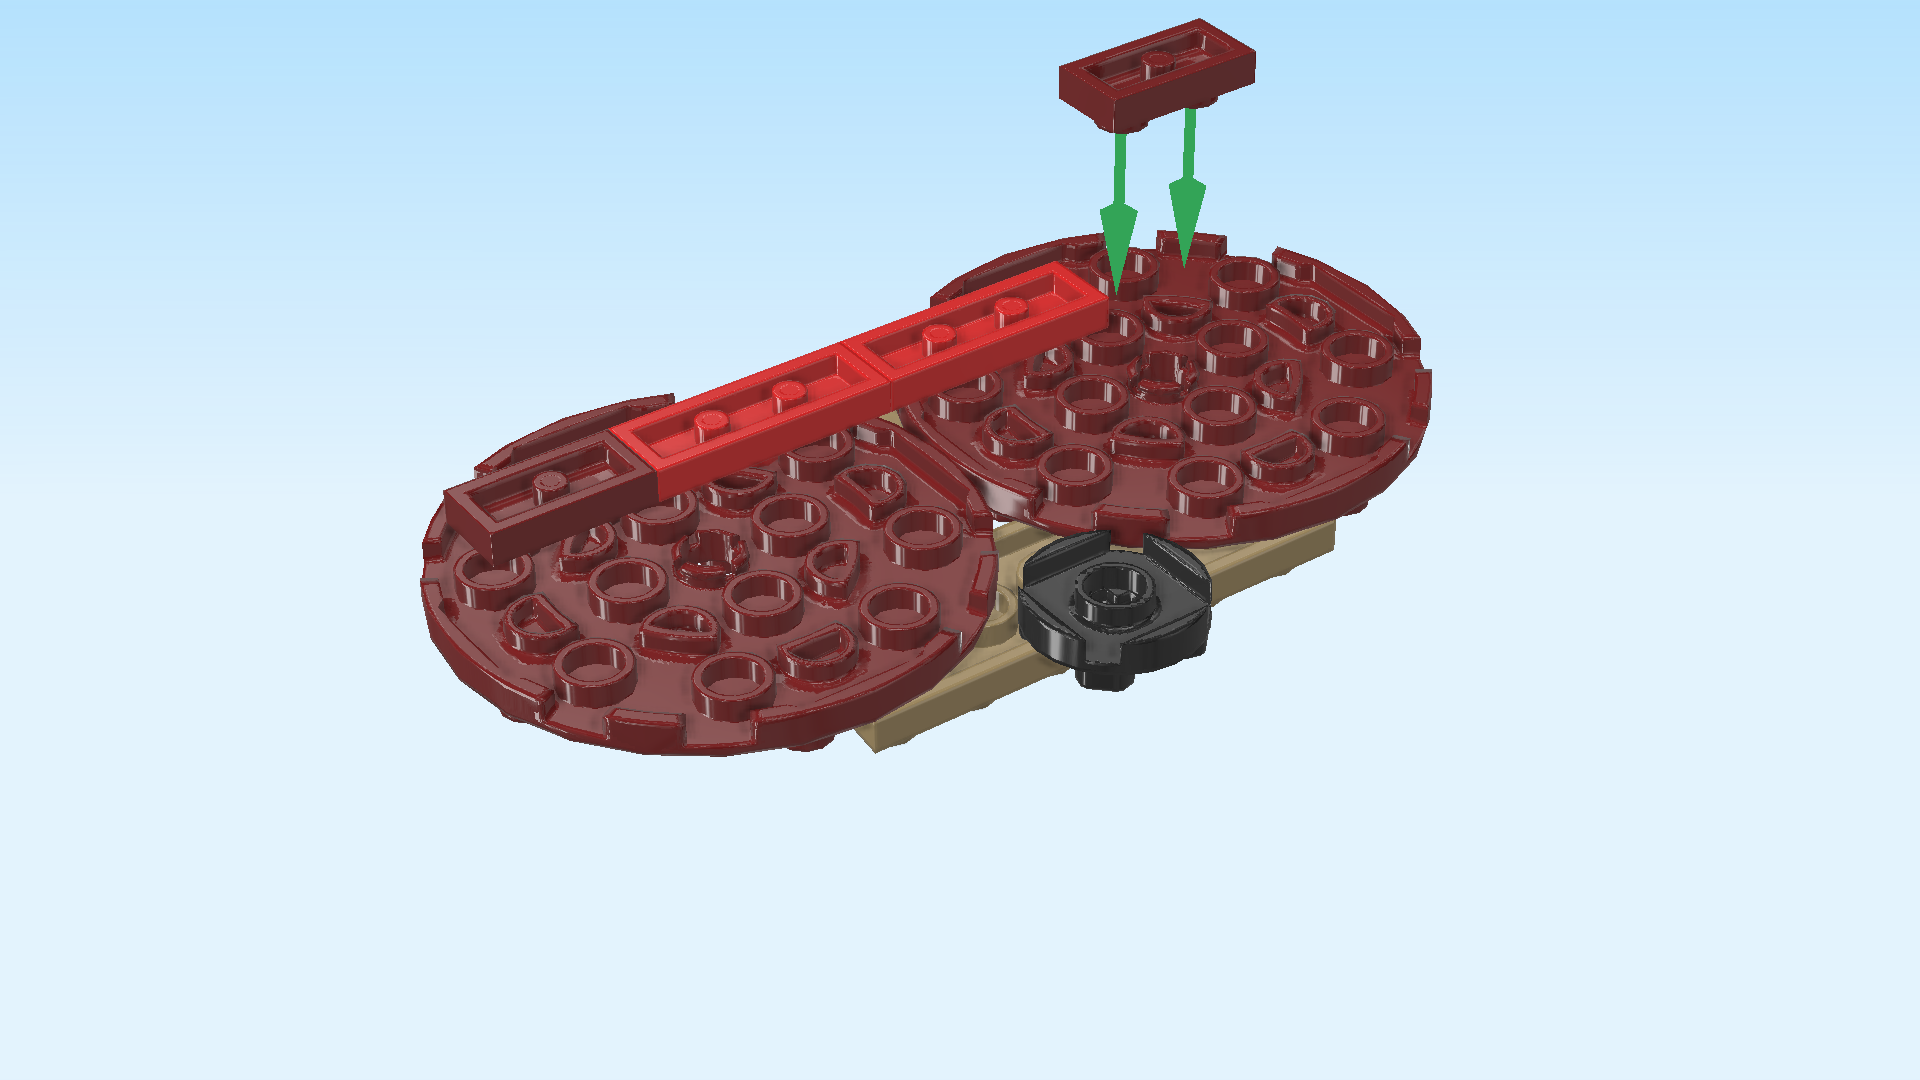
| Find 1 black round plate 2x2. |
| First, flip the manta ray structure upside down. Keep the orientation horizontal. |
| Mount the round plate 2x2 centered on the front edge, half of the plate overhanging to the front. |
| Collect the following 4 pieces: |
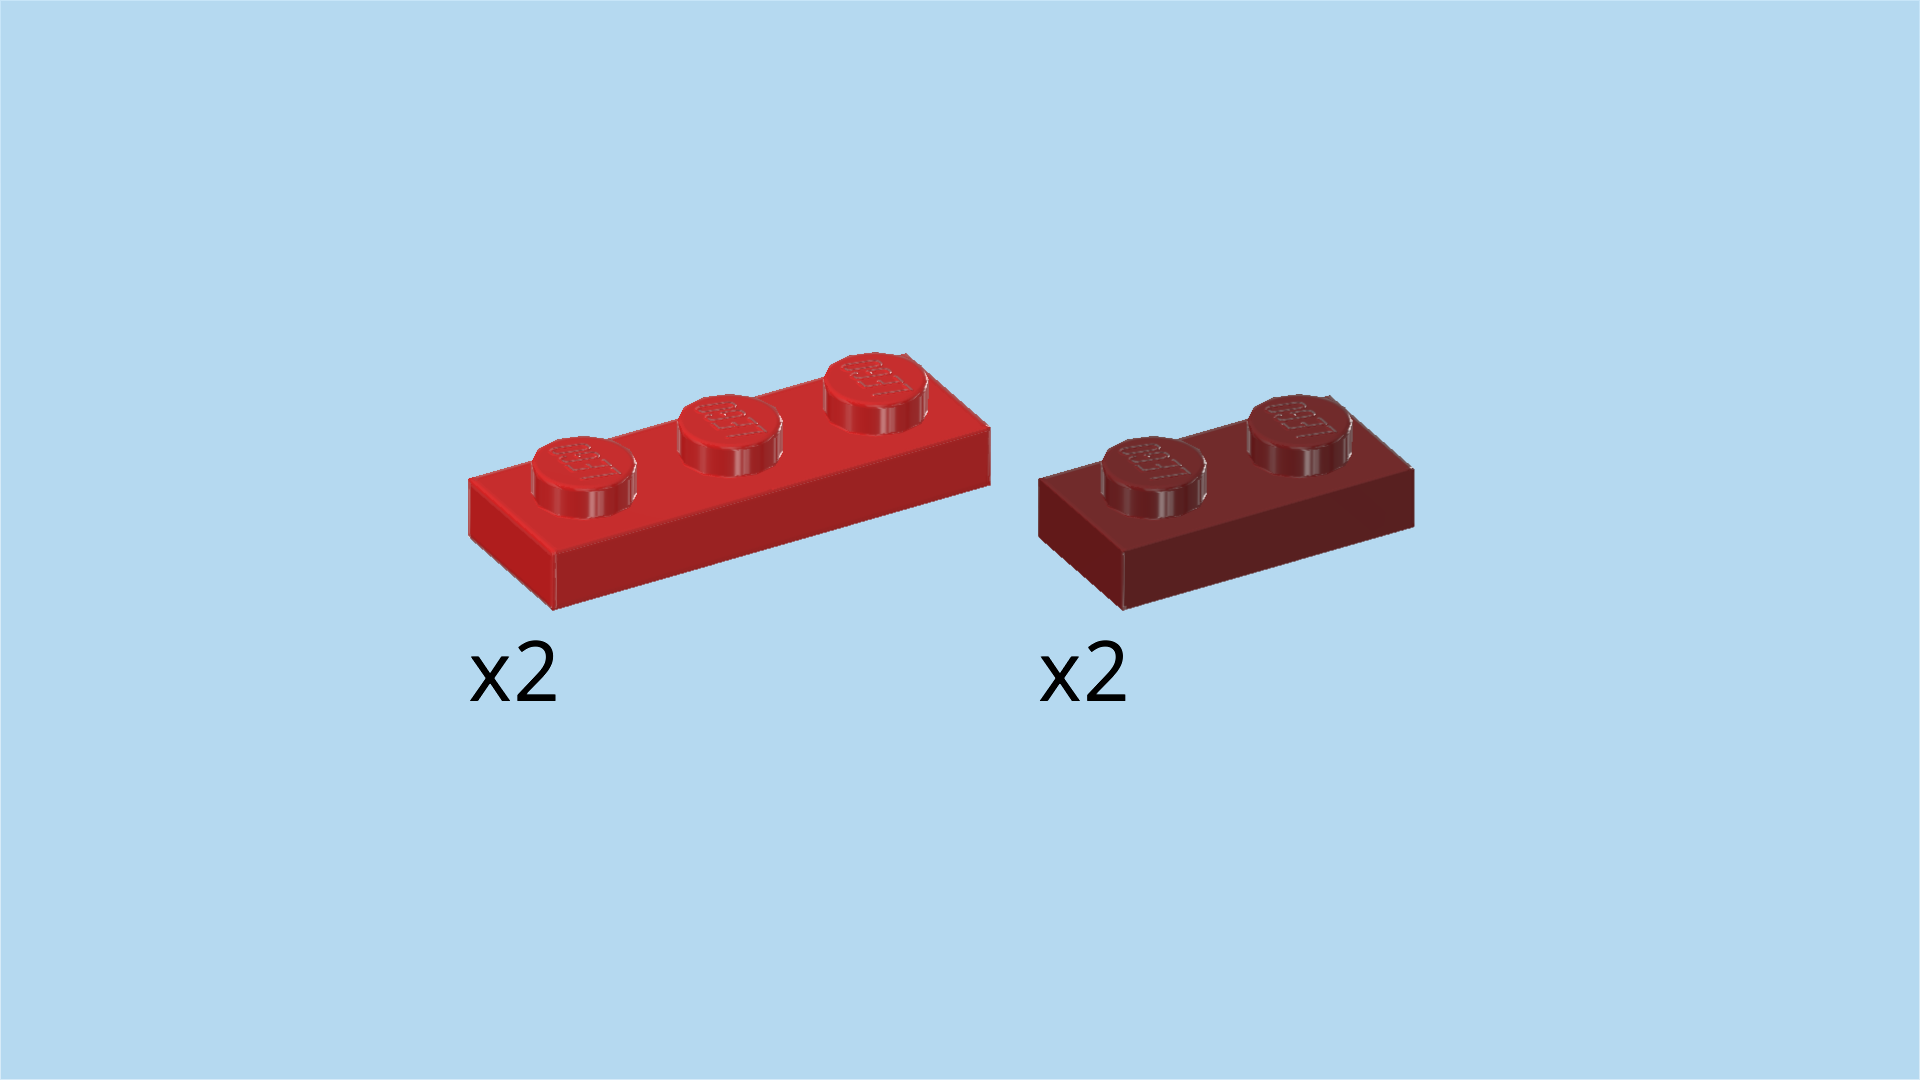
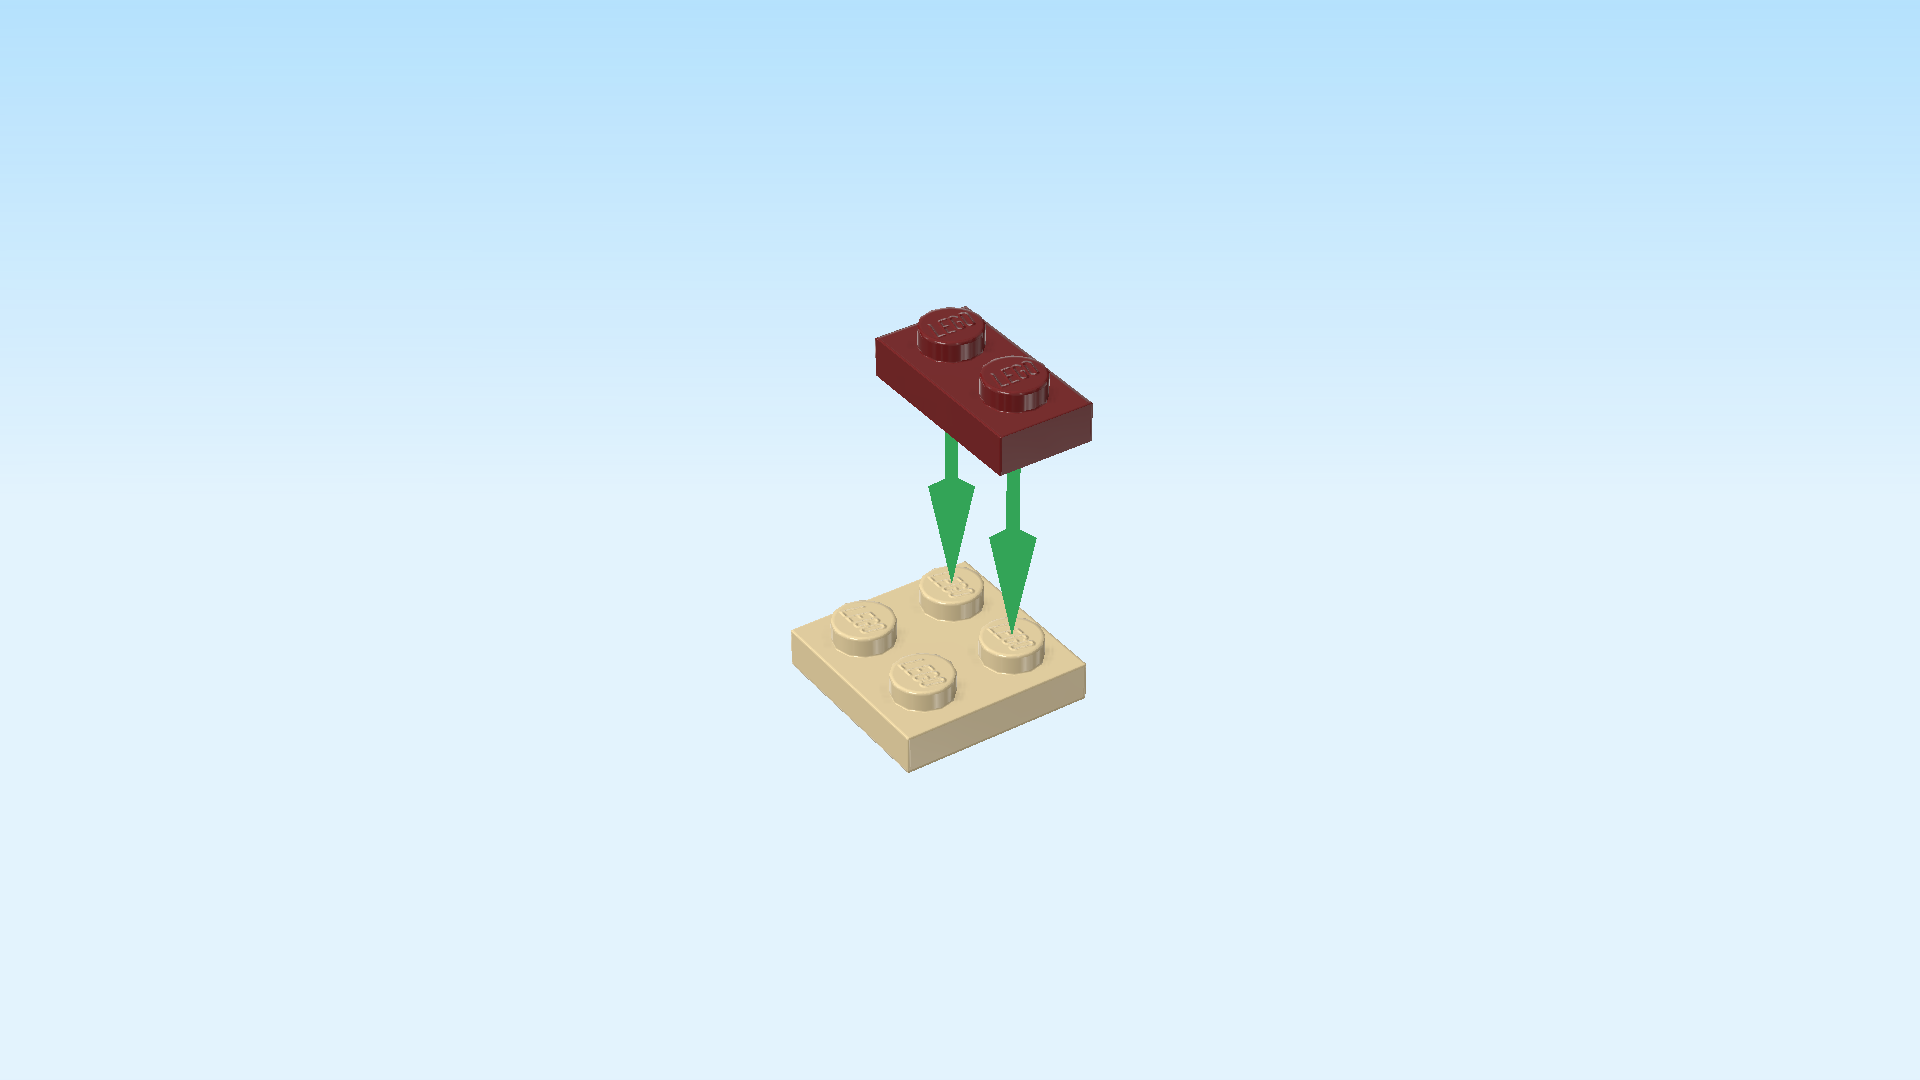
| 2 maroon red plates 1x2, |
| and 2 bright red plates 1x3. |
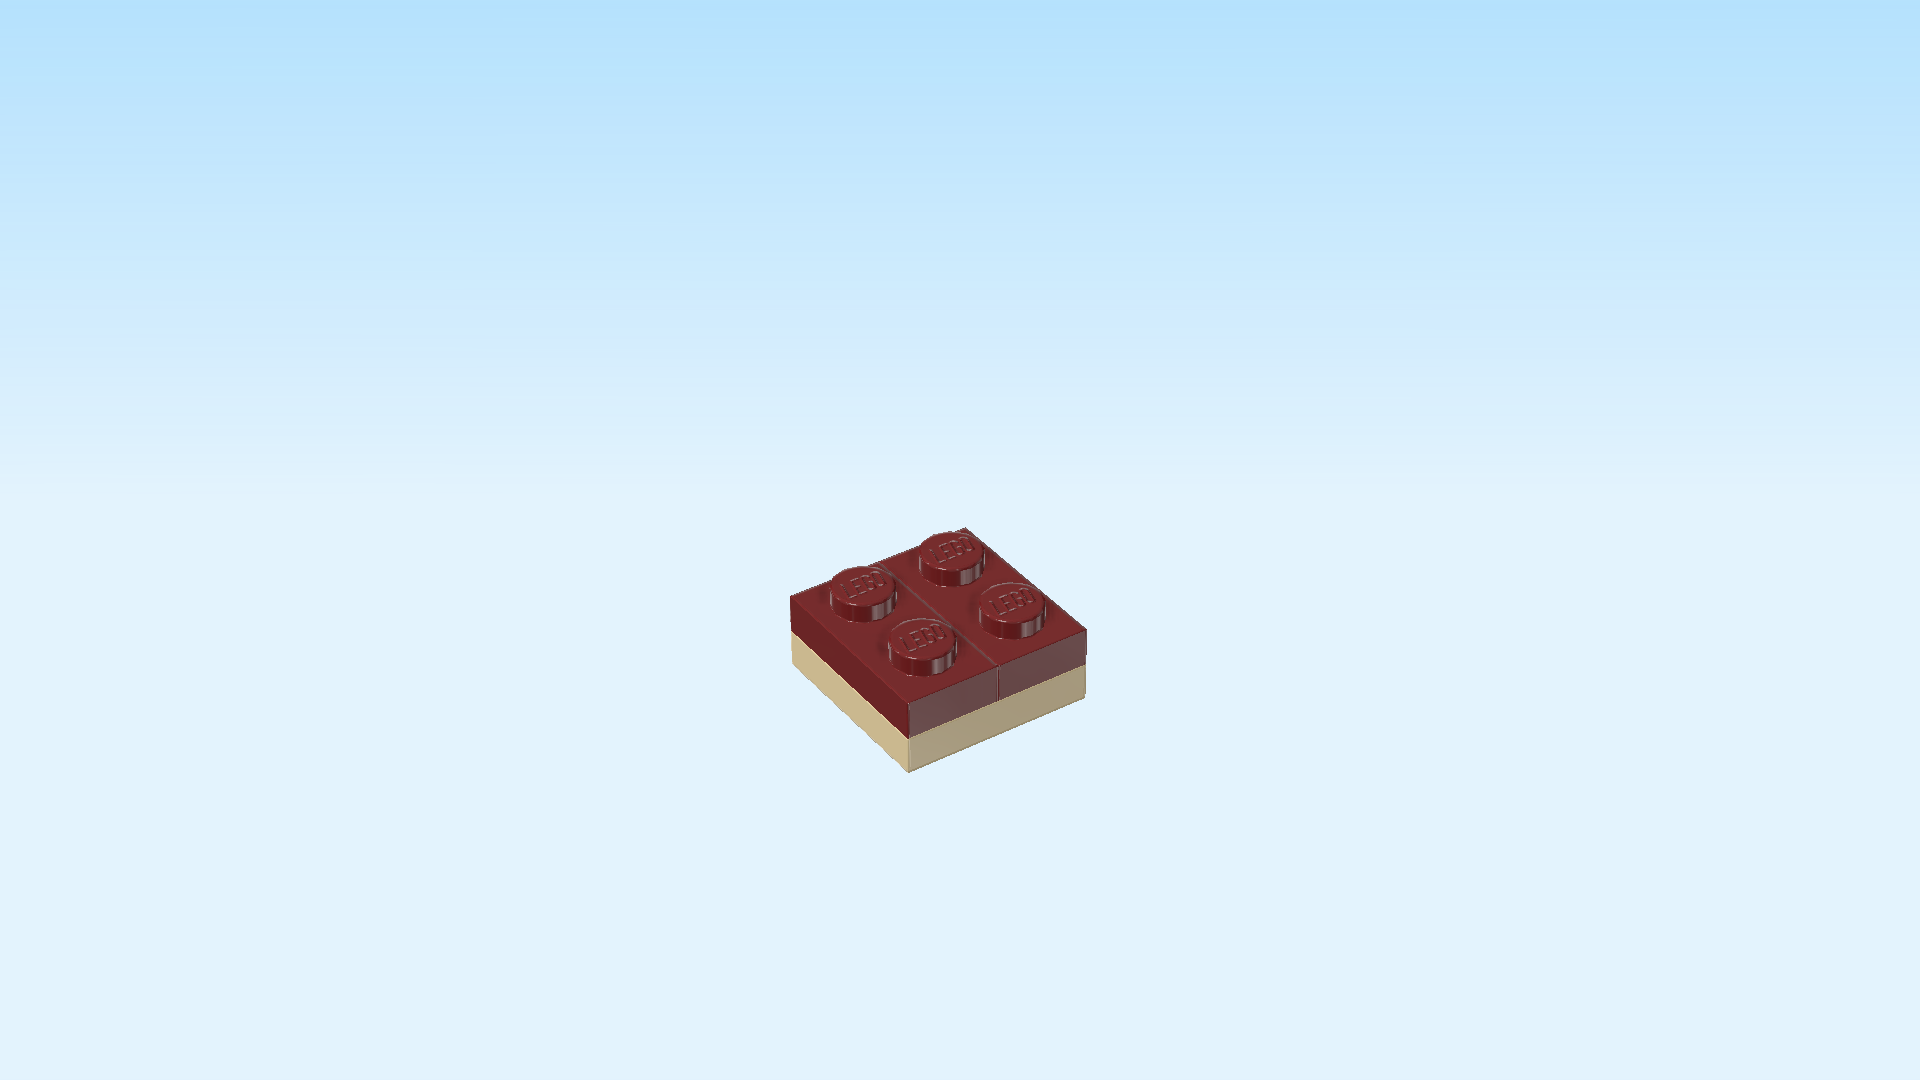
| Put 1 plate 1x2 horizontally on the second row from the back, starting from the left. Make sure that the curvature of the round plate 6x6 protrudes underneath this plate to the left and to the back. It only aligns with the outer circumference of the base plate on the back left corner. |
| Put 1 plate 1x3 horizontally to the right of the previous piece. |
| Put the other plate 1x3 horizontally to the right of the previous piece. |
| Put the remaining plate 1x2 horizontally to the right of the previous piece. |
| If done correctly, these 4 plates form 1 row at the back. The 2 back curvatures of the round plates 6x6 will slightly protrude towards the back, and the left curvatures protrude symmetrically, as well. |
| Next, we will make 2 sub-parts of the manta ray. |
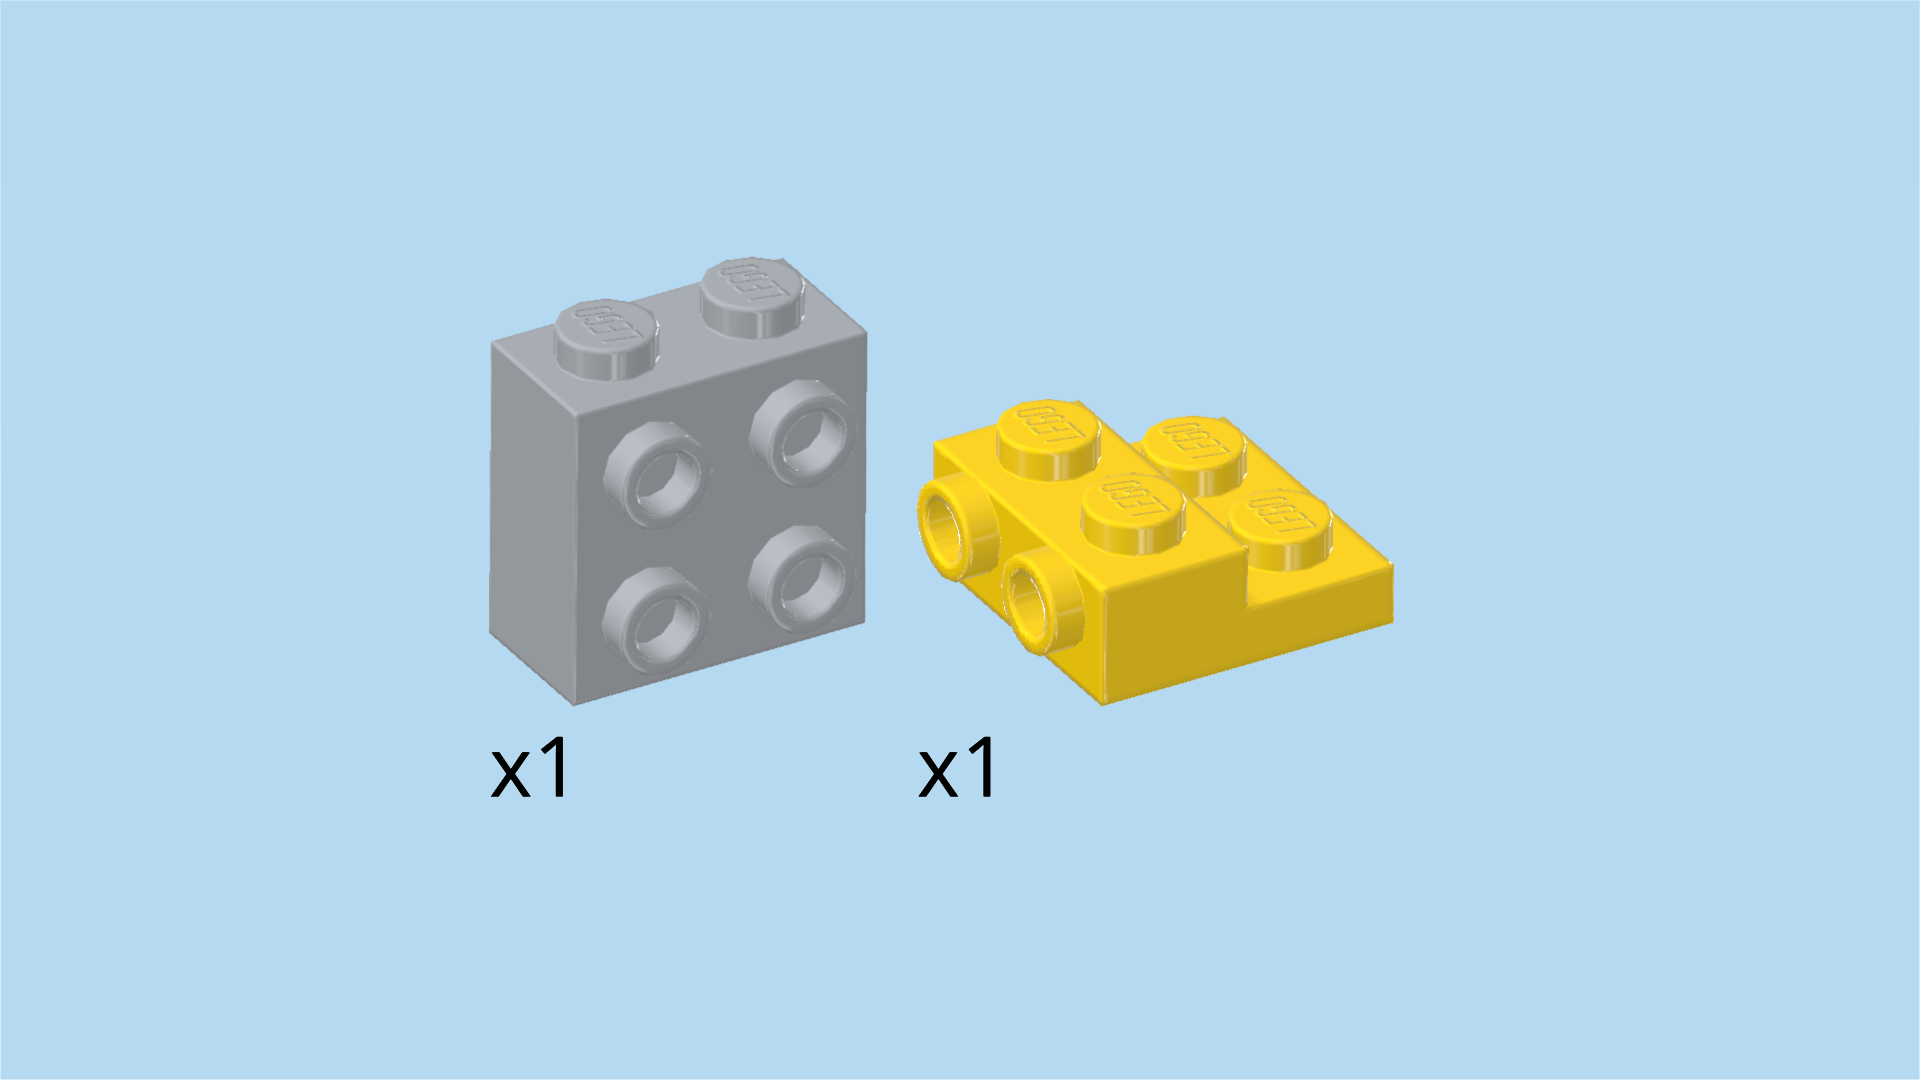
| Collect the following 2 pieces: |
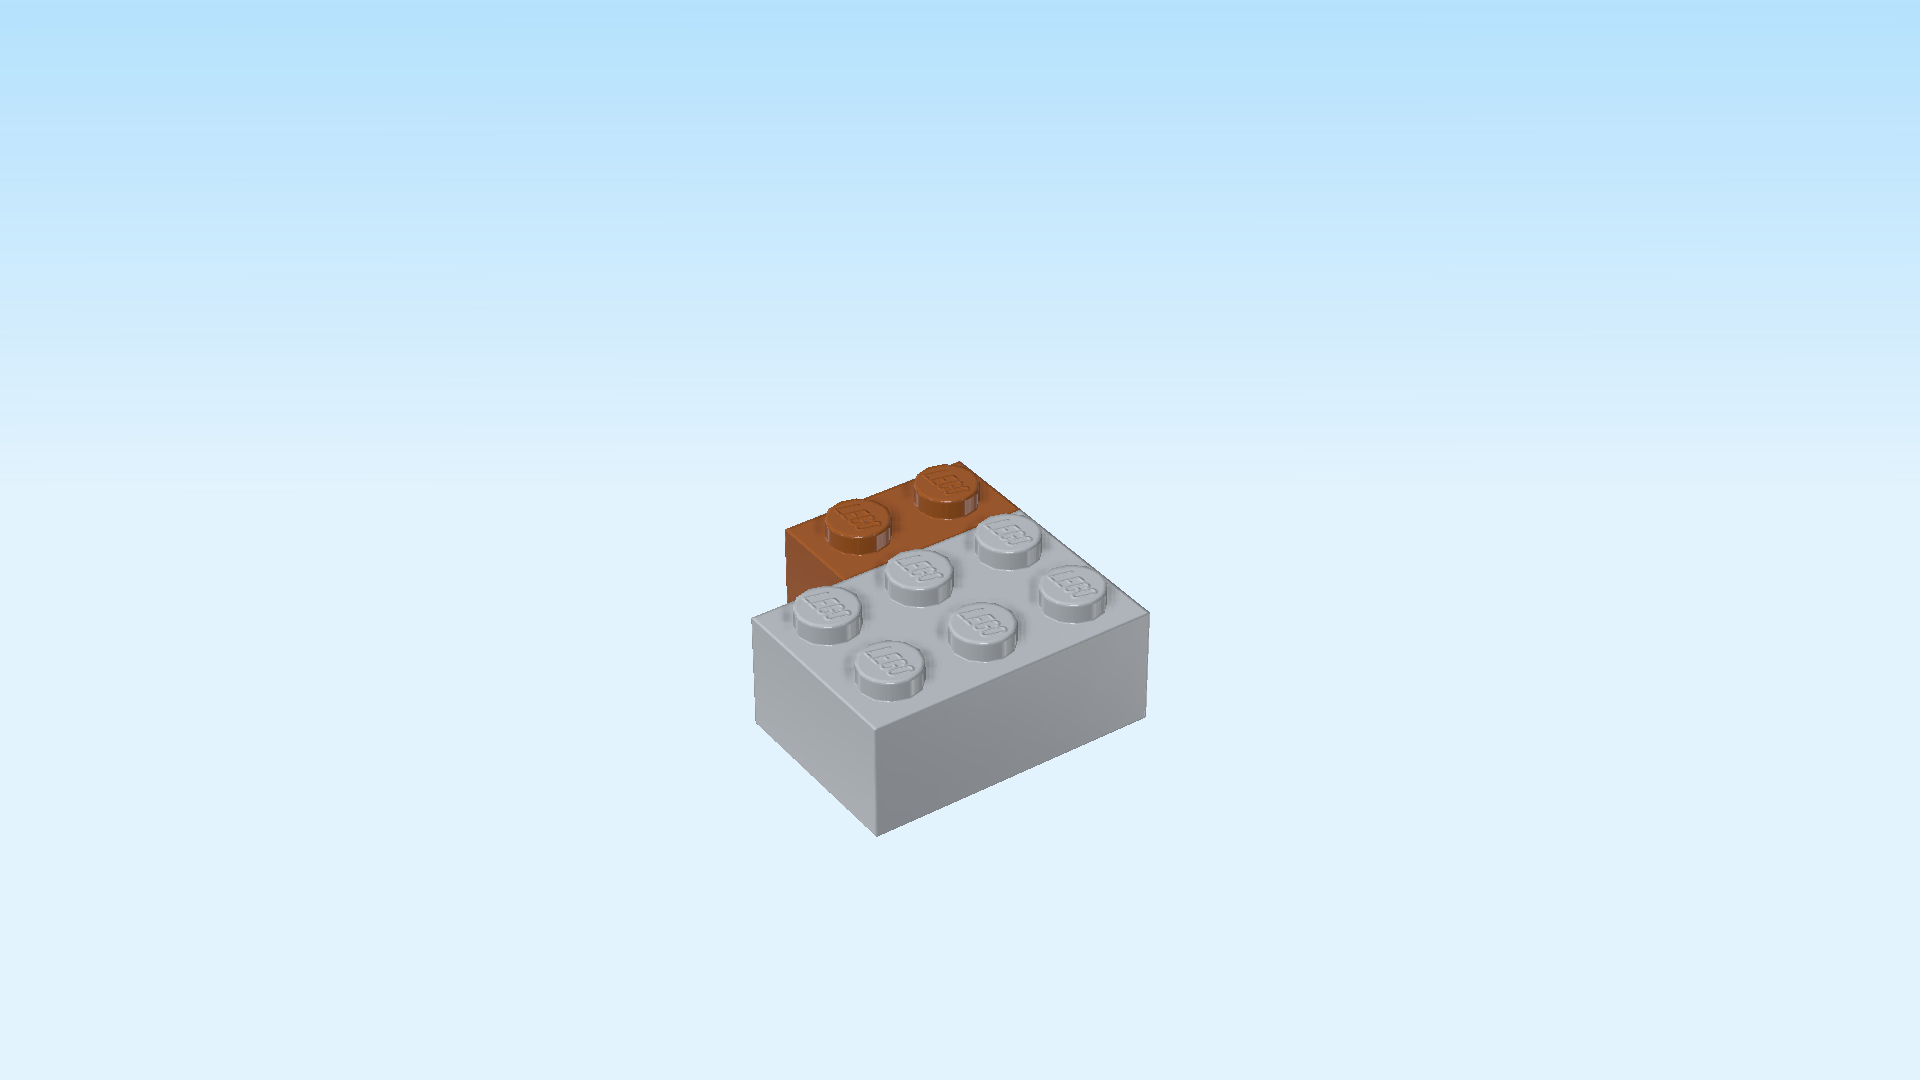
| 1 medium stone grey brick 1x2x1⅔ with 4 side knobs, |
| and 1 bright yellow one-stepped plate 2x2x⅔ with 2 side knobs. |
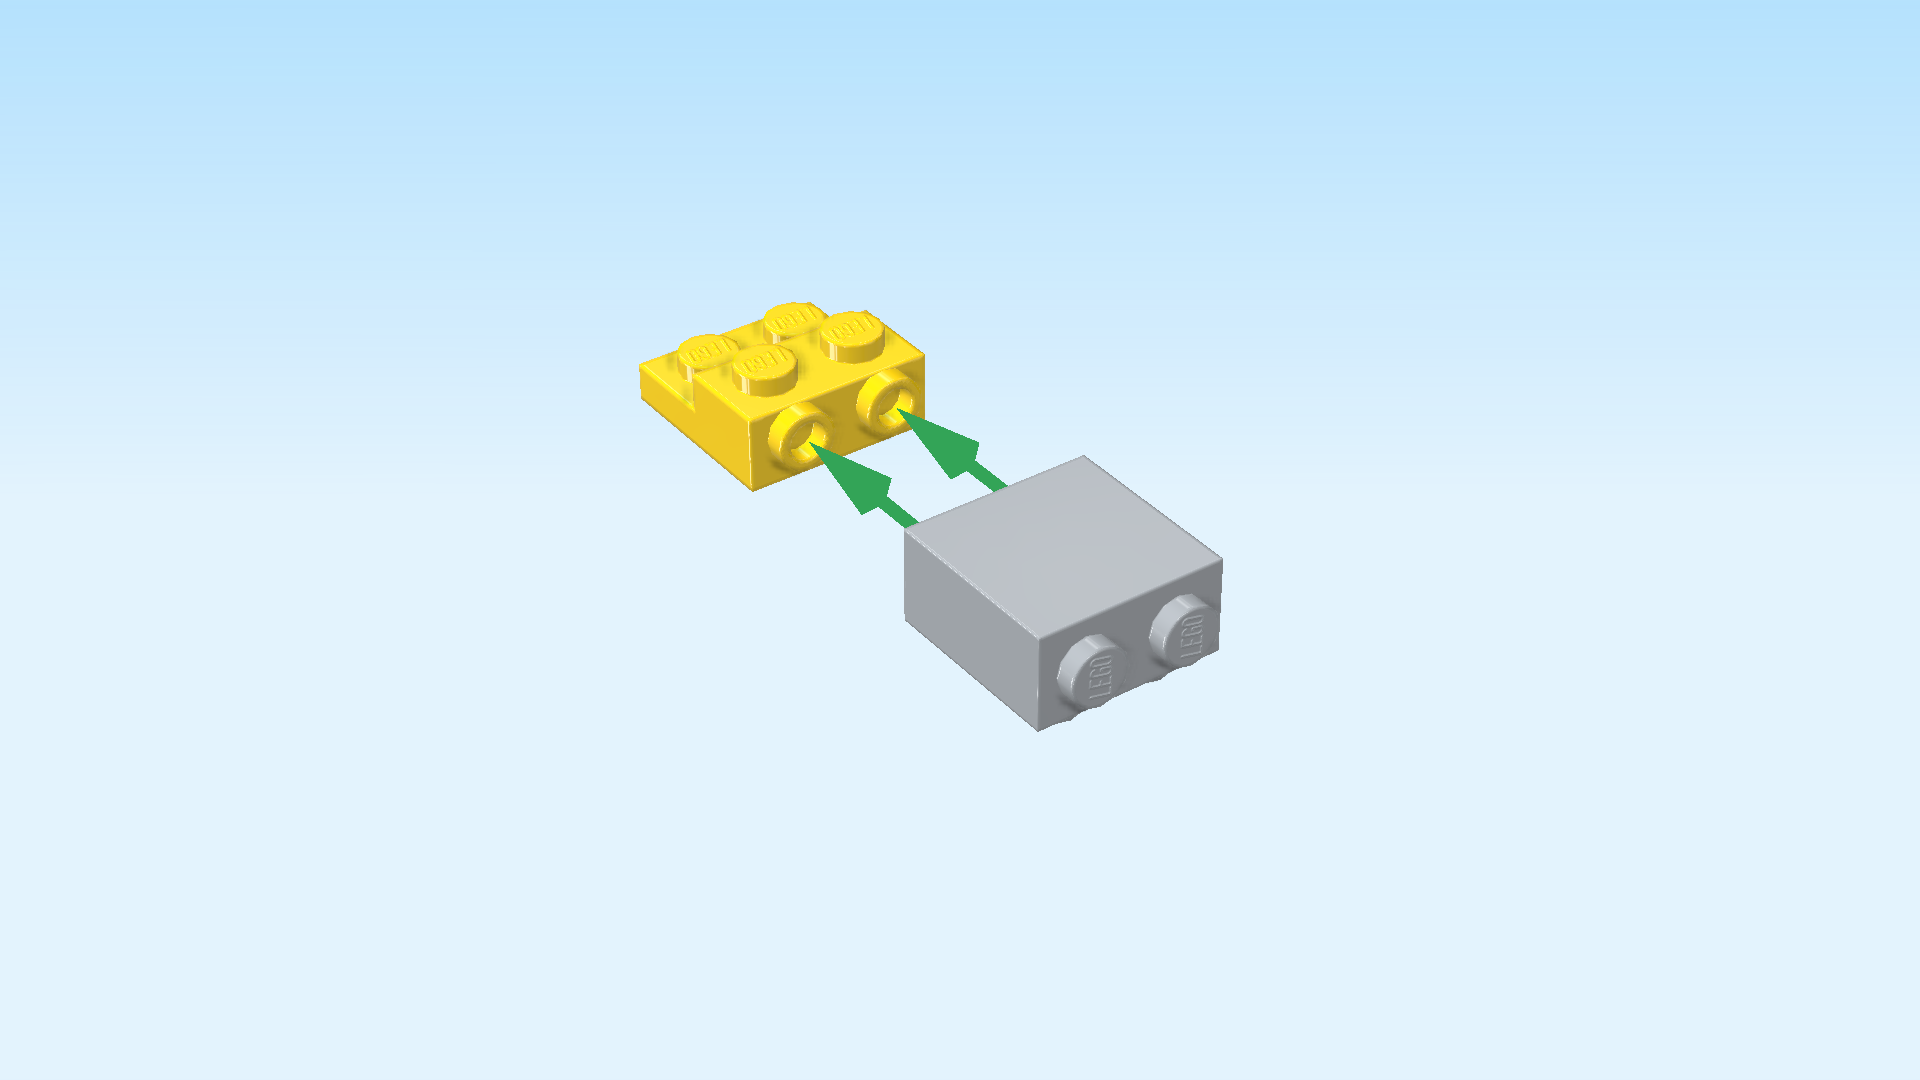
| Put the one-stepped plate 2x2 on the table, 2 side knobs pointing to the right, 4 top knobs to the top. |
| Put the brick 1x2 with 4 side knobs flat on the table to the right of the previous piece, and make sure its 4 side knobs are pointing to the bottom and its 2 top knobs are pointing to the right. |
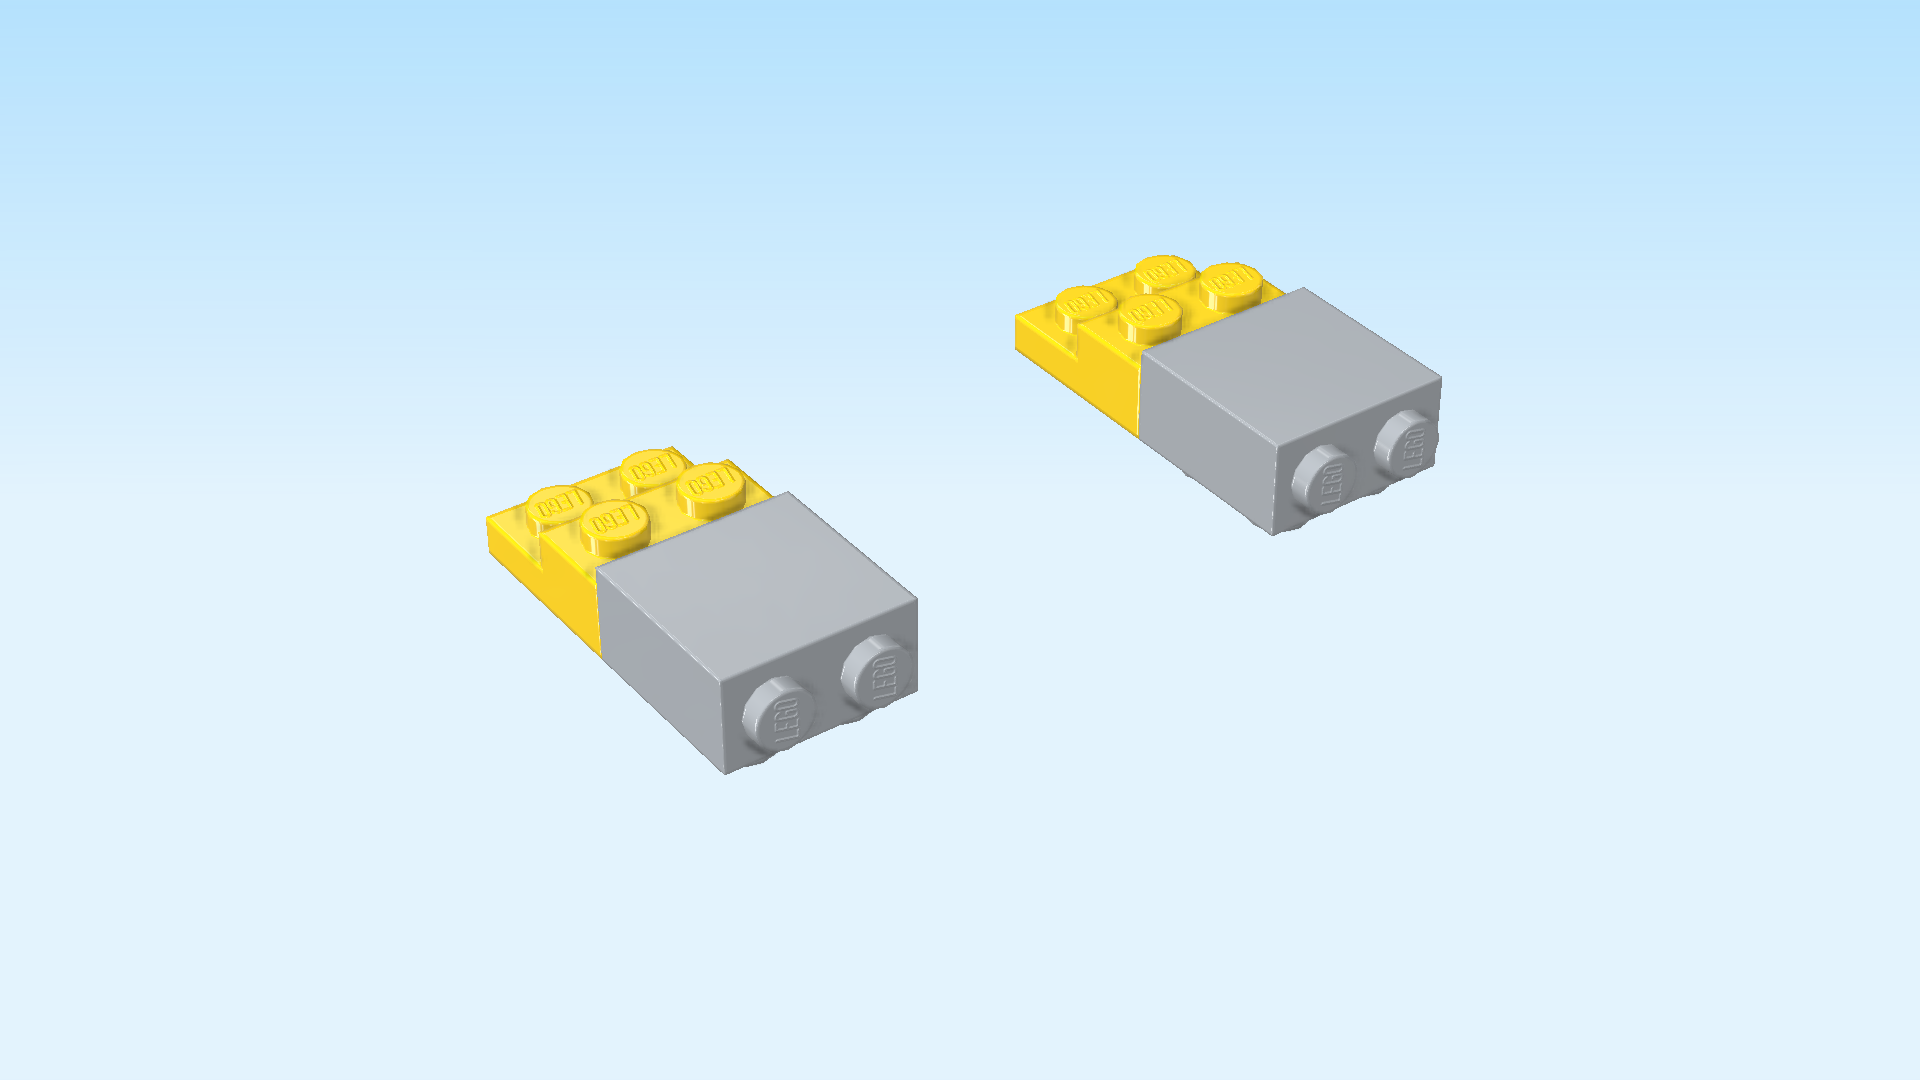
| Then, mount the 2 side knobs of the one-stepped plate coming from the left on the brick 1x2. |
| Collect the following 2 pieces: |
| another medium stone grey brick 1x2x1⅔ with 4 side knobs, |
| and another bright yellow one-stepped plate 2x2x⅔ with 2 side knobs. |
| Repeat the previous step with these parts: put the brick 1x2 flat on the table, 4 side knobs to the bottom, 2 top knobs to the right. Mount the 2 side knobs of the one-stepped plate on the brick, coming from the left. |
| Mount 1 sub-part vertically centered on the left round plate 6x6 directly in front of the row of plates at the back. Make sure the 2 knobs of the brick are pointing to the front. |
| Mount the other sub-part vertically centered on the right round plate 6x6, again directly in front of the row of plates at the back, 2 knobs to the front. |
| Next up, we will build a base strutting of the manta ray. |
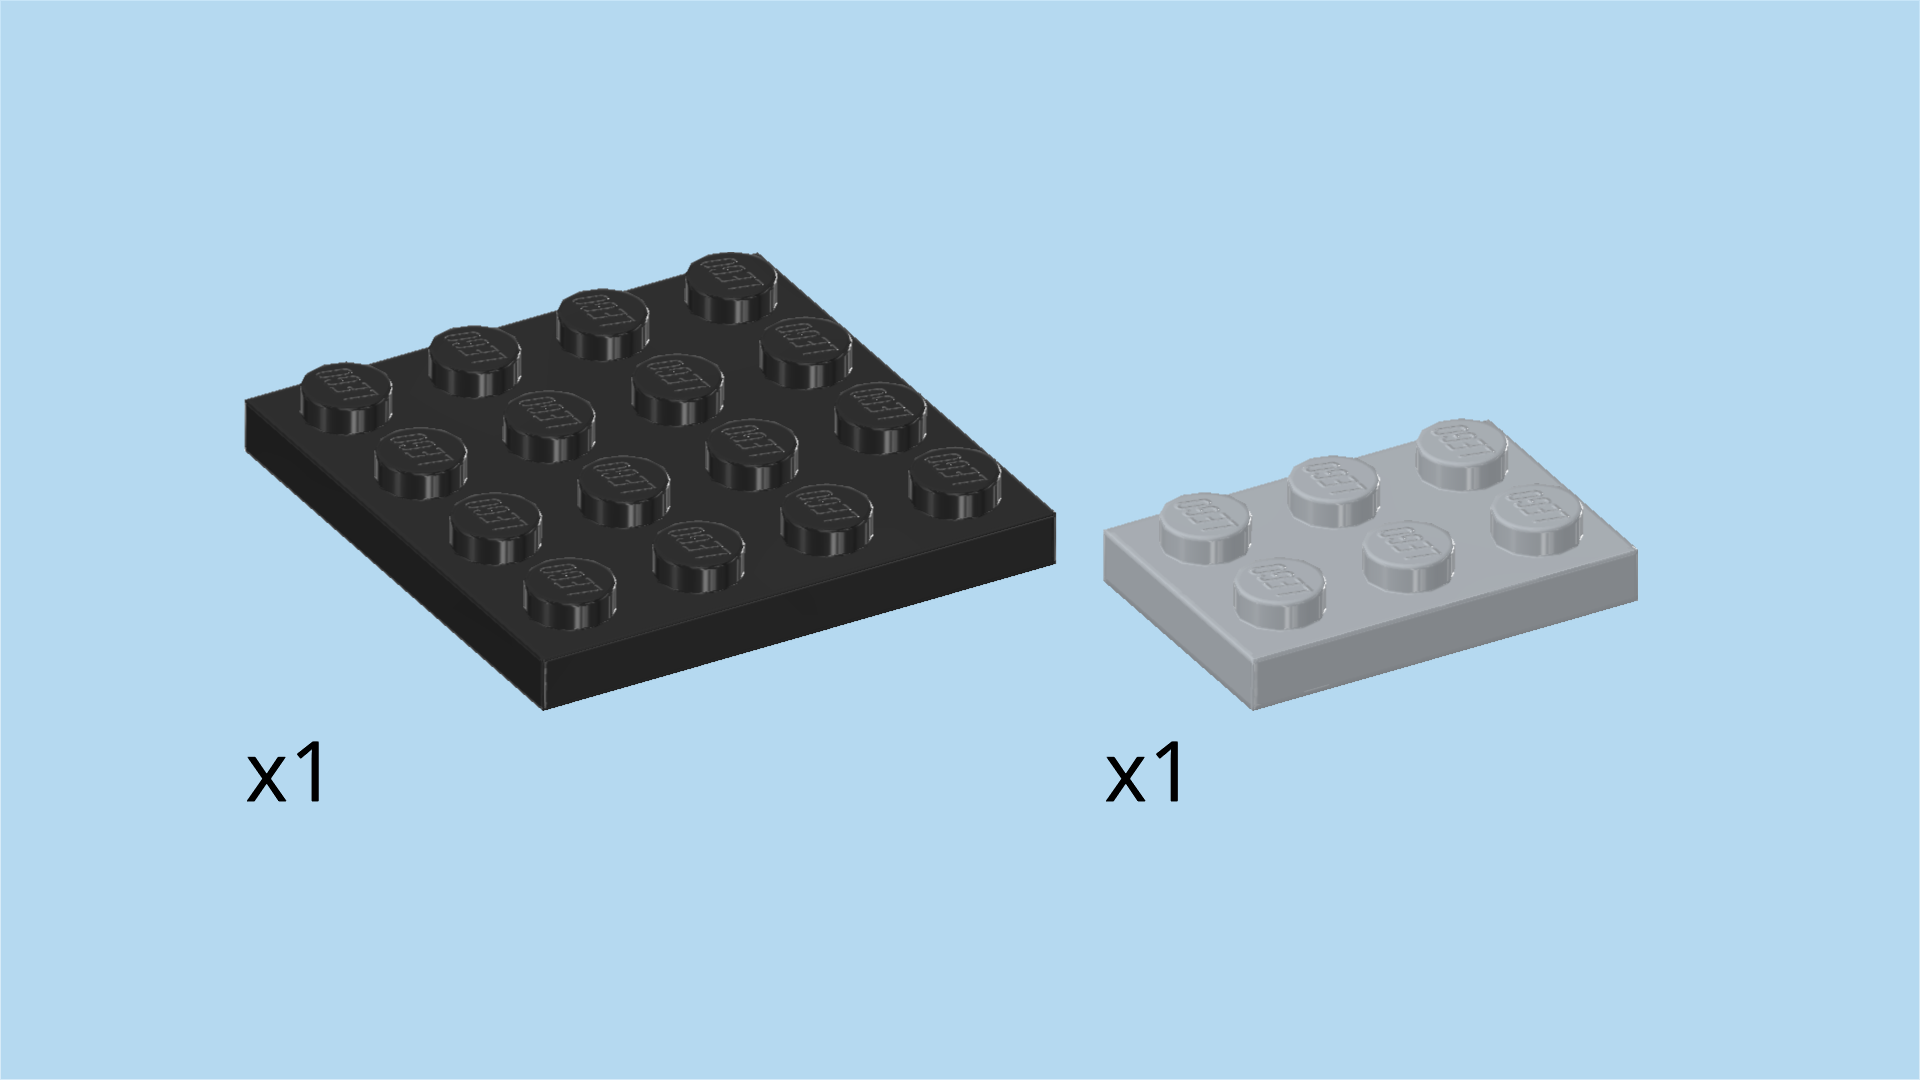
| Collect the following 2 pieces: |
| 1 black plate 4x4, |
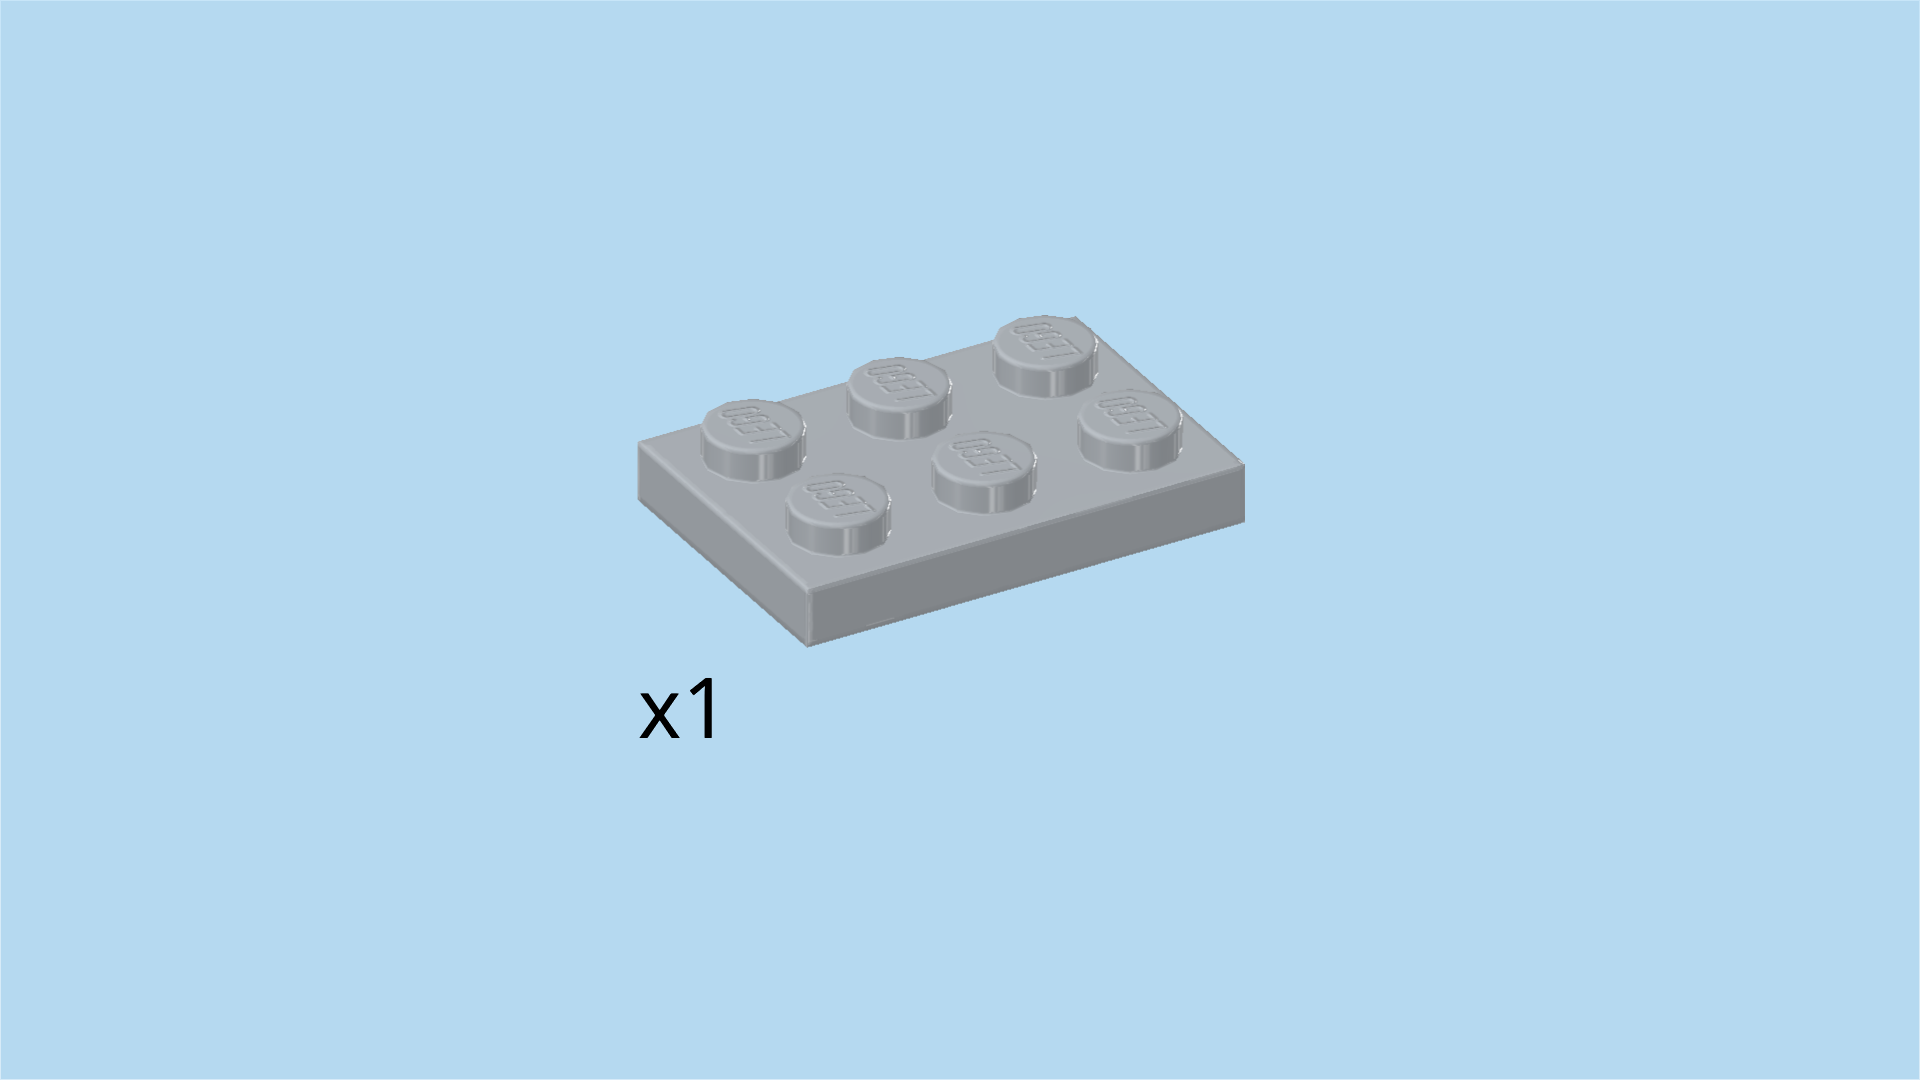
| and 1 medium stone grey plate 2x3. |
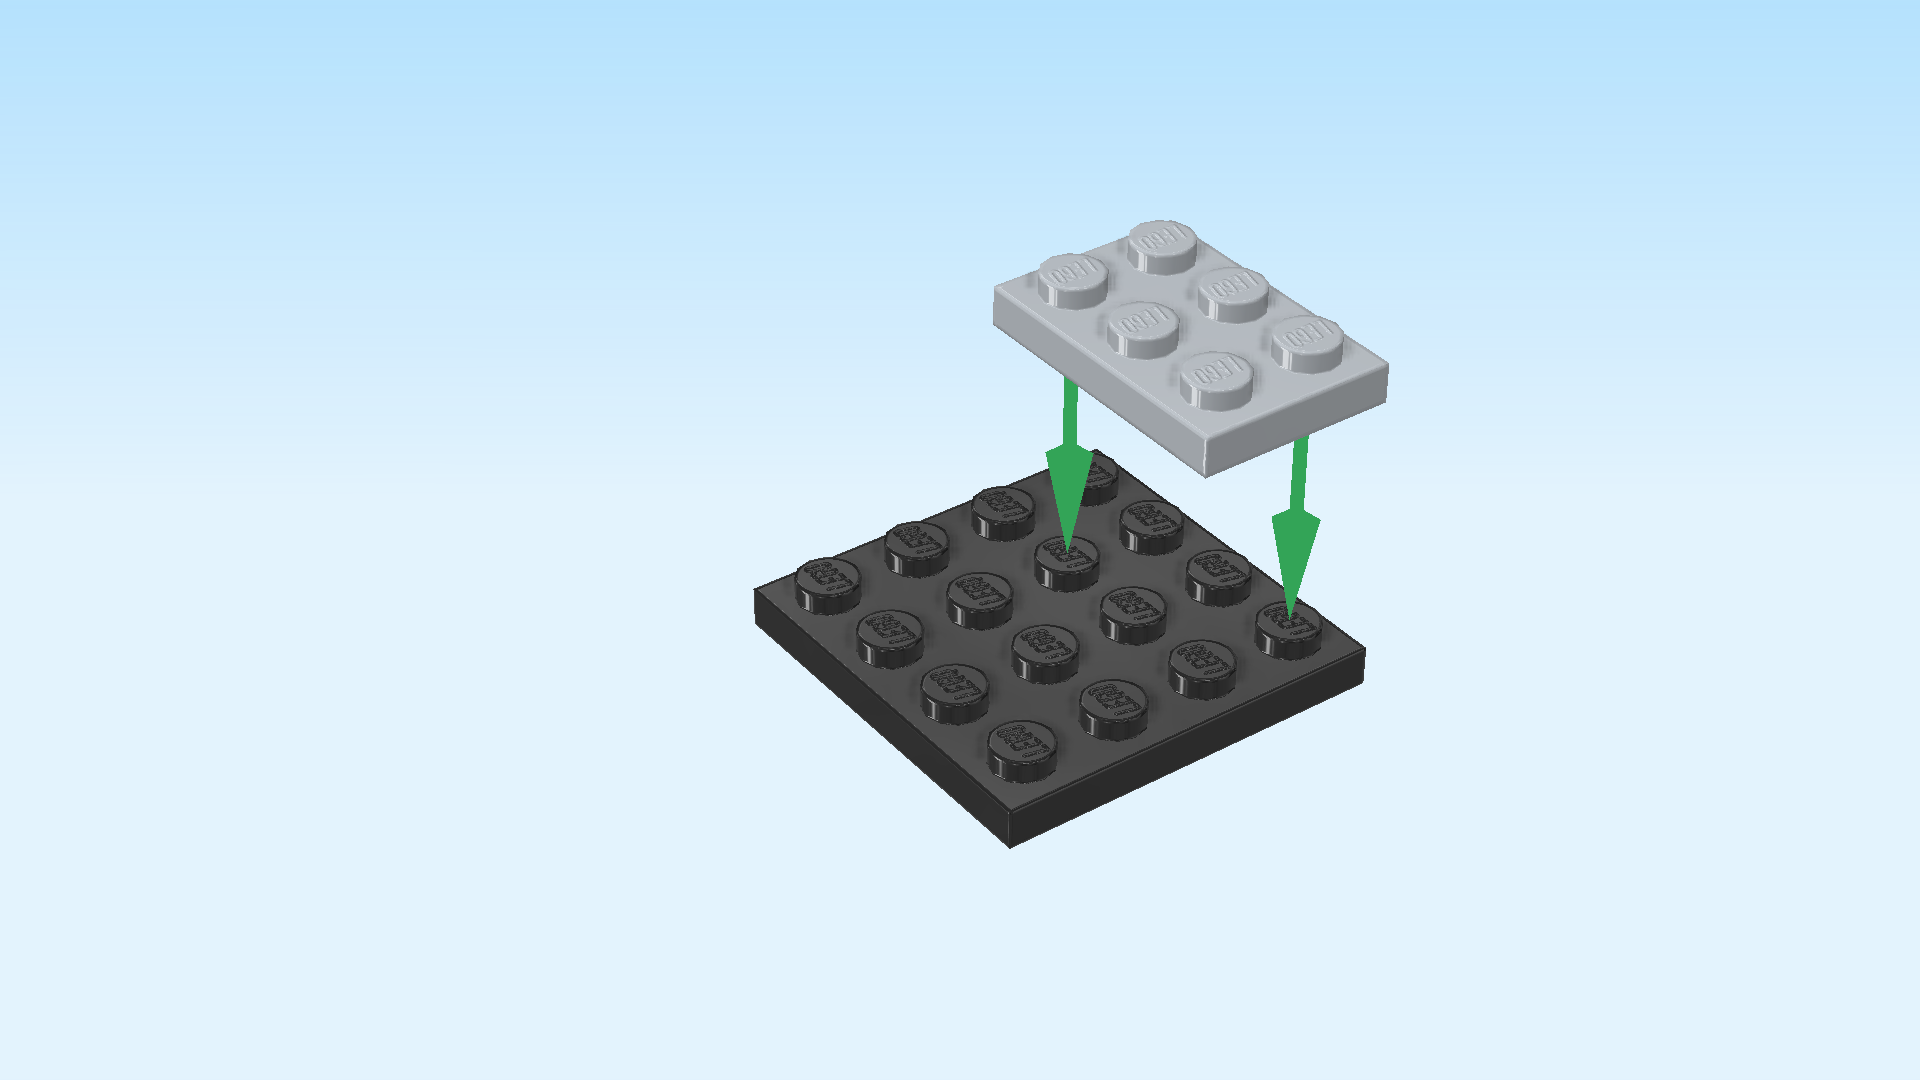
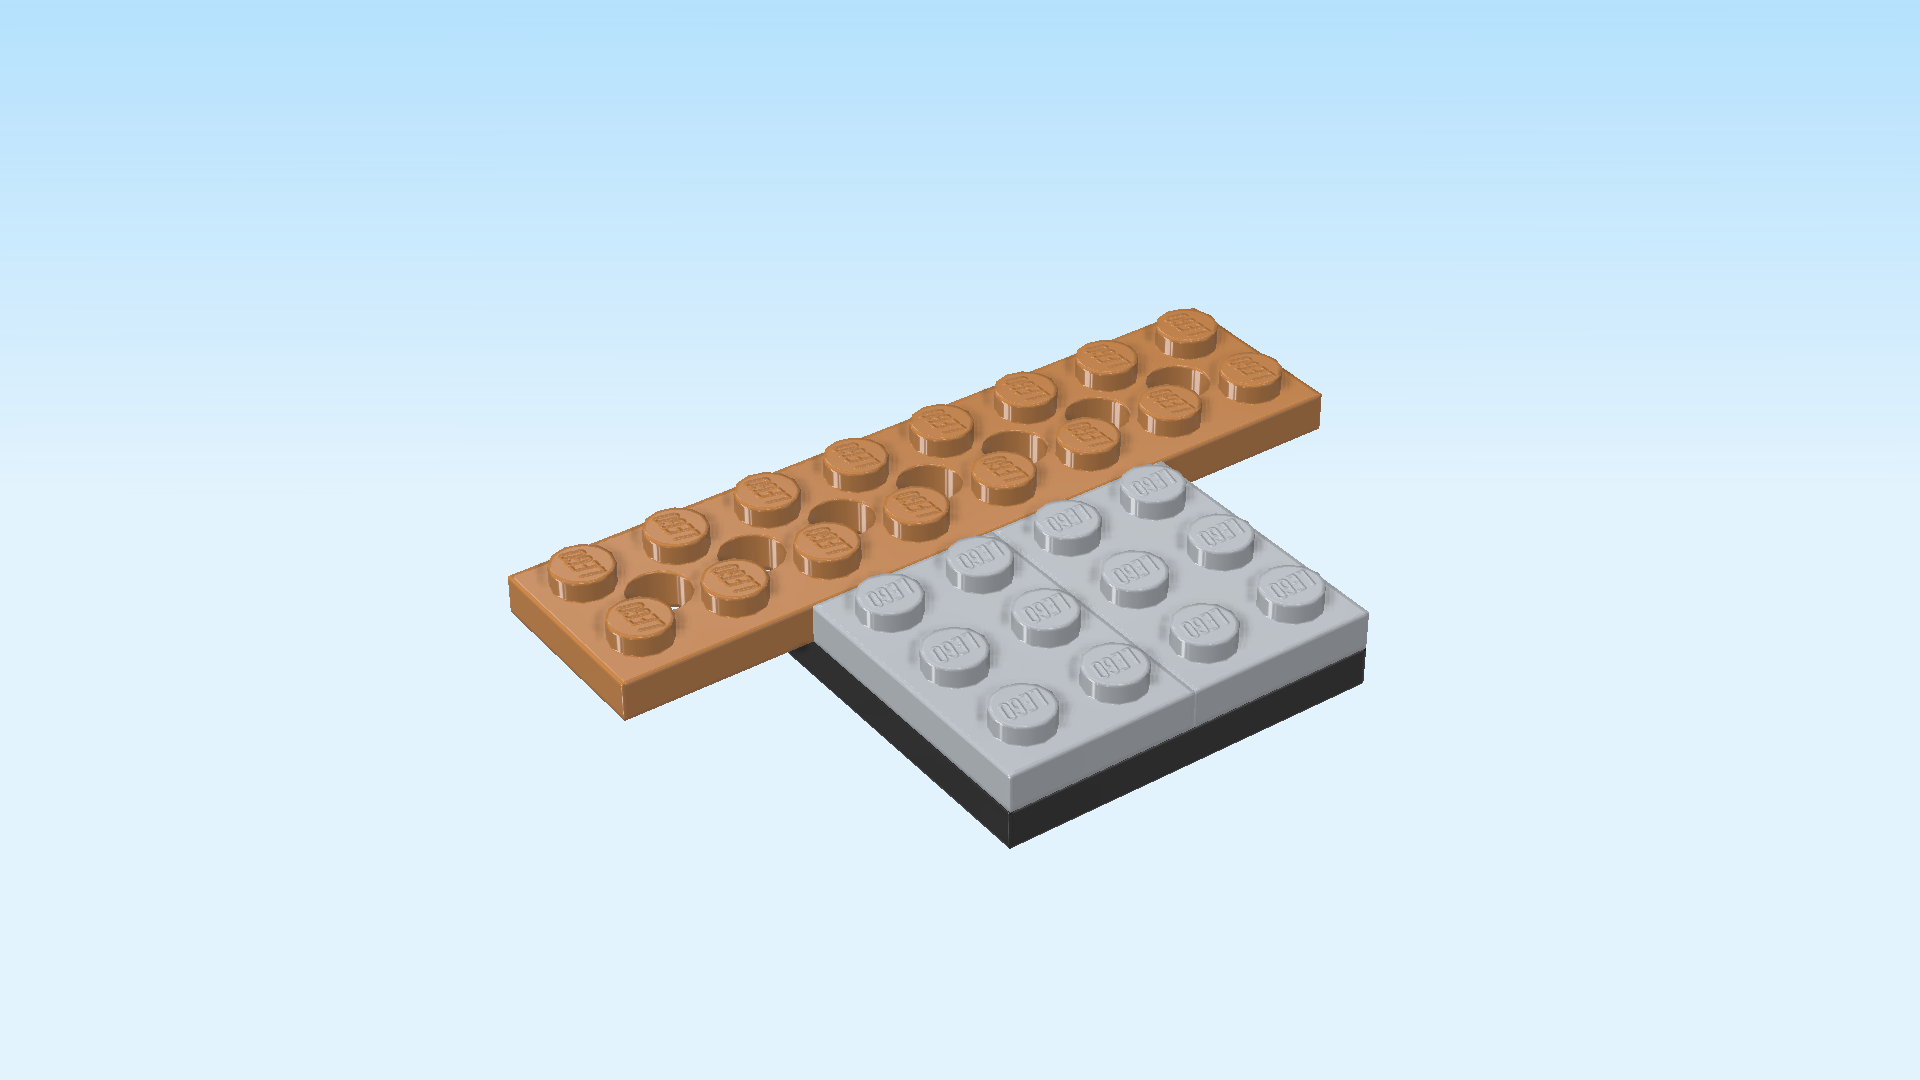
| Put the plate 4x4 on the table. |
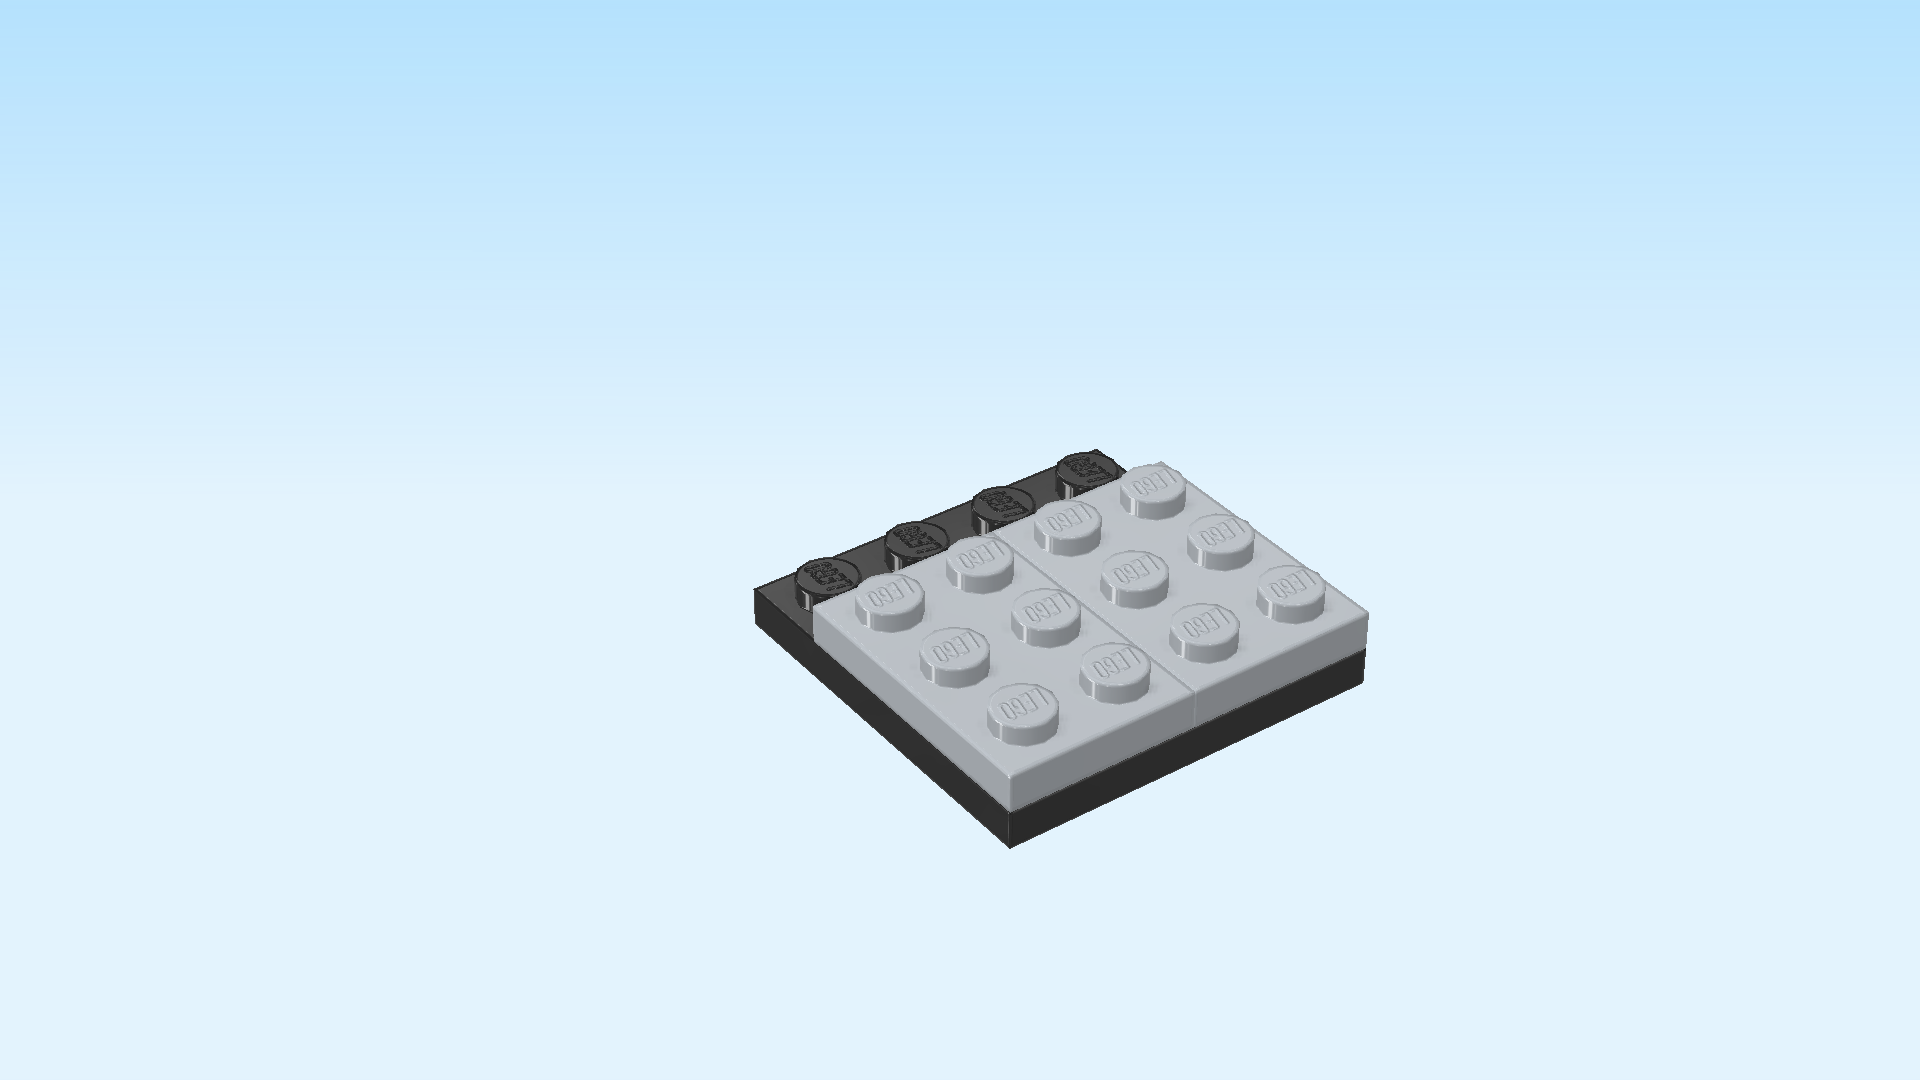
| Put the plate 2x3 vertically on the 2 rightmost columns, starting from the front. |
| Find 1 medium stone grey plate 2x3. |
| Put it vertically to the left of the previous piece. If done correctly, the back row is still empty. |
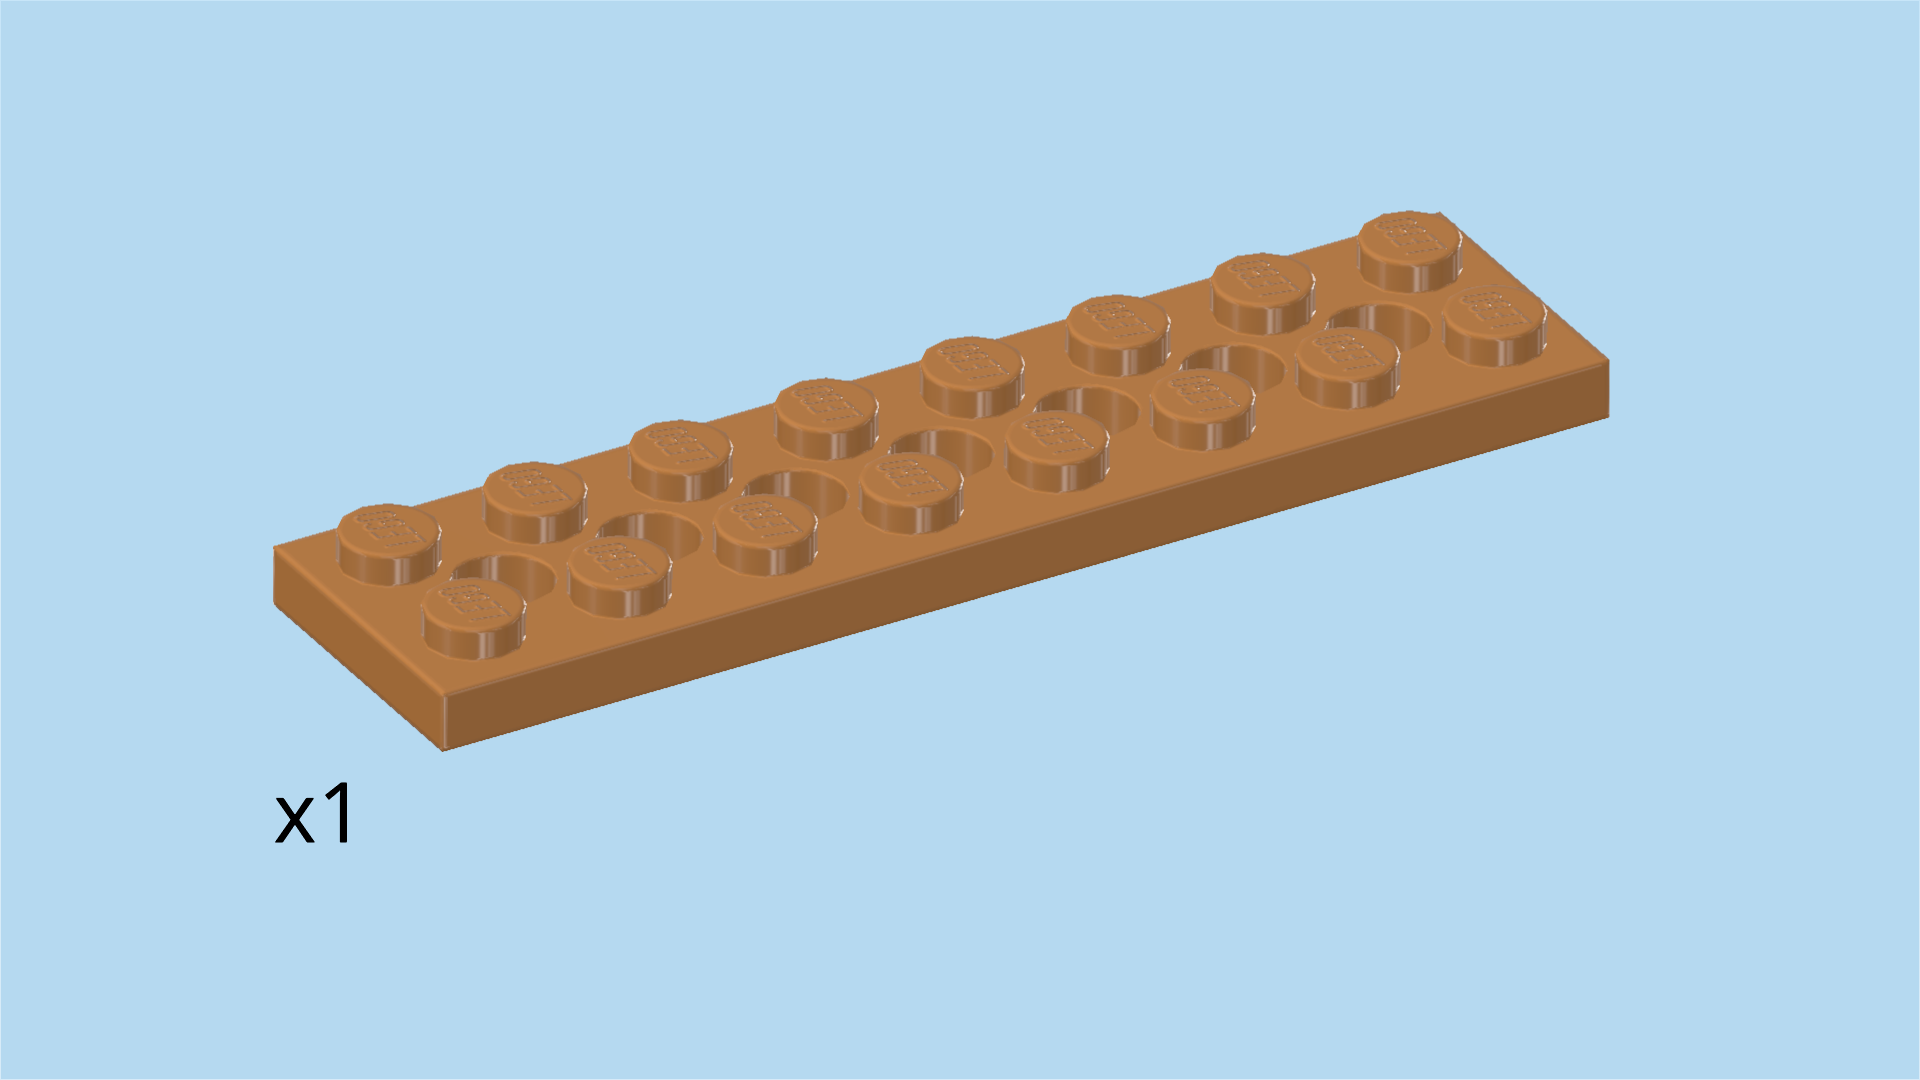
| Find 1 medium nougat brown plate 2x8 with 7 holes. |
| Put it horizontally behind the 2 previous pieces, symmetrically overhanging to the left and right, 1 row overhanging to the back. |
| Attention: keep the base strutting in the building orientation, do not flip it upside down. |
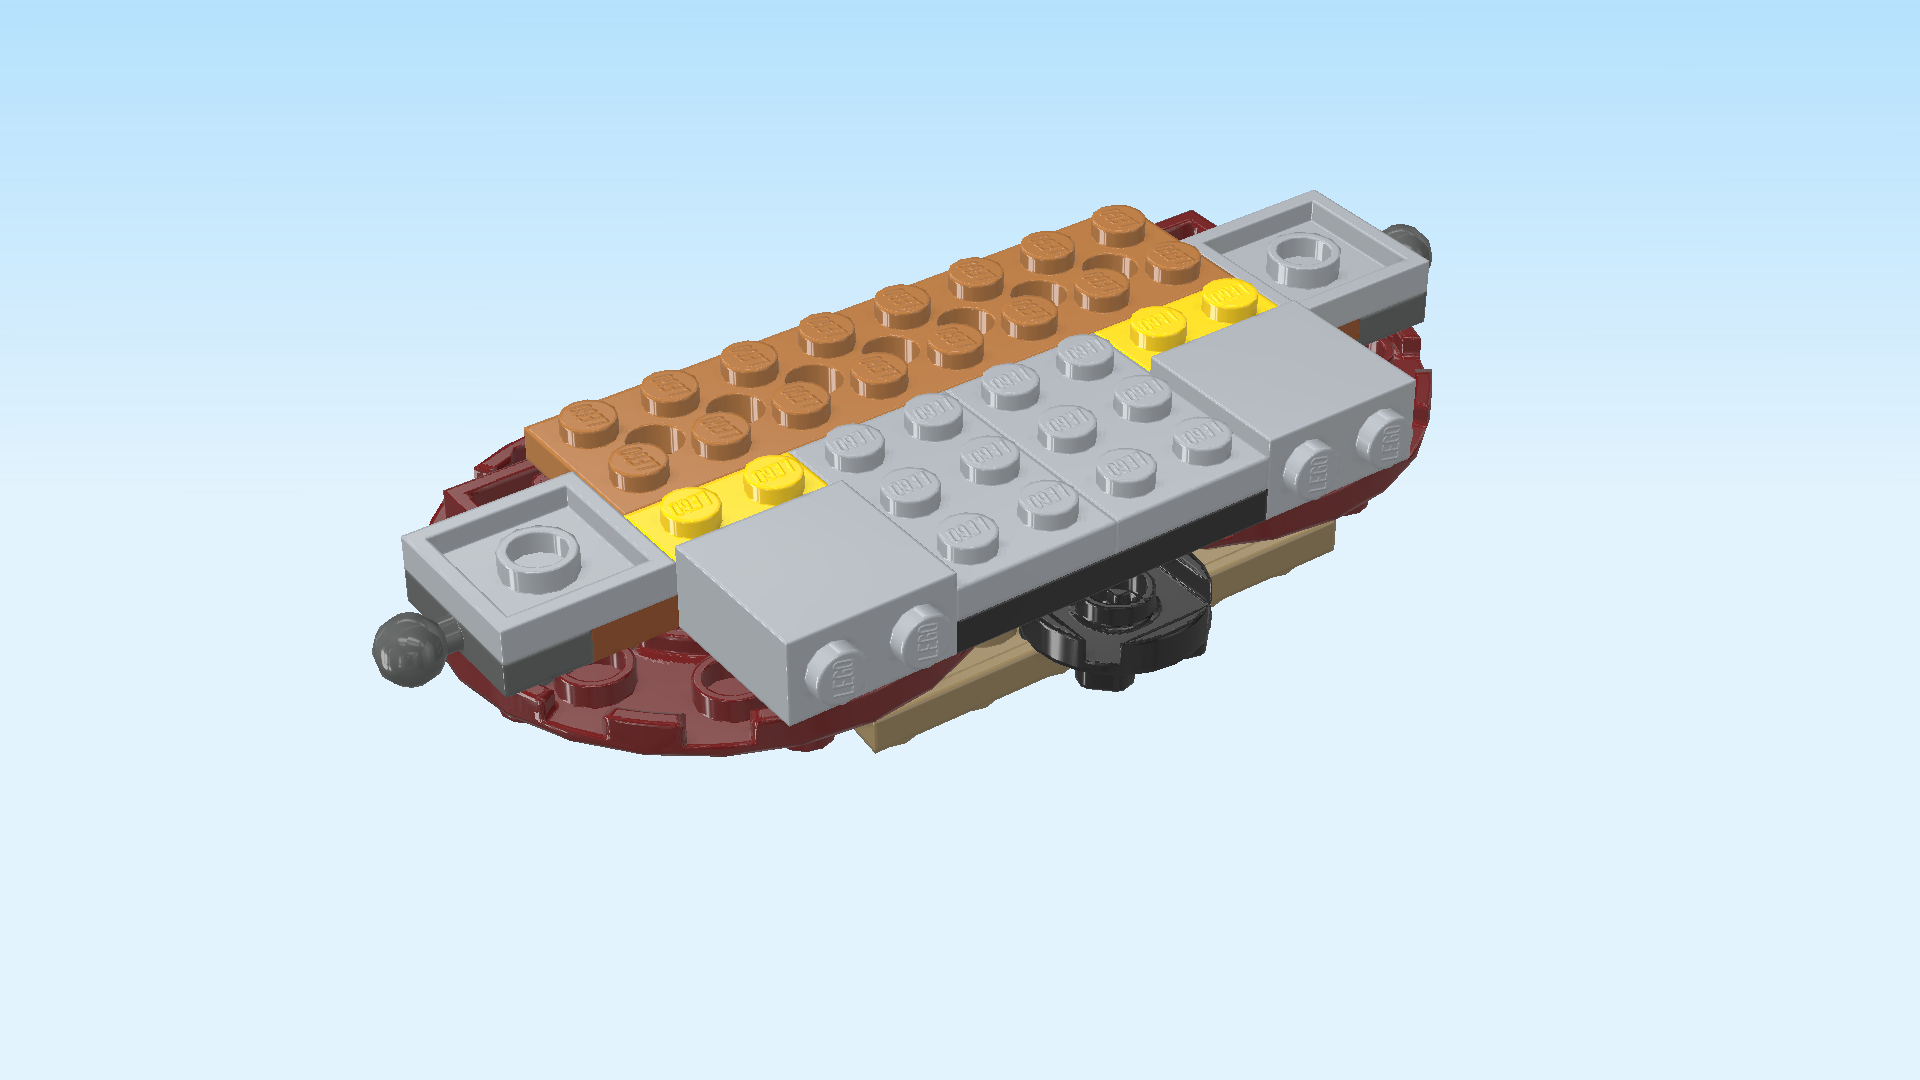
| Mount the base strutting by inserting the front part with the 2 plates 2x3 between the 2 previously mounted sub-parts. The front row of the plate 2x8 connects with the back rows of the 2 one-stepped plates 2x2 on the left and right edge. |
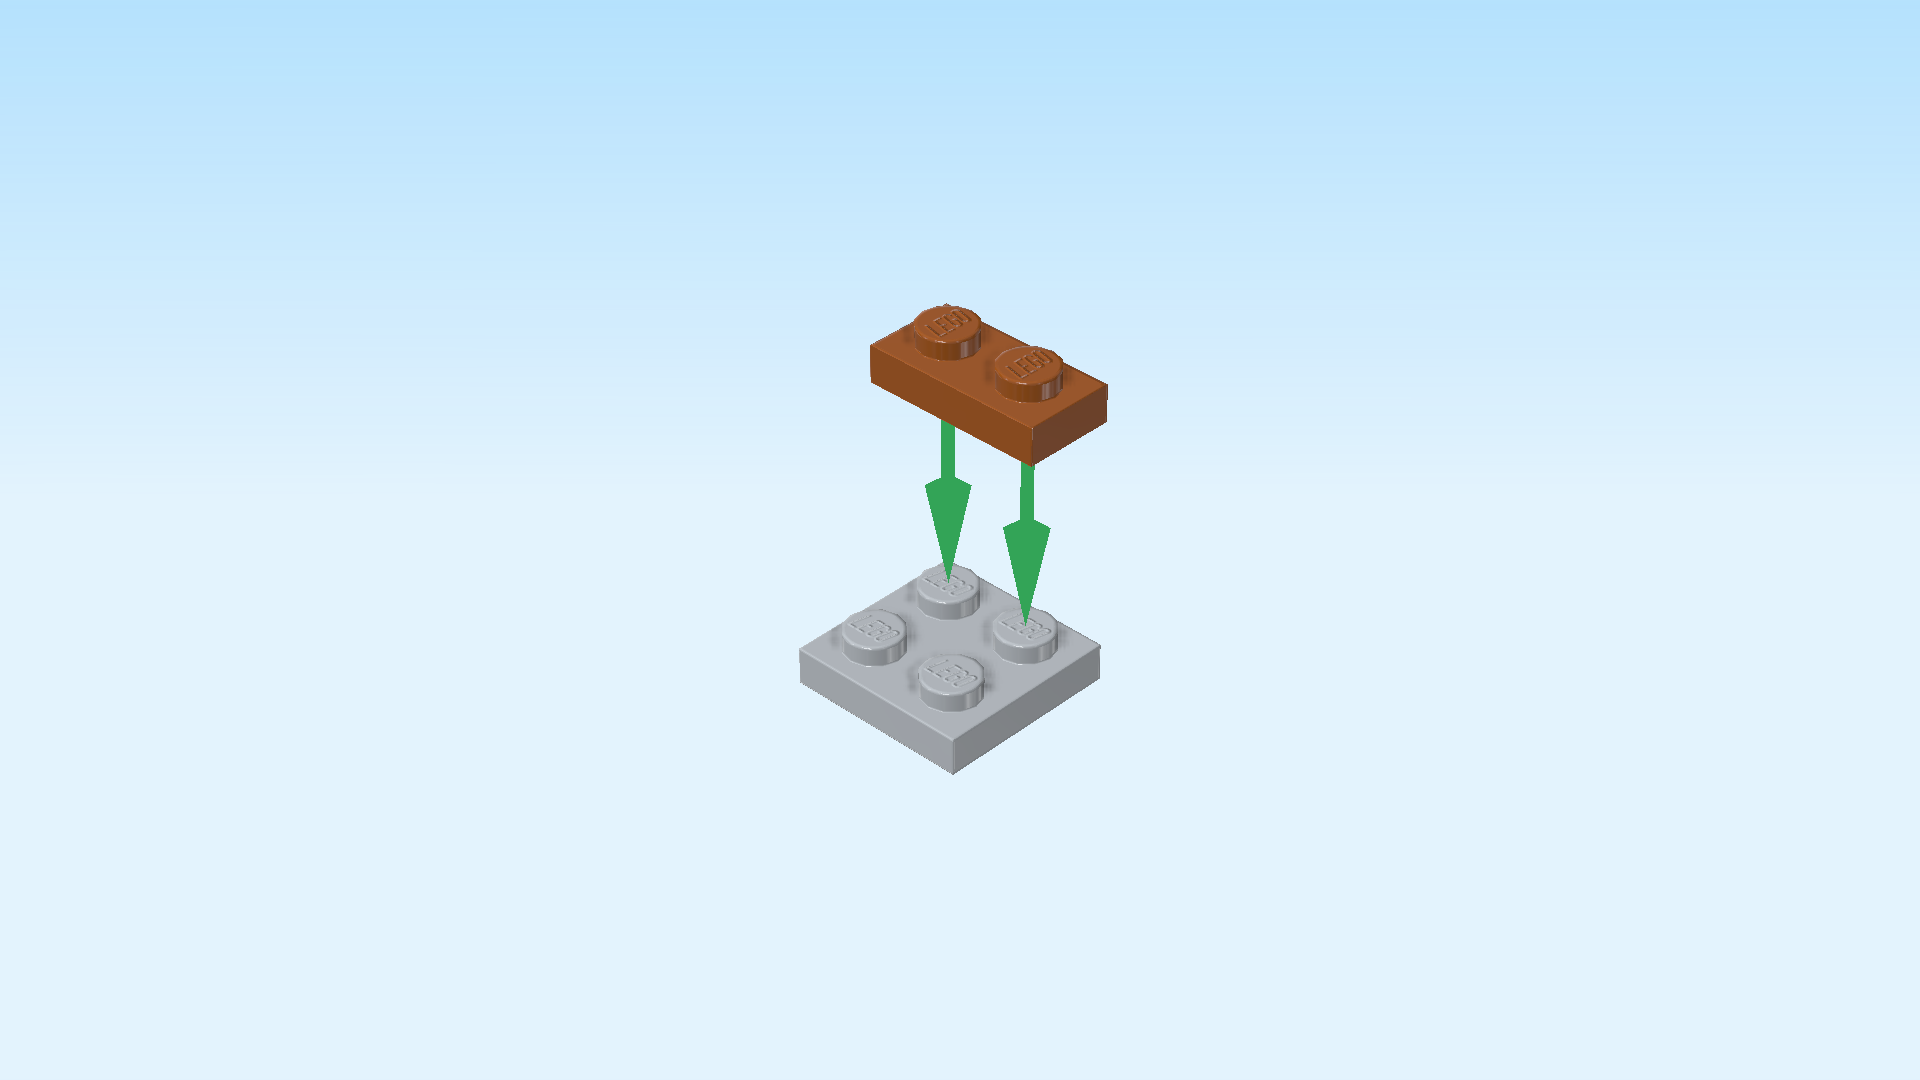
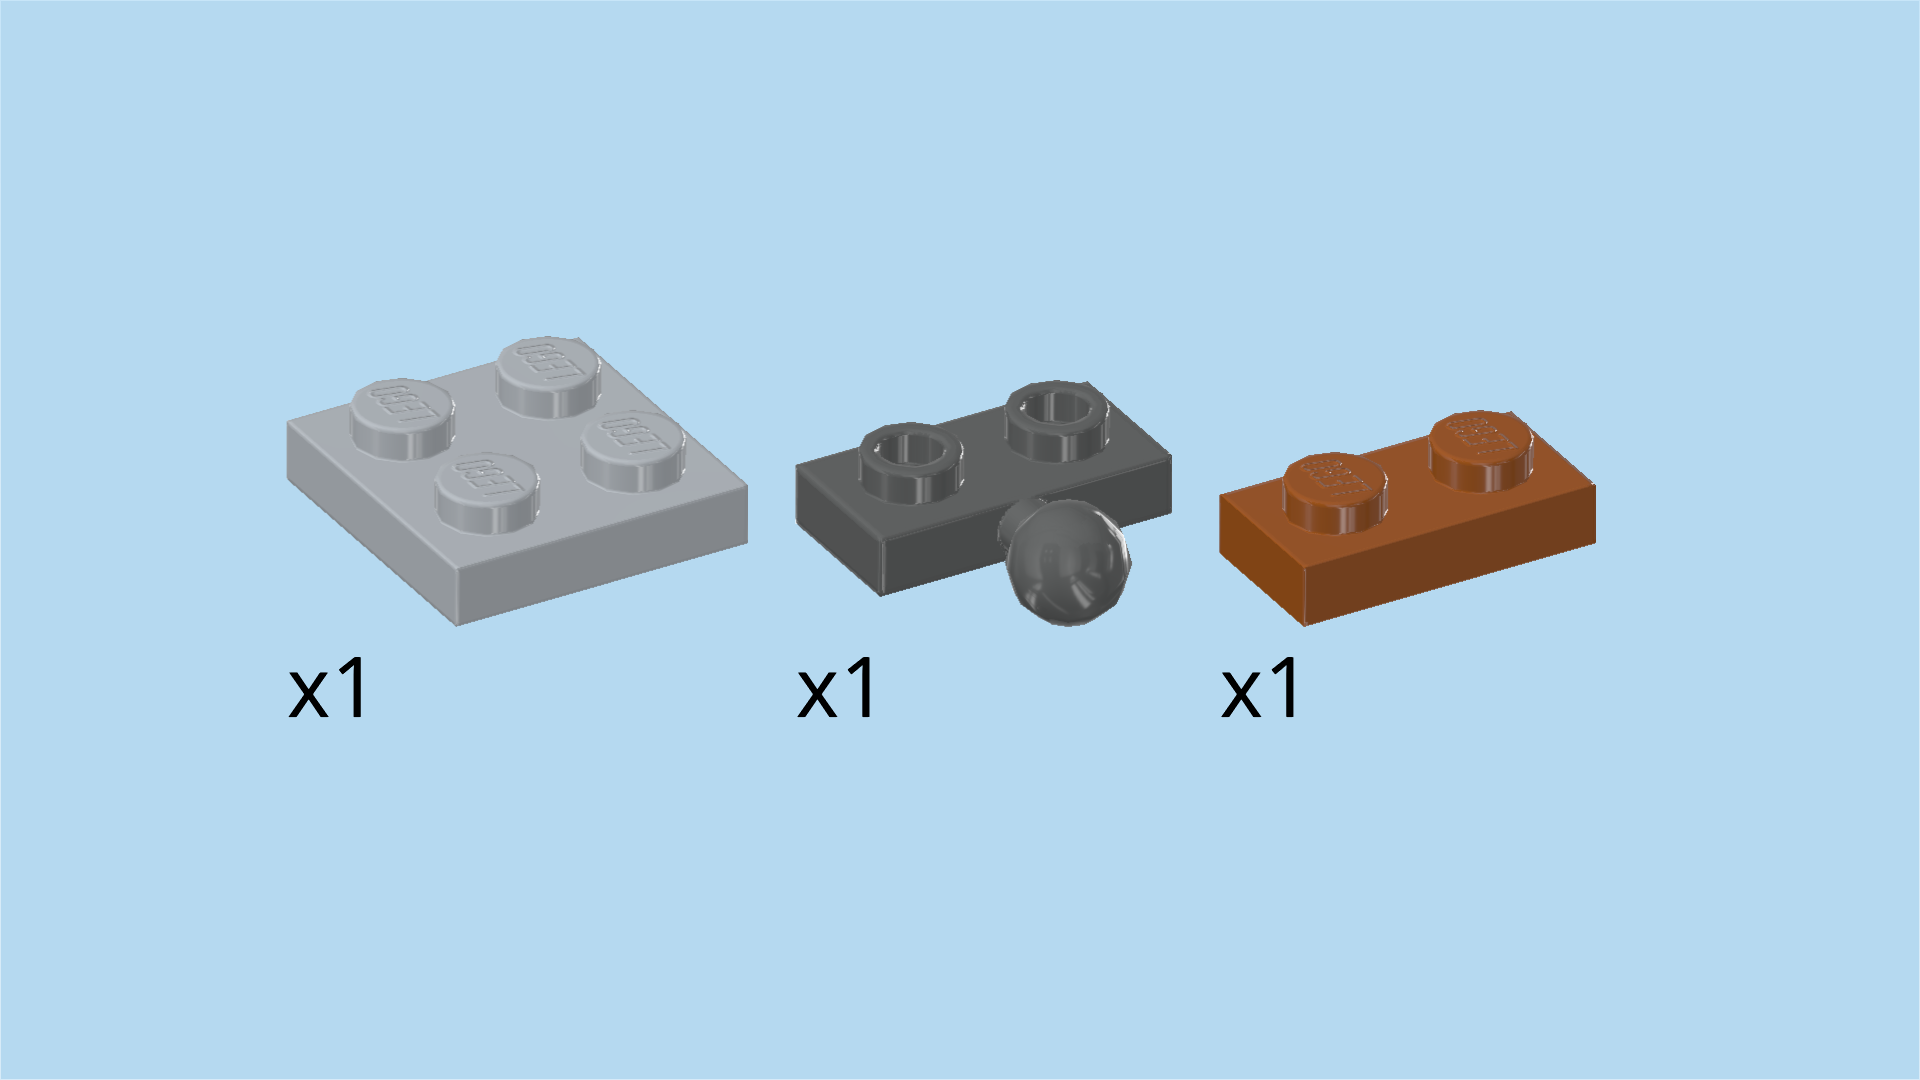
| Now, we will build 2 mounts for the pectoral fins. |
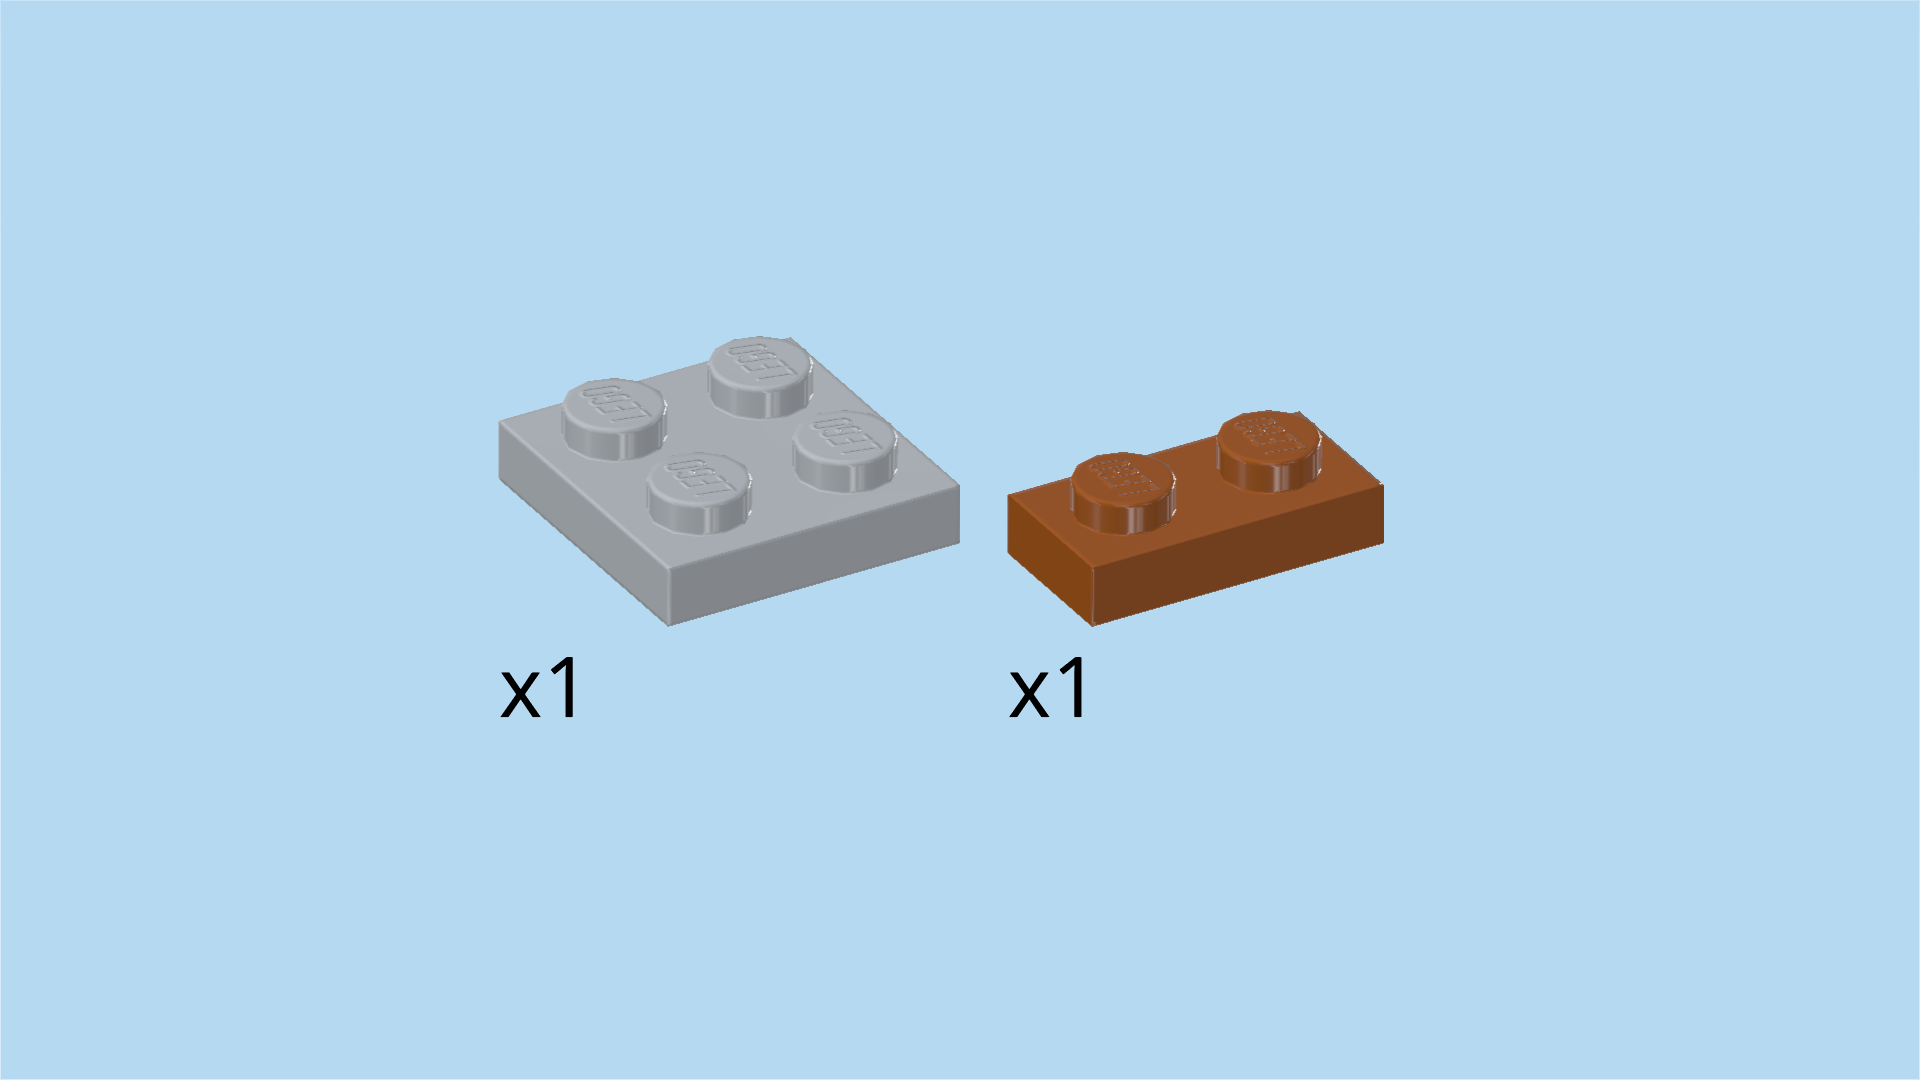
| Collect the following 2 pieces: |
| 1 medium stone grey plate 2x2, |
| and 1 dark orange plate 1x2. |
| Put the plate 2x2 on the table. |
| Put the plate 1x2 vertically on the right column. |
| Find 1 dark stone grey plate 1x2 with ball on long side. |
| Put it vertically on the left column, ball to the left. |
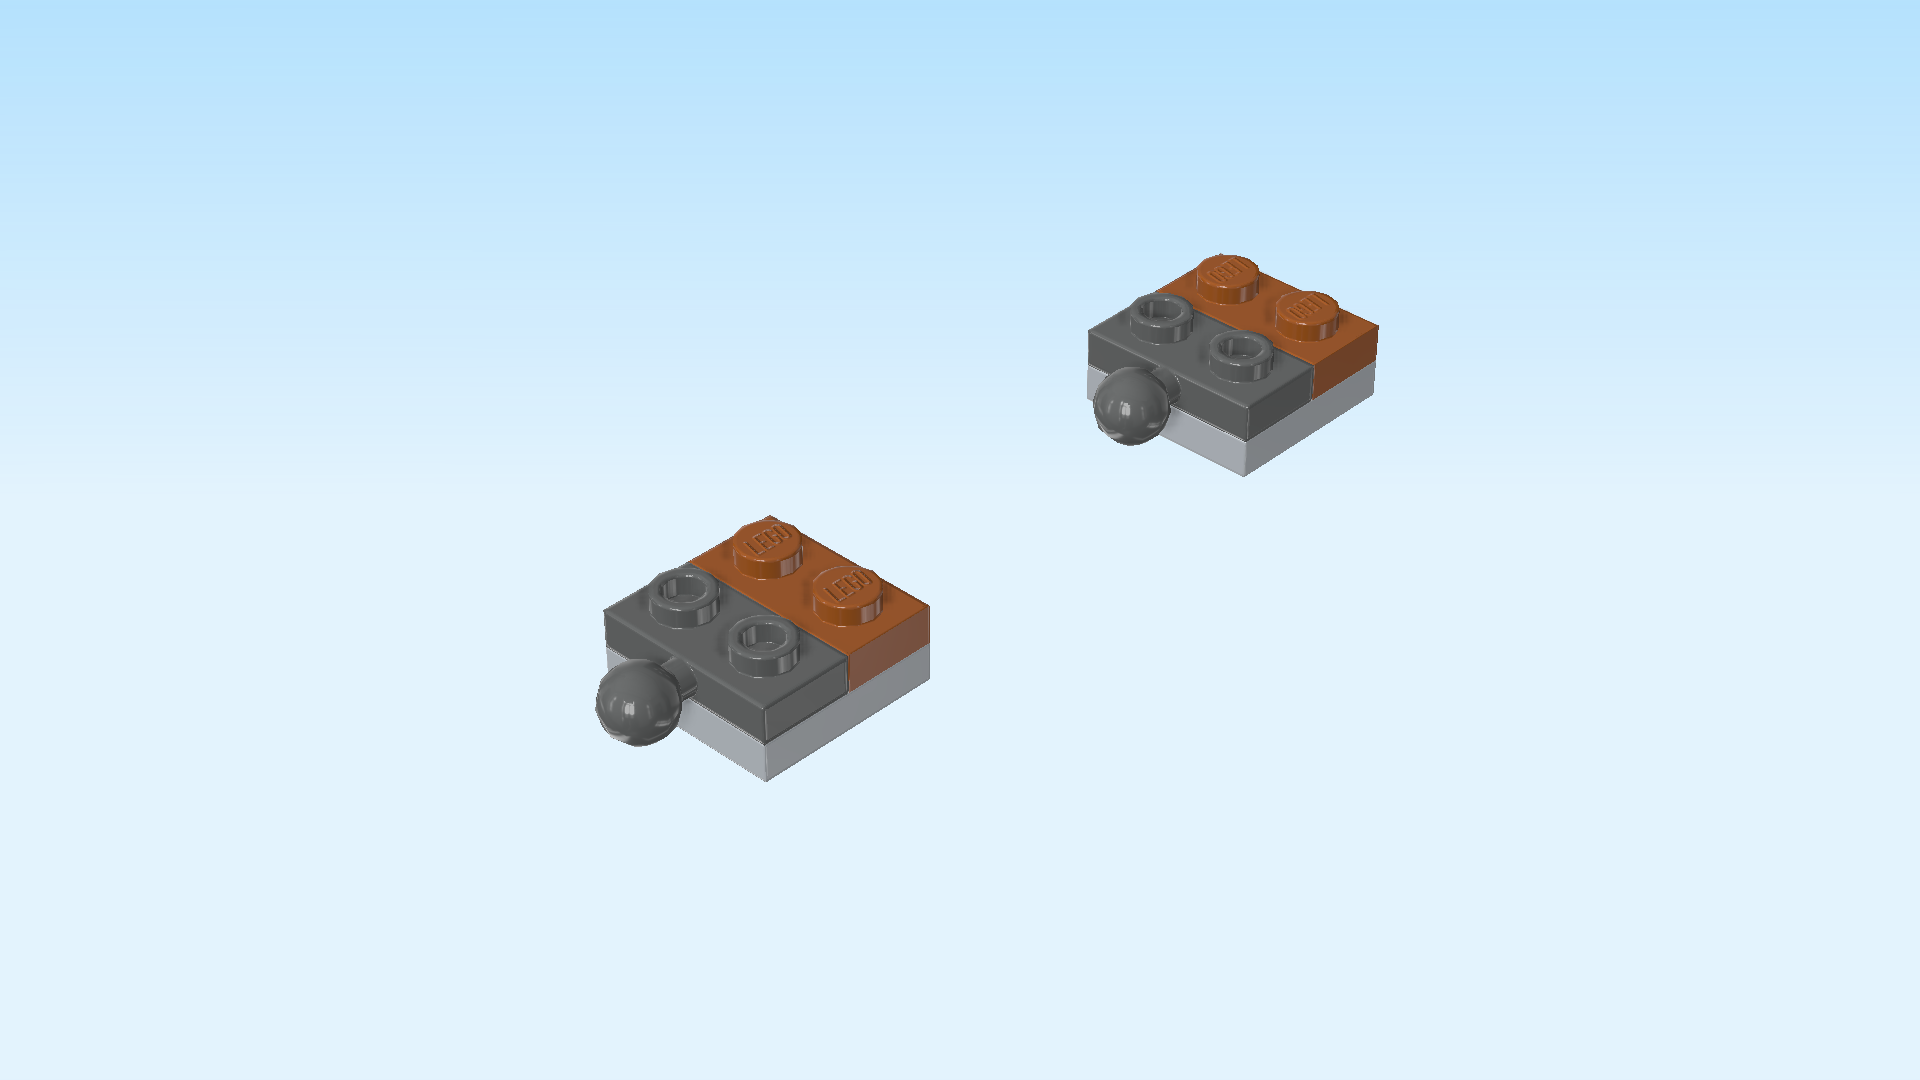
| Collect the following 3 pieces: |
| 1 medium stone grey plate 2x2, |
| 1 dark stone grey plate 1x2 with ball on long side, |
| and 1 dark orange plate 1x2. |
| Repeat the previous steps: put the plate 2x2 on the table, put the plate 1x2 vertically on the right column, and the plate with ball vertically on the left column, ball to the left. |
| The 2 pectoral fin mounts are finished! Flip 1 upside down, ball to the left, and mount it centered on the left edge of the structure, ball overhanging to the left. |
| Flip the other mount upside down, ball to the right, and mount it centered on the right edge of the structure, ball overhanging to the right. |
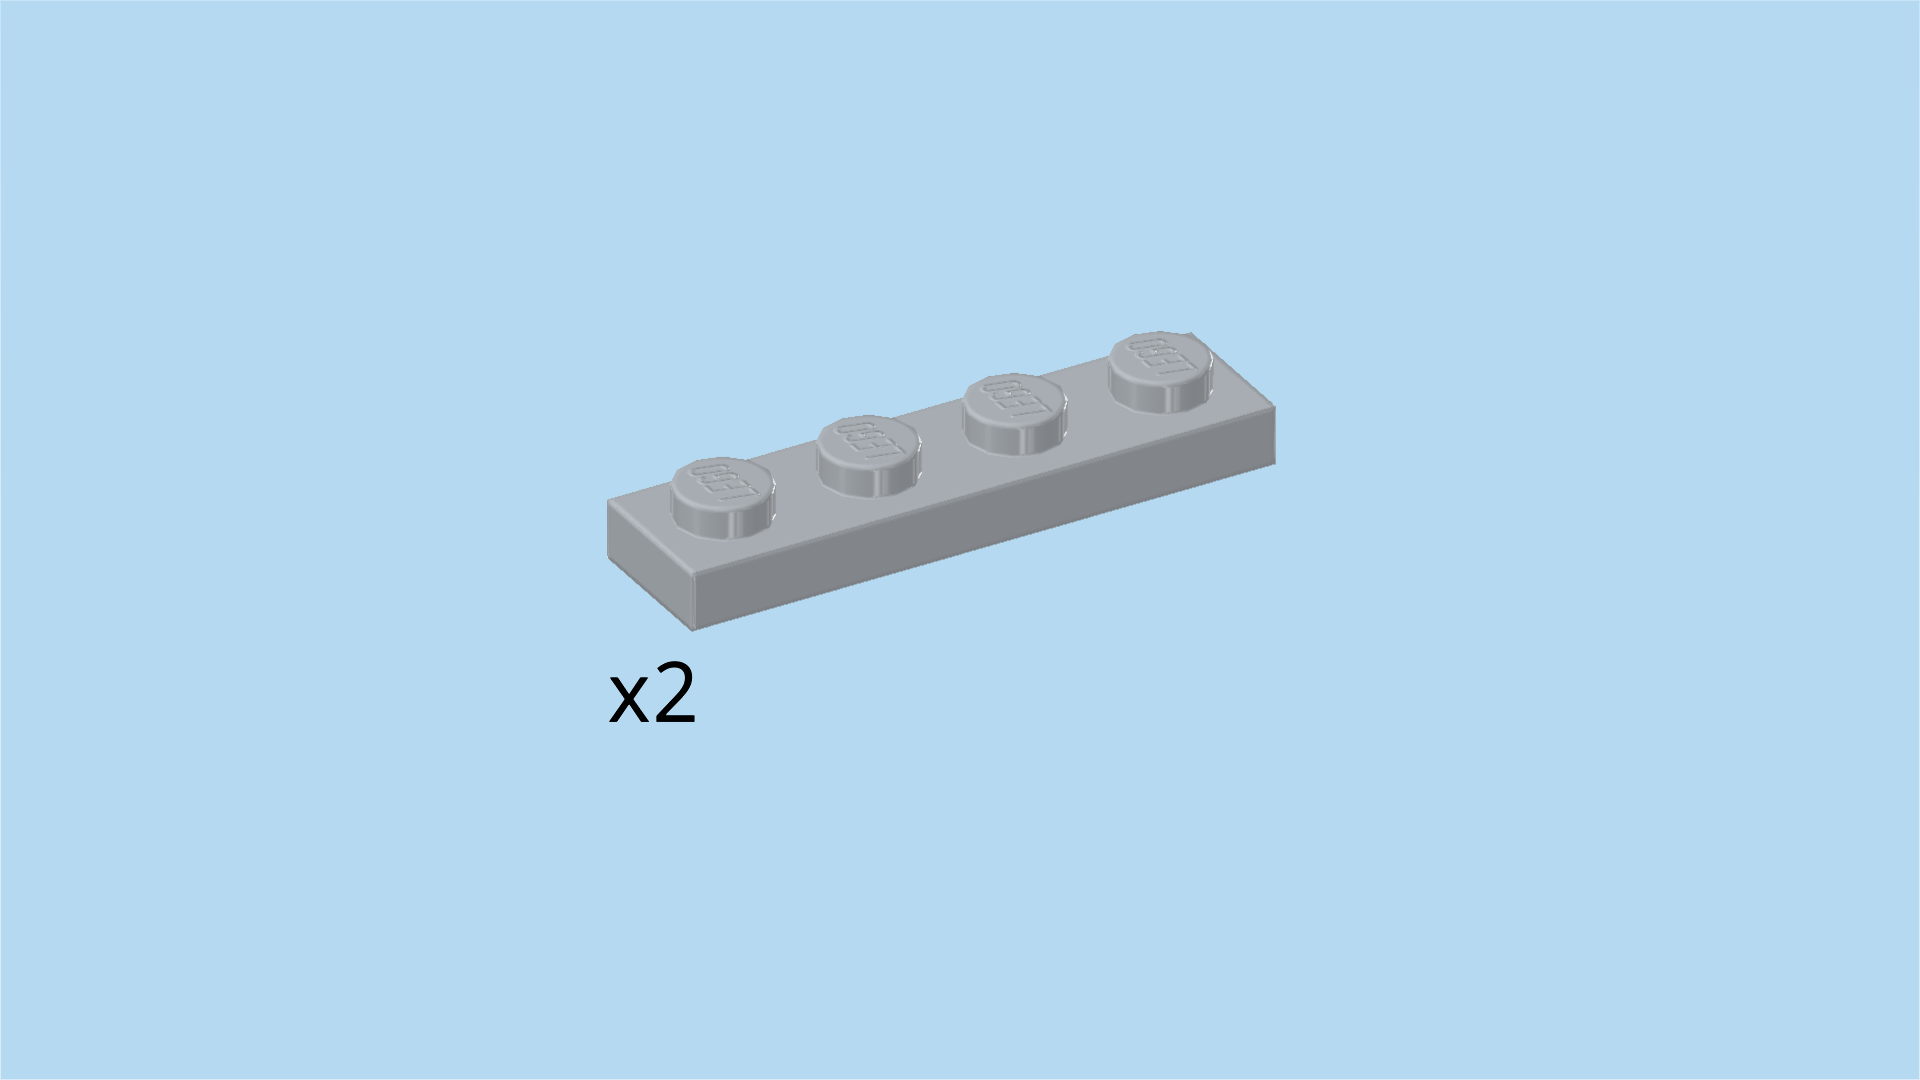
| Find 2 medium stone grey plates 1x4. |
| Flip 1 upside down and turn it vertically. |
| Mount it centered on the back edge of the left round plate 6x6, 3 knobs overhanging to the back. |
| Repeat symmetrically with the other plate 1x4 on the right round plate 6x6. |
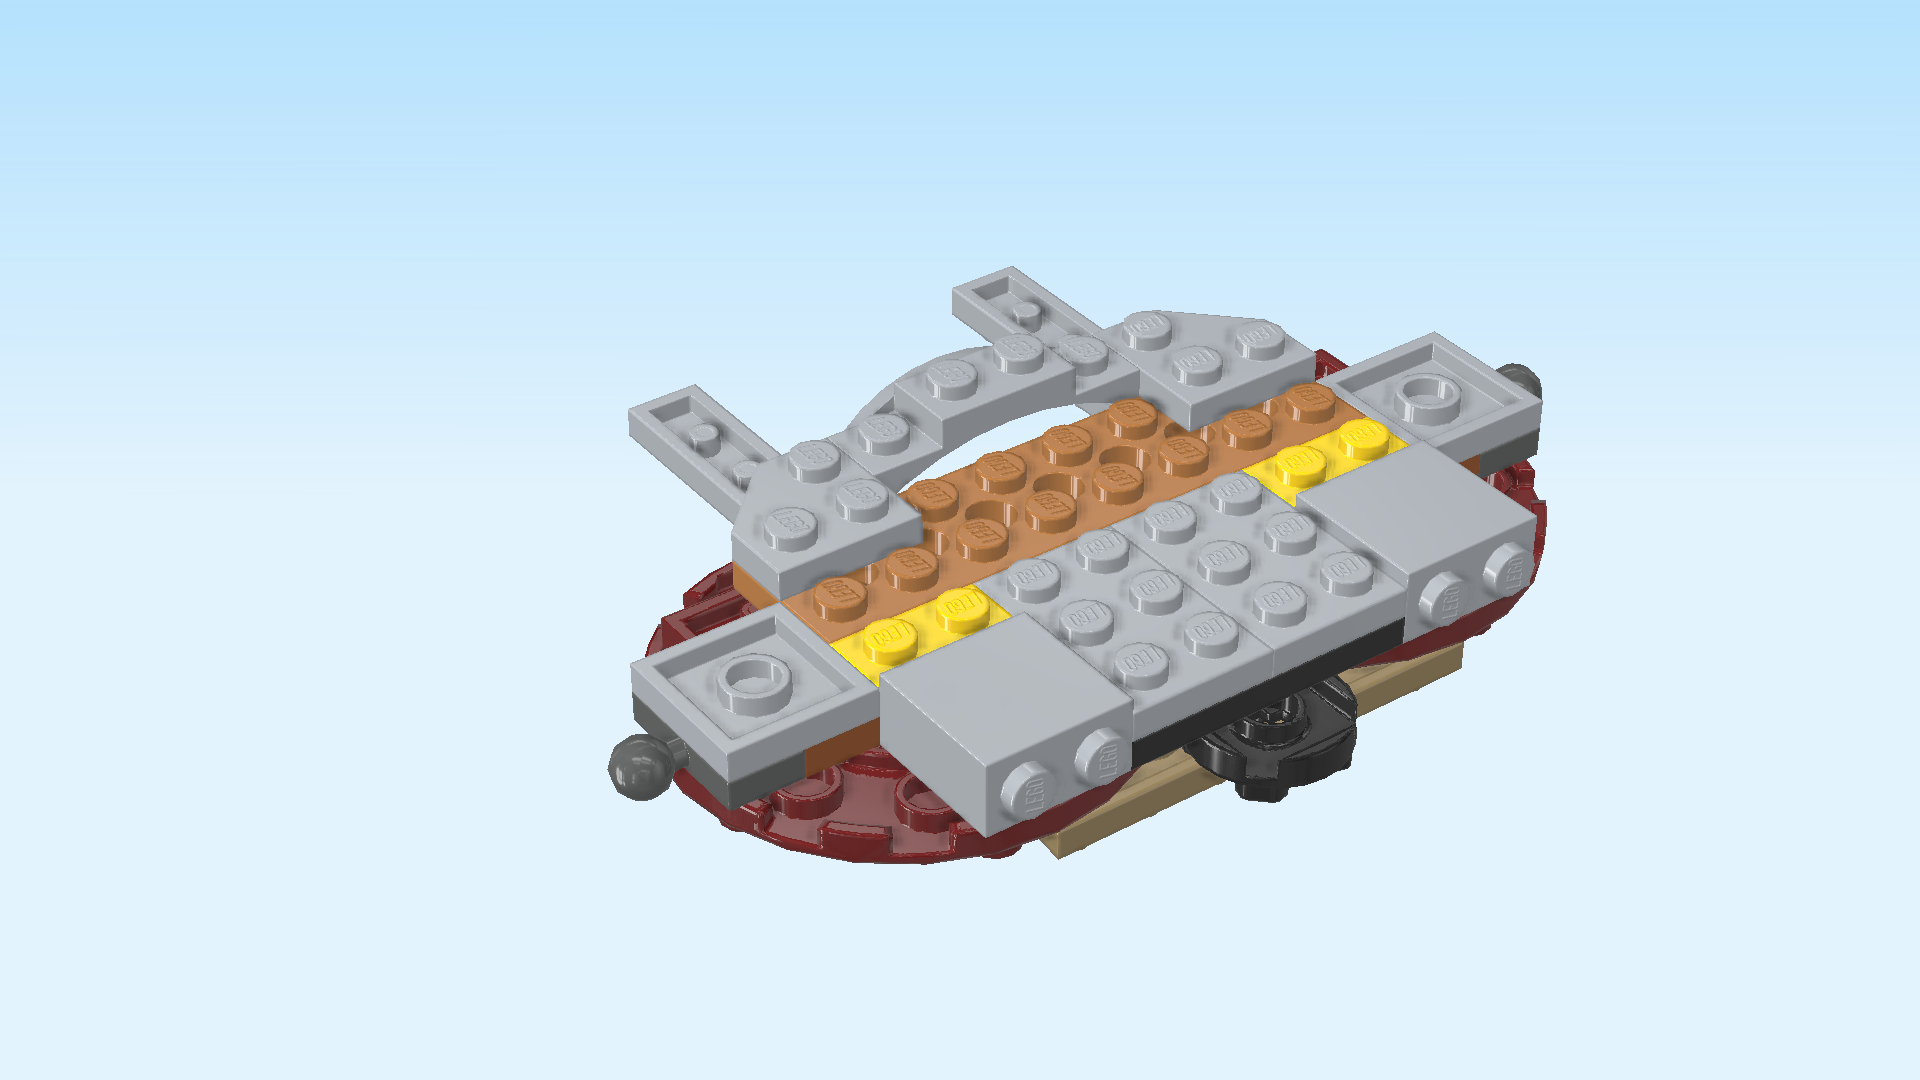
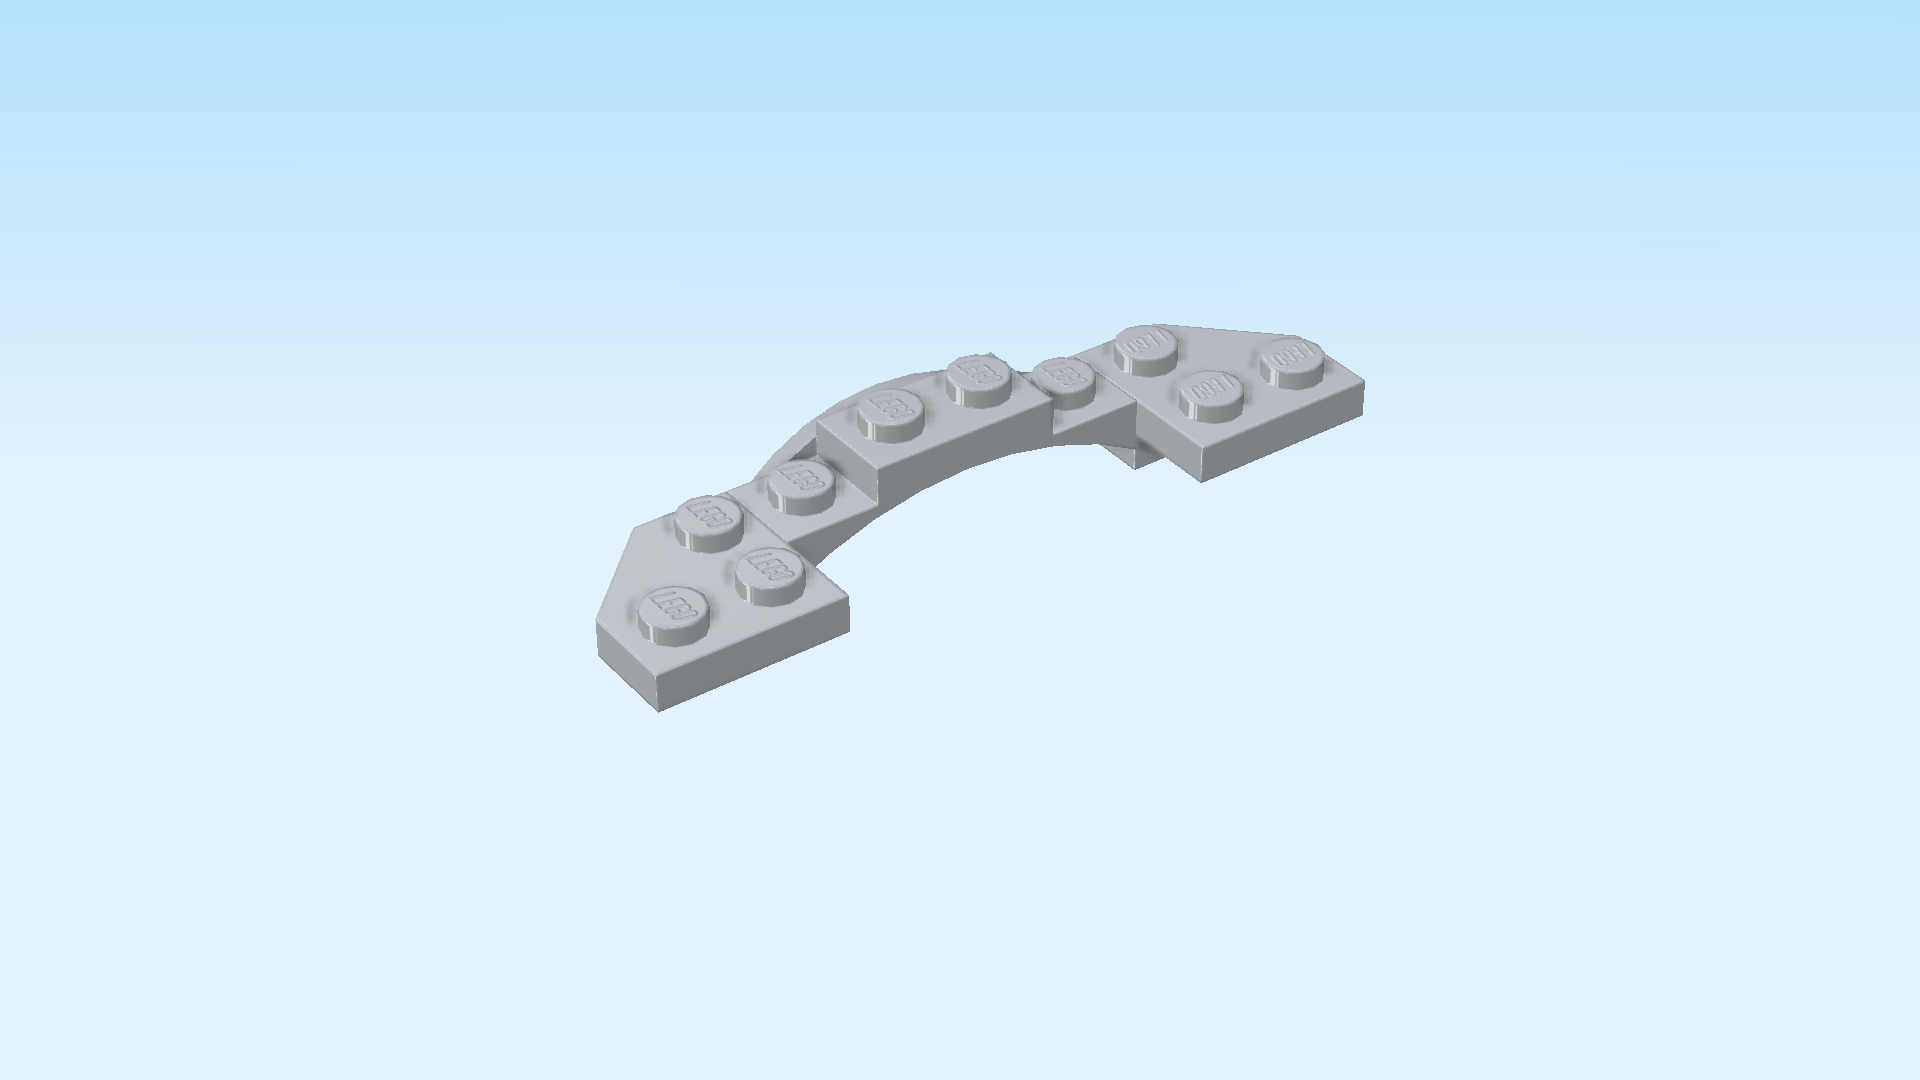
| Next, we'll build the lower lip of the manta ray. |
| Collect the following 2 pieces: |
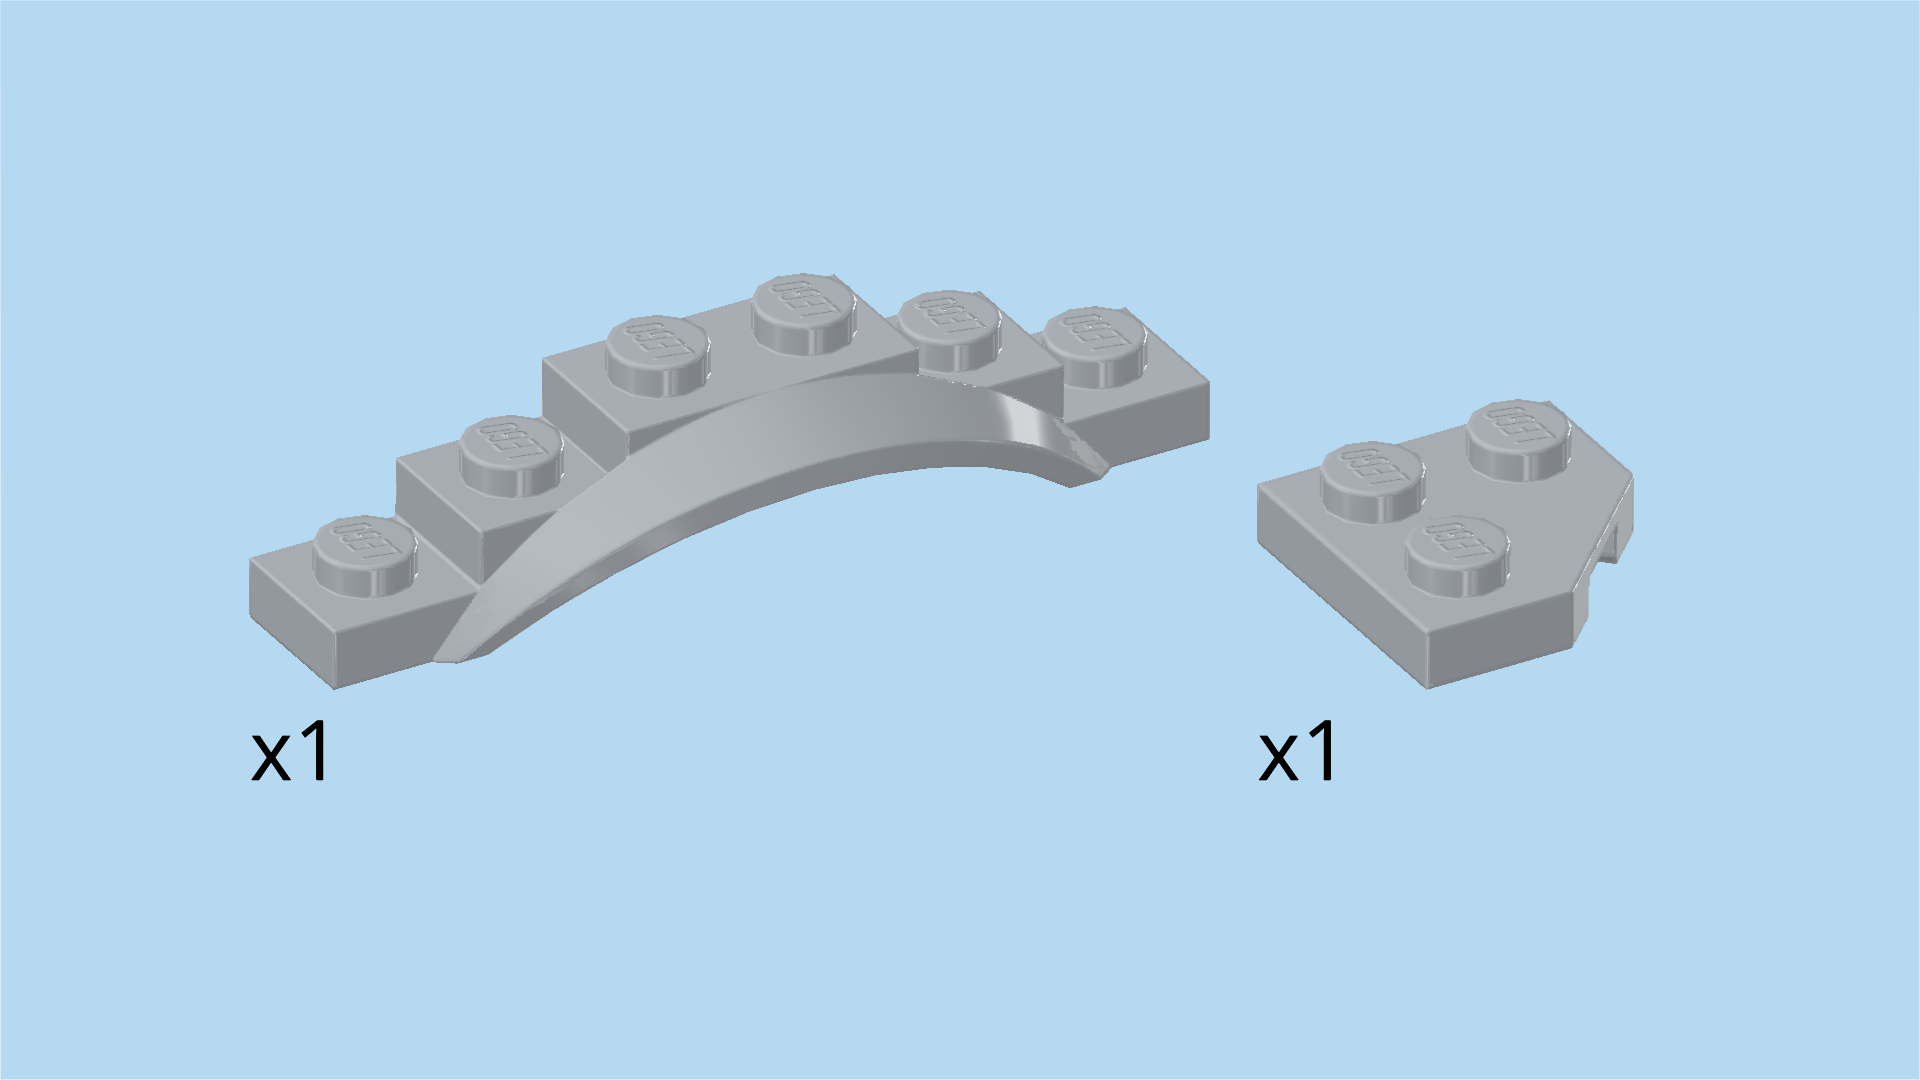
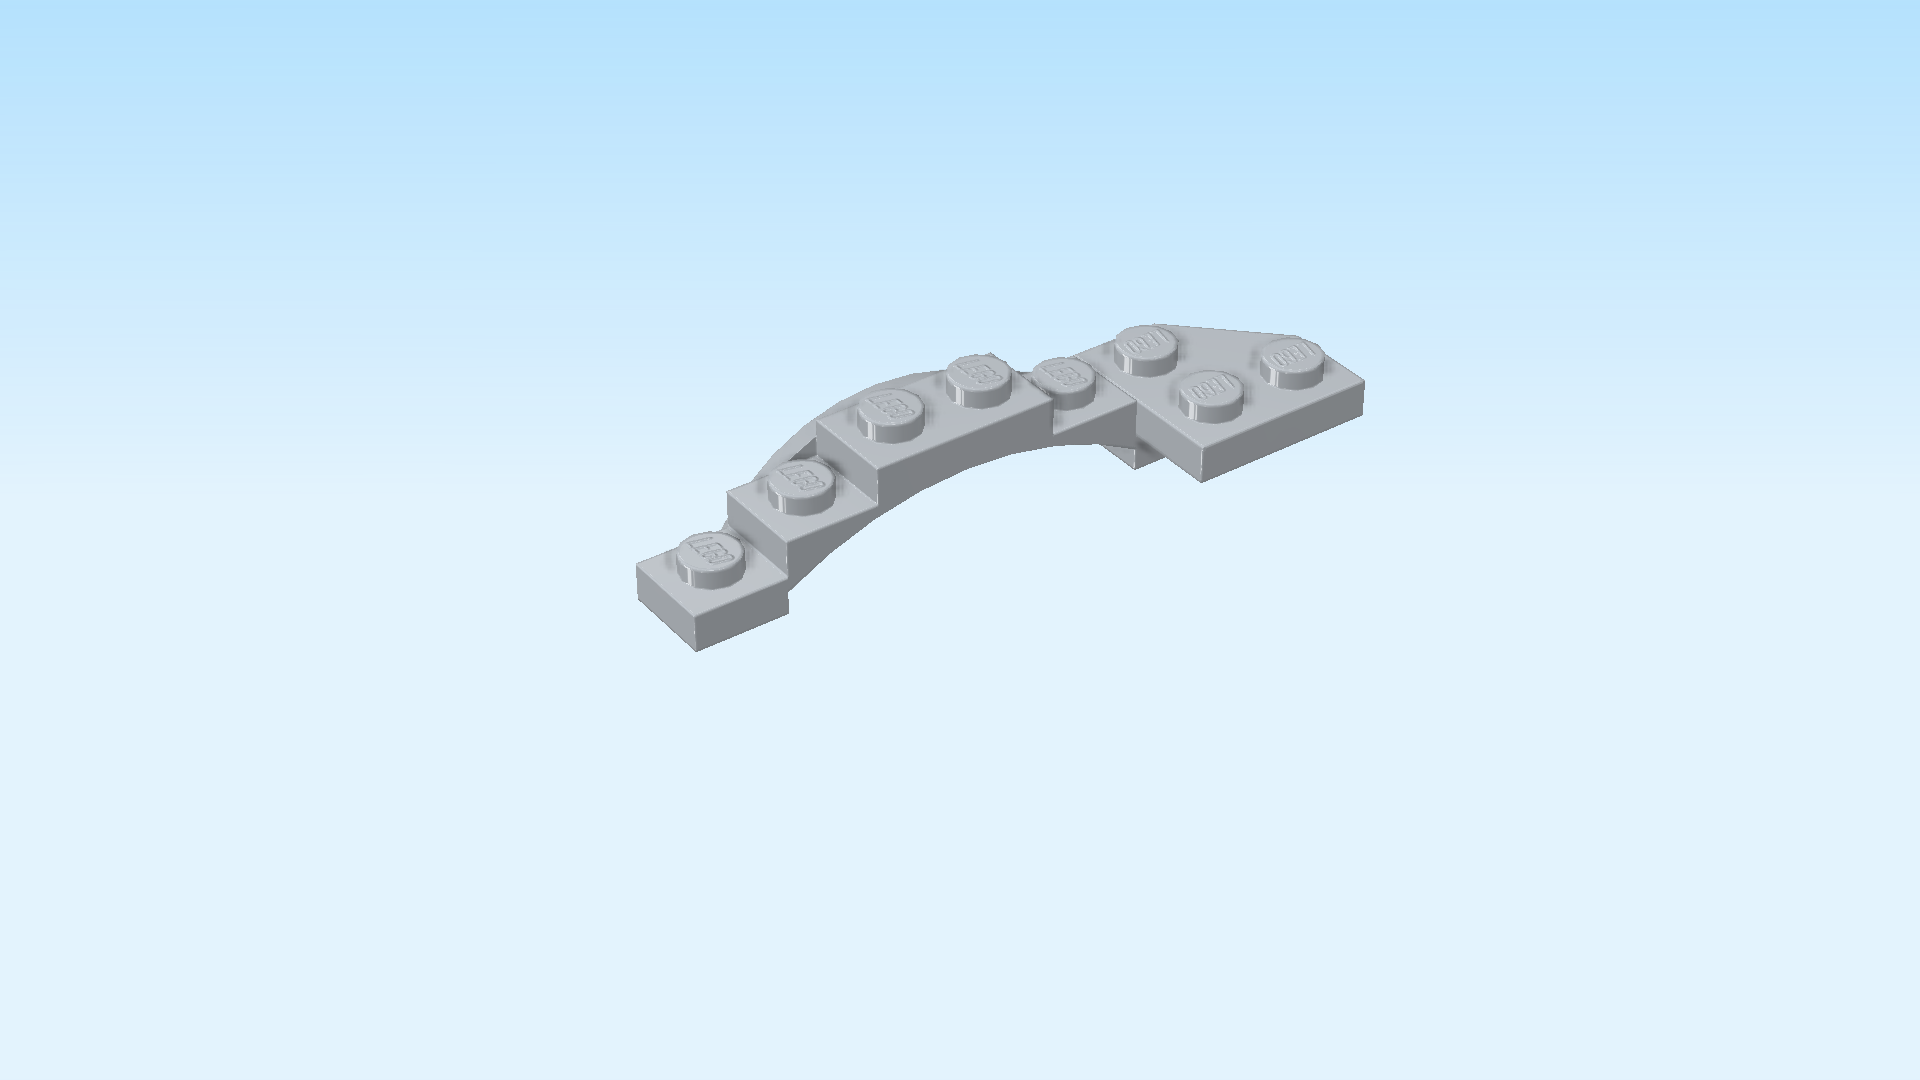
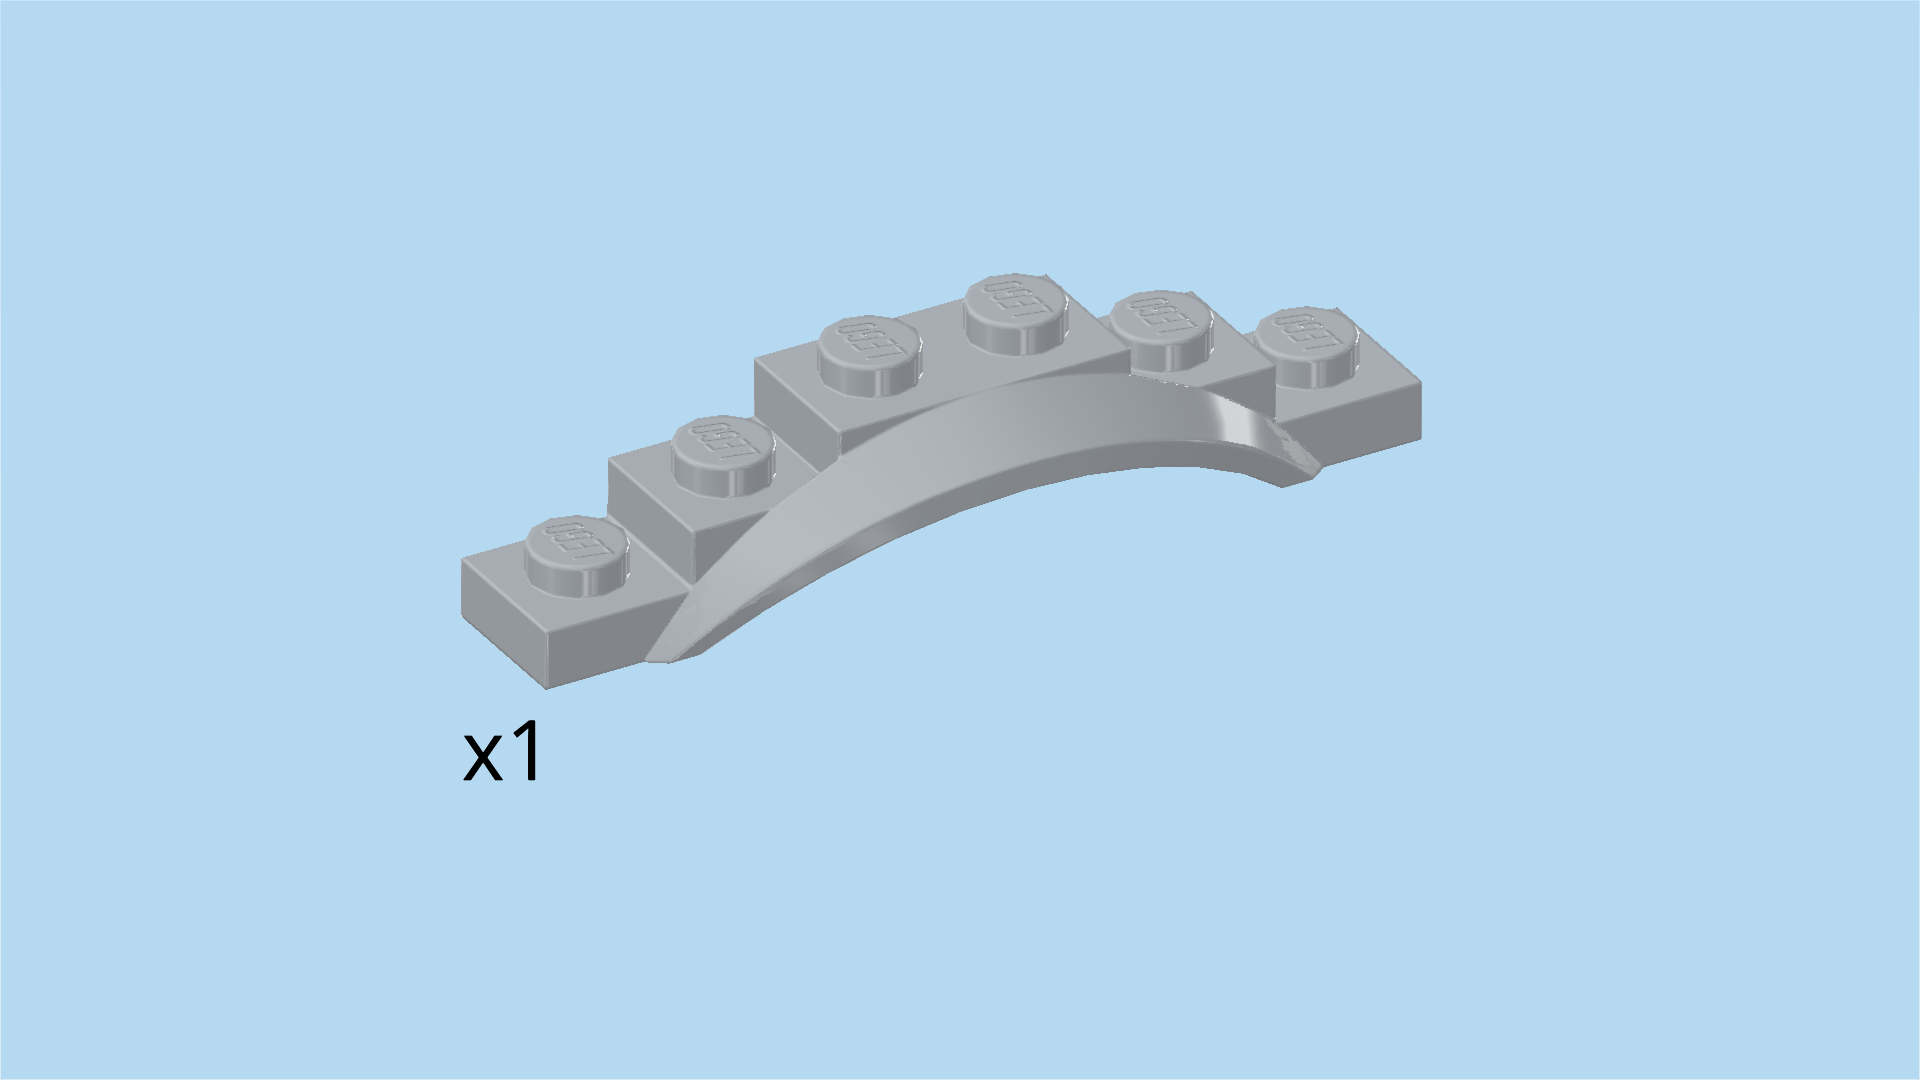
| 1 medium stone grey mudguard screen 1x6 with steps and 6 knobs, |
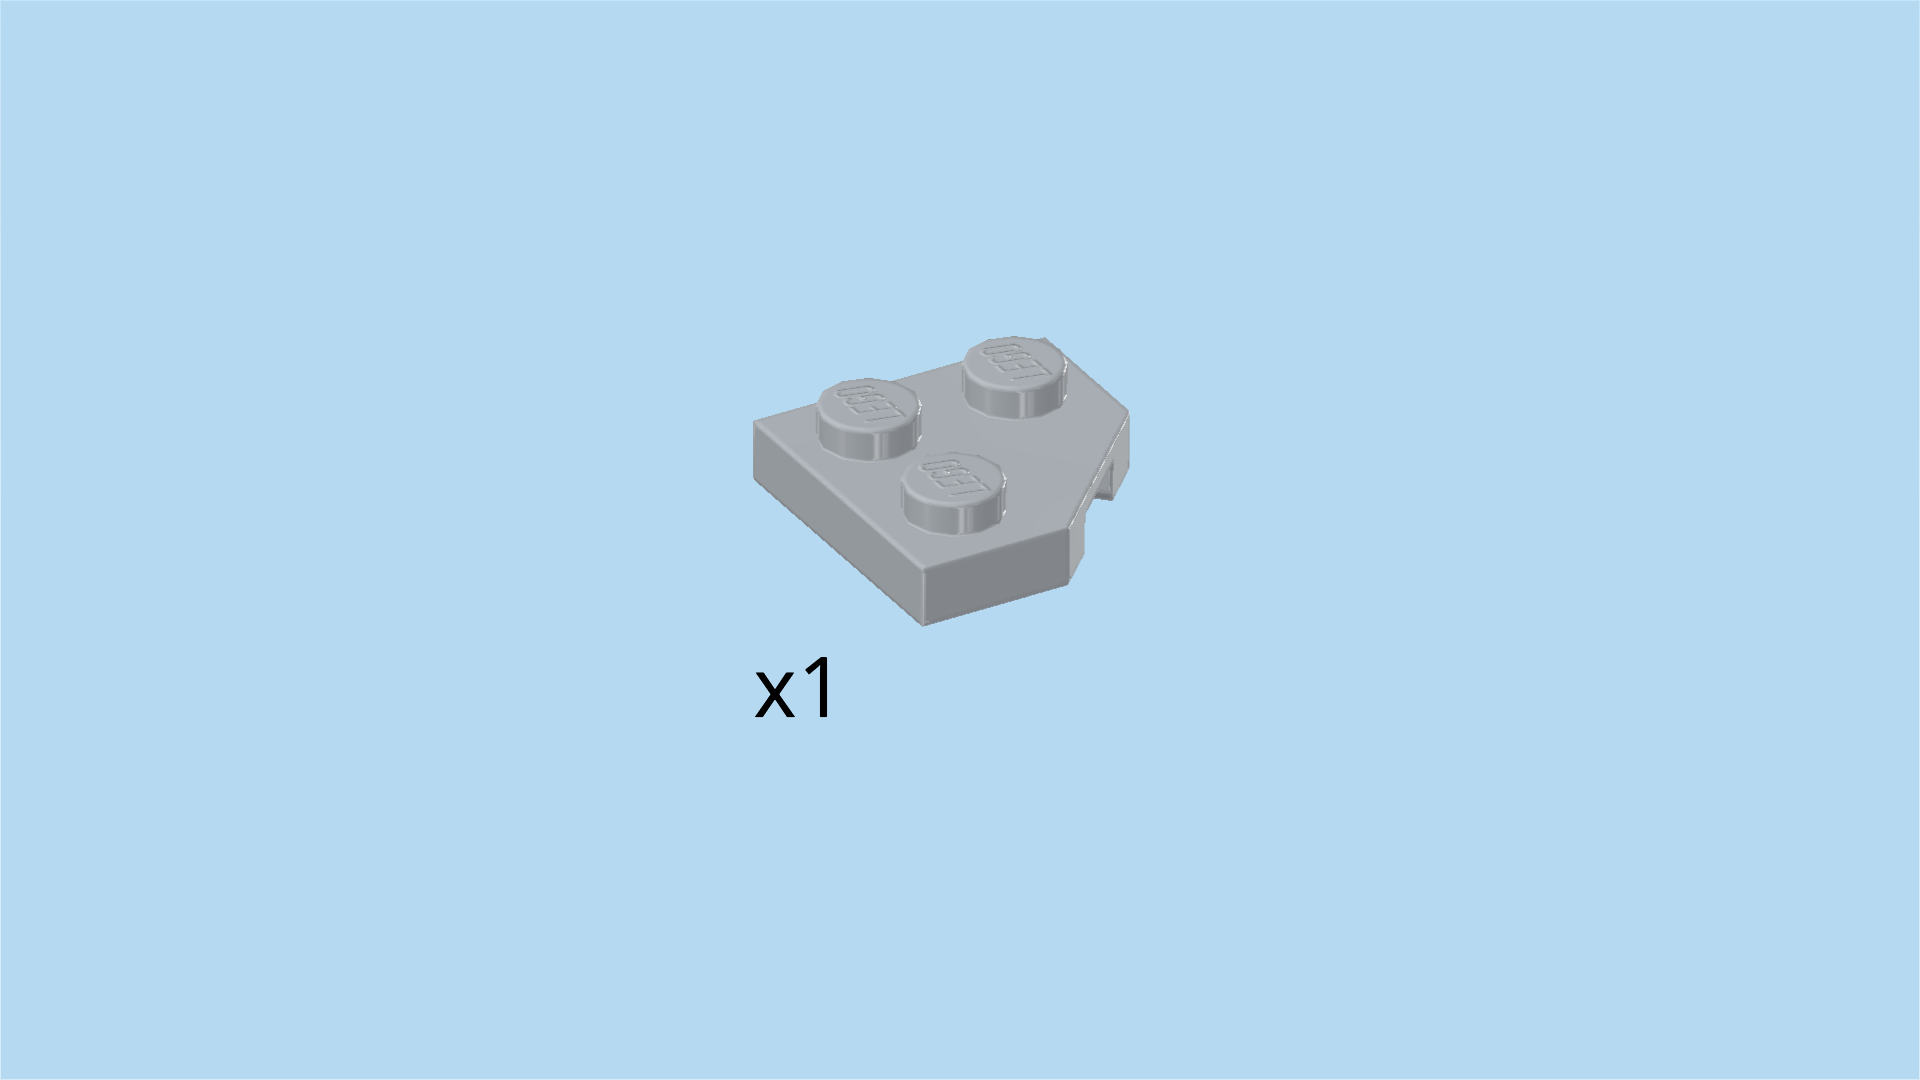
| and 1 medium stone grey wedge plate 2x2 with 45° corner and 3 knobs. |
| Put the mudguard screen 1x6 horizontally on the table, smooth mudguard pointing to the back. |
| Turn the wedge plate 2x2 so that its cut-off corner is to the back right. |
| Mount its back knob on the rightmost knob of the mudguard plate, 1 row overhanging to the front. |
| Find another medium stone grey wedge plate 2x2 with 45° corner and 3 knobs. |
| Turn it so that its cut-off corner is to the back left. |
| Mount its back knob on the leftmost knob of the mudguard plate, 1 row overhanging to the front. |
| Before you mount the lower lip, identify the plate 2x8 with 7 holes that is mounted horizontally in the back half of the structure. Again, keep the building orientation of the strutting. |
| Mount the lower lip horizontally on the back row of said plate 2x8 using the 2 overhanging front rows of the wedge plates. If done correctly, the wedge plates are mounted on the left and right edges of the plate 2x8, and the mudguard screen is to the back. |
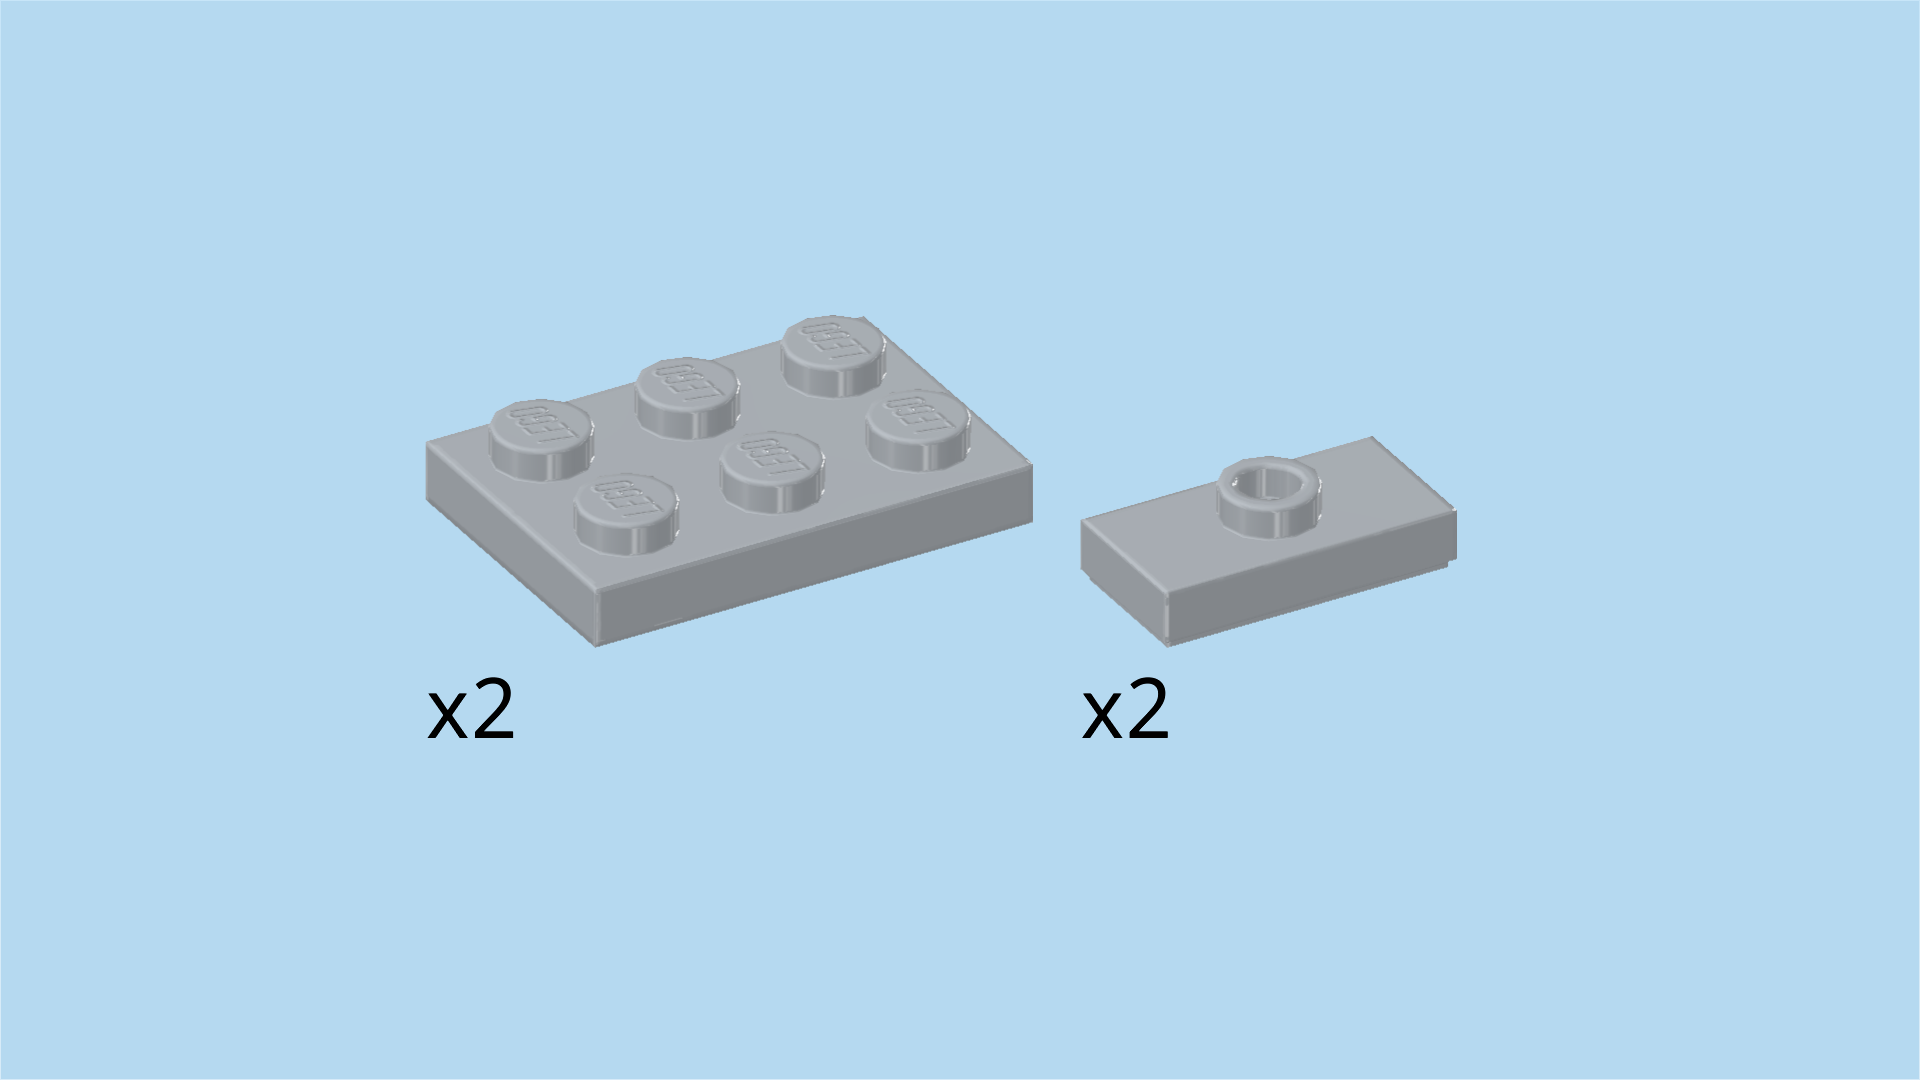
| Collect the following 4 pieces: |
| 2 medium stone grey plates 2x3, |
| and 2 medium stone grey plates 1x2 with 1 knob. |
| Again, all these pieces will be mounted right side up. |
| Leave the protruding half of the round plate 2x2 and the frontmost row of knobs empty, and put the 2 plates 1x2 horizontally next to each other on the second row from the front. They fit neatly between the 2 bricks 1x2 with 4 side knobs mounted at the front edge. |
| Put the 2 plates 2x3 vertically behind the 2 previous pieces. |
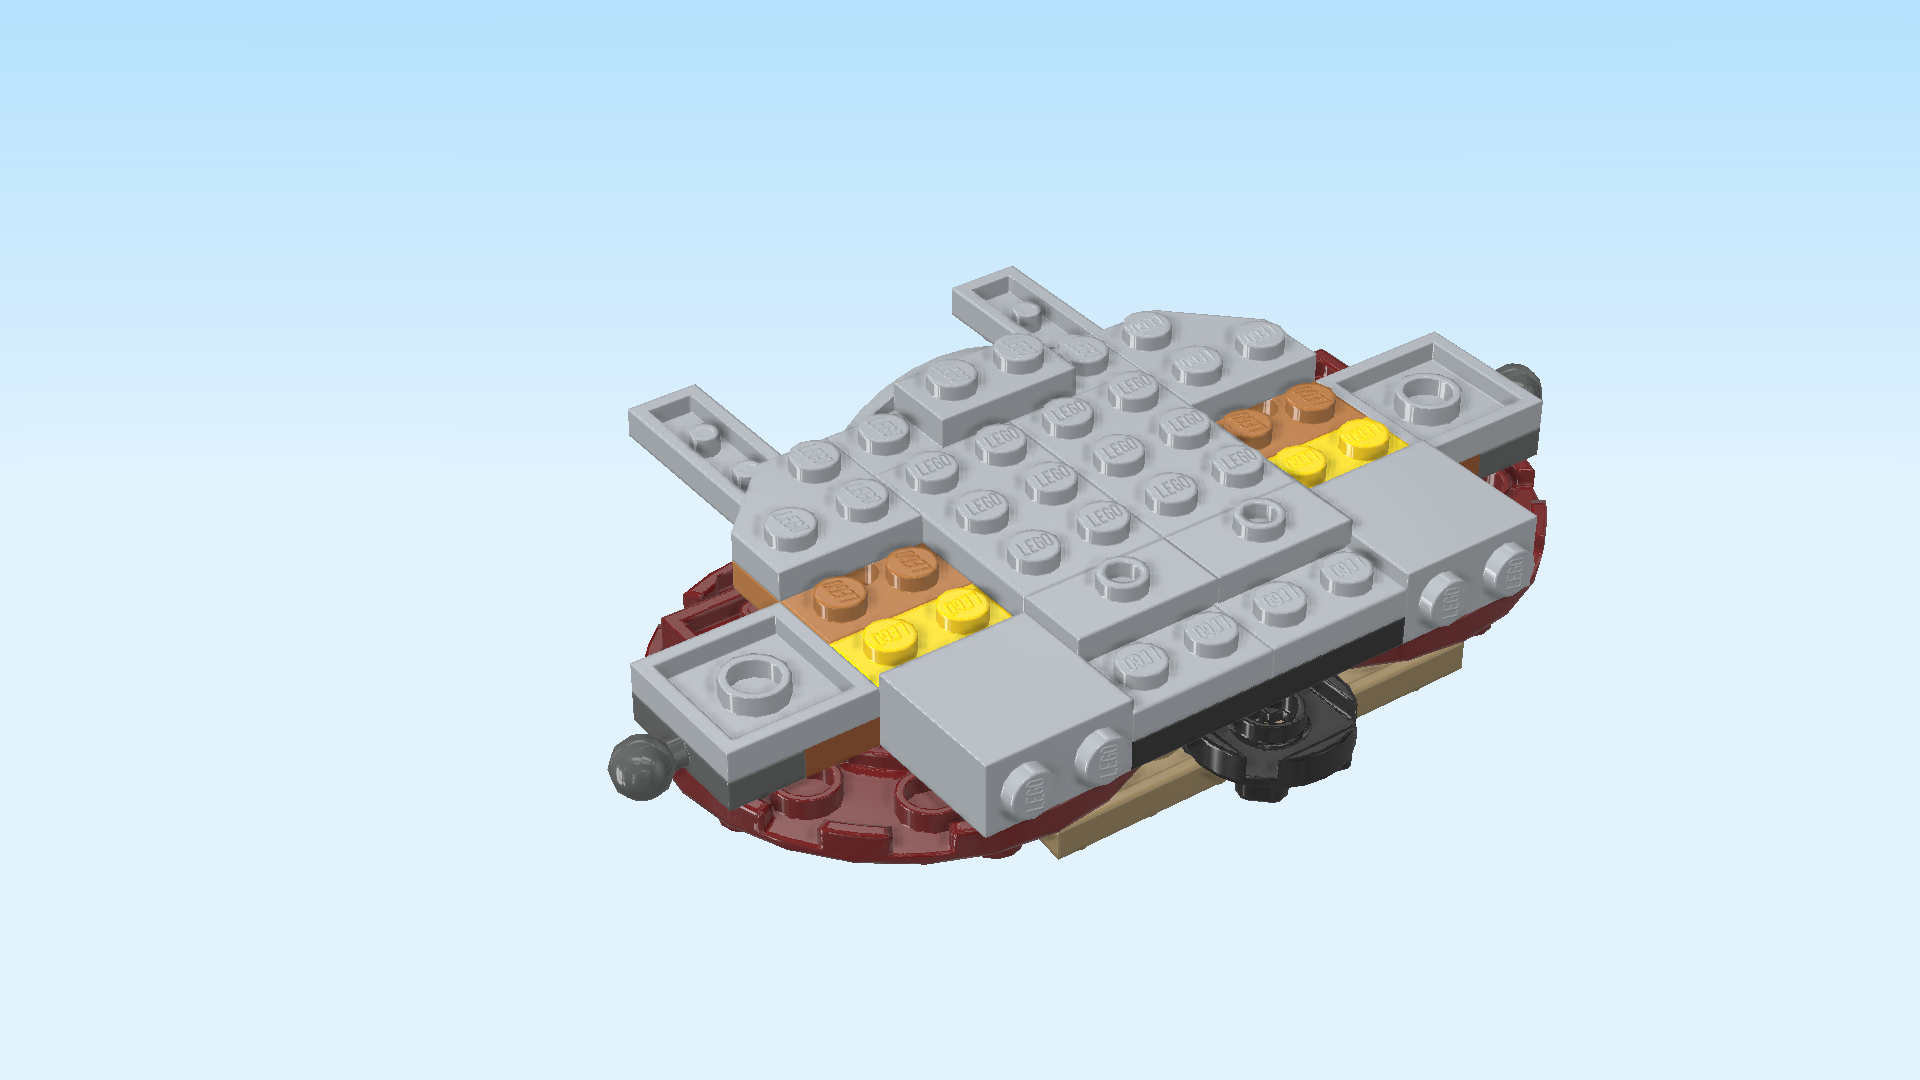
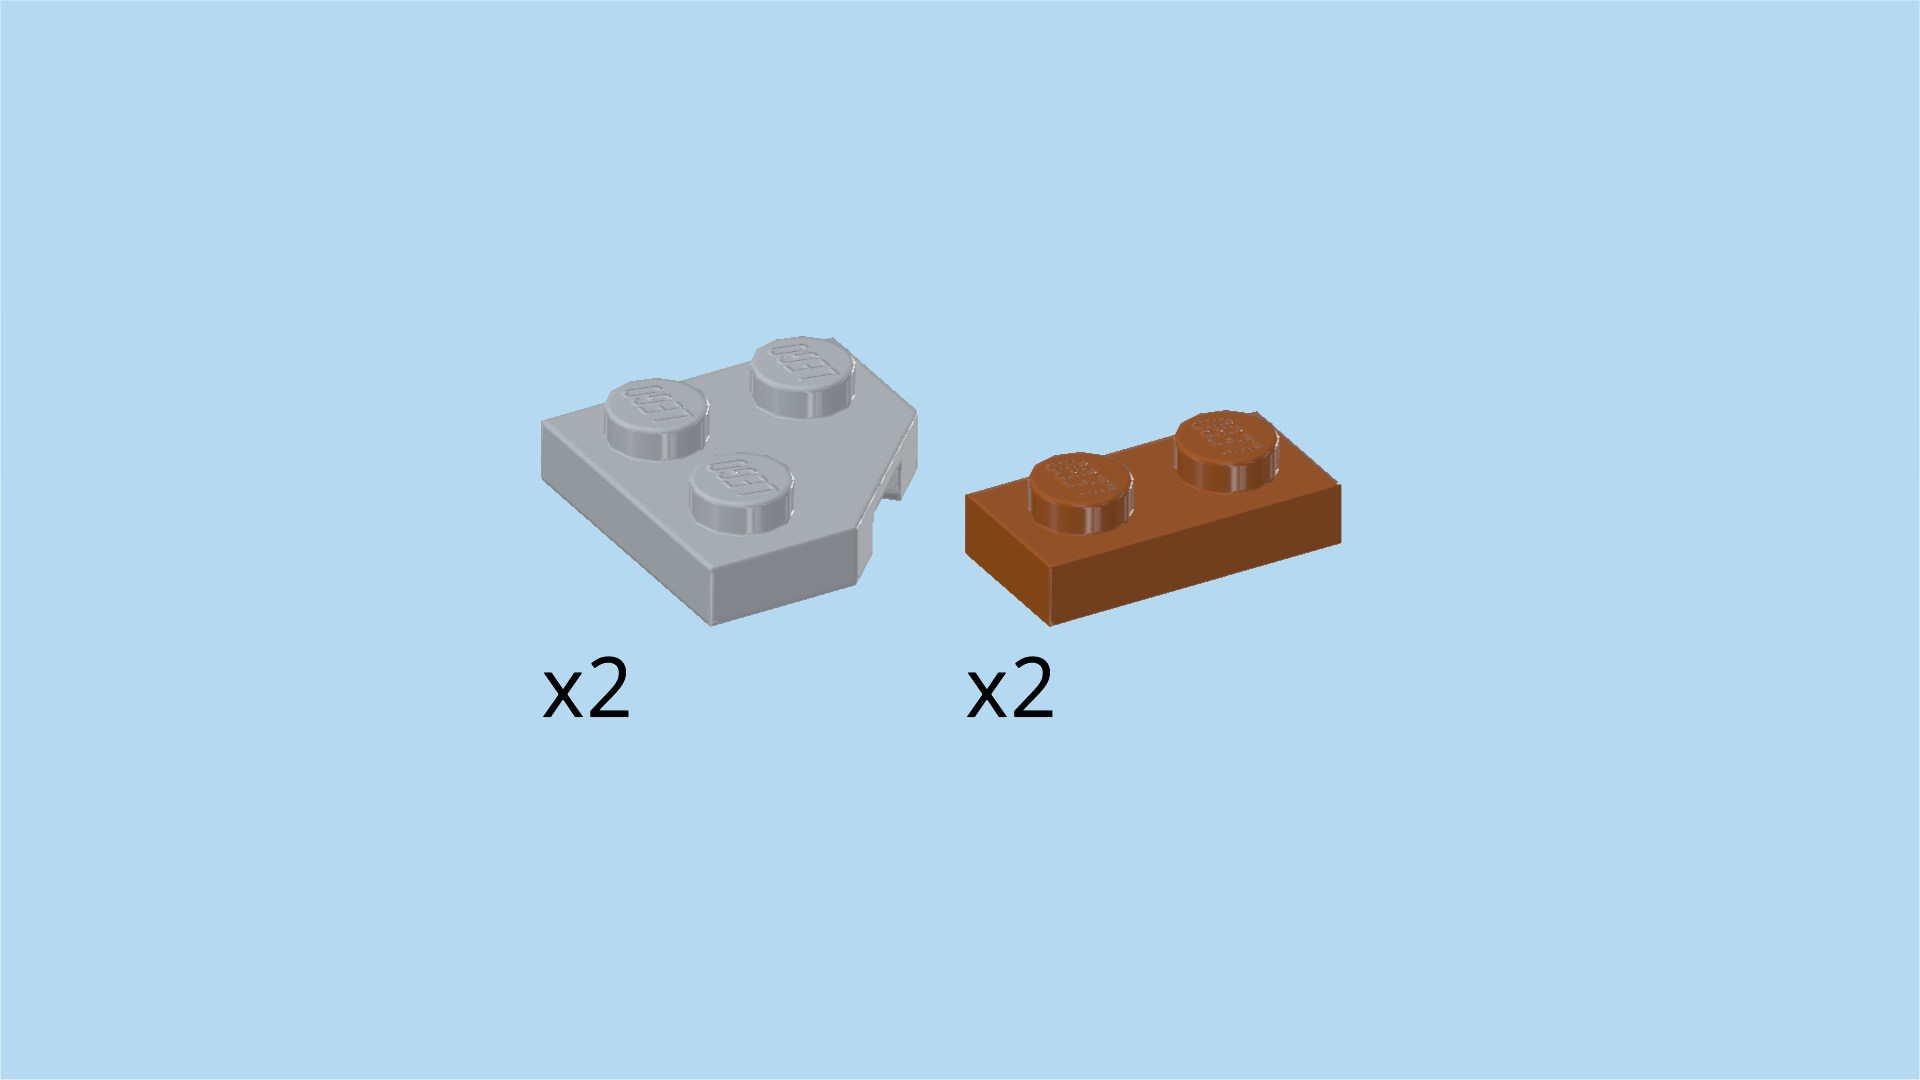
| Collect the following 4 pieces: |
| 2 medium stone grey wedge plates 2x2 with 45° corner and 3 knobs, |
| and 2 dark orange plates 1x2. |
| First, identify the 2 smooth 2x2 surfaces on the front edge that belong to the 2 bricks 1x2. |
| Put 1 plate 1x2 vertically behind the right half of the smooth surface on the left. |
| Put 1 wedge plate 2x2 to the left of the previous piece, cut-off corner to the back left. |
| Repeat symmetrically on the right: put the other plate 1x2 vertically behind the left half of the smooth surface on the right. Then, put the other wedge plate to the right of the previous piece, cut-off corner to the back right. |
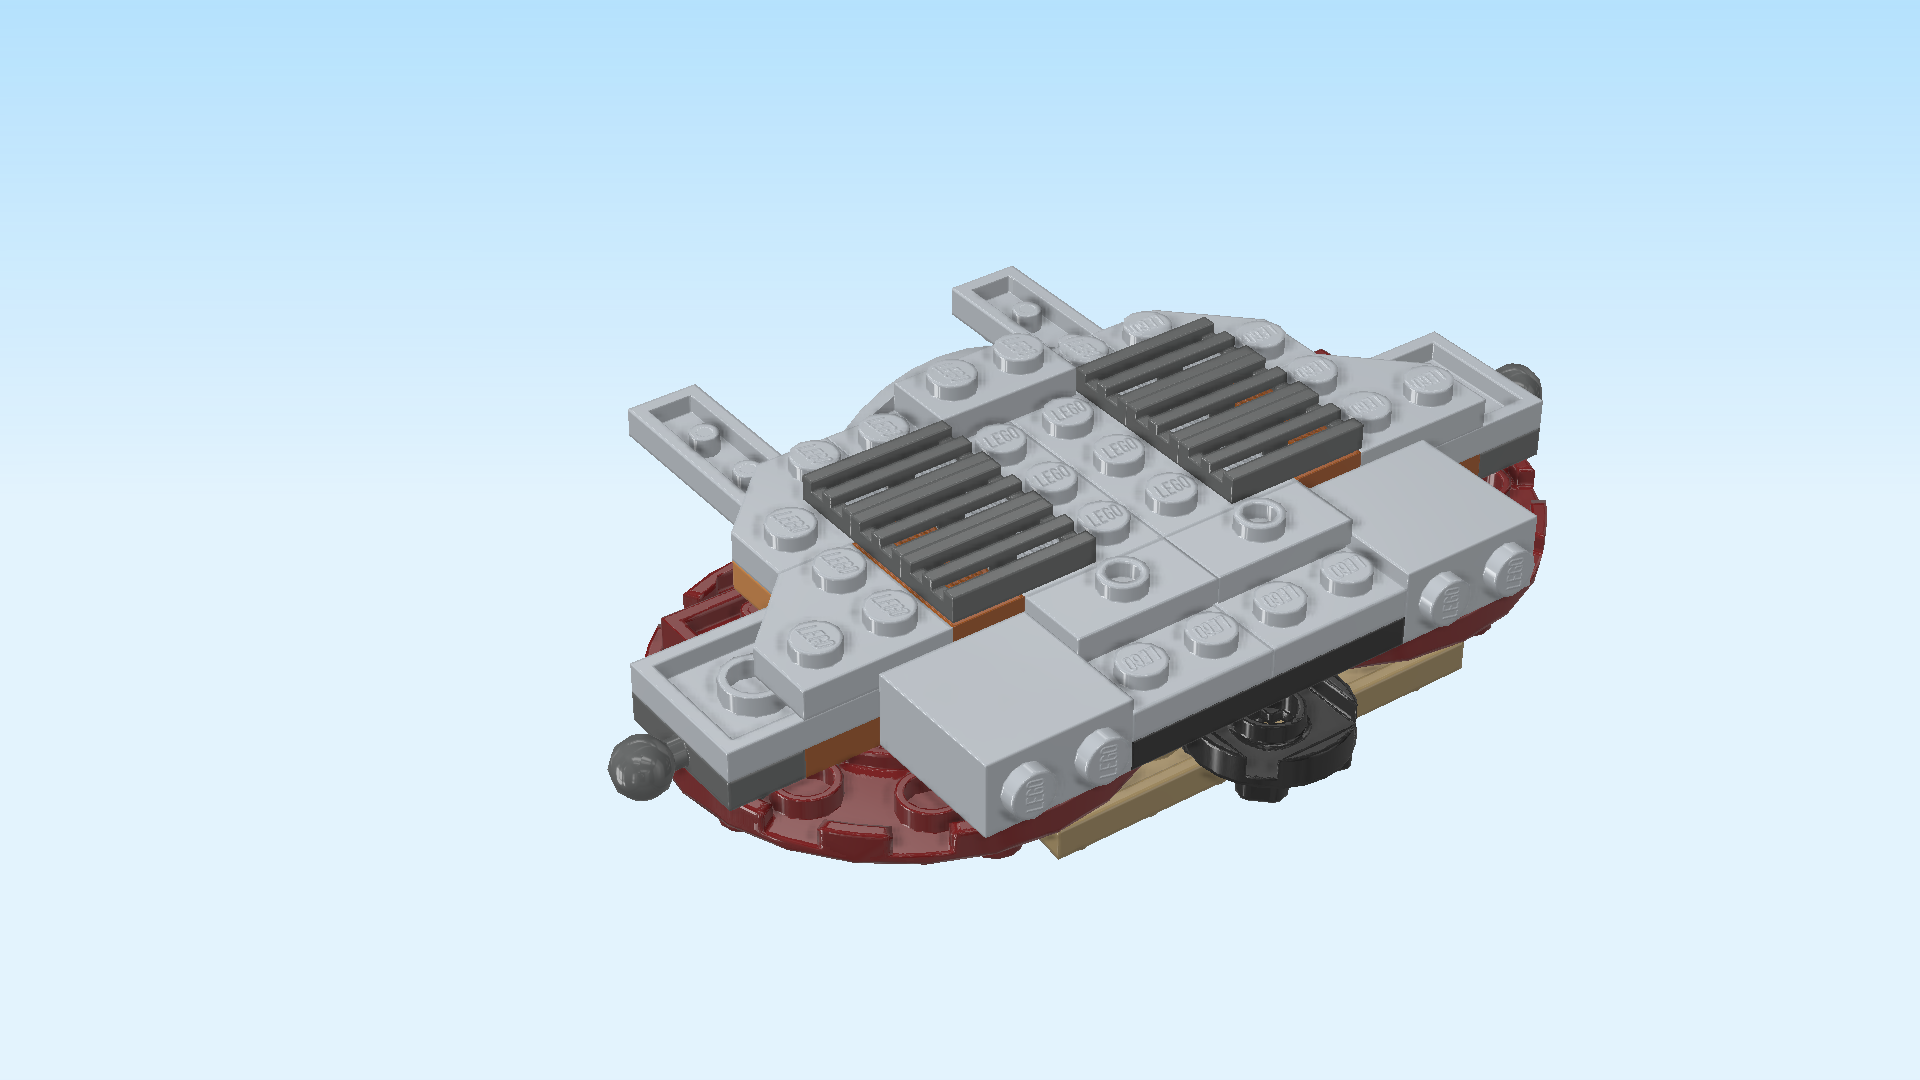
| Find 6 dark stone grey grille tiles 1x2. |
| Put 1 horizontally to the left of the previous piece's front row (the previous piece is the wedge plate 2x2 we have just mounted in the right half of the structure) . |
| Put 1 horizontally behind the previous piece. |
| Put another 1 horizontally behind the previous piece, so now there are 3 grille tiles behind one another. |
| Repeat symmetrically in the left half of the structure: put 1 grille tile horizontally to the right of the wedge plate's front row, and put the last 2 grille tiles horizontally behind the previous piece. |
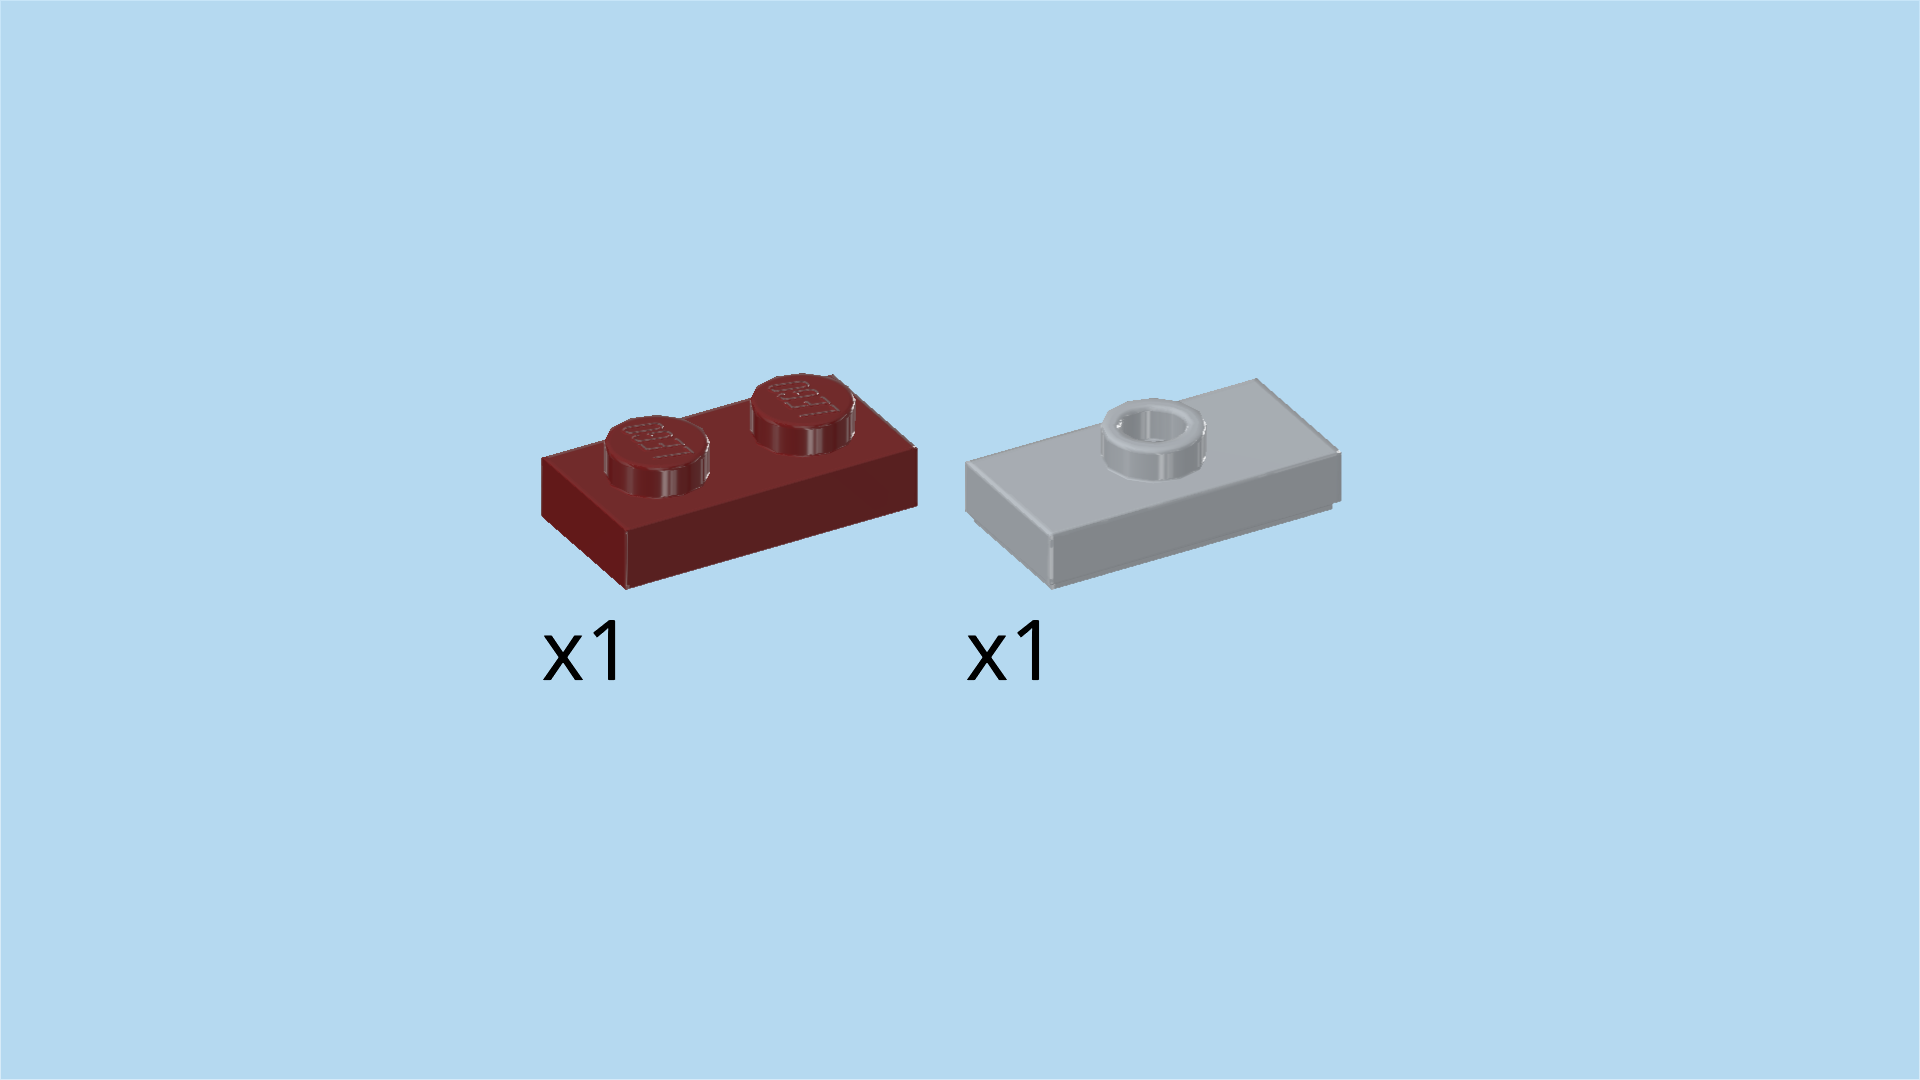
| Collect the following 2 pieces: |
| 1 maroon red plate 1x2, |
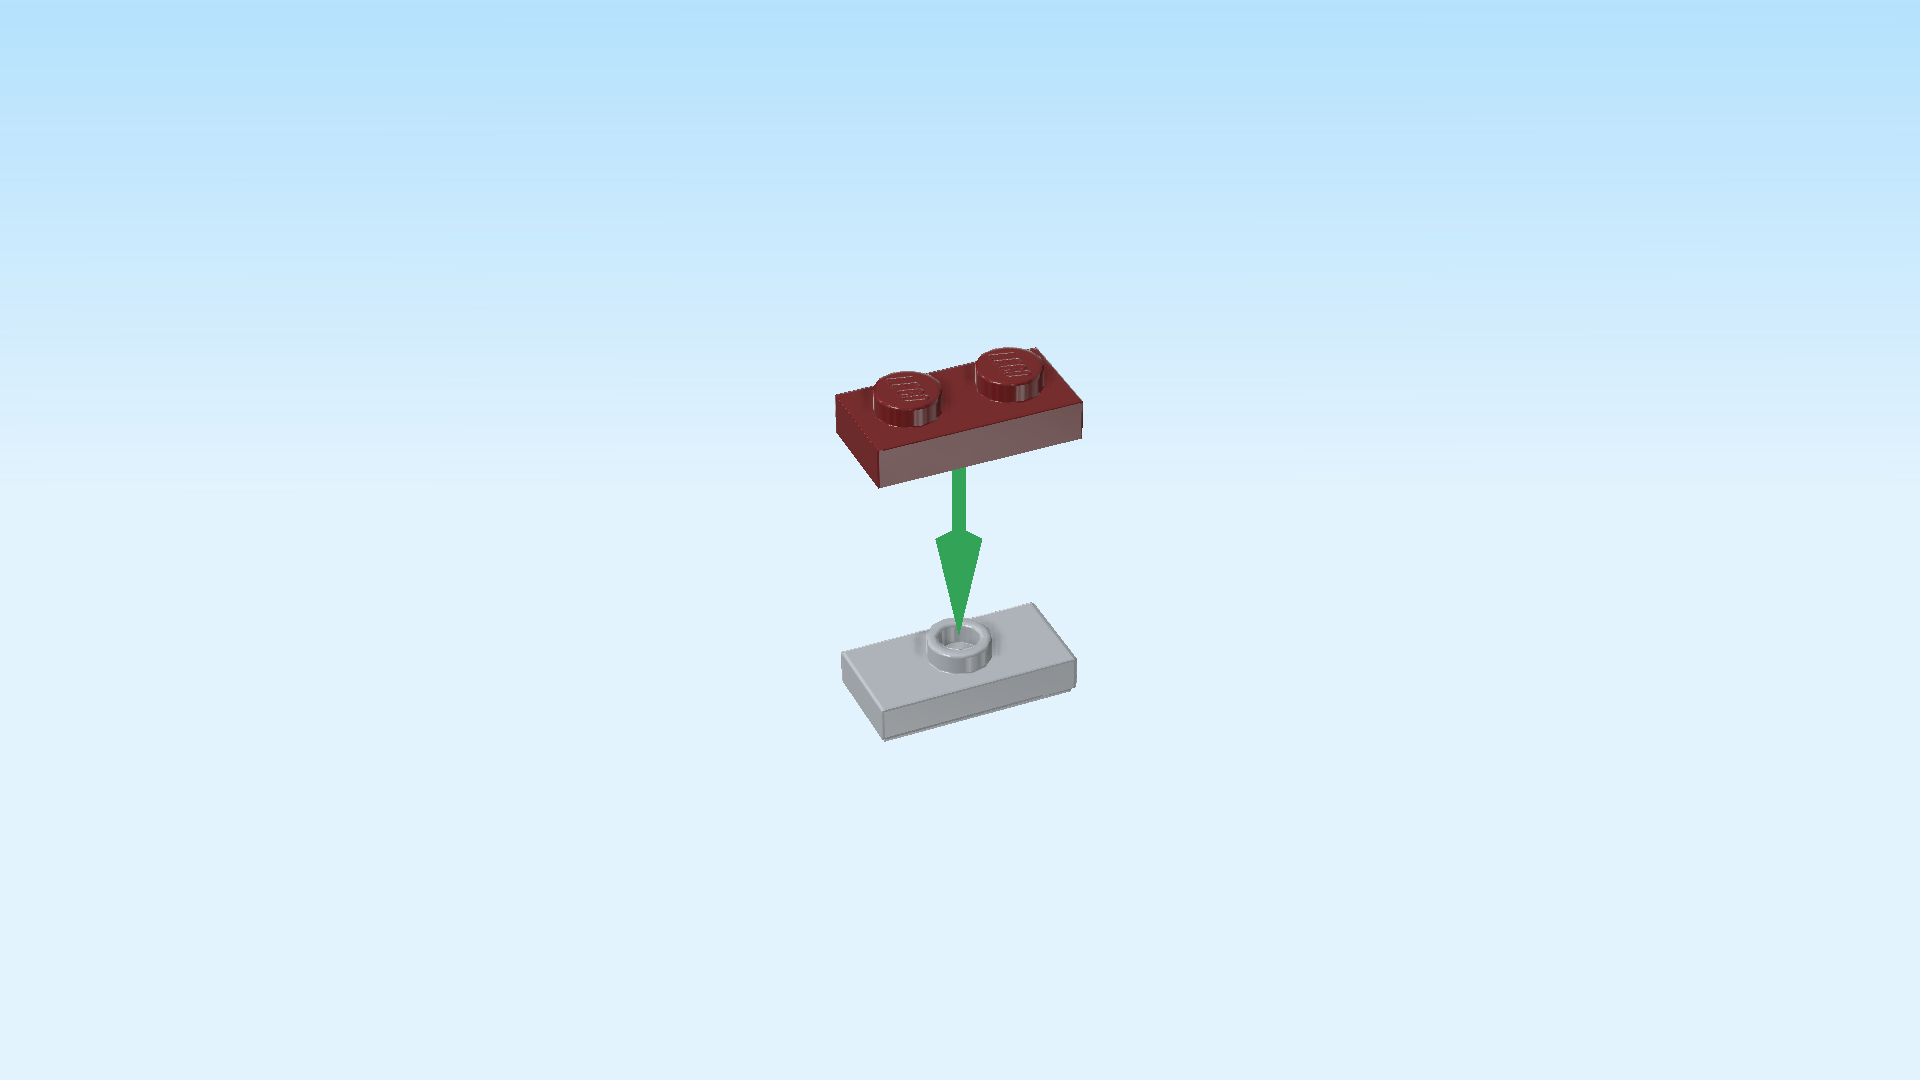
| and 1 medium stone grey plate 1x2 with 1 knob. |
| Put the plate with 1 knob horizontally on the table, and put the plate 1x2 horizontally on top. |
| Flip the stacked plates upside down and mount them horizontally on the frontmost possible point in the middle. This means they will be mounted on the front half of the round plate 2x2. |
| Find 1 dark stone grey plate 1x2 with ball on long side. |
| First, flip the structure right side up again. Keep the horizontal orientation of the manta ray structure, but make sure that the 2 columns 1x3 as well as the mudguard screen are protruding to the front now, and the balls are to the left and right. |
| Mount the plate with ball horizontally on the backmost possible point in the middle, ball to the back. This means it will sit on the protruding knobs of the round plate 2x2. |
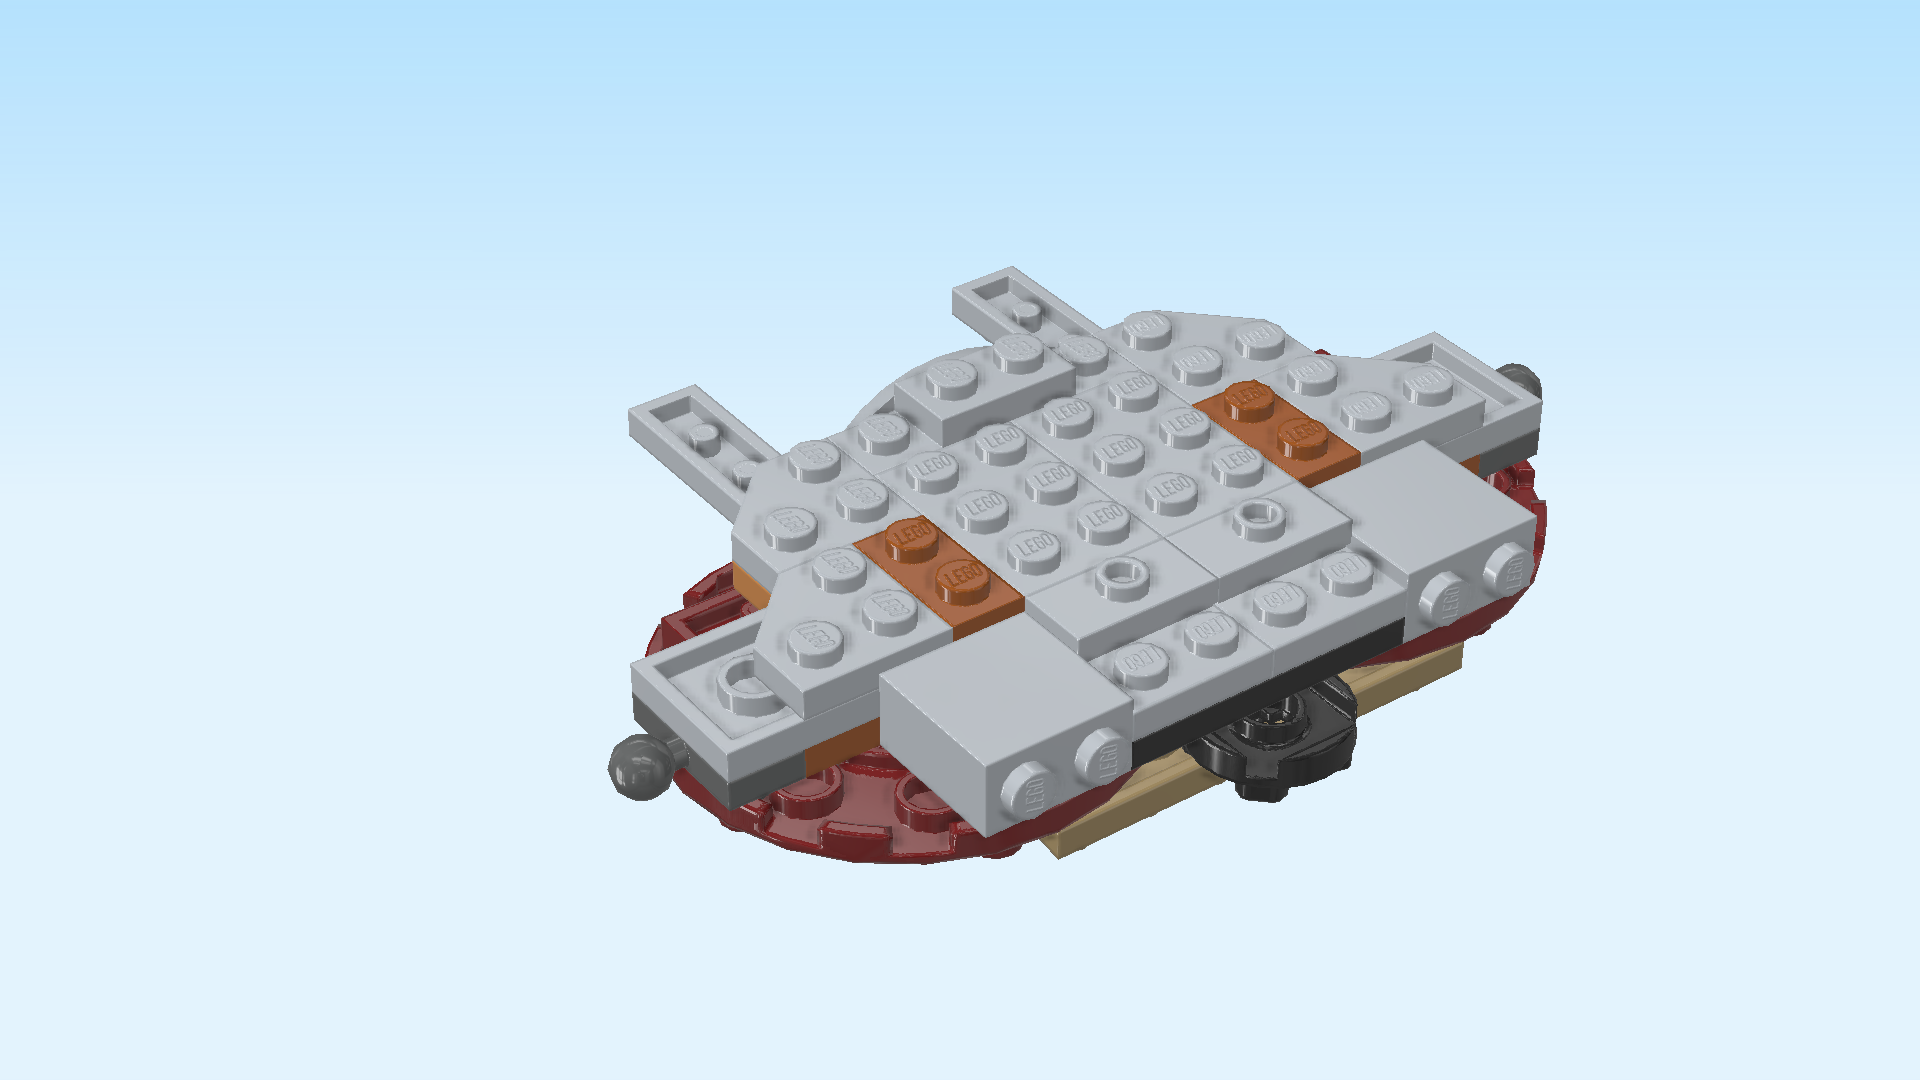
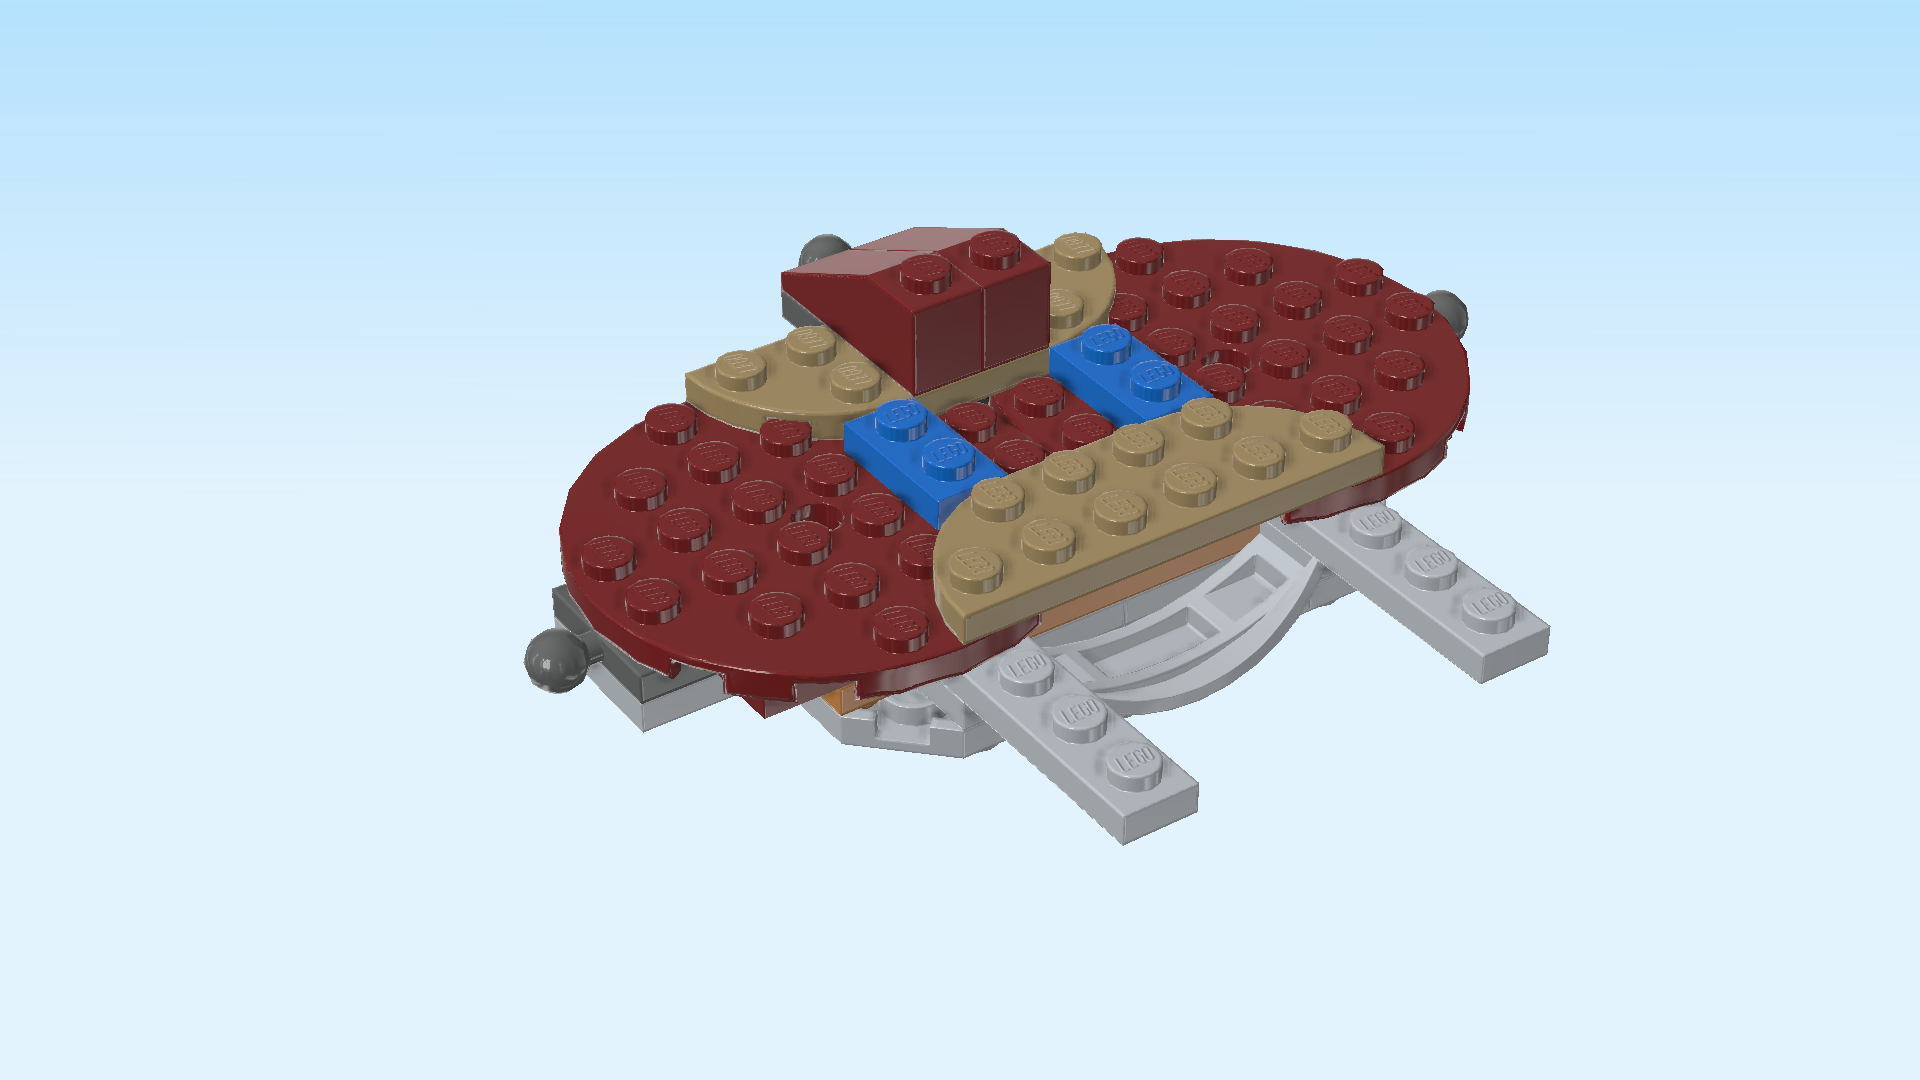
| Find 2 maroon red roof tiles 1x3, 25°. |
| Mount them vertically next to each other on the previous piece and the 2 rows in front of it, slopes to the back. |
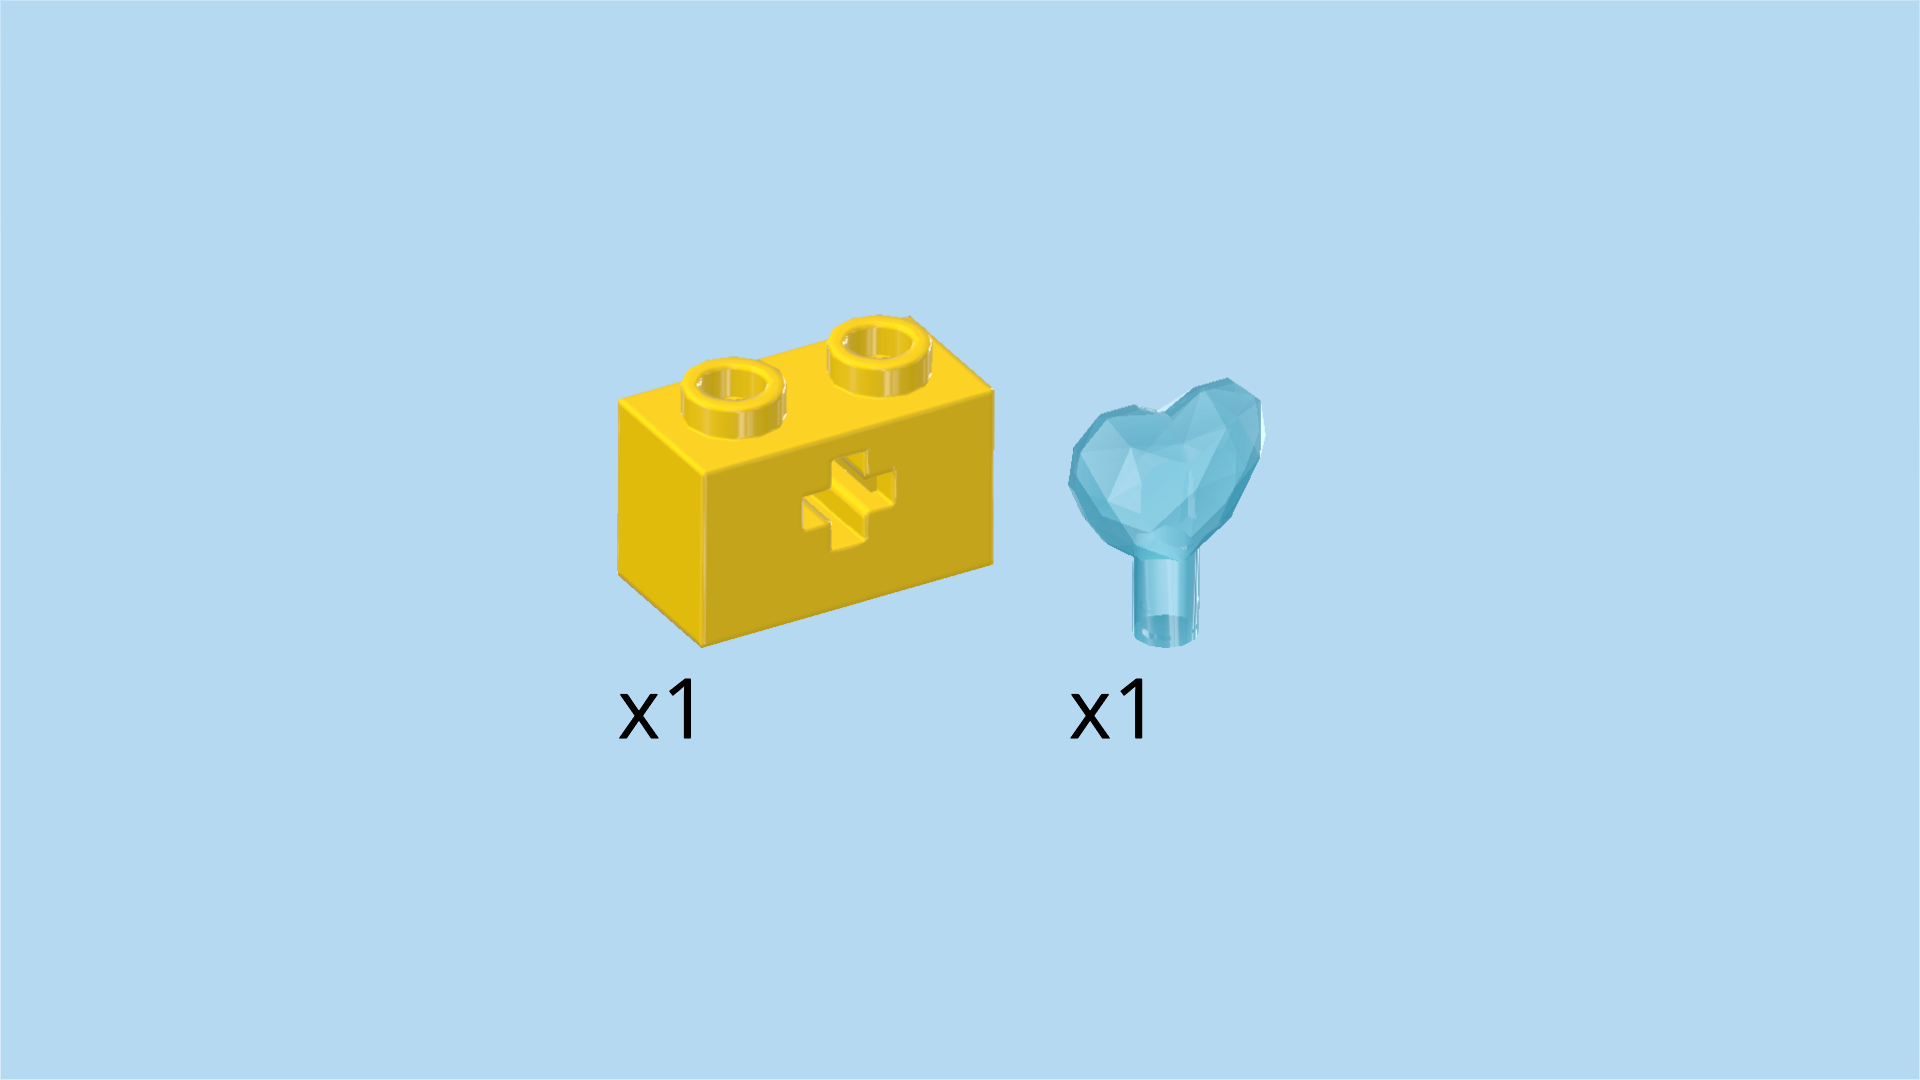
| Collect the following 2 pieces: |
| 1 bright yellow brick 1x2 with side cross hole, |
| and 1 transparent light blue heart-shaped crystal with shaft. |
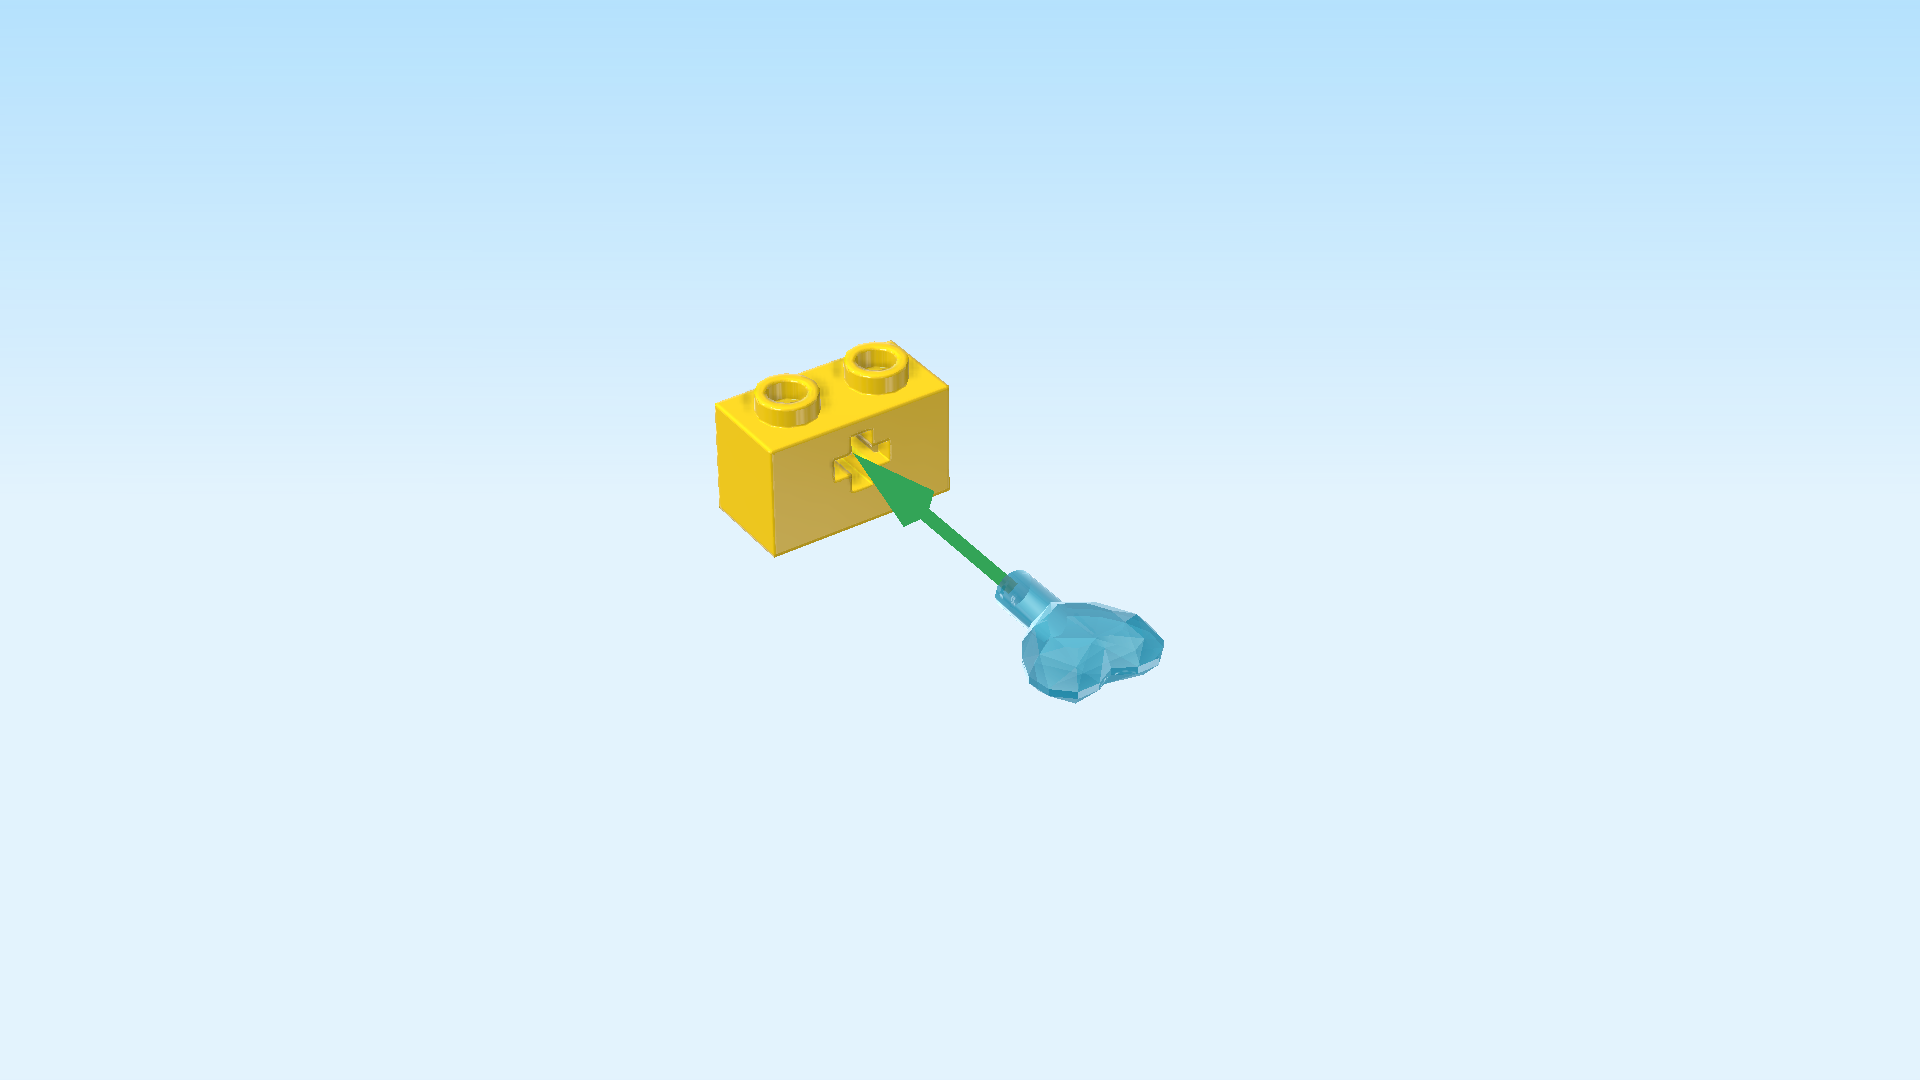
| Insert the shaft of the crystal into the cross hole. |
| Mount the brick 1x2 with crystal horizontally in front of the 2 previous pieces, crystal pointing to the front. If done correctly, the brick with crystal is mounted between 2 vertical plates 1x2. |
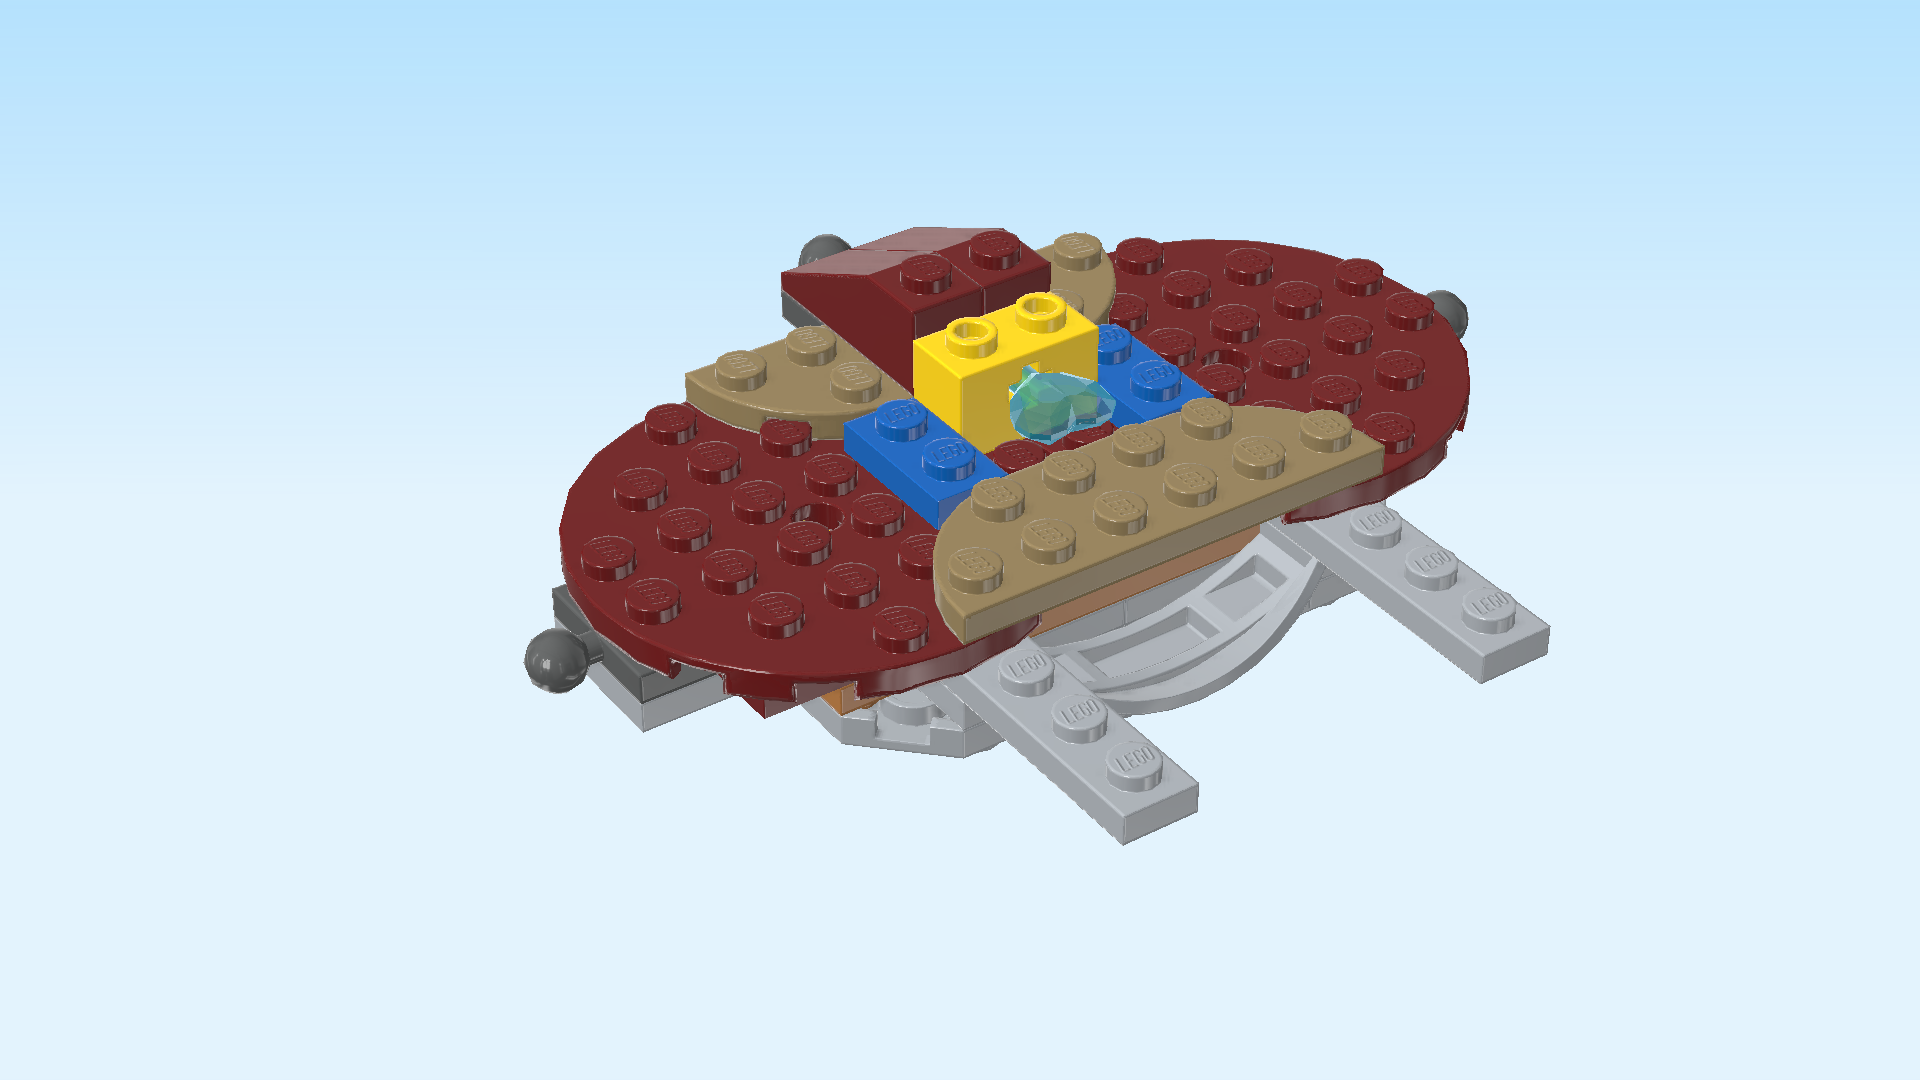
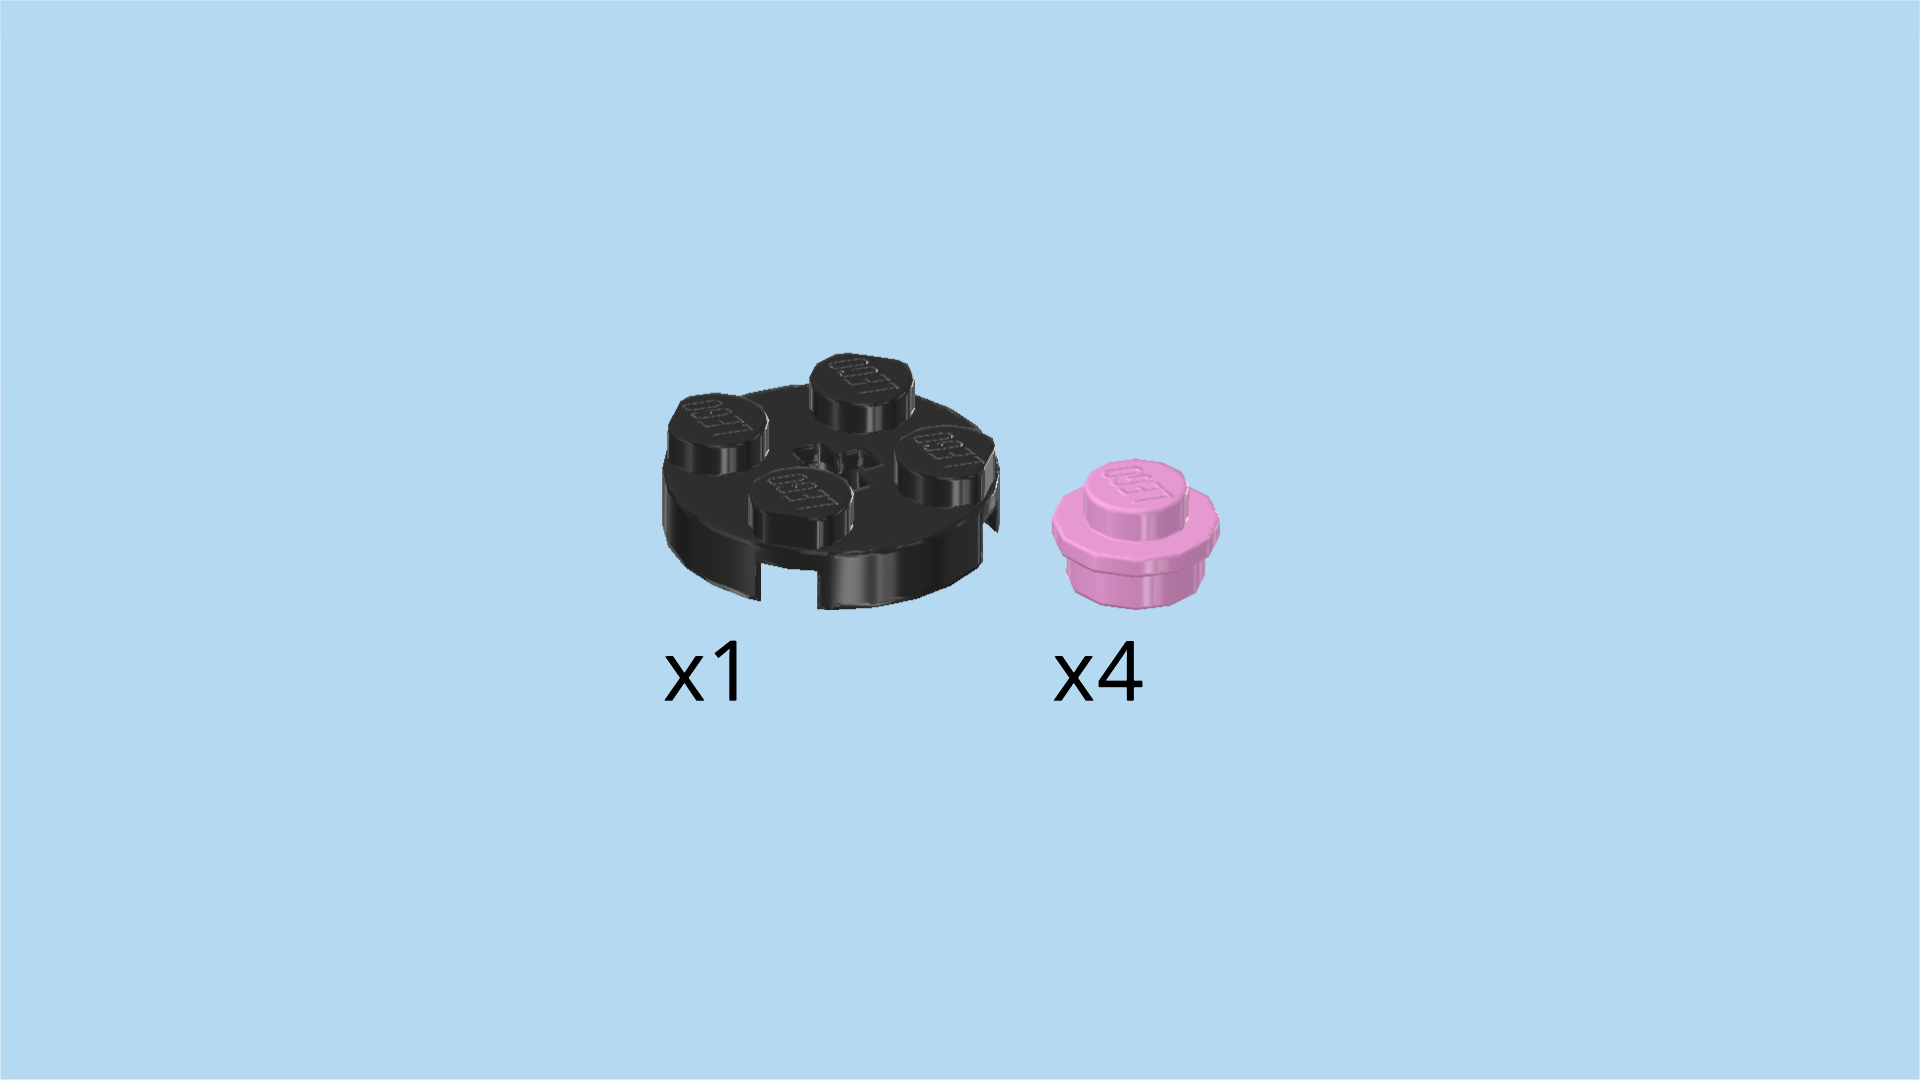
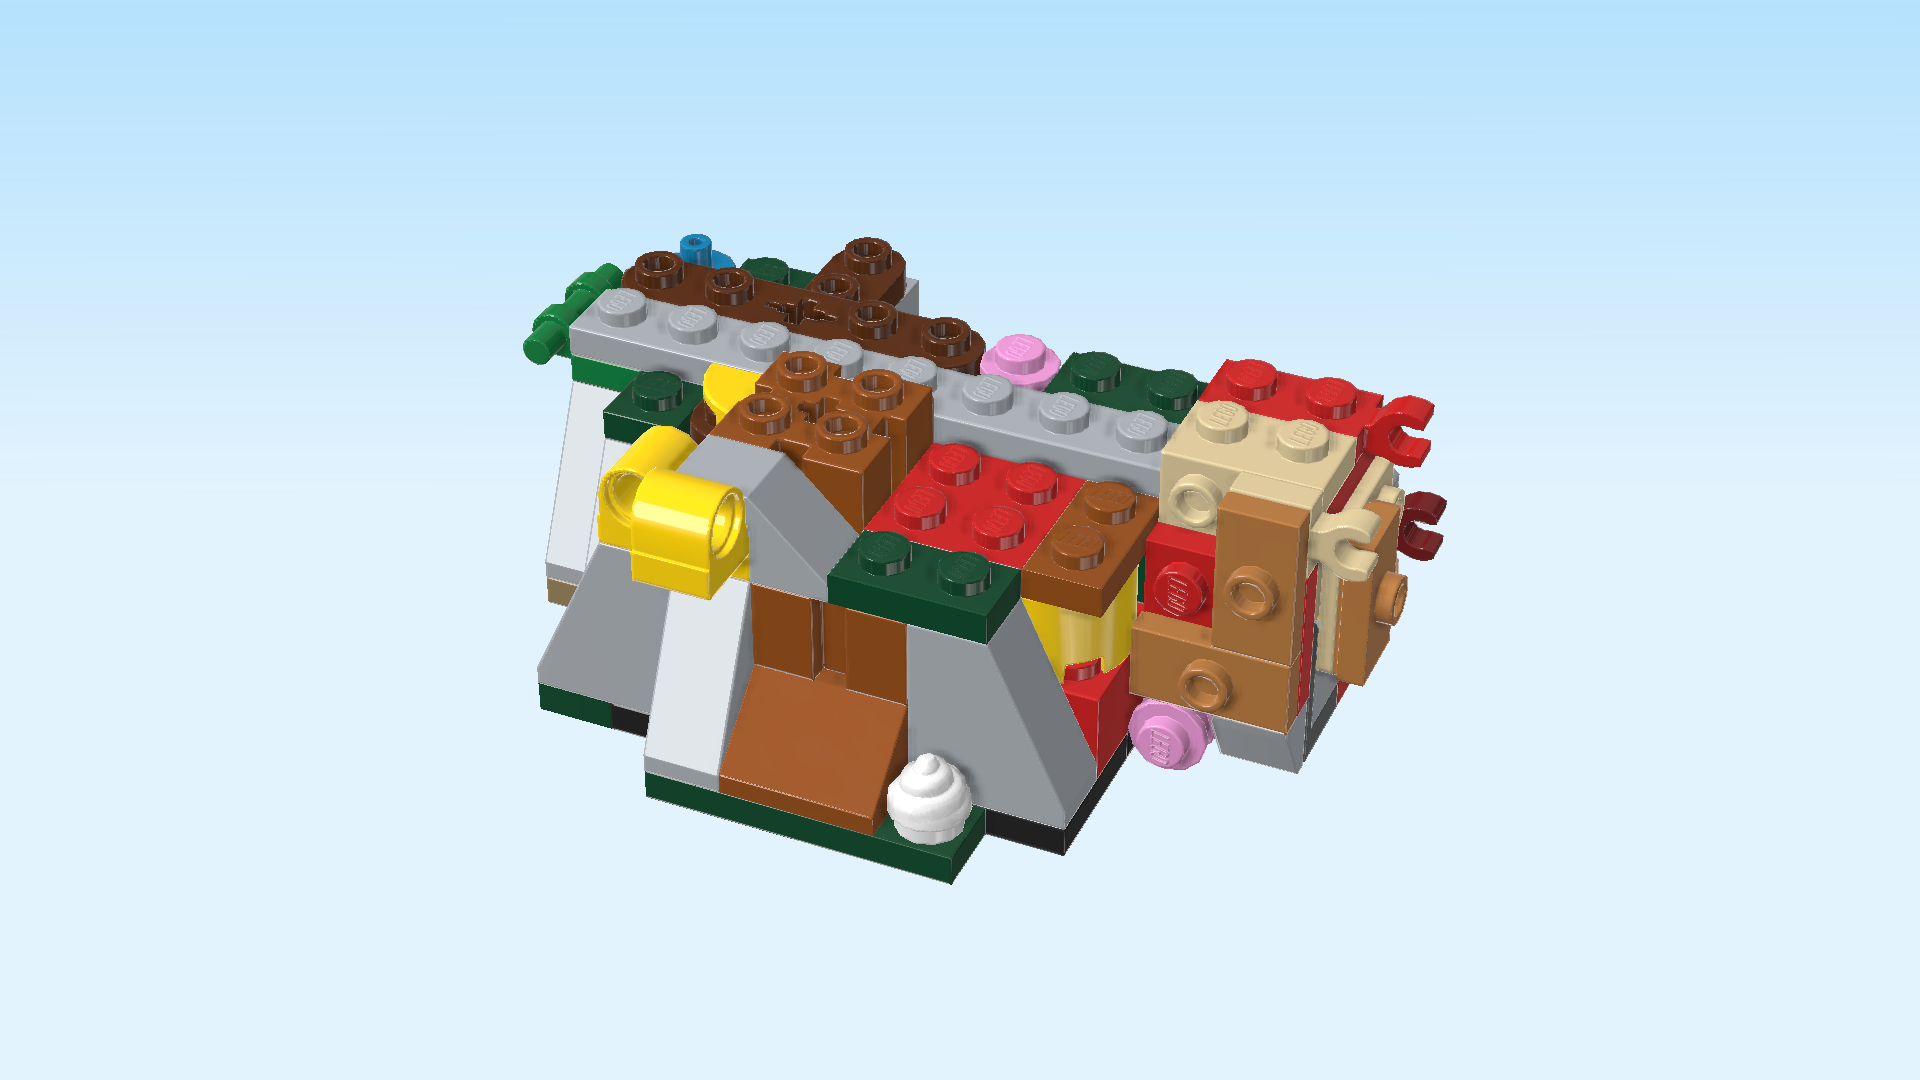
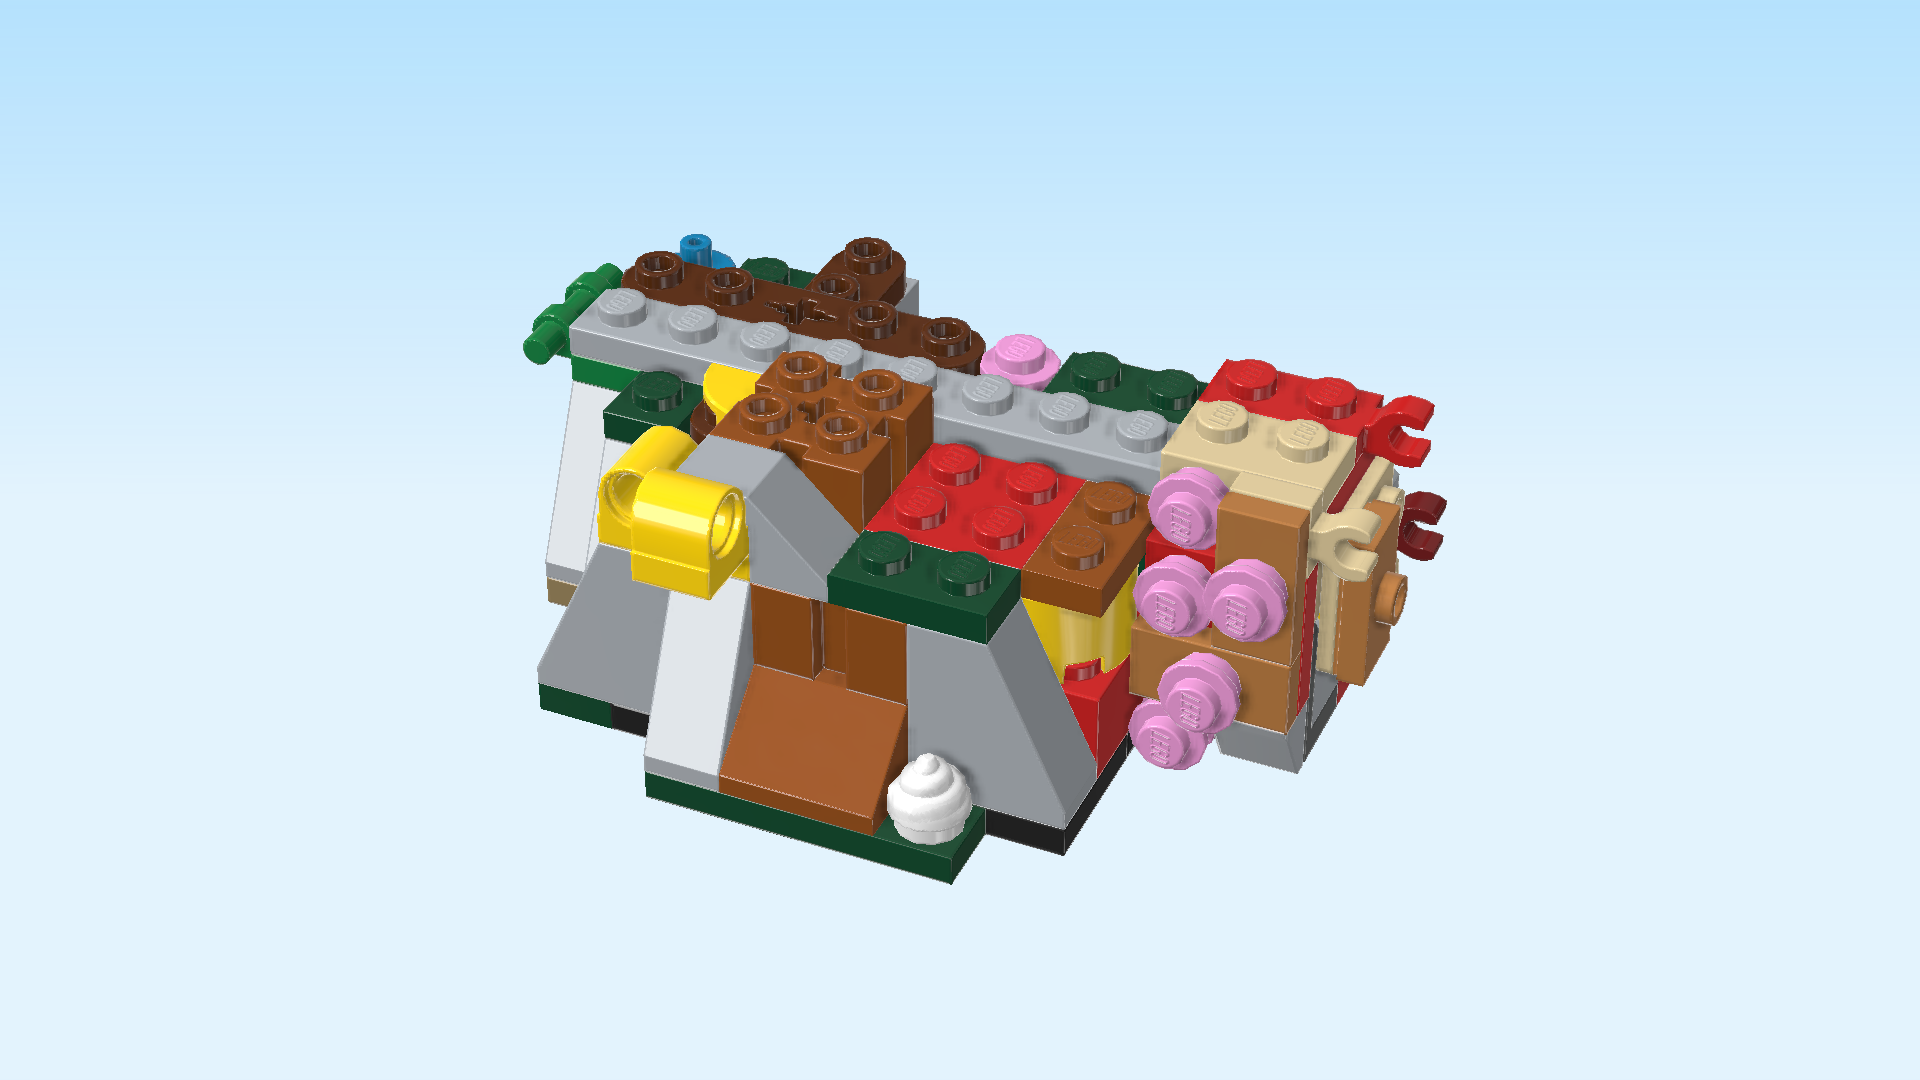
| Collect the following 5 pieces: |
| 1 black round plate 2x2, |
| and 4 light purple round plates 1x1. |
| Put the round plate 2x2 centered in front of the crystal. If done correctly, it will be mounted in the middle of the plate 2x6 with 2 round corners. |
| Put 1 round plate 1x1 on each knob of the plate 1x2 to the left of the brick with crystal. |
| Repeat symmetrically to the right of the brick with crystal. |
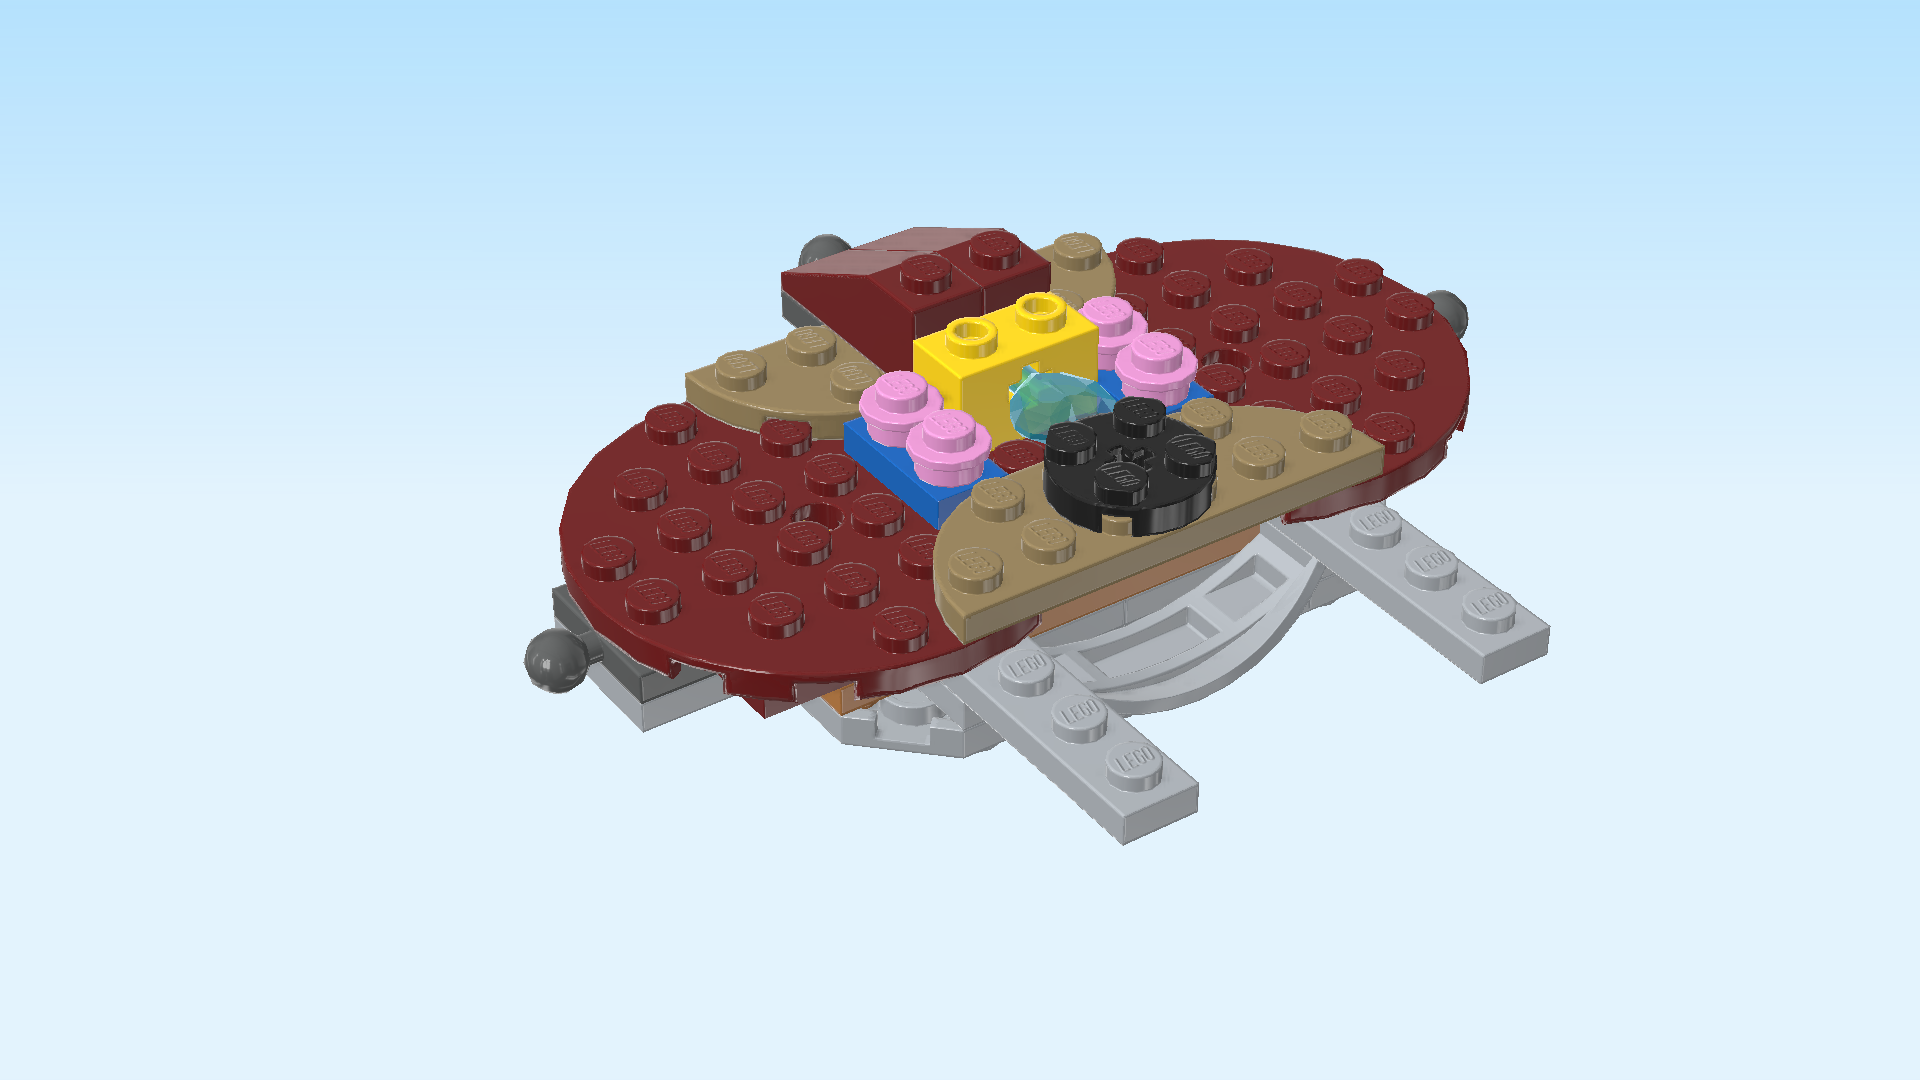
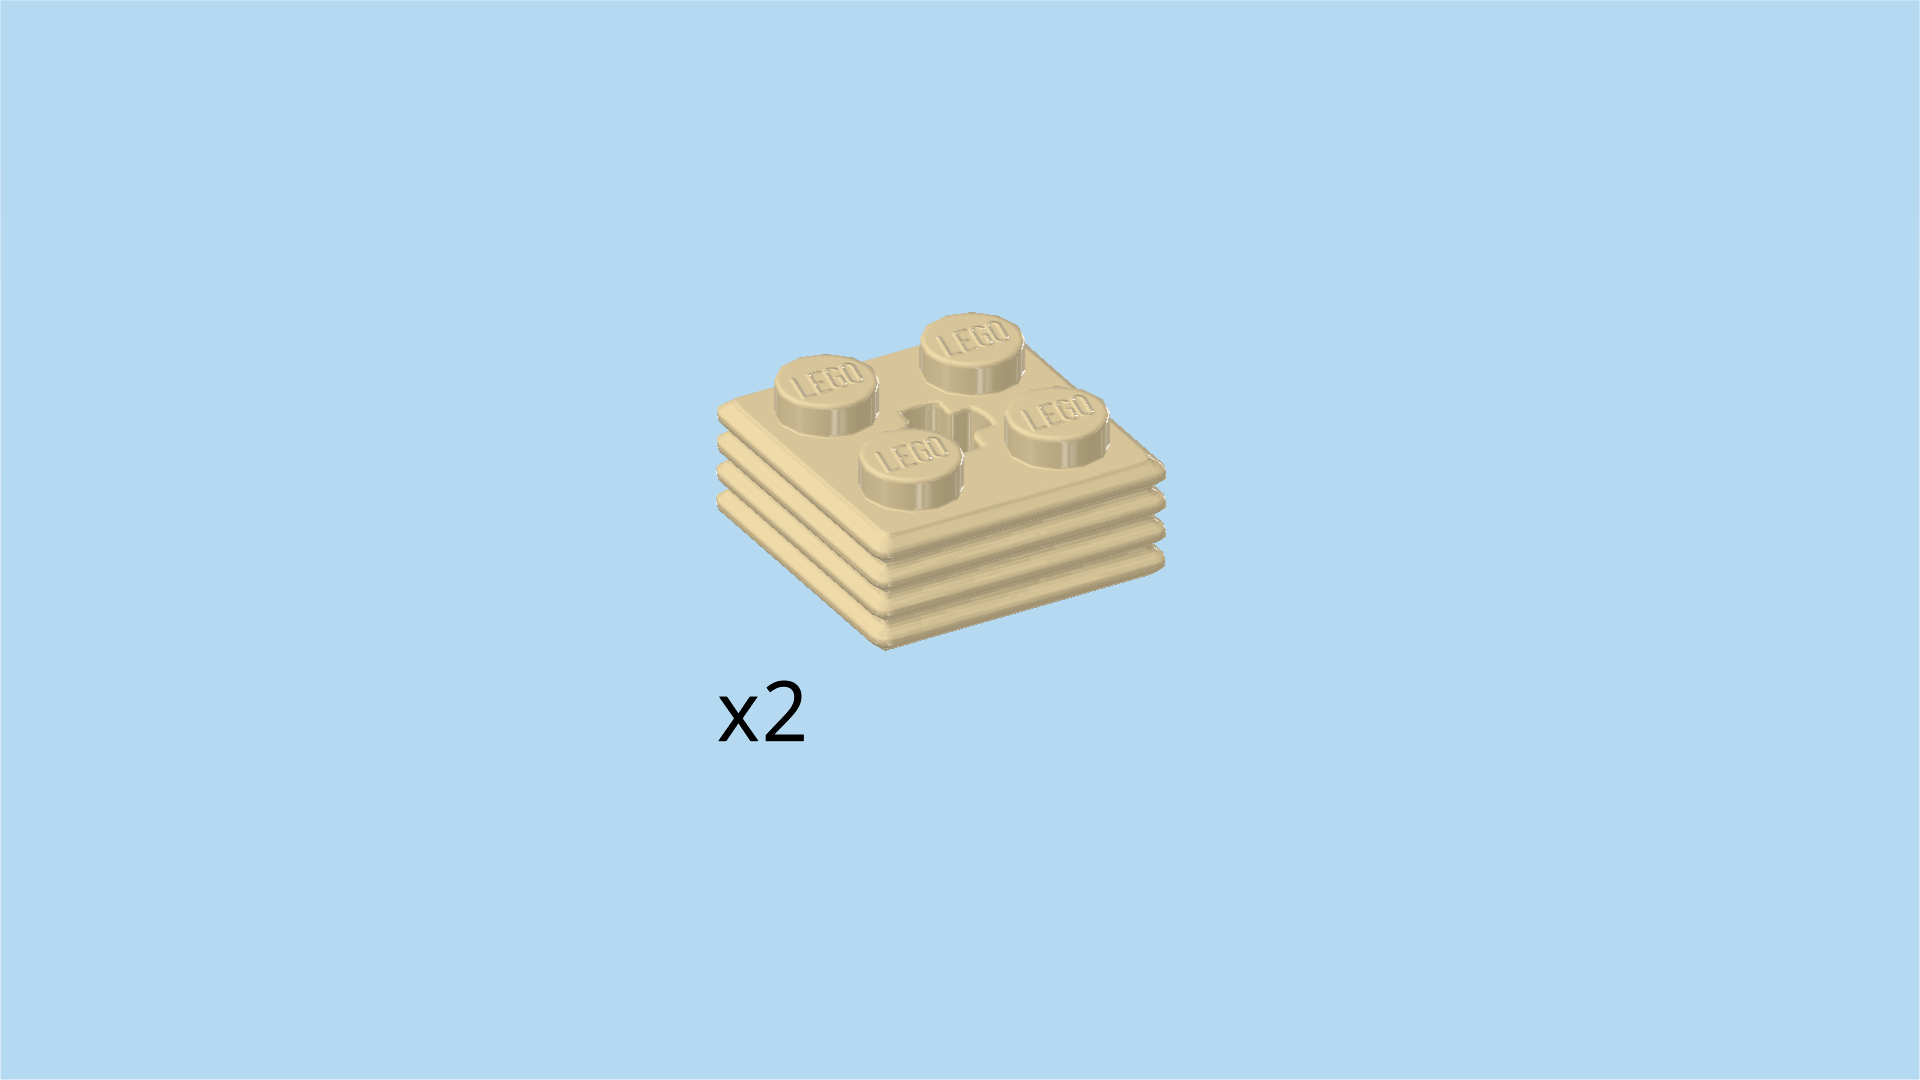
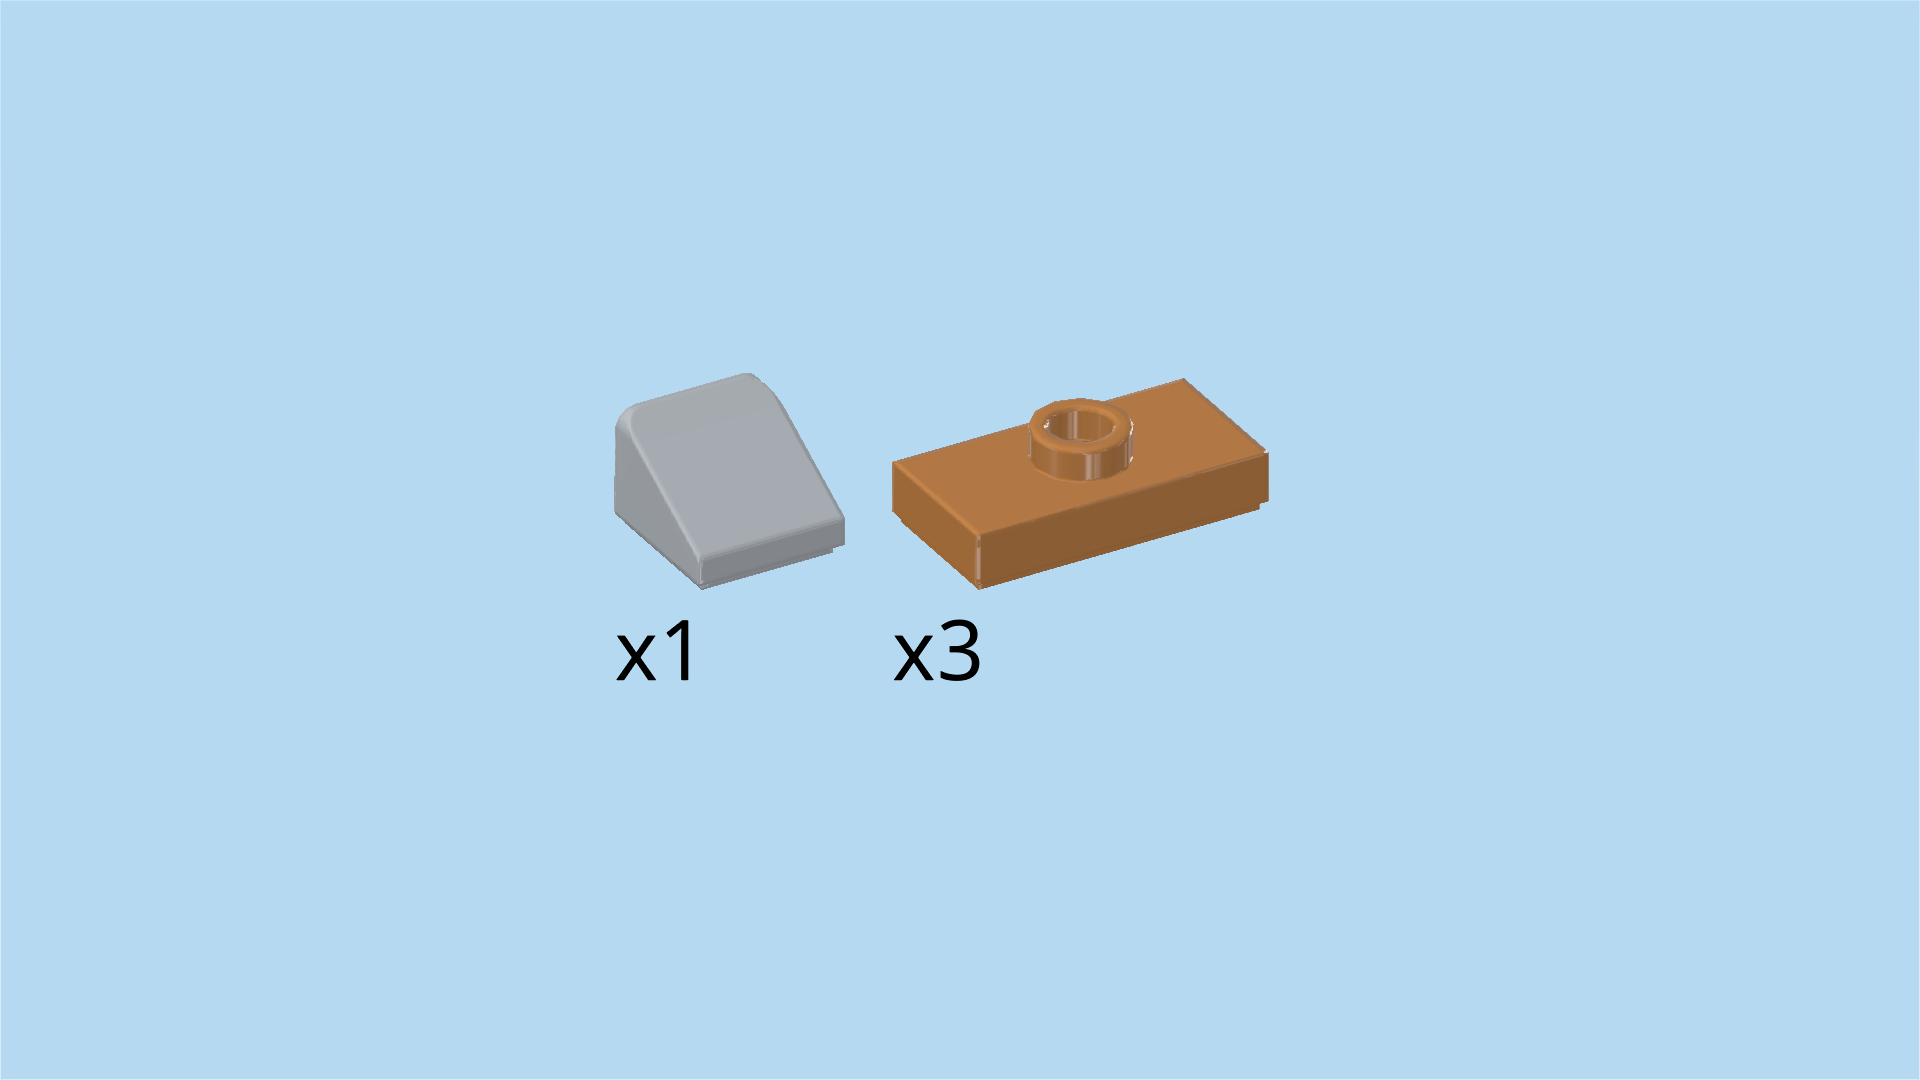
| Find 2 pale ocher yellow low profile bricks 2x2x⅔. |
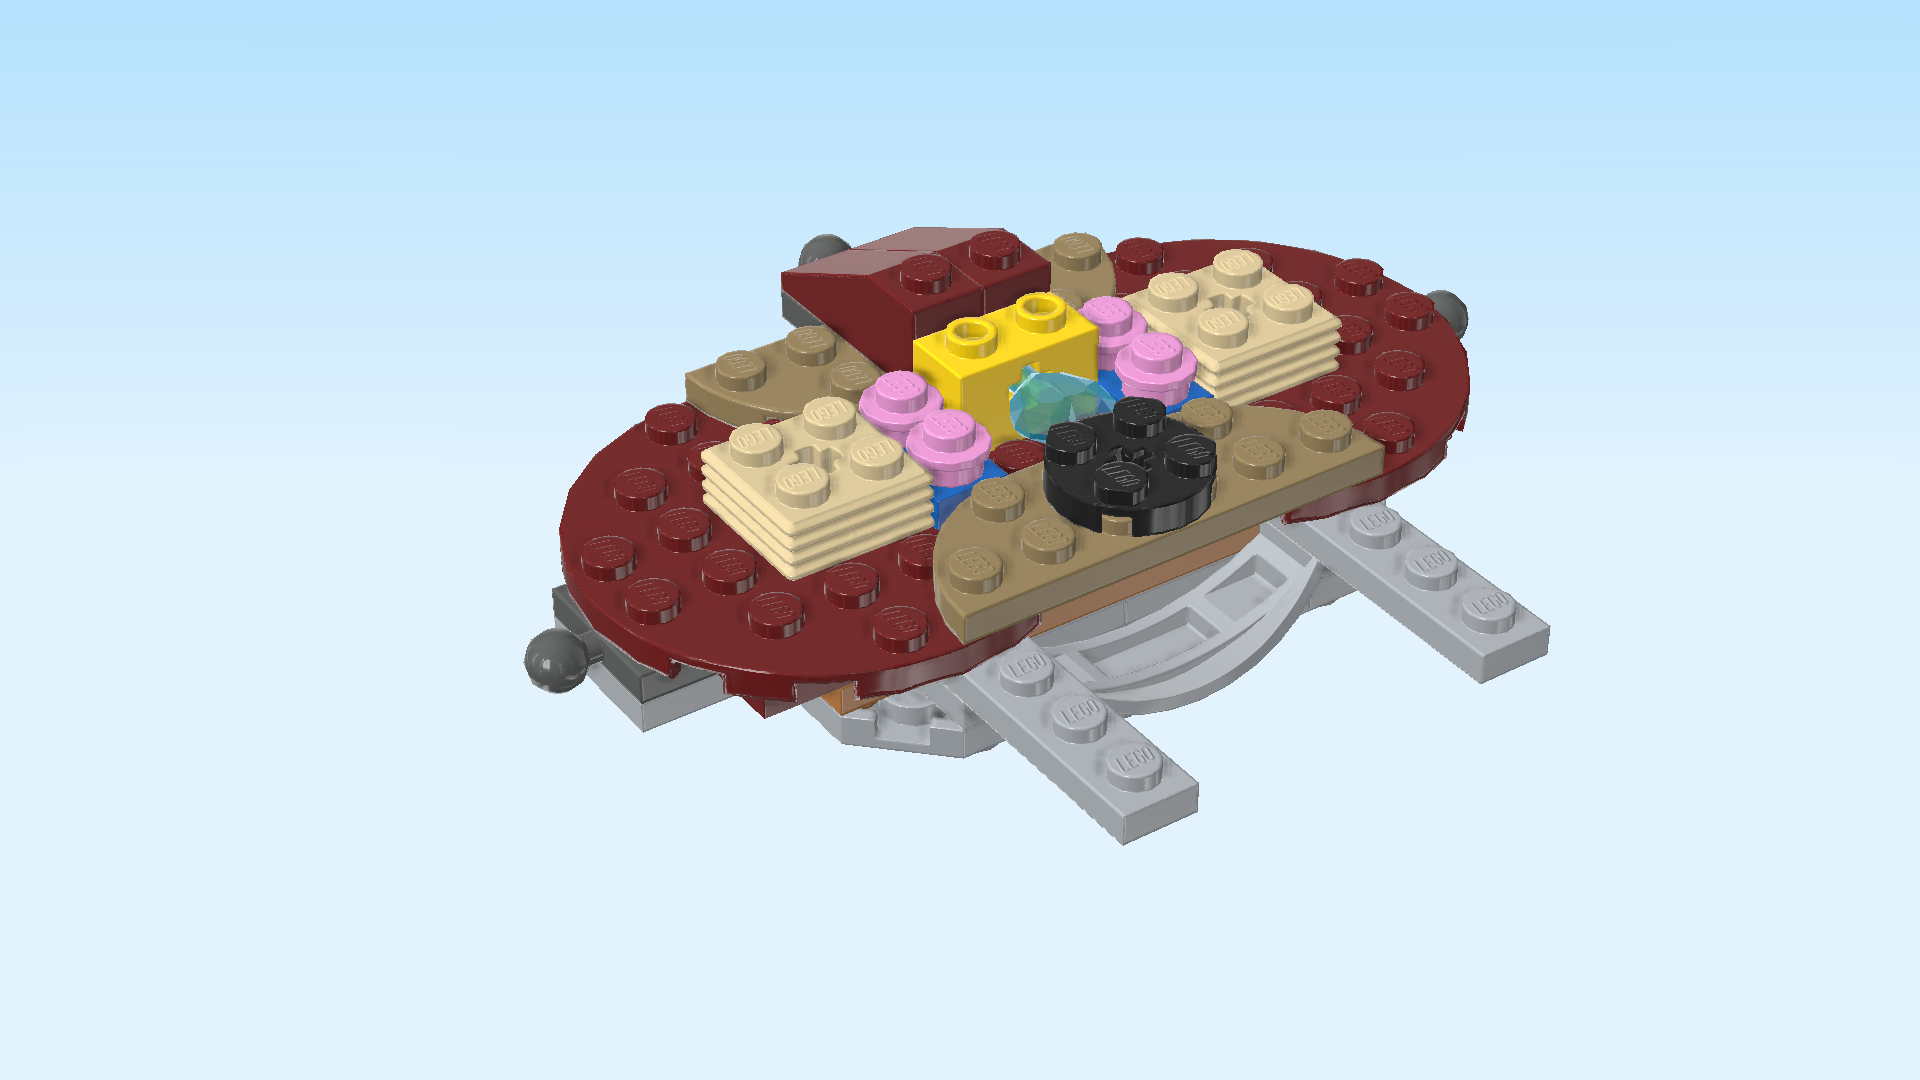
| Put 1 to the right of the 2 previous pieces. |
| Repeat symmetrically on the left: put the second low profile brick to the left of the 2 round plates 1x1. |
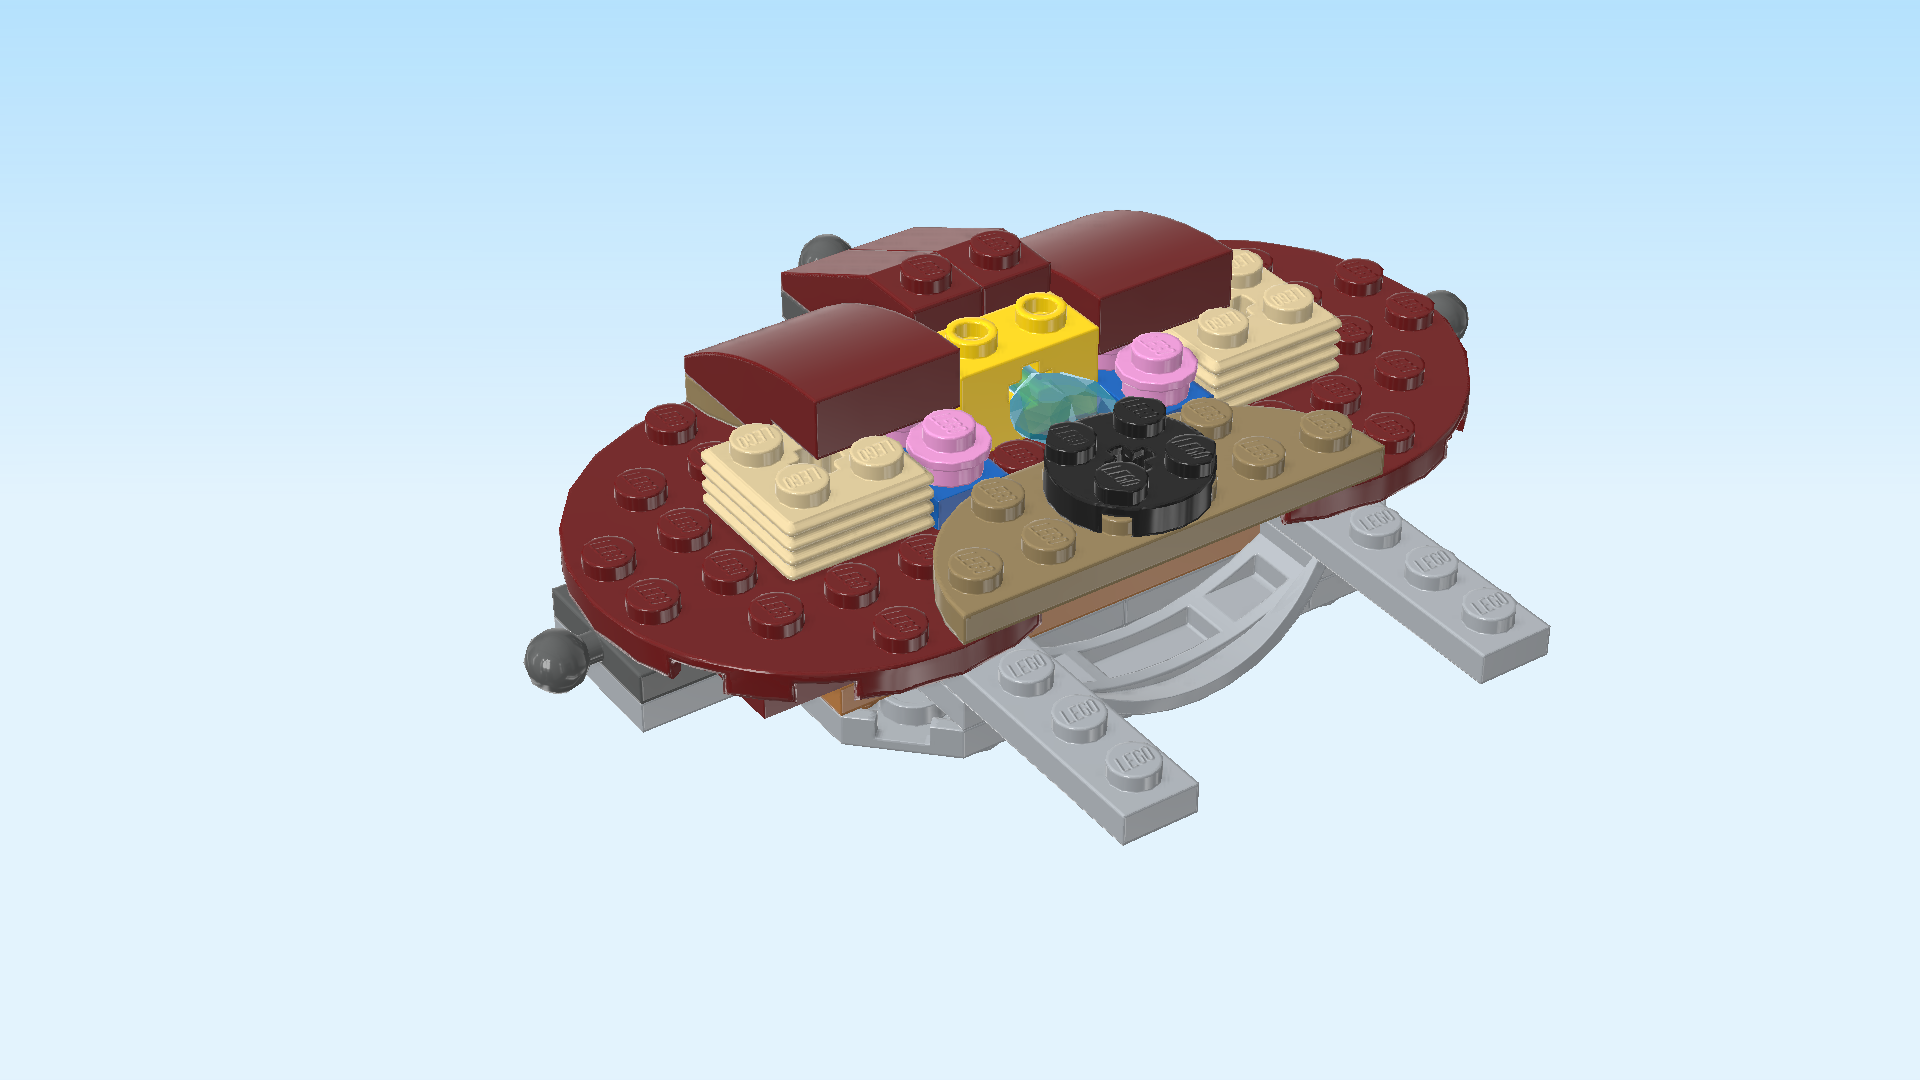
| Find 2 maroon red one-stepped curve tiles 2x3. |
| Put 1 vertically to the left of the 2 roof tiles 1x3 at the very back, slope to the back. The frontmost edge of this piece will sit on 1 knob of the previous piece and on 1 round plate 1x1. |
| Repeat symmetrically to the right of the 2 roof tiles, slope to the back. |
| Find 4 dark orange round plates 1x1. |
| Put 2 in front of the previous piece, and repeat symmetrically in front of the other curve tile 2x3 on the left. |
| Find 2 maroon red plates 1x2. |
| Put 1 horizontally on the 2 previous pieces, and repeat symmetrically on the right on the other two round plates 1x1. |
| Find 3 dark orange plates 1x2. |
| Put 1 horizontally in front of the previous piece. This piece will only connect to one knob. |
| Put 1 horizontally to the left of the previous piece. |
| Put the last one horizontally to the left of the previous piece. Also this piece will only connect to one knob. |
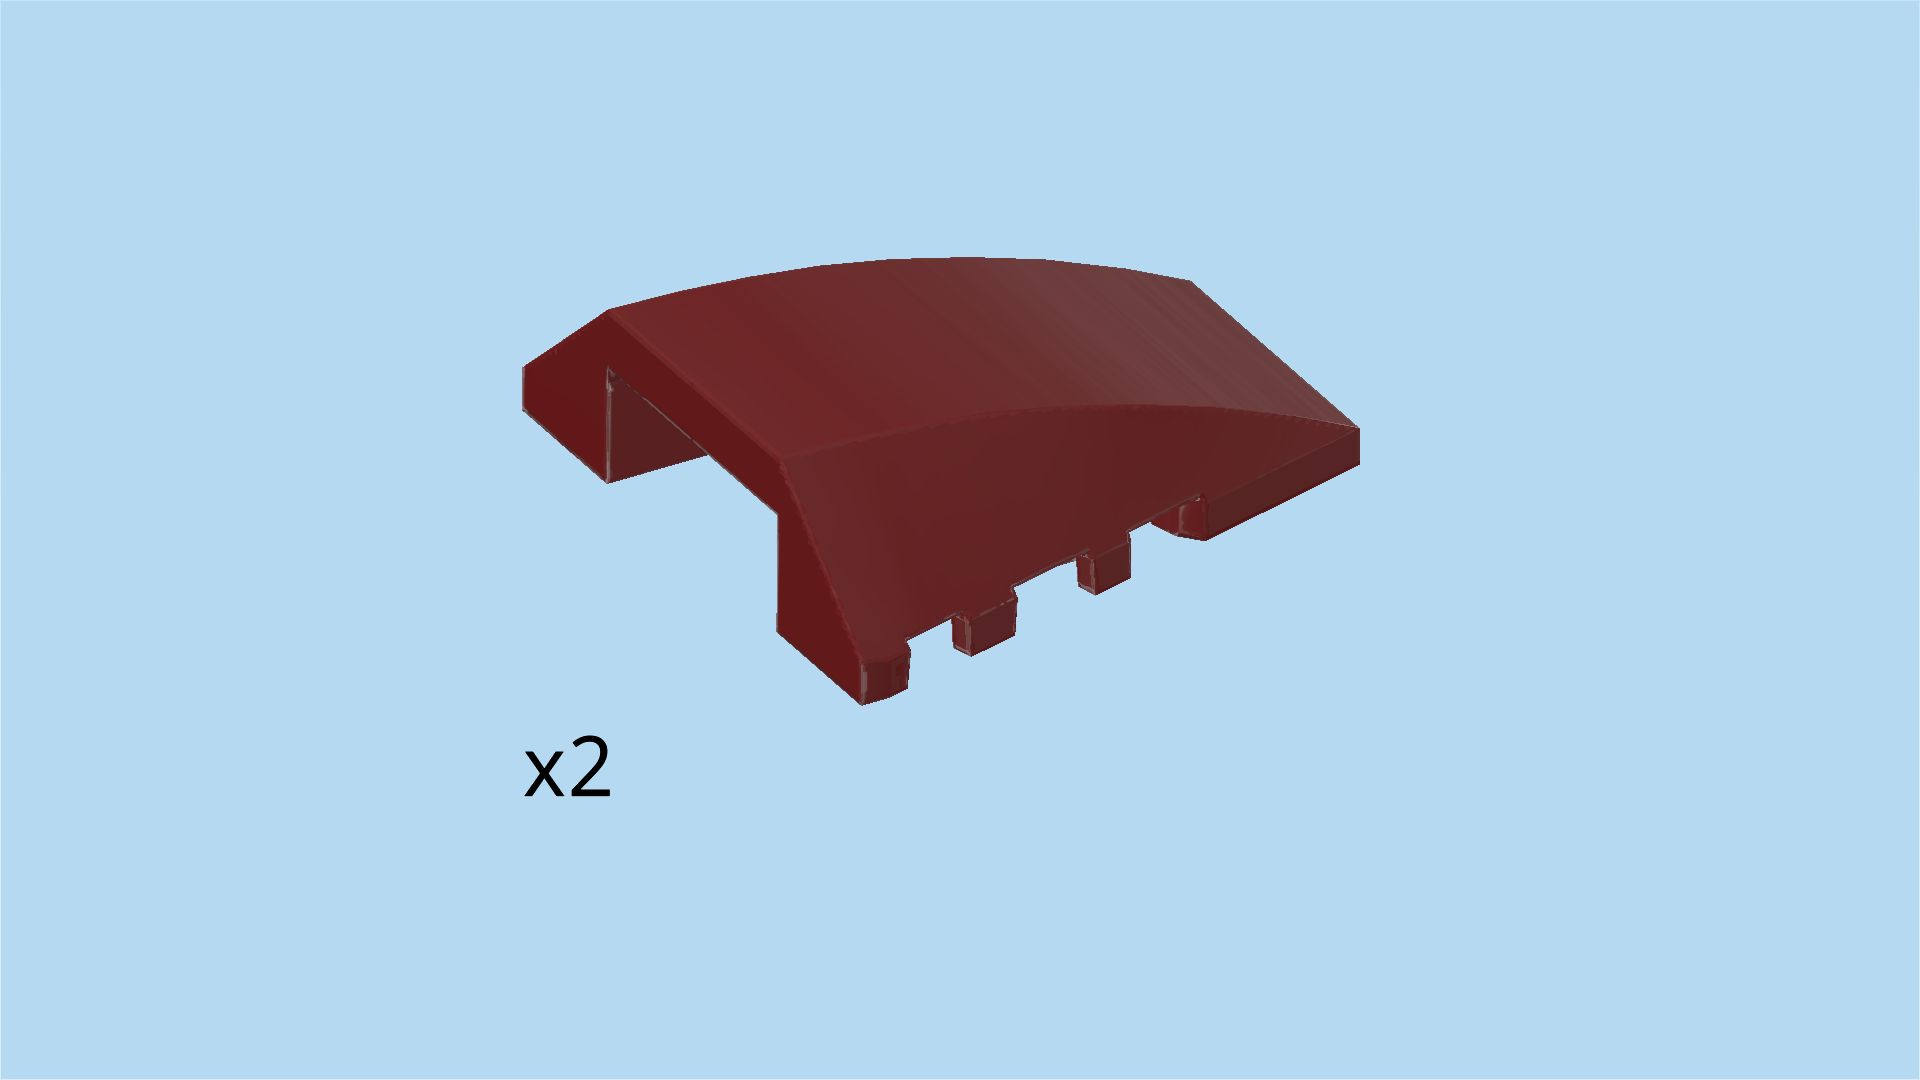
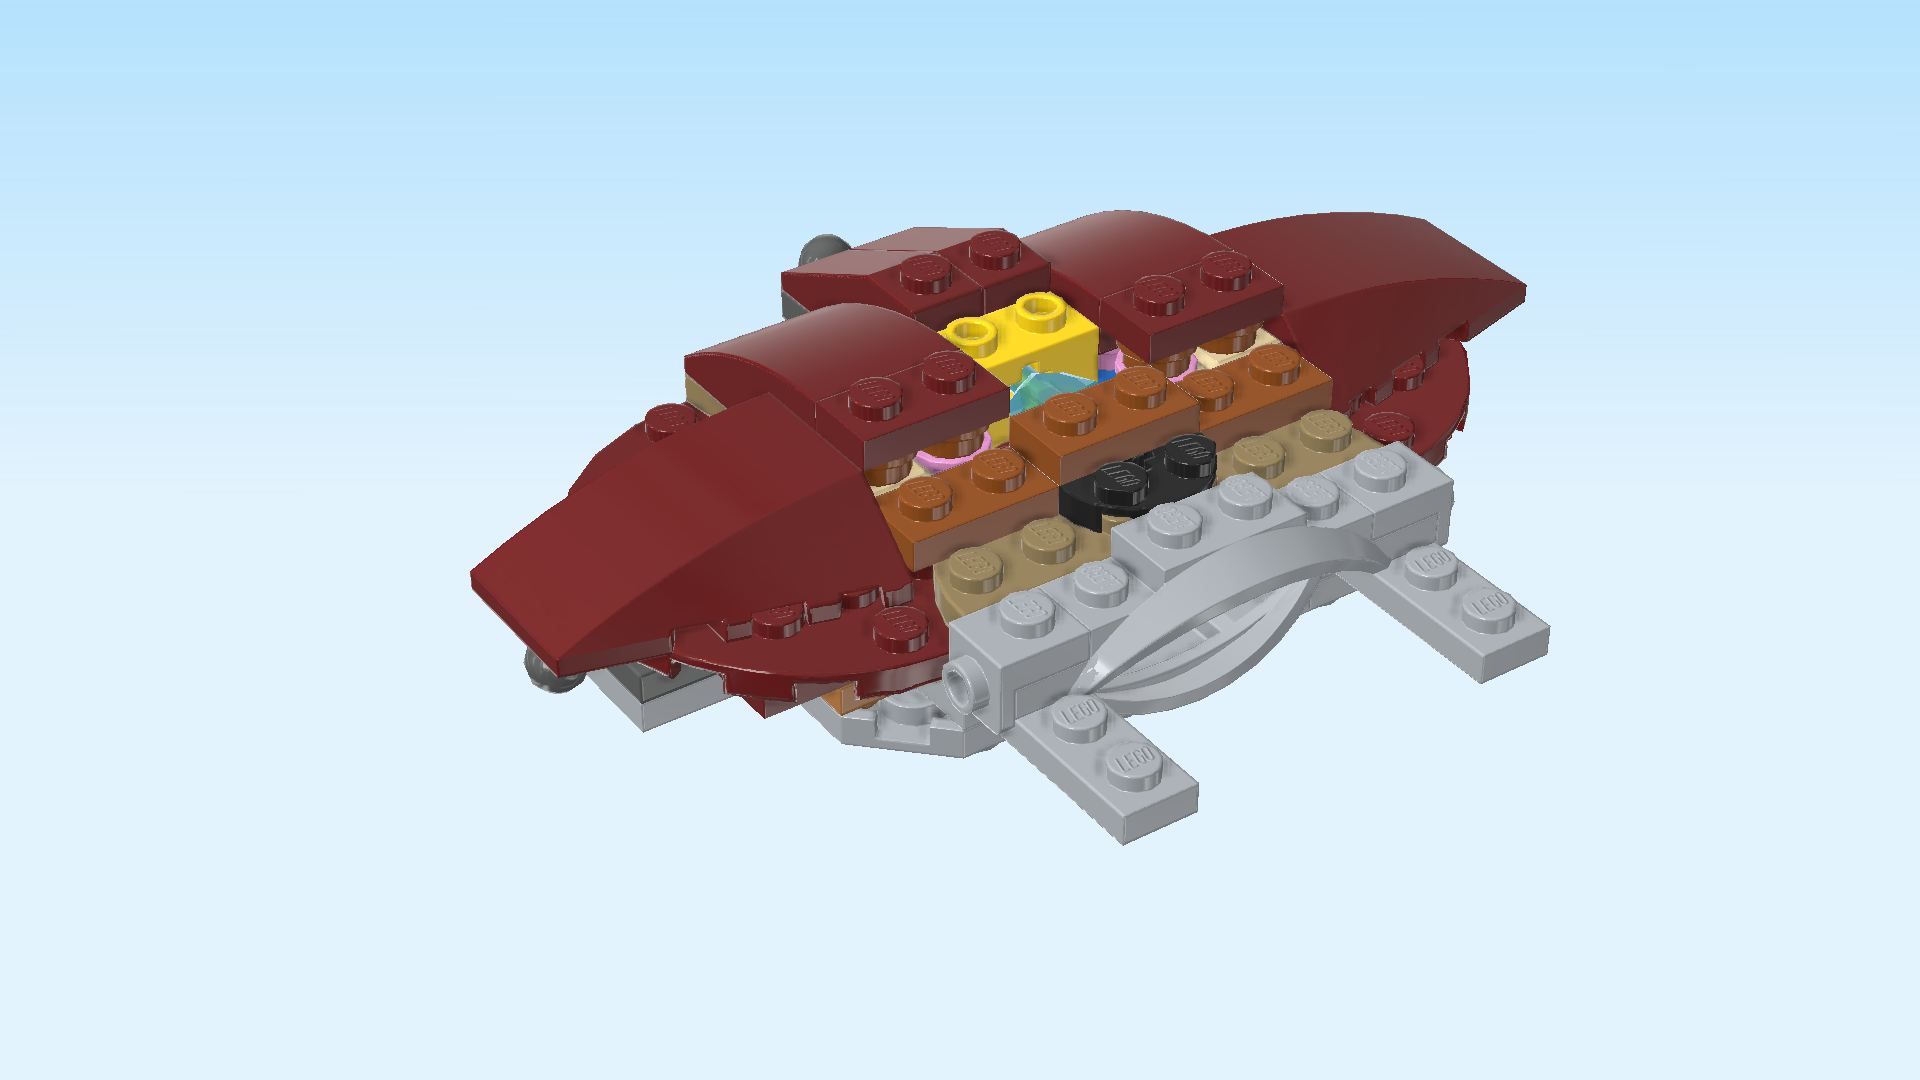
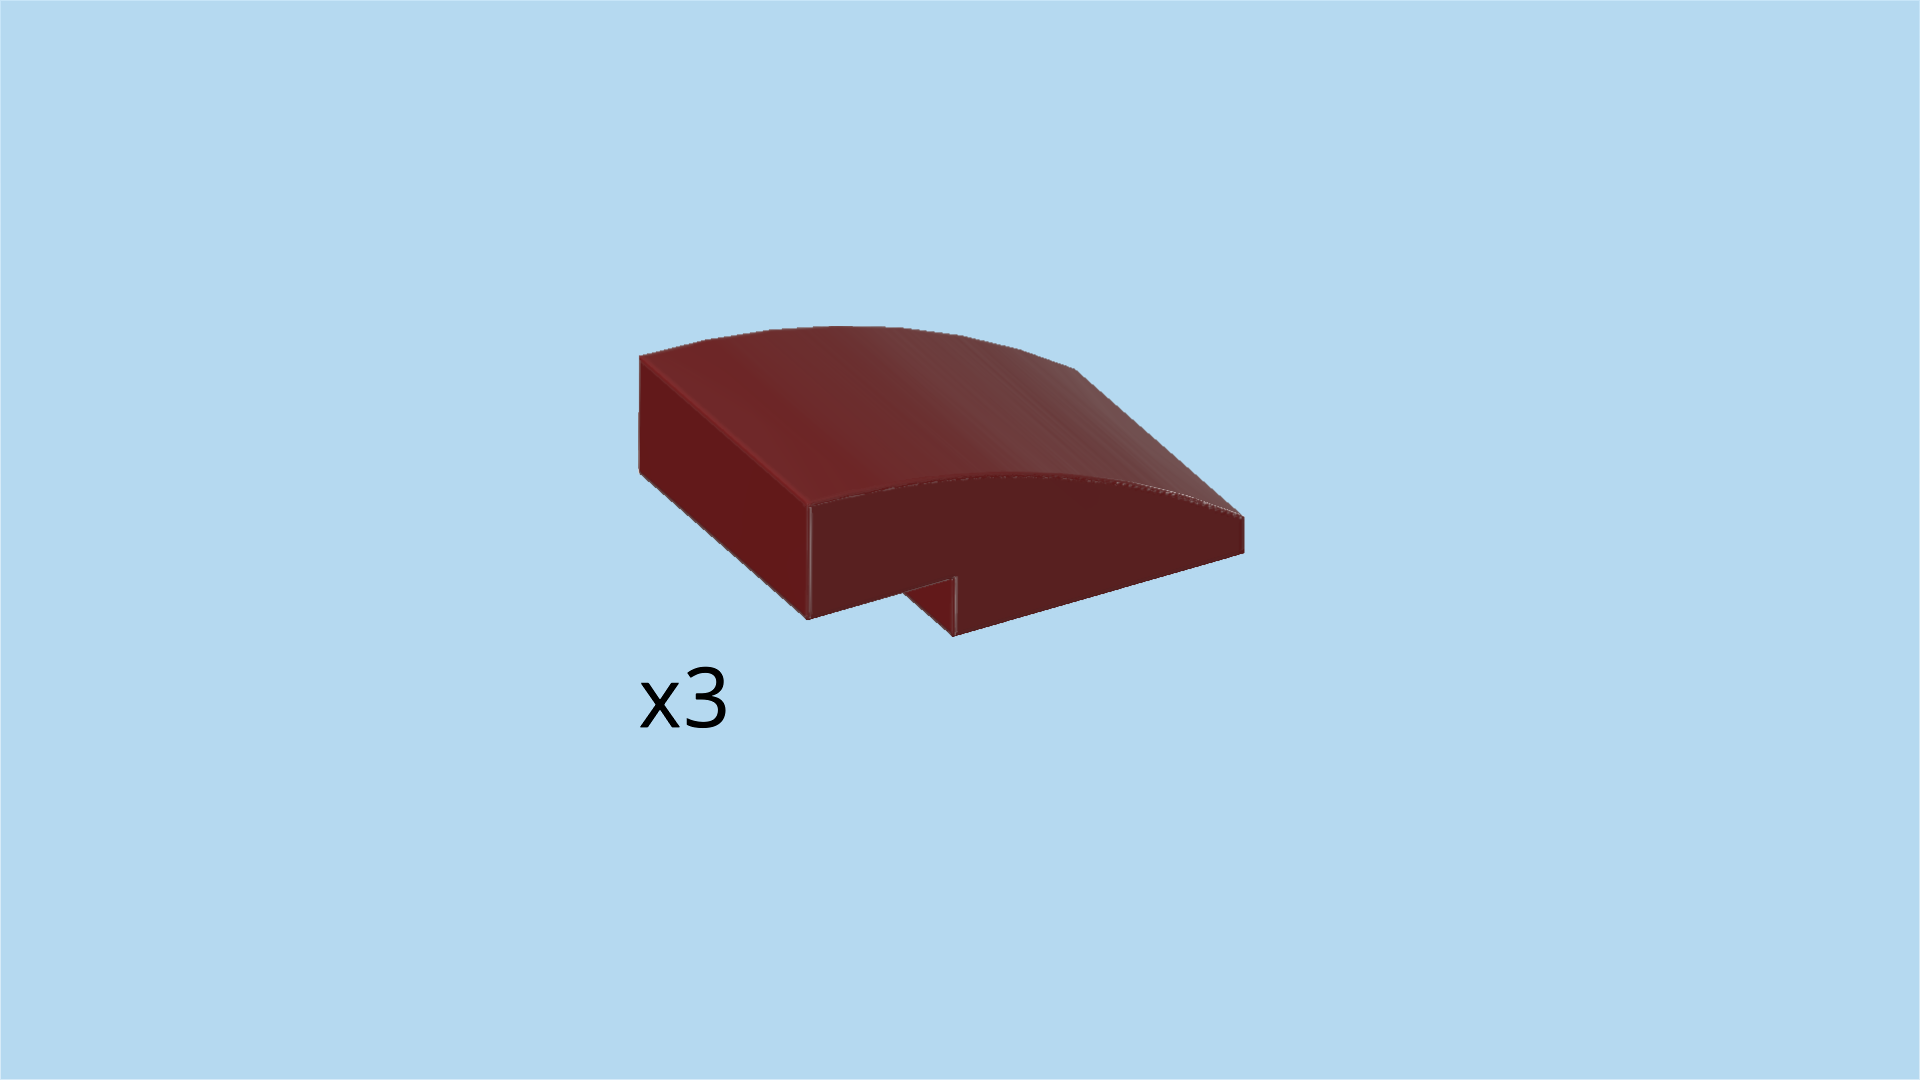
| Find 2 maroon red curve pieces 4x4x1 with 3 sloped sides. |
| Put 1 horizontally on the 2 middle rows, starting from the left edge, narrow end to the left. Make sure 1 column of the curve piece is overhanging to the left, and roofing the ball underneath it. |
| Repeat symmetrically on the right, narrow end to the right, 1 column overhanging to the right. |
| Find 1 medium stone grey mudguard screen 1x6 with steps and 6 knobs. |
| Put it horizontally on the third row from the front, mudguard screen to the front. This means it is mounted on the third knobs of the 2 plates that are sticking out towards the front. |
| This piece is actually the upper lip of the manta ray's mouth! The lower lip is slightly retracted compared to the upper lip. |
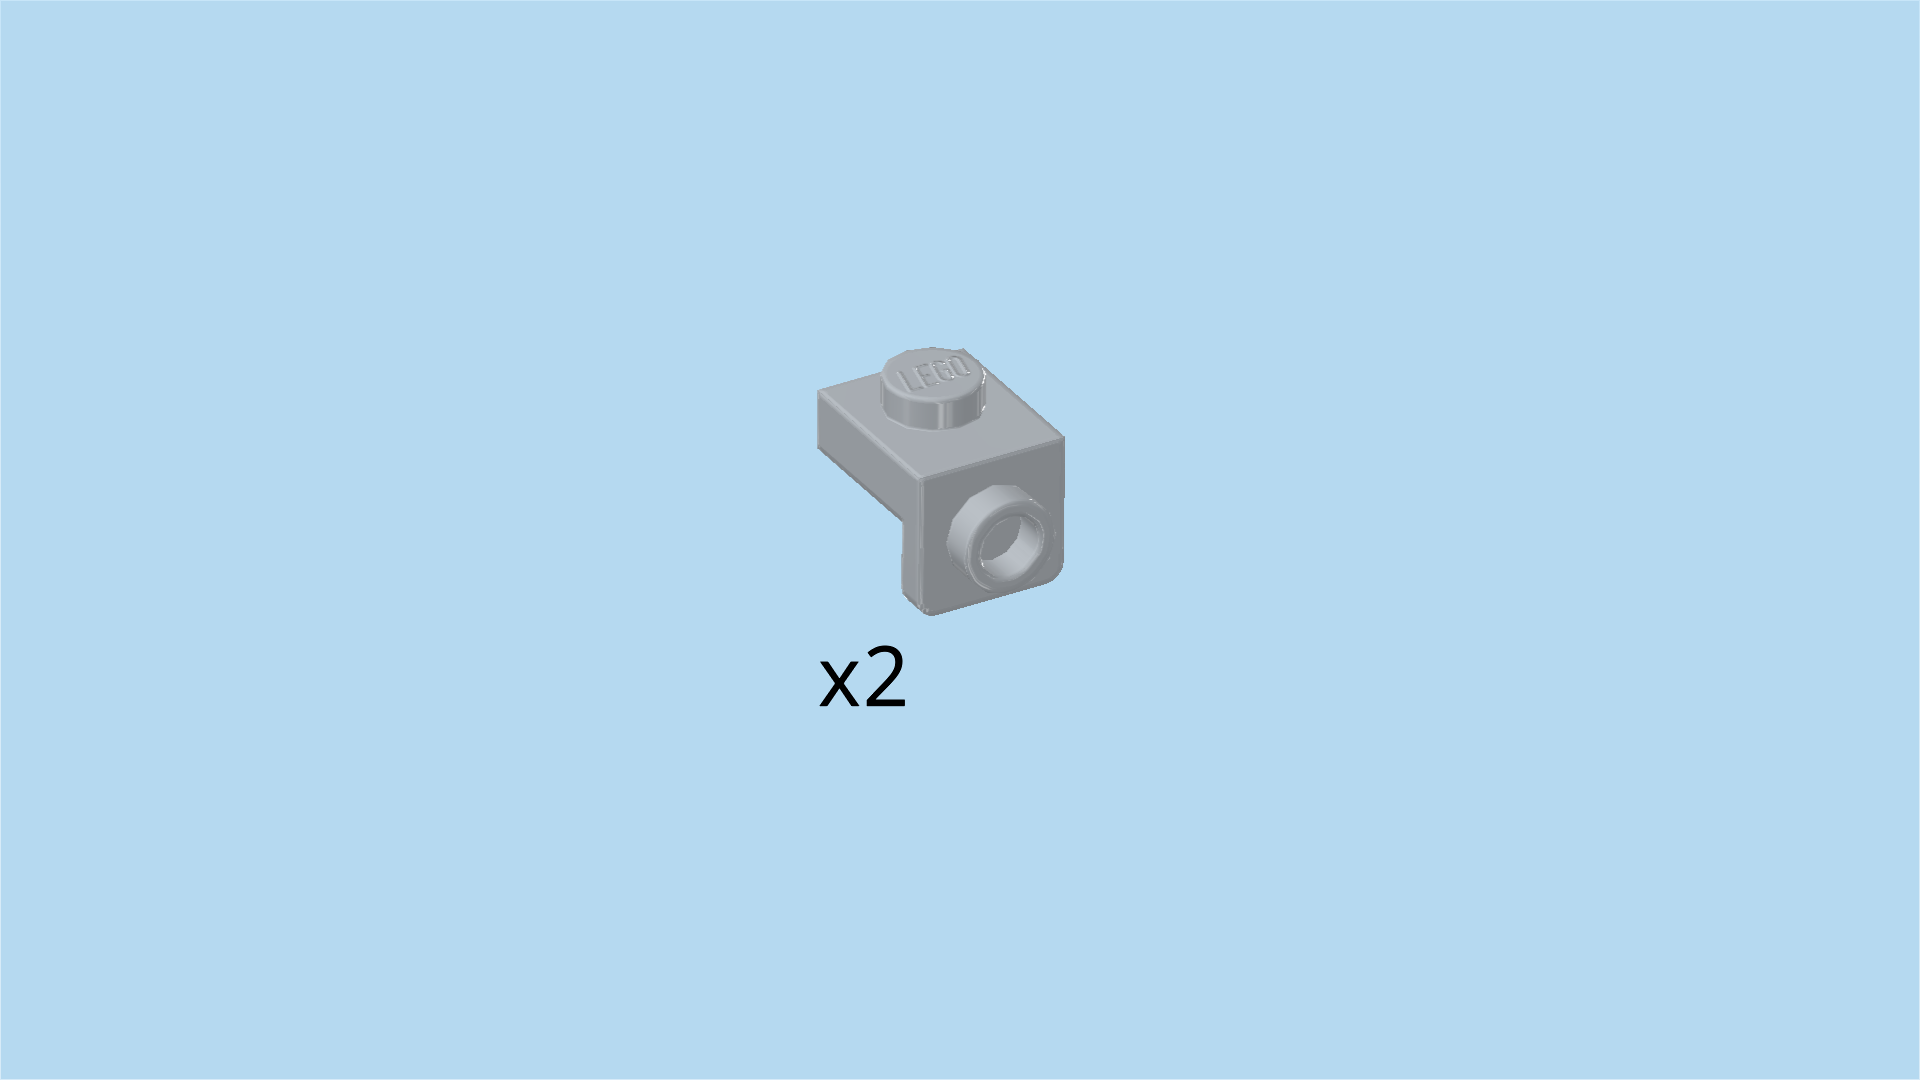
| Find 2 medium stone grey top angle plates 1x1 - 1x1 with side knob. |
| Put 1 on the rightmost knob of the previous piece, side knob pointing to the right. |
| Repeat symmetrically on the left, side knob pointing to the left. |
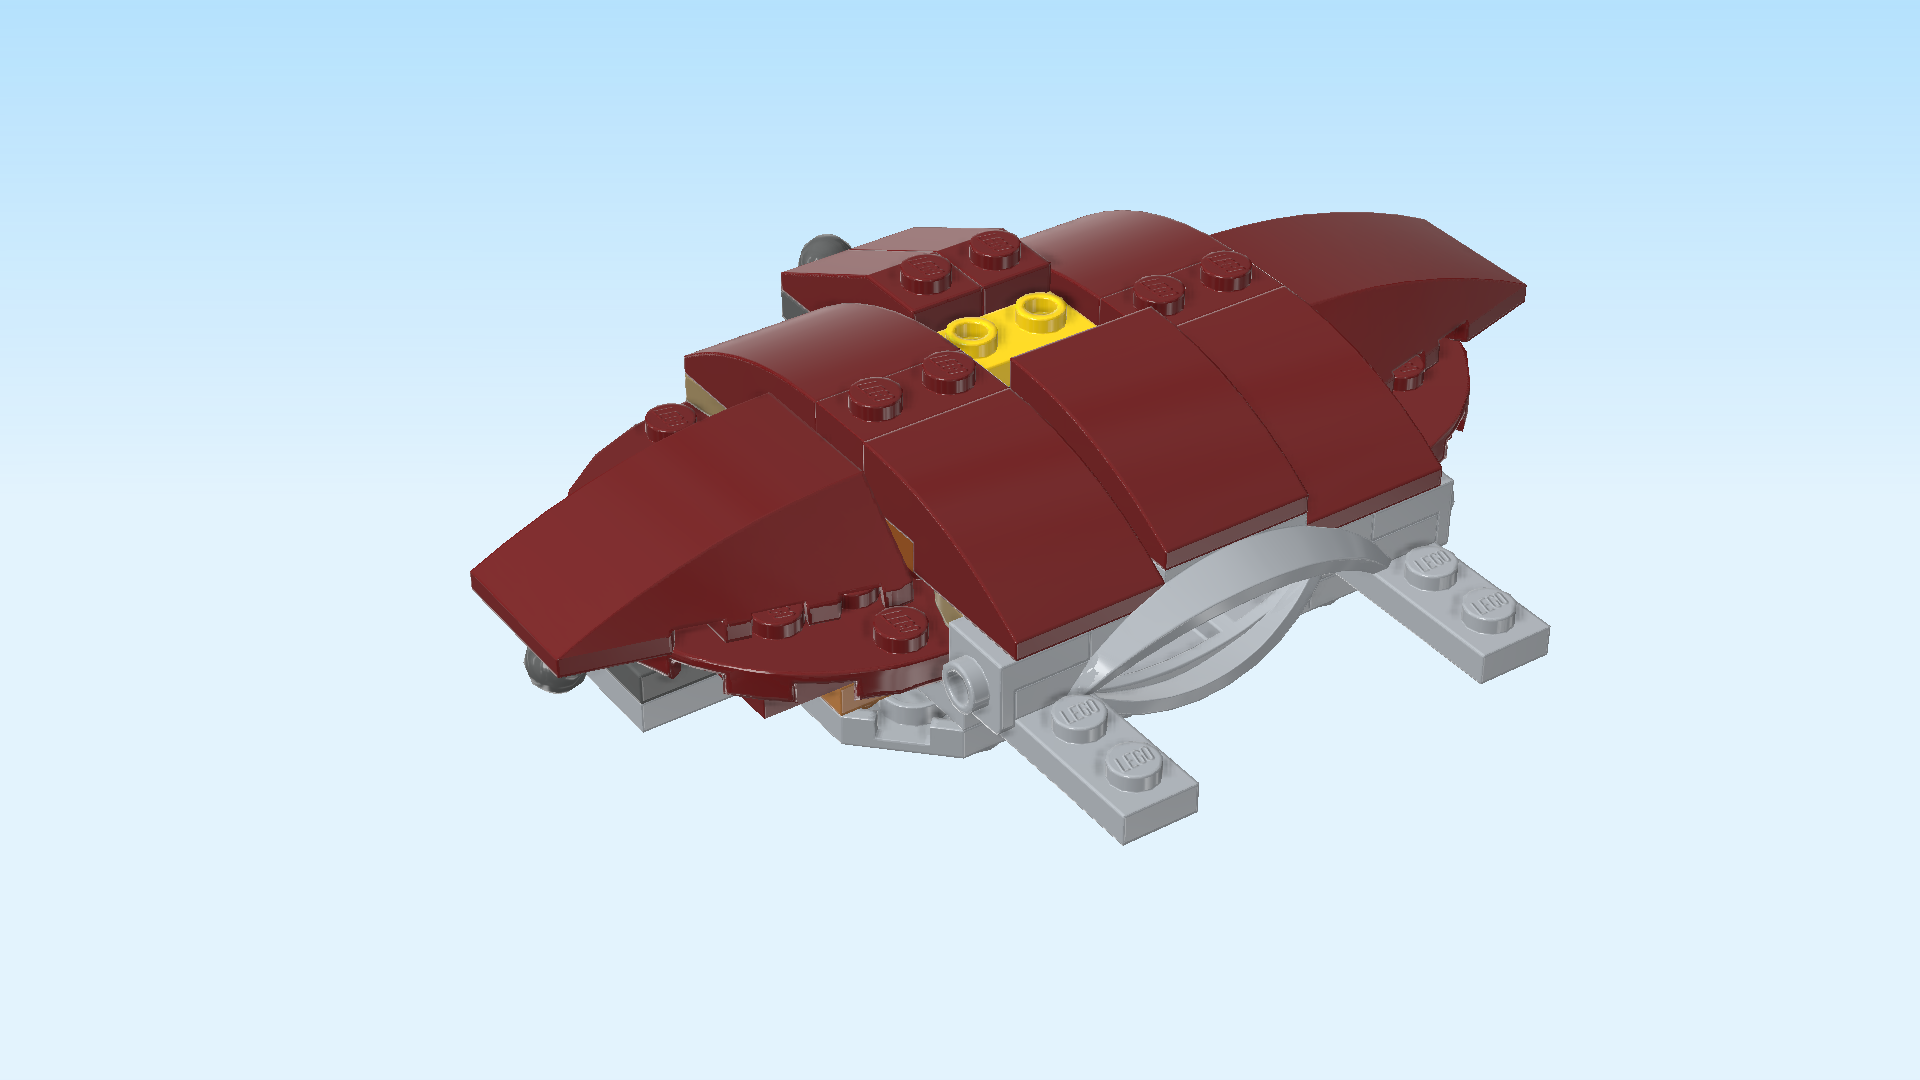
| Find 3 maroon red one-stepped curve tiles 2x3. |
| Put 1 vertically centered directly behind the mudguard, slope to the front. |
| Put 1 vertically to the left of the previous piece, and the other one vertically to the right of the previous piece, slopes to the front. |
| If done correctly, all 3 are mounted on the front edge directly behind the upper lip. |
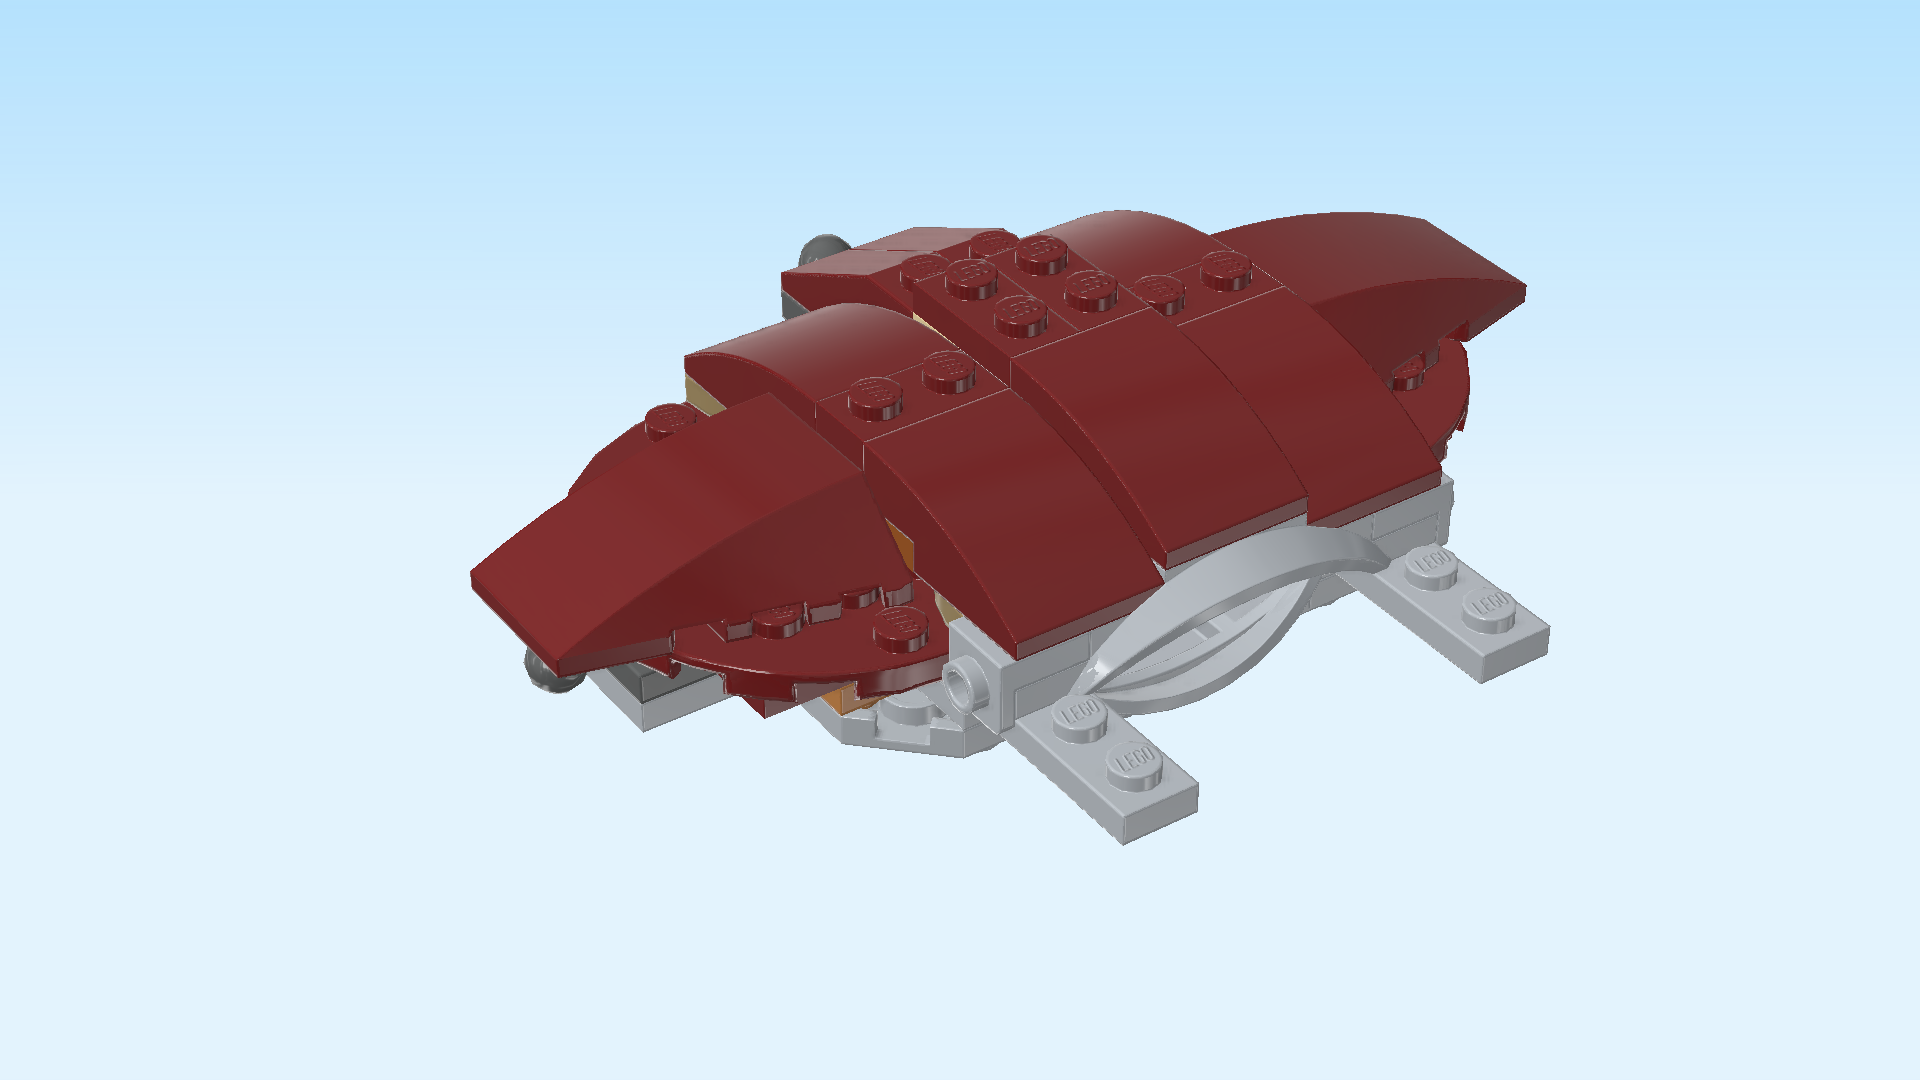
| Next, let's make the top plate of the manta ray. |
| Collect the following 2 pieces: |
| 1 pale ocher yellow plate 2x2, |
| and 1 maroon red plate 1x2. |
| Put the plate 2x2 on the table. |
| Put the plate 1x2 vertically on the right column. |
| Find another maroon red plate 1x2. |
| Put it vertically on the left column. |
| Mount the top plate in the hole located in the very center of the manta ray, directly above the crystal heart. |
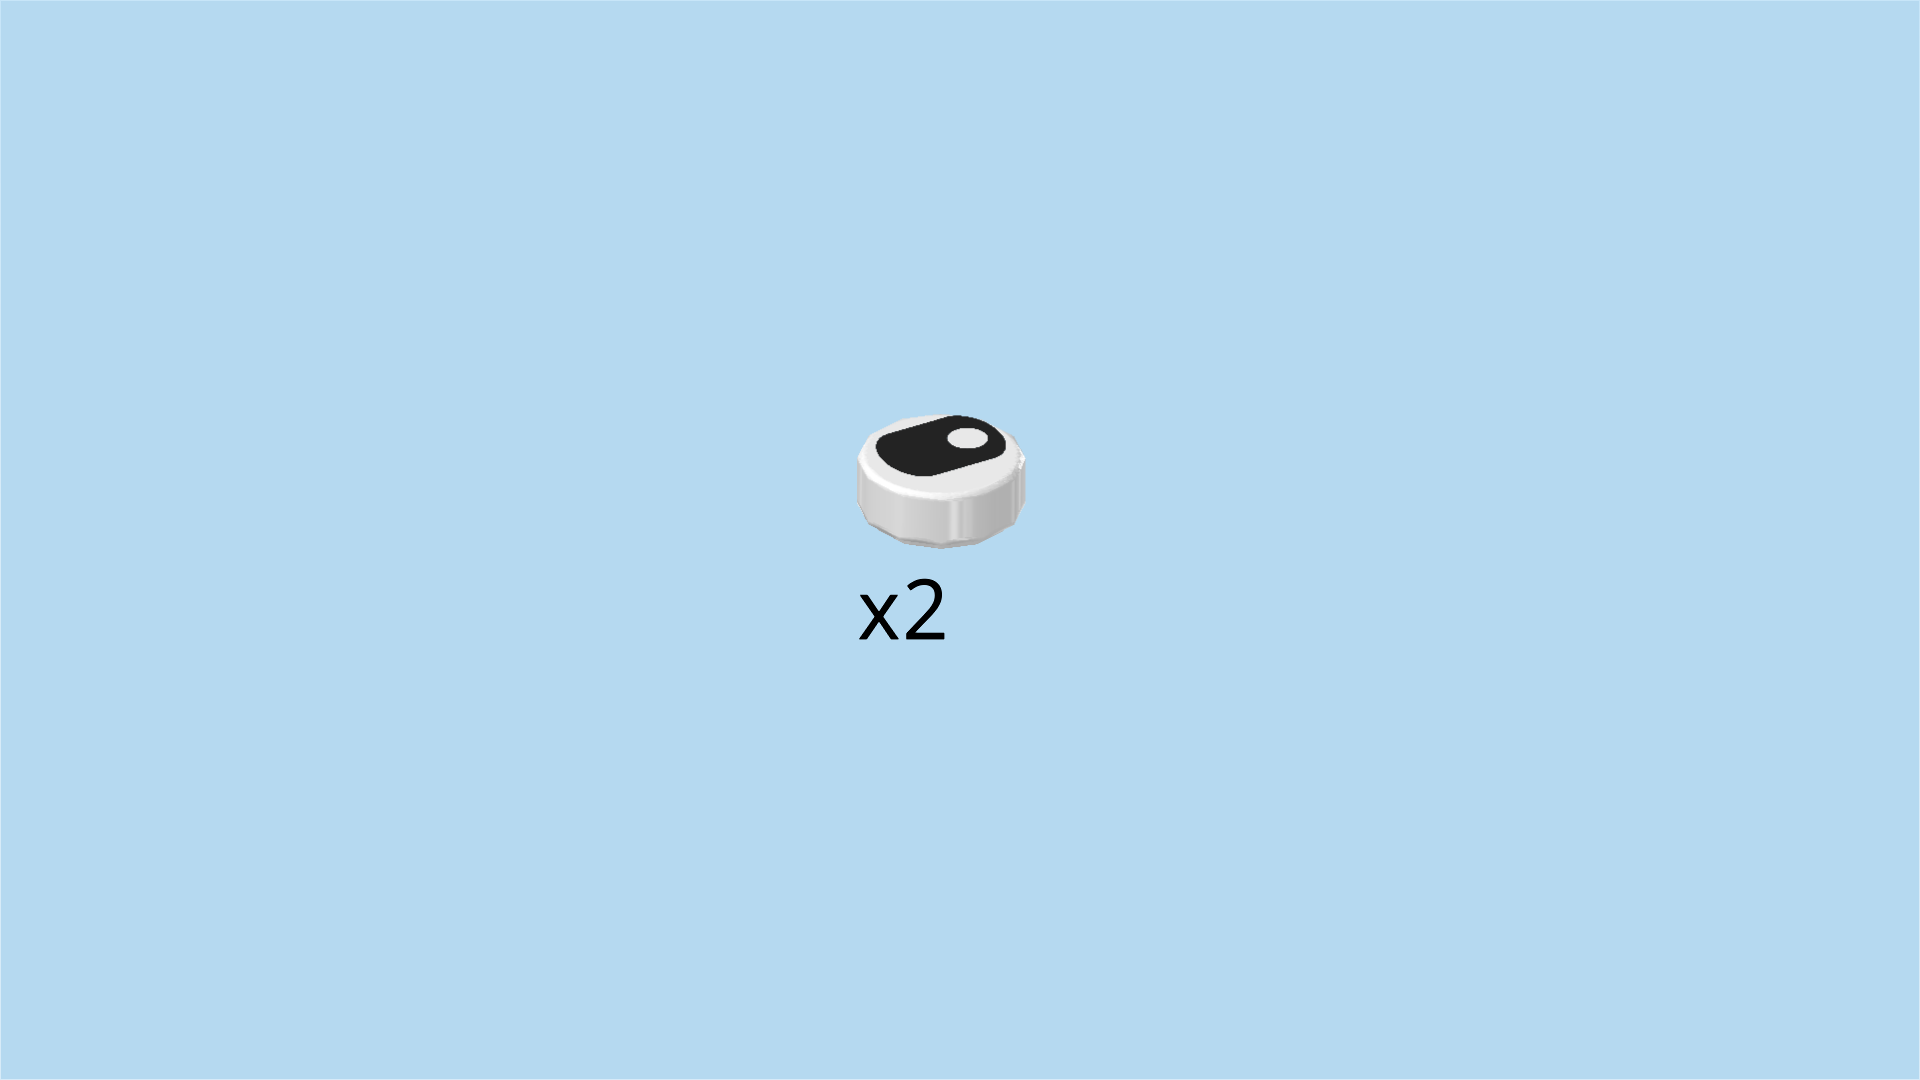
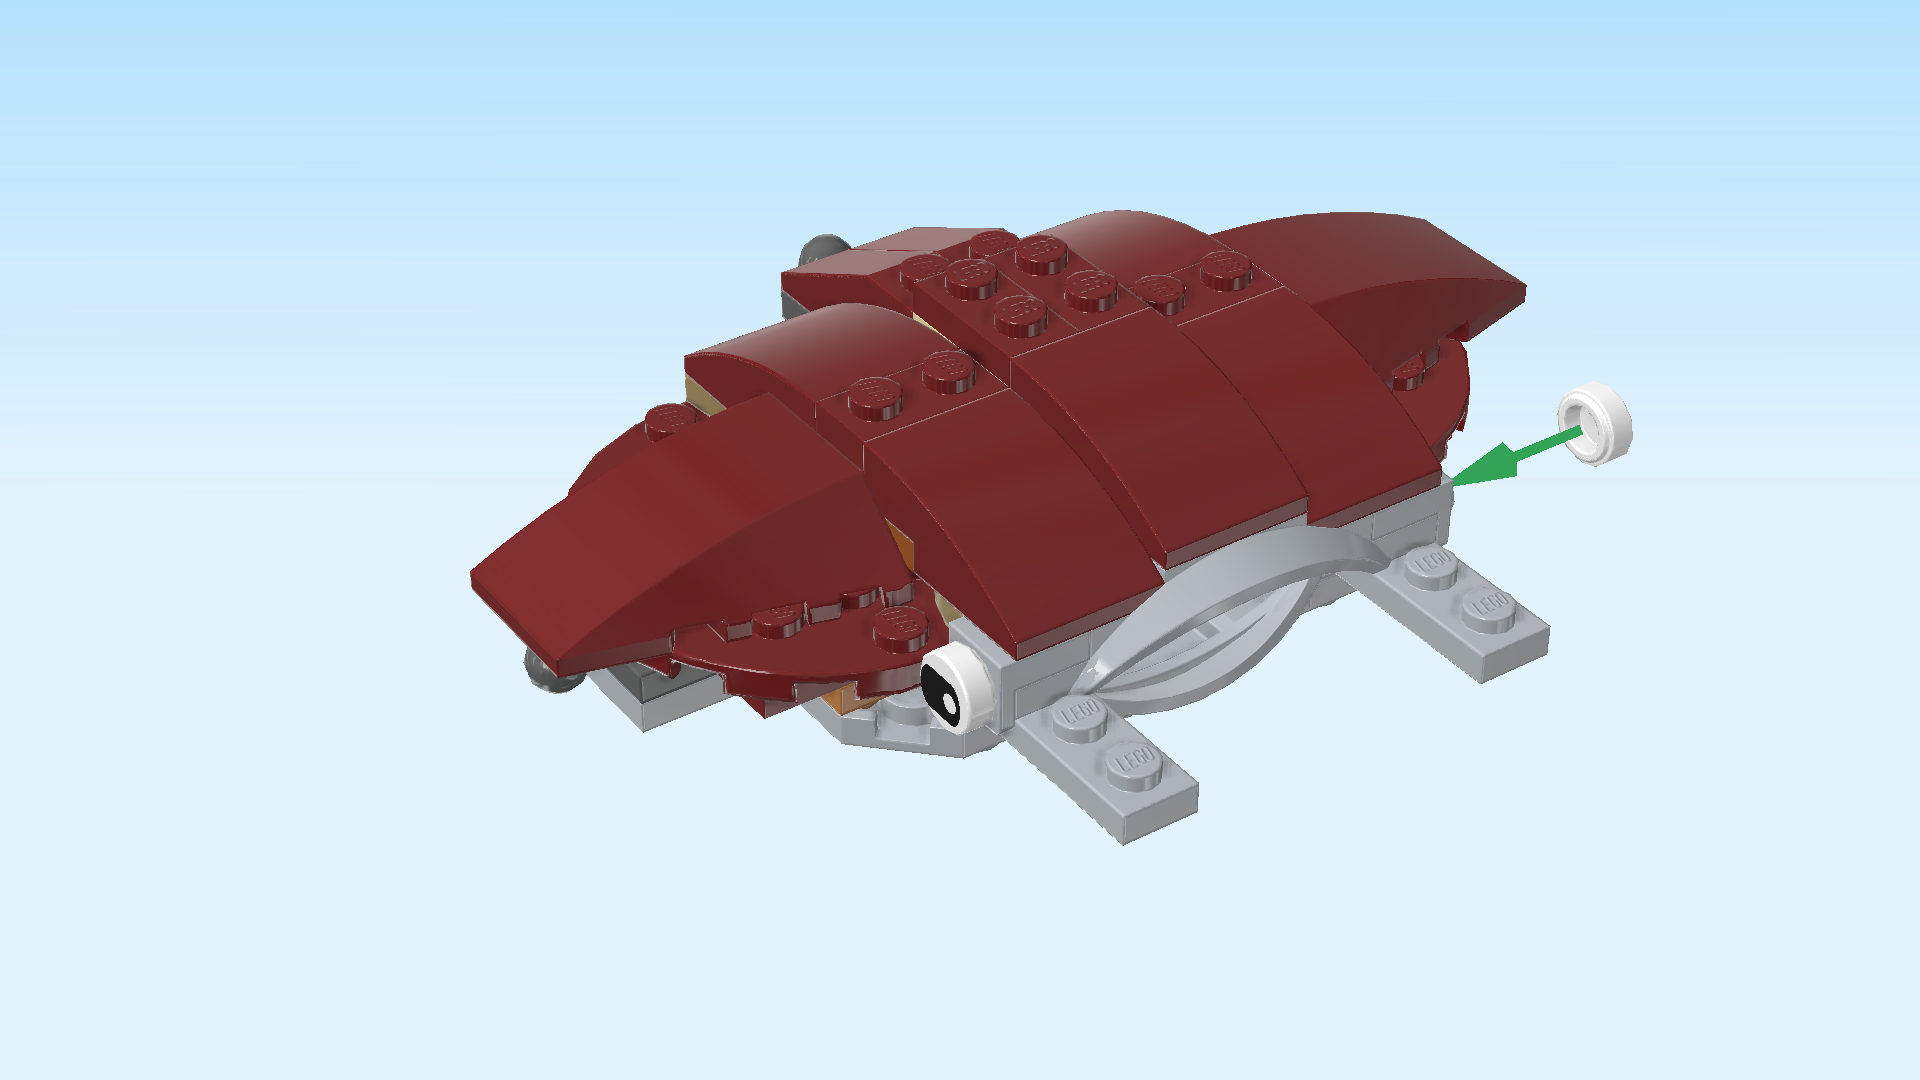
| Find 2 white round tiles 1x1. |
| Mount 1 upright on the single side knob pointing to the right at the front of the structure. |
| Repeat symmetrically on the single side knob pointing to the left. The pieces are printed with black oval eyes. |
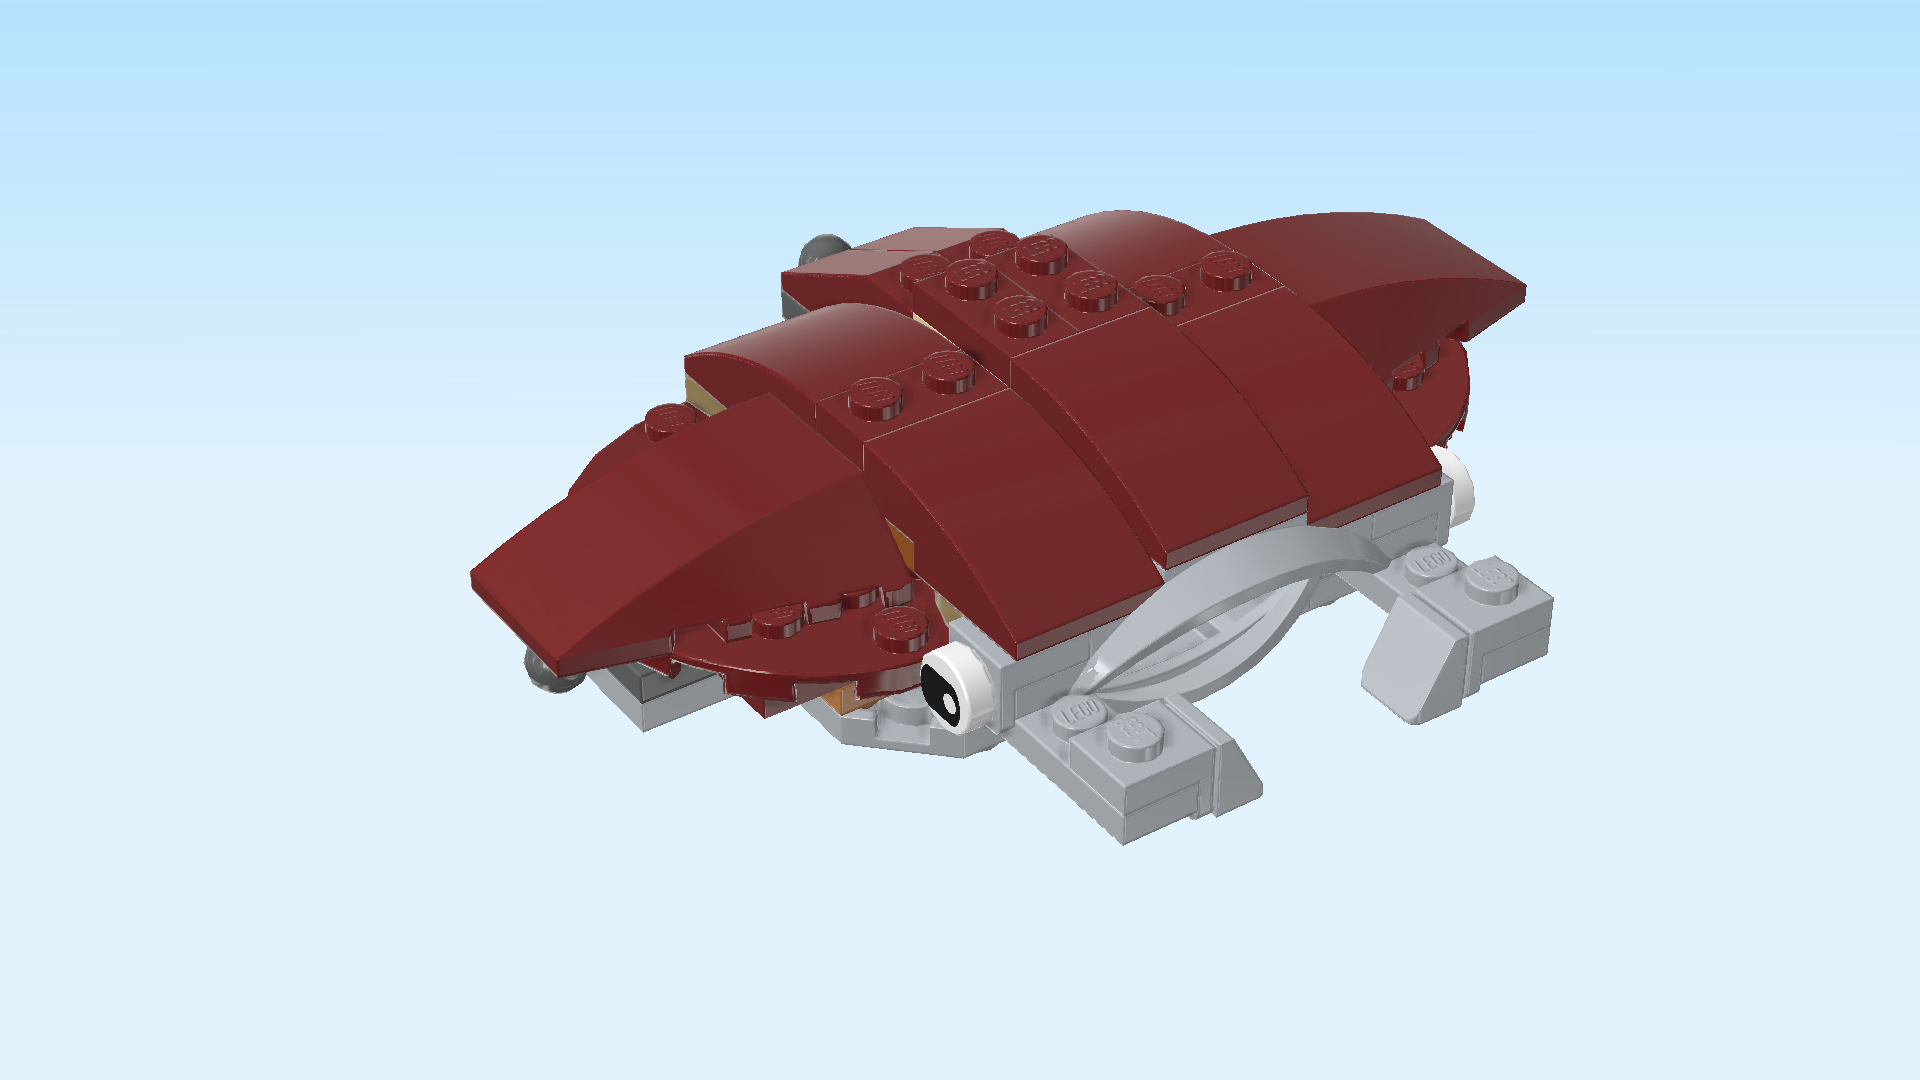
| Find 2 medium stone grey top angle plates 1x1 - 1x1 with side knob. |
| Put 1 on the frontmost knob of the right plate protruding to the front, side knob pointing to the left. |
| Repeat symmetrically on the frontmost knob of the left plate protruding to the front, side knob pointing to the right. |
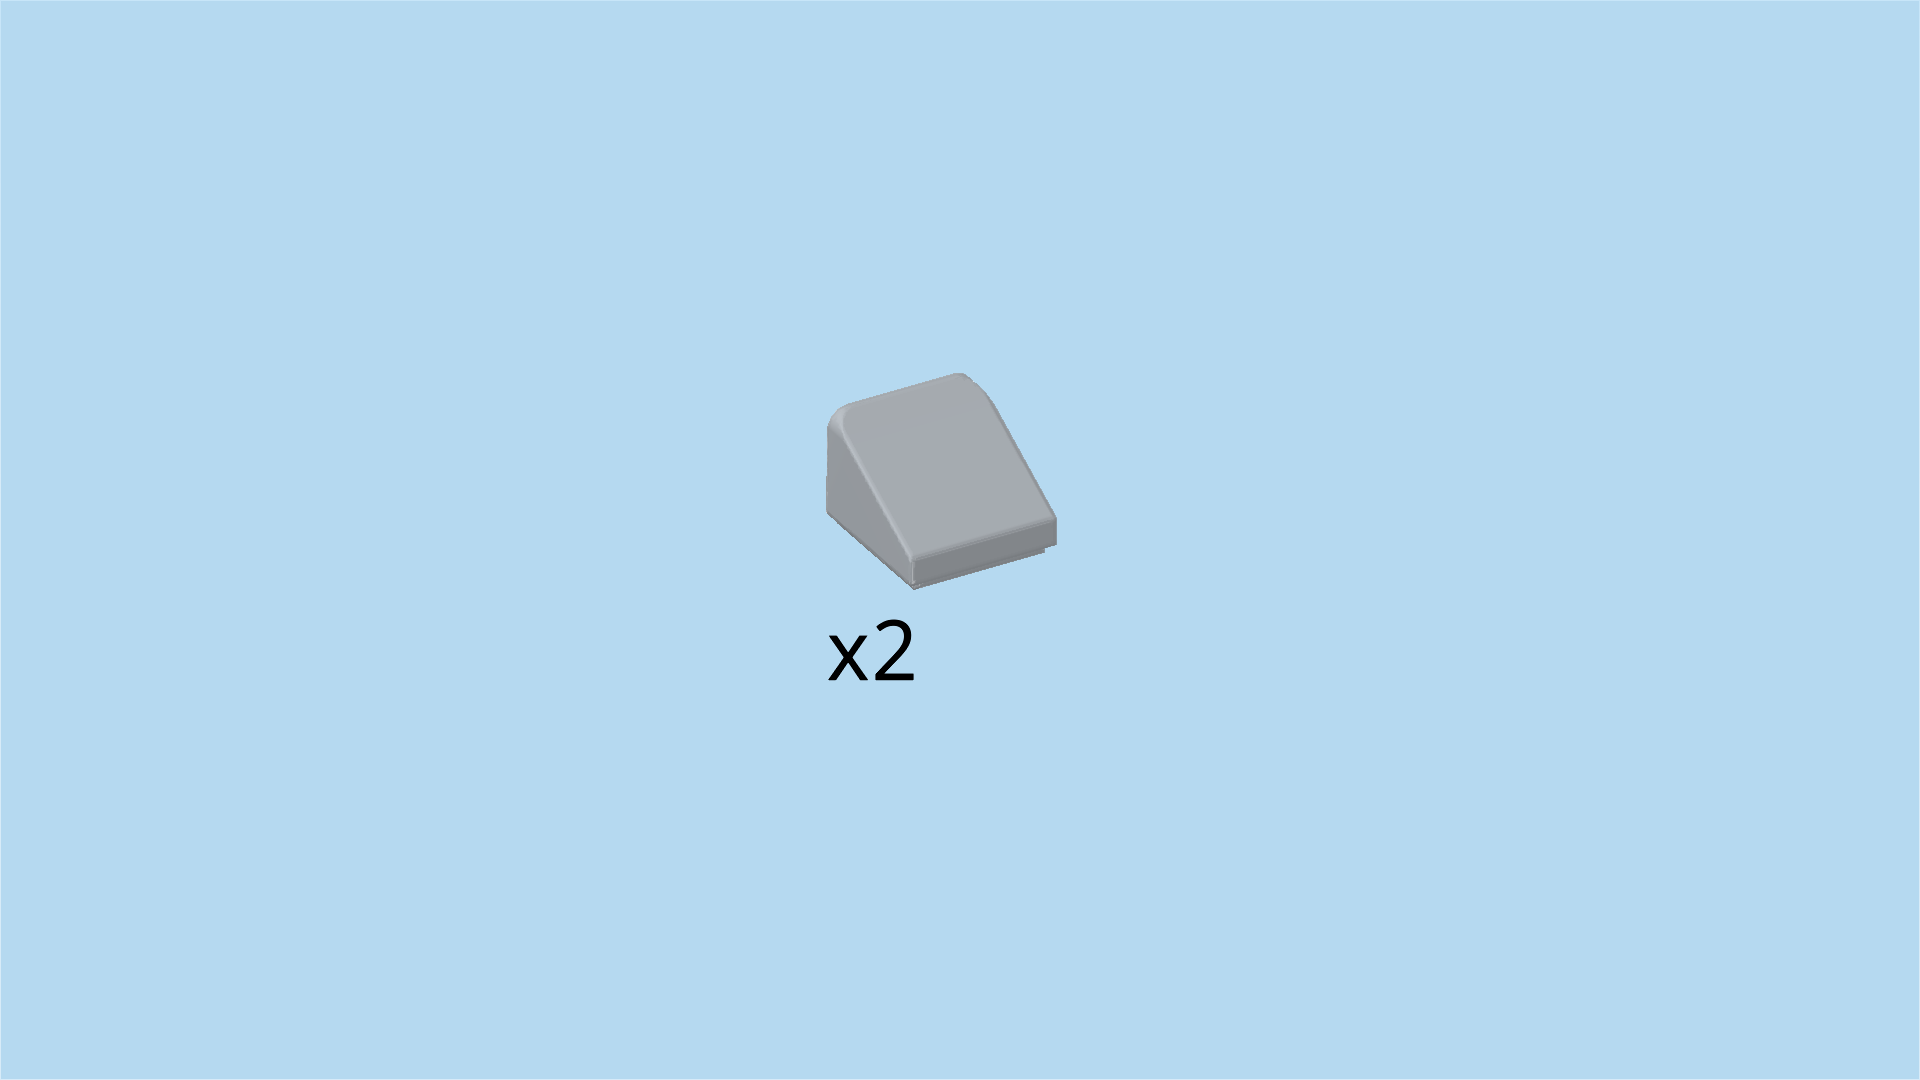
| Find 2 medium stone grey smooth roof tiles 1x1x⅔. |
| Put 1 upright on the side knob of the previous piece, slope to the top. |
| Repeat symmetrically on the opposite side knob, again slope to the top. |
| That was tricky, great job! These two protruding structures are actually the so-called "cephalic fins" of the manta ray. They help the manta ray push food into its mouth during filter feeding. Manta rays are fascinating creatures, don't you think? |
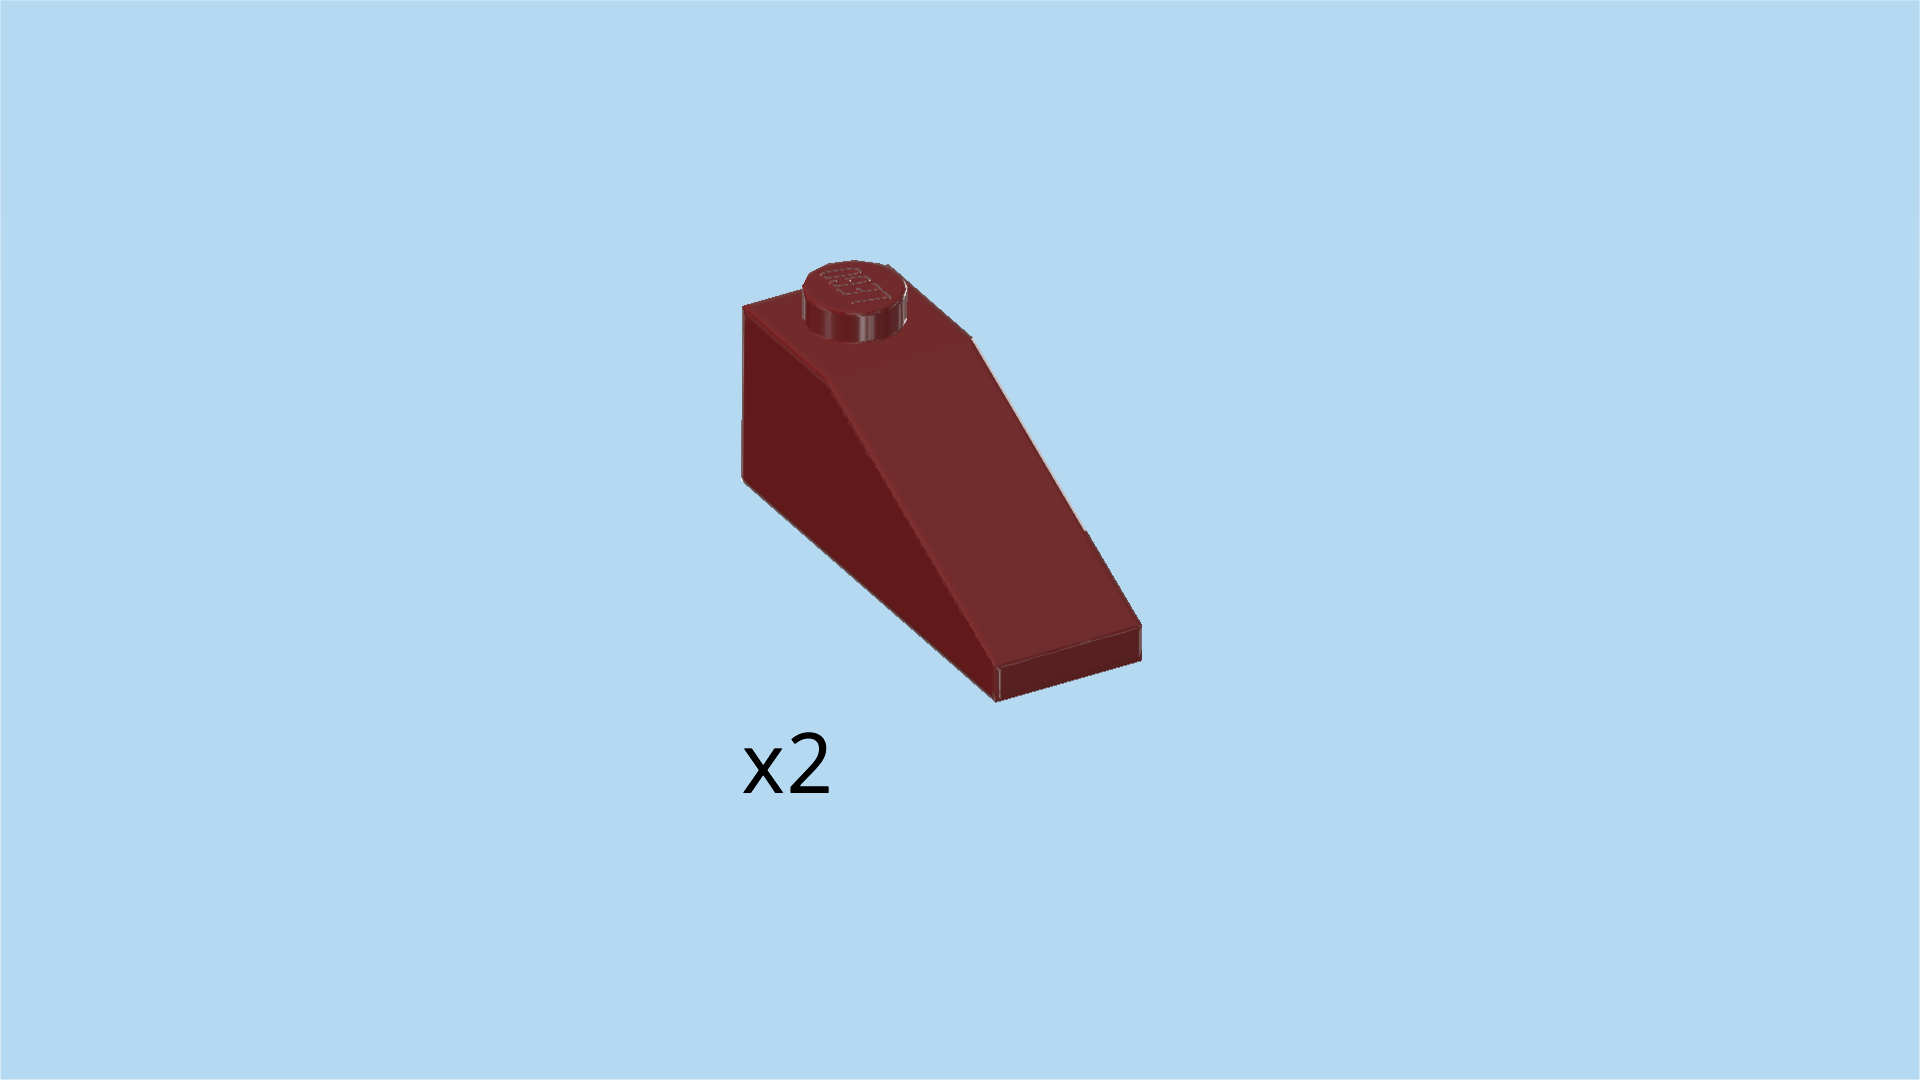
| Find 2 maroon red roof tiles 1x3, 25°. |
| First, turn the structure left to right. Now, the mudguard screen (or the manta ray's mouth) and the protruding structures (the cephalic fins) we have just built should be pointing to the back. |
| Flip 1 upright, turn it horizontally, its knob facing you and slope to the right. |
| Mount it in this orientation on the 2 side knobs pointing to the front in the right half of the structure, ⅓ overhanging to the left. |
| Repeat symmetrically on the left: put 1 upright horizontally on the 2 side knobs pointing to the front in the left half, ⅓ overhanging to the right. |
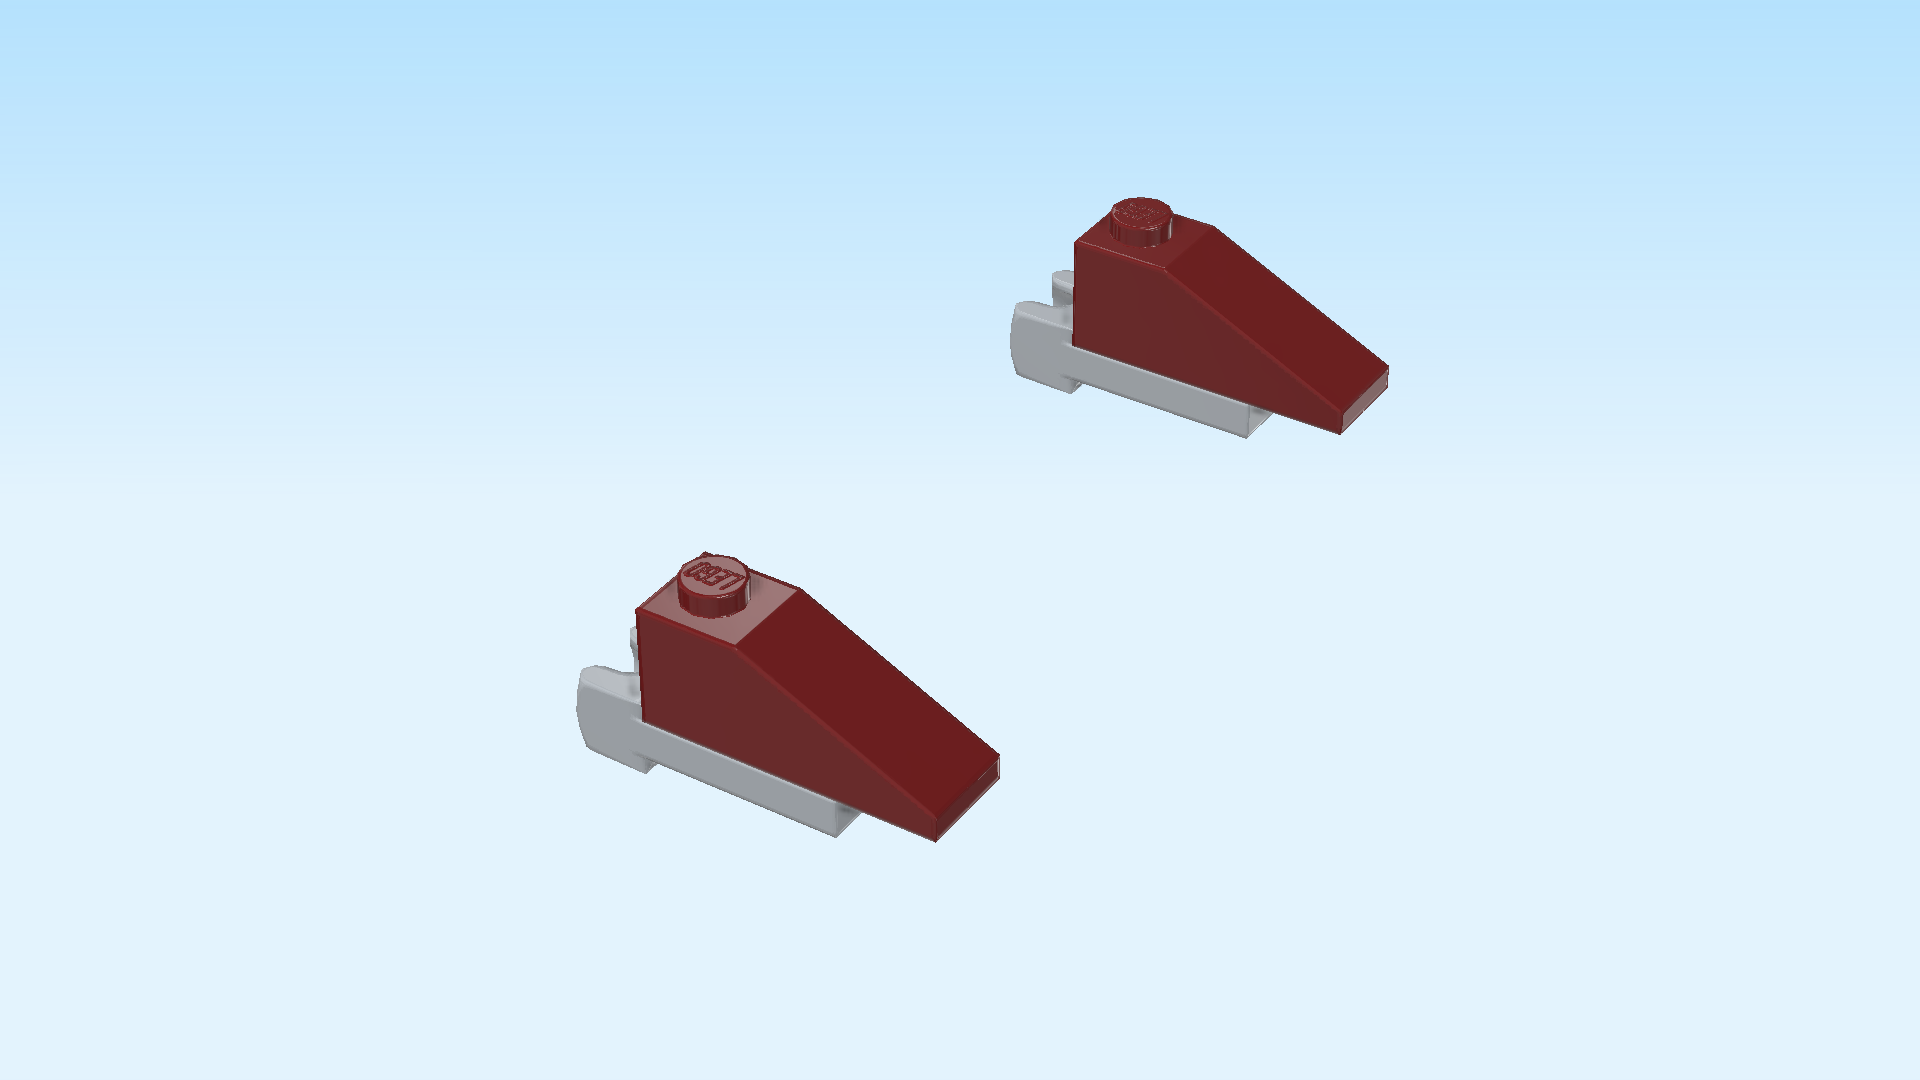
| Next, we will build the 2 pectoral fins of the manta ray. |
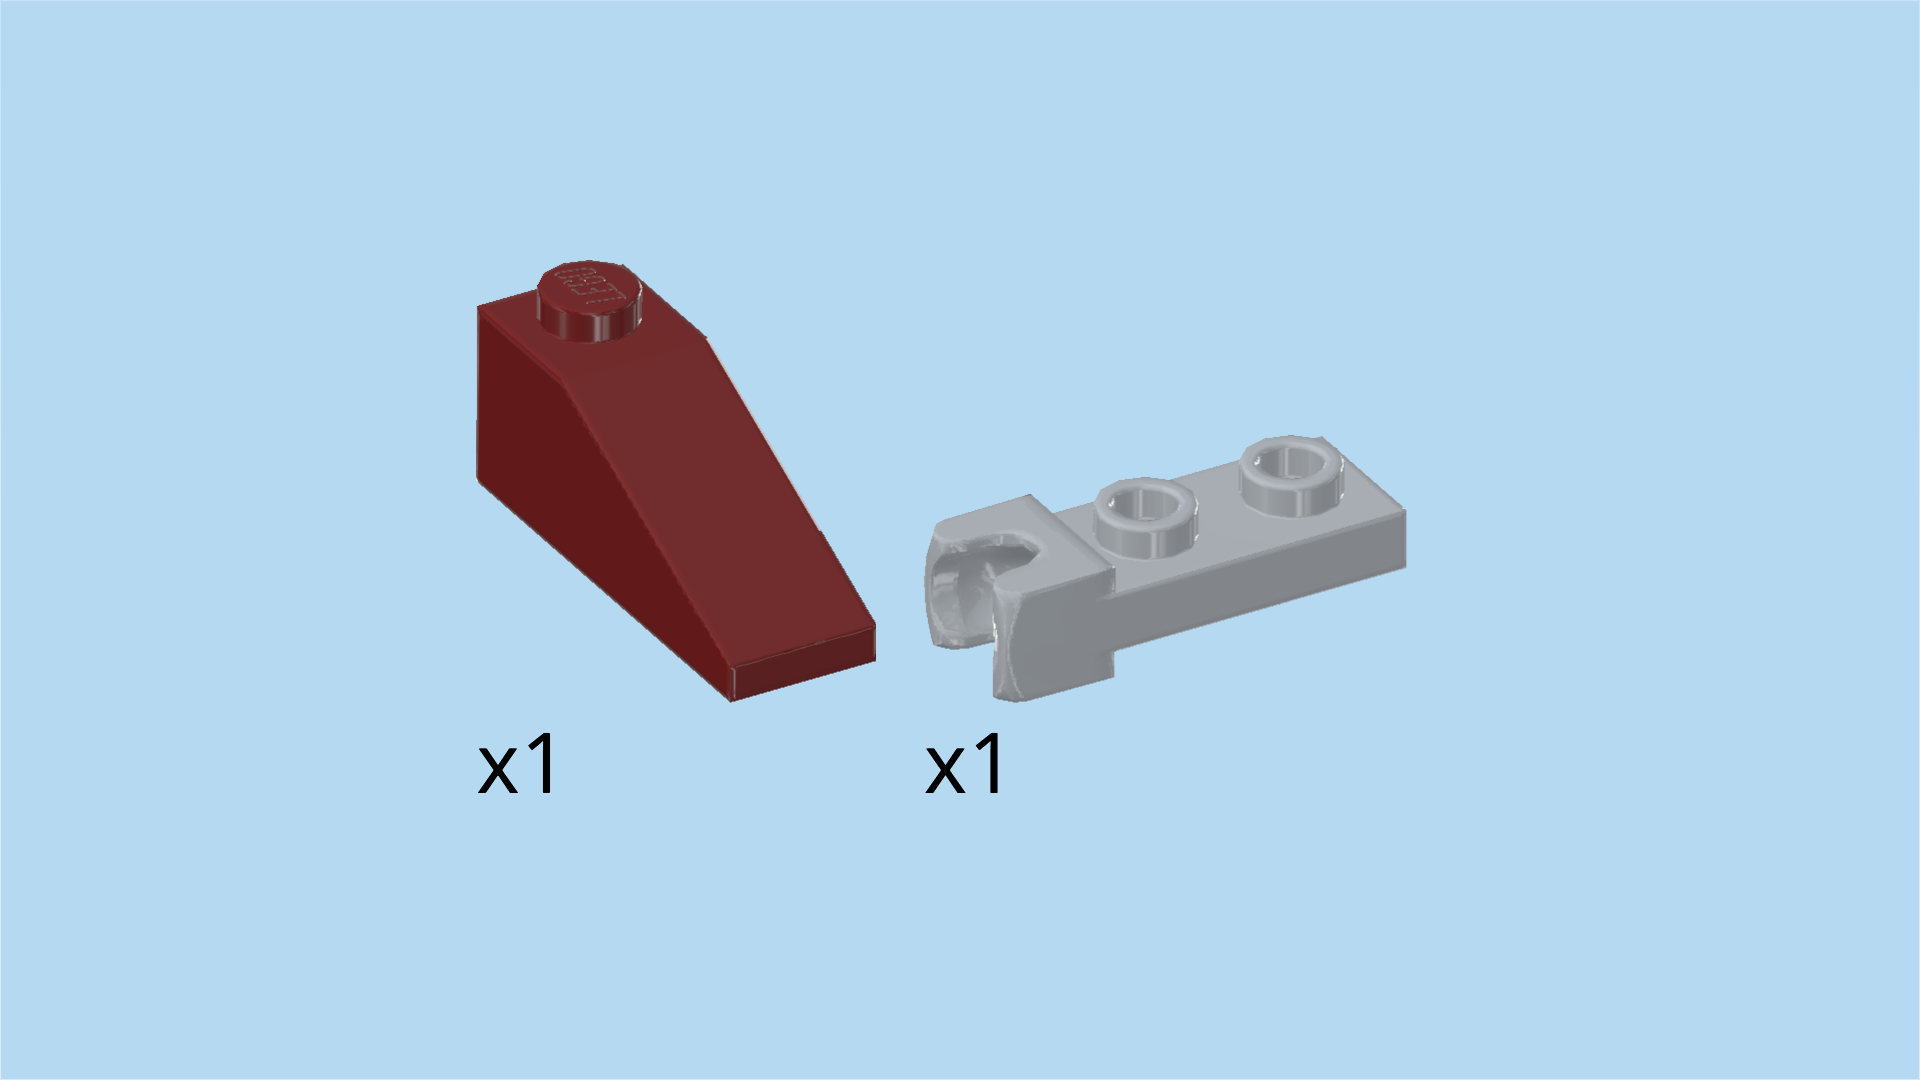
| Collect the following 2 pieces: |
| 1 maroon red roof tile 1x3, 25°, |
| and 1 medium stone grey plate 1x2 with ball cup on short side. |
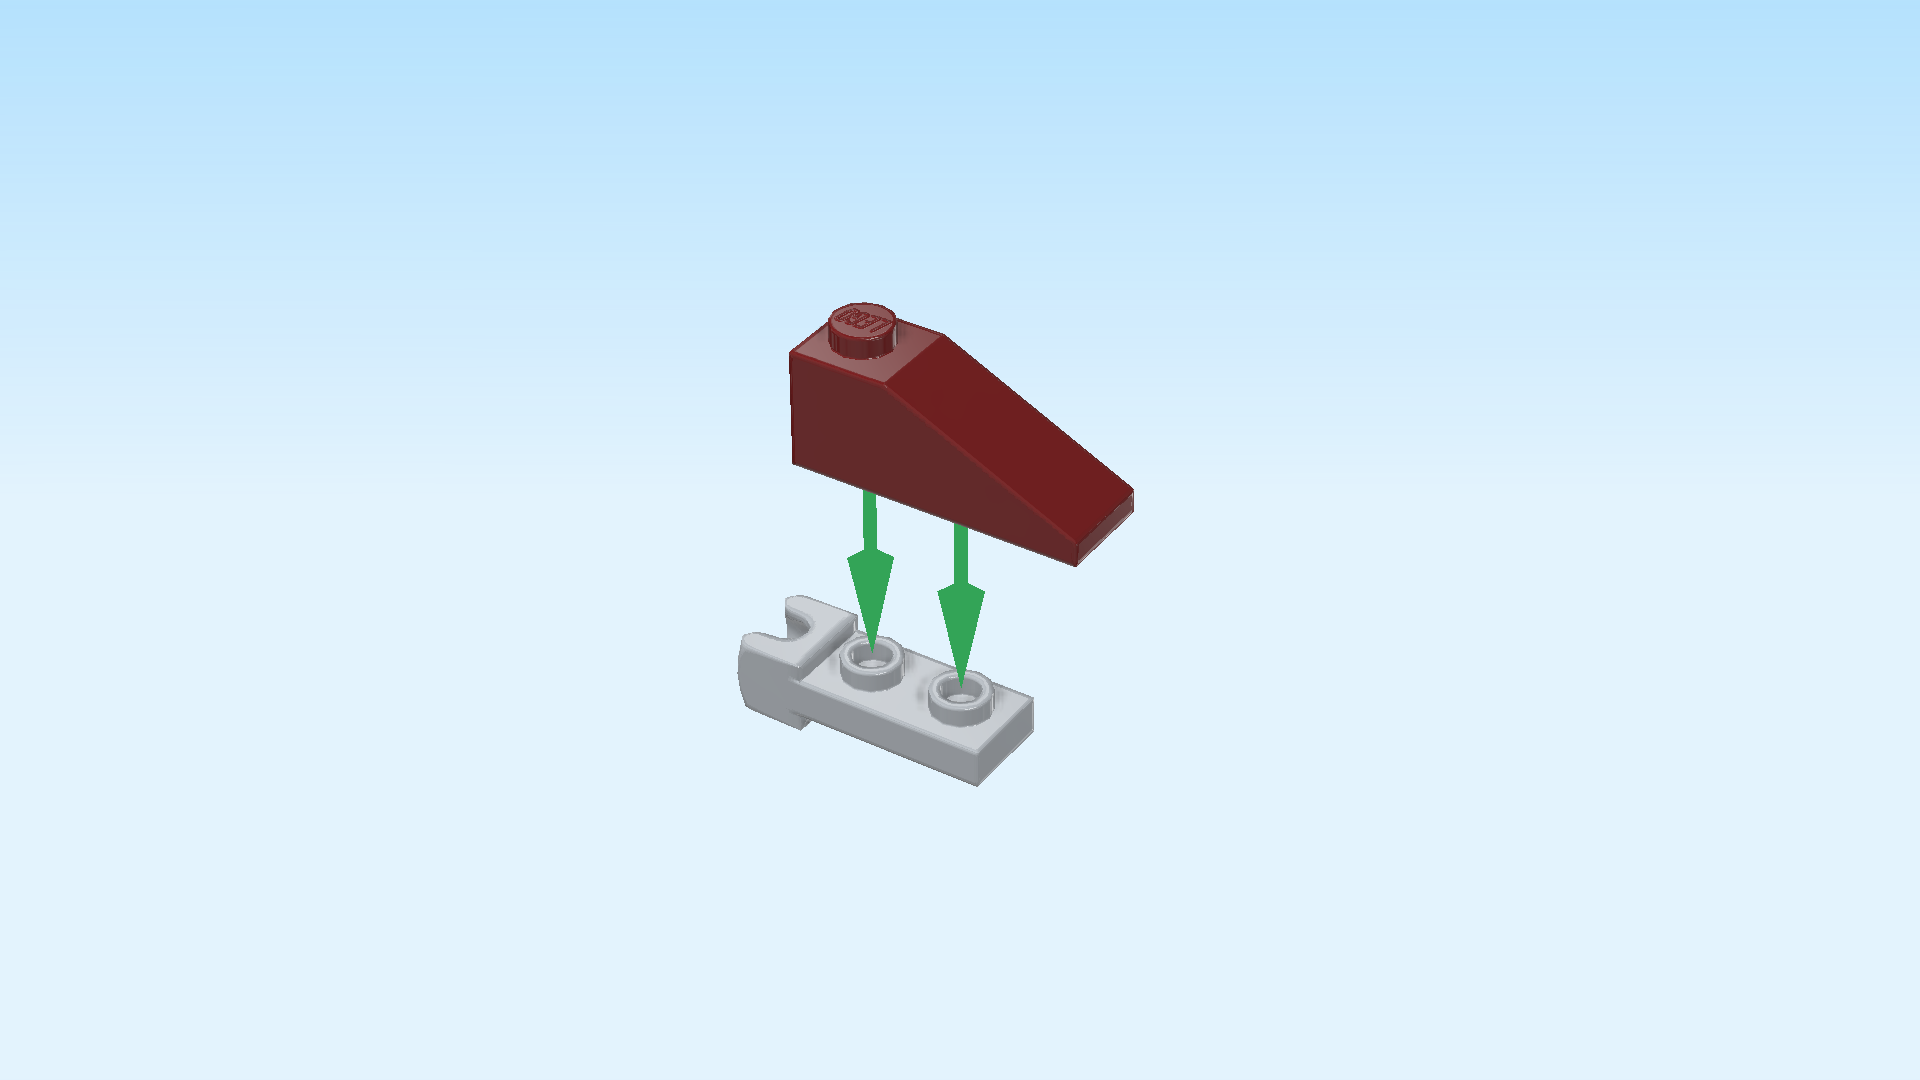
| Put the plate with ball cup horizontally on the table, ball cup to the left. |
| Put the roof tile 1x3 horizontally on top, slope to the right, ⅓ overhanging to the right. |
| Collect the following 2 pieces: |
| another maroon red roof tile 1x3, 25°, |
| and another medium stone grey plate 1x2 with ball cup on short side. |
| Repeat the previous step: put the plate with ball cup on the table, ball cup to the left, and put the roof tile horizontally on top, slope to the right, ⅓ overhanging to the right. |
| The 2 pectoral fins of the manta ray are finished! Well done! Snap their ball cups onto the 2 balls on the pectoral fin mounts on the left and right side of the manta ray. Turn them so that their knobs are pointing in the same direction as the mouth and the 2 cephalic fins. |
| Next, we will build the tail of the manta ray. |
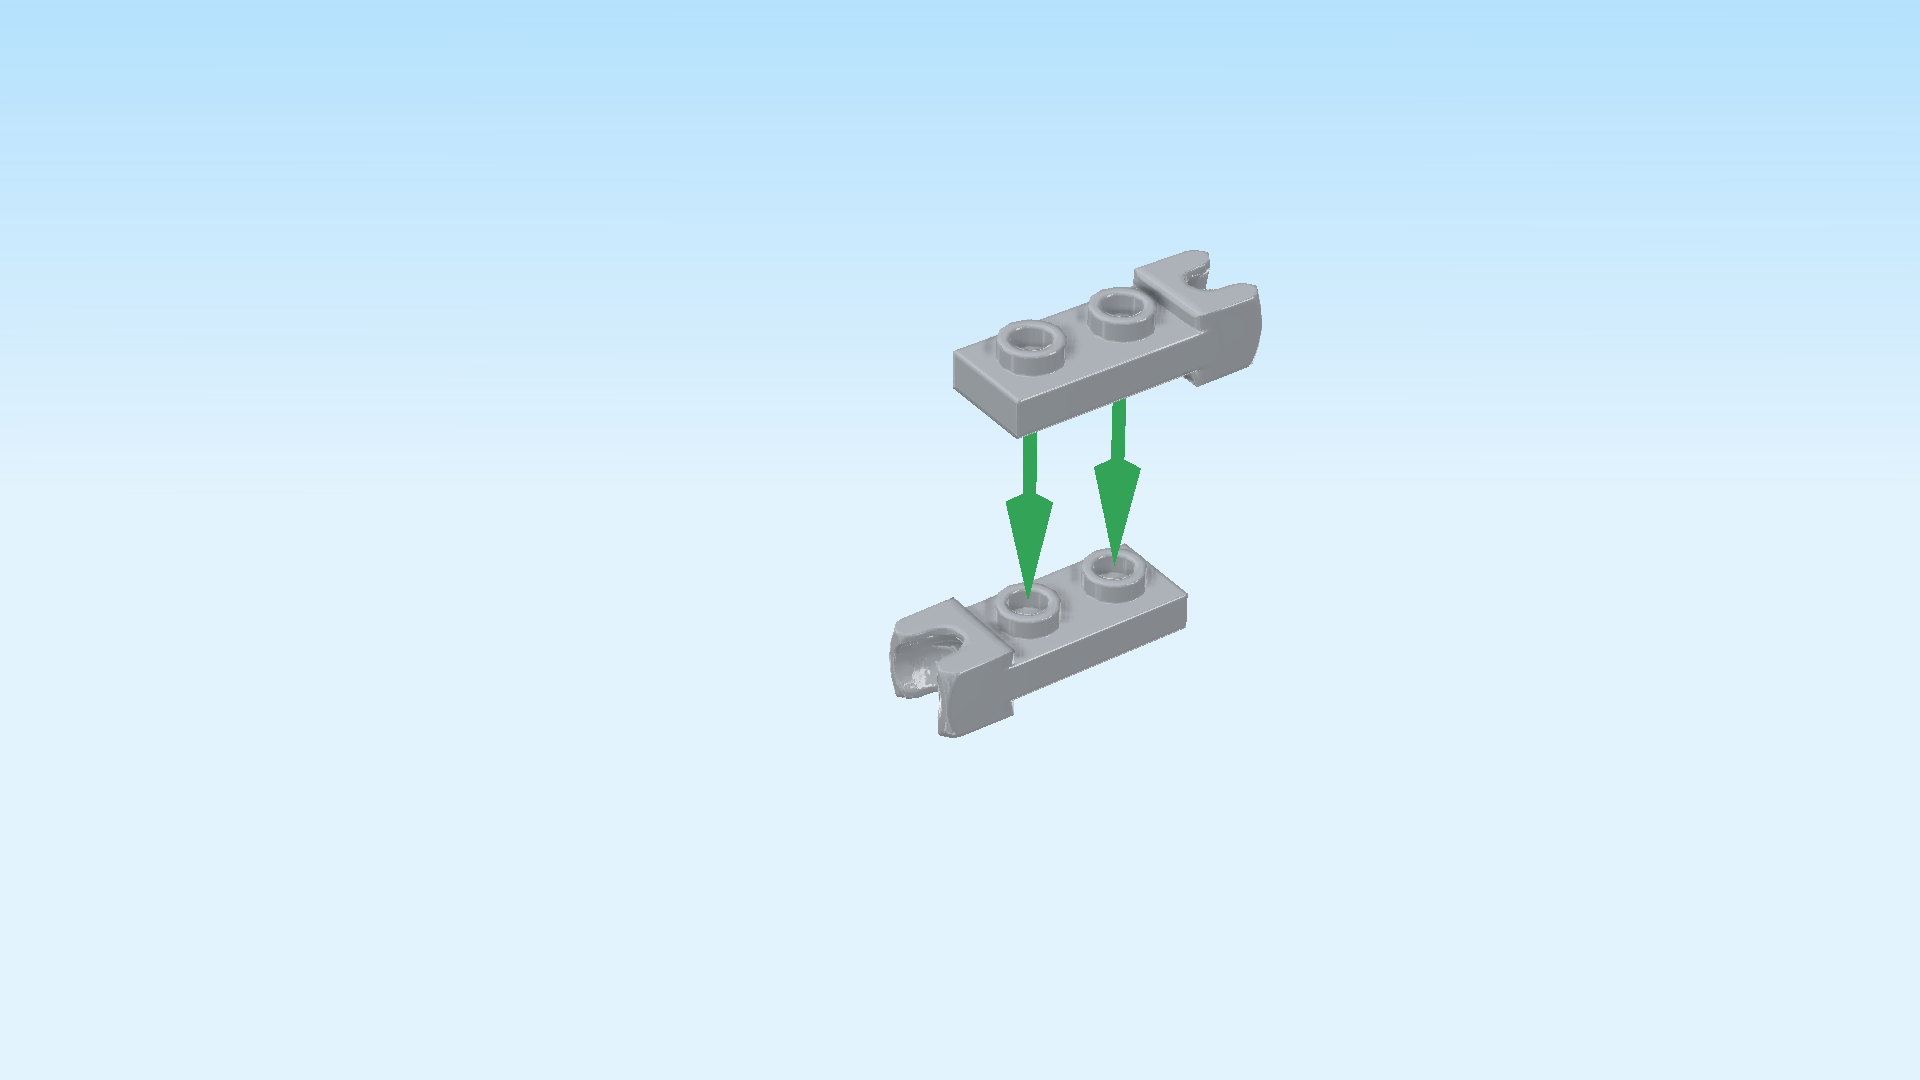
| Find 2 medium stone grey plates 1x2 with ball cup on short side. |
| Put 1 horizontally on the table, ball cup to the left. |
| Put the other one horizontally on top, ball cup overhanging to the right. |
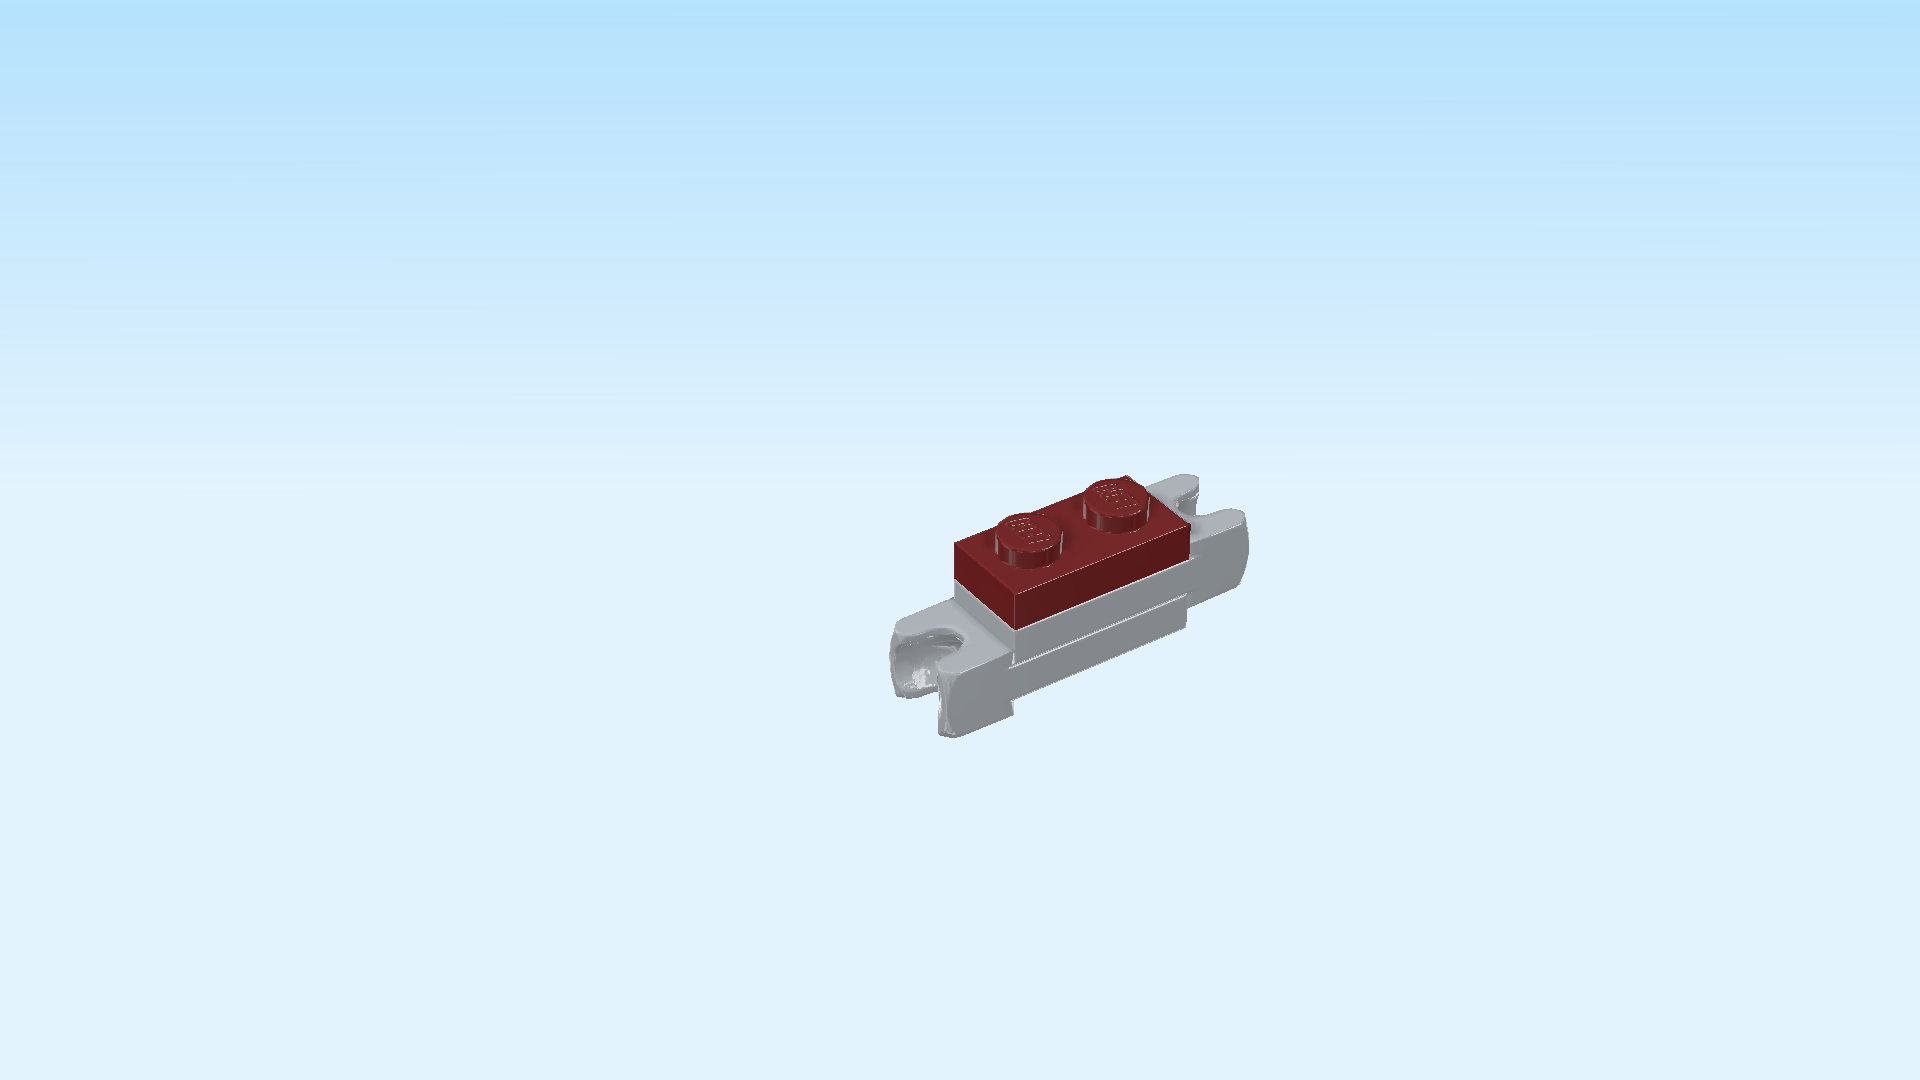
| Find 1 maroon red plate 1x2. |
| Put it horizontally on top. |
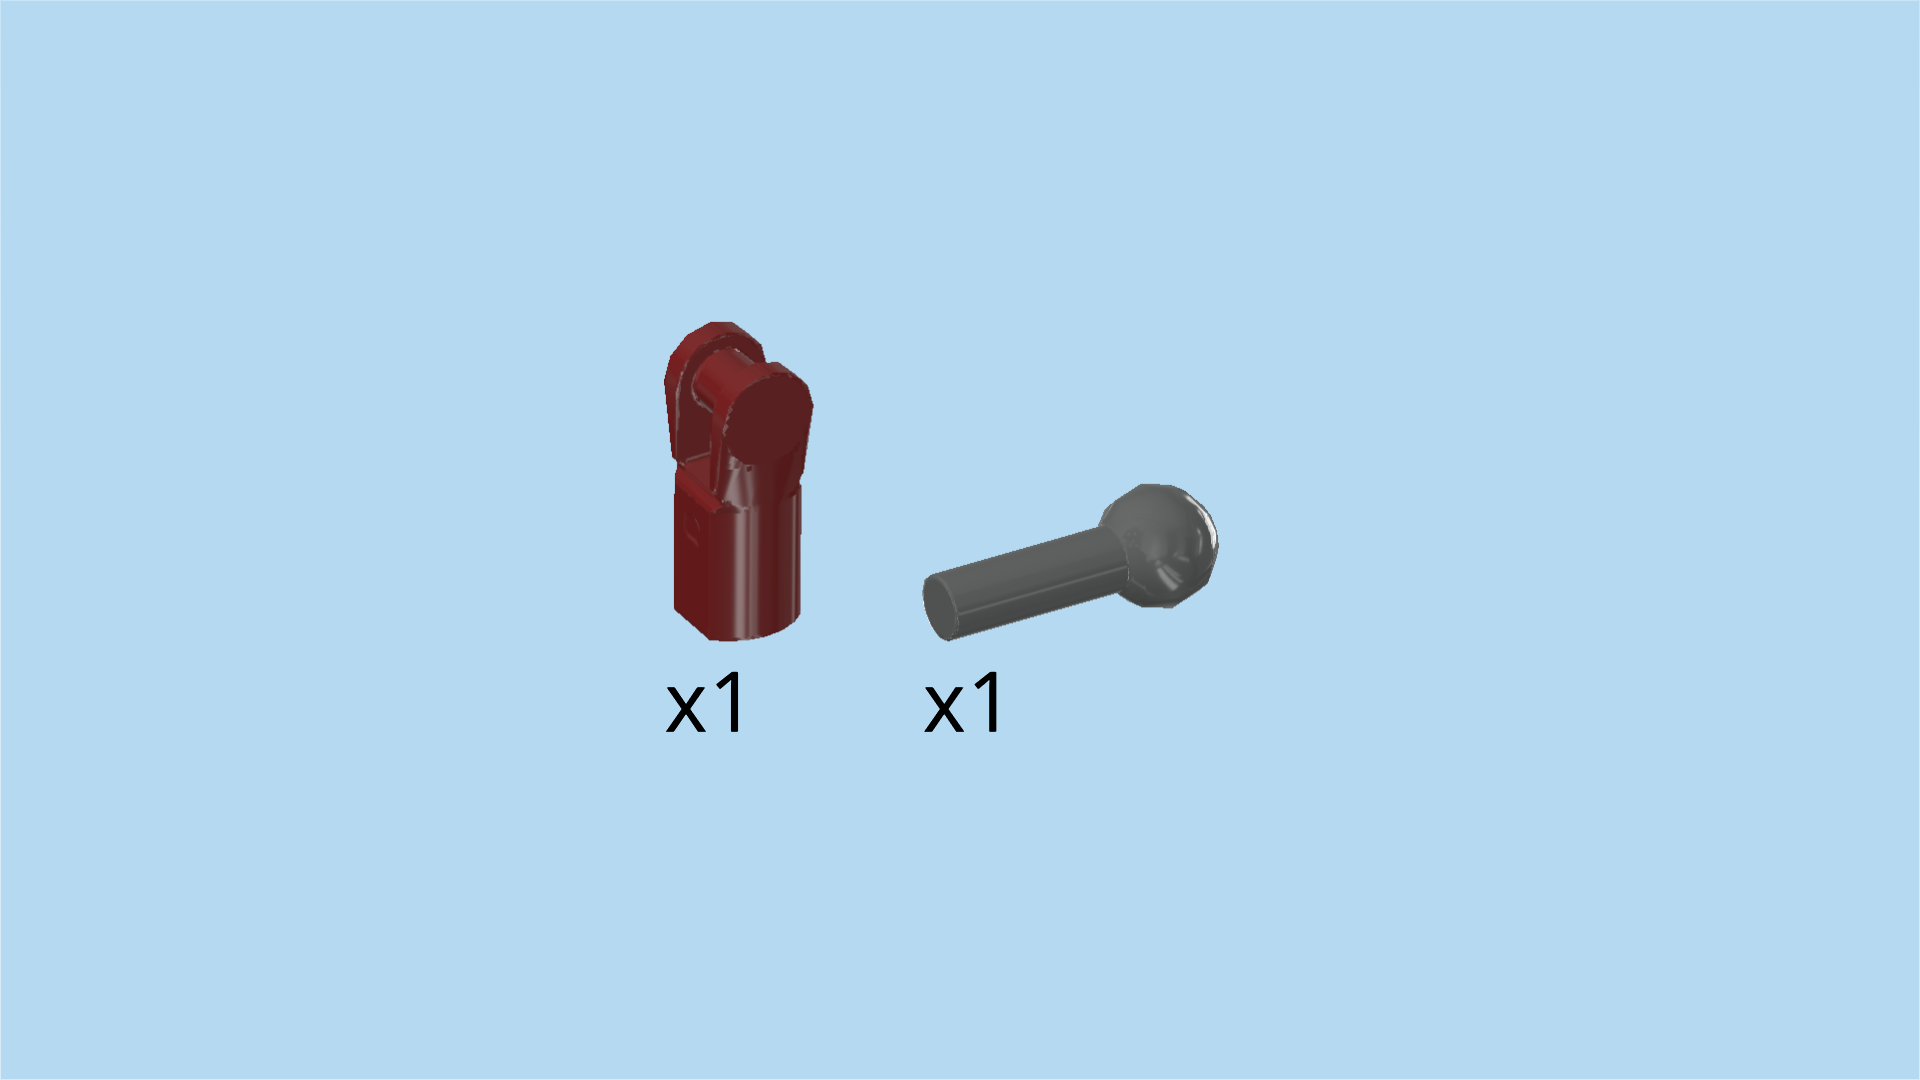
| Collect the following 2 pieces: |
| 1 dark stone grey shaft 1m with ball, |
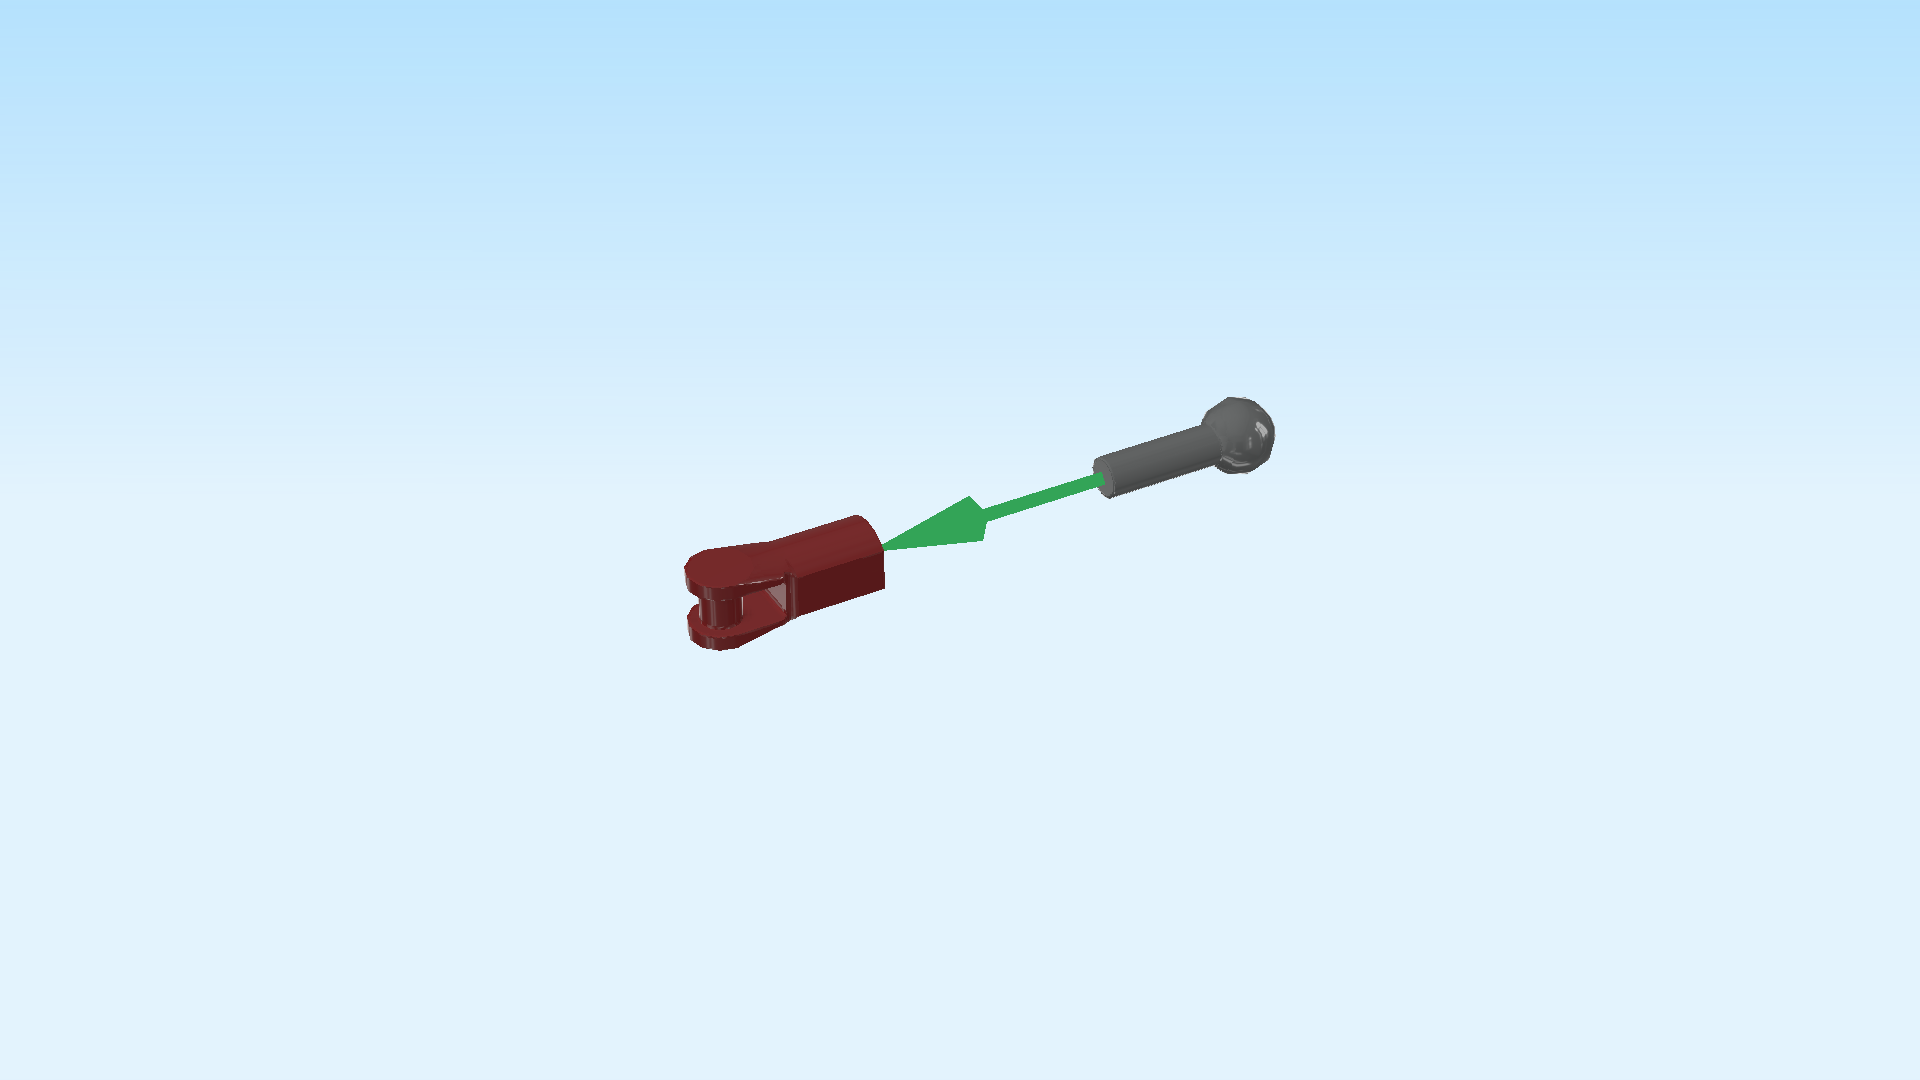
| and 1 maroon red small tube with shaft. |
| Insert the shaft with ball into the small tube. |
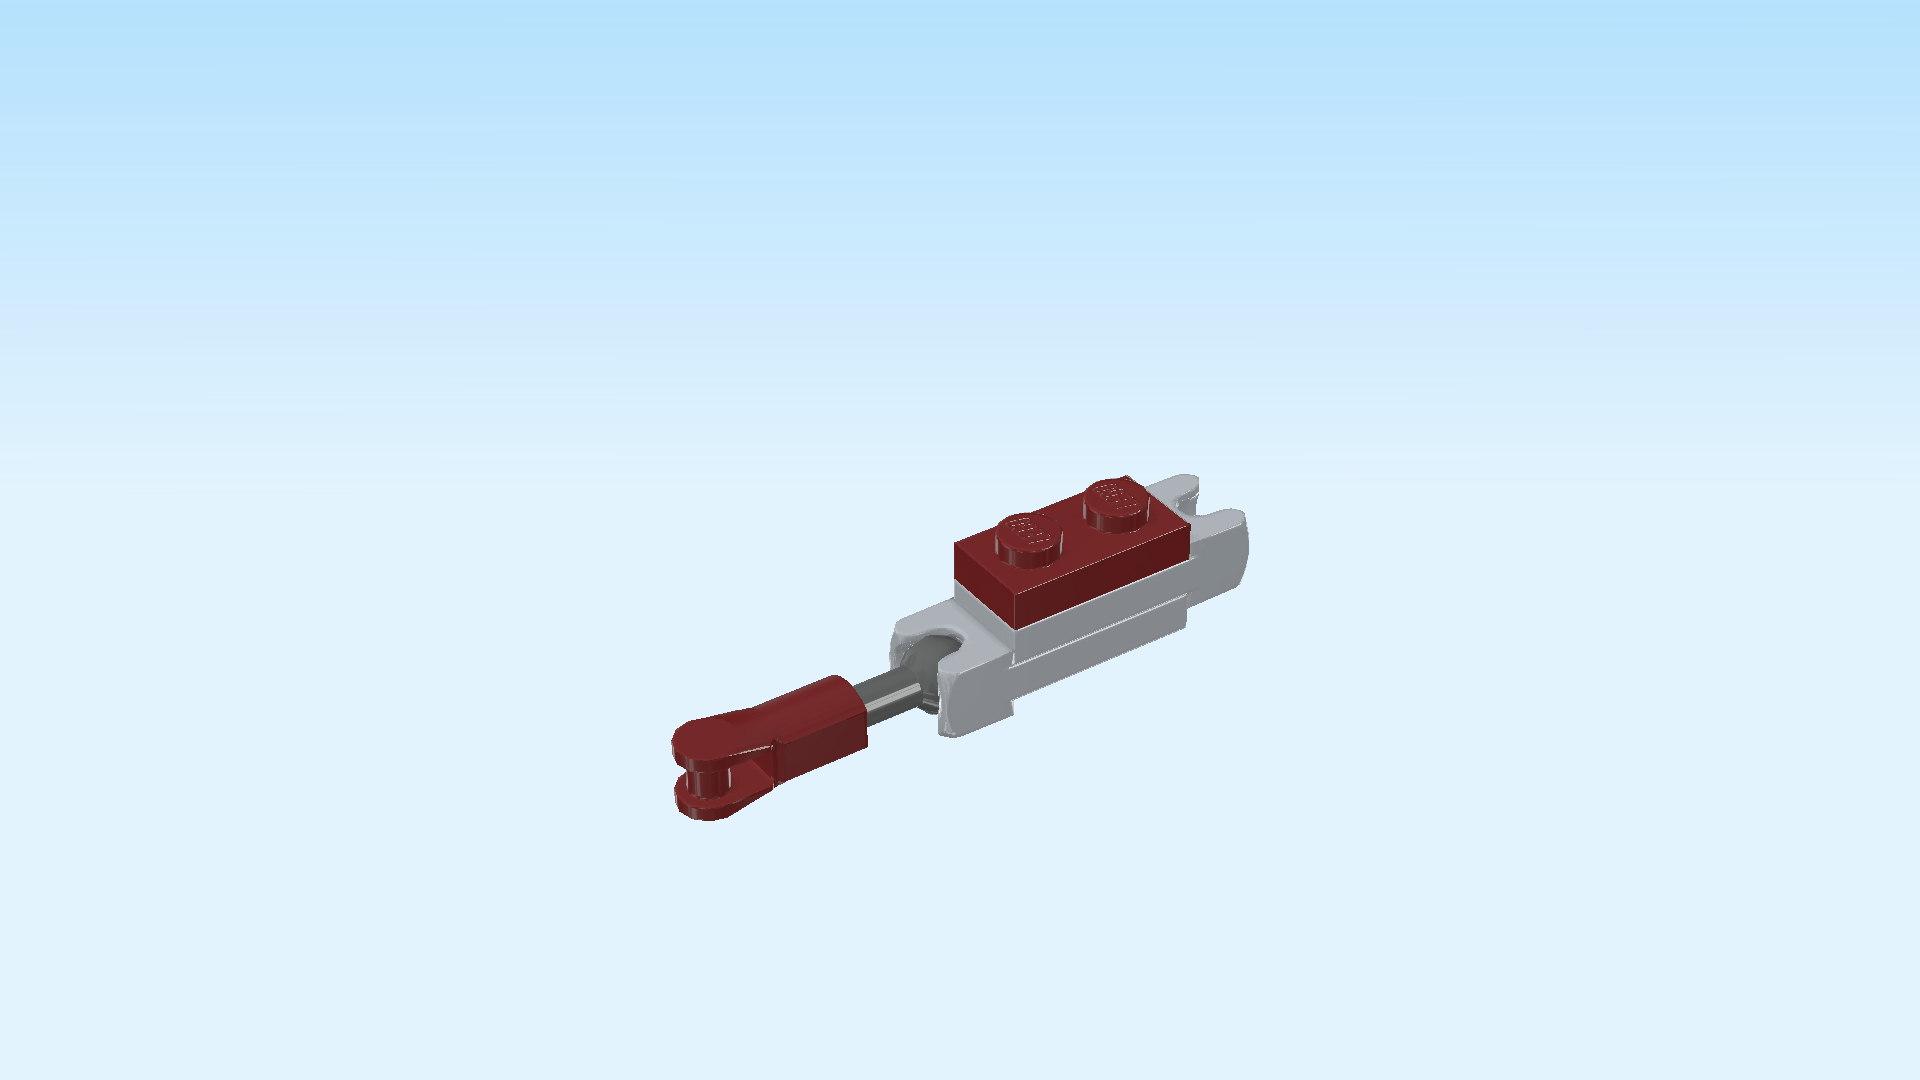
| Snap the ball coming from the left into the ball cup on the left of the tail structure. |
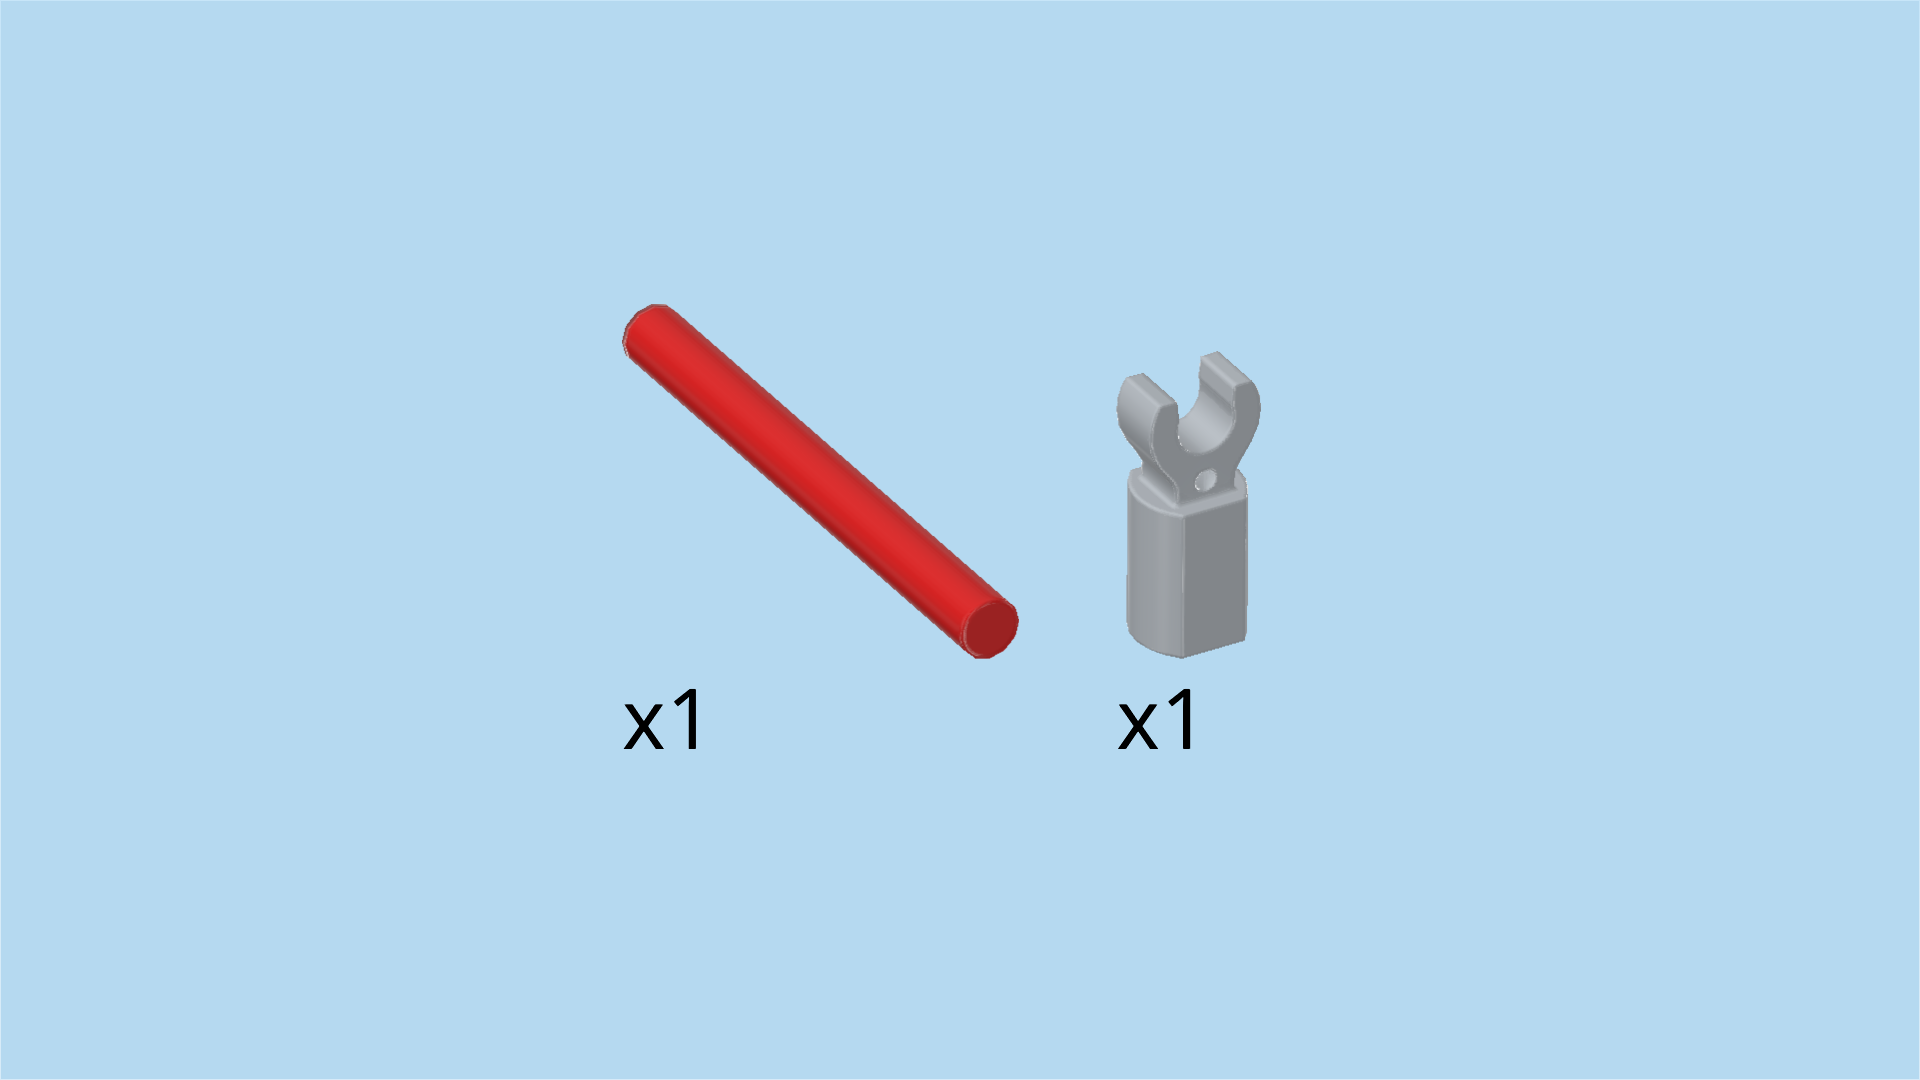
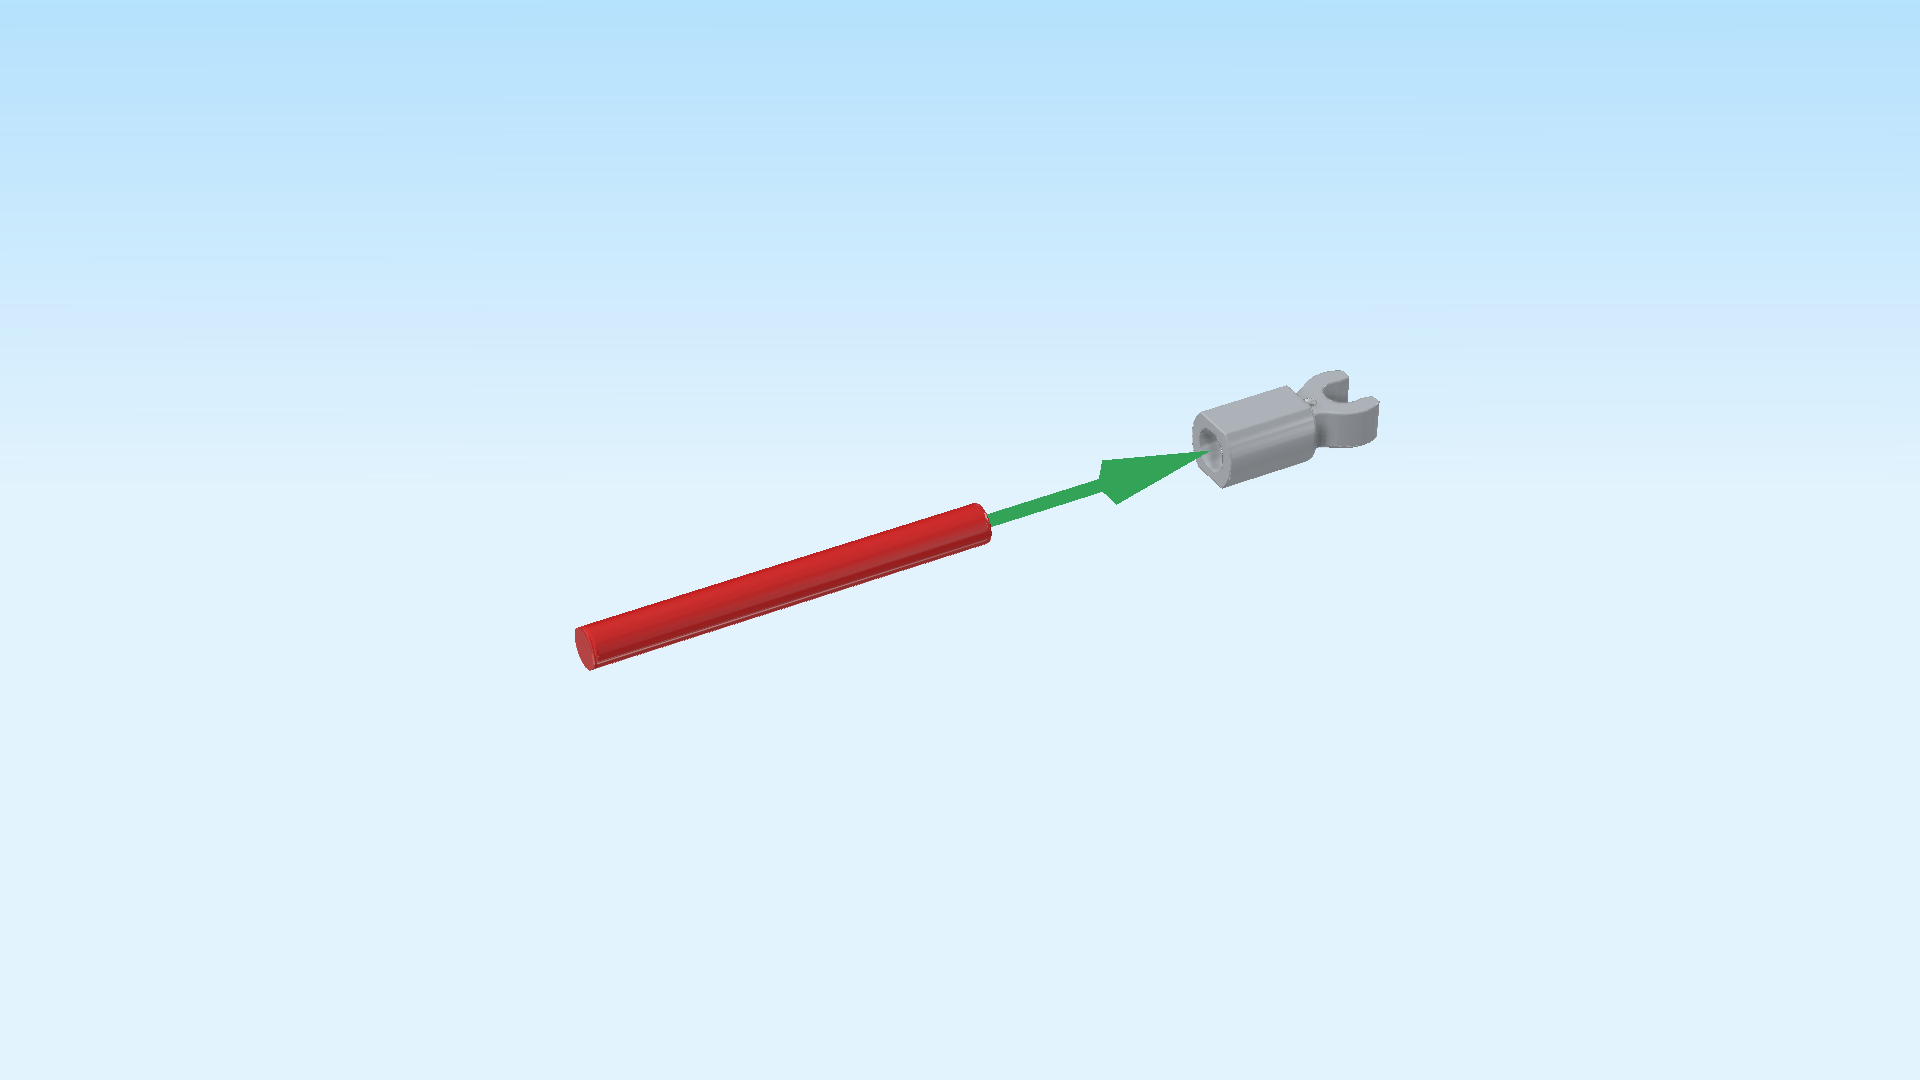
| Collect the following 2 pieces: |
| 1 bright red shaft 4m, |
| and 1 medium stone grey small tube with clasp. |
| Insert the shaft into the small tube. |
| Now, snap the clasp of this sub-part on the small shaft on the left edge of the tail structure. |
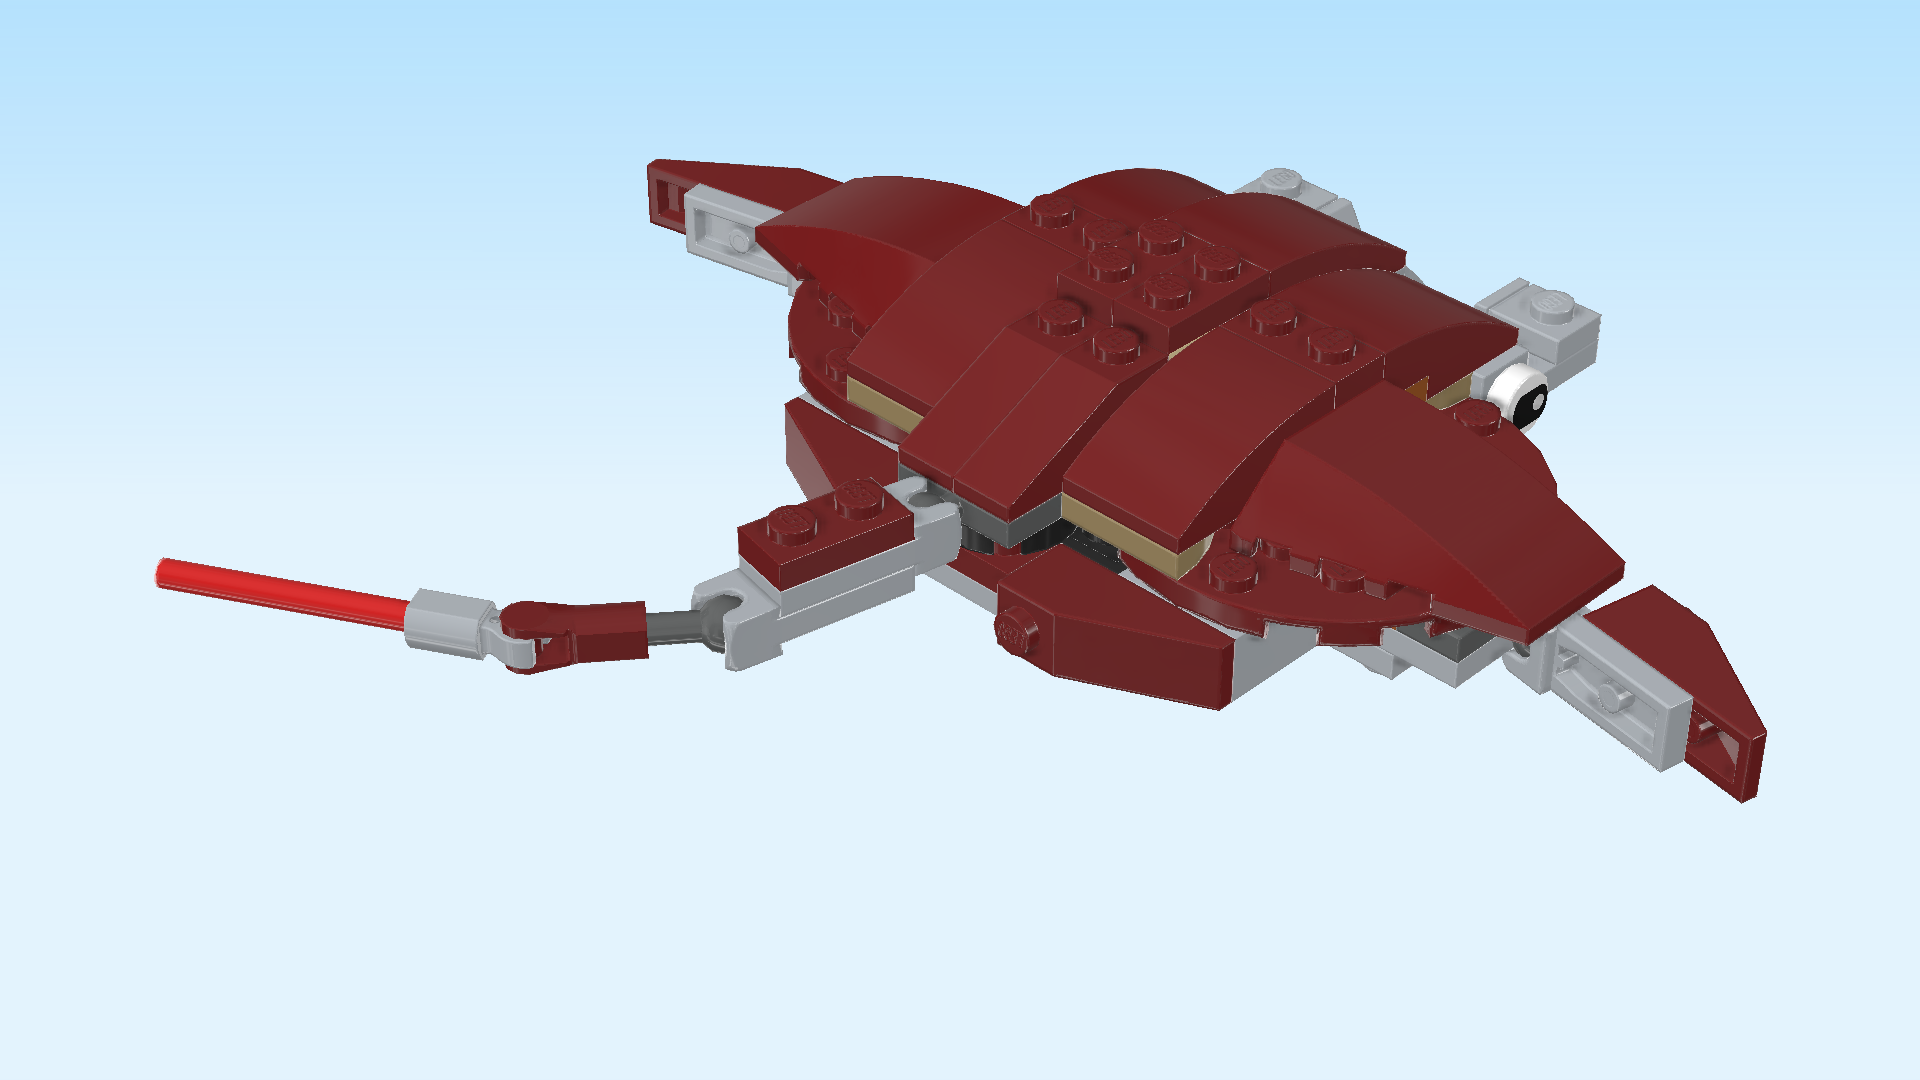
| The tail of the manta ray is finished! Well done! Snap its ball cup on the ball pointing to the front in the middle. You can bend and adjust the shape of the tail as you like. |
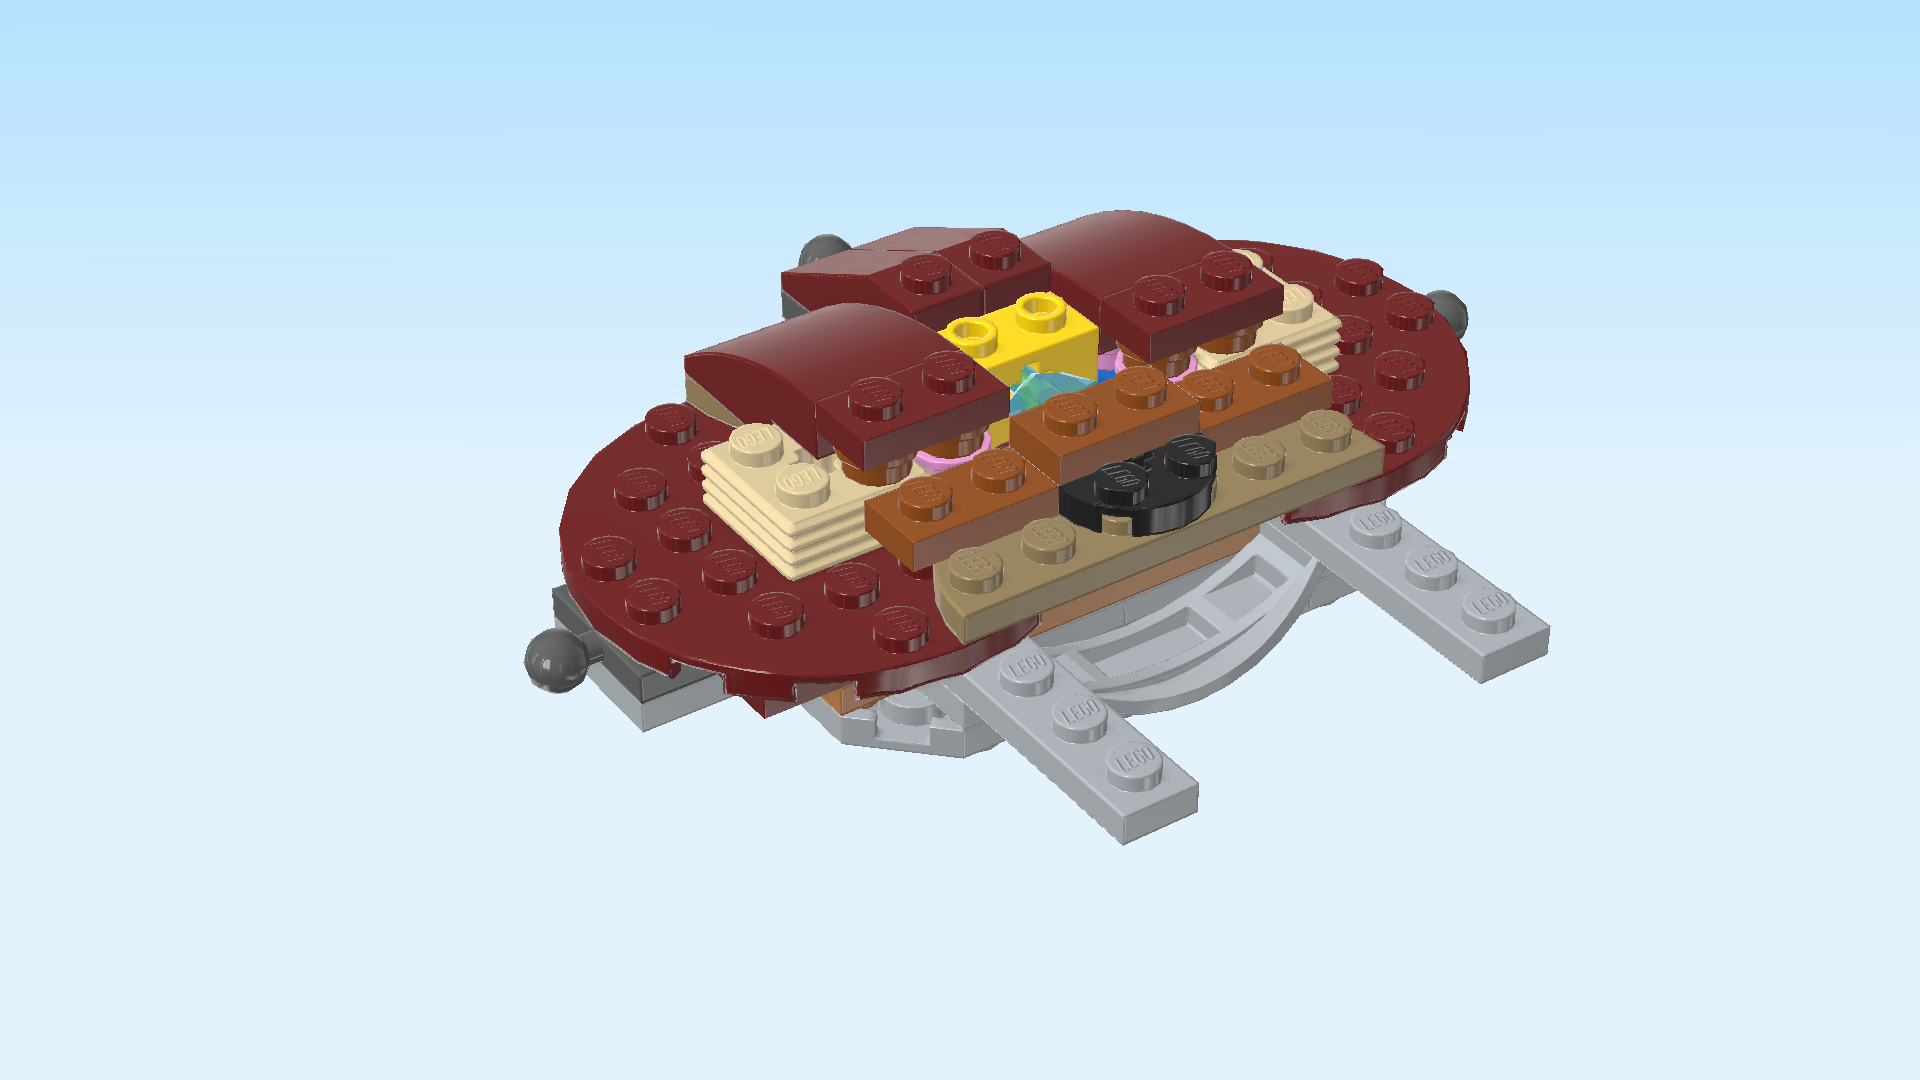
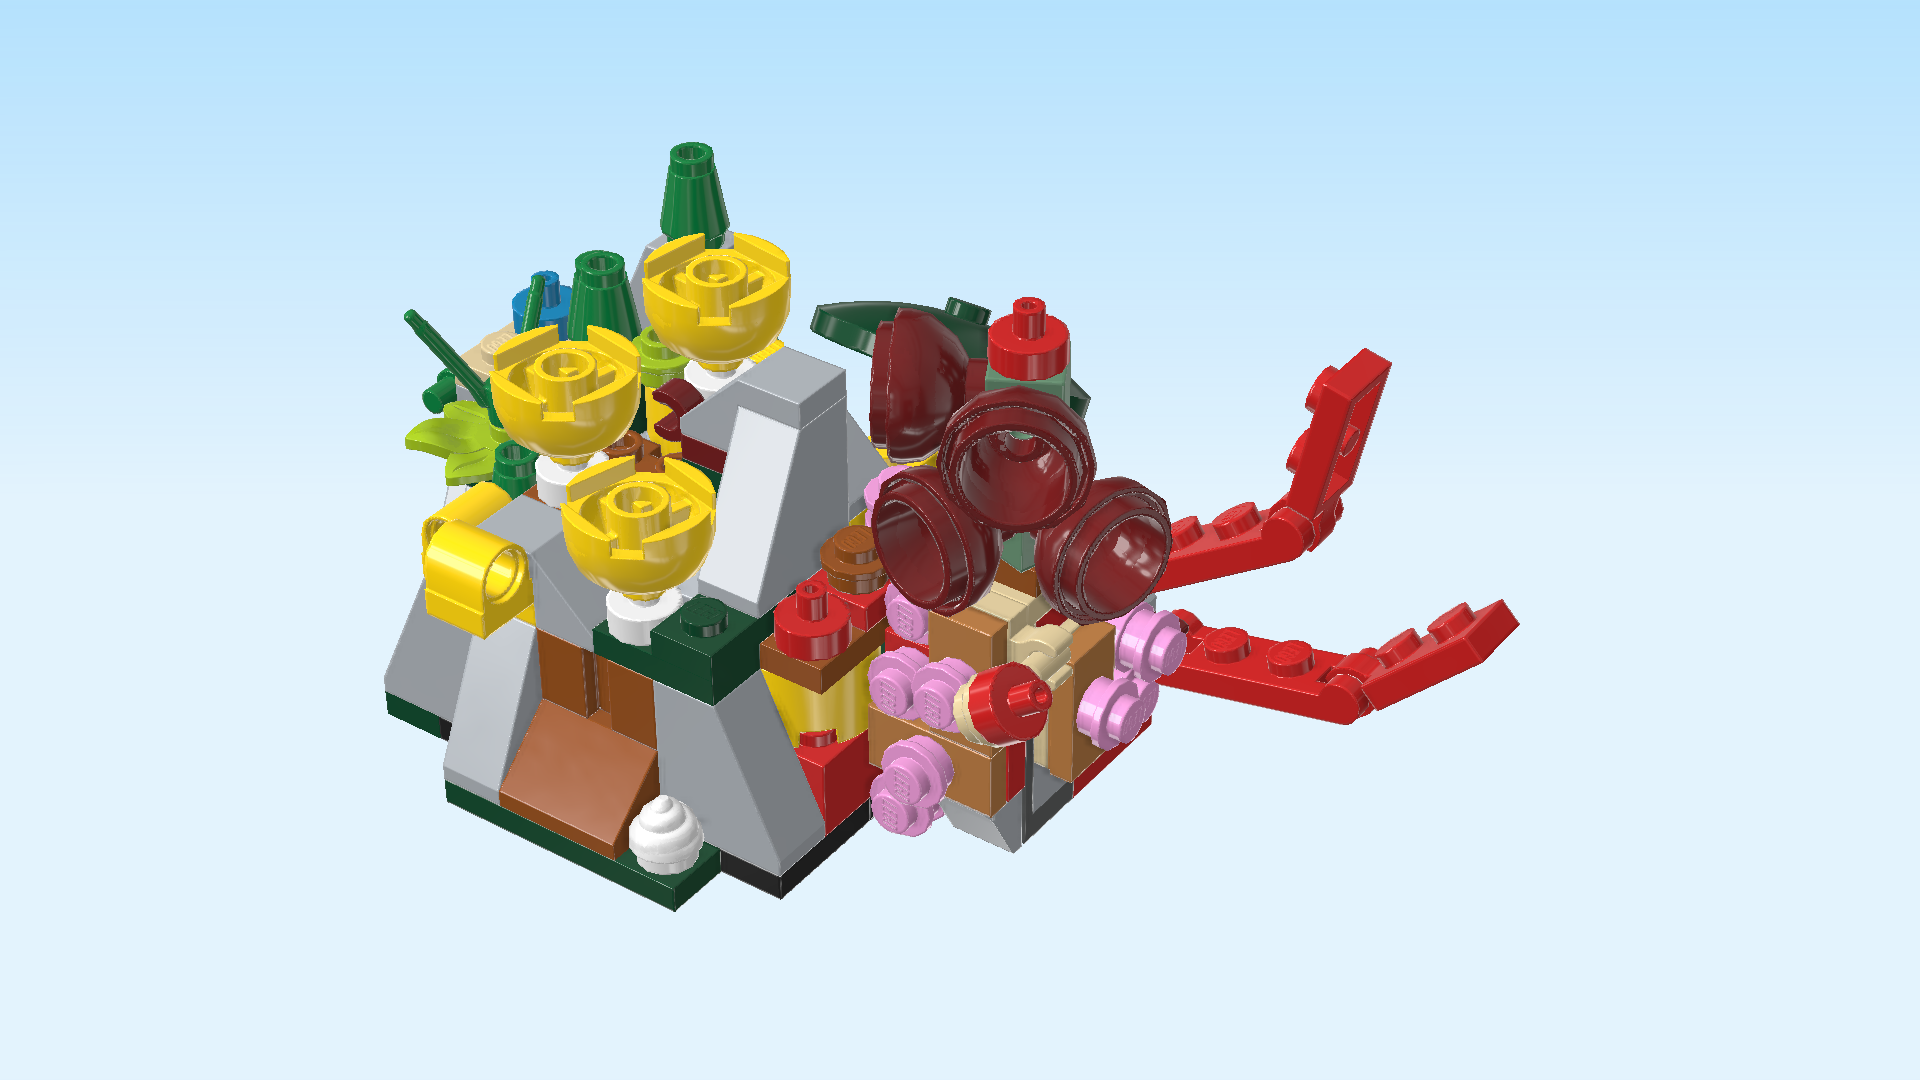
| The giant manta ray is finished! Very well done, this was a really intricate build! The manta ray is a deep-sea creature related to both fish and sharks. Manta rays glide through the ocean and feed off tiny plankton that is floating in the water. |
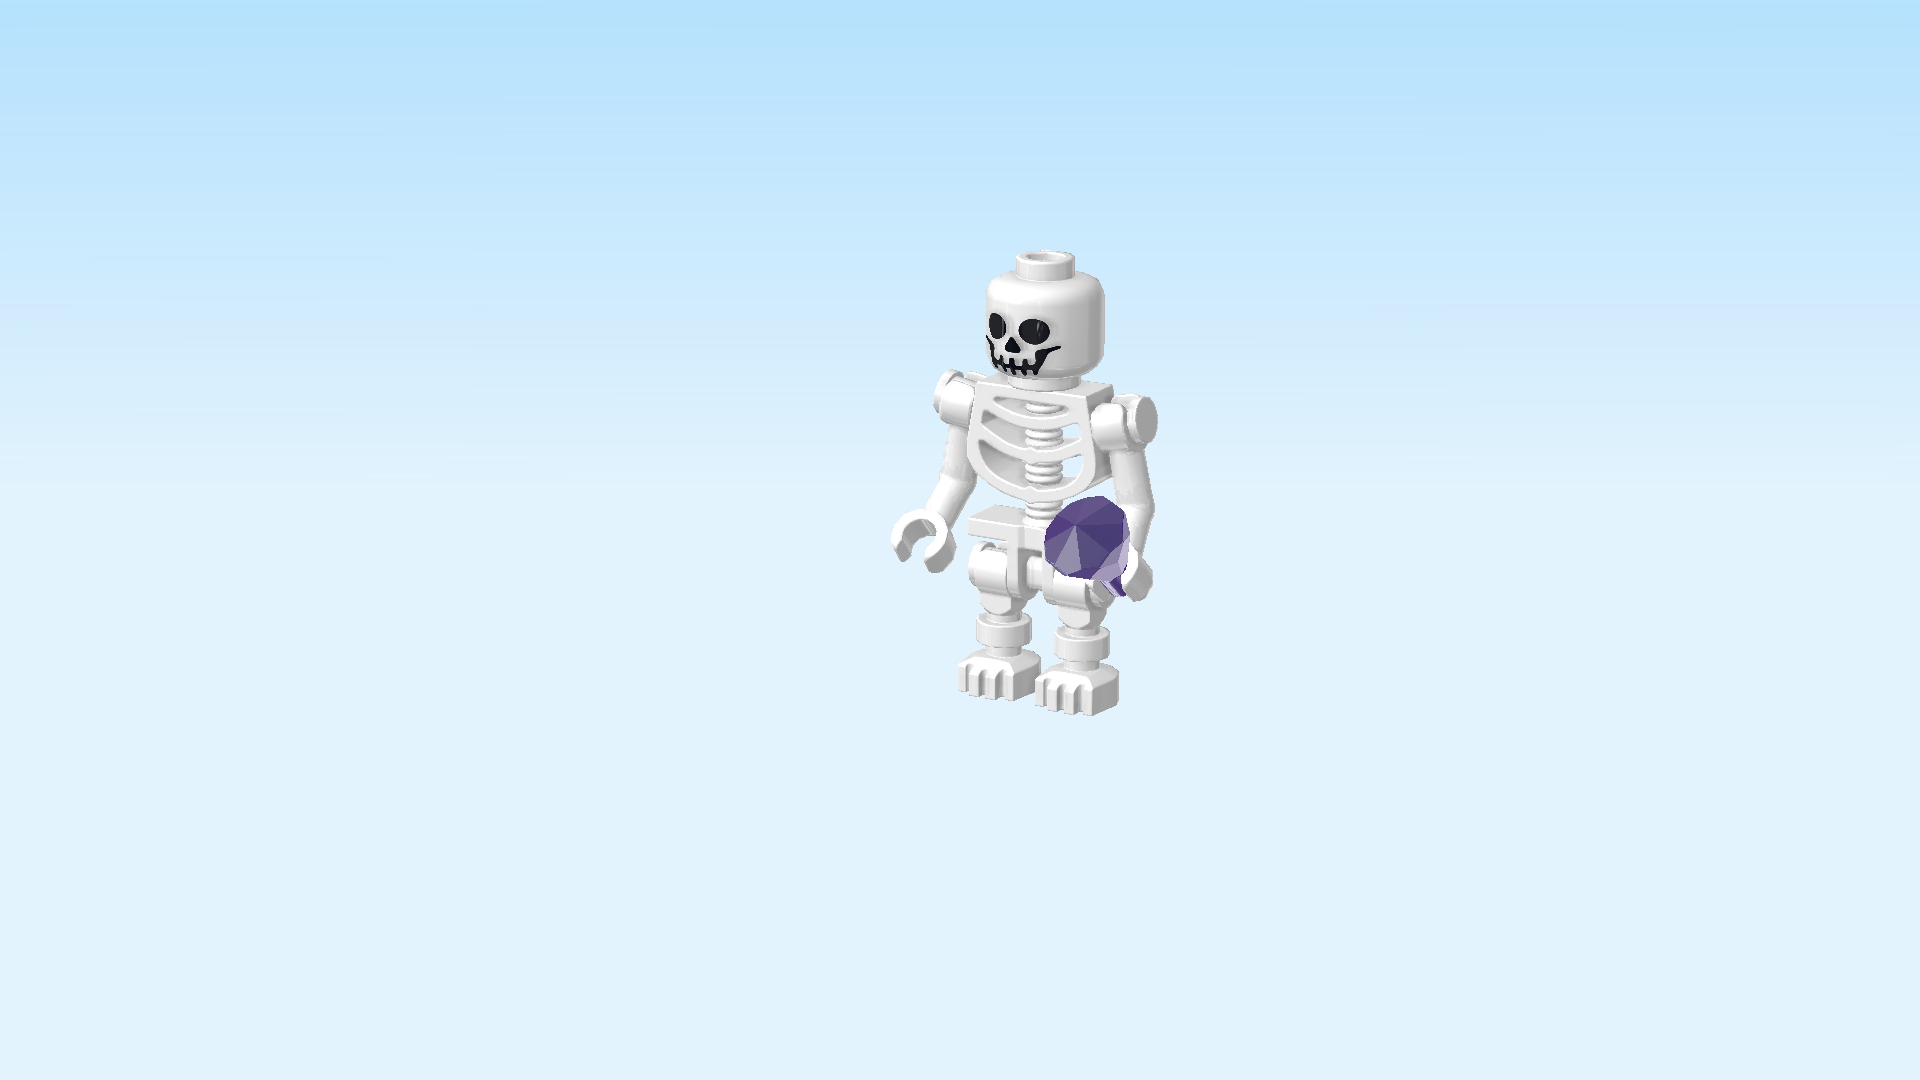
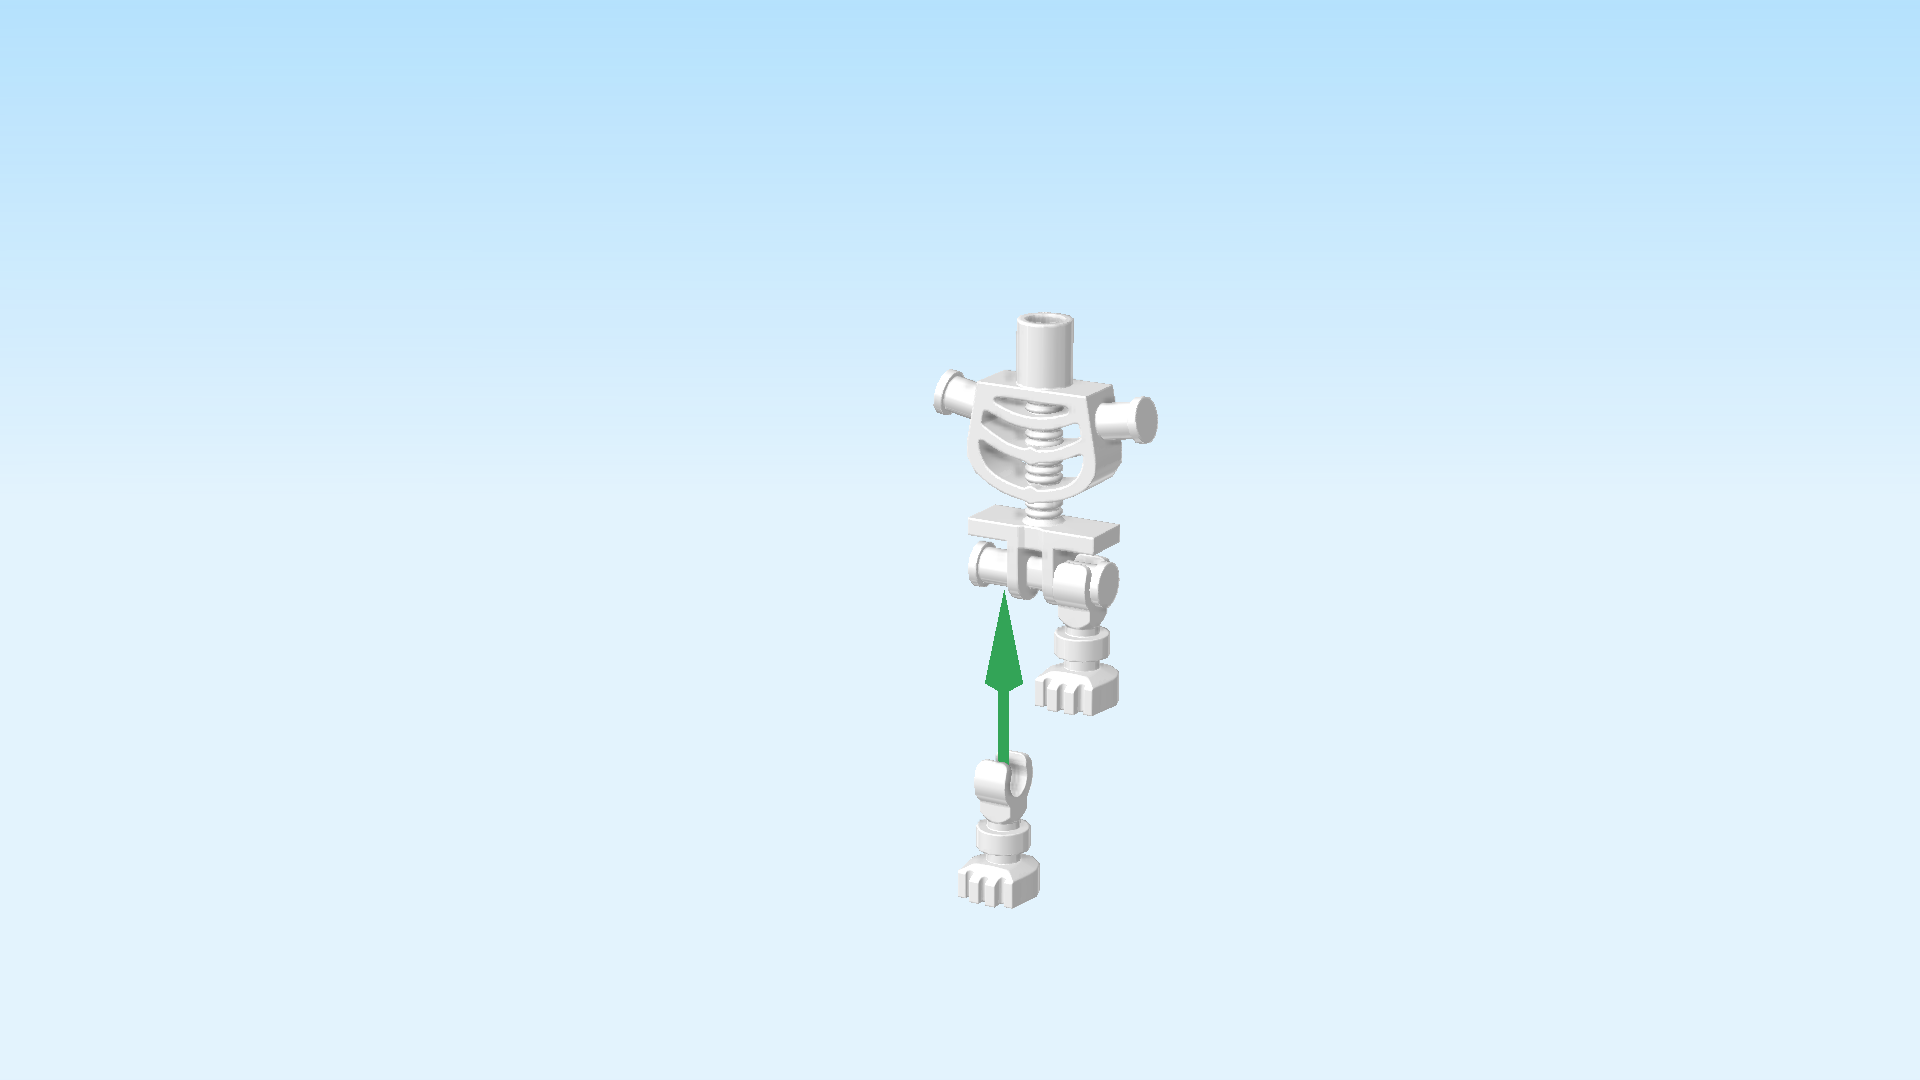
| Now, we will build the diamond skeleton Minifigure. |
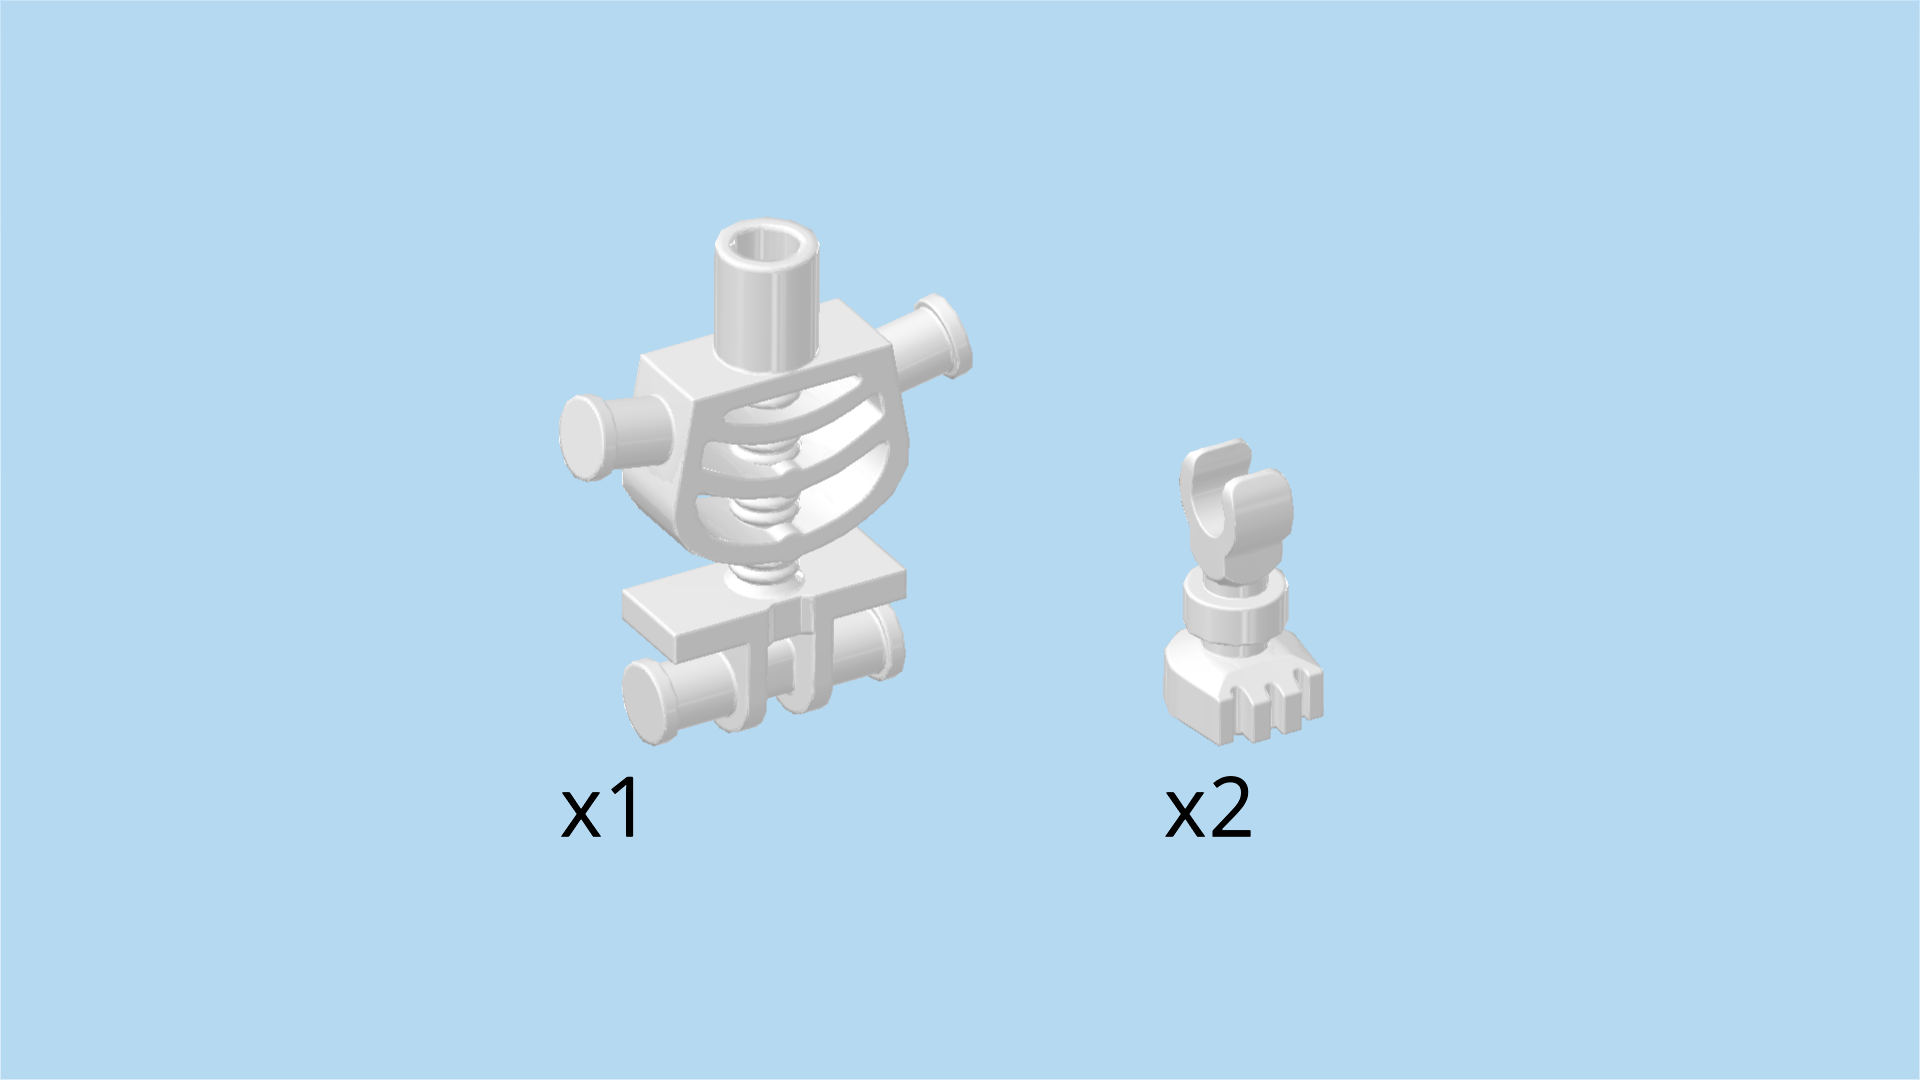
| Collect the following 3 pieces: |
| 2 white skeleton feet 1x1 with top clasp, |
| and 1 white skeleton torso with 2 arm shafts and 2 leg shafts (this piece also has a discernible ribcage). |
| Snap the 2 skeleton feet on the 2 leg shafts which are the shafts below the ribcage. Make sure the little skeleton toes are to the front on both feet. |
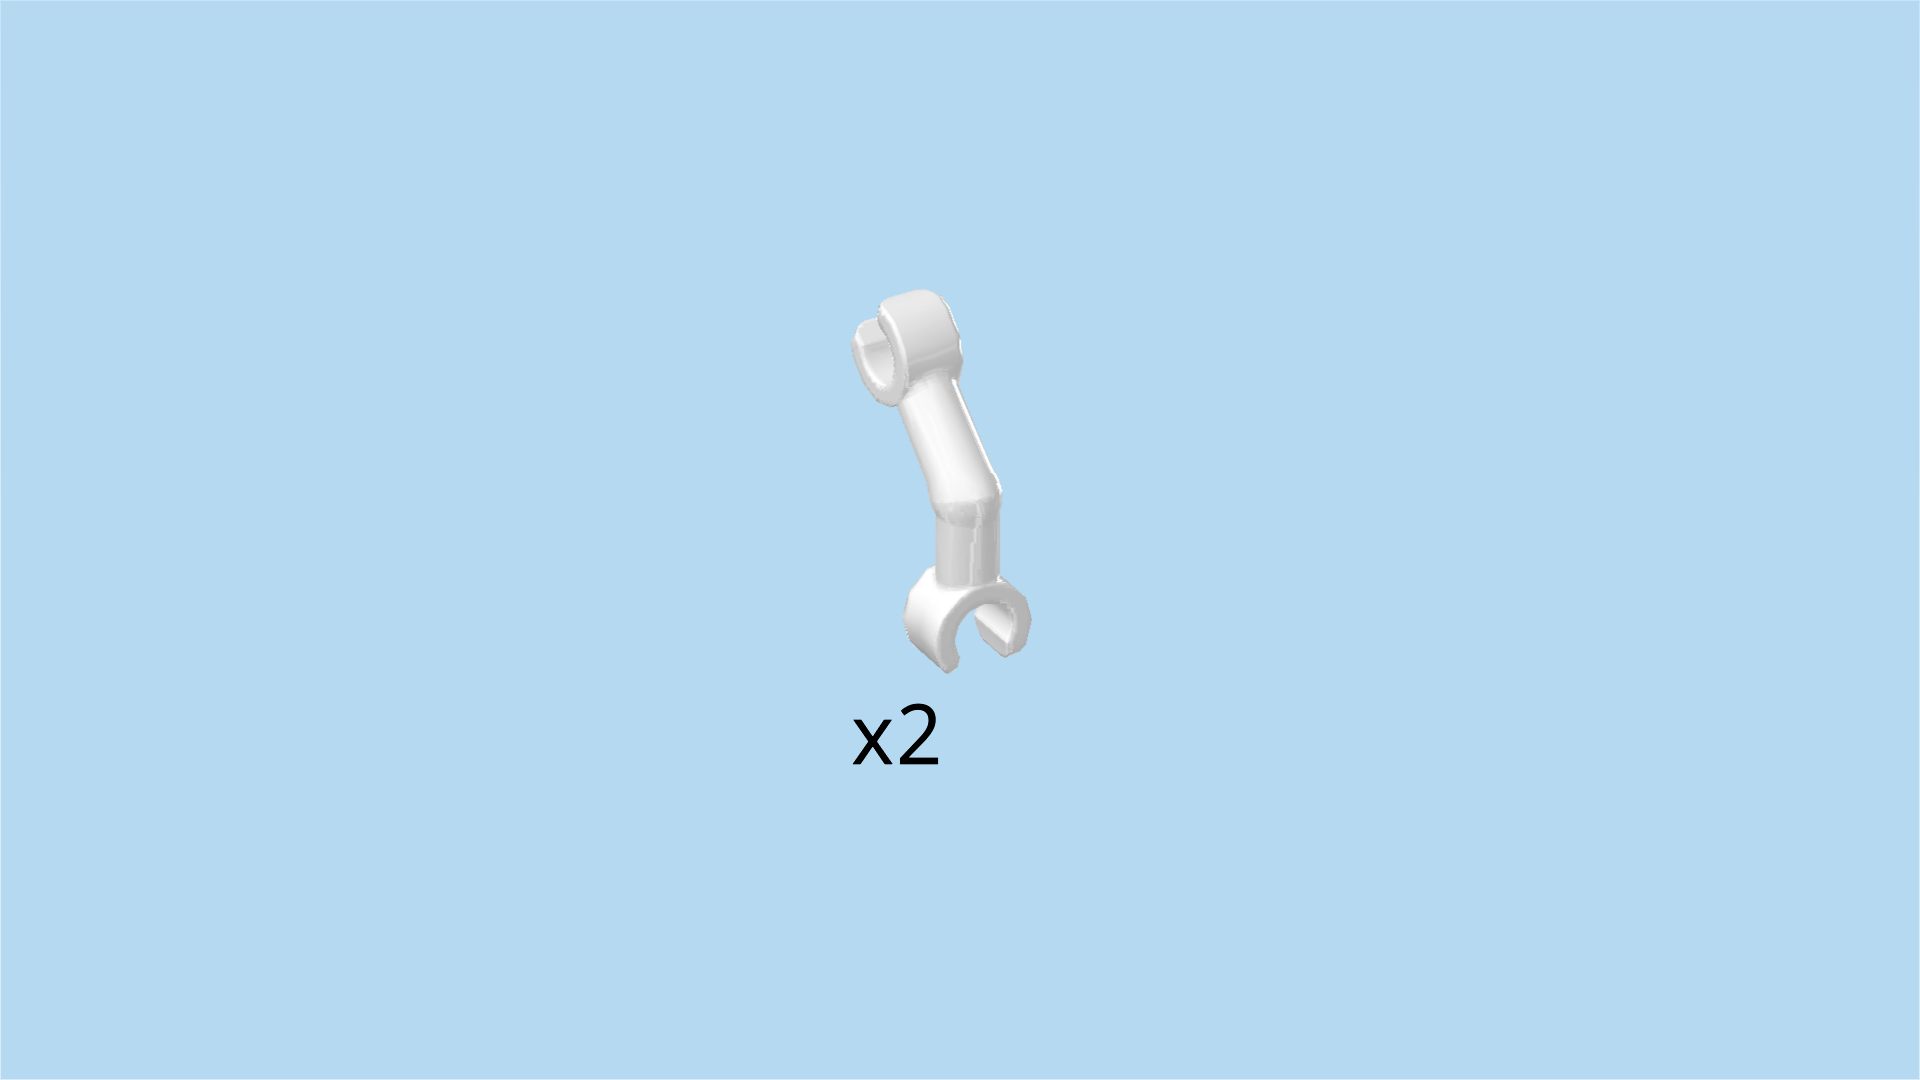
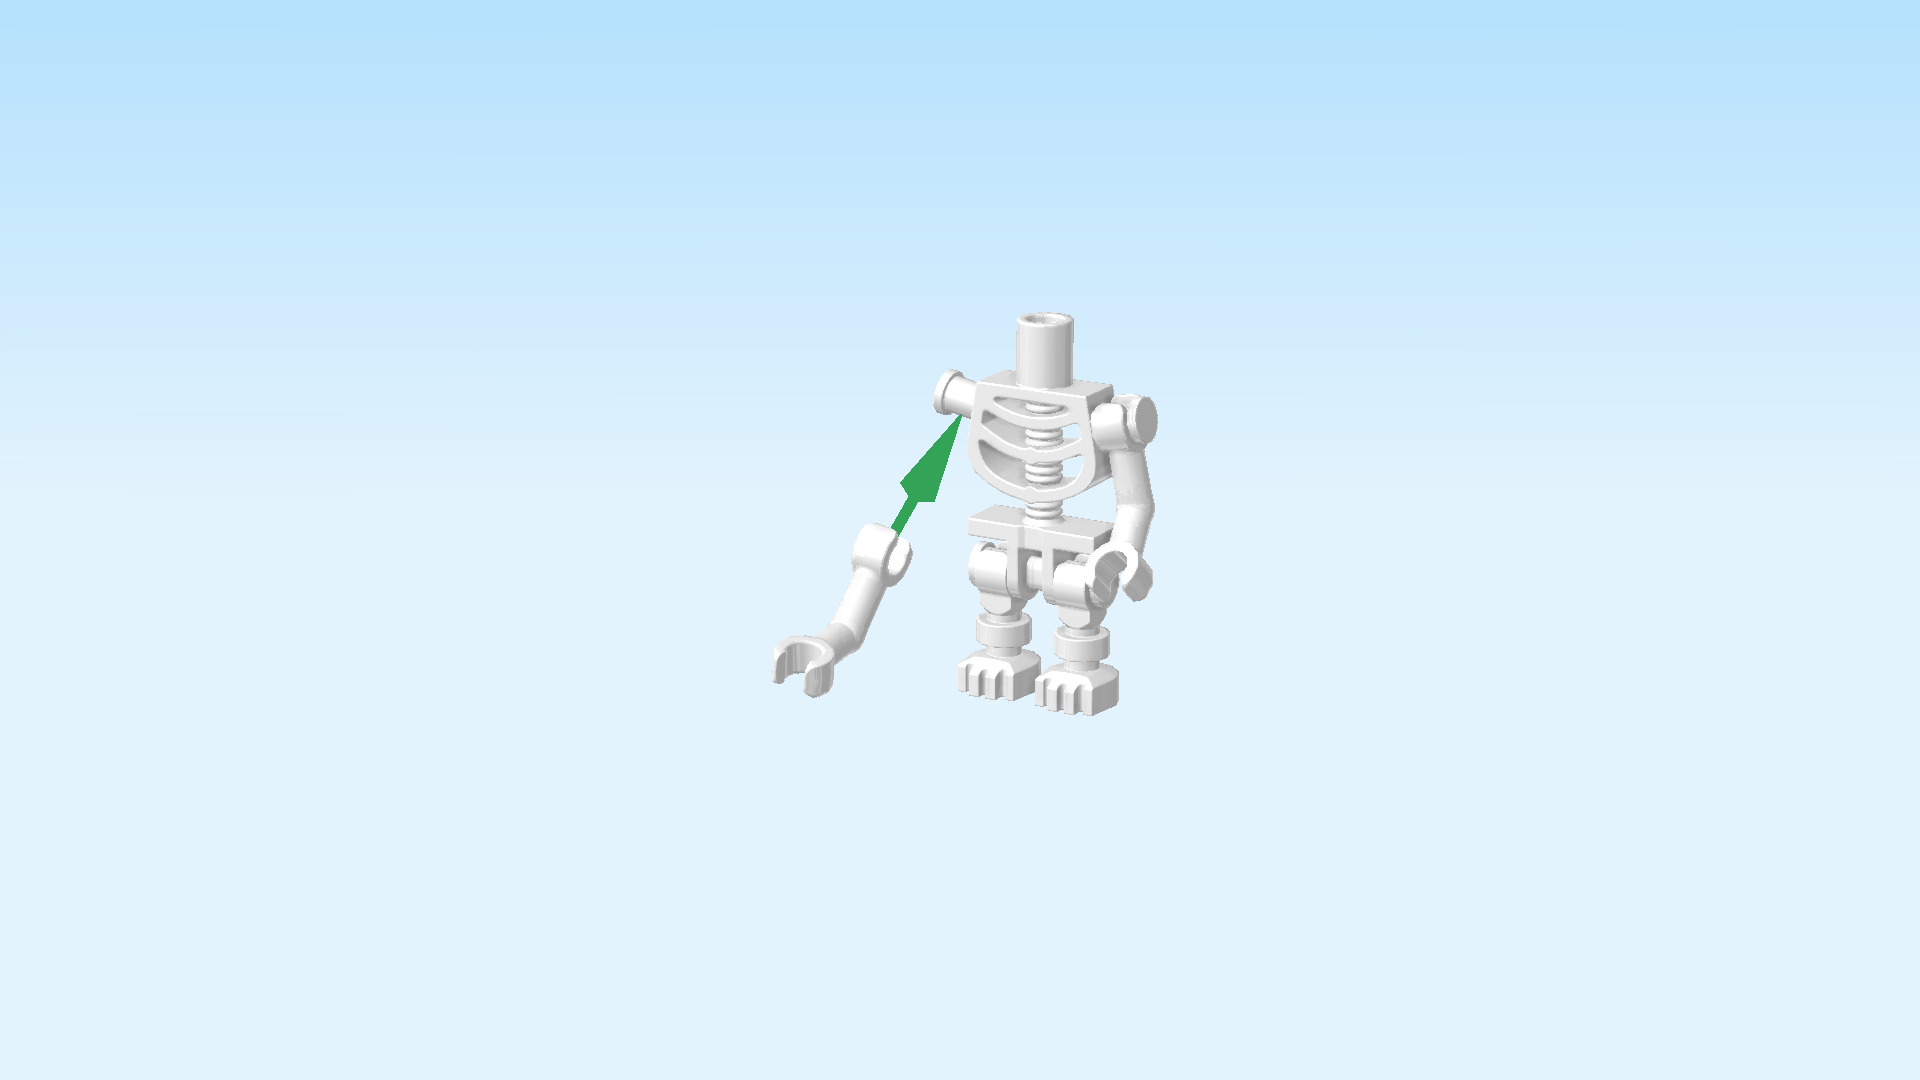
| Find 2 white skeleton arms. |
| Snap the skeleton arms on the arm shafts to the left and right of the ribcage. Make sure the elbows are pointing to the bottom. |
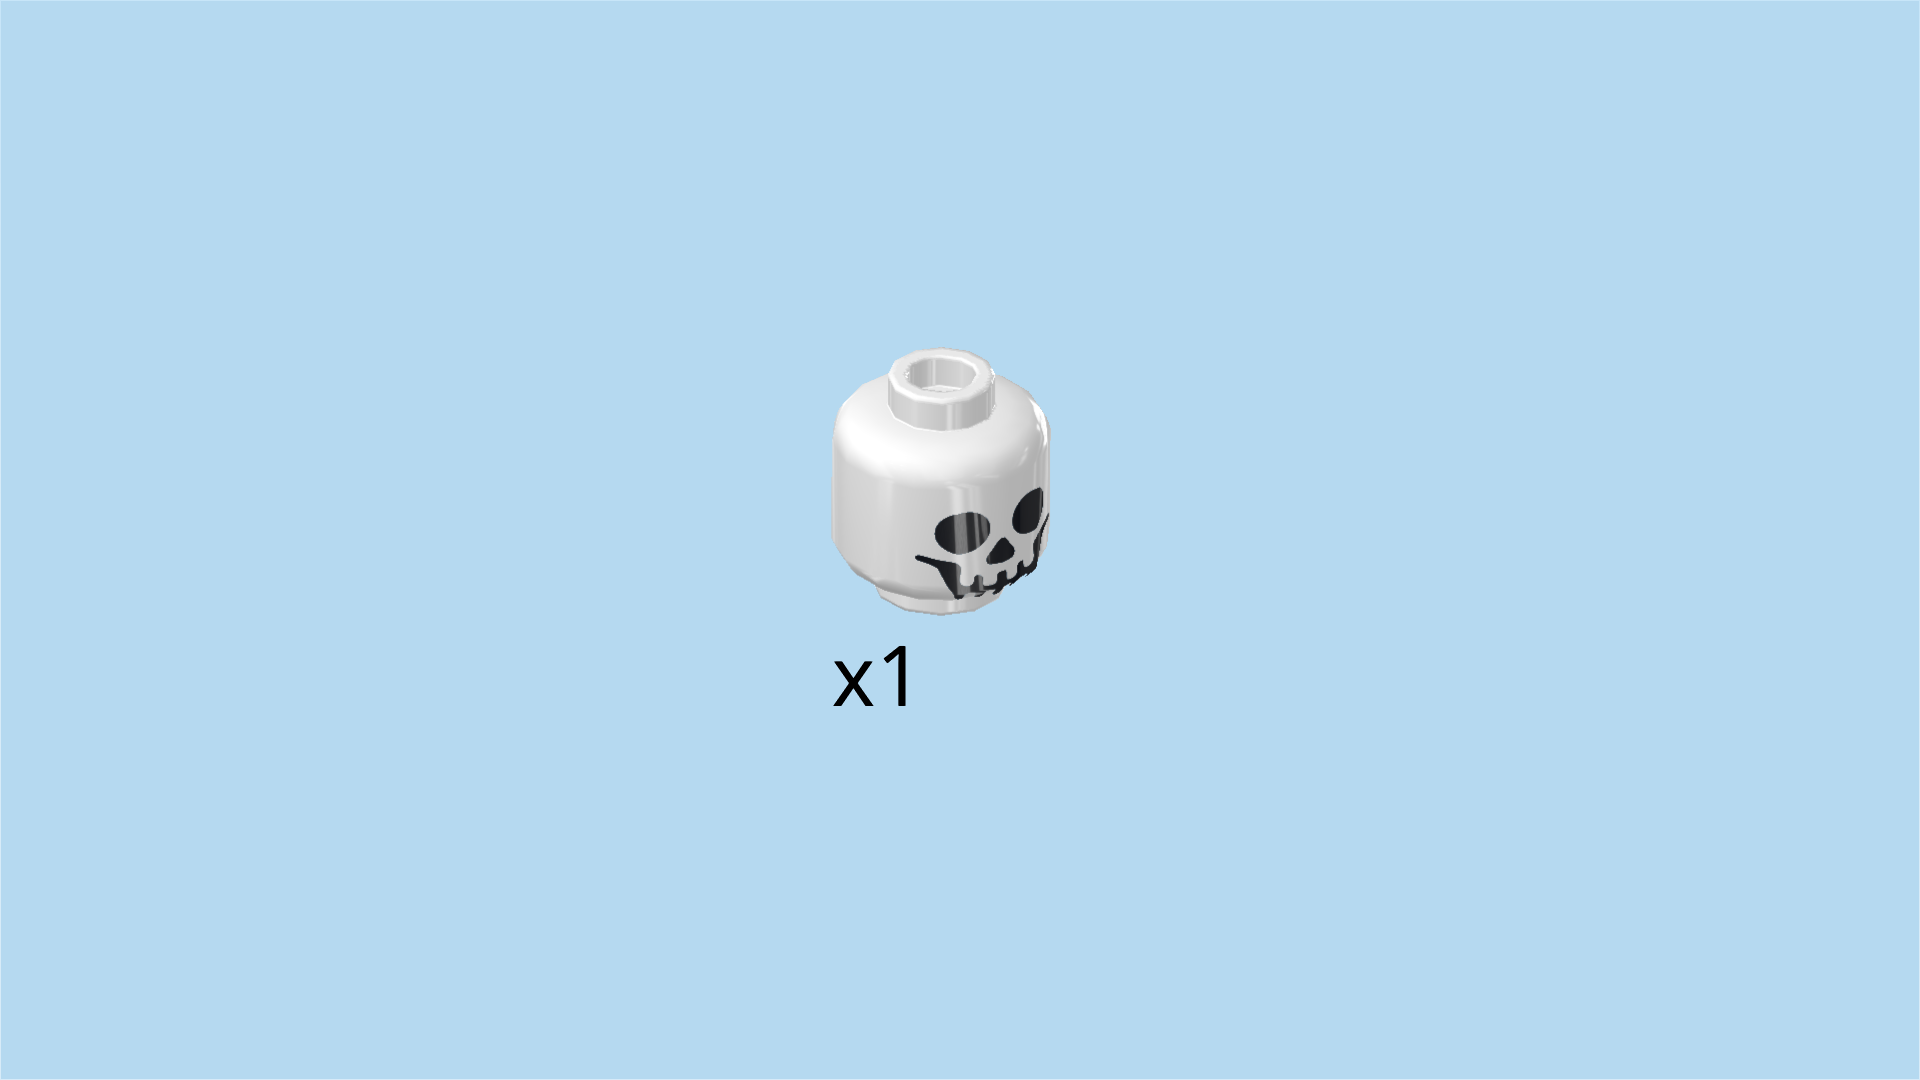
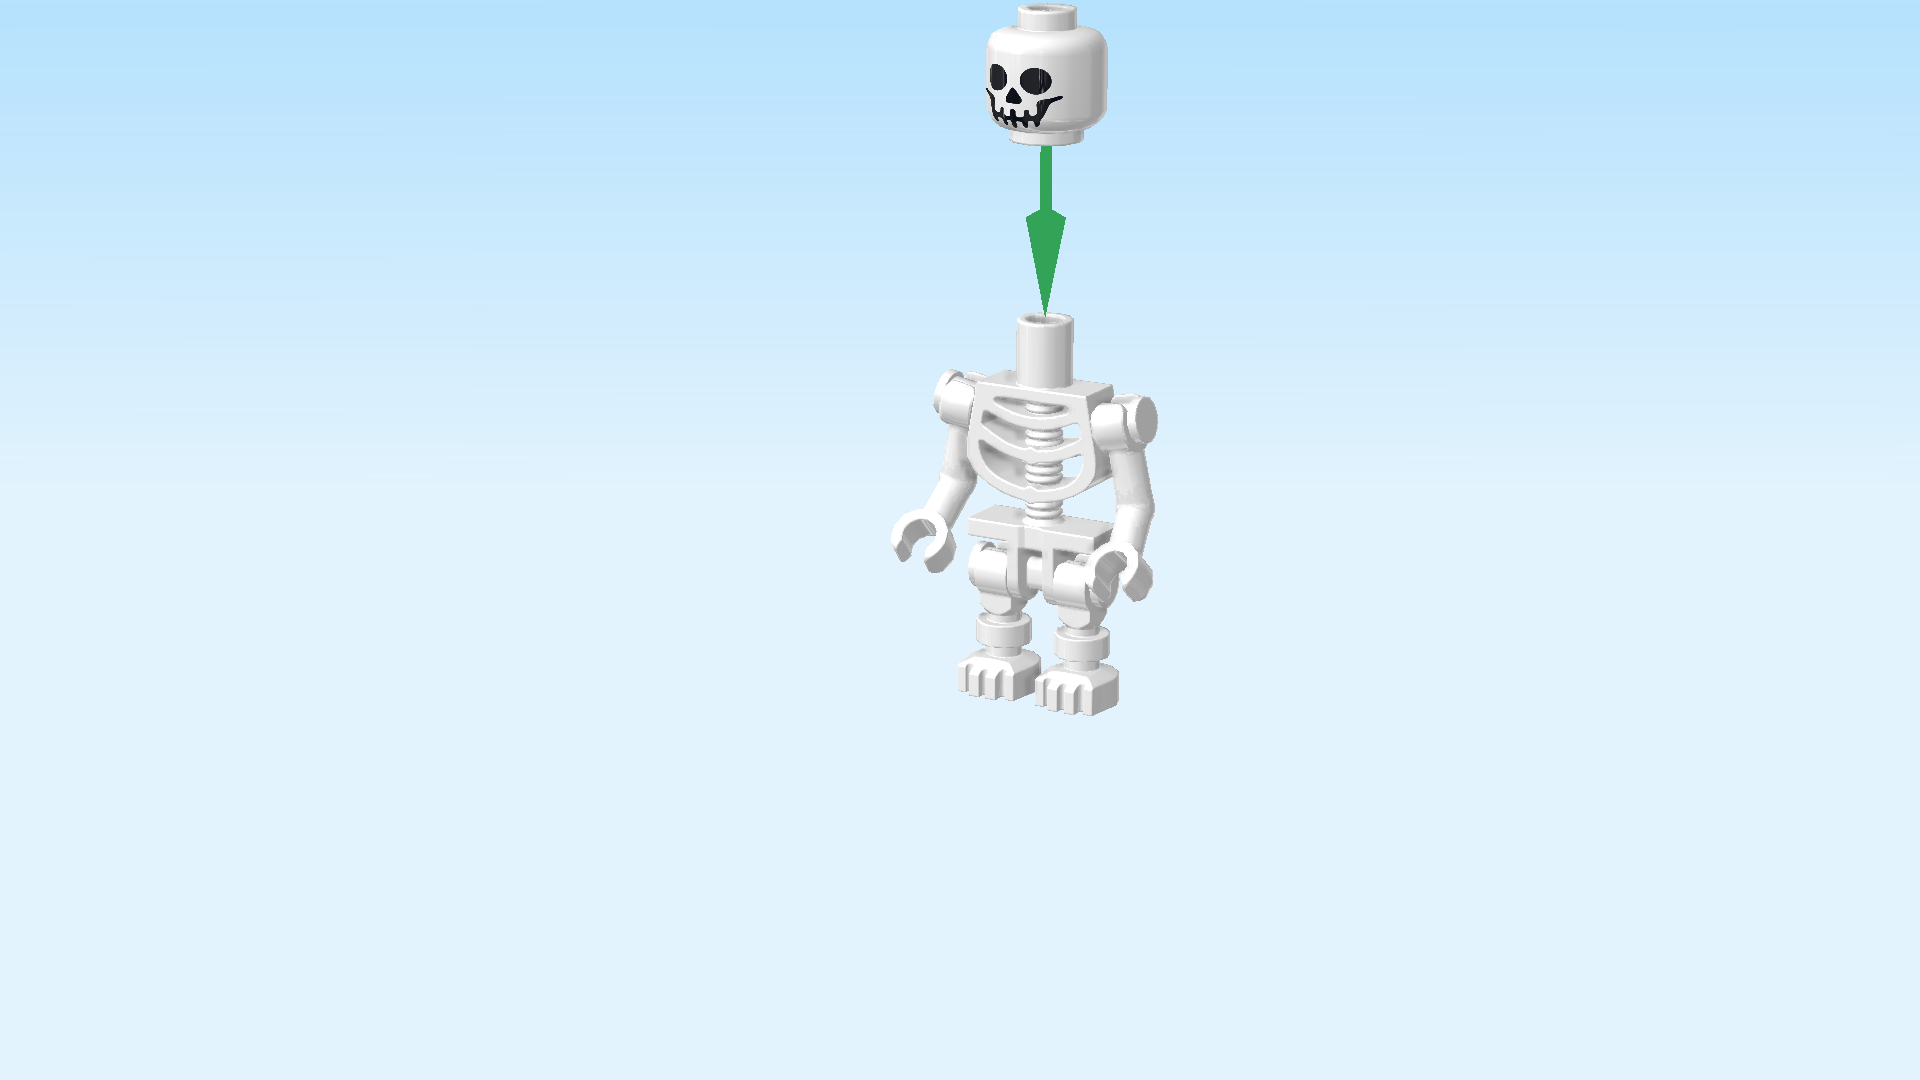
| Find 1 white Minifigure head. |
| Put the head on the skeleton. It is printed with a skull with 2 black circles for eye sockets, a black triangle for the nose opening and a big skeleton grin. |
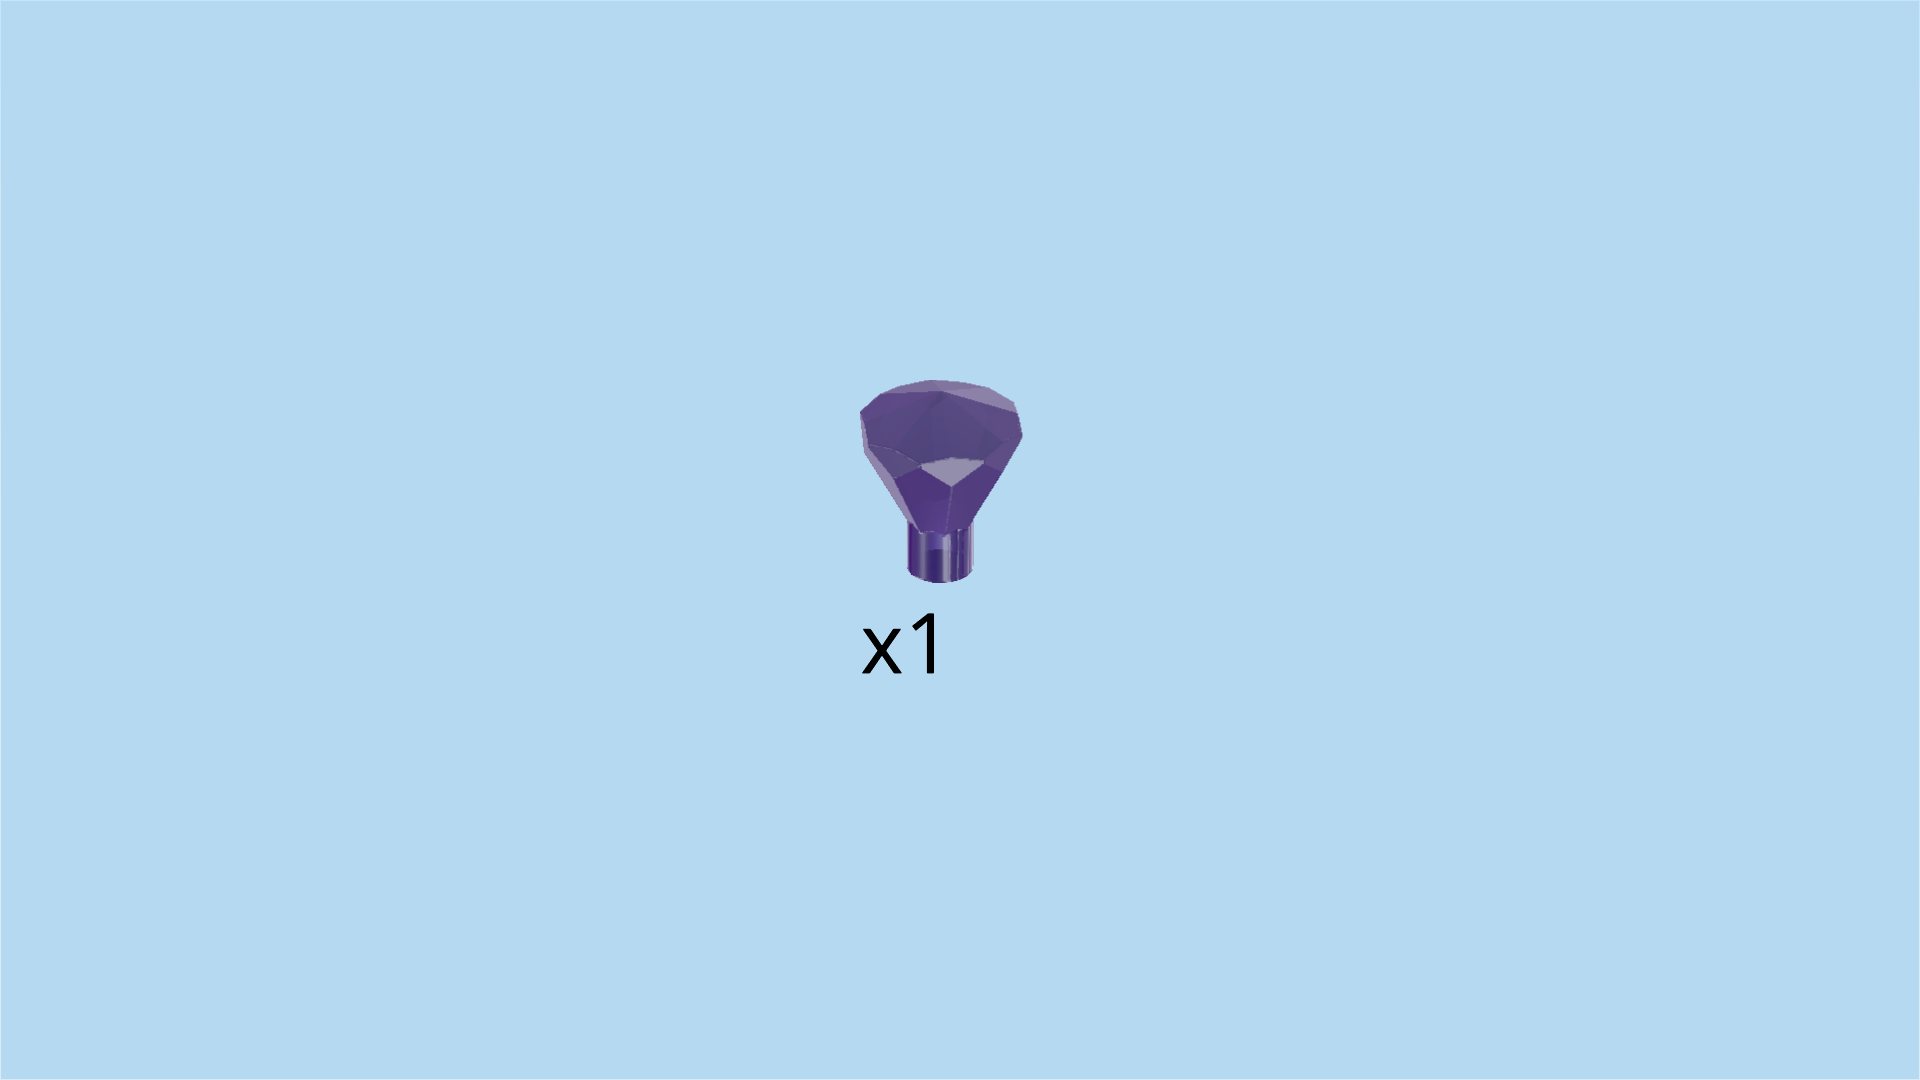
| Find 1 transparent bright bluish violet diamond with stick. |
| Snap the stick of the diamond into the skeleton's hand. |
| The diamond skeleton Minifigure is finished! Well done! It is a surprising deep sea dweller. Who knows how it got there, swimming amidst coral reefs and sea creatures. |
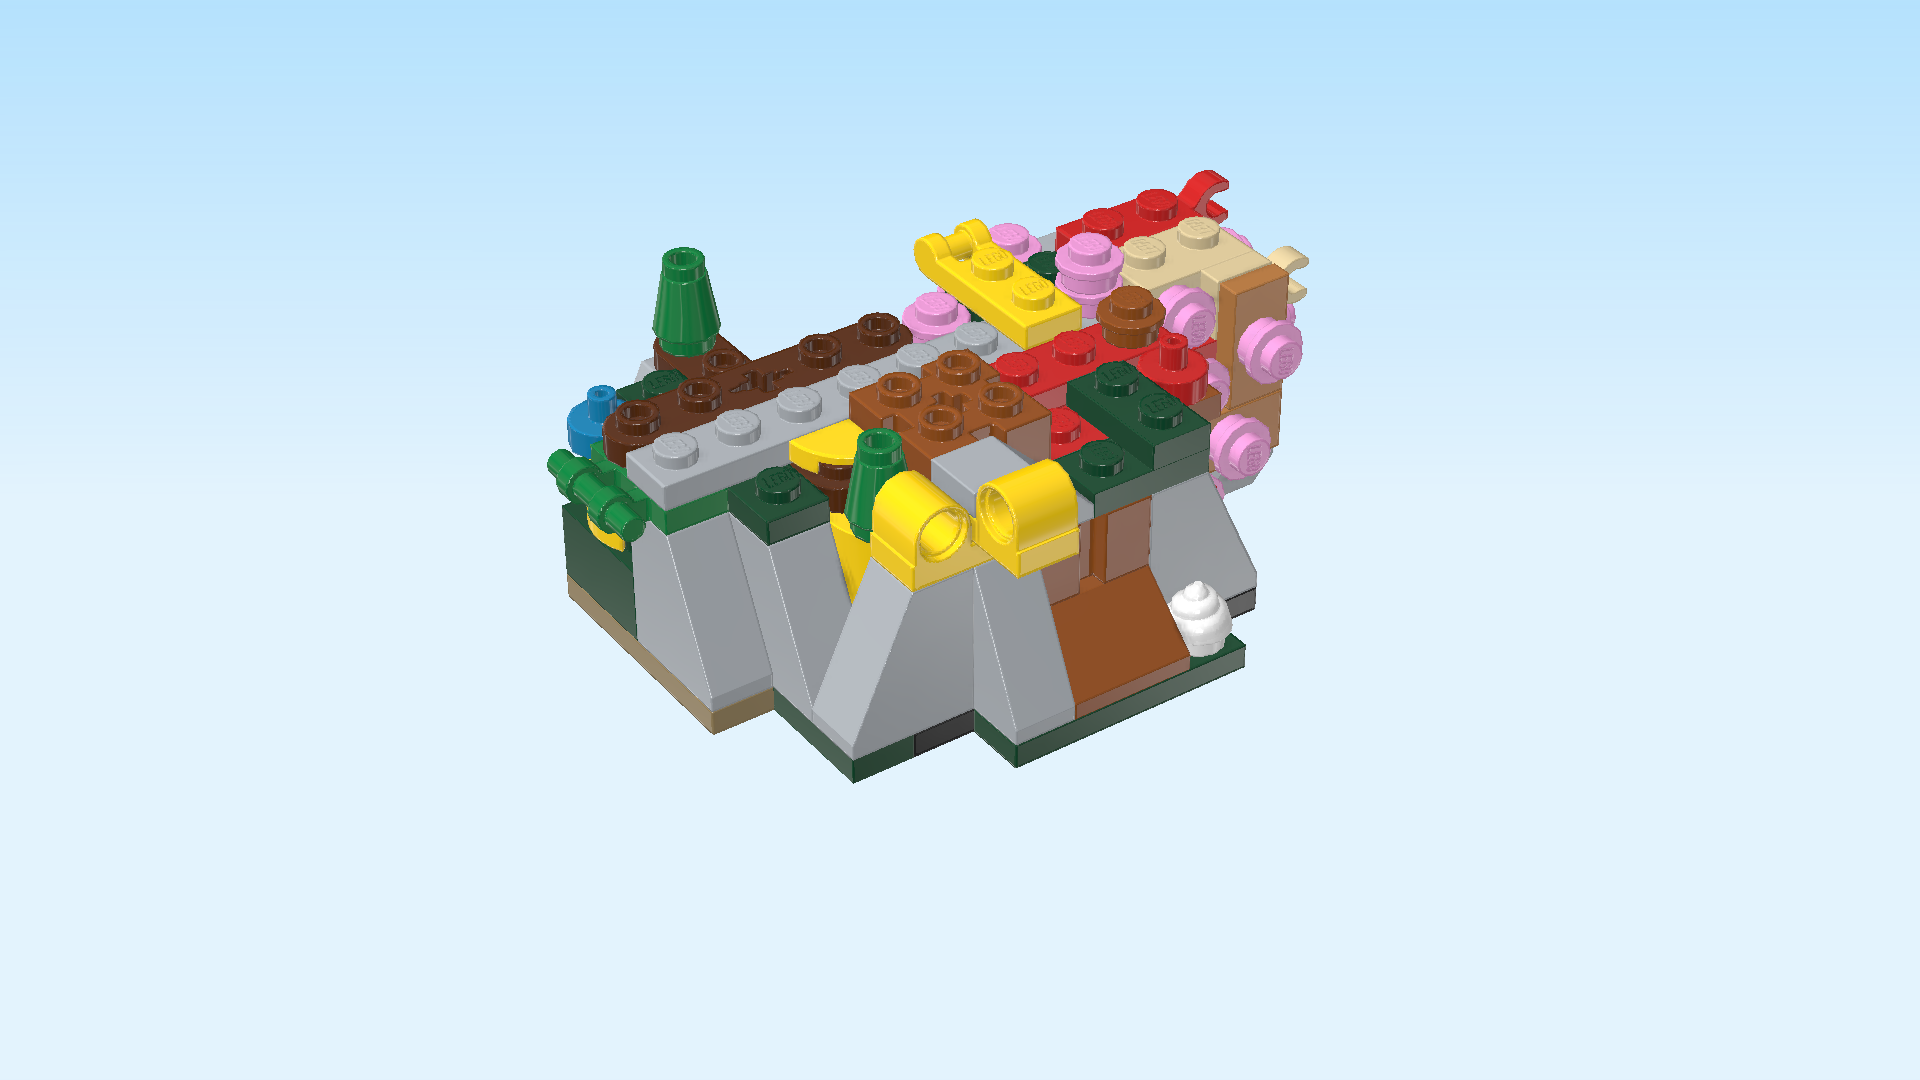
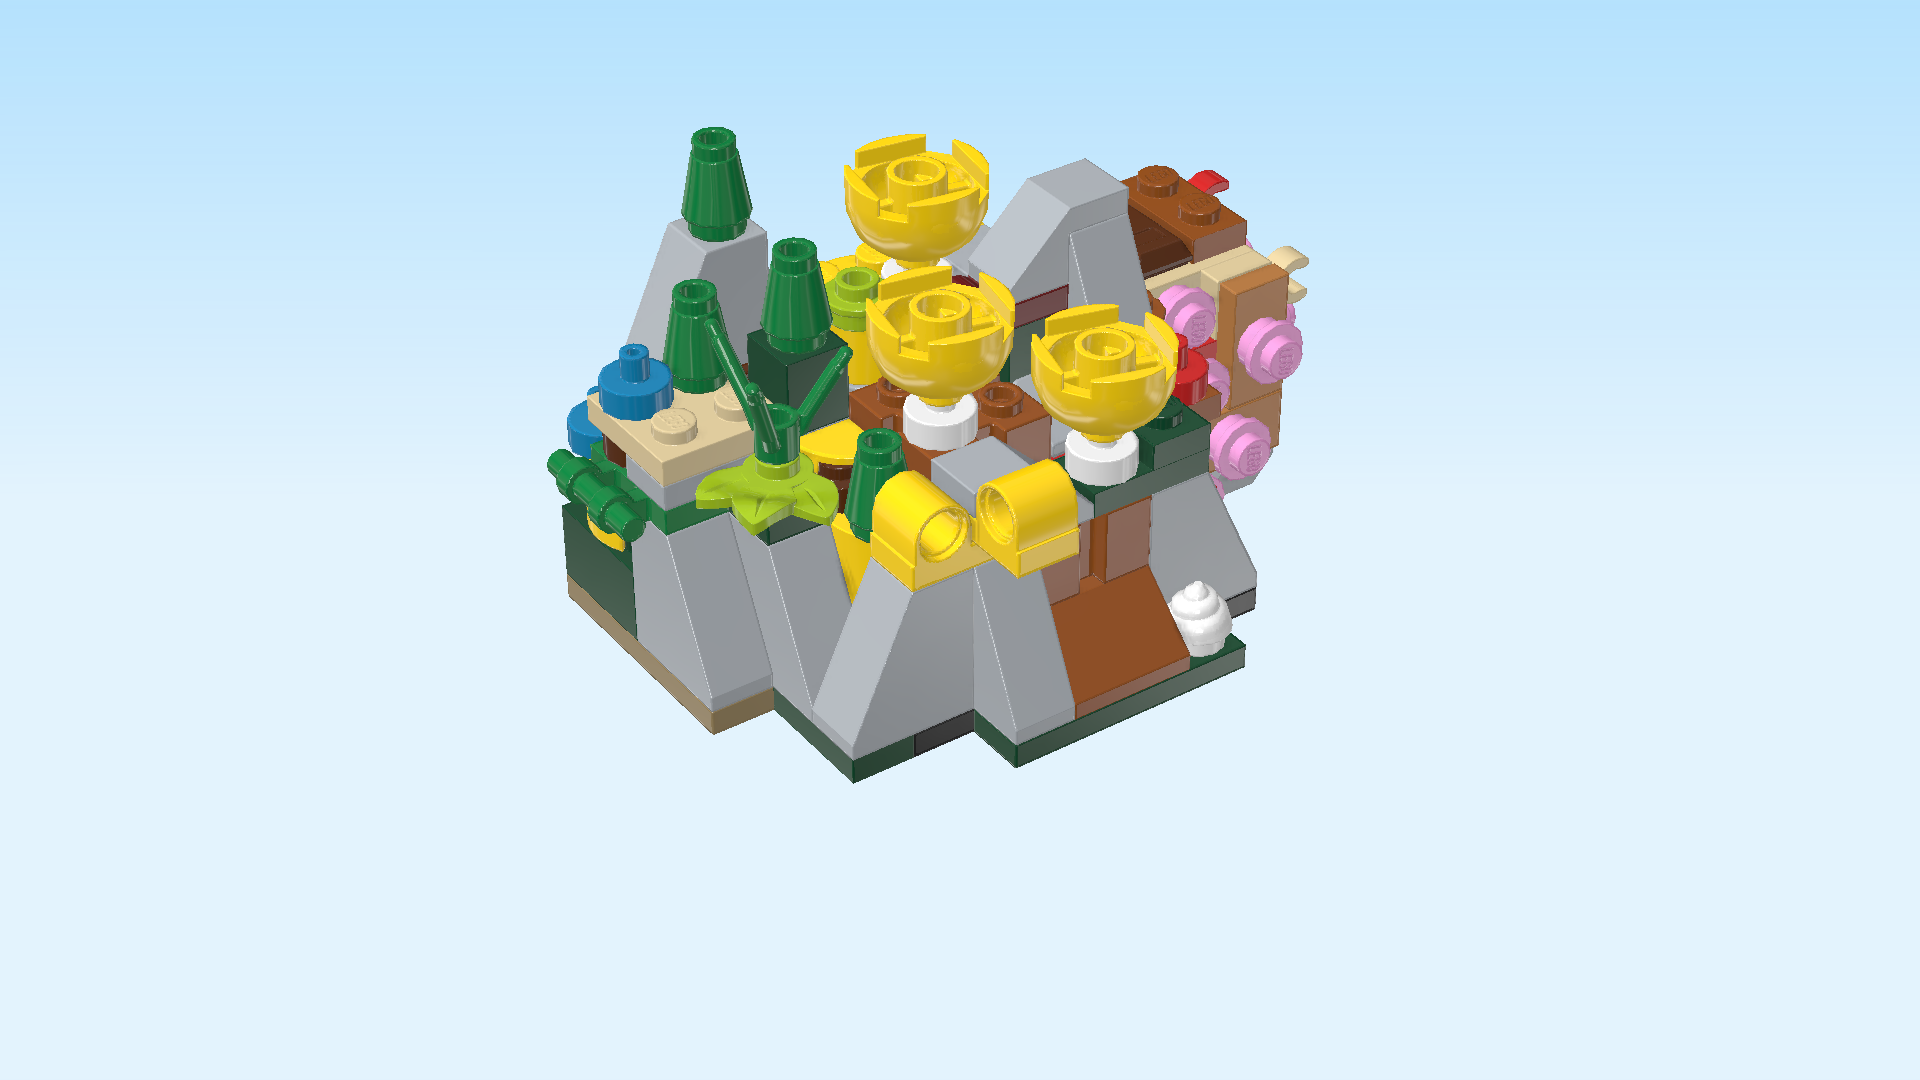
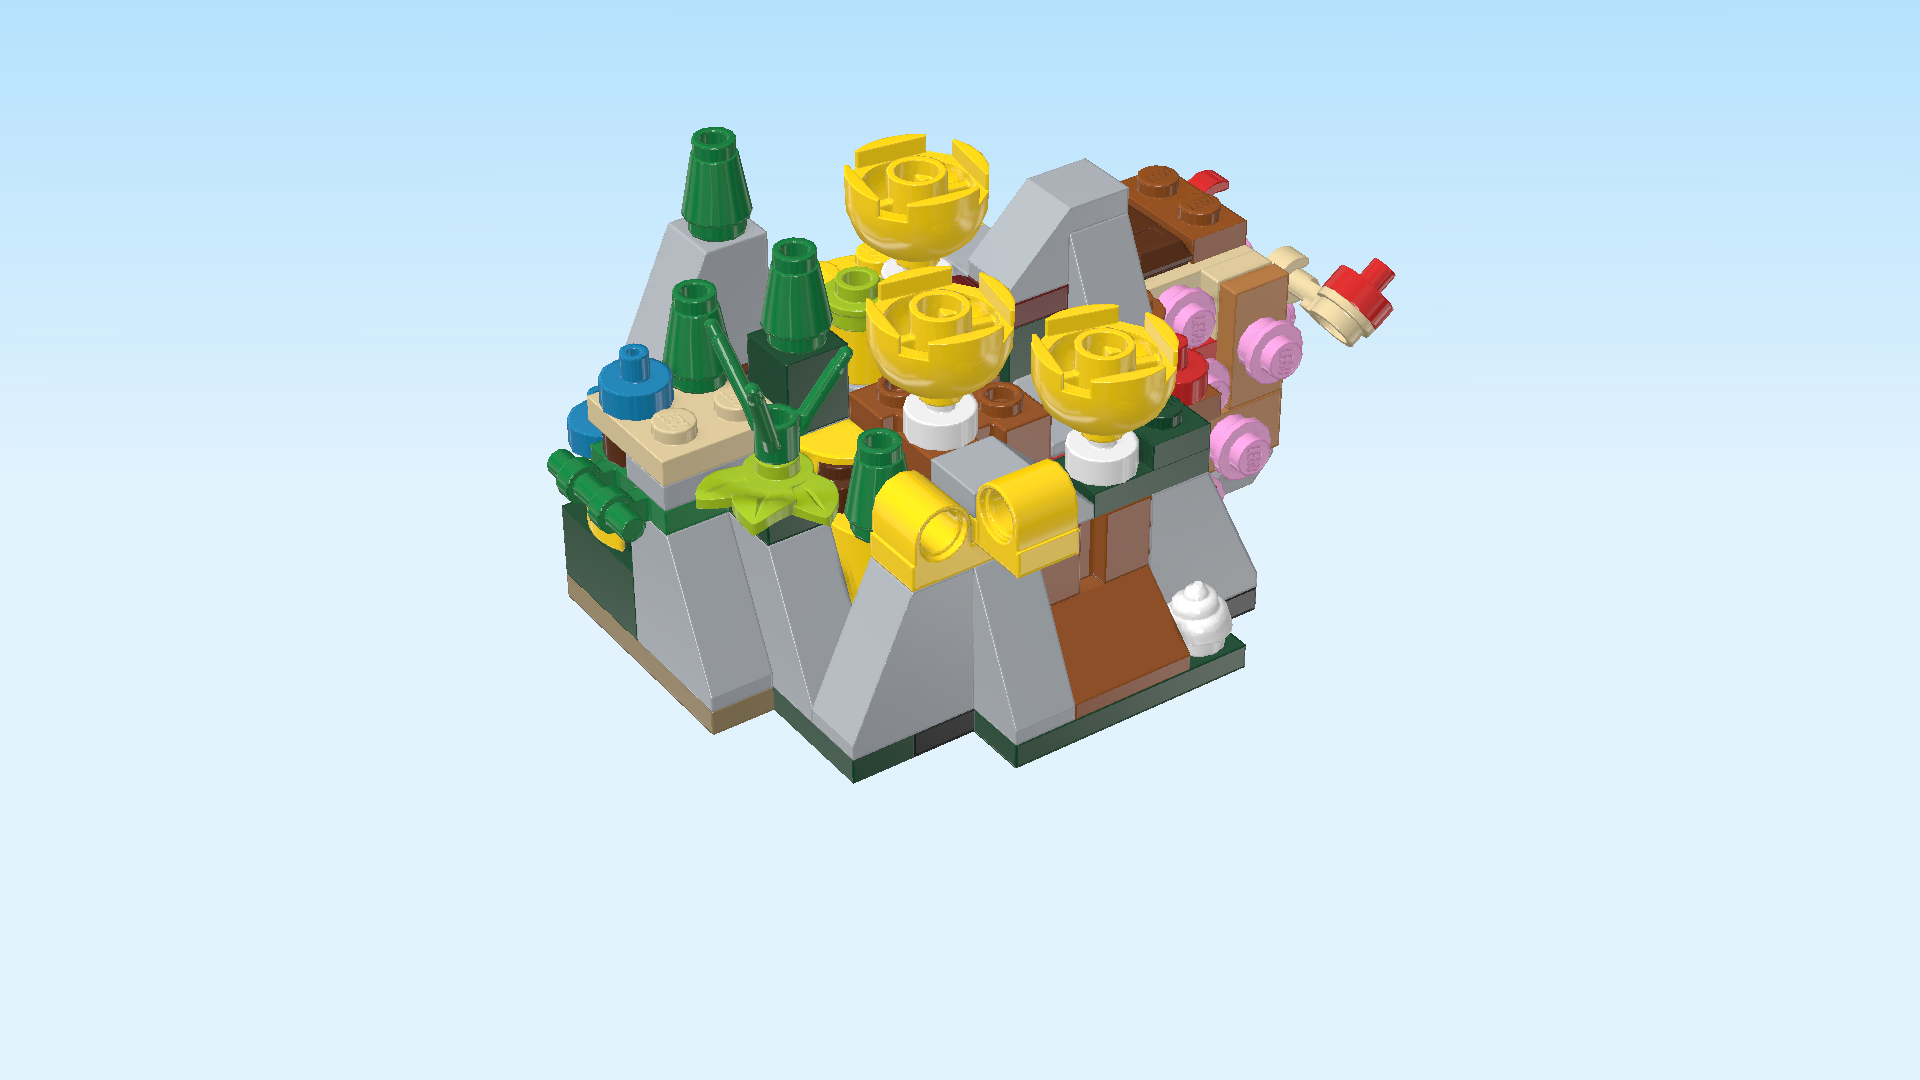
| Next, we will build the coral reef. |
| The coral reef consists of different plants, corals and other small details and is a pretty intricate build that sometimes calls for very specific instructions. But of course, the coral reef is pretty modular: You can also decide to place all the different pieces to your own liking. Do give it a try, the end result is marvelous! |
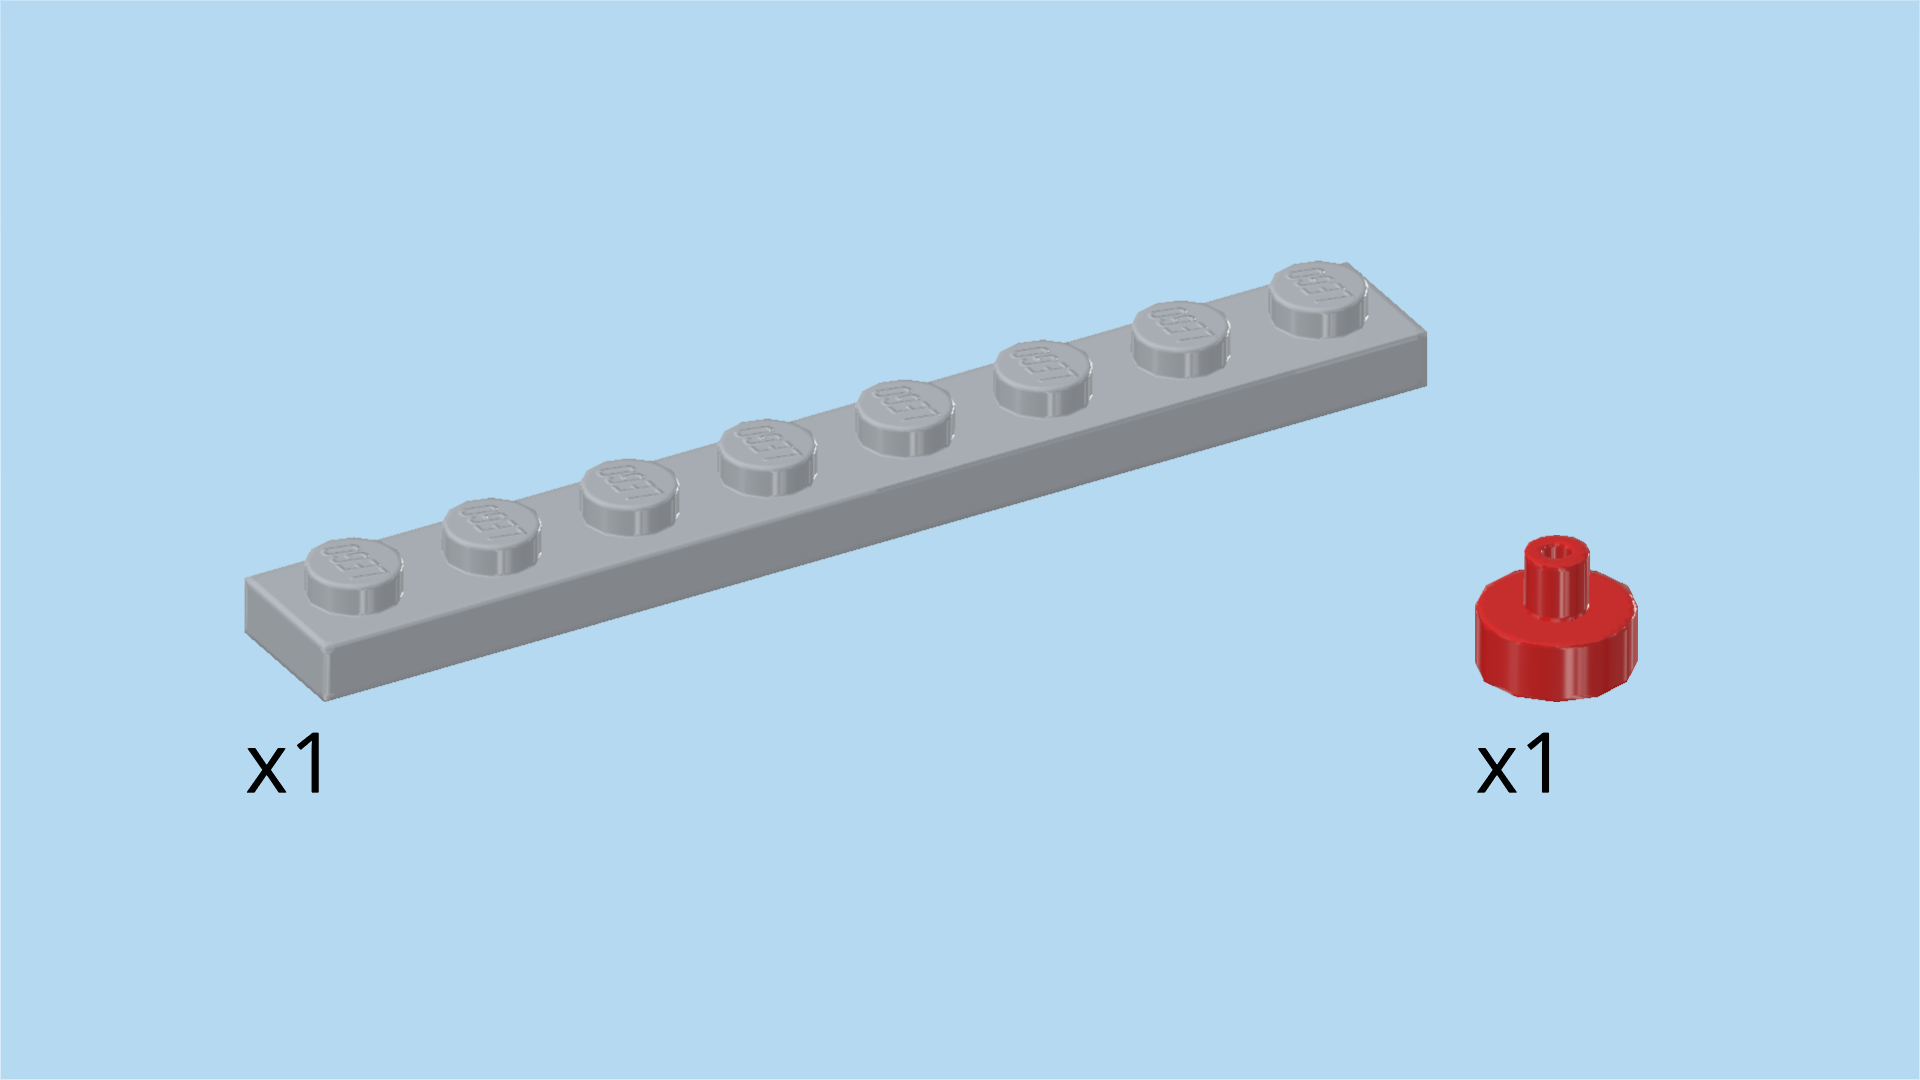
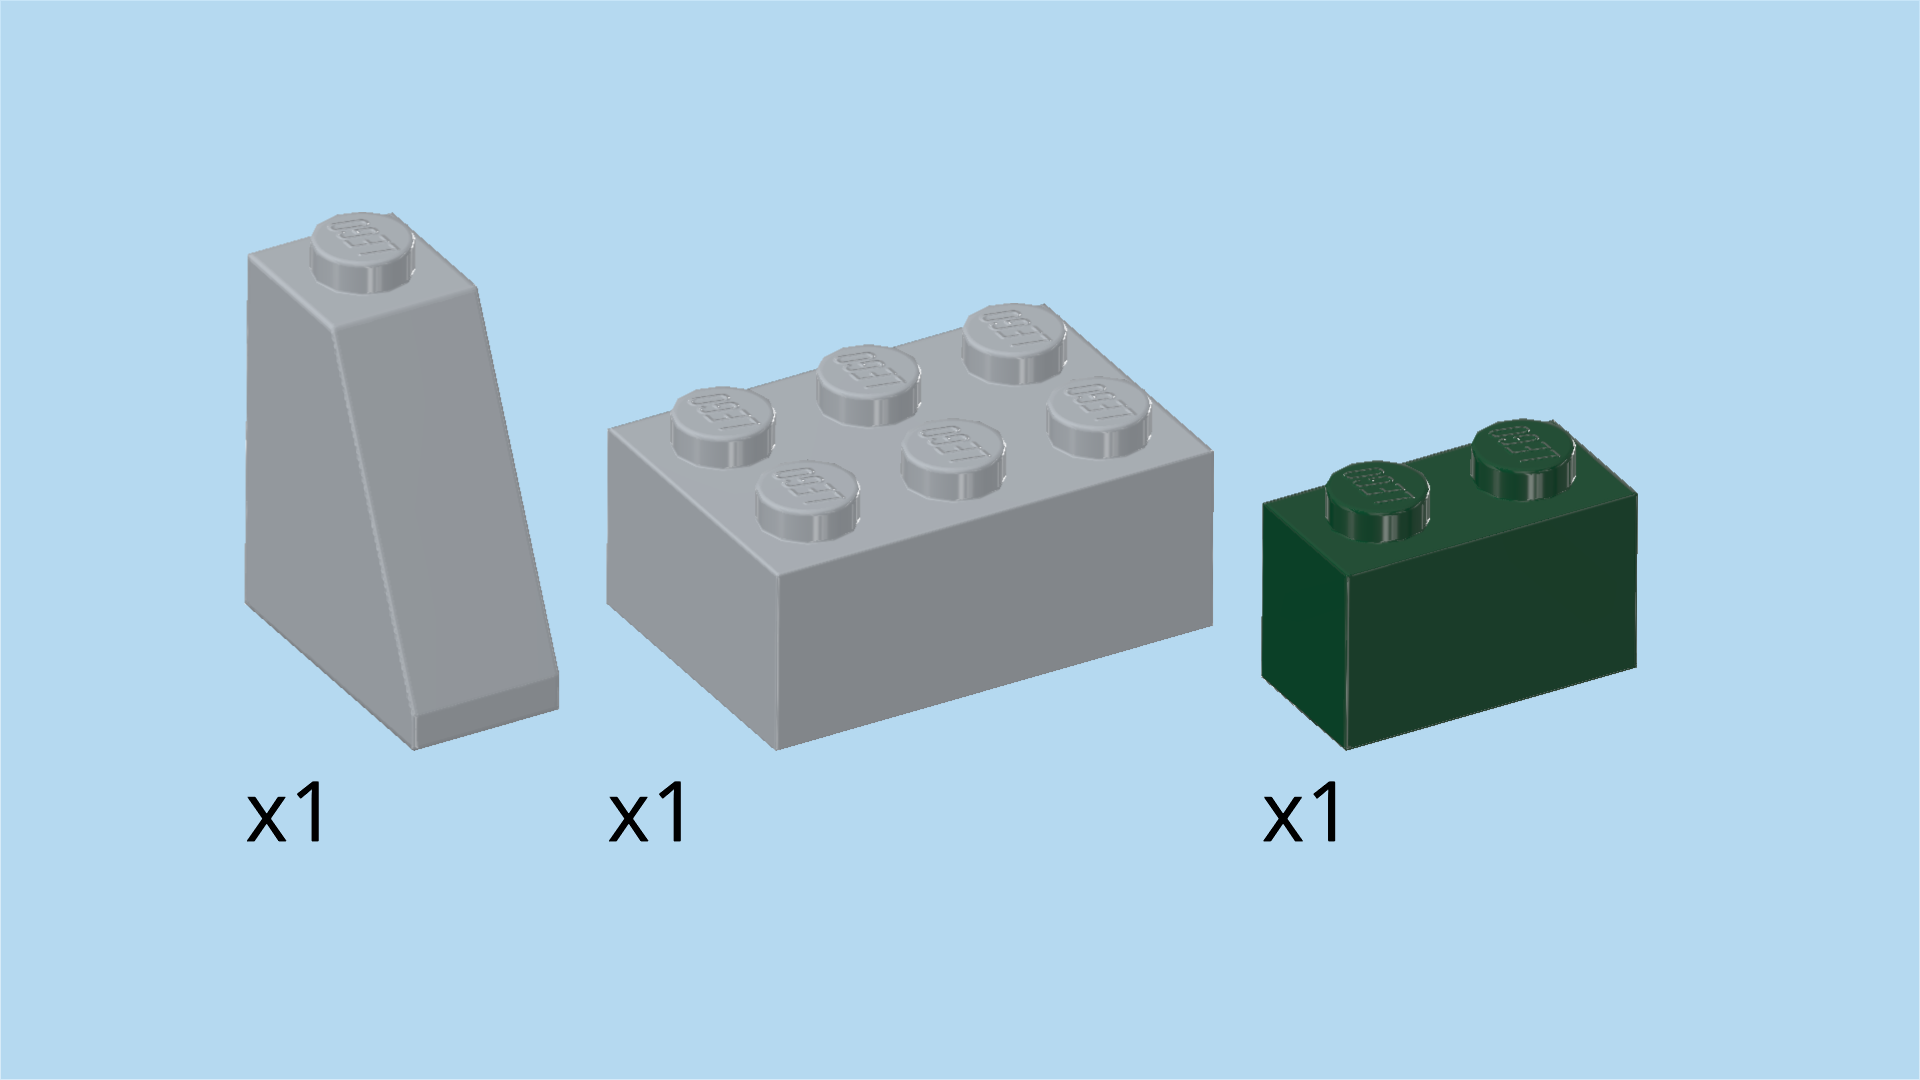
| Collect the following 2 pieces: |
| 1 medium stone grey plate 1x8, |
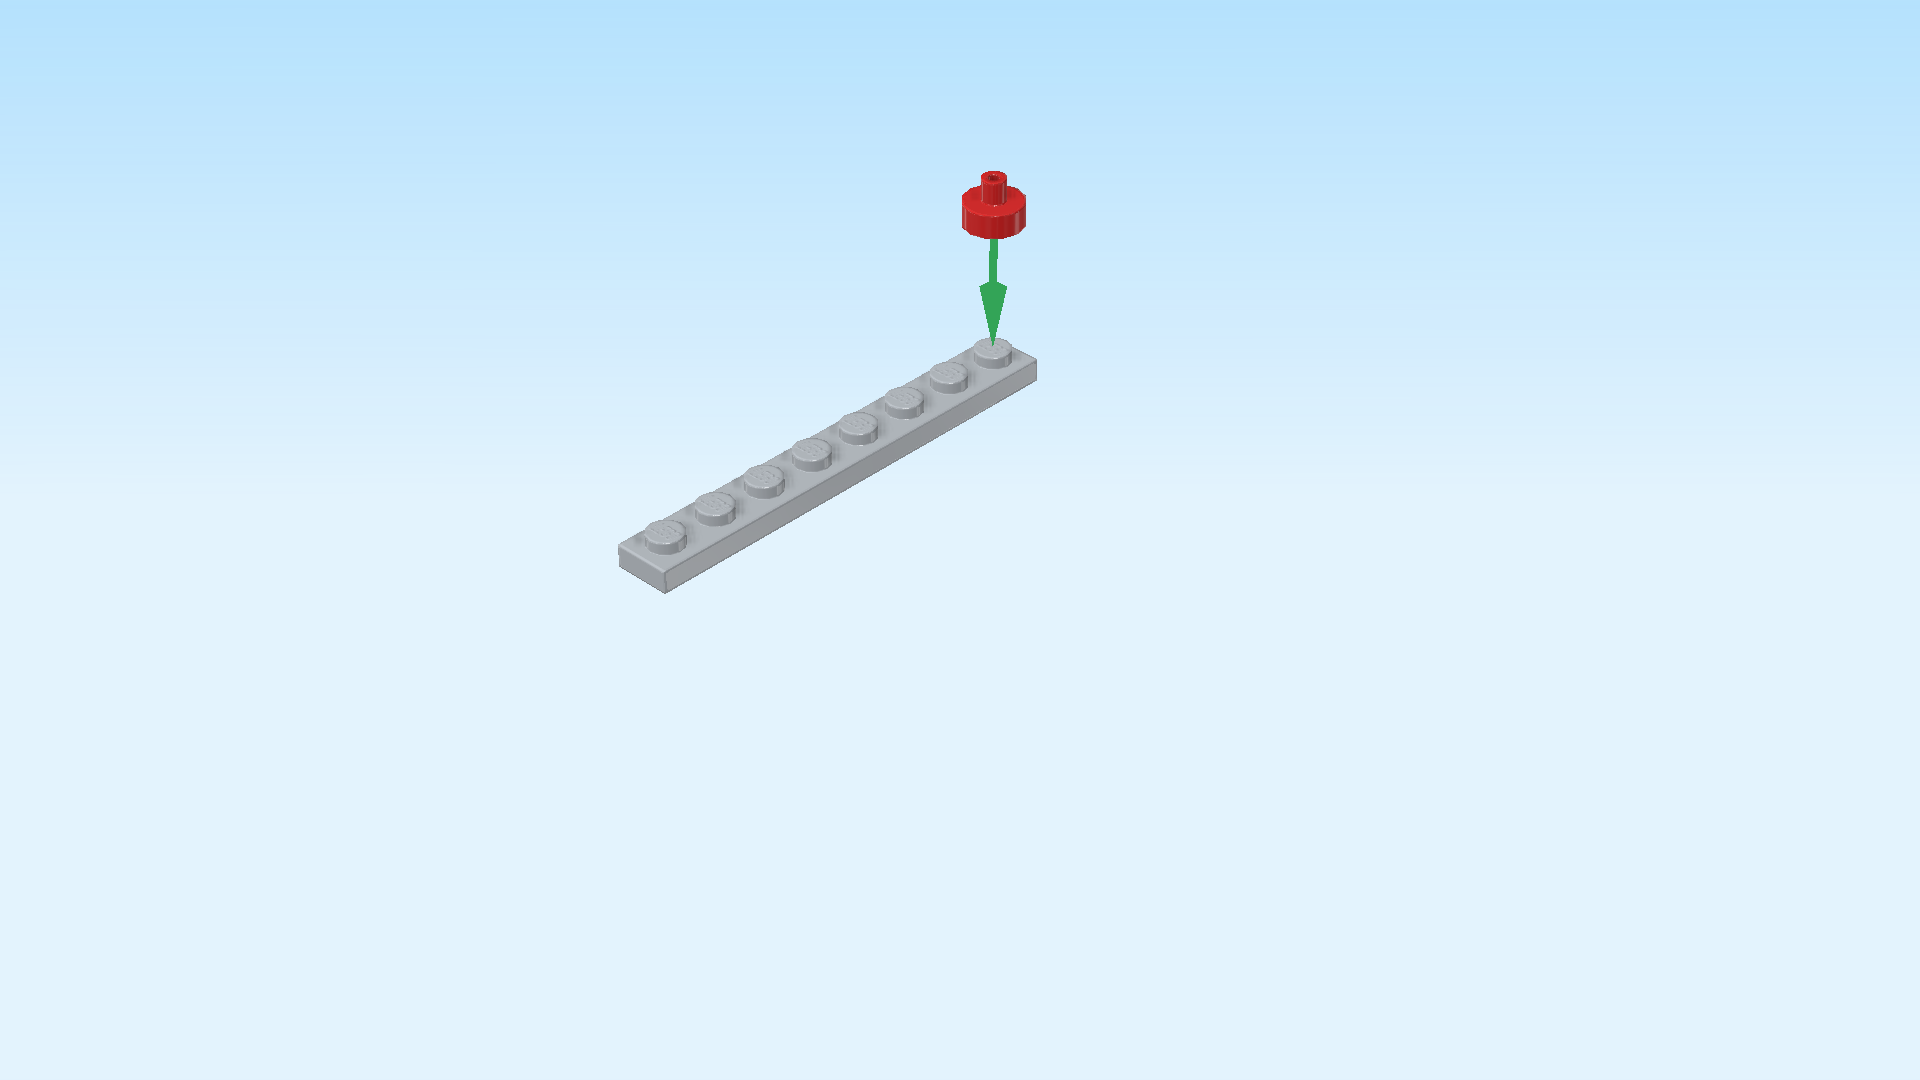
| and 1 bright red round plate 1x1 with top shaft. |
| Put the plate 1x8 horizontally on the table. |
| Put the round plate with top shaft on the rightmost knob. |
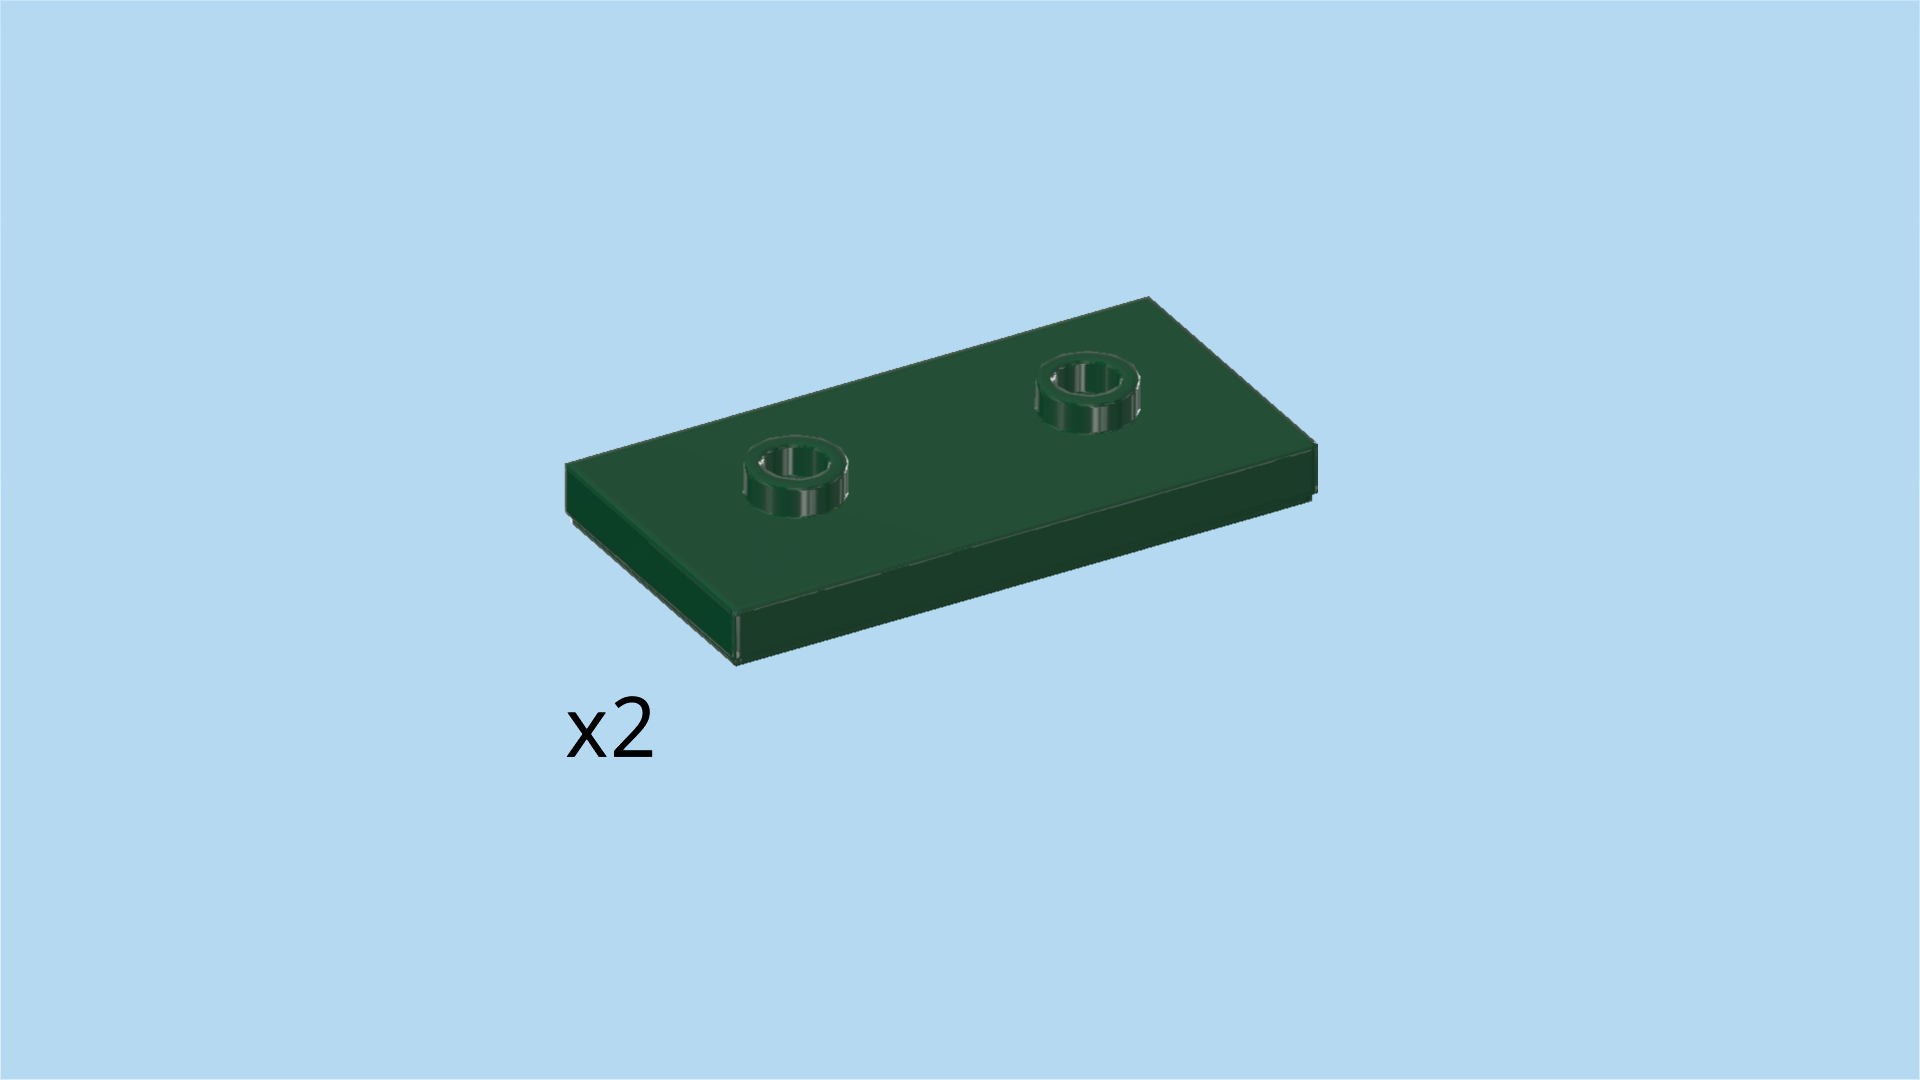
| Find 2 mossy green plates 2x4 with 2 knobs. |
| Put them vertically next to each other on the 4 middle knobs of the plate 1x8, aligning their back edges with the plate, ¾ overhanging to the front. |
| If done correctly, there is one empty knob between the round plate with top shaft and the right plate 2x4. On the left edge, there are 2 empty knobs protruding below the left plate 2x4. |
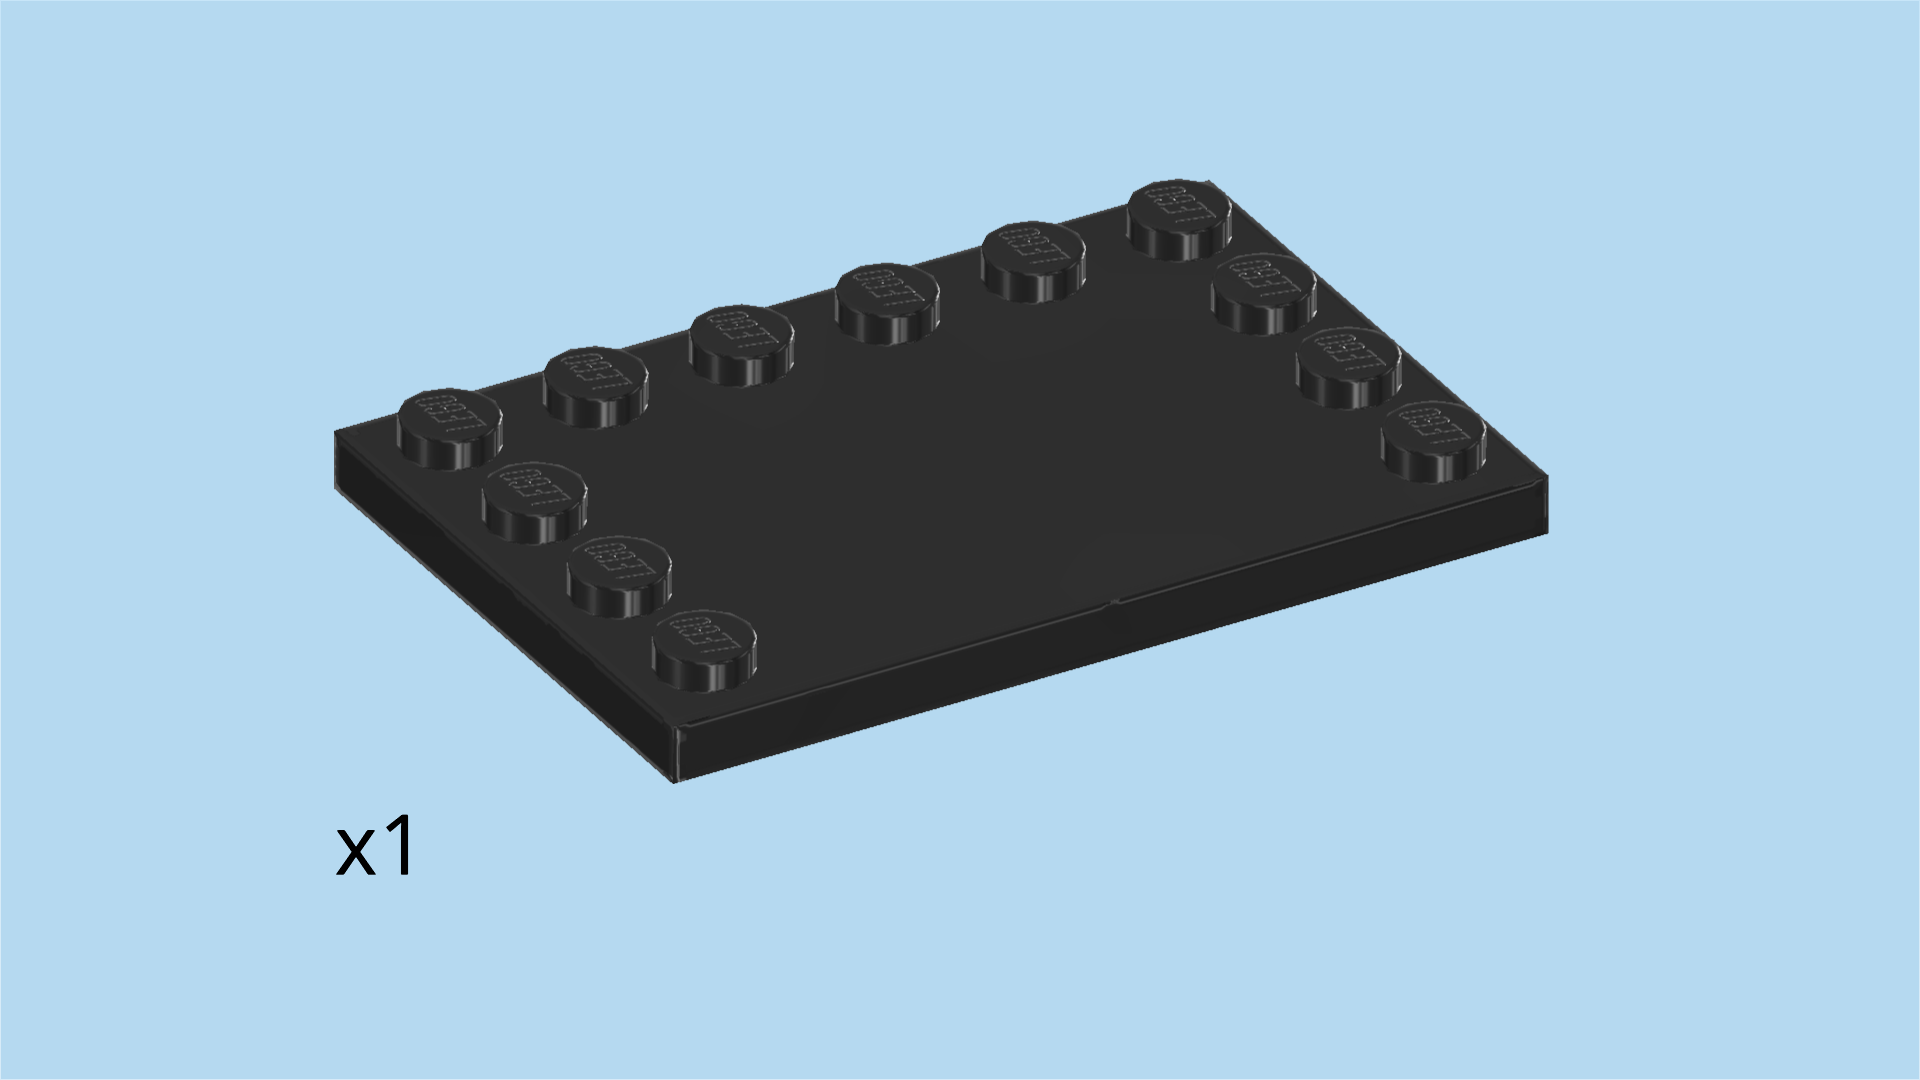
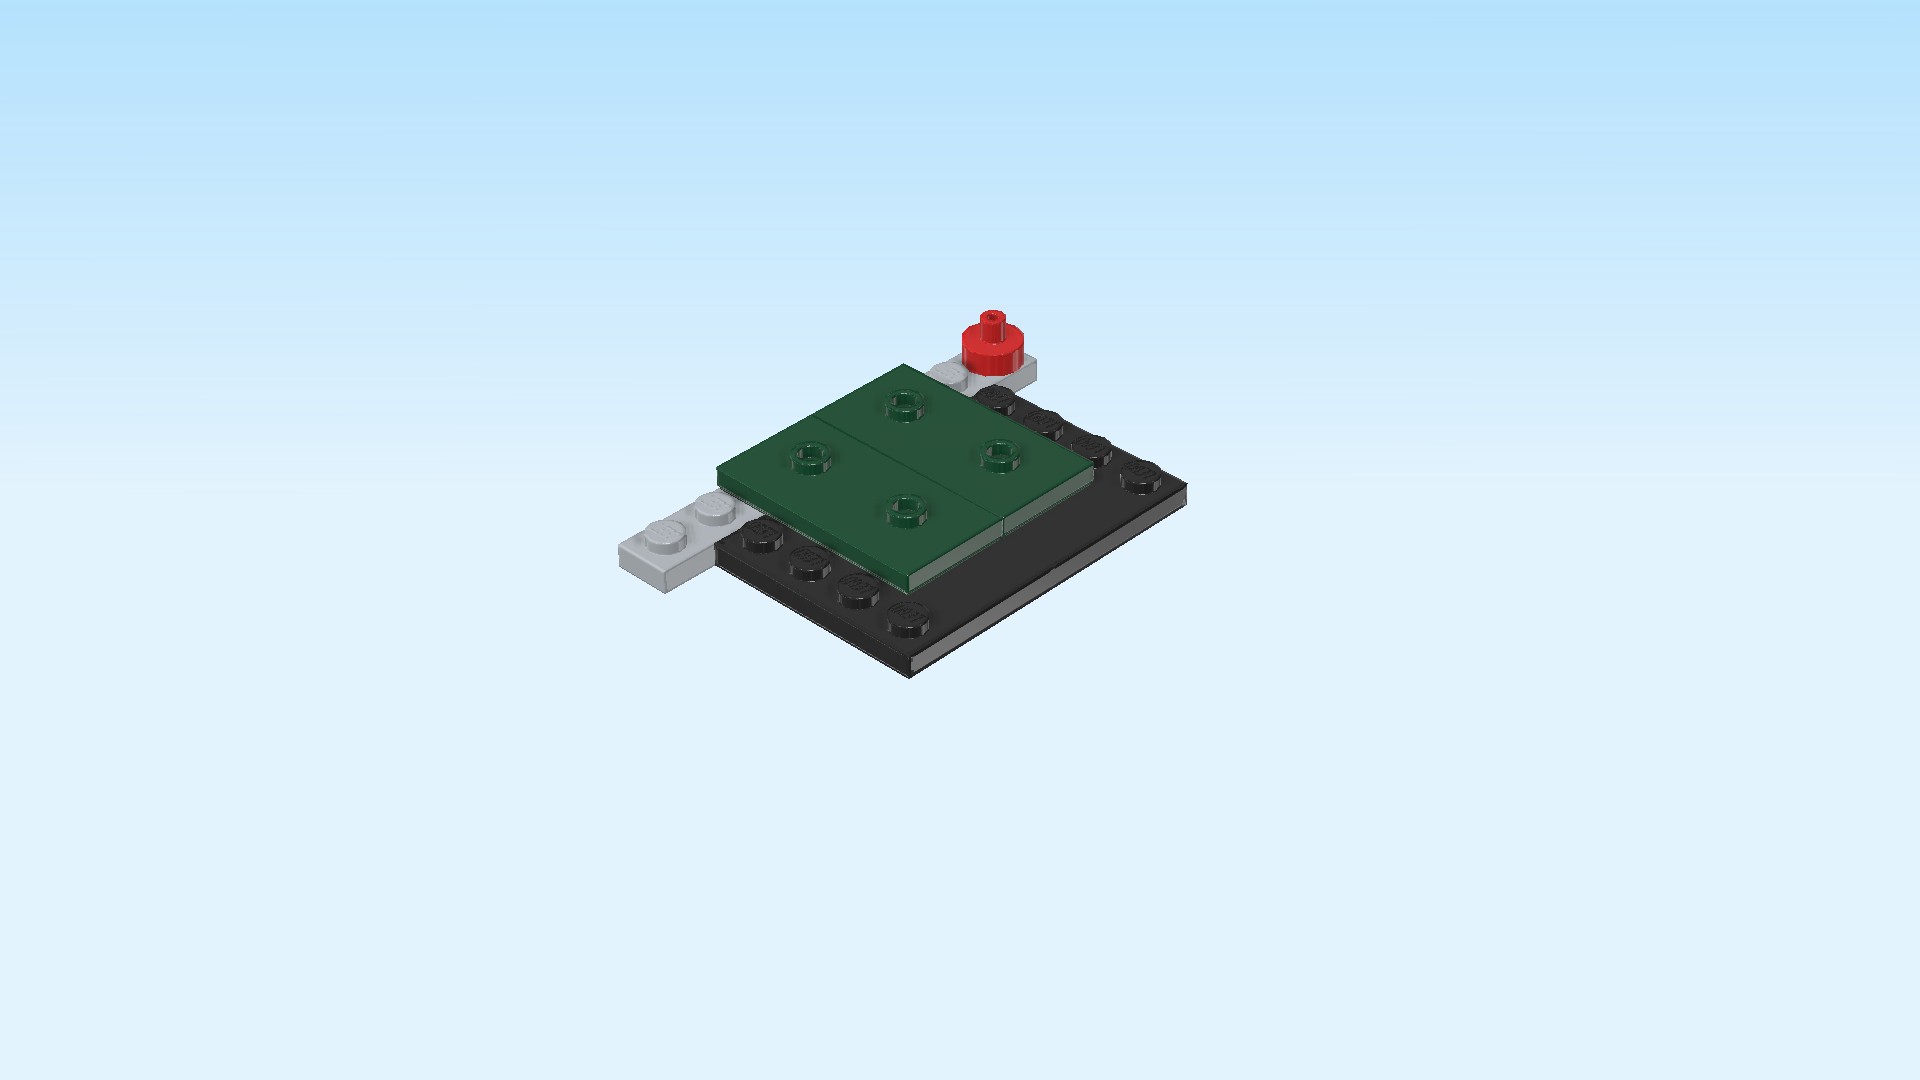
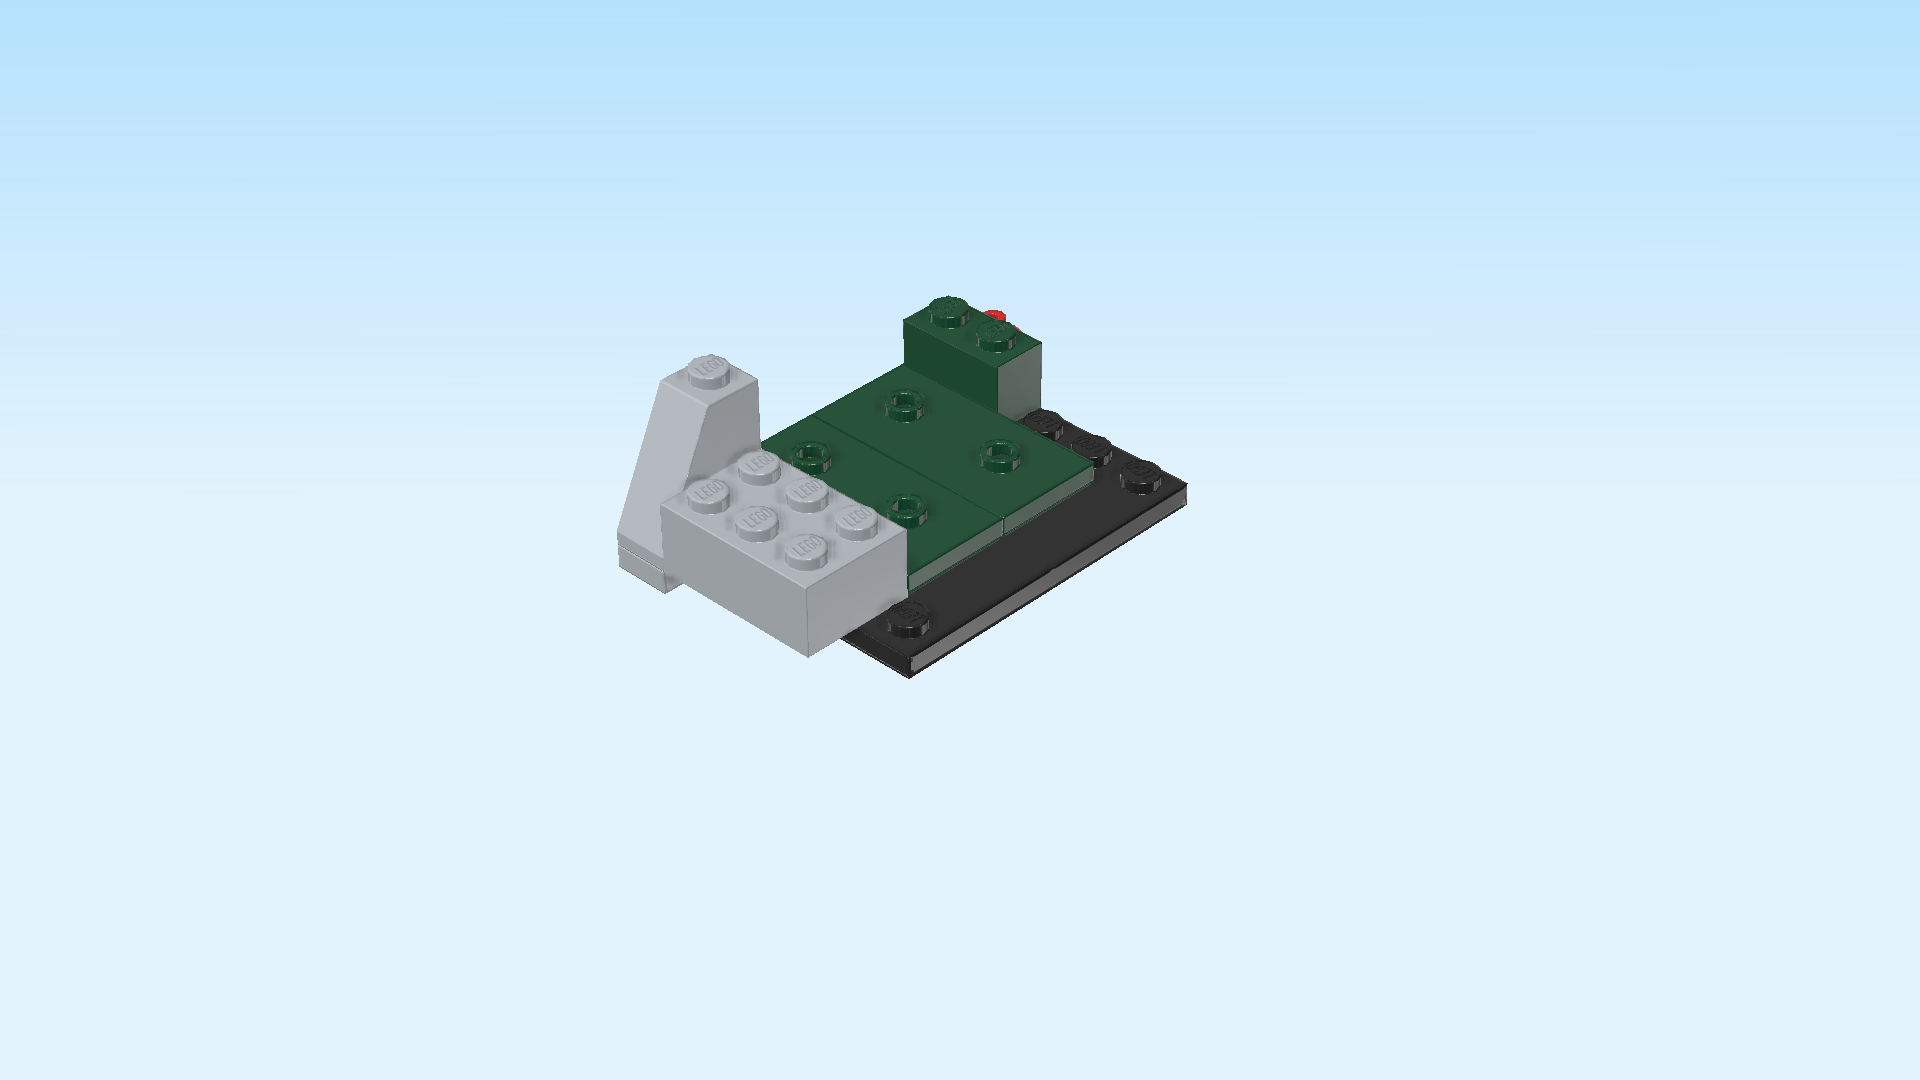
| Find 1 black plate 4x6 with 12 knobs. |
| Mount it horizontally centered underneath the overhanging ¾ of the 2 previous pieces, edge without knobs to the front. |
| Collect the following 3 pieces: |
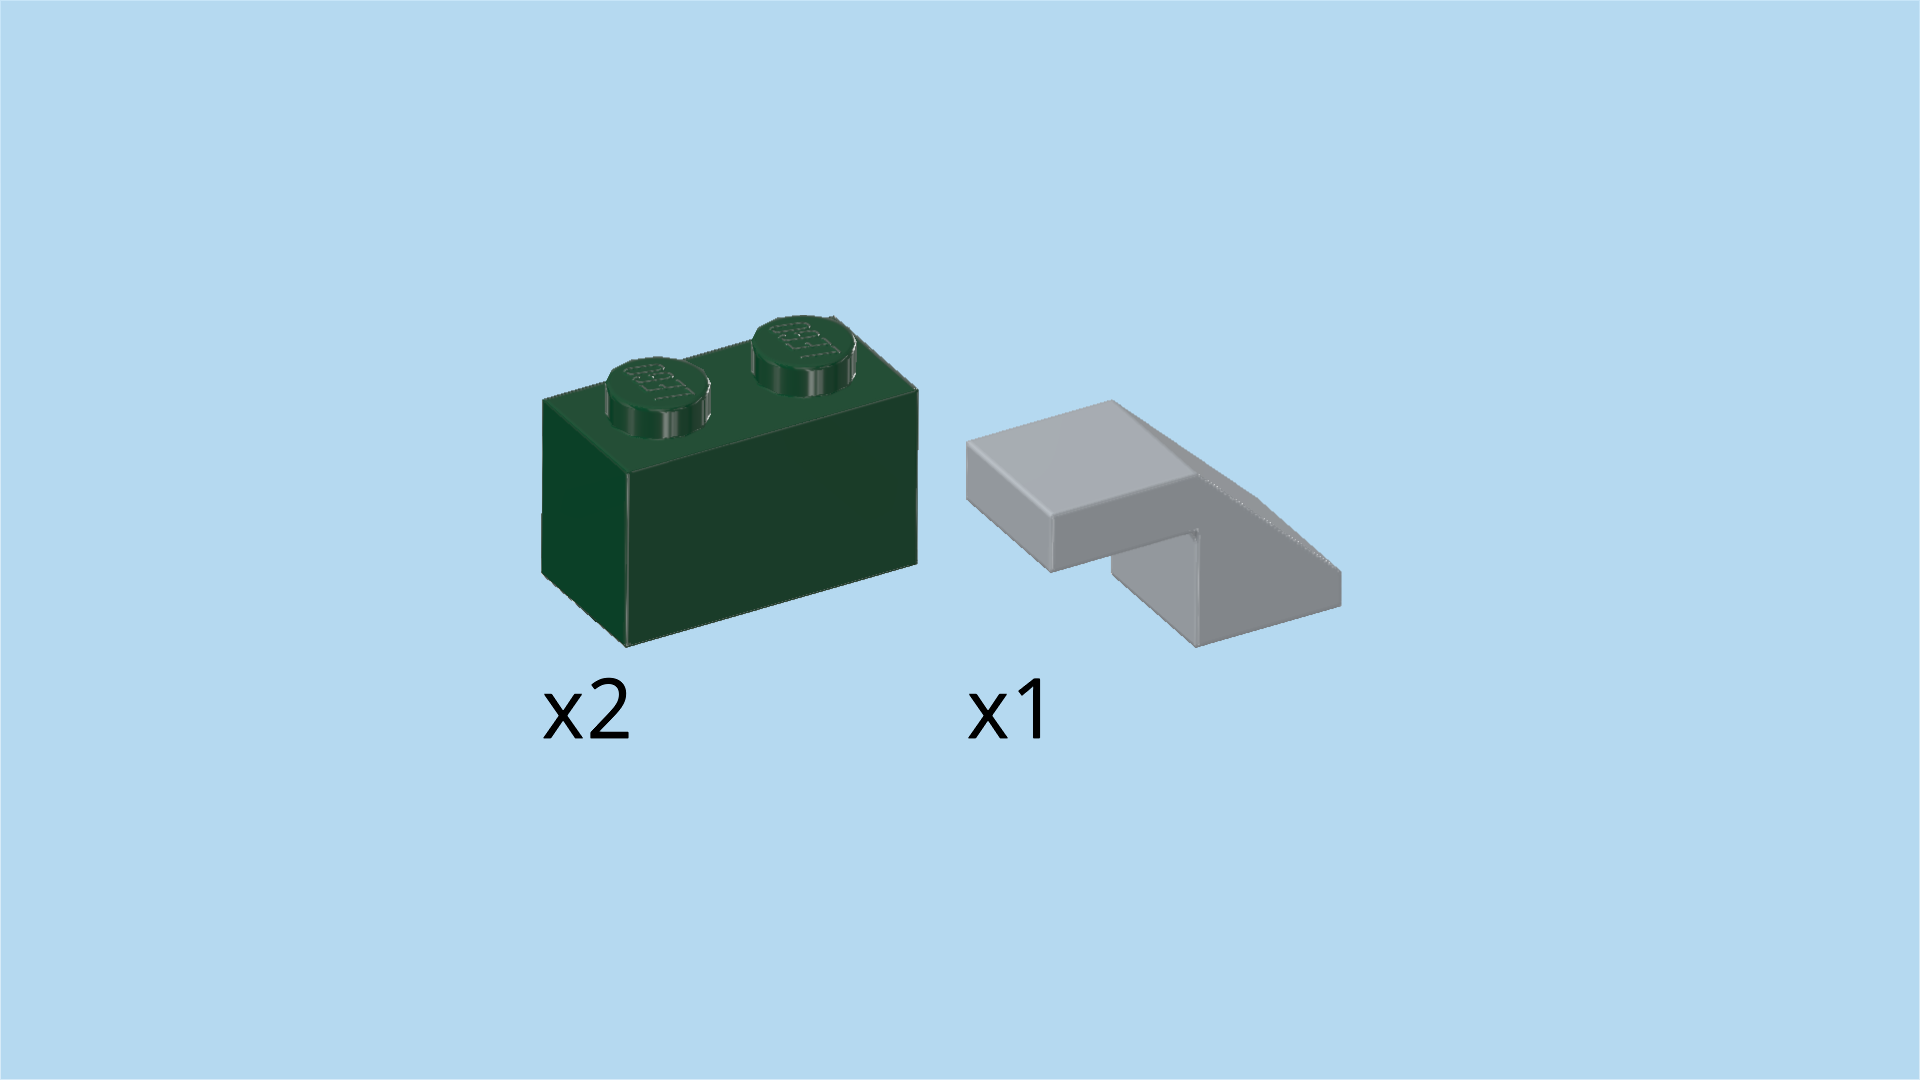
| 1 medium stone grey roof tile 1x2x2, 65°, |
| 1 mossy green brick 1x2, |
| and 1 medium stone grey brick 2x3. |
| Put the brick 1x2 vertically on the empty column to the left of the round plate 1x1 with top shaft. |
| Put the roof tile 1x2x2 horizontally on the backmost row on the left edge, slope to the left. |
| Put the brick 2x3 vertically in front of the previous piece, its left column overhanging to the left. |
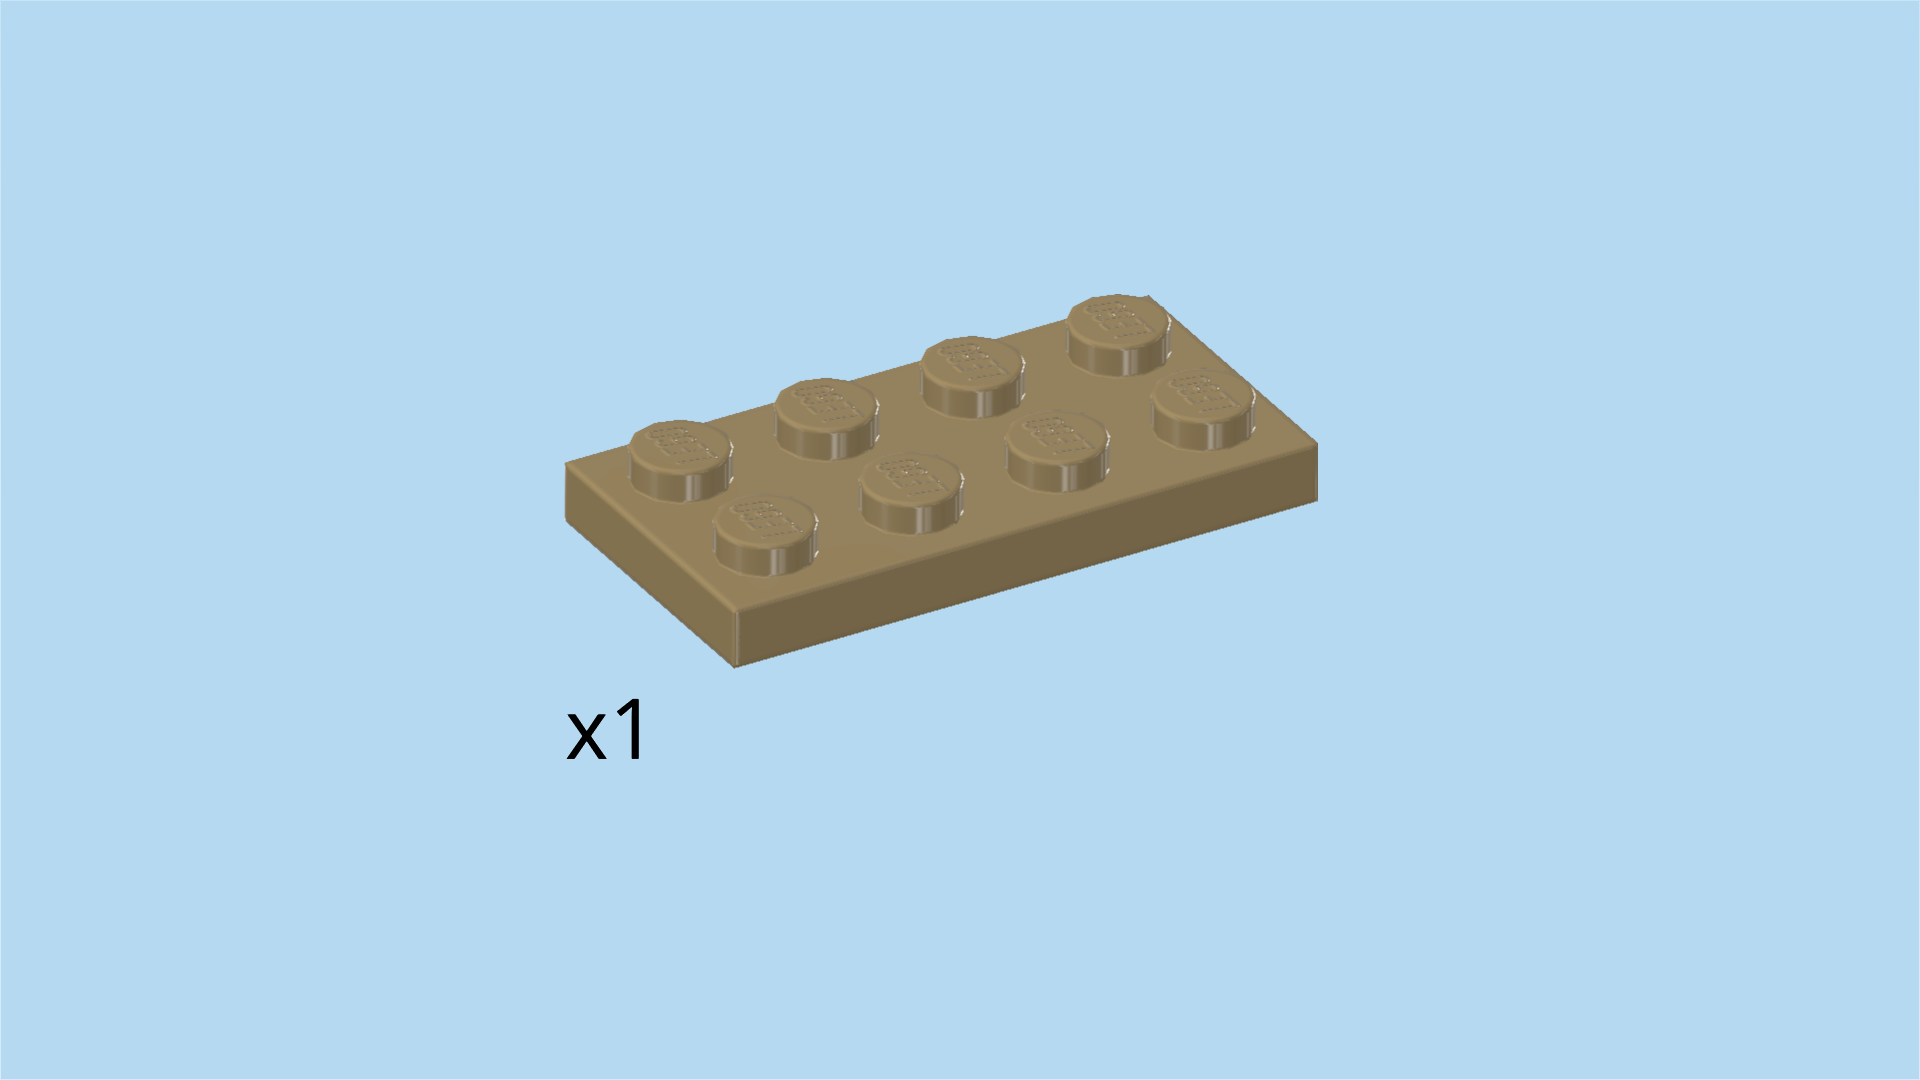
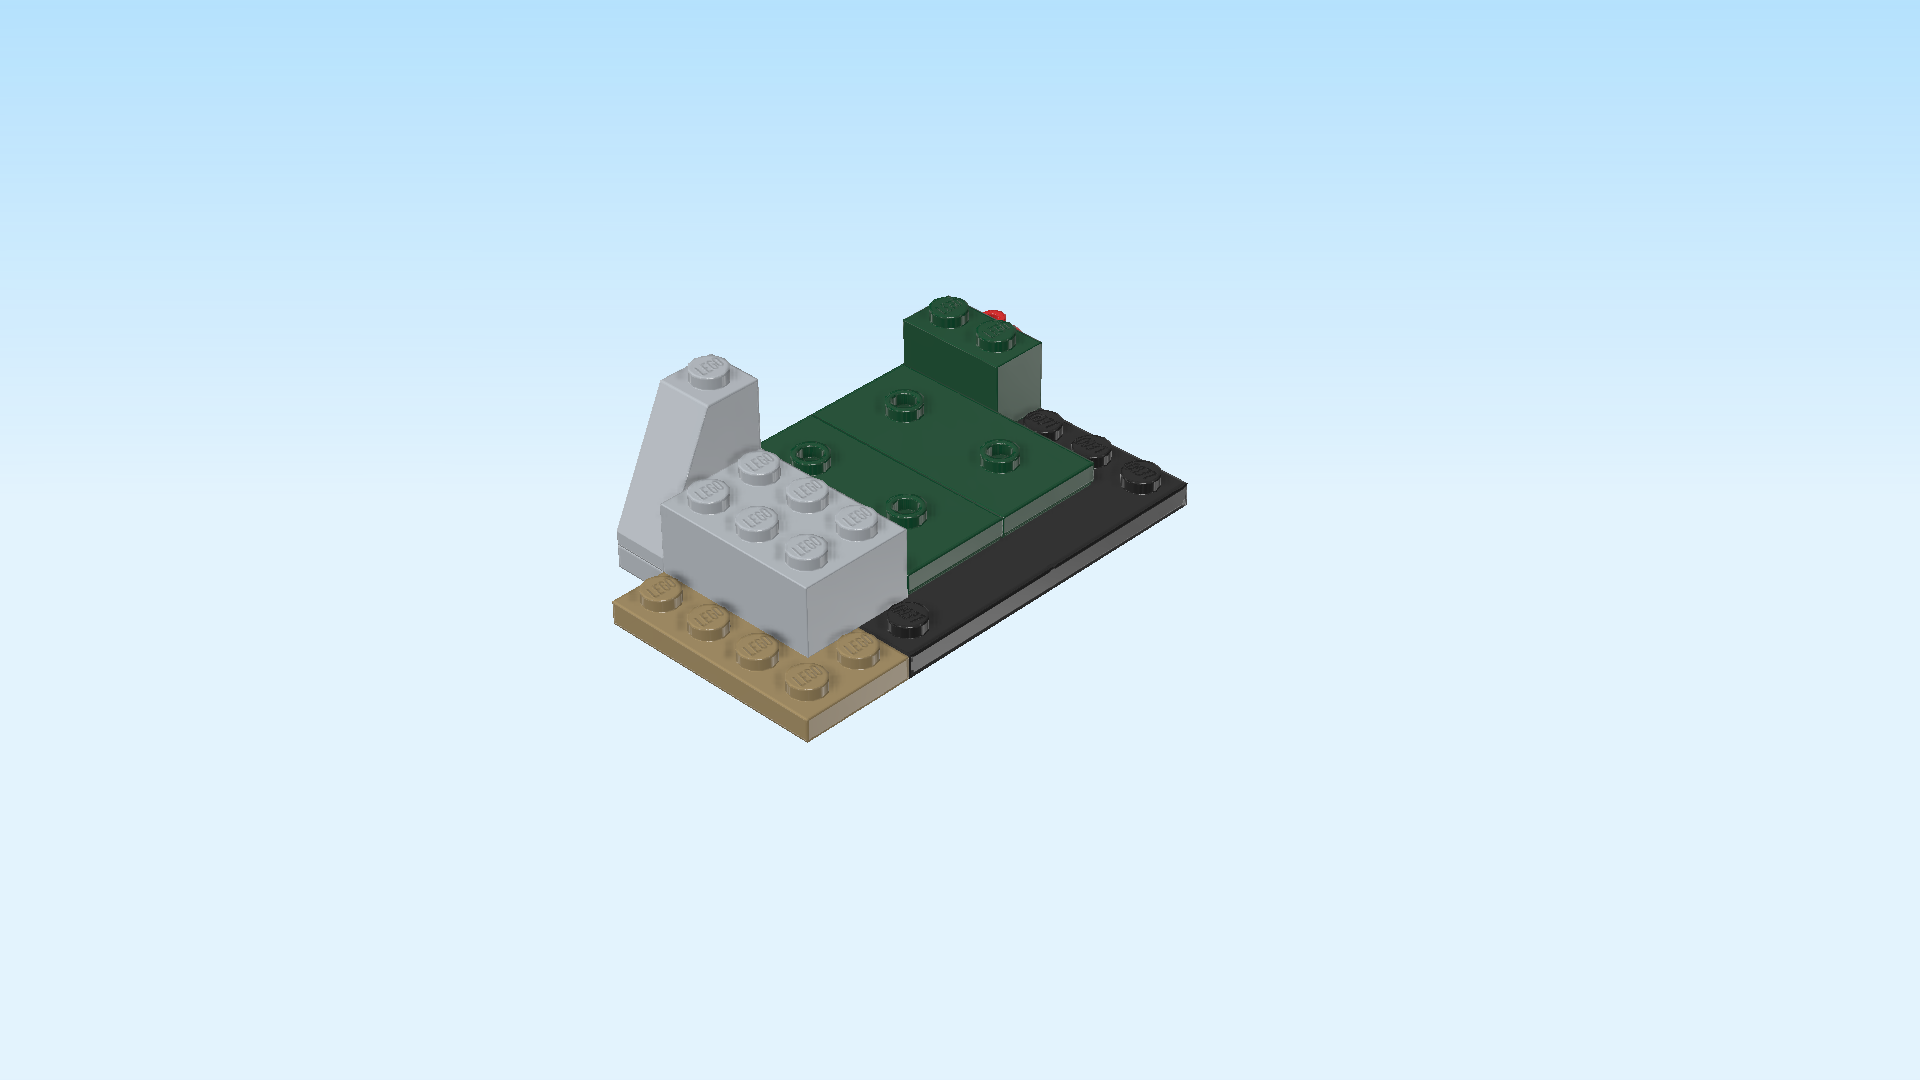
| Find 1 mud grey plate 2x4. |
| Put it vertically underneath the previous piece's left column, 1 column protruding to the left, 1 row protruding to the front. |
| Collect the following 2 pieces: |
| 1 mossy green brick 1x2, |
| and 1 bright red brick 2x6. |
| Put the brick 2x6 horizontally on the frontmost row to the right of the previous piece, 1 row overhanging to the front. Make sure not to cover the previous piece. The current piece will only be mounted on 2 knobs since this part of the frontmost row is mostly flat without knobs. |
| Put the brick 1x2 vertically on the leftmost column of the structure, starting from the back. |
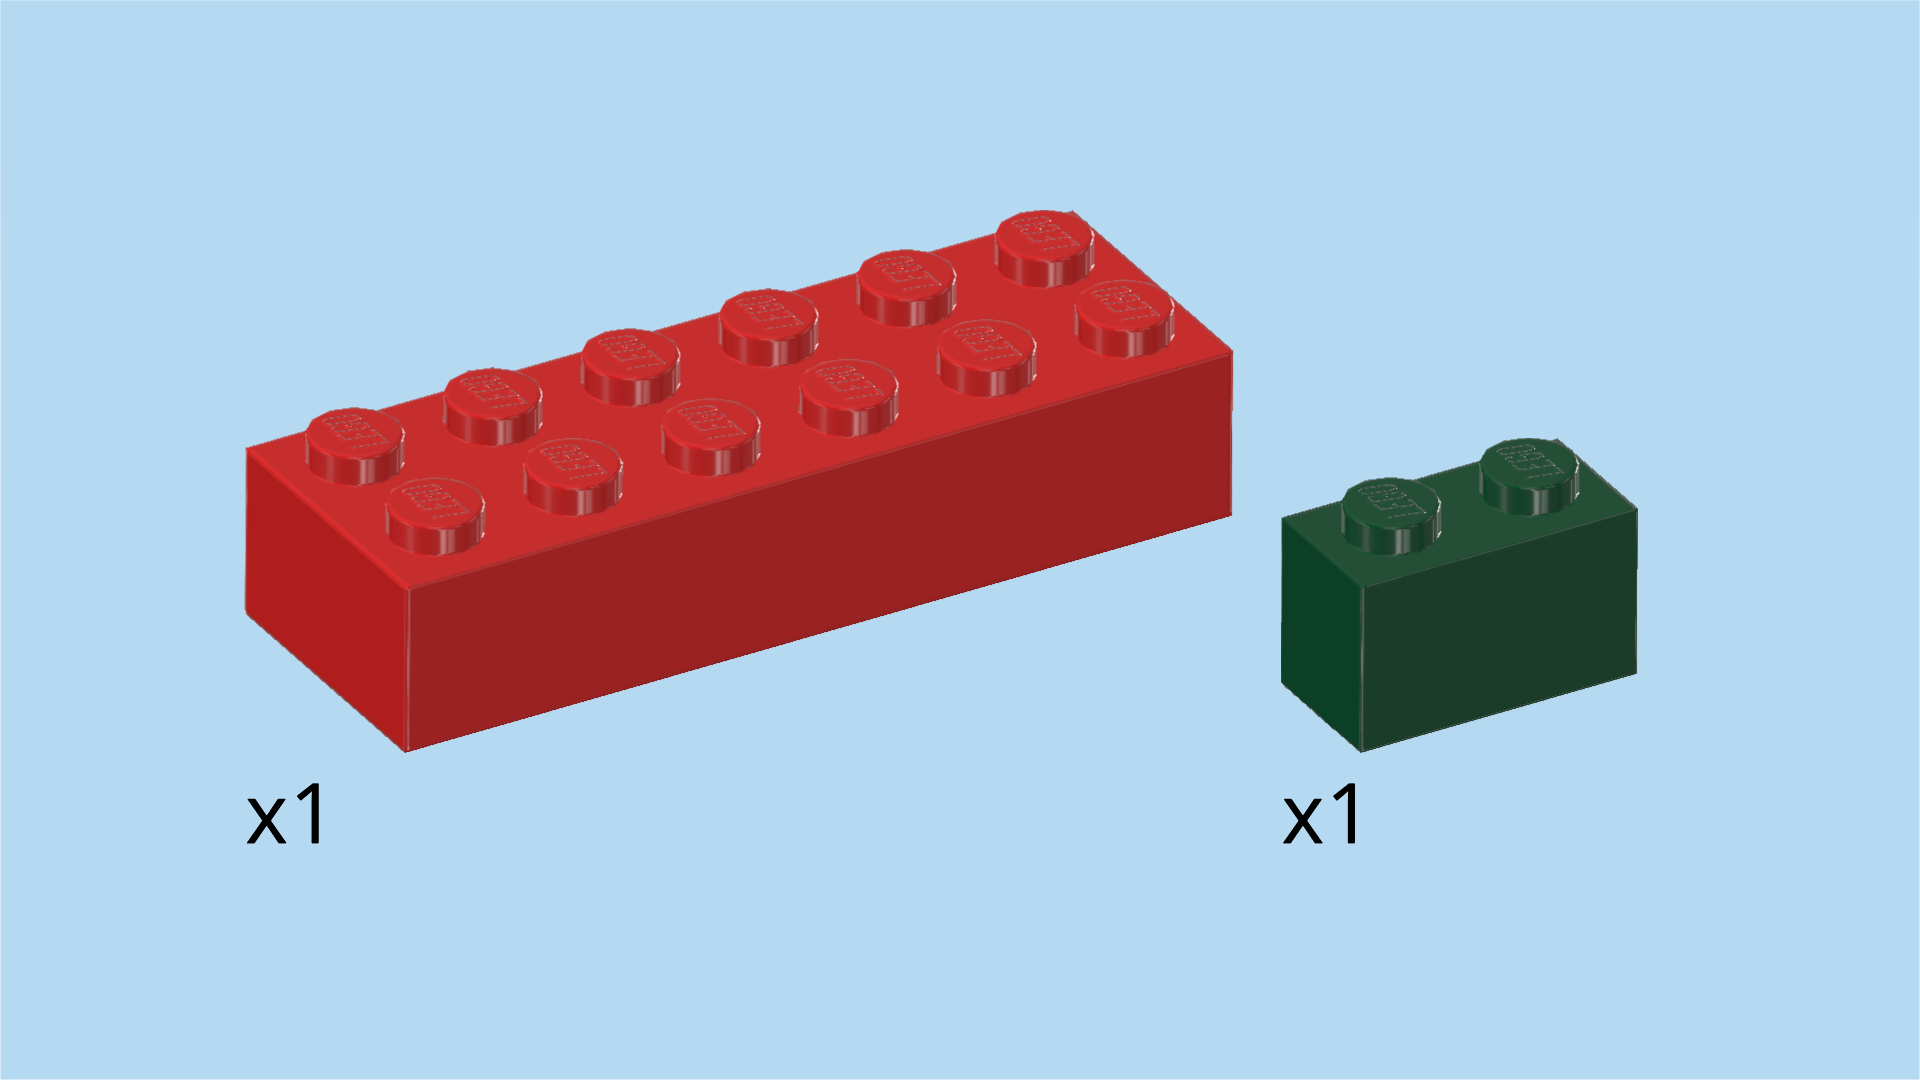
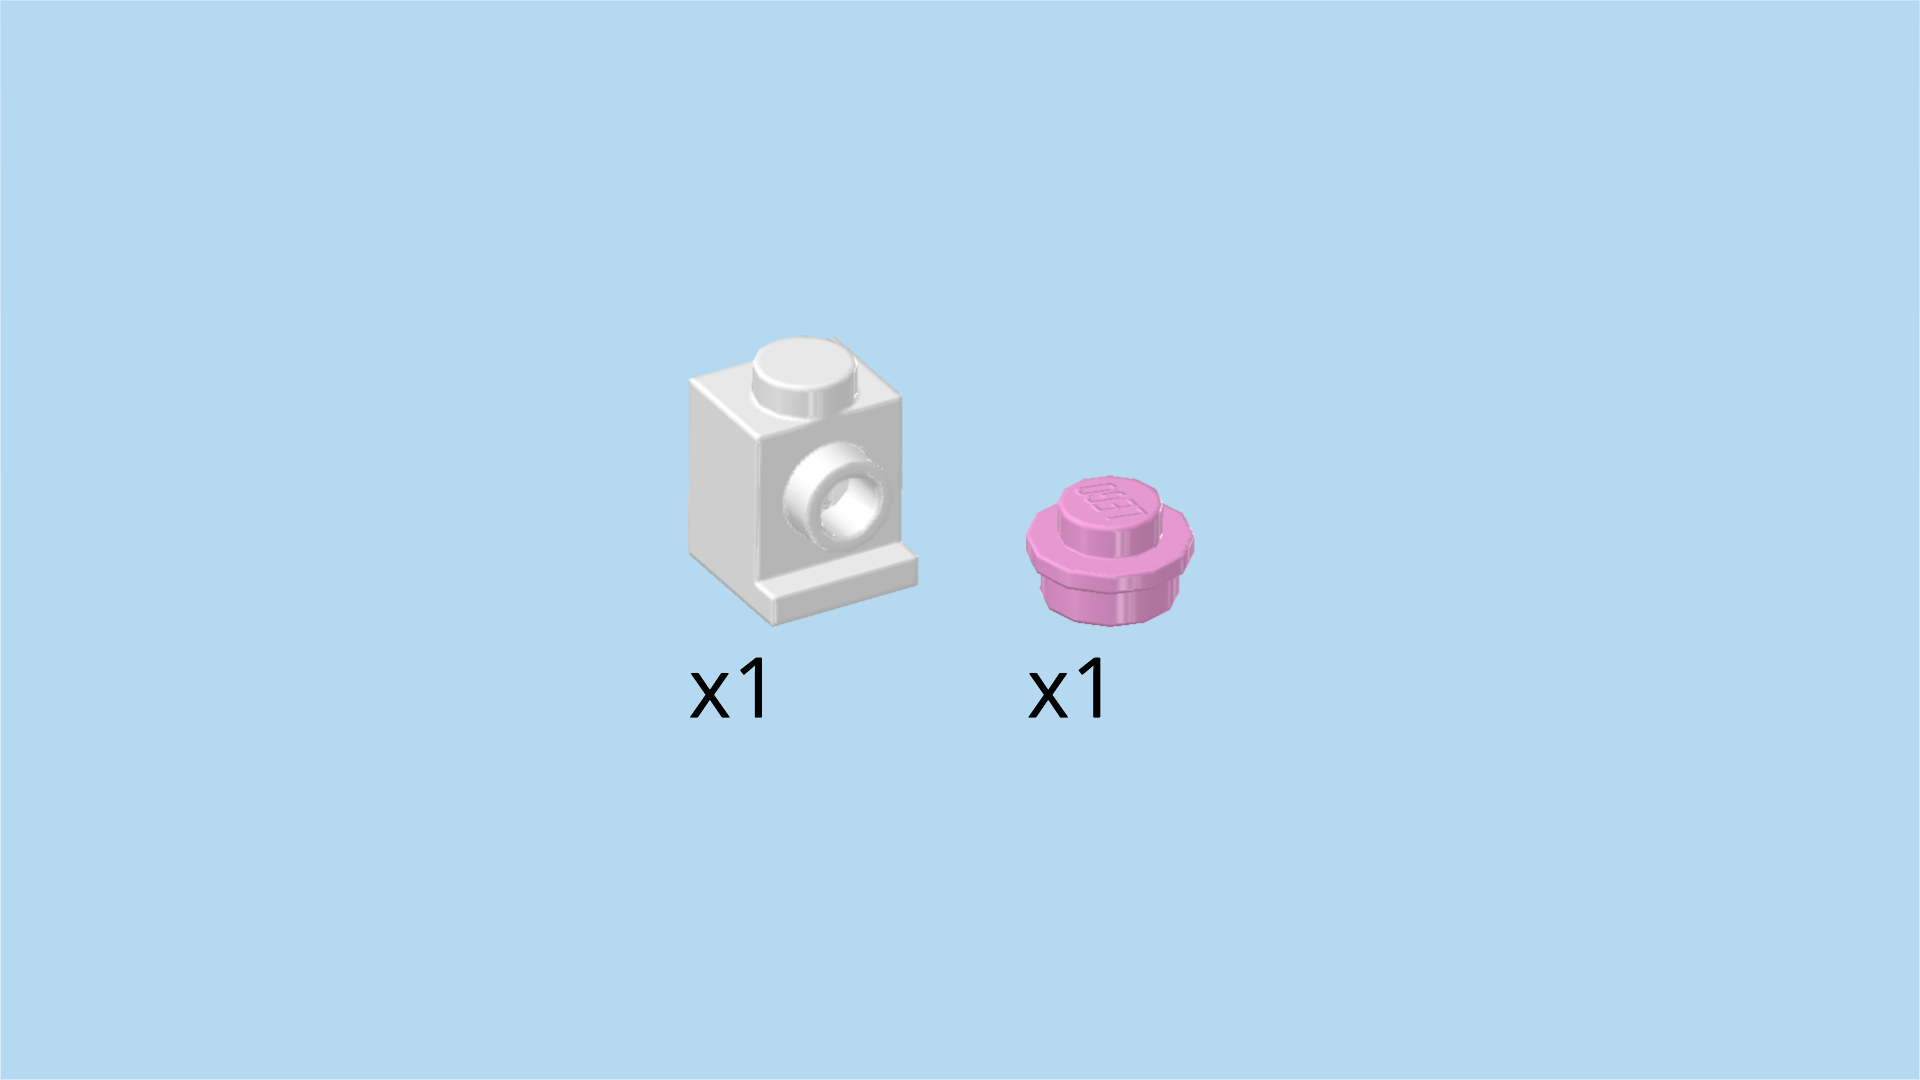
| Collect the following 2 pieces: |
| 1 white brick 1x1 with side knob and bottom foot, |
| and 1 light purple round plate 1x1. |
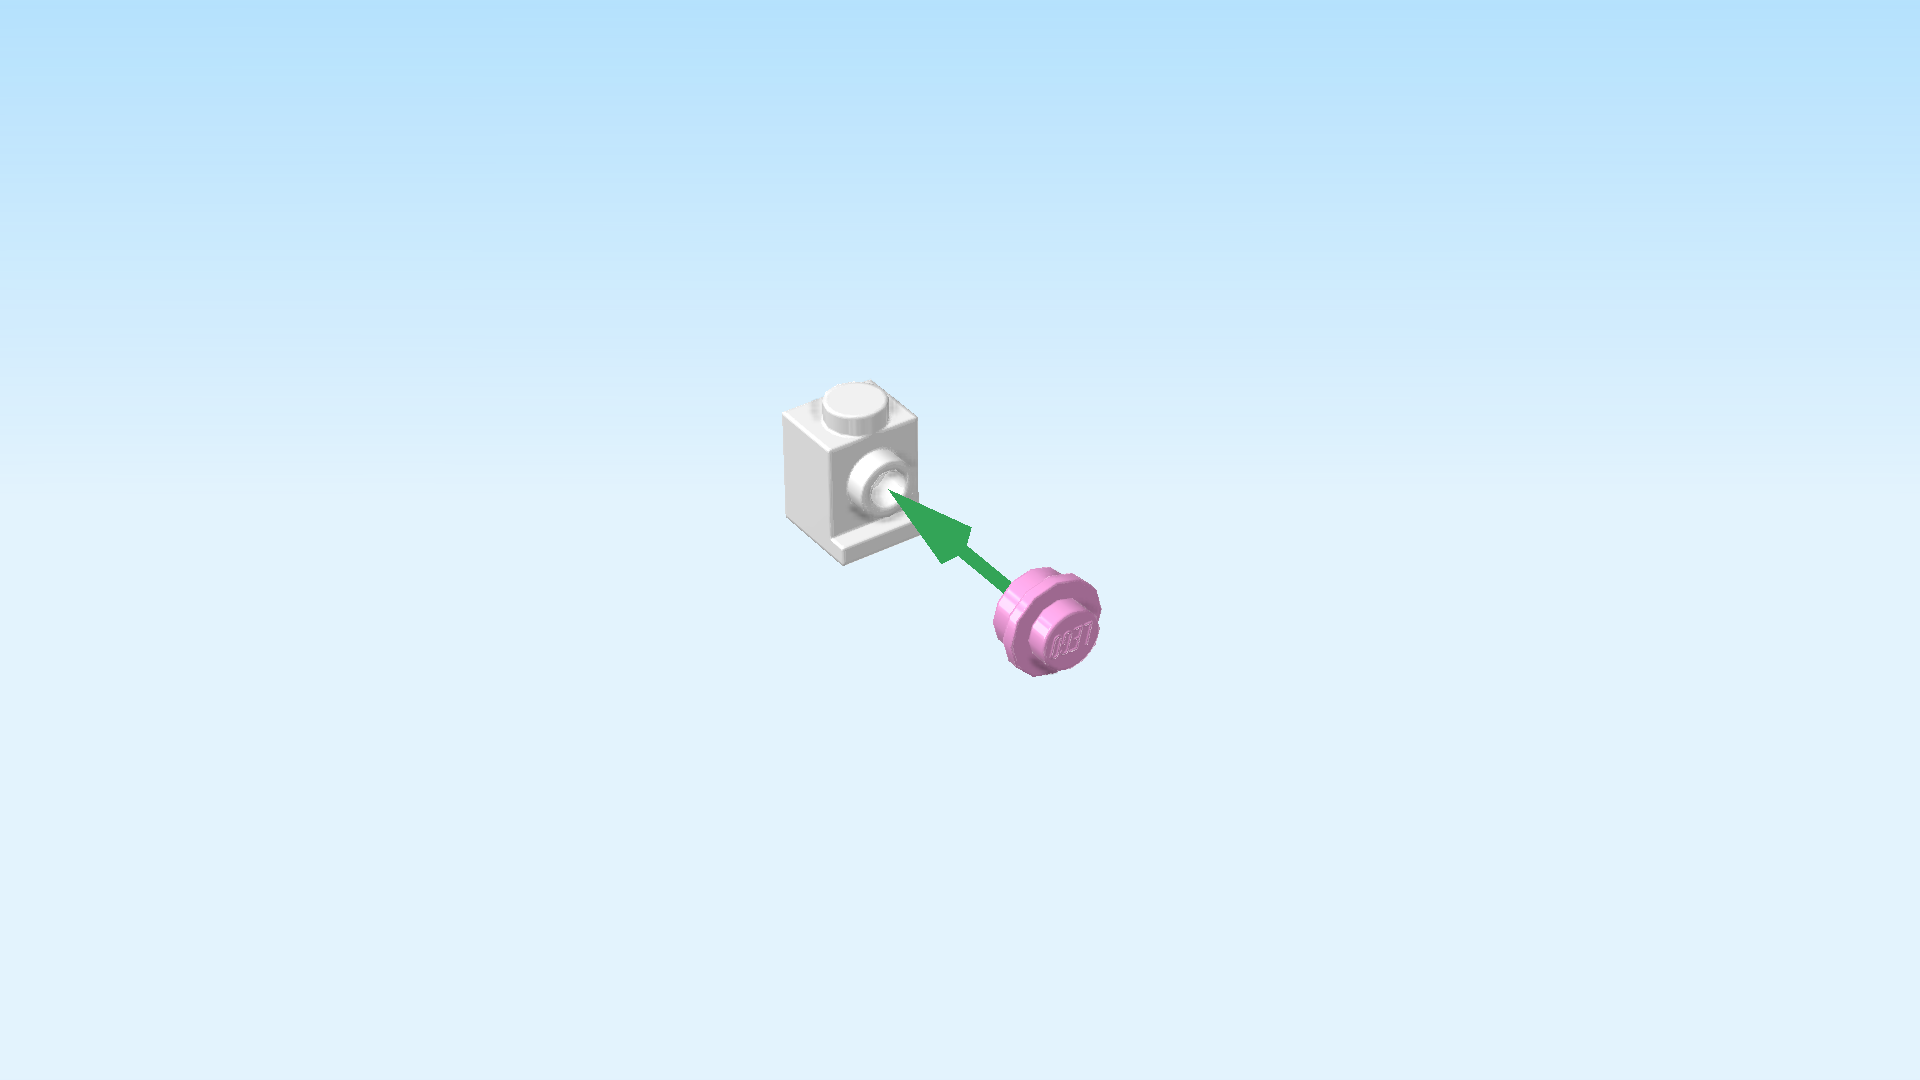
| Put the round plate 1x1 upright on the side knob of the brick 1x1. |
| Mount this piece directly in front of the knob of the roof tile 1x2x2. Make sure the side knob and round plate 1x1 are pointing to the right. |
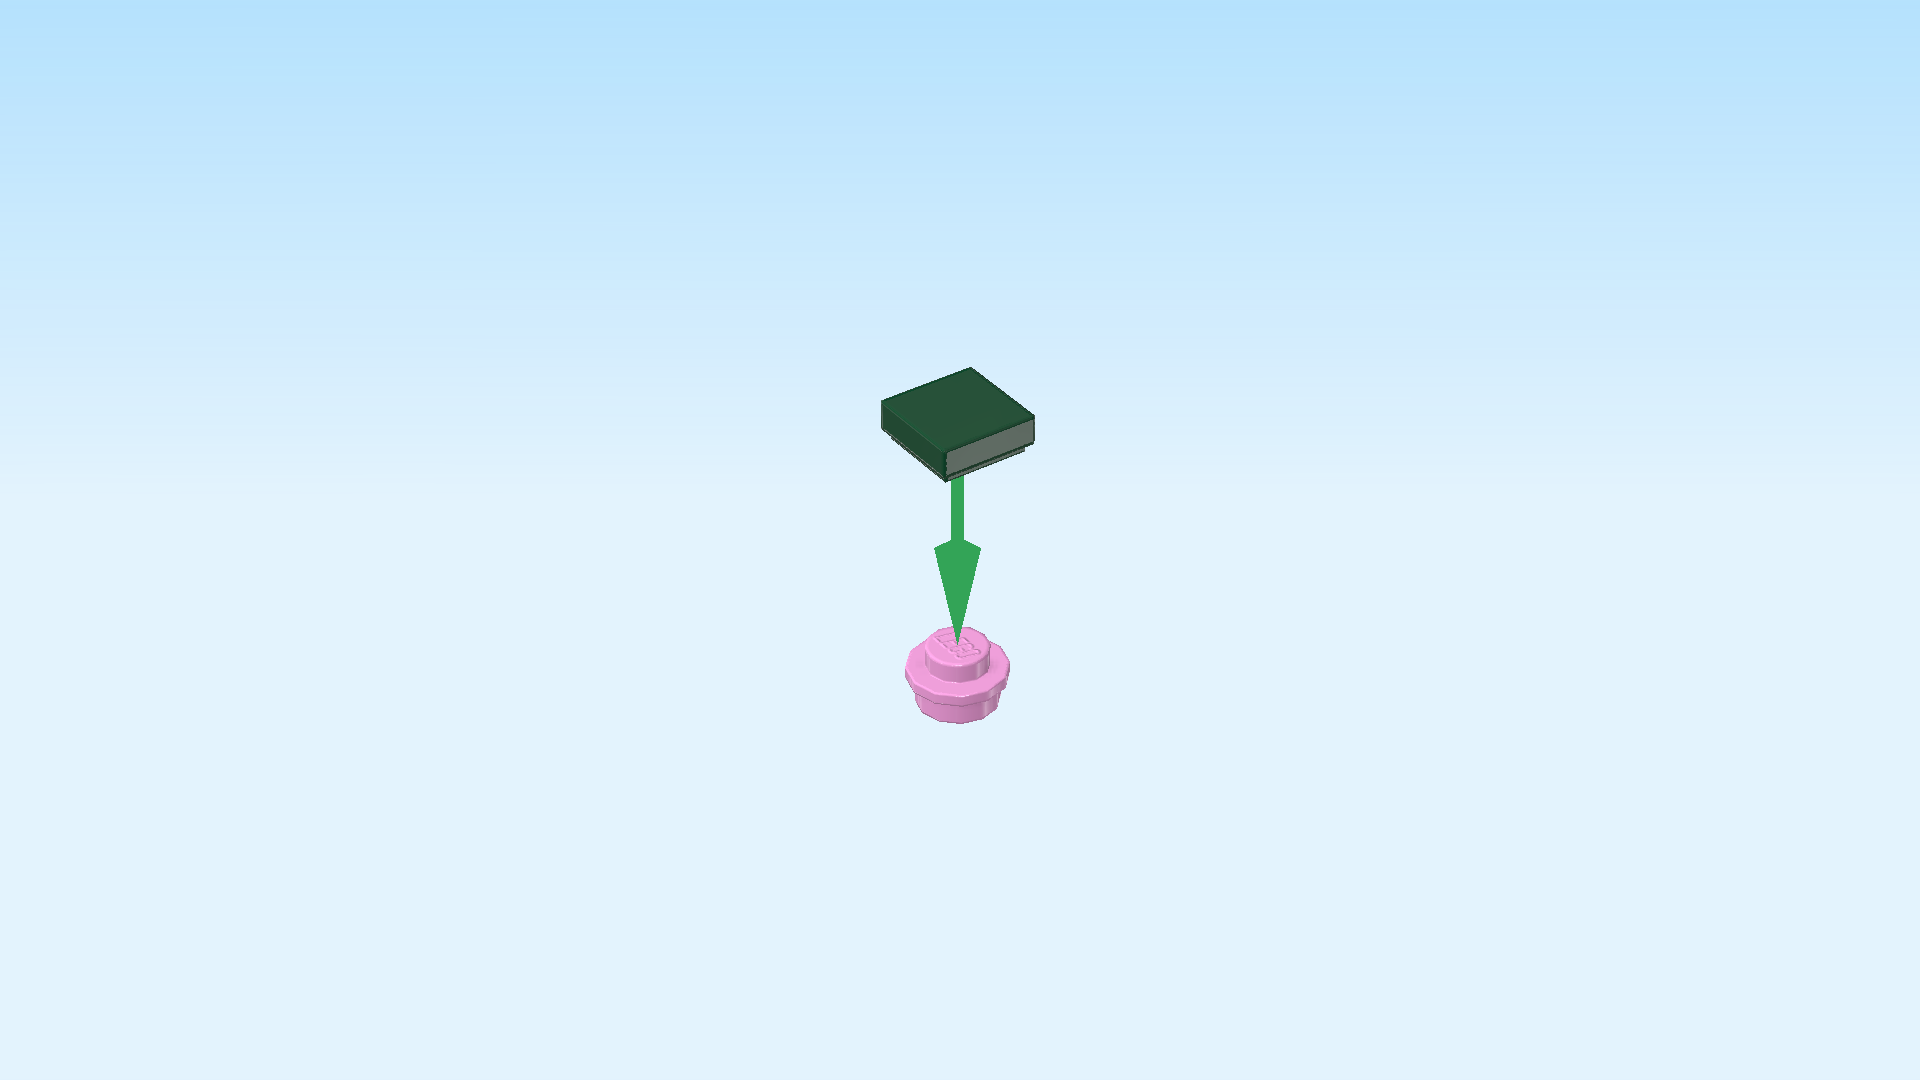
| Collect the following 2 pieces: |
| 1 light purple round plate 1x1, |
| and 1 mossy green flat tile 1x1. |
| Put the round plate on the table and the flat tile on top. |
| Mount this piece in front of the previously mounted piece. |
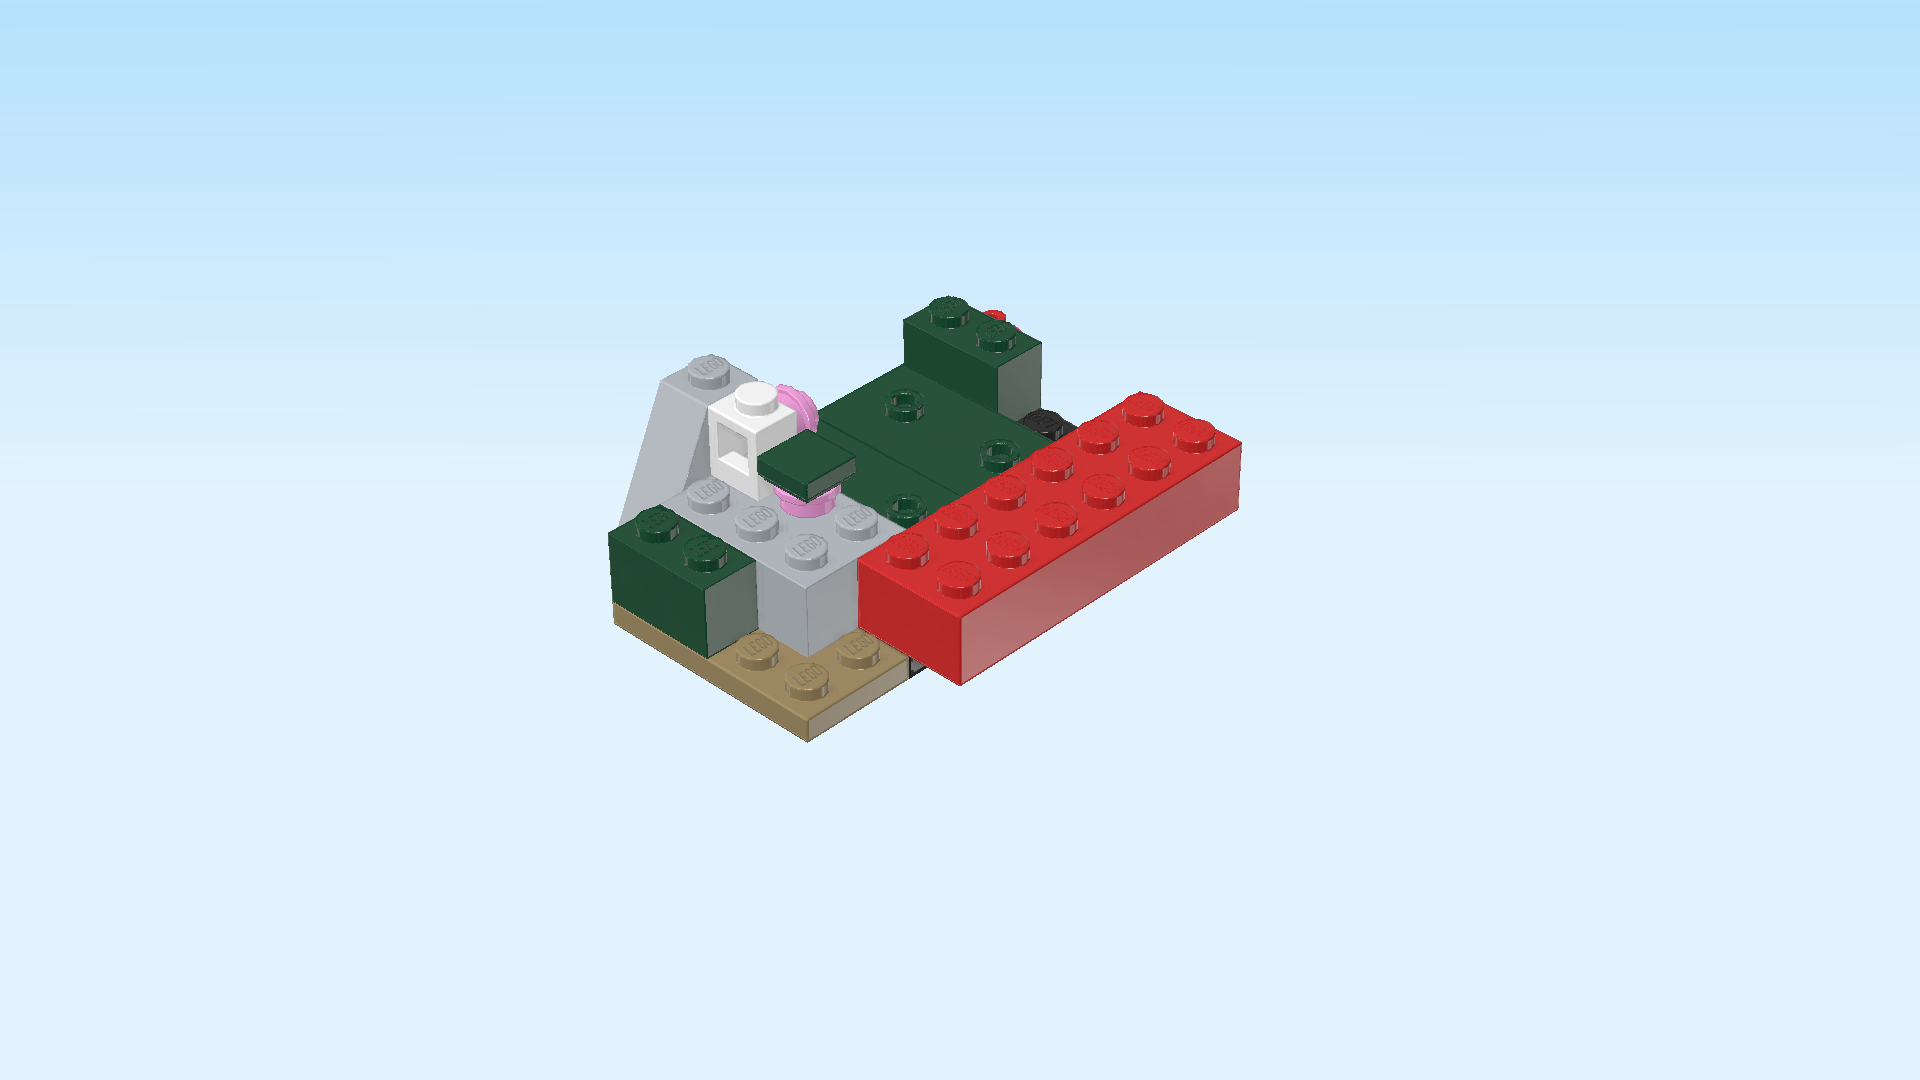
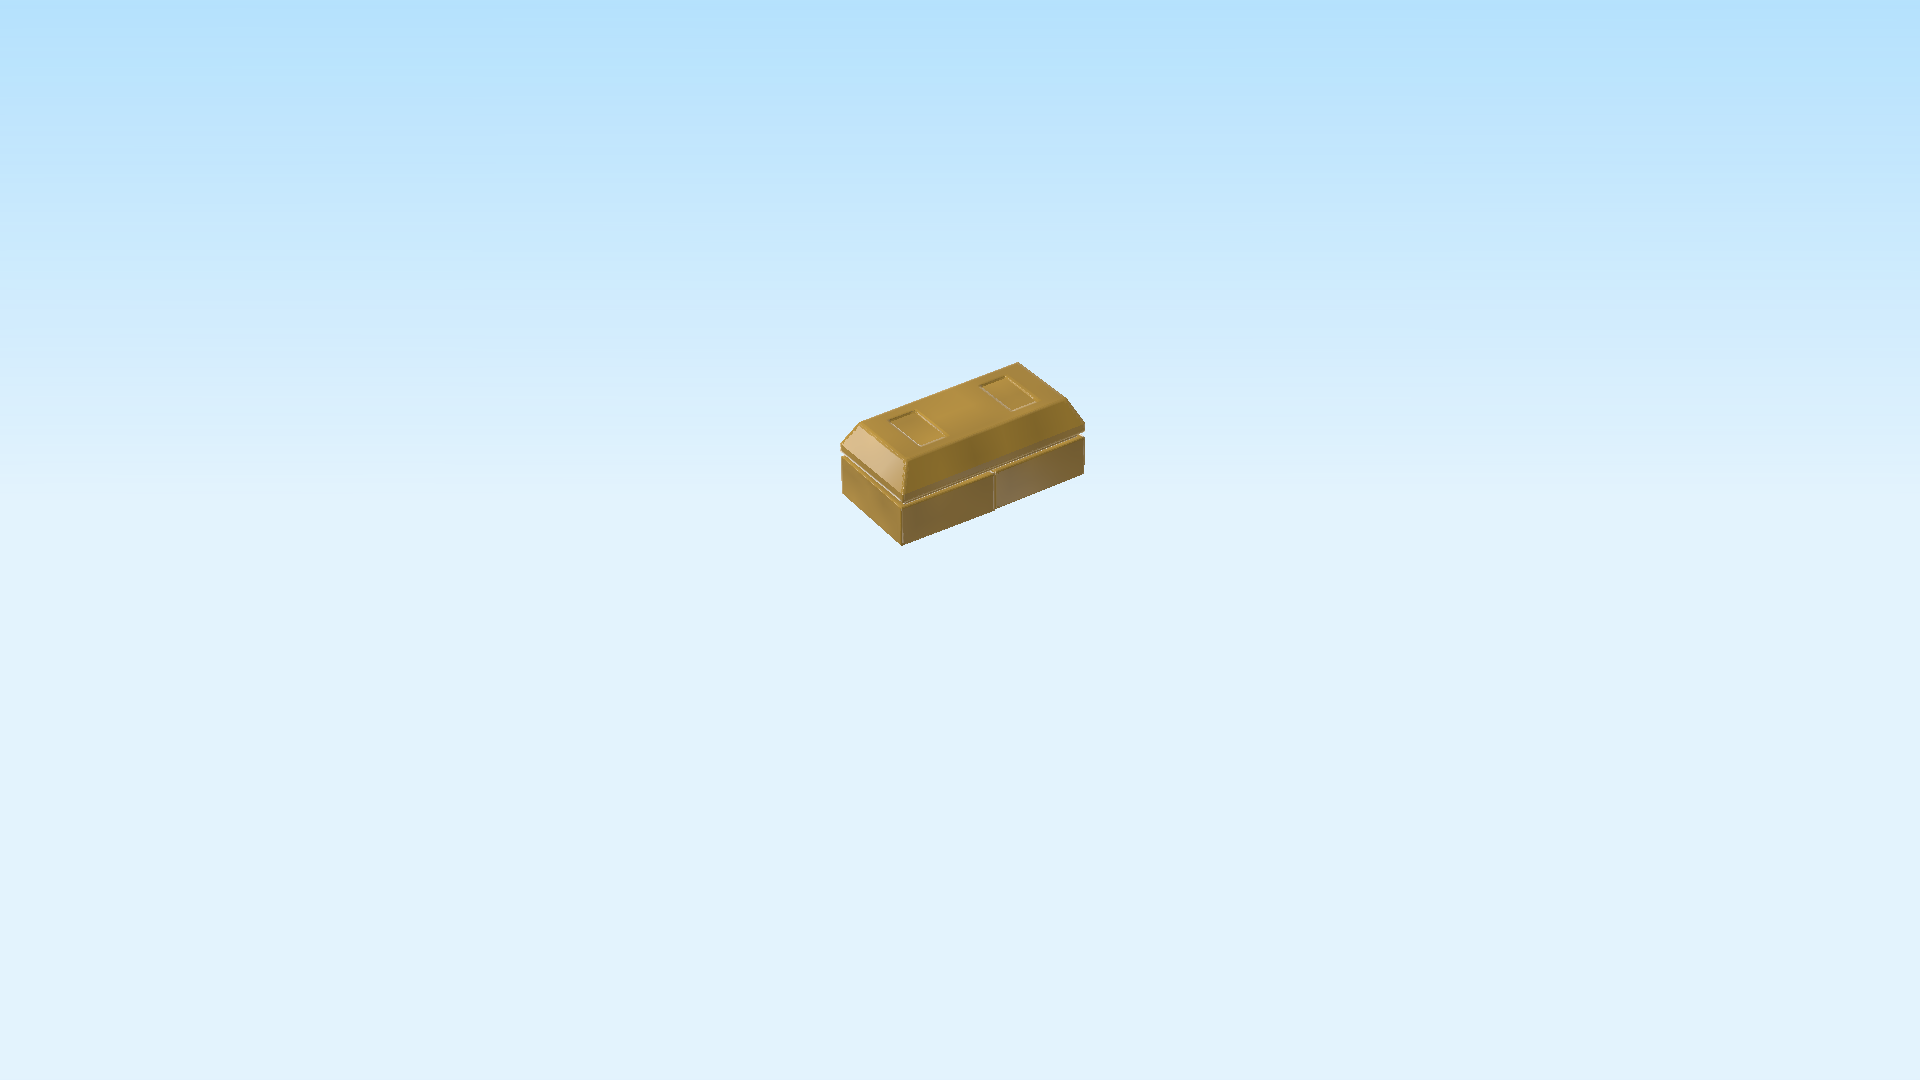
| Now, we will make a thick gold ingot. |
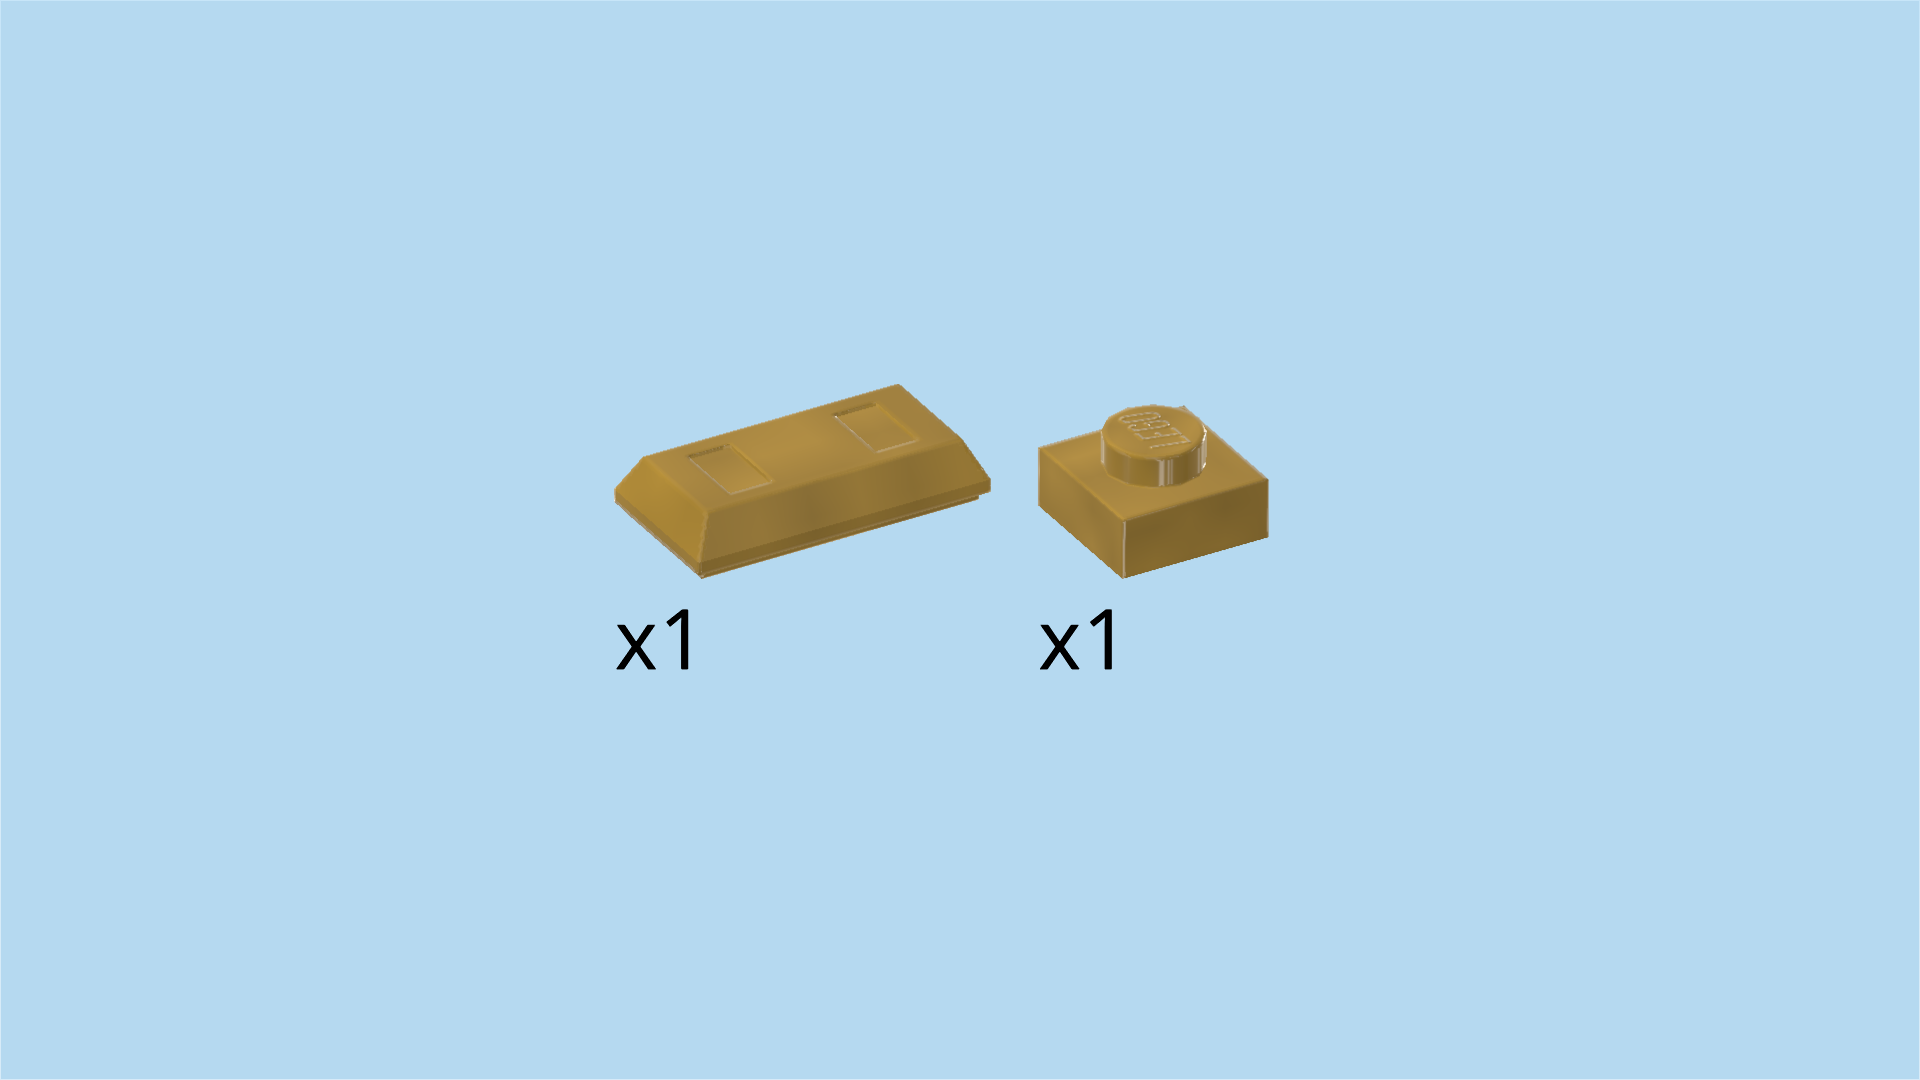
| Collect the following 2 pieces: |
| 1 warm gold ingot 1x2, |
| and 1 warm gold plate 1x1. |
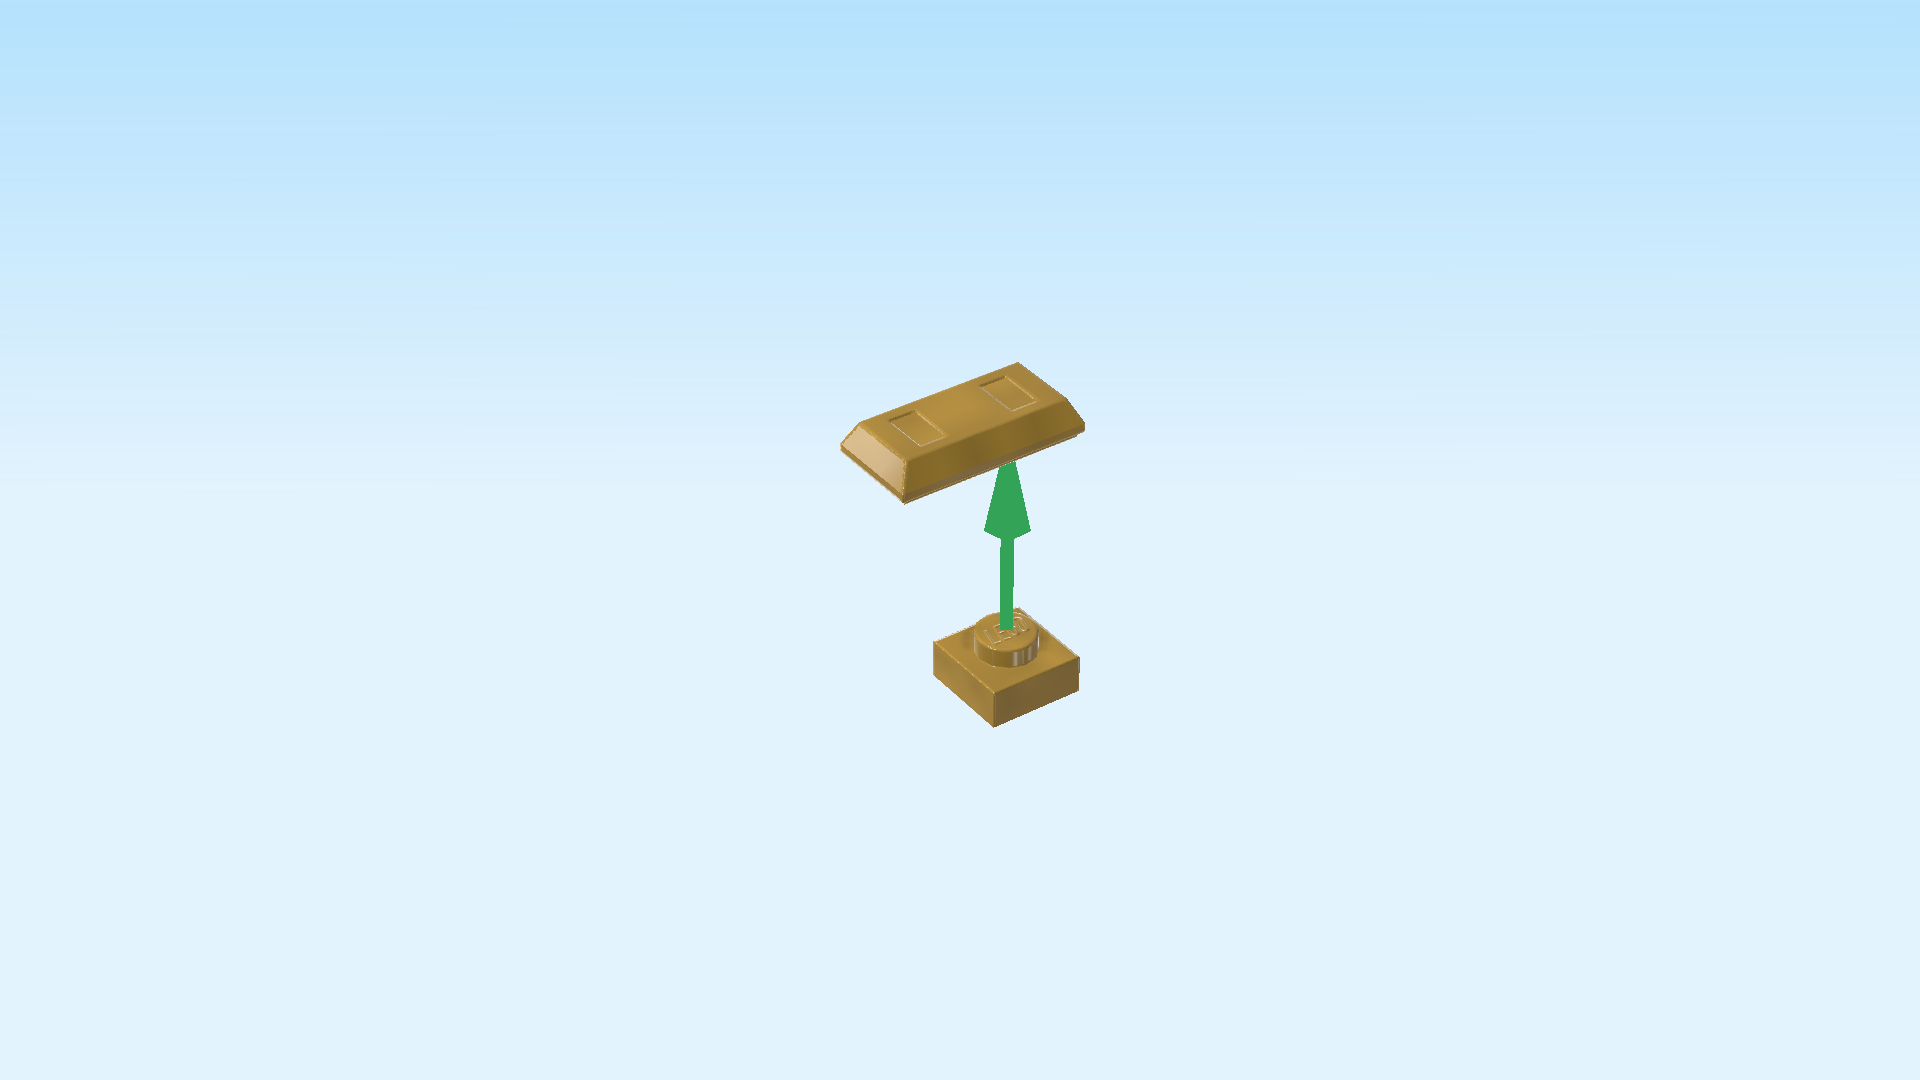
| Put the plate 1x1 on the table. |
| Put the ingot 1x2 horizontally on top, one half overhanging to the left. |
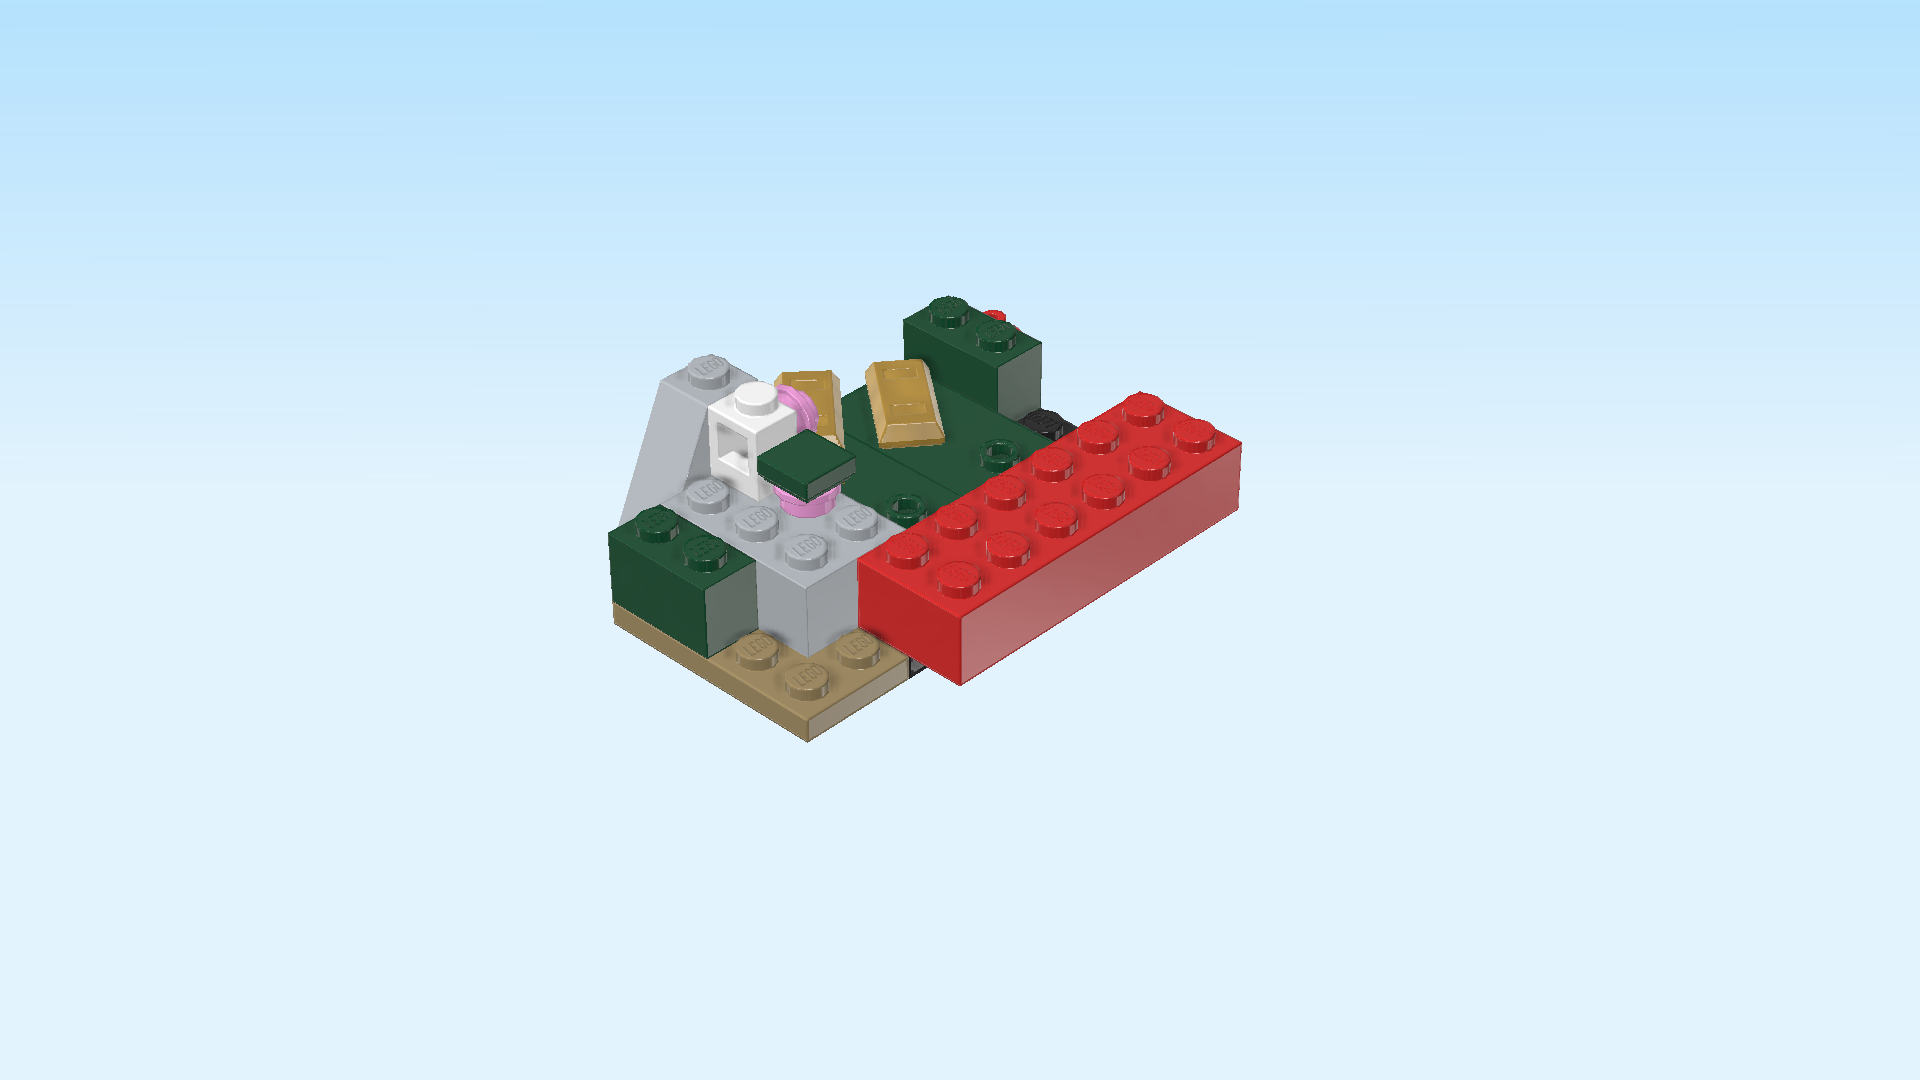
| Find 1 warm gold plate 1x1. |
| Put it underneath the left half of the ingot. |
| Identify the 2 back knobs of the 2 plates 2x4 that only have 2 knobs each. Mount the thick ingot diagonally running from the back right to the front left on the left knob, one corner slightly protruding to the back. |
| Mount it diagonally to the left of the previous piece, again slightly protruding to the back. |
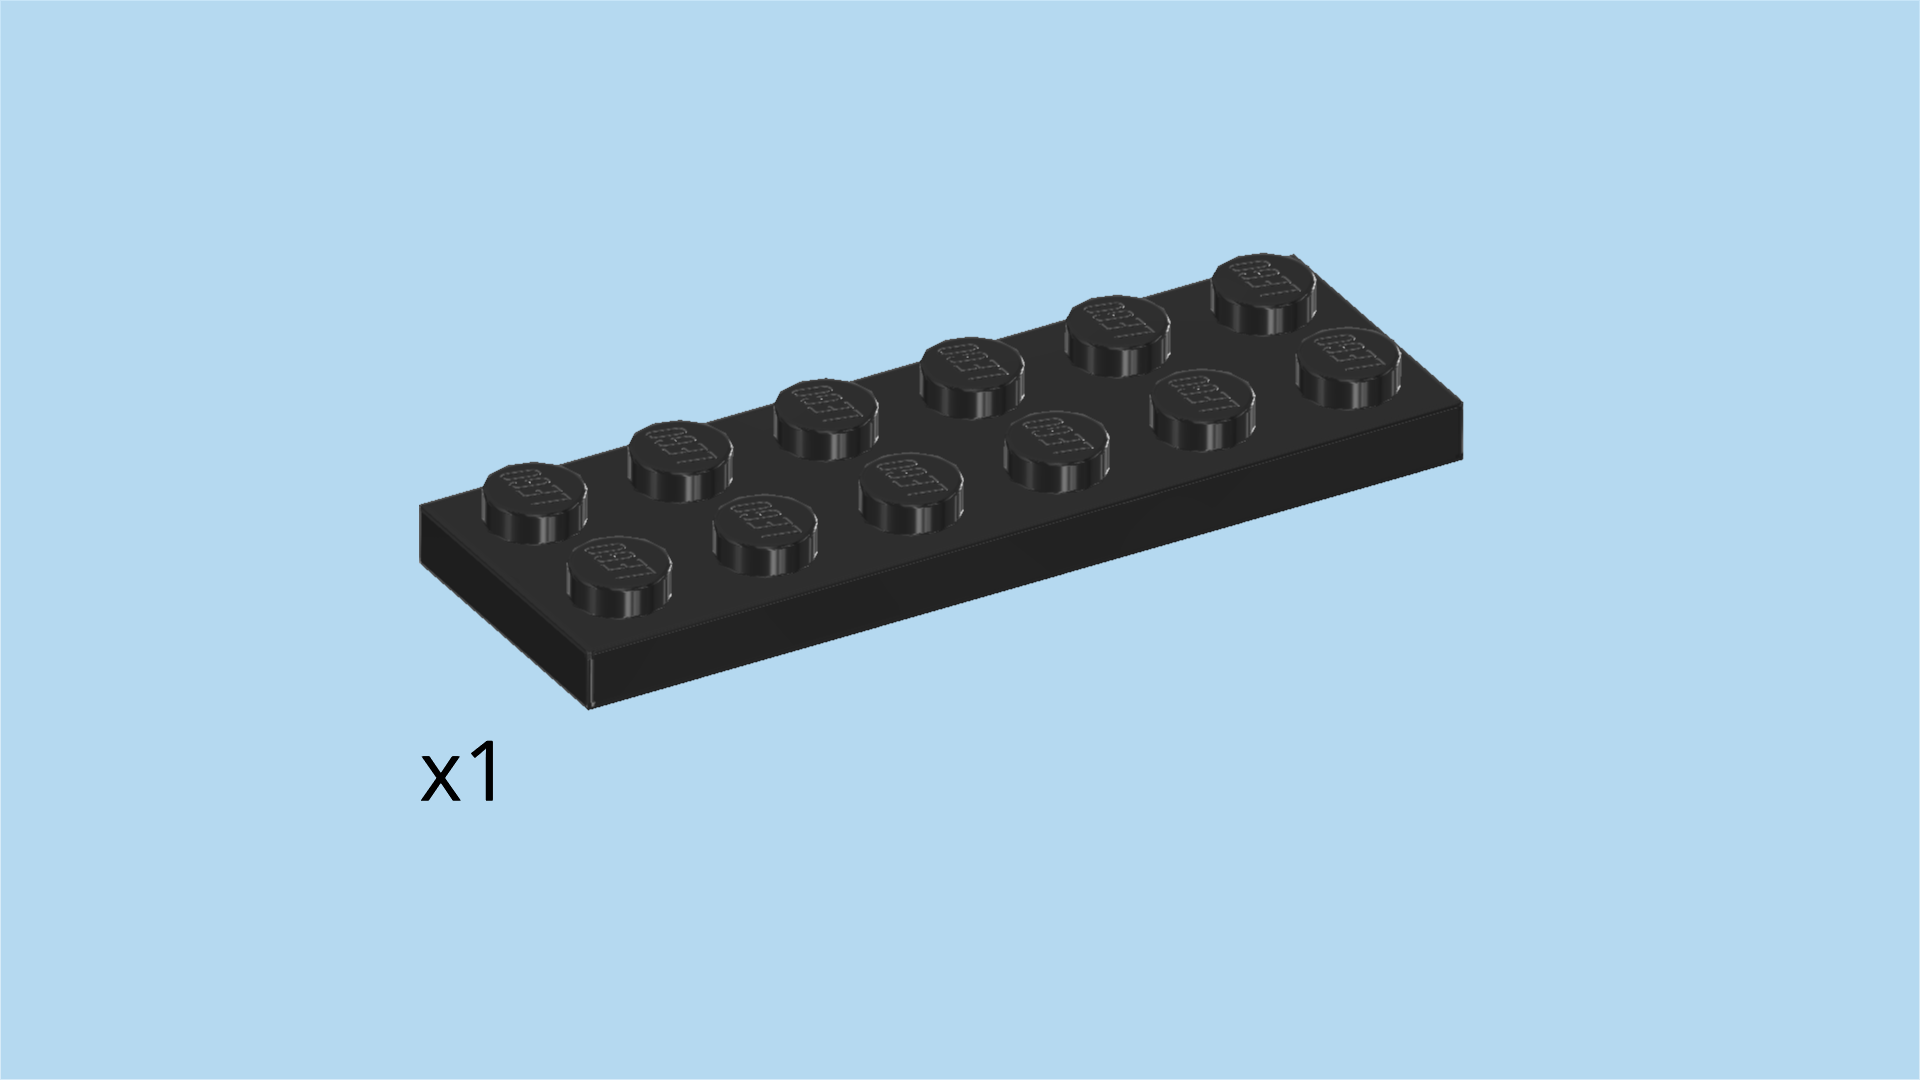
| Find 1 black plate 2x6. |
| Put it horizontally underneath the frontmost row, 1 row protruding to the front. This means it is mounted underneath the overhanging row of the brick 2x6 at the front. |
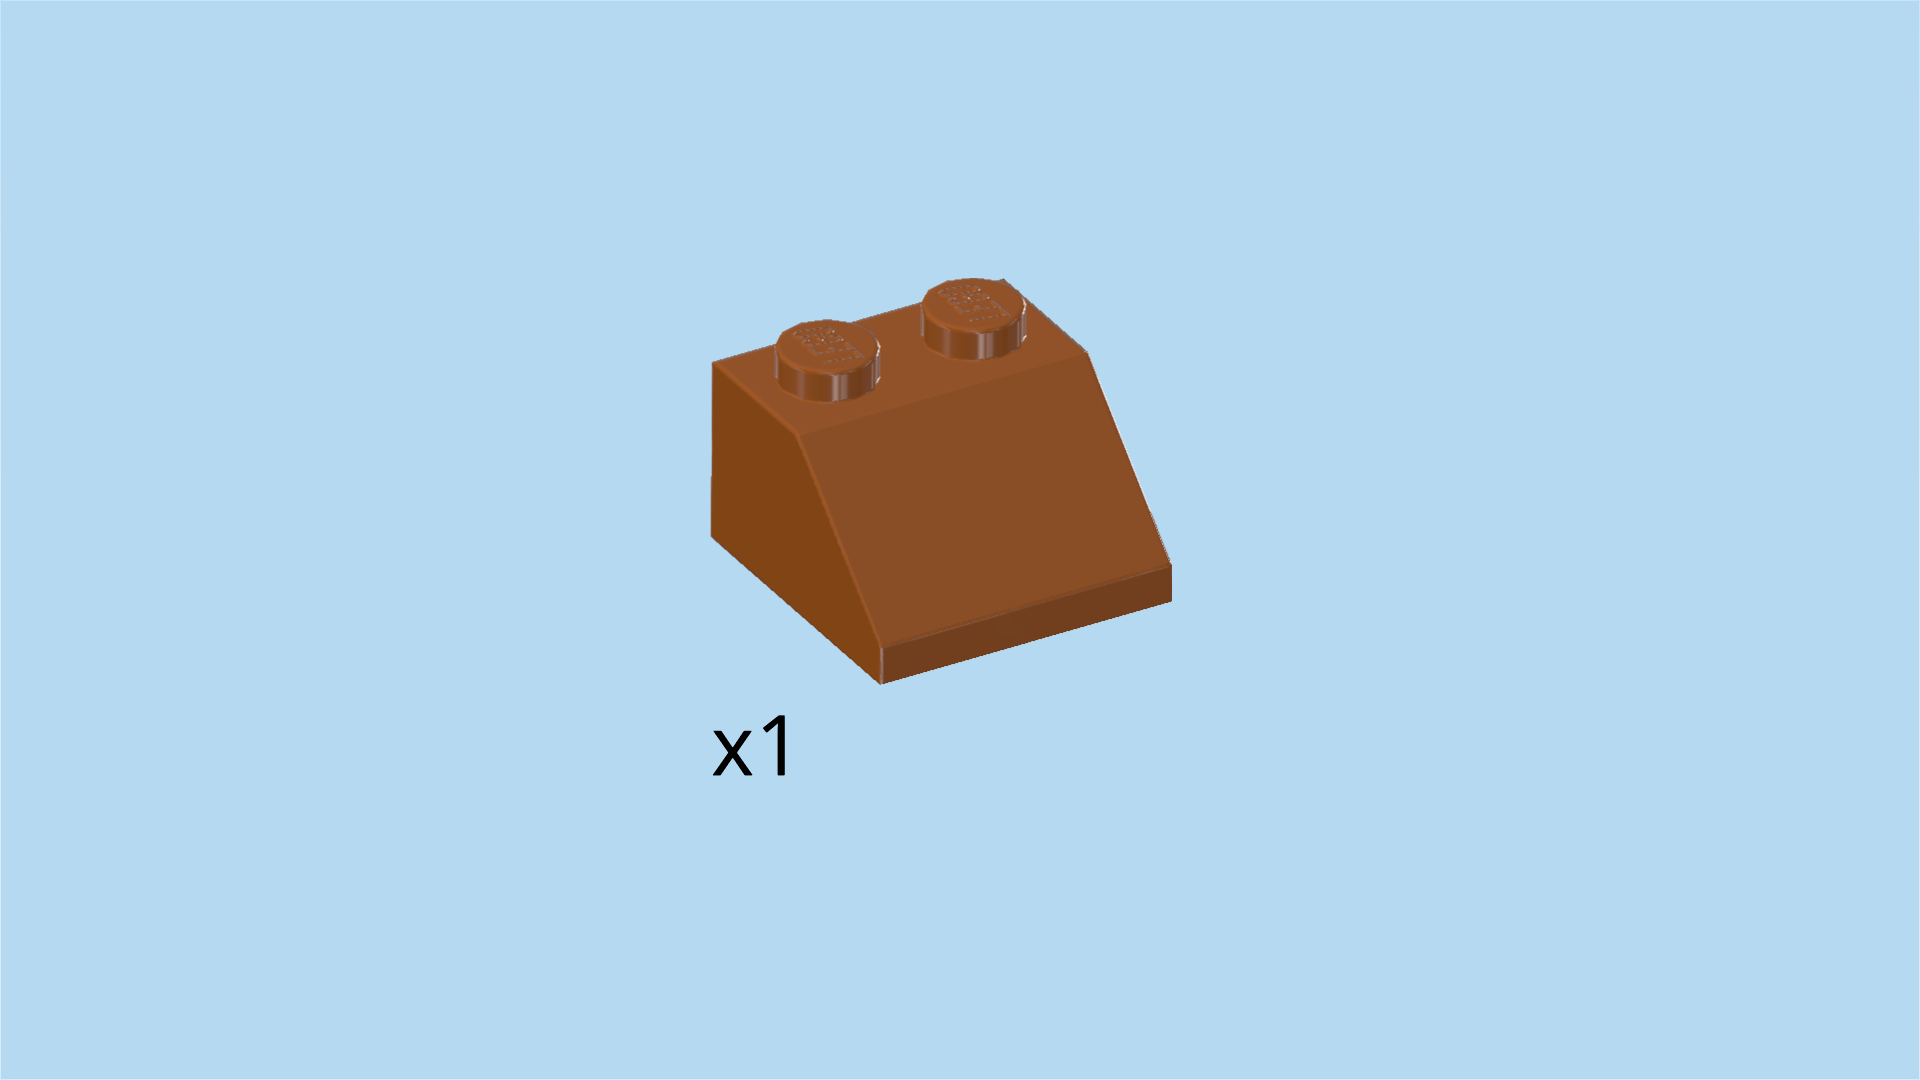
| Find 1 dark orange roof tile 2x2, 45°. |
| Put it centered in the middle of the previous piece's front row, slope to the front. |
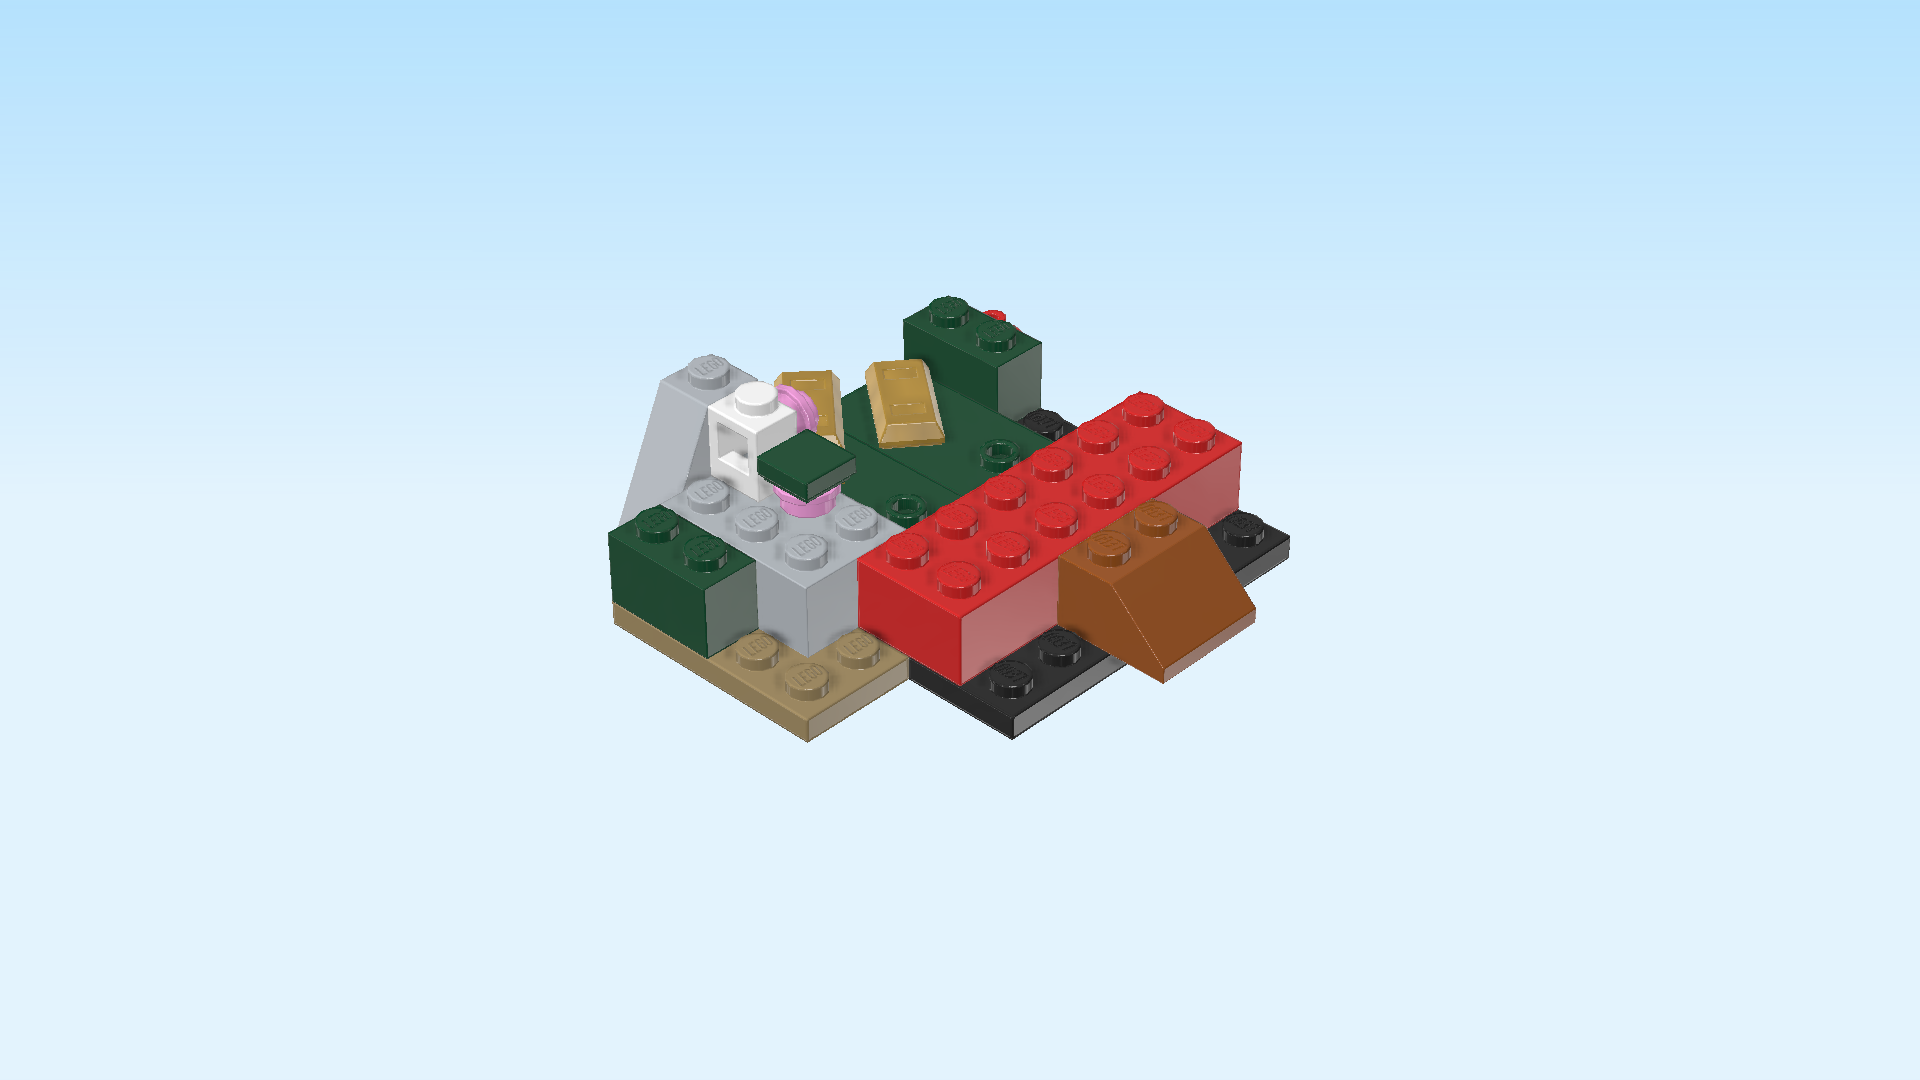
| Next, let's make a little sub-construction for the reef. |
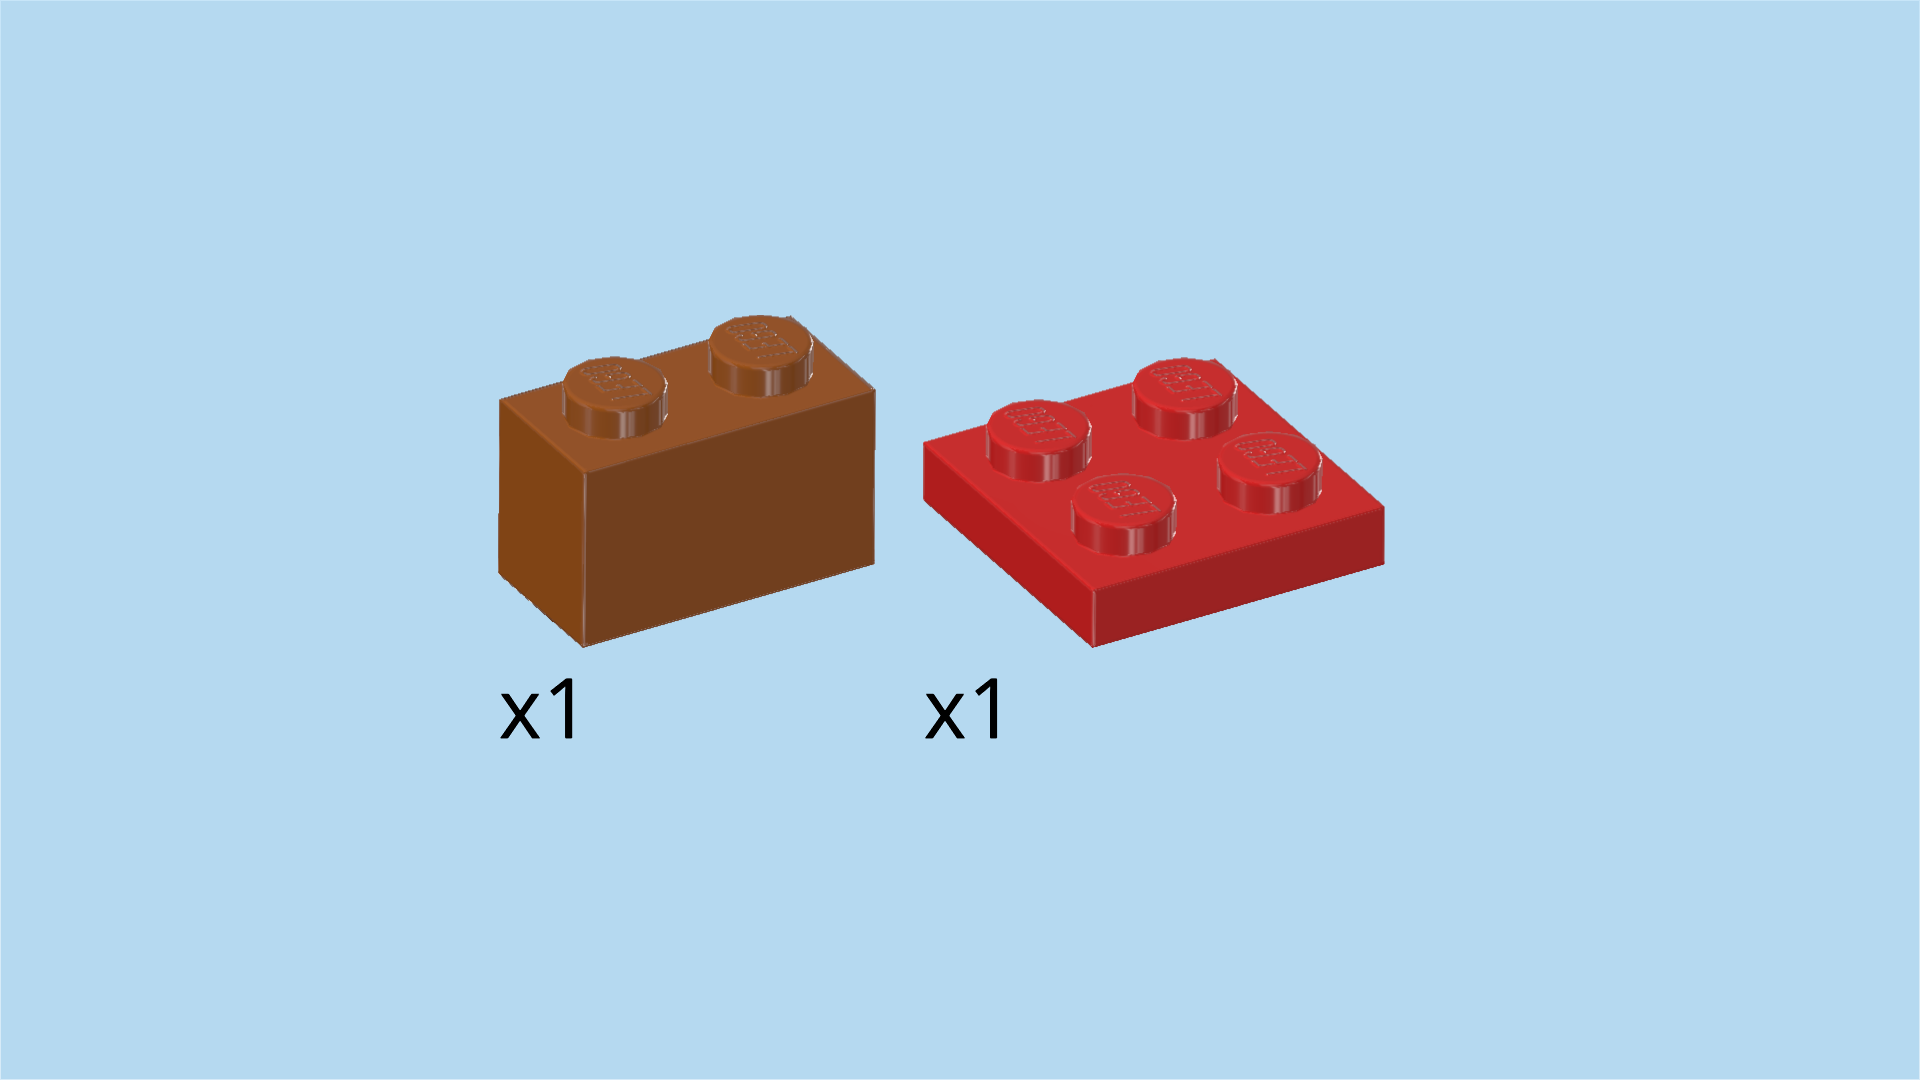
| Collect the following 2 pieces: |
| 1 bright red plate 2x2, |
| and 1 dark orange brick 1x2. |
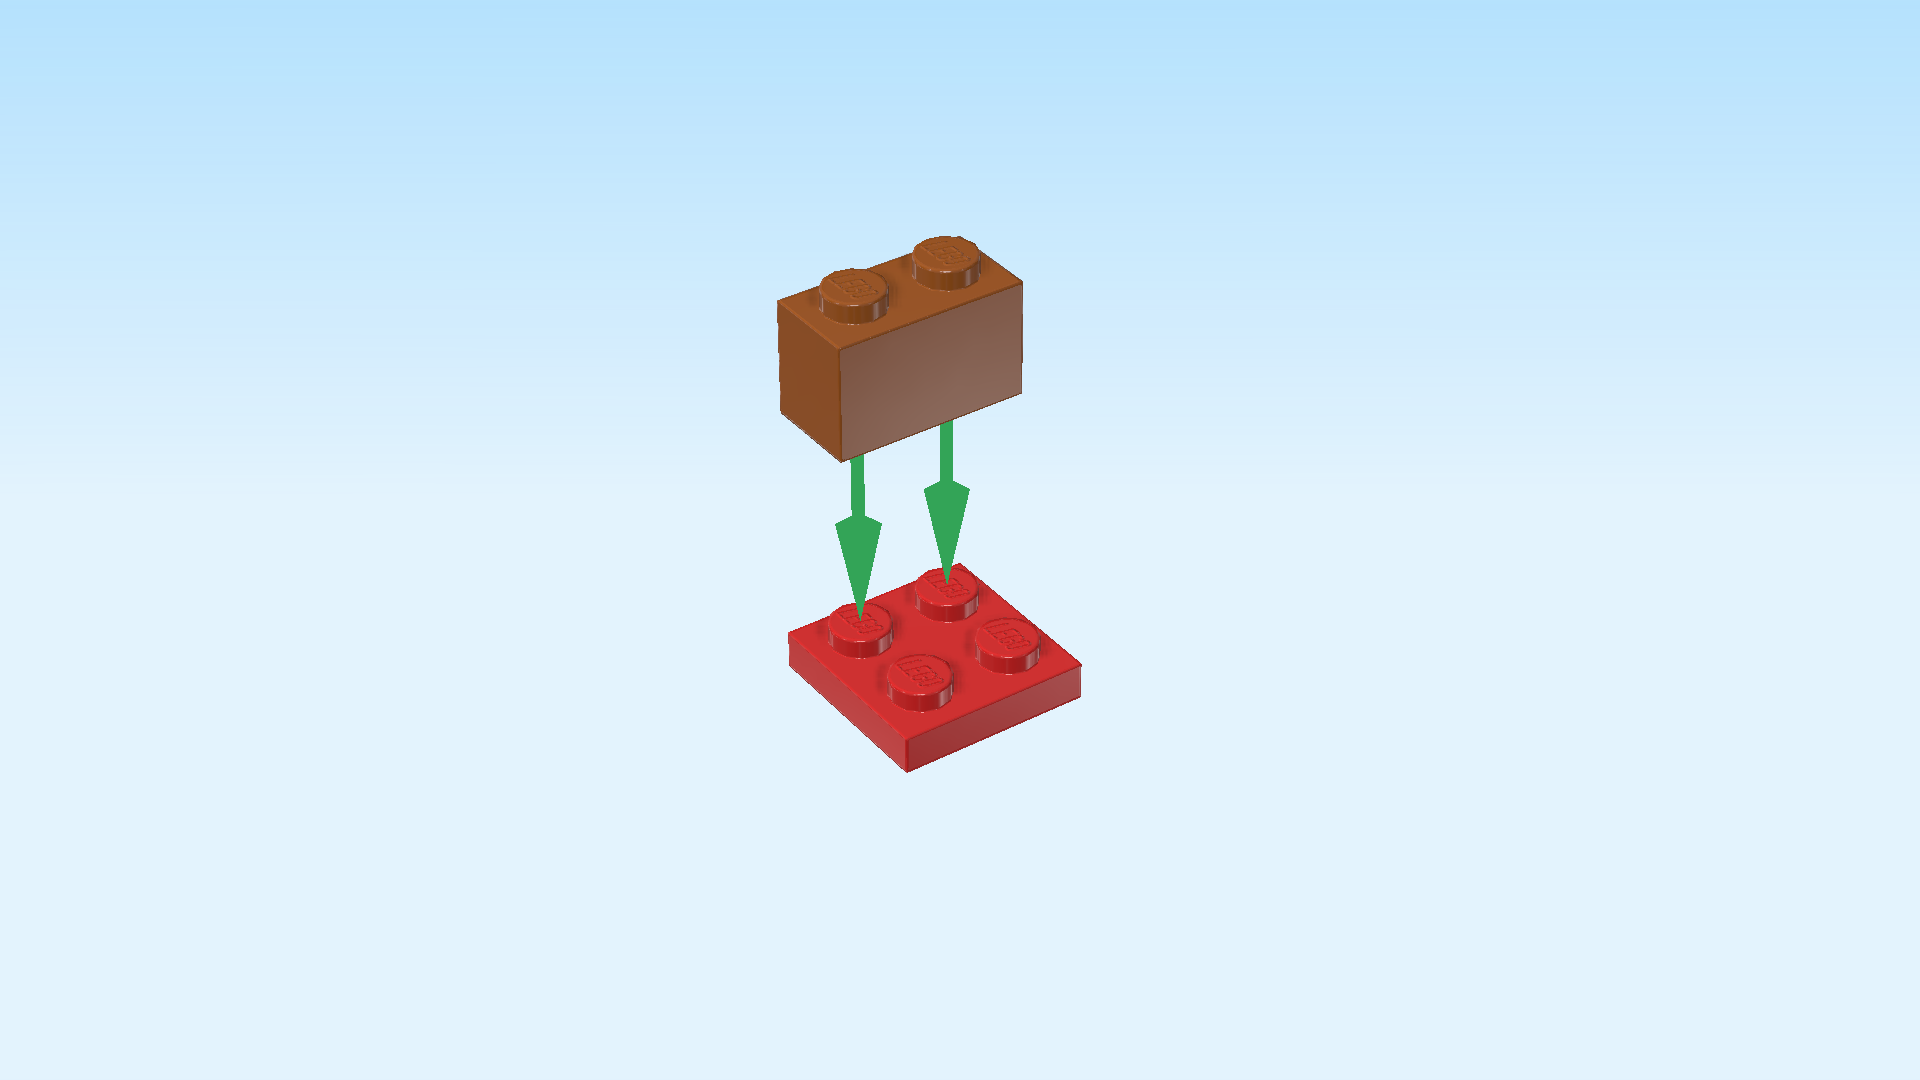
| Put the plate 2x2 on the table. |
| Put the brick 1x2 horizontally on the back row. |
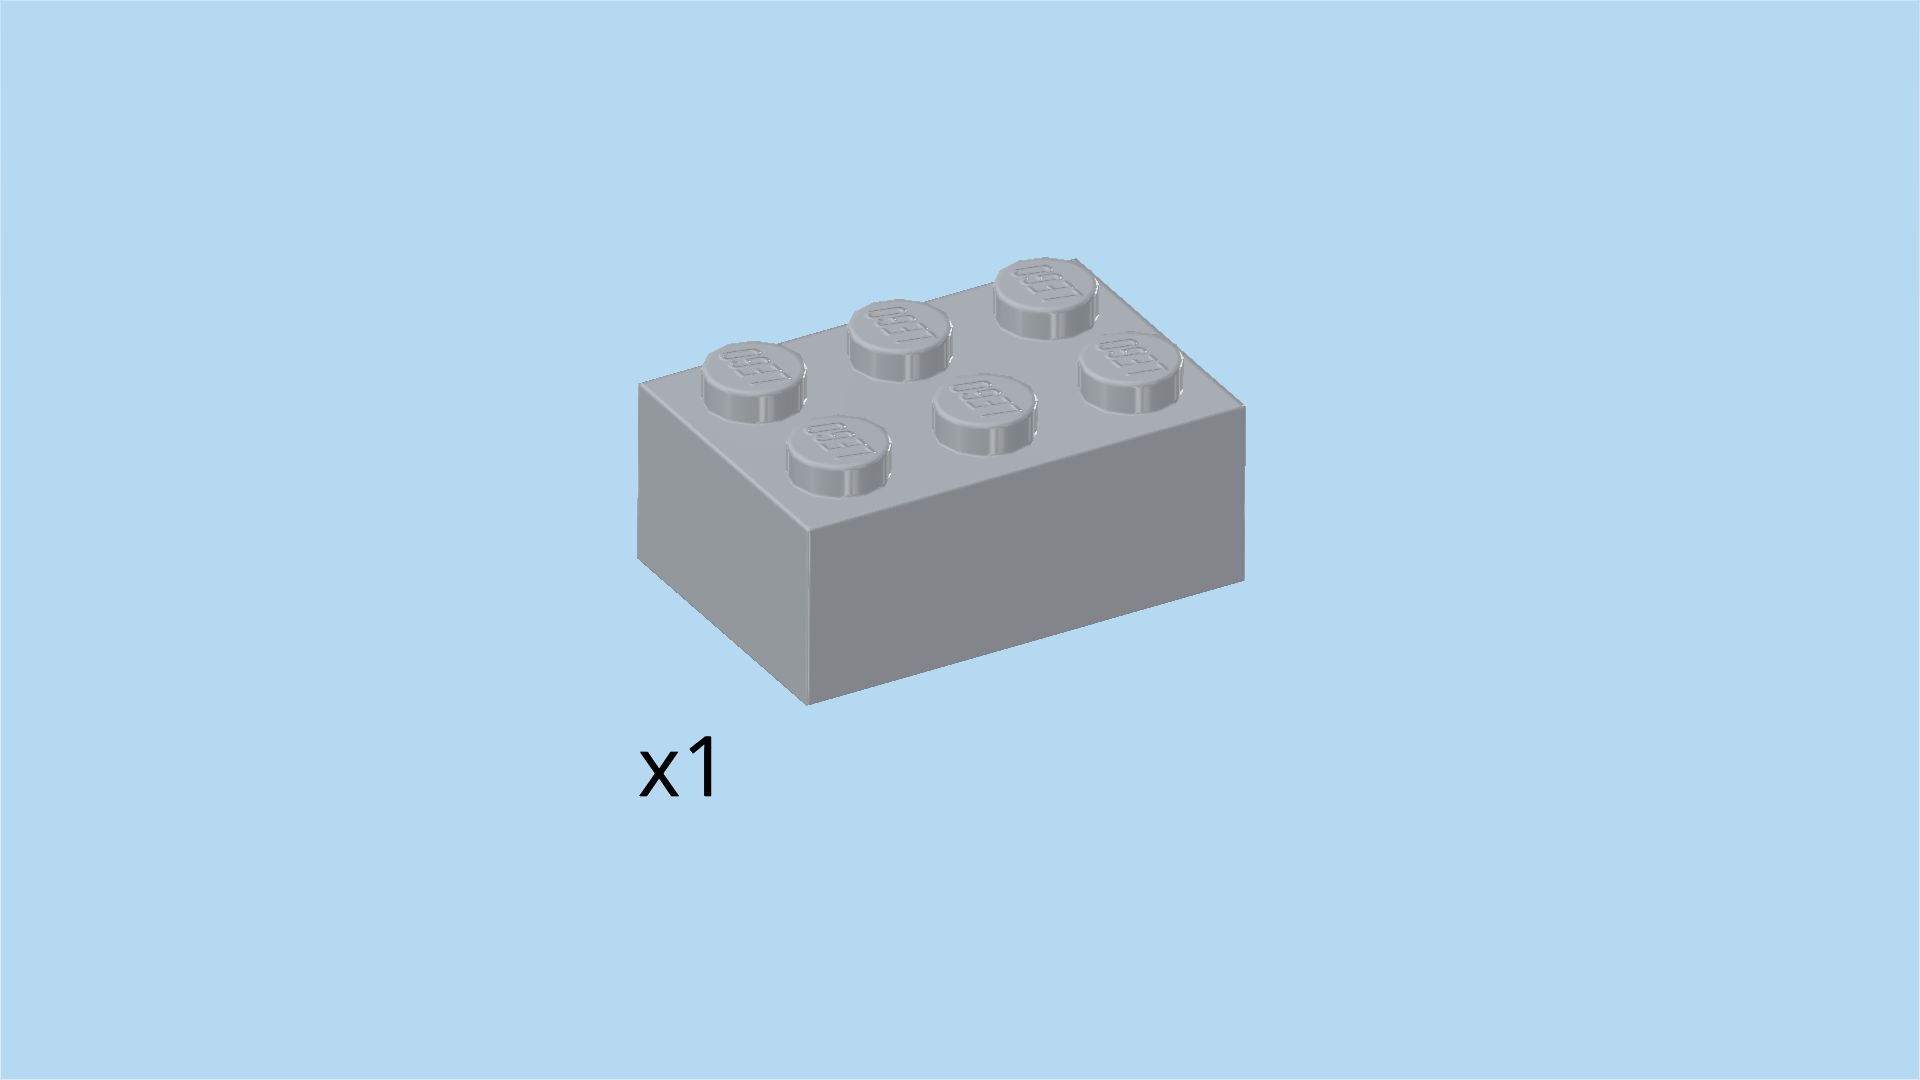
| Find 1 medium stone grey brick 2x3. |
| Put it horizontally in front of the previous piece, 1 column overhanging to the left, 1 row overhanging to the front. |
| Collect the following 2 pieces: |
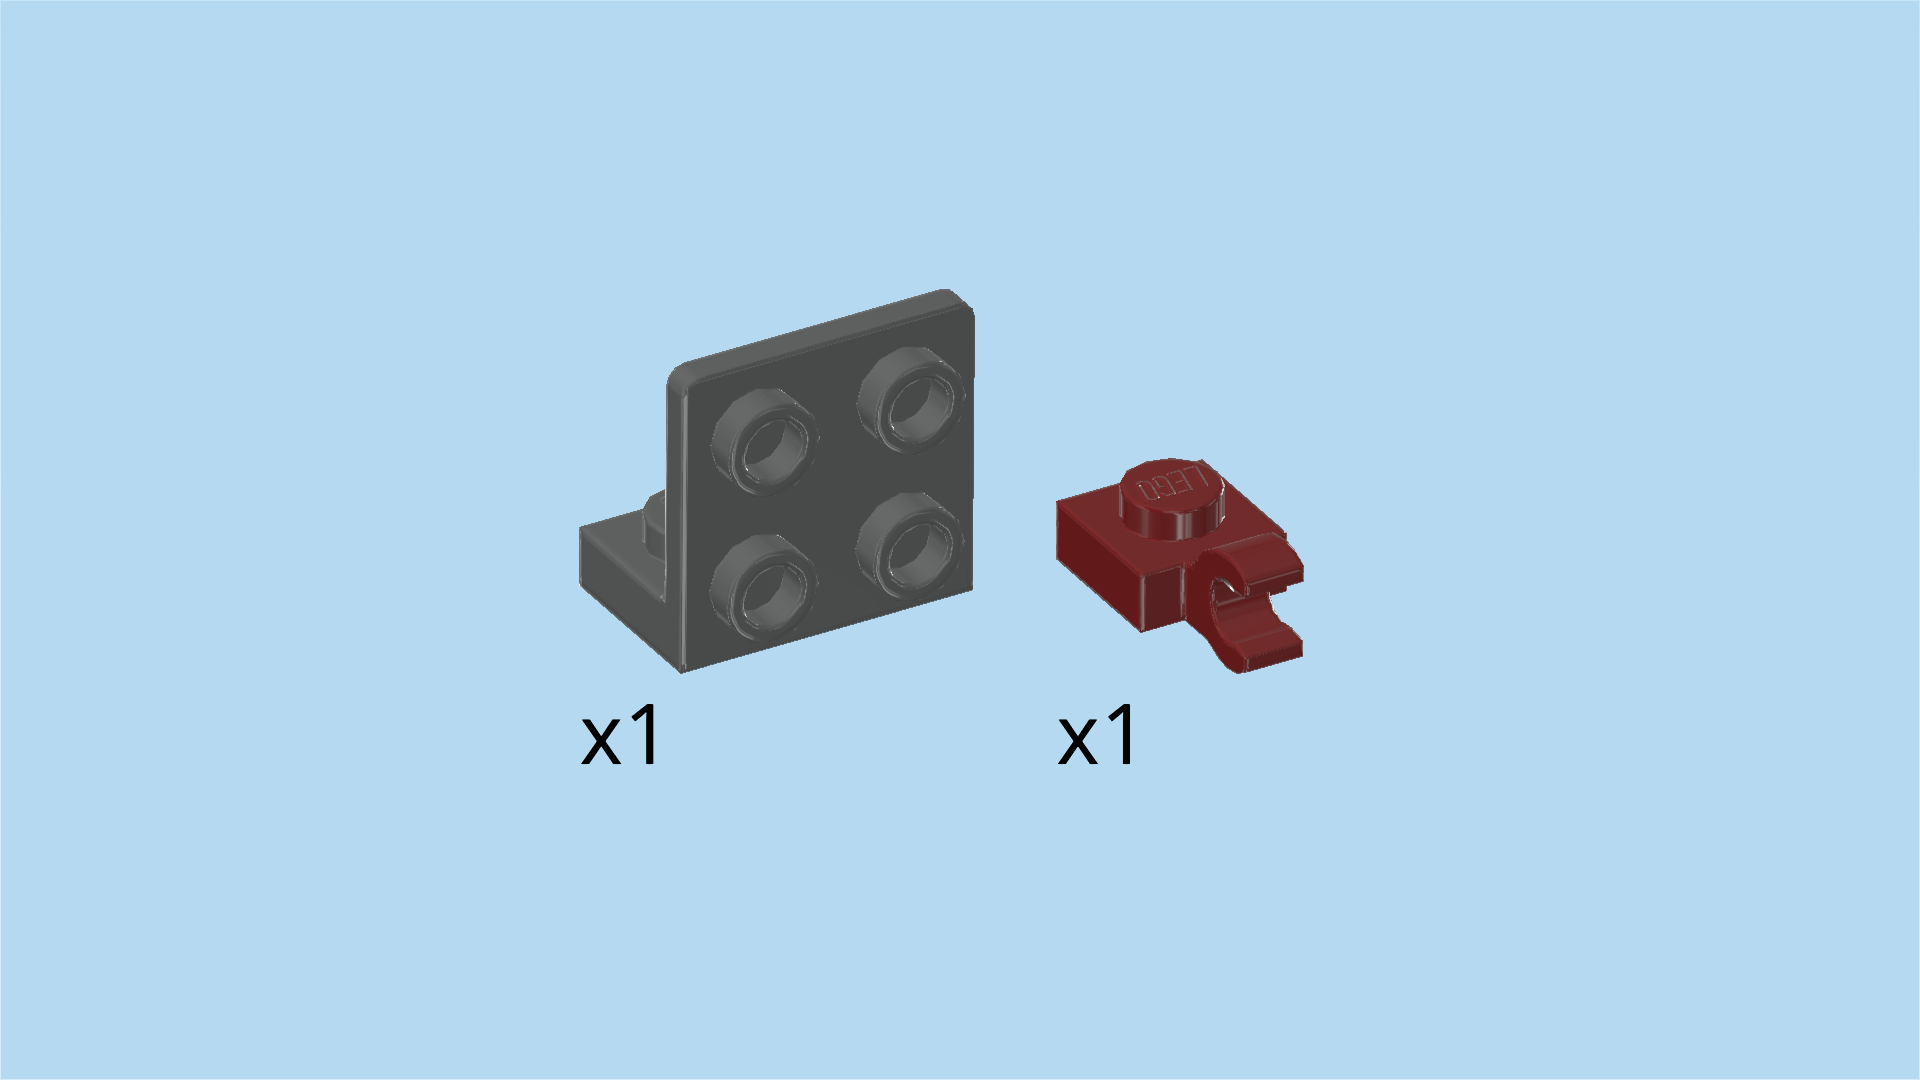
| 1 dark stone grey bottom angle plate 1x2 - 2x2 with 4 side knobs, |
| and 1 maroon red plate 1x1 with vertical side clasp. |
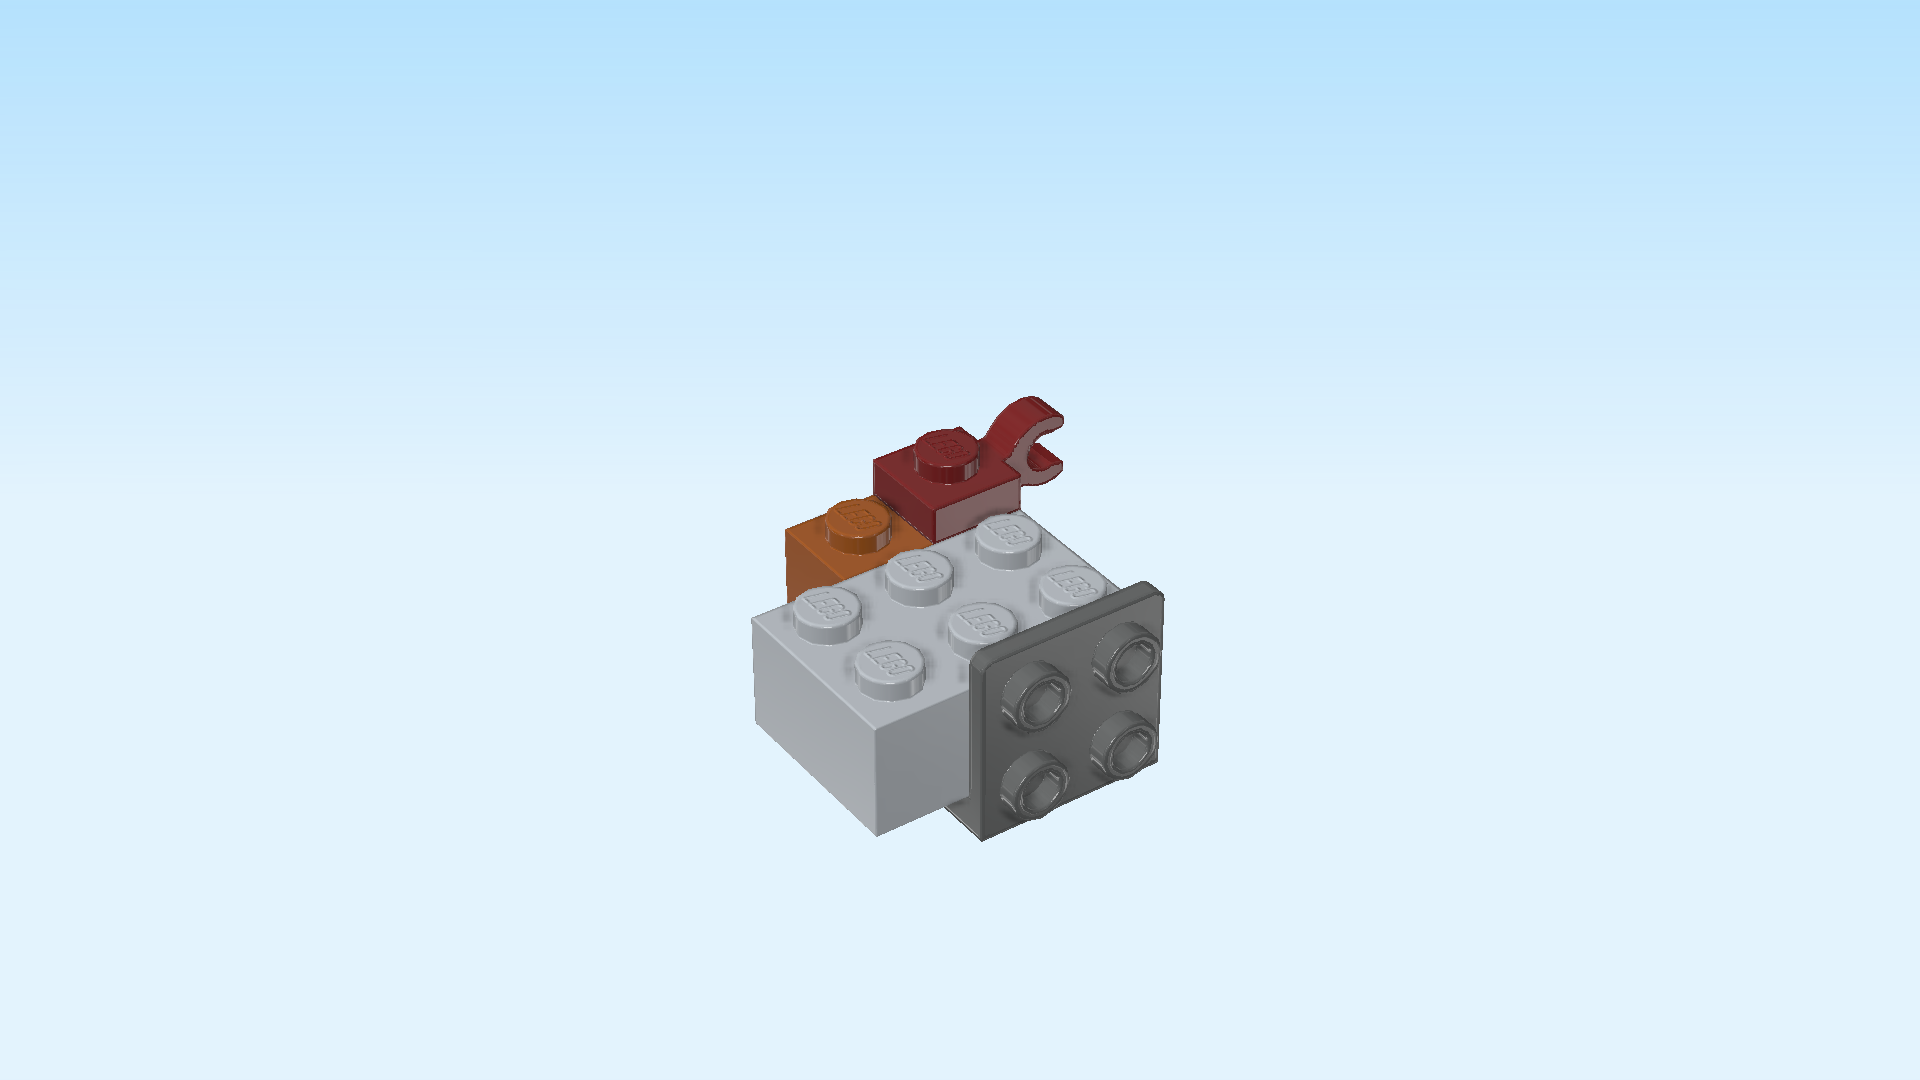
| Put the angle plate 2x2 horizontally underneath the front row of the previous piece, 4 side knobs to the front. Align the two pieces on their right edges. |
| Put the plate 1x1 with clasp on the knob in the back right corner, clasp pointing to the right. |
| Mount the sub-construction in the building orientation in front of the round plate 1x1 with top shaft in the back right corner. The 2 knobs overhanging to the left will connect to the coral reef structure. The rightmost column of the sub-construction overhangs to the right. |
| Collect the following 3 pieces: |
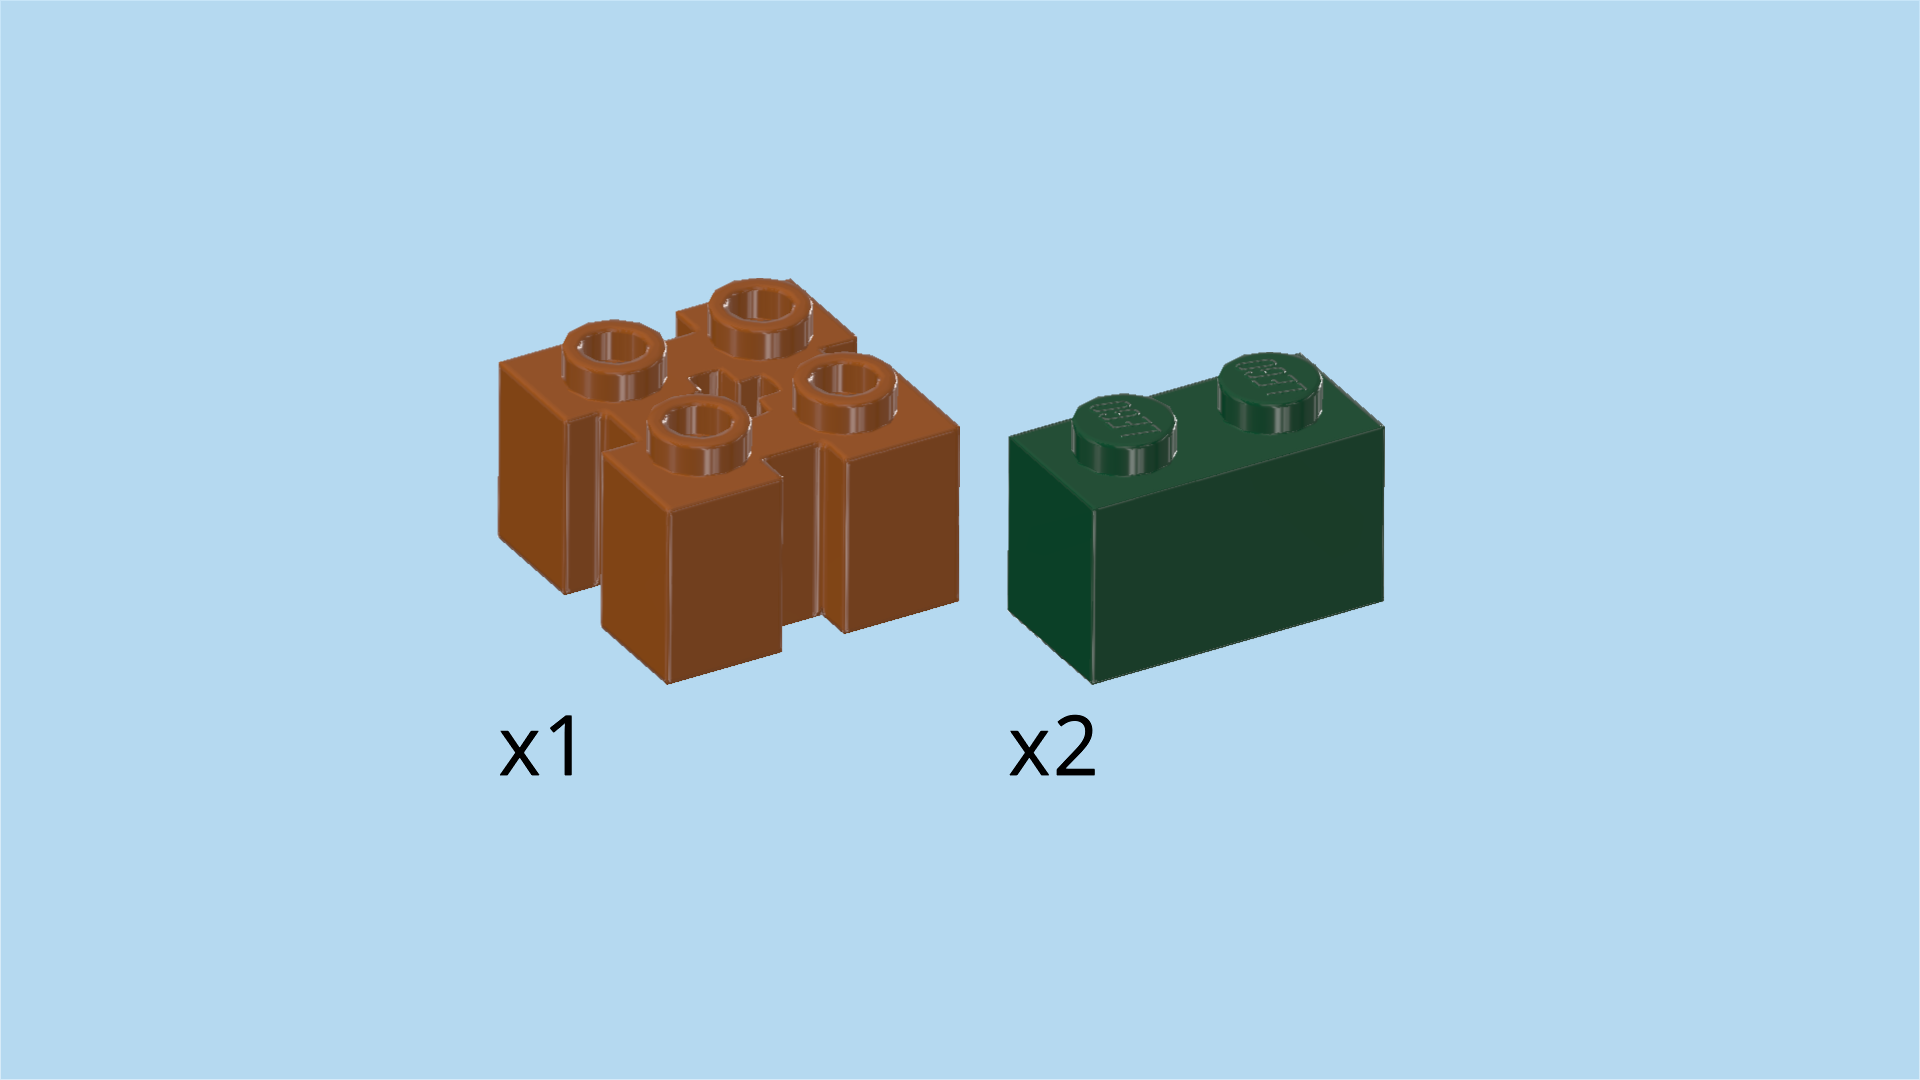
| 1 dark orange brick 2x2 with 4 side grooves and cross hole, |
| and 2 mossy green bricks 1x2. |
| Put the brick 2x2 on the roof tile 2x2 in the front center and 2 knobs behind it. |
| Put 1 brick 1x2 horizontally behind the previous piece. |
| Put the other brick 1x2 horizontally to the left of the plate 1x1 with side clasp pointing to the right at the back (this piece is mounted on the sub-construction we have attached in the previous step) . |
| Collect the following 3 pieces: |
| 2 mossy green bricks 1x2, |
| and 1 medium stone grey smooth roof tile 1x1 with overhanging top tile 1x1. |
| Put the roof tile with top tile horizontally on the previous piece and the knob to its right, top tile to the left. |
| Put 1 brick 1x2 vertically on the third column from the right. Mount it in front of the left half of the brick 1x2 to which the top tile of the previous piece is attached. |
| Put the other brick 1x2 horizontally on the third row from the back, skipping the leftmost column. This means it will be mounted on the front left corner of the vertical brick 2x3 that has been mounted many steps ago. |
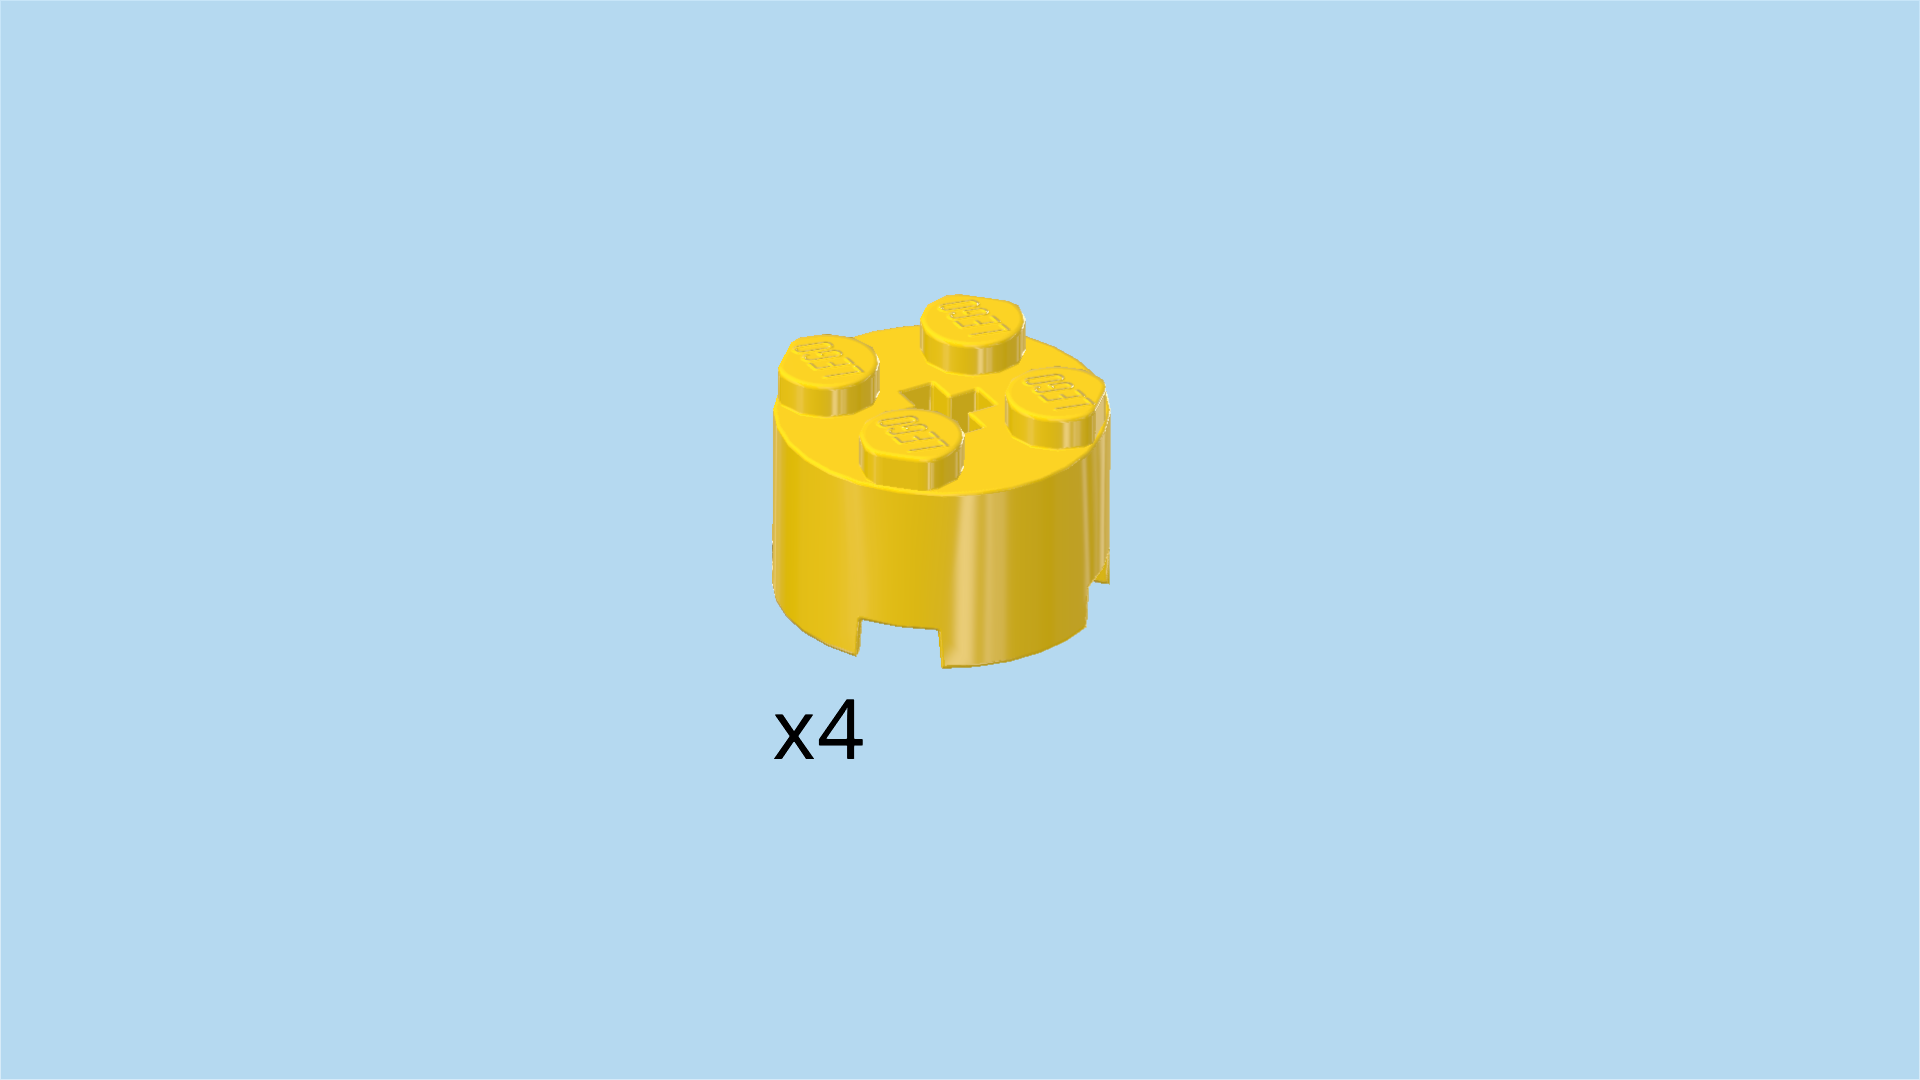
| Find 4 bright yellow round bricks 2x2 with top cross hole. |
| Put 1 behind the left half of the previous piece on the leftmost edge. |
| Put 1 to the left and 1 to the right of the brick 2x2 with 4 side grooves that is mounted at the center front. |
| Put 1 directly behind the 4 side knobs pointing to the front in the right half of the structure. |
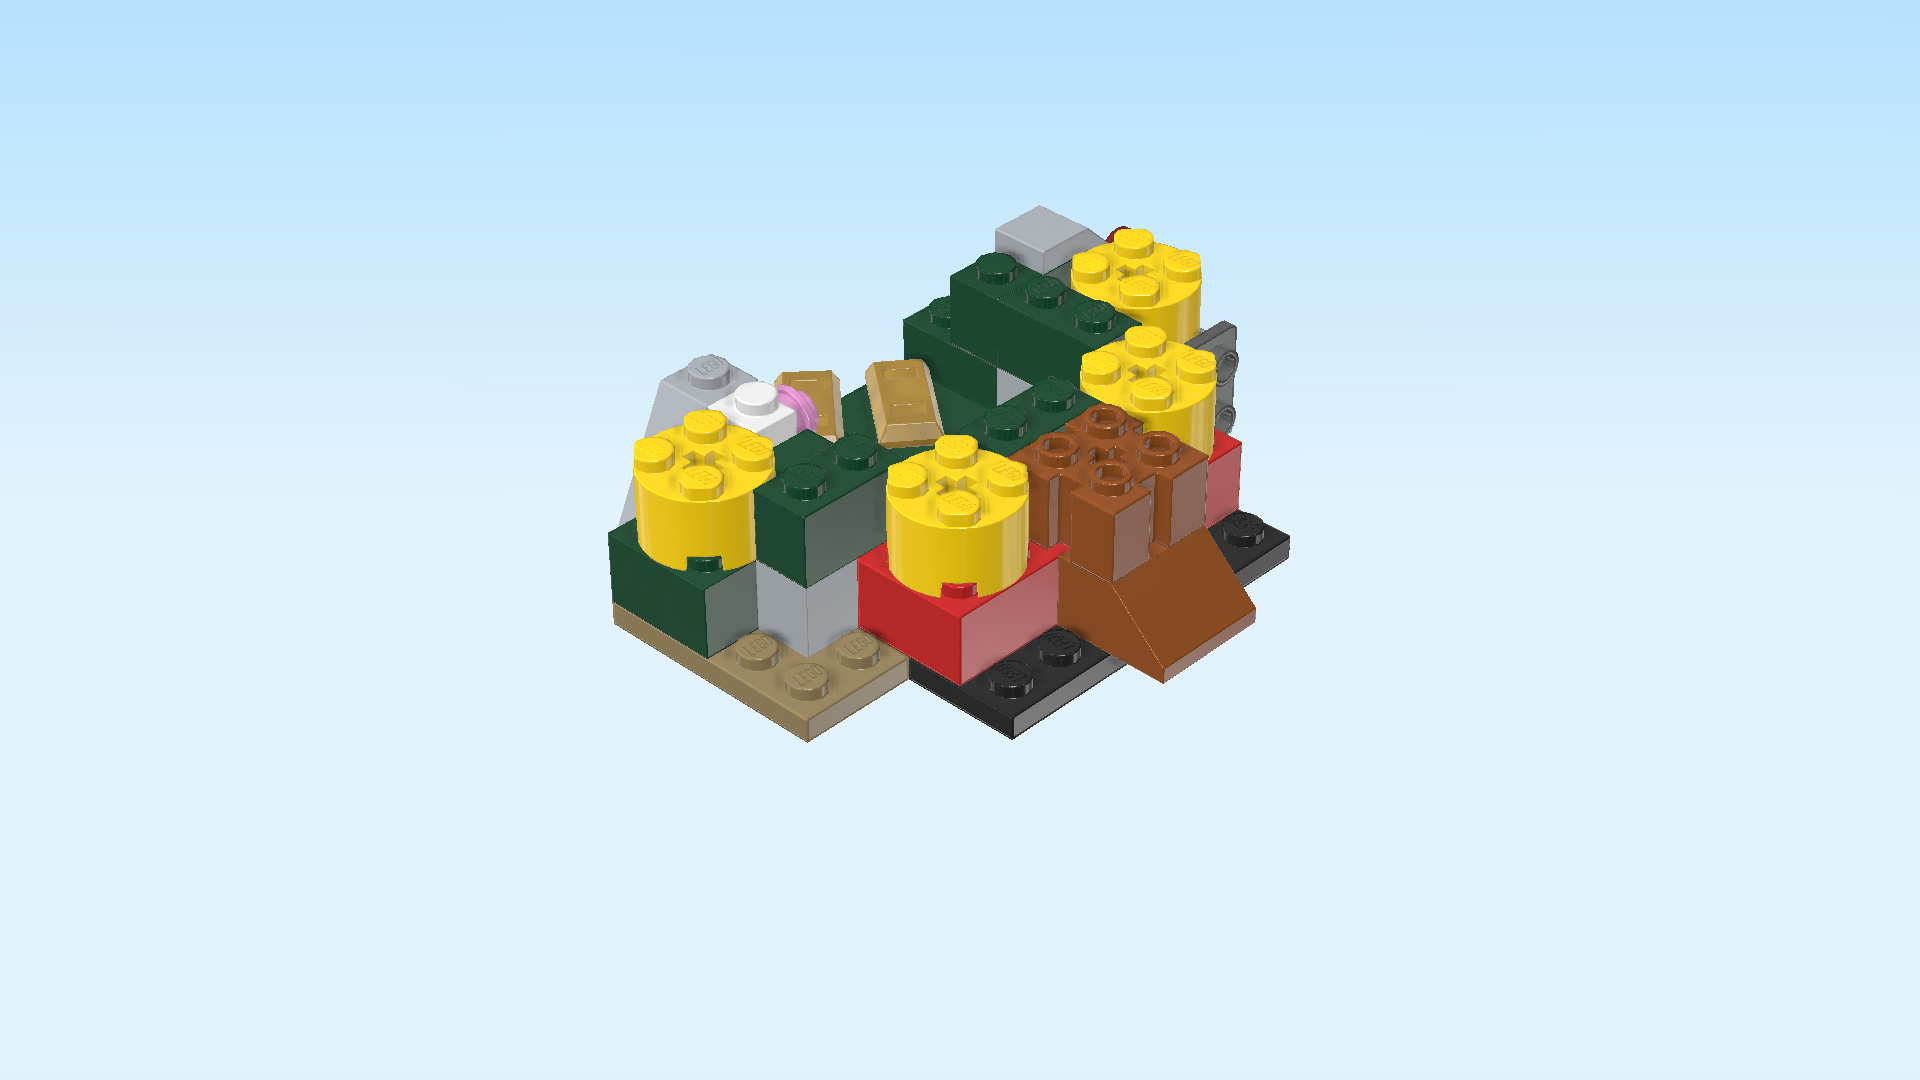
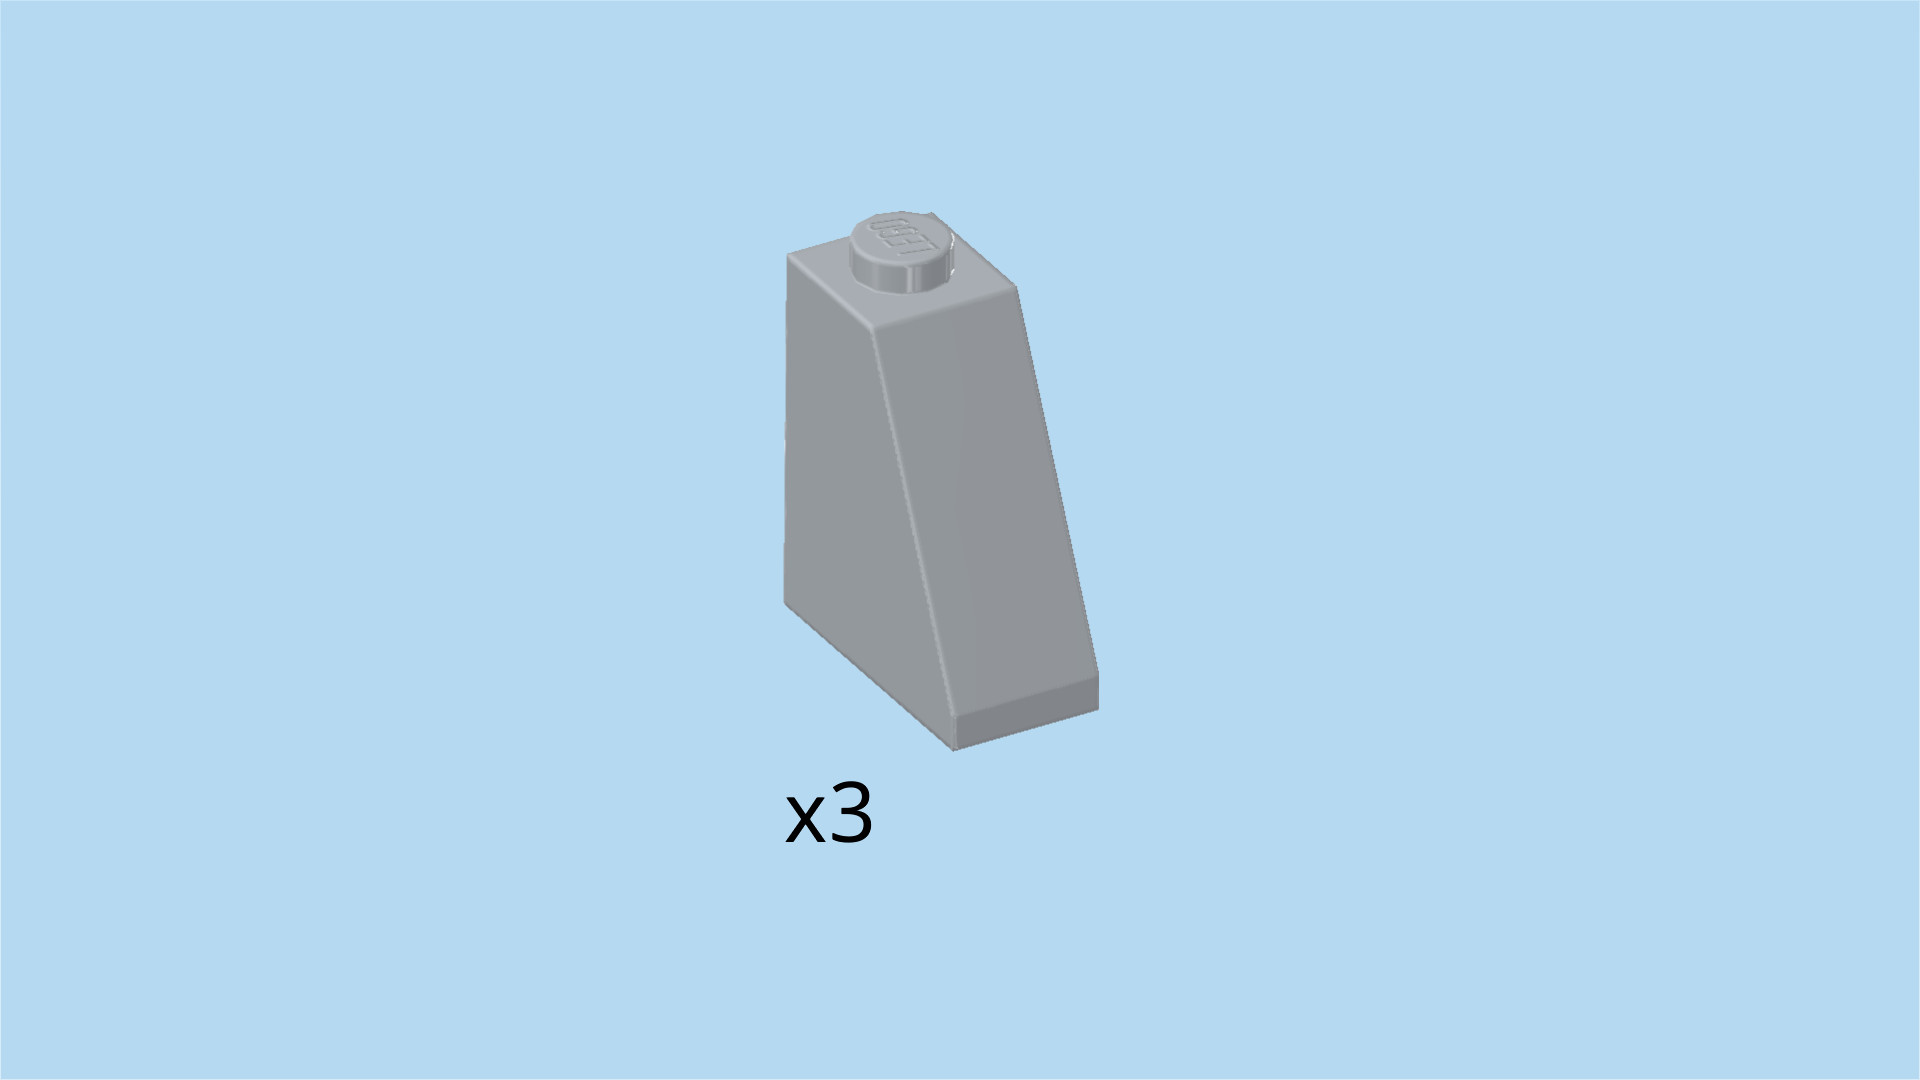
| Find 3 medium stone grey roof tiles 1x2x2, 65°. |
| Put 1 horizontally on the frontmost row on its 2 rightmost knobs, slope to the right. |
| Put 1 vertically on the leftmost column on its 2 front knobs, slope to the front. |
| Put the last one vertically to the right of the previous piece, only using the frontmost knob, slope to the front, ½ overhanging to the front. |
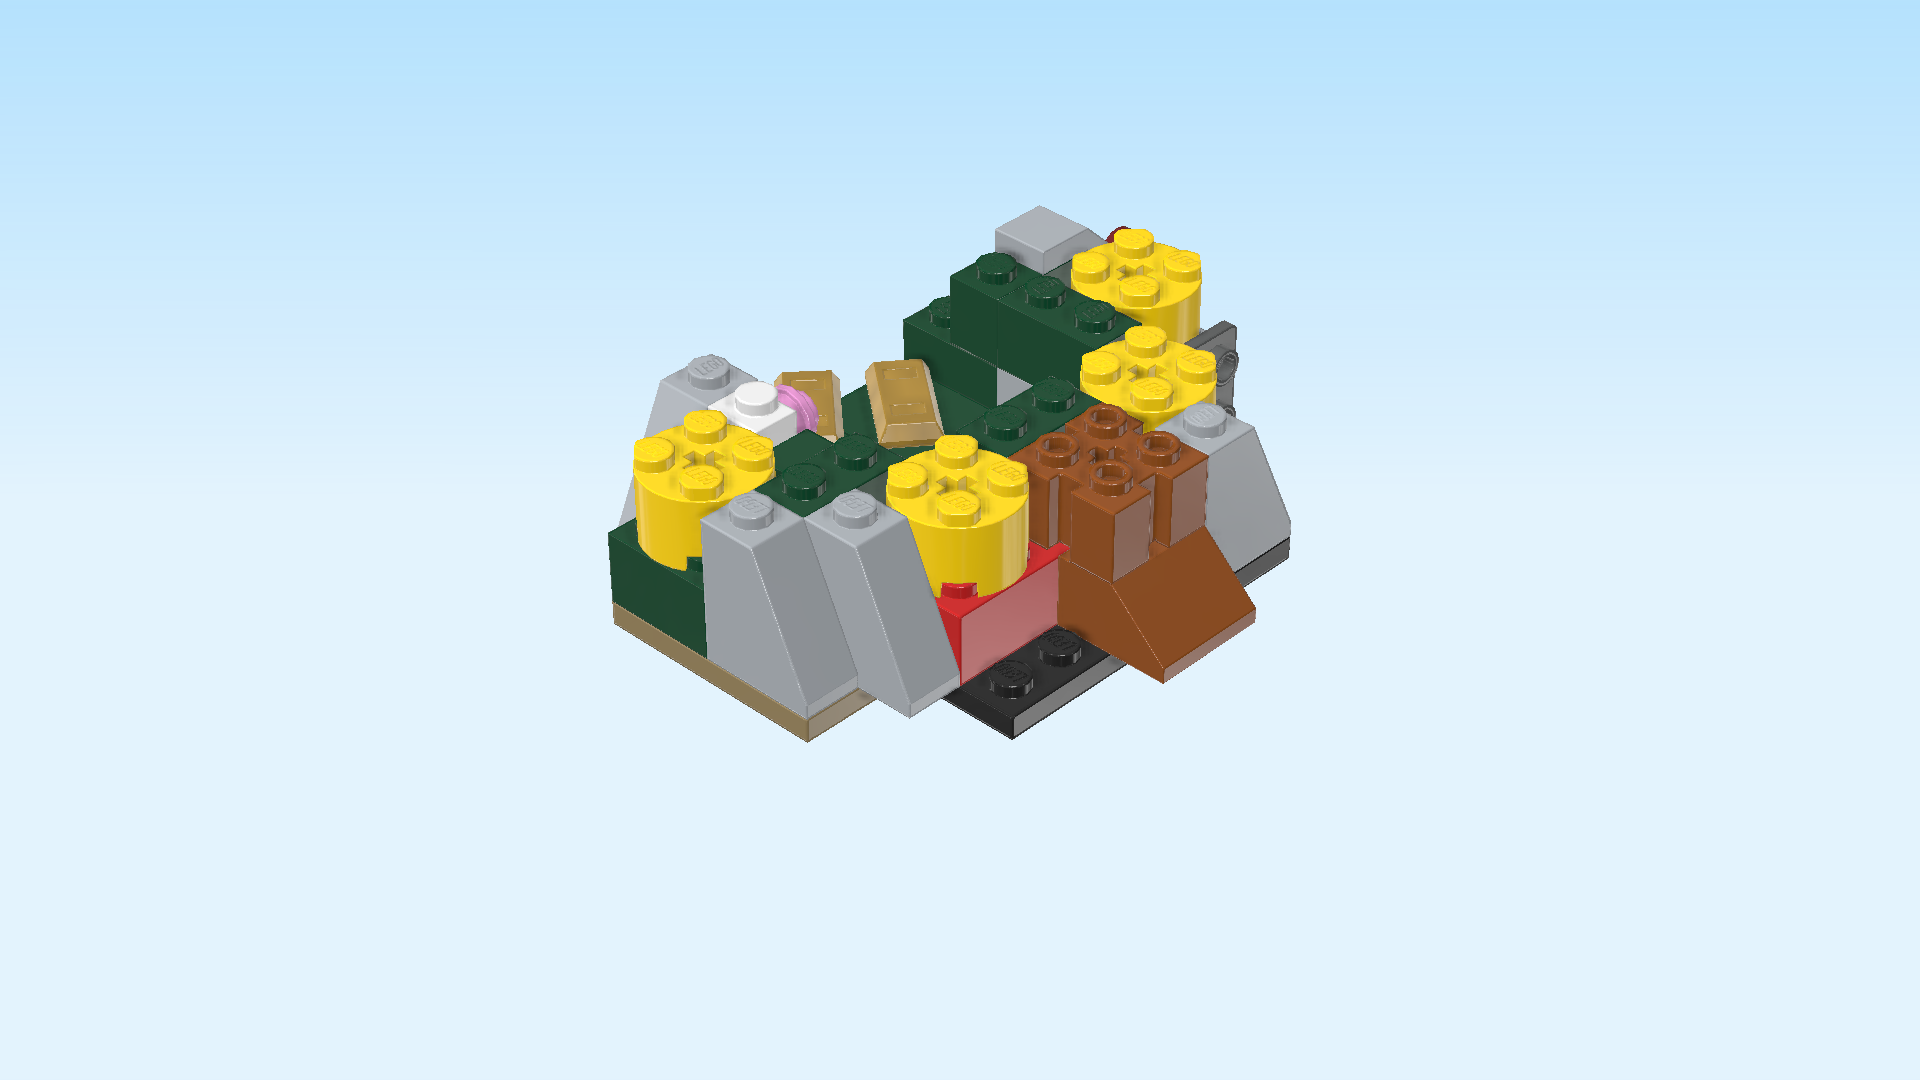
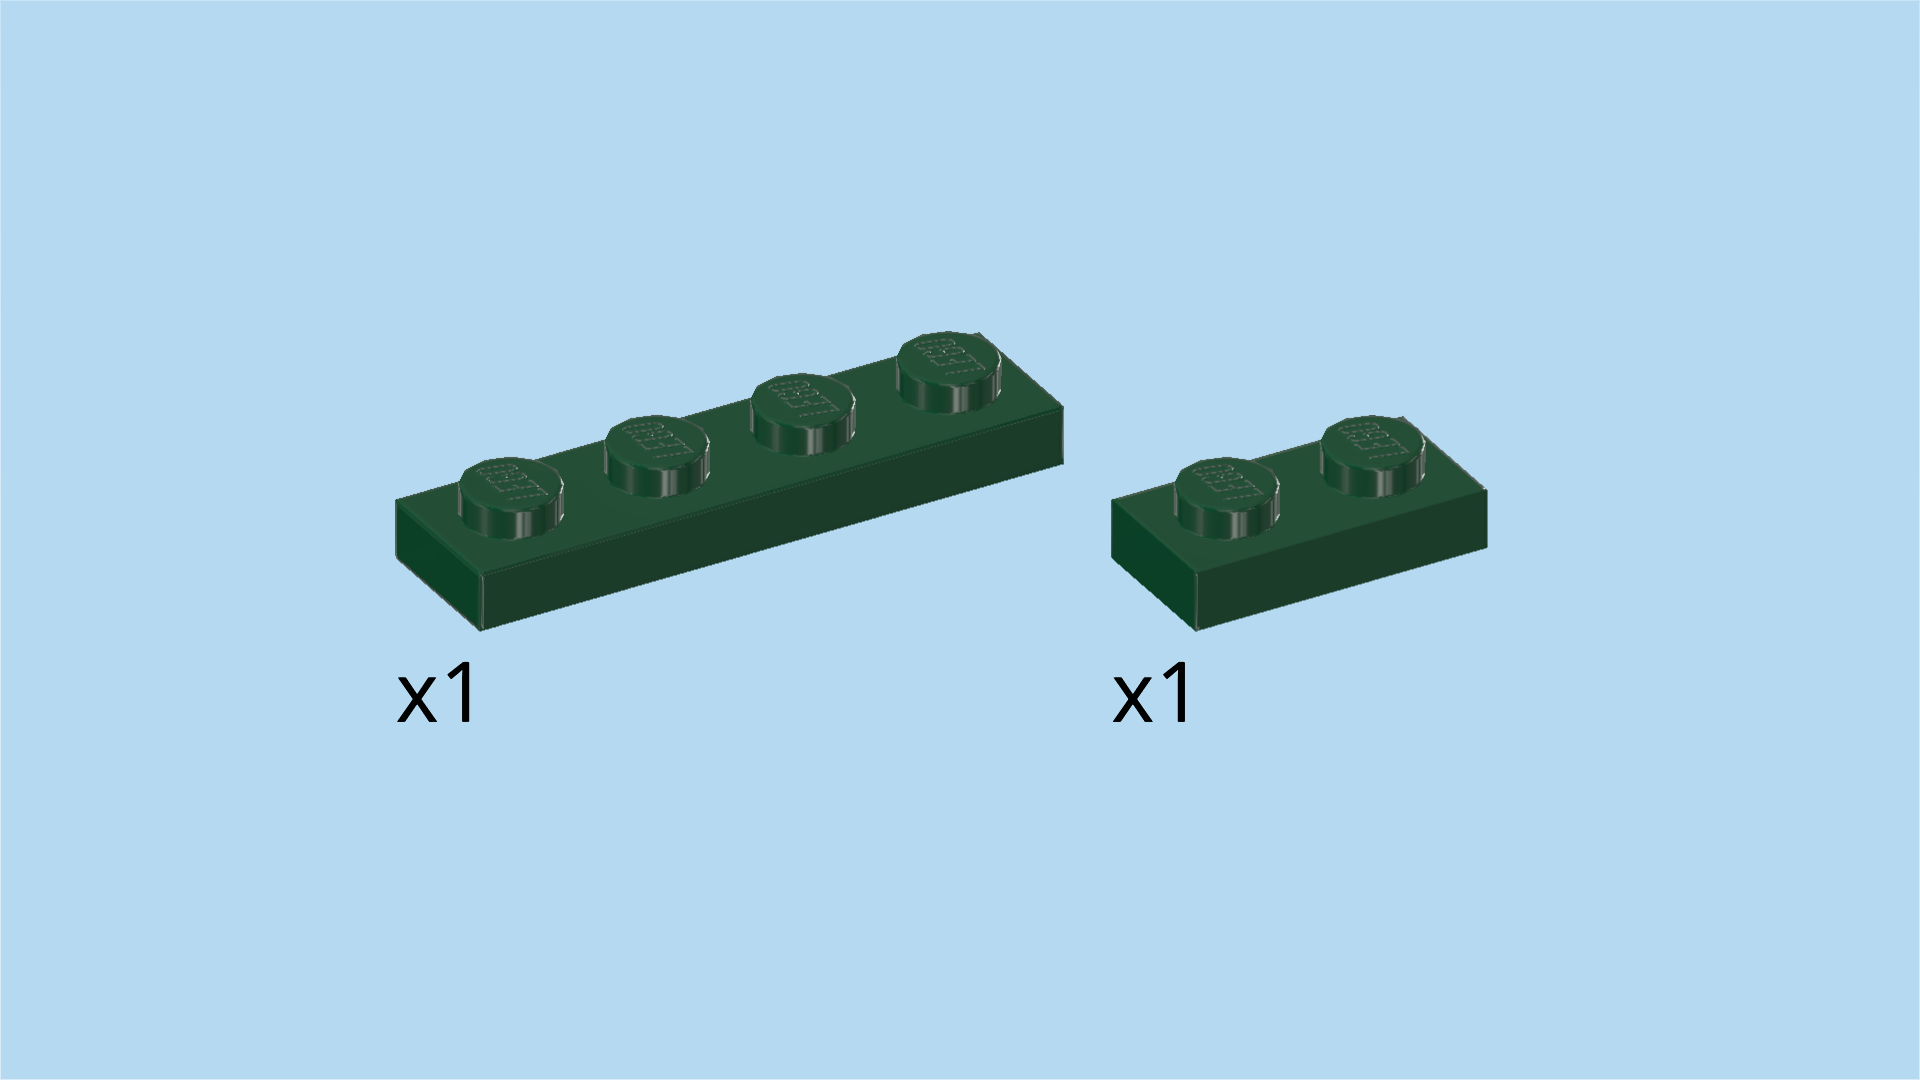
| Collect the following 2 pieces: |
| 1 mossy green plate 1x2, |
| and 1 mossy green plate 1x4. |
| Put the plate 1x2 vertically underneath the front half of the previous piece, 1 knob protruding to the front. |
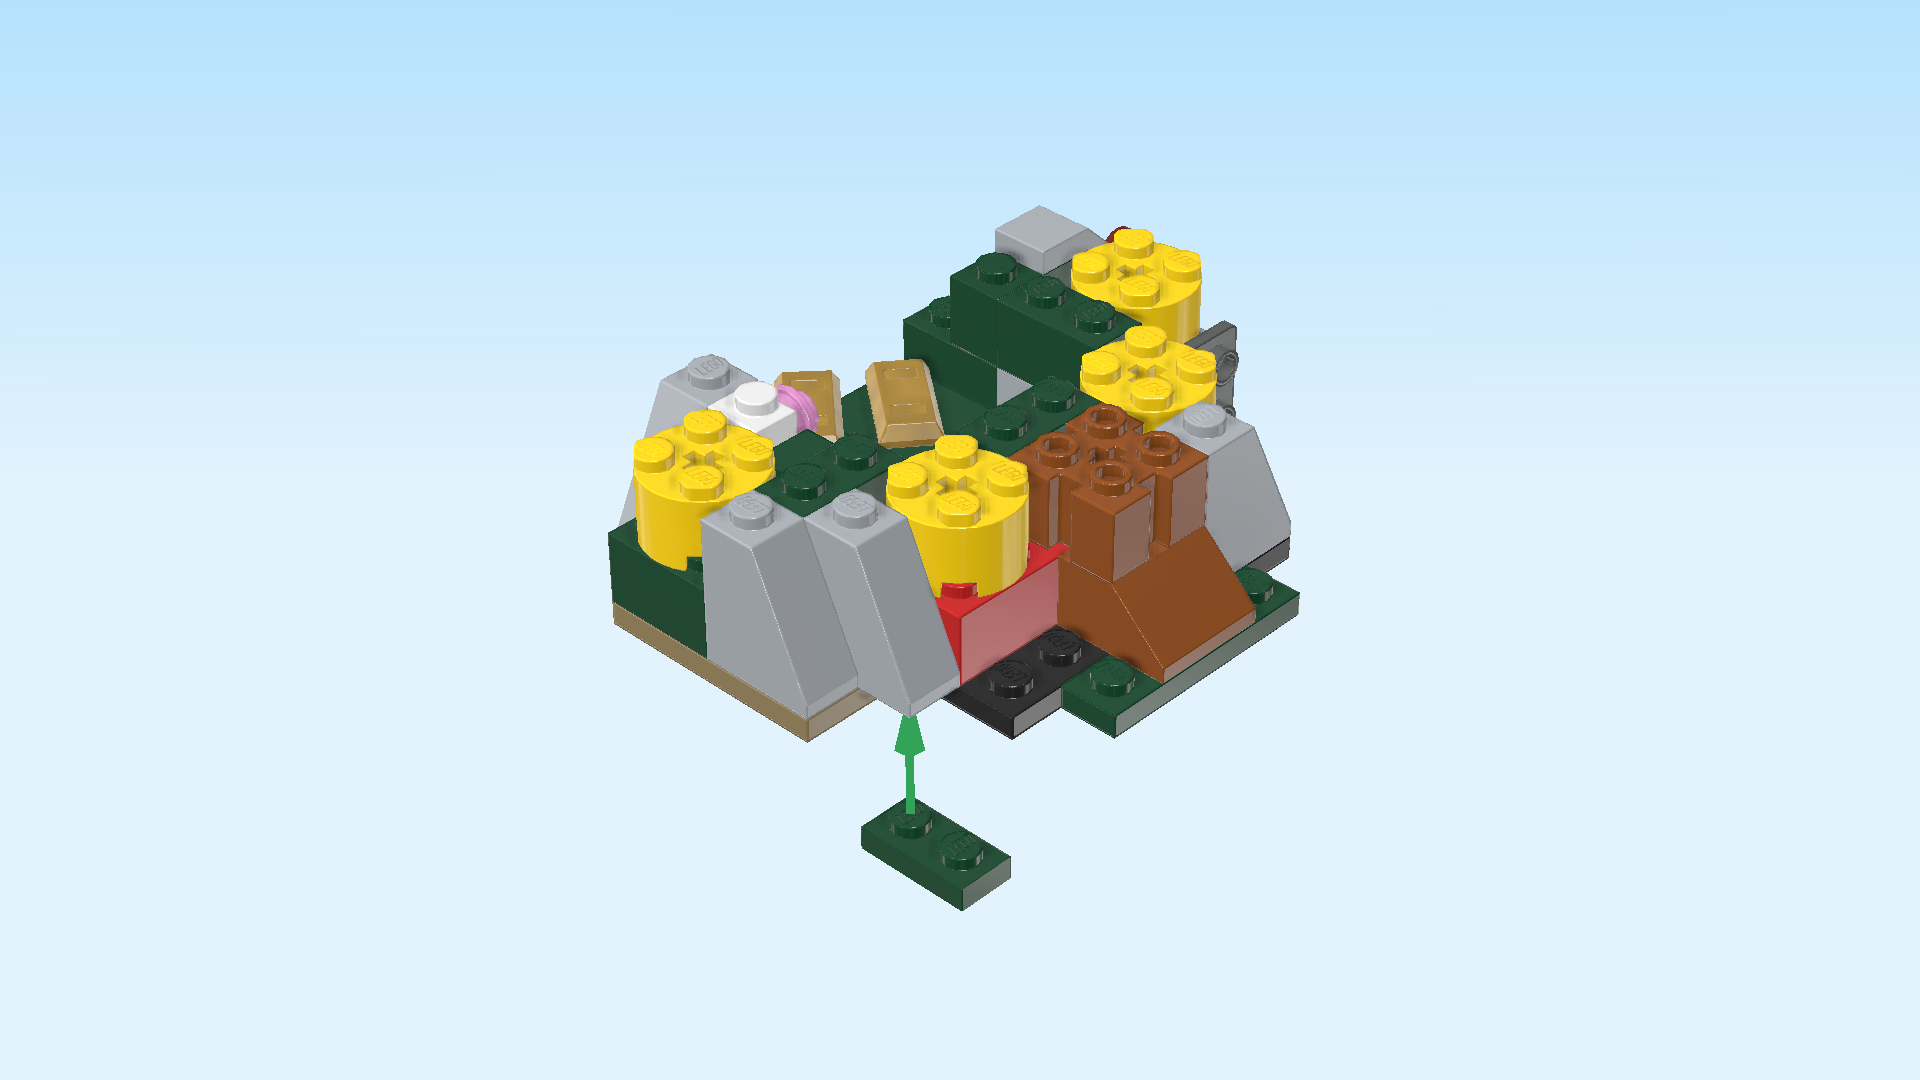
| Put the plate 1x4 horizontally underneath the overhanging slope on the frontmost edge, symmetrically protruding to the left and right. |
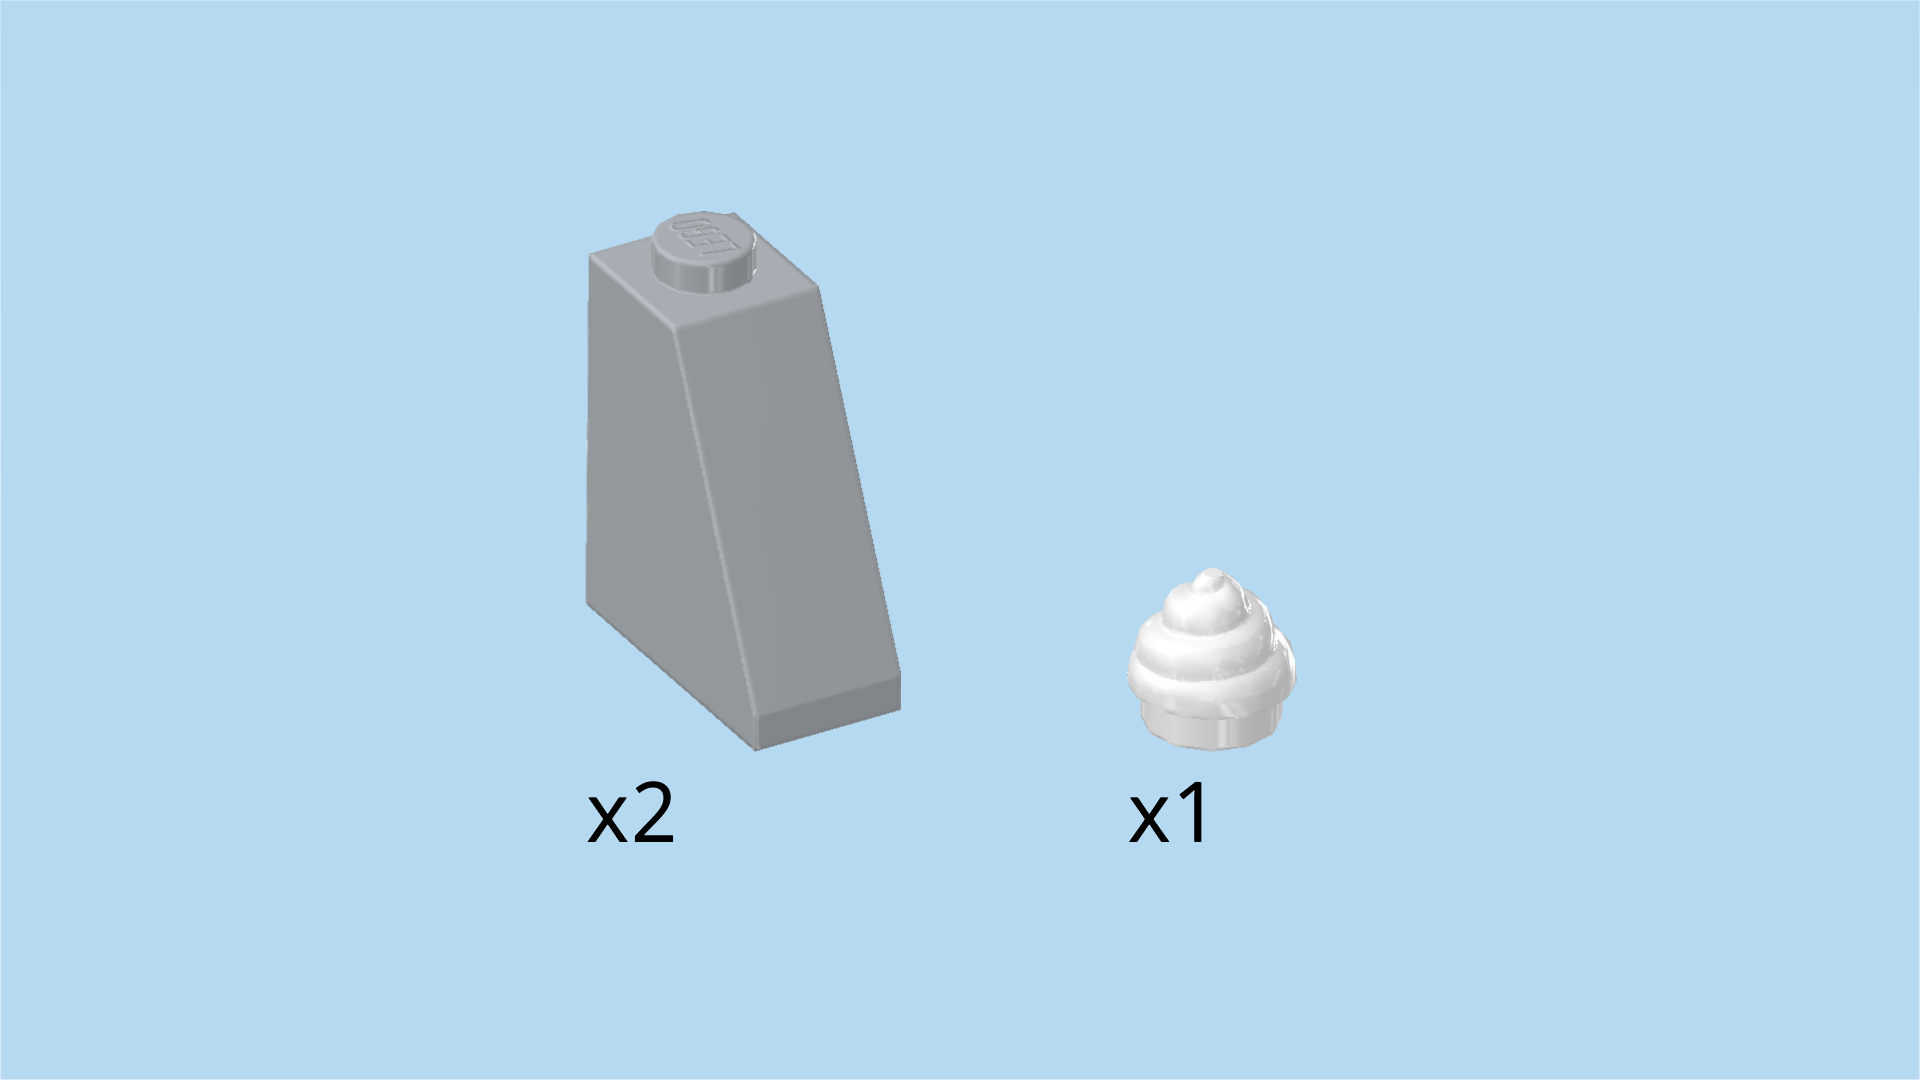
| Collect the following 3 pieces: |
| 2 medium stone grey roof tiles 1x2x2, 65°, |
| and 1 white swirly ice cream scoop 1x1. |
| Put the swirly ice cream scoop 1x1 on the rightmost knob of the previous piece. This means that only the leftmost knob of the previous piece is still empty. |
| Put 1 roof tile 1x2x2 vertically on said empty knob of the plate 1x4 and the knob behind it, slope to the front. |
| Put the other roof tile 1x2x2 horizontally on the 2 knobs to the left of the previous piece, slope to the left. |
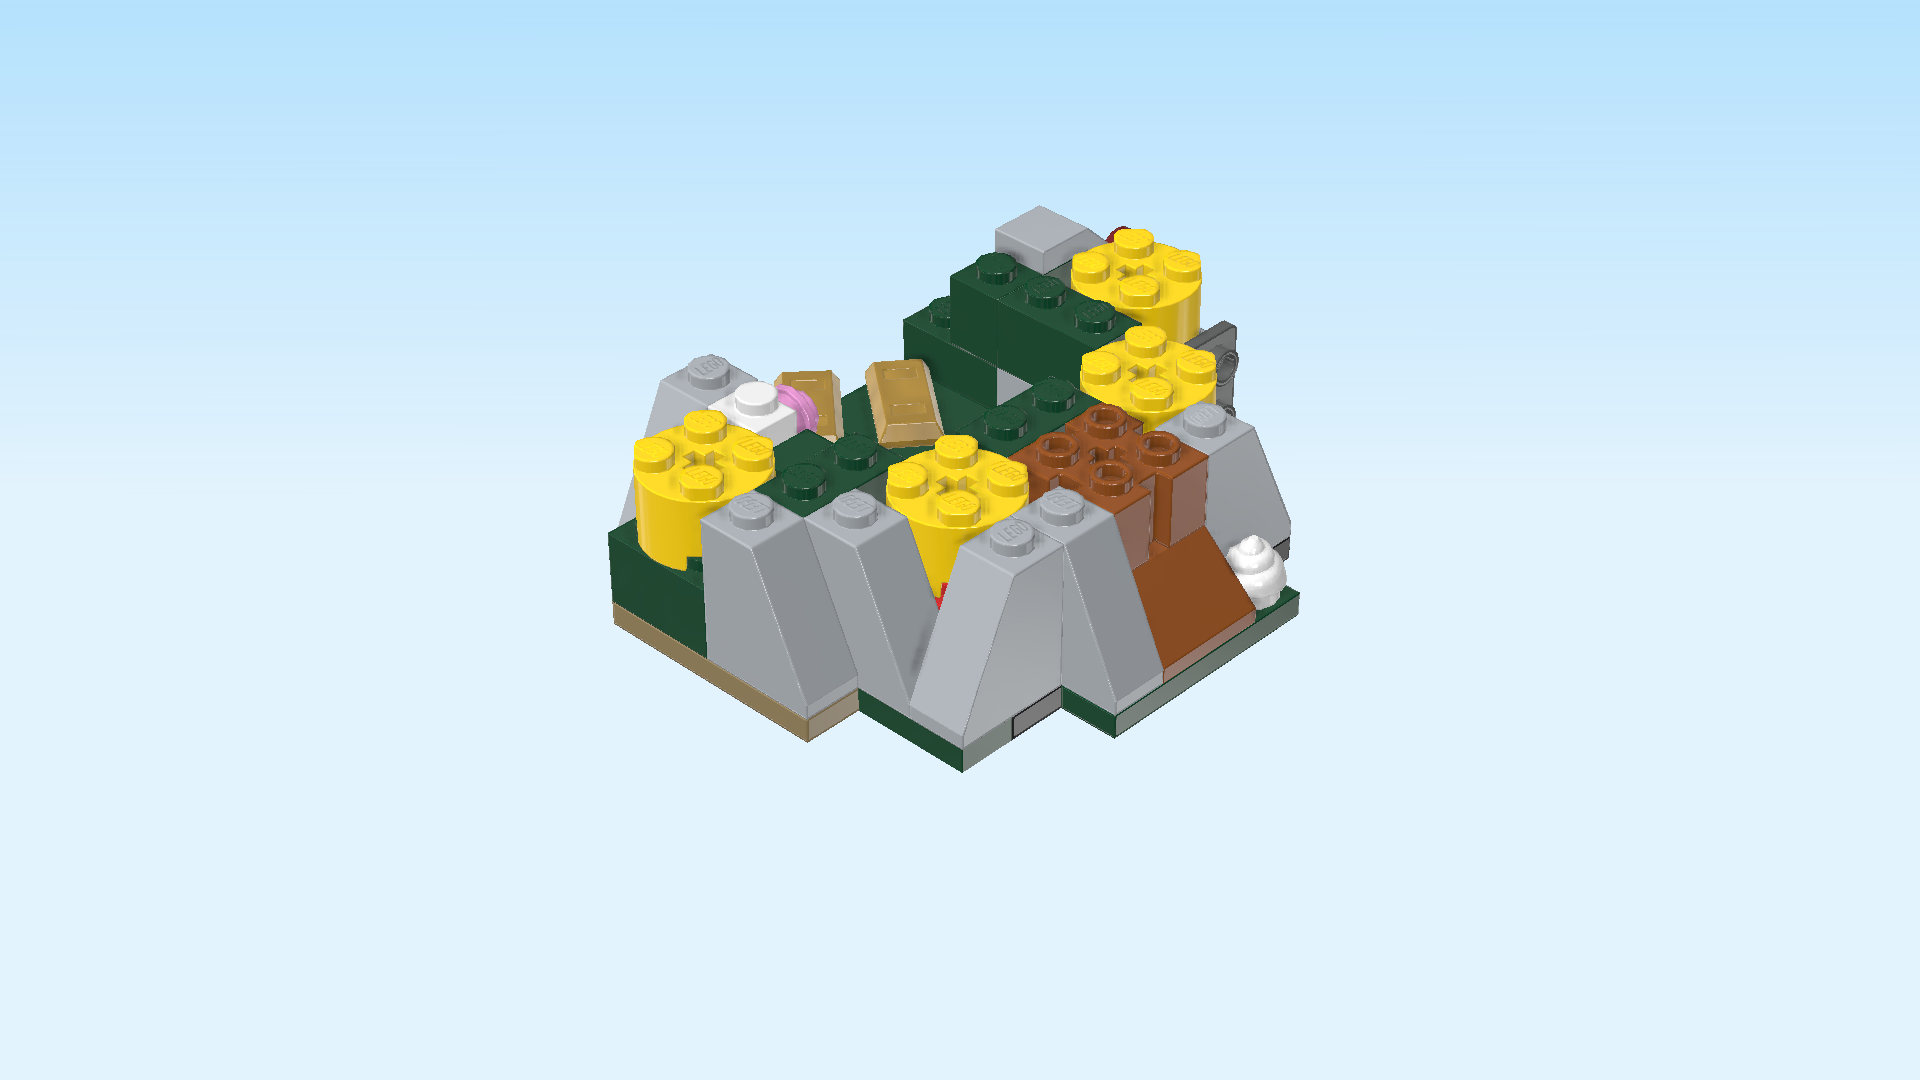
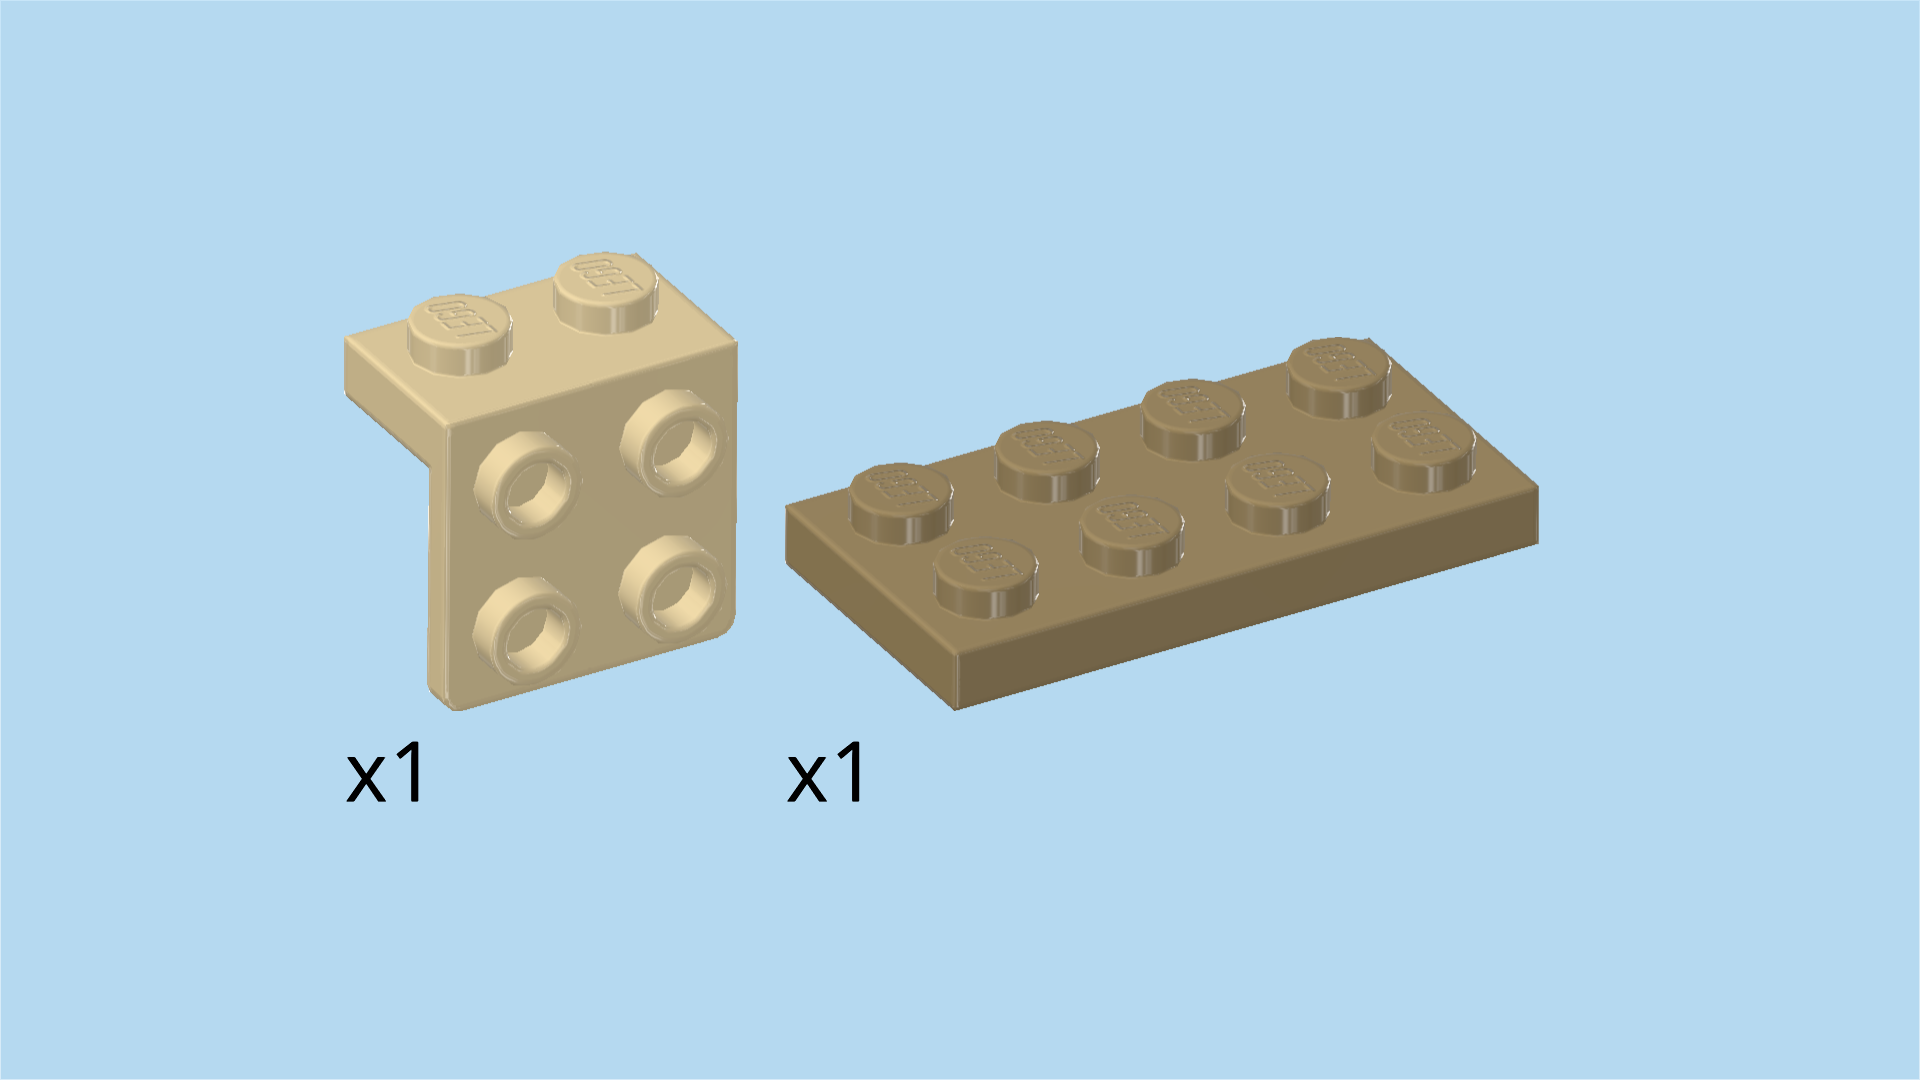
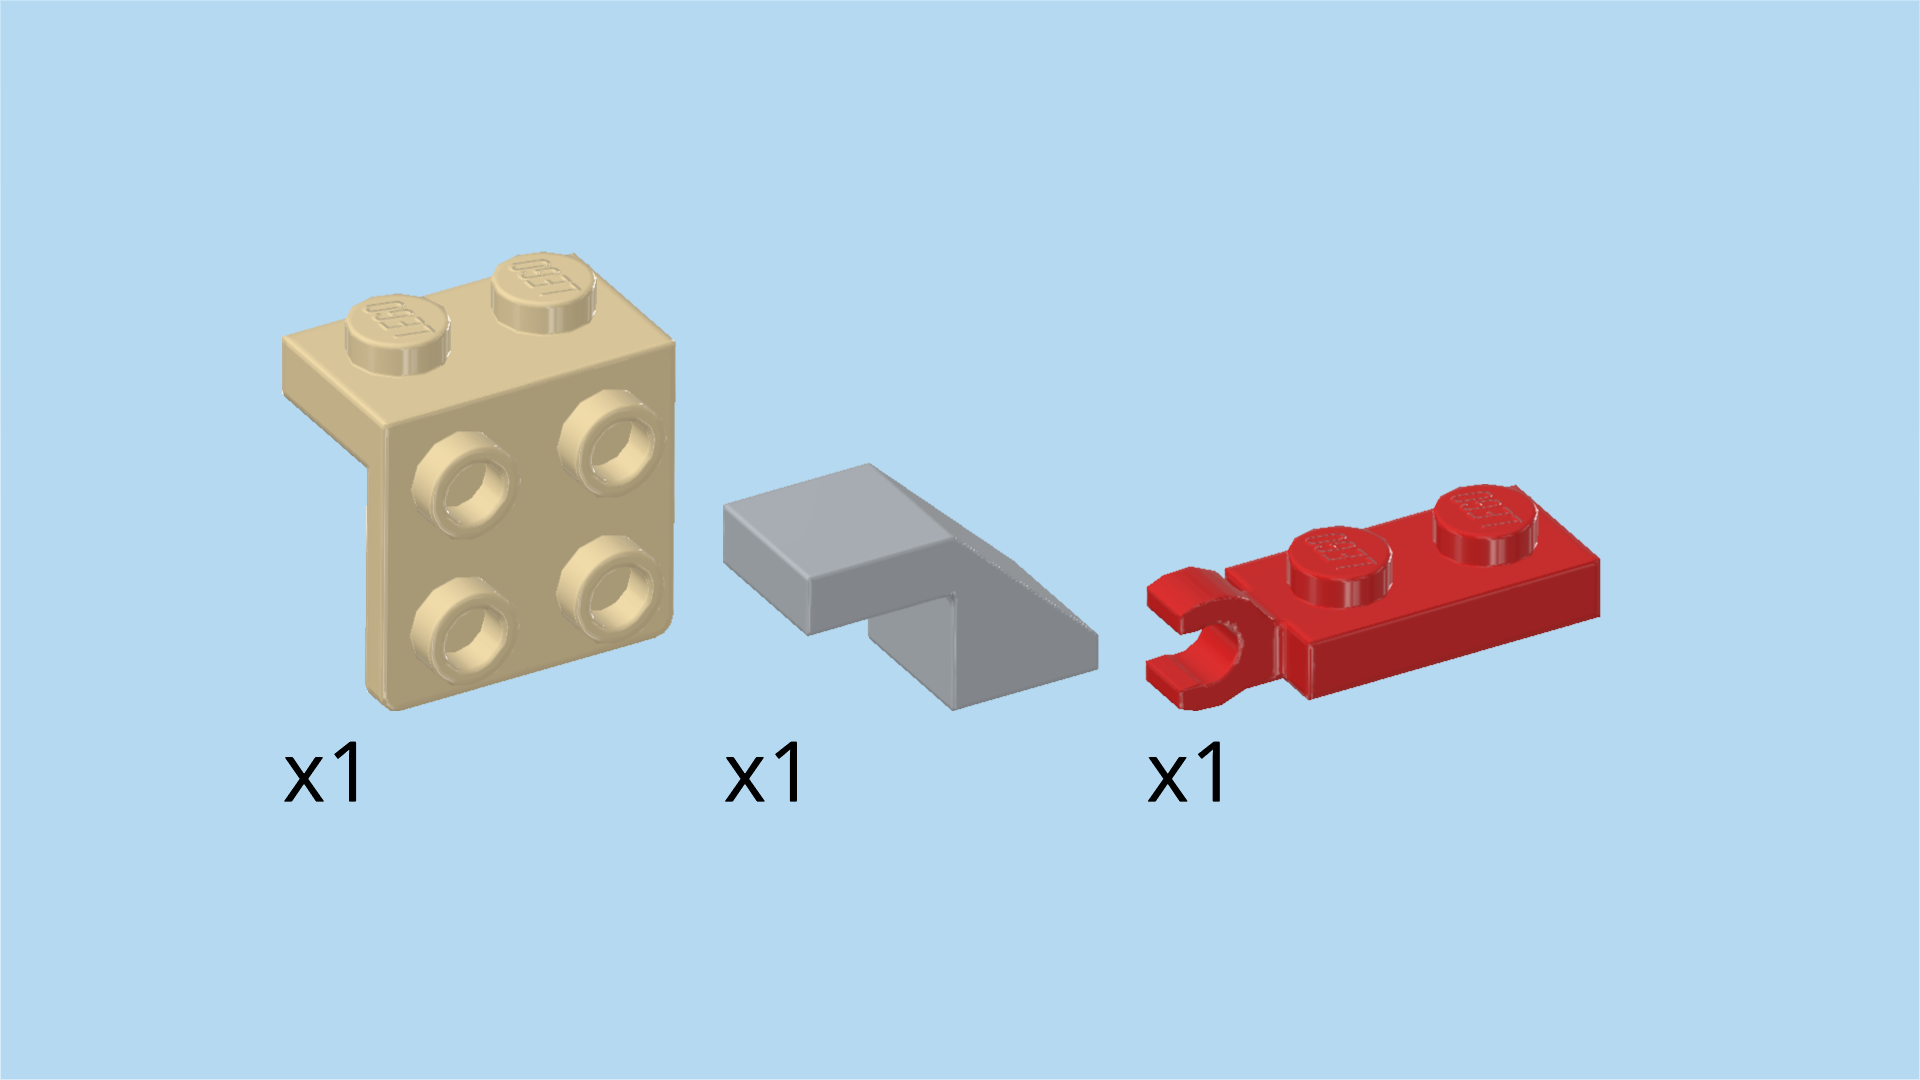
| Collect the following 2 pieces: |
| 1 mud grey plate 2x4, |
| and 1 pale ocher yellow top angle plate 1x2 - 2x2 with 4 side knobs. |
| Put the angle plate 2x2 vertically on the rightmost column, side knobs to the right. This column consists of the 2 right knobs of the rightmost round brick 2x2. |
| Put the plate 2x4 horizontally to the left of the previous piece. |
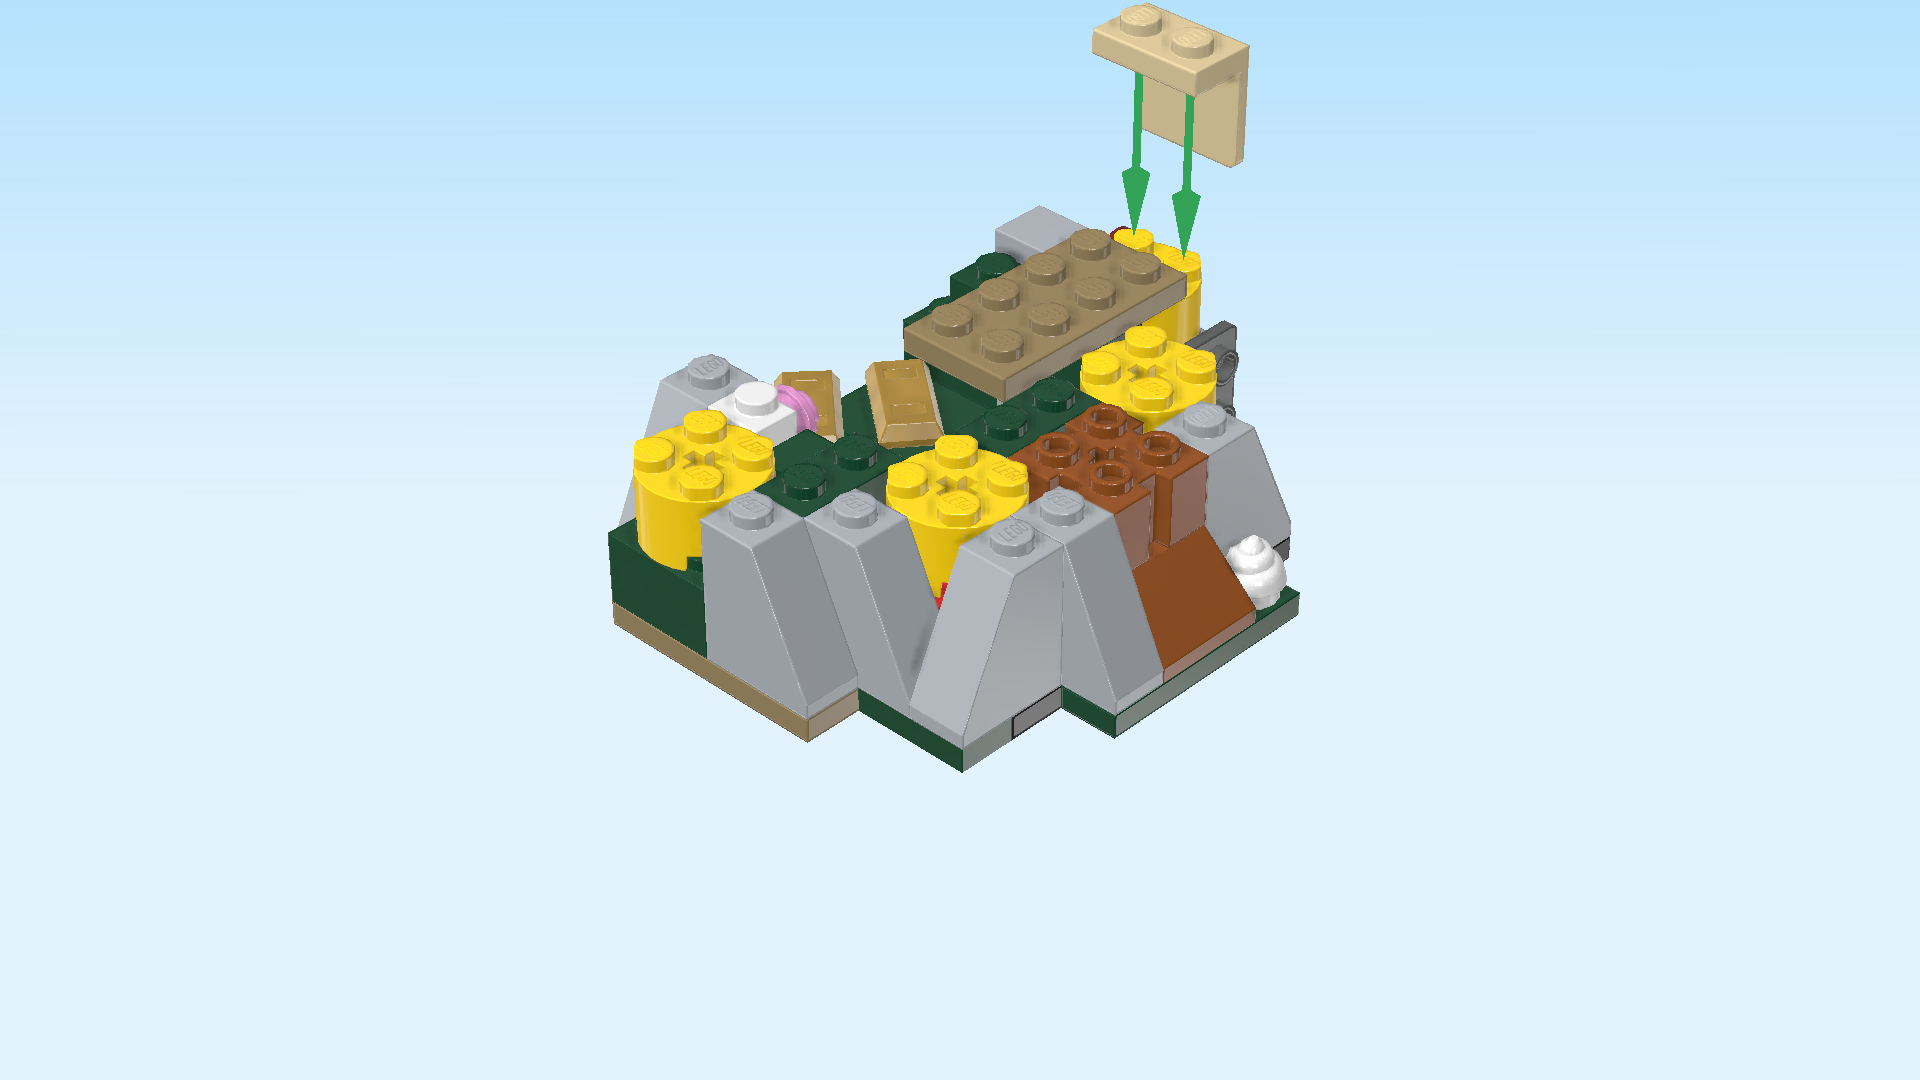
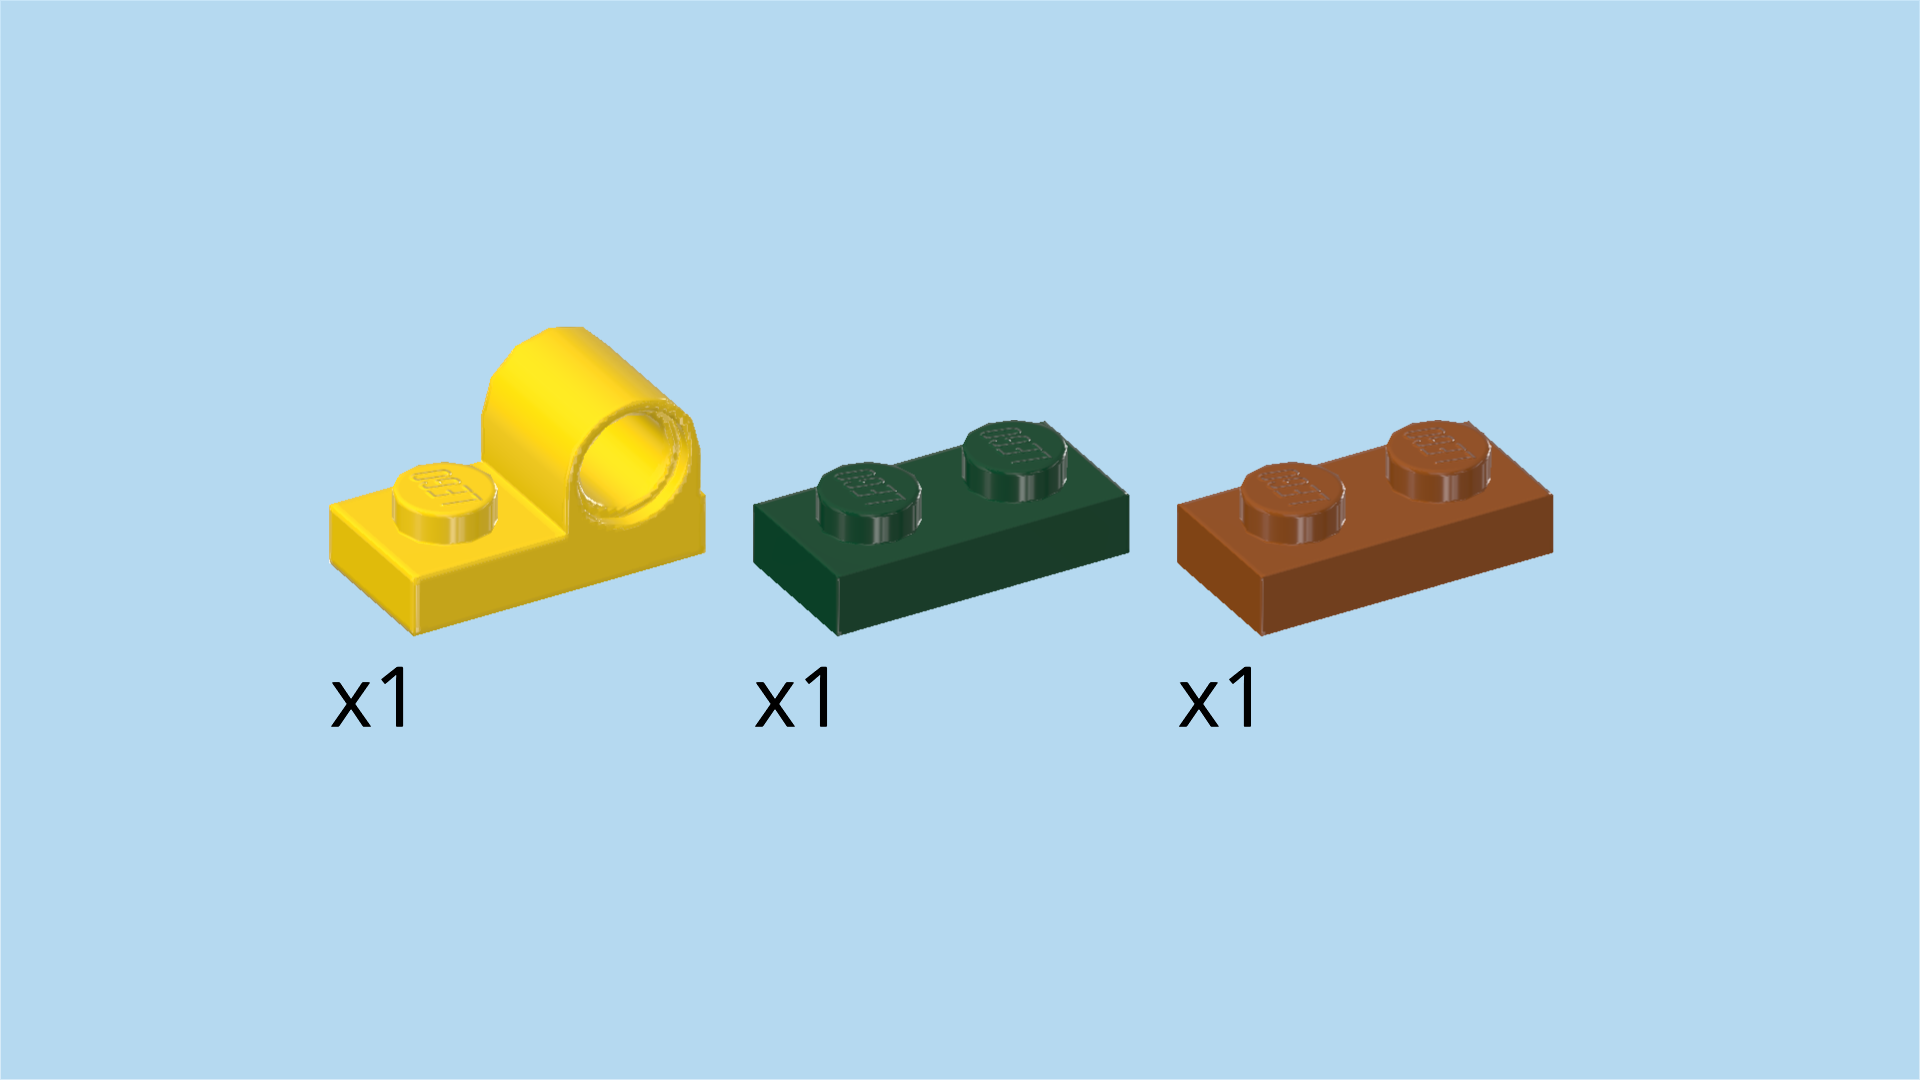
| Collect the following 4 pieces: |
| 1 reddish brown rounded plate 1x5 with middle cross hole, |
| 1 mossy green plate 1x4, |
| 1 dark green plate 1x2 with shaft on long side, |
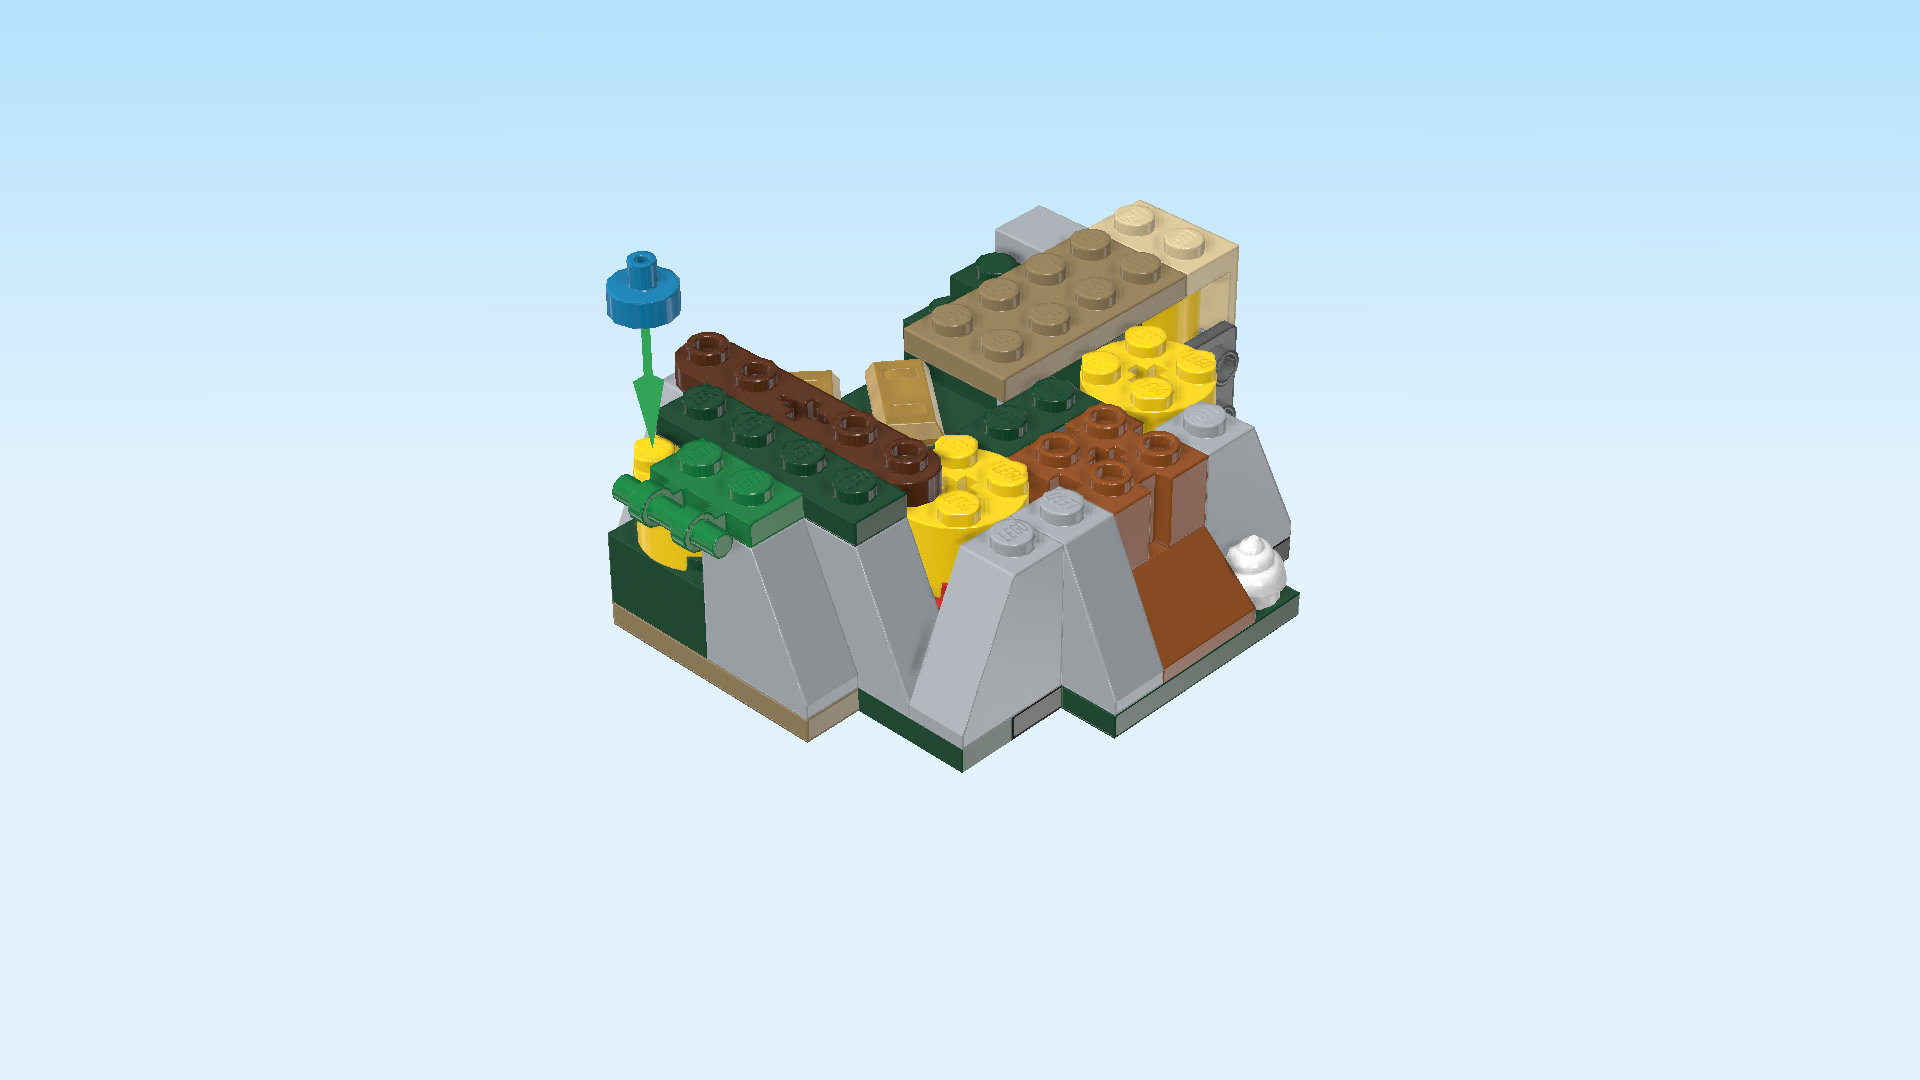
| and 1 dark azure blue round plate 1x1 with top shaft. |
| Put the plate 1x2 with side shaft vertically on the leftmost column, starting from its front edge, shaft to the left. |
| Put the round plate 1x1 with top shaft behind the previous piece. |
| Put the plate 1x4 vertically to the right of the 2 previous pieces. Make sure its back edge is aligned with the previous piece. |
| Put the rounded plate 1x5 vertically to the right of the previous piece, and make sure to align its front edge with the front edge of the previous piece. |
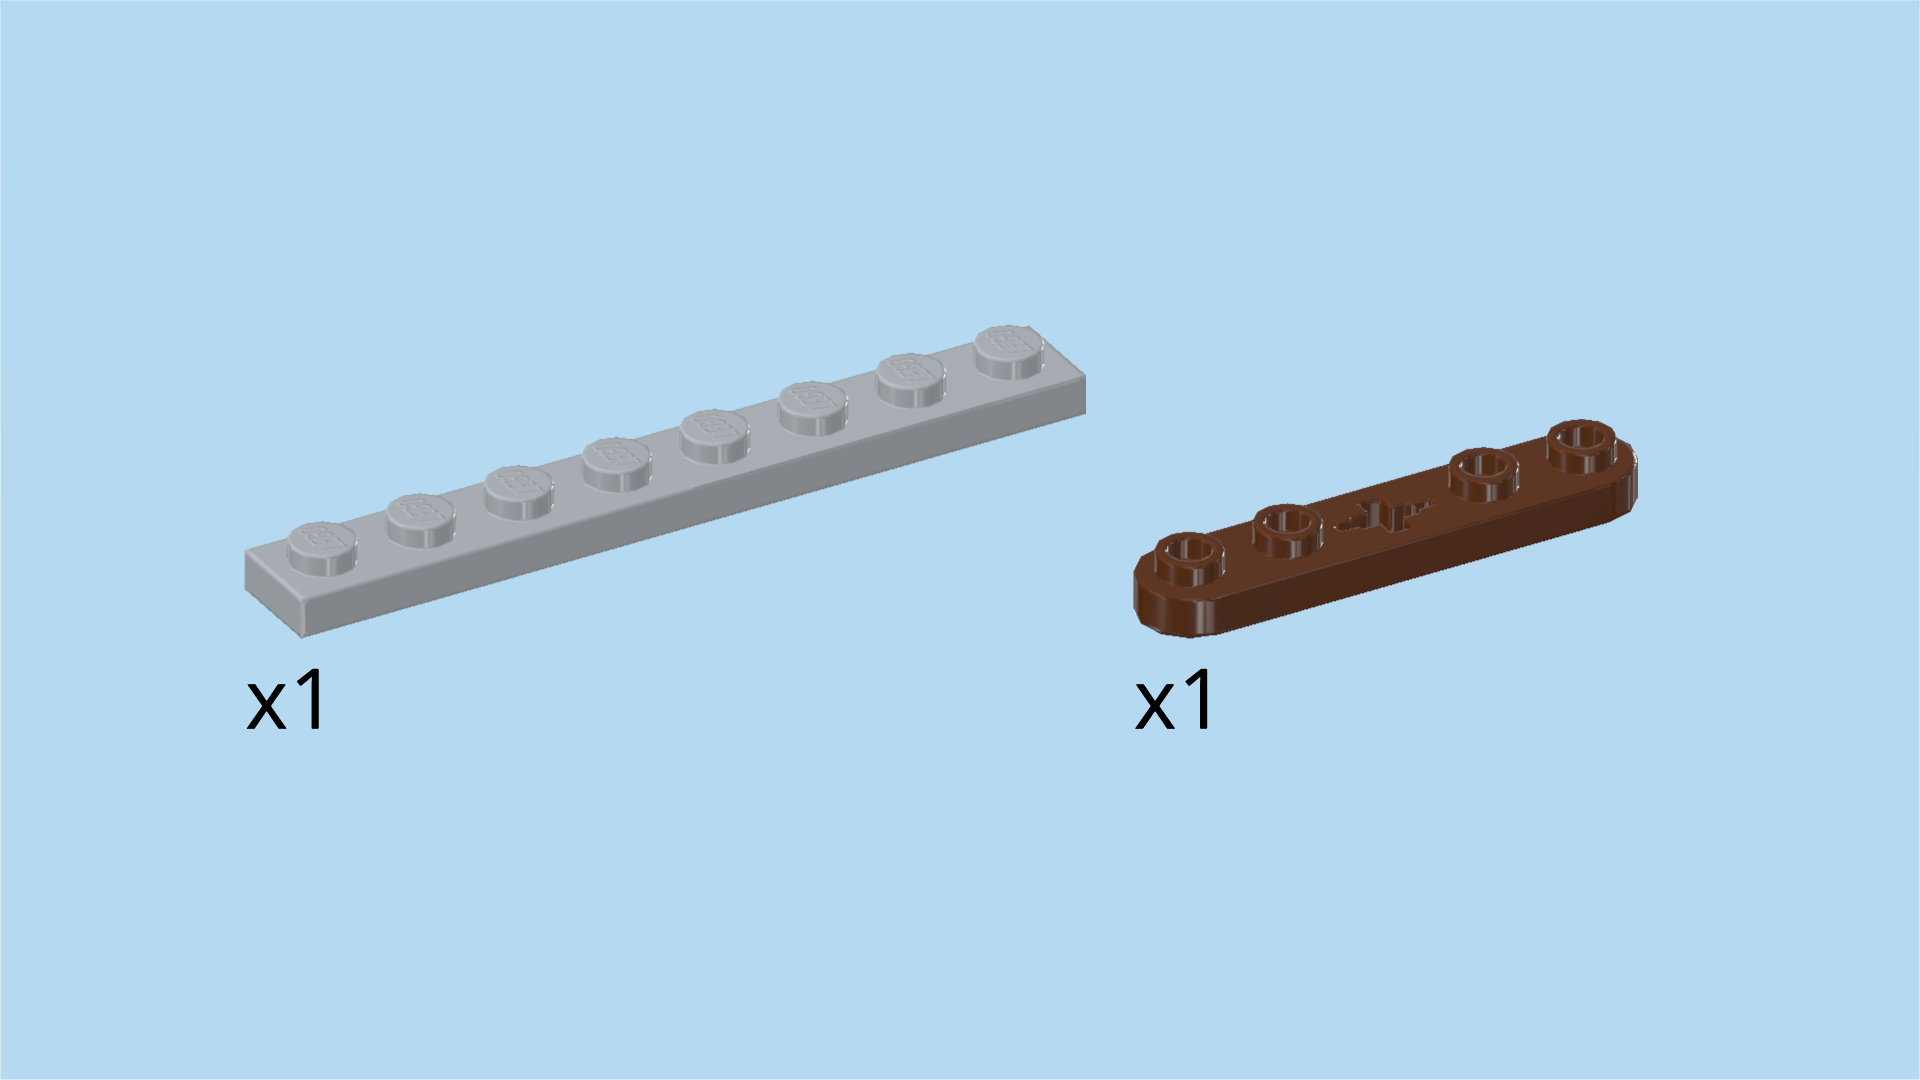
| Collect the following 2 pieces: |
| another reddish brown rounded plate 1x5 with middle cross hole, |
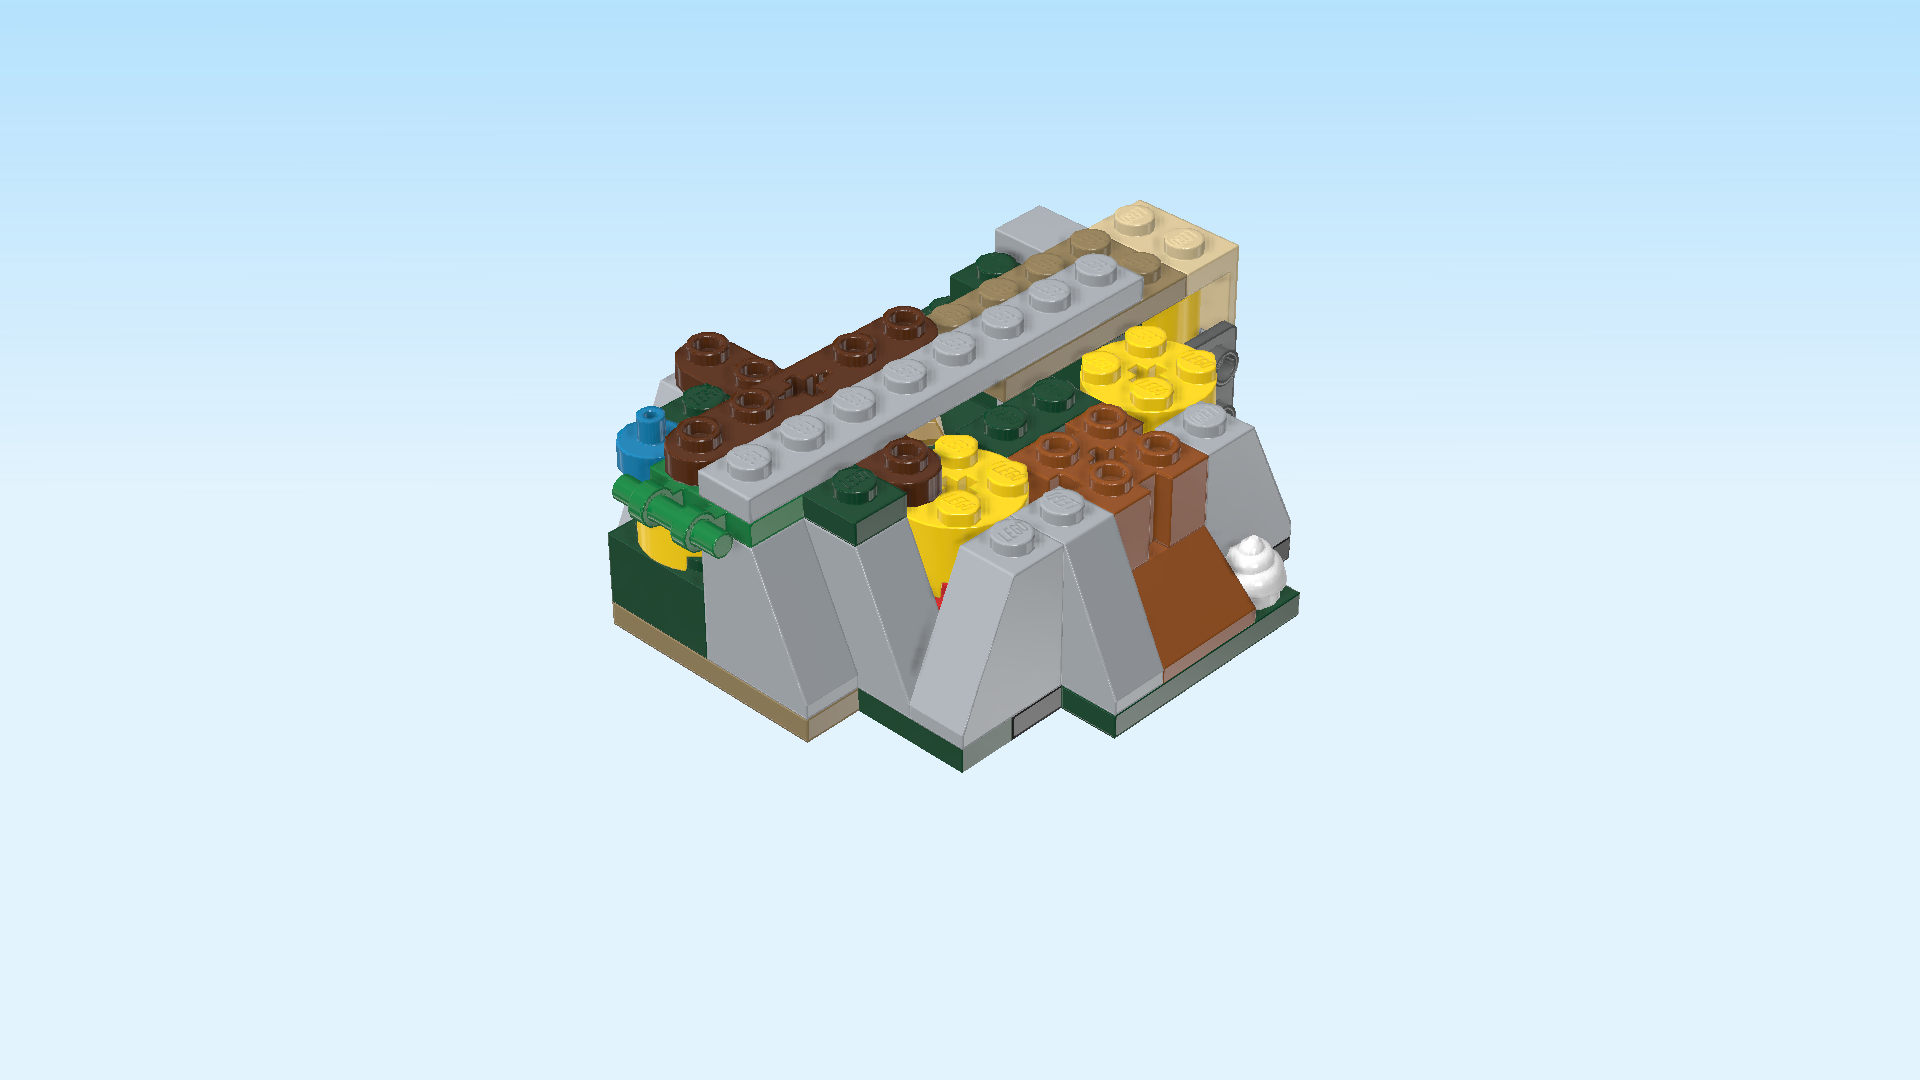
| and 1 medium stone grey plate 1x8. |
| Mount the plate 1x8 horizontally across the previous pieces: Put its leftmost knob on the frontmost knob of the leftmost column, plate extending towards the right. |
| Put the rounded plate 1x5 horizontally behind the previous piece, starting from the left edge. |
| Collect the following 3 pieces: |
| 1 mossy green plate 1x2, |
| 1 light purple round plate 1x1, |
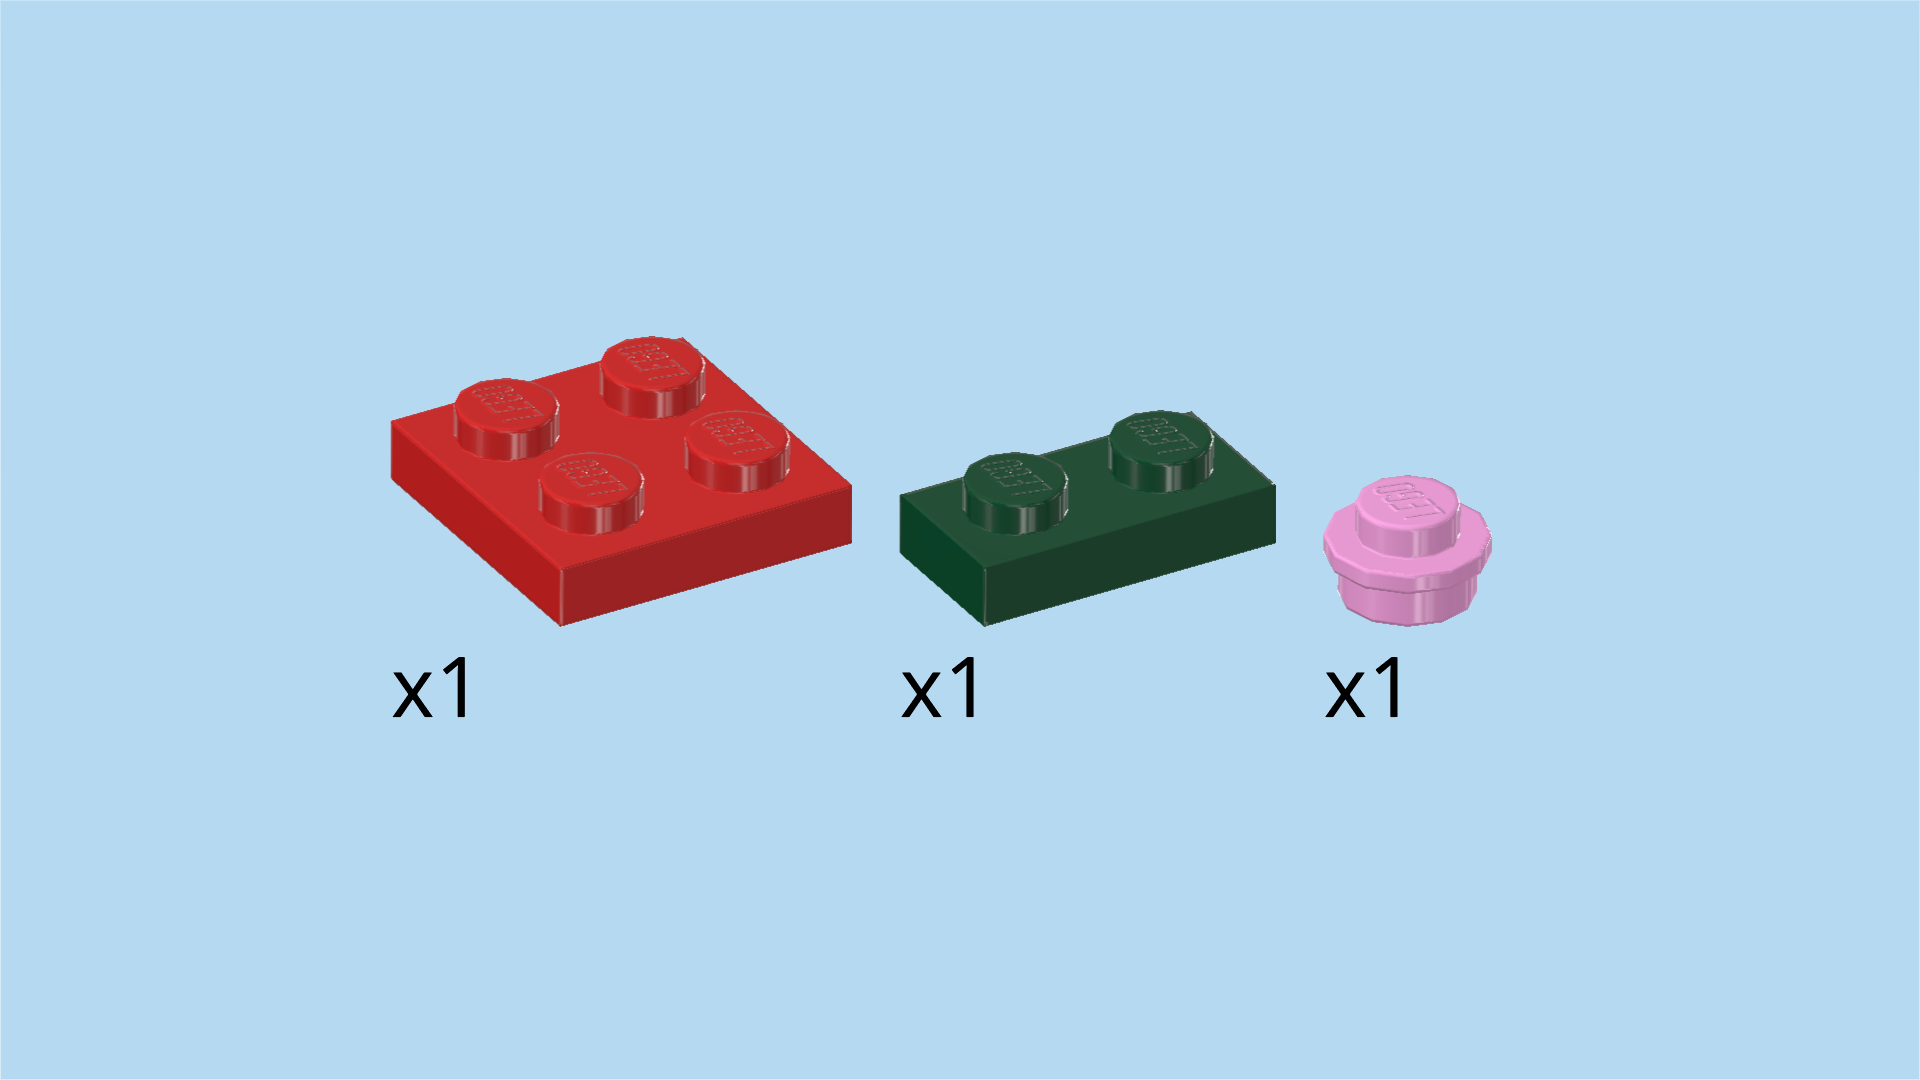
| and 1 bright red plate 2x2. |
| Put the round plate 1x1 to the right of the previous piece. |
| Put the plate 1x2 horizontally to the right of the previous piece. |
| Put the plate 2x2 to the right of the previous piece and the plate 1x8. |
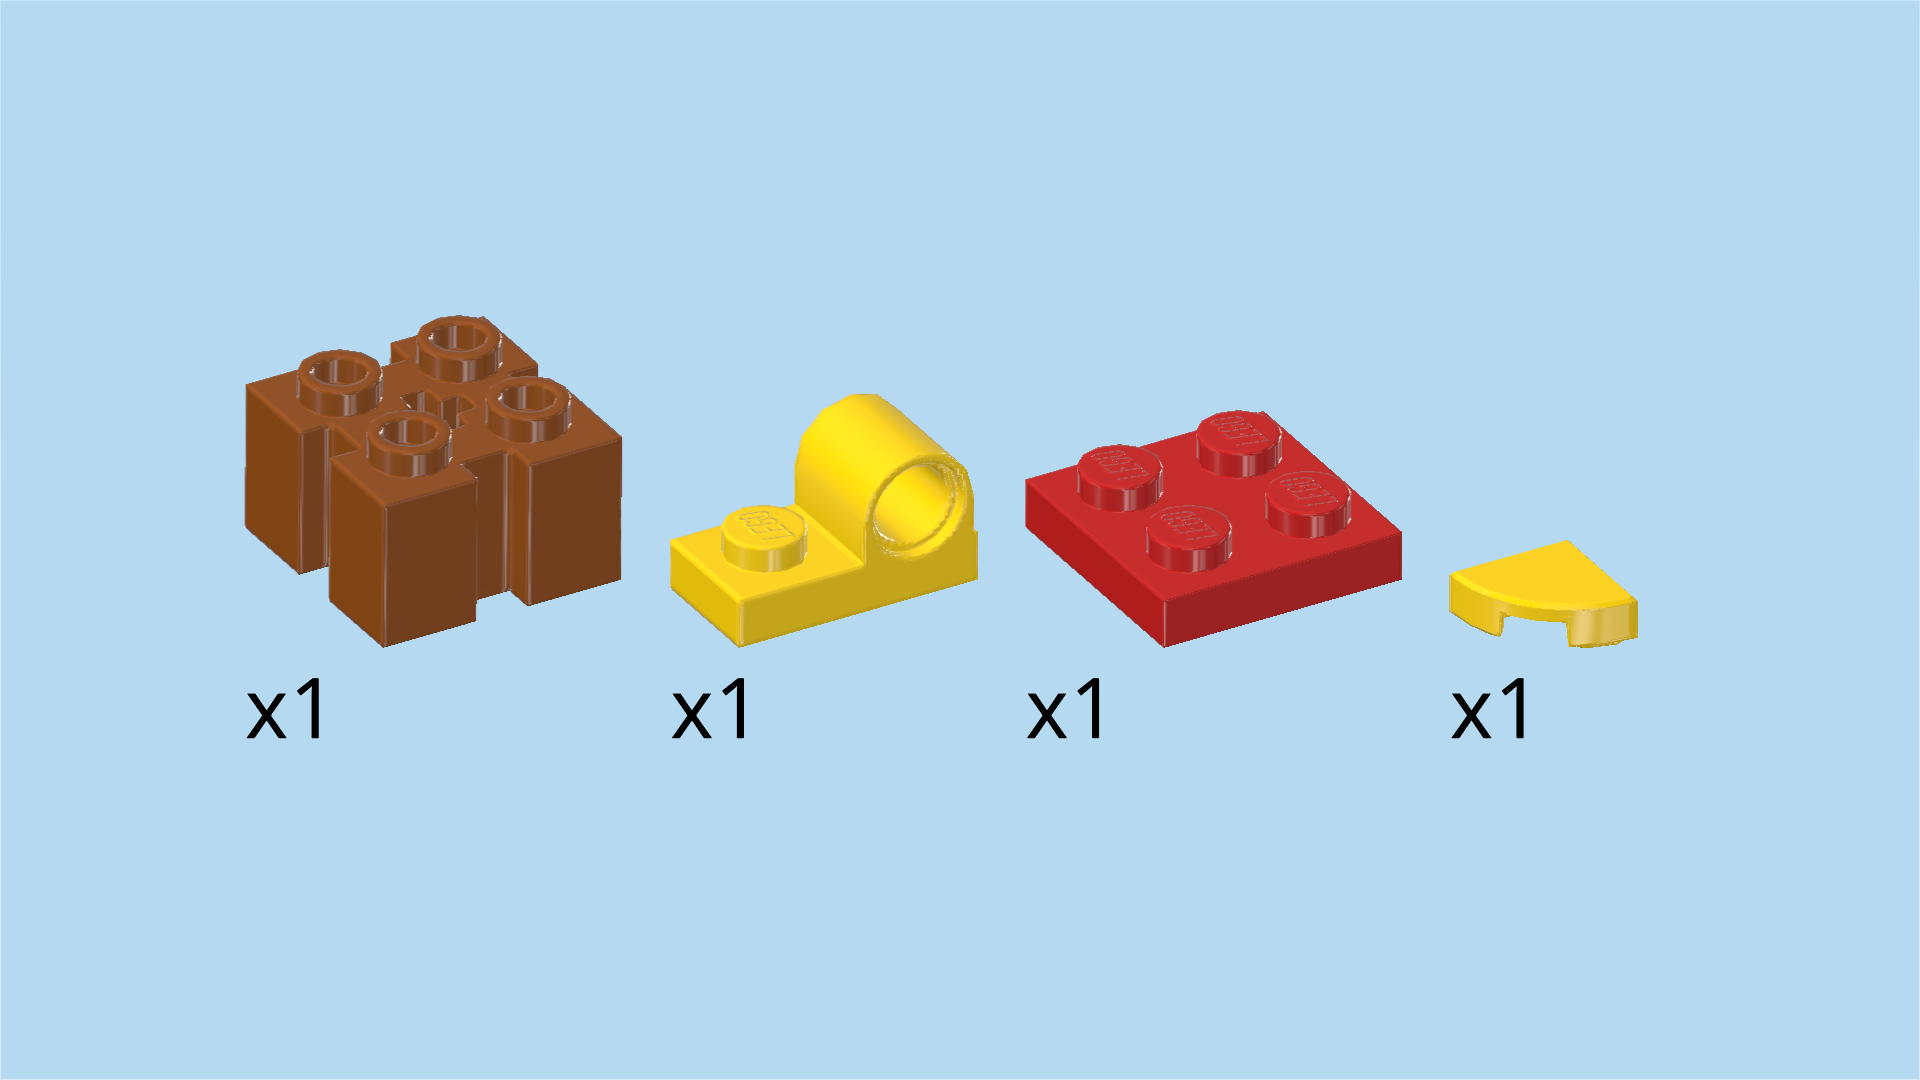
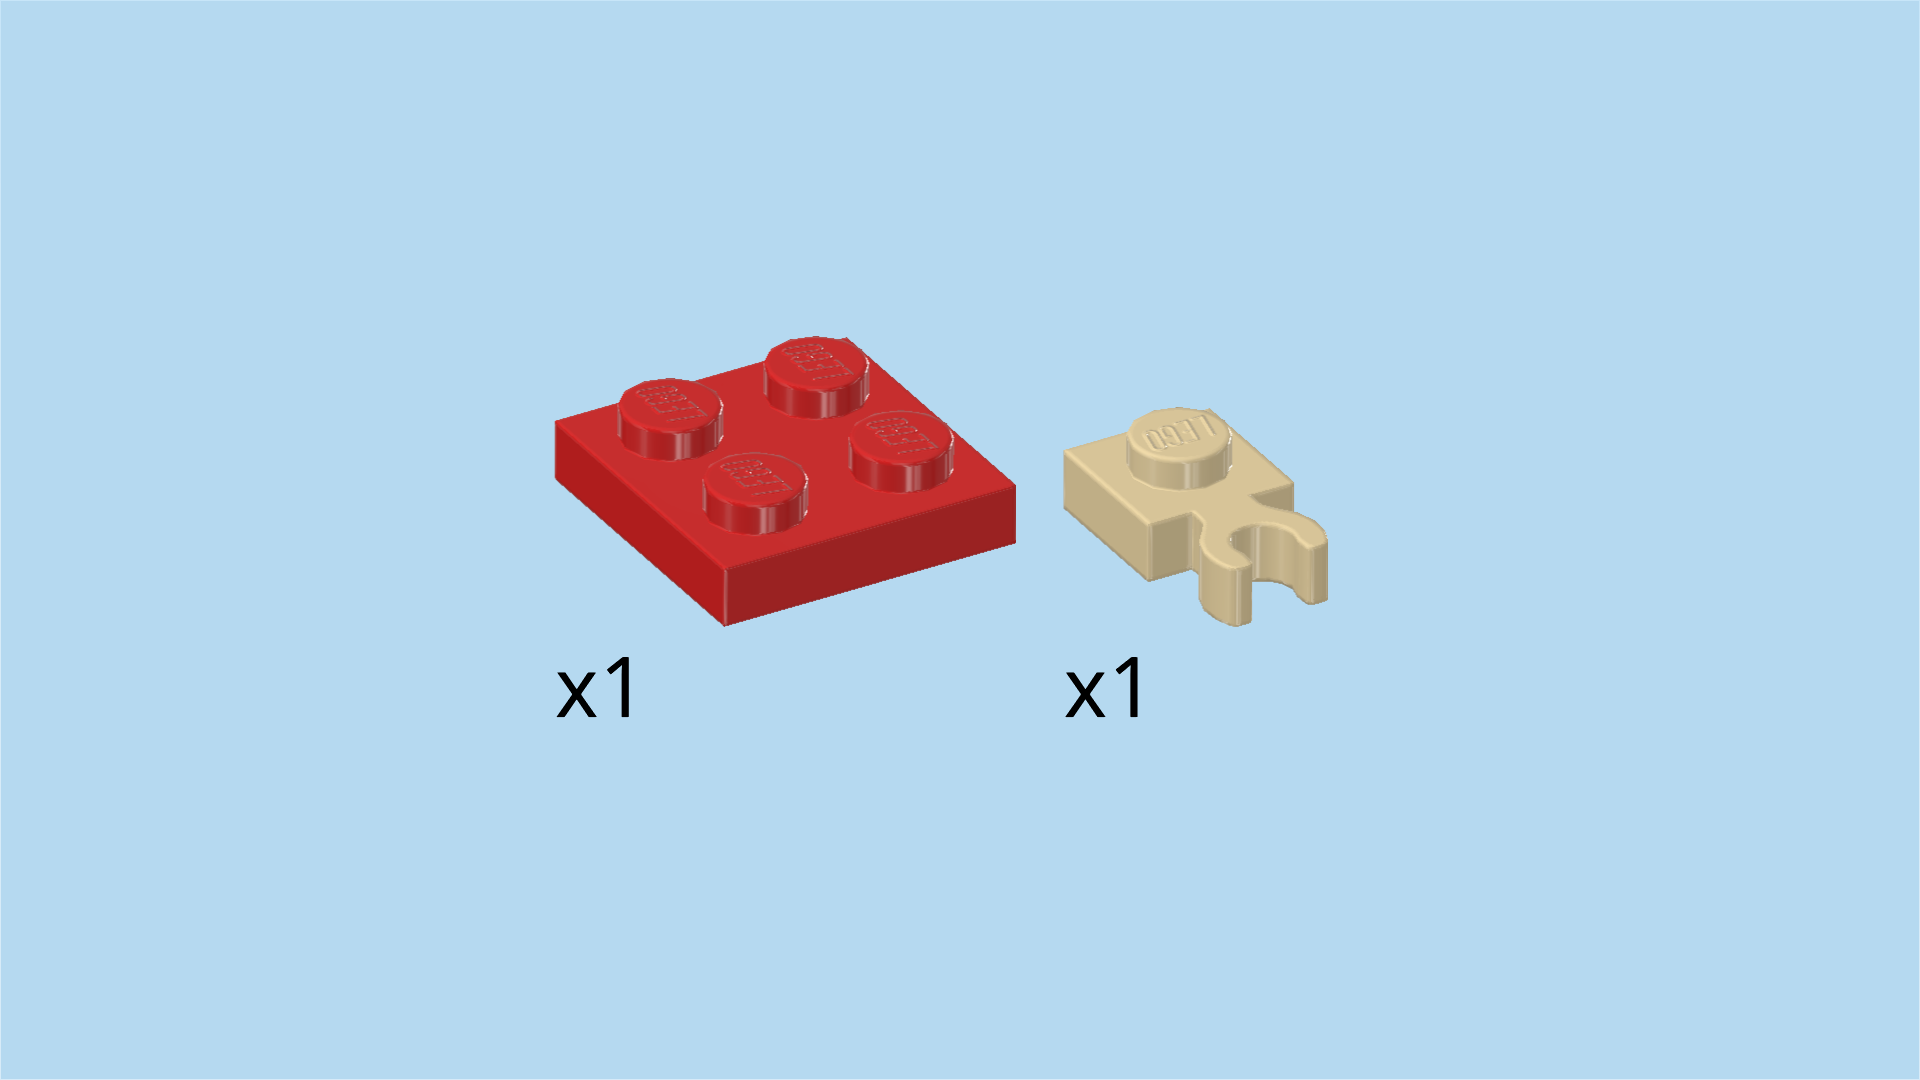
| Collect the following 4 pieces: |
| 1 bright red plate 2x2, |
| 1 dark orange brick 2x2 with 4 side grooves and cross hole, |
| 1 bright yellow quarter-circle tile 1x1, |
| and 1 bright yellow plate 1x2 with top tube. |
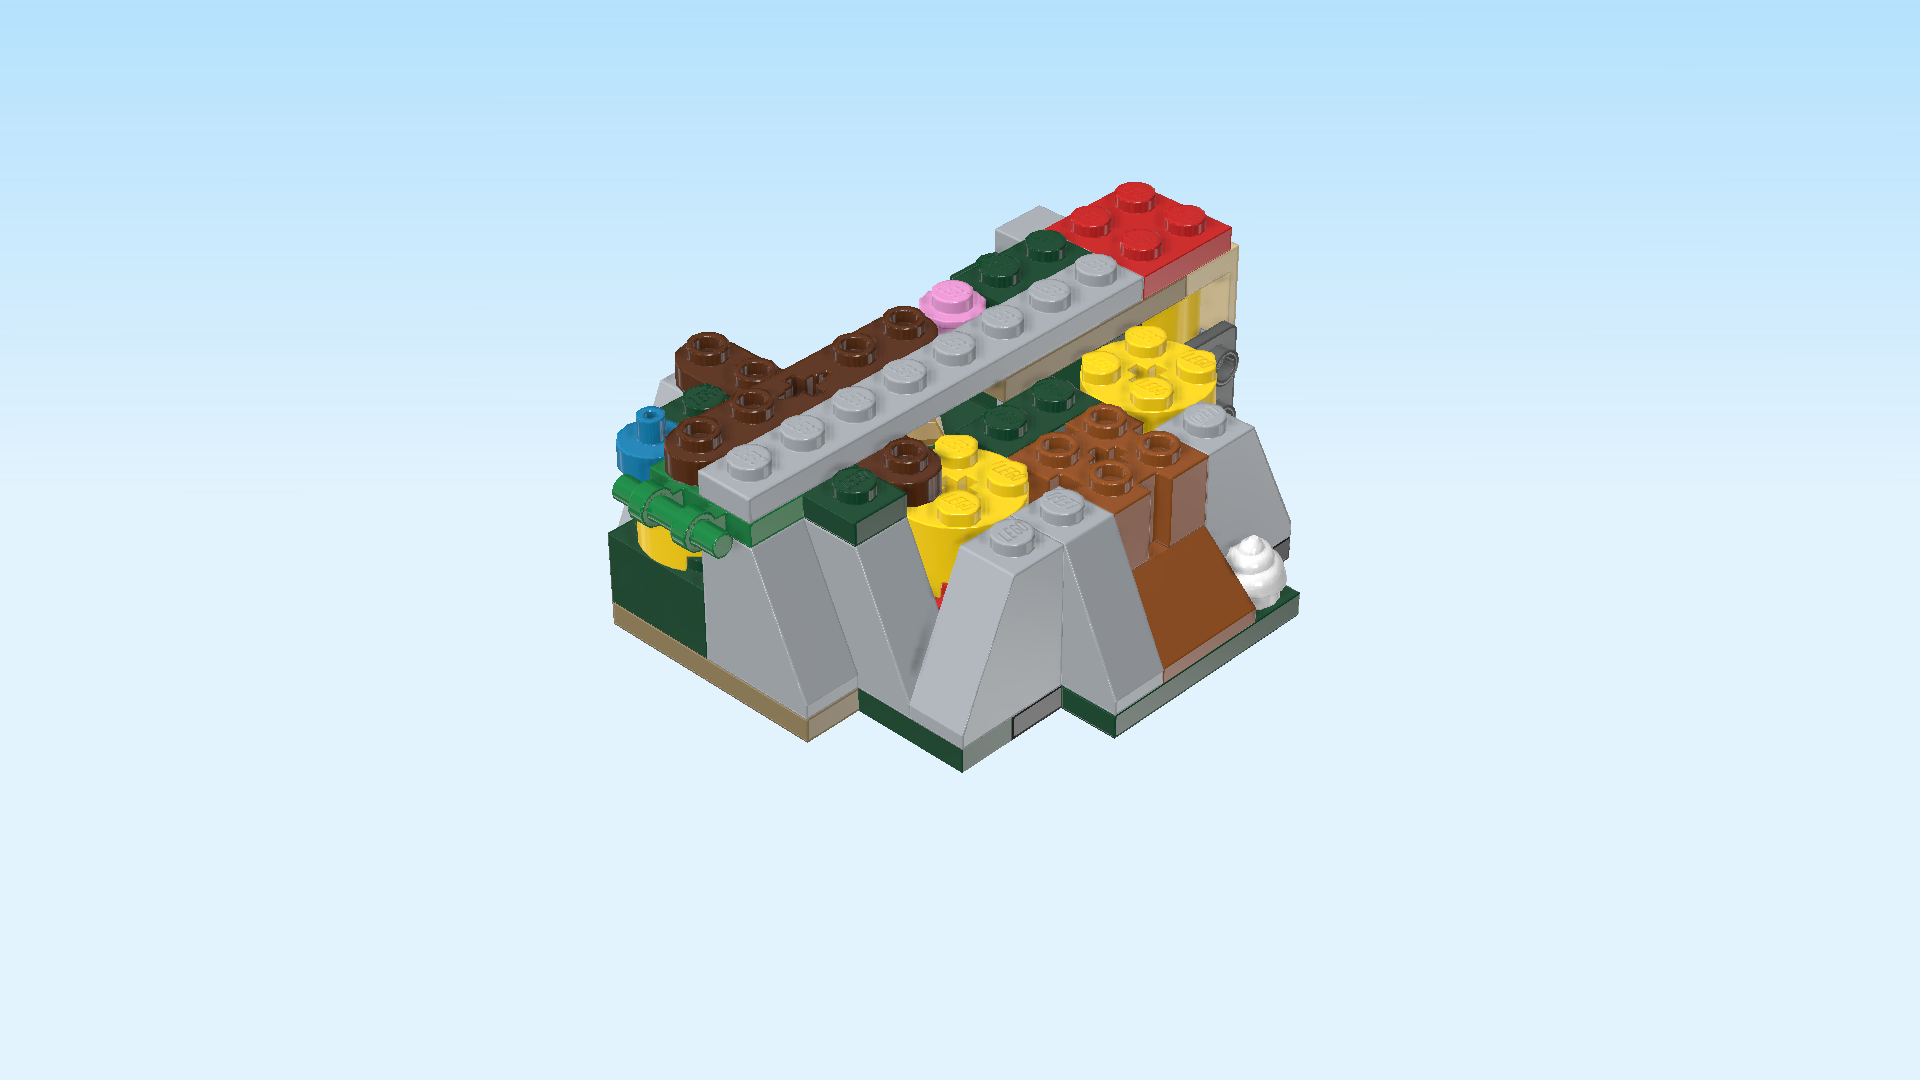
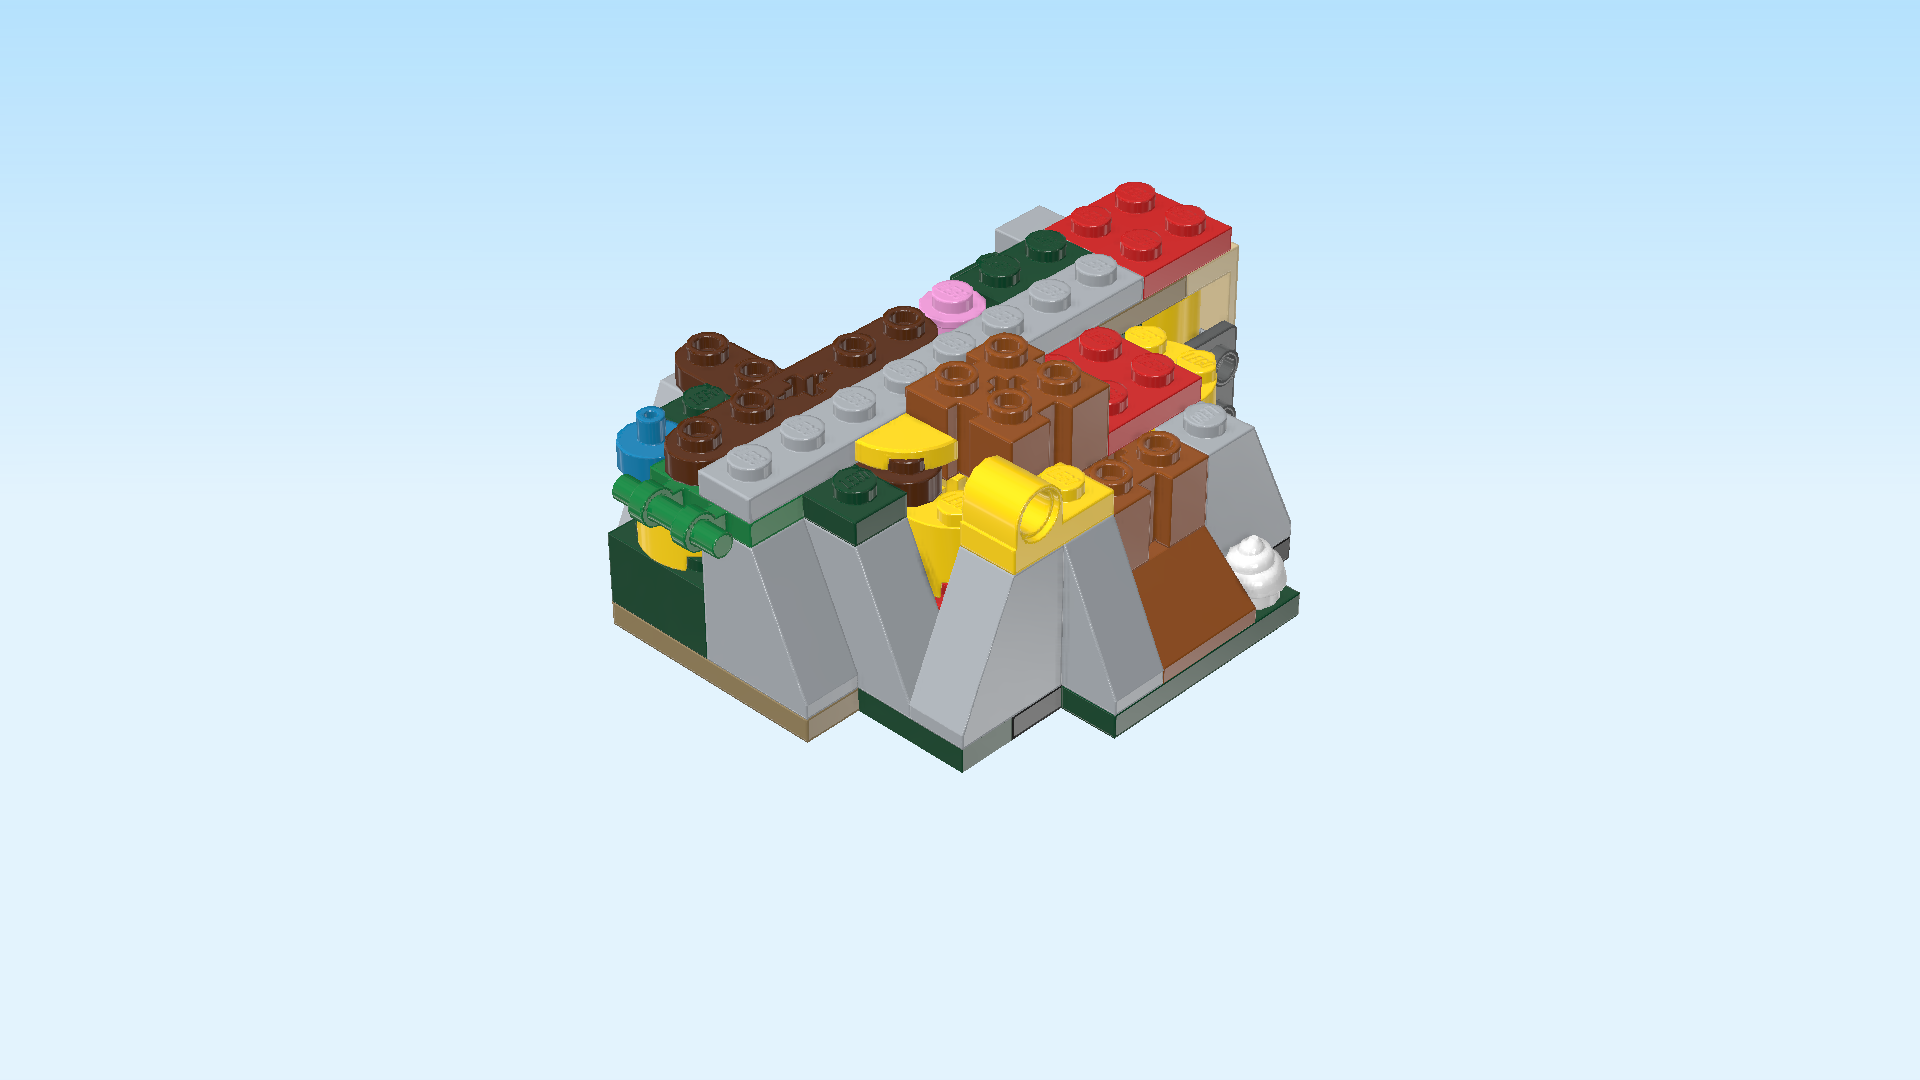
| Put the plate 1x2 with top tube horizontally on the frontmost row, starting from the left edge, tube to the left. |
| Put the brick 2x2 with side grooves behind the right half of the previous piece and 2 knobs on the right. |
| Put the quarter-circle tile 1x1 to the left of the previous piece's back row, quarter circle to the front left. |
| Put the plate 2x2 to the right of the brick 2x2 with side grooves we have just mounted. |
| Collect the following 3 pieces: |
| 1 dark orange plate 1x2, |
| 1 mossy green plate 1x2, |
| and 1 bright yellow plate 1x2 with top tube. |
| Put the dark orange plate 1x2 vertically to the right of the previous piece, and the mossy green plate 1x2 horizontally in front of the previous piece. |
| Put the plate with top tube vertically on the right knob of the previously mounted plate with top tube, the current piece's top tube overhanging to the front. |
| Collect the following 3 pieces: |
| 1 medium stone grey smooth roof tile 1x1 with overhanging top tile 1x1, |
| 1 pale ocher yellow top angle plate 1x2 - 2x2 with 4 side knobs, |
| and 1 bright red plate 1x2 with vertical clasp on short side. |
| Put the roof tile 1x1 horizontally on the previous piece and the knob to its right, top tile to the left. |
| Put the angle plate 2x2 horizontally on the row above the 4 side knobs that are already pointing to the front on the right edge of the structure, 4 side knobs also pointing to the front. |
| Put the plate with clasp horizontally behind the previous piece, clasp overhanging to the right. |
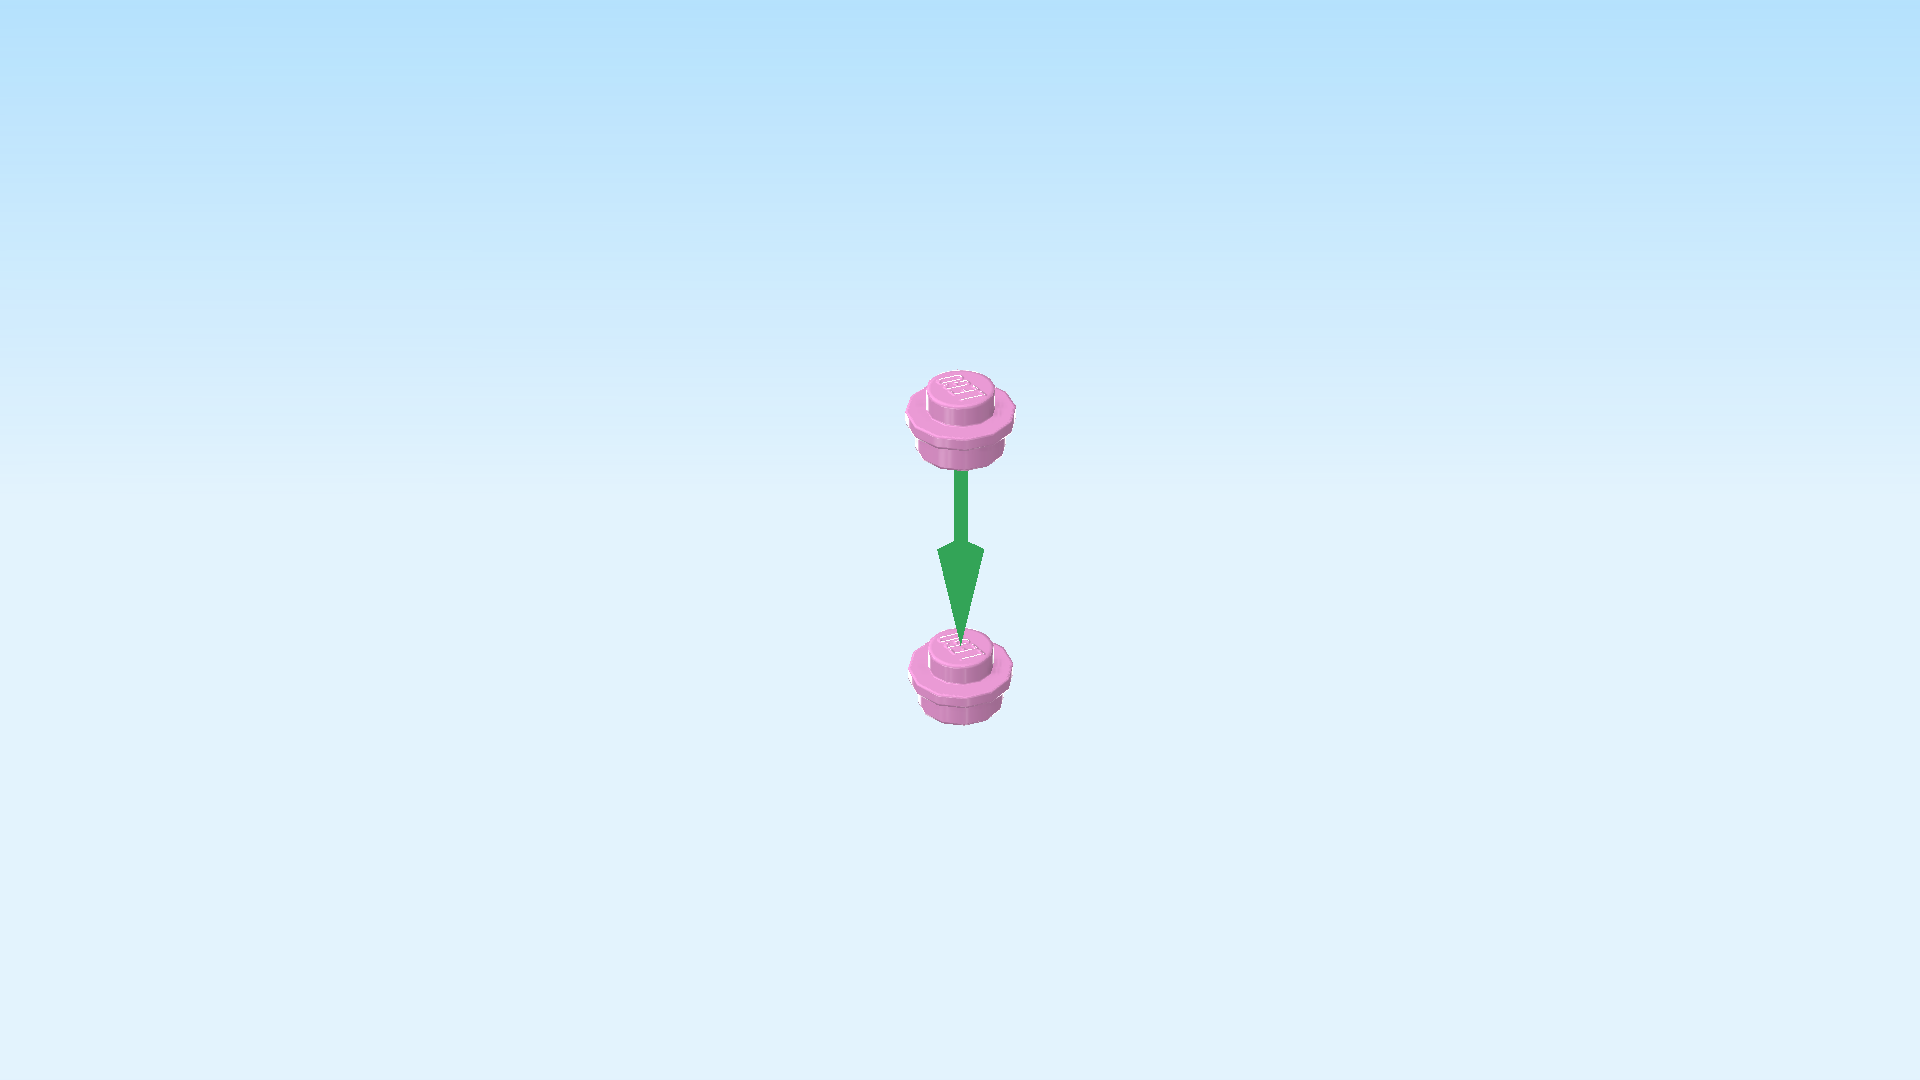
| Find 2 light purple round plates 1x1. |
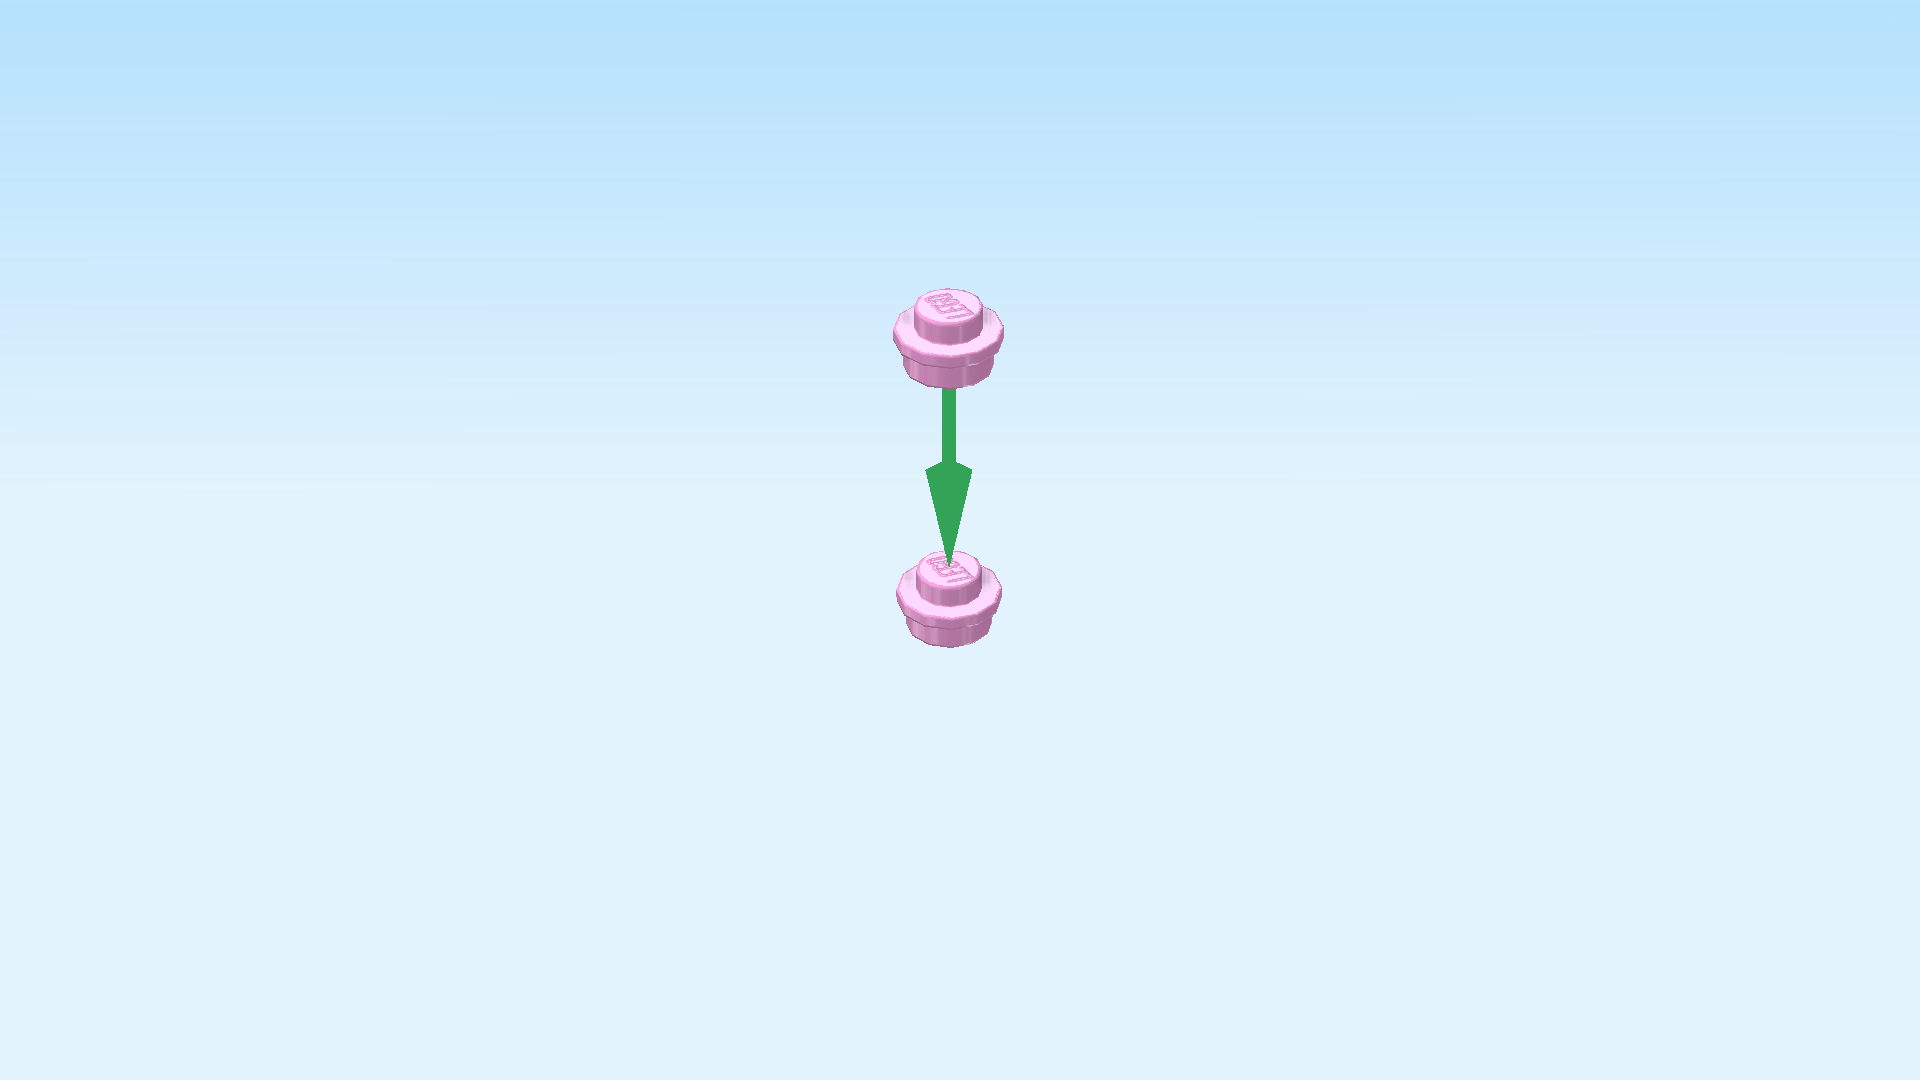
| Stack them on top of each other. |
| Put the stacked round plates upright on the left knob of the 2 bottommost side knobs pointing to the front. |
| Collect the following 2 pieces: |
| 1 bright red plate 2x2, |
| and 1 pale ocher yellow plate 1x1 with horizontal side clasp. |
| Put the plate 2x2 upright on the 2 rows above the previous piece. This means this plate is mounted on the 4 middle knobs of the 8 side knobs pointing to the front. |
| Put the plate 1x1 with clasp upright above the right half of the previous piece, clasp overhanging to the right. |
| Collect the following 4 pieces: |
| 3 medium nougat brown plates 1x2 with 1 knob, |
| and 1 medium stone grey smooth roof tile 1x1x⅔. |
| Put the roof tile 1x1 on the right knob of the 2 bottommost side knobs pointing to the front, slope to the bottom. |
| Put 1 plate 1x2 upright horizontally on the row above the previous piece. |
| Put 1 plate 1x2 upright vertically above the right half of the previous piece. |
| Put the last plate 1x2 upright vertically on the front column of the side knobs pointing to the right. |
| Find 4 light purple round plates 1x1. |
| Put them on the remaining side knobs pointing to the front except the knob in the bottom left corner (since this knob already is a light purple round tile 1x1) . |
| Find another 2 light purple round plates 1x1. |
| Stack them on top of each other. |
| Put the stack upright on the top back knob of the side knobs pointing to the right. |
| Again, find 2 light purple round plates 1x1. |
| Put them on the 2 remaining side knobs pointing to the right, leaving the stack of round plates mounted in the previous step empty. |
| Find another 4 light purple round plates 1x1. |
| Make two more stacks, each consisting of 2 round plates 1x1. |
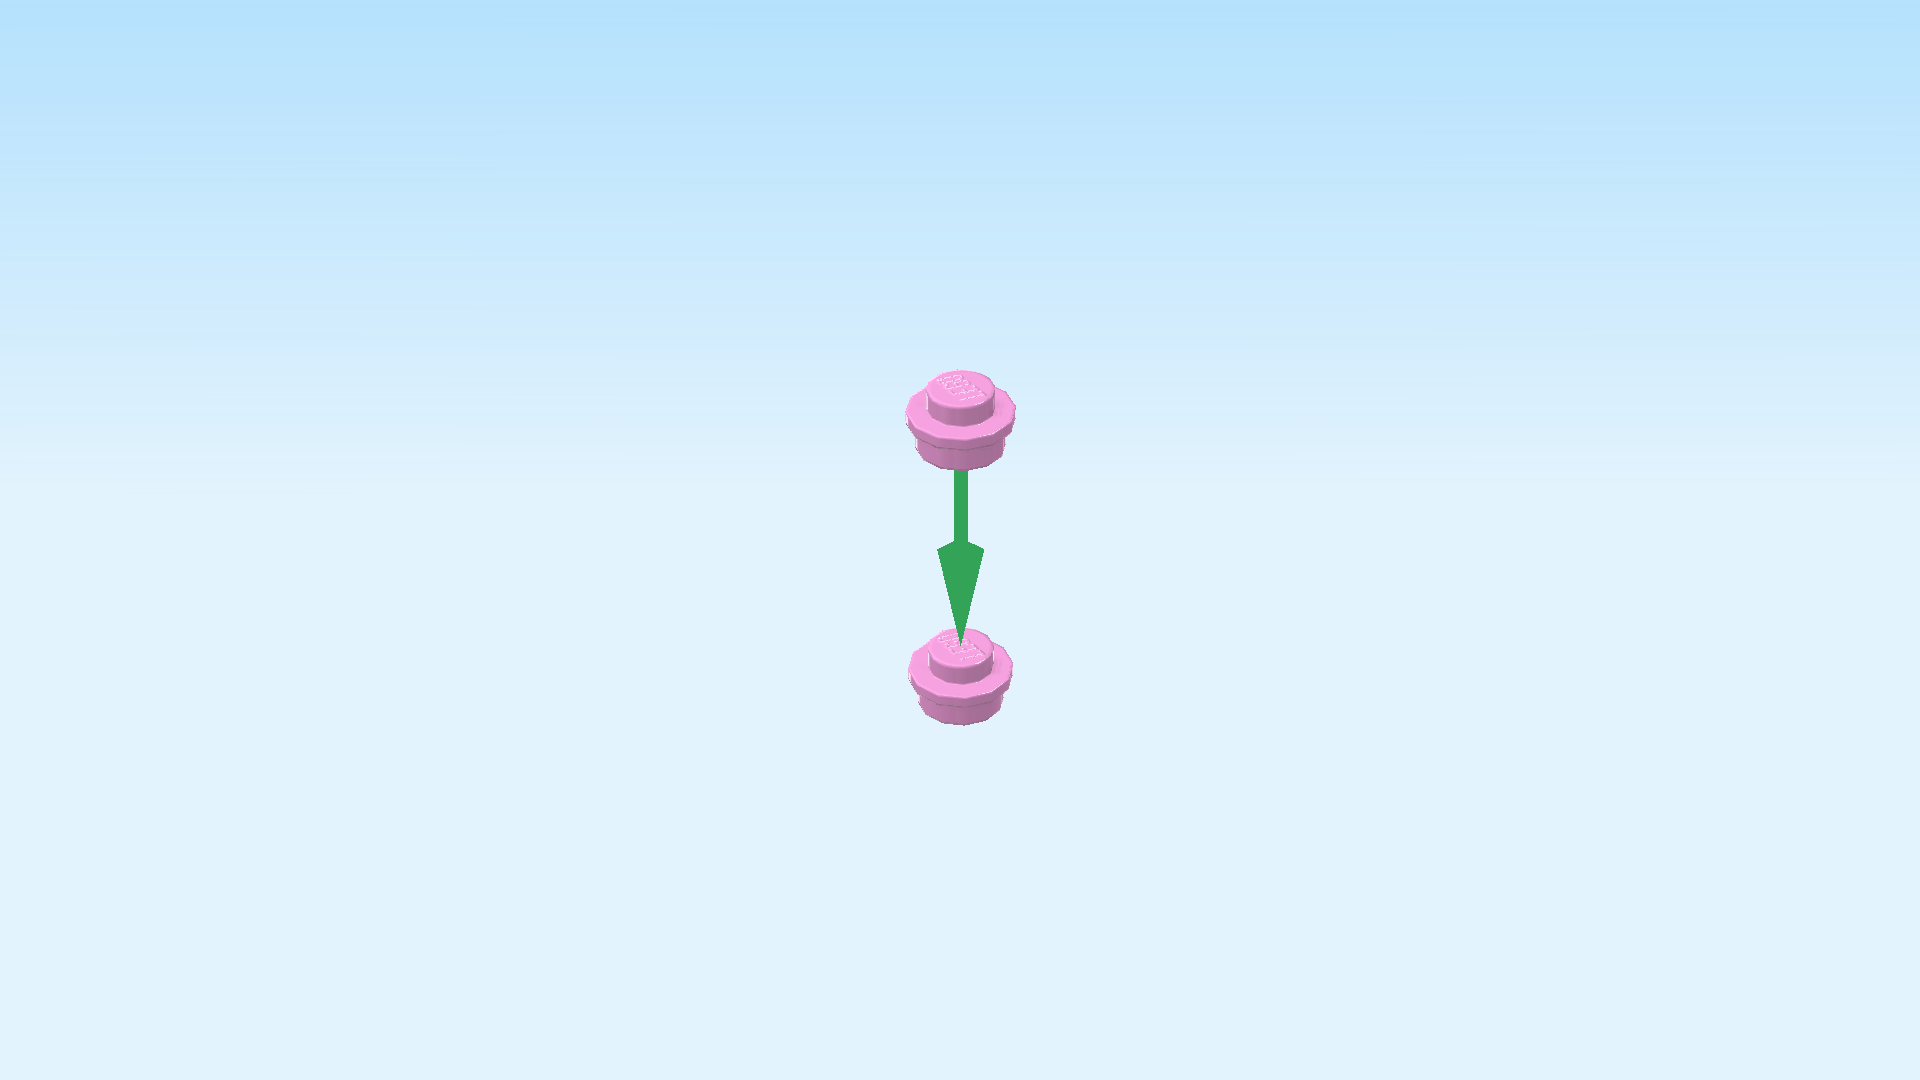
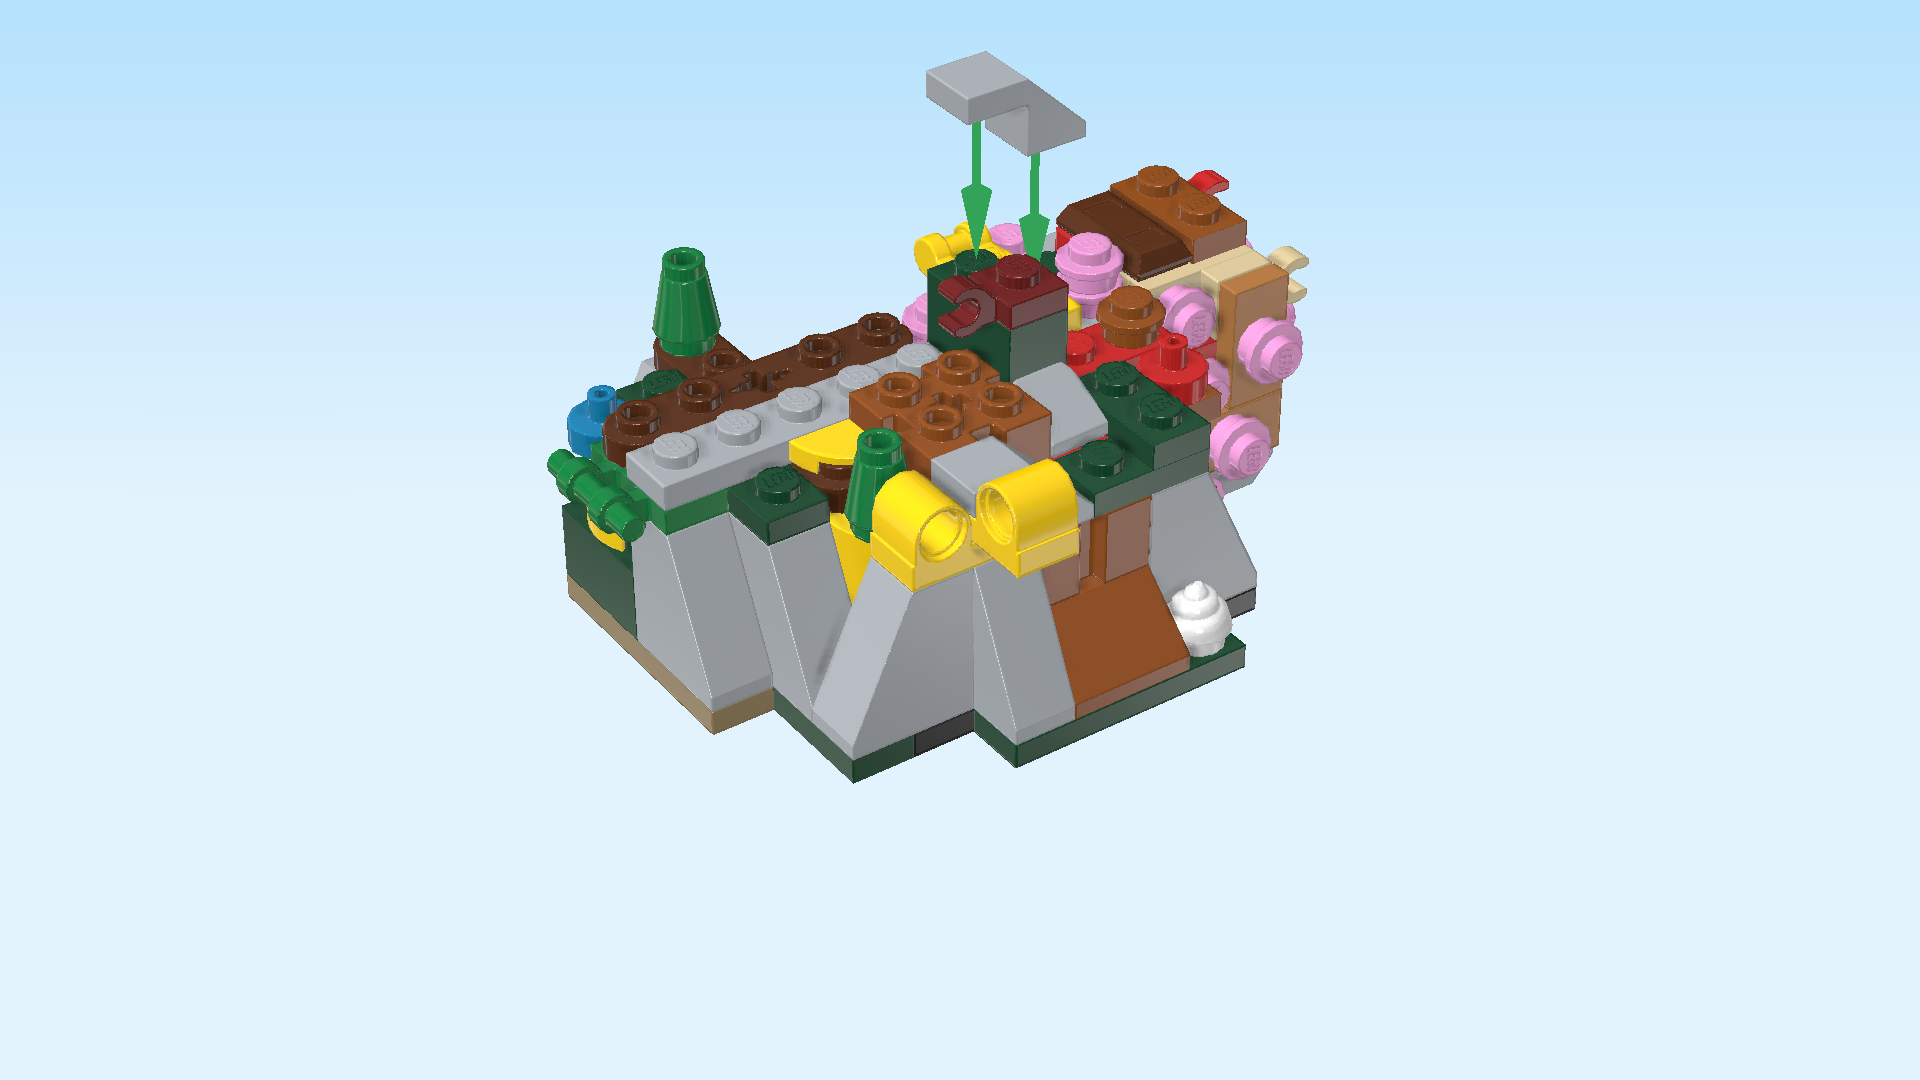
| Turn the structure from right to left. Now, the 2 plates 1x2 with top tube are at the back, and the 2 golden ingots are at the bottom front. |
| Mount 1 stack on the frontmost row on the leftmost knob. This means that it will be mounted to the right of a round plate 1x1 with top shaft. |
| Mount the second stack on the knob behind the previous stack. |
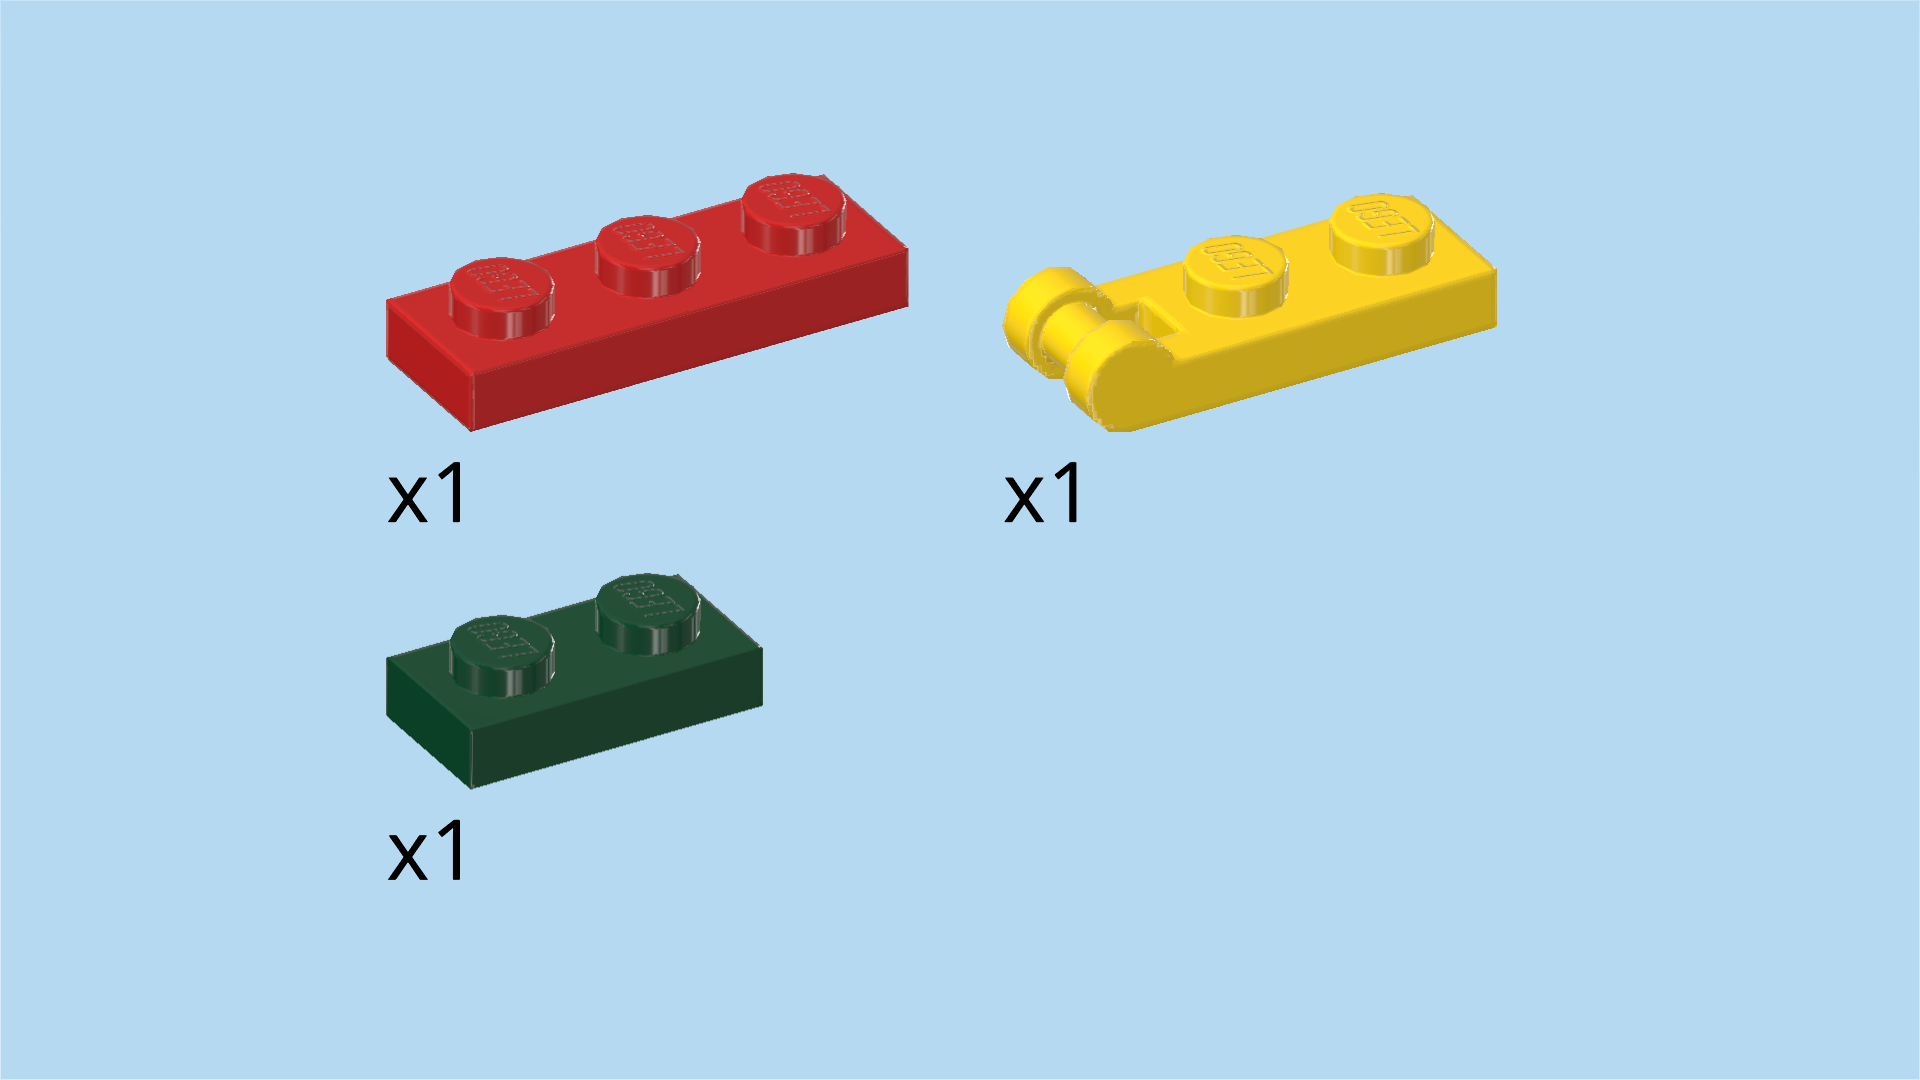
| Collect the following 3 pieces: |
| 1 bright yellow plate 1x2 with shaft on short side, |
| 1 bright red plate 1x3, |
| and 1 mossy green plate 1x2. |
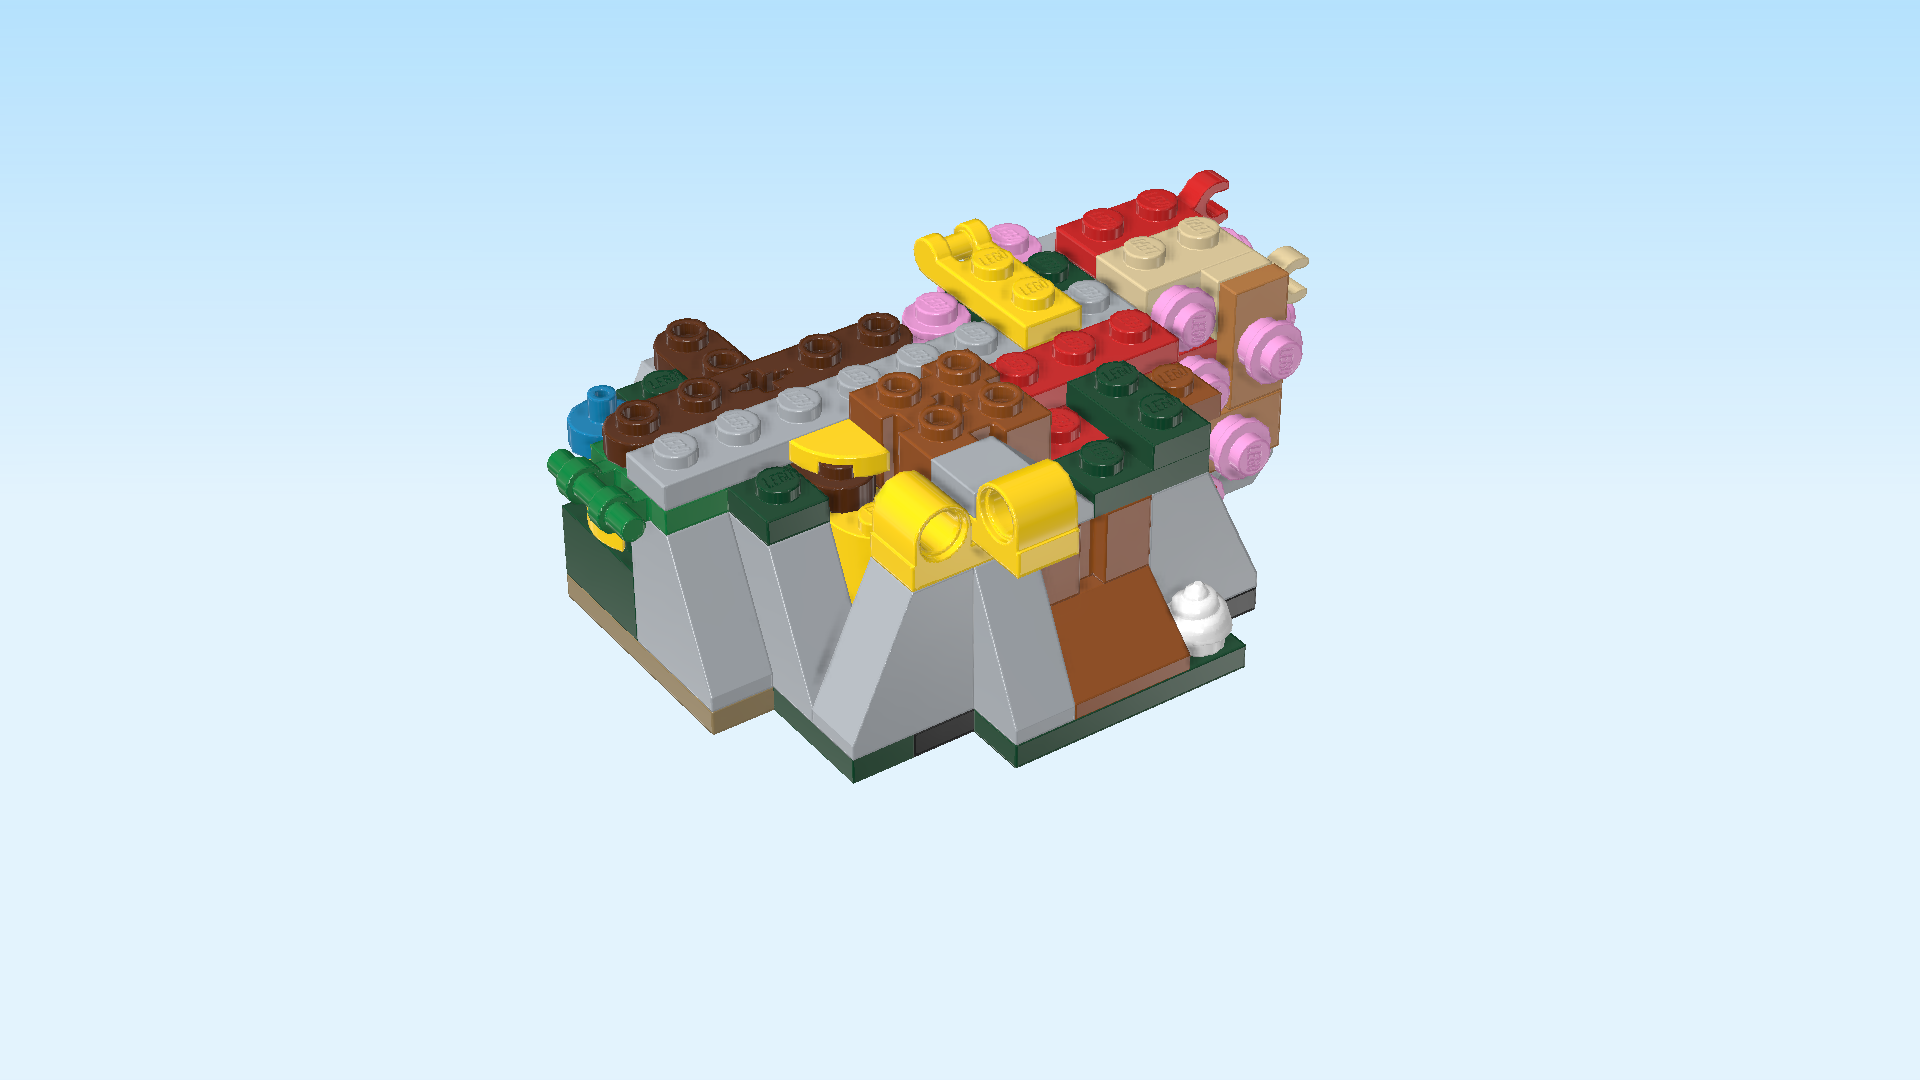
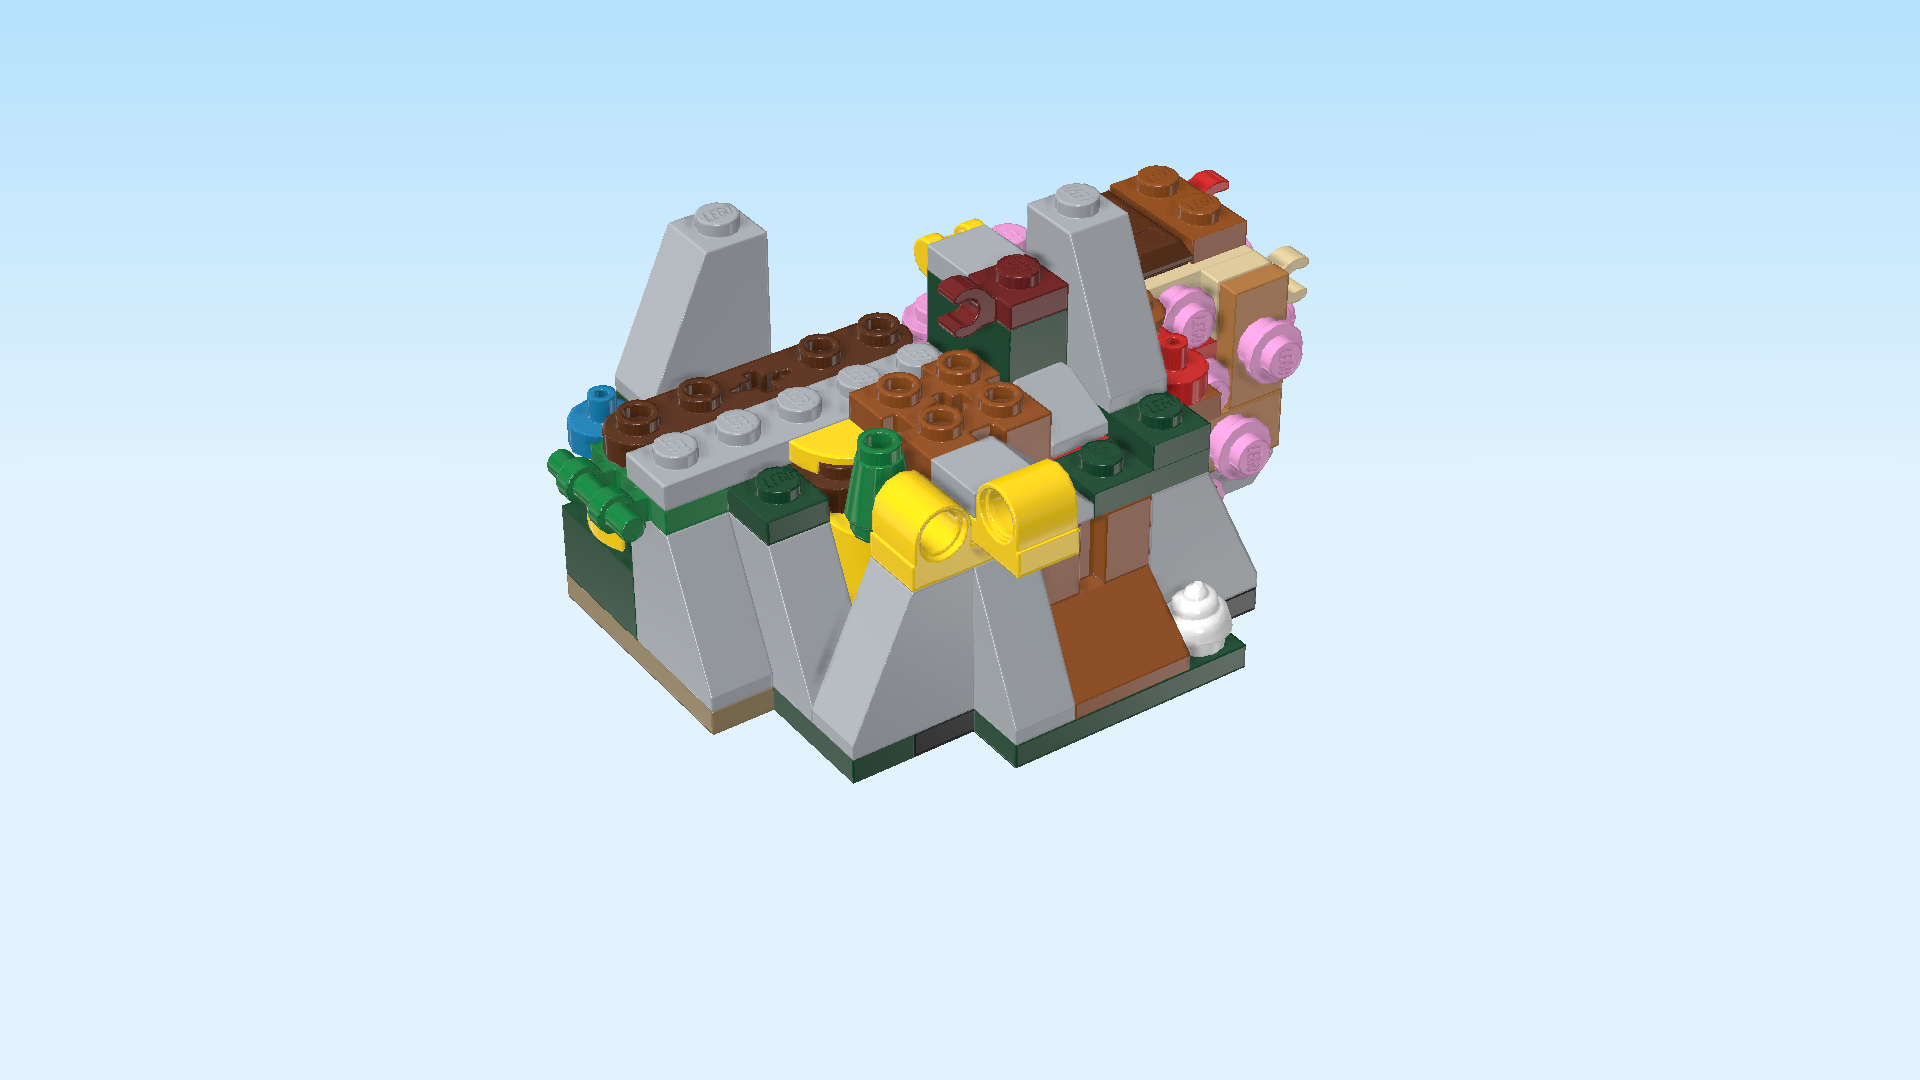
| Turn the structure left to right again so that the 2 top tubes are at the front again. |
| Put the plate 1x2 with shaft vertically on the fourth column from the right, starting from the back, shaft overhanging to the back. |
| Put the plate 1x3 horizontally centered in front of the previous piece. |
| Put the plate 1x2 vertically in front of the previous piece's middle knob. If done correctly, this piece aligns with the front right corner of the frontmost row. |
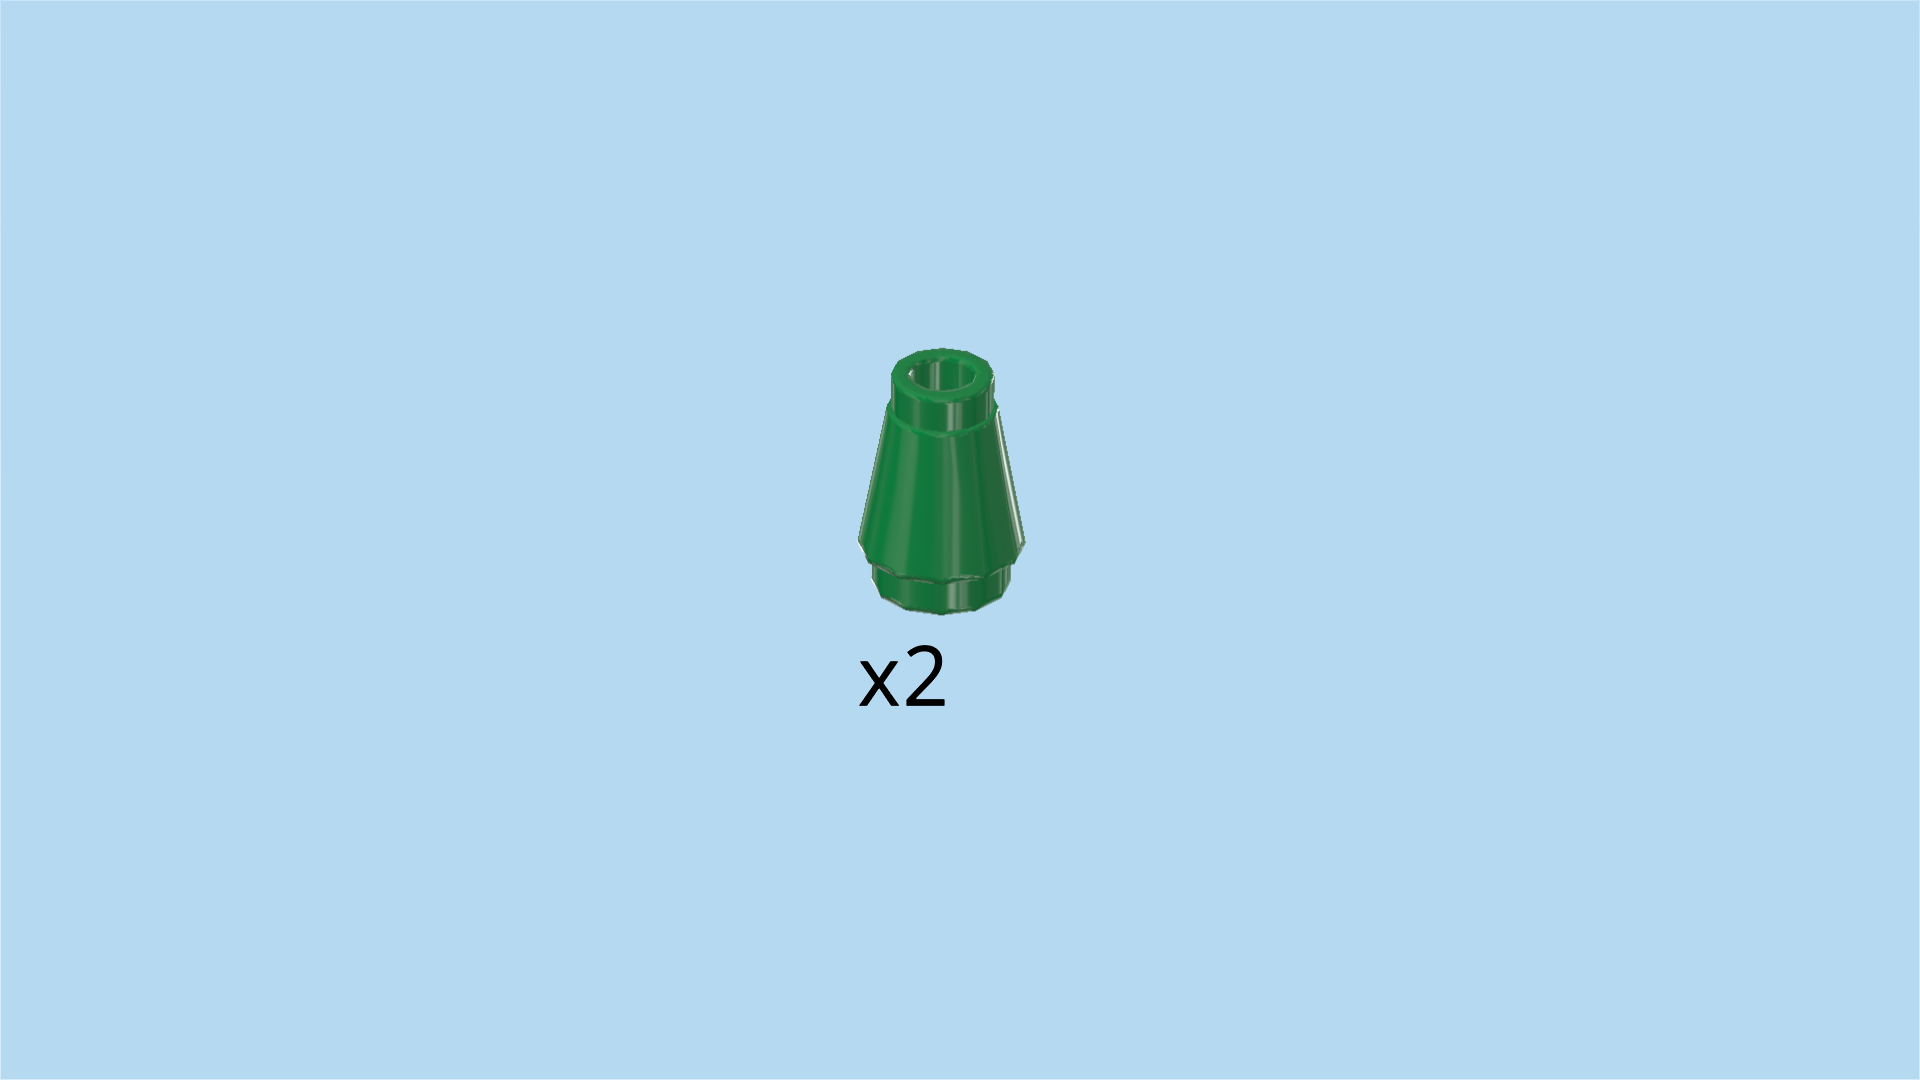
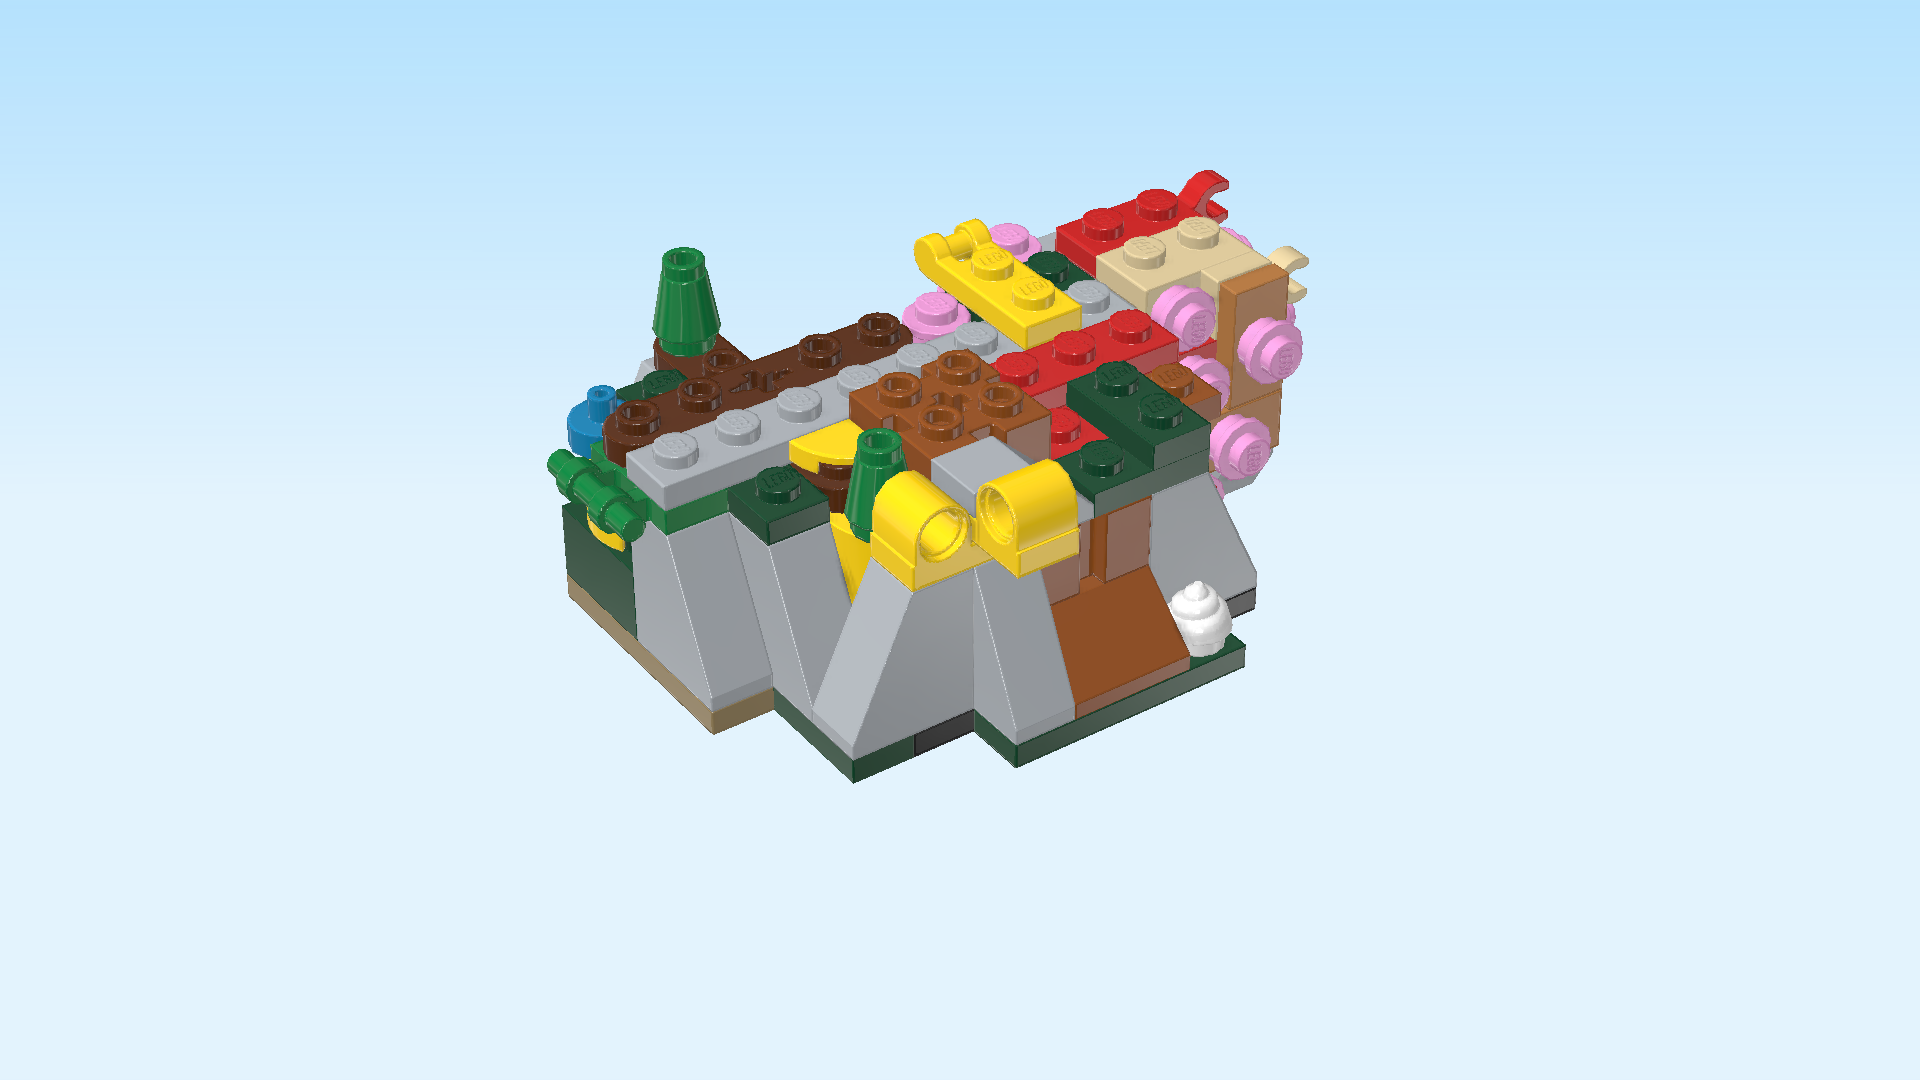
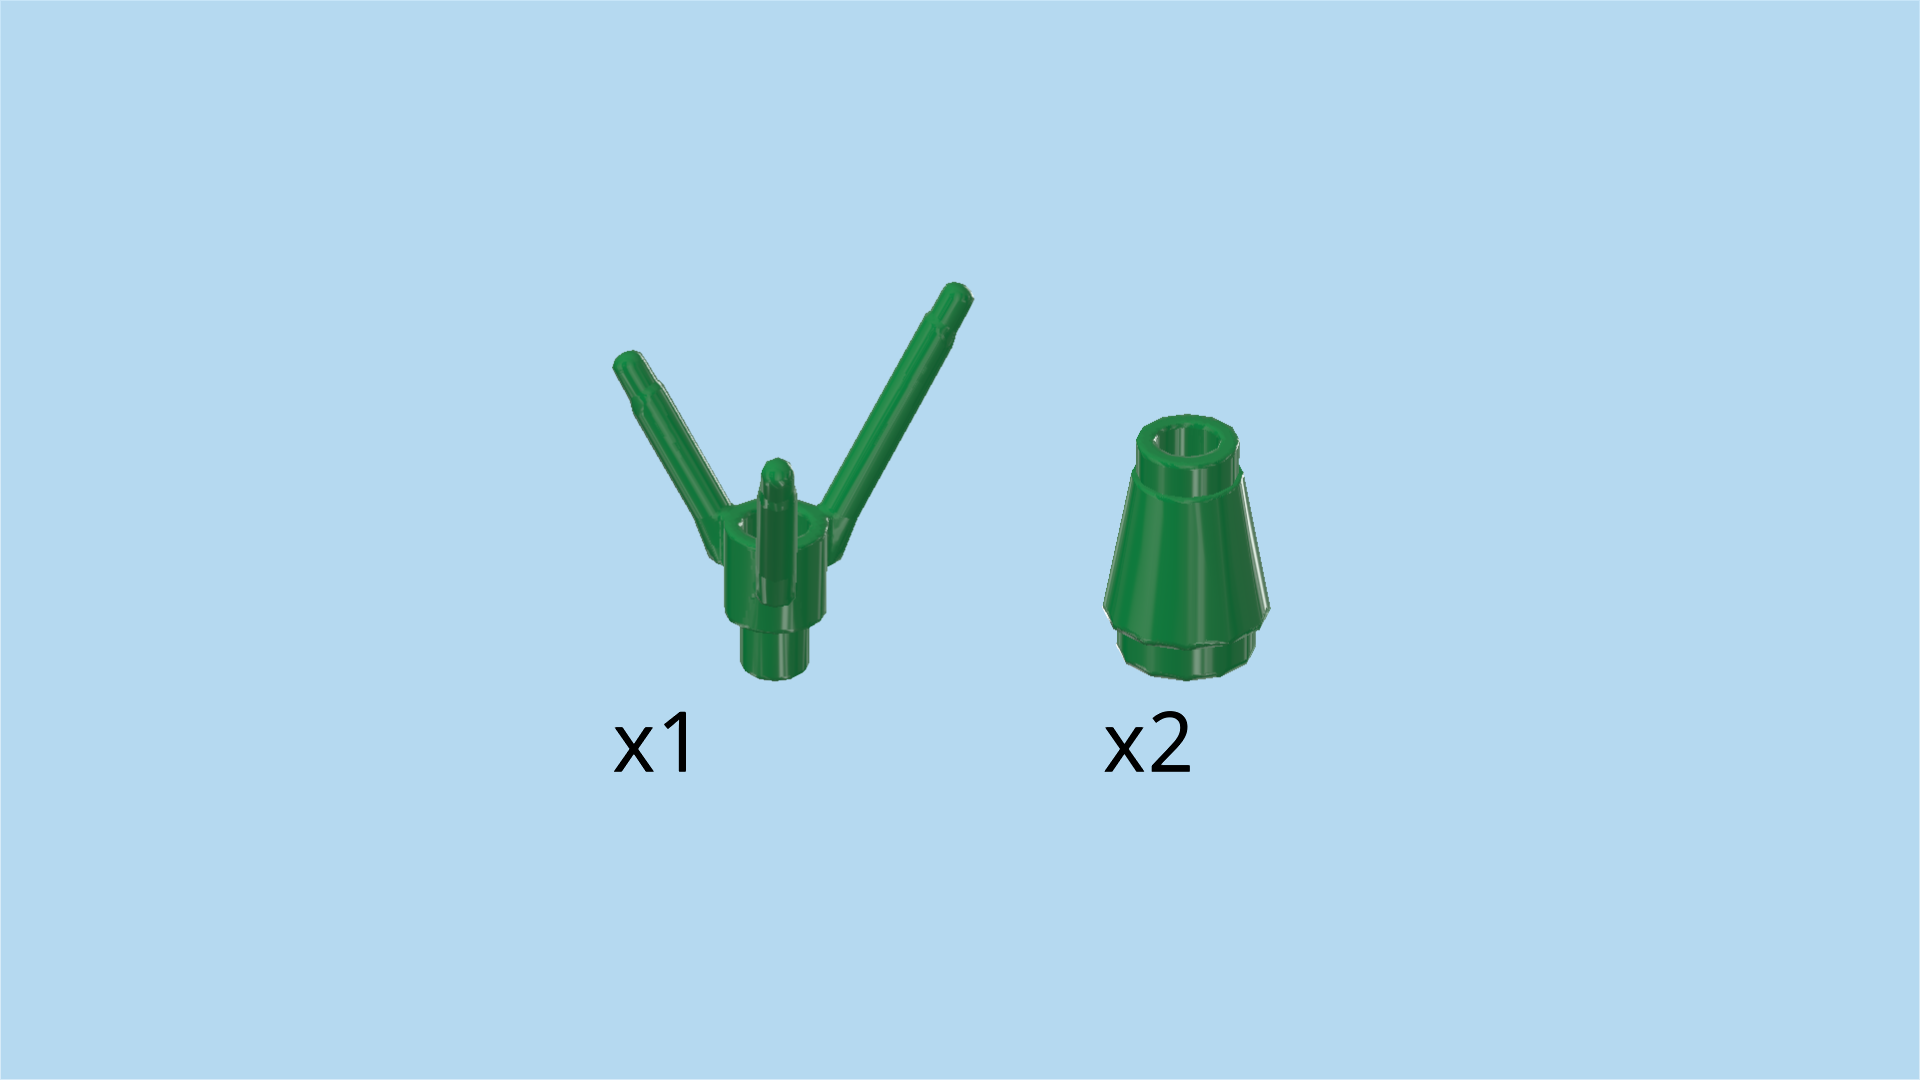
| Find 2 dark green nose cones 1x1. |
| Put 1 on the single backmost knob pointing to the back in the left section of the coral reef. |
| Put the other one on the same column as the previous piece, directly behind the top tube that can be found at the front edge. |
| Find 2 light purple round plates 1x1. |
| Stack them on top of each other. |
| Keep the stack close, but before mounting it, collect the following 2 pieces: |
| 1 dark orange round plate 1x1, |
| and 1 bright red round plate 1x1 with top shaft. |
| First, identify the second row from the front. Put the round plate with top shaft on the rightmost knob of that row. |
| Put the dark orange round plate 1x1 behind the previous piece. |
| Put the 2 stacked round plates 1x1 behind the previous piece. |
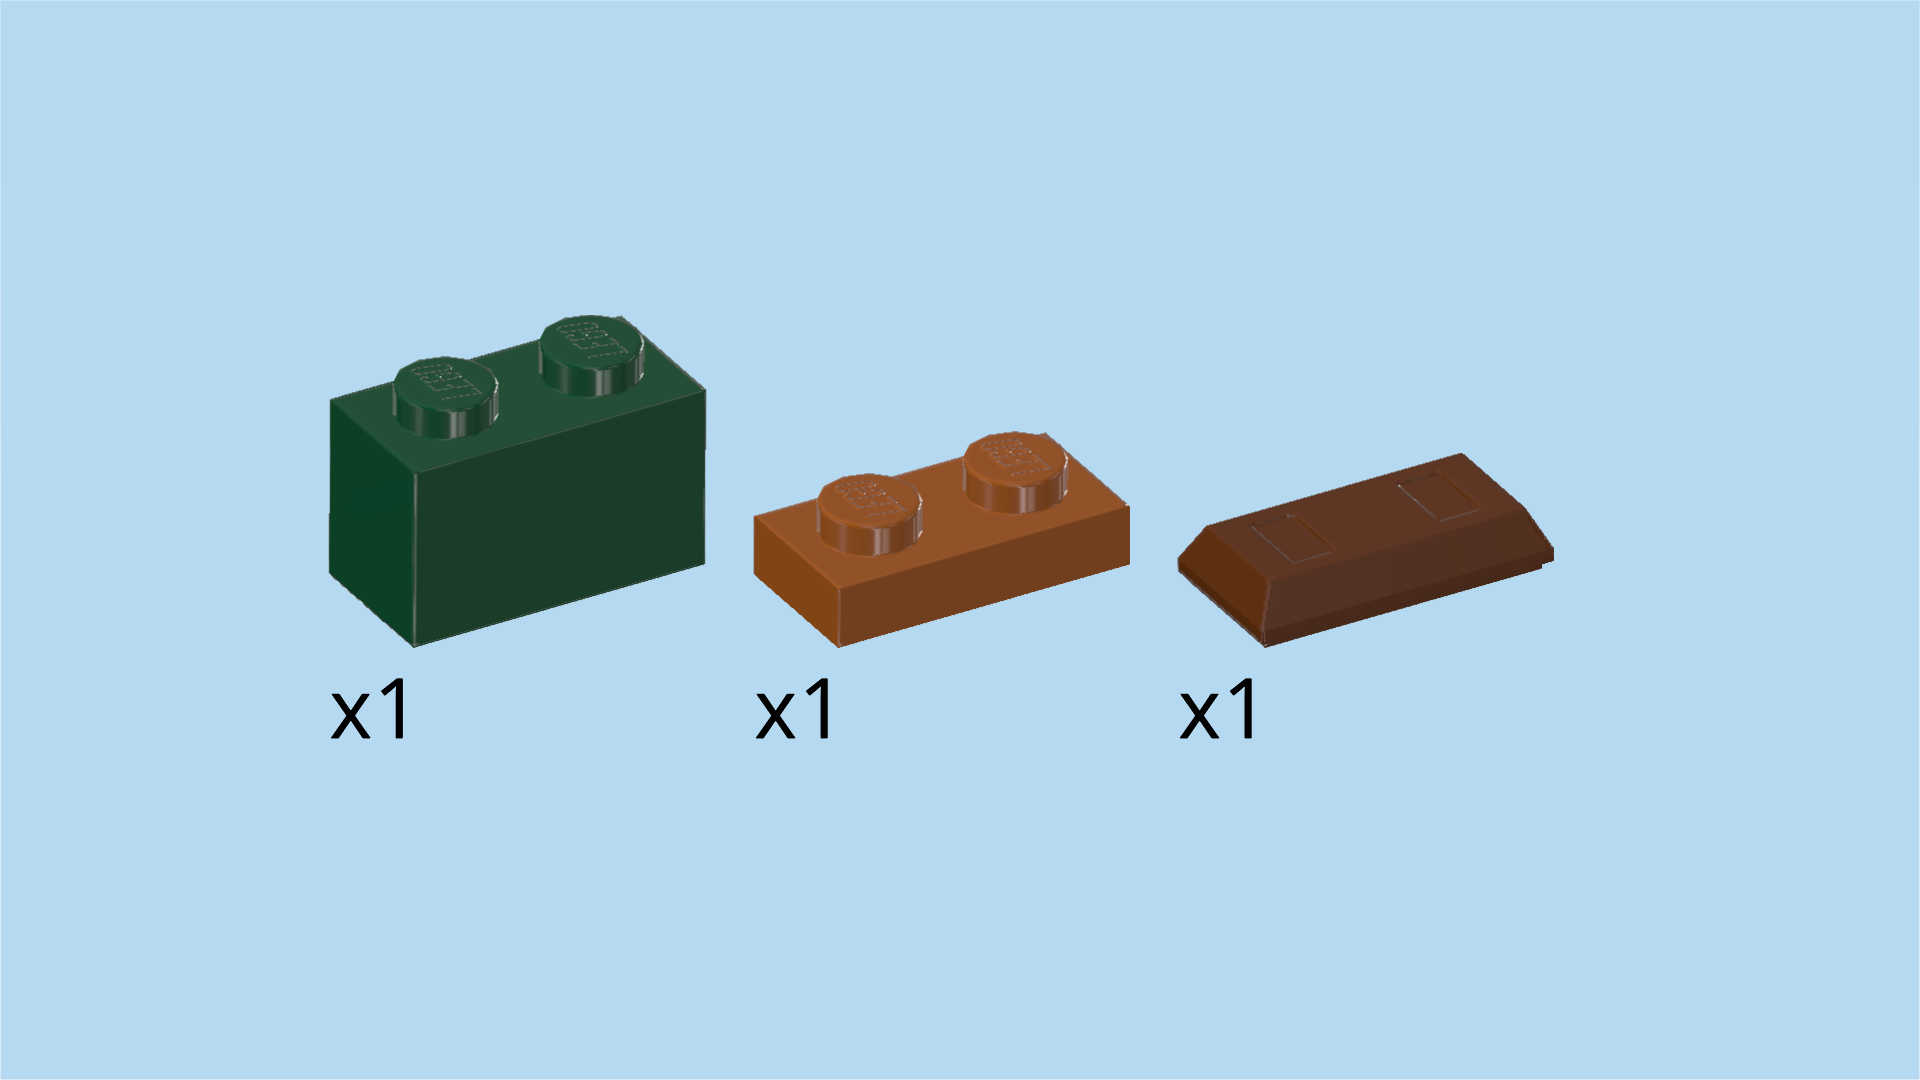
| Collect the following 3 pieces: |
| 1 reddish brown ingot 1x2, |
| 1 dark orange plate 1x2, |
| and 1 mossy green brick 1x2. |
| Put the plate 1x2 vertically on the rightmost column. This column only consists of 2 knobs by now. |
| Put the ingot 1x2 vertically to the left of the previous piece. |
| Go to the frontmost edge and identify the second column from the right there. Put the brick 1x2 vertically on the third and fourth knob of that column. |
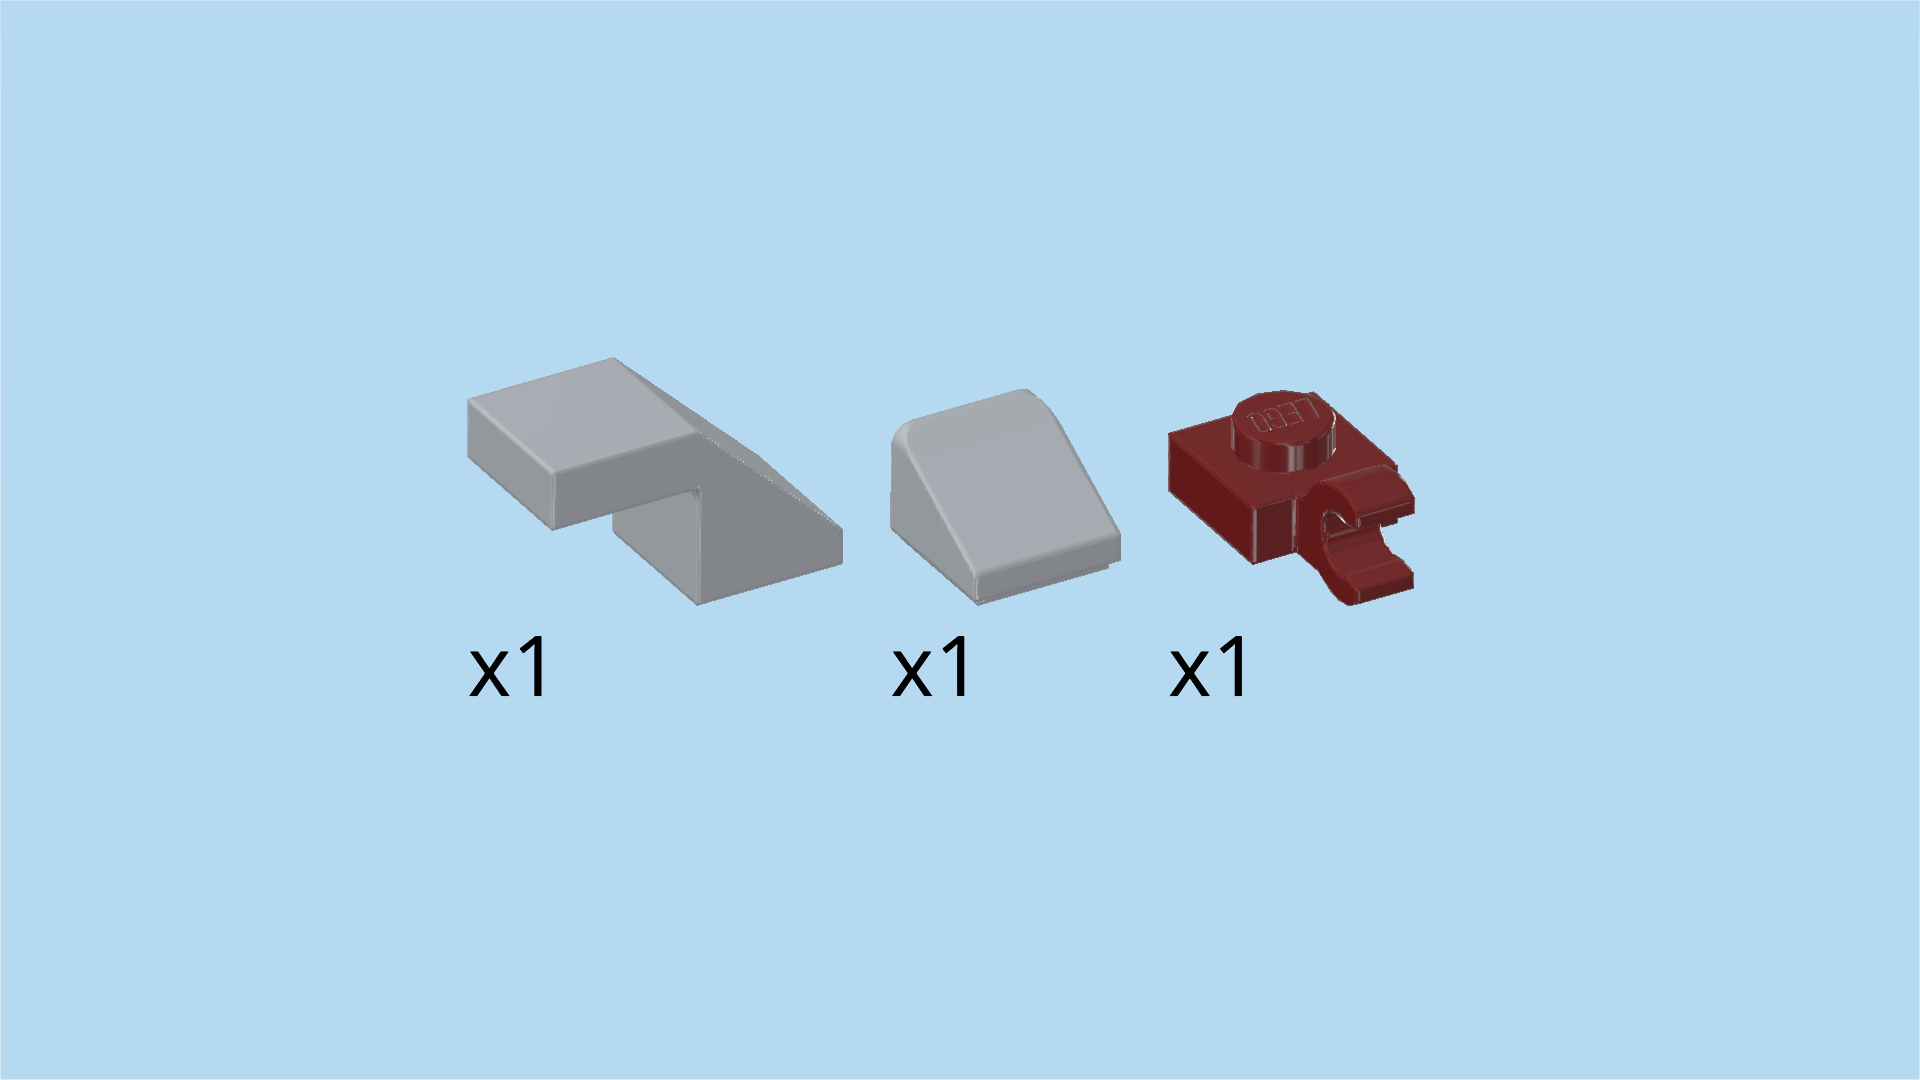
| Collect the following 3 pieces: |
| 1 maroon red plate 1x1 with vertical side clasp, |
| 1 medium stone grey smooth roof tile 1x1 with overhanging top tile 1x1, |
| and 1 medium stone grey smooth roof tile 1x1x⅔. |
| Put the roof tile 1x1 in front of the previous piece, slope to the front. |
| Put the plate with clasp behind the previous piece (this means it is mounted on the front knob of the brick 1x2 from the previous step) , clasp to the left. |
| Put the roof tile with top tile horizontally behind the previous piece and a knob to its right, top tile to the left. |
| Find 2 medium stone grey roof tiles 1x2x2, 65°. |
| Put 1 vertically in front of the slope of the previous piece, slope to the front. If done correctly, there is 1 empty knob in front of it. |
| Put the other one horizontally on the backmost row on the left edge, directly to the right of the round plate 1x1 with top shaft, slope to the left. |
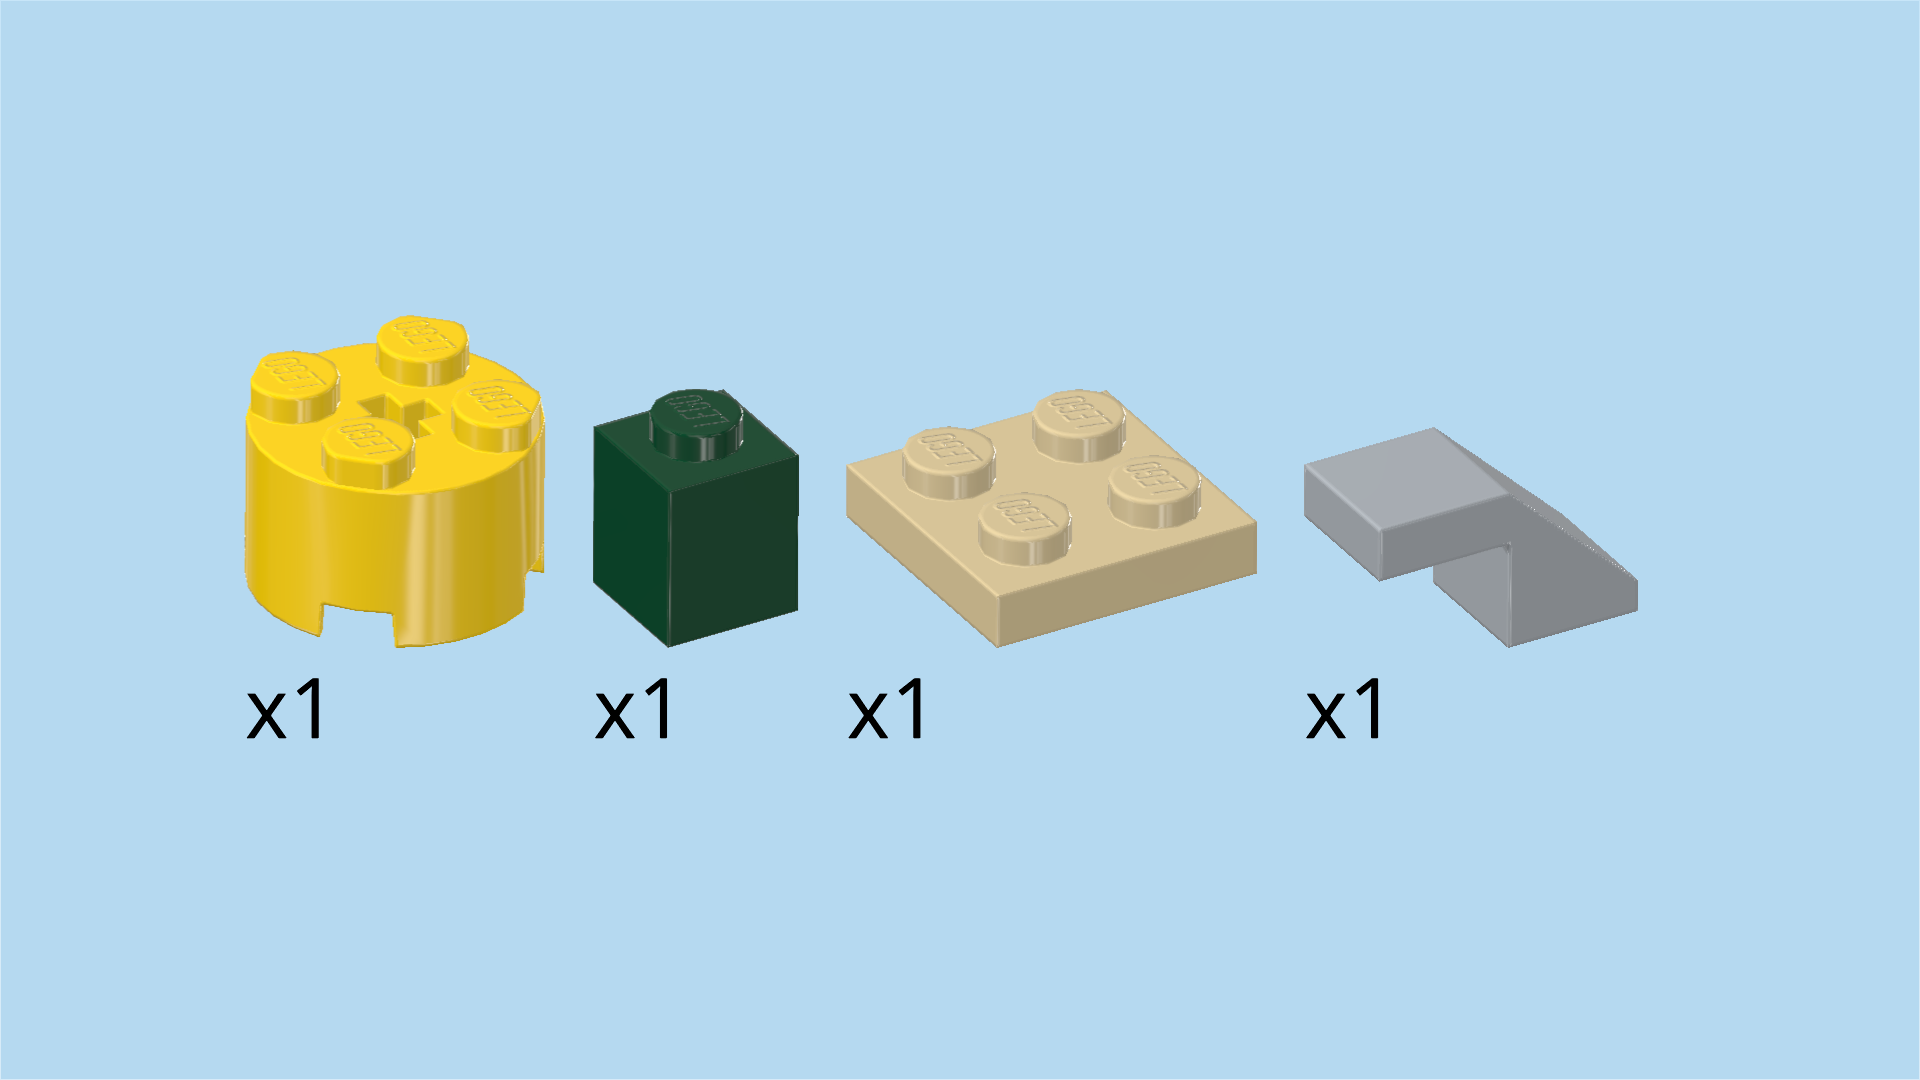
| Collect the following 4 pieces: |
| 1 bright yellow round brick 2x2 with top cross hole, |
| 1 pale ocher yellow plate 2x2, |
| 1 mossy green brick 1x1, |
| and 1 medium stone grey smooth roof tile 1x1 with overhanging top tile 1x1. |
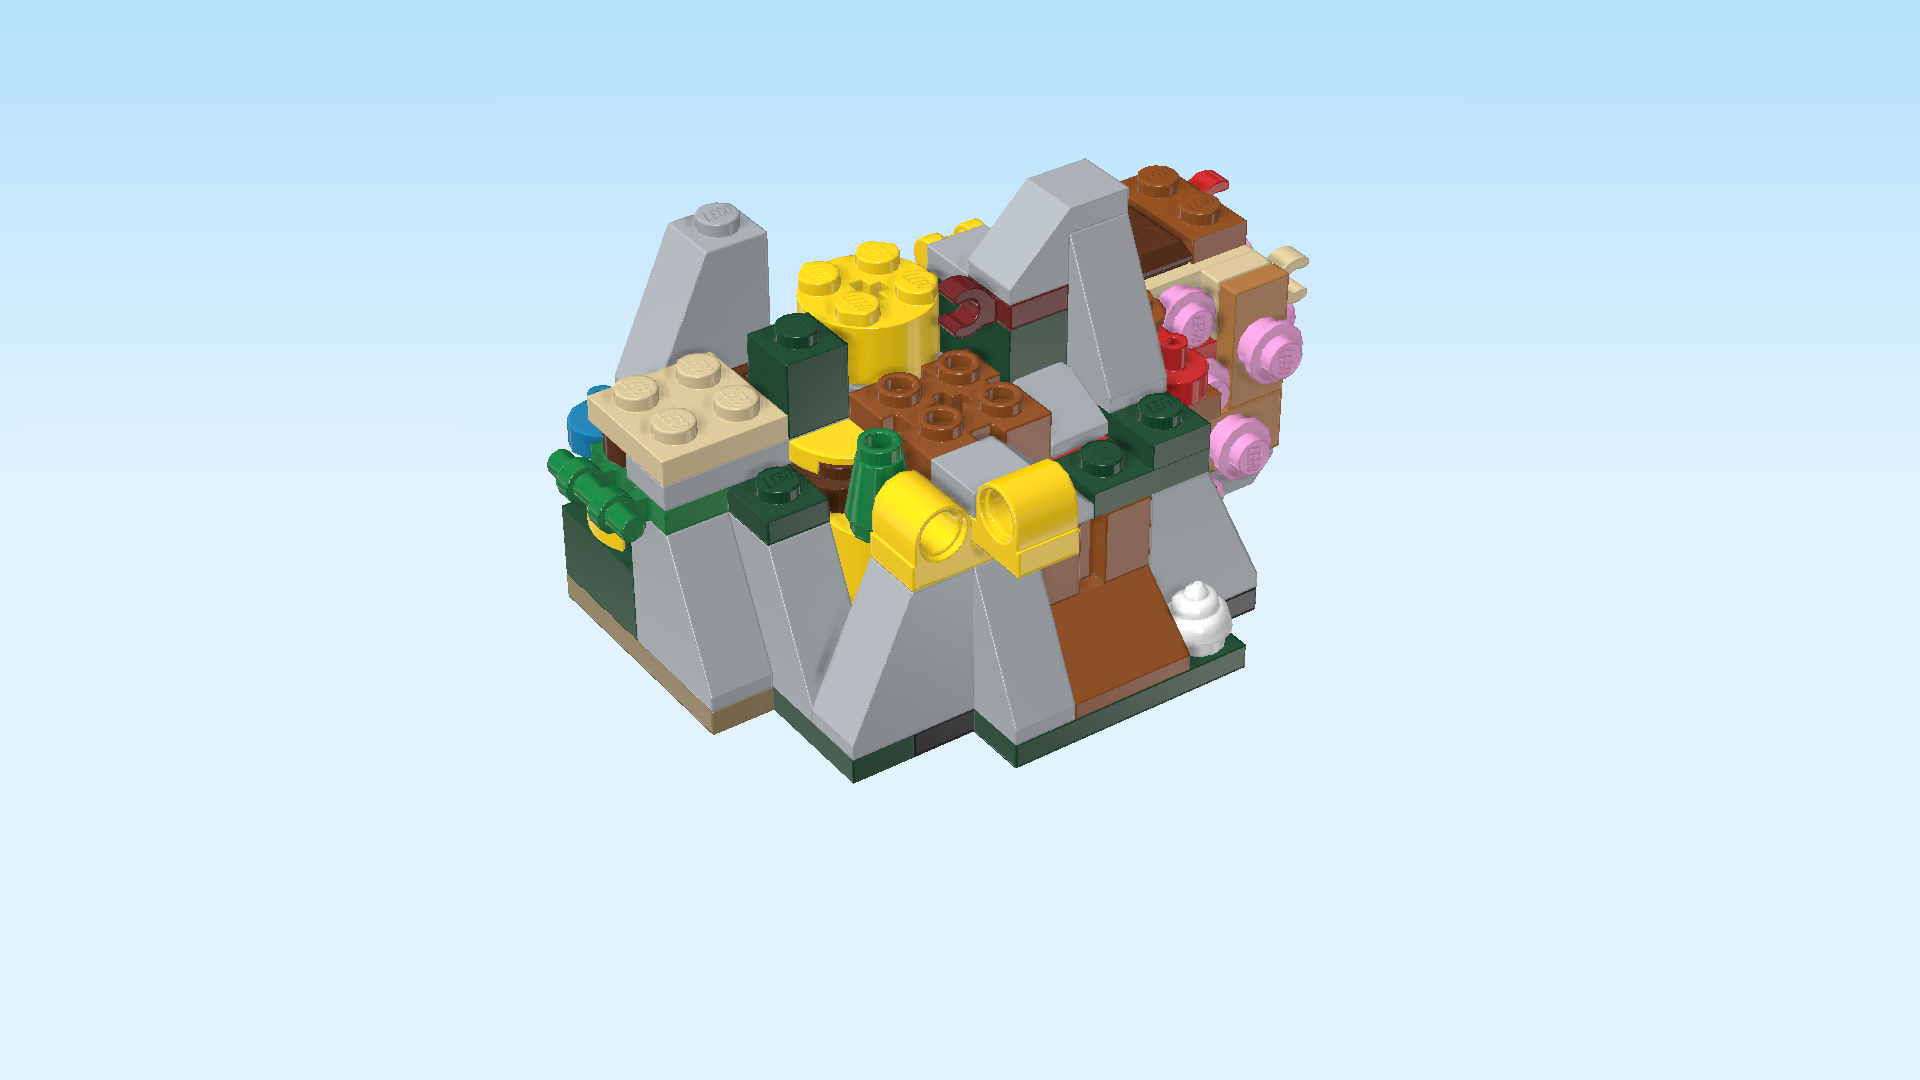
| Put the brick 1x1 in front of the right half of the previous piece. If done correctly, there is a 1x1 space without a knob between them. |
| Put the round brick 2x2 to the right of the previous piece and the row behind. |
| Put the plate 2x2 on the 4 knobs on the leftmost edge. |
| Put the roof tile with top tile horizontally on top of the plate 1x1 with side clasp that is mounted relatively in the top center of the structure (the clasp is pointing to the left) , top tile to the right (it connects to a roof tile 1x2x2) . |
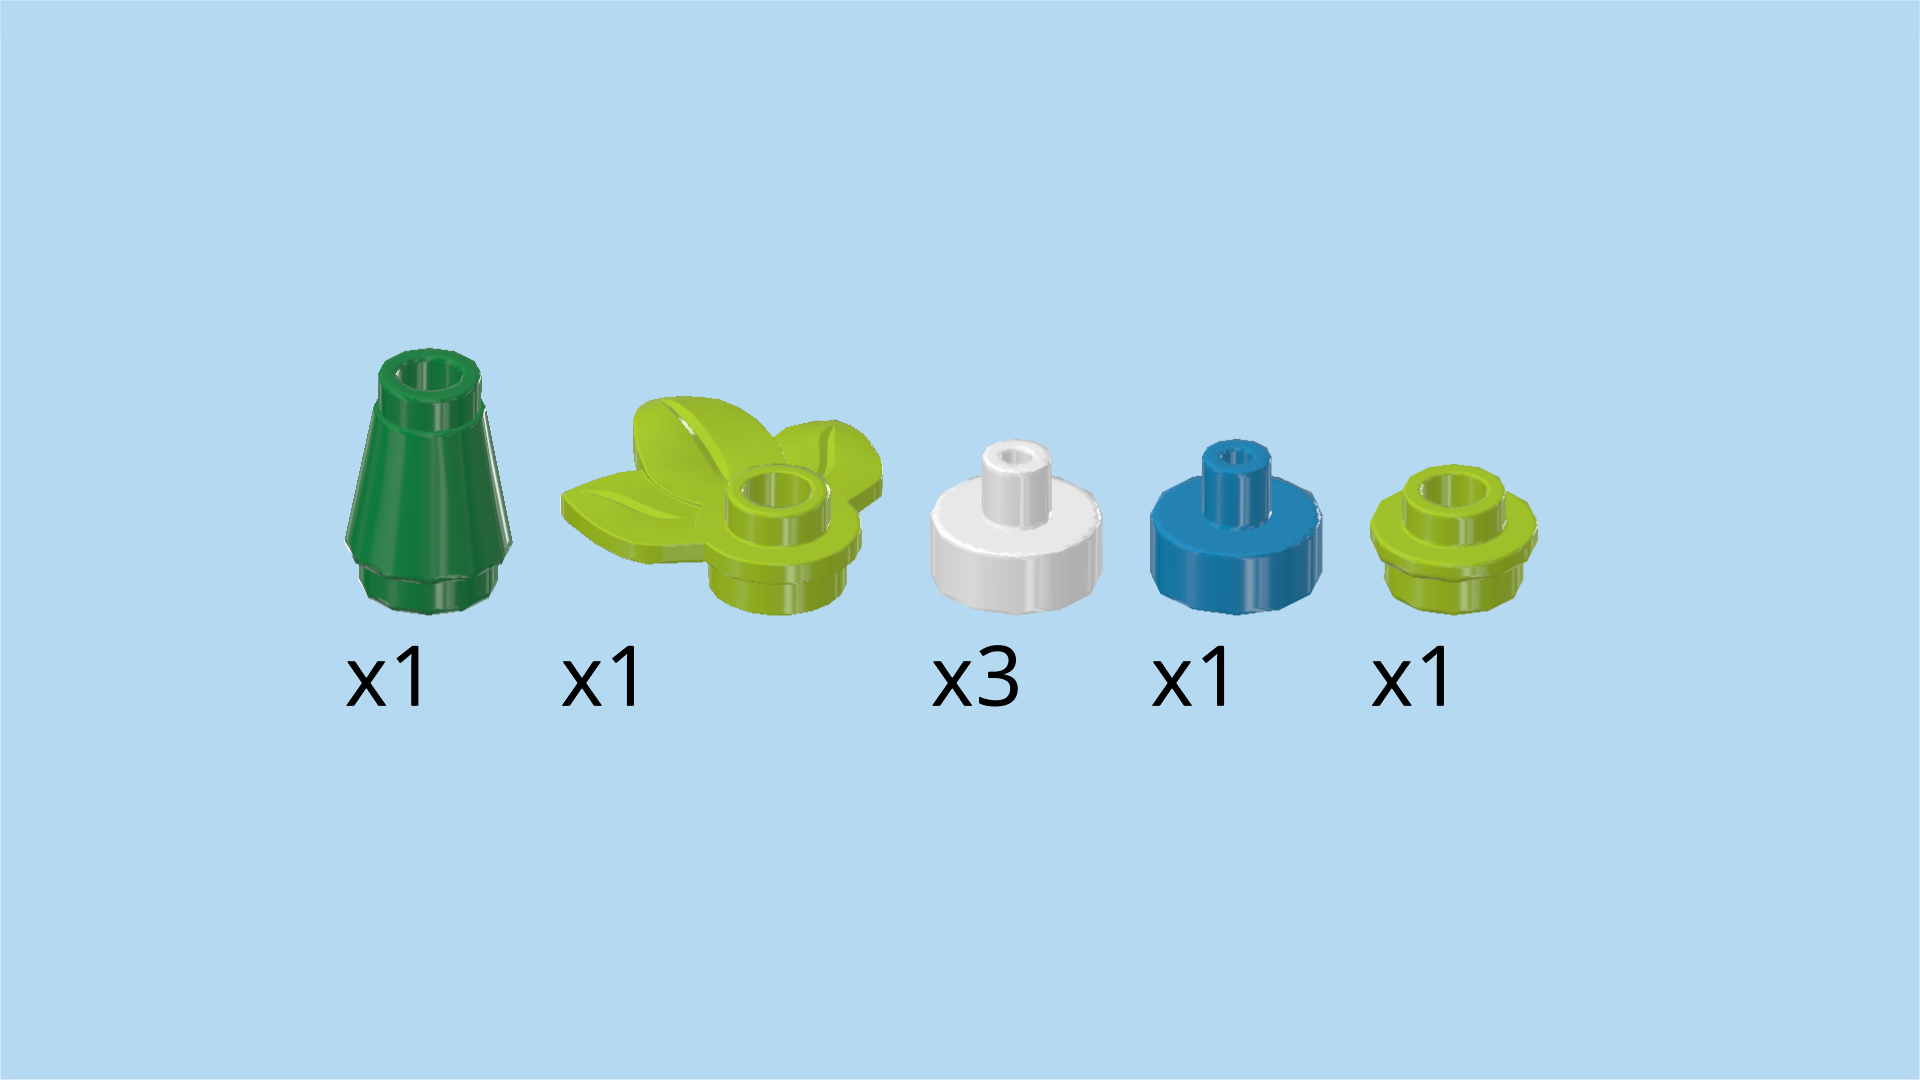
| Collect the following 7 pieces: |
| 3 white round plates 1x1 with top shaft, |
| 1 bright yellowish green round plate 1x1 with through-hole, |
| 1 dark azure blue round plate 1x1 with top shaft, |
| 1 bright yellowish green round plate 1x1 with 3 leaves, |
| and 1 dark green nose cone 1x1. |
| Put the round plate with 3 leaves on the frontmost knob of the second column from the left, leaves to the front left. |
| Put the dark azure blue round plate 1x1 with top shaft on the back knob of the leftmost column. |
| Put the nose cone 1x1 to the right of the previous piece. |
| Skip the empty 1x1 space to the right of the previous piece, and put the round plate 1x1 with through-hole to the right of said space. If done correctly, it will sit on the round brick 2x2 from earlier. |
| Put 1 white round plate 1x1 with top shaft to the right of the previous piece. |
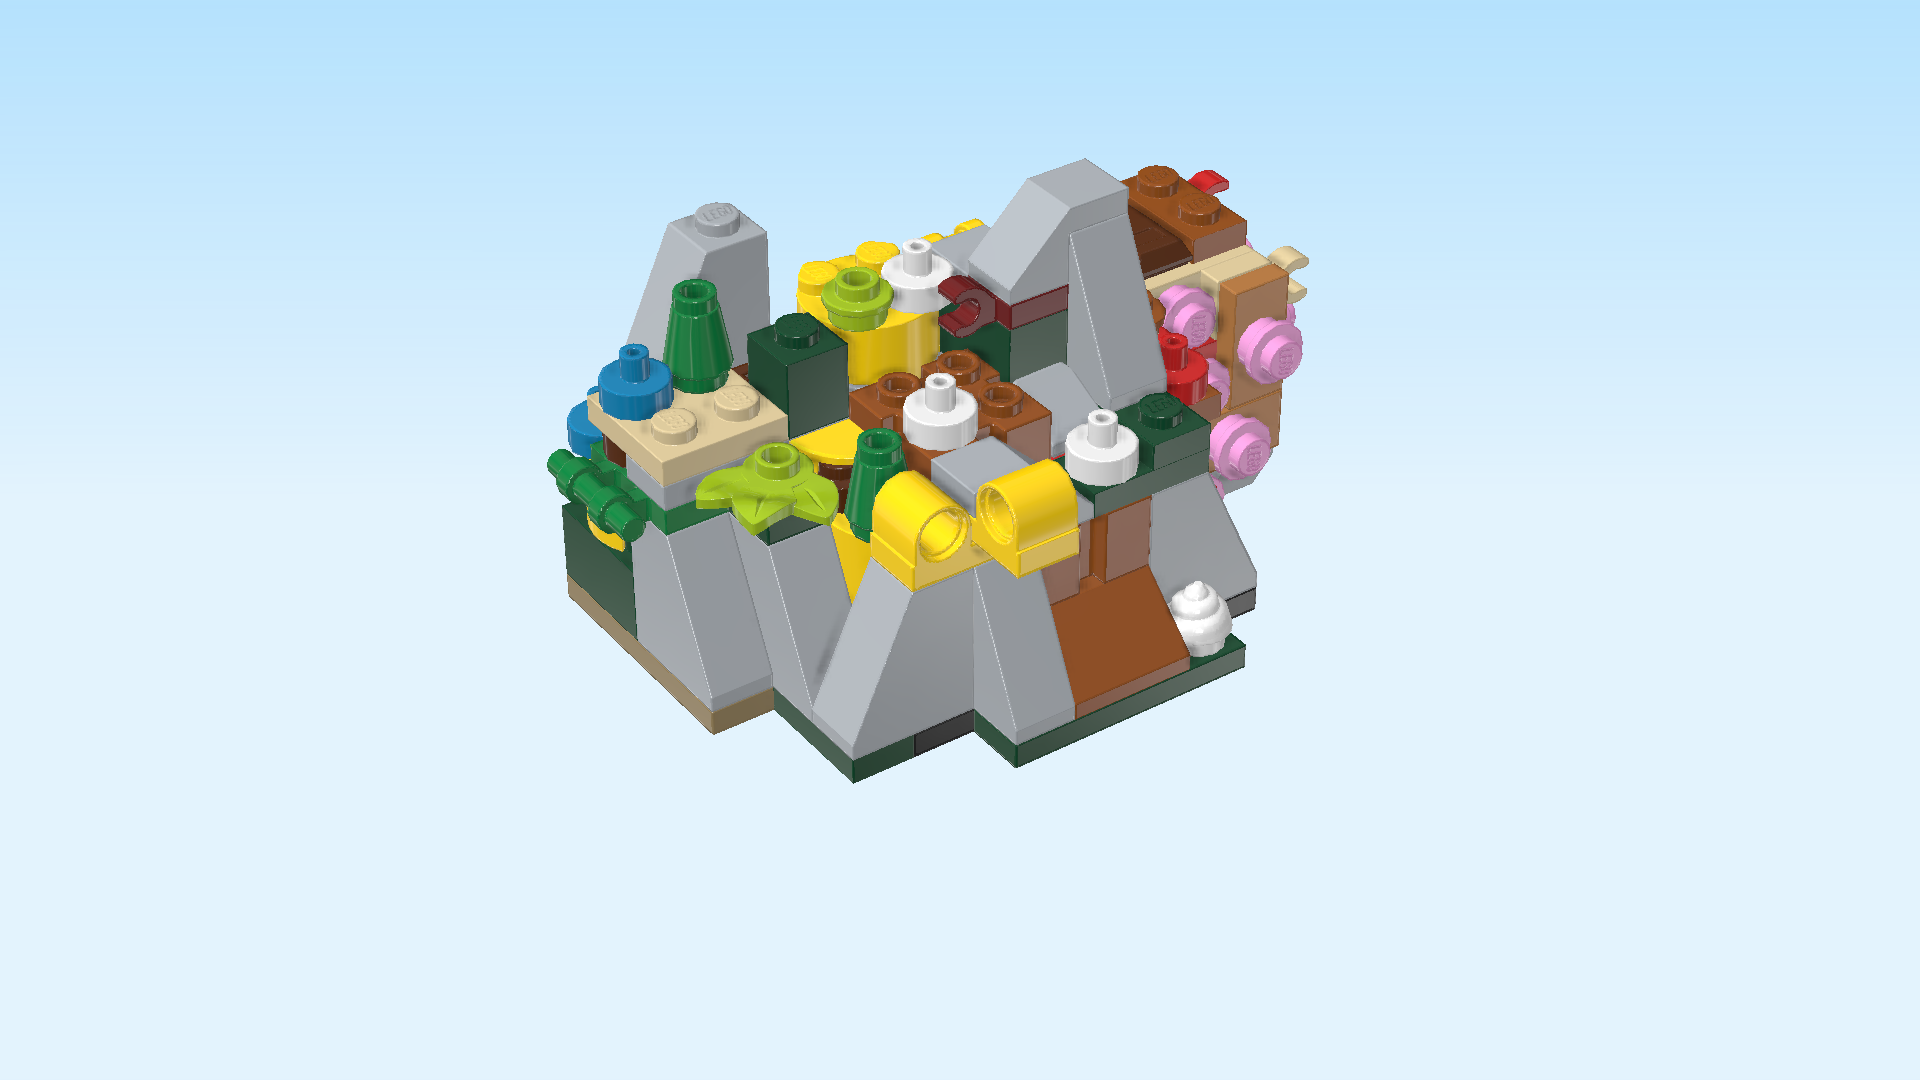
| Put 1 white round plate 1x1 with top shaft on the first knob behind the top tube overhanging to the front. This means it will be mounted on the same column as the round plate with through hole we have just mounted. |
| Put the last white round plate 1x1 with top shaft on the left knob of the frontmost row. Remember the placement of the 3 white round plates with top shaft for the upcoming step. |
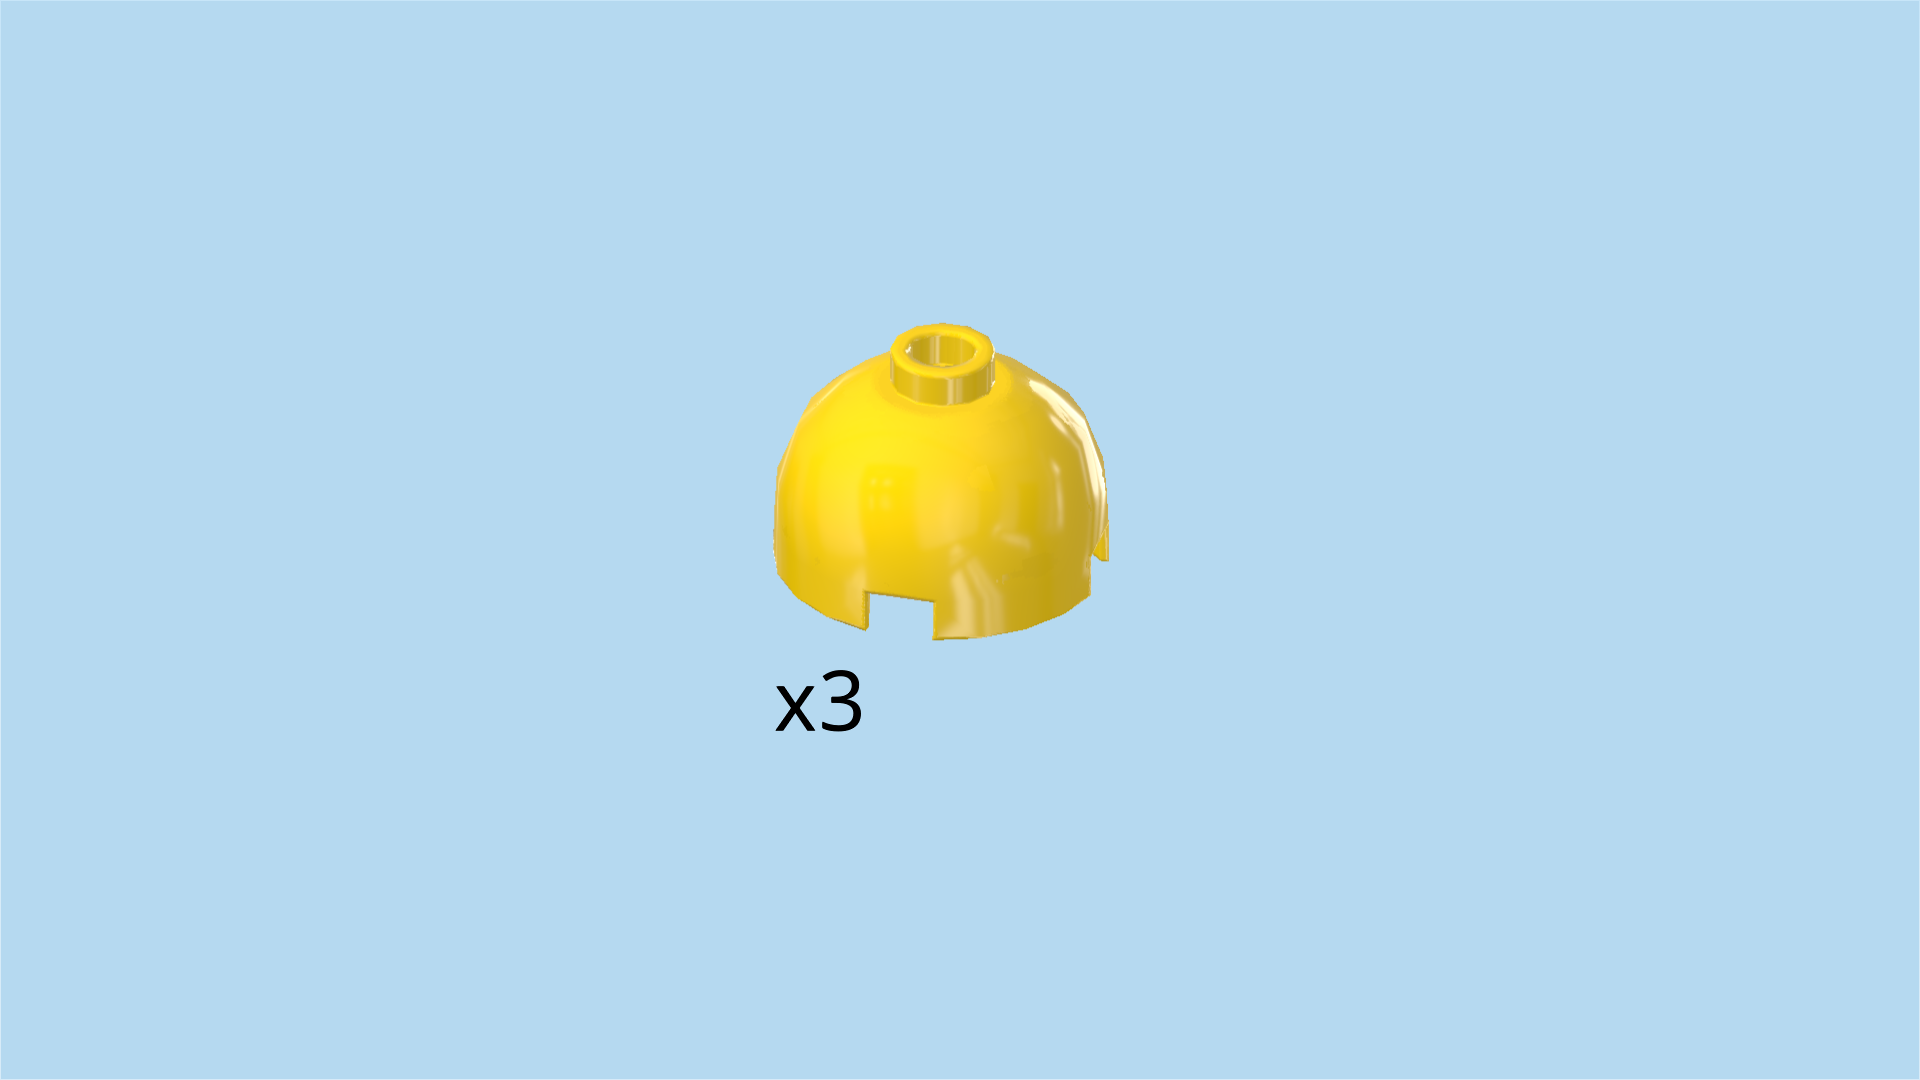
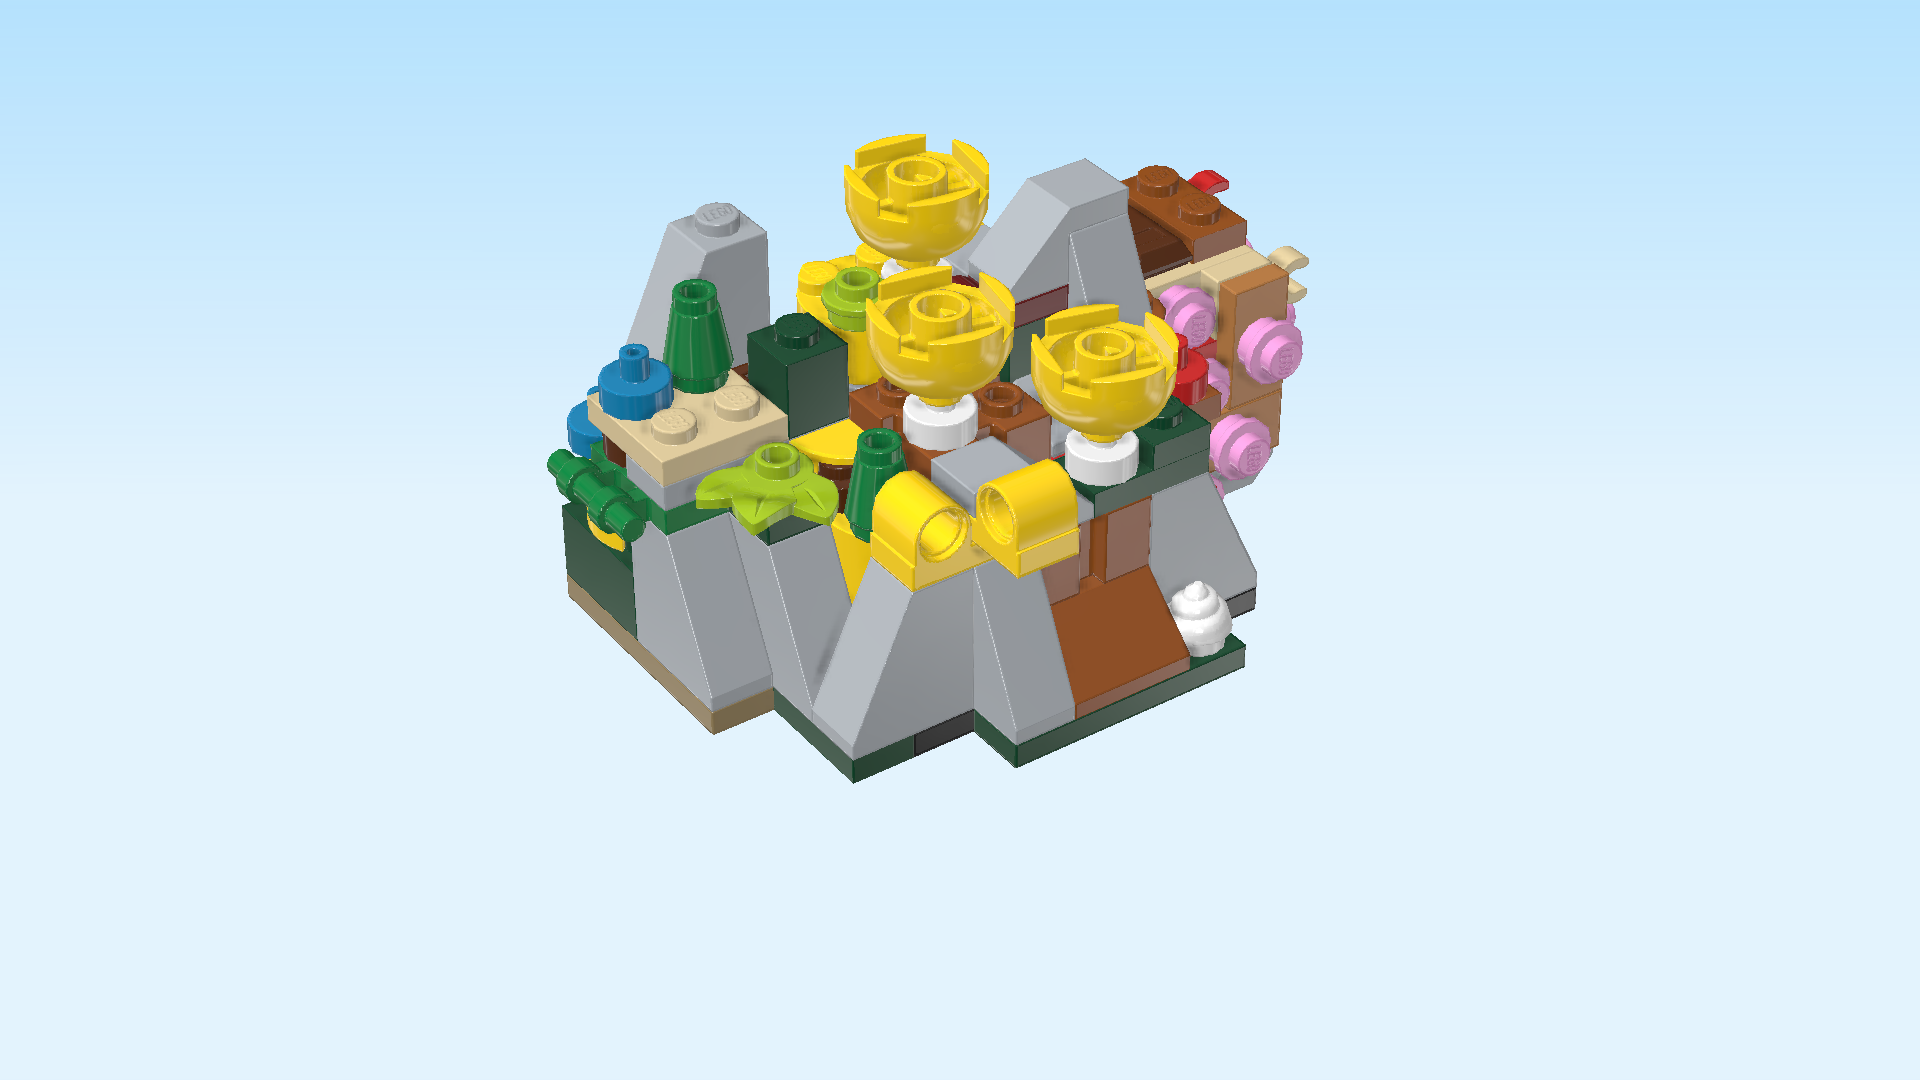
| Find 3 bright yellow domes 2x2 with 1 knob. |
| Flip the domes upside down so that their hollow knobs are to the bottom, and mount those knobs on the 3 with round plates with top shaft from the previous step. |
| Collect the following 3 pieces: |
| 2 dark green nose cones 1x1, |
| and 1 dark green plant base 1x1 with 3 stalks. |
| Insert the bottom shaft of the plant base into the round plate 1x1 with 3 leaves that sits on the front knob of the second column from the left. |
| Put 1 nose cone on the single brick 1x1 mounted diagonally behind the previous piece. |
| Put the other nose cone on the roof tile 1x2x2 behind the previous piece. |
| Next up, we will make a small sub-part. |
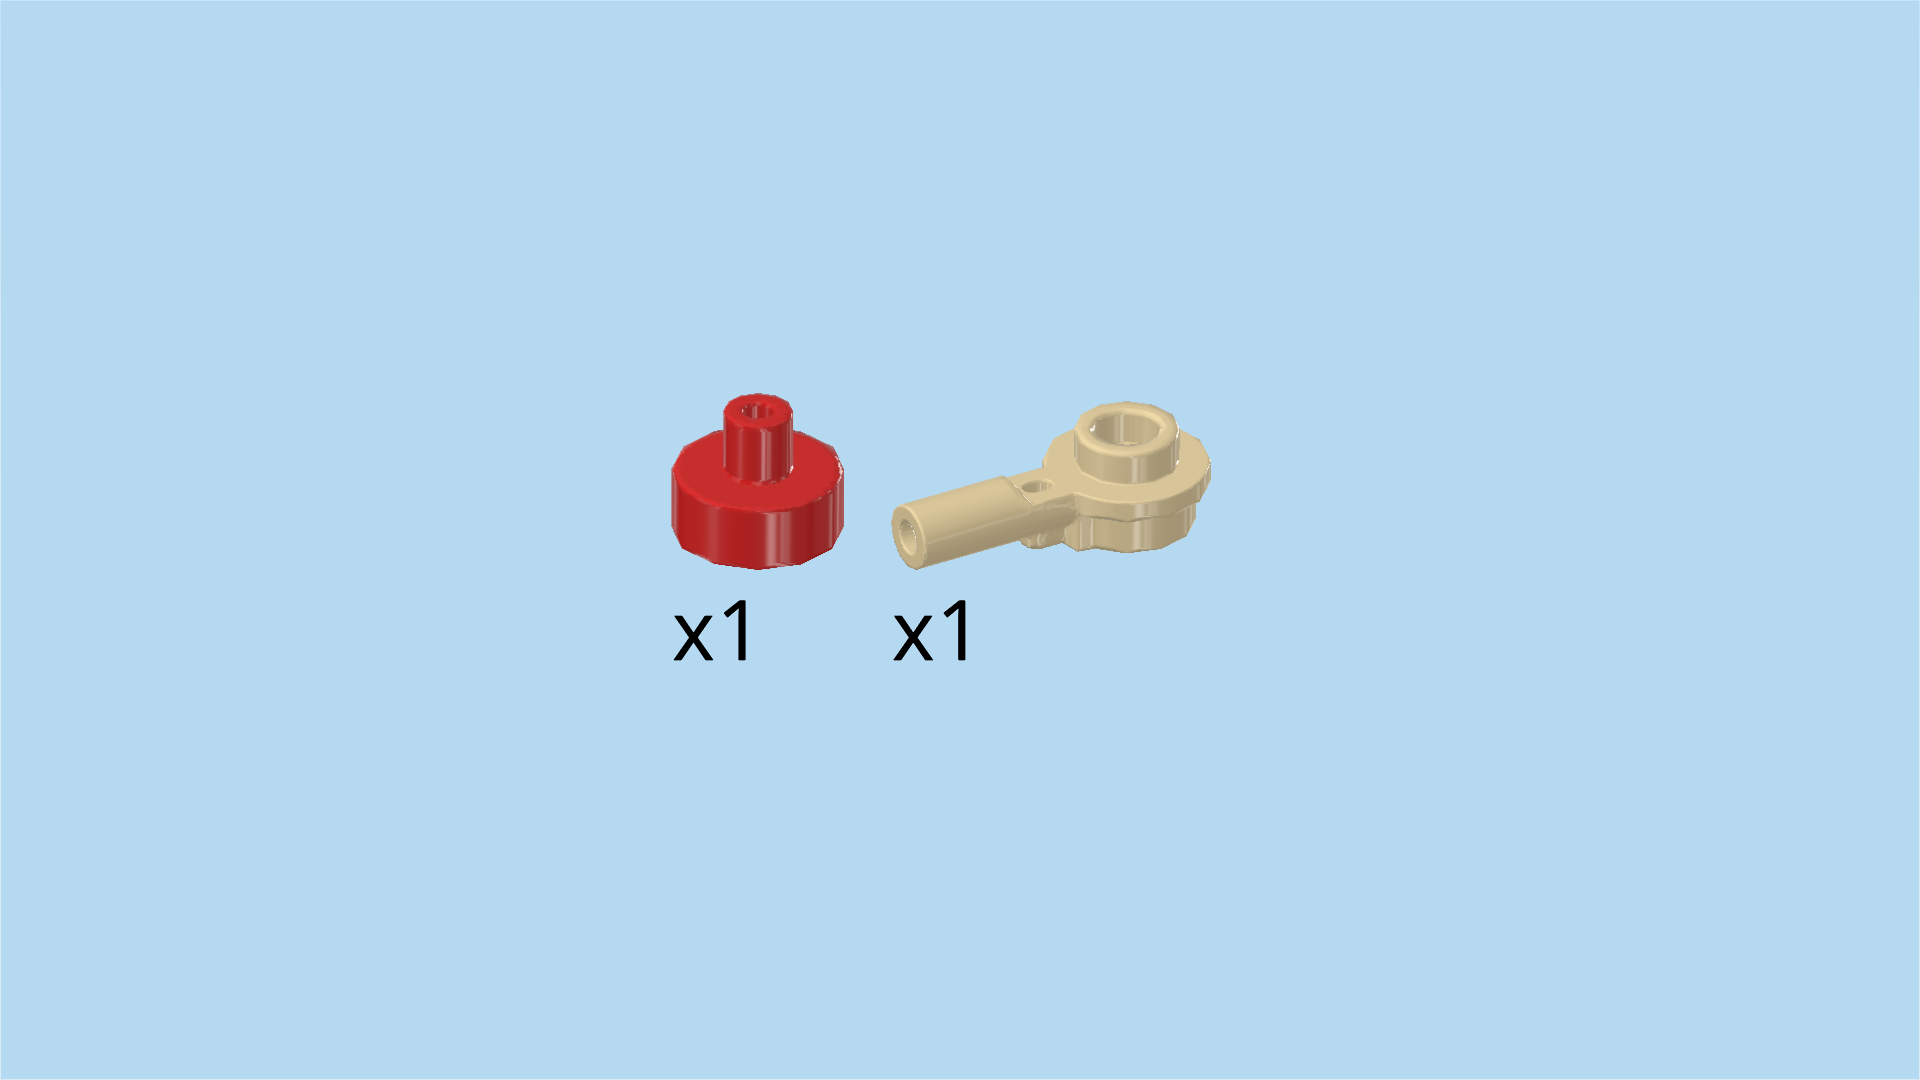
| Collect the following 2 pieces: |
| 1 pale ocher yellow round plate 1x1 with side handle, |
| and 1 bright red round plate 1x1 with top shaft. |
| Put the round plate with side handle on the table, and put the round plate with top shaft on top. |
| Snap the handle into the frontmost clasp pointing to the right in the top corner. Make sure the round plate with top shaft is to the front and pointing to the top right. |
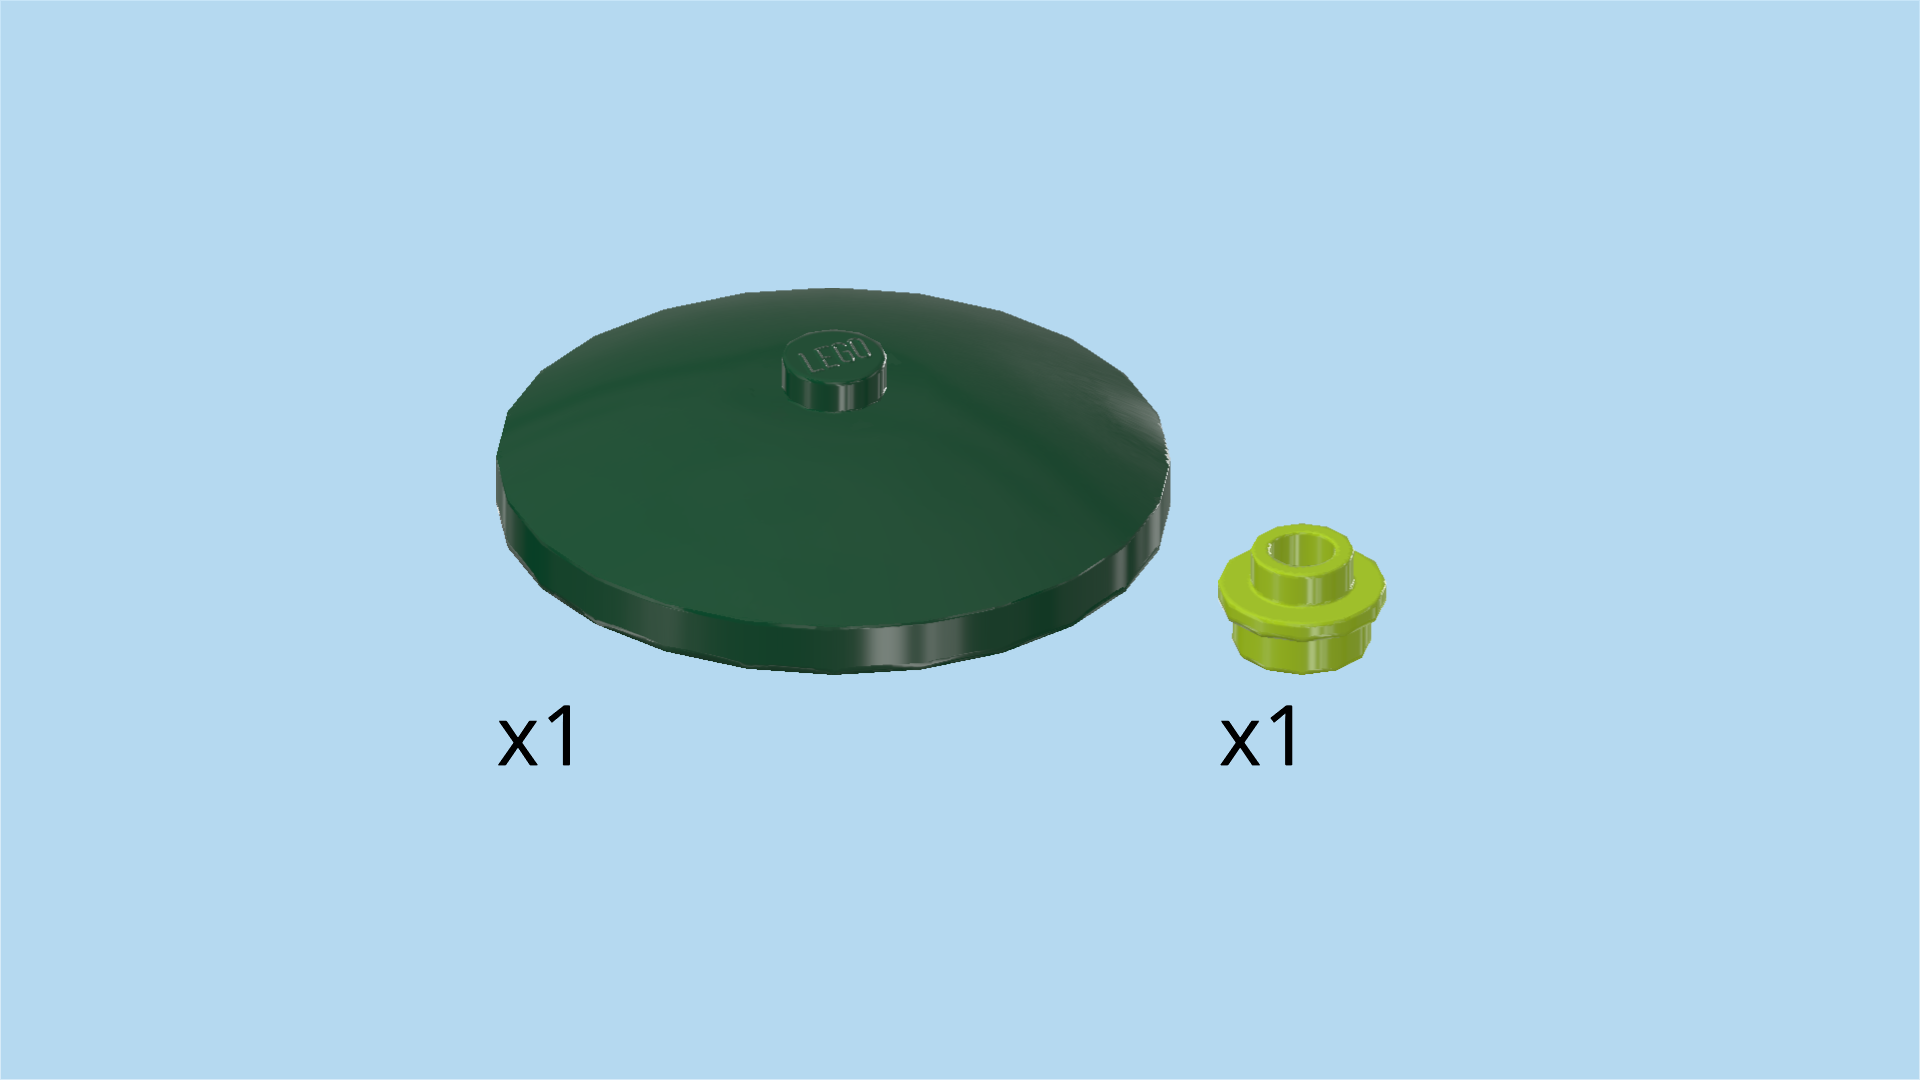
| Next, we will build a big underwater plant leaf. |
| Collect the following 2 pieces: |
| 1 mossy green disk 4x4 with 1 knob, |
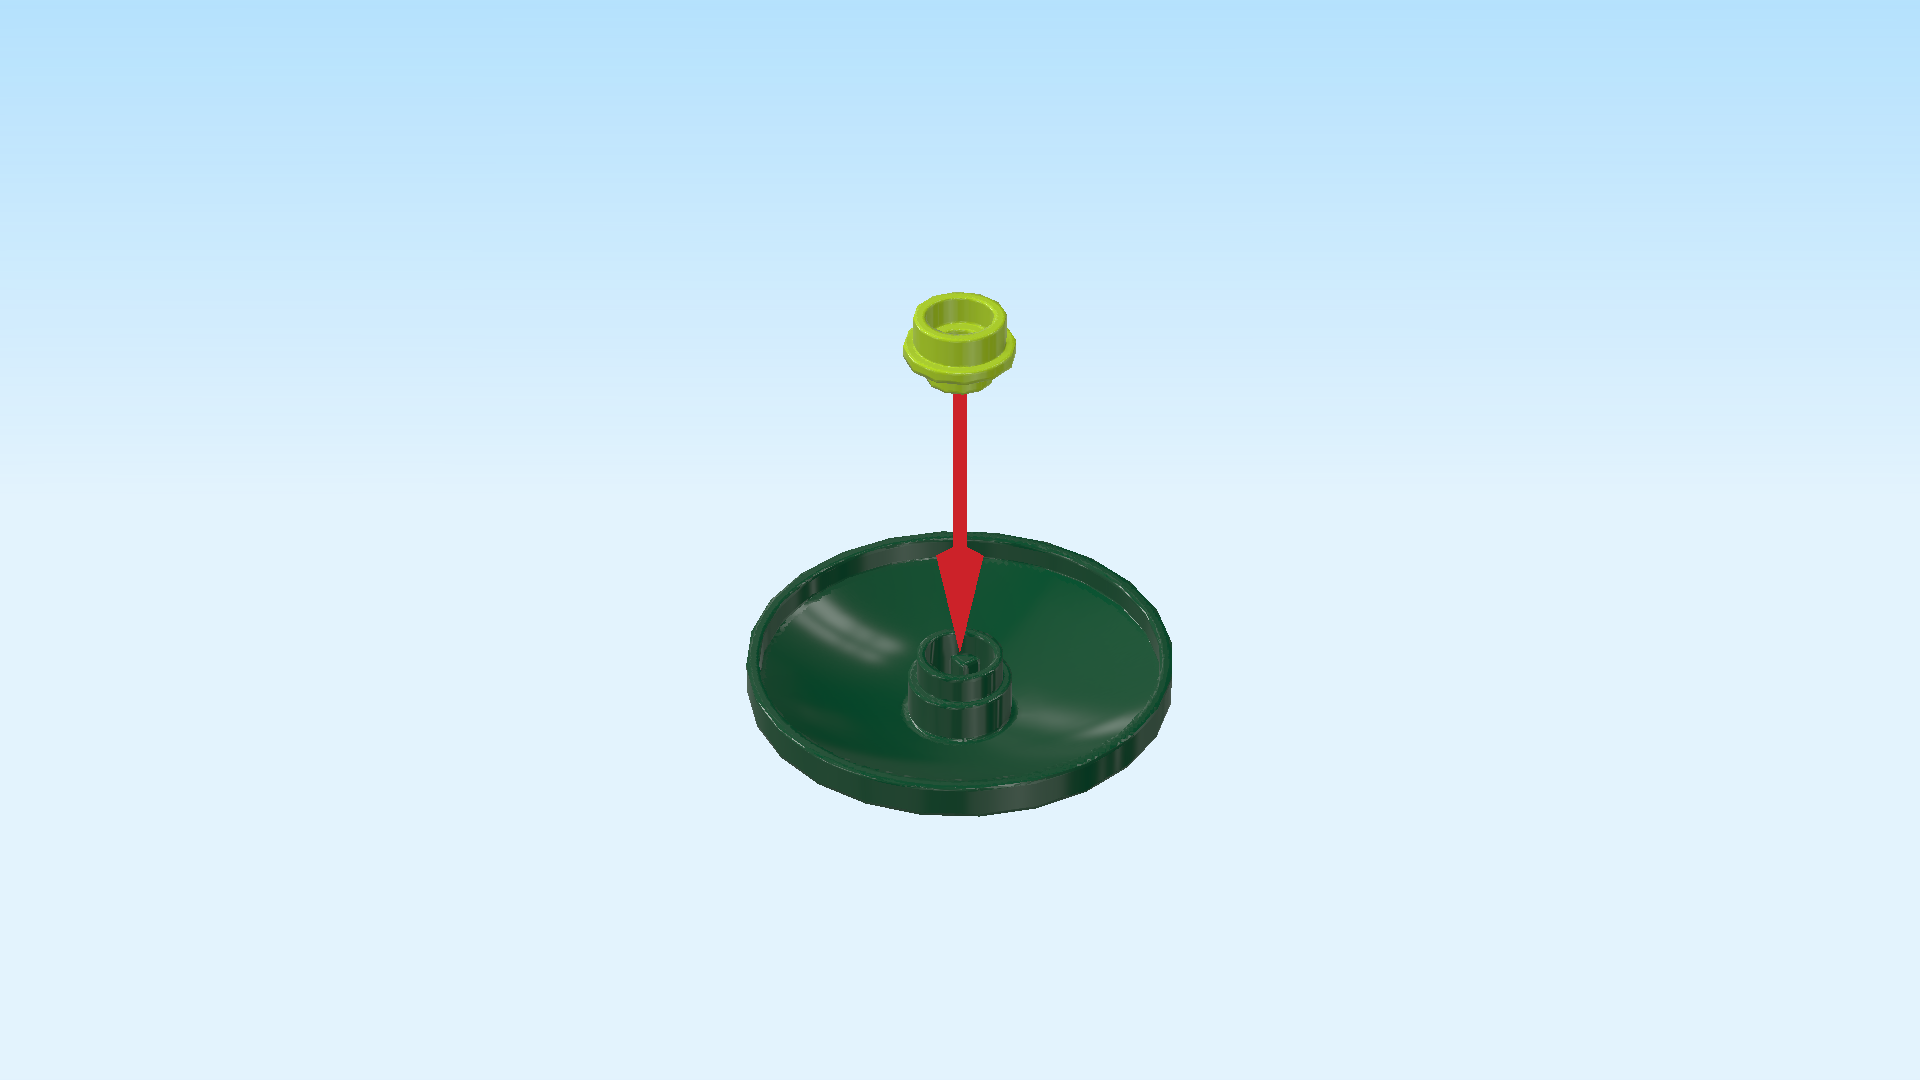
| and 1 bright yellowish green round plate 1x1 with through-hole. |
| Put the disk 4x4 upside down on the table, knob to the bottom, disk curvature towards the top. |
| Put the round plate 1x1 upside down on the middle hole of the disk. |
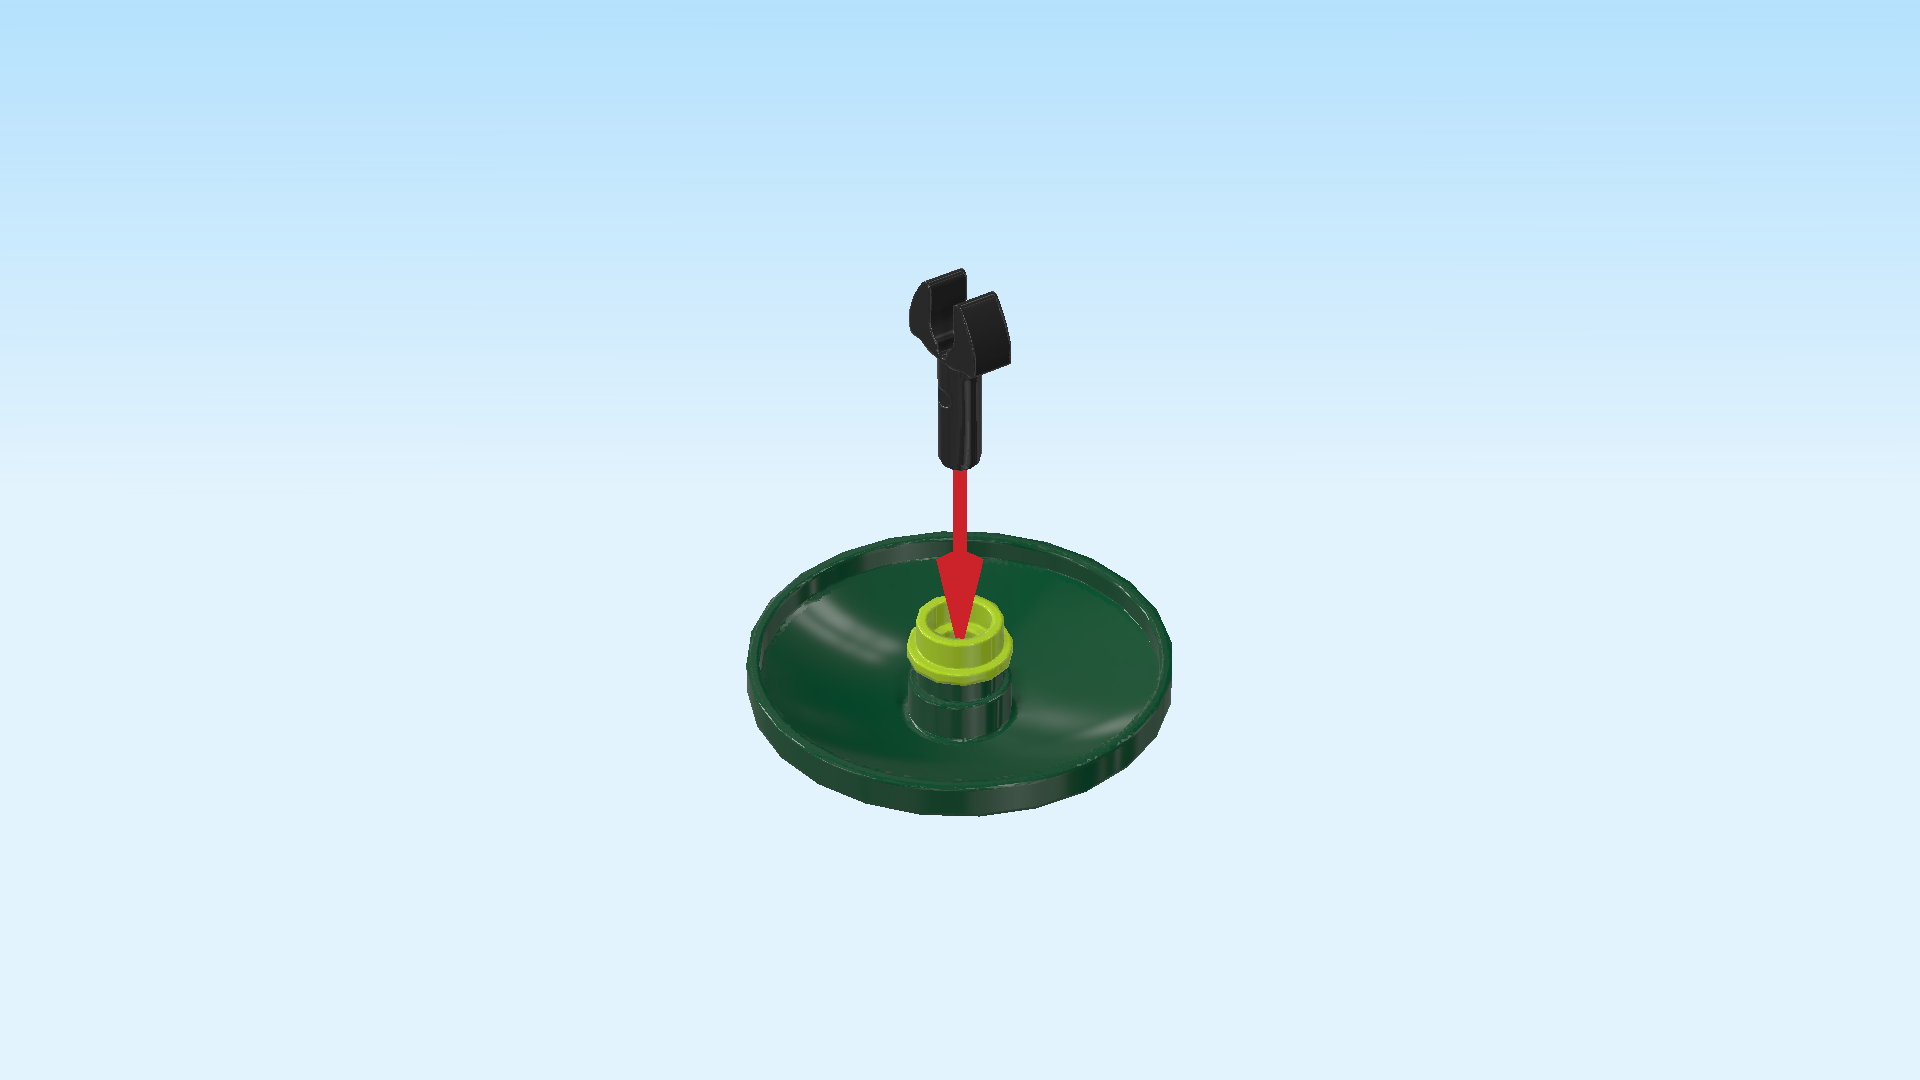
| Find 1 black open end wrench. |
| Insert its handle from the top into the middle holes of the 2 previous pieces. |
| The big underwater plant leaf is finished! Flip it right side up and snap the wrench head onto the small shaft pointing to the back in the middle. |
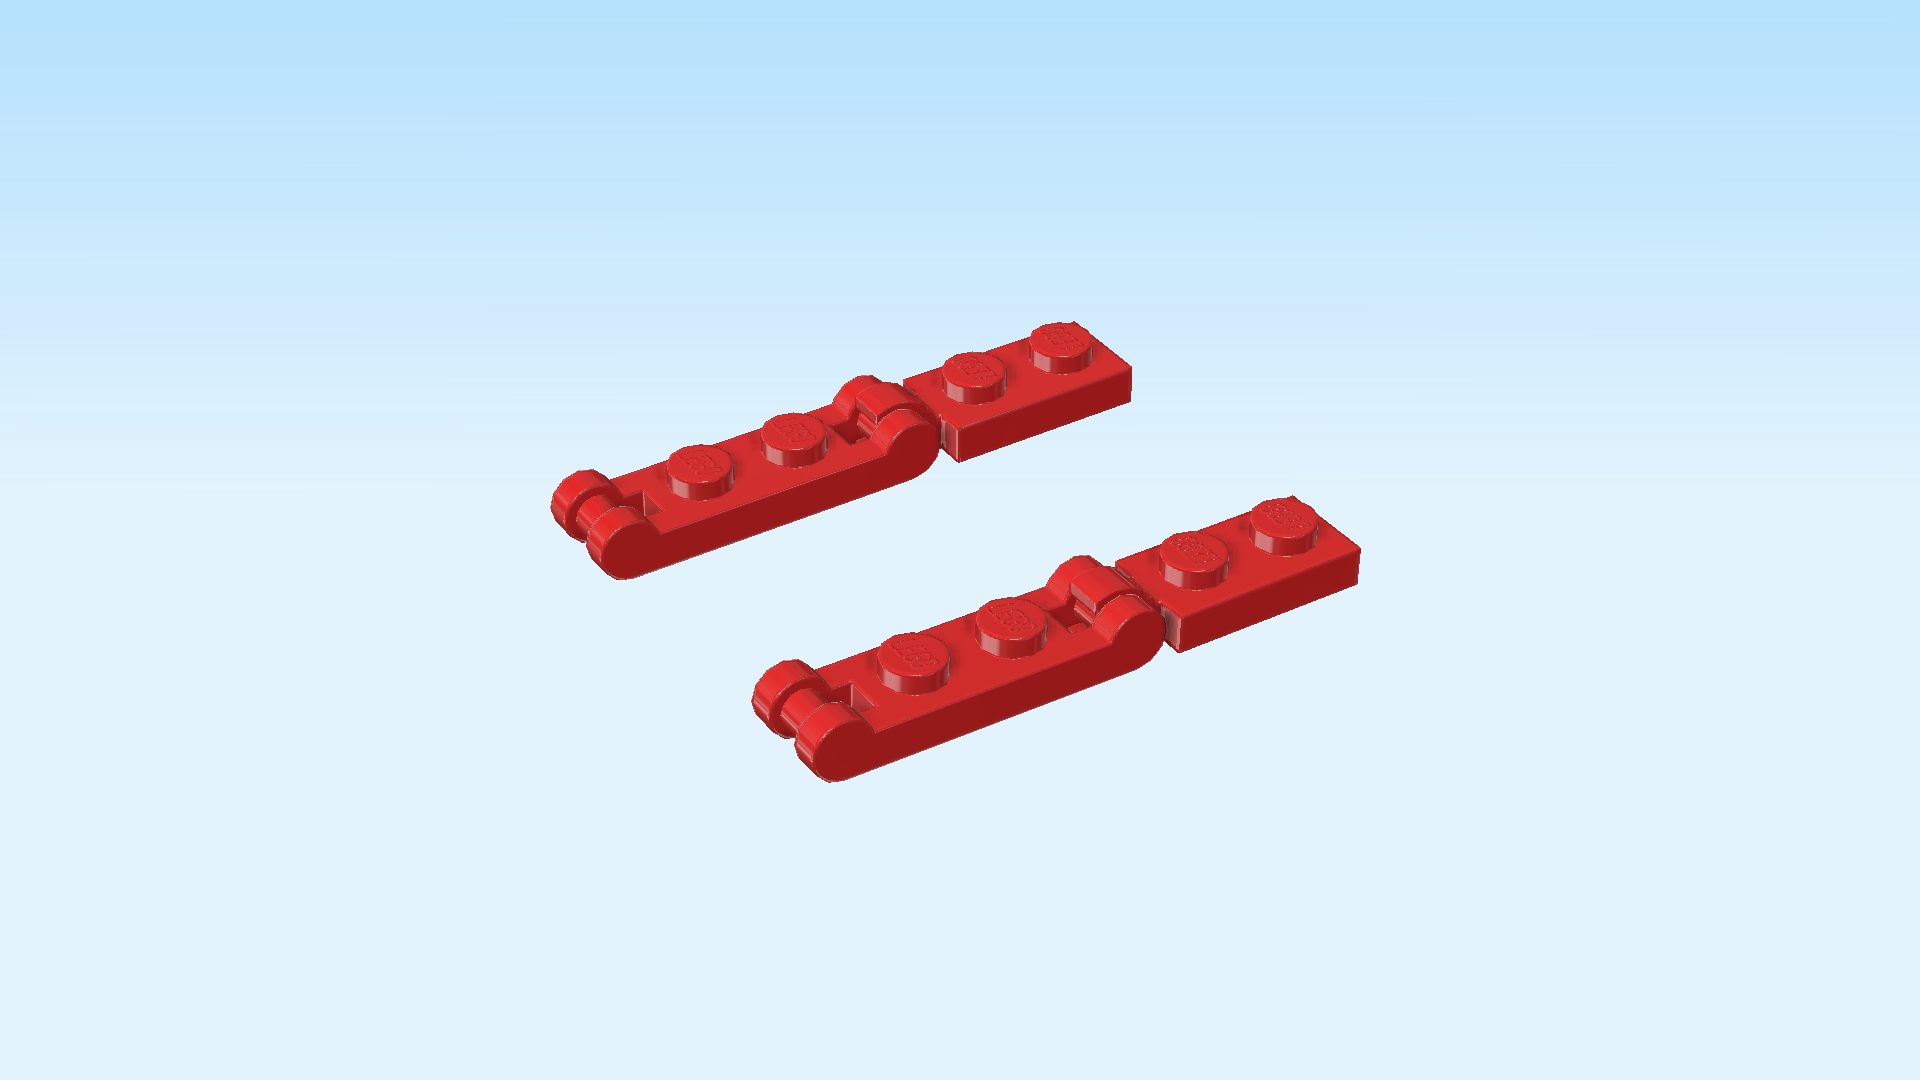
| Next, we will build 2 red coral branches. |
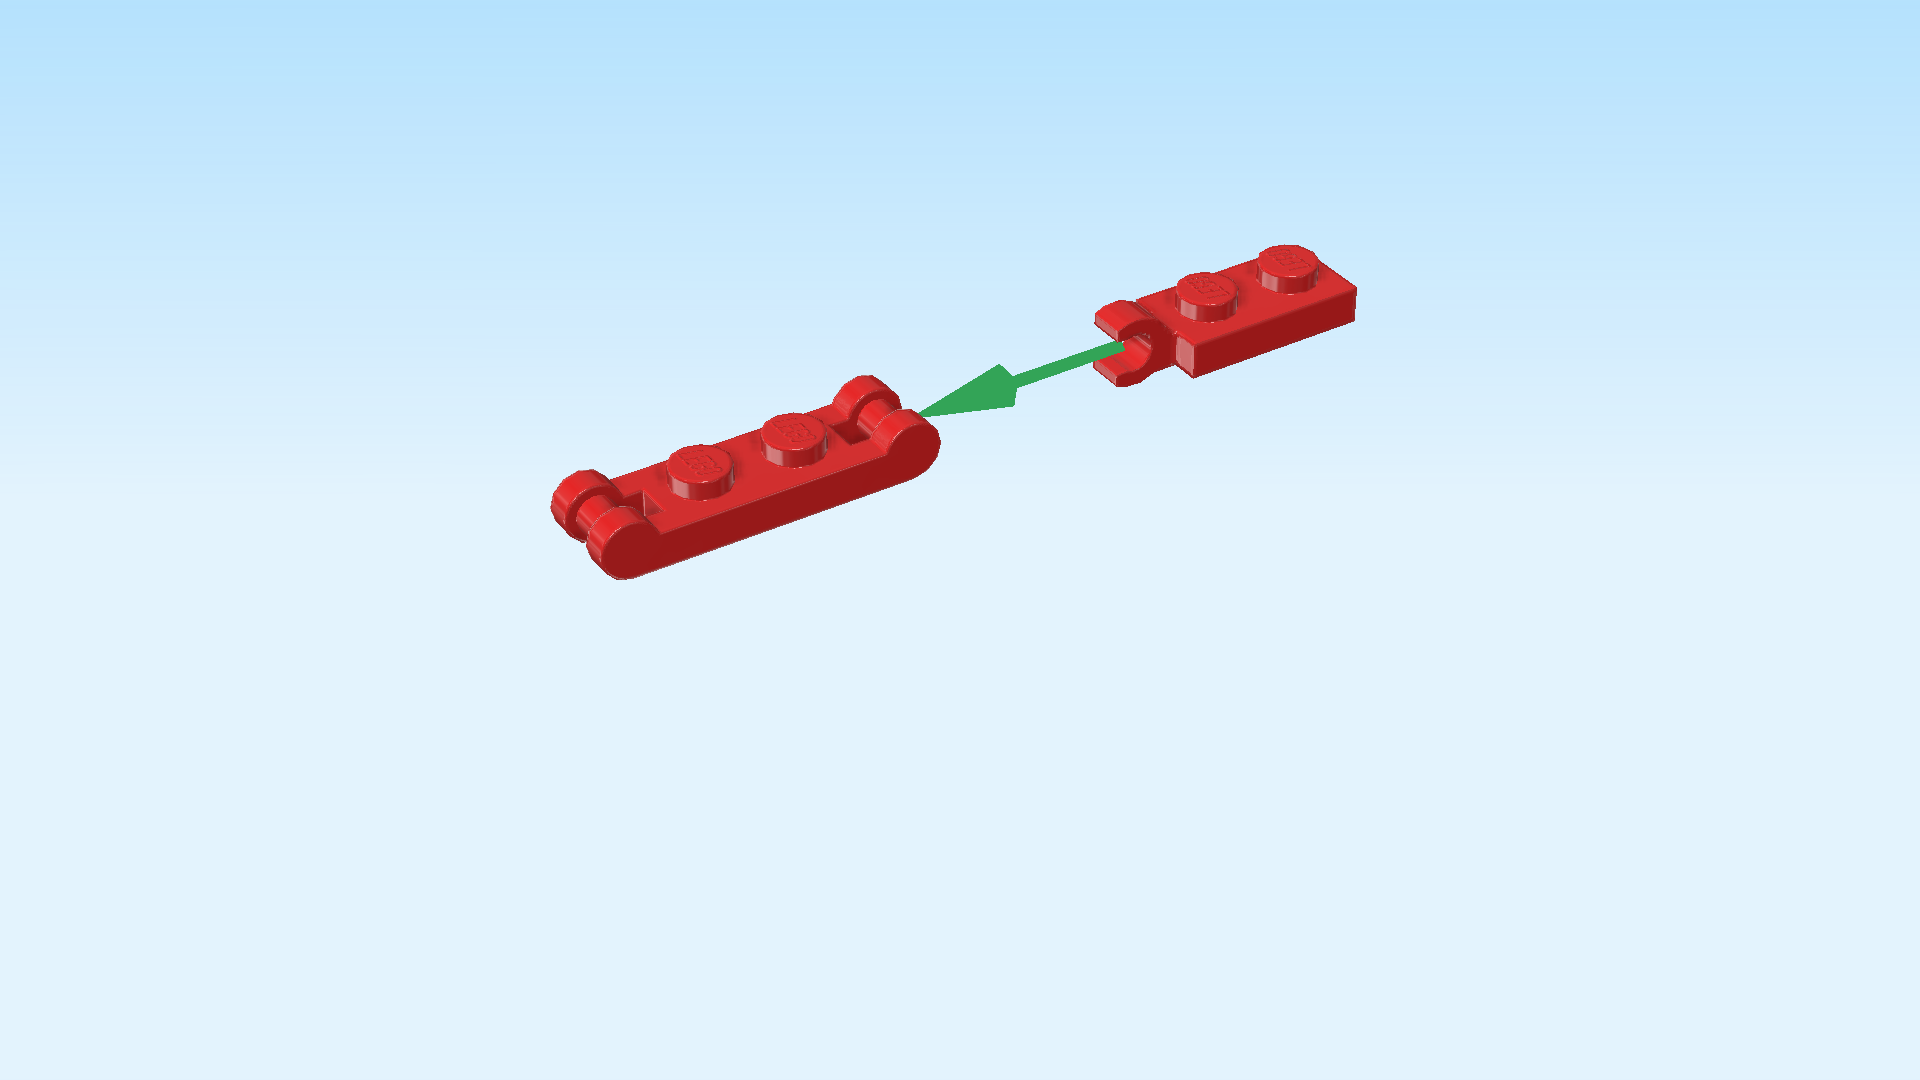
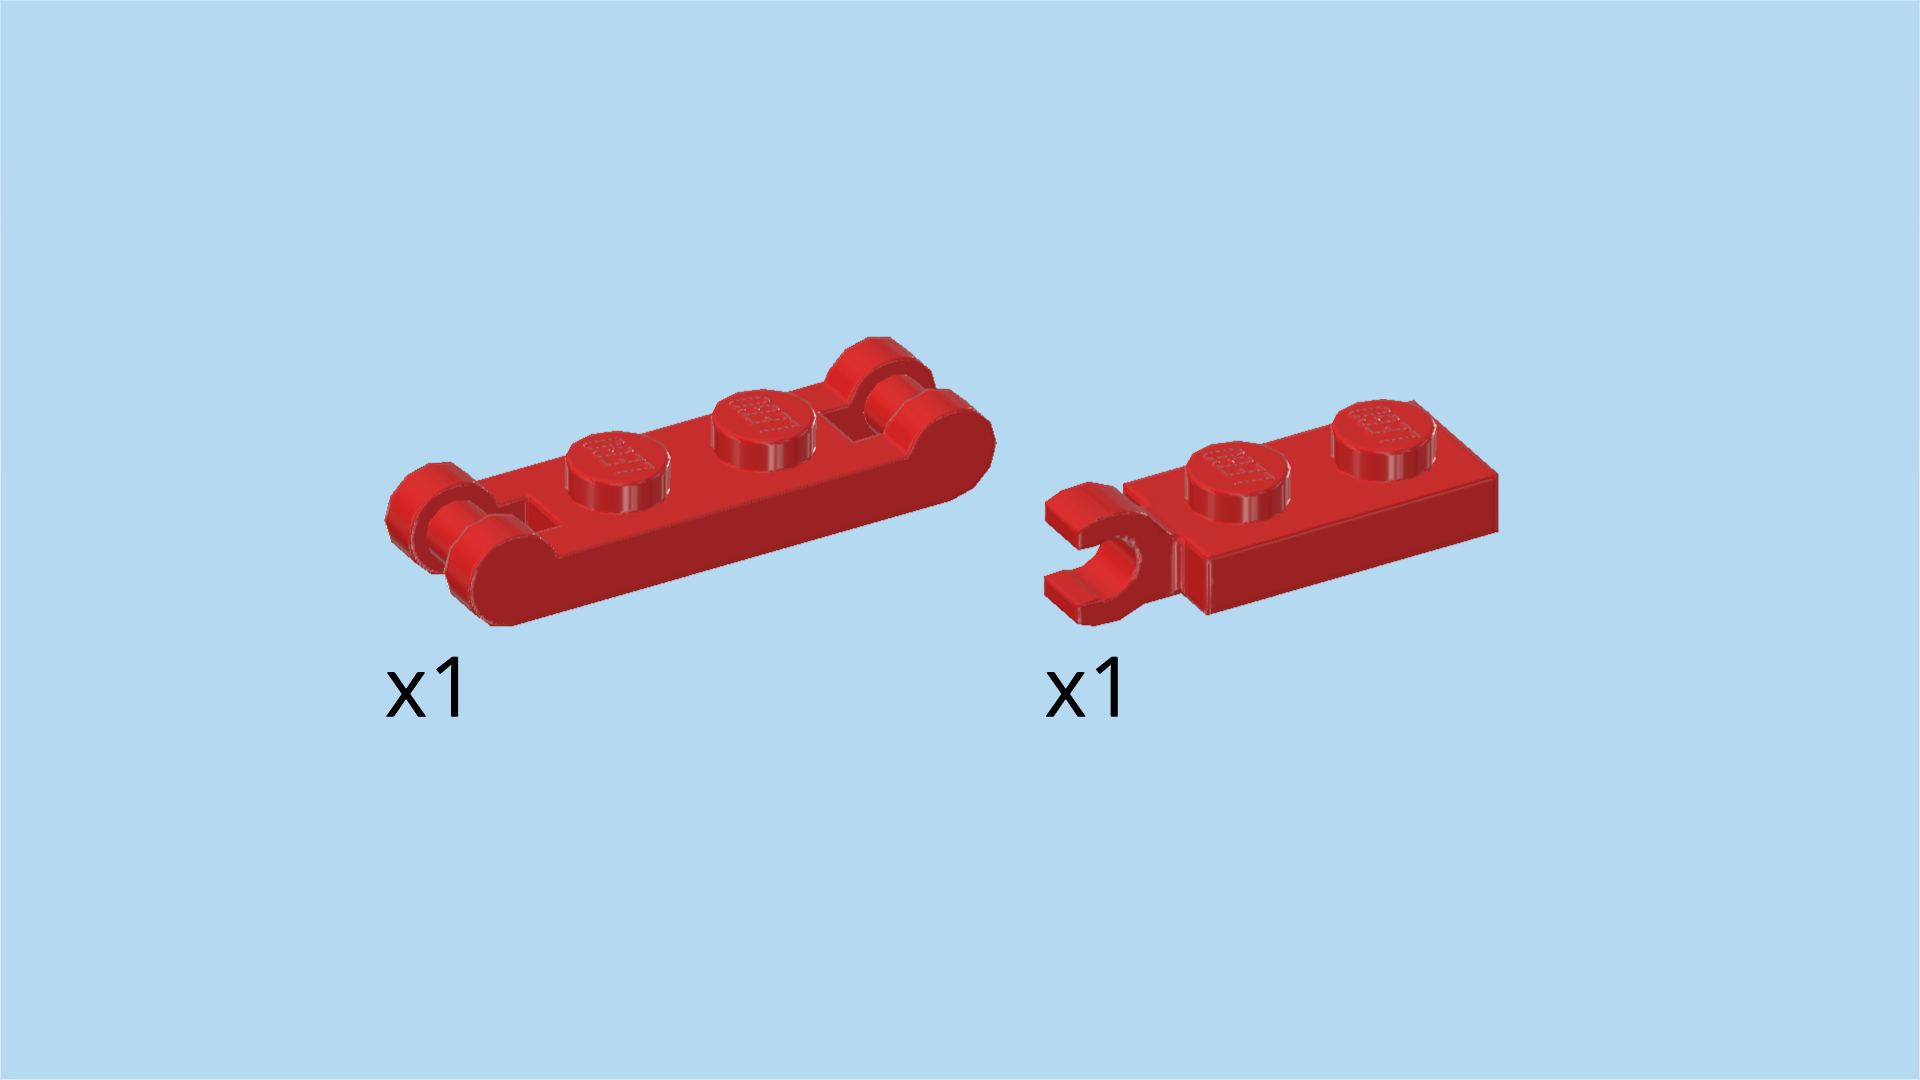
| Collect the following 2 pieces: |
| 1 bright red plate 1x2 with vertical clasp on short side, |
| and 1 bright red plate 1x2 with 2 shafts on short sides. |
| Put the plate with side shafts horizontally on the table, shafts to the left and right. |
| Snap the clasp of the plate 1x2 with clasp on the right shaft. The two plates form a straight row. |
| Collect the following 2 pieces: |
| another bright red plate 1x2 with vertical clasp on short side, |
| and another bright red plate 1x2 with 2 shafts on short sides. |
| Repeat the previous steps: put the plate with shafts horizontally on the table, and snap the clasp on the right shaft. |
| Snap the left shafts of the 2 coral branches onto the 2 clasps that are pointing to the right on the coral reef. Bend the coral branches and adjust their positions to your liking. |
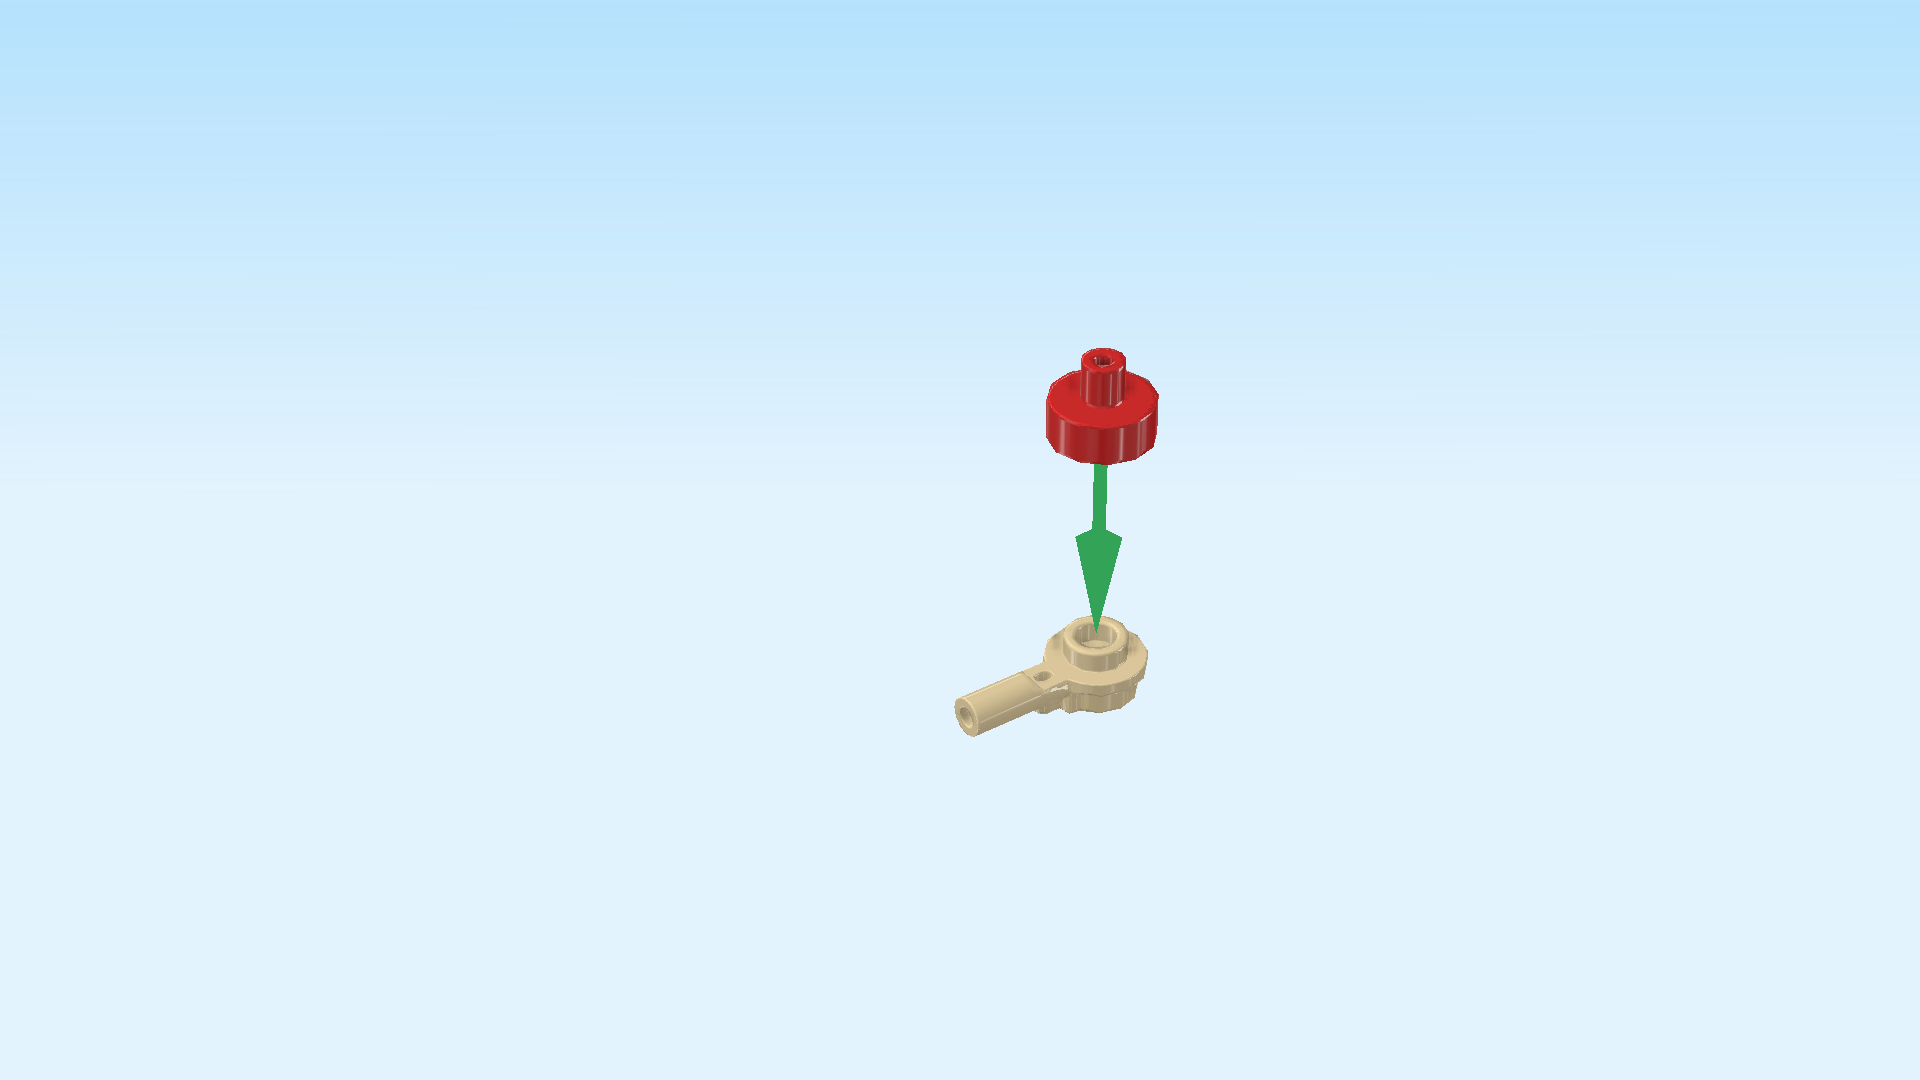
| Now, we will build the stem of an extravagant underwater plant. |
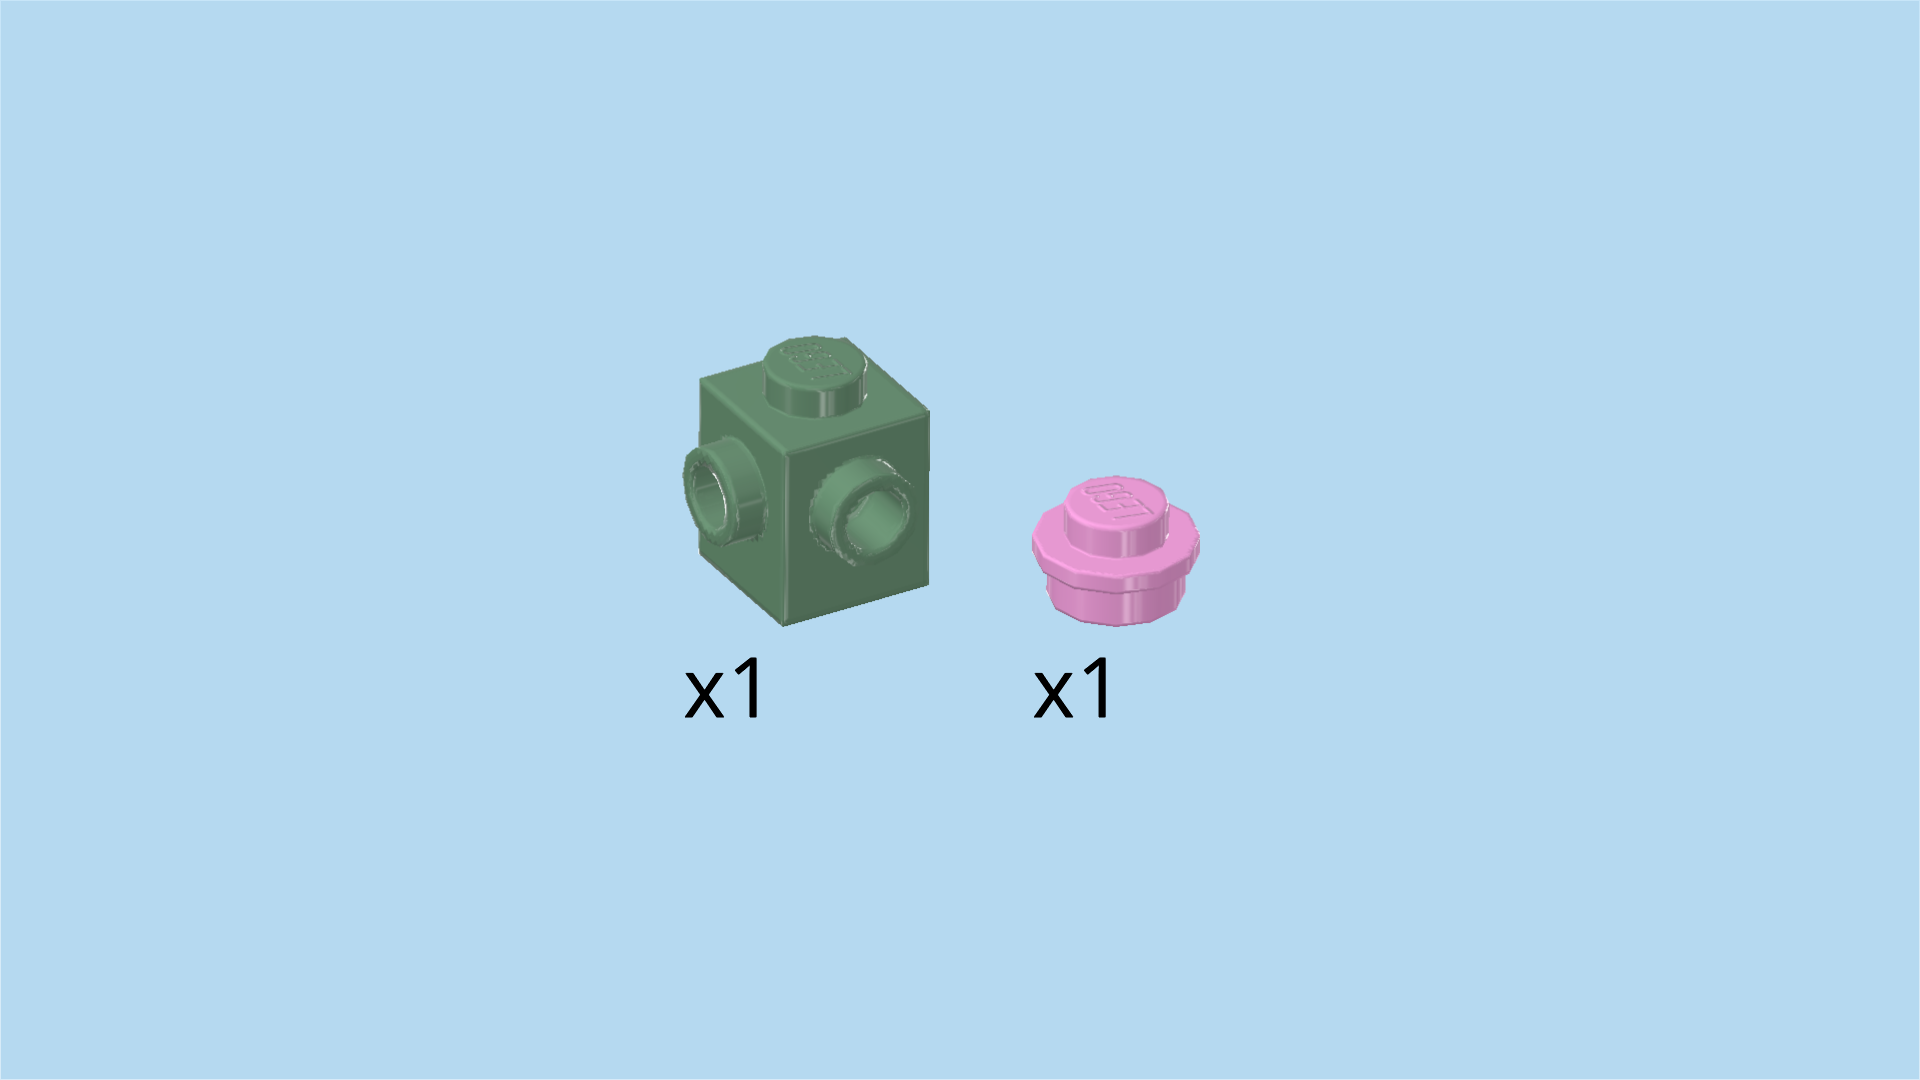
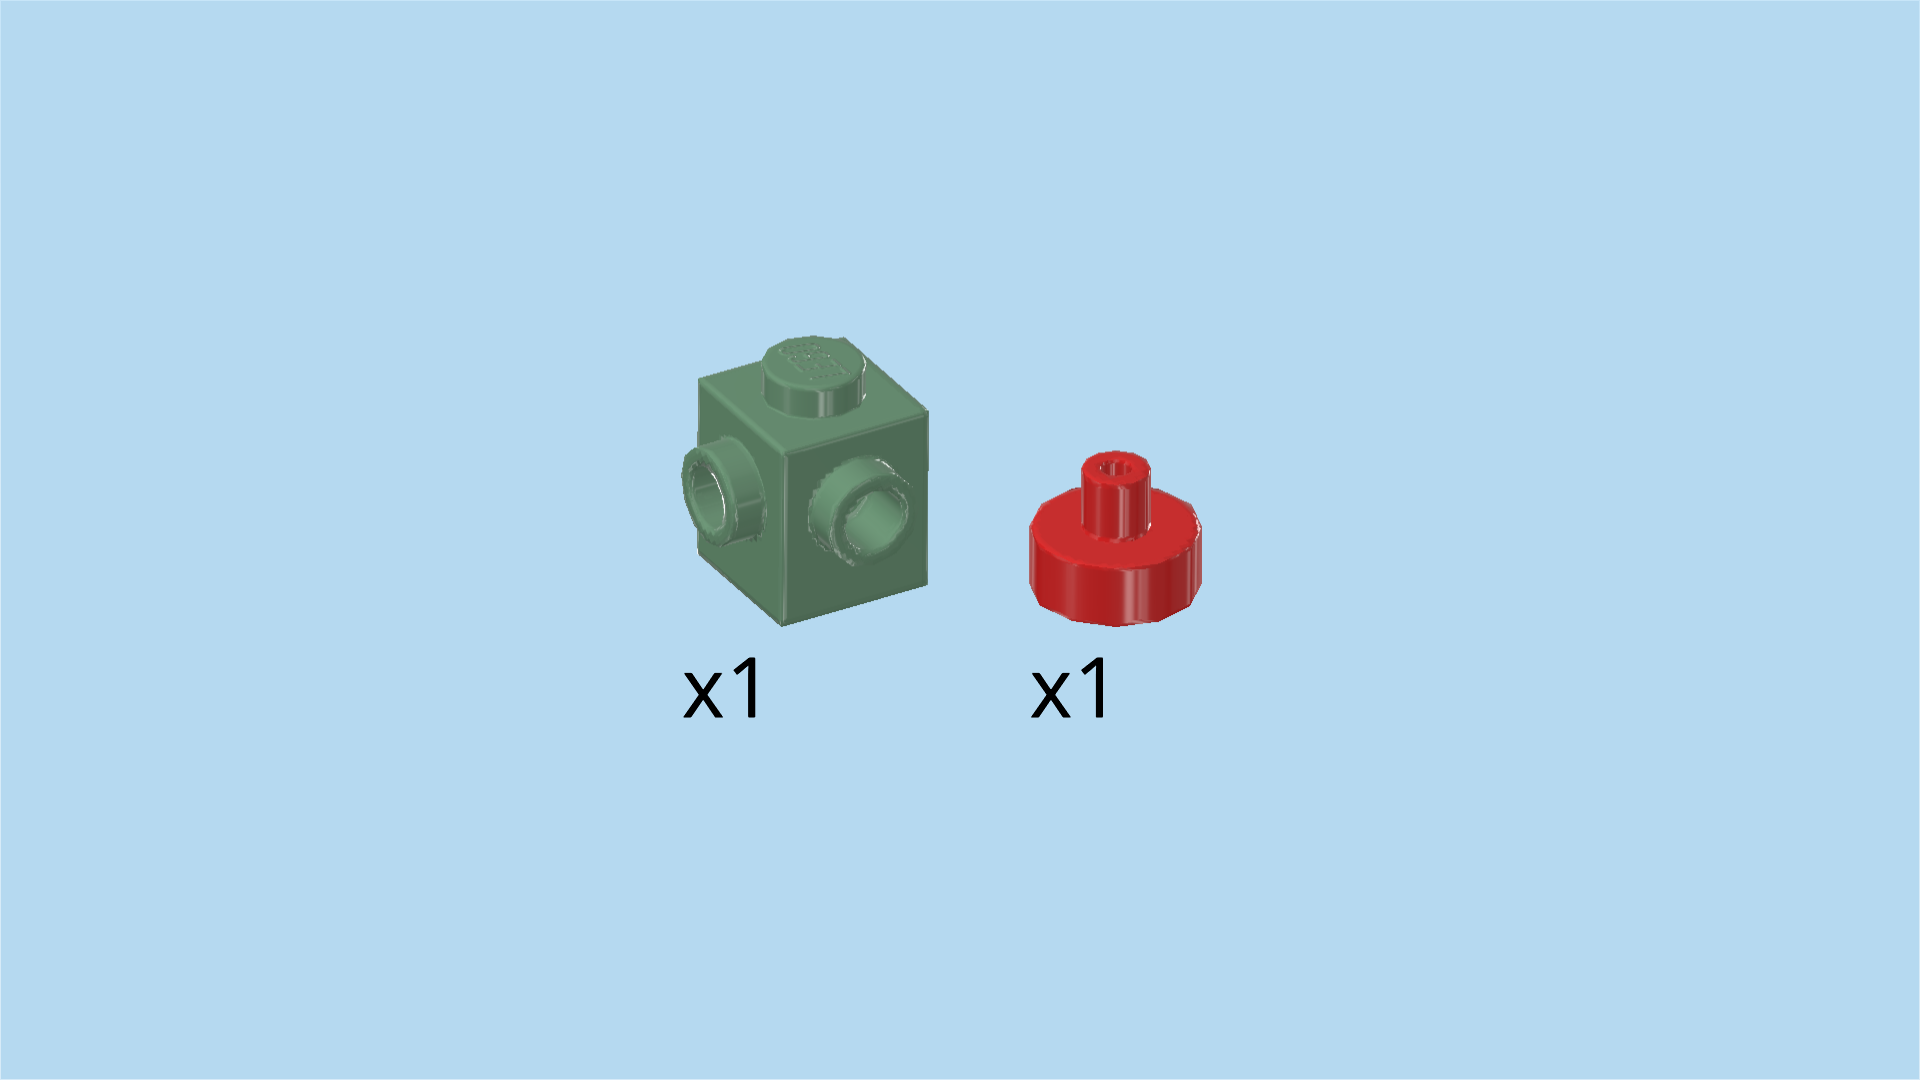
| Collect the following 2 pieces: |
| 1 light purple round plate 1x1, |
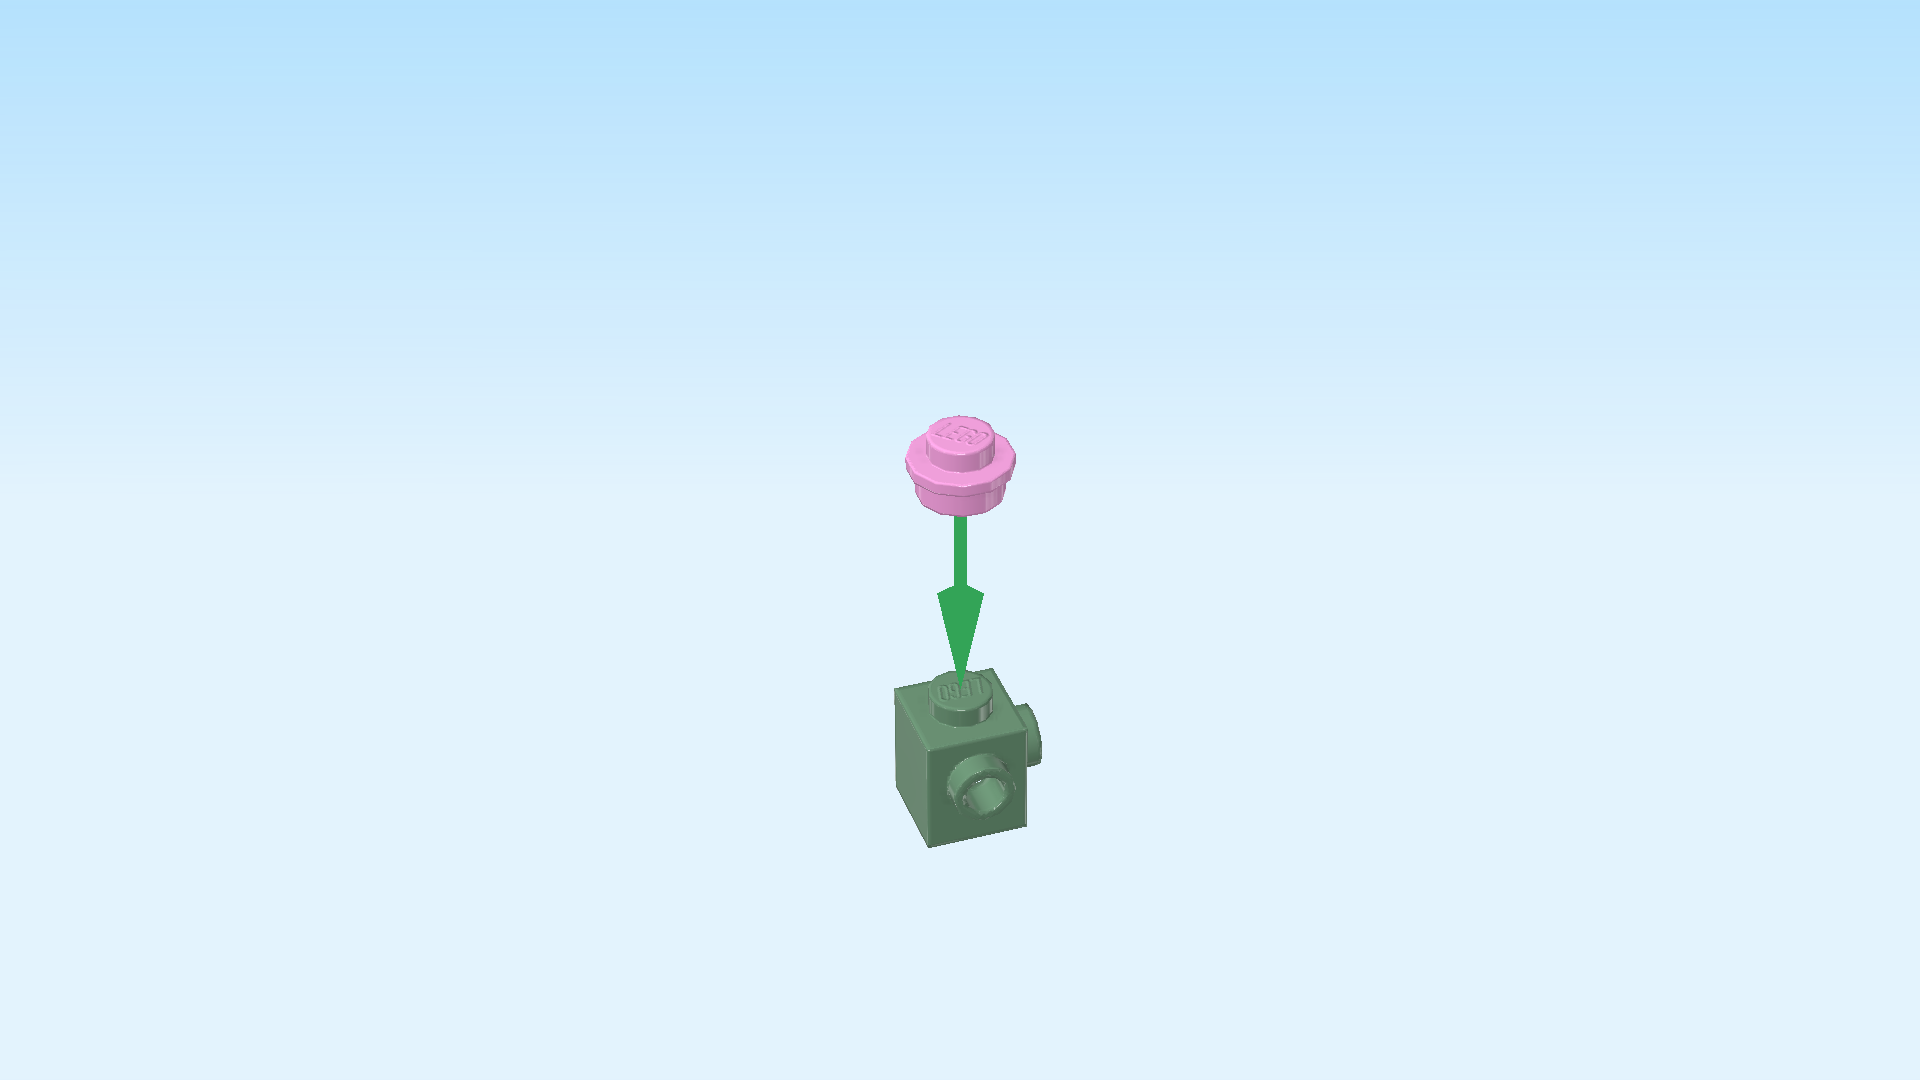
| and 1 sand green brick 1x1 with 1 front and 1 side knob. |
| Put the brick 1x1 on the table, side knobs to the front and right. |
| Put the round plate on top. |
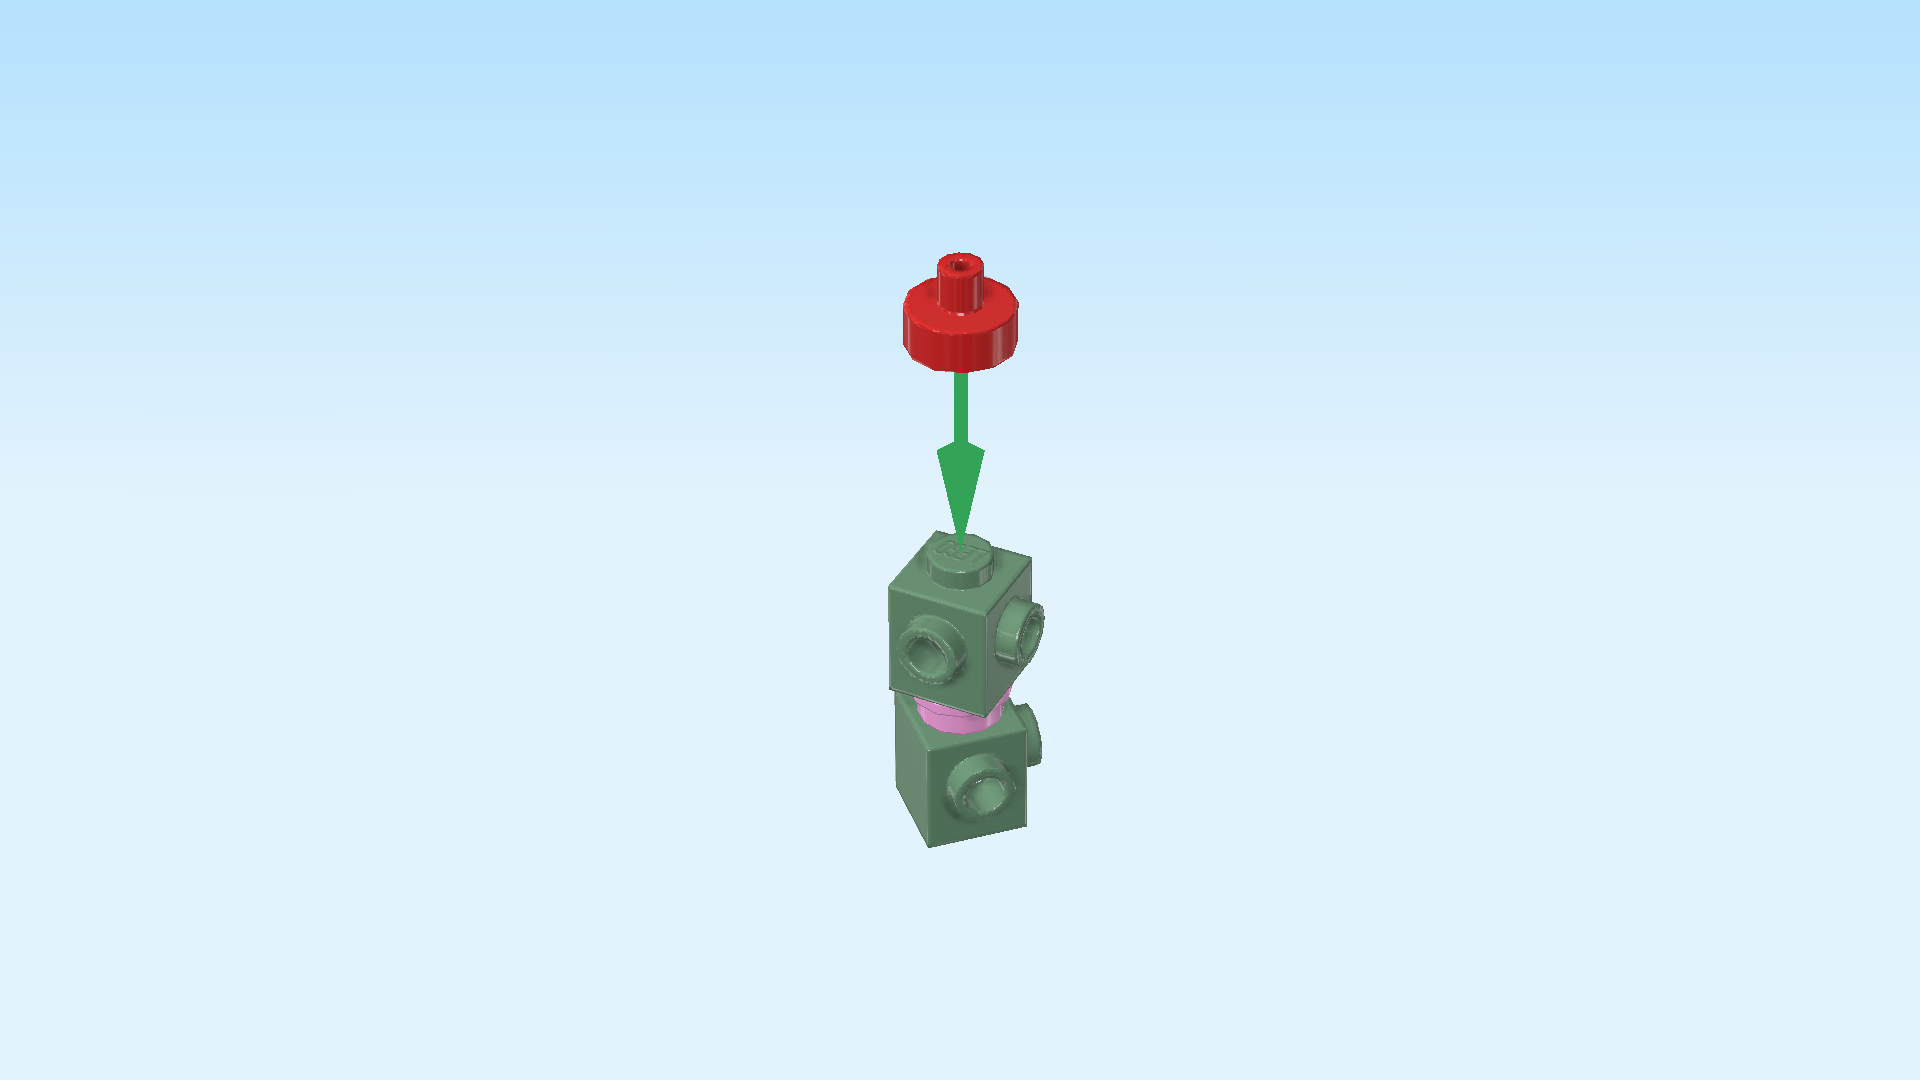
| Collect the following 2 pieces: |
| 1 bright red round plate 1x1 with top shaft, |
| and another sand green brick 1x1 with 1 front and 1 side knob. |
| Put the brick on top, but make sure its side knobs are pointing in slightly different directions as the previous brick 1x1. |
| Put the round plate with shaft on top. |
| Mount the stem on the front knob of the rightmost column on the coral reef. Make sure the knobs are pointing outwards, so rather to the front, right and left. |
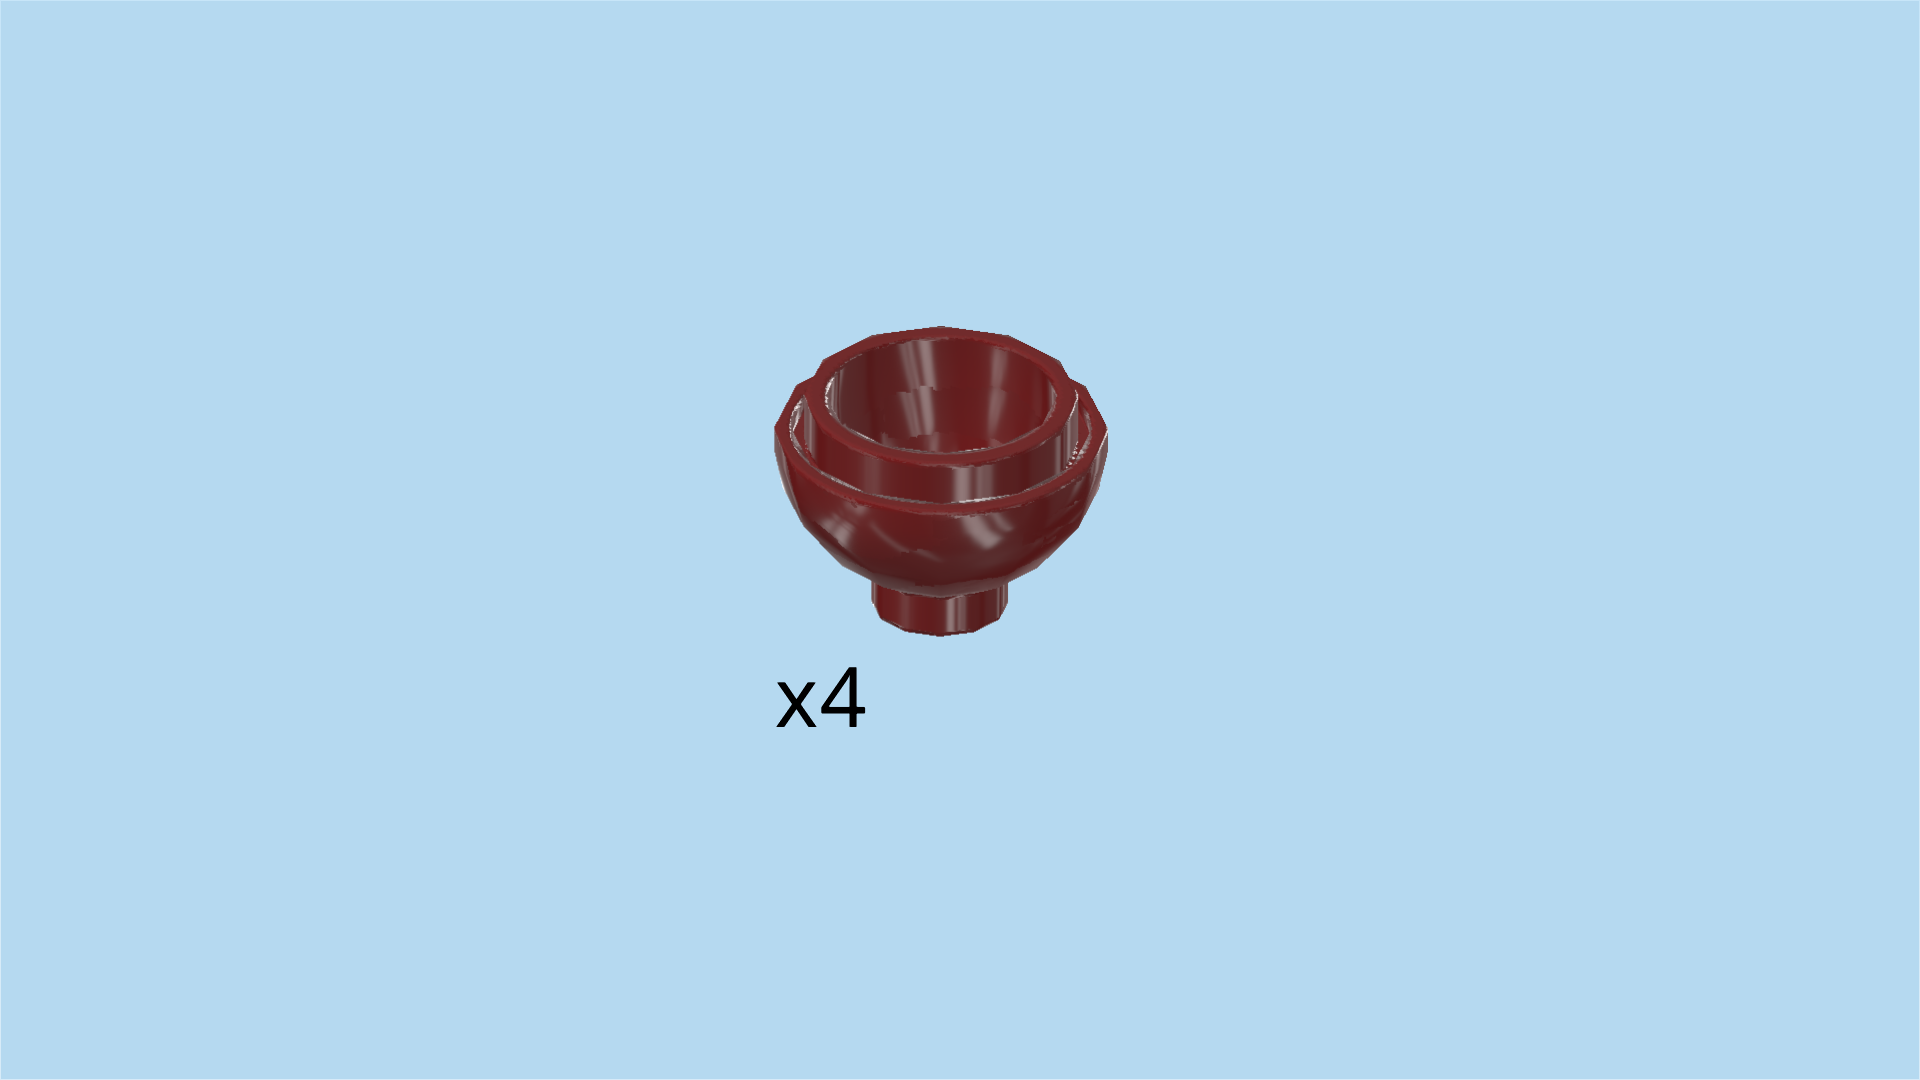
| Find 4 maroon red inverted domes 2x2 with 1 knob. |
| Put the hollow knobs of the domes on the 4 side knobs of the stem. You will probably have to adjust the stem a bit to fit all 4 domes on it. |
| Now, let's make the top part of the extravagant plant. |
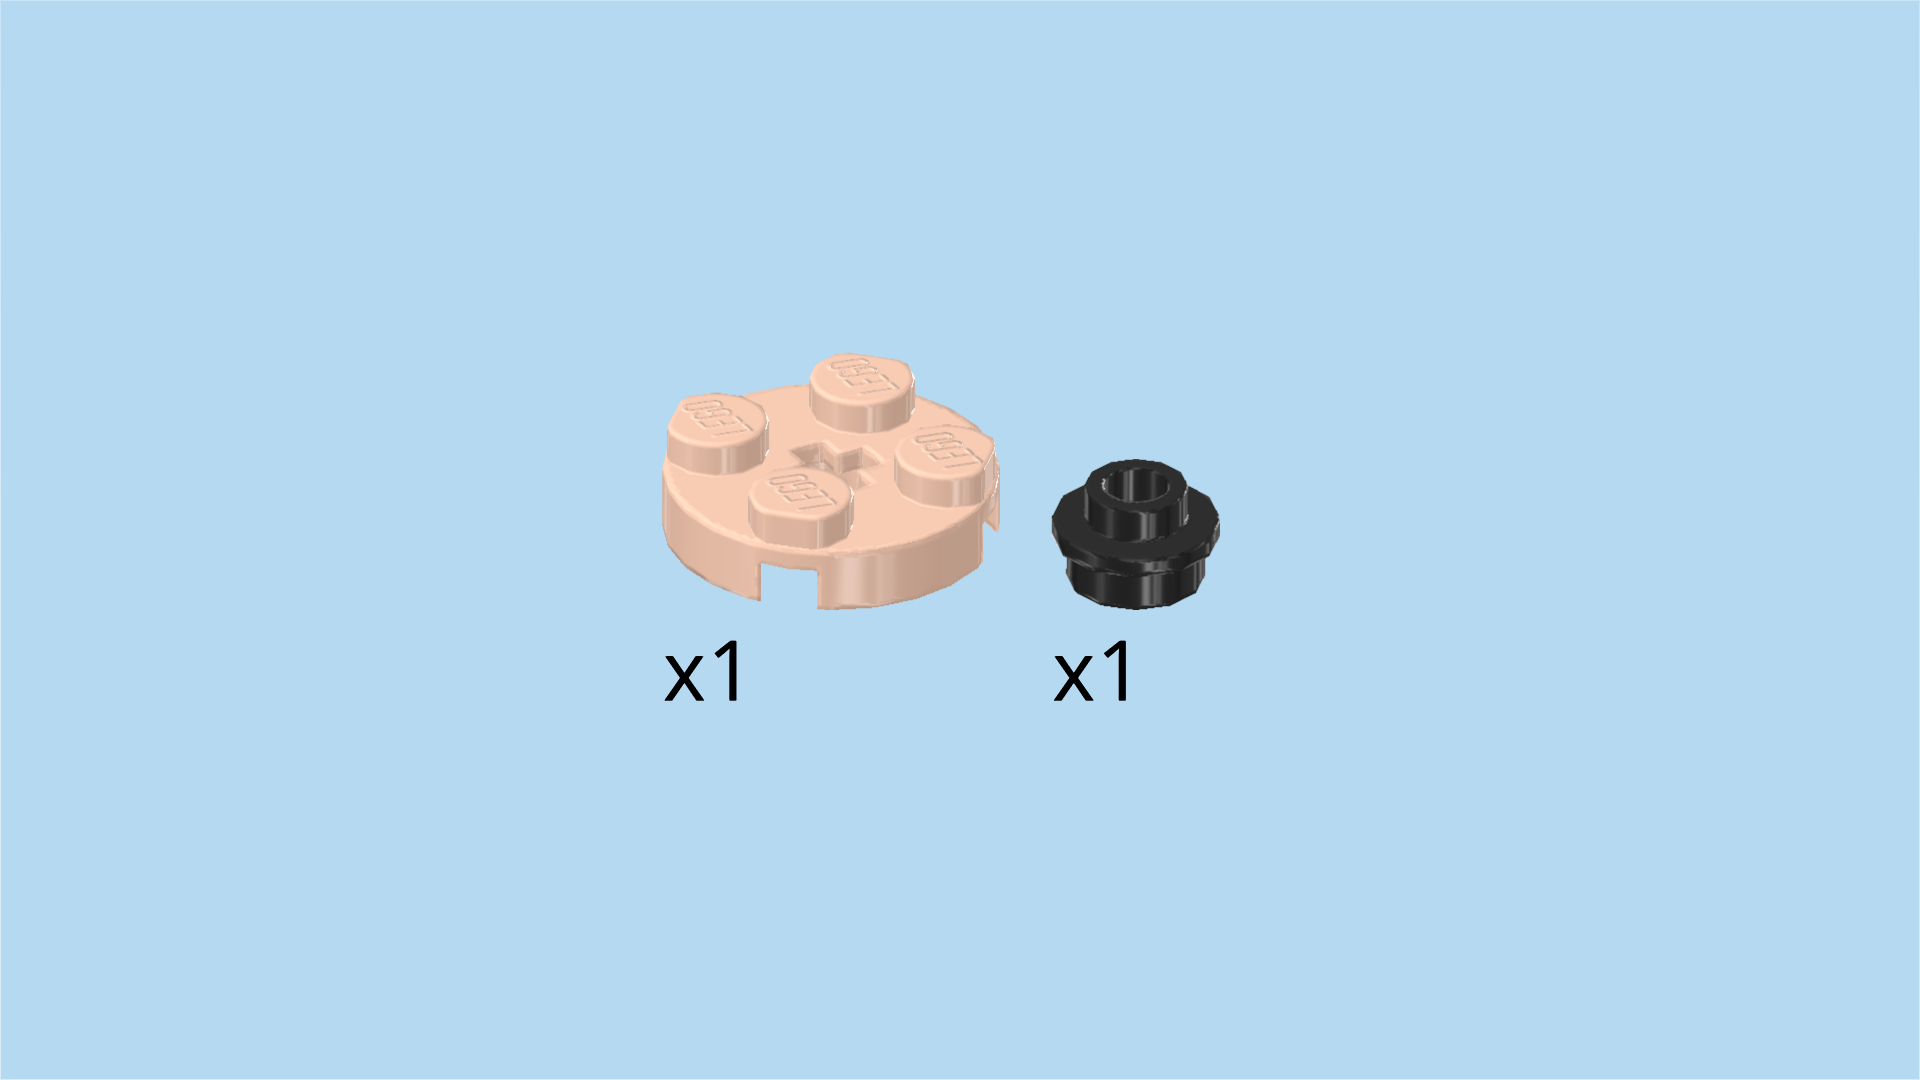
| Collect the following 2 pieces: |
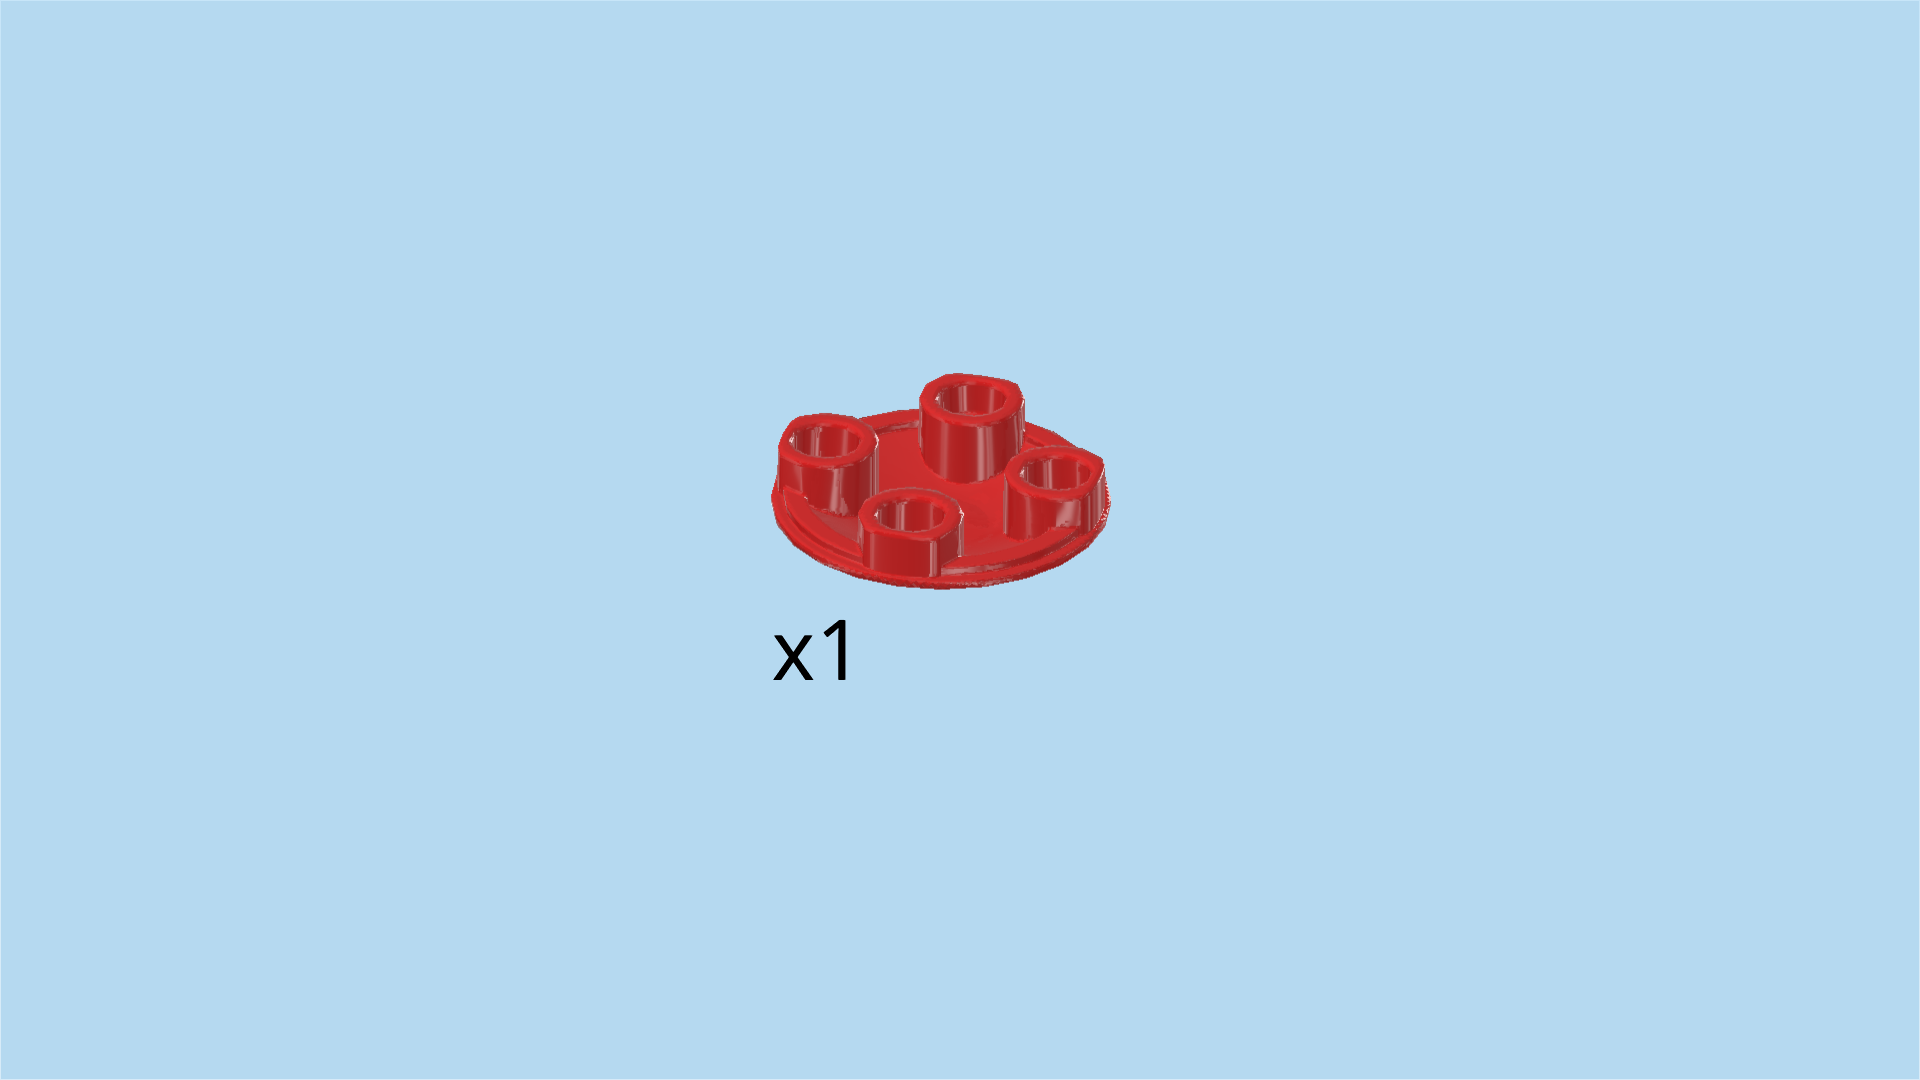
| 1 light nougat brown round plate 2x2, |
| and 1 black round plate 1x1 with through-hole. |
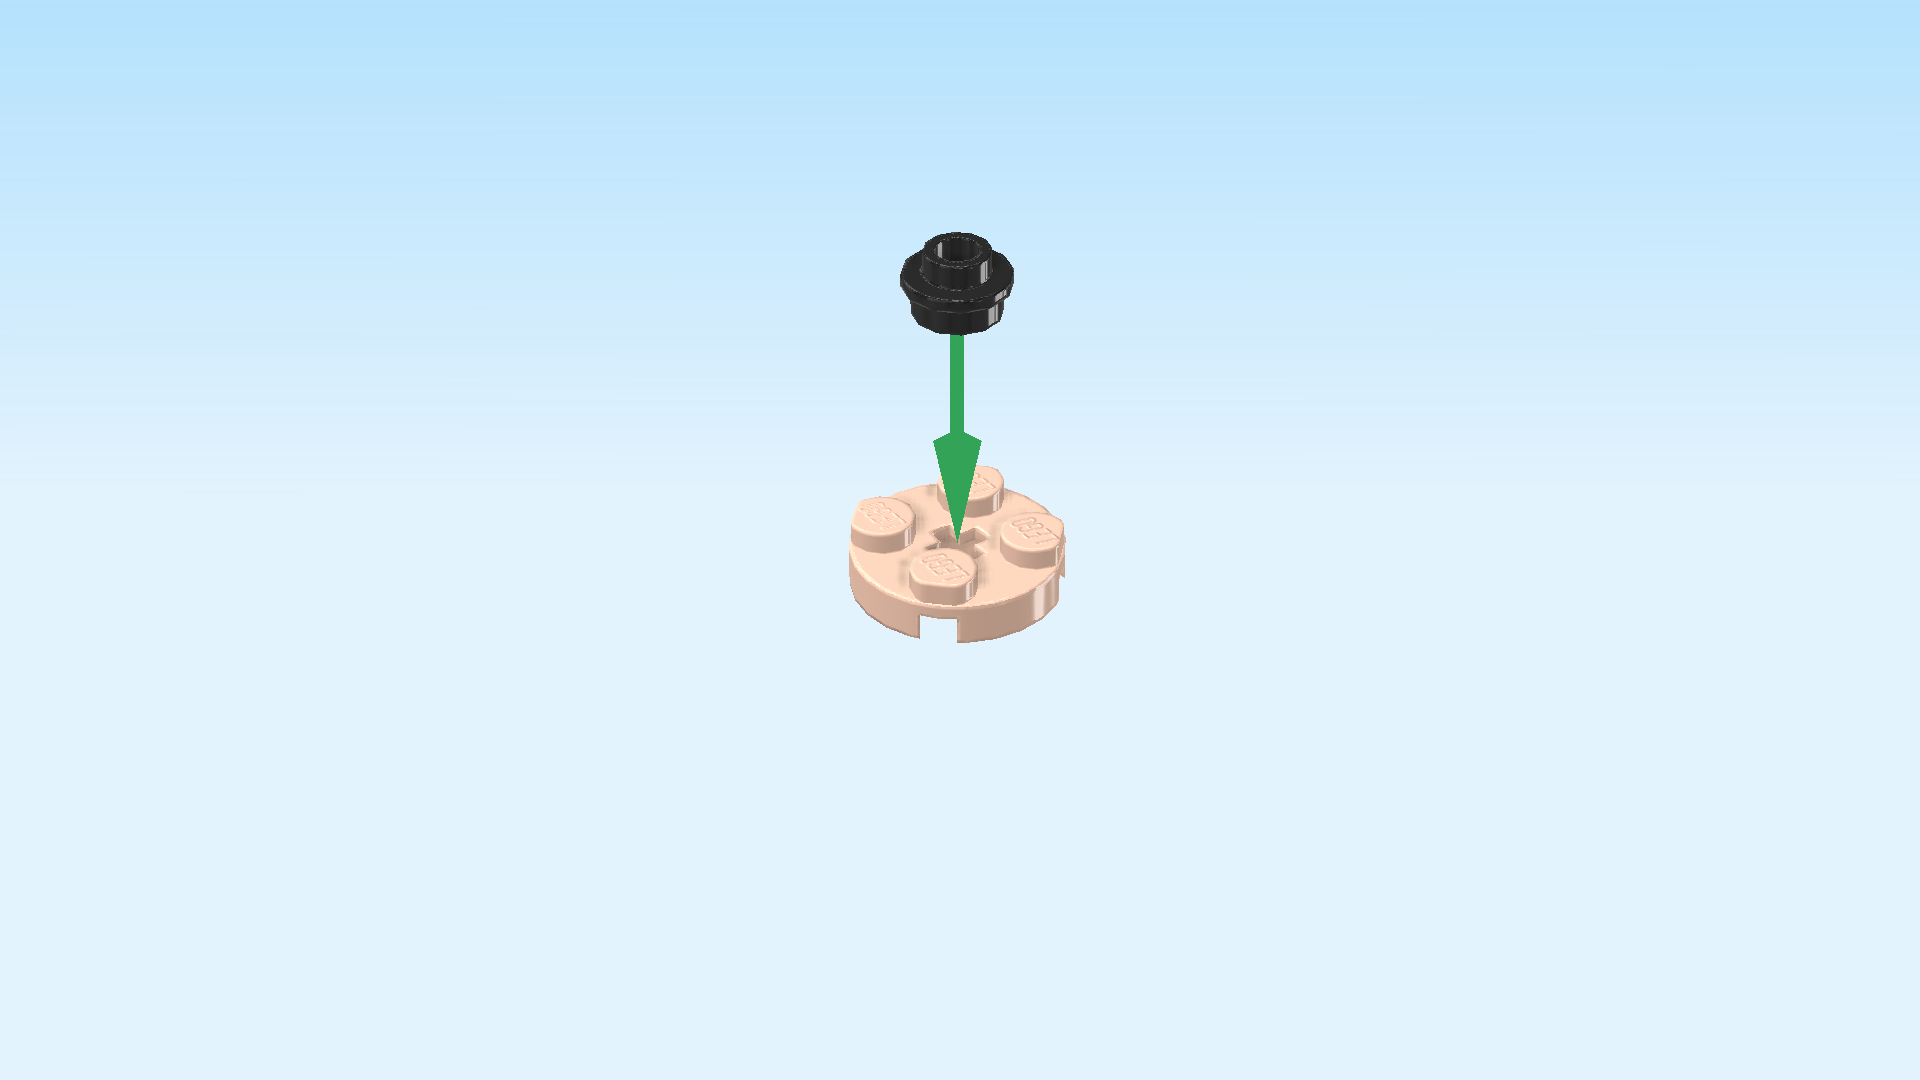
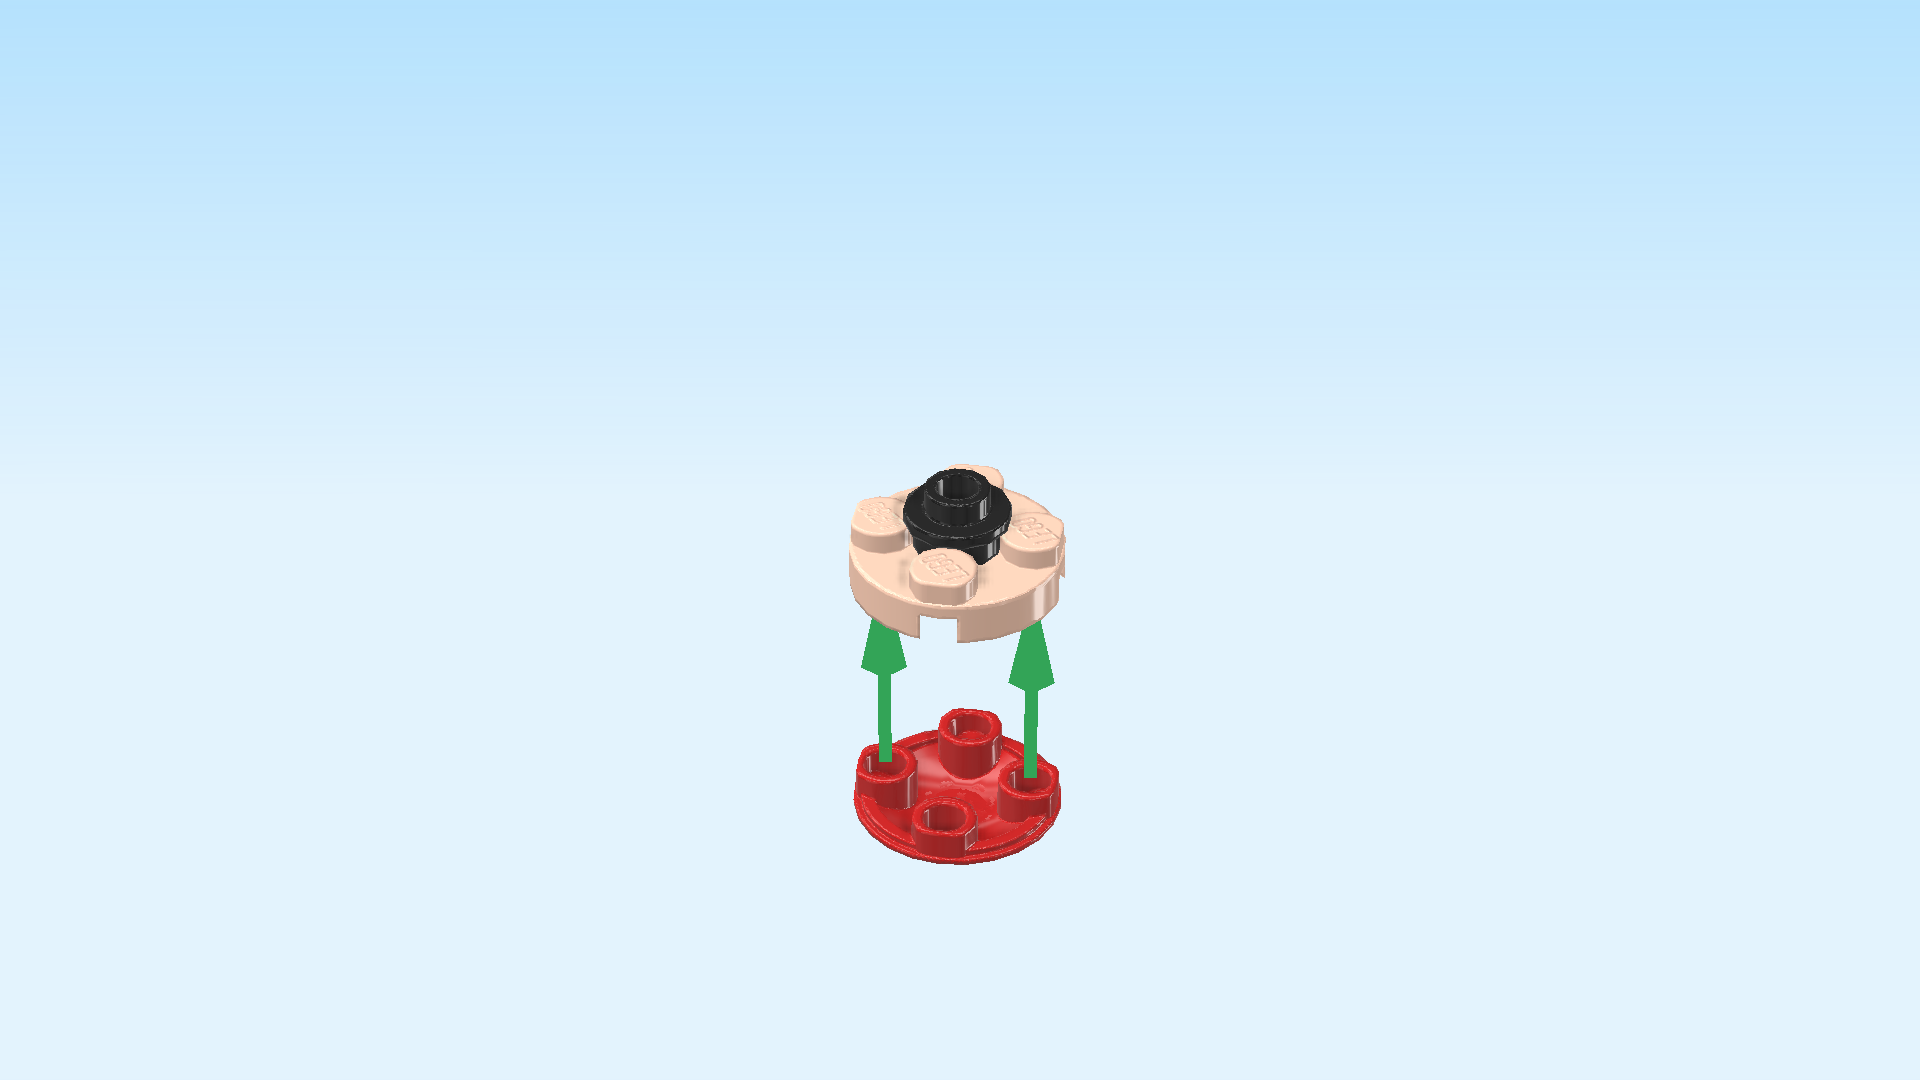
| Put the round plate 2x2 on the table. |
| Put the round plate 1x1 in the middle between the 4 knobs of the plate 2x2. |
| Find 1 bright red inverted curve disk 2x2 with 4 knobs. |
| Put it underneath the plate 2x2, curve to the bottom. |
| Flip the part upside down so that the curve is to the top, and mount it on the small shaft at the top of the plant stem. |
| The extravagant plant is finished, well done! |
| Next up, we will build a blue coral element. |
| Collect the following 2 pieces: |
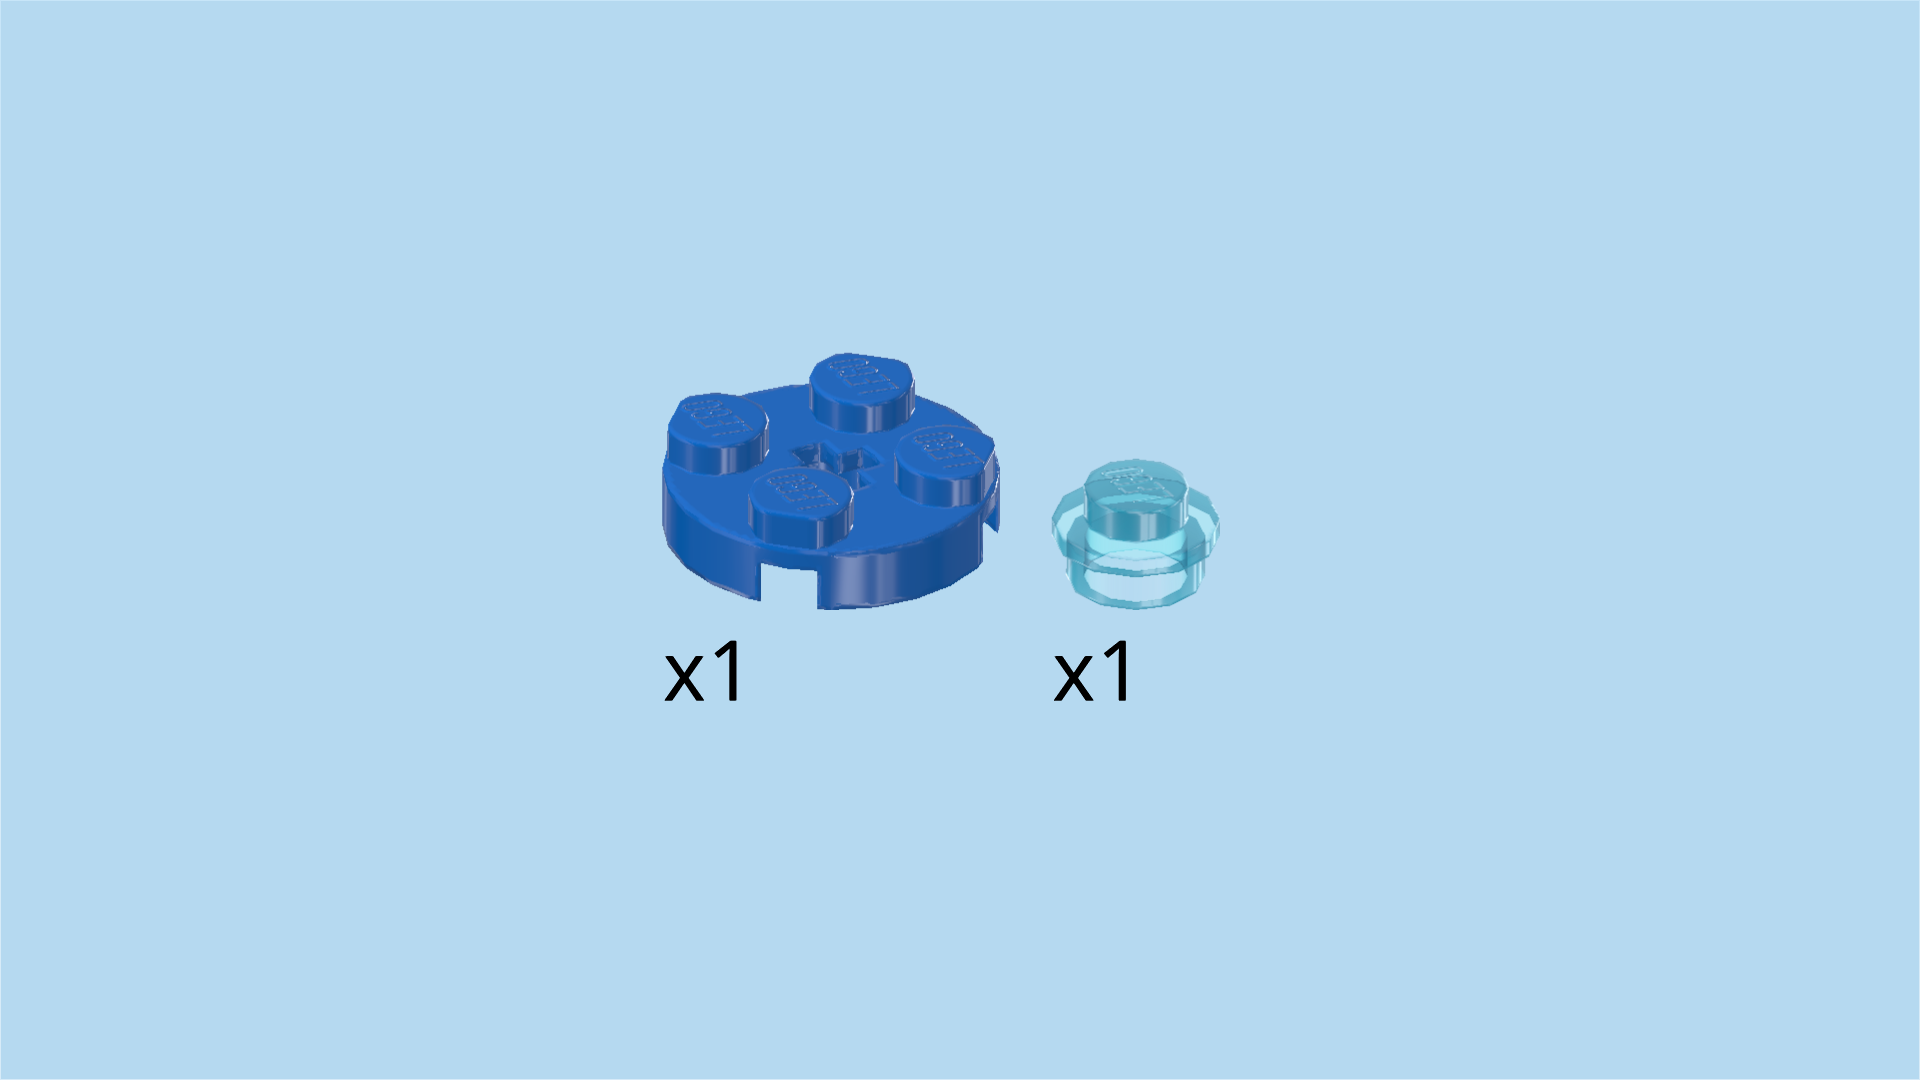
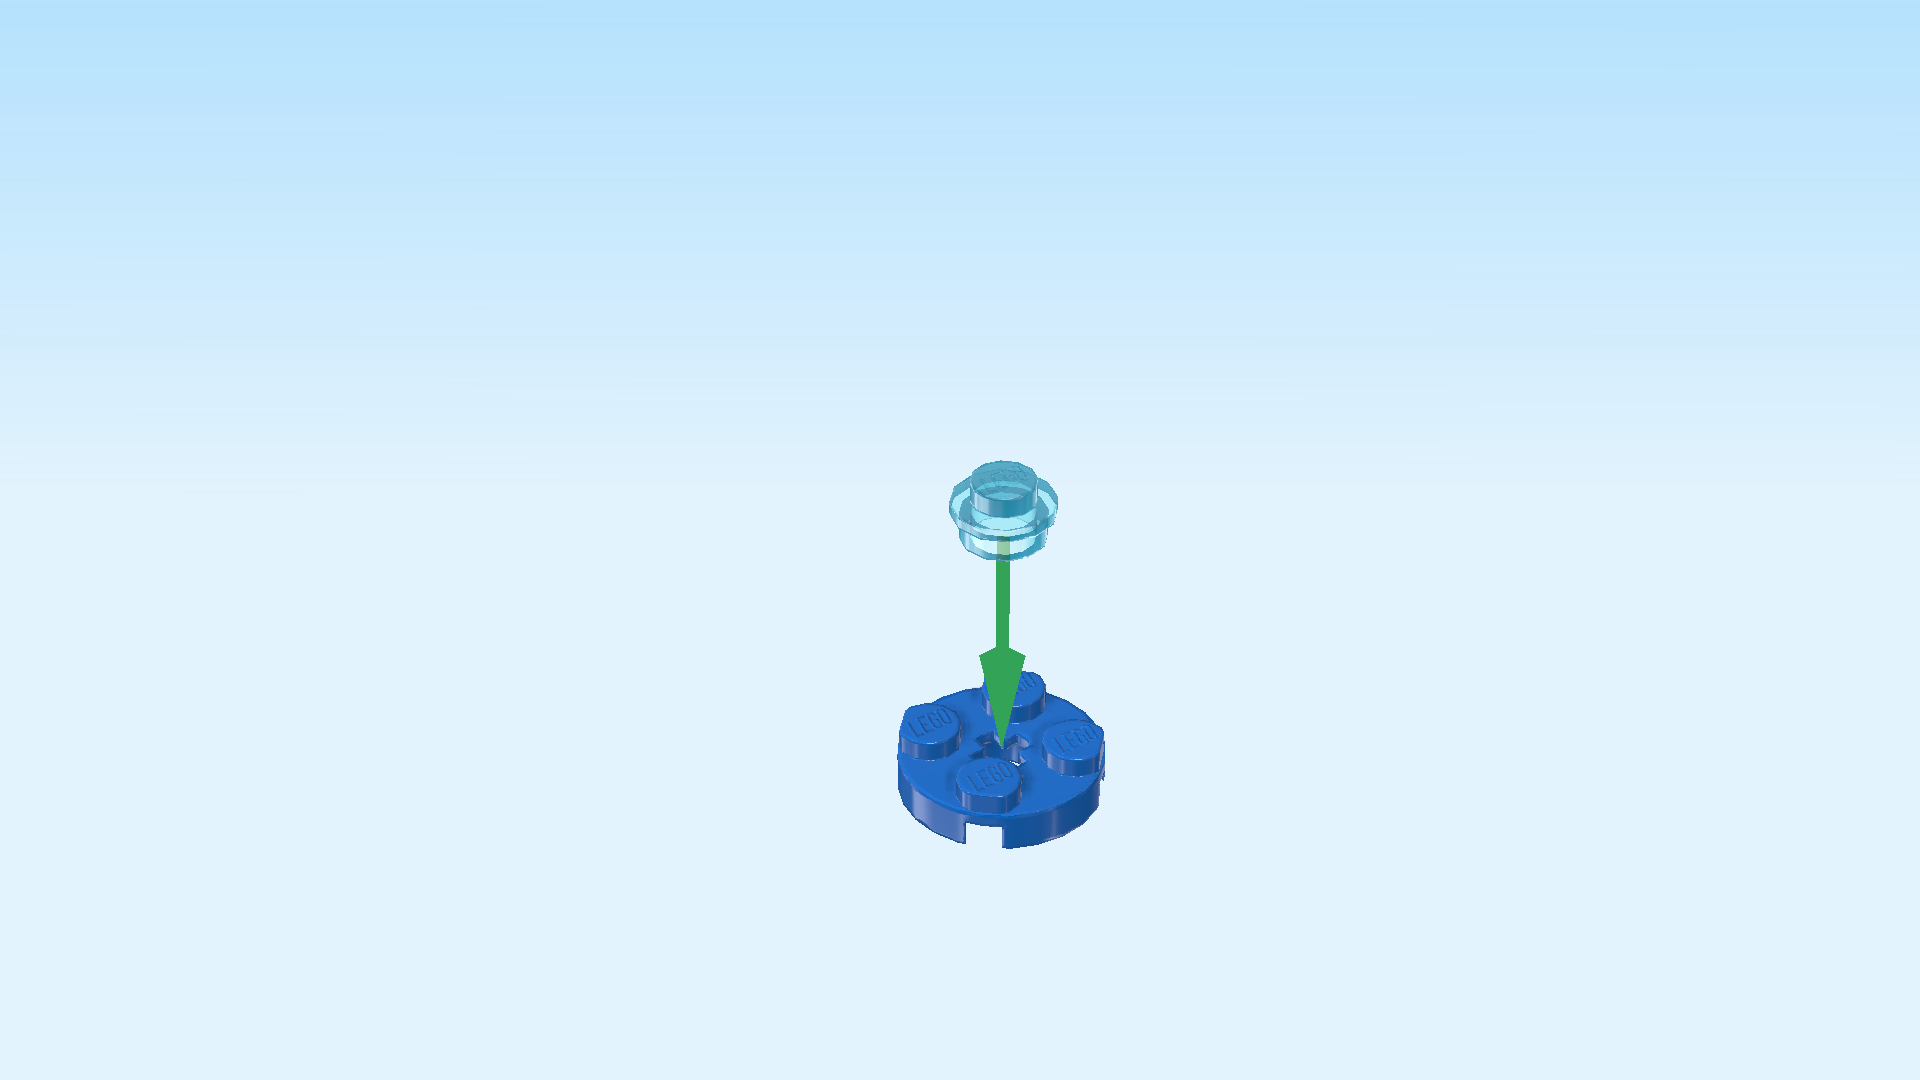
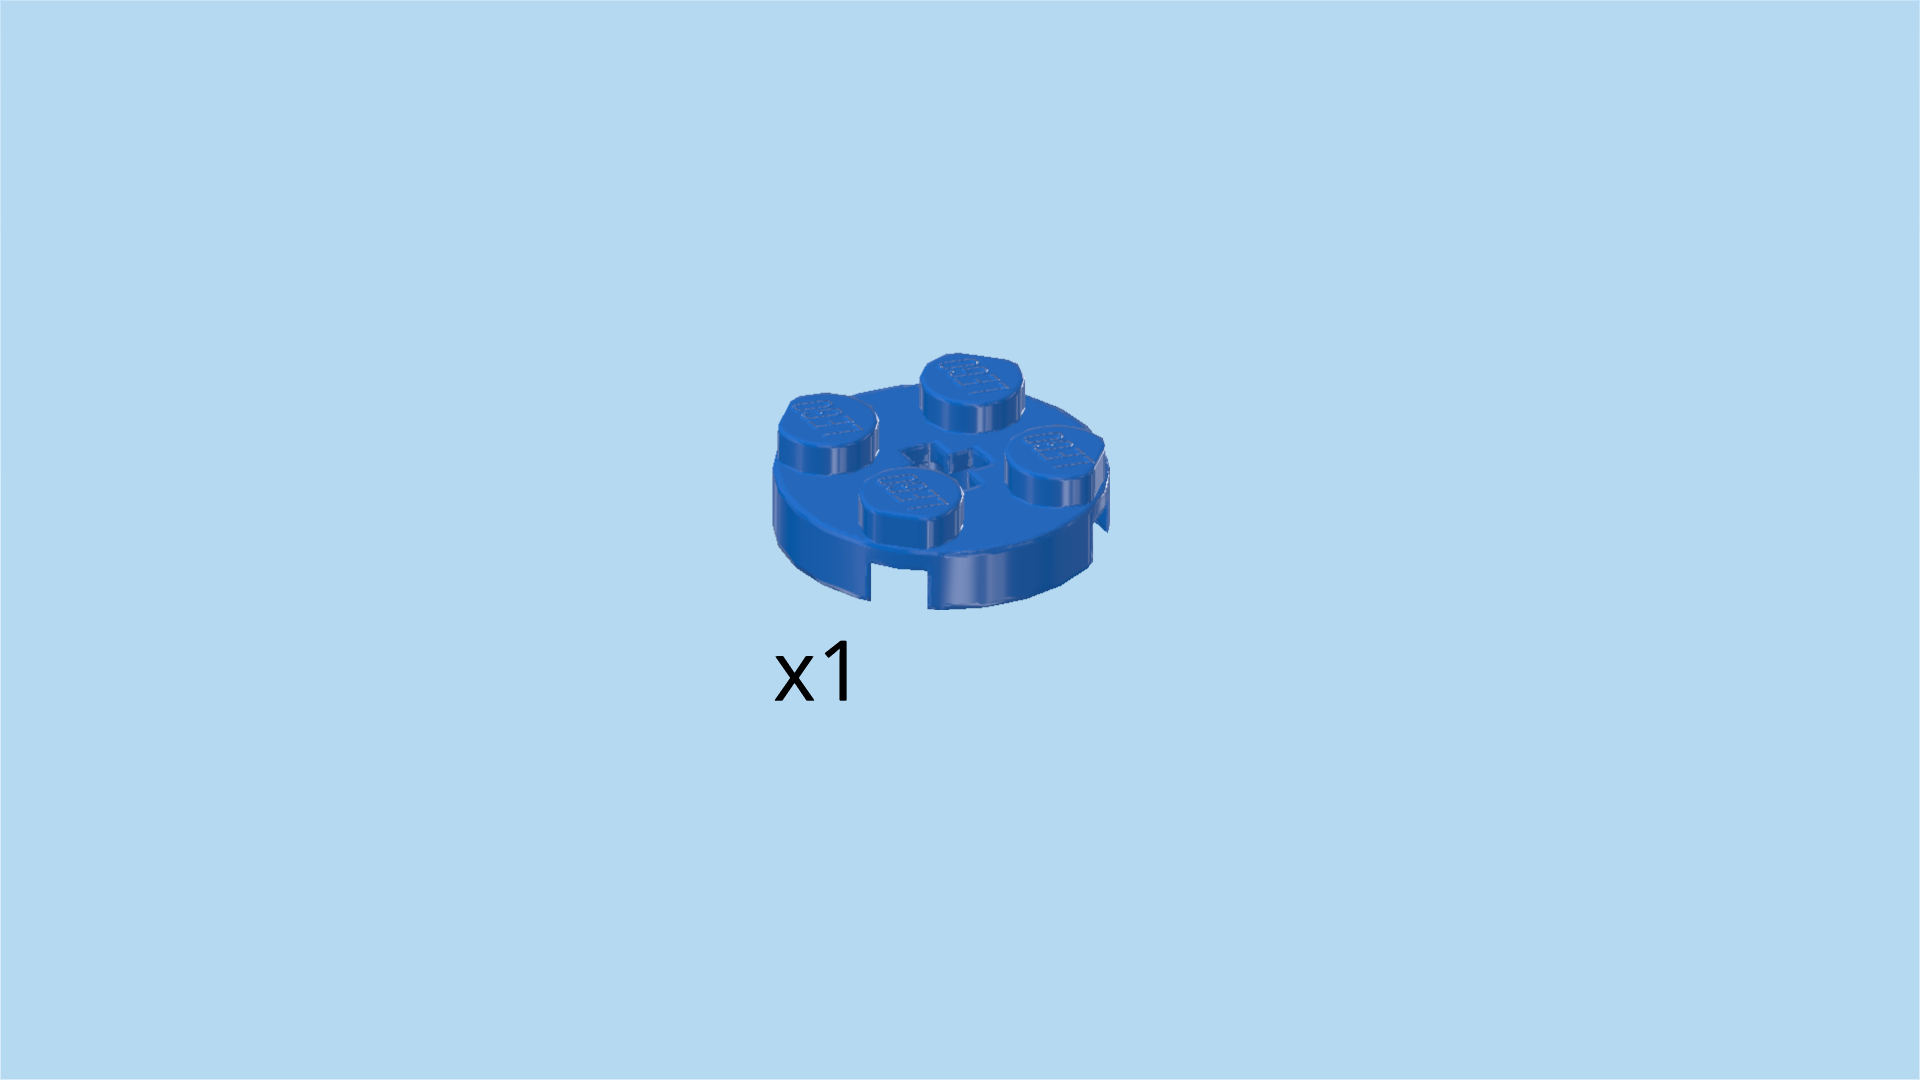
| 1 bright blue round plate 2x2, |
| and 1 transparent light blue round plate 1x1. |
| Put the round plate 2x2 on the table. |
| Put the round plate 1x1 in the middle between the 4 knobs of the plate 2x2. |
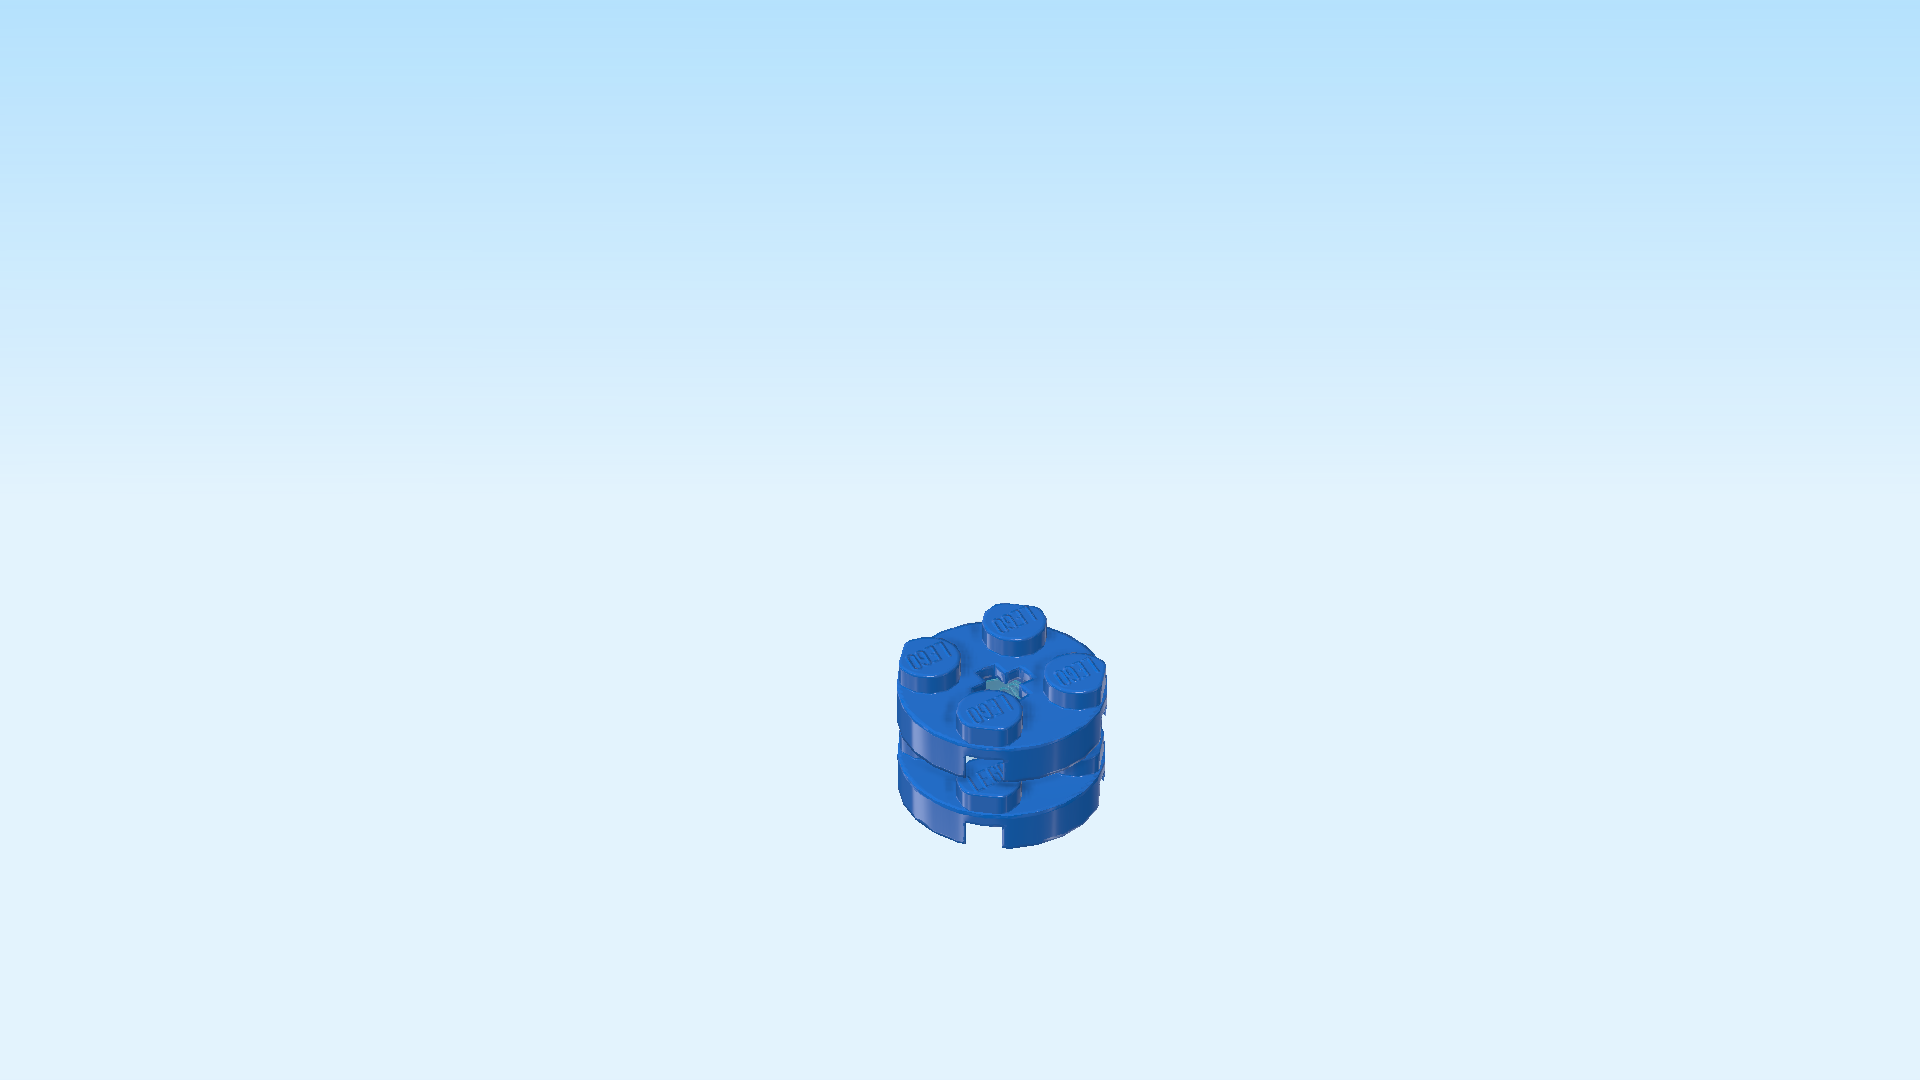
| Find 1 bright blue round plate 2x2. |
| Put it on top. |
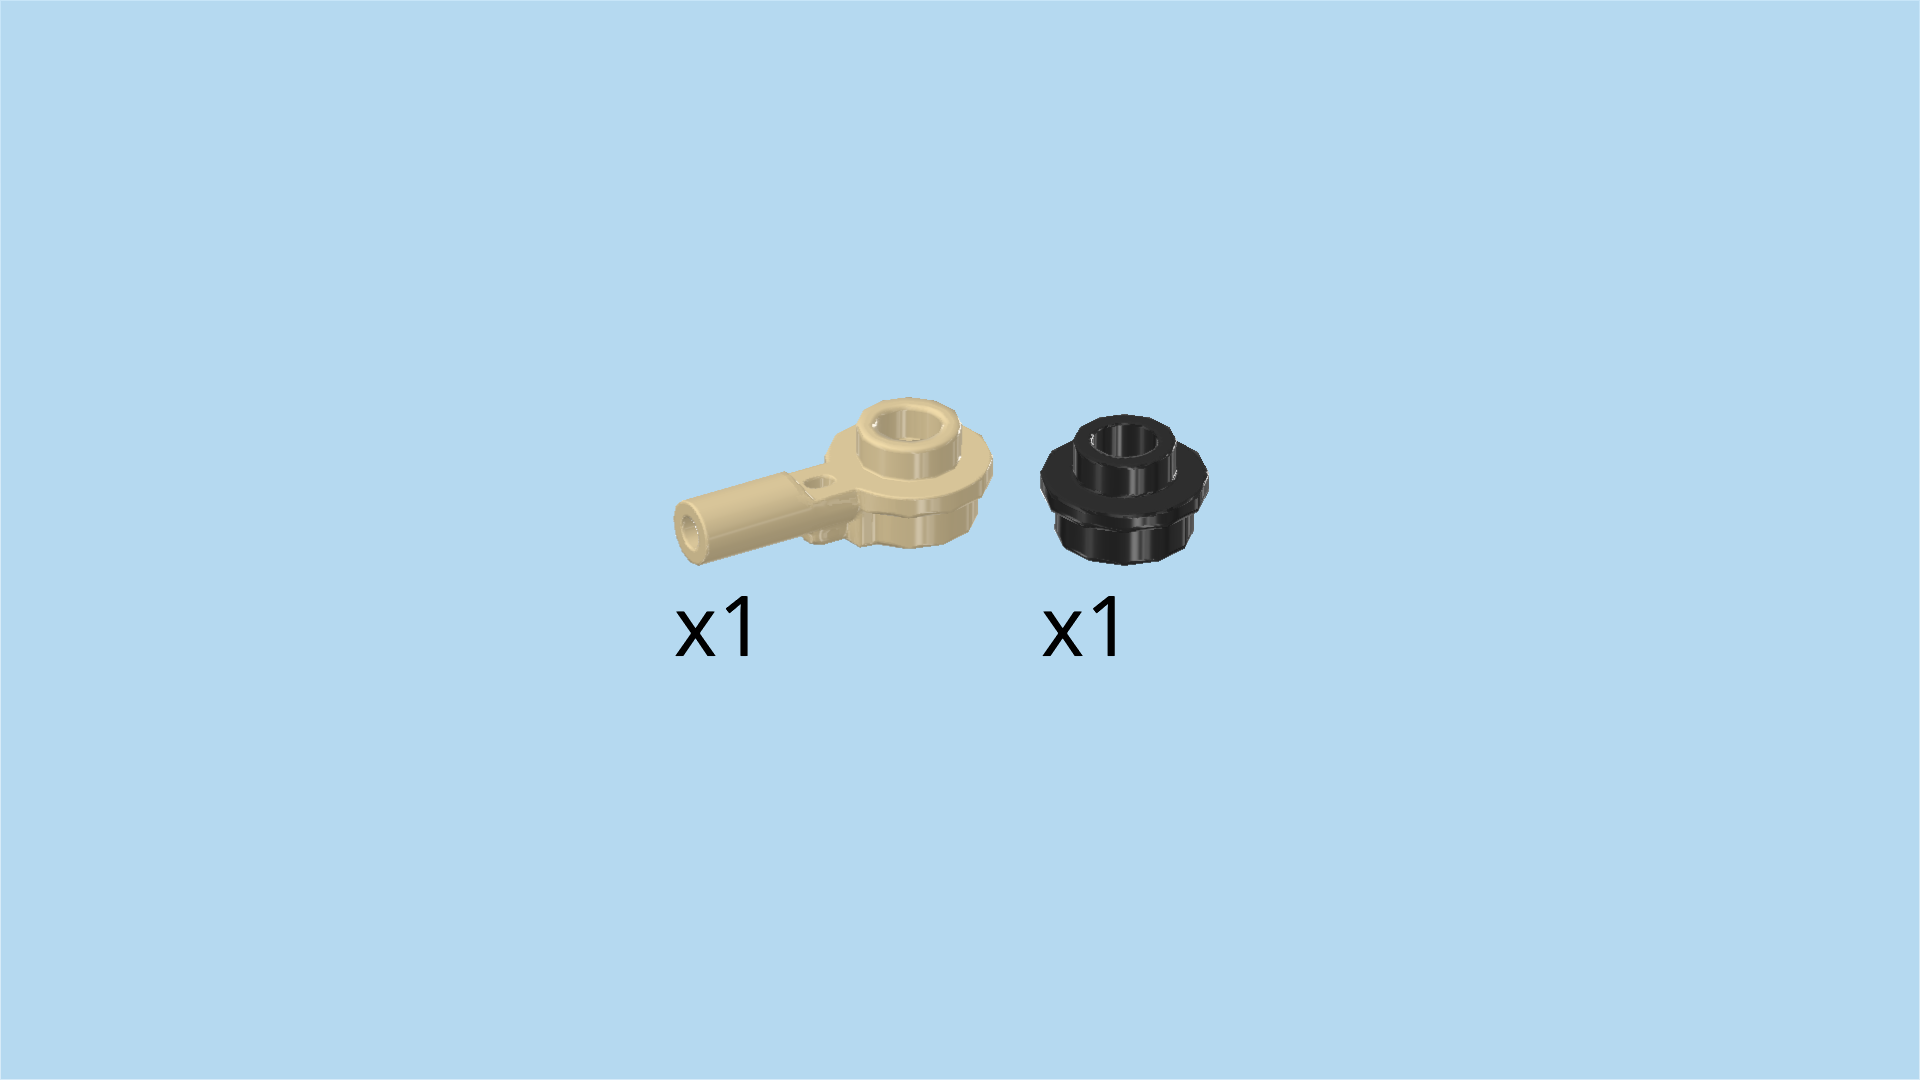
| Collect the following 2 pieces: |
| 1 black round plate 1x1 with through-hole, |
| and 1 pale ocher yellow round plate 1x1 with side handle. |
| Flip the blue coral element upside down so that its knobs are on the table. |
| Put the round plate 1x1 with through-hole upside down on the middle hole. |
| Insert the handle of the round plate with handle into the hole from the top, its knob pointing to the left. |
| Find another black round plate 1x1 with through-hole. |
| Put it upright on the knob of the previous piece, knob pointing to the left. |
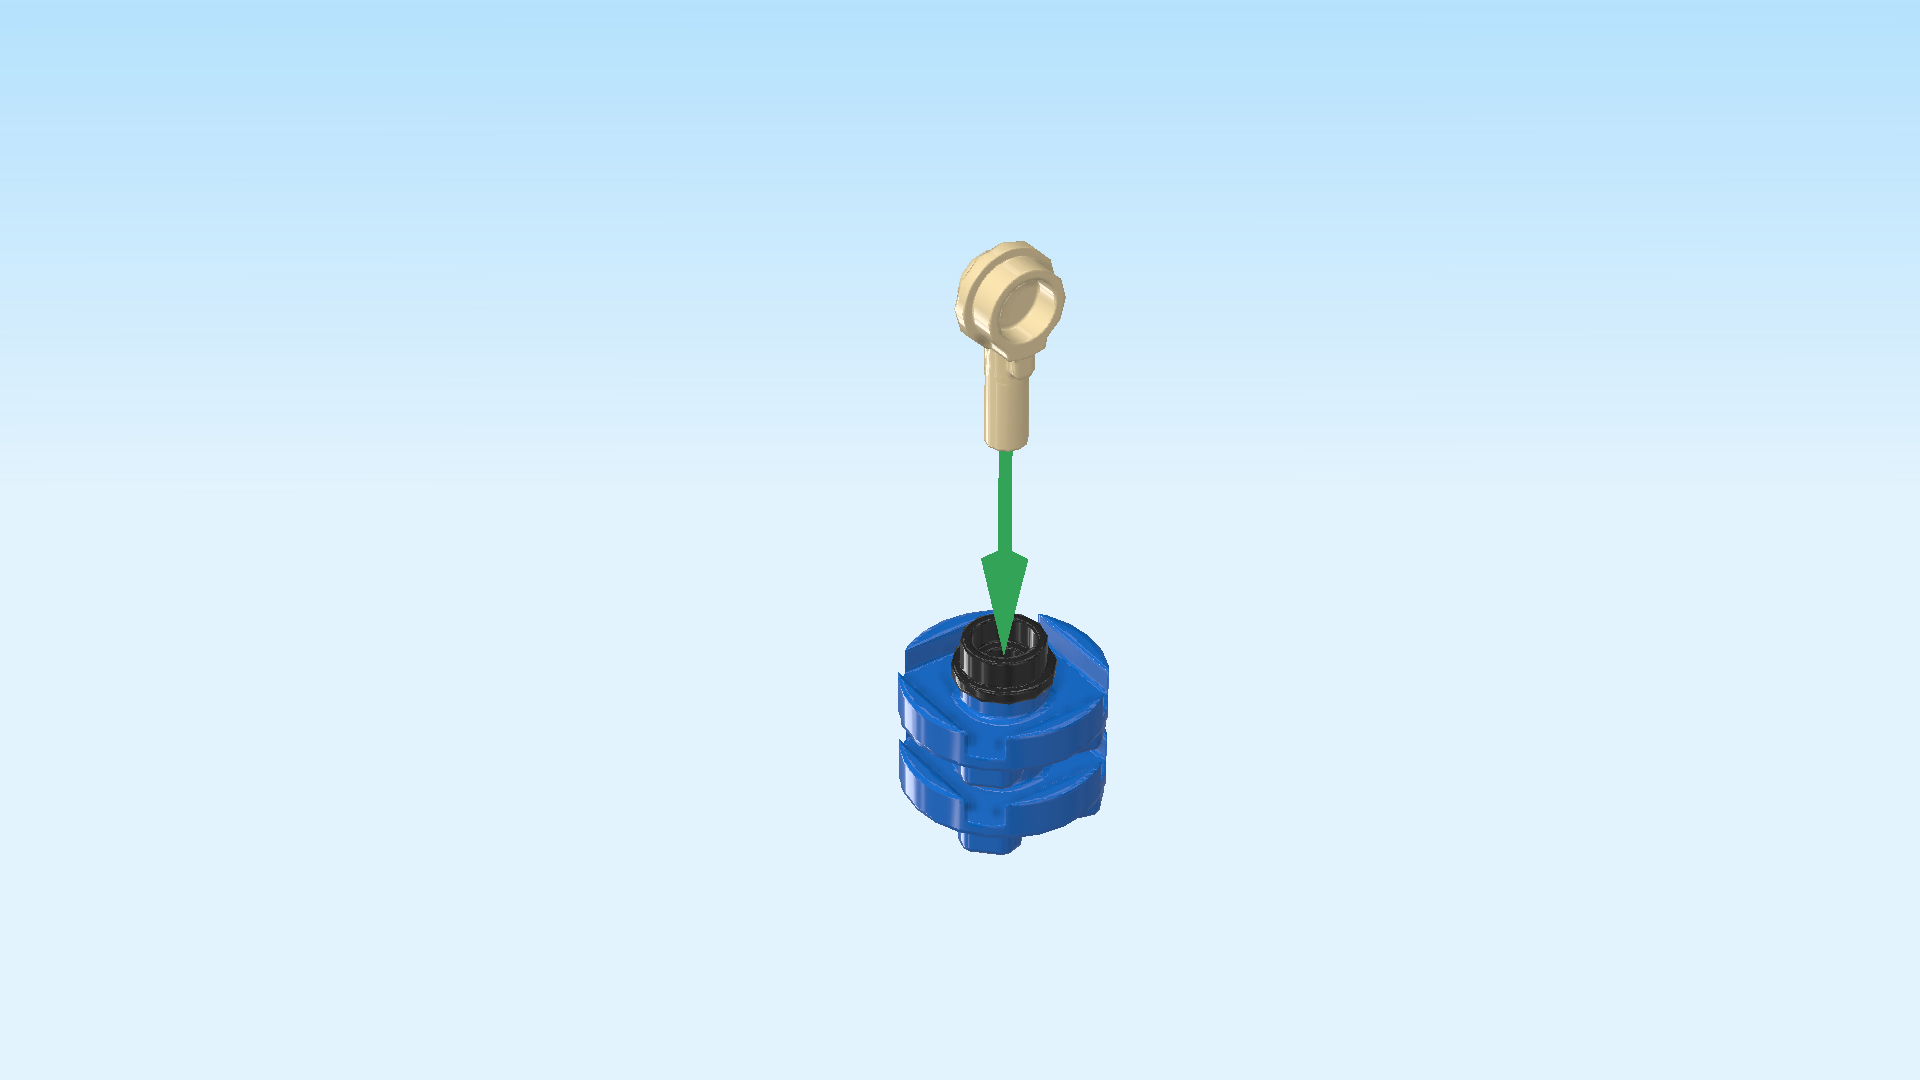
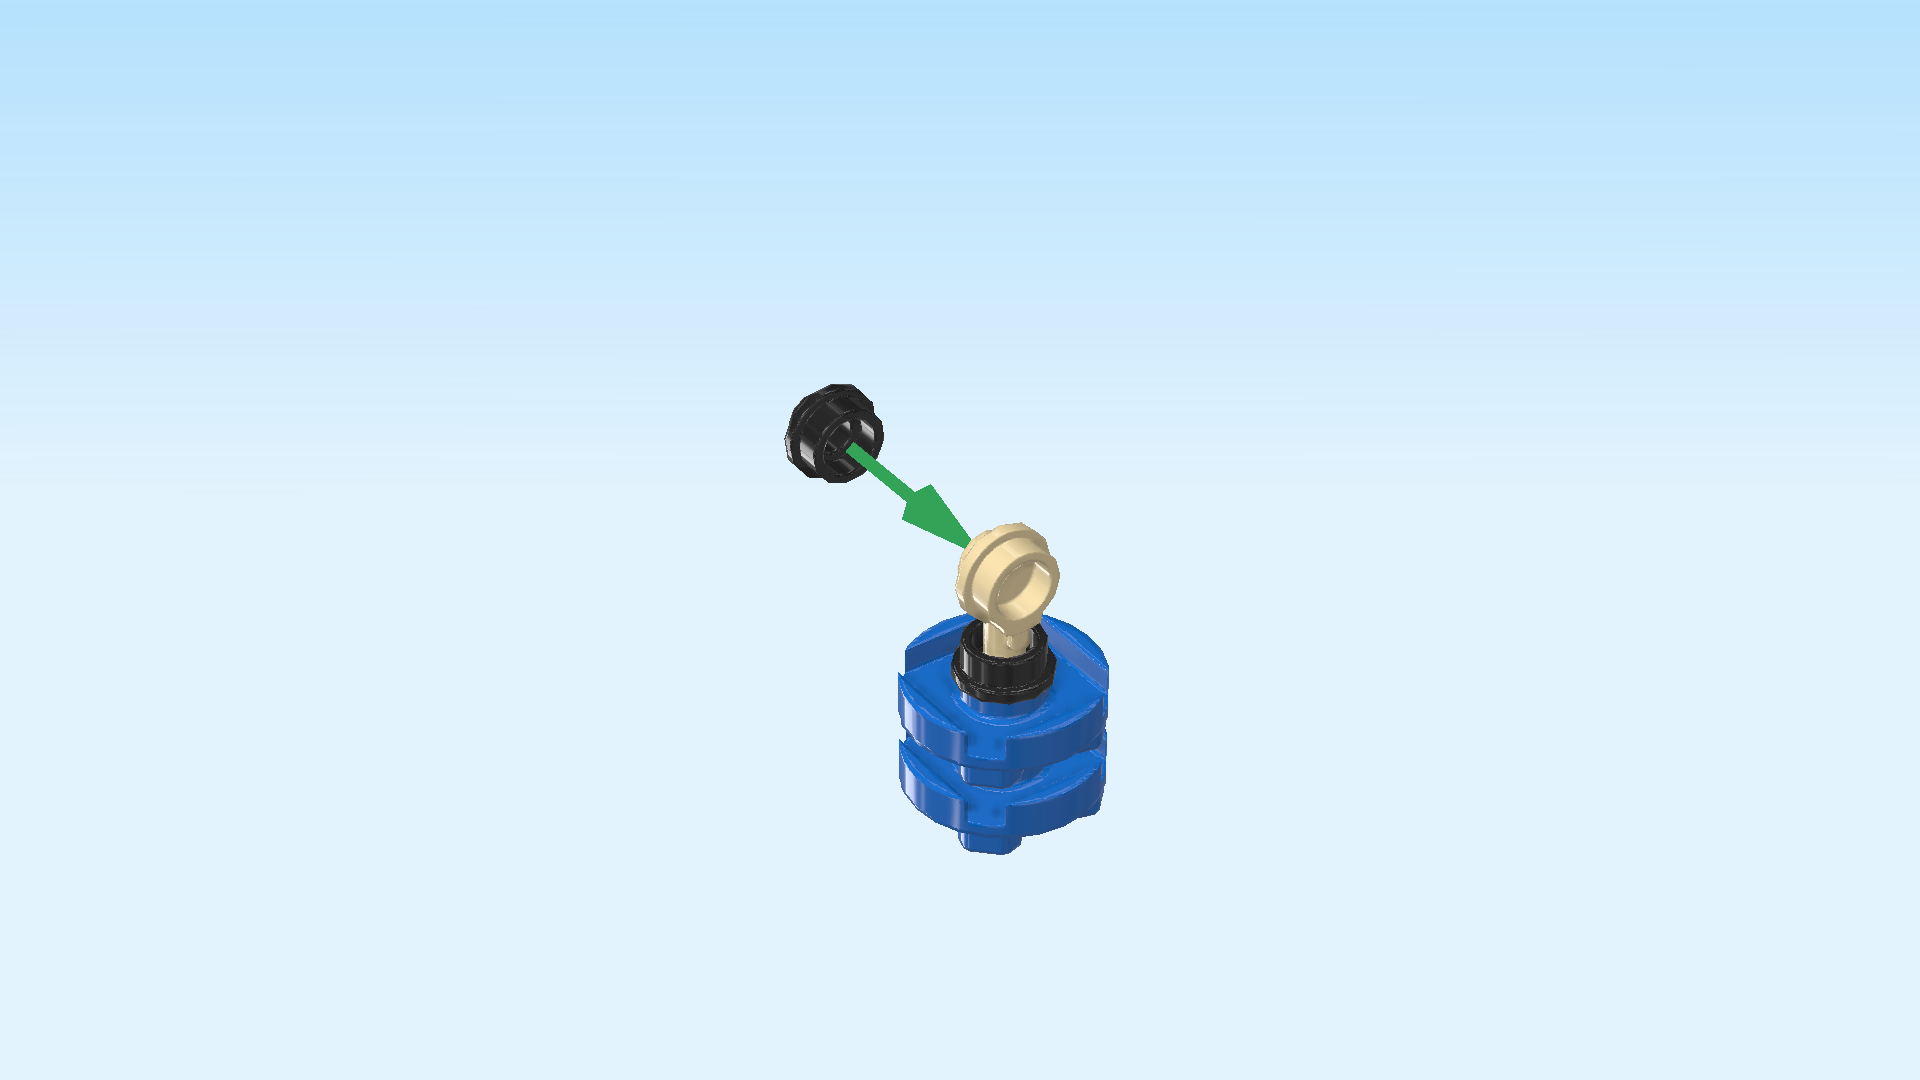
| The blue coral element is finished! Before you mount it, identify the side shaft on the left edge of the coral reef. |
| Insert the back end of said shaft into the hollow knob of the previous piece, blue coral element sticking out towards the top left. |
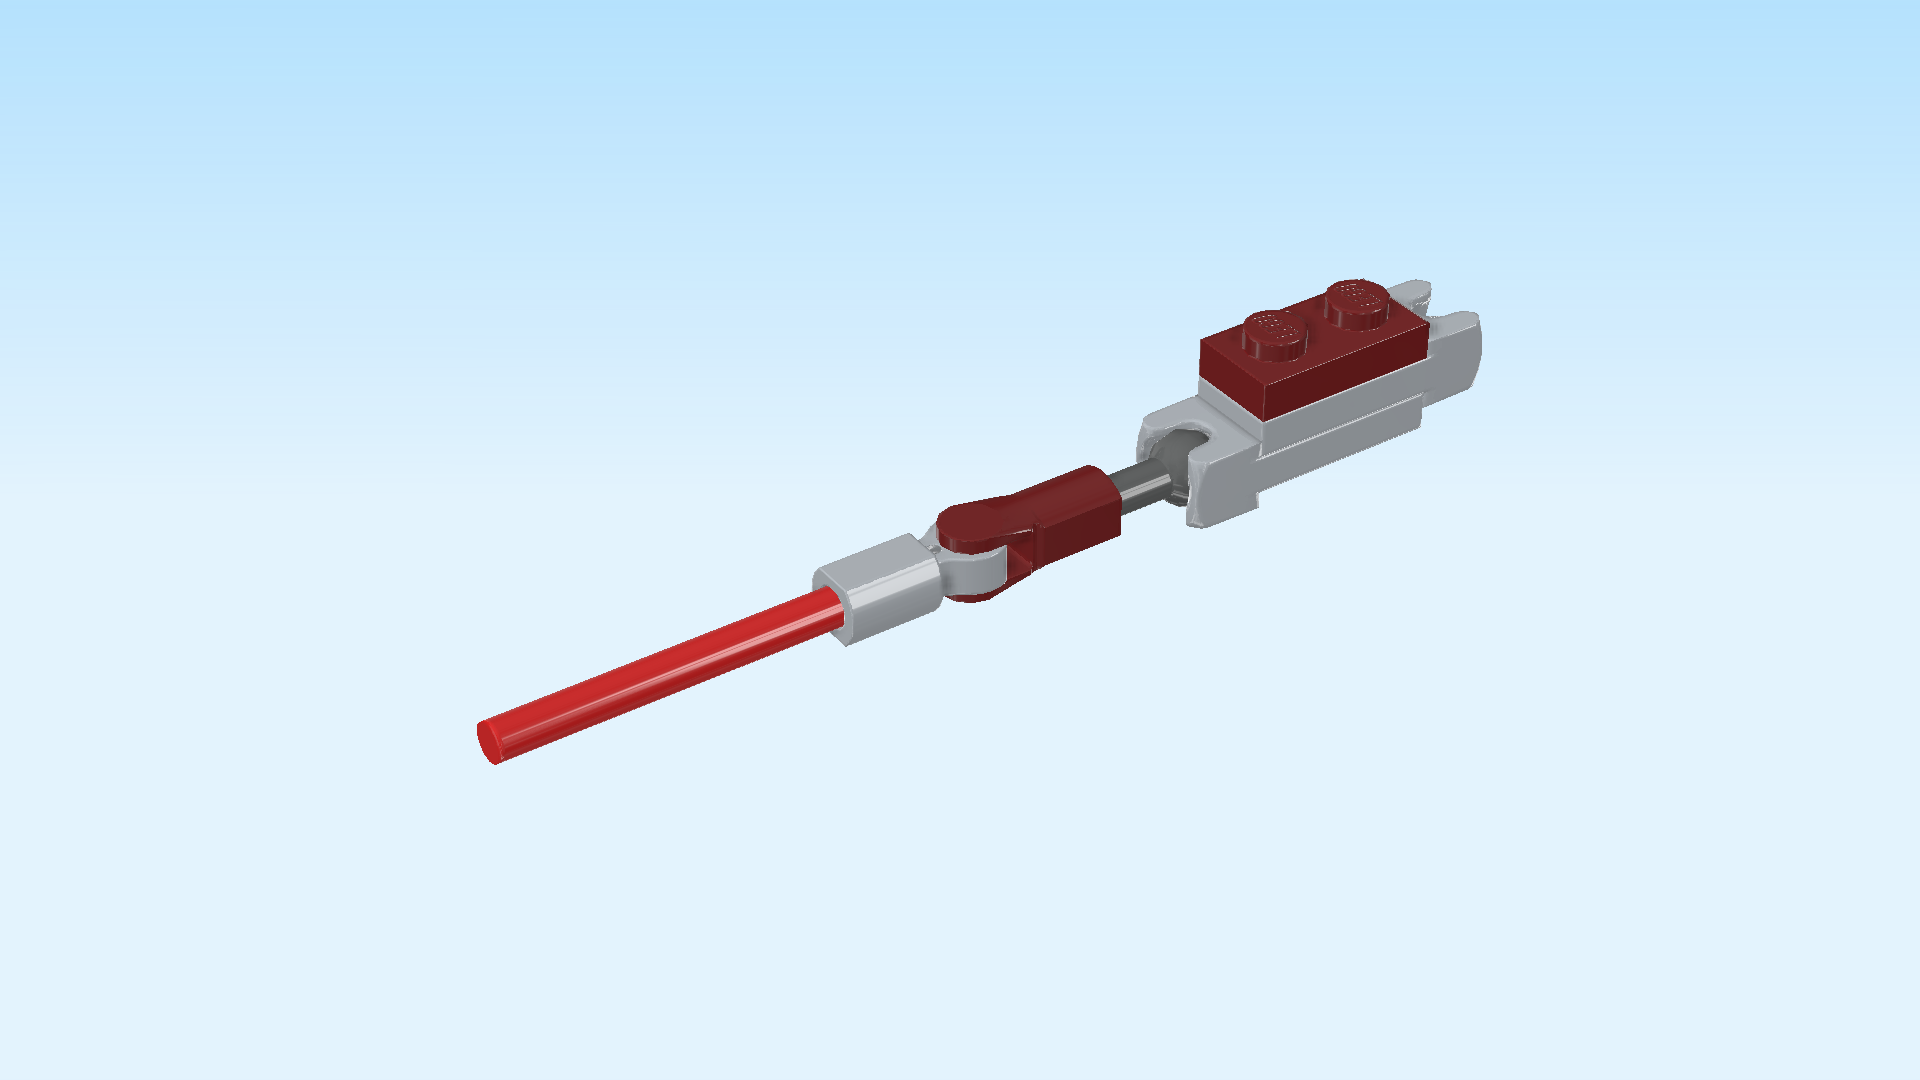
| Now, we will build a thick light-blue coral branch. |
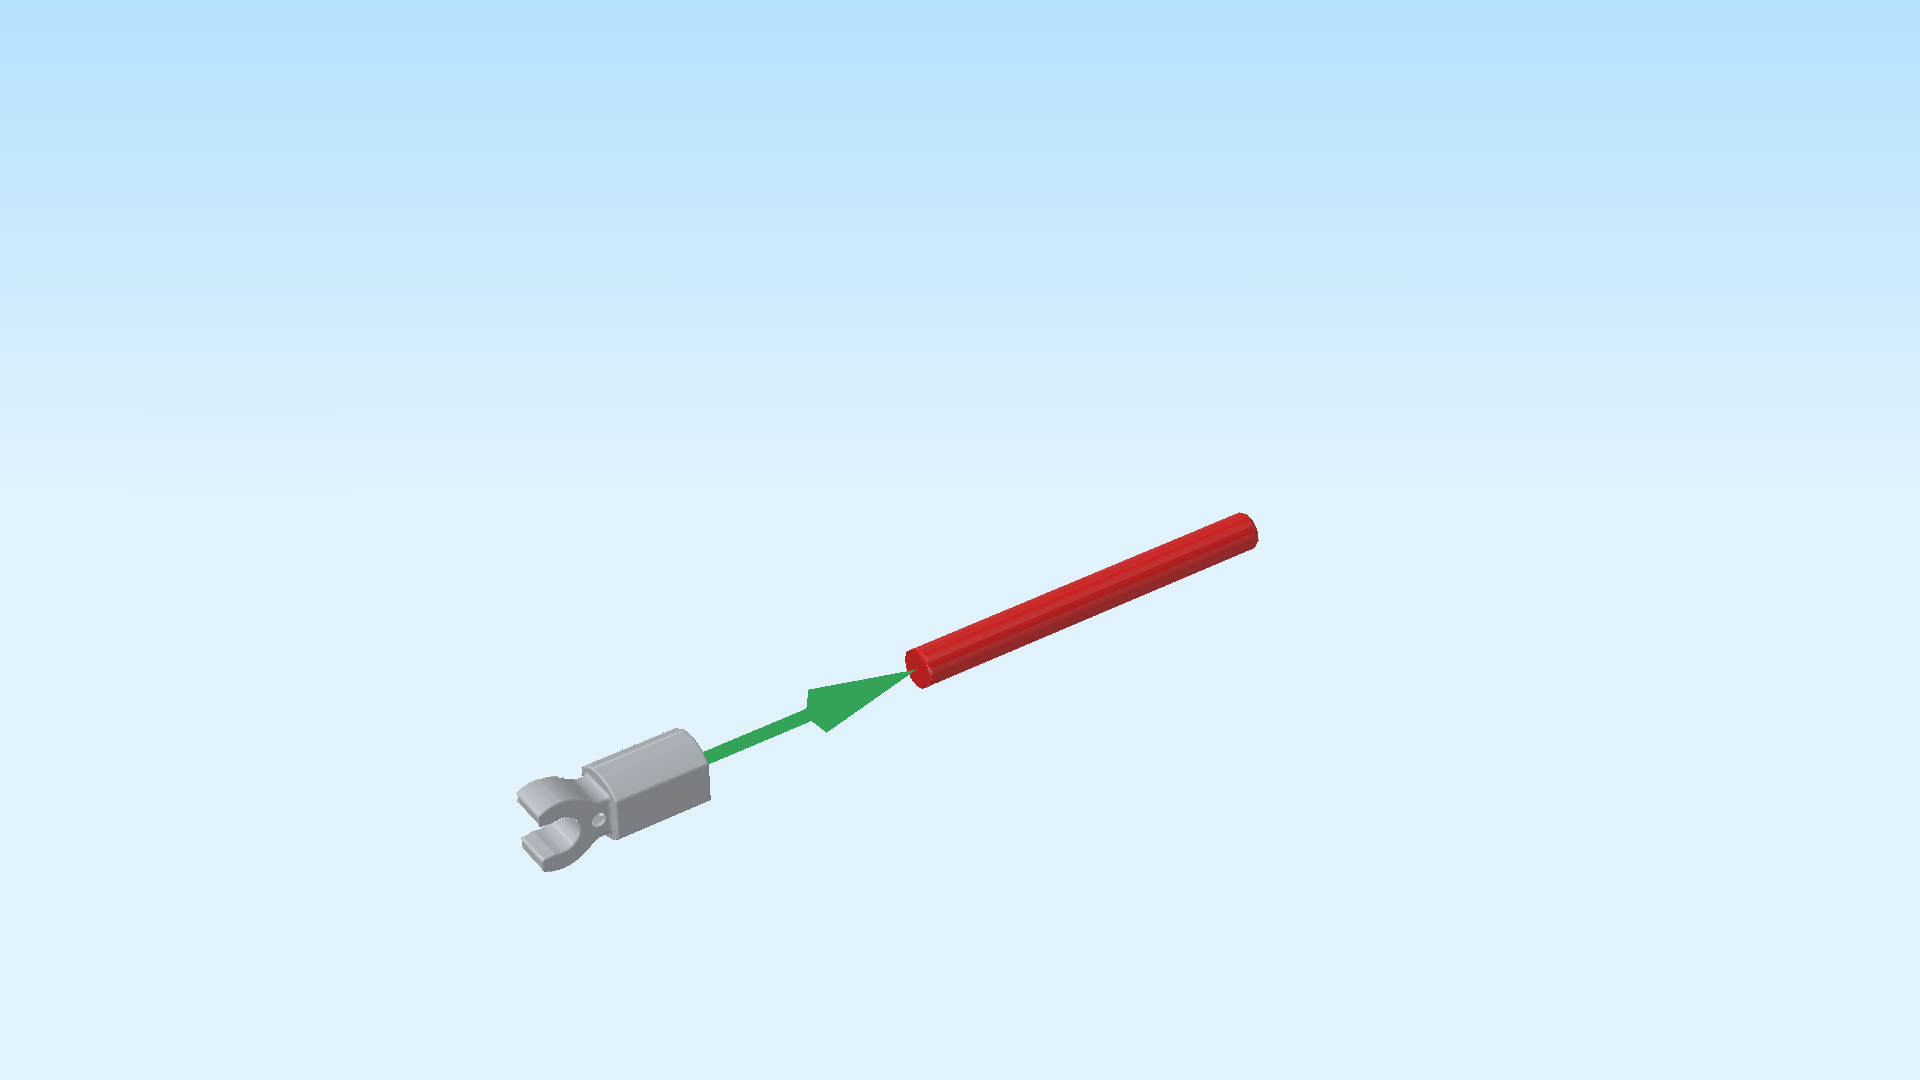
| Collect the following 2 pieces: |
| 1 bright red shaft 4m, |
| and 1 medium stone grey small tube with clasp. |
| Hold the small tube in your left hand, clasp to the left, and insert the shaft from the right. |
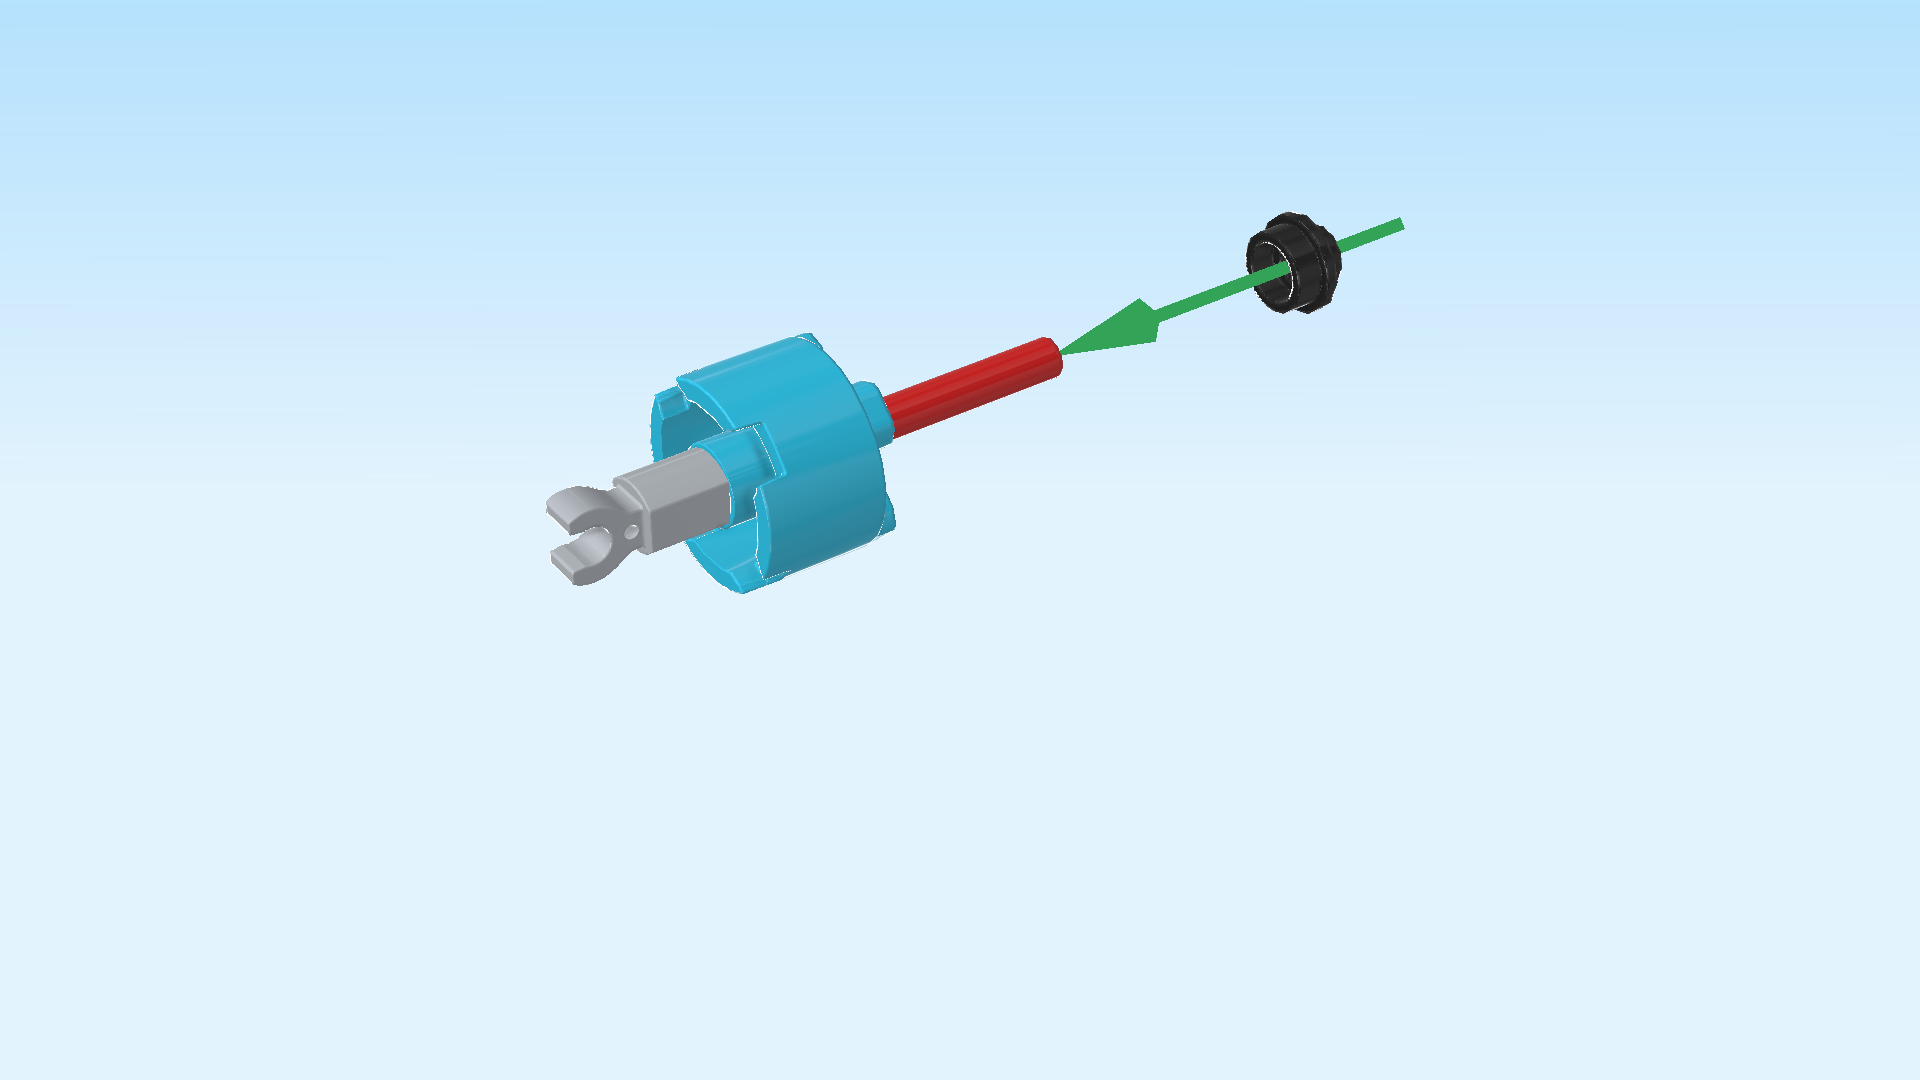
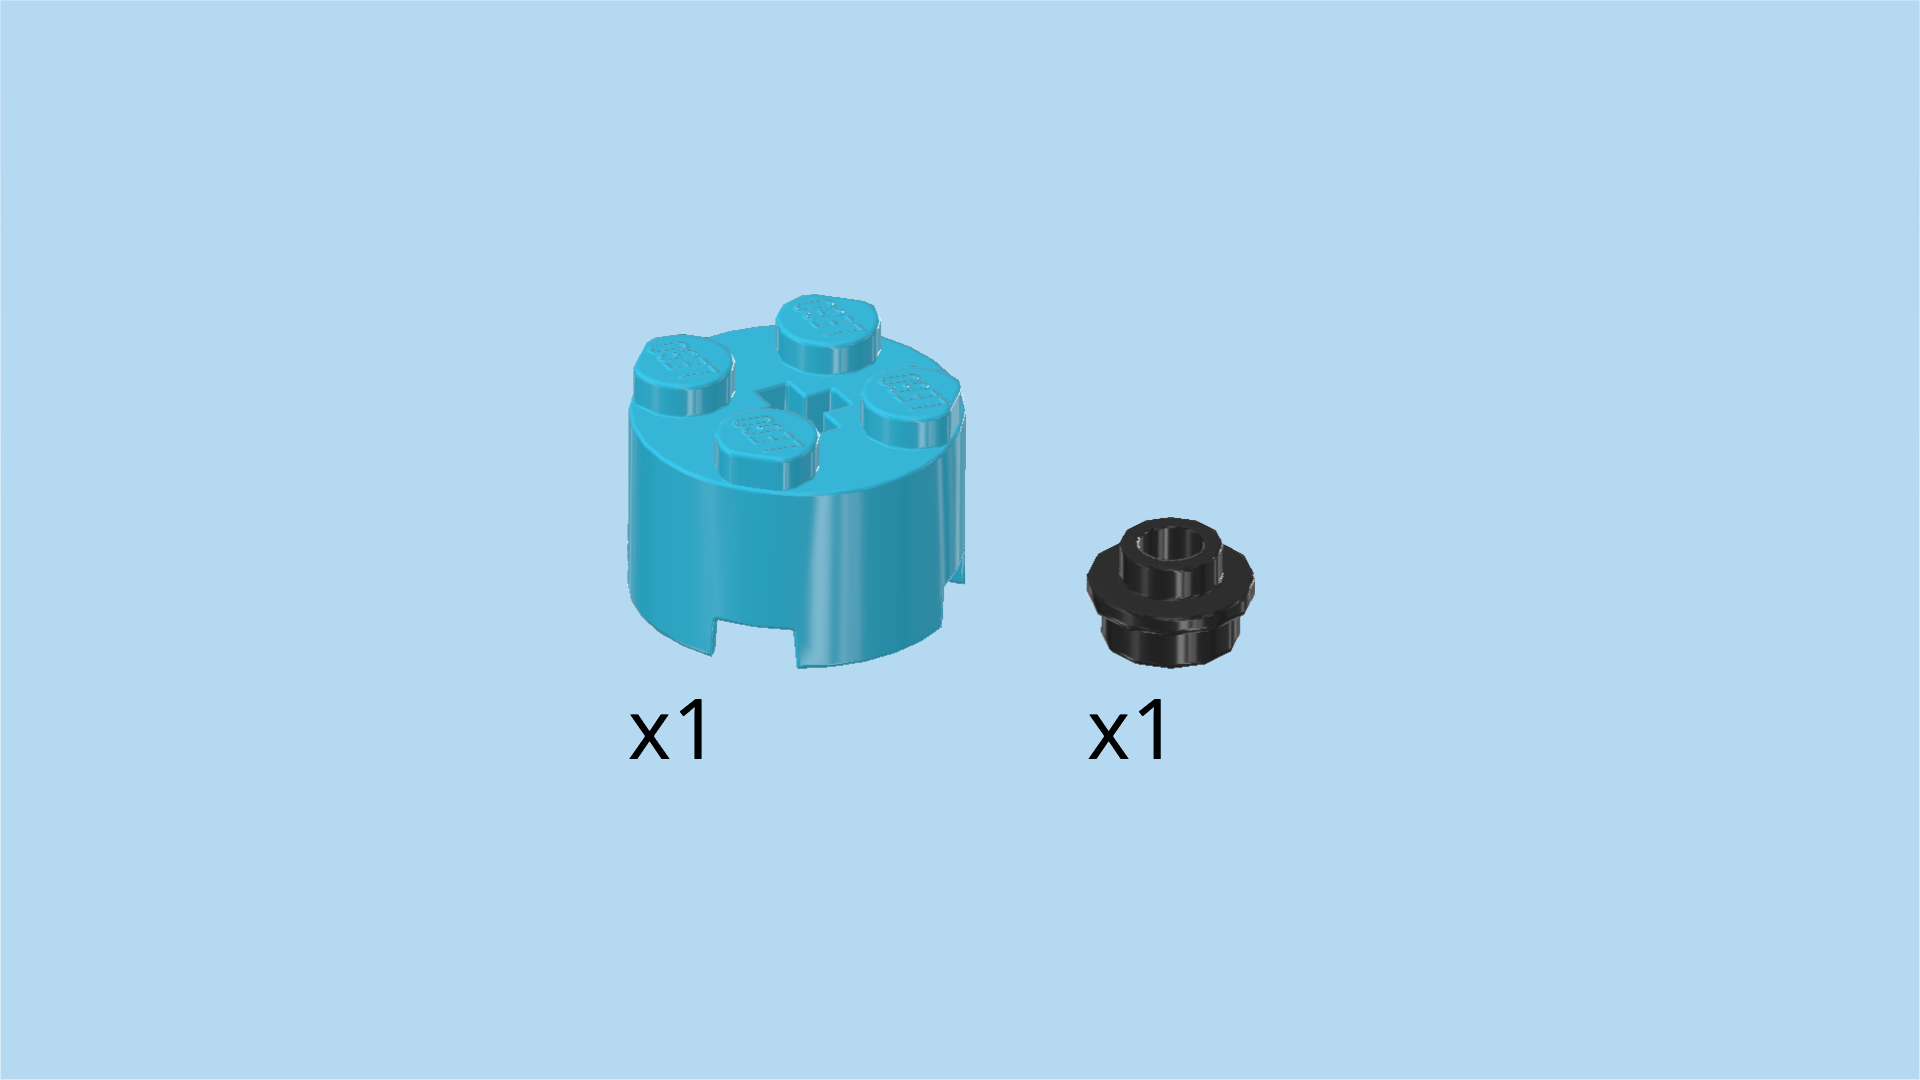
| Collect the following 2 pieces: |
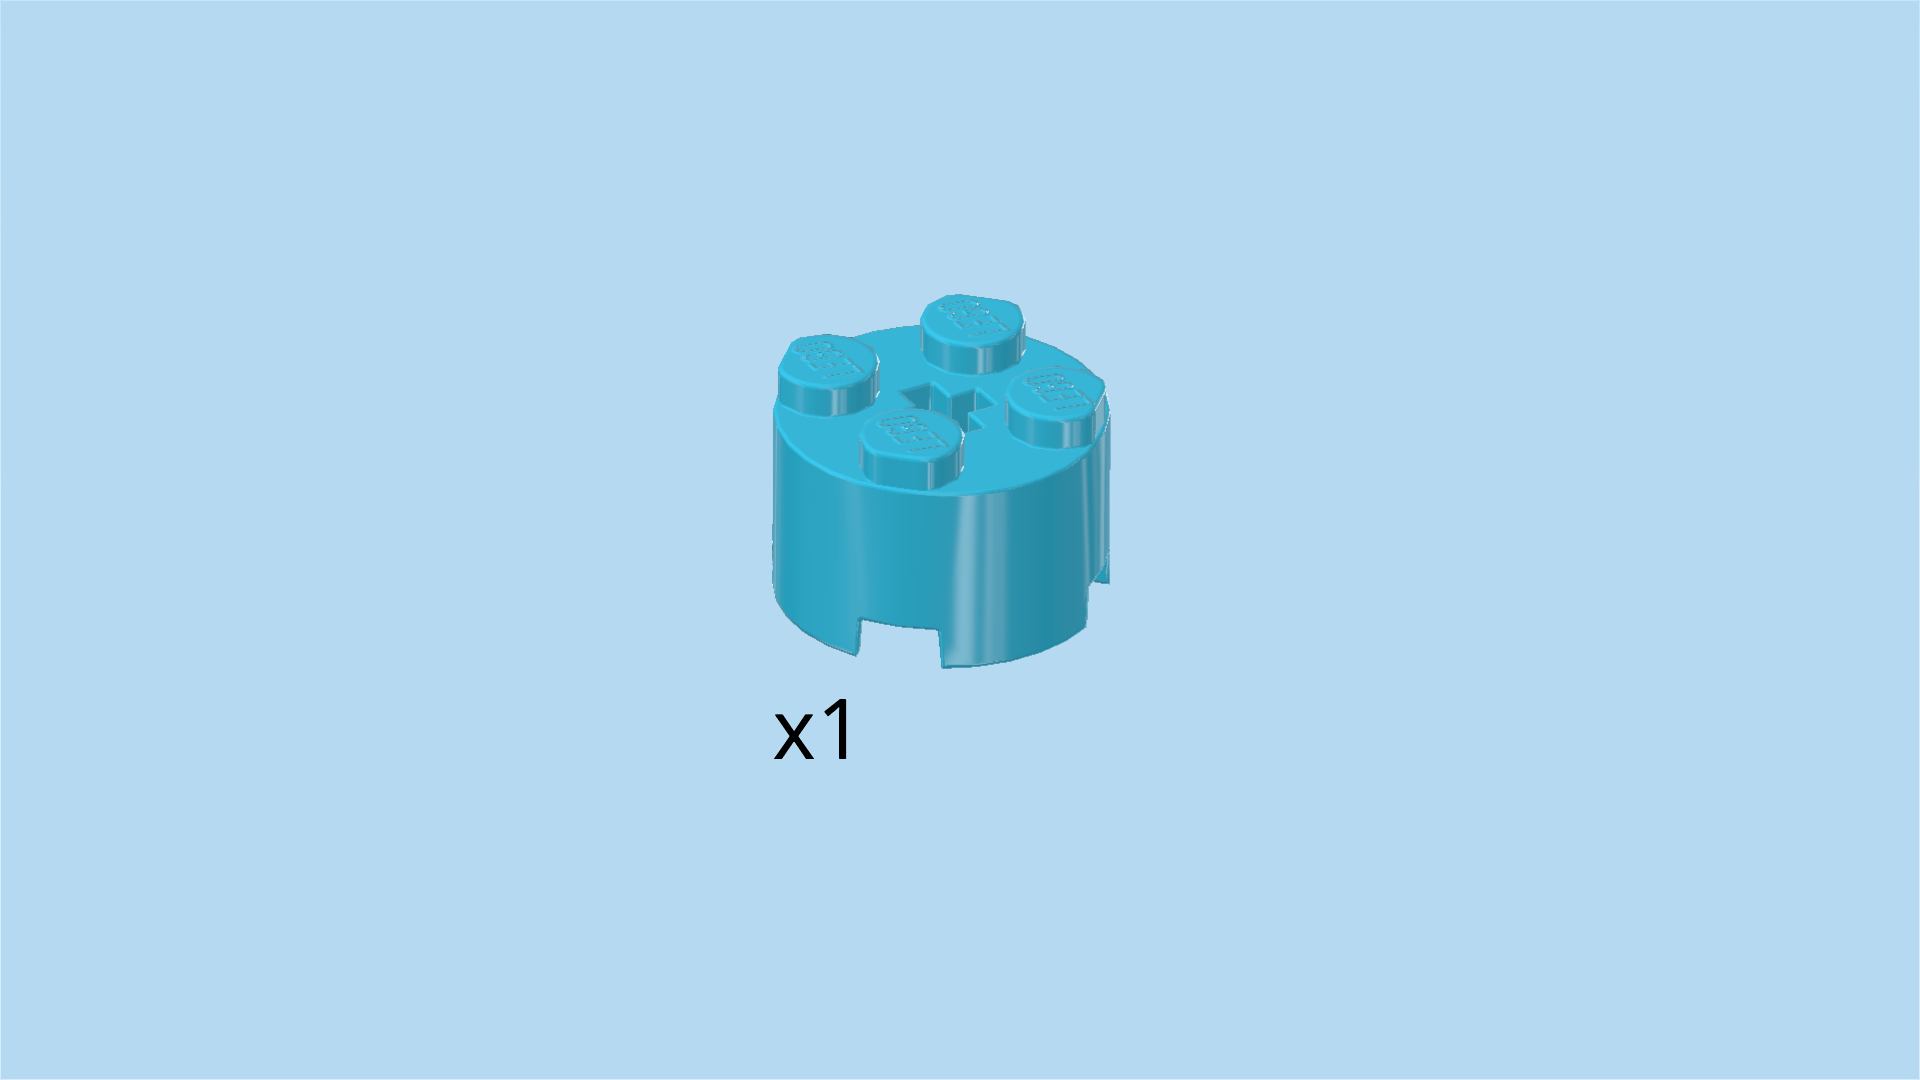
| 1 medium azure blue round brick 2x2 with top cross hole, |
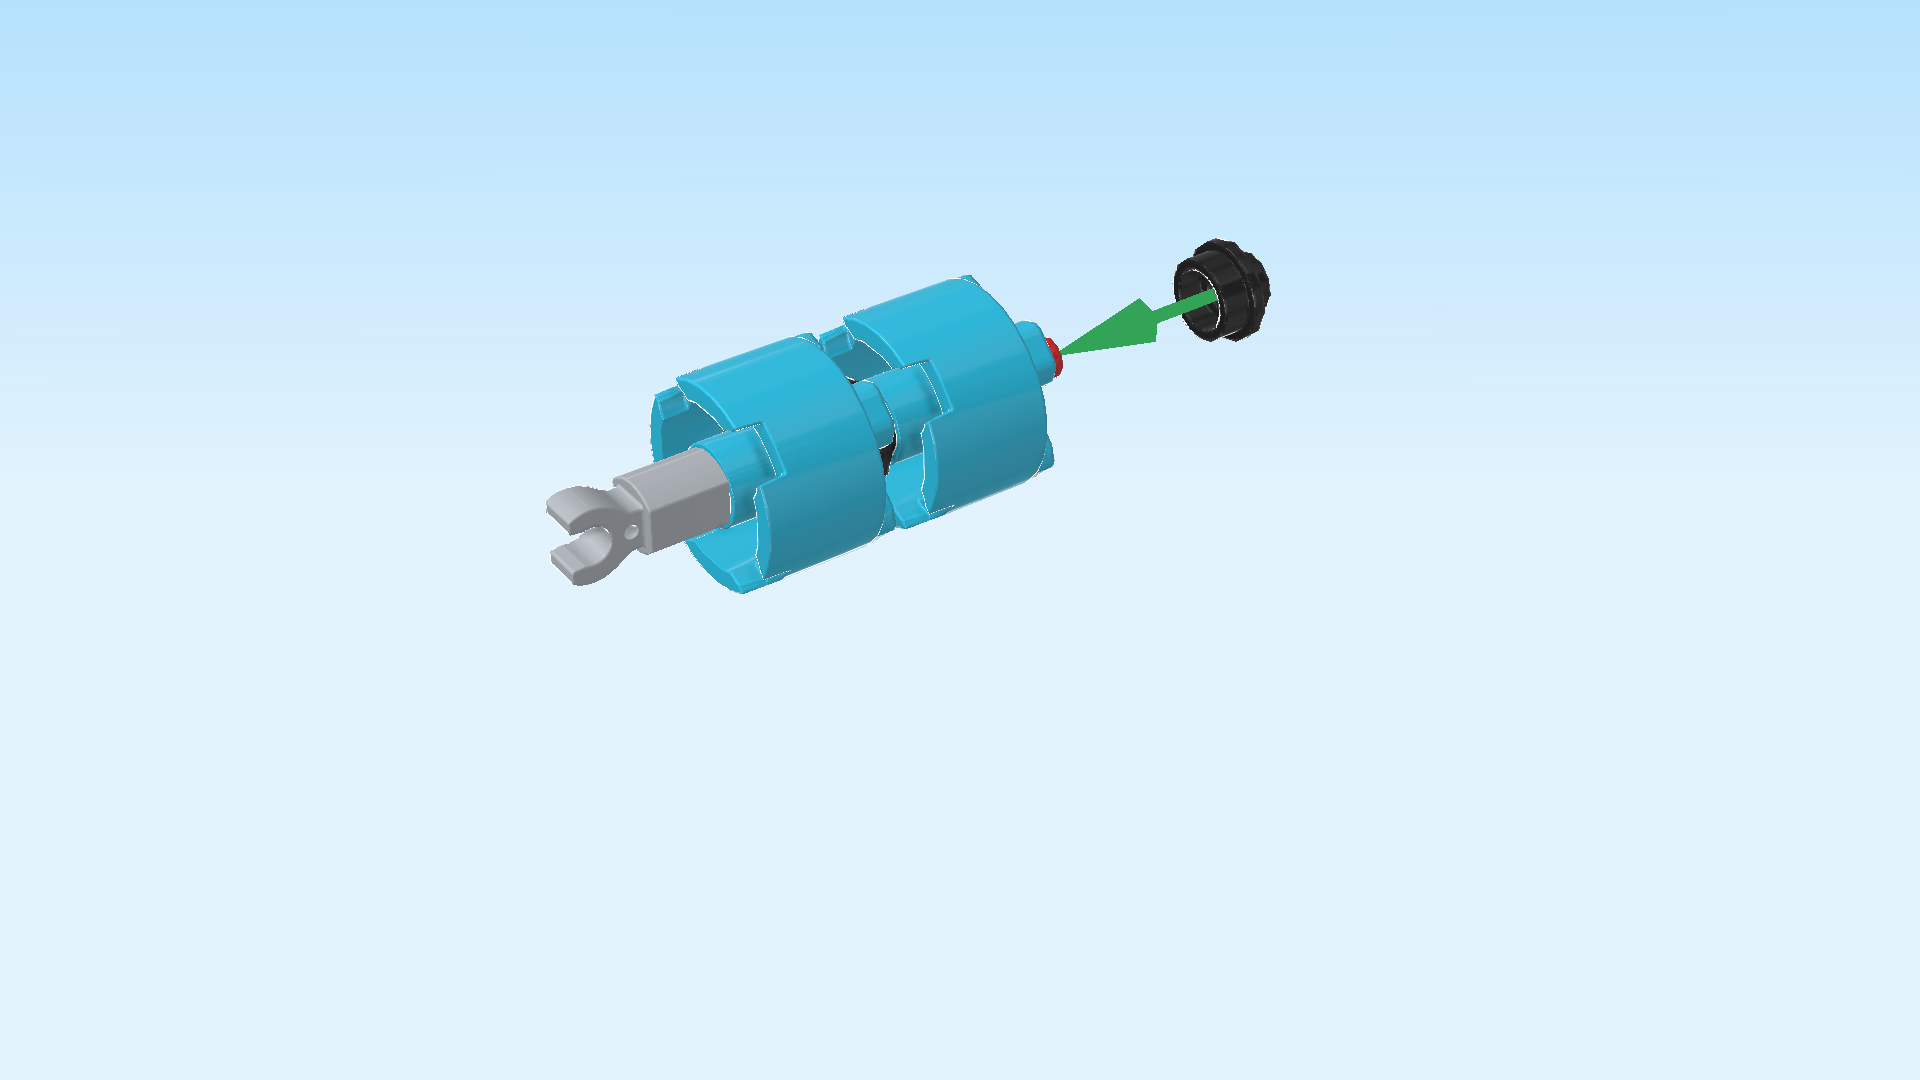
| and 1 black round plate 1x1 with through-hole. |
| Put the middle hole of the round brick on the shaft, coming from the right, knobs pointing to the right. |
| Put the round plate with through hole on the shaft, top knob to the right. |
| Collect the following 2 pieces: |
| another black round plate 1x1 with through-hole, |
| and another medium azure blue round brick 2x2 with top cross hole. |
| Repeat the previous steps: put the middle hole of the round brick on the shaft, knobs to the right, and put the round plate 1x1 on the shaft, top knob to the right. |
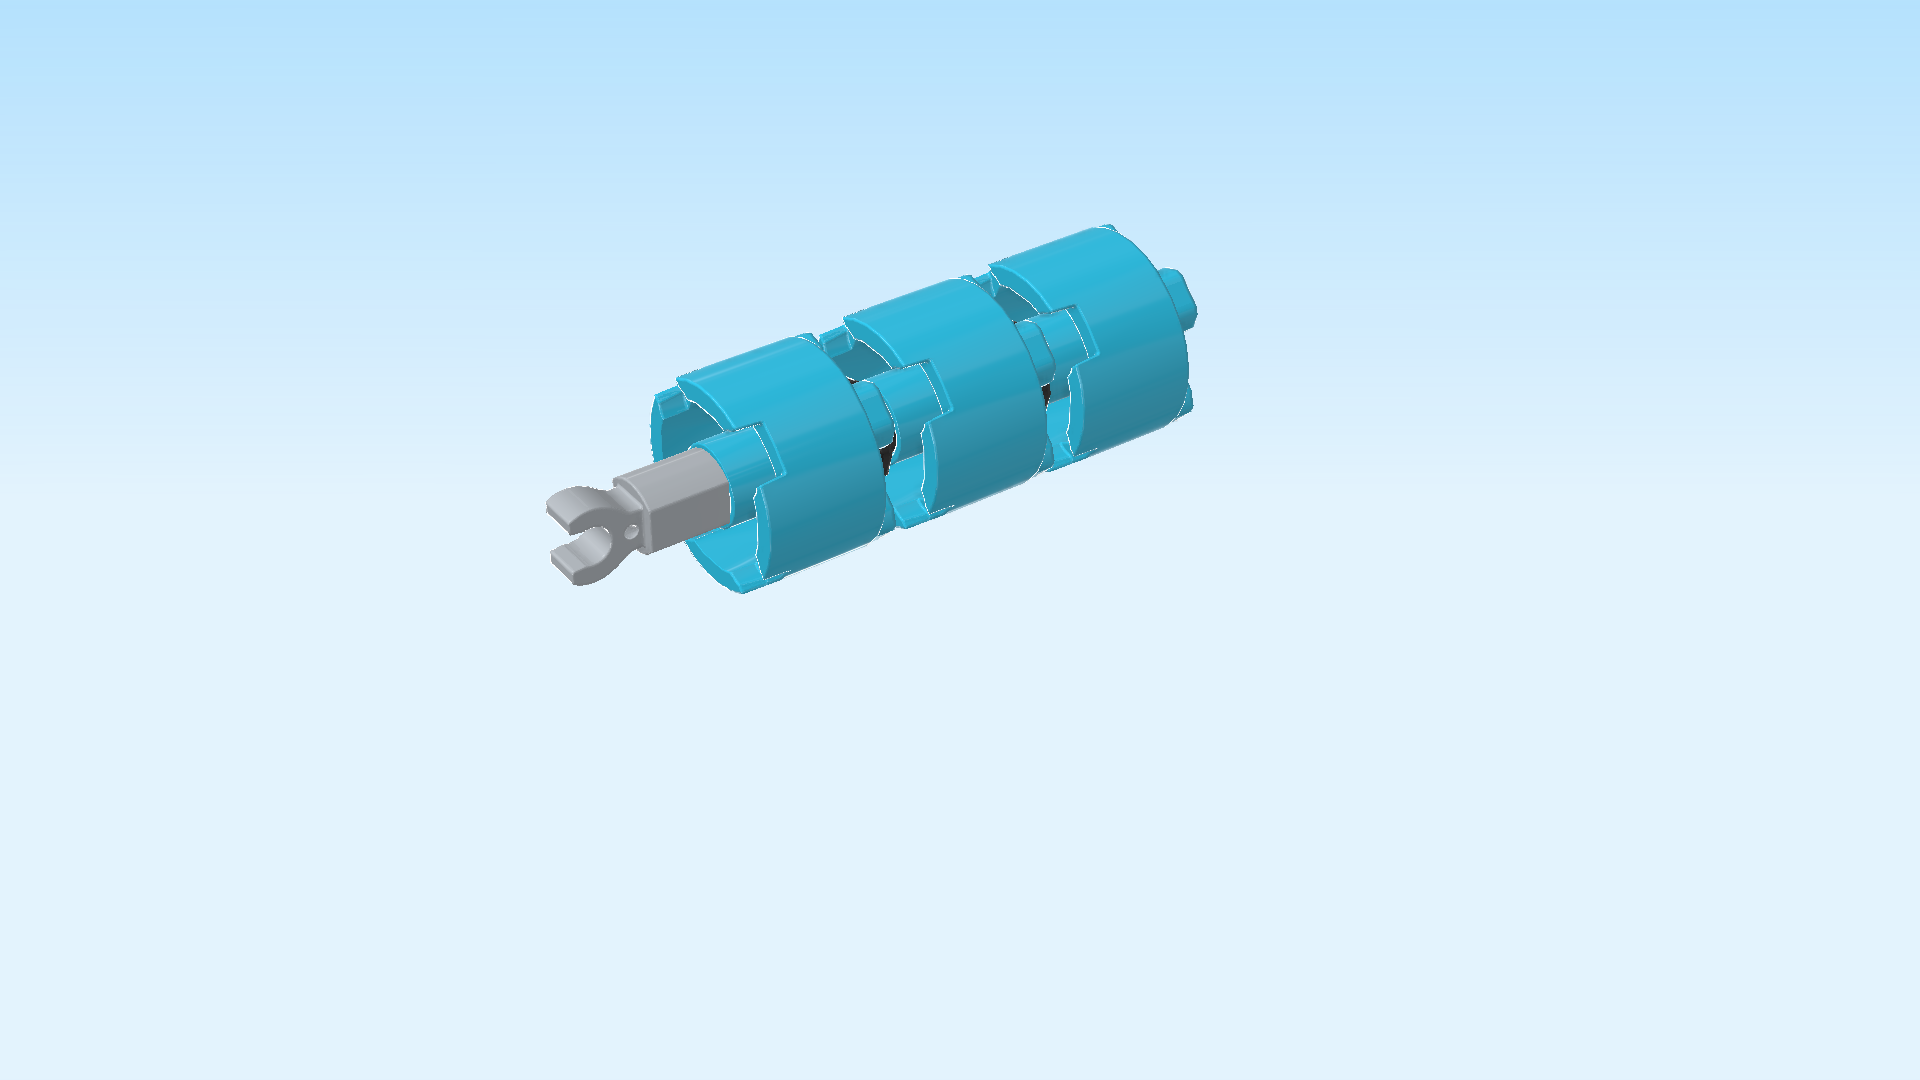
| Find 1 medium azure blue round brick 2x2 with top cross hole. |
| Put its middle hole on the shaft, top knobs to the right. |
| The thick light-blue coral branch is finished! Well done! Snap its clasp on the front end of the side handle on the left edge of the coral reef. Adjust its orientation to your liking. |
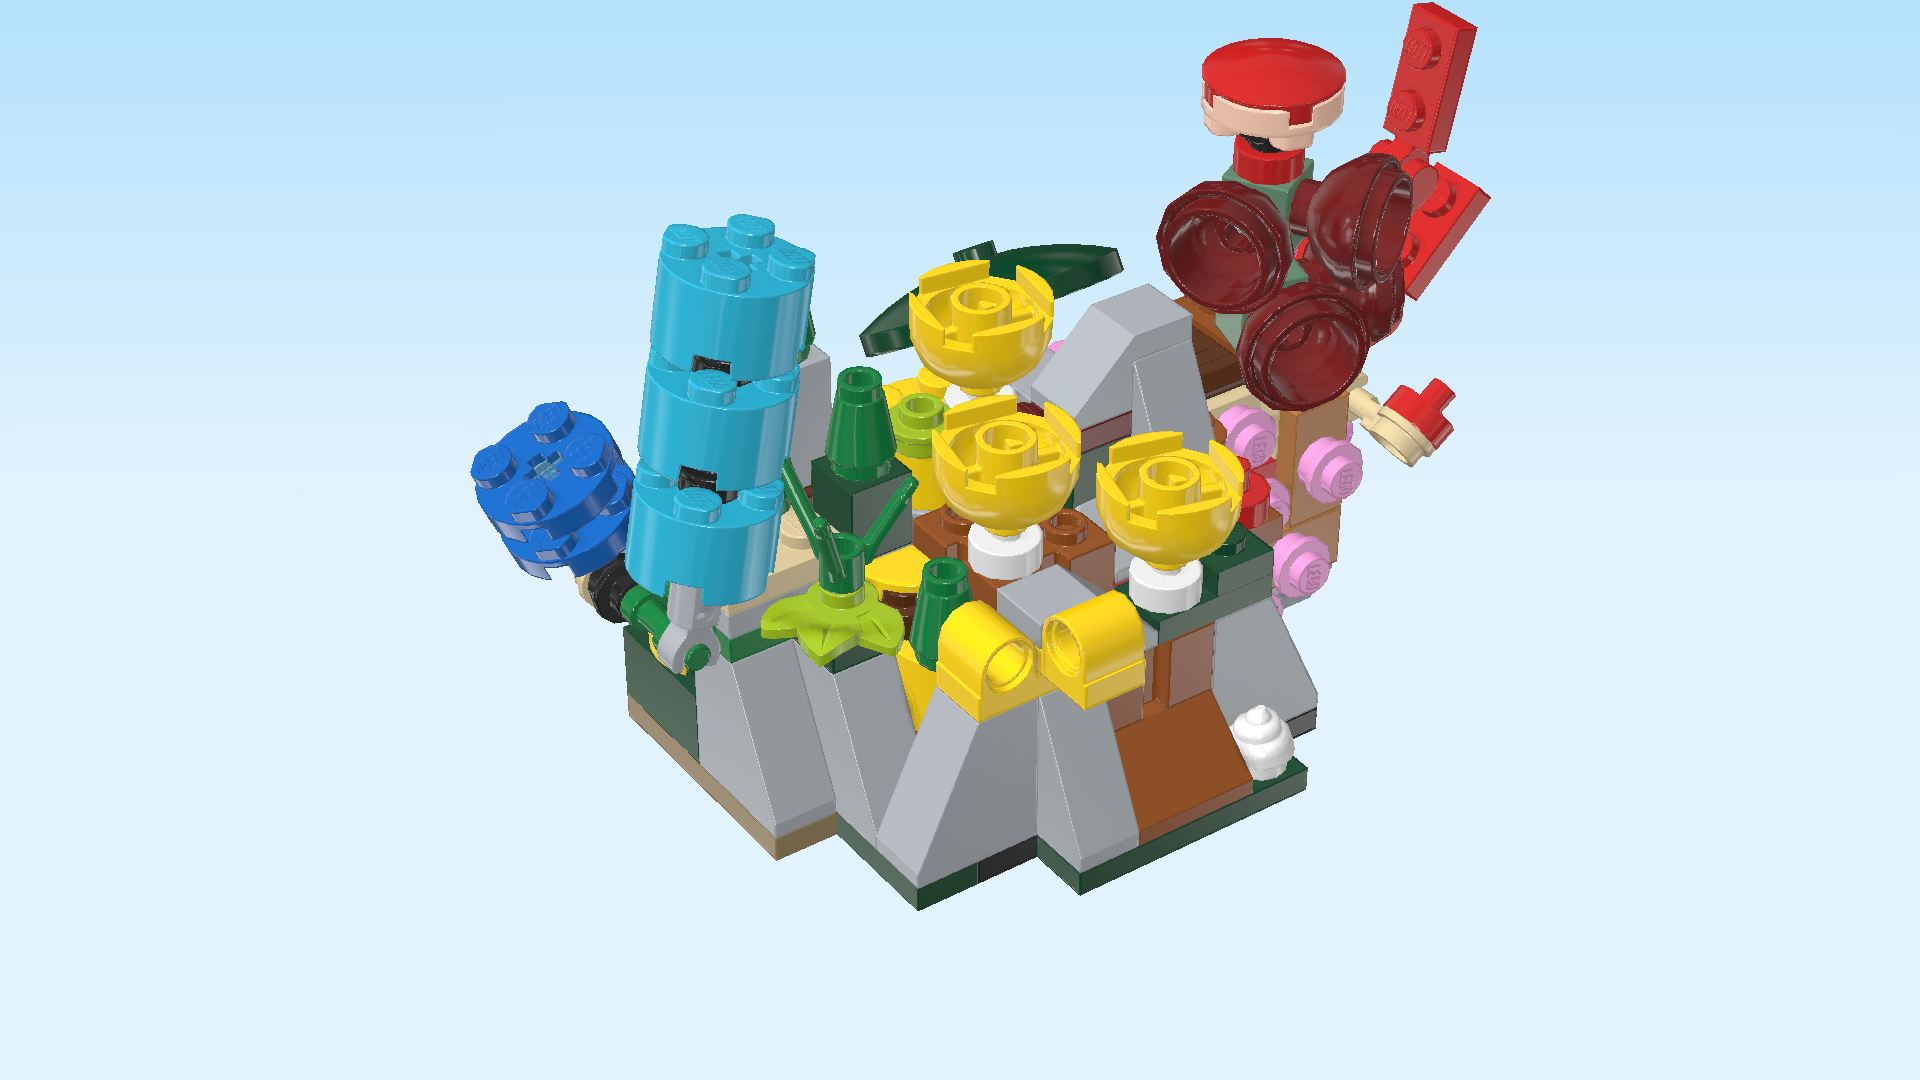
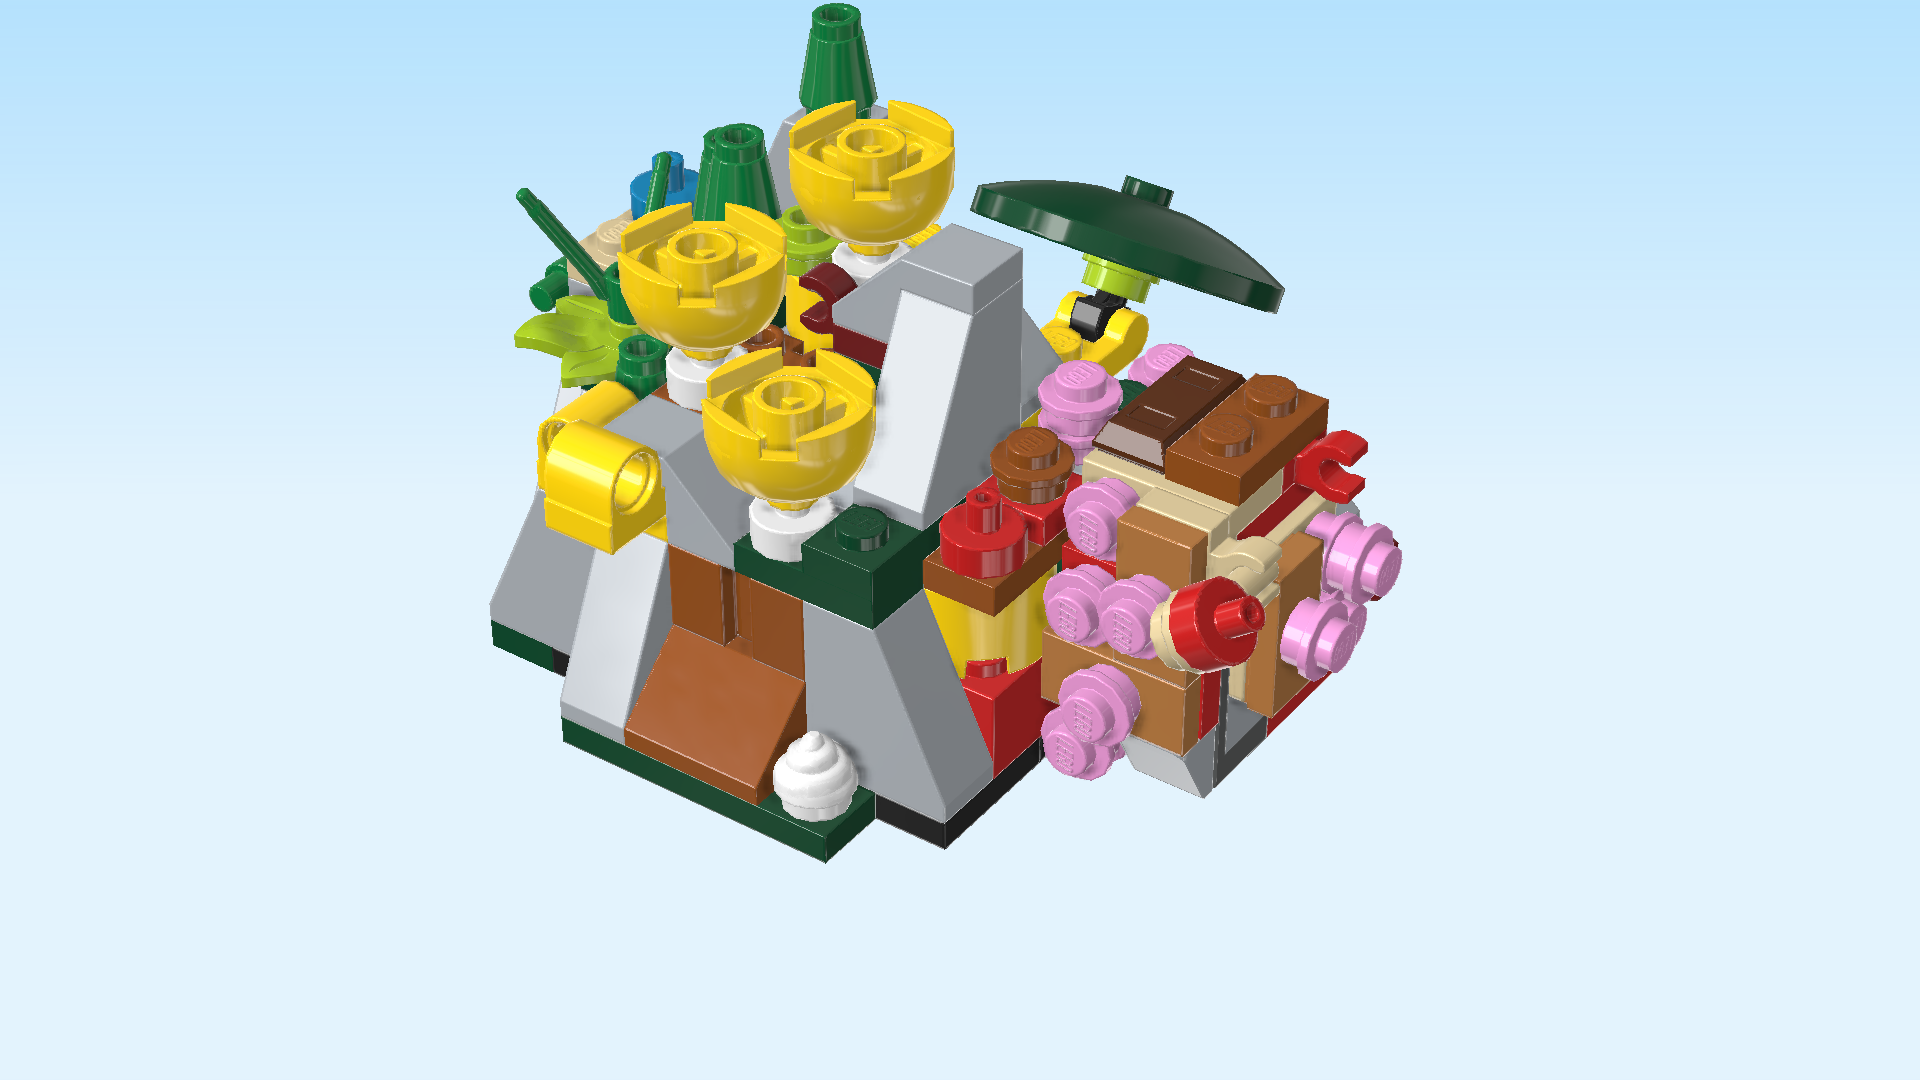
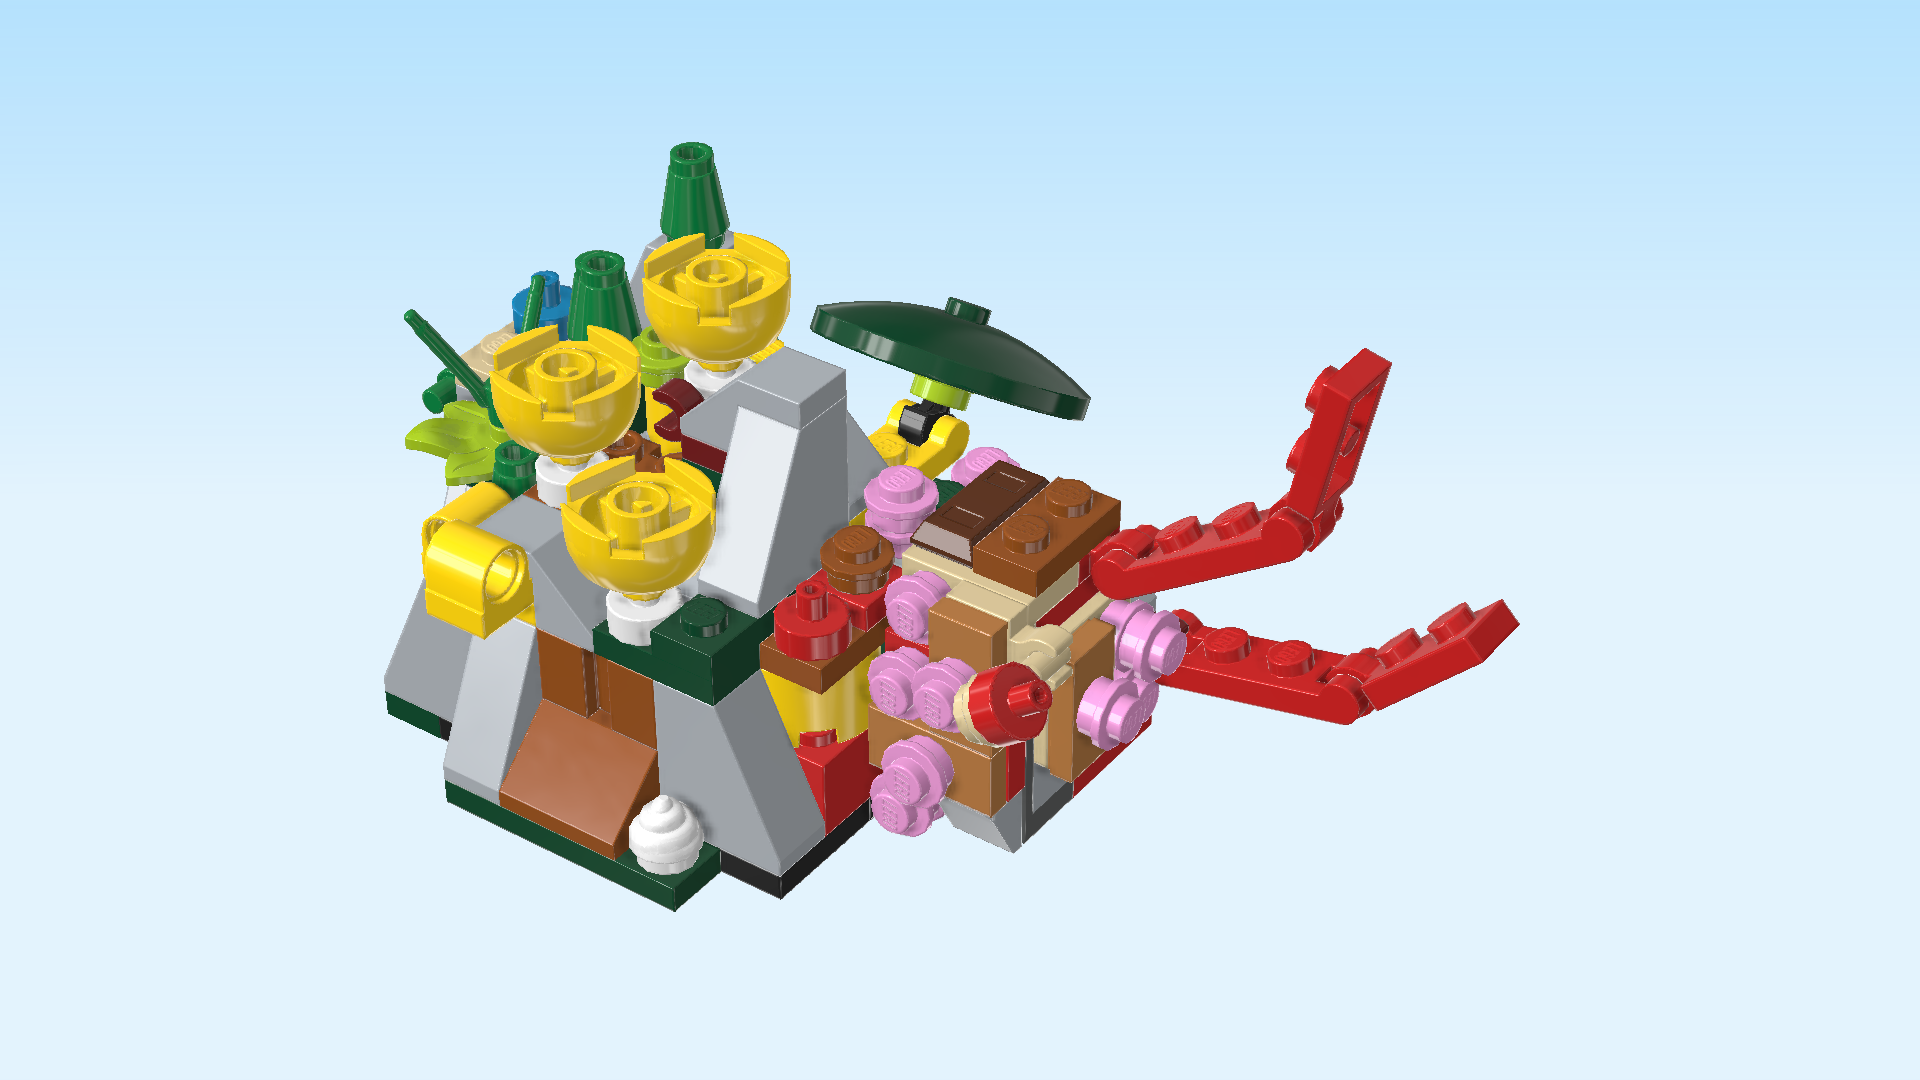
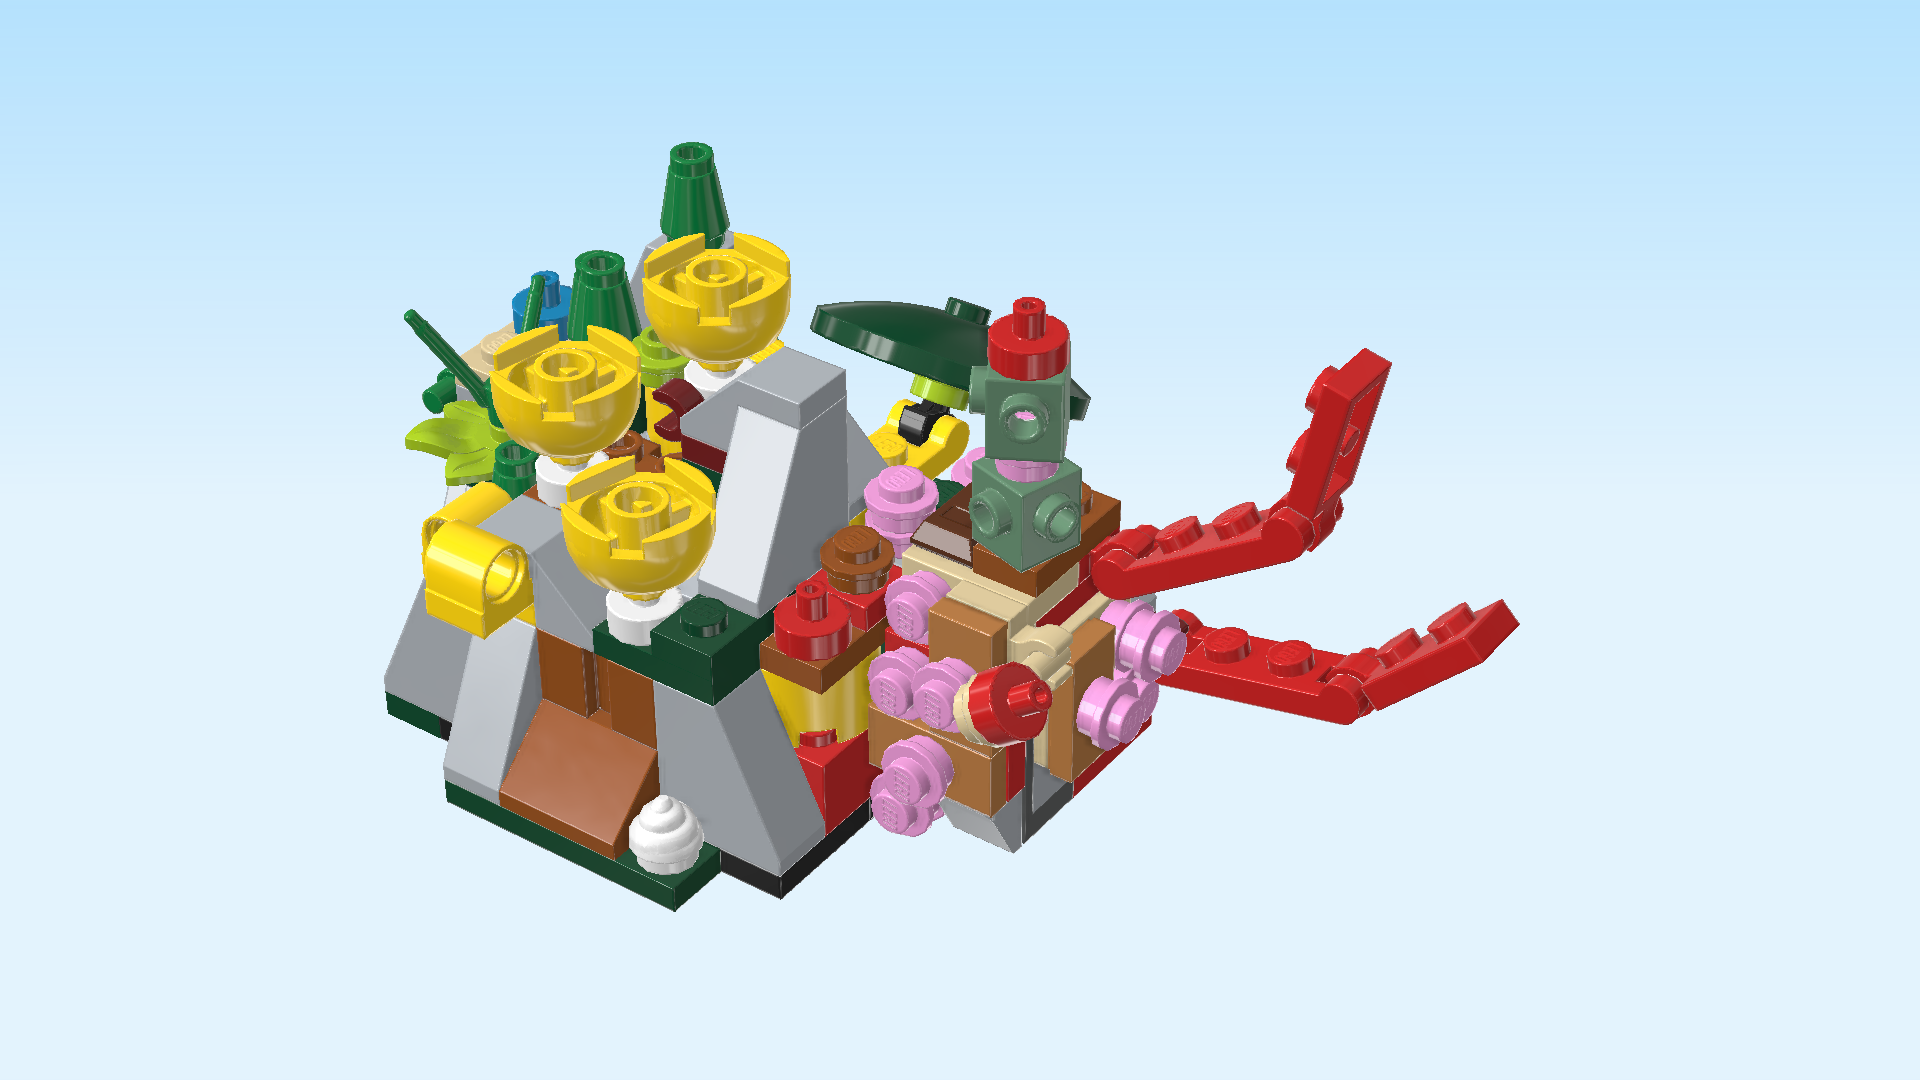
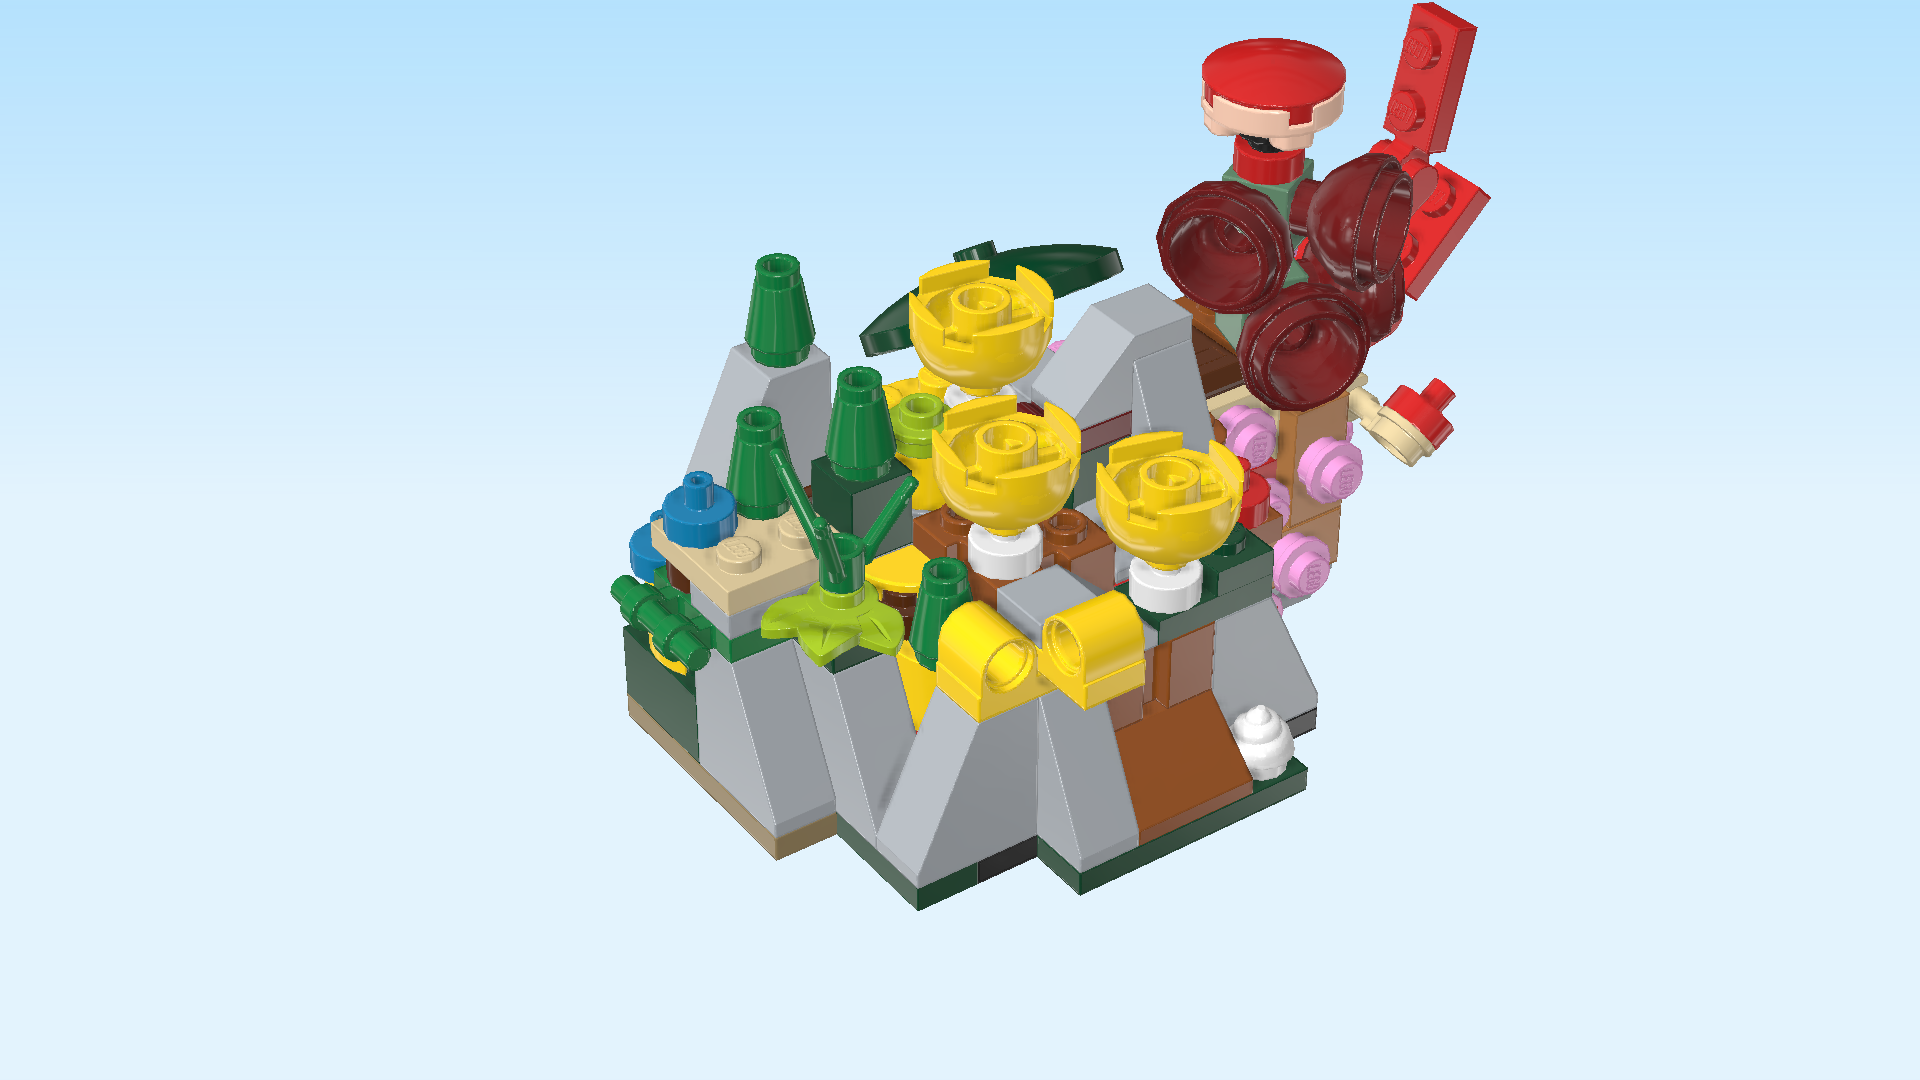
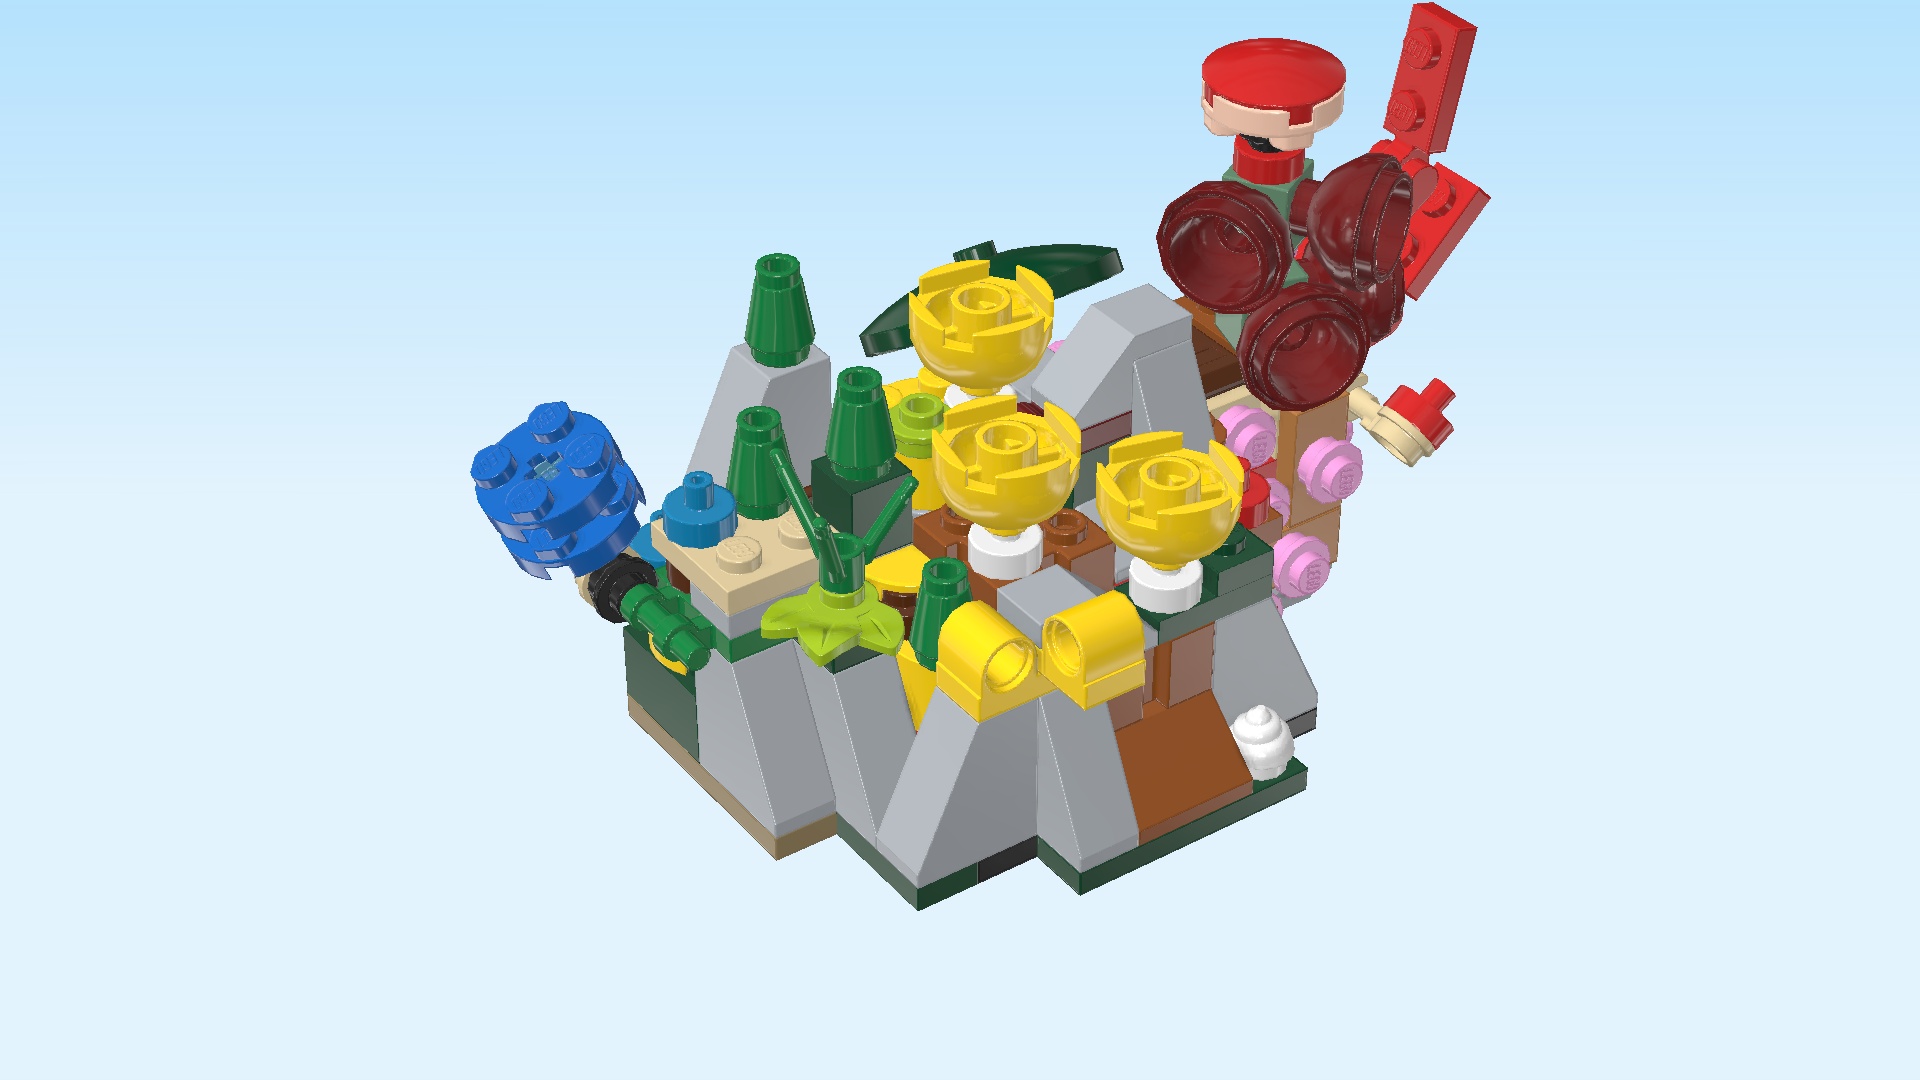
| The coral reef is finished! What a difficult build, you can be proud of yourself! The work was definitely worth it though: The reef is amazing! Exotic, unique and colorful, the diver will be delighted to examine it from up close and take breathtaking pictures with the underwater camera. |
| You have finished building the entire set! Fantastic job! Go and explore all the wonders of the deep blue sea: mesmerizing plants and coral reefs, majestic and fascinating sea creatures such as the manta ray, and unexpected deep-sea dwellers like the diamond skeleton. What a fascinating world! |
| Enjoy! |