LEGO 21241 The Bee Cottage 

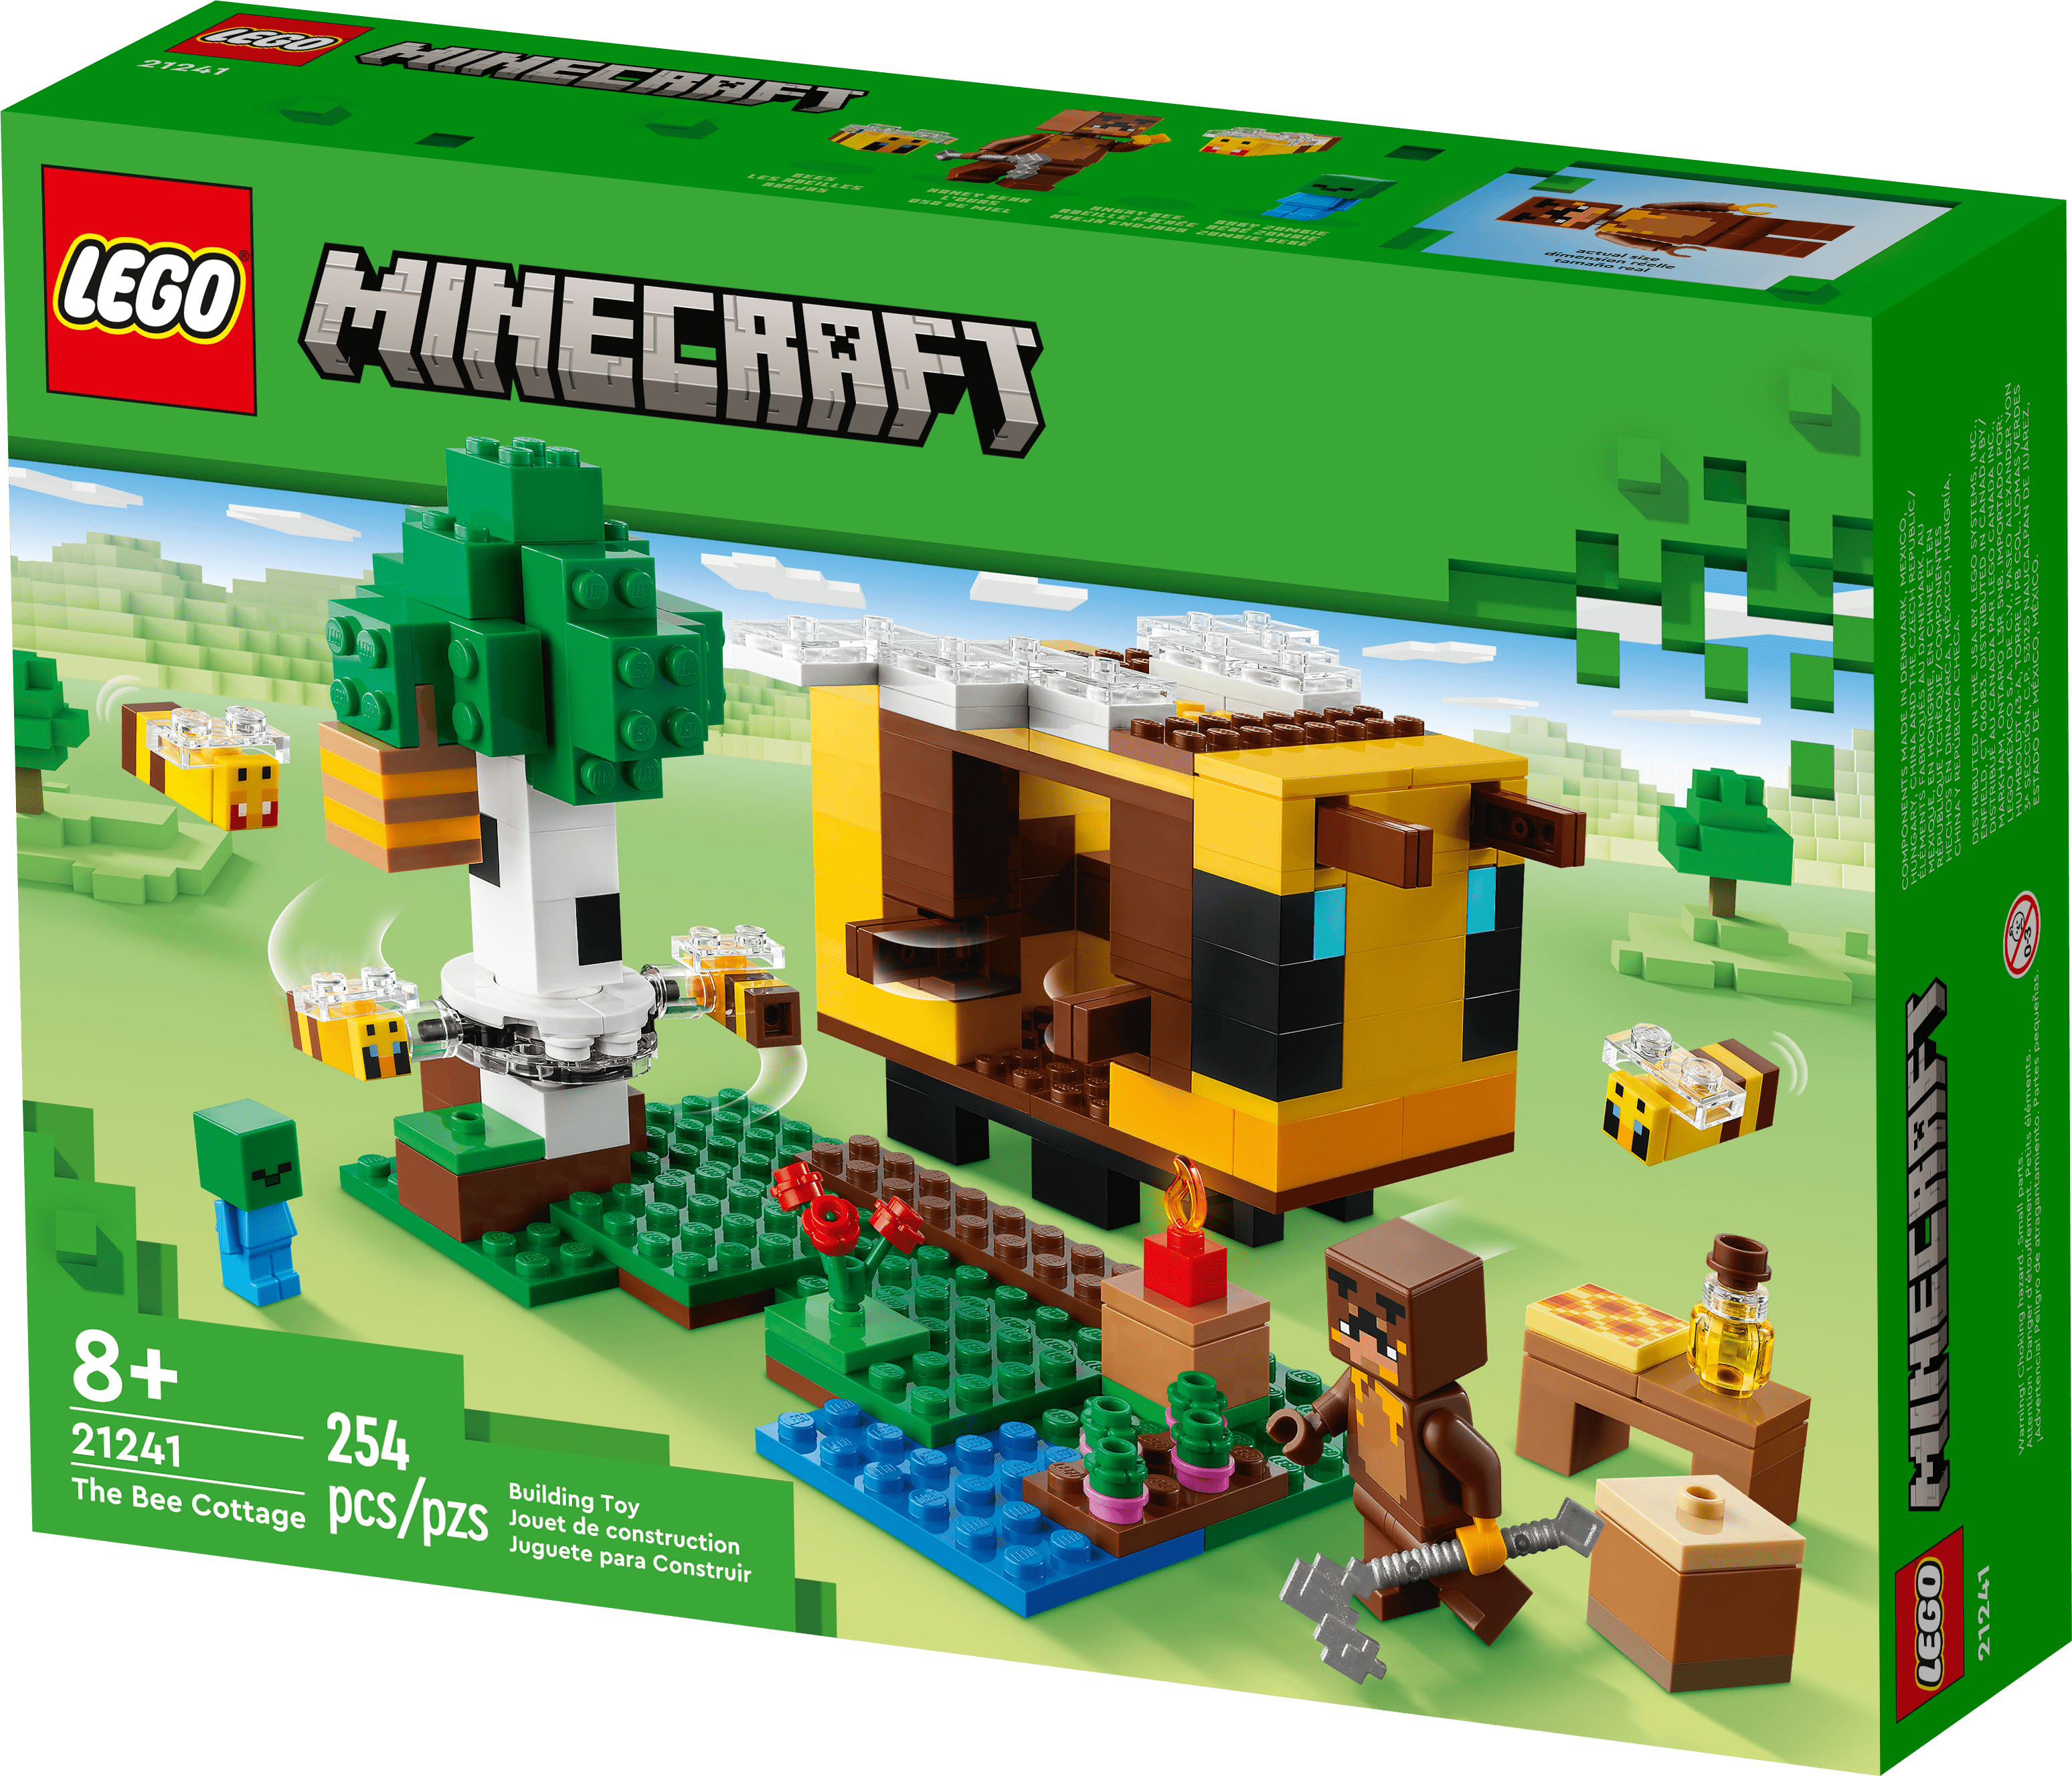
LEGO Audio & Braille Building Instructions for the LEGO Minecraft set "The Bee Cottage".

Harvest honeycomb from a beehive, grow crops on a farm and defend your base as you build a bee-shaped house in this fun Minecraft adventure. And if the angry bees racing round the nearby tree decide to attack, lift the roof off your bee cottage to enjoy many more activities inside.

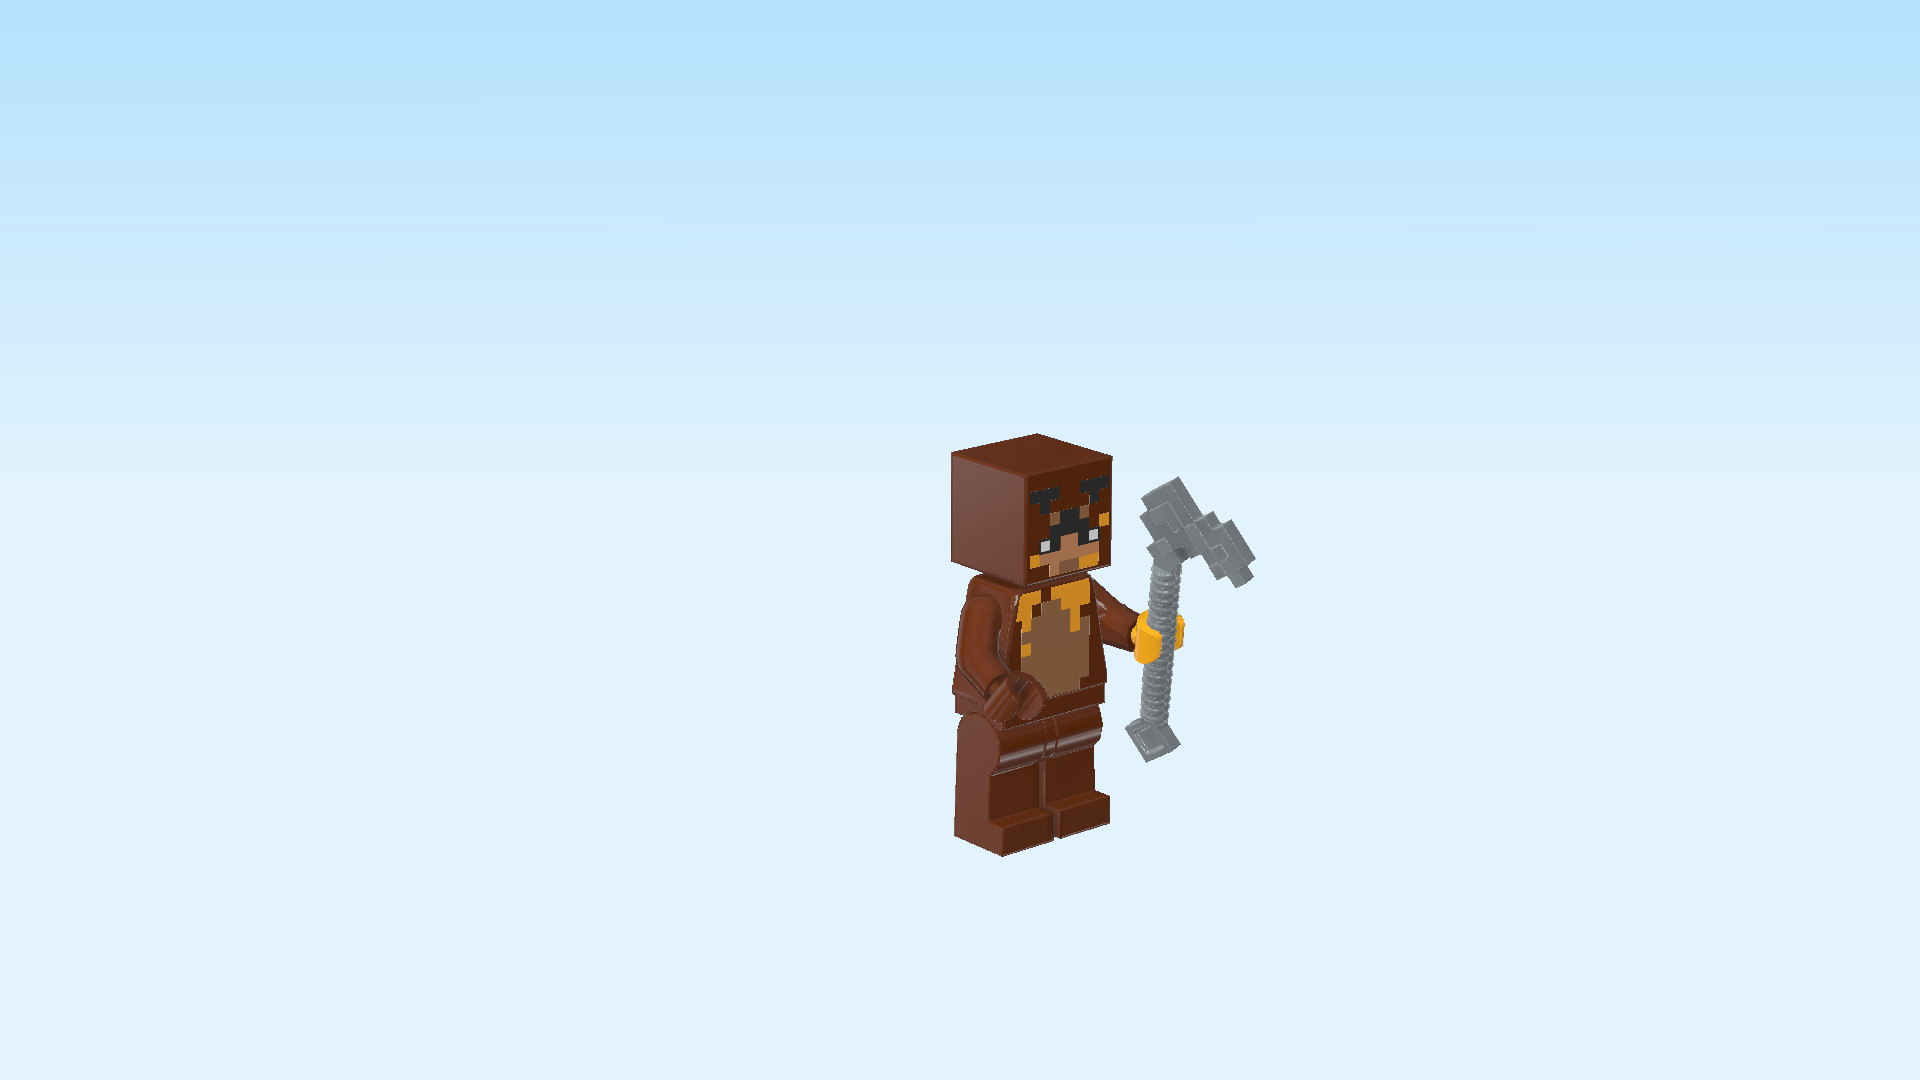
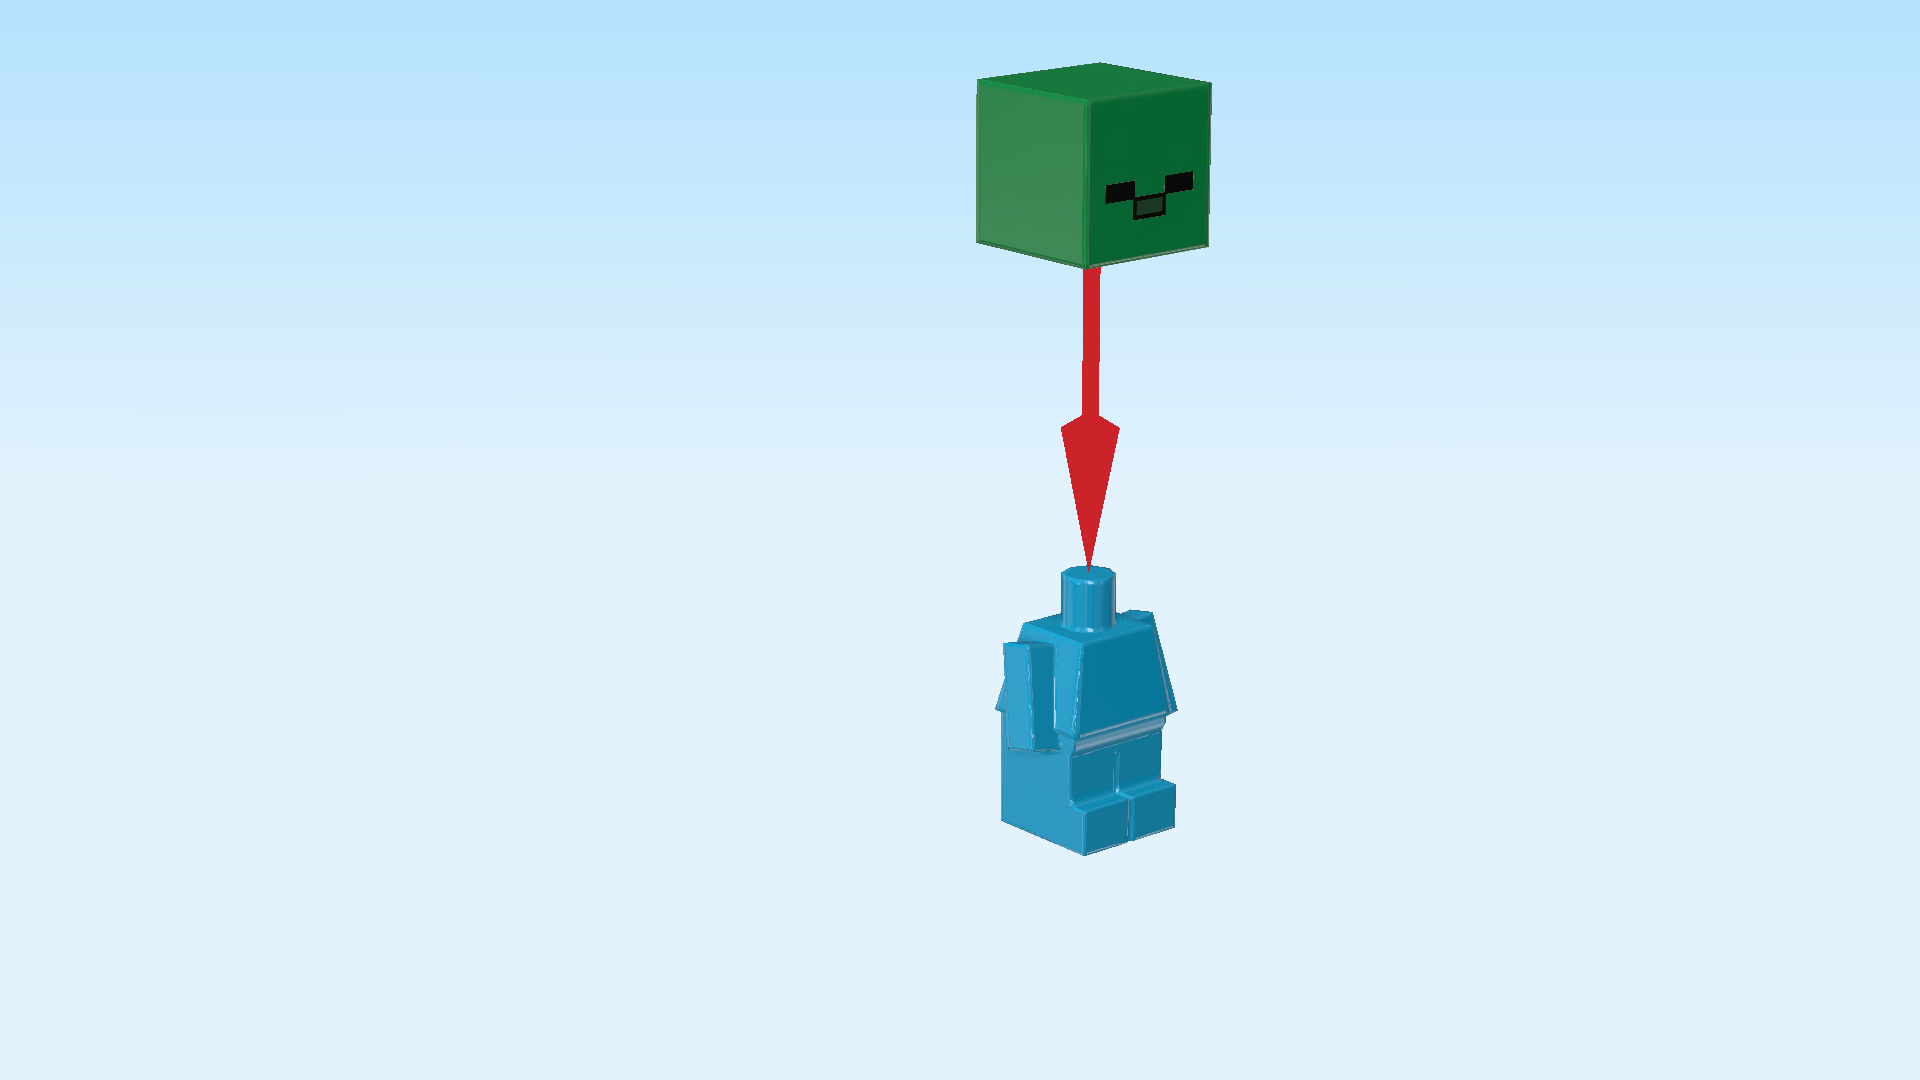
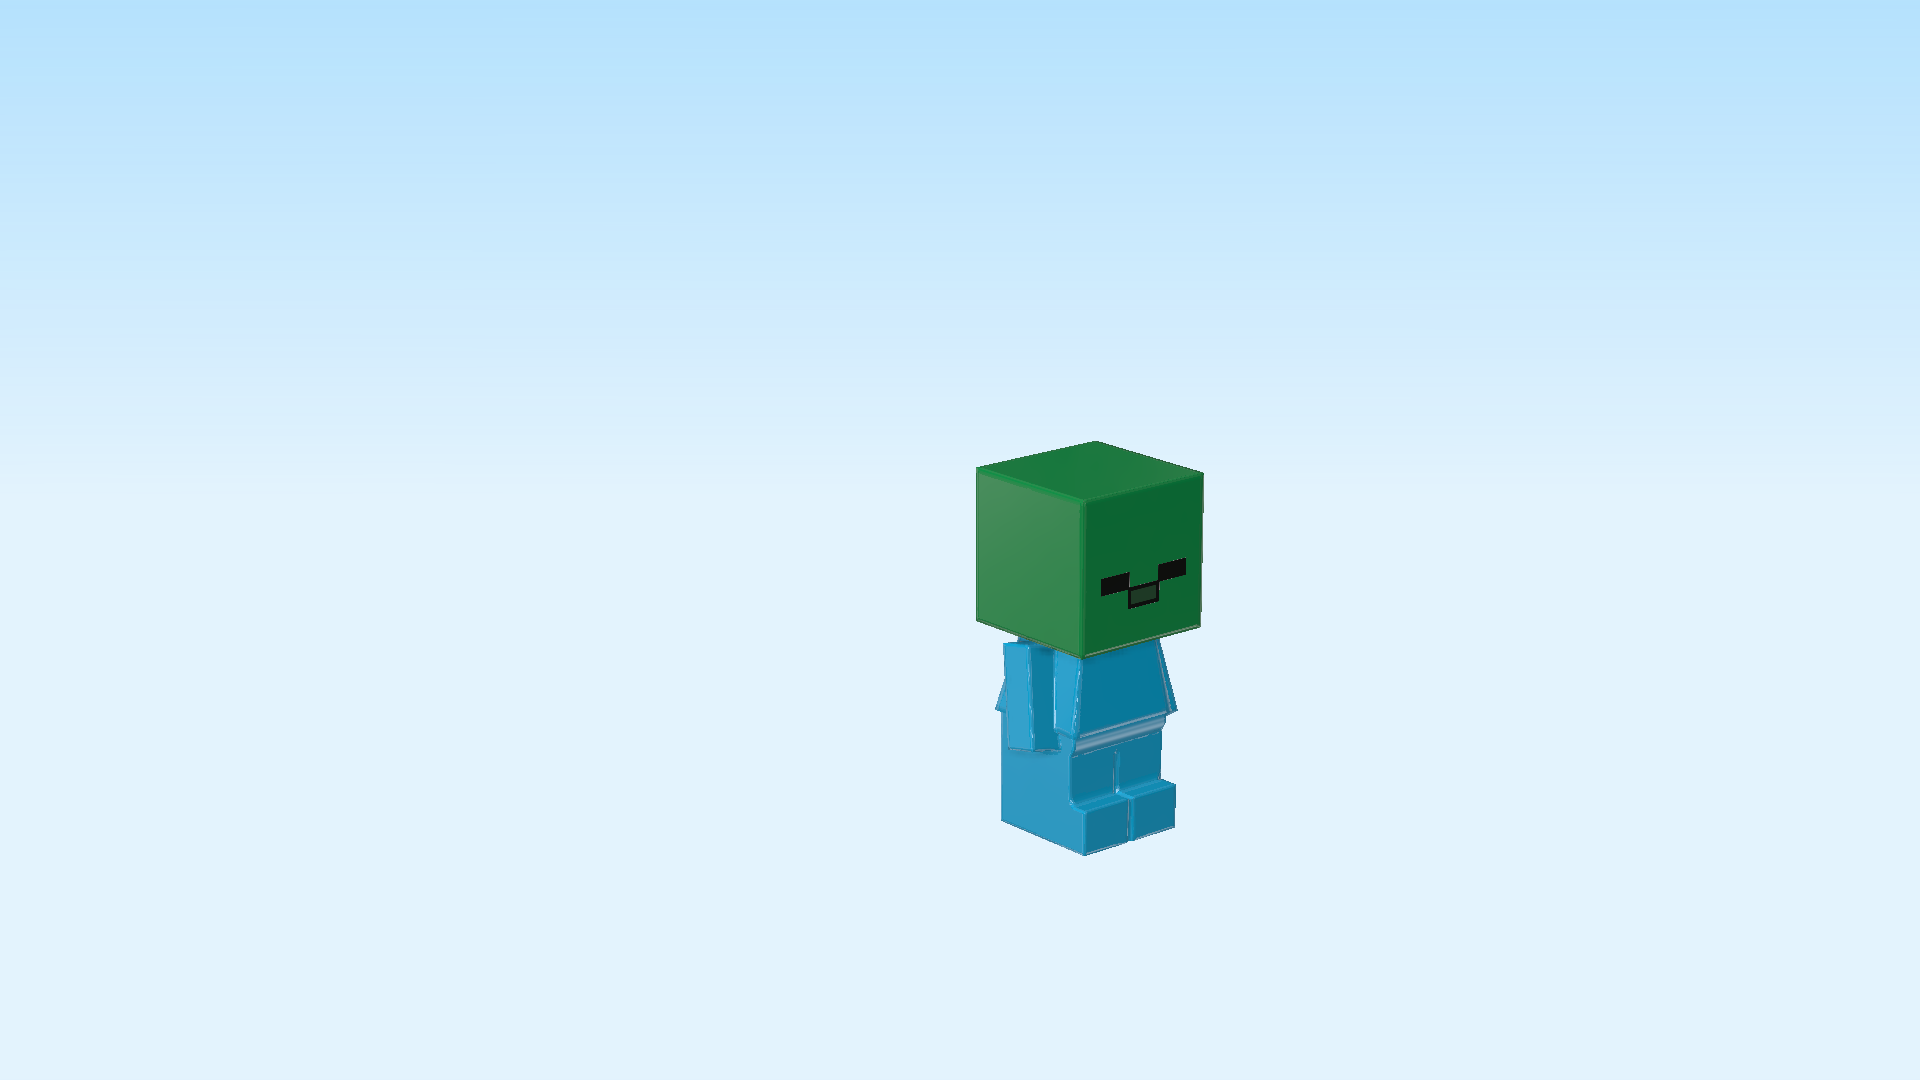
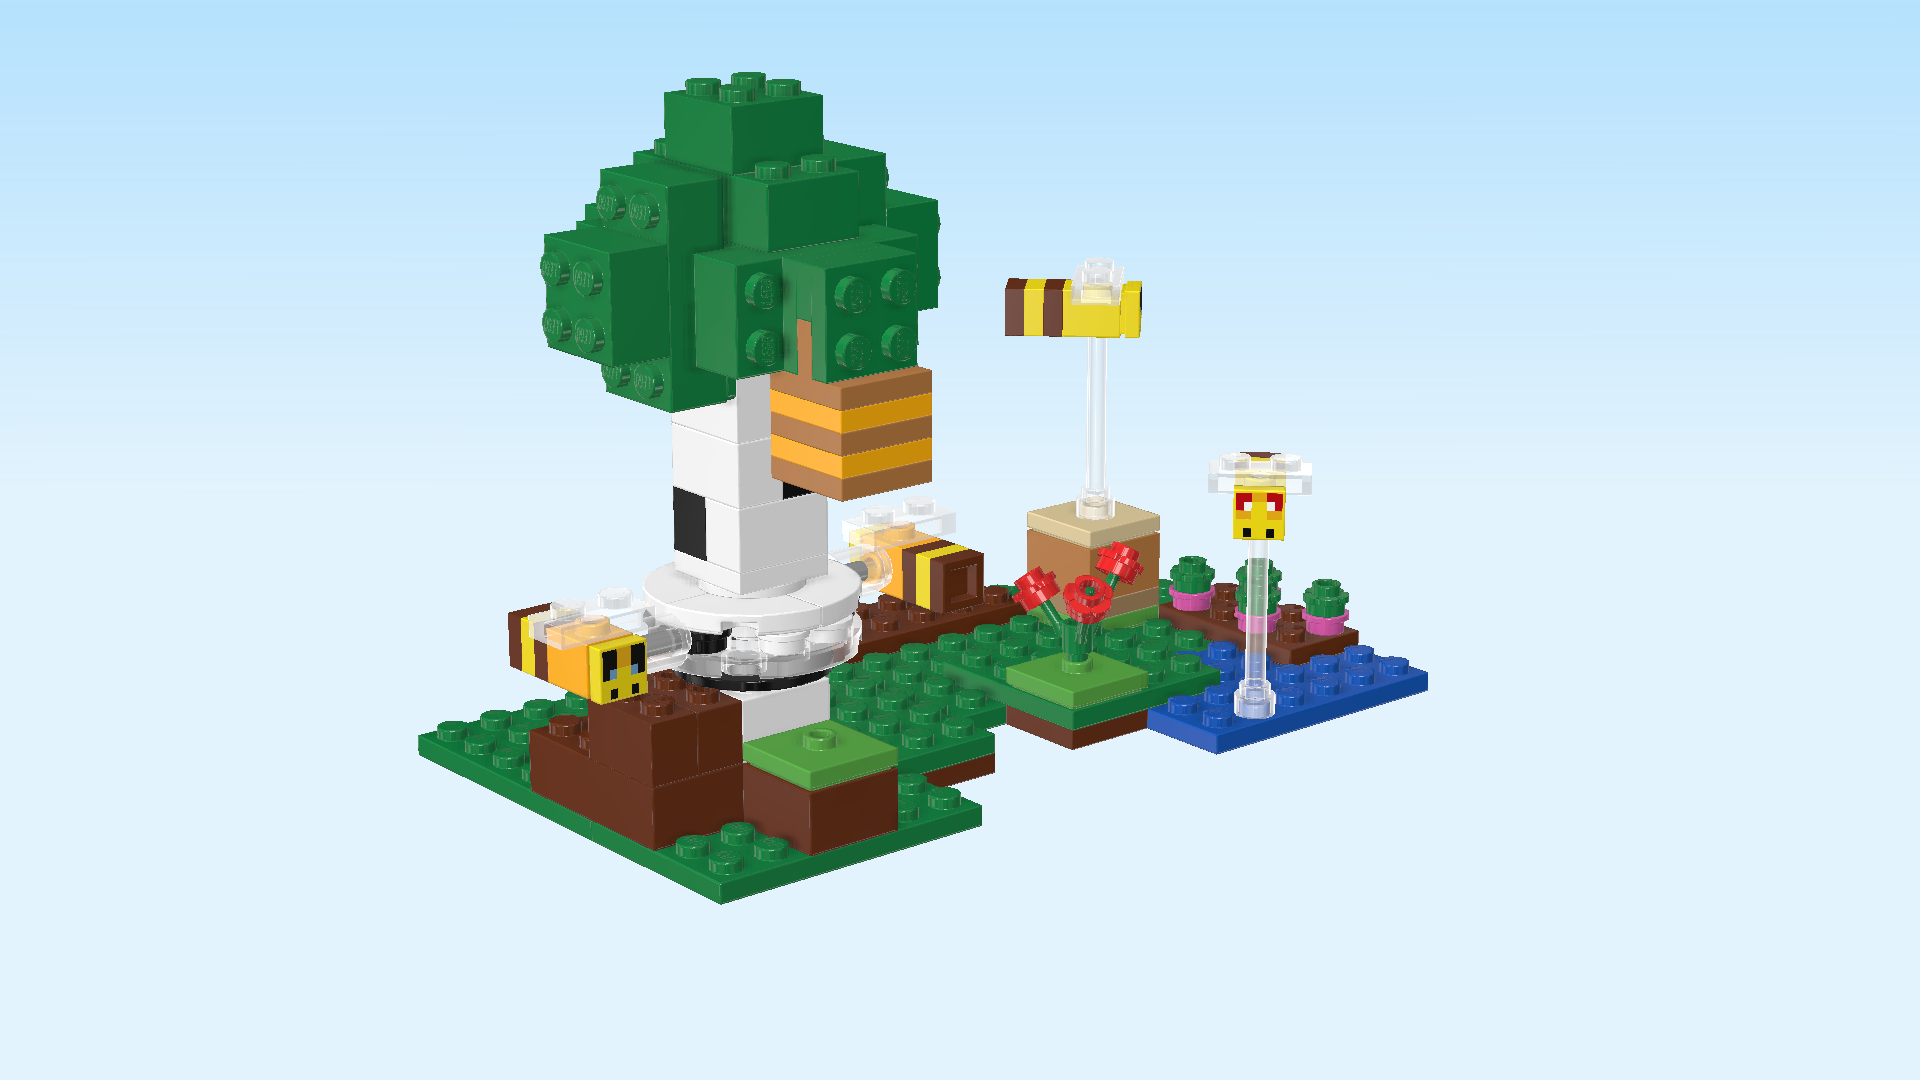
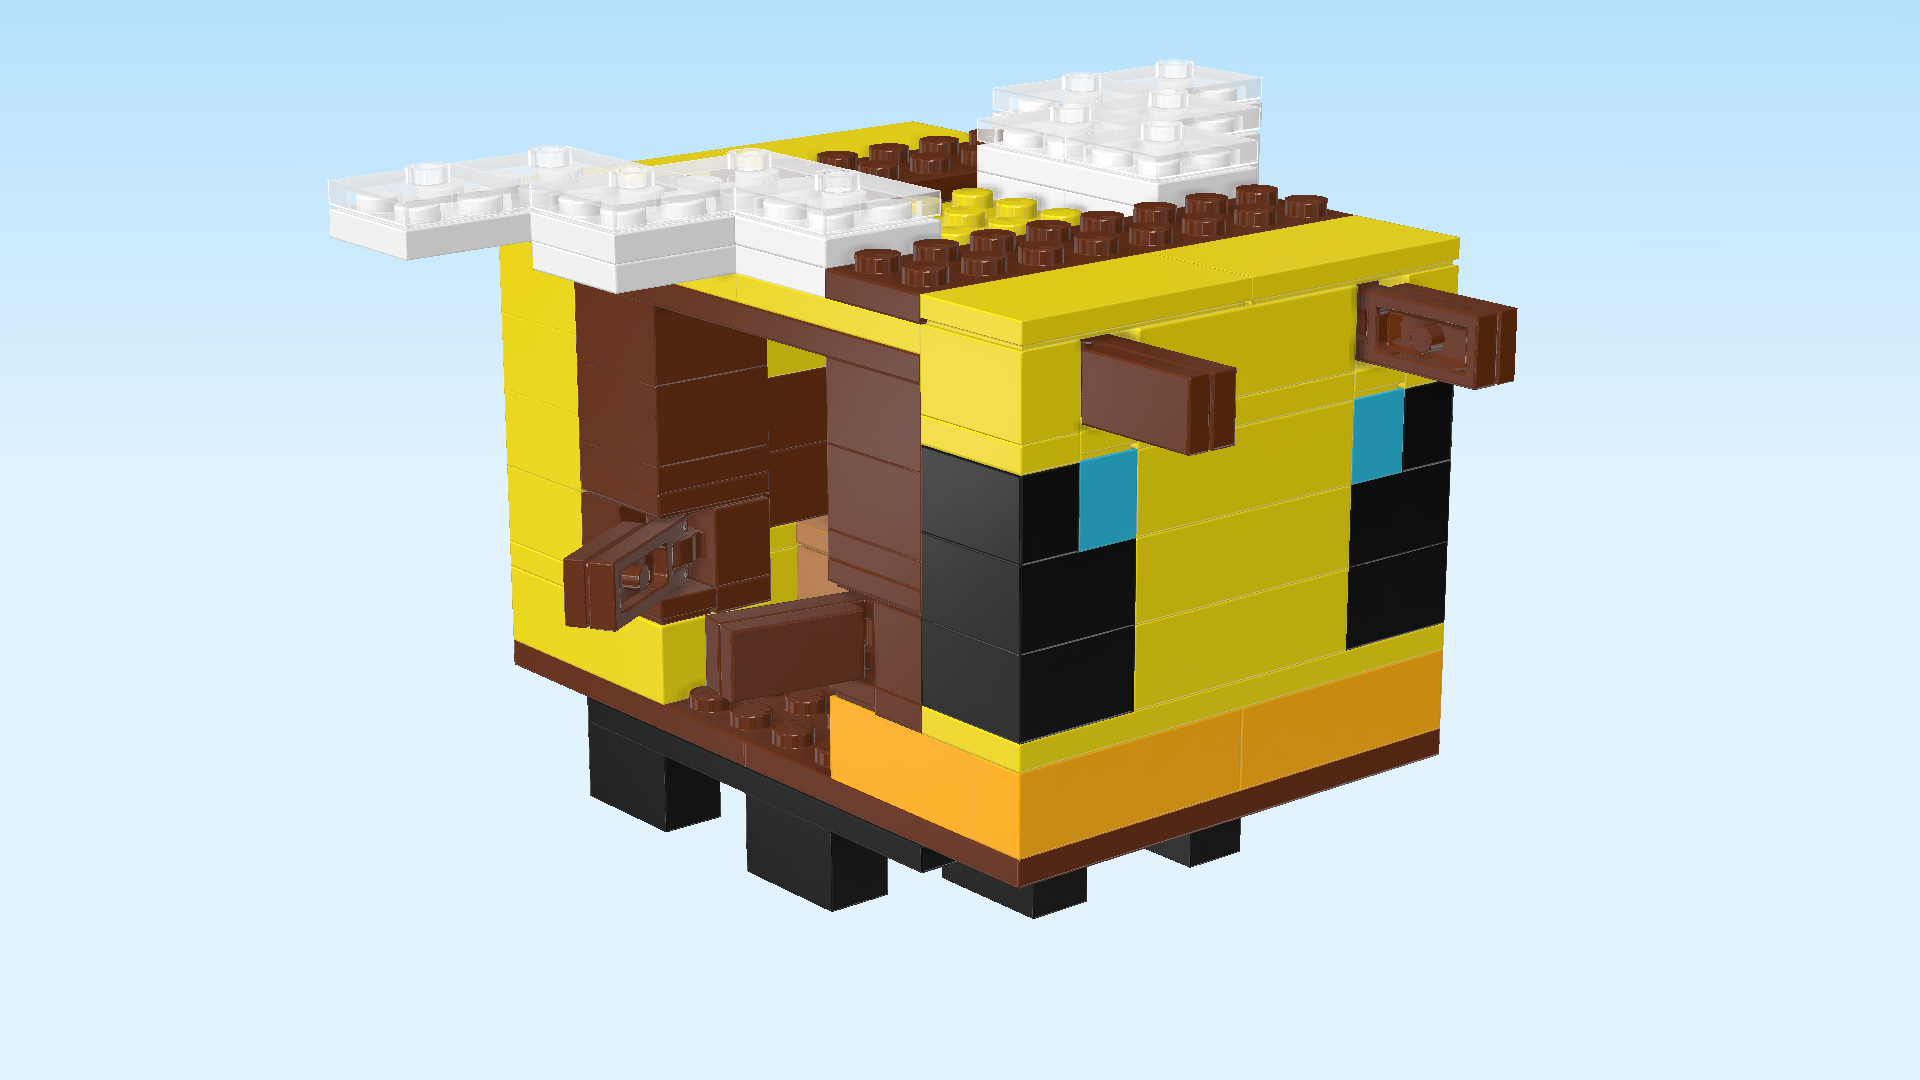
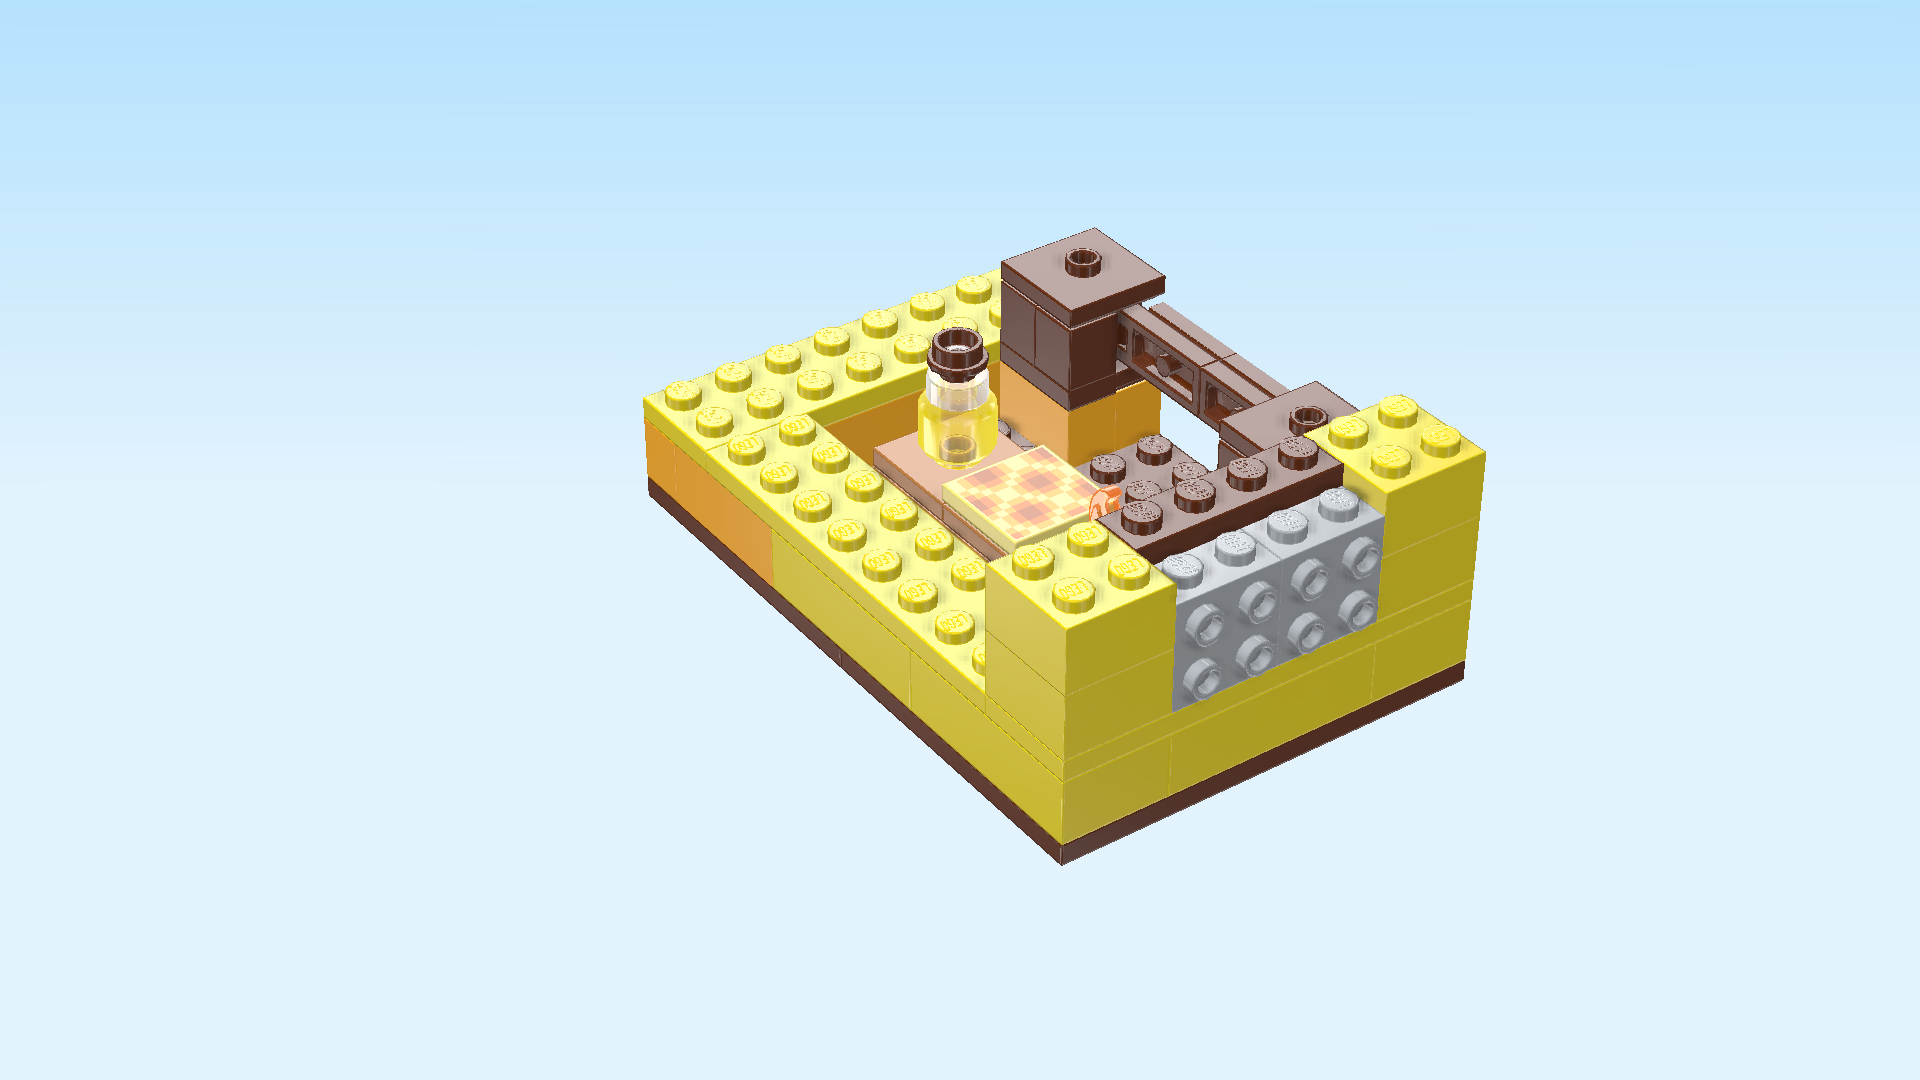
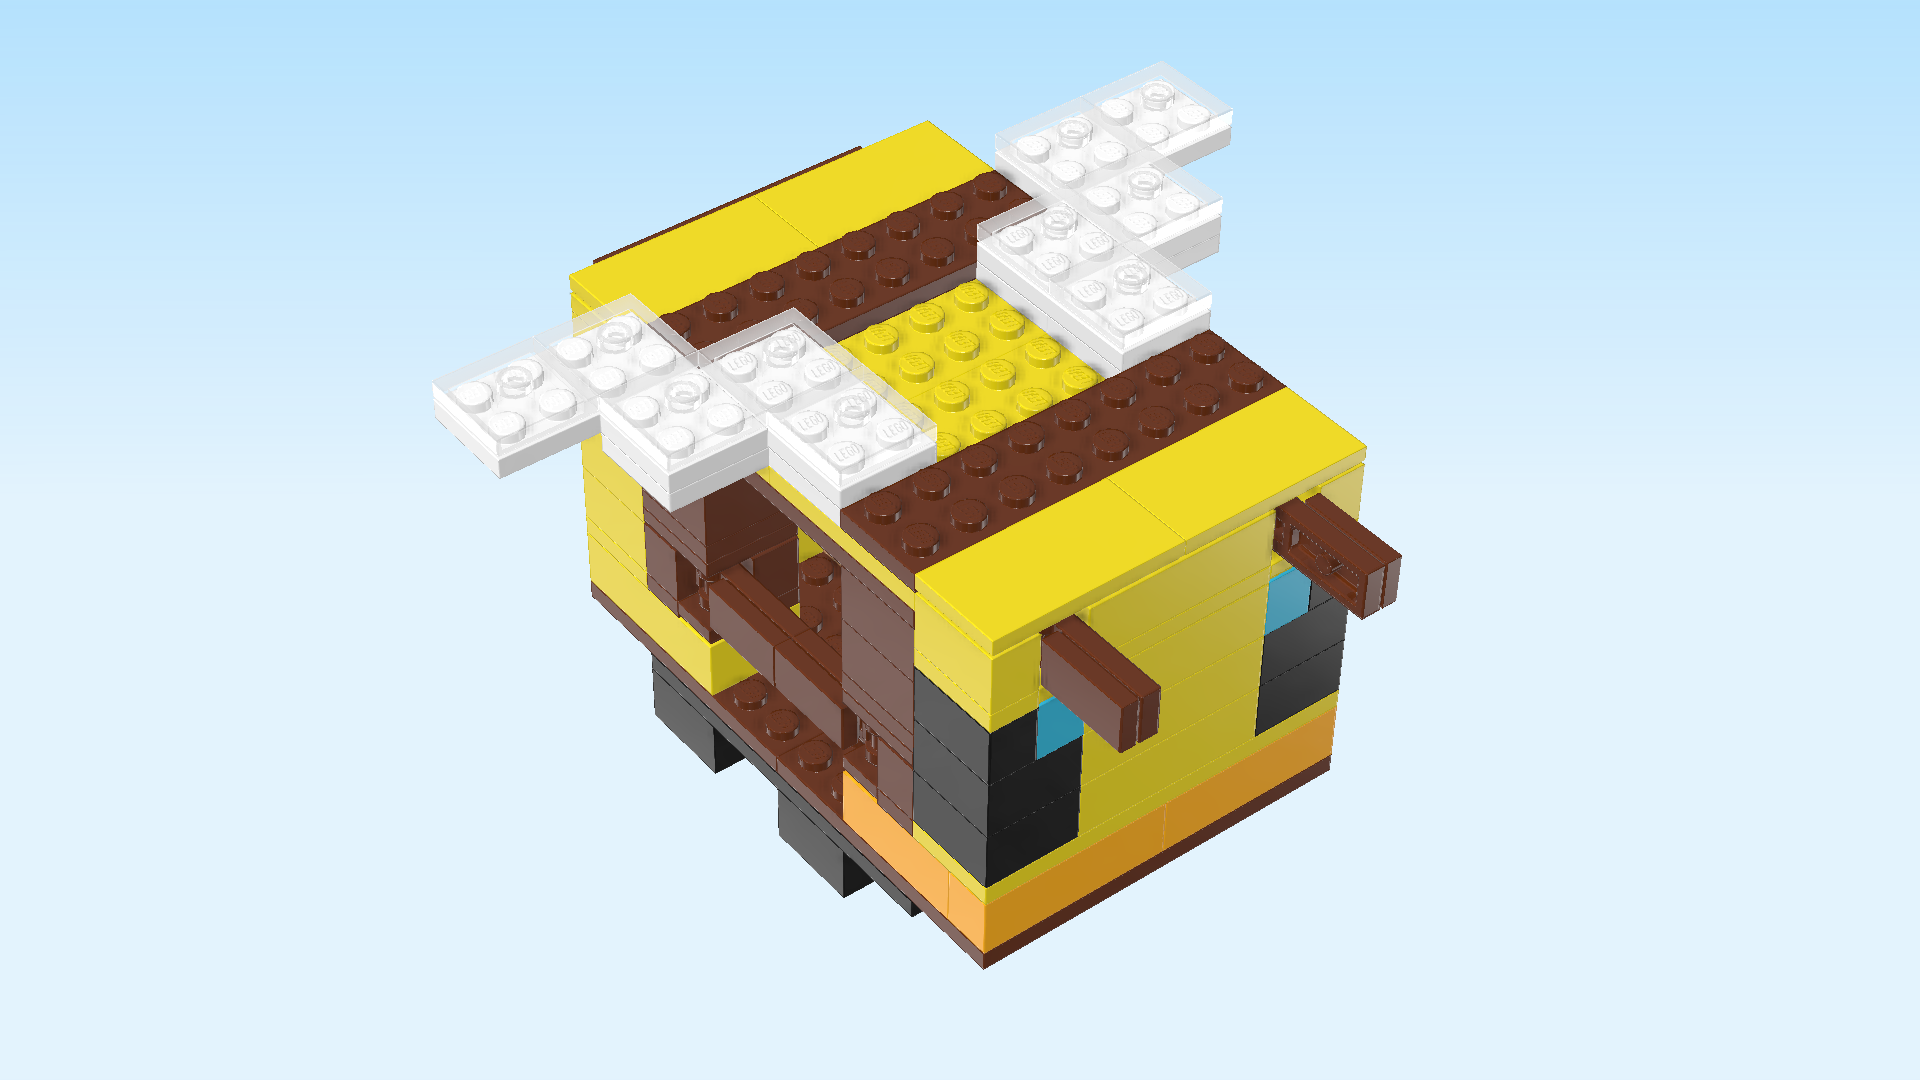
The box cover shows a scene that could be straight out of the computer game Minecraft where you can create your own blocky 3-dimensional world. In the background there are green blocky hills, and our bee cottage is situated in the middle of a green meadow. The bee cottage is actually a little house in the form of a squared bee: it's a rectangular box in yellow with brown and black stripes and some orange hues mixed in. The right side wall has a bee face with blue eyes and two antennae. On the roof, the two white-and-transparent wings are mounted. This cottage bee does not have a sting though: The left side wall is a brown smooth surface, mimicking the bum of the bee. The cottage has a swing-out door and a little honey cooking station inside. It is located on a peaceful piece of farmland with a small pond, a little meadow and some flowers. A big beautiful tree is growing next to it. It has a black-and-white bark, and in its green treetop there is a beehive! Two bees are flying around the tree, watching their hive. Two more bees are roaming the farmland in the search of tasty flowers. The Honey Bear Minifigure is busy extracting some honey from a honeycomb and filling it into his honey jar. But what's that? A baby zombie is visiting! Is it trying to tease the bees or steal some honey? Honey Bear better watch out! Hopefully, he does not need to use his iron hoe.

Open the box. This can be tricky; ask someone to help you!

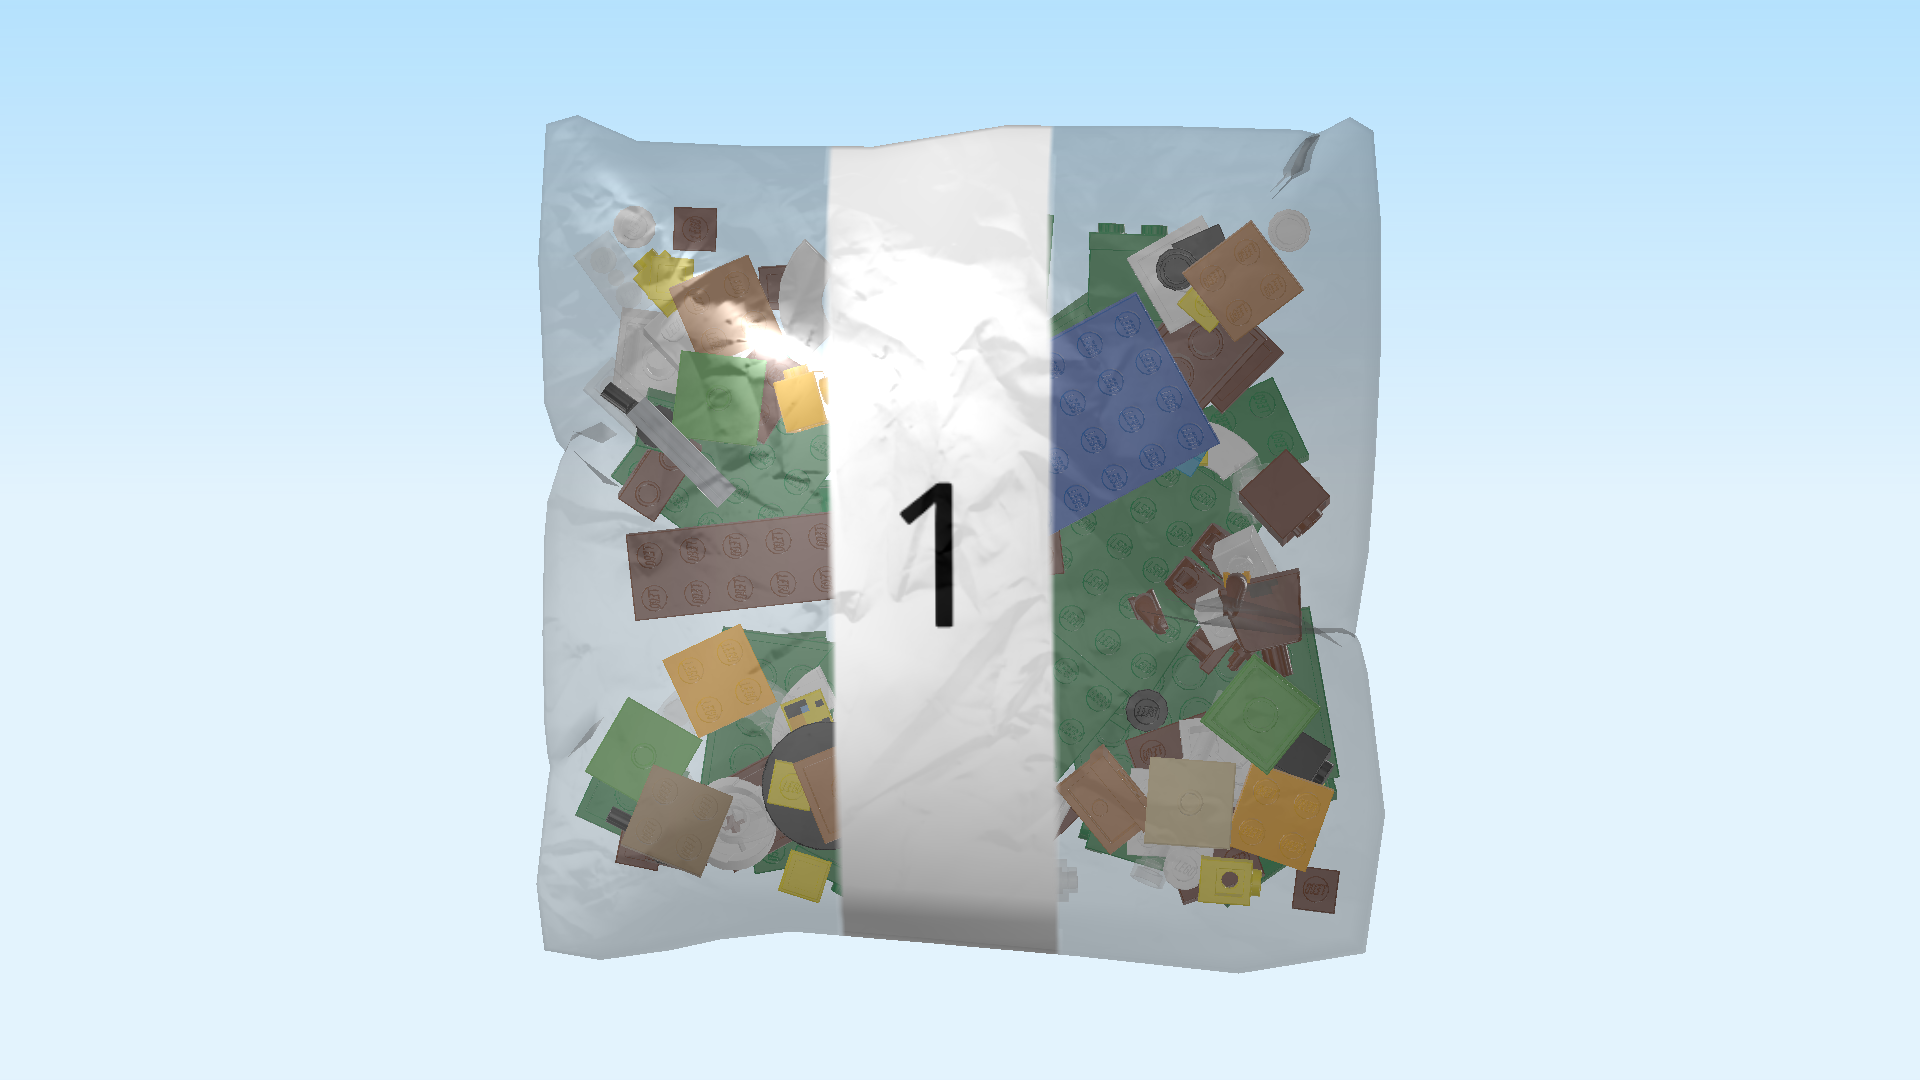
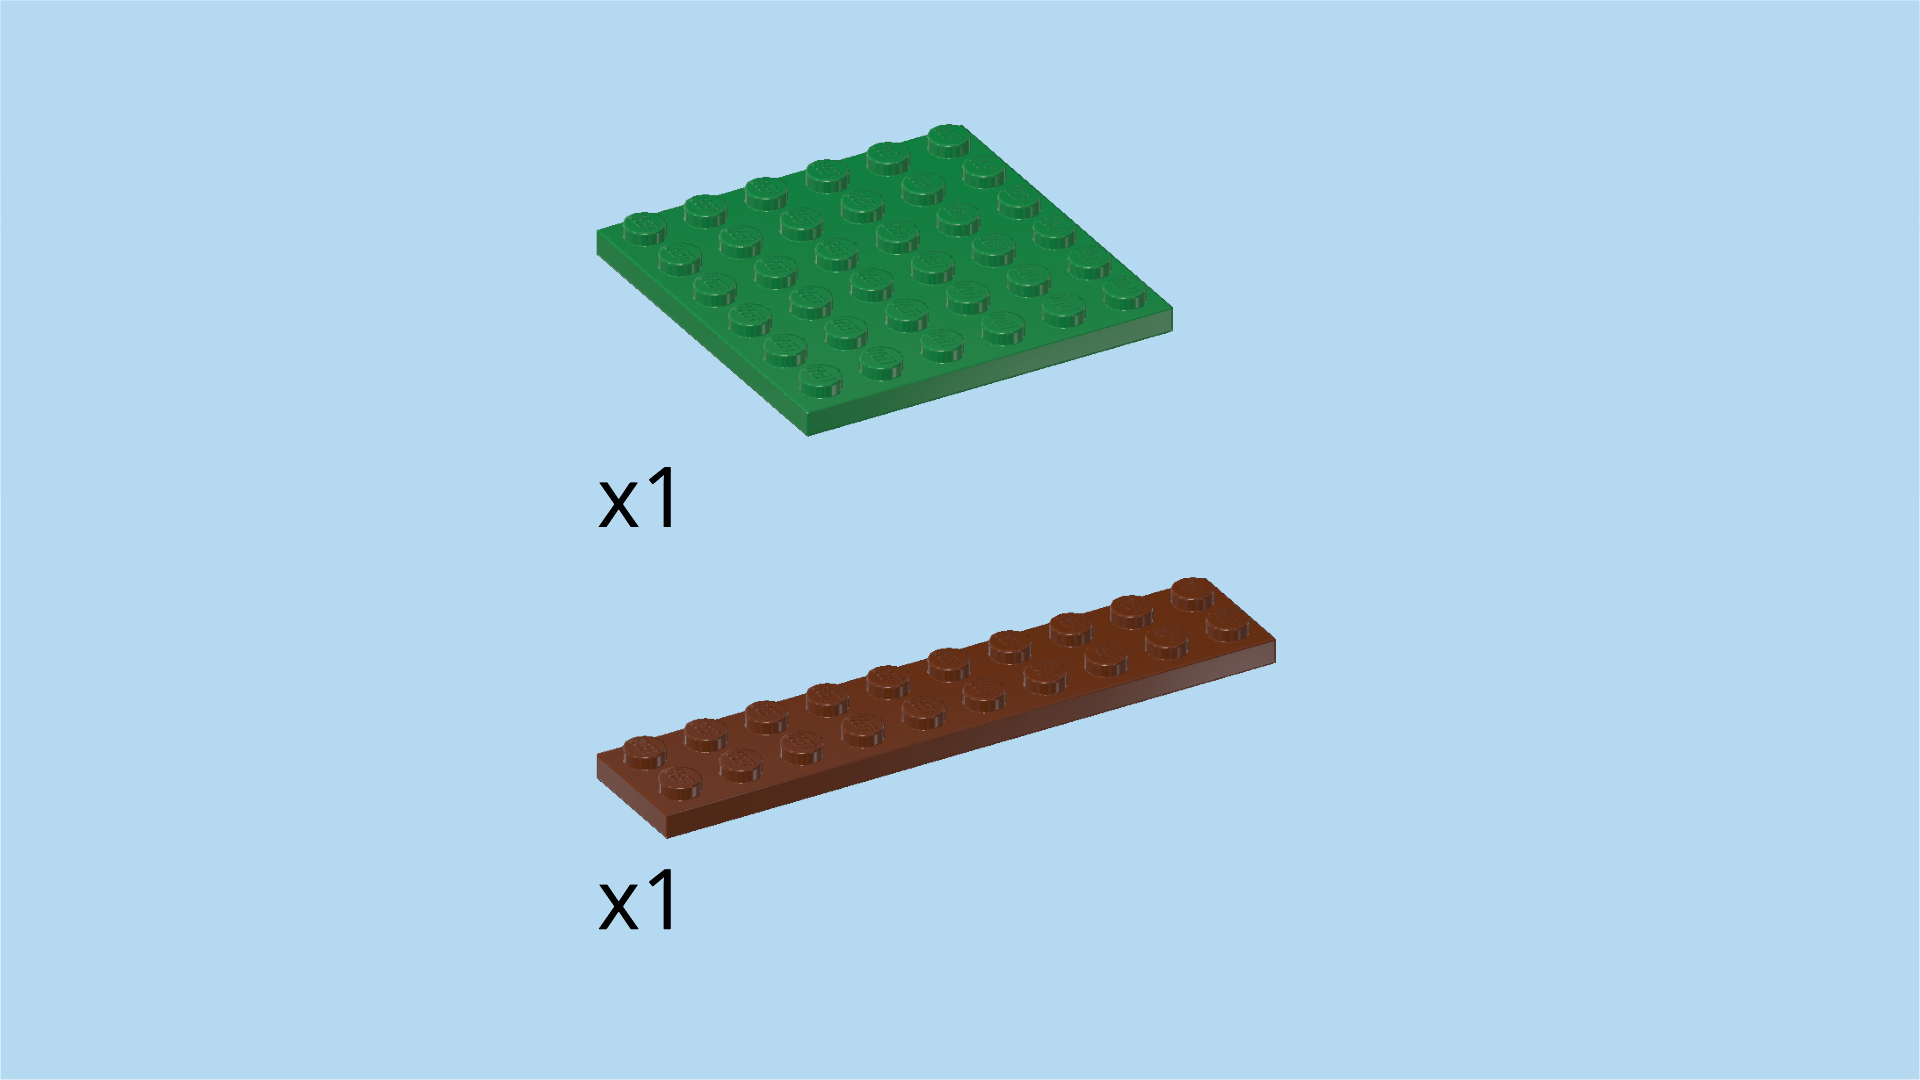
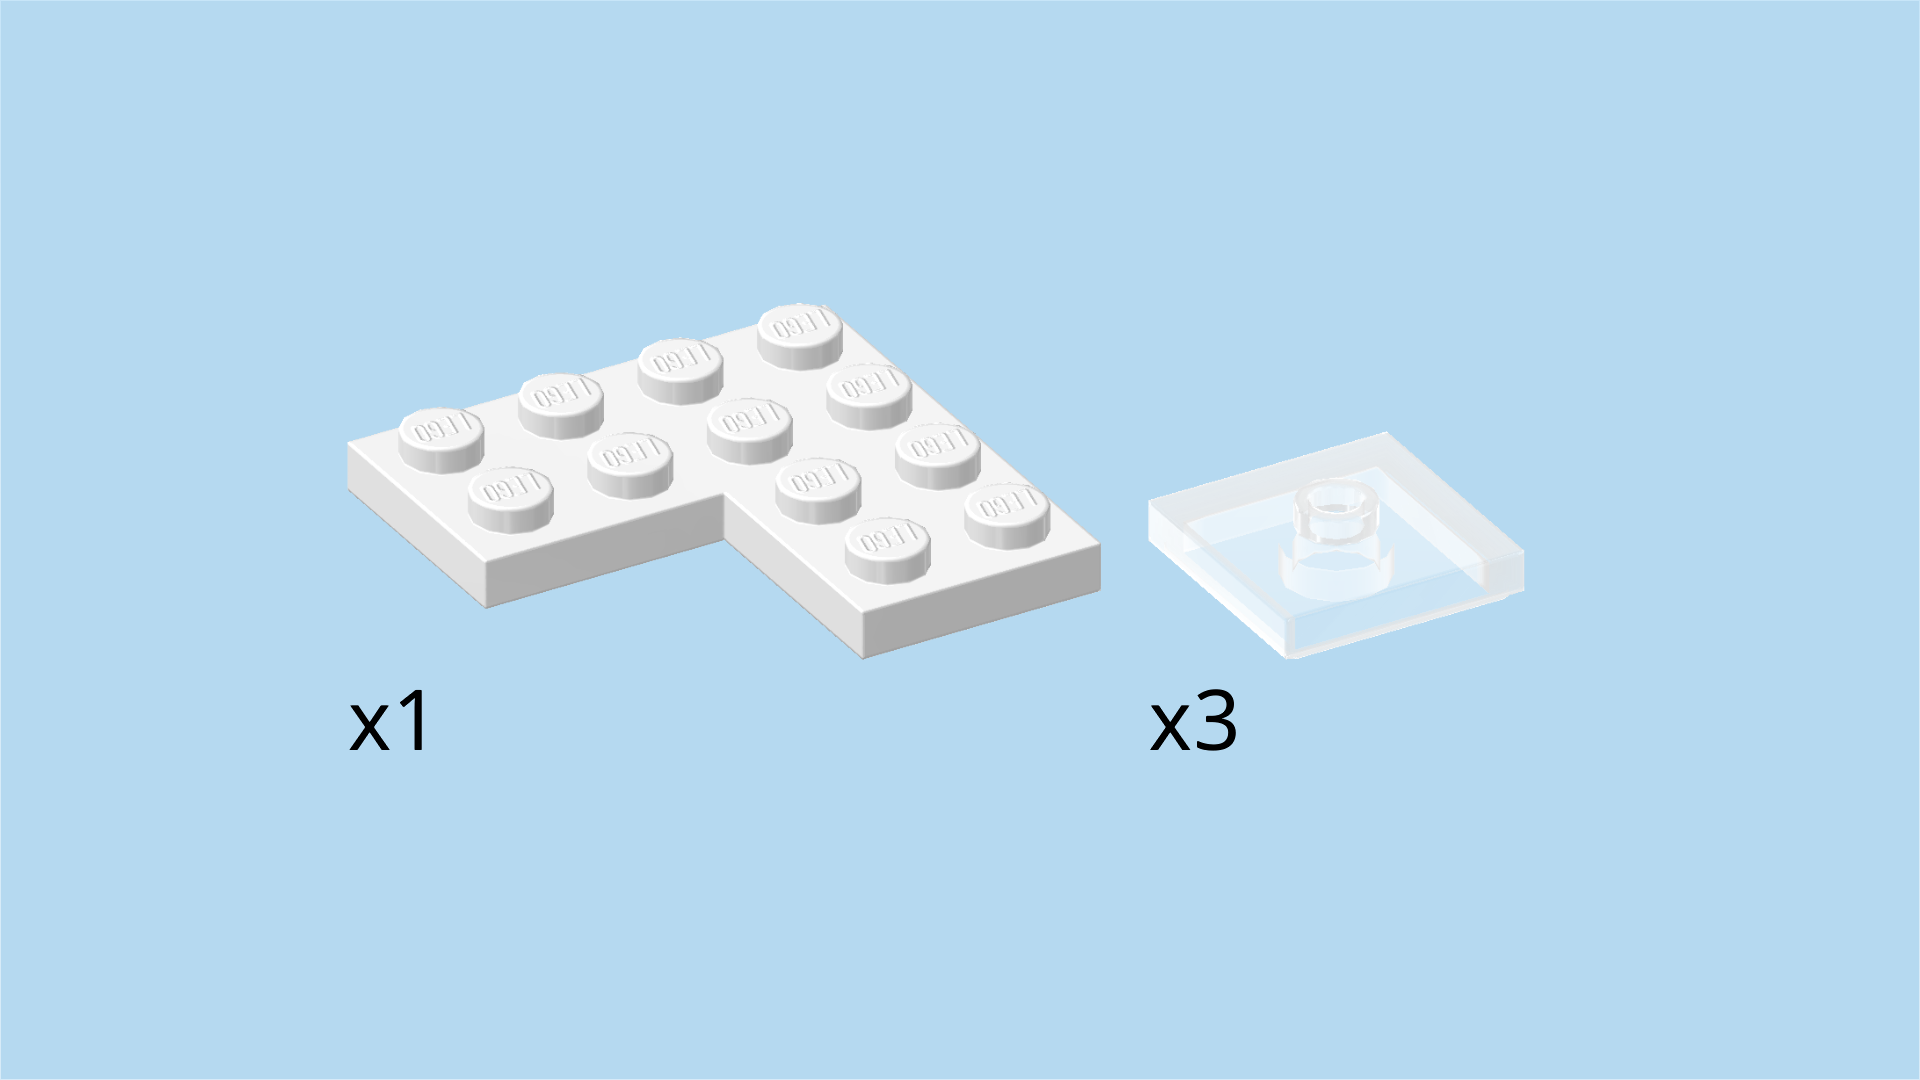
The box contains 1 booklet with visual building instructions and 2 bags with numbers printed on them. Ask a sighted person to help you find the correct bag!

Carefully open bag number 1 and any small sub-bags in it. This bag contains all bricks and pieces for the Honey Bear Minifigure, the Zombie Minifigure, the farmland with tree, and four small bees.

Before you start building, ask a sighted person to help you sort the pieces by color. This makes finding the correct pieces even easier!

First, we will build the Honey Bear Minifigure.

Collect the following 3 pieces:

1 reddish brown square Minifigure head,

1 reddish brown and flame yellowish orange upper part of the body,

and 1 reddish brown pair of legs.

Assemble the Minifigure: put the upper part of the body on the legs, and put the head on top.

Find 1 silver metallic Minecraft iron hoe.

Snap it into the left hand of the Honey Bear Minifigure.

The Honey Bear Minifigure is finished! Well done! It's a brown bear with some greyish-brown and orange chest fur. Its face, just like its fur, is pixelated according to Minecraft style. The bear is hungry for some tasty honey, so let's continue!

Next, we will build the Baby Zombie Minifigure.

Collect the following 2 pieces:

1 dark azure blue baby zombie body,

and 1 dark green square zombie head.

Put the head on top of the body.

The Baby Zombie Minifigure is finished! Great job! It has a tiny blue body and a green head. The zombie's face only consists of three horizontal black lines: two for the eyes, and one for the mouth. It doesn't look very friendly, so you better watch out!

Now, we will build the farmland.

Collect the following 2 pieces:

1 reddish brown plate 2x10,

and 1 dark green plate 6x6.

Put the plate 6x6 on the table. Make sure that its knobs form straight rows and columns in front of you.

Put the plate 2x10 horizontally on the 2 backmost rows and the 2 rightmost columns, 8 columns overhanging to the right.

Find another dark green plate 6x6.

Put it underneath the previous piece, aligning it with the first plate 6x6.

If done correctly, there are still 2 empty columns of the plate 2x10 overhanging to the right, and the two plates 6x6 form flush edges at the front and back.

Find yet another dark green plate 6x6.

Put it next to the previous piece, underneath the 2 overhanging columns of the plate 2x10.

If done correctly, the three plates 6x6 form flush edges at the front and back, and the plate 2x10 is mounted centered at the back edge of the 3 base plates.

Find 2 dark green plates 4x4.

Skip 4 columns from the left, and mount 1 plate 4x4 on the 2 frontmost rows, 2 rows overhanging to the front.

Skip 4 columns from the rightmost edge, and mount the other plate on the 2 frontmost rows, 2 rows overhanging to the front.

If done correctly, there are 2 empty columns between the 2 pieces you have just mounted.

Find 2 reddish brown plates 2x2.

First, flip the entire structure upside down. This means that the knobs of the plates are now touching the table. Make sure the 2 previous pieces are still protruding to the front.

Put 1 on the front left corner of the right protruding plate. This is the inner front corner of that plate.

Put the other one on the front right corner of the left protruding plate.

Collect the following 2 pieces:

1 bright blue plate 4x6,

and 1 dark green plate 4x6.

Put the bright blue plate 4x6 horizontally to the left of the previous piece. This means that only its back right corner will be mounted on the base structure. The rest is overhanging to the front left, forming a flush edge with the rest on the left side.

Repeat symmetrically with the dark green plate 4x6: mount it horizontally on the right edge of the structure. Only its back left corner will actually attach to the structure. Again, the right edge should be flush.

Collect the following 2 pieces:

1 reddish brown plate 2x4,

and 1 bright green plate 2x2 with 1 knob.

Now, flip the structure right side up again. Make sure that the straight long edge is at the back, and the overhanging plates are pointing to the front.

Go to the rightmost edge of the structure. Skip the 2 frontmost rows, and put the plate 2x4 vertically on the 2 rightmost columns.

Put the plate 2x2 diagonally behind the previous piece, this means that you skip 2 columns from the right edge. If done correctly, only the back left corner of the previous piece and the front right corner of the current piece are touching.

Find 2 reddish brown bricks 2x4.

Go to the left edge of the structure. Skip the 2 frontmost rows, and put 1 brick 2x4 vertically on the 2 leftmost columns.

Put the other one vertically to the right of the previous piece, but start attaching it from the frontmost edge.

If done correctly, the left front 2x2 corner of the base plate should remain empty.

Collect the following 2 pieces:

1 reddish brown brick 1x2 with technic hole,

and 1 white brick 2x2 with side connector and top cross hole.

Put the brick 1x2 vertically on the table.

Insert the connector of the brick 2x2 into the technic hole coming from the right.

The two pieces now form a 2x3 element. Remember the cross hole at the top center of the brick 2x2. We will need it later.

Skip the leftmost column of the structure, and mount this part horizontally on the third and fourth row from the front.

Again, remember the top cross hole of the part you have just mounted. It should now be between the two right columns of this 2x3 element. If this is not true, try rotating the 2x3 element.

Find 1 reddish brown brick 1x2.

Put it vertically to the left of the previous part.

Find 2 bright green plates 2x2 with 1 knob.

Put 1 on the two frontmost rows, skipping the 2 leftmost columns. This means it will be mounted on the heightened 2x2 surface at the front edge.

The front edge of the structure has a recess with several corners in the middle part. There are 2 inner corners in the left half of the structure and 2 in the right half. Put the other plate 2x2 on the inner corner of the right half that is more towards the back.

Find 1 medium stone grey cross axle 3m. (3m means that this piece is about 3 knobs long.)

Insert it from the top into the cross hole on the heightened part in the left half of the structure. About two thirds of the cross axle will stick out towards the top.

Find 1 black round disk 3x3 with cross hole.

Put the disk on the previous piece by inserting the cross axle into the cross hole. Push the disk down.

Find 1 white round brick 2x2 with top cross hole.

Put it on top of the previous piece by inserting the cross axle into the cross hole from the bottom. This means that the knobs of this piece should point to the top.

This structure will be the base of the rotating bee mechanism and the farmland tree. Remember this round brick 2x2 for later.

Find 4 bright purple round plates 1x1.

First, identify the plate 2x4 that is mounted vertically on the rightmost edge of the structure.

Now put 2 round plates 1x1 on the first and third knob of the right column of that plate.

Put the other 2 on the second and fourth knob of the left column of that plate.

The round plates 1x1 are now arranged in a zig-zag line.

Find 4 dark green flower pieces 1x1 with through-hole.

Put one on each of the 4 previous pieces, making 4 small flowers.

Collect the following 2 pieces:

1 mud grey plate 2x2,

and 1 medium nougat brown brick 2x2.

Identify the plate 2x2 with 1 knob mounted diagonally behind the previous pieces.

Put the plate 2x2 on top of that plate with 1 knob.

Put the brick 2x2 on top.

Find 1 pale ocher yellow plate 2x2 with 1 knob.

Put it on top of the previous piece.

Remember this small tower, we will soon mount a cute little bee here.

Next up, we will build 2 individual bees.

Collect the following 6 pieces:

4 reddish brown plates 1x1,

and 2 bright yellow plates 1x1.

Put 1 reddish brown plate on the table.

Put 1 bright yellow plate on top. Make sure to align them neatly.

Put another reddish brown plate on top.

Repeat symmetrically with the remaining 3 pieces: put 1 reddish brown plate on the table, put 1 bright yellow plate on top, and put another reddish brown plate on top.

Find 2 bright yellow bricks 1x1 with side knob and bottom foot. (Do not confuse this piece with the bricks 1x1 with 2 side knobs.)

Put 1 on top of each bee structure, side knobs to the front.

These are the cute little bee bodies!

Find 2 transparent plates 1x2.

Put 1 upright horizontally on the side knob of the previous piece. The bee body and plate should form a cross together.

Repeat symmetrically with the other bee.

These are the little transparent wings of your bees!

Find 2 bright yellow flat tiles 1x1. (These pieces are printed.)

Put 1 on top of each bee.

The two tiles are printed with Minecraft bee faces. One has red and white eyes and the other one has black and blue eyes. They both have black nostrils. The face print consists of squares only, Minecraft style!

Find 2 transparent flagpoles 1x1x3.

Flip 1 bee upright so that the plate 1x2 (the wings of the bee) is at the top. Feel the bottom side for a square hole opposite of the wings. Insert the tip of 1 flagpole into that square hole.

Repeat with the other flagpole and the other bee.

The 2 individual bees are finished! Well done! Mount 1 on the small 2x2 tower that we have built near the right back corner.

Mount the other bee on the frontmost row of the structure, skipping 5 knobs from the right.

Next, we will build a red flower.

Collect the following 4 pieces:

1 dark green plant base with 3 branches and bottom pin,

and 3 bright red flower pieces 1x1 with through-hole.

Hold the plant base in your hand, 3 branches to the top.

Put the 3 flower pieces on the 3 branches.

The red flower is finished! Great! Mount it on the plate 2x2 with 1 knob that is mounted in the recess at the front edge in the right half of the structure.

Next, we will build the rotating mechanism with 2 bees.

Find 1 transparent ring plate 4x4.

Put it on the table. It has 4 groups of 2 knobs each that are closer to each other. Make sure that 2 form rows at the front and back, and the other 2 form columns at the left and right.

Find 4 white round plates 1x1.

Put 2 on the 2 frontmost knobs.

Put the other 2 on the 2 backmost knobs.

Collect the following 4 pieces:

2 black round plates 1x1,

and 2 black round plates 1x1 with through-hole and side handle.

Put 1 round plate 1x1 on the front knob of the right column.

Put 1 round plate with side handle horizontally behind the previous piece, handle to the right.

Put the other round plate 1x1 on the back knob of the left column.

Put the other round plate with side handle horizontally in front of the previous piece, handle to the left.

Find 4 white quarter-arched tiles 2x2.

Use them to cover the entire ring: Put 1 on the previous piece and the left knob of the front row. Put one on the right knob of the front row and the front knob of the right column, and so on.

Next, we will build the 2 rotating bees.

Collect the following 6 pieces:

4 reddish brown plates 1x1,

and 2 bright yellow plates 1x1.

Beware: these bees are very similar to the 2 bees we have built previously, but there are a few differences. Make sure to listen to the instructions again to build them correctly.

Put 1 reddish brown plate on the table.

Put 1 bright yellow plate on top.

Put another reddish brown plate on top.

Repeat symmetrically with the remaining 3 pieces: put 1 reddish brown plate on the table, put 1 bright yellow plate on top, and put another reddish brown plate on top.

Collect the following 4 pieces:

2 flame yellowish orange bricks 1x1 with 1 front and 1 side knob,

and 2 bright yellow flat tiles 1x1. (These two pieces are printed with bee faces again.)

Put 1 brick 1x1 on top of one bee structure, 1 side knob to the front and 1 side knob to the left.

Put 1 flat tile 1x1 on top.

Repeat symmetrically with the other bee: put the brick 1x1 on top, 1 knob to the front and 1 knob to the left, and put the other flat tile on top.

Collect the following 4 pieces:

2 transparent round bricks 1x1,

and 2 transparent plates 1x2.

Flip 1 round brick upright, and put it on the side knob pointing to the left of the previous piece.

Put 1 plate 1x2 upright horizontally on the knob pointing to the front. Again, these are the wings!

Repeat symmetrically with the other bee: put the round brick upright on the knob pointing to the left, and put the plate 1x2 upright horizontally on the knob pointing to the front.

The 2 rotating bees are finished! Well done! Flip one bee upright so that its plate 1x2 is at the top, and the printed tile 1x1 is pointing towards the front. Then insert the left side handle of the rotating ring into the round brick 1x1.

Flip the other bee upright so that the plate 1x2 is at the top and the printed tile is pointing to the back. Then insert the right handle into the round brick 1x1.

The rotating mechanism with 2 bees is finished! Great job! To mount it, put the ring structure over the round brick 2x2 mounted on the cross axle in the left half of the farmland. Give the bees a little spin!

You are making great progress! The farmland is coming along nicely, and you have already built 4 cute little bees!

Next, we will build the tree with beehive.

Collect the following 2 pieces:

1 white plate 2x2,

and 1 black brick 1x1.

Put the plate 2x2 on the table.

Put the brick 1x1 on the back left knob.

Find 1 white corner brick 1x2 - 1x2.

Put it on the other 3 knobs so that it hugs the previous piece.

Collect the following 2 pieces:

another white corner brick 1x2 - 1x2,

and another black brick 1x1.

Put the corner brick 1x2 so that its outer corner sits on the back left corner of the structure (which is the black brick 1x1 of the previous step) .

Put the brick 1x1 into the recess of the previous piece so that they fit neatly together.

Find 2 white bricks 2x2.

Stack them both on top of the previous pieces, forming one smooth 2x2 tower. This will be the tree trunk!

Collect the following 3 pieces:

1 white plate 2x2,

and 2 dark green top angle plates 1x2 - 2x2 with 4 side knobs.

Put 1 angle plate vertically on the right column of the tree trunk, 4 side knobs pointing to the right.

Put the other angle plate vertically on the left column, side knobs to the left.

Put the plate 2x2 on top of the 2 previous pieces.

Find another 2 dark green top angle plates 1x2 - 2x2 with 4 side knobs.

Put 1 horizontally on the front row, 4 side knobs to the front.

Put the other one horizontally on the back row, 4 side knobs to the back.

We will continue with the treetop in the upcoming steps.

Next, let's make a sub-part of the treetop.

Collect the following 2 pieces:

1 dark green brick 2x4,

and 1 dark green brick 2x2.

Put the brick 2x4 horizontally on the table.

Put the brick 2x2 on the 4 middle knobs.

Mount this sub-part upright horizontally on the 4 side knobs pointing to the back, 1 column protruding to the left and 1 column protruding to the right.

Next up, we will build the beehive.

Collect the following 3 pieces:

2 medium nougat brown plates 2x2,

and 1 flame yellowish orange plate 2x2.

Put 1 medium nougat brown plate 2x2 on the table.

Put the flame yellowish orange plate 2x2 on top.

Put the other medium nougat brown plate 2x2 on top.

Collect the following 2 pieces:

1 flame yellowish orange plate 2x2,

and 1 medium nougat brown flat tile 2x2 with upright top middle plate 1x2.

Put the plate 2x2 on top of the previous piece.

Put the flat tile with top plate on top of the previous piece, top plate 1x2 in horizontal orientation, its knobs pointing to the front.

Find 1 dark green plate 2x2.

Mount it upright behind the top middle plate 1x2 of the previous piece, 1 row protruding to the top.

Find 1 dark green plate 1x2.

Put it upright horizontally on the 2 top knobs of the previous piece.

Find 1 dark green plate 2x2.

Put it upright on the 4 knobs pointing to the front.

Find 1 dark green brick 2x4.

Put it upright horizontally behind the previous pieces, one column protruding to the left and one column protruding to the right.

The beehive is finished! Well done! Keep its building orientation, and mount it centered on the 4 knobs pointing to the front on the tree trunk, 1 column protruding to the right and 1 column protruding to the left. The beehive is hanging towards the bottom.

Now, we will make the top part of the treetop.

Collect the following 2 pieces:

1 dark green brick 2x4,

and 1 dark green brick 2x2.

Put the brick 2x4 vertically on the table.

Put the brick 2x2 on the 4 middle knobs.

Mount this part vertically centered on the 4 topmost knobs of the tree trunk.

Next, we will make 2 more side parts of the treetop.

Collect the following 4 pieces:

2 dark green bricks 2x4,

and 2 dark green bricks 2x2.

Put 1 brick 2x4 horizontally on the table.

Put 1 brick 2x2 on the 4 middle knobs.

Repeat symmetrically with the other two pieces.

Mount 1 side part upright vertically on the 4 side knobs of the tree trunk pointing to the left. Make sure to mount the part centered.

Repeat symmetrically with the other treetop side part on the right side of the tree trunk.

The tree with beehive is finished! Very well done, that was hard! Mount the tree on top of the round brick 2x2 inside the rotating mechanism with 2 bees. Make sure the beehive is at the front.

You have finished building the Minecraft farmland! Great job! Tend to your lovely flowers, and watch the bees fly. Make sure you're not agitating them!

Open bag number 2. You can choose to have the bricks sorted by color again. This bag contains all bricks and pieces for the bee cottage.

Next, we will build the bee cottage.

Collect the following 4 pieces:

1 reddish brown plate 6x8,

and 3 flame yellowish orange bricks 1x4.

Put the plate 6x8 vertically on the table.

Put 1 brick 1x4 vertically on the rightmost column, starting from the back.

Put 1 brick 1x4 vertically in front of the previous piece.

Put the remaining brick 1x4 vertically centered to the left of the 2 previous pieces.

Find 4 flame yellowish orange bricks 1x3.

Put 1 horizontally in front of the previous piece. This means that it will sit on the second row from the front, leaving two knobs to its left empty.

Put 1 horizontally in front of the previous piece.

Repeat symmetrically with the 2 remaining bricks on the 2 back rows.

Collect the following 3 pieces:

1 reddish brown plate 6x8,

and 2 bright yellow bricks 2x4.

Put 1 brick 2x4 horizontally to the left of the 2 previous pieces, left half overhanging to the left.

Put the plate 6x8 vertically underneath the previous piece. Make sure that it forms flush edges with the other plate 6x8 at the front and back.

Put the other brick 2x4 horizontally to the left of the first brick 2x4, so on the 2 back rows on the left edge.

Find 2 bright yellow bricks 2x4.

Put 1 vertically in front of the previous piece on the 2 leftmost columns.

Put the other one horizontally in front of the previous piece on the 2 frontmost rows, starting from the left edge.

Find 3 bright yellow plates 2x8.

Put 1 vertically on the 2 rightmost columns of the structure.

Put 1 horizontally on the 2 backmost rows to the left of the previous piece.

Put the last one vertically on the 2 leftmost columns.

The recess at the front of the structure will be the entrance of the bee cottage. The brick structures you have just built will be the walls.

Collect the following 4 pieces:

2 reddish brown corner plates 1x2 - 1x2,

and 2 reddish brown flat tiles 1x1.

Turn 1 corner plate so that its outer corner is at the back left and its recess is at the front right.

Mount it in this orientation to the right of the previous piece on the 2 frontmost rows.

Repeat symmetrically on the right: turn the other corner plate so that its outer corner is at the back right, and mount it on the frontmost 2 rows on the third and fourth column coming from the right.

Put the 2 flat tiles 1x1 in the 2 recesses of the corner plates.

If done correctly, the 2 flat tiles sit on the frontmost row; one on the 4th knob from the right, the other one on the 4th knob from the left.

Collect the following 2 pieces:

1 medium nougat brown brick 2x2,

and 1 medium nougat brown plate 2x2 with 1 knob.

Put the brick 2x2 into the inside of the back left wall corner. This means that you leave the wall structures themselves empty and fit the brick snugly into the corner they form.

Put the plate 2x2 on top of the previous piece.

Find 2 medium nougat brown bricks 1x2.

Put 1 vertically to the right of the 2 previous pieces.

Skip 2 columns to the right, and mount the other brick 1x2 vertically.

Find 1 medium nougat brown plate 2x4.

Put it horizontally on top of the 2 previous pieces, connecting them and creating a little table.

Find 2 medium nougat brown plates 2x2 with 1 knob.

Put them next to each other on top of the previous piece.

Now, we will build the honey jar.

Collect the following 3 pieces:

1 transparent yellow Minifigure head, (this piece is similar to a round brick 1x1 but not as high)

1 transparent round plate 1x1 with top shaft,

and 1 reddish brown round plate 1x1 with through-hole.

Put the Minifigure head on the table.

Put the round plate with top shaft on top.

Flip the round plate 1x1 upside down and insert the shaft of the previous piece into the middle hole.

The honey jar is finished! Well done! Before we mount it, we will build another part.

Next up, we'll make a small candle.

Collect the following 2 pieces:

1 bright red low brick 1x1x⅔,

and 1 transparent bright orange single flame.

Put the low brick on the table.

Put the shaft of the flame into the knob of the brick.

Mount the small candle on the leftmost plate 2x2 with 1 knob, and mount the honey jar on the rightmost plate 2x2 with 1 knob.

Find 1 lemon yellow flat tile 2x2. (This piece is printed.)

Mount it between the candle and the honey jar. It is printed with a honeycomb pattern in dark orange and yellow.

Find 2 reddish brown bricks 1x1 with horizontal side clasp.

Identify the flat tile 1x1 in the left half of the frontmost row.

Put 1 brick behind that flat tile, clasp to the front.

Repeat symmetrically on the right behind the other flat tile 1x1.

Find 2 reddish brown bricks 1x2.

Put 1 vertically to the right of the previous piece.

Repeat symmetrically on the left: put it vertically to the left of the other brick 1x1 with side clasp.

Find 2 reddish brown plates 2x2 with 1 knob.

Put 1 on top of the previous piece and the brick 1x1 with side clasp.

Repeat symmetrically on the right.

Now, we will build the swing door.

Collect the following 4 pieces:

2 reddish brown plates 1x2 with shaft on short side,

and 2 reddish brown flat tiles 1x2.

Put the 2 plates with side shafts horizontally next to each other on the table, side shafts to the left.

Put the 2 flat tiles horizontally on top of the 2 previous pieces.

To mount the swing door, flip one door half upright, smooth surface to the front and shaft to the left, and snap the shaft into the clasp of the left brick 1x1 with side clasp. This can be a bit tricky because the clasp is covered by a plate 2x2.

Repeat symmetrically on the right. Make sure the smooth tile of the door half is pointing to the front again but the shaft is to the right.

Collect the following 3 pieces:

2 bright yellow bricks 2x2,

and 1 reddish brown brick 1x4.

Now, we continue with one of the two side walls.

First, turn the structure 90 degrees to the right. This means that the swing door is now on the right side, and the short sides of the structure are at the front and back.

Put 1 brick 2x2 on the left front wall corner.

Put the brick 1x4 horizontally to the right of the previous piece on the second row from the front.

Put the other brick 2x2 to the right of the previous piece on the front right wall corner.

If done correctly, the 4 middle knobs of the frontmost row remain empty for now.

Collect the following 3 pieces:

1 reddish brown brick 1x4,

and 2 bright yellow bricks 2x2.

Put the brick 1x4 horizontally on top of the brick 1x4 that was mounted in the previous step.

Put the two bricks 2x2 on the left and right wall corners at the front.

Find 2 medium stone grey bricks 1x2x1⅔ with 4 side knobs.

Put them horizontally next to each other on the 4 middle knobs of the frontmost row, side knobs to the front.

Find 1 medium stone grey plate 1x4.

Put it horizontally on top of the 2 previous pieces.

Find 2 bright yellow bricks 2x8.

Put 1 horizontally on top of the 2 frontmost rows.

Put the other one horizontally on top of the previous piece.

Collect the following 3 pieces:

1 bright yellow plate 2x8,

and 2 bright yellow flat tiles 2x4.

Put the plate 2x8 horizontally on top of the previous piece.

Put the 2 flat tiles 2x4 horizontally next to each other on top of the previous piece.

Now, we will build the bum of the bee cottage.

Collect the following 3 pieces:

1 reddish brown plate 6x6,

1 reddish brown flat tile 2x2,

and 1 reddish brown flat tile 2x4.

Put the plate 6x6 on the table. Make sure its knobs form straight rows and columns in front of you.

Put the flat tile 2x2 on the front right corner of the previous piece.

Put the flat tile 2x4 vertically behind the previous piece.

Collect the following 2 pieces:

another reddish brown flat tile 2x2,

and another reddish brown flat tile 2x4.

Put the flat tile 2x2 to the left of the previous piece on the 2 backmost rows.

Put the flat tile 2x4 vertically in front of the previous piece.

Collect the following 2 pieces:

another reddish brown flat tile 2x2,

and another reddish brown flat tile 2x4.

Put the flat tile 2x2 to the left of the previous piece on the 2 frontmost rows.

Put the flat tile 2x4 vertically behind the previous piece.

The bum of the bee cottage is finished! Well done! Flip it upright, and mount it centered on the wall we have just built. The side knobs that are used for mounting are not exactly in the middle, so make sure that the side wall is centered on the structure regardless.

Collect the following 3 pieces:

2 black bricks 2x2,

and 1 bright yellow brick 2x4.

First, turn the structure 90° to the left again. Now, the swing door is facing you, and the side wall with bee bum should be on the left. We will continue with building the other side wall.

Put 1 brick 2x2 on the right back wall corner of the structure.

Put the brick 2x4 vertically in front of the previous piece.

Put the other brick 2x2 in front of the previous piece.

Collect the following 3 pieces:

another 2 black bricks 2x2,

and another bright yellow brick 2x4.

Put 1 brick 2x2 again on the right back wall corner.

Put the brick 2x4 vertically in front of the previous piece.

Put the other brick 2x2 in front of the previous piece.

Collect the following 5 pieces:

2 black corner bricks 1x2 - 1x2,

2 medium azure blue bricks 1x1,

and 1 bright yellow brick 2x4.

Turn 1 corner brick so that its outer corner is pointing to the back left.

Mount it in that orientation on the back right wall corner.

Put 1 brick 1x1 into the recess of the corner brick which means it will sit on the rightmost column on the second knob from the back.

Put the brick 2x4 vertically in front of the two previous pieces.

Turn the other corner brick so that its outer corner is pointing to the front left, and mount it on the front right wall corner.

Put the other brick 1x1 into the recess of the previous piece. If done correctly, all bricks from this step form 1 smooth surface on the right side wall.

You are already creating the face of the bee! The two blue bricks 1x1 for instance will be the eyes of the bee.

Collect the following 5 pieces:

2 bright yellow corner plates 1x2 - 1x2,

2 bright yellow flat tiles 1x1,

and 1 bright yellow plate 2x4.

These 5 pieces will exactly match their brick counterparts of the previous step. Continue for detailed instructions.

Turn 1 corner plate so that its outer corner is pointing to the back left. Mount it in this orientation on the back right wall corner.

Put 1 flat tile into the recess of that corner plate.

Put the plate 2x4 vertically in front of the 2 previous pieces.

Turn the other corner plate so that its outer corner is pointing to the front left. Mount it on the front right wall corner.

Put the other flat tile into the recess of that corner plate.

Find 2 reddish brown bricks 1x1 with horizontal side clasp.

Put 1 on the second row from the front and the second column from the right, clasp to the right. This means the clasp is hovering above the flat tile 1x1.

Repeat symmetrically at the back: put the other one on the second row from the back and the second column from the right, clasp to the right.

Collect the following 3 pieces:

2 bright yellow bricks 1x2,

and 1 bright yellow brick 2x4.

Put 1 brick 1x2 horizontally behind the previous piece on the backmost row.

Put the brick 2x4 vertically between the 2 clasp elements on that same wall.

Put the other brick 1x2 horizontally on the frontmost row.

Find 2 bright yellow flat tiles 2x4.

Put them vertically on the right wall to cover the previous pieces.

Next, we will make the 2 antennae of the bee cottage.

Collect the following 4 pieces:

2 reddish brown plates 1x2 with shaft on short side,

and 2 reddish brown flat tiles 1x2.

Put the 2 plates with side shaft vertically next to each other on the table, shafts to the front.

Put the 2 flat tiles vertically on top of the 2 previous pieces.

Flip 1 antenna upright so that its smooth side is pointing to the back and the shaft is pointing to the left. Snap the shaft into the back clasp on the right side wall.

Repeat with the other antenna: flip it upright so that its smooth side is to the front and the shaft is to the left. Snap the shaft into the clasp at the front of the right side wall.

Collect the following 3 pieces:

2 reddish brown bricks 2x2,

and 1 bright yellow brick 2x4.

First, turn the structure from left to right. This means that now the swing door is at the back, and the antennae are pointing to the left.

Put 1 brick 2x2 on the 2 frontmost rows directly next to the wall on the left.

Put the brick 2x4 horizontally to the right of the previous piece.

Put the other brick 2x2 to the right of the previous piece.

Collect the following 3 pieces:

2 reddish brown plates 2x2 with 1 knob,

and 1 bright yellow flat tile 2x4.

Put 1 plate 2x2 on top of the previous piece.

Put the flat tile 2x4 horizontally to the left of the previous piece.

Put the other plate 2x2 to the left of the previous piece.

Next up, we will build the back wall with 2 windows.

Collect the following 2 pieces:

1 reddish brown plate 2x8,

and 1 bright yellow brick 2x4.

Put the plate 2x8 horizontally on the table.

Put the brick 2x4 horizontally centered on the previous piece, the previous piece symmetrically protruding to the left and right.

Find 1 bright yellow brick 2x4.

Put it horizontally on top of the previous piece.

Find 2 transparent brown wall elements 1x2x2 with 2 top knobs.

Put 1 horizontally on the front row to the right of the previous piece, panel to the front.

Repeat symmetrically on the left, panel to the front.

Find 1 reddish brown plate 2x8.

Put it horizontally on top of the previous pieces.

The back wall with 2 windows is finished! Well done! Keep its building orientation, and mount it horizontally centered on the wall we have started building in the previous steps.

Now, we will build 2 pillars of the entrance.

Collect the following 6 pieces:

2 reddish brown plates 2x2,

and 4 reddish brown bricks 2x2.

Put 1 plate 2x2 on the table.

Put 1 brick 2x2 on top.

Put another brick 2x2 on top.

Repeat with the other 3 pieces: put 1 plate 2x2 on the table and the 2 remaining bricks 2x2 on top.

First, turn the structure right to left again so that the swing door is at the front and the antennae are pointing to the right.

Mount one pillar on the 2 frontmost rows on the plate 2x2 with 1 knob next to the left side wall. Repeat symmetrically with the other pillar next to the right side wall.

Find 1 reddish brown plate 2x8.

Put it horizontally on top of the 2 pillars to connect them.

Find 2 bright yellow plates 4x8.

Put 1 vertically to the right of the smooth 2x8 surface on the left side wall.

Put the other one vertically to the right of the previous piece. Together, they form the roof.

Find 2 reddish brown plates 2x8.

Put 1 vertically on the 2 right columns of the previous piece.

Repeat symmetrically on the left. If done correctly, you leave 4 columns between these two pieces empty.

Collect the following 3 pieces:

1 black plate 2x4,

and 2 black plates 2x8.

Flip the entire cottage upside down. Make sure the back wall with the 2 windows is now at the front, and the 2 antennae are pointing to the right.

Put 1 plate 2x8 horizontally centered on the 2 frontmost rows.

Put the other plate 2x8 horizontally centered on the 2 backmost rows.

Put the plate 2x4 vertically between the two previous pieces on their right edge. Make sure the three pieces are aligned on their right edges.

Find 6 black bricks 1x2.

These will be the 6 legs of the bee!

Put 1 horizontally on the back left corner of the plate 2x8 mounted horizontally at the back.

Skip the length of 2 knobs to the right, and mount another brick 1x2 horizontally on the backmost row.

Repeat symmetrically with 2 bricks 1x2 on the front row of the plate 2x8 mounted at the front edge.

Put another one horizontally on the back edge of the plate 2x4.

Put the last one horizontally on the front edge of the plate 2x4.

Next, we will build the first wing of the bee cottage.

Collect the following 2 pieces:

1 white plate 2x4,

and 1 white plate 2x2.

Put the plate 2x2 on the table.

Put the plate 2x4 vertically on top of the previous piece, 2 rows overhanging to the back.

Find 1 white plate 2x4.

Put it horizontally underneath the protruding part of the previous piece, 2 columns protruding to the left.

Find 2 transparent plates 2x2 with 1 knob.

Put 1 on the back right corner of the wing structure.

Put the other one in front of the previous piece.

Next up, we will make a sub-part of the wing.

Collect the following 4 pieces:

1 white corner plate 2x4 - 2x4,

and 3 transparent plates 2x2 with 1 knob.

Put the corner plate on the table so that its outer corner is pointing to the back right. This means that its recess is at the front left.

Put 1 plate 2x2 on the front 4 knobs of the corner plate.

Put another plate 2x2 behind the previous piece.

Put the remaining plate 2x2 to the left of the previous piece.

Keep this sub-part in its building orientation, and mount its frontmost 4 knobs on the 4 knobs of the wing protruding to the left. This means that the two pieces connect only on those 4 knobs, the remaining 2 rows of the sub-part are overhanging to the back.

The first wing of the bee cottage is finished! Well done! Before you mount it, flip the cottage right side up again, and turn it 90 degrees. Make sure that the swing door is on the left and the 2 antennae on the side wall are pointing towards you.

Mount the 2 rightmost columns of the wing vertically centered above the swing door of the cottage, which means in the middle of the 2 leftmost columns. The rest of the wing is overhanging to the left.

Now, we will build the second bee cottage wing.

Collect the following 2 pieces:

1 white plate 2x4,

and 1 white plate 2x2.

Put the plate 2x2 on the table.

Put the plate 2x4 vertically on top, 2 rows overhanging to the back.

Find 1 white plate 2x4.

Put it horizontally underneath the overhanging part of the previous piece, 2 columns protruding to the right.

Find 2 transparent plates 2x2 with 1 knob.

Put 1 on the back left corner of the bee cottage wing.

Put the other one in front of the previous piece.

Now, we will make a sub-part of the second wing.

Collect the following 4 pieces:

1 white corner plate 2x4 - 2x4,

and 3 transparent plates 2x2 with 1 knob.

Put the corner plate 2x4 on the table. Make sure its outer corner is pointing to the back left.

Use the 3 plates 2x2 with 1 knob to cover the corner plate just like before.

Mount this sub-part in its building orientation. Connect its frontmost 4 knobs with the 4 knobs protruding to the right on the wing. If done correctly, 2 rows of the sub-part are overhanging to the back.

The second bee cottage wing is finished! Great job! Mount it in its building orientation. Put its 2 left columns centered on the 2 rightmost columns of the cottage, the rest of the wing overhanging to the right.

The bee cottage is finished! Well done! Remember: You can carefully take off the top of the bee cottage for better access to your indoor utilities!

You have finished building the entire set! Very well done! It is time to bring your little Minecraft universe to life: harvest delicious honey and enjoy your farmland! Watch out for the mean Baby Zombie and agitated bees! Do you think the bee cottage can actually fly? It is for you to decide!

Enjoy!