| LEGO Audio & Braille Building Instructions for the LEGO Classic set "Creative Transparent Bricks". |
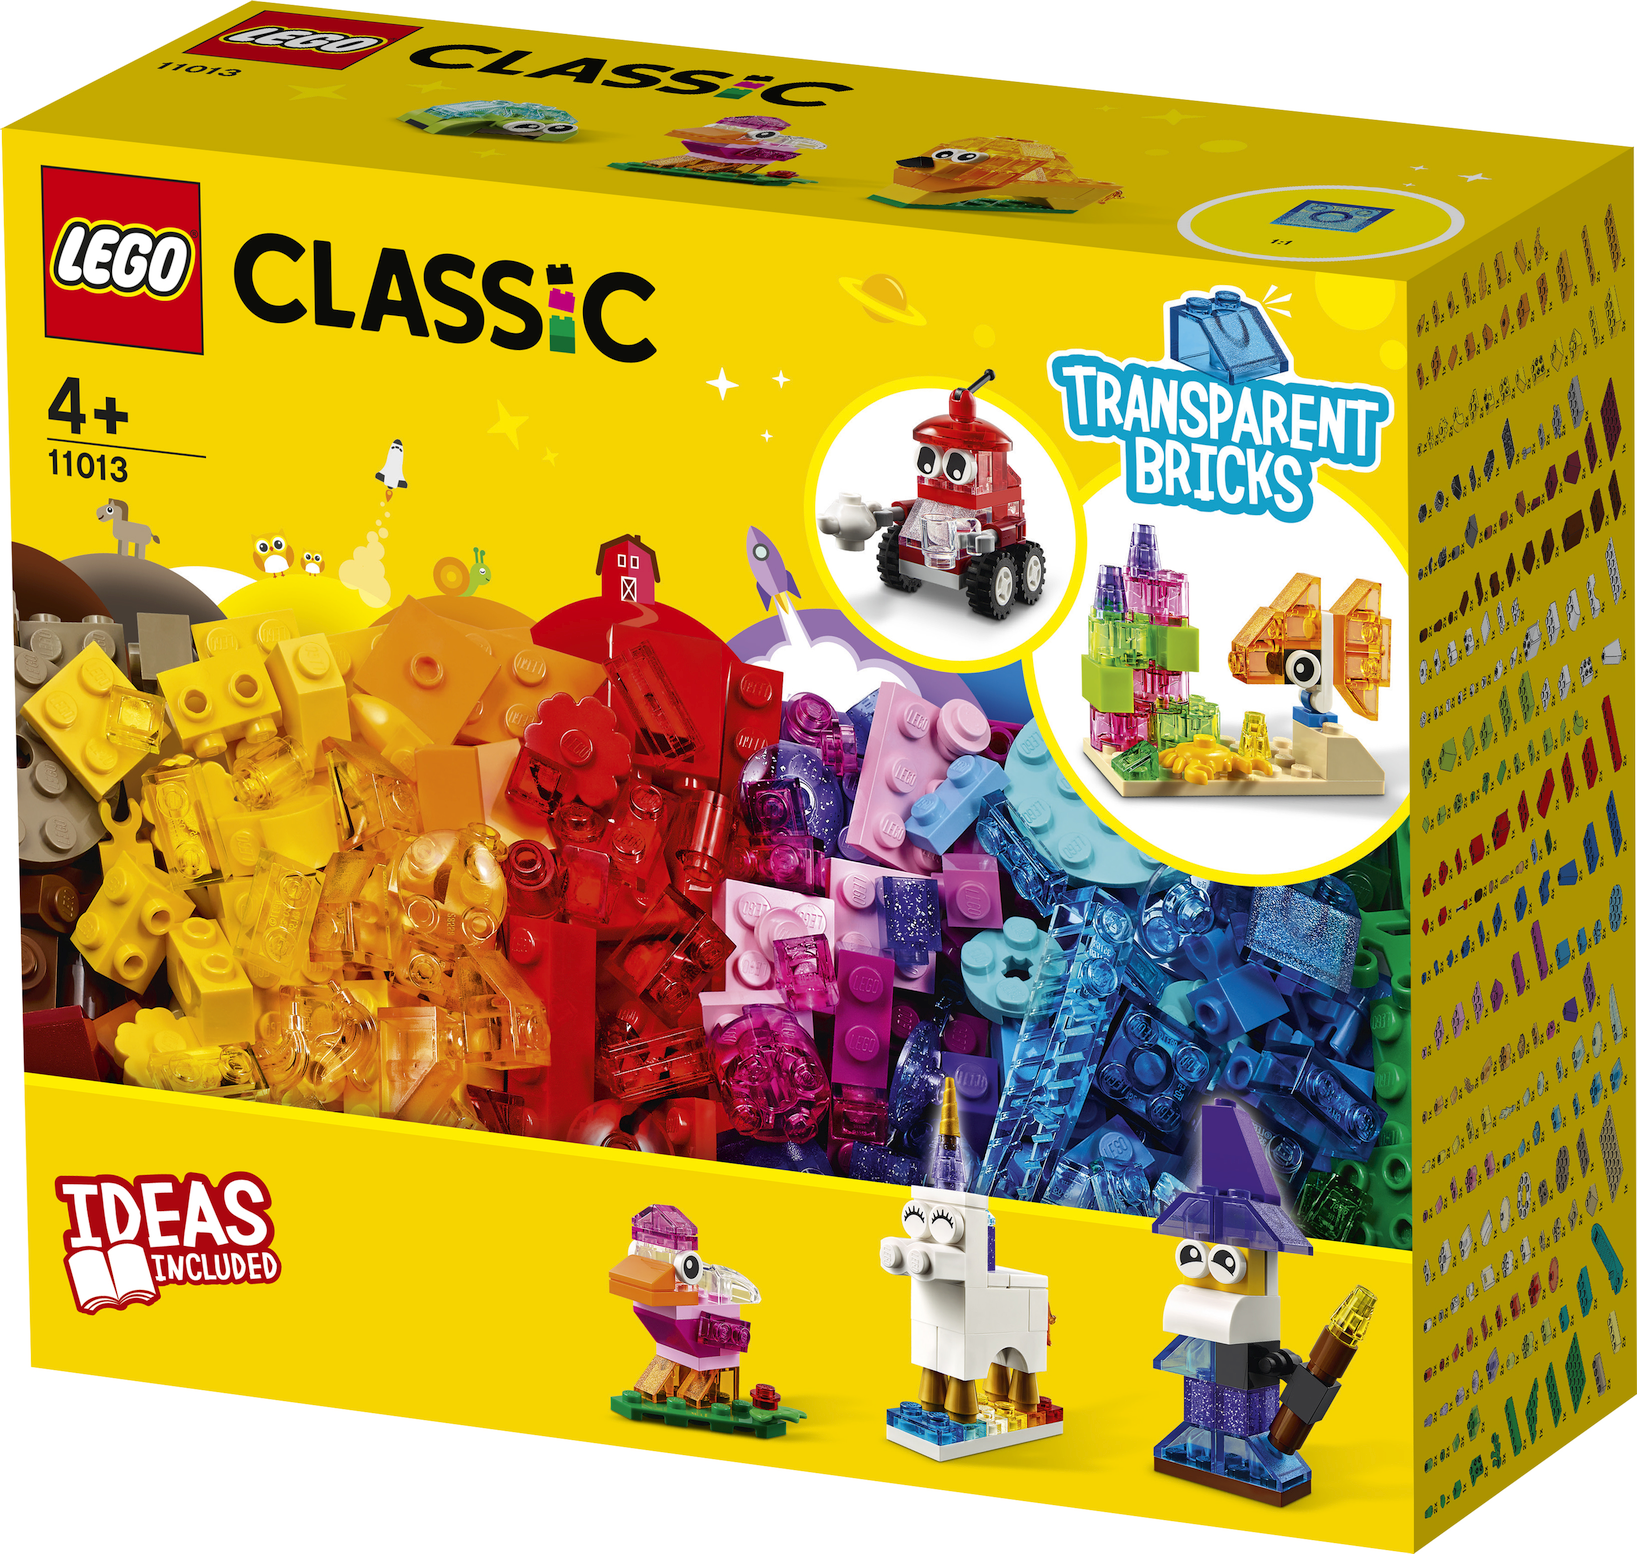
| This LEGO Classic Creative Transparent Bricks playset adds sparkle to your LEGO creations, featuring a colorful selection of translucent LEGO pieces. You can choose from 8 glistening build ideas: there is a little bird, a lion, a turtle, a shiny tea-serving robot, a paradise bird, a unicorn, Merlin the wizard and his potions table, as well as a little underwater scene with corals and a clownfish. But there is more! With the extra bricks in the box, you can make your own building ideas come to life and create new combinations and variations in your builds! |
| In the middle of the bright yellow box cover, all bricks and pieces of this set are presented in a color-sorted scale: this scale starts at the left edge of the box with the grey and black elements followed by the yellow, orange, red, pink and lilac, blue, and green bricks all the way to the right edge of the box cover. At the bottom, the paradise bird, the unicorn and Merlin the wizard are presented. In the top right corner, there is a white pop-up bubble showing the tea-serving robot and another bubble showing the underwater scene with corals and clownfish. |
| Open the box. This can be tricky; ask someone to help you! |
| The box contains two booklets with visual building instructions, as well as 4 plastic bags with numbers printed on them; ask a sighted person to help you find the correct bag! |
| Carefully open bag number 1. This bag contains all bricks and pieces for the little bird and the lion. |
| Before you start building, ask a sighted person to help you sort the pieces by color. This makes finding the correct pieces even easier! |
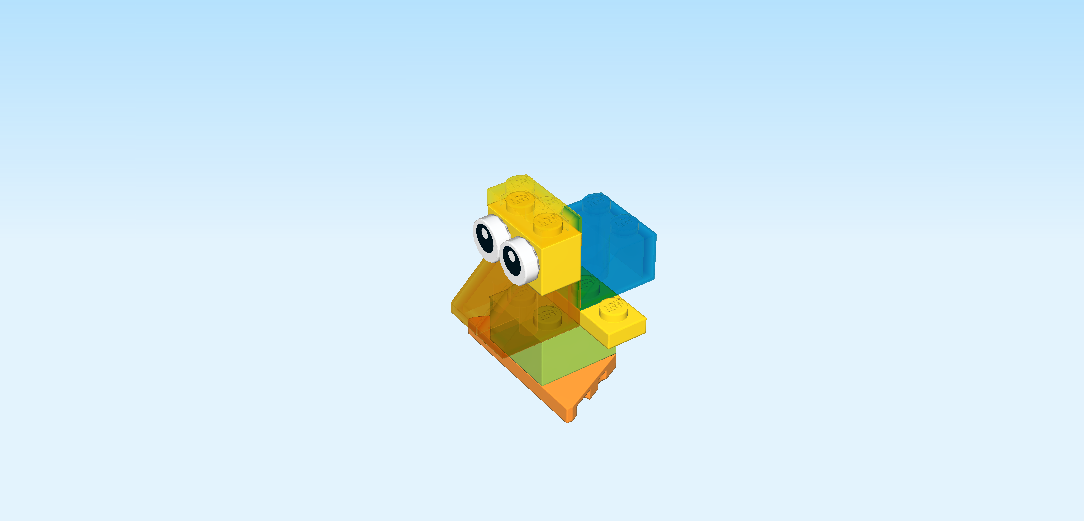
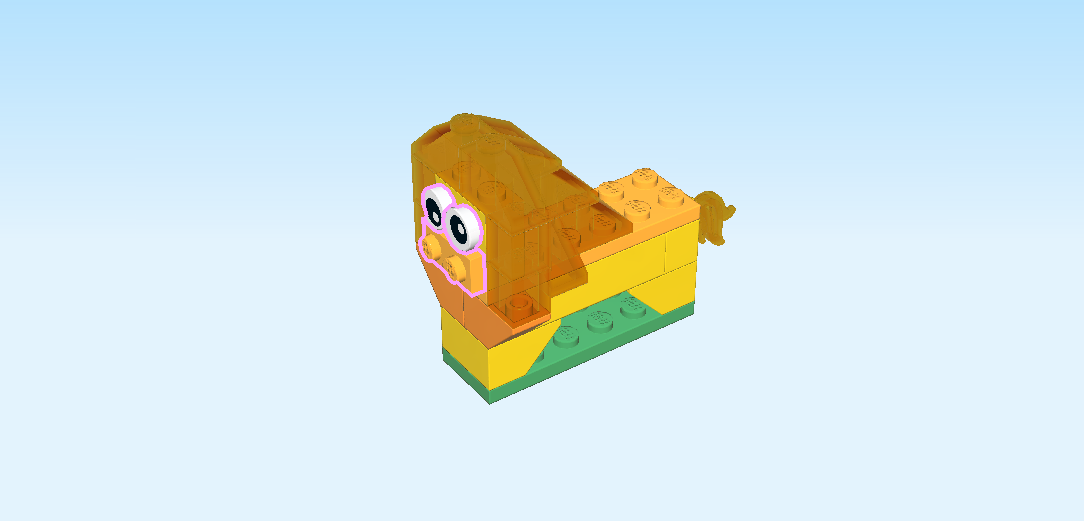
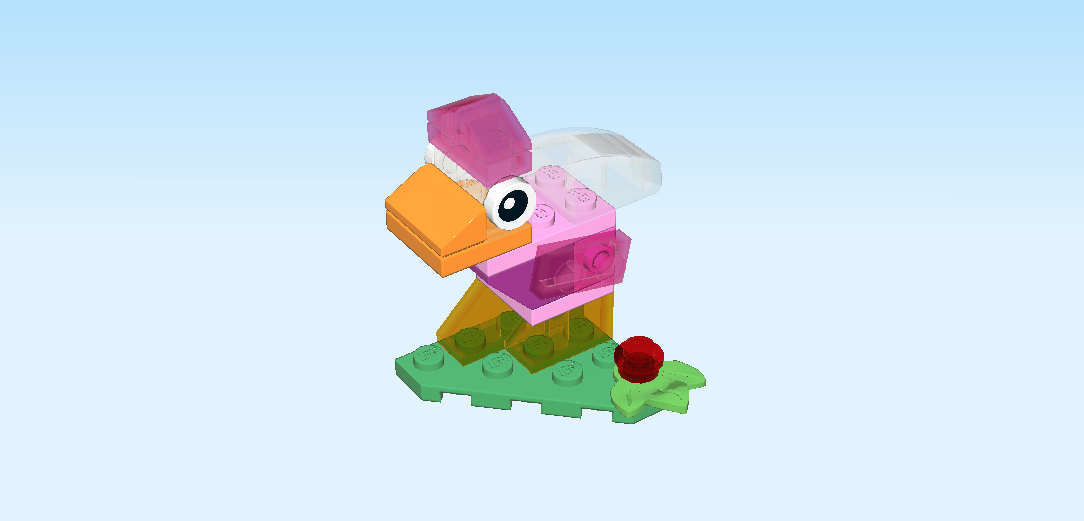
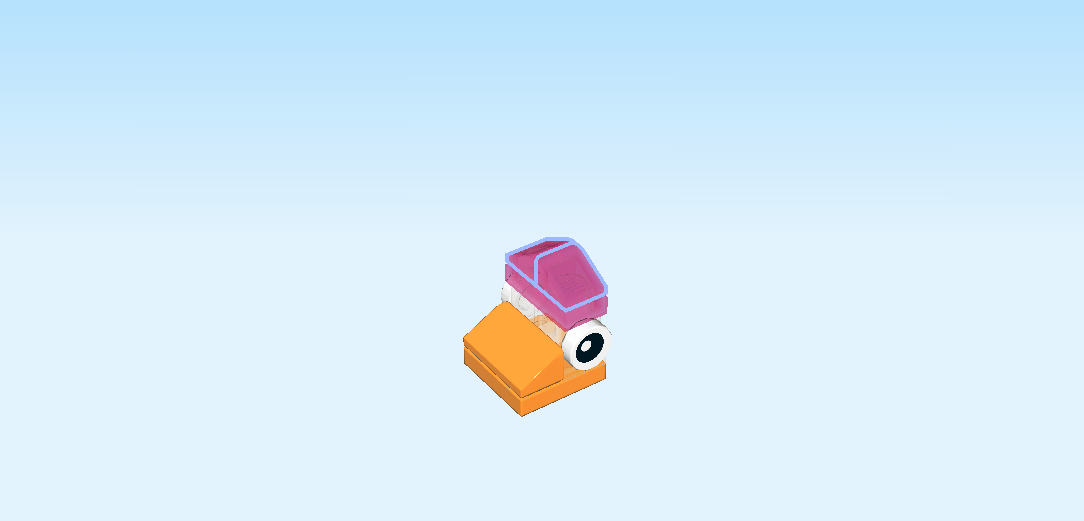
| First, we will build the little bird. |
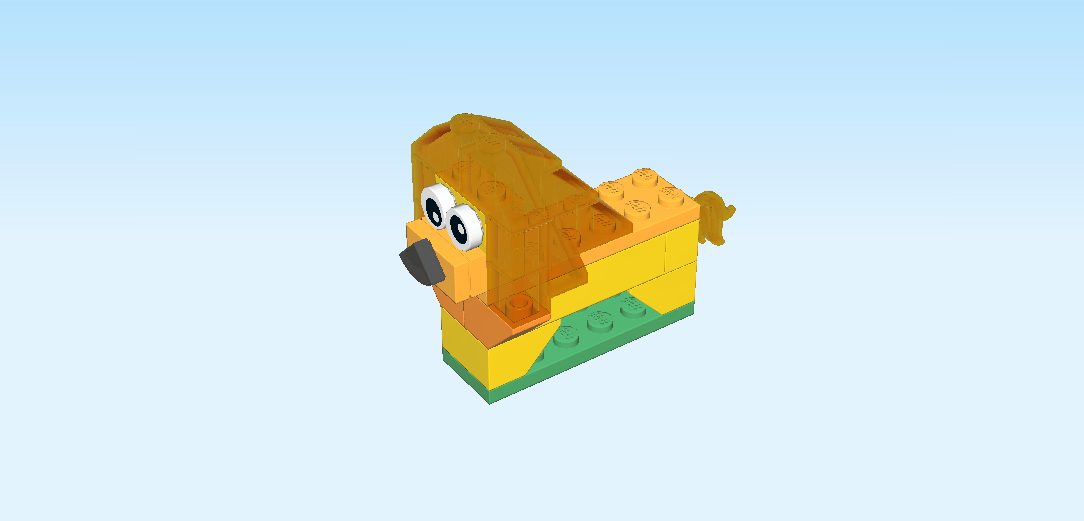
| It is a colorful animal with orange feet, a green, yellow and blue body, a yellow head, and of course an orange beak. The little bird's rump and beak as well as its top head feathers are translucent! |
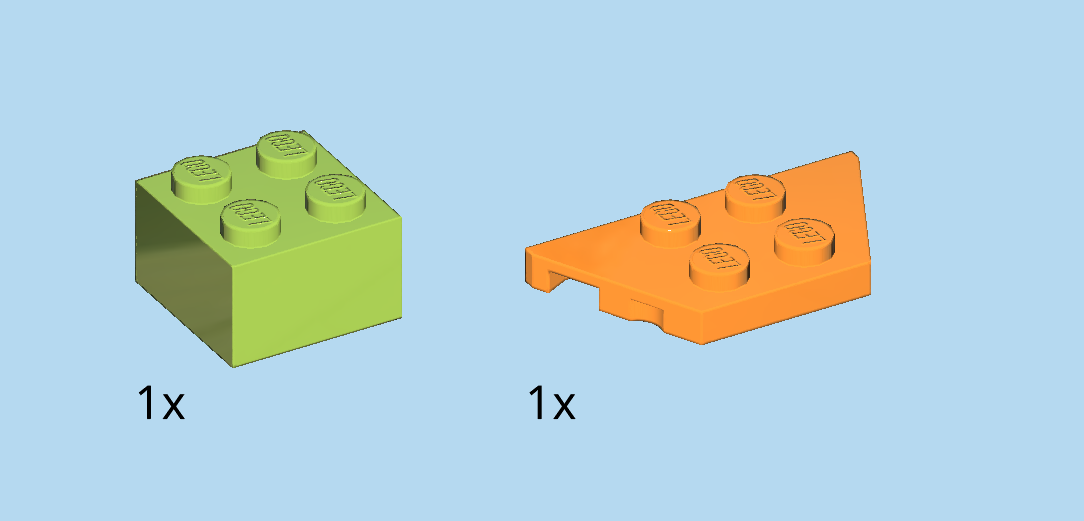
| Collect the following 2 pieces: |
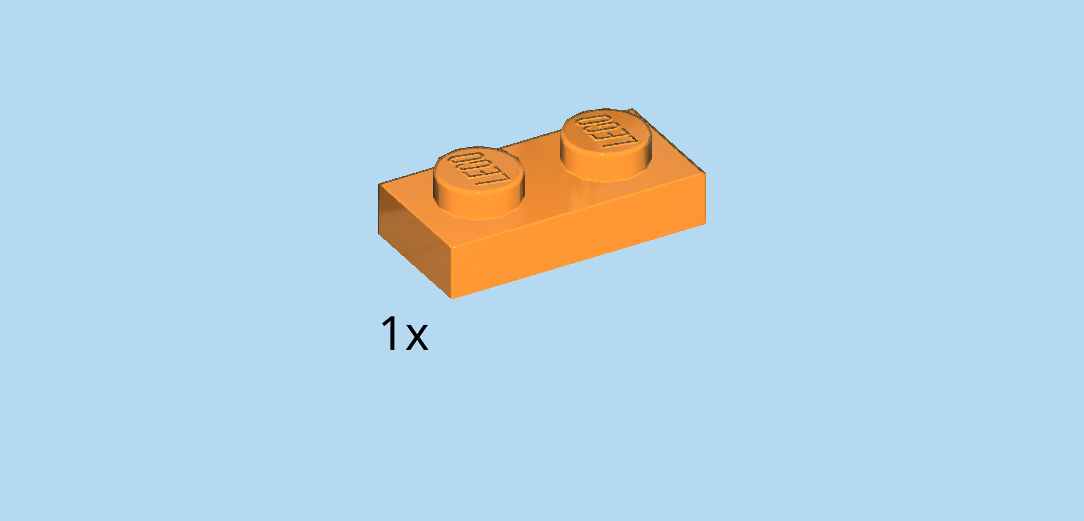
| 1 bright orange trapeze plate 2x4, |
| and 1 bright yellowish green brick 2x2. |
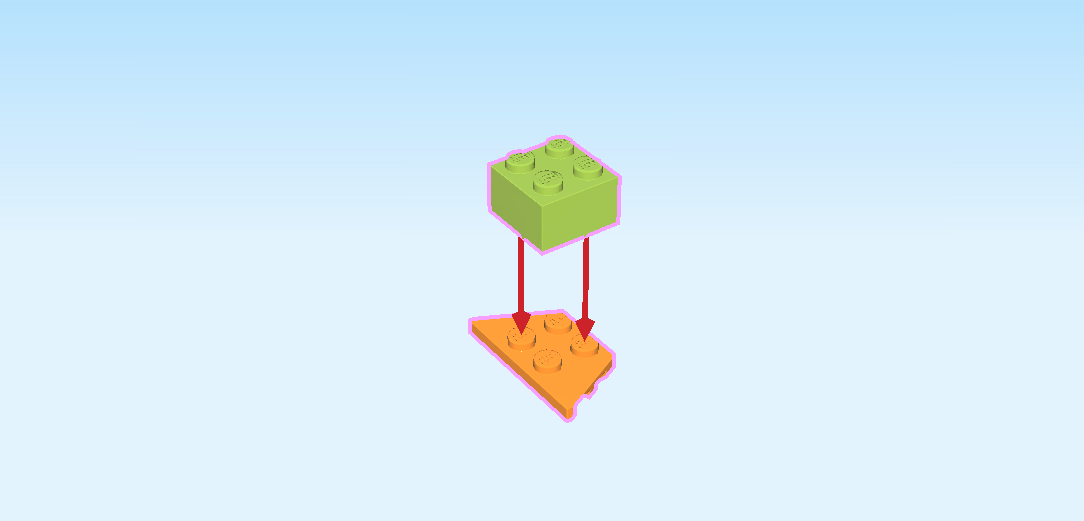
| Put the trapeze plate vertically on the table, narrow end to the right, wide end to the left, and angles to the front and back. |
| Put the brick 2x2 on top. |
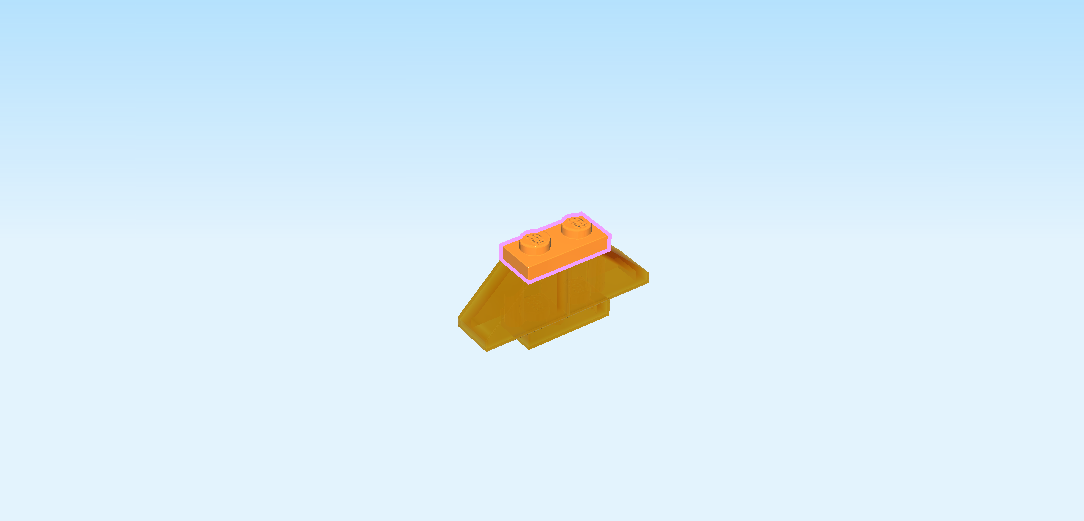
| Find 1 bright yellow plate 1x4. |
| Put it vertically centered on the right column of the previous piece. Centered means that it is symmetrically overhanging to the front and back. |
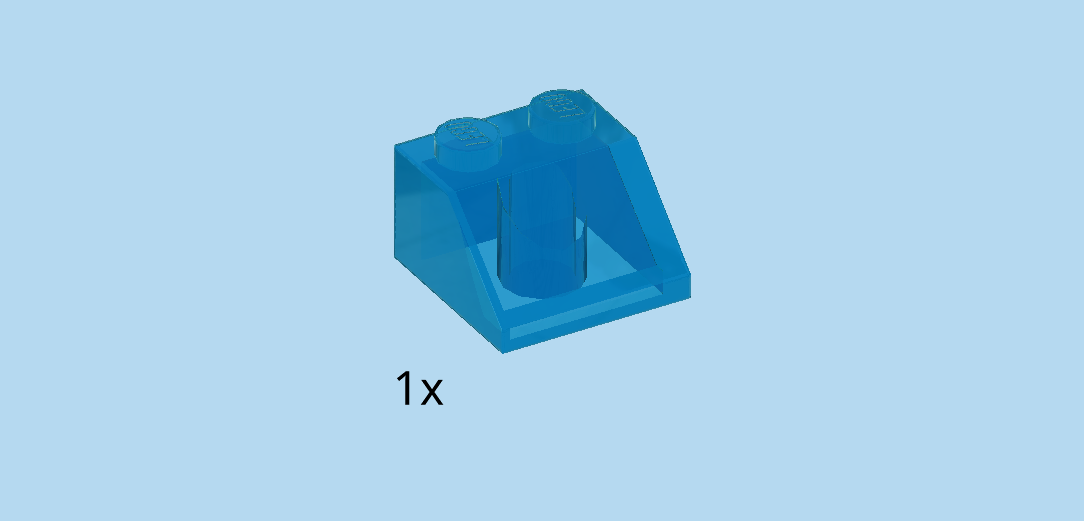
| Find 1 transparent blue roof tile 2x2, 45°. |
| Put it in the middle of the right column, overhanging to the right, slope to the left. |
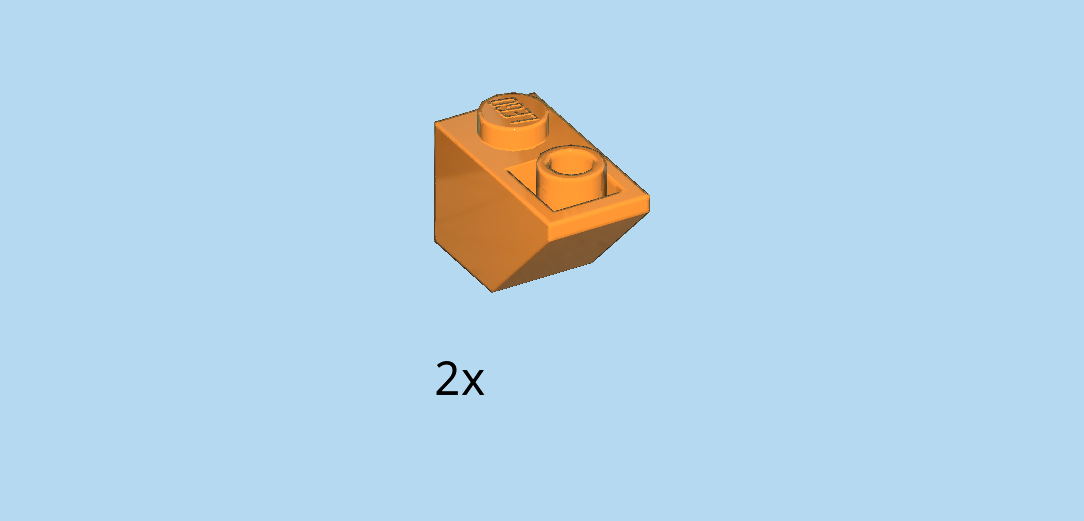
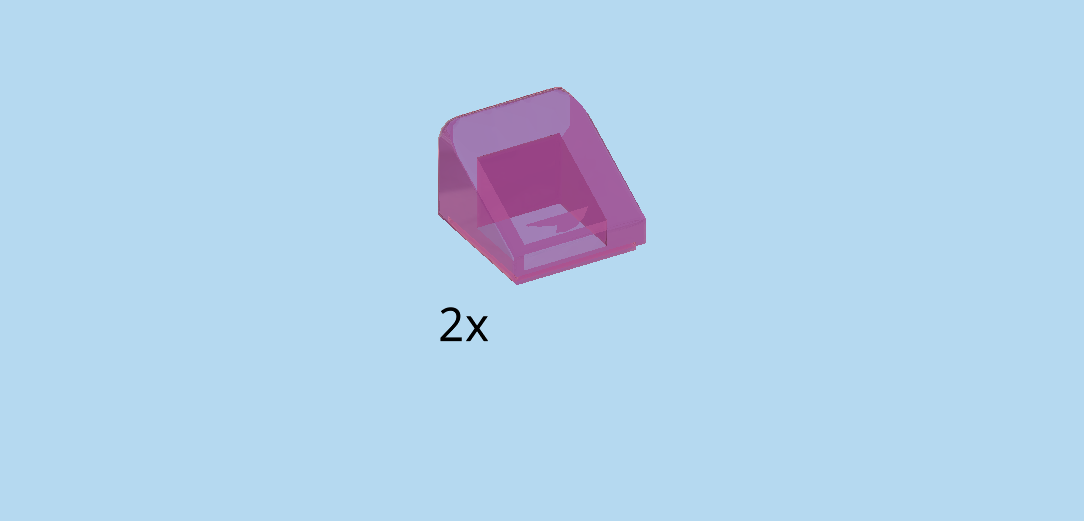
| Find 2 transparent bright orange roof tiles 1x2, 45°. |
| Put 1 horizontally on back knob of the left column, slope to the left. |
| Put the other one horizontally in front of the previous piece, slope to the left. |
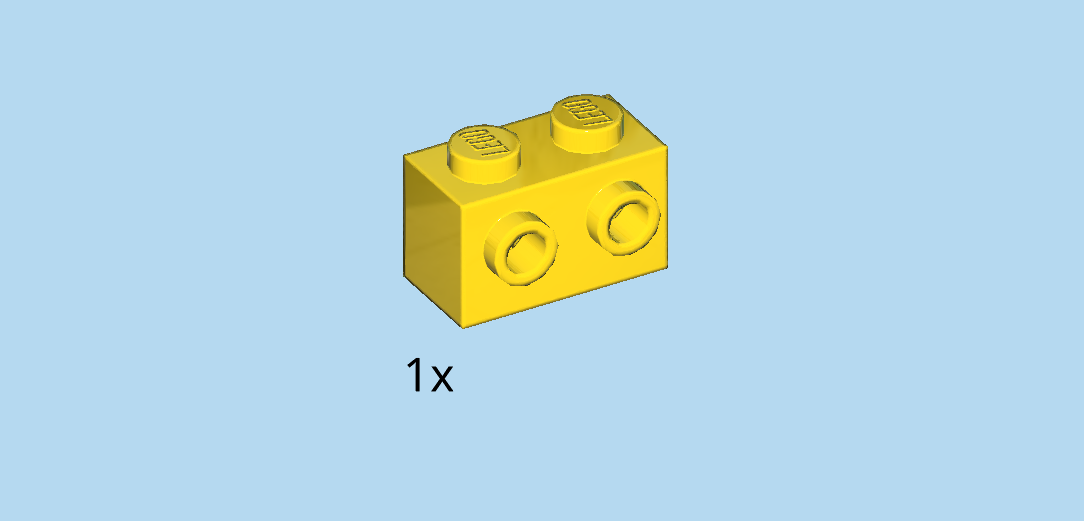
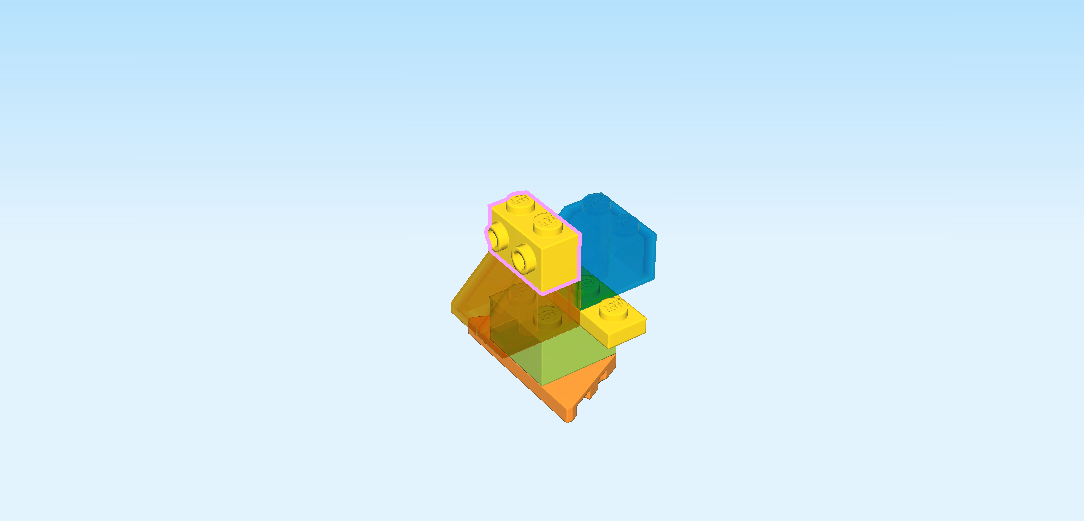
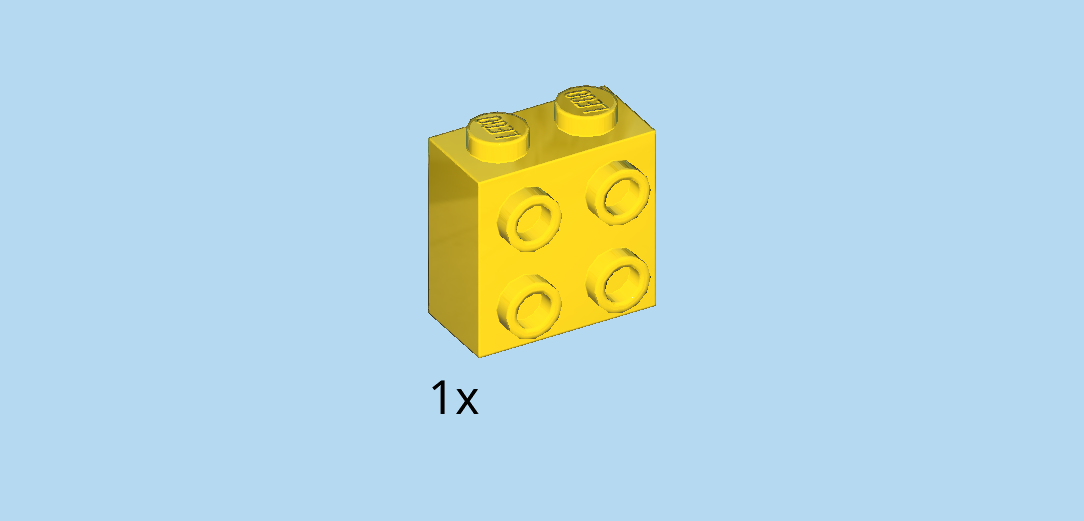
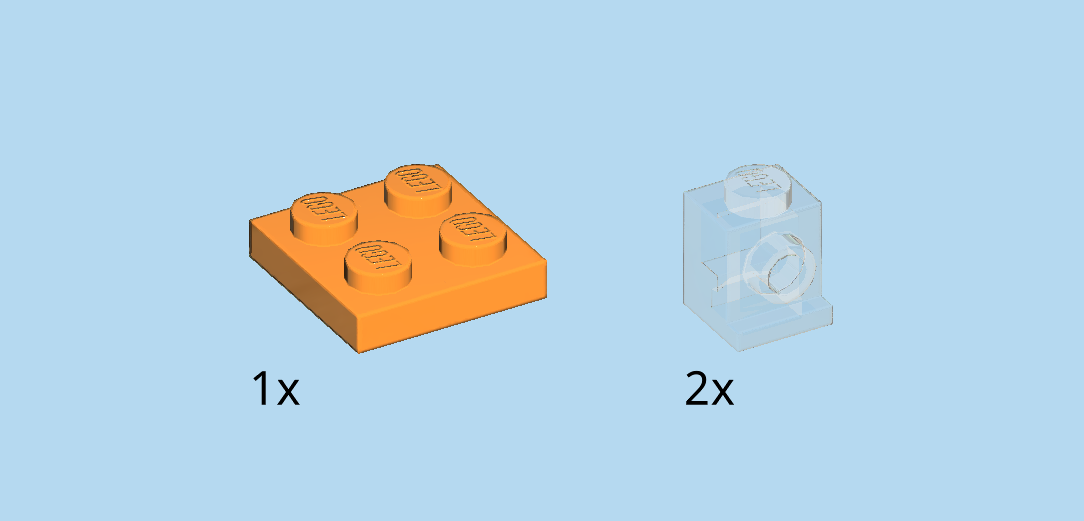
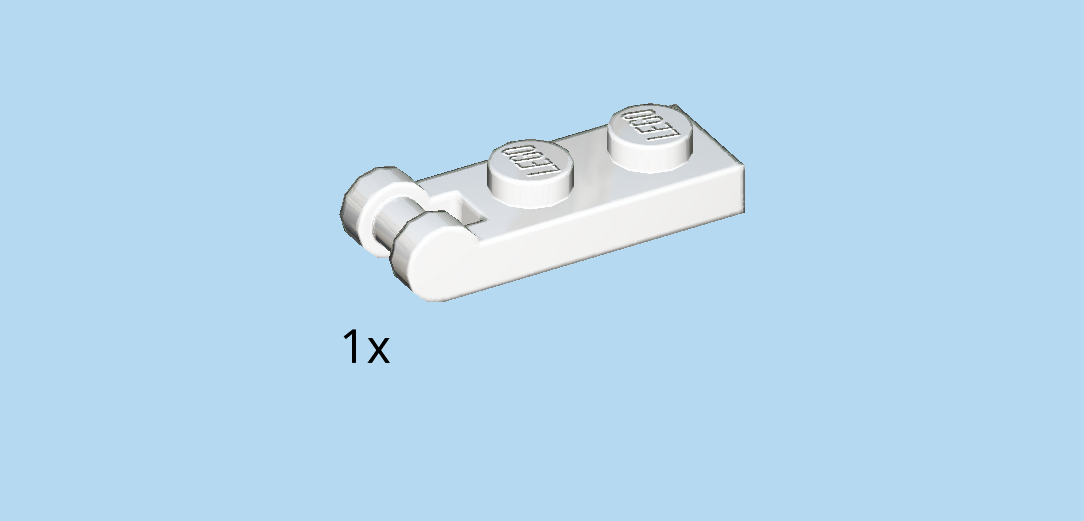
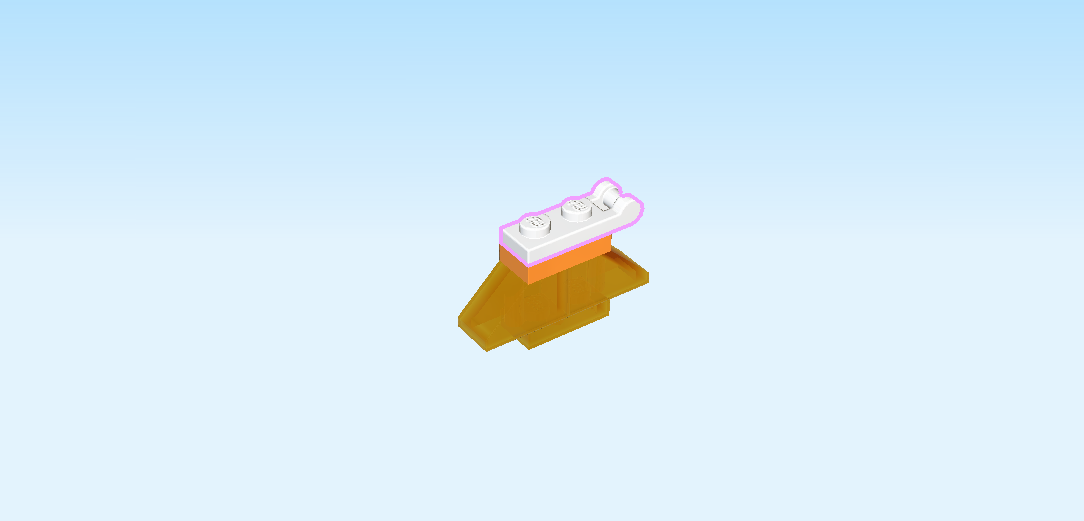
| Find 1 bright yellow brick 1x2 with 2 side knobs. |
| Put it vertically on top of the two previous pieces, side knobs to the left. |
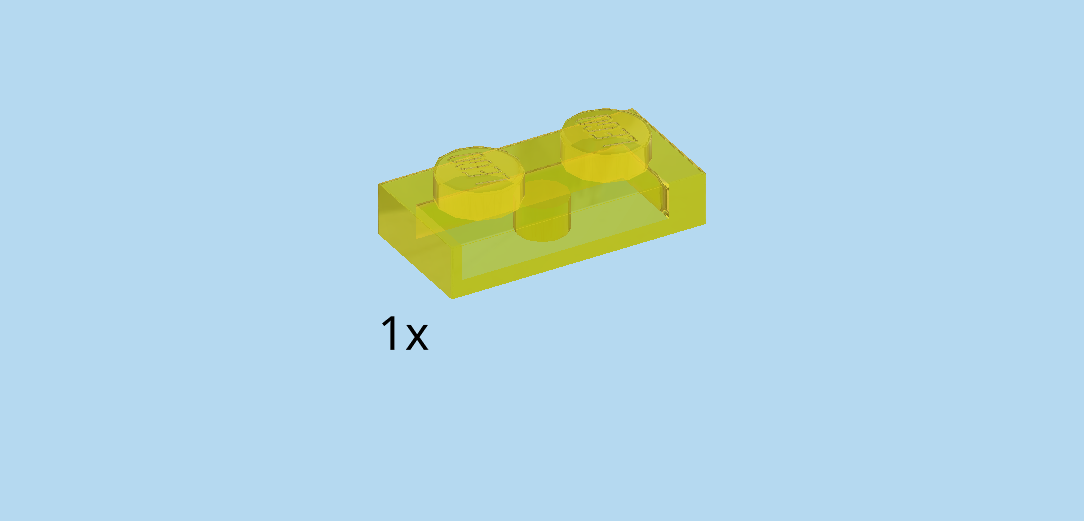
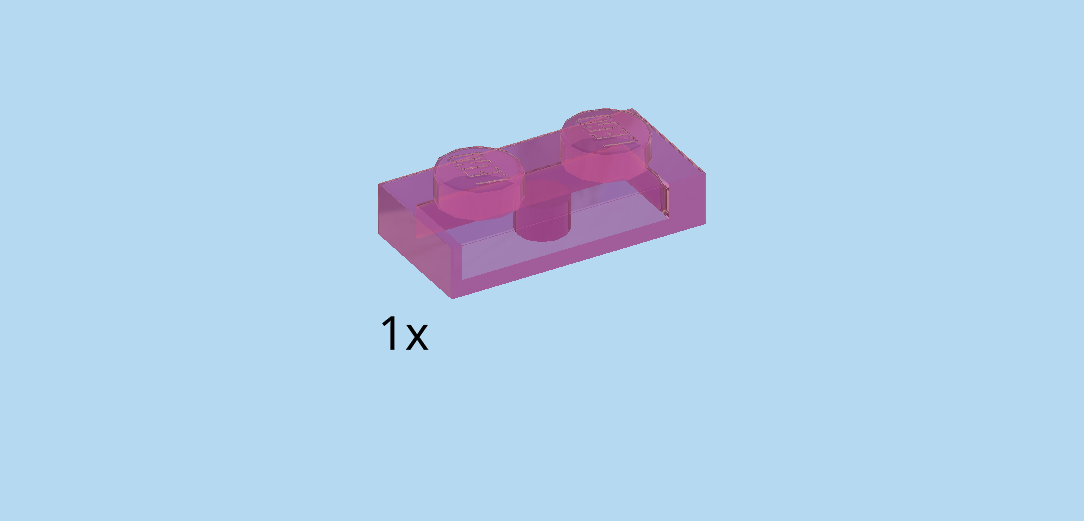
| Find 1 transparent yellow plate 1x2. |
| Put it vertically on top of the previous piece. |
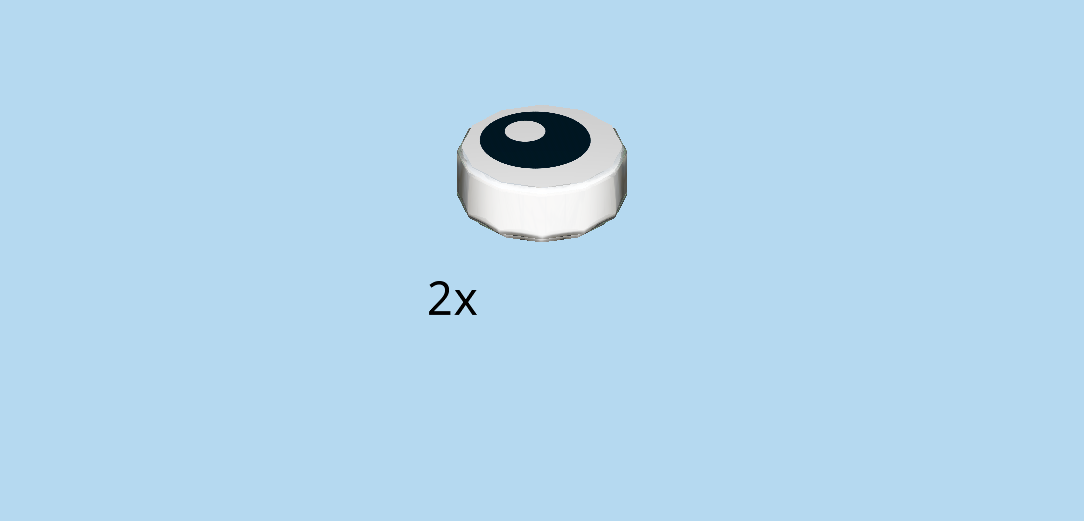
| Find 2 white round tiles 1x1. |
| Put them upright on the two side knobs on the left side. |
| These two round tiles are printed with eyes! |
| The little bird is finished! Very well done! Let's make him some friends to play with, shall we? |
| Now, we build the lion. |
| The jolly lion has a yellow body, a bright orange back, an orange tail, and its trademark is its big translucent mane. |
| Collect the following 2 pieces: |
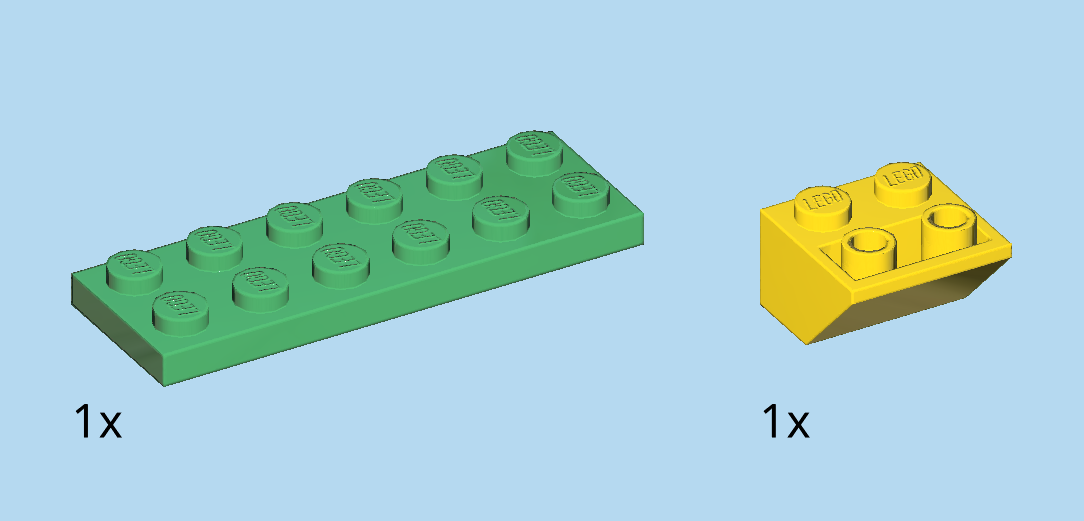
| 1 dark green plate 2x6, |
| and 1 bright yellow inverted roof tile 2x2, 45°. |
| Put the plate 2x6 horizontally on the table. |
| Put the inverted roof tile 2x2 on the rightmost column, slope to the left. |
| Find 1 bright yellow inverted roof tile 2x2, 45°. |
| Put it on the leftmost column, slope to the right. |
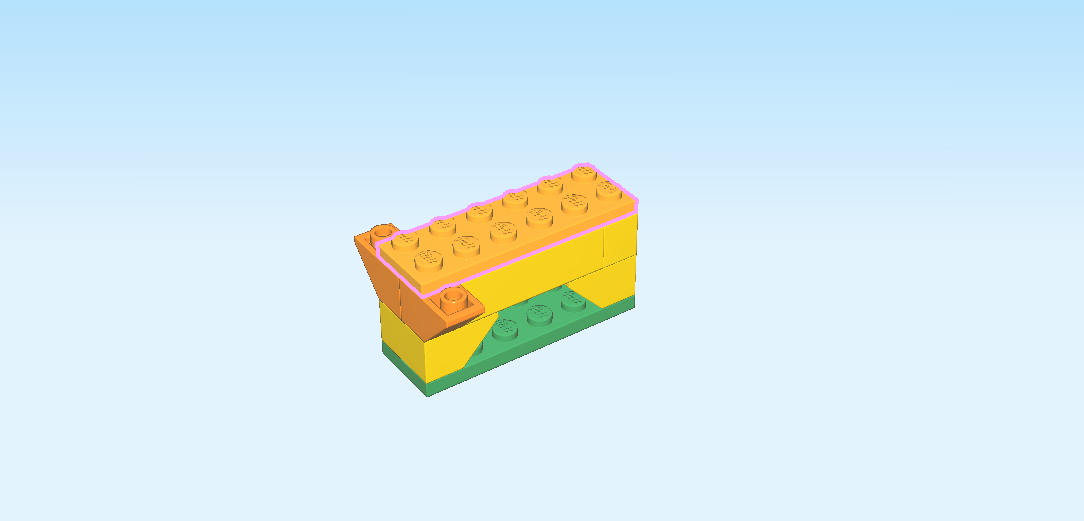
| Find 1 bright yellow brick 2x4. |
| Put it horizontally on top of the two roof tiles. It only attaches to the inner columns of the roof tiles, so this can be quite wobbly! You might have to try a few times. |
| Find 1 bright yellow brick 1x2 with technic hole. |
| Put it vertically on the rightmost column. |
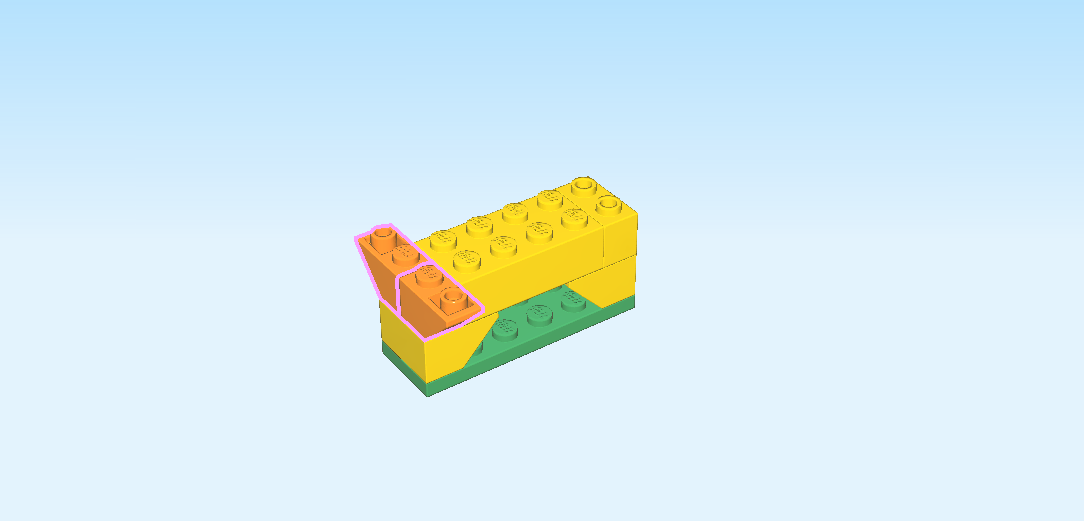
| Find 2 bright orange inverted roof tiles 1x2, 45°. |
| Put 1 vertically on the back knob of the leftmost column, slope to the back. |
| Repeat symmetrically on the front knob. |
| Find 1 flame yellowish orange plate 2x6. |
| Put it horizontally on top of the structure. |
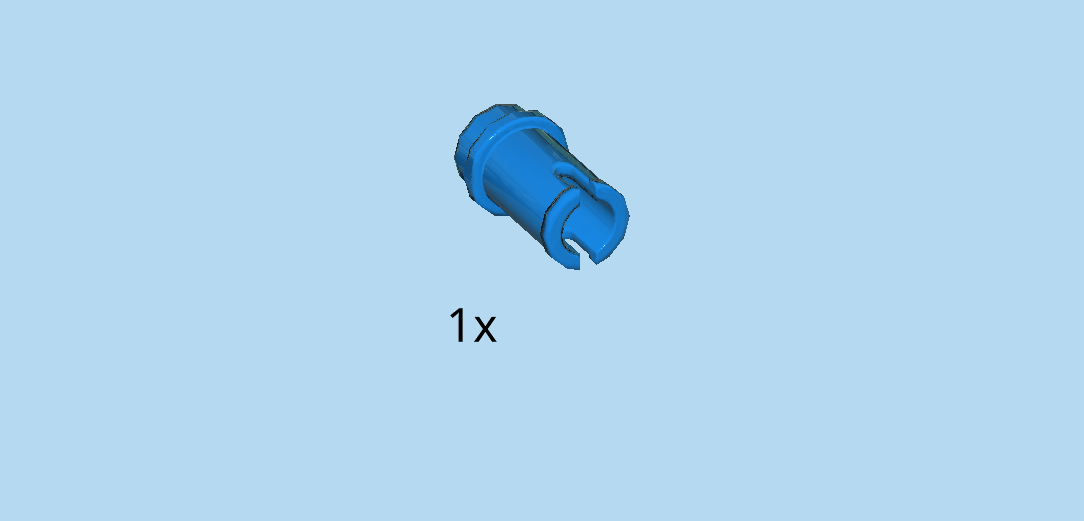
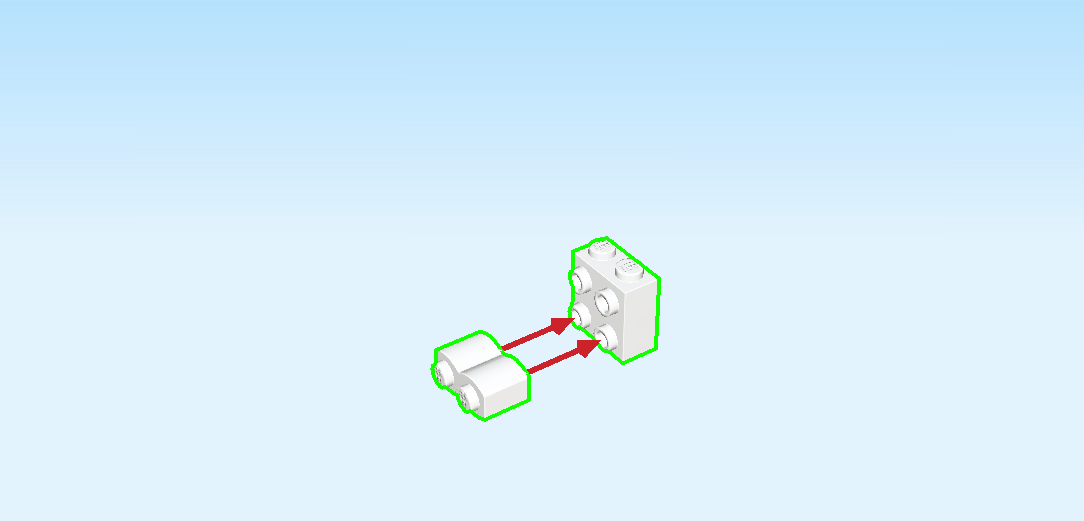
| Find 1 bright blue connector peg 1m with knob. (This means that the piece is 1 knob long) . |
| Insert the connector peg into the hole on the right side of the structure. |
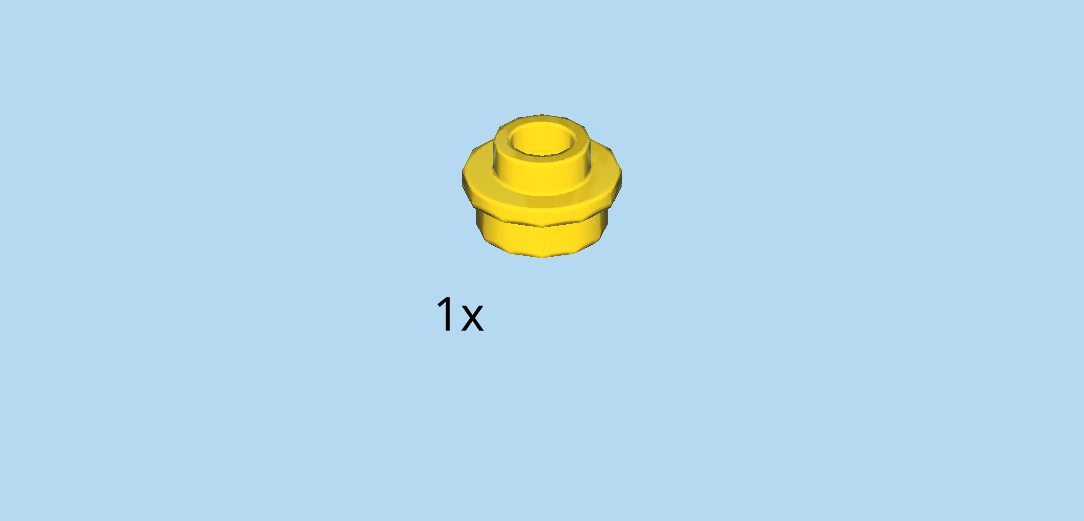
| Find 1 bright yellow round plate 1x1 with through-hole. |
| Put it upright on the knob of the previous piece. |
| Find 1 transparent bright orange feather. |
| Insert the small shaft of the feather into the knob of the previous piece. |
| This is the bushy tail of the lion! |
| Collect the following 4 pieces: |
| 2 transparent bright orange bricks 1x1, |
| and 2 transparent bright orange roof tiles 1x2, 45°. |
| Put 1 brick 1x1 on the backmost knob of the leftmost column. |
| Repeat symmetrically at the front. |
| Put 1 roof tile 1x2 vertically on the back knob of the second column from the left, slope to the back. |
| Repeat symmetrically at the front. |
| Find 2 transparent bright orange roof tiles 1x2, 45°. |
| Put 1 horizontally to the right of the previous piece, slope to the right. |
| Repeat symmetrically at the back. |
| Find 2 transparent bright orange roof tiles 1x2, 45°. |
| Skip 1 column from the left, and put 1 horizontally on the back row, slope to the right. This means that the sloped half of this brick is on top of the previous piece. |
| Repeat symmetrically at the front. |
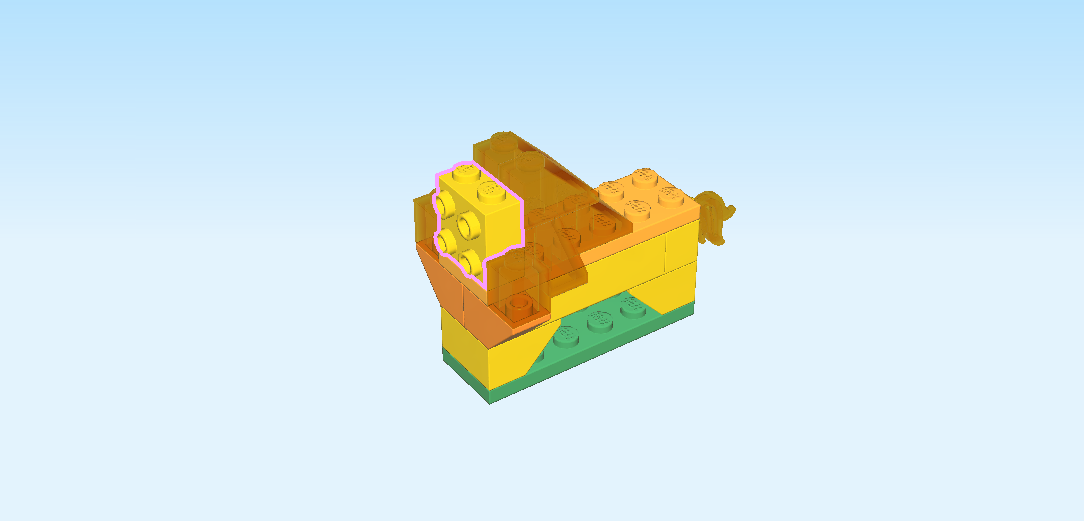
| Find 1 bright yellow brick 1x2x1⅔ with 4 side knobs. |
| Put it vertically on the leftmost row in the middle, side knobs to the left. |
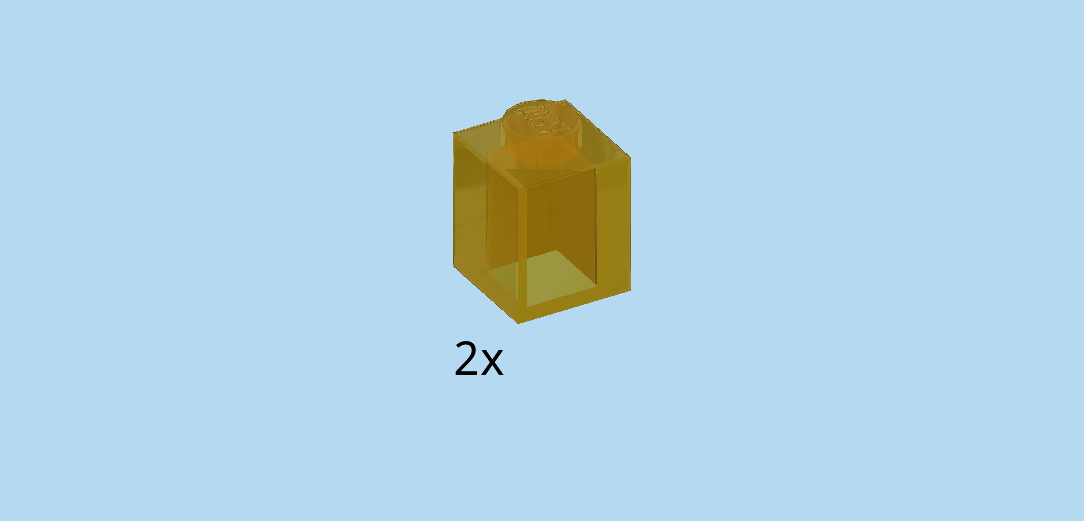
| Find 2 transparent bright orange bricks 1x1. |
| Put 1 behind the previous piece. |
| Repeat symmetrically at the front. |
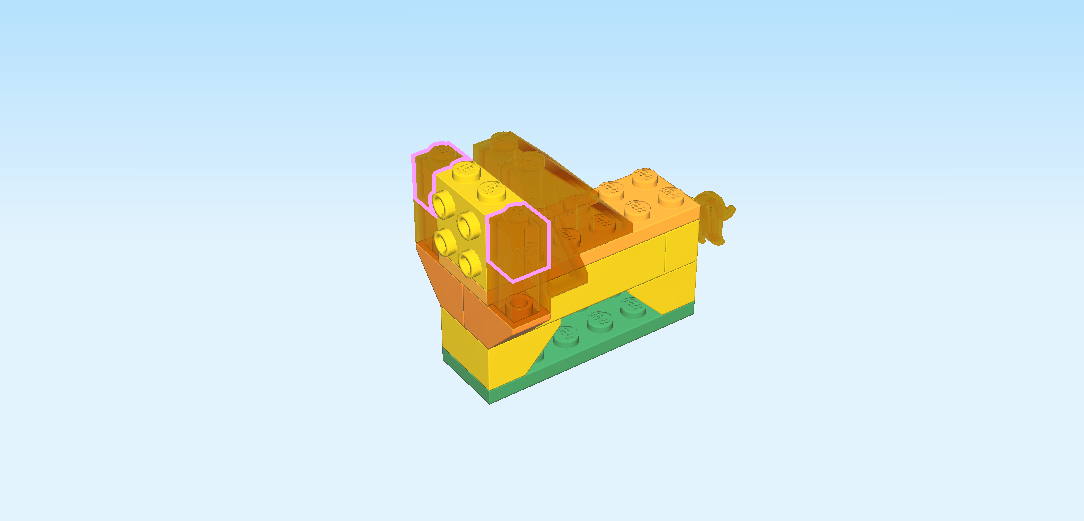
| Find 2 transparent bright orange roof tiles 1x2, 45°. |
| Put 1 vertically on the two back knobs of the leftmost column, slope to the back. |
| Repeat symmetrically at the front. |
| Find 2 transparent bright orange smooth roof tiles 1x1x⅔. |
| Put them on the second column from the left, slopes to the right. |
| Collect the following 3 pieces: |
| 2 white round tiles 1x1 (these pieces are printed), |
| and 1 flame yellowish orange plate 1x2. |
| Put the 2 round tiles 1x1 upright on the two upper knobs of the left side knobs. They are printed with eyes! |
| Put the plate 1x2 upright horizontally on the side knobs below the eyes. |
| Find 1 flame yellowish orange plate 1x2 with 1 knob. |
| Put it upright horizontally on the previous piece. |
| Find 1 black quarter-circle tile 1x1. |
| Put it upright on the knob of the previous piece, corner of the tile to the top. |
| The lion is finished! Well done! It has a very friendly face and a magnificent translucent mane, don't you think? |
| Open bag number 2. You can choose to have the bricks sorted by color again. This bag contains all bricks and pieces for the turtle and the tea-serving robot. |
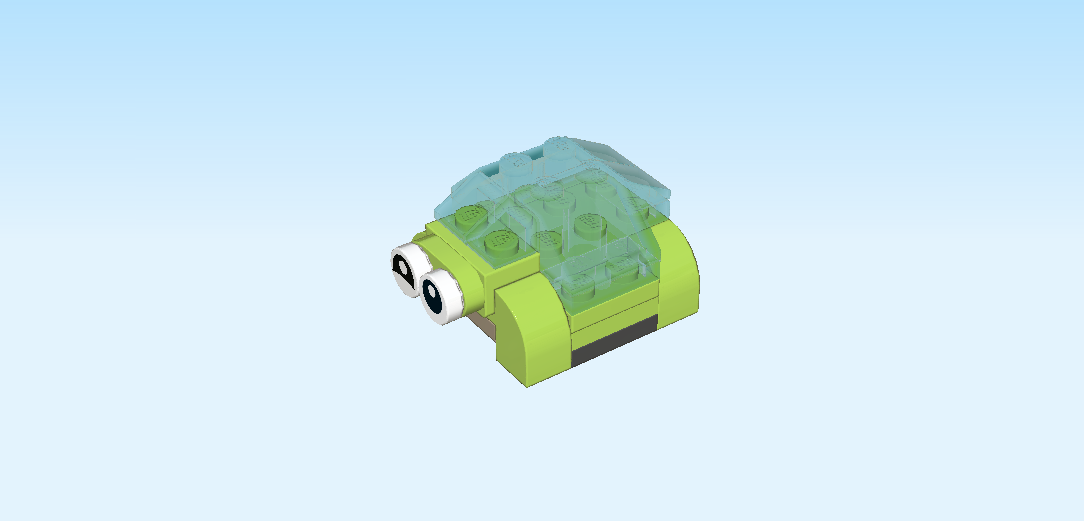
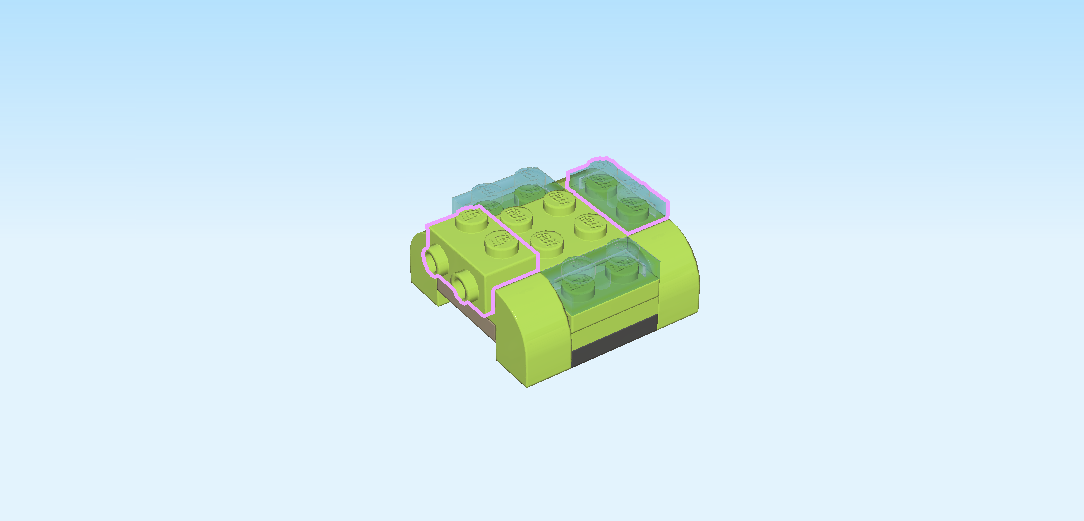
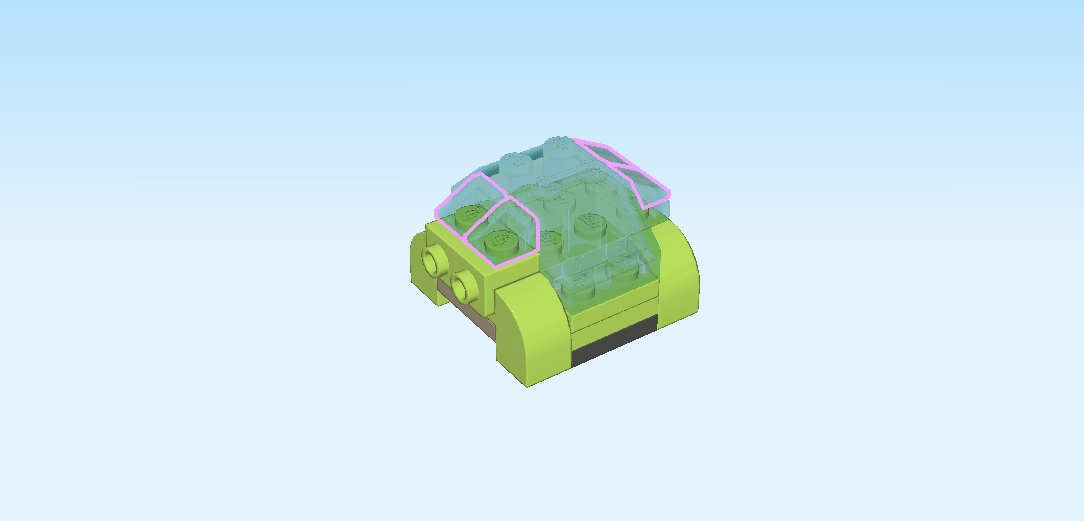
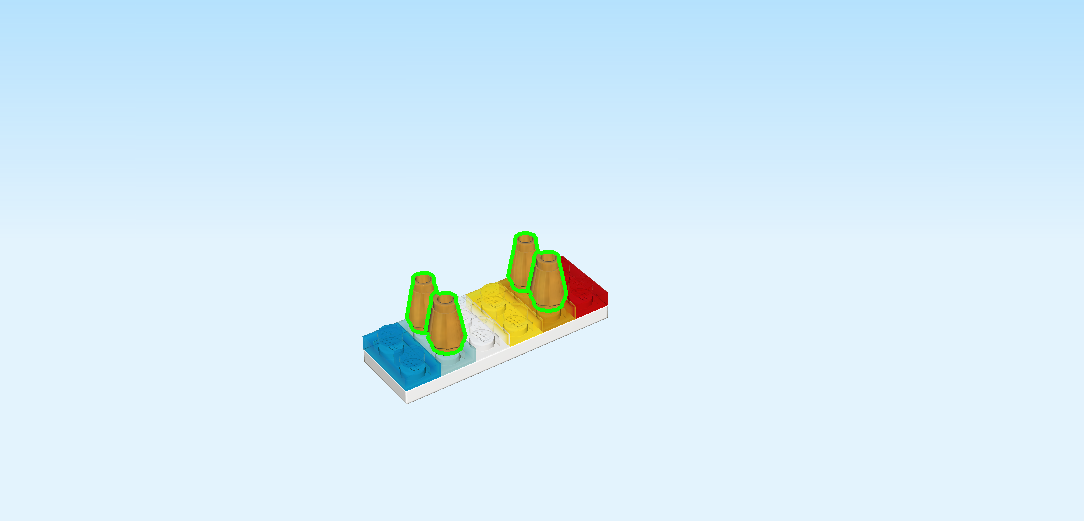
| Next, we will build the turtle. |
| The turtle is our smallest friend with a green underbelly and legs and a translucent green shell. |
| Collect the following 2 pieces: |
| 1 black plate 2x4, |
| and 1 mud grey plate 2x4. |
| Put the black plate 2x4 vertically on the table. |
| Put the mud grey plate 2x4 horizontally on top on the middle two rows. The two plates now form a cross. |
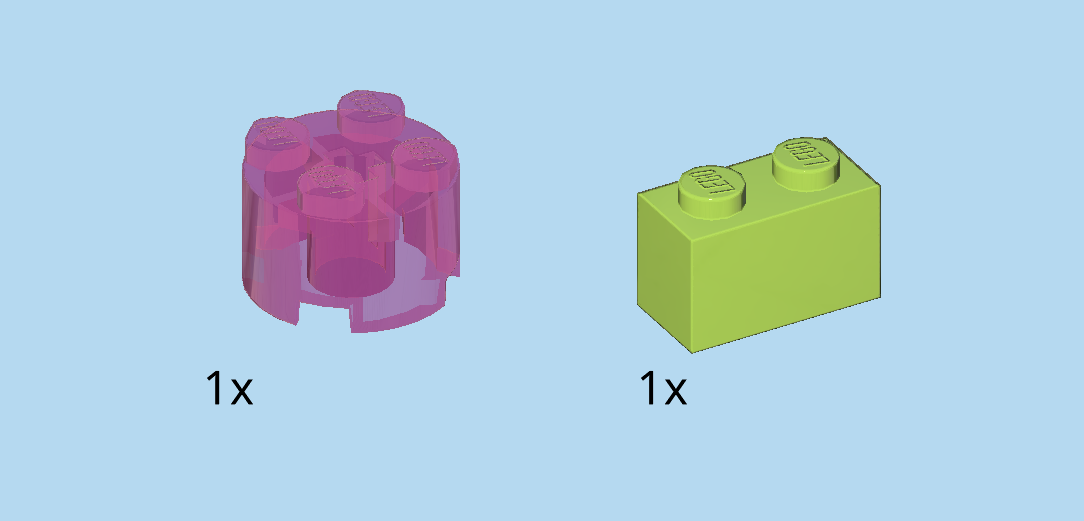
| Find 2 bright yellowish green plates 1x2. |
| Put 1 horizontally on the backmost row. |
| Repeat symmetrically at the front. |
| Find 1 bright yellowish green plate 2x4. |
| Put it vertically on top on the two middle columns. |
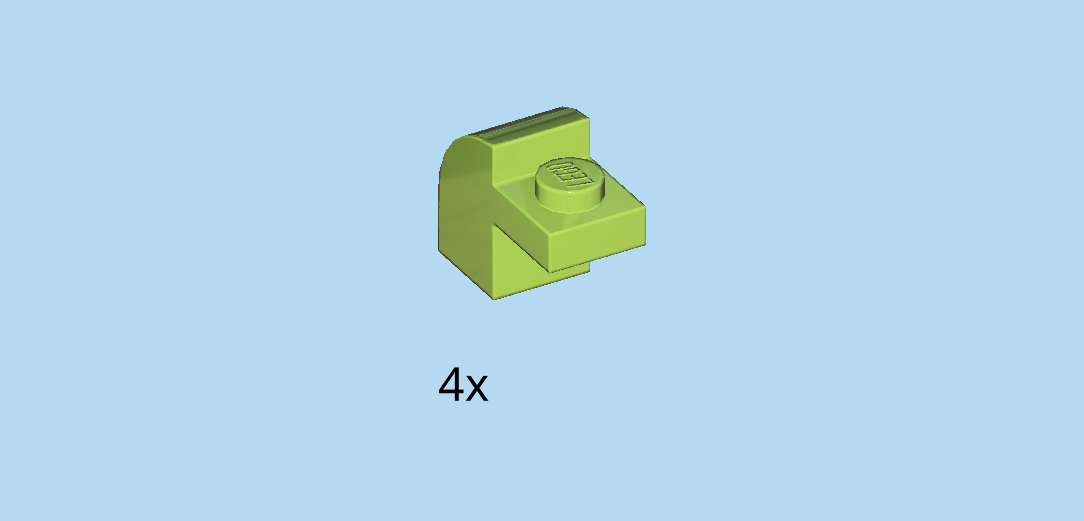
| Find 4 bright yellowish green arched bricks 1x1 with protruding plate. |
| Listen carefully, they will be mounted in a special way! |
| Turn 1 brick vertically so that the protruding plate is pointing to the front. Then connect the protruding plate with the back knob of the leftmost column. The arch of the brick is at the back. |
| Repeat symmetrically at the front. |
| Put another one behind the back knob of the rightmost column, protruding plate to the front. |
| Repeat symmetrically at the front. |
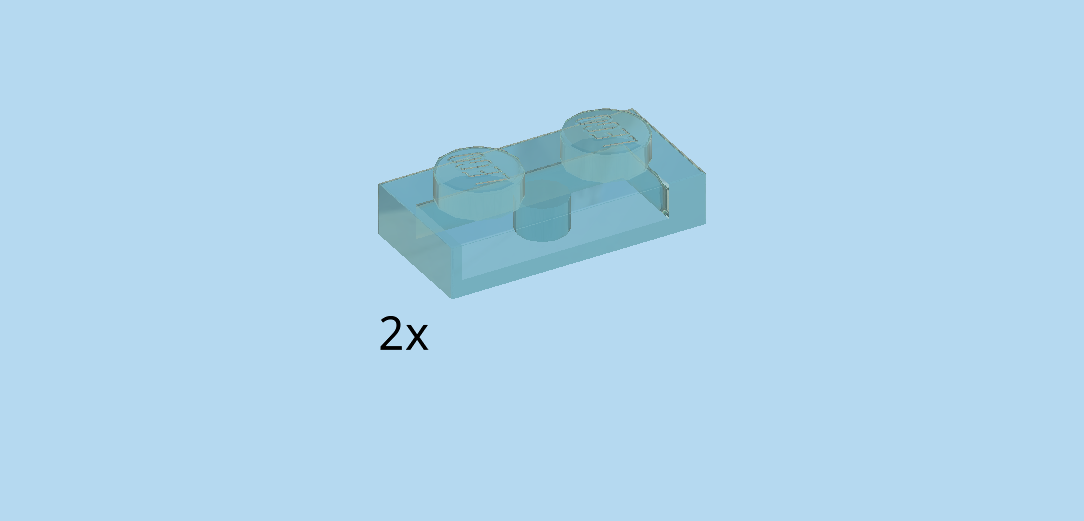
| Find 2 transparent light blue plates 1x2. |
| Put 1 horizontally on the backmost row in the middle. |
| Repeat symmetrically at the front. |
| Find 1 bright yellowish green plate 2x4. |
| Put it horizontally on top in the middle. |
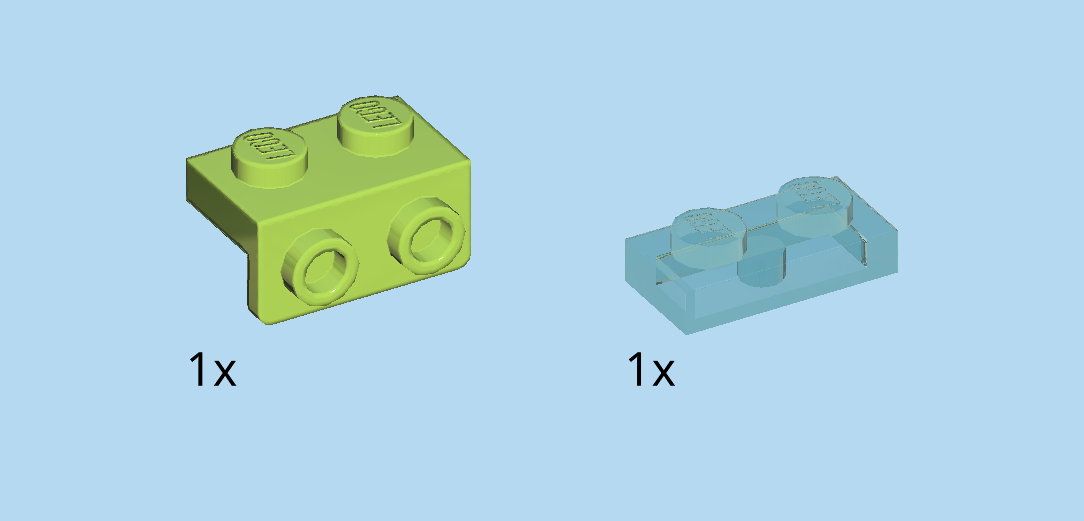
| Collect the following 2 pieces: |
| 1 bright yellowish green top angle plate 1x2 - 1x2 with 2 side knobs, |
| and 1 transparent light blue plate 1x2. |
| Put the angle plate 1x2 vertically on the leftmost column in the middle, side knobs to the left. |
| Put the plate 1x2 vertically on the rightmost column in the middle. |
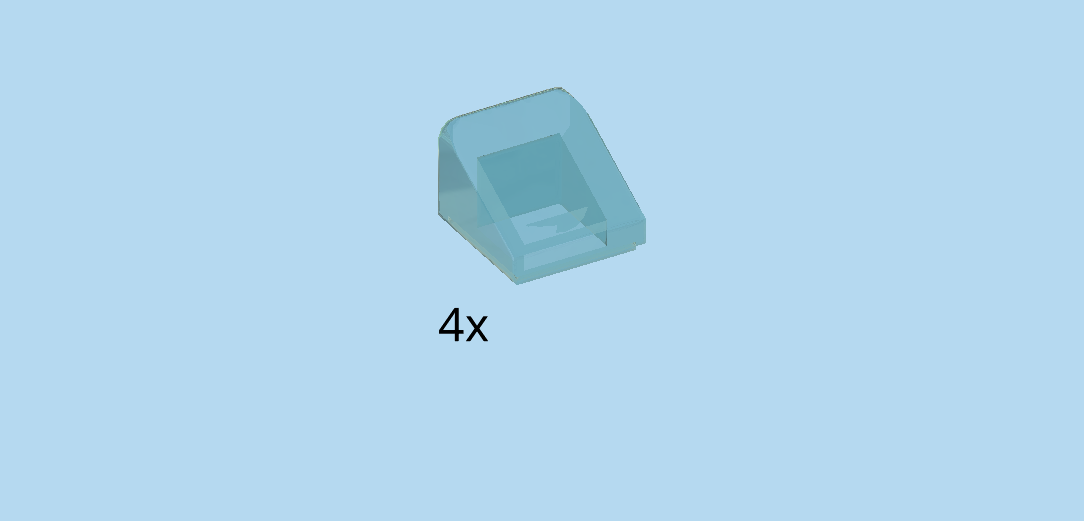
| Find 2 transparent light blue roof tiles 2x2, 45°. |
| Put 1 on the four back knobs of the two middle rows, slope to the back. |
| Repeat symmetrically at the front. |
| Find 4 transparent light blue smooth roof tiles 1x1x⅔. |
| Put 2 on the leftmost column, slopes to the left. |
| Repeat symmetrically on the right. |
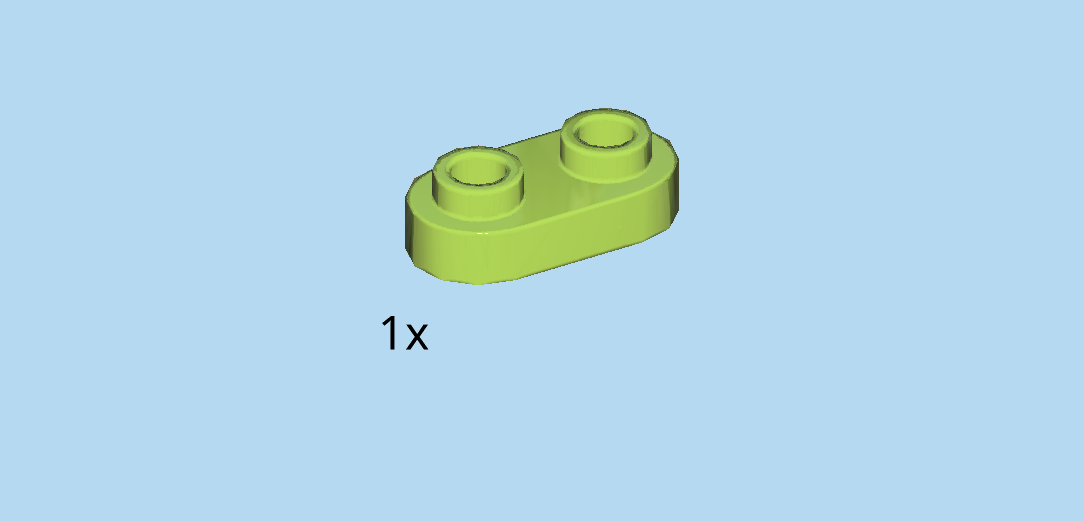
| Find 1 bright yellowish green rounded plate 1x2. |
| Put it upright horizontally on the side knobs on the left side surface. |
| Find 2 white round tiles 1x1. |
| Put them upright on the side knobs on the left side surface. |
| The tiles are printed with eyes: one is wide open, and the other one is winking. |
| The turtle is finished! Great job! Looks like turtle is a little prankster! Who or what do you think she is winking at? |
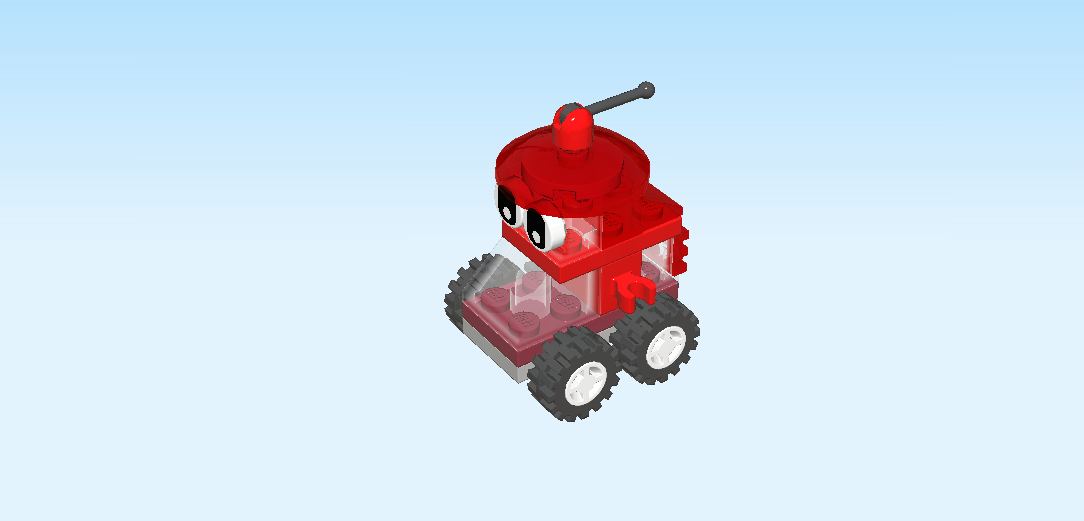
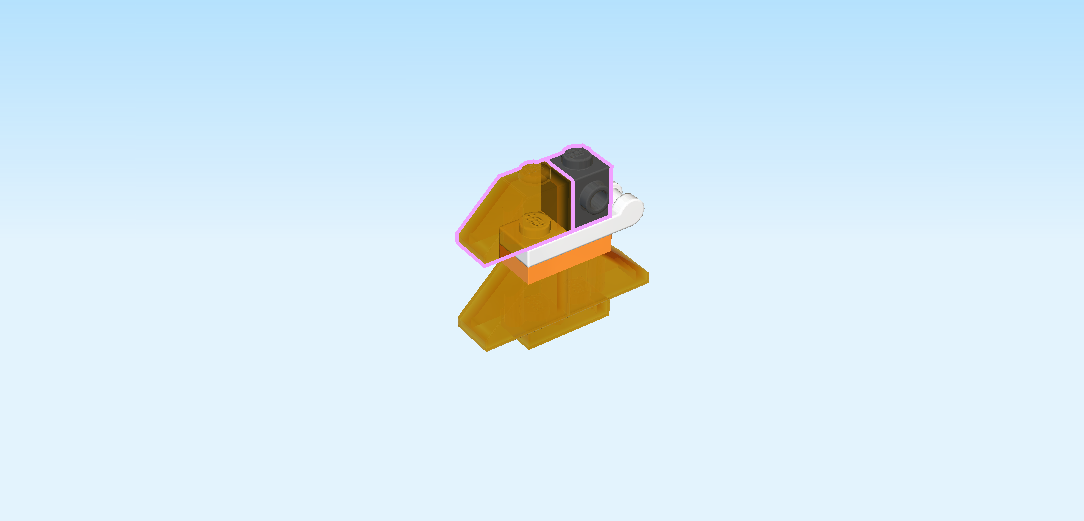
| Next up, we build the tea-serving robot. |
| The robot has four small black wheels with white rims, and its body consists of dark and bright red components but also completely see-through parts. Nifty! It has a translucent top with antenna, two googly eyes, and two robot arms which it uses to carry a teapot and a mug. What a spiffy little fella! |
| Collect the following 2 pieces: |
| 1 medium stone grey plate 2x2 with 2 small connectors pins, |
| and 1 maroon red plate 2x4. |
| Put the plate with connector pins on the table, pins pointing to the front and back. |
| Put the plate 2x4 horizontally on top, four knobs overhanging to the left. |
| Find 1 medium stone grey plate 2x2 with 2 small connectors pins. |
| Put it underneath on the left side, connector pins to the front and back. |
| Find 2 transparent bricks 1x1 with side knob and foot. |
| Put them on the rightmost column, side knobs to the right. |
| Find 1 transparent red grille tile 1x2. |
| Put it upright on the side knobs of the two previous pieces. |
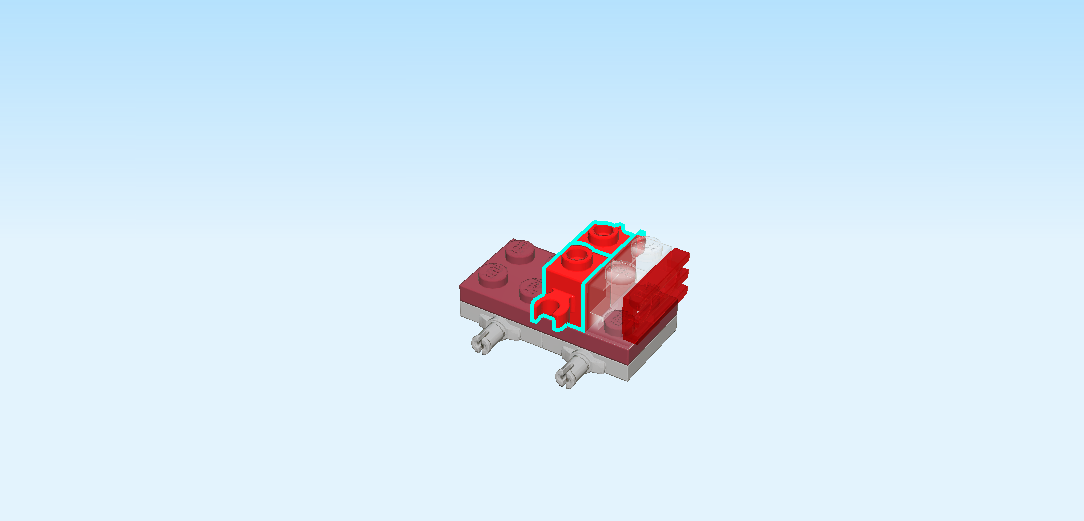
| Find 2 bright red bricks 1x1 with clasp. |
| Skip 2 knobs from the left, and put 1 on the back row, clasp to the back. |
| Repeat symmetrically at the front. |
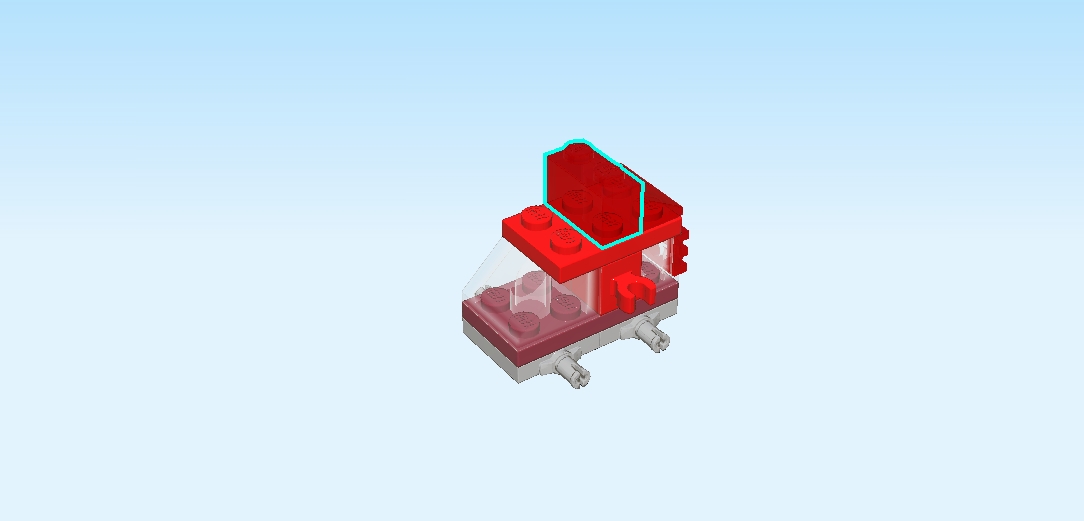
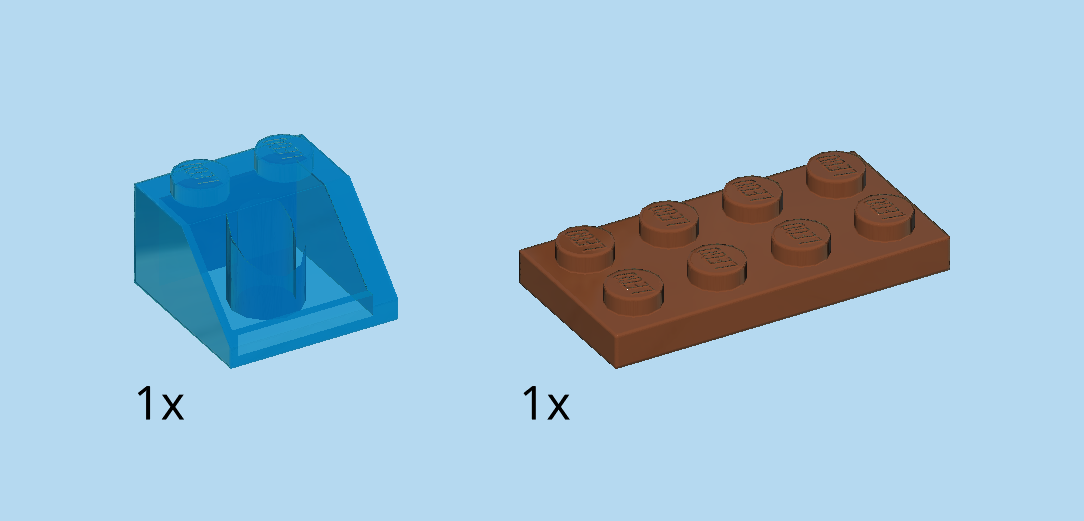
| Find 1 transparent roof tile 2x2, 45°. |
| Put it to the left of the two previous pieces, slope to the left. |
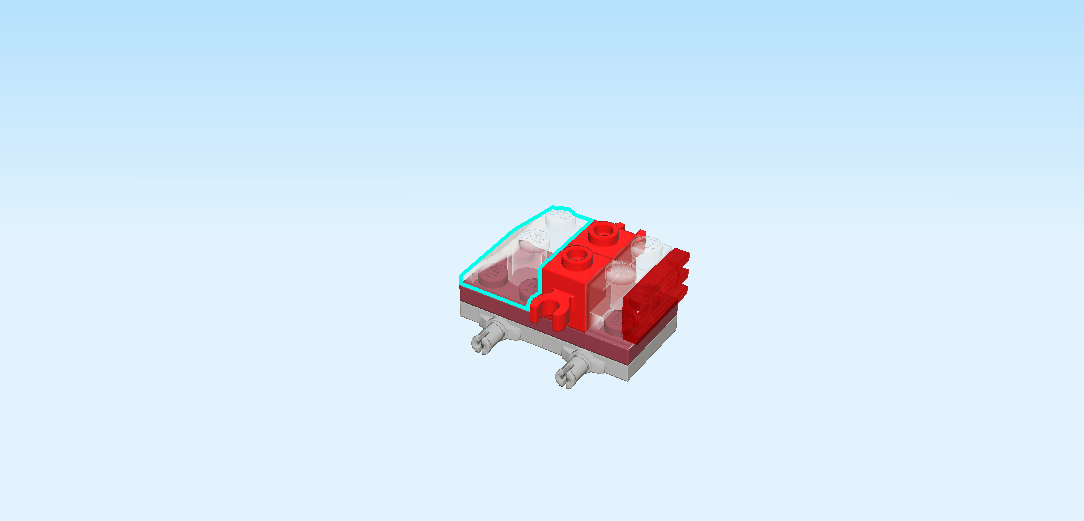
| Find 1 bright red plate 2x3. |
| Put it horizontally on top. |
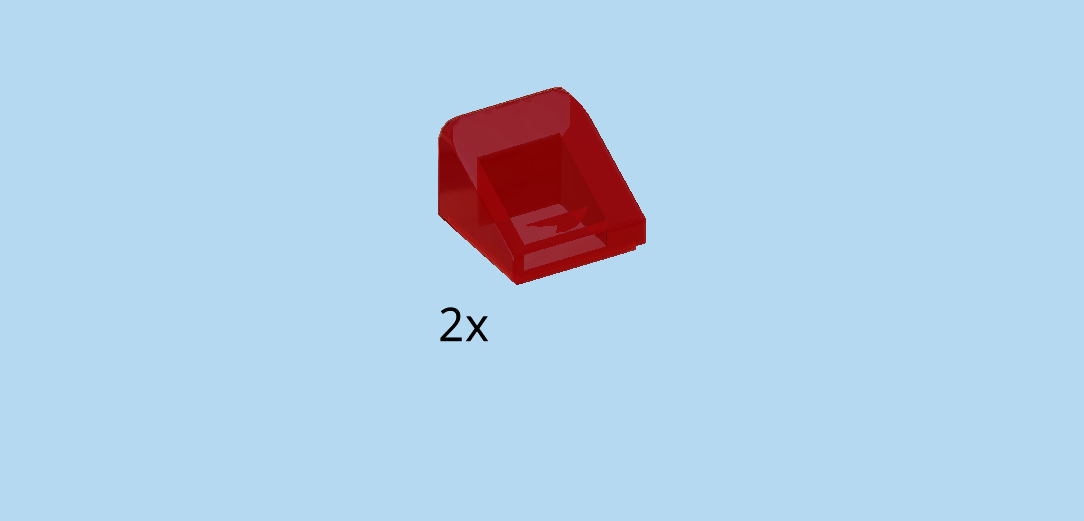
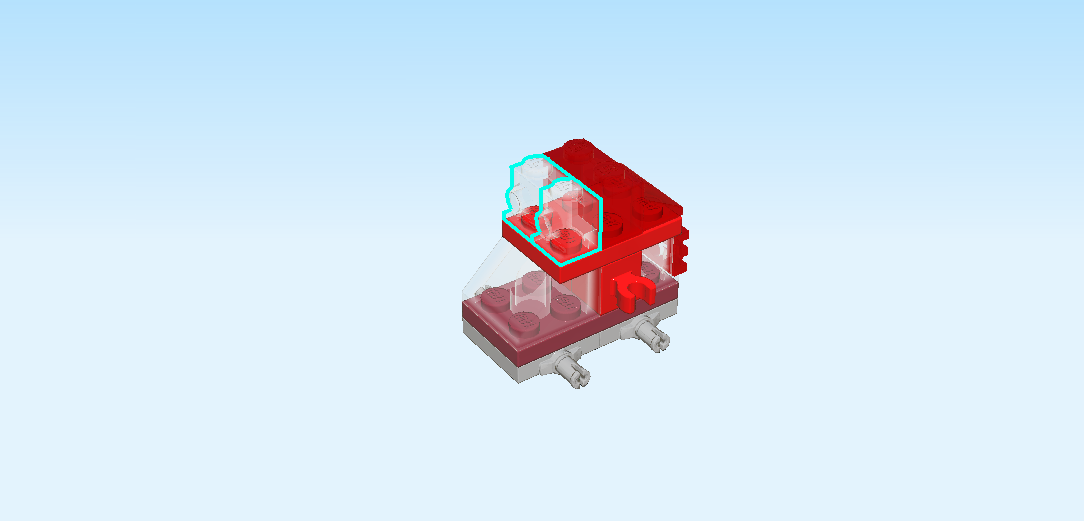
| Find 2 transparent red smooth roof tiles 1x1x⅔. |
| Put them on the rightmost column, slopes to the right. |
| Find 1 transparent red hollow brick 1x2. |
| Put it horizontally to the left of the two previous pieces. |
| Find 2 transparent bricks 1x1 with side knob and foot. |
| Put them on the leftmost column, side knobs to the left. |
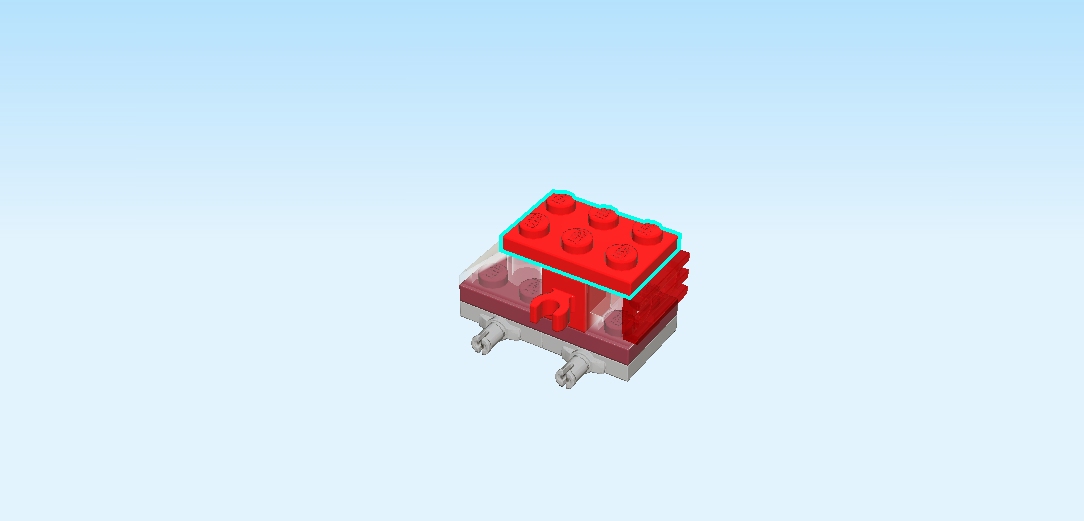
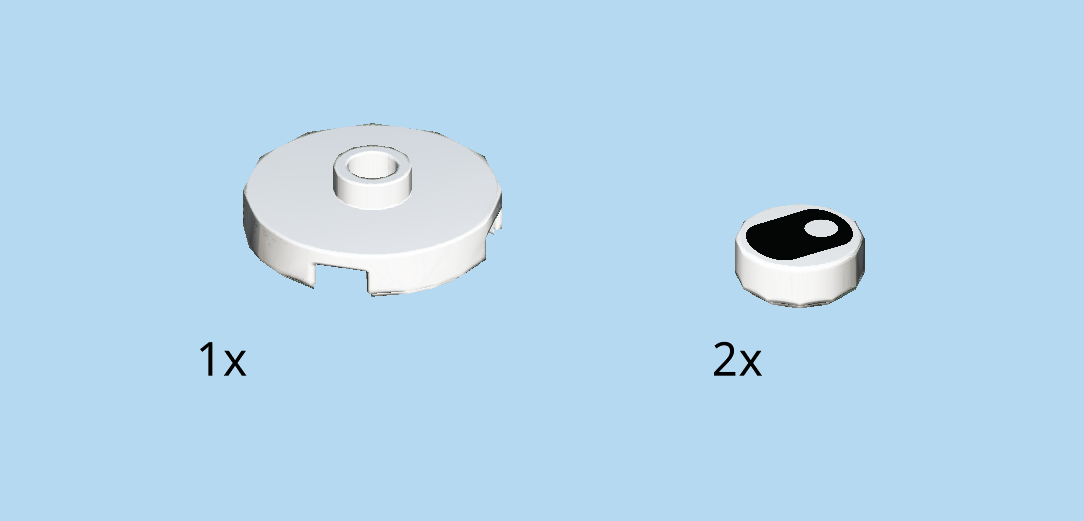
| Collect the following 3 pieces: |
| 1 white round plate 2x2 with 1 knob, |
| and 2 white round tiles 1x1. |
| Put the round plate 2x2 on the four top knobs. |
| Put the round tiles 1x1 upright on the two side knobs on the left side. |
| The tiles are printed with googly robot eyes! |
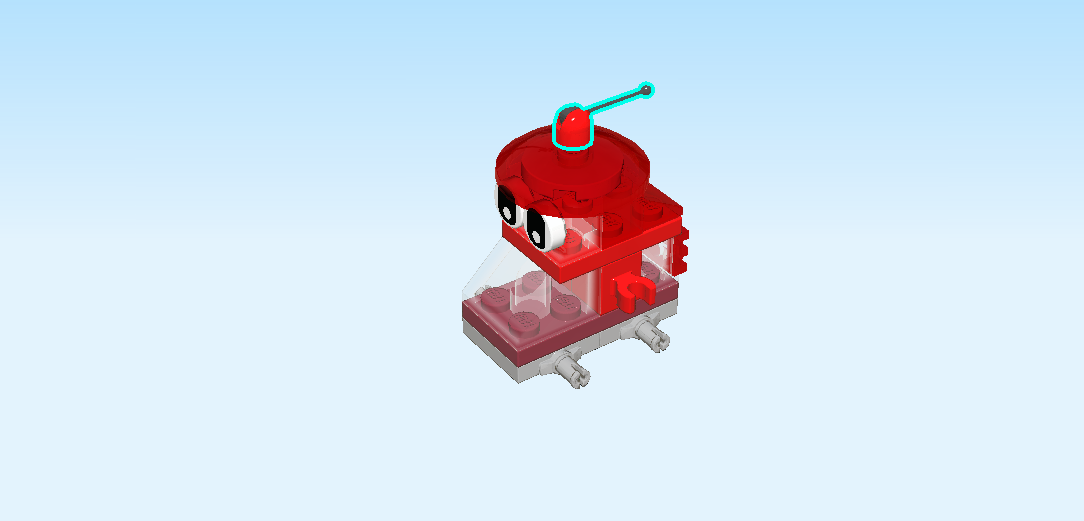
| Find 1 transparent red disk 3x3 with 1 knob. |
| Put it on top. |
| Find 1 bright red and black joystick. |
| Put it on top, antenna to the right. |
| Next, we will build 4 robot wheels. |
| Let's start with one. |
| Collect the following 2 pieces: |
| 1 white narrow rim with cross hole, |
| and 1 black narrow rubber tire with high profile. |
| Put the tire around the rim. |
| Find 3 more tires and 3 more rims. |
| Assemble the remaining 3 wheels just like the first one. |
| Now, snap the wheels on the connectors at the bottom of the structure. |
| Great job! |
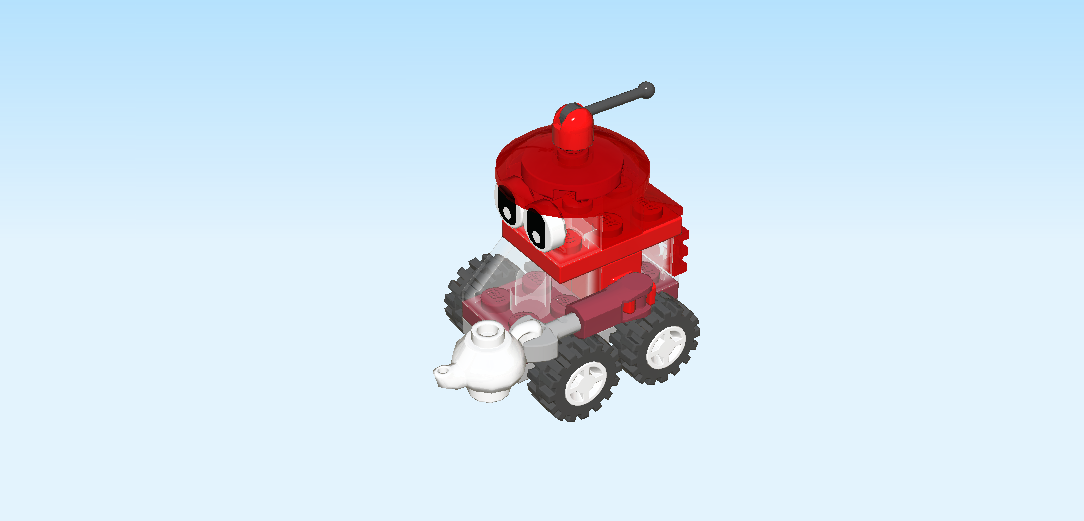
| Now, we will build the left robot arm with teapot. |
| Collect the following 2 pieces: |
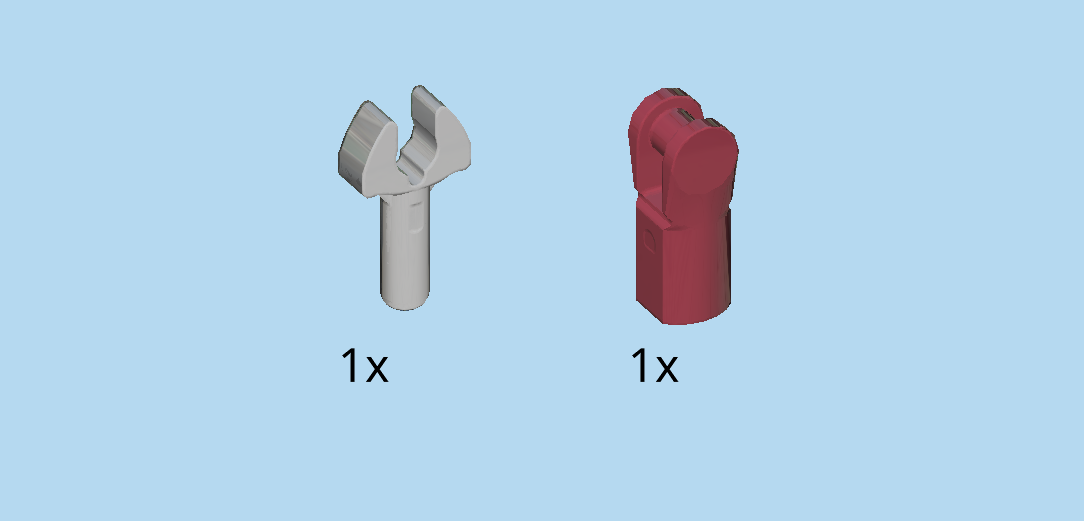
| 1 maroon red small tube with shaft, |
| and 1 medium stone grey open end wrench. |
| Insert the handle of the open end wrench into the small tube. |
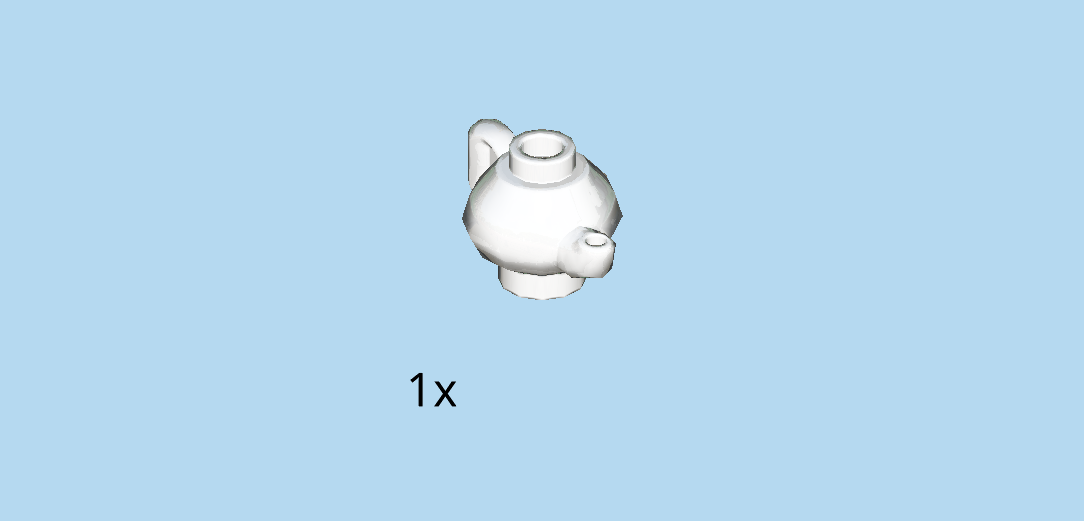
| Find 1 white teapot. |
| Snap the handle of the teapot into the open end wrench. This can be a bit tricky. |
| The left robot arm with teapot is finished! Well done! Now snap its little shaft into the clasp at the front side of the robot. The teapot is pointing to the left. |
| Next, we will build the right robot arm with mug. |
| Collect the following 2 pieces: |
| 1 maroon red small tube with shaft, |
| and 1 medium stone grey open end wrench. |
| Again, insert the shaft of the open end wrench into the tube. |
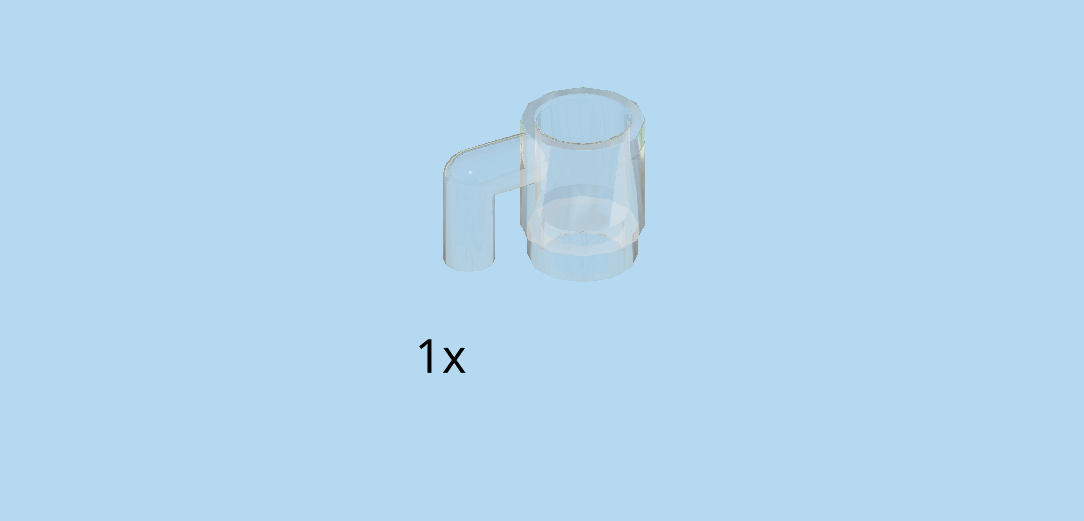
| Find 1 transparent Minifigure mug. |
| Snap the handle of the mug into the open end wrench. |
| The right robot arm with mug is finished! Great job! Snap its small shaft into the clasp on the back of the structure. |
| The tea-serving robot is finished! Fantastic job! Now you can send him on his first mission to make one of his friends happy with a nice cup of tea! |
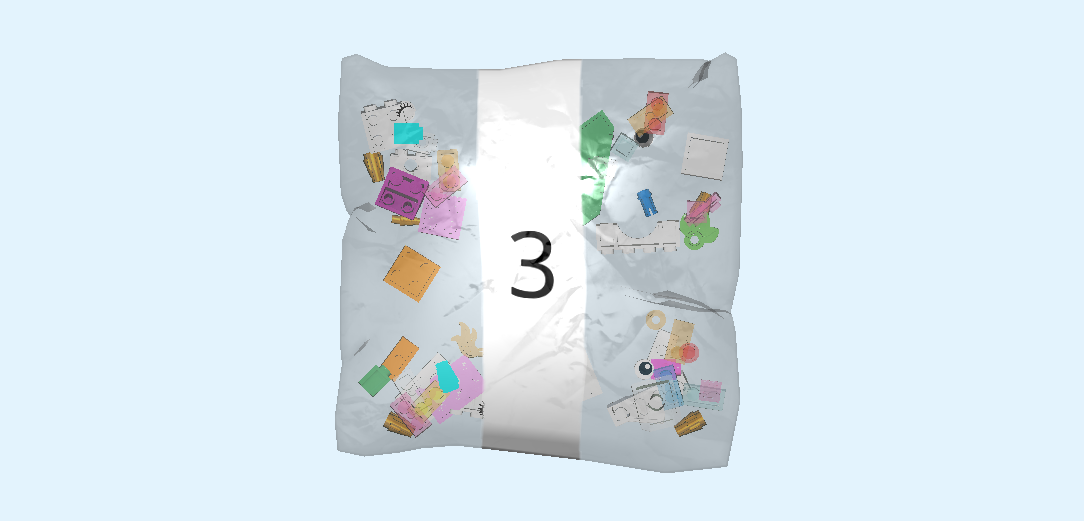
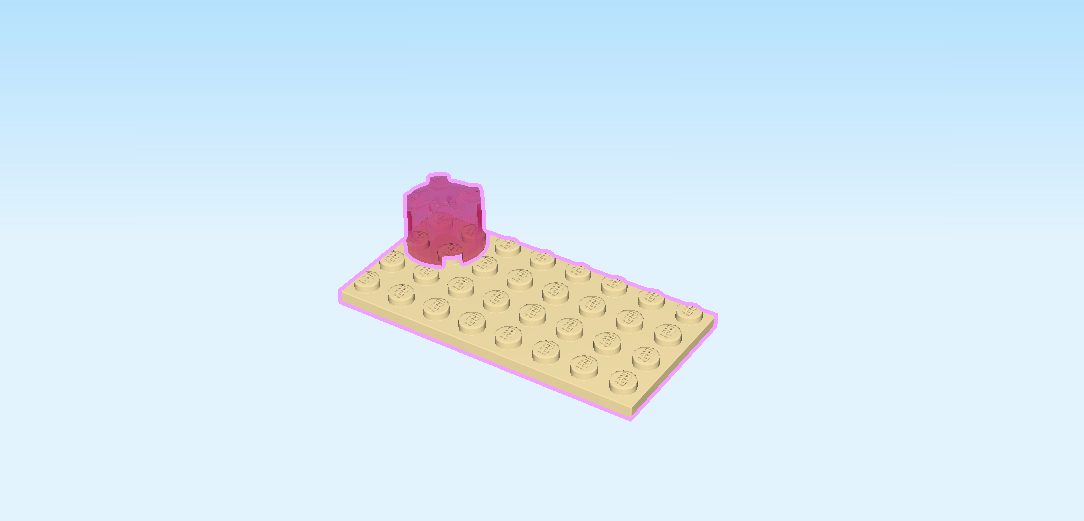
| Open bag number 3 and the small sub-bag in it. You can choose to have the bricks sorted by color again. This bag contains all bricks and pieces for the paradise bird and the unicorn. |
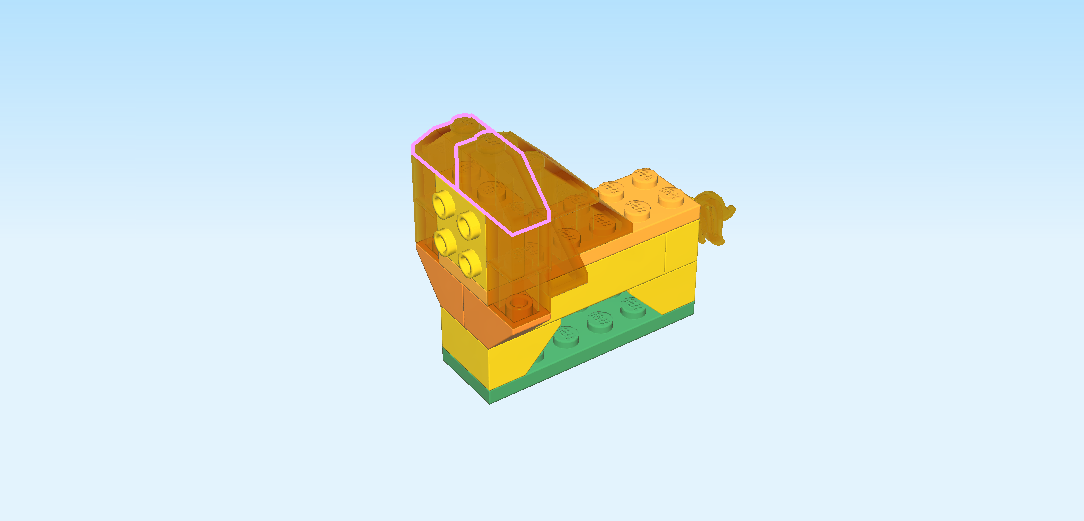
| Next, we will build the paradise bird. |
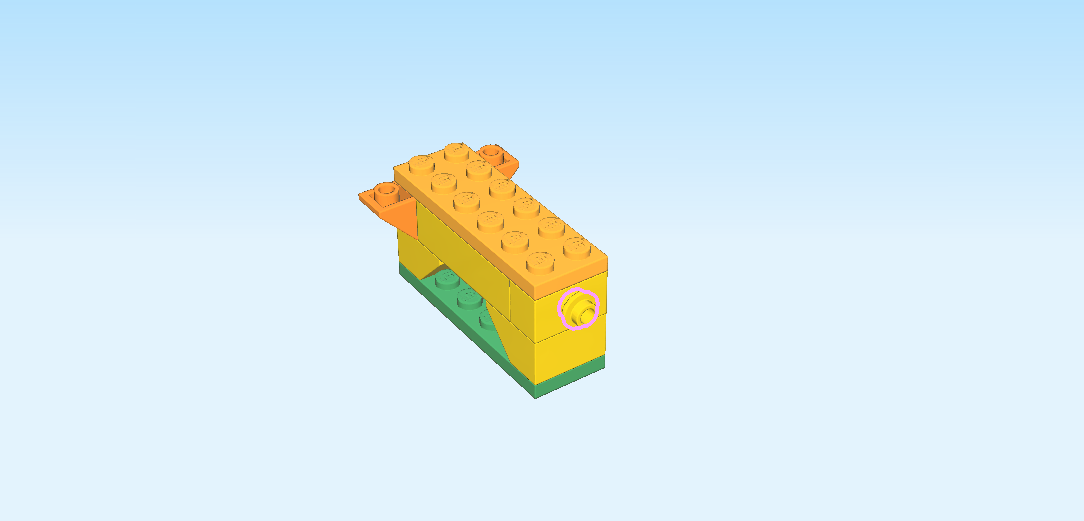
| The paradise bird likes green grass and pretty flowers. Its feathers are different shades of pink, the bouncy behind is transparent, and its orange feet are translucent as well. It almost looks like paradise bird is floating! The bird's beak is orange. |
| Collect the following 2 pieces: |
| 1 dark green wedge plate 4x4 with 45° cut-off corner, |
| and 1 dark green brick 1x1. |
| Put the wedge plate on the table. Turn it so that the pointed corner is in the right back. The cut off corner is to the front left. |
| Put the brick 1x1 into the back right corner. |
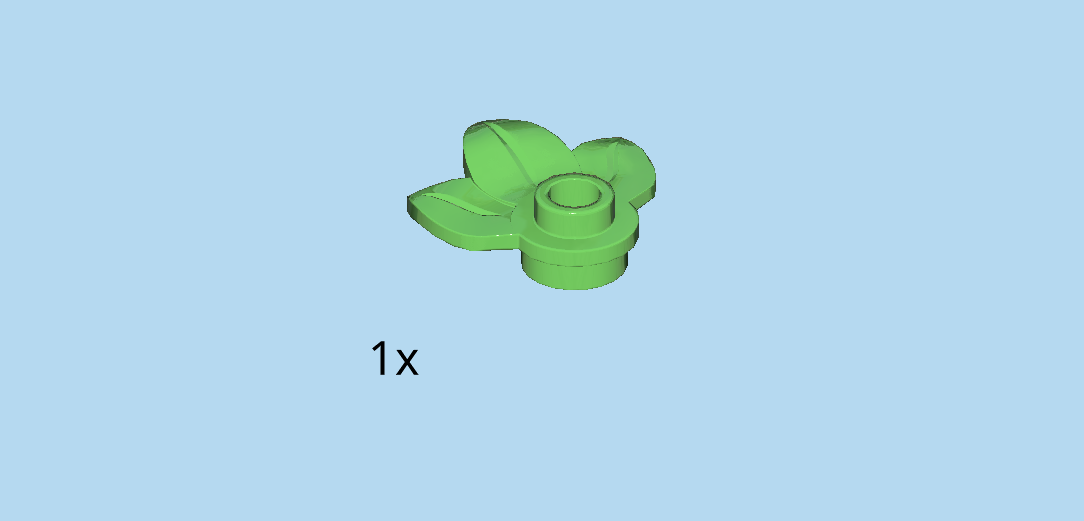
| Find 1 bright green plant with plate 1x1. |
| Put it on the frontmost knob, leaves pointing to the front. |
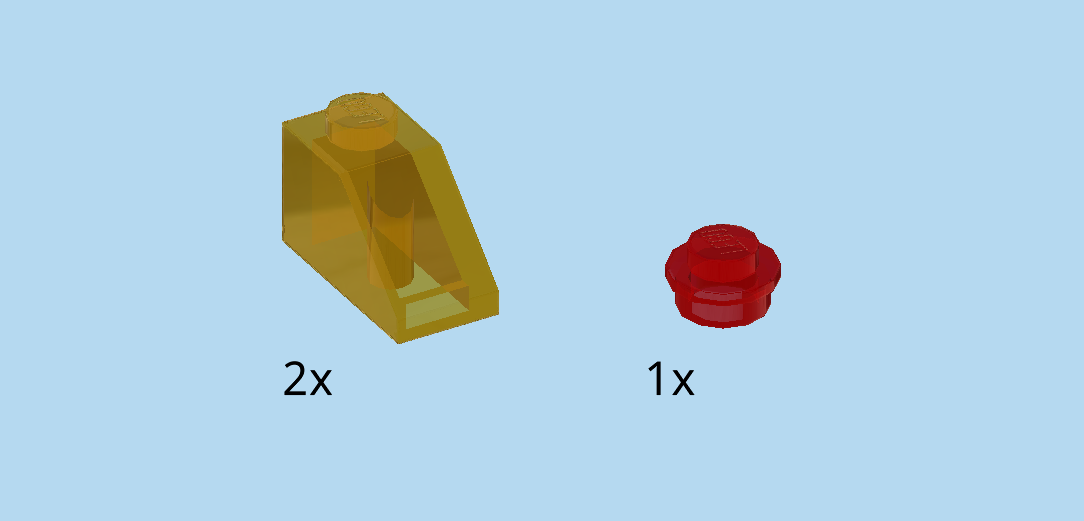
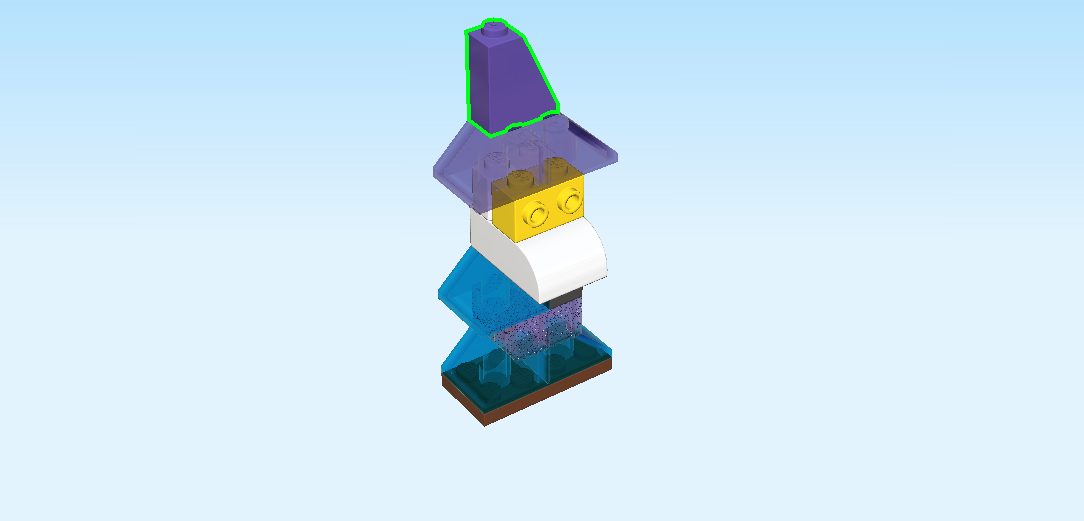
| Collect the following 3 pieces: |
| 1 transparent red round plate 1x1, |
| and 2 transparent bright orange roof tiles 1x2, 45°. |
| Put the round plate 1x1 on top of the previous piece. |
| Put 1 roof tile 1x2 horizontally on the backmost row in the middle. |
| Put the other roof tile 1x2 horizontally on the second row from the back, starting from the right edge. |
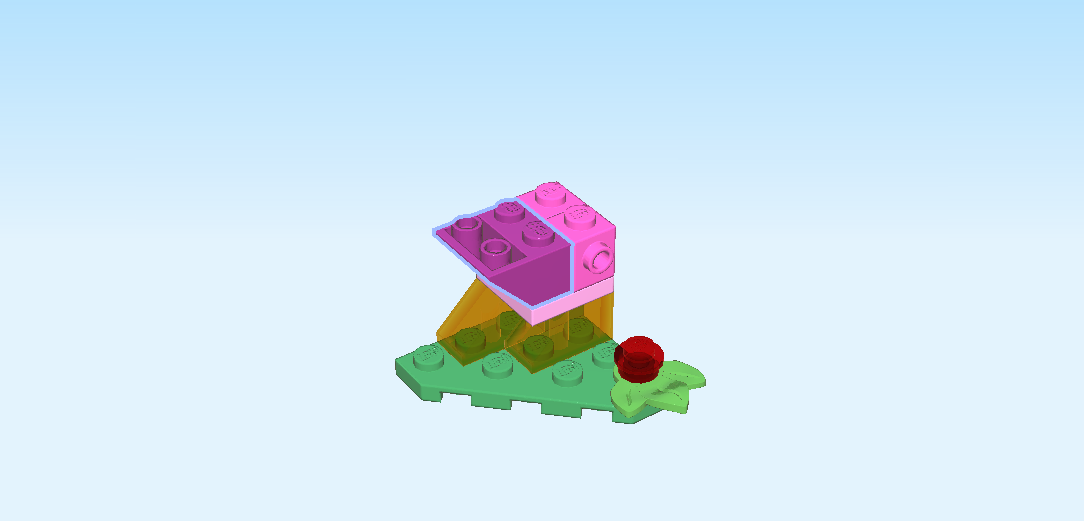
| Find 1 light purple plate 2x2. |
| Put it on top in the back right corner. |
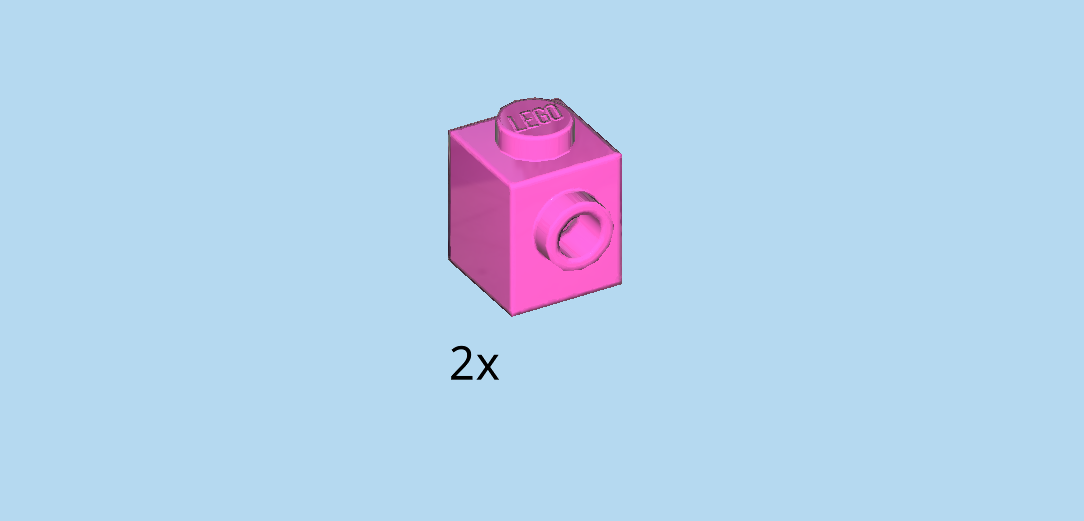
| Find 2 bright purple bricks 1x1 with side knob. |
| Put 1 on the backmost rightmost knob, side knob to the back. |
| Put the other one in front of the previous piece, side knob to the front. |
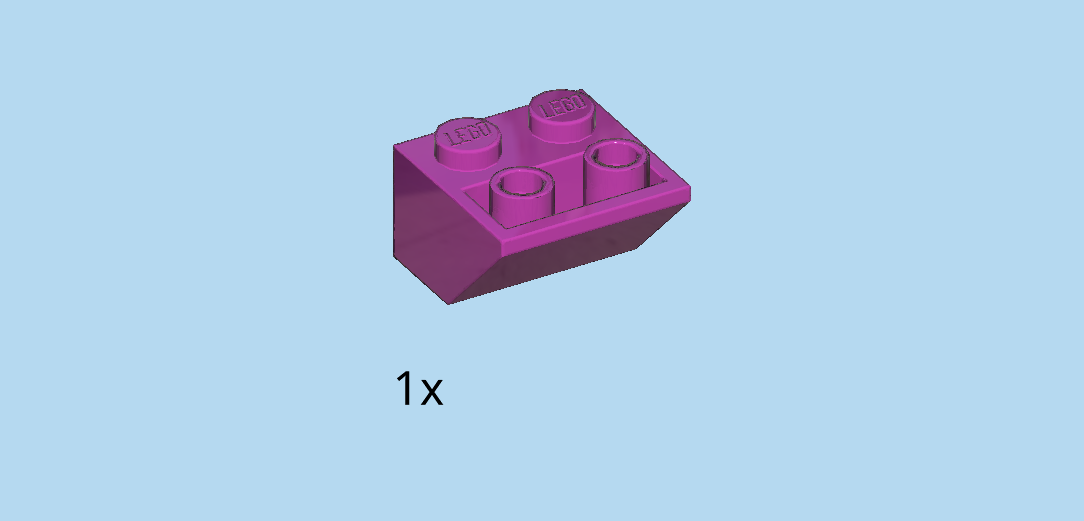
| Find 1 purple violet inverted roof tile 2x2, 45°. |
| Put it to the left of the two previous pieces, slope to the left. |
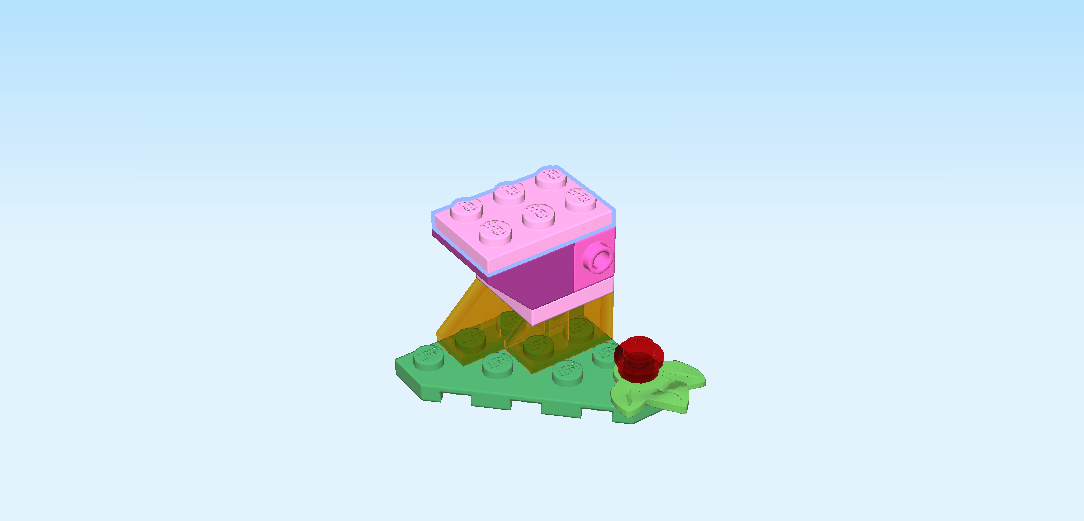
| Find 1 light purple plate 2x3. |
| Put it horizontally on top of the three previous pieces. |
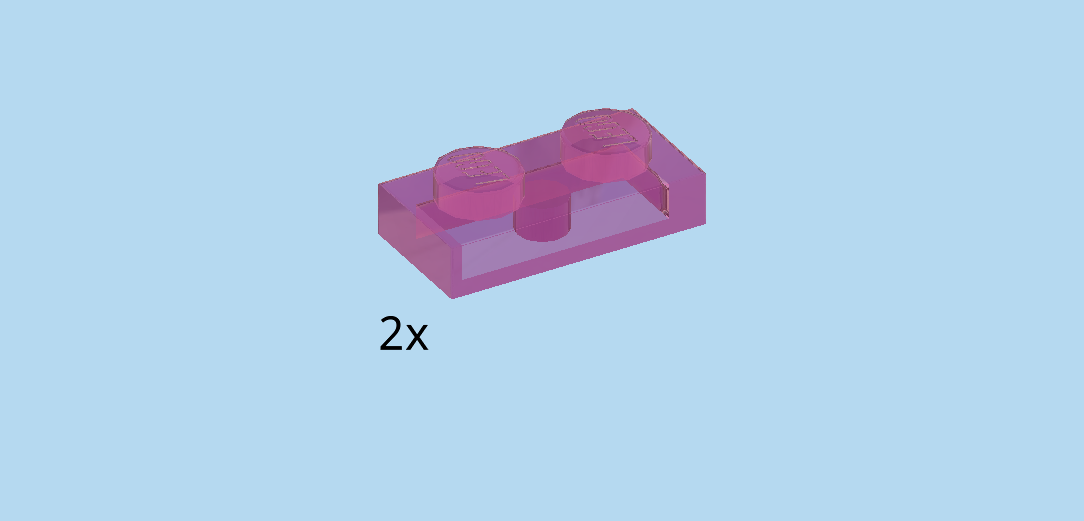
| Find 2 transparent raspberry red plates 1x2. |
| Put 1 upright horizontally on the side knob pointing to the front. This is the wing of the paradise bird: you can adjust its position as you like! |
| Put 1 upright horizontally on the side knob pointing to the back. This is the other wing! |
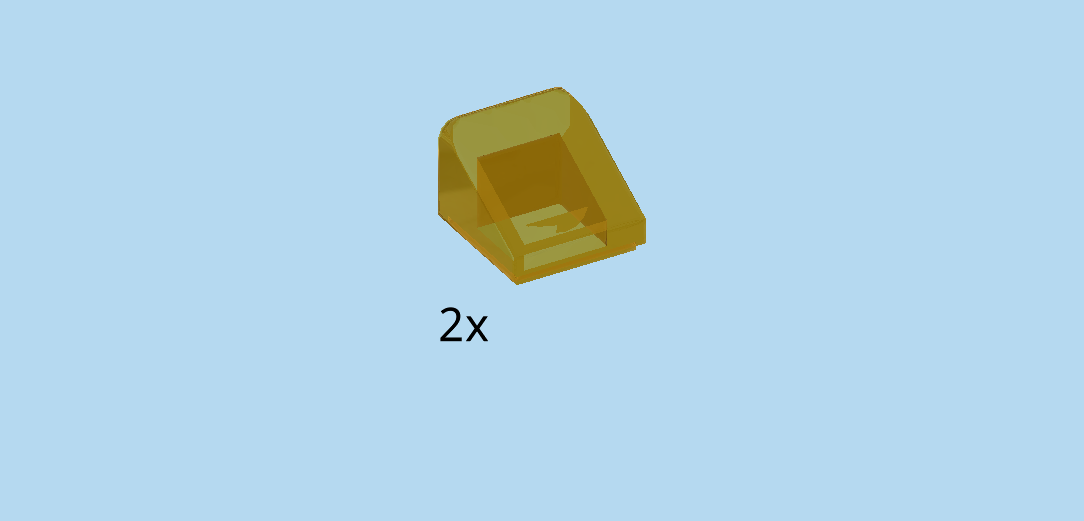
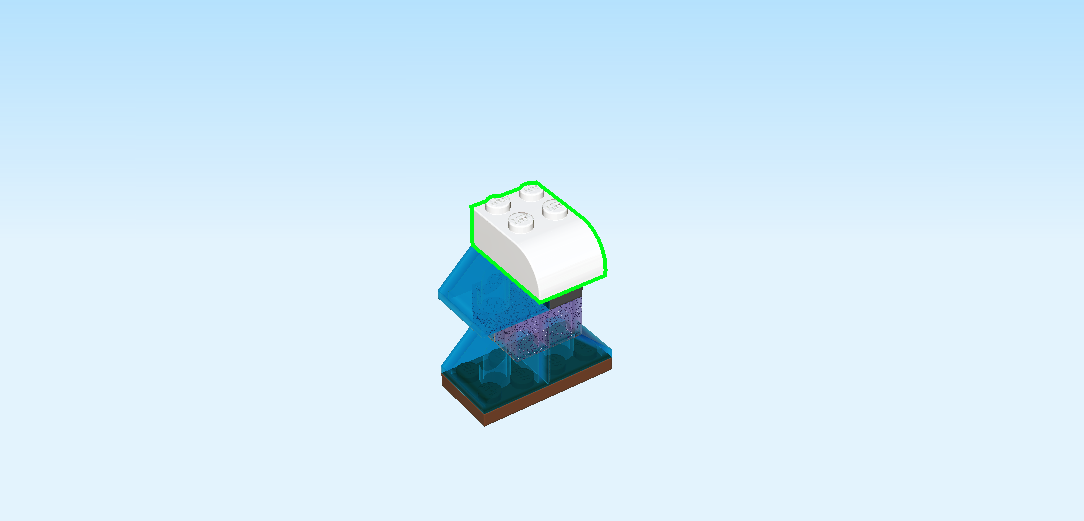
| Find 1 transparent curved sport front 2x2. |
| Put it on the rightmost column at the back, slope to the right, piece overhanging to the right. |
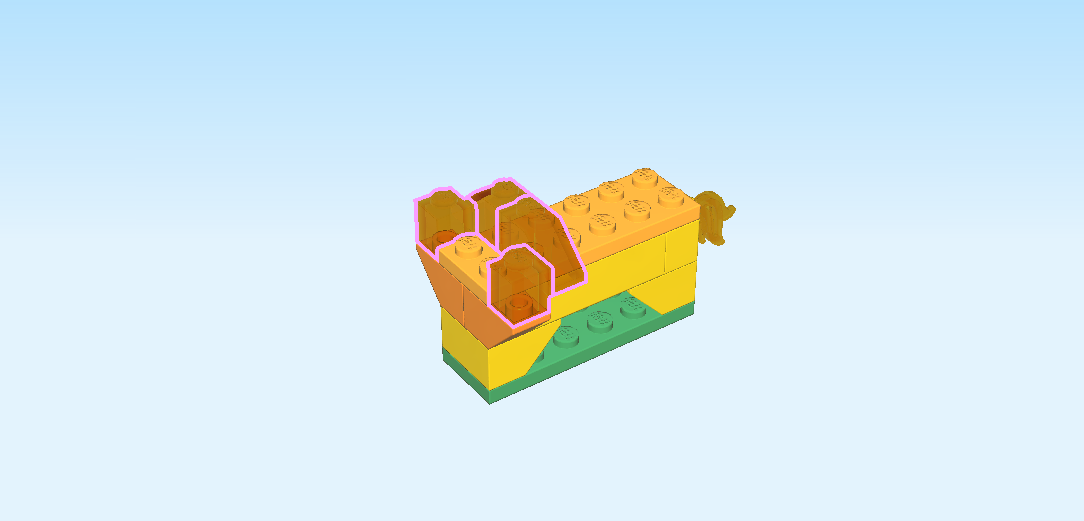
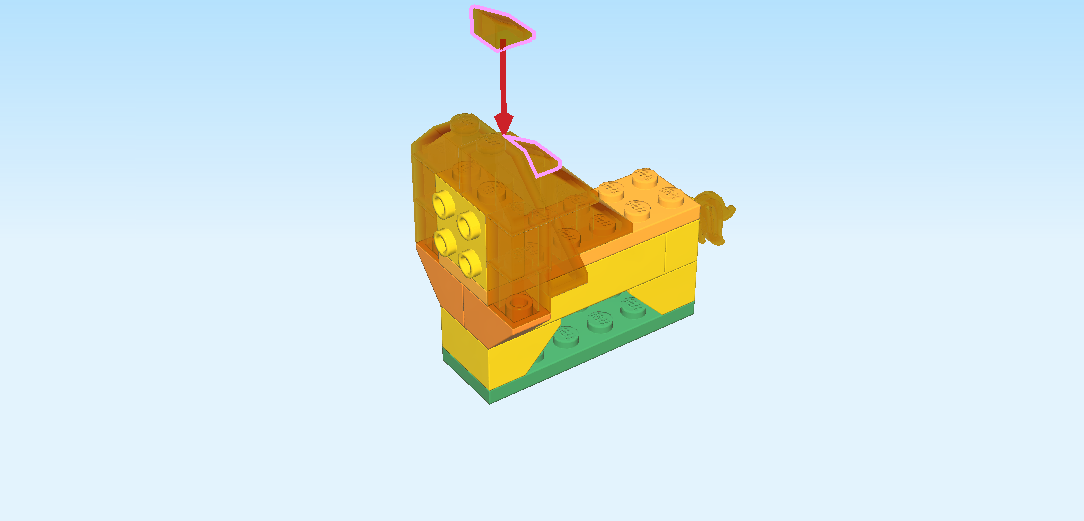
| Next, we build the head of the paradise bird. |
| Collect the following 3 pieces: |
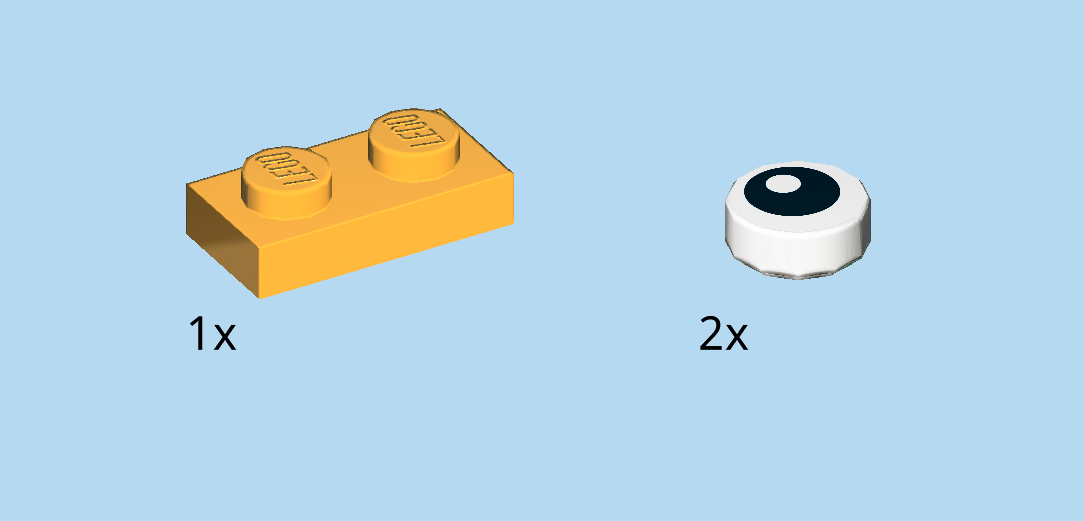
| 1 bright orange plate 2x2, |
| and 2 transparent bricks 1x1 with side knob and foot. |
| Put the plate 2x2 on the table. |
| Put 1 brick 1x1 on the back button of the right column, side button to the back. |
| Repeat symmetrically at the front. |
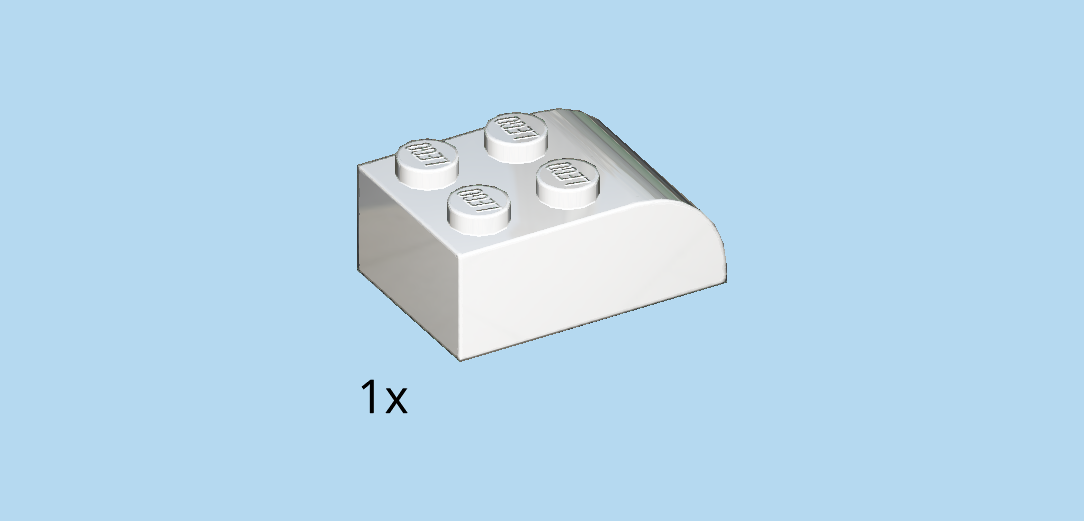
| Find 1 bright orange smooth roof tile 1x2x⅔. |
| Put it vertically on the left column, slope to the left. |
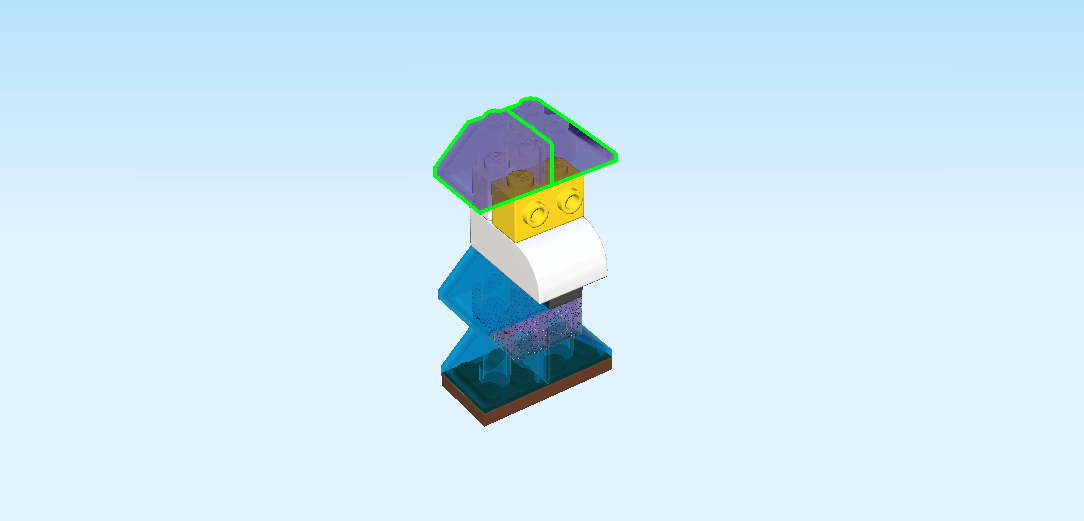
| Find 1 transparent raspberry red plate 1x2. |
| Put it vertically on the right column. |
| Find 2 white round tiles 1x1. |
| Put 1 upright on the side knob at the back. |
| Repeat symmetrically at the front. |
| The tiles are printed with eyes! |
| Find 2 transparent raspberry red smooth roof tiles 1x1x⅔. |
| Put 1 on the remaining knob at the back, slope to the back. |
| Repeat symmetrically at the front. |
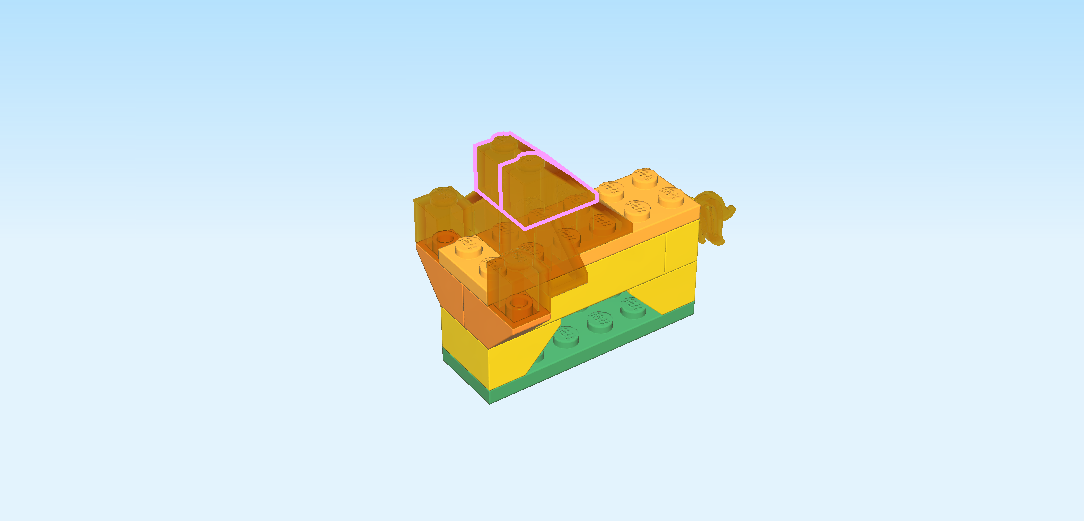
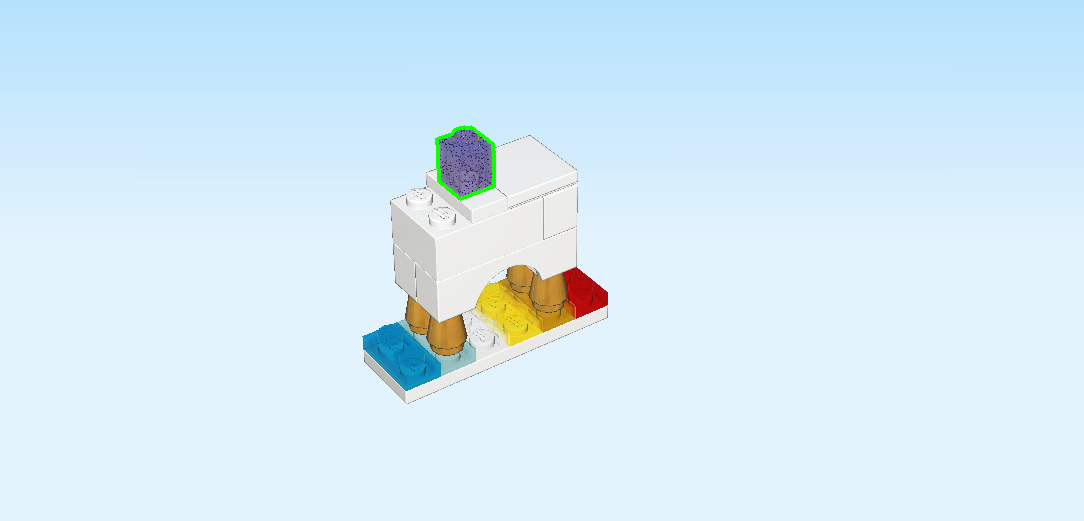
| The head of the paradise bird is finished! Mount it on the leftmost column of the high part. |
| The paradise bird is finished! Great job! He is ready to go play with his friends. |
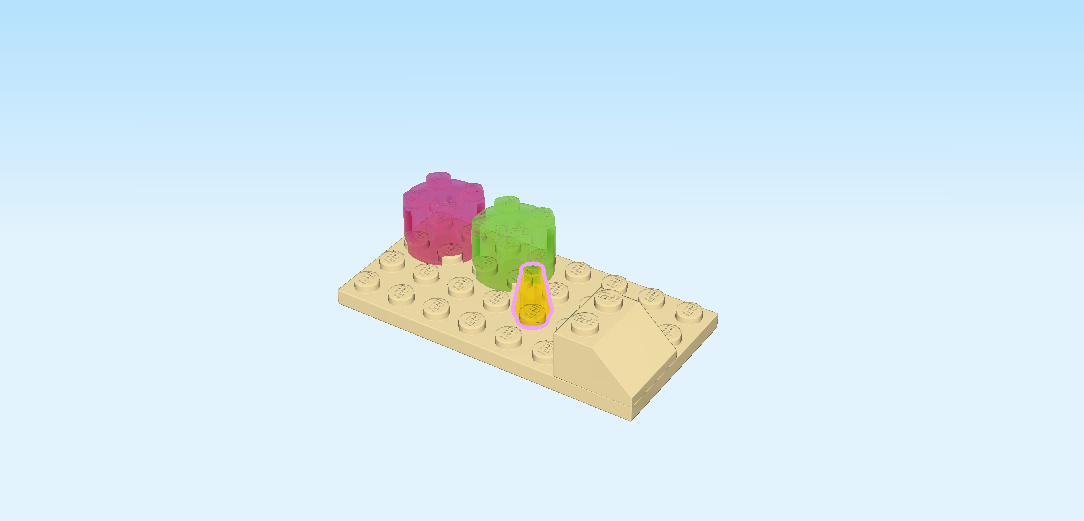
| Next, we will build the unicorn. |
| The friendly unicorn is white, but there is also translucent violet glitter in its skin. With its golden hooves it is galloping across the translucent rainbow, and what would a unicorn be without its beautiful horn? It's golden too! |
| Collect the following 2 pieces: |
| 1 white plate 2x6, |
| and 1 transparent red plate 1x2. |
| Put the plate 2x6 horizontally on the table. |
| Put the plate 1x2 vertically on the rightmost column. |
| Collect the following 5 pieces: |
| 1 transparent bright orange plate 1x2, |
| 1 transparent yellow plate 1x2, |
| 1 transparent light blue plate 1x2, |
| 1 transparent blue plate 1x2, |
| and 1 transparent plate 1x2. |
| We will tell you exactly in which order the different colors are used for our unicorn. But of course you can also choose to make up your very own order! |
| Put the orange plate to the left of the previous piece. |
| Put the yellow plate to the left. |
| Put the transparent plate to the left. |
| Put the light blue plate to the left. |
| Finally, put the darker blue plate on the leftmost column. |
| Find 4 warm gold nose cones 1x1. |
| Put 2 on the second row from the left. |
| Put the other 2 on the second row from the right. |
| These will be the four hooves of the unicorn! |
| Find 2 white bricks 1x4 with inside arch. |
| Put 1 horizontally on the back row in the middle. This means it will rest on two of the nose cones. |
| Repeat symmetrically on the front row. |
| Collect the following 2 pieces: |
| 1 white brick 1x2 with technic hole, |
| and 1 white brick 2x3. |
| Put the brick 1x2 vertically on the rightmost column of the two previous pieces. |
| Put the brick 2x3 horizontally to the left. |
| Collect the following 2 pieces: |
| 1 white plate 1x2 with 1 knob, |
| and 1 white flat tile 2x2. |
| Put the flat tile 2x2 on the four rightmost knobs of the high part. |
| Put the plate 1x2 vertically to the left. |
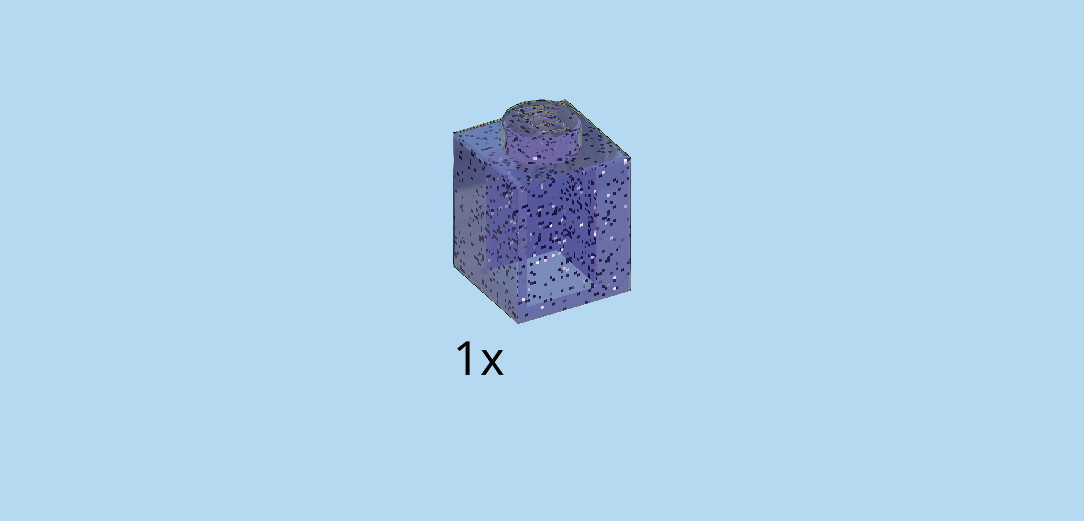
| Find 1 transparent bluish violet glitter brick 1x1. |
| Put it on the knob of the previous piece. |
| Find 1 bright blue connector peg 1m with knob. |
| Insert the connector peg into the side hole on the right side. |
| Collect the following 2 pieces: |
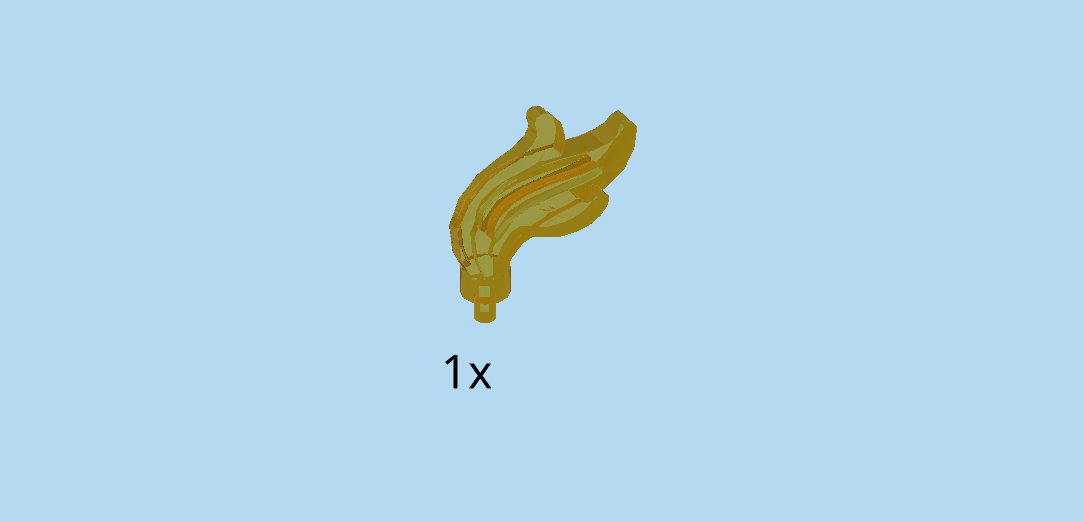
| 1 transparent bright orange feather, |
| and 1 transparent bright orange round plate 1x1 with through-hole. |
| Put the round plate 1x1 upright on the previous piece. |
| Insert the small shaft of the feather into the knob of the previous piece. This is the tail of the unicorn! |
| Find 1 transparent light blue smooth roof tile 1x1x⅔. |
| Put it on the single brick 1x1 at the top of the structure, slope to the right. |
| Next, we will build the unicorn head. |
| Collect the following 2 pieces: |
| 1 white brick 1x2x1⅔ with 4 side knobs, |
| and 1 white palisade brick 1x2. |
| Put the brick 1x2x1⅔ vertically on the table, side knobs to the left. |
| Put the palisade brick 1x2 upright horizontally on the two bottom side knobs. |
| Find 2 white round tiles 1x1. |
| Put them upright on the two upper side knobs. |
| They are printed with closed eyelids and long lashes. If they are turned with the lashes pointing down, it looks like the unicorn is sleeping. But if they are turned with the lashes pointing up, the unicorn is smiling! |
| Find 1 white plate 1x2 with 1 knob. |
| Put it vertically on top of the head. |
| Collect the following 2 pieces: |
| 1 transparent bluish violet glitter nose cone 1x1, |
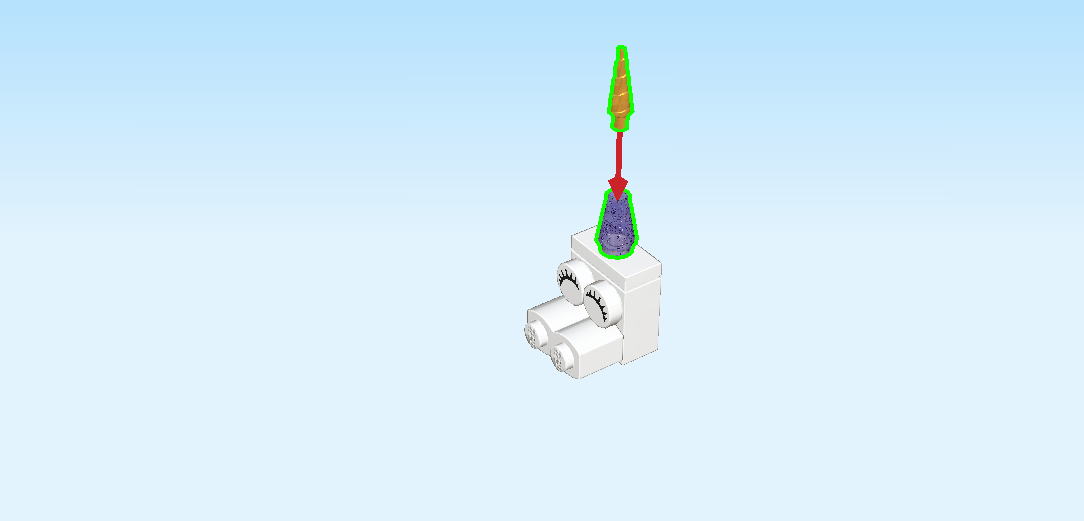
| and 1 warm gold conical horn with small shaft. |
| Put the nose cone 1x1 on the knob of the previous piece. |
| Insert the small shaft of the horn into the previous piece. |
| The unicorn head is finished! Now put it vertically on the leftmost column of the high part. |
| The unicorn is finished! Excellent job! The happy unicorn is ready to roam the enchanted forests! The sleepy unicorn could probably do with a nice cup of tea. Your choice! |
| Open bag number 4. You can choose to have the bricks sorted by color again. This bag contains all bricks and pieces for the potions table, Merlin the wizard and the underwater scene with corals and clownfish. |
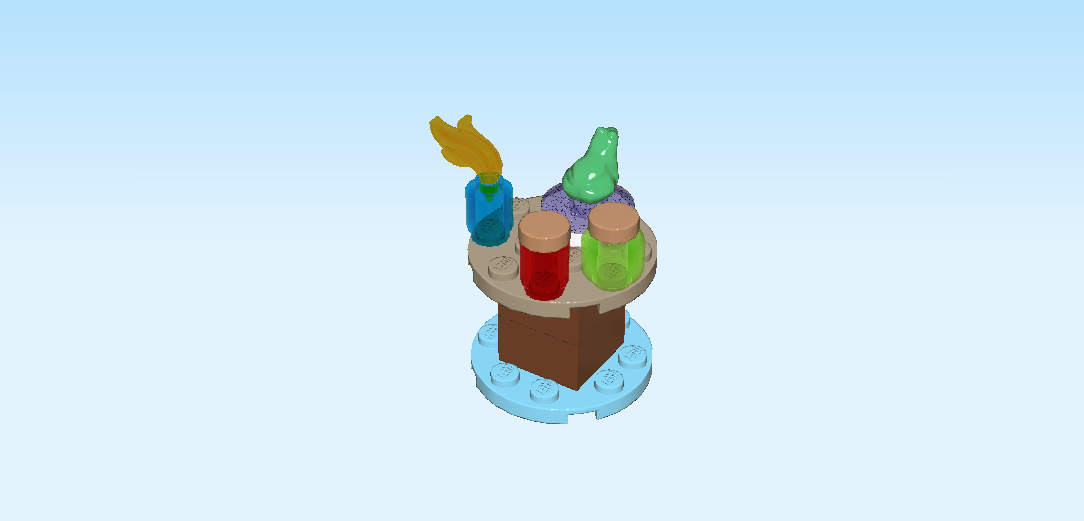
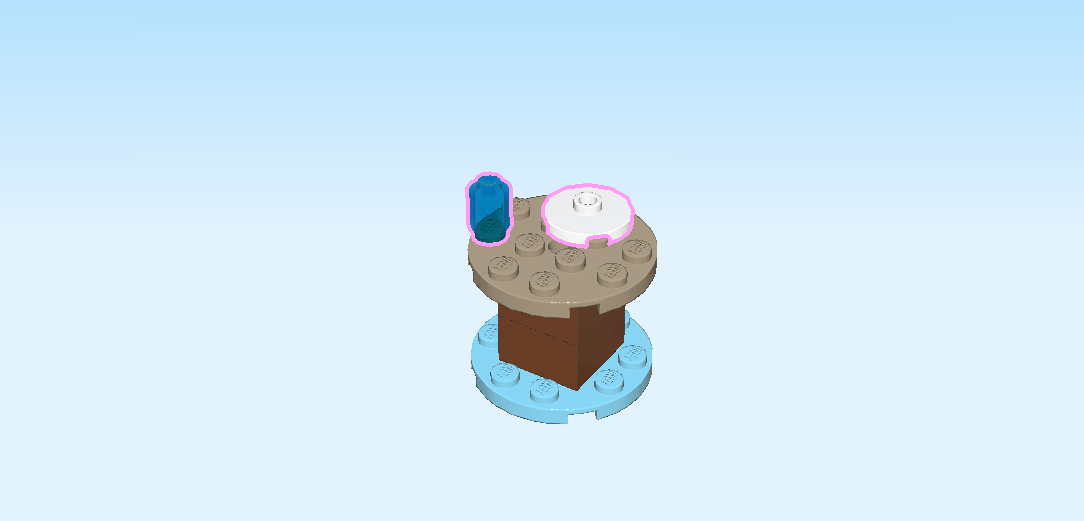
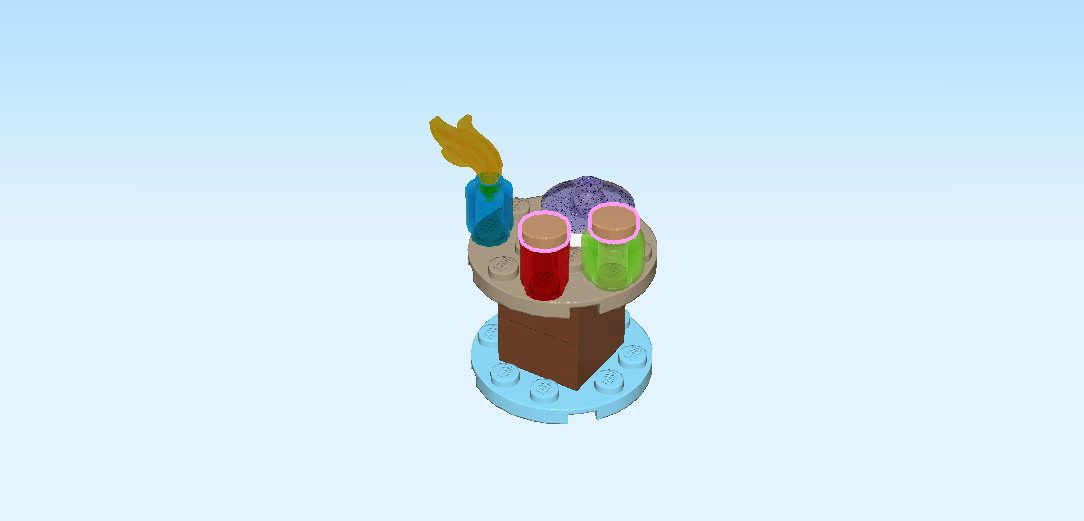
| Next, we will build the potions table. |
| It's a small, inconspicuous brown table, but the colorful see-through dishes and flasks that are set up on it are mighty powerful! |
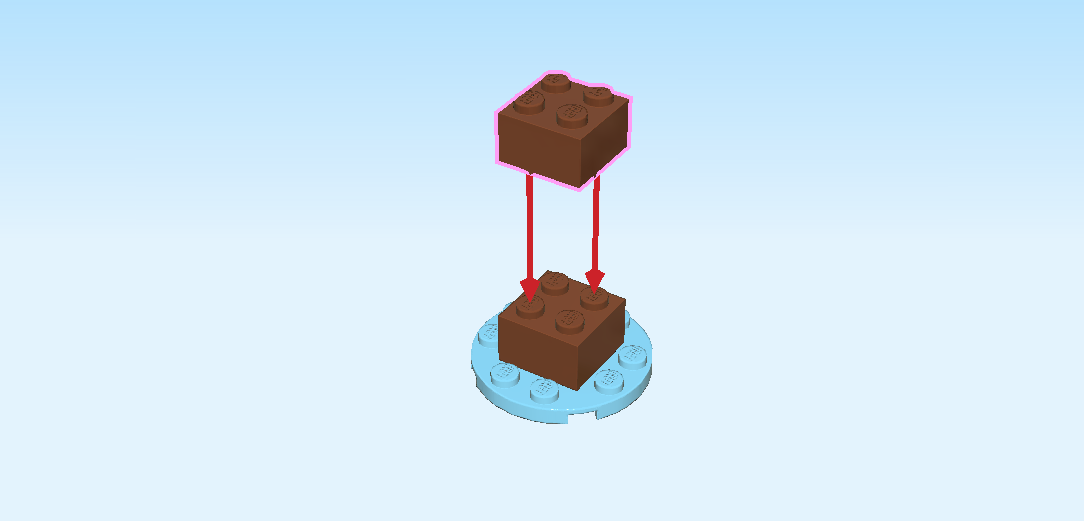
| Collect the following 2 pieces: |
| 1 medium azure blue round plate 4x4 with middle hole, |
| and 1 reddish brown brick 2x2. |
| Put the round plate 4x4 on the table. |
| Turn it so that the knobs form straight rows and columns in front of you. |
| Put the brick 2x2 on top in the middle. |
| Find 1 reddish brown brick 2x2. |
| Put it on top of the previous piece. |
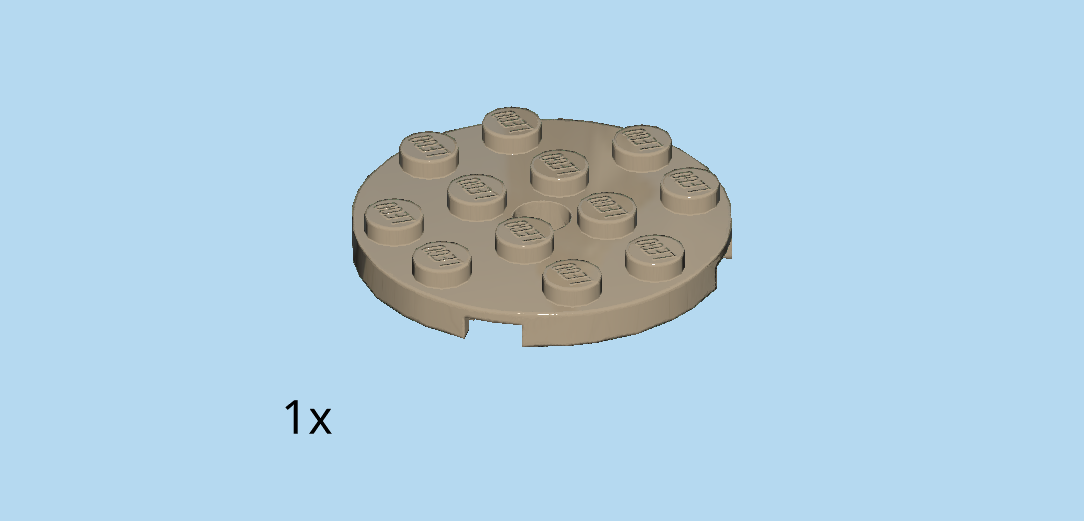
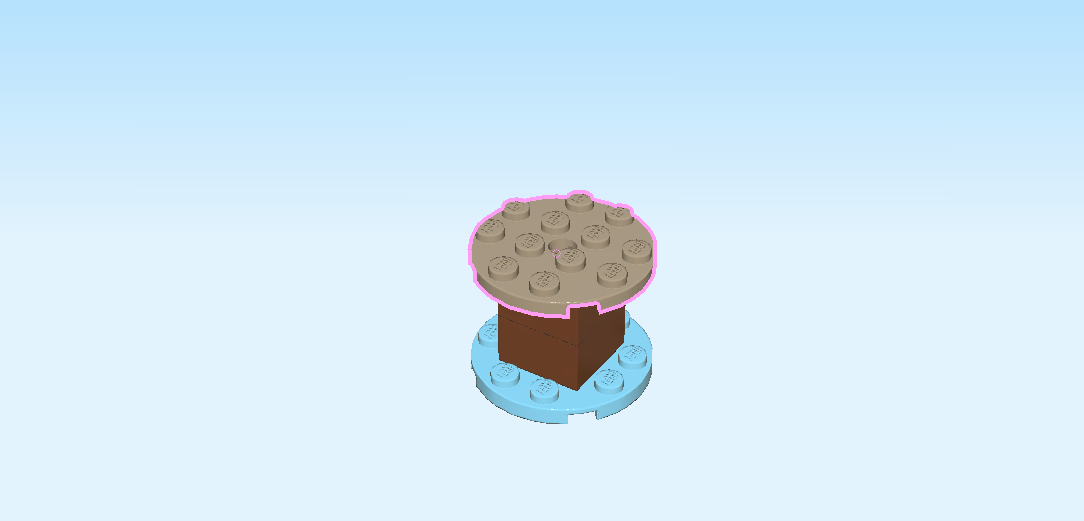
| Find 1 mud grey round plate 4x4 with middle hole. |
| Put it on top in the middle. |
| Now it's time to set the table. We will give you suggestions where to put what, but you can also choose your own setup. |
| Collect the following 2 pieces: |
| 1 white round plate 2x2 with 1 knob, |
| and 1 transparent blue round brick 1x1. |
| Put the round plate 2x2 on the four back knobs. |
| Put the round brick 1x1 on the leftmost knob at the front. |
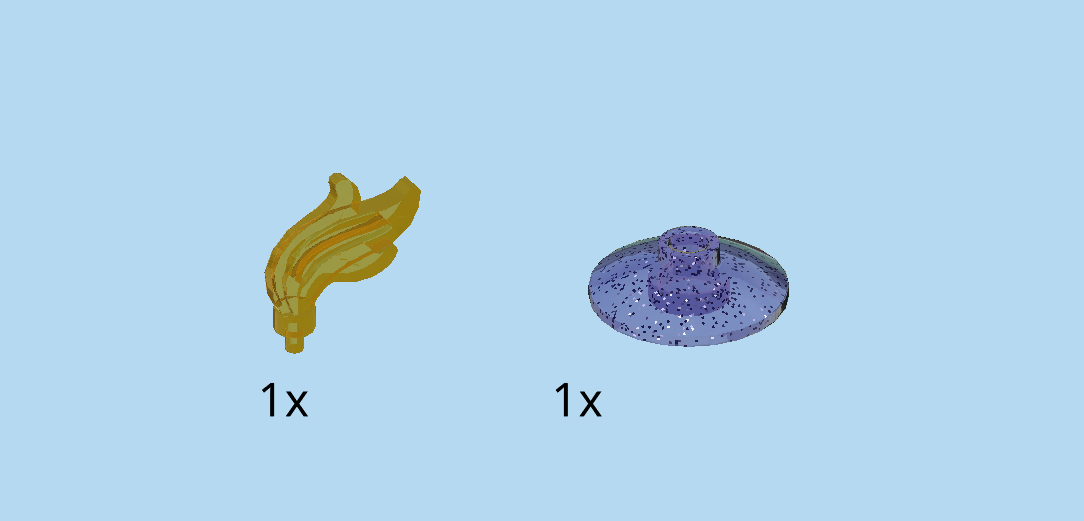
| Collect the following 2 pieces: |
| 1 transparent bluish violet glitter disk 2x2 with 1 knob, |
| and 1 transparent bright orange feather. |
| Put the disk 2x2 on top of the round plate with 1 knob. |
| Insert the small shaft of the feather into the round brick 1x1. |
| Collect the following 2 pieces: |
| 1 transparent bright green head (this will actually serve as another potions flask), |
| and 1 transparent red round brick 1x1. |
| Put the head on the rightmost knob at the front. |
| Put the round brick 1x1 on the right knob of the front row. |
| Find 2 medium nougat brown round tiles 1x1. |
| Put them on top of the two previous pieces. |
| Find 1 dark green frog. |
| Put it on the knob of the disk 2x2. |
| The potions table is finished! Well done! There are already some magical things brewing. Quick, let's build Merlin so that he can start making powerful potions! |
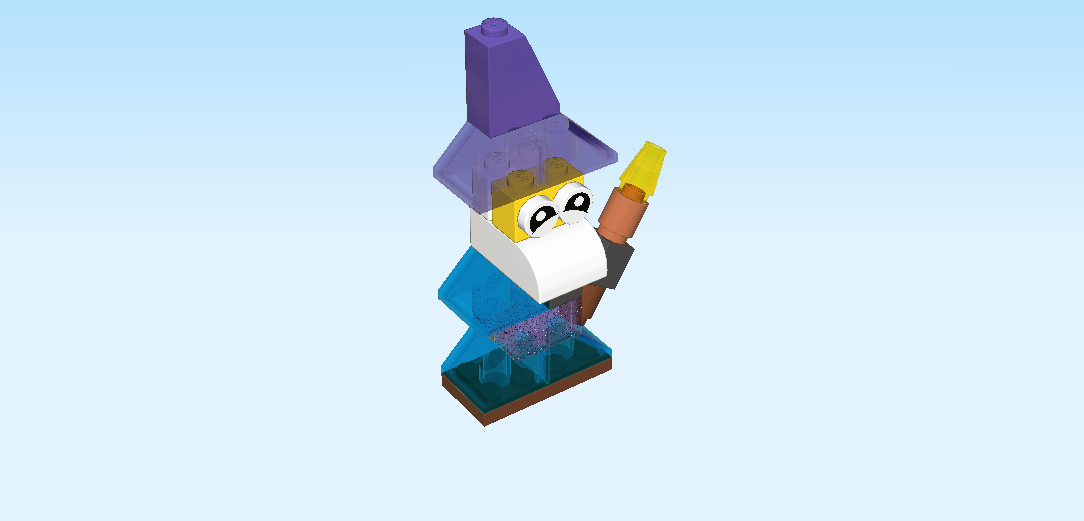
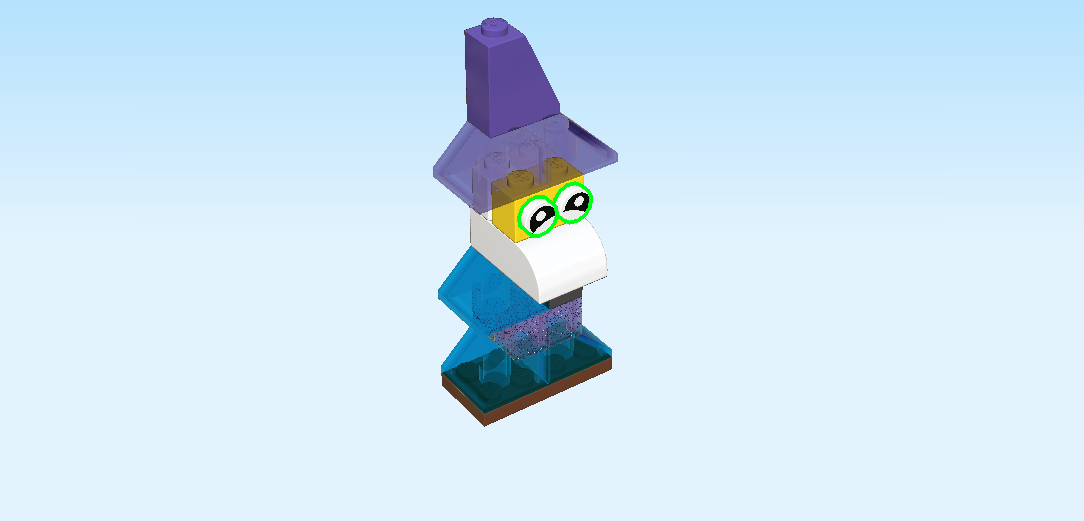
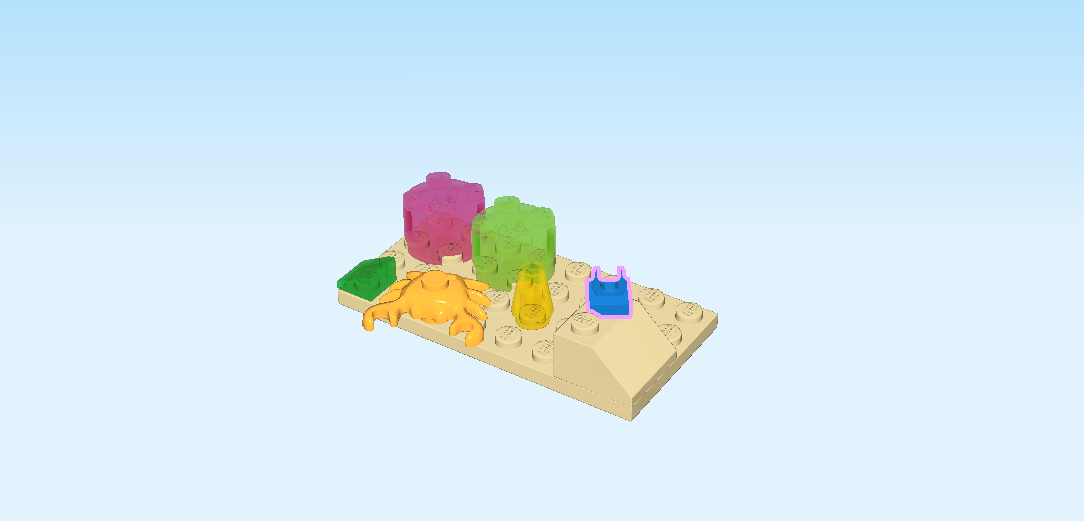
| Now, we will build Merlin the wizard. |
| Merlin is wearing a transparent blue and glittery violet coat and a translucent violet hat. He has a bushy white beard and a powerful wand. |
| Collect the following 2 pieces: |
| 1 reddish brown plate 2x4, |
| and 1 transparent blue roof tile 2x2, 45°. |
| Put the plate 2x4 horizontally on the table. |
| Put the roof tile 2x2 on the four right knobs, slope to the right. |
| Find 1 transparent blue roof tile 2x2, 45°. |
| Put it on the four left knobs, slope to the left. |
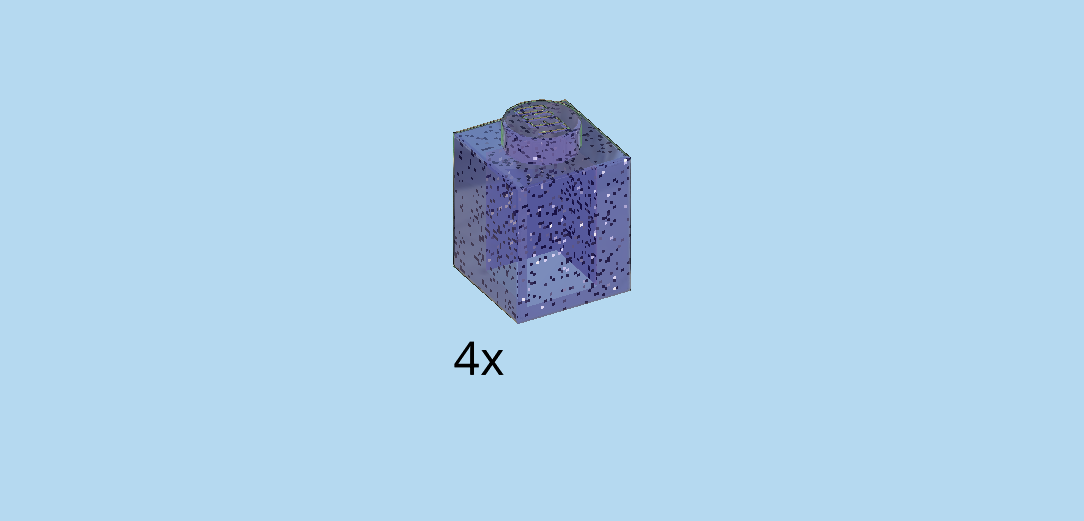
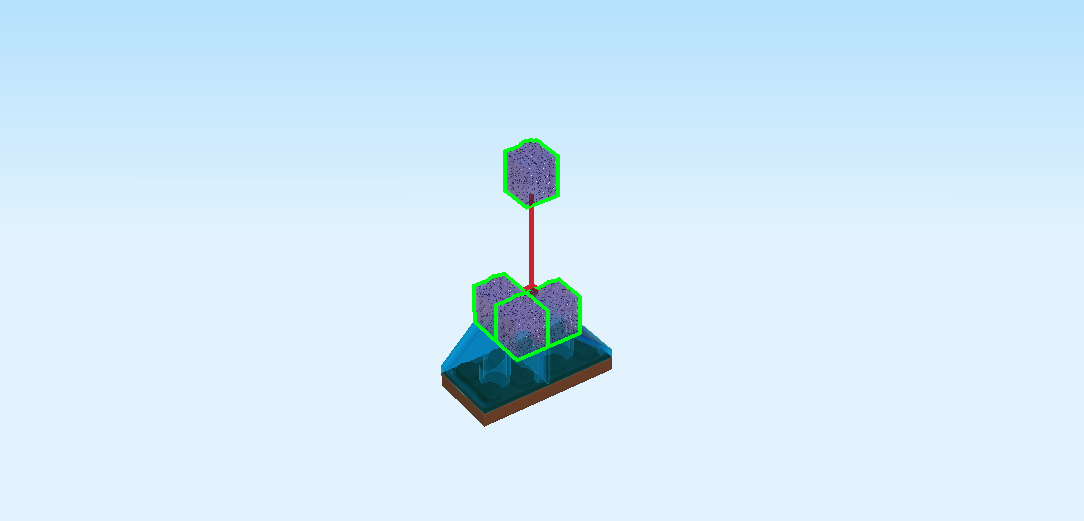
| Find 4 transparent bluish violet glitter bricks 1x1. |
| Put them on the 4 top knobs. |
| Collect the following 2 pieces: |
| 1 black brick 1x2 with shaft on long side, |
| and 1 transparent blue roof tile 2x2, 45°. |
| Put the brick 1x2 vertically on the right column, shaft to the right. |
| Put the roof tile 2x2 on the left column, overhanging to the left, slope to the left. |
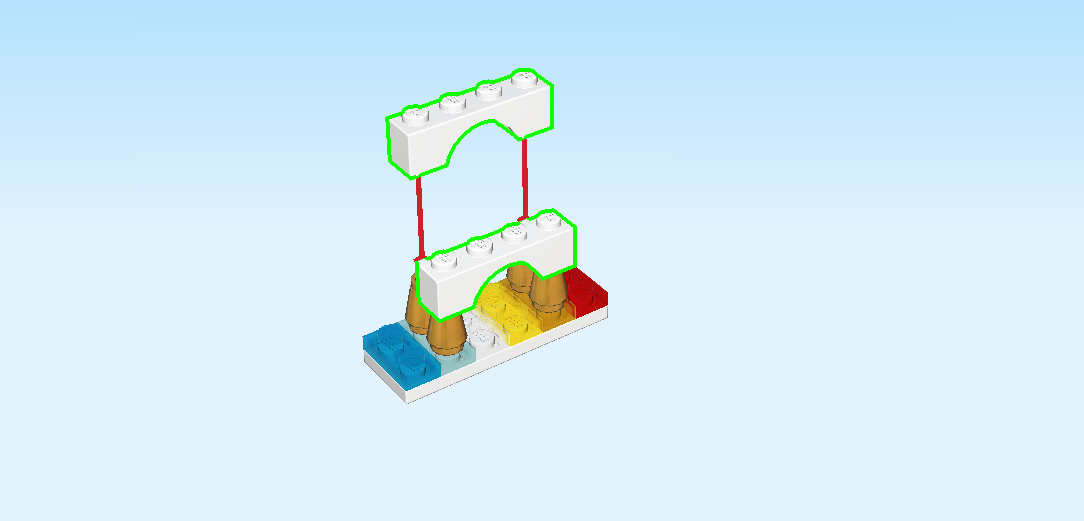
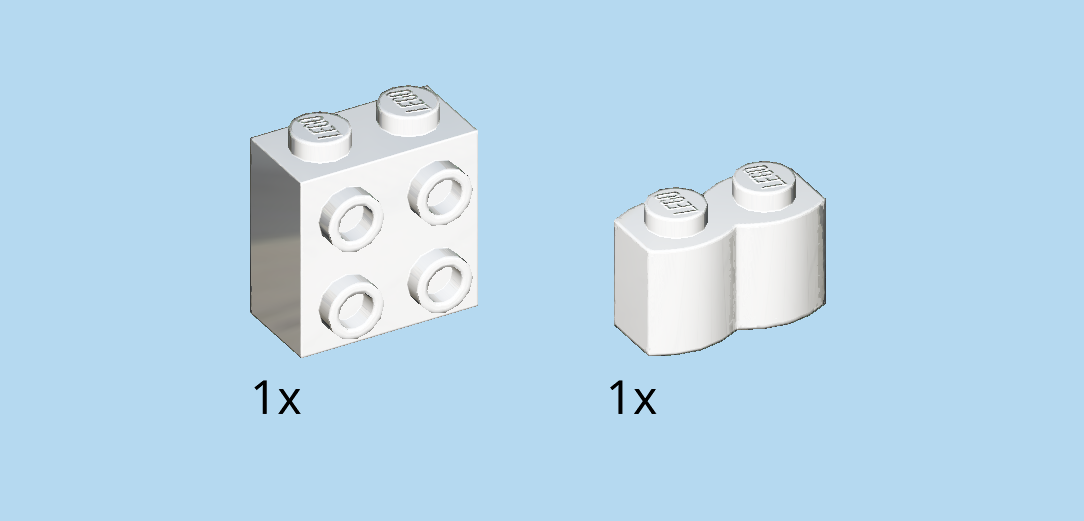
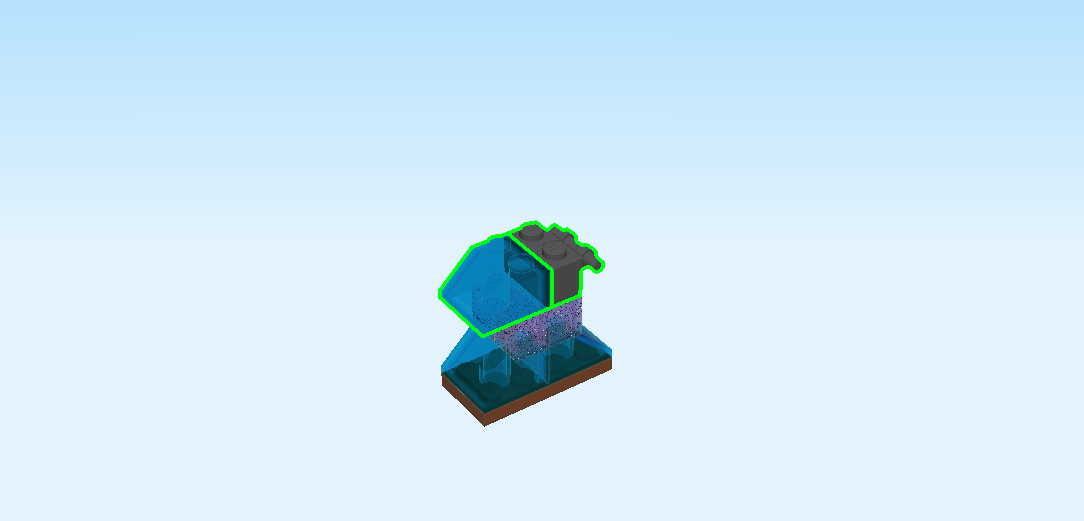
| Find 1 white brick 2x3 with arch and 4 knobs. |
| Put it vertically on the four top knobs, arch overhanging to the front. |
| Collect the following 2 pieces: |
| 1 white palisade brick 1x2, |
| and 1 bright yellow brick 1x2 with 2 side knobs. |
| Put the palisade brick 1x2 horizontally on the back row. |
| Put the brick 1x2 horizontally on the front row, side knobs to the front. |
| Find 2 transparent bright bluish violet roof tiles 2x2, 45°. |
| Put 1 on the right column, overhanging to the right, slope to the right. |
| Repeat symmetrically on the left. |
| Find 1 medium lilac roof tile 1x2x2, 65°. |
| Put it horizontally on the back row, slope to the right. |
| Find 2 white round tiles 1x1. |
| Put them on the two side knobs pointing to the front. |
| They are printed with winking eyes. |
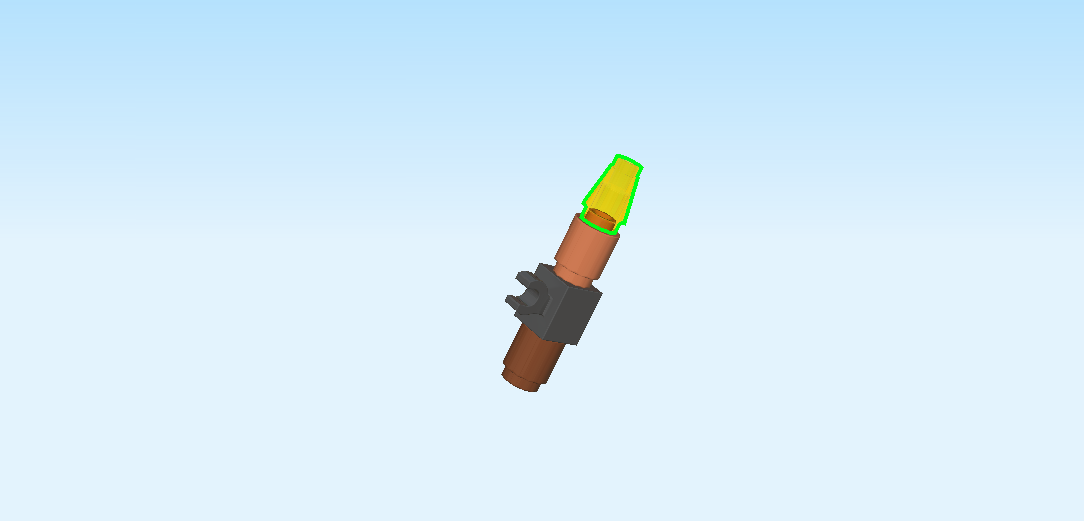
| Now, we will build Merlin's wand. |
| Collect the following 2 pieces: |
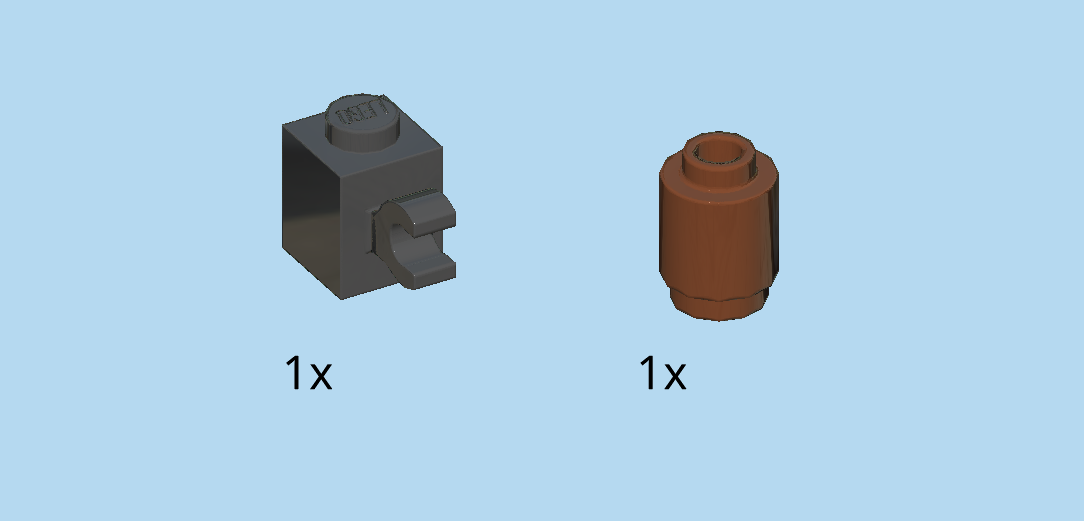
| 1 black brick 1x1 with vertical clasp, |
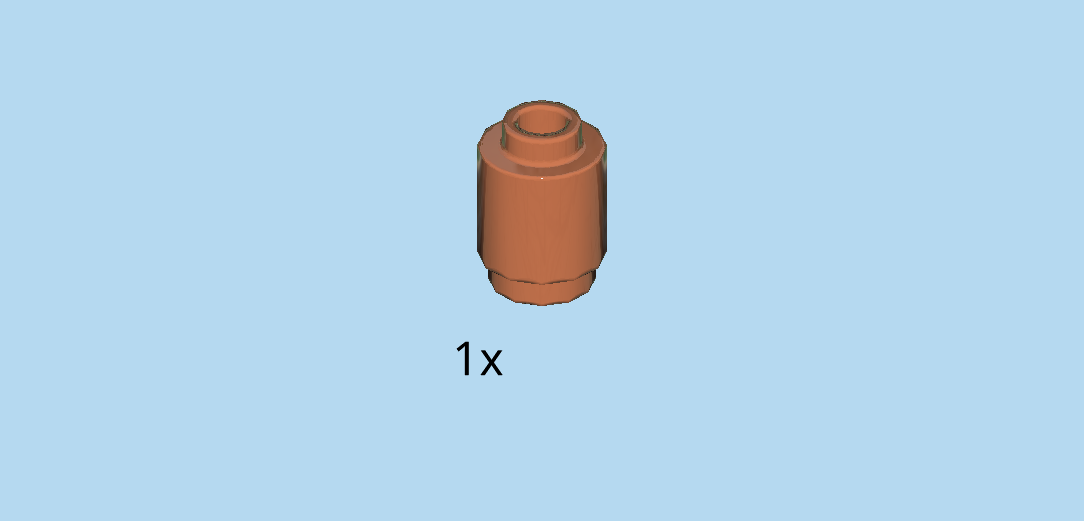
| and 1 reddish brown round brick 1x1. |
| Put the round brick 1x1 on the table. |
| Put the brick with clasp on top. |
| Find 1 dark orange round brick 1x1. |
| Put it on top. |
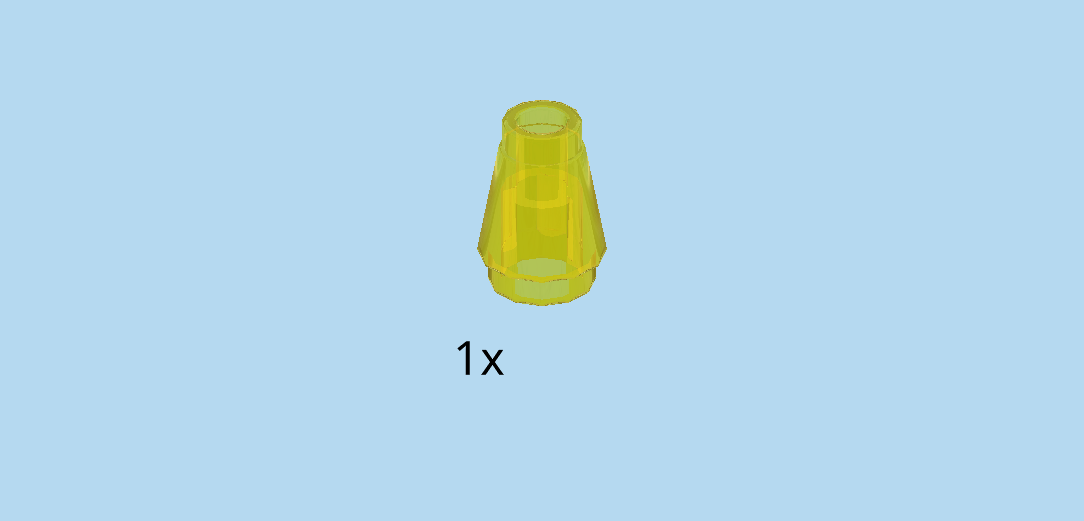
| Find 1 transparent yellow nose cone 1x1. |
| Put it on top. |
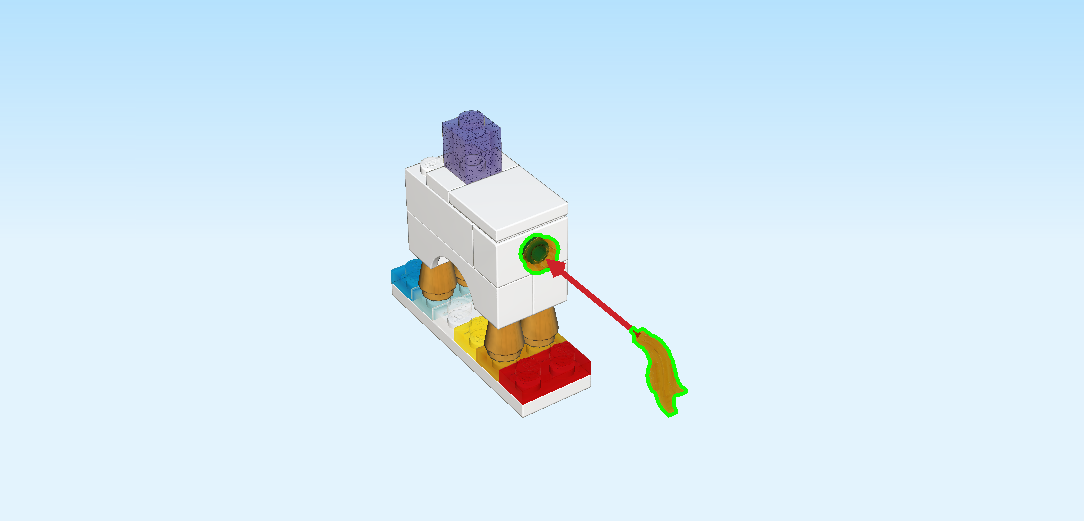
| Merlin's wand is finished! Snap its clasp on the shaft on the right side of the structure. |
| Merlin the wizard is finished! Well done! Which potions will he concoct for you? |
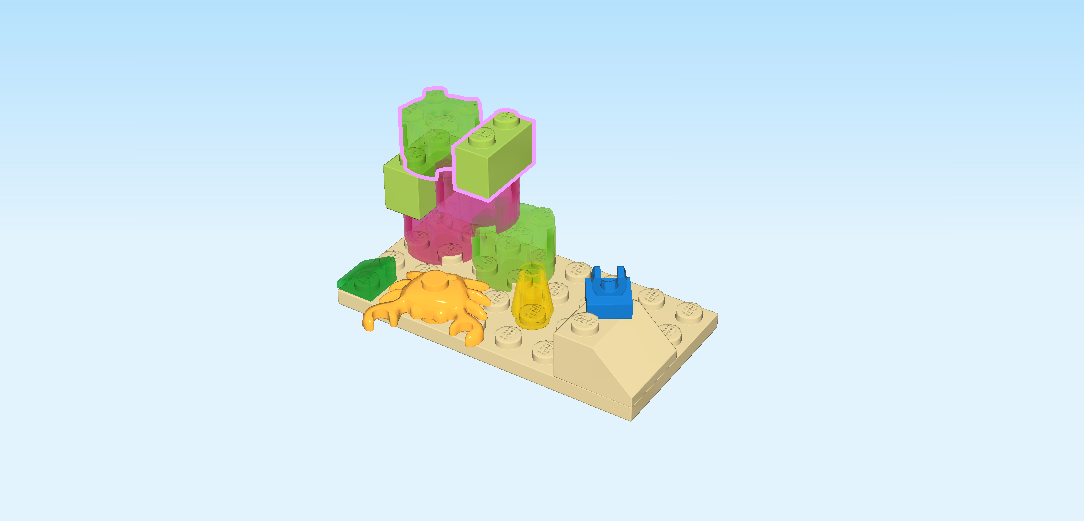
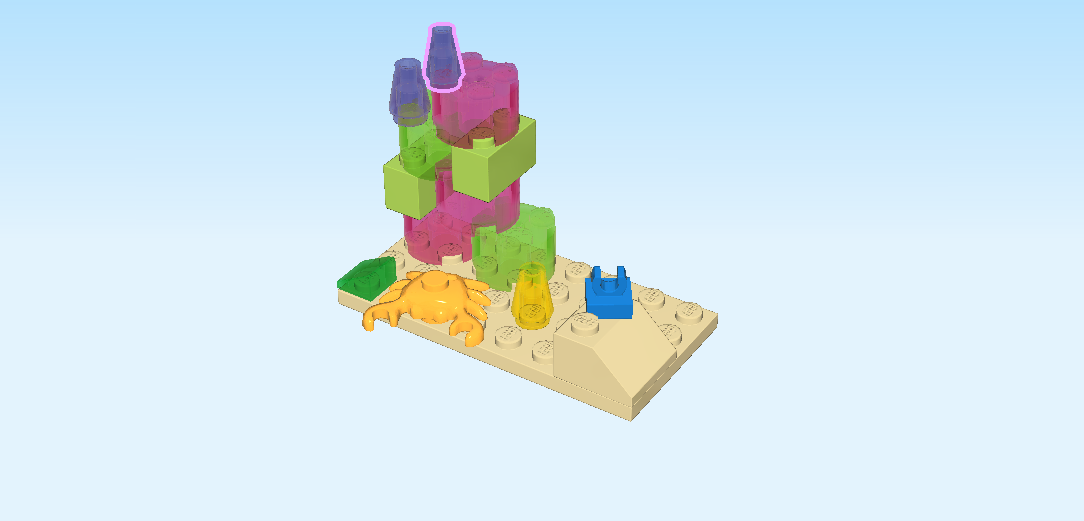
| Next up, we will build the underwater scene with corals and clownfish. |
| The colorful corals in different shapes and forms are the perfect home for our little translucent clownfish and his friend, the crab. |
| Collect the following 2 pieces: |
| 1 pale ocher yellow plate 4x8, |
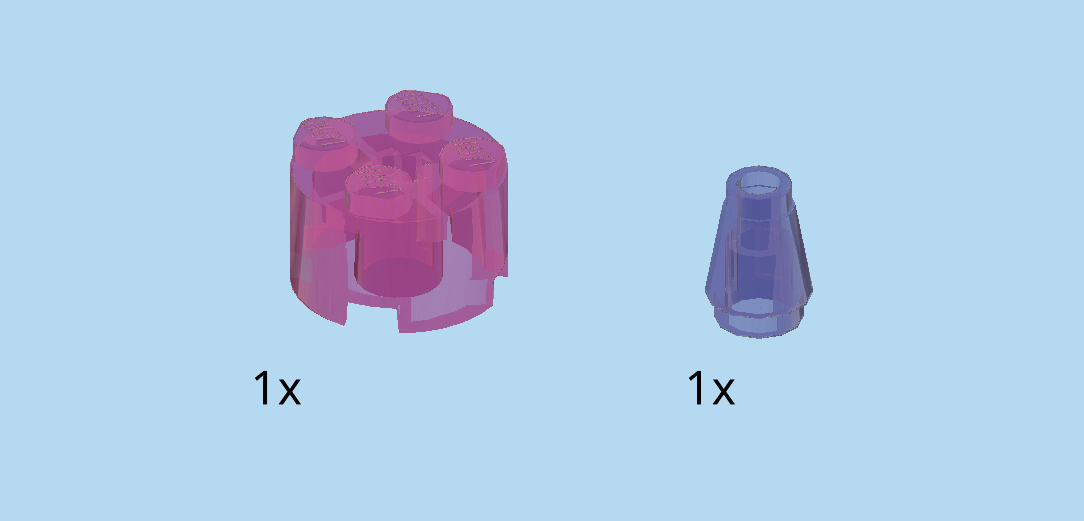
| and 1 transparent raspberry red round brick 2x2 with top cross hole. |
| Put the plate 4x8 horizontally on the table. |
| Put the round brick 2x2 in the left back corner. |
| Collect the following 2 pieces: |
| 1 transparent bright green round brick 2x2 with top cross hole, |
| and 1 pale ocher yellow roof tile 2x2, 45°. |
| Put the round brick 2x2 to the right of the previous piece. |
| Put the roof tile 2x2 in the front right corner, slope to the right. |
| Find 1 transparent yellow nose cone 1x1. |
| Put it on the fourth column from the right on the second knob from the front. |
| Collect the following 2 pieces: |
| 1 transparent green smooth roof tile 1x1x⅔, |
| and 1 flame yellowish orange crab. |
| Put the roof tile 1x1x⅔ on the leftmost knob of the front row, slope to the left. |
| Put the crab to the right. This might be a bit tricky. Make sure to use the hollow in the middle at the bottom of the crab. |
| Find 1 bright blue plate 1x1 with top clasp. |
| Put it on the back knob of the roof tile at the front. |
| Collect the following 2 pieces: |
| 1 bright yellowish green brick 1x2, |
| and 1 transparent raspberry red round brick 2x2 with top cross hole. |
| Put the brick 1x2 vertically on the leftmost column at the back on top of the leftmost round brick 2x2. |
| Put the round brick 2x2 to the right. |
| Collect the following 2 pieces: |
| 1 transparent bright green round brick 2x2 with top cross hole, |
| and 1 bright yellowish green brick 1x2. |
| Put the round brick 2x2 in the left back corner on top of the 2 previous pieces. |
| Put the brick 1x2 vertically to the right. |
| Collect the following 2 pieces: |
| 1 transparent raspberry red round brick 2x2 with top cross hole, |
| and 1 transparent bright bluish violet nose cone 1x1. |
| Put the nose cone 1x1 on the second knob from the back on the leftmost column. |
| Put the round brick 2x2 to the right of the previous piece on the 4 back knobs. |
| Find 1 transparent bright bluish violet nose cone 1x1. |
| Put it on top of the previous piece on the front left knob. |
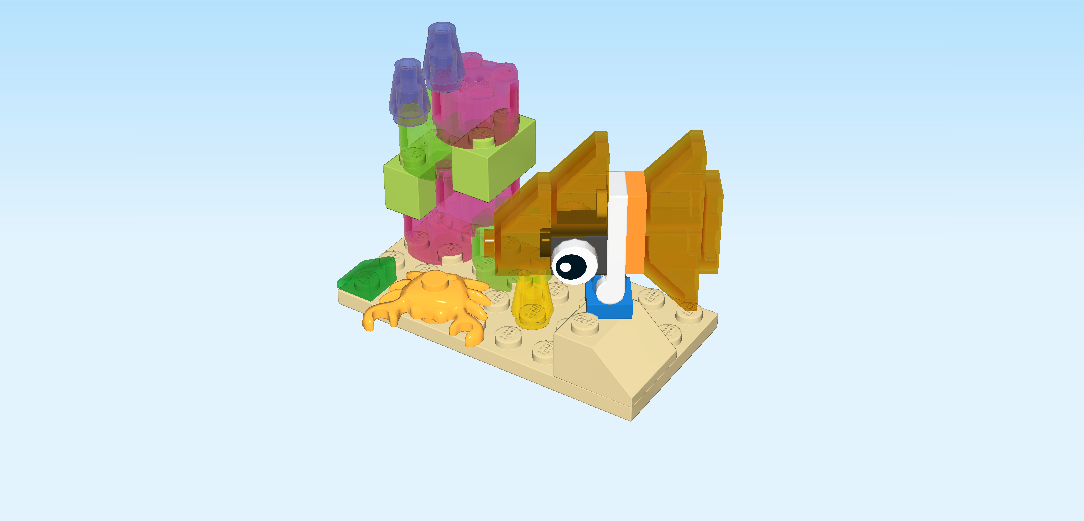
| Next up, we build the clownfish. |
| Collect the following 2 pieces: |
| 1 transparent bright orange plate 1x2, |
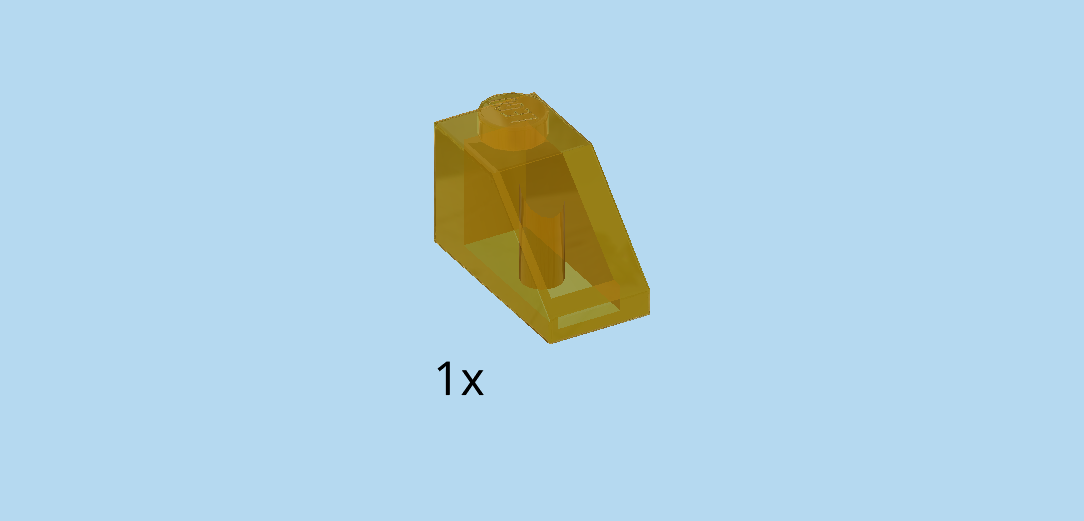
| and 1 transparent bright orange roof tile 1x2, 45°. |
| Put the plate 1x2 horizontally on the table. |
| Put the roof tile horizontally on the right knob, overhanging to the right, slope to the right. |
| Find 1 transparent bright orange roof tile 1x2, 45°. |
| Put it horizontally on the left knob, overhanging to the left, slope to the left. |
| Find 1 bright orange plate 1x2. |
| Put it horizontally on top. |
| Find 1 white plate 1x2 with shaft on short side. |
| Put it horizontally on top, shaft to the right. |
| Collect the following 2 pieces: |
| 1 black brick 1x1 with 1 front and 1 back knob, |
| and 1 transparent bright orange roof tile 1x2, 45°. |
| Put the roof tile 1x2 horizontally on the left knob, piece overhanging to the left, slope to the left. |
| Put the brick 1x1 on the right knob, side knobs to the front and back. |
| Find 2 white round tiles 1x1. |
| Put them upright on the side knobs of the previous piece. |
| The tiles are printed with eyes! |
| Find 1 transparent bright orange roof tile 1x2, 45°. |
| Put it horizontally on top, slope to the left. |
| The clownfish is finished! Well done! Flip it so that the small shaft is pointing to the bottom. Snap the shaft into the clasp at the front right of the structure. You can turn the fish in any direction you want! |
| The underwater scene with corals and clownfish is finished! Great job! |
| You have finished building all the different suggestions from our instructions. Great job! But of course you can use this set to invent your own builds and worlds of LEGO! |
| Enjoy! |